HOLIDAY DONATION DRIVE - SUPPORT MSW - DO YOUR PART TO KEEP THIS GREAT FORUM GOING!
×


Chuck Seiler
-
Posts
1,876 -
Joined
-
Last visited
Content Type
Profiles
Forums
Gallery
Events
Everything posted by Chuck Seiler
-
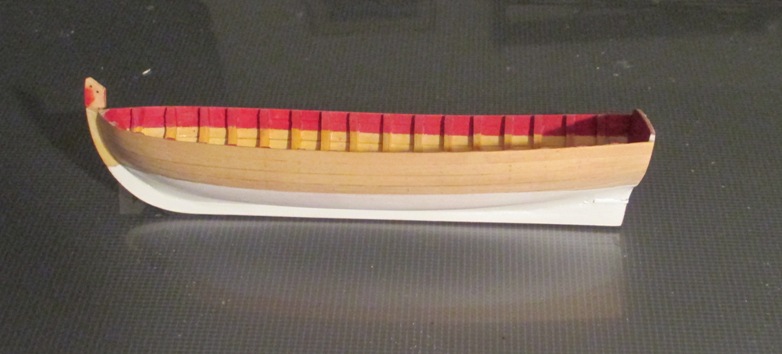
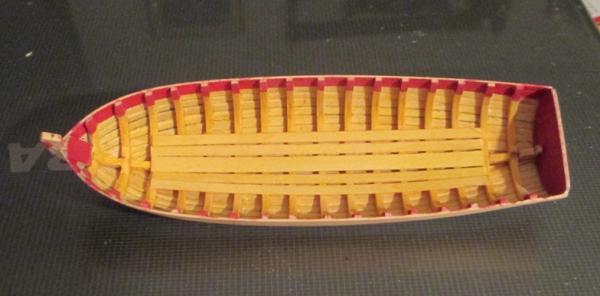
 Paint job is complete and tape is removed. Note: I have added broken stem piece. Taking pics inside using the ol' laptop as a backdrop seems to be more successful than outdoor shoots with poor light. I am not very happy with the result of the waterline painting. It doesn't look quite right. I have checked and rechecked after painting and that, indeed, is a correct waterline....still looks funny. A gander at the inside. I have touched up the inside, removing or covering the slight overspray. I decided to paint the red topping before adding the toprail. Note the hole in the top of the stem piece. A bamboo 'peg'/treenail will be glued and inserted to improve the strength and <hopefully> keep it from breaking off again.
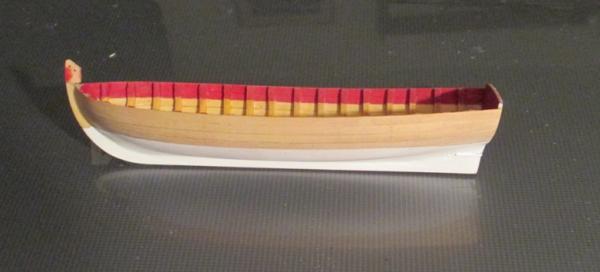
-
Simulate moving fast forward 10 days.
-
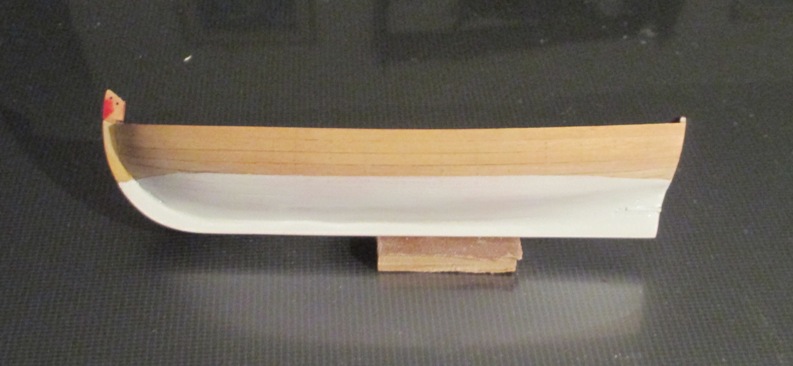
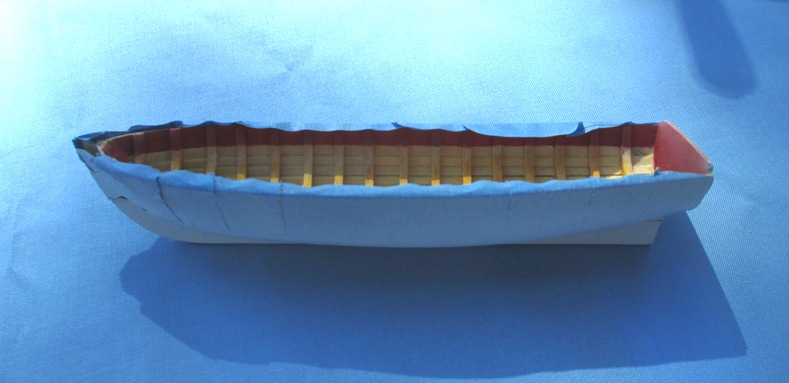
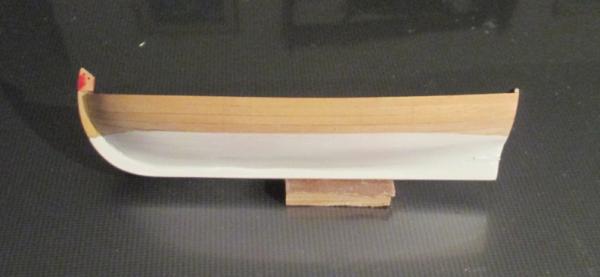
I have a few days off from work and the boatyard is in full operation. While waiting for paint and glue to dry, I will post some far overdue thingies. The hull is taped out and second coat of white spray enamel has been applied. This will be left to dry and a fine sand before I apply two more coats. As you see from the date, this was actually done a couple weeks ago. A look inside the boat shows that some paint mist is getting inside the boat when I spray, however this is not a lot and it can be easily covered. A note on paint: Normally I like to use acrylic, but have not mastered the airbrush. Instead I use spray enamel.

-
Enamle vs Acrylic
Chuck Seiler replied to Timothy Wood's topic in Painting, finishing and weathering products and techniques
Popeye, Try Badger paints. Used normally for airbrushing, they can also be brushed on. I found the reds cover quite well. I originally got mine online...getting several colors of red since I didn't know if I could trust the color chart. (I have subsequently opted for caboose red. Santa Fe red isn't bad either.) Recently, I found our local model train store carries it as well. :-) -
Enamle vs Acrylic
Chuck Seiler replied to Timothy Wood's topic in Painting, finishing and weathering products and techniques
A little up front disclosure: Me and paint don't get along real well. I prefer to use natural wood and only paint when I have to. I have experimented with (and used almost exclusively on my SULTANA) India ink. I have also used colored wood dyes. That having been said, I like acrylic because it allows (in my experience) more color variations. By using the artist acrylics thinned with water you can get more earth tones and toned down colors rather than the very bright colors you get with many enamels. -
Eight oars does kind of clutter the place up. Same decoration on both sides?
-
Bob, Superb!!! And you didn't break off the stem piece. :-) I wouldn't worry about being slow. You are going great and the result is fantastic.
-
I found that the drill and fill method works quite well... or in my case, pinhole and fill.
-
Silver Soldering Tools
Chuck Seiler replied to bundybear1981's topic in Metal Work, Soldering and Metal Fittings
Ensure the work surface is thoroughly clean. Also, ensure the two surfaces to be soldered MUST be touching. Unlike low temp soldering, silver solder does not bridge the gap. -
Toni, Looking good! Mine is languishing in the paint shoppe getting the bottom painted. Hopefully I can crank that out this weekend and on to the interior. I like the fly ty.
-
We could use it for signal flags. "England expects.....". We could utilize the whole SDSMG fleet for that one.
- 162 replies
-
- 1
-

-
- 18th century longboat
- model shipways
- (and 1 more)
-
Silver Soldering Tools
Chuck Seiler replied to bundybear1981's topic in Metal Work, Soldering and Metal Fittings
Dave B./dgbot, I dunno. That looks like the stuff I use. I will have to check the actual tube when I get home. It is silver solder paste with the flux mixed in. You can get it in three different temp settings, but 1250 is about right. I have 2 temperatures if I need to make two solders close together. The first can be the higher of the two temps so the second one does not melt the first. Jason, Another source for a soldering working surface is to get a ceramic tile from the local home improvement store.. -
Chuck, Thanks. I will take a look at the paintings to see what I can find. If I can make signal flags for a 1:1200 scale HMS VICTORY, I can make an ensign or pennant for a 1:48 longboat. :-)
-
Chuck, At our community build meeting last Saturday, we were discussing the flag halyard. What sort of flag or pennant would a longboat fly? The only thing we came up with is the possibility of the personal flag or pennant of an embarked CO or flag officer while going to and fro.
-
Mike, Will you be making your own sheeves or buying them?
-
Mike, Looks great. Looked even better in real life. You did not say, but based on your past work, I am assuming you blackened the brasswork rather than paint it. Correct?
-
Bob, Are you tapering the plank before you edge bend it or after? I would think you should taper before, but the photos in post #36 seem to show that you did not.
-
My plan is to have a 5 foot x 5 foot x 5 foot display case. ...although I do like the water cask idea. It saves on space.
-
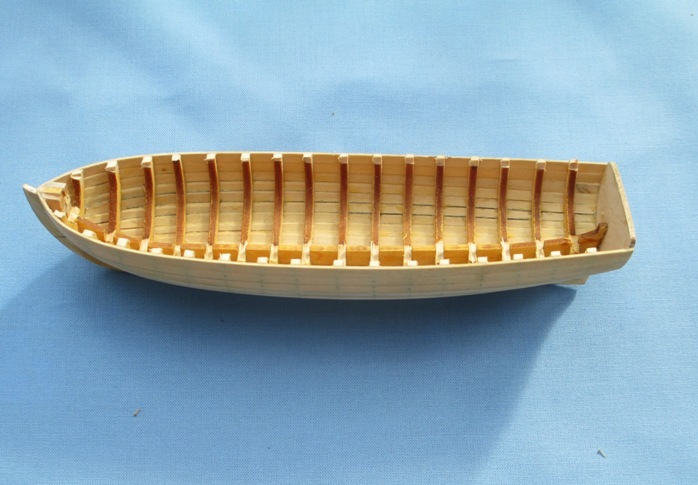
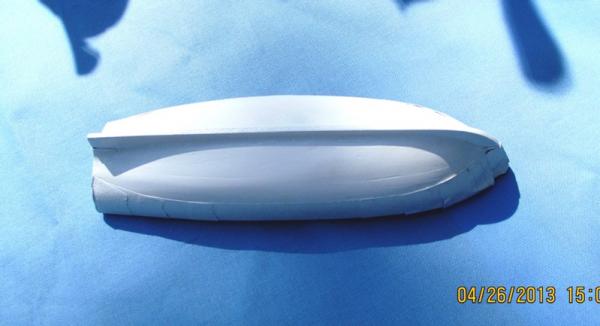
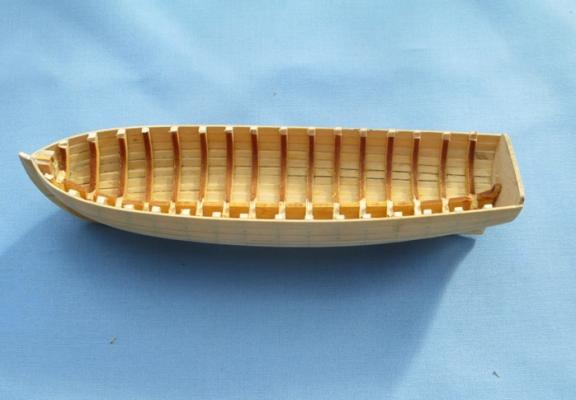
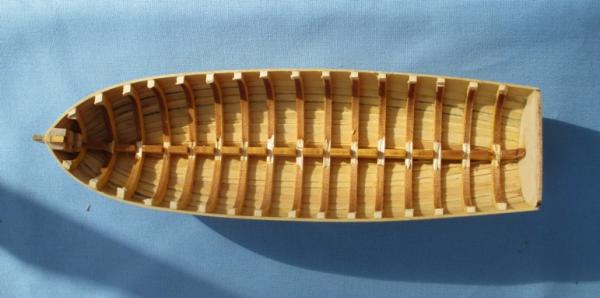
A view of the interior highlights the problems I had with the planking. Interior does not sand down as smoothly as exterior.
-
Planking is done. If I want to pull the planks off and fix the planking, now is the time. Otherwise, it's time to remove the bulkhead centers. I decided to use a Dremel with cutoff wheel for this. Caution is important to avoid any damage to exterior planking. As indicated by others, even though the model is very delicate at this point, it is surprisingly sturdy. Extra care must be taken here. As I sand down the insides of the frames, the structure becomes weaker. Once you start adding things to the interior, it becomes stronger again.
-
what powertools to buy
Chuck Seiler replied to Adrieke's topic in Modeling tools and Workshop Equipment
For many years my only power tool was a dremel. I did get the Dremel drill press. As somebody mentioned, it is not that great, but it does most of what Iwant it to do. If I had to do over... A couple years ago I got the Byrnes Saw (Jim hates when you call it that). It is great, I LOVE it. It allows me to do some things more precisely than if done by hand...and other things I could never do before. I am mor einto kit bashing and scratch building now, but I think that was due to the addition of the tool. Note: Any mini table saw with the same properties would be equally helpful, but I really like the precision the B-Saw gives with the micrometer function. -
BobF, You answered my question perfectly. Patience is the watchword, I suppose. I am too far along to pull the old planks and try again, but I may decide to build a second one (or try the pinnace).
-
Bob, Did you bend that downward curve in your broadstrake or did you cut it from a double wide piece of wood?
-
Bob, I am watching your progress with great anticipation. As indicated in my log, I have problems with planking between the garboard strake and wale....specifically at the bow. I understand what you are doing with the tick strips and 'diminishing grid'. I have fond, however, to allow for the proper lay of the plank in the bow while it is curving in, up and twisting, the plank has to have more of a curved taper rather than straight. I sit riveted.
-
I went to see the HUNLEY several years ago. It was still in a tank of water and they were still excavating the interior. At the time, they had a "Confederate honor guard" posted at a location in the exhibit that talked about the crew. I thought it was a touristy thing that they were doing...a novelty sort of thing. I found out that it was an actual honor guard (I'm not sure of how official it was) to 'guard' the remains of the crew that were being kept at that location until they could be formally interred later that year. Very interesting site. Highly recommended if you are going. Patriot's Point is also a good location.