HOLIDAY DONATION DRIVE - SUPPORT MSW - DO YOUR PART TO KEEP THIS GREAT FORUM GOING! (83 donations so far out of 49,000 members - C'mon guys!)
×


Chuck Seiler
-
Posts
1,877 -
Joined
-
Last visited
Content Type
Profiles
Forums
Gallery
Events
Everything posted by Chuck Seiler
-
 WQ, Sorry, I missed that. No offense intended. I wanted to emphasize the point because I found many new modelers (including myself) don't necessarily consider that. It wasn't until I started studying ship's internal structure and how ships were really made that I fully understood the process.
 -
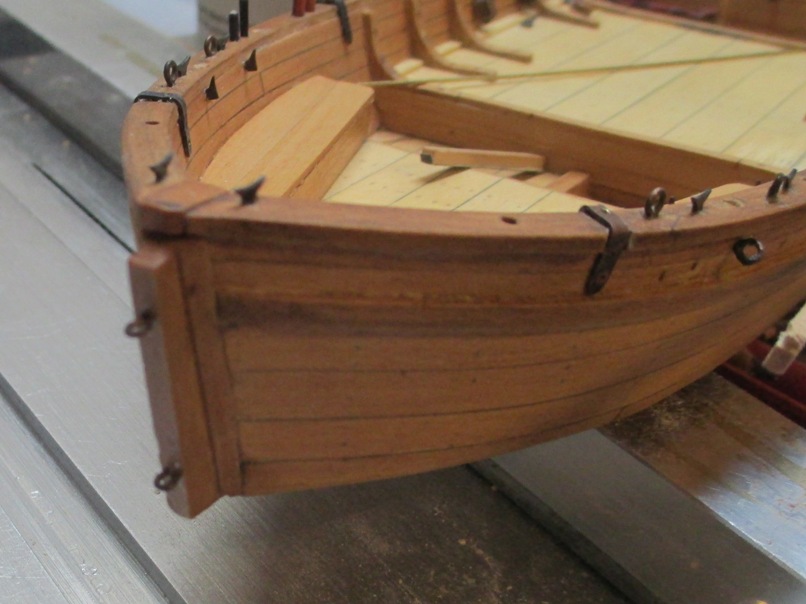
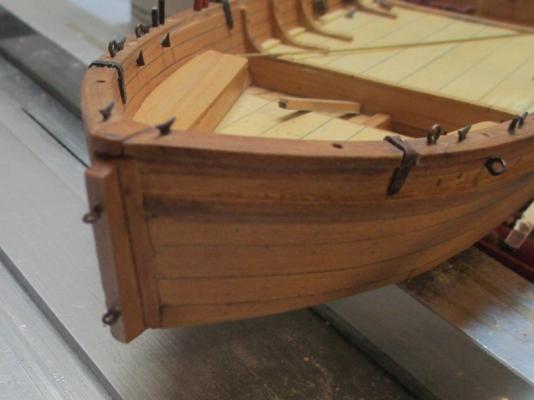
Egad!!!!! I need to get a-postin' before I slip to page 3. Here are some shots of last week's work. We don't need no stinkin' fancy-pants gudgeons!!!! Just slap on some robust eyebolts....honest. As indicated in previous posts, they could get away with a lot of things that could not if they planned on the ship being around awhile. The rudder (AKA the bard door) is hung. The tiller has not been added yet. It will eventually stained the same color as the exterior hull. The two 1"thickbattens were only on the starboard side. They were nailed on to the rudder boards and helped hold it together. The nail were supposed to be less obvious, but the stain enhanced them. You will be hearing more about the hole in the top later.

-
Hmmm. Interesting. I can see that with the carronade, since (IIRC) the wheels swivel). I am not sure if that is possible with the clunky trucks on a standard gun. I guess with the right leverage, inhaul and 'side haul' you could adjust the angle.
-
While we are on this topic, let me pose a related question: Most gun carriages I have seen have 1 ring bolt and 2 eyebolts on each side. This includes real gun carriage on replica ships and even (I think I recall) CONSTITUTION. The ring bolt is used for the breech rope and one eyebolt is used for the outhaul tackle. What is the other eyebolt used for? I have never seen it 'occupied'.
-
I'm not sure if wq3296 was saying you don't need to worry about th elocations of the butt joints or that you didn't have to structurally worry if the joint fell on a bulkhead or not...however... you should ensure that the joints fall on actual bulkheads or 'notional frames' and are not just randomly scattered around the hull.
-
Another solution is to use a single plank for the strake, then score butt joints into the plank at the appropriate lengths and locations.
-
But how is it for staying power? I have heard it gives out after couple years.
-
Thanks Kurt, My intent is to enter it into the "Design in Wood" exhibit at the County Fair in June. I don't plan on winning anything, but I wanted to get it out in public. That may be a factor. Perhaps I will make 2 masts...
-
Thanks Dave.
-
I have another query for the gallery. The mast for PHILADELPHIA was white pine. If you look at the picture in thread #59, it appears they got a nice straight pine tree, stripped off the branches and smoothed it off. What are your thoughts on making the mast with the bumps/imperfections as opposed to perfectly round?
-
Mike, What guns will you be using? John Bratten* lists WASHINGTON as having 1x 18 pounder, 1 x 12 pounder, 2 x 9 pounders and 6 x 6 pounders. *The Gondola PHILADELPHIA & the Battle of Lake Champlain, by John R. Bratten
- 175 replies
-
- 1
-

-
- washington
- galley
- (and 1 more)
-
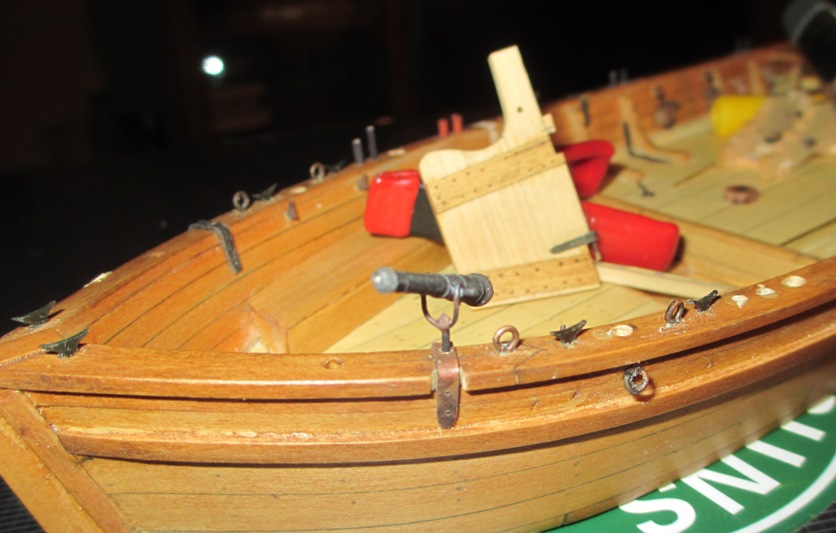
Here is how my experimentation with the swivel gun yoke turned out. Not bad for a prototype, but still needs some work. "Barn door" with lower pintol in the background.

-
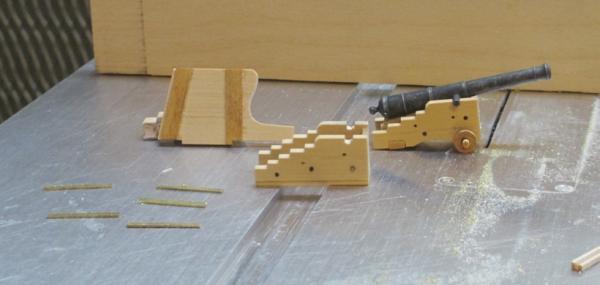
A post to get me back on page 1. I didn't get as much 'ironwork' done last week as I would have liked. This weekend I want to focus on a couple ironwork projects to get key areas done: Pintols for the rudder, swivel gun straps and a prototype swivel gun yoke. Here is what I have ben working on this week. The gun carriages you have seen. Left rear is the rudder (AKA The Barn Door). In the foreground are brass strips cut for the swivel gun straps. Unlike many ships that have the gun mounted on a stock, PHILADELPHIA uses a strap wrapped around the caprail (with some of the caprail cut away). I assume they were easier to make, but it is harder for me...so experiment I will go. I got a lot of work done today, but no fully completed projects. More tomorrow.
-
Where does one acquire canopy glue?
-
Have you used bloodwood before? I like the look when freshly cut, but it darkens over time. I guess you need to put a finish on it rather quickly.
- 175 replies
-
- 2
-
-
- washington
- galley
- (and 1 more)
-
Mike, Dang! You guys have a roof not made out of canvas! I see you are using beech for your gundeck framing as well. I did not notice it with the other framing, but it really shows here. Do you only use if for faming or will you use it for planking in any areas? I was thnking about using it for ceiling planking for my next project...give it that miniature oak look. Thoughts?
- 175 replies
-
- 1
-
-
- washington
- galley
- (and 1 more)
-
Byrnes Saw (he hates when you call it that) DEFINITELY. A precision tool with a lot of options. Hopefully soon he will come out with a featherboard. If you get one, I think you find many more uses for it. (See my build log for Gunboat PHLADELPHIA and making gun carriages). http://modelshipworld.com/index.php?/topic/5721-gunboat-philadelphia-by-chuck-seiler-scale-148-1776-scratch-from-ms-plans/page-4#entry176933
-
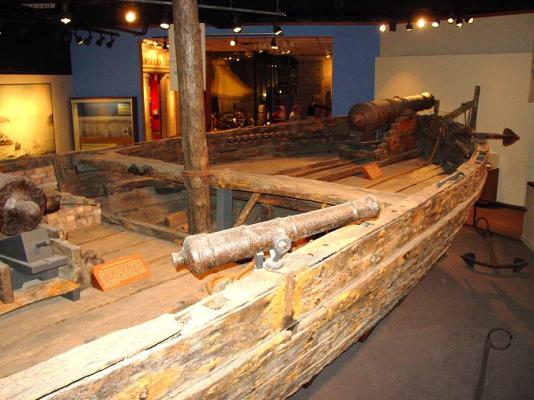
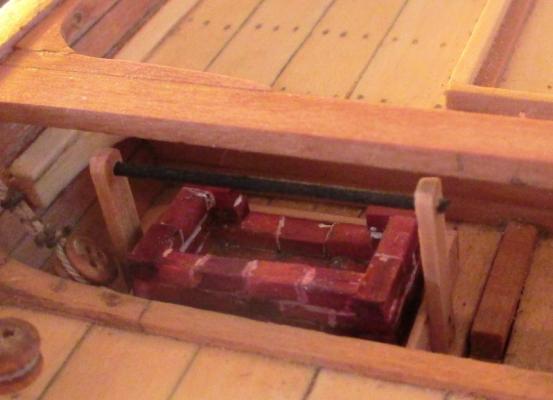
More on the cook stove. I checked the reference book I spoke of. I stated that when found, the cook stove was located on the center deck, just forward of the port 9 pounder, as indicated here. (Along with cooking gear and at least 1 bone) This is where it is located on the PHILADELPHIA in the Smithsonian It went on to say that due to the scorching on the underside of the mast partner, it was routinely used in the forward cockpit. So, there is evidence it was used in both locations. If you have been following Mike41's build log of his 1775 Row Galley WASHINGTON, you will see a discussion on stoves. See below (I hope this link works) http://modelshipworld.com/index.php?/topic/5902-uss-washington-by-mike-41-1776-row-galley-scale-148/page-4#entry175102 The 'inside story' on that thread is that both PHILADELPHIA and WASHINGTON were part of the Continental fleet at Valcour Island. As the PHILADELPHIA was sinking, the WASHINGTON came alongside and offloaded the crew. Believe you me, they were quire disappointed to learn that, while they were eating hot dogs on a stick, the WASHINGTONians were getting donuts and baked Alaska

-
Bob, No worries. It gives me some ideas.
-
<sigh!>
-
Bob, With regards to using paint brush bristles as nails...are you using natural or synthetic bristles.
-
I got the idea on the jig from Clay Feldman, as part of his LEXINGTON build. It helps keep everything aligned properly. Seems like a waste when making 1 or 2 carriages (One 12 pounder and 2 nine pounders), but essential when dealing with 8, 10, 36 guns.
-
Tony, Thanks for the tip.