HOLIDAY DONATION DRIVE - SUPPORT MSW - DO YOUR PART TO KEEP THIS GREAT FORUM GOING! (89 donations so far out of 49,000 members - C'mon guys!)
×


pilidk
-
Posts
73 -
Joined
-
Last visited
Content Type
Profiles
Forums
Gallery
Events
Everything posted by pilidk
-
 Hi Jerry, Just love your Victory. Absolute fantastic work you've done with her!! I was wondering if you do have a plan how to build the ships wheel and the binnacle. I don't have it in my kit and cannot find it anywhere Would be absolute great with some help. I would also pay for them if I could find some Greetings Philippe
 -
Hello; Nice work I have just completed the hull and am wondering which mast I should start with. Is there a logic step in the rank of the mast building? I will appreciate your comments and reflexions on the subject best regards Philippe
- 439 replies
-
- 1
-

-
- victory
- caldercraft
- (and 1 more)
-
Hello Keith, I am not sure what you mean in your comment about the gun ports? Philippe
-
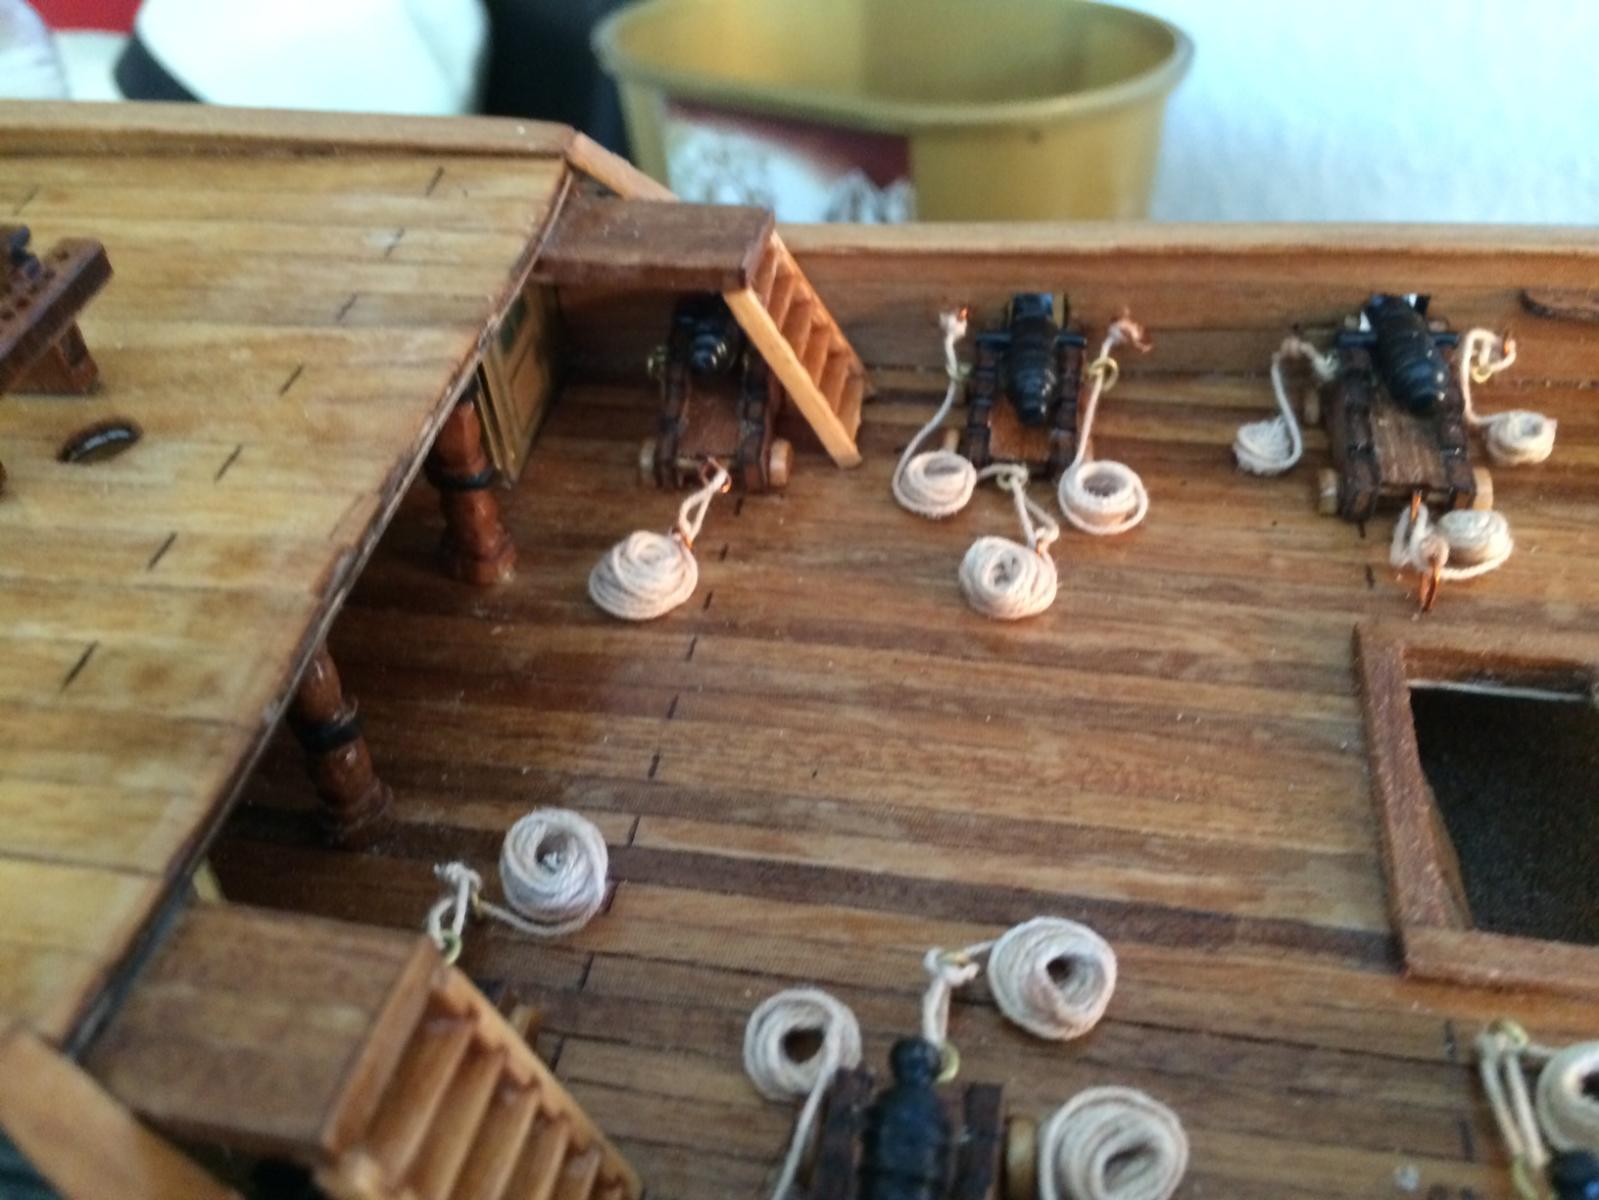
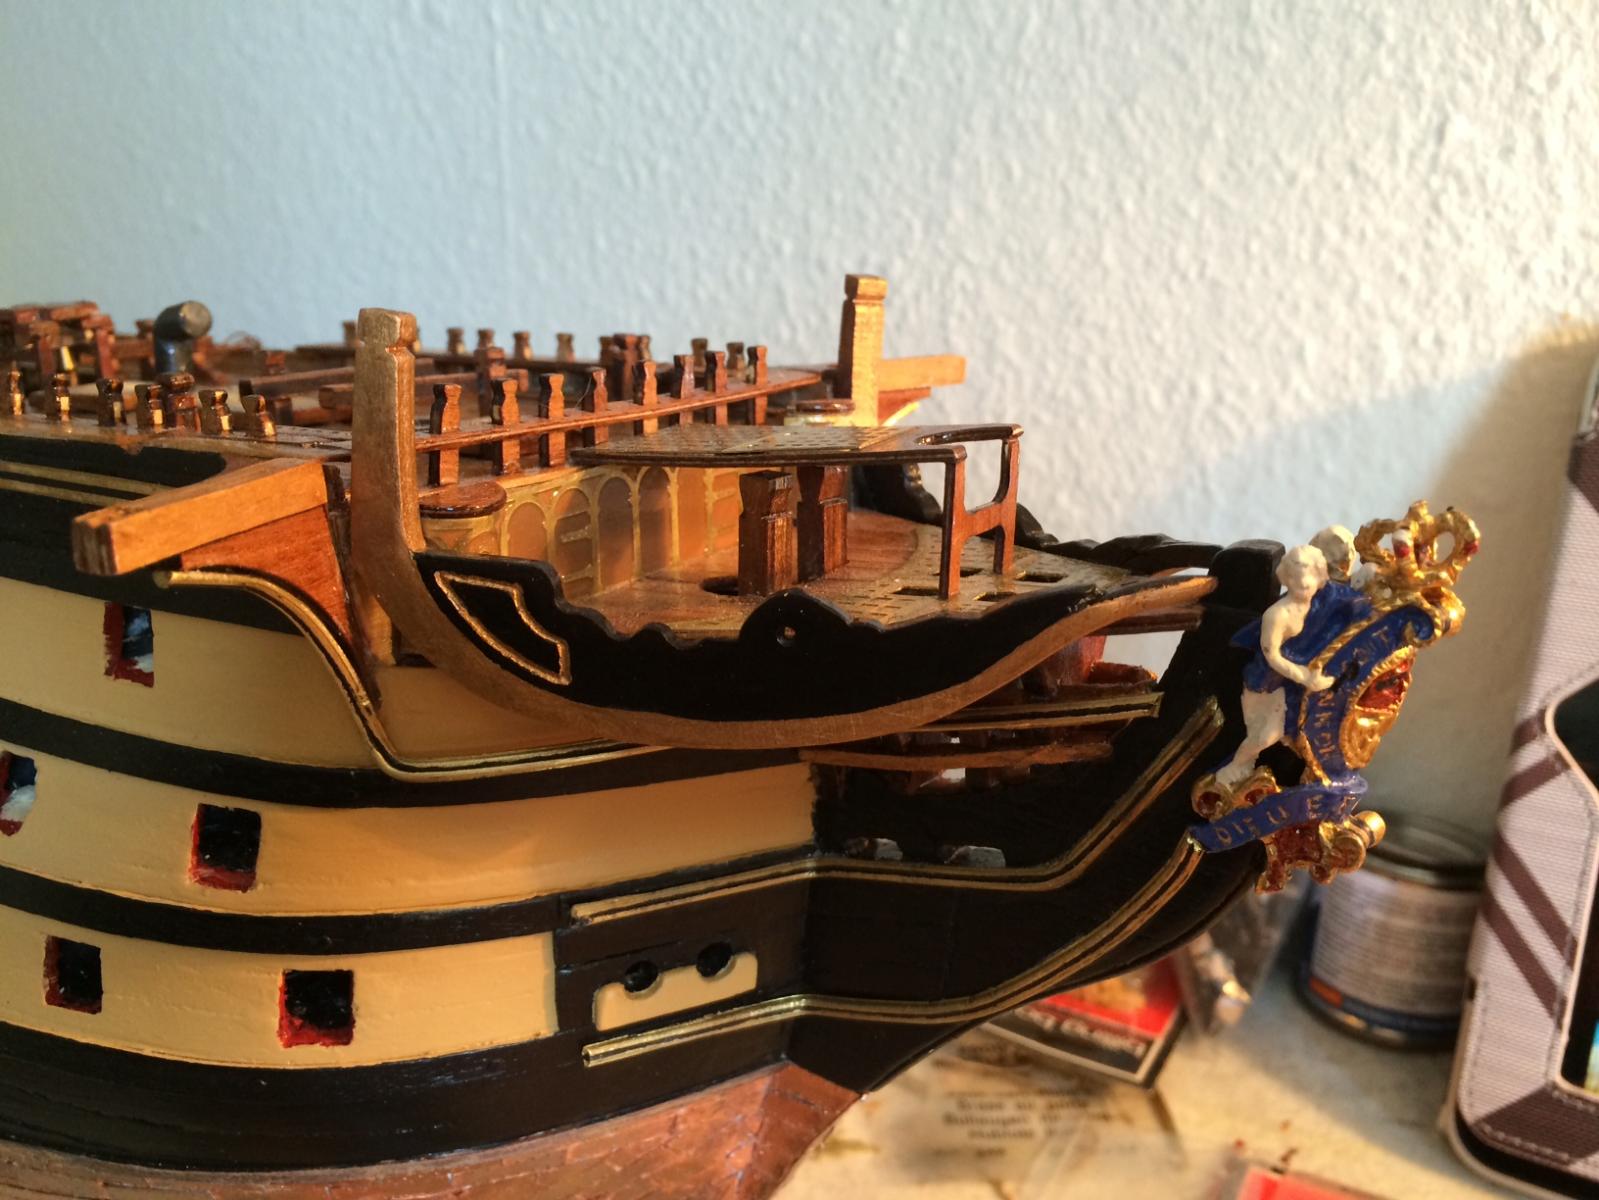
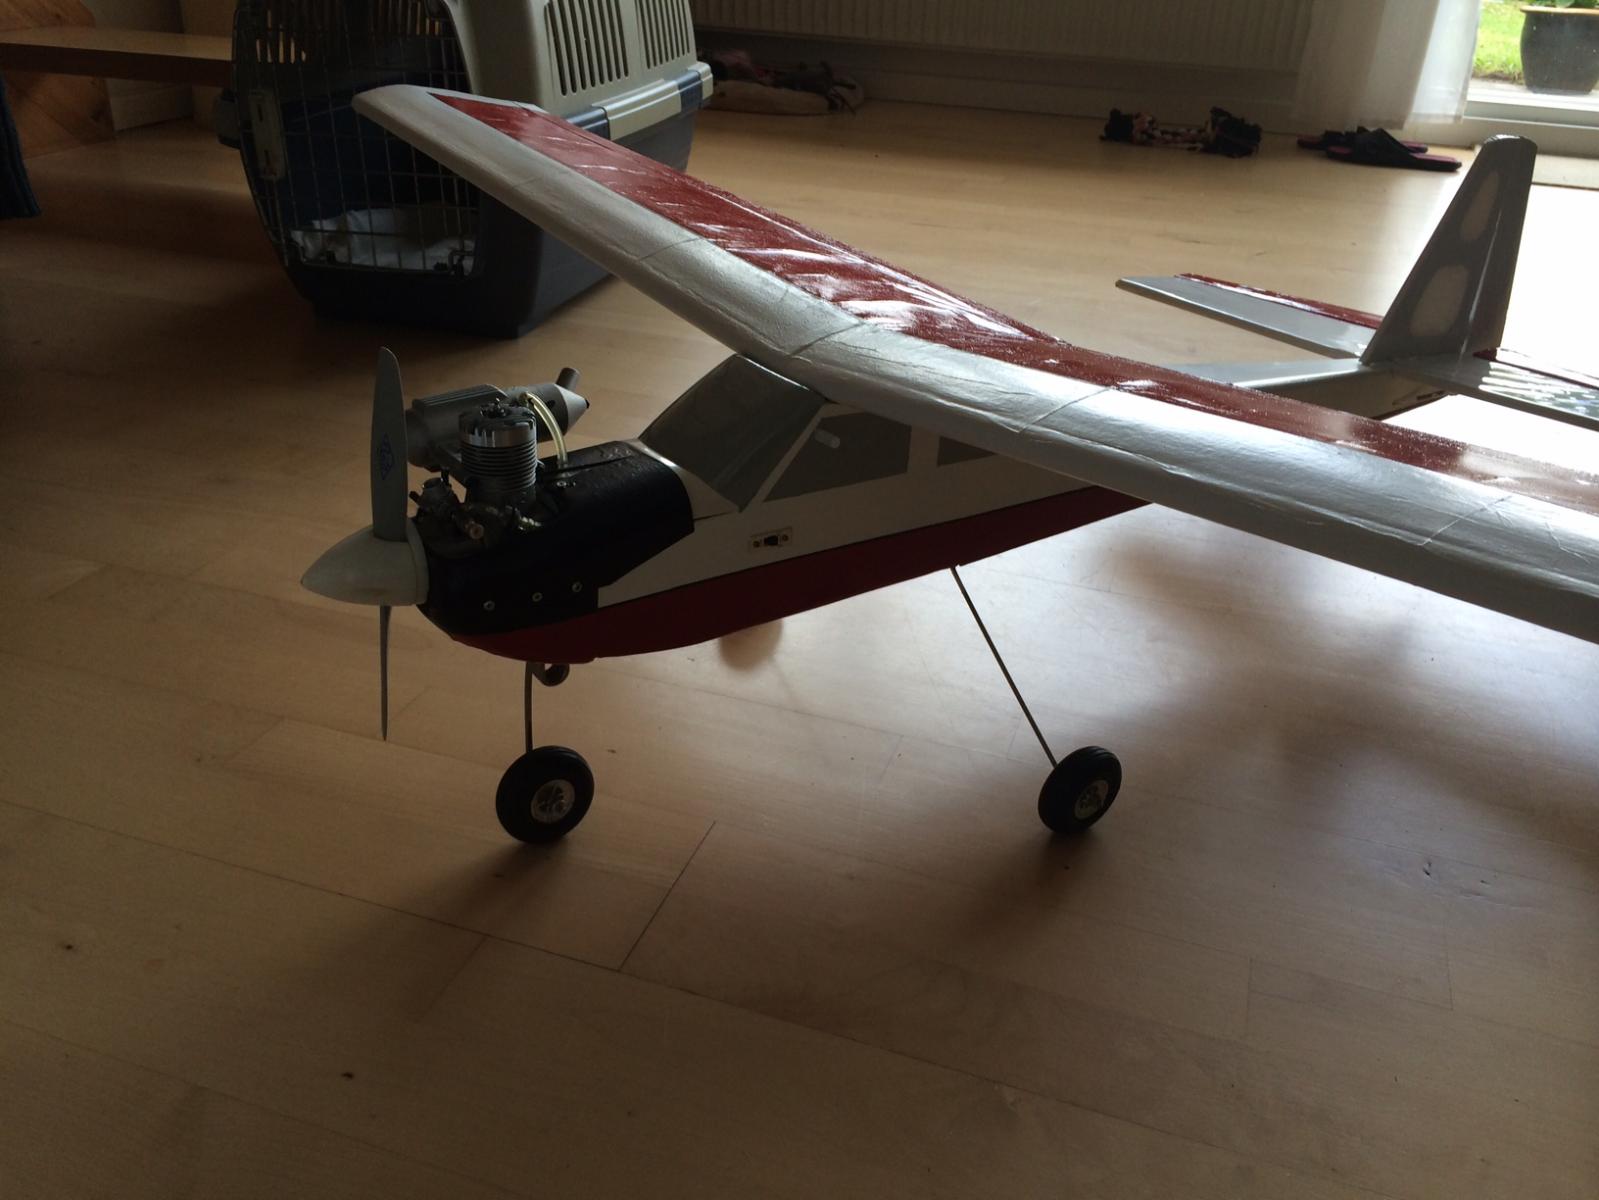
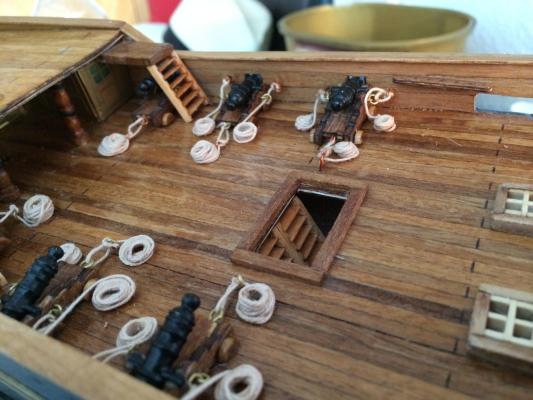
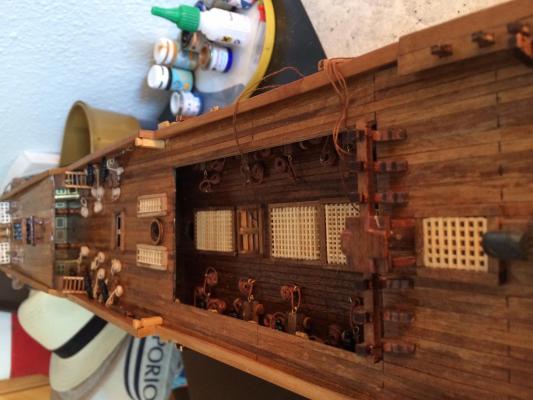
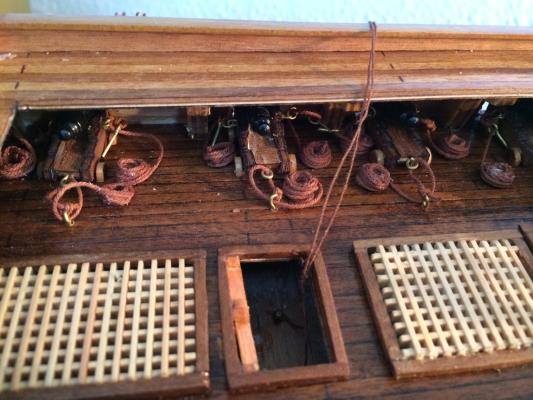
Hello shipmates! So the vacation is over and the shipyard has been rolling in slow motion for the past two months. In the mean time, I had to help a friend building his model plane, an old Taxi II. Plane is finished and delivered. Mate is happy and so am I. I have never done that, and i am now convinced that plane are not for me. Only ships matters! Here are some pictures from the Victory. And one from the plane I made. Enjoy:)


-
I used cherry wood. Nicely polished and three times clear varnish. Looks very good and keep the wood free from any dust and glue stains.(easy to remove) The wood supplied with the kit was so poor in quality:( Afterall I should move this diary to the scratch log build because I do not use any parts from the kit, just some brass bits and pieces. Best regards And thanks a lot for your comments and recognition
-
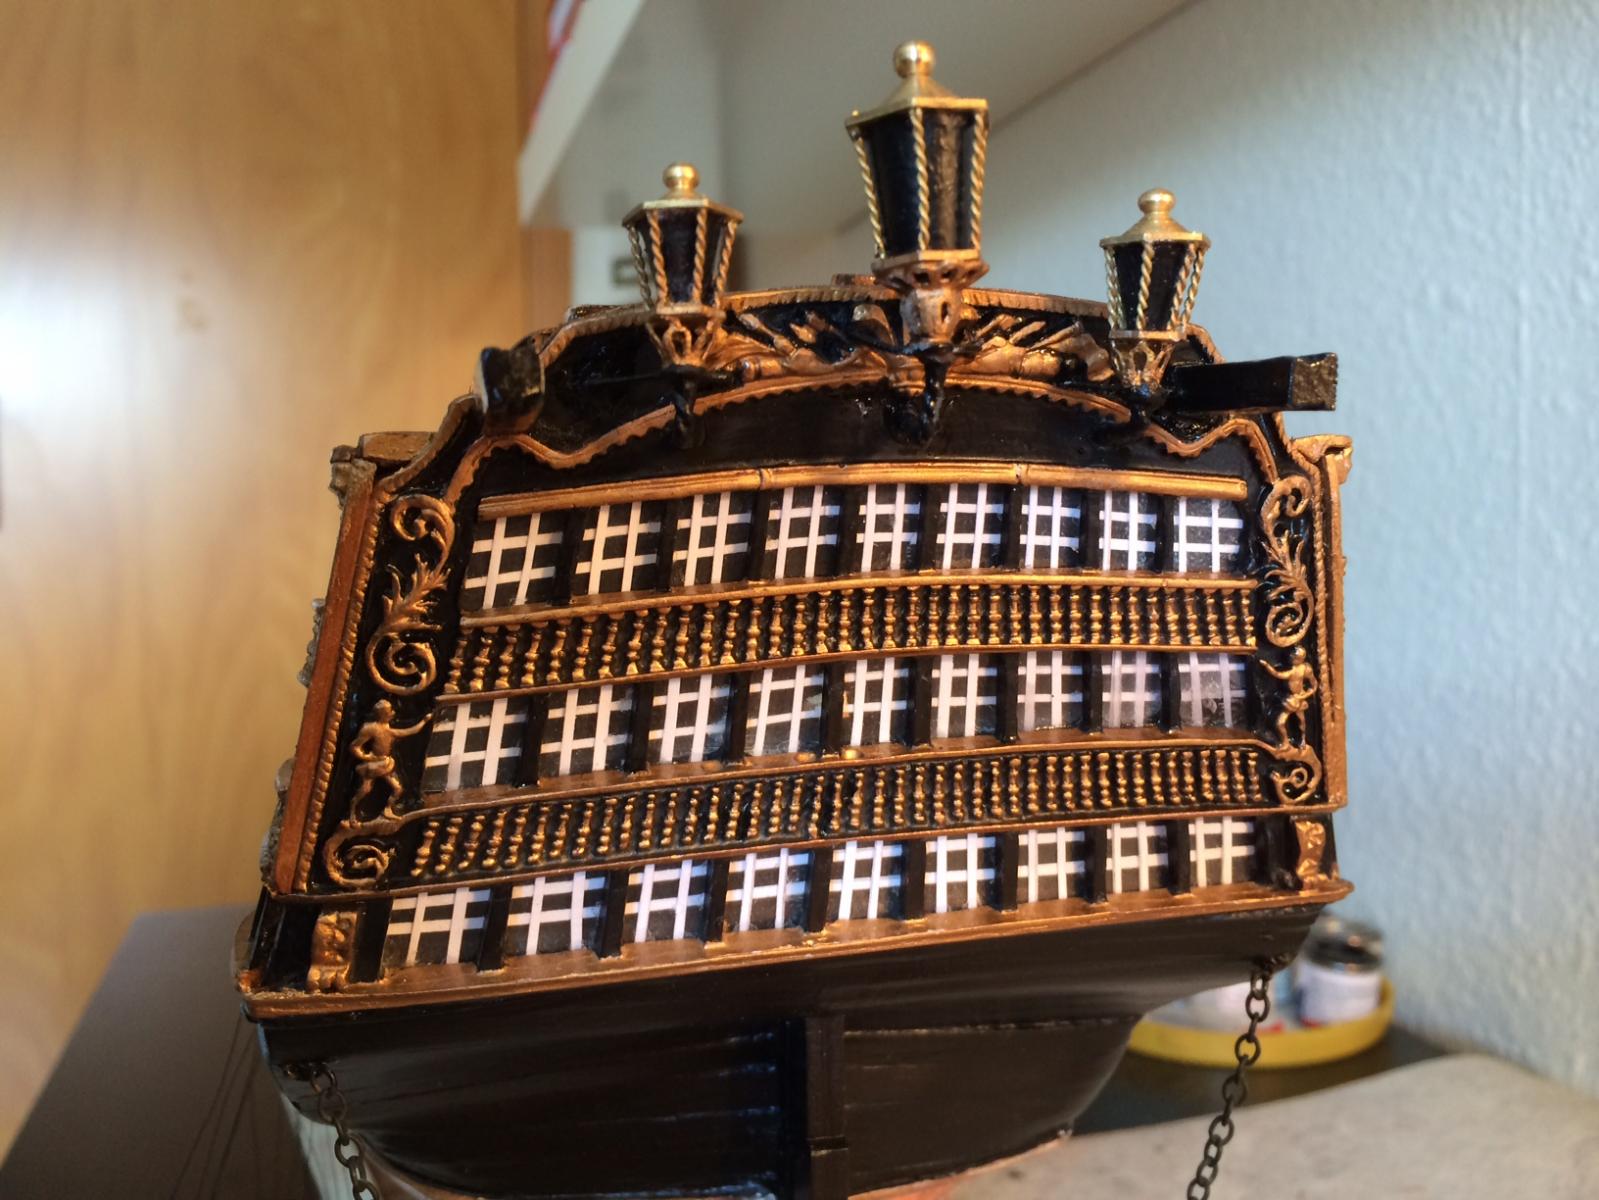
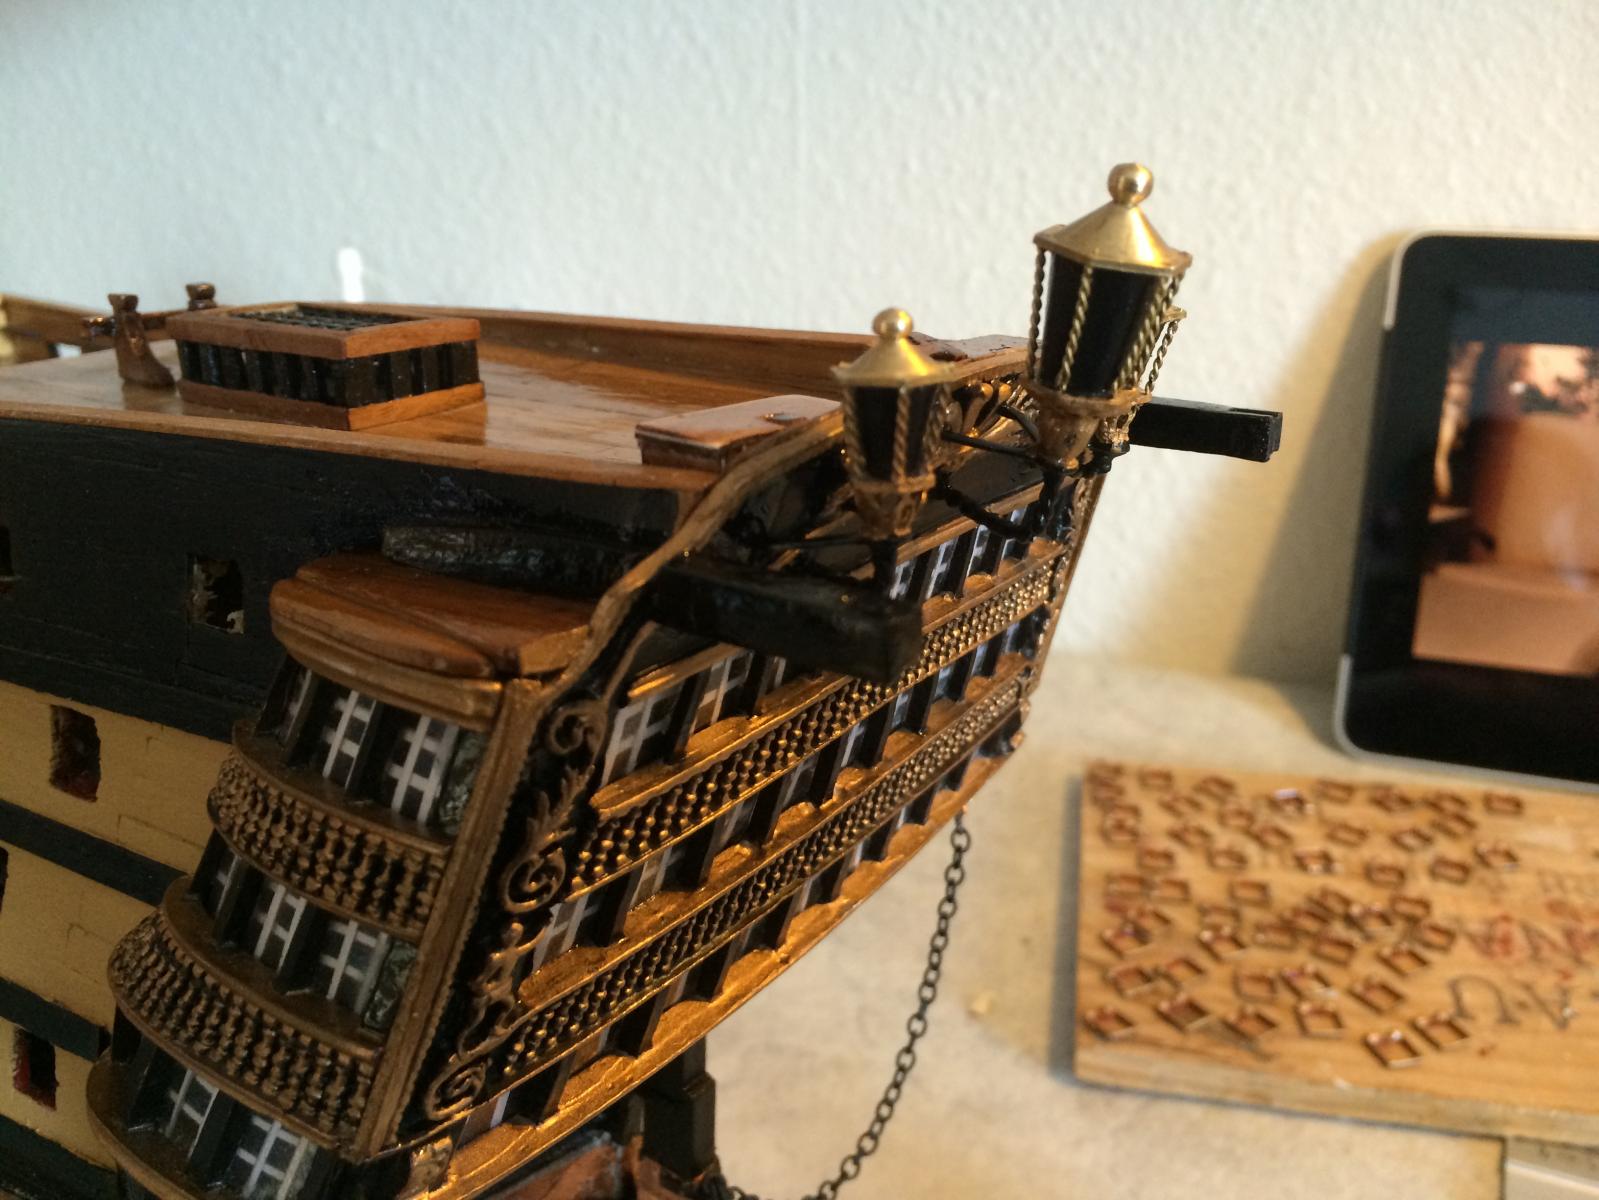
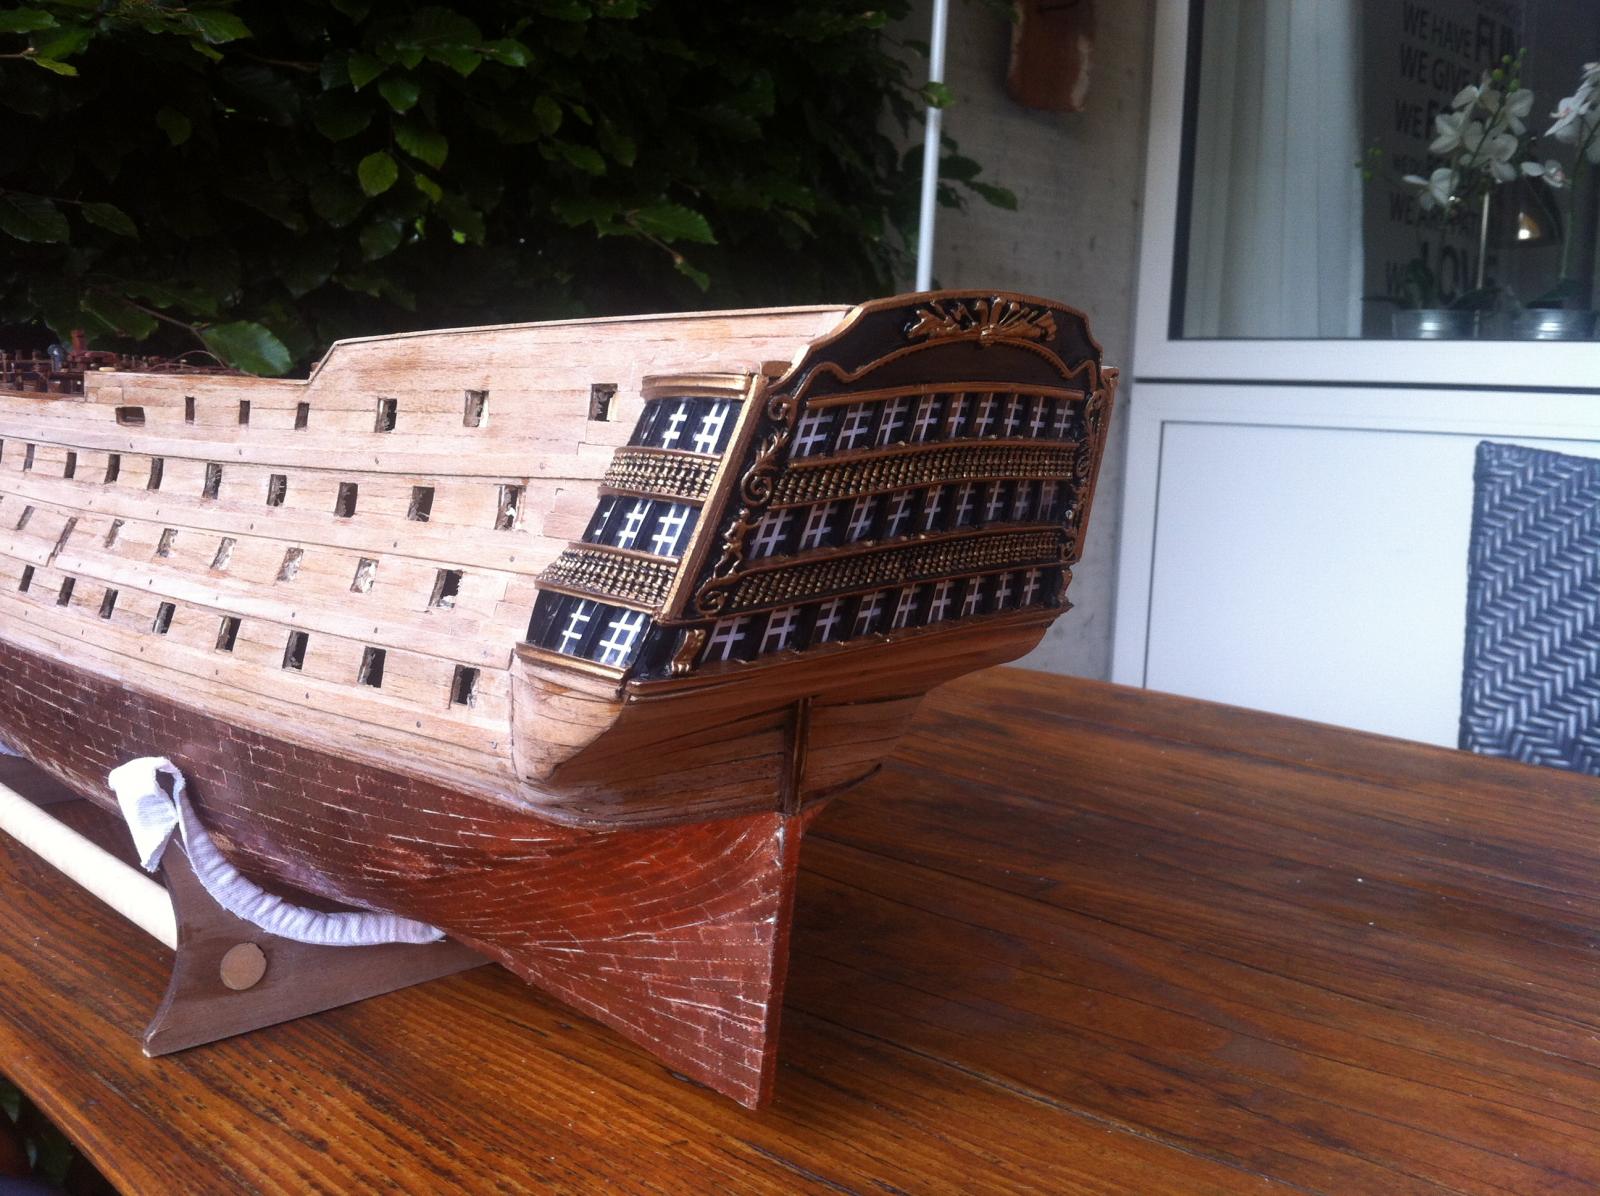
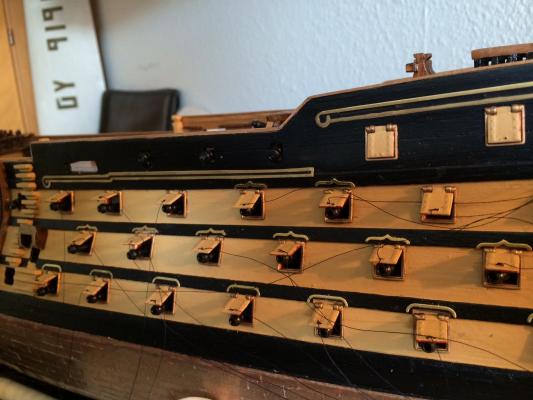
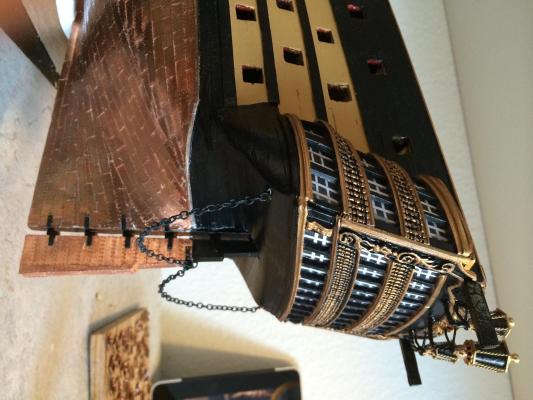
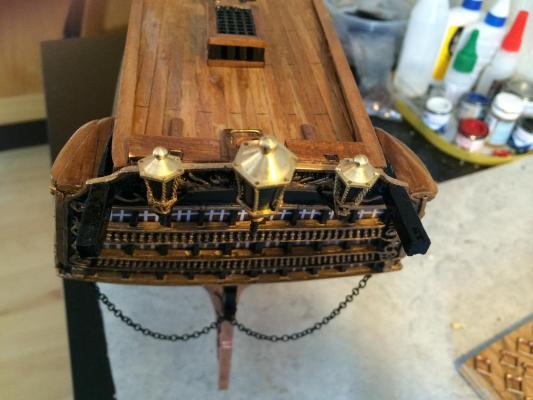
Hello Mates. Time for an update on my built. I have been painting the ship the past week, and quite happy with the result. I bought the original admiralty painting, and the ocre color is superb. I have also been working on the stern and finished the painting job and the three lanterns. Now is time come to take care of all the canons holes. Been painting the frames, nearly finished. Long job, boring. Here are some pics of the finished stern post:

-
Yes, I might be that, I just read all documentation I have on the Victory and there is no use for these strange things. So I will just remove them, Thanks a lot for your advice !
-
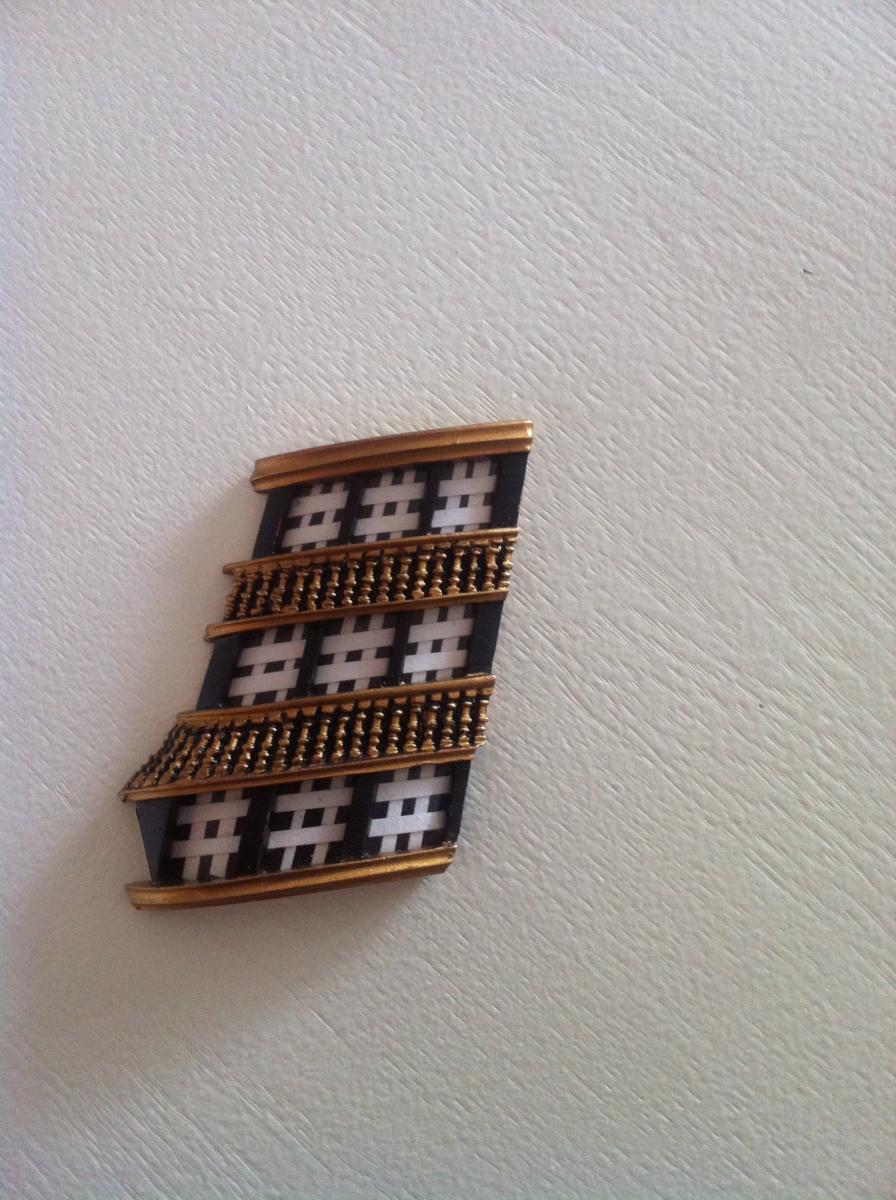
Hello Keith. Thanks for your answer. They have both the same size. They all do. The only difference is that 5 of those have this strange "button" on the right upper side of the frame. Misterious
-
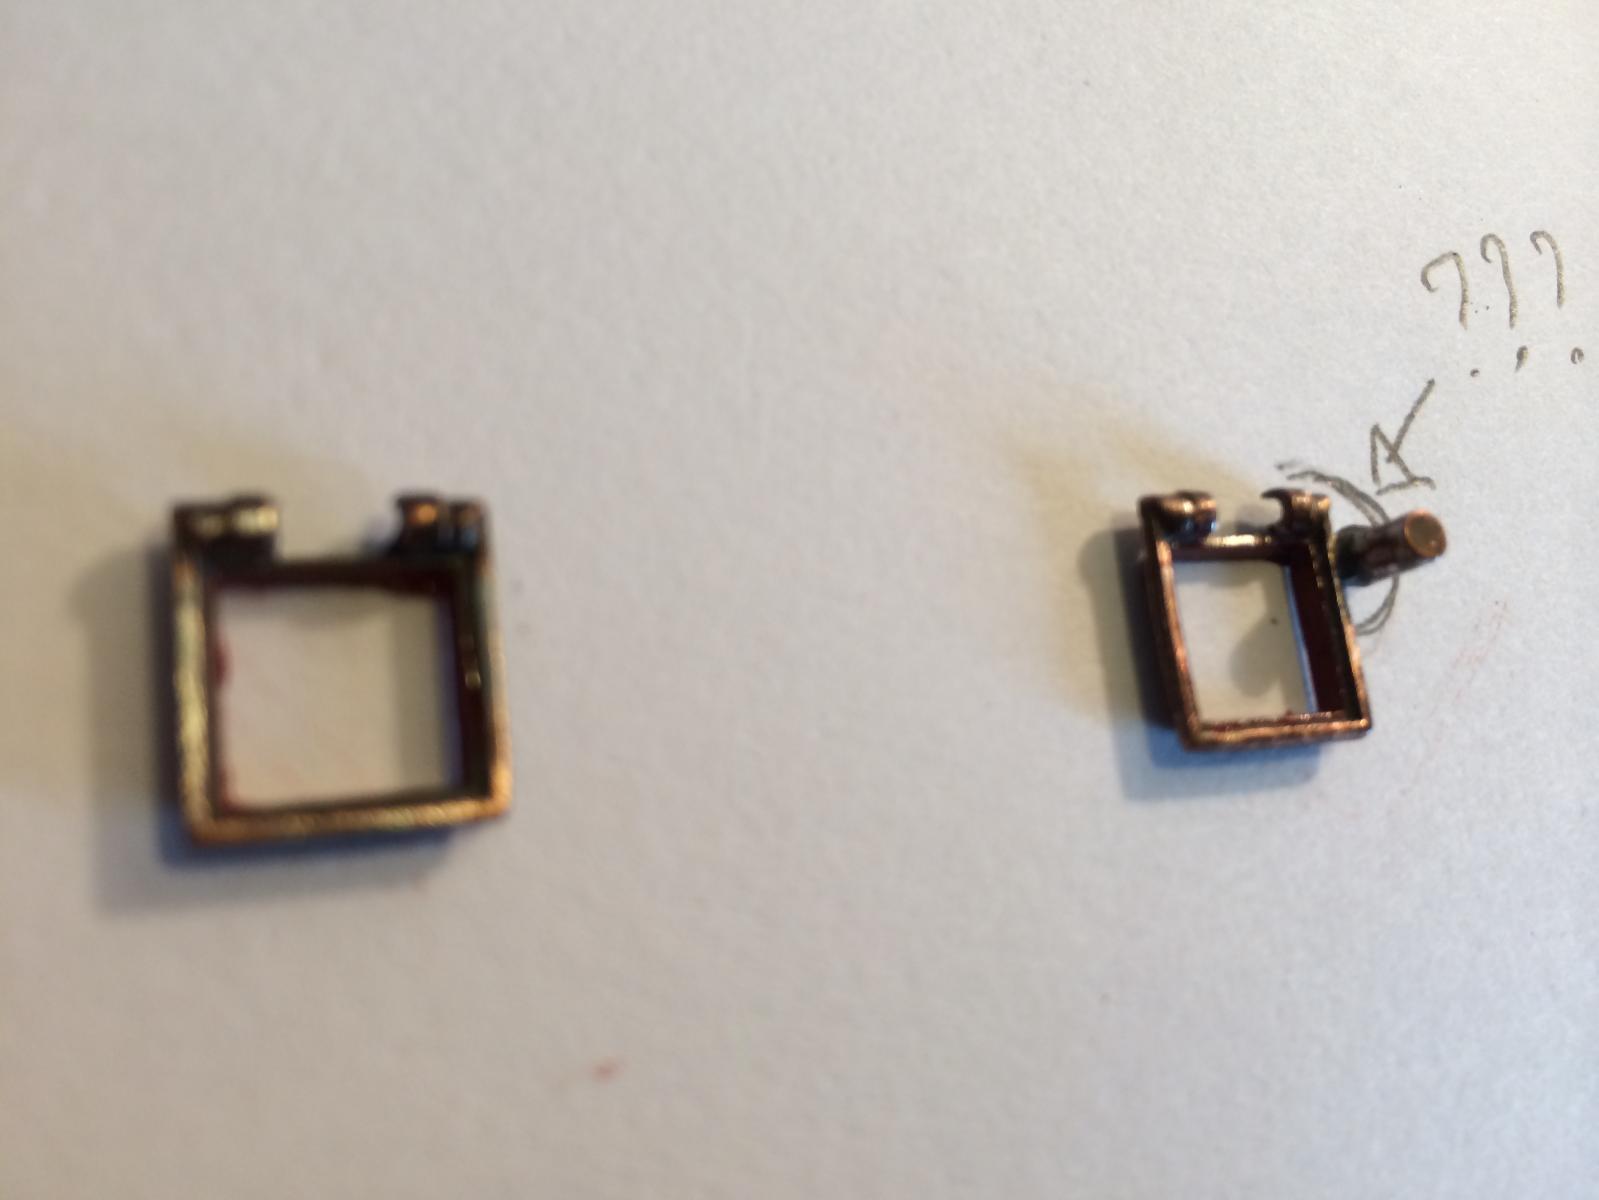
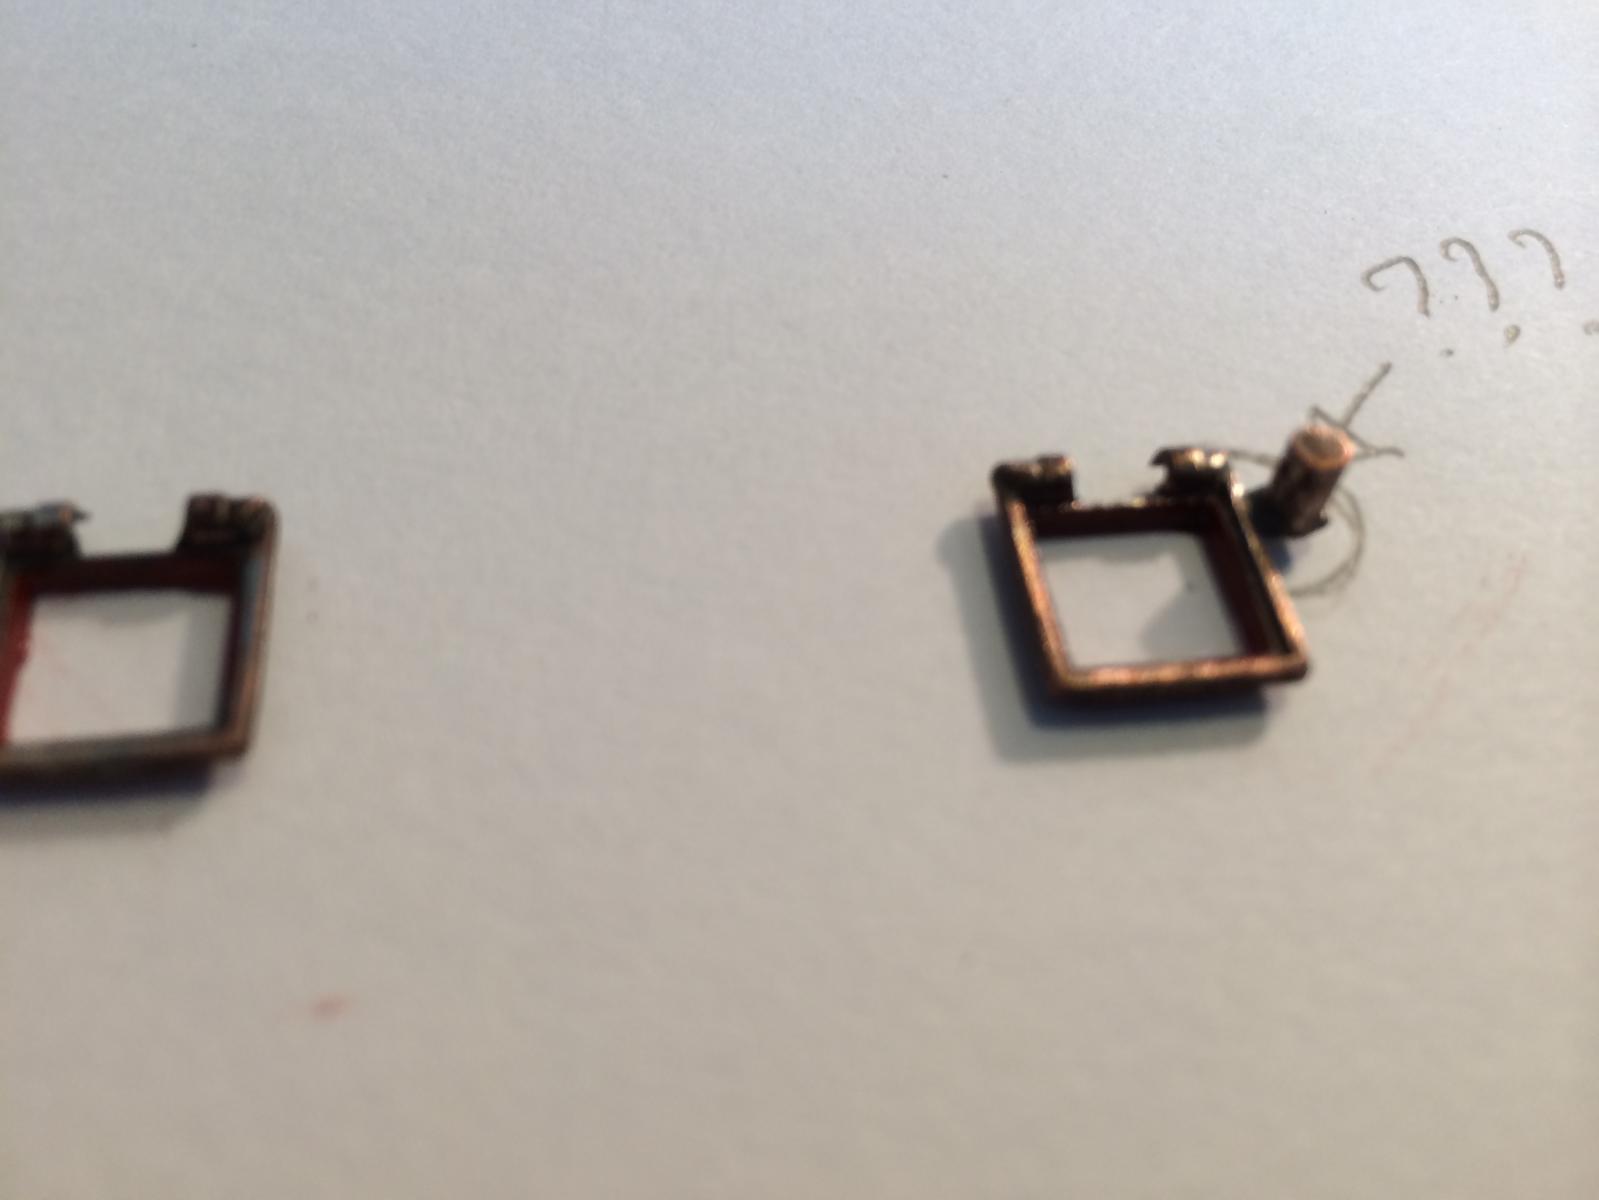
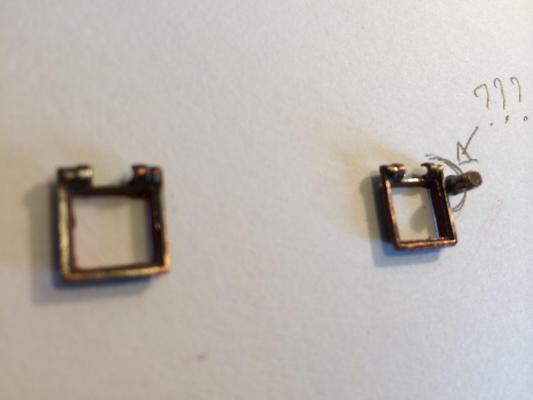
Need Help!!! I was painting the canon holes frame and I discovered that there were 5 of them which had a different look. I don't know what this is for and where to place them.... Can you help me ?? Please sees the following two pictures. On the left you can see a normal frame, and on the right the "odd" one...

-
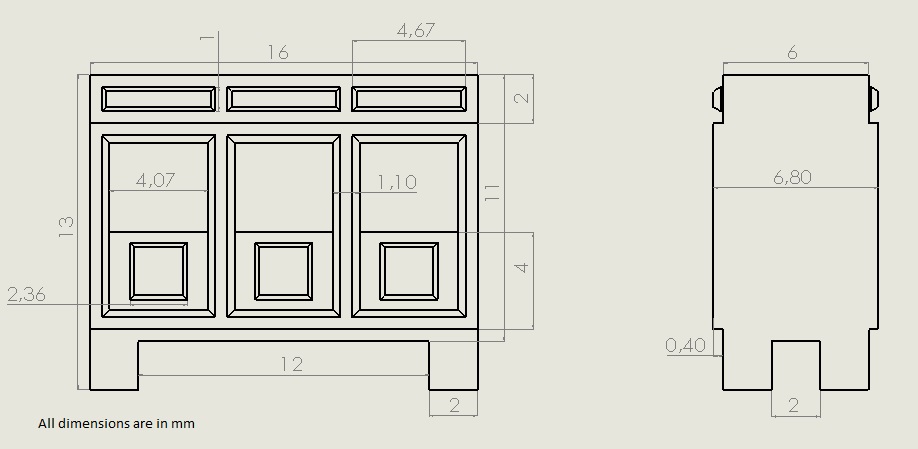
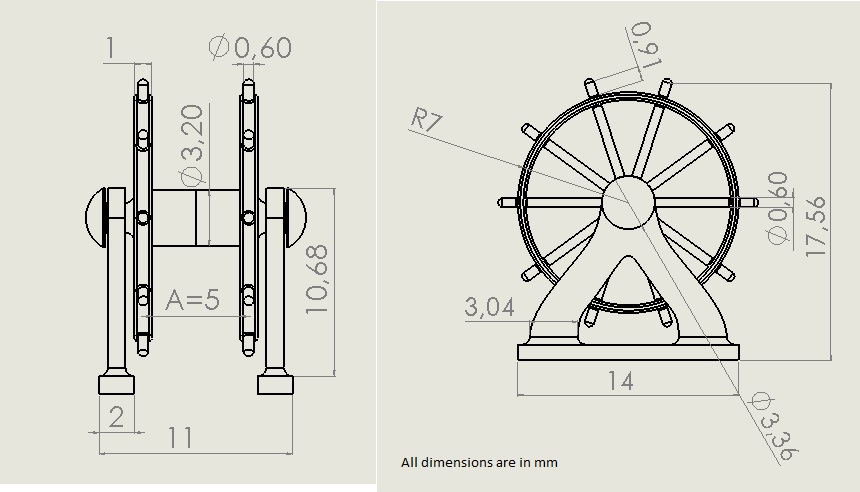
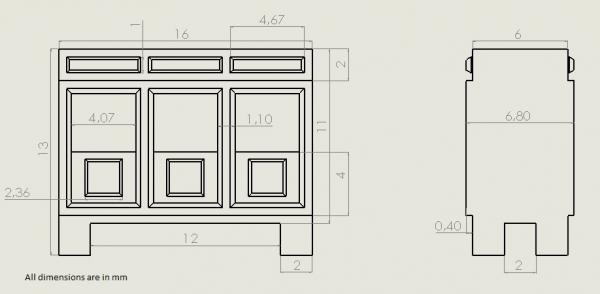
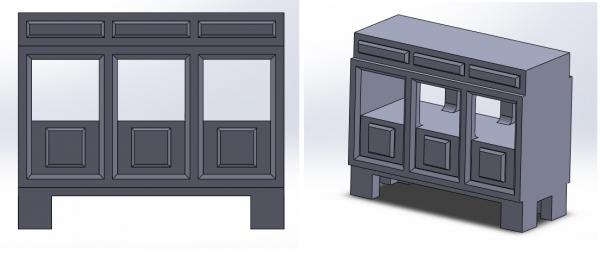
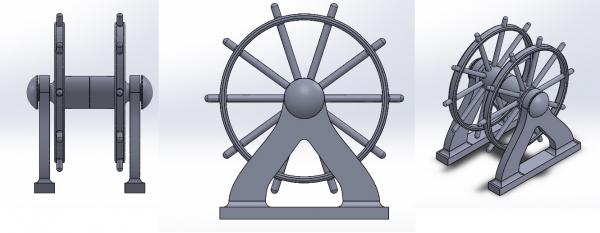
I use a 3D program named: Solidworks. Regards Philippe
-
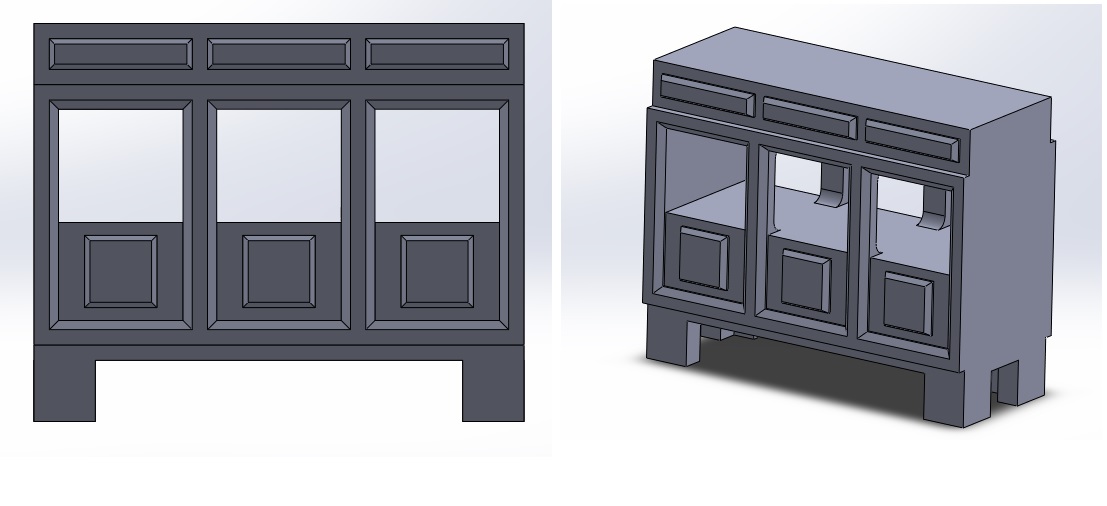
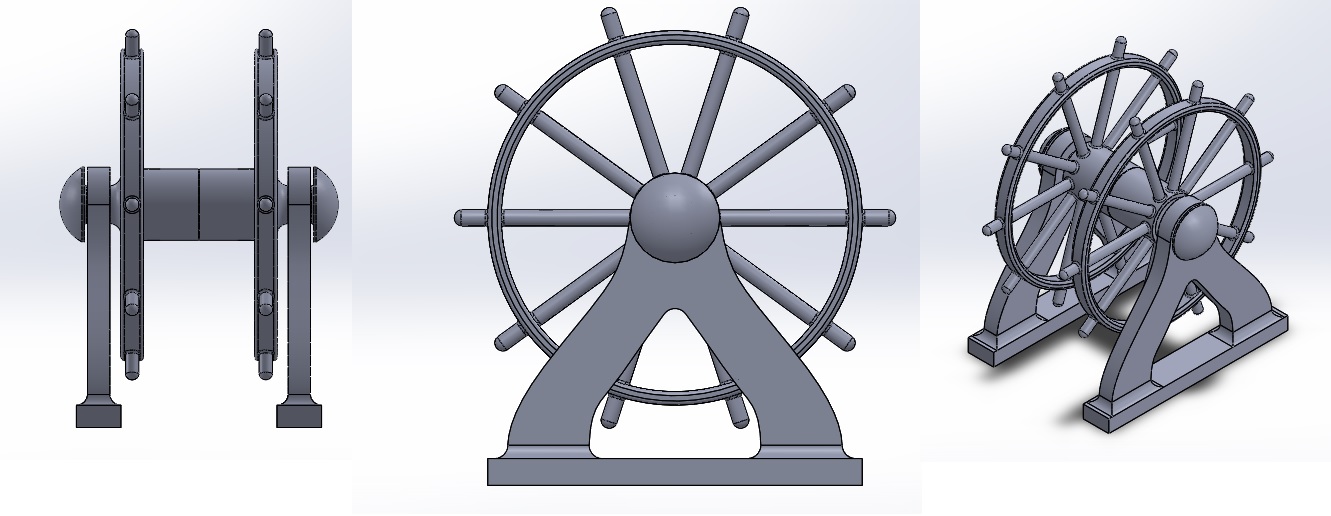
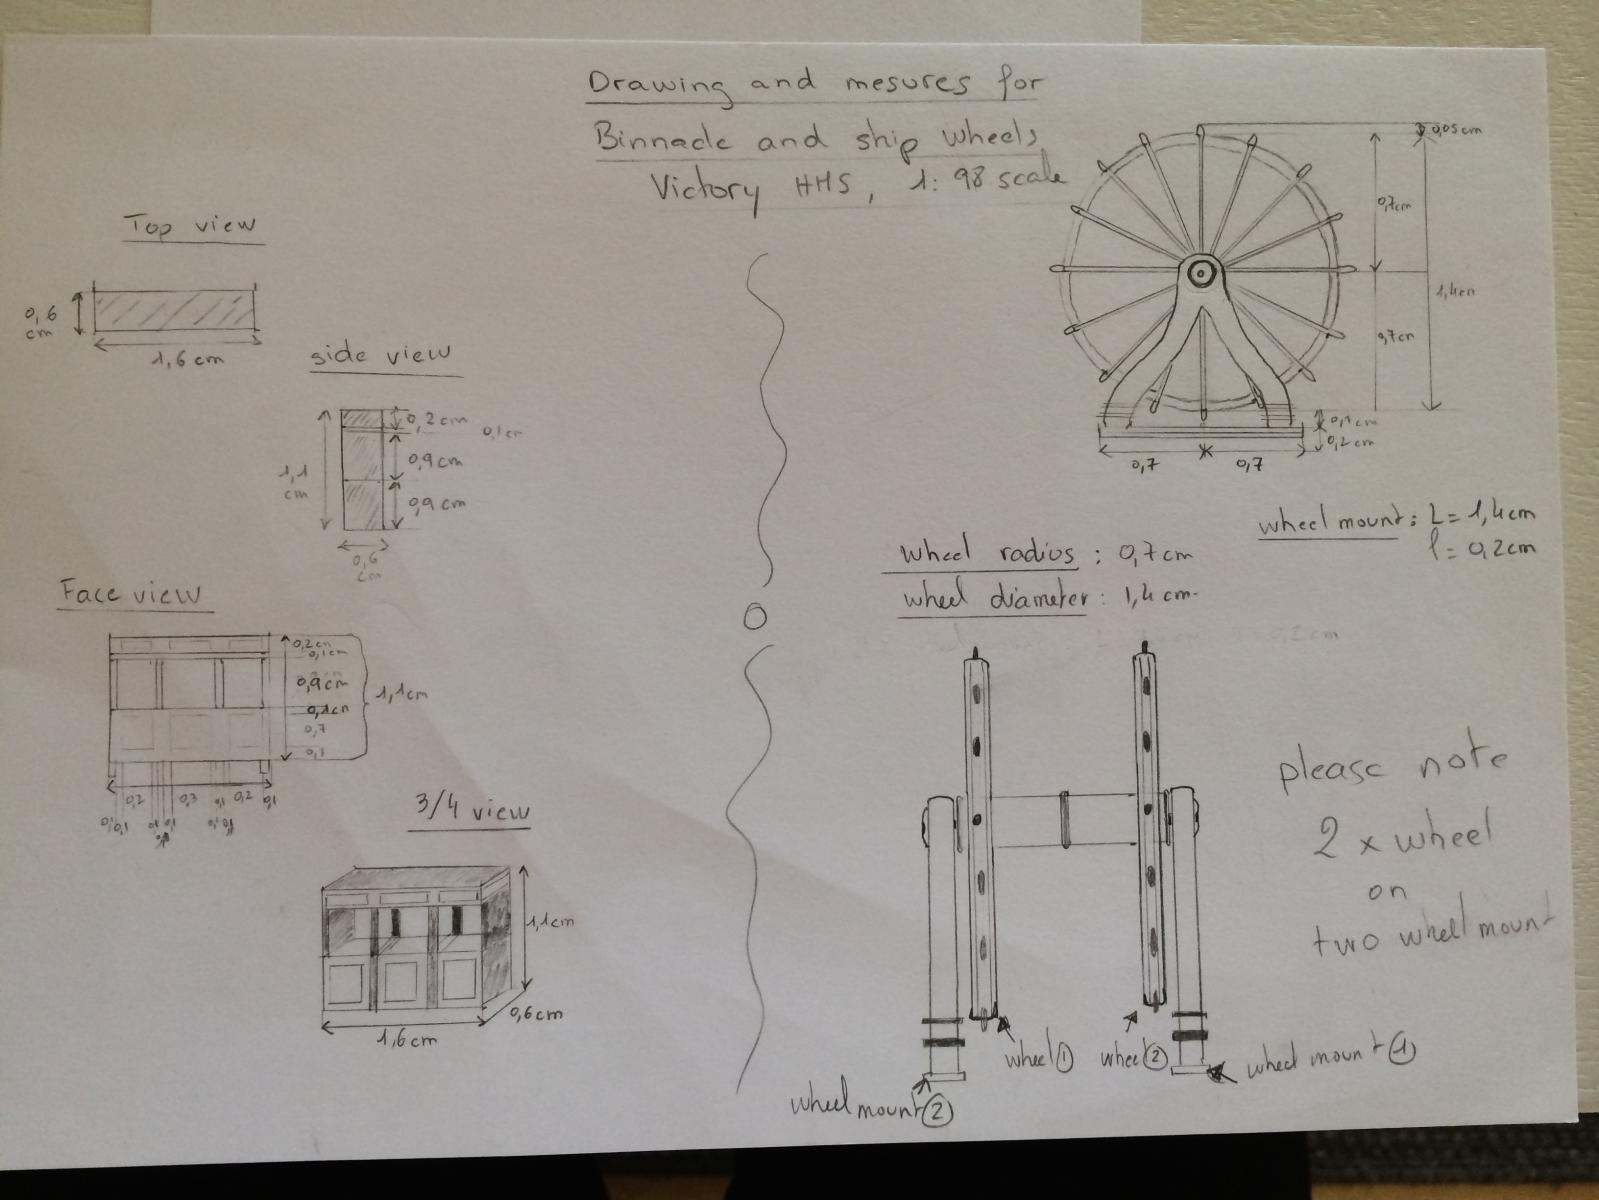
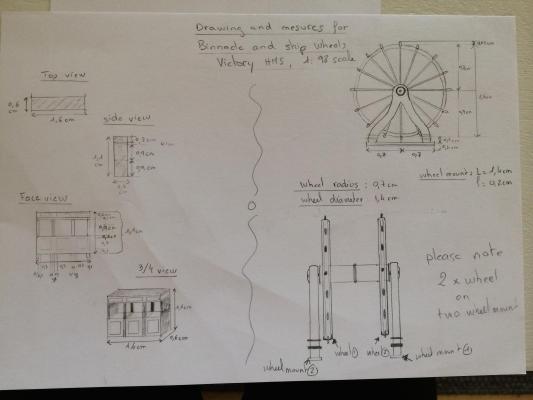
Done some drawing and measuring. It think I have the correct dimensions. now back to the workbench to try to make these two parts. Here are the drawings:
-
Clever idea! I will do so the same. Keep on the god work:)
-
Great Job Keith! Seems you have your hands full with two build at the same time. One question: I can see your are not finished with the canon holes, is it true? I am about to start this step on my own Victory and looking for good advices and tips. Best regards Philippe
-
Hello Wacko! Good idea! So I am off to the local timber shop Thanks for the advice ! Have a great day!
-
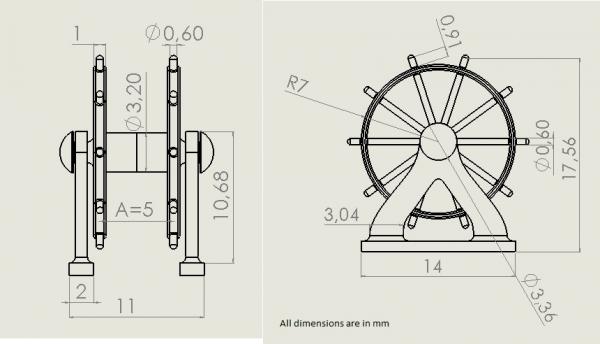
Now is the time come to make some changes on the binnacle and the ship wheel. There were no wheels in the kit, and despite several attempt to contact Mantua, I can only see that they are not a very serious model kit builder. Not even a mail!!! I offered to pay for the missing items and the transports. But nothing...absolutely Nothing So I will try to make my own Binnacle and wheels. Love the challenge Here is the drawing i made, so I am ready to start the building process. Not sure what kind of wood I will use. I made a try with balsa but it is far too soft. Maybe pine or cherry will be best. Will se
-
hello ! Great work! Just love your work on the binnacle. Do you have the exact measures for ht binnacle and the ship wheel? I would like to have them, so I can create them myself. Hope to hear from you soon Best regards Philippe
-
Good luck on this project ! I will be following you with great interest Best regards Philippe
-
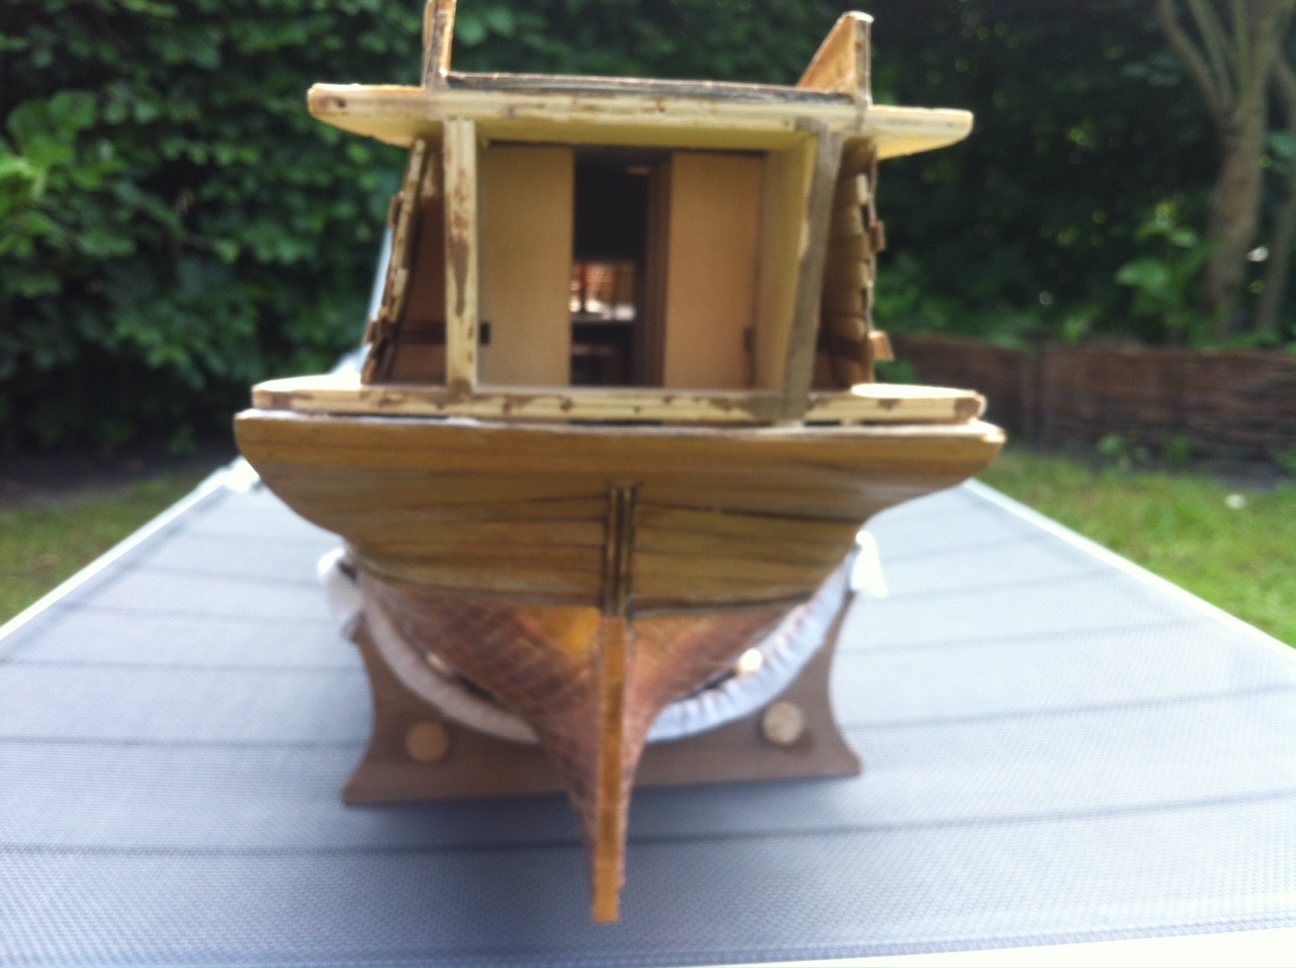
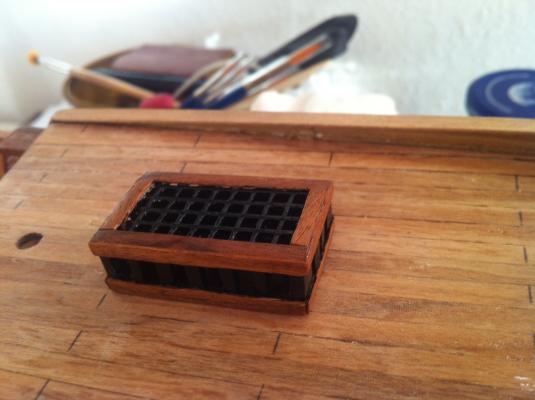
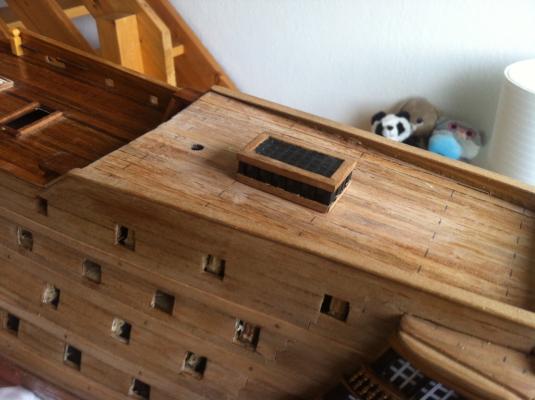
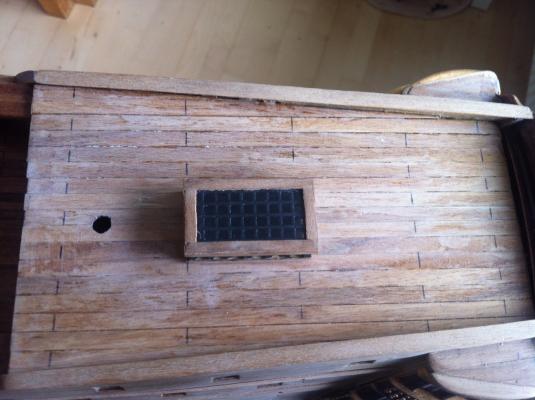
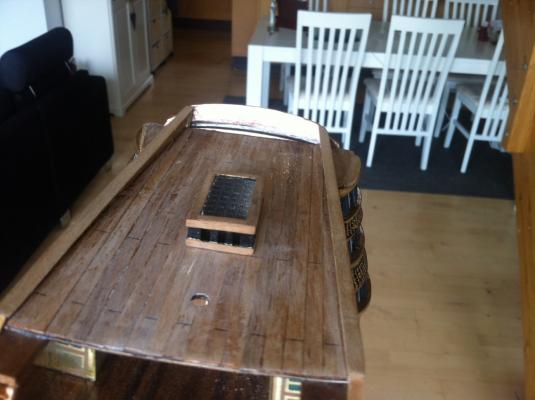
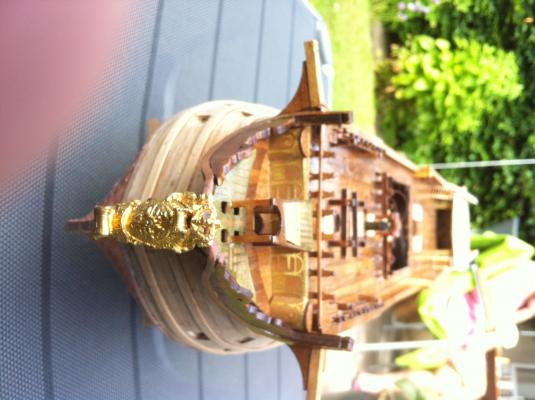
Skylight is now finished. Regards Philippe ps.working on the figure head now
-
So here we come. I have been working on the skylight these past few days. Not finished yet, missing the glass and the varnish. Just tried it on the model. Take a pic and please do comment if you have any suggestions, good ideas Best regards Philippe

-
Yes, Keith, I am also quite happy for it. Now, i am trying to make the skylight from scratch as the one provided in the kit is really bad. Best regards Philippe
-
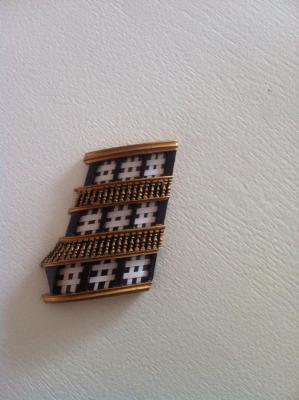
Hello Clearway! You are right. I thought the windows frames were too wide, so I made them smaller. Lots of paper cutting See the results:

-
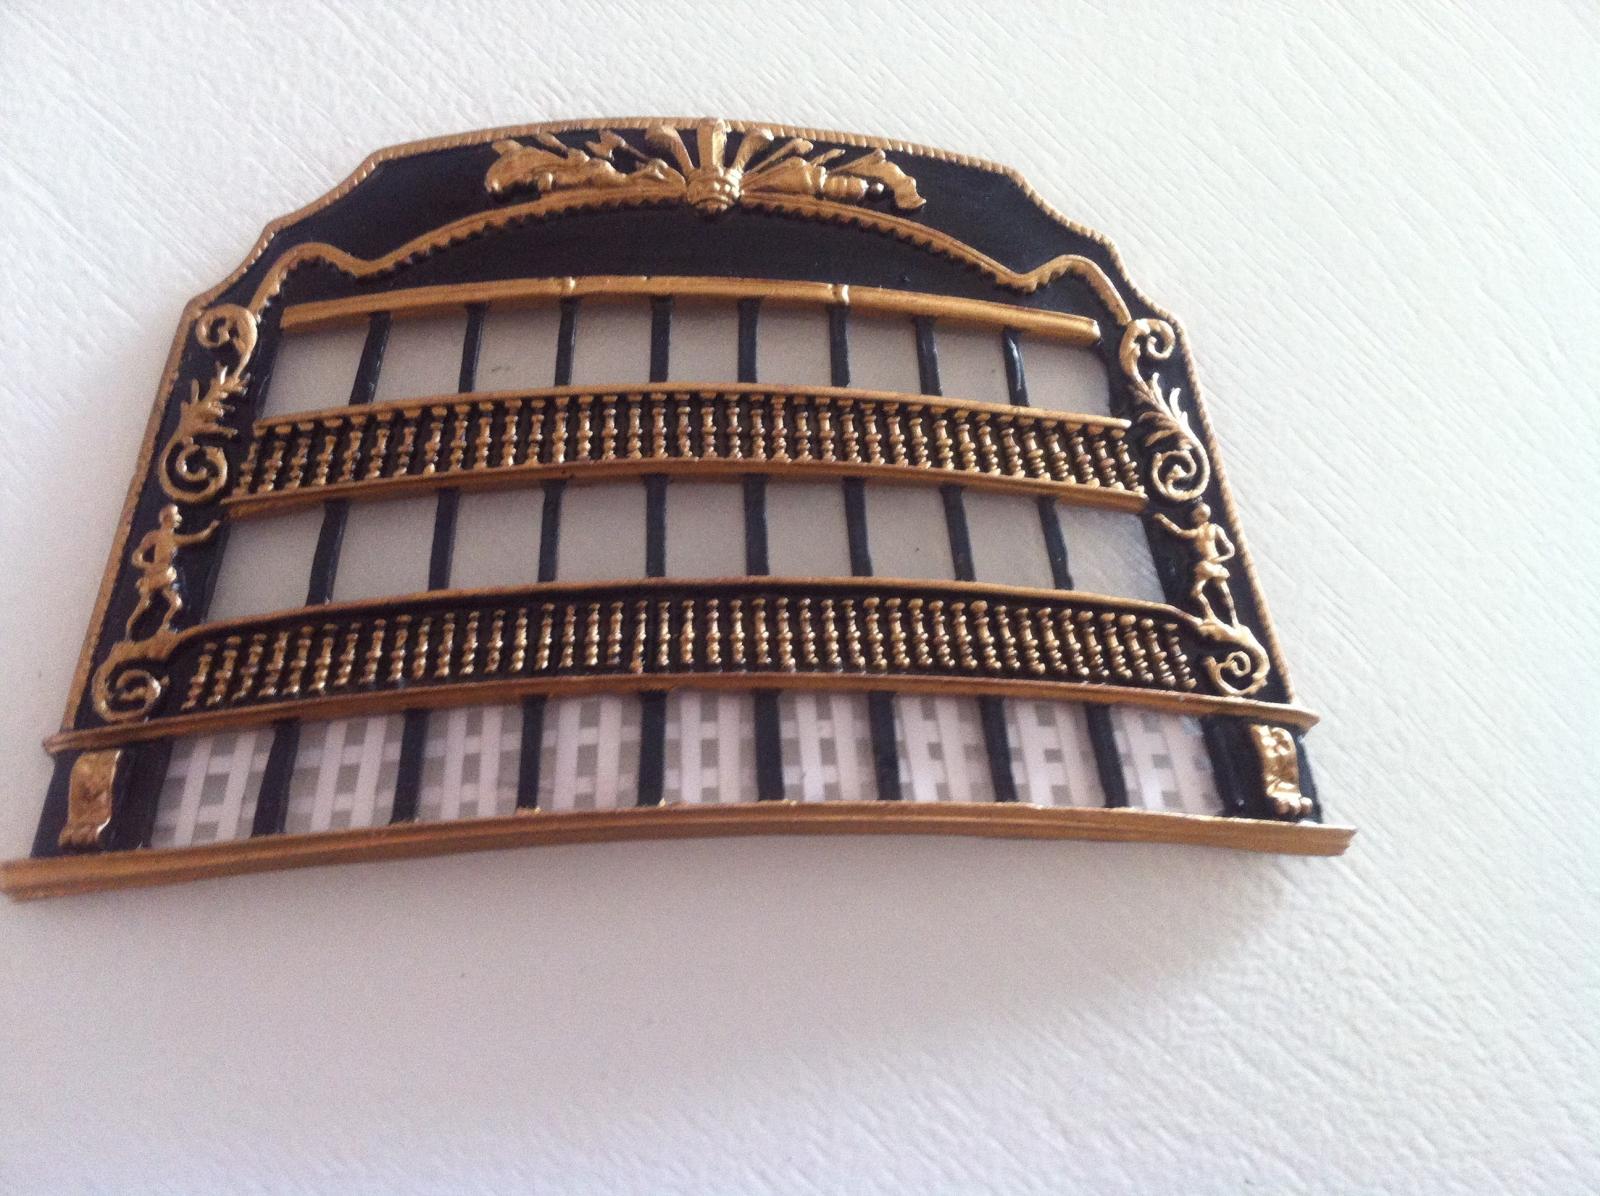
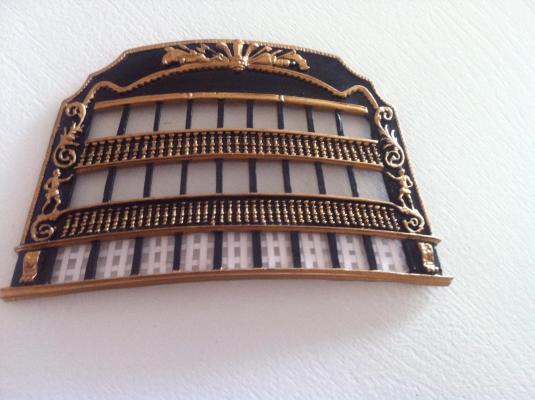
Stern post and gallery: Here we go! I have received them from cornwallmodelship in the U.K. I have painted them and currently making the window. I have also adjust them to the ship. She is waiting for them now. I hope to post some new pictures soon. In the mean time, here is a pick of the stern gallery and the stern post as they are today. Have a nice week end folks! Ps. just discovered that there is a lot of brass fittings missing from the kit. As I bought it from a second hand site on the internet, impossible to retrace the original owner. I contacted Mantua, they don't bother to answer....I just want to buy the missing parts!!! If anyone have a Mantua kit, I would like to know what exactly is coming in the plastic bag where the ship wheel and the brass eyes which comes on the deck. It will be a great help, so I can order the missing parts. Thanks in advance !!
-
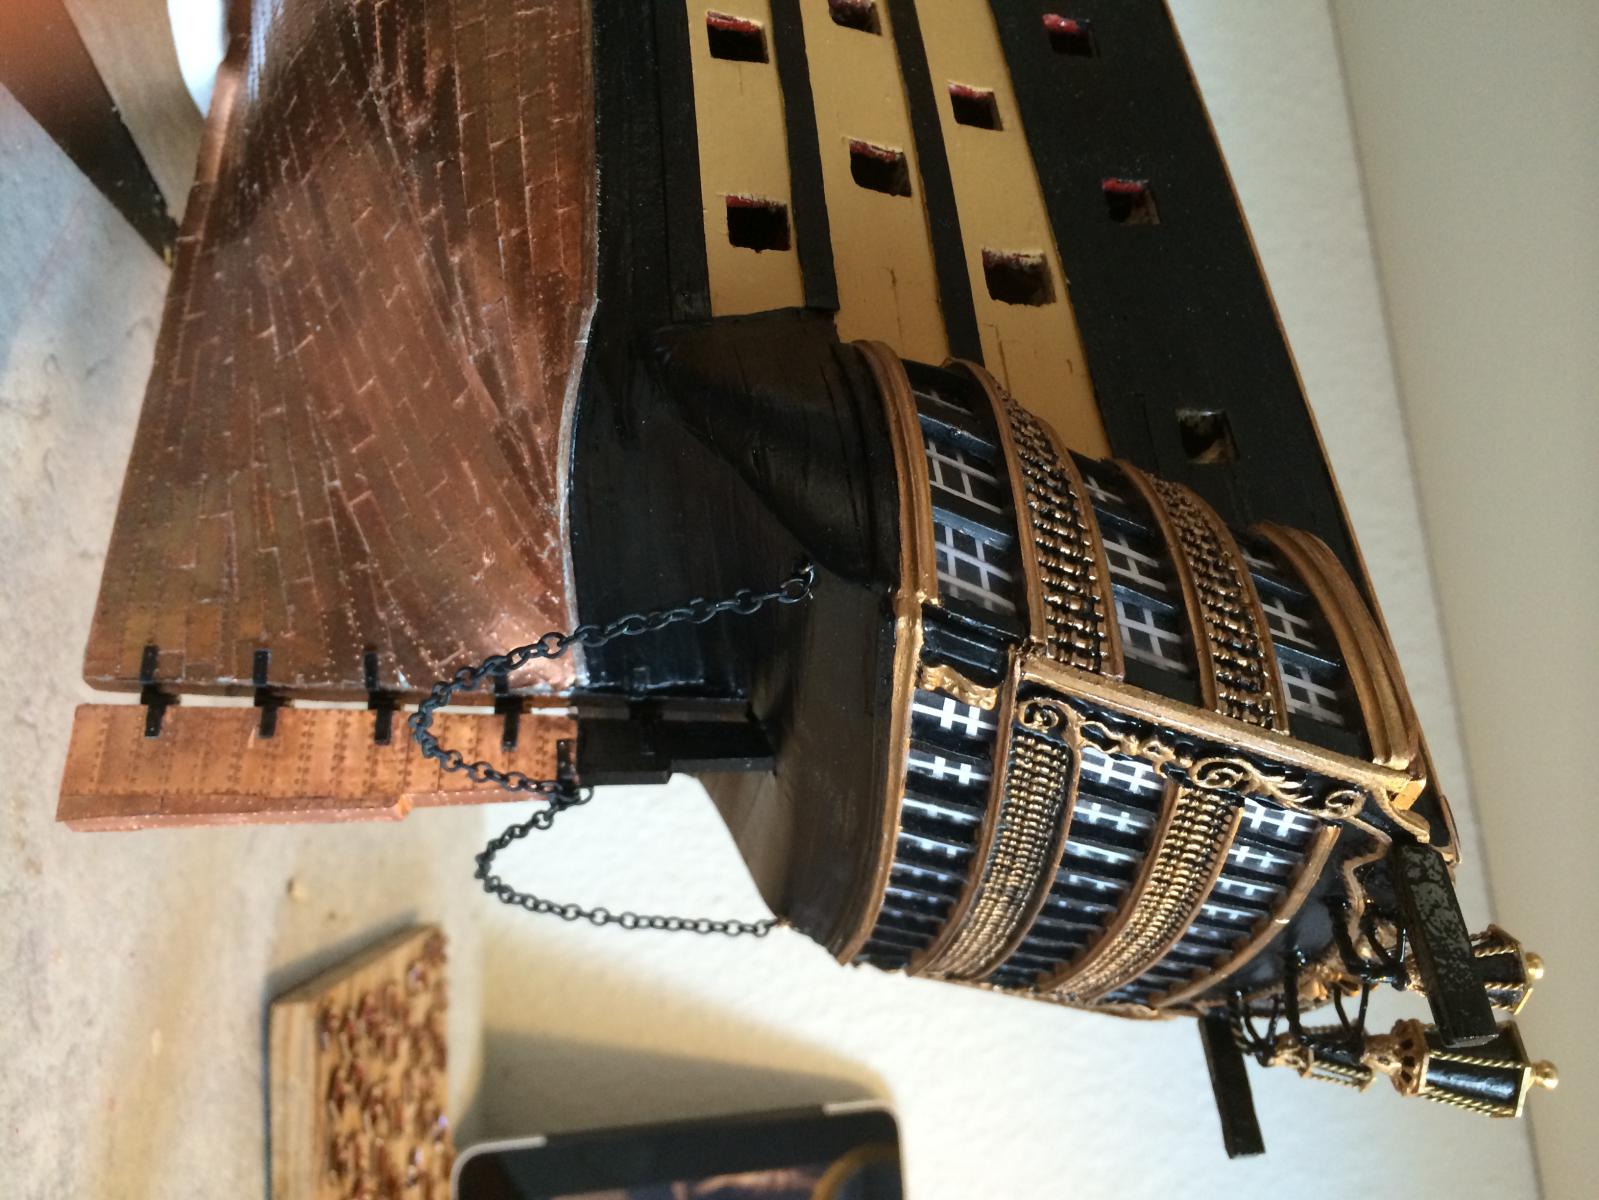
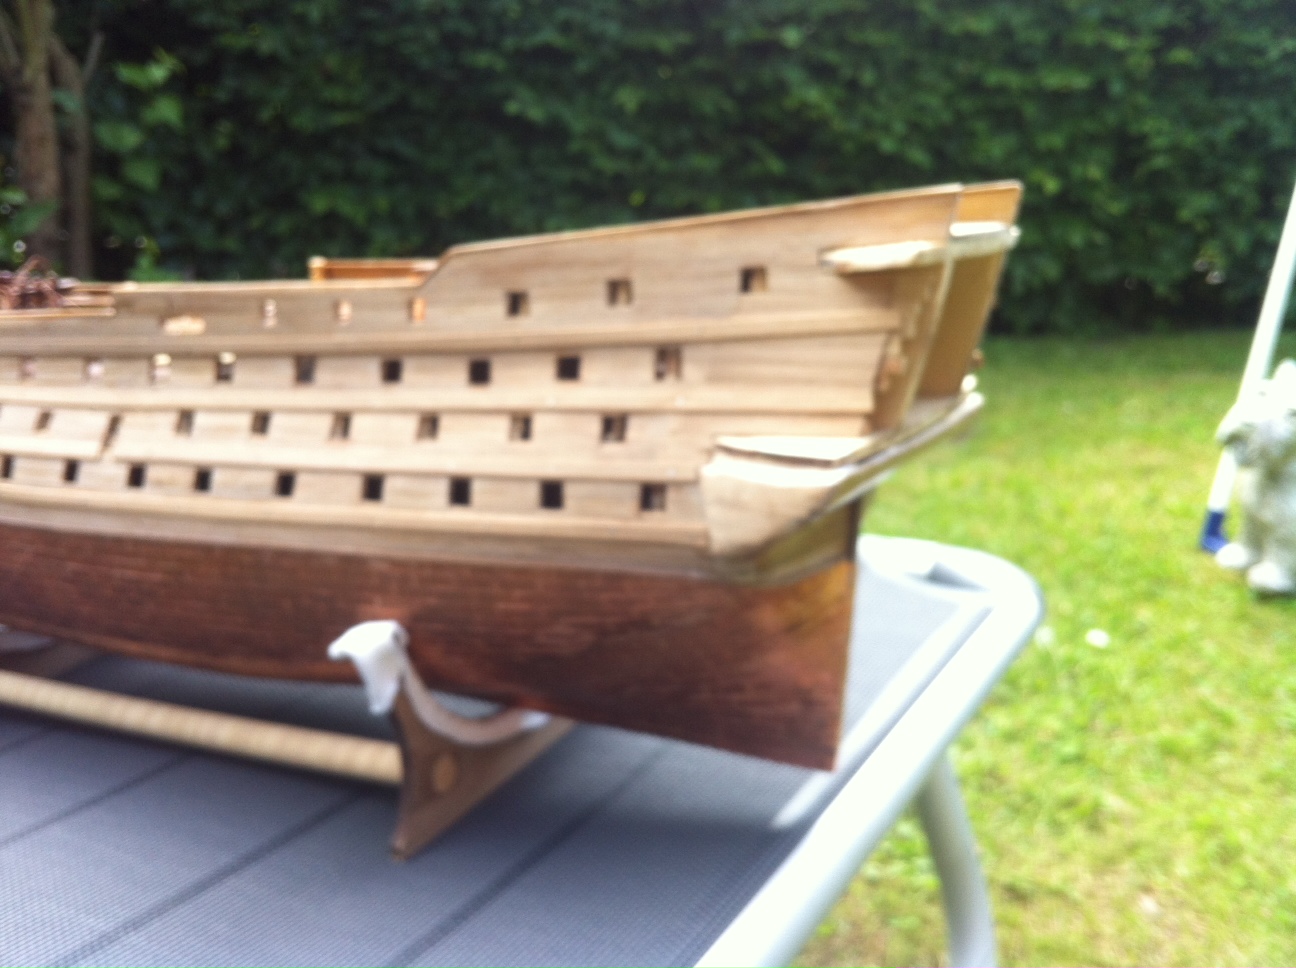
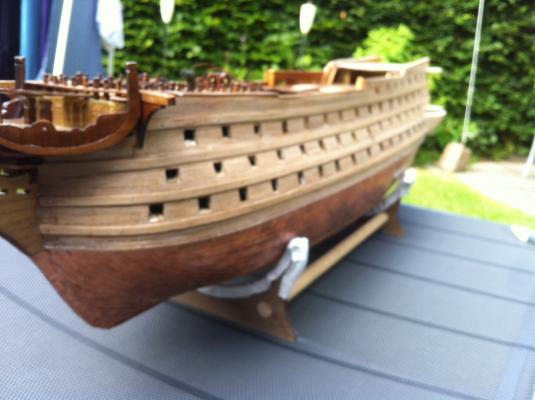
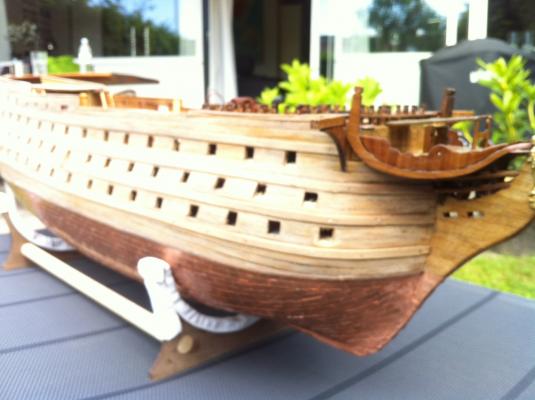
hello, Quite some changes on my project. First I have finished the copper planking. I took more than 130 hours and almost 2200 plates. Quite a challenge. I am not very happy with the result, but it has to be ok for now. I will probably come back to it later on. The stern and the stern gallery: Well, what can I say? I was not pleased at all with the original laser cut plates which comes with the kit, so I decided to make my own. I worked hard for 40 hours to make some.... After I was finished, I was too ashamed of them. Not good enough. So...I took them off again. I just have clean up his area and wait for some new parts ordered fro Cornwallmodelshipping. I couldn't find any good explanations how to make the stern on my own. I have worked on both side of the ship, and the next step is the canon holes. First some adjustment, polishing and painting the inside with red color. I look forward to make them Here is some picks of my baby as she is today. She took a walk in the garden. Quite unusual for a ship ! Best regards Philippe


-
Just an uptade: Still coppering the hull.... It took 125 hours so far. I wonder how can I get the copper plates to get green as if they had been in a salt water for some time. Any recommendations? Regards Pilidk
-
Hello There! I do have one question to your topic: How to you accelerate the aging of the copper? I am building the Victory at the moment and in process of planking. 2000 tiles so far and not finished yet! It took 125 hours so far. I would like to find a method to make the copper green as it is after many years in the salt water. I have built the Cutty Sark, also with hull copper plates, but even after 3 years, the color is still bright. Any good advice is welcome:) Sail on mates! Pilidk