HOLIDAY DONATION DRIVE - SUPPORT MSW - DO YOUR PART TO KEEP THIS GREAT FORUM GOING! (Only 24 donations so far out of 49,000 members - C'mon guys!)
×


schiffebastler
-
Posts
322 -
Joined
-
Last visited
Content Type
Profiles
Forums
Gallery
Events
Everything posted by schiffebastler
-
 Here are now all 5 sails of the main mast. Since these sails are constructed in the same way as those on the foremast, there is nothing new to say. So here are just a few pictures, both from the front and the back of the sails. Joachim
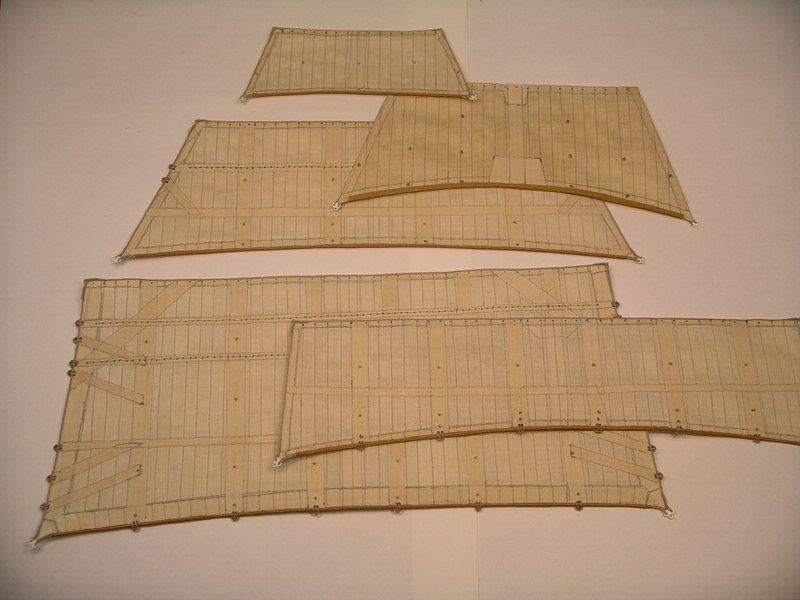
-
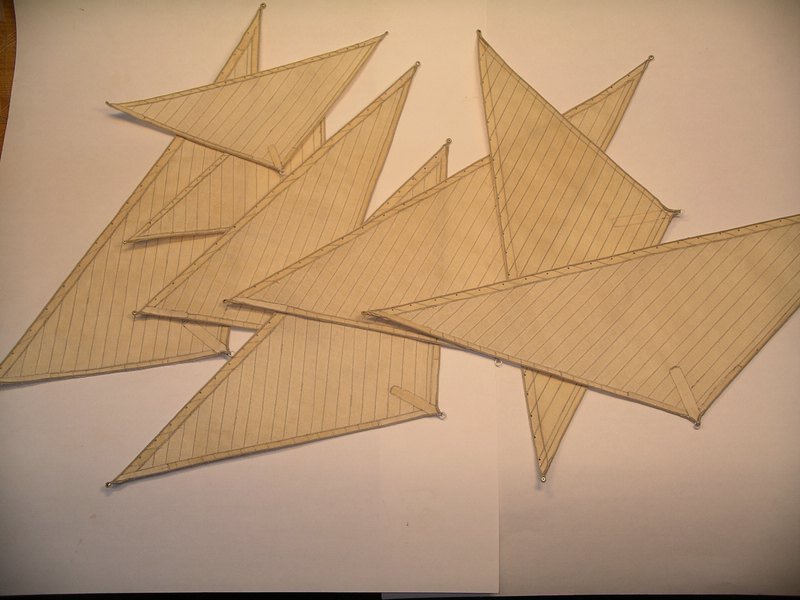
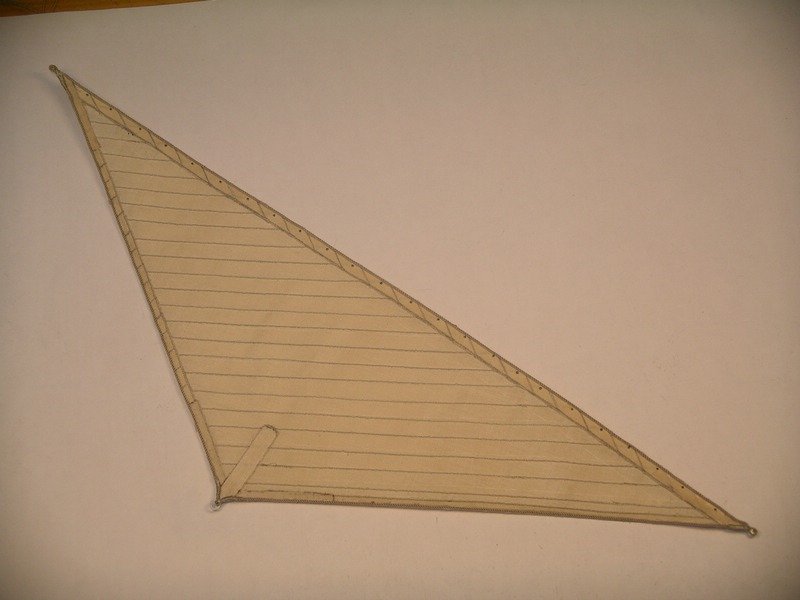
And another step further with the sails. These are now all the staysails, it takes a while, but everything is not as complex as the square sails. Joachim
-
Hello Drazen, now I have been following the construction of your model for a while and I really have to congratulate you for this fantastic work! It's always nice to see more progress and I'll stick with it. Cheers, Joachim
- 487 replies
-
- 3
-

-
- ship of the line
- 80 guns
- (and 1 more)
-
Although there were no errors with any of my browsers right now, it is not easy to rule out that other versions may produce unexpected behavior in combination with special settings on the computers and operating system. Therefore I have removed the direct links to EMail on the website for the time being. The contact always goes via the mail address given above. Of course a PM is also possible in the forum. best regards Joachim
-
Hello @Jaager this behavior in Firefox sounds really weird. I'm sorry you had problems. I will test it thoroughly myself. So far, my contact forms are still in progress, so that an order or a contact via a direct mail to me works: info@modellbau-muellerschoen.de I will complete the contact forms as soon as possible. Again sorry for your problems with Firefox. best regards, Joachim
-
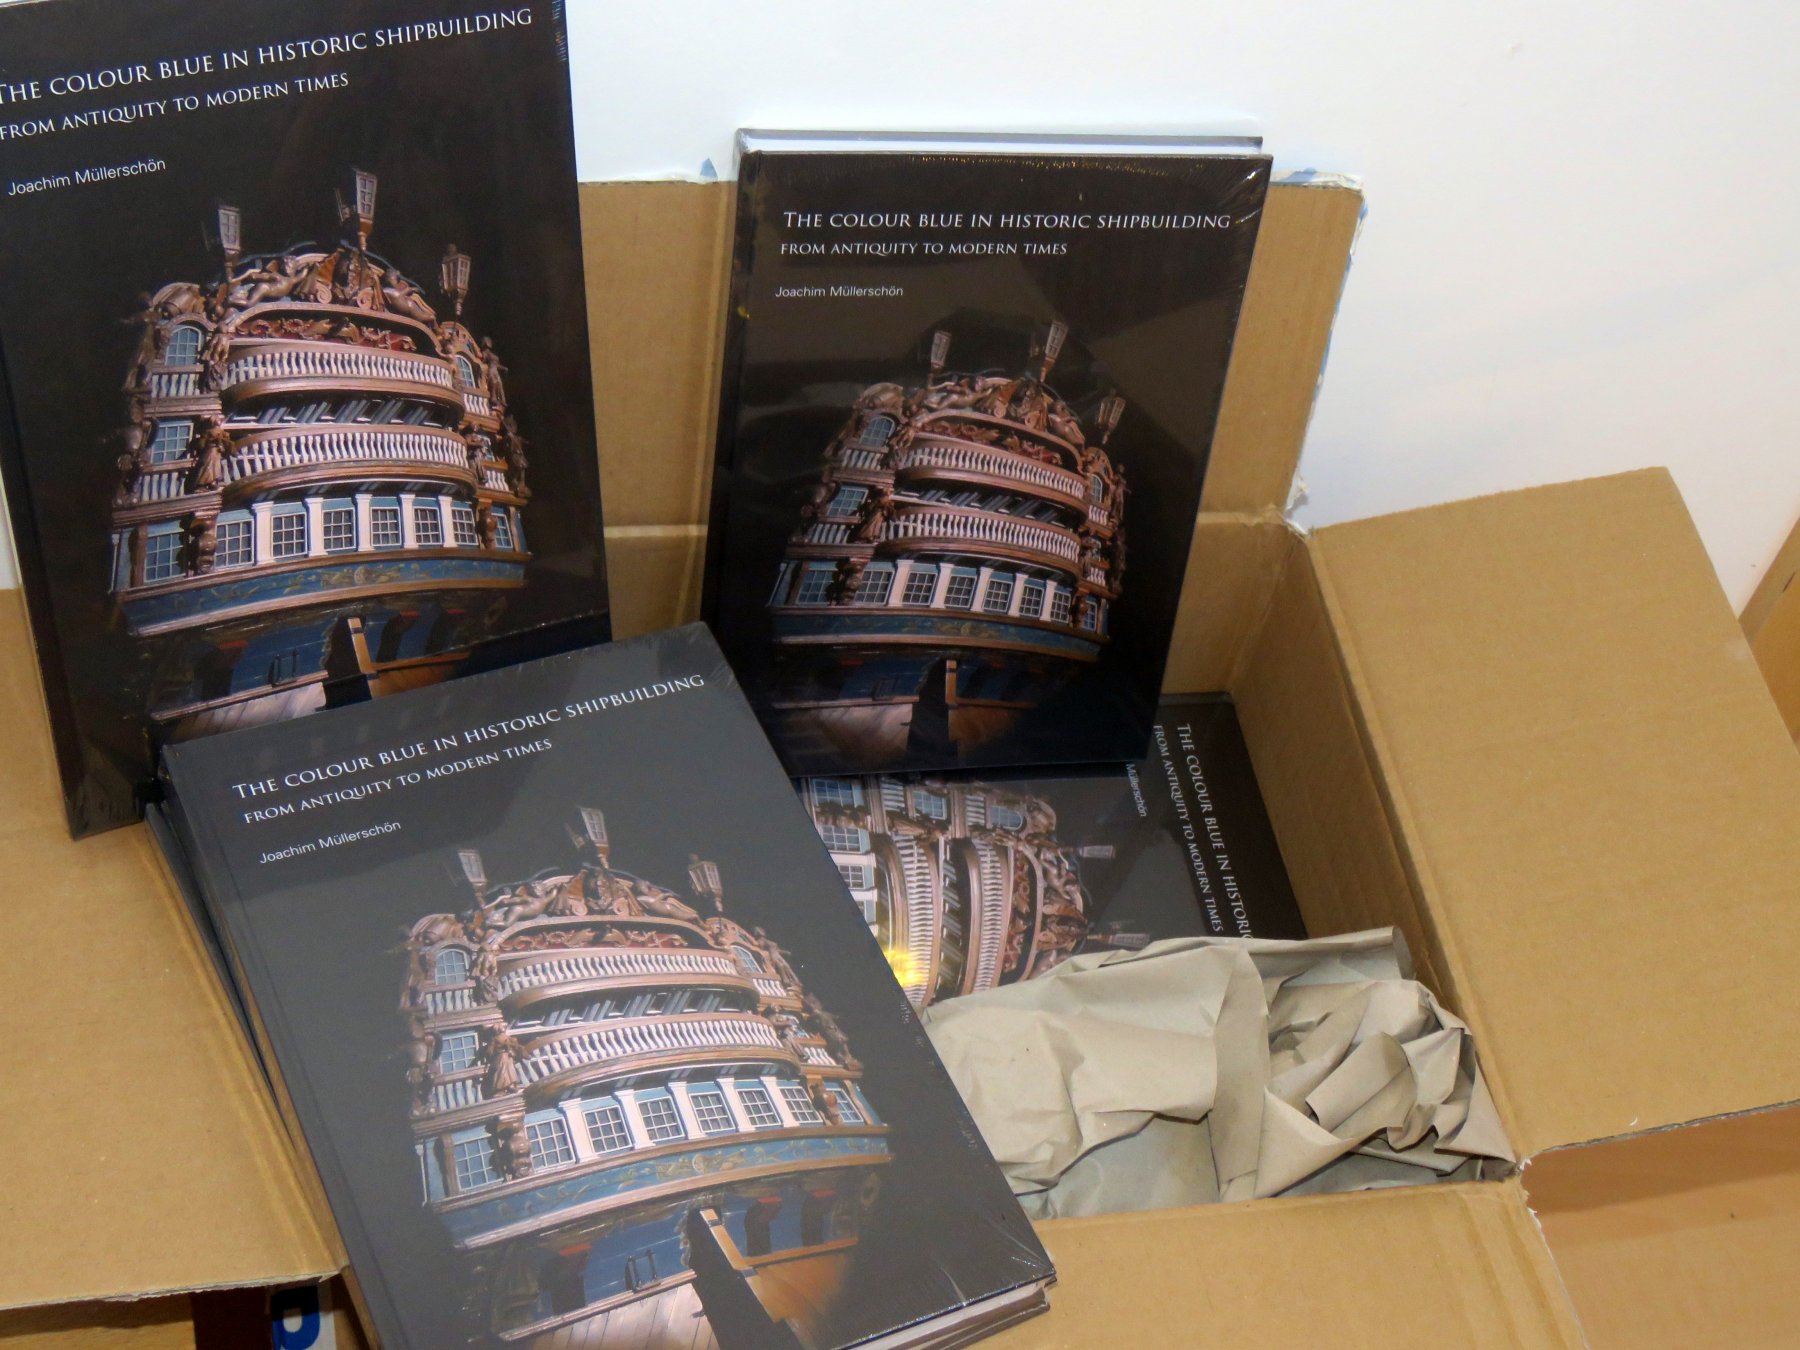
I'm glad that finally the English edition is available. The first batch of books has arrived. Cheers, Joachim

-
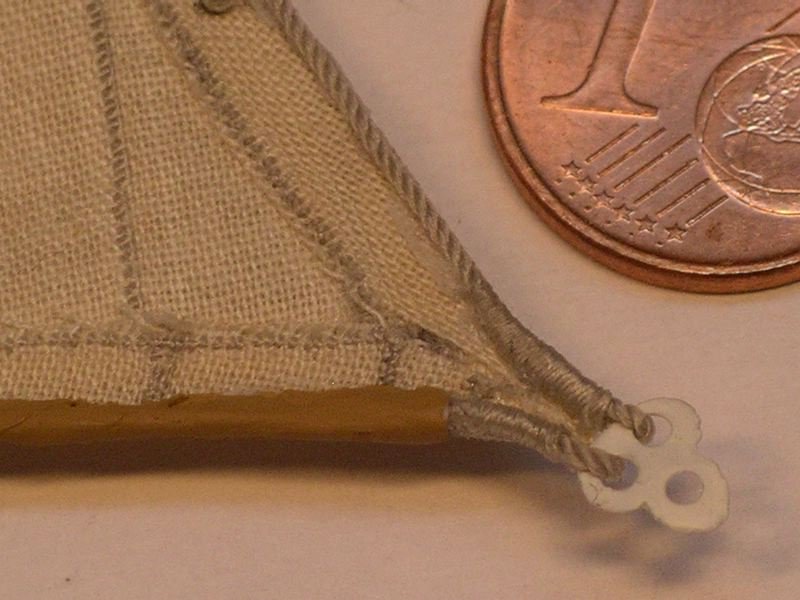
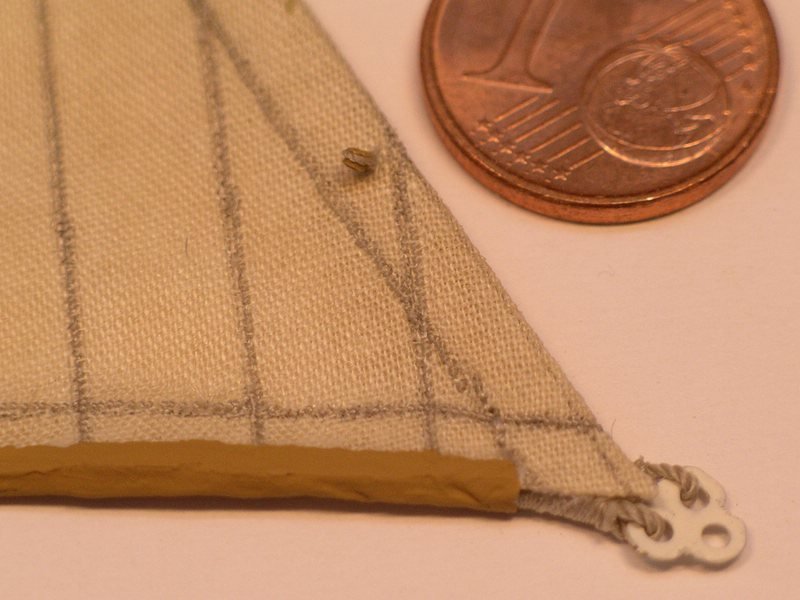
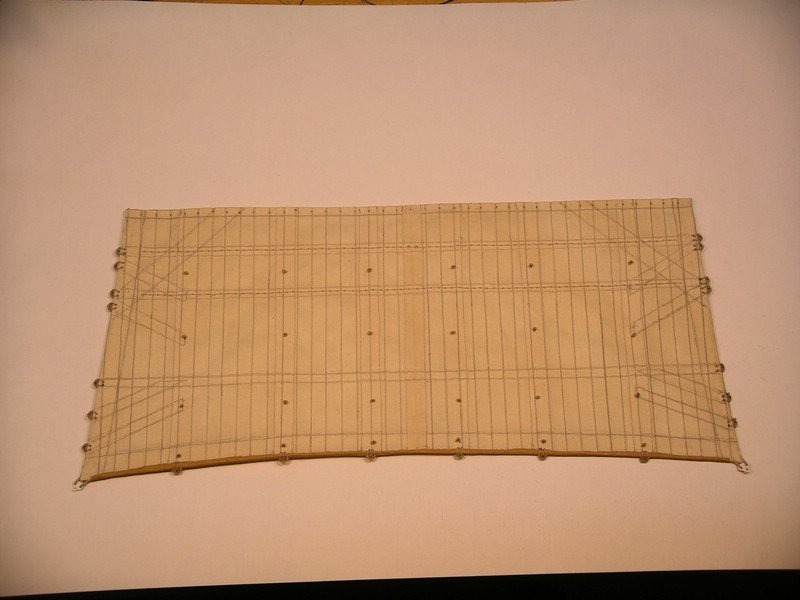
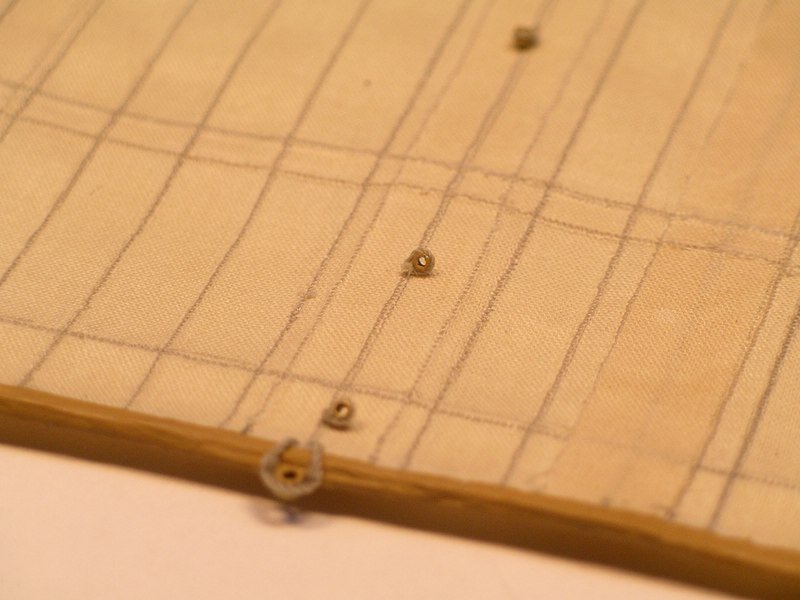
Now it may be a little continuation. I had shown the foresail last time, now the remaining sails of the foremast follow today. A little overview, of course. As you can see in the picture, each sail looks a bit different, but overall they are not as elaborate as the jib itself. All sails have in common that the foot of the leech is originally covered with a leather strap. I have copied this in the model with a thin, painted paper. Here now only the hunier volant has a retracted reefing line, as there are two of them at the jib. Now a few details about the sail. So a bit of a size comparison some details of the smallest of the sails, the royal sail. The links are between 0.35 and 0.45 mm thick, the guide thimbles of the Gordings have an outer diameter of 0.8 mm. Bye Joachim

-
Well Lapis Lazuli is well known, but was hardly used in ship painting, but there were also some other early pigments, cobalt, Egyptian blue, smalt, azurite, indigo to name only the most important of them. All of them not easy to produce at that time, with special characteristics, but partly over 5000 years old in their application. Joachim
-
😉 Well, the colour blue was something special because of its rarity and preciousness. Since this color is discussed controversially again and again, I have chosen this topic. But who knows, maybe I'll get enough interesting facts about other colors as well ... James Bond already said, never say never again ...
-
Thank you for the nice contribution, David! I am really happy that David has taken on the task as editor to make sure that the book got this great quality. Thanks alot! Joachim
-
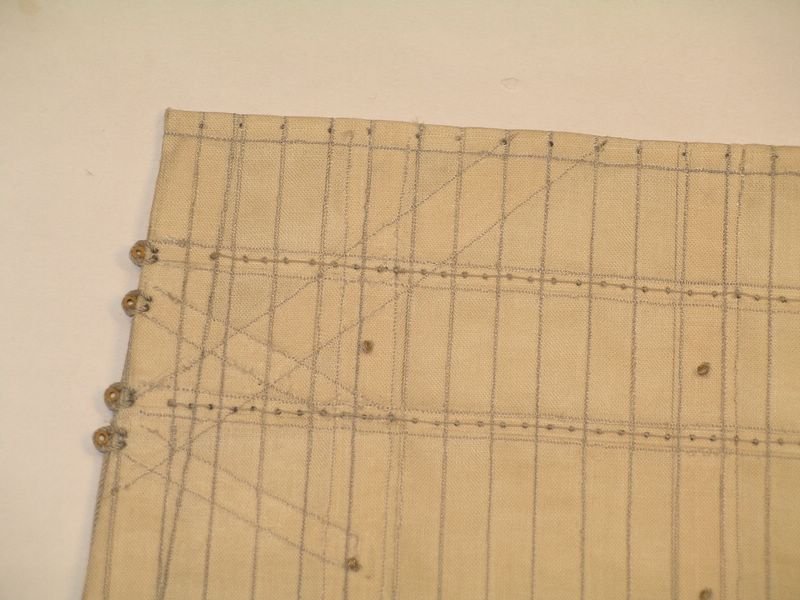
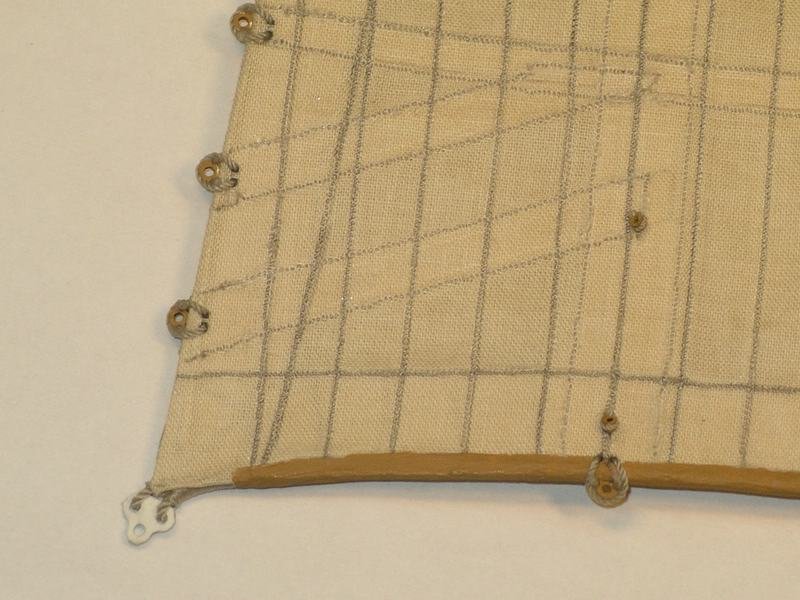
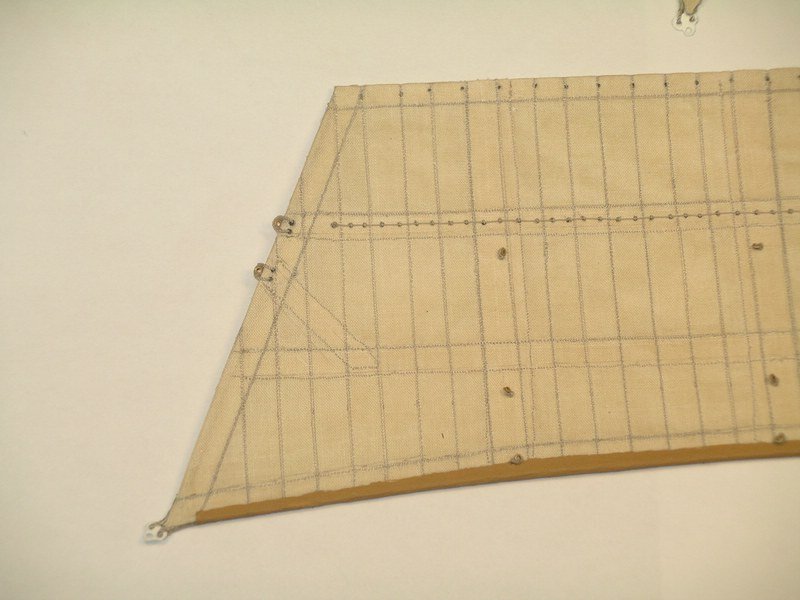
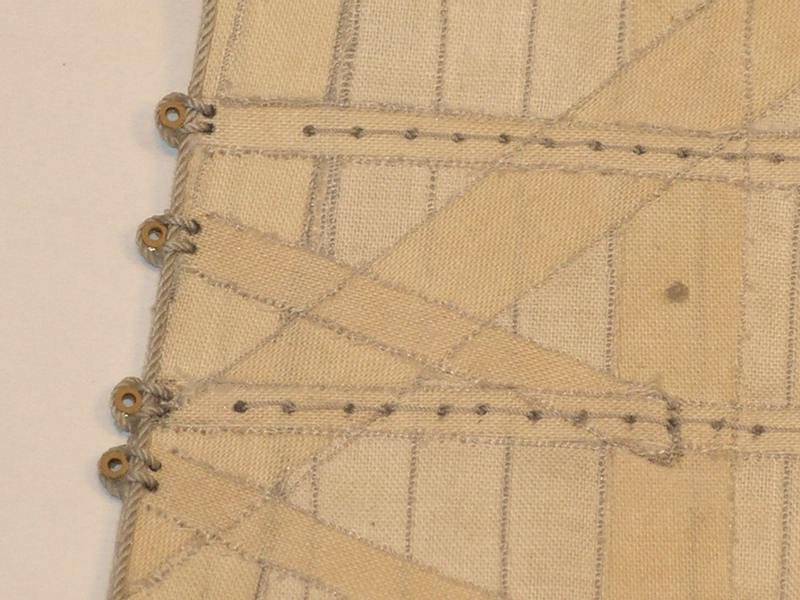
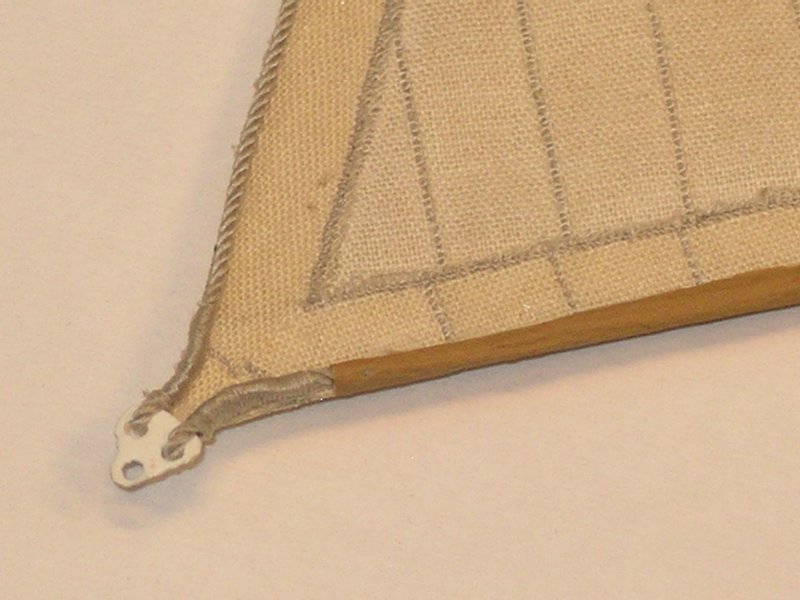
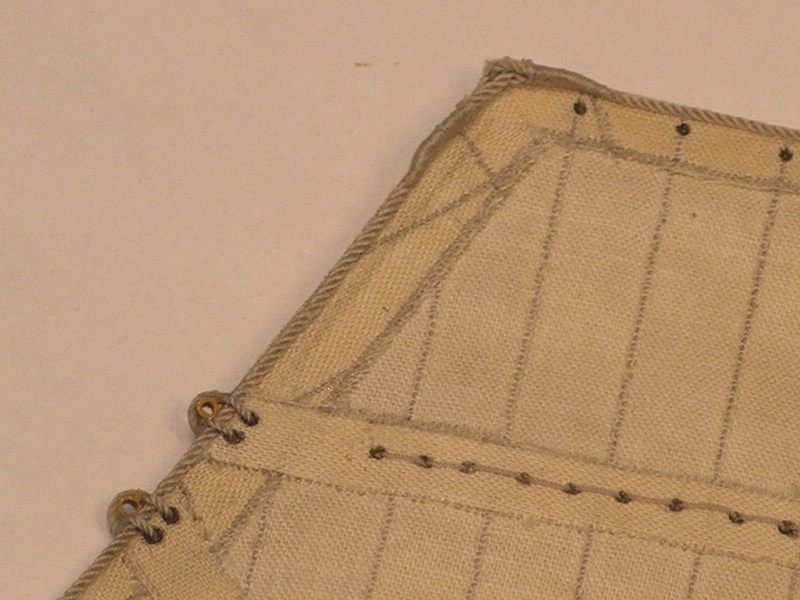
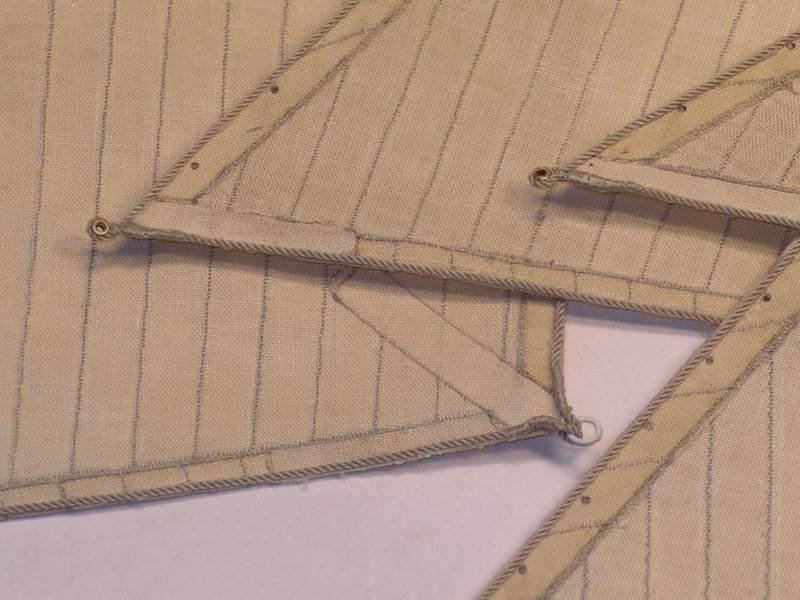
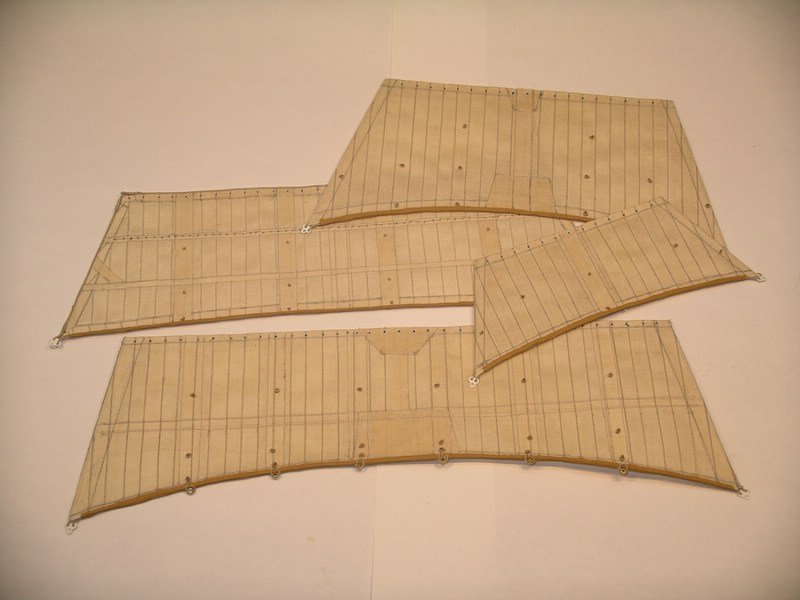
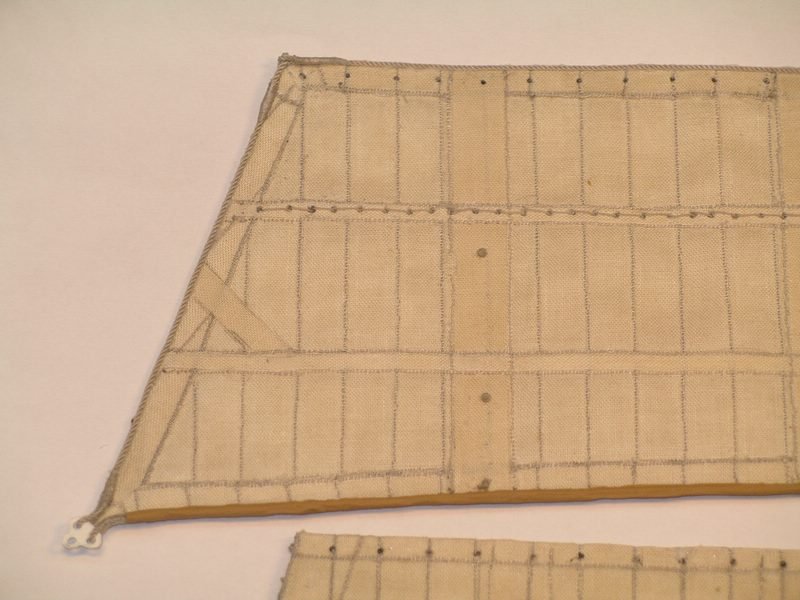
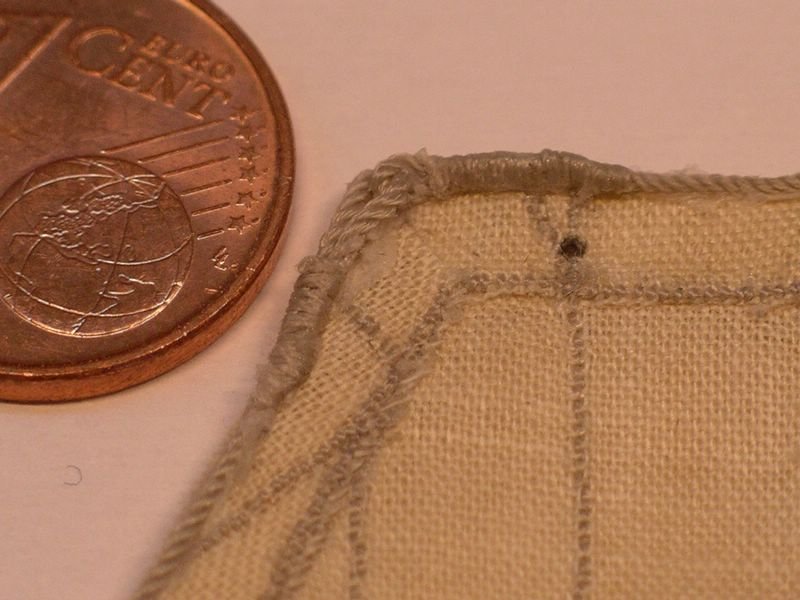
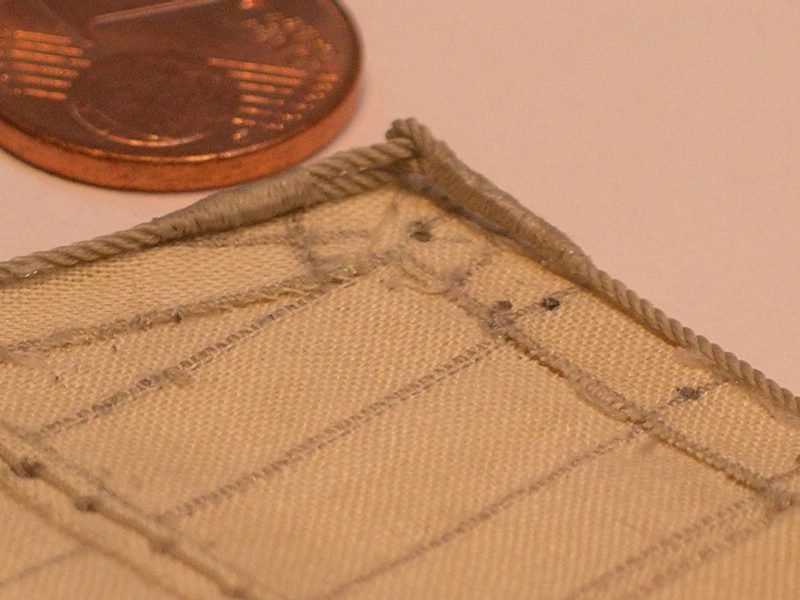
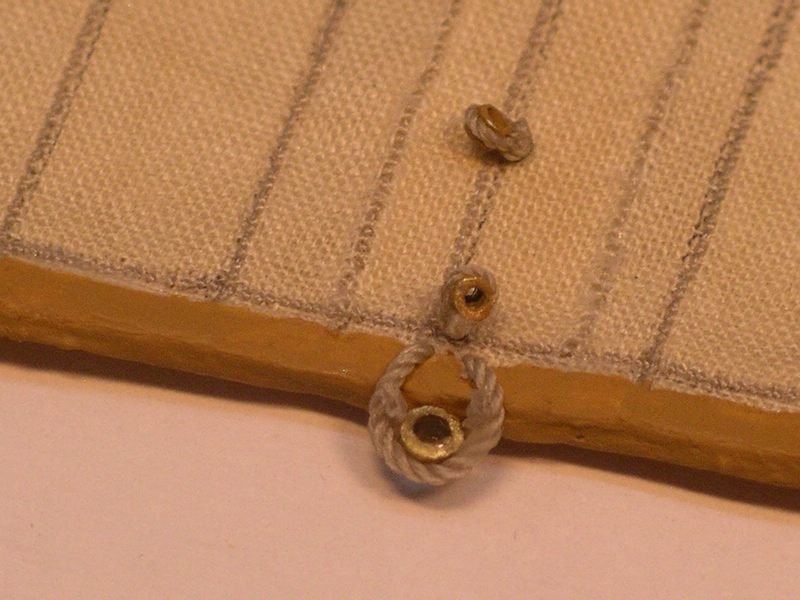
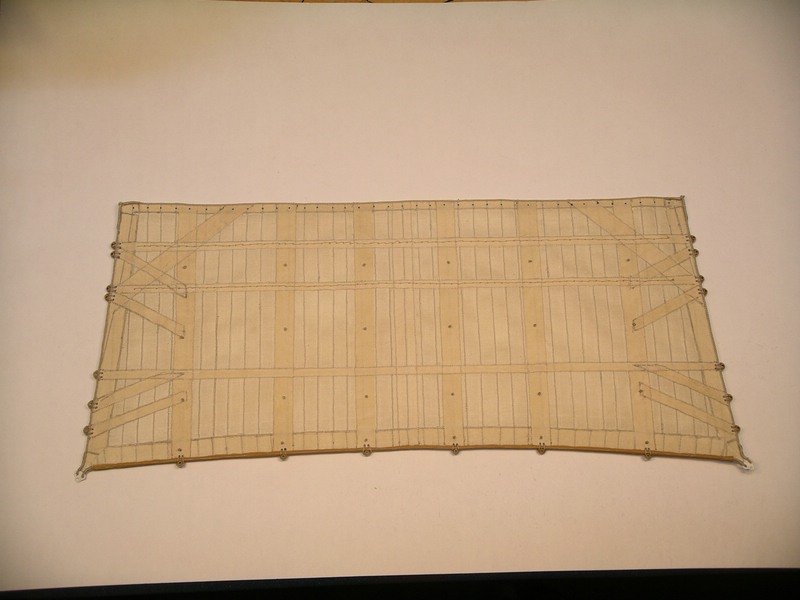
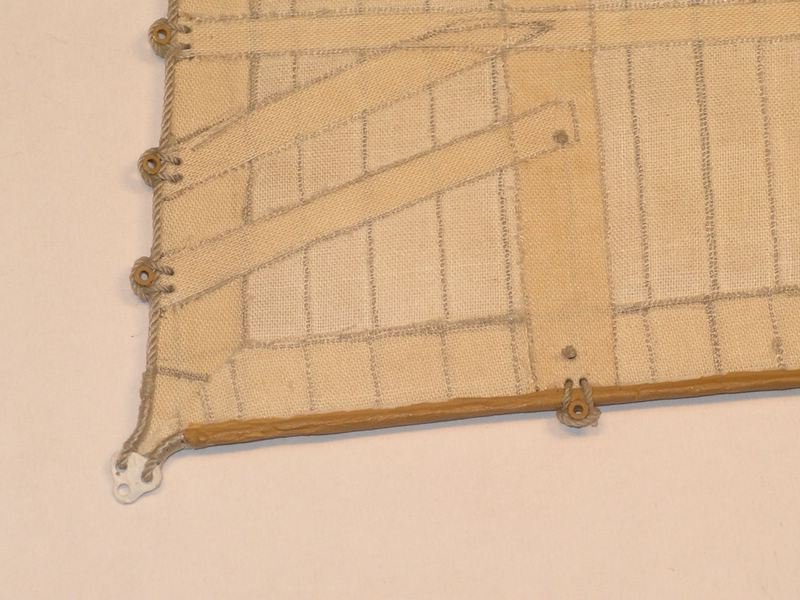
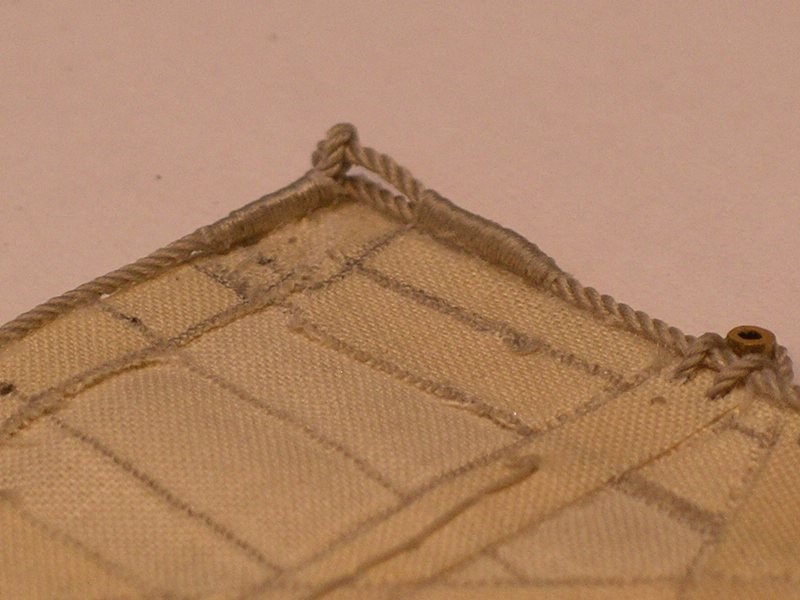
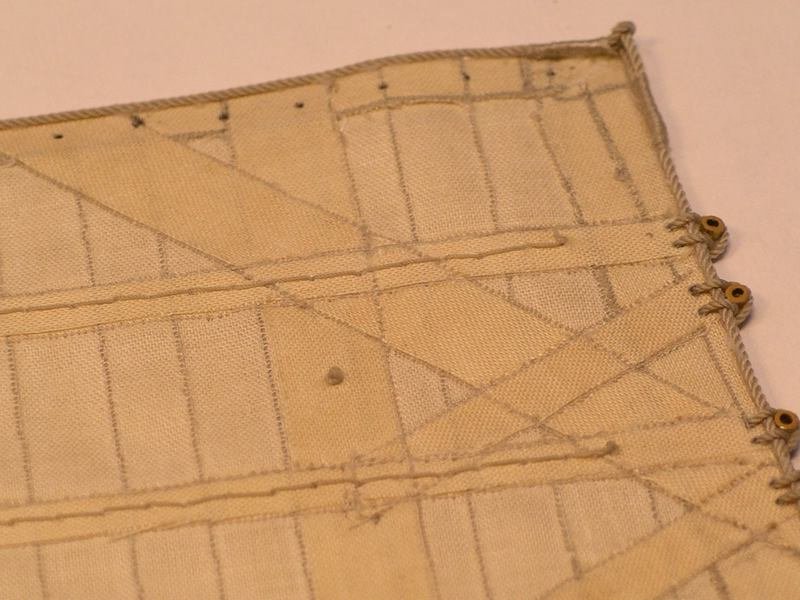
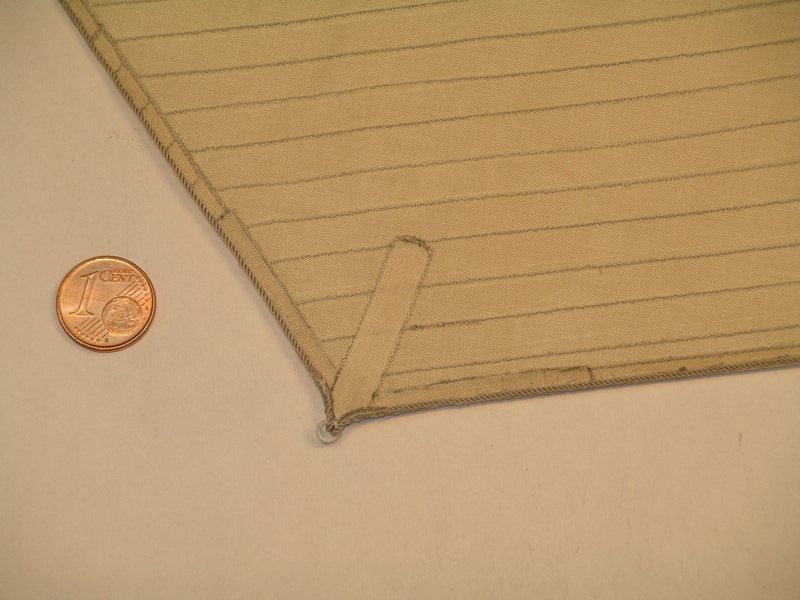
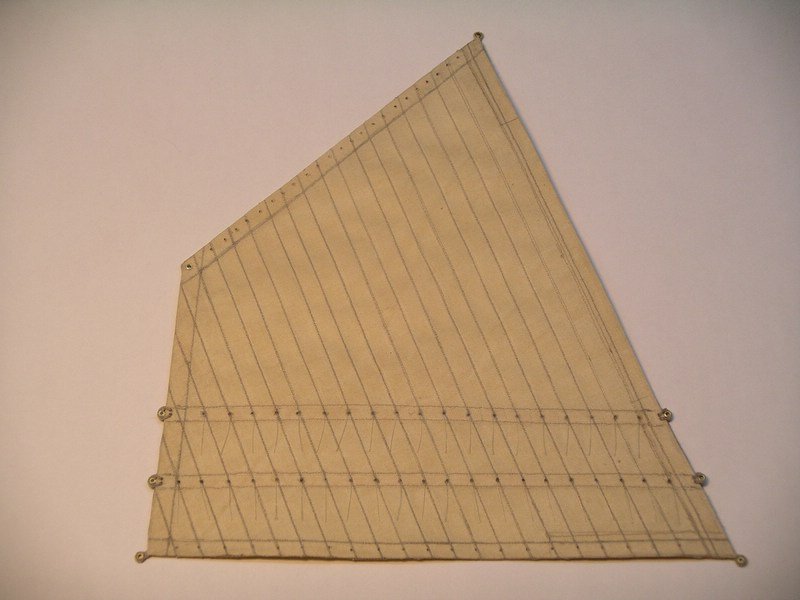
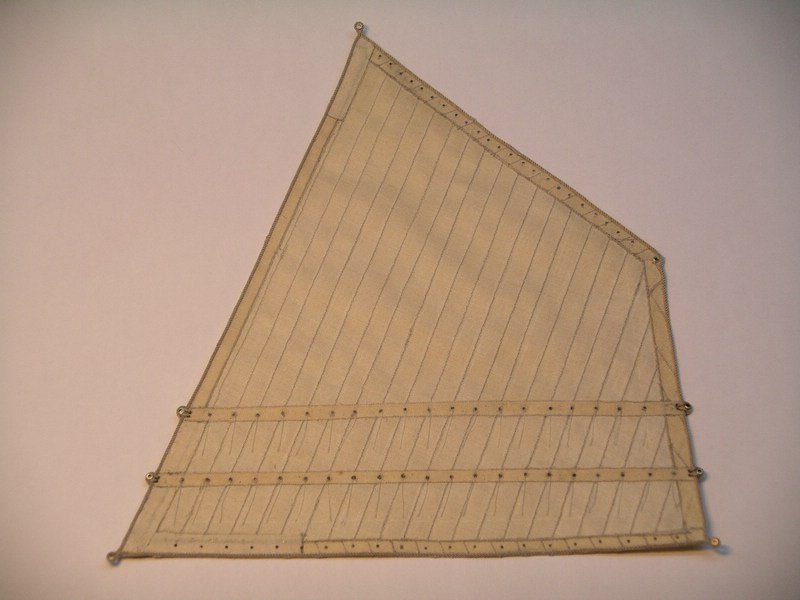
There is another sail, the jib. It is with the mainsail to the sails, which make a big effort. Of course, here too, the upper, lower and side mischiefs have different strengths. Here are the front and rear views at a glance. At the Schothörnern the Lieken are fastened to a metal fitting. The underlie is bordered along its entire length with a leather strap. Various thimbles (here 2 mm outer diameter) are integrated on the side and the bottom luff. The side-lobes are connected to the upper lug by means of spliced eyes. In the upper two reinforcing bands double refractions are included. As can be seen in the front view and the macro shot, there are a number of Leitungskauschen to guide the Gordings on the front of the sail. With these large sails, these thimbles have an outer diameter of 1.3 mm and decrease on the smaller sails up to 0.8 mm outer diameter. I do not know if I always find the right English terms, I hope you still understand me. Cheers, Joachim
-
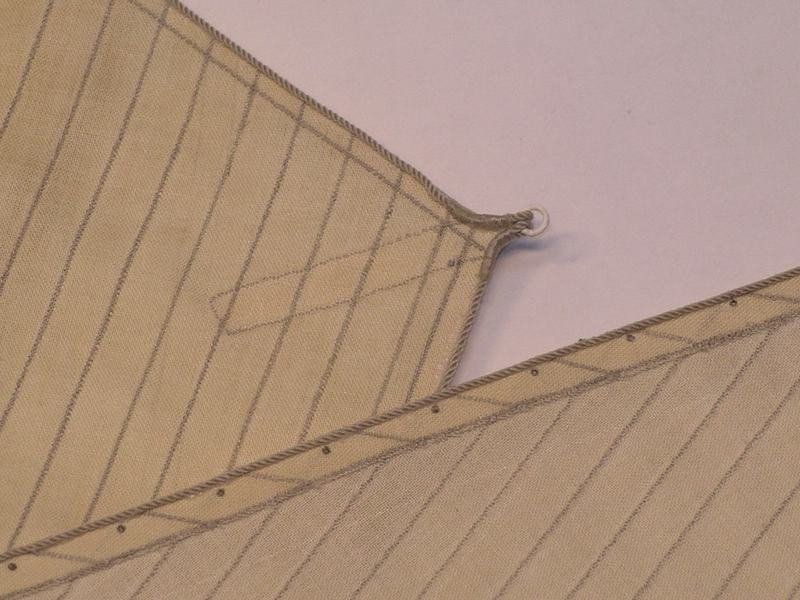
Now pictures one of the 'simple' staysail. At the Amerigo, a ring is attached to the clew of the staysail, to which the moorings are lashed. But even this relatively simple sail takes time, after all, here are the Liektaue different strengths, must be connected to each other and get in this area a Kleedung. Then the final attachment to the sail is the easiest exercise. Joachim
-
Looks really nice, I like it. Joachim
-
Thank you @TonyUK is a good decission to start first with another build. The Manta model is not easy to build. At my build only the basis is still Mantua. Some of the equipment, the boats, the whole rig, the sails and many other things are no more Mantua. The Mantua model is good, but can be optimized, the boats and the whole rig with sails is too poor and partly wrong. Therefore I had to make my own plans. Cheers, Joachim
-
Hello, Michael, thank you very much for your kind words. You have always faithfully accompanied my construction report and I am glad that you have seen these updates. I will catch up also in the near future everything. cheers Joachim
-
The mizzen sail was finished, lyres attached and the ledges fastened with their thimbles, then the reef ribbon pulled in. The pictures show the sail from the front and back. Joachim
-
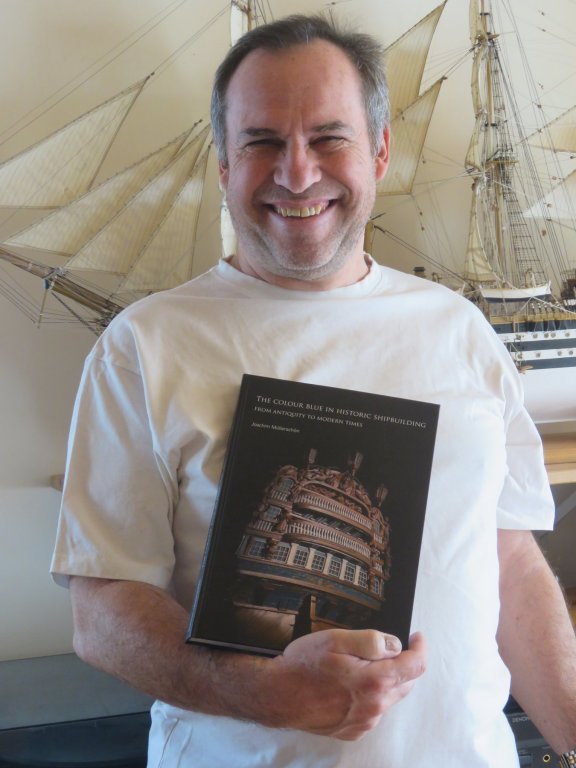
In the meantime the proof copy of the English edition of my book has arrived! It got really great, I'm very happy! "The colour blue in historic shipbuilding - from antiquity to modern times" I am especially happy that David Antscherl supported me as editor. Through his help, this English edition has become particularly good! The publisher now got the release and in 2-3 weeks you can buy this book, either in the bookstores (not from all countries) or directly at my place. http://www.modellbau-muellerschoen.de/buch-en.htm ISBN: 978-3-7494-1988-3 Best regards, Joachim
-
In the meantime all leks are hemmed and wires are inserted in the side and foot leeks. I painted everything with Ponal and ironed it with an iron. Then all reef tapes and doublings were sewn on, glued on and the edges sewn with the sewing machine. Some basic information came from a plan of Franco Gay. Based on this, I made actuel plans. At least you can still find everything on photos today. Joachim
-
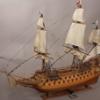
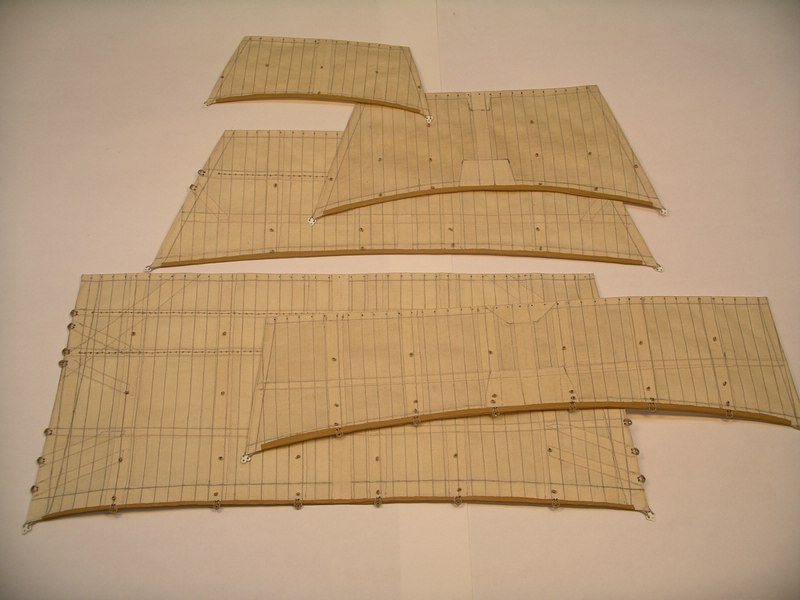
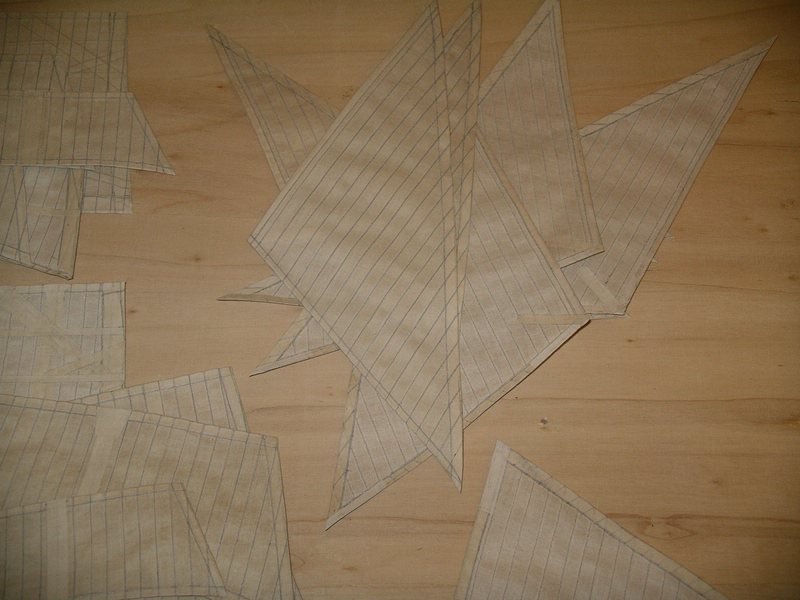
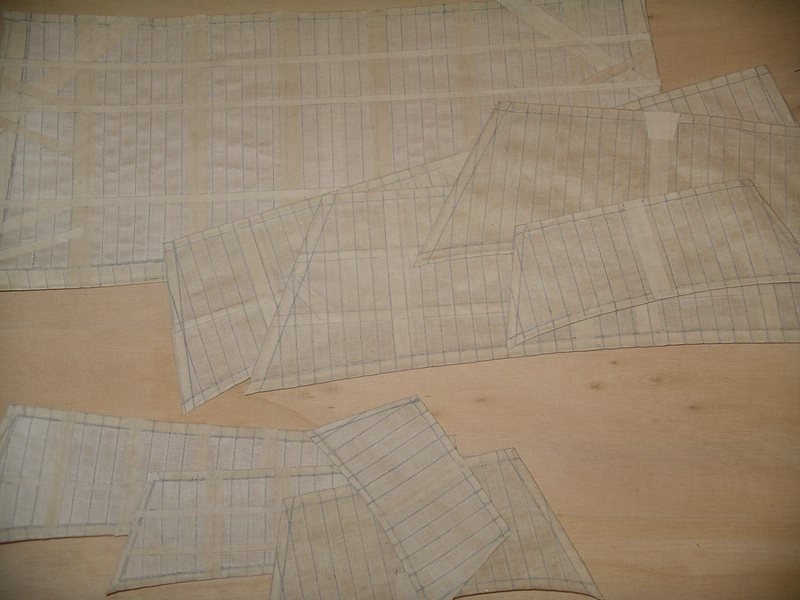
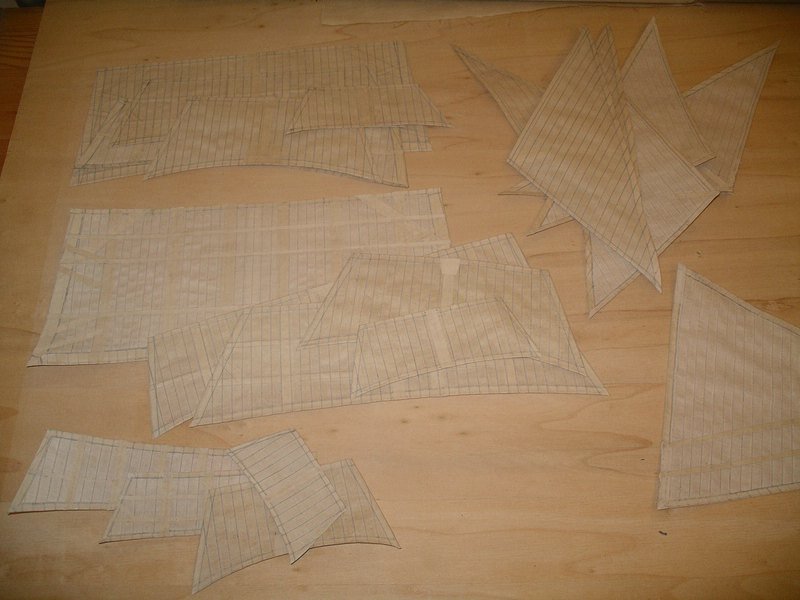
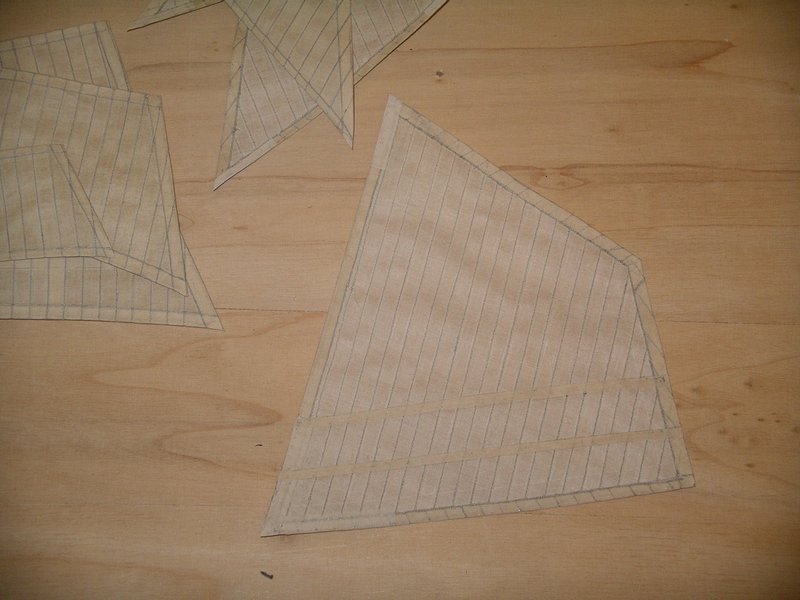
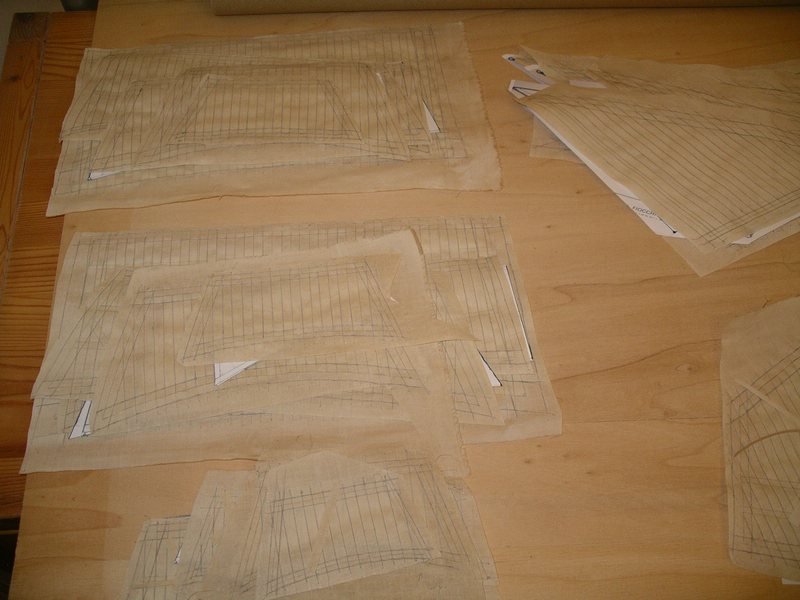
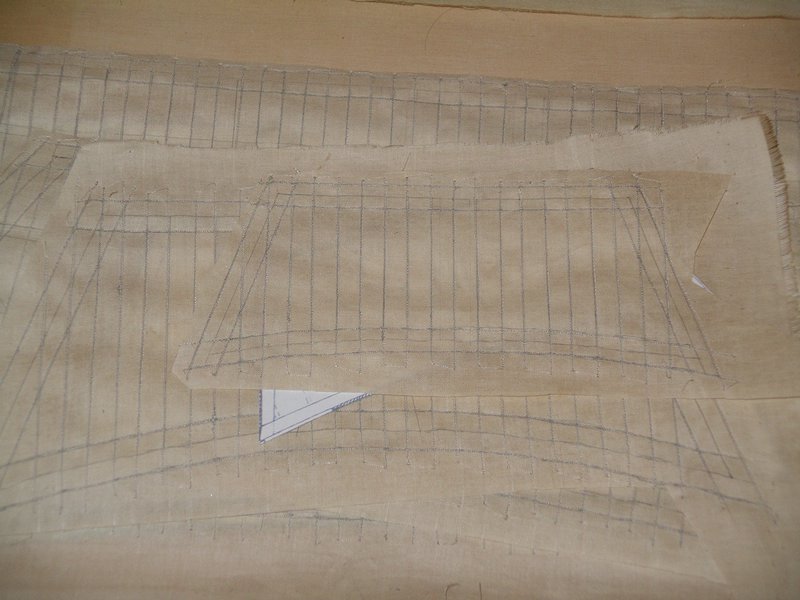
And now the sails continue. The sails from the kit were not usable and also not the right sizes. So I made a better design, which corresponds quite well to the original. I used a colleague's manufacturing method. First paint the fabric with diluted tensioning lacquer, mark the sails and cut them out. I spent many weeks sewing sails in autumn. Since my wife had never operated a sewing machine before, I took the part myself, learned how to handle it and then sewed these sails for many, many hours. Of course, there are also 23 sails that are at stake. This is now the result of the sewing orgy. Joachim

-
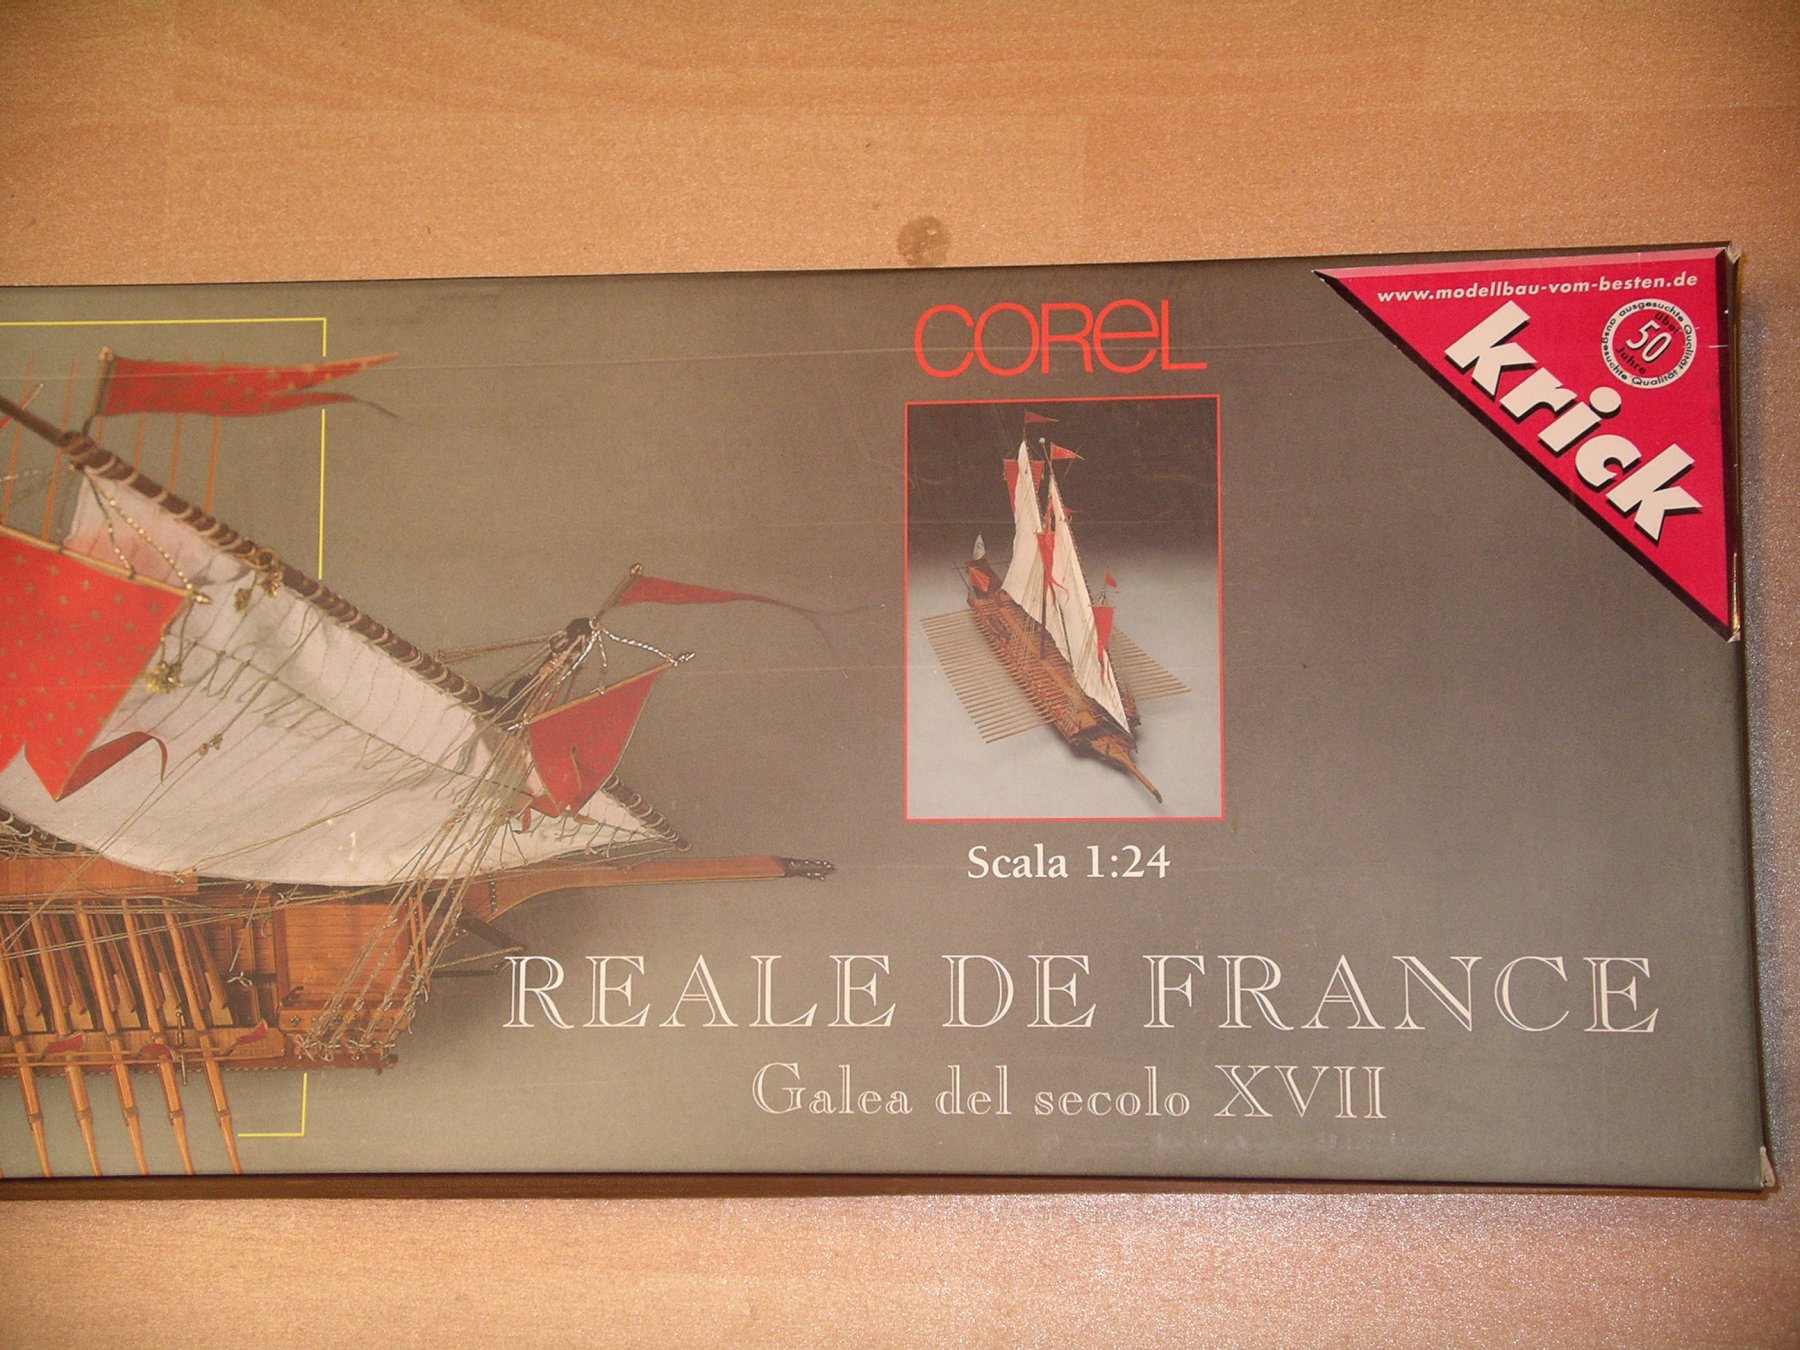
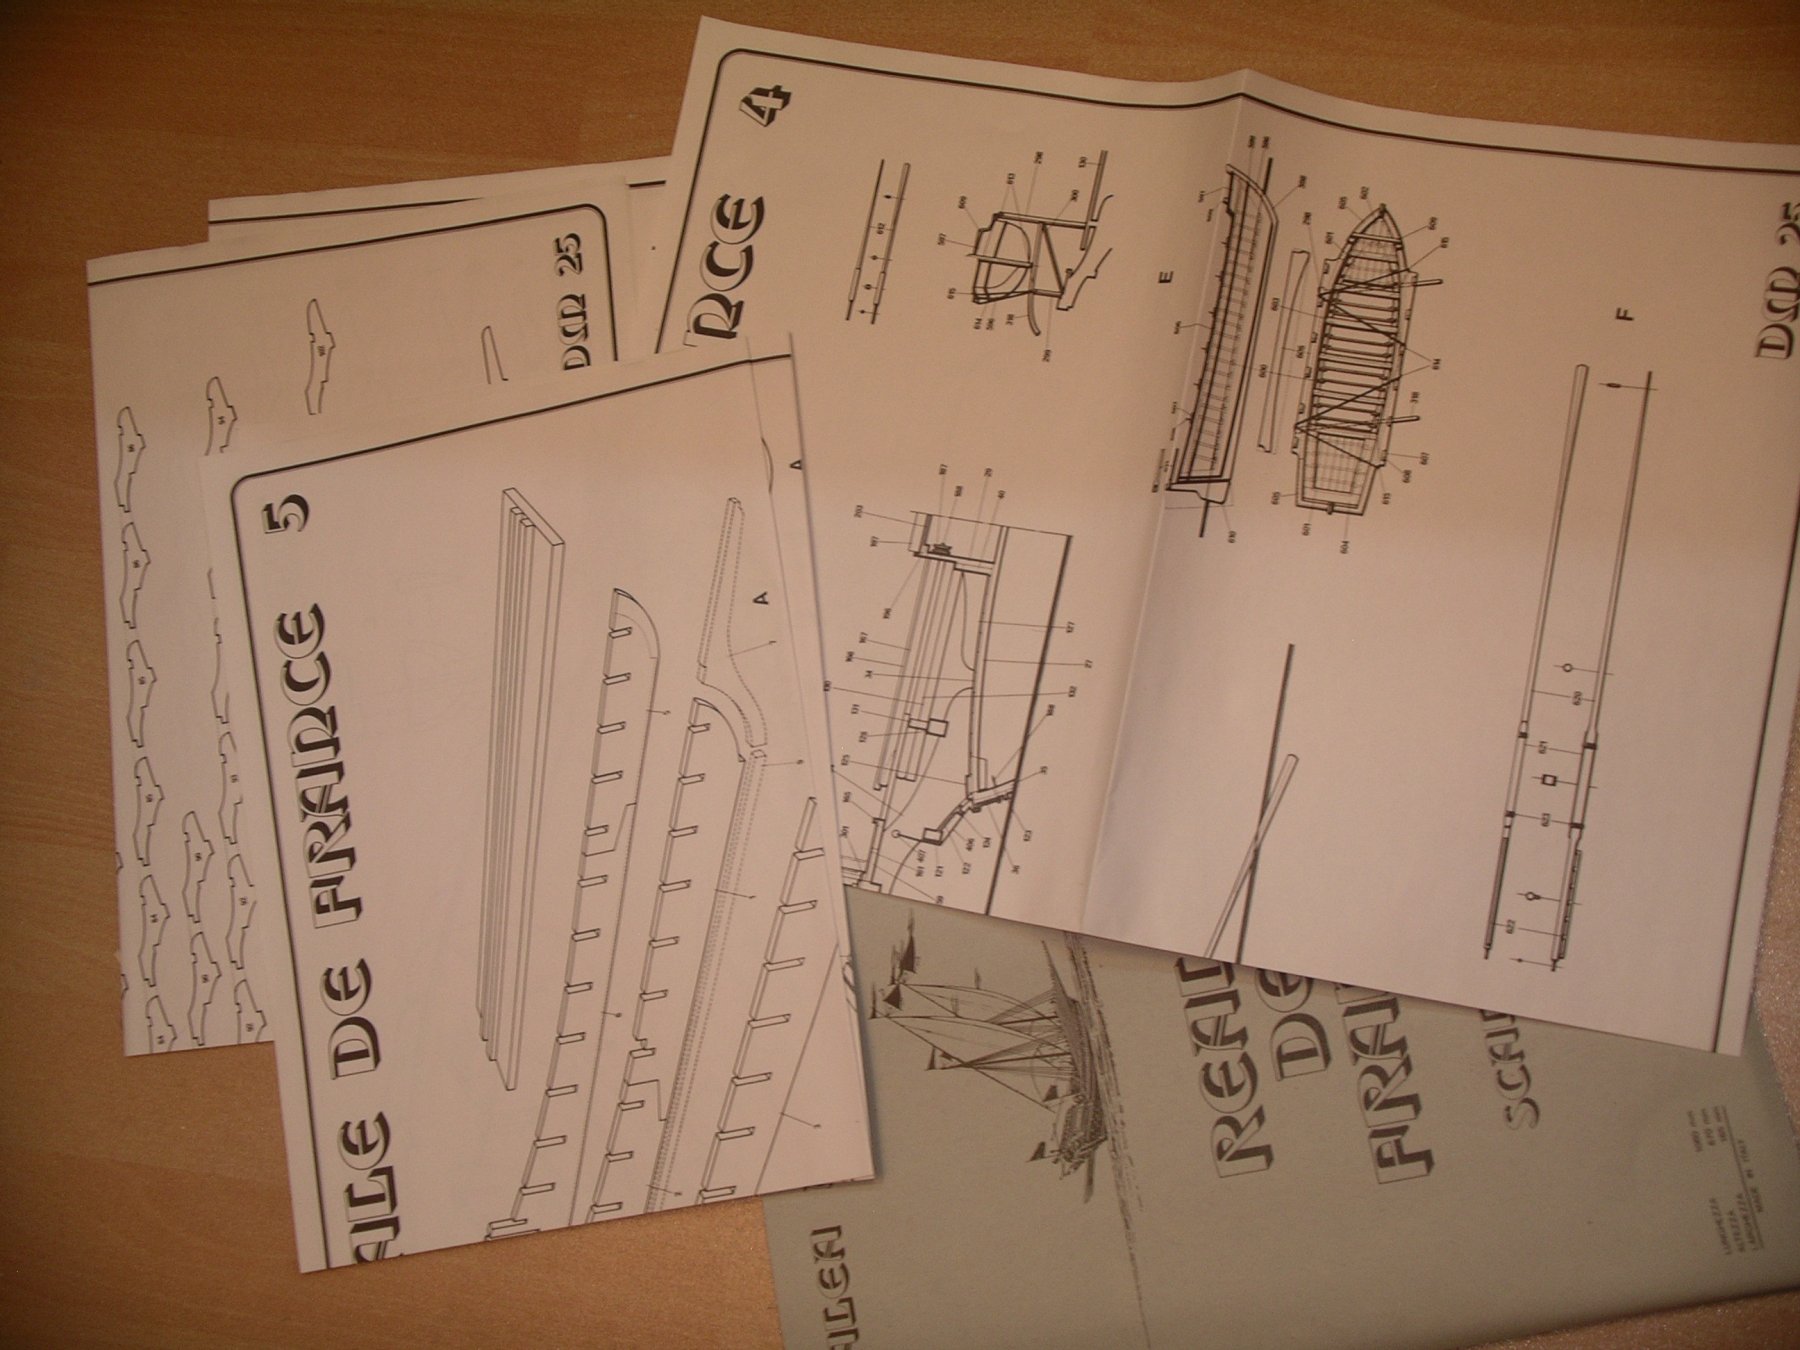
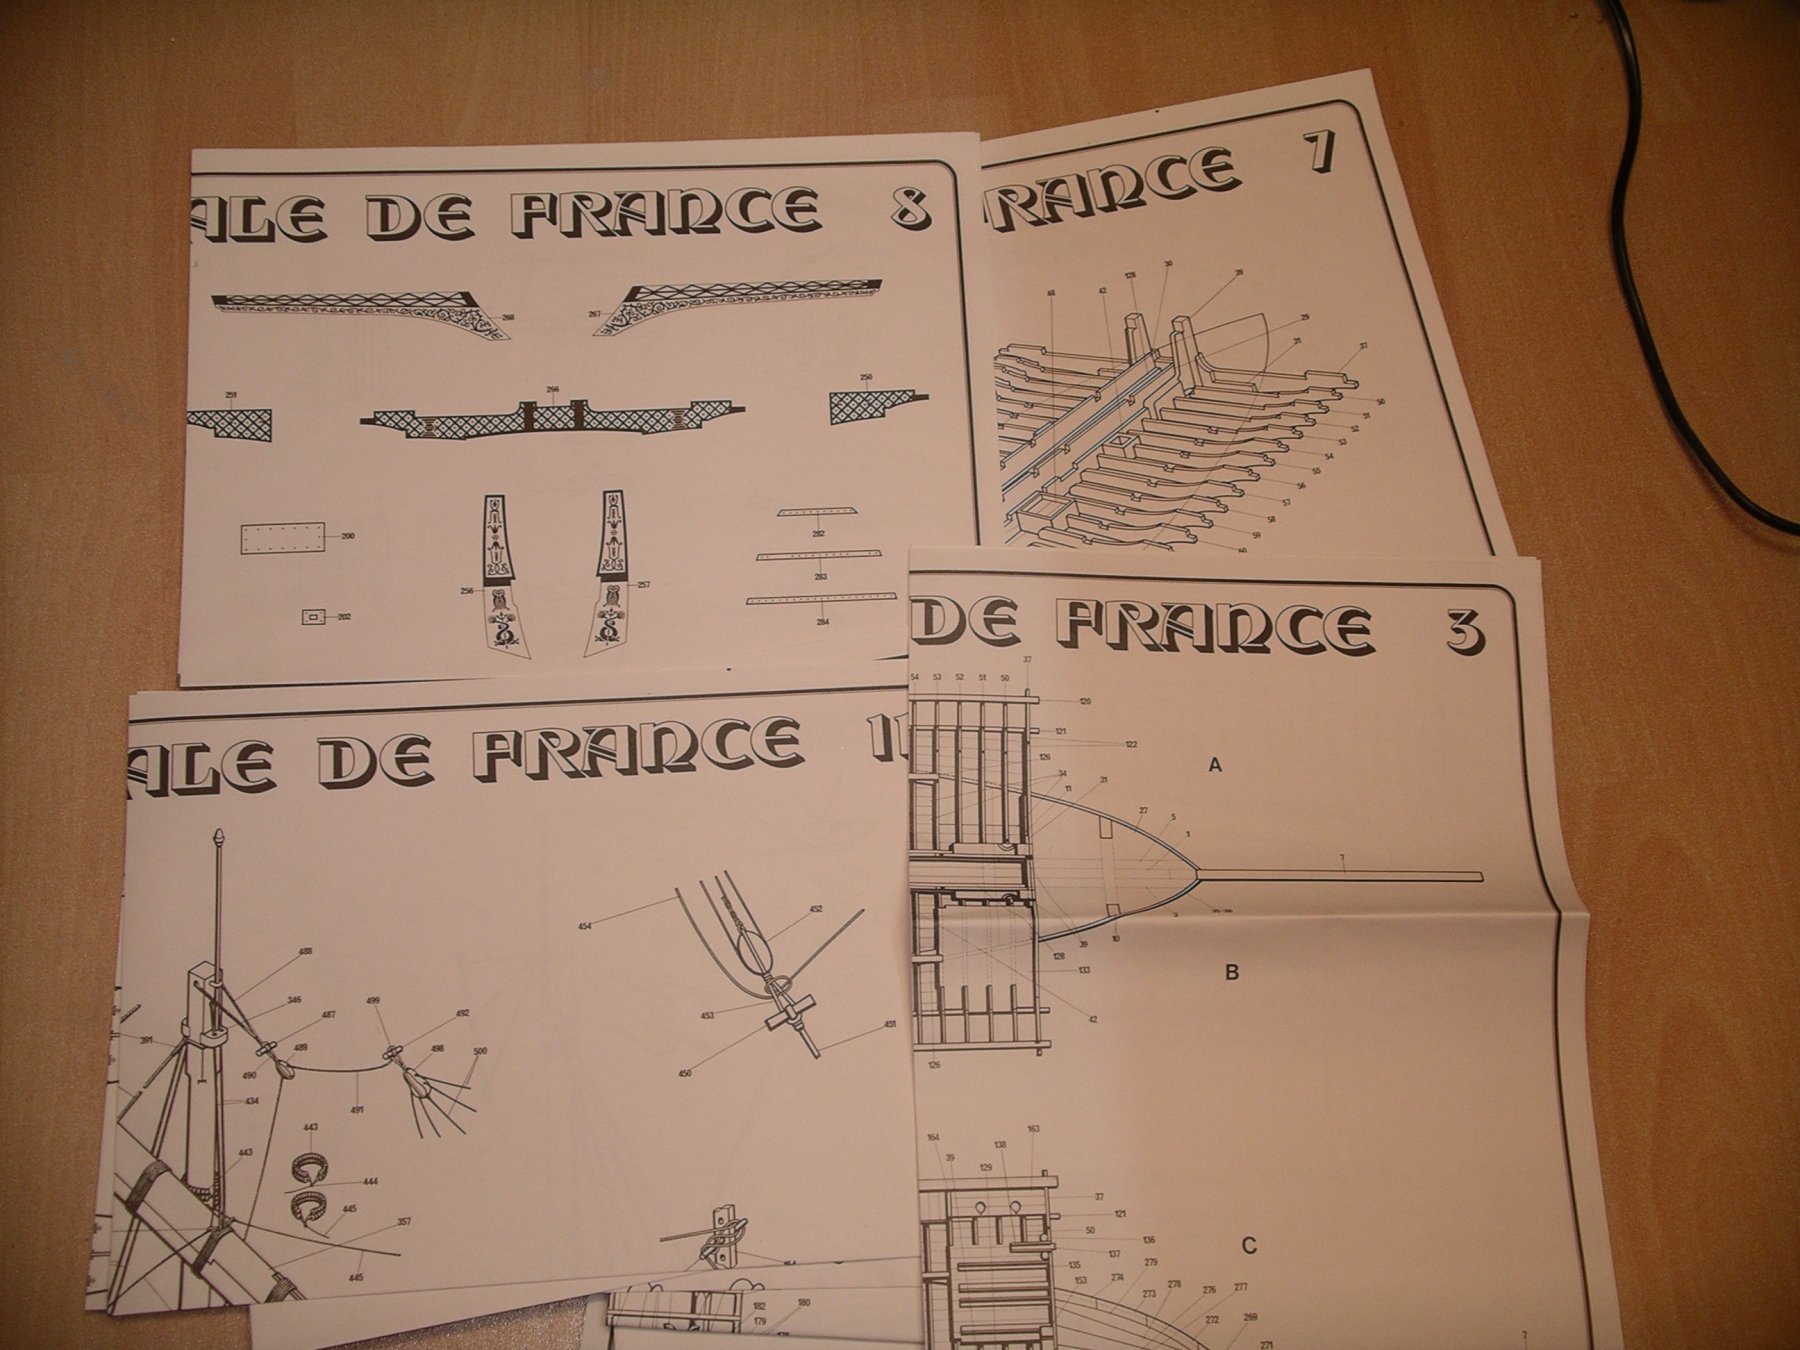
review 1:60 Corel Réale de France
schiffebastler replied to schiffebastler's topic in REVIEWS: Model kits
Hi @Hubac's Historian as I wrote in the carving techniques, I intend to build the Reale from scratch with a new plan. Since the Corel model is otherwise a quite good model kit, I have introduced it here. Regards, Joachim -
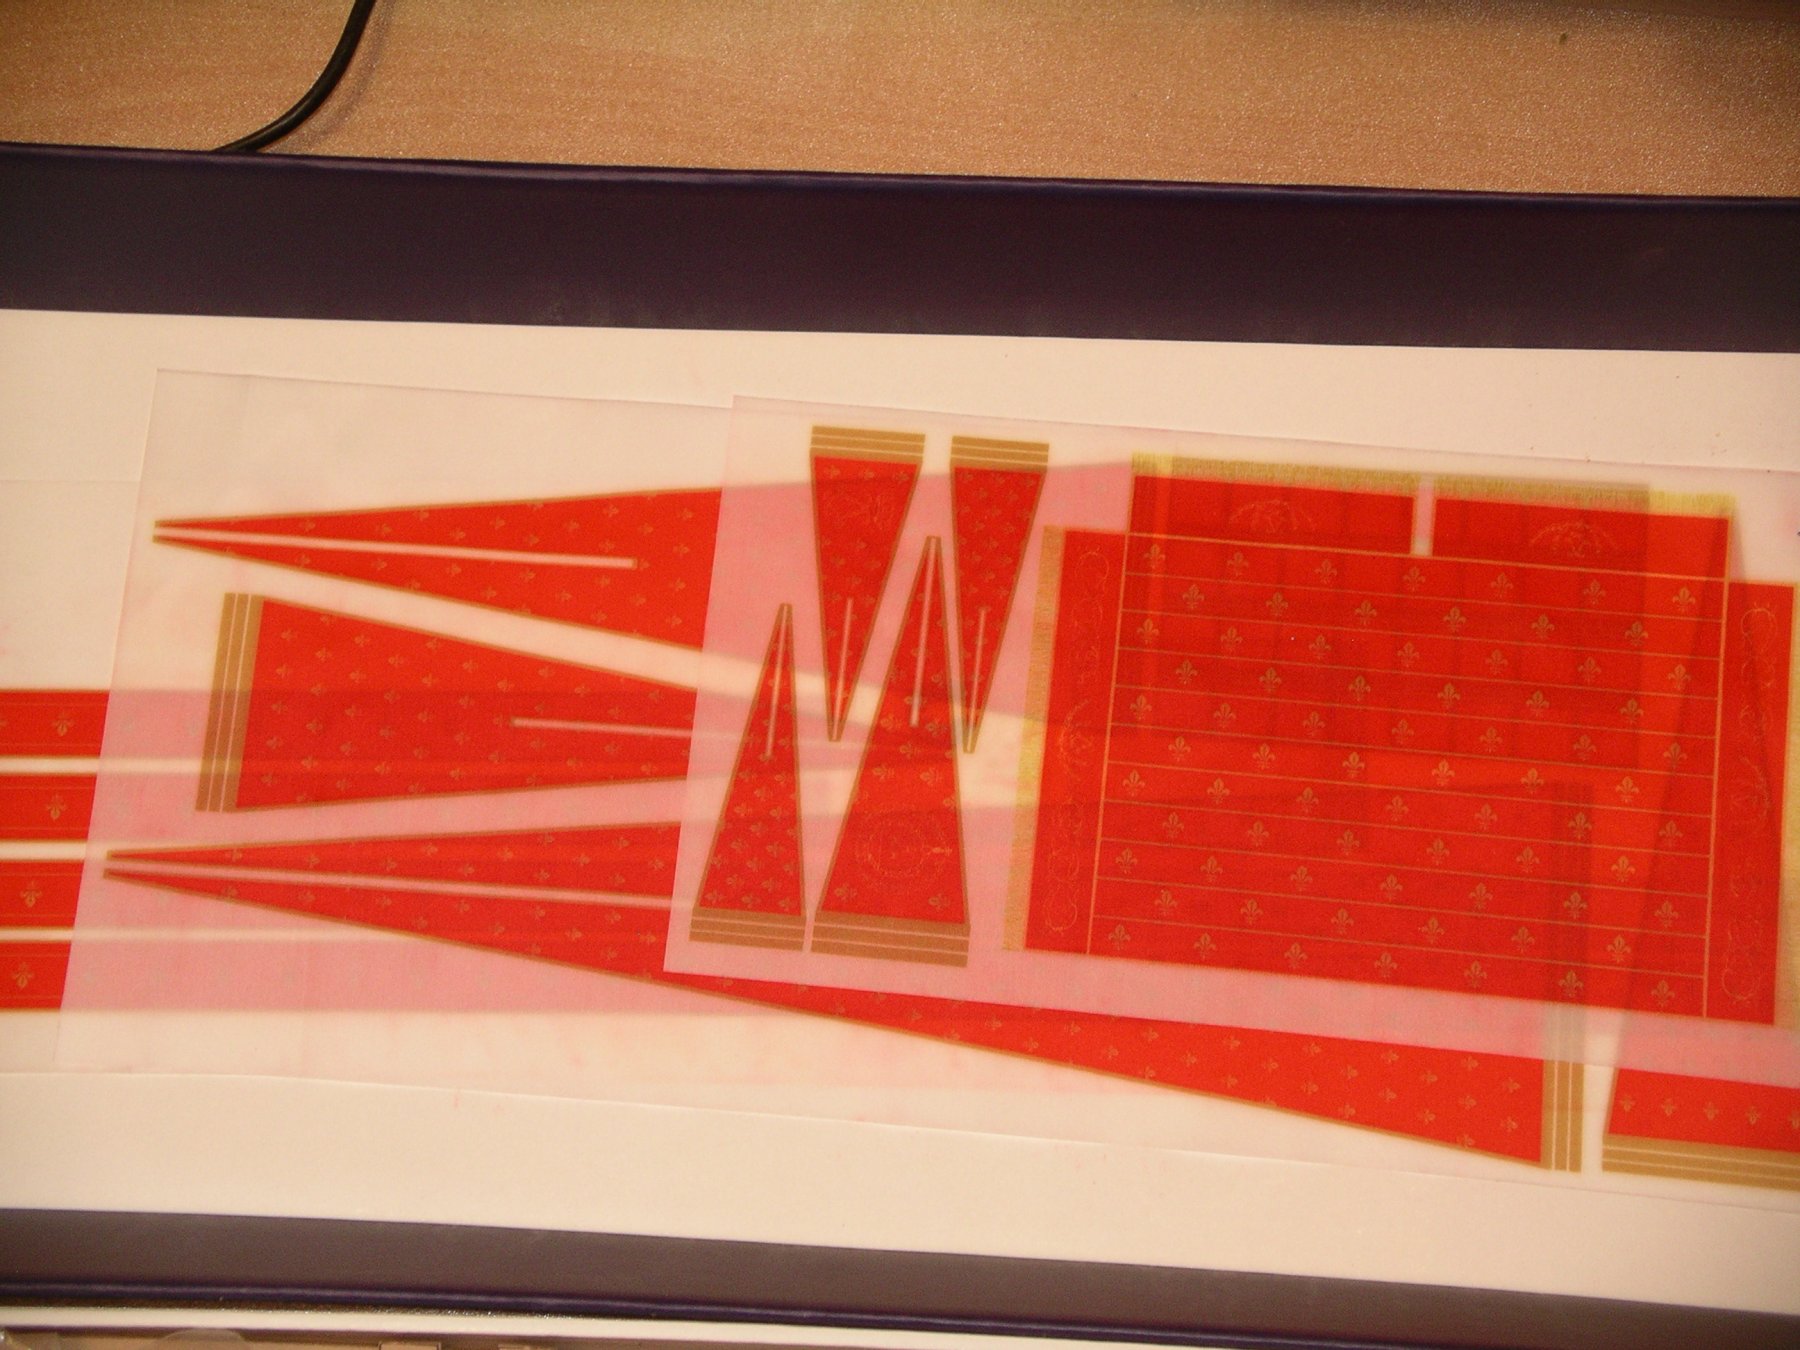
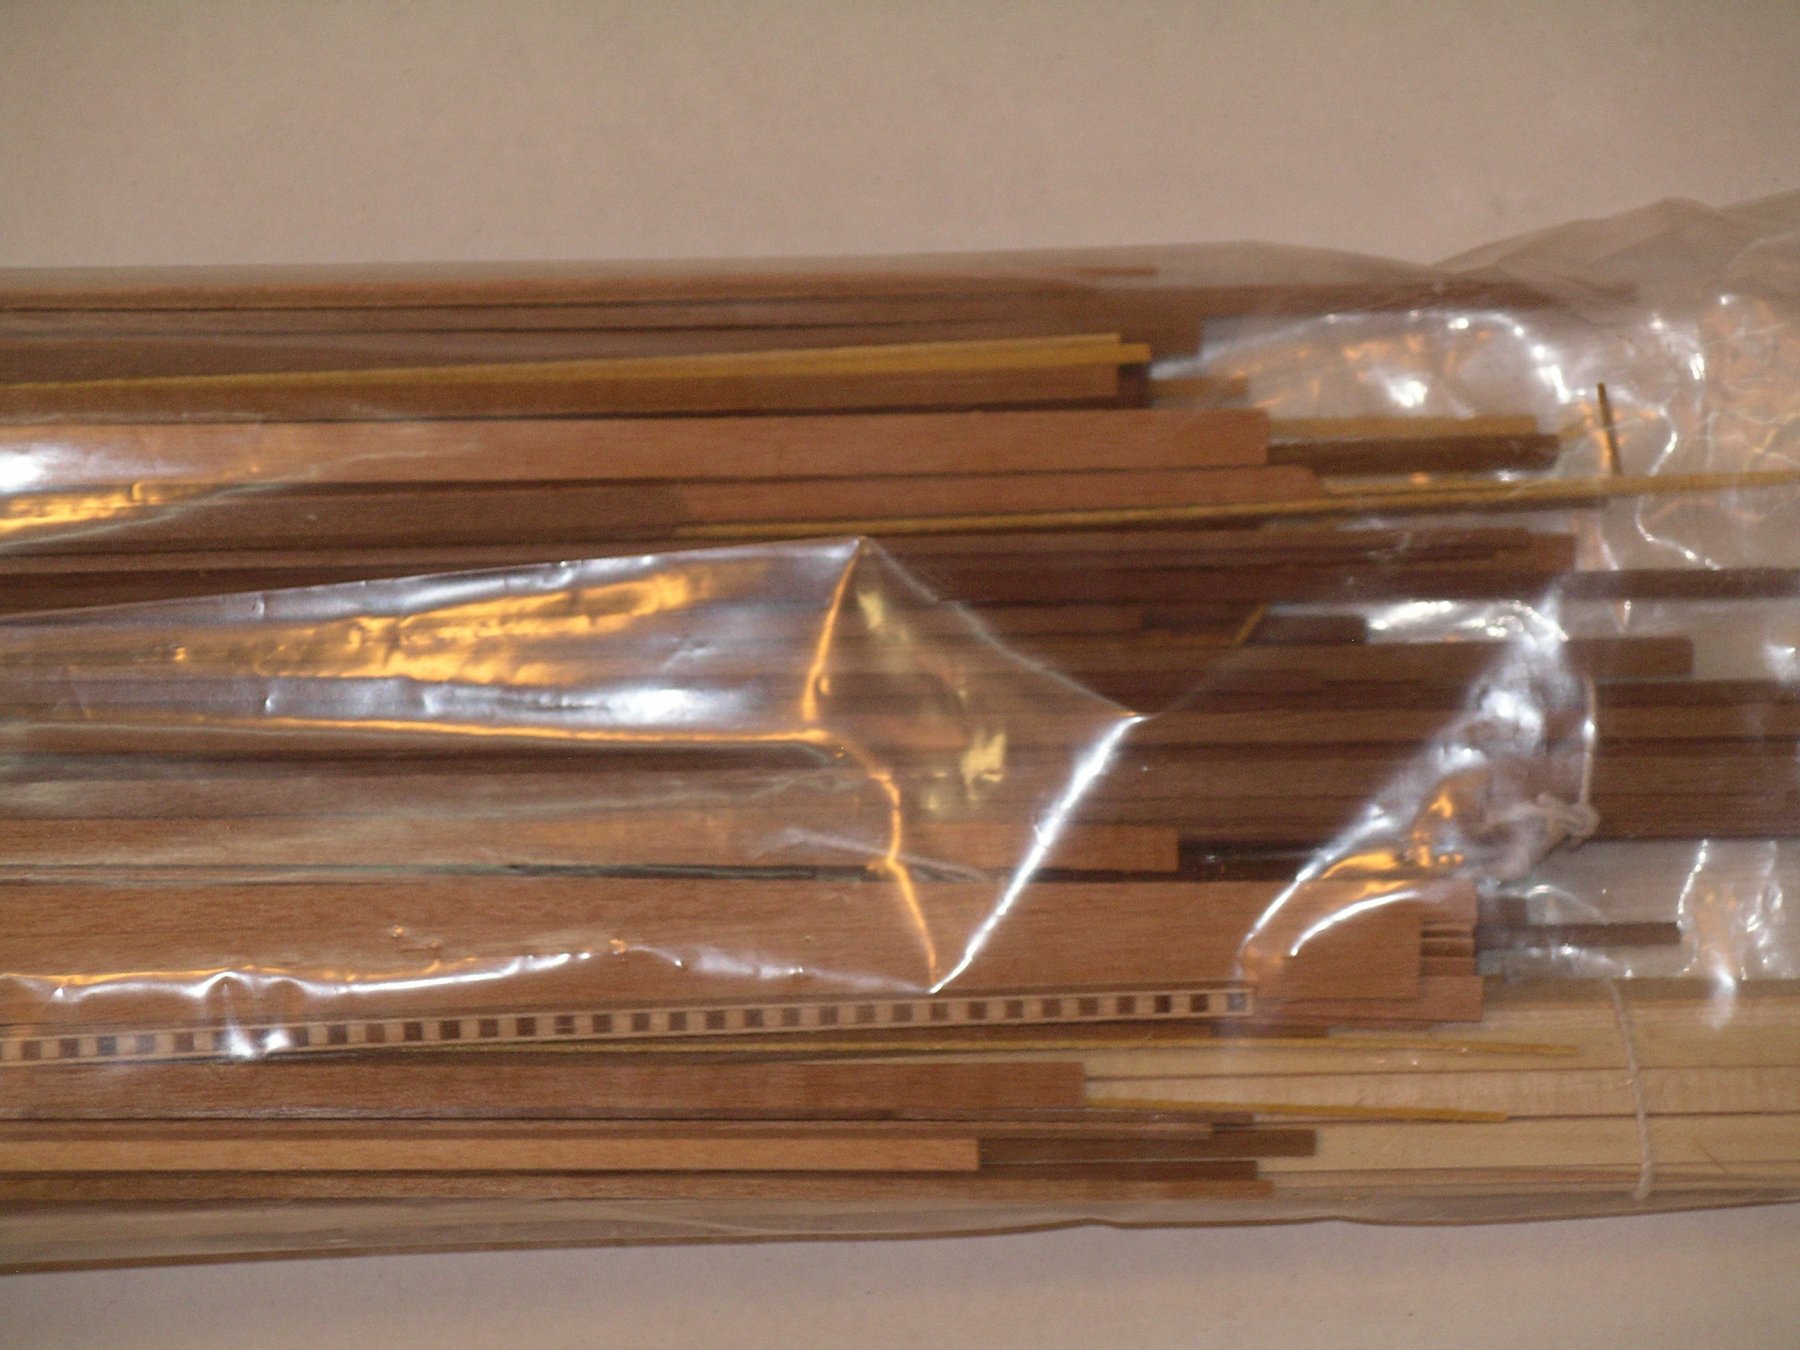
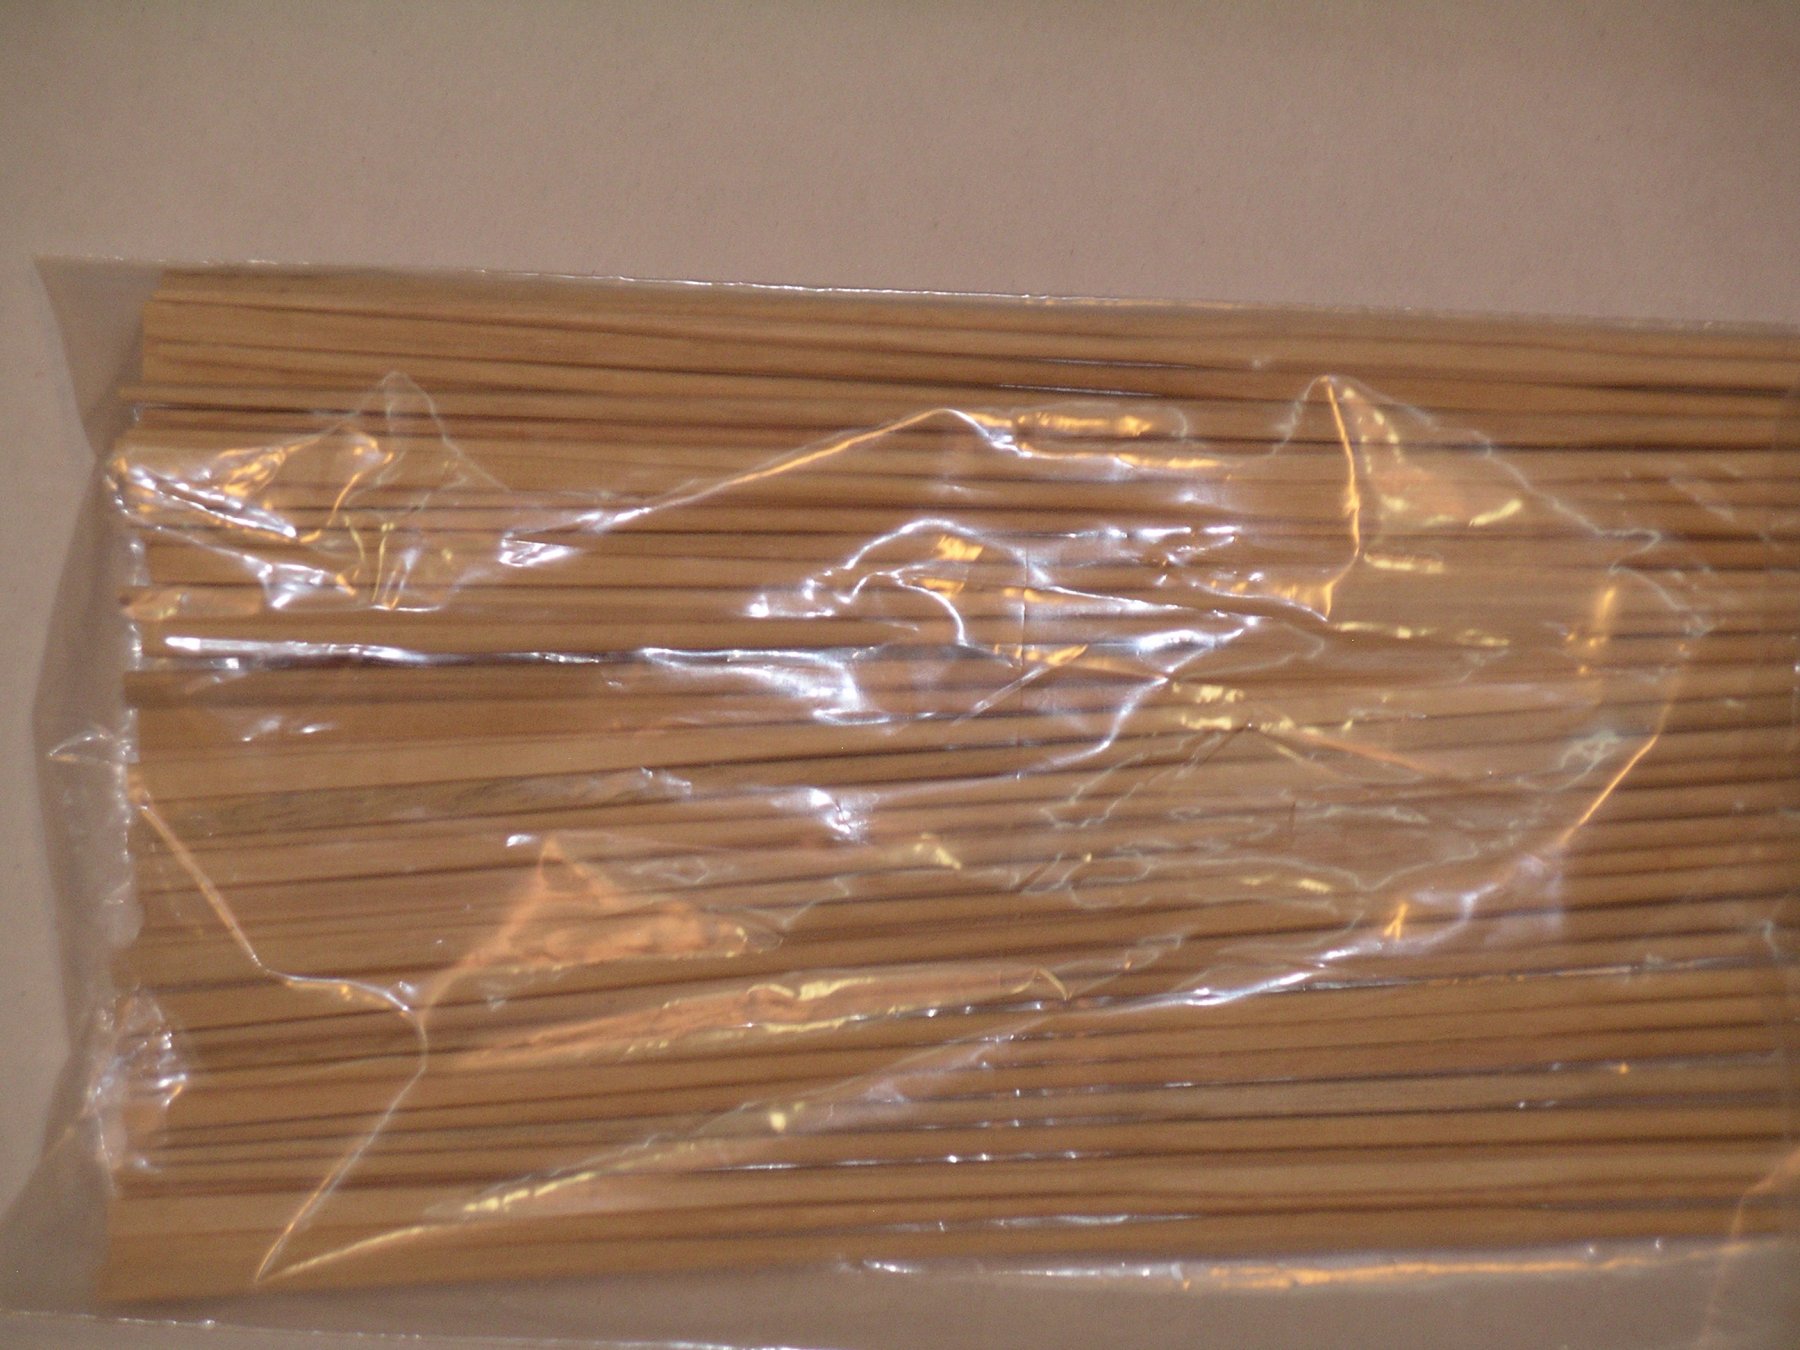
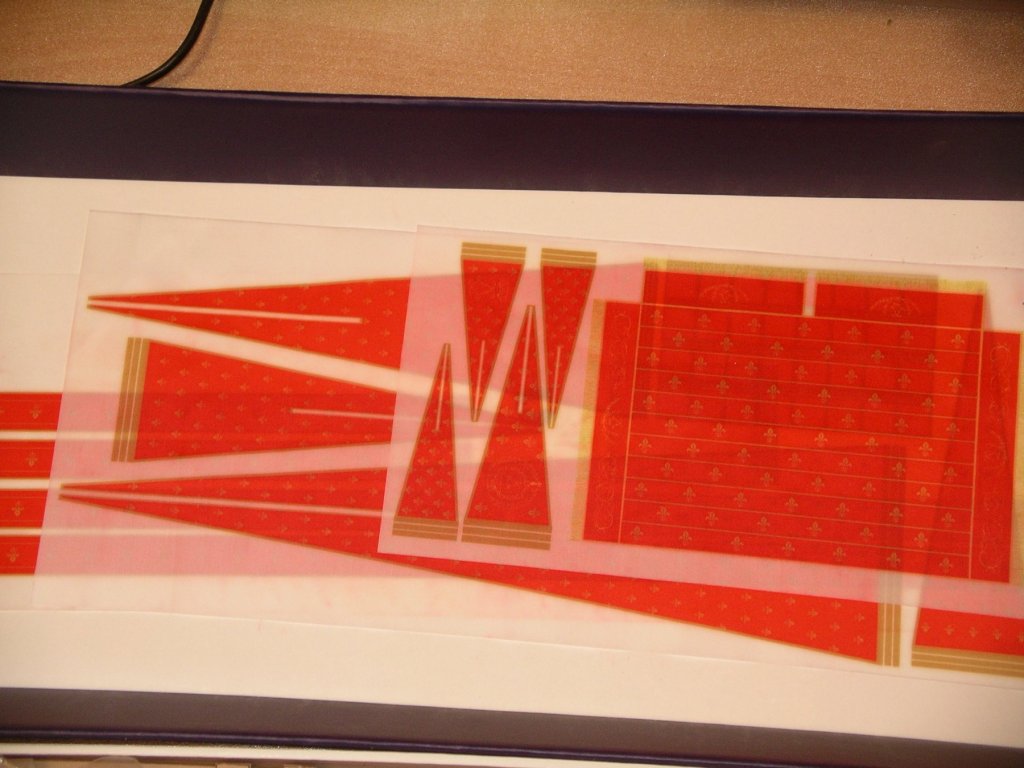
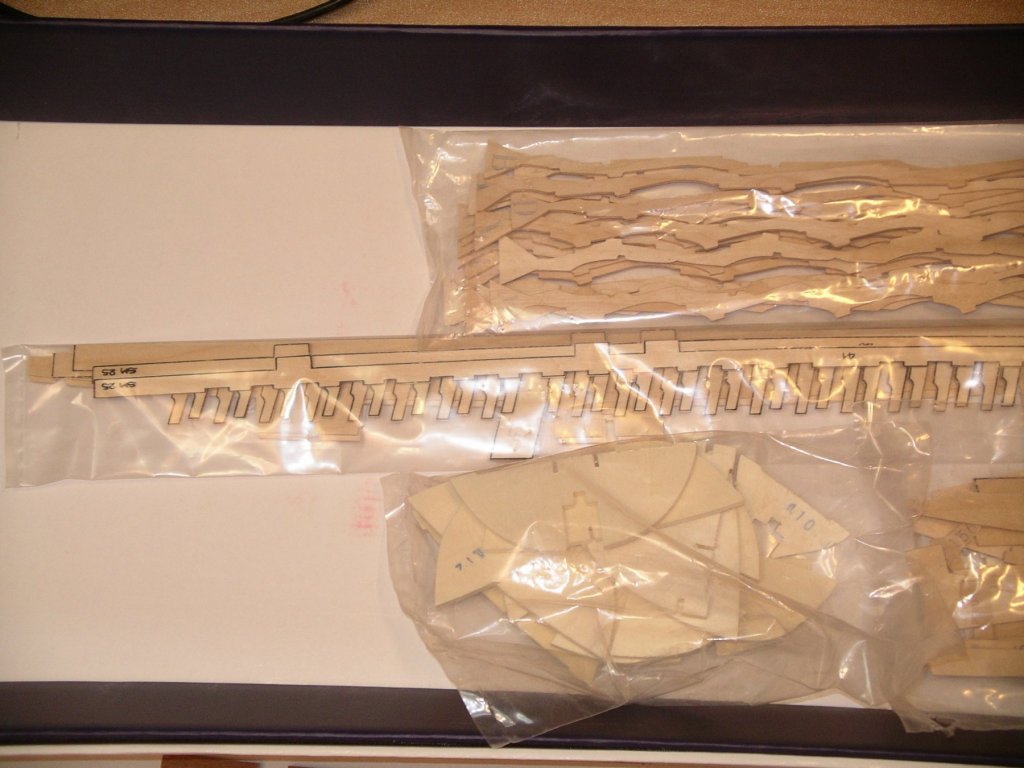
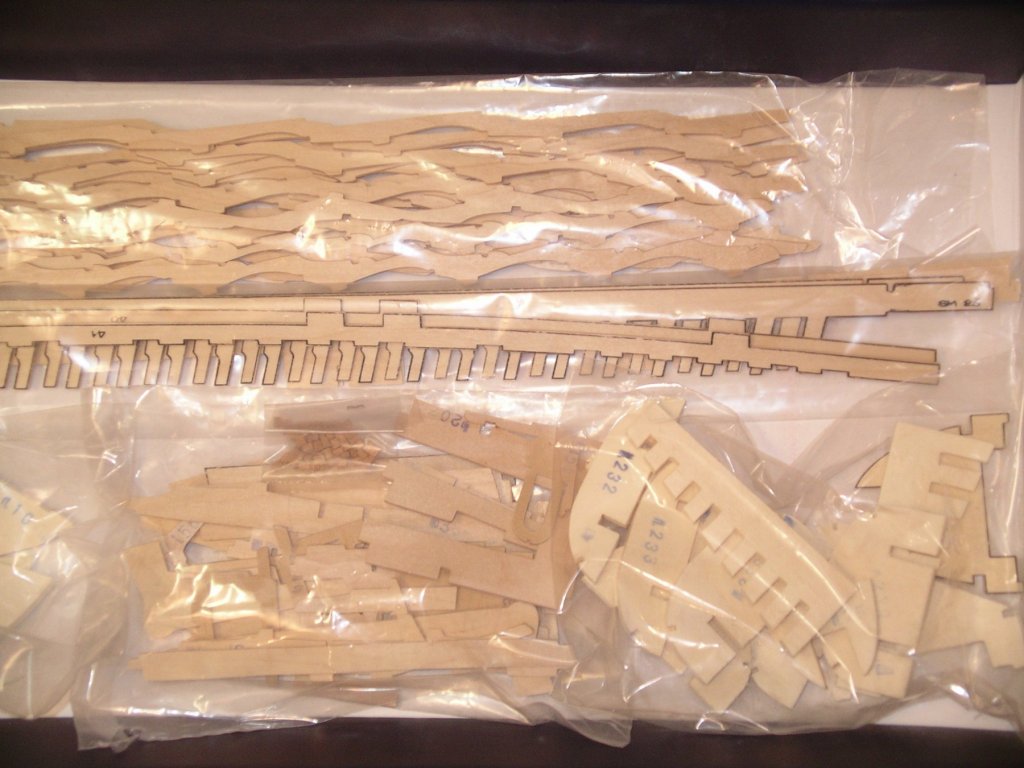
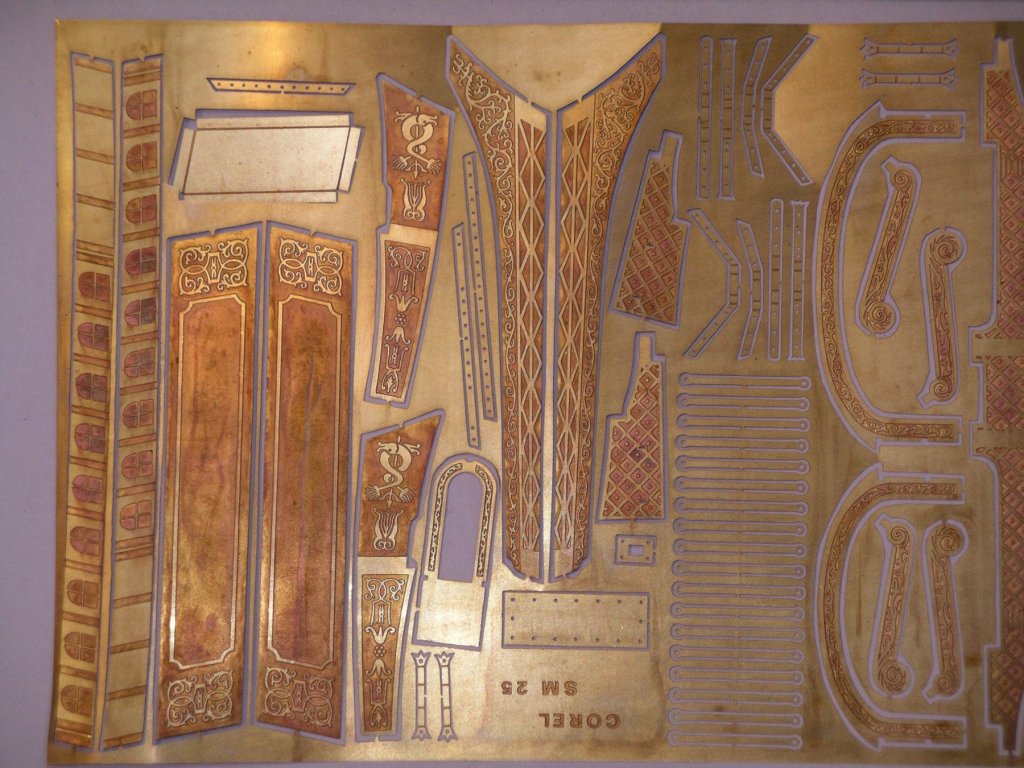
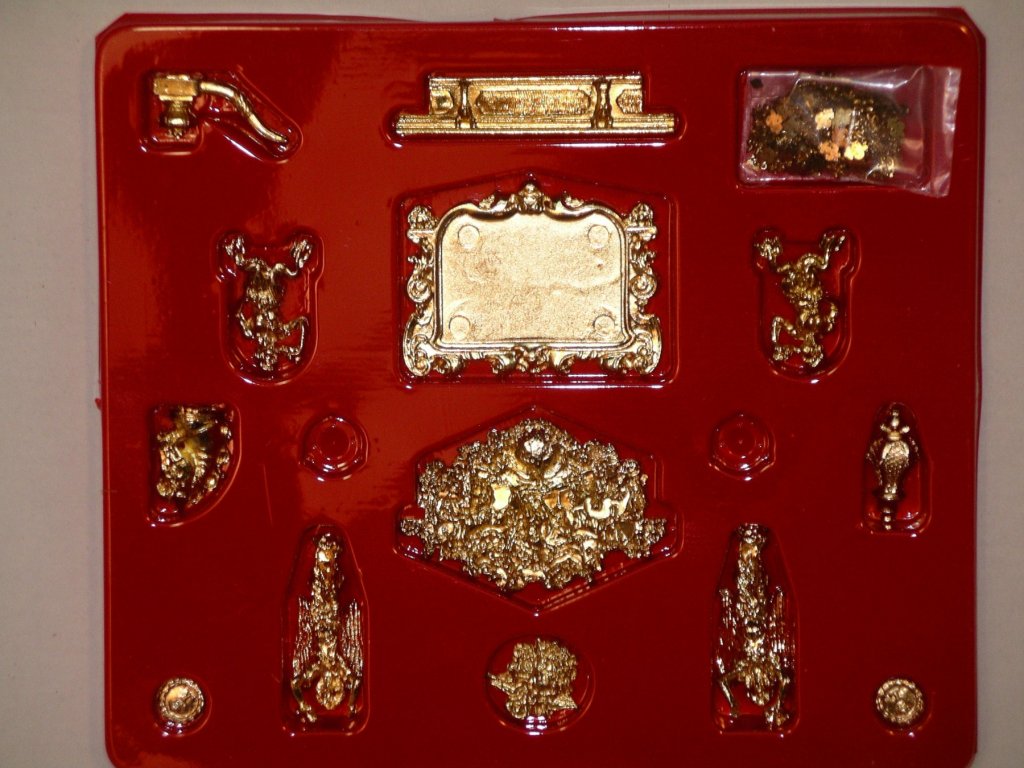
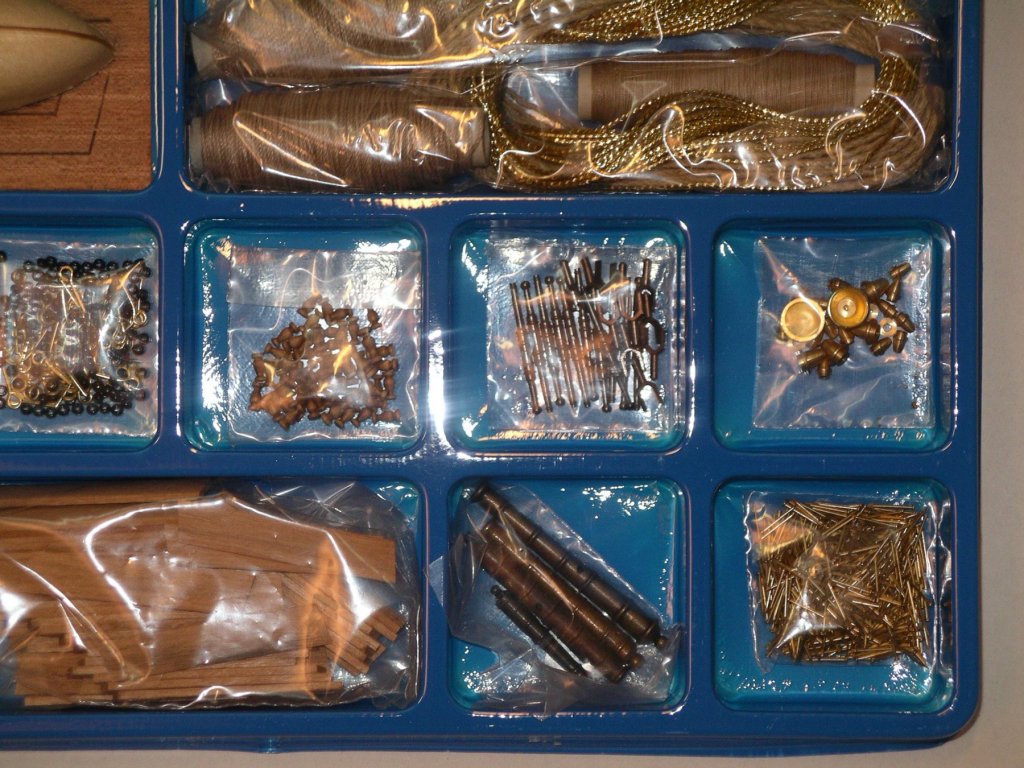
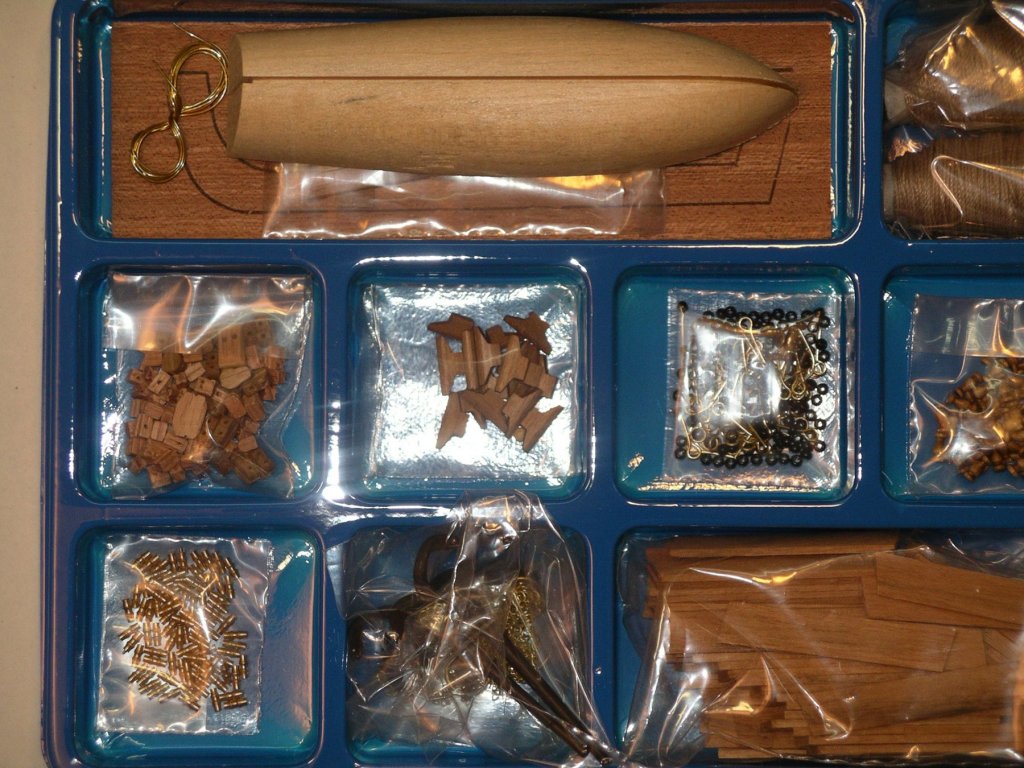
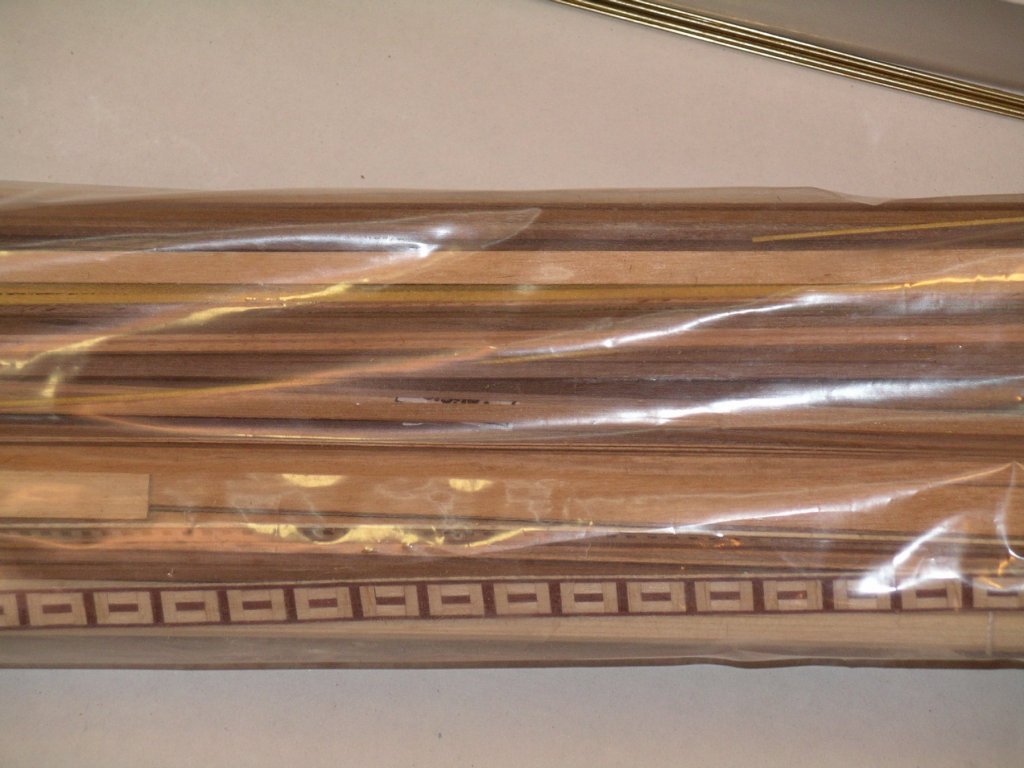
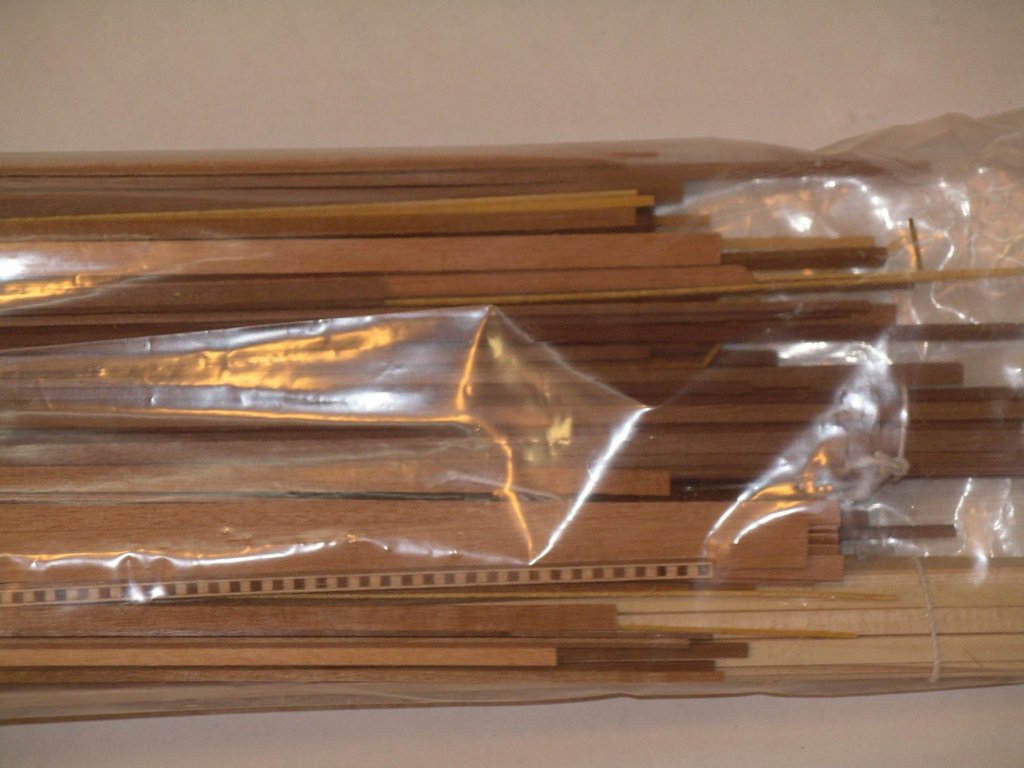
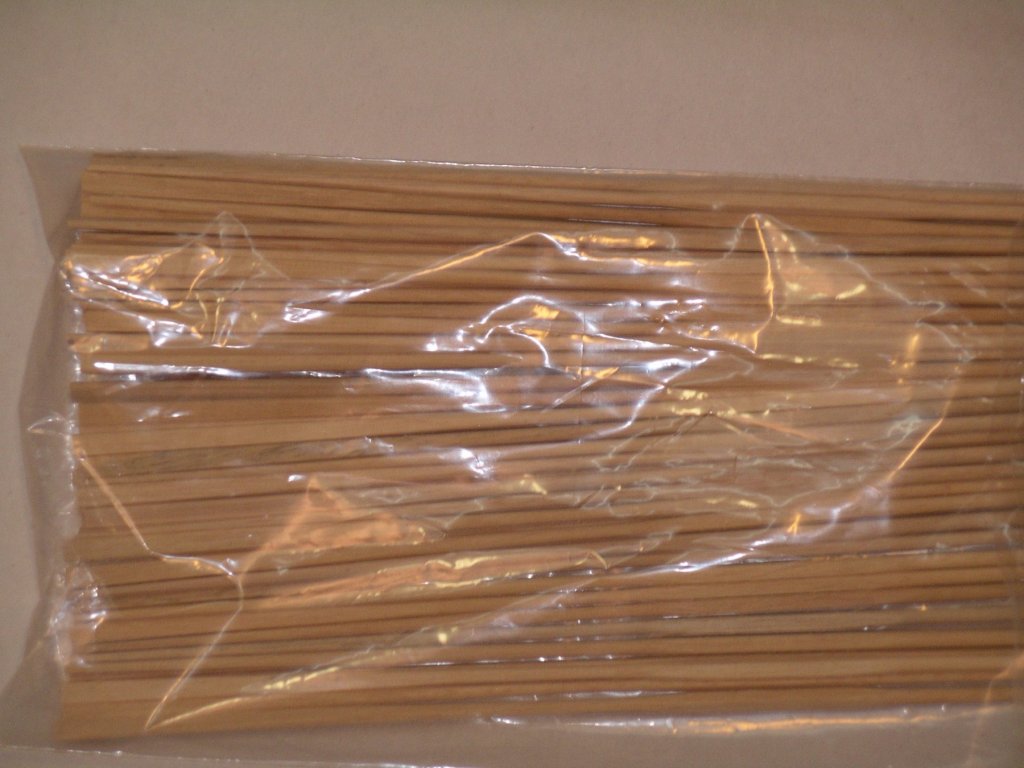
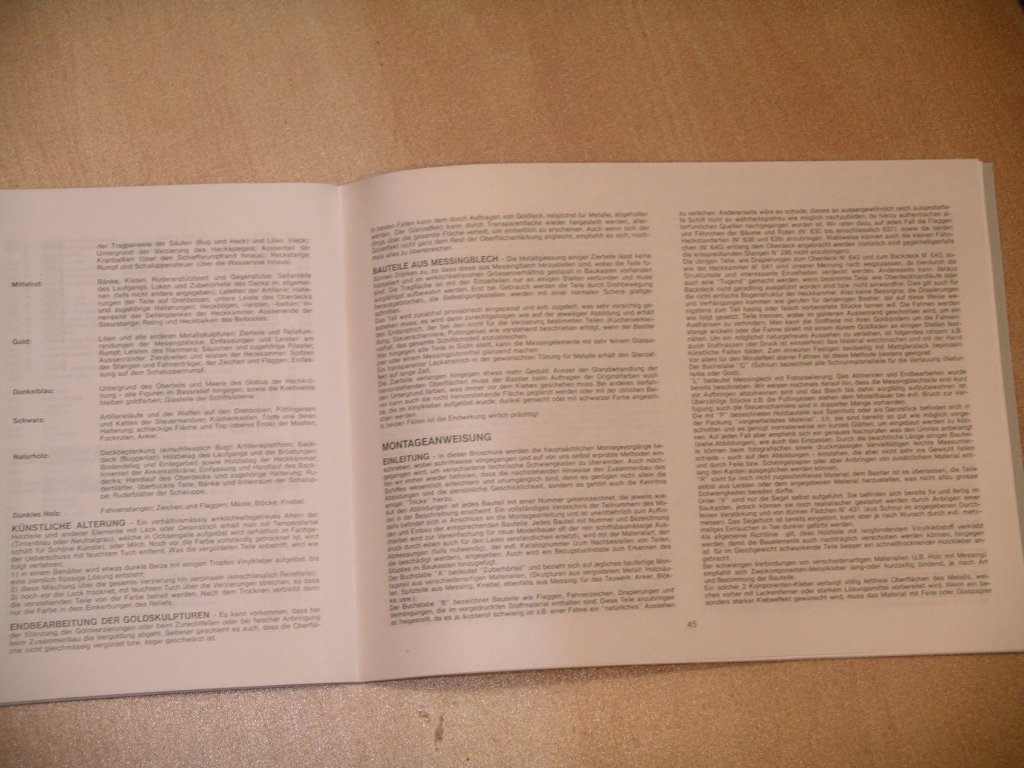
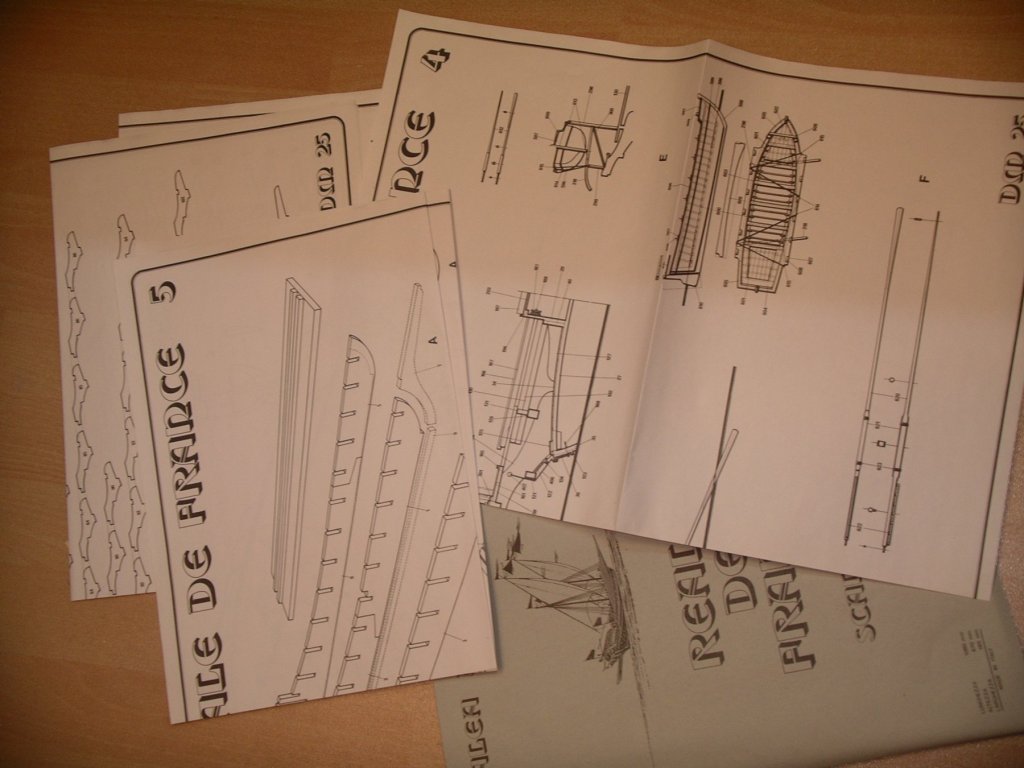
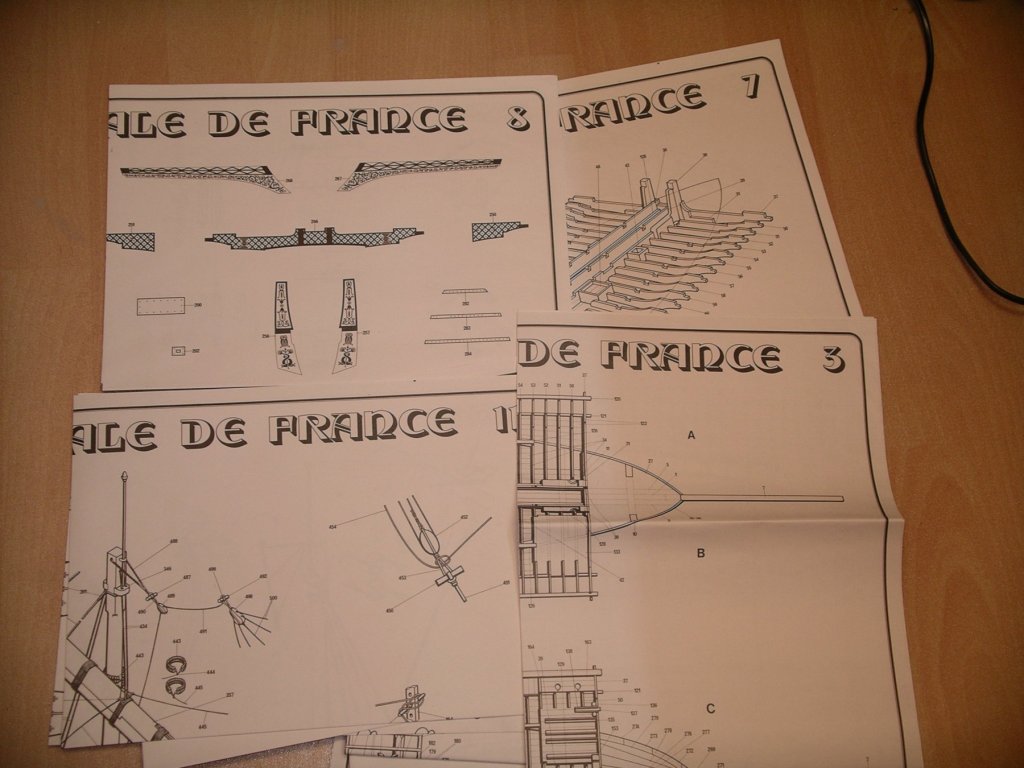
Hello, since I haven't found the Réale de France model kit from Corel in this list yet, I would like to present it here. Regards, Joachim Manufacturer: Corel Model: Réale de France Materials: Various types of wood, such as plywood, ramin, lime, walnut, and various others. as well as castings, gold-plated ornaments, metal strips, etched sheets, various rigging yarns, etc. Scale: 1:60, length 1060mm, width 670mm Price: around 699,00 EUR, sometimes more Provider: many relevant shops Impressions of material and plans: The materials are predominantly shrink-wrapped in plastic films/bags, but not on tension, so that no tension of the materials occurs. Many wooden parts are already prefabricated, but the real work remains with the model builder and he can reveal his quality without restrictions. The materials are very versatile and extensive. Building plans: There are 15 DIN-A1/A2 plans available. All components are shown in their original size and in their position in the model. The construction plans are very detailed and excellently worked out in every way. The accompanying description booklet is available in 4 languages, 18 pages for each language version. In addition to the description of the actual construction, various tips for the construction, the handling of the gold sculptures, suggestions for artificial aging, and much more are given. Evaluation of quality: All in all, the construction kit makes a very high-quality impression. The gold-plated ornaments are well worked out for a model kit. The various types of wood are of good quality, are not frayed and make a good visual impression. For the creation of the dinghy a core is provided, over which the spanners are pulled and planked. However, this dinghy does not correspond exactly to the original. Also missing is the second boat contained in the original plans. The etched brass sheets are very fine, detailed and precisely worked out. All flags are printed on very fine fabric. A fabric appropriate to the model size was also used for the enclosed sails. Apart from the plans, most of the fittings, ornaments, anchors, flags and artillery have also been reproduced historically. Apart from a handful of blocks for example, the usual standard parts were not used. Only the dinghy seems to be a 'standard model'. Valuation with regard to "historical accuracy":To check the "historical correctness" I obtained and compared the plans of the ship from the Naval Museum in Paris. Corel's plans correspond in almost every detail to those of Paris. Only a few details have been slightly modified with regard to model building. Furthermore, I have procured from Wolfram Mondfeld "The galley from the Middle Ages to modern times". This book contains detailed plans of the French réale "La Dracène" from the same period. These plans also largely coincide with those of the Réale de France. In the fuselage shape of the kit there are differences to the Fleur-de-Lis. Its planned record is based on a historical description for a standard galley with a precisely defined procedure. Although it is not possible to say for sure what the Réale de France really looked like in detail, the model makes a good impression. Overall conclusion: It is a construction kit of selected quality. Good materials were predominantly used. Although the construction plans are extremely comprehensive and the description is easy to understand and detailed, the construction kit is by no means recommended for beginners. The variety of materials, the size and the attention to detail require practice and experience in model making in order to produce an appropriate model of the highest quality.


-
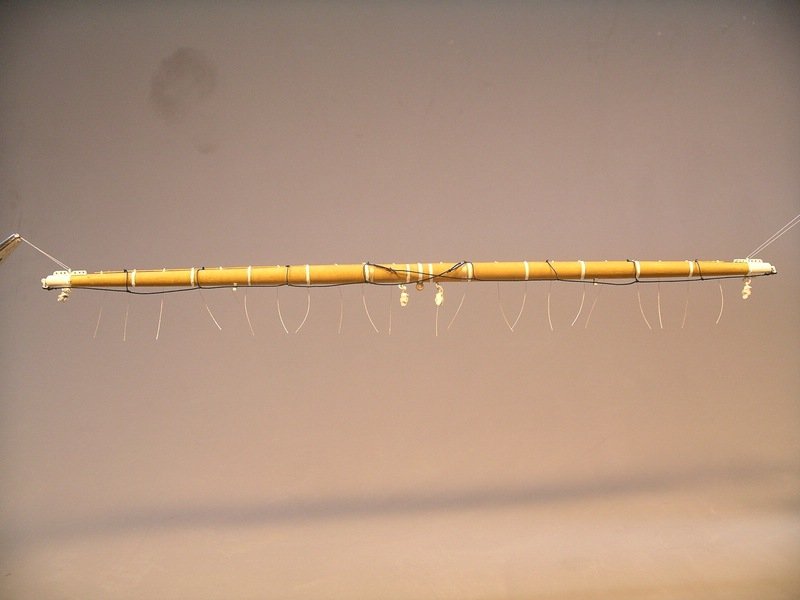
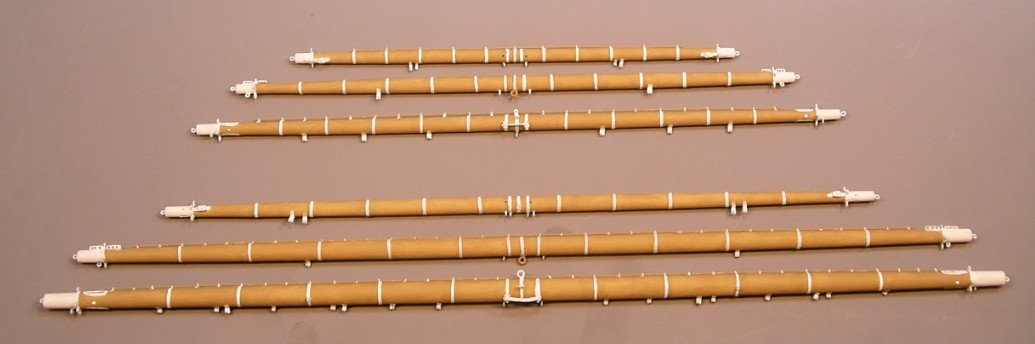
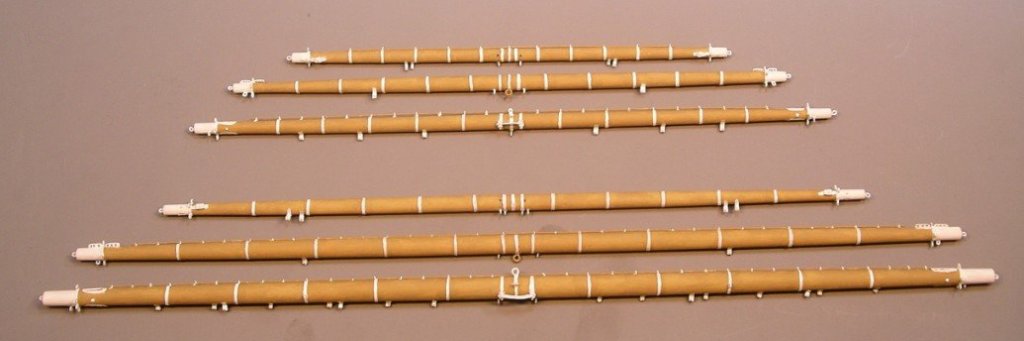
And now the lower three yards of the masts. regards, Joachim regards Joachim

-
I have looked at all your posts here, these are really fantastic pictures that you show us here. I can't keep up with my own pictures. I'm looking forward to the next update. Regards Joachim
-
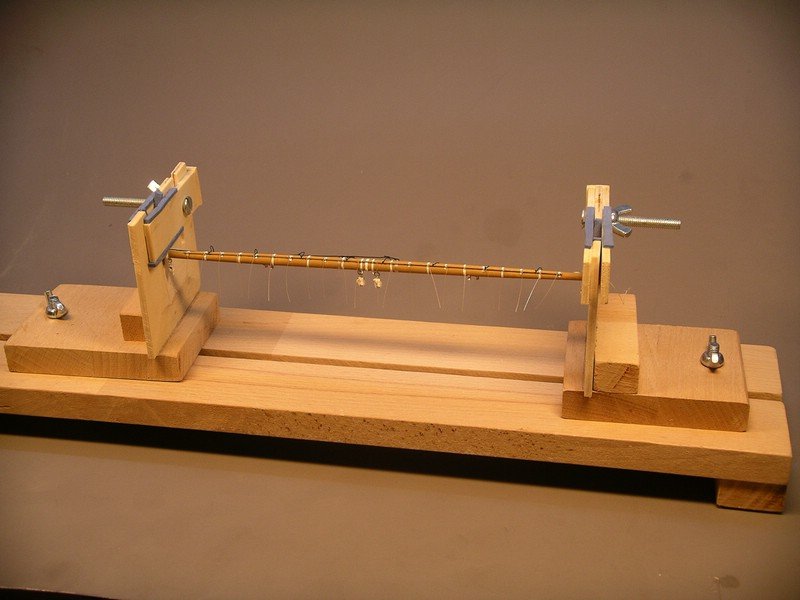
Here I have a picture of a holder, which is very useful to fix masts, yards or other things. bye Joachim
-
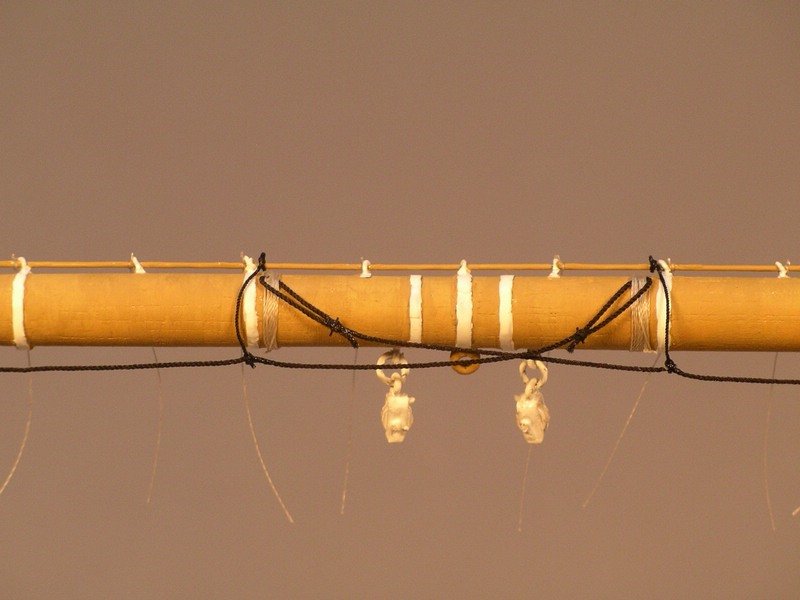
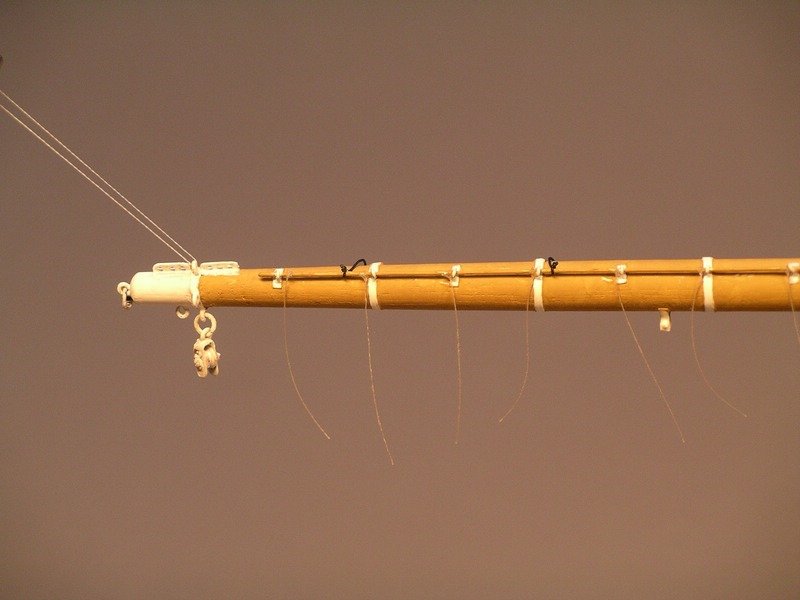
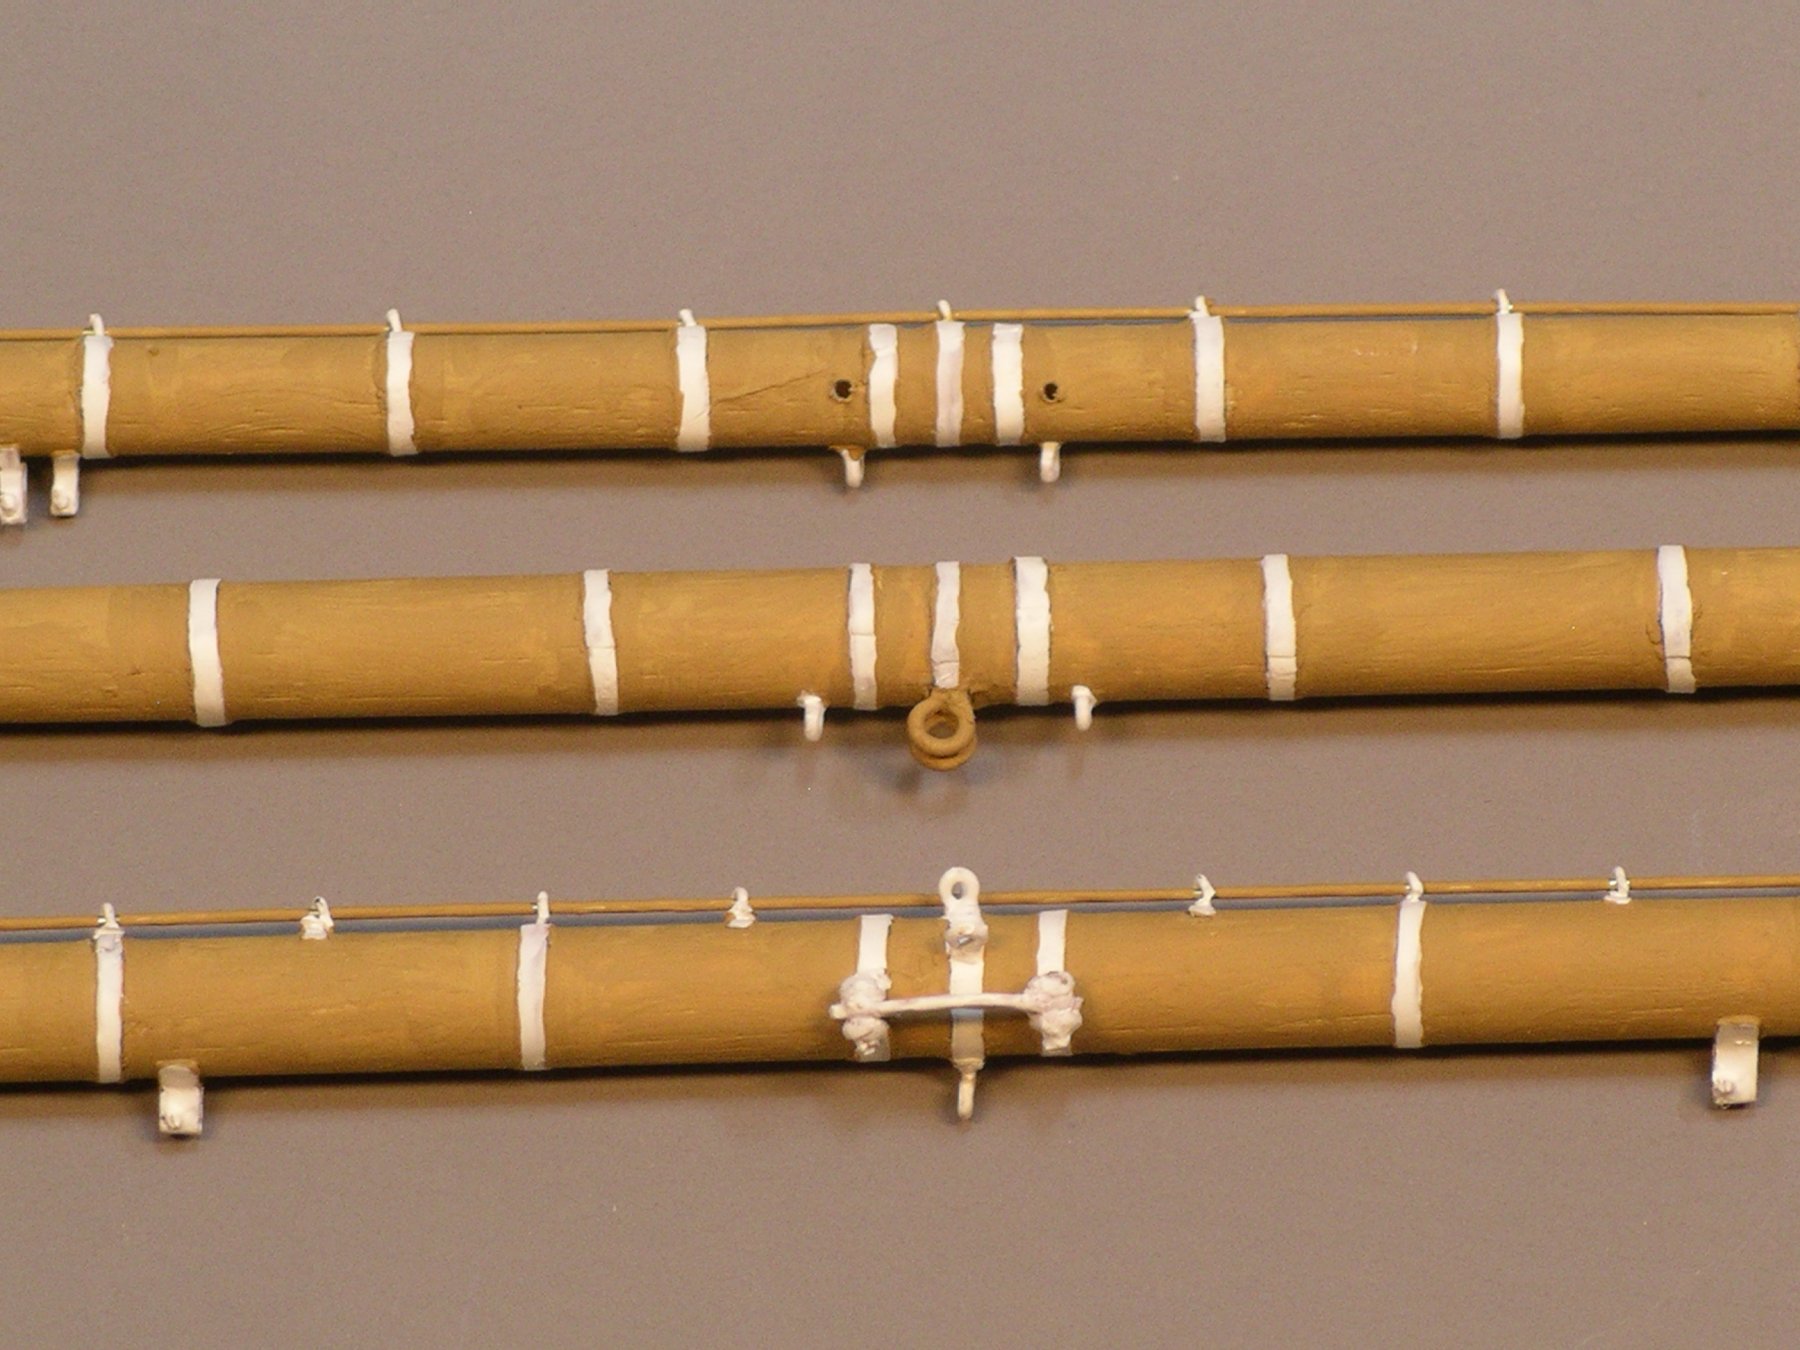
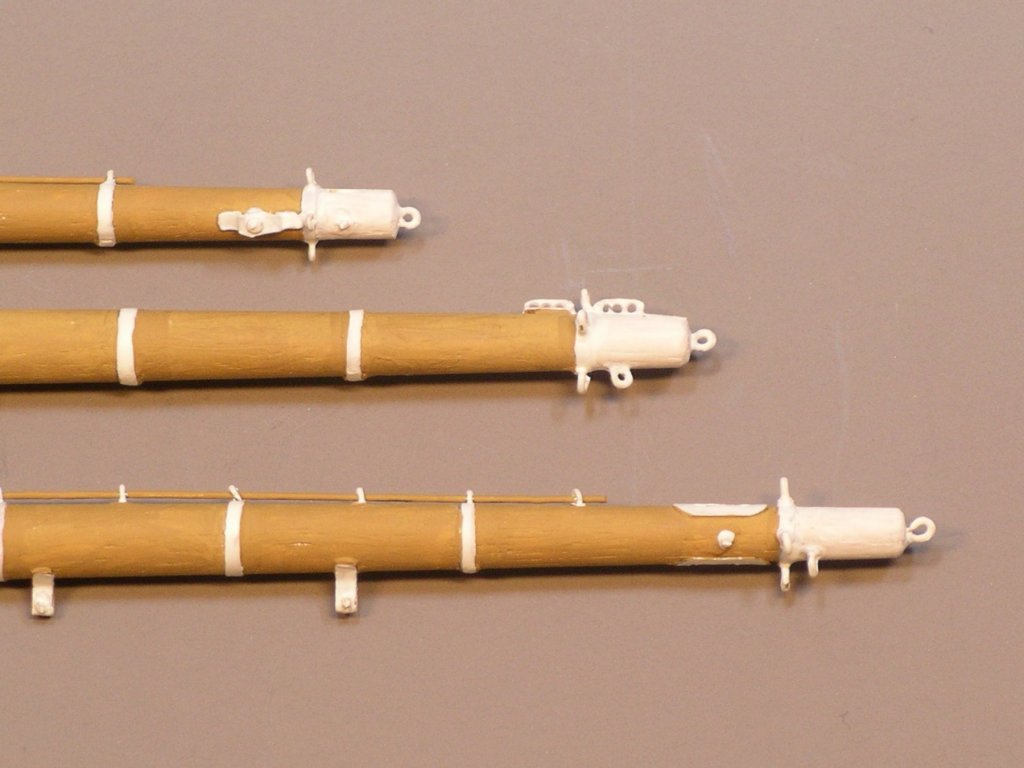
The next step is the lower topsail yard Now a close-up view of the middle part of the yard. At the bottom, somewhat hidden are round fittings in which the frame is attached to the mast, then two pulleys. A little bit unusual seems the attachment of the foot horses in this area. While the foot horses are fastened to eyelets via thimbles at the yard cams, they are tied directly to the yard in the middle area. A divided fitting with several holes is attached to the top of the frame on the views of the frame cams. Here the sheets of the Obermars sails are attached by chains, they cannot really be adjusted, only by a ring, through which the chain later still runs, the point of attack can be changed easily. In modern square sailers, the upper mars sails are set by pulling the upper marsrah upwards. bye Joachim