HOLIDAY DONATION DRIVE - SUPPORT MSW - DO YOUR PART TO KEEP THIS GREAT FORUM GOING! (Only 13 donations so far - C'mon guys!)
×


schiffebastler
-
Posts
322 -
Joined
-
Last visited
Content Type
Profiles
Forums
Gallery
Events
Everything posted by schiffebastler
-
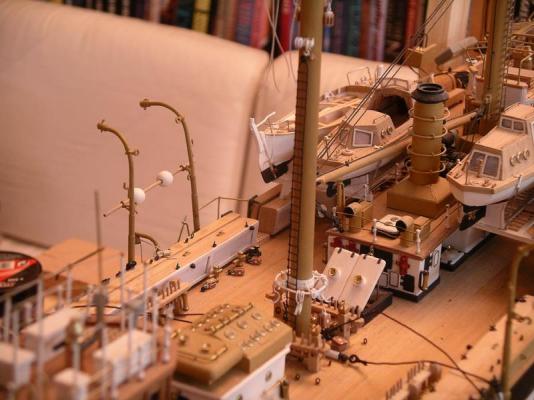
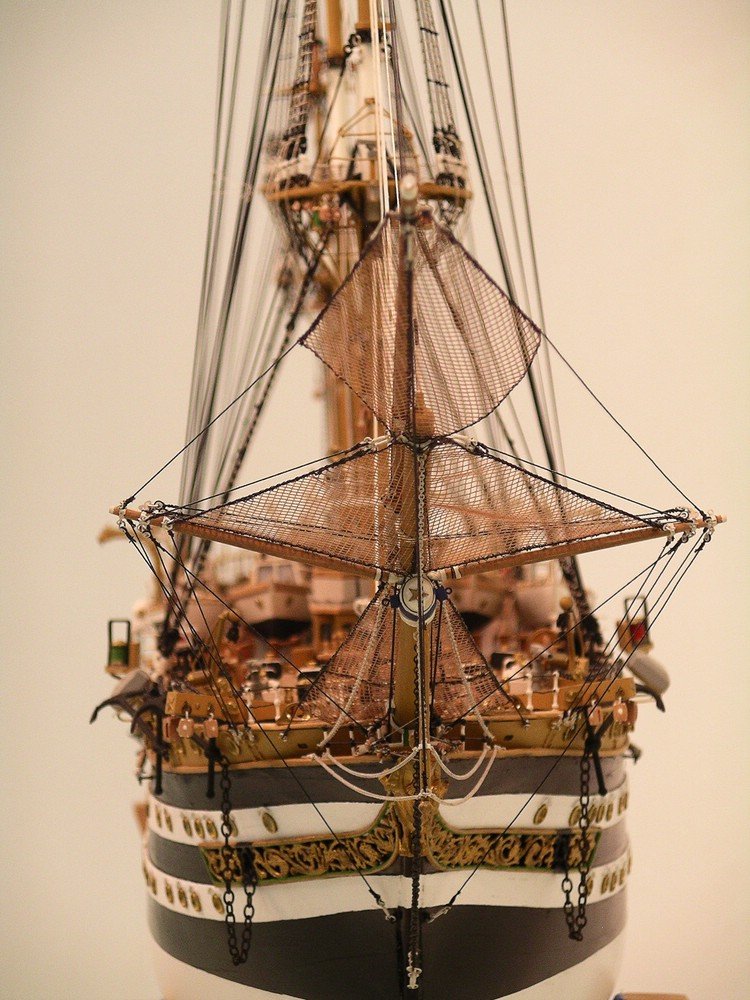
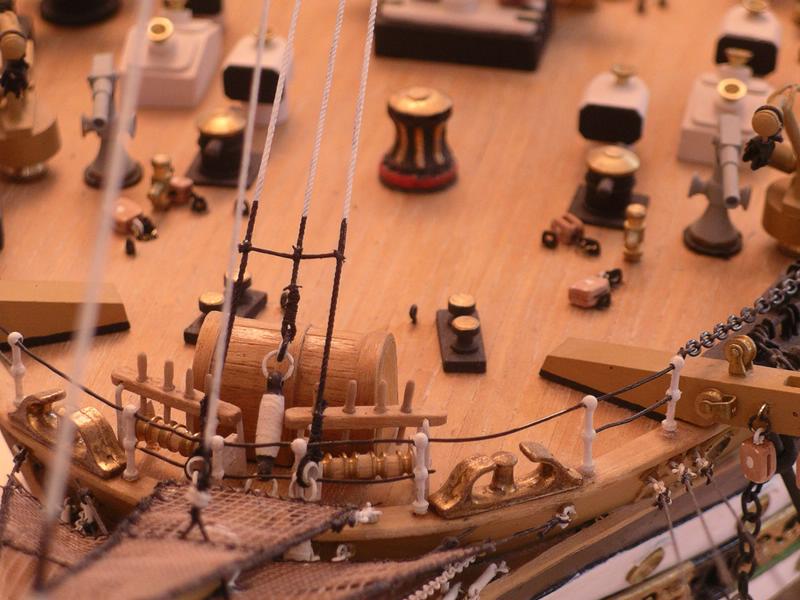
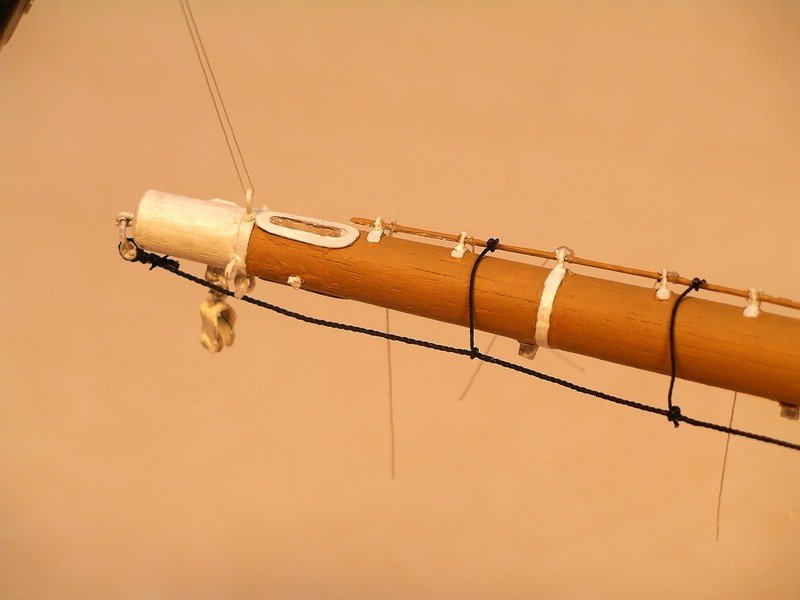
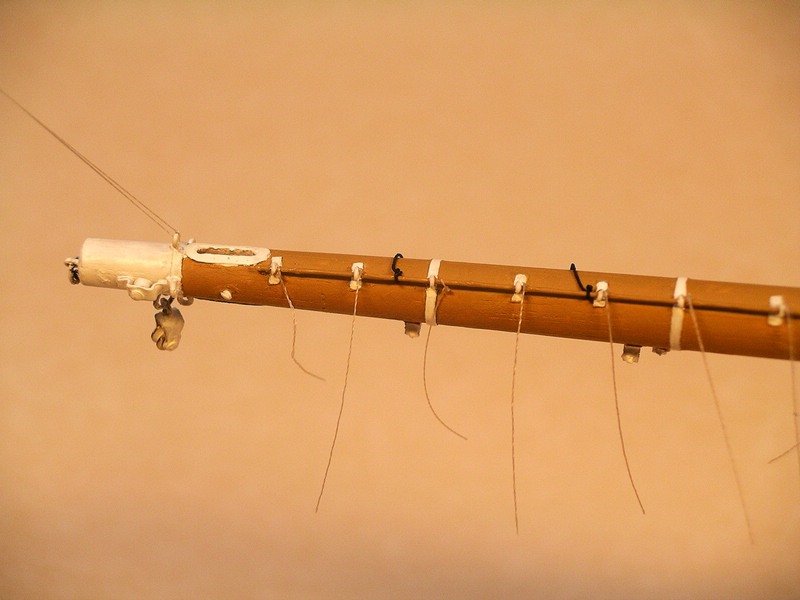
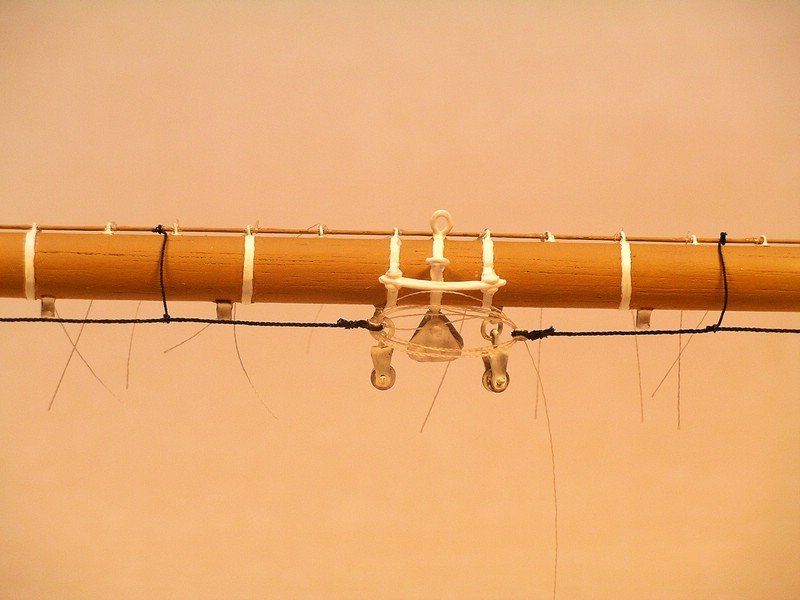
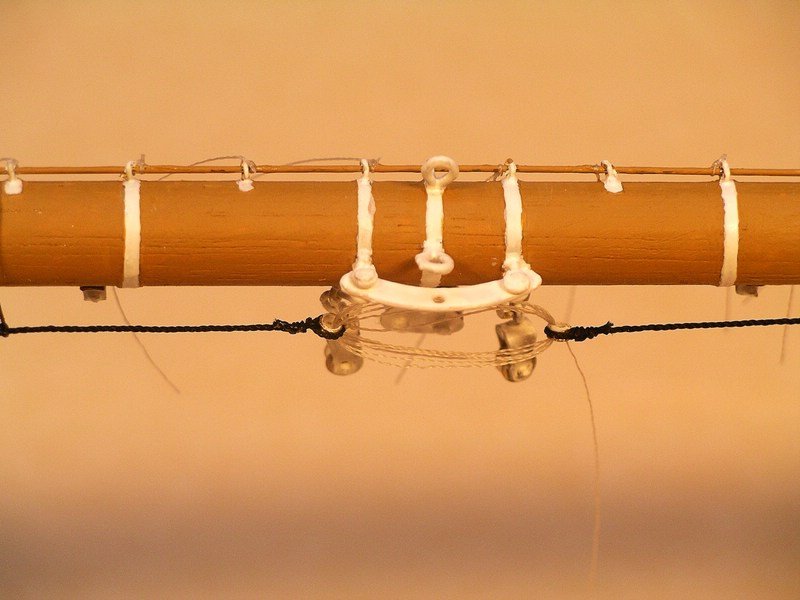
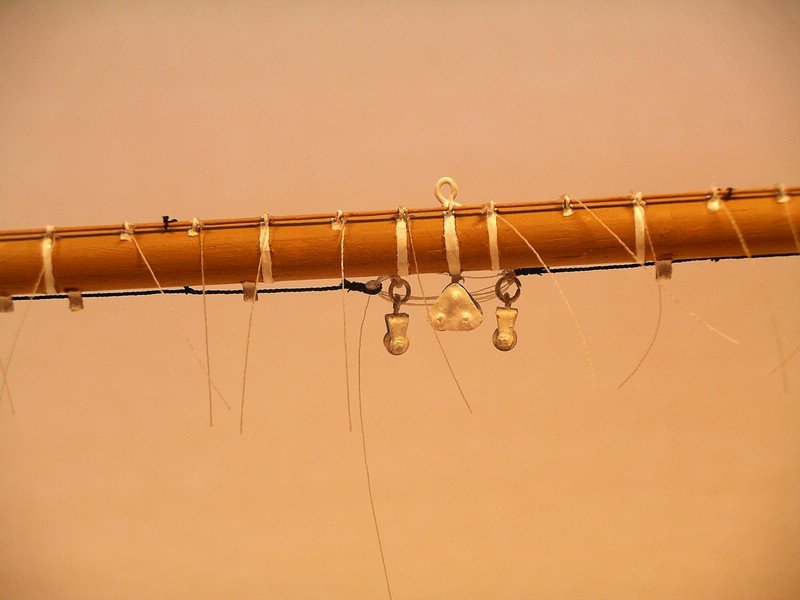
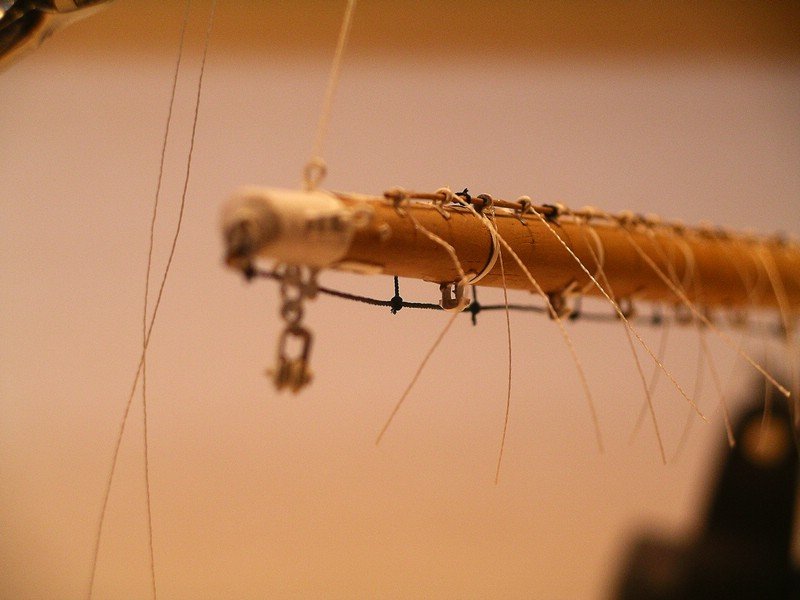
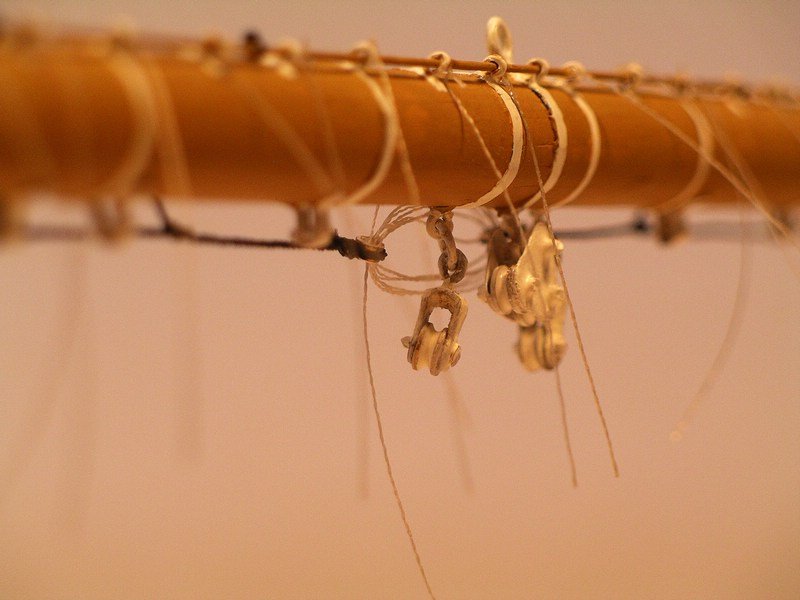
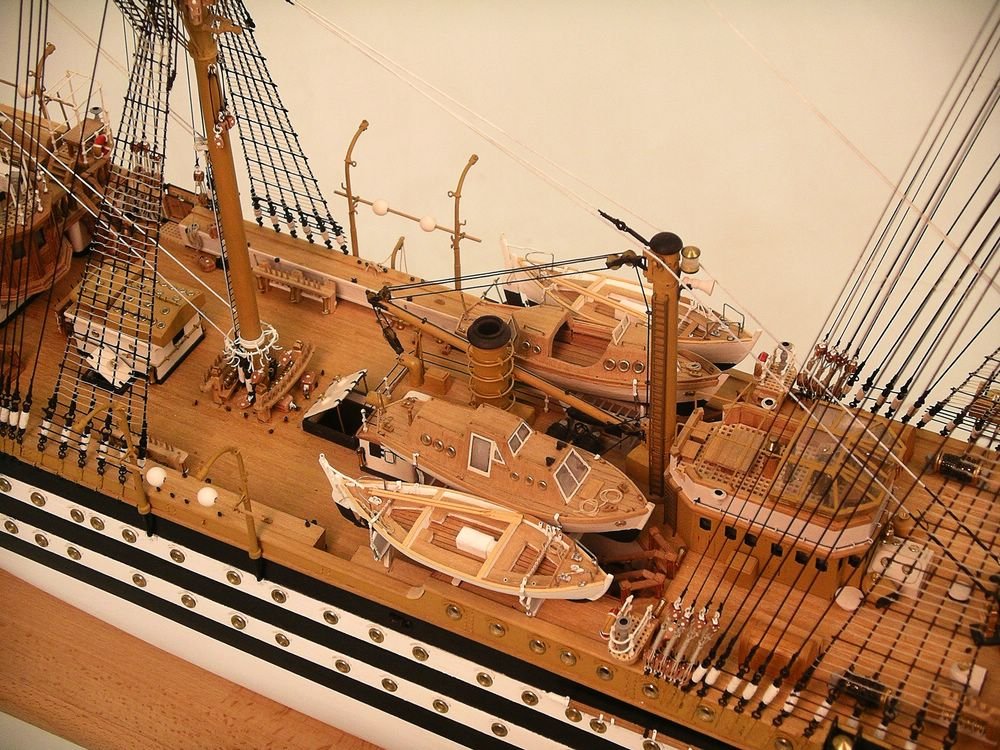
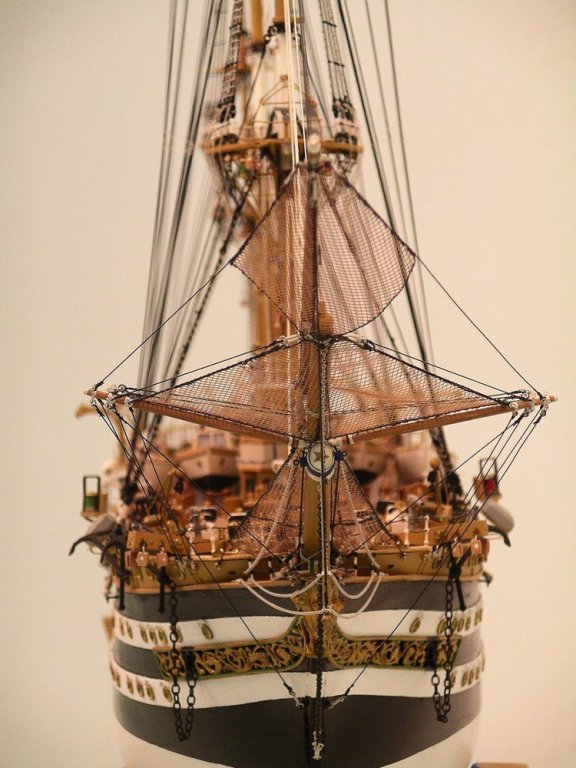
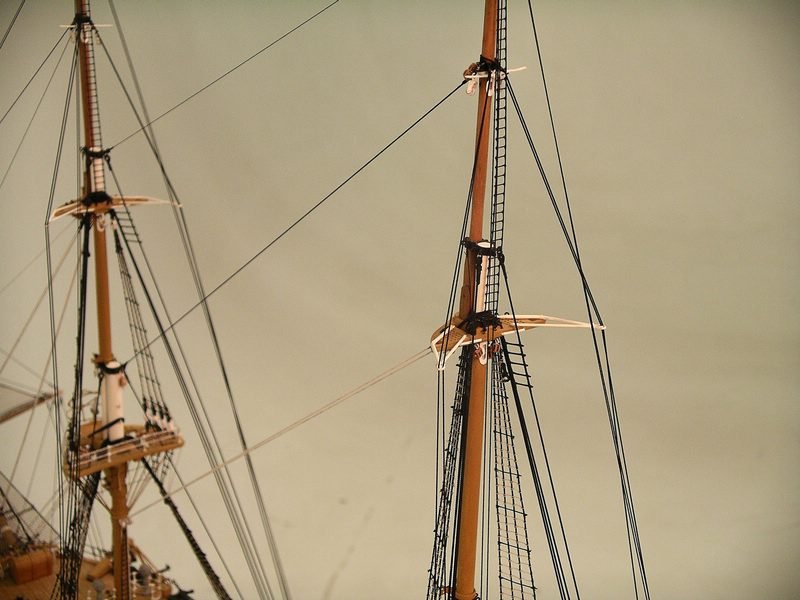
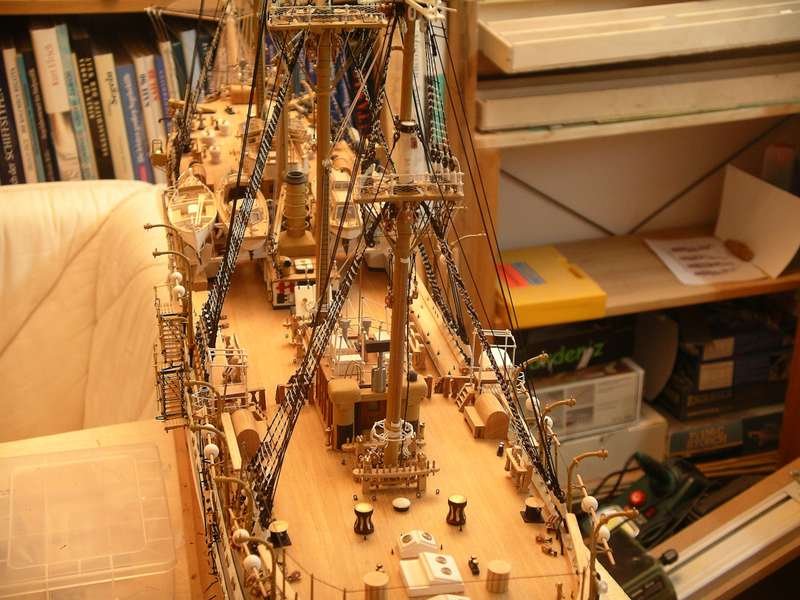
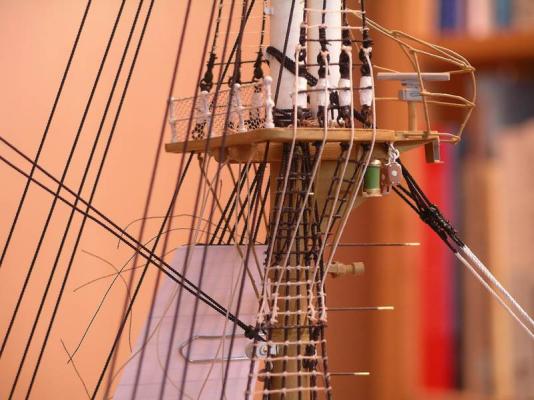
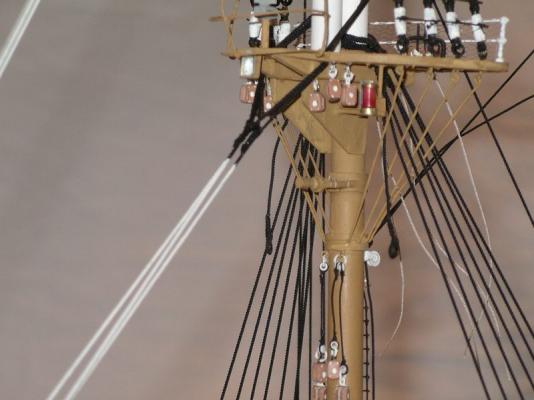
 Before I set up all the yards in parallel, I took a look at the jibrah to see how everything works together and whether the result is as desired. First of all a complete overview with all parts, view from behind. Here also the foot horses are to be seen quite well. The ribbons go to the front with whose help the sails are tied together at the yard. Both are attached to the handrail, to which the sail is later attached. At the moment these ribbons are still hanging off in different directions, so I have to think about it, that they hang down cleanly, I haven't found a good solution yet. Rollers are recessed in the frame cams, deflection pulleys for ropes are fitted underneath. A deflection pulley is also mounted on the outside of the front. In the middle part of the yard you can see the curved fitting from behind, which is attached to the yard holder on the mast. Heavy chains are attached to the two large rings in the middle of the frame to hold and secure the frame. Under the frame hang two single blocks and combined block with two rollers. The foot horses of the port and starboard side are tied together in the middle by means of a ribbon, in between there is the frame holder. Below the frame are a number of brackets with thin pulleys (somewhat difficult to see) over which the ropes run, which are then steered on deck by means of the blocks attached in the middle of the frame. bye Joachim
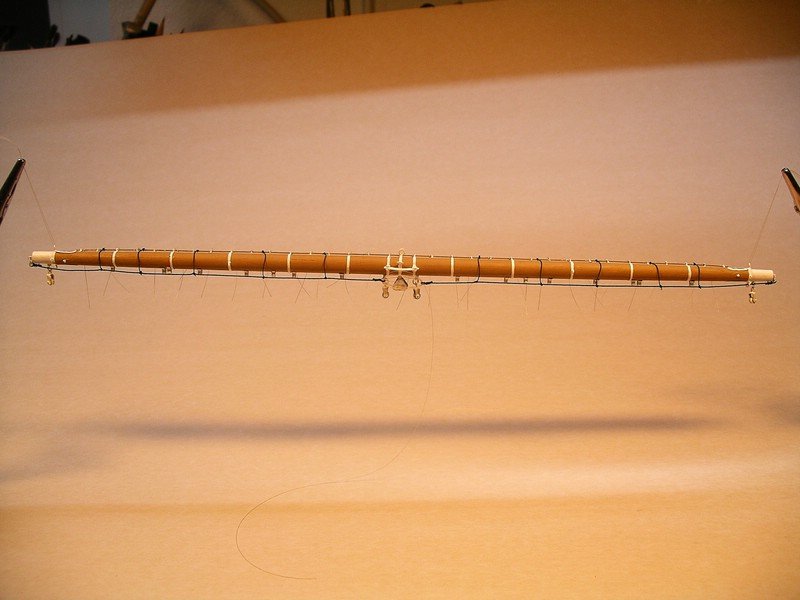
-
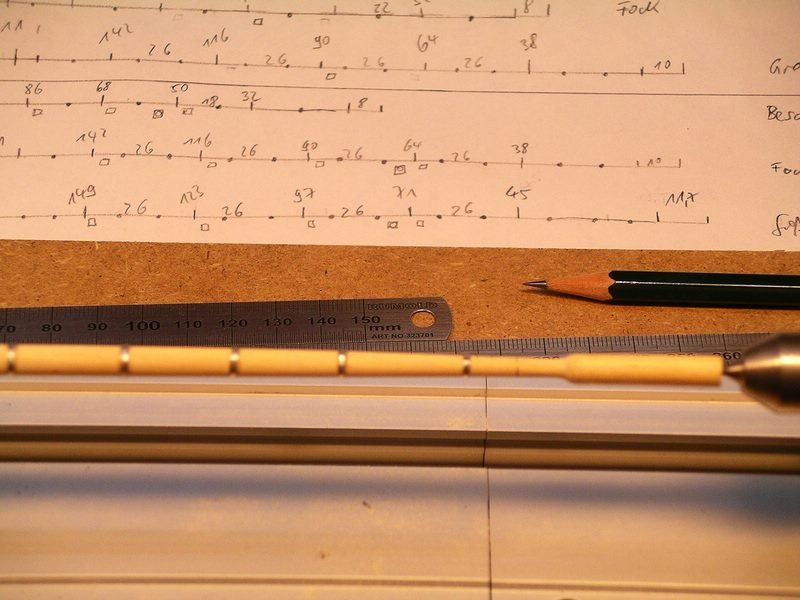
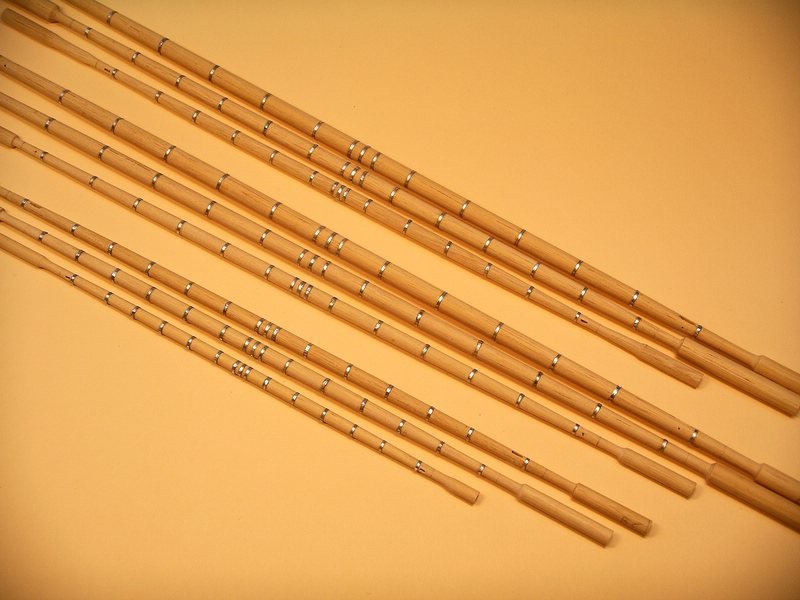
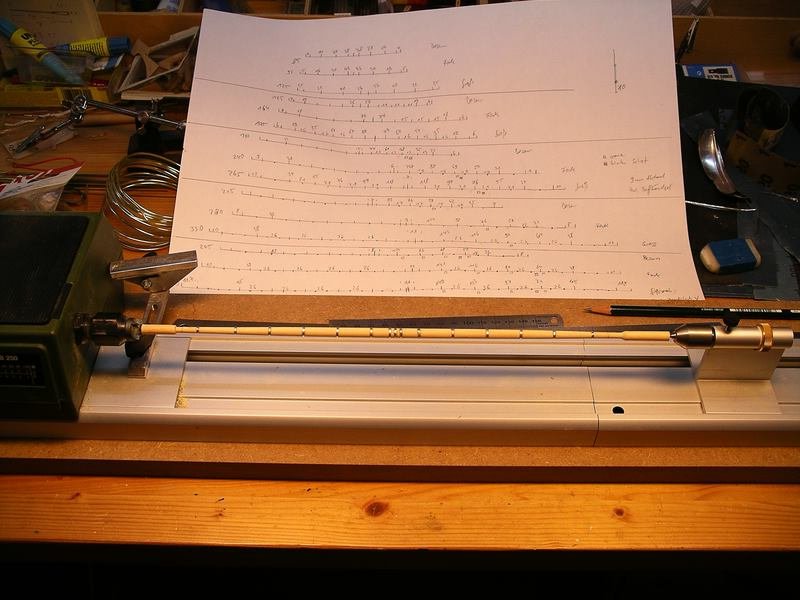
Dear colleagues, Unfortunately I haven't shown anything here for a long time, but now I want to catch up with the state of the model. After I had shaped the yards in the lathe, I attached the metal rings. I continued to use the lathe, the metal rings are about 0.8 mm wide and 0.05 mm thick. Since no two yards look the same, I had to determine the position of each metal ring and the respective fittings at the yards in the apron again on the basis of the pictures. I then entered the essential data in the overview sheet visible at the back. many greetings Joachim

-
Hello @James H as far as the colouring of the Bounty is concerned, I can't give you a definitive answer, there is no definitive description in my sources and books. But at that time a painting like the one shown in #10 was quite common. Instead of blue it could be black, green (not usual in England) or red, but also the blue paint was used and would have been possible for the Bounty. Since Prussian Blue was discovered in the 20s of the 18th century, an inexpensive blue color was available in large quantities. The costs for Prussian Blue in the middle of the 18th century were only about twice the price of the cheap red, red/yellow colors. Of course, at that time also other blue colours had been available, but mostly Prussian Blue was used. regards, Joachim
-
Thank you for your kind response! In fact, I am considering making the book in English. Hopefully I can manage this within the next few months. My major problem is, to produce a comparable high quality description in english language.
-
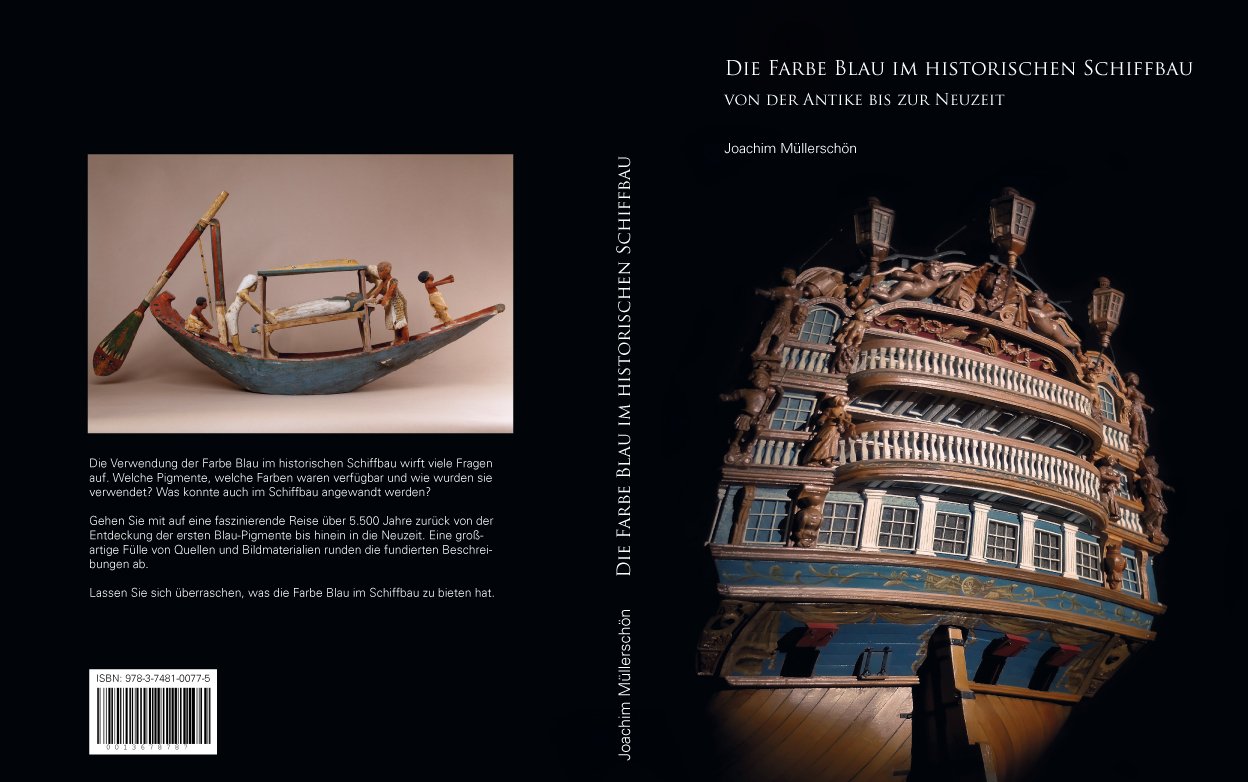
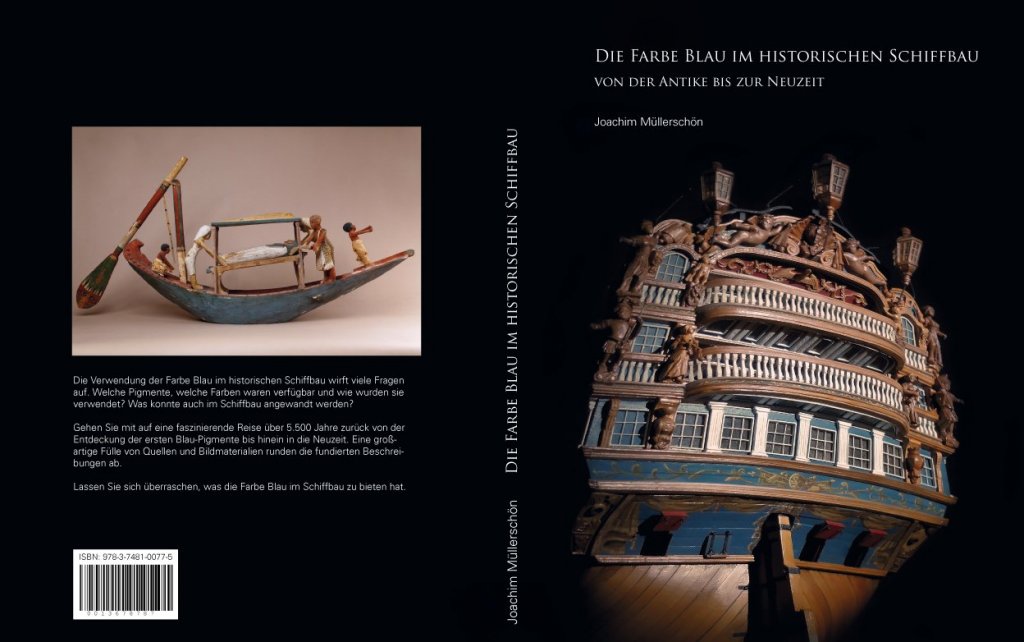
Dear colleagues, I am very happy to present my book to you today. It carries the title: " Die Farbe Blau im historischen Schiffbau – von der Antike bis zur Neuzeit" A short description: "The use of the colour blue in historical shipbuilding raises many questions. Which pigments, which colours were available and how were they used? What could be used in shipbuilding? Join us on a fascinating journey over 5,500 years back from the discovery of the first blue pigments to modern times. An abundance of sources and pictorial materials round off the well-founded descriptions. Let yourself be surprised what the colour blue has to offer in shipbuilding". A few dates on the book: - Hardcover with 200 pages - High quality colour printing - Over 160 images, mostly color - Language: German - Publisher: Books on Demand, Norderstedt - Price incl. VAT 76,80 € The book is expected to be available on the German book market at all booksellers and online shops in the second half of January 2019, from abroad directly from me. But you can also order directly from me, I will always have a certain contingent. http://www.modellbau-muellerschoen.de/buch-en.htm info@modellbau-muellerschoen.de I accept pre-orders gladly, the supply within Germany is then free of charge and reduced accordingly abroad. Who would like it, can also get a personal dedication. These are the main chapters: Einführung Geschichtliche und gesellschaftliche Entwicklungen der Farbe Blau Die blaue Farbenkunde Anwendung der Farbe Blau Blau im Schiffbau der Antike Blau im Schiffbau des Mittelalters Blau im Schiffbau fernöstlicher Kulturen Blau im Schiffbau der frühen Neuzeit Zum guten Schluss On my website you will find the complete table of contents and also some views of pages from the book. Have a look under it: http://www.modellbau-muellerschoen.de/buch-en.htm I'd be delighted if I'd aroused your interest in the book. Best regards, Joachim
-
Hi Michael, I just took a look again through your wonderful build log! It is really an amazing and fantastic bouild, your Wasa! Unfortunataly I had not enough time in the past to look continuously through your post. But the result now is great! Big gratulations for finishing it in this way! Regards, Joachim
-
Hi Michael, interesting making of your blocks. The Proxxon-Part cannot be bought on a regular way, but you can write an e-mail to Proxxon service and ask for this as a spare part (the part no. of mine was 34114-2015). Then they give you an offer with a price and you can order it. Me and some of my collegues did it this way. Joachim
-
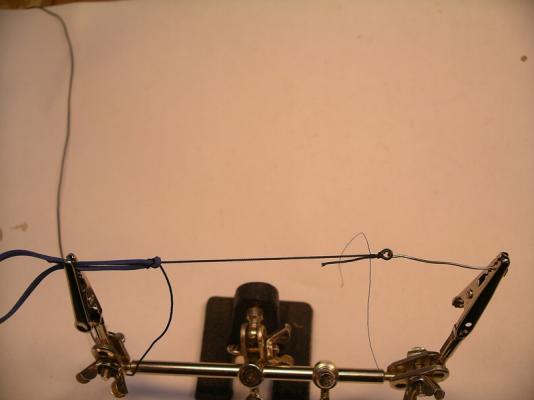
Hi Michael, as you also, I have the same lathe from Proxxon. But I ordered also the bottom part as spare part from Proxxon. I screwed both on a long, narrow wooden plate. So I have now the possibility to work on very long rods and this makes work much easier, it works pritty good. In the picture you can see the extension on the right side. Joachim
-
Thank you all very much ! I am pleased about so much interest. @Karleop concerning the net, they are simply from fly screens for windows, there exist different ones and I looked for some with the right grid-size. bye Joachim
-
Dear Michael, after a long time I was not in the forum, I have read with great joy all the new posts in your build log. You know I love your Wasa and she has made fantastic progress. It will be a great model. I will continue to look over your shoulder. best regards Joachim
-
Dear colleagues, thanks a lot for your kind words and the Likes. I'm glad that still some are following my build log, although I was absent for long time . Cheers, Joachim
-
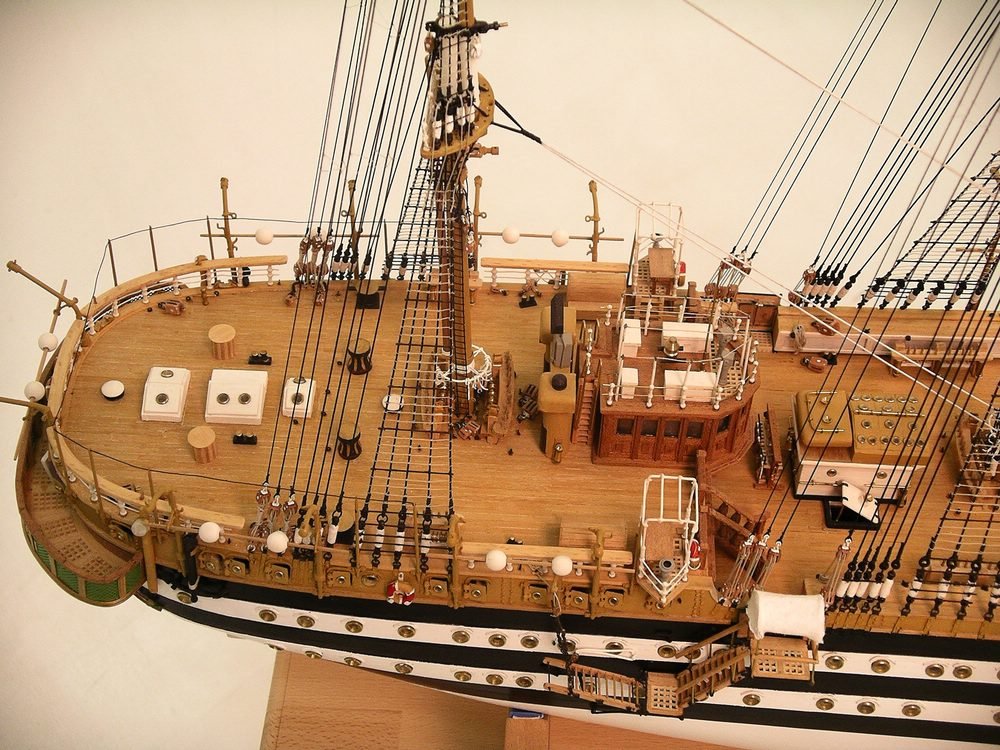
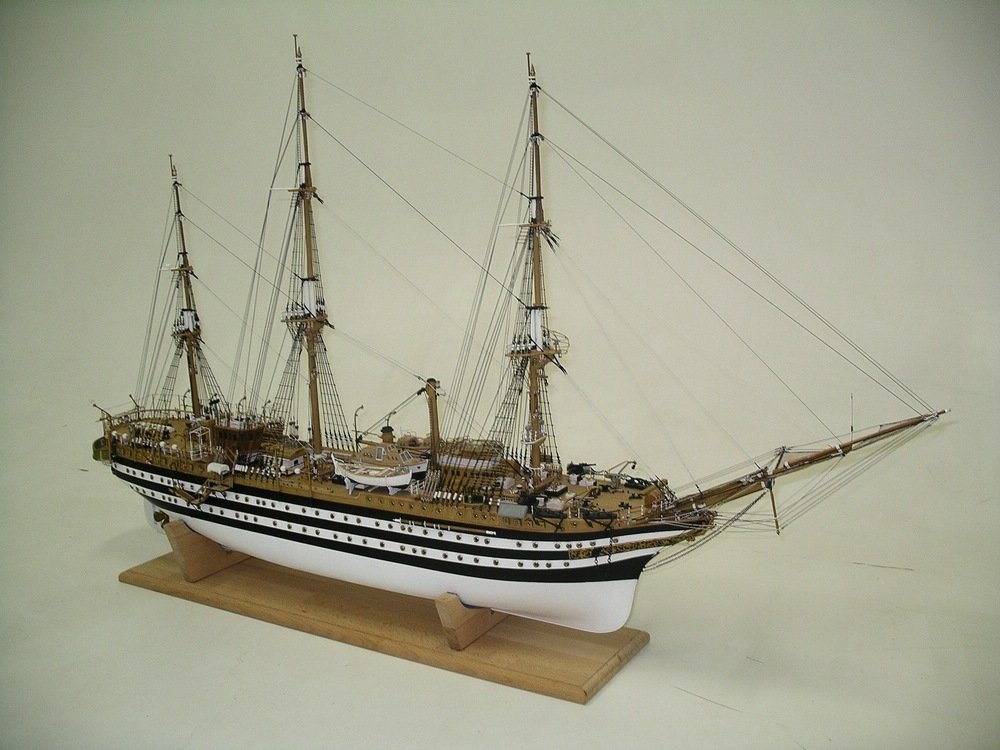
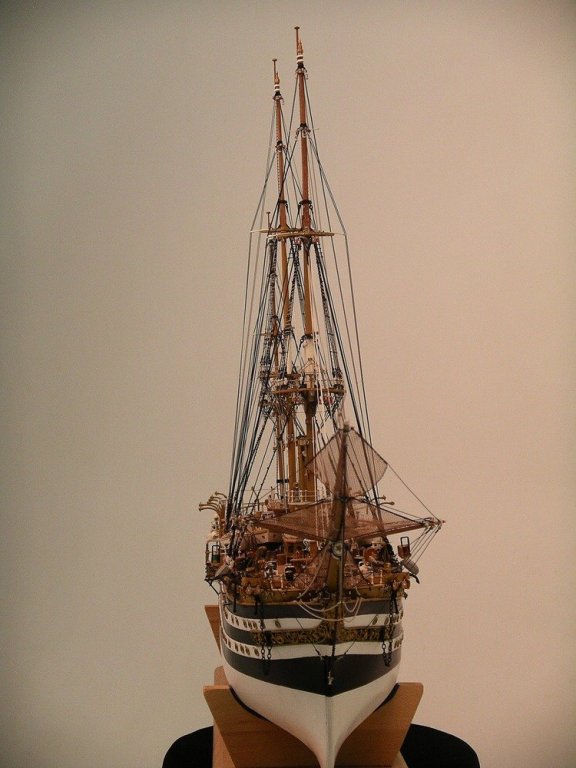
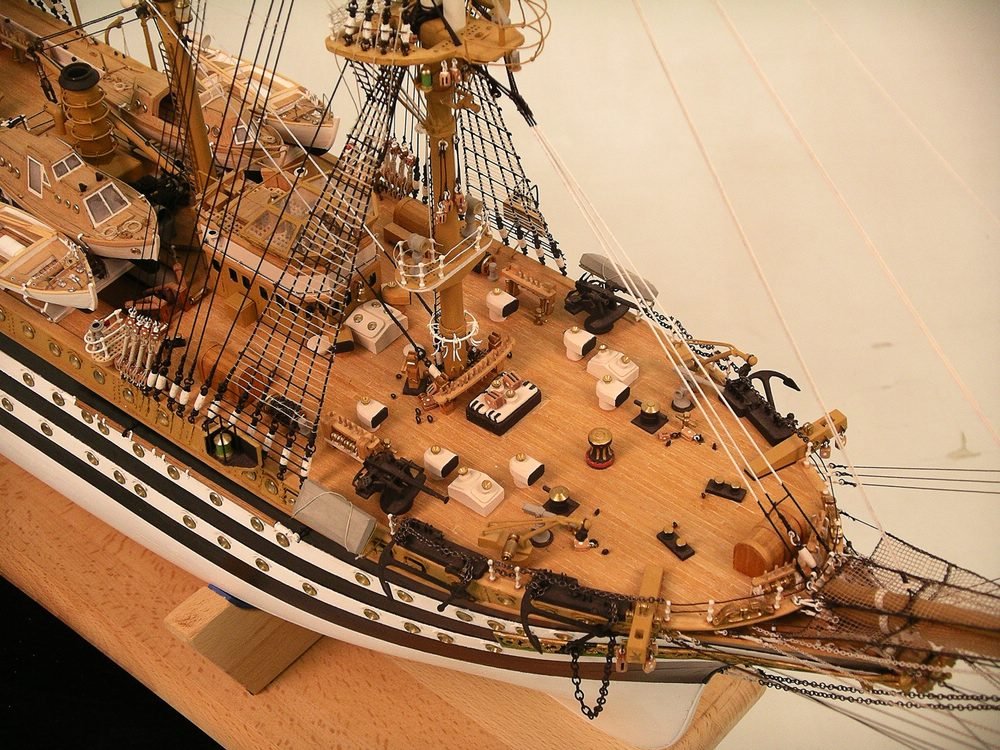
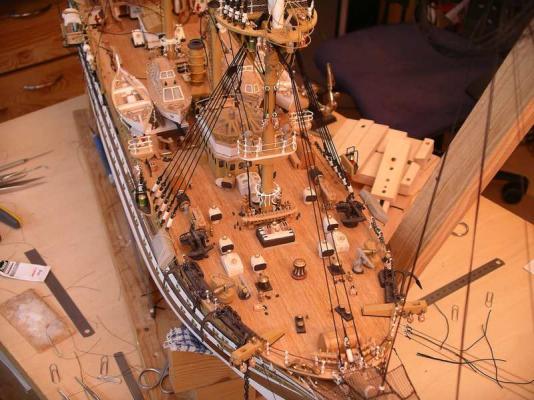
... and now, the last pictures of the overview. Bye Joachim


-
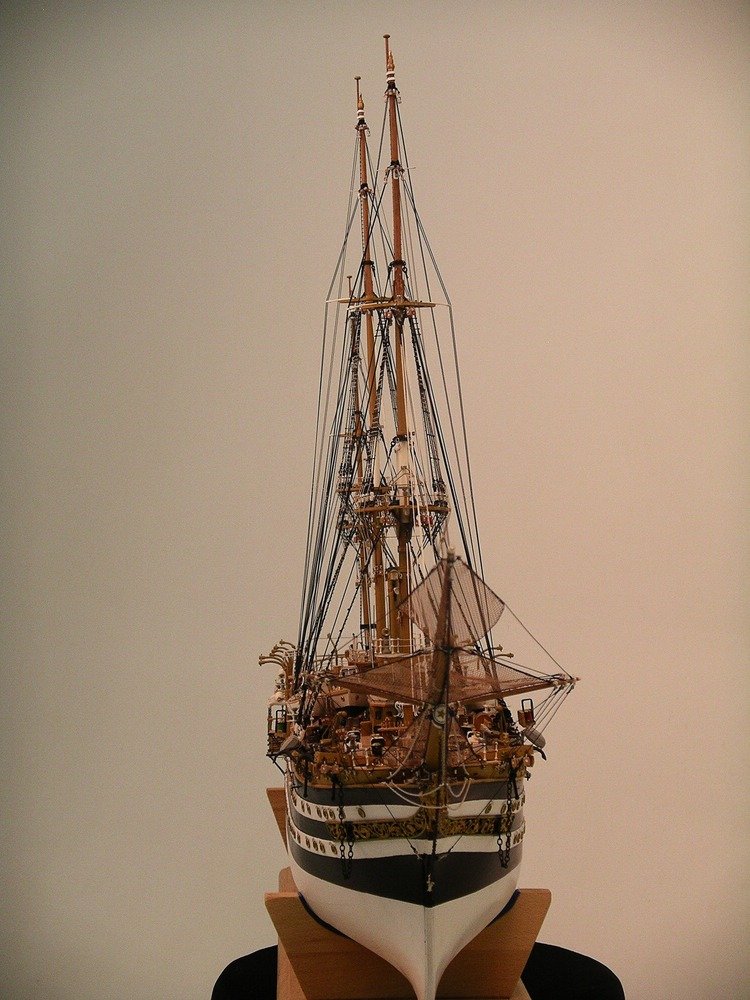
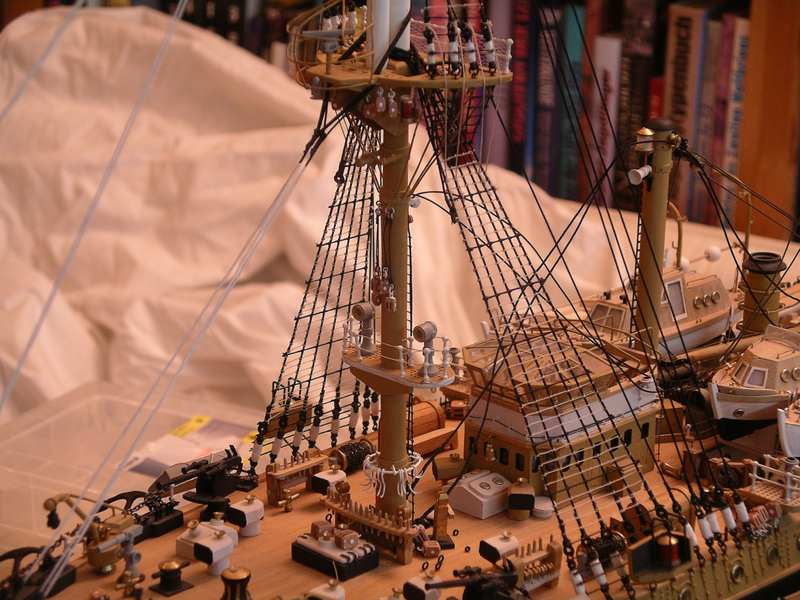
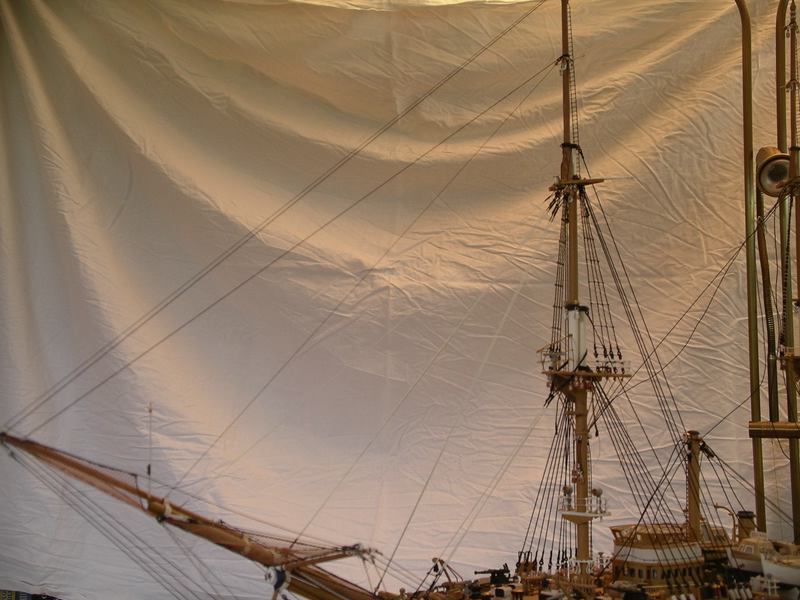
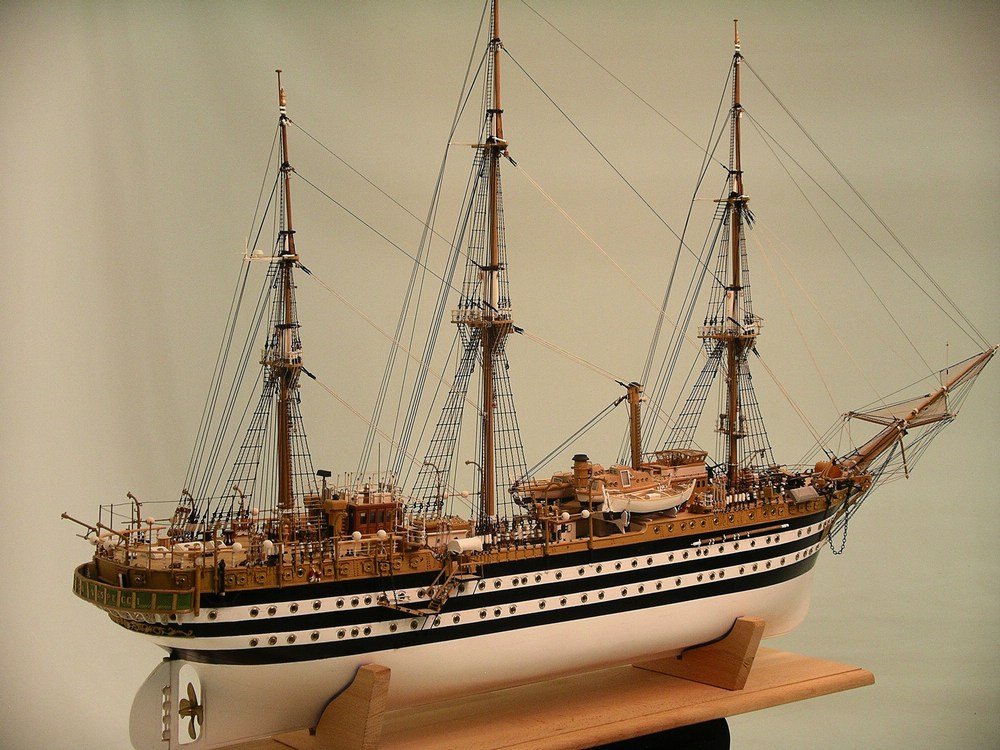
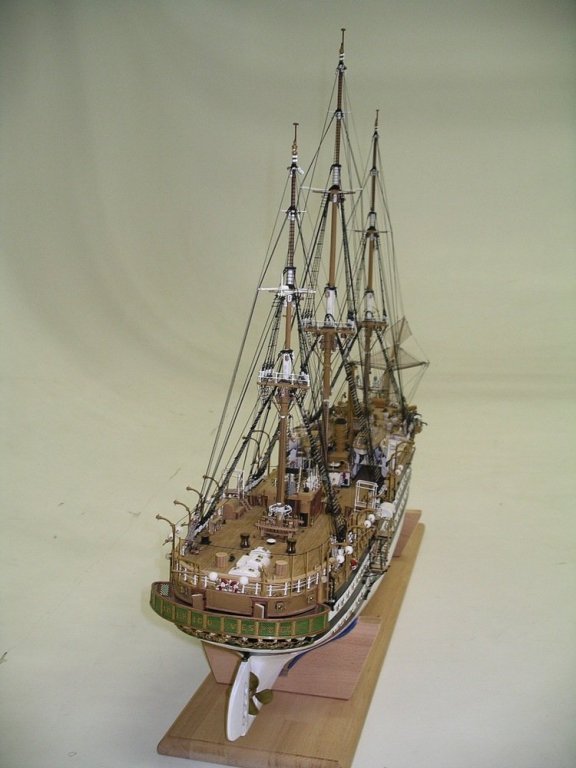
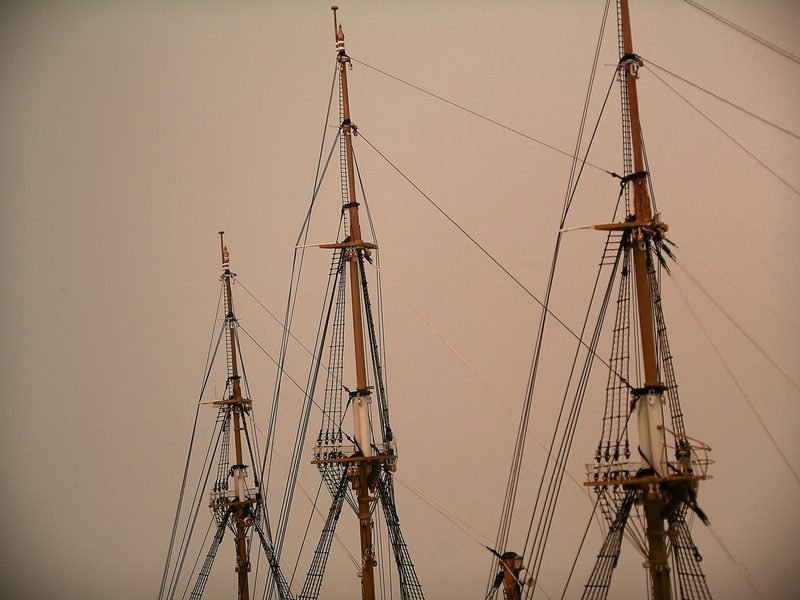
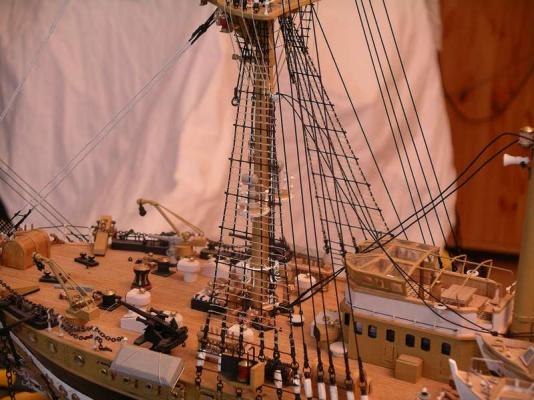
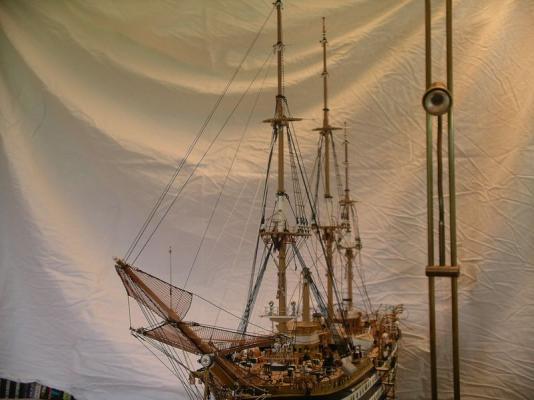
Hello, now the standing rigg is finalized. Due to this step I made some pictures of the whole model. Regards, Joachim


-
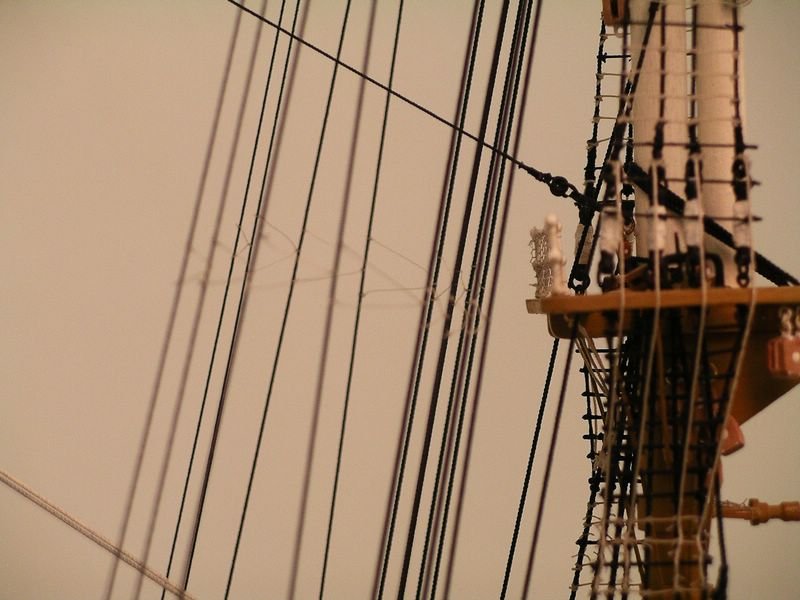
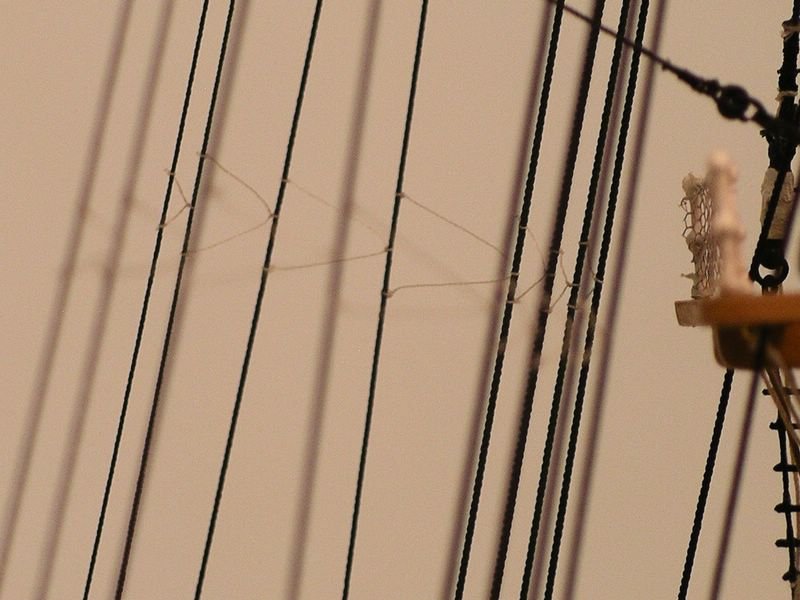
Hello, For avoiding vibrations of the backstays, there are fixed small ropes between them. Bye Joachim
-
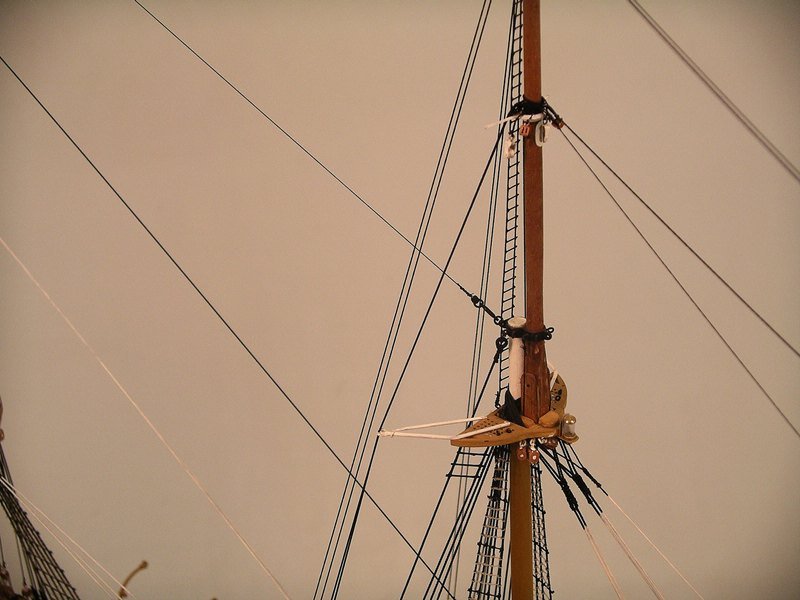
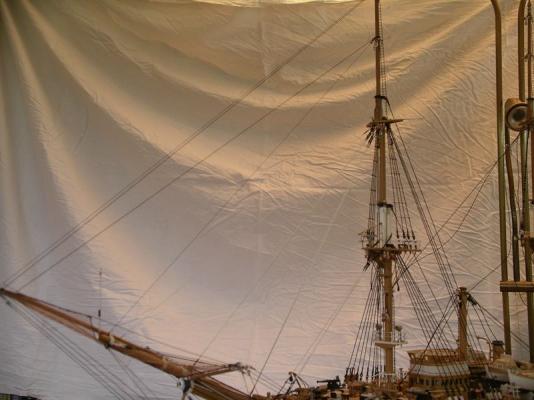
Hello, next are the backstays. Although they are not shown in any plan and no model kit knows it, they exist and can be seen on all pictures. Therefore I analysed the pictures for all details and build them. Bye Joachim


-
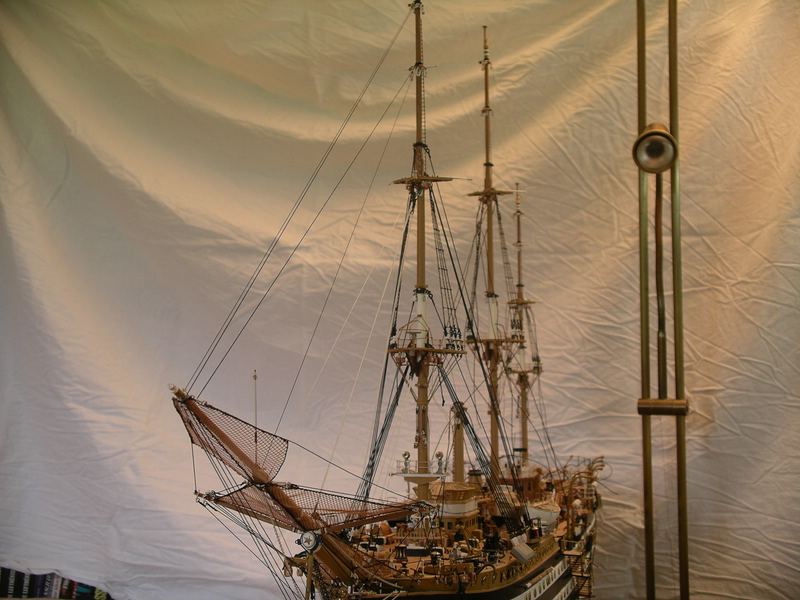
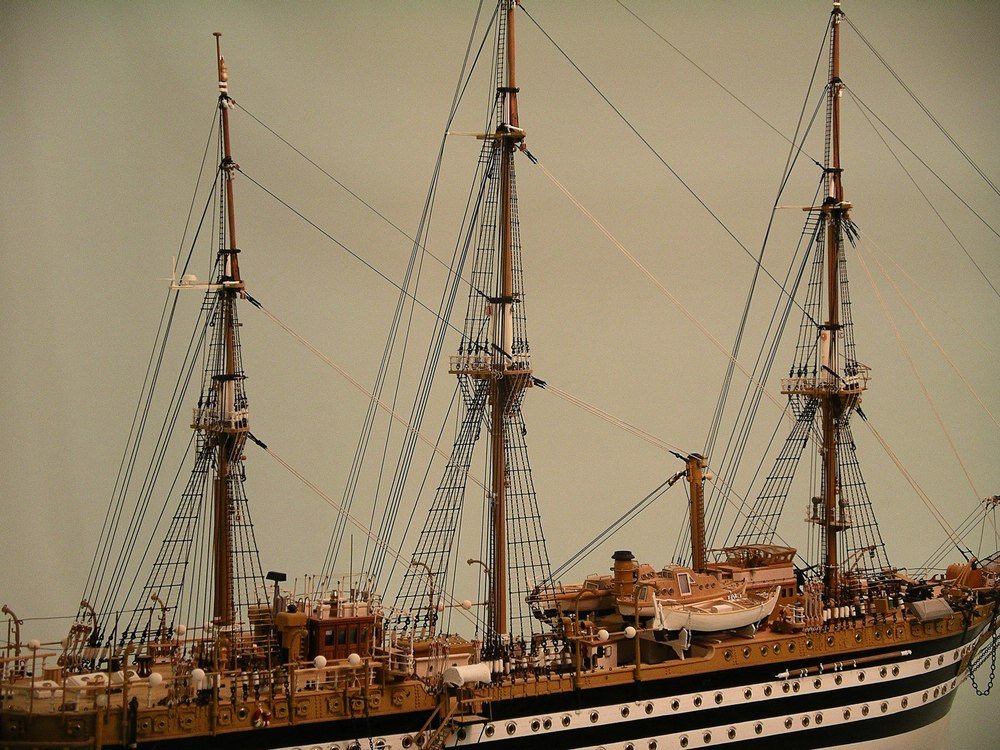
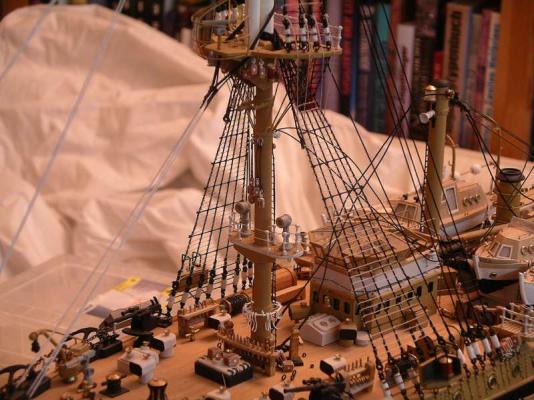
Hello everybody, long, long time since my last update. Unfortunately I hat too less time, keeping up all the forums with updates of the AV. But now I intend to update this build log here step by step. Maybe there is still somebody, remembering me and my AV. First I will start with an overview with all fixed shrouds. Bye Joachim

-
Hi Michael, after a long absence here, I am really happy to see these fantastic advance on your model ! It looks so realistic ! During my summer holiday unfortunately I had a big accident with my car and the caravan, everything was totally damaged. Fortunately, my family and I were unhurt, but afterwards we had a lot of trouble and I could not spend my time for anything else. But now, I am back again and I am glad following your build log further on. regards, Joachim
-
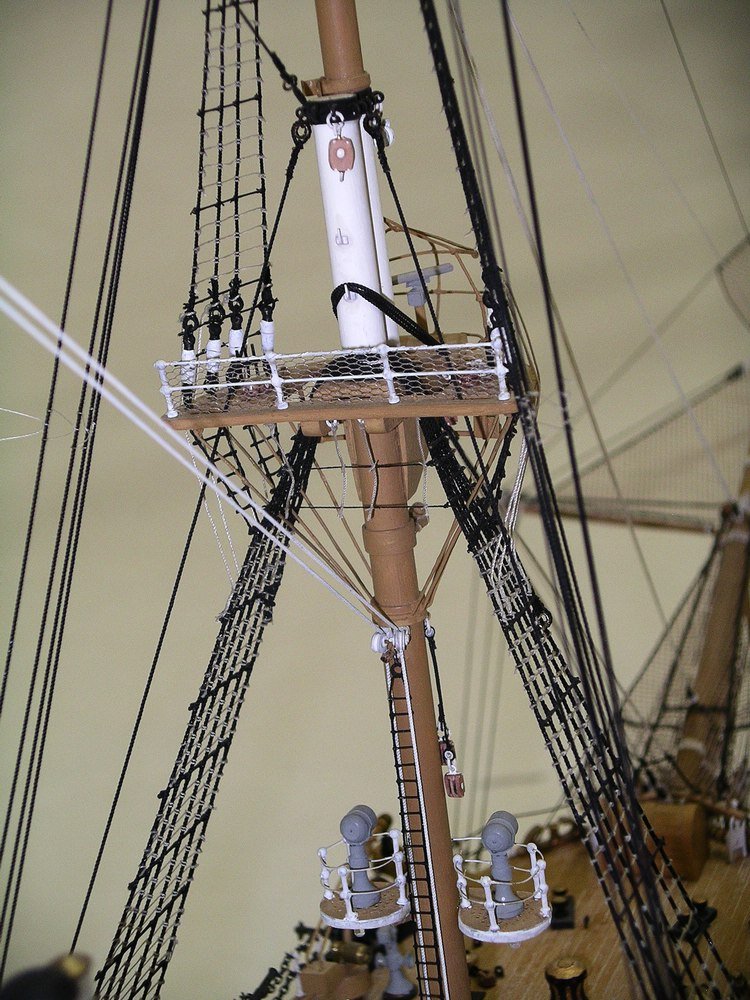
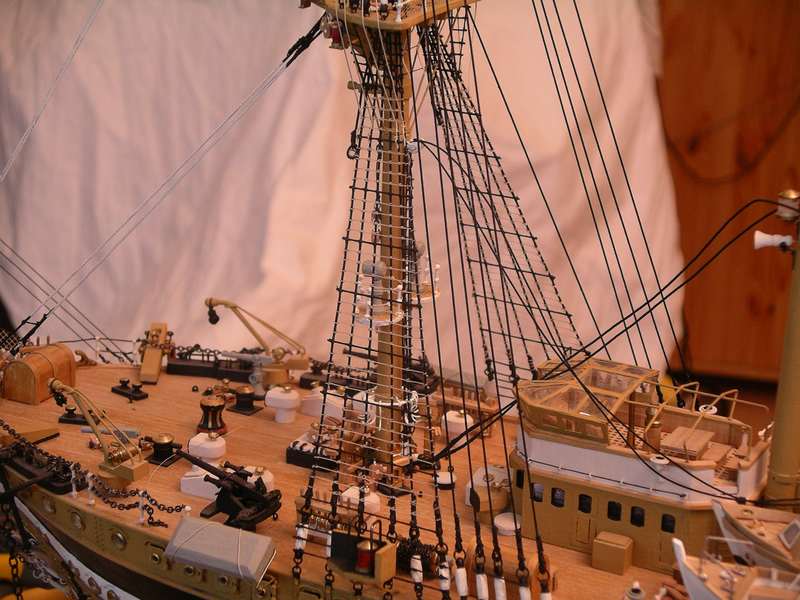
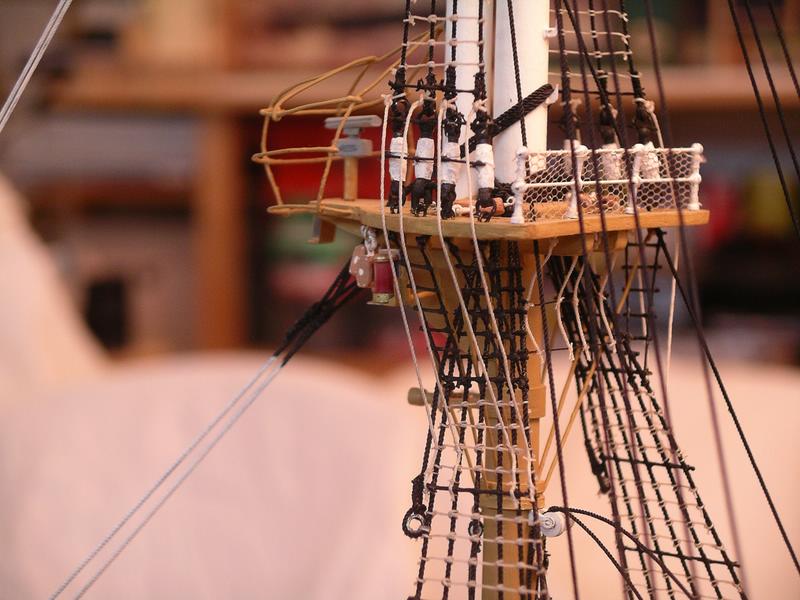
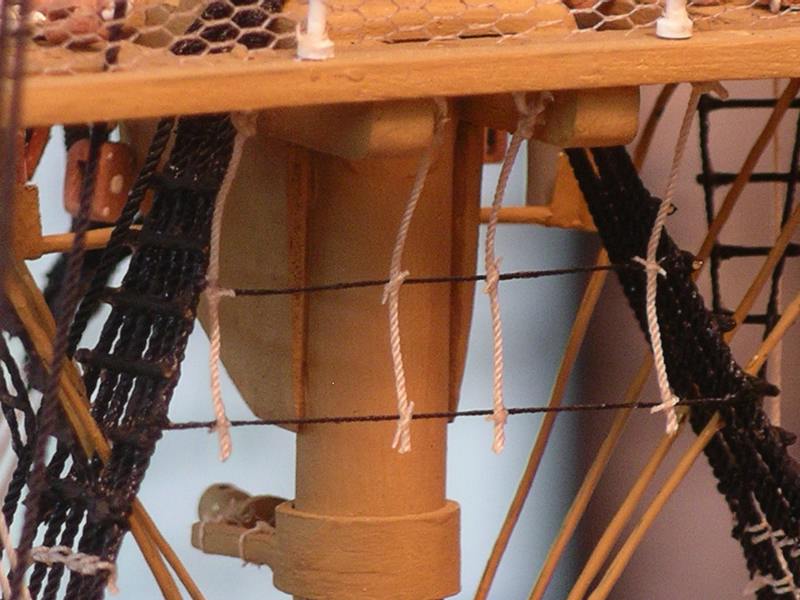
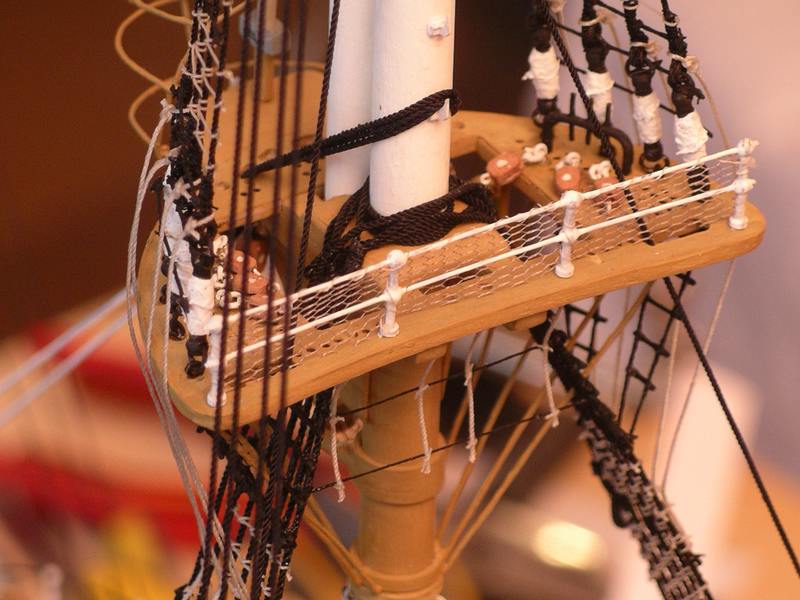
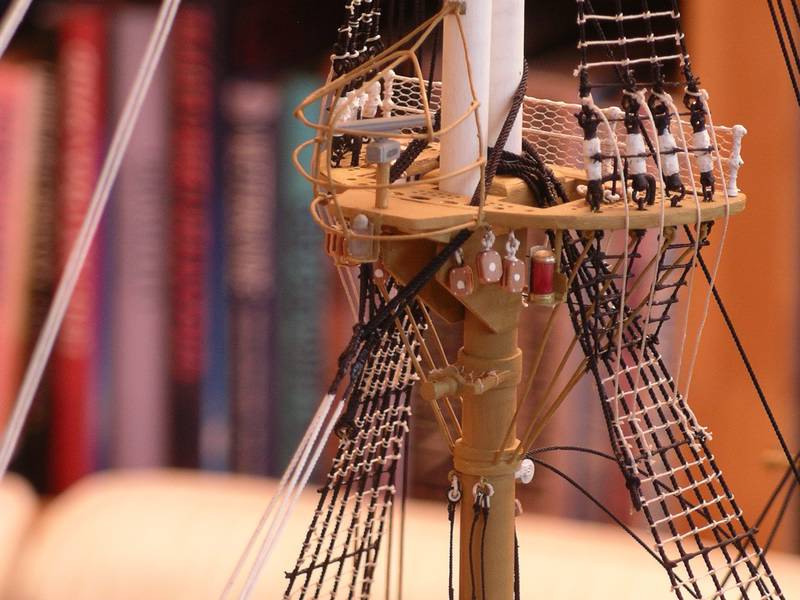
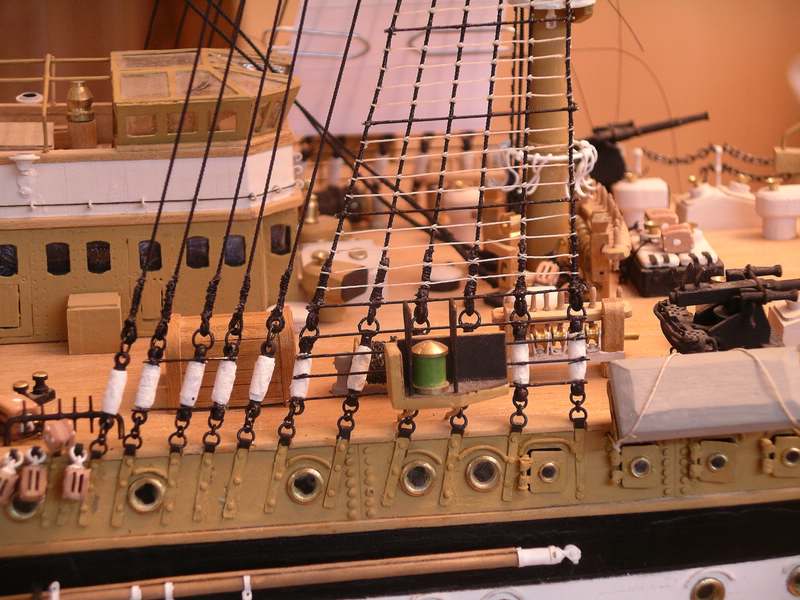
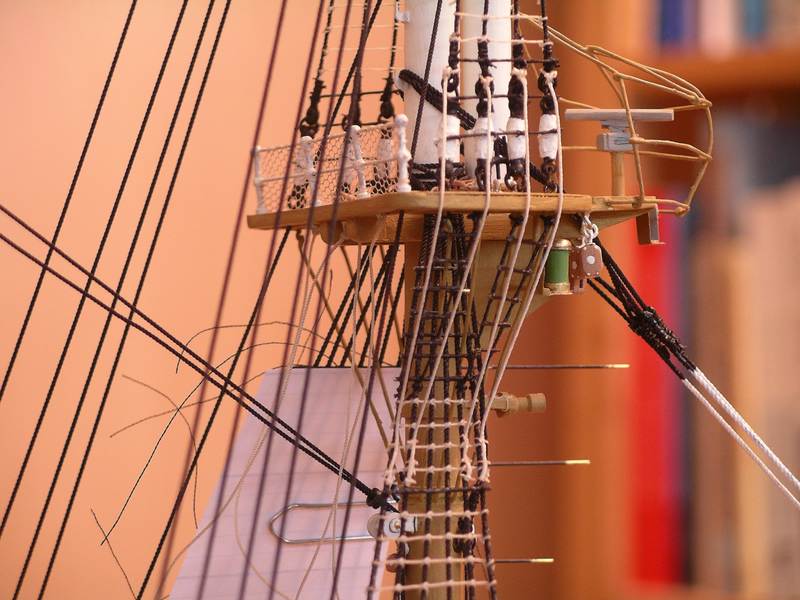
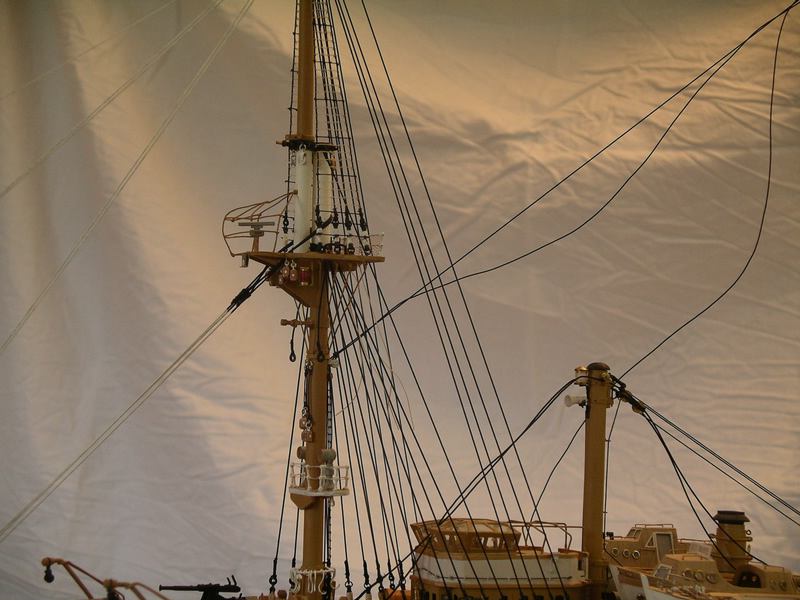
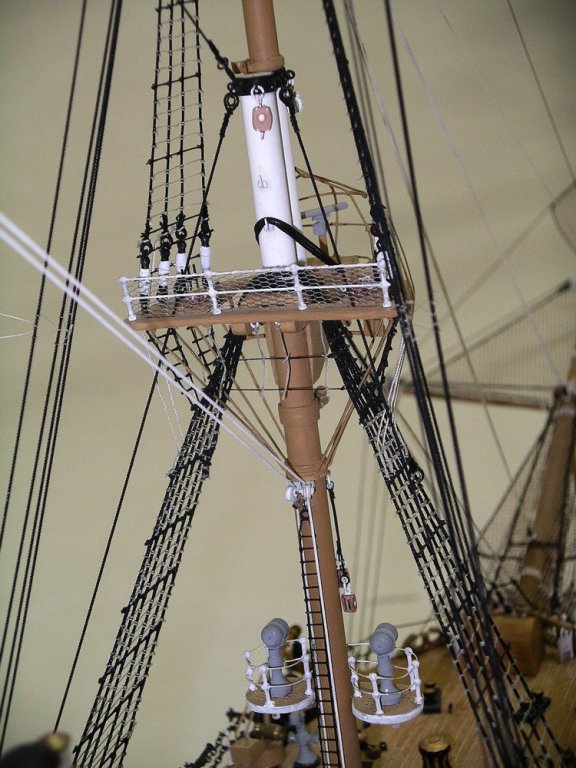
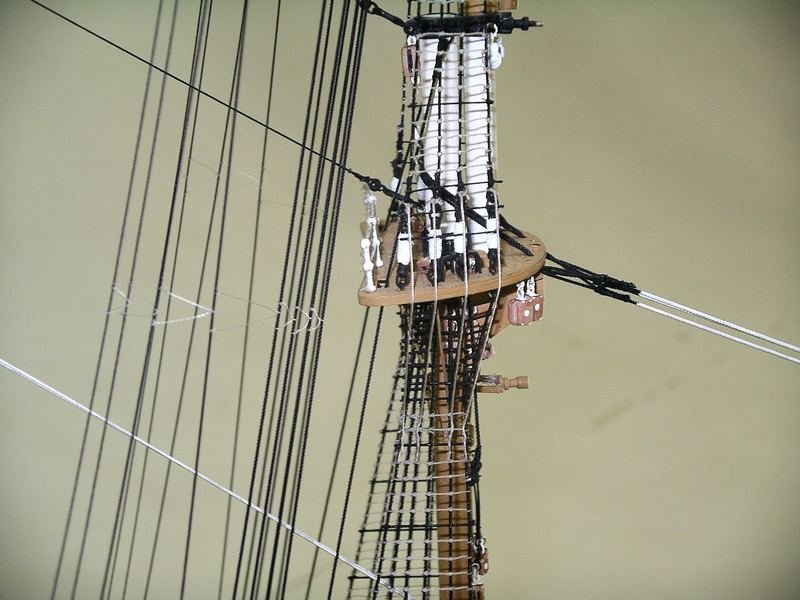
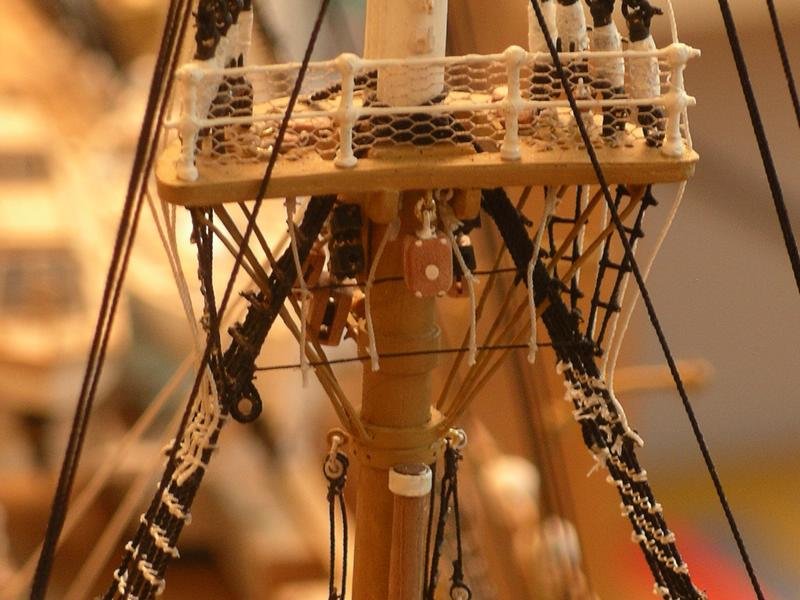
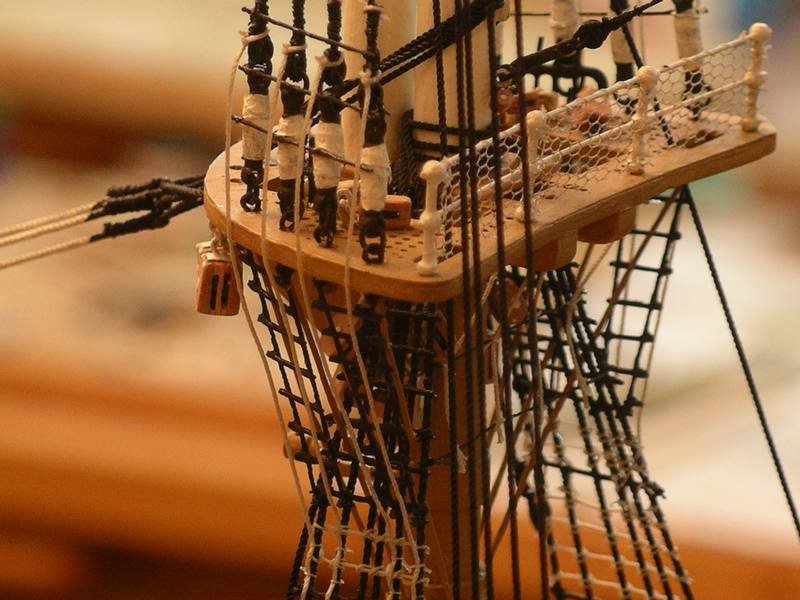
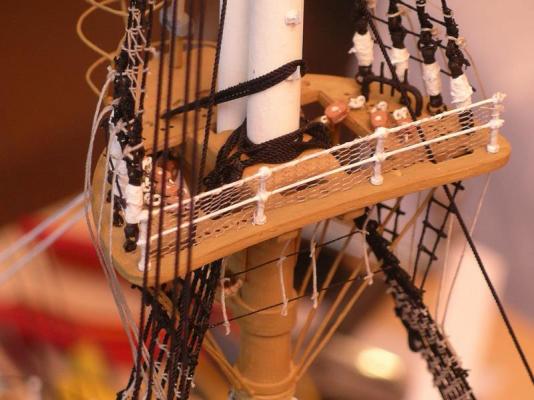
Meanwhile, the lower shrouds of the foremast are ready so far. First an overview. On the next screen, the ratlines with he metal bars are quite clearly visible. Around the top there is built a lot. You can see now on the port side of the futtock rigging with the leashings. The pendants are fixed to the ratlines. Between the shrouds there are fixed two ropes (I don't know the english word ...) and those ropes are again fixed below the top again with some ropes. Now even more views. And now I am going into the summer hollidays to the Mediterranean. So best wishes, and read on here then again in a few weeks. bye Joachim


-
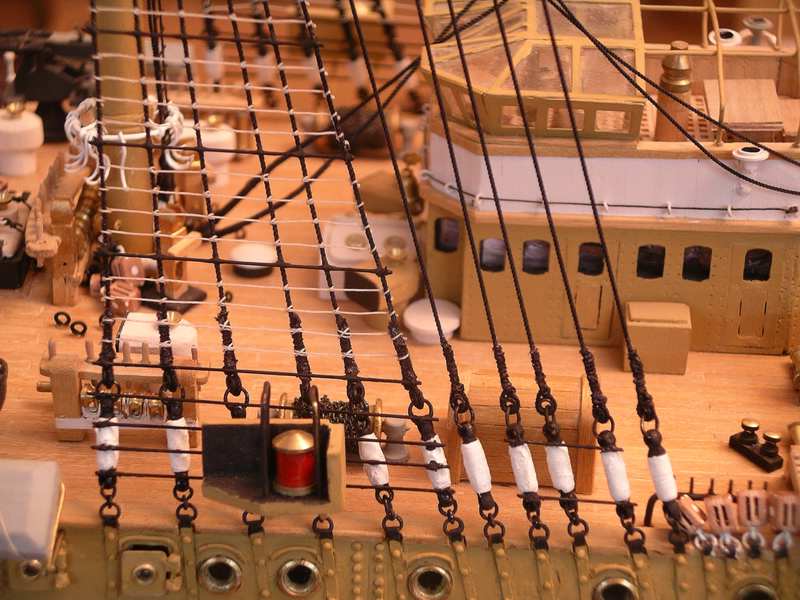
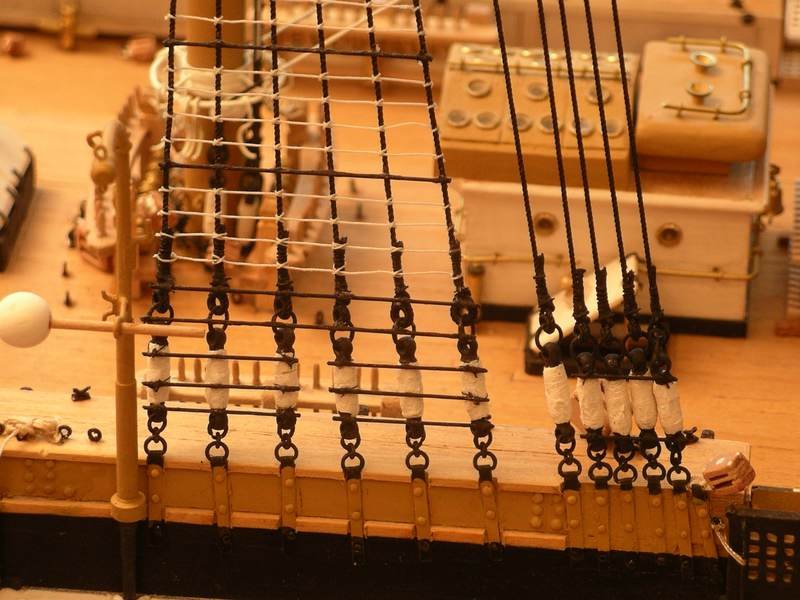
And now we continue with the lower shrouds on the foremast. On the AV every 5th ratline is a metal rod. Also metal rods are attached to the clamping screws. As an aid for positioning the ratlines I have behind provisionally fixed with a printed ratlines paper. and so you can see the finished ratlines Next, the lower futtocks. There are four leashes, two of which are interconnected by metal rods, For better grip when aloft serve 4 tethers. and now a few more views... bye Joachim


-
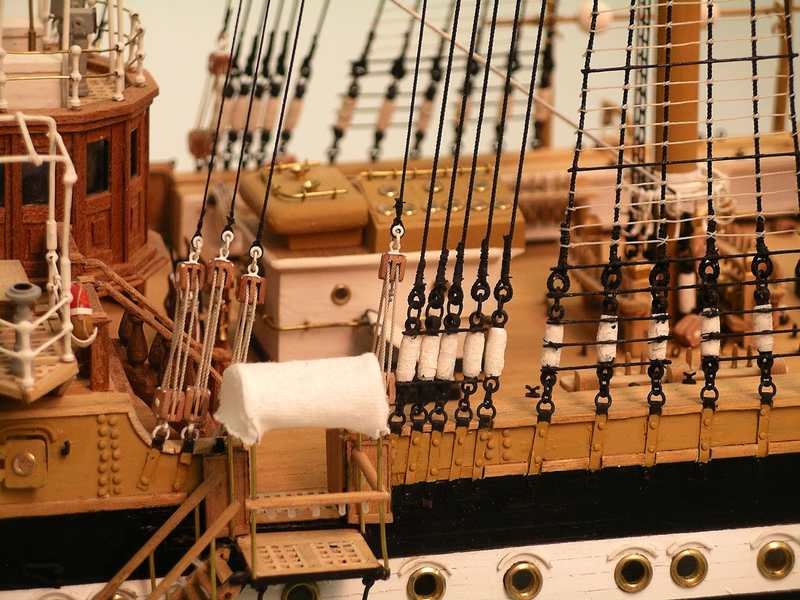
Now even an intermediate level of the standing rigging on the foremast. Except for the backstays all shrouds and forestay are now attached. All ropes of standing rigging of the AV are made of steel and are usually painted black. Some of the larger stays are partially painted in white. The pictures are me, not so particularly successful, but the essence will probably be seen anyway. I guess if I have a reasonable intermediate level with the entire standing rigging, I'll probably bring everything into the photo studio of my wife and then there's a few better shots. bye, Joachim


-
Now it goes to the standing rigging. I started with the lower shrouds and stays of the foremast. Here are the first pictures of it. bye, Joachim

-
Hello Guys, thanks a lot for all the likes! Michael, usually I also like my work room, but since more than two months there are always 30 to 34 degrees celsius within this room, really hot this summer .... bye, Joachim
-
Besten Dank Dirk!! Bye Joachim
-
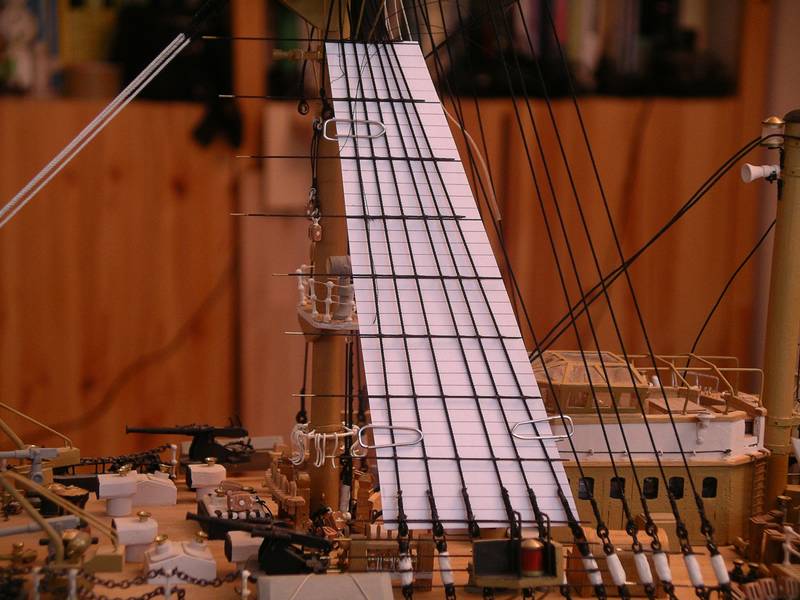
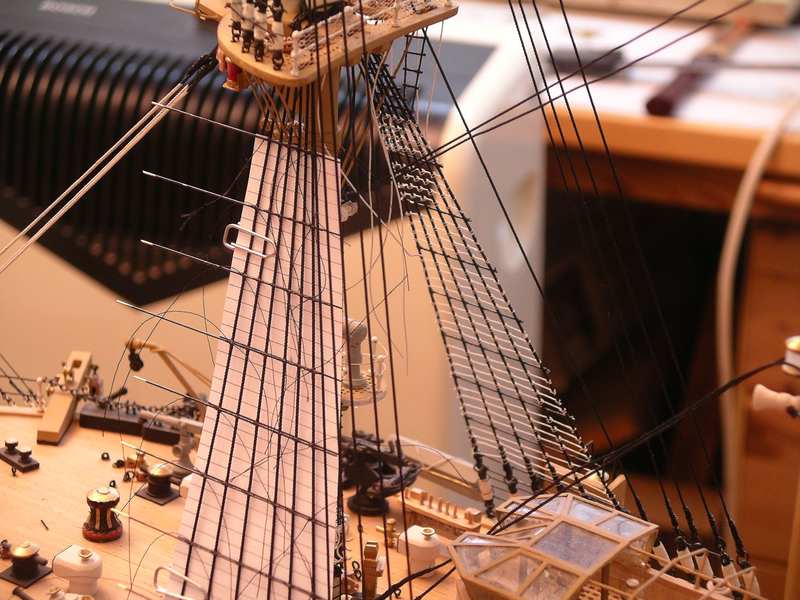
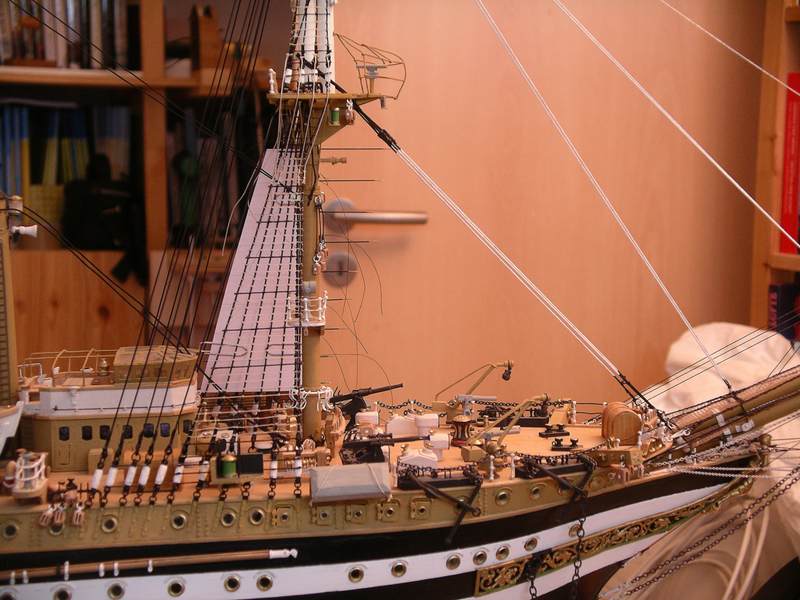
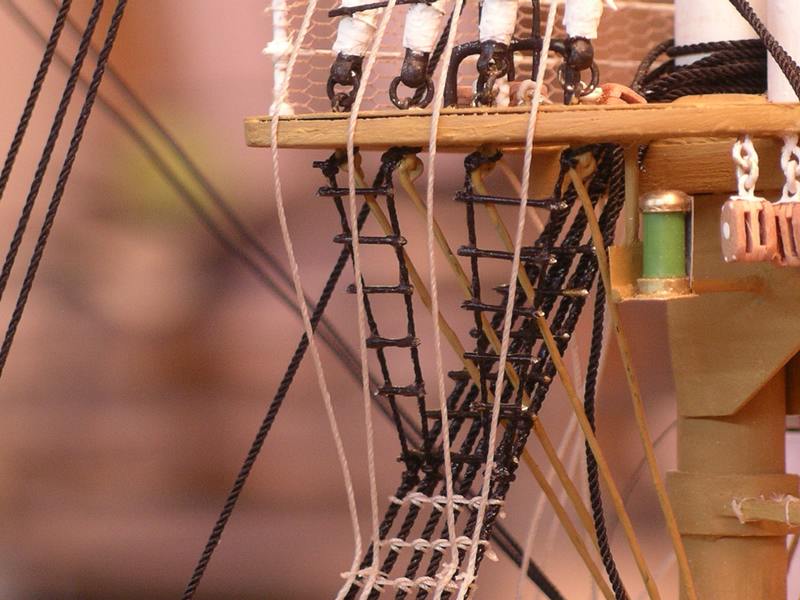
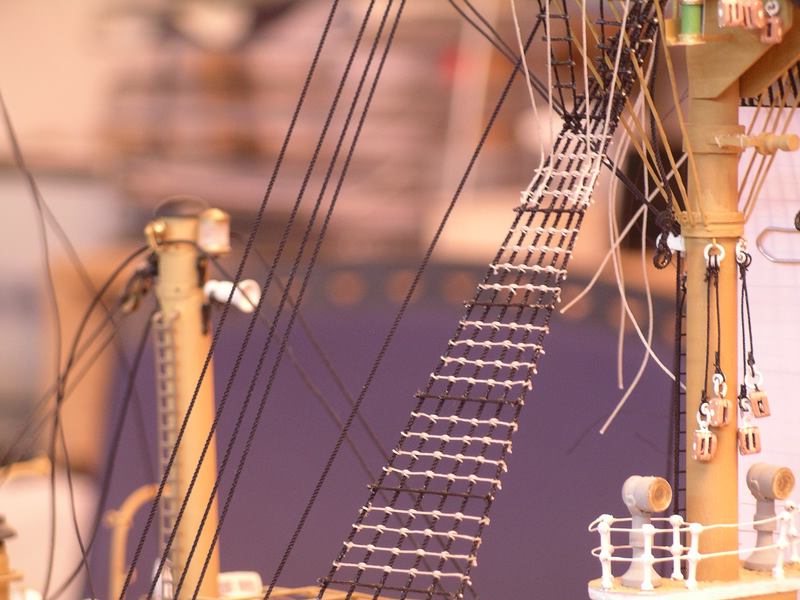
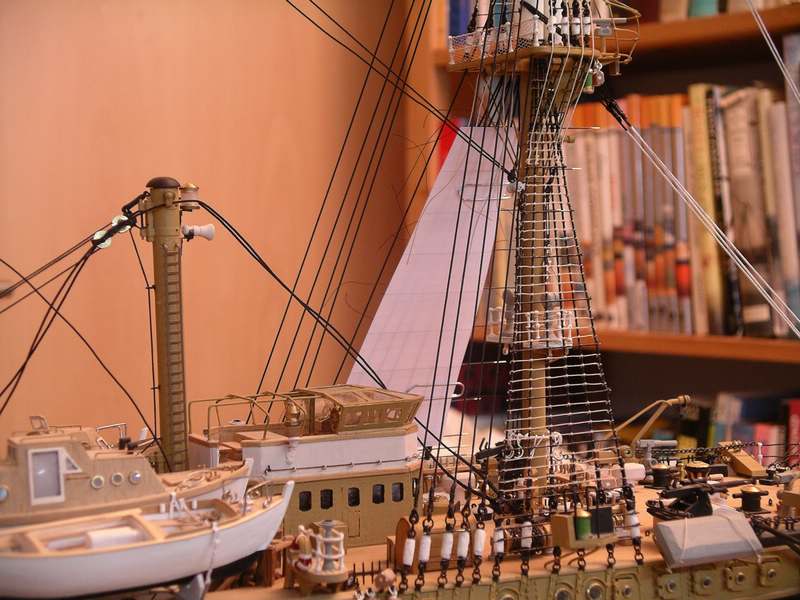
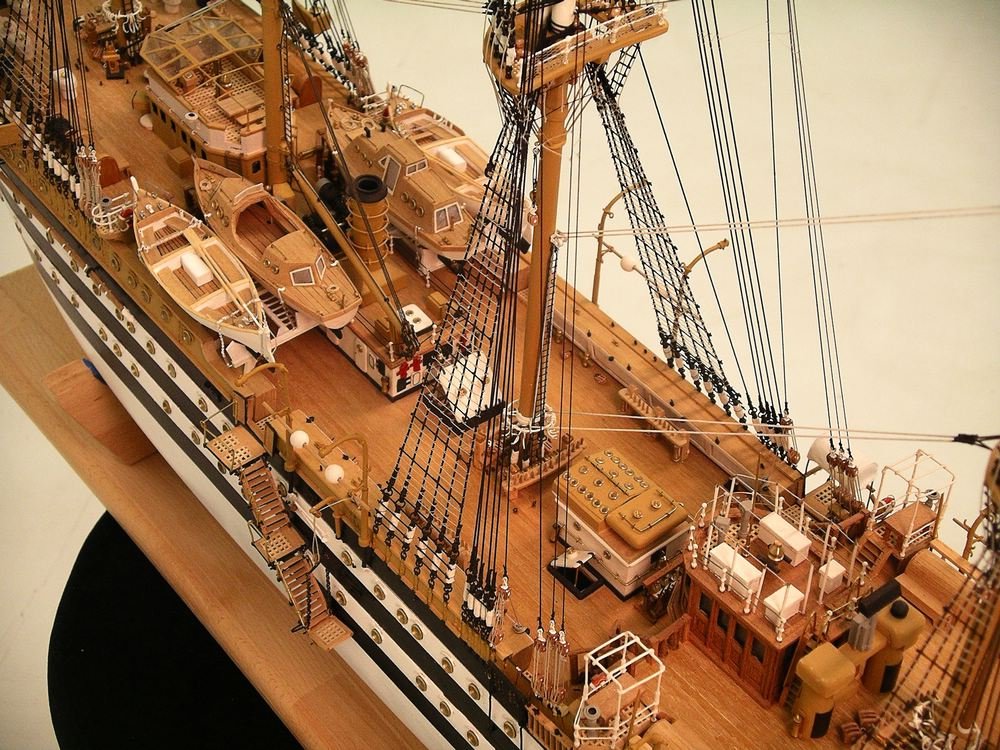
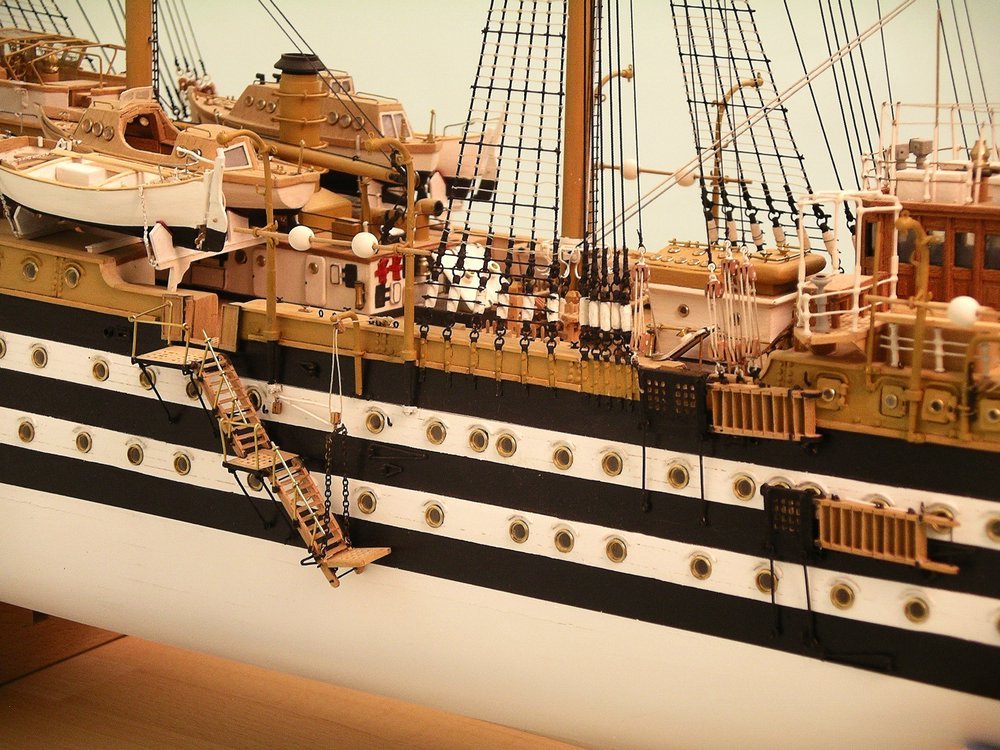
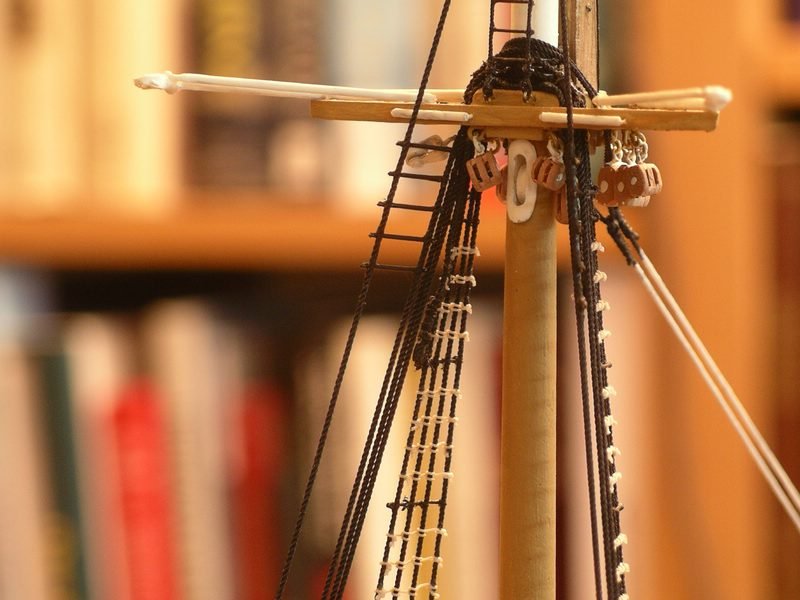
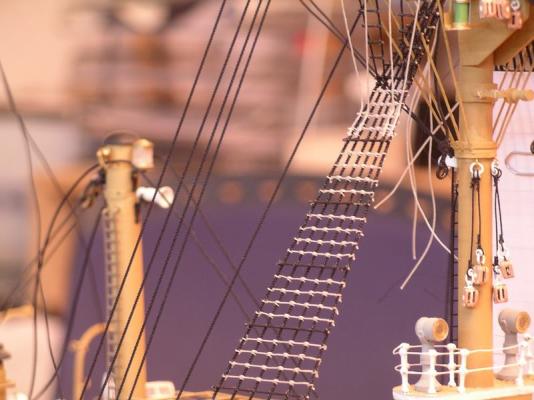
Now a few pictures of the rope ladders at the main mast and foremast that to go up to the stay sails. Bye Joachim