HOLIDAY DONATION DRIVE - SUPPORT MSW - DO YOUR PART TO KEEP THIS GREAT FORUM GOING! (Only 13 donations so far - C'mon guys!)
×


SawdustDave
-
Posts
1,770 -
Joined
-
Last visited
Content Type
Profiles
Forums
Gallery
Events
Everything posted by SawdustDave
-
 Thank you Jon. Great shot.... I searched everywhere for that photo and couldn't find it. The Google tour was the only visual reference I had to go with. This photo will give me a perfect reference of how to connect the steel cable to the anchor chain after it passes through the vises. Any thoughts regarding the actual function of these mechanisms. They certainly are not heavy enough to support the weight of a deployed anchor. Dave
- 742 replies
-
- 6
-

-
- constitution
- frigate
- (and 1 more)
-
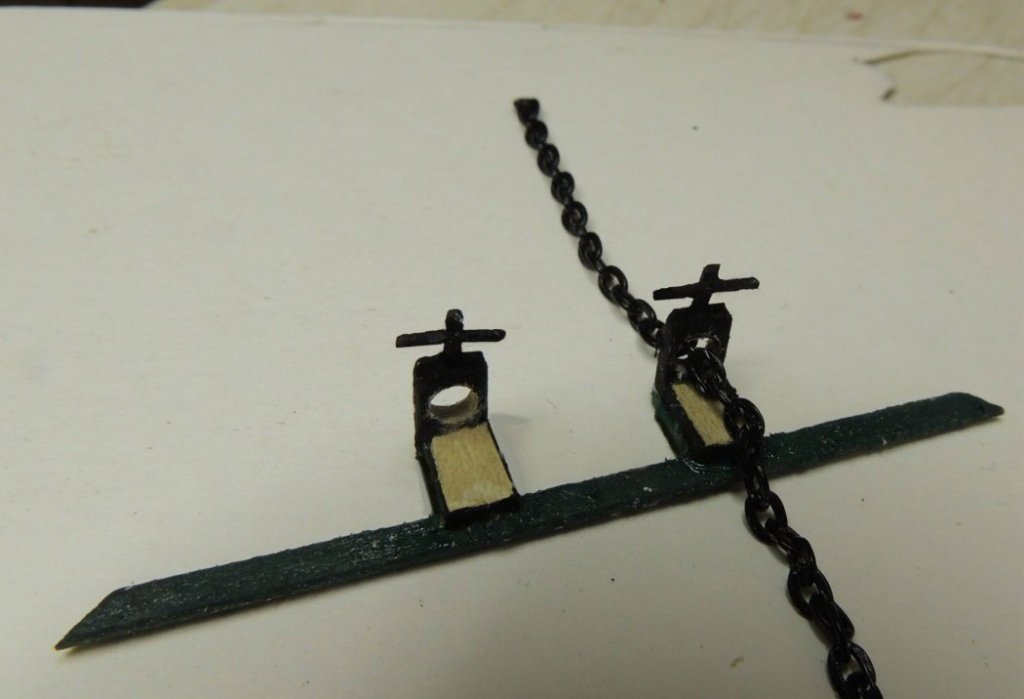
Anchor chain vises.... Trimming out the bow area of the gun deck.... Seen here, are a couple of fixtures that do not show up on any of the plan sheets I have, nor can I find any photo's in my research. I don't even know the correct name for them, so I'm calling them "anchor chain vises" because they appear to be mechanical devises with a vise screw. I did see them on my visit, and they show up very clearly on the Google virtual tour. The anchor chain passes directly from the hawse pipes through the hole in these vises. I assume the purpose is to secure the anchor chain during times when the anchors are up in their stowed position. Any suggestions?
- 742 replies
-
- 10
-
-
- constitution
- frigate
- (and 1 more)
-
Hi Bill: Just think in terms of making everything larger by a constant factor of 1.3333.... piece of cake for an old sawdust maker like yourself. Good choice to go "scratch" on that model, and 1:48 is a great scale to work with. I remember, I was going to go 1:50th on my Connie until I did my original conversion scaling and realized she was already a very large model at kit size. Going to 1:50th would have been HUGE! BTW.... The tragic loss of our friend Augie was a sad time for all who knew him through MSW. Cheers Dave
-
Welcome aboard Bill. Comments and suggestions from fellow MSW artists are welcome here. Dave
- 742 replies
-
- 5
-
-
- constitution
- frigate
- (and 1 more)
-
Greg....My dear old friend from down under. What a great comment for me to wake up to this morning! As much as I thank you for such kind words, I must tell you, I feel quite different regarding my modeling efforts. I can't tell you how many times, after examining the photo's, I have the urge to rip out and start all over.... all I see are the things I could have done better. I'm sure, among fellow modelers, I am not alone with this self imposed affliction. Thank you again for your many visits and "likes" and, especially, for the many words of encouragement from the other side of this big ol' ball we're walking around on. Dave
- 742 replies
-
- 9
-
-
- constitution
- frigate
- (and 1 more)
-
Very nice clean work on the hull and the beautiful paint job. Now the real fun stuff begins, huh?
-
Ken.... I cannot begin to tell you how grateful I am that you have shared this incredible build log for those of us who rely on such references to steer us through rough seas. As a scratch builder, with moderate woodworking skills, I am hopelessly lost without the guidance from the likes of our mutual MSW friends such as yourself, Tom, Jon, Steve, Mark, and so many others.... too many to list them all. It is very comforting to me personally, to know that I will eventually complete my own model of this very special ship BECAUSE of your comprehensive guidance posted herein. I humbly bow to your excellence as an artist and extreme craftsmanship sir. Big fan! Dave
-
The next, and final, major gun deck fixture is her bowsprit bitt. I have completed the bitt but not installed onboard, because this stage leads me, finally, to adding her bowsprit.... a major undertaking in itself. Might be a few days before my next update.
- 742 replies
-
- 7
-
-
- constitution
- frigate
- (and 1 more)
-
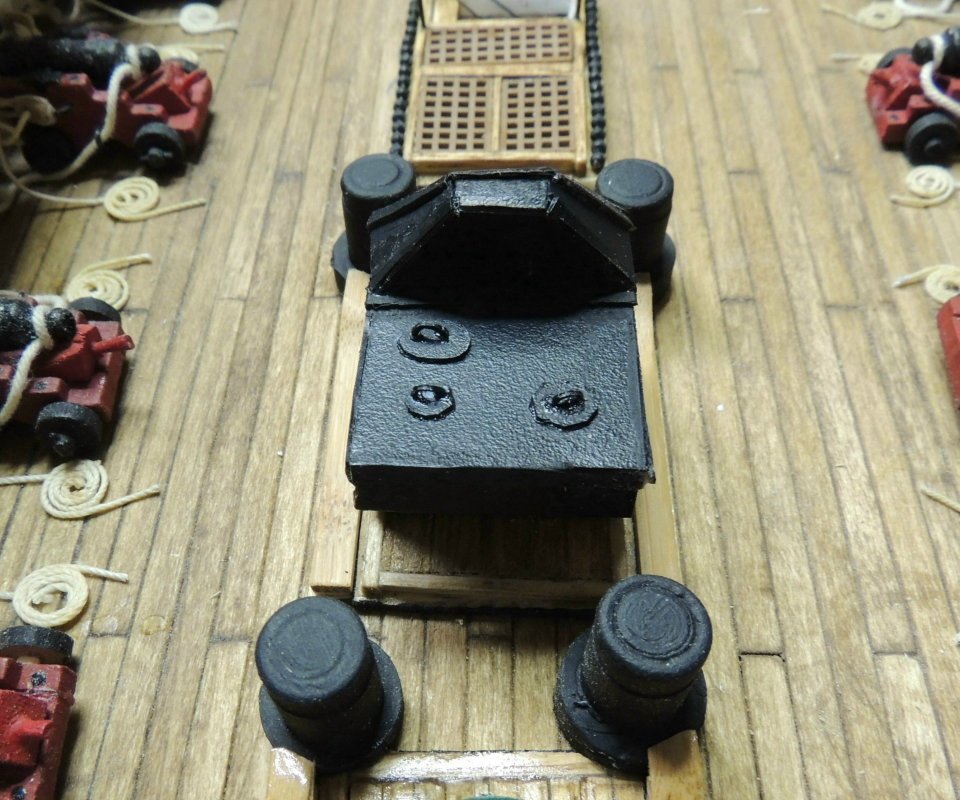
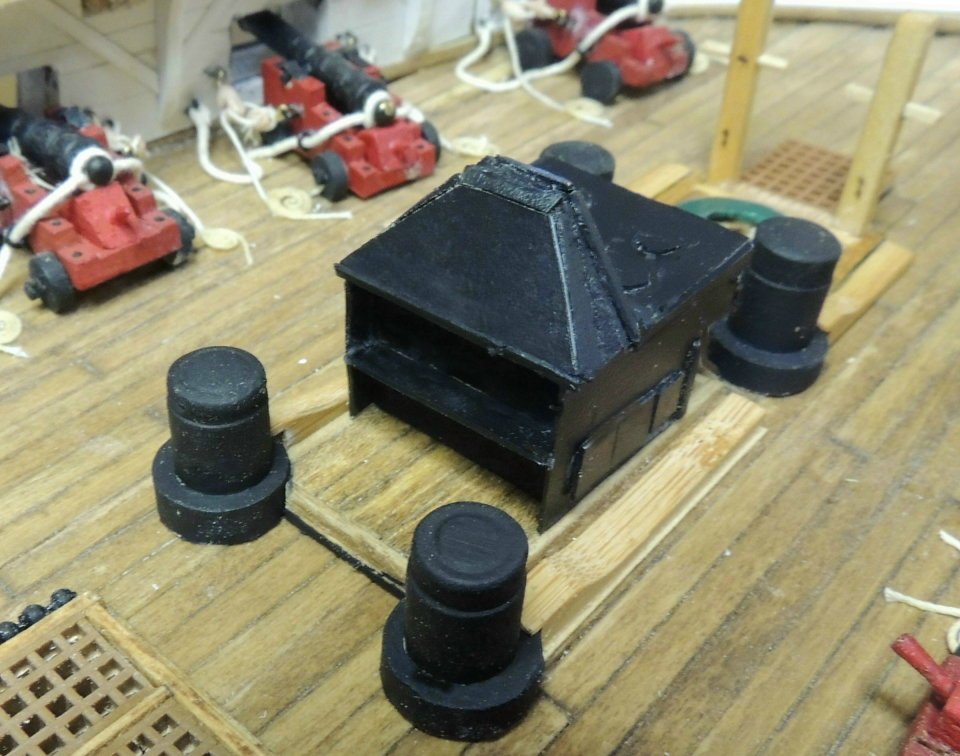
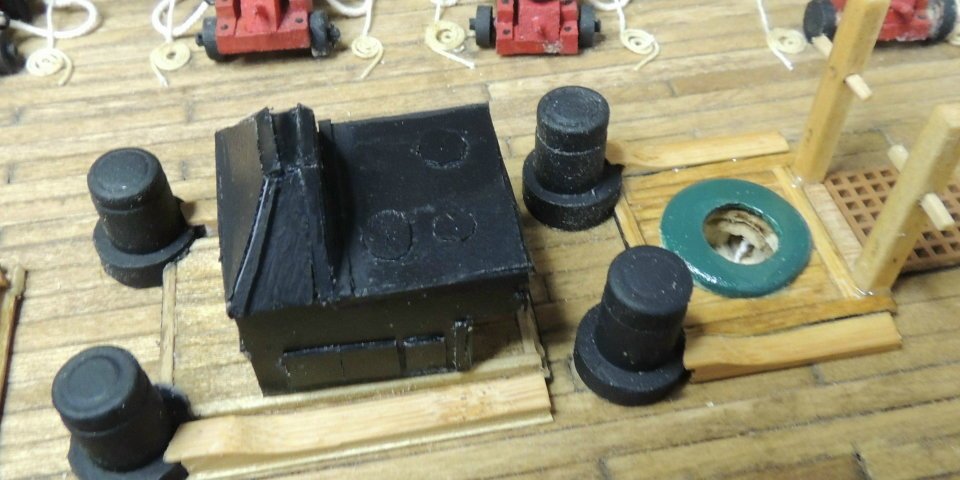
Thanks for the great reference Jon. The link to Allan Yedlinsky's stove would have been very helpful had I received in two days ago. Clearly the stove I completed this morning (seen below) falls far short of the masterpiece in his tutorial. I did manage to capture most of what I was able to make out from the images found on line. Note that, after taking the first two shots, I saw that the handles on the three vents on top had been left off.... third pic is after they were fitted.

- 742 replies
-
- 15
-
-
- constitution
- frigate
- (and 1 more)
-
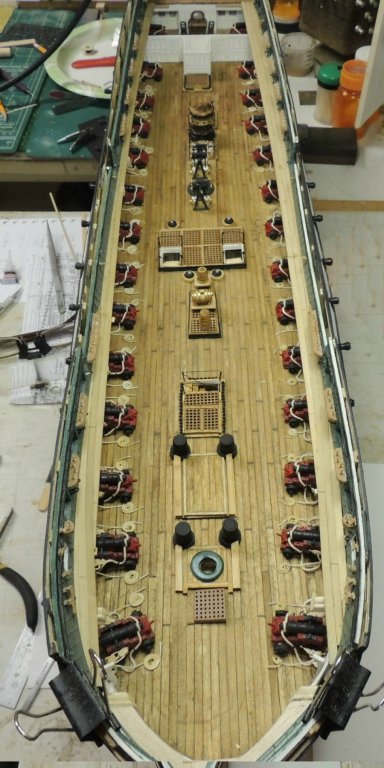
The gun deck overhead view.... beginning to fill up nicely huh?
- 742 replies
-
- 14
-
-
- constitution
- frigate
- (and 1 more)
-
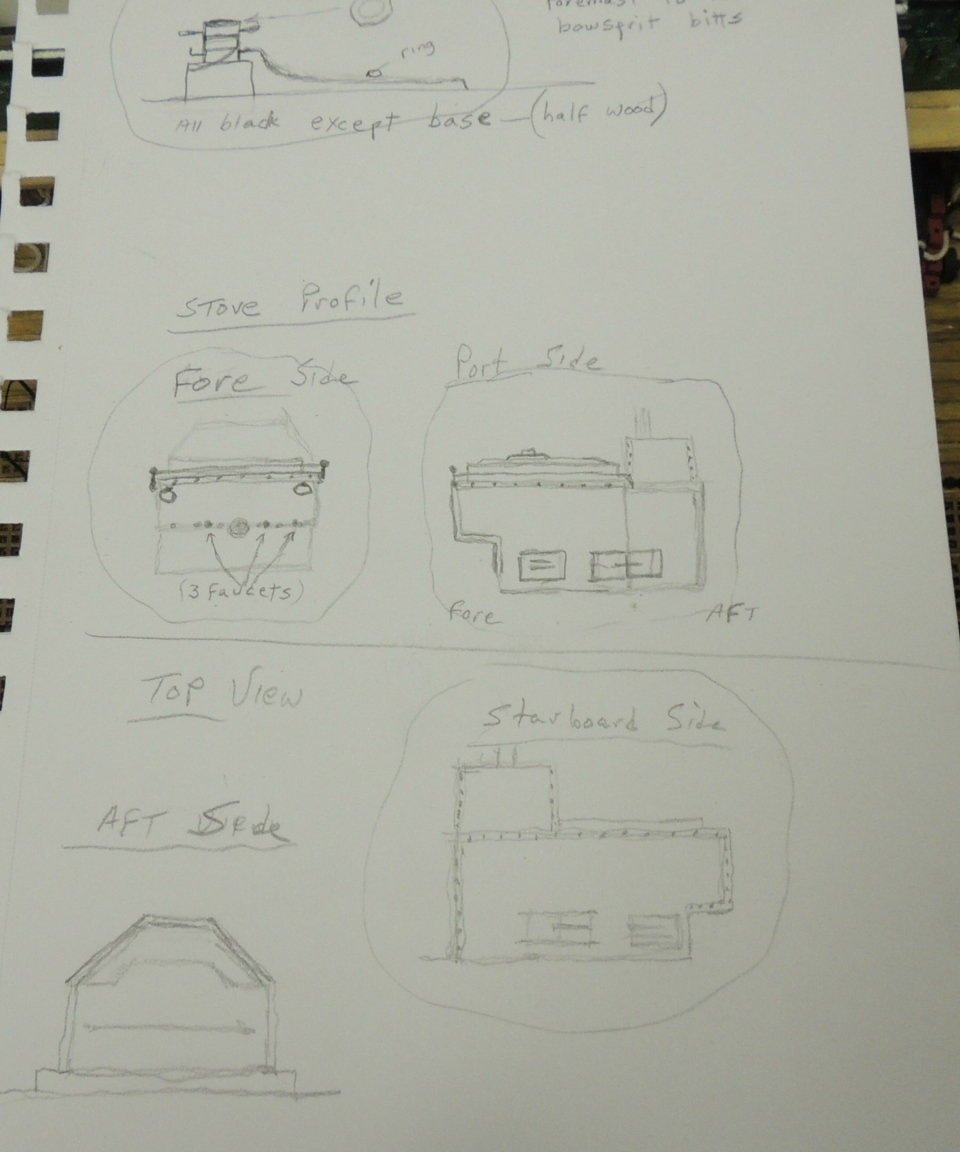
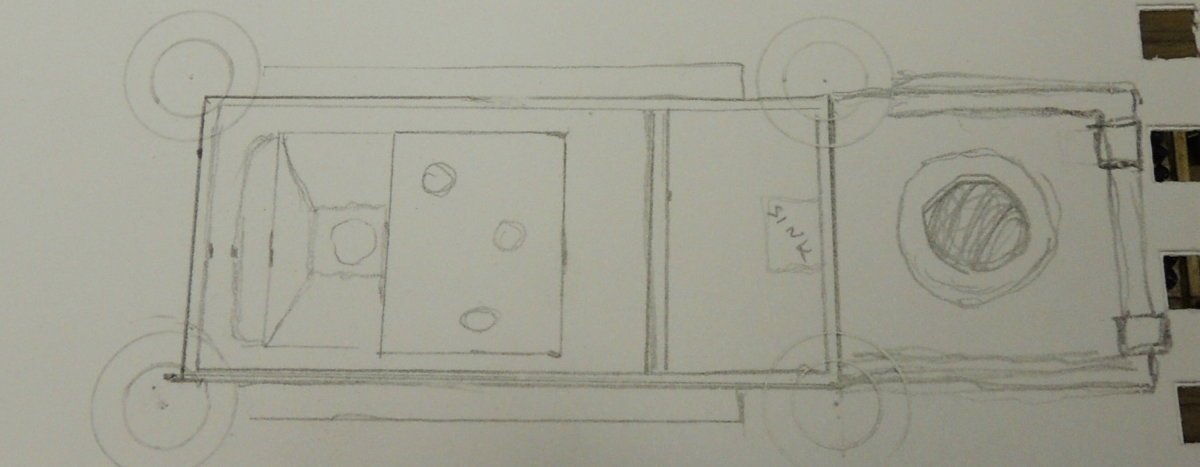
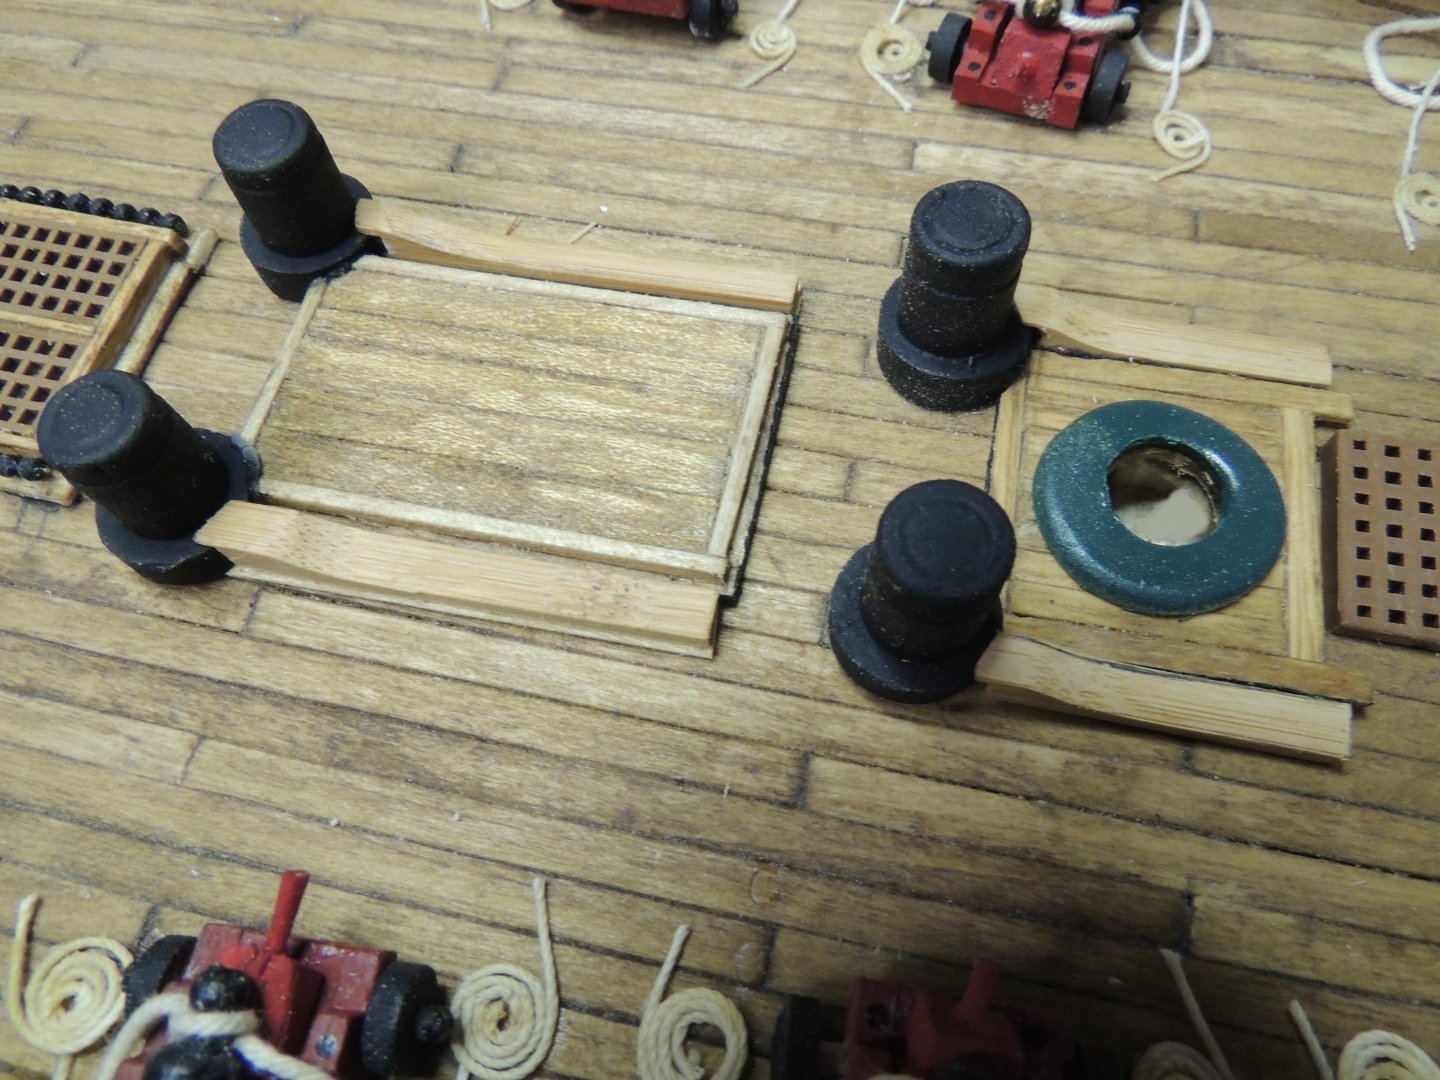
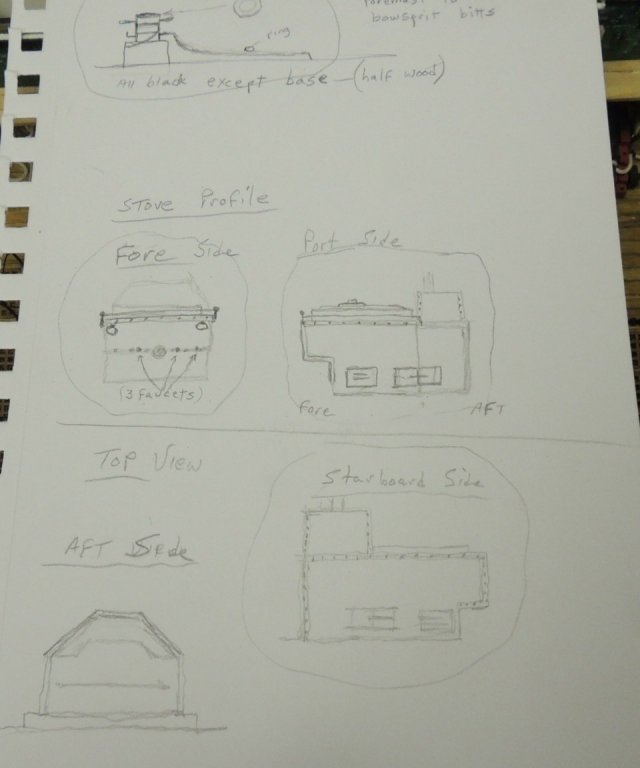
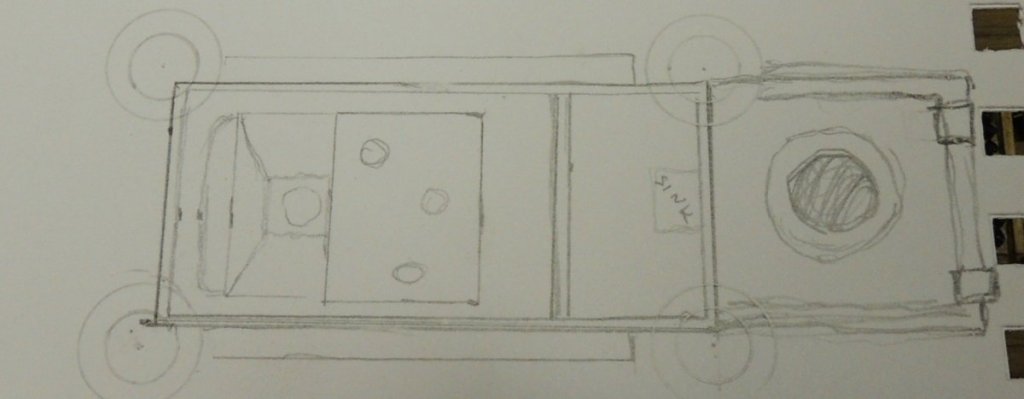
I'm still working toward that ship's stove.... getting much closer. The last three days have been spent developing sketches from internet photos. With a solid plan in hand, here is the foundation platform.... the four chain bitts needed to be added at this point, so I also added the little base around the fore mast.

- 742 replies
-
- 9
-
-
- constitution
- frigate
- (and 1 more)
-
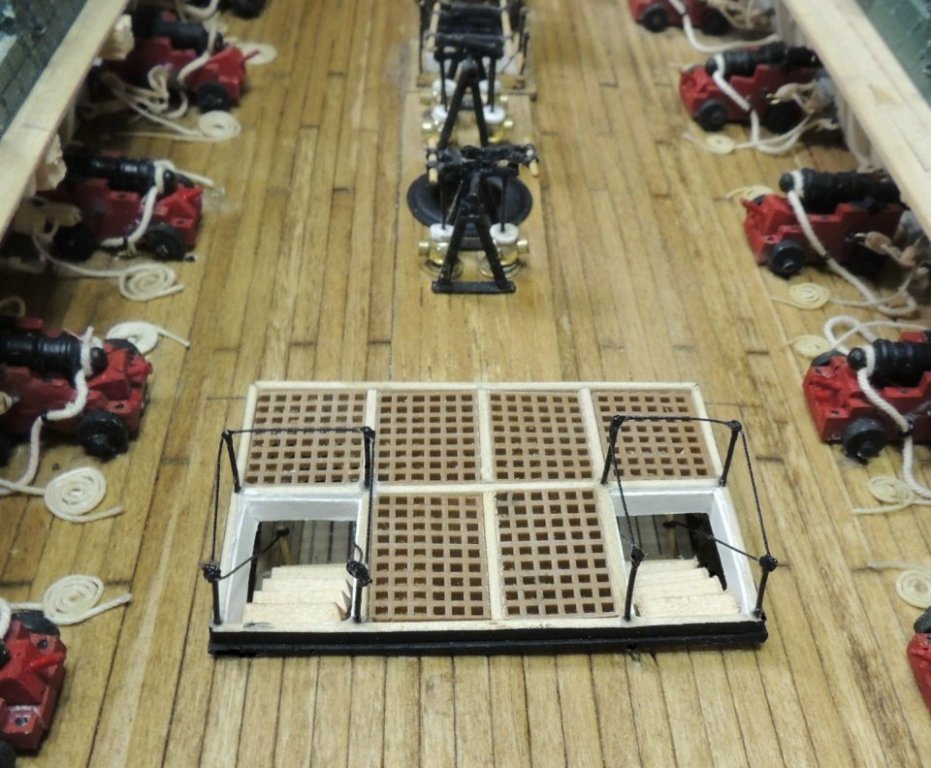
The last of the gun deck companionways installed.... With this final passage way installed, I can proceed to the chain bits and the ship's stove. Those tiny cannon balls are rat shot pellets from my 22 cal pistol ammo. I think I purchased those cartridges at least 20 years ago.
- 742 replies
-
- 12
-
-
- constitution
- frigate
- (and 1 more)
-
The USS Gerald Ford was commissioned today. The largest and most powerful US warship in our country's history. I was curious to see a comparison of this modern war ship to the actual greatest war ship in our history. 1,500 feet compared to 240 feet..... would look something like this. We've come a long way baby!

- 742 replies
-
- 13
-
-
- constitution
- frigate
- (and 1 more)
-
I try not to think about things like that Joseph. A statement made in an interview I just saw last night on TV about "How to eat an elephant" really struck me.... "You eat an elephant one piece at a time." I think that should be a scratch modeler's motto. Thanks for your visit.
- 742 replies
-
- 7
-
-
- constitution
- frigate
- (and 1 more)
-
Always great to have you visit Greg. Hope you're back on top.
- 742 replies
-
- 4
-
-
- constitution
- frigate
- (and 1 more)
-
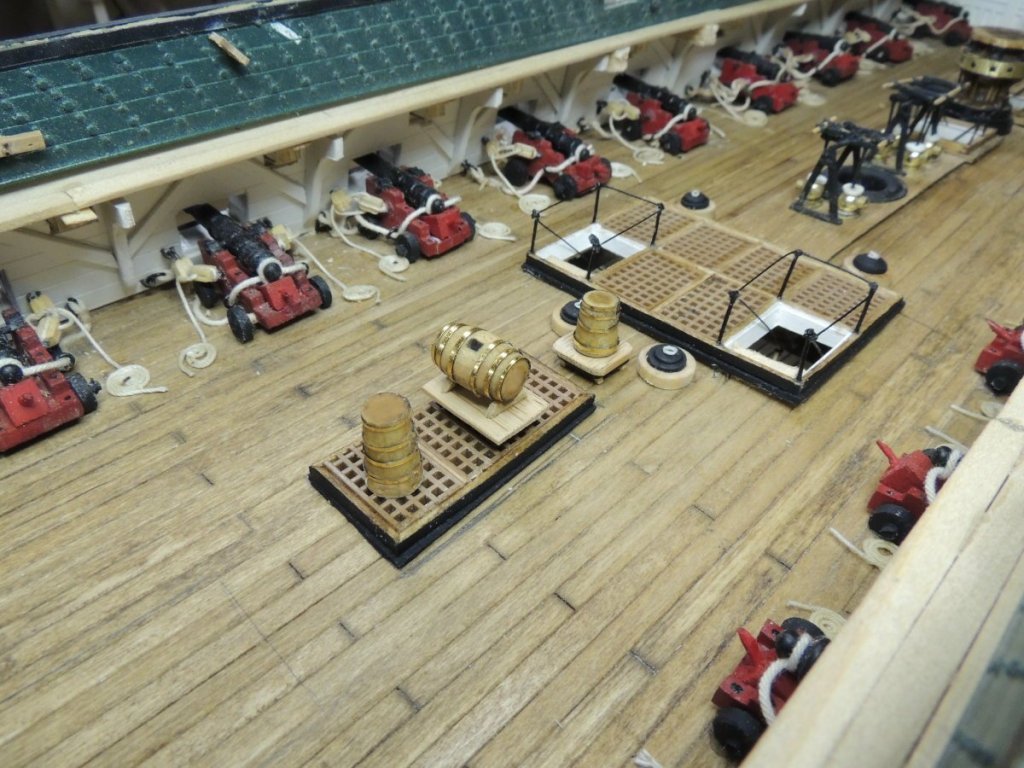
Scuttlebutt, grog, and water containers finished.... Slowly but surely, her gun deck is taking shape. Next.... rip out some more deck for the last companionway module.
- 742 replies
-
- 13
-
-
- constitution
- frigate
- (and 1 more)
-
Such amazingly clean work Tom. Just a personal comment, I should have posted weeks ago..... As much as my trip to visit the Connie was a huge disappointment (due to the fact that she was completely stripped down of all rigging and literally everything on her gun deck removed) - The high point of my trip was the pleasure of meeting and spending some time with you, my friend. Thanks for taking the time to join us for a cold one in beautiful Charlestown. Keep up the beautiful work. You should be very proud. Cheers
- 1,348 replies
-
- 3
-
-
- constitution
- model shipways
- (and 1 more)
-
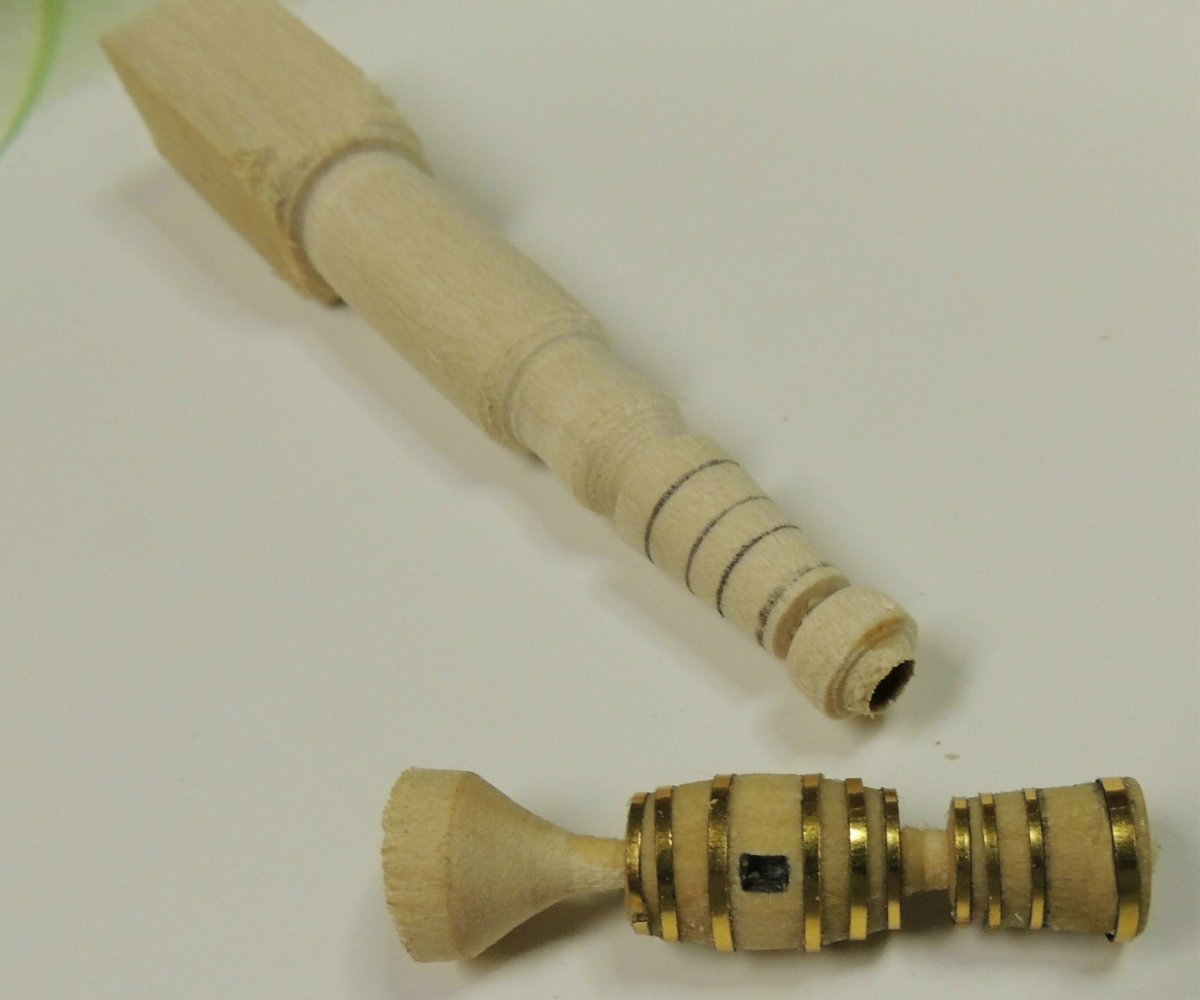
Gun Deck Barrels.... I'm taking a really simple approach to these three gun deck containers (scuttlebutt, grog tub, and water barrel). The shapes first turned on the lathe and marking location of each brass band. A couple of coats of golden oak poly is applied to the forms before adding the bands. There are still two low tables to tables to build. I'm still working on creating the 80 proof grog.... may just go with Jack Daniels. Cheers

- 742 replies
-
- 12
-
-
- constitution
- frigate
- (and 1 more)
-
Chain Pots.... After further study, decided I must put off the ships stove for now because of the potential for damage to it when I have to cut into the deck again very close to it. So, the more prudent task of creating these four little chain pots became next in line. Looks like I will be playing with the development of a grog tub, water barrel, and scuttle butt next. Cheers

- 742 replies
-
- 14
-
-
- constitution
- frigate
- (and 1 more)
-
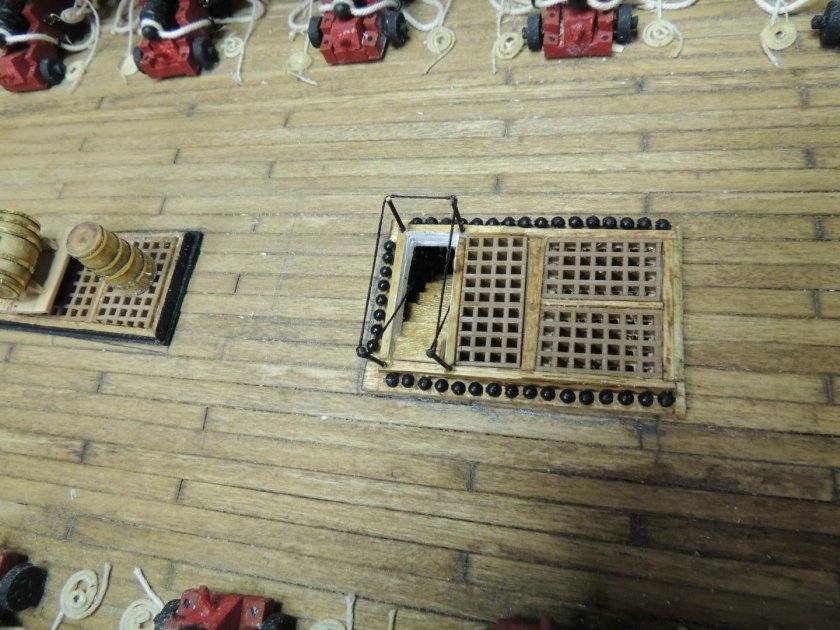
The large coaming with grating panels and two companionways installed. There is one more coaming with companionway passages down from the gun deck. At this point, I'm studying the ship's big stove as the next fixture I'll work on. I haven't built a ship's stove since my Confederacy.... should be a fun build. I can also play with the Grog Tub, Scuttle Butt, and several of the small water tubs scattered around. Meantime, I would be interested if anyone happens to have a good closeup of the Barber Chair.
- 742 replies
-
- 12
-
-
- constitution
- frigate
- (and 1 more)
-
A little short or wide.... not a concern since they are hardly visible down in the hole at the bottom of the companionway stairs. Something else CapSteve.
- 742 replies
-
- 3
-
-
- constitution
- frigate
- (and 1 more)
-
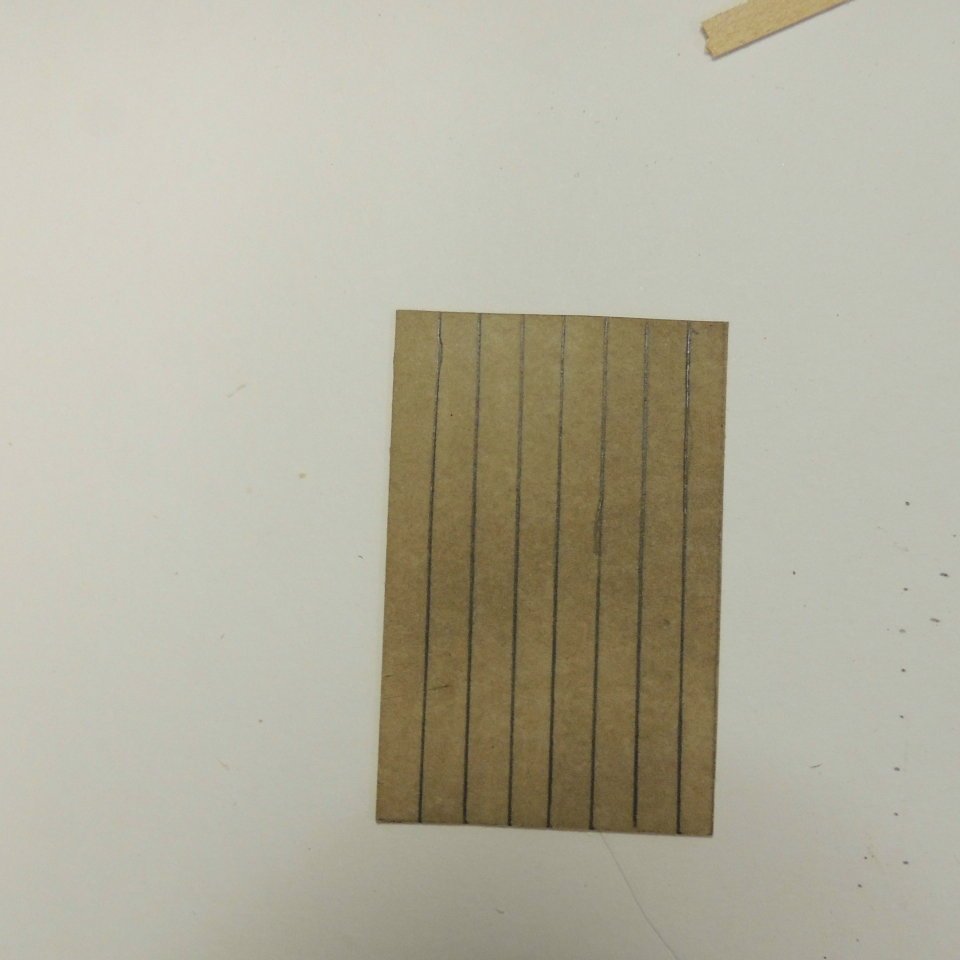
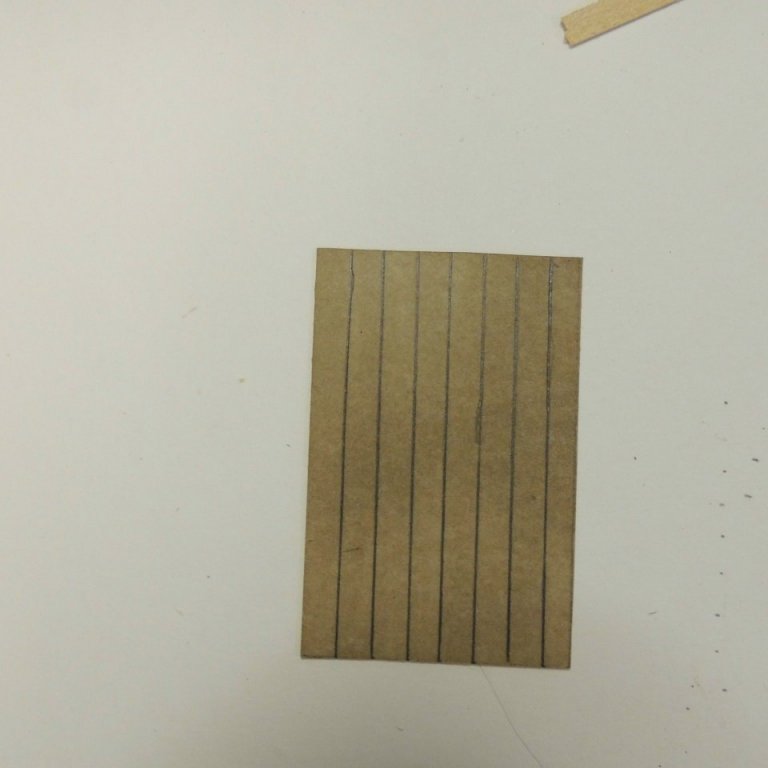
This is too funny! Here's the cardboard cutout I just drew plank lines onto and stained for the false deck I'll glue into the bottom of the big hole.... So what's wrong with this picture?
- 742 replies
-
- 7
-
-
- constitution
- frigate
- (and 1 more)
-
I dare say, anyone who thinks scratch building model ships is a "low stress" hobby has never done anything like this..... yahaha

- 742 replies
-
- 10
-
-
- constitution
- frigate
- (and 1 more)
-
So glad to hear you say that Mark. It is exactly what I came to the shop early this morning planning to do. Onward ho.... Cheers
- 742 replies
-
- 6
-
-
- constitution
- frigate
- (and 1 more)