HOLIDAY DONATION DRIVE - SUPPORT MSW - DO YOUR PART TO KEEP THIS GREAT FORUM GOING! (Only 20 donations so far - C'mon guys!)
×


_SalD_
-
Posts
828 -
Joined
-
Last visited
Content Type
Profiles
Forums
Gallery
Events
Everything posted by _SalD_
-
 Brian, good to have you back and the cannons are coming along nicely and do yourself a favor take a vacation.
- 831 replies
-
- 2
-

-
- Armed Virginia Sloop
- Model Shipways
- (and 1 more)
-
Good luck Cricket, hope you have as much fun building the Phantom as I did doing mine. You have a great teacher.
-
Thanks Jim, Augie & George. I like the thicker letters too, I just hope I don't need the extra set someplace else.
- 659 replies
-
- 1
-
-
- syren
- model shipways
- (and 1 more)
-
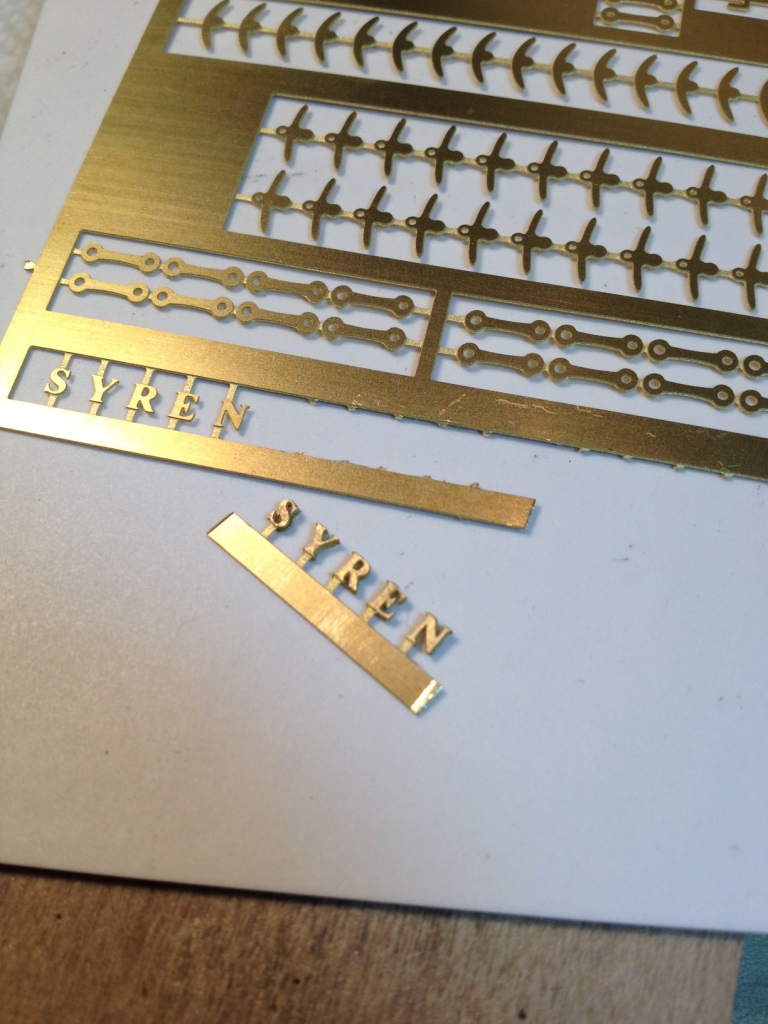
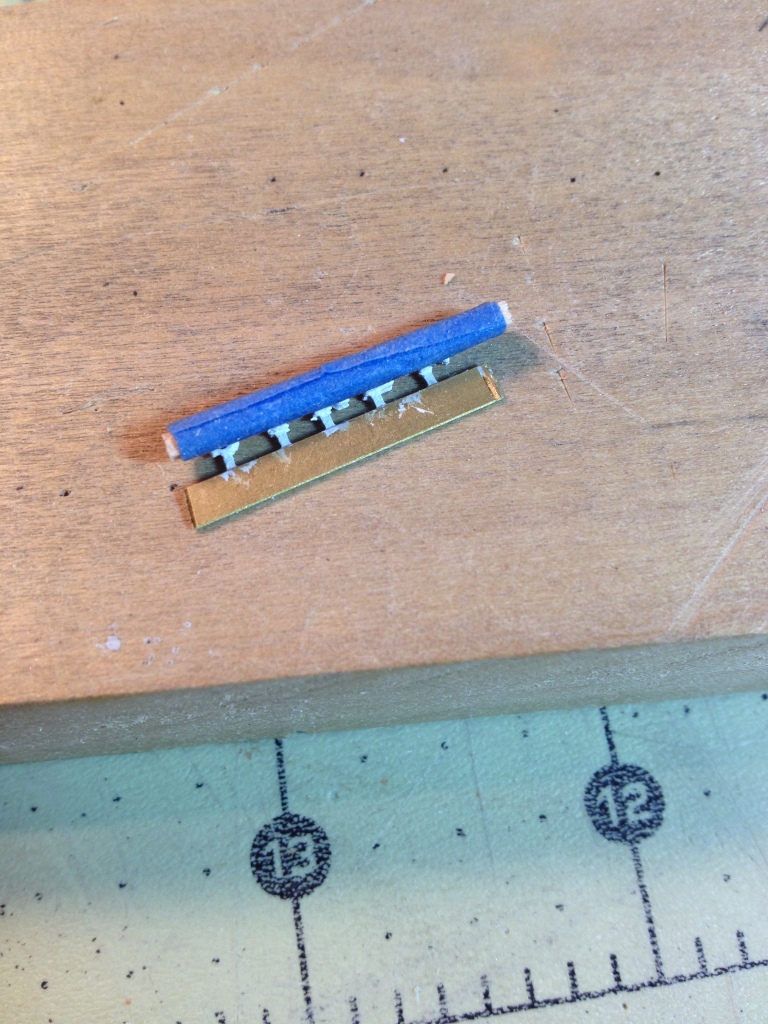
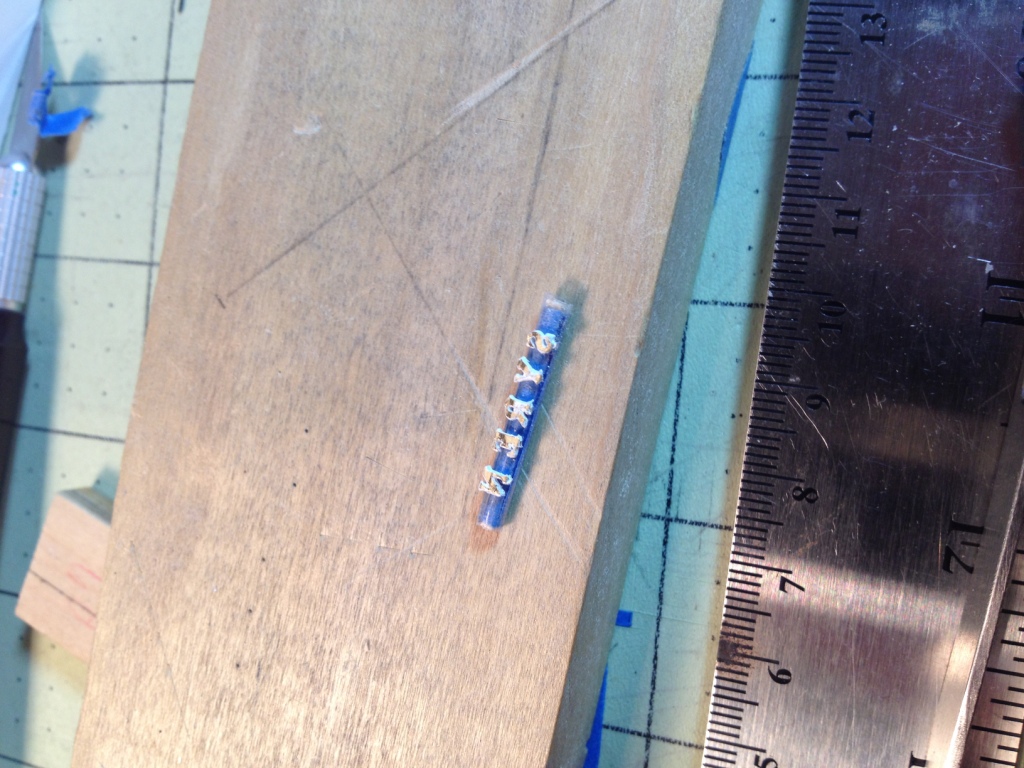
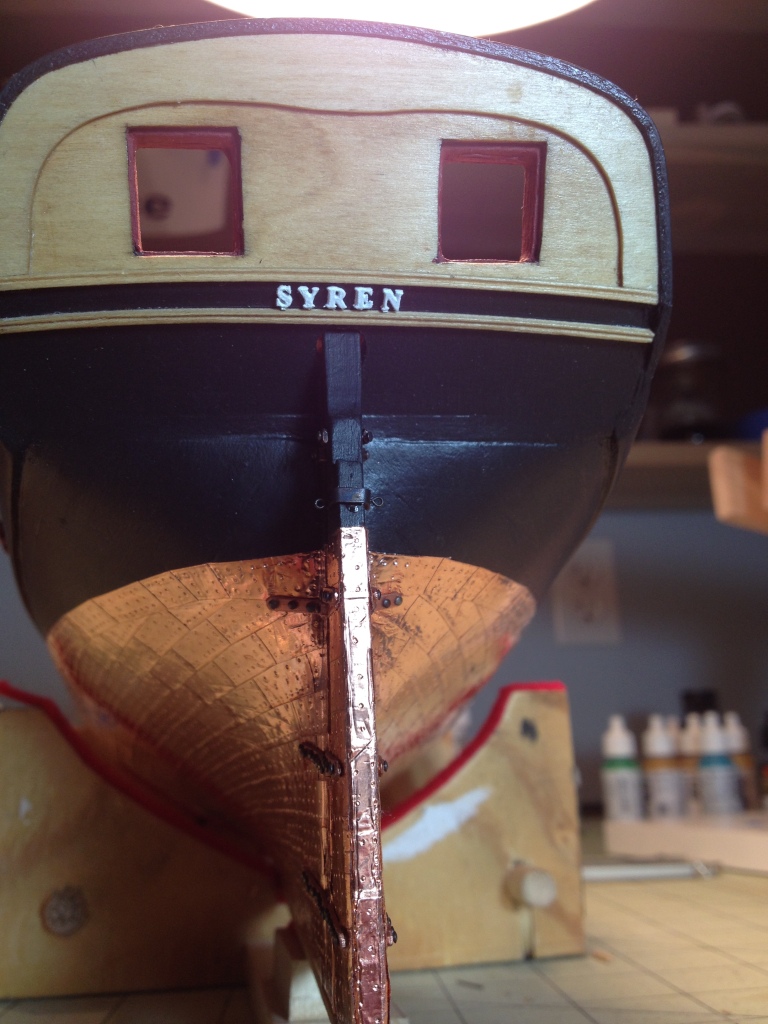
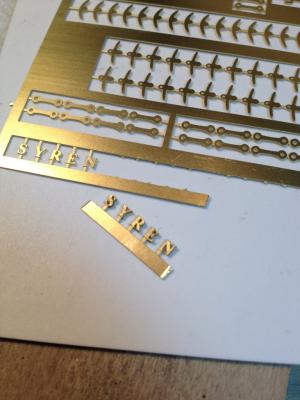
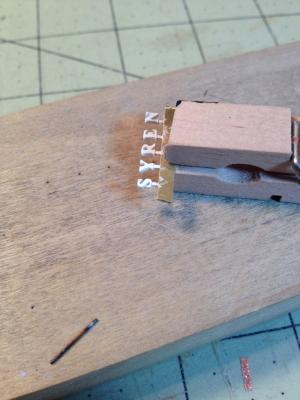
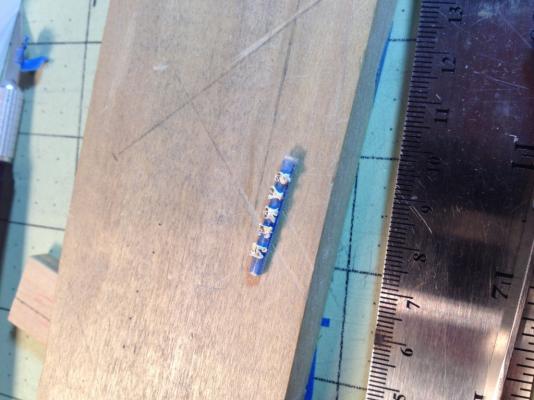
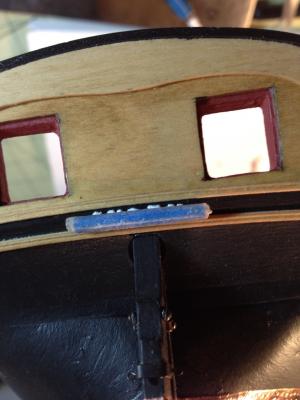
Things are moving right along now and I think I see the light at the end of chapter nine’s tunnel (or maybe it’s the headlights of oncoming traffic ). For the letters making up the ship’s name I decided, since there was more than one photo-etched set, to double them up to make the letters a little thicker. This was done by removing one whole set of letters and gluing it on top of another set. I also liked the spacing of the letters so I removed them as a whole. The letters were given three coats of paint and allowed to dry thoroughly. To apply the letters to the hull, first I wrapped a 1/16” square wood strip, about 1” long, with painter’s tape sticky side out. I then pressed this strip to the painted side of the letters. Next, using a nice little flush cut nipper that I recently purchased, I carefully cut the letters loose from the part of the photo-etched sheet that was holding them together. To affix the letters to the ship I sprayed the back side of the letters with a spray-on-adhesive and then pressed them into position. After a minute or two I carefully removed the wooden strip. In the long run I don’t know if all that effort was really required to set the letters but the name appears to have come out okay. After the name was applied I installed the stern gun port lids. Please note that I installed these ports with the ship upside down and the picture has been rotated 180 degrees hence the gravity defying lid ropes.


- 659 replies
-
- 12
-
-
- syren
- model shipways
- (and 1 more)
-
As always thank you George and Augie for the kind words. And I will definitely take your advice Augie to pin everything down. I'd like to thank everyone for hitting the like button also.
- 659 replies
-
- 1
-
-
- syren
- model shipways
- (and 1 more)
-
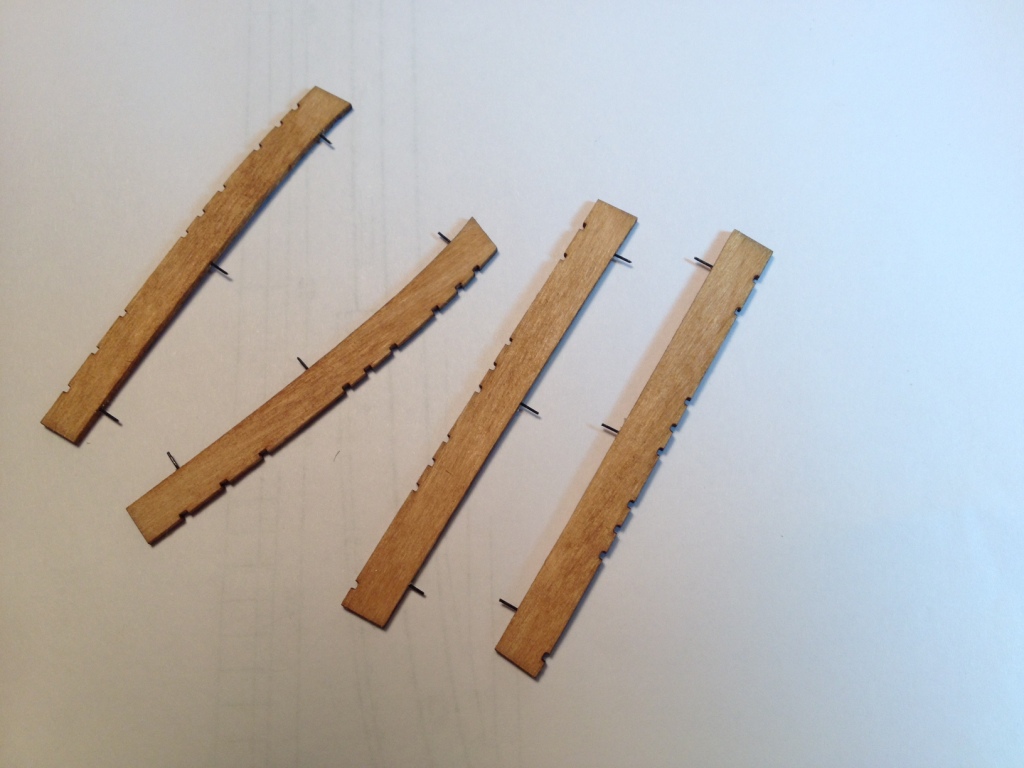
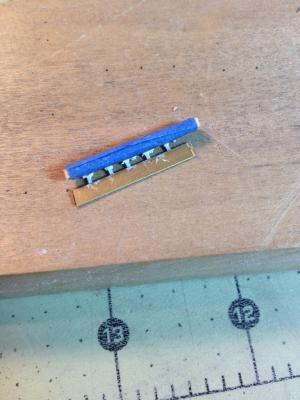
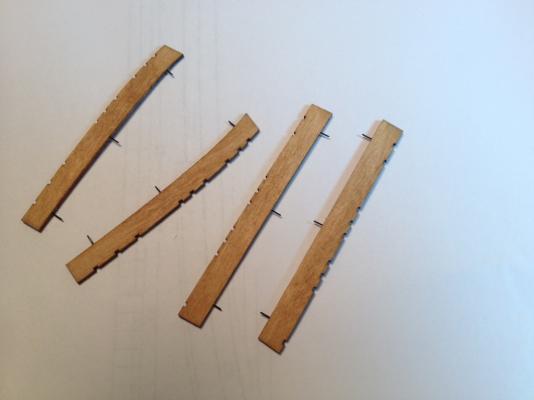
The laser cut main and fore channels were removed from the basswood sheet and sanded to remove the char. Eye bolt shanks that were cut off the eye bolts used to make the gun port lid handles were used for pins set into the channels to help secure them to the ship. To help locate the holes in the channels for the eye bolts used for the rigging I made copies of the channels from the drawings to use as patterns. The port channels are shown on sheet 1and the starboard channels are on sheet 8. The patterns were cut out and placed over the channels and the holes were drilled at the appropriate locations. The eye bolts were not installed until the channels were glued to the hull. The channels were painted and glued into position. I found it easier to mark the location of the channel pins and to drill the holes in the sheer strake with the ship upside down but then installed the channels with the ship right side up. The eye bolts were glued into the channels after the glue set over night.
- 659 replies
-
- 12
-
-
- syren
- model shipways
- (and 1 more)
-
Nice wheels Augie, hope I can clean mine up that well.
- 2,191 replies
-
- 2
-
-
- confederacy
- Model Shipways
- (and 1 more)
-
US Brig Syren by Gahm - Model Shipways
_SalD_ replied to Gahm's topic in - Kit build logs for subjects built from 1801 - 1850
Thomas the carronades are stunning, beautiful work. -
Thanks Jesse, I've been following your build also. This is a nice ship to build, it's well designed and Chuck's instructions are easy to follow and there are a lot of excellent Syren build logs on MSW to "borrow" ideas from.
- 659 replies
-
- 3
-
-
- syren
- model shipways
- (and 1 more)
-
Thanks Thomas, this chapter is a lot of work but it's also very rewarding, especially when all the pieces go on and like Augie said, you sit back and say 'holy sh*t I did that', or something like that.
- 659 replies
-
- 3
-
-
- syren
- model shipways
- (and 1 more)
-
Jesse, glad everything worked out for you and that's a very impressive clamp arrangement you have there in the last picture.
- 1,306 replies
-
- 4
-
-
- syren
- model shipways
- (and 1 more)
-
George, Jim, I appreciate the kind words and thanks for looking in.
- 659 replies
-
- 1
-
-
- syren
- model shipways
- (and 1 more)
-
Thanks Augie, can't wait to do the cannons with all their parts!! Thanks for the likes too.
- 659 replies
-
- 1
-
-
- syren
- model shipways
- (and 1 more)
-
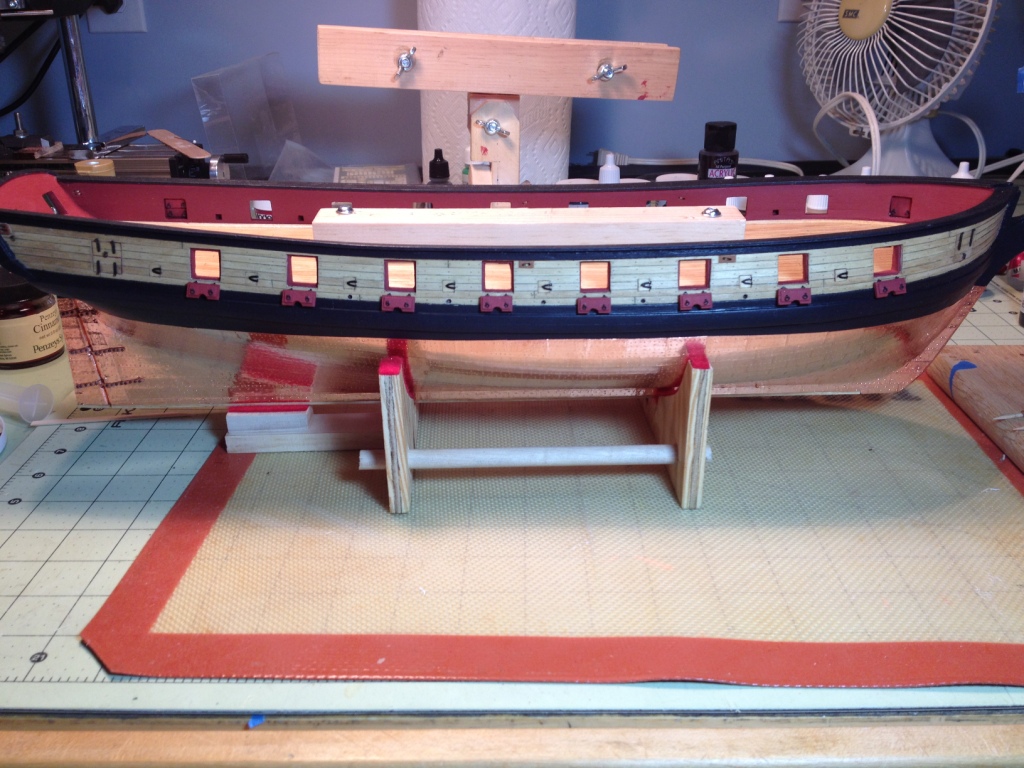
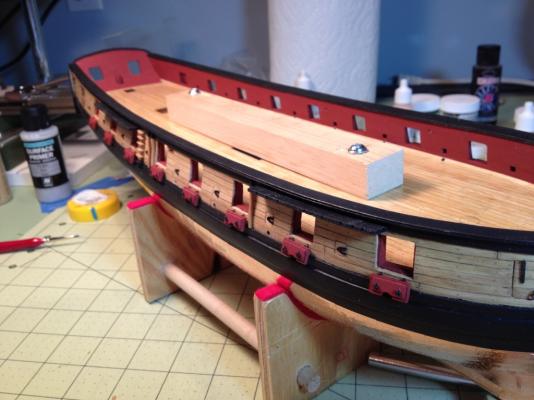
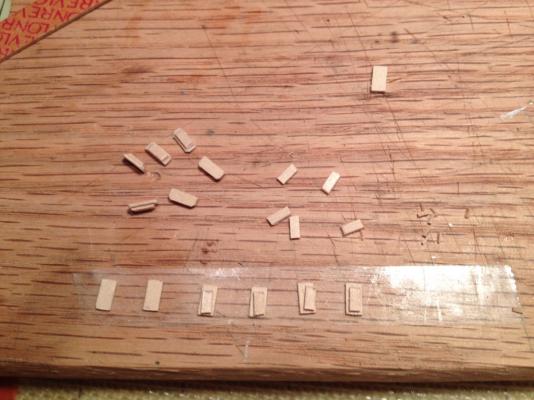
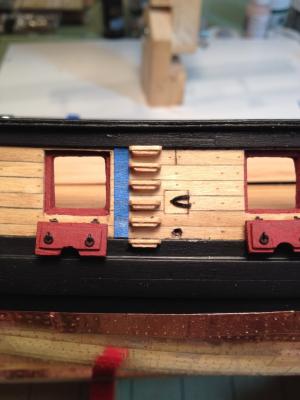
It seems like this is a never ending chapter. Actually there is just a lot of prep work that needs to be done for all the pieces, i.e., eye bolts, split rings, hinges, staining, painting, etc., and there are a lot of pieces. But the ship is starting to come together. After assembling all the parts of the gun port lids they were installed on each side of the ship. The boarding ladder steps were made from two pieces of 1/32” thick strips cut to a rough shape and then sanded to the correct size. To help with installing these steps on the hull a piece of tape was placed on the hull corresponding to one edge of the steps. To get an even spacing of the steps I placed four marks on the tape, prior to placing it on the hull, dividing it into five equal spaces. The steps were then glued to the hull at their corresponding mark on the tape. The fenders were also cut to fit between the cap rail and top wale, stained, painted and glued into position.

- 659 replies
-
- 15
-
-
- syren
- model shipways
- (and 1 more)
-
Popeye, I'm glad I found your new build I was starting to have withdrawal symptoms since you finished the Andrea Gail. I hope I can learn more building techniques from you.
-
Popeye, Absolutely amazing, the table that is, so clean…oh and the ship is nice too. Only kidding the ship is magnificent. Bravo!!
- 956 replies
-
- 5
-
-
- andrea gail
- trawler
- (and 1 more)
-
Thanks Jim see you next meeting Thanks George, the scuppers I need to give credit to Dirk for giving me the idea to do them that way.
- 659 replies
-
- 2
-
-
- syren
- model shipways
- (and 1 more)
-
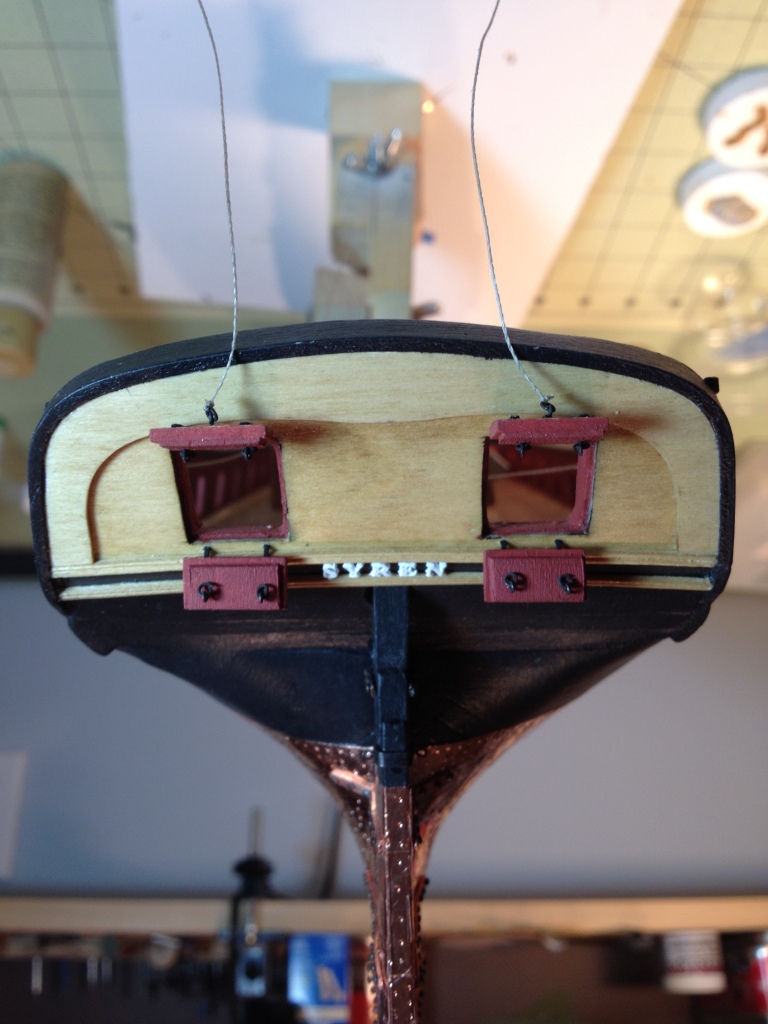
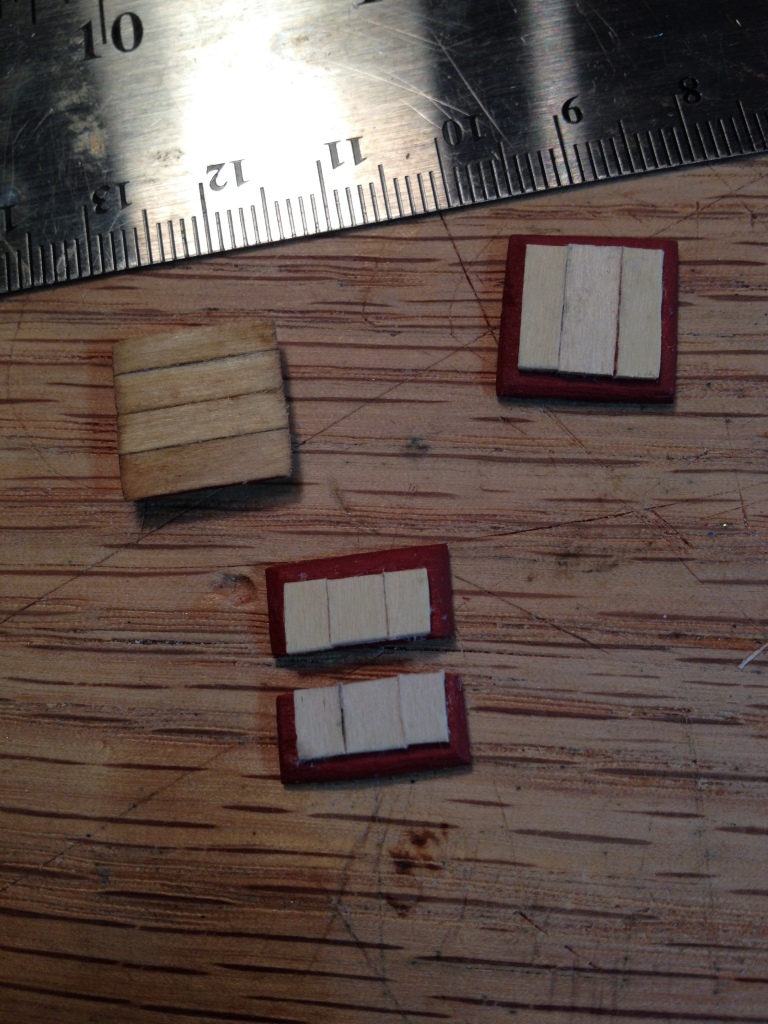
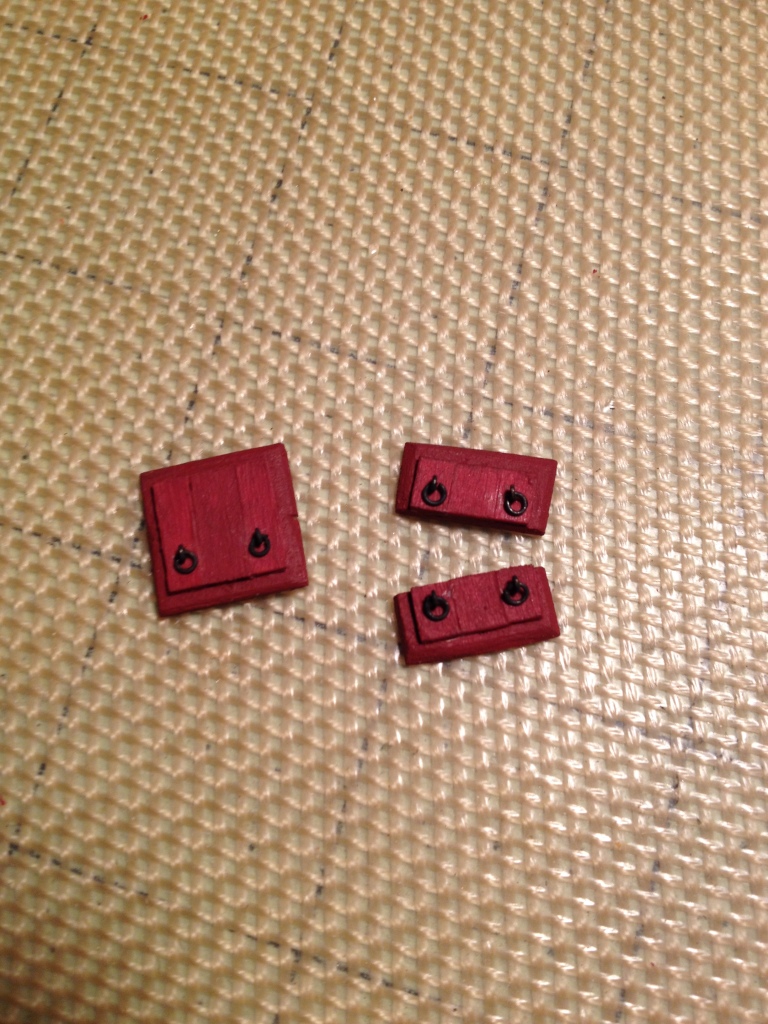
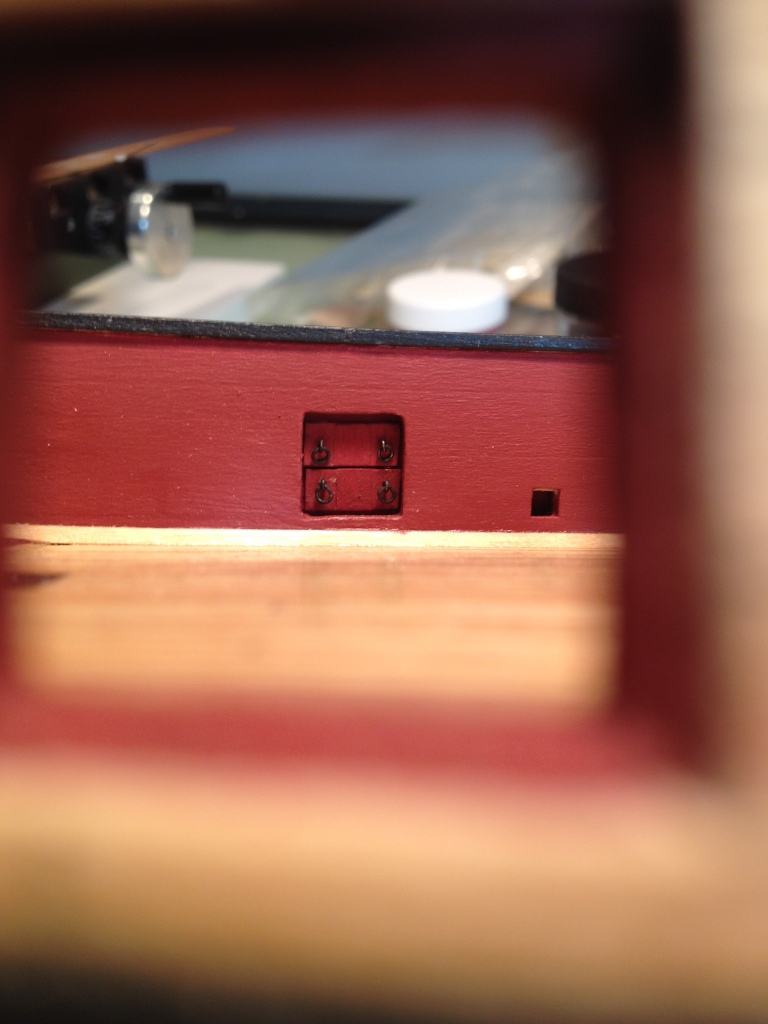
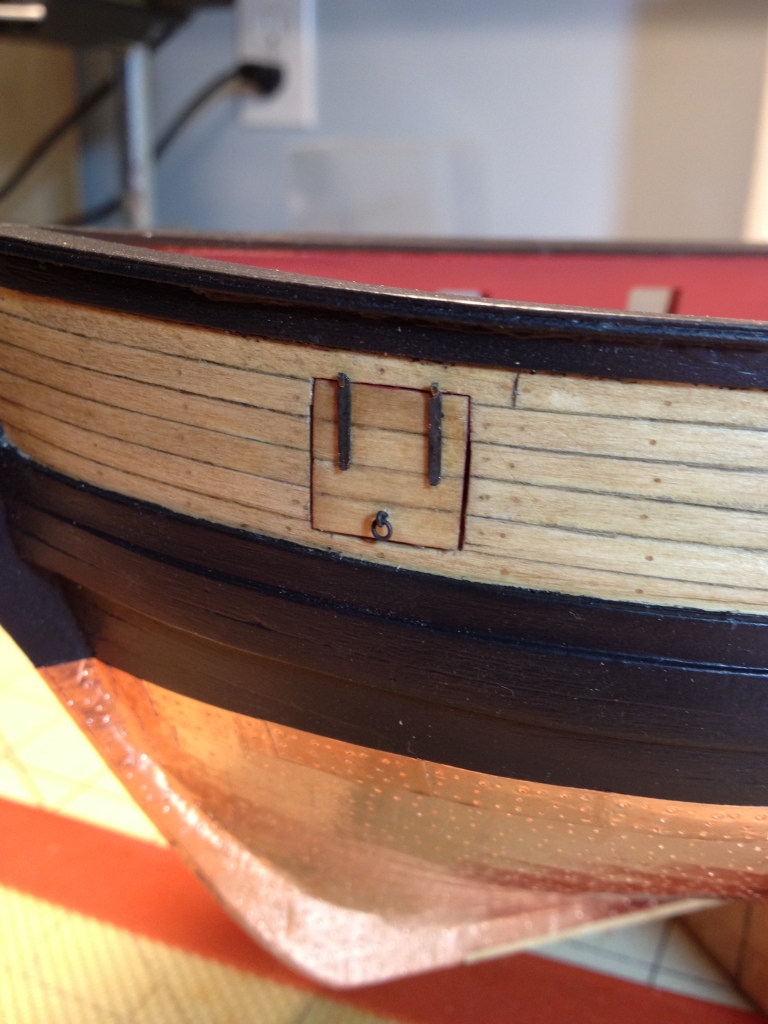
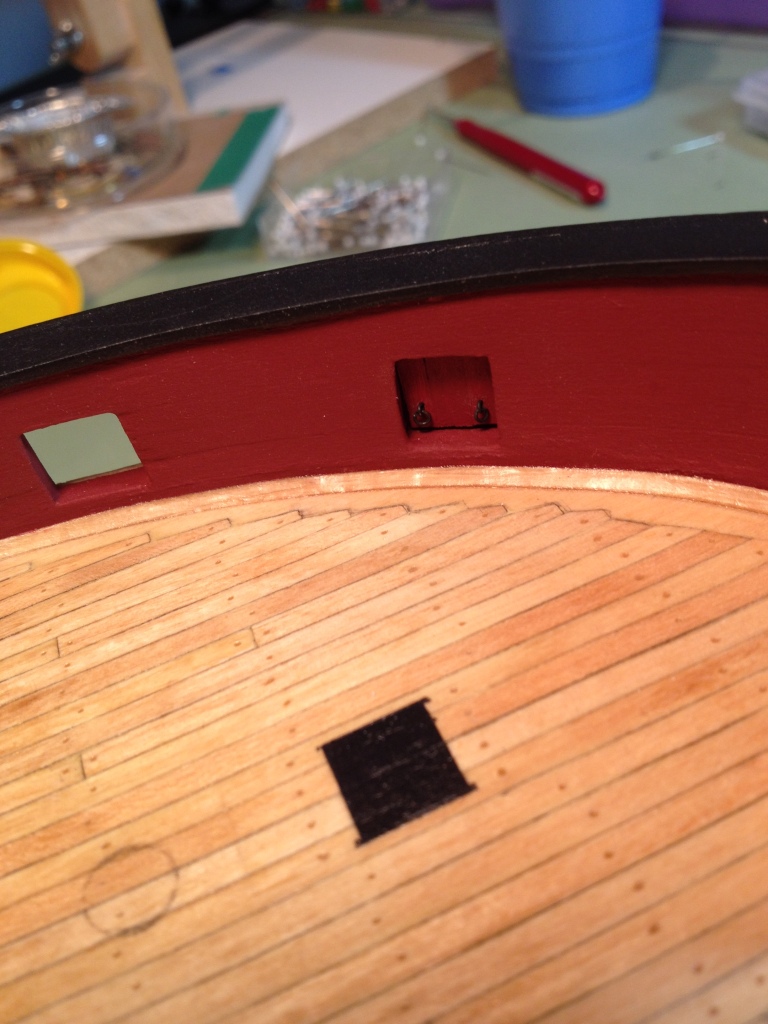
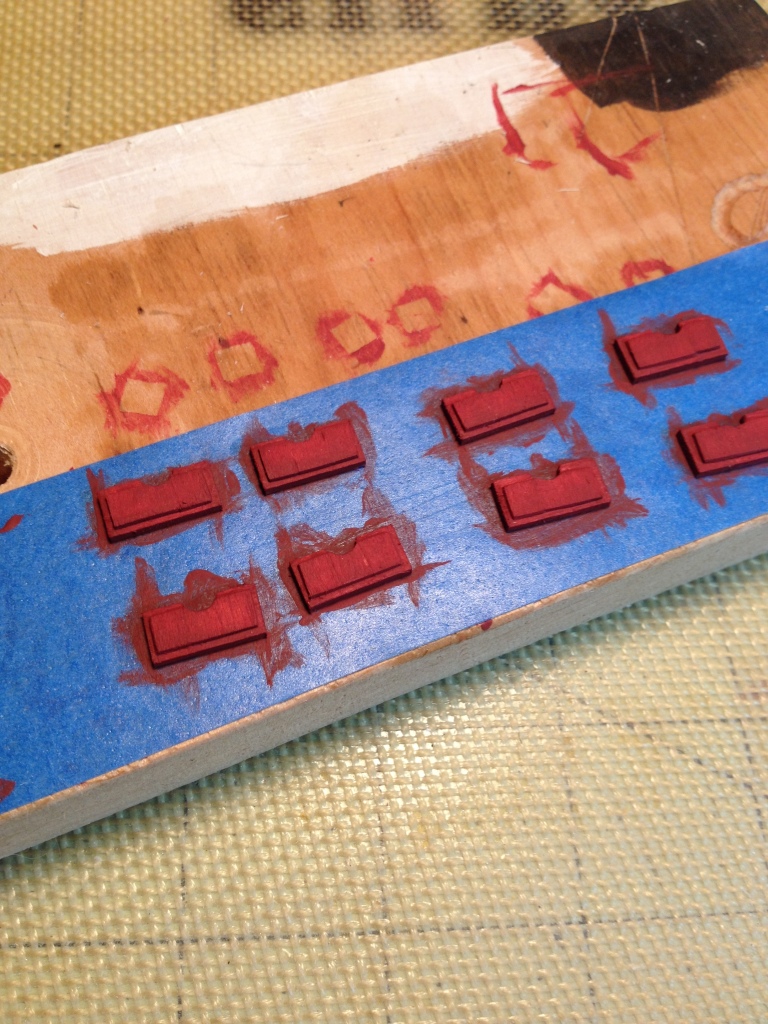
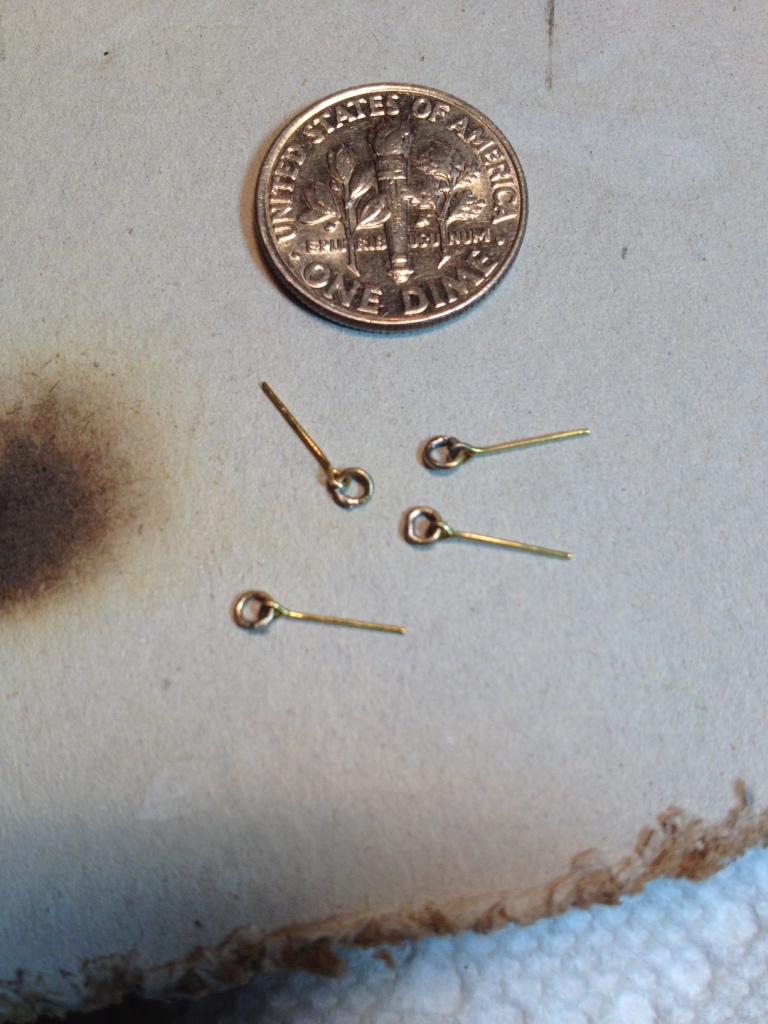
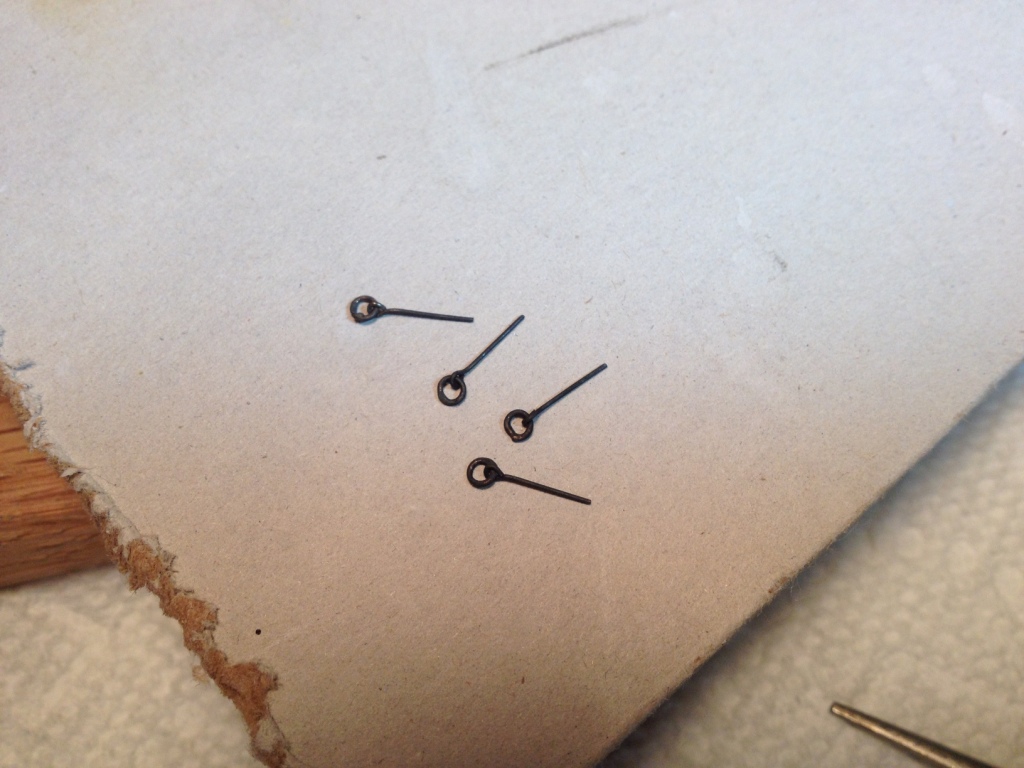
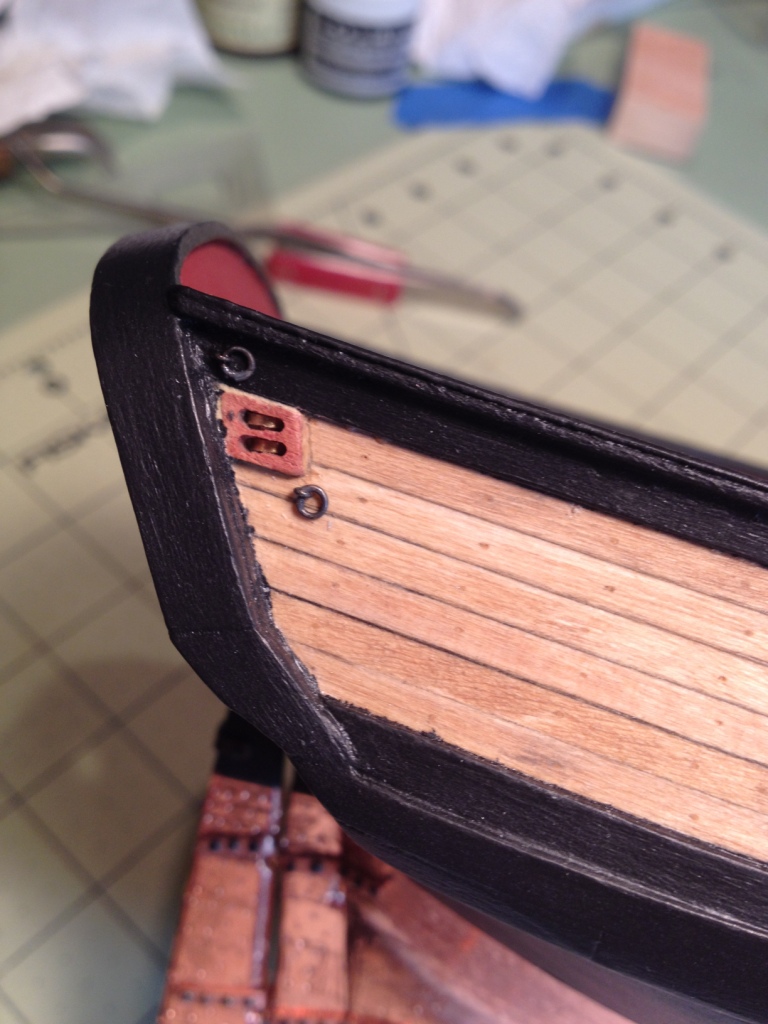
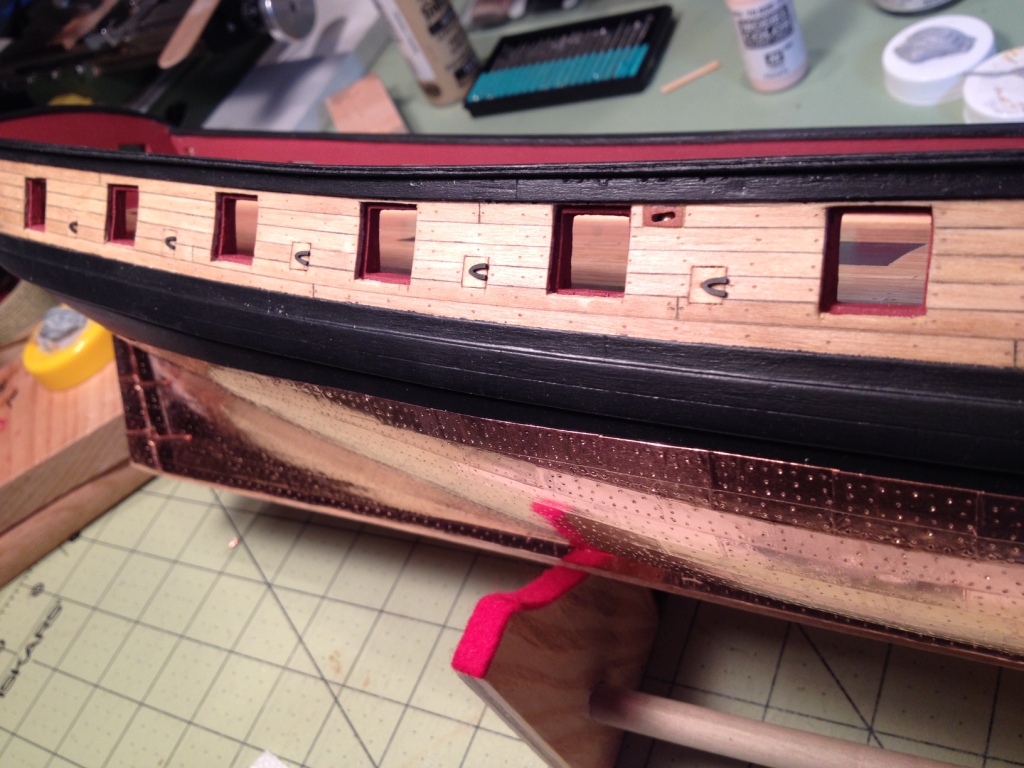
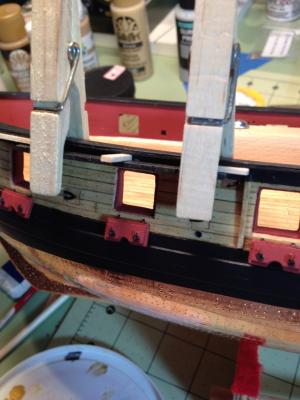
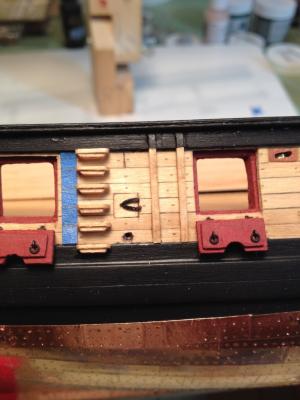
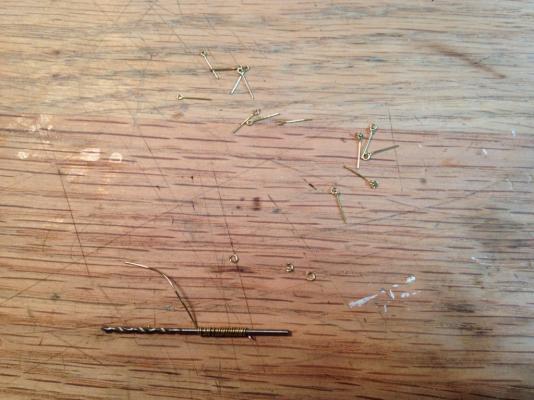
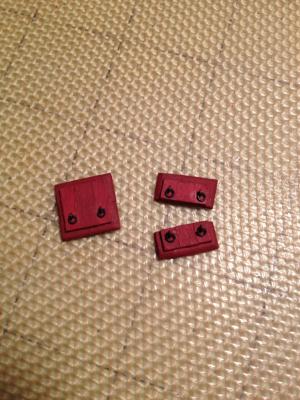
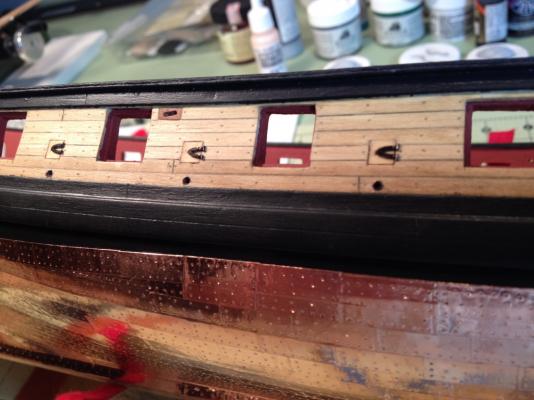
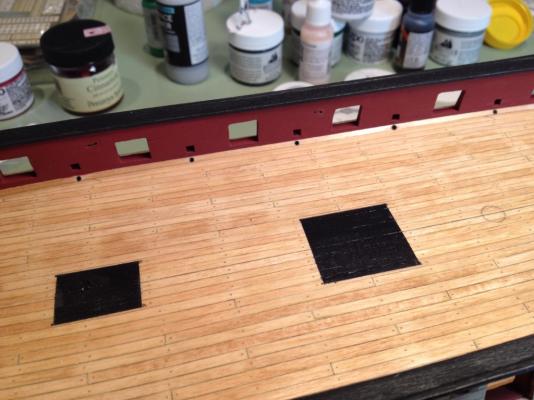
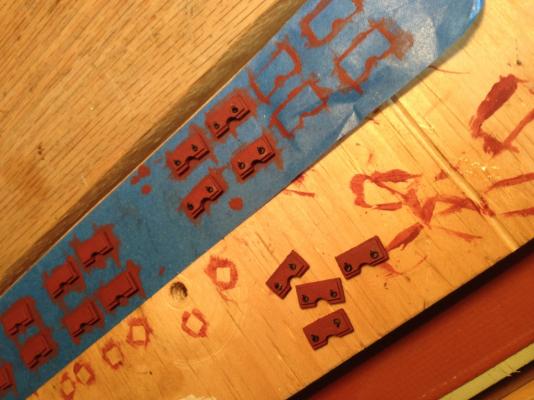
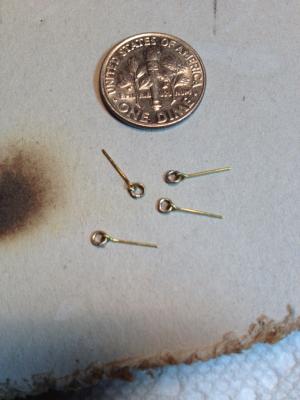
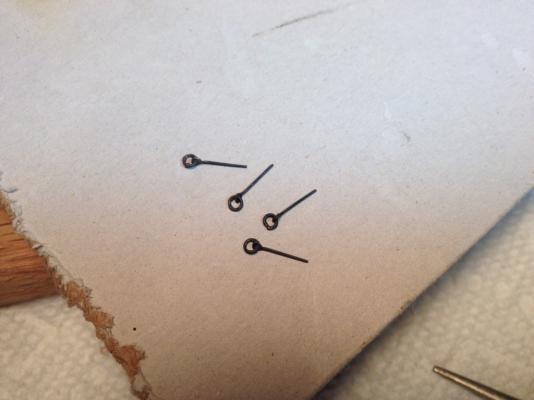
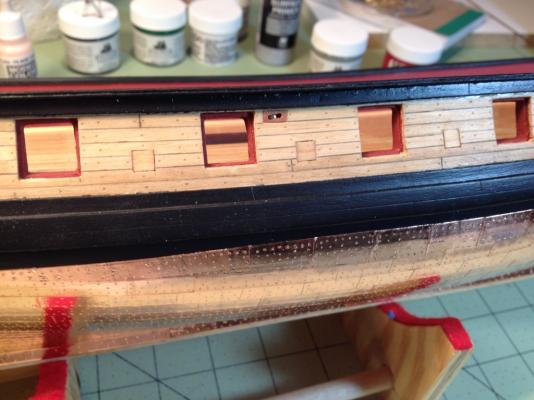
Continuing on with chapter 9, I decided to take another page out of Dirk’s playbook by lining my scuppers with some copper tubing. Using some 1/16” diameter tubing, one end was reamed out and then cut into 3/32” long pieces. These pieces were blackened and inserted into the holes drilled in the outboard planking and inboard waterway. Next I started working on the aft gun and forward bridle port lids. I decided to make the lids using two plies of wood instead of the one as shown in the instructions. The outboard side of the lid was made from 1/16” x 1/8” wide strips and the inboard side was made using 1/32” x 5/32” wide strips. The two plies were run 90 degrees to each other and the inboard strips were sanded down to create the rabbet around the door. For the lid's inboard and outboard handles I tried my hand at making some small split rings that were attached to the provided eyebolts. The split rings were made by first winding some 28 gauge brass wire around the shank of a 1mm diameter drill bit. Little sections of the coil were then cut off to form the rings. After placing the rings on the eyebolts the ends were flatten to close the ring. These pieces along with the photo-etched hinges were blackened. After staining and painting the lids the handles were added and then glued into their appropriate gun port. The hinges were added last to finish the lids. It wasn’t until I was attaching the bridle port hinges that I noticed that they were not as long as shown in the manual. At that point I decided to use what was provided although I noticed afterwards that I could have easily made longer ones by using some of the excess material that’s on the photo-etched sheet. The sixteen remaining lower gun port lids were built similar to the aft lid except for the half circle cutout. The circular cutout was done by using an 1/8” diameter, 240 grit, sanding drum on my dremel and then cleaned up with a circular needle file. They were stained and painted and the inboard handles added. I still need to add the hinges before installing these lids.


- 659 replies
-
- 11
-
-
- syren
- model shipways
- (and 1 more)
-
It's a great kit, take your time and enjoy. I'm also in the process of building her. Good luck
- 1,306 replies
-
- 3
-
-
- syren
- model shipways
- (and 1 more)
-
Thanks George, thanks Augie. As for the 'fiddly bits', being that my carving abilities are slim to none I need to make due with what I have. Lets see what a coat paint does for them.
- 659 replies
-
- 1
-
-
- syren
- model shipways
- (and 1 more)
-
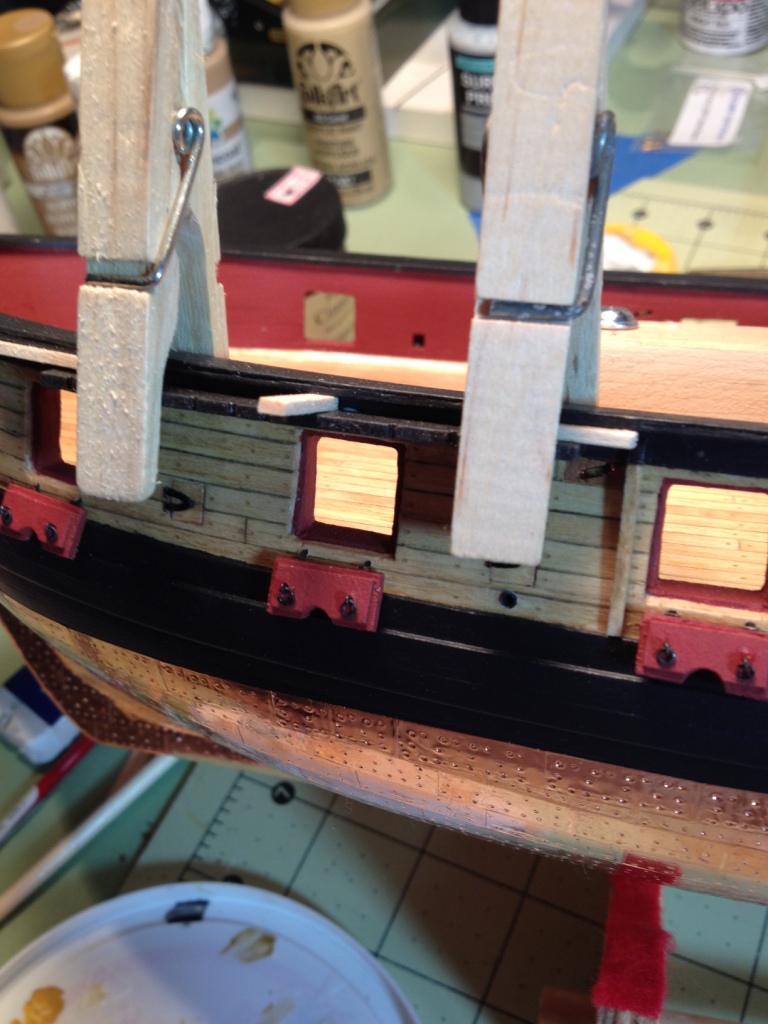
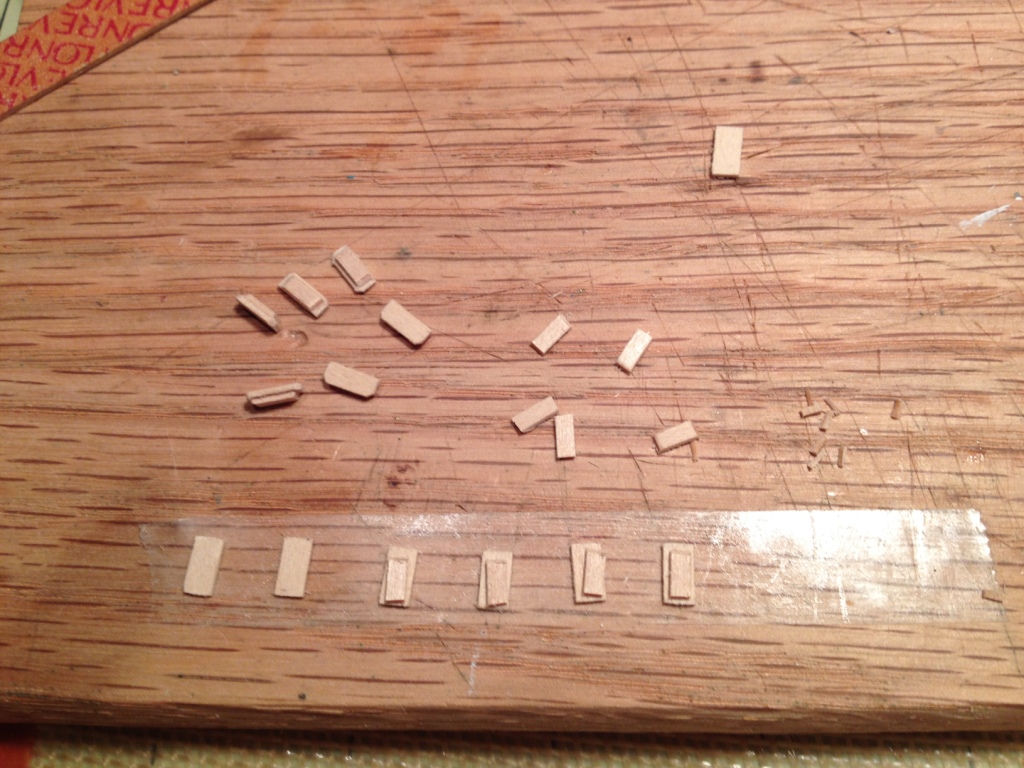
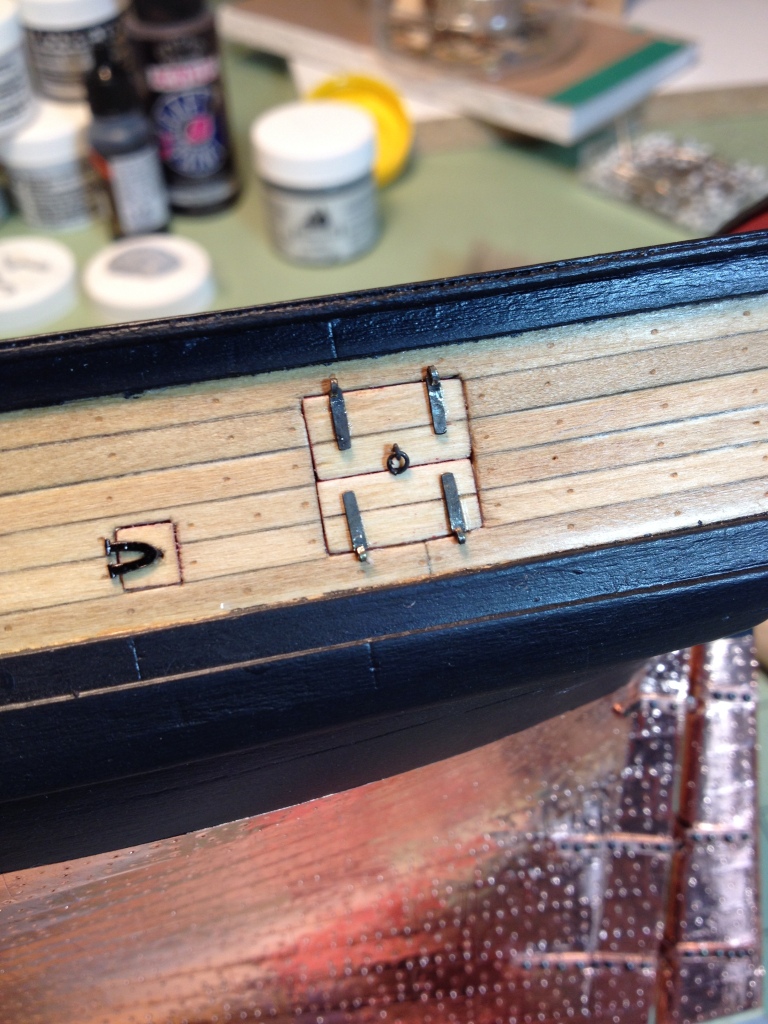
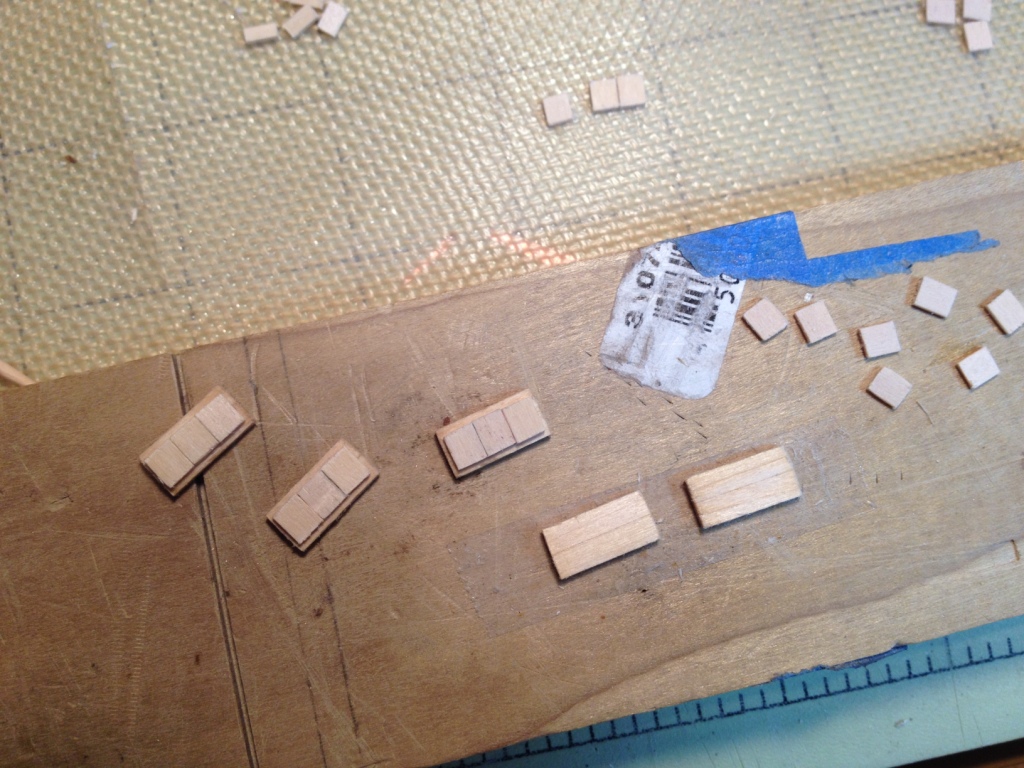
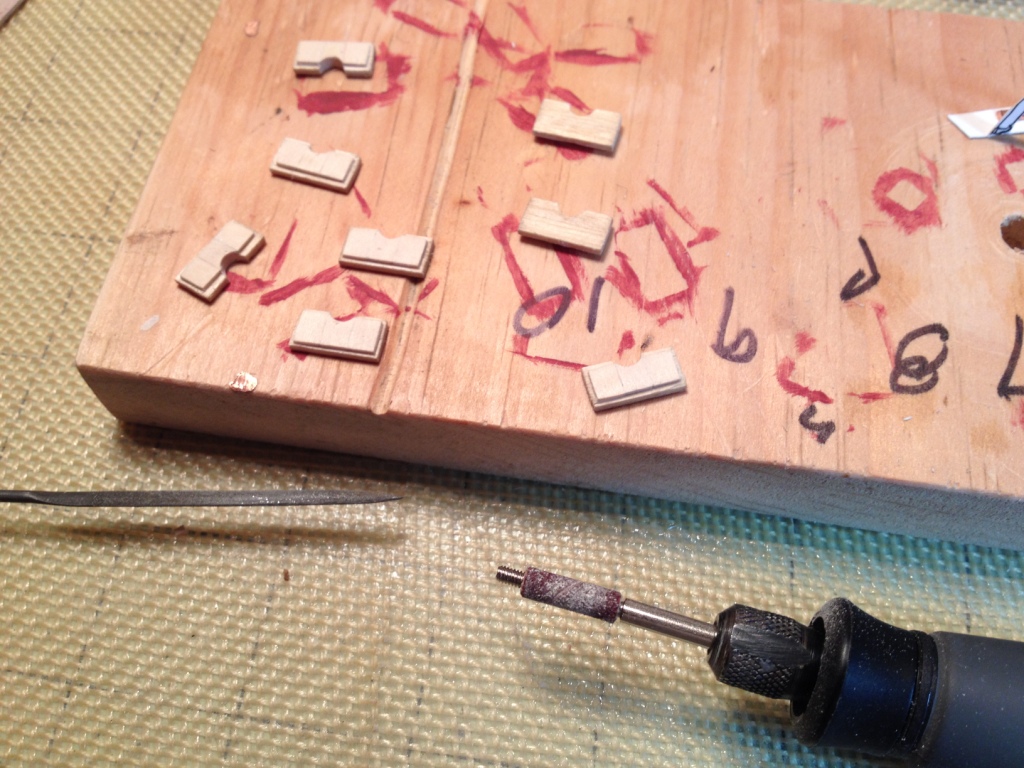
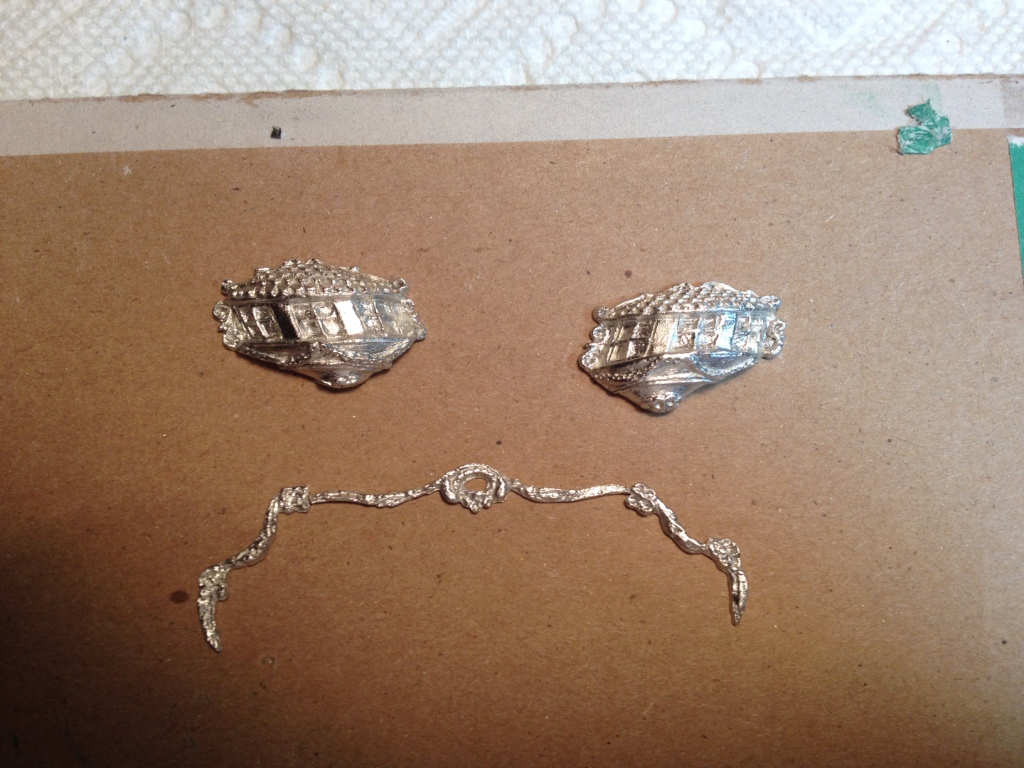
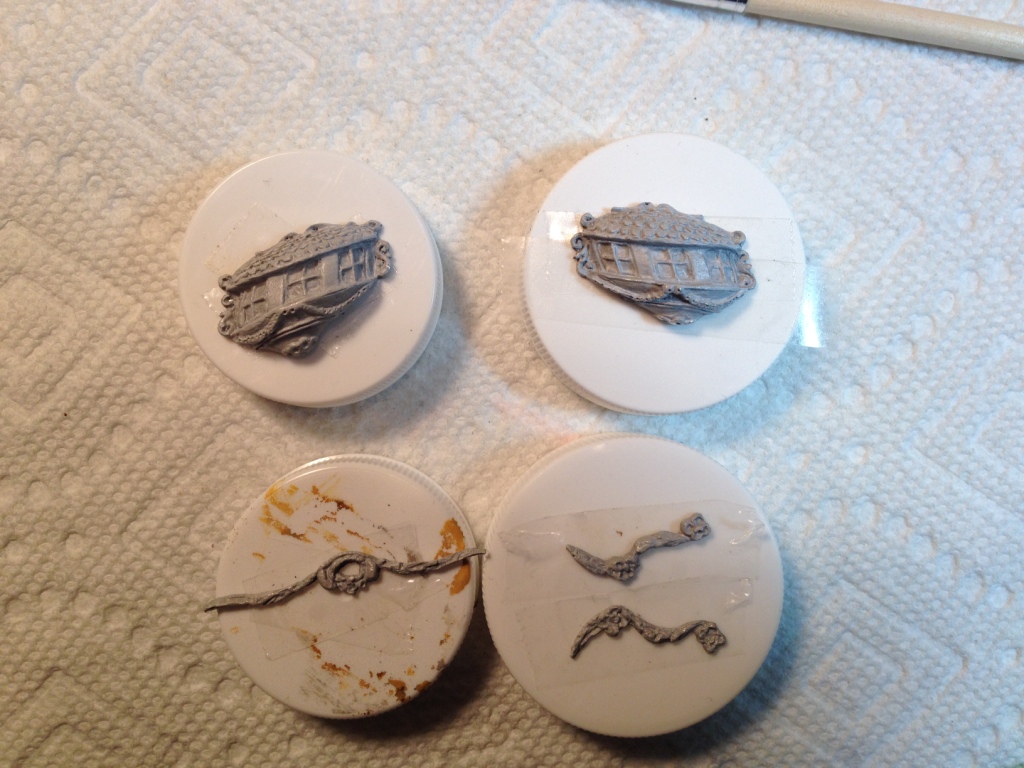
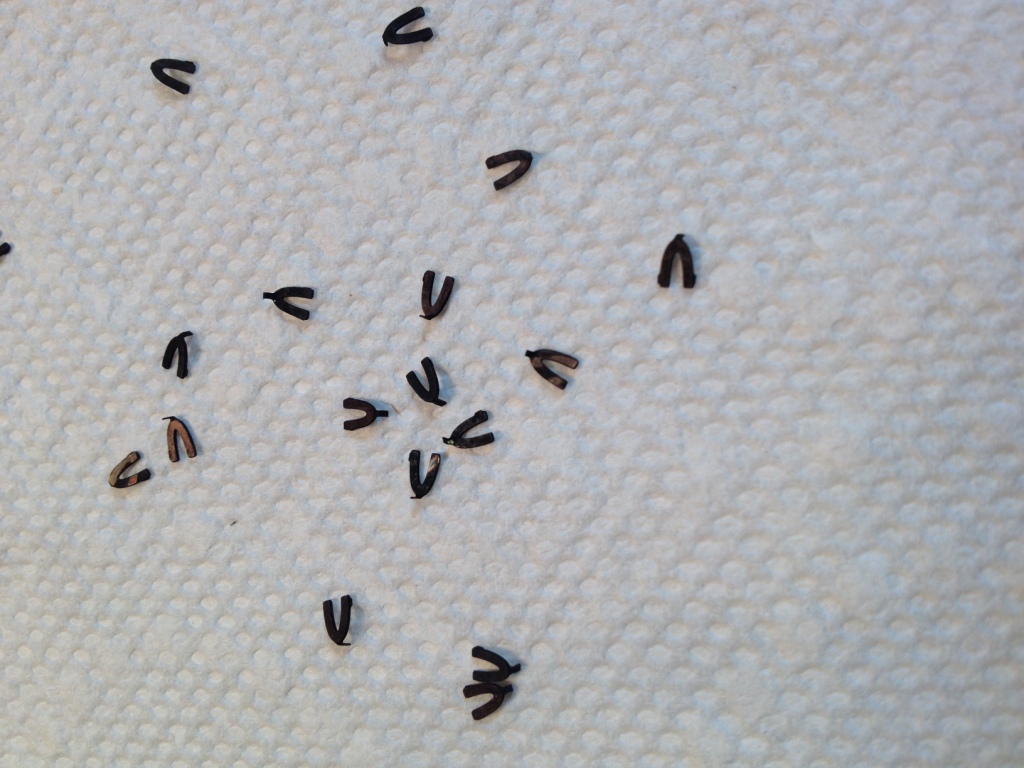
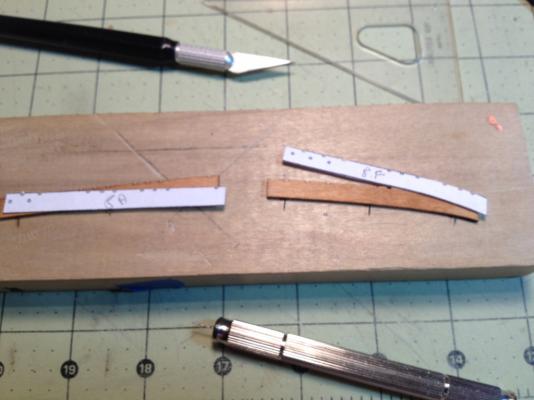
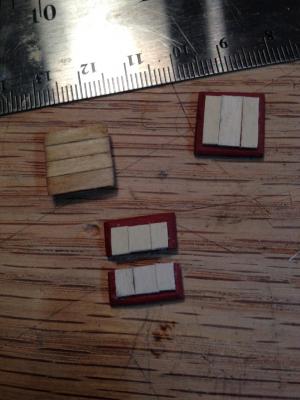
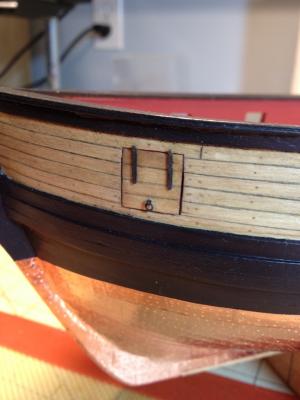
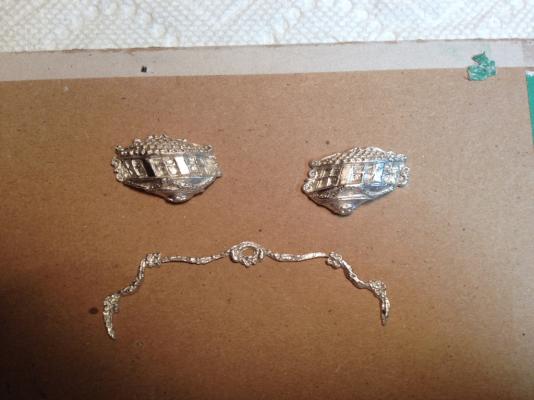
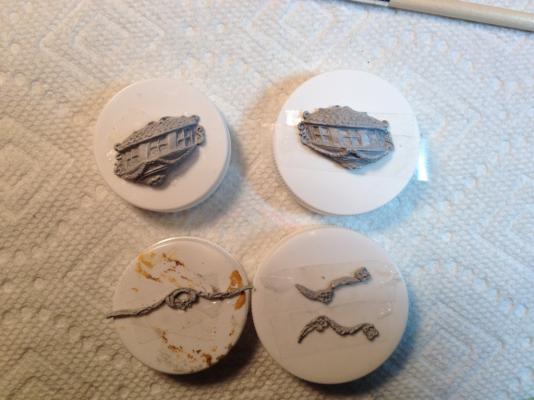
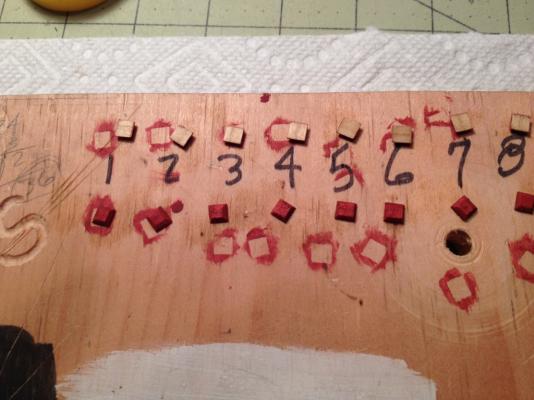
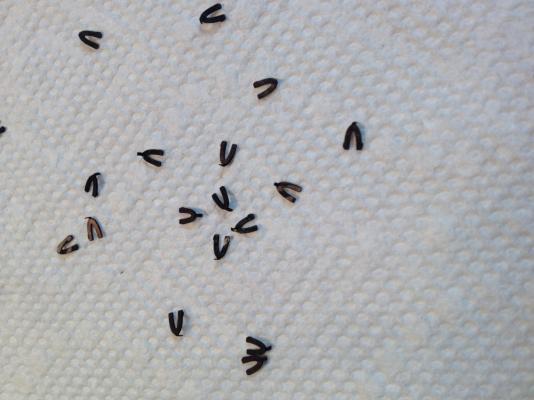
Starting chapter 9 – Hull Details I decided not to try my hand at carving the stern decorative pieces or the quarter badges but to use the castings provided. I cleaned them up a bit by removing the flash and mold lines then primed them. I’m in the process of trying out different paint colors before painting the actual pieces. While experimenting with paint colors I continued by making up and installing the split rings aft of the quarter badges. I used the eye bolts and split rings that came with the kit and not knowing how much force would be applied to these rings I decided to solder them together. After soldering the pieces were cleaned and blackened. Still trying different colors for the badges so I went on to make the sweep port lids. After reading the instructions for making these lids I discovered that I made the openings in the planking a little too big. The instructions say to use a 1/8” wide strip for the lids but my ports are closer to 3/16” square. In my defense however when making these ports back in chapter 5, the ports were to be 1/8” square plus no more than 1/32” all around for the lip, which would give you 3/16”. No big deal though, so I used a 3/16” wide strip for the lids that fit the port fine. I also chamfered the edges on the back of the lids, similar to how Dirk did his, which made them fit better. The ‘U’ shaped hinges I used as provided and did not thin them down like some others had done with theirs. I thought the thicker hinge would look better on the bigger lids. I also decided not to remove the little tab on the front of the hinge that’s used to hold it in place on the photo etched sheet. (There’s probably a proper name for those little pieces but I don’t know it). I bent the little tab down to use it like a nail to help secure the hinge to the lid. The hinges were blackened and then installed. I will try cutting tiny pieces of wire for the ends of the hinges but I’m not sure how I’m going to cut pieces that small yet.


- 659 replies
-
- 12
-
-
- syren
- model shipways
- (and 1 more)
-
Jim, thanks ever so much for the input. The pictures are great. Augie, thanks again for asking Jim.
- 659 replies
-
- 2
-
-
- syren
- model shipways
- (and 1 more)