Supplies of the Ship Modeler's Handbook are running out. Get your copy NOW before they are gone! Click on photo to order.
×


_SalD_
-
Posts
804 -
Joined
-
Last visited
Content Type
Profiles
Forums
Gallery
Events
Everything posted by _SalD_
-
 Nils, very impressive. Beautiful work.
- 2,625 replies
-
- 3
-

-
- kaiser wilhelm der grosse
- passenger steamer
- (and 1 more)
-
I did but it's very slight. Taking measurements from the drawings the scaled curvature (radius) of the deck is roughly 36", so I tried to match that radius for the hatches. It wasn't easy.
- 659 replies
-
- 4
-
-
- syren
- model shipways
- (and 1 more)
-
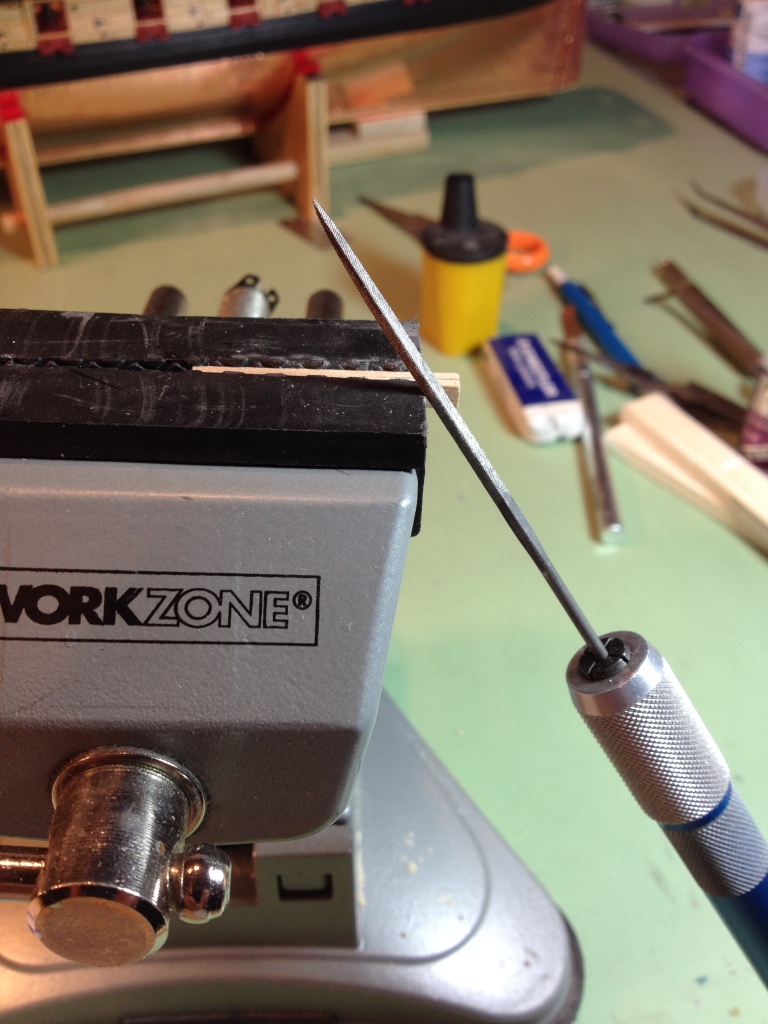
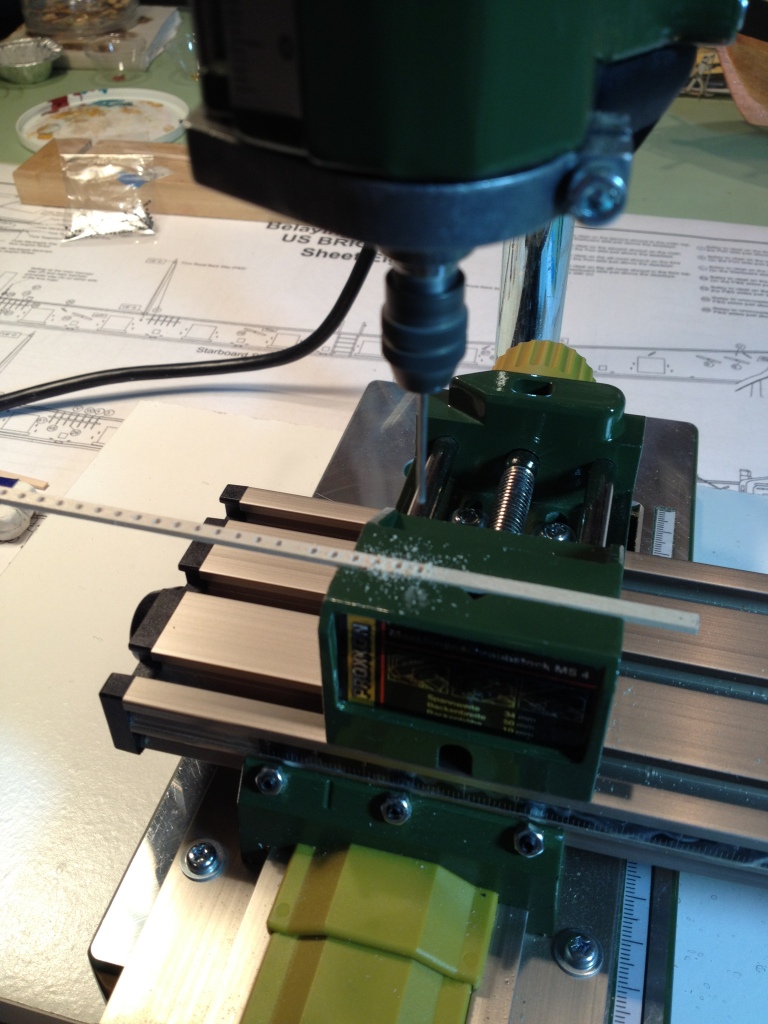
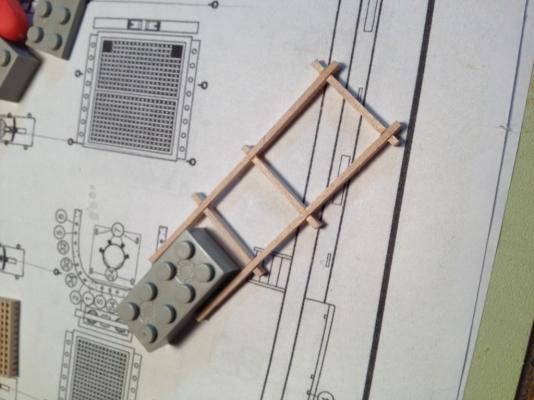
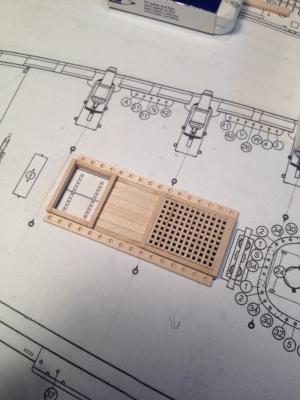
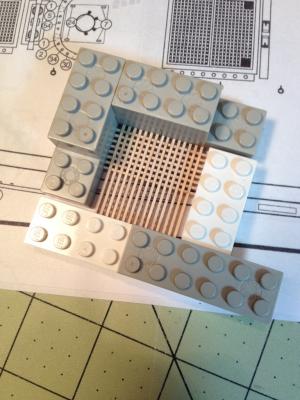
After getting my grating bars spanning in the right direction (thanks Dirk) I moved onto the coaming for the hatches. I believe it was Brian in his AVS log that used a 1/16” square file to cope the ends of the coaming for the lap joints so I thought I would give that a try. I clamped the pieces into a vise and using the file I notched them accordingly. I also cut down the coaming where the capstan platform is located so the planking will sit flush. I assembled the frame upside down and used my trusty lego block to square it up and then used a tiny drop of ca glue to tack the pieces together. Once the entire frame was assembled I painted each joint with a dilute mixture of white glue and water. After letting the glue to dry overnight I trimmed and sanded the ends. The shot racks were made using my Proxxon drill press and compound table which helped keep the notches in line and evenly spaced. Coaming and grating stained, and cannon balls added.


- 659 replies
-
- 9
-
-
- syren
- model shipways
- (and 1 more)
-
Richard, If you drill the holes for the hawse pipe careful enough you may not even need the extra inboard pieces. The only reason I put them in is because I really chewed up the inside of the bulwarks when I drilled the holes. I used them more like an eschion to cover up my boo-boos.
-
Thanks Jason, I had to steal mine from my nephew, my daughters weren't into Legos.
- 659 replies
-
- 5
-
-
- syren
- model shipways
- (and 1 more)
-
Thanks Dirk and Brian. I appreciate the comments. I think I should just be able to turn the pieces over to have the grate go in the right direction. If not I think I'll just live with it for this ship.
- 659 replies
-
- 2
-
-
- syren
- model shipways
- (and 1 more)
-
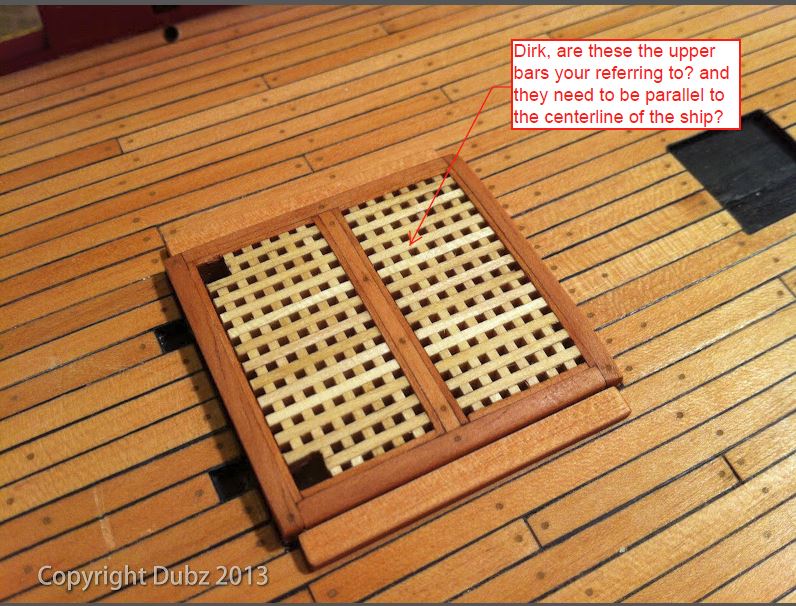
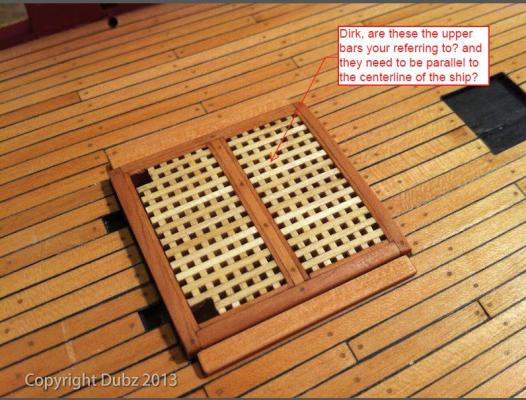
Dirk, I'm not exactly sure which bars you a referring to but are they the ones I am pointing to in the below photo? If so I think I can correct that by turning the grating over and using the other side.
- 659 replies
-
- 7
-
-
- syren
- model shipways
- (and 1 more)
-
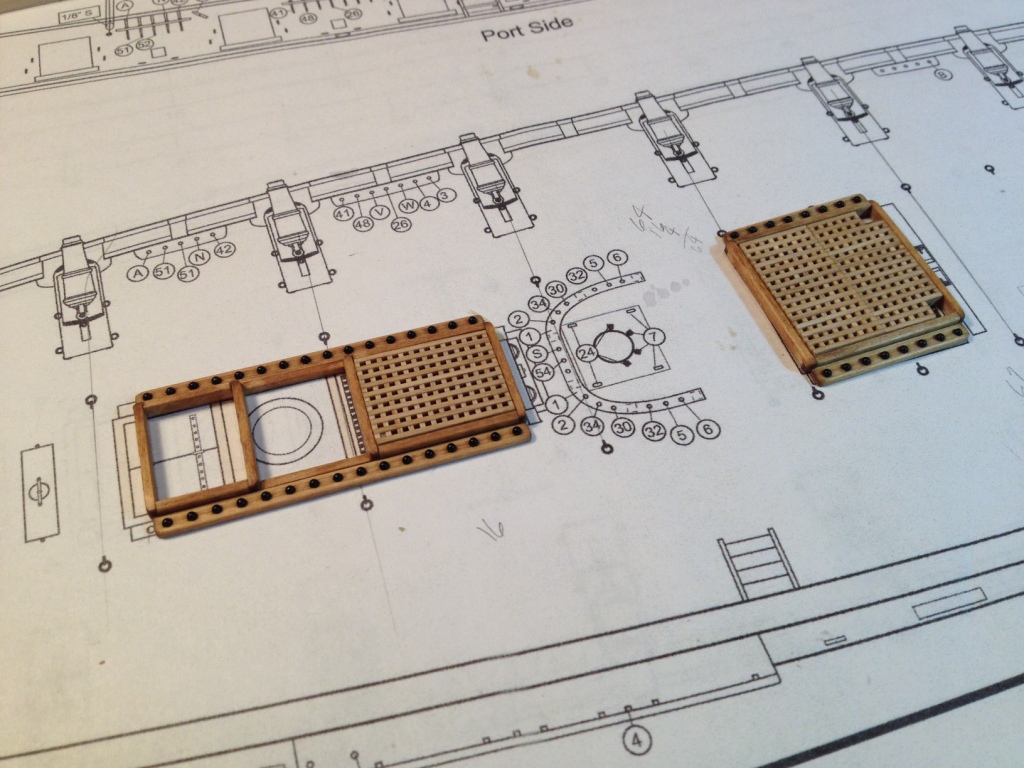
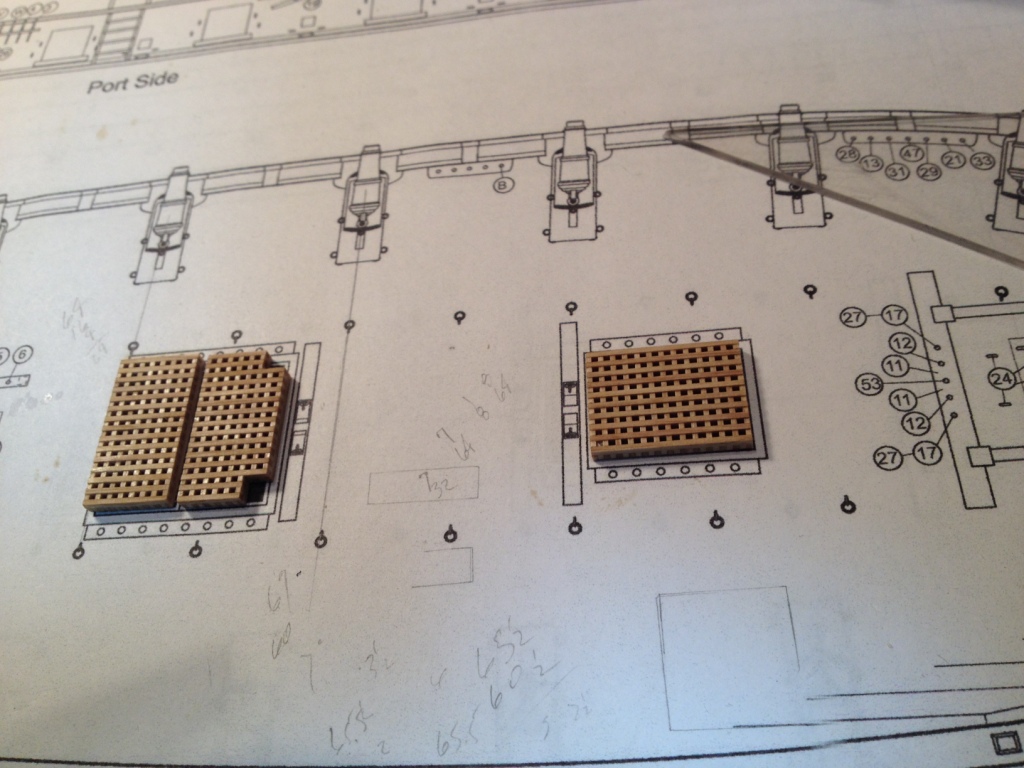
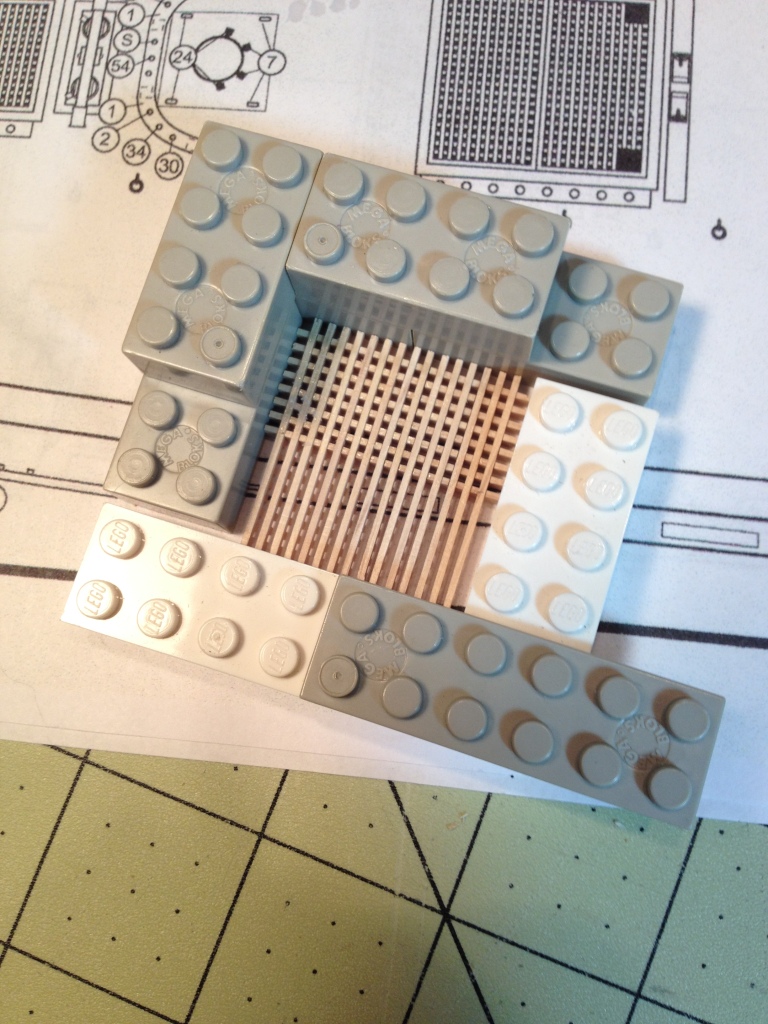
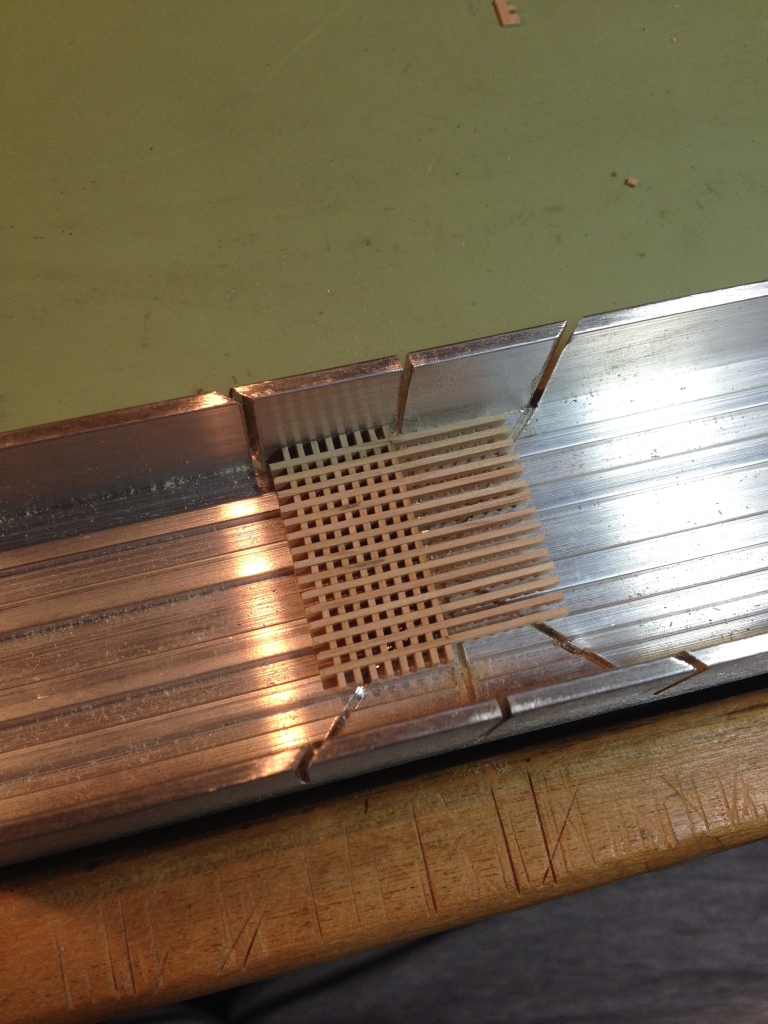
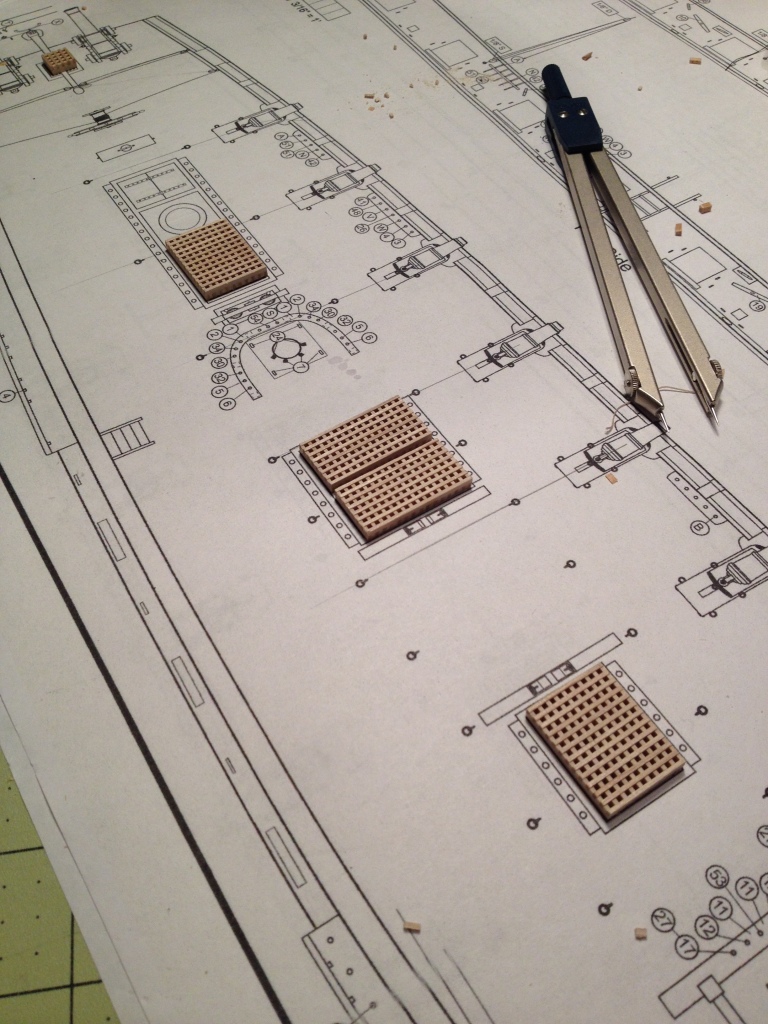
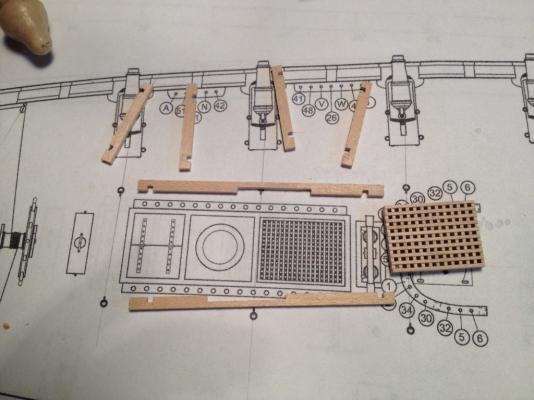
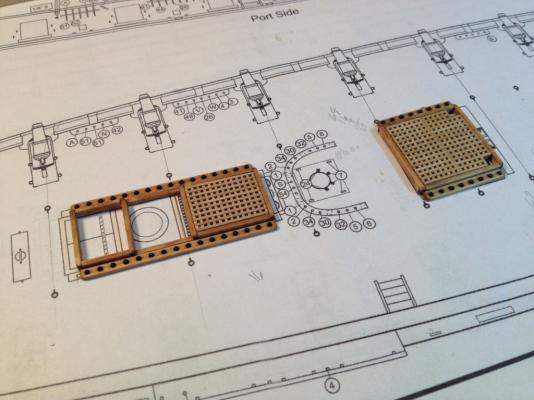
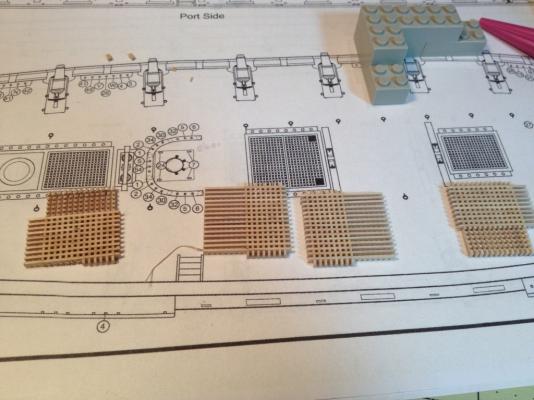
Chapter 12 – Deck Fittings I was going to start this chapter by cutting and assembling the coaming frame pieces for the small aft-most hatch until I read Chuck’s Cheerful build log and how he made his hatches. In his log he, and it seems so obvious now, recommended building the grating first and then build the frame to fit around it. So following Obi-Wan-Passaro’s advice I changed course and made all the grating pieces for the hatches. This worked out well because I was able to lay out the grating so I ended up with a banded edge all around the perimeter of the grating. The pieces are slightly smaller or larger than what’s shown on the drawing but not enough to be noticeable. After inserting all the bars to make the proper size grating I squared it up using a few Lego blocks. The piece was made upside down and held together using a tiny drop of ca glue at each joint. After letting the pieces set overnight I cut the excess off using a hobby miter box. You need to cut very slowly as some of the pieces may loosen up. After cutting the edges were sanded smooth and any loose bars were re-glued. Now I can make the frames. (errrrr…right Chuck?)


- 659 replies
-
- 12
-
-
- syren
- model shipways
- (and 1 more)
-
Hi Ed great job so far. I'll be pulling up a chair and following along if you don't mind. That's what I did. I filed out the back of my figurehead to make it fit better. Then just played around with it to make it fit. http://modelshipworld.com/index.php/topic/8410-us-brig-syren-by-sald-–-model-shipways/?p=331803
-
Eric you've been very busy. The exterior planking looks terrific painted, I might even like it better that way. Your decking came out great too and I'm glad you found my log useful. Please feel free to 'borrow' all the ideas you want. God knows I've 'borrowed' my fair share from other peoples logs, that's what this forum is all about.
-
Thanks George, two more trailing cannons to go but I'll save those for a little later.
- 659 replies
-
- 2
-
-
- syren
- model shipways
- (and 1 more)
-
Thanks Gundorph and as always thanks for the 'likes'.
- 659 replies
-
- 3
-
-
- syren
- model shipways
- (and 1 more)
-
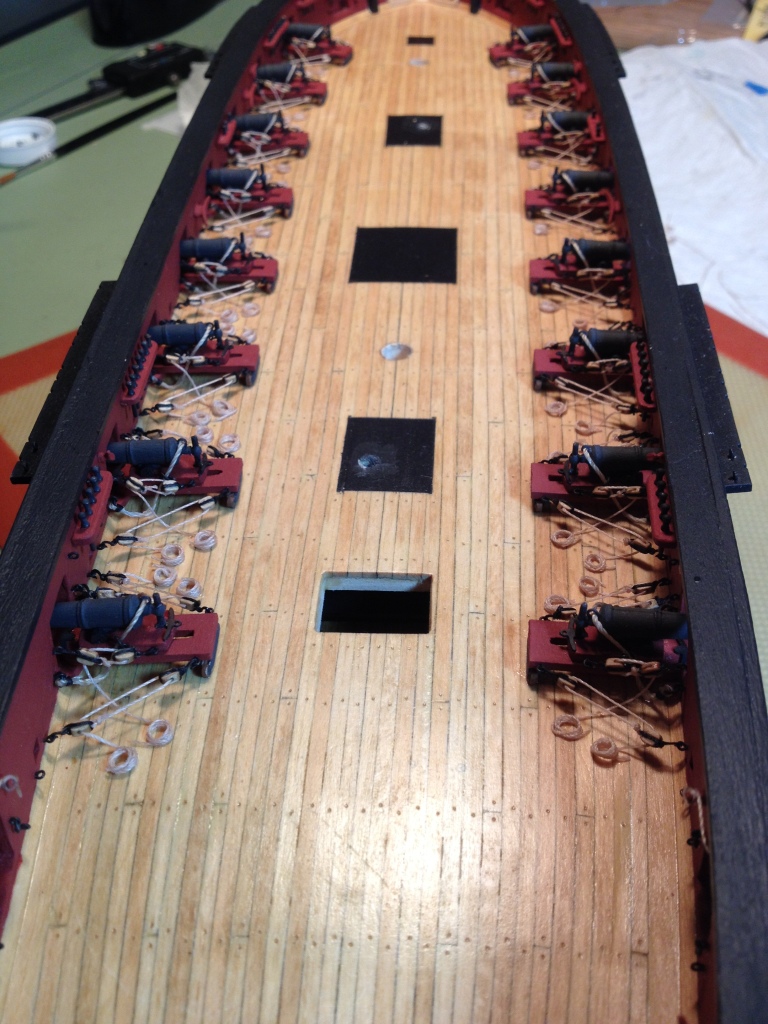
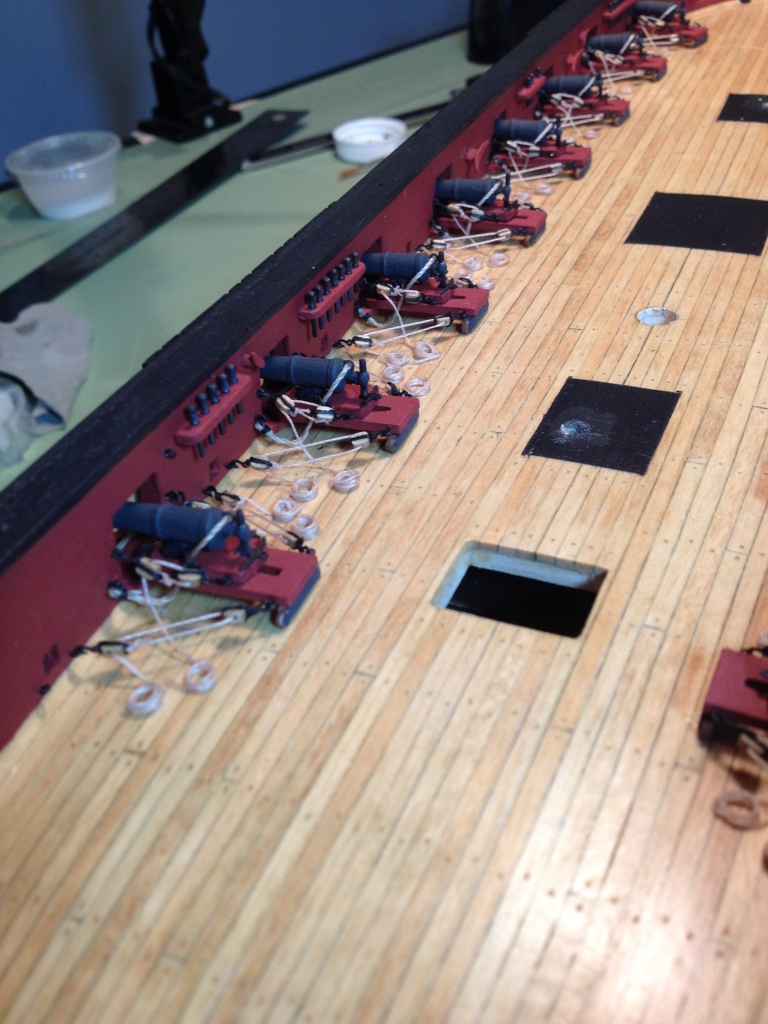
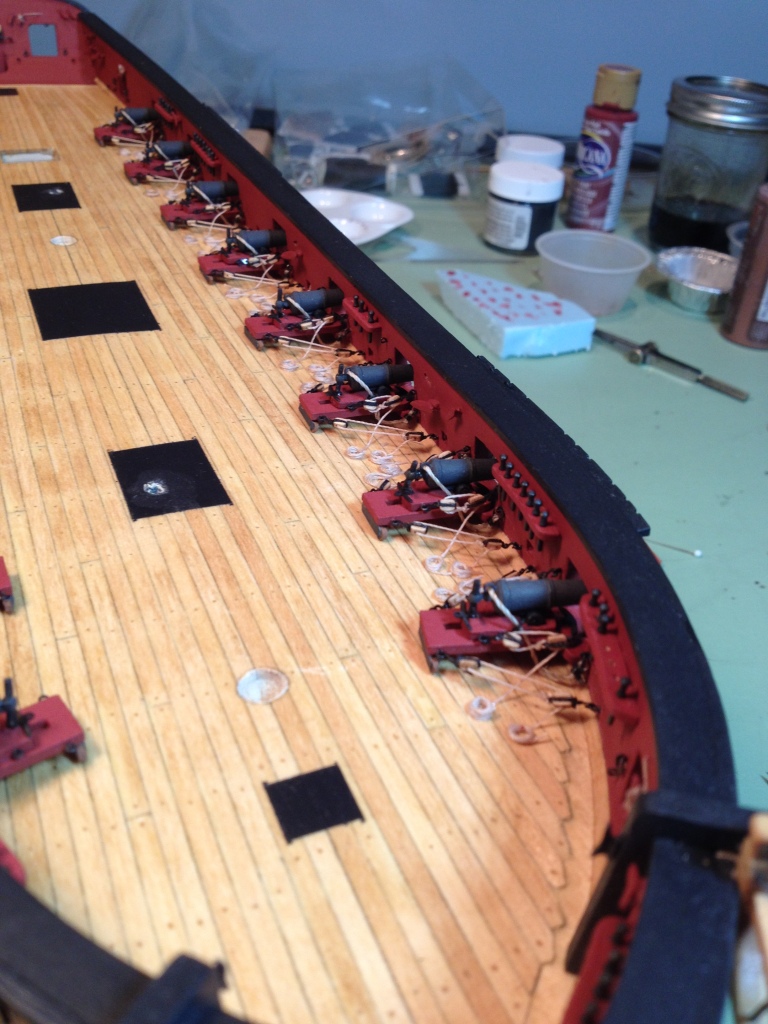
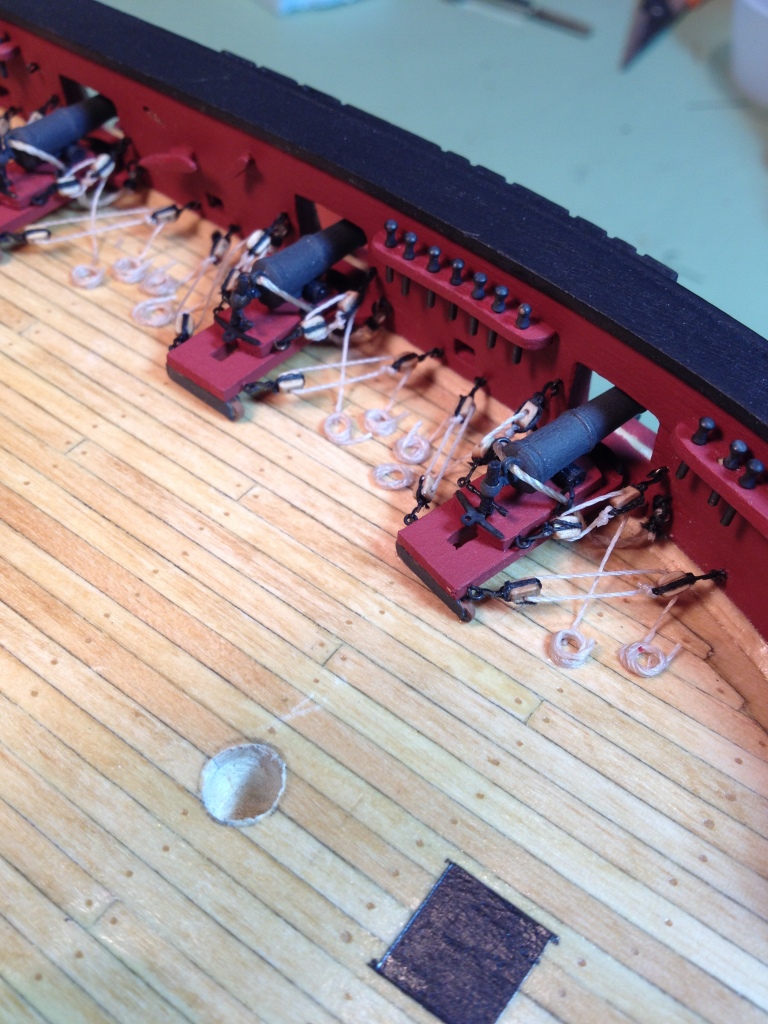
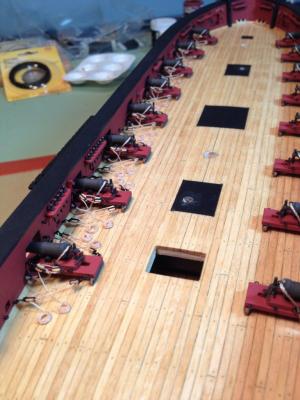
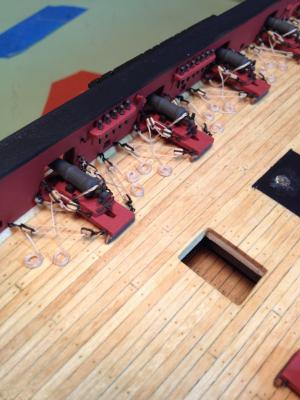
Chapter 11 complete, all carronades assembled and rigged (I didn't rush Joe). Except for the repetition rigging the cannons wasn’t as bad as I had anticipated. Using the hooks from Syren help a lot. If I had to make all the hooks and drill them into the blocks as described in the manual I don’t think I’d be a happy camper plus they look a lot better than any hook I would have made. I also did not seize the line to the blocks or strop them as you would normally do. I did this first to keep my sanity and secondly because there wasn’t enough space between the outhaul tackle eye bolts for the blocks plus the hooks plus all the seizing. I just used a simple overhand knot to tie the hook to the line that I wrapped around and glued (CA) to the block and a modified slip knot to tie the rigging line to the block. All the rope coils were made off the ship and glued in place.


- 659 replies
-
- 13
-
-
- syren
- model shipways
- (and 1 more)
-
Thanks John,hope you're doing well. John A. filled us in on your surgery at the meeting.. I will definitely bring the ship to the next meeting, see you then.
- 659 replies
-
- 2
-
-
- syren
- model shipways
- (and 1 more)
-
Thanks Thomas, means a lot to me (he says very humbly). You do have some deck fixtures done I still need to do though.
- 659 replies
-
- 3
-
-
- syren
- model shipways
- (and 1 more)
-
Thanks Gundorph and just take your time on your ship and enjoy the trip. and thanks again for all the likes, much appreciated.
- 659 replies
-
- 4
-
-
- syren
- model shipways
- (and 1 more)
-
Thanks Dirk. Thanks Brian and thanks again for the tip on threading the hooks. I didn't lose one.
- 659 replies
-
- 3
-
-
- syren
- model shipways
- (and 1 more)
-
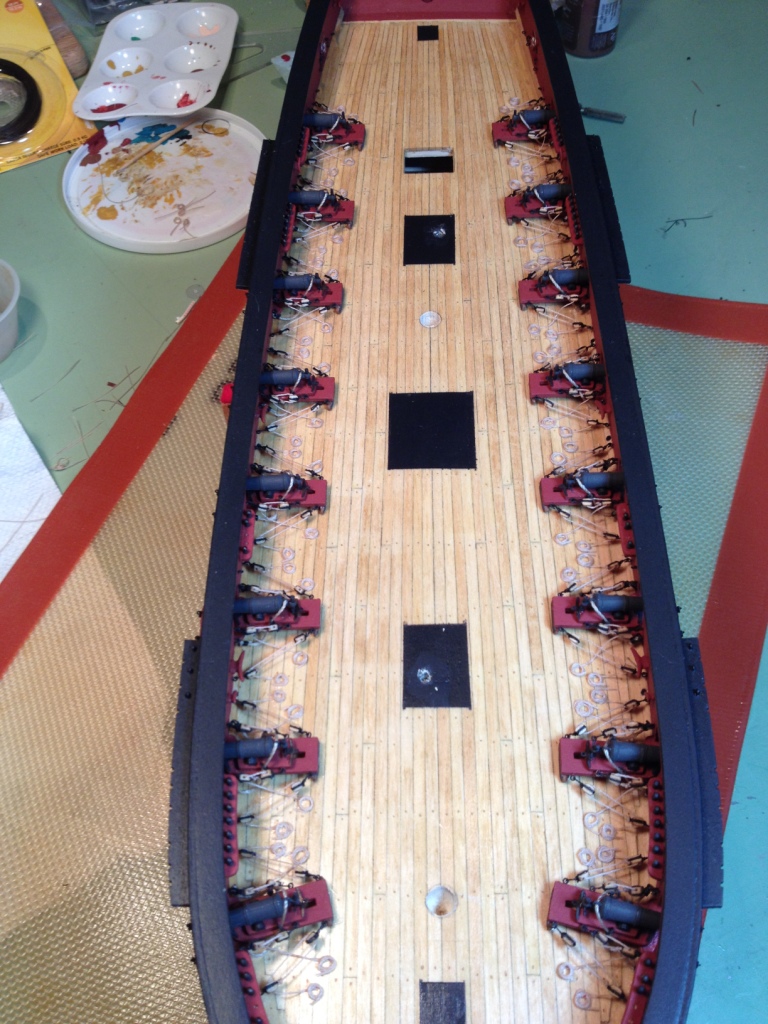
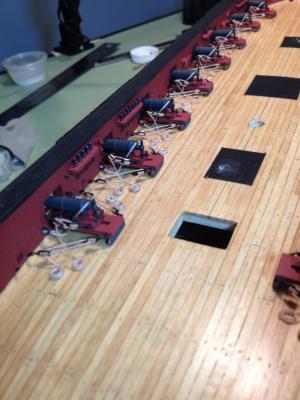
Eight down eight to go! Finished rigging the eight port side carronades which was pretty straight forward with just a lot of repetition. The Syren company hooks worked out well and I followed Brian’s (GuntherMT) advice to thread the hooks before cutting them off the sprue. I’m not sure if this is proper but I decided to run the outhaul lines underneath the gun tackle lines for a couple of reasons. One, I thought the ropes would have a more natural looking droop leaving the block and two, I didn’t want to obscure the gun tackle ropes with the outhauls going over the top of them (personal preference).


- 659 replies
-
- 14
-
-
- syren
- model shipways
- (and 1 more)
-
Seems like you found that plank you were looking for Tom...the last one. Deck looks terrific nicely done.
- 1,348 replies
-
- 3
-
-
- constitution
- model shipways
- (and 1 more)
-
great looking deck Jesse, good work on the nibbing too.
- 1,306 replies
-
- 6
-
-
- syren
- model shipways
- (and 1 more)