HOLIDAY DONATION DRIVE - SUPPORT MSW - DO YOUR PART TO KEEP THIS GREAT FORUM GOING! (Only 20 donations so far - C'mon guys!)
×


_SalD_
-
Posts
828 -
Joined
-
Last visited
Content Type
Profiles
Forums
Gallery
Events
Everything posted by _SalD_
-
 I remembered (sometimes the old synapses fire in the right order ) I purchased them from www.hobbyLinc. com. Link http://www.hobbylinc.com/htm/zon/zon37790.htm
- 659 replies
-
- 2
-

-
- syren
- model shipways
- (and 1 more)
-
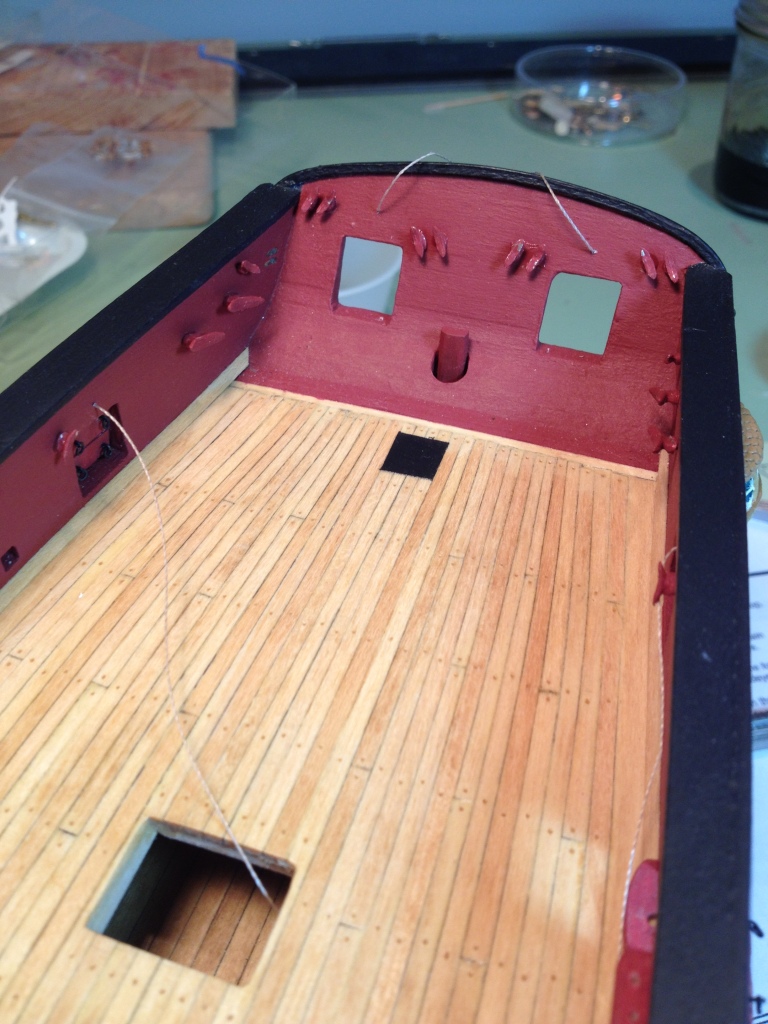
Small update today. Finished up the inboard bulwarks by stropping the double block to the traveler and installing it above the rudder. Now I'm in the process of getting all the parts ready for the carronade sleds.

- 659 replies
-
- 9
-
-
- syren
- model shipways
- (and 1 more)
-
cpt_d, I don't recall off hand where I got mine but I know I got them in the US. When I get home tonight I can look through my orders and see where I bought them.
- 659 replies
-
- 2
-
-
- syren
- model shipways
- (and 1 more)
-
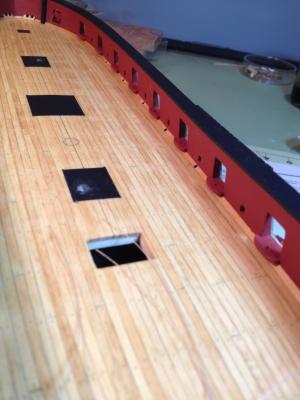
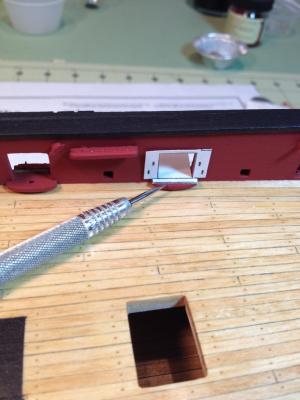
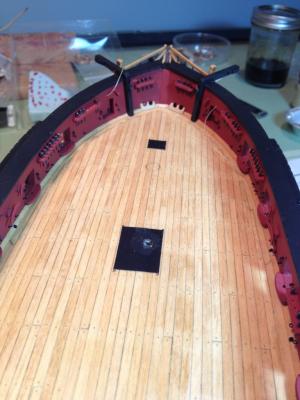
Thanks Thomas. I had a question for you or anyone else, I am planning to drill the mast holes in the deck and was wondering what size drill bit you used. I'm thinking 3/16" diameter since it's a 5/16" diameter mast.
- 659 replies
-
- 1
-
-
- syren
- model shipways
- (and 1 more)
-
Thanks George and..... I just realized I made a novice boo-boo with the carronade eye bolts. The split ring for the breeching lines should have been placed on the lower eye bolt and not on the upper where I have it. I guess I looked at the picture of the aft cannons in the instructions that shows the rings on the upper eye bolt and carried that through for the carronades (oops). Time for some ‘deconstruction’ as Dirk would say.
- 659 replies
-
- 4
-
-
- syren
- model shipways
- (and 1 more)
-
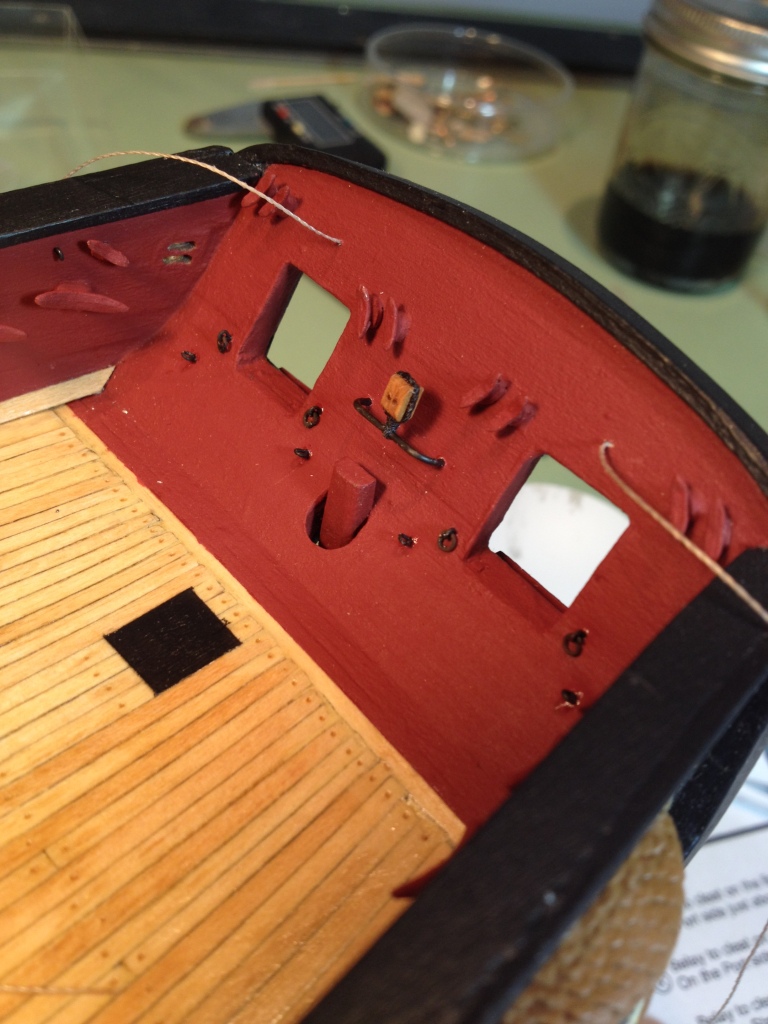
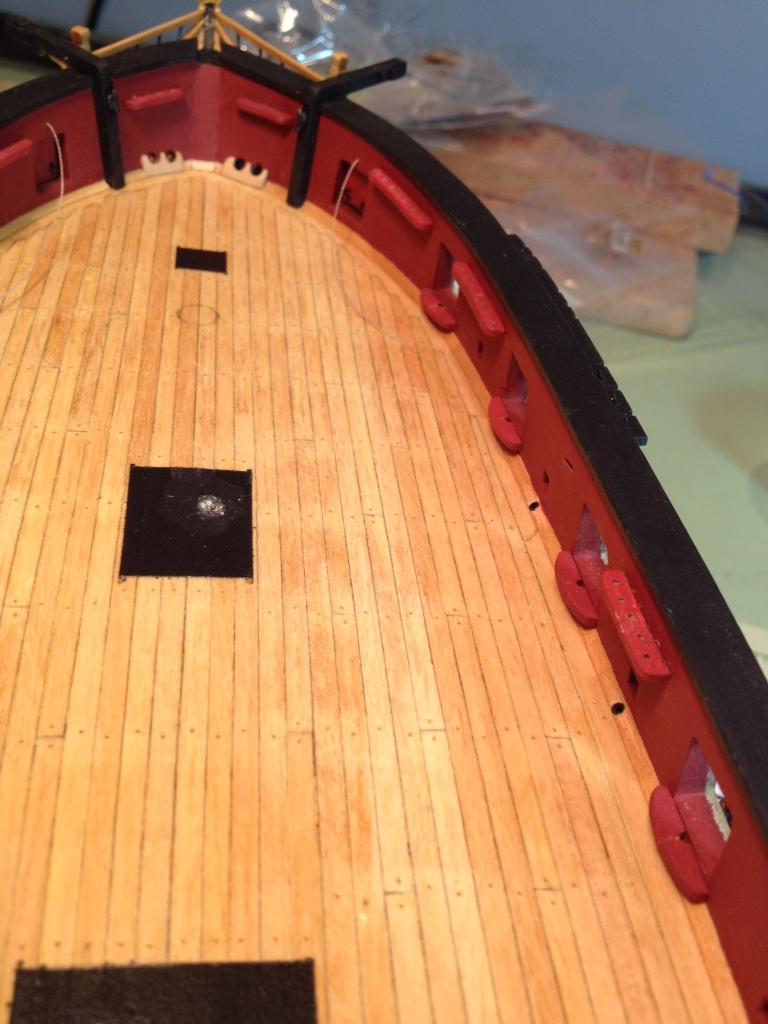
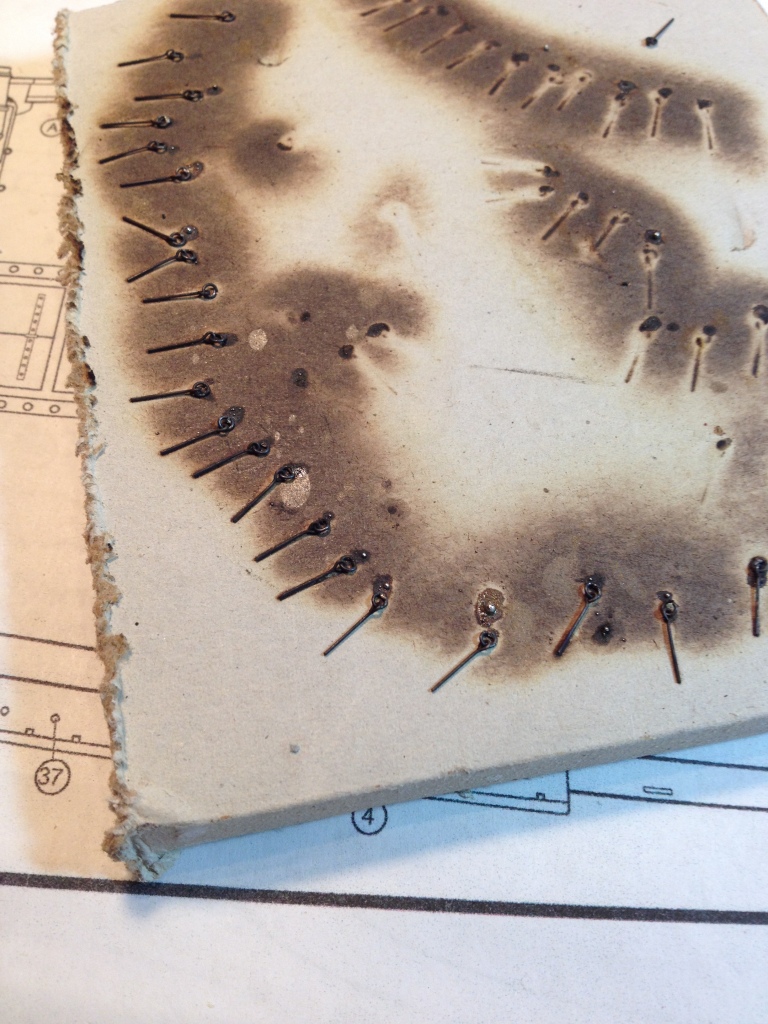
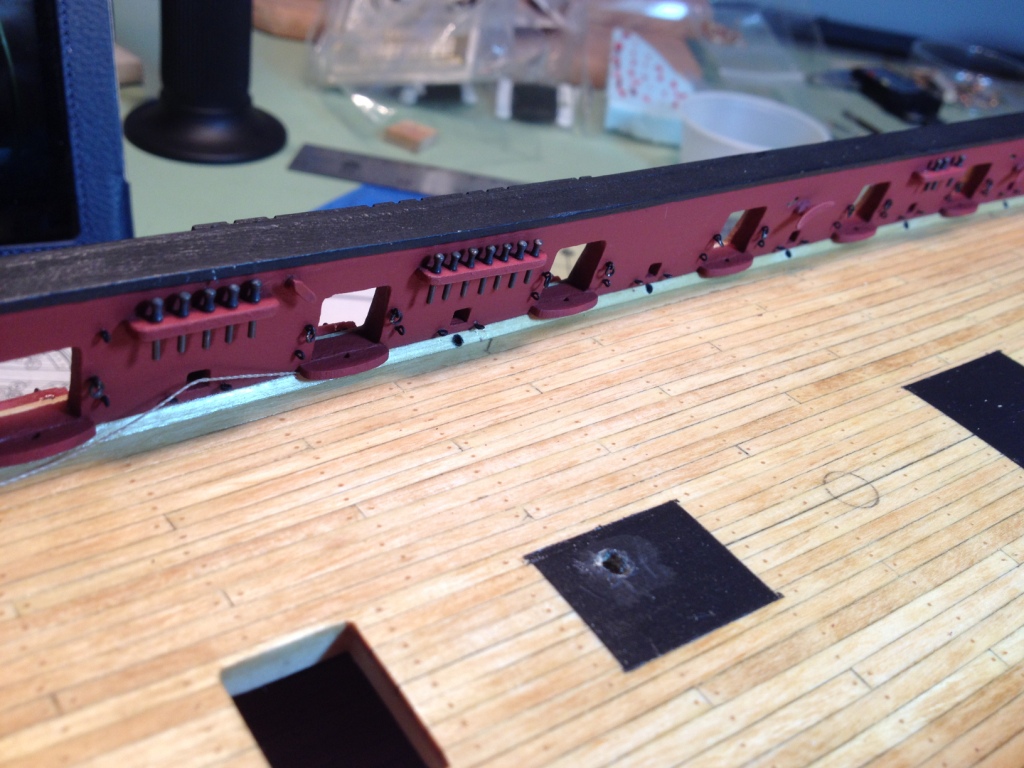
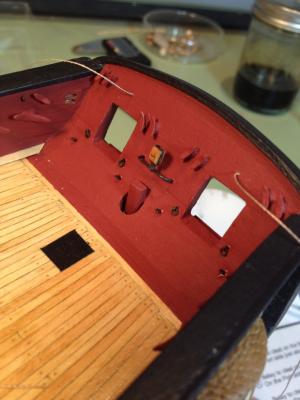
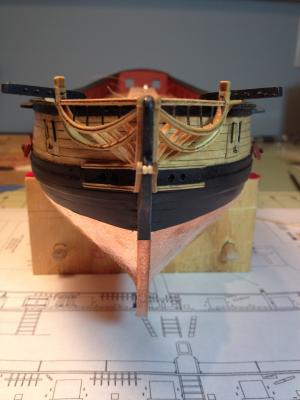
Now that all the pieces are ready I started to install them. Started with the swivel brackets for the carronades which I lined up by eye and the installation was pretty straight forward. Then the pin rails were installed followed by the cleats. After all these pieces were installed I gave the entire inward bulwarks another coat of paint. To help position the eye bolts around the gun ports I cut out the portion of the drawing showing their location to make a little template. The template was placed at each port and a tick mark was made for drilling the holes. The split rings were made from 28 gage wire wrapped around a T-pin with a diameter of about 1.3 mm. After putting the rings on the eye bolts I soldered the gap using silver solder. Used a piece of drywall for the soldering board. Eye bolts and belaying pins in place. I used the brass belaying pins that came with the kit and blackened them prior to installing them.


- 659 replies
-
- 16
-
-
- syren
- model shipways
- (and 1 more)
-
I know what you mean Tom. When I dry fit things it always looks great then add one drop of glue and I'm all thumbs. Your decking looks terrific.
- 1,348 replies
-
- 1
-
-
- constitution
- model shipways
- (and 1 more)
-
Nice job on the wales Jesse. I like the waterline marker too, I was thinking you might be able to use the container upside down so you can make some adjustments to the height by unscrewing the lid, then tape the lid in place so it doesn't rotate any further. Just a thought.
- 1,306 replies
-
- 6
-
-
- syren
- model shipways
- (and 1 more)
-
Hello cpt_d and welcome to the Syren build club. Hope you enjoy this kit as much as I do. Thomas you just beat me to it and like Thomas said, I wouldn't worry too much about the slight warp in the BF, it should straighten out if you add the filler pieces between the bulkheads as shown in the instructions. I also made up the keel clamp shown in the instructions which also helps keep it straight. For the stain I used the minwax golden oak mixed with minwax natural at a 60 (natural) to 40 (golden oak) mix but that's more a personal preference. Good luck.
- 26 replies
-
- 3
-
-
- syren
- model shipways
- (and 1 more)
-
Hemostat, duh,.. I have one of those too and just didn't think of it, thanks Tom. Thanks captainscott for looking in and the kind words and thank you all for all the likes.
- 659 replies
-
- 2
-
-
- syren
- model shipways
- (and 1 more)
-
Thanks George and Augie. I realize the pins are a good idea to help hold everything in place, now I have to start drill all the holes.
- 659 replies
-
- 1
-
-
- syren
- model shipways
- (and 1 more)
-
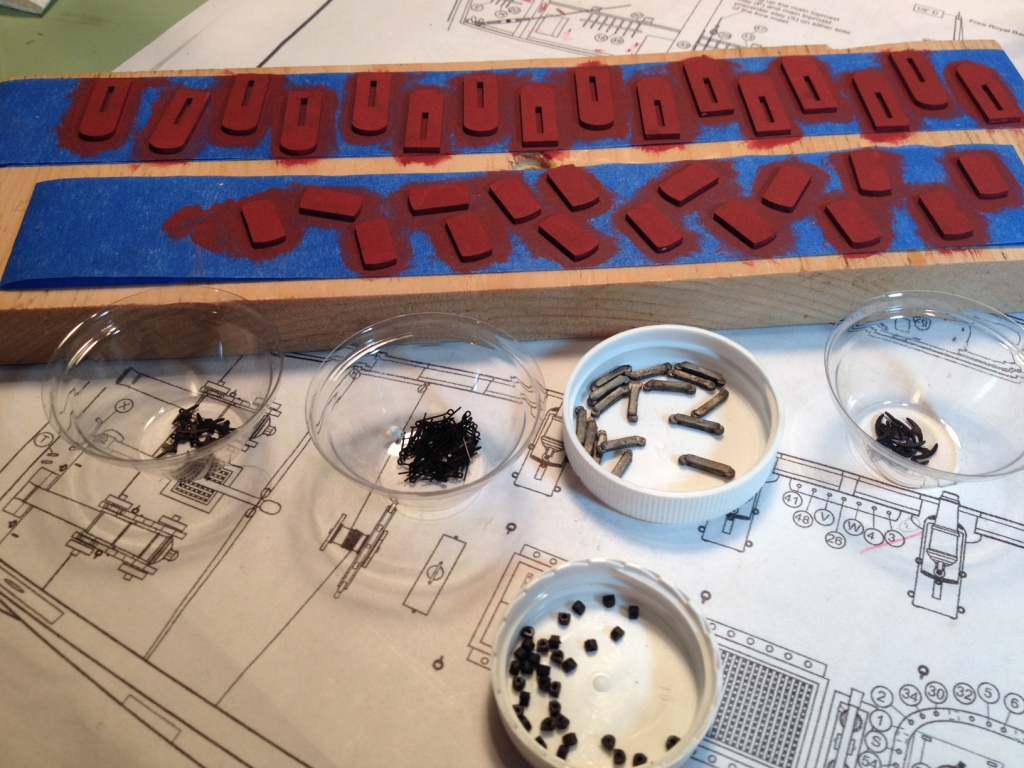
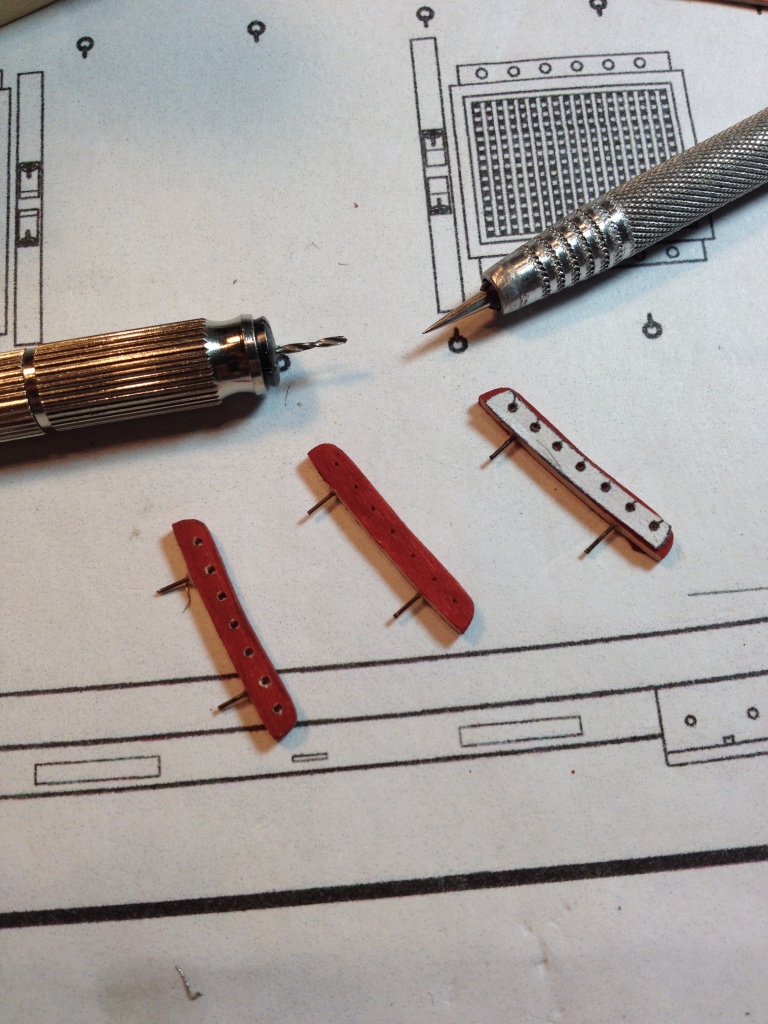
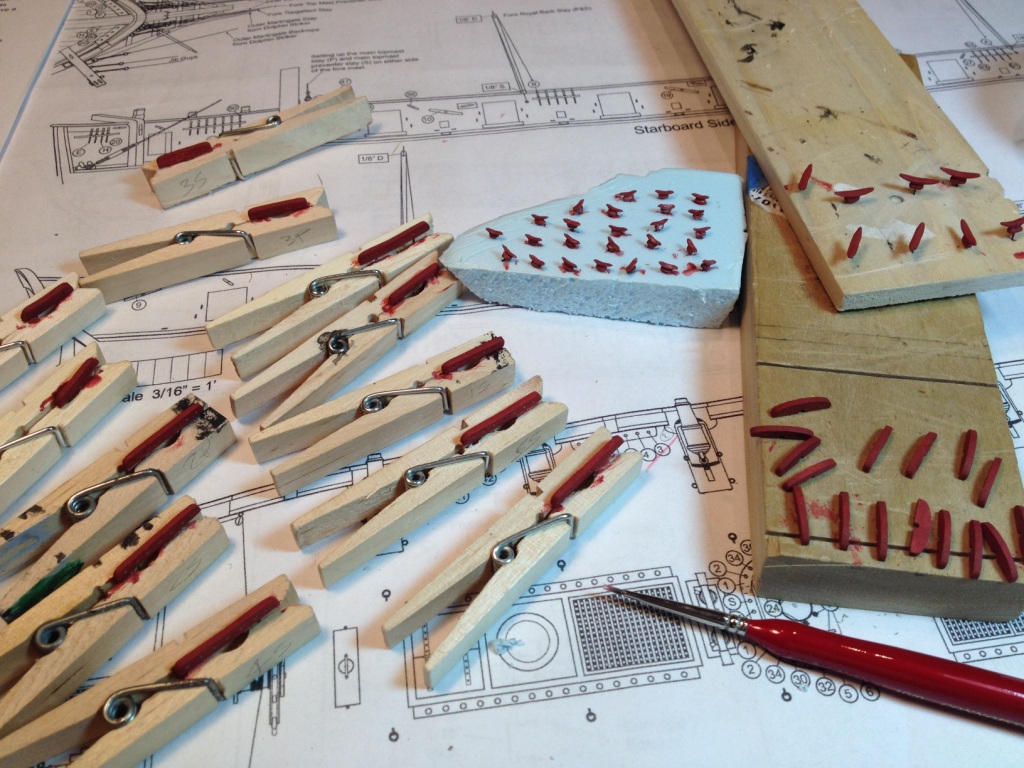
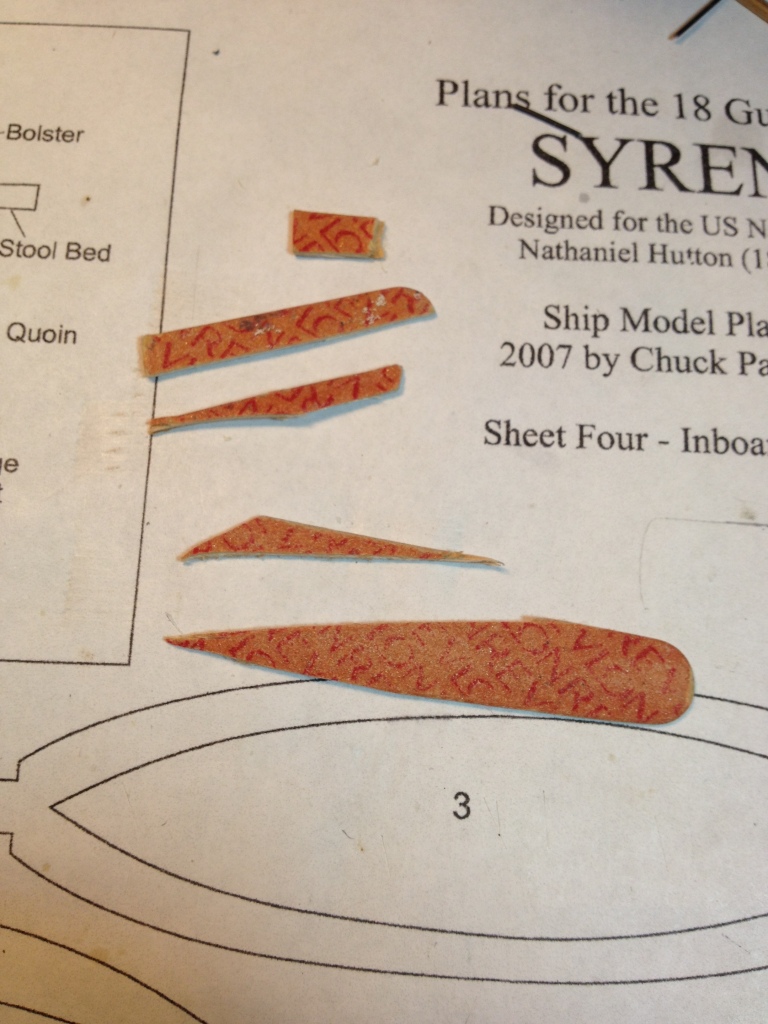
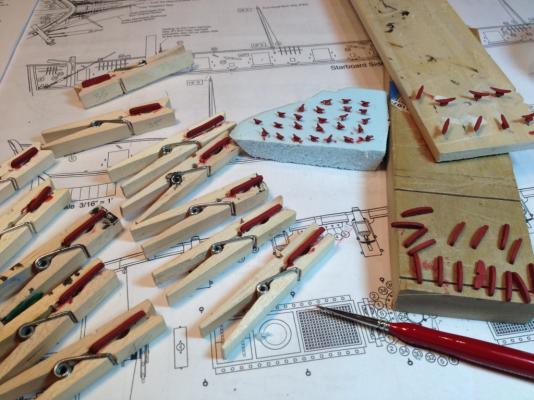
Not much to show for this update, I’ve been getting all the parts ready to install along the inward bulwarks plus the Admiral bought a new washer & dryer so I needed to paint the laundry room. I cut most of the pin rails out of 1/16 x 1/8 basswood strips and used a 1/16 x 1/4 strip for the ones along the curved bow. Added pins to help secure them to the bulwarks and cut out the drawing showing the pin rails to use them as templates to locate the holes for the belaying pins. I tried to file the cleats down to get them a little more scale appropriate but they are very hard to hold onto. I also added pins to the back of each cleat. Cut out the swivel brackets from the laser cut sheet and gave everything a couple coats of paint before I install them. I still need to make all the split rings.

- 659 replies
-
- 12
-
-
- syren
- model shipways
- (and 1 more)
-
Planking came out nice Jesse. I noticed one thing in the second picture you might want to check. From the picture it appears that the stem knee isn't tapered as described in chapter one. It needs to be tapered to fit the figurehead.
- 1,306 replies
-
- 3
-
-
- syren
- model shipways
- (and 1 more)
-
Thanks Gundorph, the Syren is an excellent kit you should enjoy building her.
- 659 replies
-
- 2
-
-
- syren
- model shipways
- (and 1 more)
-
George, Richard, Eric, Brian, thank you all for the nice compliments. Richard, just take your time and if you have any questions feel free to ask. Eric, I like those kind of logs myself that's why I try to explain what I've done but without getting too long winded. Thanks for all the likes also.
- 659 replies
-
- 2
-
-
- syren
- model shipways
- (and 1 more)
-
Thanks Thomas, your build log was a great help. Thanks as always Augie.
- 659 replies
-
- 1
-
-
- syren
- model shipways
- (and 1 more)
-
Thanks Dirk, and you're so right, they sucked big time. Thanks Jim, can't wait until you start yours.
- 659 replies
-
- 1
-
-
- syren
- model shipways
- (and 1 more)
-
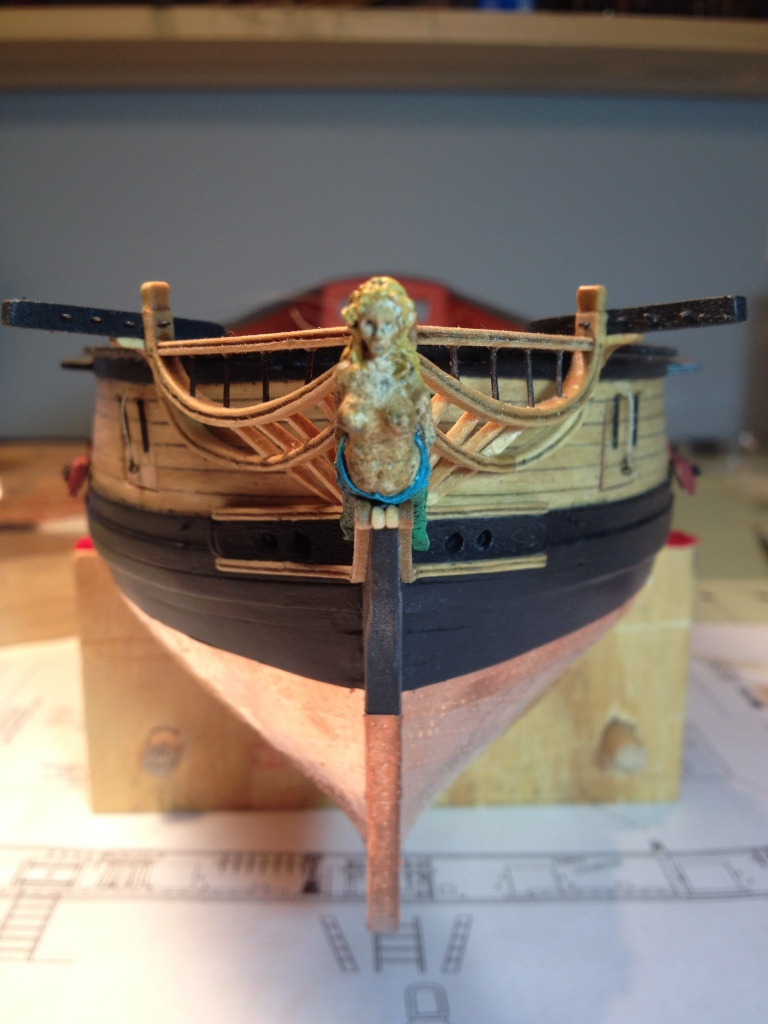
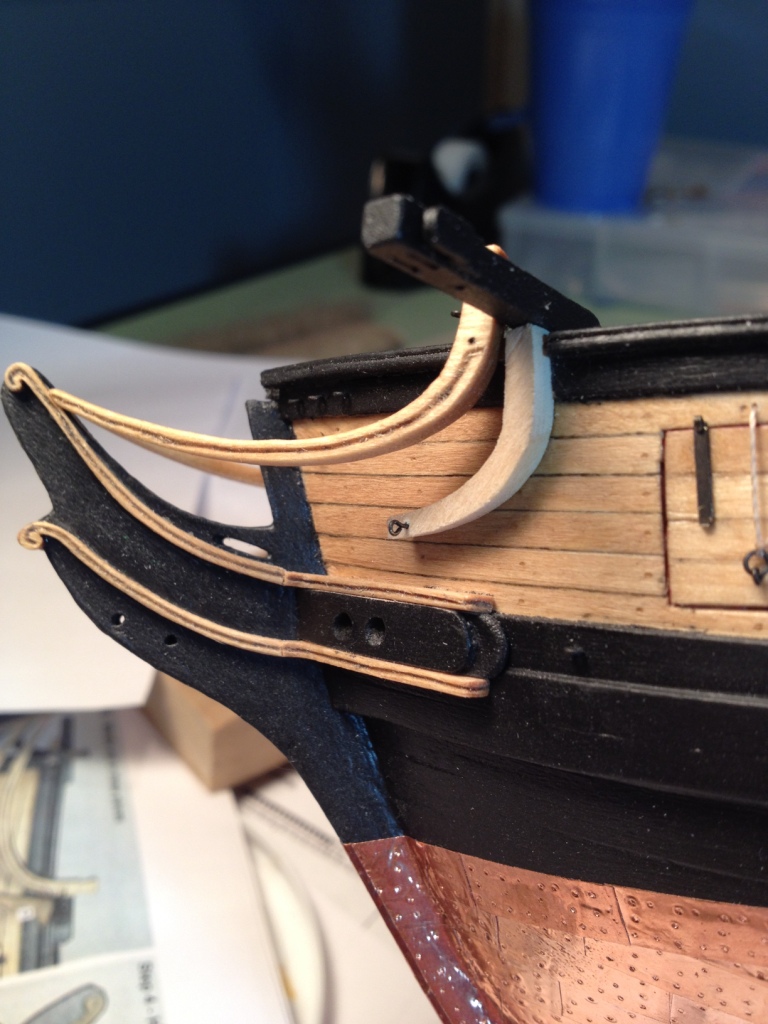
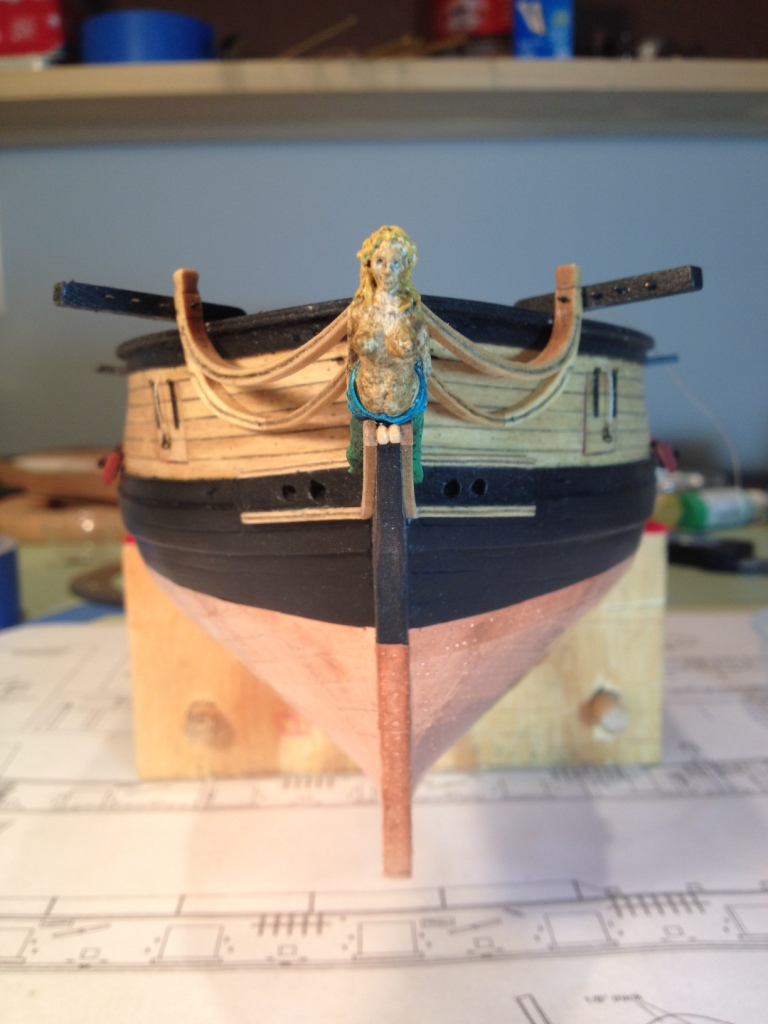
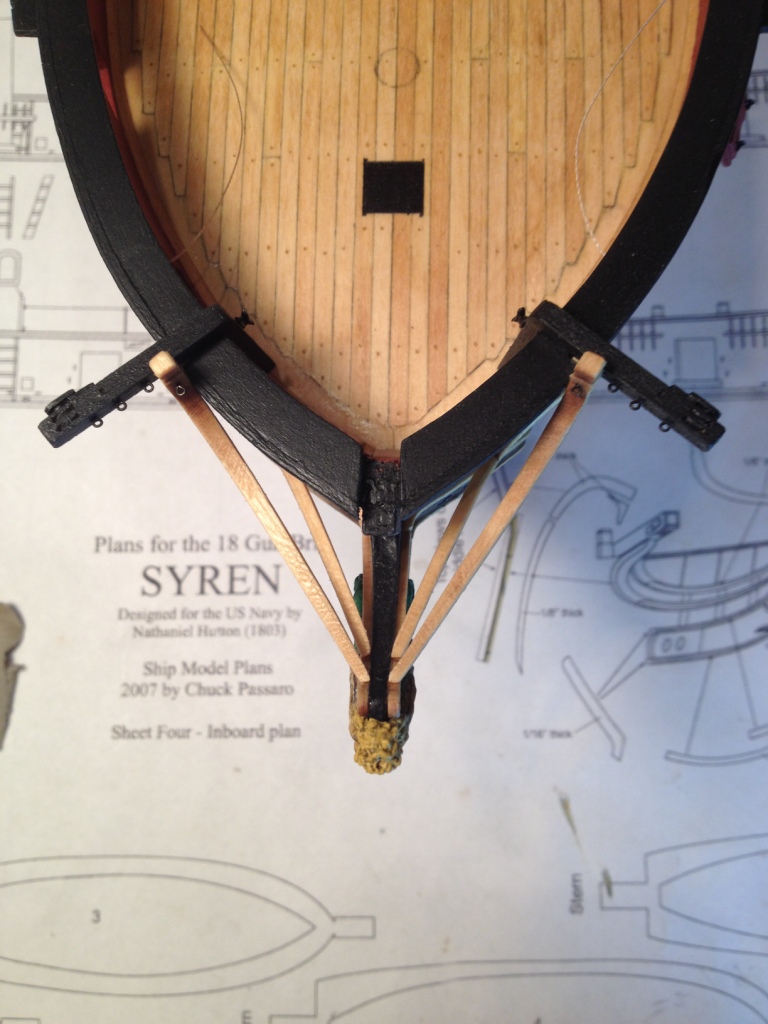
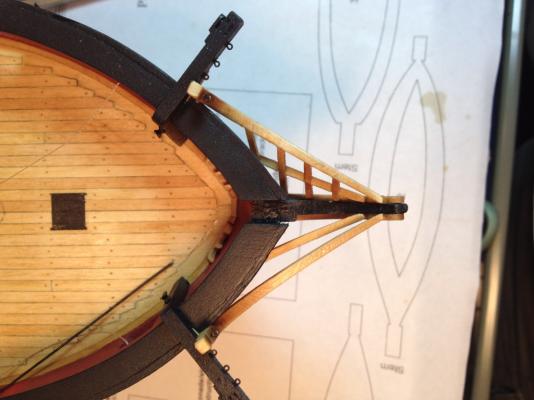
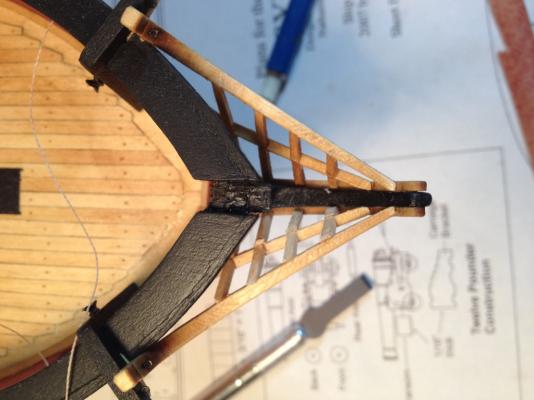
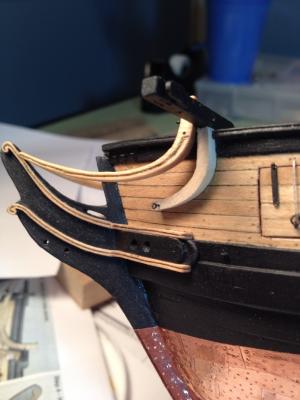
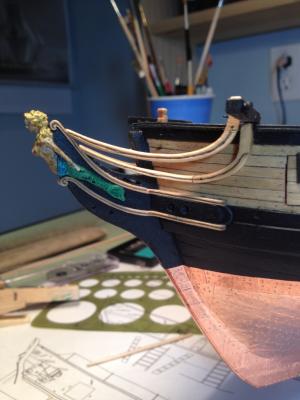
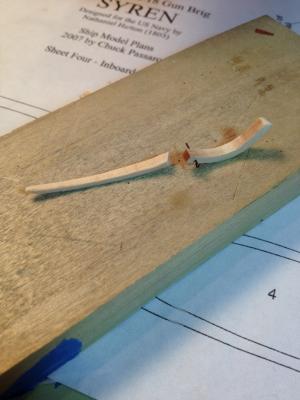
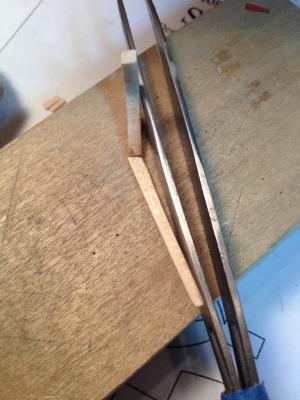
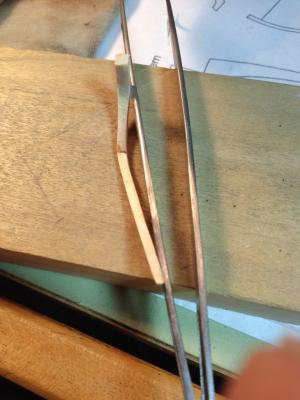
Head timbers, the little pieces of wood placed between the head rails, ! These little pieces almost cause me to put this ship on the shelf. After making a dozen or so pieces that went to scrap heap I finally came up with a solution that worked for me. For my first few failed attempts I tried to make the pieces fit perfectly between the rails. I found, however, that with these pieces being so small and having more angles than my crown molding, just a little too much sanding and the whole piece was no good. What I finally did was to cut and sand the pieces to a rough shape that fit between the rails. Next I glued the pieces in position using white glue to give me time to move them around. Once the glue was set I did the final shaping of the pieces in place. I did one set of head timbers at a time and tried to position them as shown in the manual. Since I needed to sand the pieces in place I did not apply any stain or finish to them until after they were all installed. One big help in understanding how these pieces were placed, and I'd like to thank him for it, was a sketch made by Thomas (Gahm). http://modelshipworld.com/index.php/topic/465-us-brig-syren-by-gahm-model-shipways/?p=185267. Great help Thomas, thanks. Starboard side finished Port side in place, not sanded Port side sanded To sand the pieces in place I didn’t make such elaborate sanding sticks as Thomas did but cut up an emery board to make some custom sanding shapes. Since I was pleased with the way the head timbers came out I figured I’d keep going and finish the top rails. These pieces were done as described in the manual and were somewhat anticlimactic after the other rails and head timbers, but I’m not complaining. The bumpkins were also made but not installed at this time for two reasons. One, after reading Chuck’s original build log for the Syren, he recommended leaving them off until after rigging the gammoning for the bowsprit and secondly, I’m not exactly sure where these pieces are mounted to the hull. I'm thinking that end of the bumpkin goes below the sheer stake and aft of the lower eye bolt that's mounted to the hull. If anyone can enlighten me I’d appreciate it.


- 659 replies
-
- 15
-
-
- syren
- model shipways
- (and 1 more)
-
Very nice work Augie, gives me something to aspire to.
- 2,191 replies
-
- 4
-
-
- confederacy
- Model Shipways
- (and 1 more)
-
Jim, George, Augie, Thomas and Richard thank you so much for the kind words, it's much appreciated. And thanks to all for the likes.
- 659 replies
-
- 1
-
-
- syren
- model shipways
- (and 1 more)
-
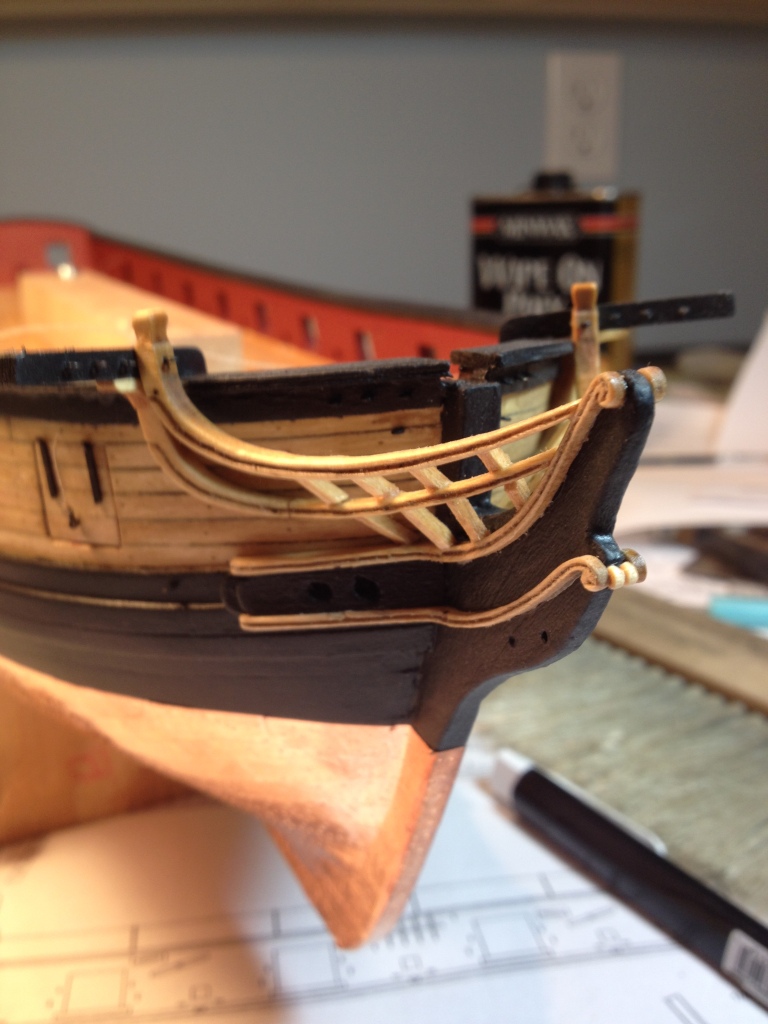
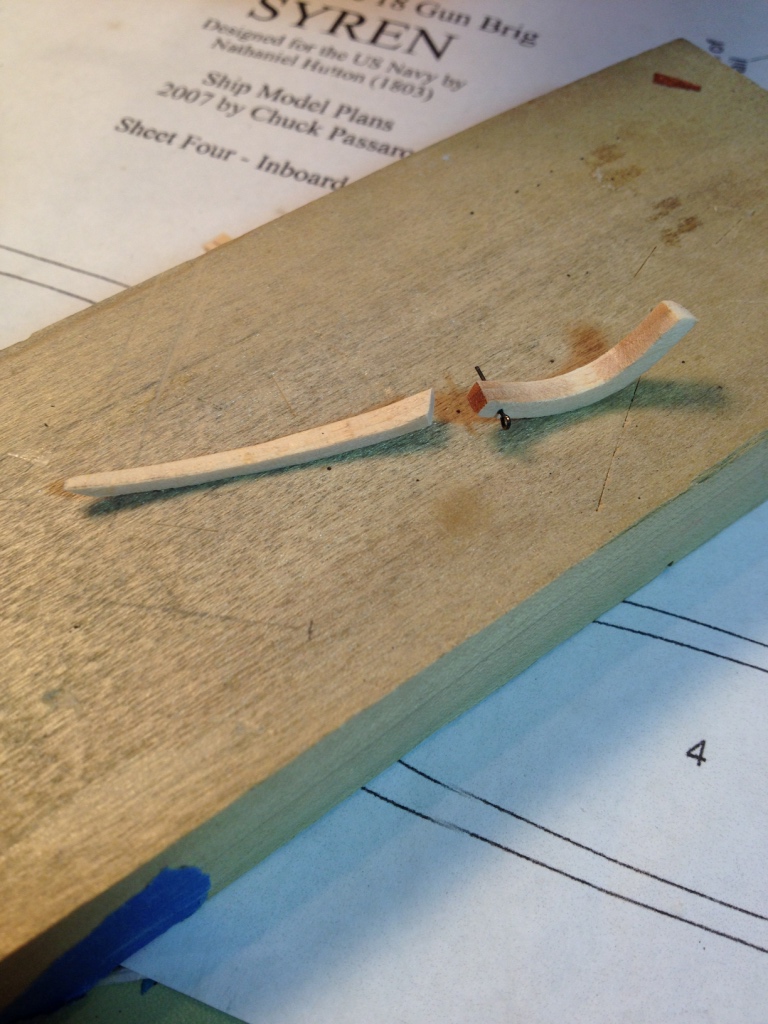
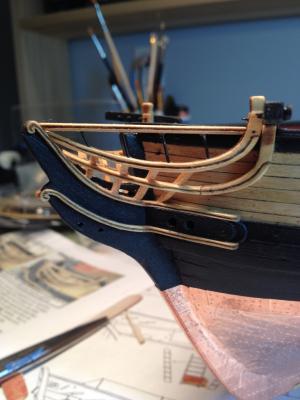
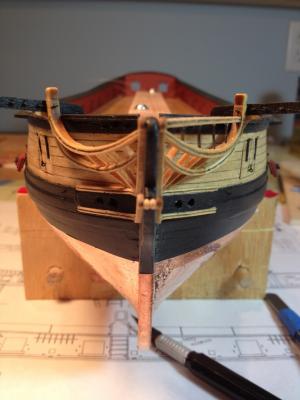
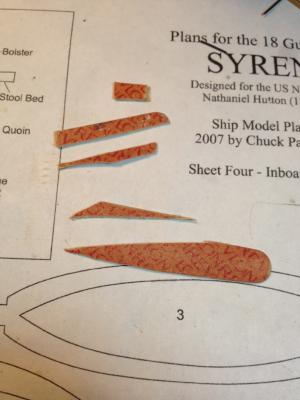
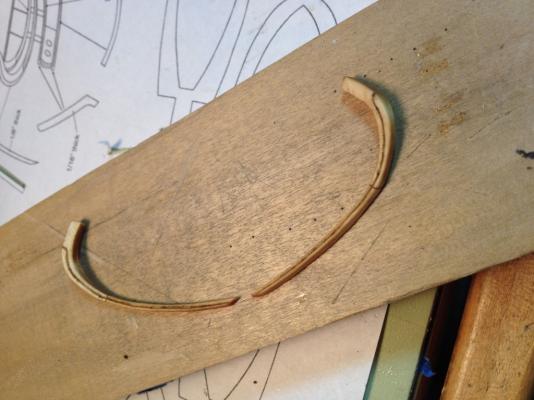
After reviewing a number of build logs here on MSW, I decided to assemble the middle rail a little differently than how it was shown in the instructions. Instead of starting with the number ‘1’ piece of the middle rail I decided to temporarily set the number ‘2’ piece in position. To hold the piece in place I drilled a small hole through the lower part of the rail and into the hull, similar to what I did for the upper rail, so I could insert an eye bolt into it. The upper portion was held by the notch in the cap rail and sheer plank. Now with piece 2 in place I was better able to position the number 1 piece. After piece 1 was tapered and shorten to fit between the cheeks and piece 2, I thought the only way I would get a smooth transition between the two pieces would be to glue them together, before they were glued on the ship. So with piece 2 just pinned in position I carefully glued piece 1 to it with a drop of CA glue, holding it in position until it set. I used an abrasive buff on my dremel to sand the pieces down to their final shape being careful not to exert too much pressure near the seam. Before After The last thing I did before gluing the piece to the ship was to carve the groove and to stain it. The piece was then glued on the ship and like the upper rail I used a shorter pin in place of the eye bolt to help secure it to the hull. I worked on both the port and starboard rails at the same time which helped to make sure they were symmetrical about the knee. In retrospect I’m glad I glued the two pieces together because I was able to get a nice transition between the two parts. The only thing I don’t like is where the two pieces are joined together. I think by using CA glue it didn’t stain well so you can see the seam between the two pieces. Now I need to work on the hanging knee (piece 3).


- 659 replies
-
- 12
-
-
- syren
- model shipways
- (and 1 more)