Landlubber Mike
-
Posts
4,543 -
Joined
-
Last visited
Content Type
Profiles
Forums
Gallery
Events
Everything posted by Landlubber Mike
-
 Yes, I knew it looked familiar!
 -
Looks great Chris. Do you end up painting/weathering these card models? Or just touch ups along seams? Seems like they are already printed with nice colors.
-
Hey Alan - for what it's worth, I tend to spray Vallejo around 15-20 PSI (15ish for their metal colors, 20ish for their paints and primers). I also thin their paints and primers (not their Metal Colors) with Vallejo's thinner, and sometimes use their flow improver. For a base primer, I'd highly recommend looking at Mr. Surfacer. I'll usually spray their gray 1200 or 1500 first to see what flaws need to be touched up, and then will spray their black 1500 (e.g., to black base) or white (usually if I need a white undercoat for tricky colors like red and yellow). You can get them in rattle cans or in jars that you can add Mr. Color Leveling Thinner to and spray in your airbrush. I'm trying to move more towards acrylics, but the Mr. Surfacer primers really are tough to beat. They clearly reveal imperfections, can be sanded, and level perfectly. For big areas like fuselages and wings, I'll use Mr. Surfacer. For small/detail items, I'll use Vallejo.
-
Nice job! The cargo net looks like a spot-on miniature representation!
-
Glad you came through relatively unscathed Craig. I'm sure it must have been a frightening period of time. Shame about the beautiful (live oak?) tree that was uprooted. It's amazing what big storms can do. When the derecho (straight line winds) hit the DC area a decade ago, some really massive oaks all over the area were similarly uprooted. And I think our winds were only 60-80mph.
-
Quick update - I've spent quite a bit of time this week working on the wings for the two 129s. The first one (opened up) was a bit tricky in trying to get the CMK undercarriage set to fit, along with the open panel for the first aid kit in the upper left wing and magazine in the lower left wing from the armament set. I found the undercarriage set not only needed a lot of shaving back along the sides to get the various aftermarket pieces to fit, but I also needed to thin them as they seemed to be a bit too tall and were bulging the wings a bit too much. Given that the undercarriage won't really be seen, if I had to do it again, I wouldn't bother buying/adding that set (which I didn't for the second 129). After a lot of grinding and test fitting, everything looks pretty good. Very minimal filler needed along the wing roots and nose pieces. This kit really fits together like a glove! A nice change of pace from my last few models that required a lot of work to get the fuselage, etc. to fit and close up big gaps. Next I worked on the wings for the second 129 (towed diorama). I removed half the wings as per the pictures. The trickiest part was creating the inserts at the ends of the wing stubs, but I think I managed to get a close representation of what those wing ends look like. Like the first 129, the fit of the wings and nose pieces to the fuselage was amazing and required minimal filler. I figured I'd putty some of the seam lines at this point as well as the hollowed out tails to which I'll attach the aftermarket rudders. While the putty cures (I used Tamiya's 2-part epoxy putty which I really like), I can start working on the engines and nacelles. Thanks for looking in!
- 51 replies
-
- 10
-

-
Awesome! I bought this kit from a member a few years ago. Itching to start it once I can find a place to put it! Looking forward to following along! I have the Pontos sets but didn't realize there were the CMK sets. What do you think of them?
-
Came out really great Alan, nice job!
-
(inexpensive) Lathe recommendations
Landlubber Mike replied to palmerit's topic in Modeling tools and Workshop Equipment
A couple of links I found on turning masts and spars on a mini lathe: Turning on a DB 250: Turning on a Sherline: -
(inexpensive) Lathe recommendations
Landlubber Mike replied to palmerit's topic in Modeling tools and Workshop Equipment
Those two are what I could consider, as the A packages have a lot of the basic accessories you would need. Personally, I'd go with the longer bed as you then can handle longer stock and won't be as concerned with the pass through capacity of the lathe - though, the longer and thinner the stock, the more you would need a steady rest as Greg noted. I'd also consider the DRO package - it's a very nice upgrade to have. Buying it after will not only cost you more, but you might also have to change out some of the hand wheels which not only adds to the cost, but also the hassle factor as you need to put in work to swap everything out. I'd prefer to just have them all installed at the factory from the beginning. Same with wanting to upgrade from an 8" bed to a 17" bed - I think when I looked into it, it was just worth selling my 8" used lathe and buying a new 17" lathe rather than buy a replacement 17" bed. Just as an FYI, for the width of pieces that you could turn, you can only turn pieces up to 3.5" diameter with the standard head and tail stocks. Sherline sells riser blocks for the headstock and tailstock that increase the diameter to 6" - though they warn that the motor strength is the same, so you shouldn't try to turn bigger projects that will require a stronger motor. I ended up getting the riser blocks as I needed a little more clearance for my non-ship modeling turning projects. For typical wood turning projects, people will usually recommend a larger wood lathe over gearing out a Sherline to make it work. I didn't want (or have room for) a wood lathe alongside the Sherline so I just sucked it up and spent the money to configure the Sherline to handle my wood turning projects. In the end, do you need a lathe for masts and spars? You don't, but then again, you really don't need any power tools to build a wooden ship model, especially if from a kit. Better modelers than me will say it's better to do masts and spars by hand, but personally, i found it very quick and easy to create the masts and spars for my Badger using the DB 250 versus doing them by hand. Sure you have to do some work by hand like the octagonal sections, but otherwise, it was only a couple hours of work getting properly tapered masts and spars. Maybe I was just lucky as I didn't find the process awkward at all - it anything, it was very simple and easy. Personally, I like monkeying around with power tools, and many times, I find they make certain model processes much easier, quicker, and more accurate. It's like anything else in this hobby or other hobbies - just figure out what your budget is and what you want to achieve. DB 250. Like I said before, the DB 250 is a very nice machine should you decide to get a lathe. I think unlike many other Proxxon products, you don't need to buy a separate transformer for it - you probably would want to consider getting one or both of their chucks though. They sell a 3-jaw chuck which is nice being all metal, and a 4-jaw chuck that I believe unfortunately is plastic. For doing masts and spars or small wood turning projects, I think it's hard to beat this lathe. Sherline. If you think you might want a mini lathe that will give you a lot more functionality down the road besides turning masts and spars, consider the Sherline. The cost, especially with accessories, will run you a lot more than the DB 250, but you'll have a tool that will last forever and can be upgraded with dozens of different accessories. And like I said, you can always start with the DB 250 and upgrade later if the mood arises. -
(inexpensive) Lathe recommendations
Landlubber Mike replied to palmerit's topic in Modeling tools and Workshop Equipment
With any lathe, you need something to hold the piece at the headstock (3 or 4 jaw chucks, lathe dog, center, etc.), something to hold the piece at the tailstock (center, etc.), and for wood, you need a tool rest (for turning metal, there is a tool post that holds the cutting implement which you move via the hand wheels, as opposed to turning wood where you manually hold a tool on the tool rest - though, you could turn wood on a tool post too). It gets complicated to spell out exactly what all the various options are, but that's the basics for a lathe. You could get an 8" Sherline lathe with their package A for under $1000. I don't think you need to initially go to their package B or C, as you can always add accessories later. Personally, I'd opt for a lathe with a 17" bed (I originally bought a used 8" lathe but sold it to upgrade to a 17" with the digital readout). The DRO is very helpful if you can swing it. Here is the milling column that converts the lathe to milling operations: https://www.sherline.com/product/30503053-vertical-milling-column/#description You can use a mill as a drill press as well as for milling operations which allow you to remove material laterally against the milling bit - drill bits aren't designed for that and will break. I haven't used the mill much, and probably could have gotten away with just using the milling column for where I am with my modeling hobby now. The whole lathe/mill thing is very overwhelming in the beginning, and to be honest, I didn't exactly understand their uses (minus the very basics) until I started using them and then realized what accessories I needed. It wasn't until I took a detour and started wood turning projects like pen turning that I really understood the potential for what a lathe could do. Of course, that meant I ended up buying accessories and upgrading to the 17" bed with DRO. You could always start with a DB 250 and then upgrade to a Sherline later if you feel the need. I bought the DB 250 new, and sold it for almost as much as I paid for it. It's a very good machine (at least when I bought it, don't know if there are quality issues these days), and if you're just looking to do masts and spars for most size kits, you'll be fine. You can always upgrade in the future to a Sherline or other lathe if you want more functionality - turn metal, longer/wider pieces, accuracy to do some pretty cool stuff with the various accessories you can buy like a DRO, etc. Sherlines are built like tanks and can be simple enough to replace parts. Not inexpensive, but they will last a lifetime. Sorry for the long post. I was in your shoes years ago and felt confused an overwhelmed with all the options out there. Hope this helps a bit. -
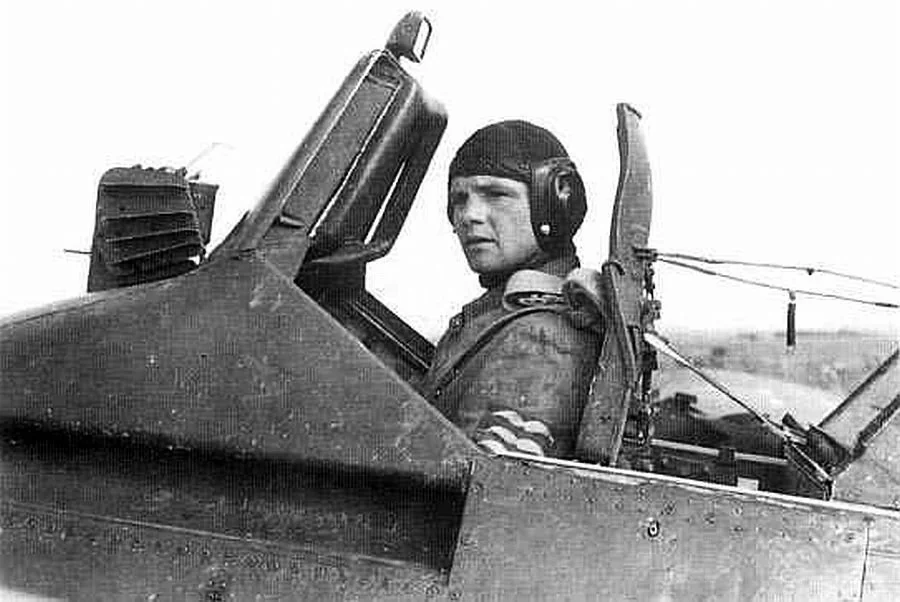
Yeah, and the pilot was sitting a couple of feet away from the fuel tank 😳
-
Nicely done! Cool subject and it looks sharp with the orange against the white. Speaking of the white, do you mind me asking what white paint you used? I need to use some white in upcoming builds, but don't want a stark white. I've liked using Insignia White, which has a bit of gray in it, but am curious what other whites are out there. Yours looks really good.
-
Wow, another fun project Glen - looking forward to following along. Nice start!
- 185 replies
-
- 9
-

-
-
- Flying Dutchman
- Black pearl
- (and 2 more)
-
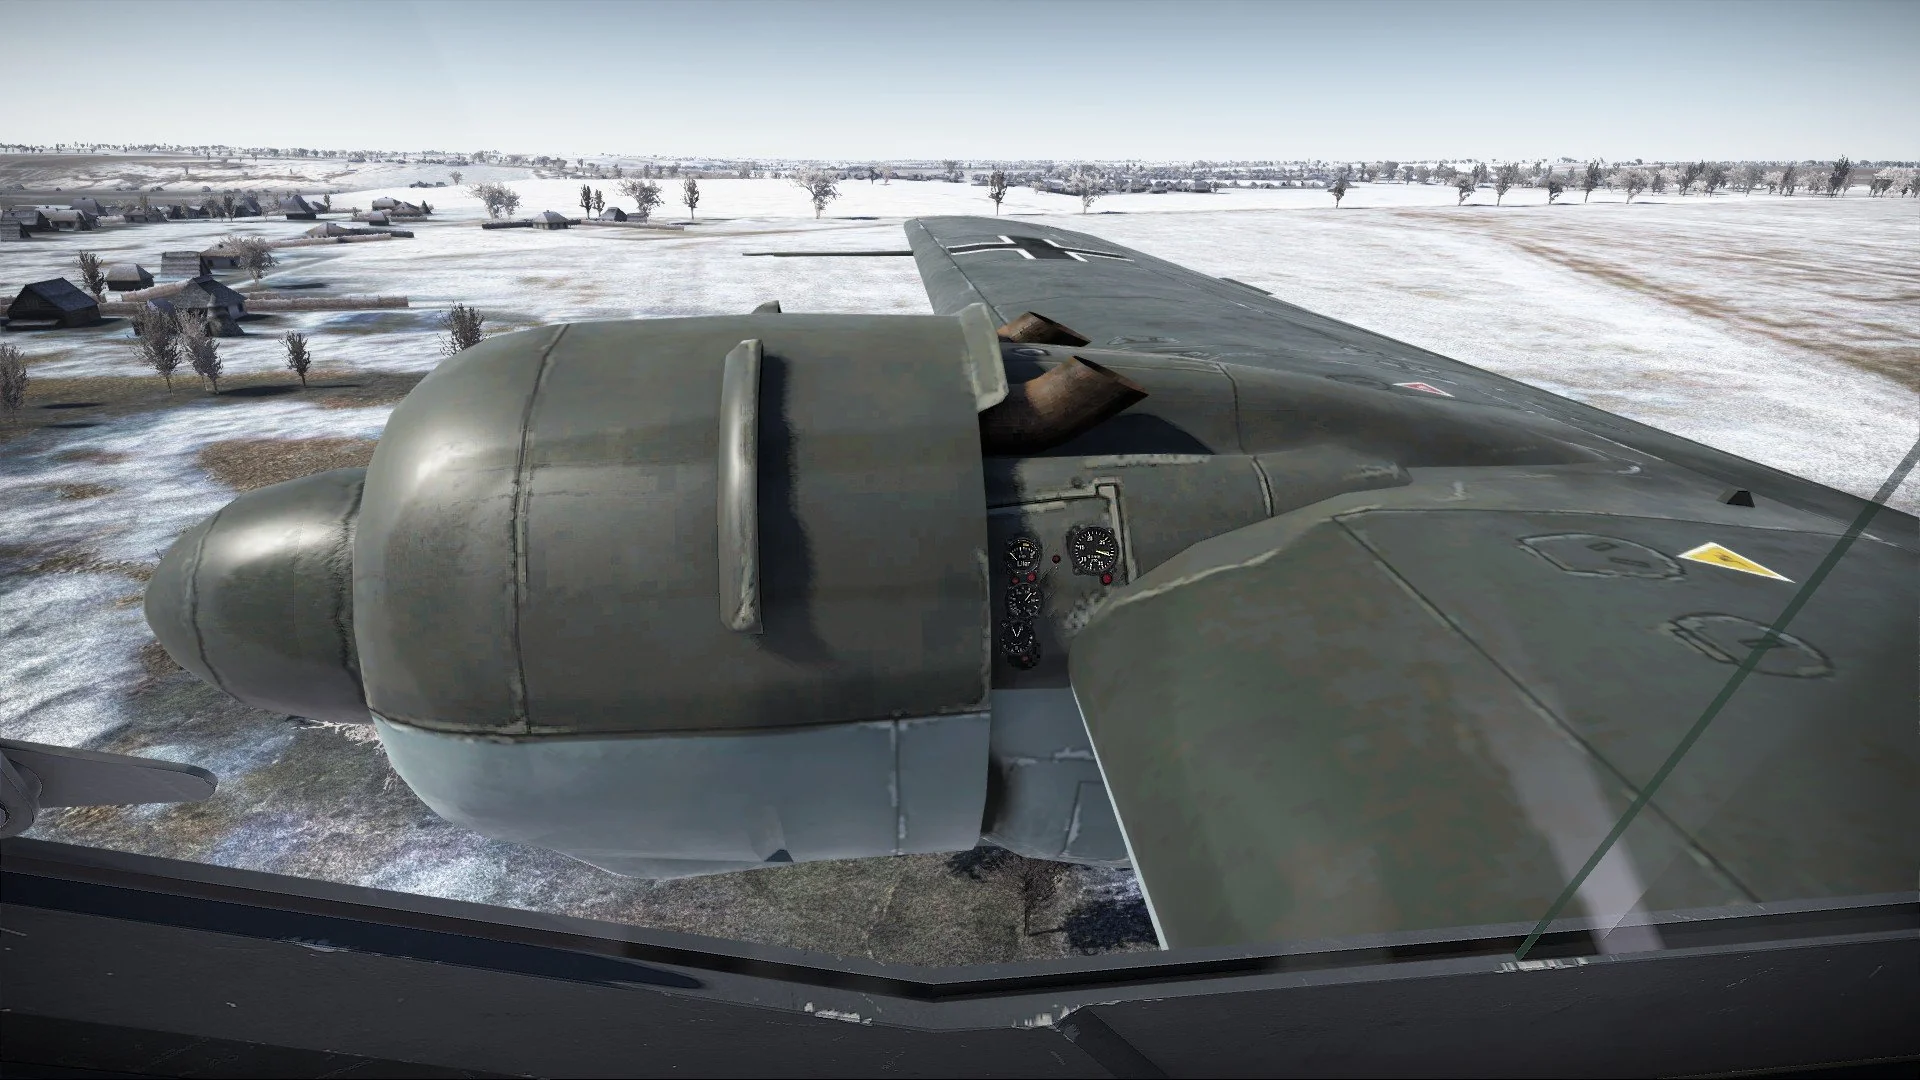
Thanks Kevin! Yeah, the cockpit is tiny as you can see from this picture: In fact, it's so small, a number of the instrument gauges had to be located outside of the cockpit and onto the engine gondolas:

- 51 replies
-
- 12
-

-
-
(inexpensive) Lathe recommendations
Landlubber Mike replied to palmerit's topic in Modeling tools and Workshop Equipment
I started with the DB 250 and loved it. It help immensely with making the masts and spars for my Badger build quickly and accurately. There is a pass through hole for longer work. I think for most wooden modeling objectives, it's a really good lathe. I had also bought the two chucks for it. I did end up selling it a few years ago to upgrade to a long-bed Sherline for more functionality - I got into small wooden turning projects, and the Sherline can turn metal. I also liked the digital readout functionality to help with accuracy. There are many accessories Sherline offers that make it a one-stop machine for small work across different types of projects. That being said, a Sherline is significantly more expensive than the DB 250. If you ever are thinking about getting a mill, Sherline does have a conversion option that allows you to buy one machine and use it for both milling and lathe operations instead of buying two separate machines. -
Some progress on the two Hs 129s. The first one with all the aftermarket has taken quite a bit of time to get the detail pieces installed. The CMK sets individually fit quite well, but there is quite a bit of work to make them all fit together. Here is the CMK cockpit set - I still need to add wires between the seat armor plate and the firewall for the fuel tank. I also have to finish up painting the seat belts: Here it is installed with the fuselage halves closed. Took quite a bit of time test fitting to get the fuselage halves to close properly, but eventually I got there: Left side of the fuselage showing the MG 151 (from Aires set) and FuG 7 radio (from CMK armament set): Right fuselage with open luggage compartment (from CMK armament set): I also closed up the fuselage on the second Hs 129. Because the cockpit was covered in a tarp in the picture I'm reproducing, I didn't do much in the cockpit aside from adding the cockpit tub. The fit on the kit is incredible - the two fuselage halves and the tub snapped together perfectly! The only other change I made was to (1) cut off the rudder, since I have a one-piece rudder in the Verlinden set, and (2) close up the insertion points for the horizontal stabilizers/elevators, since those were left off the Hs 129 as it was being towed. Can't really see it well in the picture, but I inserted a piece of plastic strip, with three holes drilled out as seen in some of the pictures of wrecked Hs 129s. Thanks for looking in!
- 51 replies
-
- 17
-
-
Looks good Alan - that plane has really nice lines.
-
Kevin, thanks for the recommendation - i picked up a set of them as they look very nice. I usually go through brushes pretty quickly - ruin the tips, etc. The one set that have survived for me and still look like new are the ones from Tamiya. Really good quality. https://www.amazon.com/Tamiya-America-Modeling-Pointed-TAM87173/dp/B00VTDYJ18/ref=sr_1_7?crid=20VRJ6Q39DX7M&dib=eyJ2IjoiMSJ9.xIiDJLV12Fx-YJI8Hf_2owKj3NE70REfDpSh5dUSIgB233rkYZjNkSWVw4FXg0g0P72NEm0yxQF9HKs2kKM0Dr5_xaZvcZRiCEH5HKjgudvca2zuBkrCl1bgh1ElyE5fMYVCvvORQr-3df7eBU-buvQiuueDnS4AlGMYOT3E6-NGF-rHD7X9L3kwy9--9J3WvAa_Sh0vYVHgRuRgzKerB67cqNIdcyEEGAIYgcSjFlZ6lsuKpKlaTisCthzg8xLBEIa7sCPEfDTIPwbldWzCB6yFzfPi-TwIY1dvxbZSnNM.gCPPrhjKrCx7G-KylfBDYkruSI-9wpO2PnWkCzOtTfs&dib_tag=se&keywords=tamiya+paint+brushes&qid=1727540985&sprefix=tamiya+paint+br%2Caps%2C92&sr=8-7
-
Wow, that's spectacular Biggles! Nice job man!!!
-
Looks really sharp Alan. You're getting really good at painting miniatures.
-
Glad you and your family made it out ok Craig - losing a gazebo stinks, but could have been a lot worse.
-
Hey Alan, just be careful about using the Vallejo Putty. I've heard it tends to shrink over time. For bigger gaps, I mostly use Tamiya 2-part epoxy putty or CA which don't shrink. For small cracks and stuff, I will use things like Tamiya putty and have used Vallejo Putty. I just get too nervous that with my slow build times, by the time I get around to painting - which could be weeks or months after construction - I'm back at square one with needing to fill (would be even worse if I had already painted!).
-
I'll spare you the bullriding quips, but way to resolve that mast problem! Looks really good.
- 301 replies
-
- 5
-
-

-
- Constitution
- Bluejacket Shipcrafters
- (and 1 more)
-
Nice job Alan. Looks like another kit that will test your skills!