


Landlubber Mike
-
Posts
4,553 -
Joined
-
Last visited
Content Type
Profiles
Forums
Gallery
Events
Everything posted by Landlubber Mike
-
 Looking really good Chris!
 -
Wow, nice paint job! Tricky but you nailed it! For custom decals, I think someone mentioned this, but you can design decals on your computer and print them out on your printer with special decal paper. I haven't had to go that route, but I can see trying it out in the future. From what I've seen from others, it doesn't sound as hard as it might seem. The one tricky thing is printing "white". You might need a special printer for that. There were these Alps printers that could print white, but maybe others now can print it as well. Maybe an easier alternative would be to design your own stencils/masks for the lettering. You design it on your computer, then get something like a Cricut machine to cut them out. If you don't want to do it yourself, there are outfits out there that can help you like this one below: https://kitmasx.com/pages/custom-mask-requests
-
Good choice in going red Craig. Your Ferrari is stunning! And thanks for posting pics of models from the show. You've got some talented people down there! I really like your Bugatti - what kit/scale is it?
-
Oh no, that is terrible news! I've dealt with them on a couple of occasions and they were incredibly nice. Hope they can sell their business - they really put out some beautiful kits of some very nice subjects.
-
Oh yes, now I remember your log! Such a great build, love it!
-
Oh wow, even cooler! Hope you can figure out the linking - that seems like a cool model. I remember Yves beautiful work. I have the Revell 1/144 kit with the Pontos set, along with the 1/72 kit with the full David Parkins upgrades that someone here on MSW was building at one point. I love the Flower Class corvettes - just want to get my skill level up to do the two kits justice!
-
Alan is that the Revell 1/72 Flower Class kit? Apologies if I forgot that you built it, but it’s a nice model, wow!
-
Nice work Craig! The piping on the seats came out really well. Hope you played the lottery - you were certainly on a lucky streak that day!
-
Such a beautiful and epic build. Really nice job!! I sometimes have a similar beverage at hand as in post #2574 to get through parts of a build
- 2,699 replies
-
- 3
-

-

-
- heller
- soleil royal
- (and 9 more)
-
That came out really great! There's a certain charm of these small craft that you just don't get with the typical model of a British 18th century warship. Well done!
- 55 replies
-
- 3
-
-
-
- Norwegian Sailing Pram
- Model Shipways
- (and 2 more)
-
That came out really great Alan! Love the colors you used - they complement each other nicely. Pretty quick build for something fairly complicated, you've become quite the expert at this scale! I chuckled when I read your part about the missing mast. Definitely has happened to us all!
-
I wouldn't use Vallejo putty as it's for plastic models. It's also unfortunately known to shrink. You have a variety of options depending on the size of the cracks and whether you are painting the the section: If very small, I'd consider filling the gap with wood glue and then immediately sanding the area before the glue dries. The sawdust will catch in the wood glue and no more gap. If very small and area will be painted, you can also use super glue - use medium to fill the gap, and then sand flush. Super glue doesn't shrink so it's a very good option. But, you can't stain, etc. it so really this option is only if you are going to paint the area. If small or especially if larger gap, then wood putty works great. The wood putties tend not to shrink as much as the putties for plastic models.
-
Thanks Bob, really appreciate it!
-
Thanks Gary, really appreciate the kind words!
- 47 replies
-
- 2
-
-
- Annapolis Wherry
- Chesapeake Light Craft
- (and 1 more)
-
Another really nice one Andrew. Looks perfect!
-
Really well done Andrew!! Nice job!
-
That's a nice little kit and you're doing a great job on it. I might have to look into these for some of my wooden builds. Thanks for posting the separate build log!
-
That came out great Alan - definitely a tricky looking part to build but you pulled it off magnificently. Your detail work is fantastic!
-
Thanks for the tip on Bob Smith Gold medium. I’ll try it out. So far I’ve been fine, but might as well take more precautions. As a side hobby, I turn pens and when using wood blanks, I like applying a CA finish. When sanded and polished, the CA turns into an ultra durable glass-like finish which is really spectacular looking for woods like burls and spalts. The process involves having the blank spin on the lathe, add a drop or two of CA onto a small piece of paper towel, and then quickly run the paper towel across the blank while it’s spinning. I’ll add anywhere from 10-20 coats like that, so the fumes get very intense. I usually run my shop vac near the lathe to pull in most of the fumes while also wearing a respirator. Otherwise, I could definitely feel the effects from the fumes. Nasty stuff!
-
Thanks Alan really appreciate the kind words!
- 47 replies
-
- 3
-
-
- Annapolis Wherry
- Chesapeake Light Craft
- (and 1 more)
-
Thank you! This build has regenerated my interest in going back to wooden ship models, so I might dust off one of the three builds I have going. My Pegasus is pretty far along, so maybe I can get back to that one. Otherwise I have enough plastic models in process to keep my busy. I have a 1/72 Planet Models Gamma 2J that is just waiting on weathering, and started a Planet Models 1/48 SNC-1 earlier this week which should be a quick build. Thanks again!
- 47 replies
-
- 3
-
-
- Annapolis Wherry
- Chesapeake Light Craft
- (and 1 more)
-
Thanks guys, really appreciate the kind words! The staining did come out a lot better than I was expecting, but pretty close to where I was hoping. I think using a more toned down white and black also worked nicely. Thanks again!
- 47 replies
-
- 3
-
-
- Annapolis Wherry
- Chesapeake Light Craft
- (and 1 more)
-
That's an incredible amount of very fine detail in your model Alan. You're doing a really great job! I've tried Gator's Grip glue, and for me, it's fine for some things but others where you need a quicker set time, I just seem to get along better with CA. I typically use medium CA (thin i find too runny and uncontrollable) applied with a pin, and if I need a quick set, I'll use an accelerator that comes in a pump bottle as opposed to the aerosol can. I just unscrew the top, dip the head of a toothpick to get a small drop of the accelerant at the tip, and then touch the glued pieces. Of course all this sounds a lot easier than it is in actual practice. I used to really hate using CA, but we've come to an understanding and I've gotten a little better with it. But there are just times that are so frustrating when the glue doesn't seem to want to hold the parts, or on the flip side, will grab immediately before I've had a chance to finalize the position (or somehow immediately glue my fingers). Some of these guys on YouTube seem to have no problems at all but maybe they have similar moments at times which end up on the cutting room floor and aren't included in the final video. Oh, and don't get me started on railings. They are my nemesis!! I'm not sure I've totally figured out a way to do them, but pre-bending is definitely a helpful step. On my first 1/700 I tried using Gator's Grip but I think the cure time was just too long and I couldn't get it to work. So now after pre-bending - even for slight curves in the hull - I add a little CA in the first section, then slowly work my way down and add CA down the line. Even then, I'll sometimes get gaps, portions of the railings will pop off, etc. and it ends up taking me much longer than one would expect to finish them. Now that you reminded me about Gator's Grip, what I might try is to start a section of railing with CA to get a firm anchor point, then use Gator's Grip for the rest since it probably has a little more flex to it and won't pop off as easily as can happen with CA.
-
Thanks guys! Really appreciate the kind words! One point I forgot to mention earlier. I think someone had mentioned problems with super glue causing wood areas not to pick up stain. I was very careful with my glue applications and sanding to make sure that I didn't have any stray CA on the stained areas. I did have a couple of small areas that didn't pick up stain very well, despite plenty of sanding. I think this might have been due to the fact that the kit wood is plywood. So, it's possible that I had sanded down the top layer to the adhesive between the first and second layer, which would probably cause the same issue of the stain not completely penetrating. Just a thought and probably worth remembering should I work with plywood in the future.
- 47 replies
-
- 8
-
-
- Annapolis Wherry
- Chesapeake Light Craft
- (and 1 more)
-
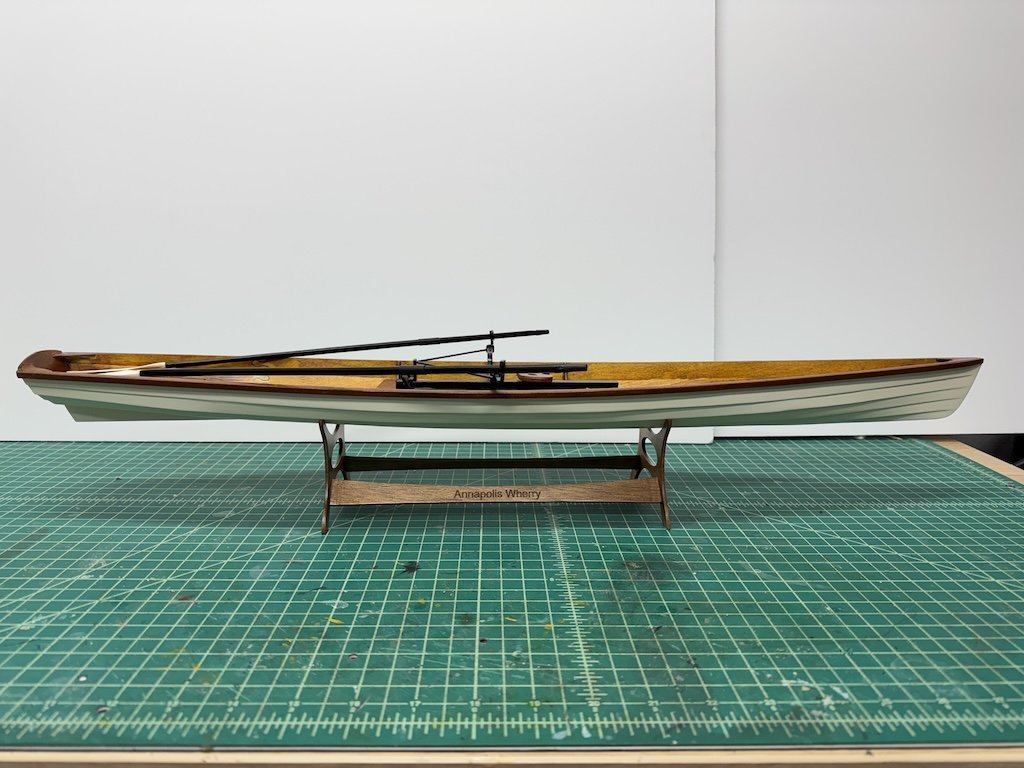
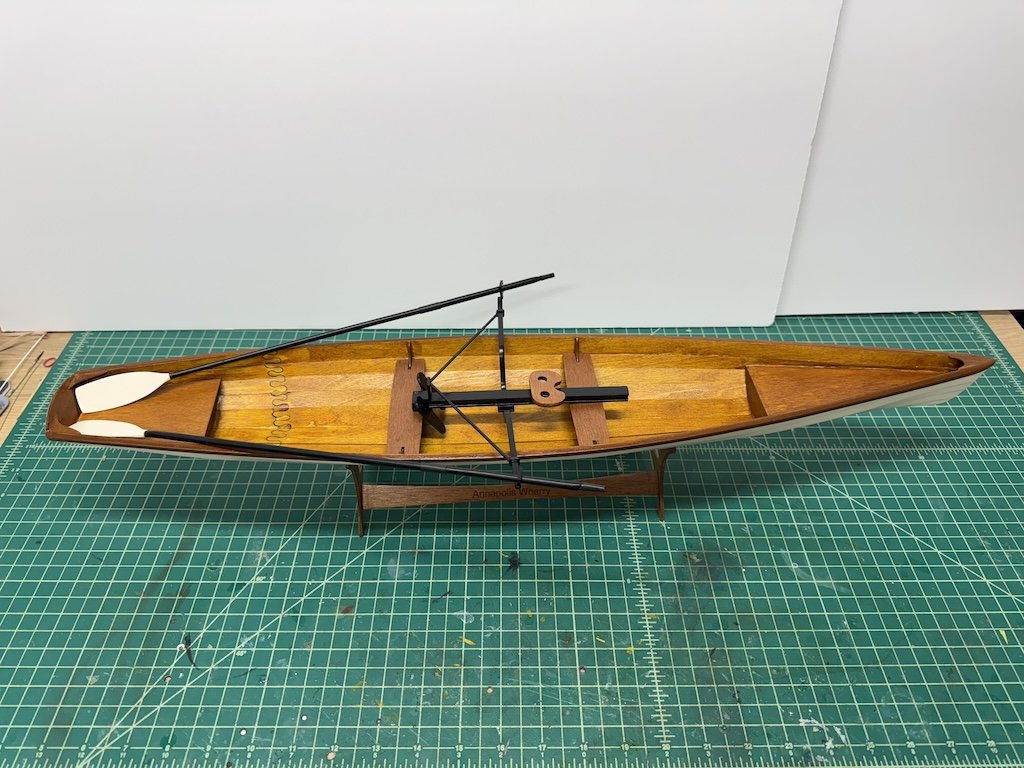
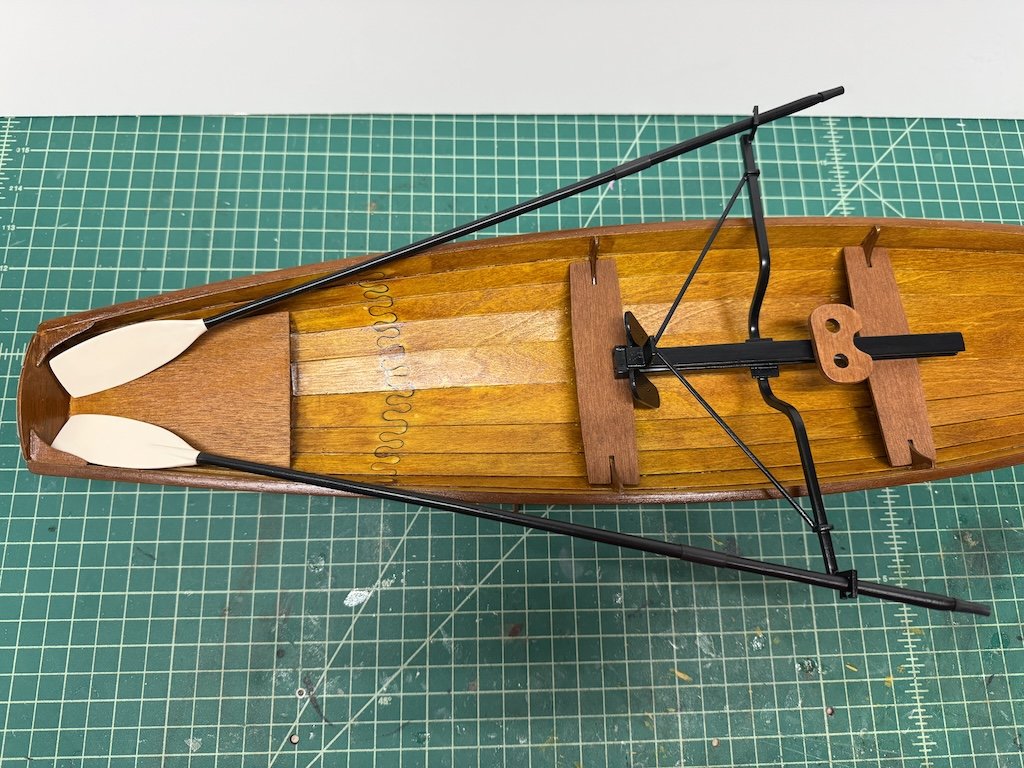
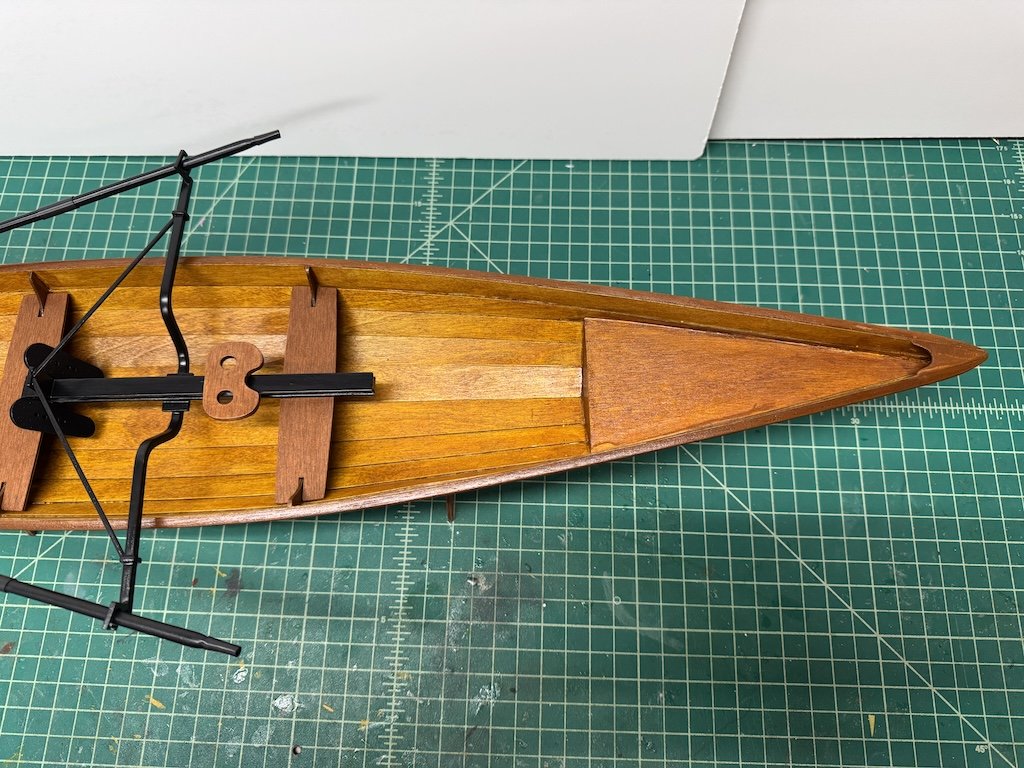
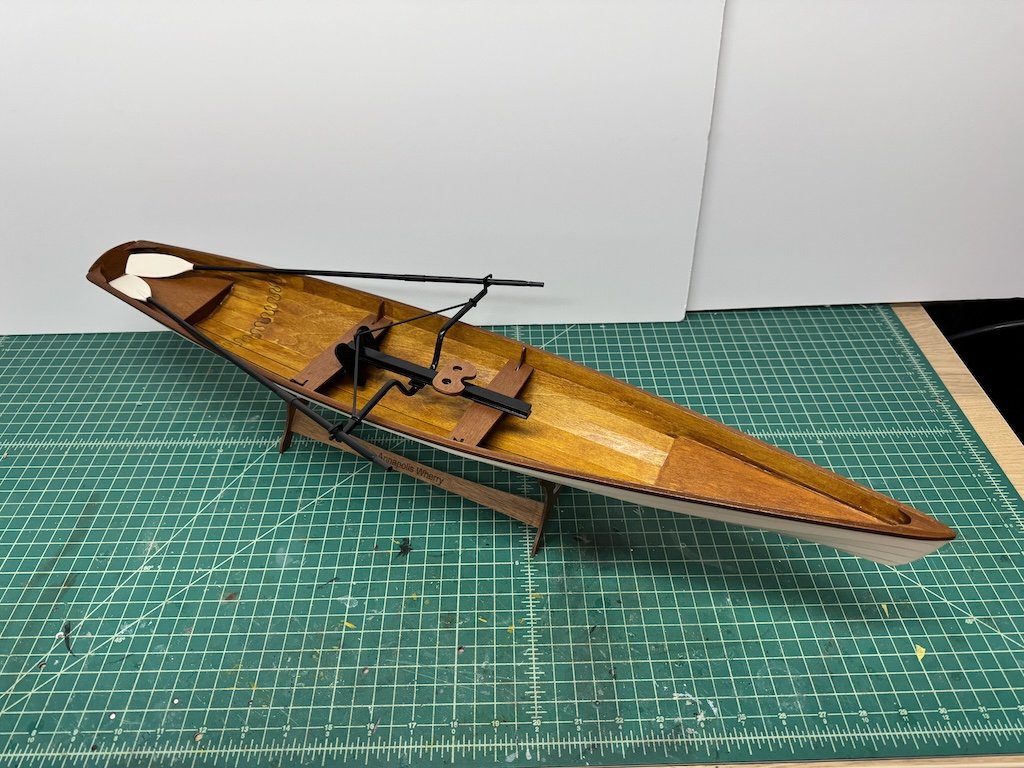
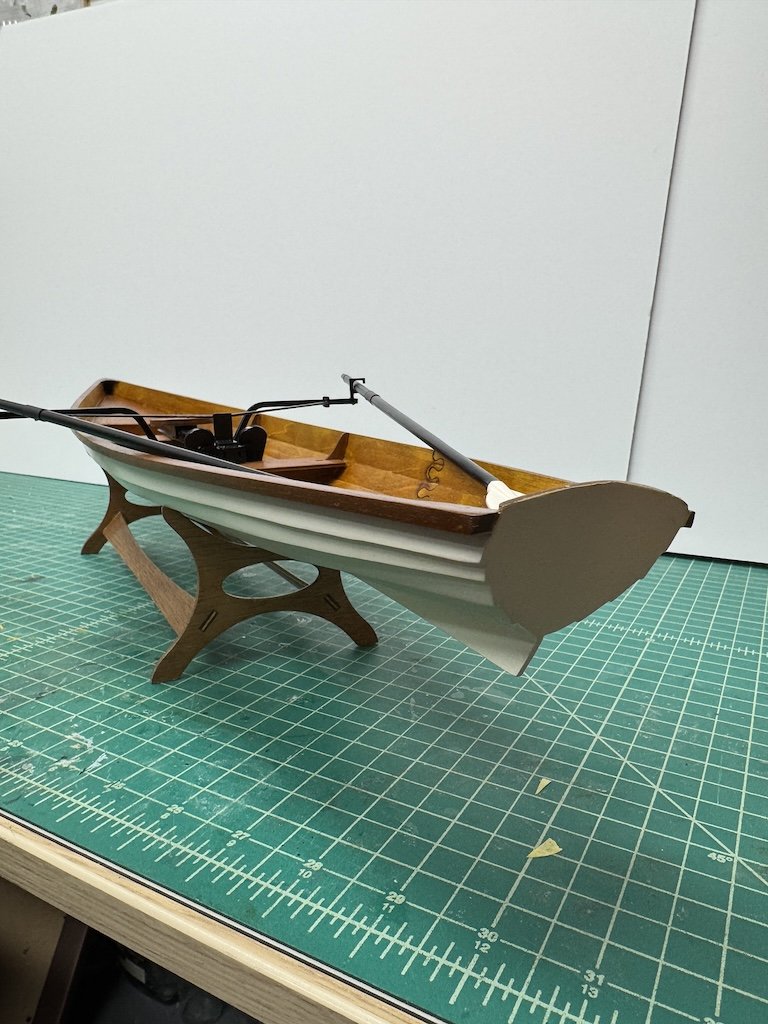
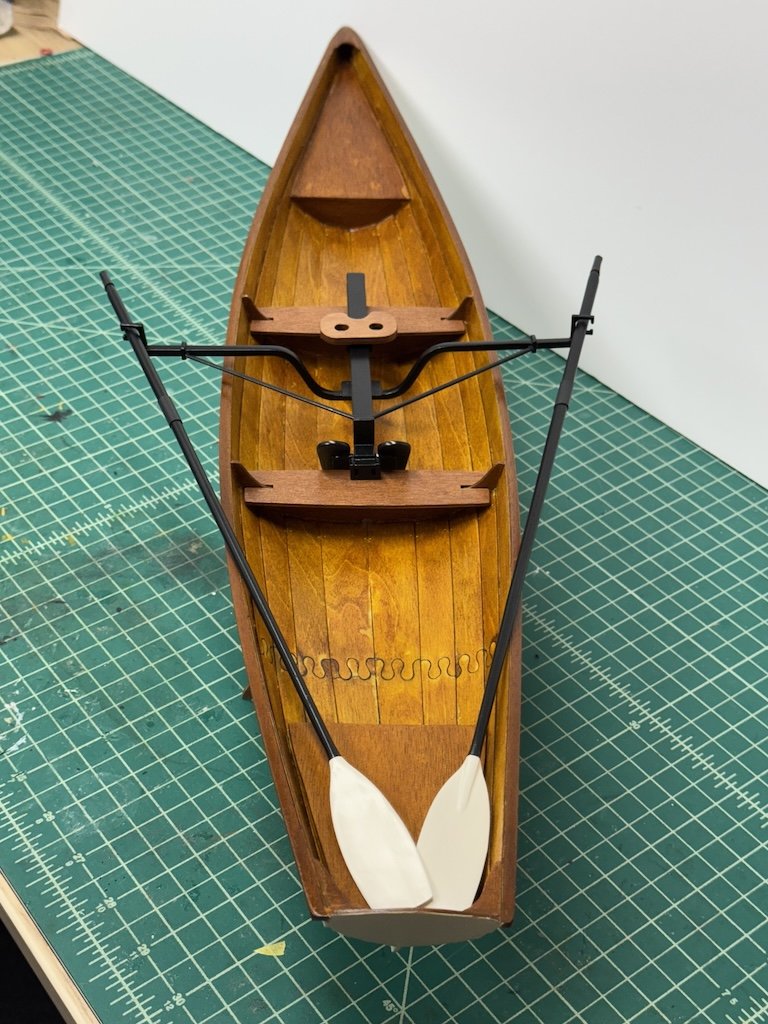
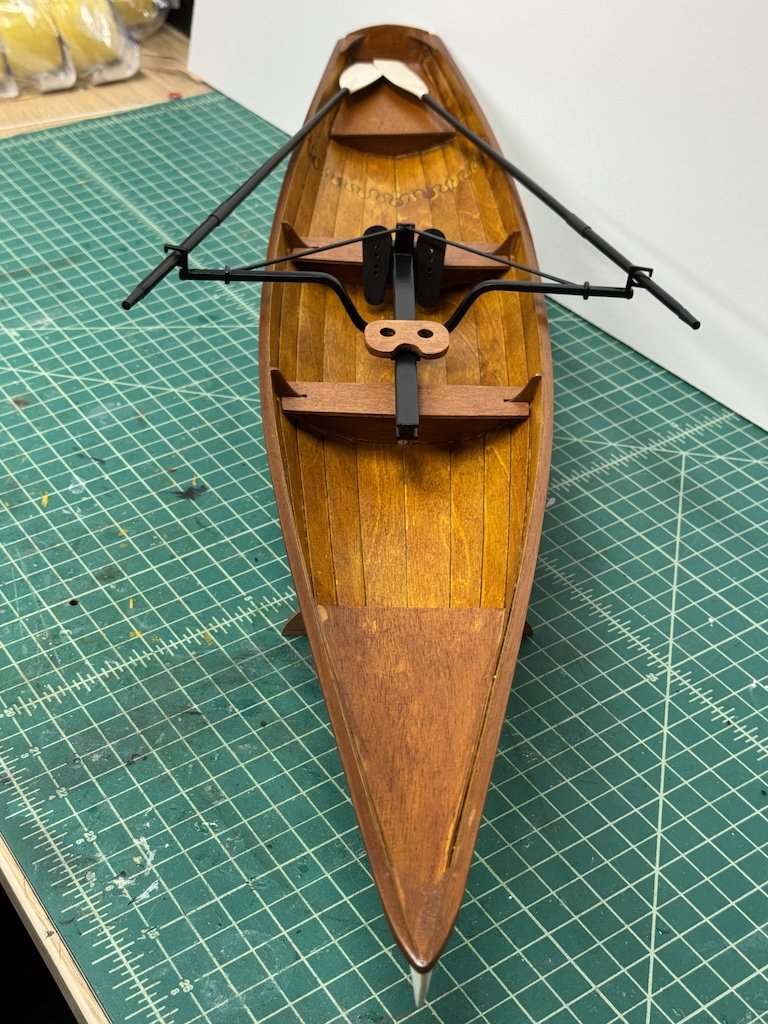
Finished! Somewhere I think I read that this kit takes about 20 hours to build. It probably took me 40-50. I had to backtrack a bit and rebuild the hull because the stem and stern settled off kilter. With the super glue method of construction, it was fairly easy to pop off the planks, sand off the glue, and re-glue. For paints and stains, I used the following: Unpainted sections: I used a combination of Minwax Golden Oak for most of the interior, and Minwax Gunstock for the rails, seats, frames, etc. These were sealed with Minwax Polycrylic clear semi-gloss. Painted sections: I primed all painted sections with Rust-Oleum Flat Gray. The white was done using Rust-Oleum Heirloom White, which I liked because it was a softer, almost cream white instead of a stark white. I originally used Rust-Oleum Charcoal Gray for the black sections, but I thought it was too light for what was supposed to be carbon fiber. So, I ended up spraying with a 2:1 mixture of Tamiya Nato Gray/Tamiya Flat Black. I then cleared with Rust-Oleum Clear Semi-Gloss. All in all, this was a really fun kit that used different construction methods than we typically use in wooden model ship building - so, I certainly learned a lot. I would definitely recommend it (or the other CLC kits) if you're looking for a quick palette-cleanser. It's a fairly long model, so my apologies for the poor pictures - best I could do! Thanks for looking in!

- 47 replies
-
- 19
-
-

-
- Annapolis Wherry
- Chesapeake Light Craft
- (and 1 more)