


Landlubber Mike
-
Posts
4,543 -
Joined
-
Last visited
Content Type
Profiles
Forums
Gallery
Events
Everything posted by Landlubber Mike
-
 Yours came out really nice Gary - I went back to your gallery to see if I was inspired enough to build the kit, and sure enough, I was. It doesn't seem to be too long of a build. Once I've buttoned up the stern and bow, it should be pretty quick I think (famous last words).
- 47 replies
-
- 1
-

-
- Annapolis Wherry
- Chesapeake Light Craft
- (and 1 more)
-
Thanks Alan! It's definitely something a little different to build. Maybe it will get me back to building wooden ship models
- 47 replies
-
- 2
-
-
- Annapolis Wherry
- Chesapeake Light Craft
- (and 1 more)
-
Thanks! It's something different. CLC also offers three other light craft kits that seem to build up similarly in case people are interested.
- 47 replies
-
- 3
-
-
- Annapolis Wherry
- Chesapeake Light Craft
- (and 1 more)
-
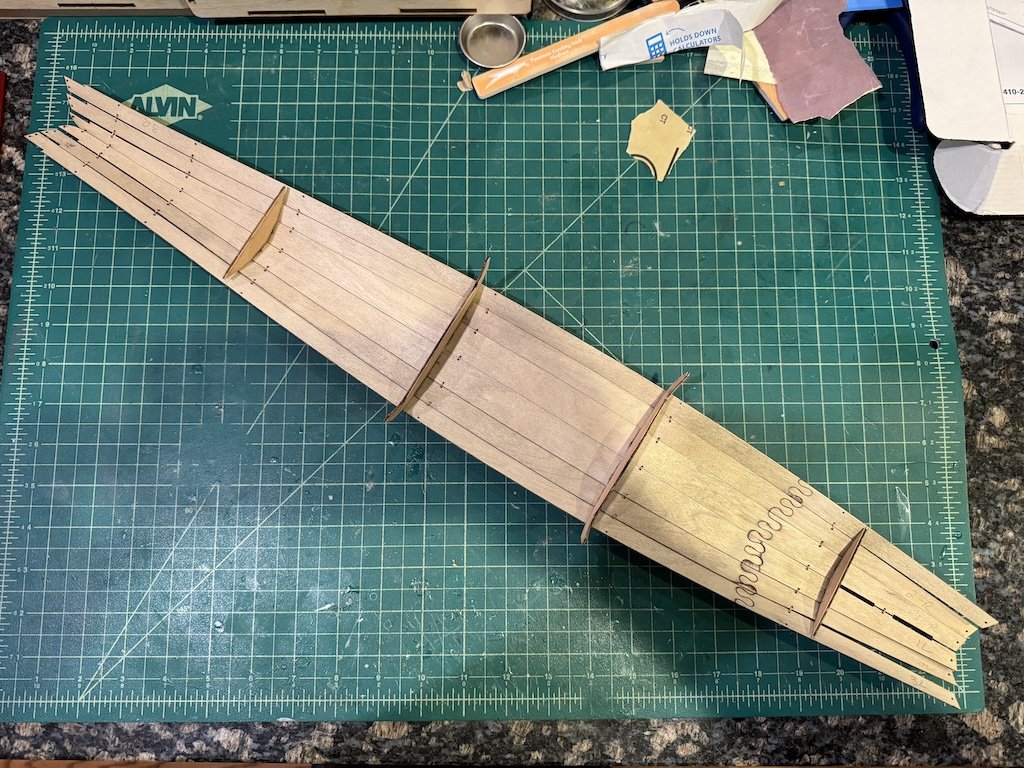
Here is where I am at the moment. The kit has you stitch the first two pairs of strakes using included copper wire, then super glue the four frames in. It's a little trickier than it sounds as the planks move around a little from the wire ties, and you want to keep the puzzle joint in perfect alignment as well as have the strakes slightly overlap one another as indicated by the indentations of the frames. You naturally also want to have no gap between the first pair of strakes. I found I had to pop off a couple of the frames to re-do things to have a tighter and more accurate fit, but I eventually got there. Next I added the third pair of strakes, which are tied in via the copper wire but not yet glued. Now that the frames are locked into proper position with the first two pairs of strakes, planks 3-5 should be a lot easier to install. Thanks for looking in!
- 47 replies
-
- 11
-
-
- Annapolis Wherry
- Chesapeake Light Craft
- (and 1 more)
-
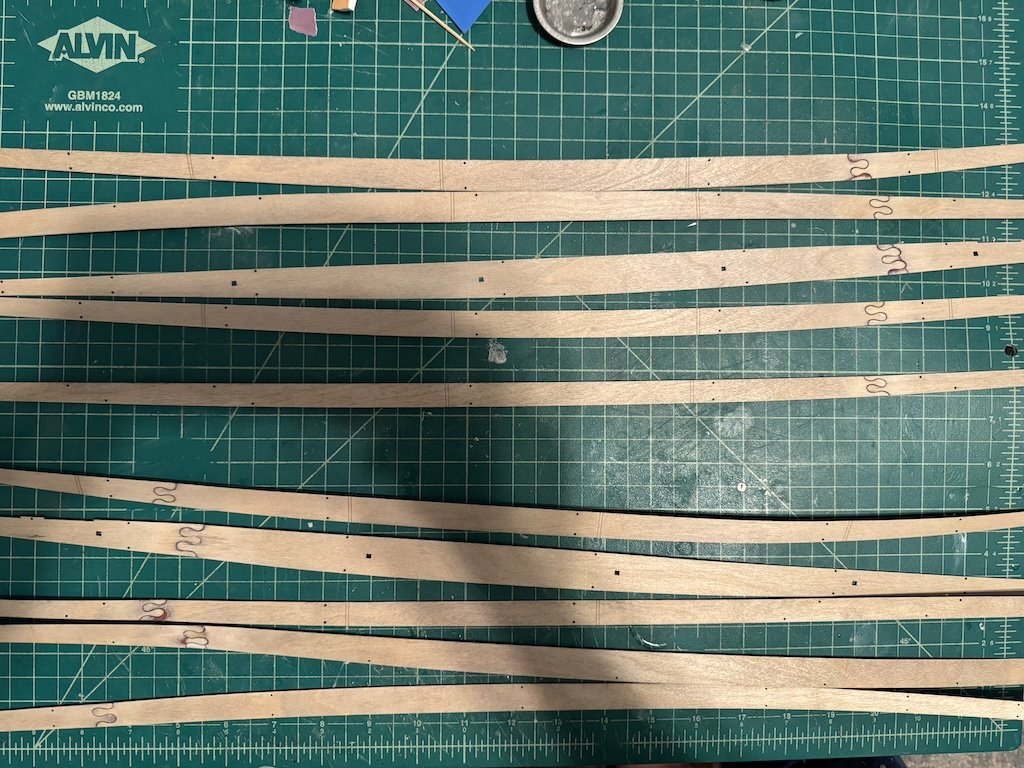
In the summer of 2020, I asked my young kids if they wanted to build it for their mother as a Christmas present. They were all gung ho until the first step which involved using CA to create the long strakes. Between the smell and sticky fingers, they quickly lost interest. I ended up gluing the two pieces of each of the ten strakes together, and then the kit sat on the shelf ever since. A couple of nights ago I decided to take the kit off the shelf to take a mental break from some of the other models I'm working on. I thought I remembered reading somewhere that the kit takes about 20 hours to complete (which means it will take me 50+ given how slow I work), but I figured it's a good "palette-cleanser build" and a good time of year to build it with the weather turning nicer so that it can be painted outdoors. Given the estimated time it would take, it would also help free up shelving given the size of the box. First thing I did was clean up the CA between the joint in the strakes. I haven't decided how I'm going to finish it, but I likely will stain and varnish the interior so I tried to make sure that there was no stray CA. For this I used a hand sander to start, followed by some sanding by hand.
- 47 replies
-
- 7
-
-
- Annapolis Wherry
- Chesapeake Light Craft
- (and 1 more)
-
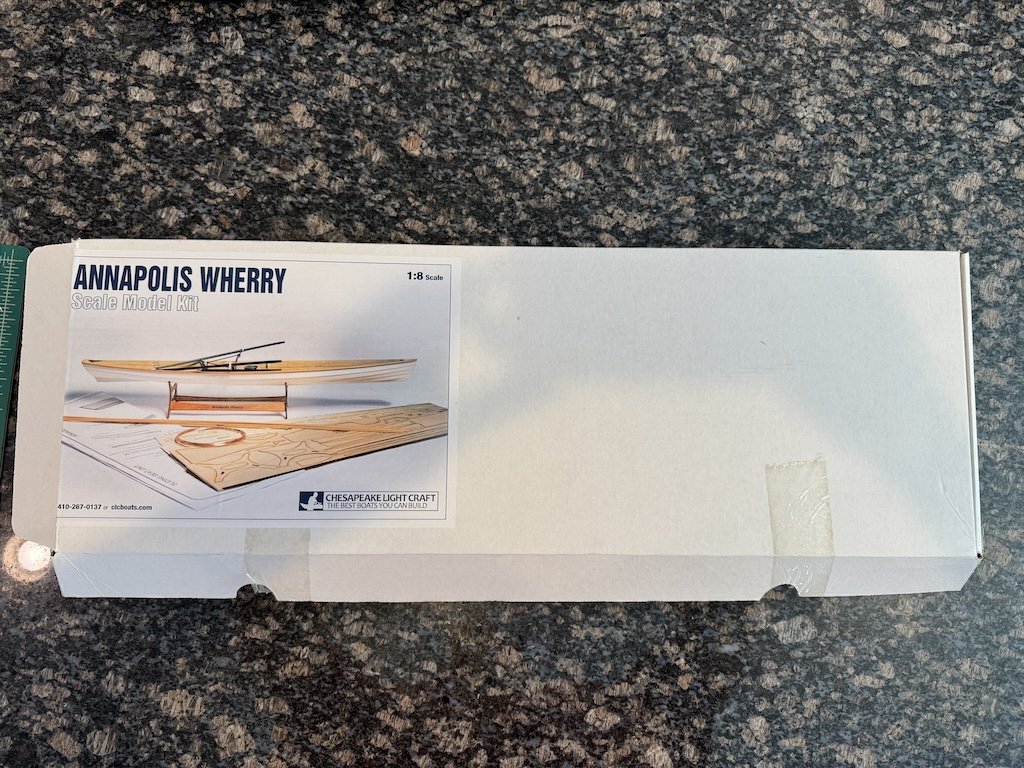
In the fall of 2019, I went to a model boat show in the Eastern Shore of Maryland, which ended up turning into a family mini vacation. At the show my wife decided to buy some raffle tickets and she ended up winning the Chesapeake Light Craft Annapolis Wherry kit. It's an interesting kit with a really nice 102-page spiral bound instruction manual (with three build photos per page). As an added bonus, CLC put out a 40 minute video on YouTube showing step by step construction. The model is built very similarly to their full sized wherry kit which CLC sells. Construction involves connecting the overlapping strakes with wire, which are then wrapped around the frames to form the shape (eventually, those wire ties are removed). For more information, you can go to CLC's website here: https://clcboats.com/shop/boats/scale-model-kits/annapolis-wherry-scale-model.html I should mention that @jbelwood and @gsdpic posted their very nice builds on here. Originally I wasn't going to post a build log, but I figured I might as well in case people are interested in seeing how this nice kit comes together.
- 47 replies
-
- 11
-
-
- Annapolis Wherry
- Chesapeake Light Craft
- (and 1 more)
-
Pin vise recommendations
Landlubber Mike replied to kgstakes's topic in Modeling tools and Workshop Equipment
I have the same. Having tried a bunch of different pin vices, including the ball end ones for the palm, the Starrett are my go-to. -
Excellent work Alan! You've gotten very good at painting these figures!
-
Thanks guys! I spent a bunch of time the past few weeks working on the Opel Blitz truck for the second diorama. I had to wait for some brass parts to come in to be able to scratch some added details to the truck bed, so started a 1/72 plane model in the meantime to keep busy. I'll probably post it in the next few days.
-
Great start on what looks like a very nice kit! I have a Wolfpack P-36 in the stash that I will probably build next, so would love to see your H75.
-
I thought I had replied earlier, but just wanted to say I love the build! Really great job Alan!
- 78 replies
-
- 4
-
-
- Derfflinger
- Flyhawk
- (and 2 more)
-
I tend to agree with you Alan - the 1/700 kits are much easier to move around and certainly take up less room. There's also much better range of subjects in 1/700 than 1/350. I still have some 1/350 kits for subjects I really want to model, but most of my ship kits are 1/700. I do have a 1/200 Bismarck with full Pontos upgrades, etc. in the stash - now that is a big kit! I've been thinking about putting it up for sale as well. I really like your Derfflinger. You've done a really great job on it!
- 78 replies
-
- 3
-
-
- Derfflinger
- Flyhawk
- (and 2 more)
-
Looks really good. You can see all the great little details from this kit. Going to be a nice model when you're done.
- 78 replies
-
- 4
-
-
- Derfflinger
- Flyhawk
- (and 2 more)
-
Thanks Alan! Really appreciate the kind words.
-
Thanks Andy! It was actually easy and without any aggravation at all. Just took a while. Probably took 2 hours to apply all the masking, and then another hour to carefully remove it. But the application of the masking wasn't difficult at all.
-
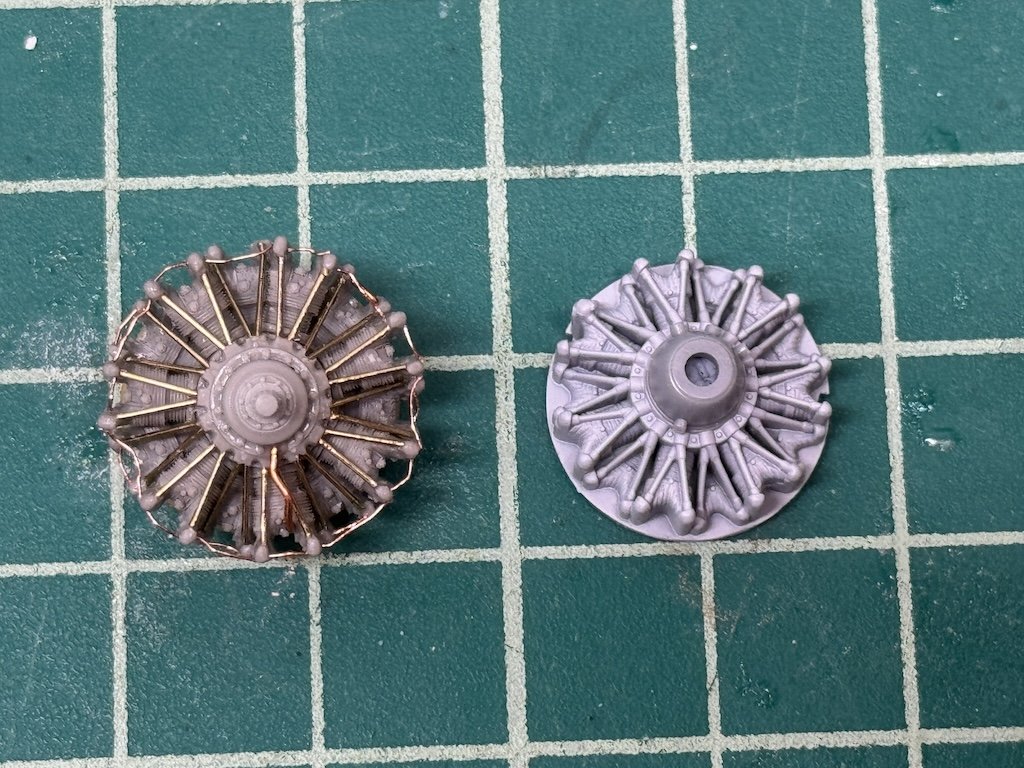
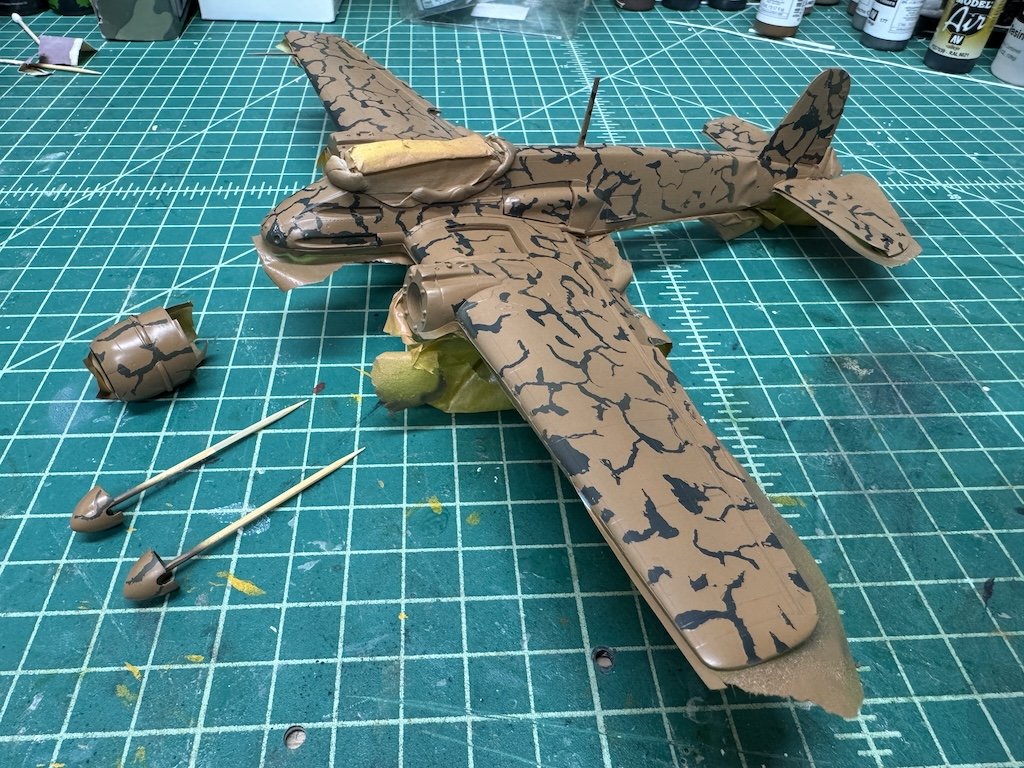
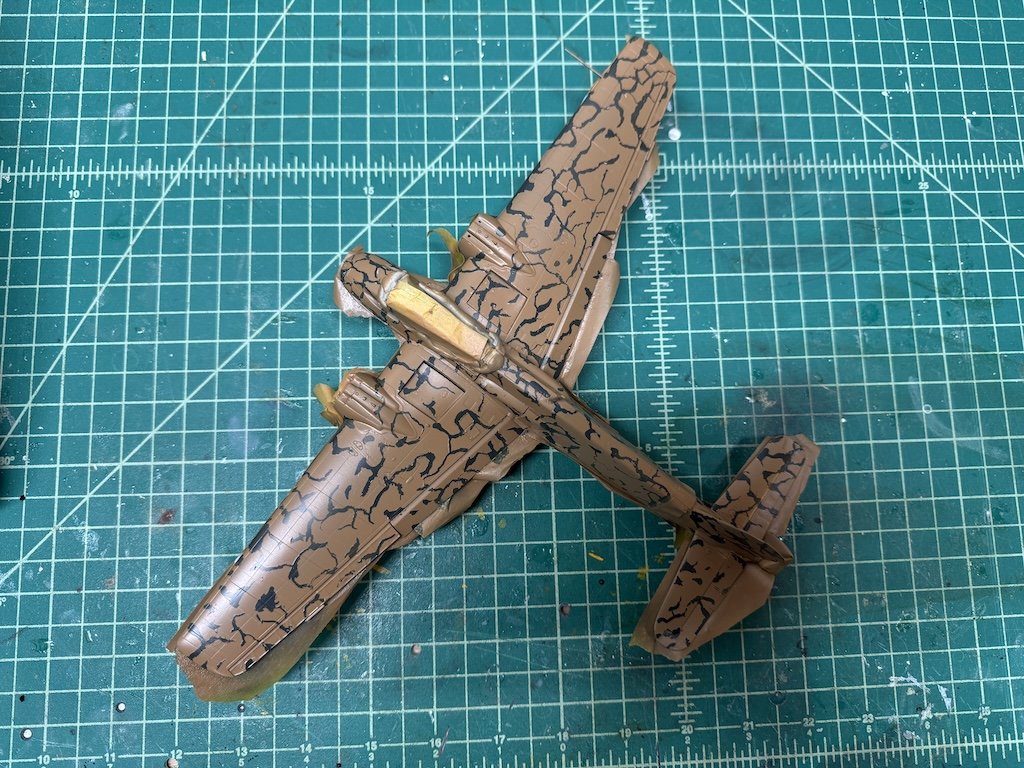
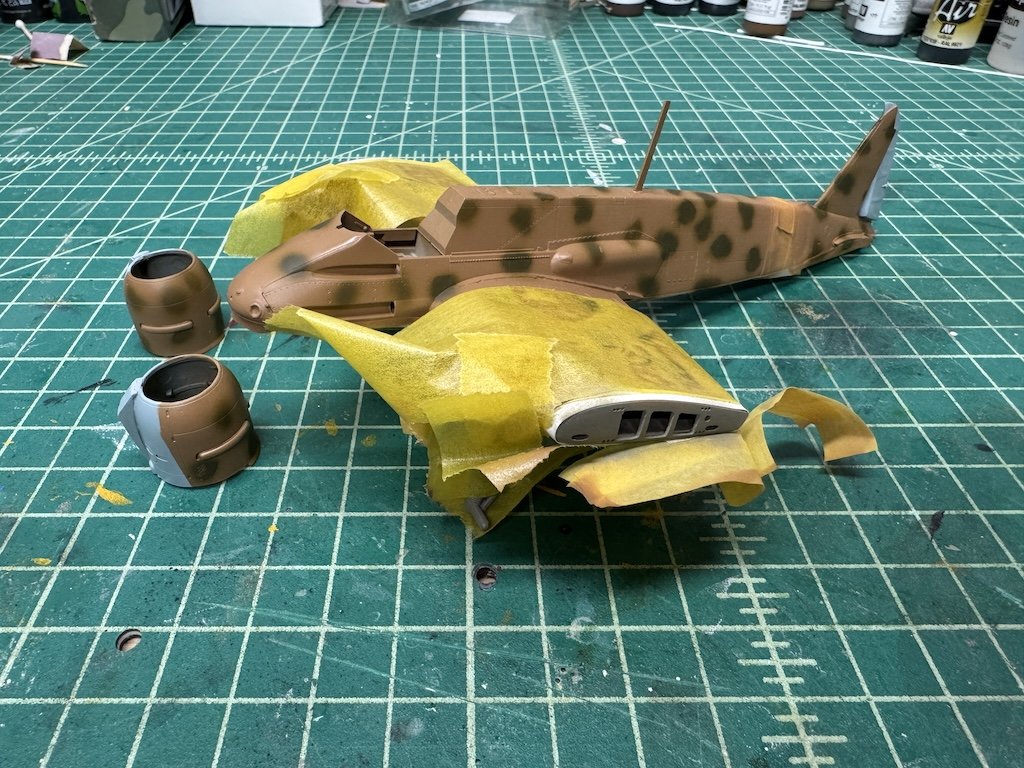
I'm slowly getting closer to the finish Iine. I spent some time detailing out the Vector engines for the first model according to some pictures of the Gnome-Rhone 14M engines. The Vector engine is on the left, and the kit engine (which is pretty nice) is on the right. I'm at the painting stage now. I first started with the second Hs 129, and used a 0.18mm airbrush to brush on the green splotches: I then tackled the first Hs 129. I had used Mr. Hobby paints for the undercoat European scheme (I figured Mr. Color would have a strong adhesion than Vallejo). Then I sprayed a light coat of Mr. Surfacer semi-gloss for a little added protection. I struggled with how to do the camo scheme, and eventually settled on using liquid masks. I did a bunch of tests first using Mr. Hobby - Mr. Masking SOL R and Vallejo Liquid Mask. I tried them both out with sprays of Mr. Color and Vallejo paints on top as I wasn't sure if the Mr. Color would dissolve the Vallejo. Turned out both were completely fine and compatible with each other, with Mr. Color on Vallejo's mask and Vallejo on Mr. Hobby's mask. I ended up going with Vallejo as it was slightly easier to apply as it's a little less viscous compared to Mr. Masking. One tip I found online was to paint masking solutions using silicone brushes. They made it much easier to apply - just apply to a section, wipe the brush (because the masking solution starts drying pretty quickly), and repeat. Still took hours to do, but well worth it with no aggravation. I was really surprised how easy it was. One thing to note is that I read that it's better to not leave masking solutions on for too long. Some said a week or two and it was hard to get the mask off. Others said they've left masks on for months and had no problems. I ended up going with Mr. Color for the Mr. Color RLM 79. I have the Vallejo equivalent to do touchups as I find Mr. Color doesn't brush as easily. Anywhere here are the pictures. Thanks for looking in!
- 51 replies
-
- 13
-
-

-
I have an Iwata Eclipse CS as my workhorse airbrush with an Iwata compressor. Really great products.
- 50 replies
-
- 3
-
-
- academy
- Admiral Graf Spee
- (and 5 more)
-
And wow, nice stash of MFH kits!! I bought the 1/12 Corvette C.1 as well. Hard to find a nicer looking car in my opinion. I also have the Tyrrell P34 kit - got that one for under retail off a FB group.
-
Just catching up with your log now Craig. Funny, I was just messaging with Rob earlier about lusting after this kit. I'm trying to stay strong with my New Year's resolution to not buy new kits, but this one looks awfully tempting.
-
Nicely done - love that color you chose.
-
That looks really well done Alan. I think the technique is referred to as zenithal highlighting. Vince Venturella on YouTube is really good to watch for techniques on miniature painting: https://www.youtube.com/watch?v=J-dQU-dSNa8
-
Really nicely done Alan. I agree with the 3D resin printing being another rabbit hole. I've got a few prints myself, mostly using them to learn painting techniques for figures in my dioramas. Definitely a nice little diversion.

