-
Posts
4,063 -
Joined
-
Last visited
Content Type
Profiles
Forums
Gallery
Events
Everything posted by Landlubber Mike
-
I bought this (or something similar) years ago when I was going to get into carving: https://www.amazon.com/PSI-Woodworking-DC725-Portable-Collector/dp/B000REX1UU?source=ps-sl-shoppingads-lpcontext&ref_=fplfs&psc=1&smid=AP845MBBUYCQH I haven't used it yet to be honest as I haven't been doing any carving, so not sure how effective it is. It wasn't exceedingly loud if I remember correctly. When I do things like sand or drill or work with resin, I found putting my shop vac nozzle in a vise near where I'm working is an easier and very effective method for removing dust.
-

Lathe Question
Landlubber Mike replied to ChrisLBren's topic in Modeling tools and Workshop Equipment
I really like my Sherline lathe. The DRO is a fantastic add-on. -
Thanks for the kind words Harry. The maple I used on my Pegasus came from the former Hobbymill supplier. I believe he referred to it as "hard maple" but I could be wrong. I wanted a light colored deck, but didn't want something too stark white like holly and maple fit the bill. The "tanganyika" (whatever it might be) is actually a really nice wood, at least the wood that was in my Caldercraft Badger kit. It works well, and really comes to life when you finish it with wipe-on poly or oil it with tung oil or the like. You won't go wrong with it. I think Jaager is right about "walnut" - here is a picture from my Pegasus kit of the various "walnut" pieces. It's possible they are all walnut (or at least the same species), but my guess is that with the huge variation in color, they might have been different species. Unfortunately, that forced me to look to replace the kit wood so that the unpainted wood sections looked more consistent. Looking forward to your build!
-

AMC DH9 by davec - Wingnut Wings - 1/32
Landlubber Mike replied to davec's topic in Non-ship/categorised builds
That's looking really really good with the decals on. I agree with Rob - glad the white was opaque enough to not have issues with the red bleeding through. Good to know the Wingnut decals hold up well in that regard. That's going to be quite the eye-catching model in your display case! -
There are lots of different colors of maple, including figured maple like curly maple. If you look at my Pegasus log you can see the maple I used for the deck. If you look at my Badger build, I believe the deck wood that came with the Caldercraft kit was tanganyika. The maple was a lot lighter than the tanganyika. If I recall correctly, the Badger deck (tanganyika) was oiled with tung oil which brought out some richness and a golden sheen to it. The maple on the Pegasus deck does not have a finish on it, but I would expect it to change in color and tone a bit as well depending on what is used.
-
In case anyone is interested, I found this short video on the JRS-1 subject I'm building and how it went looking for the Japanese fleet after the attack on Pearl Harbor. Amazing bravery for these guys - the JRS itself did not carry any armaments - the only weapons carried were rifles that Marine and Army volunteers planned to shoot out the back windows if they had to 🇺🇸
-
I've been making slow but steady progress on this kit. Part of the slow crawl is my fault in using the very nice CMK aftermarket set. But the main reason is that there are a lot of fit issues and other things like lack of connection points for important parts like the struts holding up the tail section and the main wing. For some examples: - Main wing tips are separate parts (in halves) that you have to glue together and then do some cleanup. I ended up adding brass rod to help secure them: - Engine cowlings are too small, so I added thin plastic strip between the halves to fit the engines. Figured that was much easier than filing down the engines: - CMK tail isn't quite right, needing extra plastic on the fixed part of the tail: At the moment, I'm mostly done with the wing. The CMK set is nice in that it gives you the control surfaces, but still quite a bit of work to add them. I have a few bits of PE to add along with the exhausts, and then of course the pontoons: The body is close to being done as well. I have a few more pieces of PE to add, along with the cockpit and landing gear and some other odds and ends that I'm waiting to add as they are fragile and will likely bust off. But, I think so far it's looking pretty good: I'm still debating how to go about staging the painting sessions. I might end up painting the wing separately, then adding it to the body and painting the body once the wing is installed. Because the wing struts don't have attachment points, I'm a bit worried about glue getting where it shouldn't be. Still a bit to go before I get to that stage so I can think on it a little more. Thanks for looking in!
-

P-51D Mustang by CDW - FINISHED - Dragon - 1:32 Scale
Landlubber Mike replied to CDW's topic in Non-ship/categorised builds
Wow, just found out you finished this one Craig - amazing job! That Mr. Color silver paint job looks fantastic - love it! -

AMC DH9 by davec - Wingnut Wings - 1/32
Landlubber Mike replied to davec's topic in Non-ship/categorised builds
Looks really great Dave. Must be an interesting experience dealing with well-made kits that have tight clearances. Most of the ones I've worked on recently have had big gaps to fill! -

Keeping my head in the game.....
Landlubber Mike replied to Egilman's topic in 3D-Printing and Laser-Cutting.
Looks great! Are you planning to print these parts? -

Keel holder/clamp recomendations
Landlubber Mike replied to Mike Shea's topic in Modeling tools and Workshop Equipment
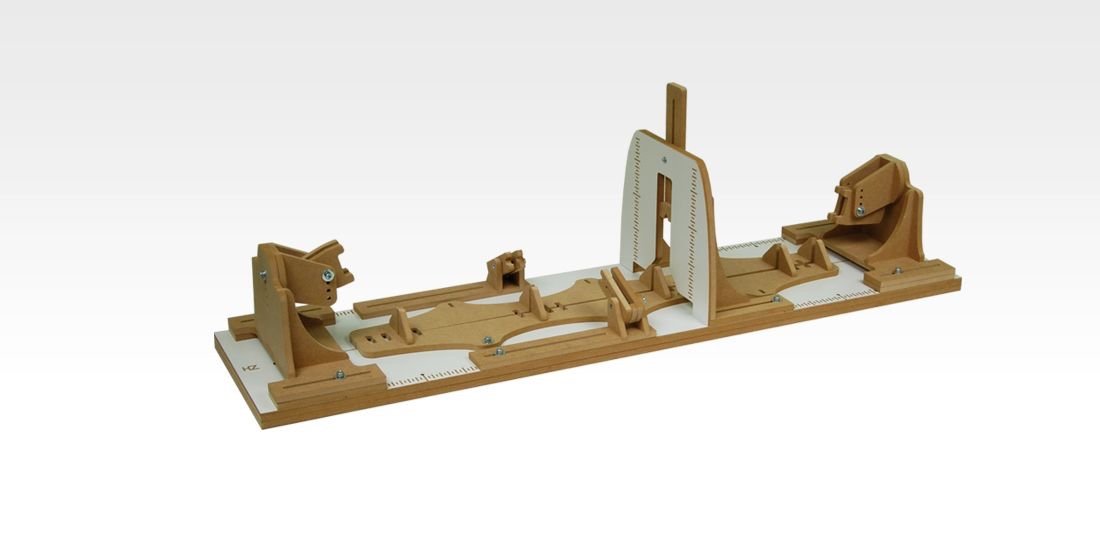
I'm a big fan of the Amati Keel Klamper and the Hobbyzone Professional building slip. You can probably build something similar to the slip (I did using MDF board and angle brackets) as well. -

Keeping my head in the game.....
Landlubber Mike replied to Egilman's topic in 3D-Printing and Laser-Cutting.
Not sure how I missed this one - sweet project and subject! Looking fantastic! Hope everything is going better for you my friend! -
I have the Revell 1/144 Snowberry kit with Pontos set (bought from a member here a few years ago) and the Revell 1/72 kit with the David Parsons upgrades. Would love to start building them, but want to get my skills up a bit to do them justice. Those Mirage kits look quite nice, especially at that scale.
- 33 replies
-
Looking great Alan! I love the Flower Class corvettes.
- 33 replies
-
Hi Nils, great start on your Elbe! These light ships are really interesting. I visited the Overfalls a few years ago (it's in Delaware) and always thought these ships would be cool subjects to model - something different than the 5000 English war ships that are out there. Looking forward to following along!
- 122 replies
-
- lightship
- Feuerschiff Elbe 1
-
(and 1 more)
Tagged with:
-
He's back! Looks great Kevin, very crisp work on the PE there.
- 33 replies
-
- Scharnhorst
- Trumpeter
-
(and 1 more)
Tagged with:
About us
Modelshipworld - Advancing Ship Modeling through Research
SSL Secured
Your security is important for us so this Website is SSL-Secured
NRG Mailing Address
Nautical Research Guild
237 South Lincoln Street
Westmont IL, 60559-1917
Model Ship World ® and the MSW logo are Registered Trademarks, and belong to the Nautical Research Guild (United States Patent and Trademark Office: No. 6,929,264 & No. 6,929,274, registered Dec. 20, 2022)
Helpful Links
About the NRG
If you enjoy building ship models that are historically accurate as well as beautiful, then The Nautical Research Guild (NRG) is just right for you.
The Guild is a non-profit educational organization whose mission is to “Advance Ship Modeling Through Research”. We provide support to our members in their efforts to raise the quality of their model ships.
The Nautical Research Guild has published our world-renowned quarterly magazine, The Nautical Research Journal, since 1955. The pages of the Journal are full of articles by accomplished ship modelers who show you how they create those exquisite details on their models, and by maritime historians who show you the correct details to build. The Journal is available in both print and digital editions. Go to the NRG web site (www.thenrg.org) to download a complimentary digital copy of the Journal. The NRG also publishes plan sets, books and compilations of back issues of the Journal and the former Ships in Scale and Model Ship Builder magazines.


