


Landlubber Mike
-
Posts
4,543 -
Joined
-
Last visited
Content Type
Profiles
Forums
Gallery
Events
Everything posted by Landlubber Mike
-
 Another beauty! Well done!
 -
Another nice one Alan, you're getting good at these miniature figurines! Glad to also hear that life is returning back to normal for you.
-
Just getting around to catching up on the logs on this board. Great job Alan on a not-so-easy kit! Really well done!
-
Wow, that came out really great! Well done!
-
I'm a big fan of this site precisely because of the build log function. I learn an incredible amount reading through build logs, and really enjoy the camaraderie that develops over a build. If this site moved to just being a virtual museum of finished models, I probably wouldn't visit all that often. You can get that on Facebook and other sites. Where this site really shines is in the build log and community departments. Don't get me wrong, seeing pictures of a completed model can be inspiring and I certainly can appreciate the artistry in a well-made project. I think the gallery function works great to alert people that a particular project is completed and give an overview of the project since I don't have the time to track every build log. Often times though, it seems like those that only post pictures of their completed projects are projecting their egos in a "look at me" and/or marketing kind of way without really contributing to the community by chiming in on other build logs or discussion topics (Chuck's examples about abuses to the gallery system are unfortunate examples of this). Again, I can get that on Facebook and other places that are not really designed to handle compartmentalized build logs. In summary, I think the build log and gallery functions serve good and independent objectives. The rules around both seem fairly reasonable to me.
-
Looks great! You're really flying along on this kit.
-
Wow, a lot of work there! I'm not sure I'm going to be willing to put that kind of effort into fixing the hull on mine, but am impressed by your dedication to improve the accuracy!
-
Hi Dan, thanks very much for the suggestion. I considered that approach, as well as just painting everything sand color and hand brushing the green paints (or using artist pencils). I have an airbrush with a very thin nozzle (I think 0.18mm) so I'm going to practice and see if I can make it work. I figure I can always touch up areas by hand brushing if need be.
-
Holy cow Glen, that came out so well!! Your creativity is amazing, not just for the SIB itself, but the overall composition with the display base. Well done my friend! The only problem I see is that you keep upping the bar for yourself. You're making it harder and harder to top your last efforts, but I have faith in you
- 185 replies
-
- 7
-

-

-
- Flying Dutchman
- Black pearl
- (and 2 more)
-
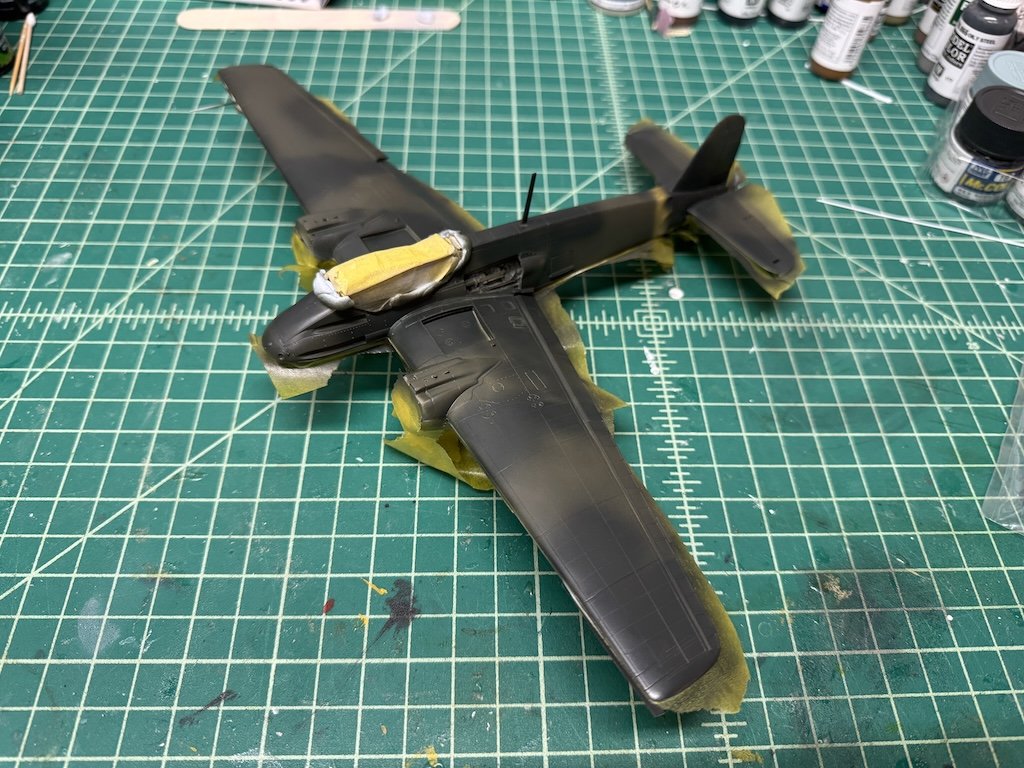
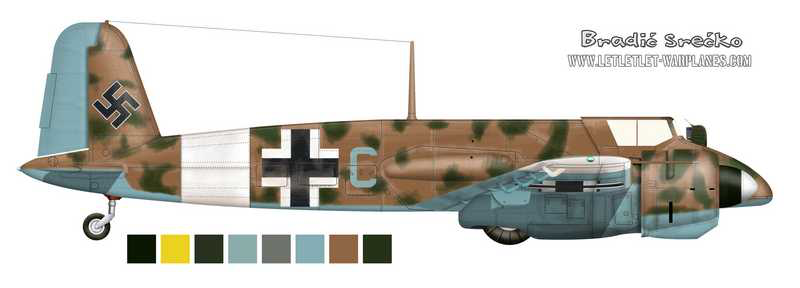
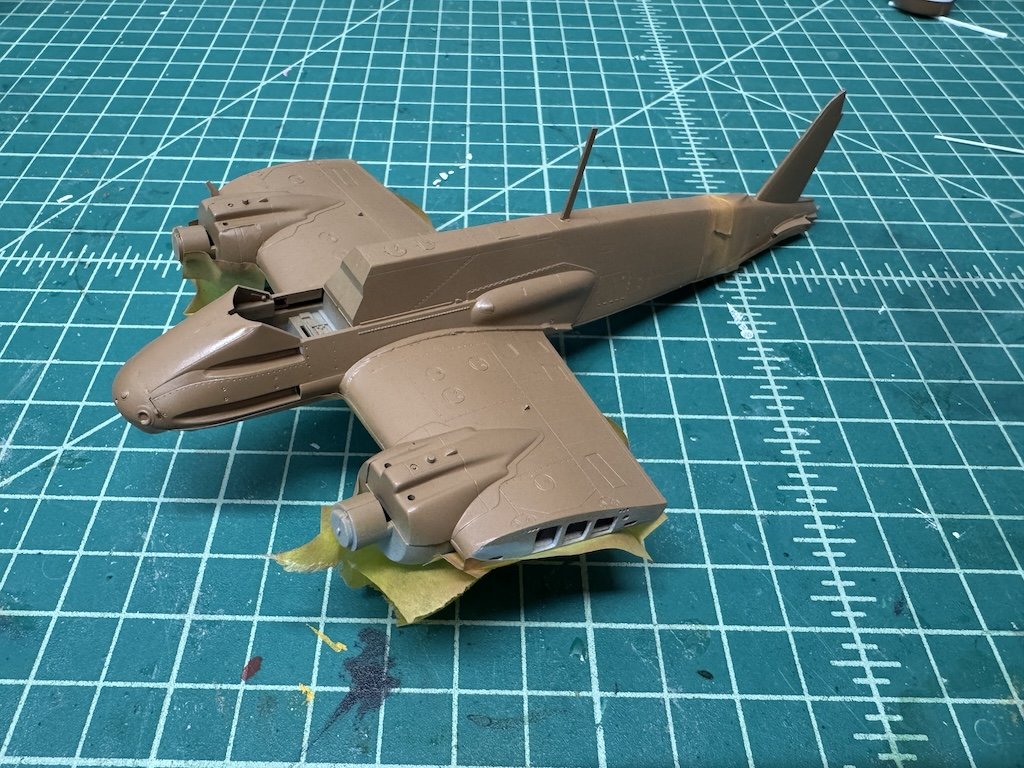
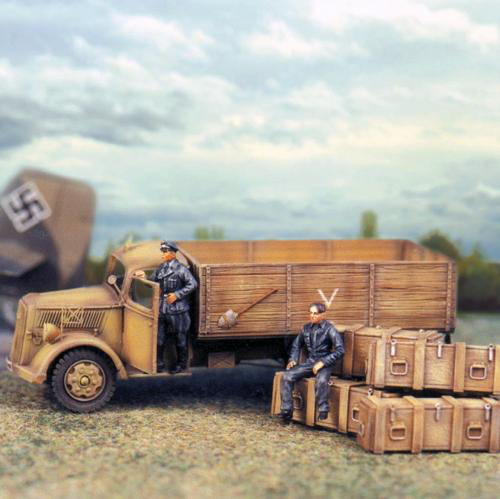
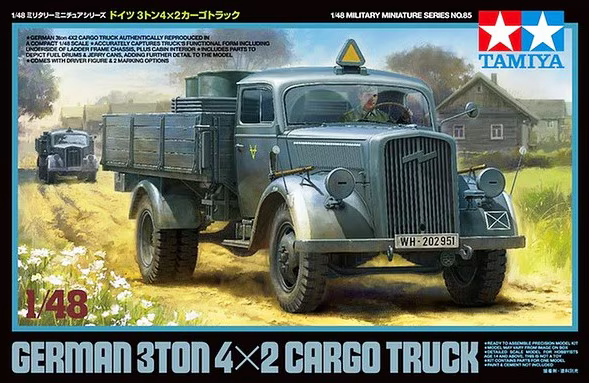
Moving along at a decent pace on the painting. I have the undersides of the two models painted in Hellblau Light Blue (RLM 65), along with their bands. For the first diorama, I'm doing this scheme which is German Sand Yellow (RLM 79) painted on top of the typical RLM 70/RLM 71 scheme: Since the RLM 70/RLM 71 scheme will barely peak through the Sand Yellow (and are quite similar in hue), I went ahead and free hand painting the underlying scheme. For the second plane, I'm doing this scheme: I took a different approach and just painted the topside with RLM 79 (Sand Yellow), and will add the splotches after: I used Mr. Color for the undersides and top coats on both planes. I think I might try using Vallejo for the Sand Yellow (first plane) and splotches (second plane), as I can scratch off the excess fairly easily without mucking up the Mr. Color underneath. I'm dreading the first scheme, but have some paint mules to practice on. The second diorama will have an Opel Blitz truck. Originally, I was planning to use this truck from SOL Models for which I somehow had two kits of in the stash: The truck isn't bad, but it's resin, and very fragile. I broke the roof section off BOTH cabs 🤬 at the windshield pillars when trying to clean up flash. For the windows, I'd have to cut them out myself out of included clear plastic sheet. And the undercarriages of both kits were warped, and had a slight bend no matter how much I soaked them in hot water. Given all that aggravation, I broke down to save my sanity and ended up buying the Tamiya kit below. After an evening, I'm almost done assembling it, and will post pictures later. It's a very, very nice kit that goes together easily and perfectly (thank you Tamiya!). I might actually use the figures and crates from the SOL kit as they are really well done, so I guess not all is lost with the SOL kits. I thought about toughing it out and finishing the SOL kits, but I just want to get these dioramas done and move on to other projects. These trucks were fairly prevalent in the various war theaters, so I'm going to put them aside and maybe use them as secondary pieces in later builds. The SOL instructions weren't the most clear, especially for the undercarriage, so while I'm working on the Tamiya kit I might just pre-assemble the SOL undercarriages while I know how the undercarriage should be configured. Thanks for looking in!

- 51 replies
-
- 12
-
-
I have a Sherline mill and lathe. I haven't done wood ship modeling in a while, but even when I was, I mostly used the Sherline tools for wood turning projects (pens, etc.). Certainly if you're going to be scratch building wooden ship models, a mill and lathe would get a decent amount of use. That being said, those tools are down the list on power tools most used in the hobby - probably my most used is a disc sander, followed by my table saw and scroll saw (I also have a band saw but haven't used it as much for wooden ship models). In terms of versatility, my micromotor is my most used power tool. Honestly, it's been a real game changer for me. I've used the gamut of accessories for it - drill bits, sanding wheels, milling bits, cut-off wheels, etc. I tend to scratch build and use aftermarket detail sets for my plastic models. I drill small holes all the time - here I drilled 0.30mm and 0.50mm holes to add the push rods in a couple of engines on my current Hs 129 builds. It would have taken my hours to drill out all the holes by hand, not to mention, I probably would have broken a dozen bits. With the micromotor, drilling the holes probably took 15-20 minutes and I didn't break a single bit: I mentioned this before, but the size, weight, and torque are what make the micromotor so much better than a Dremel. They are the kind of machines dentists use all day for delicate detail work. The stylus I use is maybe cigar-sized and ultra light weight, so I can do hours of work with it without fatigue. Not only does the size and weight help with control, but it's easy to adjust the speed on the machine and have added control using a foot pedal. Given the fairly limited amount of holes that you may need to drill building a model ship, is it worth spending over $1k on a drill press/milling machine that will see little work? If you need to drill holes in a row, you could always do them with a micromotor by putting the piece in a vise, marking the holes with an awl, drilling a pilot hole, etc. If I had to do it over again, I would have first invested in the micromotor, then add the more specialized machines like a lathe and mill later.
- 53 replies
-
- 5
-
-
- Drill Press
- Milling
- (and 1 more)
-
I’d throw another option out there. If you’re going to spend that kind of money to drill holes, maybe consider getting a micromotor if you don’t already have one — essentially a high-end Dremel-type tool. I used mine for drilling, sanding, cutting, etc. The one I have - recommended by @vossiewulf - is a Nakanishi Evolution. It’s got a very light stylus so you can work with it for considerable periods. You’ll find a ton more versatility from a tool like that than a drill press or even a mill.
- 53 replies
-
- 3
-
-
- Drill Press
- Milling
- (and 1 more)
-
Beautiful work Alan! That ship certainly had nice lines. Enjoy your trip!
- 78 replies
-
- 4
-
-
- Derfflinger
- Flyhawk
- (and 2 more)
-
There are some mini modeling-size drill presses that have been coming out similar to the one that Gregory mentioned above that seem to be getting decent reviews. For light work like we do in modeling, might be a cost and space efficient option. Here's an example: https://innocraftsman.com/products/mini-drilling-machine
- 53 replies
-
- 4
-
-
- Drill Press
- Milling
- (and 1 more)
-
Thanks! You probably can build this kit out of the box in a week, it goes together that smoothly. The aftermarket is probably causing me to spend probably 4-5x the amount of time it would normally take to complete it 😵💫 Some people prefer to paint parts first, then assemble. I tend to prefer assembling as much as possible, mostly because I can minimize glue issues that way.
-
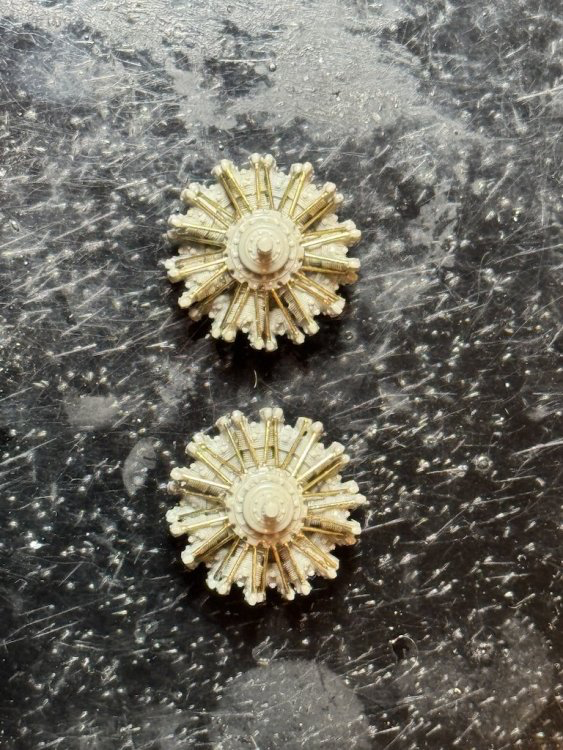
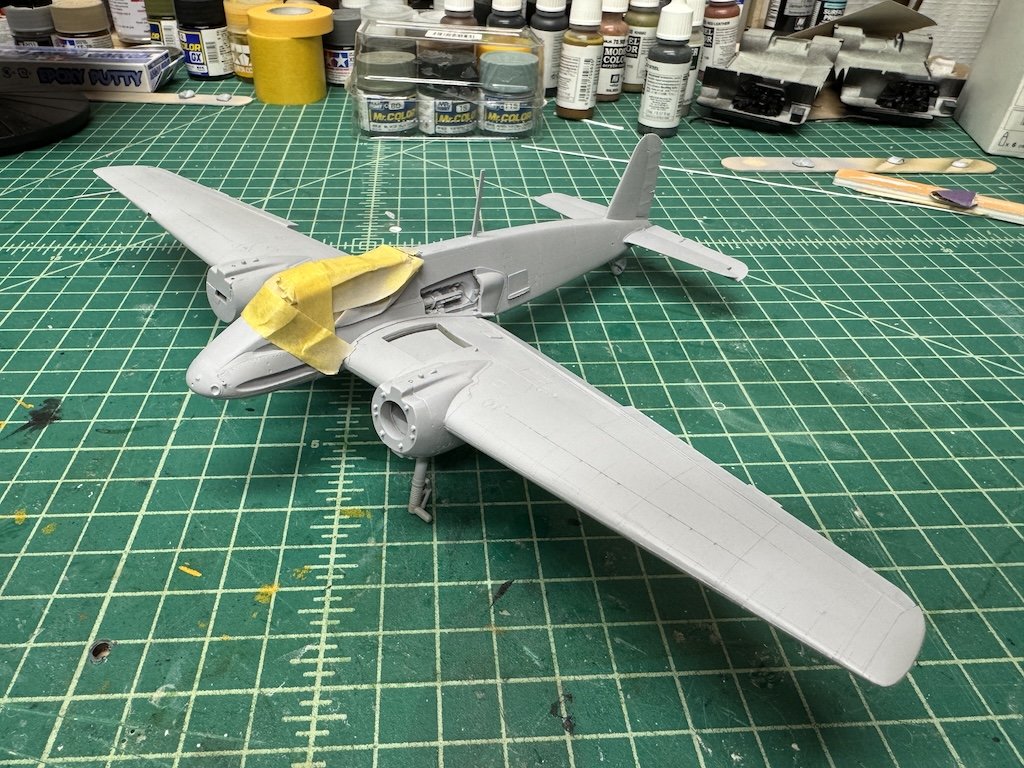
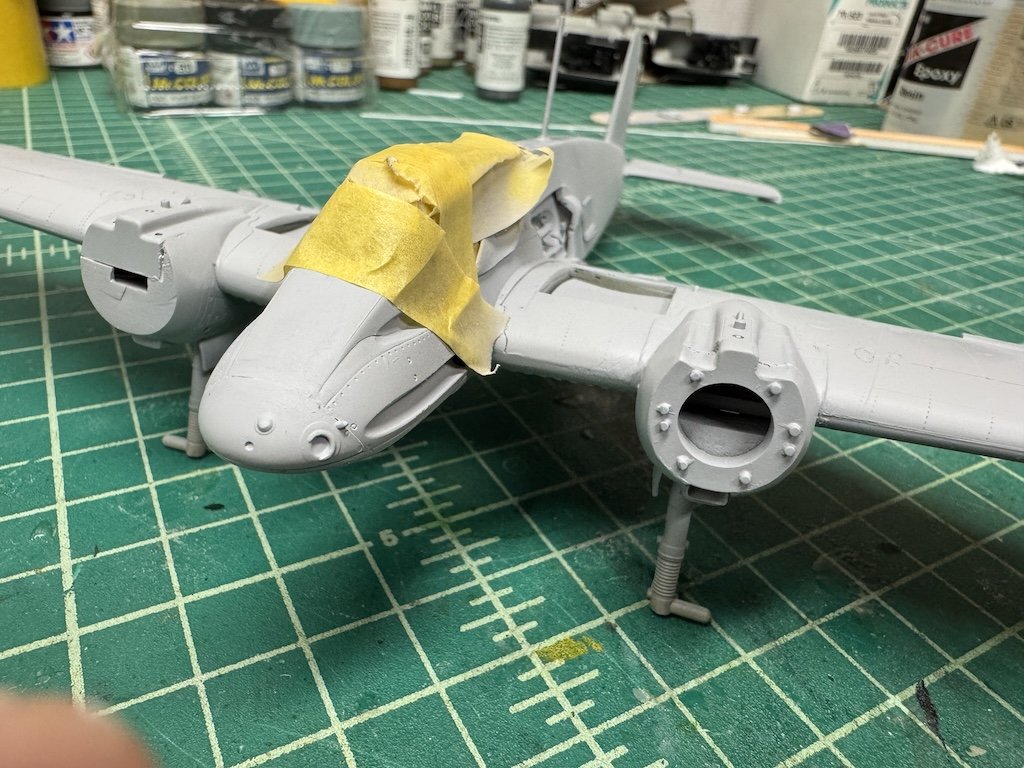
I've made some good progress the past few days. I've got both planes mostly built up and a few rounds of primer and sanding to get them ready for actual painting: One of the trickier parts of the build was to modify the left nacelle be able to show an exposed engine. Verlinden provides a full engine, the exhaust ring for the engine, a mounting ring for the engine all in the same Hs 129 upgrade set so you have a one-stop shop for this. Things are a little more complicated for me because I decided to use the very nice Vector engine along with the CMK external set which replaces the parts for the undercarriage and nacelle. After some putty, everything is looking pretty good - you can see the Verlinden engine mount ring on the left nacelle and the CMK nacelle front on the right nacelle: I think Verlinden vastly oversimplified the engine mount ring. Looking at schematics and the Zoukei Mura kit, the ring is actually just a smaller diameter ring supported by a lattice type structure of frames inside the nacelle. Where this matters is that the rear part of the engine actually hangs down on the other side of the ring into that bottom vent piece you see in the Verlinden ring. That was going to be way too complicated to replicate, so I just stuck with the Verlinden mount ring. What's interesting is that Verlinden provides the back pieces for the engine that would feed down into the bottom vent piece, but you can't really use them because the Verlinden engine mount ring is not accurately configured. One other note - the CMK undercarriage set provides more details for the landing gear bay for sure, but if I had to do it over, I don't think it's a set worth adding. It's a lot of work to add the CMK parts for details that will not really be visible. In addition, the kit has a very secure way of installing the landing gear legs where they are locked into position into the wing. For the CMK set, you can only glue the flat end of the leg against the nacelle, so it's definitely a lot less stable and not as easy to lock into the proper orientation. I ended up using two-part epoxy glue to make sure that the legs are securely fastened to the undercarriage bay. Thanks for looking in!

- 51 replies
-
- 12
-
-
That came out very sharp Andy. Really nice job!
-
Looks really good Dave! I love how the decals show texture - definitely a nice upgrade for those kits.
-
Thanks Alan! Trying to get these done by January 1 for the LSM group build deadline. Cutting it awfully close
-
Great to hear Alan! Sorry to have been the bearer of bad news but glad it all worked out. It's really odd how they package things. I remember being super confused when looking for the Lutzow and almost made the same mistake. I also have the Flyhawk Bismarck "Deluxe" edition which includes their PE aftermarket along with the kit similar to my Lutzow "Collector's Edition" -- the Bismarck kit also doesn't include a wooden deck so I had to buy an aftermarket deck. Let me know if you end up starting it and maybe I'll build mine alongside yours (though I probably should start mine and get a head start since I'm a very slow builder).
- 78 replies
-
- 3
-
-
- Derfflinger
- Flyhawk
- (and 2 more)
-
The Flyhawk kit designations are a bit odd and I found them very confusing when looking to get the Lutzow. And, the kit designations vary between kits as well! 😵💫 My understanding is that the base kit is 1301, and the Gold Medal package, which I think does not include the kit itself (just the PE, etc.), is 780004. The Gold Medal package doesn't include wooden decks, it just includes deck painting masks. My version is 1301D, which I've seen marketed as the "Collector's Edition" and "Offshore" - it includes the base kit and the Gold Medal package. There was also a 1301S "special" edition that I think was the base plastic kit along with a torpedo boat kit. *** I just checked my box and it doesn't include the wooden decks. I've got the Shipyardworks' wooden deck. I think Hunter and Artwox also make wooden decks. Just wanted to pass this info along in case you're looking at the Lutzow. I think it's cheapest to get the 1301D kit if you want to build the kit with the Gold Medal package (which looks incredible by the way). Sounds like Santa only made a partial stop this year for you, so maybe he will bring you a Lutzow this year if you're nice...
- 78 replies
-
- 3
-
-
- Derfflinger
- Flyhawk
- (and 2 more)
-
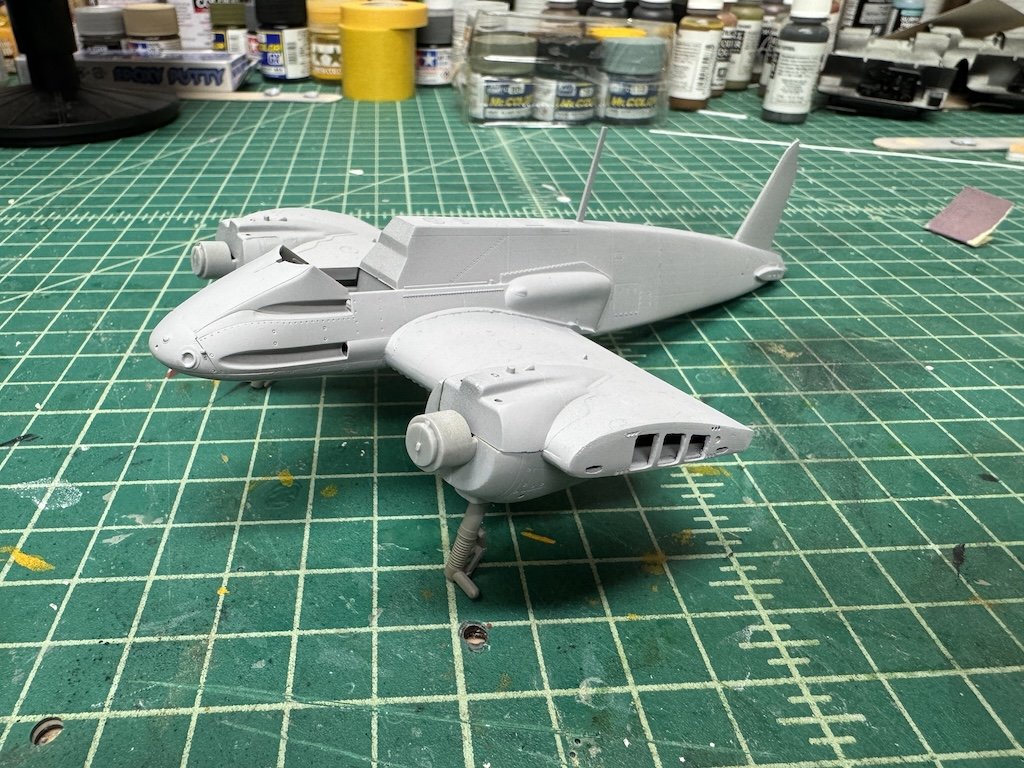
The second plane has been a little easier. I realized that the cowling shapes differed between the B-1 which was my kit versus the B-2 which i am modeling. It helped a lot having the Hobby 2000 B-2 boxing for the other model so that I had a model to convert the B-1 cowlings. It wasn't too difficult, and I didn't try to make them absolutely perfect given that the engines are going to be tarped anyway (all I needed was the general shape): //forum.largescalemodeller.com/uploads/monthly_2024_12/IMG_2001.thumb.JPG.d047d02dad81ca13a2981104c0c1726f.JPG With the cannon pod removed from the plane in this diorama, I realized that all that would be remaining would be the cannon rack as well as the open space in the bottom of the fuselage for the ammo, etc. So, I cut open the bottom of the fuselage similar to how I did the other. Much easier this time around as I didn't have the various aftermarket detail pieces in the fuselage so the fuselage was essentially hollow. After cutting, all I really had to do was line it which was fairly easy. I'll scratch the cannon rack and add it separately at the end of the build. //forum.largescalemodeller.com/uploads/monthly_2024_12/IMG_2068.thumb.JPG.bd386bf2199af5a10db120d00d421731.JPG This model is also primed, so I can start throwing on some color tomorrow: //forum.largescalemodeller.com/uploads/monthly_2024_12/IMG_2066.thumb.JPG.7e0bd37bd2cd77c4b75809d339f3a135.JPG https://forum.largescalemodeller.com/uploads/monthly_2024_12/IMG_2067.thumb.JPG.99f7db633e2b305707778546b10936f8.JPG Thanks for looking in!
- 51 replies
-
- 14
-
-
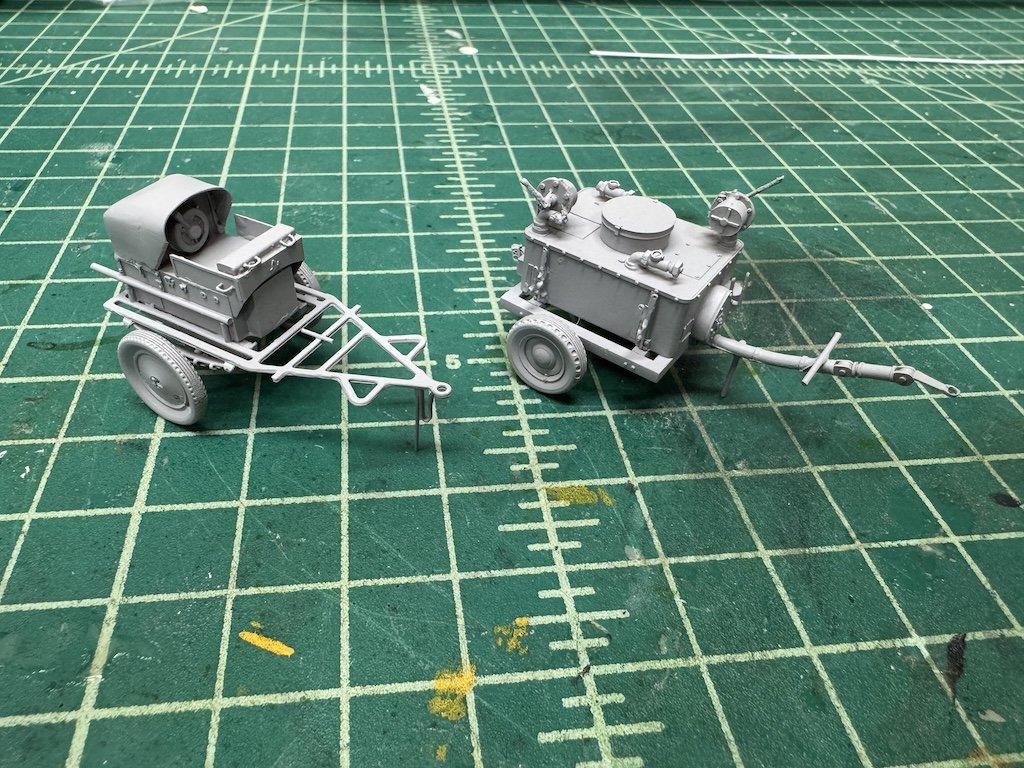
Quick update on these models: For the first diorama, I've gotten the plane and most of its parts primed. The flaps gave me a little issue as I was planning to use the CMK flaps so cut them off the kit wings. Well, as you can see in the picture below, the CMK flaps (upper right) are too short relative to the kit parts I cut off (bottom two on the right). Thankfully I remembered I had the Verlinden set which had flaps that were the proper size (top left, relative to the kit parts I cut off immediately below it). I finally got the pushrods added to the Vector engines. A real pain, but I eventually figured out a way to get them installed - only 28 per engine! But, the engines look pretty good now. I had toyed with the idea of adding a small connector at the ends of each rod using minuscule pieces of brass tube, but I dropped that idea quickly as it was just going to be too difficult and take way too much time. Here are pictures of the plane almost completely assembled, and later primed: I also remembered that I had a Verlinden "Luftwaffe Airfield Carts" that is a multimedia set that allows you to build an oil cart (first two pictures below) and a power supply cart (second two pictures below). Took much longer than one would think, but the two came out really nice I thought: I'll probably use one of these in the diorama, as I found this picture: Thanks for looking in!
- 51 replies
-
- 11
-
-
Great subject Alan! I have the Flyhawk Lutzsow set that also includes the torpedo nets. The torpedo nets were the big draw for me - a very unique feature for the model! Just to let you know, for my Lutzsow, I don't think the kit included a wooden deck. I ended up buying an aftermarket wooden deck which - plenty of manufacturers like Hunter and Shipyardworks that you can find on eBay.
- 78 replies
-
- 4
-
-
- Derfflinger
- Flyhawk
- (and 2 more)