HOLIDAY DONATION DRIVE - SUPPORT MSW - DO YOUR PART TO KEEP THIS GREAT FORUM GOING! (Only 66 donations so far out of 49,000 members - Can we at least get100? C'mon guys!)
×

MarisStella.hr
-
Posts
479 -
Joined
-
Last visited
Content Type
Profiles
Forums
Gallery
Events
Everything posted by MarisStella.hr
-
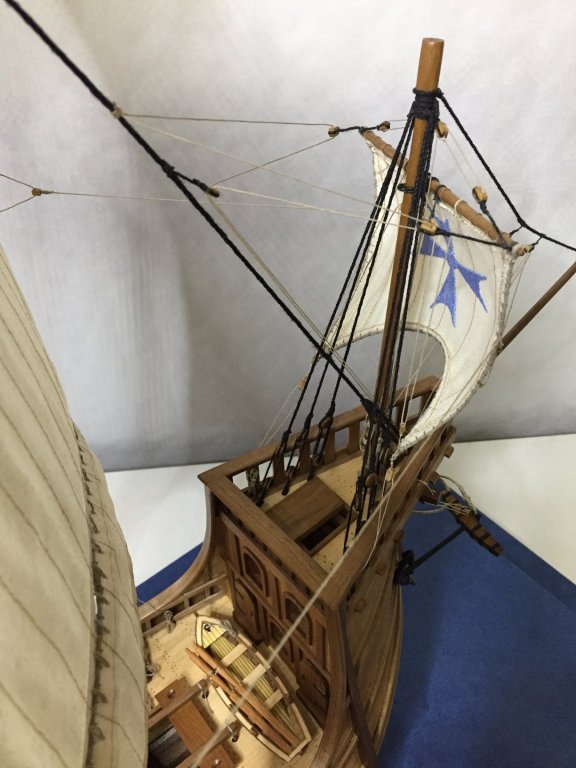
 Hello dear friends... Don, thanks for the nice comments, Mr. Rick, This ships belongs to the 13th century. they were in use up to the 16th century... These days they are a special sort of the reconstructions and models... I belong to the fans of those, they have some sort of the ancient artistic lines ... Trabaccolo is closer history, I love this too, but thruly : I love old sorts of the ship , up to the 19th sencury: sails are irresistible ... Following the Trabaccolo build log, this is coming next : the companionway at the stern, and the forecastle shuttle at the bow ... ... and of course, this is an easy part : to show the photographs to you :
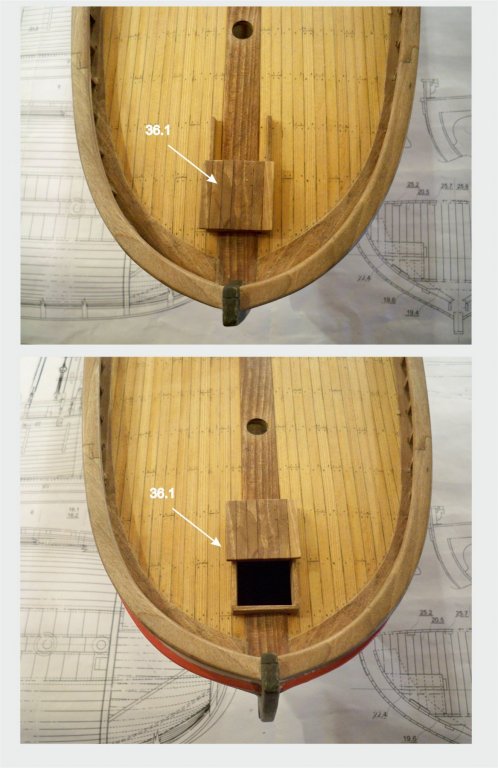
-
Hi Mr. Jack ...this Falkusa is done really good!! Beautiful work ... Best Regards, Zoran
-
Hello Dear friends... Now I would like to corrupt this Trabaccolo presentation ... I just received the new photos: If You remember the Ragusian Cog model from the begining of this topic, You will know what is this about... Modeller Davorin has completed this model. He has done several good models by now, so here is his work, so you could see this ... The first photograph is a reminder from before, the other ones are the new ones :


- 221 replies
-
- 12
-

-
Hello there... I have been folowing builds of old Mediterenian models, so this is interesting one ... The photos above are very old work from a Croatian modeler. These models were building in such a artistic way for centuries over here ... Originals are very interesting ones ... I will keep both eyes at Your build Vivian... Regards, Zoran
-
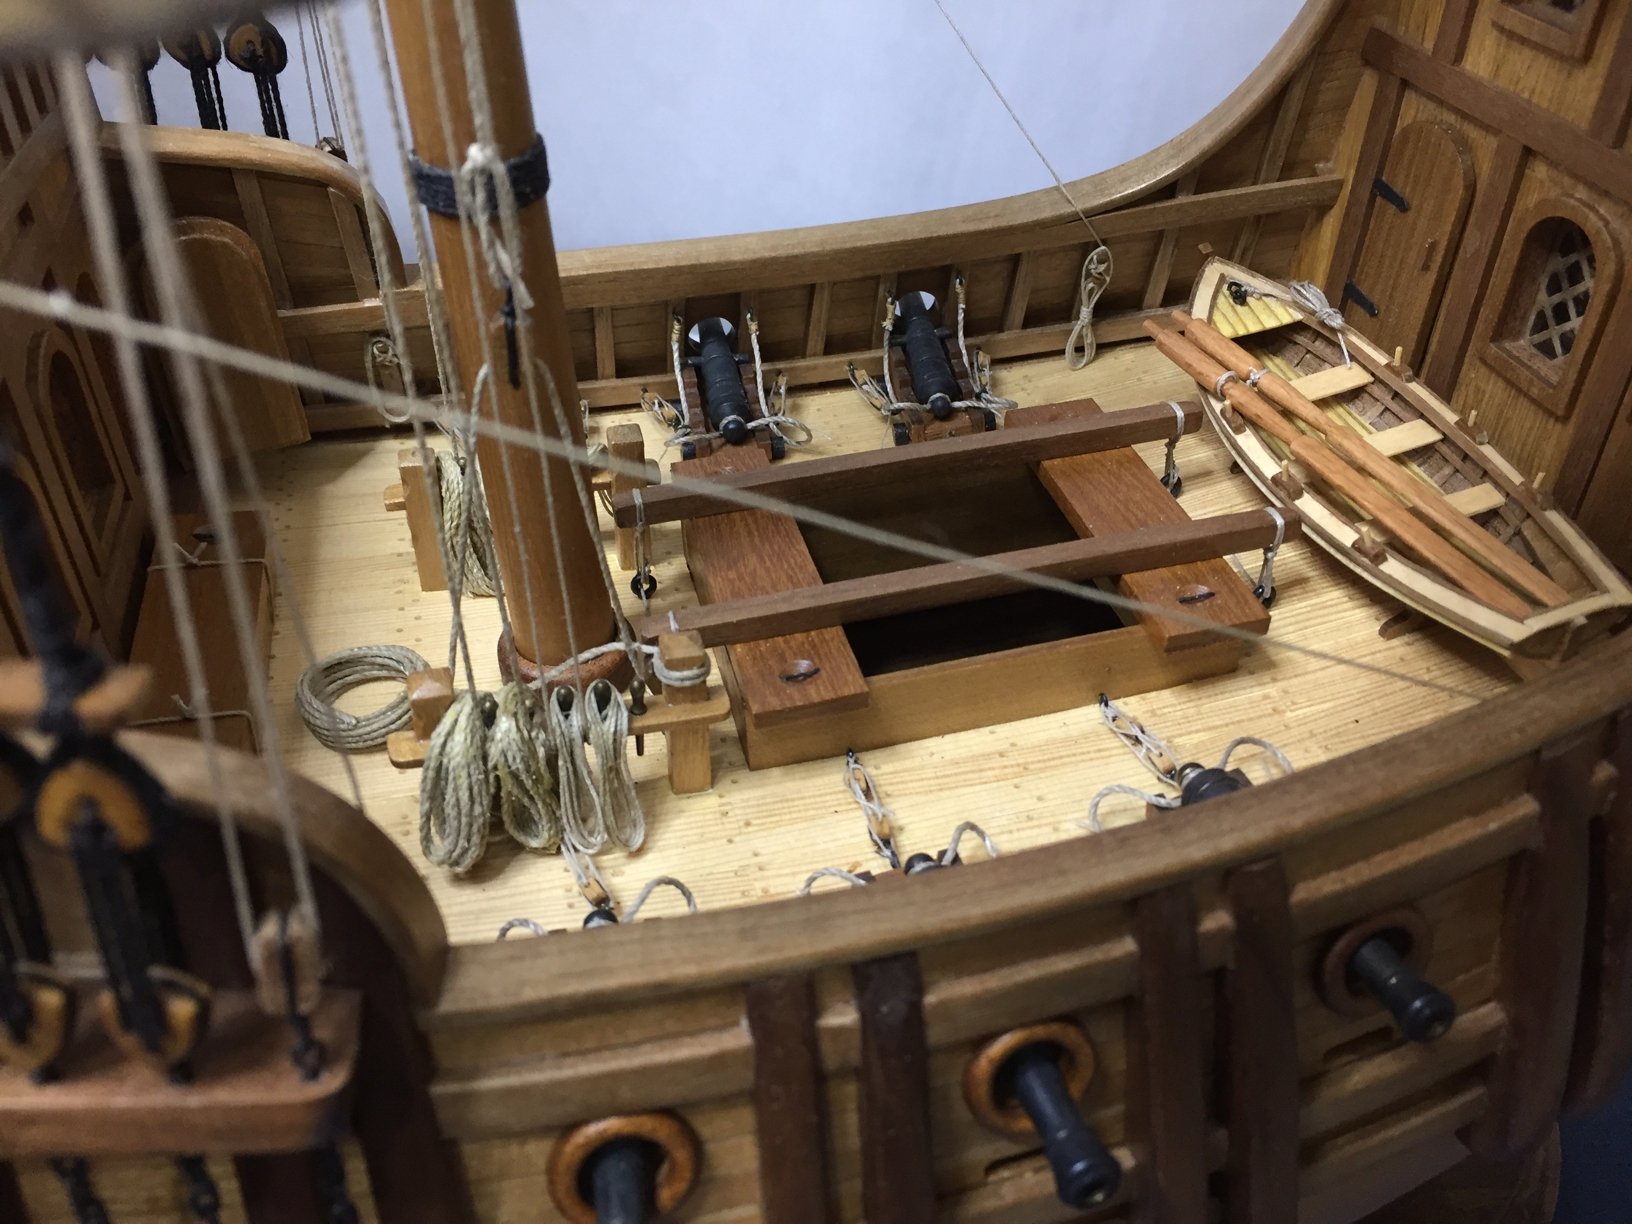
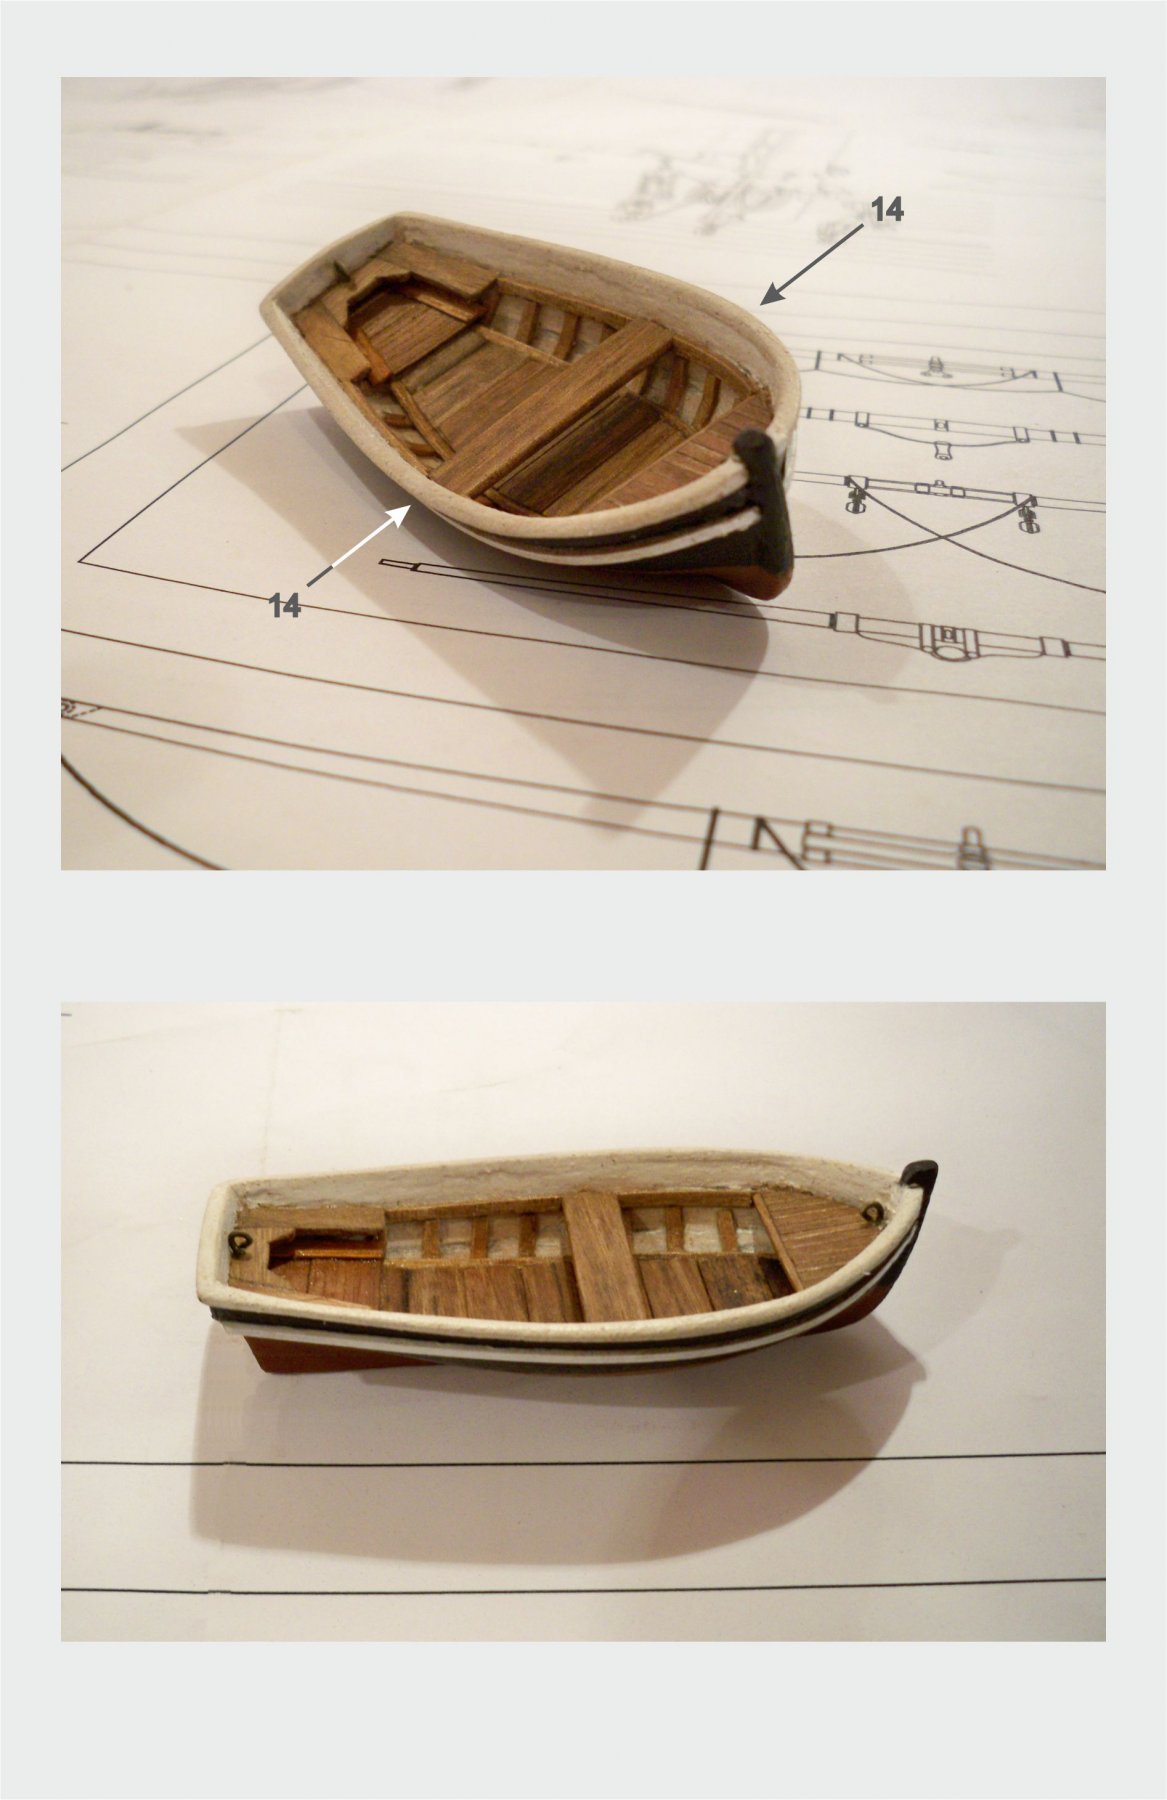
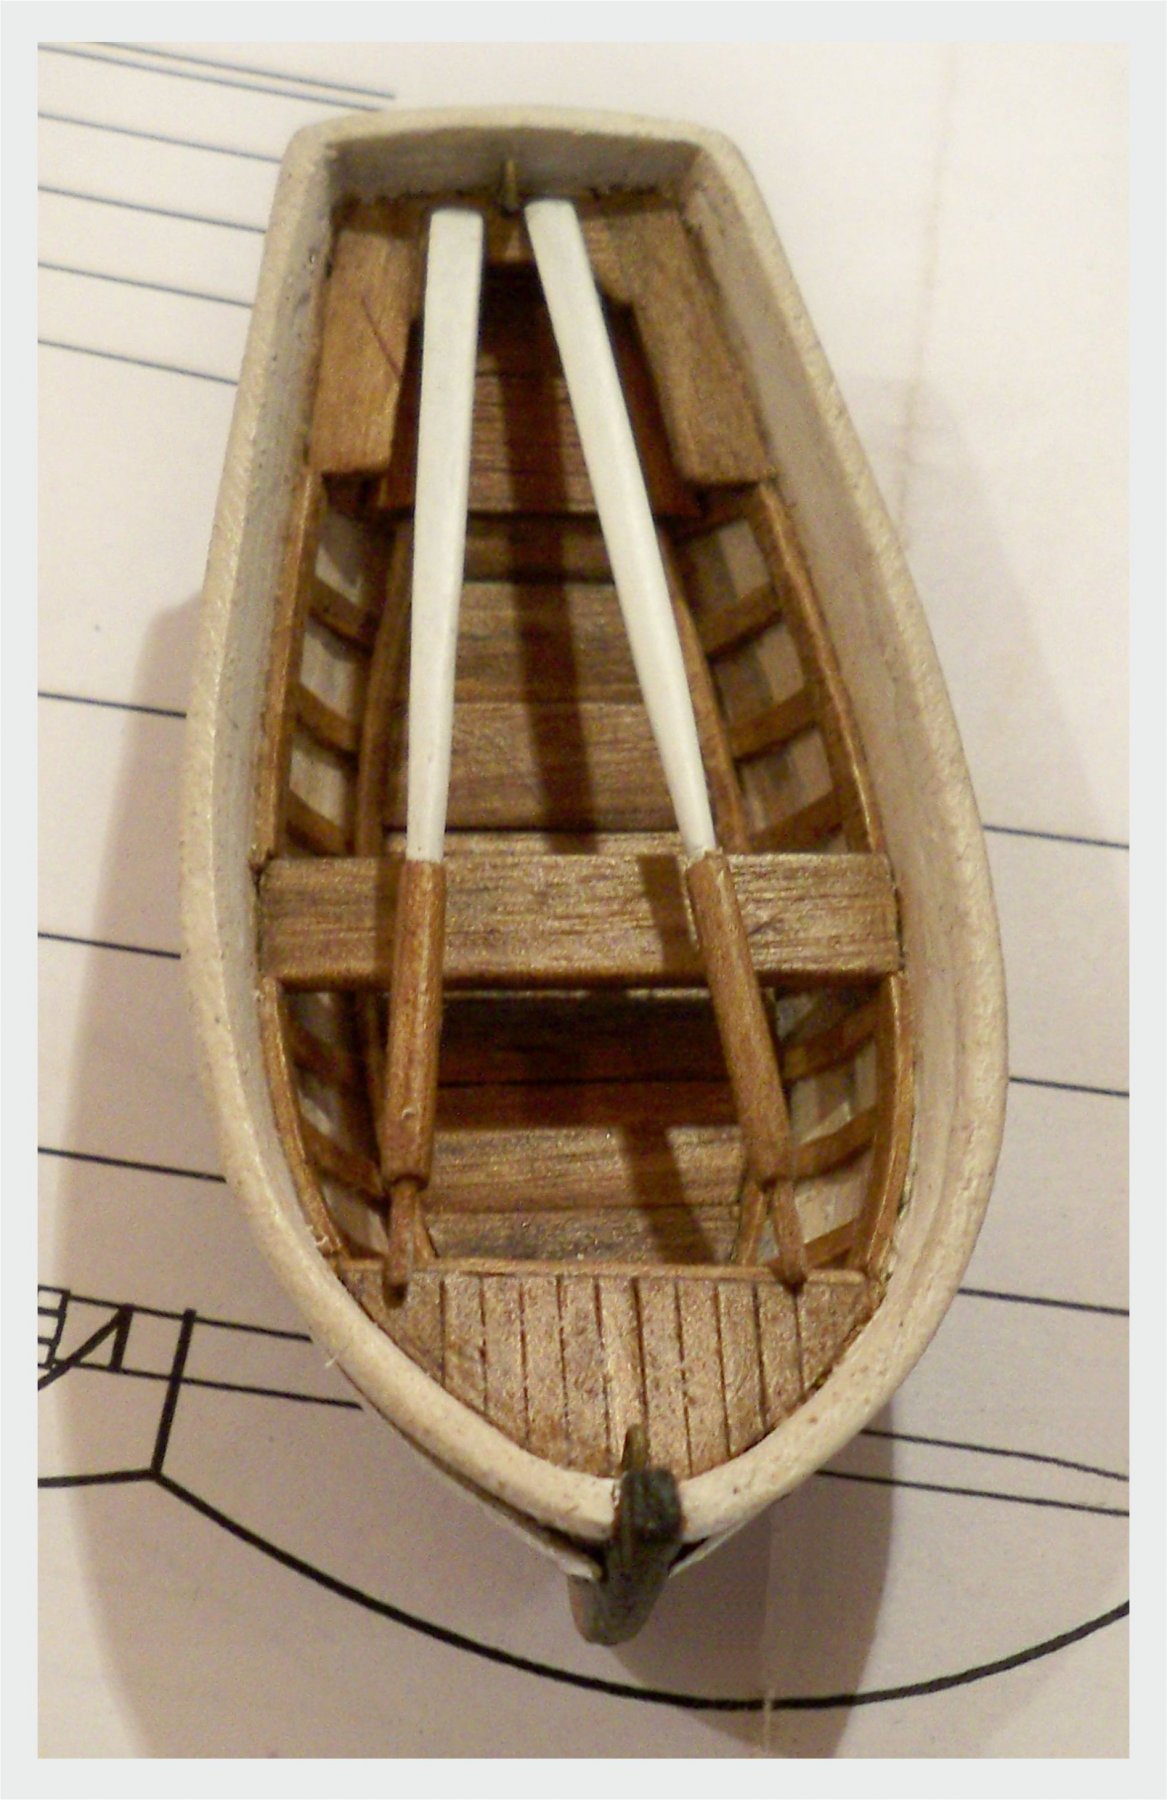
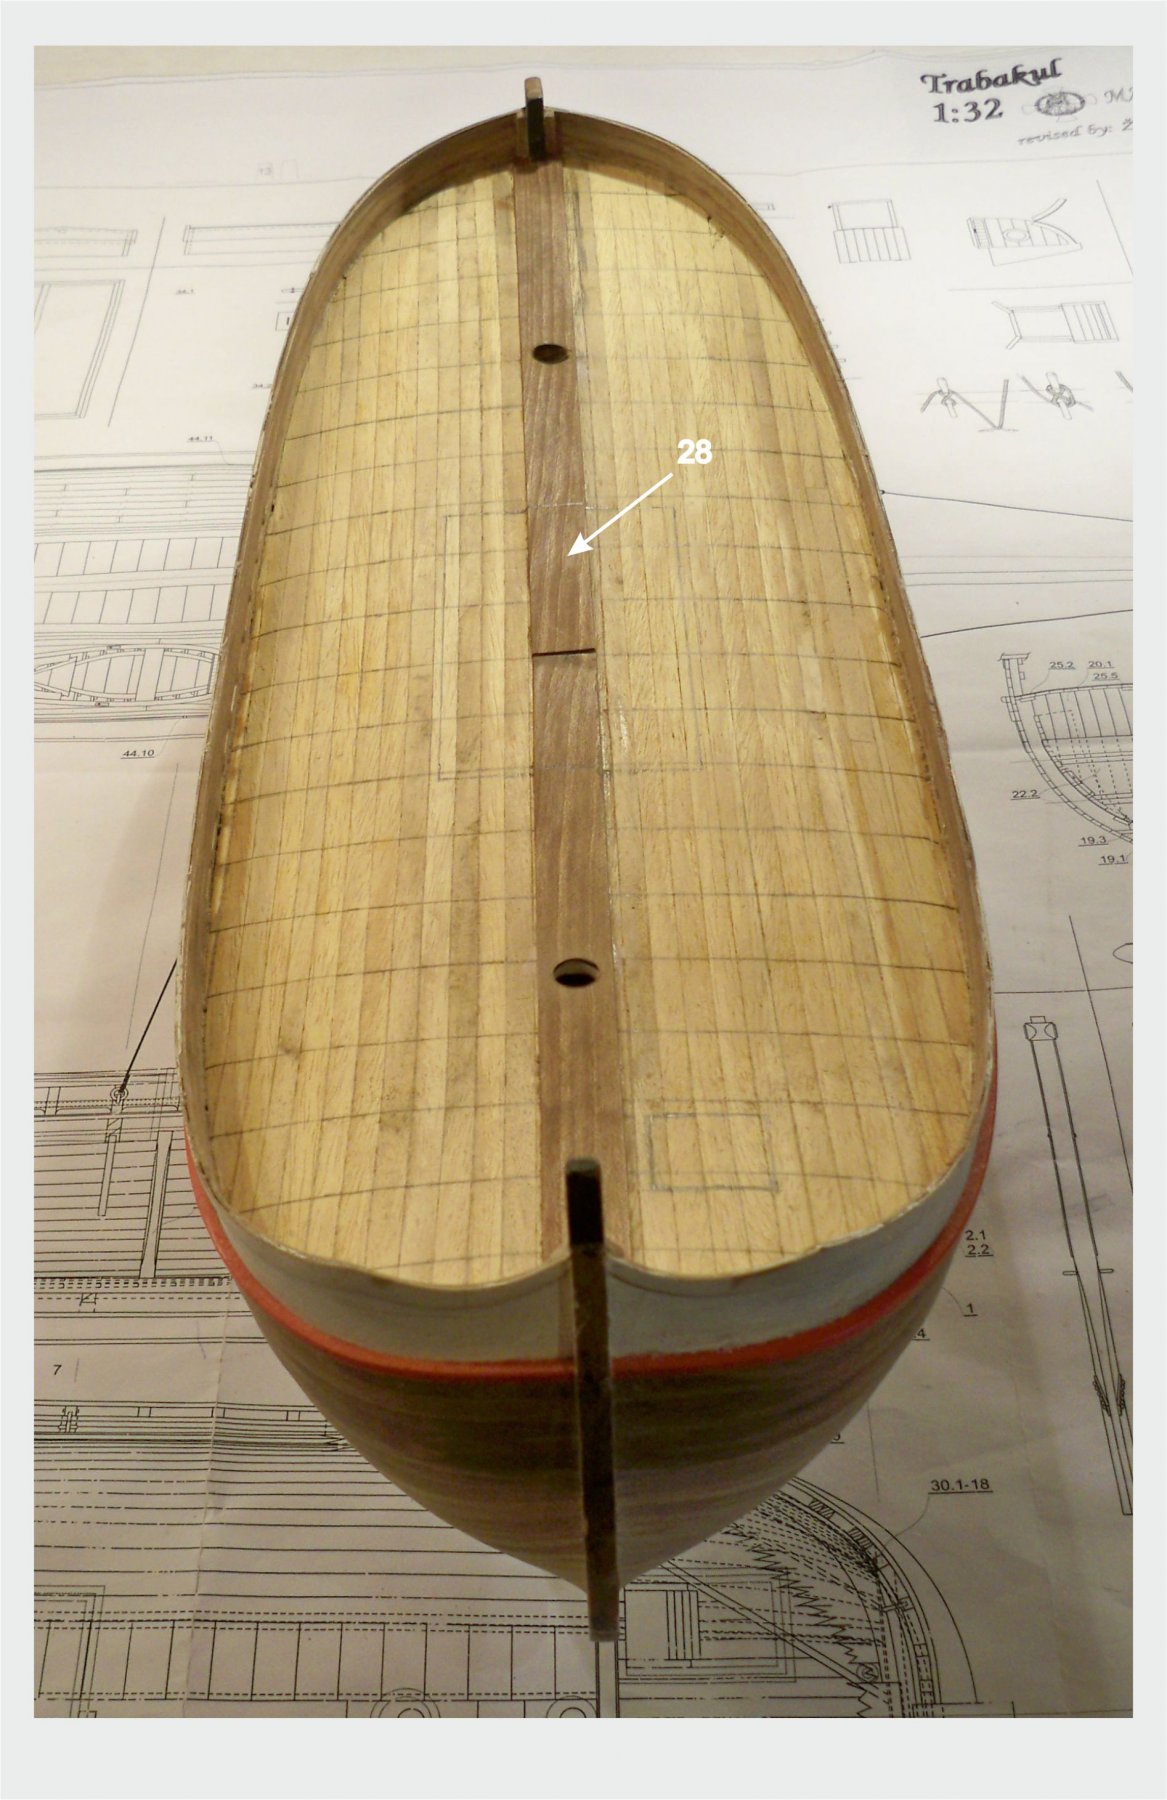
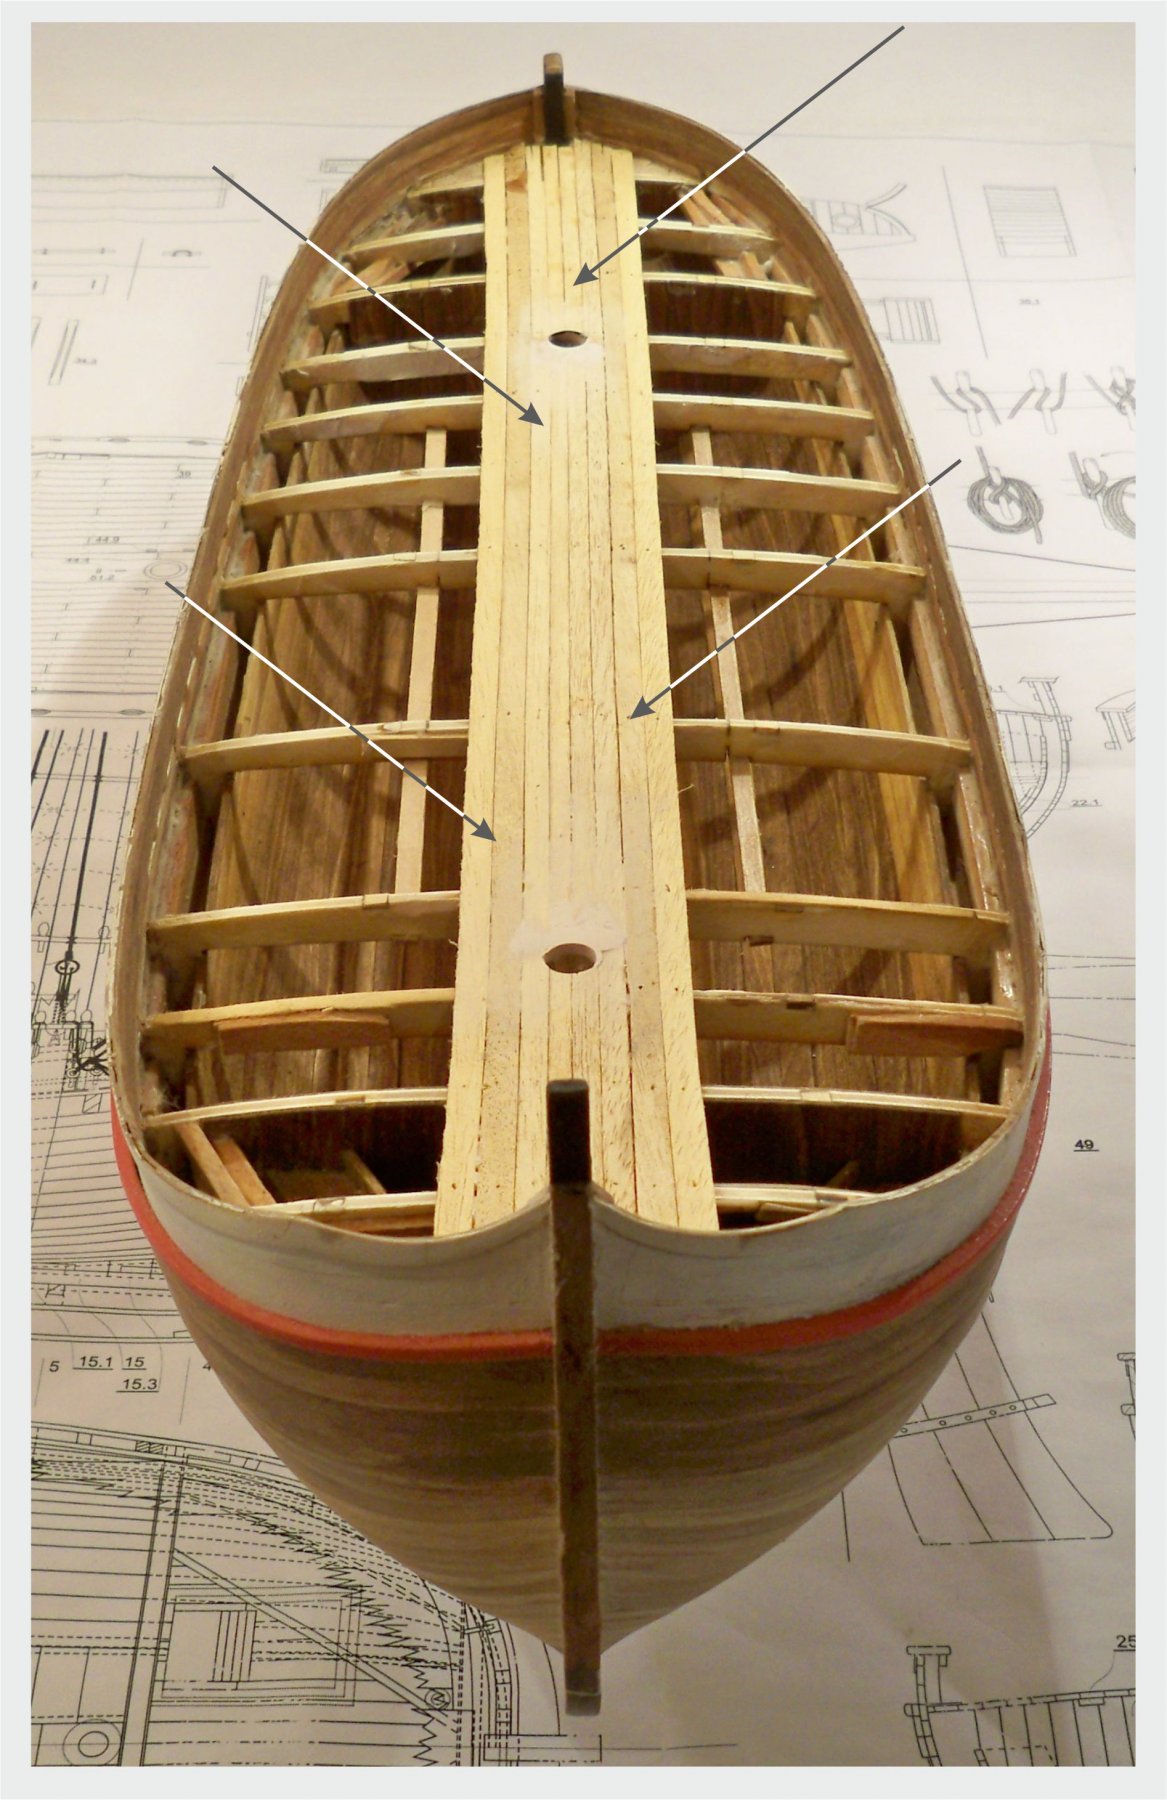
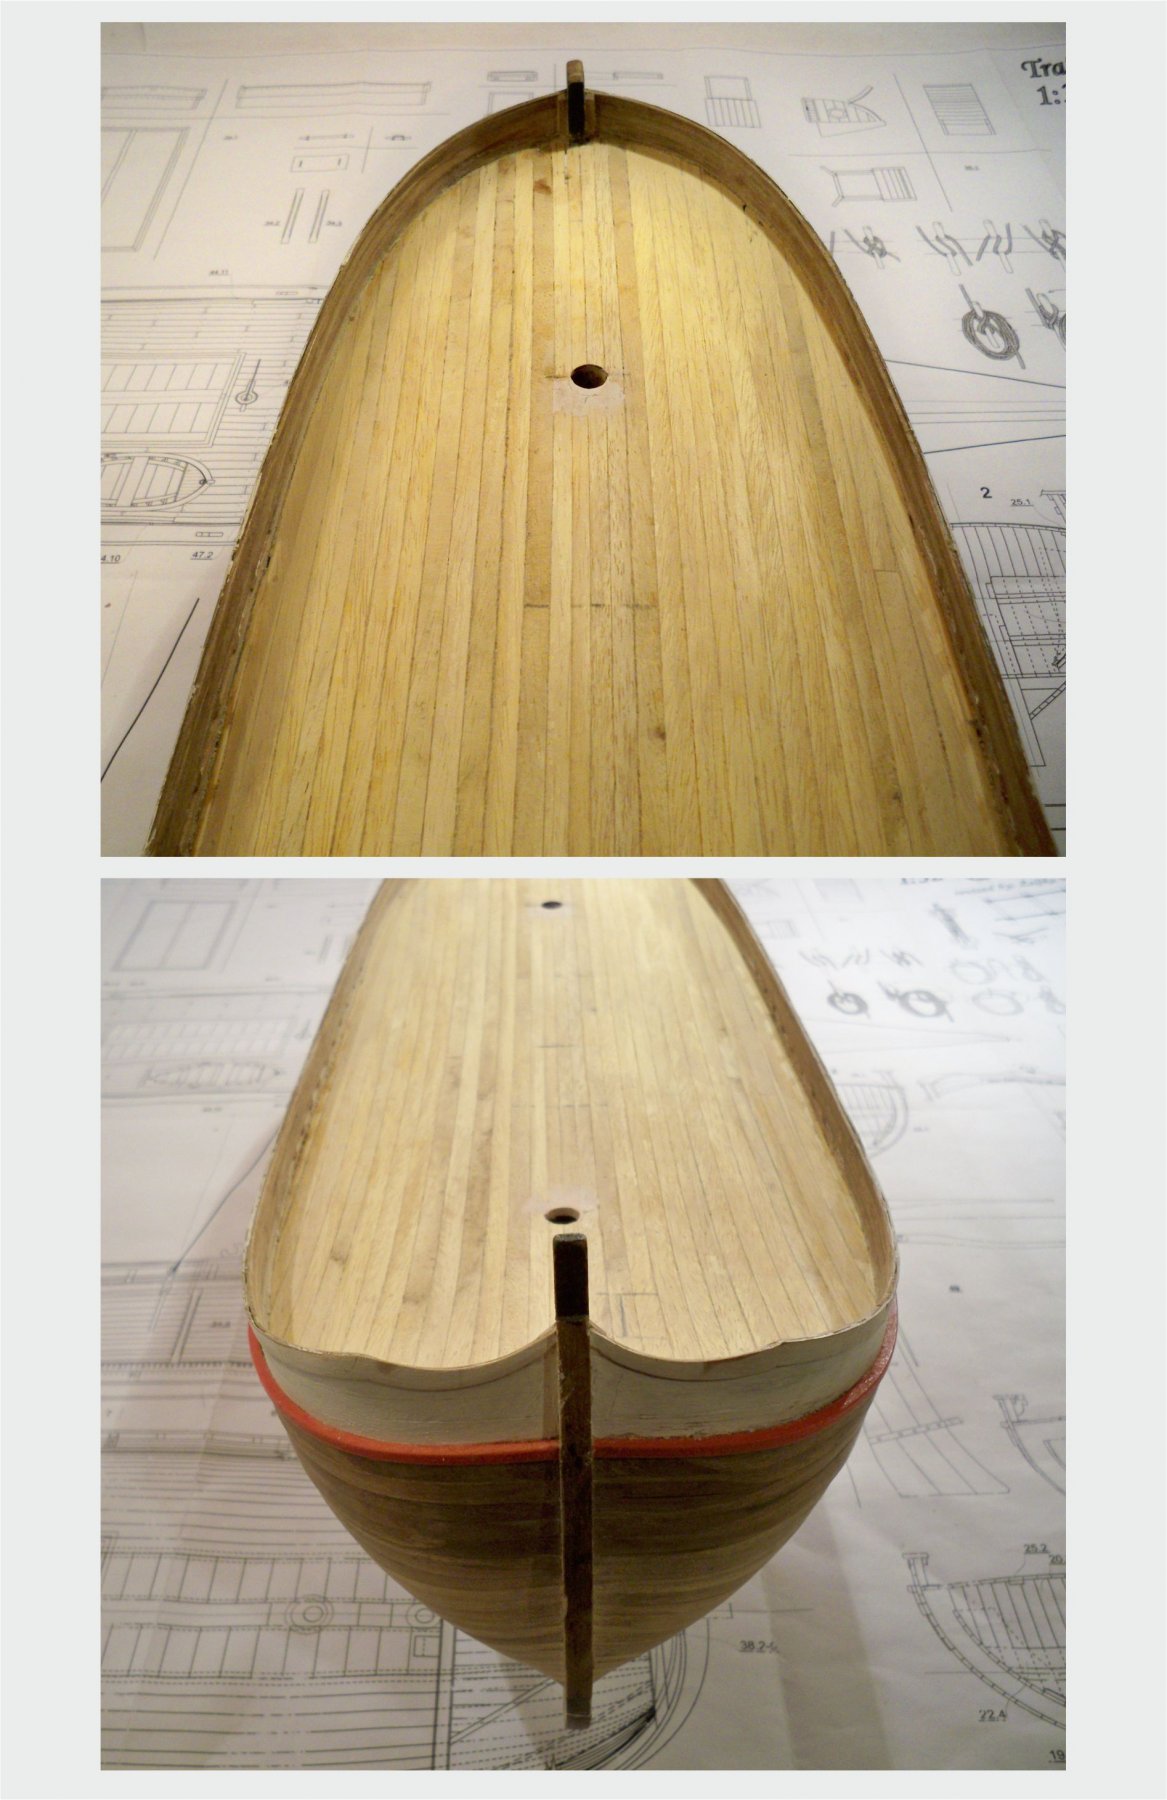
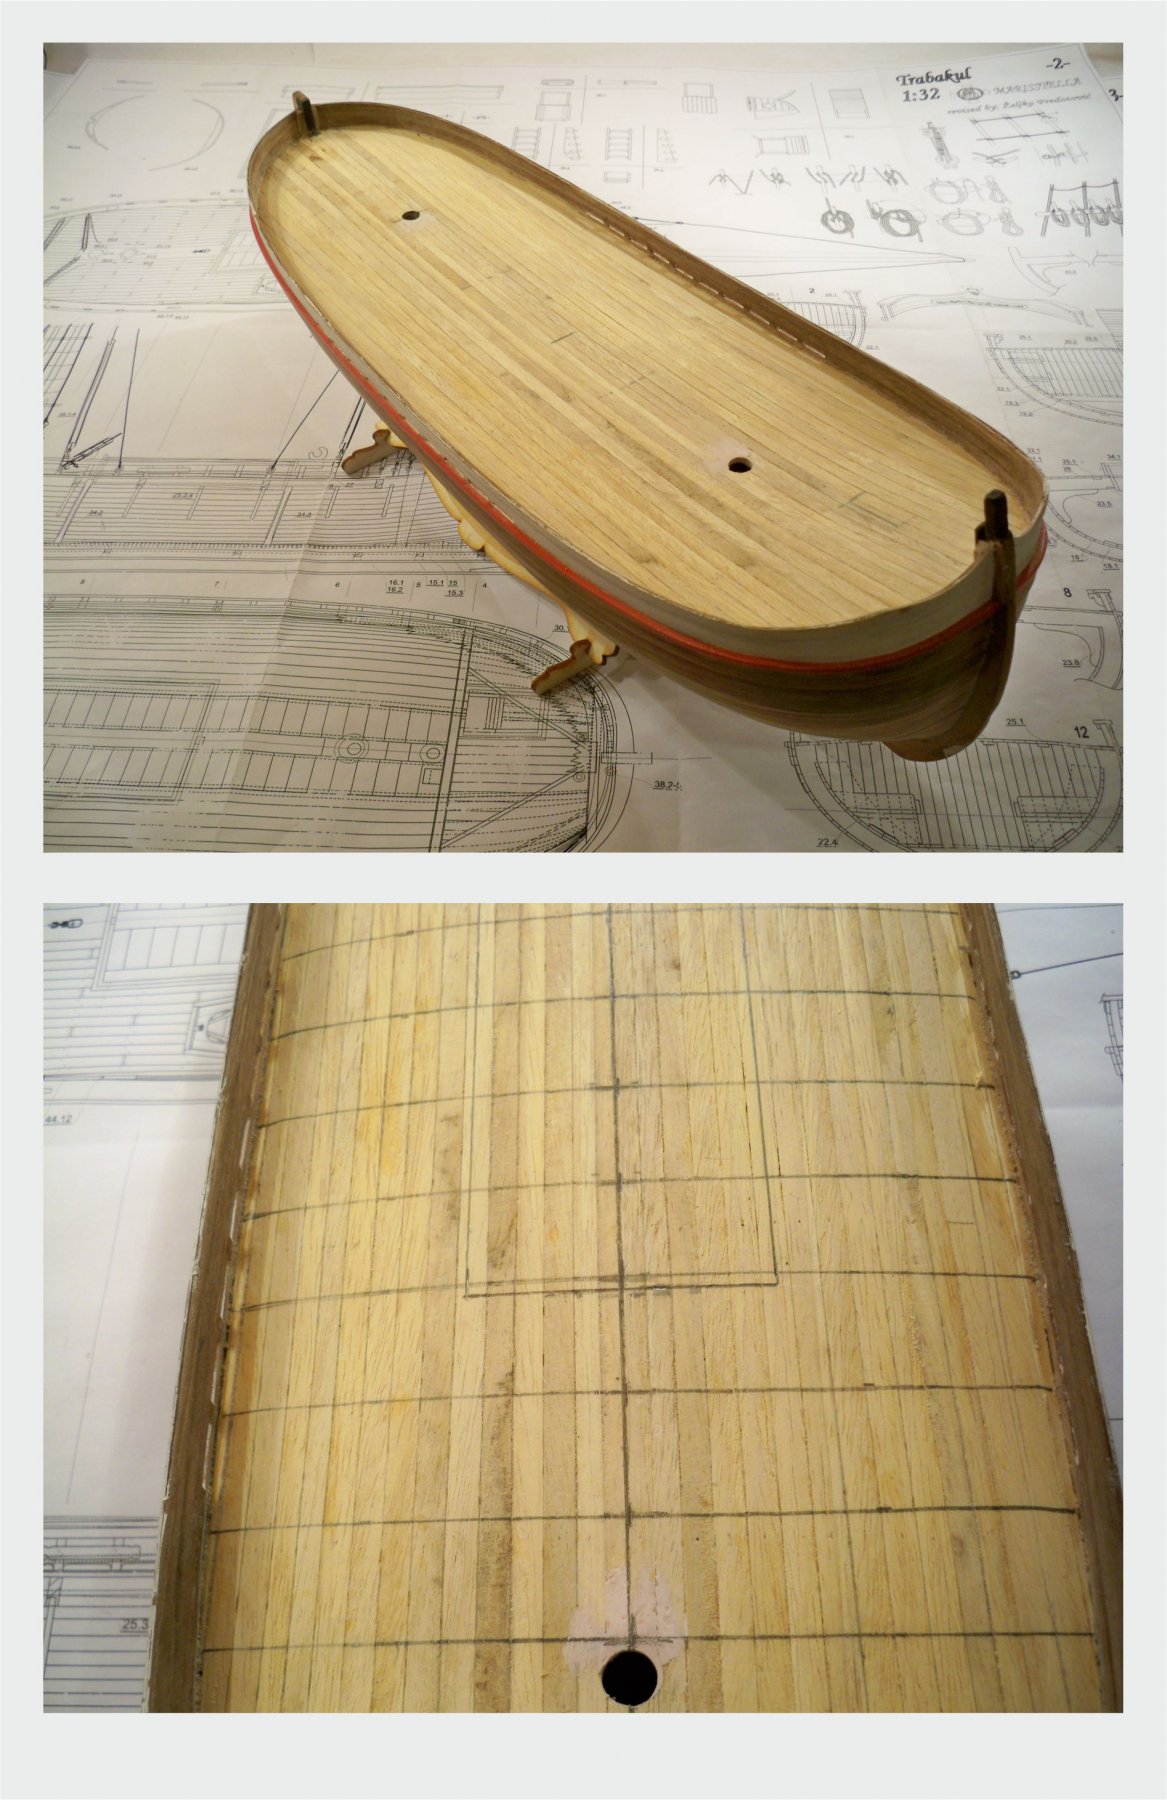
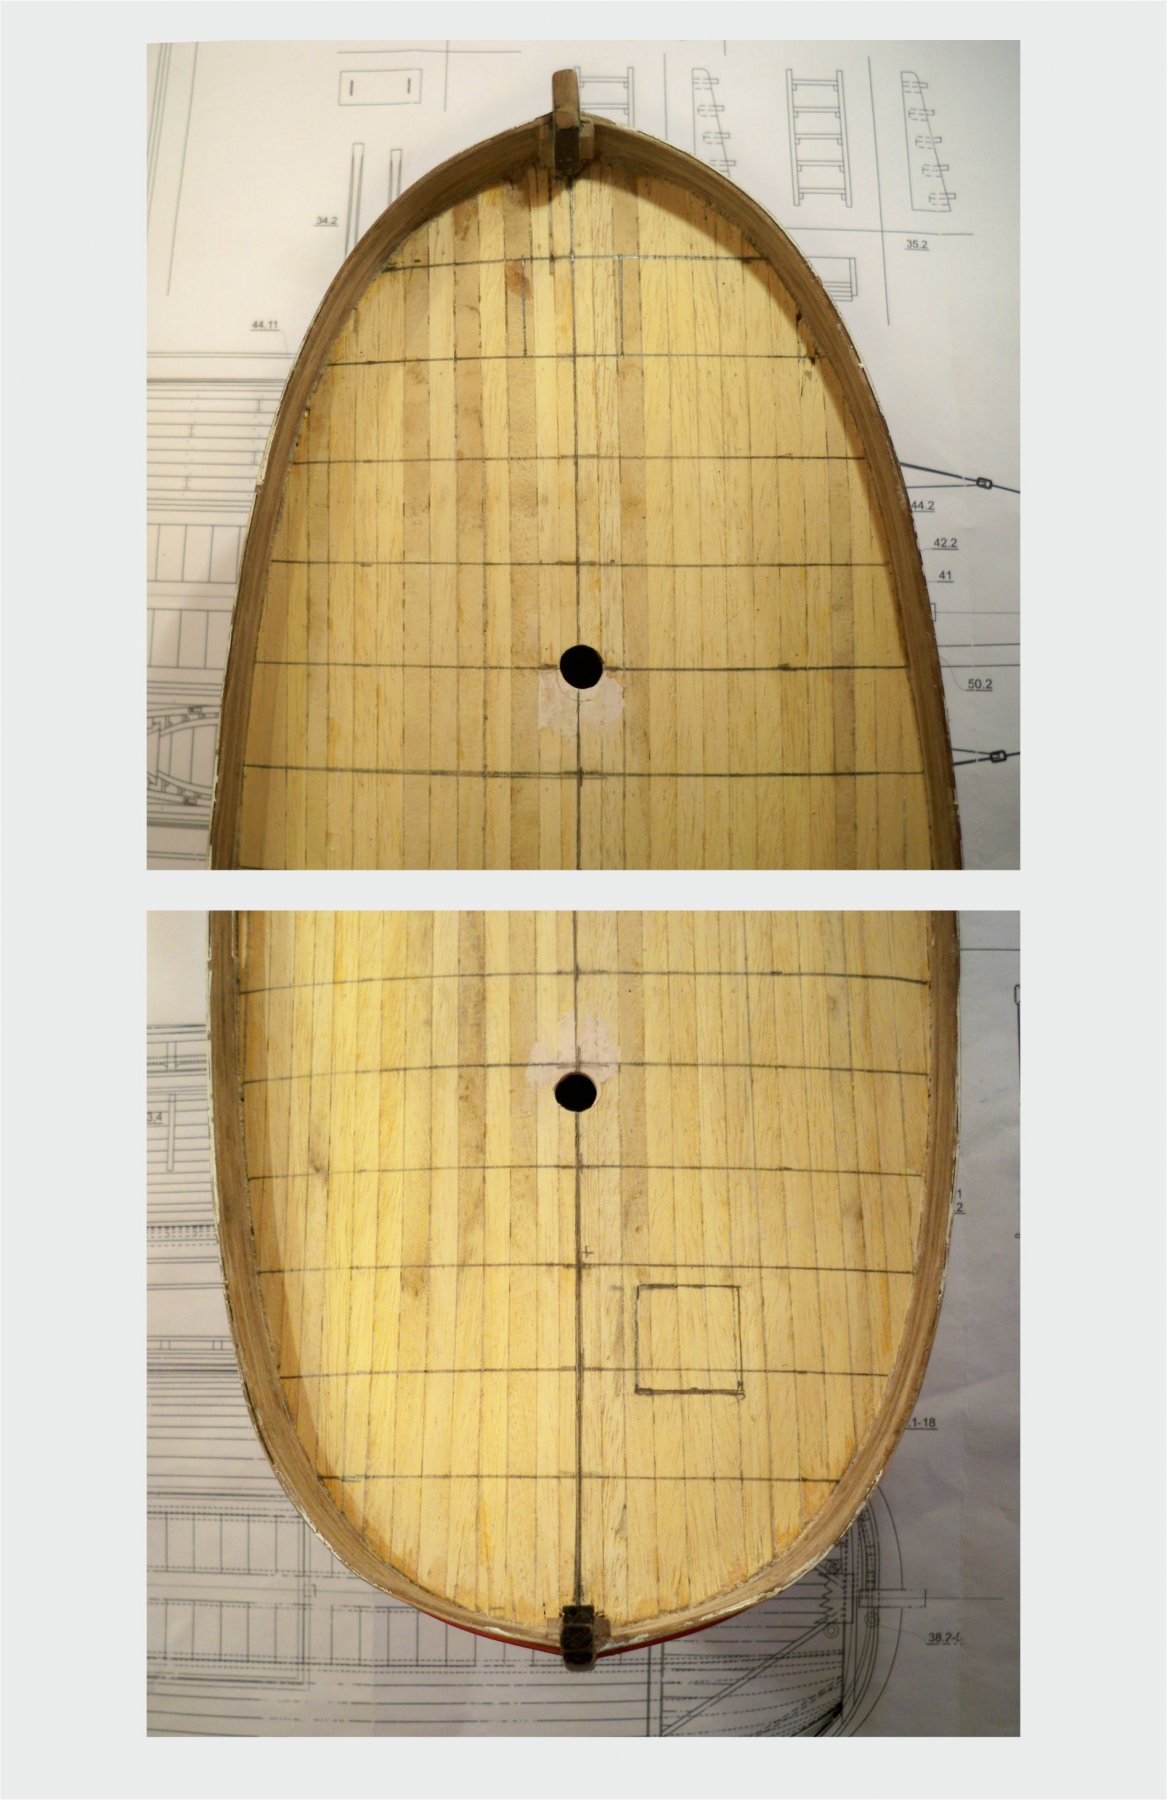
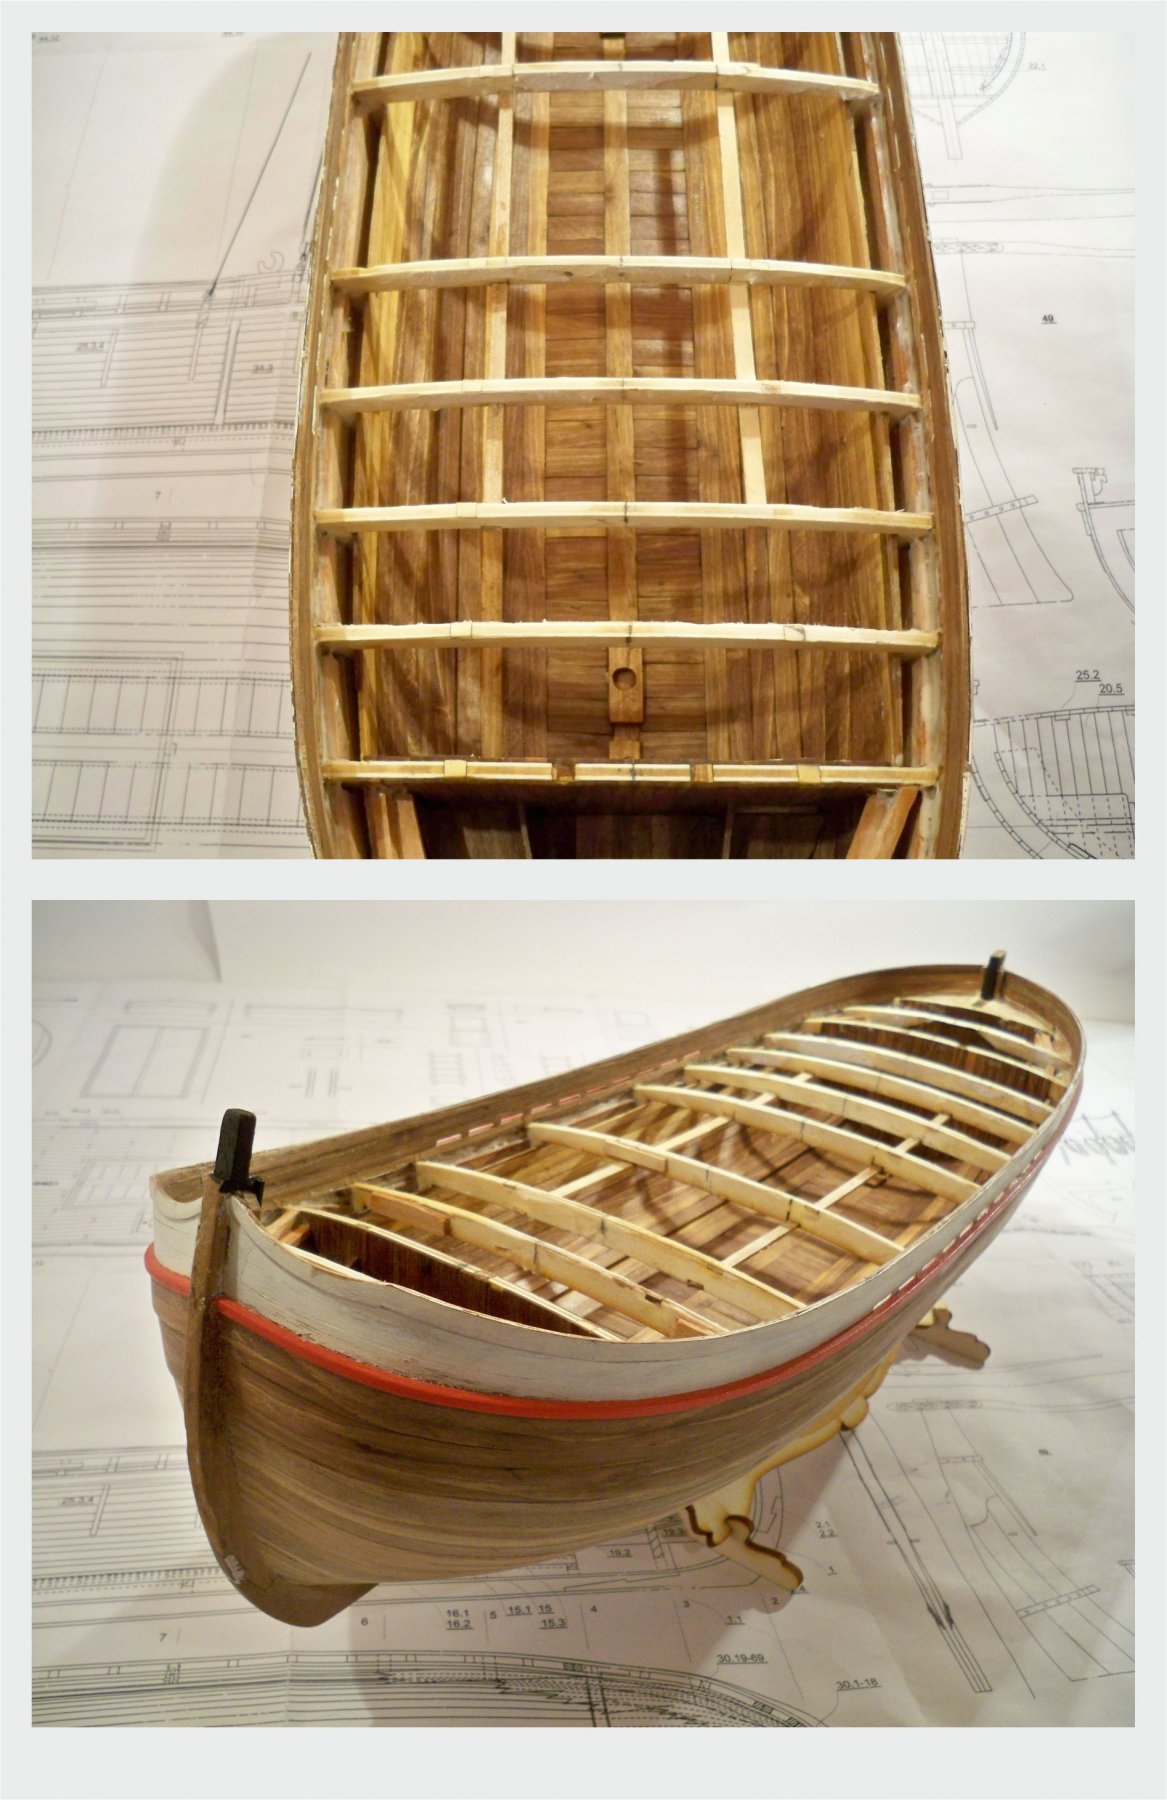
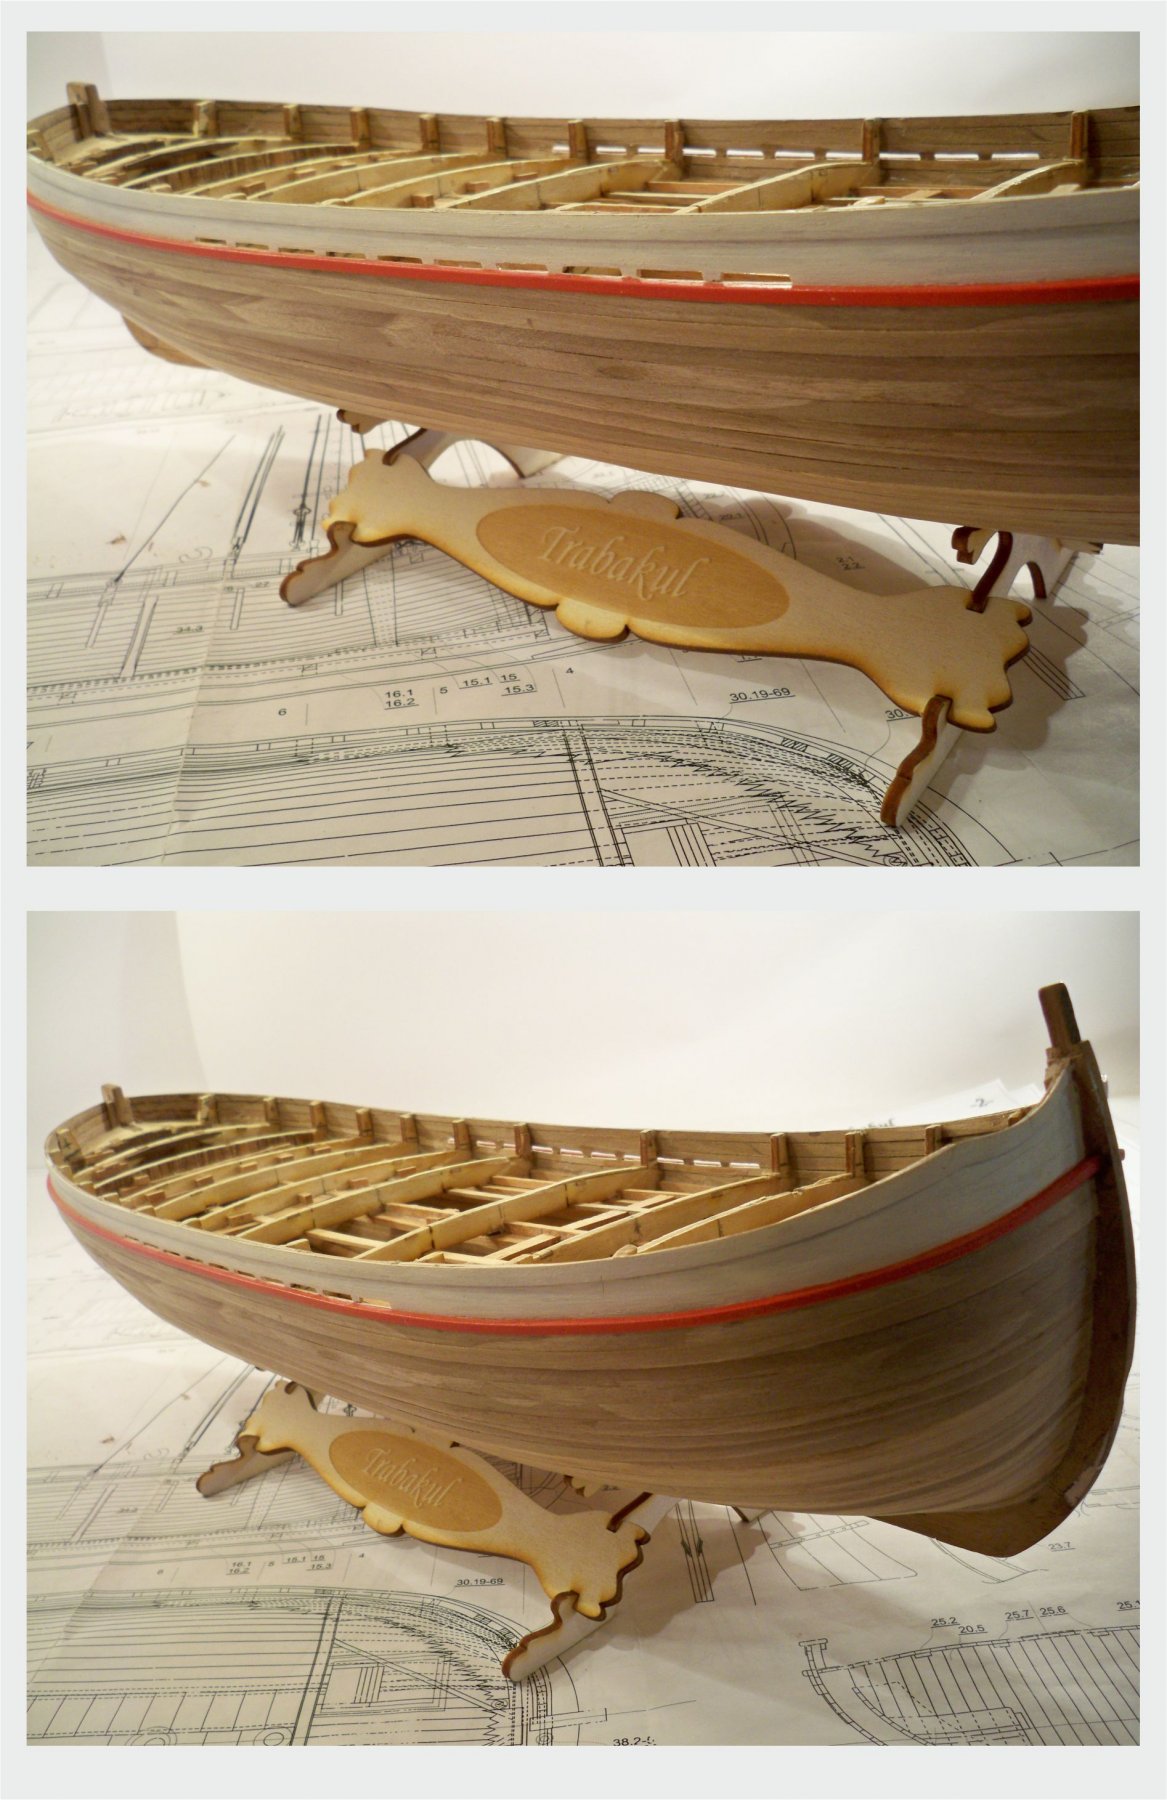
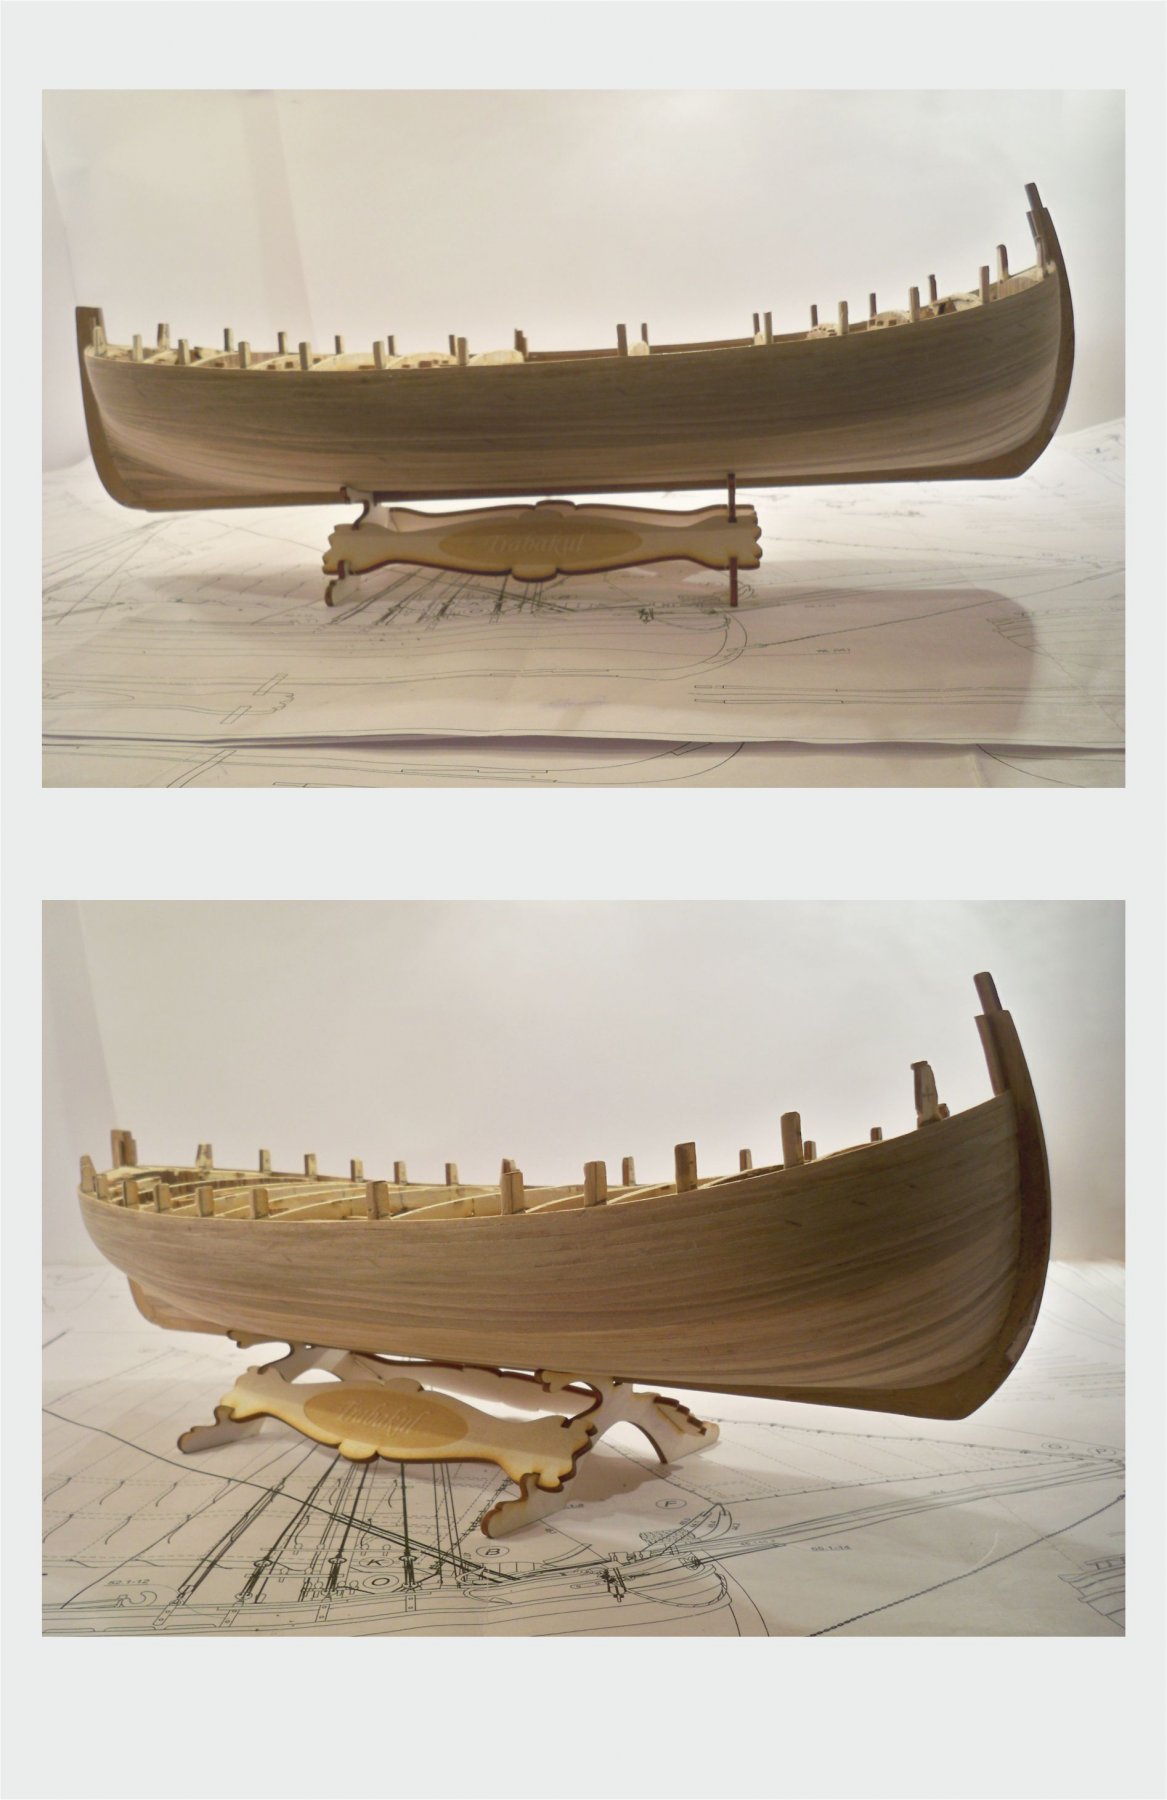
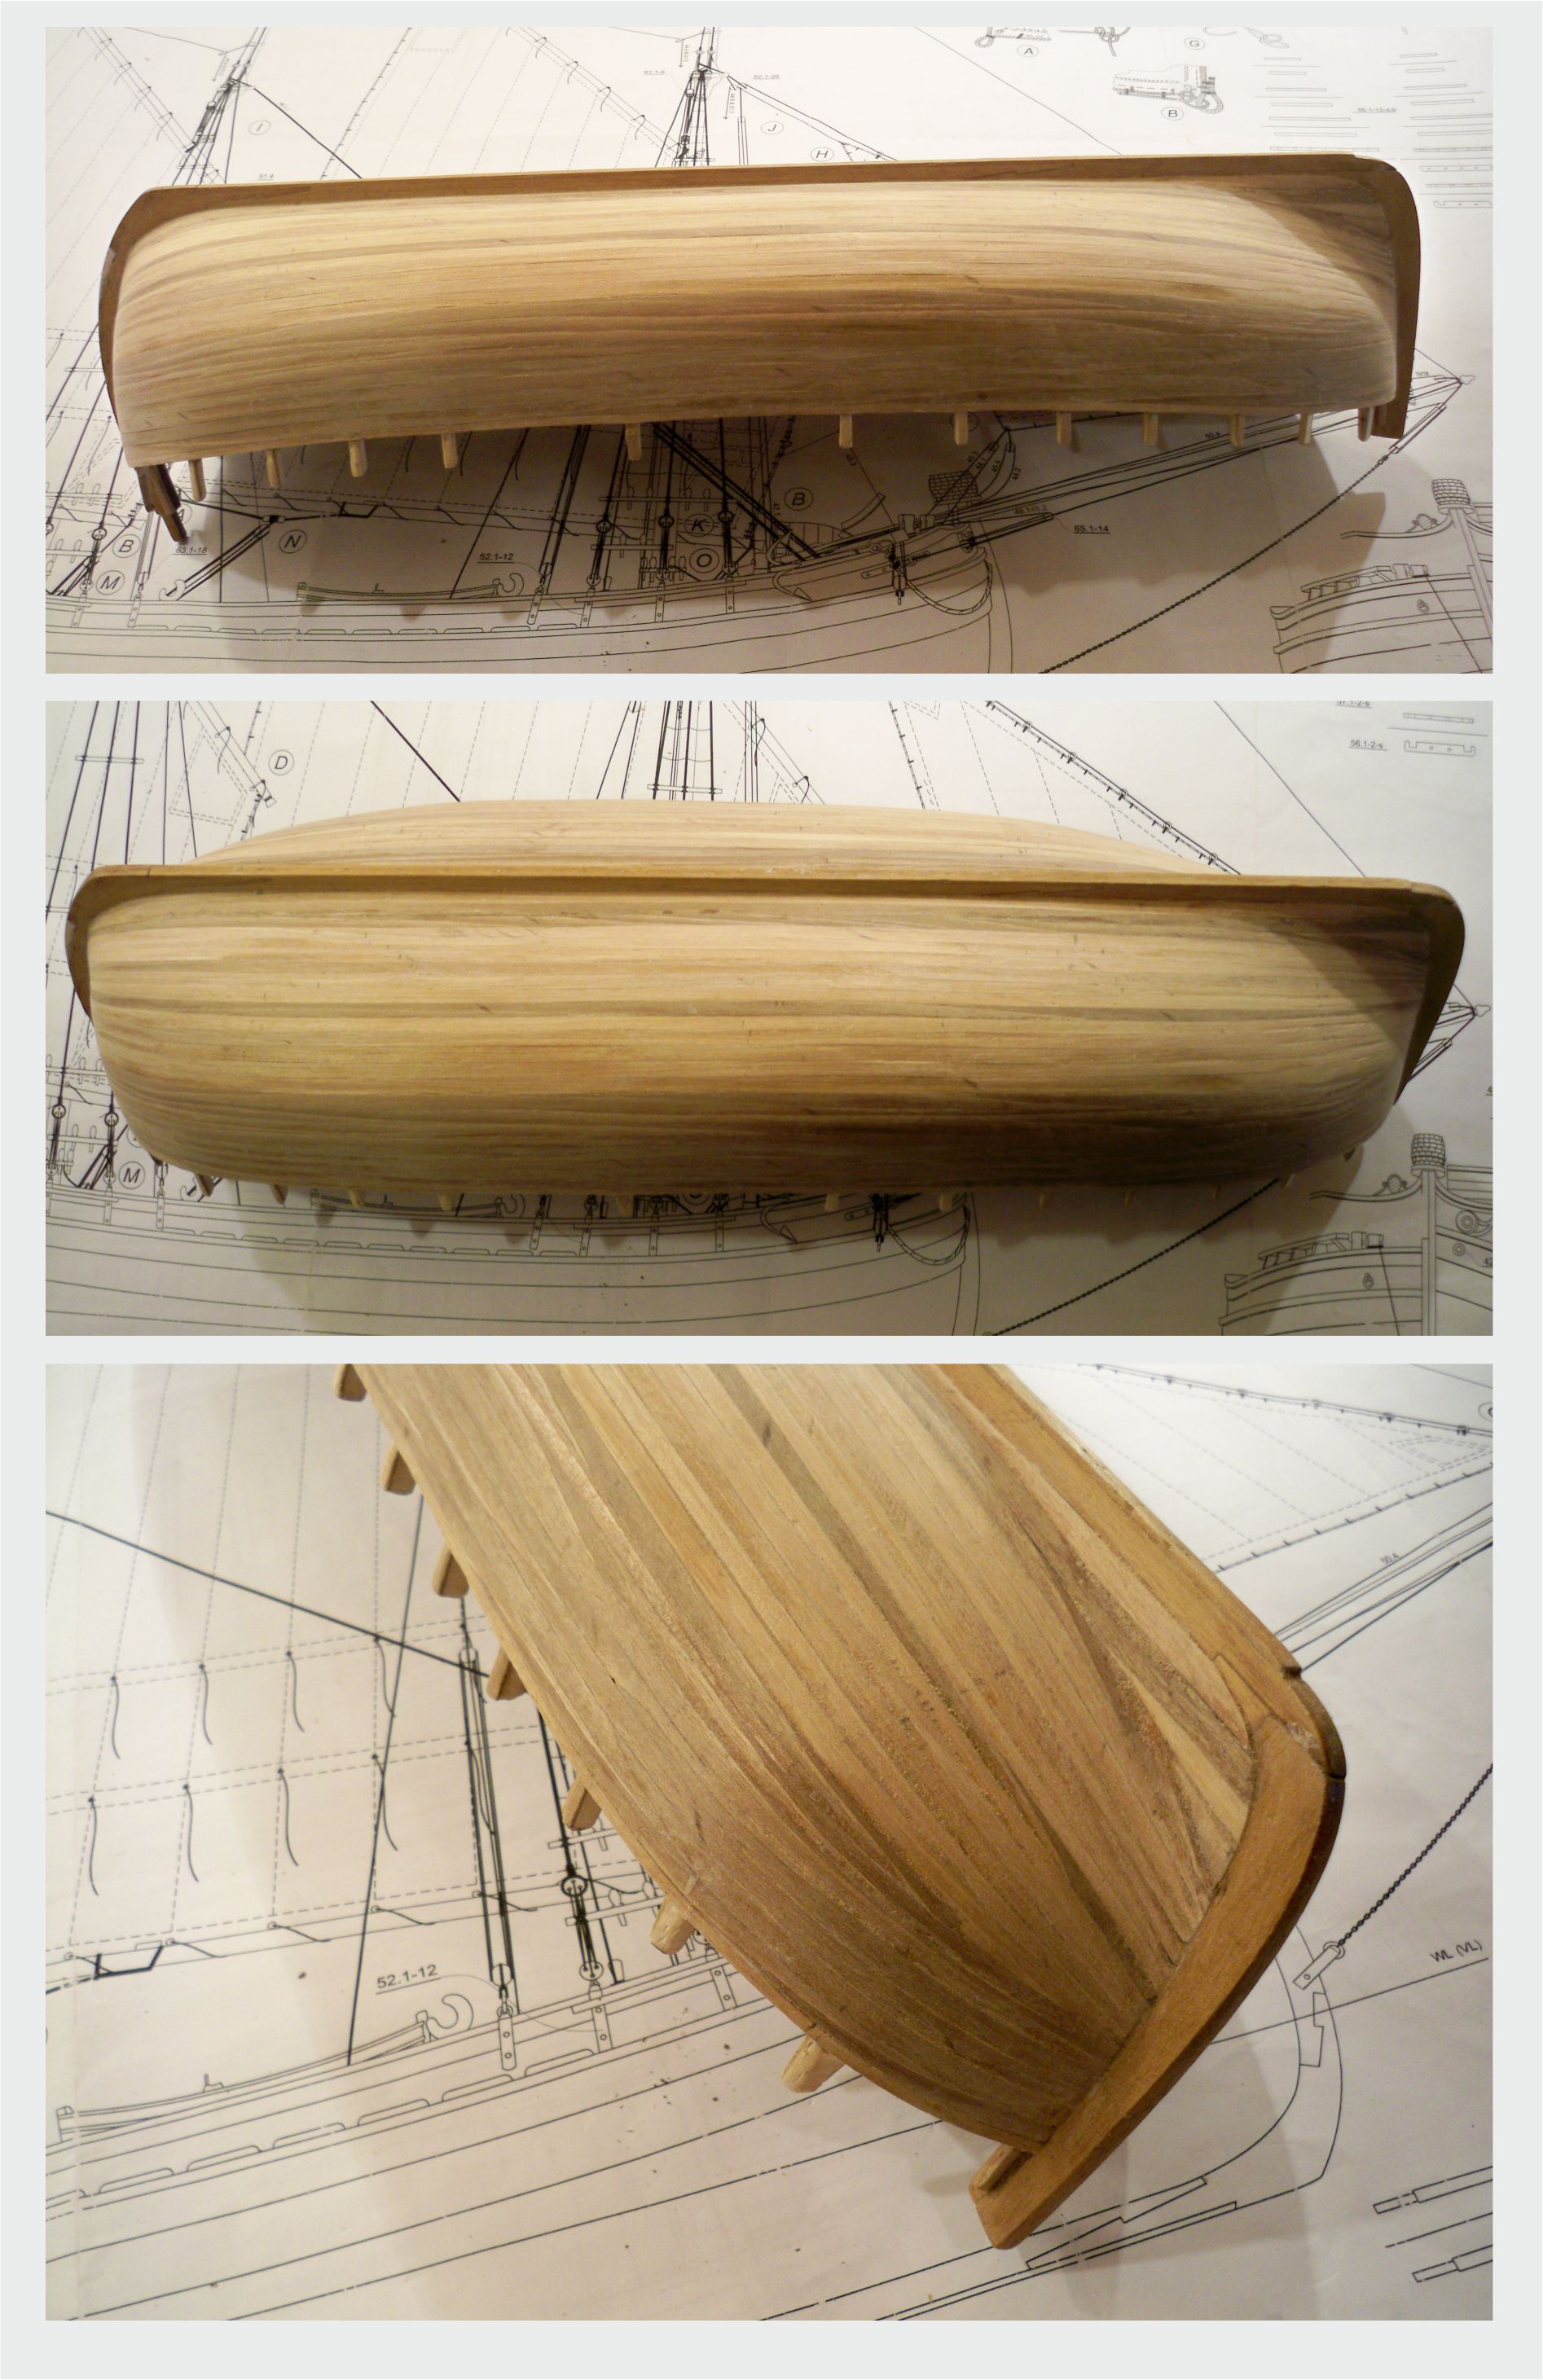
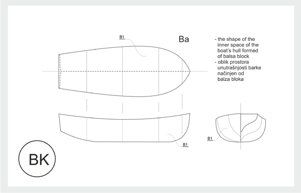
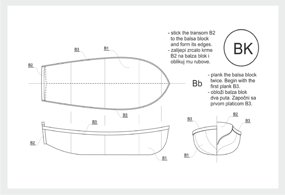
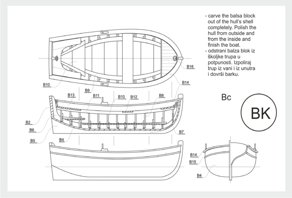
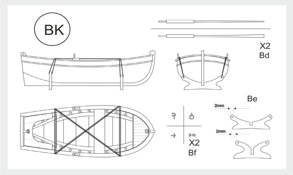
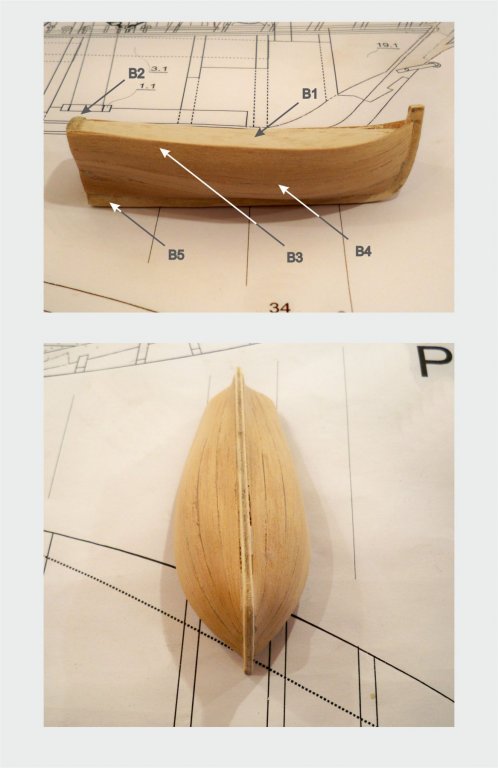
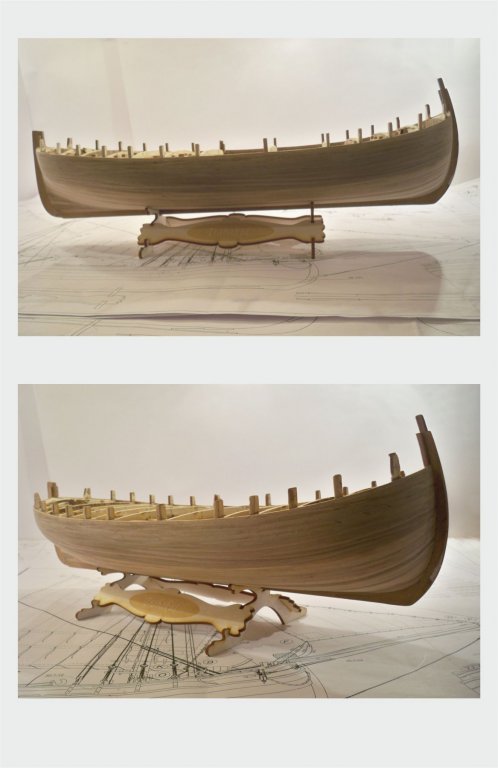
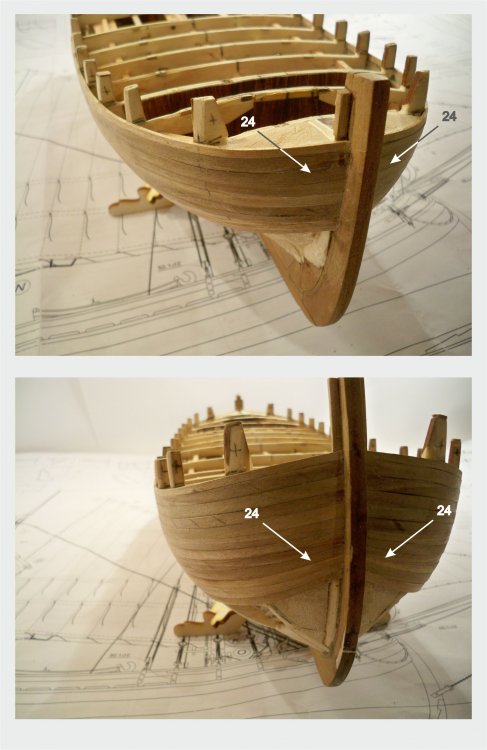
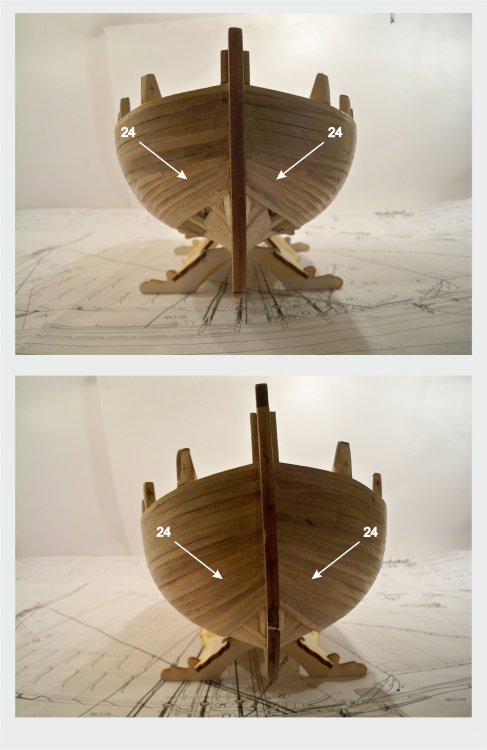
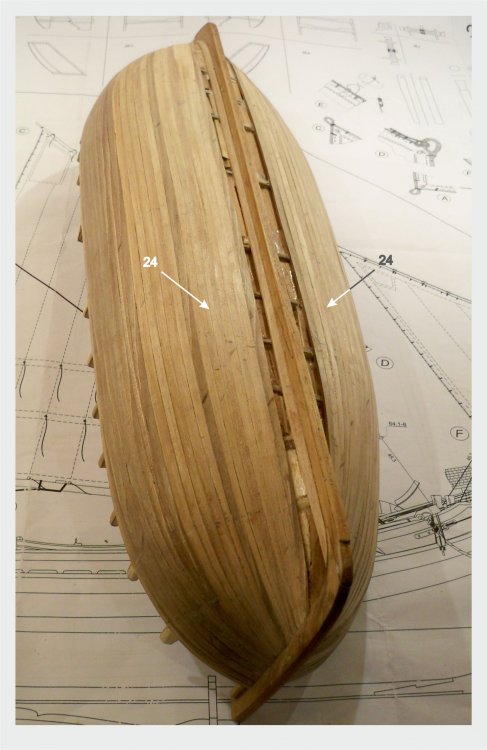
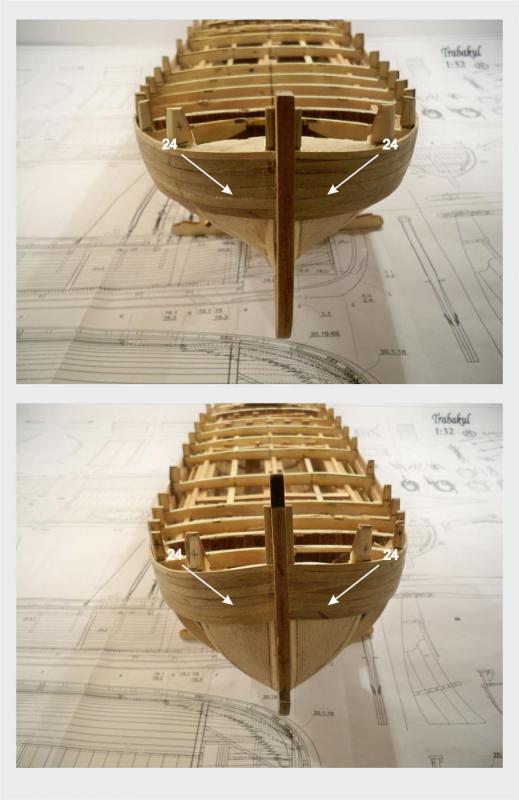
Trabaccolo had about 4 meters long boat. This boat was a mandatory part of the ship's equipment... There are many ways of the boat building at the different sorts of the kits, but MarisStella has its way of doing this ... This was described at the begining of this forum topic, but I will repeat it here : So, at the first , a modeller needs to shape the inner mold of the boat. Balsa wood is ideal for doing this ... ... Then the transom needs to be glued at the mold. The planking is to be done next... Double planking is the one we are talking about, and this with tiny veneer planks 2,5mm wide... ... After this, complete balsa wood should be removed by carving and the shell needs to be polished from inside and outside... The frames are done out of the veneer, as well as all of the elements inside of the shell... The keel is 2mm walnut wood and is glued at the shell from the outside... ... So, here are the photographs of the real model :


-
Hi Don ... realy nice one ... It is a pleasure to stop by and to see this work ... Regards, Zoran
- 653 replies
-
- 5
-
-
- trabakul
- marisstella
- (and 1 more)
-
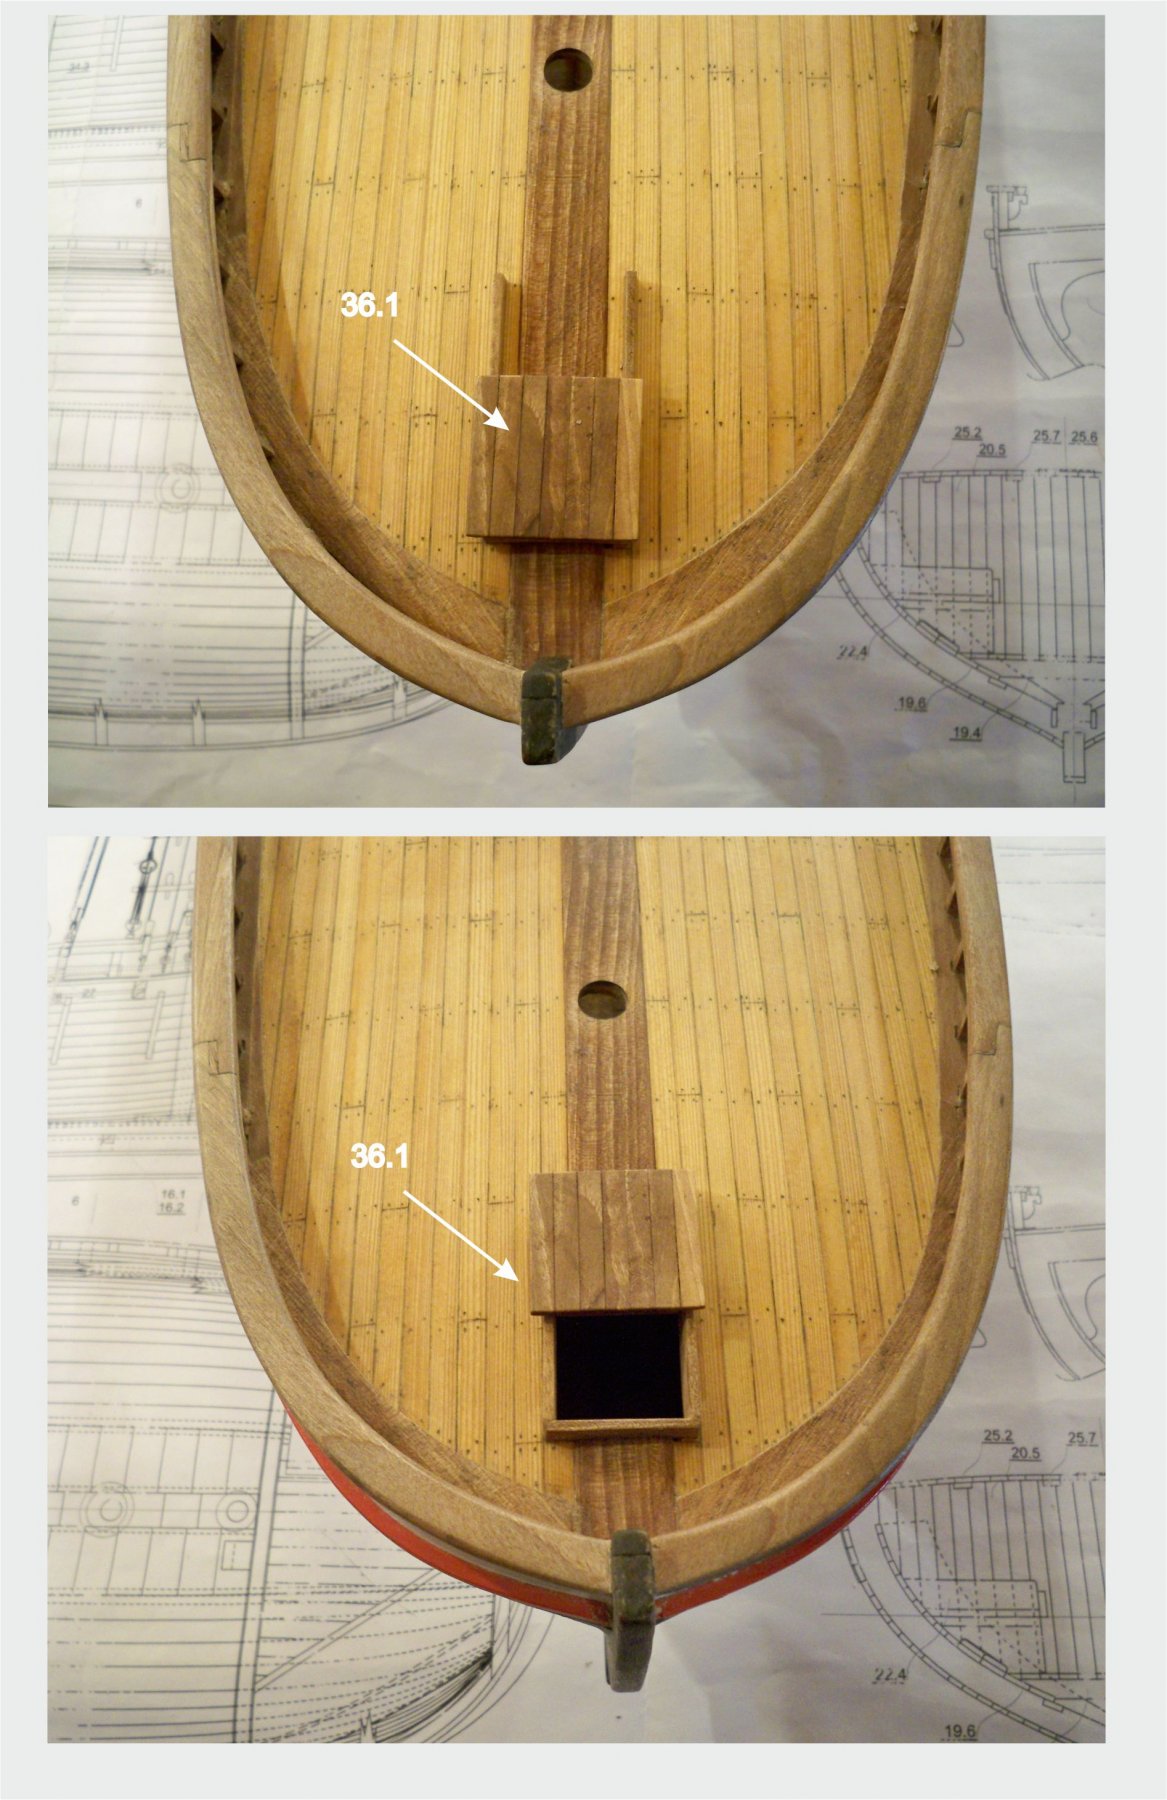
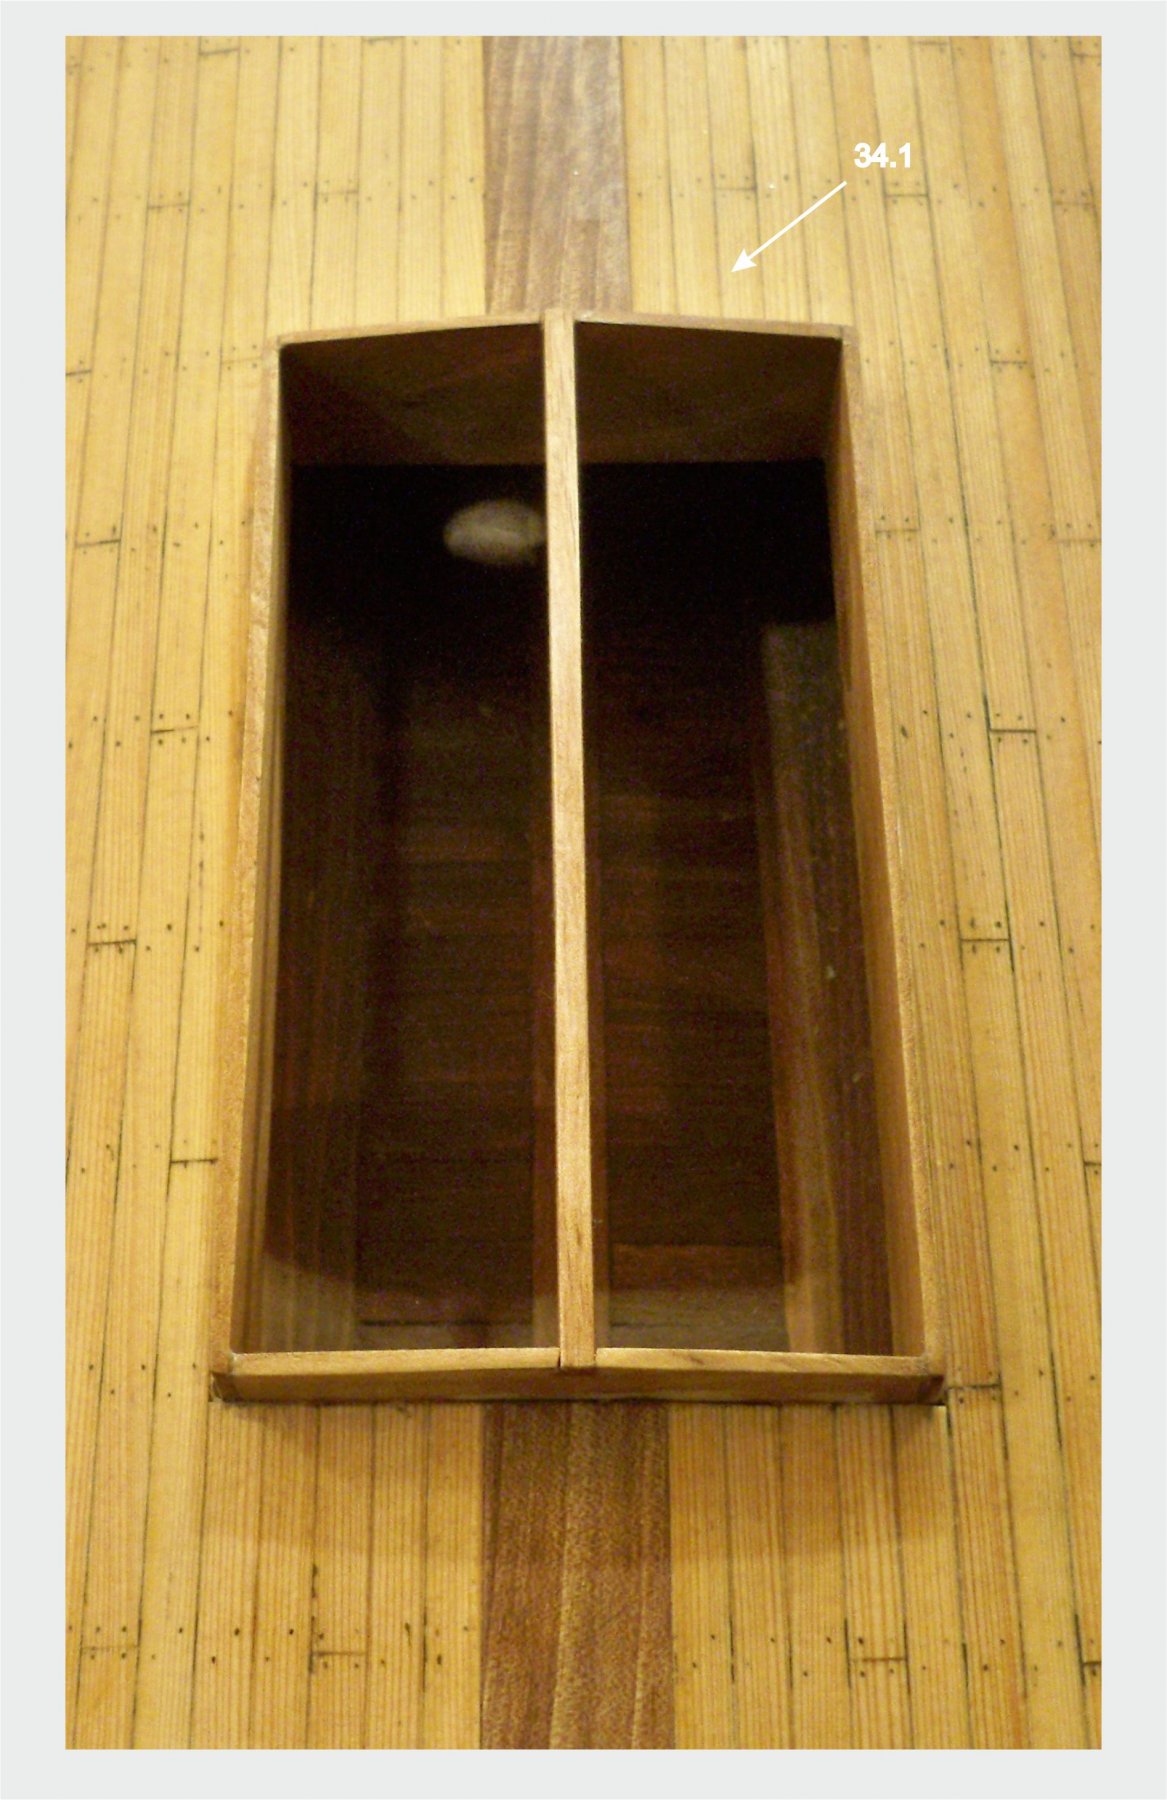
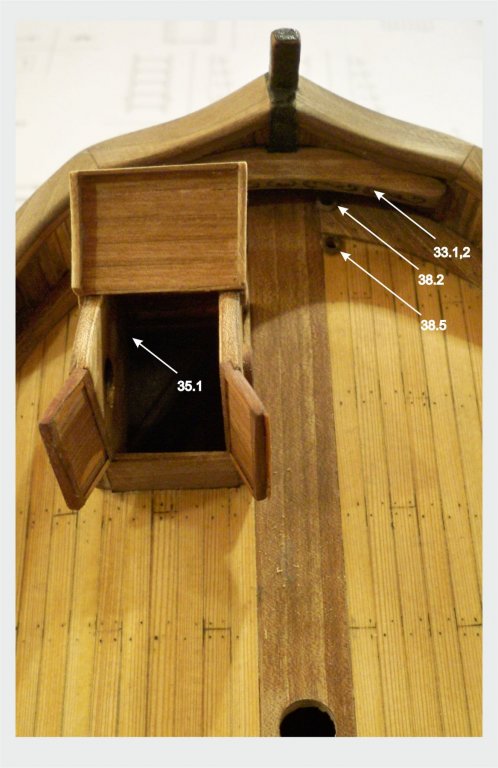
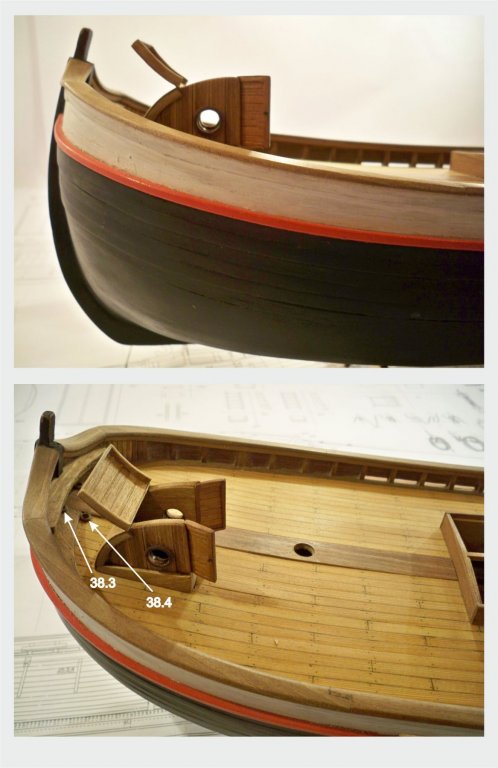
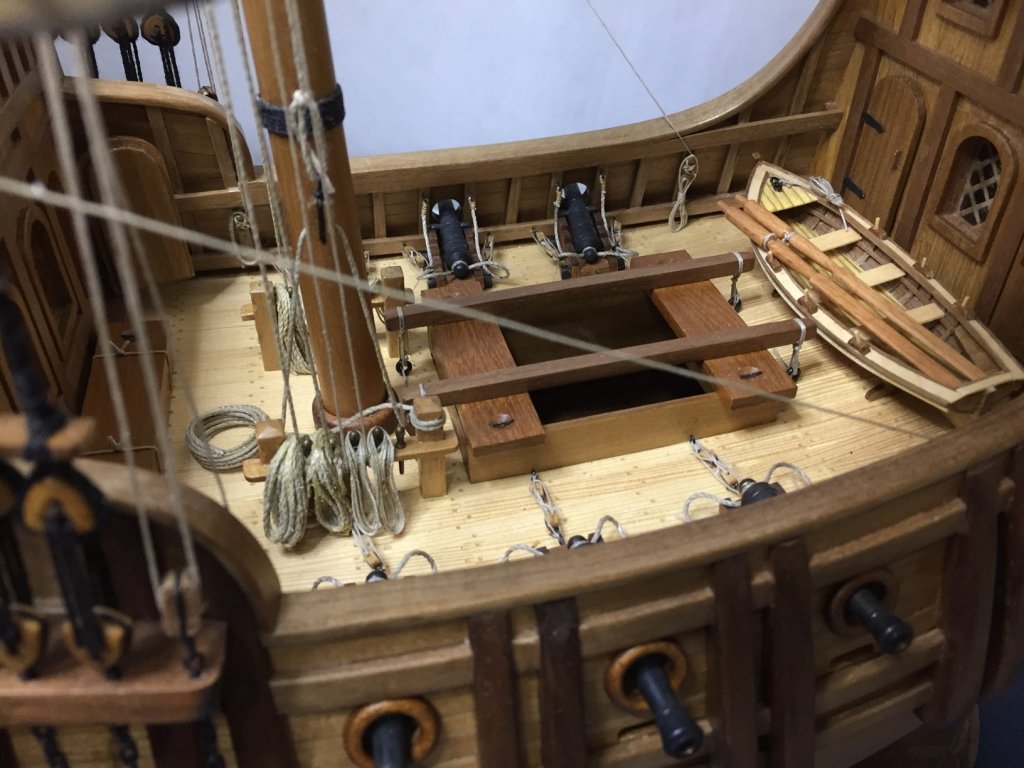
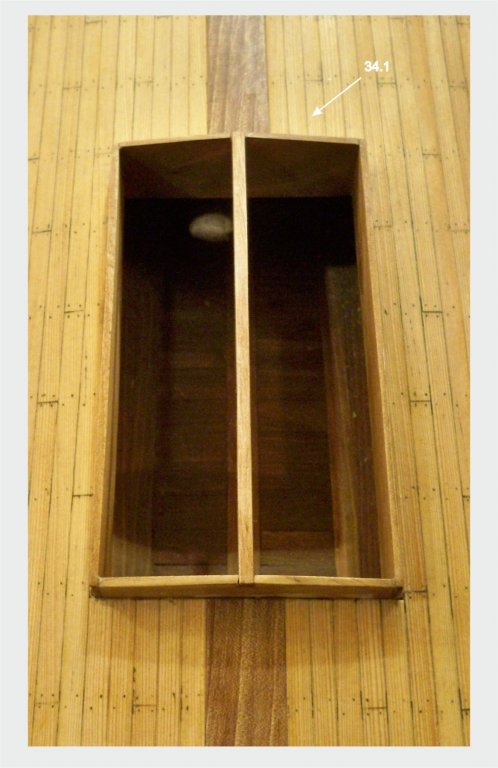
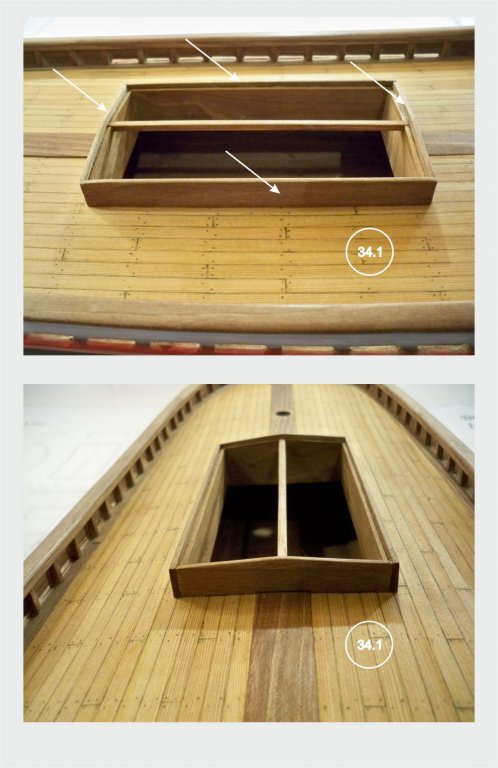
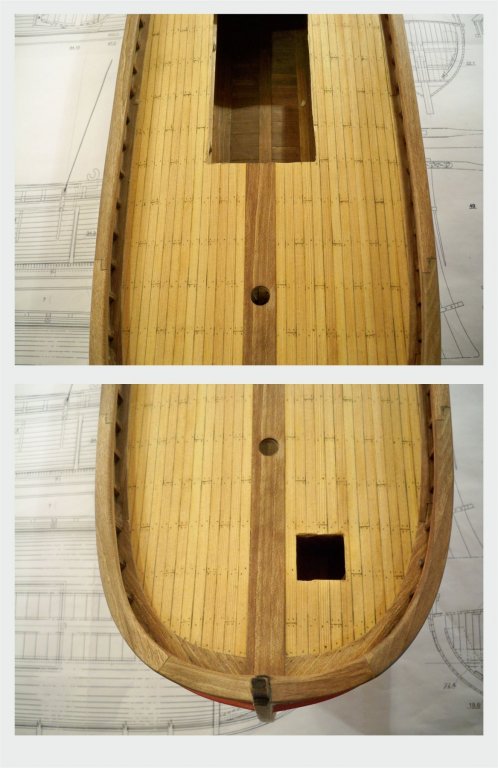
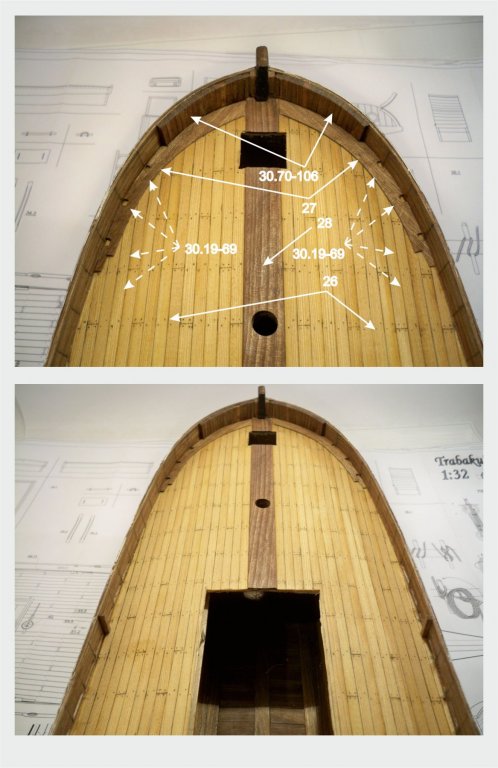
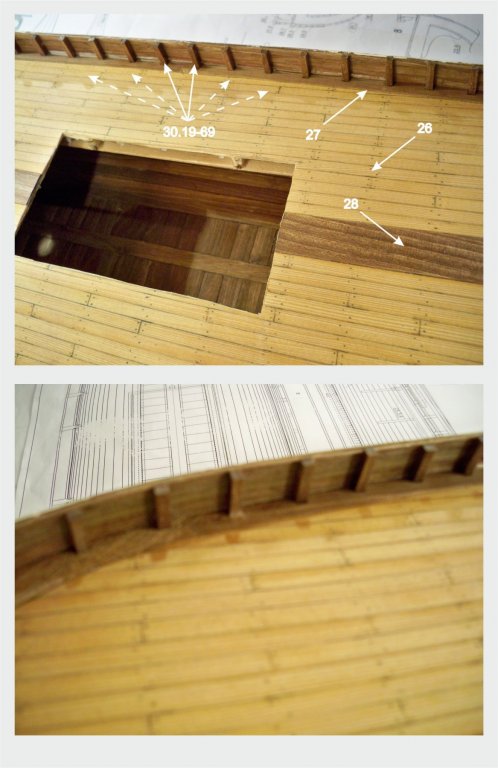
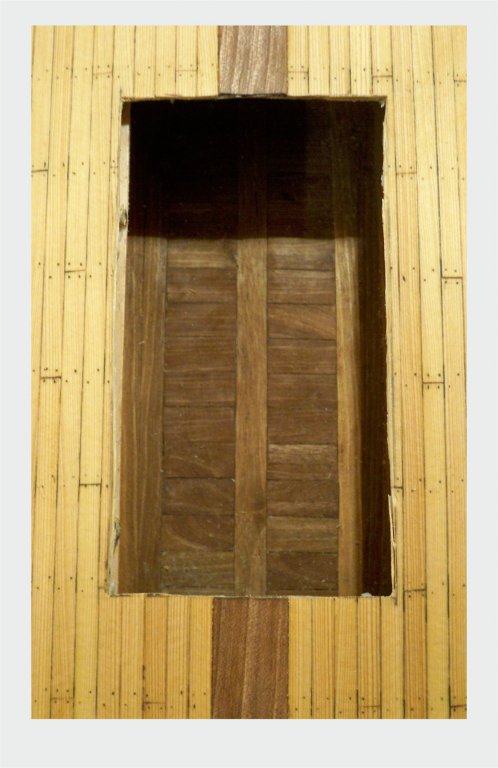
The hatch coamings are to be done next ... those are eight walnut wood plates 2mm... they cover all the imprecise cuts of the opening at the deck ... In the end they look like those on thise photographs :

-
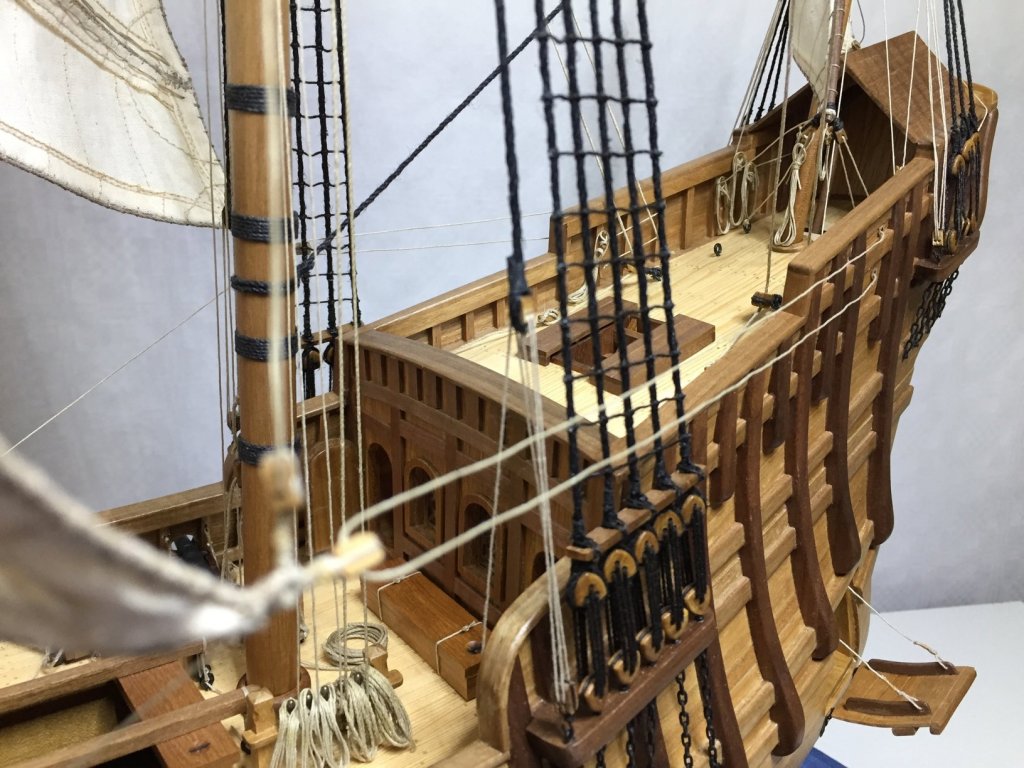
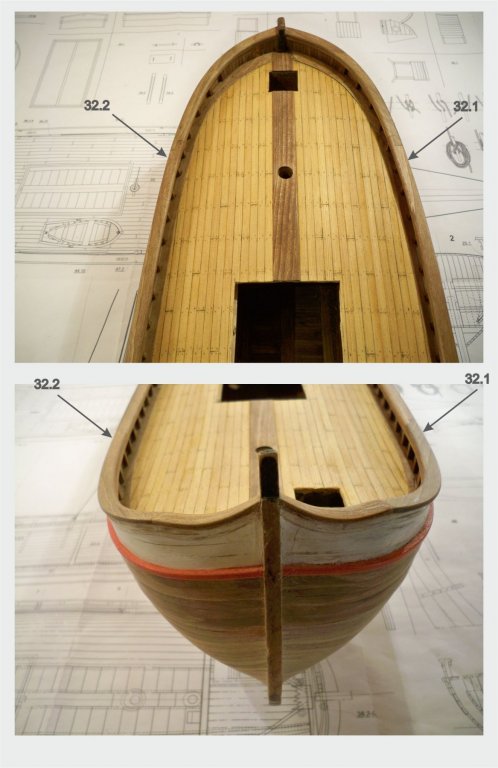
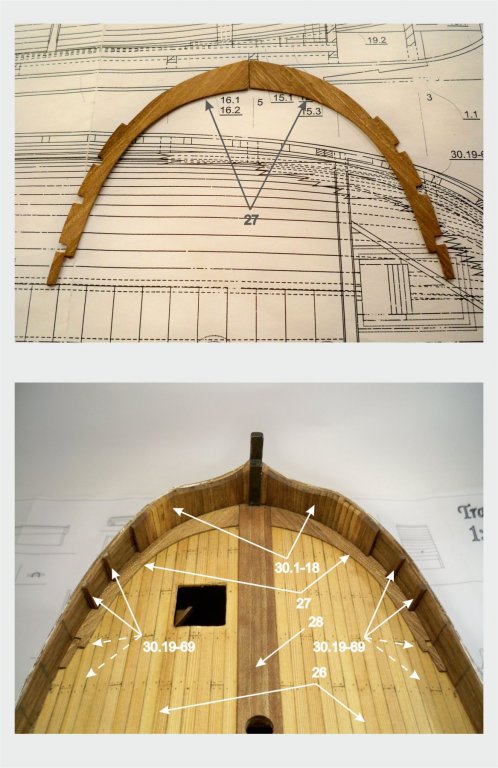
The topgallanr rail is the next.... its parts should be glued on the top of the planking, on the top of the top timber... after this, it should be sanded to the required shape ... the photos show the result of this ...
- 221 replies
-
- 11
-
-
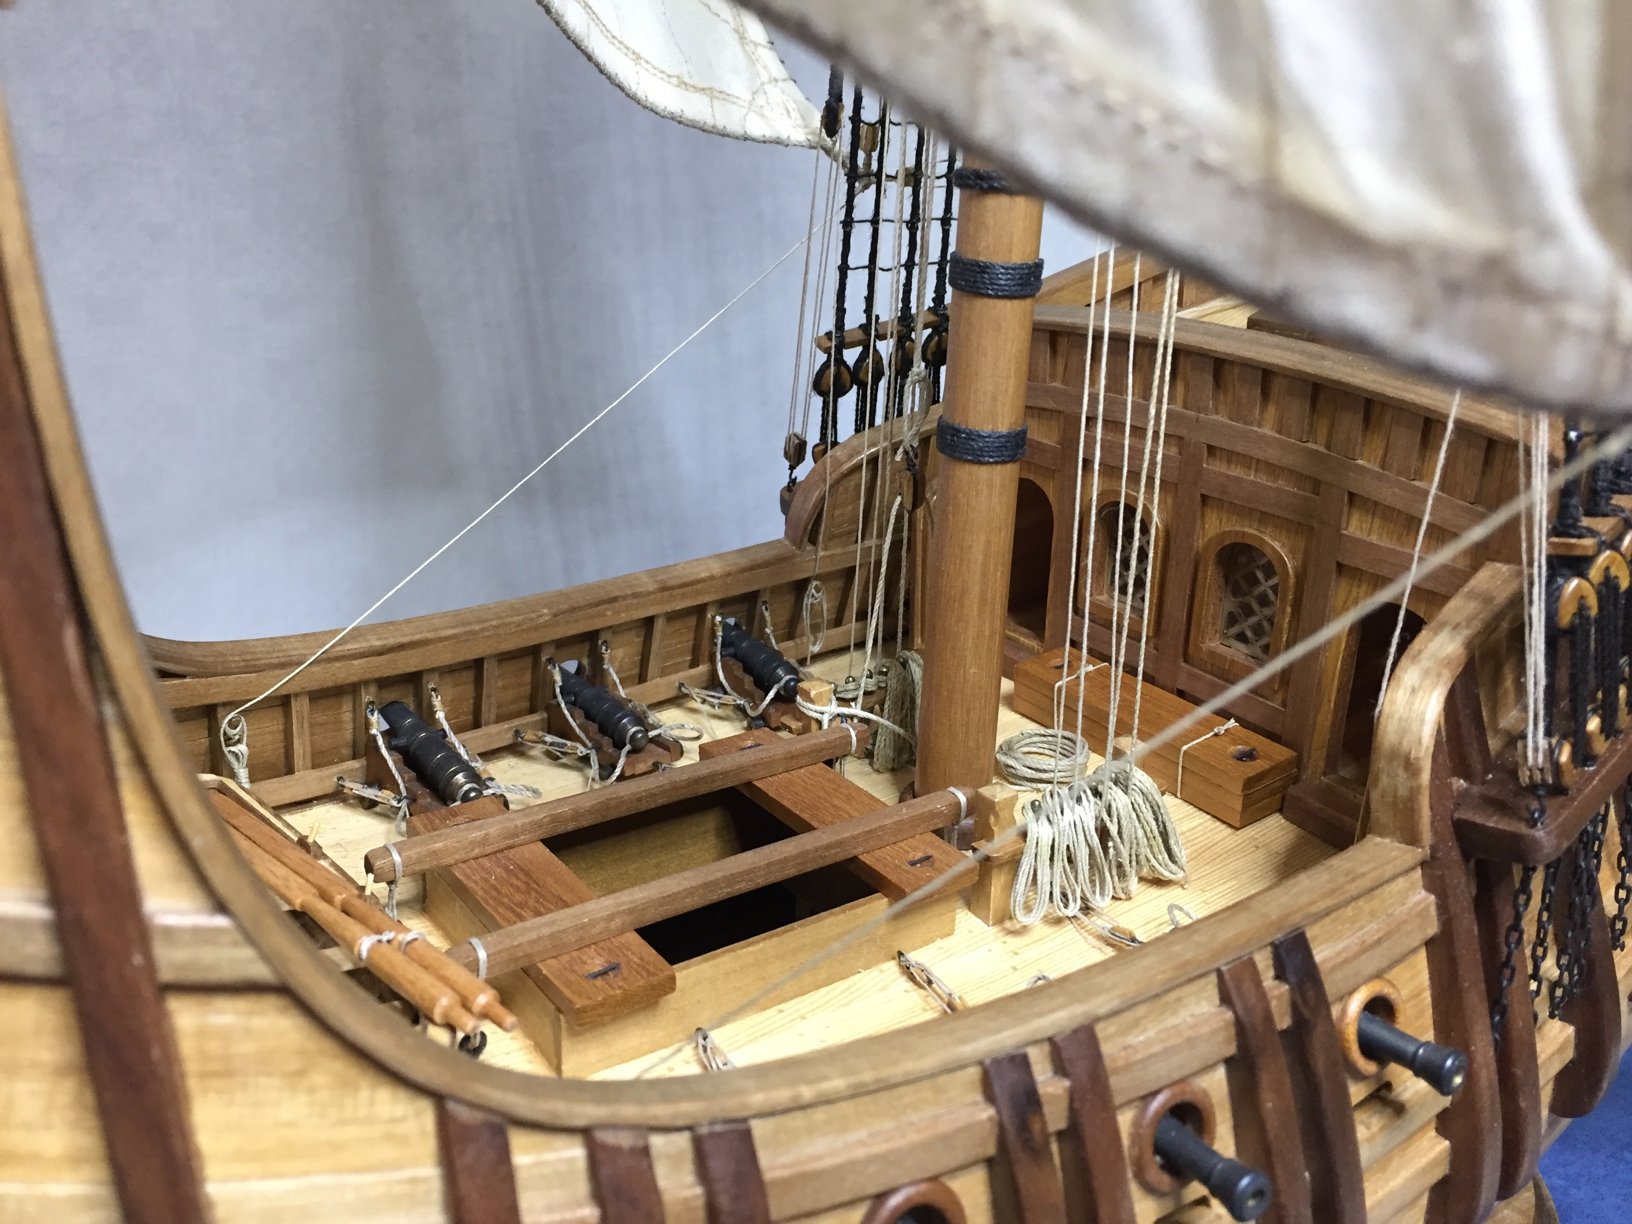
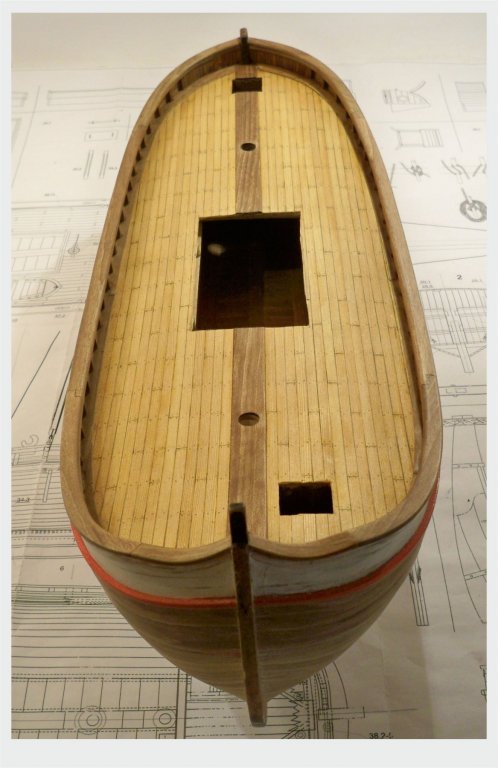
The deck rail is to be done next... it is made of vaneer 0,6mm thick. When it is sticked to the deck, it looks like it was a thick part of a solid wood... There are the top timber and the knight heads (to the stern and bow) to be done after this. They are made of 3x3mm strips ... Here are the photos :
- 221 replies
-
- 11
-
-
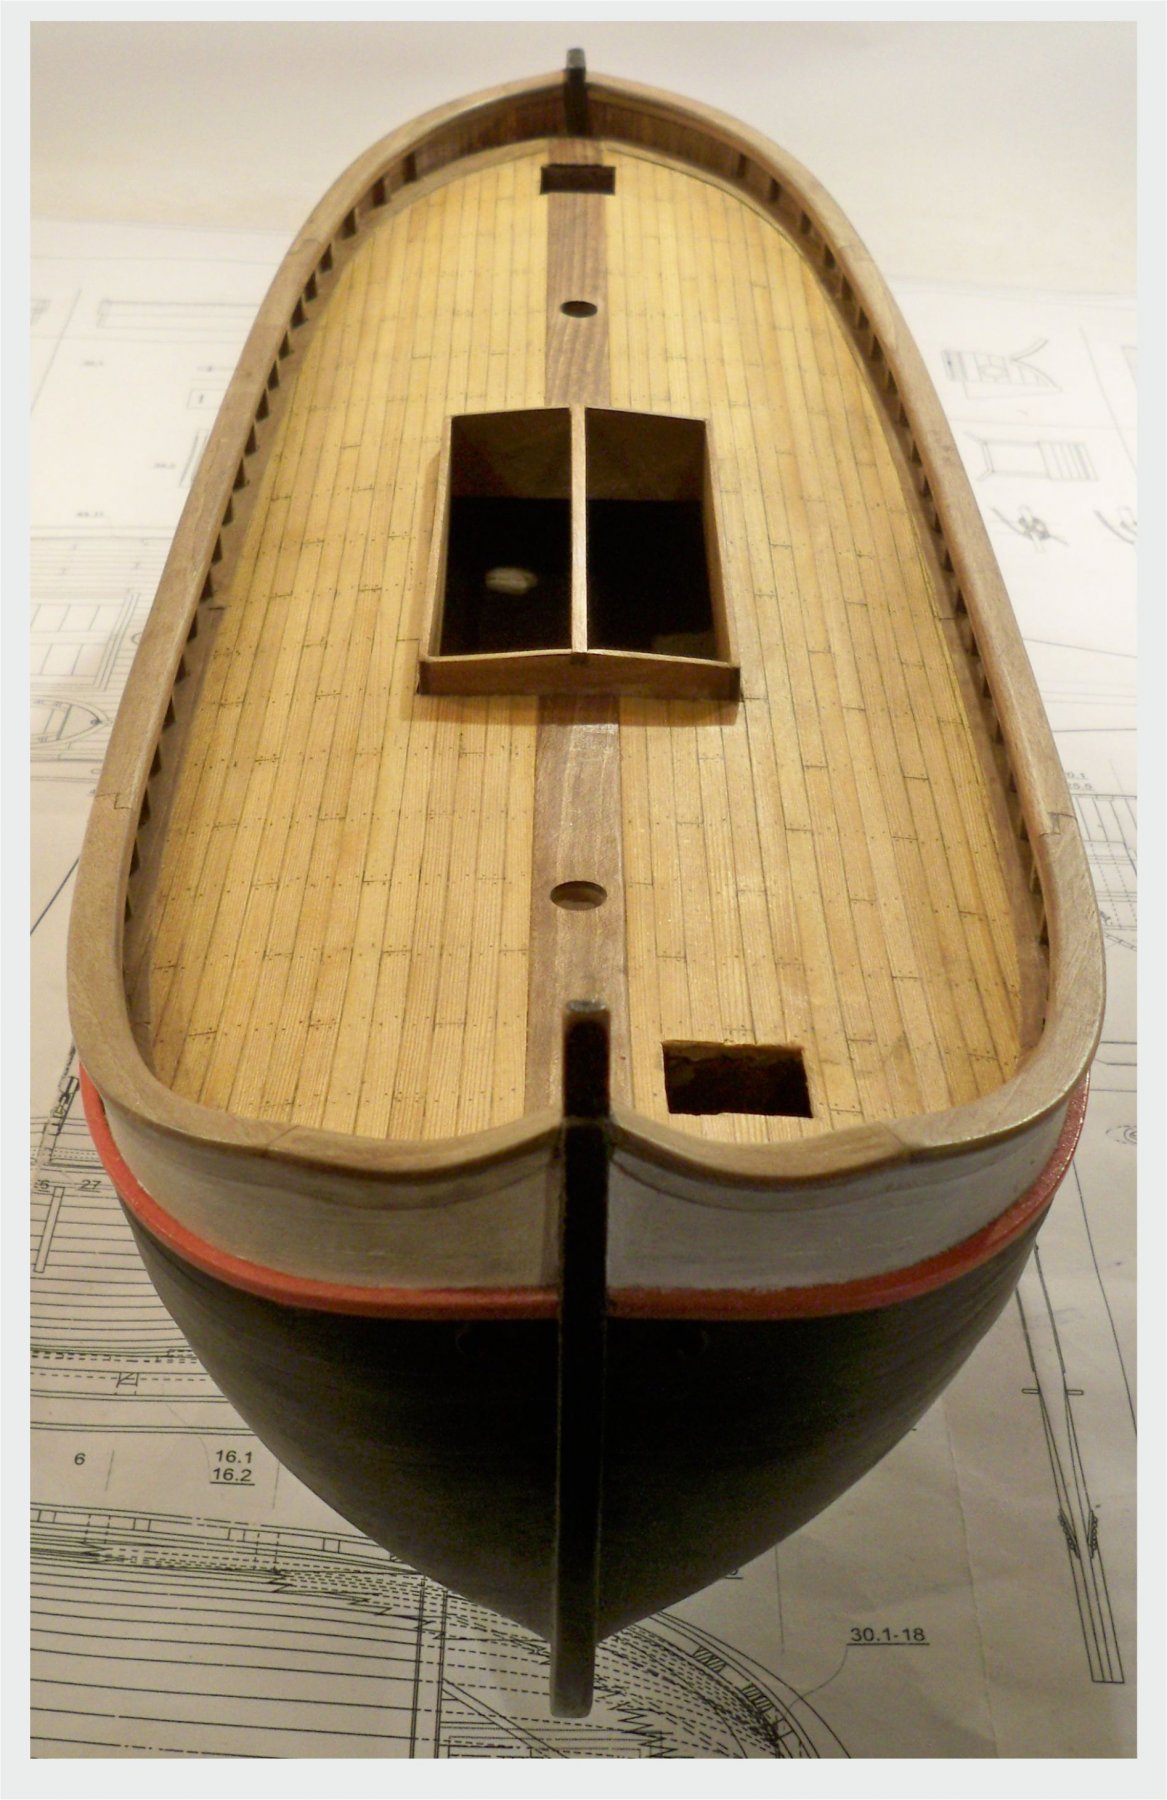
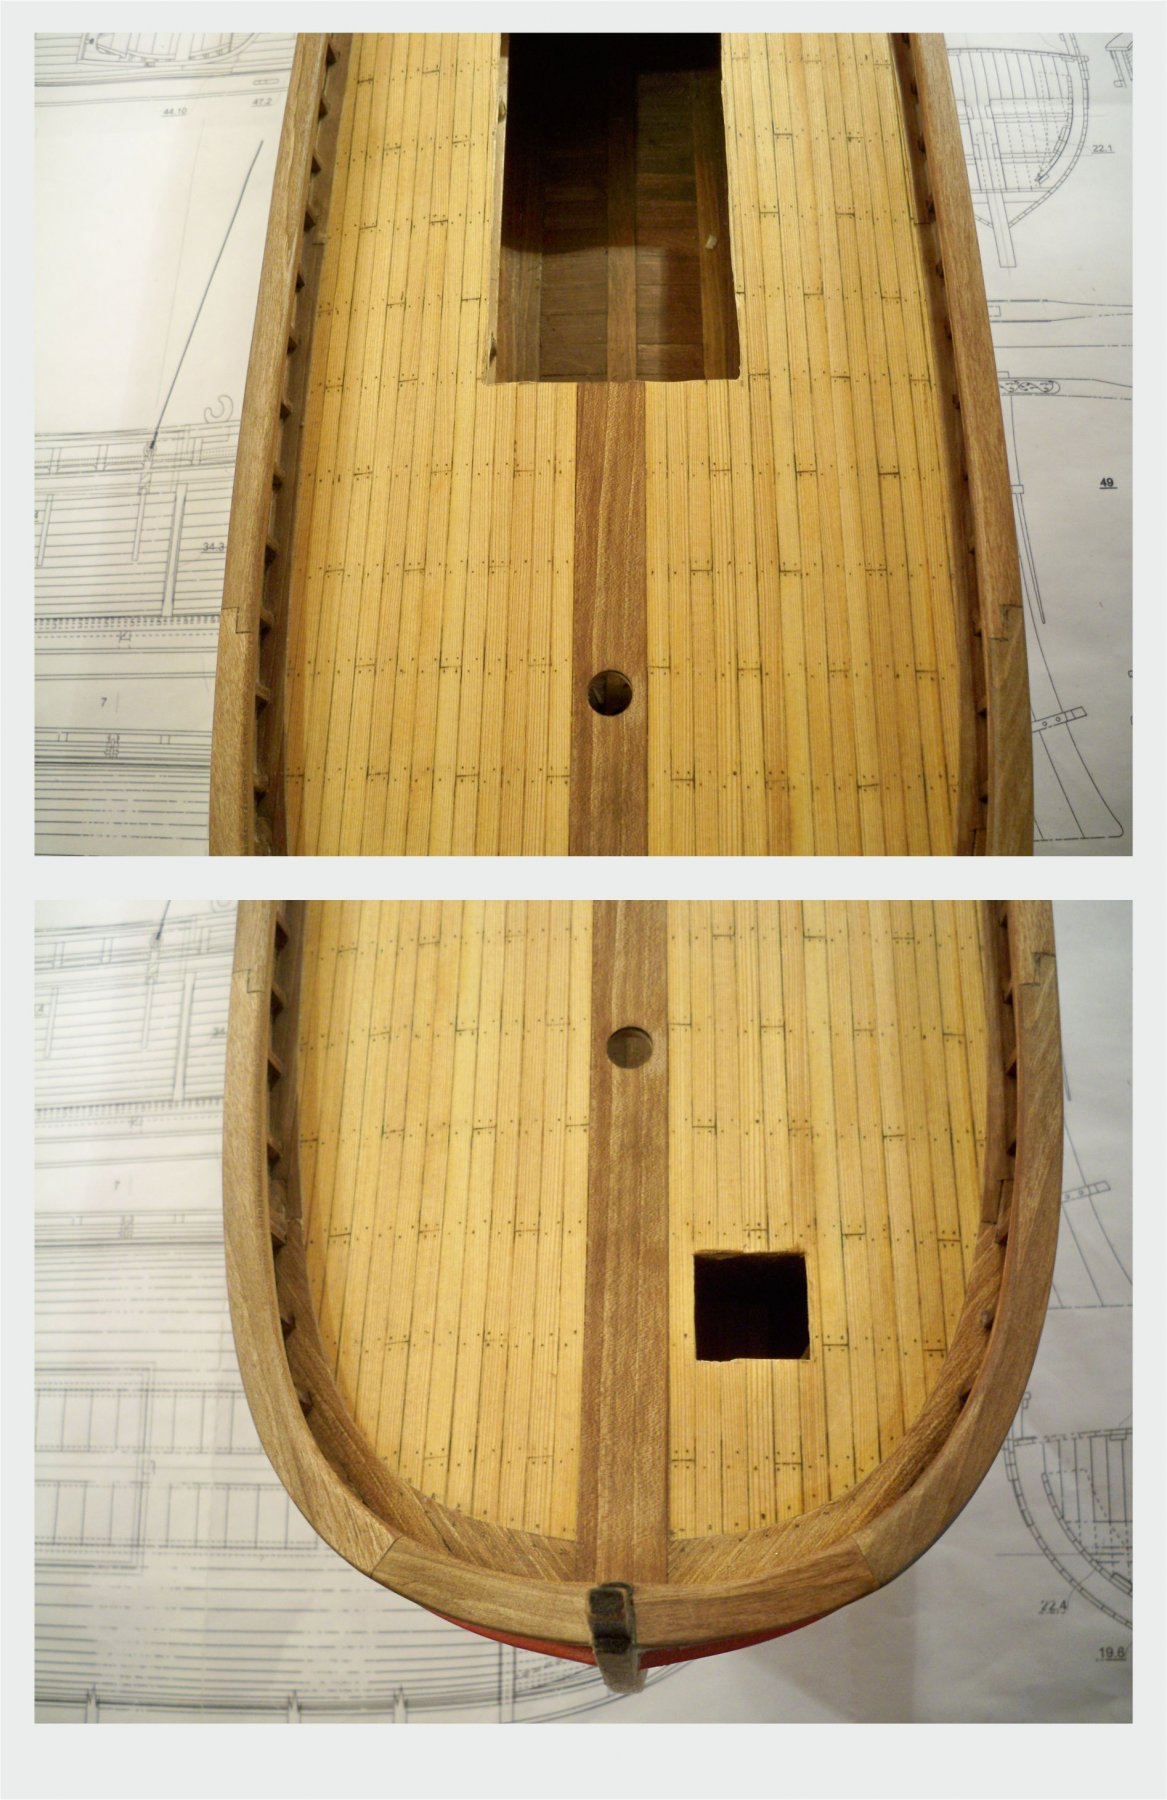
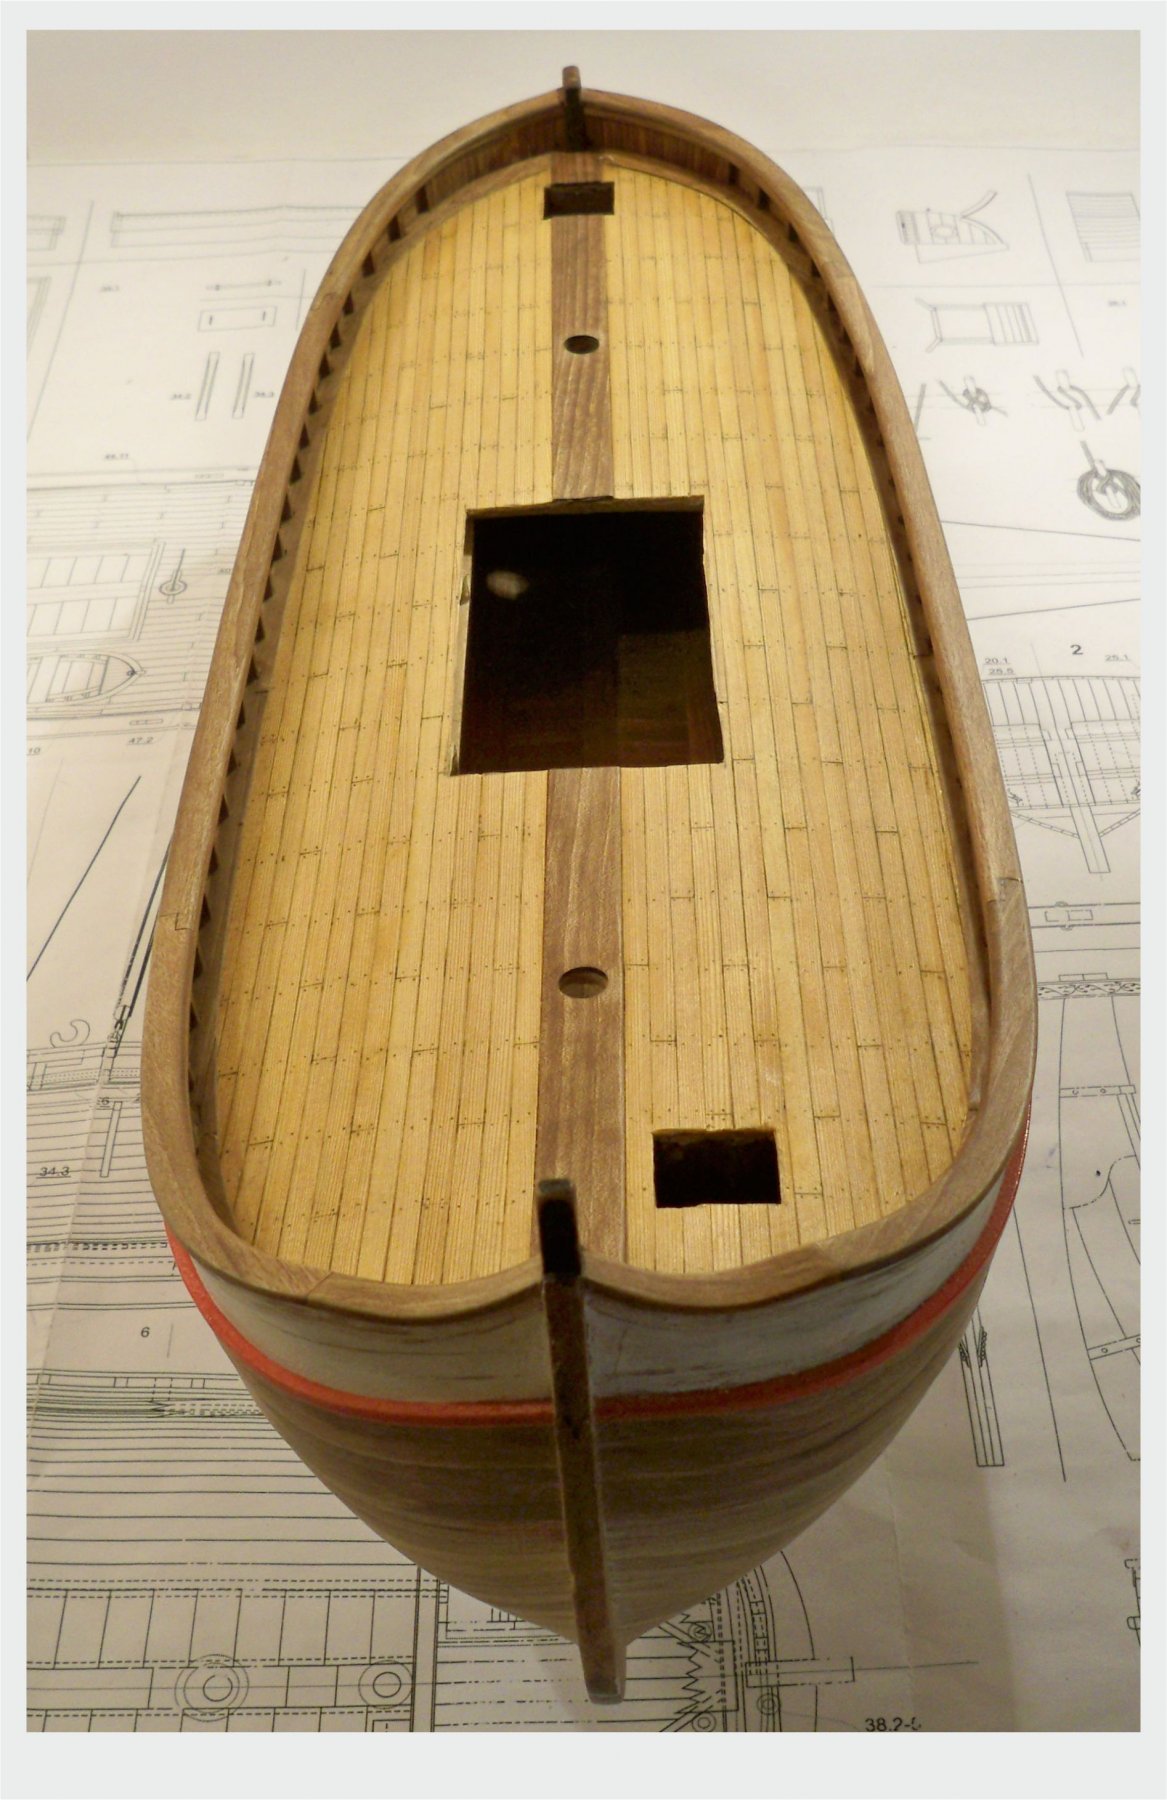
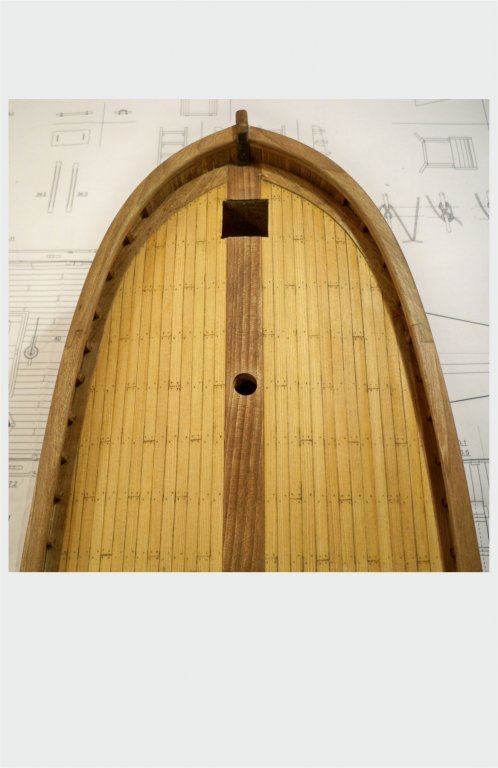
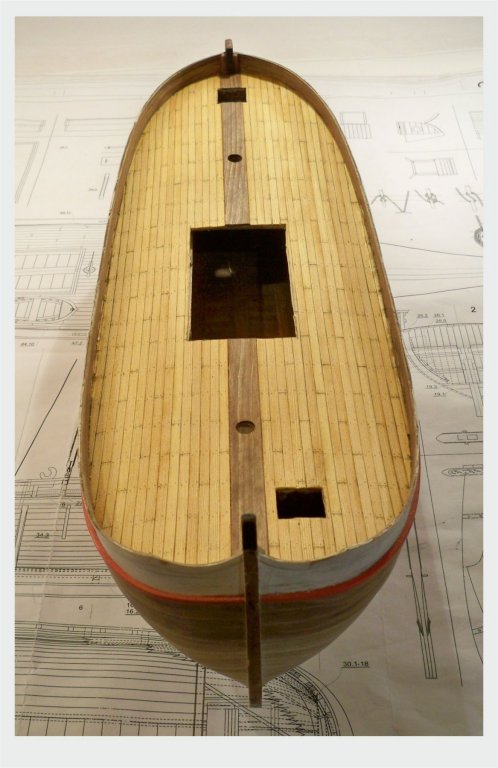
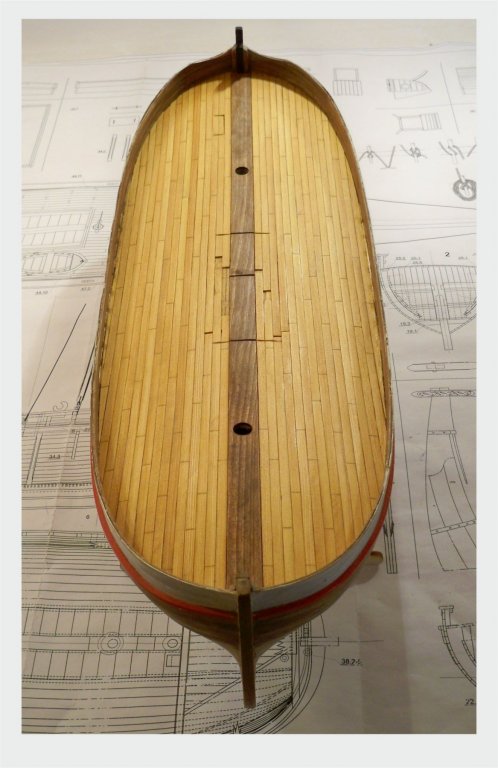
When the deck is a solid , it is time to cut all of the openings into it ... This, as everything else, can not be done without the drawings ... Everything should be right on the place as it is drawn ...
-
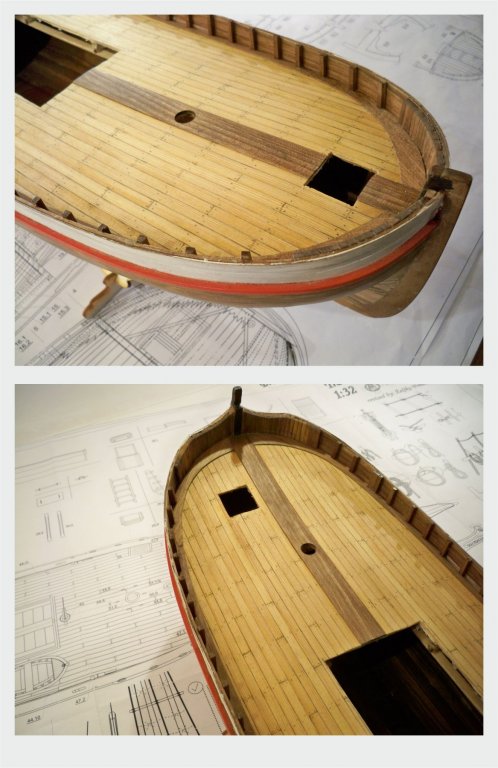
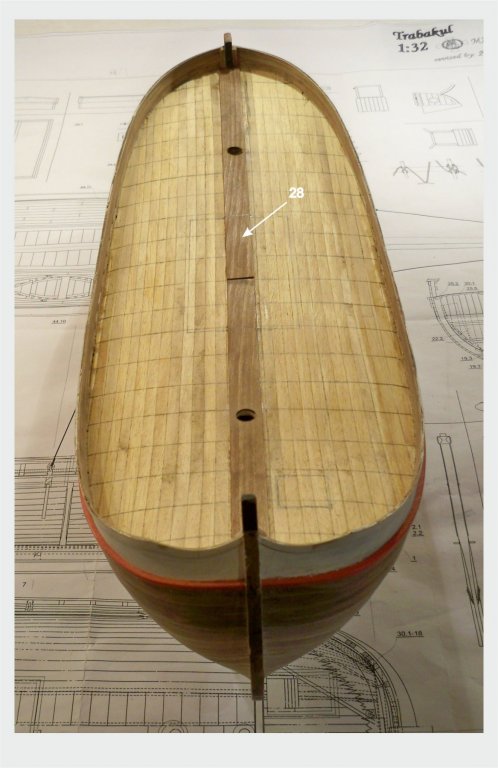
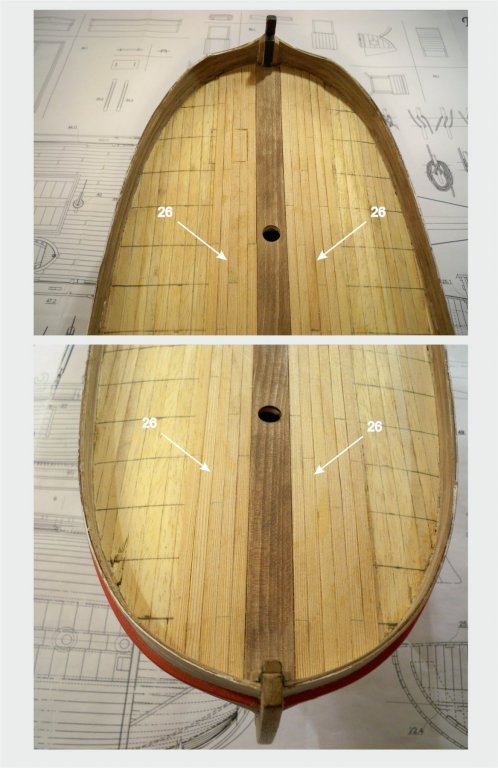
The second coat of the deck is the final one. It is done with 0,5x5mm strips... The middle part is to be planked first, then the parts left and right from center... in the end , the deck needs to be polished and coated with some leenseed oil...
- 221 replies
-
- 11
-
-
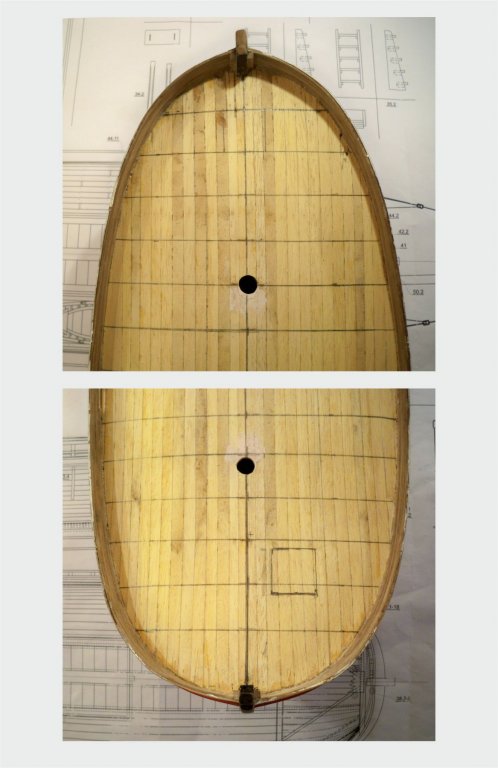
... finally, the deck base. It is done of 1,5x5mm strips glued one next to the other... this is the realistic shape of the deck, as I mention before (at Brazzera I think) : the deck should be transversely and longitudinally curved. The curves are the same as those on the ship in reality ... After sanding the deck base, there should be drawn the lines of the deck beams on it. This lines are very helpfull when putting the final coat of the deck planks. The lines are the places of the deck planks' connections (this will be more clear in the next phase of model's building)...


-
... after this the deck is to be done... the top sides of the bulkheads are cut off and the top edges of the bulkheads are beveled ... Everything is prepared for the deck base instalation... The deck base comes after this and the deck will lay on the smooth base in the one of the next building phases ...

-
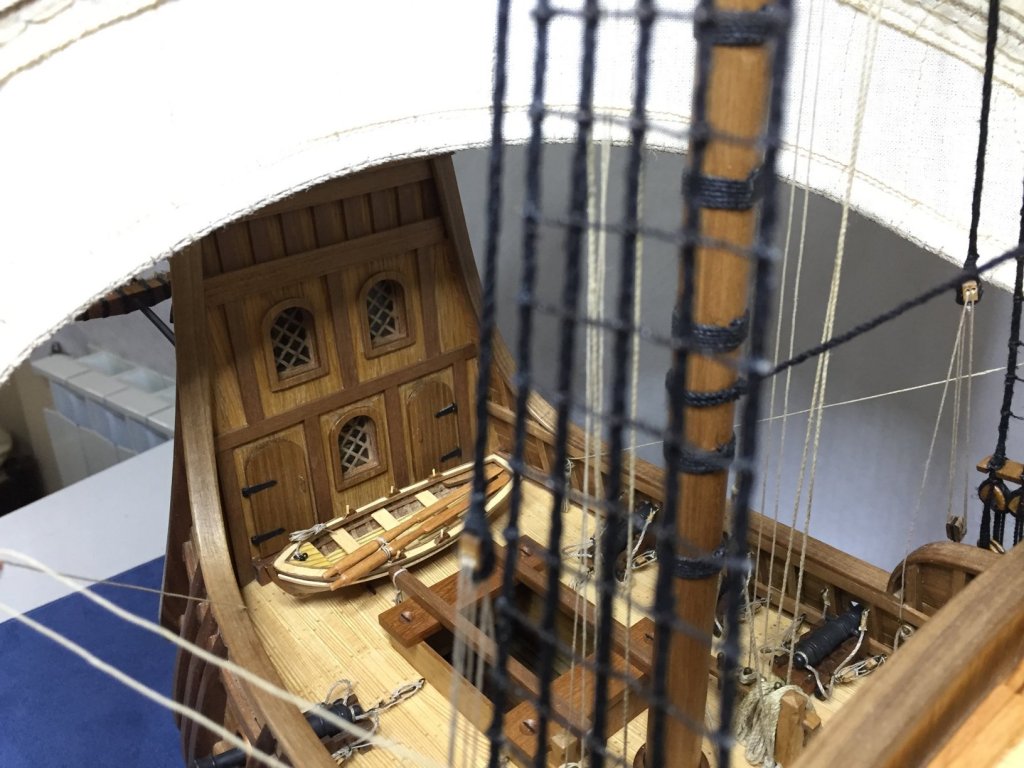
Hello Mr. Jack ... this is a very beautifull build ... When we do with things like this, we just remove the flooring from its positions... So You could do the same... make the flooring and when the model is finished, just put them in the boat, but not at the correct position, this is the way the frames will be exposed. The model will look much more complicated ... Regards, Zoran
- 174 replies
-
- 3
-
-
- gaeta falcata
- marisstella
- (and 1 more)
-
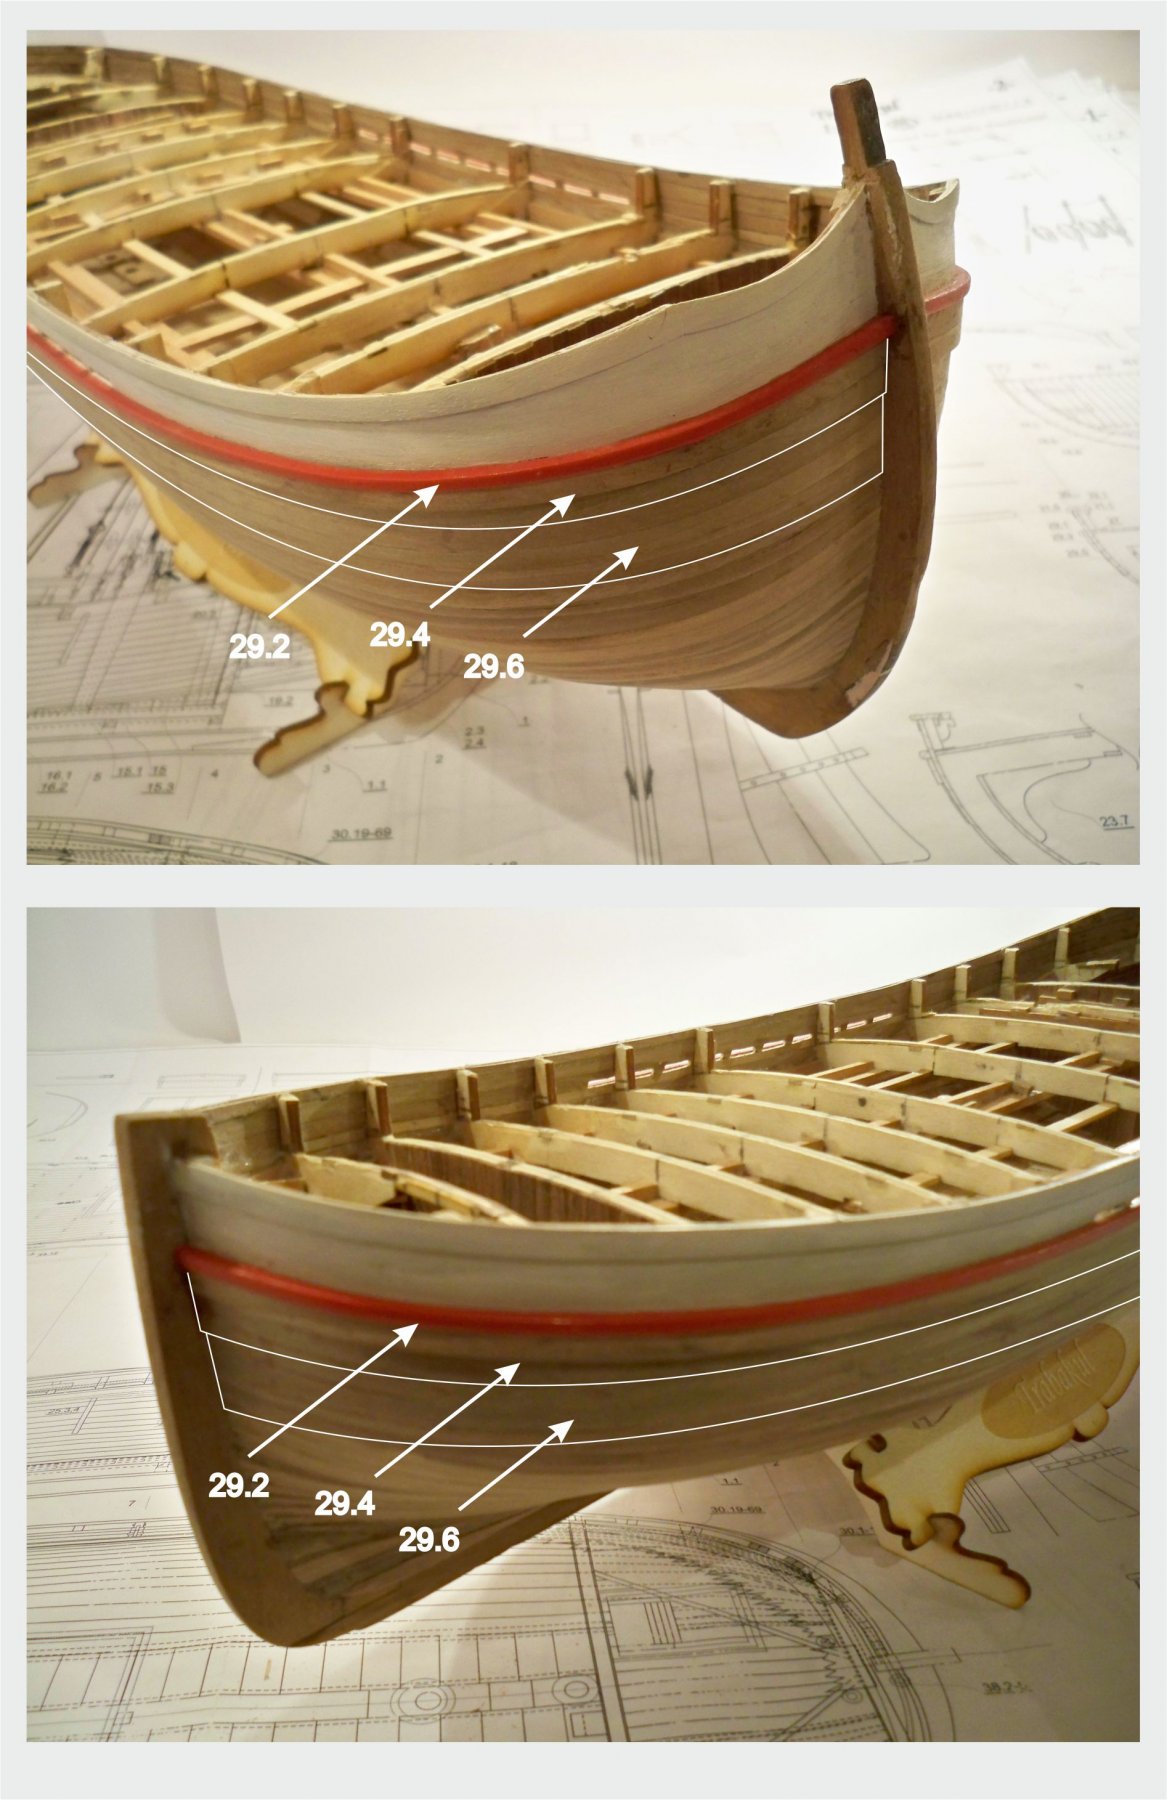
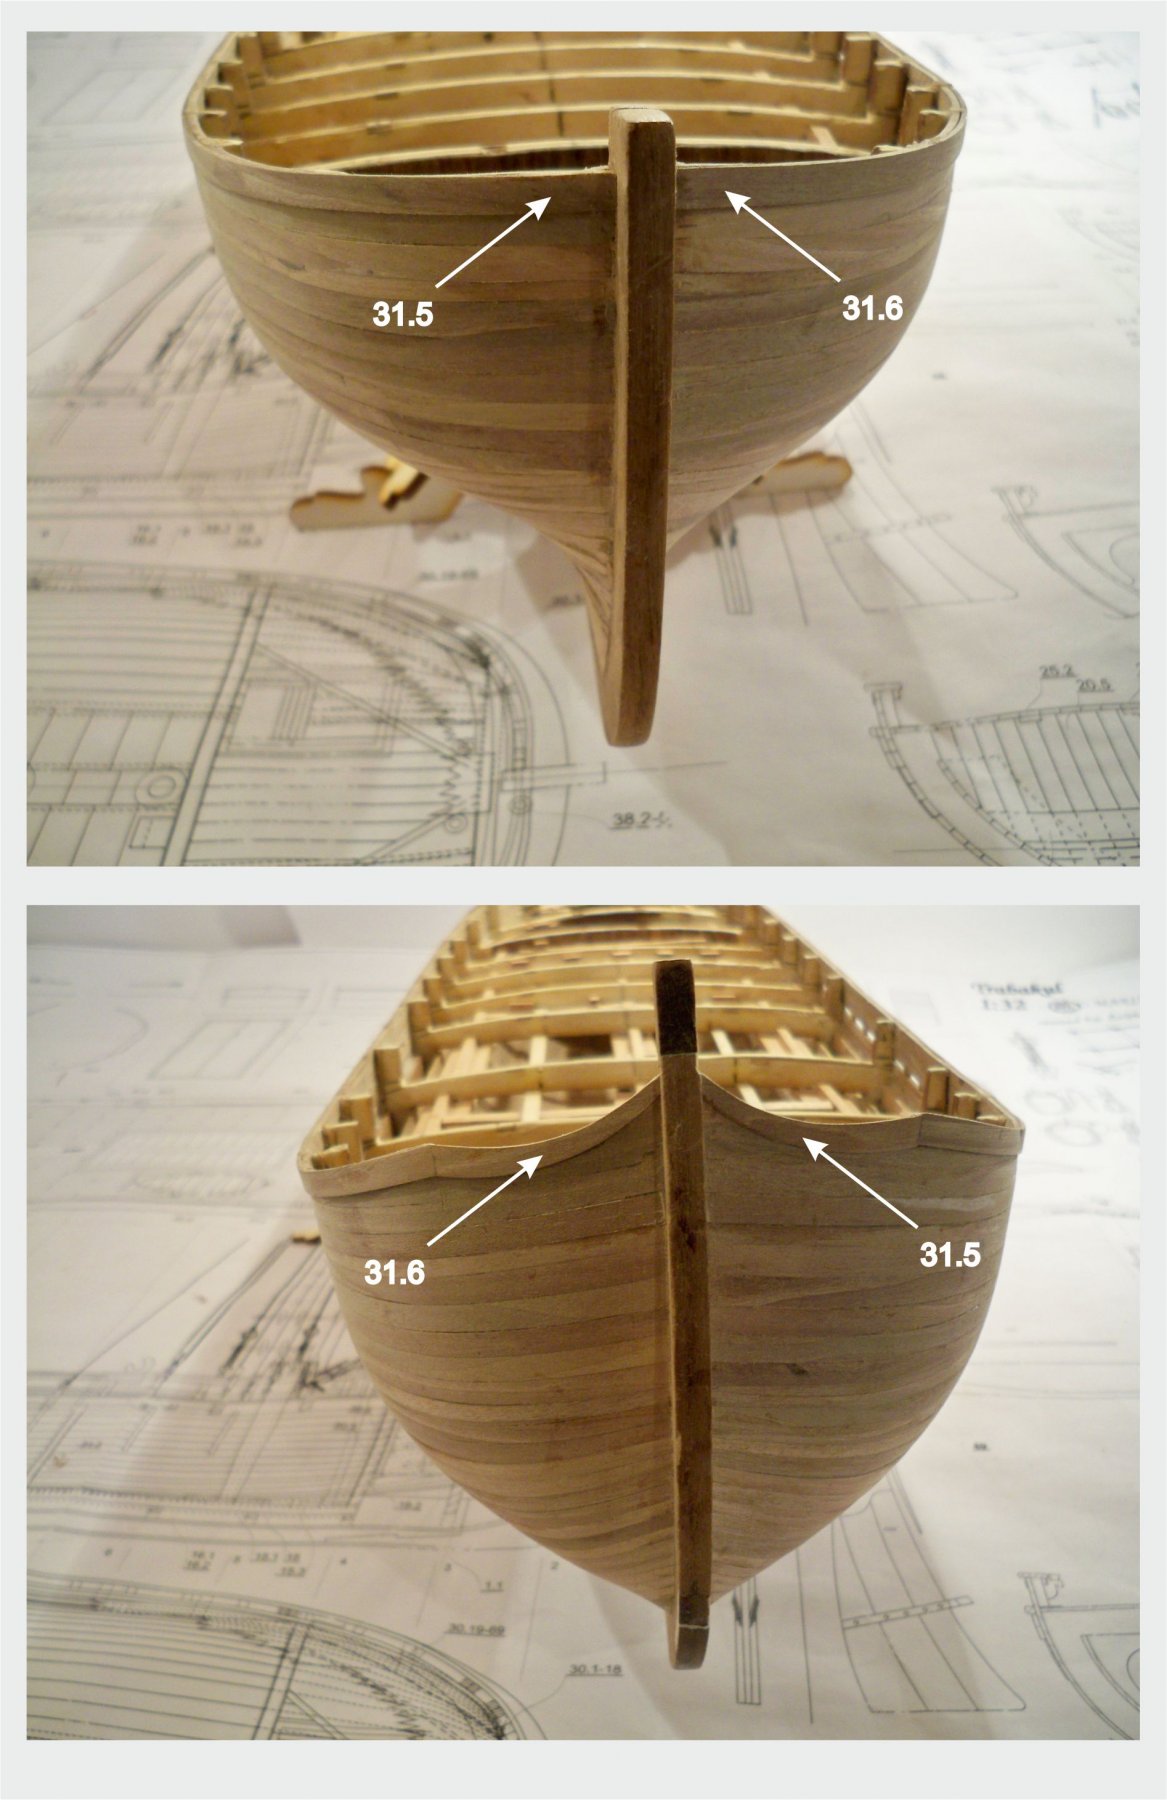
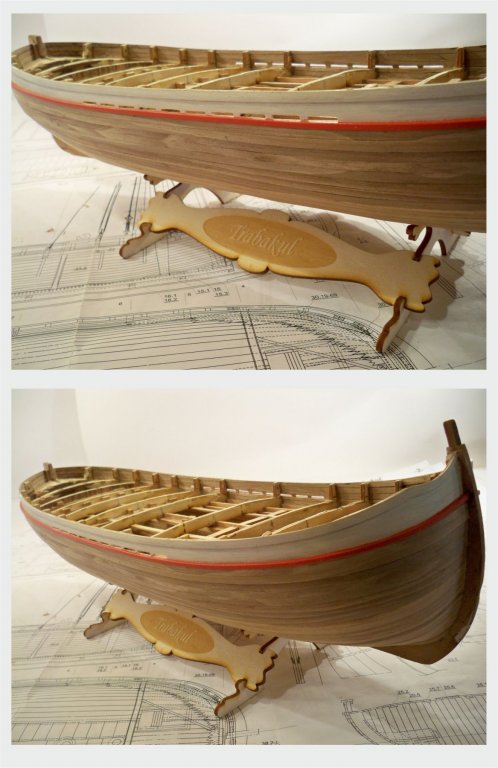
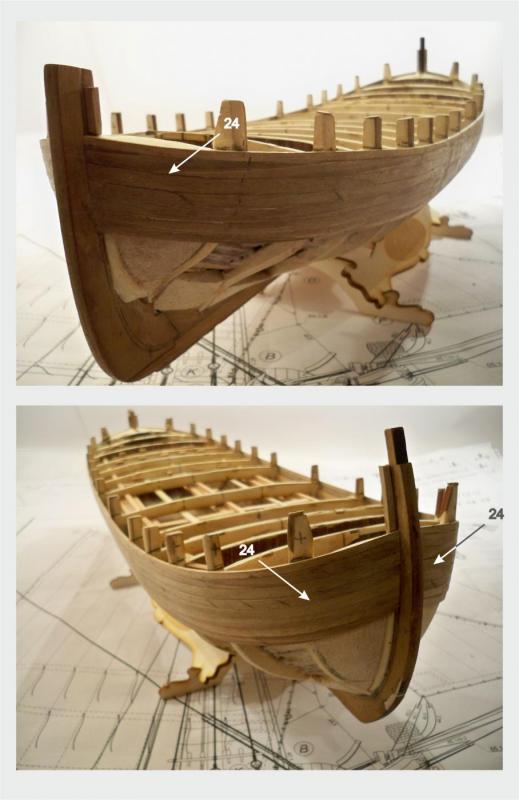
... The wale, the rubbing strake ... The rubbing strake is comming first, below it the wales are comming in two thickness; 0,5mm the lower strips and 1mm the upper ones. They are to be glued onto the planking, so it looks like they are the strips of different thickness. ...Some coloring is good to do before the next steps. This is the way to avoid the stains later on ...

-
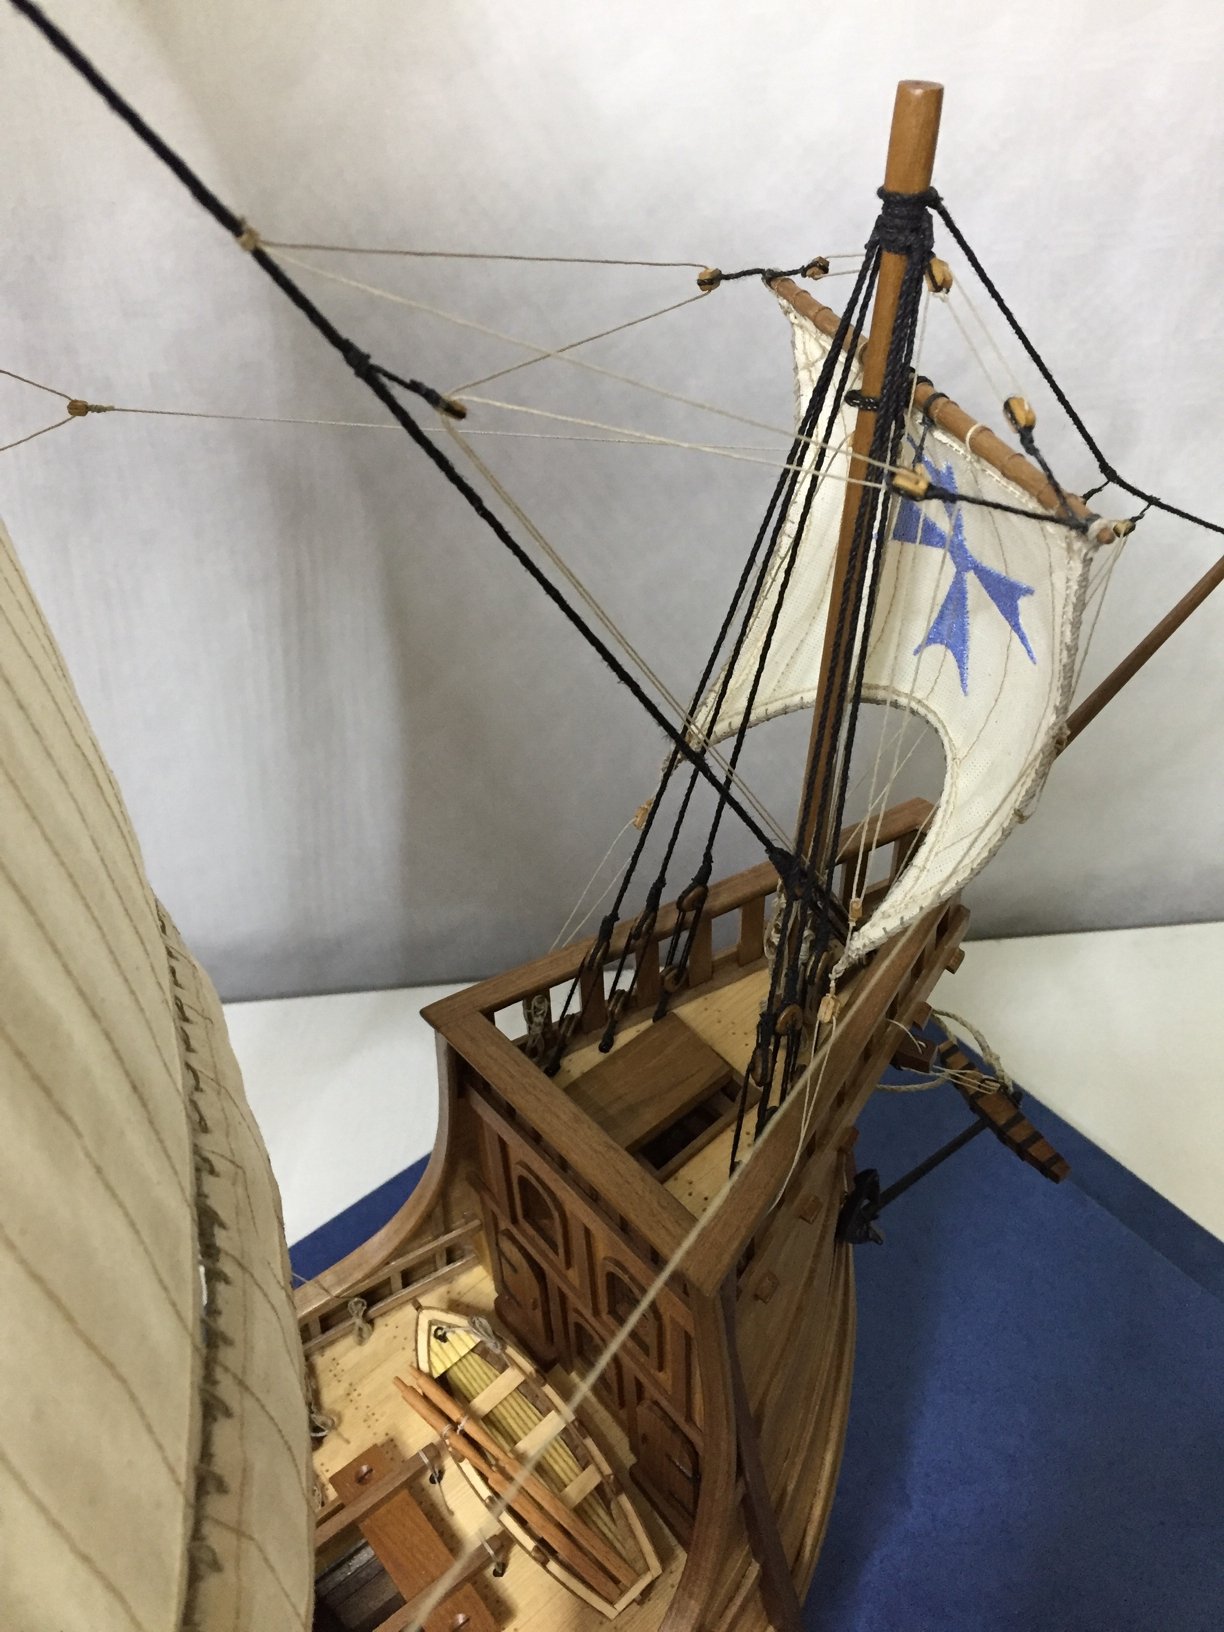
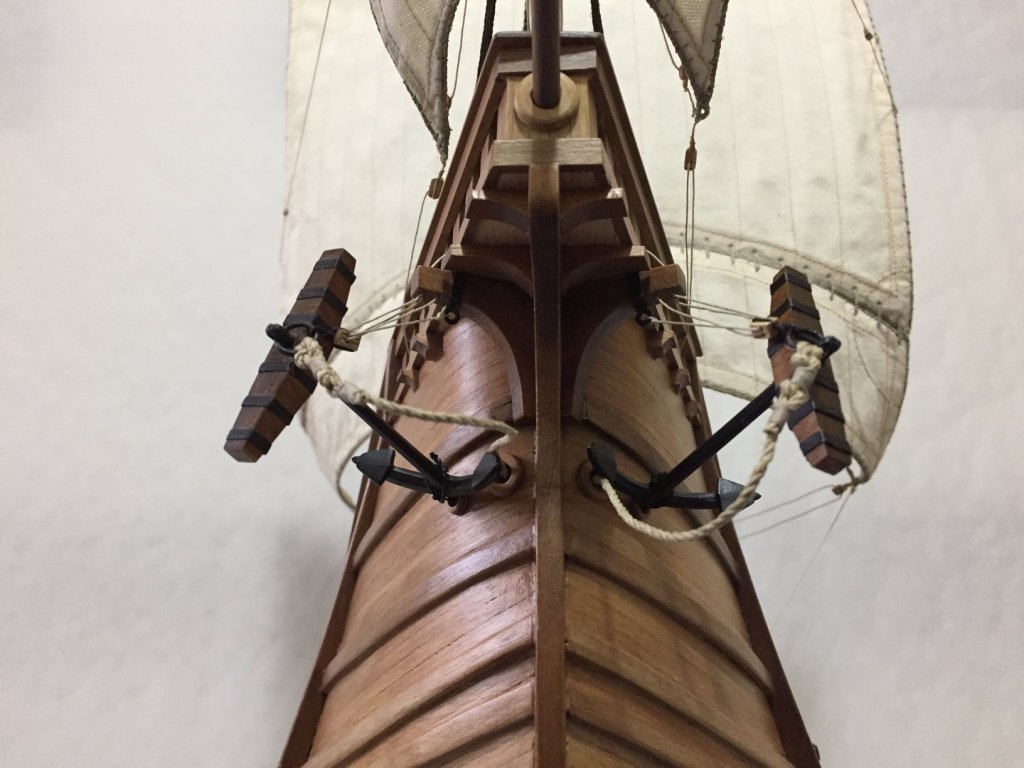
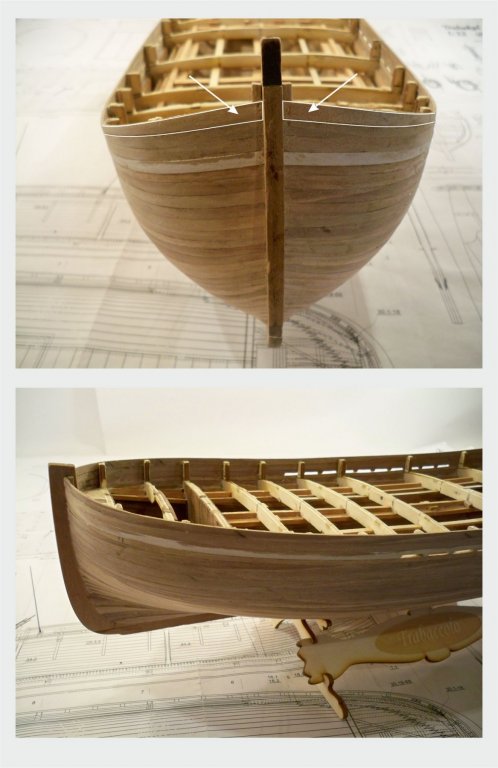
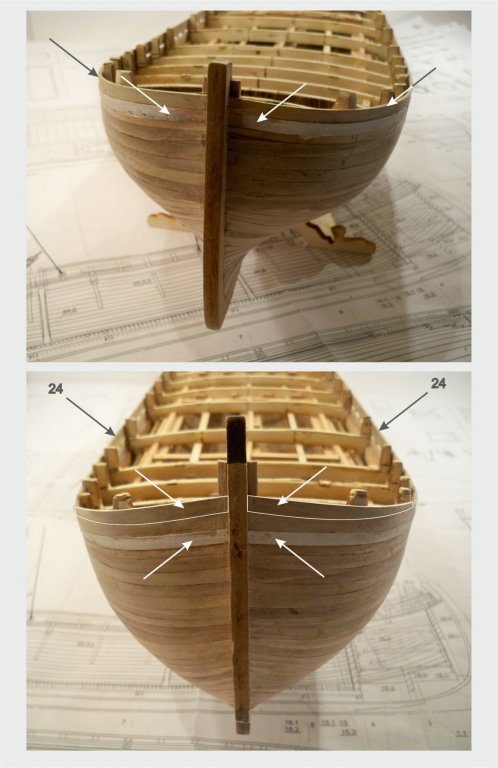
... then the freebord finish ... specialty part at the bow... there is a specific shape of this planks, this is the mark of the Brazzera and Trabaccolo ... It is not hard to make it, but it is one of the mandatory things at these models ...


- 221 replies
-
- 10
-
-
Hi Mr. Ian ... seems to be a nice job ... and You were afraid of this, ... watching from this angle, it looked completely OK ... Regards, Zoran
- 107 replies
-
- 2
-
-
- brazzera
- marisstella
- (and 1 more)
-
Hello all ... hah another sunday in the line ! Finally, I got some time to do another post ... this time is something interesting I hope so ... the specific part for the Trabaccolo : the freeboard ! This sort of a ship has a very specific bow. The planks has the specific shape. The freebord at the bow is raised up, so there is some extra plank added ... Now , I will try to show you what is it about : The first part is quite normal one ... here are the photographs :
-
... Then some classical planking... the way to the keel and upwards from the keel ...

-
The next step looks to be a simple one : one strip downwards and then planking entire wale area... all the strips are equal wide to their entire lengths...
-
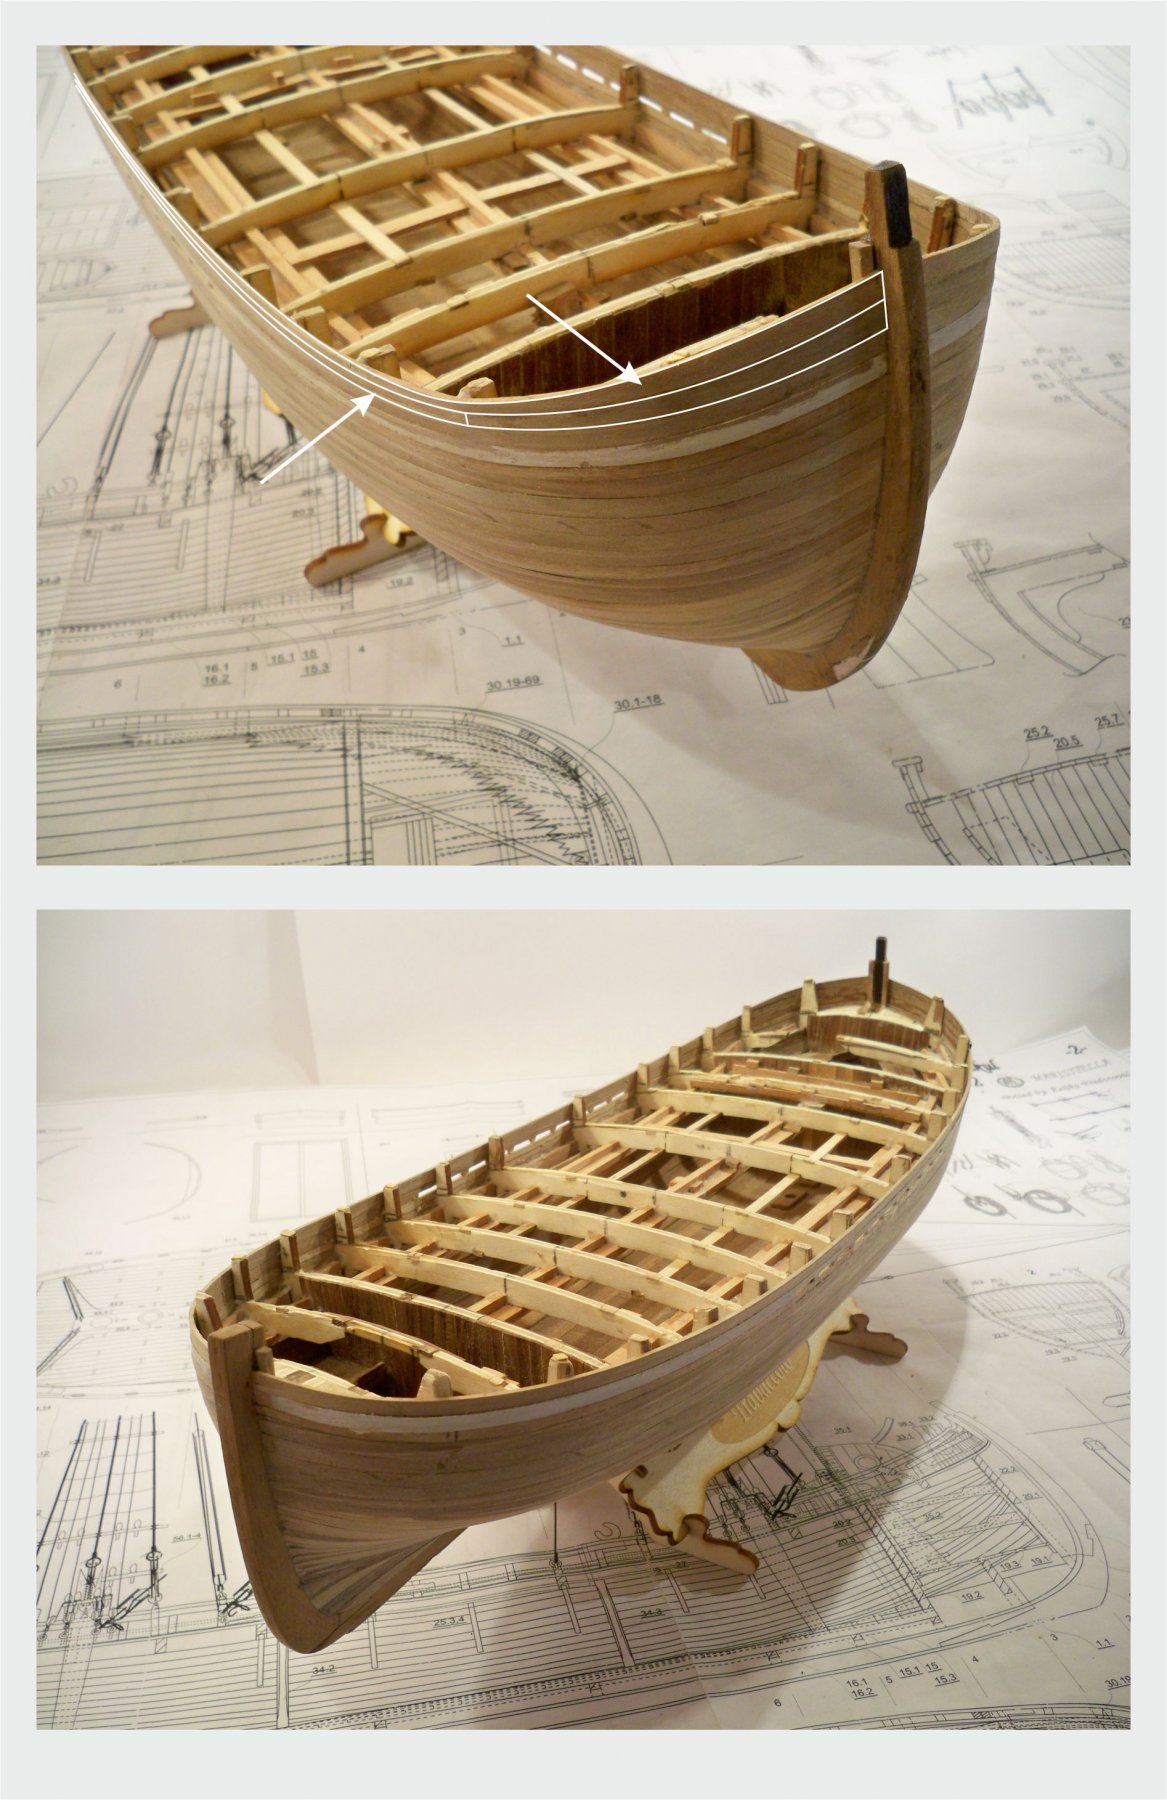
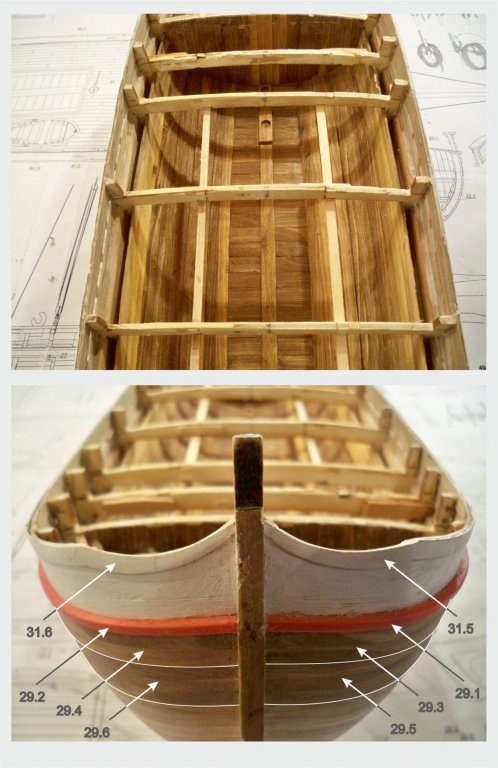
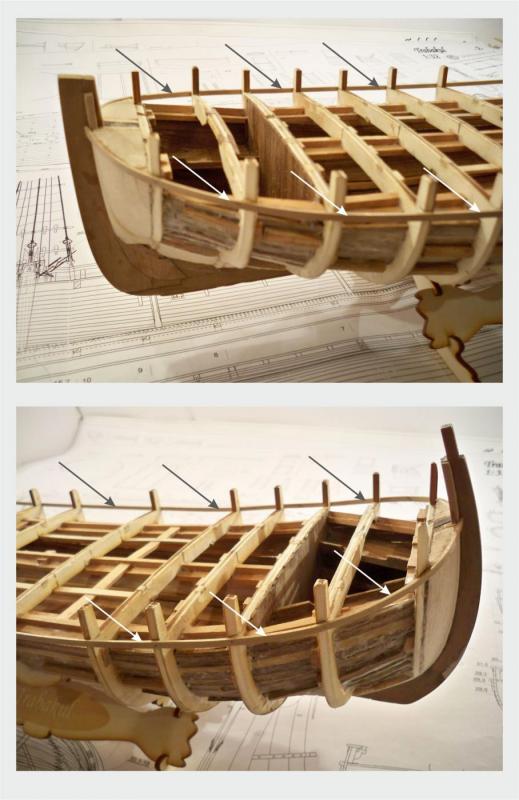
Strong, firmly, straight , precise ... these are the words to describe this construction in this stage ... Was it fragile in the beginning ? ... The first phase of the pleasent job has just been done .... The second phase is the hull planking... All planking of this hull begins with two 4mm wide strips. The first planking strip is glued so that its upper edge follows the upper edge of the main deck rail that will be attached to the deck later. Below this one follows the same one. This is the base for the top of the wale that will be attached later... instead of this combination the 3mm and 5mm wide strips could be used. The point is that this part of the wale should be 8mm wide all along its lenght ... Here is the first strip :
-
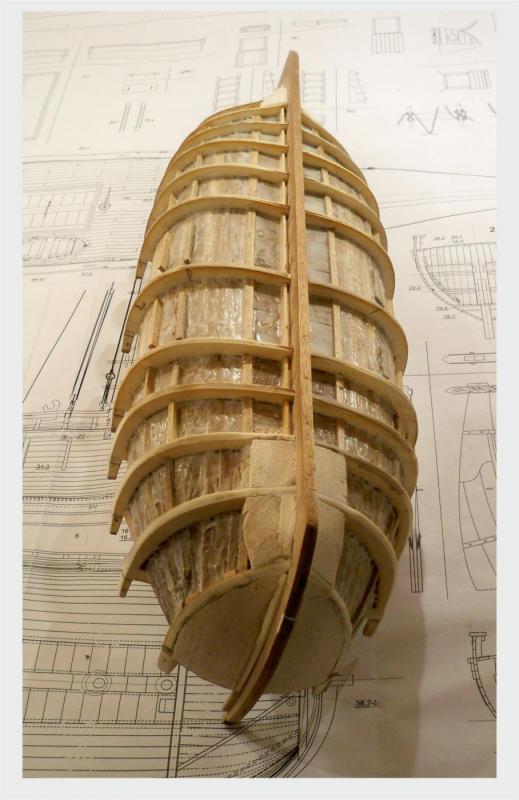
So, this photograph shows the construction prepared well for the planking... those blocks are quite well done for the modelers who have the experience in the single planking method ... The single planking method is the one MarisStella ship modelling school recommends to everyone because it is the way of planking very close to the planking in reality and it saves the time a lot ... Once You get to it, You will be doing it for all times ... ... This construction could have been filled with the blocks between all the bulkheads... that would be recommended to the beginners... The surface, prepared in that way, is actually like the first planking and the planks over it is actually like the second planking ... It is good for acquisition of experience in the single planking method ... So, avoiding of making the blocks saves the time, but in that case bit more of experience is needed ...
-
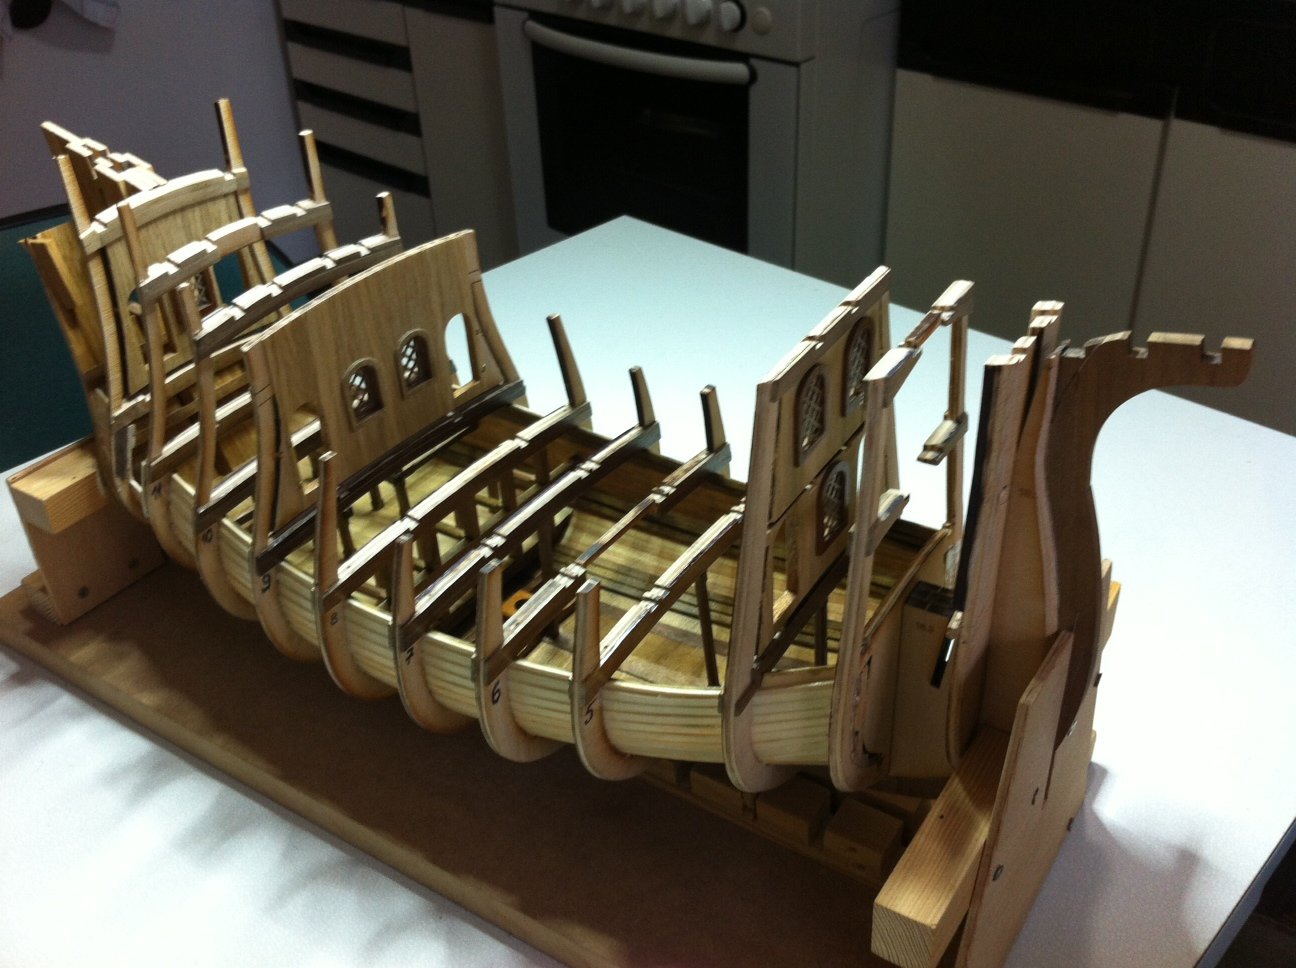
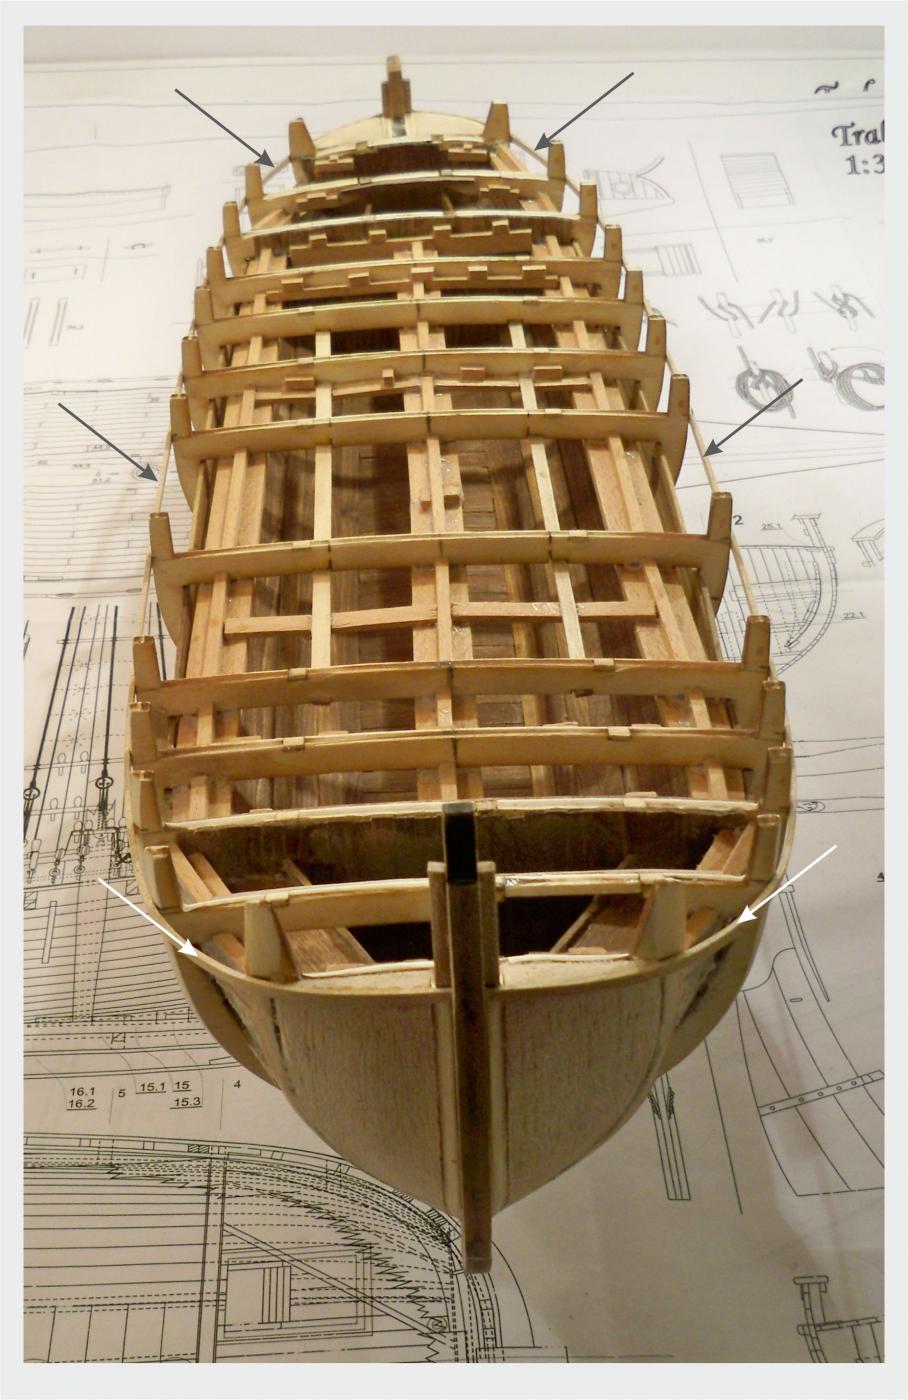
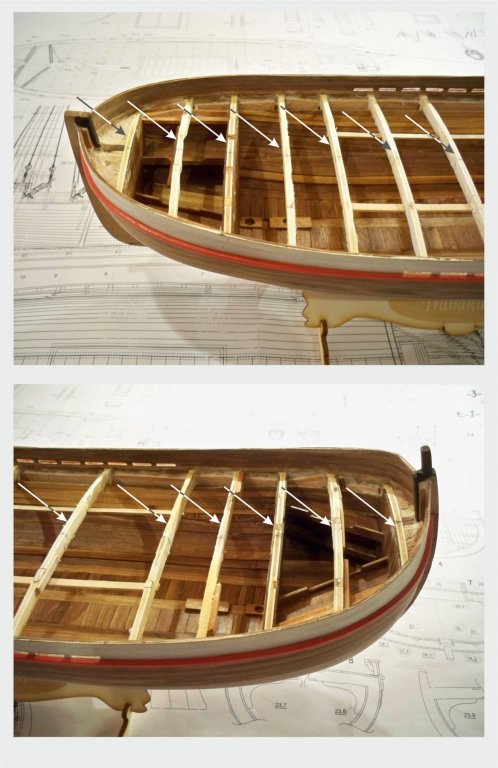
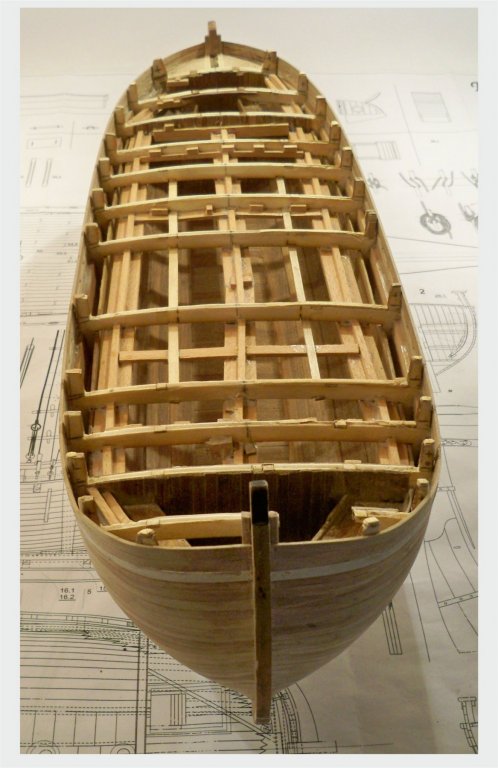
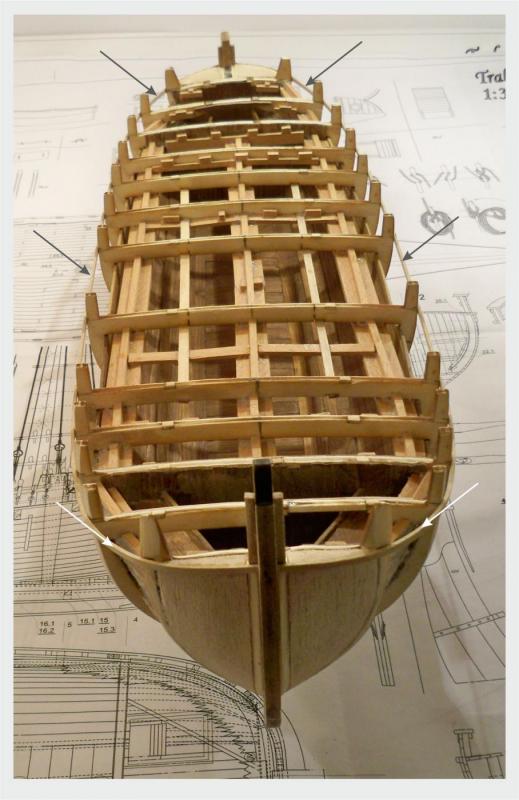
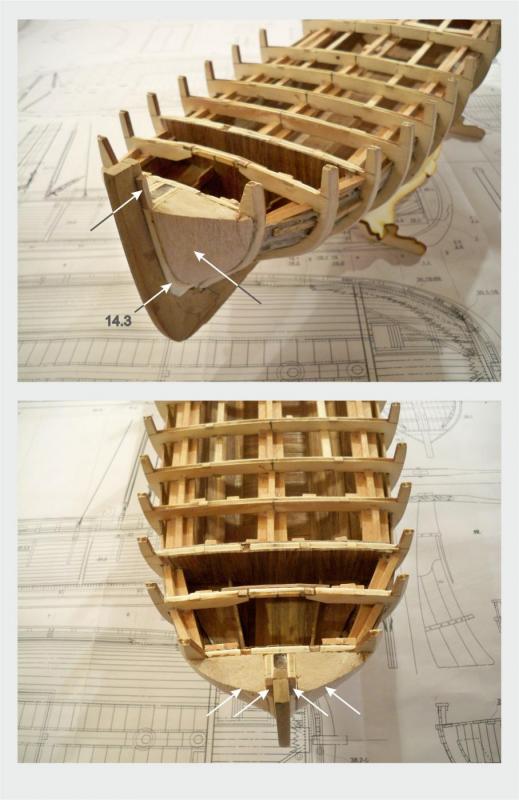
Now, when the interior is finished, it is time to prepare the construction for the planking ... Beveling needs to be done in detail ... Then the stern and bow blocks are to be done and installed onto their places... There are the freeboard supports needs to be installed too . Those are some kind of the first knight heads that are to be glued to the posts. They are made of 3mmx3mm strips ... Here are the photographs :
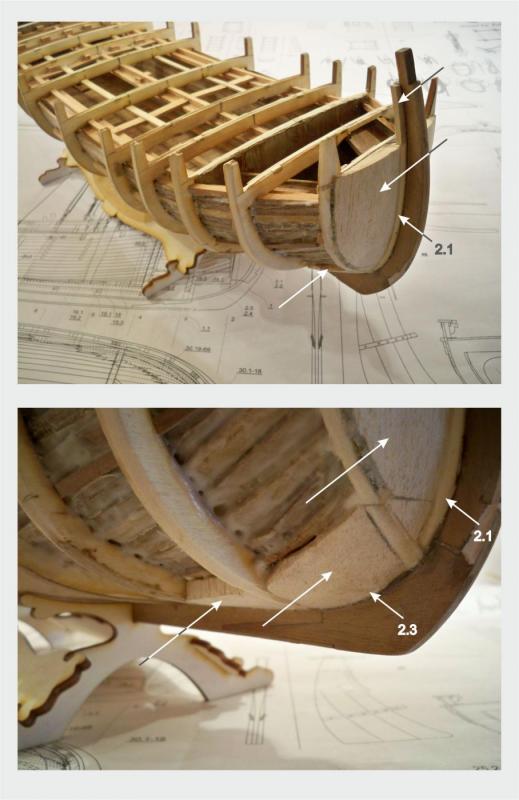
-
Hi Mr. Jack ... I was looking for the right word and I was not able to find it ... Then Yves wrote it .... Complete approach is brilliant : Your work is a work of an perfectionist ... Regards, Zoran
- 174 replies
-
- 3
-
-
- gaeta falcata
- marisstella
- (and 1 more)
-
Hi Mr. Pierre... I think You are doing great.... Regarding Santa Maria... I will send You the new build log drawings... It is a single planking, but I will show You how to fix the hull so it will be the same as double planking ... I feel You'll do it great .... It is visible at Batelina already now ... Regards, Zoran
- 46 replies
-
- 4
-
-
- batelina
- marisstella
- (and 2 more)