HOLIDAY DONATION DRIVE - SUPPORT MSW - DO YOUR PART TO KEEP THIS GREAT FORUM GOING! (Only 20 donations so far - C'mon guys!)
×


jburchfield1@wowway.com
-
Posts
302 -
Joined
-
Last visited
Content Type
Profiles
Forums
Gallery
Events
Everything posted by jburchfield1@wowway.com
-
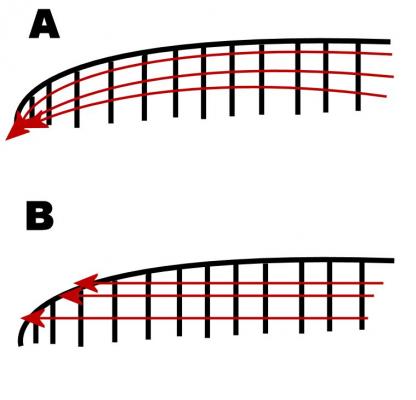
 Capt Steve - A is the way I have faired as well. I don't see how I could have gotten form 3 too low since I made sure to bridge at least 3 forms when fairing. I also used a batten across the forms while fairing and it appeared to be accurate. Grimber - The lay of the plank, at least to this new builder, would be more like B in my opinion. Please correct if I'm wrong. Another possibility, maybe even more likely, is that I pushed one of the lower planks too far forward causing a small "crimp" that, while I didn't notice, lifted the plank off of form 3 at the curve. Then as I progressed, I compounded the problem by making each plank line up with the one below it.
 -
This ship is gonna be my next build so if you don't mind I'm gonna follow along. You shouldn't expect much in the way of helpful input though, because I'm too new at this to really be helpful.
-
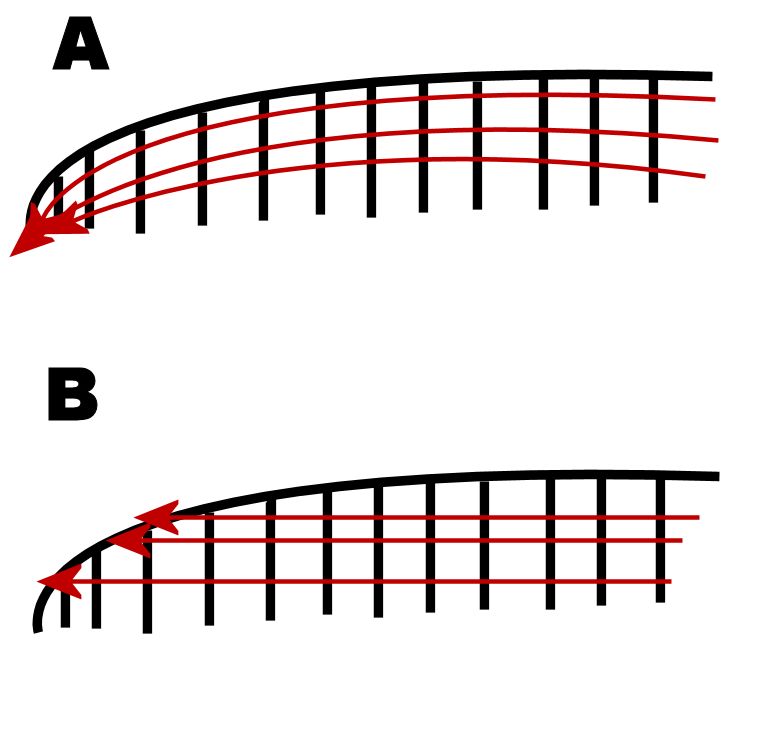
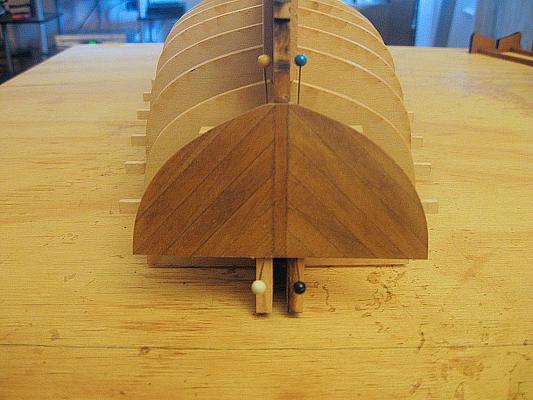
HELP!!!!! I think I might have created a problem for myself. I'm down to the last 3 planks and I've noticed that the plank(s) are not laying flat against form 3. Fitting everywhere else great, but appears to be "raised" at that form. Can't get a picture because I have to get too close and can't do it with the camera I have. I think the problem is the fairing of the frames/forms but not sure. SO..........I created this little image (go ahead and laugh if you want, I'm know I'm not an artist ) When fairing the frames/bulkheads/forms should I be fairing in the direction(s) indicated by image A or image B. I had some of this same issue when fairing the Longboat, that's what makes me think that I'm fairing wrong. When I fair these things I use the pattern as shown in image A, and use the batten the same way, following that curve of the keel. But after two boats (well, actually 1 1/2 boats), and realizing that the planks actually run basically fore to aft, and NOT following the curve of the keel, I think I SHOULD be fairing as indicated by image B. Again, HELP!!!!!
-
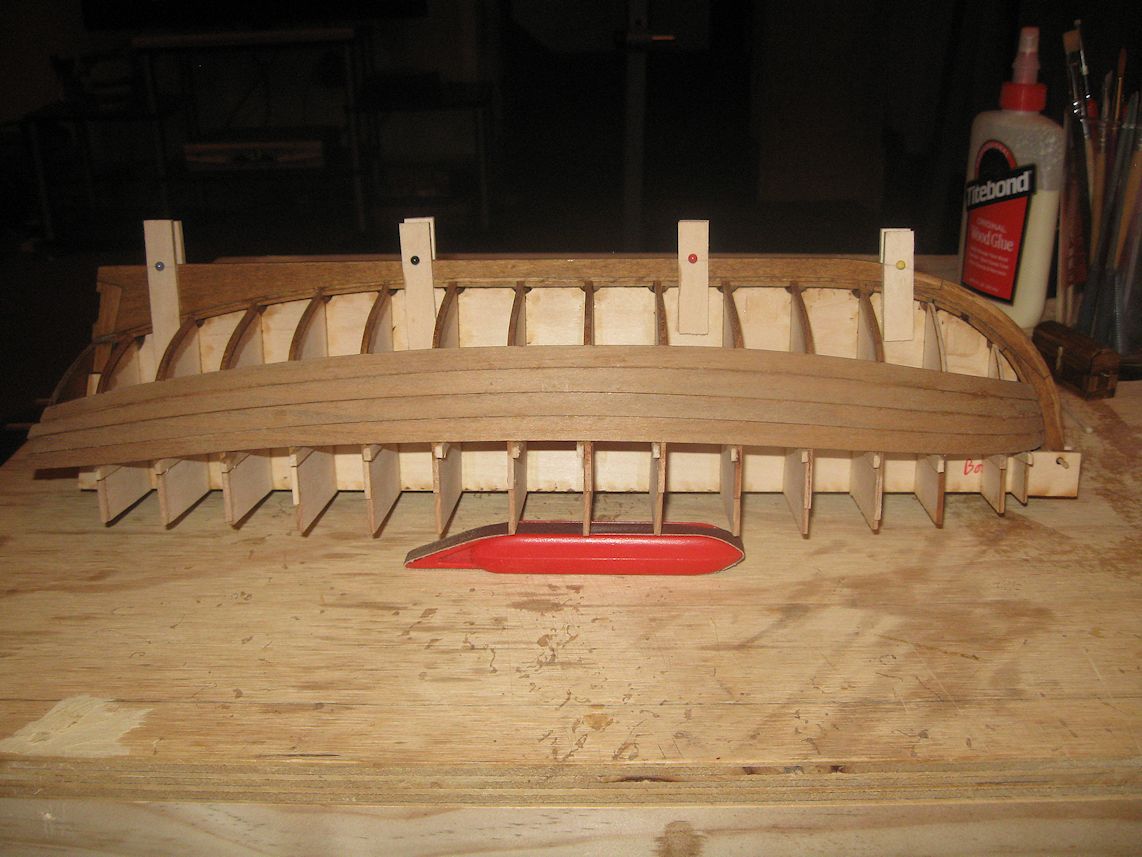
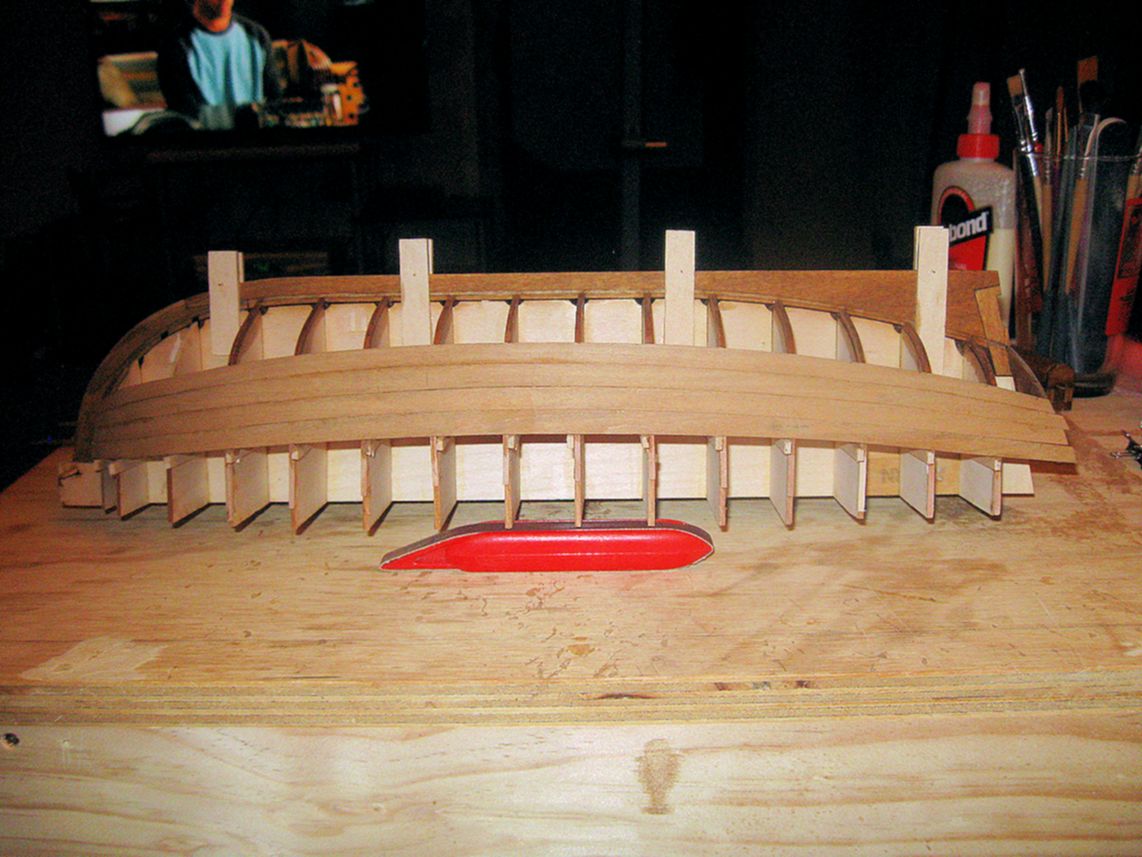
Well, decided to take pics before I attach the 5th plank (which is actually the kit named shutter plank). PORT SIDE STARBOARD And last but not least the BOW Clicking on the image will give you the larger version for a better look. Comments/Critiques/Suggestion are ALL welcome.


-
TKS Tom, Adam. I've noticed that several of the planks are not quite as wide as the tick marks on the forms, so that's probably why that shutter plank is not quite wide enough. Also noticed just this morning that plank #7 (4th from the sheer) is actually too close to the exact length needed. Since my "homemade transom" is just a little thicker than the original, I came up about 1/32 short, but I can deal with that by sanding back (with a block) the transom. New pics tomorrow after I install my fifth plank. I've turned the bilge so should be easier from here (I hope)
-
Thanks Mario, and everybody for the likes. I can understand the importance of the sheer strake, and I would assume that the garboard is important because it ties everything to the keel. Basically what I'm doing, I think, (at least in my head) is, instead of putting the shutter plank in the approximate center of the craft, it's gonna now be the plank after the garboard. In otherwords, I'm going to plank from the sheer plank down to the last two planks, then place the garboard, leaving the shutter plank as the last plank to go in, but the actual 1st plank off the garboard. This way, any flaws, likely because of my inexperience, will be at the bottom of the craft instead of highly visible. It will probably work for the Launch because the planks are laser cut and fit nicely. Not so sure about when I do the next one and the planks are just straight strips of wood. May have to re-think this.
-
Tom - I've been thinking/wondering about that. Maybe you are right. That would still allow any "gapping" (which obviously I'm gonna try NOT to have) to be at the bottom. So far, I've been lucky (can't call it skill and probably never will) and all the planks are fitting tightly together. All I've had to do was sand off that miniscule laser bevel. Obviously, I believe it would be VERY different if I was just trying to use raw strip material. 4th plank is being wet shaped now and I'll have new photos tomorrow.
-
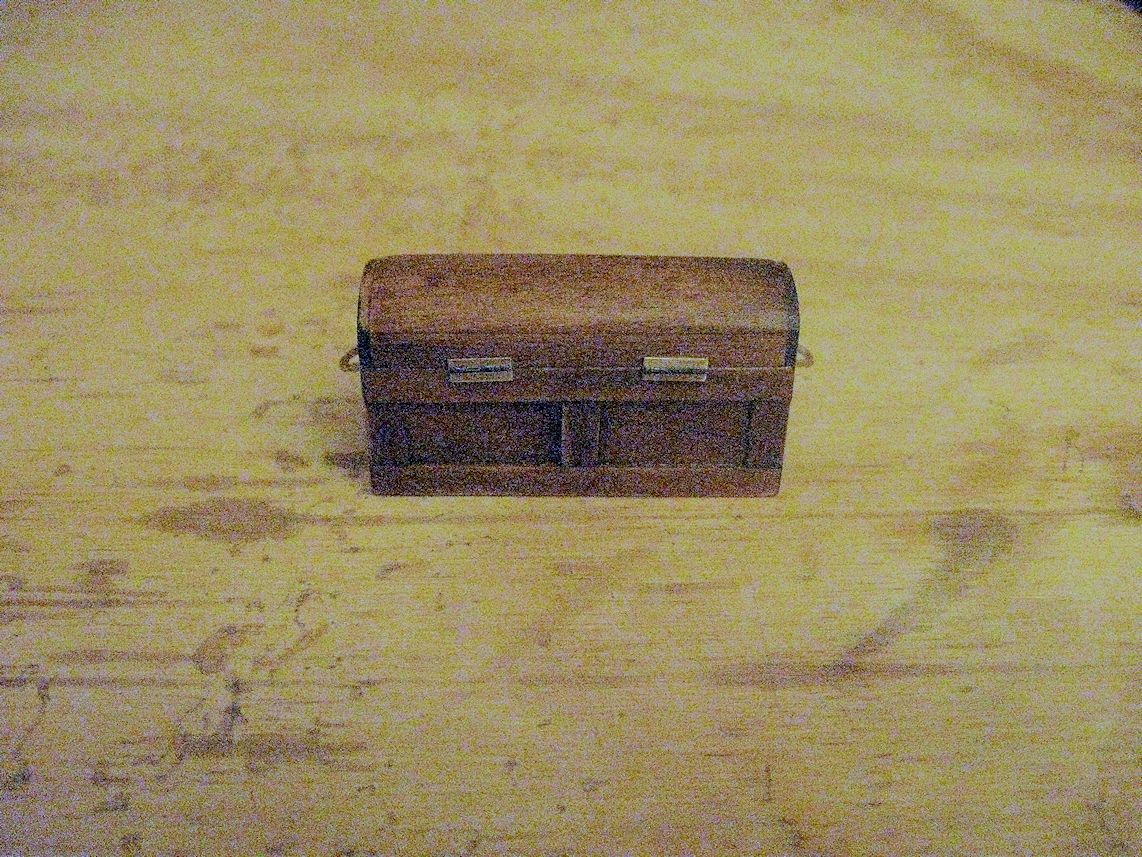
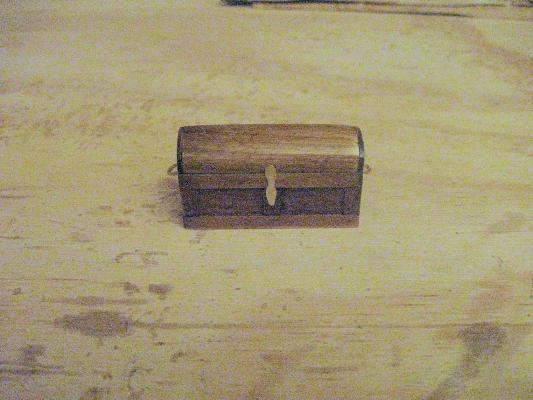
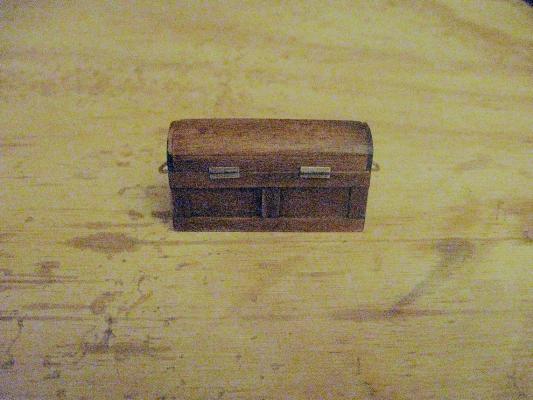
Thanks for the likes everybody. Capt Steve - I kinda agree with you about the hinges. I tried that because it was done that way on the longboat. However, I decided today to take off the wire piece and leave them flat. As you say, the back of the tool chest will be mostly hidden against the hull so not really visible anyway. I finished up the chest today and got stake #2 glued on both side. #3 is soaking now. I'm gonna try to get better pics of the chest but not sure this camera can go that close.
-
K, sorta got the camera figured out. Still a little blurry, but you can see what I've done here for the hinges/clasp for the tool chest. Clasp Hinges I've been toying with the idea of leaving these in poly covered brass just for a little bit of shine on the thing. What say you guys? Brass or Black? Sorry about the pictures. Too close and really crappy.
-
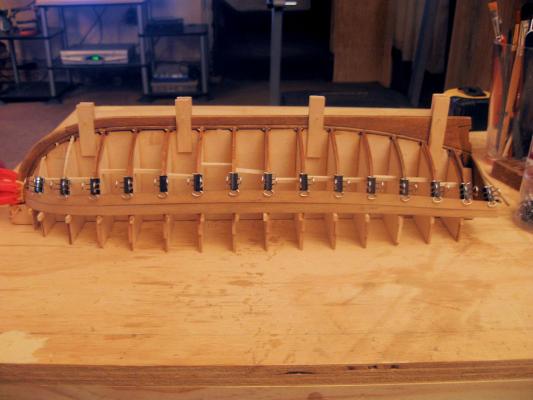
K, here's a couple of shots of the planking in progress, second plank is being wet shaped. Not much, but showing progress. I'm playing around with the camera to figure out how to do close up shots and will then post a image of the tool chest. It just needs to have the "hinges and clasp" attached. I'm finding this boat MUCH easier to work with than the longboat. I'm very hopeful at this point. I've also decided that my next ship will be the San Francisco (have started the savings "account"). It was on my list of to-do projects and I'm really starting to get excited again after my failure with the longboat.

-
Started the planking today. Pics tomorrow or Sunday. Got the two sheer planks drying now, and will attach them tomorrow and wet and shape the next 2. I've decided to follow the "optional" method of planking (Bob Crane said I could in his instructions), by planking from the sheer to the garboard instead of from both directions. Don't want to take a chance with the shutter plank looking wavy. This way if there is anything wavy (hoping not) it will be the garboard plank at the bottom. Not to mention that it just makes more sense to me. Never have heard/understood why ships are planked from both directions, seems counter-intuitive to me.
-
Thanks everybody for the likes and comments. Tks Adam, sorry I got sidetracked with this when I got it, and I'm only about half way thru Amati, but getting there. I'm finding it much easier than the longboat, not that there was anything wrong with the longboat, just that this larger scale seems to allow me a better grip and I don't have as much anxiety about breakage. I've decided that when I finish this one for auction, I'm gonna buy a second one, so I can have one too! Not much done today, had to redo a couple(3) of the frames that had broken under the clamp and didn't see them until I took the clamps off for gluing. Replaced those and got the transom faired. Also finished the tool chest. I'm not accomplished enough (yet) to open it up and make all those tools like some have, but it looks pretty good. I'll include a shot in one of the later pictures.
-
Well, no picture for this, but the "dreaded" bending on of the cherry frames is done. I was really hesitant to begin this step because of some of the build logs, but it actually went pretty easy. I boiled the sticks for about 30 minutes (after cutting them to length) and then started placing them. Had some breaks (5 sticks I think), but other than that was pretty straightforward. Will get them glued on tomorrow and then on to the planking.
-
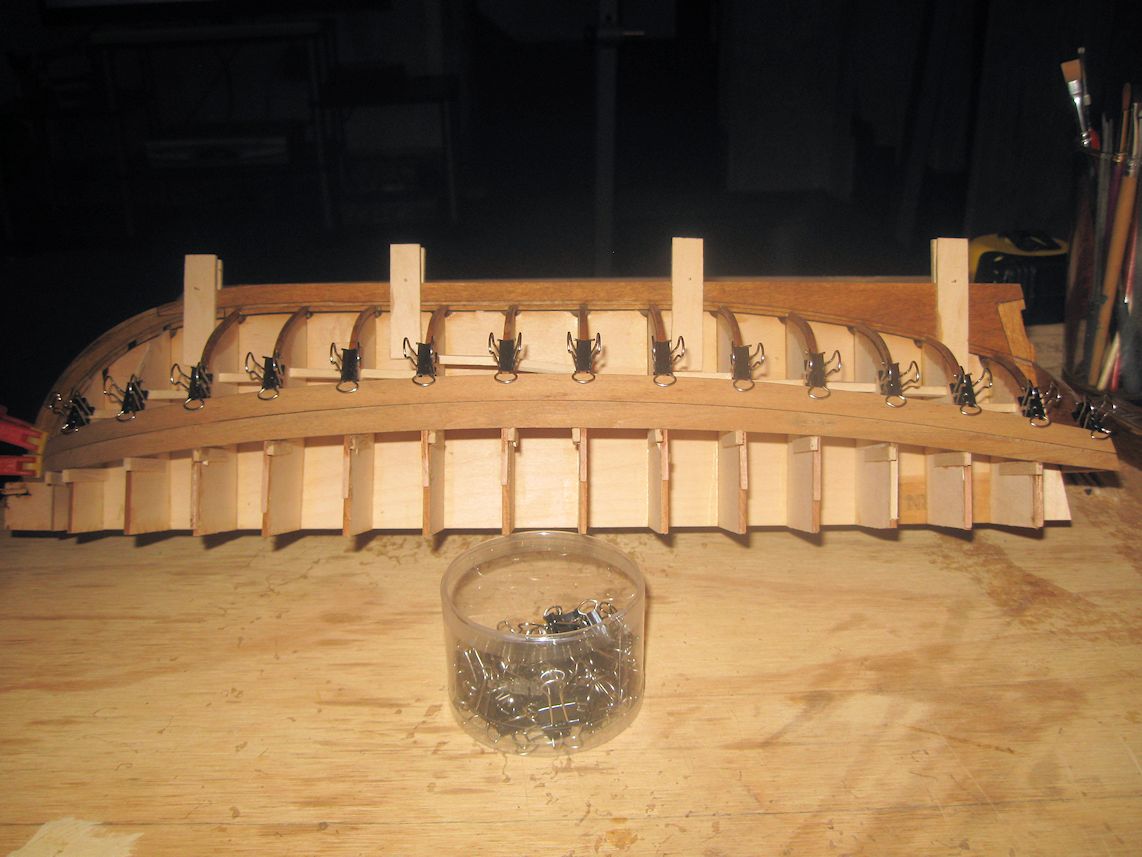
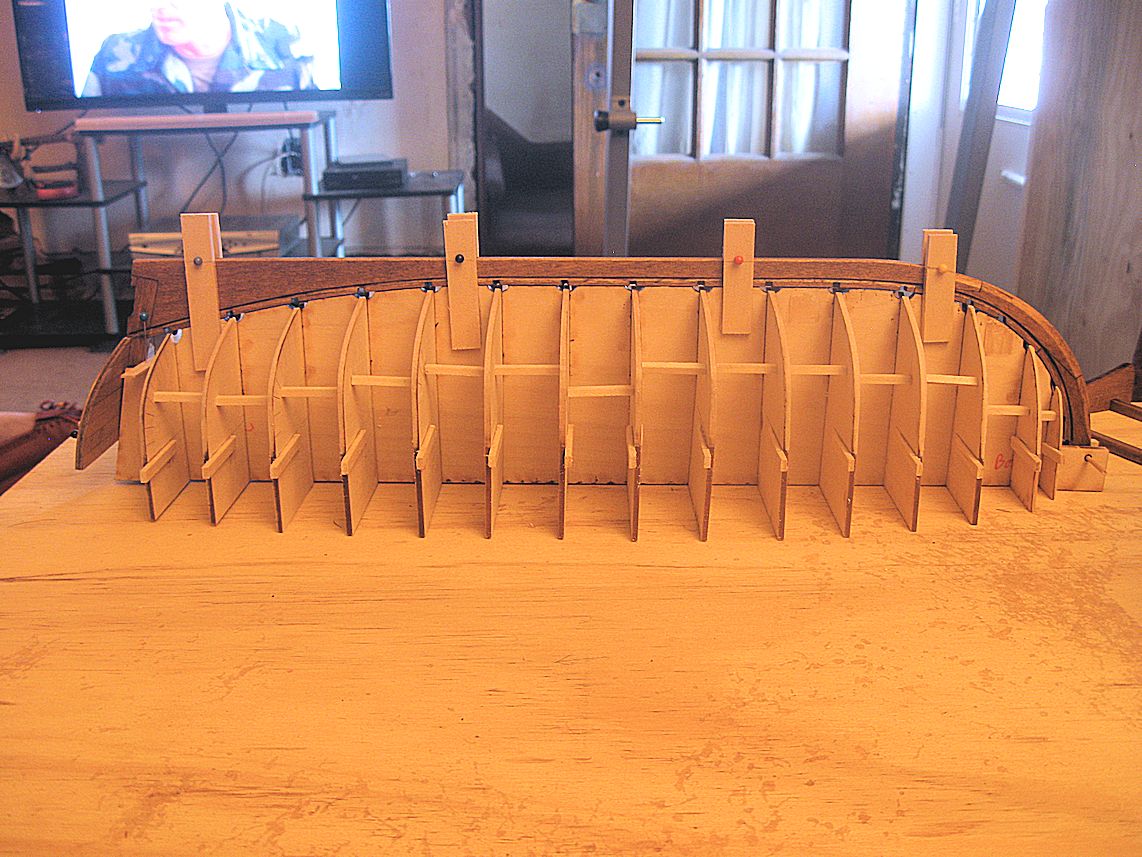
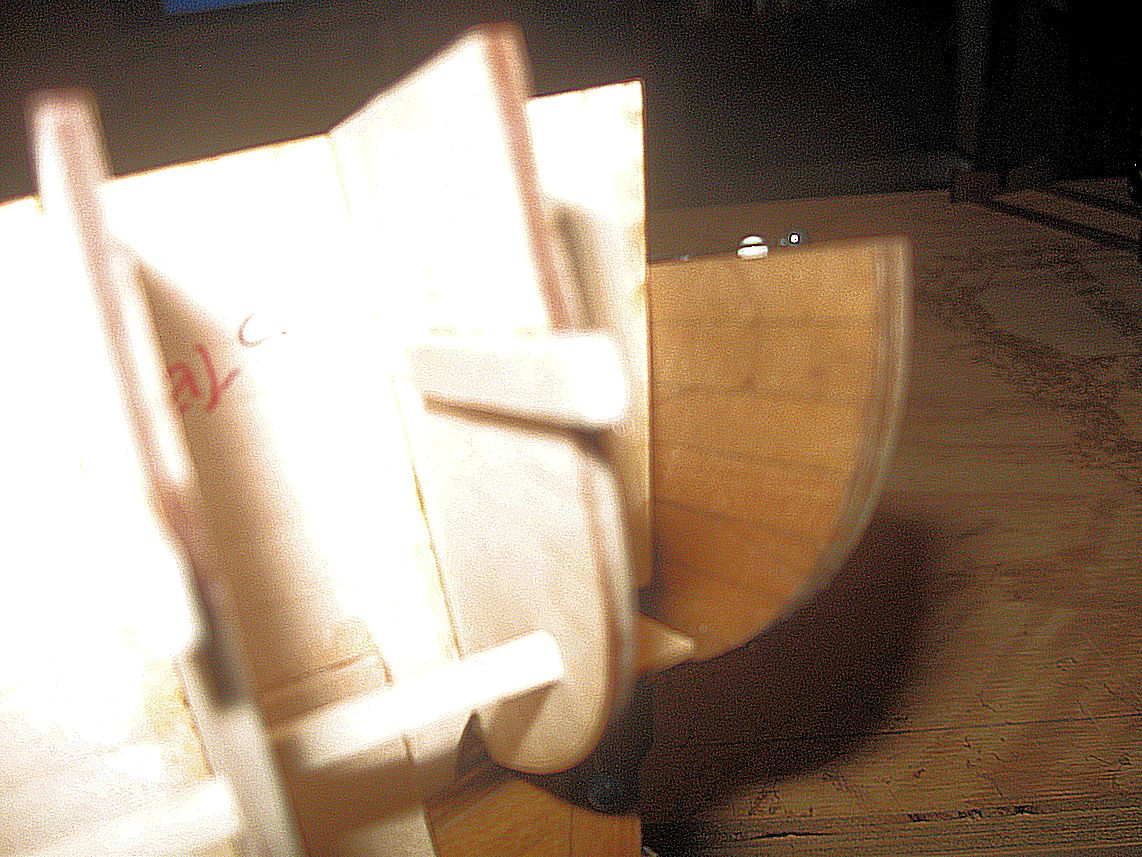
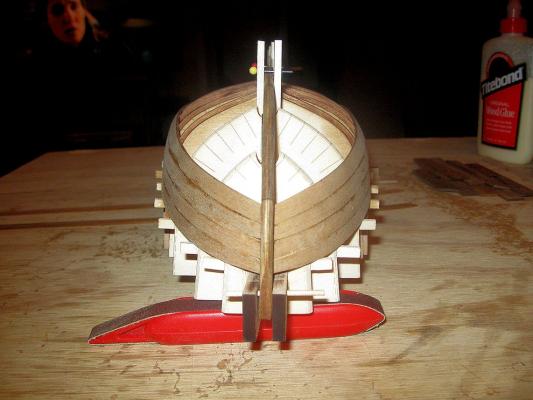
K, finally got some pictures. Not much but showing some progress. Here's the form/building jig and the keel and transom have been completed. This is the way I decided to do the outside of the transom (everybody knows about the word engraved on the part). I decided that I wanted to plank both the inside and the outside of the transom so I bought a 1/32 sheet and cut three layers - a center one solid and planked both inside and outside. Outside - And here's the inside. Got too close so a little blurry, but the pattern here was planked all the way across the transom. If this is not appropriate for this boat, somebody let me know - I can still change it. Just don't particularly like the solid transom look. I've decided to NOT paint anything - all natural wood - figured that would go with any decor and might let someone buy it at the auction where they might not if they didn't like the color(s). Comments/Critiques always welcomed.


-
Thanks Captain. I did indeed move those tabs as needed and completed the assembly/fairing of the building form today. Had to go buy a candle Us bachelors don't have much call for them, but it's here when needed. Gonna finish putting the keel together Sat/Sun and then I'll be putting some pics up here. I must say this one is easier than when working on the longboat. I think it's because of the size. Now, if I can just learn to read/follow instructions................
-
Thanks Mario, I think you're right about the sheer strake being the reason. I had put them on with CA, but just carefully broke them off without damage to the station itself. Tomorrow I'll cut some new ones and put them on the correct side. I just finished putting on 9-15 being very careful to face them the correct way, so things are moving along. Hope to have some images of actual boat construction early next week.
-
Agreed, I assume that is because of the procedure used when using the laser to cut it. BUT the instructions say that stations 9-15 should have the tab on the forward side (which is the marked side) and stations 1-8 should have the tab on the aft side(which means either put the tab on the unmarked side or flip the stations). Flipping 1-8 is what I missed. No problem for 9-15, they haven't been installed yet. I just need to know if it is REALLY critical that those tabs (other than 1 and 15) be on the "correct" side of the station. Does it affect the sheer line or what? If it's NOT critical then it's a lot of unnecessary work to remove and replace all those tabs. If it IS critical then I will indeed do it, just wondering why?
-
Ok, stoopid here. Sorry no pictures yet, but I'm only building the form - no actual work on the launch itself. Even after reading through the other logs on the Launch, and reading the instructions 4 times, I still ended up with the sheer tabs on the wrong side of the forward 8 stations (according to the instructions). Aft are no problem, they haven't been glued on yet. Here's my question - I know that the instructions state "IMPORTANT" when addressing the side of the station that the sheer tab is positioned on, but WHY? I can understand station 1 - the stem alignment block must glue to the forward face of the station so must be on the aft side and station 15 tabs must be on the forward side because of the transom horse, but why the IMPORTANT about the tabs being positioned on a given side of the station? Is it critical enough to move those tabs? NO fairing has been attempted yet. Thanks for any answers/assistance.
-
I've also heard that storing paints/poly's/etc upside down (make real sure the lid is tight) will do the same thing. It keeps the liquid seal around the opening and makes the container 100% airtight. I've always stored my model paints upside down and seems to work with them.
-
Well, got my kit today of the launch from Model Expo (probably the absolutely BEST and most customer oriented business I've ever seen). Skipped the intro of photographing the box/parts since you've seen many of those and all know what's inside the box. The only thing bad was two of the walnut belaying pins are broken. Just in case I need all 20 I'll talk to them tomorrow about replacements. They are quick on this kind of stuff so those will arrive well before I need them. I'm donating this to Dave's (Sawdust Dave) Wounded Warrior Project for auction so I want it to be really clean and as accurate as possible. As this is only my 1 1/2 build (didn't get the longboat completed because I got depressed about "wavy" thwarts and set it aside) I'm asking you guys to help me get this assembled well. One thing that will help is the rather large size of this model - 1:16. I will do my best to take pictures of every step as I go along and if you see something that is screwy (or gonna cause something screwy later on) PLEASE don't hesitate to tell me. I'm not a sensitive person (I've been called Spock and Sheldon(Big Bang)) and you are not going to hurt my feelings. TRUTH PLEASE - especially from the "masters" if they happen to see this build. It will be a few days before anything more shows up here - I've gotta finish at least enough of my new work table to get started, but stay tuned.
-
For those of us who have yet to build a larger craft such as this, might I ask: When the plan sheet is larger/smaller than the stated scale, and the parts do not necessarily match the plan, which is to be considered accurate - the plan or the part?
-
Launch Bounty (Moved by moderator)
jburchfield1@wowway.com replied to Sapphire's topic in Wood ship model kits
Thanks for the info. I'm going to be painting the inside but natural outside. Also, I'm gonna be shipping this thing so I wanted a harder wood - less chance of damage. Maple it is. -
Launch Bounty (Moved by moderator)
jburchfield1@wowway.com replied to Sapphire's topic in Wood ship model kits
Not sure if this is the proper place, but didn't see anything better. Hope this is NOT considered a hi-jack as that was not the intention. Can anyone tell me why the Bounty Launch, as done by Model Expo (or Shipways) uses cherry wood for the frames as the rest of the boat is done in basswood? I'm going to order some additional wood (breakage/upgrade) and was debating using maple as opposed to cherry. Definitely gonna use maple for the planking but not sure about the frames. Any comments or sure knowledge? -
I'm really new here so this may sound really elementary, but have you checked the bulwarks against each other? Maybe one is wider than the other? It kinda looks like it in the second picture(lower left).