


mrcc
-
Posts
418 -
Joined
-
Last visited
Content Type
Profiles
Forums
Gallery
Events
Posts posted by mrcc
-
-
Thanks Popeye for the input,
I think I will affix the chains just above the strake and thus onto the hull, even though it may not be historically accurate. I think it will be impossible to find the chains to match should I wish to extend the chains by a link or two.
The other problem with regards to tapering the masts are likely best tackled with a drill and the problem here is the main mast is a diameter of 12 mm which will not fit in the chuck but I am sure I will find a workaround.
Cheers
-
Still hemming and hawing over what to do with the masts...
I have noticed with this hobby that the further you progress in skills, the more perfectionistic you become and with these masts, I feel I do not want to tackle them quite yet and I keep mulling over the fact that I should buy a proxxon mini lathe to truly do them justice.
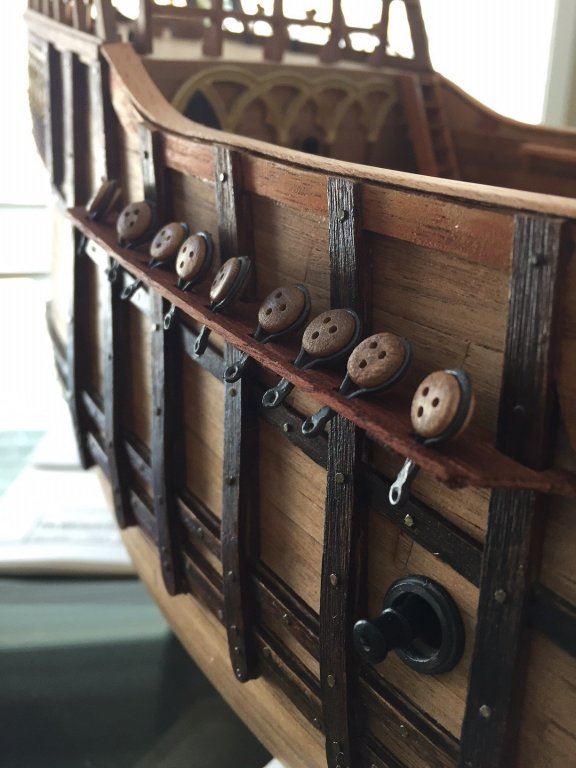
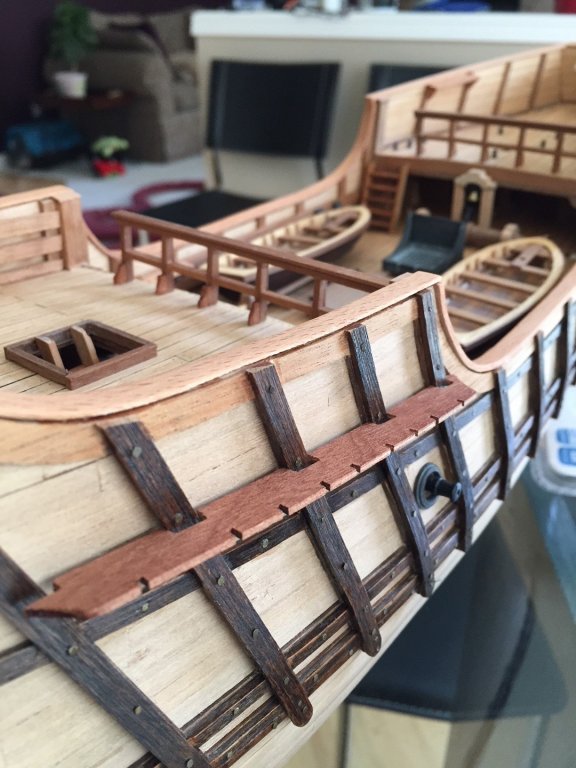
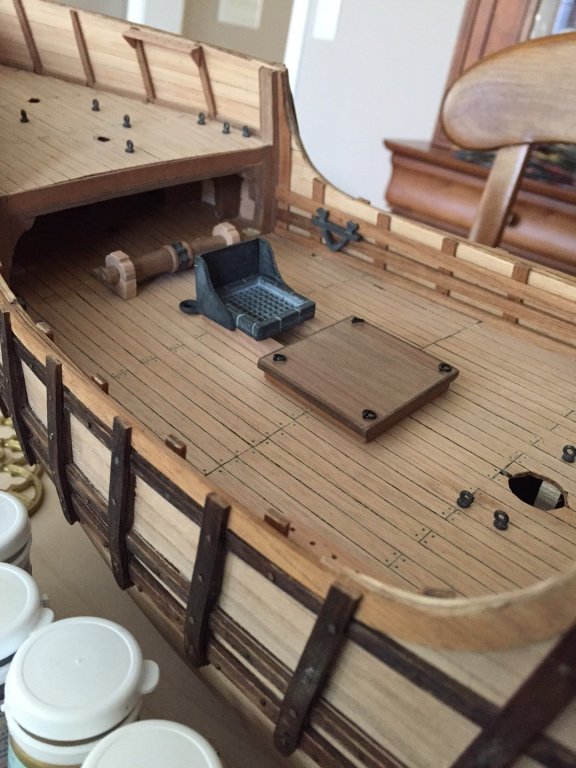
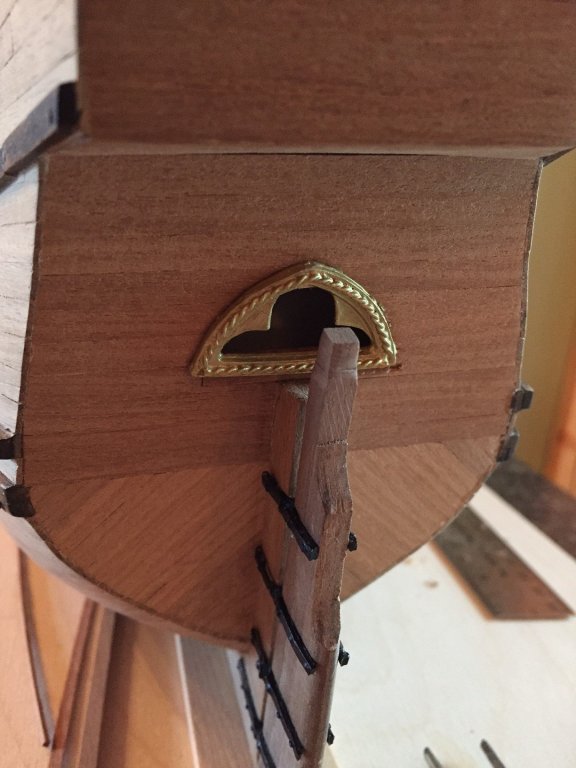
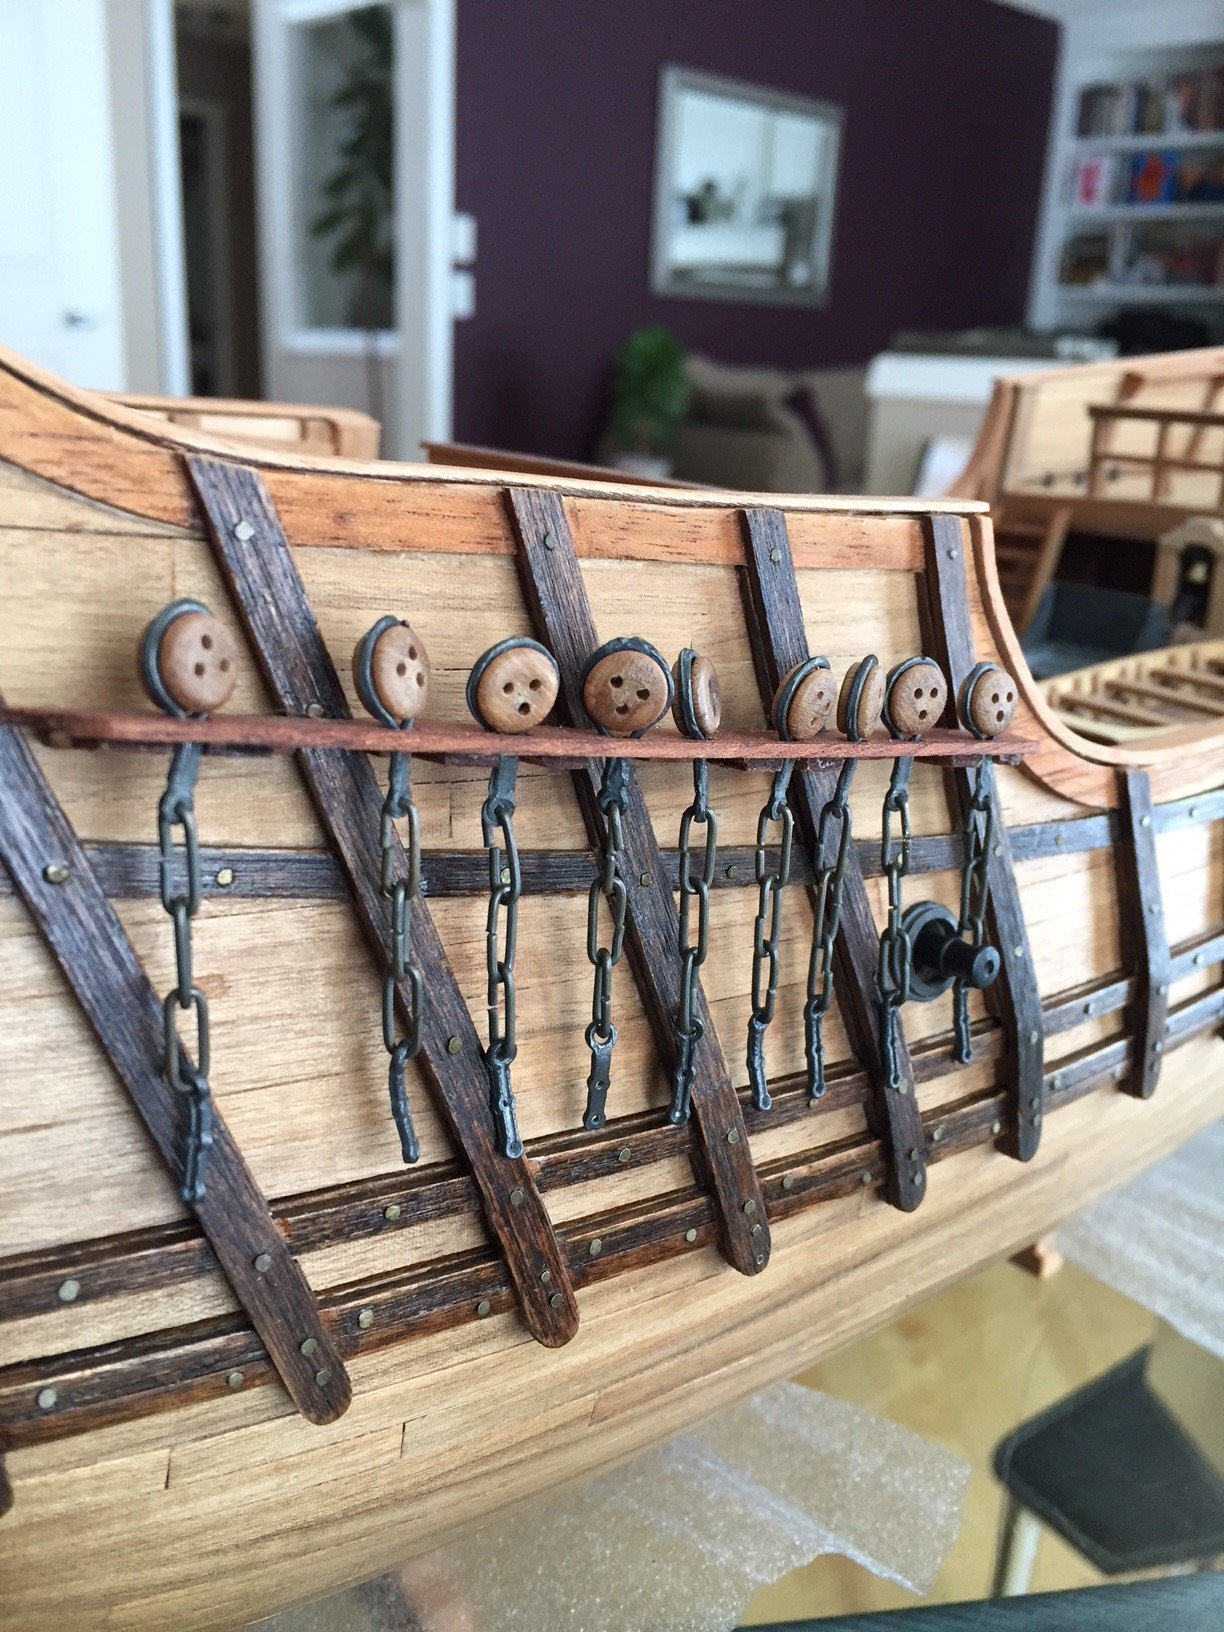
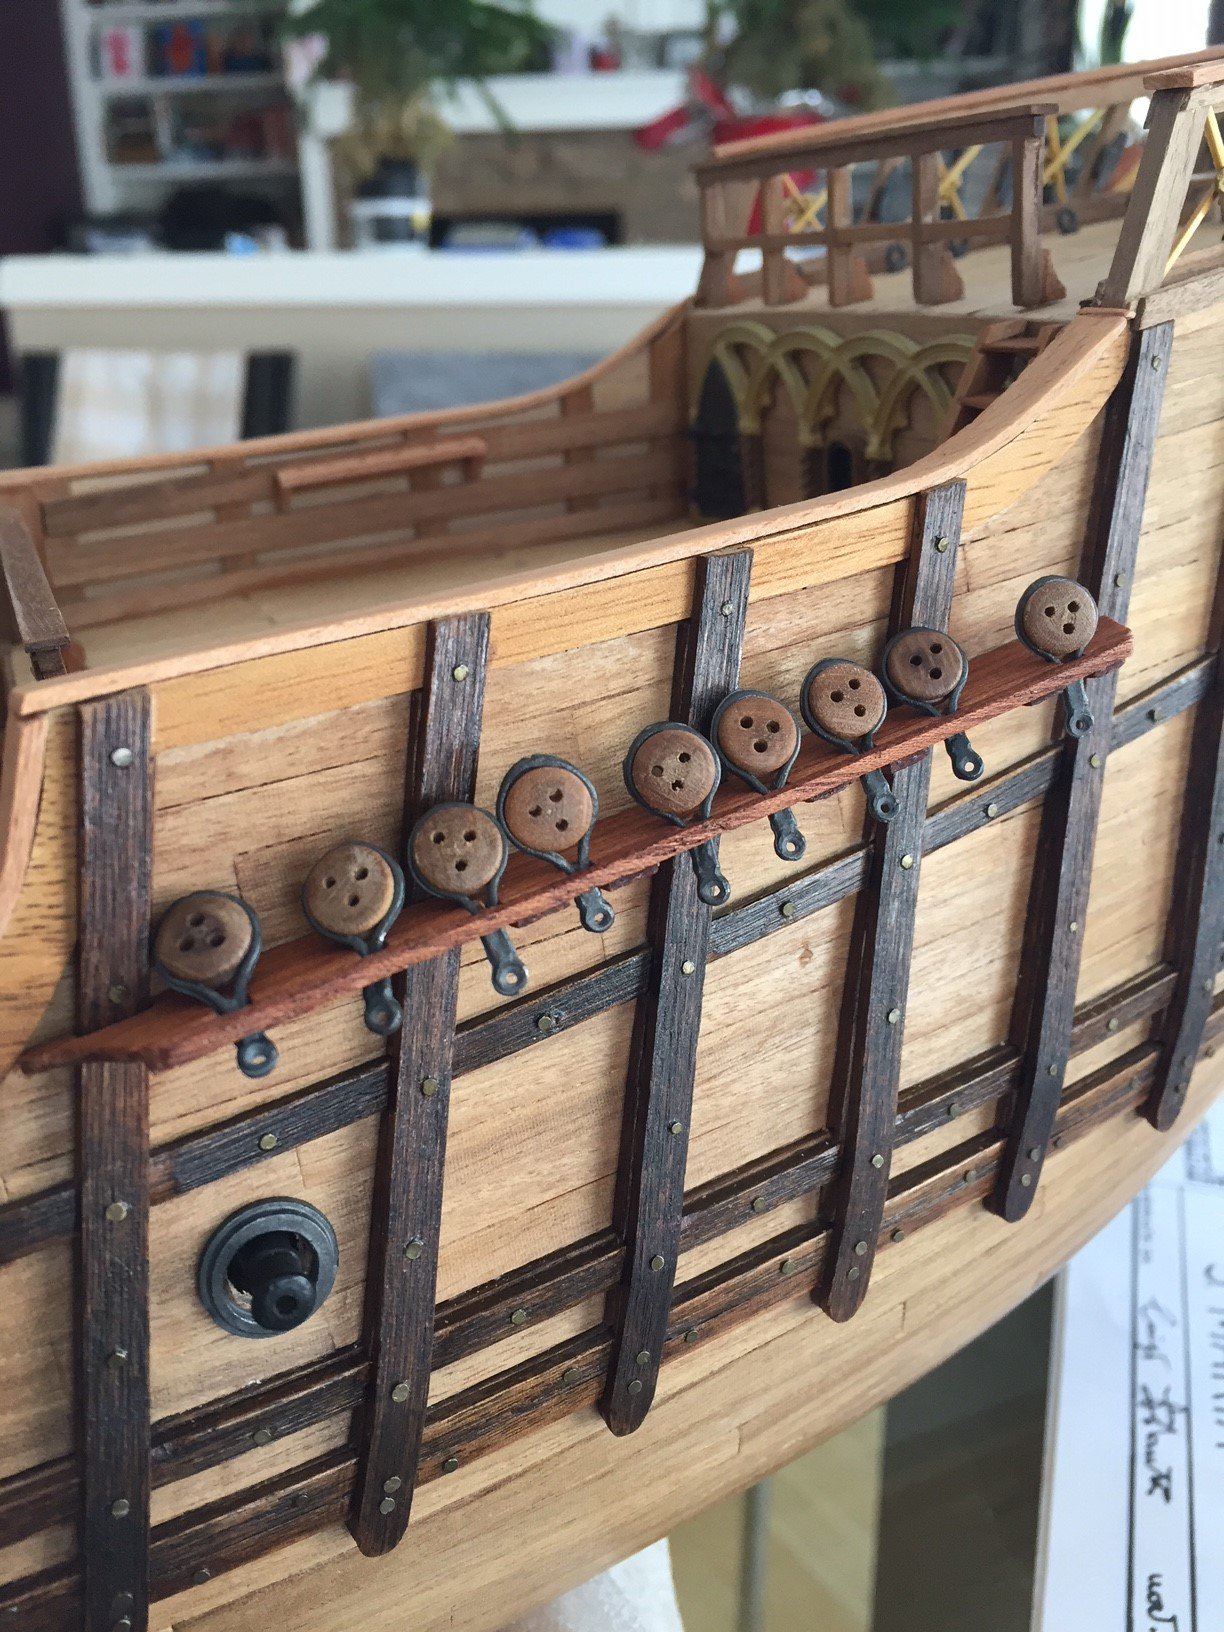
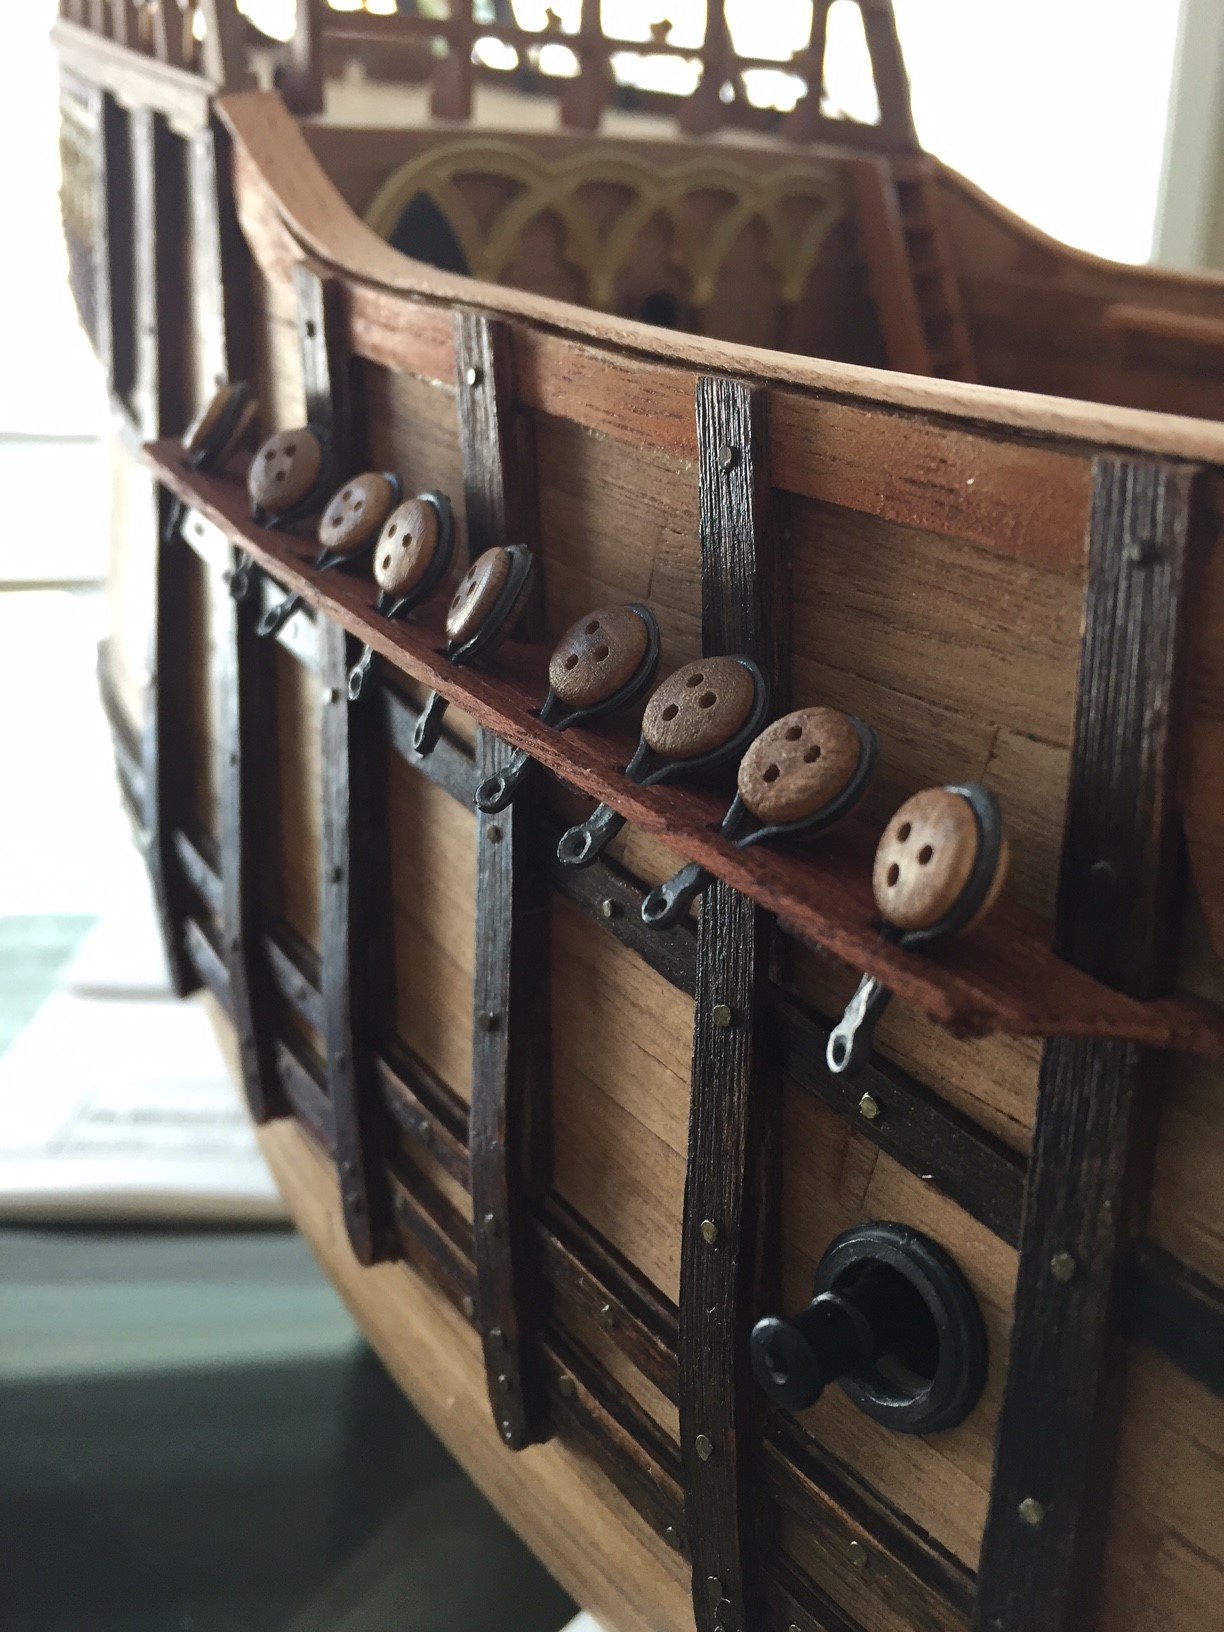
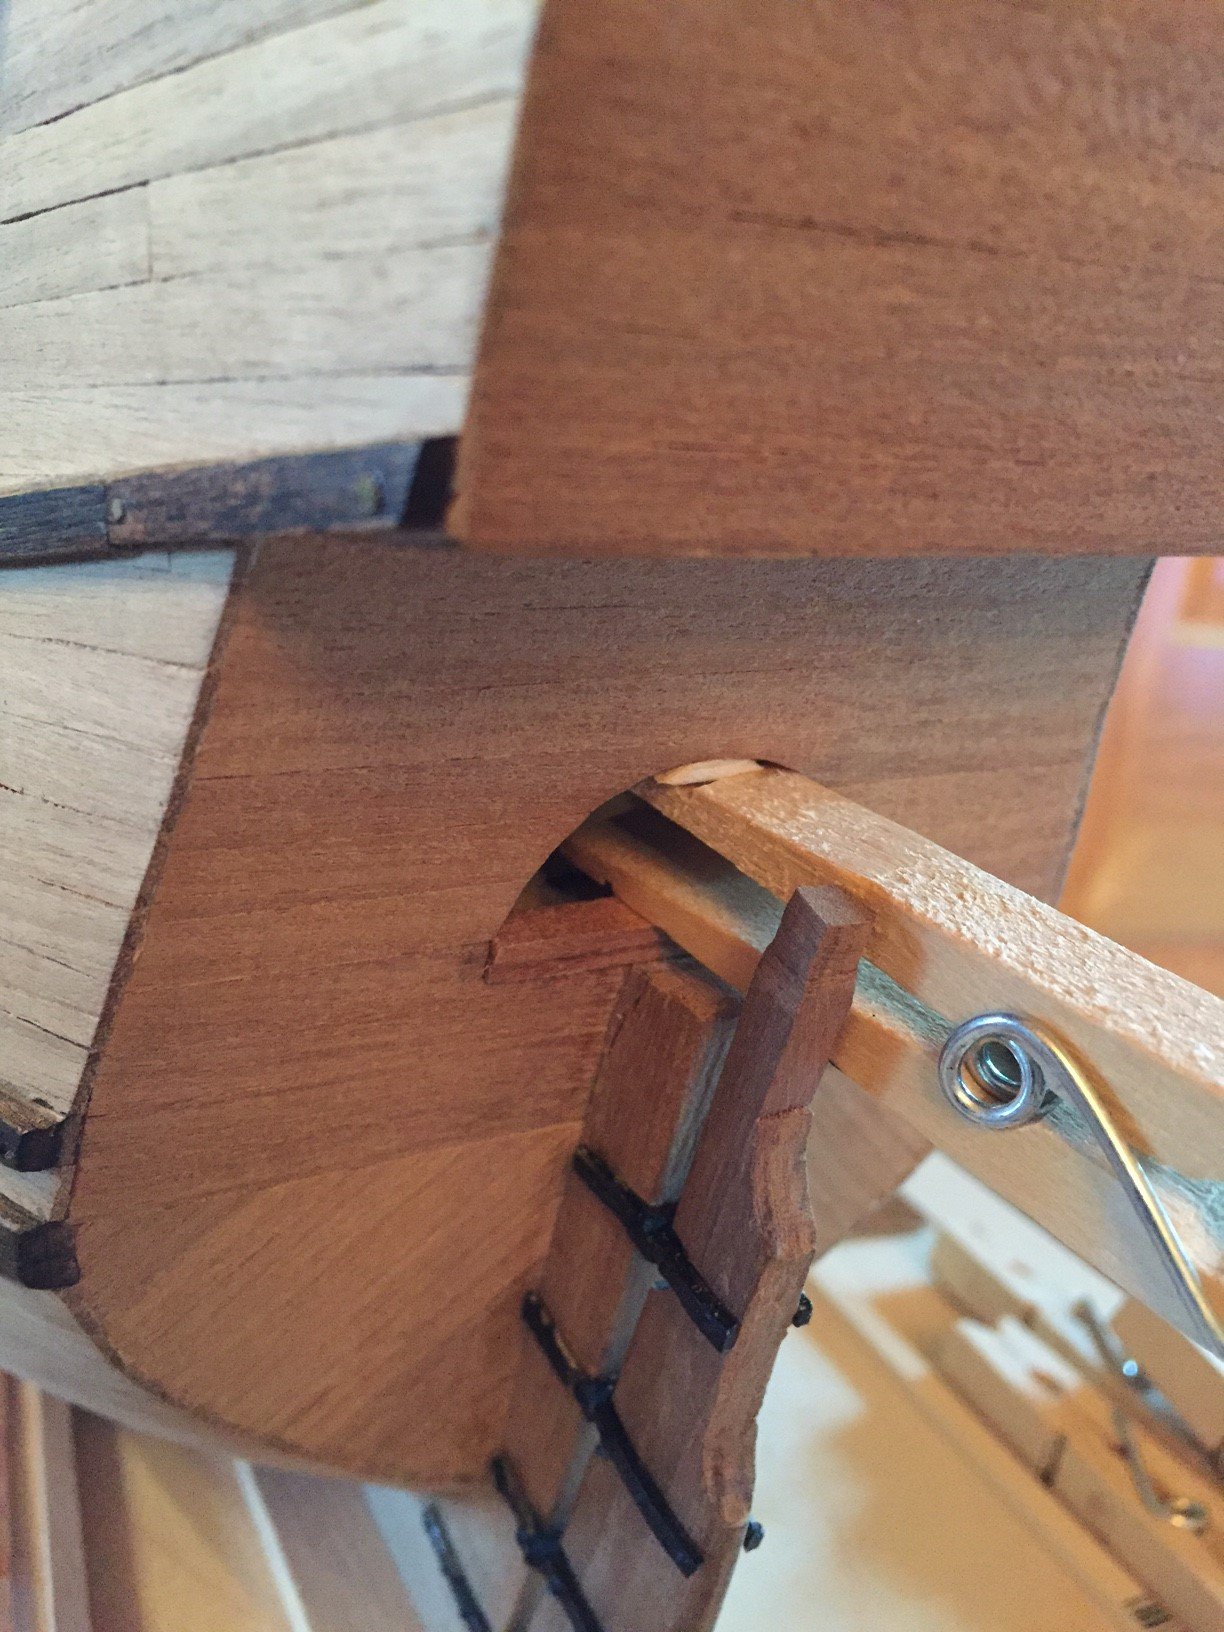
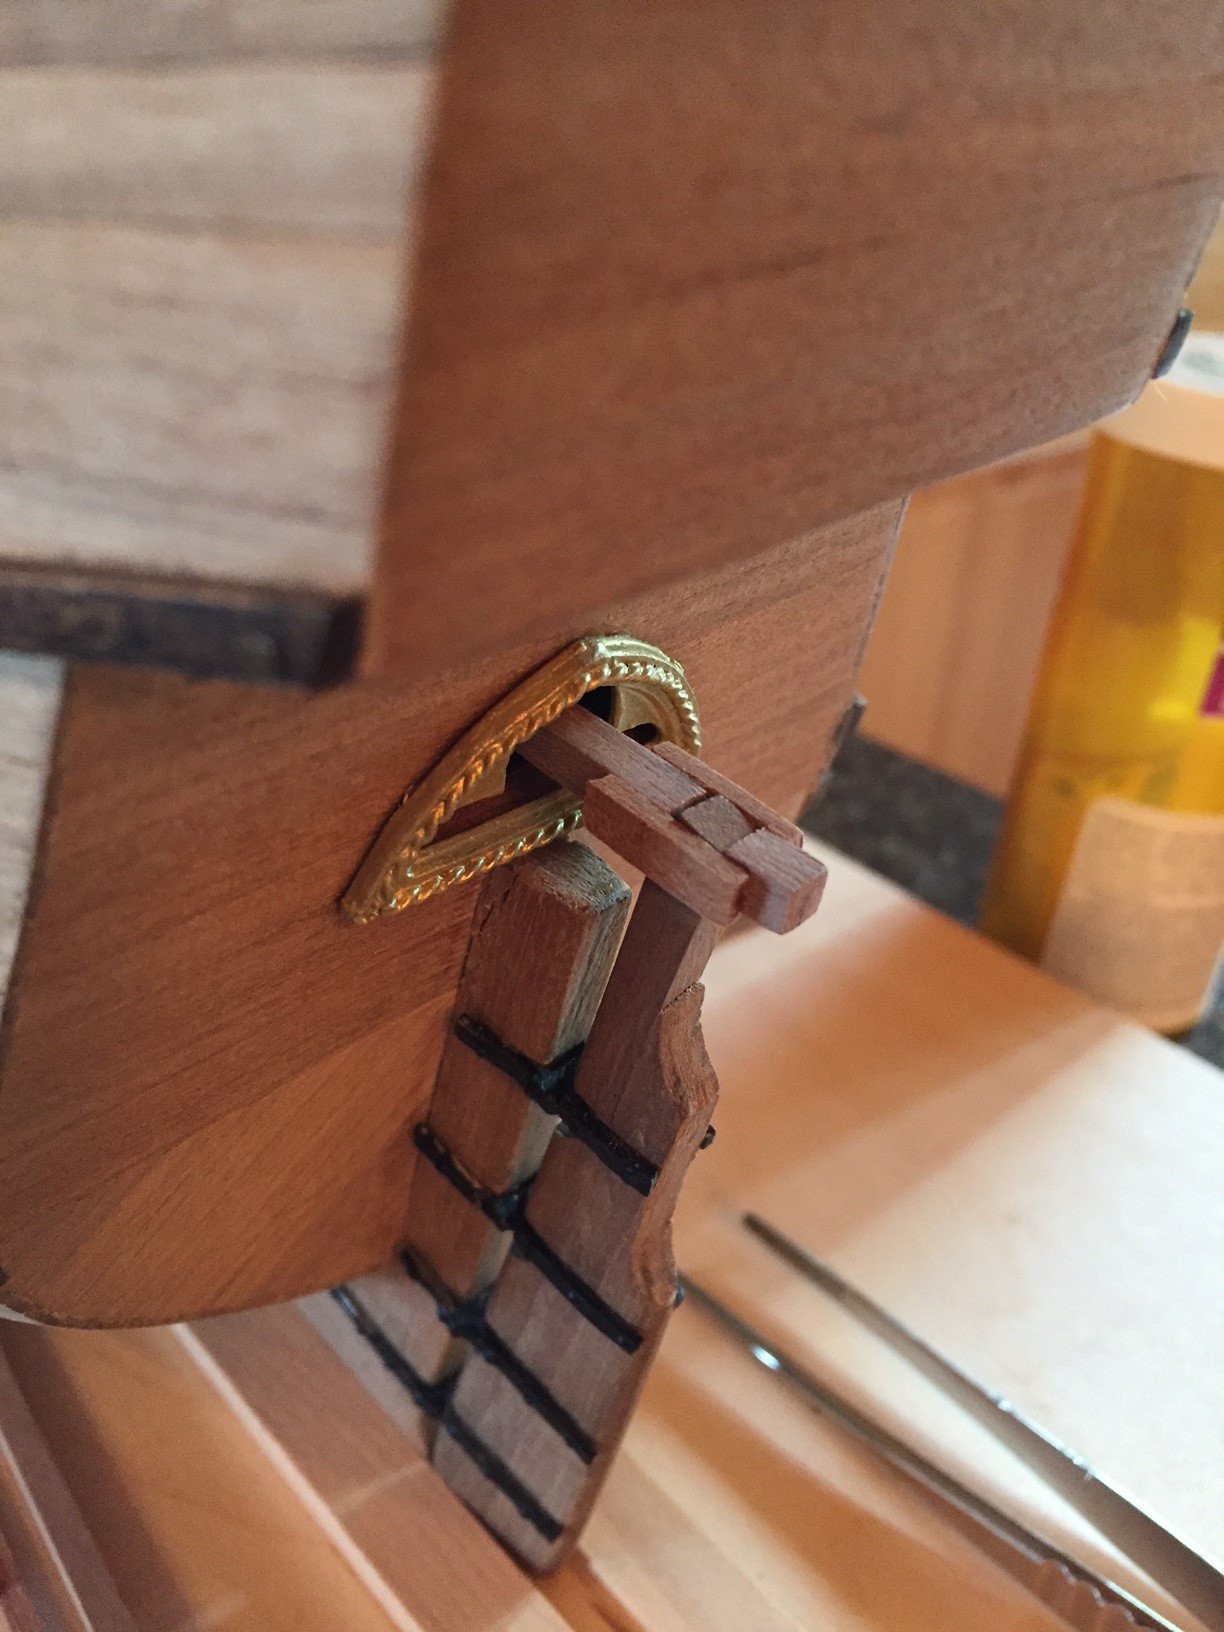
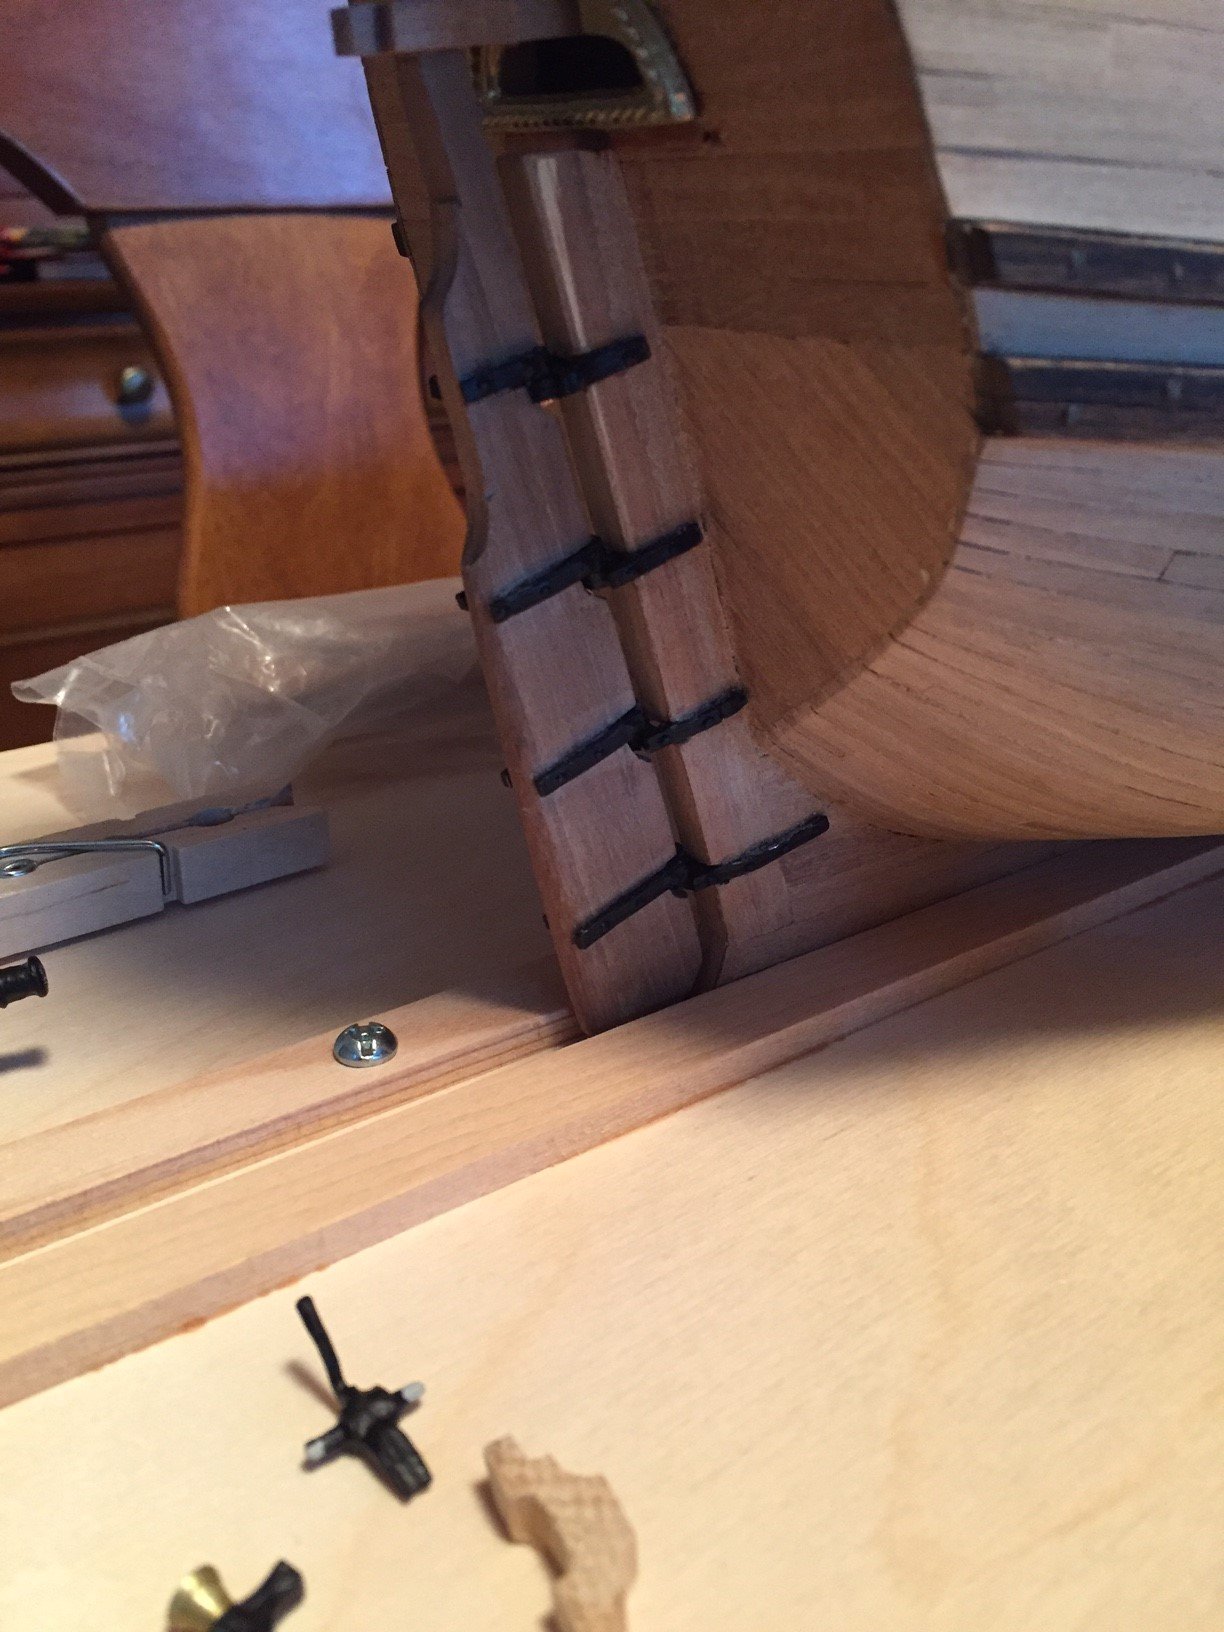
Anyways, one problem that I have from the picture below is that the chains don't reach as far down as they should according to the plans. My understanding is that they should anchor into the upper of the two lower strakes pictured. Either I put the series of strakes a bit to low and perhaps I put the chain plate a bit too high as well... and thus the problem.
Question: just anchor them into the hull and don't worry about anchoring them into the strake or try and purchase the chains to match and extend them a bit further down. This is an old kit from Mamoli and it will be difficulty to find a perfect match of the existing chains.

-
After lots of "hemming and hawing"...
Should I buy a mini lathe or not...
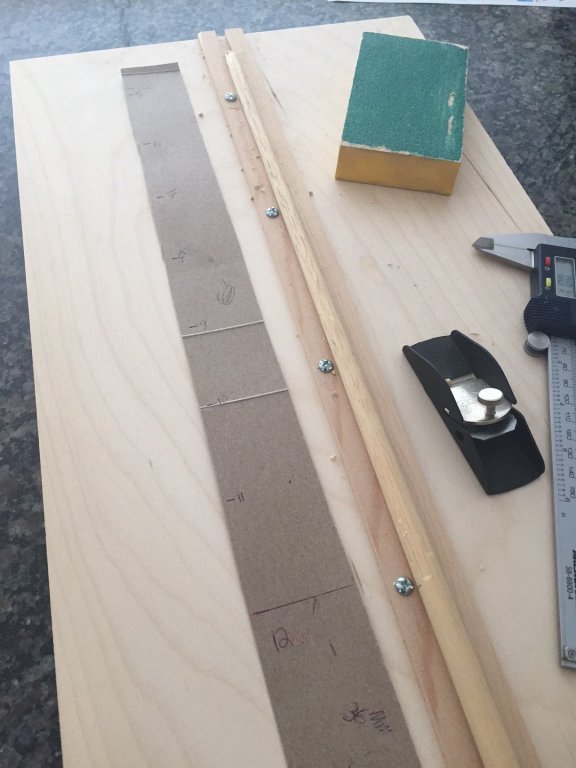
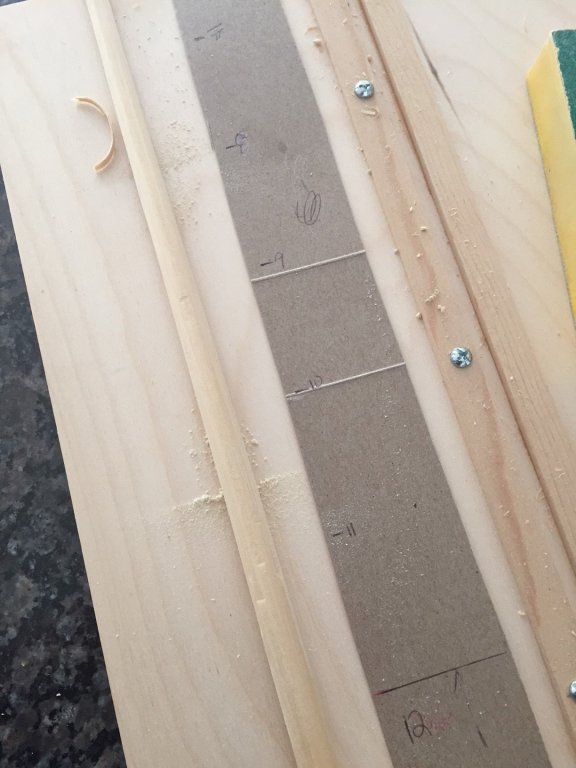
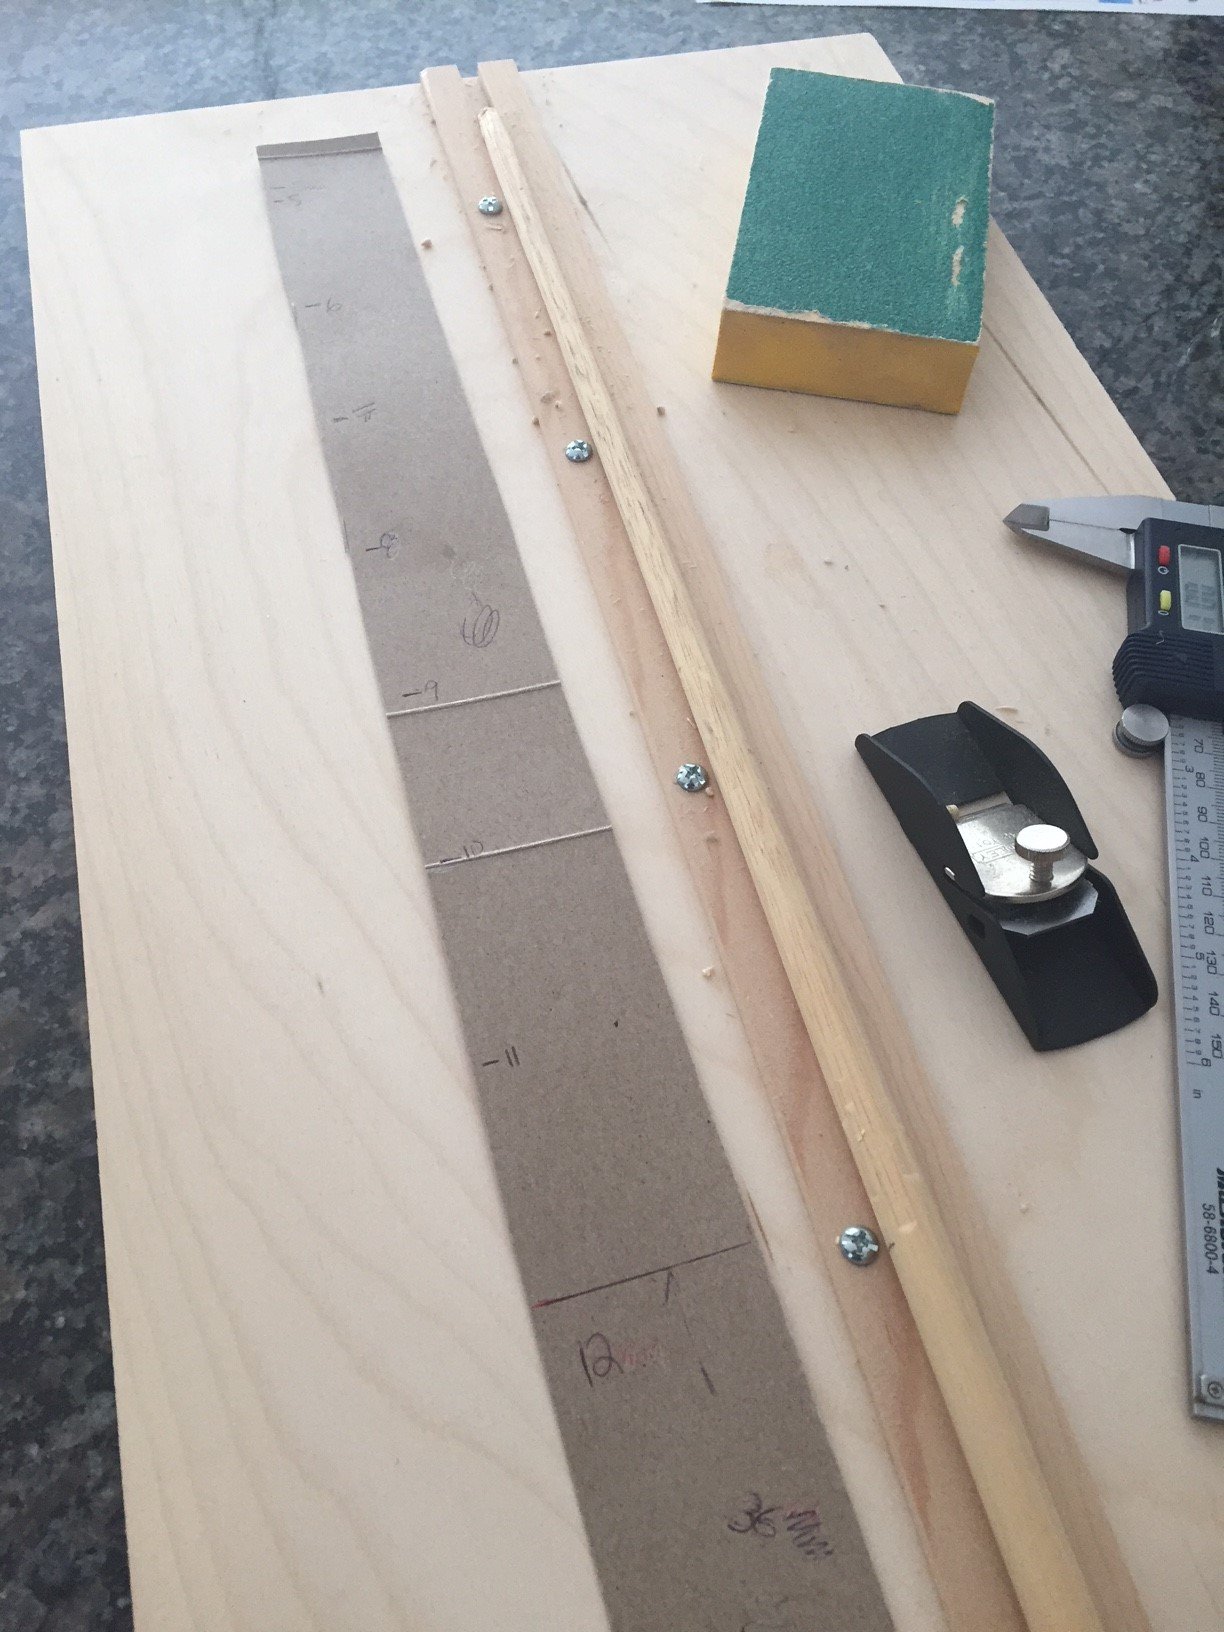
I decided to tackle the tapering of masts in the most basic way. I marked out the main mast at the point where the taper begins from 12 mm and ends at 5 mm on a piece of cardboard and dividing the total distance, that by the difference of 7 mm, marked out my hashmarks on the cardboard, and began with the mini planer to strip the dowel from the end to the base in ever less increments, constantly measuring with the caliper. I kept the dowel at about 1 mm larger than need and plan to final finish the taper with sandpaper... which I ran out of, thus the lack of pictures with final finished mast.
This process took me all of 10 minutes with the new sharp planer that I had and was pleasantly surprised at how well it turned out. Glad I saved some money in the non purchase of the mini lathe but would still love to own one nevertheless.
-
Thanks Ian/Popeye for the kind regards...
I was Ian, going to put a Danish or Tung oil finish on until I saw your Brazzera finish... and that easily convinced me to do the wipe-on poly.
Now I am contemplating what to do next with the masts and tapering of them. I feel a bit intimidated with the prospects as I will likely taper them with just a hand mini planer and sandpaper. Would love to invest in a proxxon mini lathe...
-
As more evident on these images...


- zappto, popeye the sailor, mtbediz and 1 other
-
 4
4
-
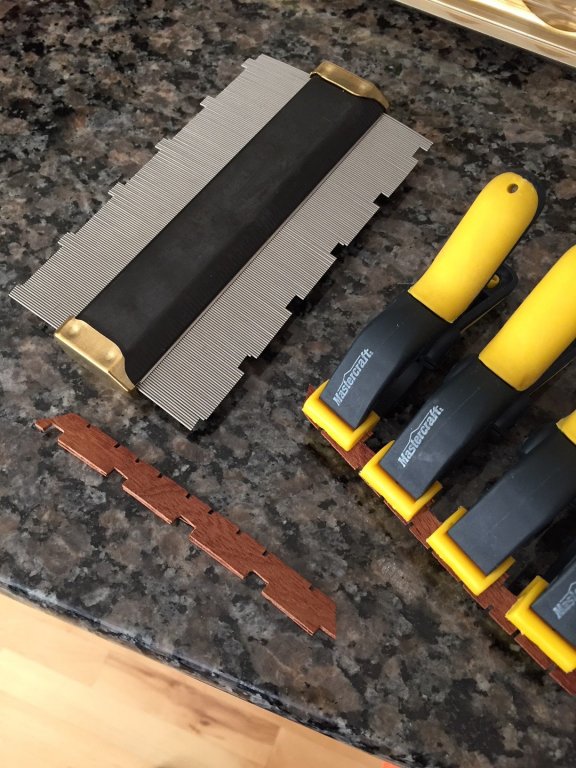
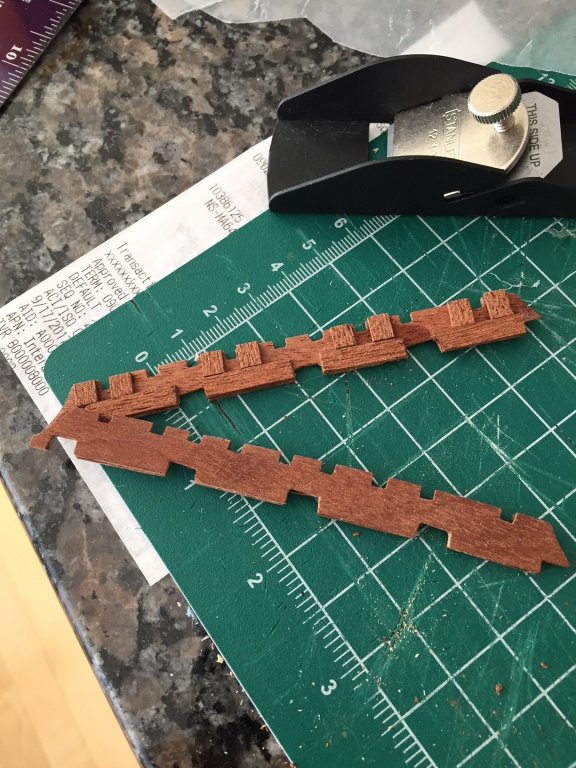
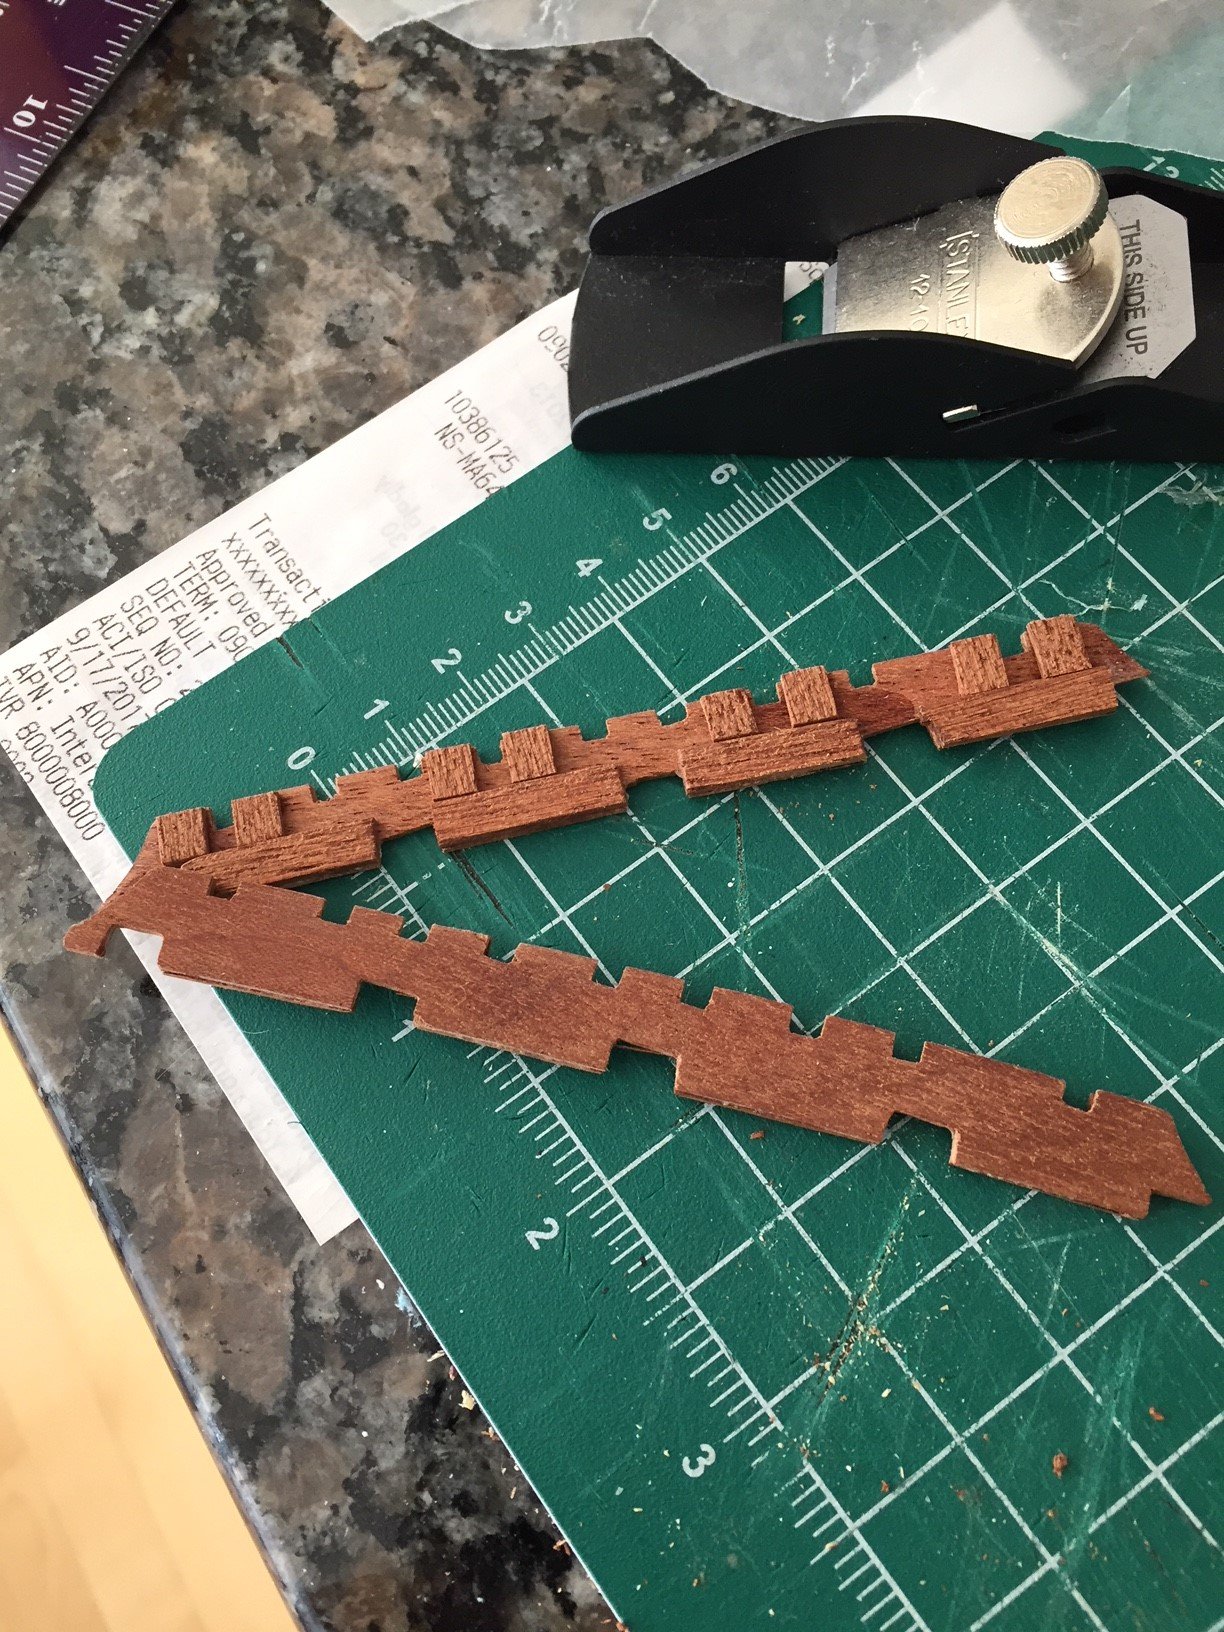
And I used a contour gauge to mark out and notch the chain plates, also further notching out the spaces to allow the deadeyes to fit more easily, further adding a mahogany strip on the outside, prior to affixing the plates on the hull.
- zappto and Seventynet
-
2
-
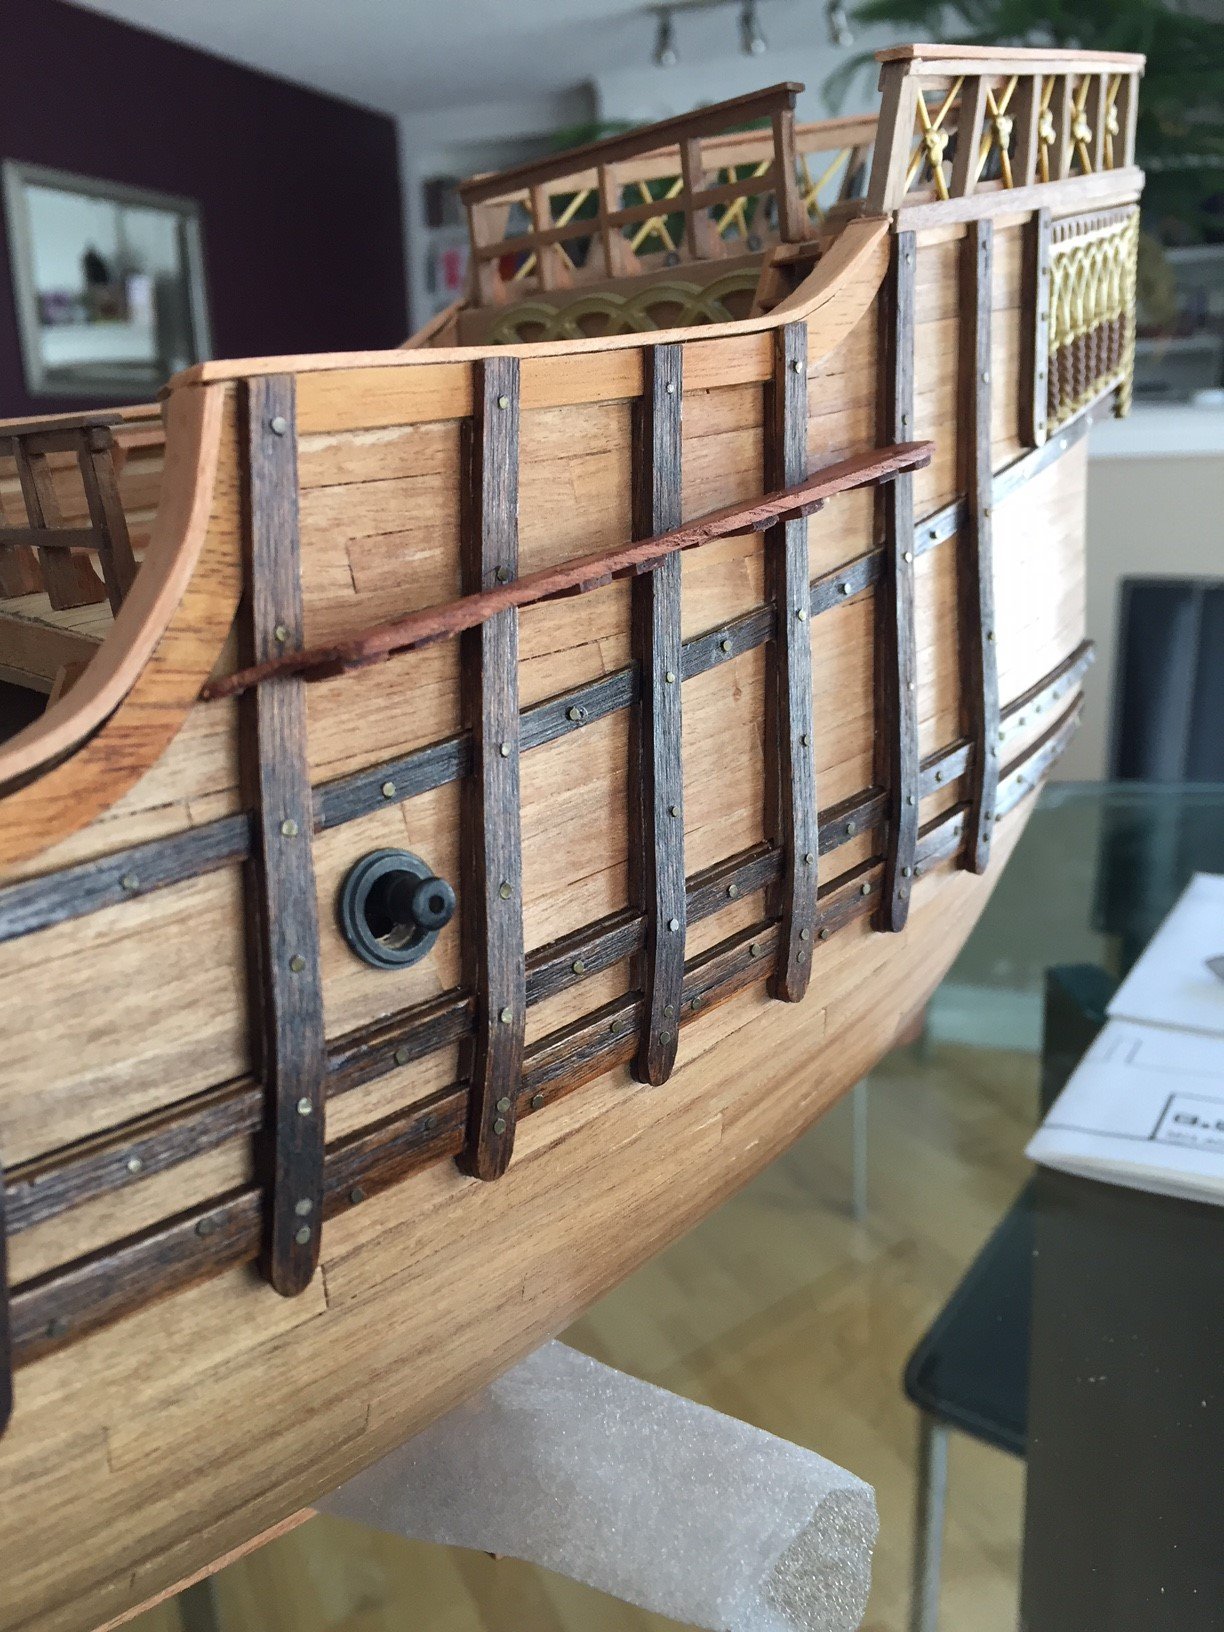
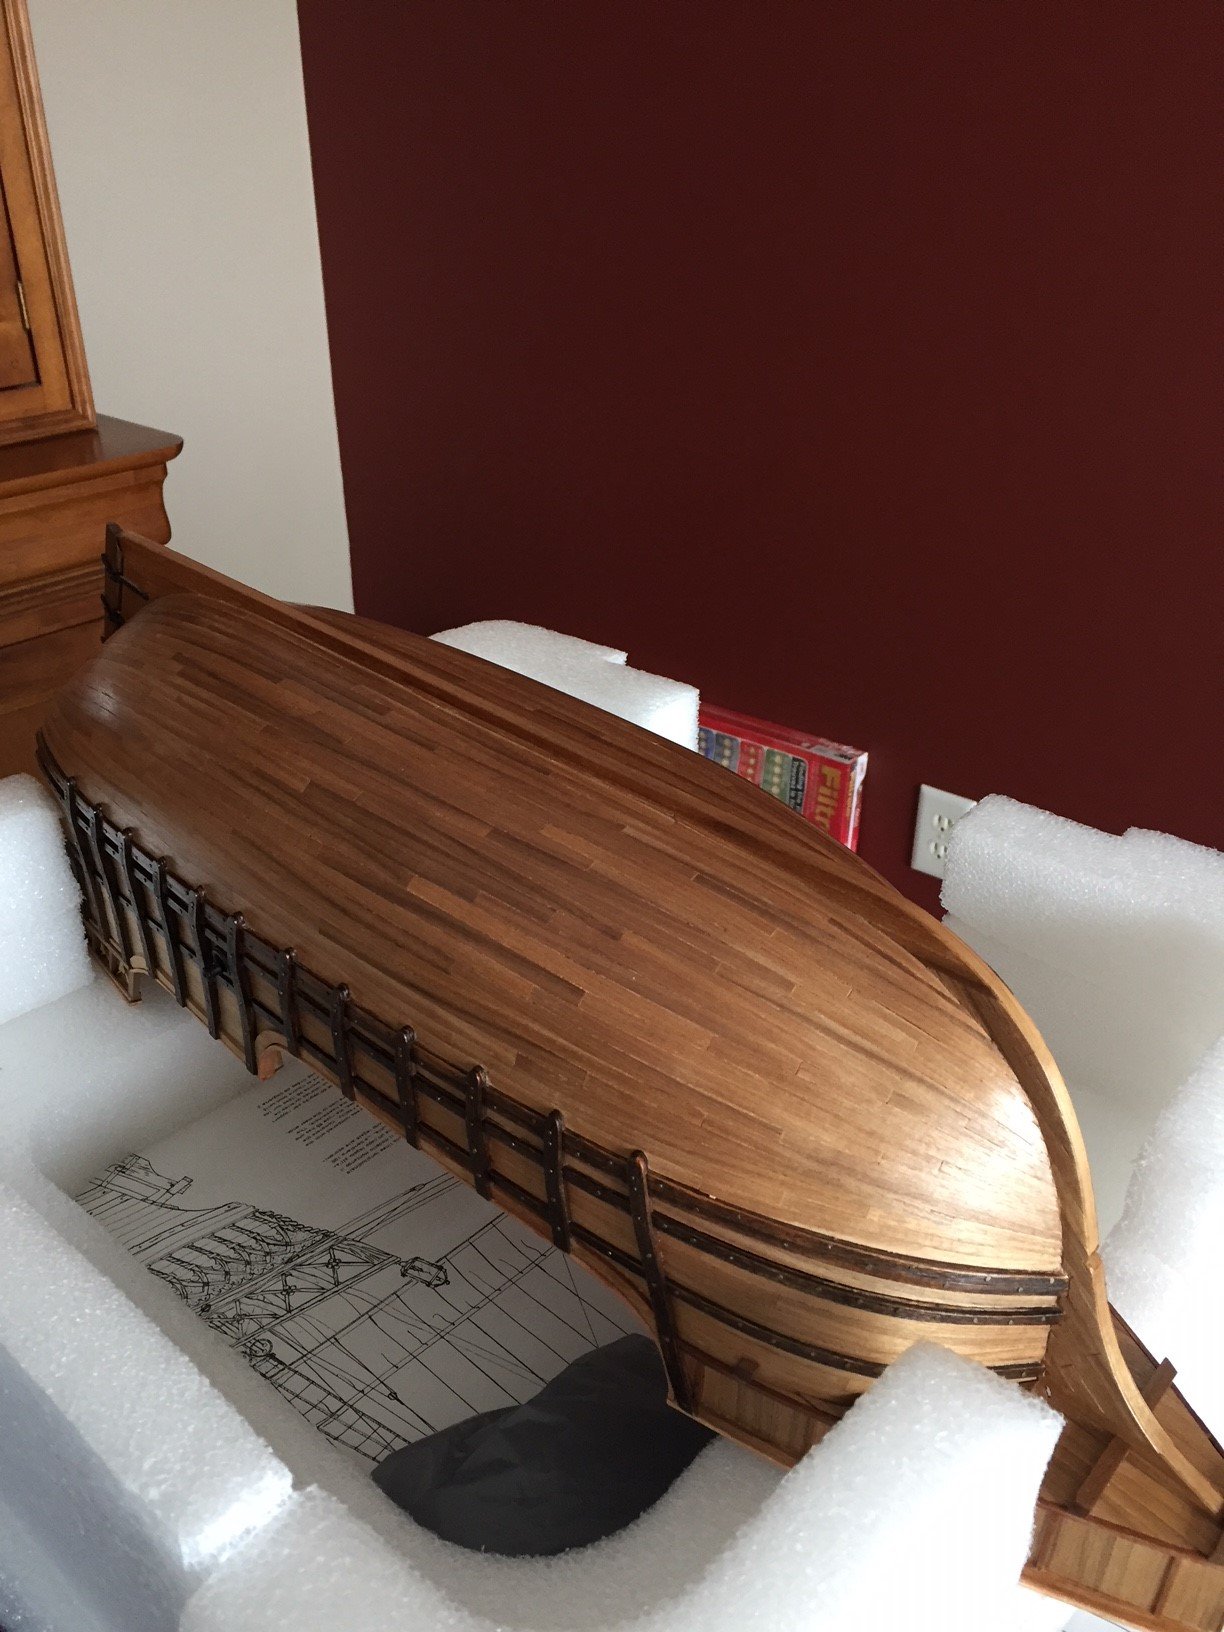
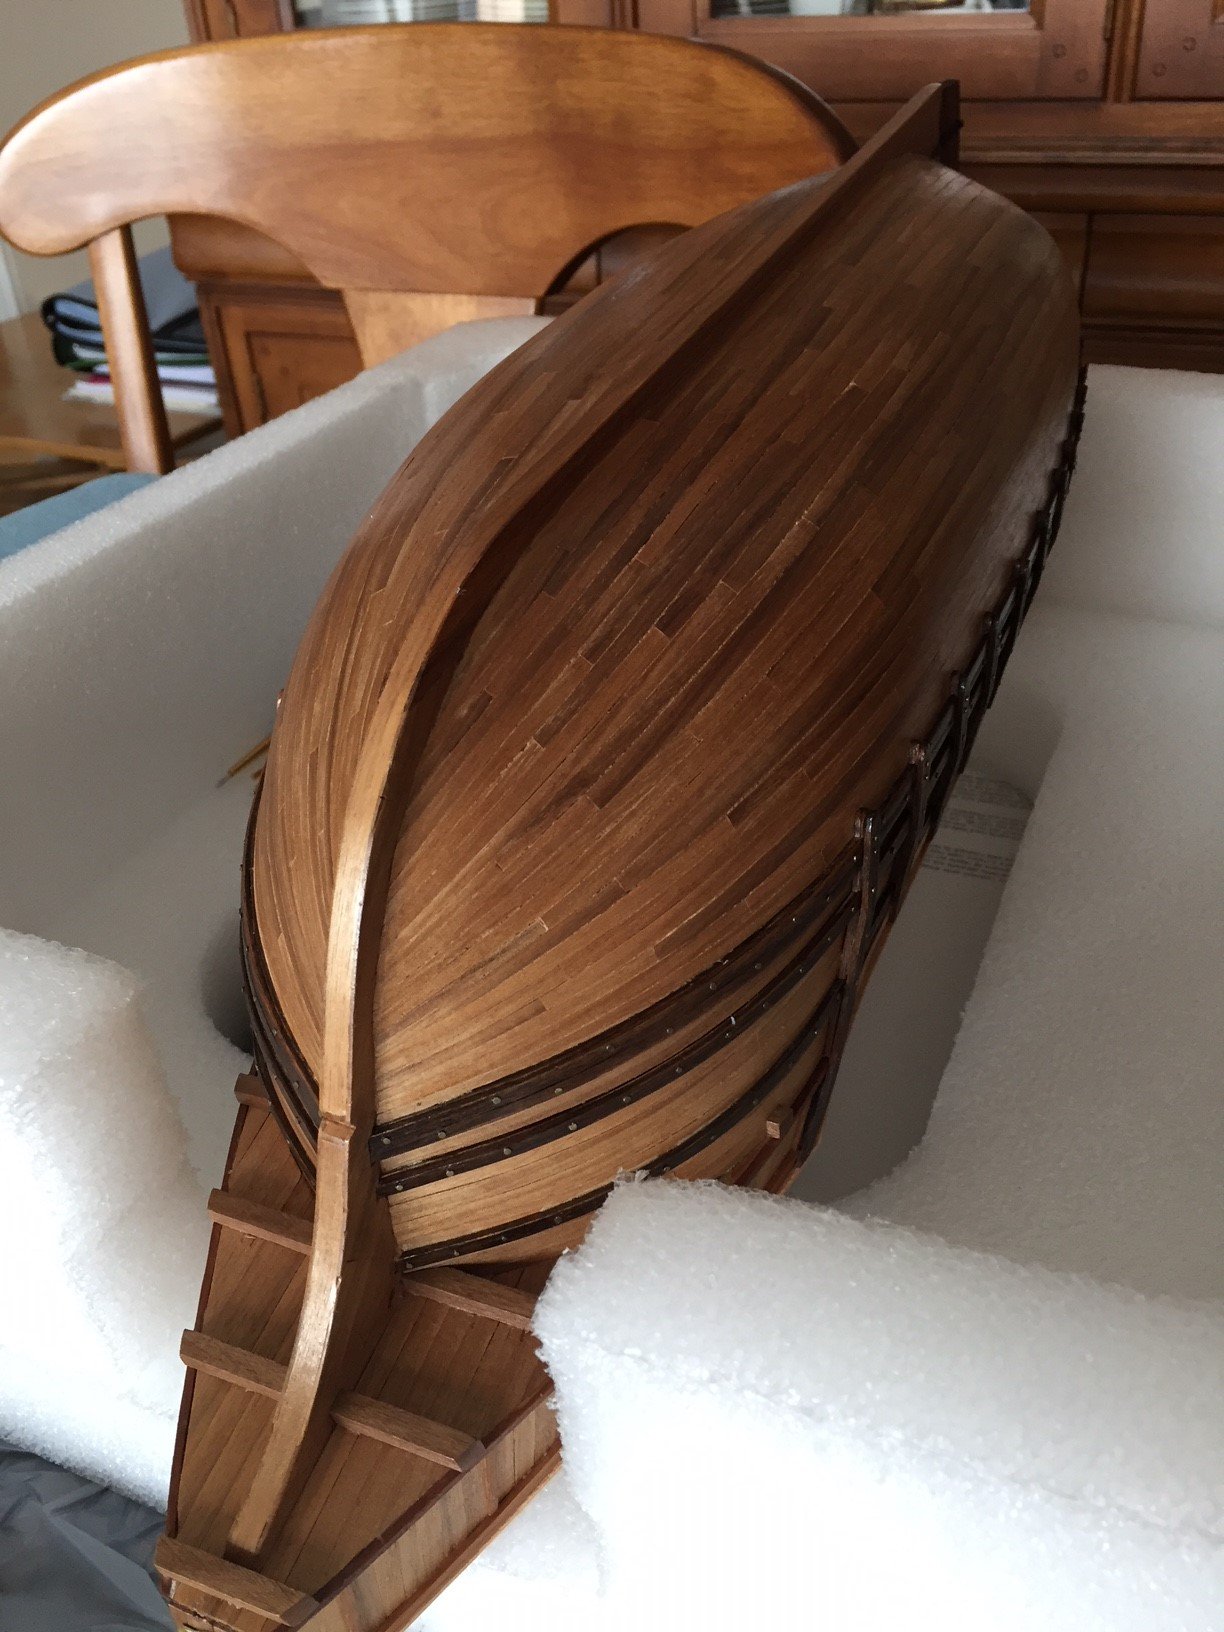
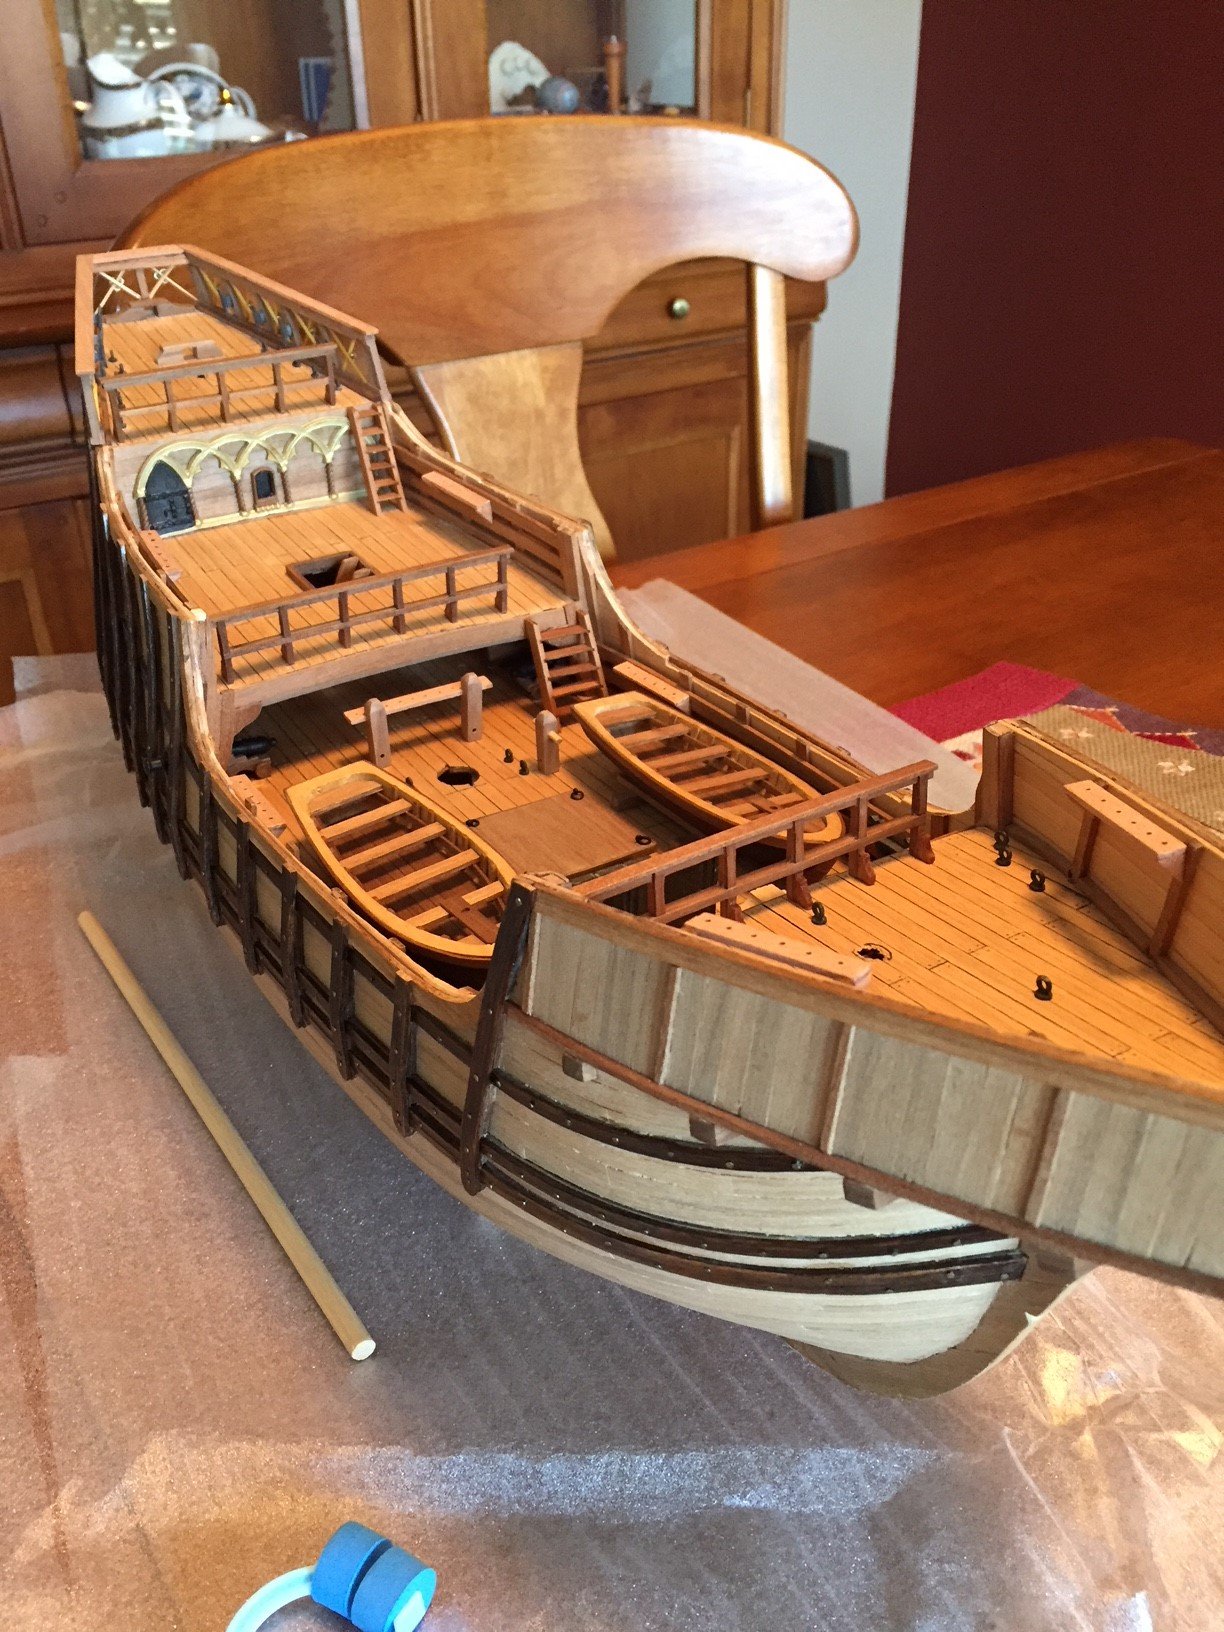
And here are images of my hull with 3 coats of satin wipe-on poly. The images/photos are taken with the fresh, most recent coat of finish, and appear much more glossy than what they really are...


-
Hi Scott, thanks for the kind compliments... I also peek in quietly to your Mamoli build log.
Actually I found the castings to be very good in my kit.
Thanks Ian, trying to keep up to your level of finish on the Brazzera. I will likely do 3 coats of finish and see how it looks. Do you think a 4th coat will add extra depth to the finish?
Thanks Popeye, the finish is satin (Wipe-on Poly). The ship's boat are loose for now as I turn the S. Maria over and upside down to do my finish coats for the time being.
-
Thanks again Popeye for checking in...
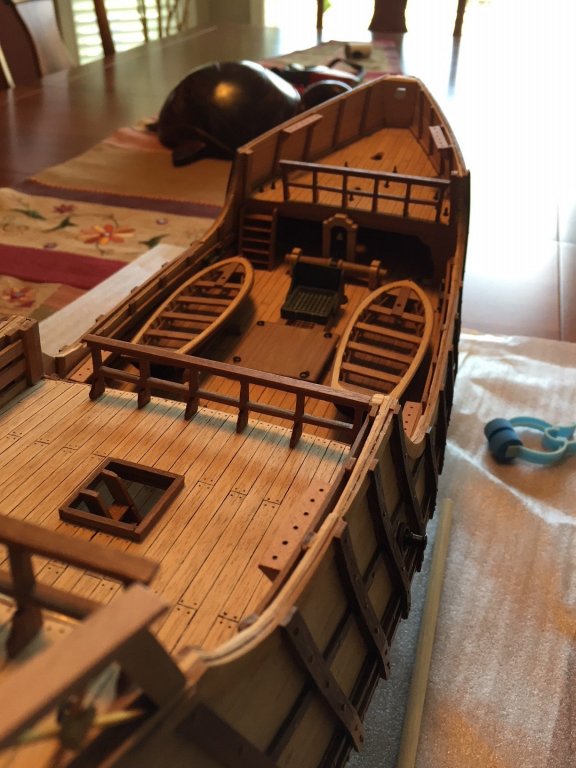
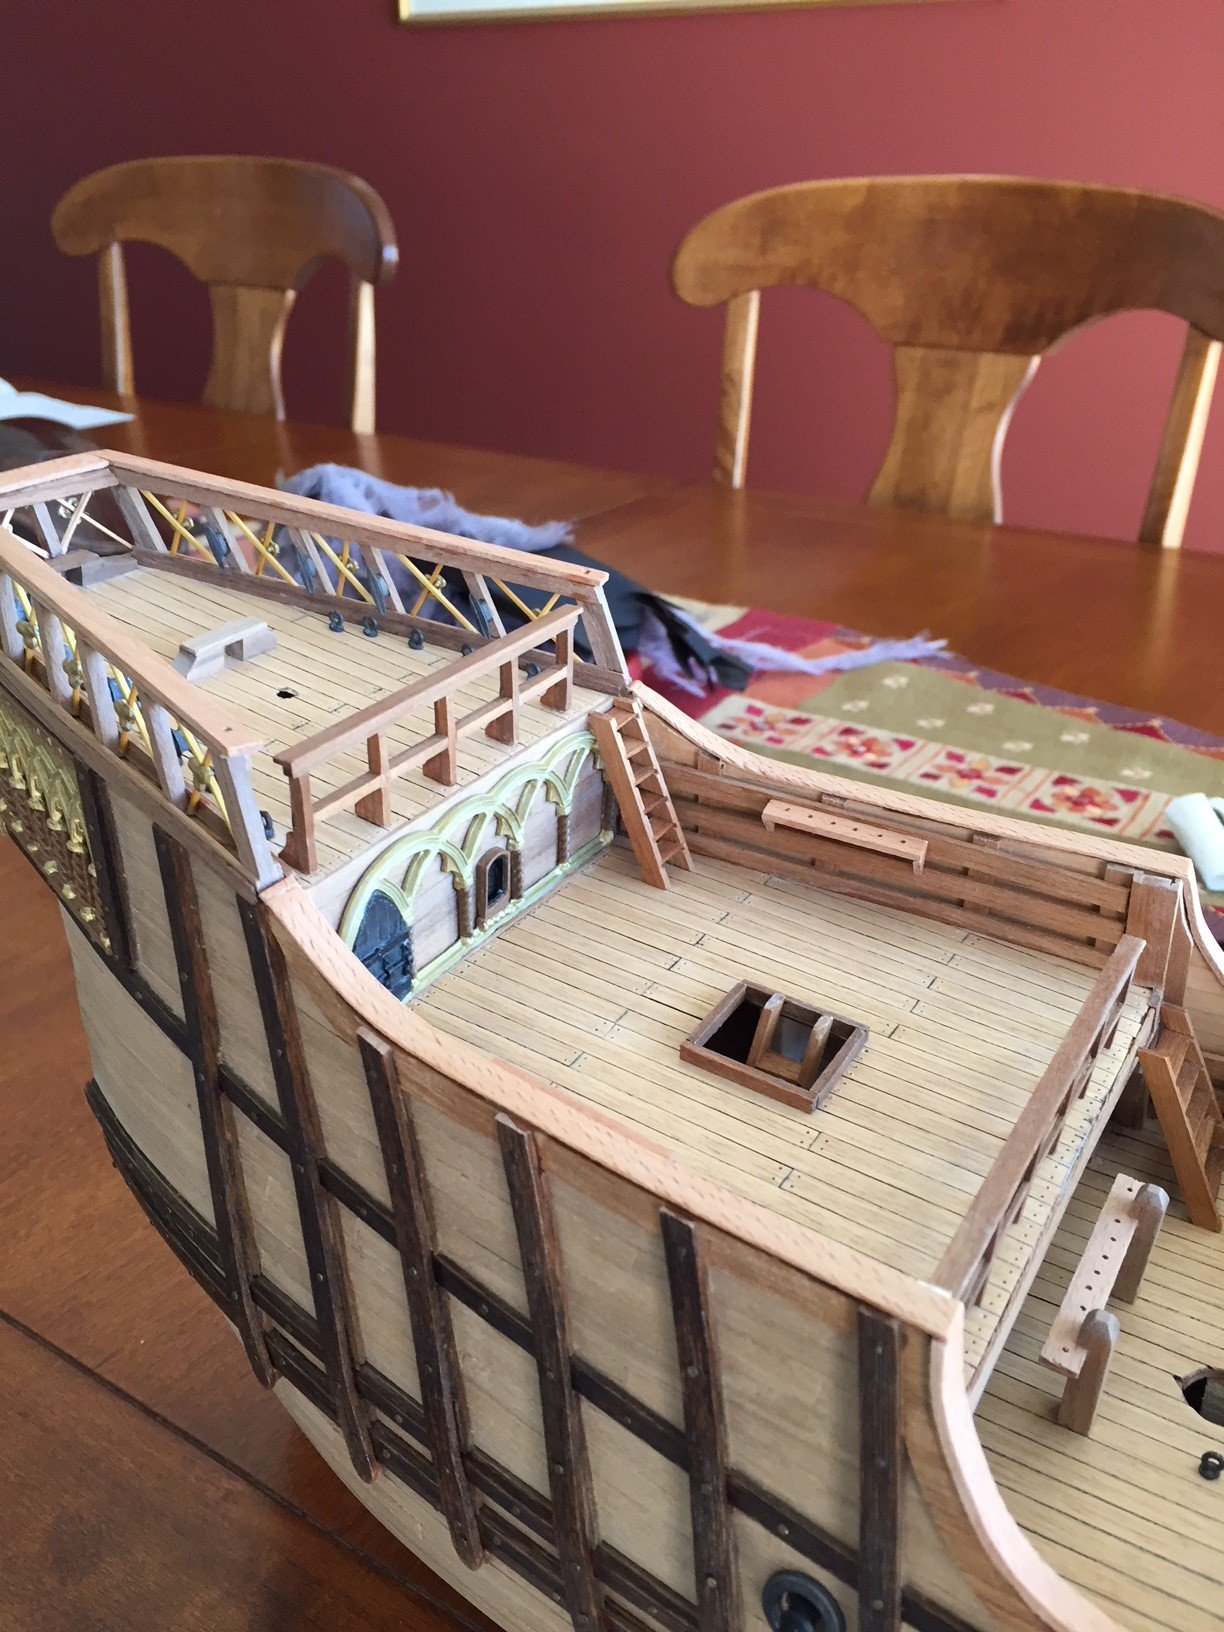
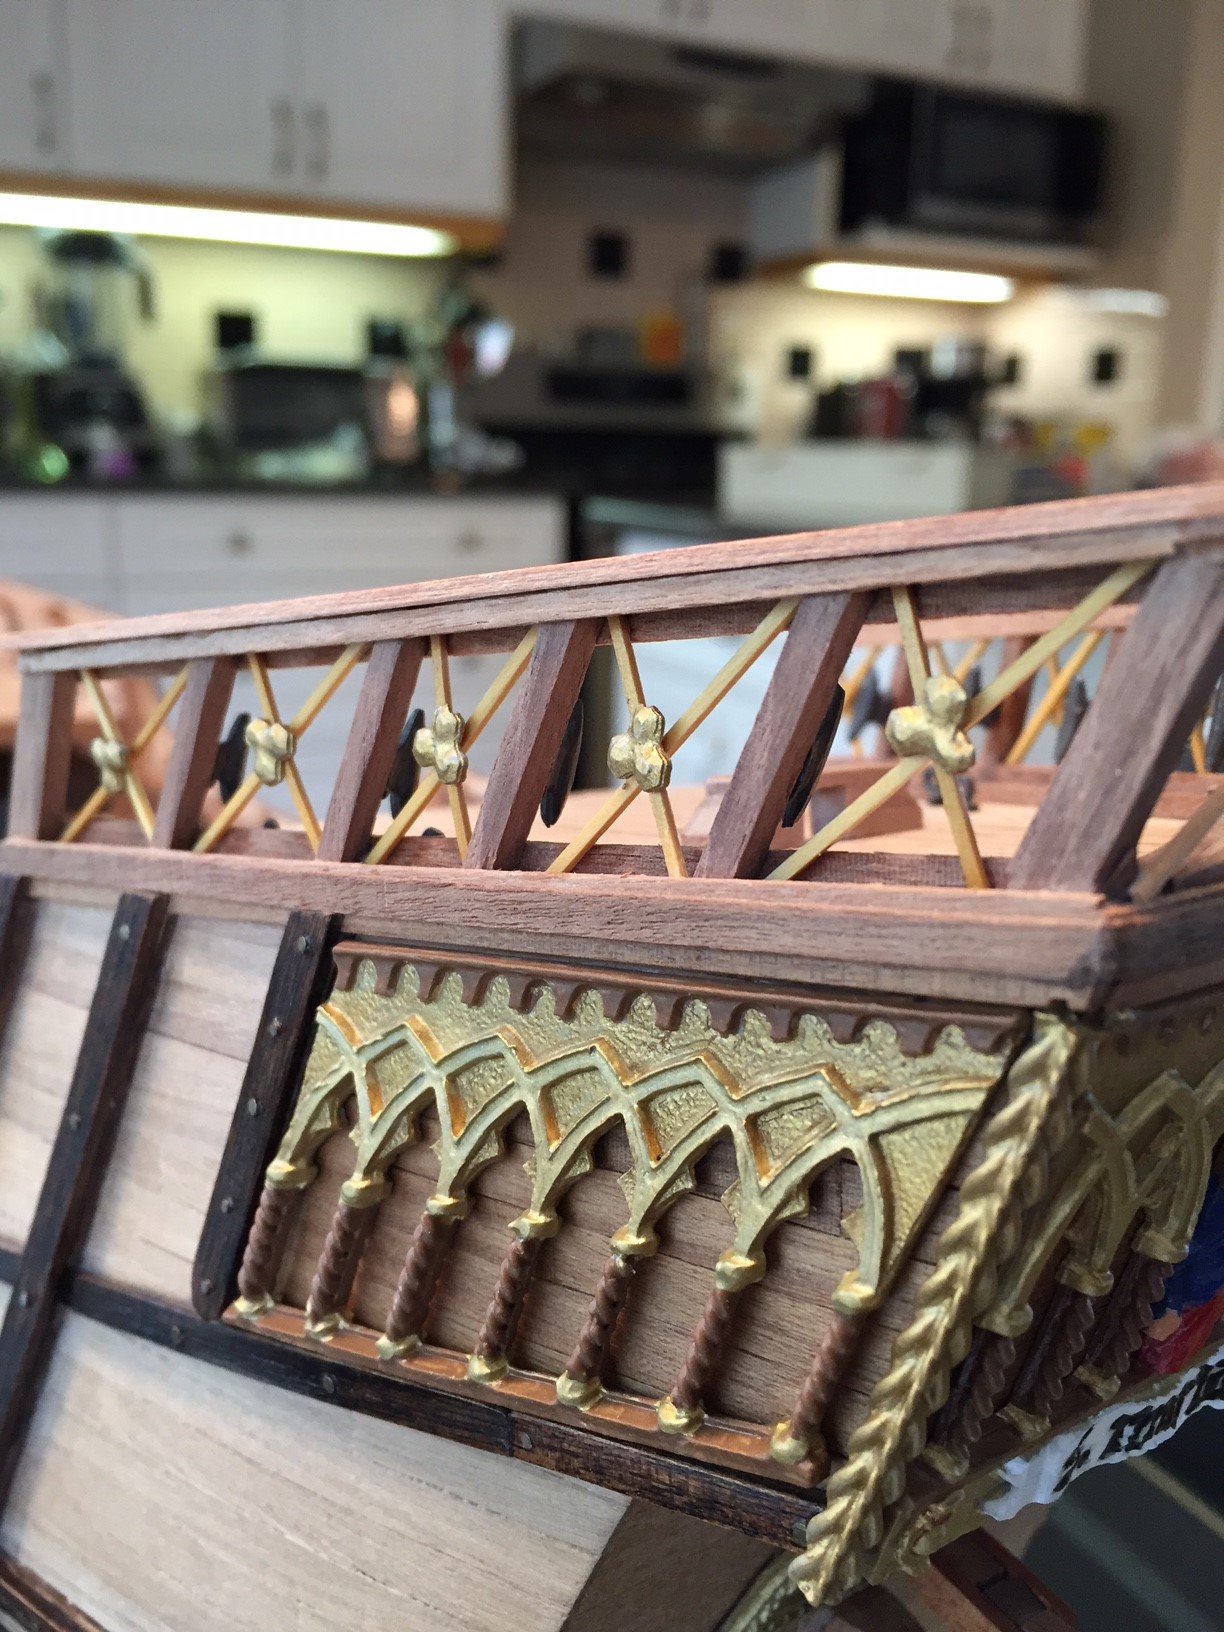
On this update, I have to report that I spent hours getting the cap railings to fit properly. I would have to additionally say that I am now an expert at steam bending.
The cap rails are beautiful beechwood strips and once soaked and steamed, and once bent on the flat iron, they contorted and twisted lengthwise. So with the main/middle deck and having the cap rails bent at each end with steam bending, I found them to be a real challenge to place them properly. The foredeck and half deck were relatively easy. The pictures below have the Humbrol varnish applied and look very good in my opinion.

-
Hi Glenn, you have created such a wonderful build log...
I love the historical details, the pictures of the real ship, planning and solutions above what the Billing kits allow, and the workmanship of course.
Perfect in all regards!
-
Thanks JB... The Mamoli kits build out very nicely in my opinion.
Overall I am very happy with the kit... The instruction material is weak, also the setting of bulkheads and decking can be a real challenge at the beginning of the build to get right, given my older kit and non laser cut bulkheads... but once past these issues, the kit can really shine, especially with regards to the supplied strip wood and supplied castings.
-
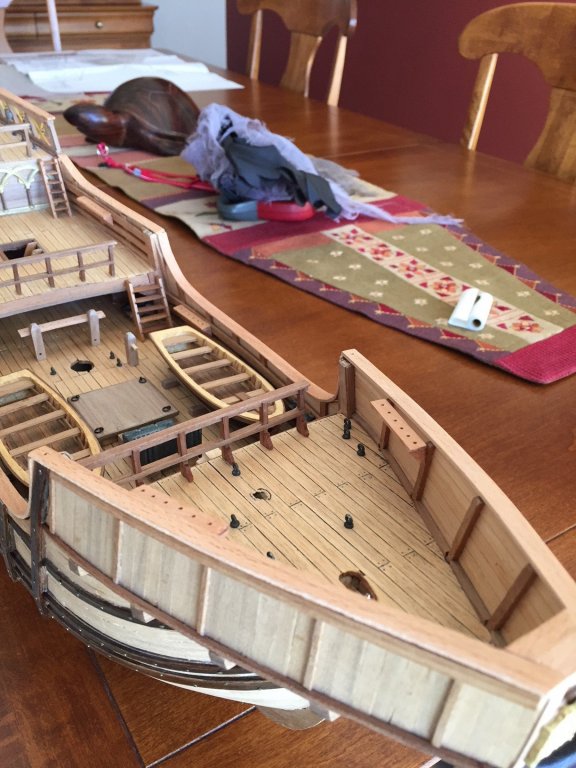
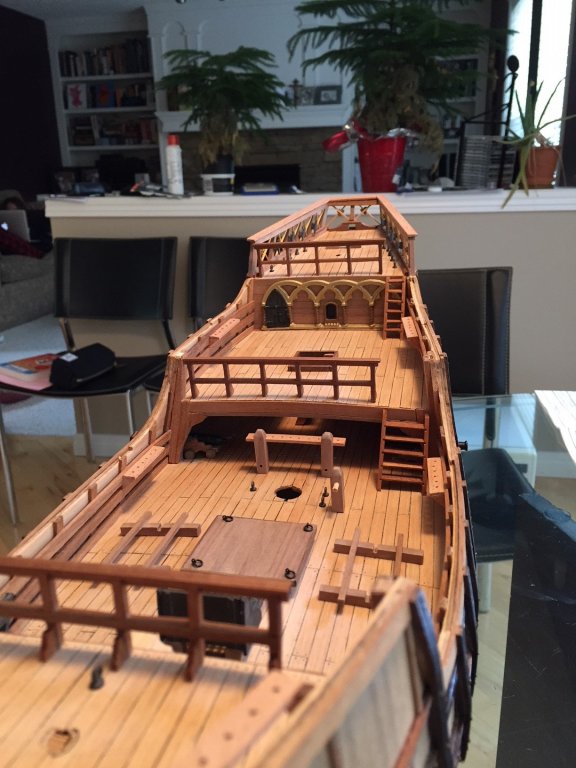
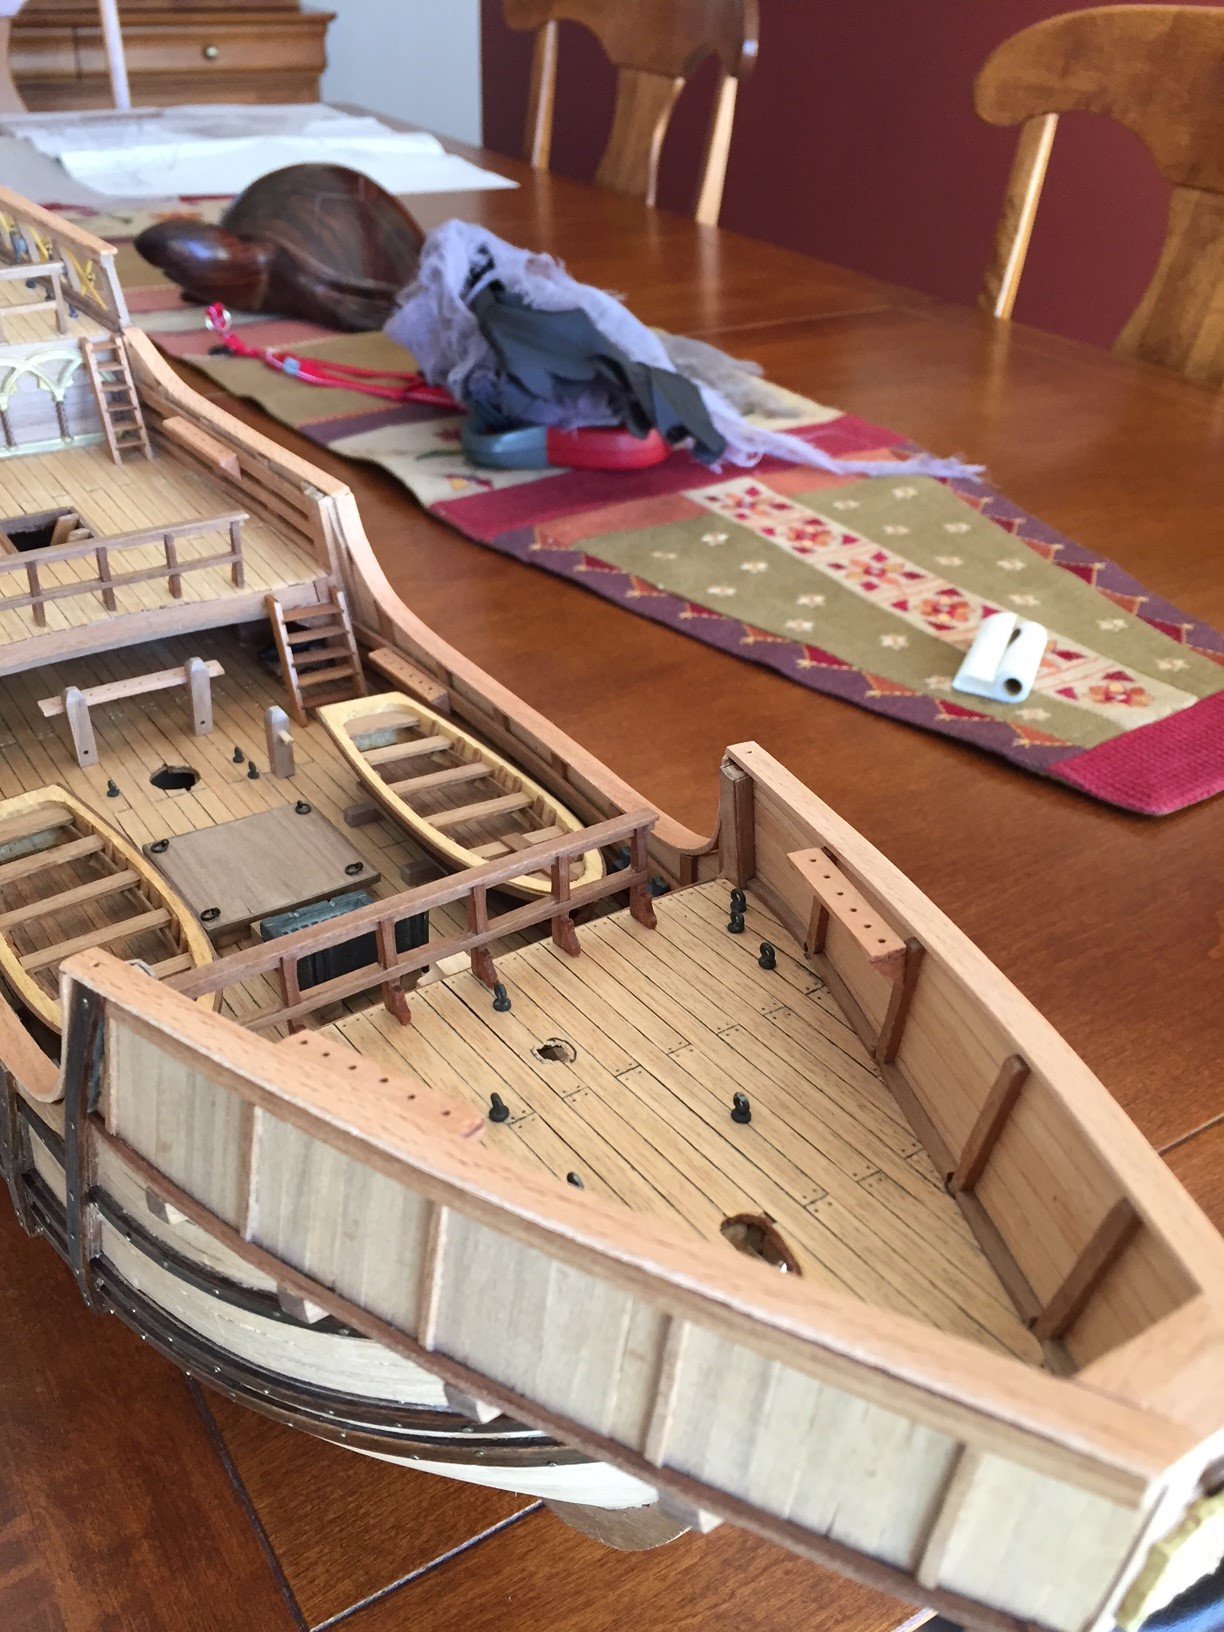
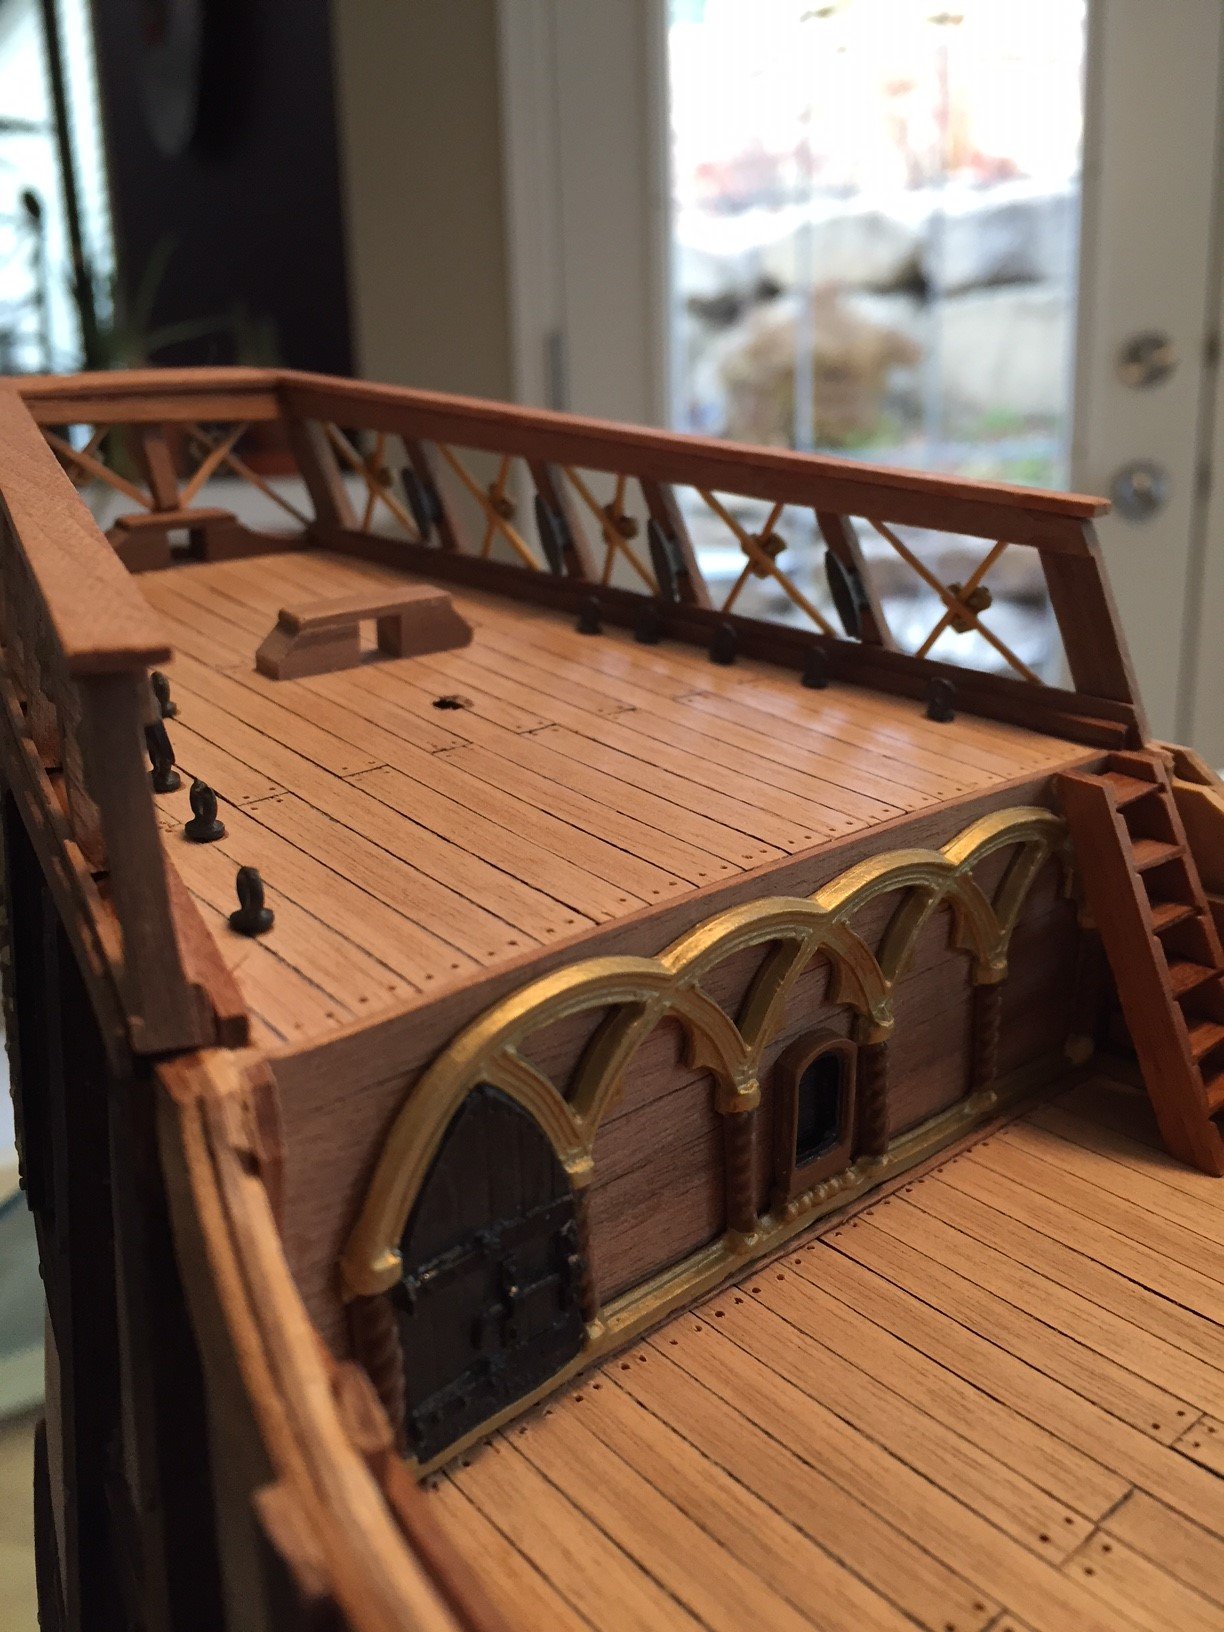
And here are some images of the decks with the railings installed, just recently varnished with Humbrol matt varnish.
The lighting is perhaps not the best with these images...

- mtbediz, Seventynet, zappto and 1 other
-
4
-
More details to report...
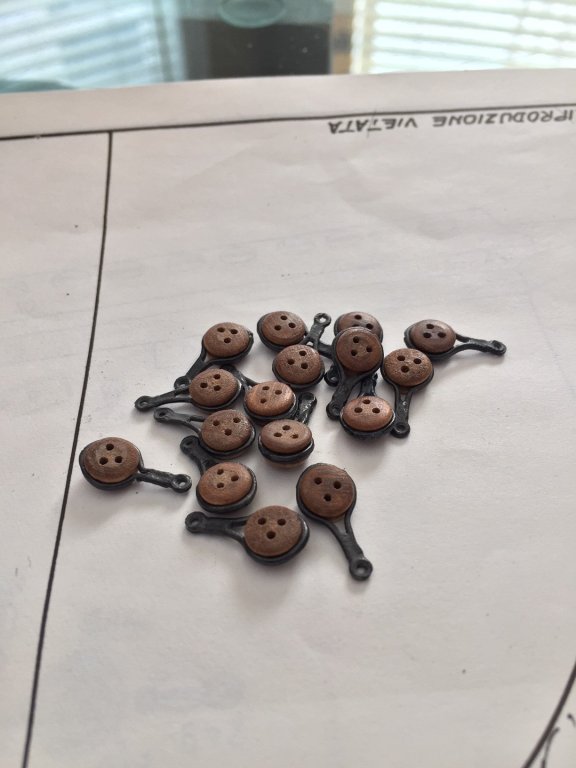
Lots of fun adding some of the ornamentation to the ship. I believe the casting are a brass based metal, a soft, easy to bend material. I painted them with a primer and then added the acrylic paint colors according to my own instinct. The recommended color scheme by Mamoli is certainly not to my liking. I must admit that the castings are very well done and in my opinion are looking great on the ship.


-
-
Thanks Popeye, Mustafa for your fine compliments... much appreciated.
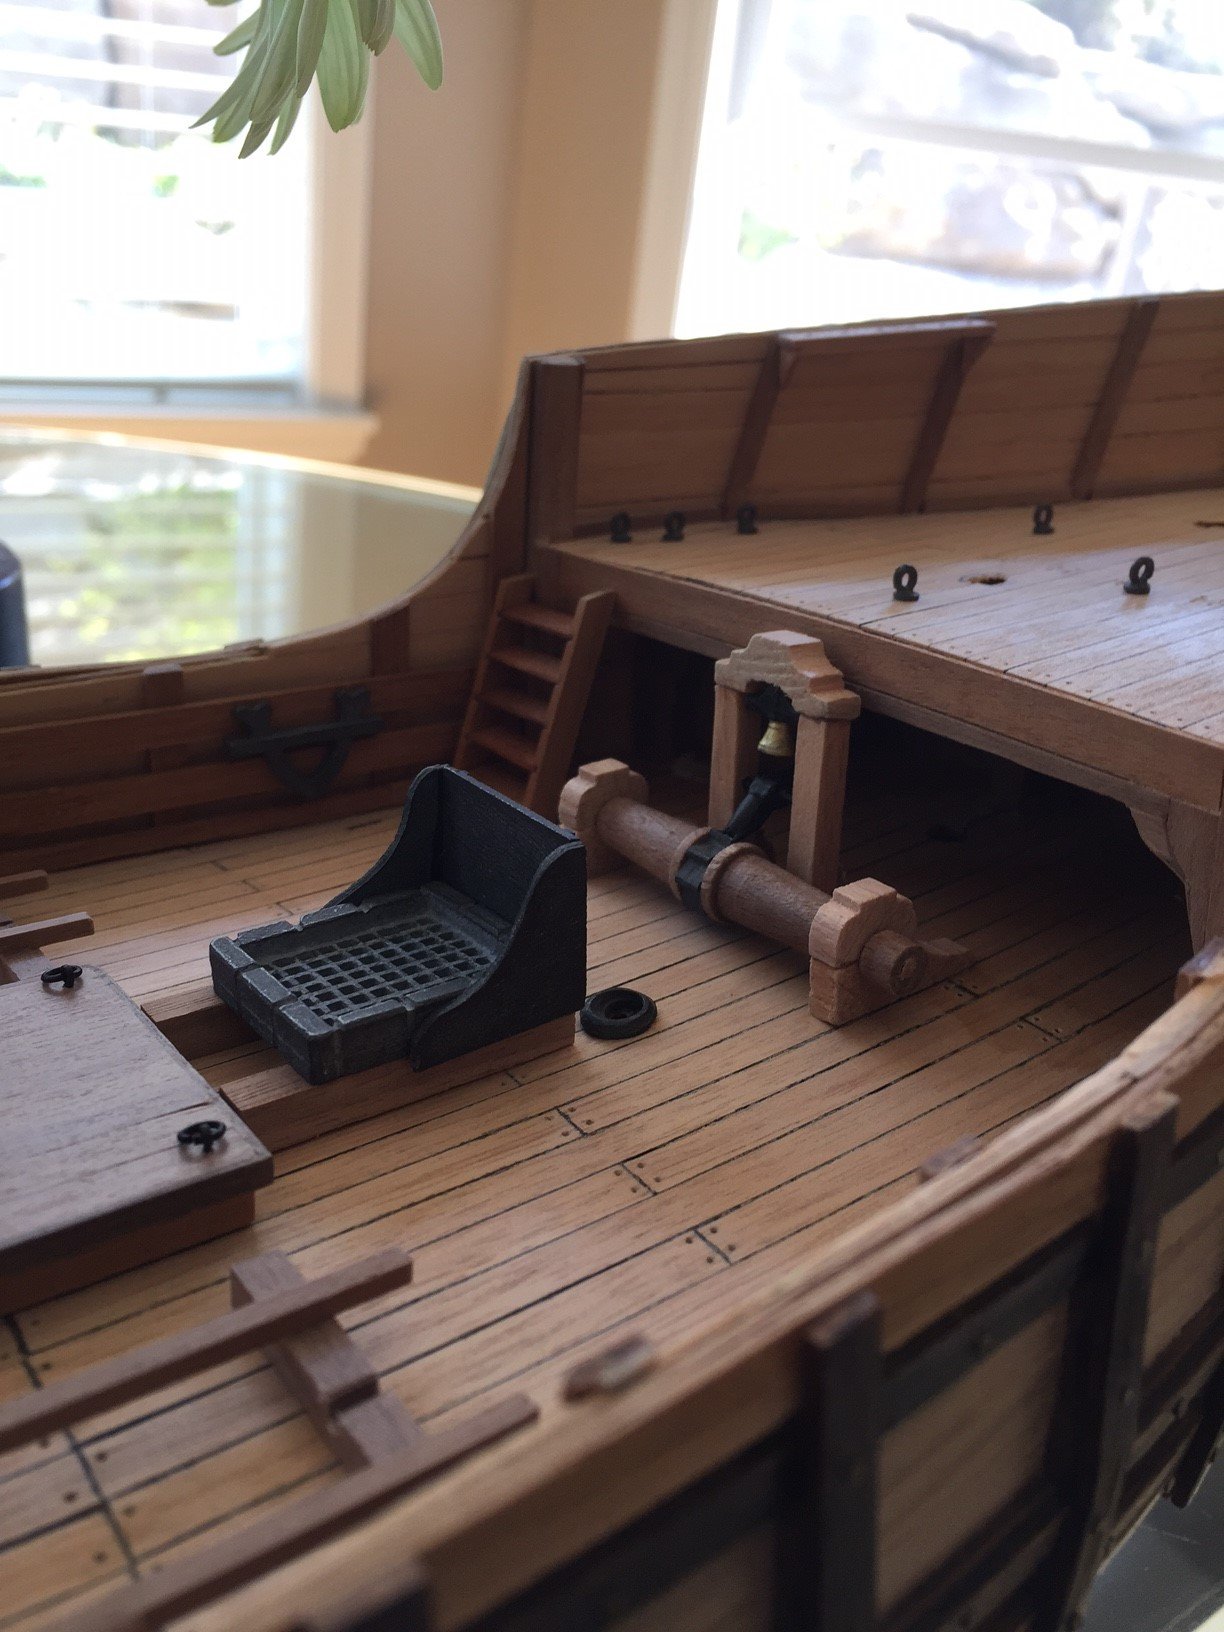
The stove was the kit supplied stove, unaltered and unpainted. I was debating whether to accent some of the features of the stove with paint.
-
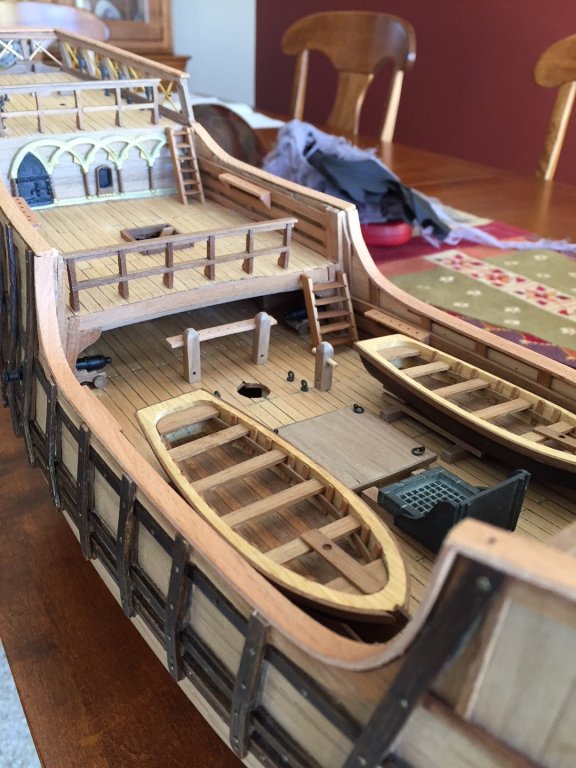
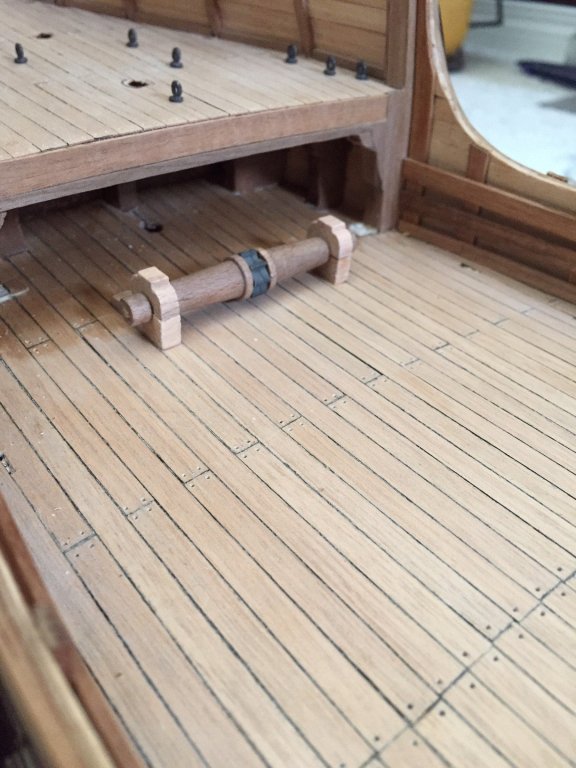
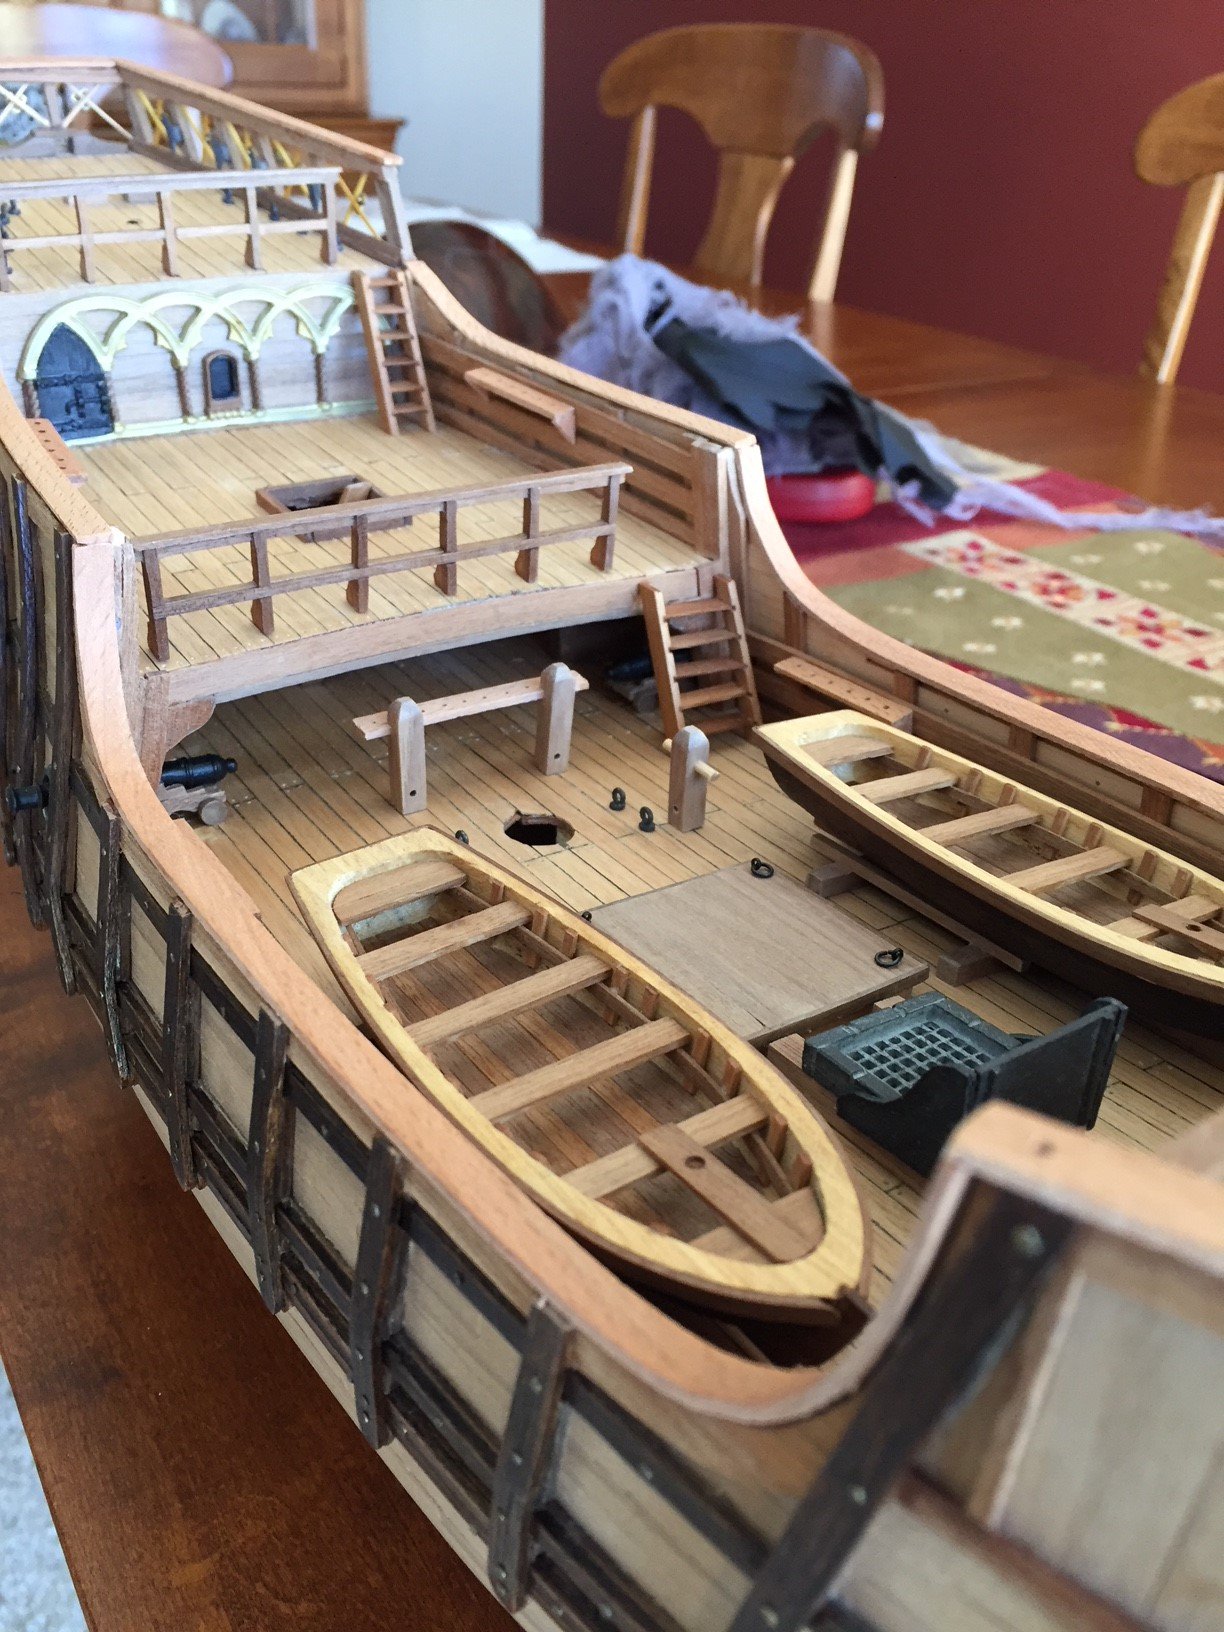
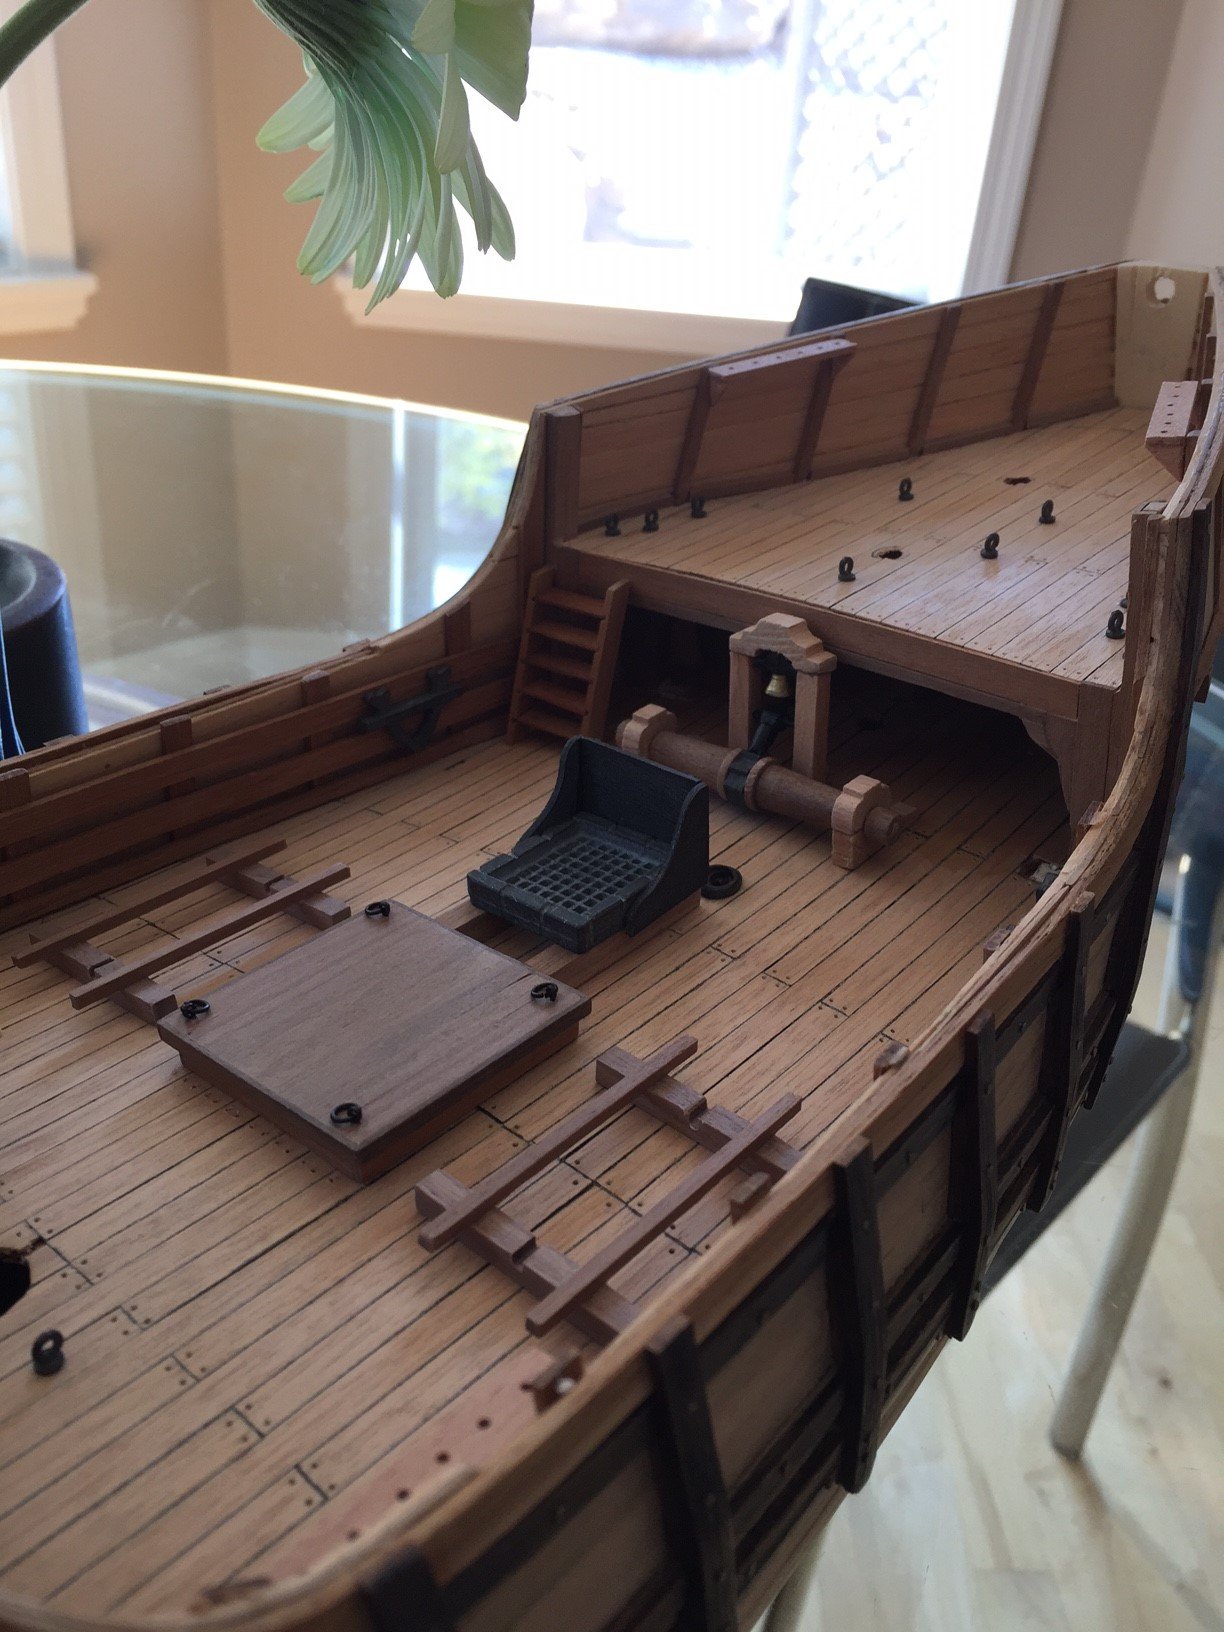
And more details on the deck...
the hatch, stove, and pinnace cradles glued down onto the deck.


- Seventynet, BenD, mtbediz and 1 other
-
4
-
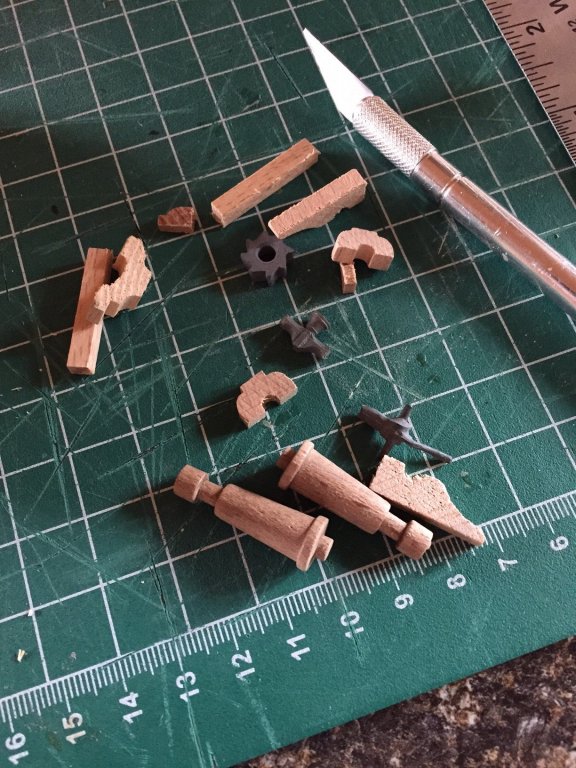
The windlass... the belfry parts...
-
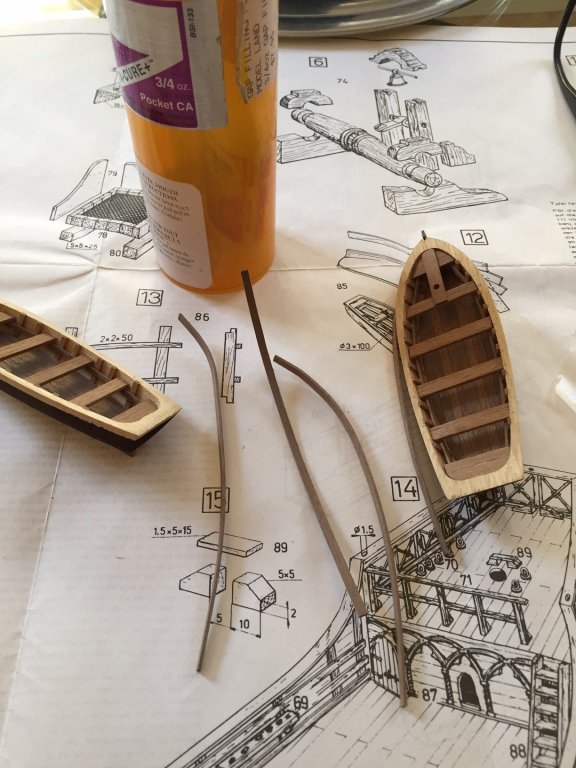
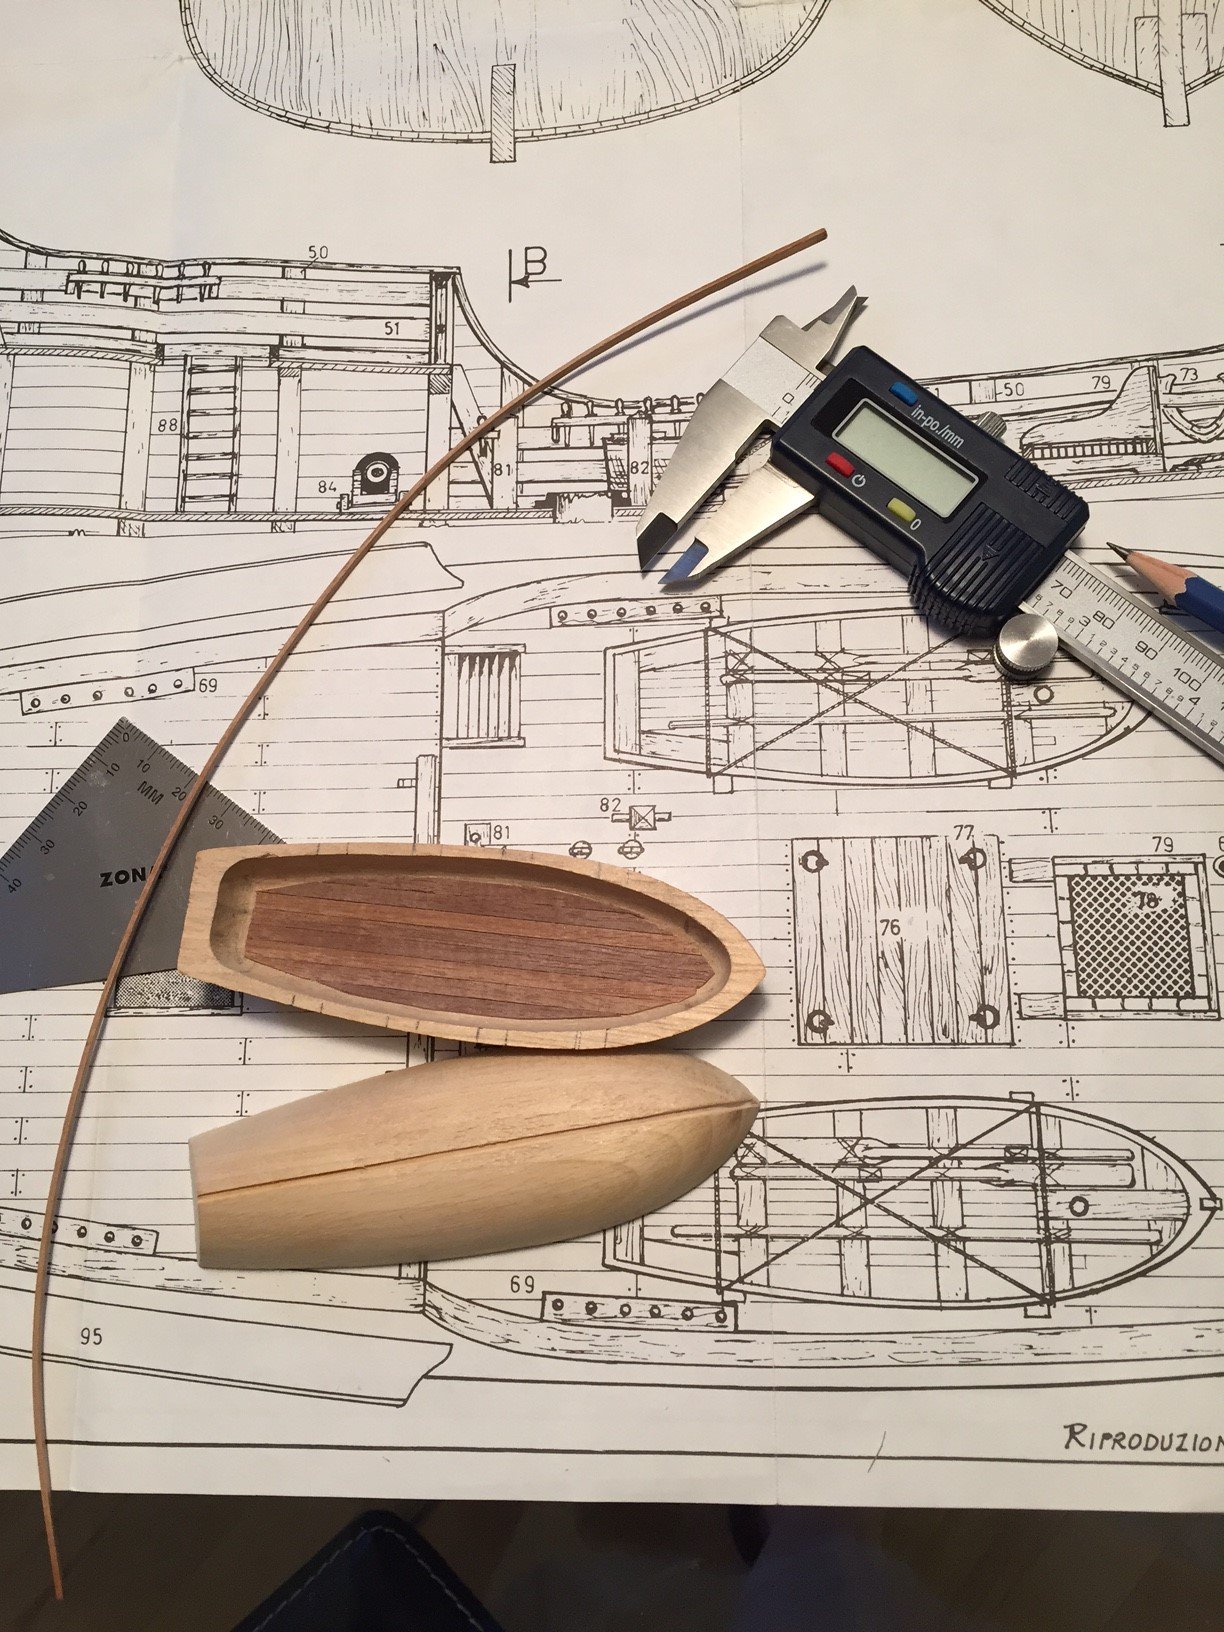
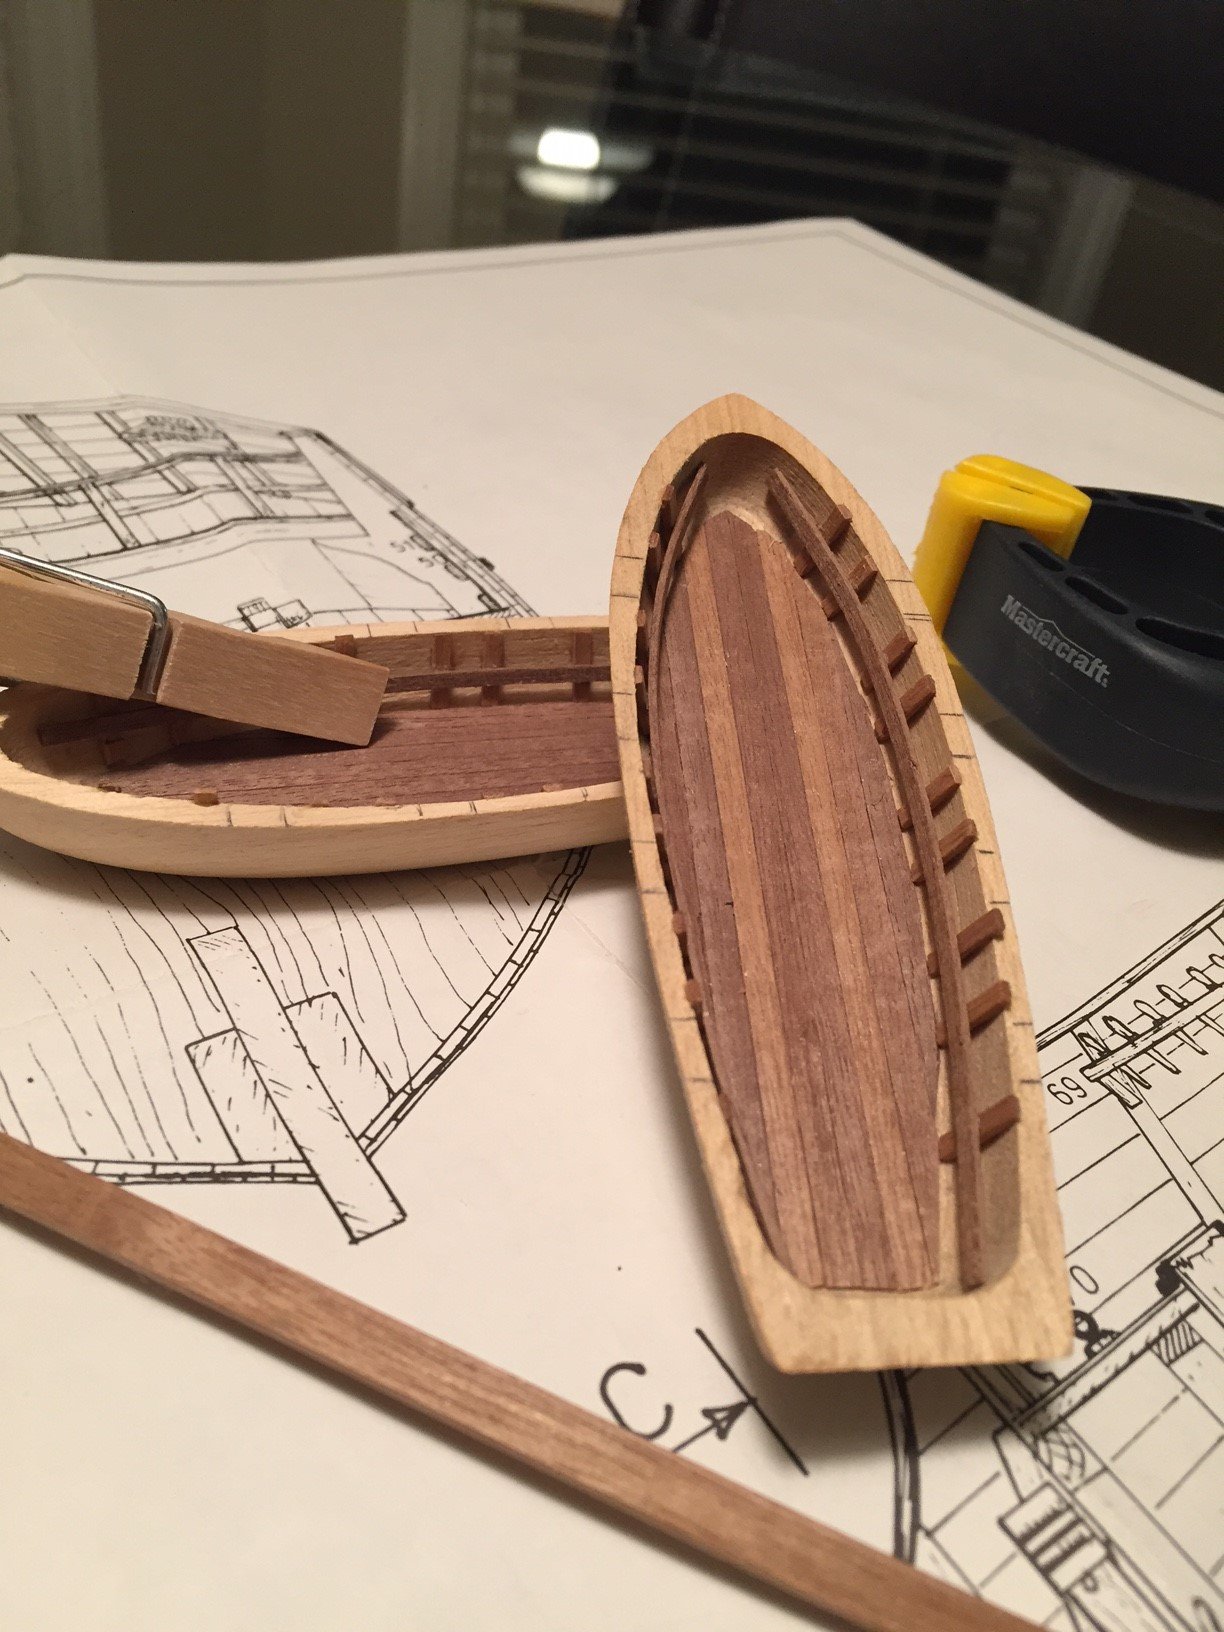
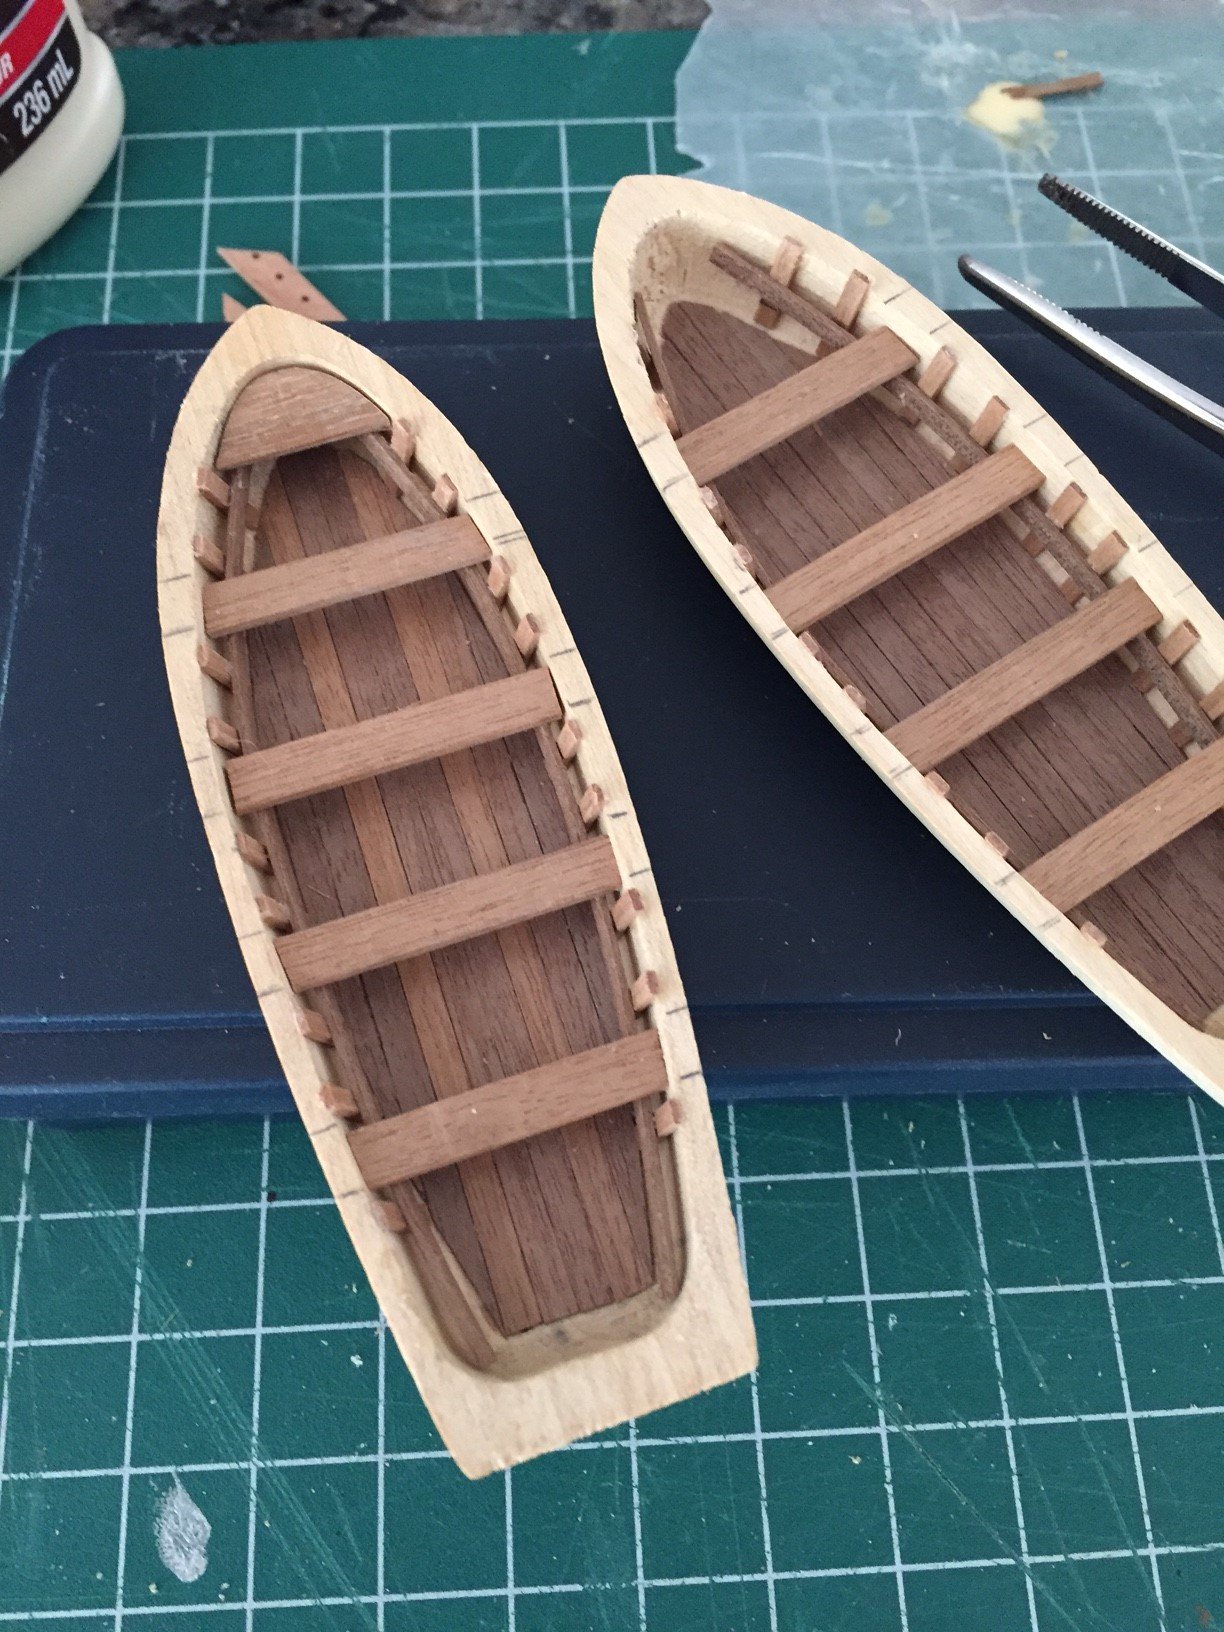
More time to post some progress...
I am very happy how the smaller boats, the pinnace's came out. A few add on modifications compared to how Mamoli set them out to be built...


-
Yes Ian, I was going to do Danish or Tung Oil but your finish with Wipe on Poly is stunning...
Did you wipe or brush it on?
-
Wow, what an amazing job Ian...
Very nice!
One quick question, how did you do the finish on the hull?
Wipe-on Poly? It's perfect!
-
-
Thanks Slideways... do not know if I would say with ease.
Cheers!
-
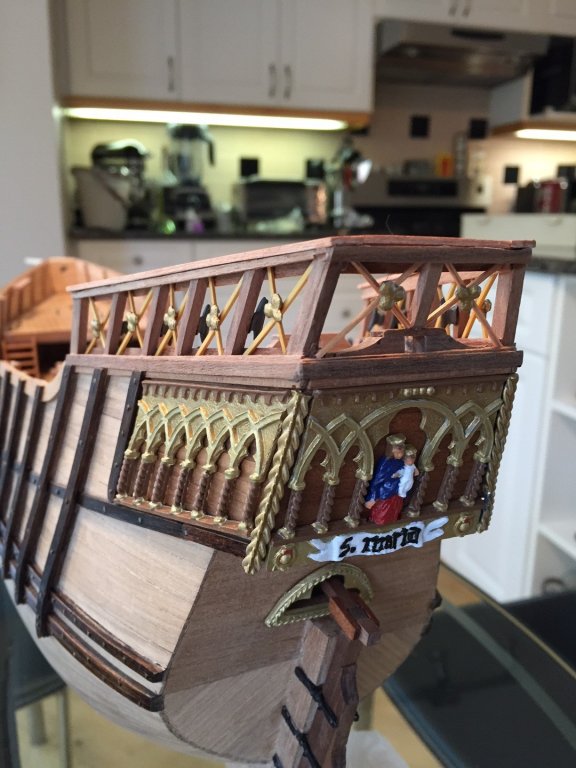
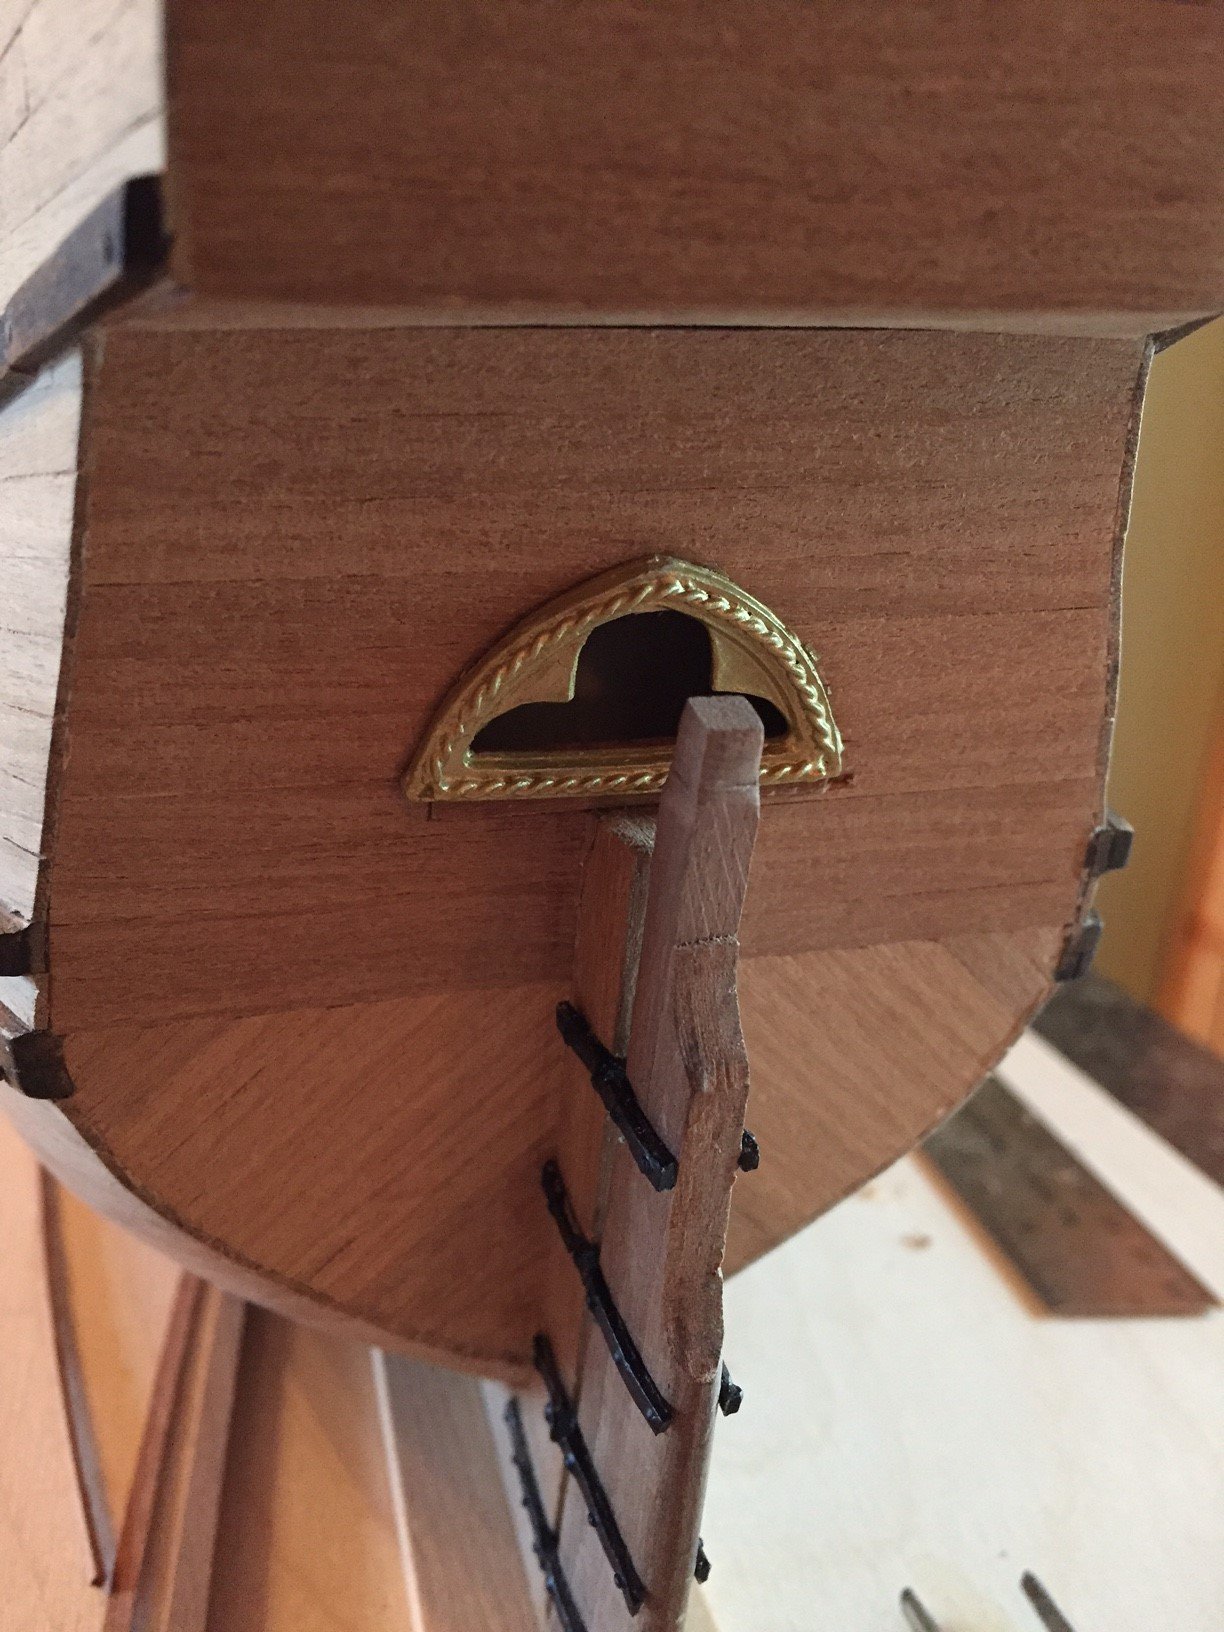
Another minor issue once found attaching the stern decoration is that the opening was too big too completely cover with the metal badge so I added some inside trim (would be hidden anyways) and once painted with a brass color (different from the white, blue, and red coloration scheme that Mamoli indicated), I glued it down with CA.


-
Here's the close-up... it is offset ever so slightly to the left but not noticeable on the picture. Also I should have placed the top portion of the rudder a little closer as the pintle was not pushed in far enough onto the keel prior to the CA setting. The most obvious issue though is I sanded back too much into the keel board and into the plywood... Any suggestions in how to fix?
Laminate a piece of 0.5 mm walnut strip and then sand back I guess...

- jbford, mtbediz, popeye the sailor and 1 other
-
4


Santa Maria by mrcc - FINISHED - Mamoli MV42 - 1:50
in - Kit subjects built Up to and including 1500 AD
Posted · Edited by mrcc
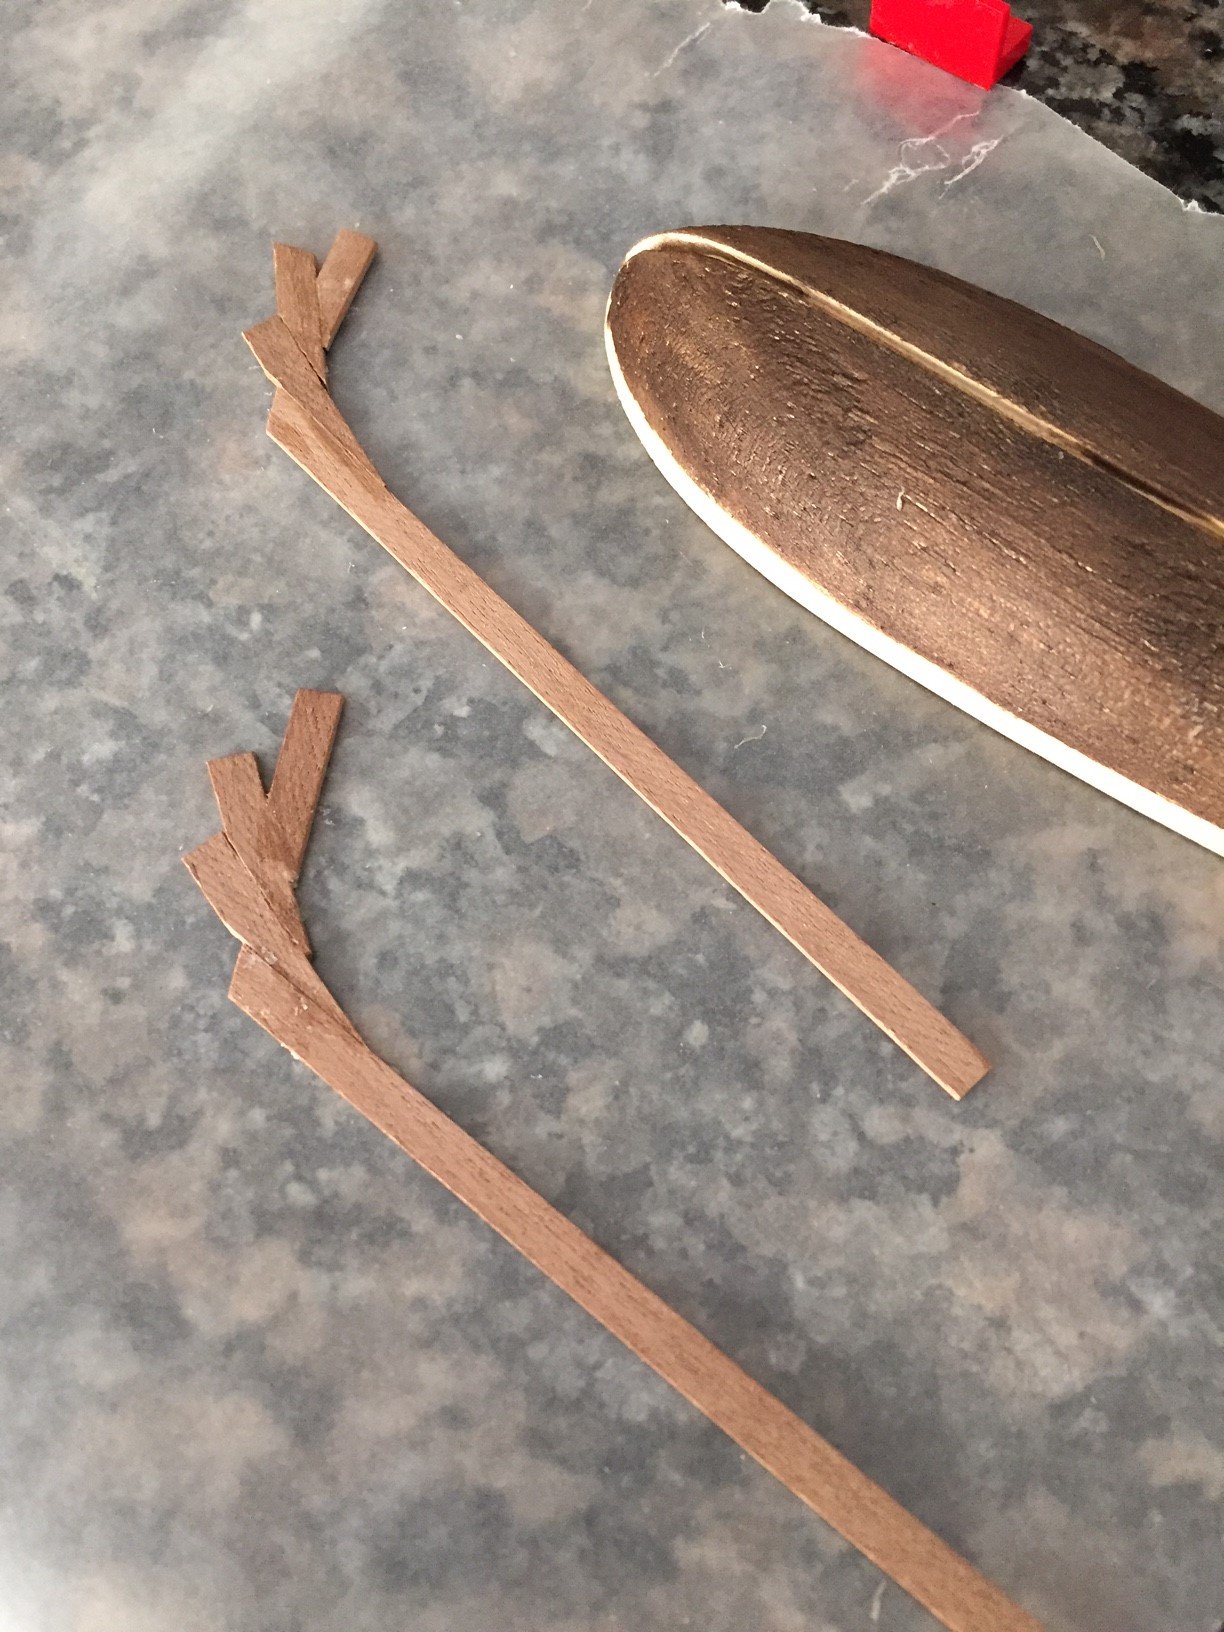
Don't know why I was scared to tackle the tapering of the yards and masts without a mini lathe...
So easy to do with a cheap mini plane and a bit of time and patience. I just divided the mast /yard into increments, knowing what my end diameter is and planed the furthest to the midway taking gentle cuts with the plane as to not gouge into the wood. I constantly measured with my caliper being careful not to take too much off and then sanded first roughly with 80 and then final sanded with 120 to get the perfect taper.