mtdoramike
-
Posts
2,094 -
Joined
-
Last visited
Content Type
Profiles
Forums
Gallery
Events
Everything posted by mtdoramike
-
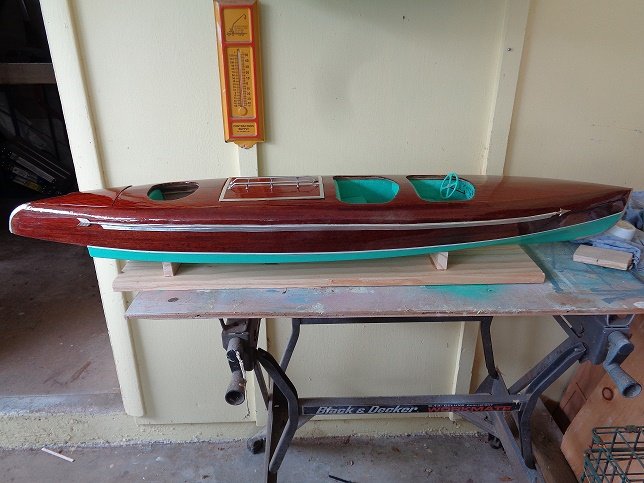
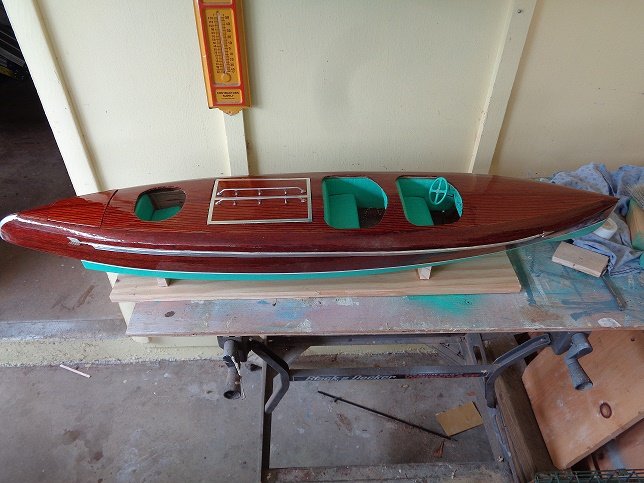
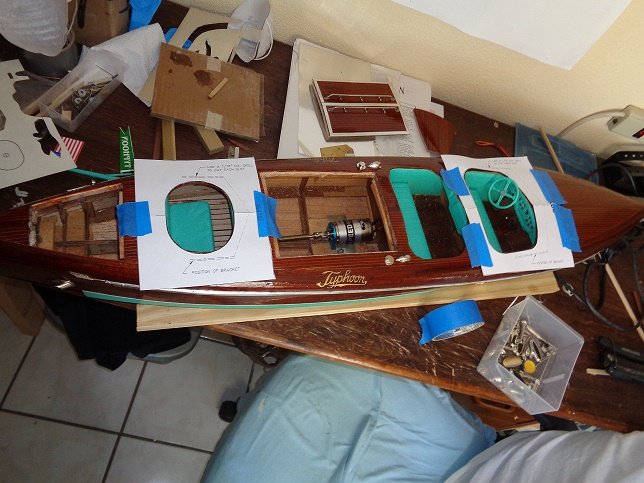
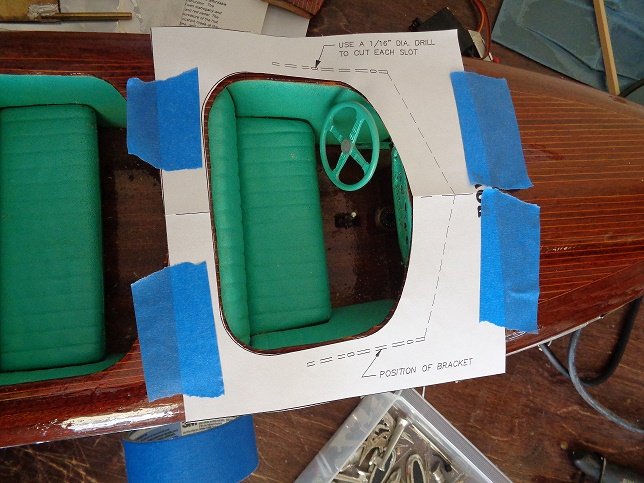
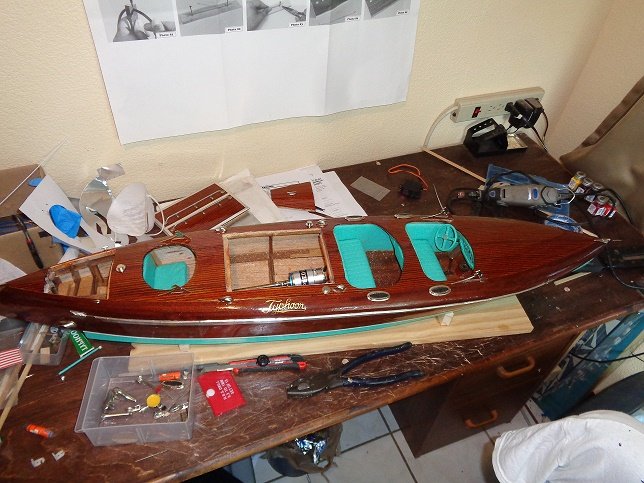
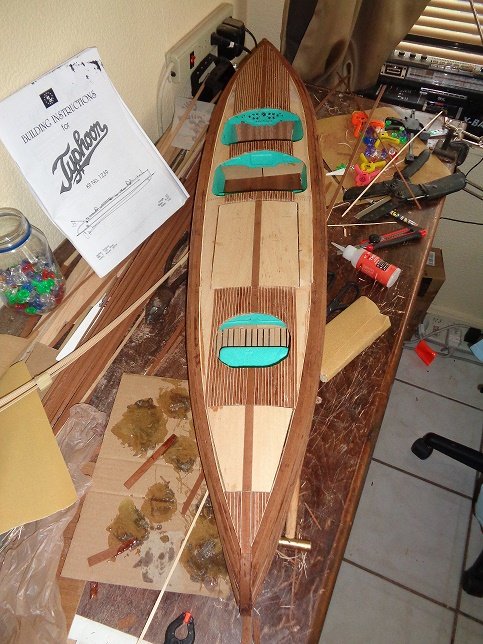
I used the supplied diagram to drill out the holes for the windshield brackets and also installed some of the deck hardware. I think the hardest part of this entire build is going to be fitting the windshields front and back. They are not perfect fits and will need to be down sized slightly and trimmed to fit properly. The old saying applies here, "you can always take away, but you can never add to" is the rule of thumb to follow here. Wish me luck.
-
Here is a few of the models that I have built over the years
mtdoramike replied to mtdoramike's topic in Wood ship model kits
There is really no comparison in my opinion. Model Shipways is one of the best if not the best Constitution kit on the market. Mamoli Constitution makes into a nice model if you are building for yourself. But if building for a client, the Model Shipways Constitution is the only way to go. The Mamoli Constitution I built for myself, receiving some wood from a refit of the actual ship, which I used to carve out some pieces of the model and incorporated the wood into the model. I later sold the Mamoli Constitution to a Computer Software comp. in New Jersey. Now the Model Shipways Constitution I also used some of the left over wood from the refit, but this was a commission job and went to an Insurance Corp in CT. I have built around 60+ kits over the years and have never found a bad kit or subpar kit. I always go into a build of a kit with the realization that a kit is only a starting point and to make a kit exceptional is totally up to the builder. -
Here is a few of the models that I have built over the years
mtdoramike replied to mtdoramike's topic in Wood ship model kits
I sent you a personal message. -
It was a bit frustrating, but not a big deal, nothing a bit of elbow grease, sand paper and finishing resin couldnt fix. I spent a few days correcting the problem. I have learned by trial and error to check the weather forecast to make sure the humidity is low, like below 50%, if the humidity is too high, the resin will not properly cure and the finish will remain tacky, now that is a big pain in the rear. I have the boot strping on, bottom painted and getting started on installing the running hardware and drive train. So the build is slowly coming to an end. I only have a small window to work on my projects since we are babysitting our two year old 24/7 for the past three weeks.
-
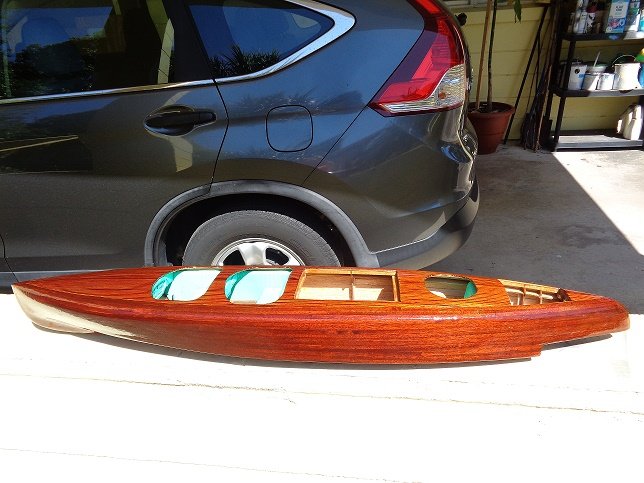
Well I took two steps forward and three steps backward today. I checked the weather this afternoon and temp was going to be in the upper 80's here, no rain and humidity around 57% around noon time. So I figured I would lay the finishing clear coat on the Typhoon, which I did and then set it out under my carport area to dry. I checked on it a few hours later when I noticed the wind had picked up. Yep, just as I suspected, the wind blew in dust and dirt, which caused the Typhoon to now feel like sand paper. I didn't think to check the wind because when I started and up until finishing, there was no wind. Back to wet sanding AGAIN! @##$%*)(*&%##%&!
-
I still have some sanding and another coat or two of resin to apply. But she is starting to take shape. I was wearing my dust mask outside while sanding and my neighbor yelled out asking if I had the virus hahahaha. I said yep, I got the cooties and I'm contagious so stay away from me.🤭


-
https://www.ebay.com/itm/Vintage-1929-Typhoon-Mahogany-Wooden-Runabout-Racing-Boat-Model-Original-Crate/114161961076?_trkparms=aid%3D888008%26algo%3DDISC.CARDS%26ao%3D1%26asc%3D20200220090753%26meid%3D41ee59b091fe4f15b4ea5309c95f462c%26pid%3D100009%26rk%3D1%26rkt%3D1%26sd%3D153880307739%26itm%3D114161961076%26pmt%3D0%26noa%3D1%26pg%3D2047675%26algv%3DDiscV1&_trksid=p2047675.c100009.m1982 I was checking ebay and saw this, I thought it was quite neat. If you can't own a big Typhoon, then maybe this would be easier to display.
-
It will, but right now it's looking like a step child that only a mother could love. Here is a picture to prove it.hahahahaha

-
I'm using 2oz cloth on her, it's a bit easier to work with than the 4oz I was looking at, it drapes better and takes corners a bit more forgiving. I also looked at both 3/4oz cloth (way to thin) and also 1 1/2oz. both of which I have from other builds. But I settled on the 2oz which seemed to work the best for the extra rigidity and easier to drape. You have to bare in mind that the entire hull is balsa sub-planking with 2mm mahogany finished planking. So any help adding to the rigidity of the hull, the better. But by the time I'm done with her, you can drop her off a building and it shouldn't leak or break with a good 3-4 coats of resin. I usually put on 4 coats sanding in-between coats with 400-600 wet/dry black sand paper, first dry then wet sanding.
-
No real updates, just laying fiberglass on the Phoon. This process is not an easy one, due to the shape of the boat. Im sure if your an expert at glassing you could probably find some fun in this process, but im not expert at it. So its one of the least enjoyable parts of the build for me. So i chose to lay the cloth in sections like bottom section first, then the sides, overlapping the seams.
-
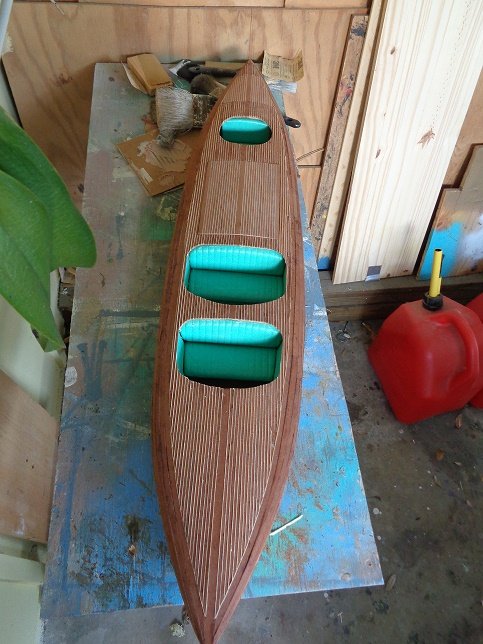
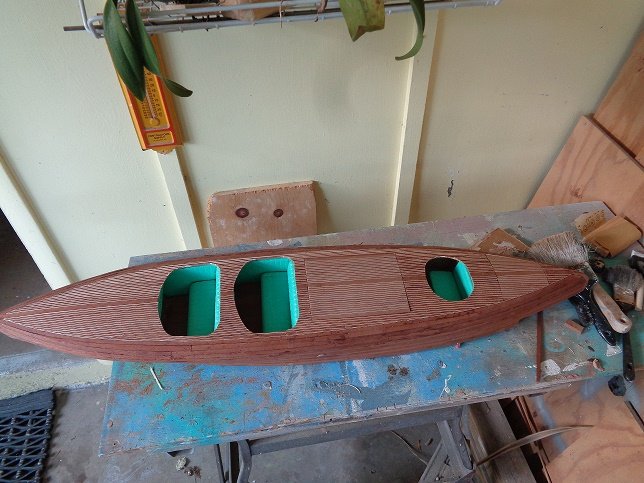
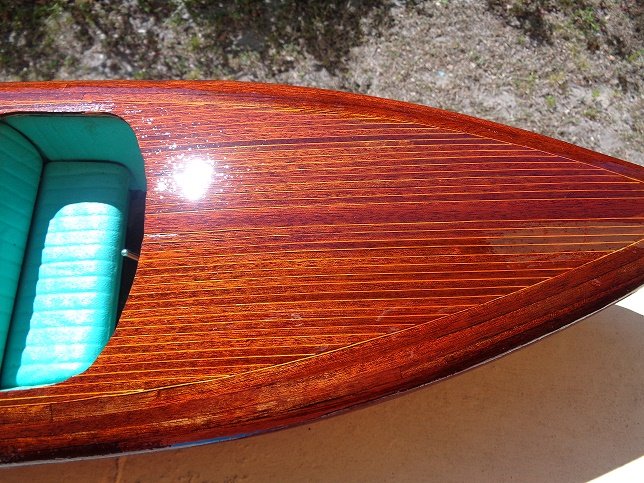
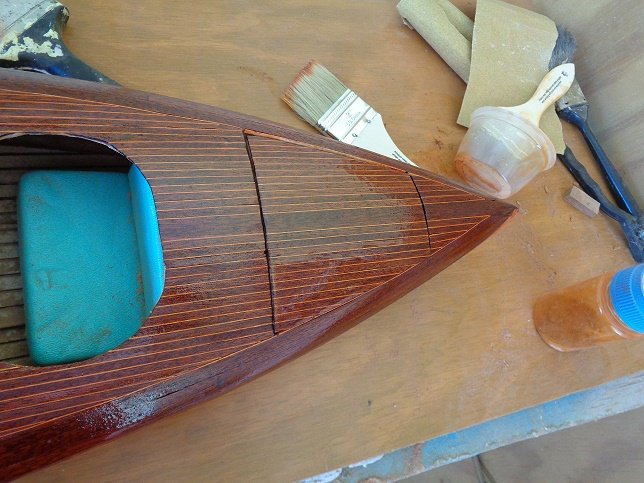
I put a coat of resin on the deck and hatch covers to see how it would look. I decided to put a coat of stain on the deck, which made the caulking strips more subdued and not stick out like a sore thumb. I like this look better. Yes, I actually do clean my work area every now and then. But like I tell my wife, "don't go fallen in love with that clean look, because it won't last very long" hahahaha
-
Thanks Tom and Bob, it's now on to sanding, sanding and just when you think it's time to start the glassing, more sanding. Unfortunately, I have not found any easier way to sand these mahogany run about boats other than hand sanding.
-
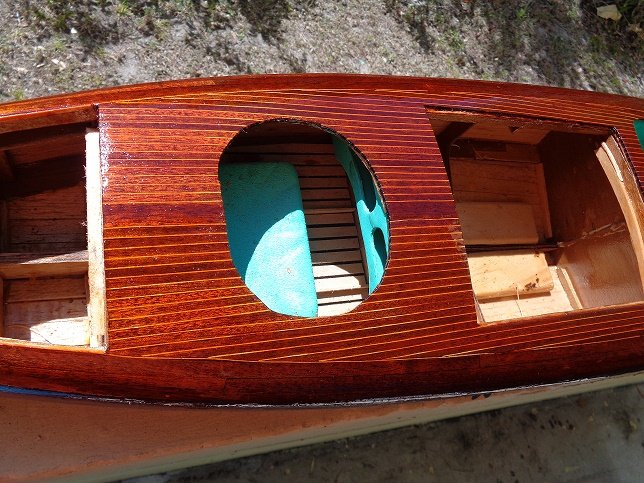
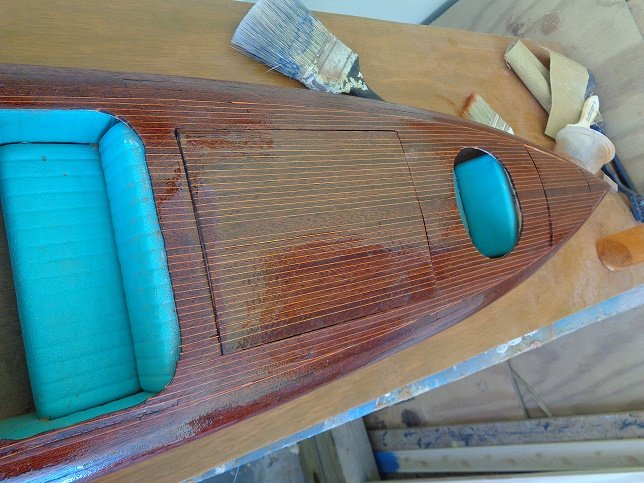
Thanks CD and Lou, the shape of the Typhoon is starting to grow on me...…..a little bit anyway. I'm quite happy with the added rear hatch, I was wondering how it was going to turn out since it was a modification, but I think it turned out quite well.
-
The Ben Latham is one of my all time favorite kits from Model Shipways. I have always wanted to build this kit, but for some reason, I just never had the chance, I guess it maybe because I was never ask to build one.
- 140 replies
-
- 1
-

-
- benjamin w latham
- model shipways
- (and 1 more)
-
Absolutely beautiful work on such a magnificent subject. You are doing Old Ironsides proud. Model Shipways has one of the best Constitution kits on the market. I have built this model several years ago as well as a few other Constitution kits and this kit is by far my favorite.
-
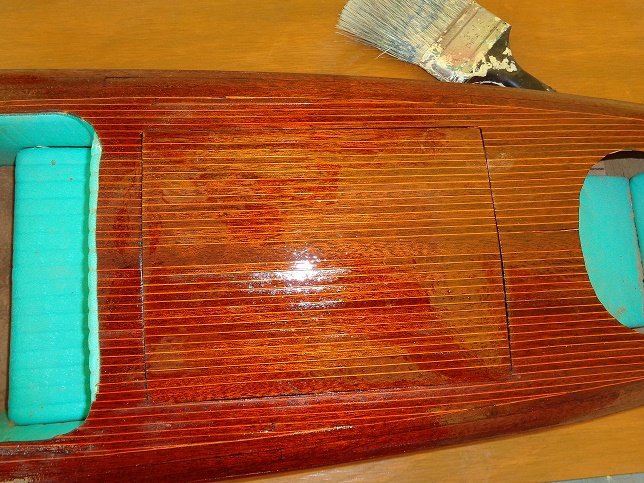
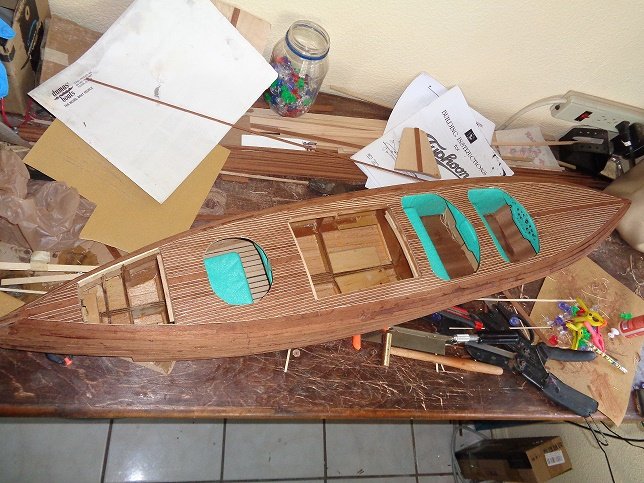
OK, I have the top deck planked, now to plank the hatch covers. The instructions indicate planking the top deck with full planks and then cutting them at all the openings later. I tried that and after applying two planks, it started looking like a snake because it was so difficult to keep the planks tight. So I ripped them off and decided to plank it in sections. Now to see how the planks will line up with the hatch cover planking. Keep your fingers crossed.
-
Well I have gotten a little further along with the tedious deck planking. Hopefully I will have the deck and hatches planked in a day or three.

-
One thing I know for sure, If I were to ever build this model again, I would not use the supplied 1/8" mahogany strips and would opt to use 1/4" wood planking strips for the top deck. The 1/8" strips take for ever to apply. The only way I would do the 1/4" strips again would be if I were building the Typhoon for a client, but if I were just building for something to do or to sell, I would opt for the bigger planks.
-
I saw your build log, she is coming together nicely. It would be fairly easy to carve the seats out of balsa using a Dremel tool, even making the pleats.
-
Beautiful work so far, the caulking looks great and the planking is excellent. I use the Spaz Stix Black and mirror chrome as well and it gives as close to a chrome finish as anything I have found.
-
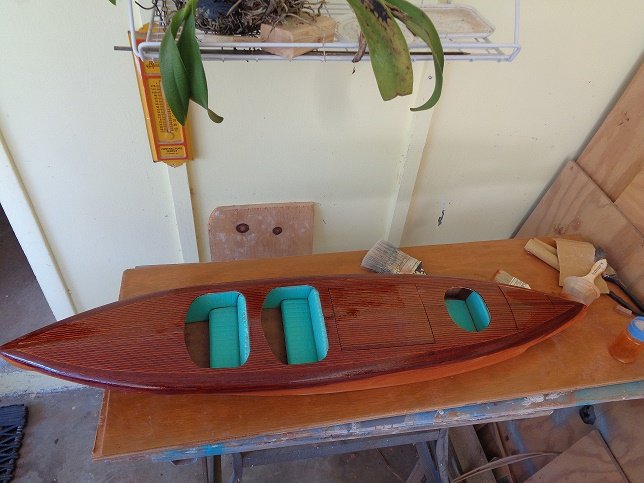
The seats for the Dumas Typhoon come with pre-molded seats in plastic. Which kit are you building that supplies balsa wood to make the seats out of ?