
HOLIDAY DONATION DRIVE - SUPPORT MSW - DO YOUR PART TO KEEP THIS GREAT FORUM GOING!
×


Jack12477
-
Posts
5,661 -
Joined
-
Last visited
Content Type
Profiles
Forums
Gallery
Events
Everything posted by Jack12477
-
 Don't know for sure, Lou. When I left Army it was still in development, working the bugs out of the system. But from the damage it did to turret, barrel, and tank after the in-bore, I would say yes. I remember one of the engineers commenting "now if we can just hit the enemy tank". I don't know how it performed in service.
 -
I think the technology developed by/for Shillelagh was later used for TOW, but I was out of Army by then, so couldn't follow it
-
Oh Yea !!!! Saw classified photos when I was in Army of the first test fire they did, remotely fired of course; had an in-bore explosion. Holy Shxxt, Batman !!!!!
-
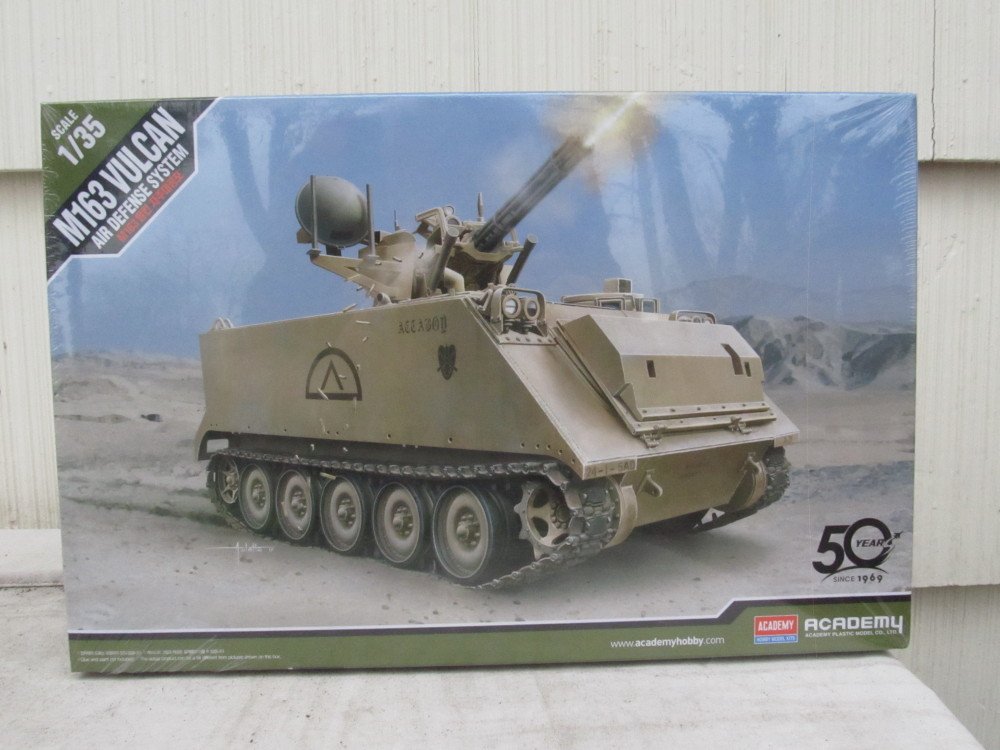
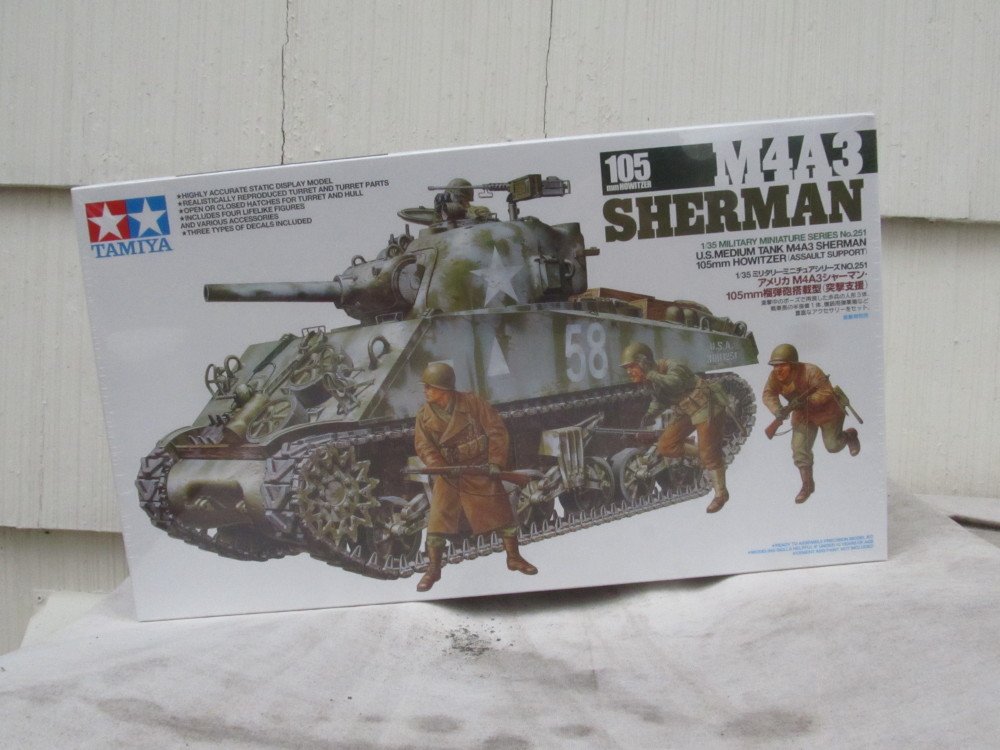
The Sheridan/Shillelagh weapon system was under development at the Arsenal I was stationed at, my civilian boss was the Project Manager. Yes, I placed the order online Monday around 1100 hrs and it shipped that same day. Only had to come from Magnolia NJ to Catskill Mtns area. 😁😁😁😁 Why the minority on Sherman? BTW this model is for Ardennes, Battle of Bulge. Haven't opened the box yet to see what extras they threw in but box says it has a lot of accessories to add. This is my 3rd air defense model. I had built the Sgt York Air Defense tank some years ago plus the German AA half track.. if I line them all up I have some massive fire power (in miniature, of course) but then one can never have enough can one
-
I have to wait for the decals to dry and set firmly so I can put a 2nd coat of gloss over them and then post some update photos. In the meantime, reinforcements arrived at 1245 hours today. Maybe I will now have enough fire power to blast my way out of this incarceration prison I've been in.....

- 147 replies
-
- 10
-

-
I think the Auburn and the Cord were guaranteed from factory to also top 100 MPH. The Auburn Boattail Speedster was powered by a 4.6L straight eight that, with the popular supercharger option (150 hp), could top 100 mph (160 km/h). And The Cord 810, and later Cord 812, produced by the Cord Automobile division of the Auburn Automobile Company in 1936 and 1937 was the first American-designed and built front wheel drive car with independent front suspension. My Dad's mechanic, whom Dad insured, bought a Cord (don't remember which model or model year), restored it and drove it around for years. When he bought it the idler gear was cracked, so he had to make a new one from scratch. This is going to be a fun kit to watch. BTW that is a beautifully restored model in those photos.
-
Mine hangs from the floor joists over one corner of the workbench in my basement, right next to the other large aircraft.
-
Edward, check out my Dauntless 1:32 scale . Not as good as yours tho.
-
Wow! That came out really nice, Edward. Nice work ! Maybe you will join me in the Armor division, easier to hide the tanks from the Admiral than the planes. I have 3 arriving tomorrow unless Andrew diverts them into AppleCity on their way up from NJ.
-
I don't mind a little off-topic conversation, just don't get too far off-topic.
-
Well, the governor just extended our incarceration till April 29th............... Boing....... Boing ......... Boing ....... Boing ........ Boing ....... 🙃😷🤕
-
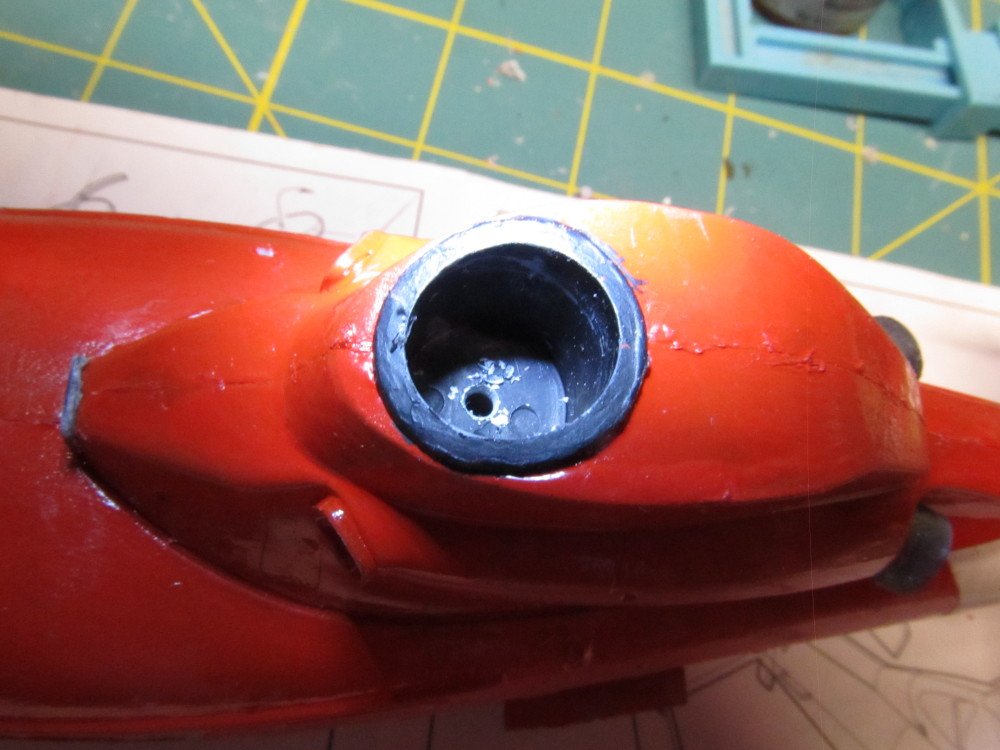
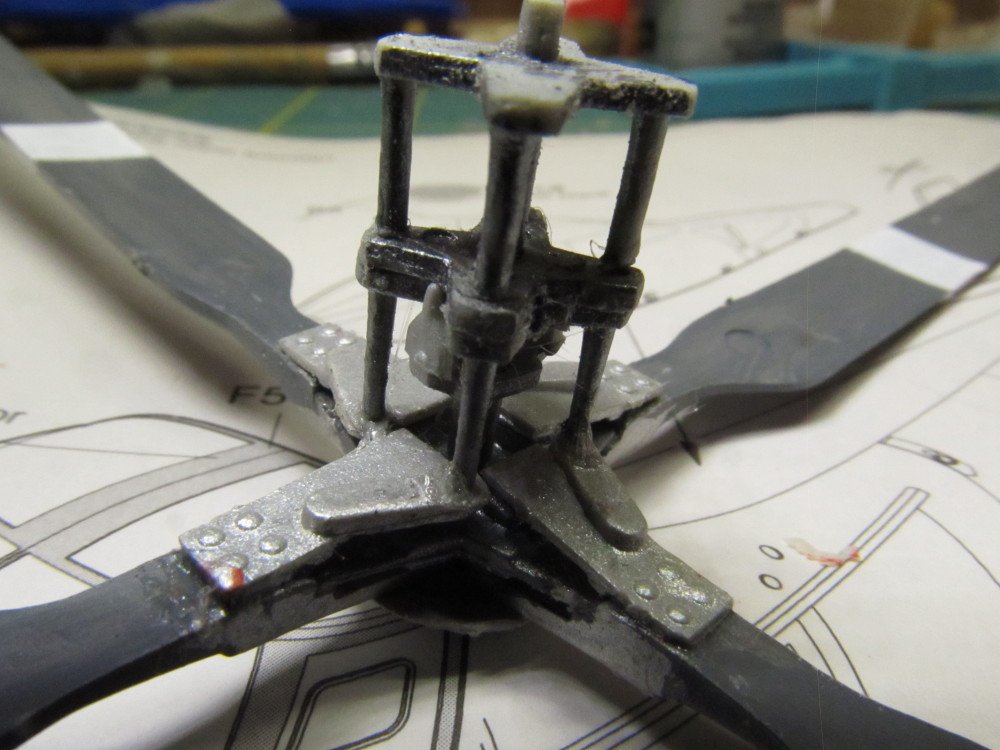
Thanks ! Yes, you can barely grasp the shaft. I think I will just let it float as you say. And yea I hate this pictograph instructions, espcially when they don't show the order of assembly, you can screw up easily.
-
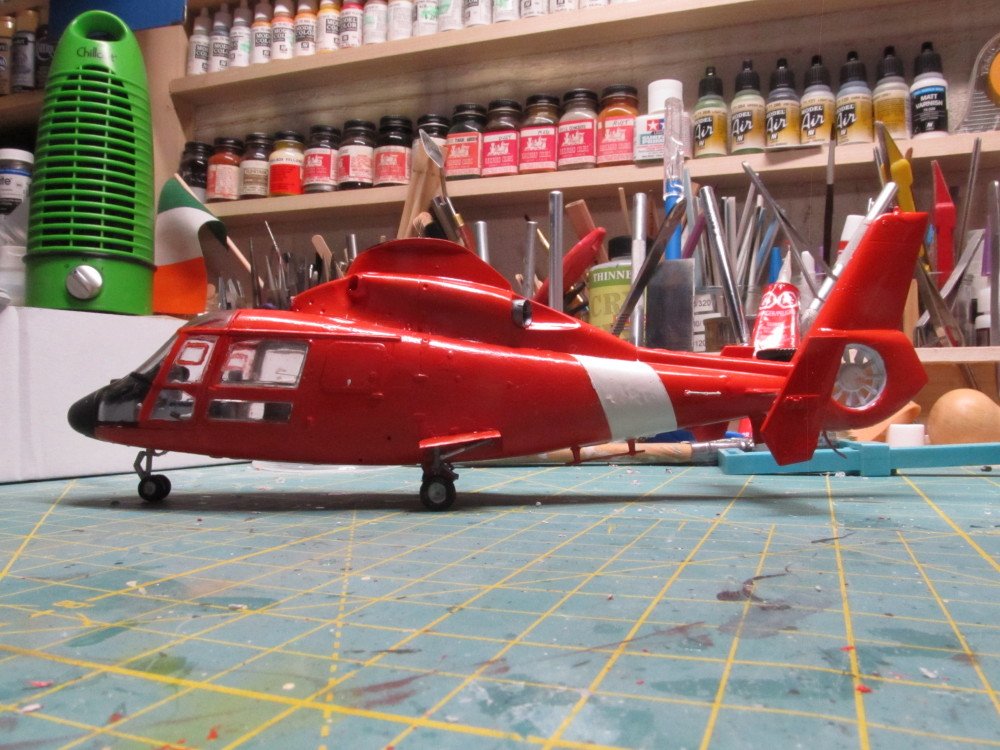
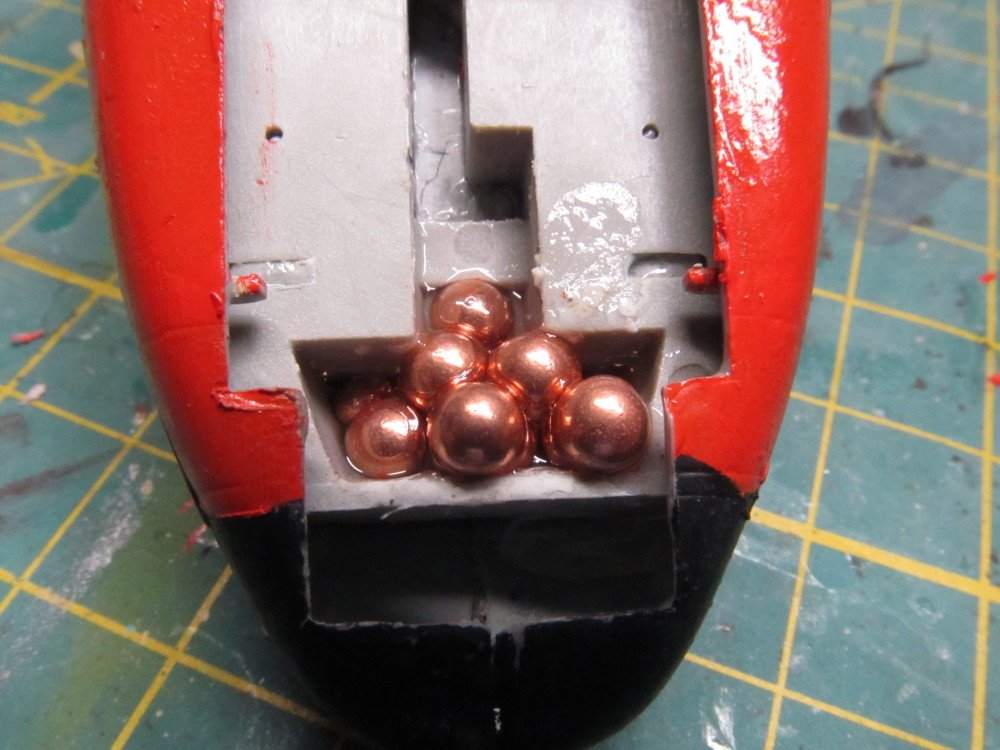
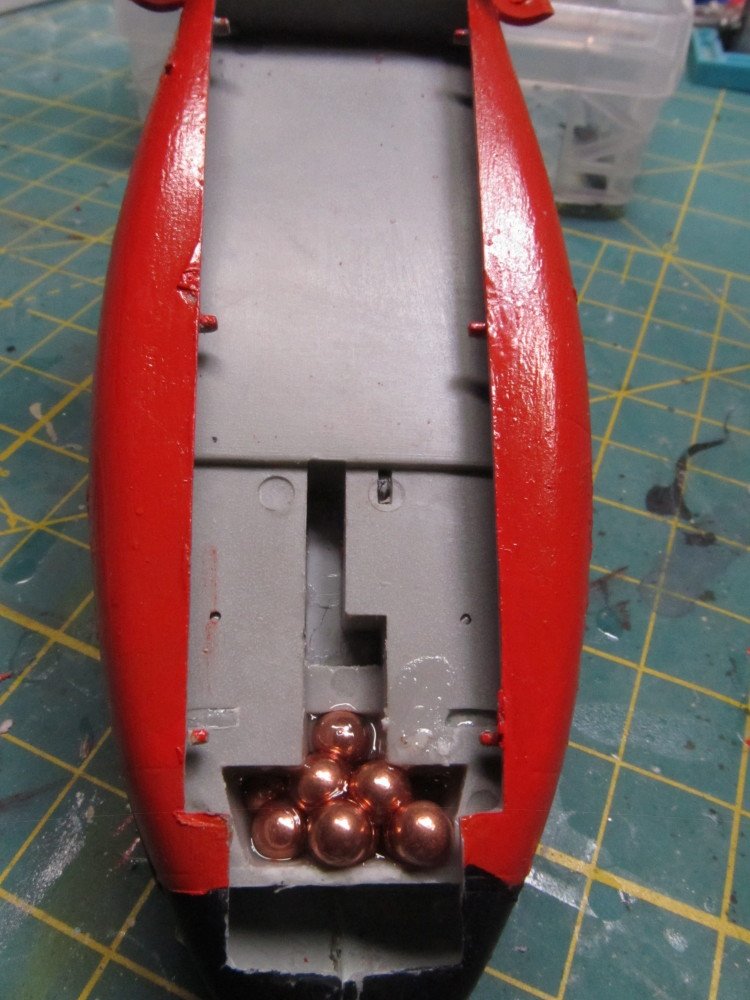
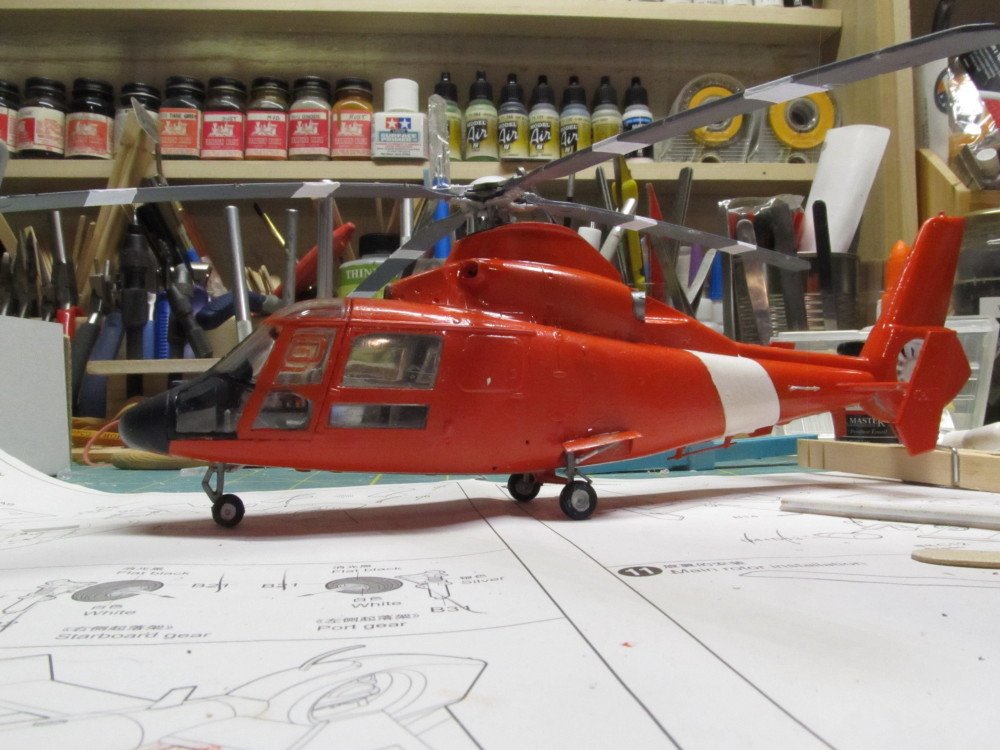
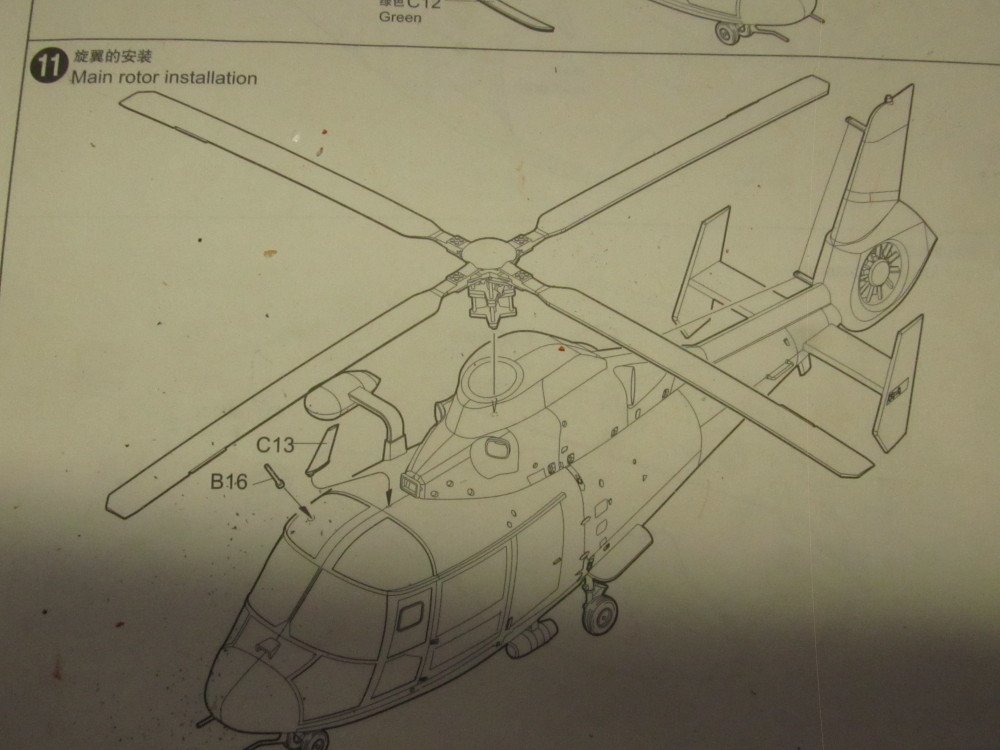
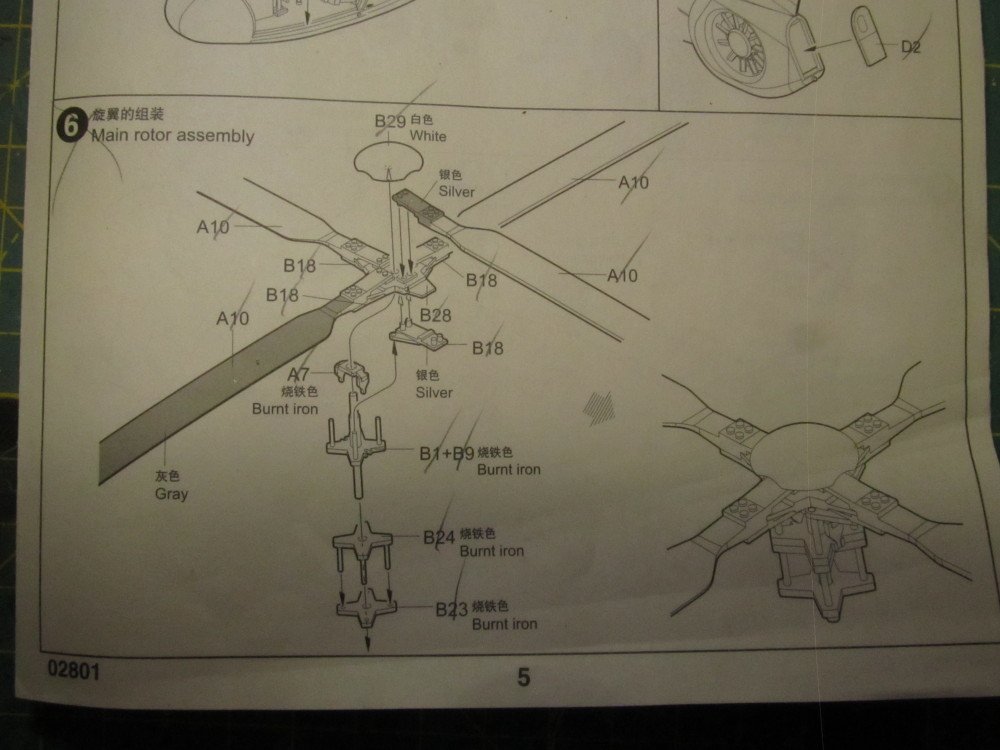
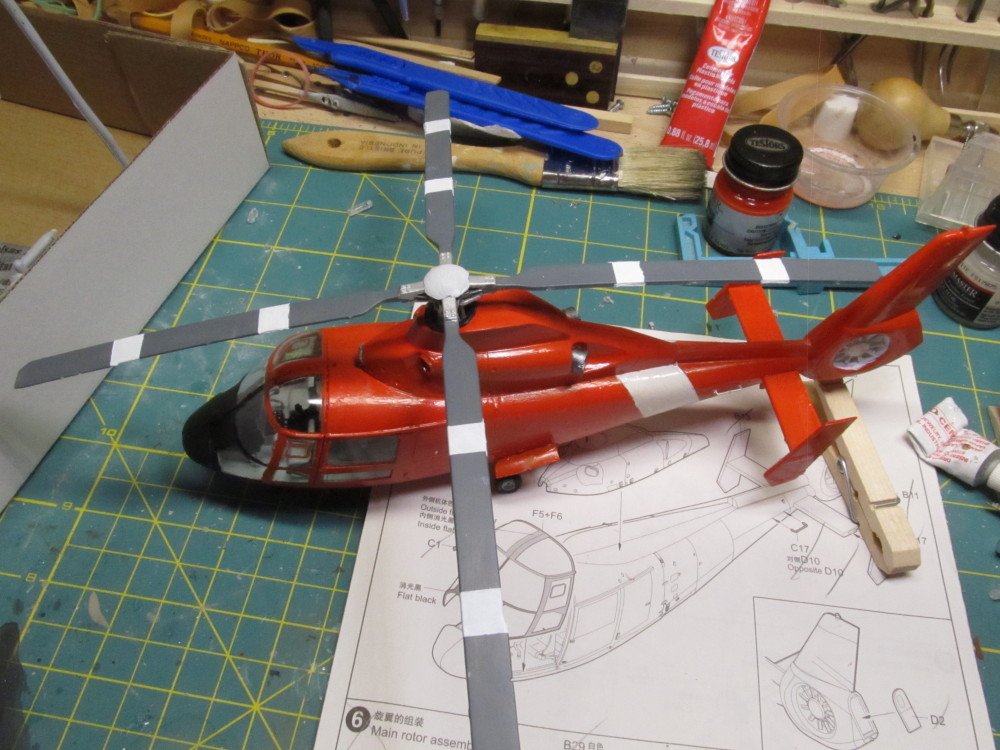
Ok, shiny BBs installed, super glue dried, ready to button up the bottom hatch. Time to start working on the decals before I install any of the remaining fiddly bits. Ole fumble fingers will surely destroy them if I don't wait till the decals are on. But now she sits nice and level. In a prior post I promised to post some close up photos of the rotor assembly - they follow First the assembly steps - parts # B1 + B9 and A7 are the top half of the rotor shaft B1 shaft is just inserted, not glued into the other parts. This assembly then glues into the parts B18. then up thru B28 to attach to cap B29. This is what disabled the rotation. Notice also that there are NO do not glue symbols anywhere on the assembly instructions. With the rotor assembly dry fit into position.

- 147 replies
-
- 11
-
-
A 10,000 volt electric fence will dissuade anyone from even thinking about it
-
Yes, they will be use to augment our defensive perimeter ! Got to protect our meager TP supply from the vultures, locusts and other nefarious hoarders. .
-
Requisitioned 3 armor units today - hope they don't get diverted
-
Well as luck would have it, I had to go to our local Post Office this morning, on the way back thru the village I had to drive past our local family owned, 5 generations, hardware store. On a whim I stopped, went inside, asked the owner if he had any BBs. Out from under the counter he pulls a bottle of 1500 BBs. He points to their sign motto on the counter, it reads "if we don't have it, you don't need it" . Voila ! Just waiting for the super glue to set! Sad thing about this pandemic is ole Dubya read a book about the 1918 Pandemic, predicted it could happen again and started to plan for it by actually stockpiling needed supplies, but two succeeding administrations gutted his efforts. You either learn from history or you are condemned to repeat it.
-
Ours is 7 AM to 8:30 PM. Off-peak according them is 7-9 AM. And they only let 5 people per 1,000 sq ft of store space in at one time, so long lines at some of their stores.
-
Unfortunately yes. I should have not followed the steps in sequence. I may have to just insert the rotor assembly into the insert without gluing it in place. Waiting for a chance to escape prison long enough to obtain the BBs for weights. Have to time it so I get there when the vultures are not feeding.
-
Make that 3rd that
-
This is Trumpeter, Ken, not Tamiya; no poly caps in this kit. Wish there were tho.
-
Not on this kit, OC
-
I like it. Looks realistic to me.
-
Not sure Lou. As I assembled it I made sure no glue got on the shaft pin that runs down thru the assembly, but I cannot see how the thing will rotate if I glue that pin into the hole in that black rimmed insert. Also cannot see how I can insert it in hole either since I am inserting it blind, no way to see the hole. Have to play around with it to figure it out. I will try to post some close ups later
-
Yep, except it is all RR colors or weathering, no mil spec colors left unfortunately. Thanks.