rcmdrvr
-
Posts
420 -
Joined
-
Last visited
Content Type
Profiles
Forums
Gallery
Events
Everything posted by rcmdrvr
-
Nice stitch work. I really like the finish you got on your hull.
- 44 replies
-
- 2
-

-

-
- Nave Egizia
- Amati
- (and 1 more)
-
You are doing very nice work on this model. I built the same model several years ago and enjoyed it very much. Look forward to following your progress.
- 44 replies
-
- 2
-
-
-
- Nave Egizia
- Amati
- (and 1 more)
-
Did you stain the model or is the color change a matter of lighting?
-
wtimlen, I have a build log on a waterline presentation of HMS Dreadnought. I have added a link to the build in my signature. Thanks for asking.
- 89 replies
-
- 1
-
-
- bluejacket shipcrafters
- revenue cutter
- (and 1 more)
-
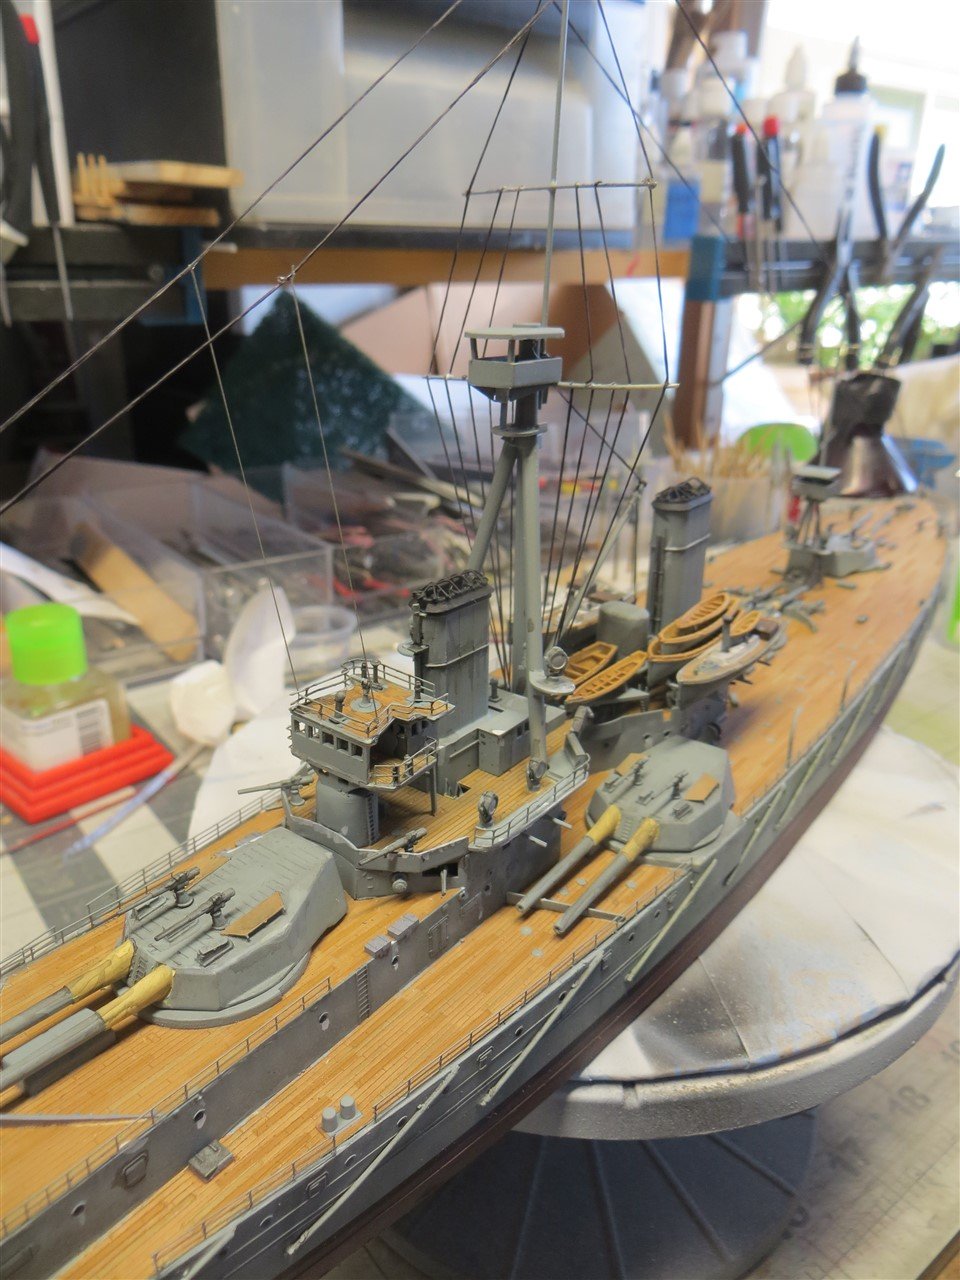
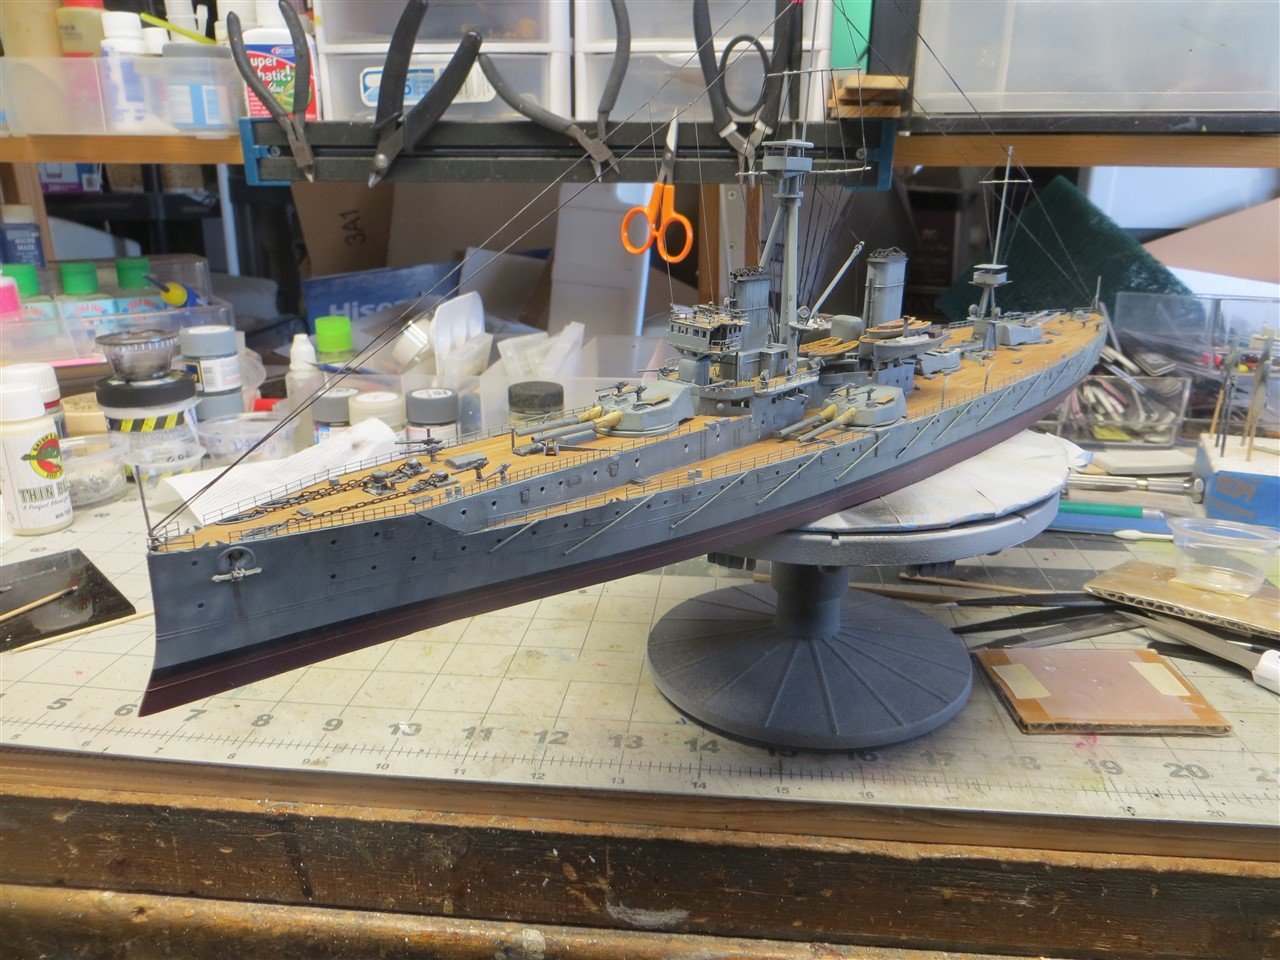
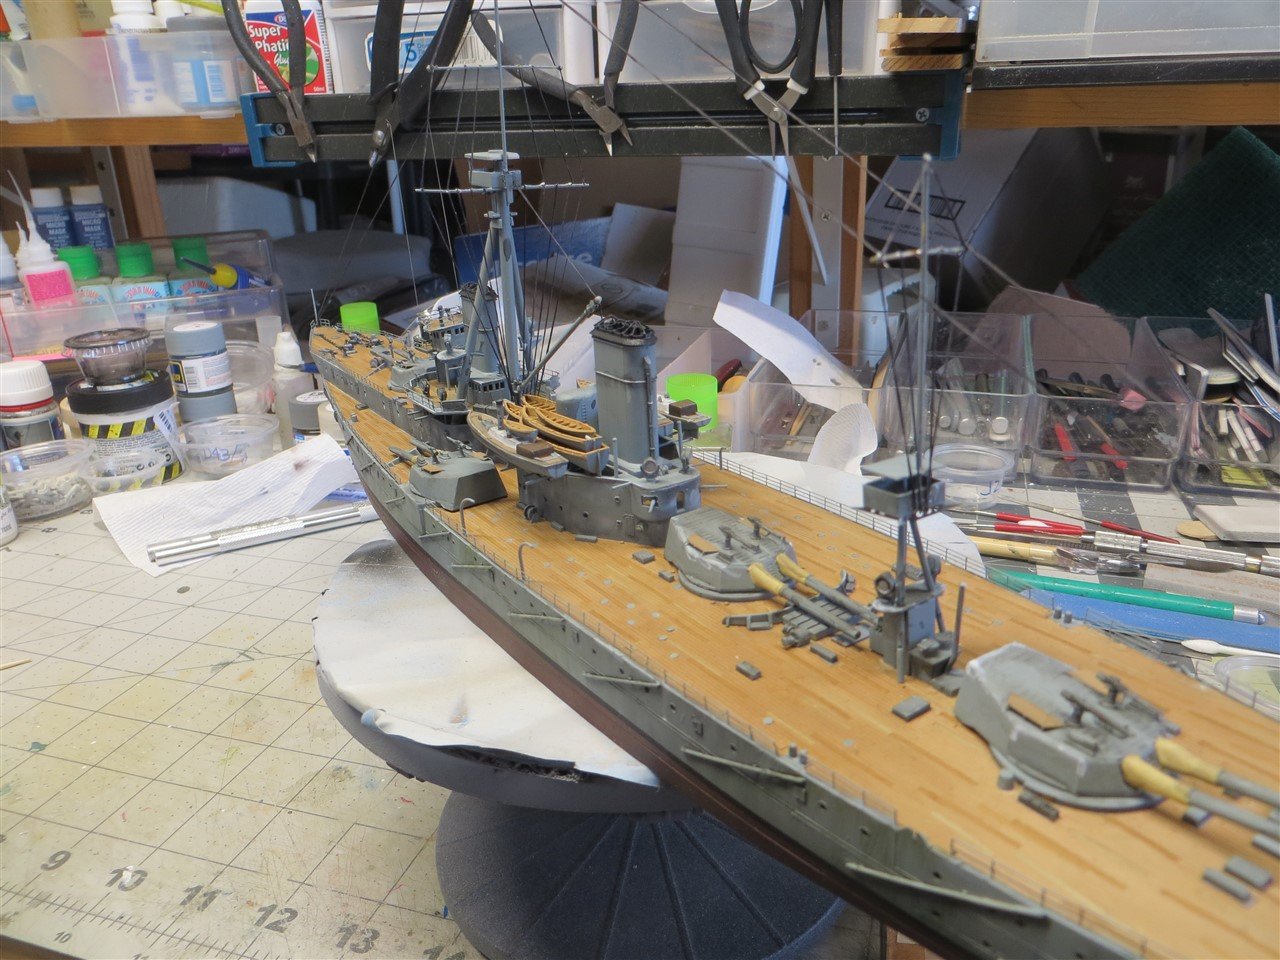
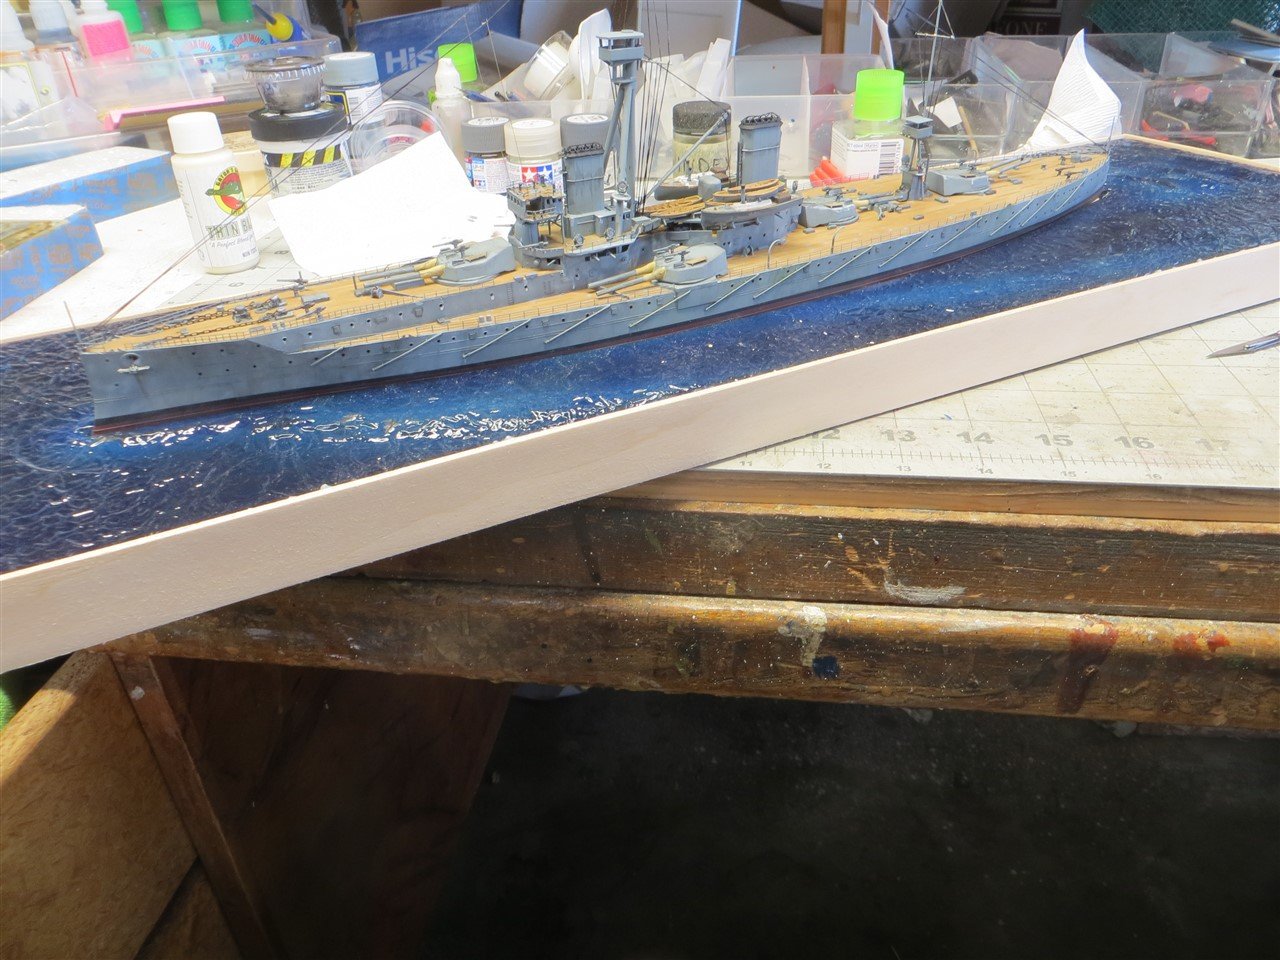
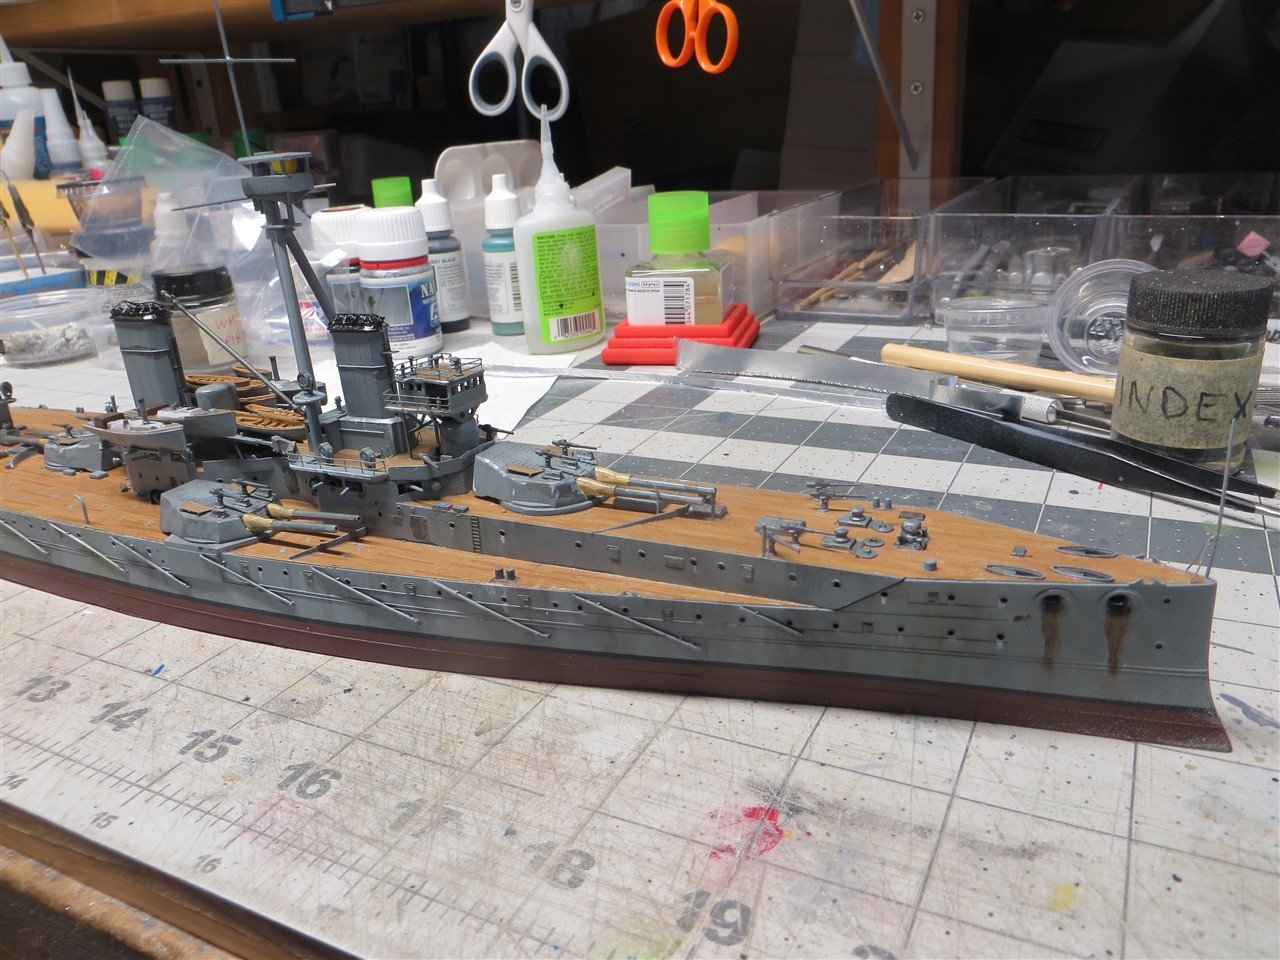
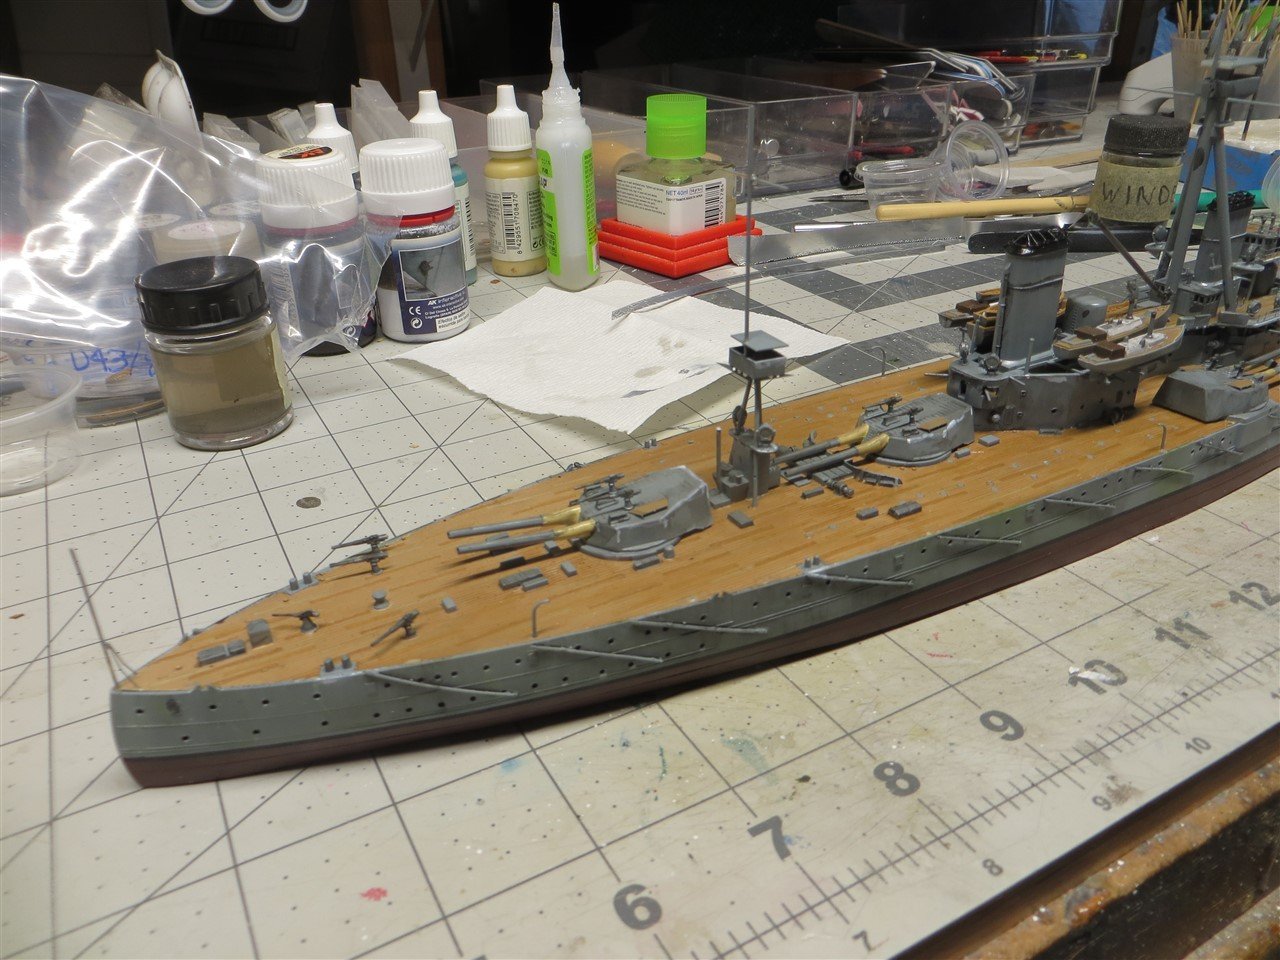
I spent the past few nights rigging. I used EZ Line (large and small). The product was not as easy to use as some of the YouTube videos I watched prior to jumping into the product. In the videos the EZ Line amost immediately adheres to the CA glue spot on the model. That was not my experience. I would apply the CA (I used gap filling consistency) and hold the tip of the EZ Line in the glue. It did not quickly adhere, even after waiting 30 seconds or so. My experience was most of the time I would have to use an accelerator to get the glue to react and grab the EZ Line. It is difficult to hold the line with tweezers while you carefully place a very small drop of accelerator on the CA. I must be doing something wrong. Perhaps my CA is old; I don't know. Has any one experienced this problem when using EZ Line. Do other brands of rigging work better? While I persisted and did get the model rigged. I ended up duplicating the rigging displayed on a photo of a model of the HMS Dreadnought that found on the internet. I know that the actual ship had quite a bit more rigging than my model but I think I obtained a result that looks realistic. Once rigged, I mounted the model in the seascape base. After the glue dries I will begin adding the wake and water crests. Here are some photos of the progress to date:

-
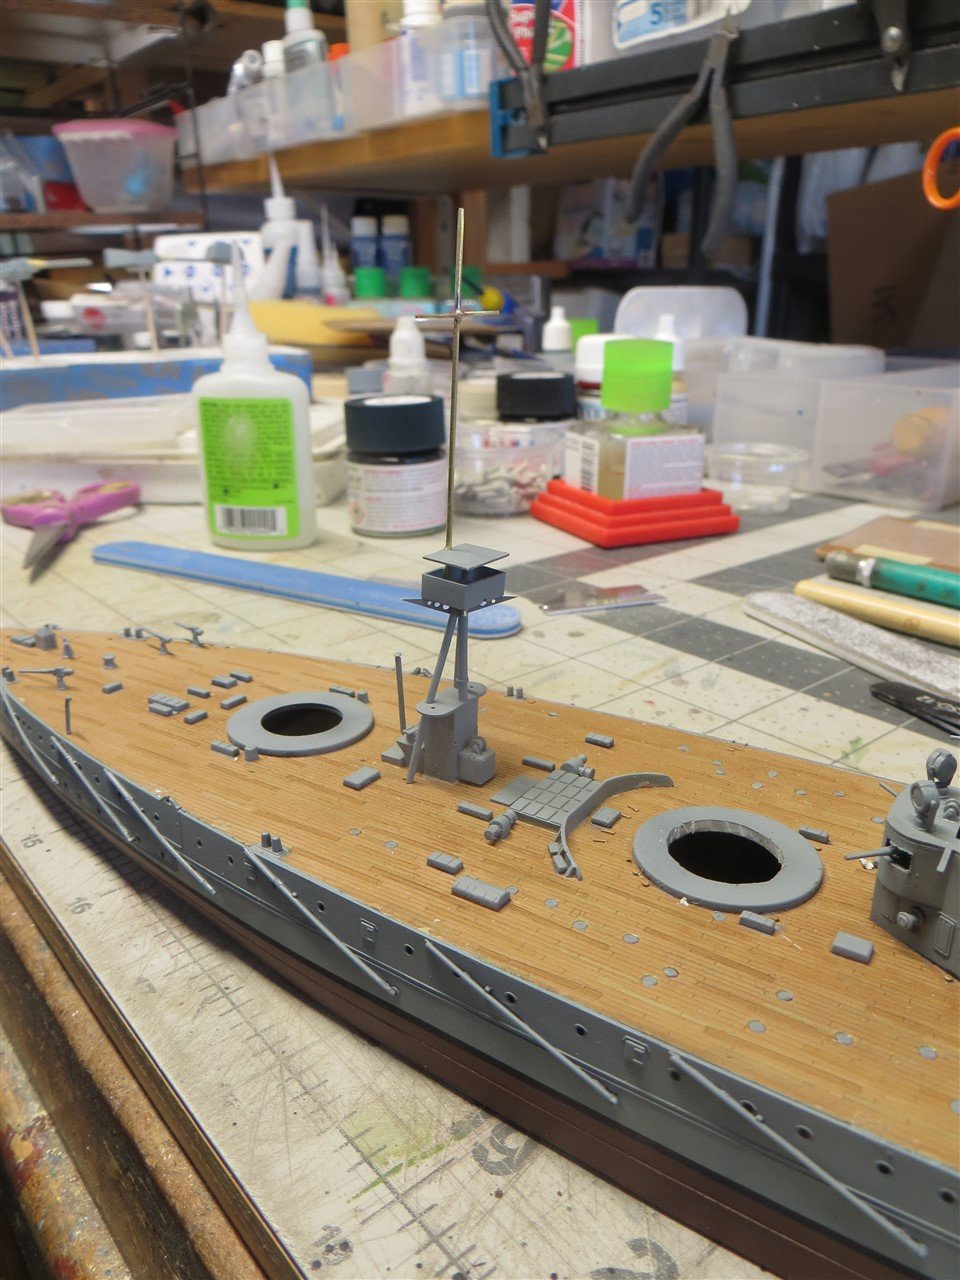
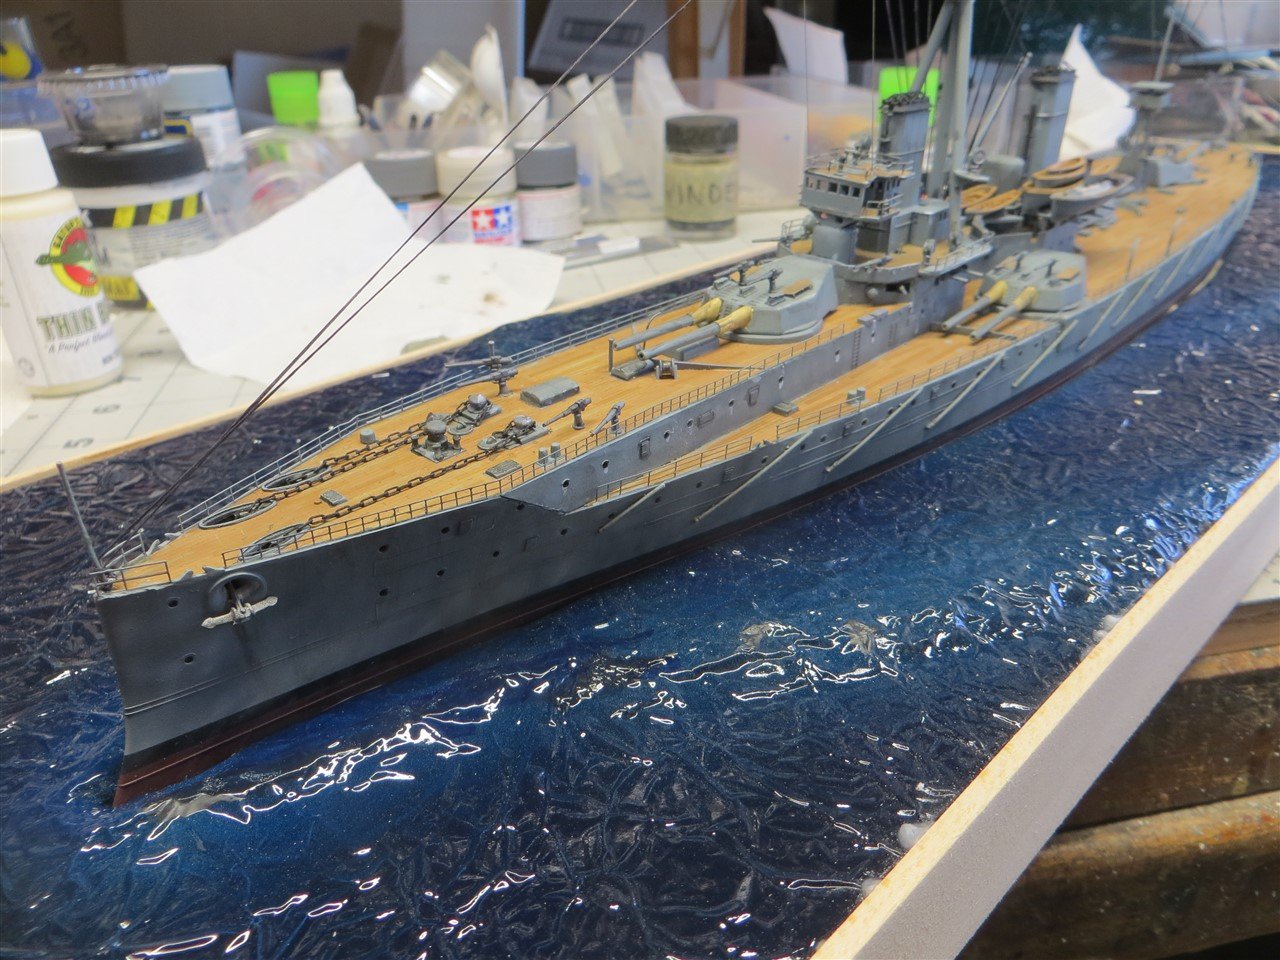
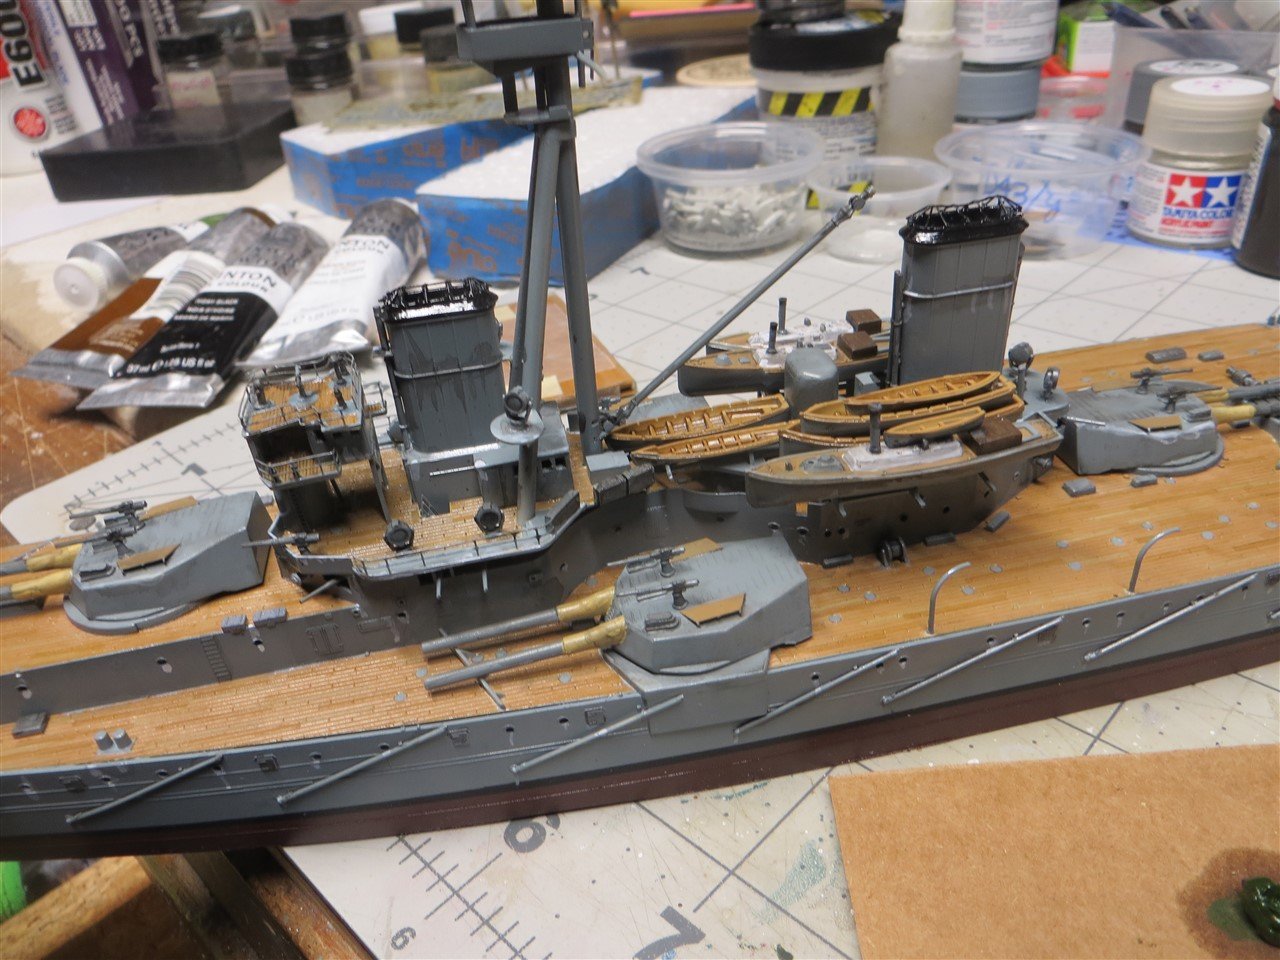
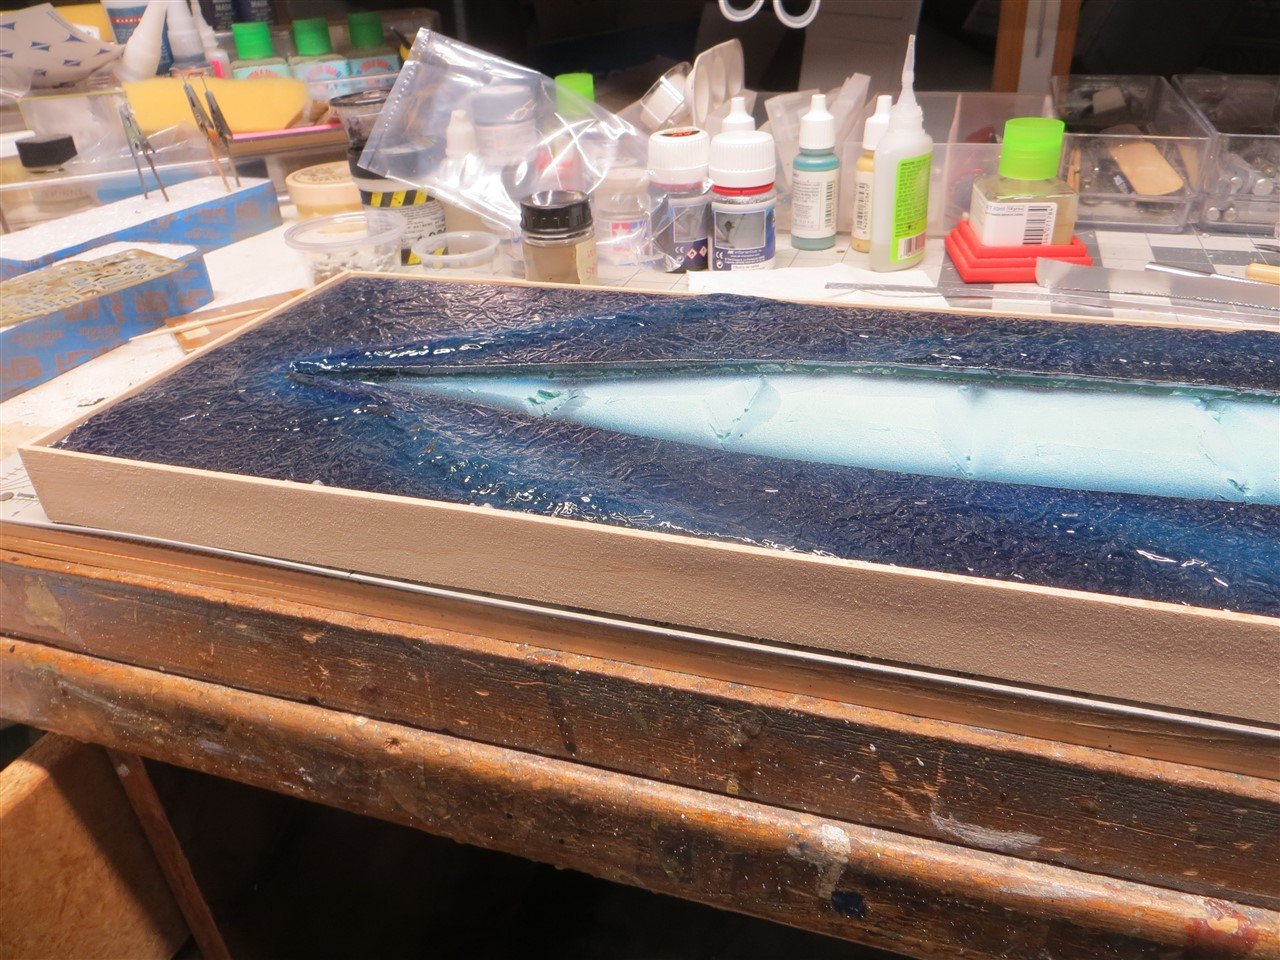
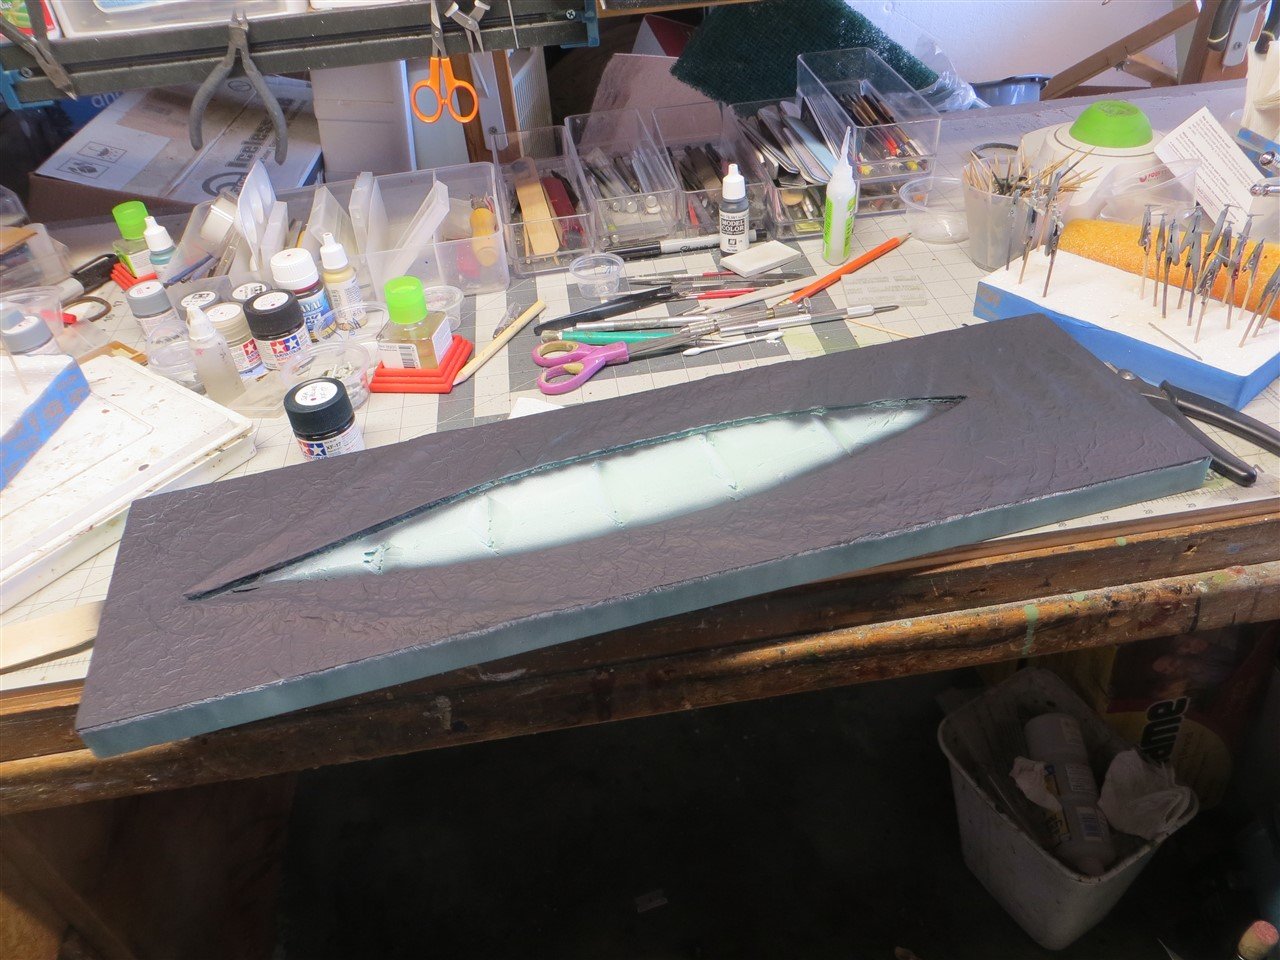
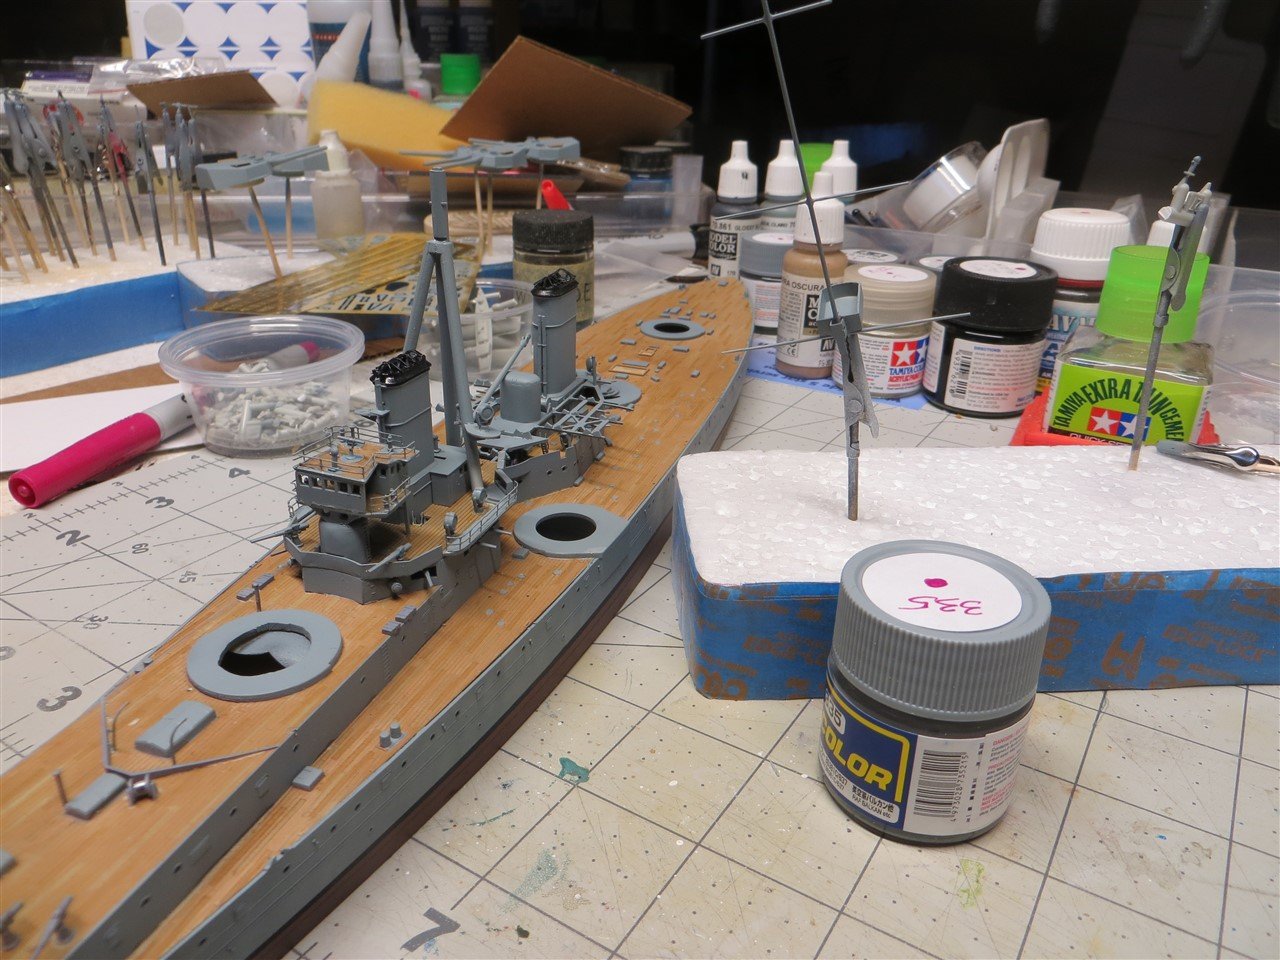
For the past few days I have been going back-and-forth between the water base and the ship model. As to the water base, I airbrushed Tamiya Clear Blue (X-22) over the entire surface and let it dry. It has a really dramatic effect. Next I airbrushed Tamiya Clear (X-22). These two coats gave the surface of the water base the reflective tones that I was looking for. I decided the next step was to frame the base. I cut a 36 inch X 1/8 inch bass sheet into 1 inch strips and used these strips to create the frame. Not a fancy base; but it will due. The water base is now ready to accept the model when it is ready. I will add the white sea foam and wave caps after the model has been installed in the base. As to the model; in viewing several photos and paintings of the actual ship, I noticed that there was a mast over the stern tower structure. There were no parts in the kit for these masts. I decided to make my own masts by soldering a few pieces of small diameter brass and mounting on the stern tower. I think I obtained an acceptable result. I tried my hand at some weathering. I used Tamiya black panel liner to highlight the detail on the guns and other deck furniture. I also used some salt and rust streaking by Ammo. I then decided to use some "dot" weathering on the hull and deck walls. I randomly applied white, black, green and brown dots of oil paints to the hull surface and then dragged the dots down the hull with a brush wetted with white spirits. I tried to keep the weathering subtle. I did not want to create a severe weathered look. Here are some photos of the work to date:


-
Absolutely gorgeous!
-
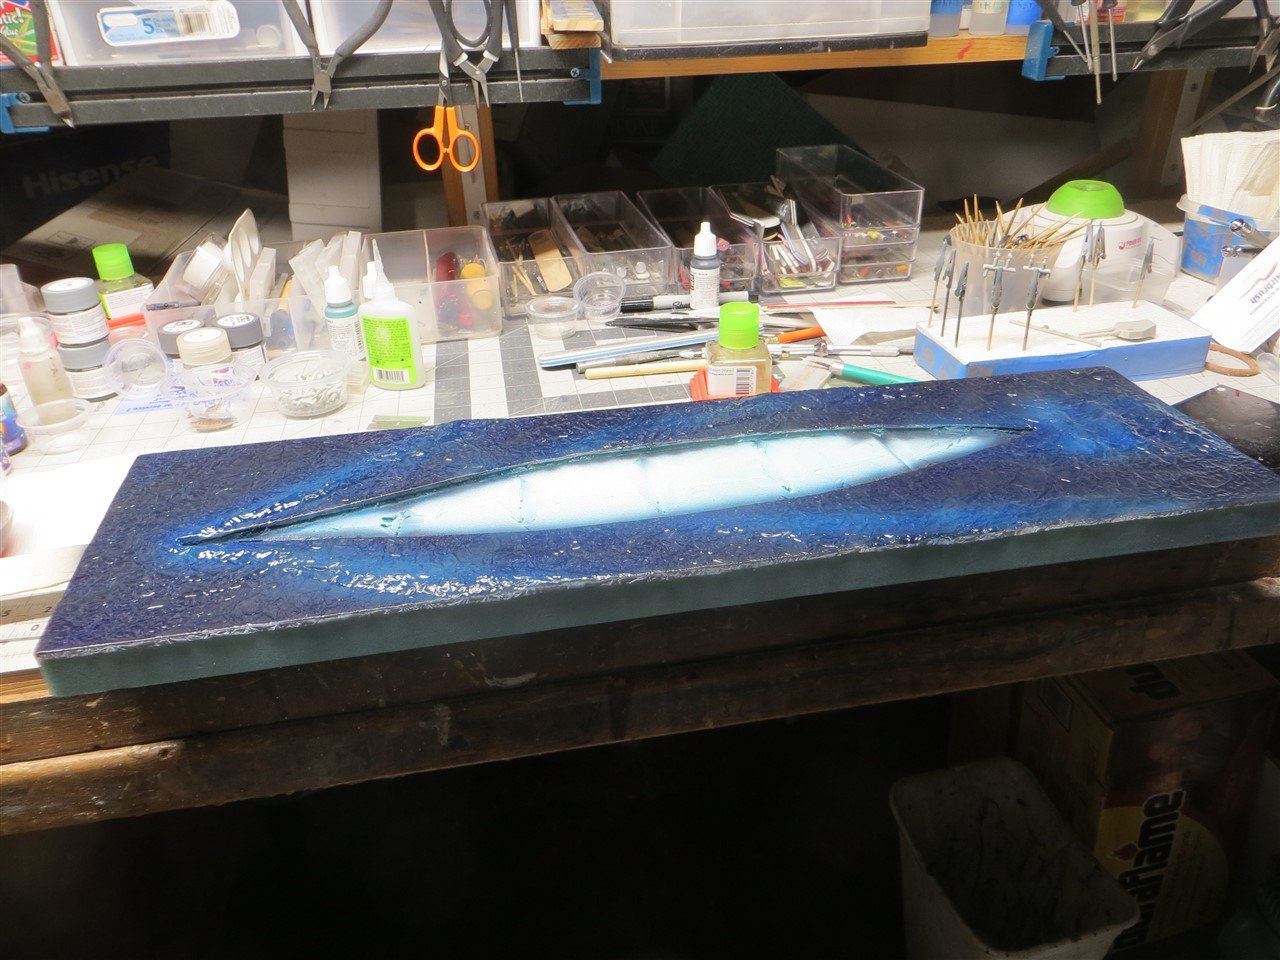
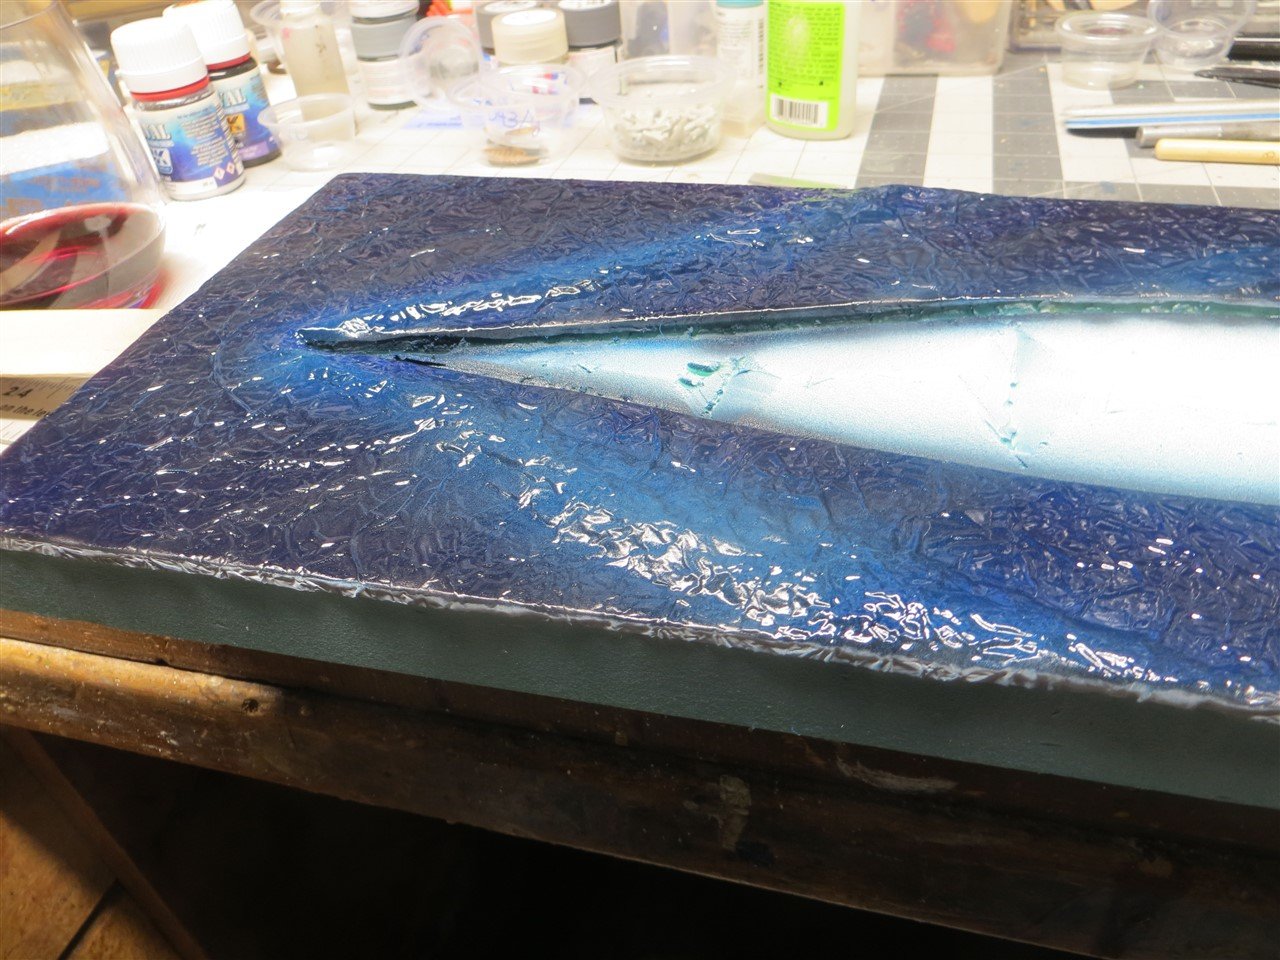
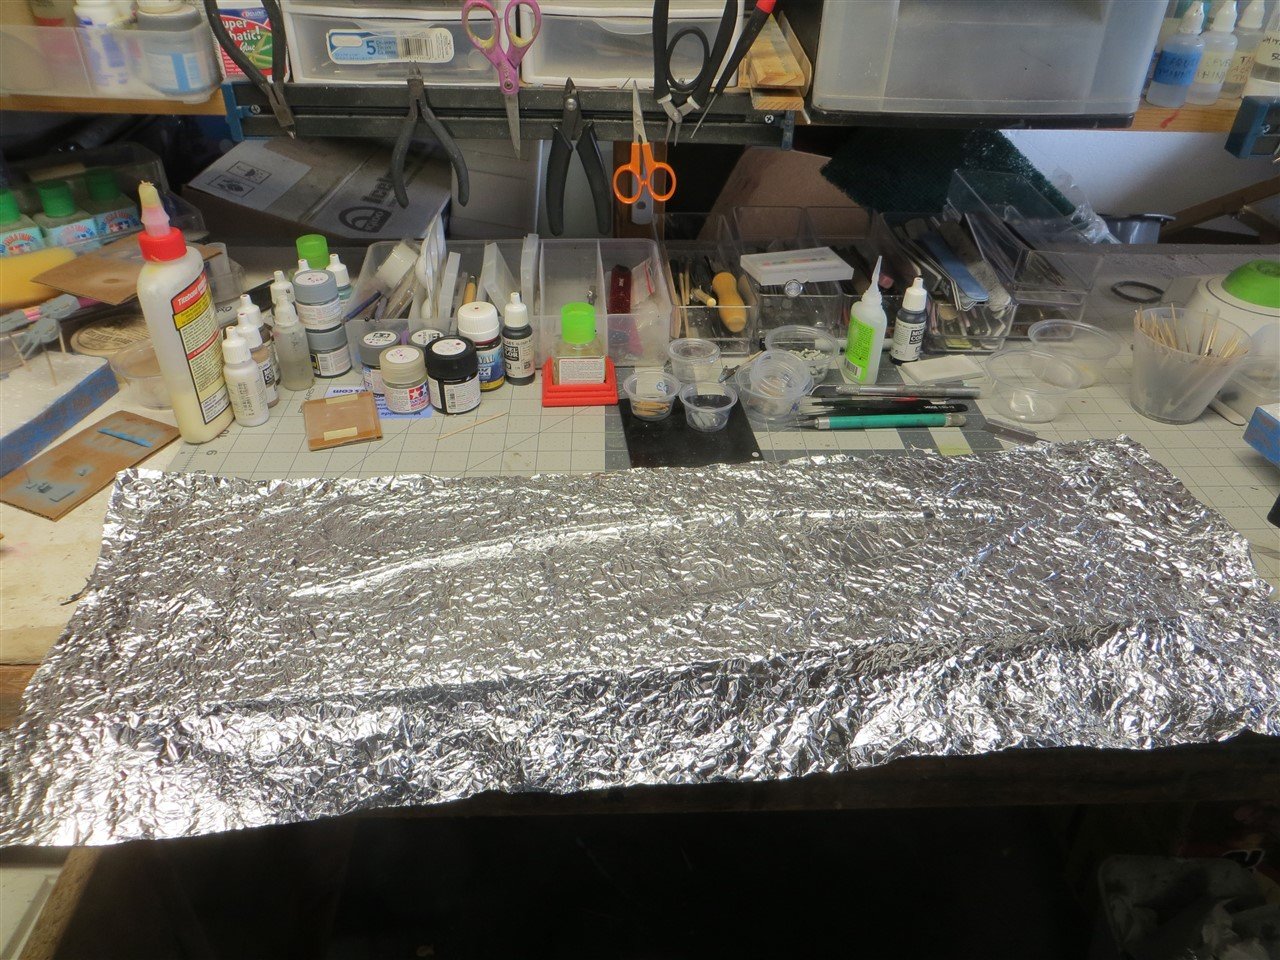
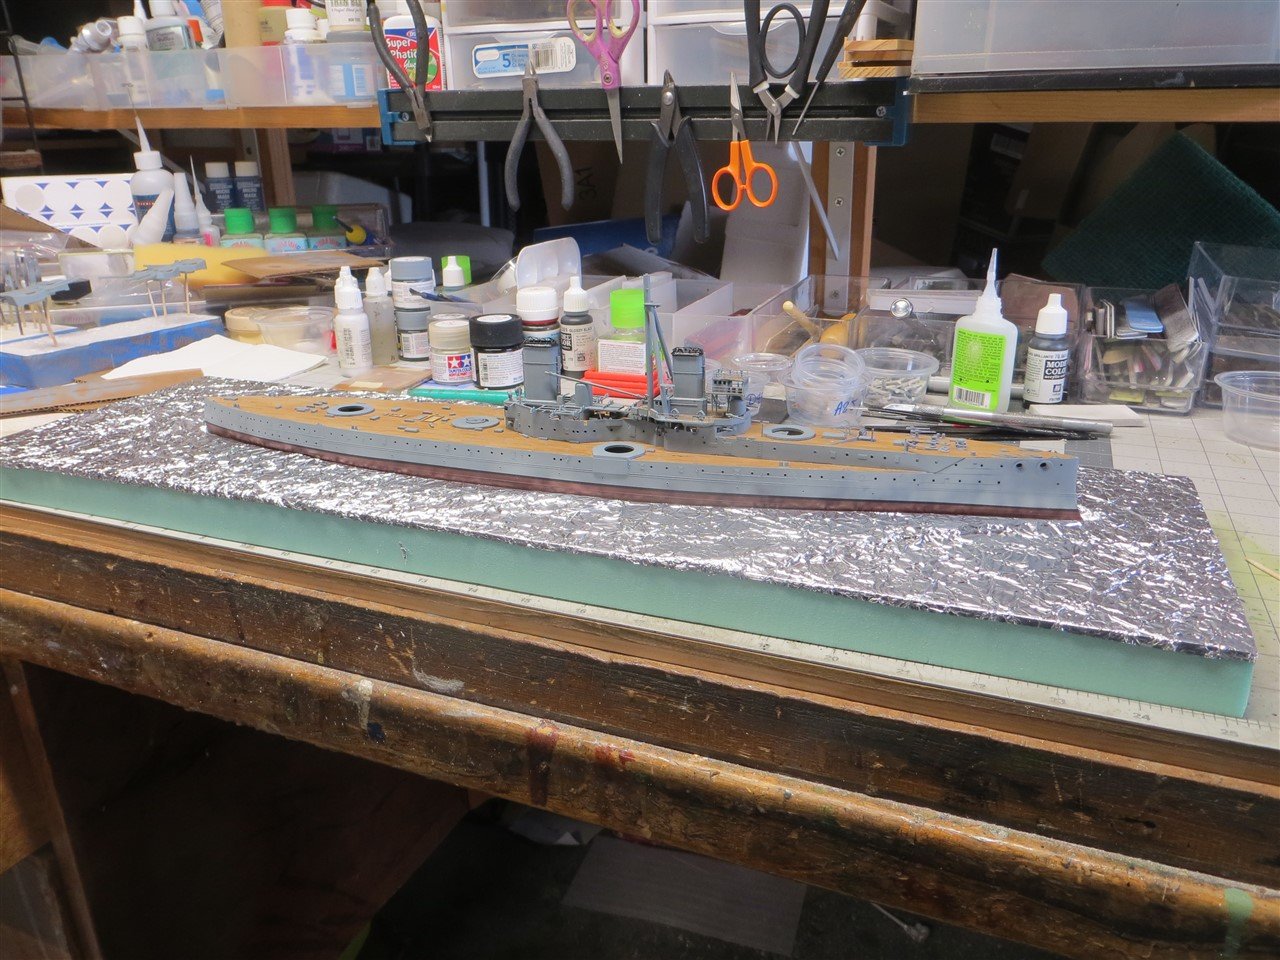
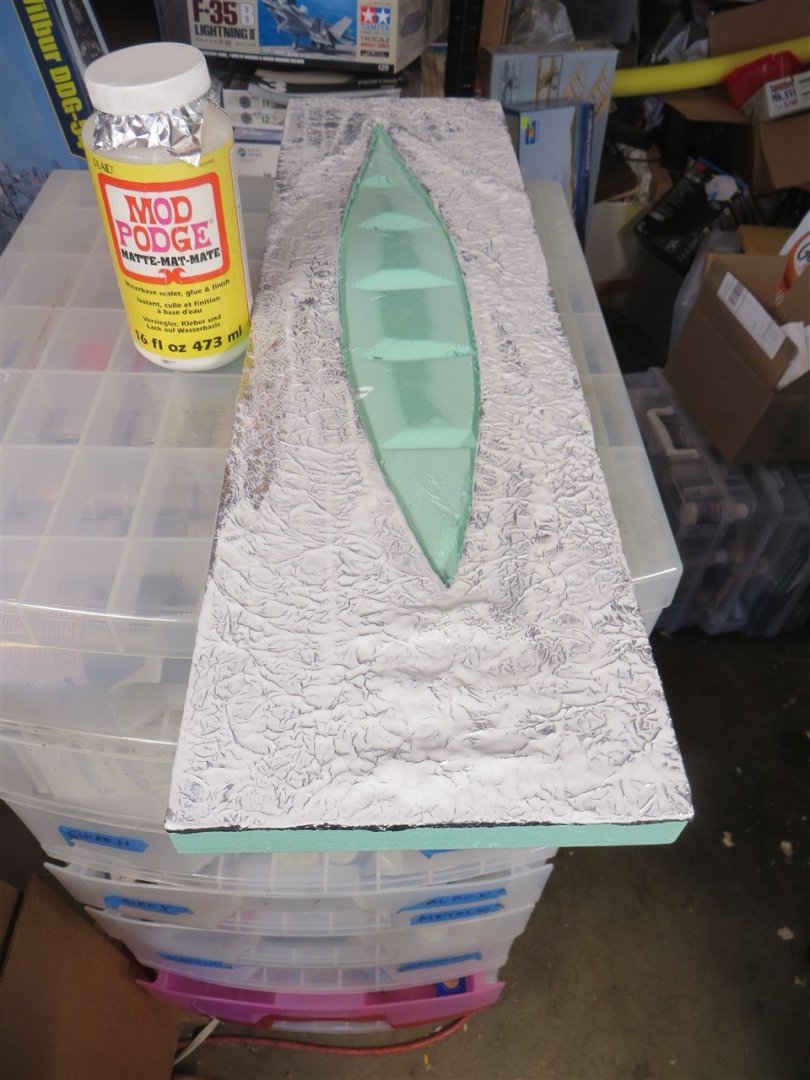
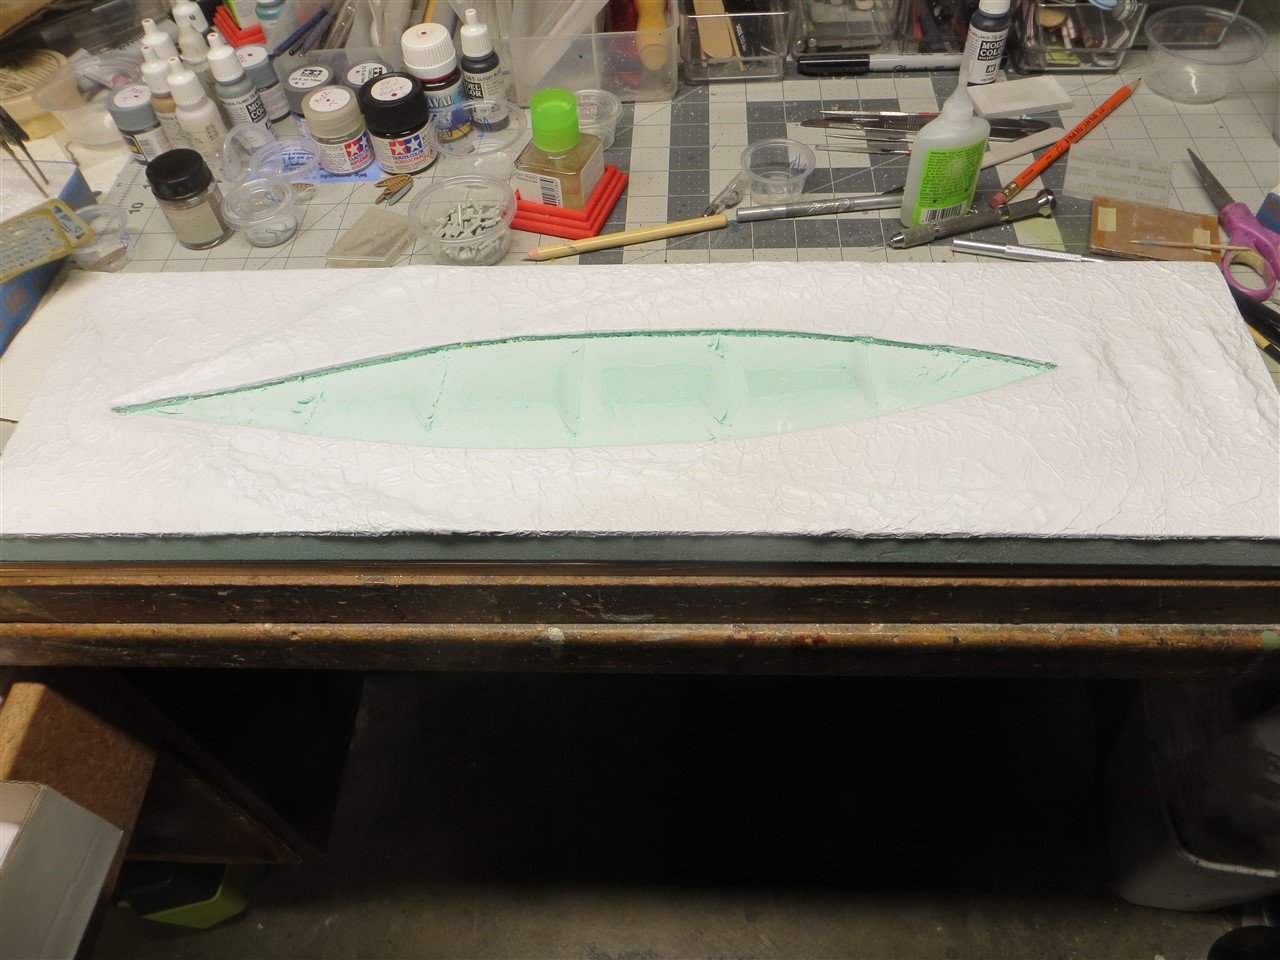
It is time to take a little break from model construction and put a little work into the base. Previously I had cut an outline of the hull into the foam base and made sure that the model will fit. The process I am following to create my seascape is one I found on youtube. There are numerous seascape builds on youtube but I chose this particular one because it does not use molded clays or resins to sculpt the sea surface. I really wanted to keep it simple. The first step is to fashion the wake by gluing rows of crinkled tin foil to the base. After the wake was dry; I covered the entire base with a single sheet of crinkled tin foil. The crinkling of the tin foil provides the random highs and lows that will become the surface of the water. I learned later that I probably did not do as good a job of smoothing the wrinkles before gluing to the base which resulted in some areas of the ocean surface having too sharp an appearance. I trimmed the foil and let the base dry for 24 hours. When dry, I gave the base a rather thick coat of Mod Podge hoping that it will help to soften the appearance of the crinkled foil. Not wanting to wait another 24 hours to allow the Mod Podge to dry I put the base in our dehydrator and ran it for 30 minutes......it did a great job. The Mod Podging was followed by a coat of white primer (Mr Surfacer 1500) and finally the first color coat which is Tamiya FX17 Dark Sea Blue. This color is almost black but will serve as the base color. That is as far as I have progressed; here are a few photos of the process:


-
Great subject. I spent a very enjoyable day at the Vancouver Maritime Museum walking around the St Roch. I did not know that Billings had a kit of this subject. May look into it as a future subject. Thanks for the build log. Will follow.
-
Modelling has always been a part of my life. I started building model airplanes when I was about 10. Hand lanched gliders and rubberband powered craft were always spread across my dad's garage workbench. Next came control line models. How many folks remember the Thimbledrone .049 engine. When I hit my 20s I graduated to radio control and for the next few years I spread hundreds of dollars of balsa wood chips across the local flying field. As I got older the models got bigger. Also, the hobby began to change. The old balsa kits began to disappear and ready built planes became the standard. While I loved flying, building had always been my real motivation. I loved turning a box of balsa into a flying machine. As model aircraft building began disappearing; I turned to plastic models of airplanes. Learning how to use an airbrush to paint and weather a model did a pretty good job of filling my need to model. About ten years ago I attempted my first wooden kit of a sailing ship after visiting a local maritime museum. It took more than a year to build but was a great challenge and I loved it. I then dived into wooden ship models building quite a few. Some were even nice enough to display in the house. During these years I stumbled on this site and enjoyed the building and community. While roaming around the internet I also found the model warship site and was taken by the models displayed, especially those in waterline presentation. They were also models of more modern ships for which I had a greater interest. Also, there was a sense of movement and excitement that static models do not have. I built one, and while it did not turn out well; it was an enjoyable build and got me to strive to do better. To this day I have a few waterline ships under construction. Well, that is a history of my modelling life. Why do I do it.....I have no idea; it is just a part of me. Someday I hope to get good at it.
-
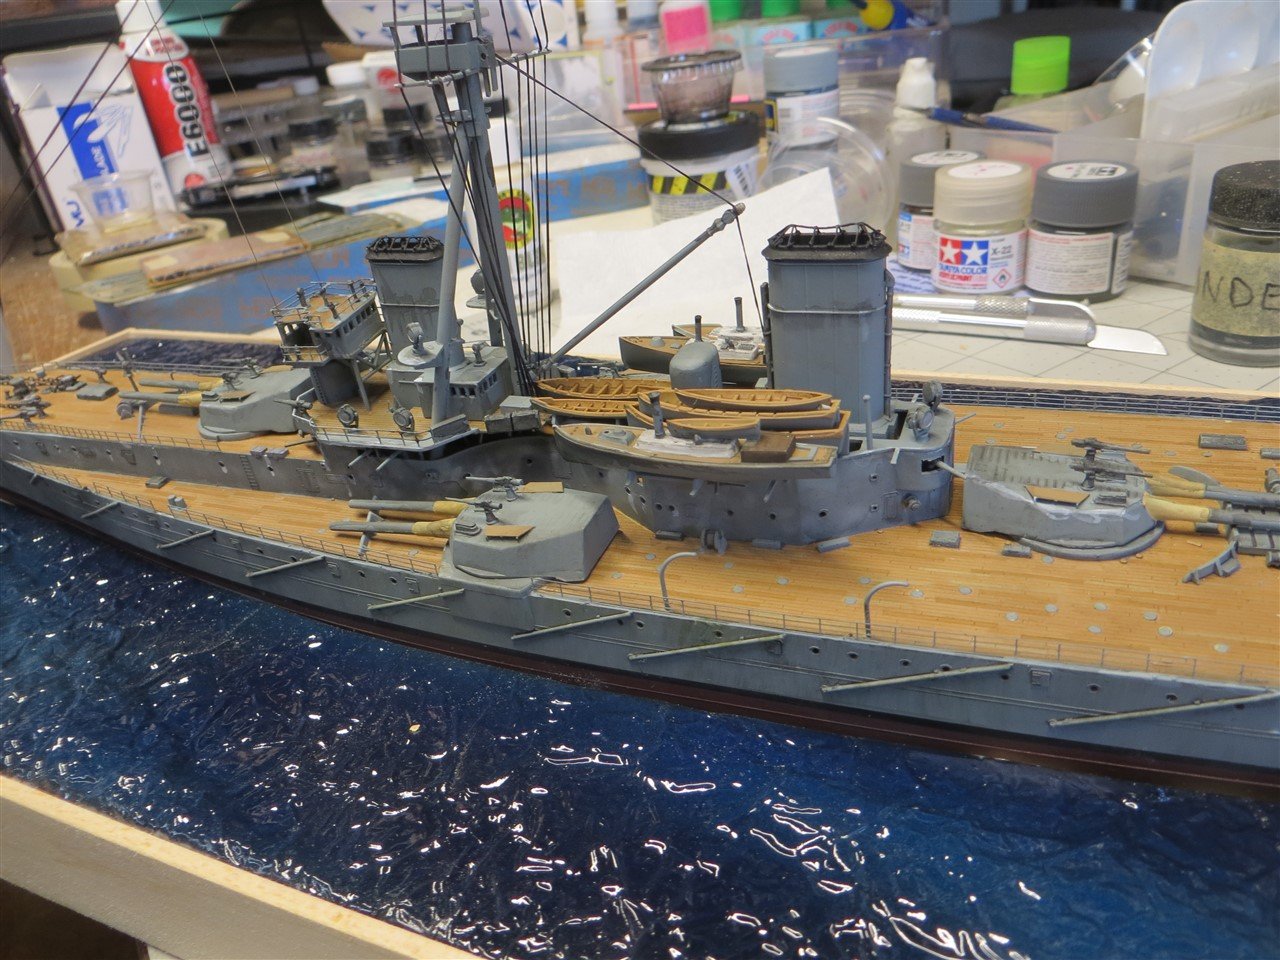
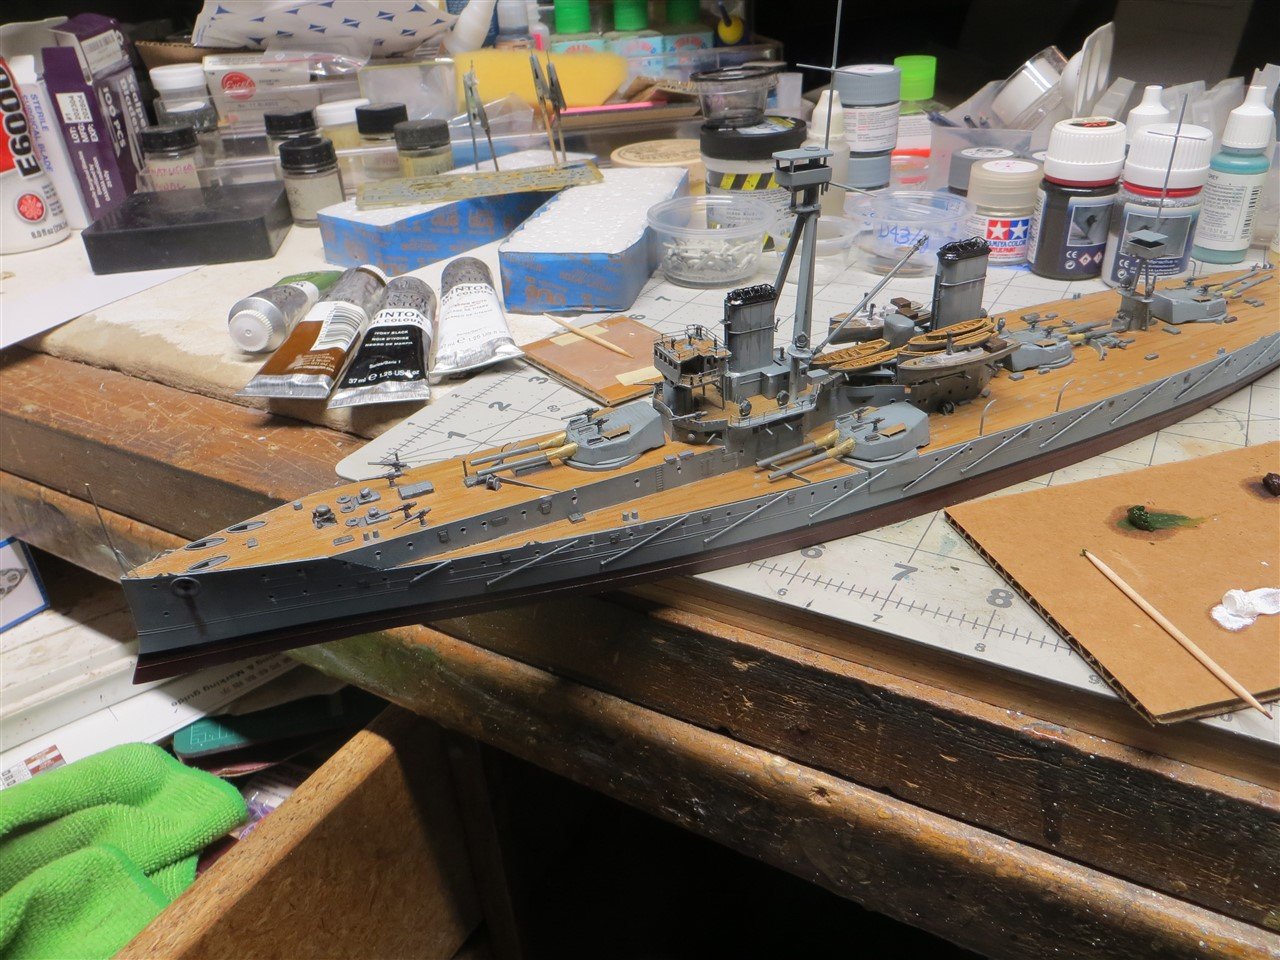
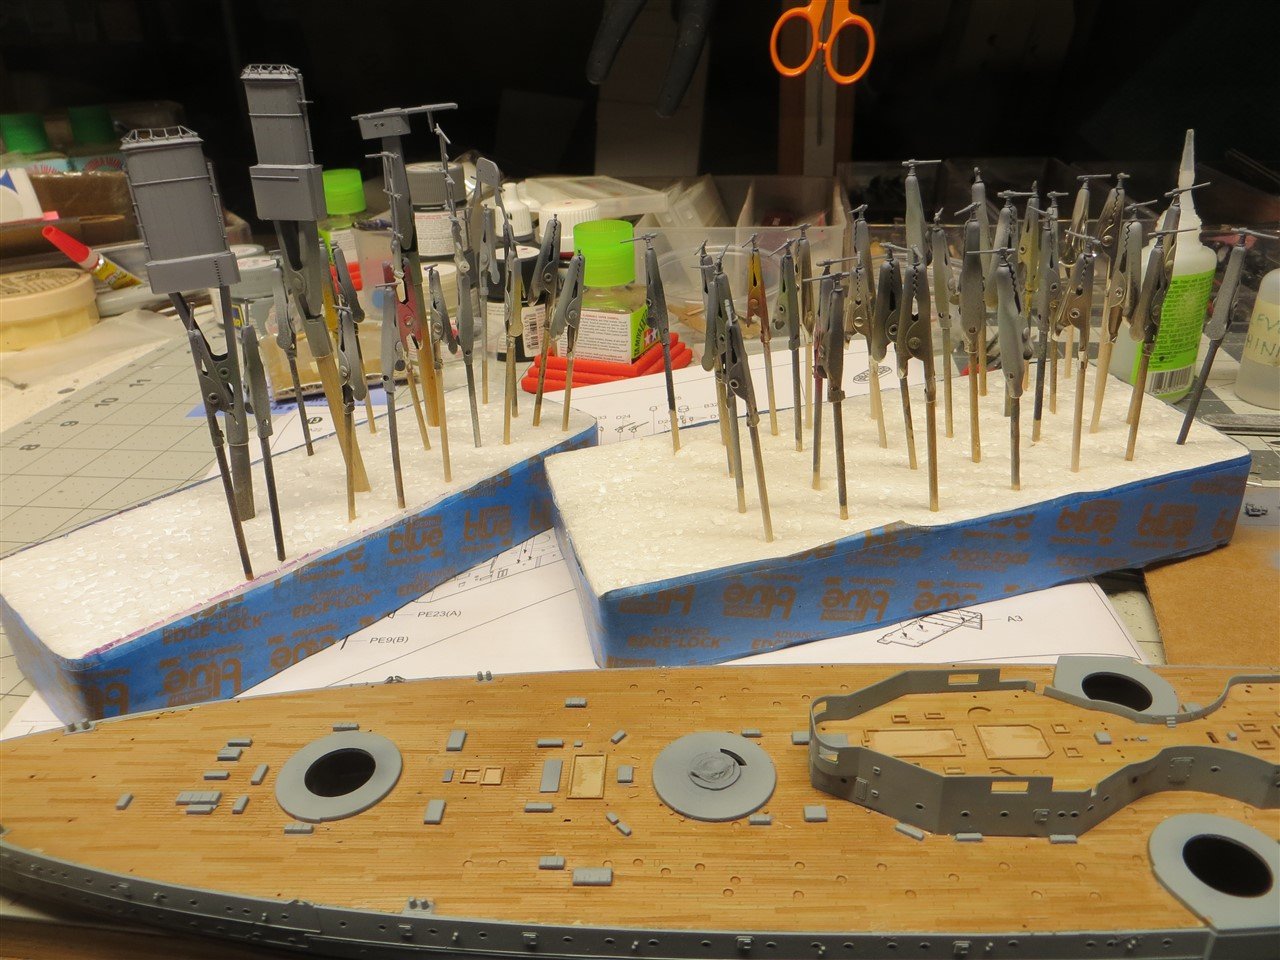
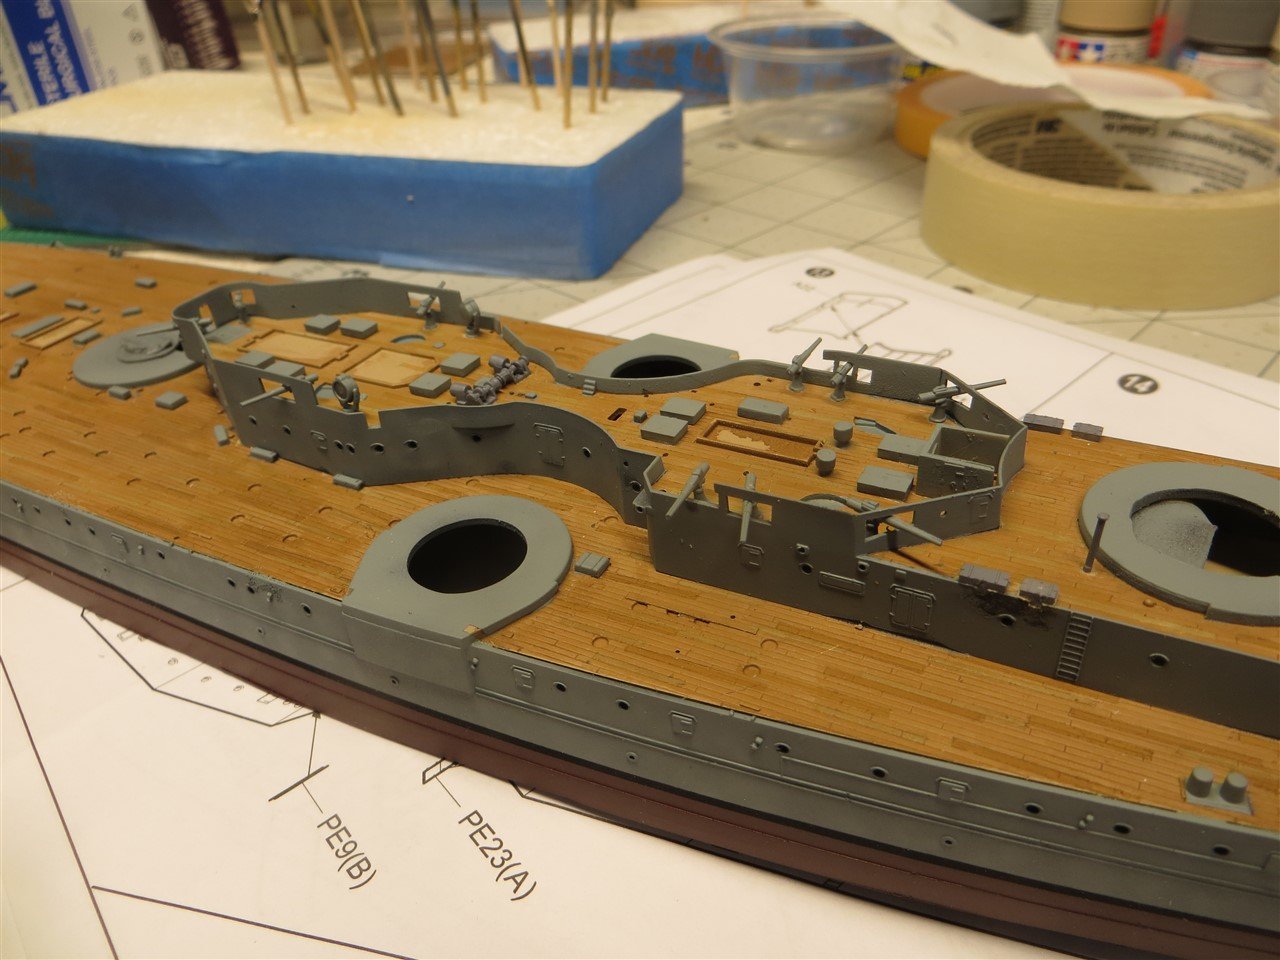
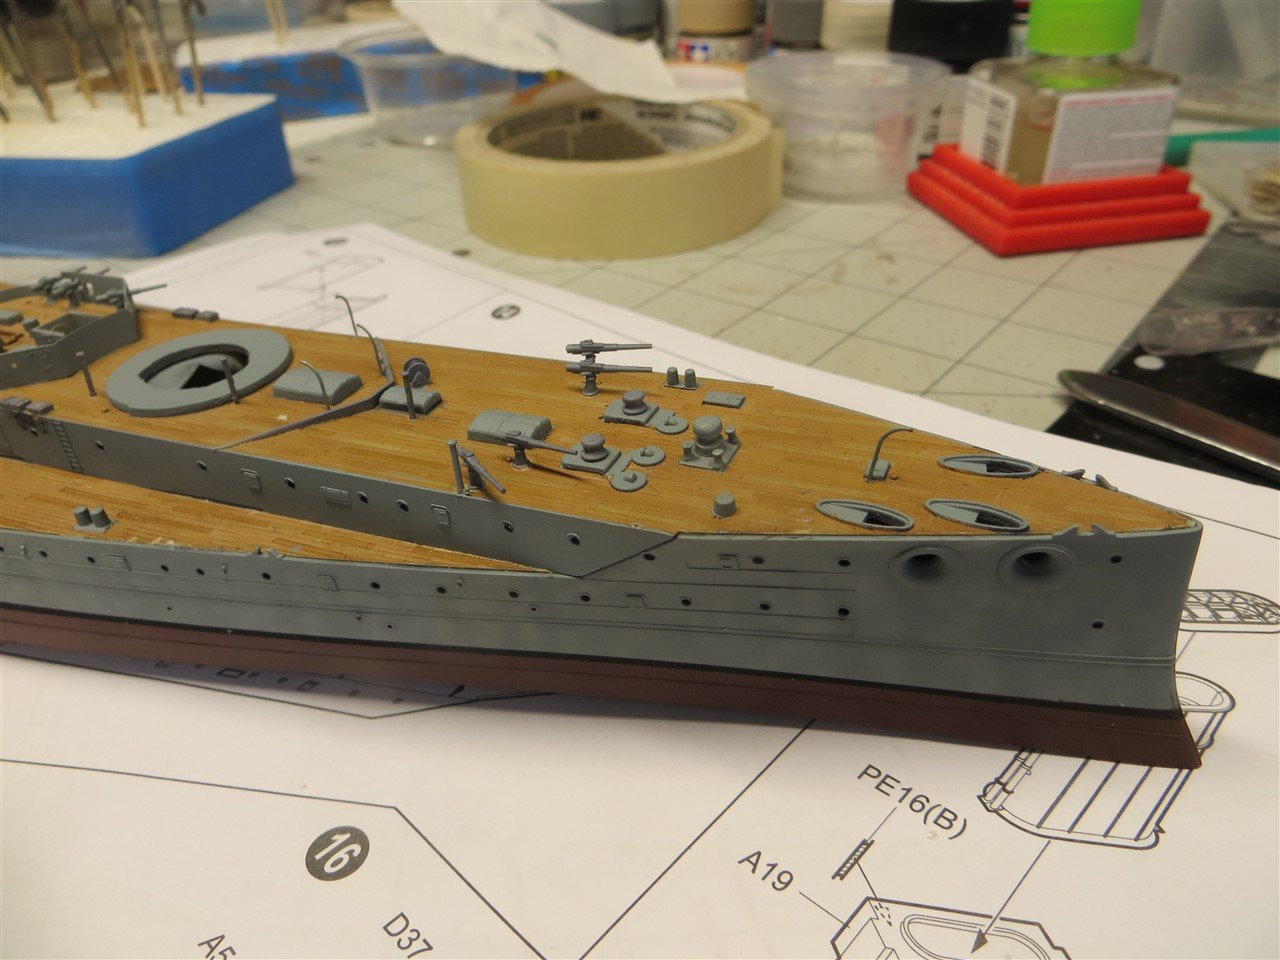
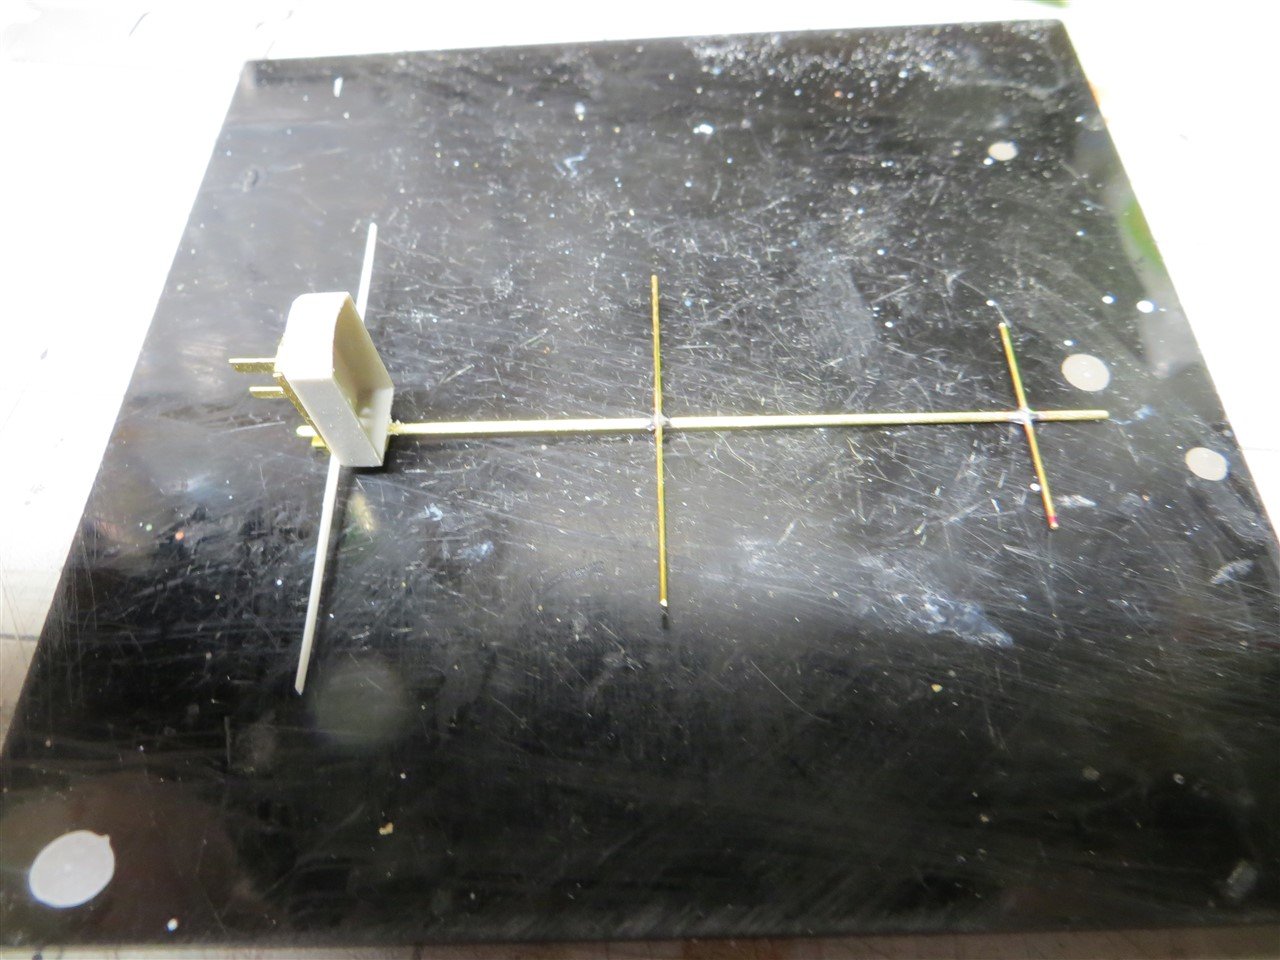
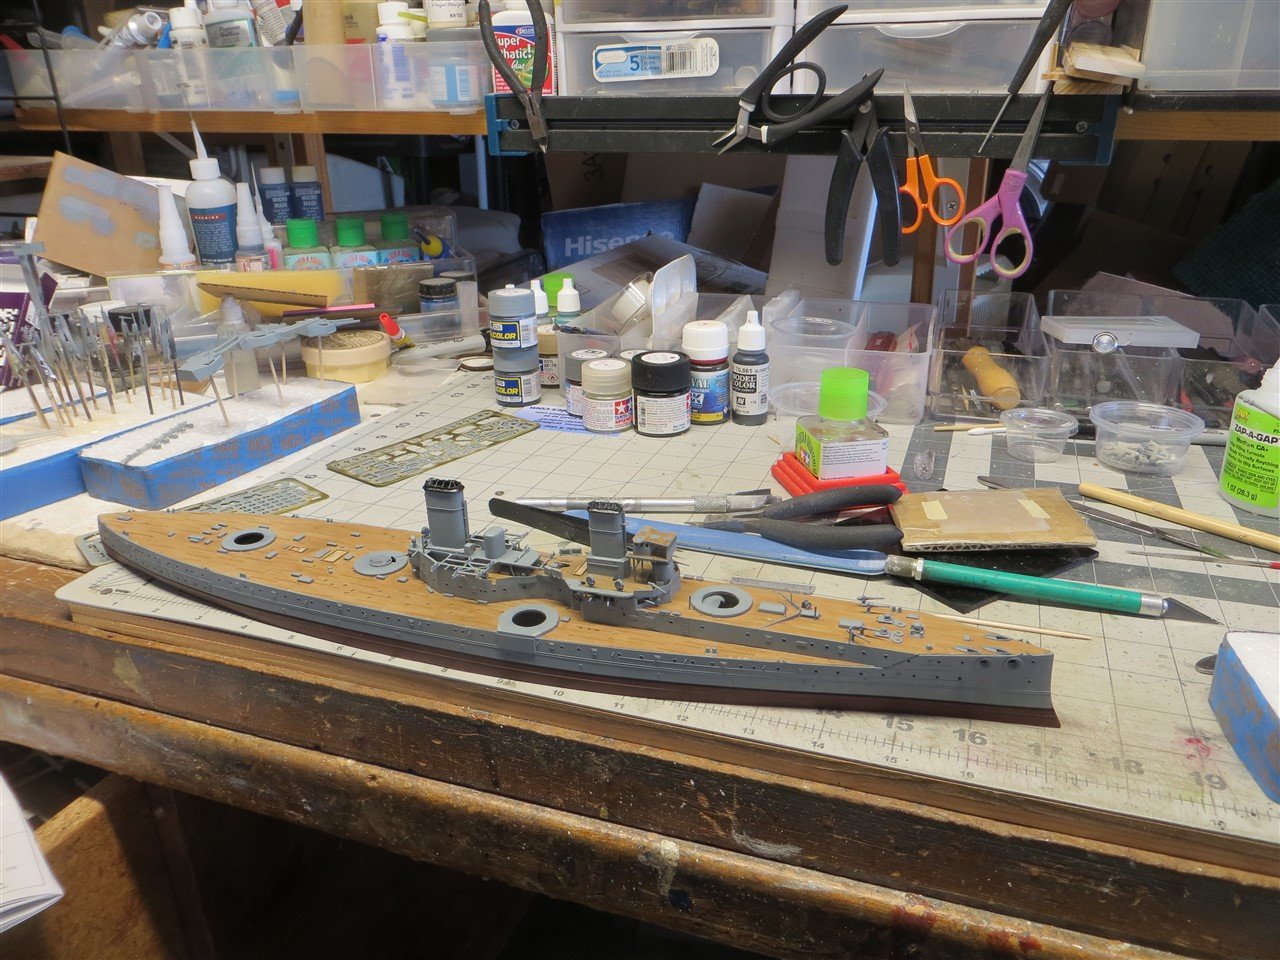
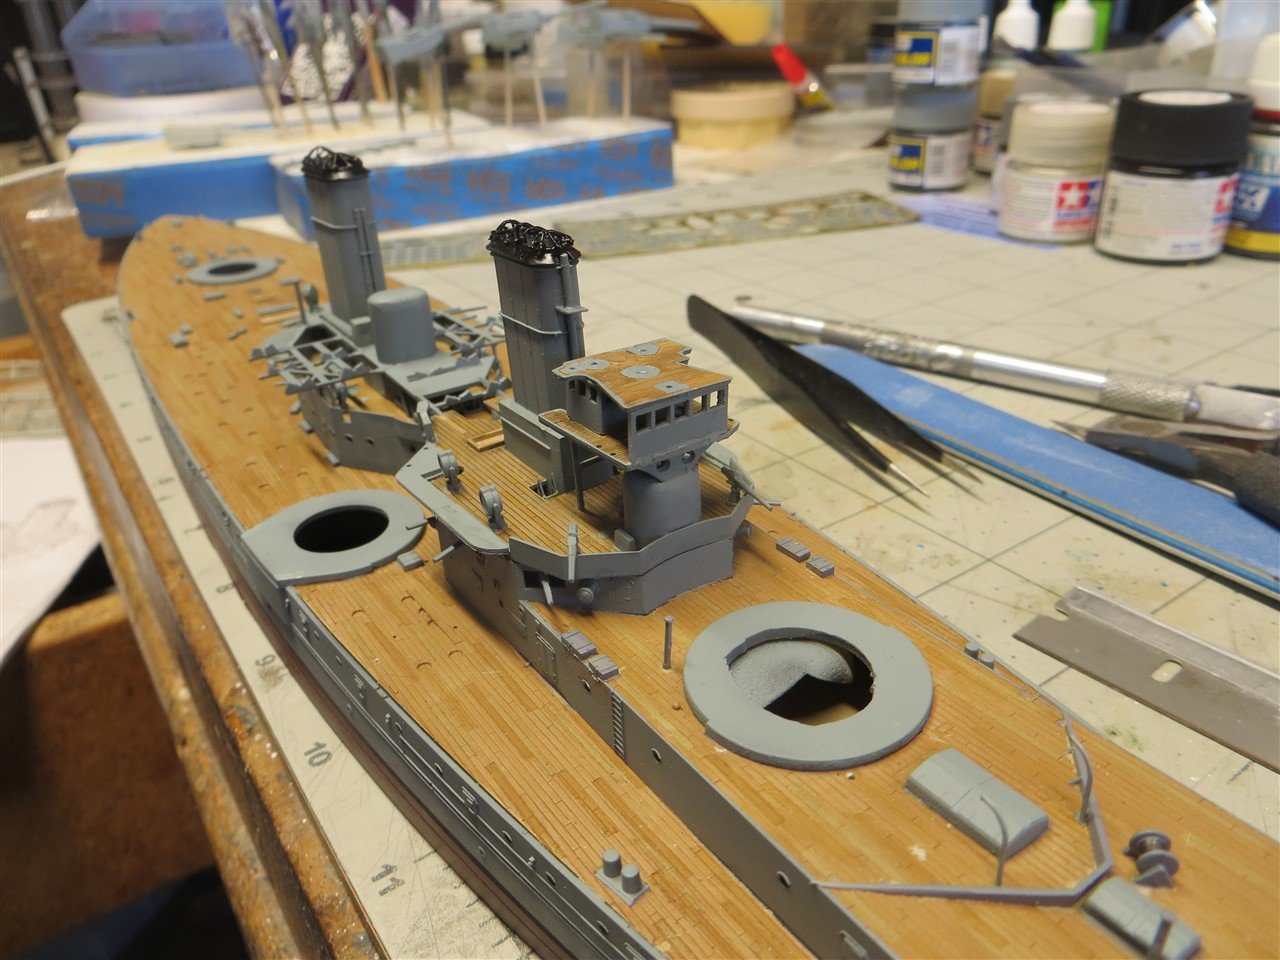
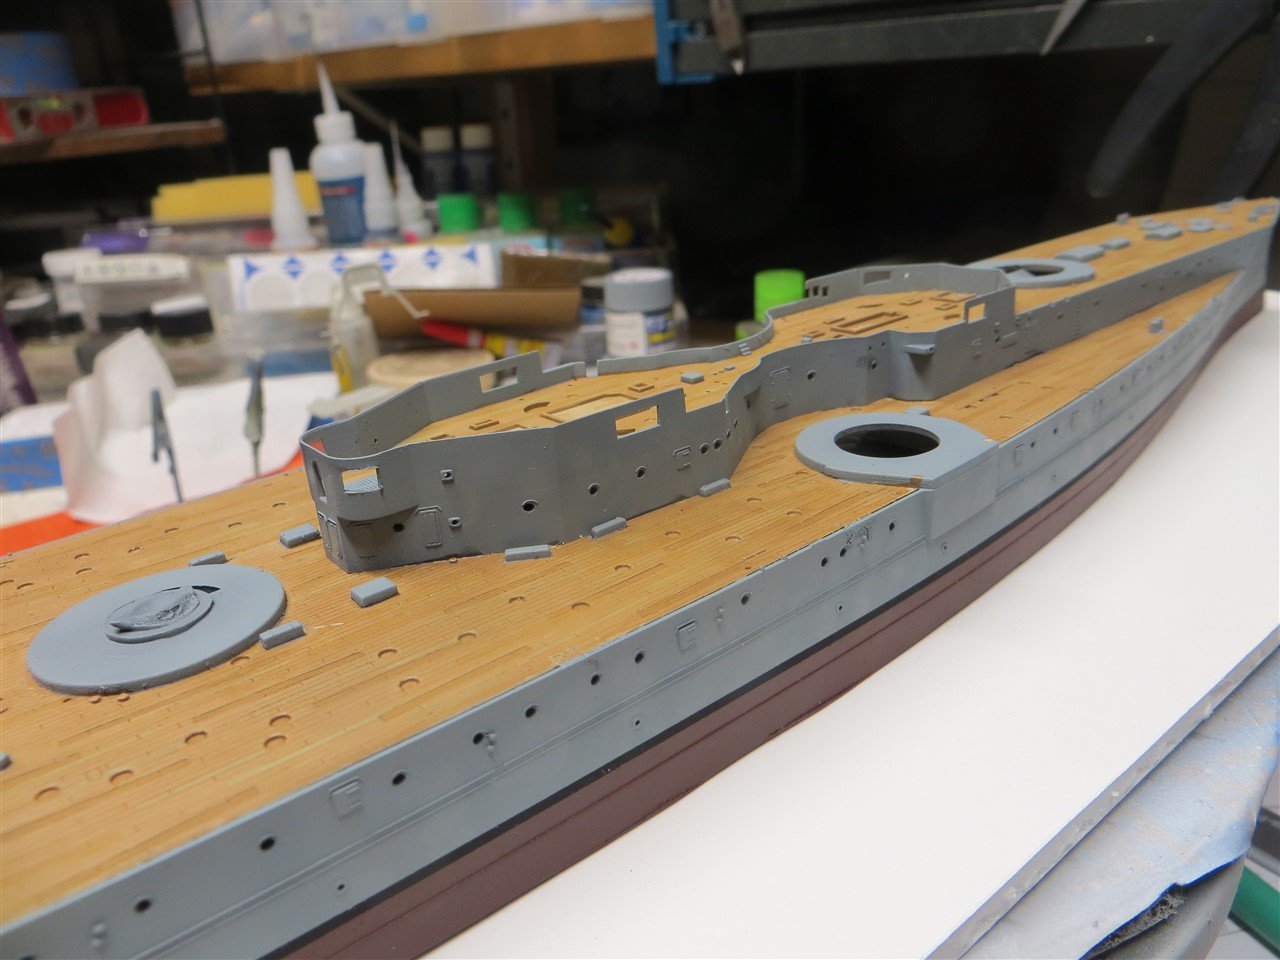
With the basic hull essentially assembled and painted it is time to tackle all the little fiddely parts. I have to admit that it can get a bit tedious to cut them from the sprue, clean up the seam lines; fill the ejection spots (although there were few of these on this kit) and paint. Painting can also be a challenge. I have made up alot of parts holders by attaching the smallest alligator clips I can find to toothpicks. I can clip these to some very small parts and then stick in foam to hold for painting. Of course, when these little parts are glued to the model you must remove the paint from the part and the location on the hull if you want a good joint. I did run into one problem while working on the small parts. The upper main mast styrene was so thin that it crumbled and broke when removing from the sprue. I then used short lengths of brass wire in various guages to recreate the broken parts. It required a little soldering; a skill I have not acquired; but I think I did OK. The following are some photos of progress to date:
-
Very much looking forward to photos of your model. You have put in lots of hard work and frustration. You have actually been a bit of an inspiration to keep on working.
- 176 replies
-
- 2
-
-
- new orleans
- iron shipwrights
- (and 2 more)
-
I find these well organized and very neat workspaces absolutely amazing. I fill up 1/2 of my garage with a workbench, a roll-away tool chest, at least two hundred bottles of paint and washes not to mention a few (?) unbuilt kits?
-
Thank you Ian_Grant for the pics. Wow, it looks like rigging is going to be a MAJOR challenge. I know I will not be able to duplicate everything, but I really want to get the basics. In the line drawings, the tripple line that runs bow to stern and droops quite a bit along the way is very prominent. In the photos, I am having trouble making them out. Were then radio antenna?
-
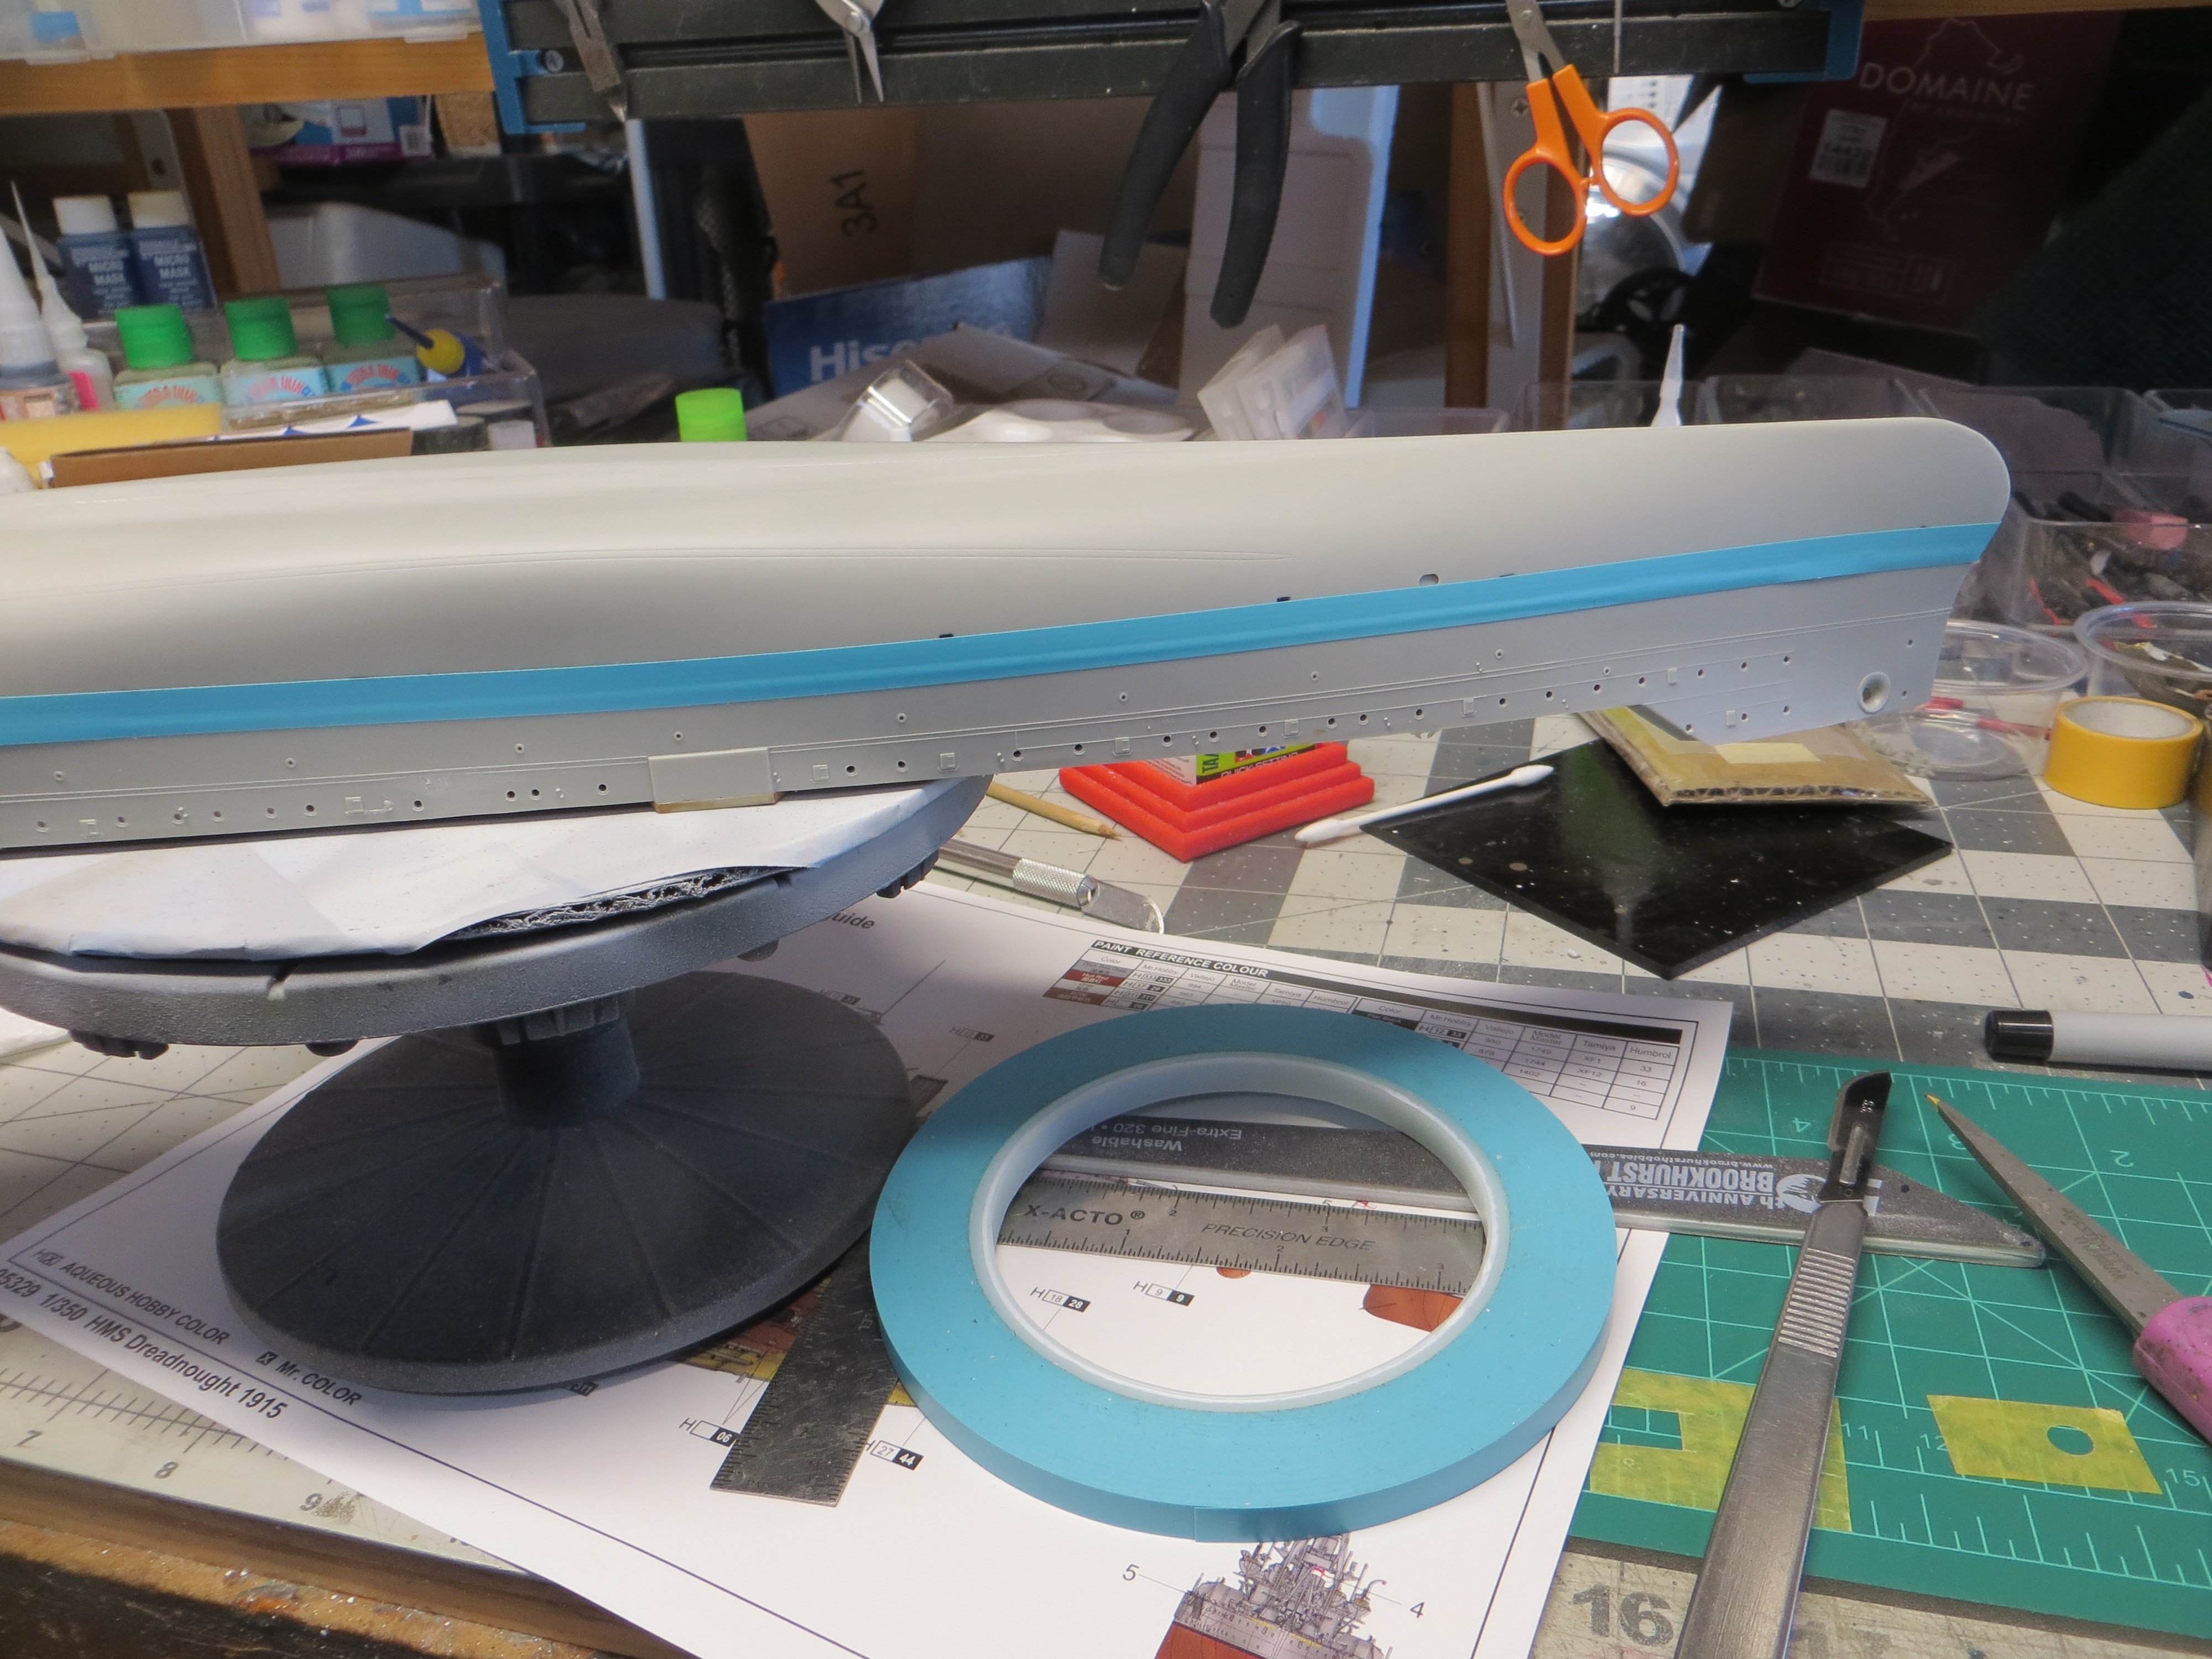
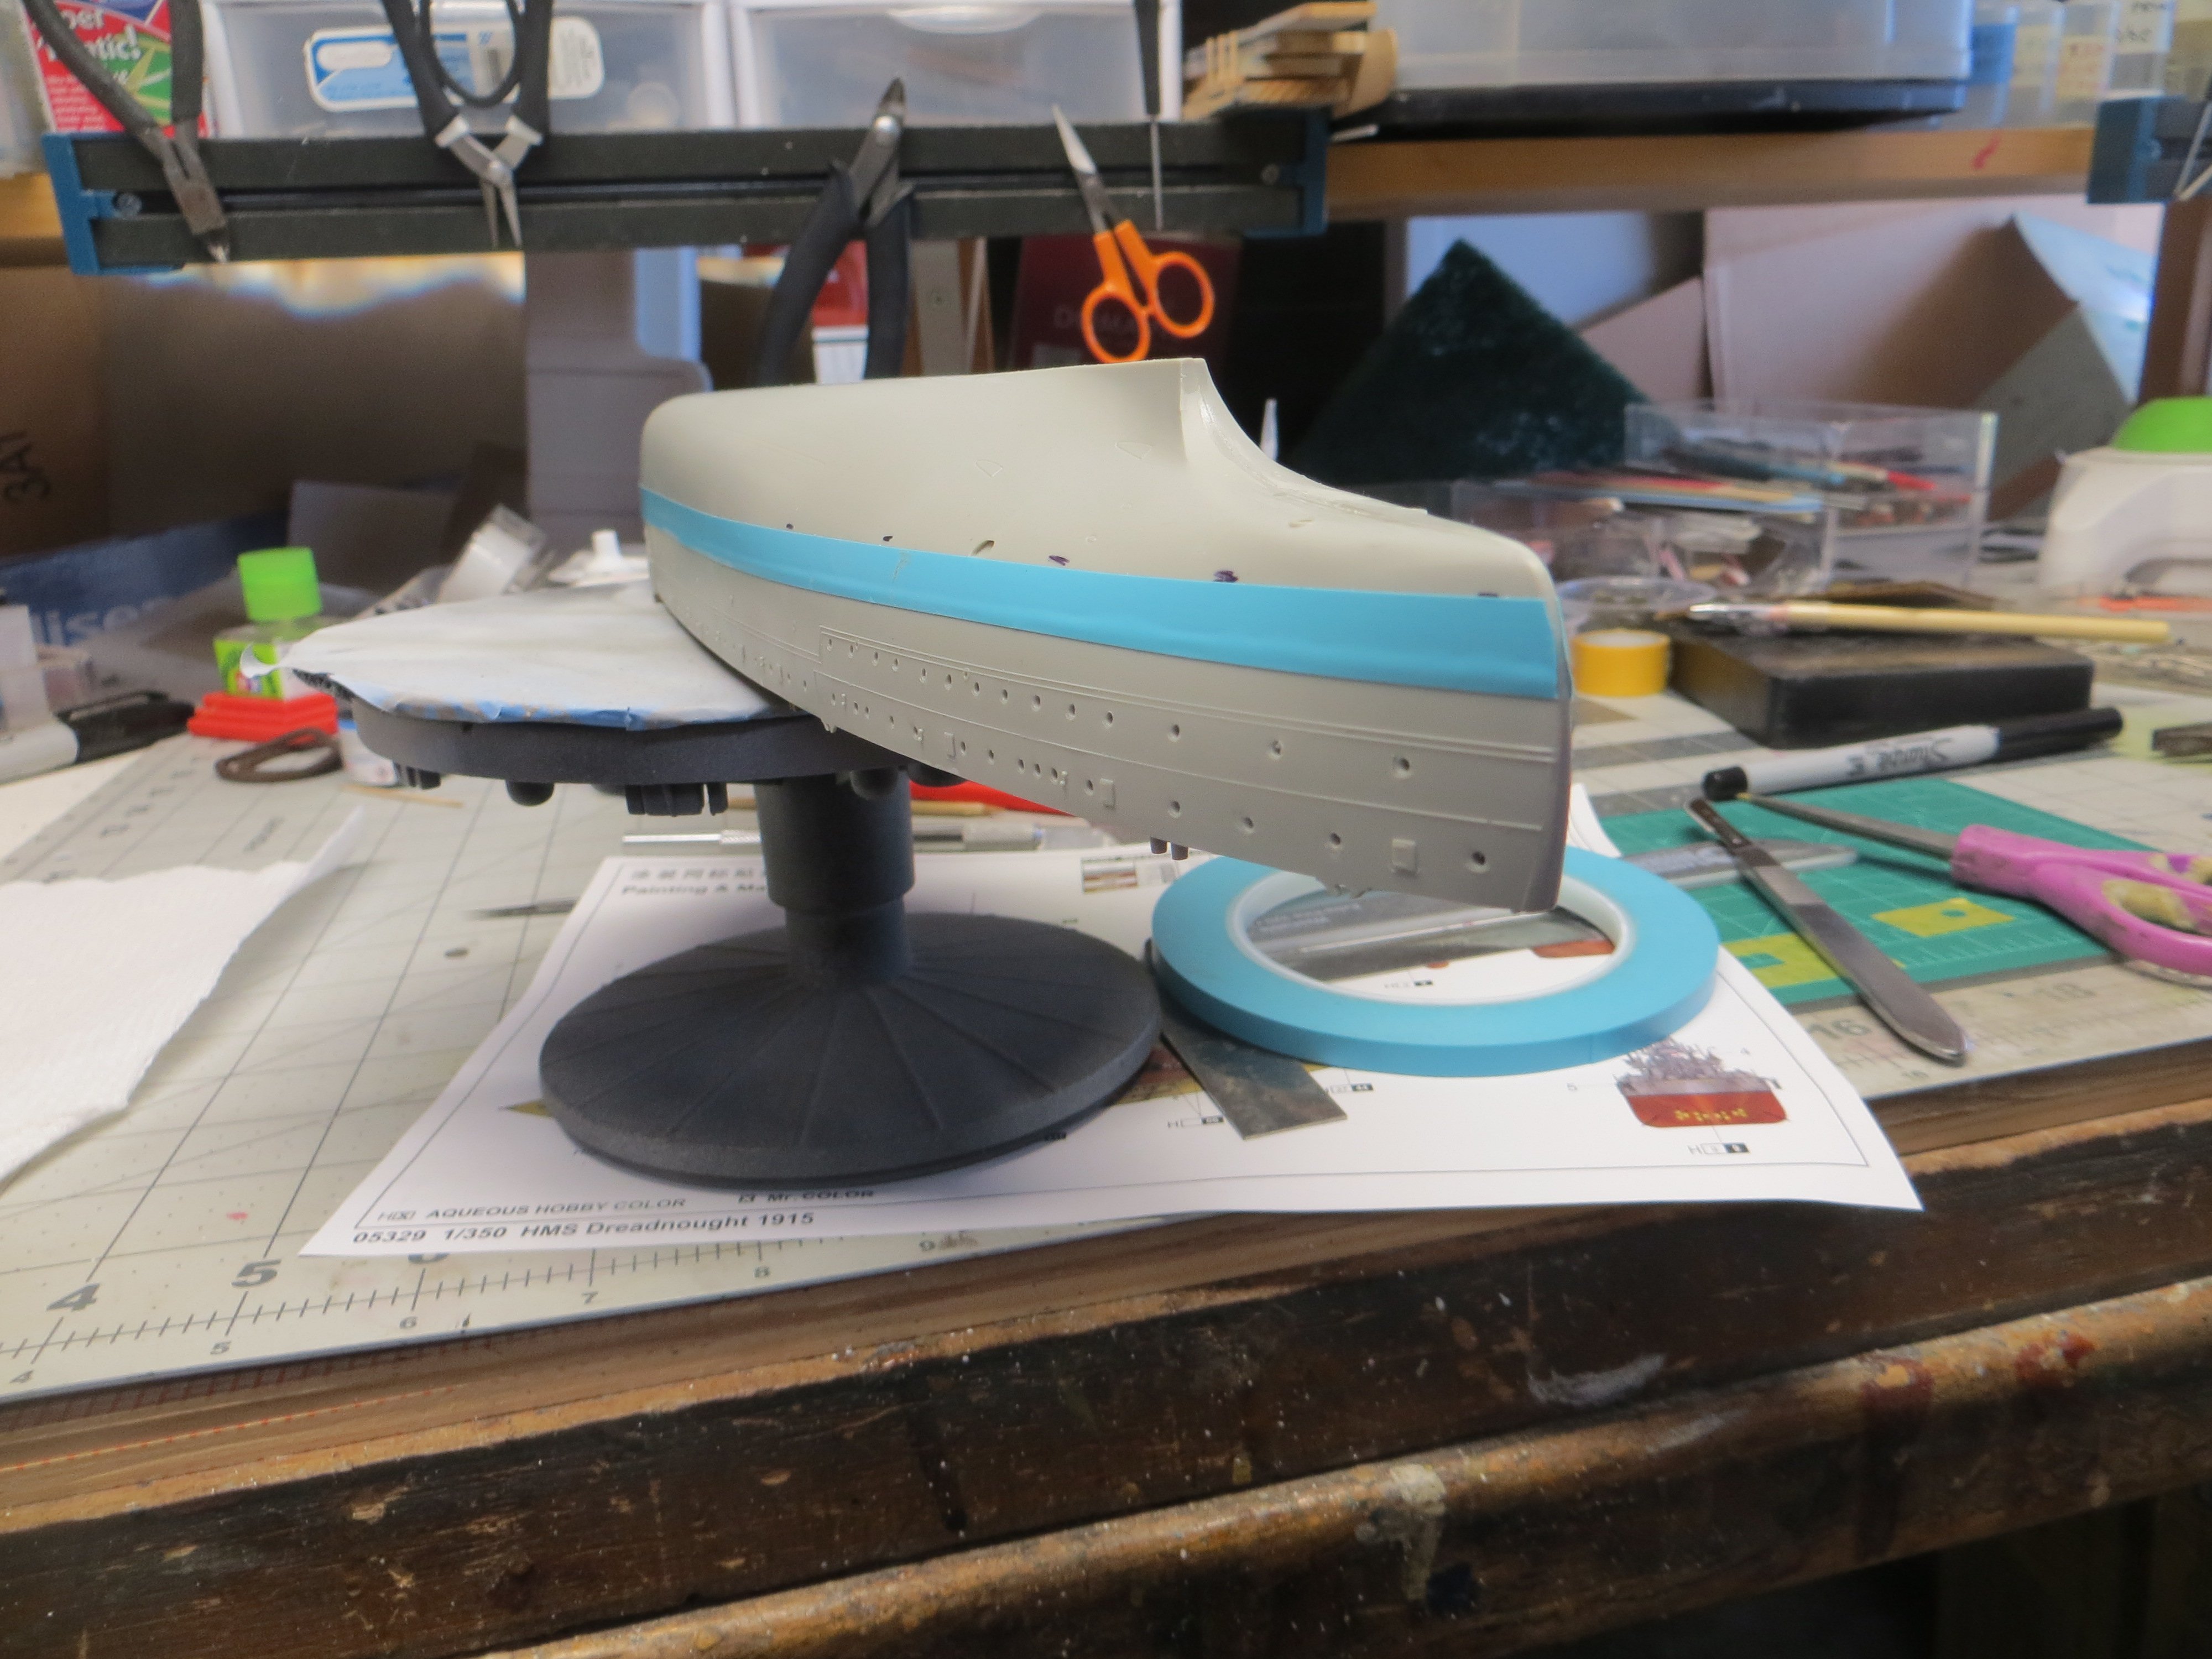
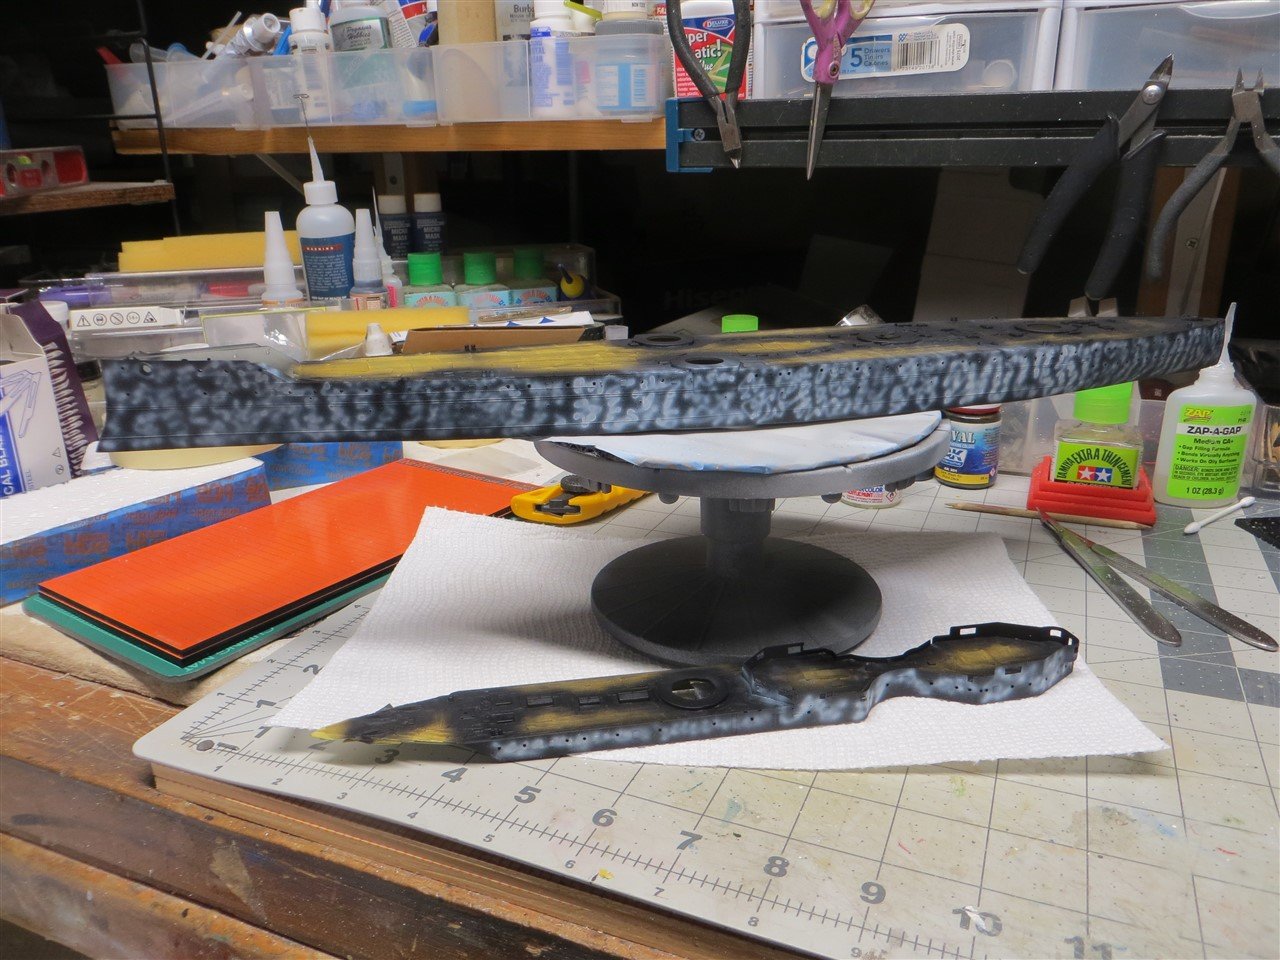
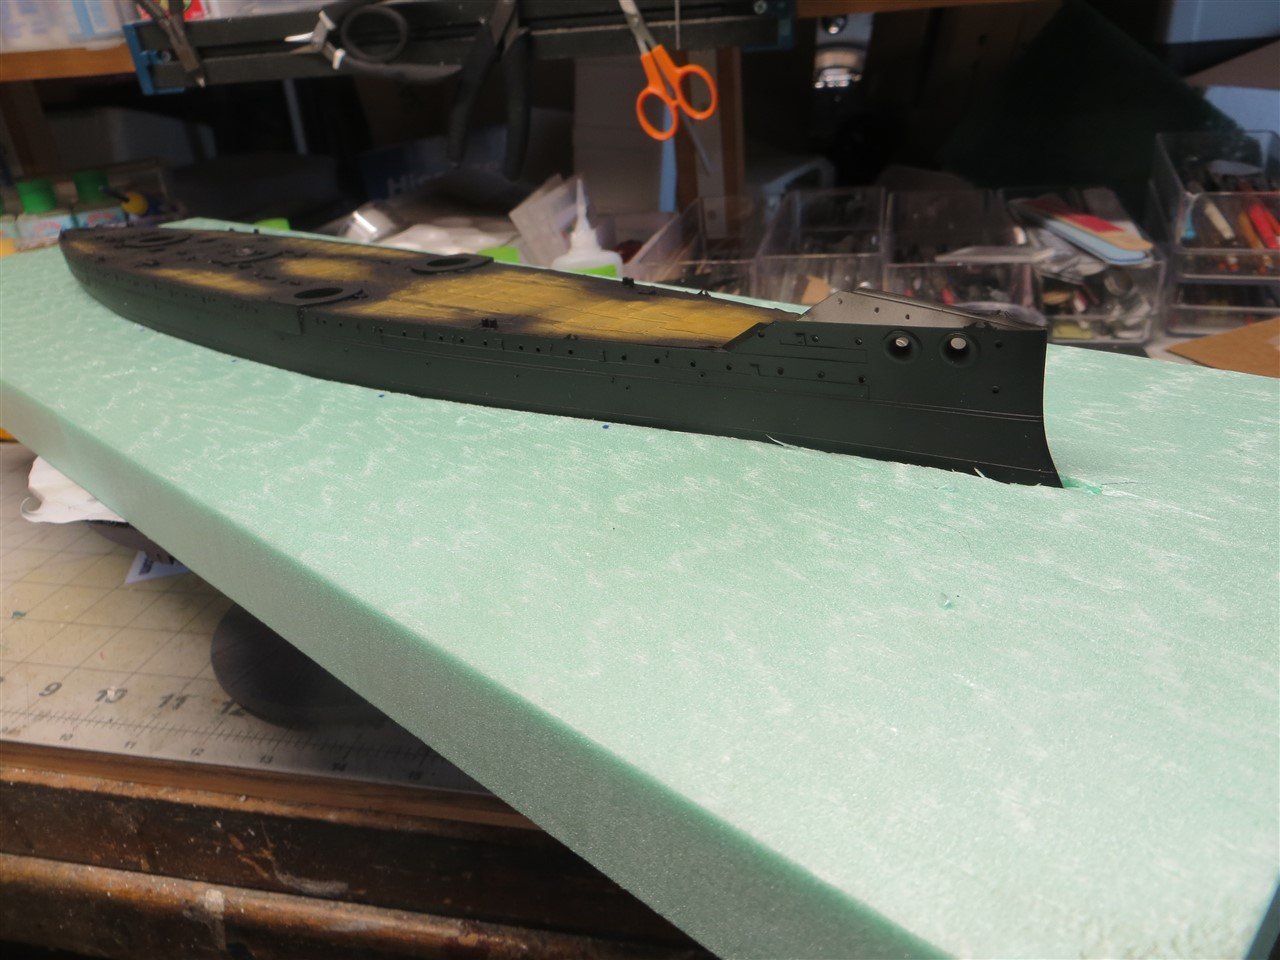
Back to painting the basic hull. I decided to do a little pre-shading by mottling the primer with some white before painting the first color coat. After that I laid airbrushed a light sea gray over the two hull pieces. I then masked off the upper hulls and airbrushed a hull red color. Finally I painted the black line at the waterline of the hull. Is this painted line called the plimsoll line and did ships of this era, i.e. early 1900's have such a line. I have ordered a book on the history of battleships and hope to learn a bit more about these ships. Question for anyone who stumbles on this build. Looking ahead I have to do some amount of rigging to make the presentation look more realistic. How do you other builders go about finding out what the rigging looked like. Photos of Dreadnought on the internet are very difficult use for this information as many are at a distant and dark. I do have some box art that gives me some ideas. I am not looking to make this an historic masterpiece, but some realistic rigging would look nice. Any help would be appreciated. Oh, some photos:
-
I just found your build and have spent the last hour reading. You are a patient and persistent modeller. I think this model would have seen a trash bin if I had been building. I love battleships, cruisers and destroyers. I had looked at Iron Shipwrights, as they have some great subjects, but now I am very hesitant. The first issue is I have never worked with resin; the second issue; it looks like resin is much, much different and more difficult than polystyrene. Would you buy another kit from Iron Shipwrights?
- 176 replies
-
- 3
-
-
- new orleans
- iron shipwrights
- (and 2 more)
-
Excellent job. You white water is really beautiful. I learned a few things I will try on my current Dreadnought project.
-
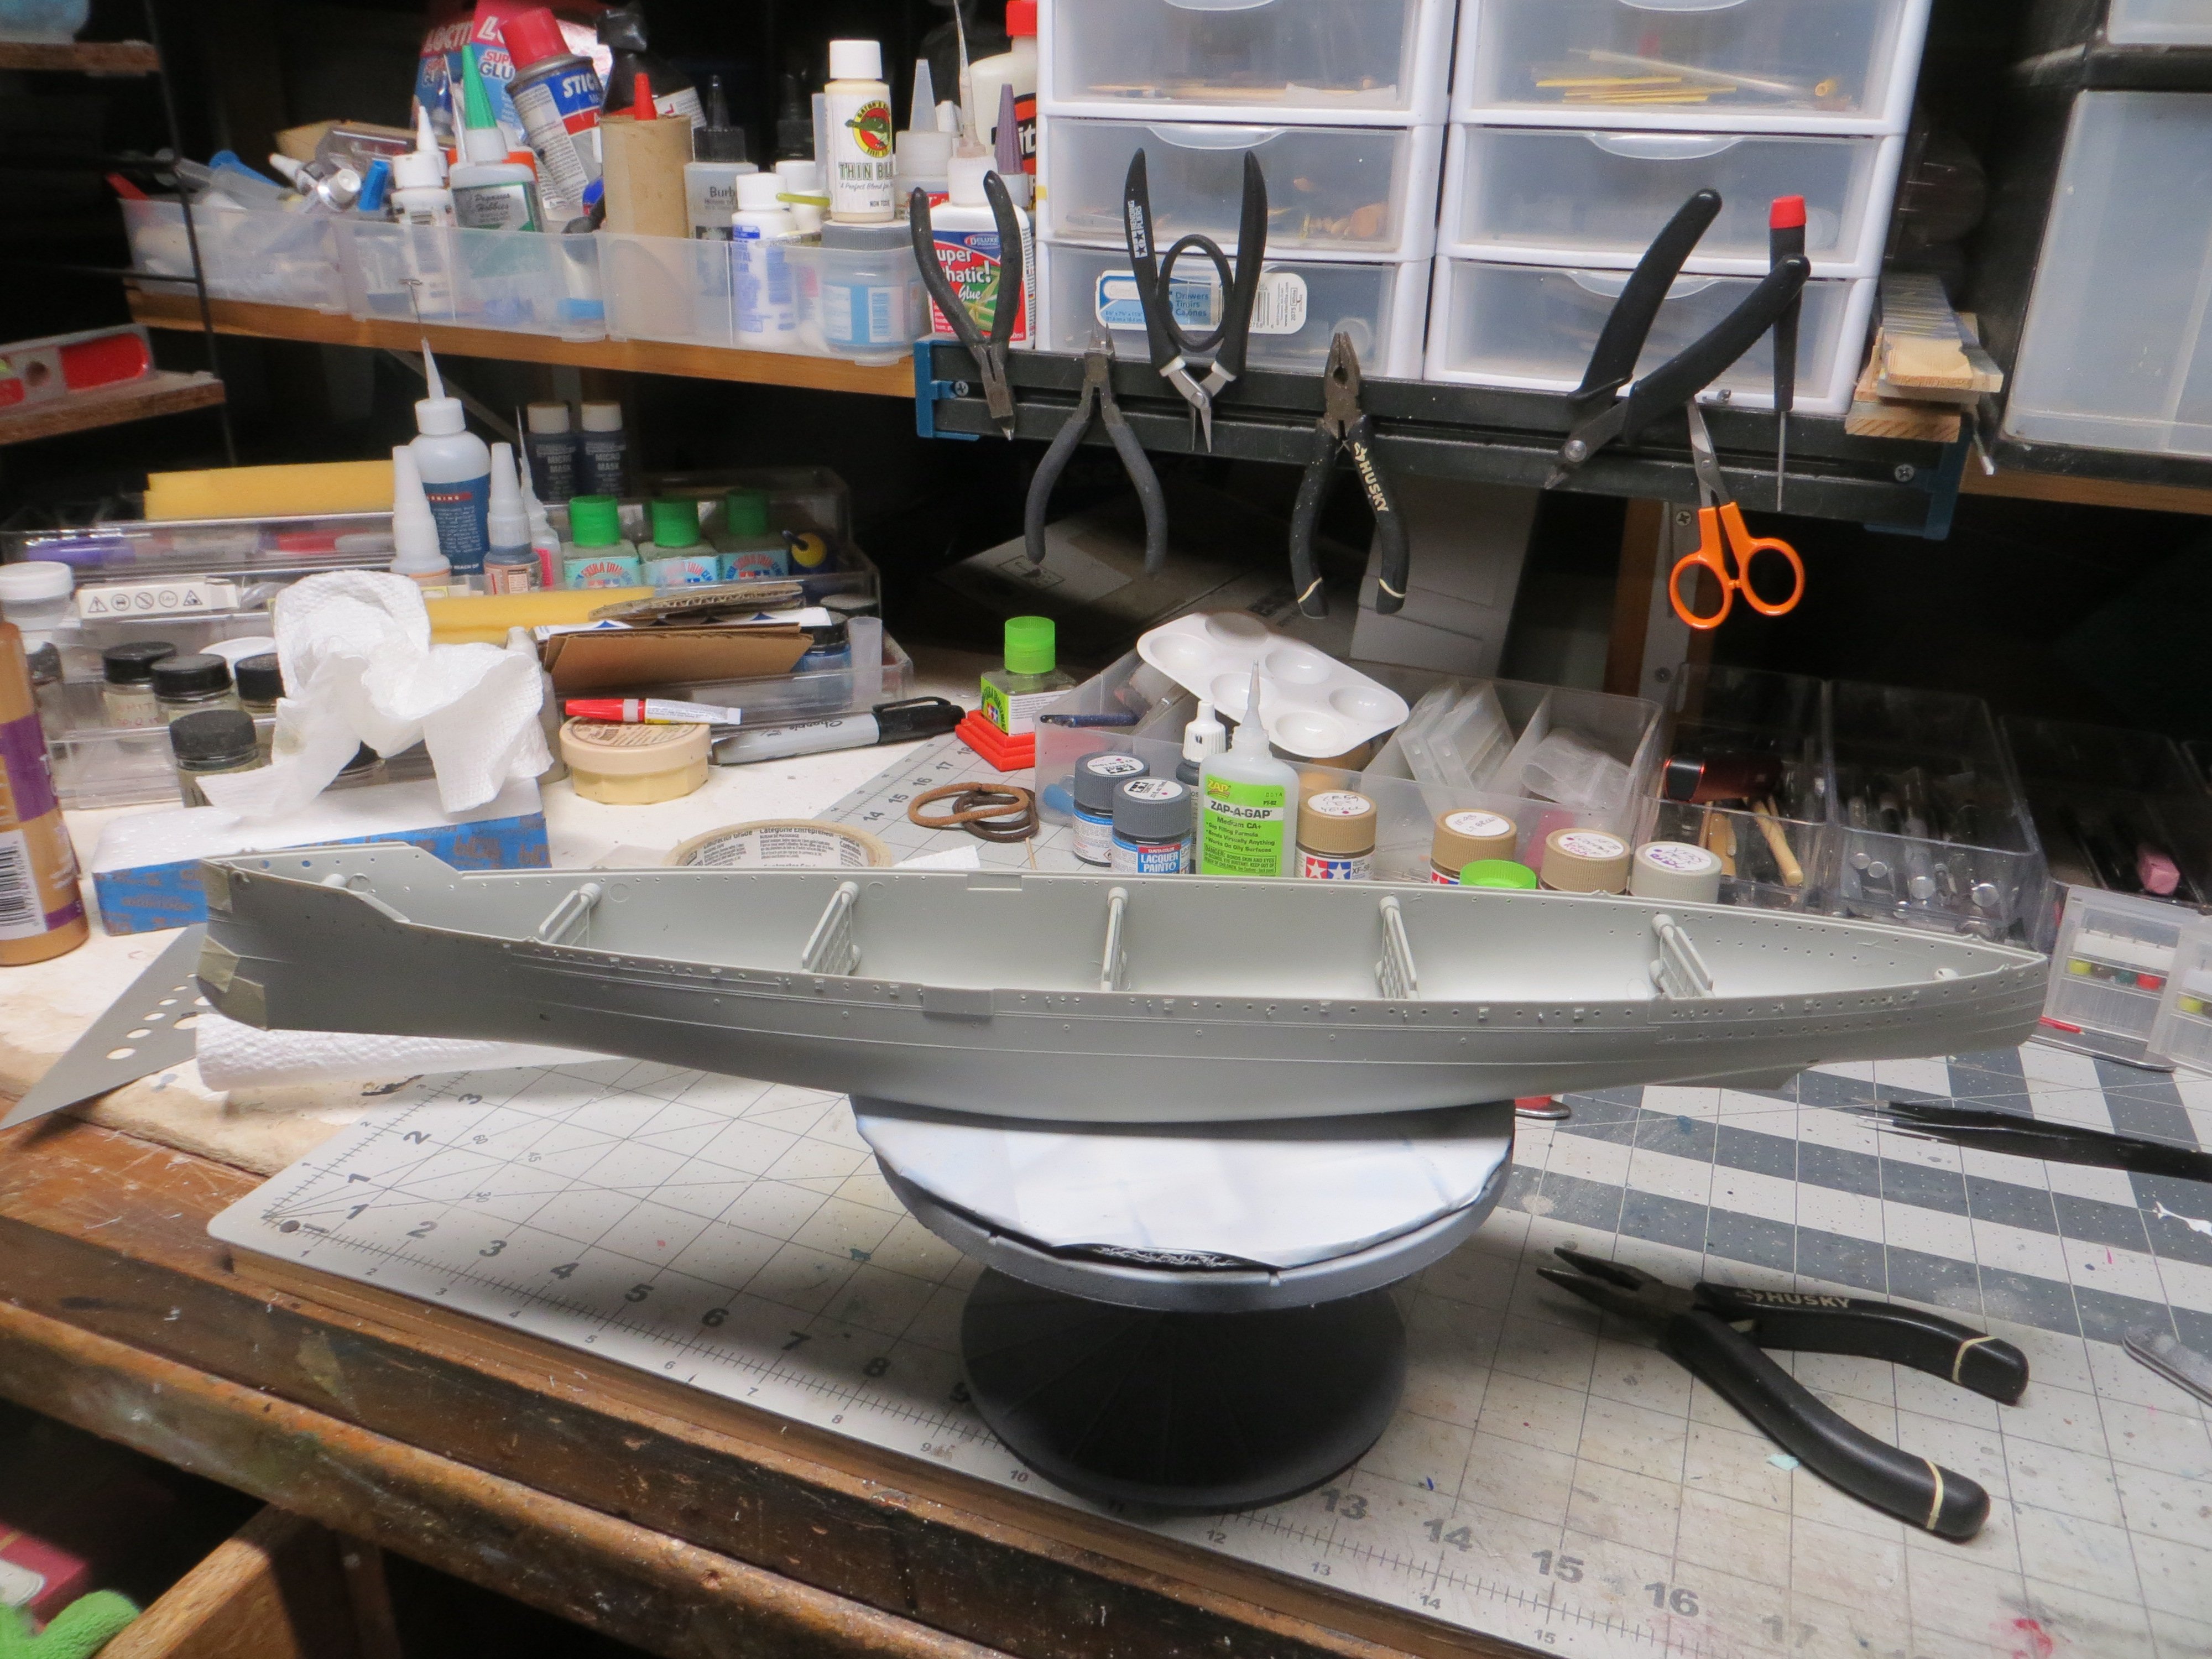
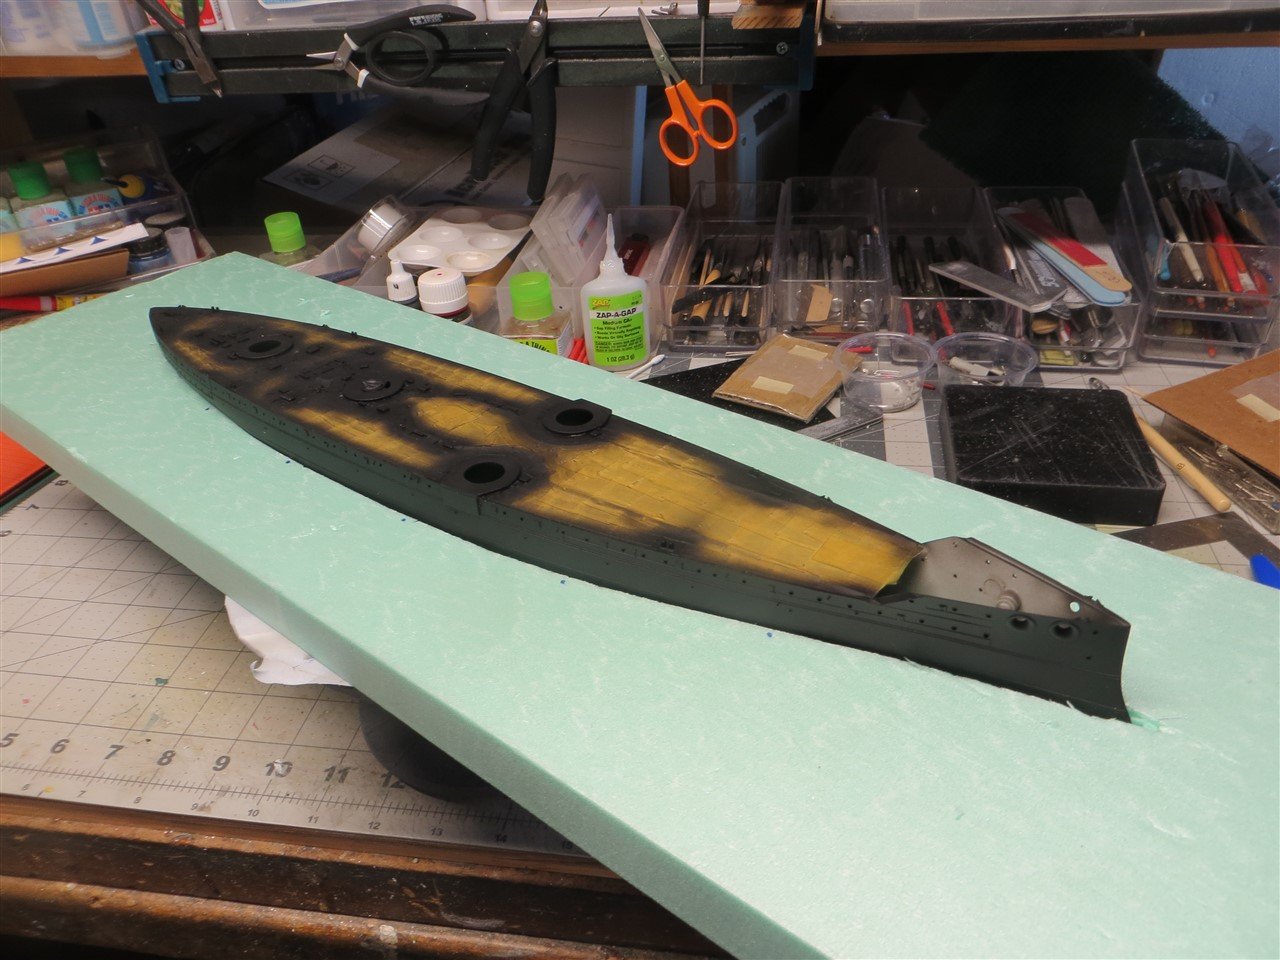
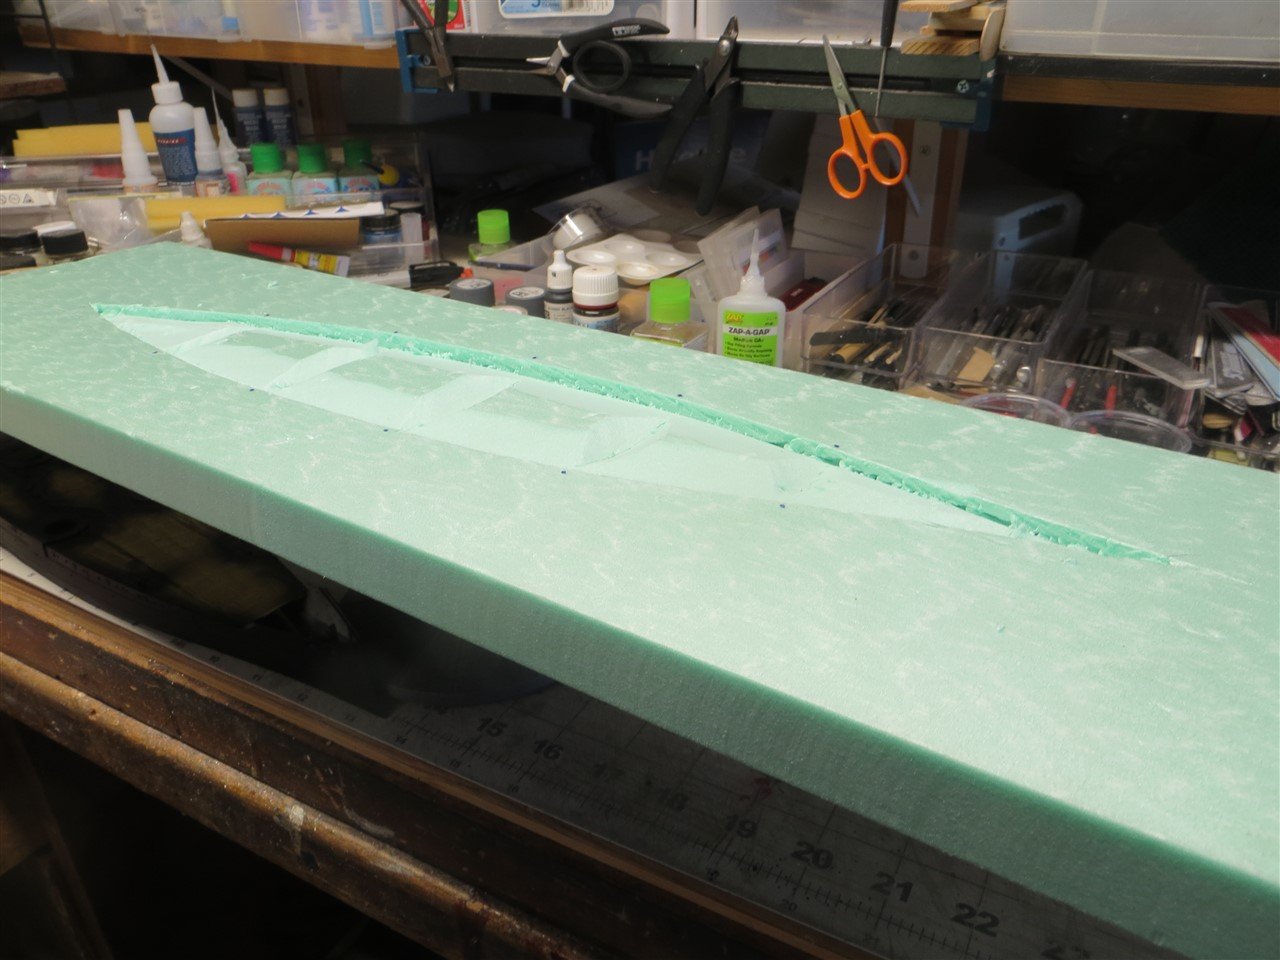
Before I get into painting and attaching all the detail to the hull; I thought it would be a good idea to prime these basic hull pieces for painting. This required me to maskoff all of the wooden decks. Several years ago I purchased two masking tape cutting mats. These mats make it easy to cut masking strips from .1 mm to 1 cm and circles of many different radius'. They were a godsend in this masking project. There were alot of projections that required me to mask the wooden deck around them. I generally did this by cutting masking tape into 5 and 10 cm lengths and from 1 to .5 mm in width. I ended up cutting hundreds of these masking tape pieces. I would guess that it took me about 8 hours to mask off the decks. I then airbrushed the primer. I used black primer thinned 50% with levelling thinner. After priming; it hit me that this would be a good time to cut the foam block display base and position the hull and cut the well. I used green craft foam (insulation) sold at the local big box hardware store. I used a foam cutter to cut out the rectangle for the base. I then used the hull to trace out its position on the foam and used various cutting knives to cut and chip out the well that the model will sit. I will now set this aside and get back to painting the basic hull. A few photos of my progress:

-
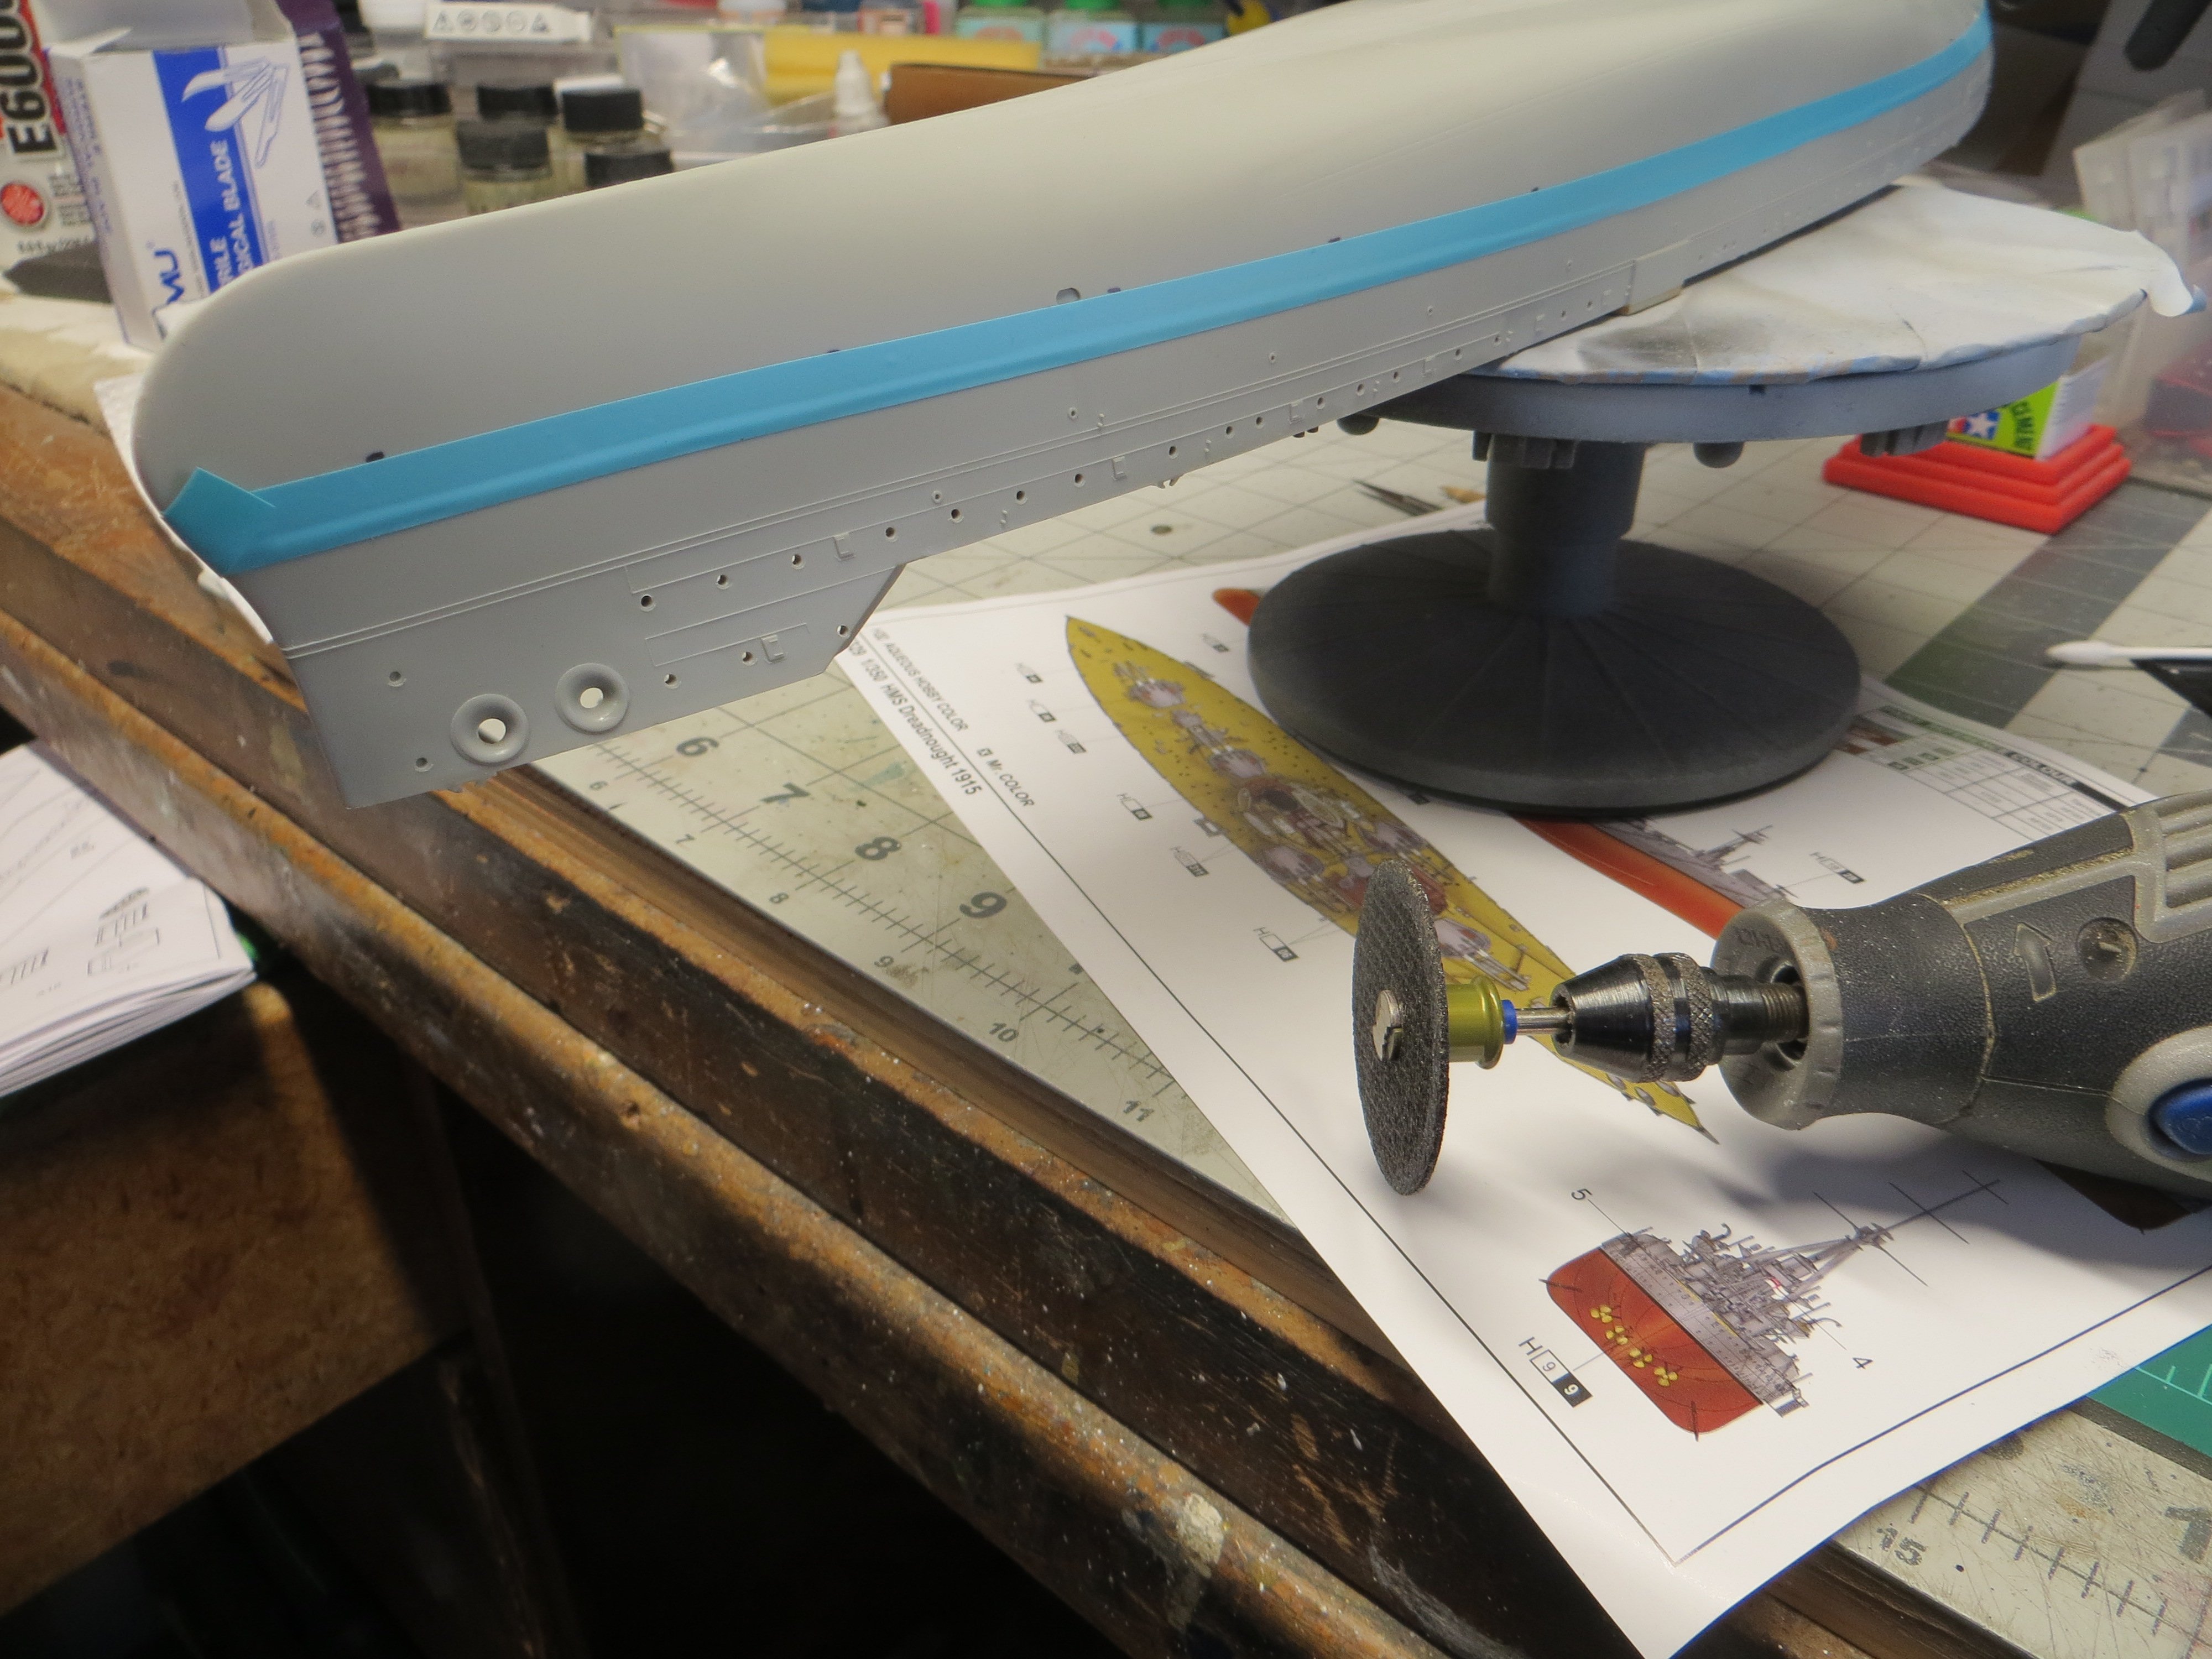
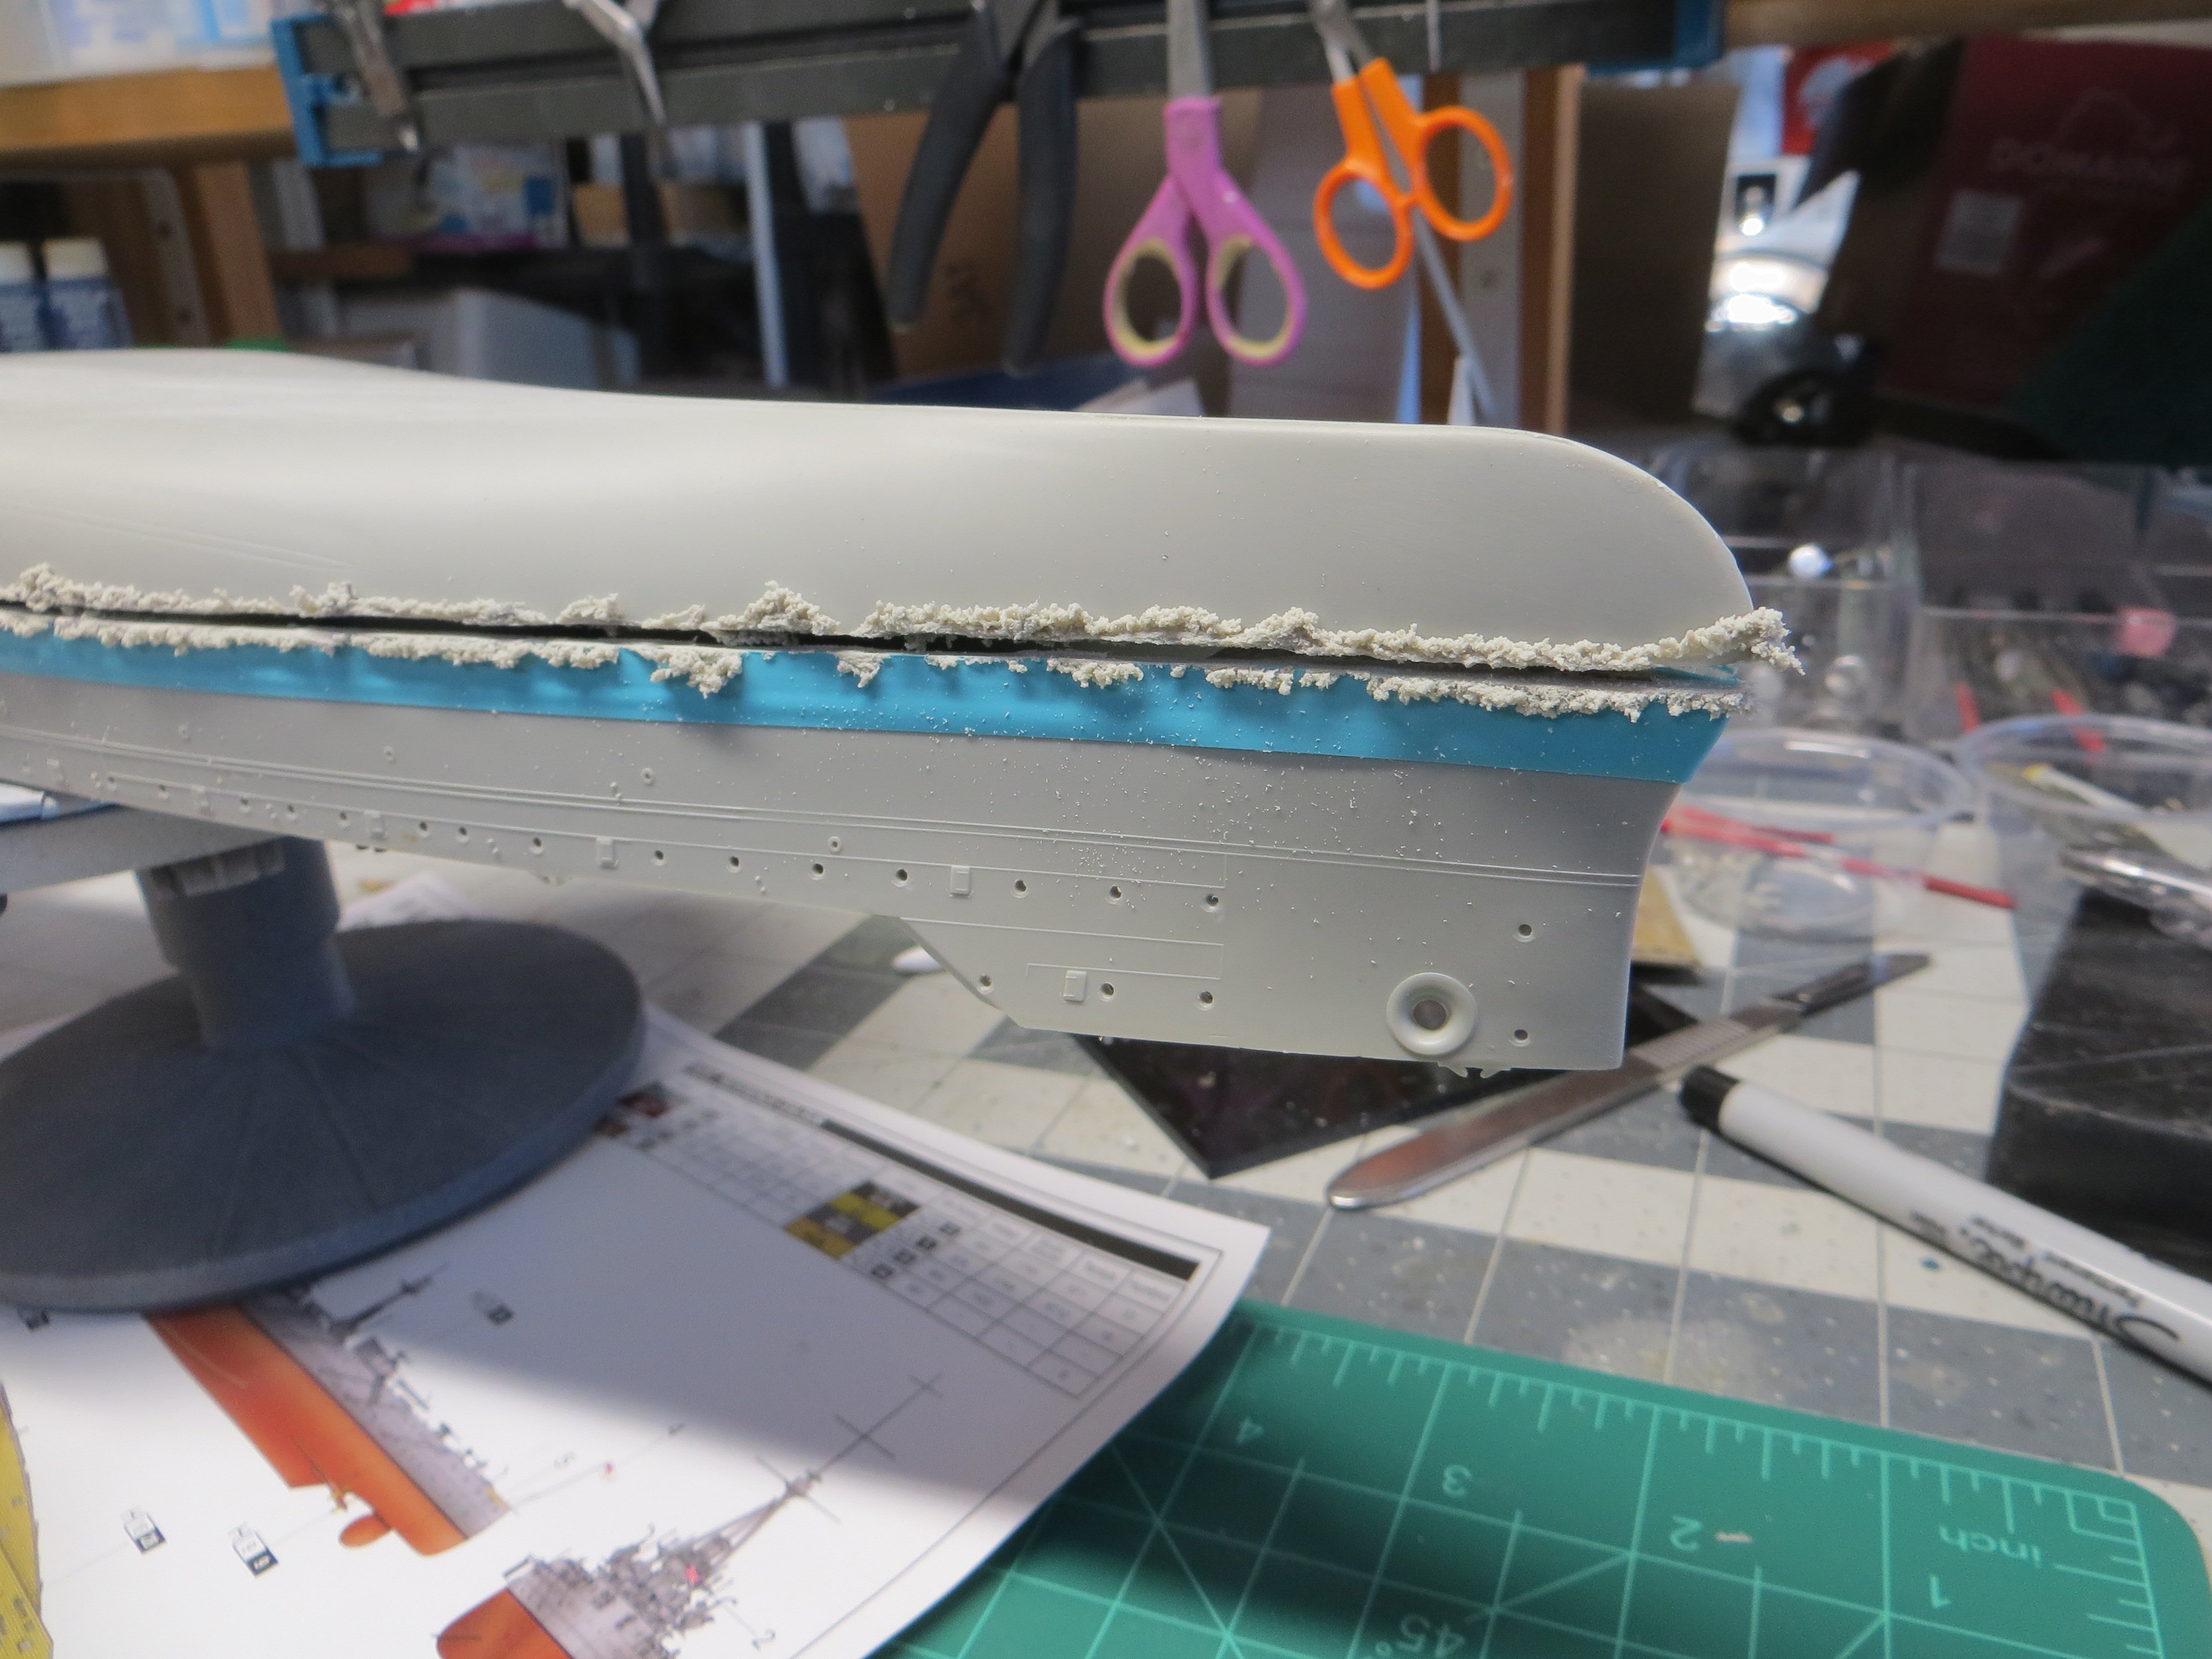
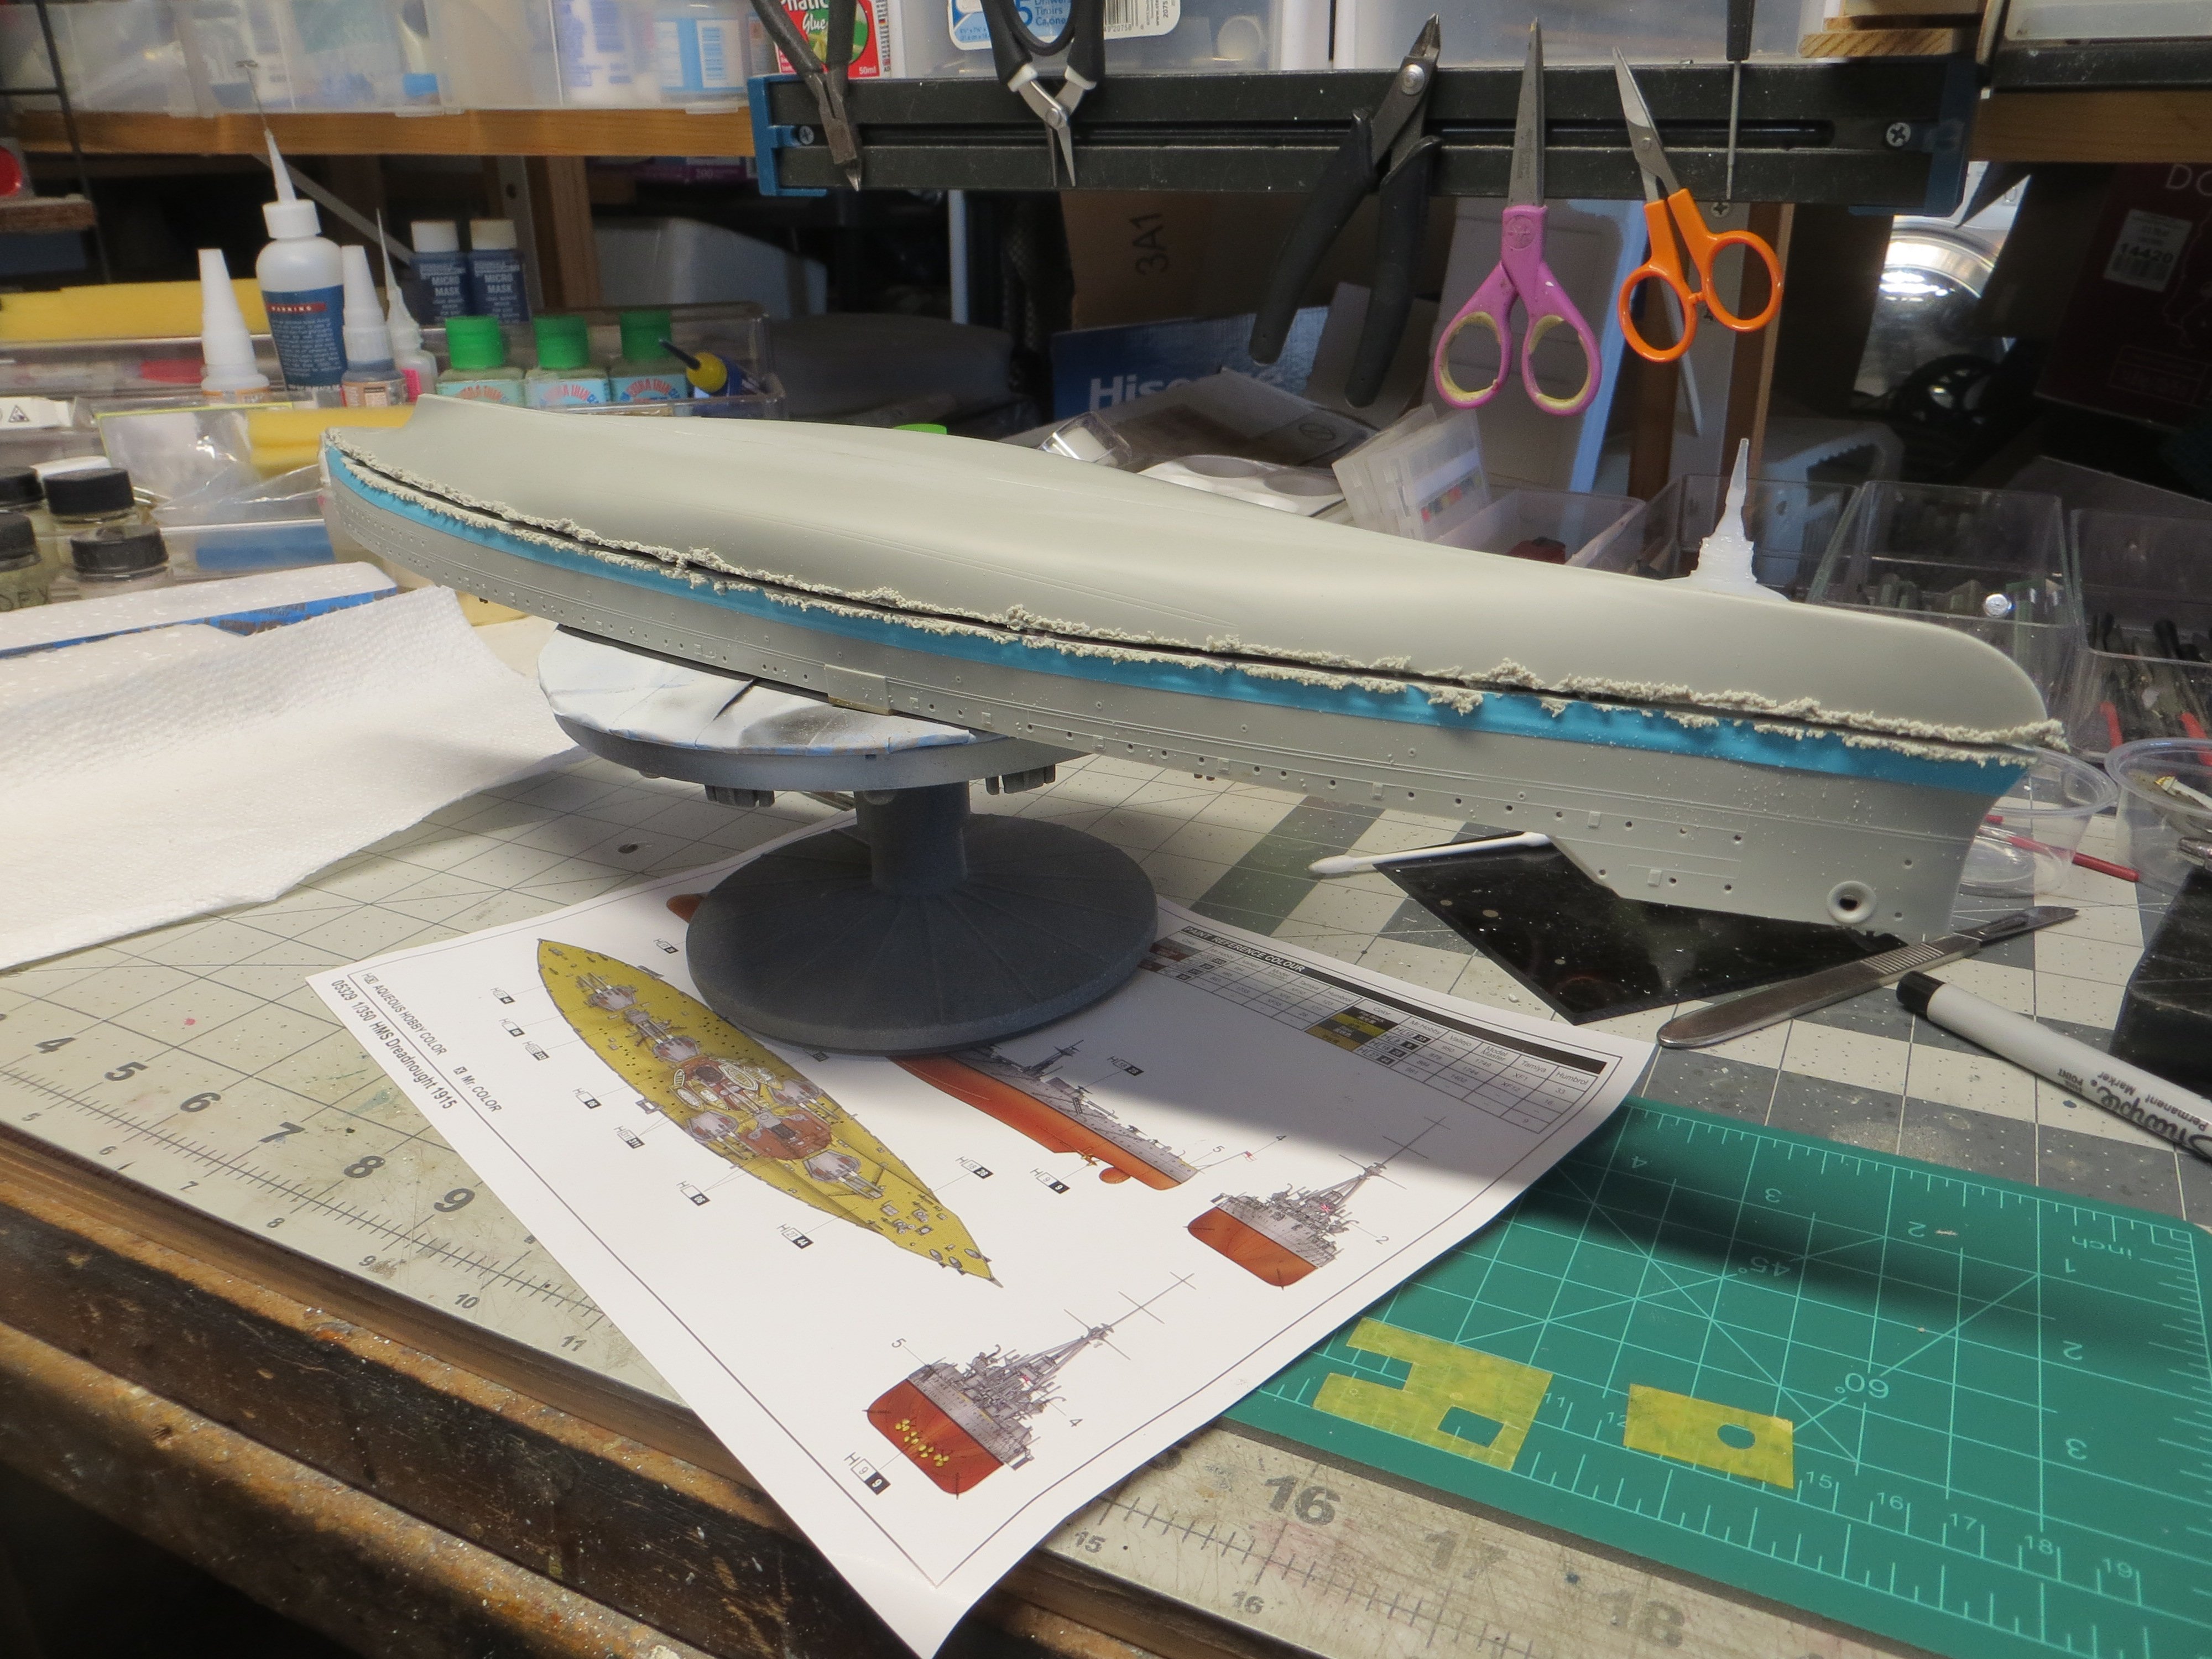
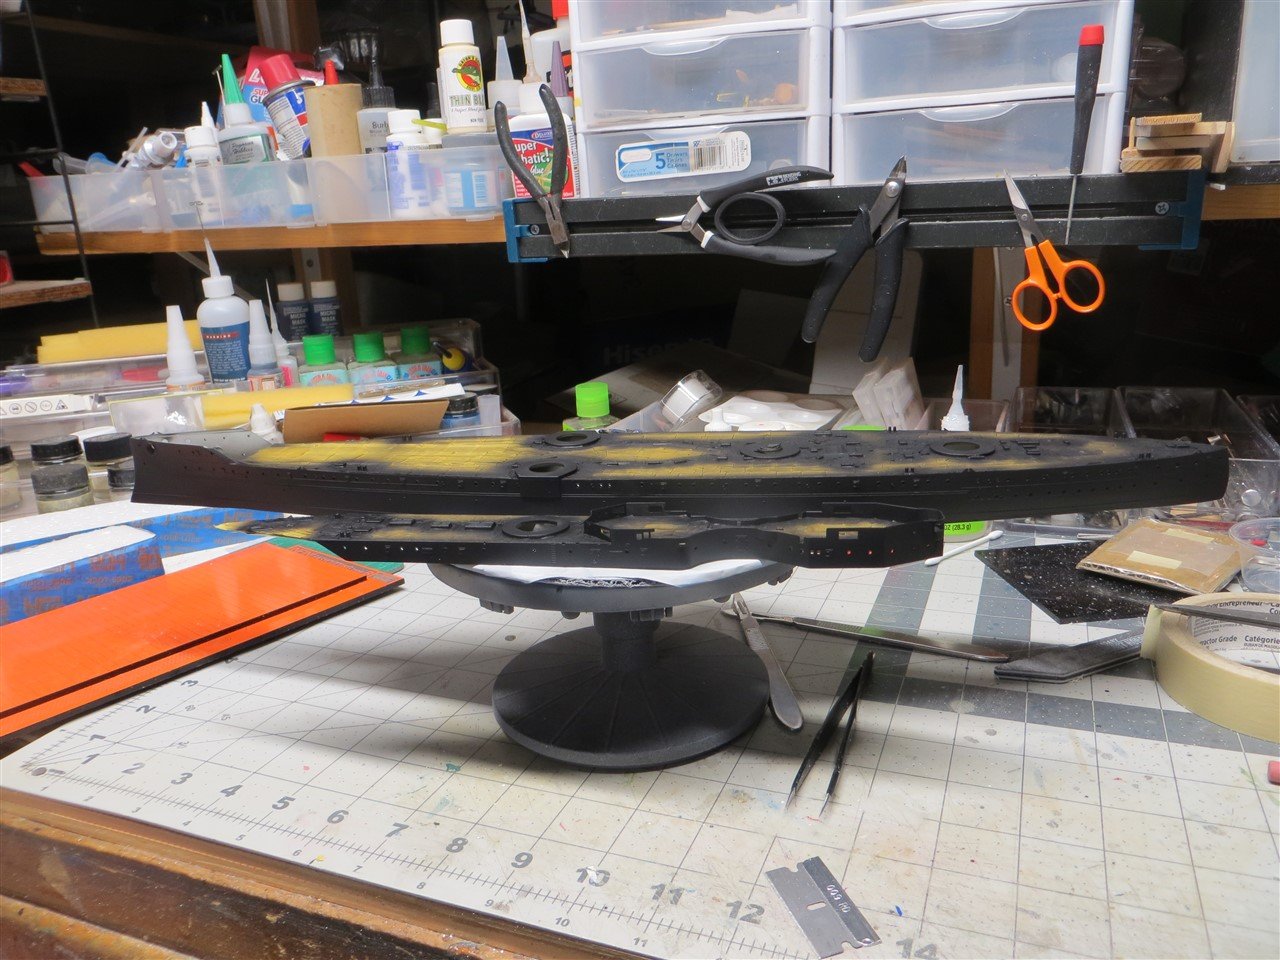
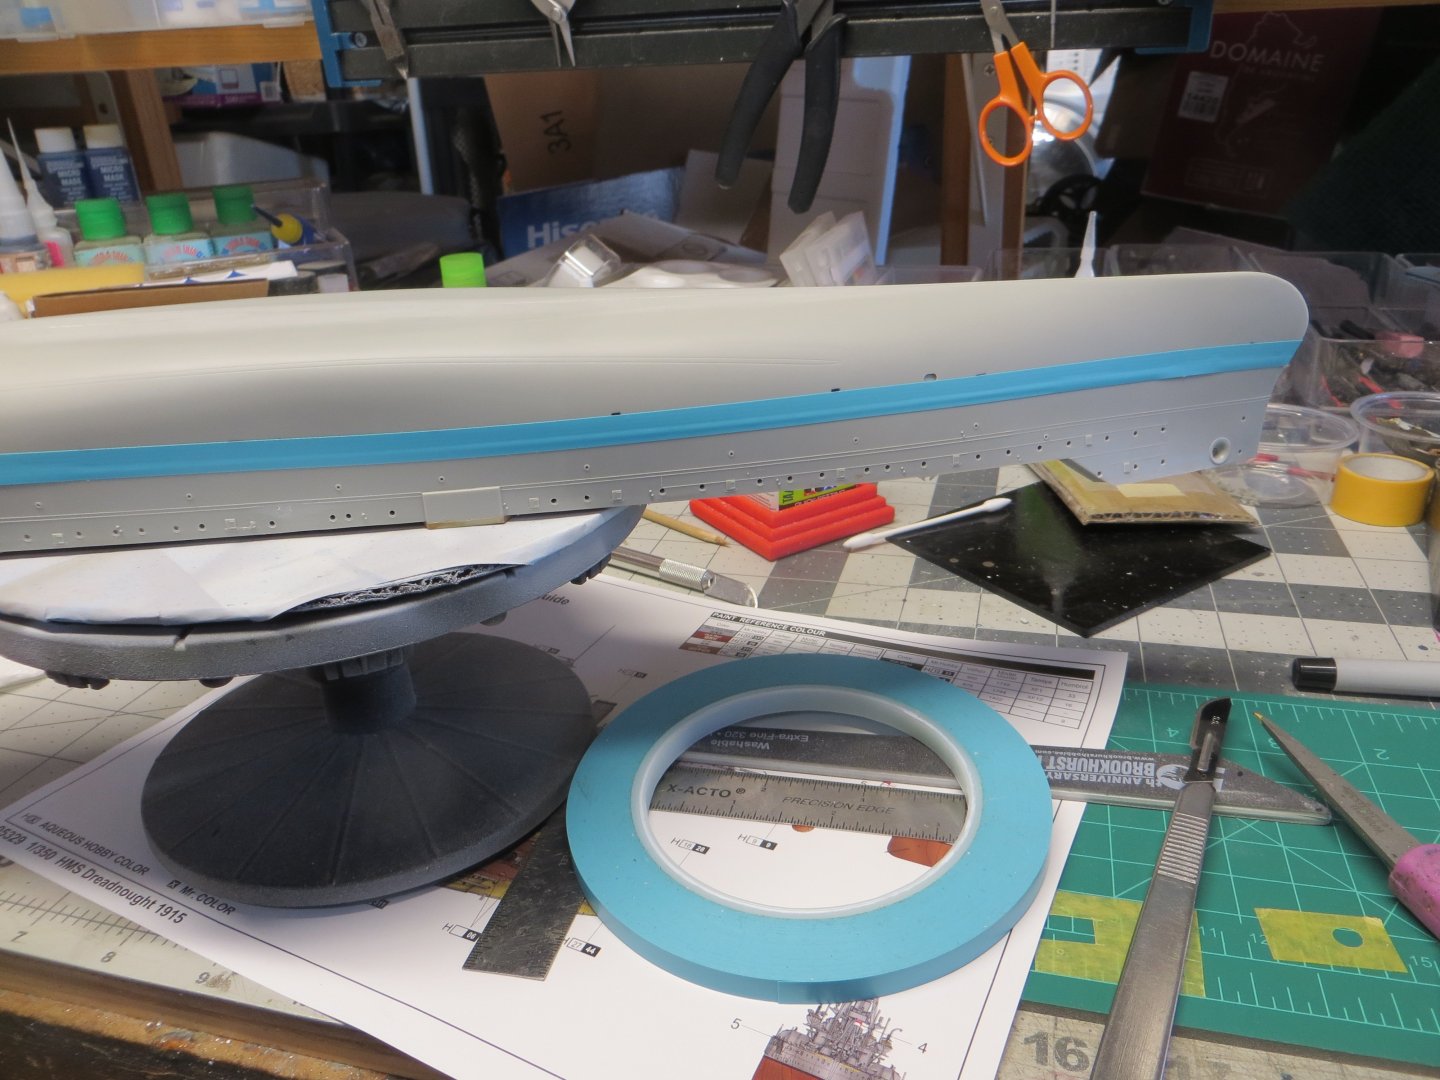
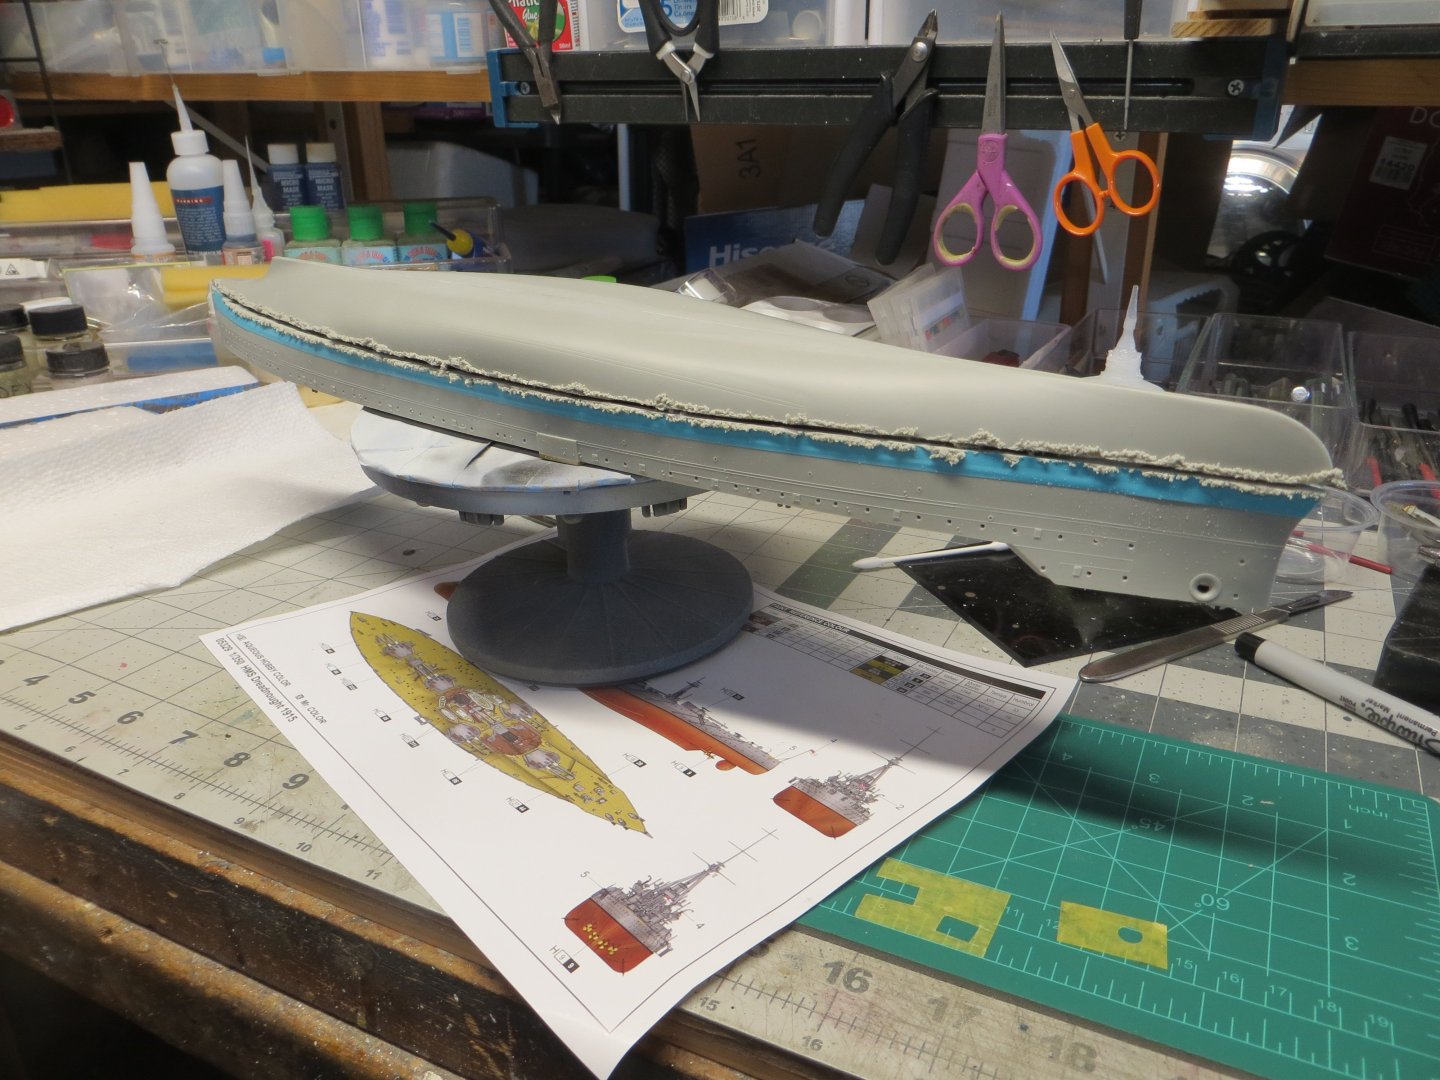
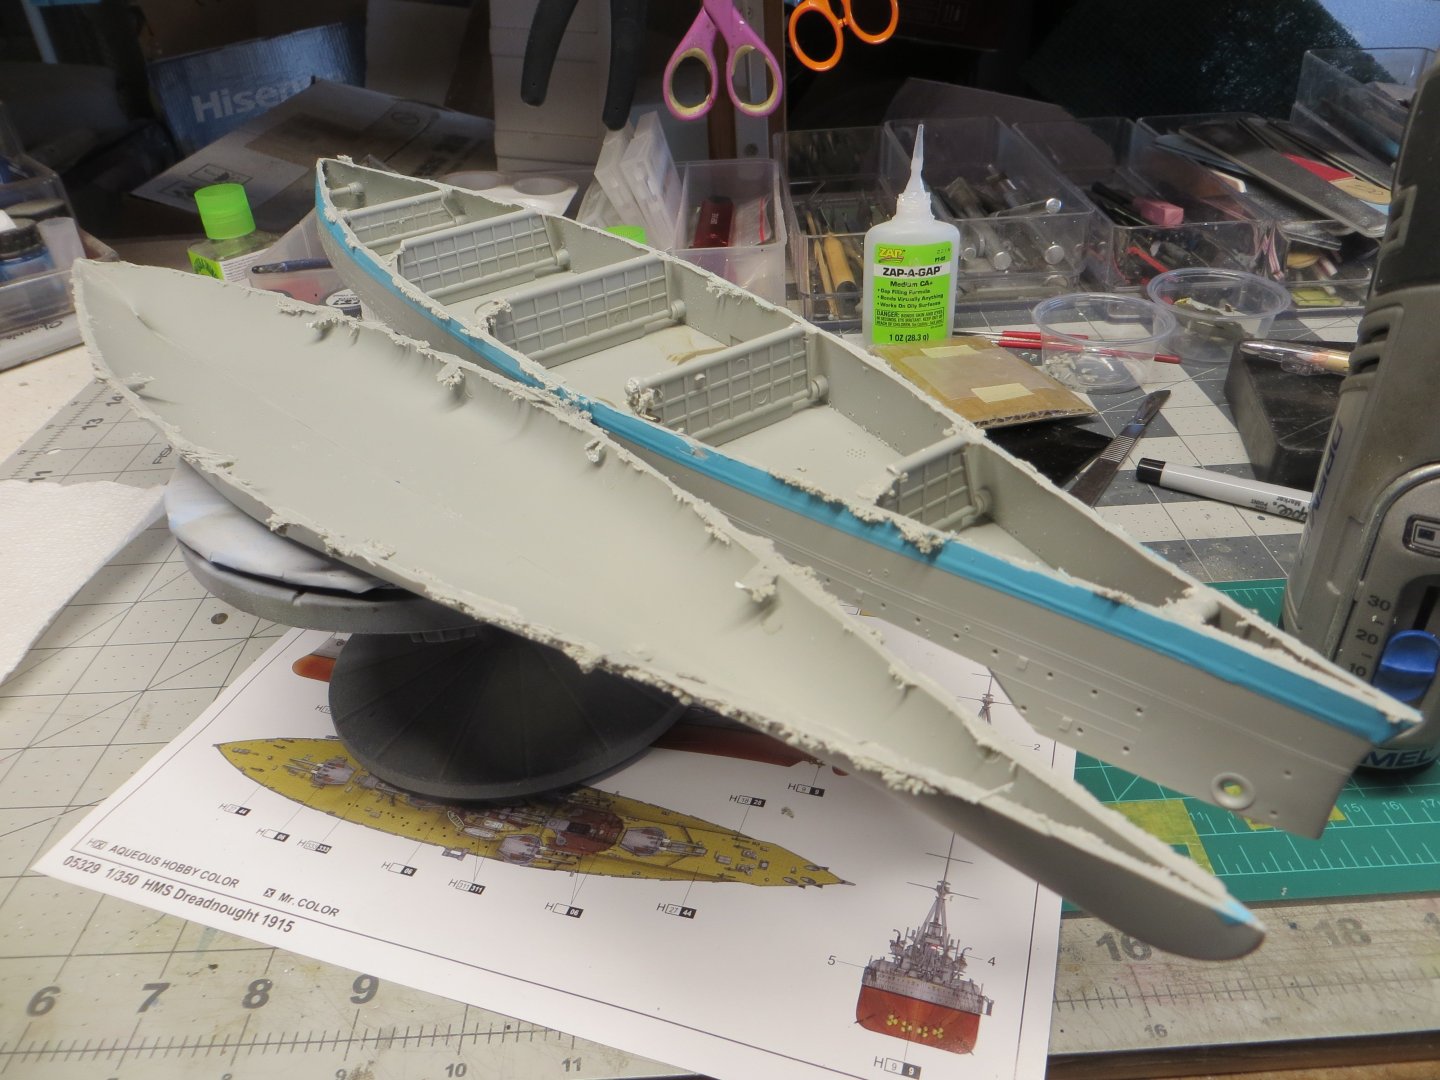
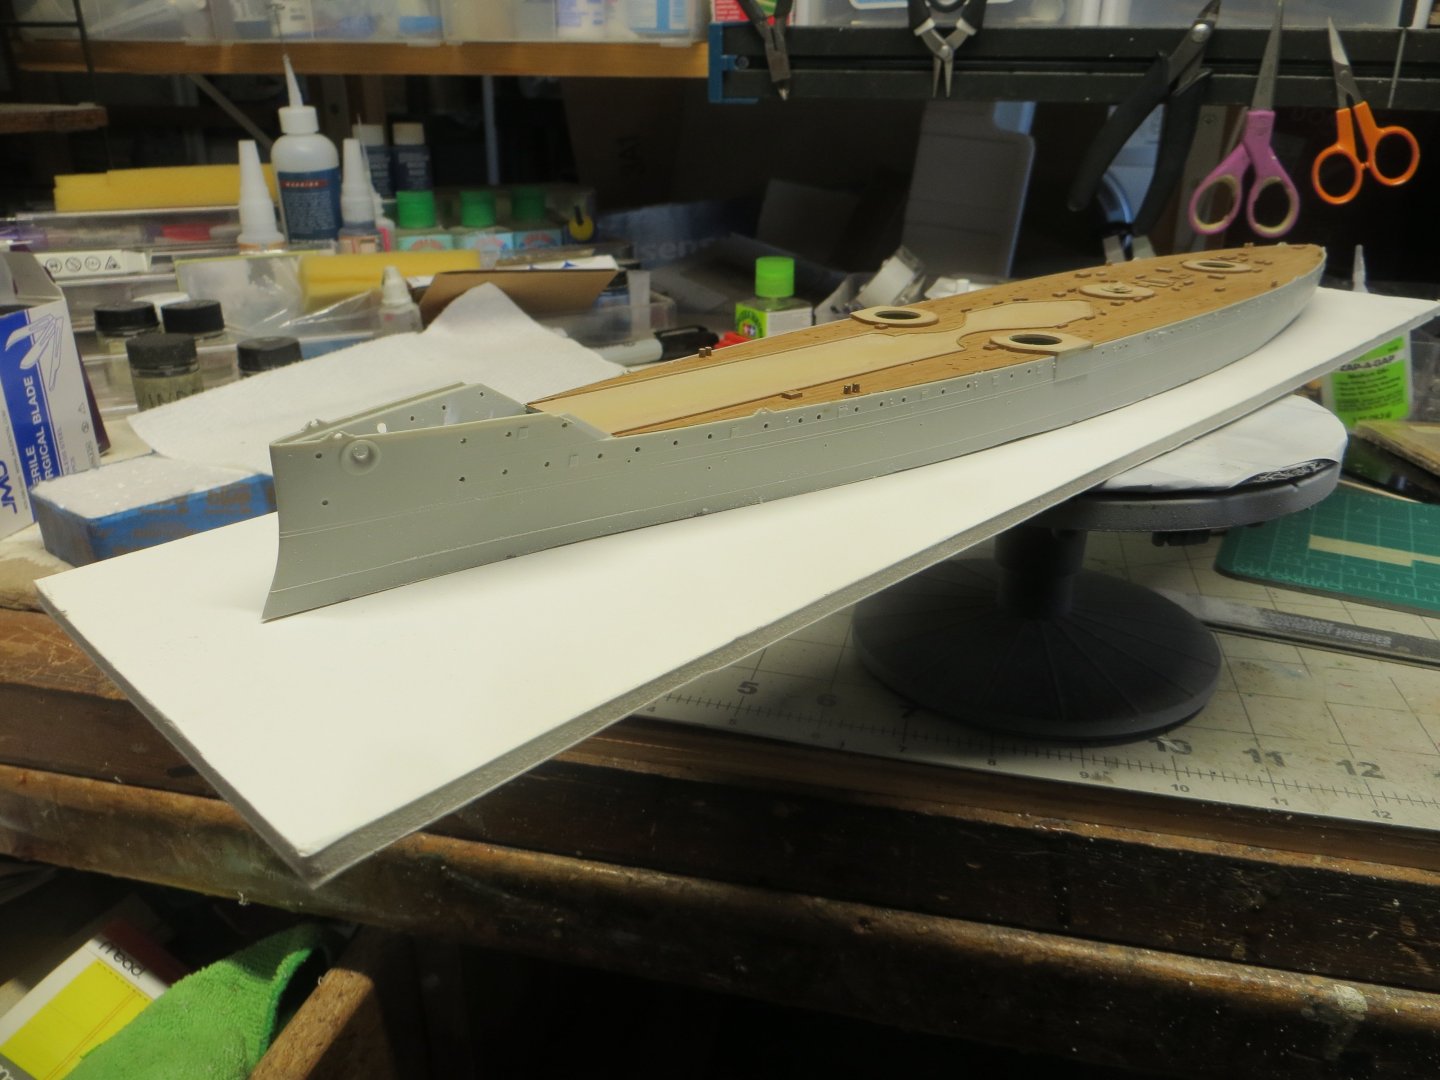
Well, the basic hull is assembled so the time has come to cut off the bottom of the hull in order to facilitate a waterline presentation. The first step in the process is to mark a cutting line around the circumference of the hull. I did this with flexible tape. I used the Trumpeter painting guide included in the kit to help me locate the cut. I wanted to cut just below the indicated waterline. It took a bit of time to eyeball the tape line to make sure it was straight so that the hull would sit flat when cut. I used a dremel rotary tool and a cutting wheel to make the actual cut around the hull. I had previously tested various cutting wheels and found that the very thin varieties break easily. Because of all the internal supports separating the two pieces took a bit of effort. You have to be very careful with the cutting tool to avoid cutting or damaging the plastic hull piece you want to keep. The plastic tape helps here. After completing the cut I had a hull that looked terrible but the melted plastic at the seam broke off easily and with a few minutes of sanding I ended up with flat hull that should facilitate a waterline presentation. Here are some photos of the process:


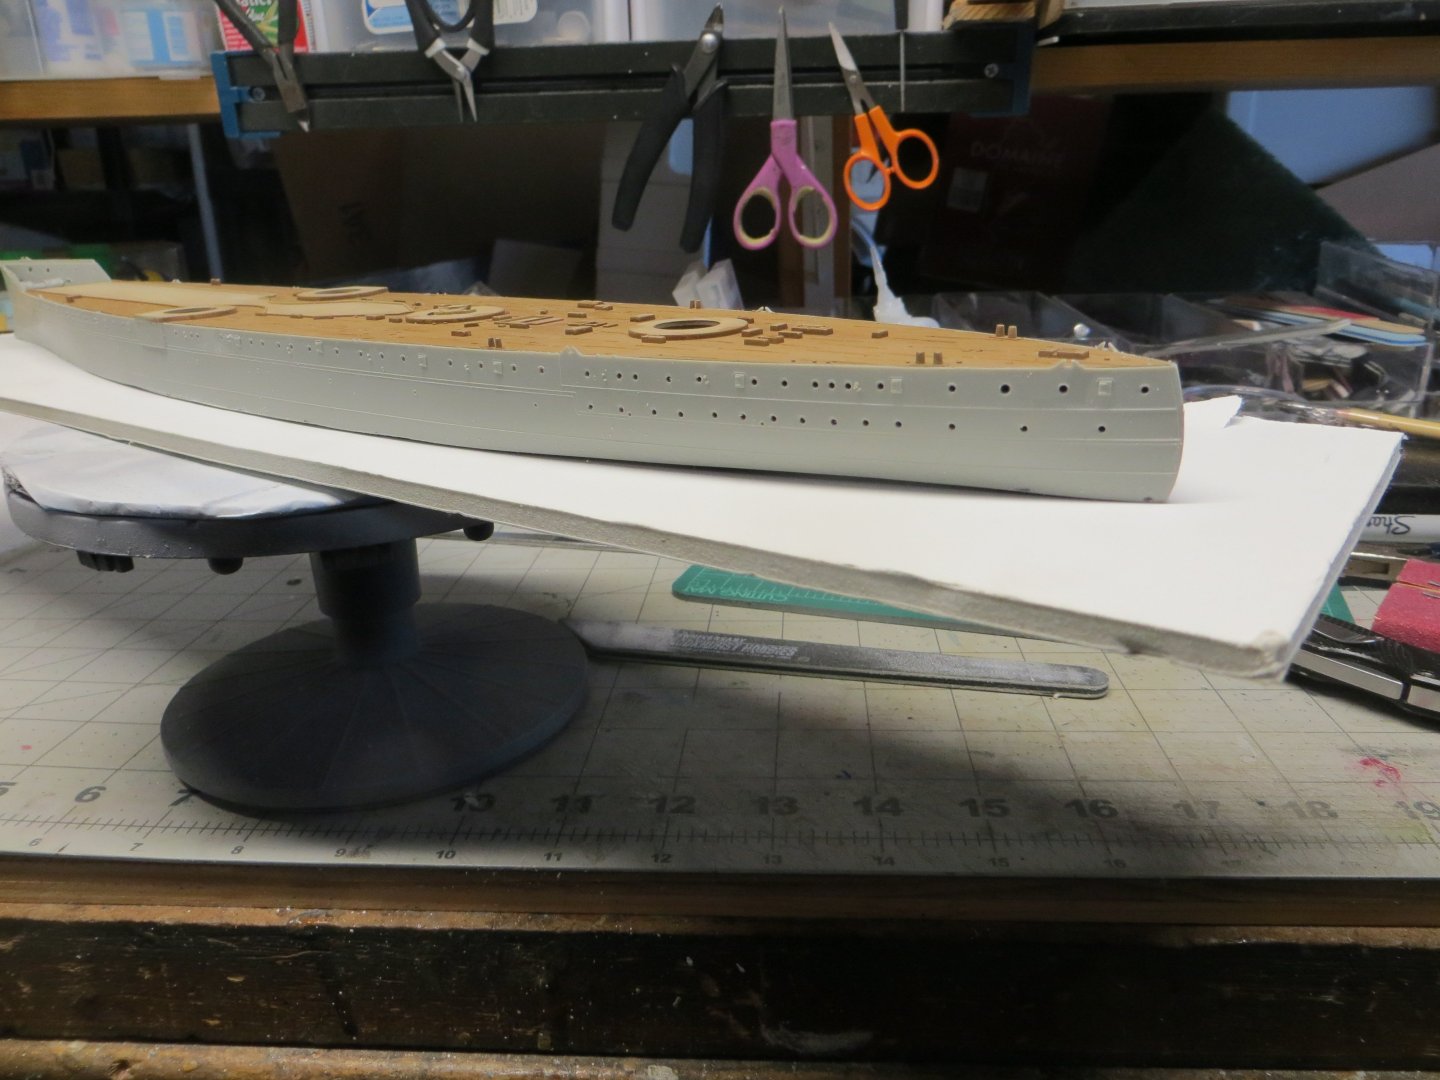
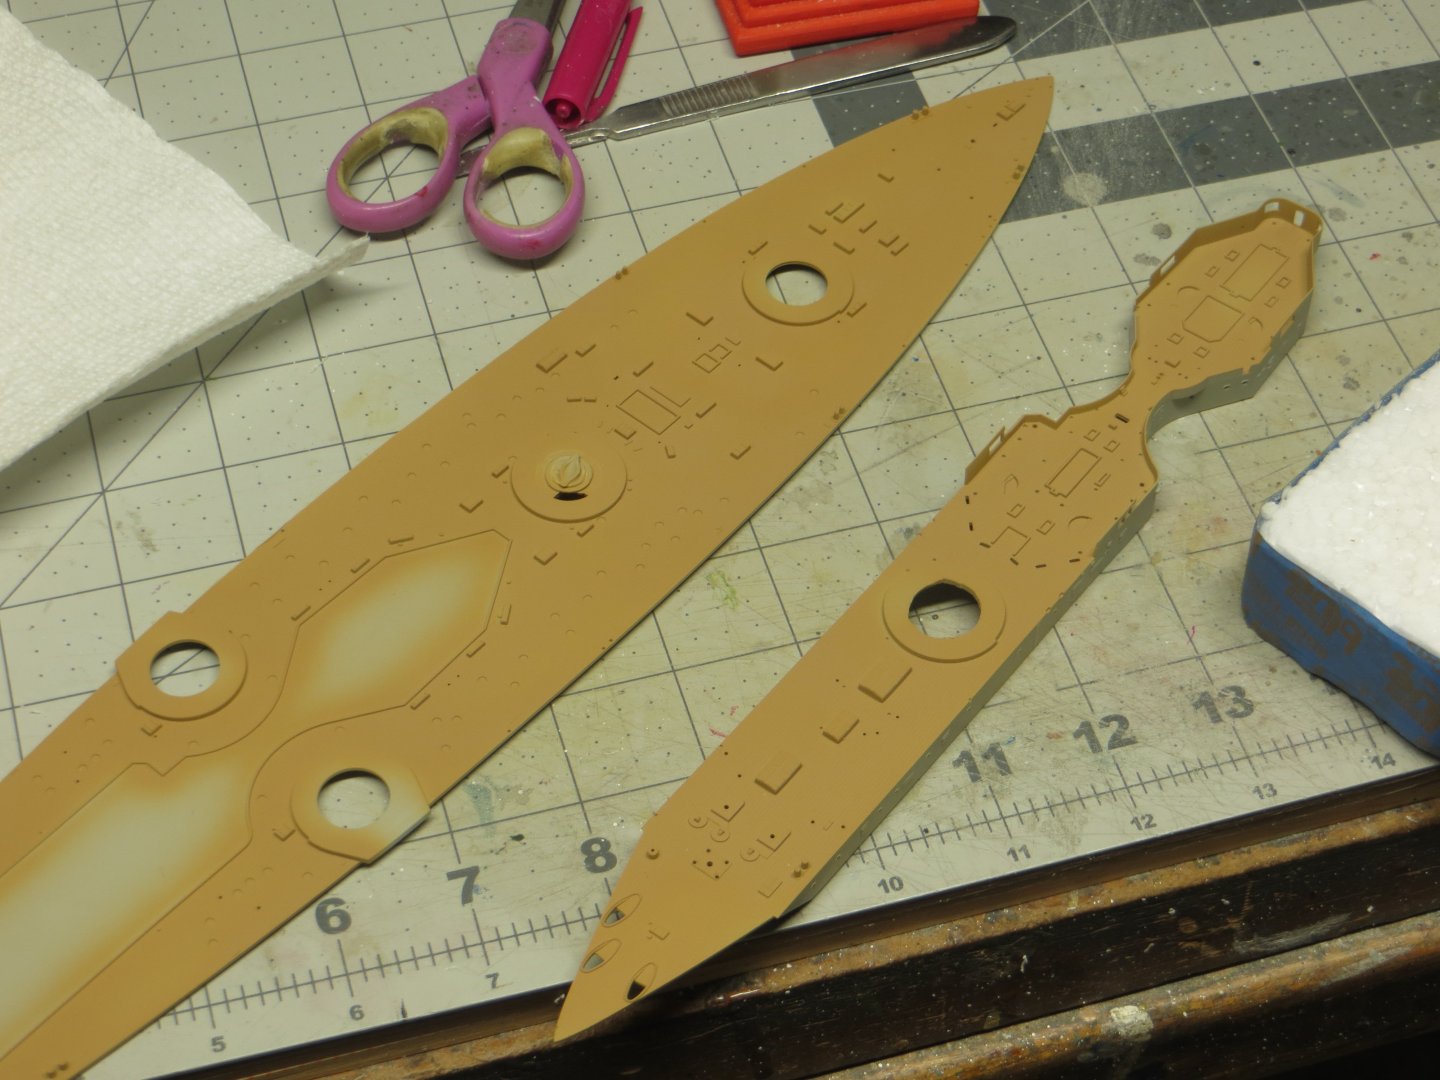
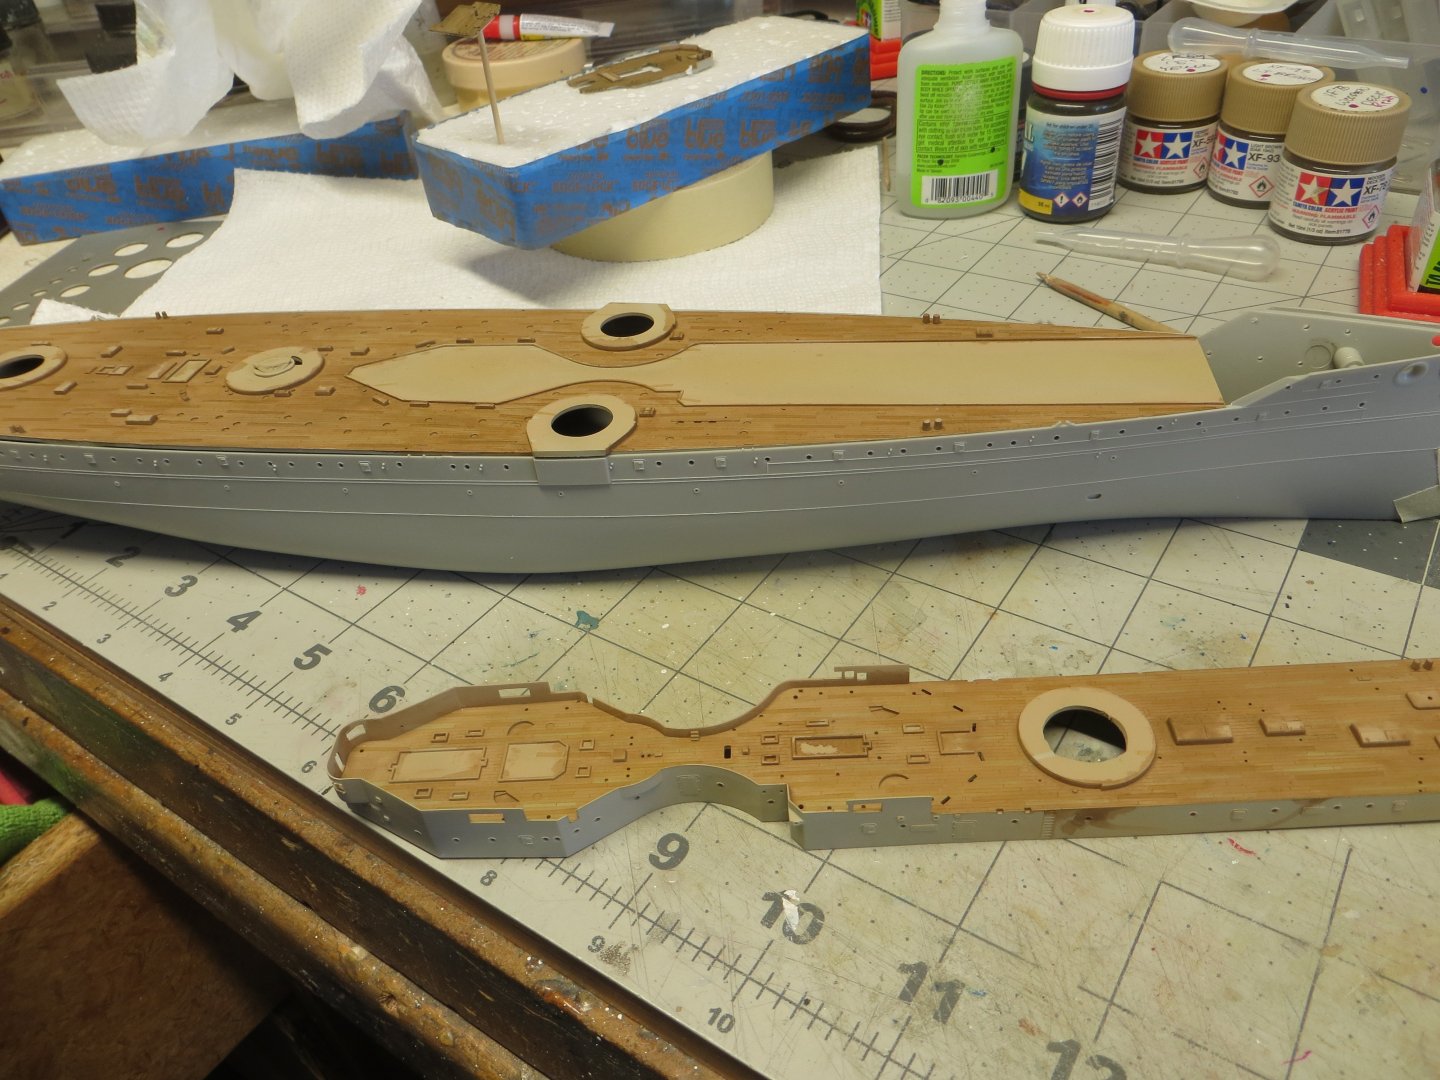
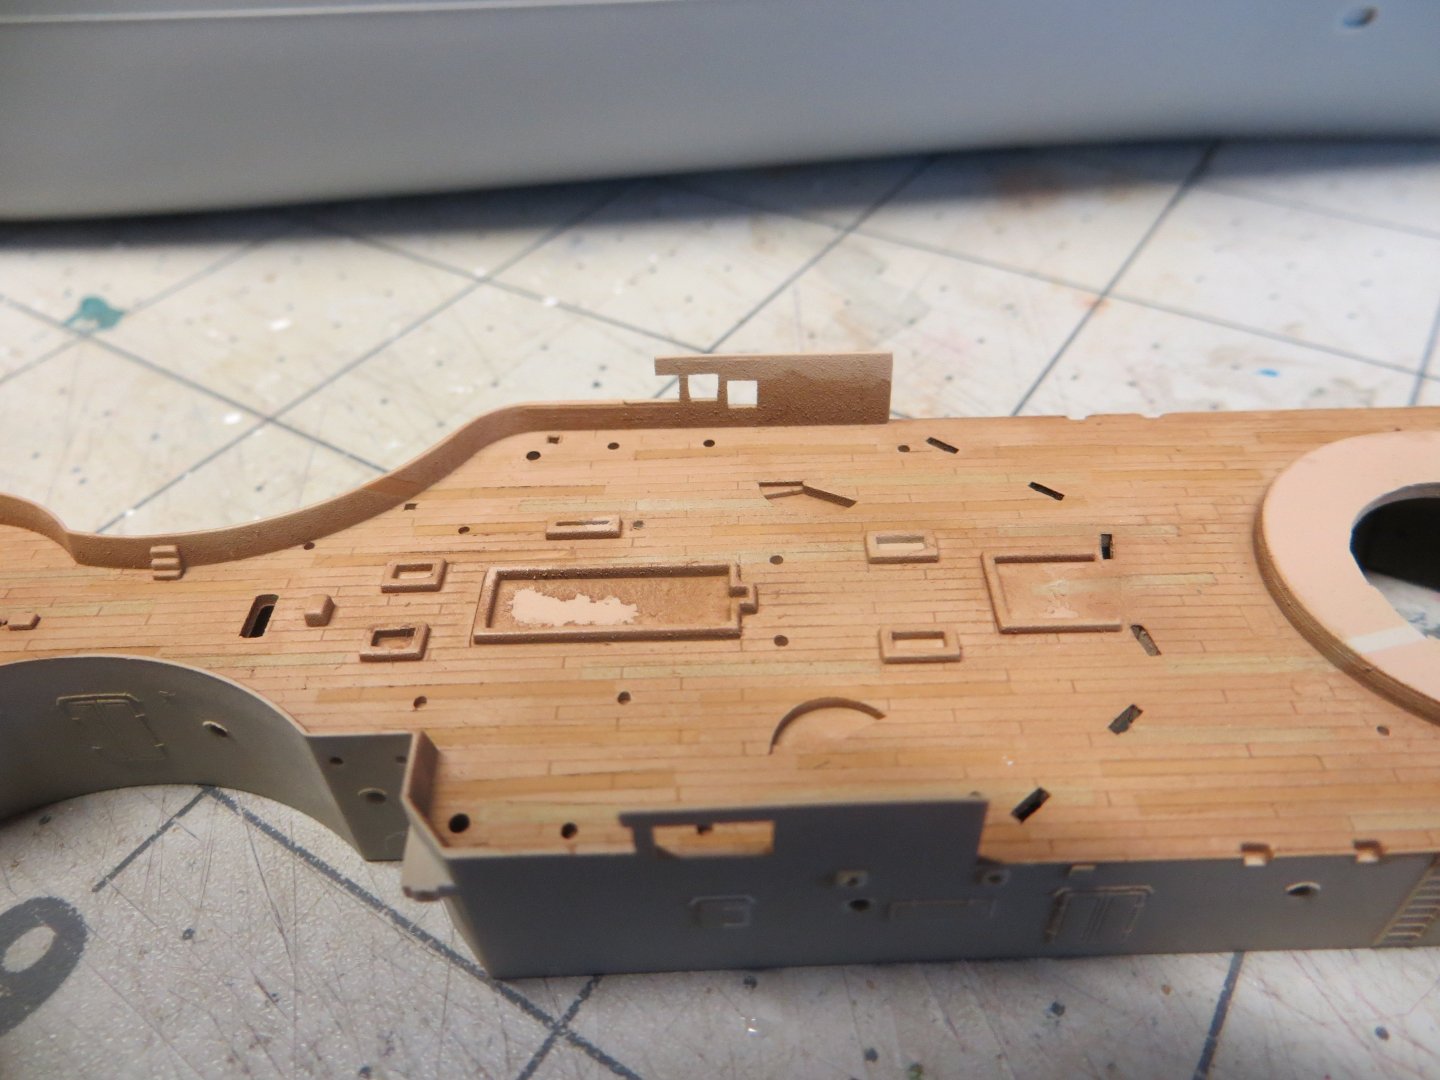
-
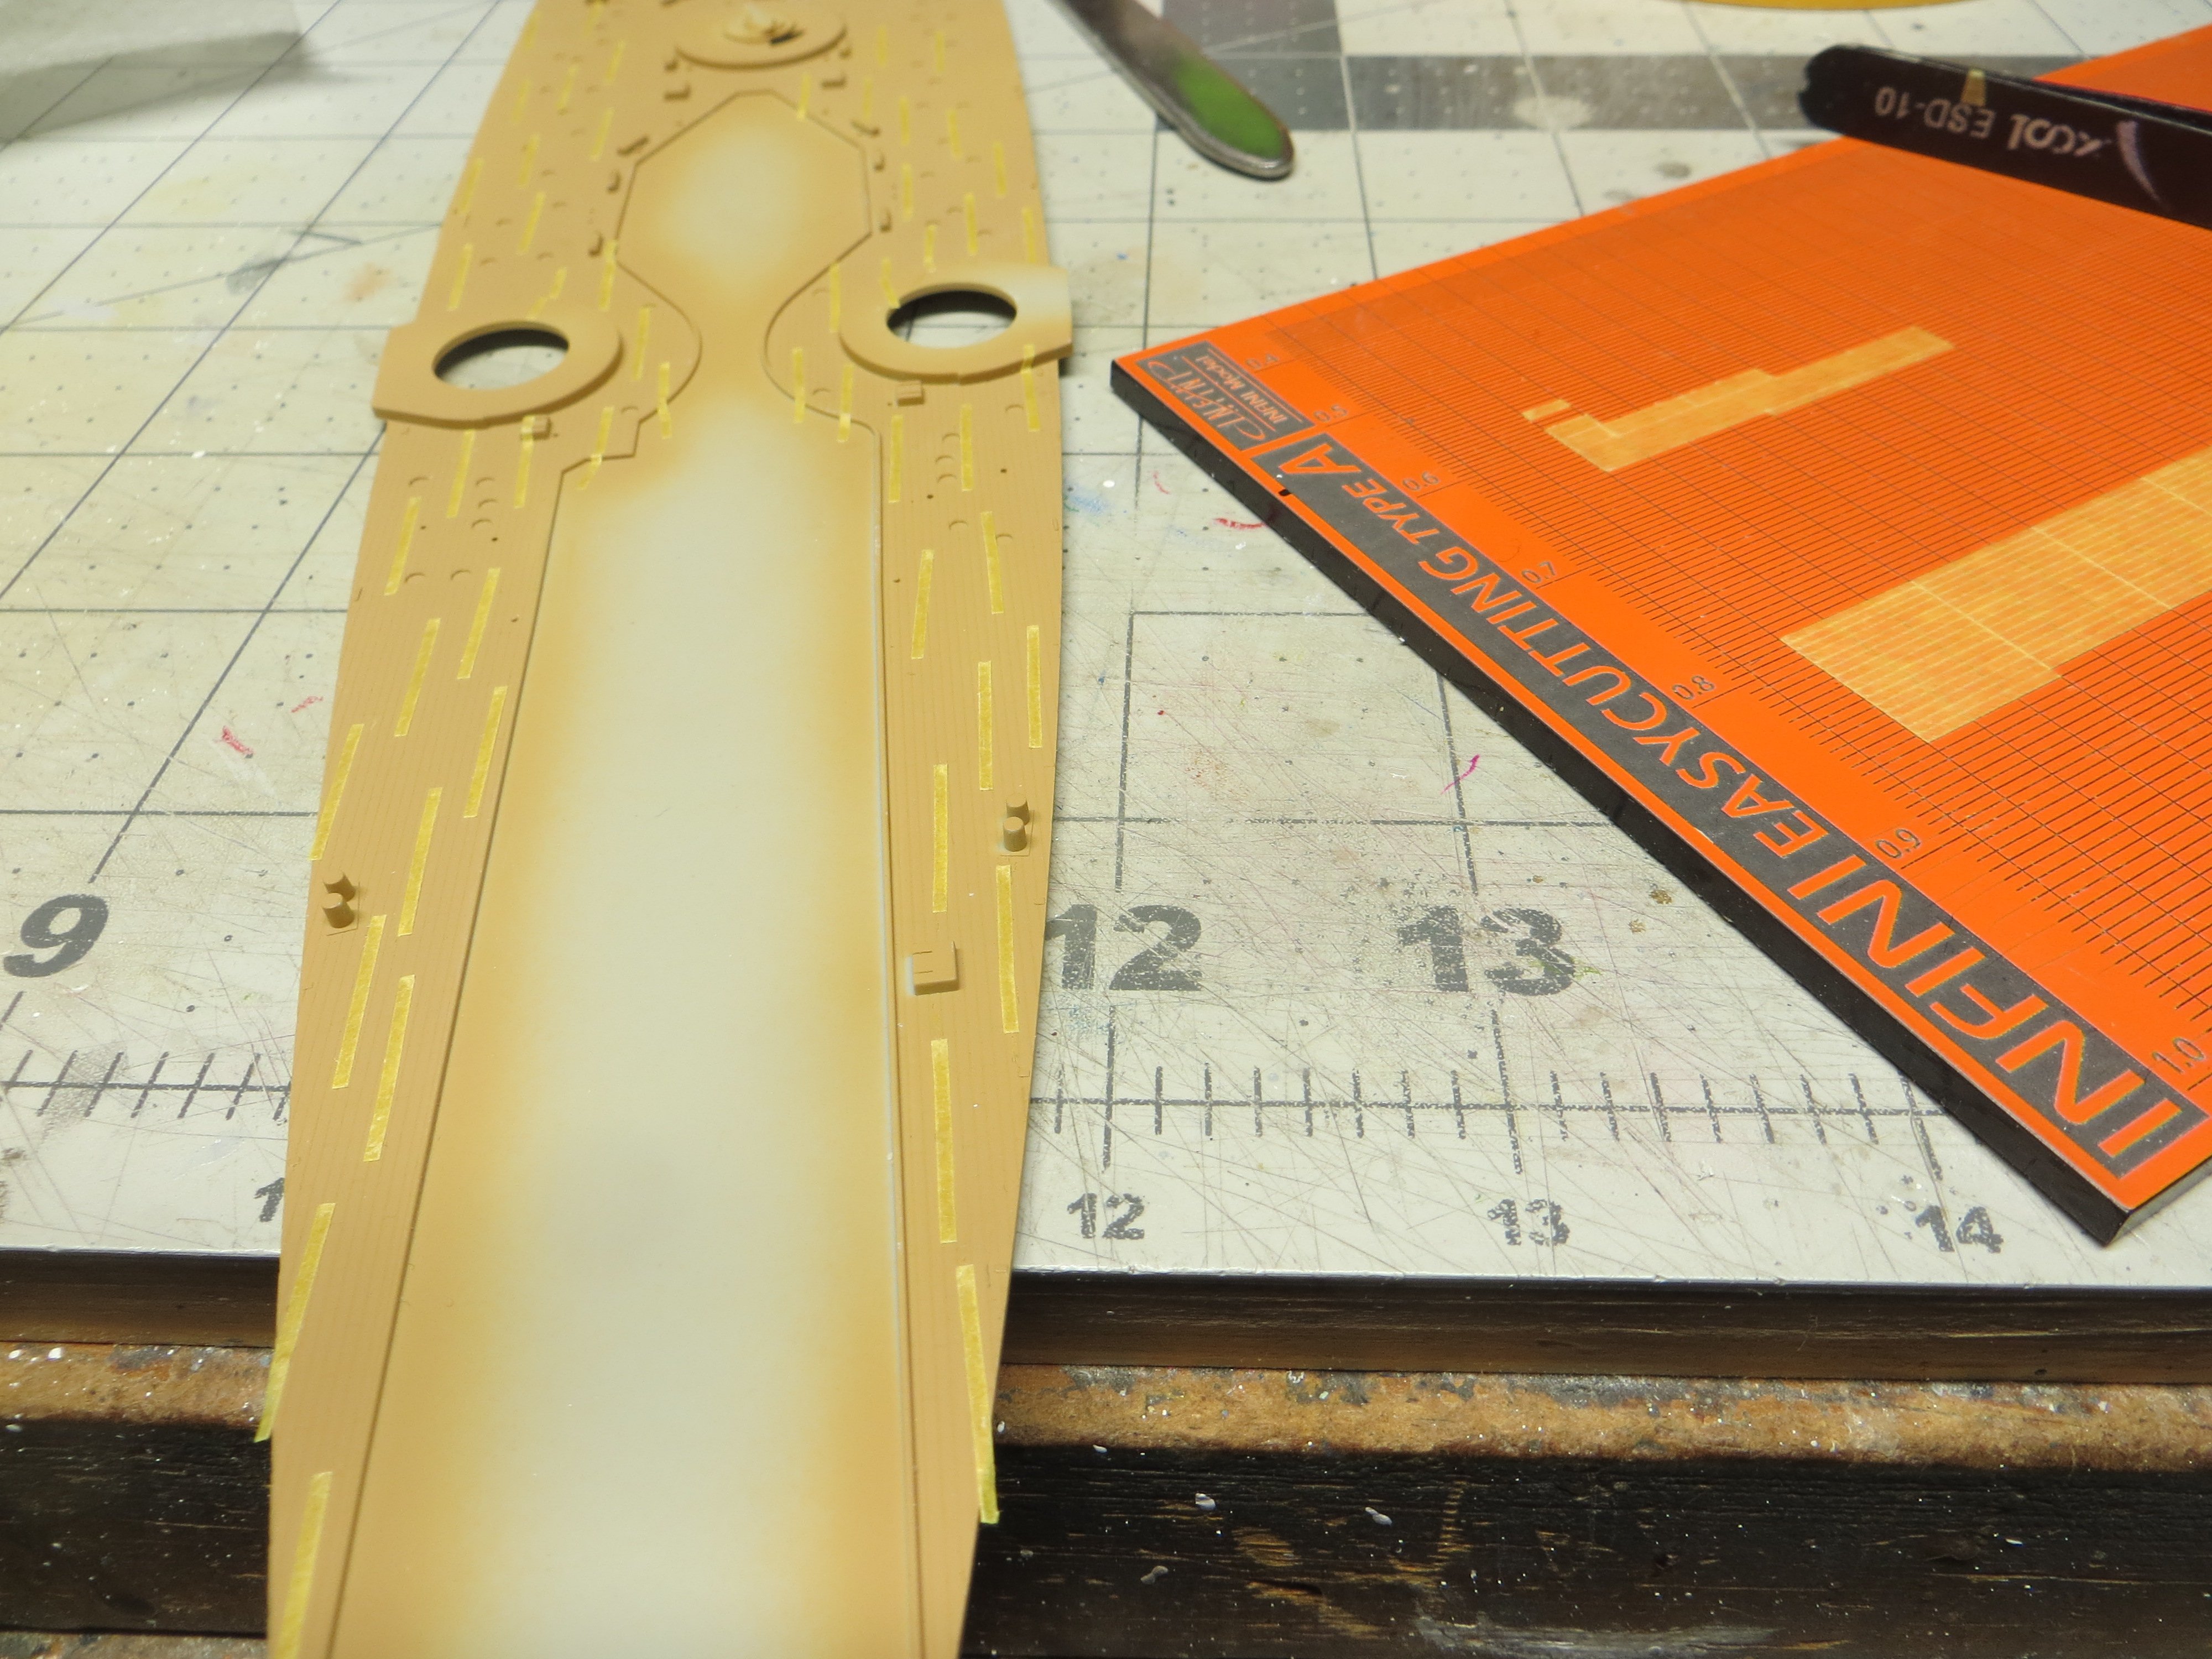
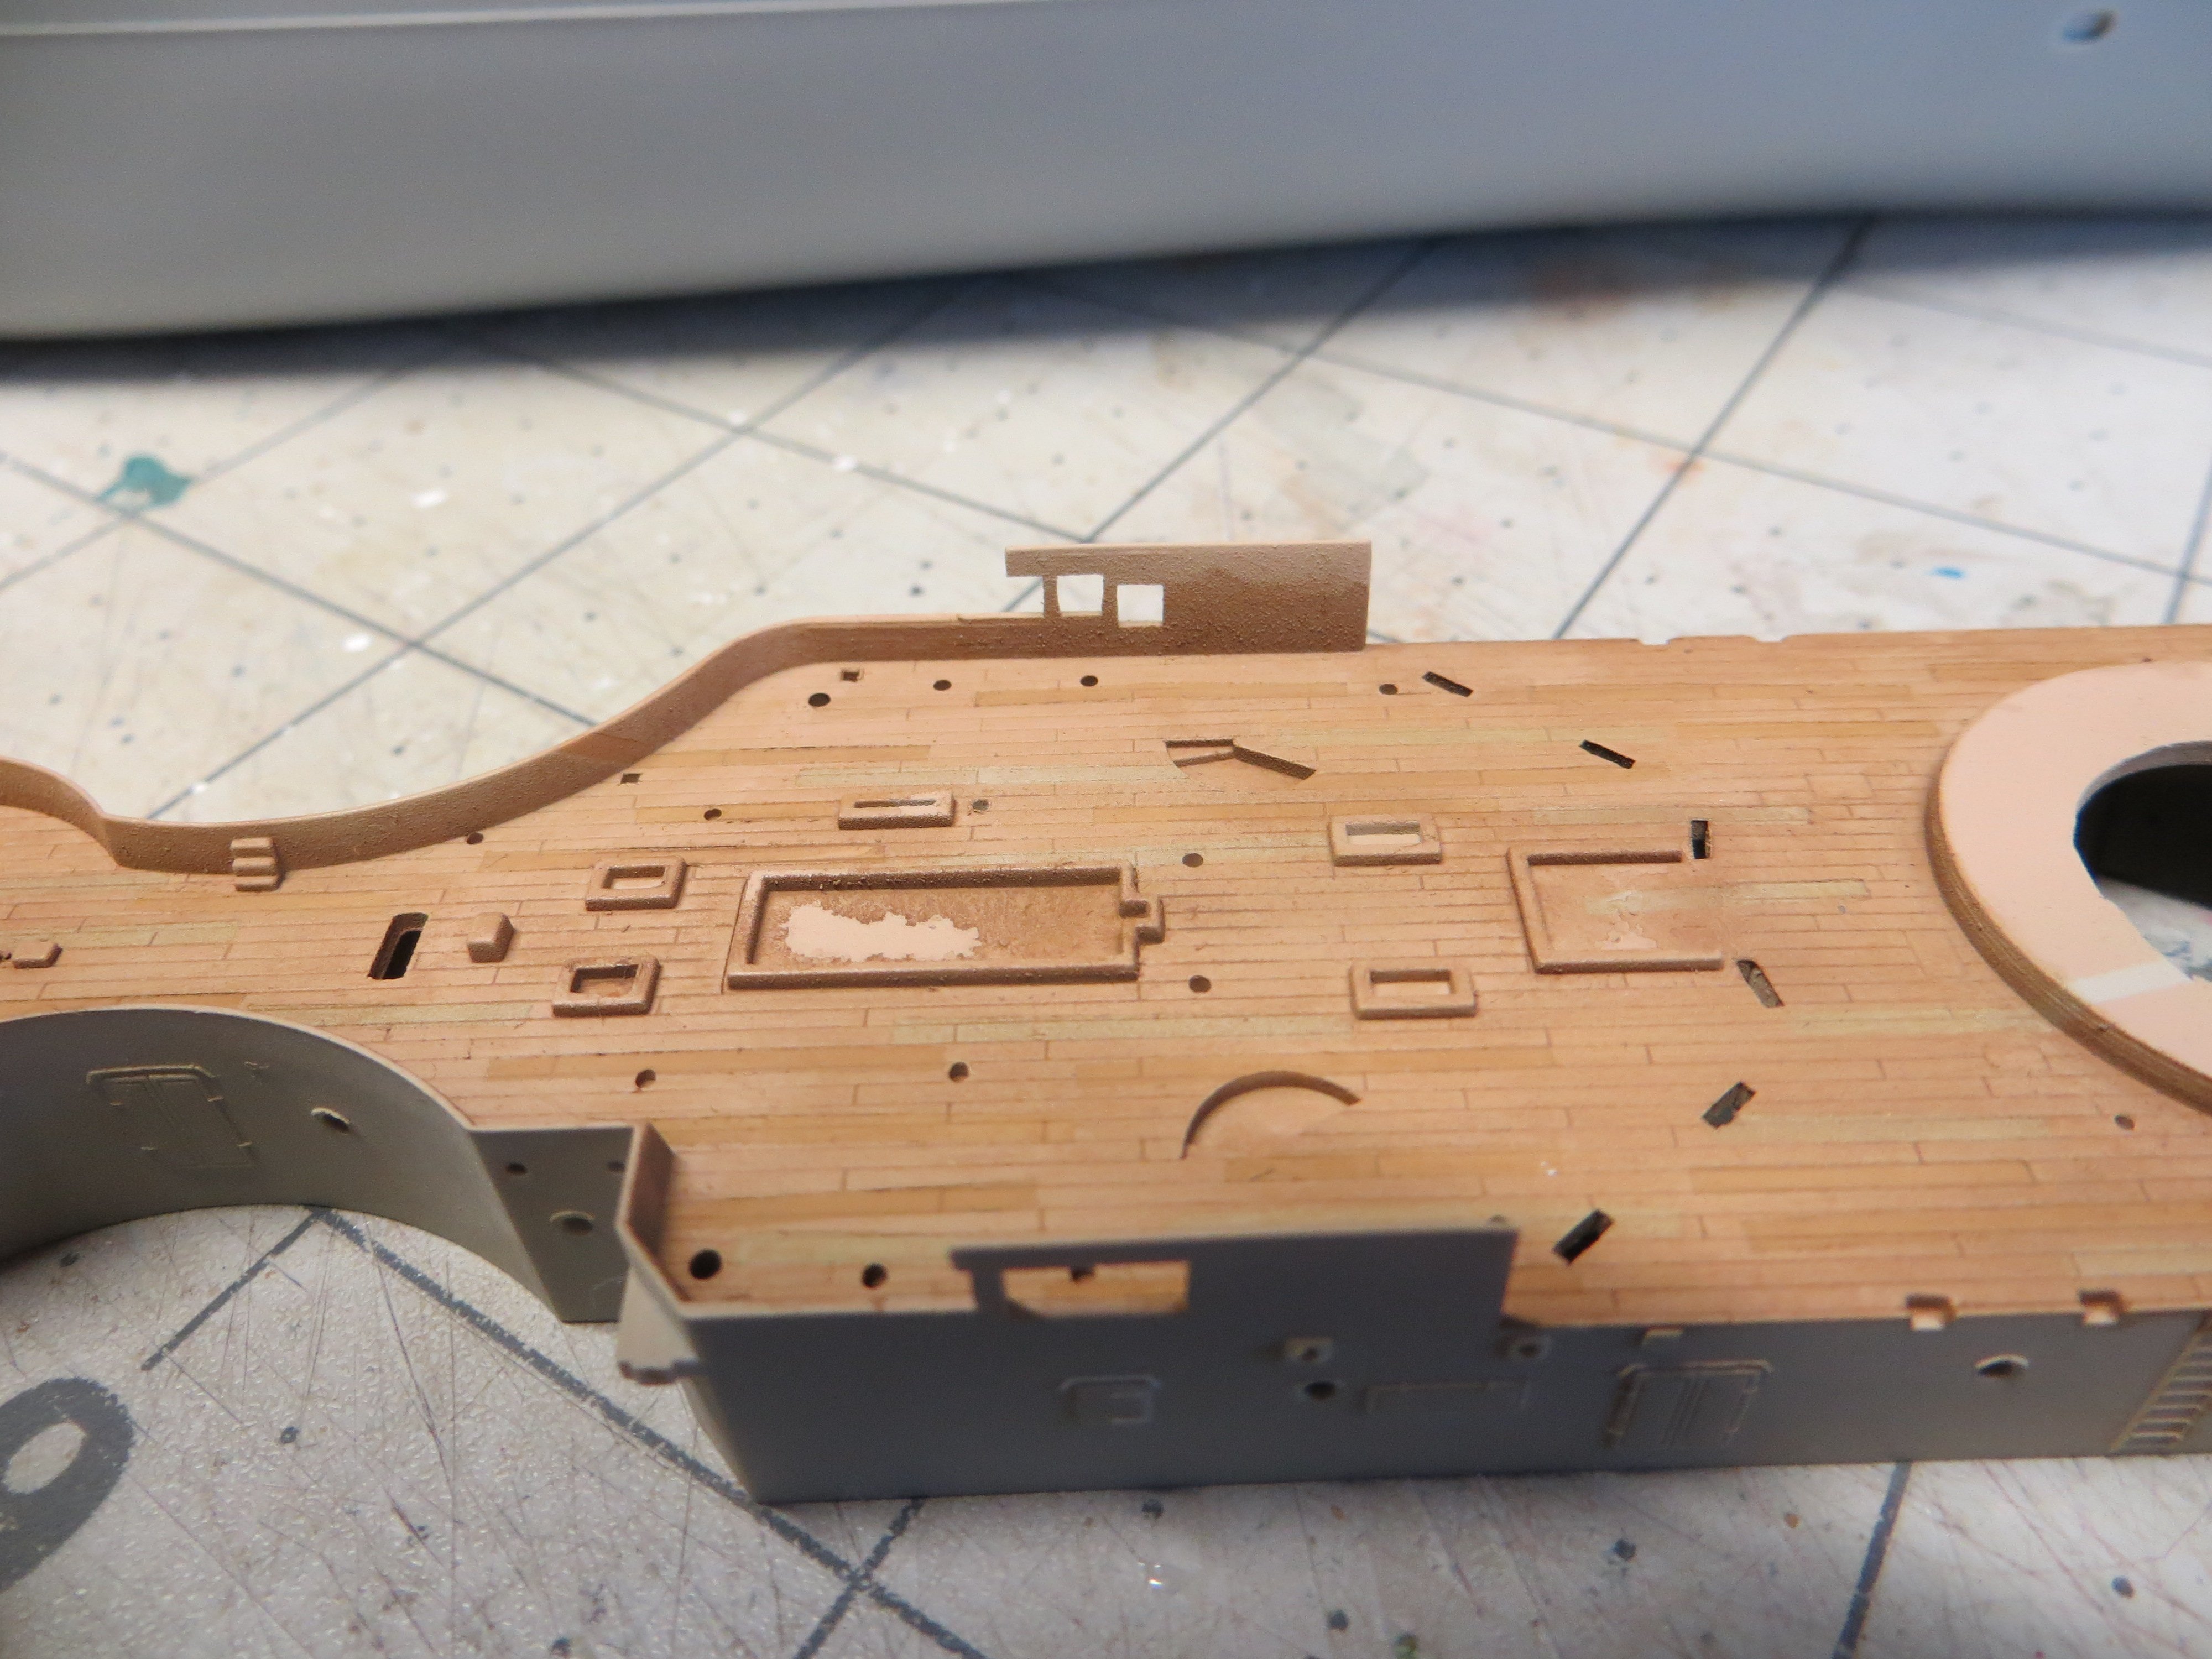
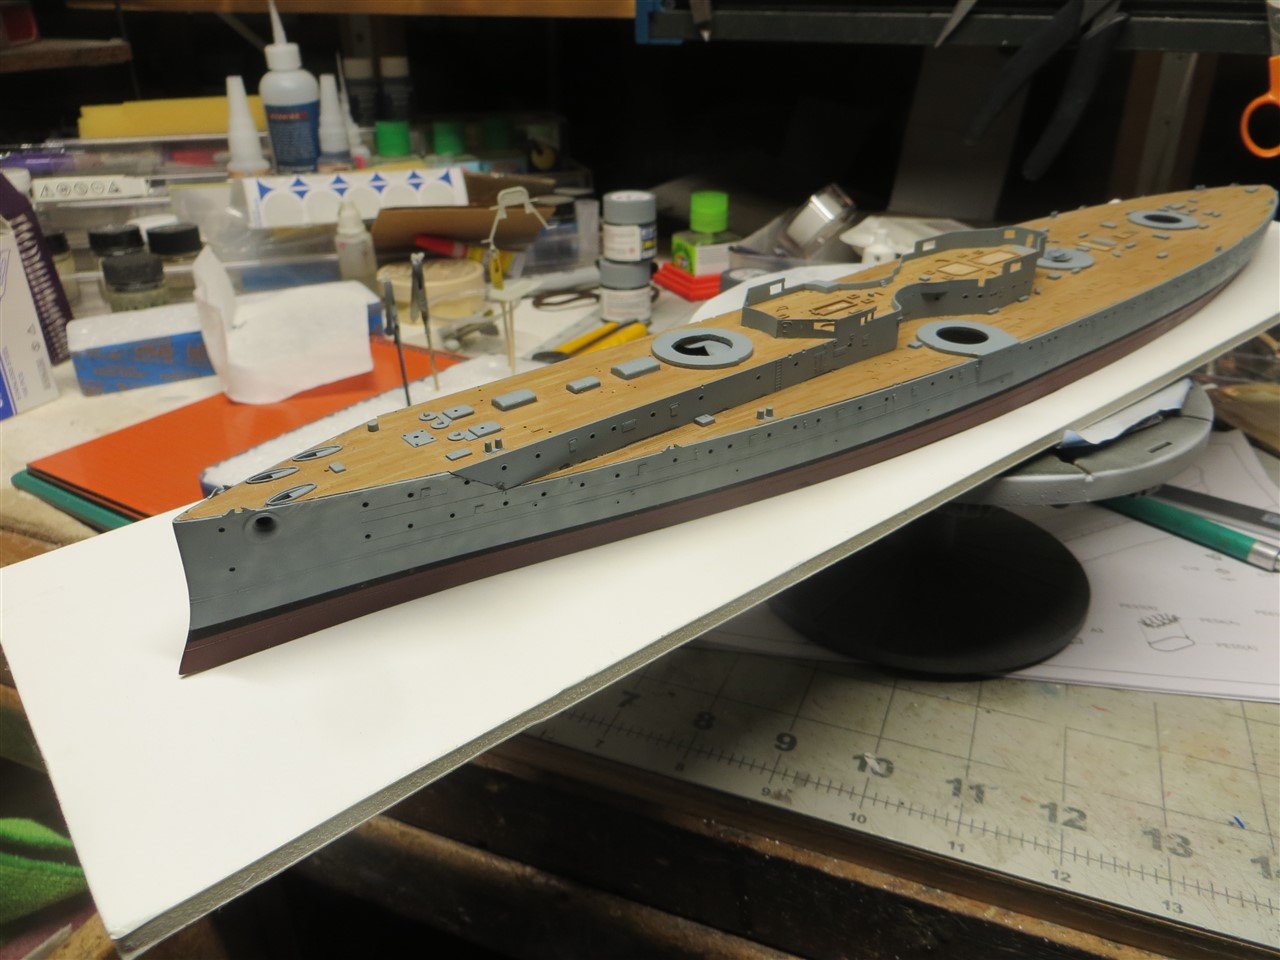
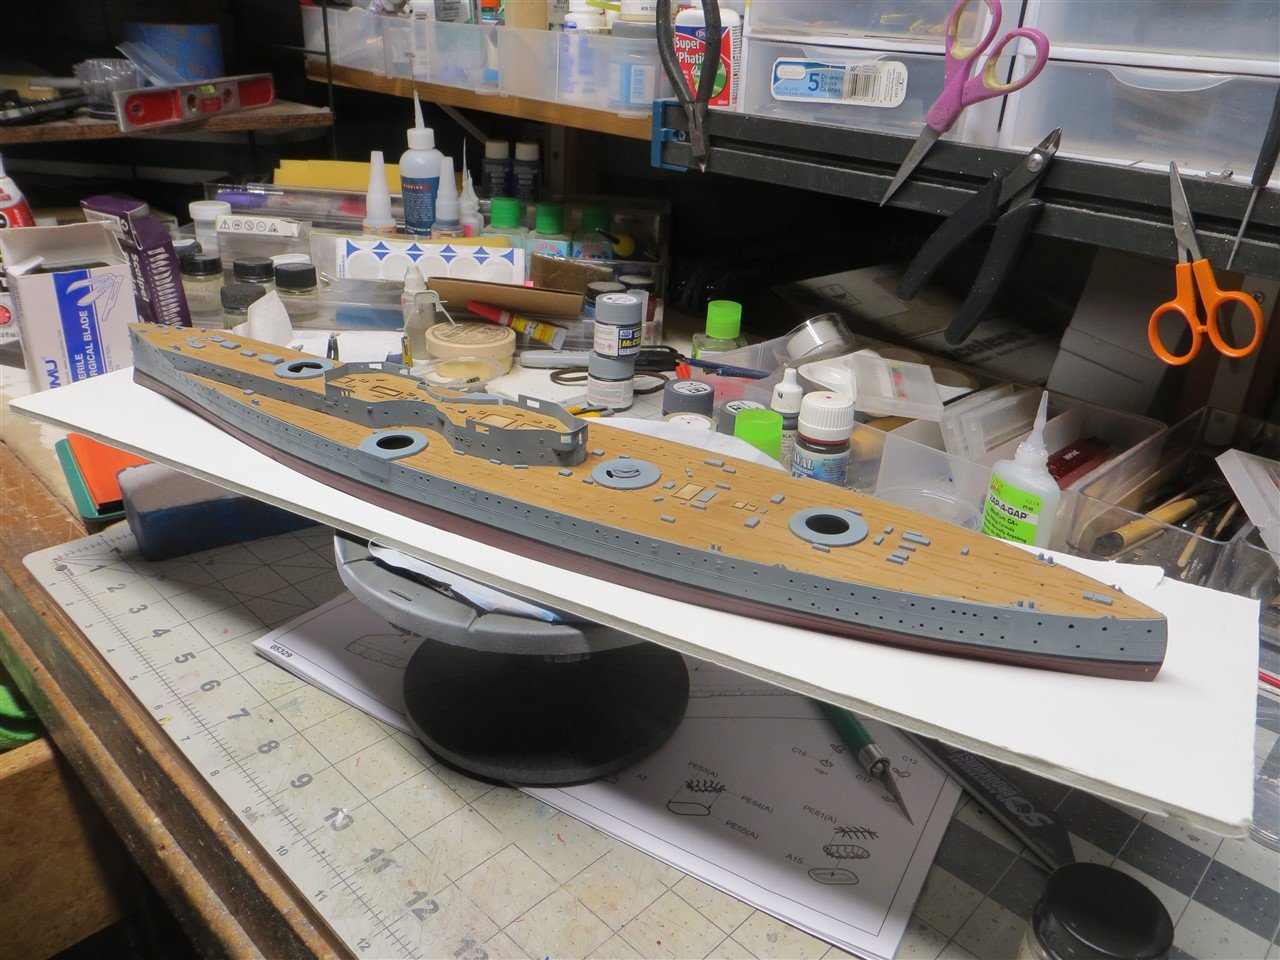
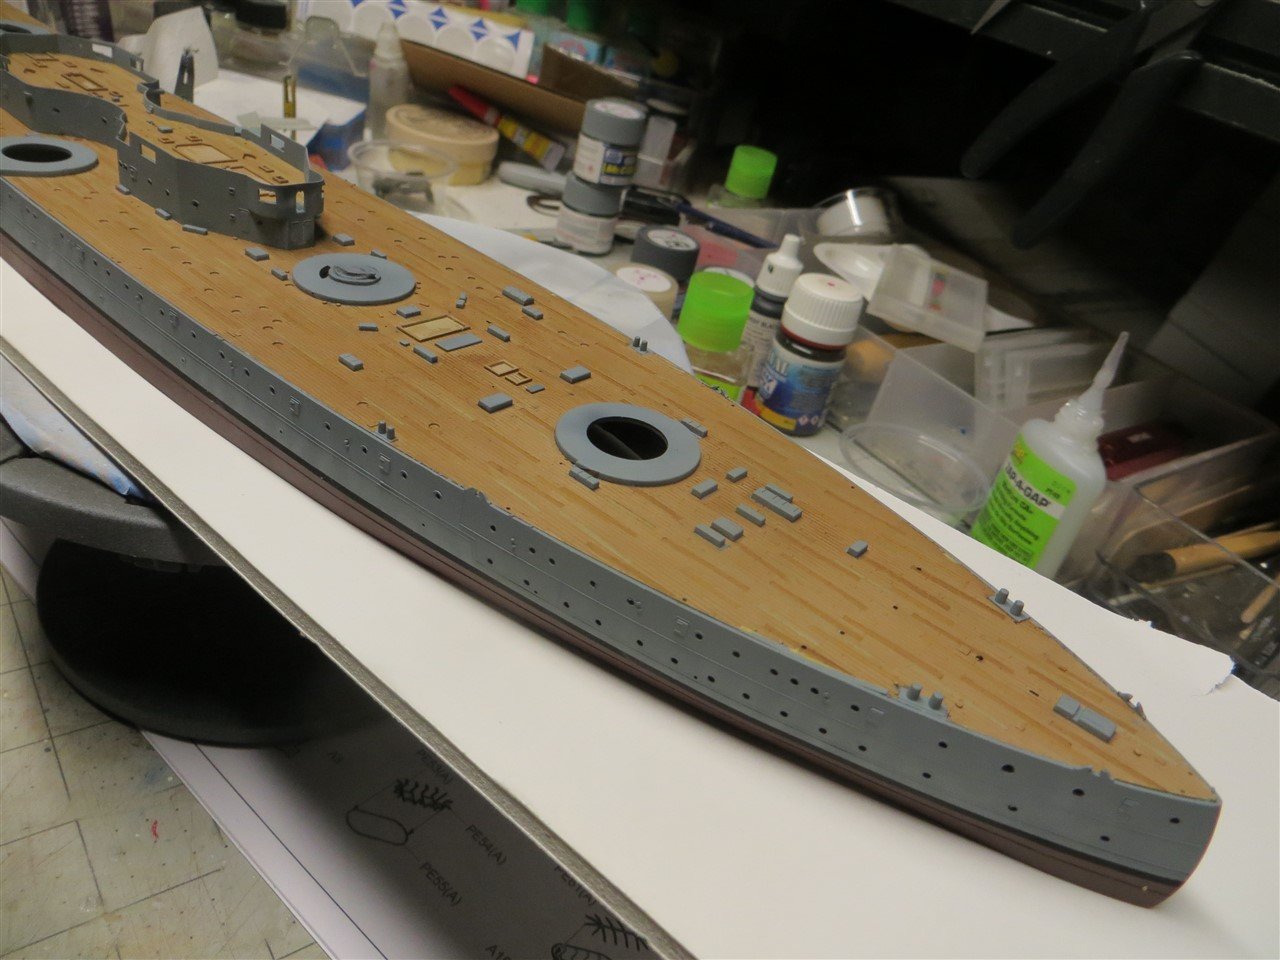
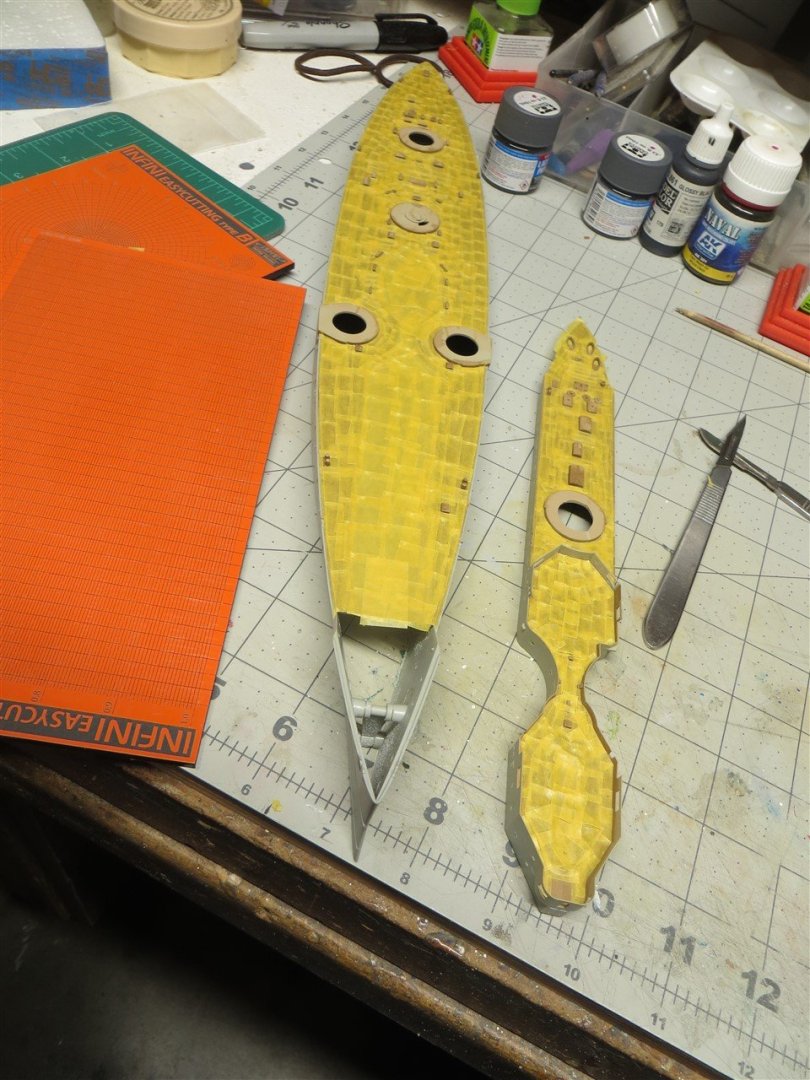
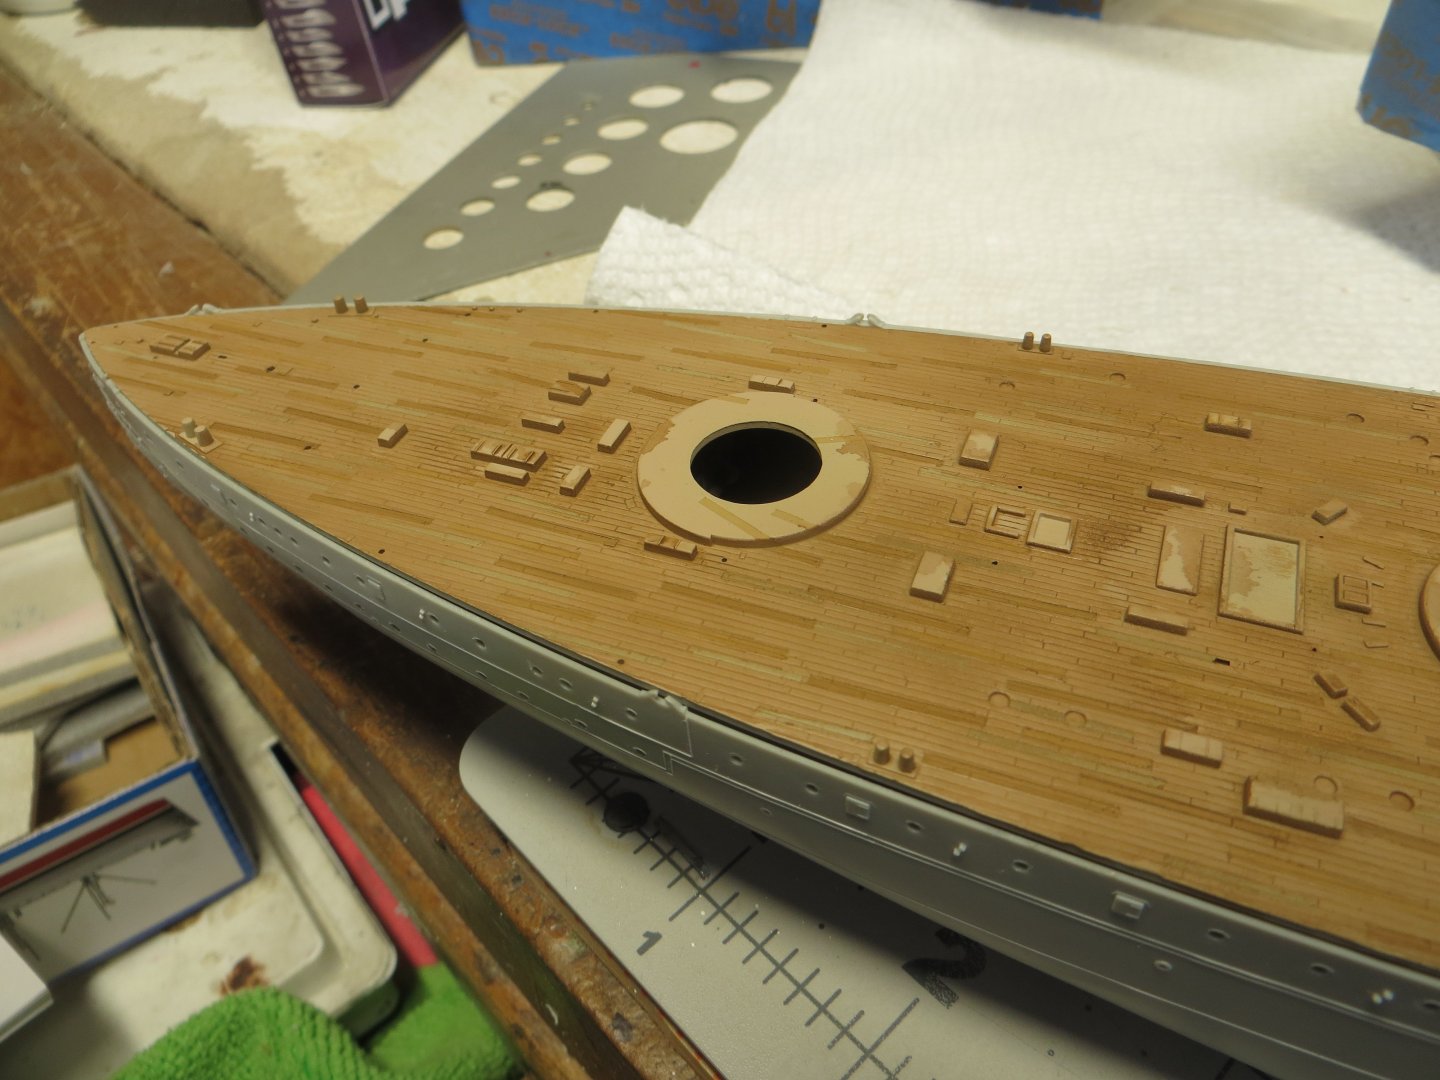
Thanks for the comments and likes. The first step will be to assemble the basic hull and decking. This also introduces the first challenge. The decks of the Dreadnought were made of wood so I have to make a few large pieces of gray plastic look like wood. I searched the internet and youtube and found several articles and videos on the process. They seem to be variations on two themes. One is to paint the entire deck with a wood color and then use washes (usually made from oil paints and white spirits) to highlight details and introduce multiple shades. The other process is to use multiple layers of paint with lots of masking. I chose the latter. Here is the process. First I painted all the decks with a light wood color. I used XF-78 (Wooden Deck). Next I used an INFINI Easy Cutting mat to make a bunch of .9 mm strips of masking tape of varing lengths from 5 to 20 mm. I then randomly masked off portions of the deck using these tiny masking tape strips (tweezers are a must tool for this process). I then repeated this process by airbrushing all the decking with XF-93 (Light Brown) and a bunch more masking tape strips. This was followed by a layer of XF-55 (Deck Tan, which I will not use again) and tape and finally XF-59 (Desert Yellow). This was allowed to dry overnight before I removed the masking tape. The final step was to wash the decks. I used Tamiya's brown panel liner as my wash for the main deck and a dark brown wash I mixed up for some of the upper decks. I think I got an acceptable result but any suggestions for improvements for the next model will be greatly appreciated. I hope the following photos give you some idea of the process and results:


-
I have really had a tough time choosing my next project. I really love warships that rely on engines for propulsion. The problem with models of these ships is they tend to be plastic; not a medium that I have had much success, and the scales tend to result in parts and pieces that are really small and easily eaten by the floor. I followed the build by patrickmil of the USS Curtis Wilbur and that got me excited to give plastics a go. The 1:200 kits are quite a bit bigger than 1:350 but also pricier so I decided to go with the smaller scale (I passed on 1:700 as they are even smaller). I decided on the HMS Dreadnought as it was a real game changer; ushering the era of the modern battleship. I also made the decision to build this model for a waterline presentation. I have visited several modelling sites and I am very impressed with that form of presentation. The Trumpeter kit is not a waterline kit so at some point I will have to cut the hull off at just below the waterline. Except for modifying the kit for waterline presentation; I will pretty much build it out-of-the-box. While here is the obligatory photo of the box:

-
Wow! You did a really great job and I learned alot studying your photos. The kit is sitting on my workbench. It is really an intimidating box of parts. The hull is huge. I am studying your log and will dive in shortly. Still intend to attempt a waterline presentation for this model.
- 97 replies
-
- 4
-
-
- Curtis Wilbur
- I Love Kit
- (and 2 more)
-
Just Retired and yes... another Heller Victory Builder
rcmdrvr replied to Fred B's topic in New member Introductions
PHOTOS!!!