Siggi52
-
Posts
1,156 -
Joined
-
Last visited
8 Followers


.thumb.jpg.62d1d69fed1f32364417cb1f9cdeb009.jpg)
Recent Profile Visitors
5,569 profile views


-
 Siggi52 reacted to a post in a topic:
Billy 1938 by Keith Black - FINISHED - 1:120 Scale - Homemade Sternwheeler
Siggi52 reacted to a post in a topic:
Billy 1938 by Keith Black - FINISHED - 1:120 Scale - Homemade Sternwheeler
-
 Siggi52 reacted to a post in a topic:
J H Crawford by LJP (Lawrence Paplham) - Scale 1:64 - an 1894 to 1898 Wisconsin sternwheeler
Siggi52 reacted to a post in a topic:
J H Crawford by LJP (Lawrence Paplham) - Scale 1:64 - an 1894 to 1898 Wisconsin sternwheeler
-
Siggi52 reacted to a post in a topic:
Tartana Genovese by maurino
-
Siggi52 reacted to a post in a topic:
Speedwell 1752 by giampieroricci - Scale 1:96 - from Antscherl & Herbert monograph
-
Siggi52 reacted to a post in a topic:
HMS Nymphe and Cléopâtre by Menne Kosian - 1:350 - engagement of 18 June 1794 - diorama
-
Siggi52 reacted to a post in a topic:
La Mahonesa by KLarsen - Scale 1/48 - stern cross-section
-
Siggi52 reacted to a post in a topic:
HMS RESOLUTION 1667 by KarenM - 1:48
-
Siggi52 reacted to a post in a topic:
HMS RESOLUTION 1667 by KarenM - 1:48
-
Siggi52 reacted to a post in a topic:
Gjøa 1872 by Harvey Golden - Roald Amundsen's Cutter built at Rosedahl, Norway
-
Siggi52 reacted to a post in a topic:
Tartana Genovese by maurino
-
CiscoH reacted to a post in a topic:
HMS Tiger 1747 by Siggi52 - 1:48 - 60 gun ship from NMM plans
-
Thukydides reacted to a post in a topic:
HMS Tiger 1747 by Siggi52 - 1:48 - 60 gun ship from NMM plans
-
Keith Black reacted to a post in a topic:
HMS Tiger 1747 by Siggi52 - 1:48 - 60 gun ship from NMM plans
-
Jack H reacted to a post in a topic:
HMS Tiger 1747 by Siggi52 - 1:48 - 60 gun ship from NMM plans
-
 md1400cs reacted to a post in a topic:
HMS Tiger 1747 by Siggi52 - 1:48 - 60 gun ship from NMM plans
md1400cs reacted to a post in a topic:
HMS Tiger 1747 by Siggi52 - 1:48 - 60 gun ship from NMM plans
-
Keith Black reacted to a post in a topic:
HMS Tiger 1747 by Siggi52 - 1:48 - 60 gun ship from NMM plans
-
ccoyle reacted to a post in a topic:
HMS Tiger 1747 by Siggi52 - 1:48 - 60 gun ship from NMM plans
-
ccoyle reacted to a post in a topic:
HMS Tiger 1747 by Siggi52 - 1:48 - 60 gun ship from NMM plans
-
scrubbyj427 reacted to a post in a topic:
HMS Tiger 1747 by Siggi52 - 1:48 - 60 gun ship from NMM plans
-
BLACK VIKING reacted to a post in a topic:
HMS Tiger 1747 by Siggi52 - 1:48 - 60 gun ship from NMM plans
-
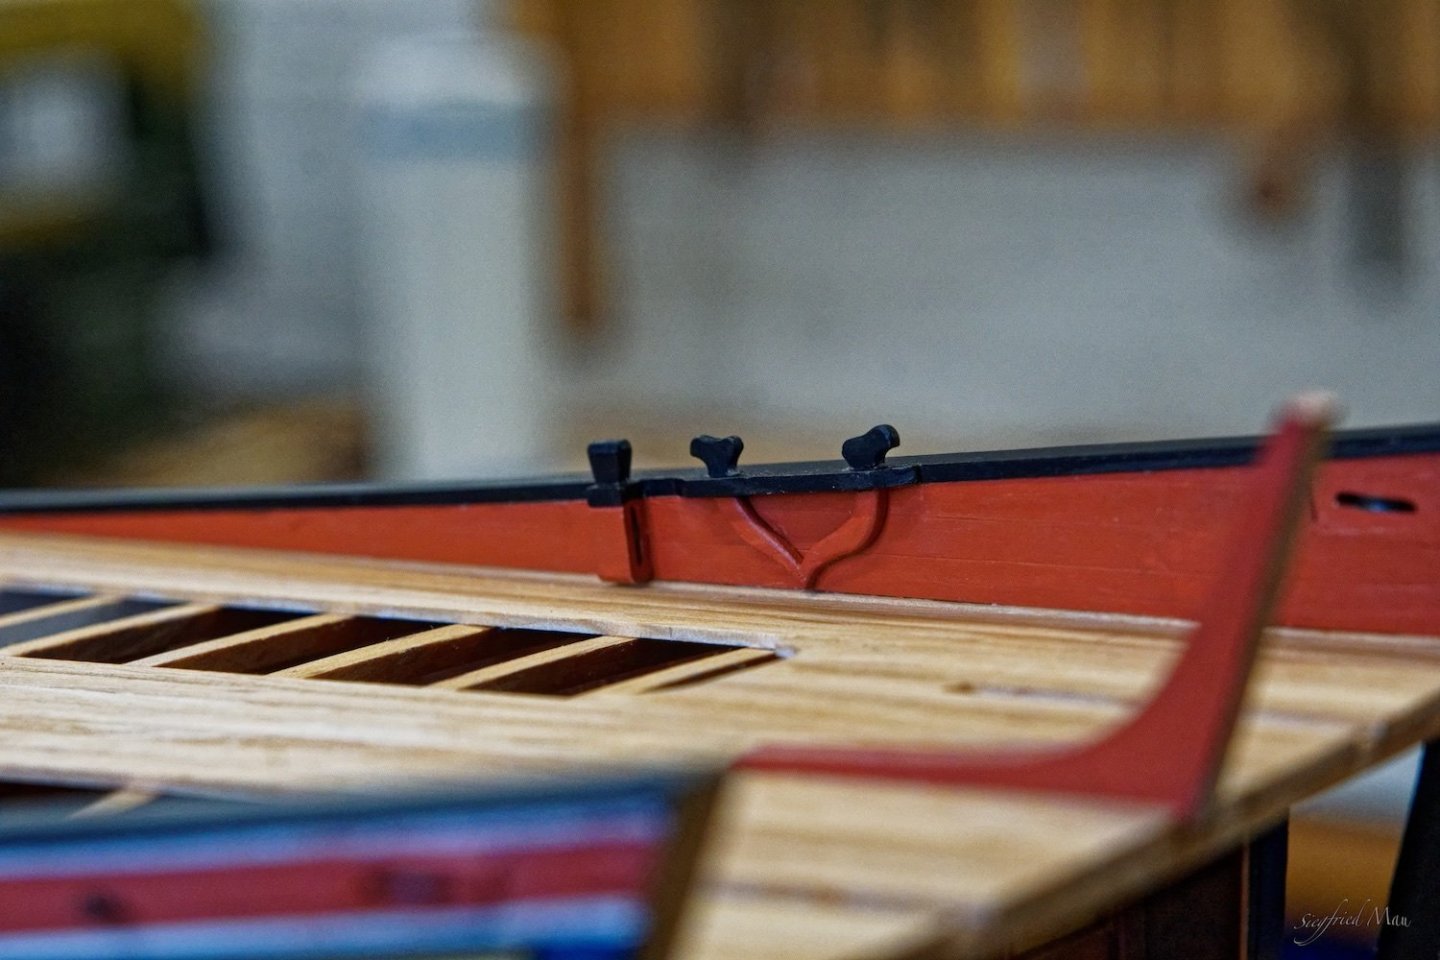
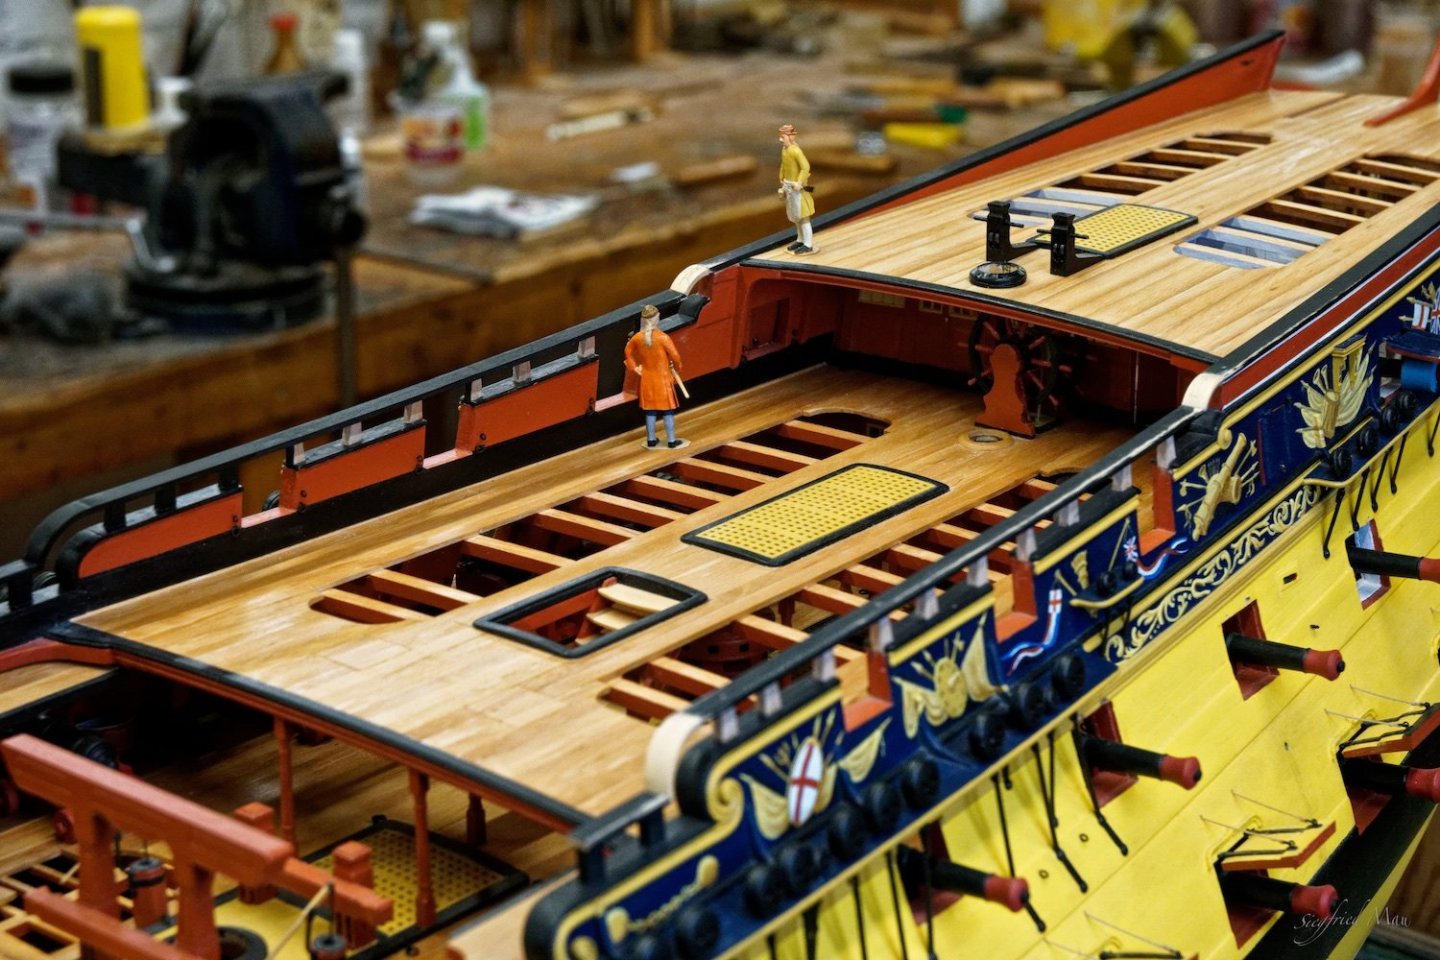
 Thank you very much for all your good wishes, likes and so on. I'm working at the moment to create the rail in front of the quarter deck, and that is not so simple as it looks. So it may take some time.
 -
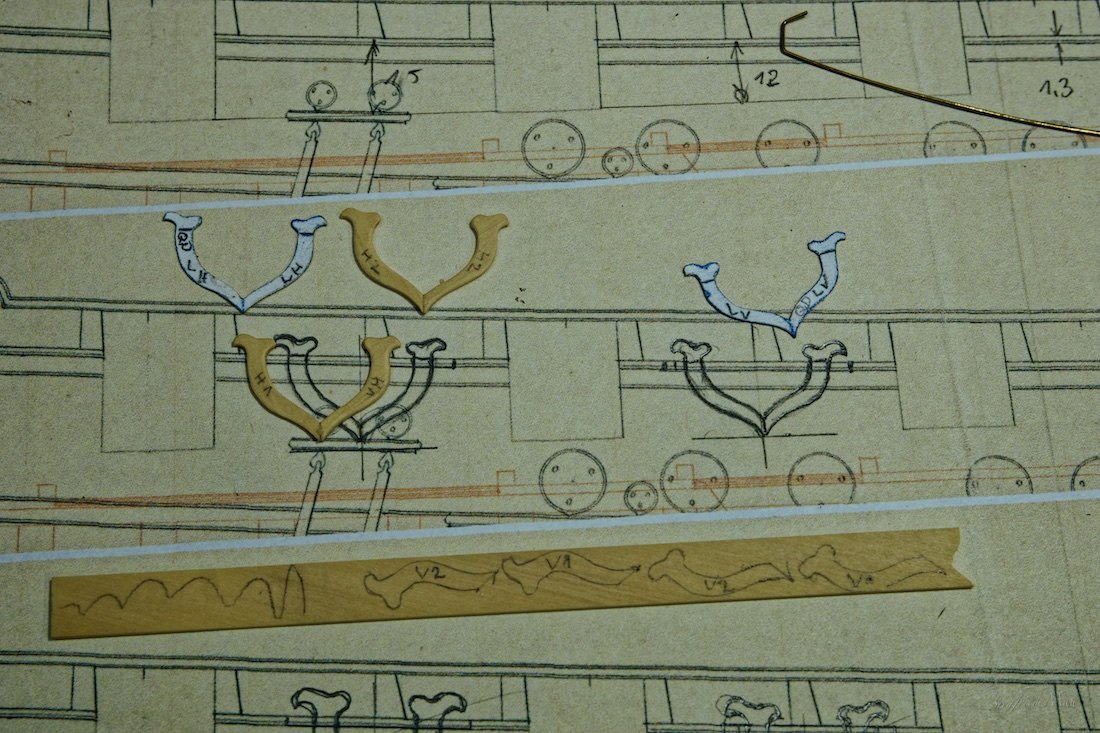
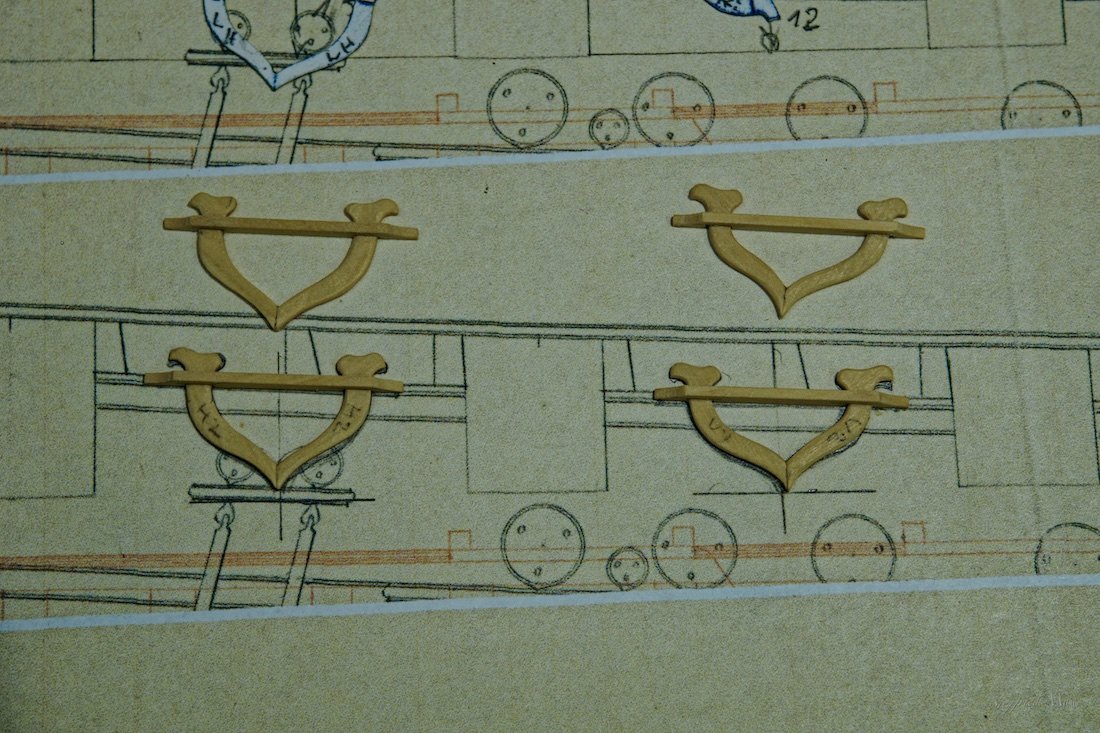
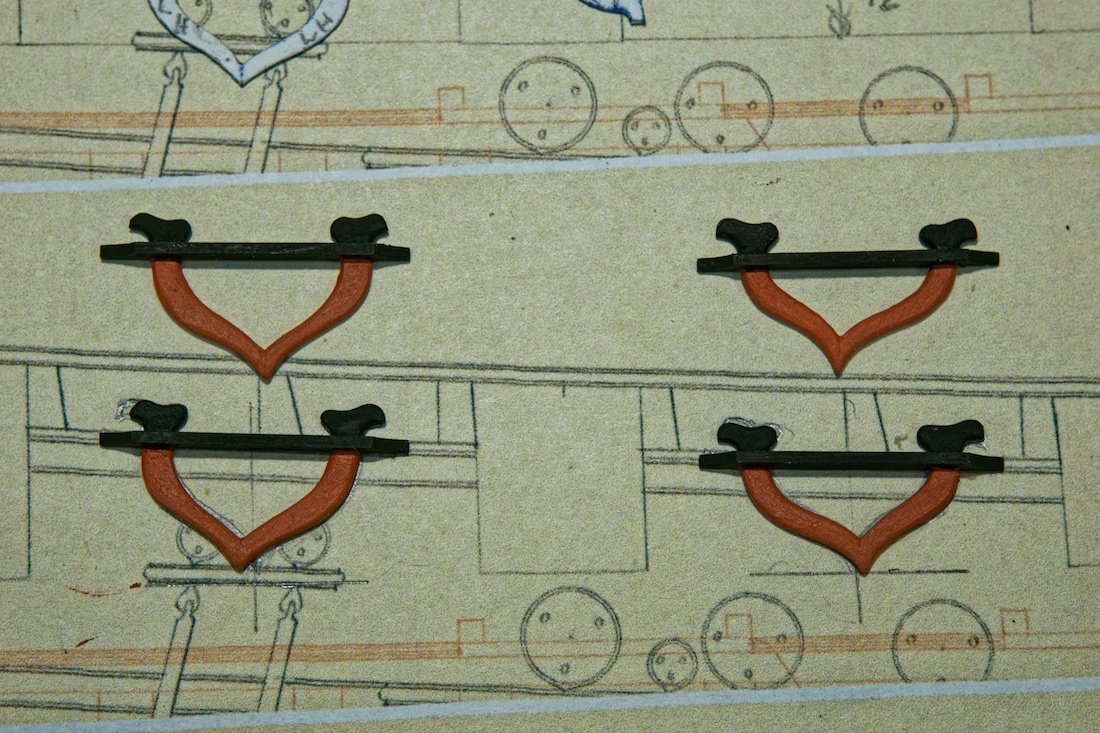
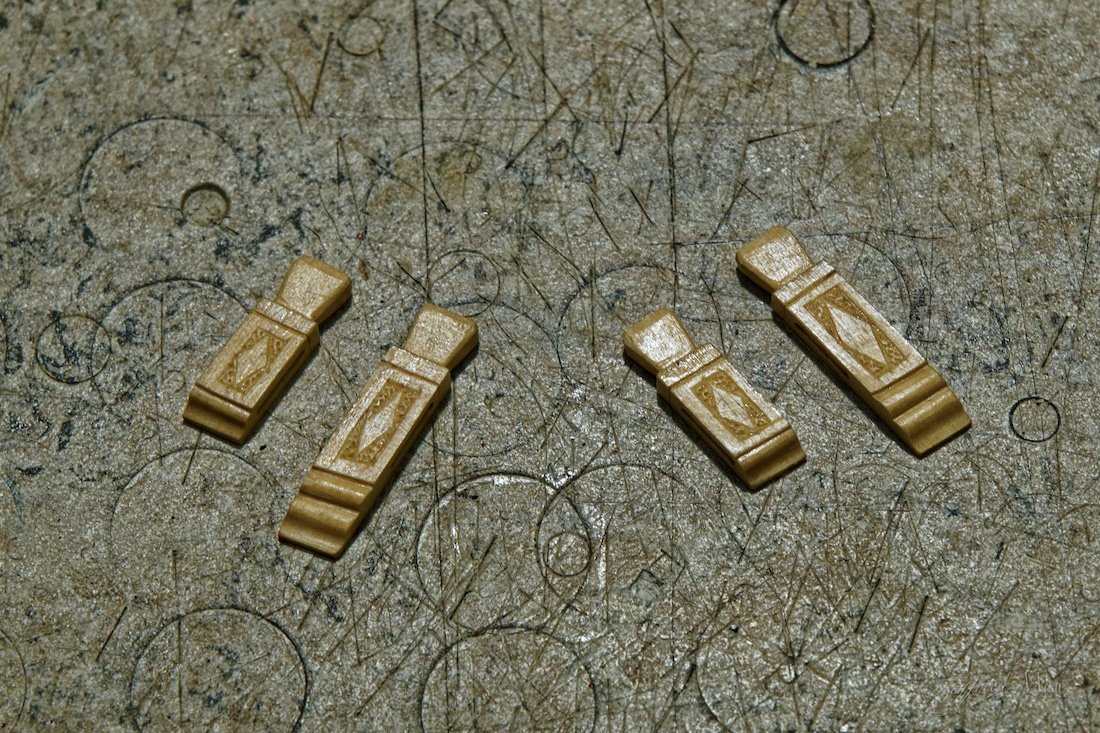
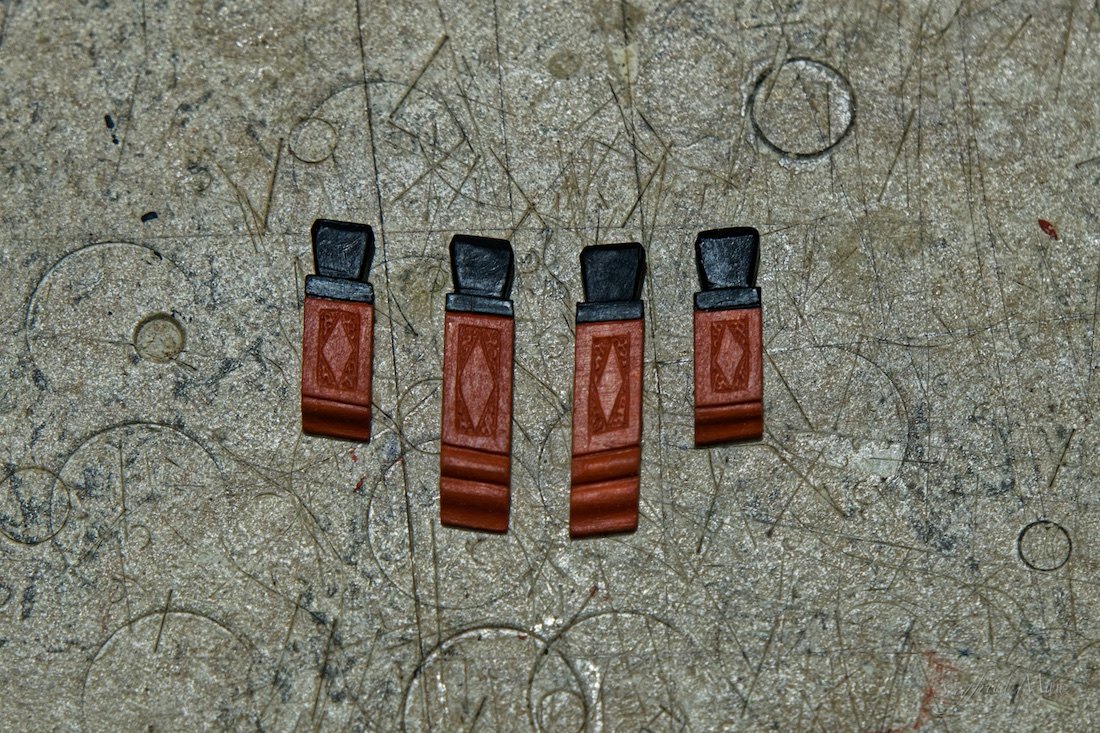
Hello, and thank you for all the likes and wishes. Since I sent the team home for the holidays, I worked a little for myself. The kevels and cavels were on the list. Here the kevels and the cavels

-
Hello Dan, thank you for your kind words. Yes you may ask me questions, may be over PM, but I must say that I'm not an expert about sails. All I know about the sails in these ships, I know from Ms Bischoff's book about the Oseberg ship. See here the first page. Could we see pictures of your ship somewhere?
-
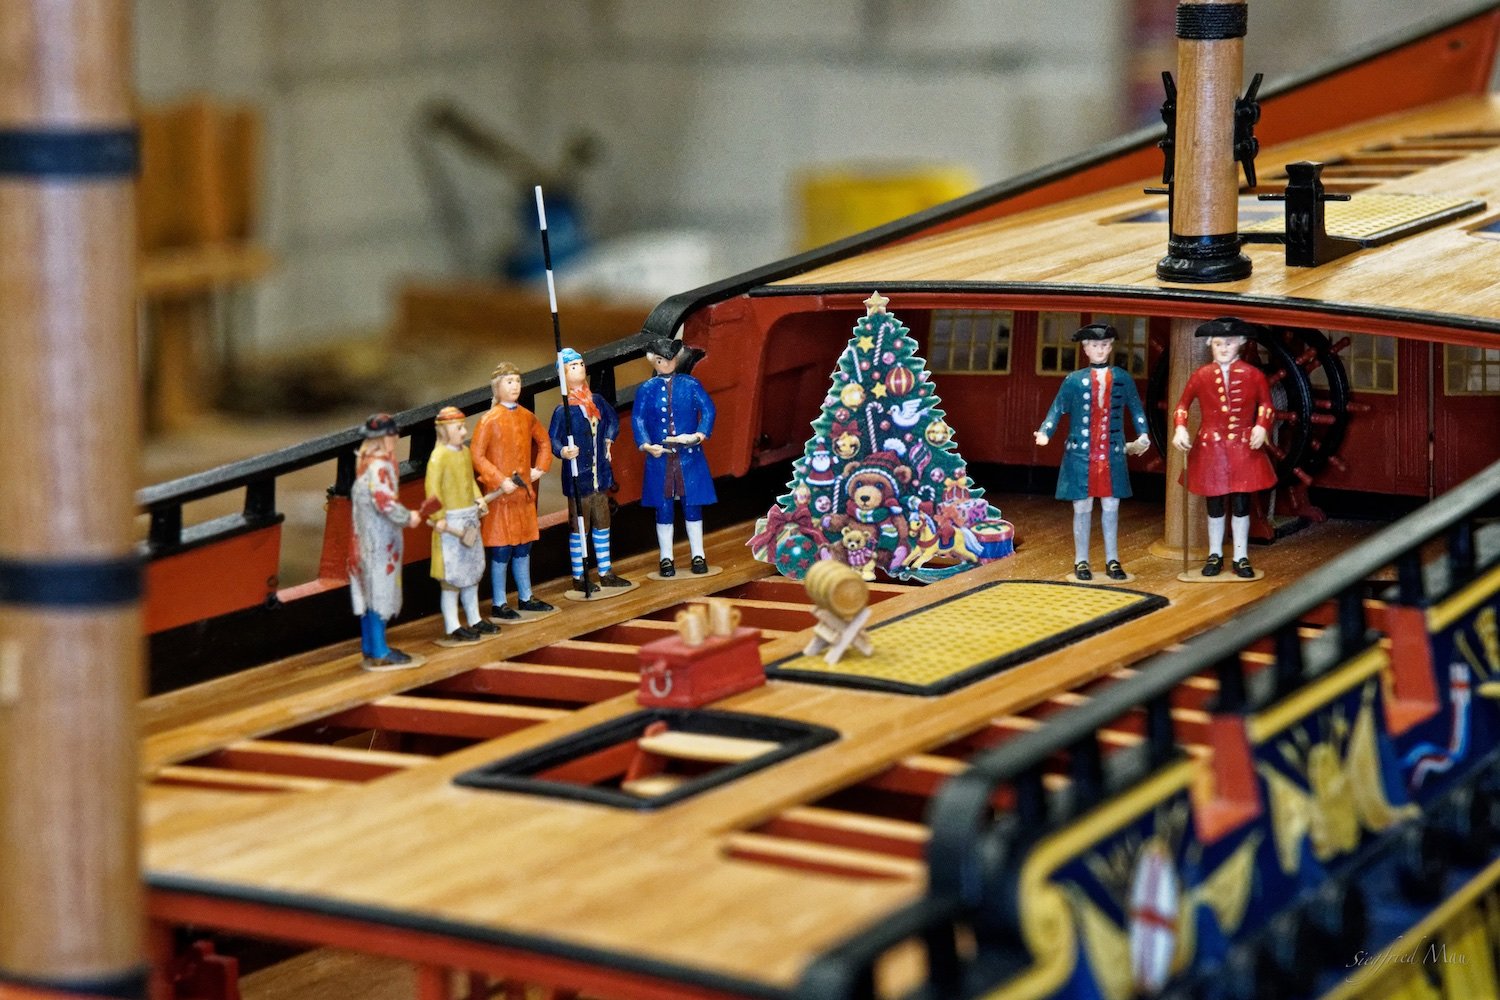
Hello, and many thanks for all your likes and comments. Because I unfortunately have a serious cold, we decided to prefer the Christmas party and then close the ship yard first. So we all from the ship yard wish you a Merry Christmas and a Happy New Year 2026

-
Hello, it is done! In the former version was too much zig zag, especially with the lage bows. So I laid the short plank a little to the inside and at least made the end pieces new. I don't know why I build them straight? May be my cold. But now all is more or less flush with the surounding area.


-
Hello, today only bad news. Because I'm not really satisfied with my work of the last days, I decidet to build some things new. If it come out better, who knows The last stand

-
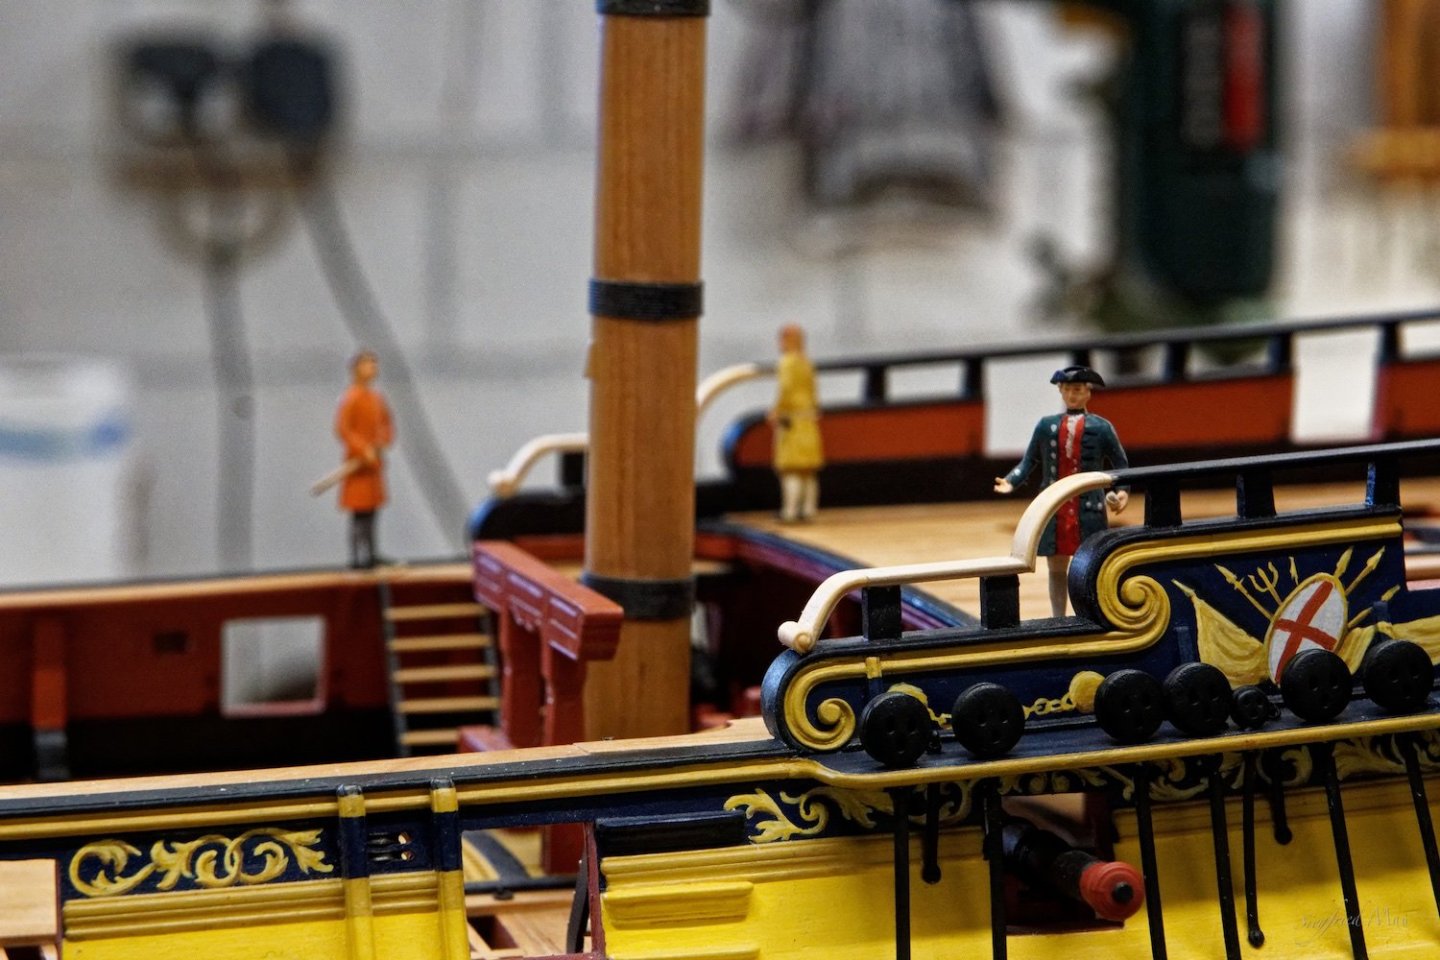
Hello, the carpenters build the end pieces and the painter had painted them. The shipwright is pleased. When the painter has varnish all tomorrow, I think we are ready with this.


-
Hello, the carpenters have finished the arches and the painter had all this afternoon painted. Now only the two end pieces left.

-
Hello, and thank you very much for your kind coments and likes. Today only a small update, I could't resist to file, sand and paint the fife rail here.

-
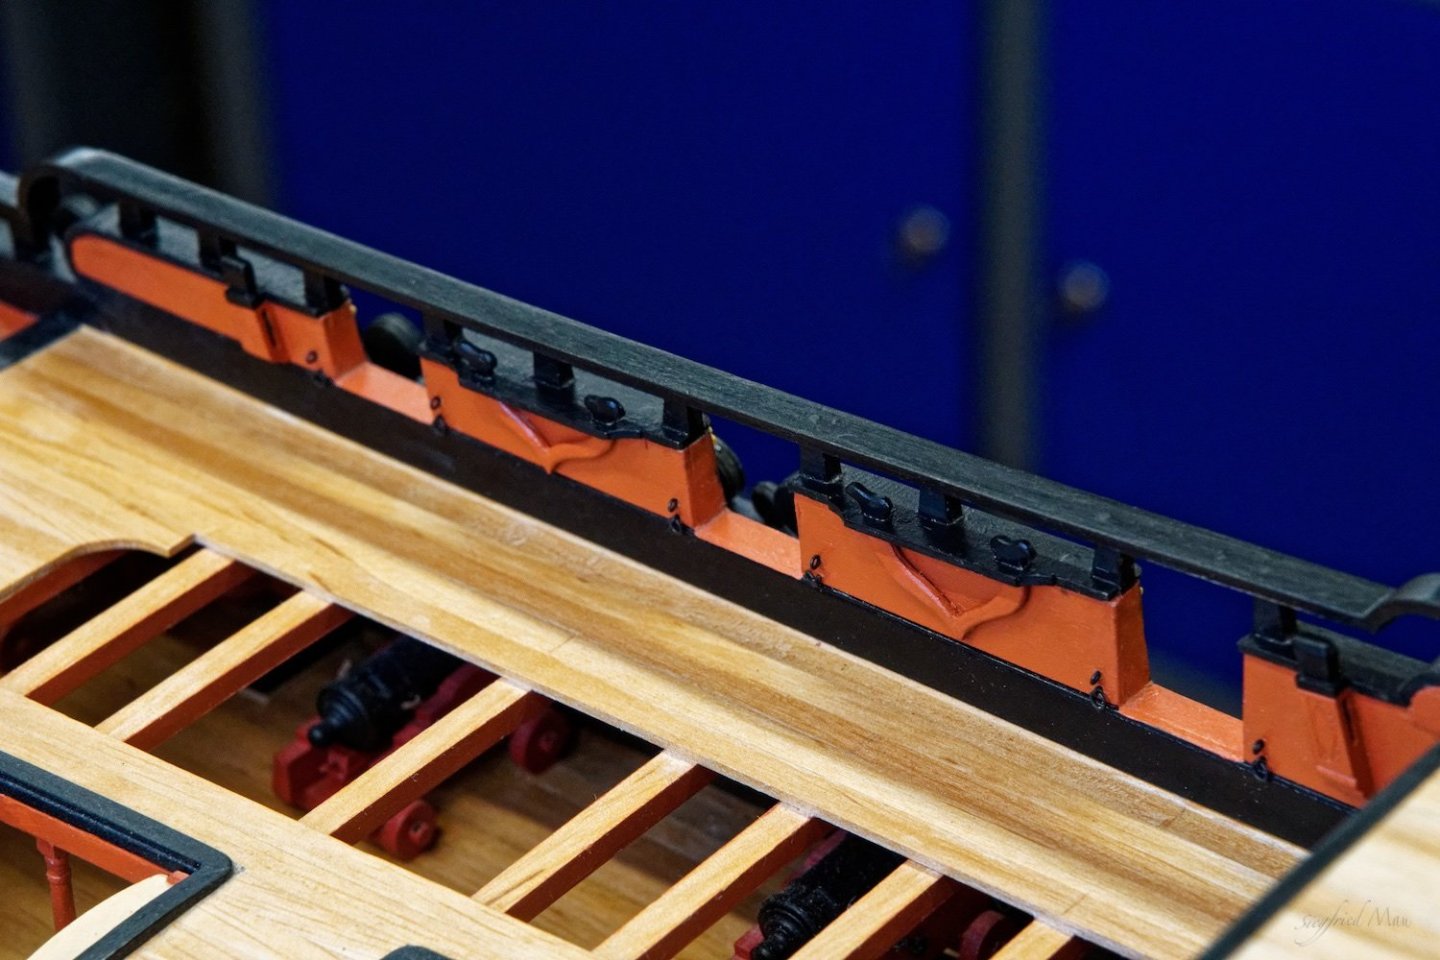
Hello, today I build in the first arch. But before that I had to repair the drift rails here. I had installed them at the wrong side 😐 I turned the arch much wider than the rail Fitting in the arch was the most complicated part here.


-
Hello, the first fife rails are installed. This was the light part, the complicated part with the arches is the next challenge 😐 But I have very talented carpenters, so I hope that this would not cause any problems.

-
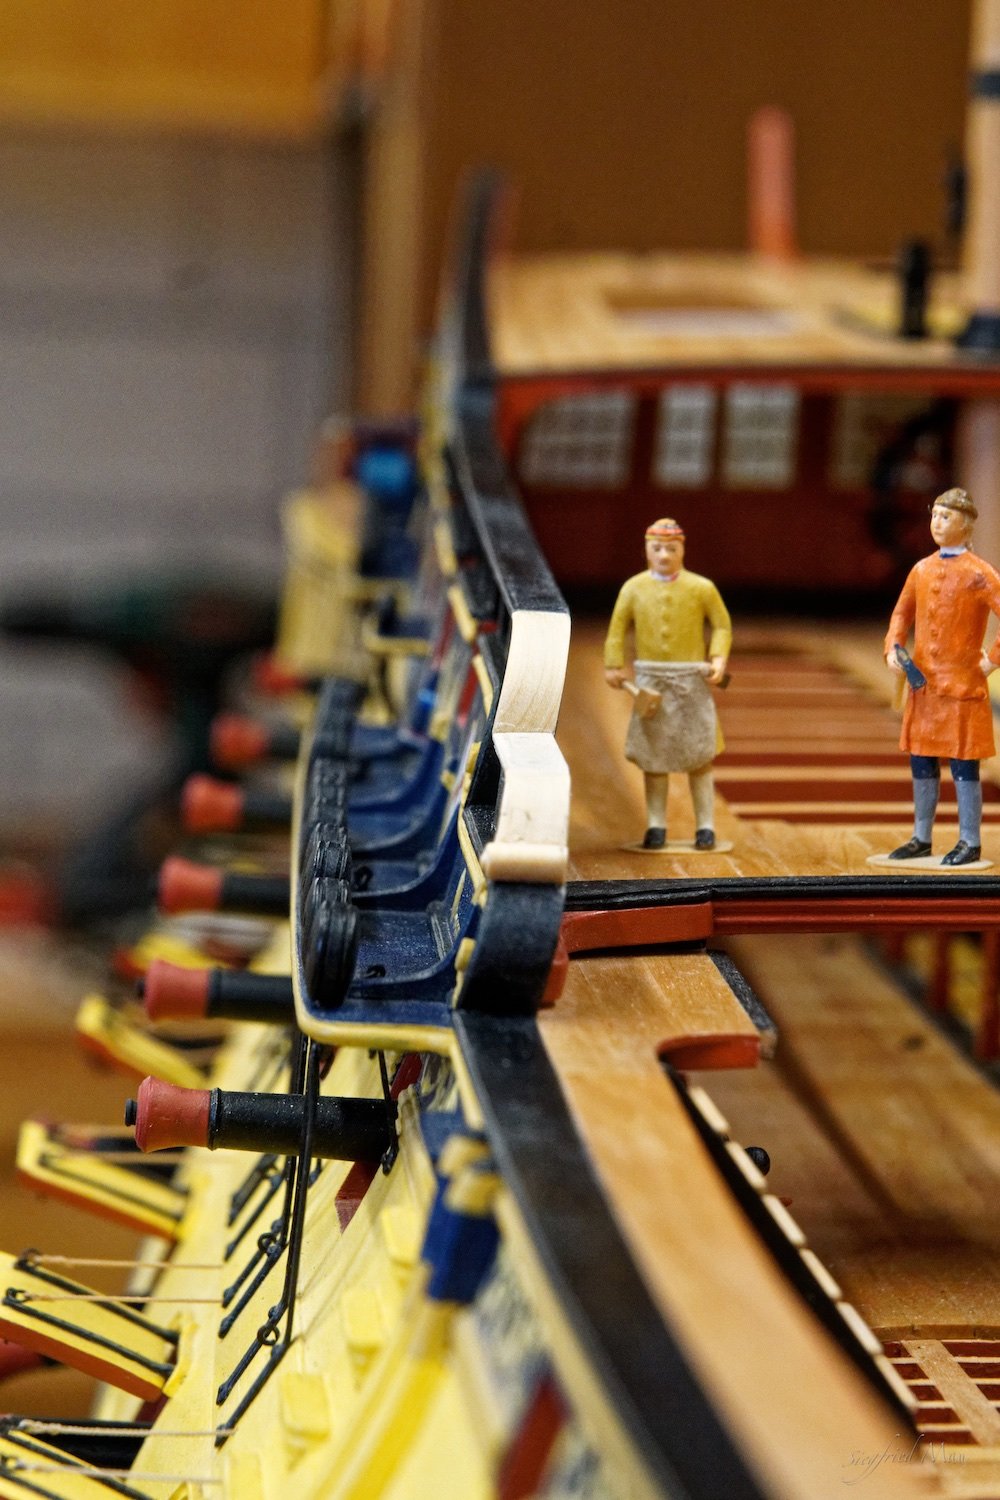
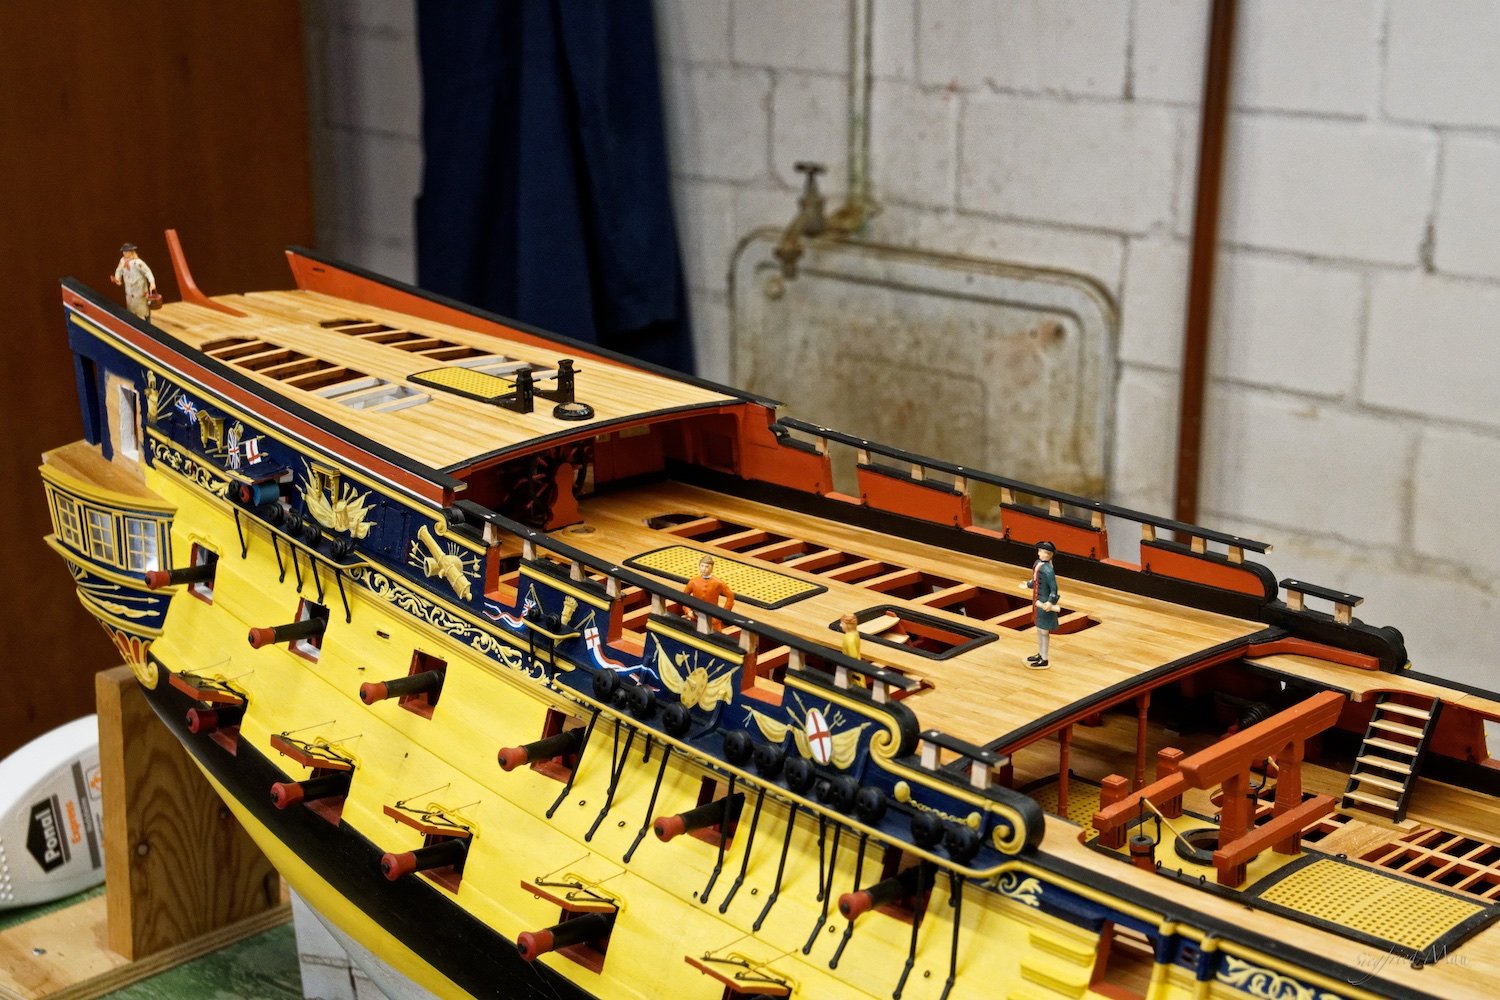
Hello, and many thanks for your kind comments now everything is pretty again and the deck is oiled. Next on my list are the Fife Rails. At the last picture you could see, how low the deck at these ships where. The shipwright is 1,80m tall, so it's just comfortable for smaller people.