palmerit
-
Posts
1,090 -
Joined
-
Last visited
Content Type
Profiles
Forums
Gallery
Events
Everything posted by palmerit
-
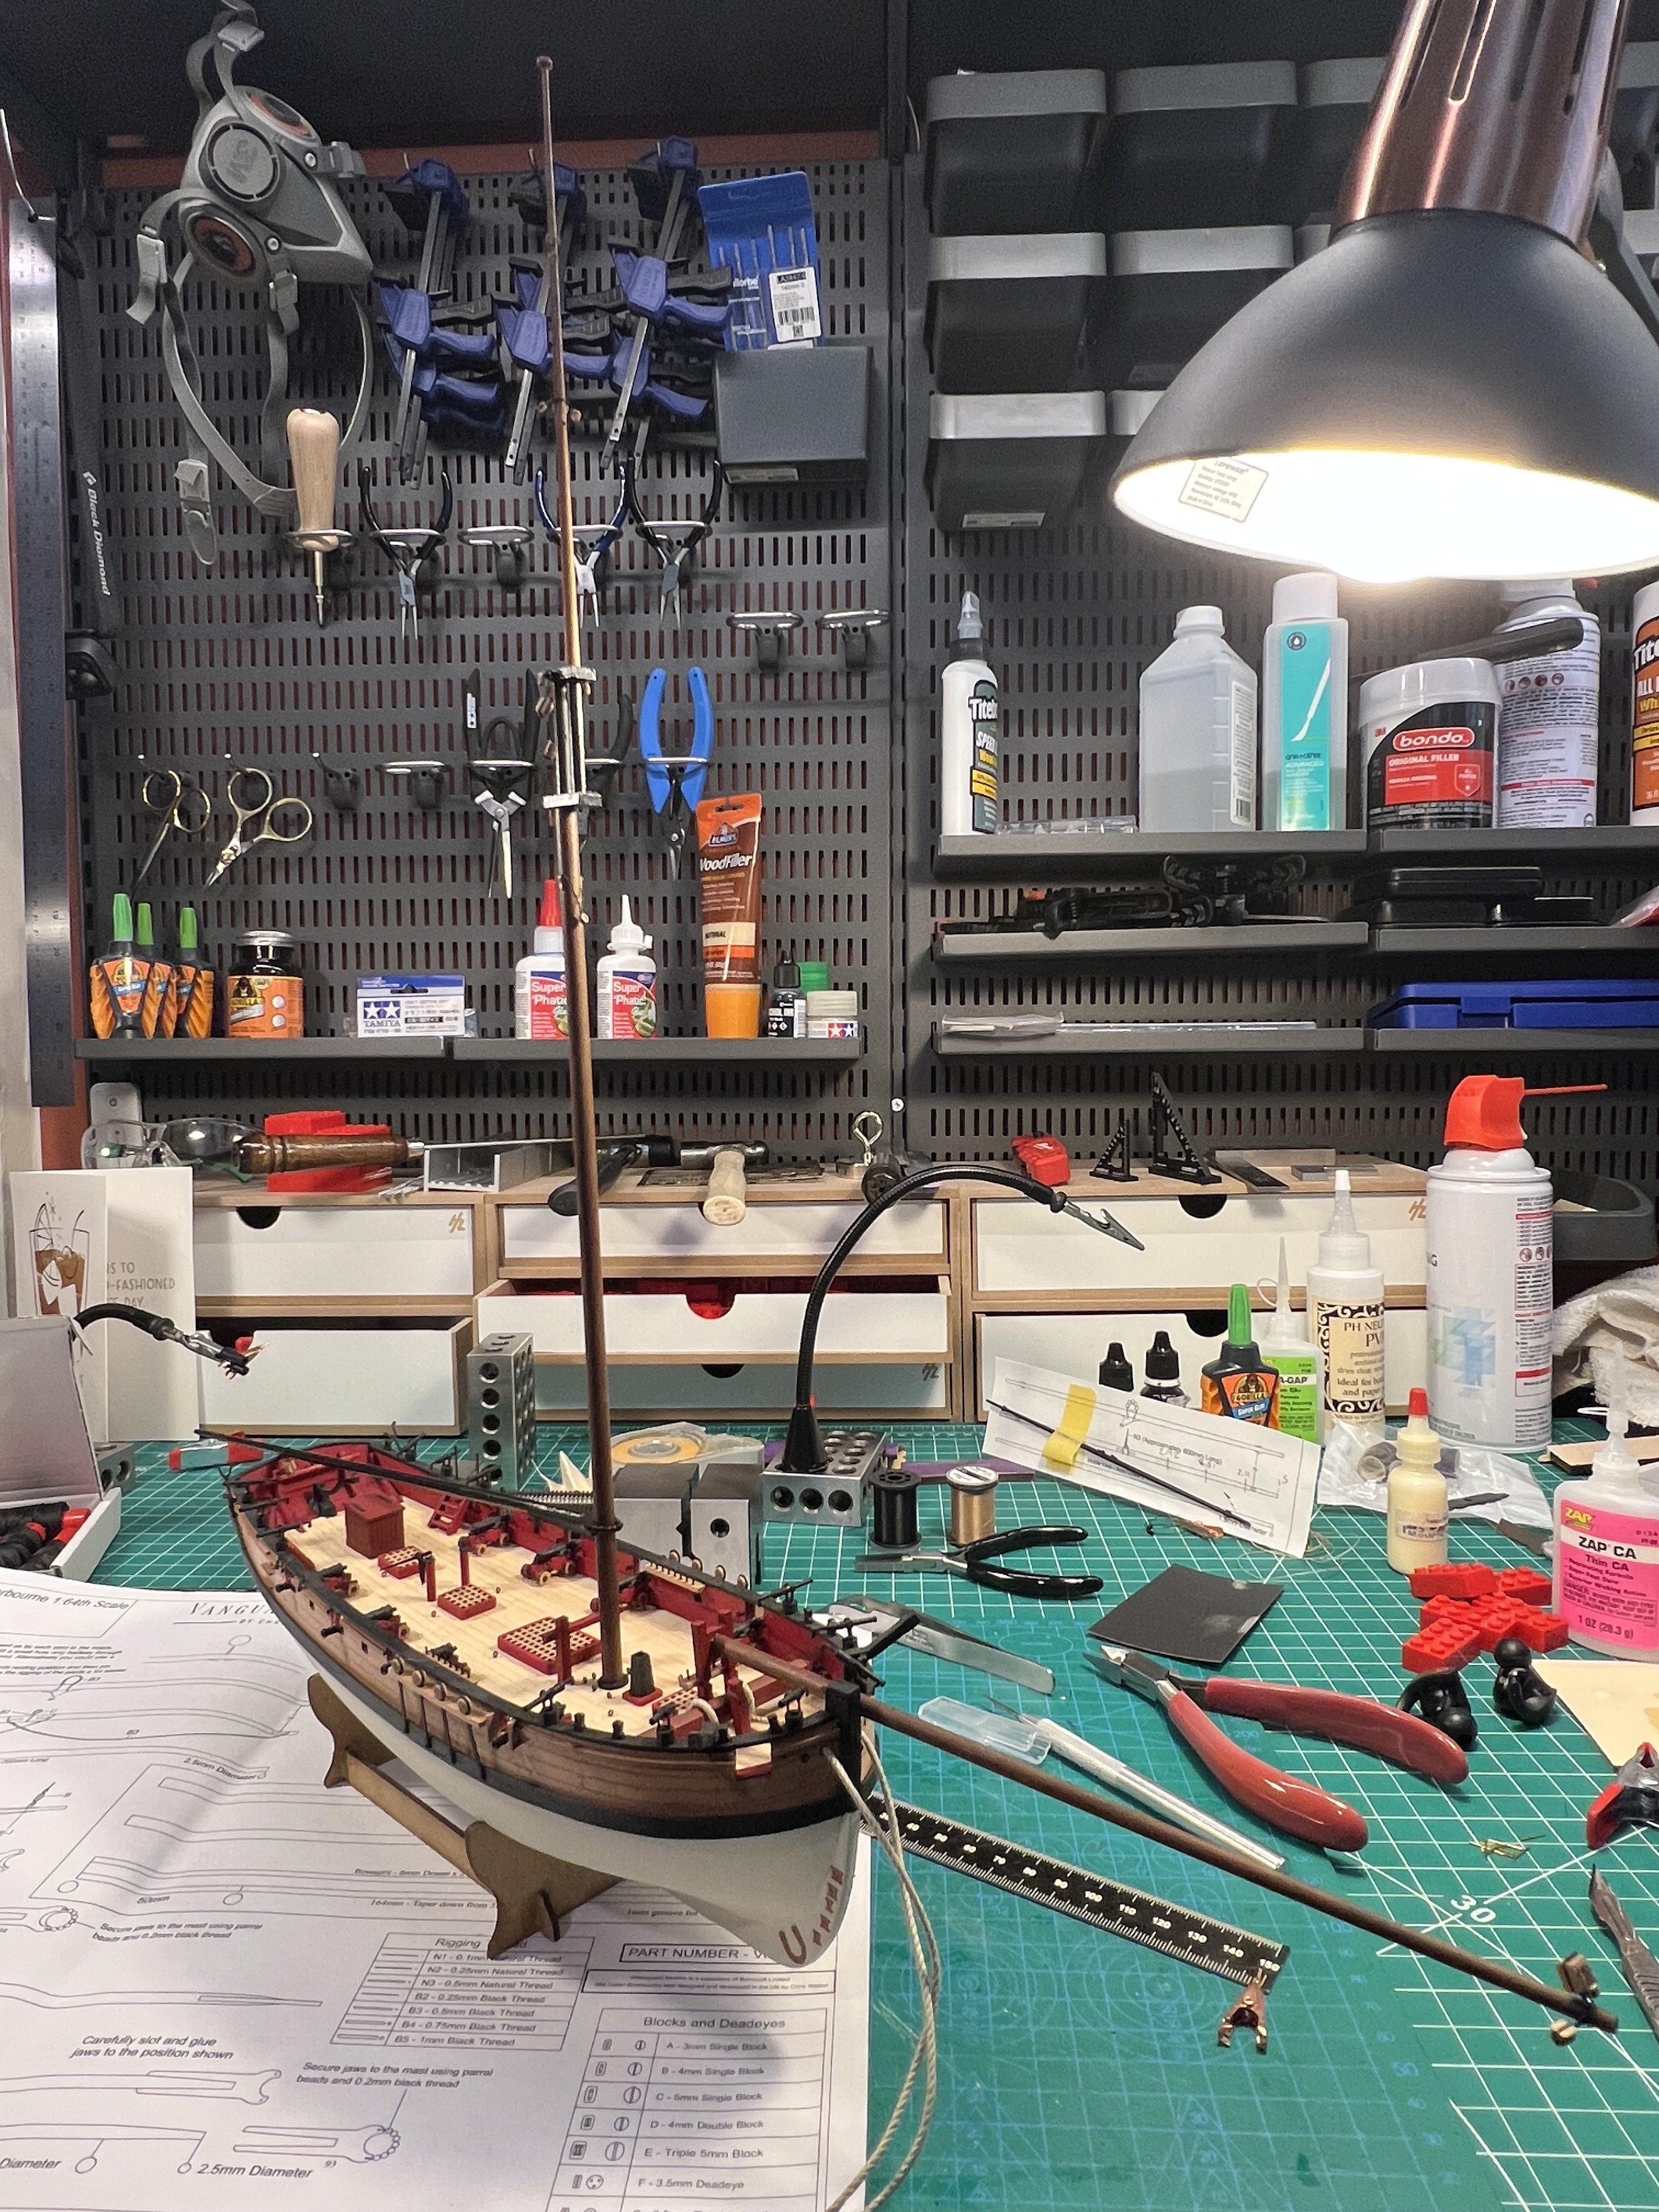
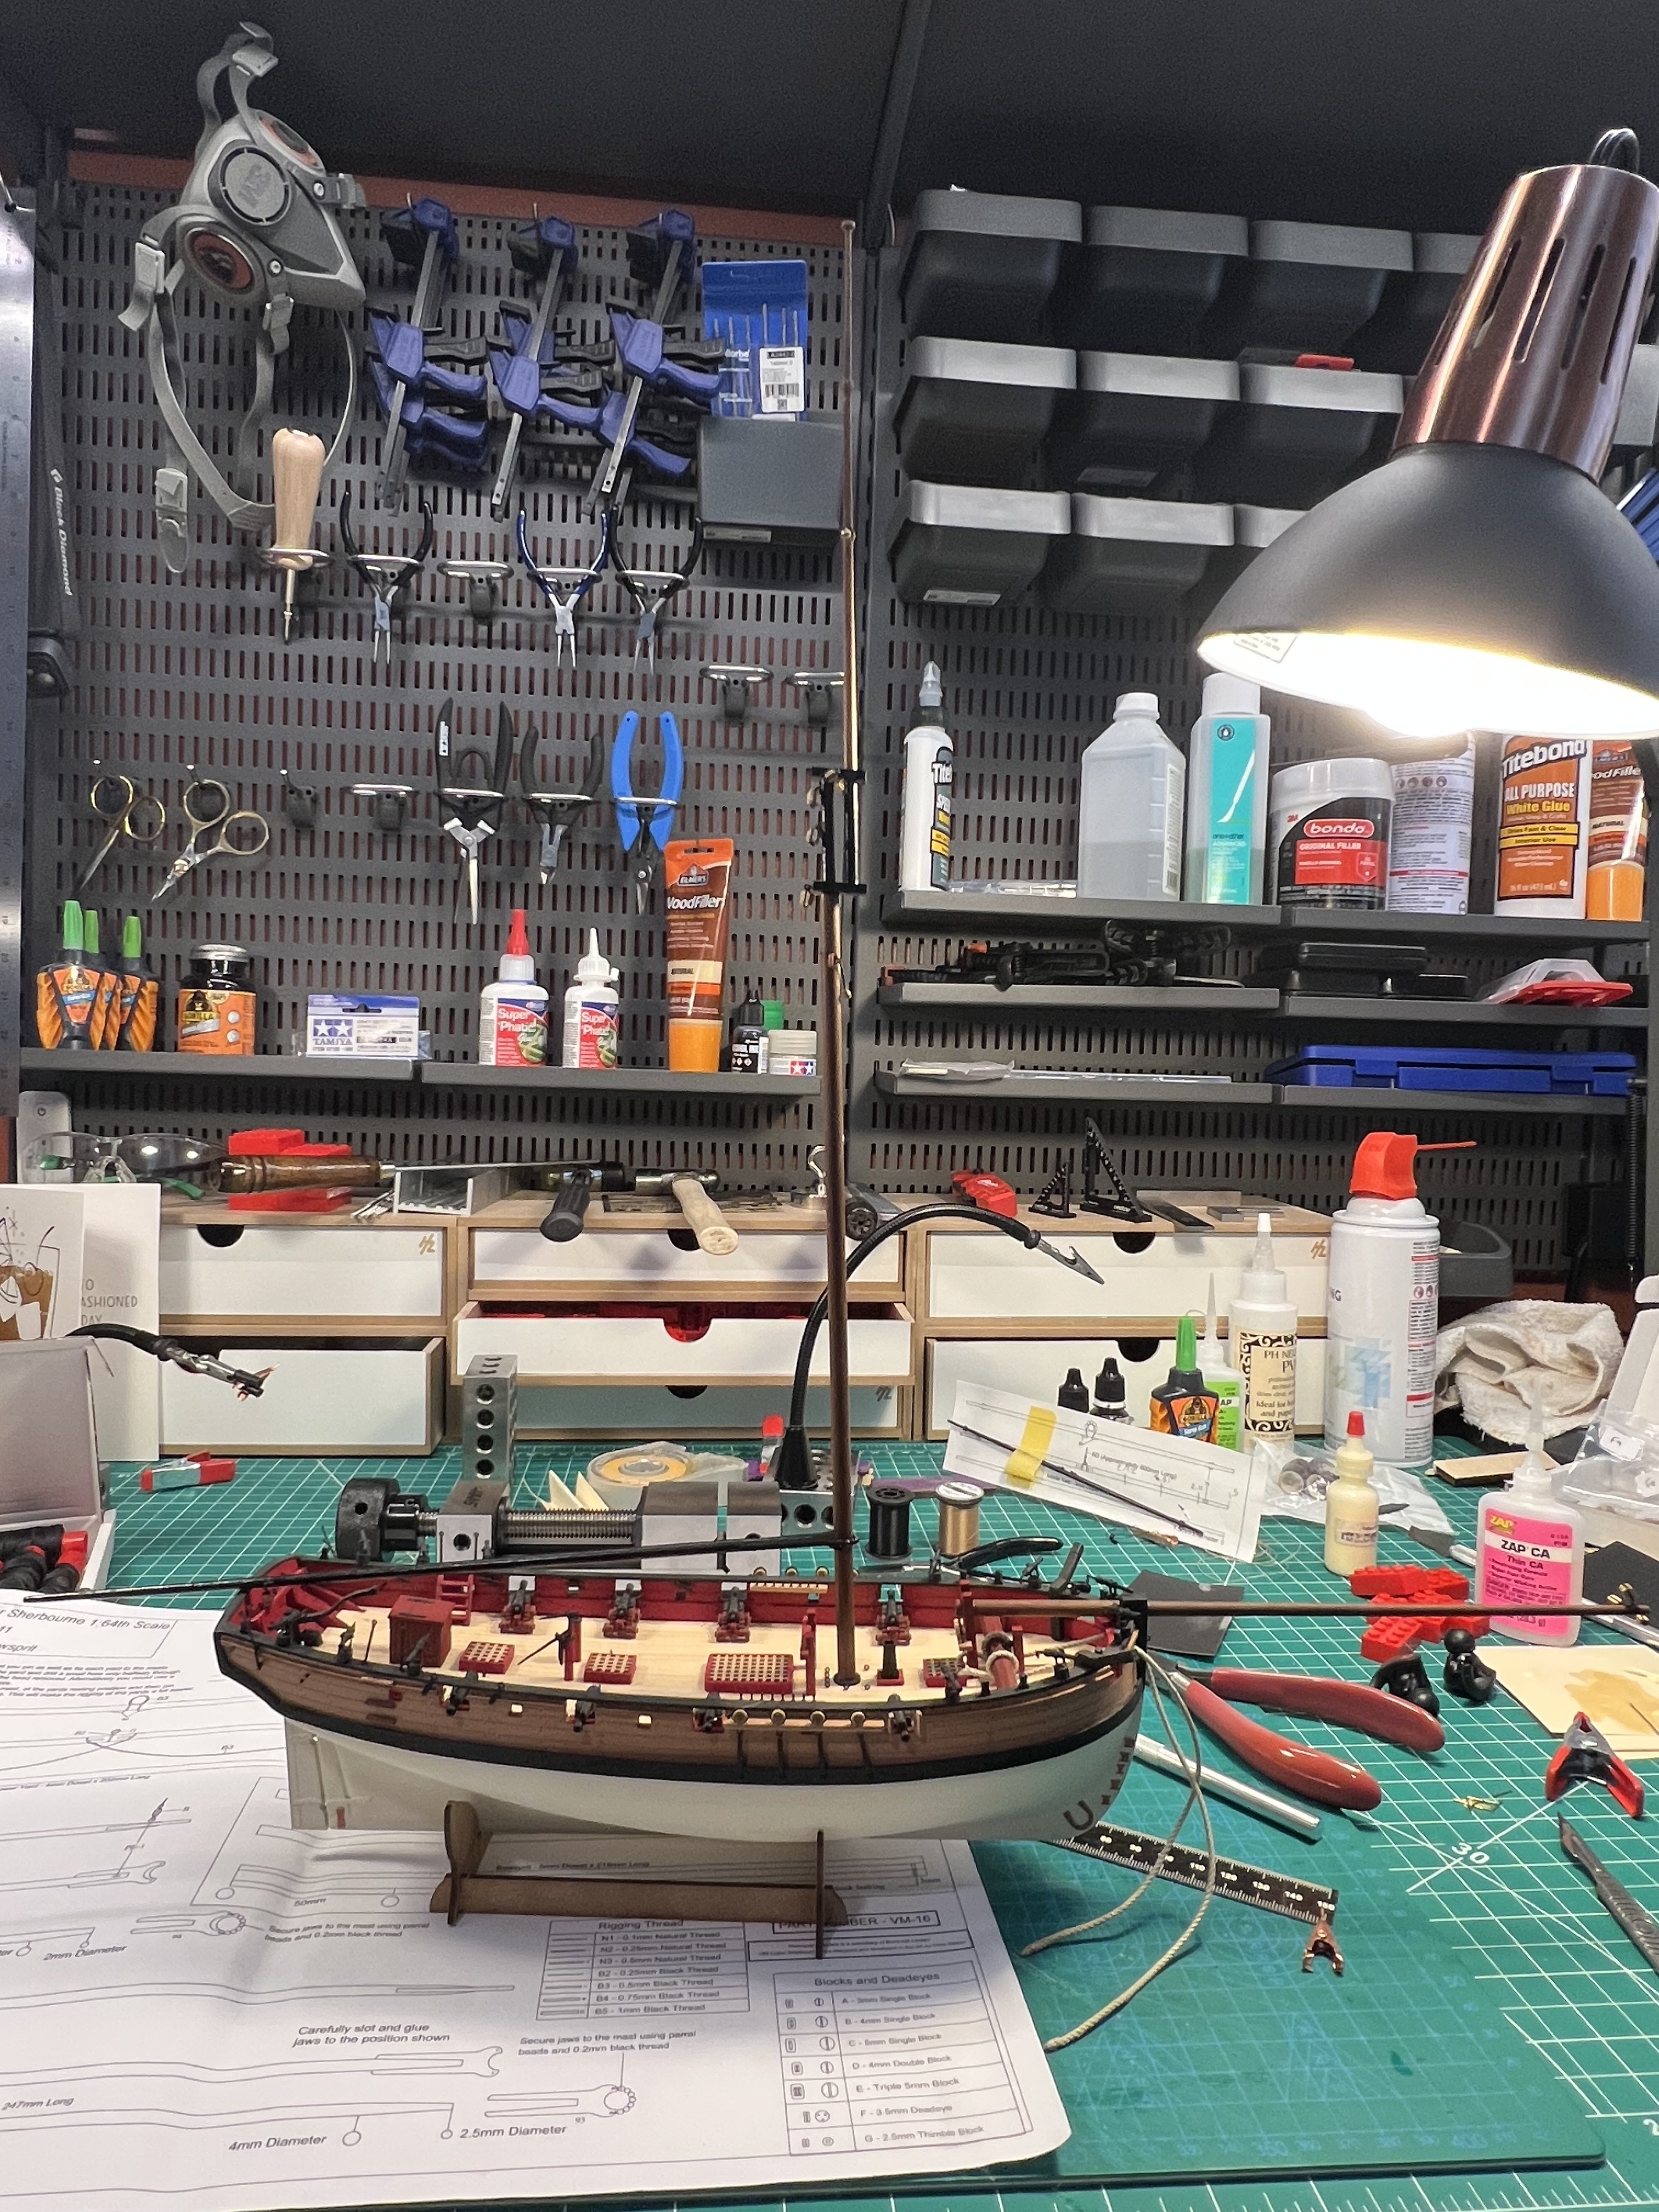
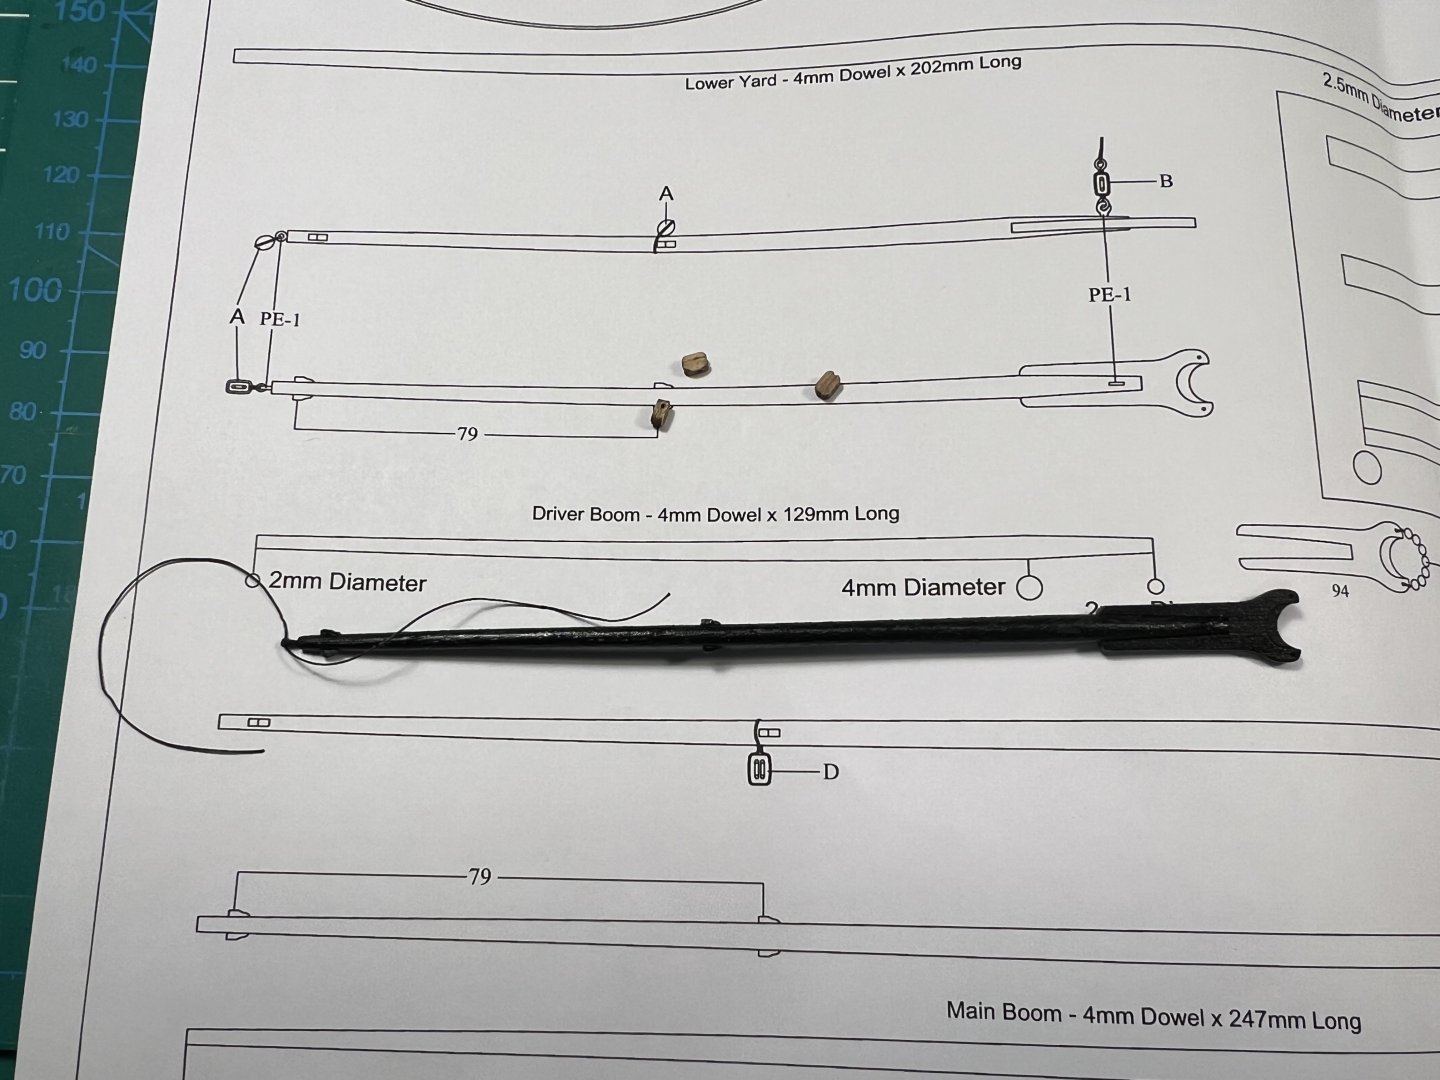
Have the mast, main boom, and bowsprit installed.


- 177 replies
-
- 6
-

-
- Sherbourne
- vanguard models
- (and 3 more)
-
Yeah, we visited the Arabia last year. Worth a visit. (And if you're an opera fan, the Lyric Opera of KC is great. Their performance center is beautiful. That's what brought us to KC. And they have a great art museum.) Given the tiny amount for a tourist to do in KC (I live in Nashville so I'd love more tourists to find another city to visit), I'm surprised the city is not more interested in keeping the Arabia and expanding. But maybe the family who runs the museum wants too much. One of the guys who found the Arabia was there talking with visitors. He's now in his 90s. I got a chance to have a pretty long conversation with one of the sons of the guys who found it, talking about the possible relocation sites. He was a kid when they found the boat and was telling me about being on the site. He's now in his 40s. I think their lease runs out in fall 2026, but given how much stuff they have they will probably need to close down months before then, assuming KC does not come to an agreement to stay. The collection of artifacts is amazing. They couldn't recover, let along document, more of the structure because they were digging in a farmer's field and the farmer gave them until the start of planting season to be gone. They said that they're looking to start an archaeological dig of a steamboat of a different era, like from the fur trapping years.
-
Vanguard makes great models. There are a bunch of great Vanguard models that are Level II. I’m working my way to the Harpy or another Vanguard model of that complexity someday.
- 6 replies
-
- 1
-
-
- Maristella Models
- vanguard models
- (and 1 more)
-
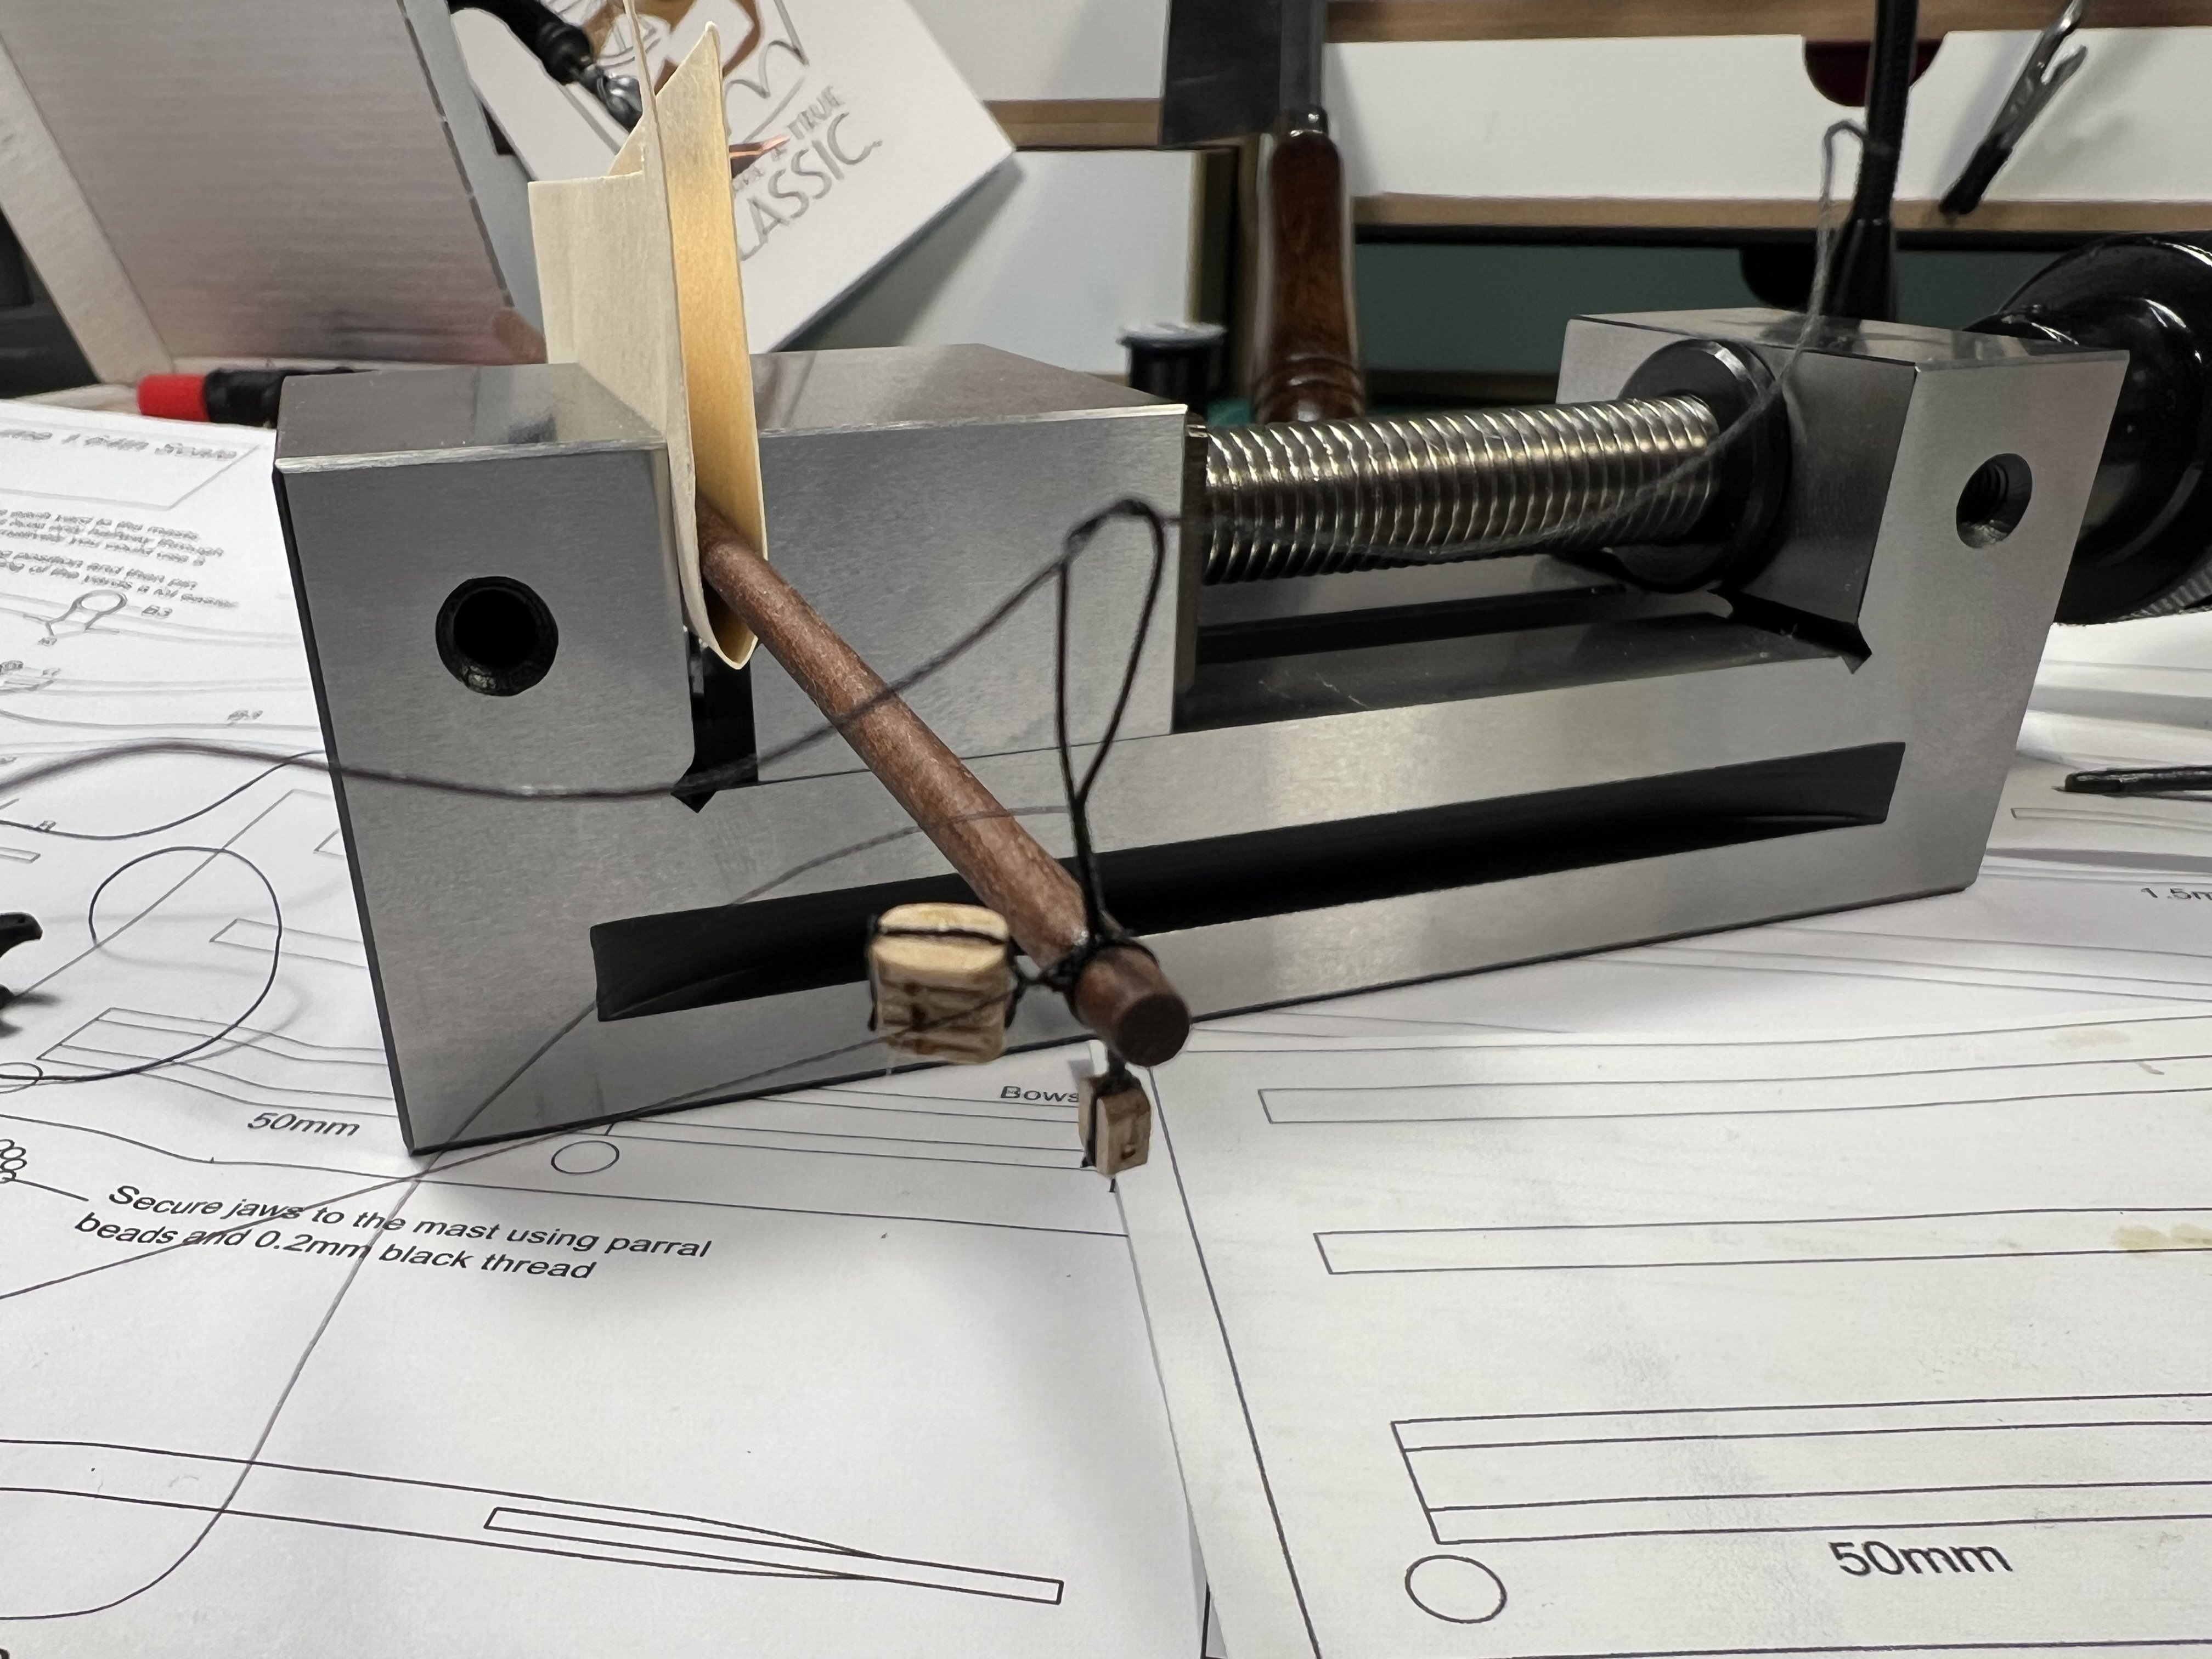
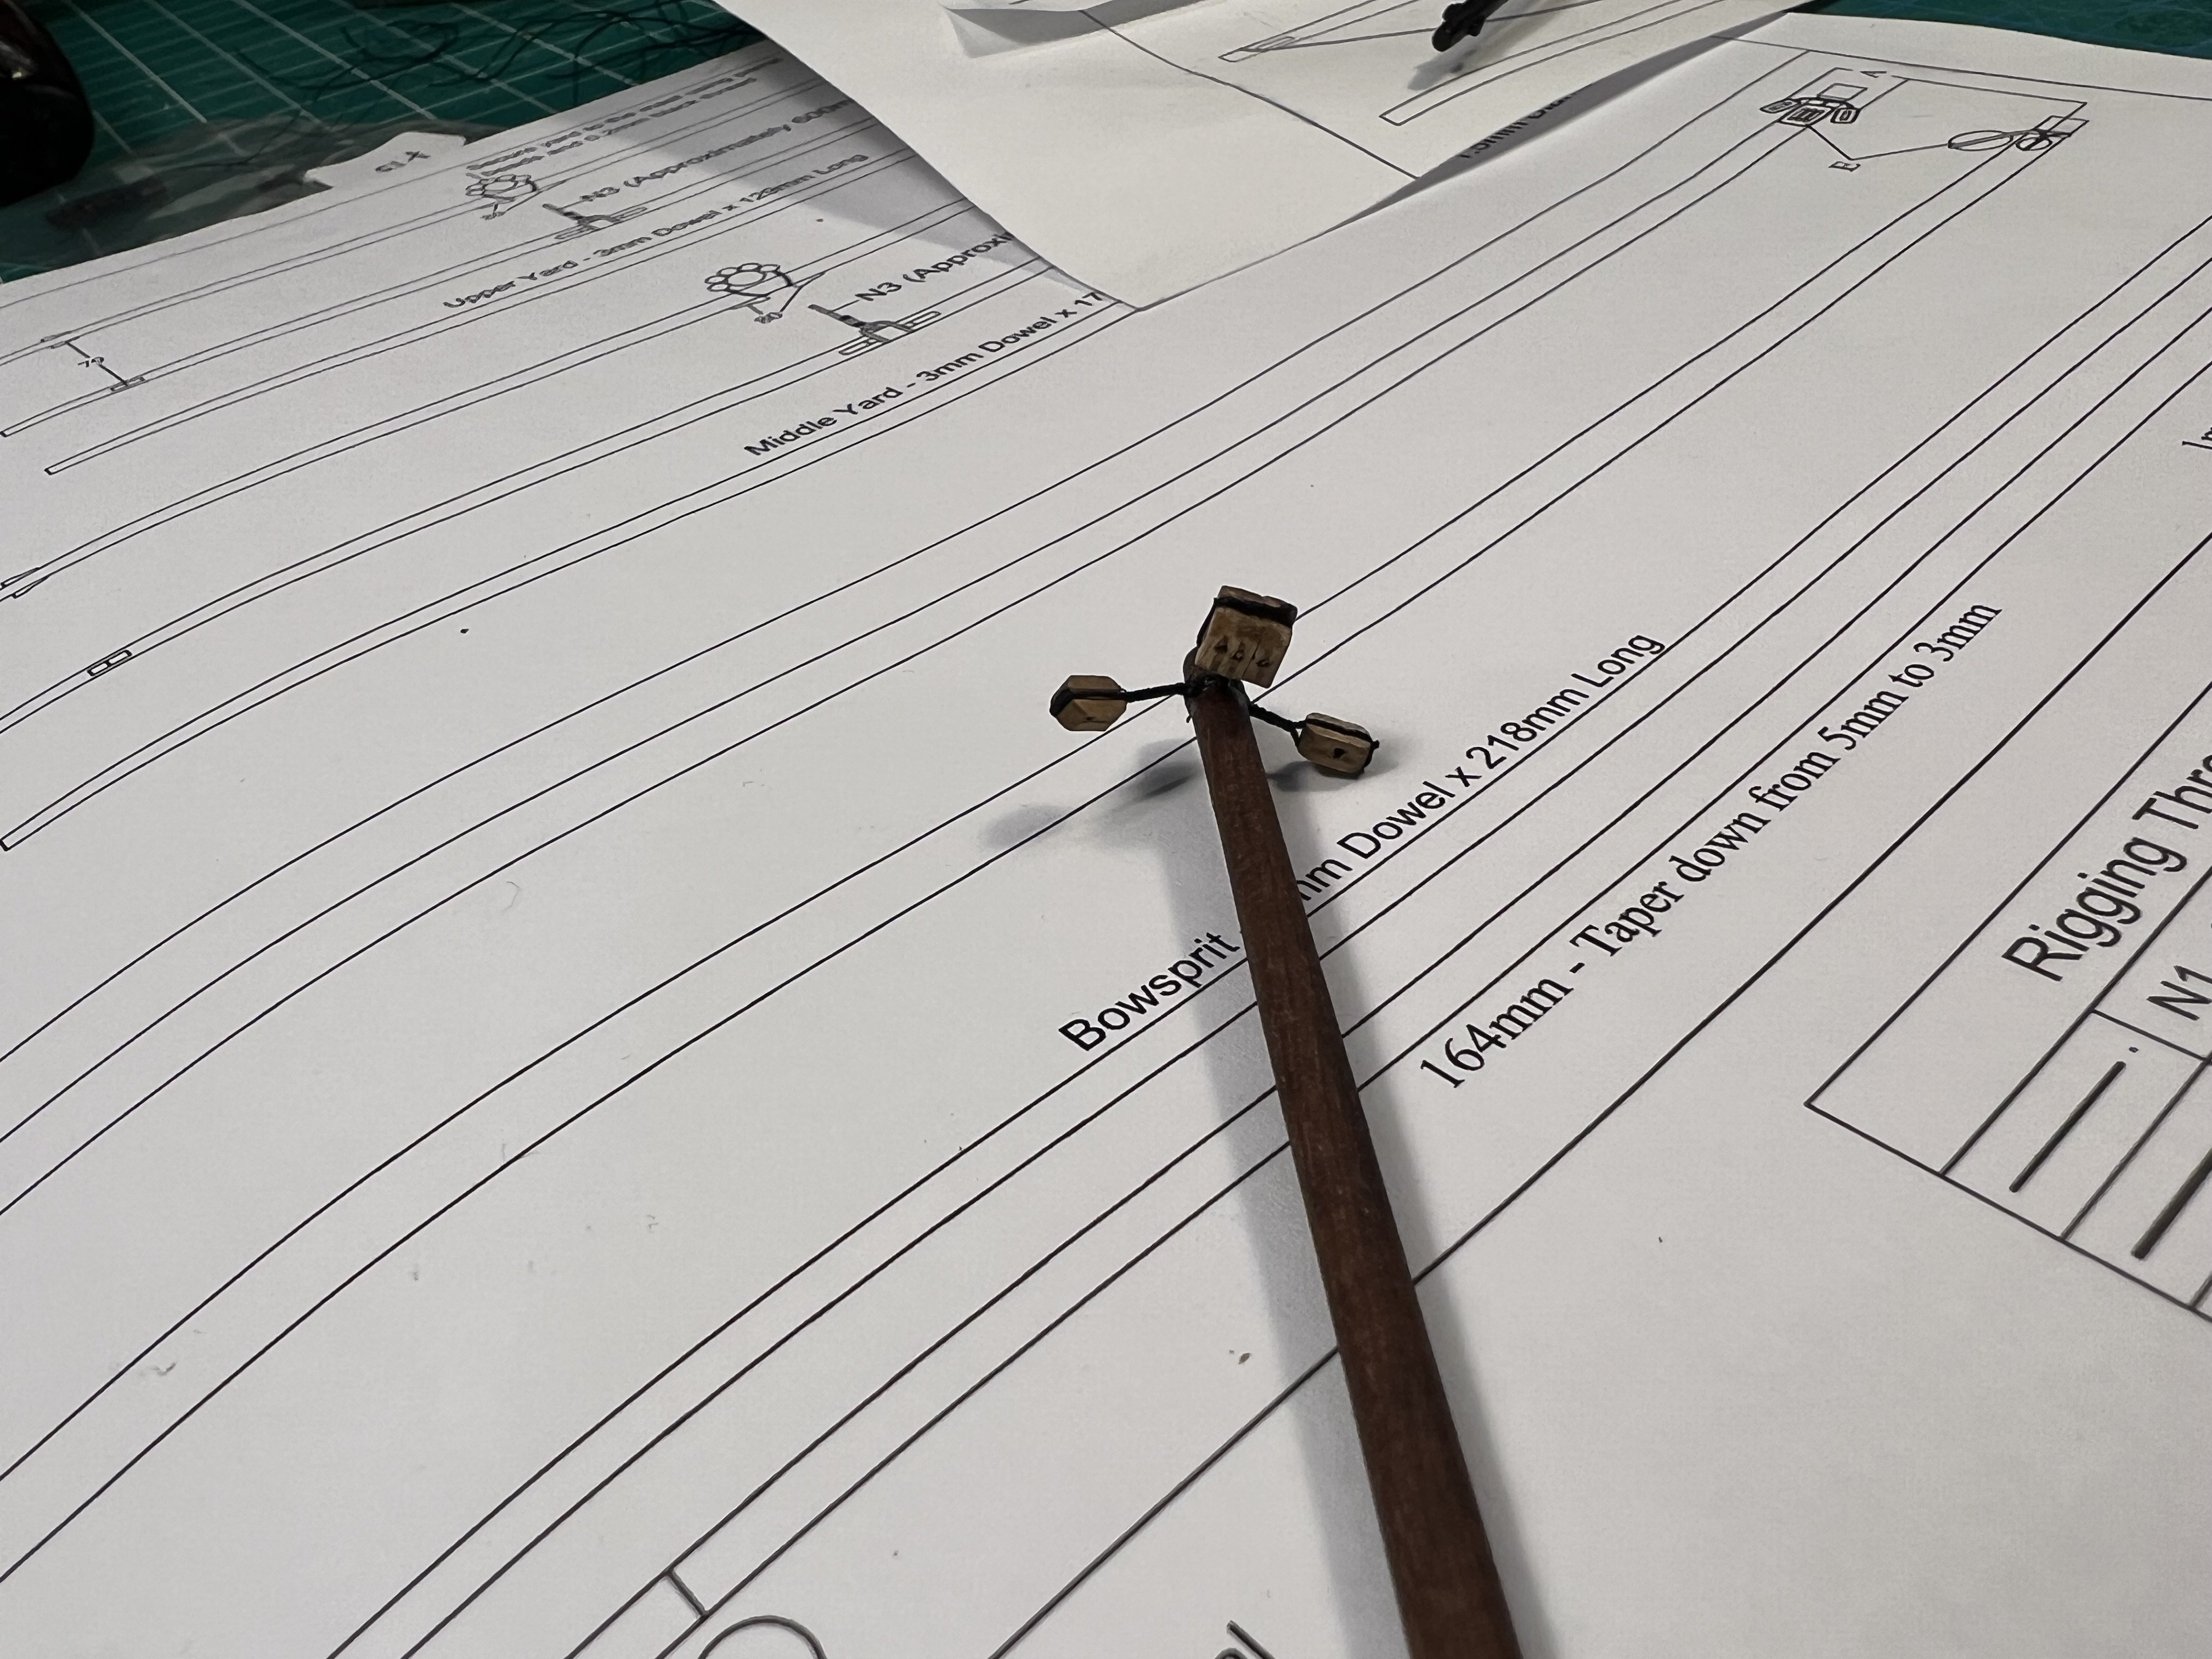
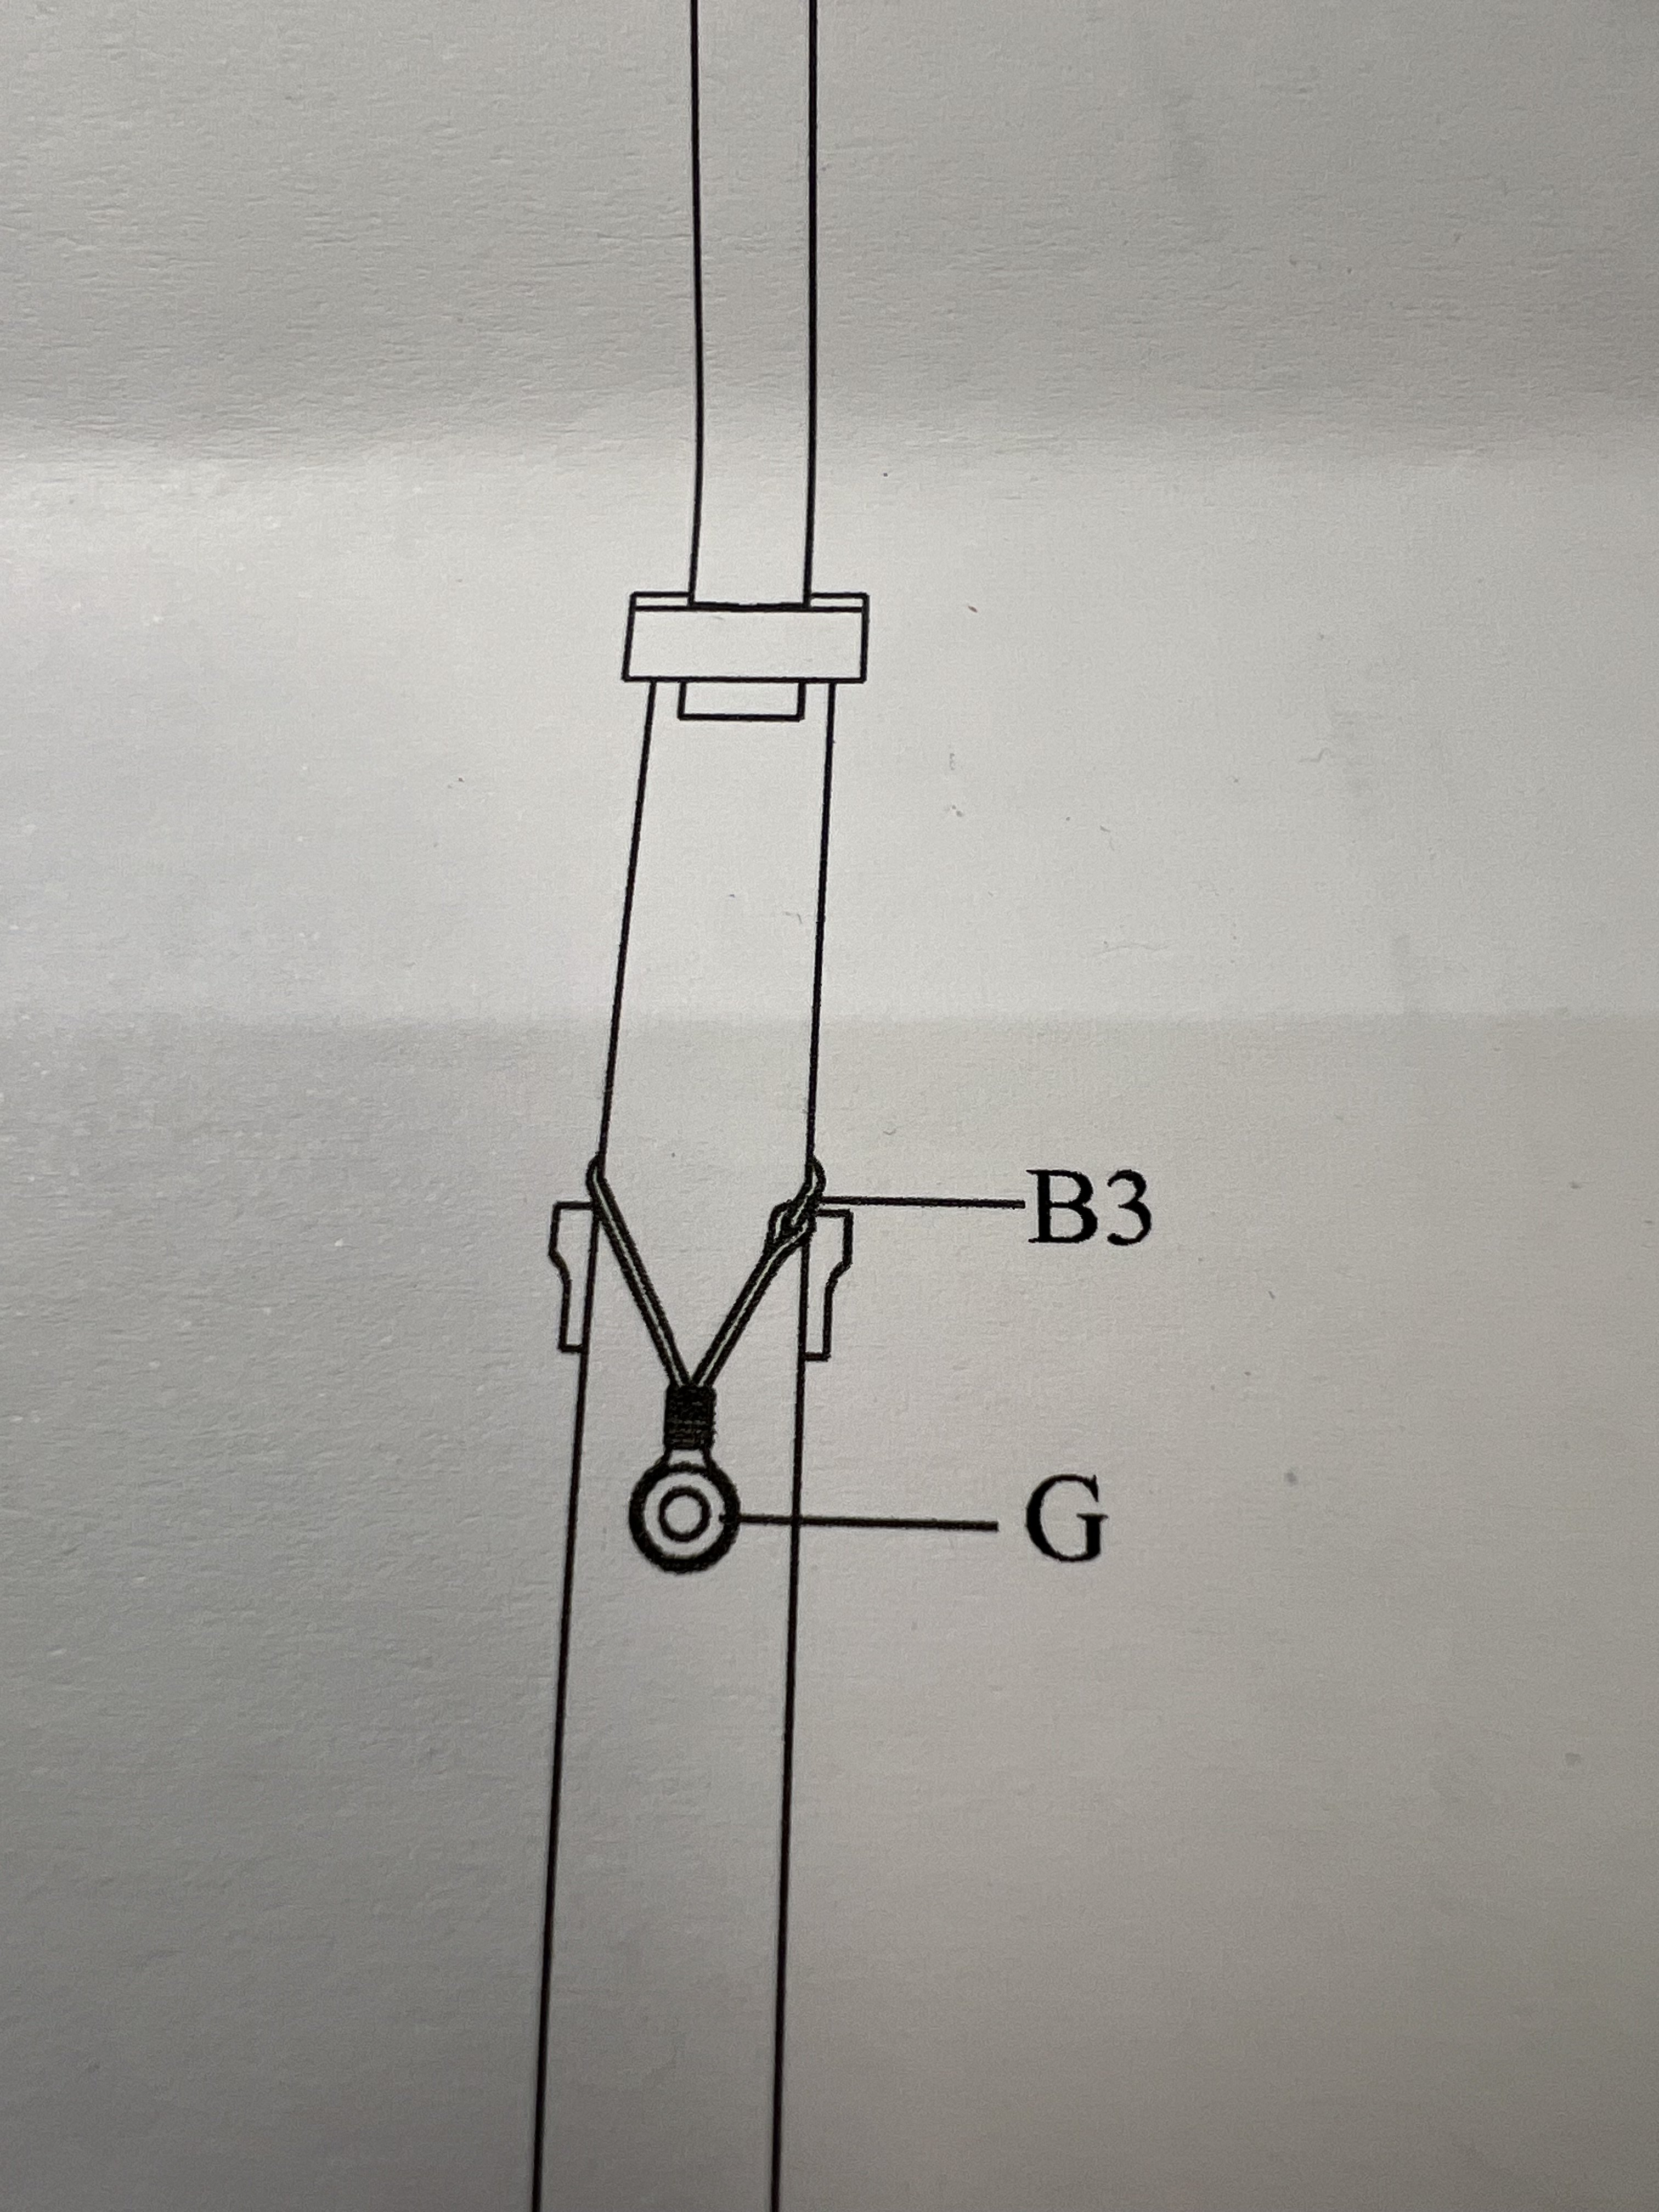
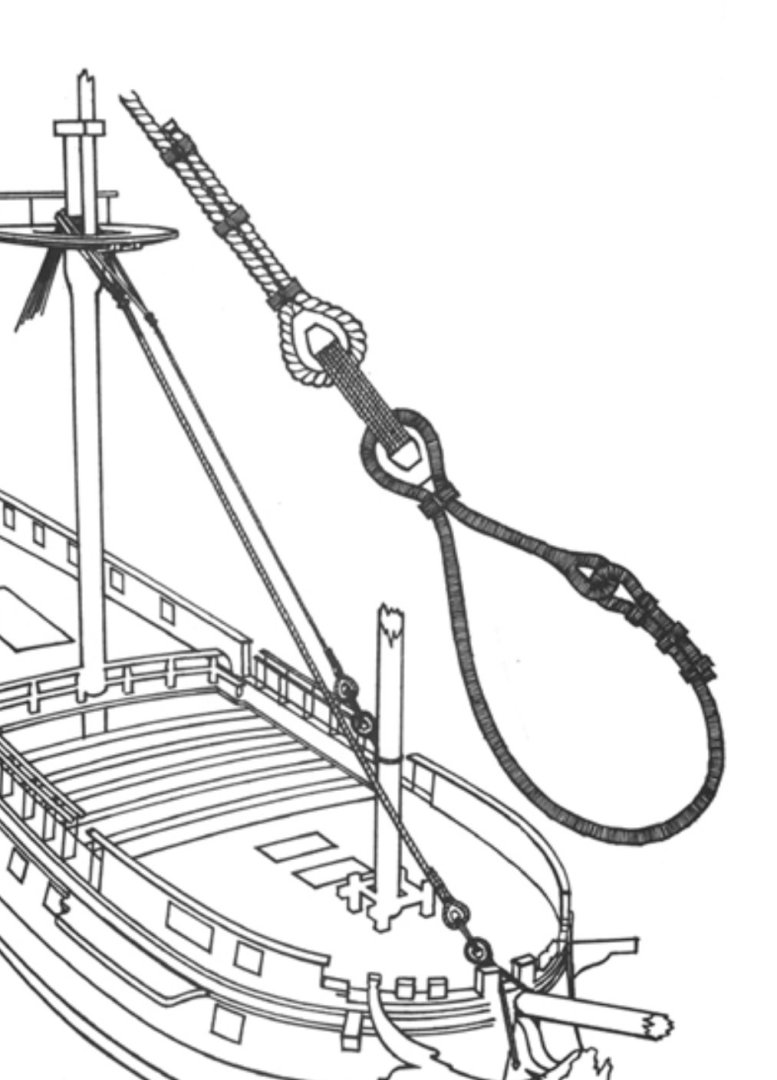
Added blocks to one of the spars and to the bowsprit. One of then blocks attached to the spar will have a becket (loop) at the top but I’ll wait to add that loop until I attach the running rigging it attaches to.


- 177 replies
-
- 3
-
-
- Sherbourne
- vanguard models
- (and 3 more)
-
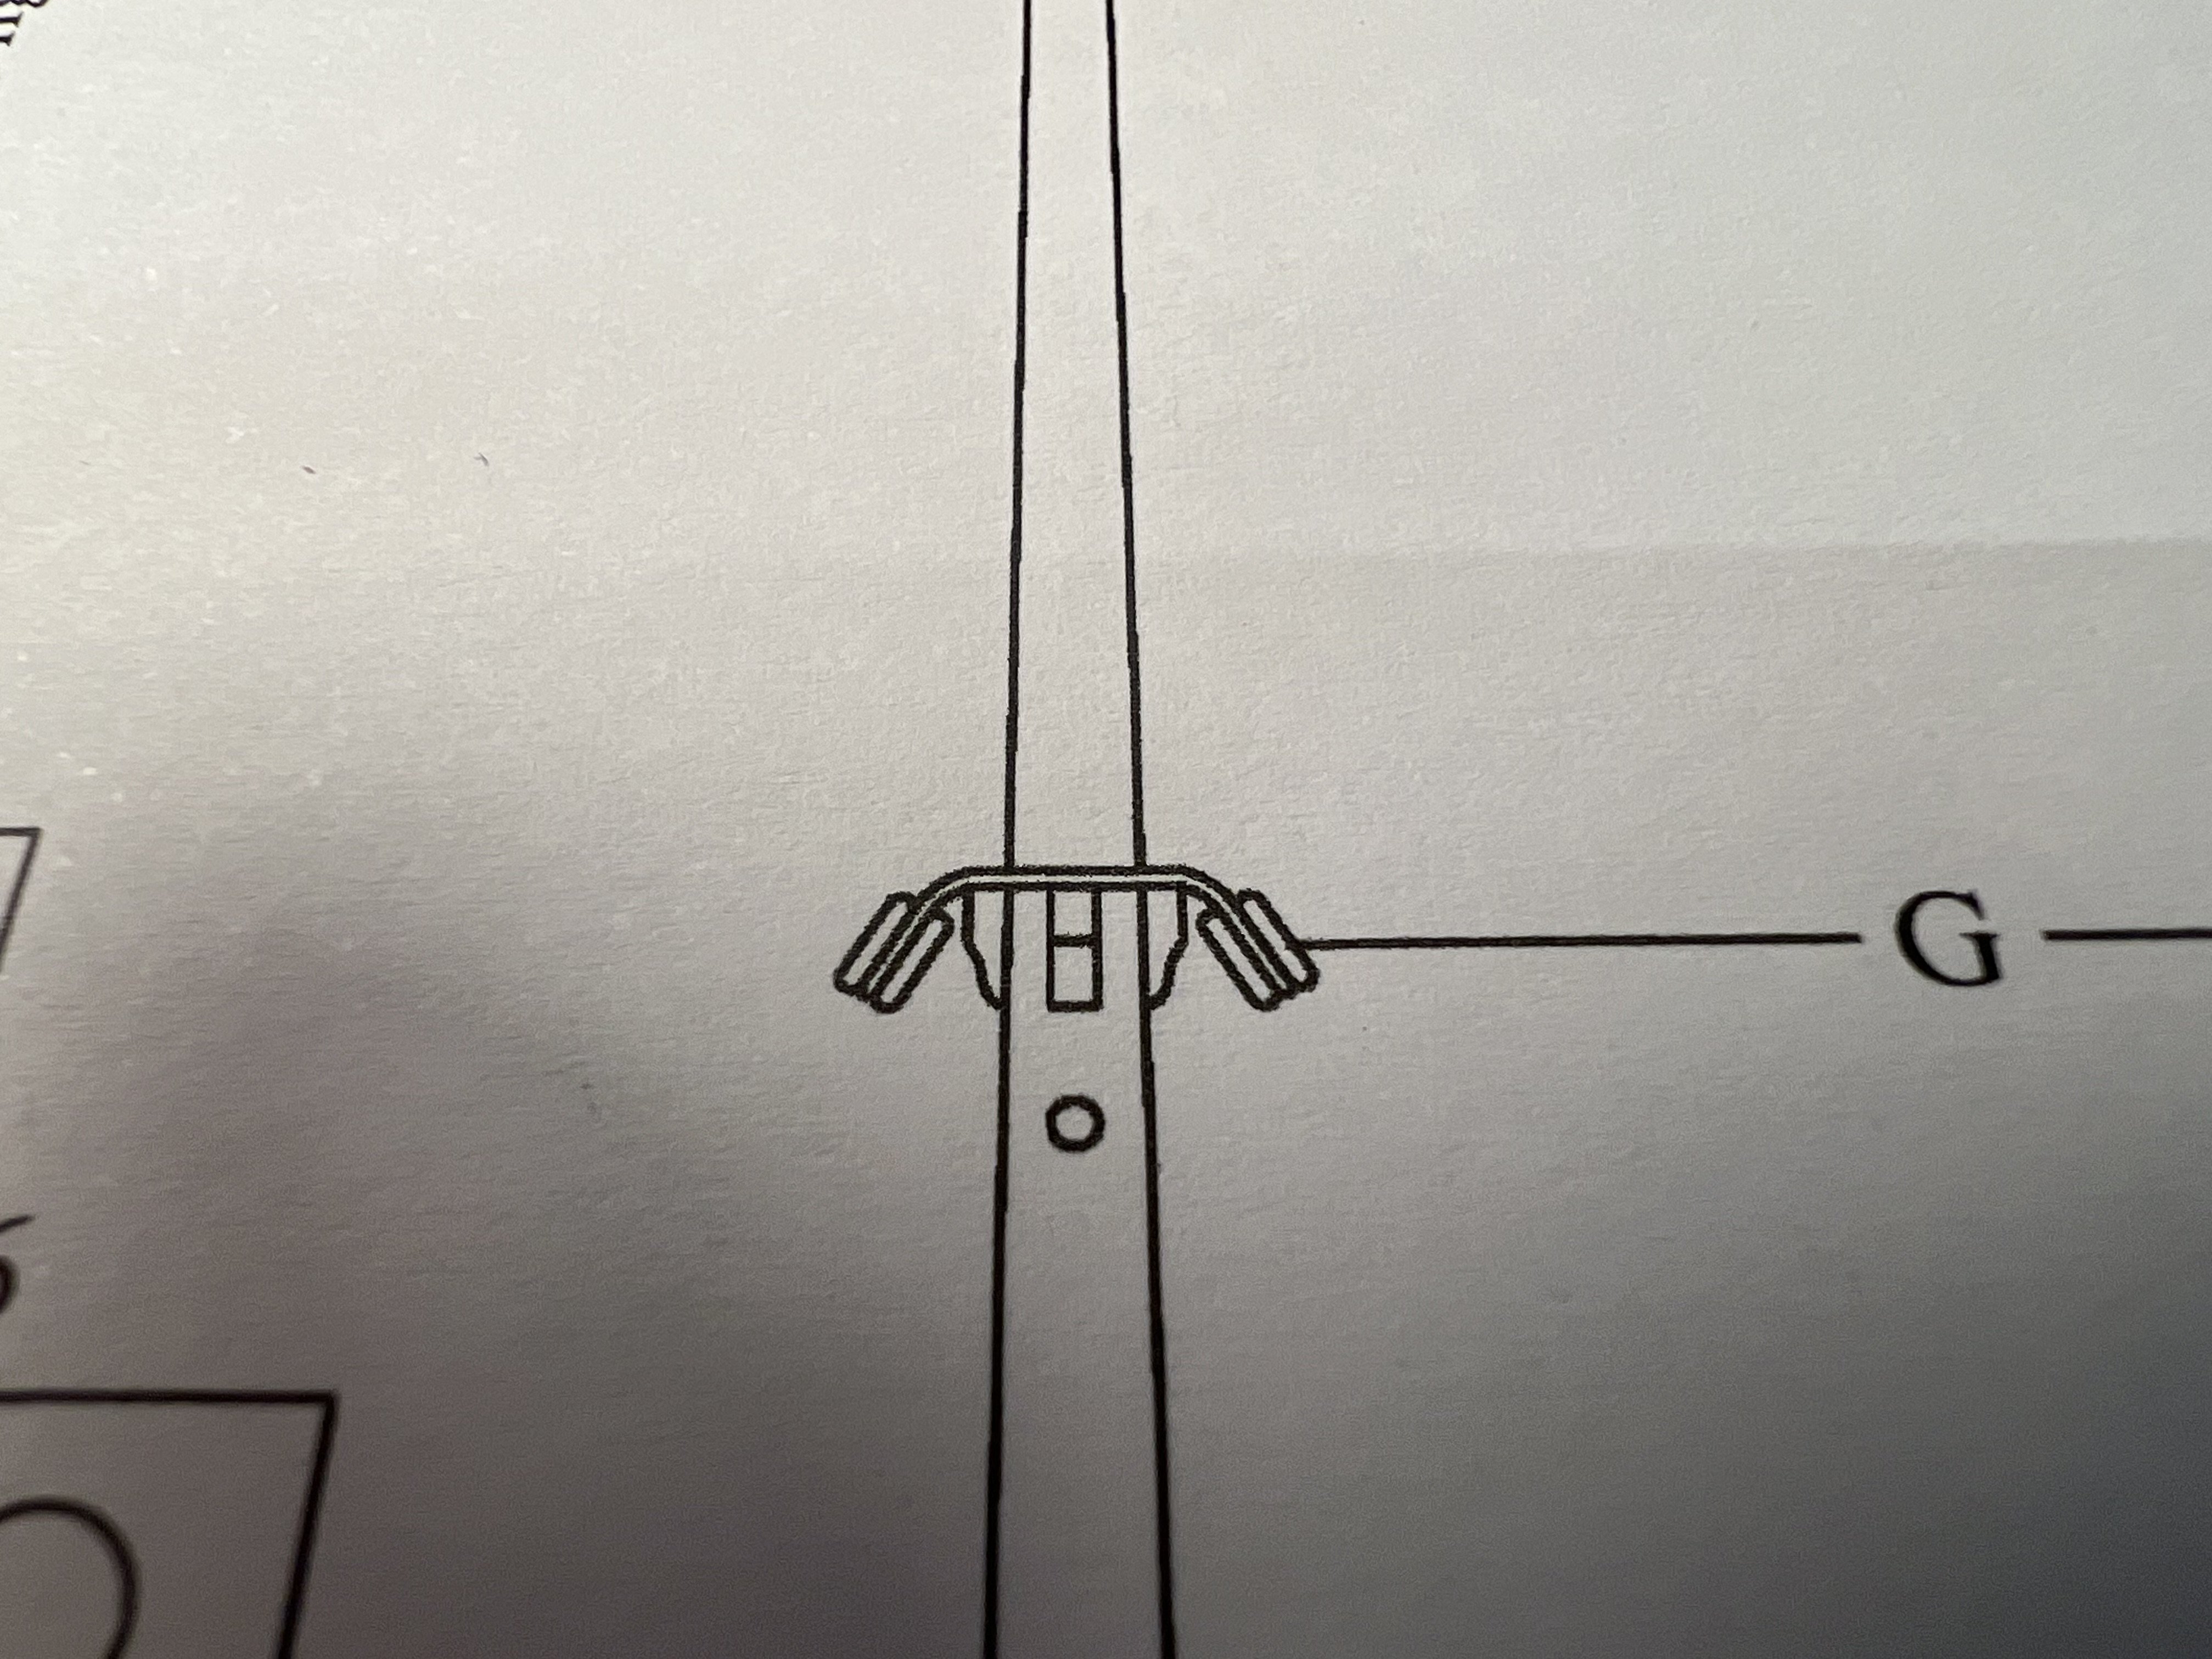
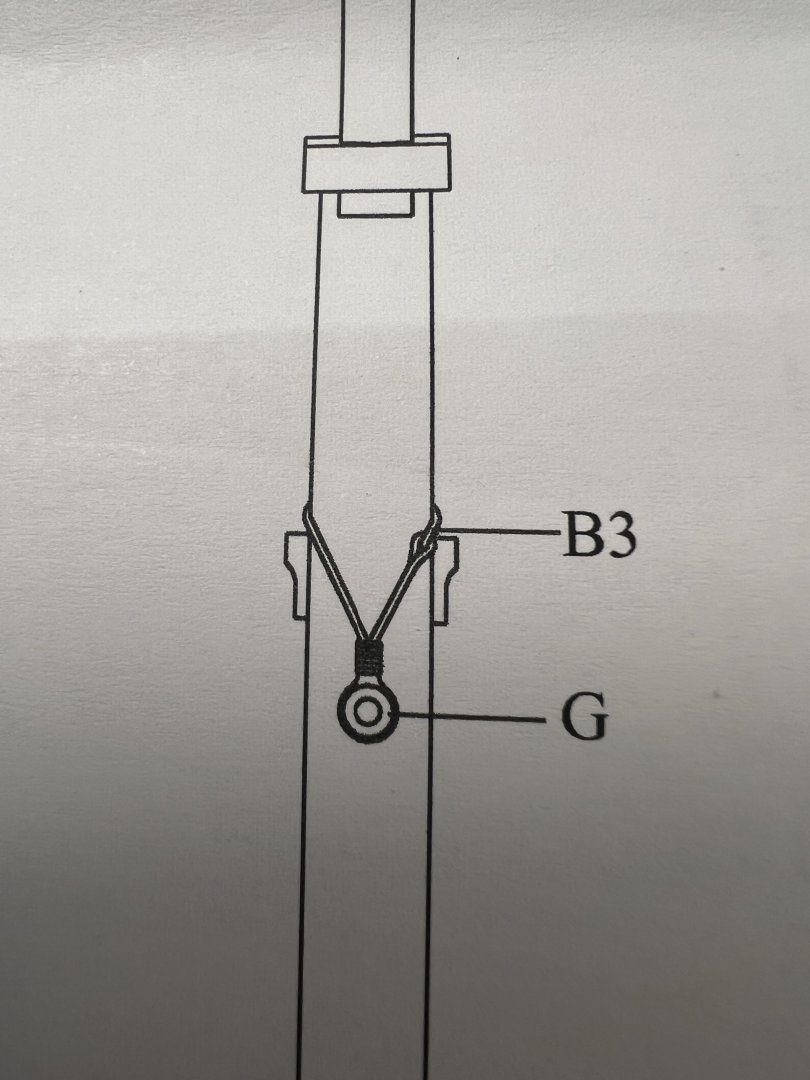
In the Modelkit Stuff build of the Sherbourne, I saw that he does a block-with-becket that is tied on an eyebolt (loop-block-loop). It turned out to be a way I was trying to do it (not entirely successfully). The main difference is that he first created the loop that the outside becket was being attached to. It’s Part 23 of the build, right at the beginning, after the intro.
- 133 replies
-
- 2
-
-
- Ranger
- vanguard models
- (and 1 more)
-
I think I saw you say in a YouTube video interview with David Antscherl that "The Fully Framed Model" series might be appearing again in print (I know they are available electronically). Just wondering if that's happening and when they might appear? I was considering getting a copy of Vol. IV to help with thinking about rigging - even if I have no plans for many many years to consider a build like the Swan.
-
Would this be called a "Frame on Bulkhead" model (and if planked a "Plank on Frame on Bulkhead" model)? I don't think I've seen one like this. Will it be planked or partially planked or planked on one side?
-
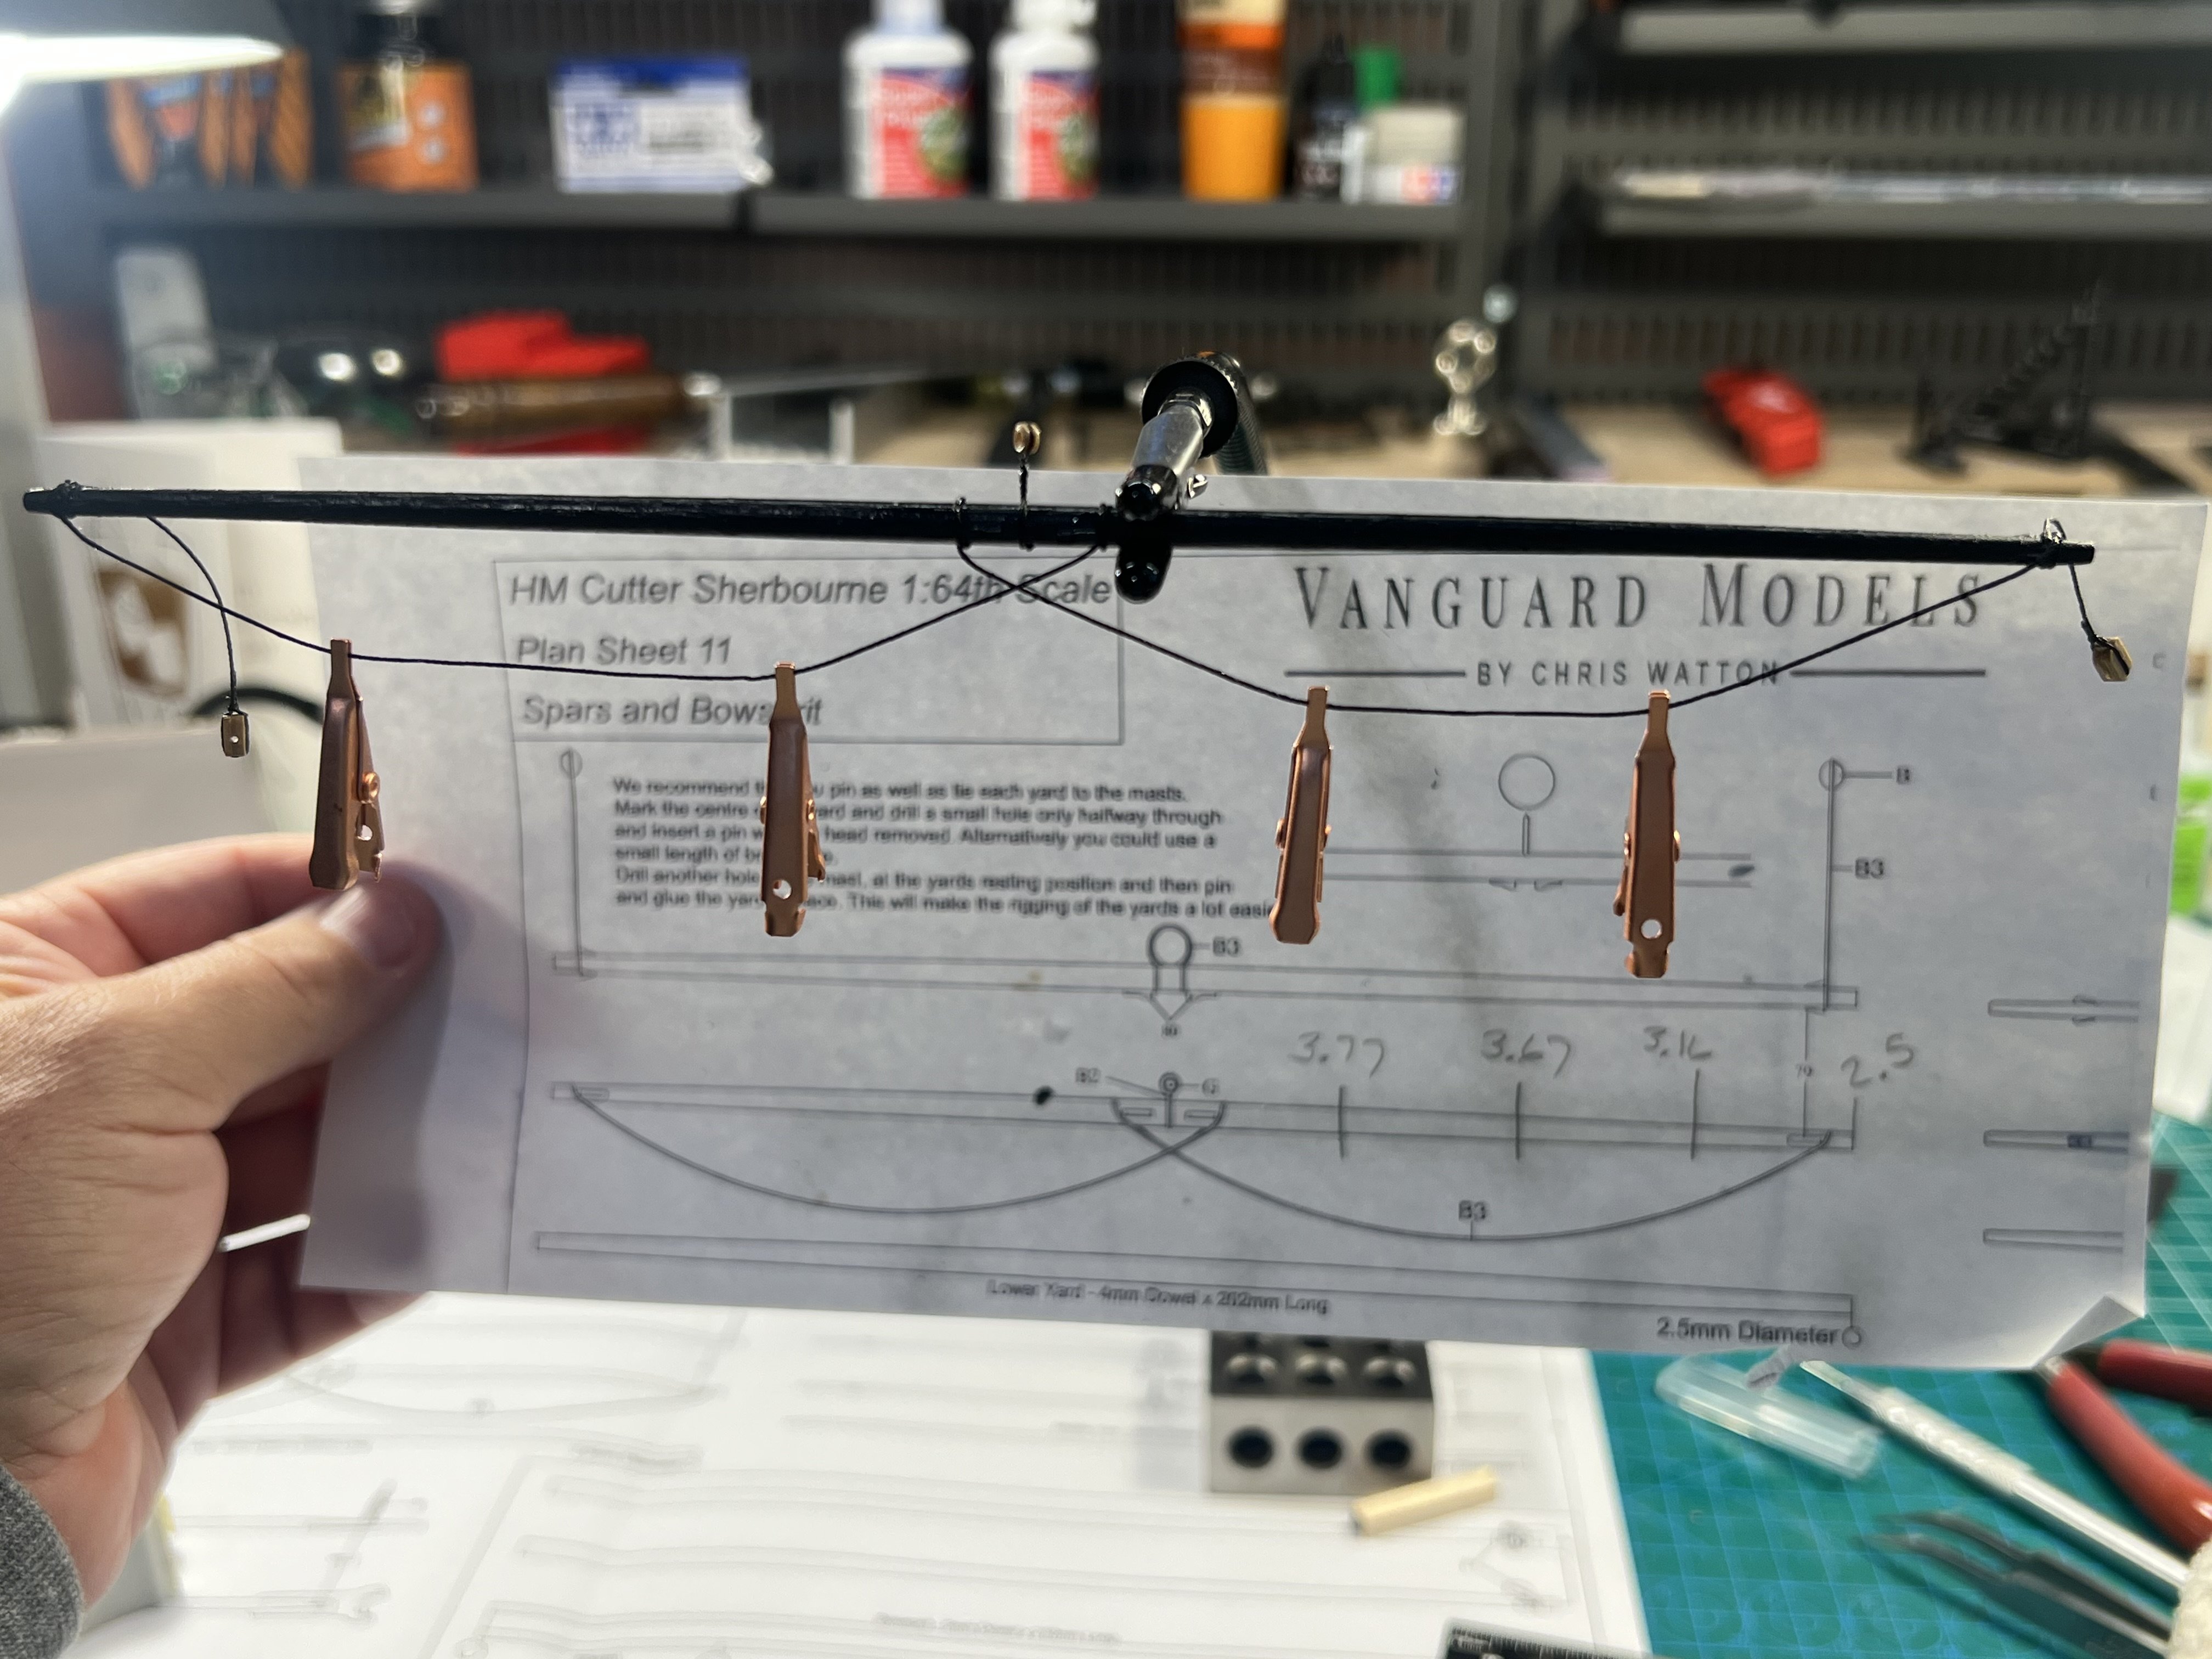
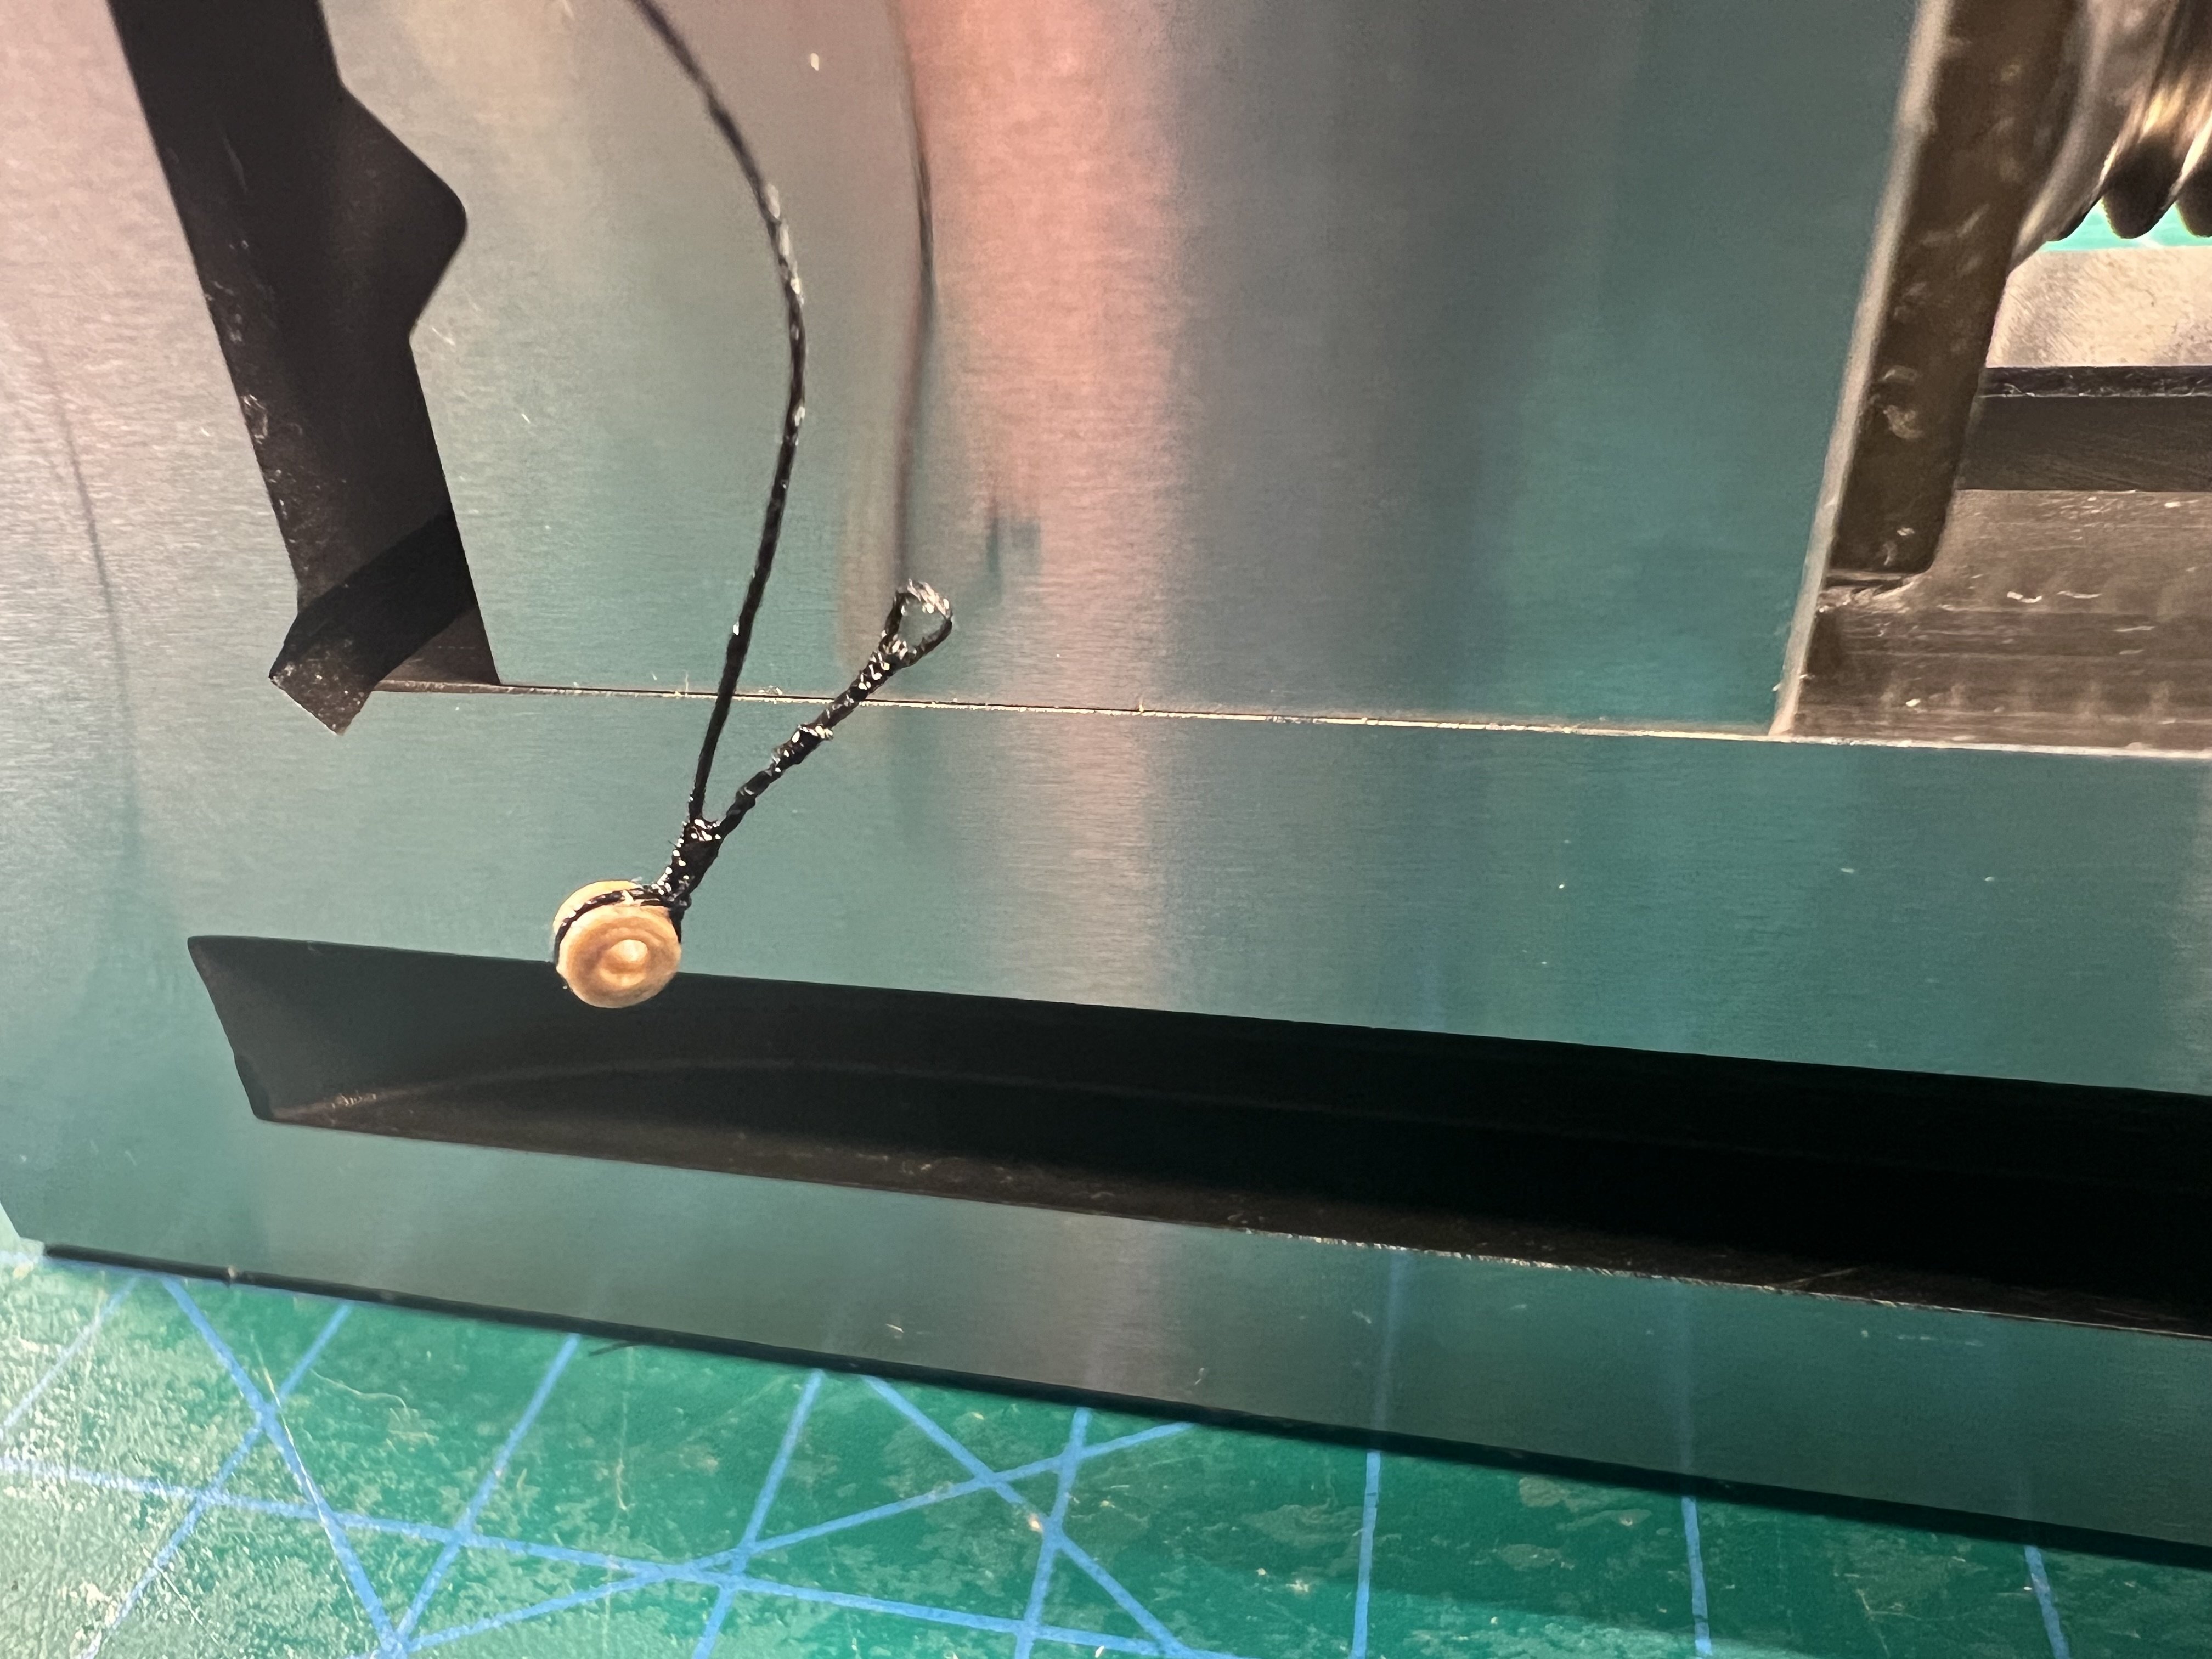
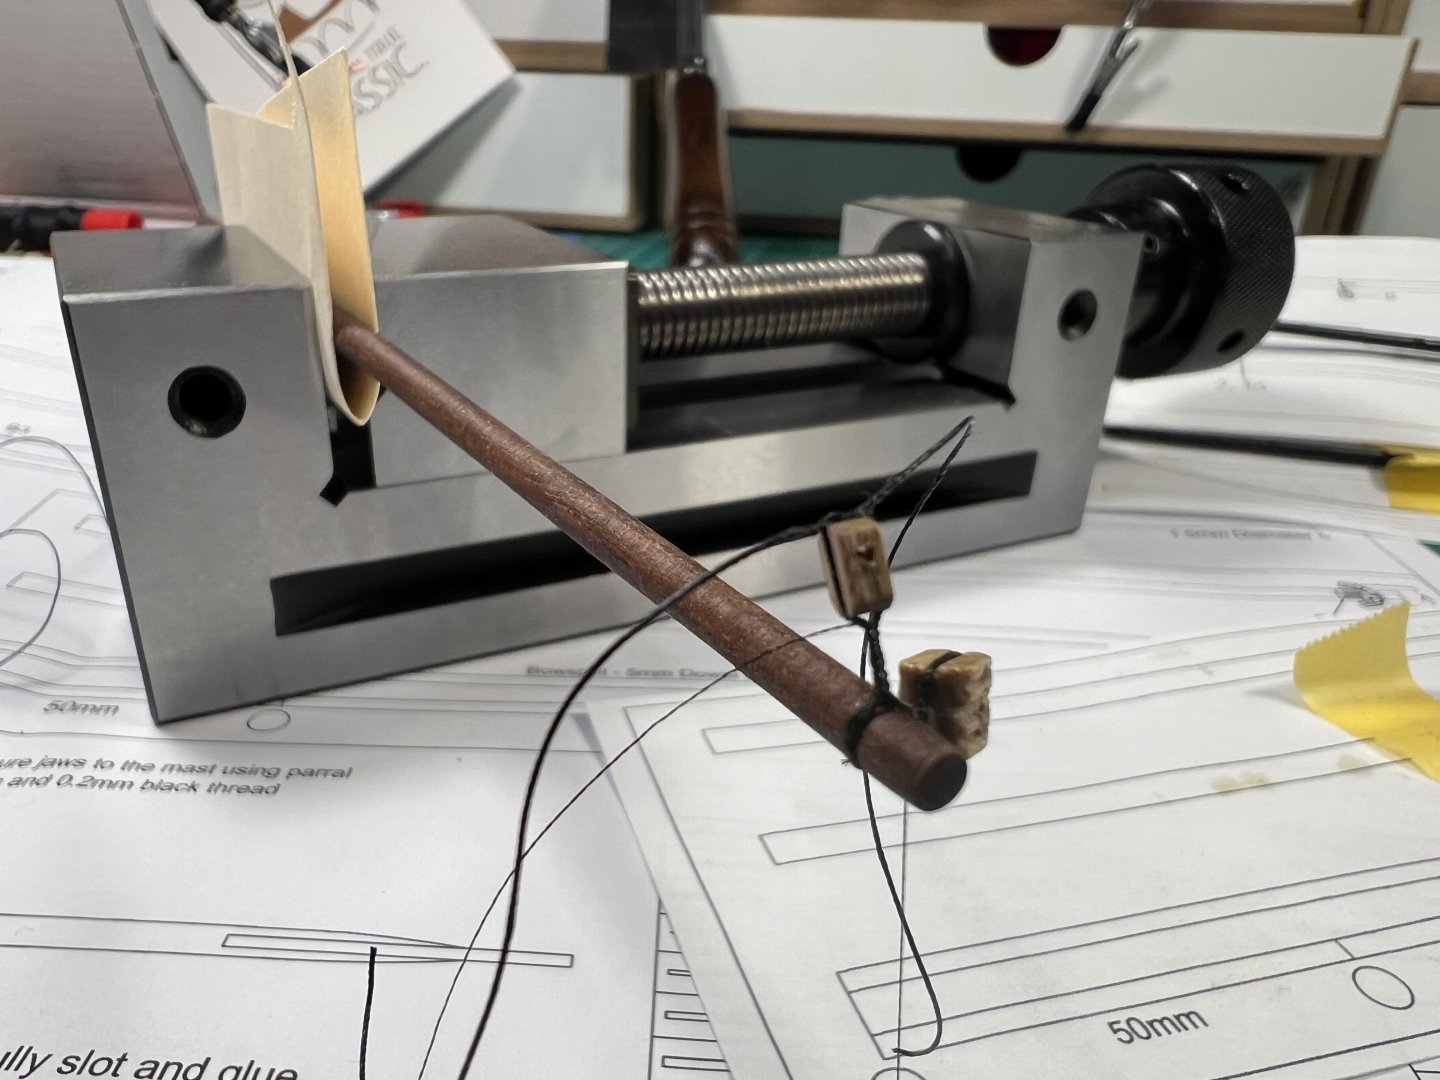
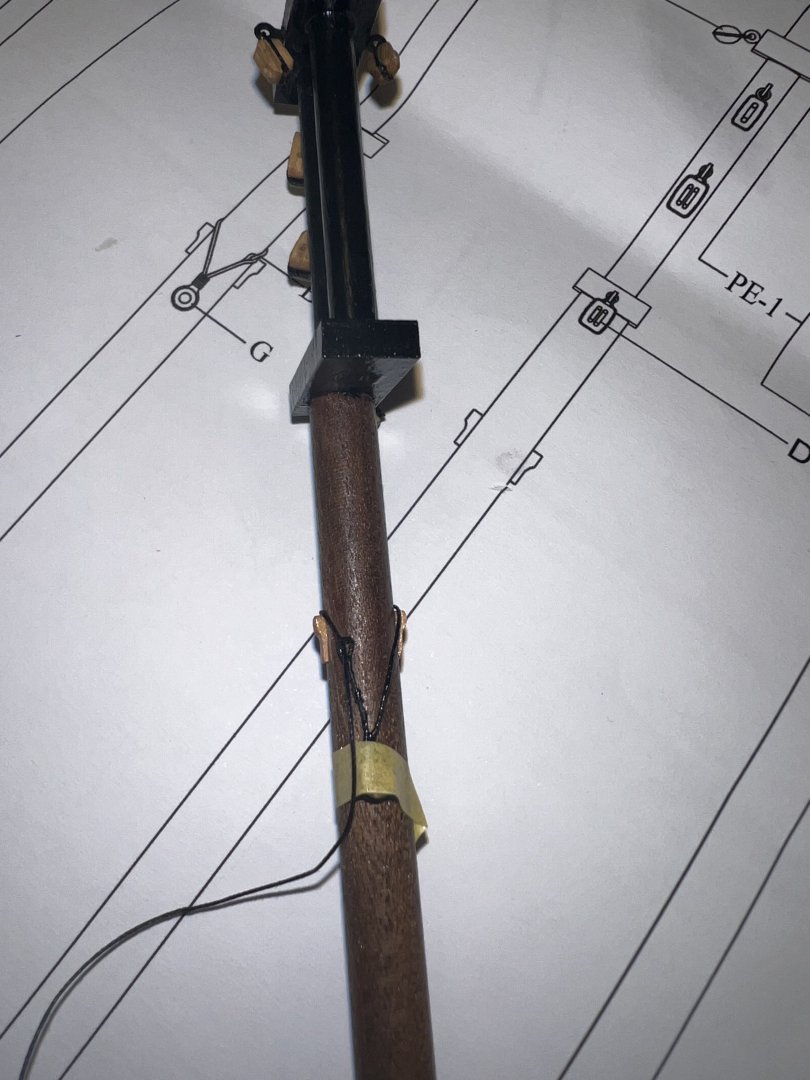
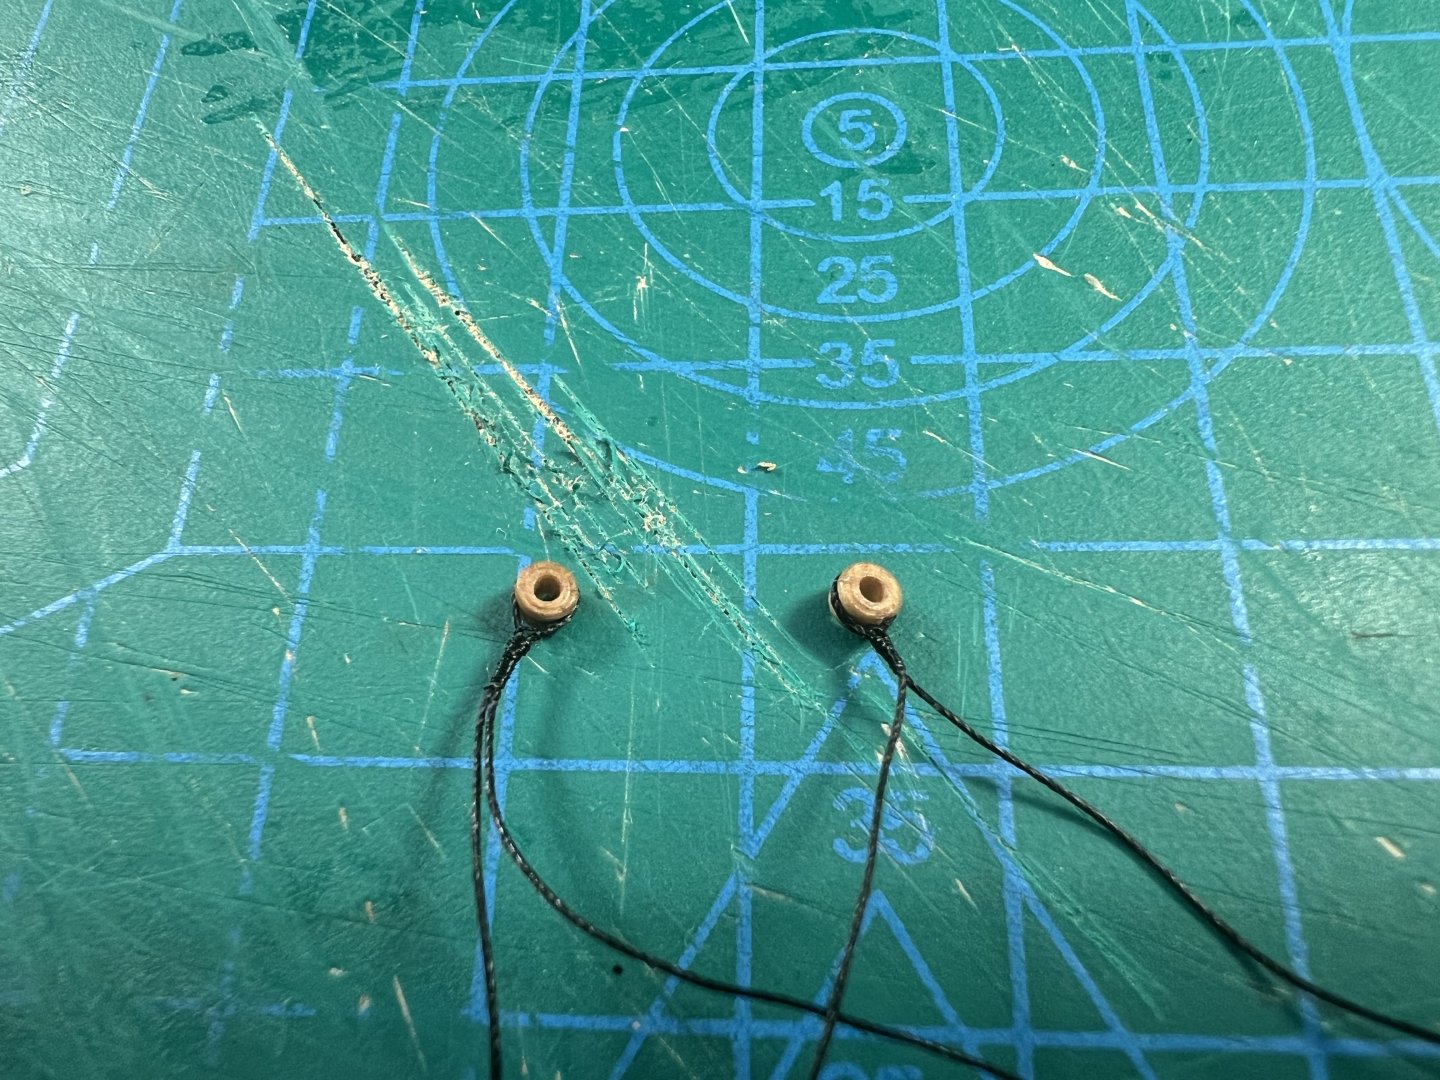
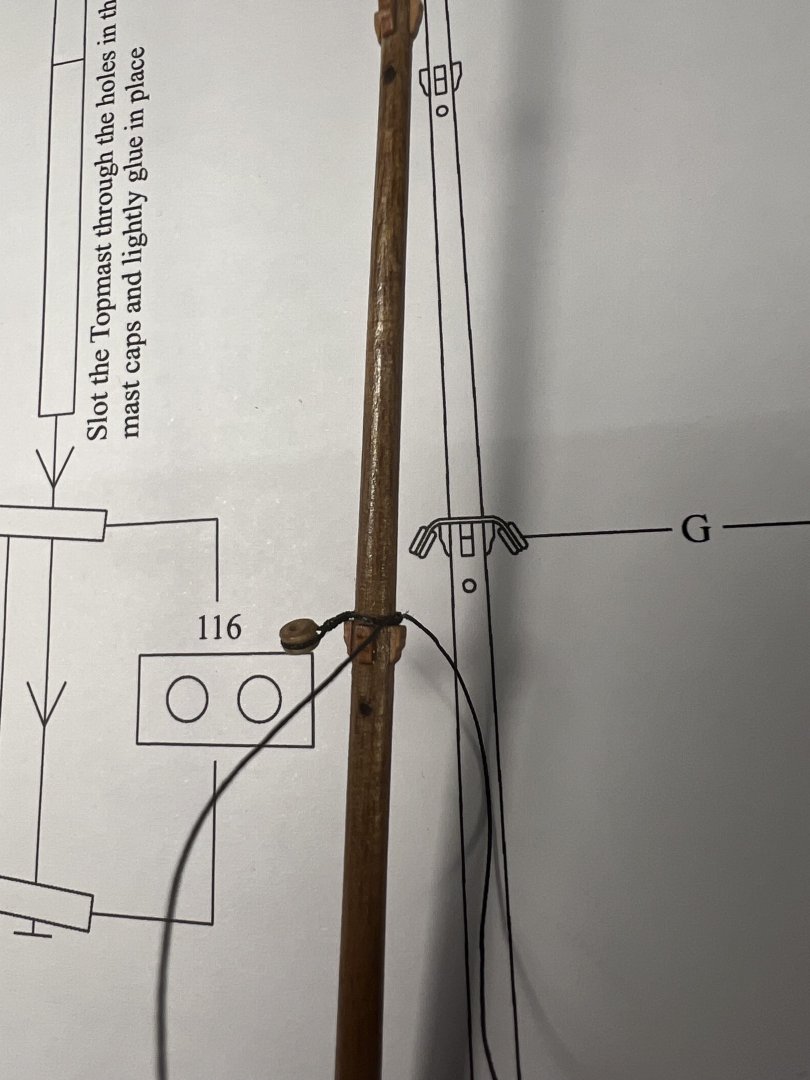
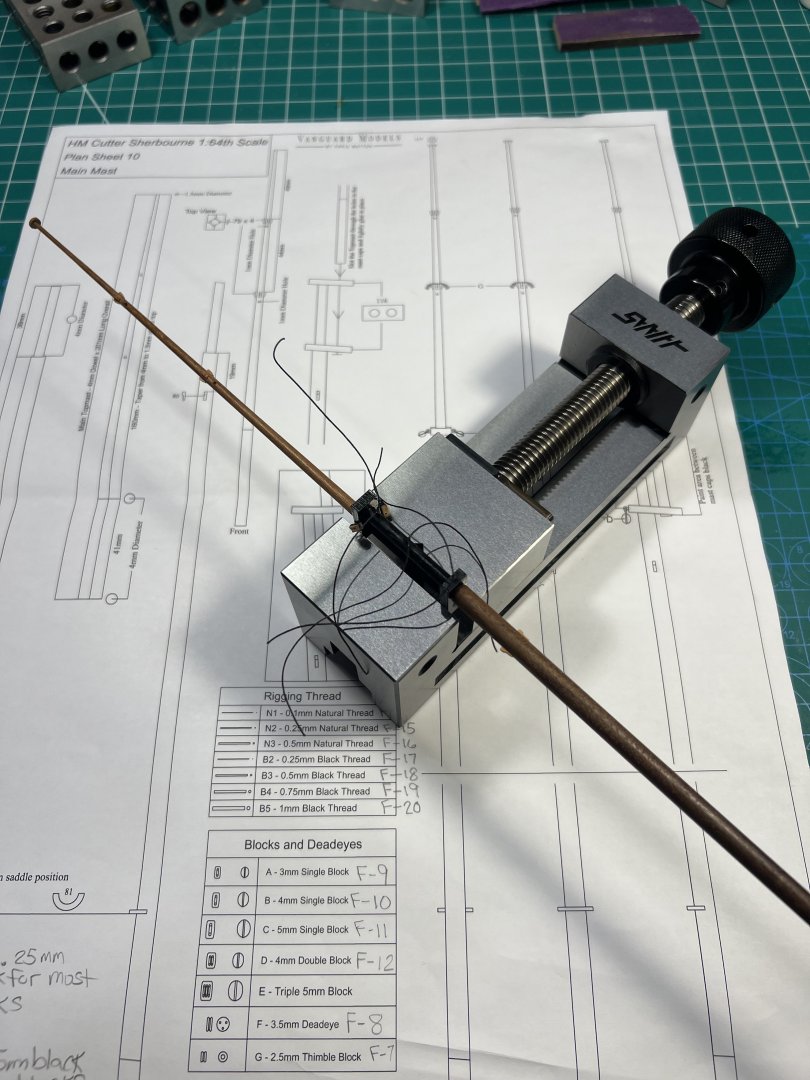
Added the thimble. It’s taped to hold in position, following the Modelkit Stuff method.
- 177 replies
-
- 4
-
-
- Sherbourne
- vanguard models
- (and 3 more)
-
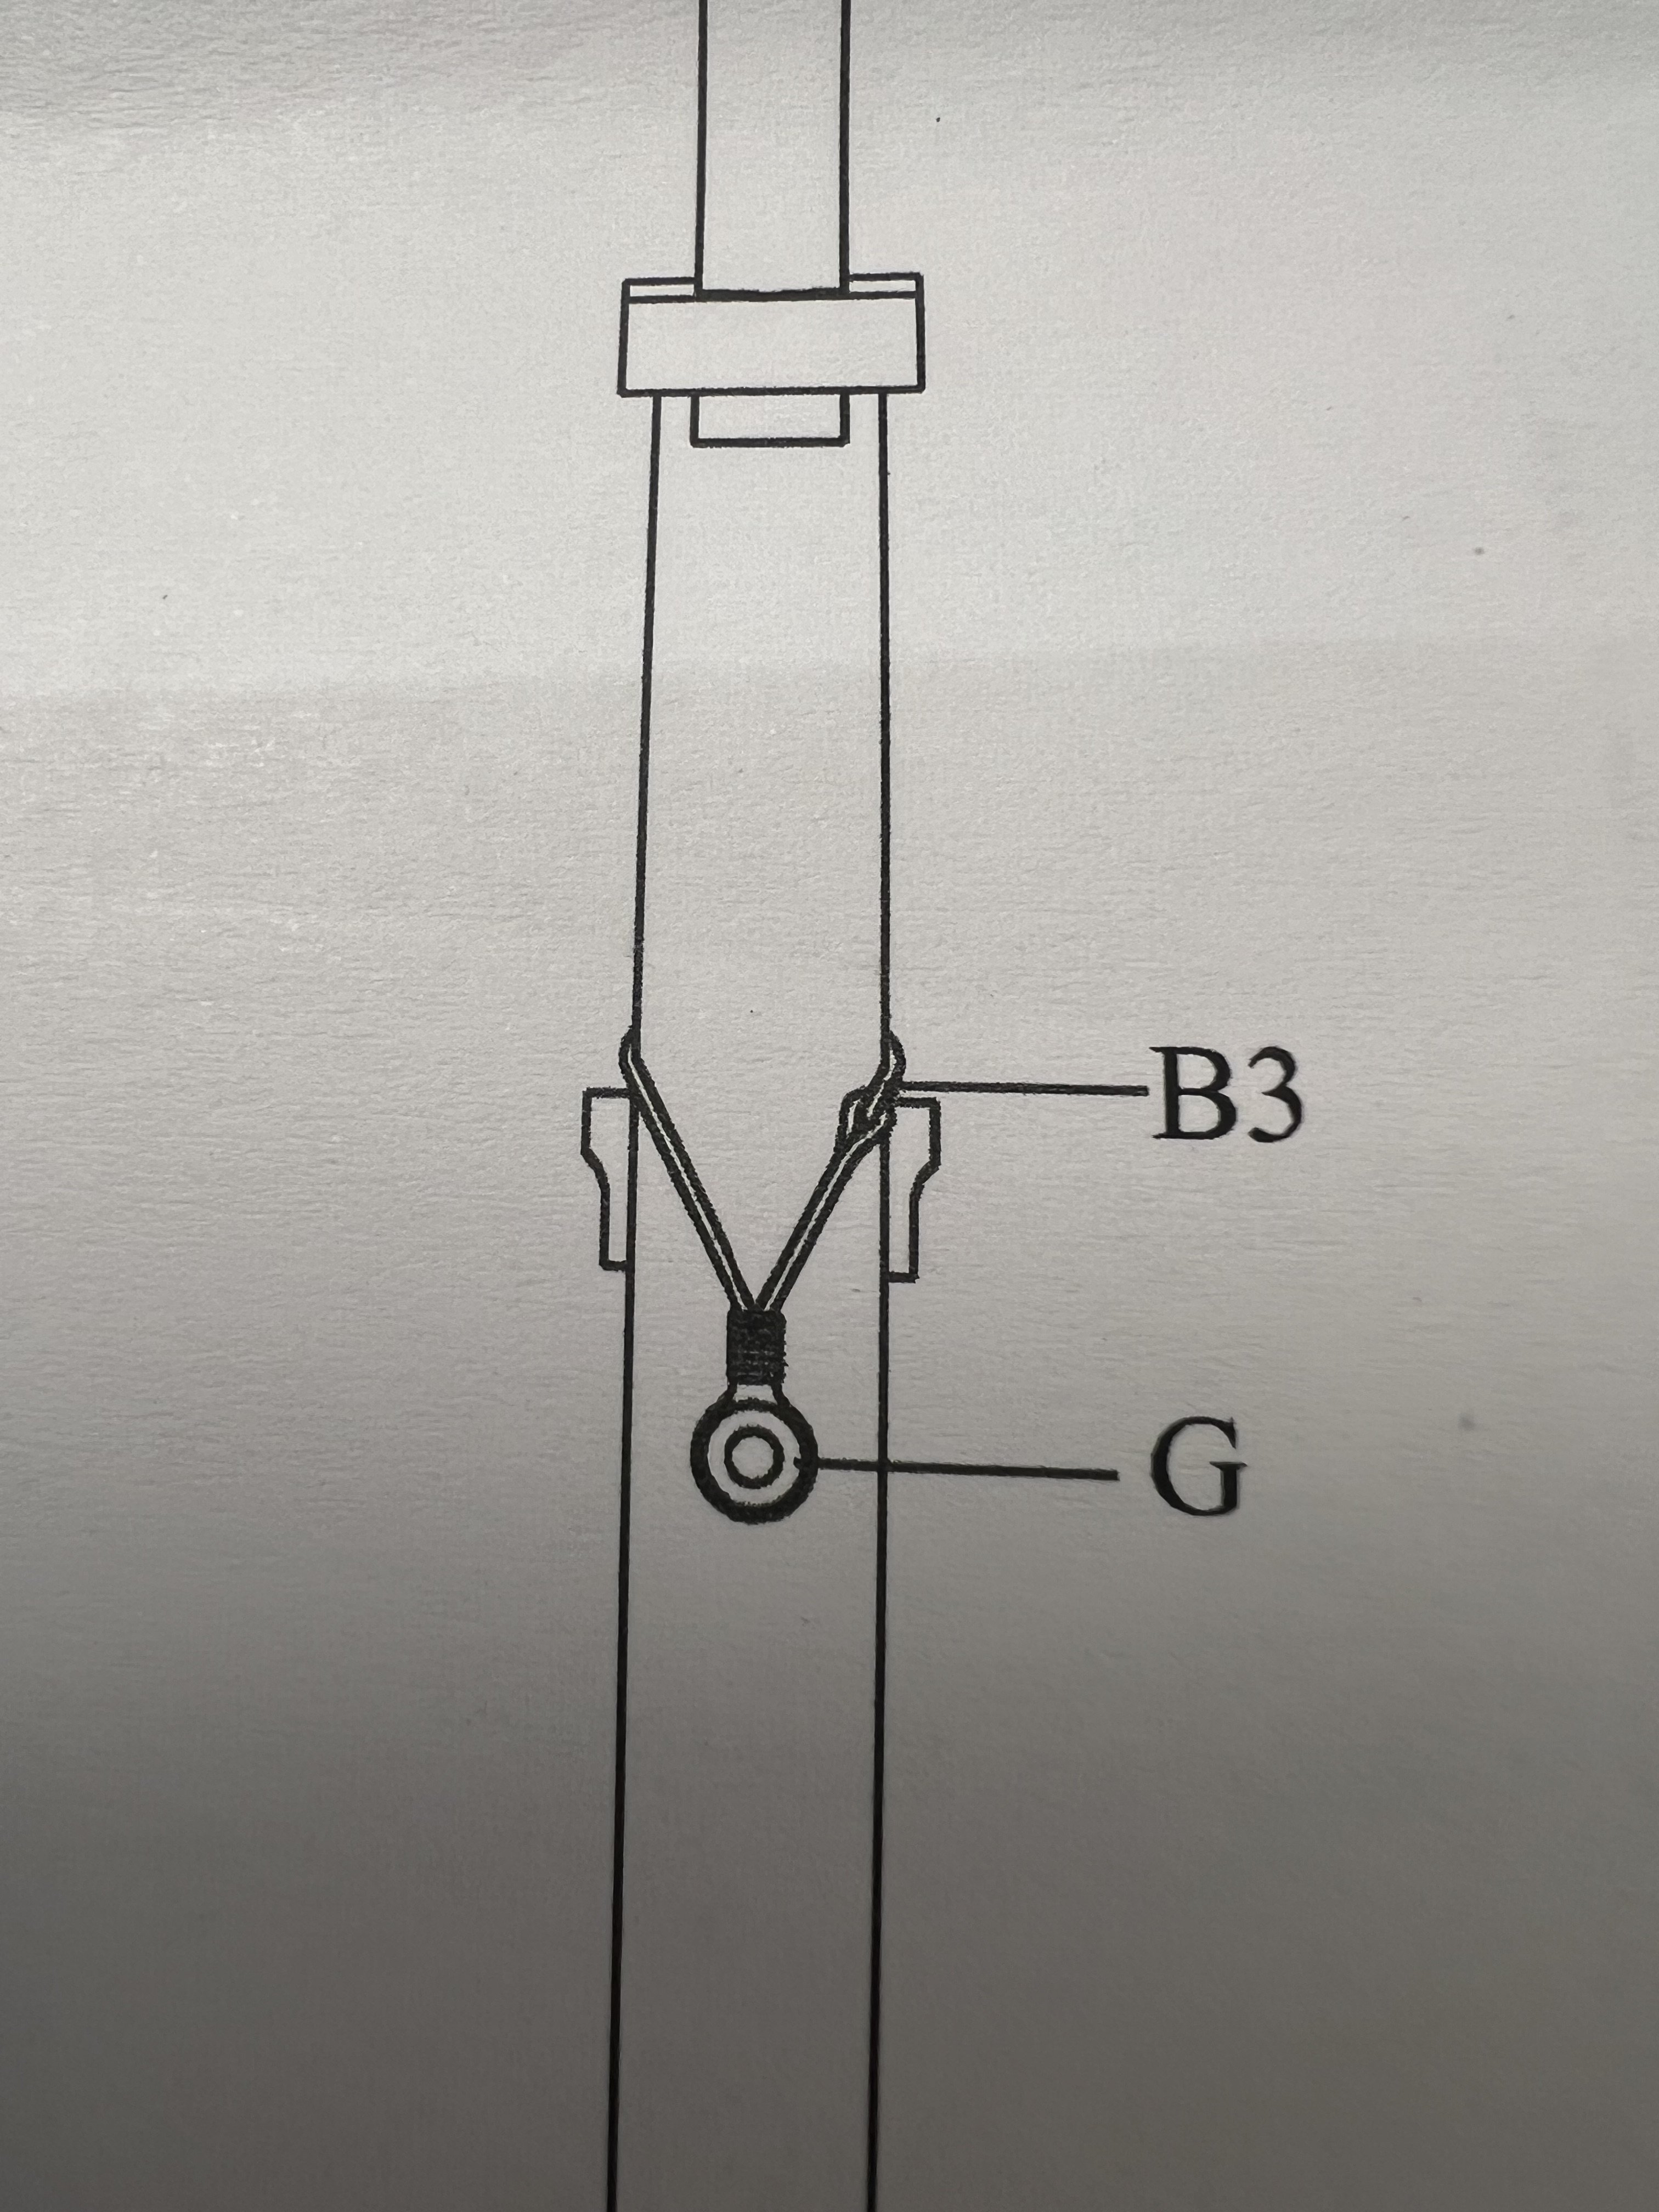
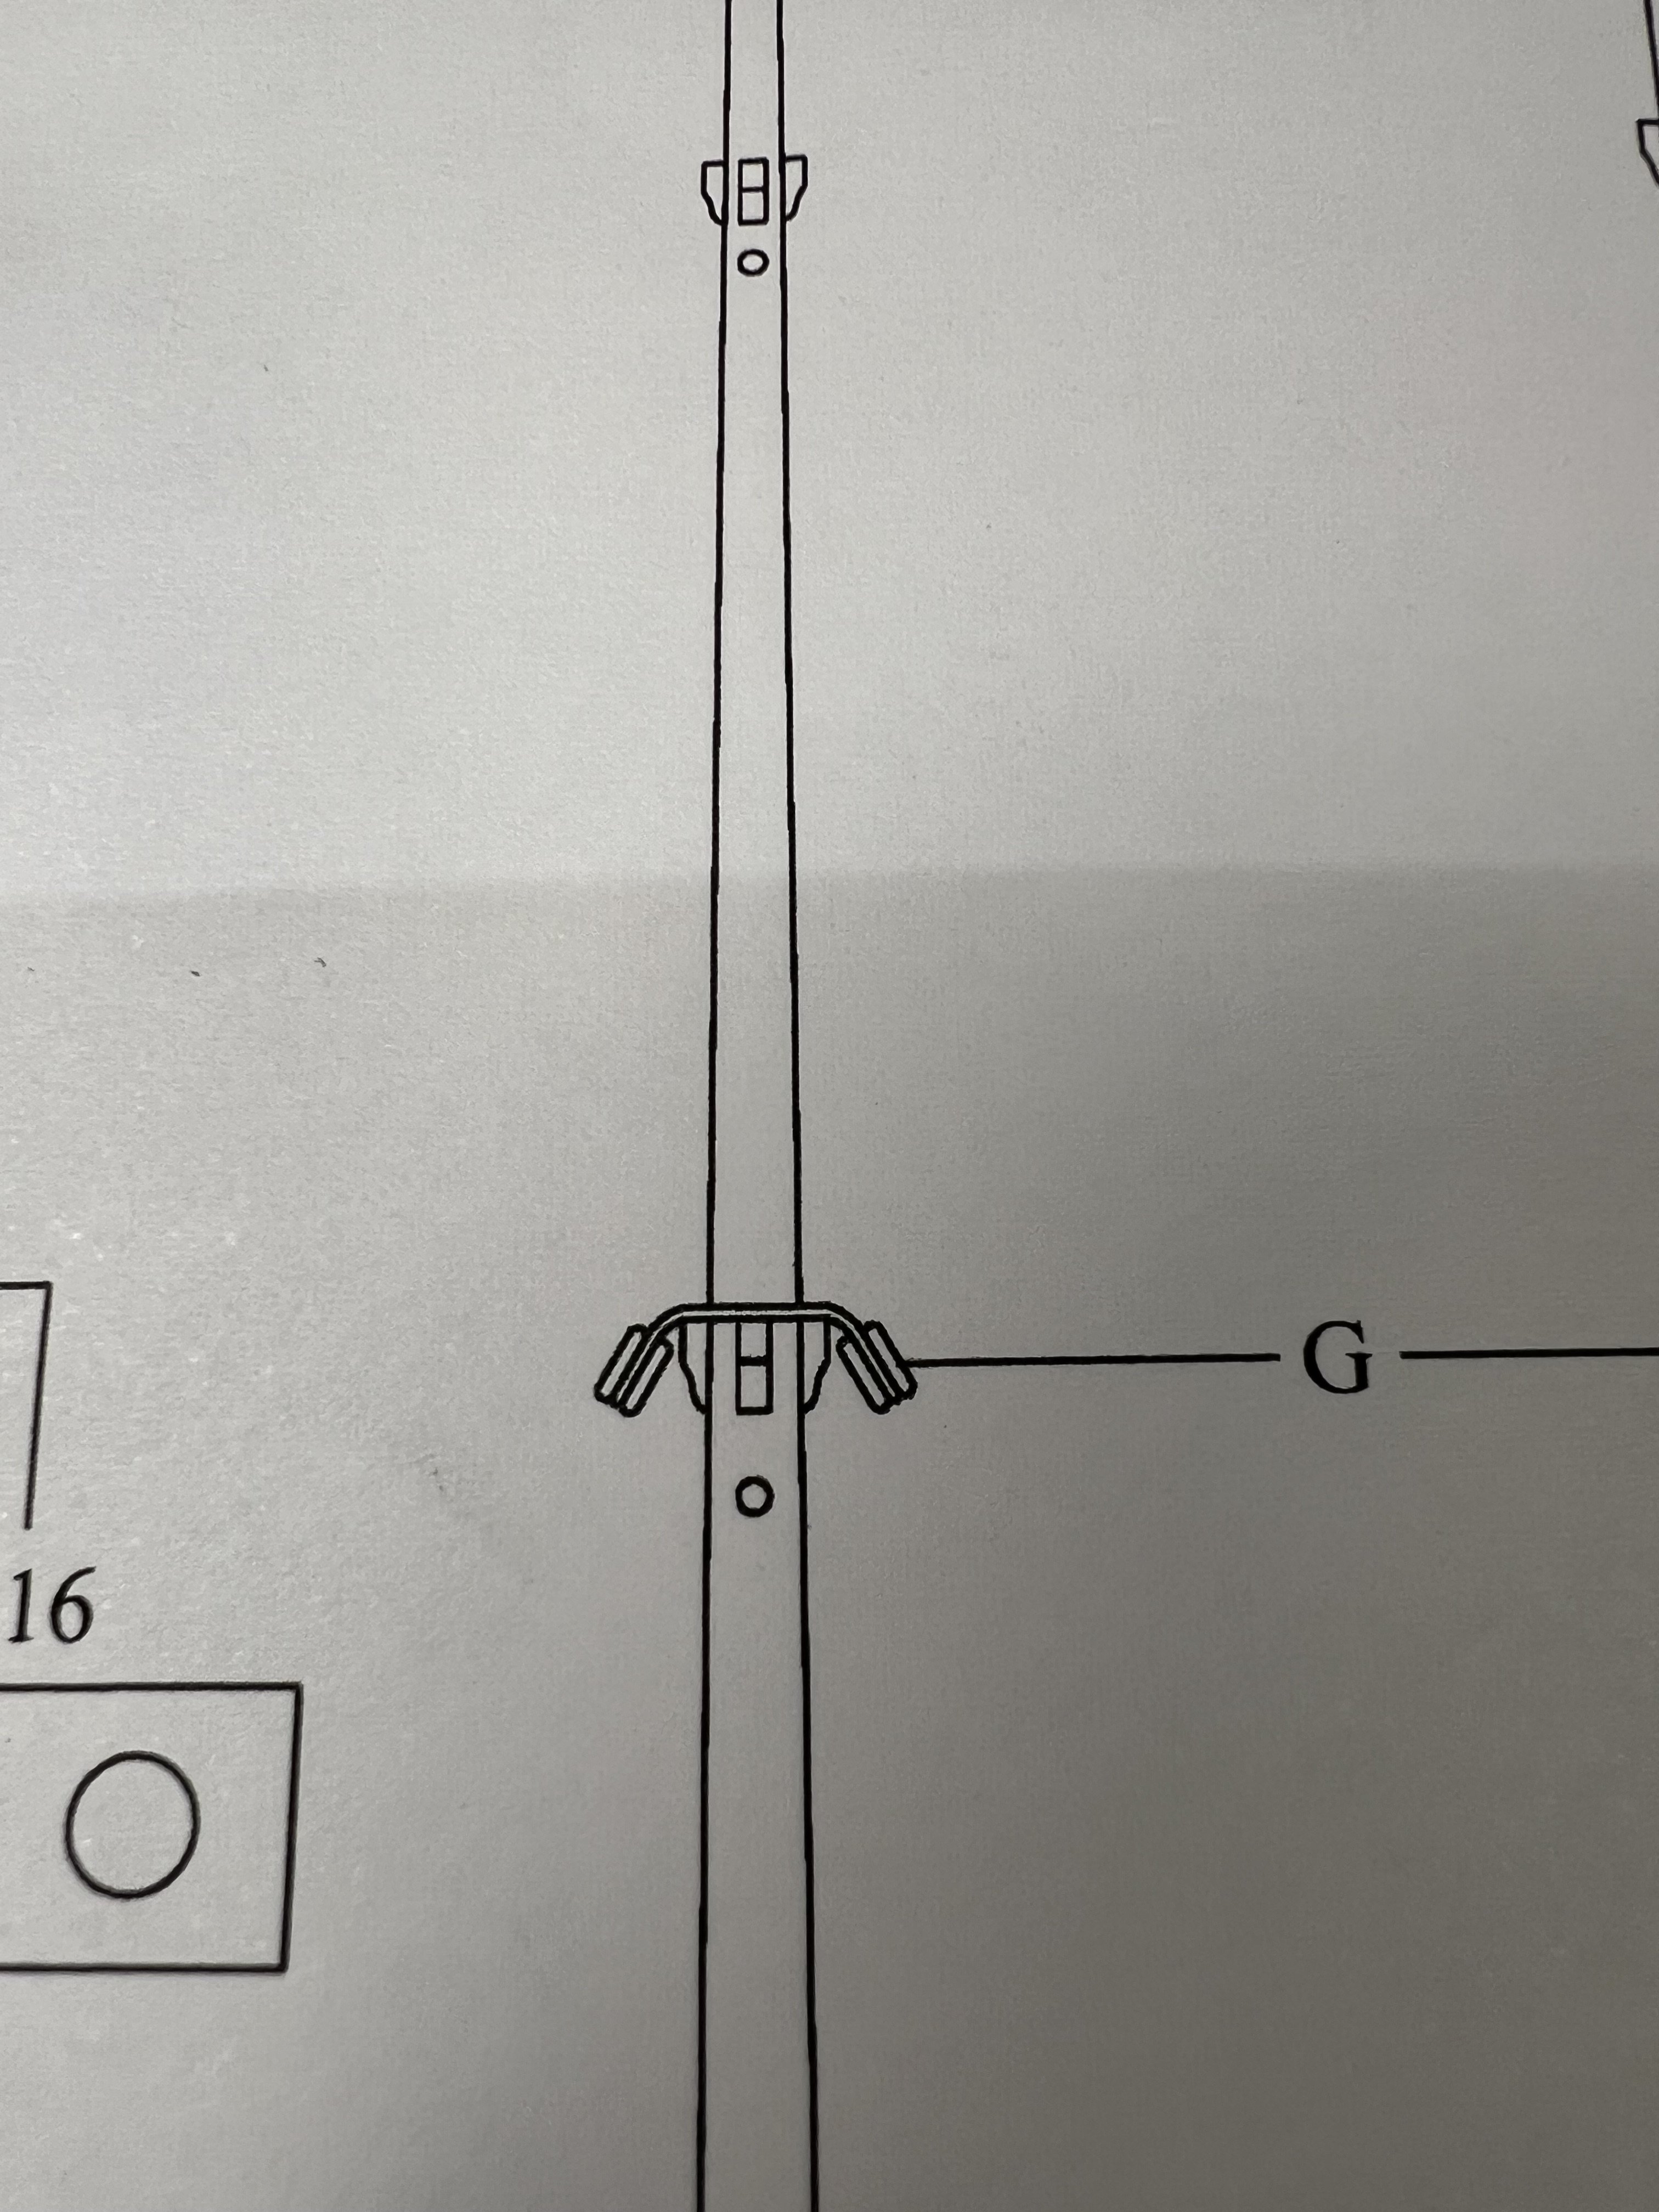
This is the next bit on the plans to do. A bit more complicated. I’m showing a drawing from Lennarth that Modelkit Stuff showed in Video 19 of the Sherbourne build.
- 177 replies
-
- 4
-
-
- Sherbourne
- vanguard models
- (and 3 more)
-
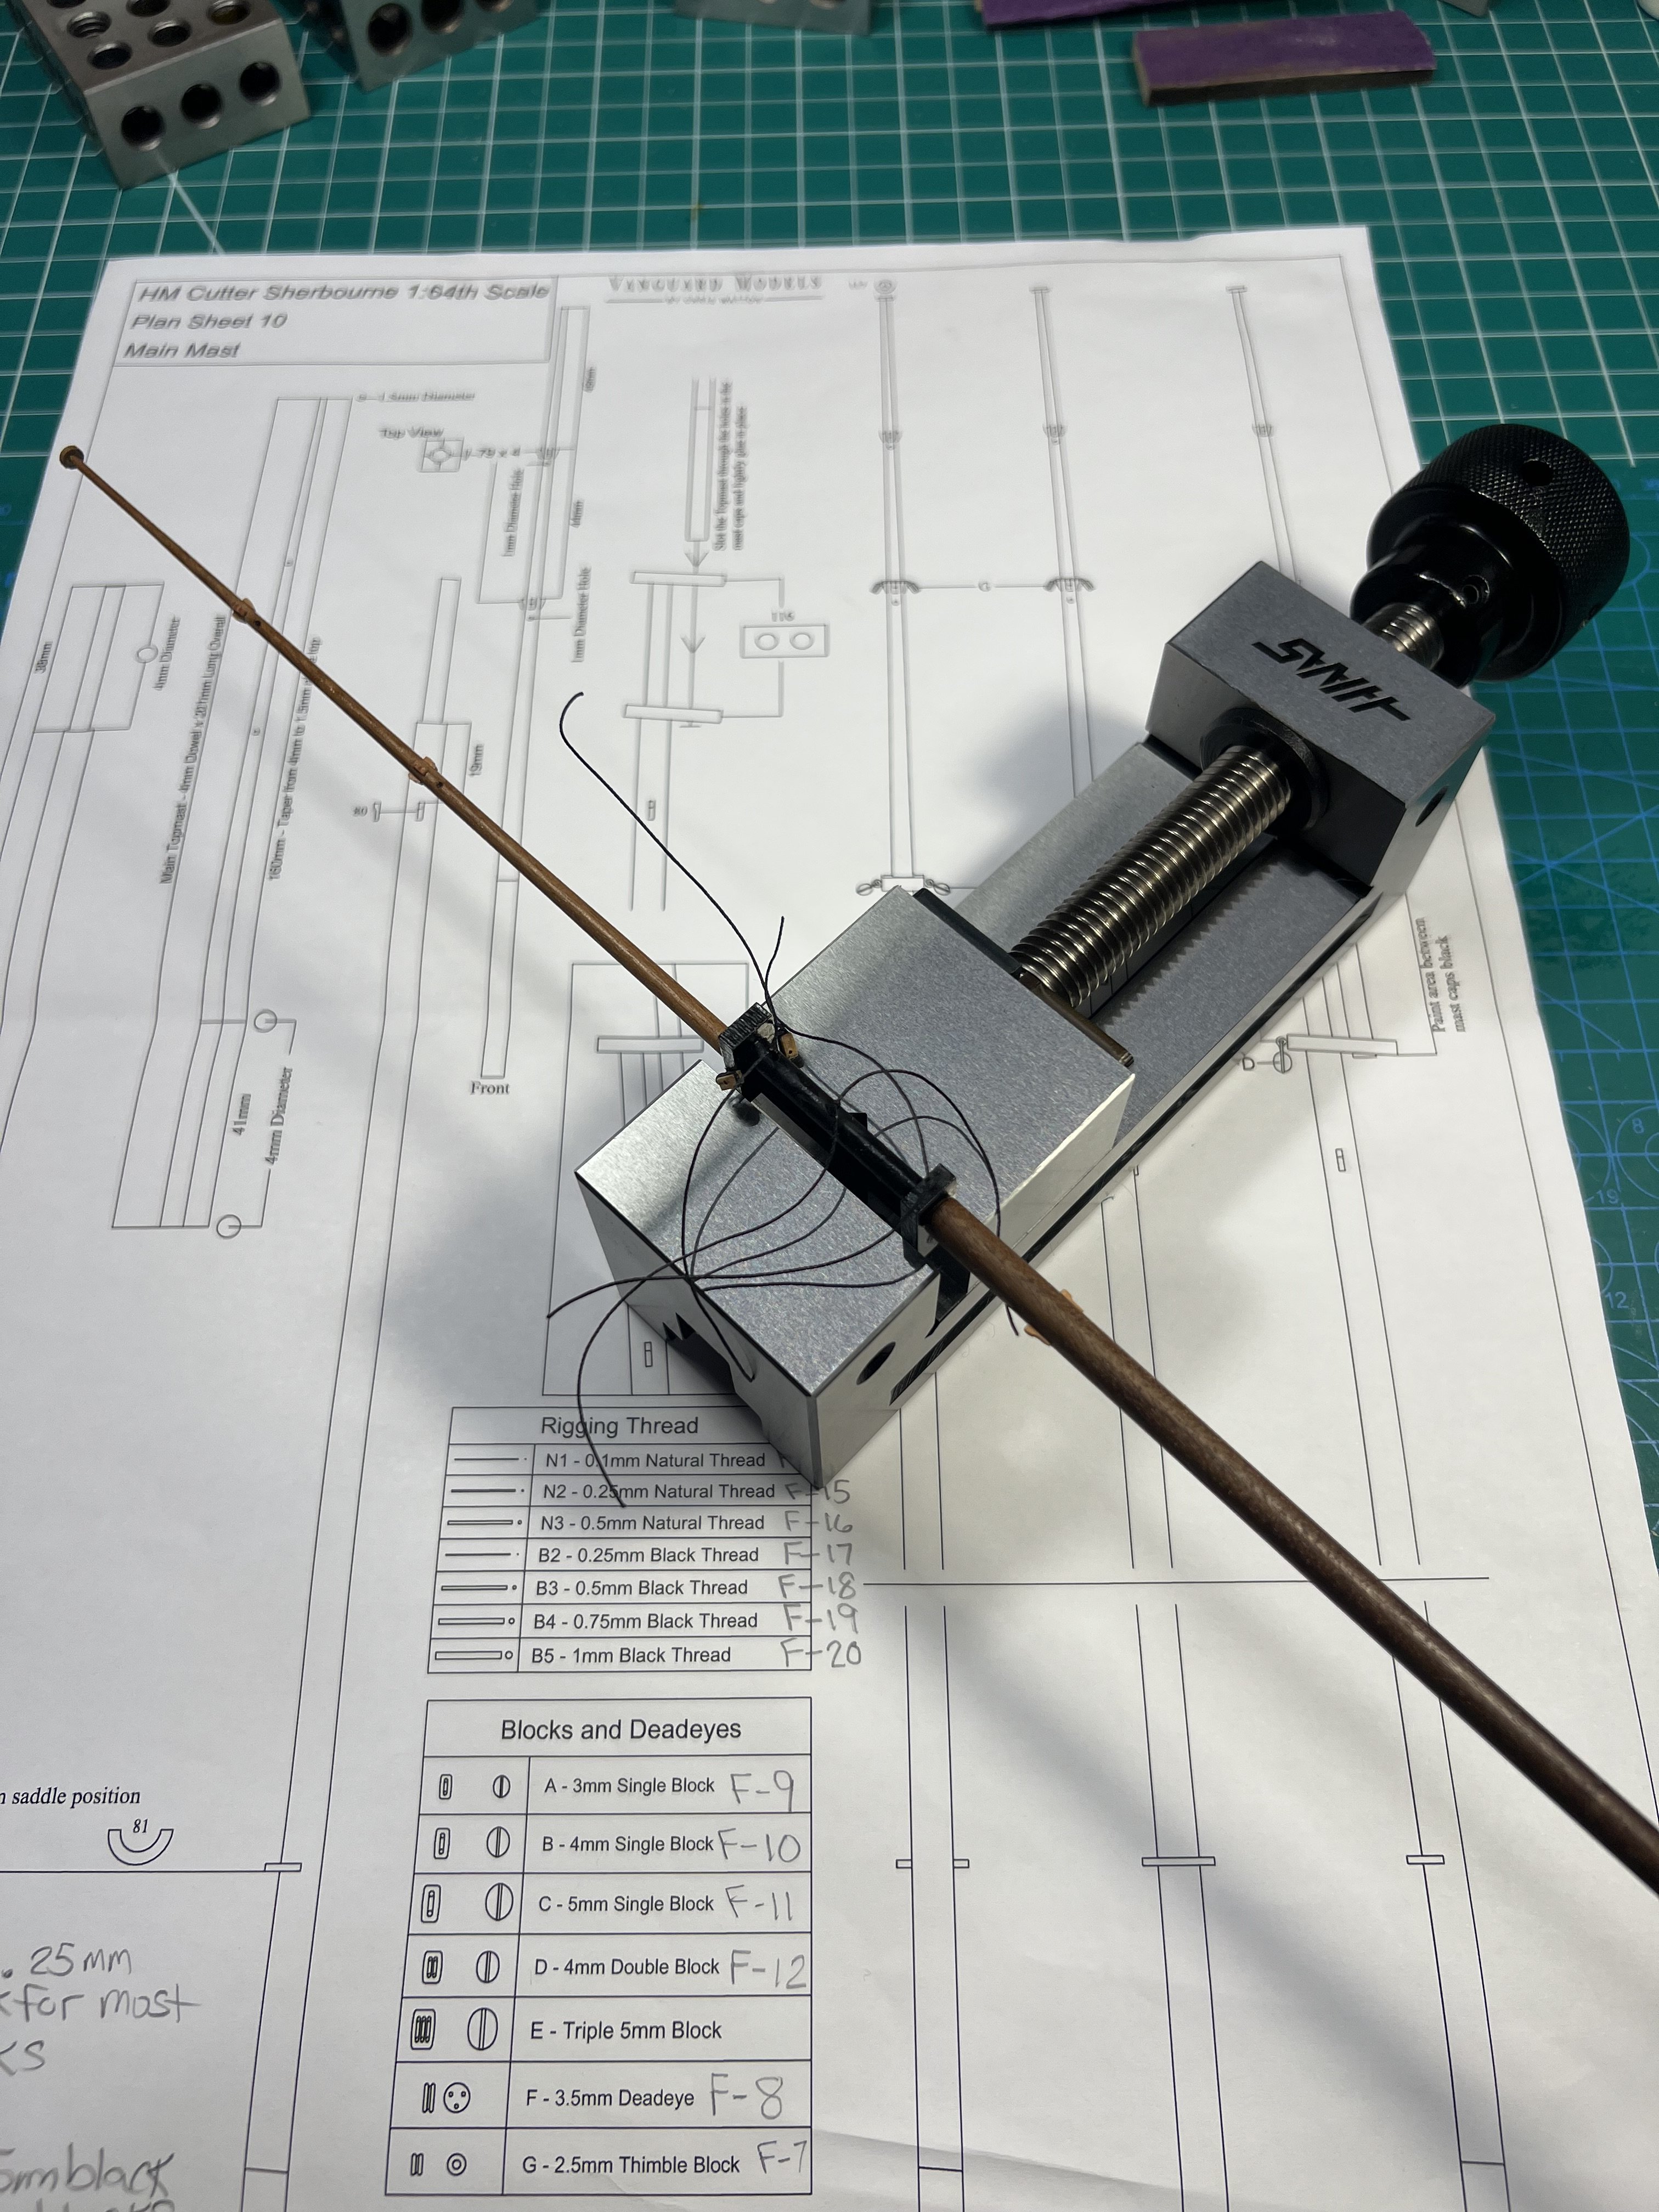
Working on the thimbles. The plans show one line that connects both thimbles. I can’t easily see how to do that. So like the Modelkit Stuff build, I’m going to do two separate lines. I was able to do the thimbles and add a bit of seizing. I think it’s going to be easier when the thicker seizing thread I ordered arrives. This 16/0 is tiny and hard to use. It’s hard to see (even with a magnifier), hard to tie, and it moves all over with the slightest breath.


- 177 replies
-
- 4
-
-
- Sherbourne
- vanguard models
- (and 3 more)
-
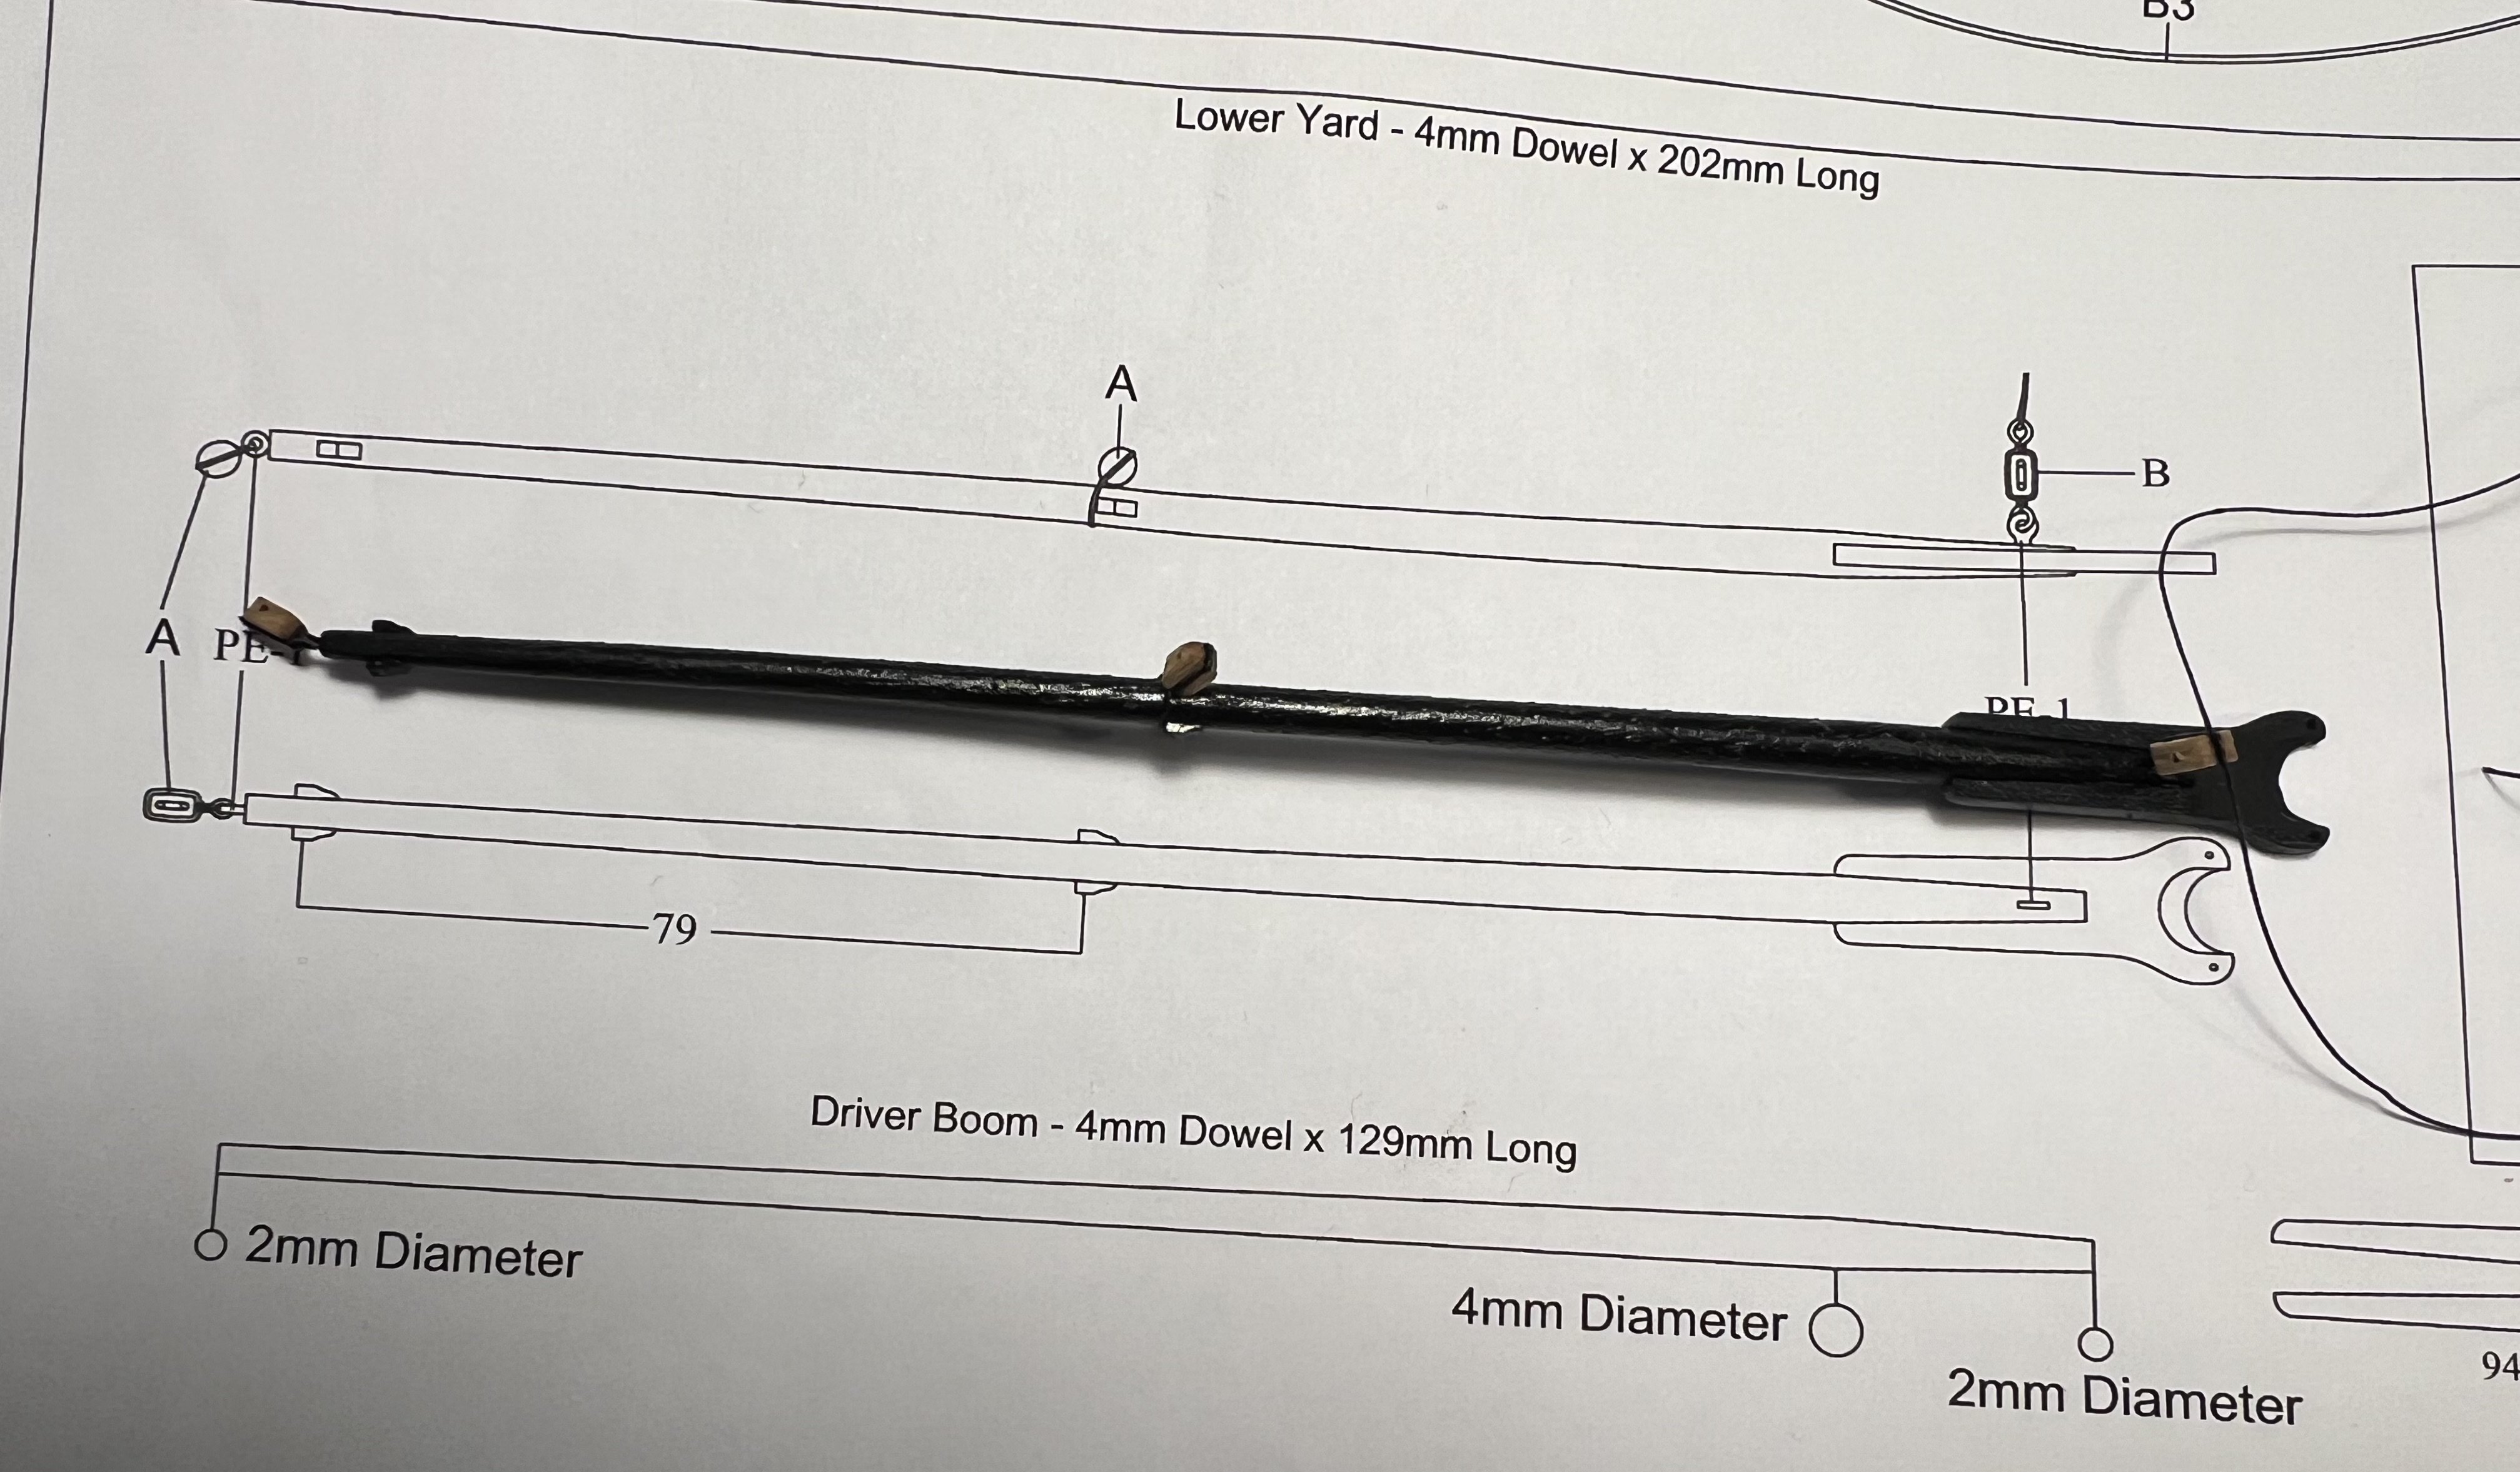
In part I was delaying the continuation of my Sherbourne because I was waiting for the Modelkit Stuff Sherbourne build to go past me. He’s now well past me in that maybe he has one more video to complete the model. His Video 19 (around time stamp 23:54) describes how to rig a couple of the blocks I hasn’t seen described in other sources.

- 177 replies
-
- 2
-
-
- Sherbourne
- vanguard models
- (and 3 more)
-
I’m finally back to my Sherbourne for a bit. I had set it aside to continue to research ways to do rigging. I started on rigging on my Ranger and figured maybe I should try to finish my Sherbourne first. After all, it is my first model ship.

- 177 replies
-
- 3
-
-
- Sherbourne
- vanguard models
- (and 3 more)
-
I currently have four in progress. I'm hoping to get one or two finished relatively soon, but I'm sure they'll quickly be replaced by one or two more.
-
I'm trying to follow the plans in the Vanguard Range kit. It has several blocks illustrated that have a becket under the block while attaching to an eyebolt, requiring a loop above and below the block. It is good to know that there are several other options should I not be happy with my continued attempts to reproduce what it is in the plans.
- 133 replies
-
- 3
-
-
- Ranger
- vanguard models
- (and 1 more)
-
This is what I bought the small (heavy) desktop vise* for (it’s less than 6 inches long but weight about 5lbs). * https://www.haascnc.com/haas-tooling/mill_workholding/toolmakers_vise/09-0569.html#gsc.tab=0


- 133 replies
-
- 2
-
-
- Ranger
- vanguard models
- (and 1 more)
-
I see that Chuck uses Gutermann Mara 220. That seems more like Veevus 3/0 or 6/0 thread. That's a good bit thicker than the Veevus 16/0 I've been used based on recommendations. Maybe I'll see if a thicker seizing thread makes it easier to use.
- 133 replies
-
- 3
-
-
- Ranger
- vanguard models
- (and 1 more)
-
https://syrenshipmodelcompany.com/resources/Stropping Blocks (one method).pdf This is a great resource. I've been on the Syren web site a bunch but never saw this. Thanks. Unfortunately, it doesn't illustrate a method to do a block with becket but the other illustrations are really useful.
- 133 replies
-
- 2
-
-
- Ranger
- vanguard models
- (and 1 more)
-
I was looking at this web page again: https://www.modelboatyard.com/stropping.html I suppose an alternative to making a loop at the bottom of a block to accept another line tied to it (requiring a loop above the block to attach to the eyebolt and one at the bottom for the becket) I could instead attach the way illustrated here. I don’t know it will be any easier.

- 133 replies
-
- 3
-
-
- Ranger
- vanguard models
- (and 1 more)
-
I suppose this is one way, passing both end through the eyebolt and tying off with a half hitch. I suppose I could try a seizing between the eyebolt and block.


- 133 replies
-
- 2
-
-
- Ranger
- vanguard models
- (and 1 more)
-
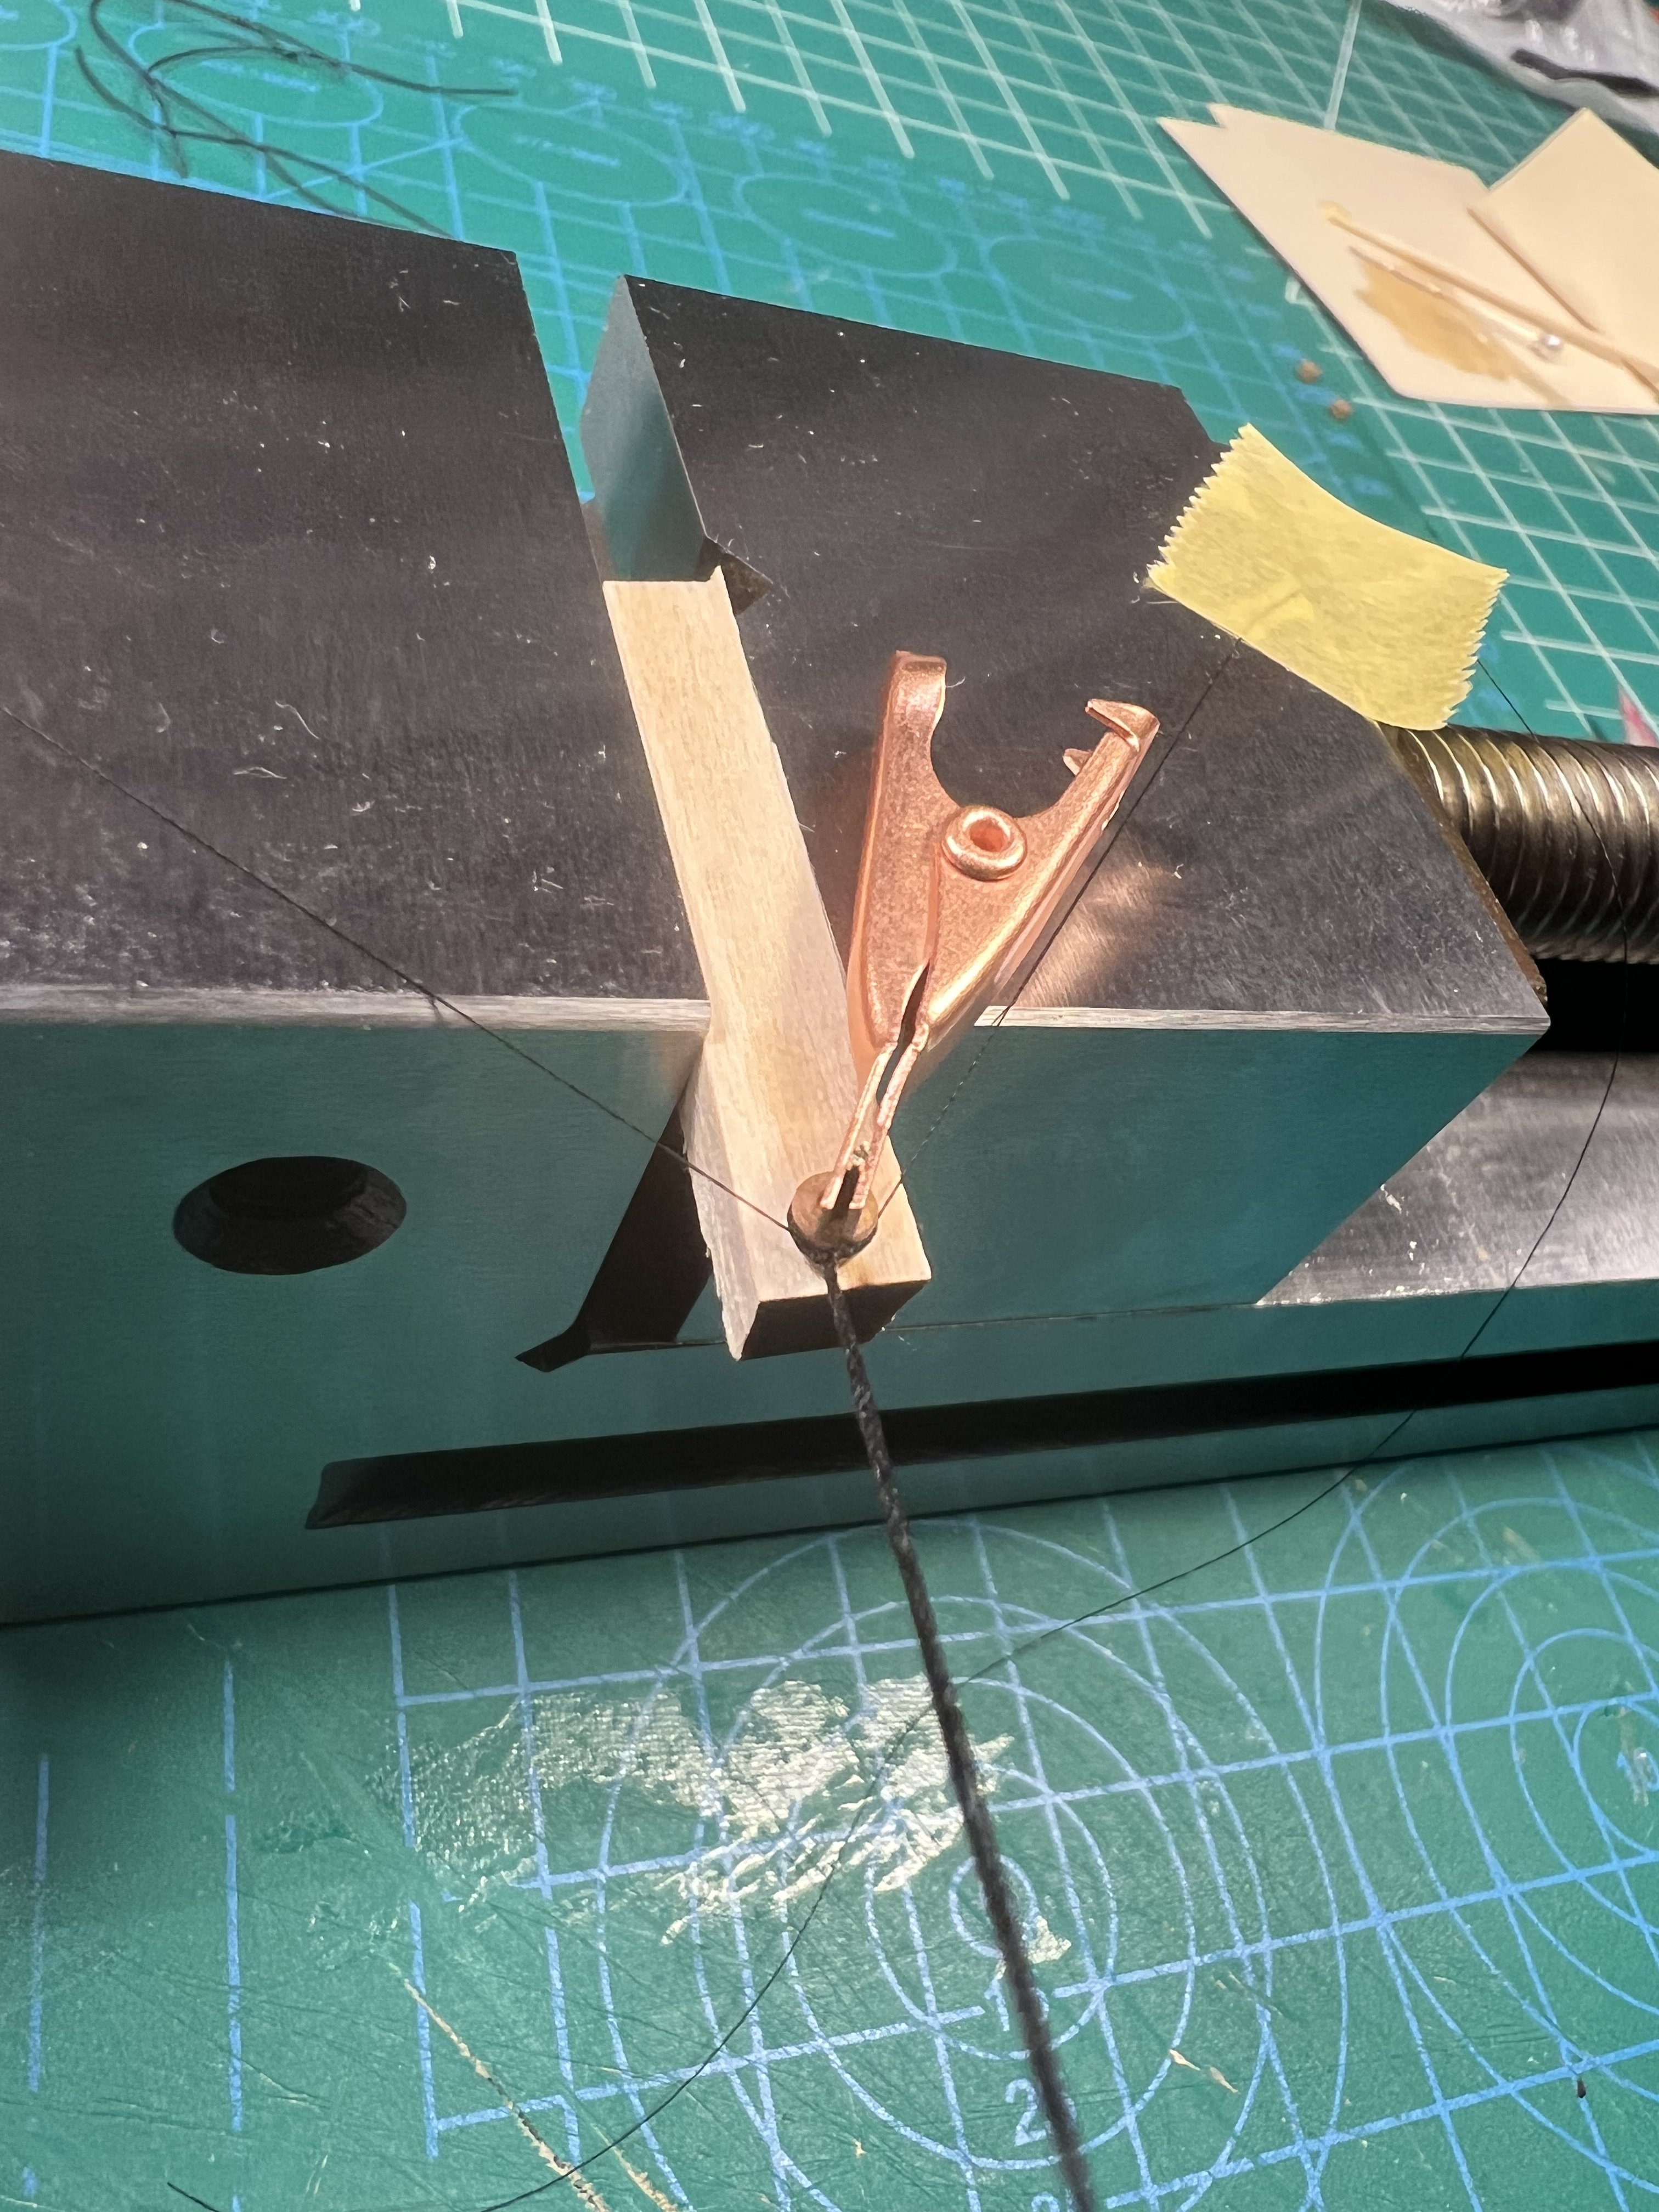
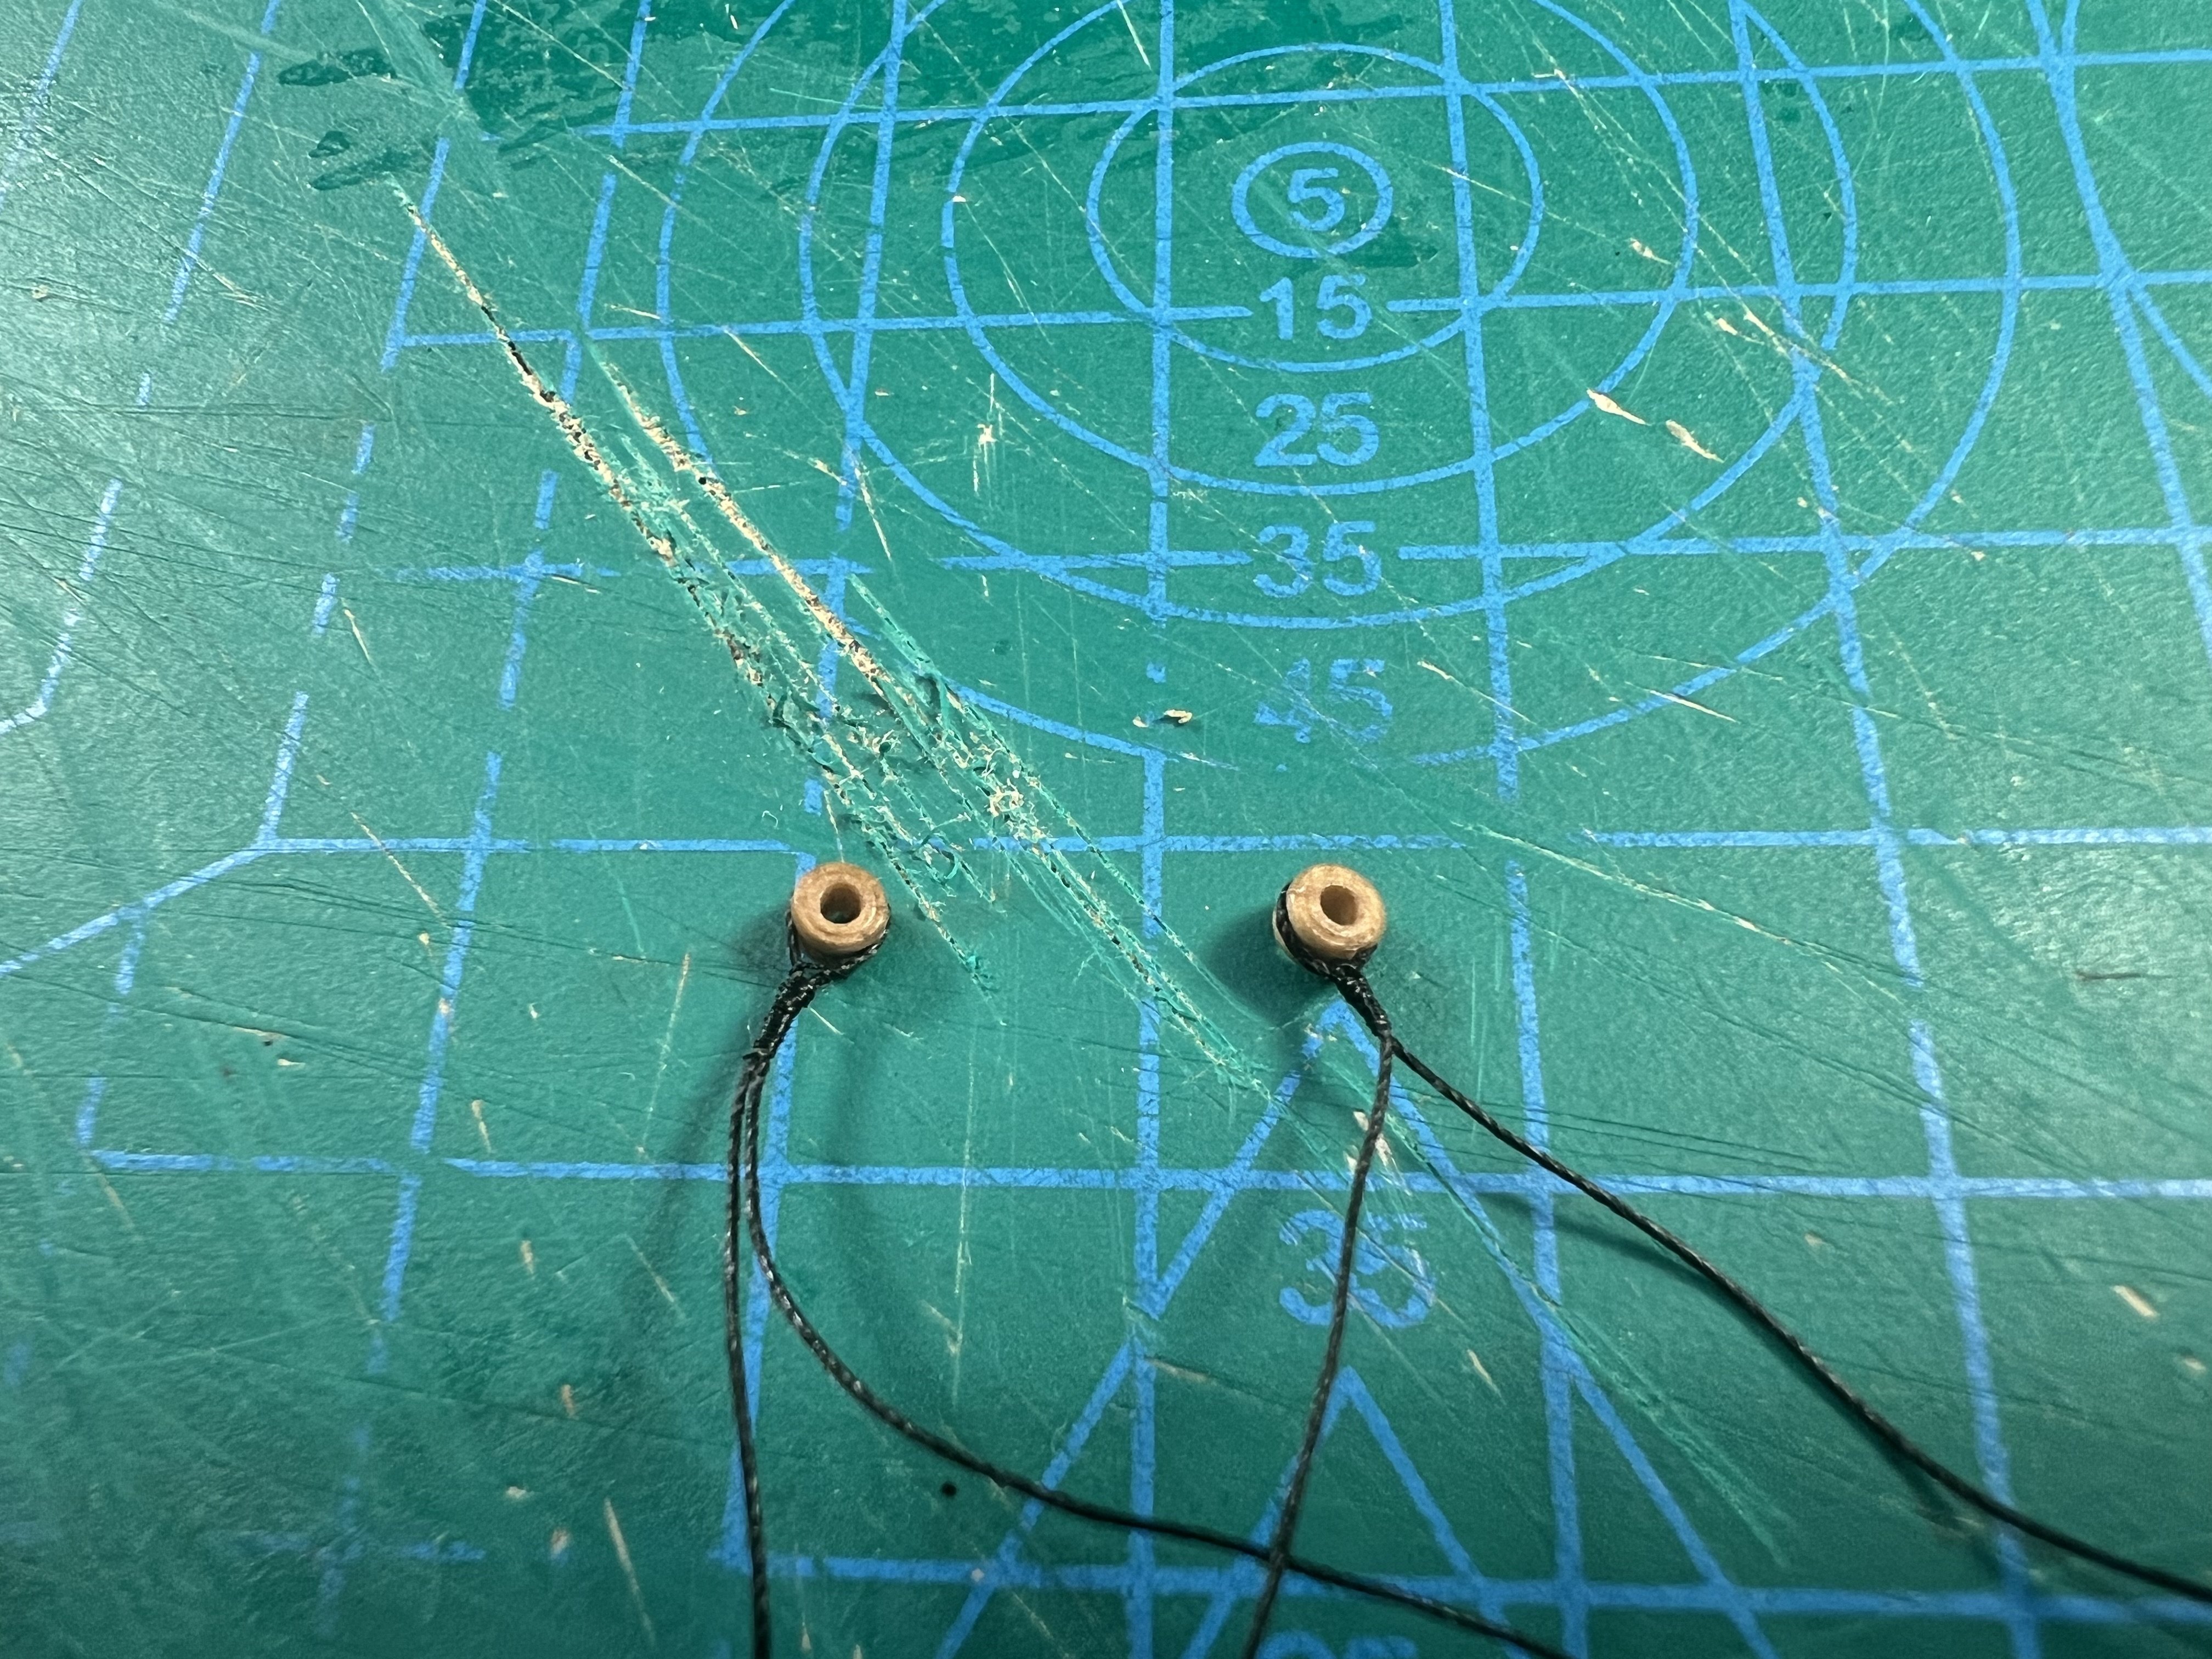
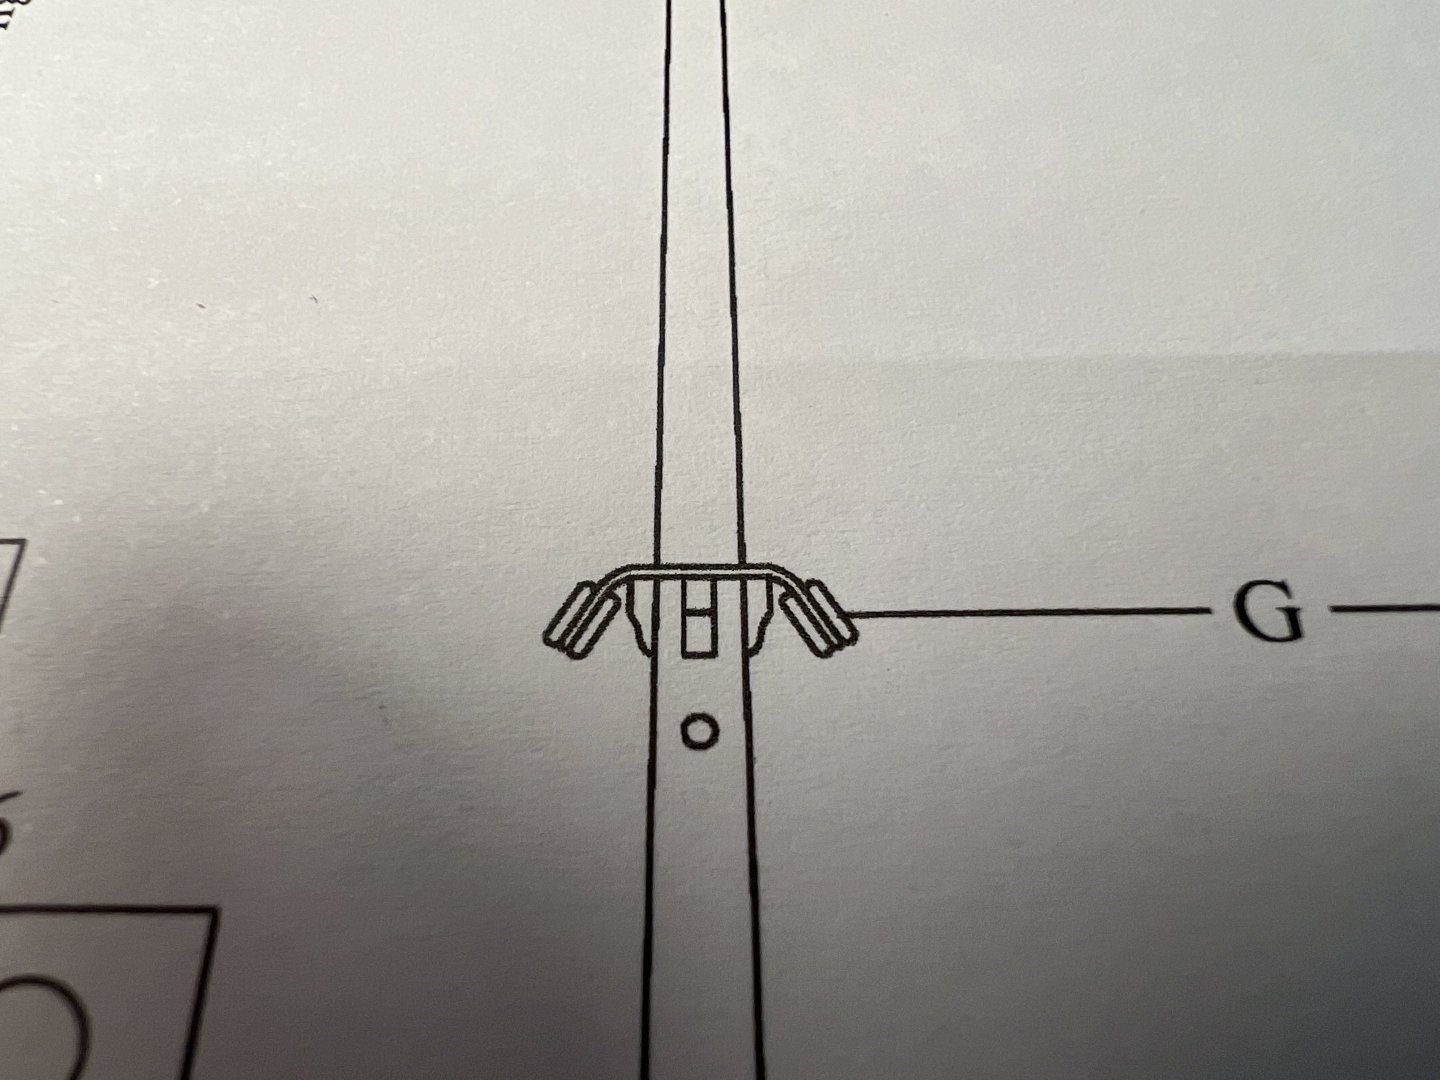
First step is creating the becket around the three deheaded nails. I tighten the half hitch around the nails and add a bit of thin CA. Then a loose half hitch to position the block in. A spot of CA after tightening. The end result is a block with a becket. Challenge is figuring out how to attach that to an eyebolt.


- 133 replies
-
- 2
-
-
- Ranger
- vanguard models
- (and 1 more)
-
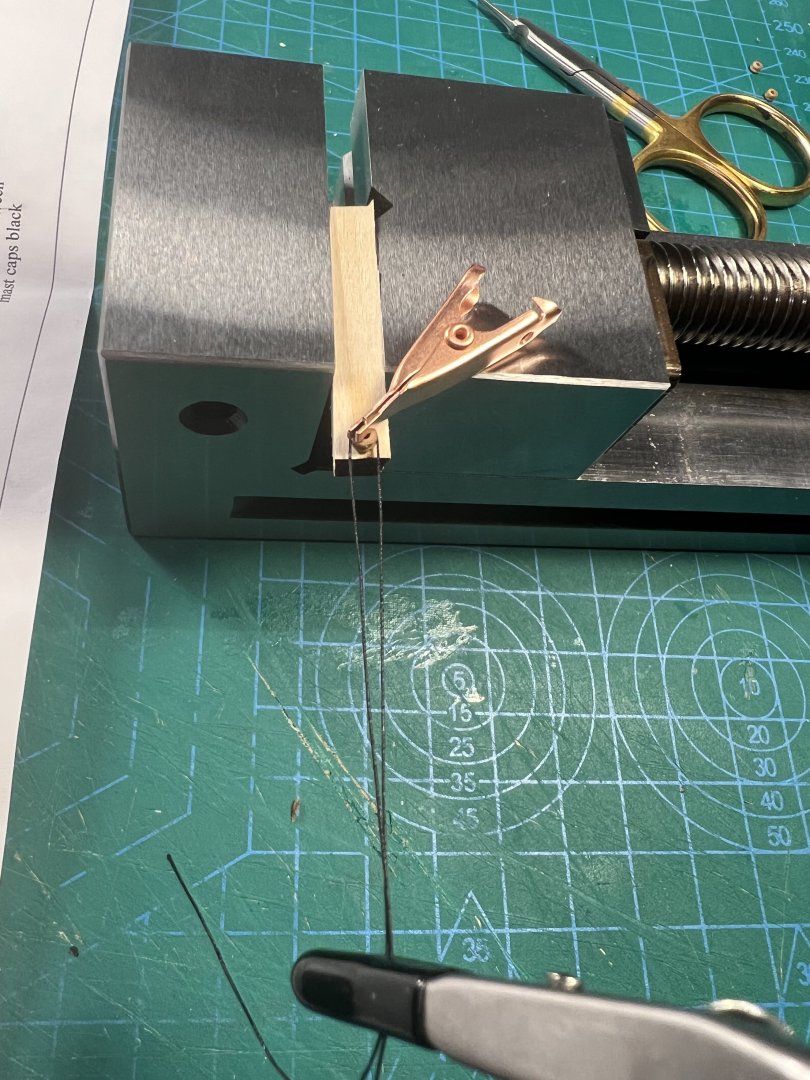
I’m still struggling to figure out the best approach for rigging blocks. Part of the challenge is translating what you might see at full scale (like what might be in the Ashley book or a photo of a rigged ship) and what might be appropriate - or “good enough” - at something like the 1:64 scale of the Ranger (and other Vanguard Models). I know at 1:24 or even 1:48 scale you might do something closer to what you might see at full scale. I think I have a way to add a simple block like I’m showing in the first two photos. Following a bunch of other people, I can simply do a half hitch of the line on the eyebolt, adding a little CA to keep the knot tight, then do another half hitch that’s loose and position the block in the eye of that knot, cinching it tight and making sure the line is in the grove of the block, adding some CA to the half hitch under the block and to the line near where the stray ends will be cut off, cutting the lines with a sharp scalpel flush so that there are no visible stray ends. I know I could do a seizing between the block and the eyebolt but I’m still struggling with seizings and I’m not sure at 1:64 if it’s really visible without a macro lens. It’s the several blocks on the Ranger with beckets (rope eyelets under the block) that are still stumping me. I can make the eyelets. The first step is hammering 2-3 small nails (the ones supplied for holding the first layer of planking) very close together to form the “mold” for the becket, cutting off their heads. I have some photos of two I’ve used. One just has the mold for the becket, the other also has a nearby nail to hold the block. The simplest approach is just to do a half hitch around the “mold” and add a little CA to hold the becket (rope eyelets that will go under the block). That gives a rope with a small eyelet. Then I can do a loose half hitch, position the block in the opening in that knot, and cinch tight, adding CA. That would work for a “floating” block with a becket at the bottom (if I trimmed the ends of the line), but I need to then tie the block-with-becket to an eyebolt. I could just do a half hitch to tie the block-with-becket to the eyebolt. Maybe that will look fine with some fiddling. Is that a simple thing folks commonly do? I tried doing the seizing method I illustrated earlier from another log. Maybe it just takes more practice getting the seizings to work. I’m using Veevus 16:0 line (bought from Stockard Fly Fishing) for seizings. I got a couple tries maybe 75% of the way there, both trying to do the seizing wraps directly on the line or doing the approach Olha uses (wrapping the line around her finger and going a “pre-seizing” and then positioning the loop where it needs to go and tightening). I’m not happy with 75%. I’m sure practice can get me to more like 90%. Are there other ways to do a block-with-becket attached to an eyebolt that I should try?


- 133 replies
-
- 3
-
-
- Ranger
- vanguard models
- (and 1 more)
-
I've read a bunch of posts about how to glue rigging lines and tried a few things. I tried white glue and it does take a while for it to hold. Not working well with polyester thread is another problem. Thanks for that. I might try using a little thin CA instead to set the line. Others have recommended instead using shellac. I wonder if there's any problem using a little CA to set the line and then using a light touch of shellac after the rigged piece is done (line and block). Shellac seems a little slow to set. A combination of little CA to set the line and shellac over some rigging (including a mast or yard) seems to be what Olha is doing in her builds too.
- 133 replies
-
- 2
-
-
- Ranger
- vanguard models
- (and 1 more)