palmerit
-
Posts
1,120 -
Joined
-
Last visited
Content Type
Profiles
Forums
Gallery
Events
Everything posted by palmerit
-
Alcohol or acetone - potentially with a few applications - will work. You’ll want it to dry overnight before regluing. I got impatient trying to pry apart glued pieces and got a scalpel blade in my palm.
- 46 replies
-
- 2
-

-
- Dory
- Lowell Grand Banks Dory
- (and 3 more)
-
Tapering Masts and Arms the easy way
palmerit replied to Johnny Mike's topic in Masting, rigging and sails
This approach works if you have a constant taper - or just want to do the first pass at a taper and then fine tune. Some of tapered masts and yards I’ve had to do aren’t linear. -
Tapering Masts and Arms the easy way
palmerit replied to Johnny Mike's topic in Masting, rigging and sails
Another solution is to put an end of a dowel in a power drill (wrapping the end in paper of cloth so as not to intent it). Maybe that’s what you mean “by hand”. I use a clamp to keep the drill turning. Then use various grits of sandpaper to shape. Way better than trying to do it by hand, with a blade, or with a plane - at least for me. Need digital calipers to measure. This approach could work great so long as you get the angle right on the pieces (and could be more efficient) - if you have a power sander (I have one for big pieces, my hobby one is a non-powered Ultimation). -
Planking problems
palmerit replied to Mrgj24's topic in Building, Framing, Planking and plating a ships hull and deck
Pretty common problem. I’ve been there. To avoid this, a few things: - read whatever you can here and elsewhere about planking and find videos online - e.g., under “Modeling Techniques” at the top of this site, you’ll find links to info about planking - you’re doing full width planks all the way (or it seems like you are) and these may need to be tapered a bit (thinner near the bow than mid- ship), but never thinner that half the plank width - you like need to do some edge bending too (using a heat source like a plank bender, soldering iron, travel iron) with a bit of water - this is bending in the direction planks don’t naturally want to bend - you can achieve it with clamps, heat, water, practice - most models don’t give great guidance on how to shape and bend planks Getting planking right is probably the hardest aspect of ship modeling - it is more me. If you look at my Sherbourne it has huge gaps. You can “fix” the problem with lots of wood filler and sanding. I’d suggest trying to remove the planks and trying again, using alcohol or acetone to release the glue. -
I do like that Model Expo has a reasonable replacement policy. I wish they’d improve their quality assurance. I’ve had to get several things replaced.
-
When creating a new build log for myself, I usually search for other builds either on modelshipworld itself or on google by typing in the name of the model and using site:modelshipworld.com (such as "grand banks dory site:modelshipworld.com") to see how others have tagged their build logs (and try to use the tags most build logs have used). The primary way I search for other build logs of a model I'm working on is by using tags. I'm sure I've probably missed some potentially useful build logs that don't use tags.
-
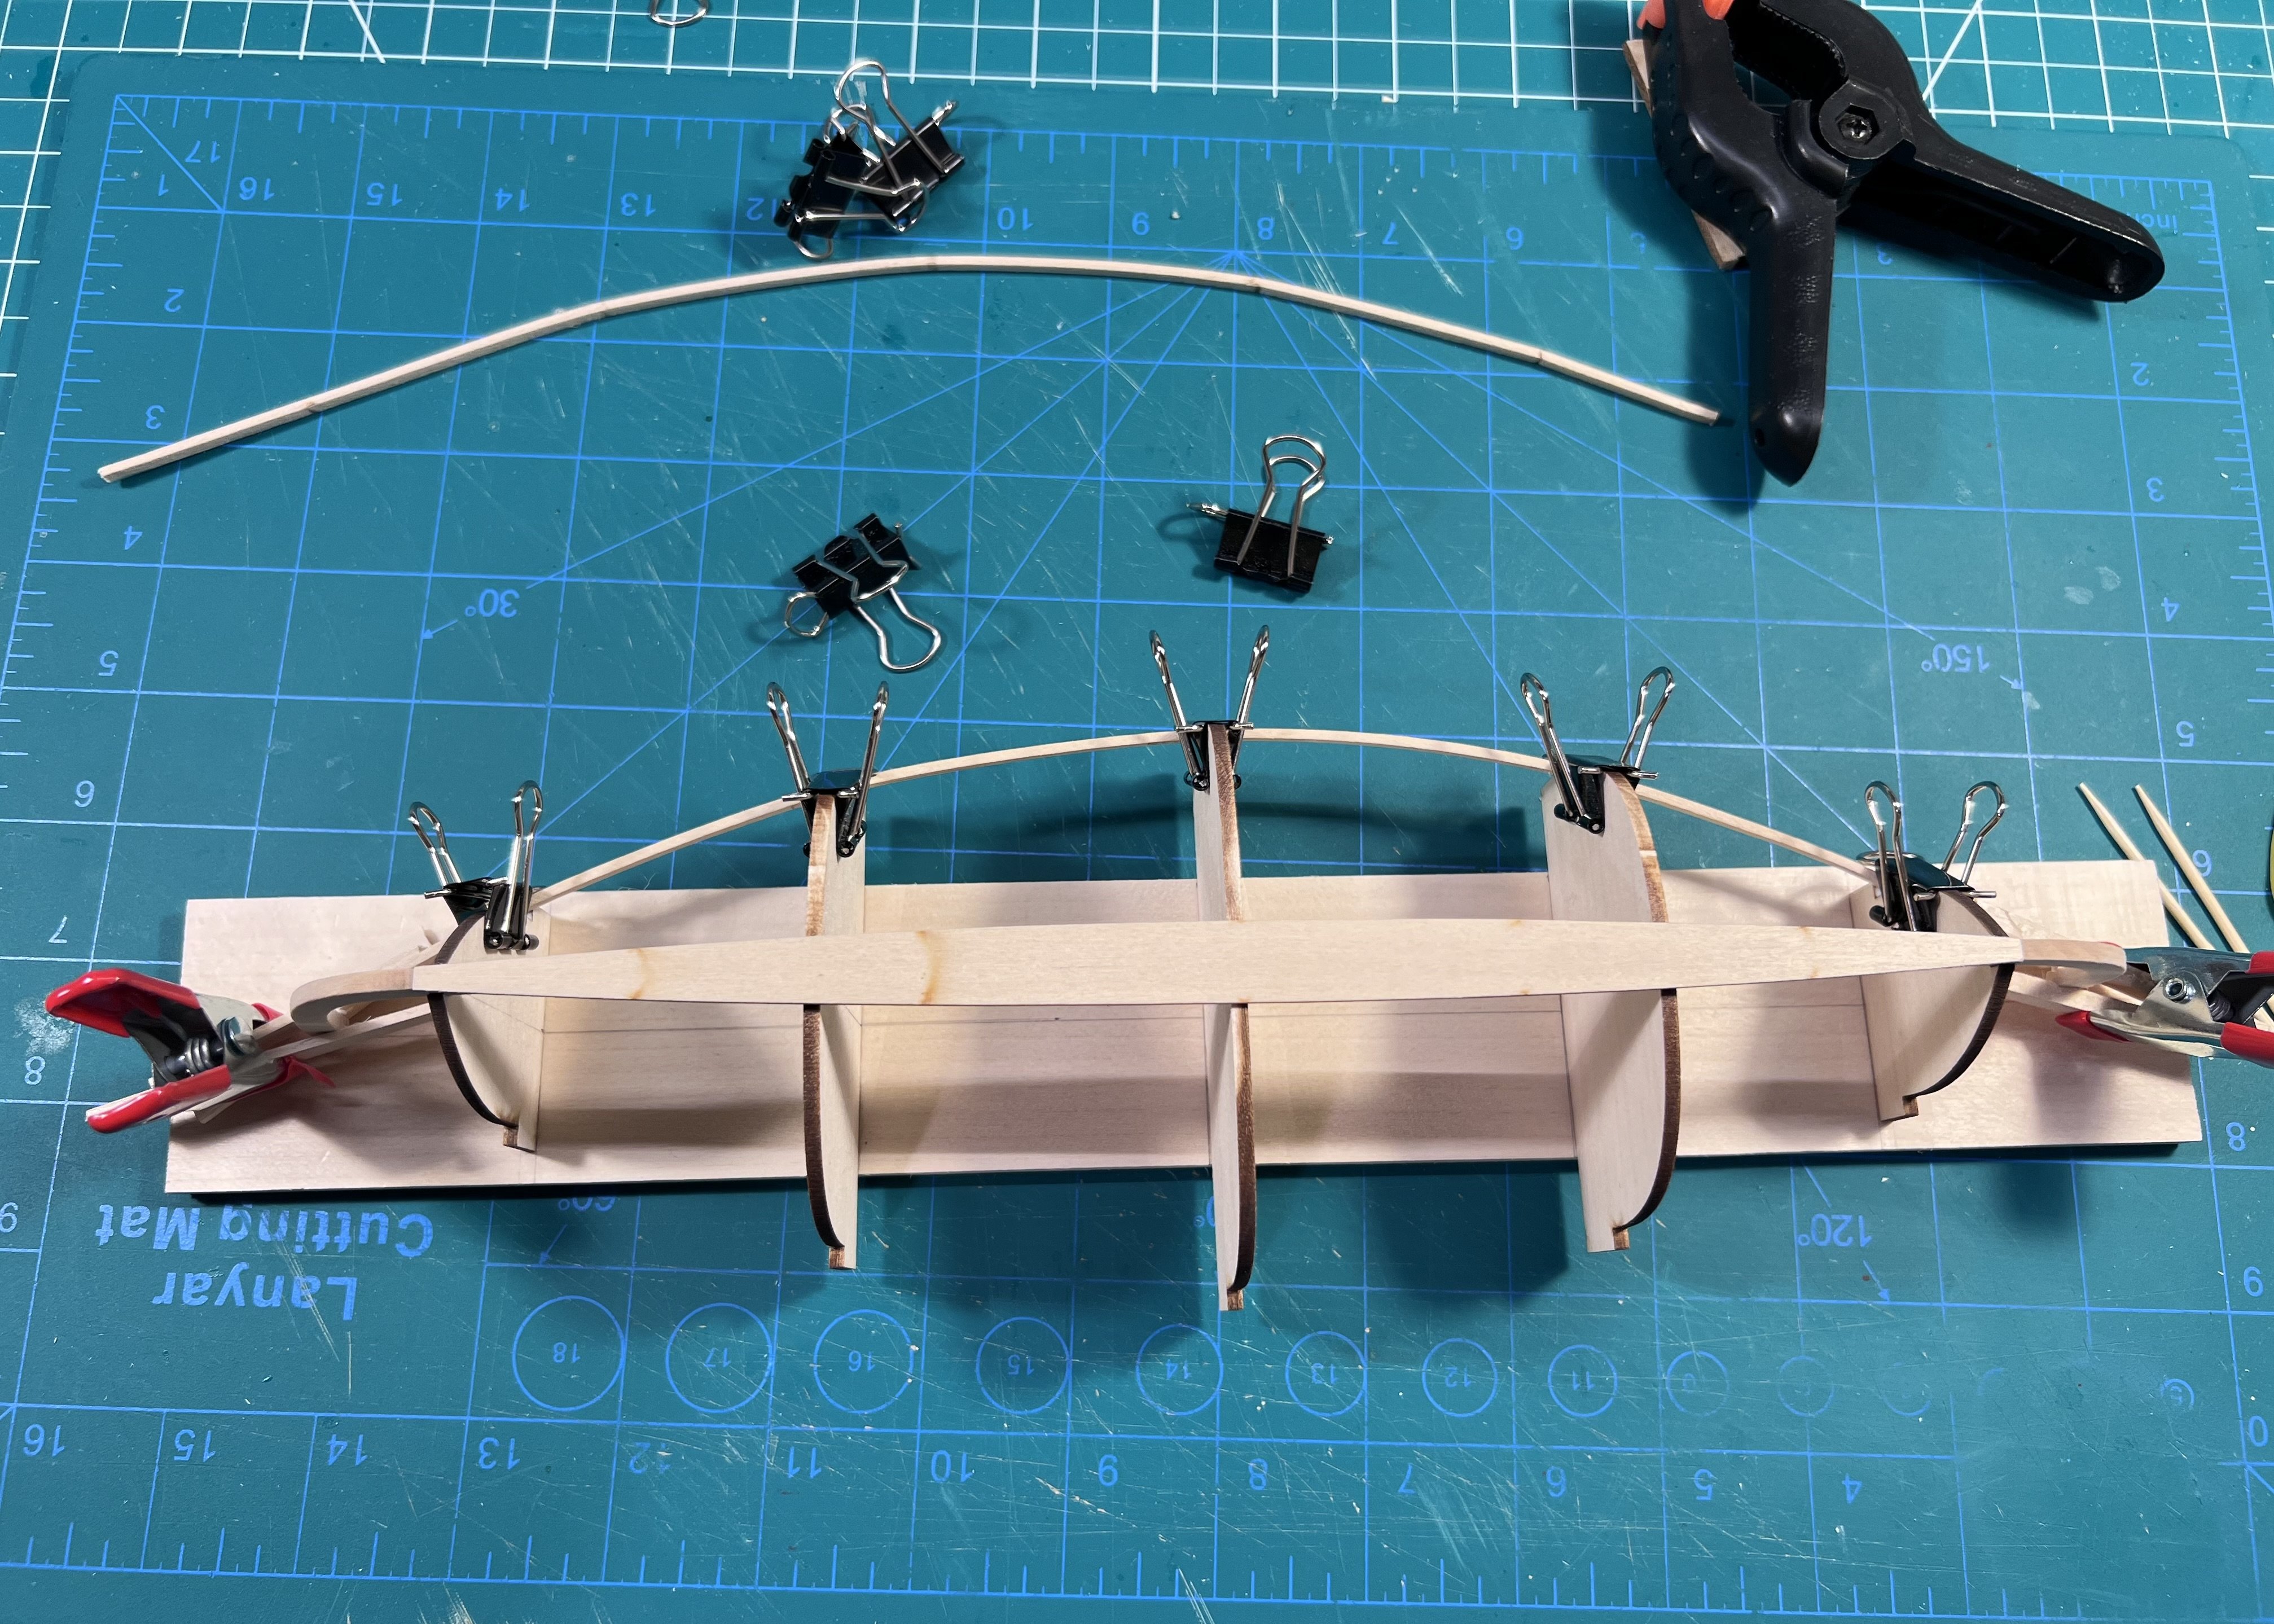
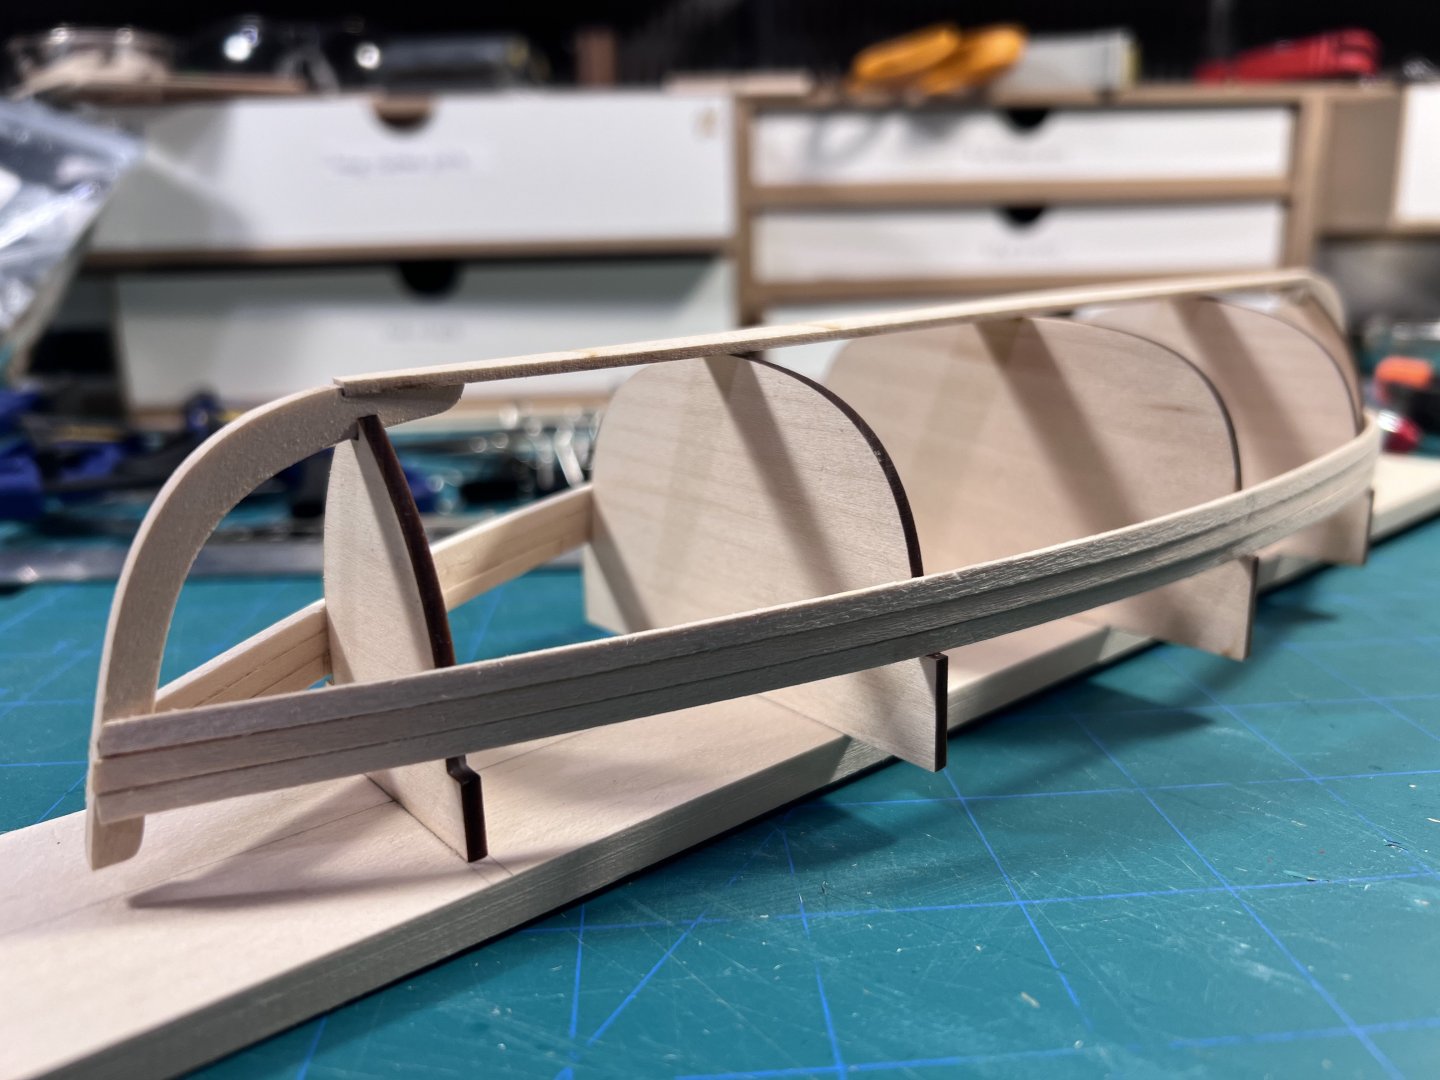
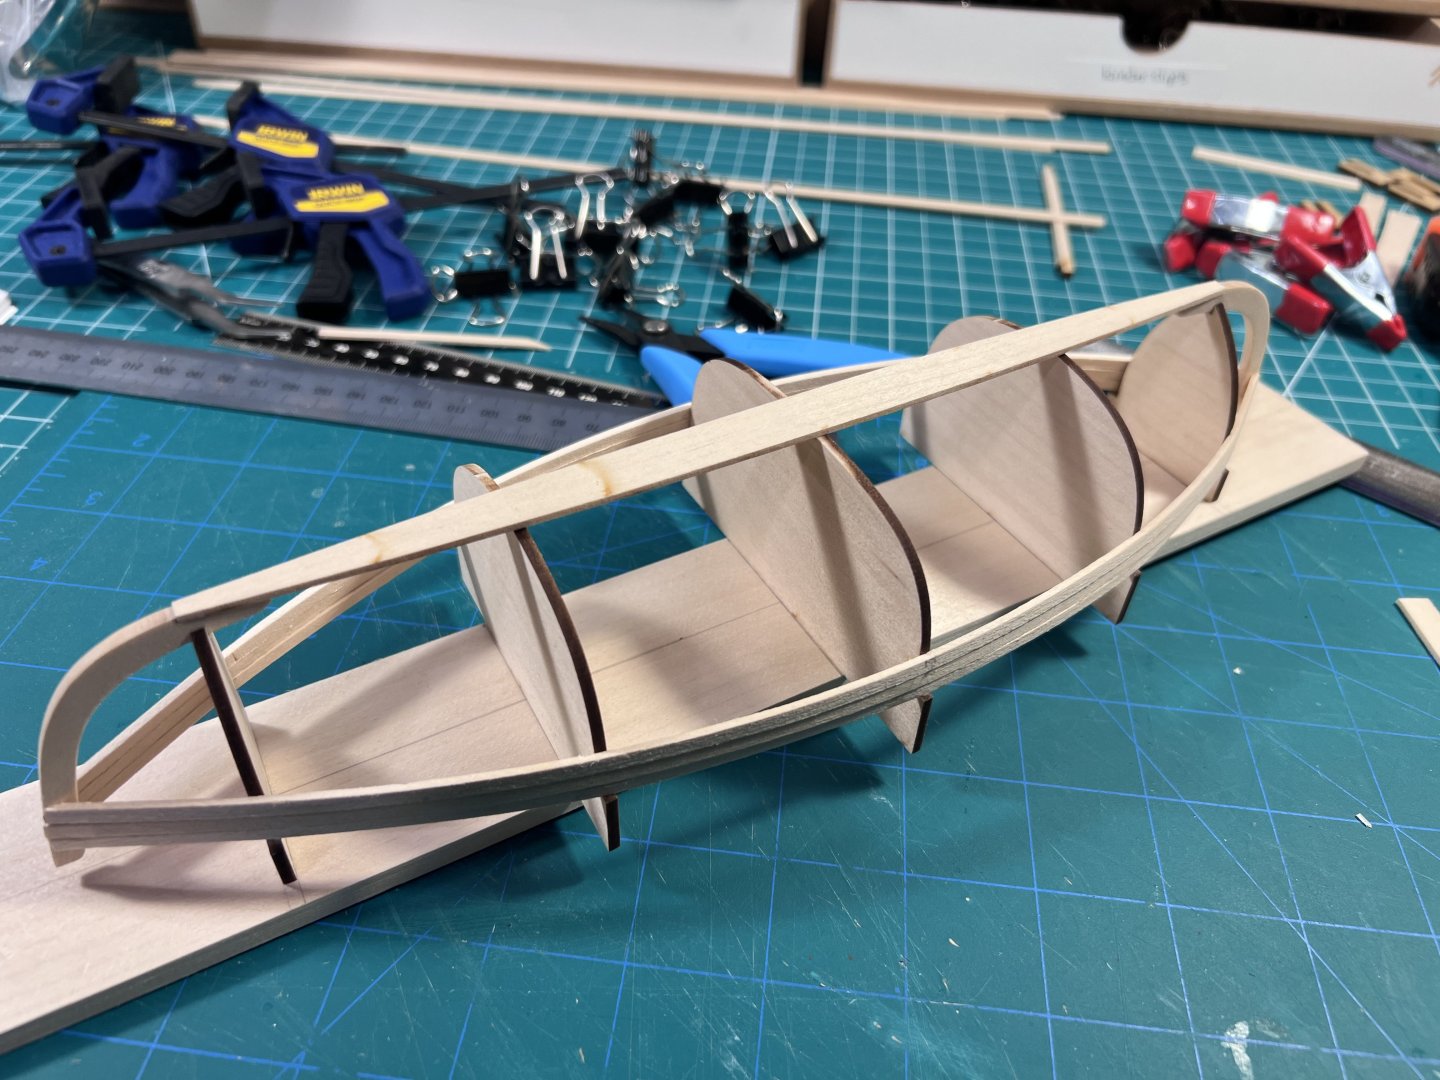
Added the keel pieces, which forms the rabbet for the second layer of planking.


- 51 replies
-
- 3
-
-
- Lady Isabella
- zulu
- (and 1 more)
-
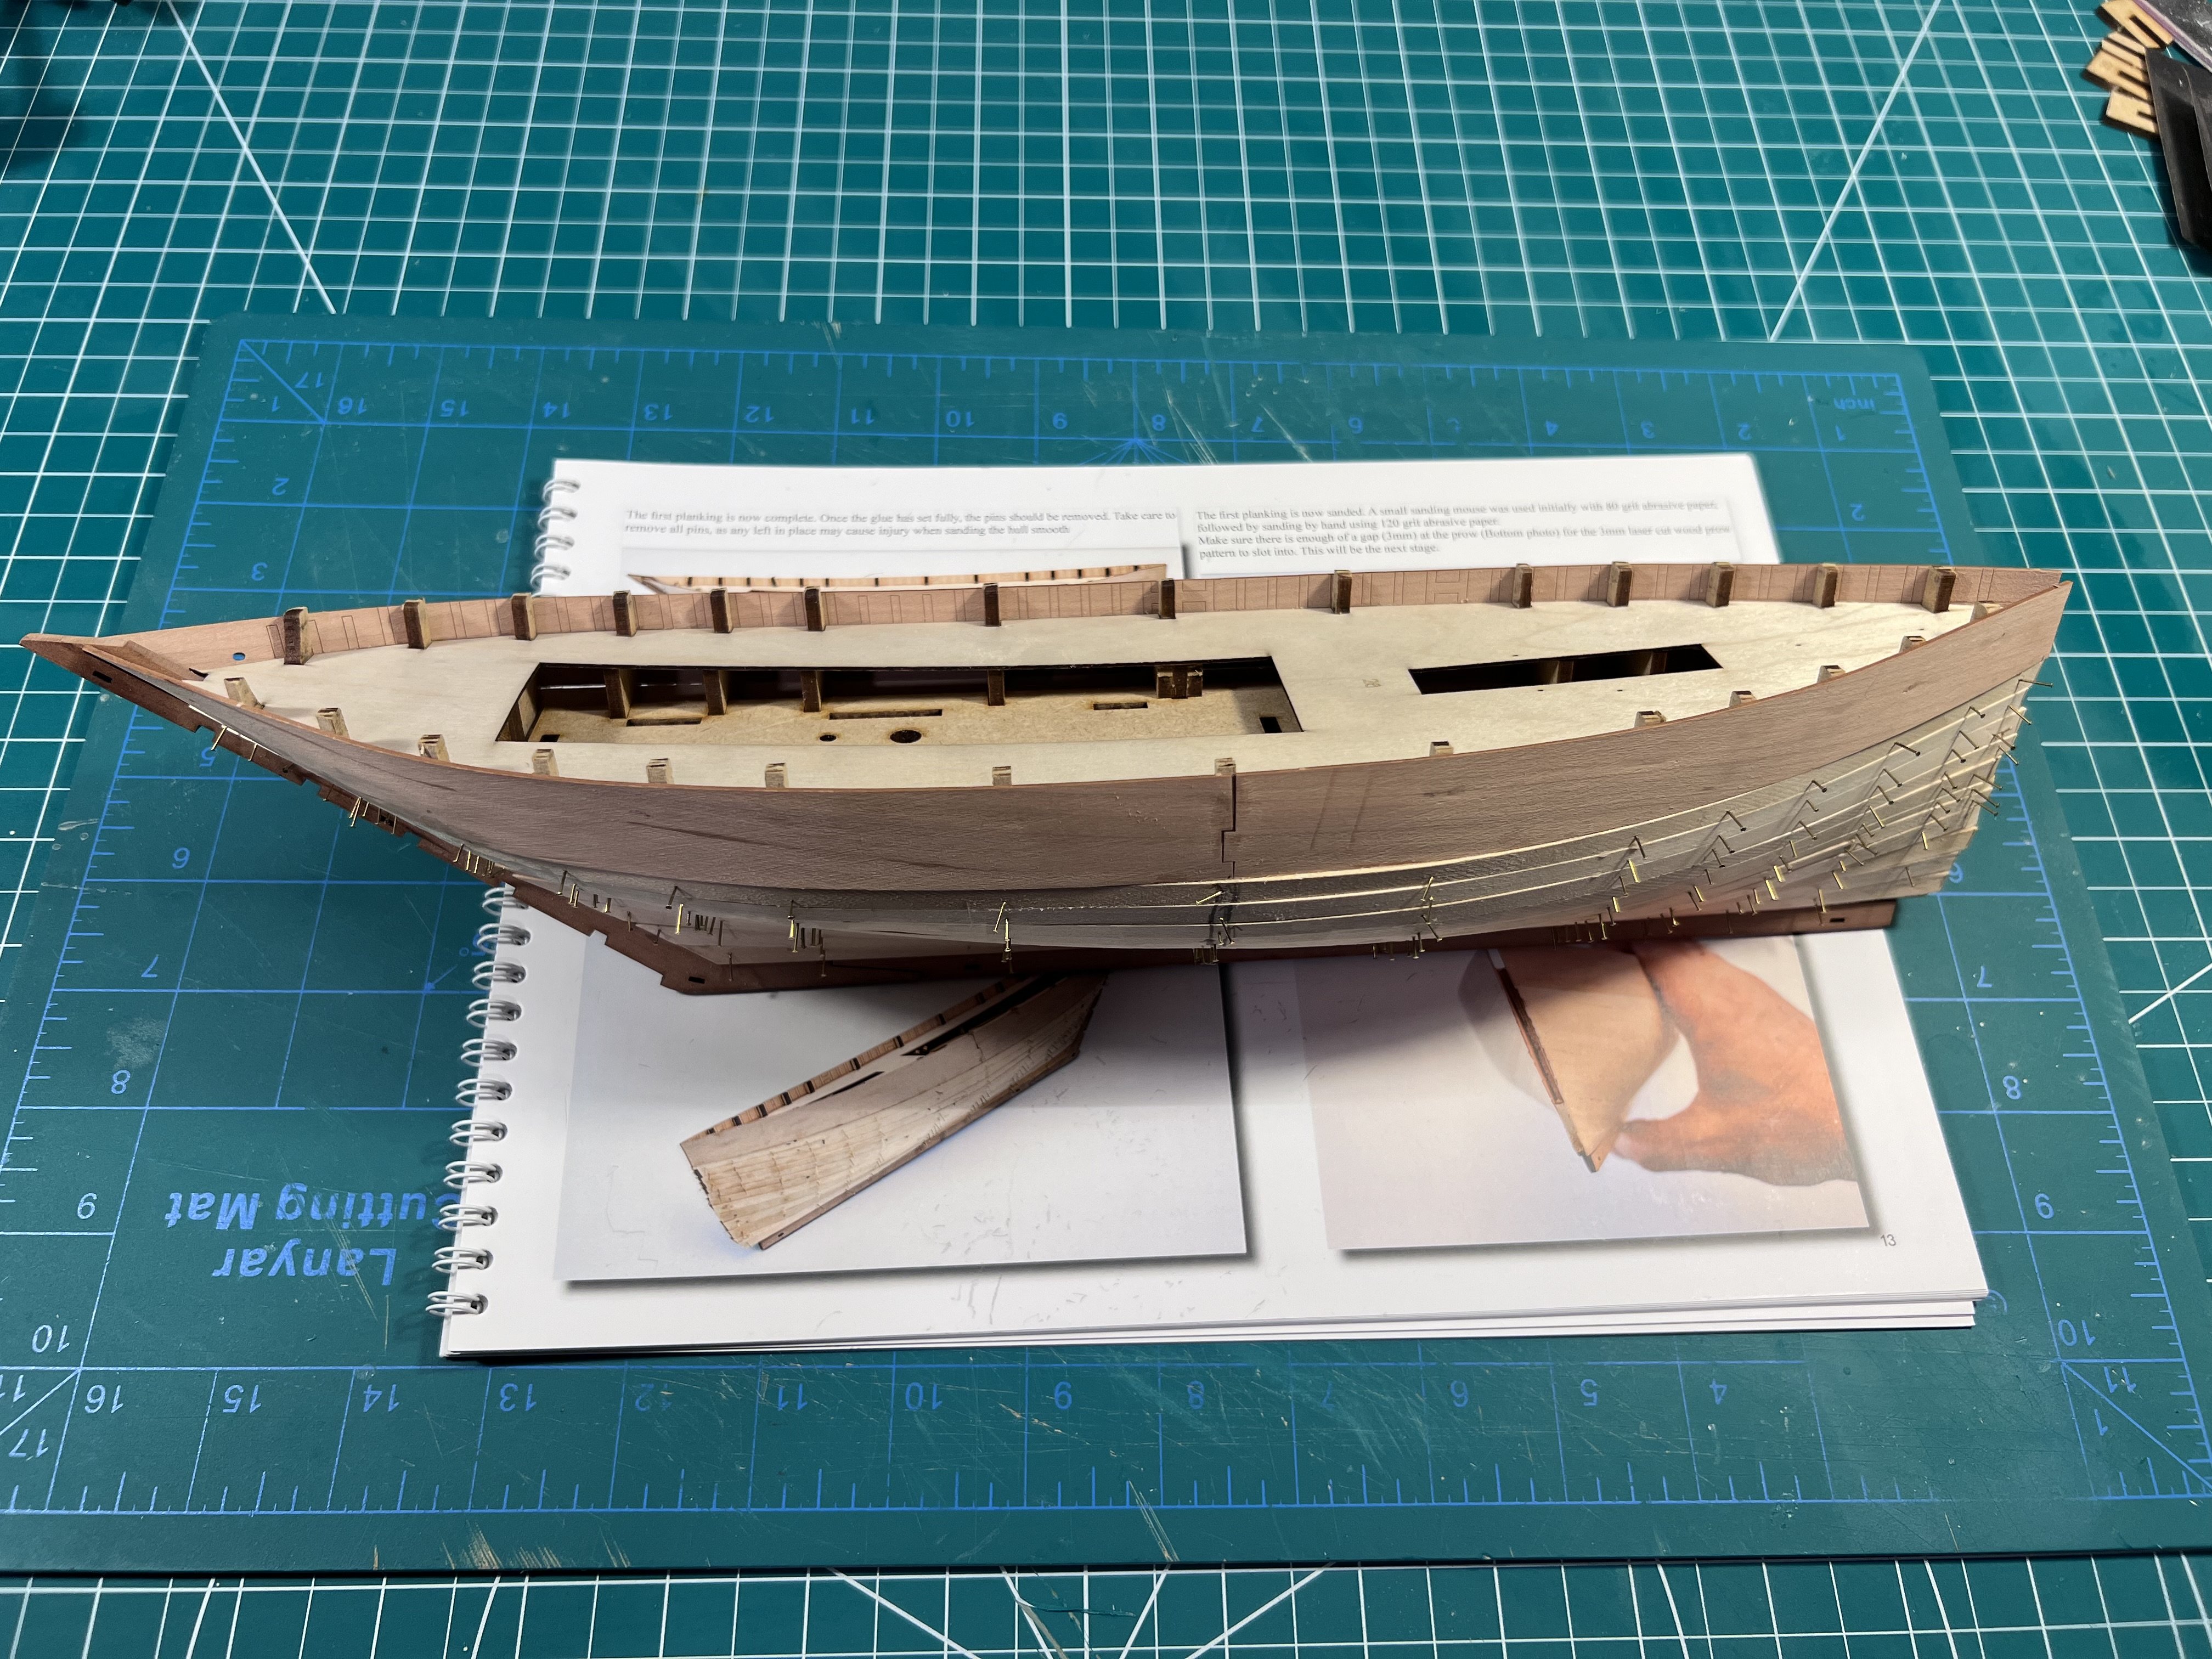
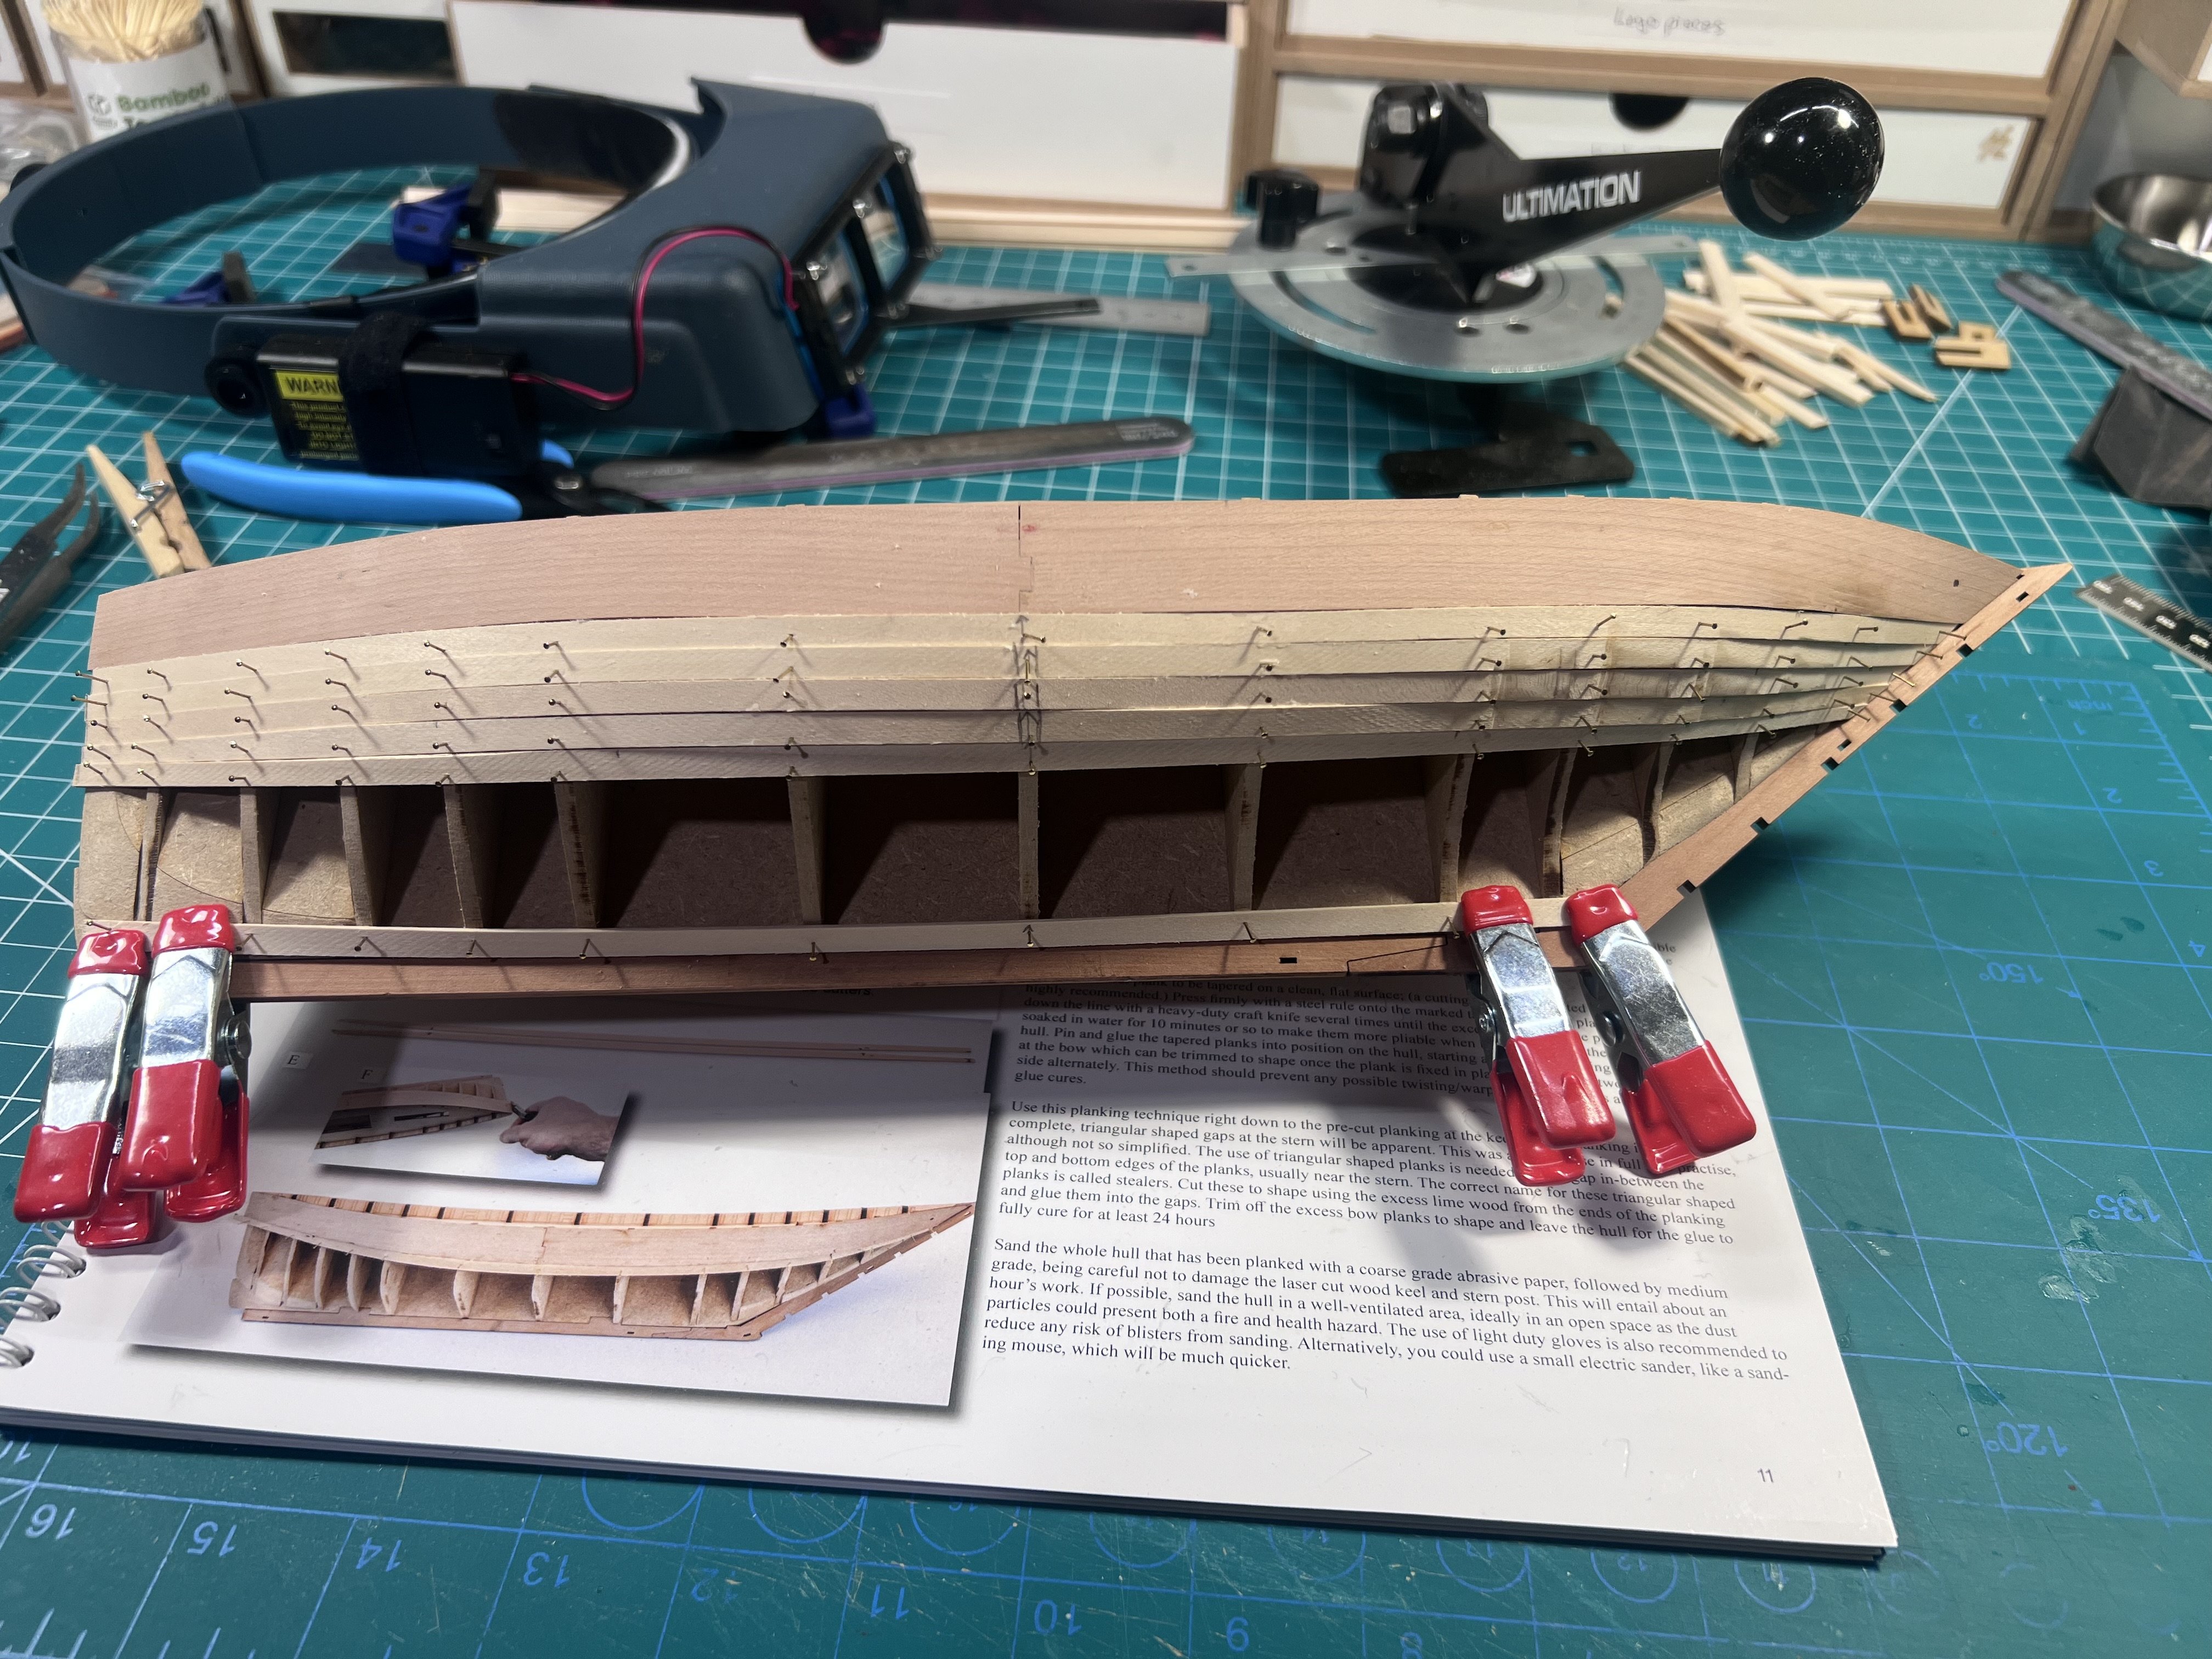
Sanding down the first layer of planking. I might need to adjust a bit when adding the next layer of keel sections before the second layer of planking can be added.
- 51 replies
-
- 2
-
-
- Lady Isabella
- zulu
- (and 1 more)
-
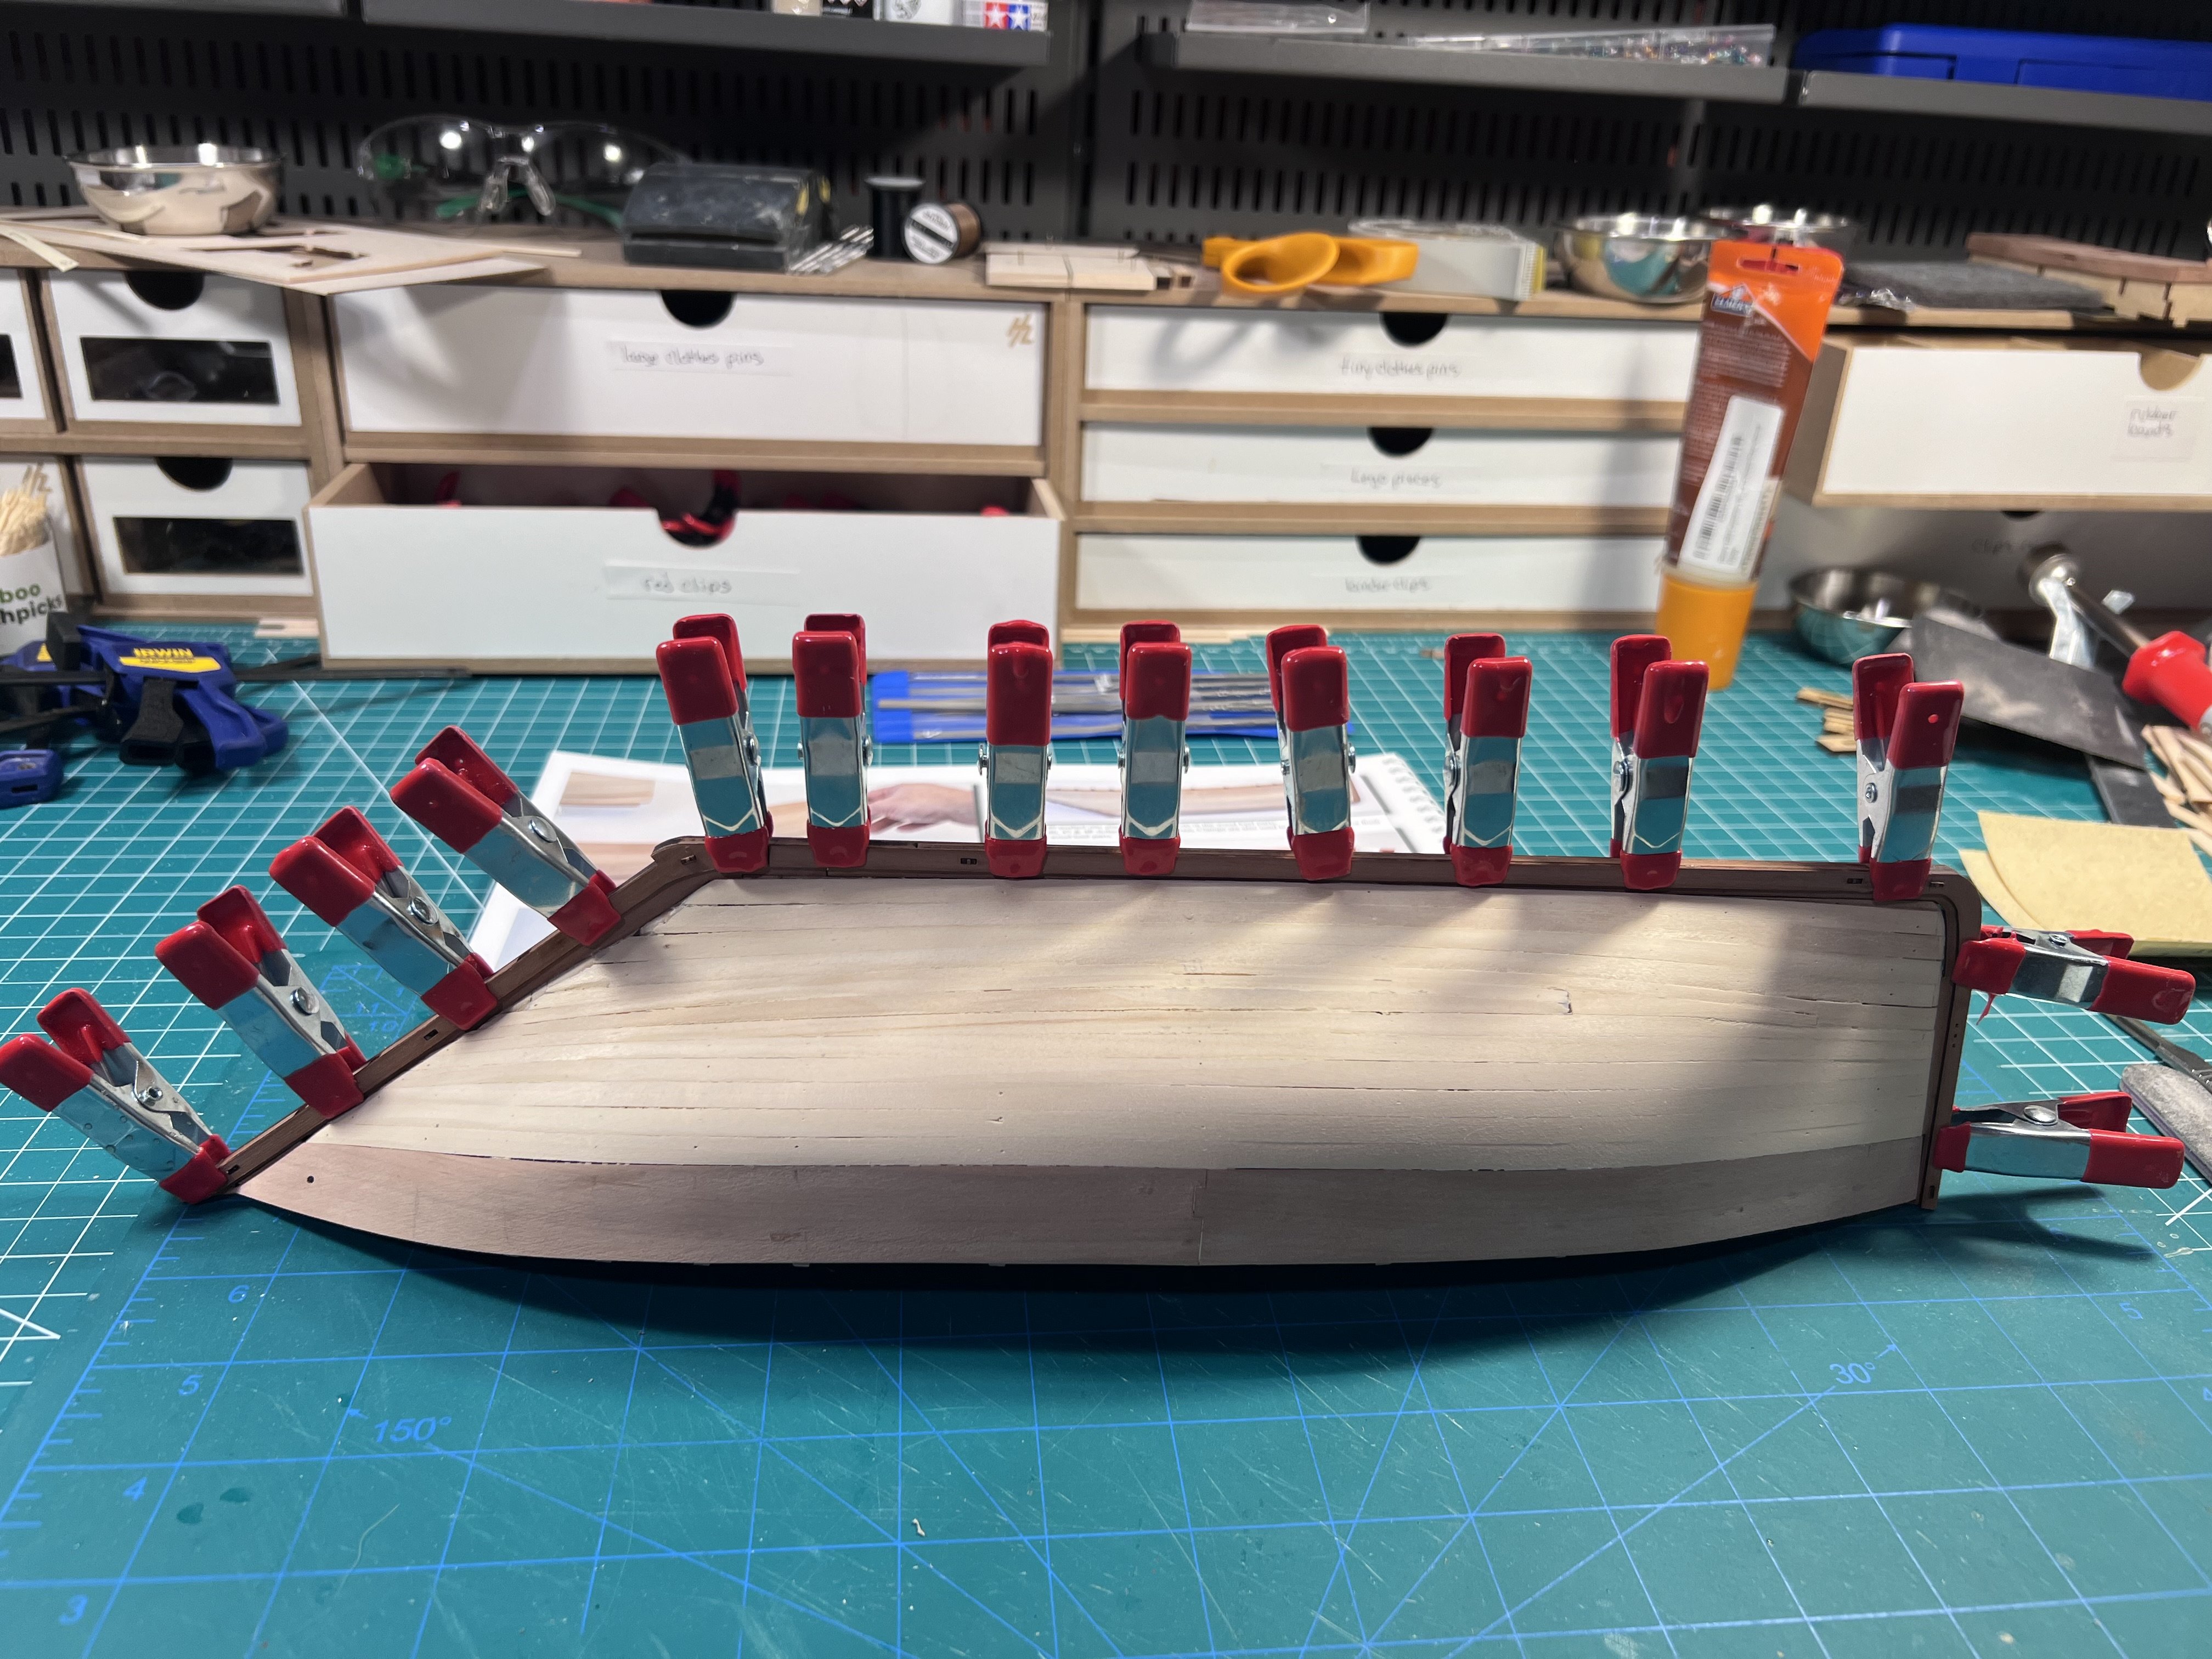
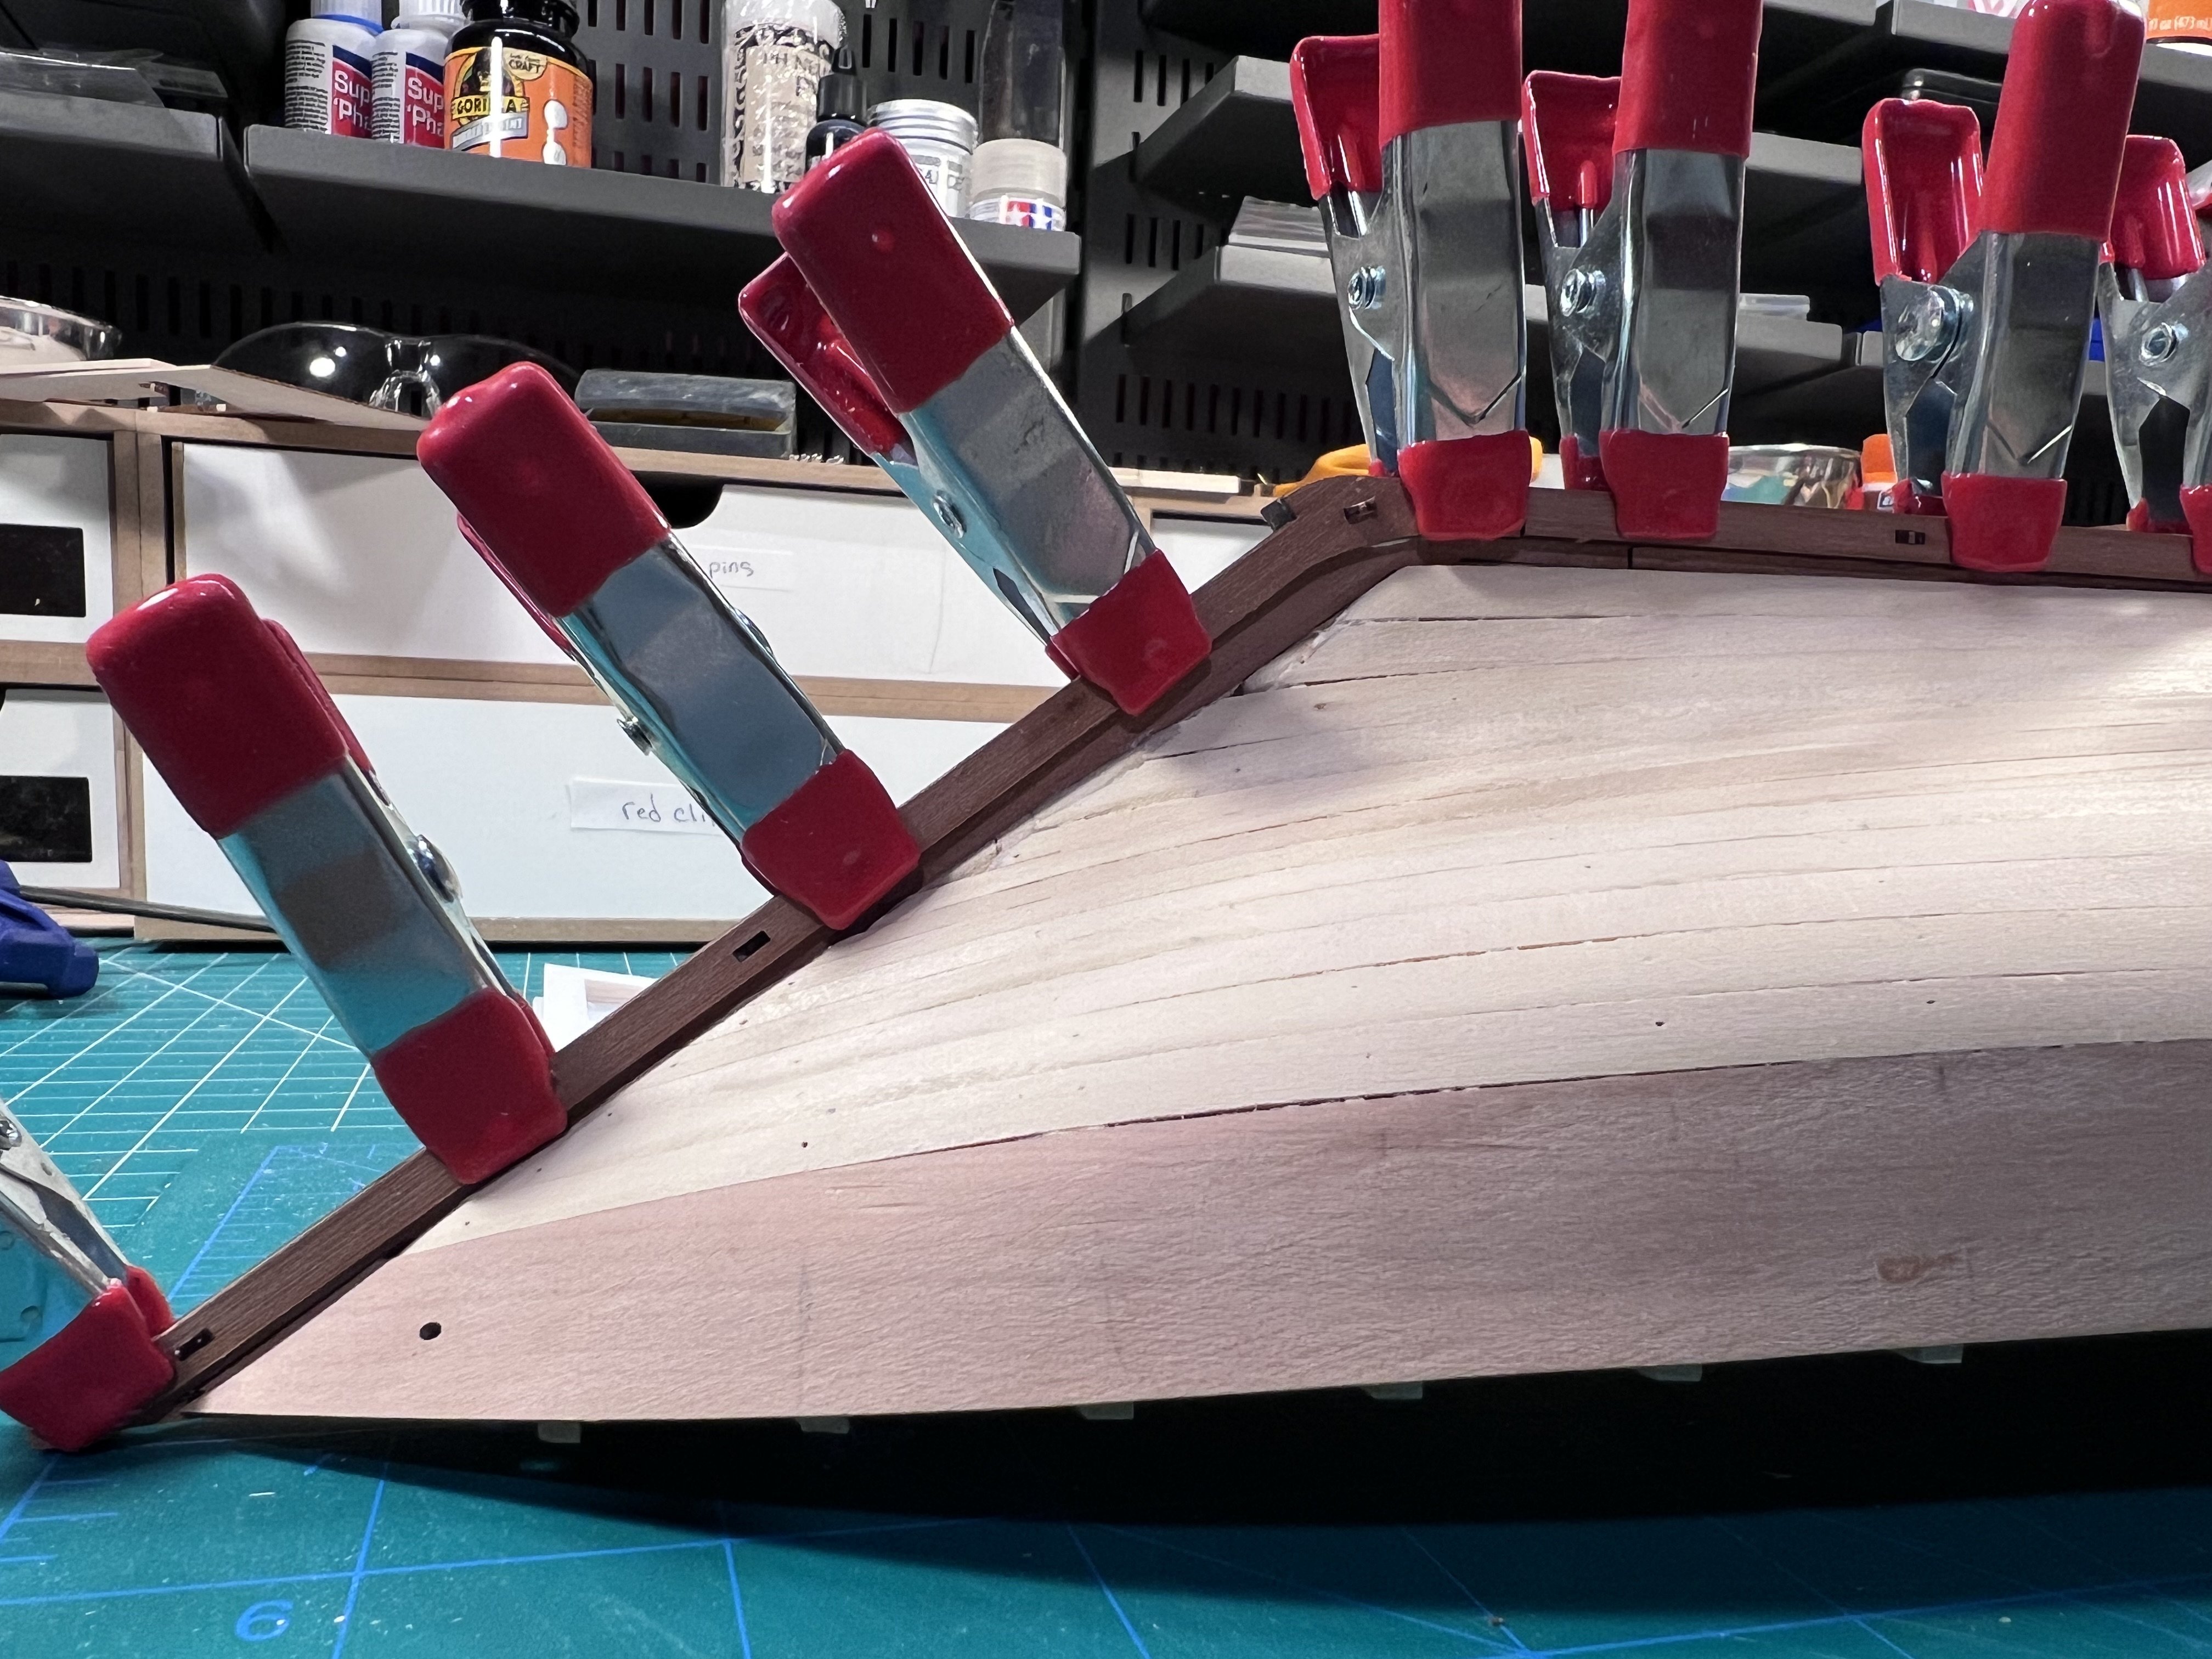
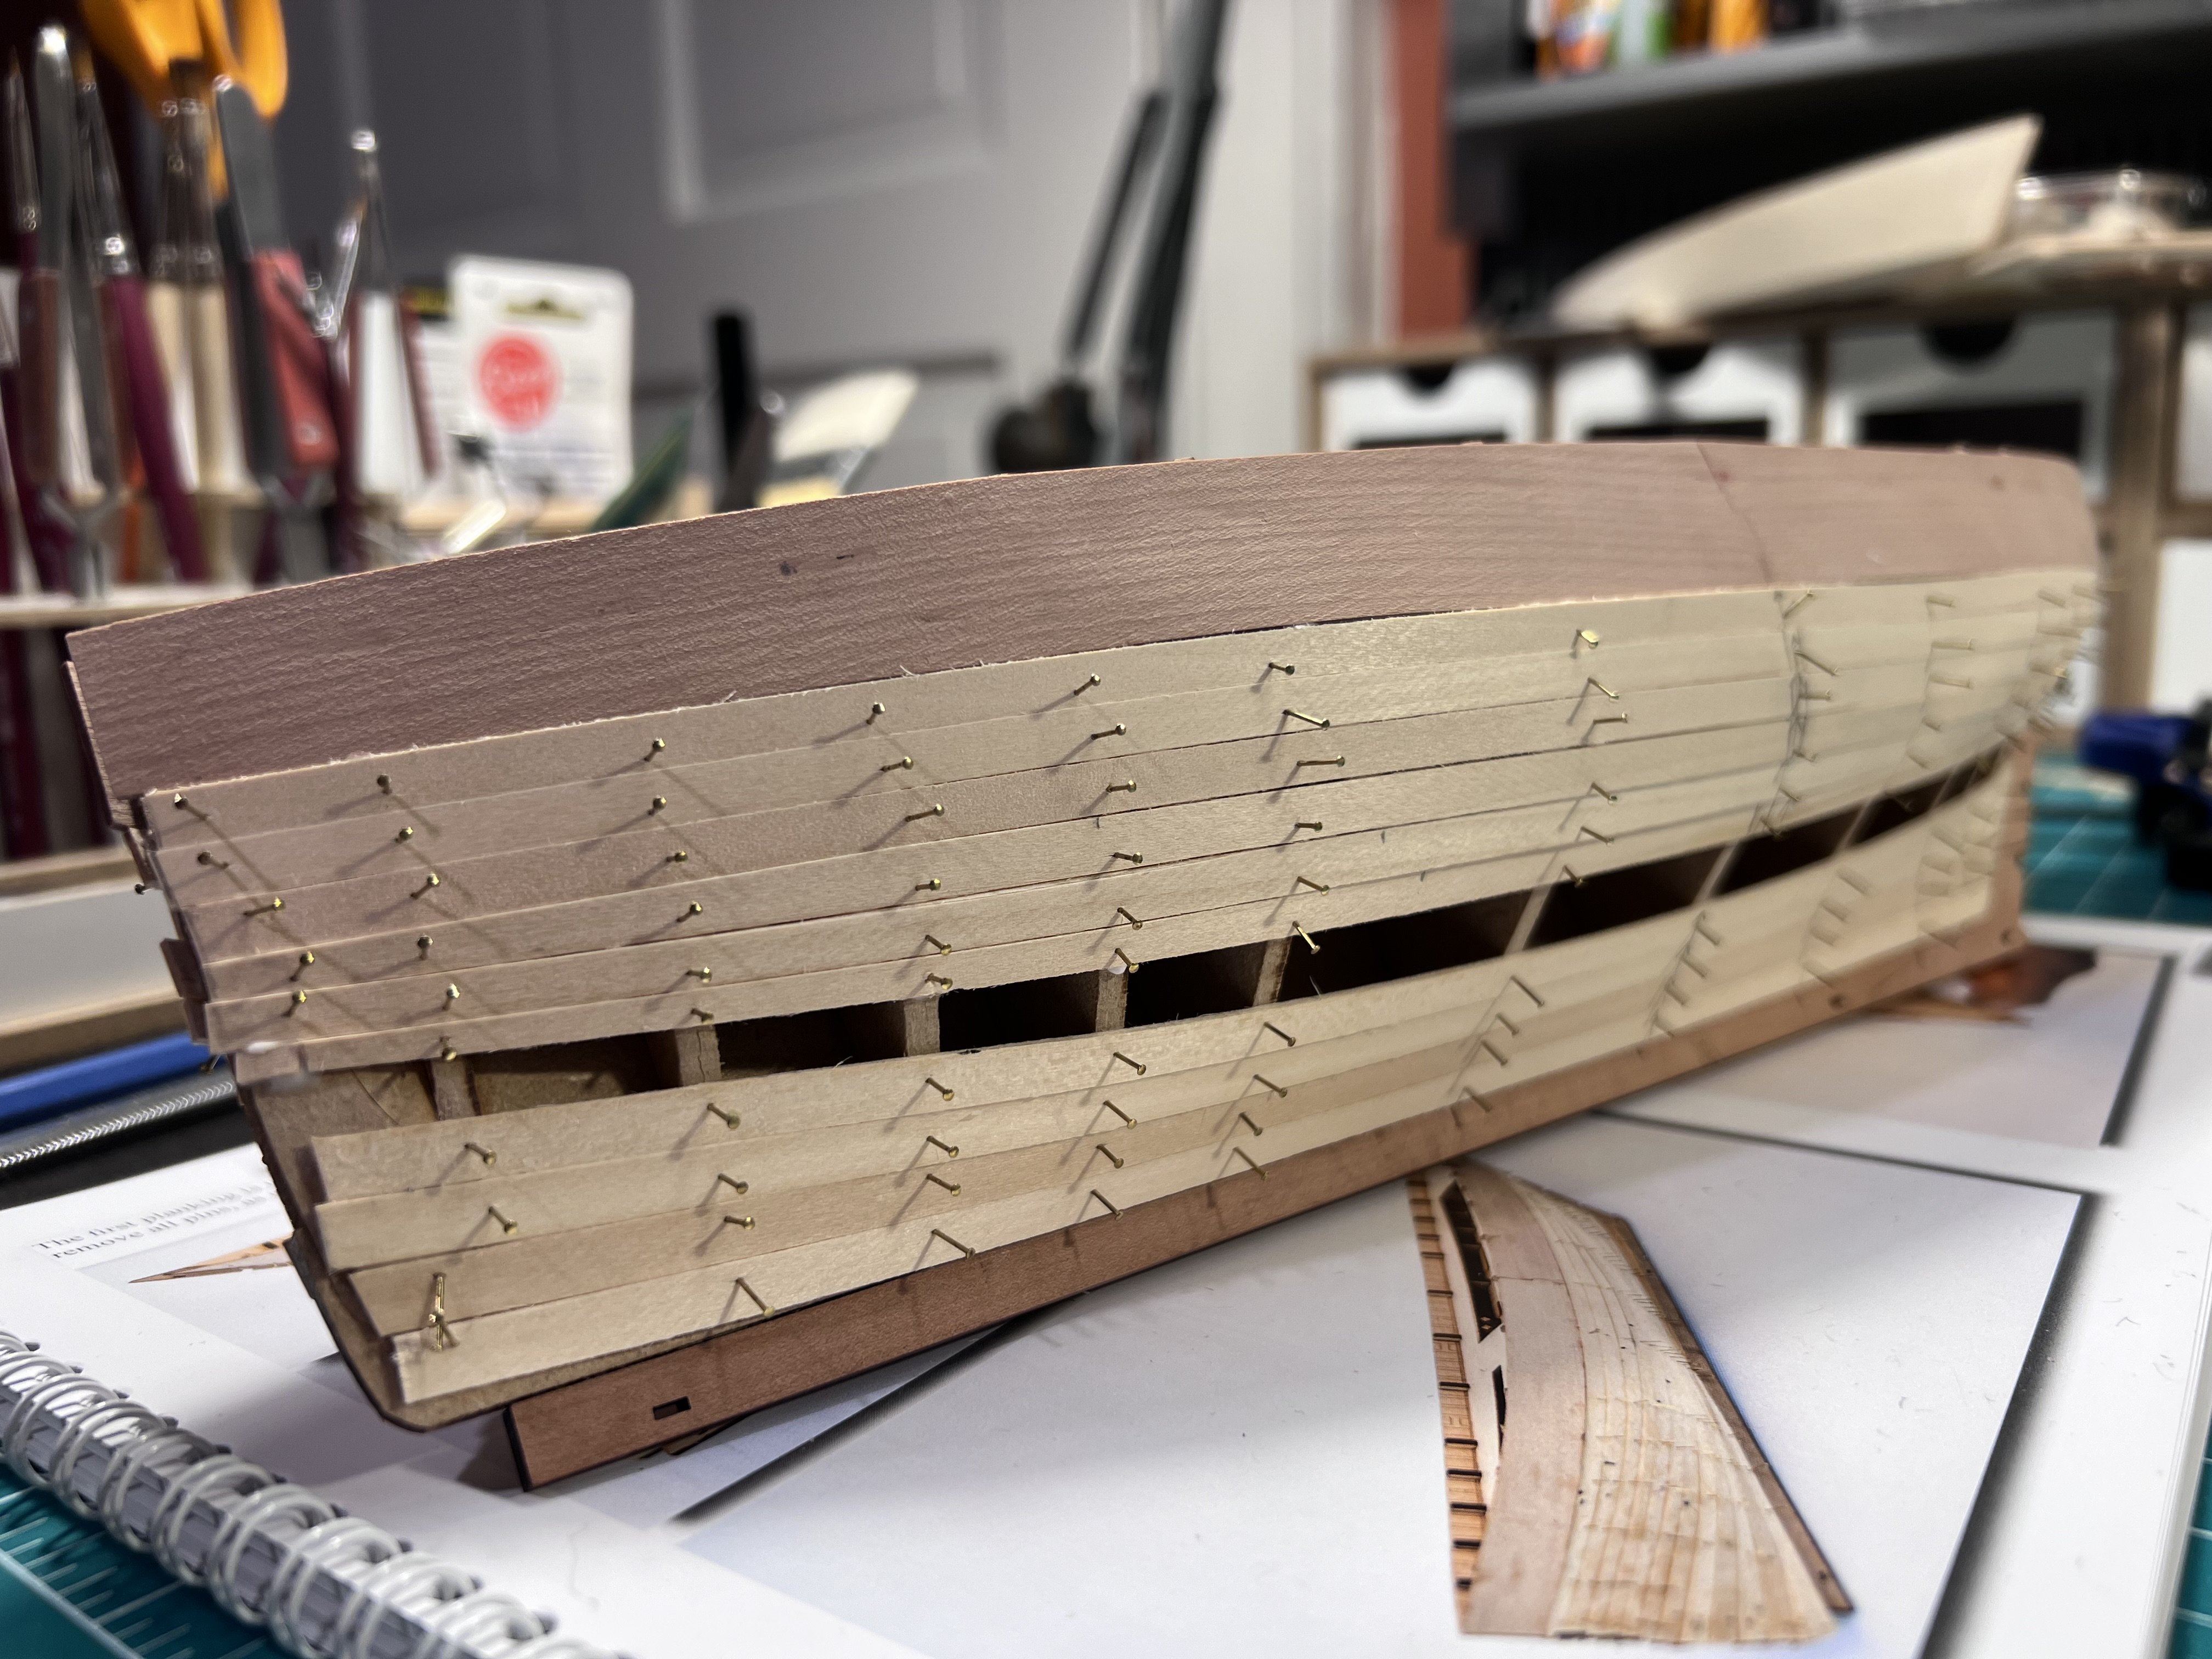
First planking done. Next step will be removing the pins and doing some sanding - I’ll do a little bit of filling in a few places just to not have any gaps for when I put on the second planking.

- 51 replies
-
- 5
-
-
- Lady Isabella
- zulu
- (and 1 more)
-
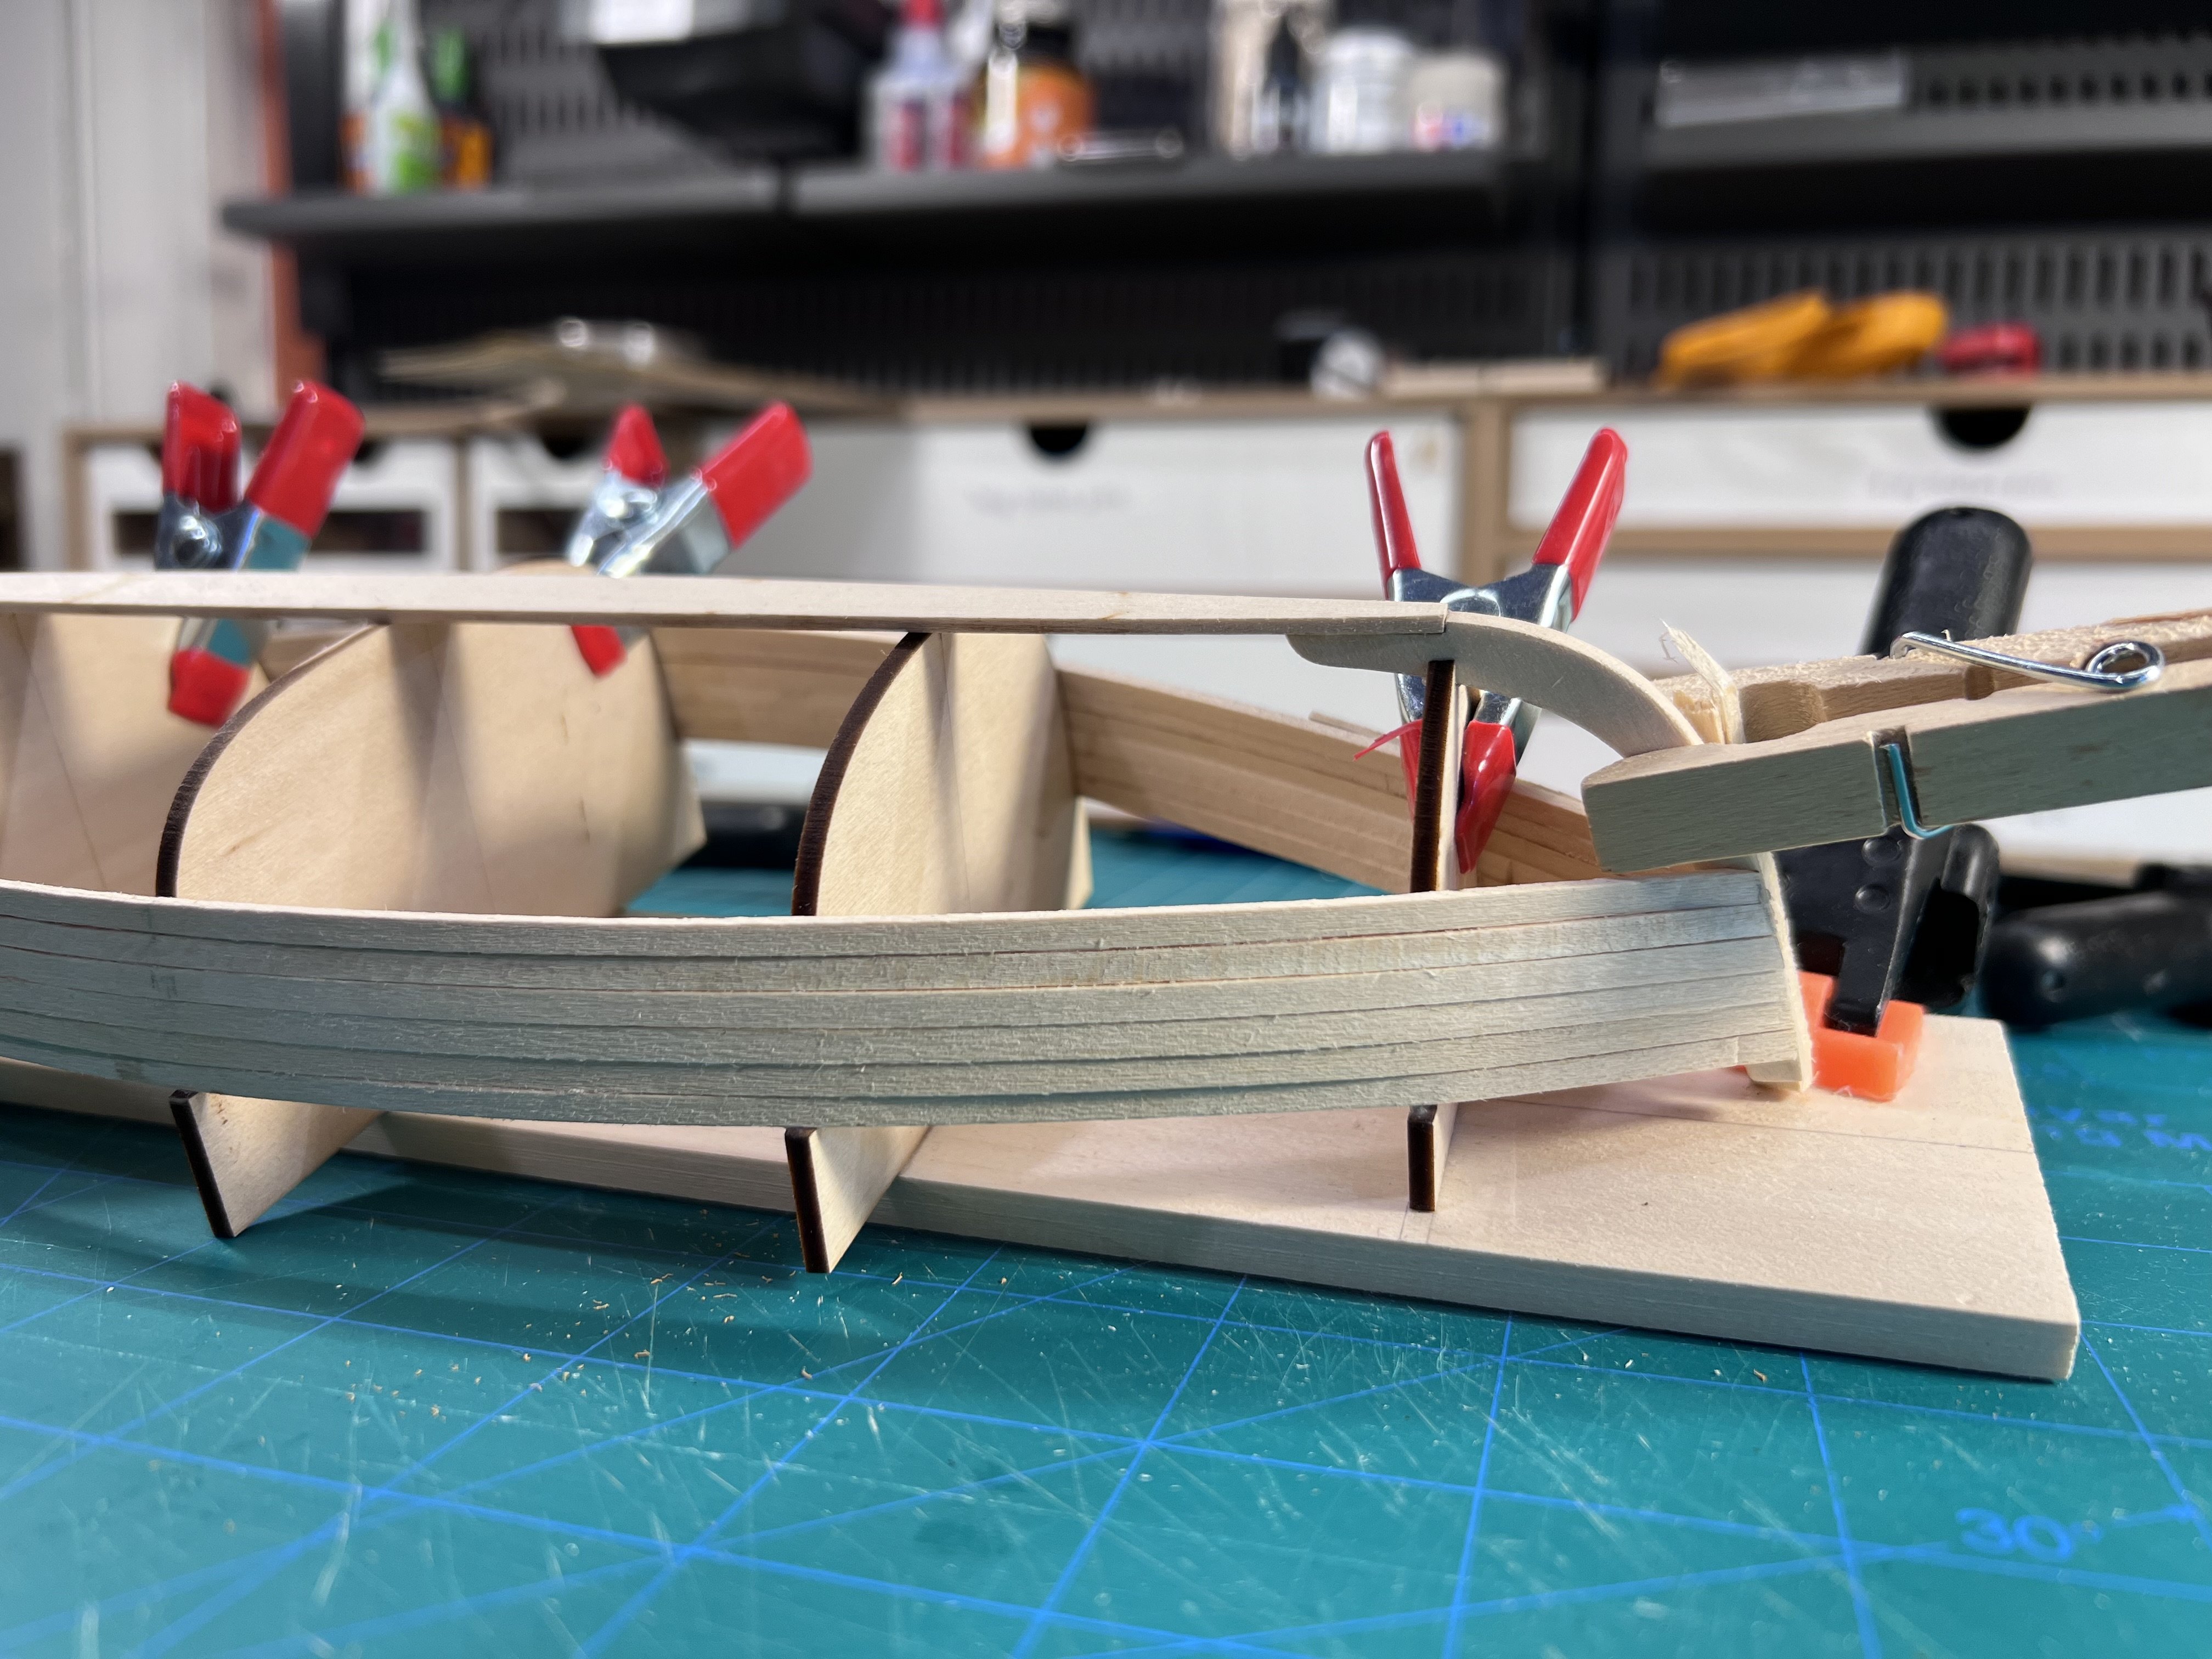
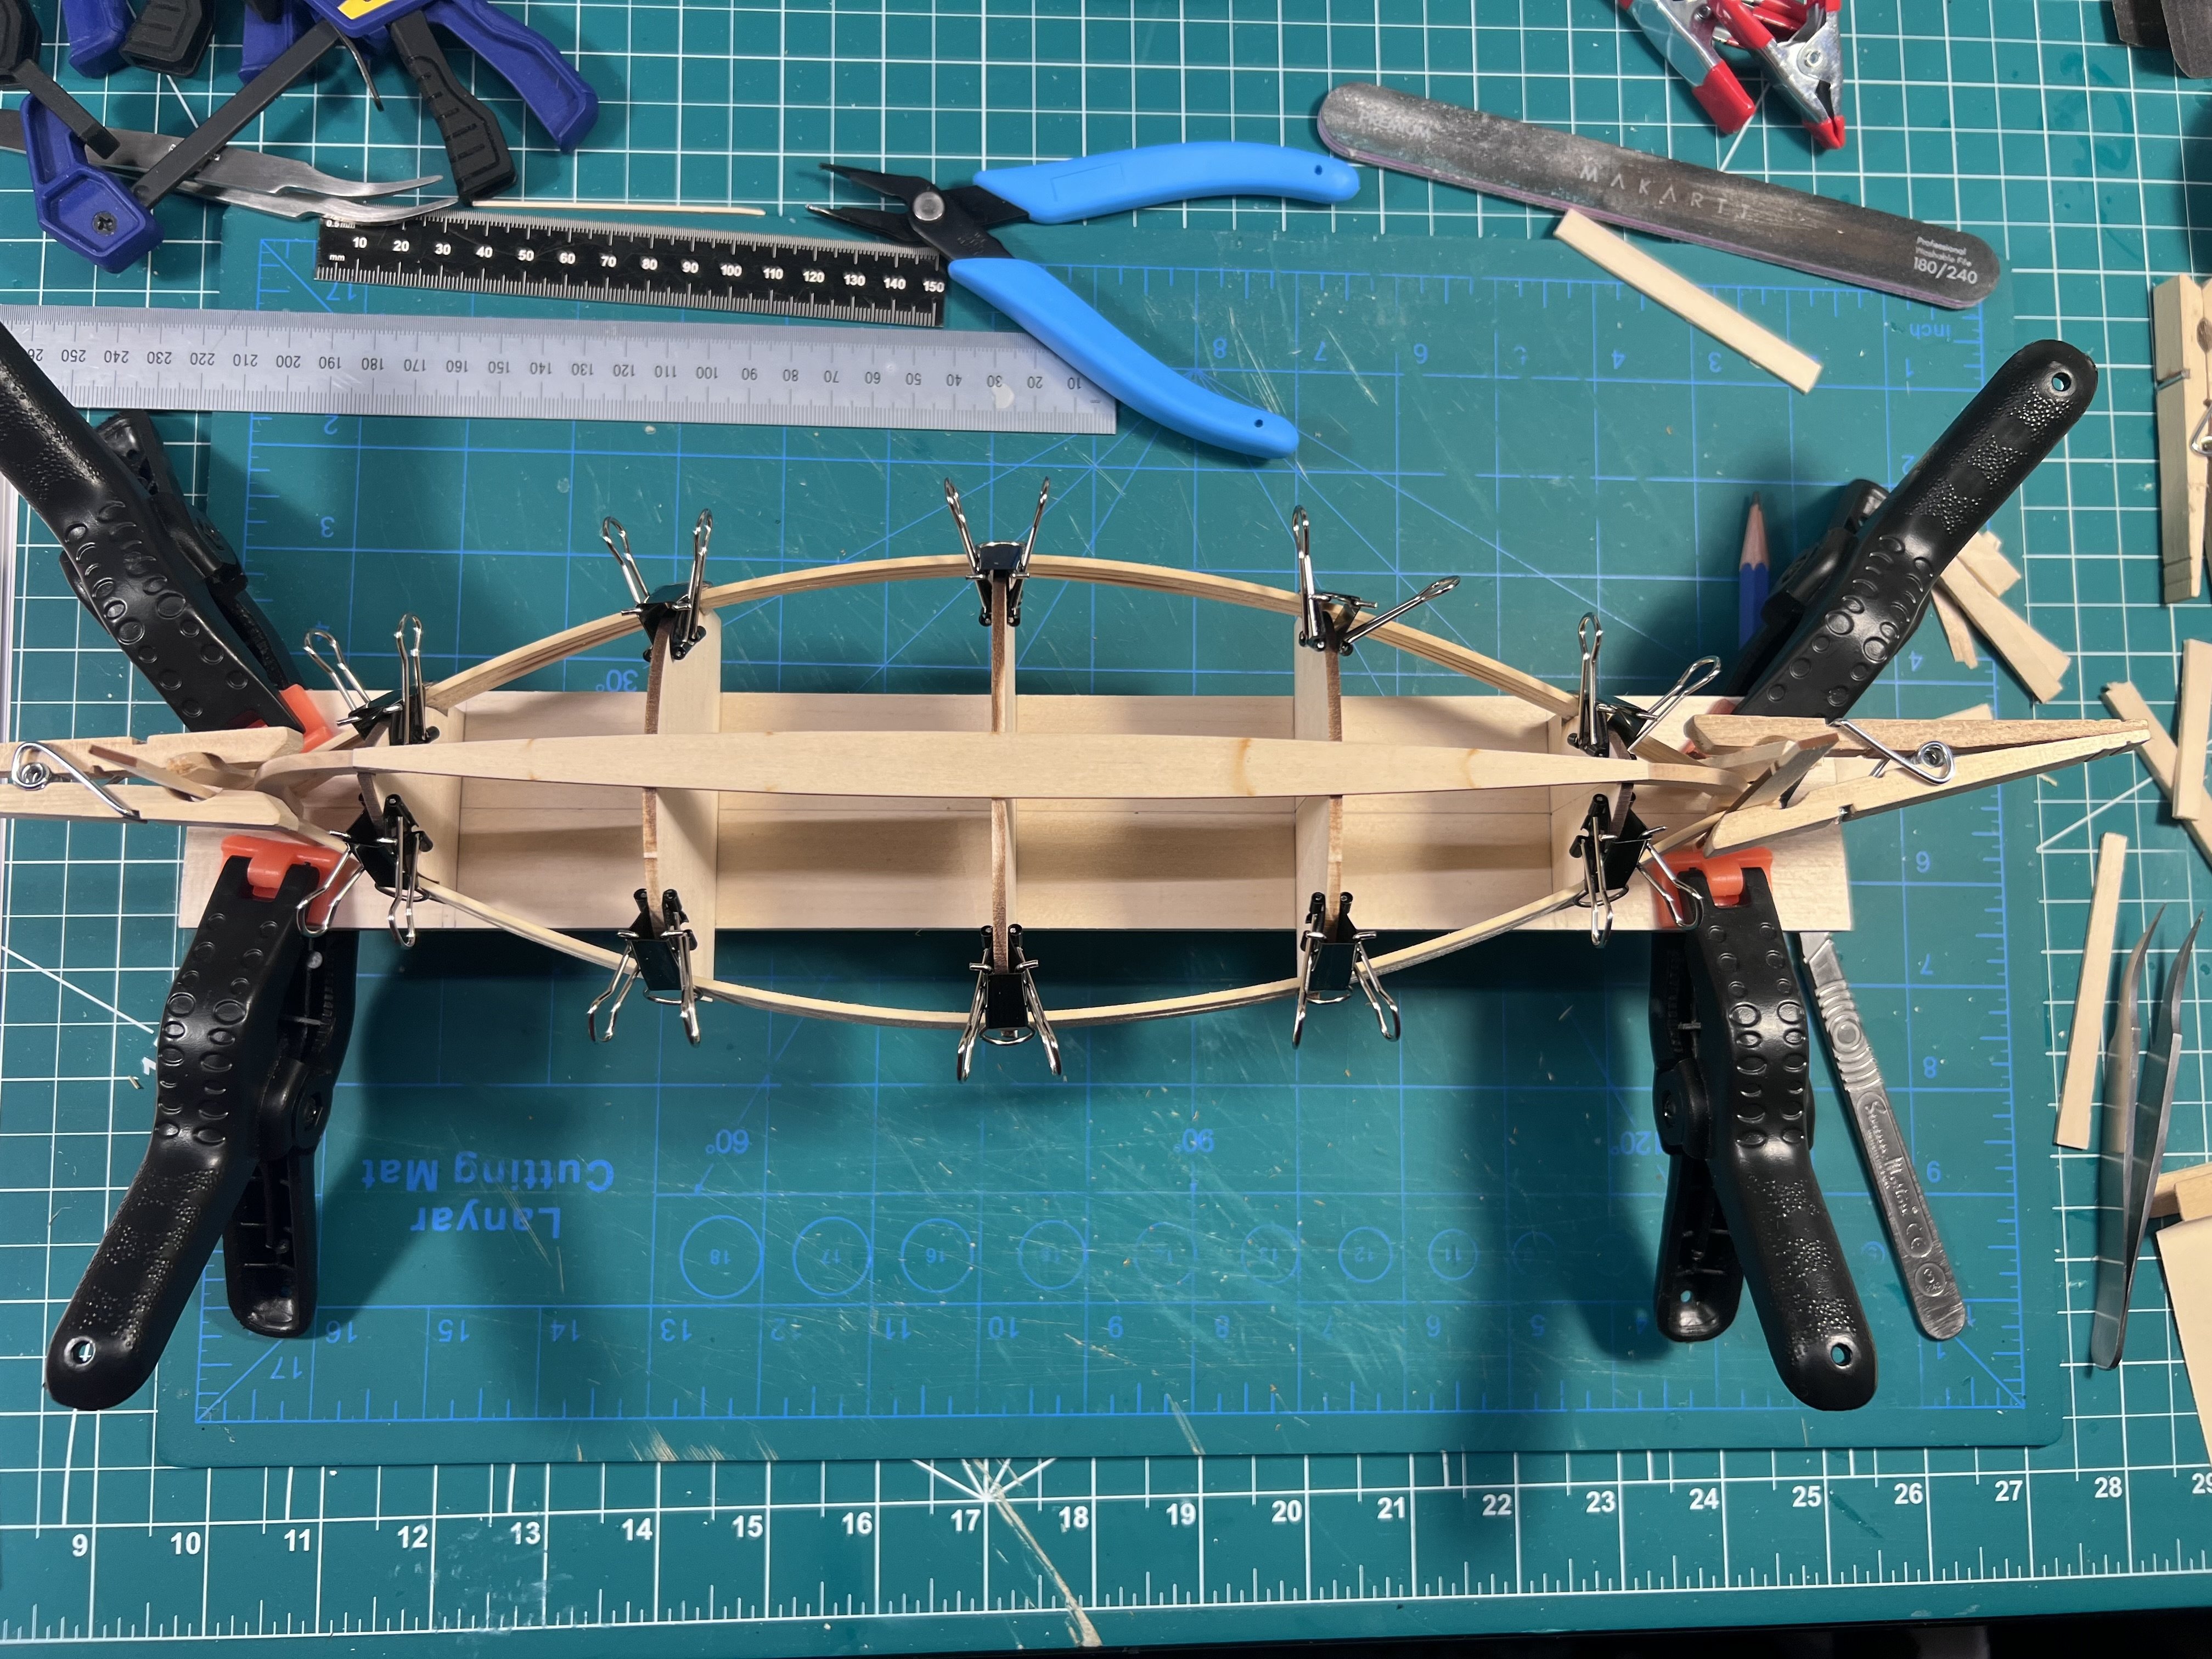
I’m doing about a pair of planks every day or two (soaking and clamping to shape into place, then trimming and gluing into place after they’ve been shaped and dried). This is a challenging planking.

- 24 replies
-
- 3
-
-
- maine peapod
- midwest products
- (and 1 more)
-
Our house is awash with Legos. We added shelves in my younger son's room to showcase his large models. But I actually ended up buying a cheap set of faux lego blocks that are all the same size (these are classic 2x4 bricks, but there are other sizes): https://www.amazon.com/dp/B0BM4SM9T8?ref_=ppx_hzsearch_conn_dt_b_fed_asin_title_5&th=1
- 46 replies
-
- 1
-
-
- Dory
- Lowell Grand Banks Dory
- (and 3 more)
-
When people come into my office at work they see a few of the models I've built on one of my shelves. I turned 60 this past year. I tell people jokingly that over the past year I've developed an old man hobby - model ship building - and a young man hobby - scuba diving (my adult boys and I completed our Advanced Open Water this summer). (I know model ship building is not an "old man hobby" but there are lots of people who discover - or rediscover - it closer to retirement.) (As long as you're healthy, and you can get your doctor to approve, scuba diving is actually a nice "old man hobby". The hardest part on the knees is when you're fully loaded getting into the water. And if you have bad knees, you can often, depending on conditions, put your heavy equipment on in the water. On a dive trips in Grand Cayman last summer there was a guy on the boat who was probably in his mid/late-70s.)
- 68 replies
-
- 3
-
-
- First build
- Cutter
- (and 2 more)
-
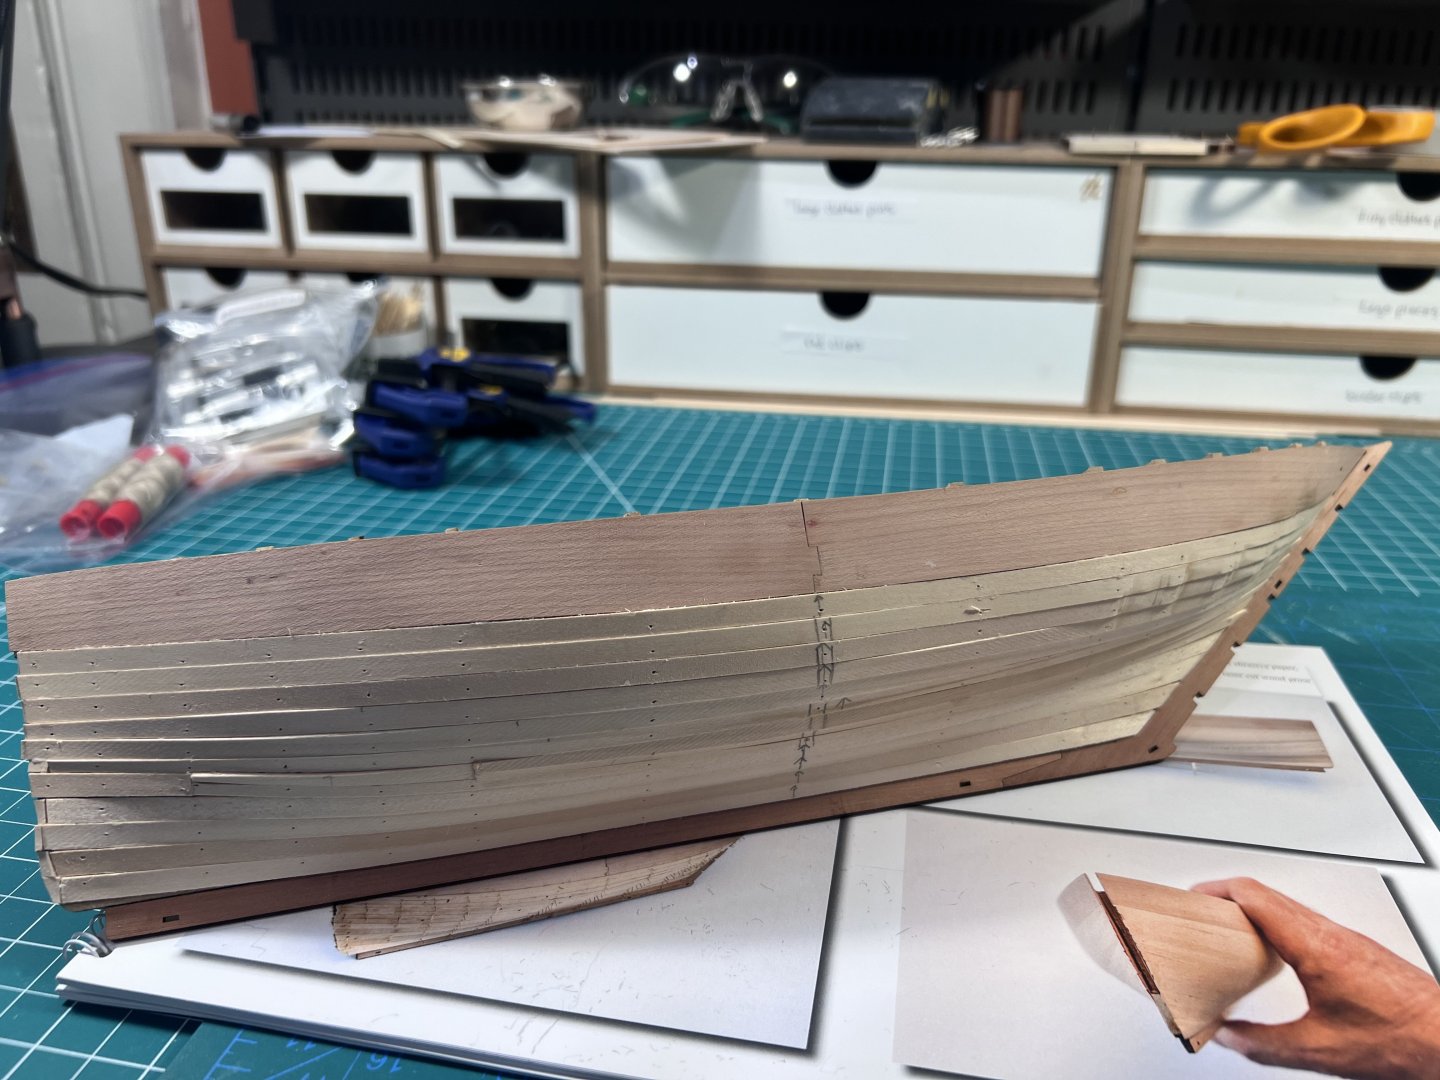
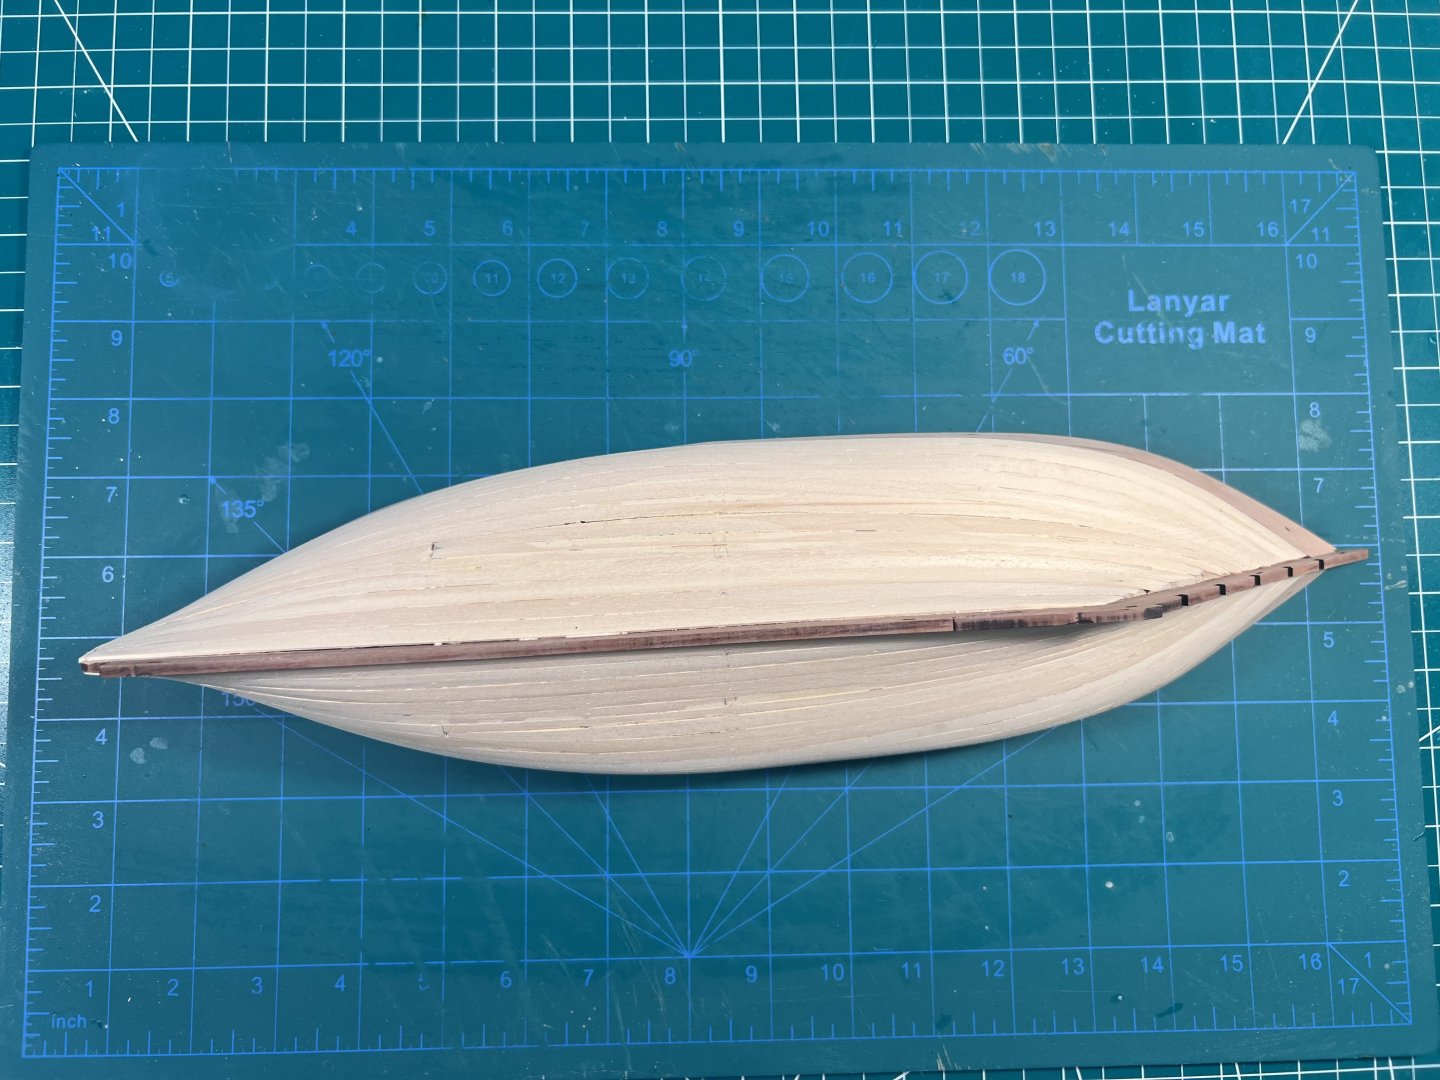
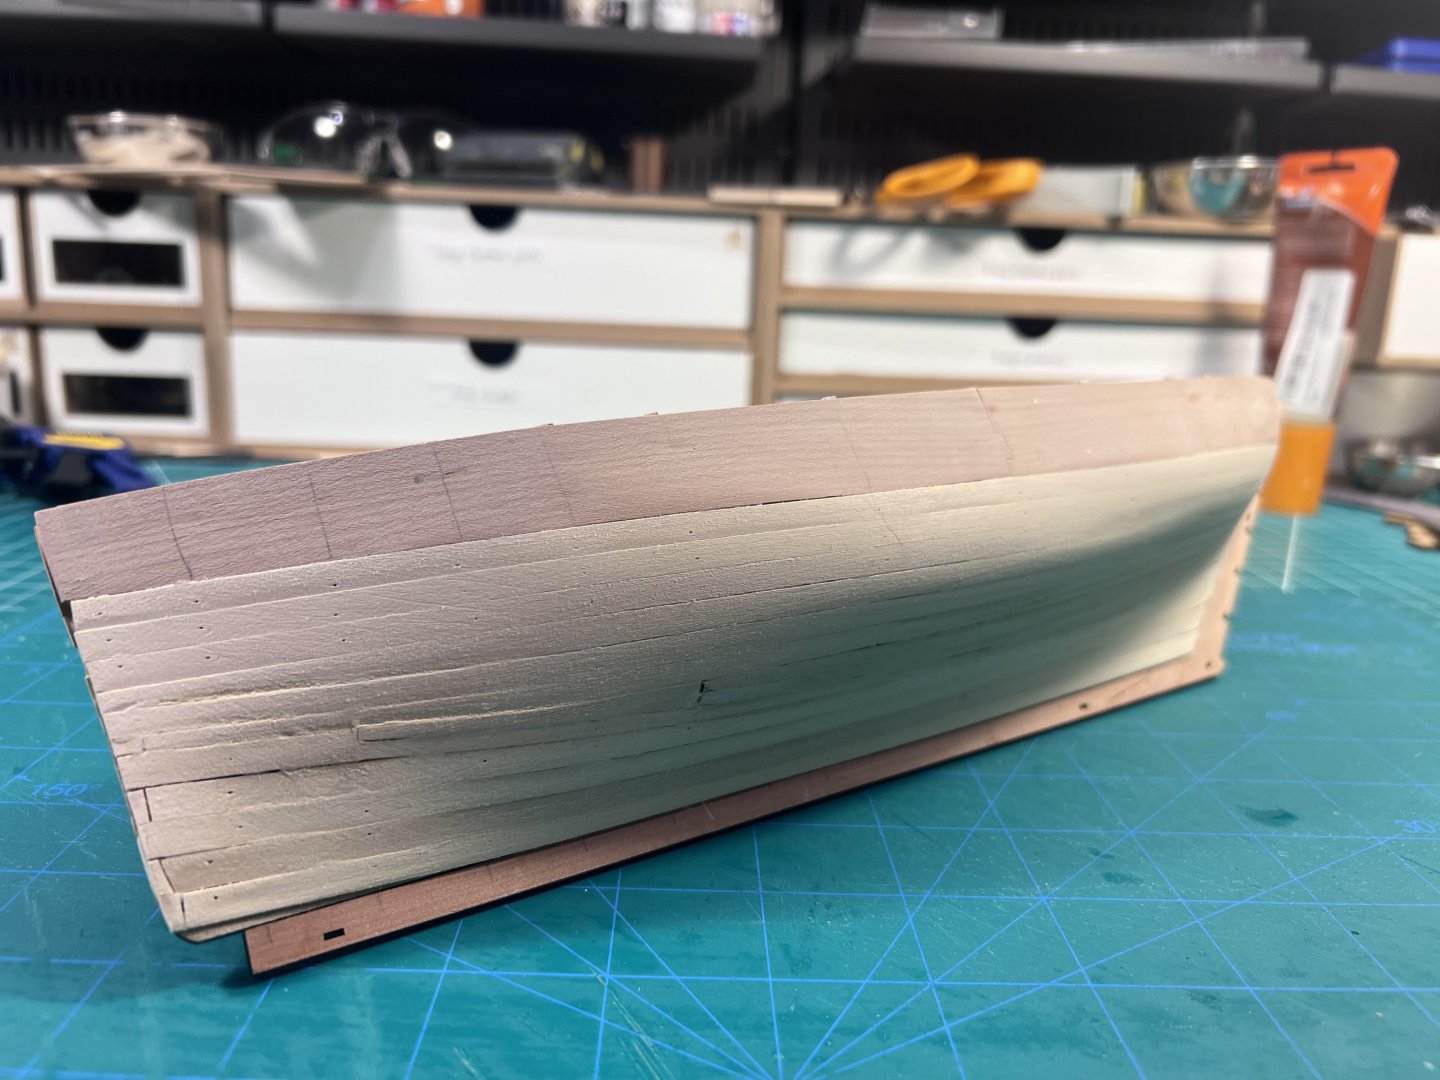
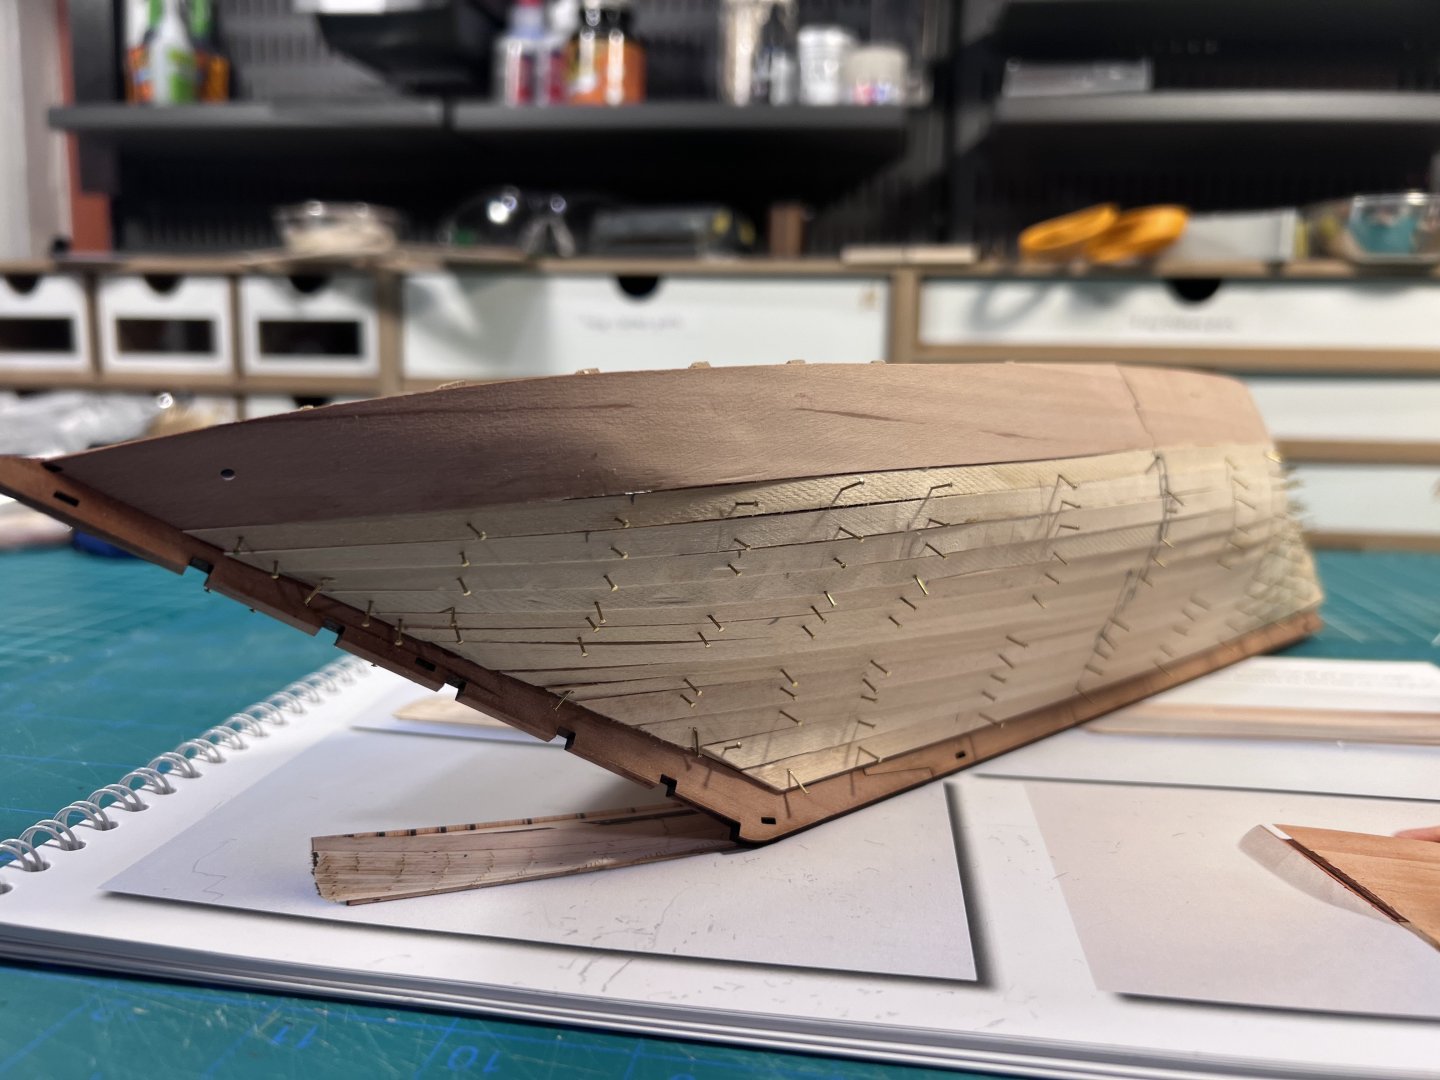
The shape of this hull continues to confuse me. The end shown in the photo above is the front and the heavily angled end on the other side is the rudder. When adding the lower planks, I forgot that and was thinking the end shown here was the rudder end and left some of the planks short since those usually end up being sanded down quite a bit. That's not the case here. I'll add some filler wood. Thankfully this is just the first planking. The instructions don't mention anything about doing any edge bending (really any bending whatsoever). In some ways it's not needed since this hull is small and straight. And since this is the first planking, any clinkering can be sanded out. The instructions in fact point out some clinkering in the photos and say not to worry about it - they'll be sanded. I did end up doing some edge bending on a couple of planks. I'm definitely going to do edge bending on the second planking. On the second planking, I'm also going to try to do some planning of the planking. I'm going to try - no guarantees - to be able to leave the upper part of the planking unpainted (if I'm unhappy with it I'll paint it). So I want the planking to look the best I can.
- 51 replies
-
- 2
-
-
- Lady Isabella
- zulu
- (and 1 more)
-
Lego blocks work great - they can be clamped or rubber banded down, or even glued. You can put a few dabs of glue - more and it’ll be a pain to free the build frames from the build board. Look ahead in the instructions to see how you free in later - it’s good in general to look ahead in the instructions. And definitely start by posting questions to your own build log.
- 46 replies
-
- 4
-
-
- Dory
- Lowell Grand Banks Dory
- (and 3 more)
-
That’s true for a large scale model. If you’re doing a 1:64 or smaller scale, probably even 1:48, you would not see brush strokes. Visible brush strokes I would think would be out of scale.
-
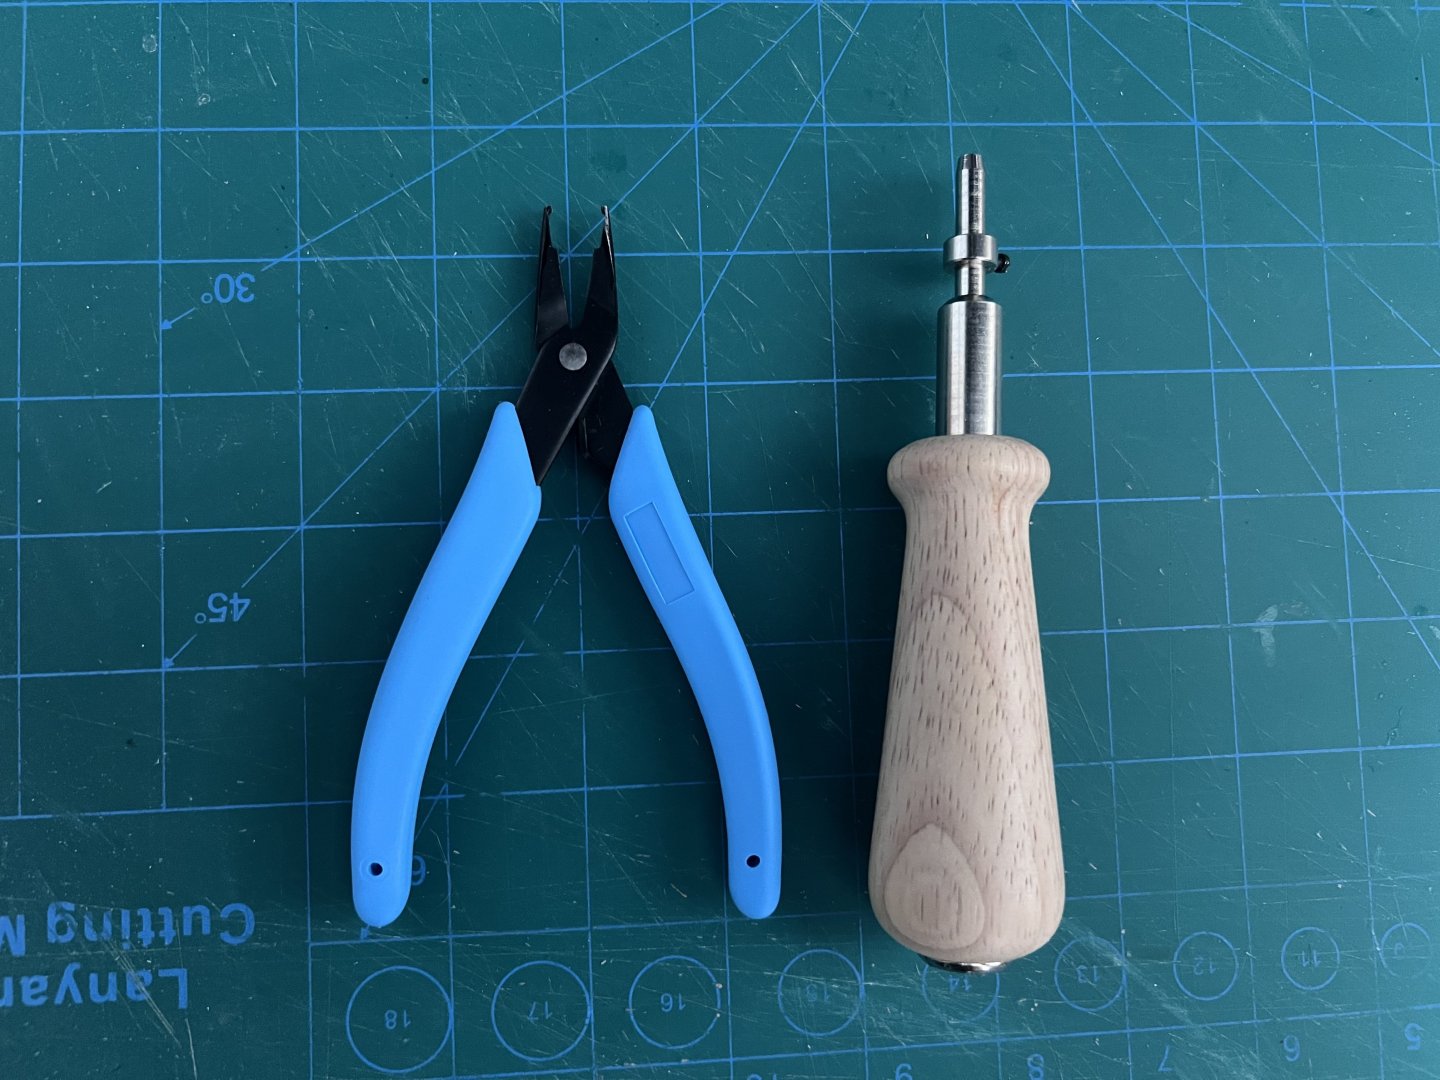
One thing I have to say: the pin insertion pliers (from micro-mark) work infinitely better than the other style of pin pushers (I’ve tried two different kinds).
- 51 replies
-
- 1
-
-
- Lady Isabella
- zulu
- (and 1 more)
-
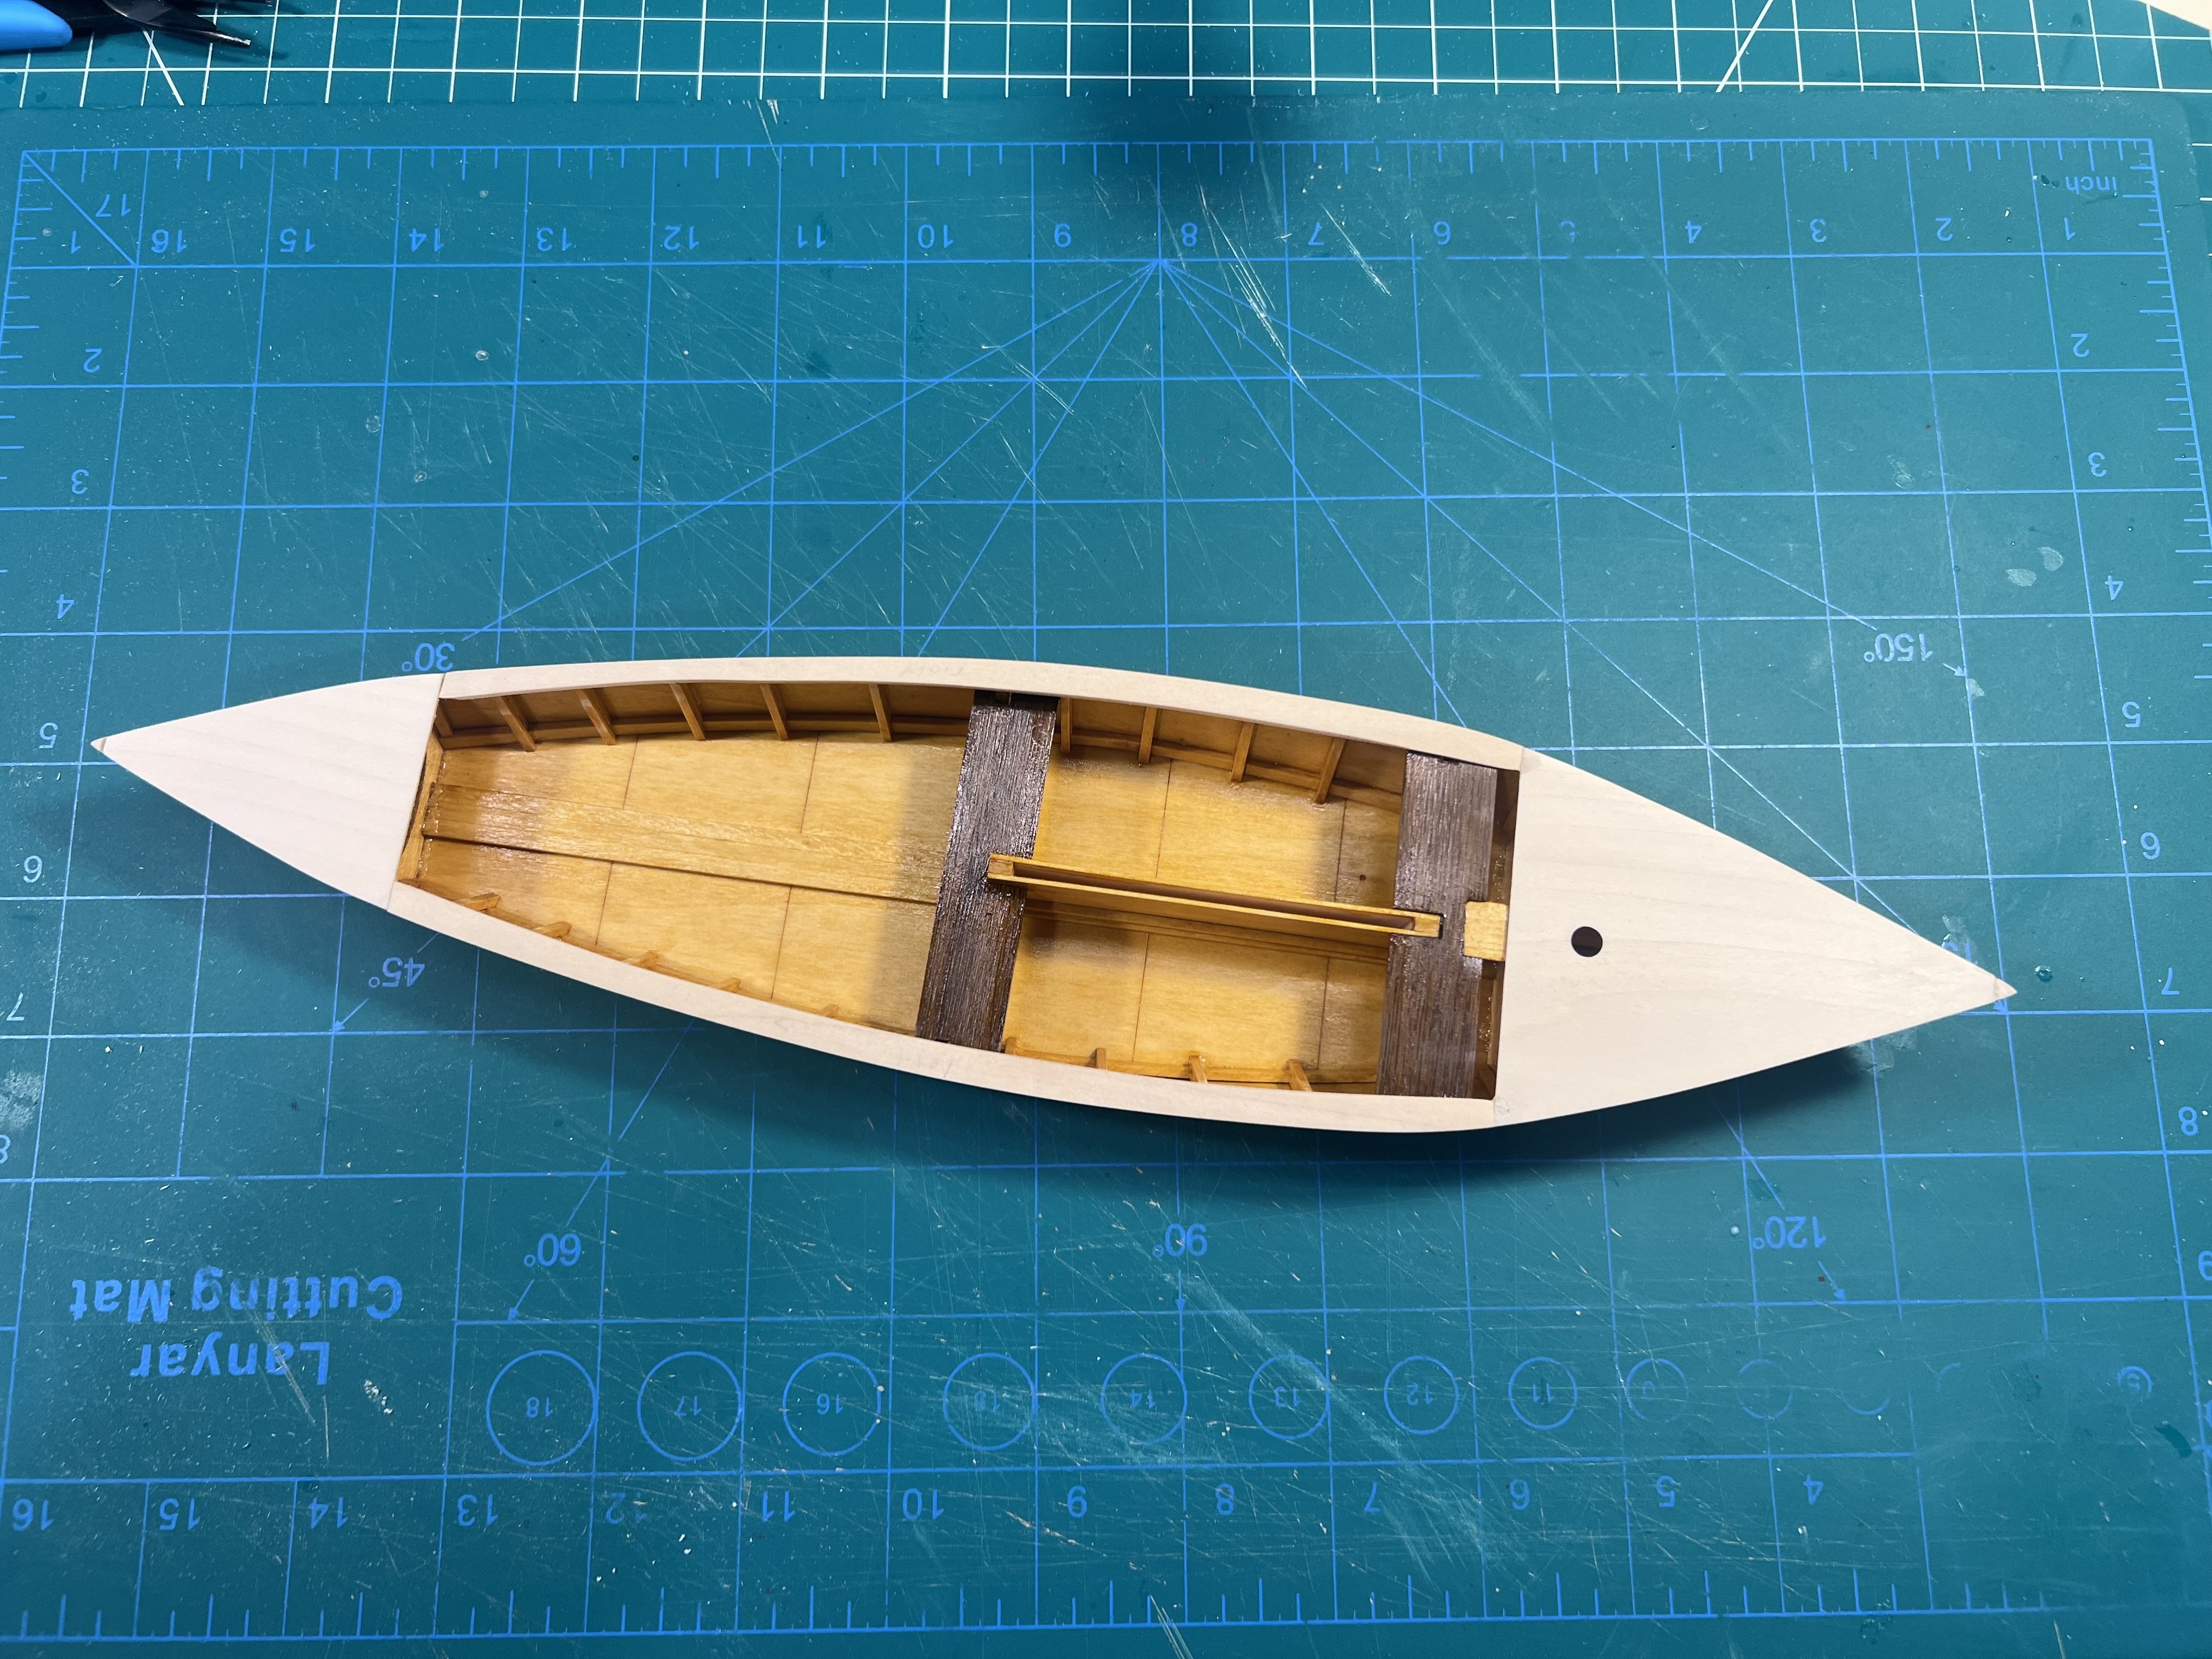
I finished adding a thin layer of decking around the side.

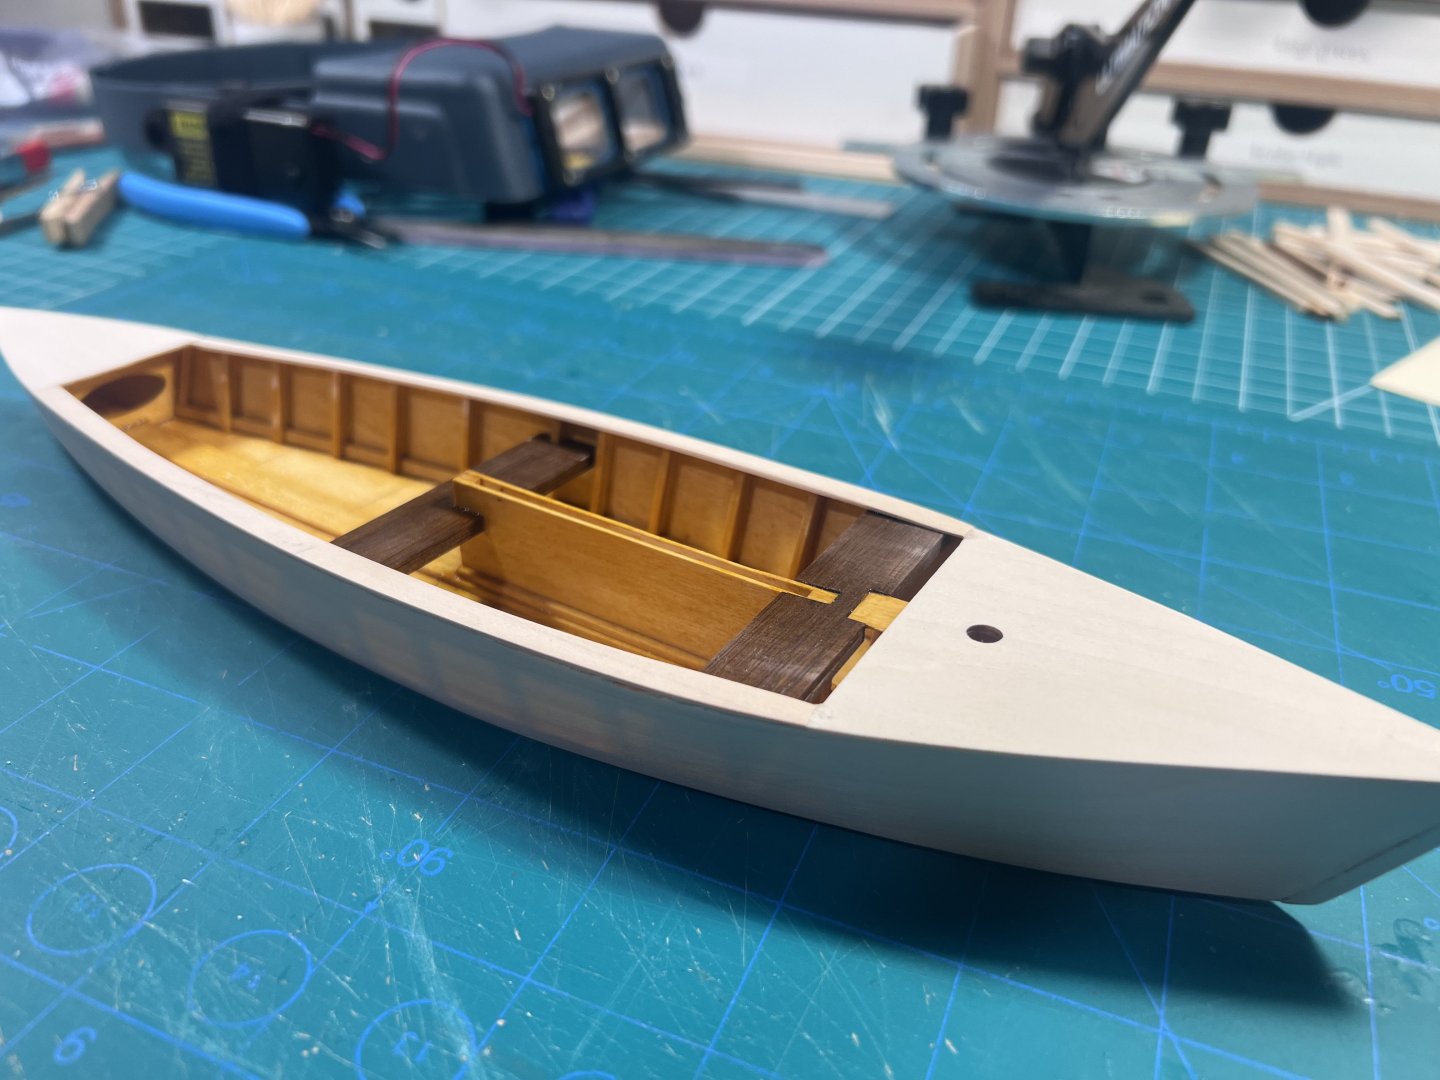
- 38 replies
-
- 3
-
-
- crabbing skiff
- Chesapeake Bay crabbing skiff
- (and 2 more)
-
I like using an airbrush. It takes some research on how to use it and how to thin the paints properly. You do have to disassemble and clean from time to time. No avoiding cleaning it, sometimes at the most inopportune times. For example, on the Vanguard models there are a lot of finely etched pieces showing detail. The airbrushing keeps all those etchings clearly visible. I'm certain you could get the same with properly thinned paints, nice brushes, and good technique, and I've seen people do that here. I like an airbrush because it is quicker, though the price of an airbrush and compressor and all the accessories is a lot more expensive than some nice brushes. Having quality paints is important whether using brushes or an airbrush. In fact, an airbrush really needs airbrush paints (I use Vallejo Air) or a lot of experimentation to get non-airbrush paints to the right consistency. Even using Vallejo Air, I thin using a combo of stuff. A recommendation depends in part on how much you want to spend. Assuming you want to get an airbrush, I'd check out some of the various YouTube videos - there are a lot - doing comparisons and ratings at different price points. I have an Iwata Eclipse airbrush (not the most expensive certainly, but not cheap). I've seen people recommend Badger, but have not tried them. I imagine a cheap no name airbrush might be a pain. Air brushes are fairly precise finely-engineered pieces of technology. Cheap knockoffs might not be worth it. Again, just basing that on things I've seen on videos, not personal experience. My Iwata is great, and it's one of the top ones recommended, but maybe overkill. To the point made by @ccoyle, there is such a big difference imho between the paint in a Model Shipways model and Vallejo paints. The former thick and fairly gritty, the latter pure liquid with no signs of the pigments. That said, I've seen people do a great job with Model Shipways paints with the right thinning and right technique. Some people love them. I used the Model Shipways paints on some work boats I built that were relatively large scale and the bit of blotchiness in those paints were okay given the context. The same blotchy grainy paints on a 1:64 model would look terrible I'd think, not that I've tried. I have a No Name compressor. Literally the brand is No Name. Got it from https://spraygunner.com/. No Name could well be their house brand. Saw it recommended someplace and it had a good sale. Again, there are lots of them that are cheaper than the one I got. I also got an airbrush booth so I could paint inside the house (our cellar is dank, we don't have a garage): https://www.amazon.com/dp/B07MGGYH2W?ref_=ppx_hzsearch_conn_dt_b_fed_asin_title_2&th=1 Not necessary, but nice to have depending on your setup. There are lots like this. I saw a review of this one. It works fine. An airbrush is great. But it is definitely an expense. And it takes a bit of practice and researching to figure out how to use it - and clean it. Short of it is that you don't NEED an airbrush. I bought one in part because I wanted to play with one and with our boys out of the house had a bit more disposable income than I had a few years ago to have fun.
-
Gluing one side (after letting the wet planks dry into place). I might try to do two sides at a time one I get the first planks glued in place. Couldn’t do both in the first pass.

- 24 replies
-
- 3
-
-
- maine peapod
- midwest products
- (and 1 more)
-
On your first post, you can edit it and add "tags" such as "muscongus bay lobster smack" and "midwest products" since they help people in the future working on this model find your build log. I use that feature all the time when working on a model to quickly pull up other logs when I hit a snag. There is also a "model shipways" version of the smack (I built that one). It's similar - and the end result looks similar - but it is a different model. If you poke around on other build logs just make not if you're looking at the midwest for model shipways versions. Someone else might also suggest (or even just edit) your post to add "- First Build" on the end of your title. I think some people are sometimes more likely to pop in when they see a "- First Build" in the title of a log to see if they can chime in, even if they have not built that particular model themselves.
- 18 replies
-
- 2
-
-
- muscongus bay lobster smack
- Model Shipways
- (and 1 more)
-
Did you see that Olha Batchvarov did a build of this on her YouTube channel? It's recordings of a live build (she does on Sat and Sun mornings). I think she finished this one back in April or May, it started last January. It's step by step, with each recording for about two hours, and she tries to go beyond to make a really nice version of the model. I've learned a lot watching (also listening) to her video series:
- 18 replies
-
- 2
-
-
- muscongus bay lobster smack
- Model Shipways
- (and 1 more)
-
Something I've been learning (slowly) is that there are really no shortcuts to planking and having it look great (even if you get more efficient at doing it). In reading build logs and seeing videos, you get a real sense of how long it takes to do it right, which includes not being afraid to do something over. Better to eliminate the small gaps by redoing (or avoiding them, being patient, measuring, adjusting, measuring, adjusting) than to assume you'll just fill them with wood filler later.