HOLIDAY DONATION DRIVE - SUPPORT MSW - DO YOUR PART TO KEEP THIS GREAT FORUM GOING! (Only 36 donations so far out of 49,000 members - C'mon guys!)
×


jdbradford
-
Posts
214 -
Joined
-
Last visited
Content Type
Profiles
Forums
Gallery
Events
Everything posted by jdbradford
-
 I too just found your kit build log. I started this kit sometime lat last year, but was technically and artistically stumped trying to paint the detail on the stern. I got frustrated removing and reapplying the paint to all of the detail. Jeff
- 42 replies
-
- 1
-

-
- Constitution
- Revell
- (and 1 more)
-
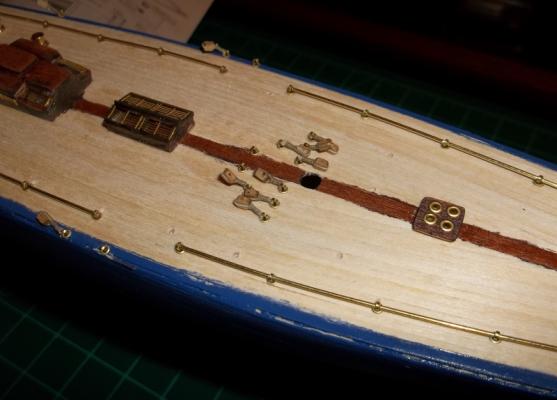
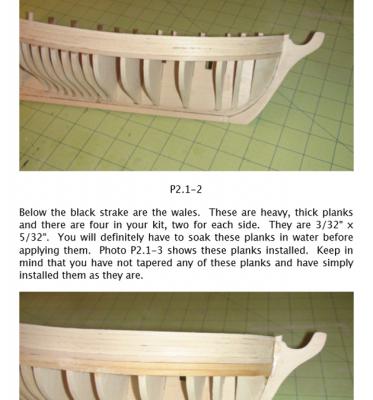
I have attached the first 5 planks on each side and will post pictures in a bit. But, I have another question I hope you all may be able to answer. The practicum says to install the 6th plank, called the Black Strake plank and that there are only 2 in the kit, so one on each side. See the pictures attached as the practicum says to notice that it is wider than the other planks. How is 5/32 wider than 3/16? In the last picture, the plank does look wider. Did I select the wrong strip from the kit? Jeff


-
It does look solid enough to handle the hull planking, heck I think you could attach a 2 x 4 to it LOL Lots of sanding to come. Jeff
-
Sometimes I think I try to go to fast. LOL Jeff
-
It usually is not a project stopper to break an item. If you have the plans you can remake the part and start again. I am sure it was frustrating as I have done similar things as well. I was gluing up the first planking on the port side yesterday and put a clamp on the far side of the keel and began to tighten it down when a piece snapped off the keel. I freaked for a second and then just got the glue out and reattached the piece. I think it will be okay as it will only be support for the decking. Jeff
-
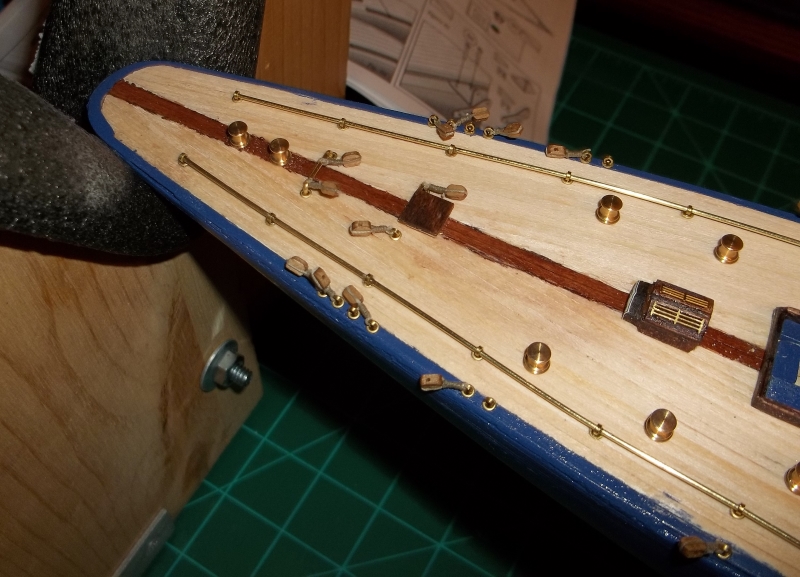
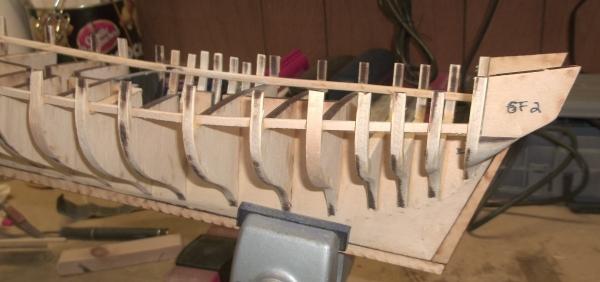
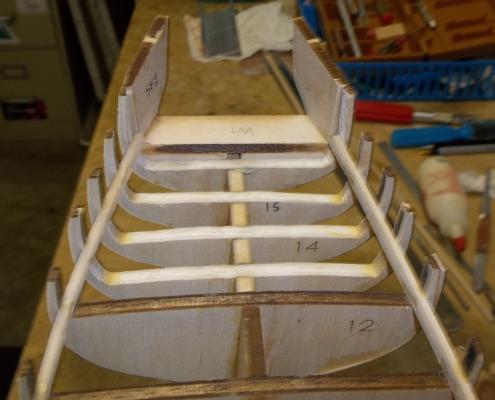
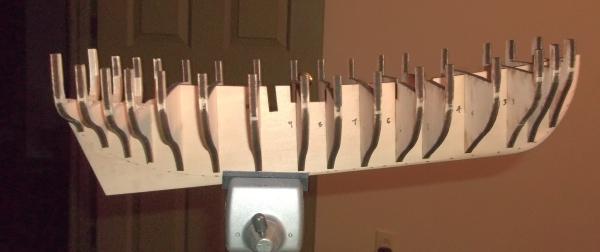
My port-side pictures above show shims on #7 and #12. I had to shave down the filler blocks, but since I am using Bob Hunt's practicum, he did not have additional uprights in front of bulkhead #1. I wish I had added them but I have the 1st 5 planks on each side starting at the top and will post those pictures tomorrow or this weekend. Let me know if you need anything at all. Jeff
-
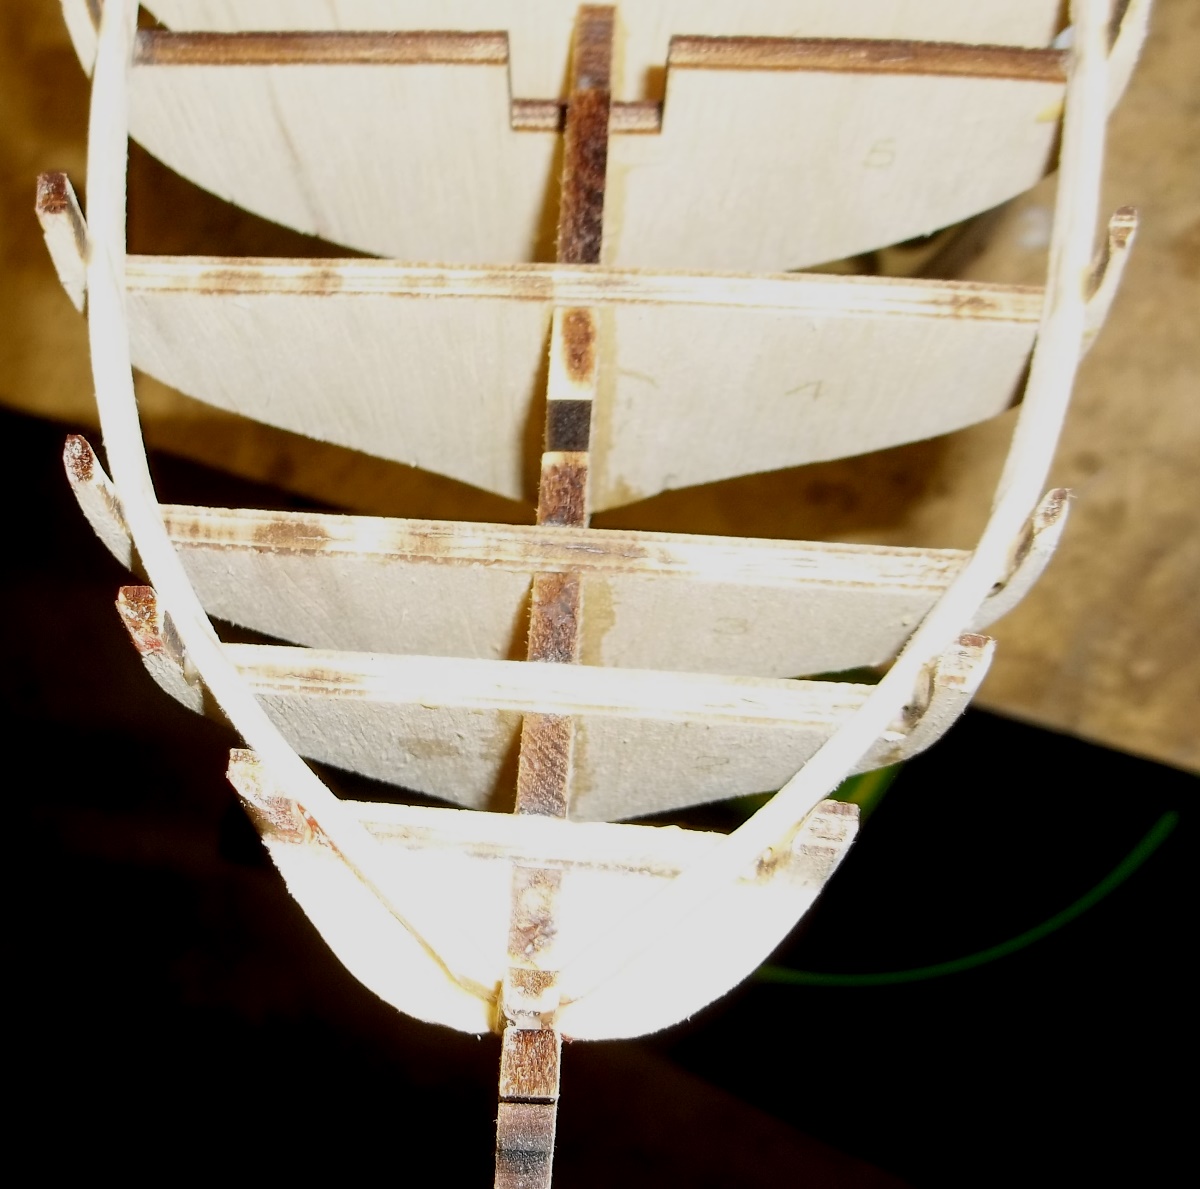
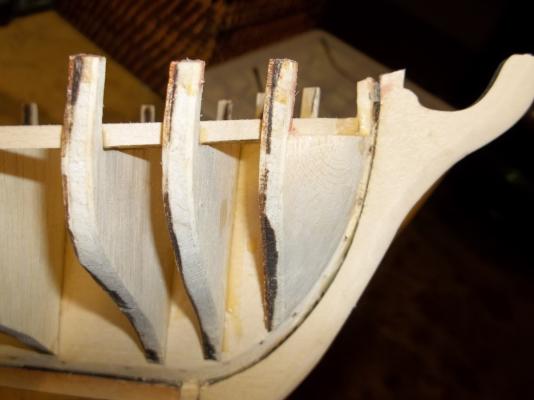
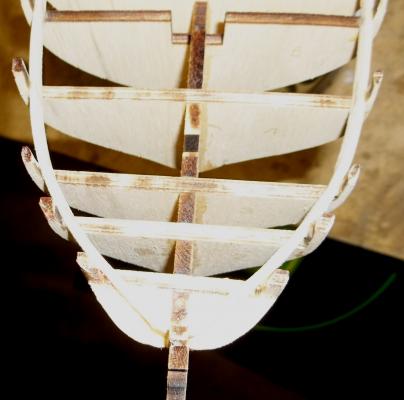
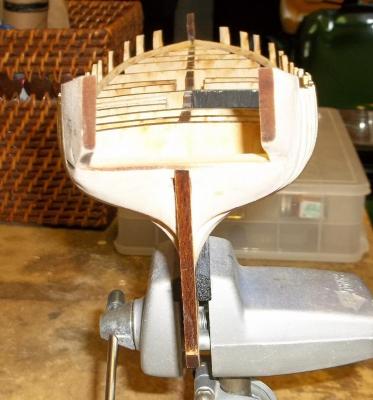
Okay folks, I need a little help. The instructions say for me to tuck the first plank in at the stem and the top of the bulkheads and then to work back aft gluing as I go. Well, the filler block only shows going as high as the deck area of the bulkheads, so the 1st plank does not have the same curvature as it would when I get down to the 3rd or 4th plank. I may have to modify the filler block, and/or add some uprights between the stem and the 1st bulkhead. Here are some shots specifically of that area. Jeff
-
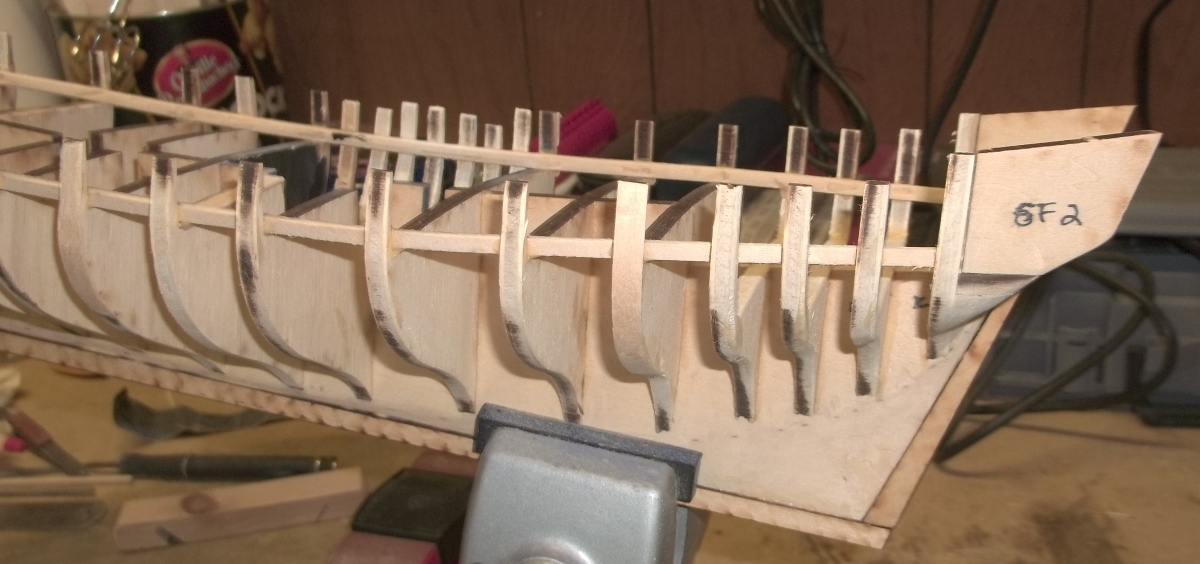
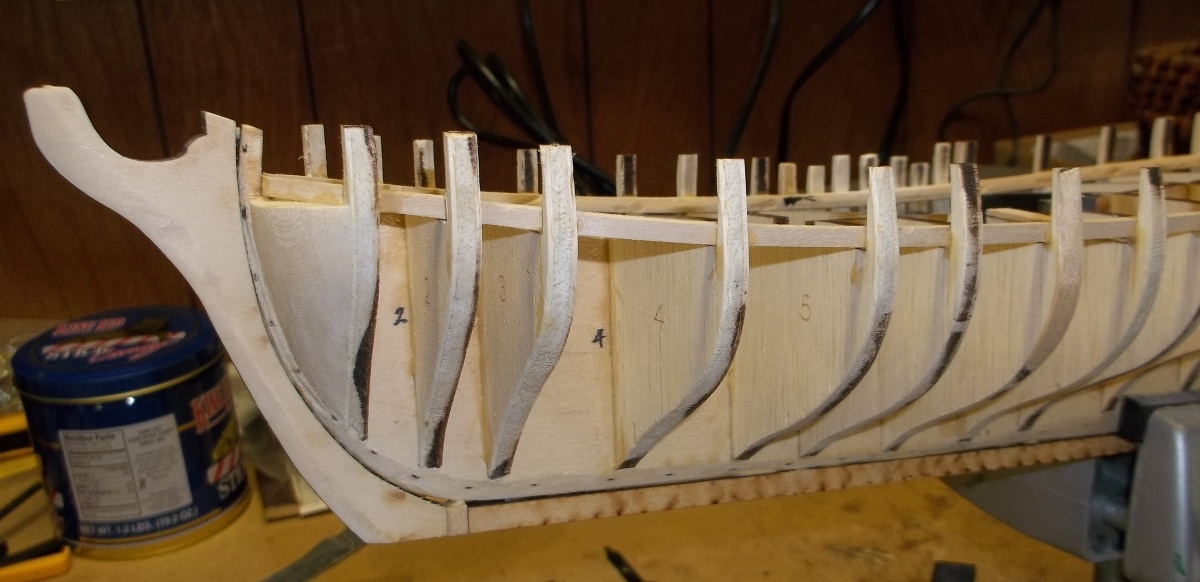
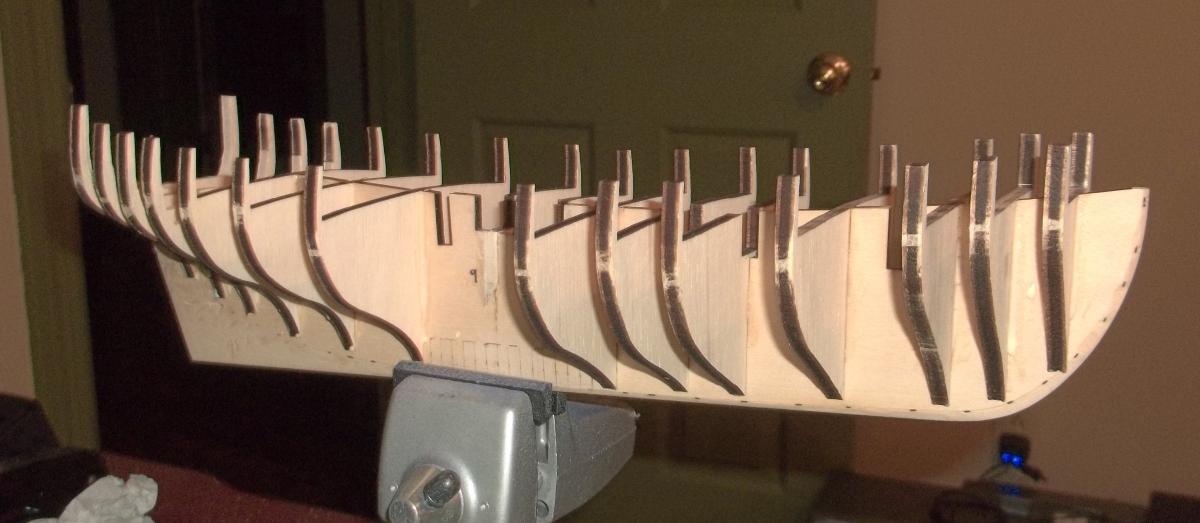
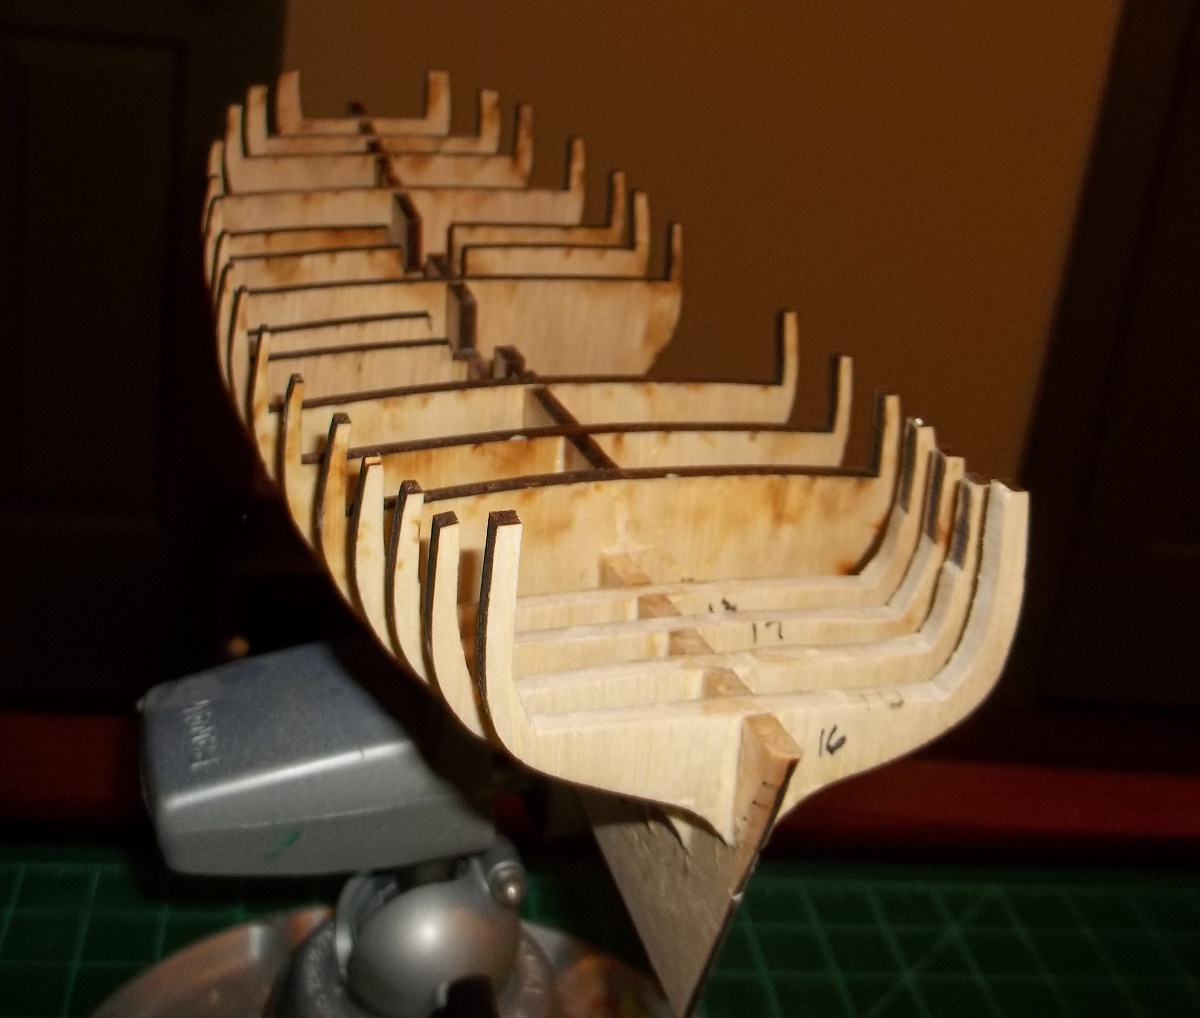
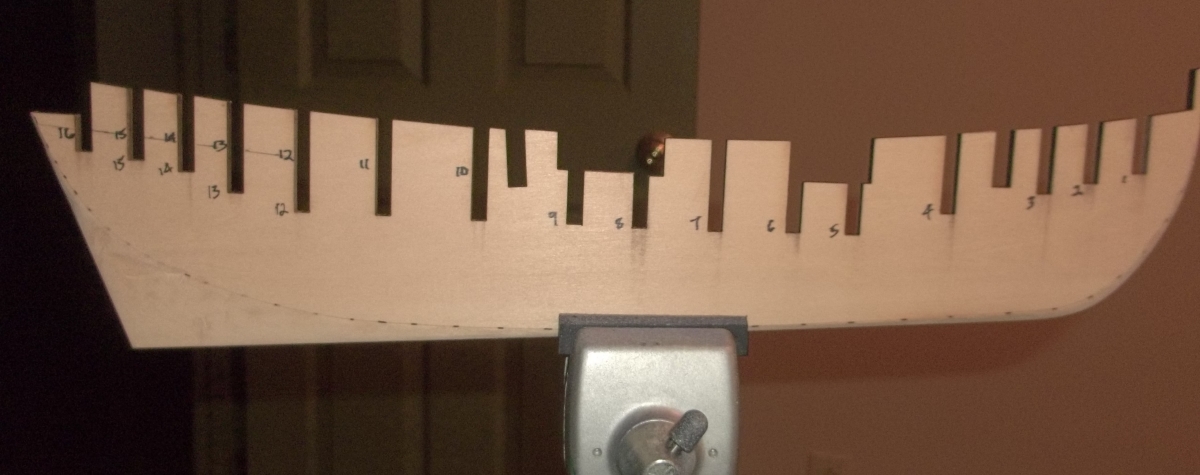
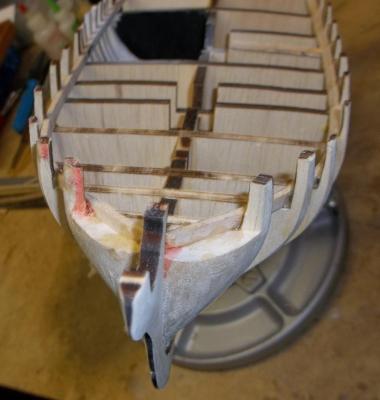
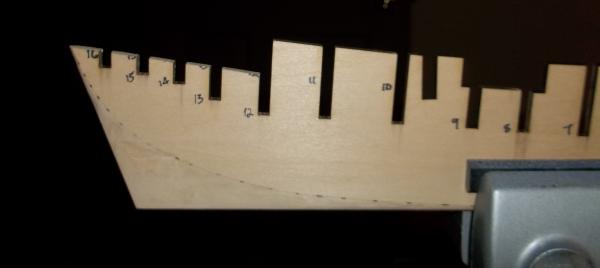
I added the bow and stern filler blocks, mounted the transom pieces, modified 2 bulkheads to show as frames, faired the model, and attached the stem, stern and keel pieces. As noticed in many of the builds, you have to add a small piece between the stem and keel section.

-
I do remember reading something about the rudder question. I did not have enough experience to comment. I think there is some type of mechanism attached by ropes to the wheel that extends down, possibly under the floor of the great deck to attach to the rudder. Else, there will be things to bump your head into if you decide to move about the great cabin. LOL Jeff
-
I broke mine off as well and waited until I was installing the waterway planks so that the pieces all had something to glue themselves to. I will post my updated build tomorrow. I have not been modeling for too long, so do not have a lot of stock wood lying around. Are you planning to modify the build in anyway? Jeff
-
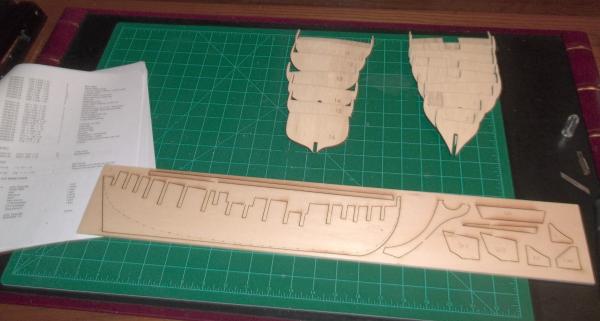
Remaining pictures from week 1 build log:


-
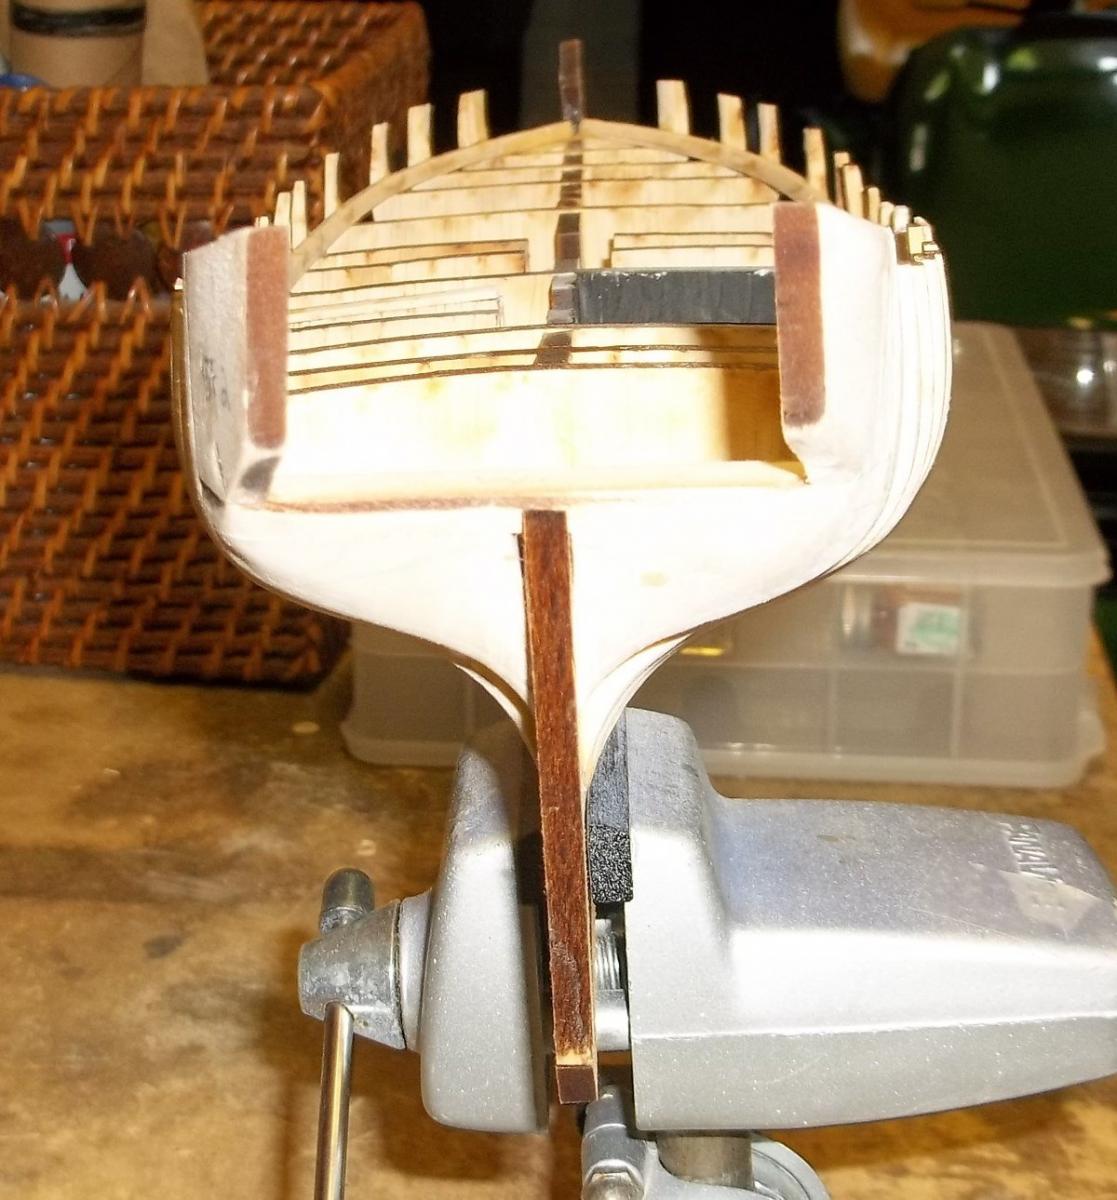
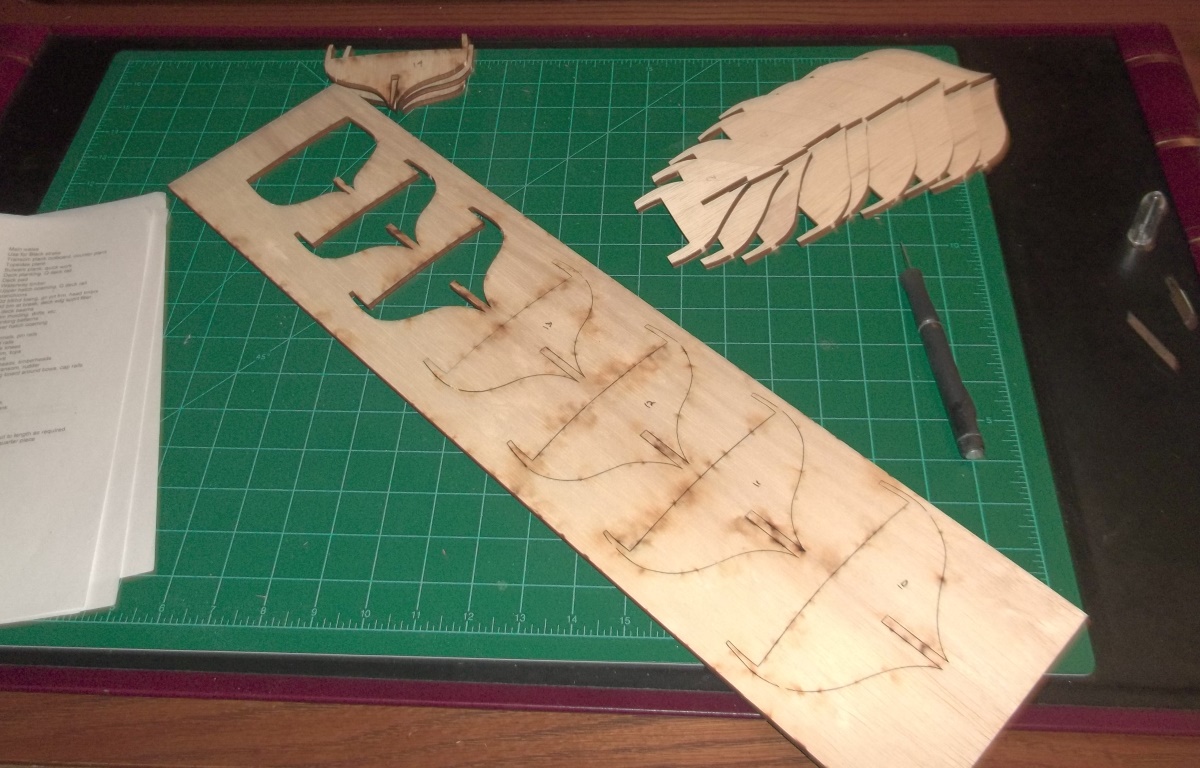
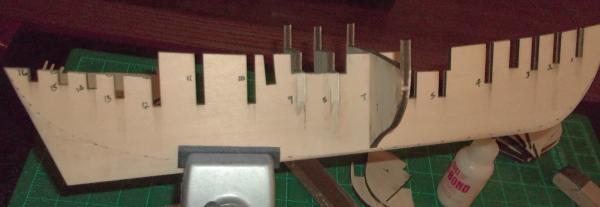
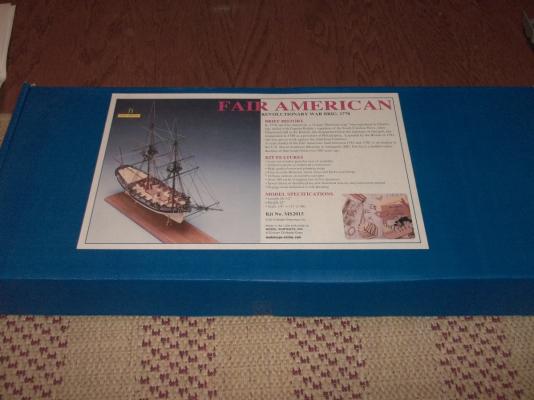
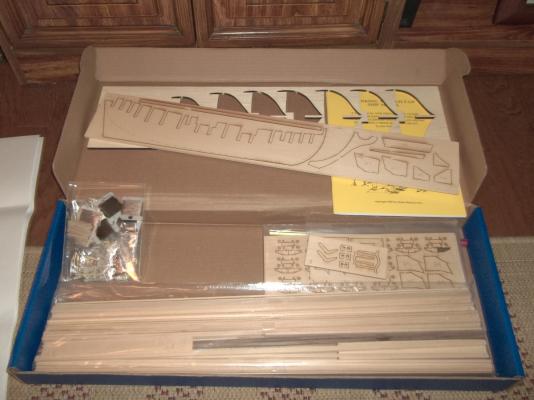
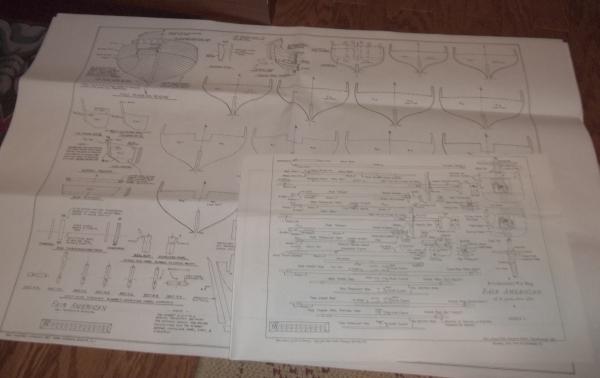
I started building the MS2015 Fair American this past Sunday and wanted to start a build log for this site. I am going to attempt some minor kit modifications per Bob Hunt's practicum and appreciate all the help and support I have gotten from the folks here. I took stock of what I had in the kit and noticed that the keel section that accepts the bulkheads is no longer made in two pieces and that much of this is also plywood. From other build logs I have read of inferior materials in regards to this, but my wood stock seems to be okay. After a bit of cleanup, I test fit the bulkheads. I made the listed modification to show the "great cabin" and some exposed framework of the ship. I added the filler blocks to the bow and began to fair the blocks and the bulkheads to prepare them for planking. After reading some of the great work done on the models from artists here, I am planning to add filler blocks between many of the bulkheads. If you have any thoughts or ideas, I would greatly appreciate them. Jeff


-
Amazon has a fair set of 6 of the most common http://www.amazon.com/C-Thru-Ship-Curve-Set-6/dp/B000HEOHVC Jeff
-
Steingraeber Brig The Fair American Scale 1:60 - Thoughts?
jdbradford replied to PopJack's topic in Wood ship model kits
I just started building the Model Shipways MS2015 Fair American this weekend. The instructions that come with the kit look pretty good, but I am following Bob Hunt's practicum with a bit of bashing to give some detail. I hope to get my build log with photos started soon. Jeff -
Hey Jerry, I just started my MS2015 Fair American today. I will create a build log and post pictures later. I wondered why there was a change to the kit. The instructions and a practicum I have from Bob Hunt specify the keel section being in two pieces, but this is not what I have. Mine is a single piece. Has anyone else experienced this? The raised aft deck is the ceiling for the great cabin. I am going to try and follow Bob's practicum to open that up on my model. All input is welcome. Jeff
-
convertion fraction to mm
jdbradford replied to rafterrat_2005's topic in Modeling tools and Workshop Equipment
Wait a minute, we are on the Dewey decimal system. Maybe you meant that we should go to metric? Jeff -
Dave, how did you attach the rigging at the end of the boom that runs through the rings on each side of the boom?
-
I am trying to simulate the boom tackle on my Endeavor J-class and wondered how others stropped the blocks using wire. I tried to recreate one tonight, but was unable to figure a way to get the "eye" created and then keep it secured to the tiny block. Thanks, Jeff
-
Floyd, I think the reason you were flat on your back was due to all of the rum you imbibed the night before. Jeff
-
I have Model Master enamel, Model Color acrylic and Testor's enamel paints. I have seen suggestions from some using water based paint and even adding more water to them. Any suggestions on this? Jeff
-
I had bought this kit in the late 70's early 80's and finally broke it out to start my build. The hull painting came out fairly well and the 2 halves glued together. The issue I am having is with trying to paint the stern adonrment. I can't keep from getting paint everywhere. I use brush cleaner to scrub the paint off and have re-primed and painted it black twice now. It does not seem to have damaged the plastic. I have very fine brushes and magnifying glasses. I hope someone has suggestions for this part. I have not made it to using the eye-bolts or guns yet. Jeff
-
What about painting the tiny figurines or stern adornment on some of the smaller scale ships. I am having a terrible time trying to do that. thanks, Jeff
-
You may also be able to use the water-based Goof-Off. http://www.wikihow.com/Remove-Paint-from-Metal-and-Plastic-Models-with-Dettol Jeff
-
I found some videos online where modelers strop blocks. That showed me the basics of how to do it. I also looked at a lot of images on rigging blocks online. I was disappointed in the look of the cleats before and after painting them. If I ever have them again, I will try to make my own out of wood. Jeff
-
I used the tan thread that came with the kit, and stropping the blocks turned out better than I thought it would. They are a bit longer than is shown in the instruction book, but I think they will work.