HOLIDAY DONATION DRIVE - SUPPORT MSW - DO YOUR PART TO KEEP THIS GREAT FORUM GOING! (Only 36 donations so far out of 49,000 members - C'mon guys!)
×


jdbradford
-
Posts
214 -
Joined
-
Last visited
Content Type
Profiles
Forums
Gallery
Events
Everything posted by jdbradford
-
My search engine is slacking on me then. I will need a replacement. Thanks, Mark.
-
Not sure which forum this one belonged in, but searching for constitution in this forum only brought back mine as the single result.
-
All of your suggestions look like they would work well on a piece of the ship that is sitting steady, but what about them trying to place a tiny piece of brass to simulate shutters over an extremely tiny window opening? I am still trying to debond the pieces from my fingers.
-
I will give that a shot Michael, thanks
-
 I now have acetate and pieces of photo-etched brass stuck to my fingers. I am going to have to remake the deck-house parts now, due to my frustration.
 -
Do you all have any suggestions for holding onto really tiny parts such as thin brass photo-etched pieces? I just glued everyone of them to my fingers trying to position them. I have a pair of tweezers that squeeze shut, not sure what they are called, but they are too strong and if they don't deform the piece, then they slip off and them piece goes flying to God knows where. Very frustrating.
-
No worries, it will help us both in selecting an excellent model kit.
-
Dave, I am working on the deck-house now and wondered if and how you put the acetate sheet for the windows inside the deck-house. The instructions had me build, glue and paint the deck-house and then put in the fake windows. I am not sure I can get my fingers inside. LOL
-
Which model maker do you consider to make the best version of the USS Constitution? Thanks
-
Hey fish, we all started off as noobies, and I still am. Where are you located? I am just south of Nashville. I am working on my first build, an Amati 1:80 Endeavor J-class America's cup boat. I have had many issues with it, but the folks here and on other sites have been great with their help.
-
I primed, sanded, primed yesterday and started the blue paint today, with a light sanding and 2nd coat. I am not displeased with the way it looks. Pics later this week. Thanks all
-
This boat will be my first attempt at doing sails. I have also been looking at Bob Hunt's practicums, so it may have some additional ideas for me. Also, I started painting the blue on my hull today. I will post the pics this weekend, but so far I like the way it is looking.
-
It looks like 1 x 1(or 2) that goes around the edge of the deck on my plans.
-
Dave, how did you lay out where all the holes would go on the deck. My plans have no measurements, so I would have to confirm that the drawing matches the model's scale and then trace everything out. then transfer to the deck.
-
double planking glue
jdbradford replied to leroy's topic in Building, Framing, Planking and plating a ships hull and deck
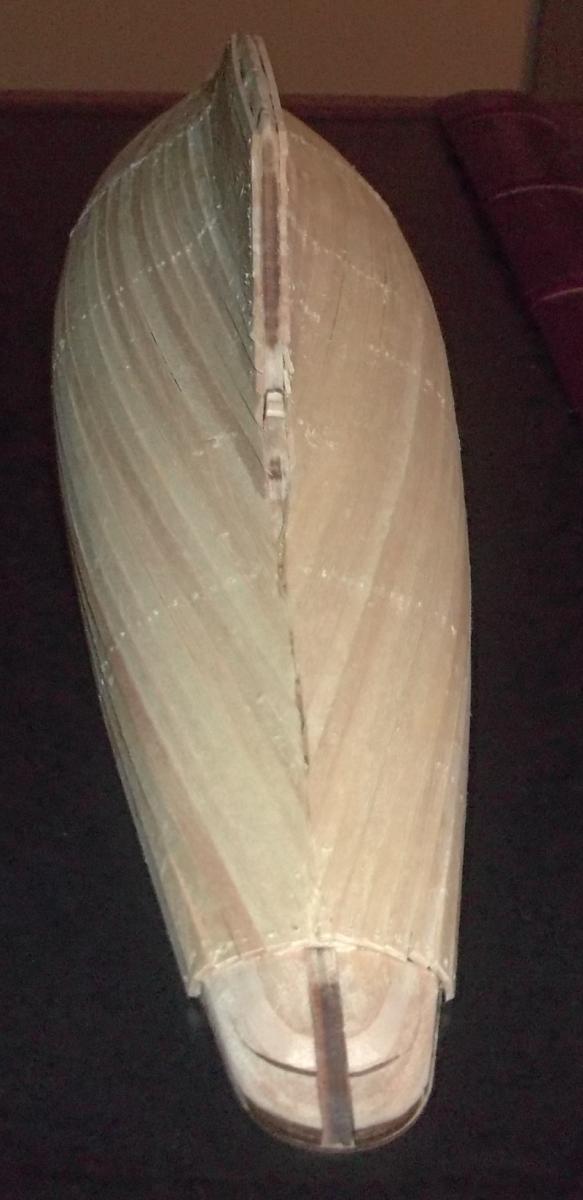
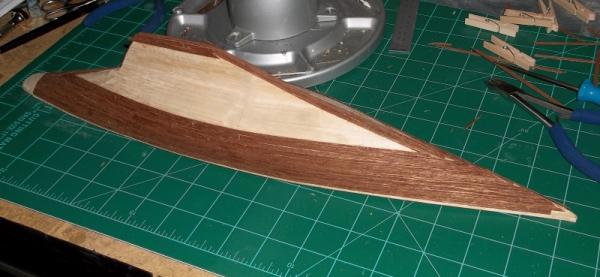
Be careful when you sand the thin 2nd planking. I am building the similar Endeavor, and the mahogany strips are .5mm They began to flake off as I sanded them down. -
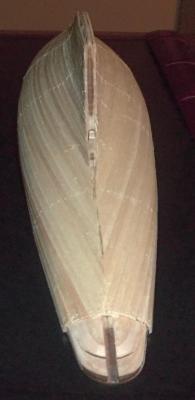
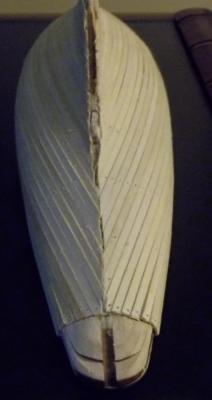
I do not like how the 2nd planking turned out. The plans discuss painting the entire hull and I am hoping for a few suggestions. It says to use a spray on filler, I wonder if it means a primer. But, the plans are not clear as to what to use. I need a better finish on the hull before I do anything else. Thanks
-
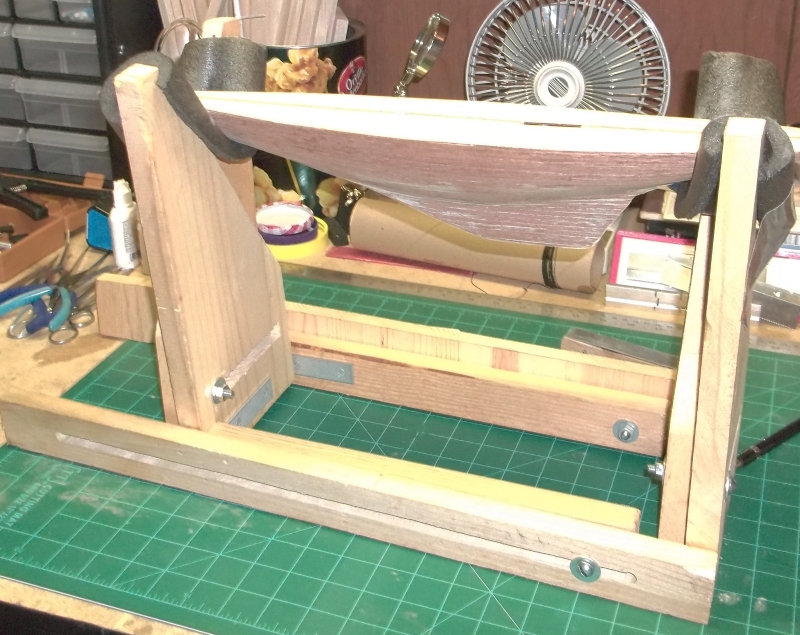
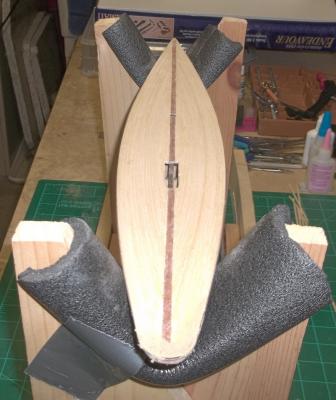
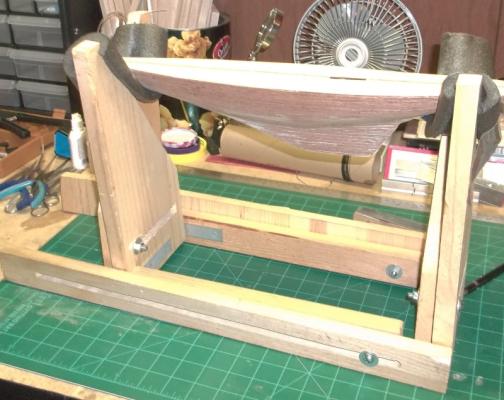
I finished the decking and at the suggestion of my mentor from NRG, Dave Querin, I built a stand to better hold the model. My Panavise was deforming the wood some.
-
I purchased this book last month and it is a very good resource for modelers.
-
I most likely will use something else on my next project.
-
That is a great idea. I have my mother and wife looking for an old steam iron. More bad news, the mahogany strips are .5mm x 3mm so after some sanding, they begin to get so thin it started to flake off. I had to place some patches of strip in. I may end up painting the entire hull. I have finished gluing the decking and will post those pictures tomorrow.
-
Yes it was an older song. "On the cover of the Rolling Stone" by Dr. Hook
-
I was not expecting the thin mahogany planks to twist and try to pull away from the hull like it did. I should have tried bending them some. I am not sure how to use a bender, I have the ones shaped like pliers.
-
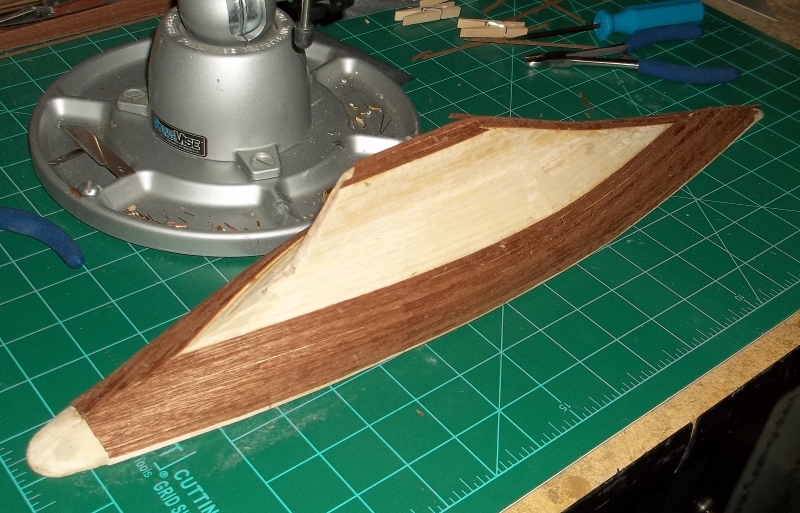
After a good finish sanding on the 1st planking, I have started the 2nd planking of the hull. Any tips or suggestions?

-
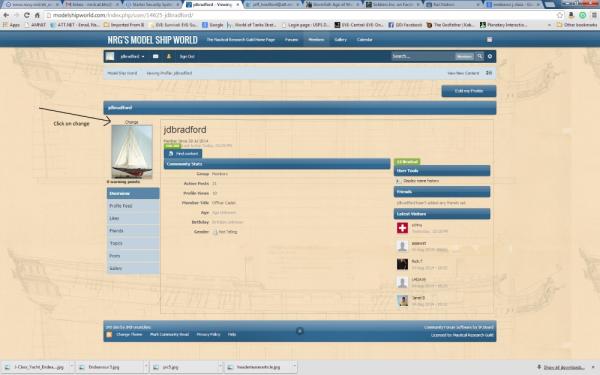
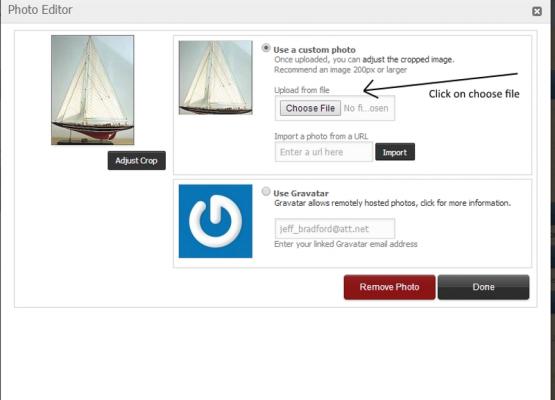
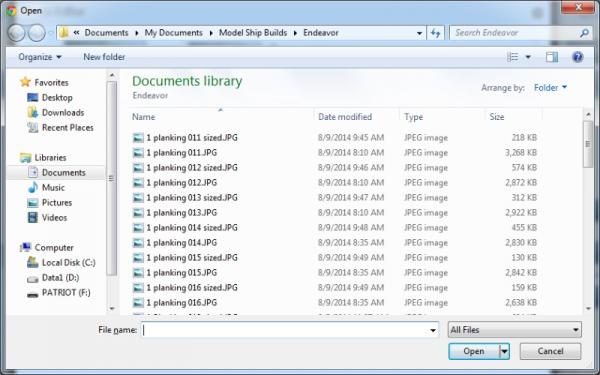
I have a couple of screenshots that may help you add a picture to your profile.
-
Going back to your first pictures showing the stern planing area, your planks appear to be wider than the ones I had in my kit. Looking at my picture what do you all think?