Thistle17
-
Posts
1,054 -
Joined
-
Last visited
Content Type
Profiles
Forums
Gallery
Events
Everything posted by Thistle17
-
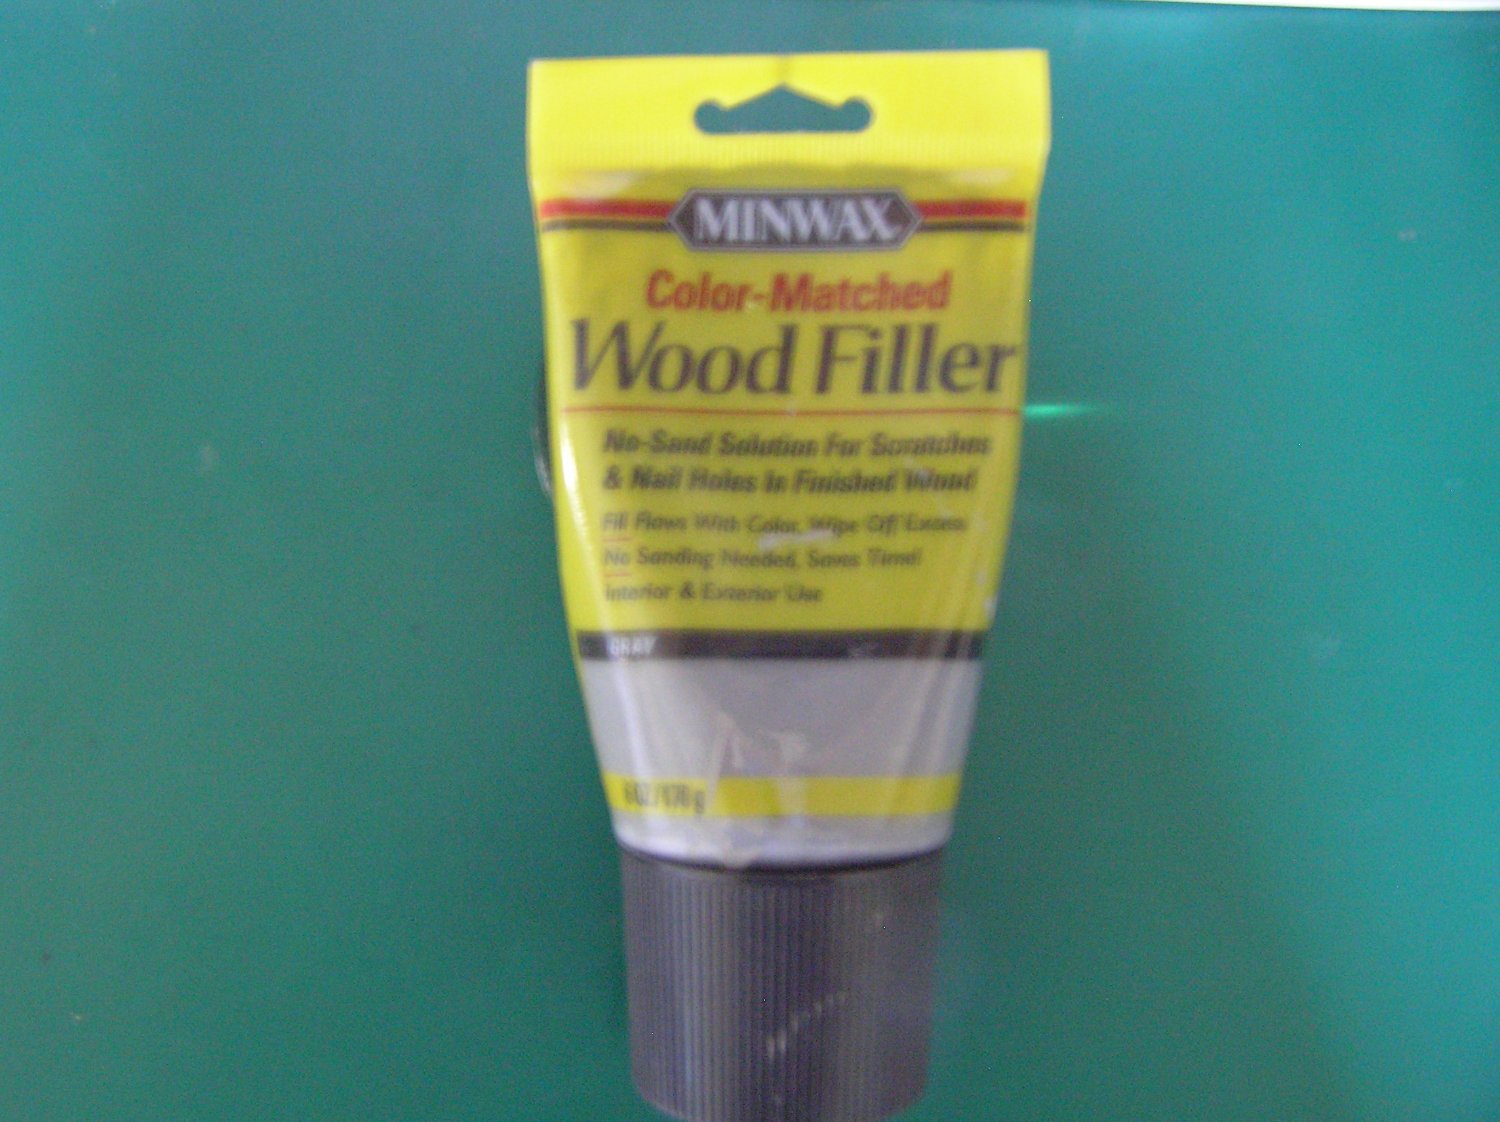
 As indicated to Pete we are pushing to get the model back to the museum prior to winter with the top sides painted. An impediment to that goal has been the refinement of the hull et al surfaces. Between weather extremes of hot, humid to dry cool some seams have opened up under prime. This is not a surprise as it is a wood model after all. And because of its size these voids just scream out at us. I have been searching for a suitable glaze or filler for these voids that was easy to work with. This has been an ongoing search. Well 2 weeks ago I stumbled on a product. The one shown is easy to apply, can be damp finger controlled in spread, dries hard in a day or so, fills small voids and cleans up with water on hands and applicators. And almost as importantly it does not seem to dry up in the tube like my other tube wood fillers. The one last test is compatibility with primer and paint. It is even a grey color! Joe
-
Well a very grateful thank you for sharing this trove of info. As we are nearing the detailing stage of the model this should prove invaluable. We usually do try to do continued research on this project because of it's storied past and the interesting way ( not withstanding its confounding and progressive disclosures) it was buil and modified during service but of late it has been an off/on order of build/ Joe
-
Thinking back to when such a technique was not available one has to admire those builders of "yesterdays"models. You continue to refine laser fabrication each time you advance this build. Your techniques put this project within reach of so many more of us than was possible in these past few years. I hope everyone appreciates your engineering efforts. Joe
- 1,784 replies
-
- 3
-

-
- winchelsea
- Syren Ship Model Company
- (and 1 more)
-
Beautiful execution Glen! Inspirational! Joe
- 840 replies
-
- 2
-
-
- winchelsea
- Syren Ship Model Company
- (and 1 more)
-
And thank you Glenn for the encouragement and alert. I have been looking ahead and have anticipated the need in this area. I am plodding ahead with the gun port lower sills as I write this. Indeed boring and annoying as the placement of those members is such a pain. I have found that the only good way to fit those members is to use my Byrnes sander and carefully tune them to fit. It is surprising that with all the time I took with the bulkhead positioning that I find when using Chucks measurement of the members right at the strong back by the time I get out to their extremities they are quite different! I have had to clamp them in place to hold their position in most cases. I will also add the members in the areas where the gun ports are absent to make the assembly more rigid. One amusing thing I found was that my "clever" method to hold the fragile uprights in place with spot glued battens had to be removed to make the sill and filler install work as I had no lateral movement capability.. Seemed like a good idea at the time! I do have one question that maybe folks can help me with though. I have yet to run across an indication of just how thin the inside of the uprights of each bulkhead should be sanded after I finish the hull planking. Is there a measurement stated somewhere? Joe
-
Thanks Frank! I may be a slow learner but all the wonderful work others have shared keeps me motivated. I marvel at those amongst us who can pull it off the very first time. Joe
-
Amongst other things I have been stuck in my own follies of late so just getting back to witness your handsome model and expert work. That wood looks so warm in those pictures and that stove is just a masterpiece! Joe
- 642 replies
-
- 1
-
-
- winchelsea
- Syren Ship Model Company
- (and 1 more)
-
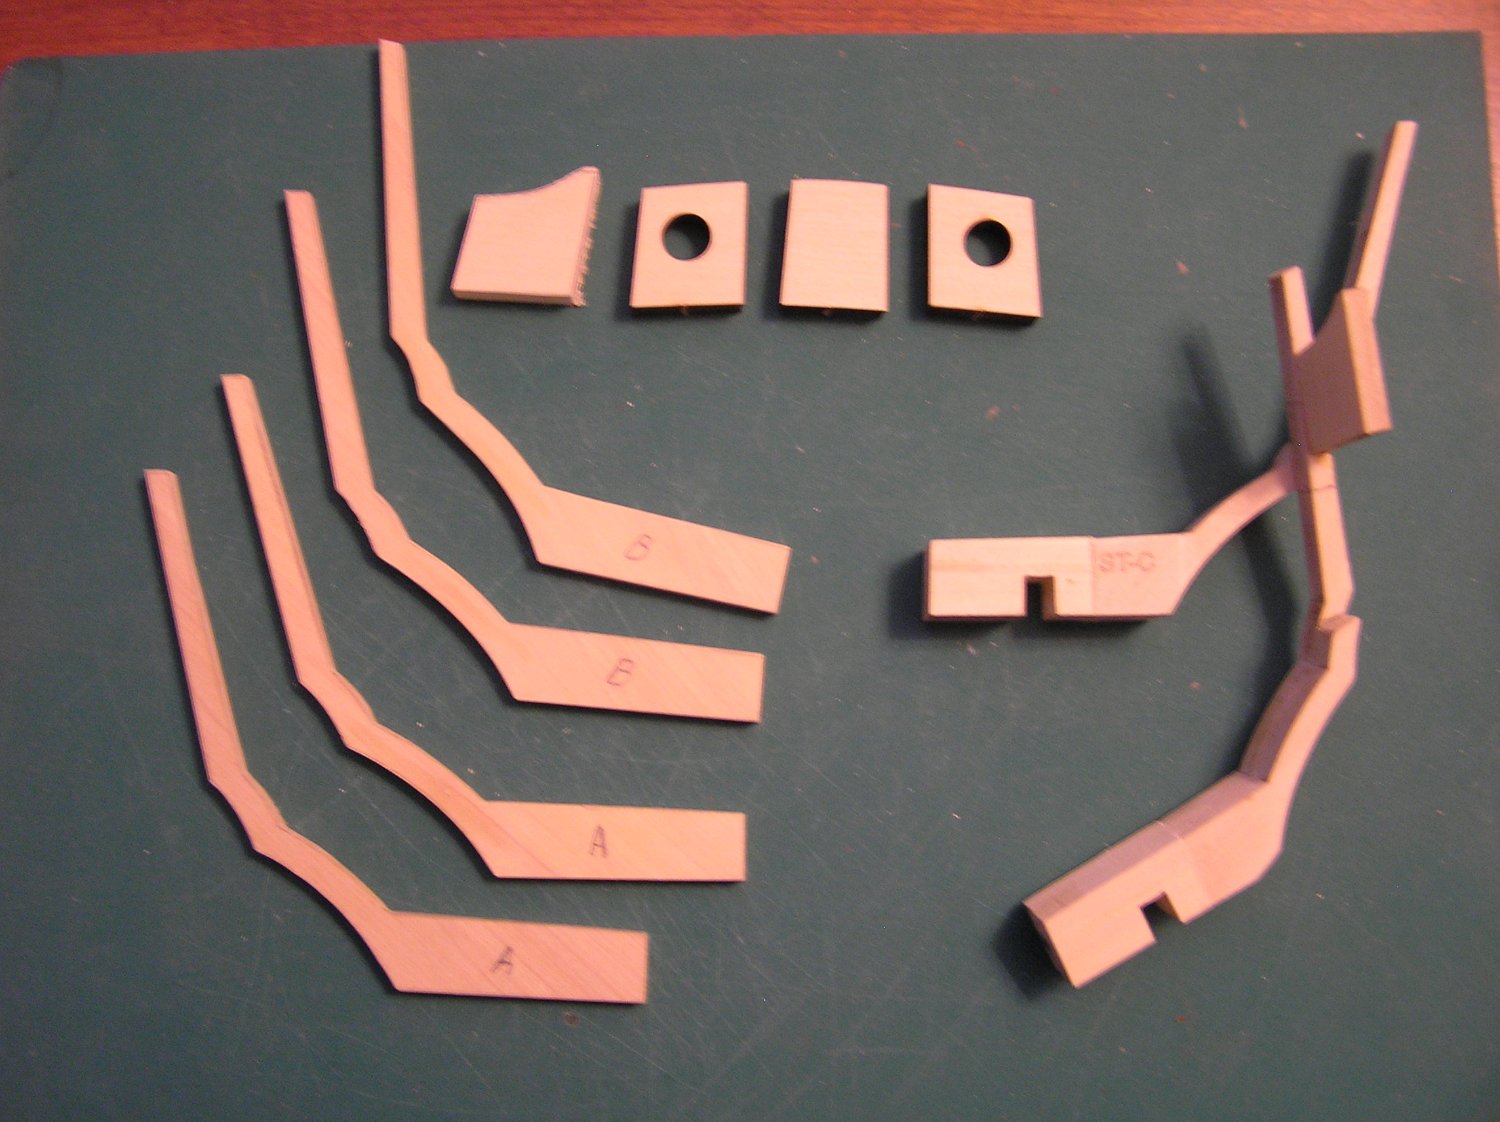
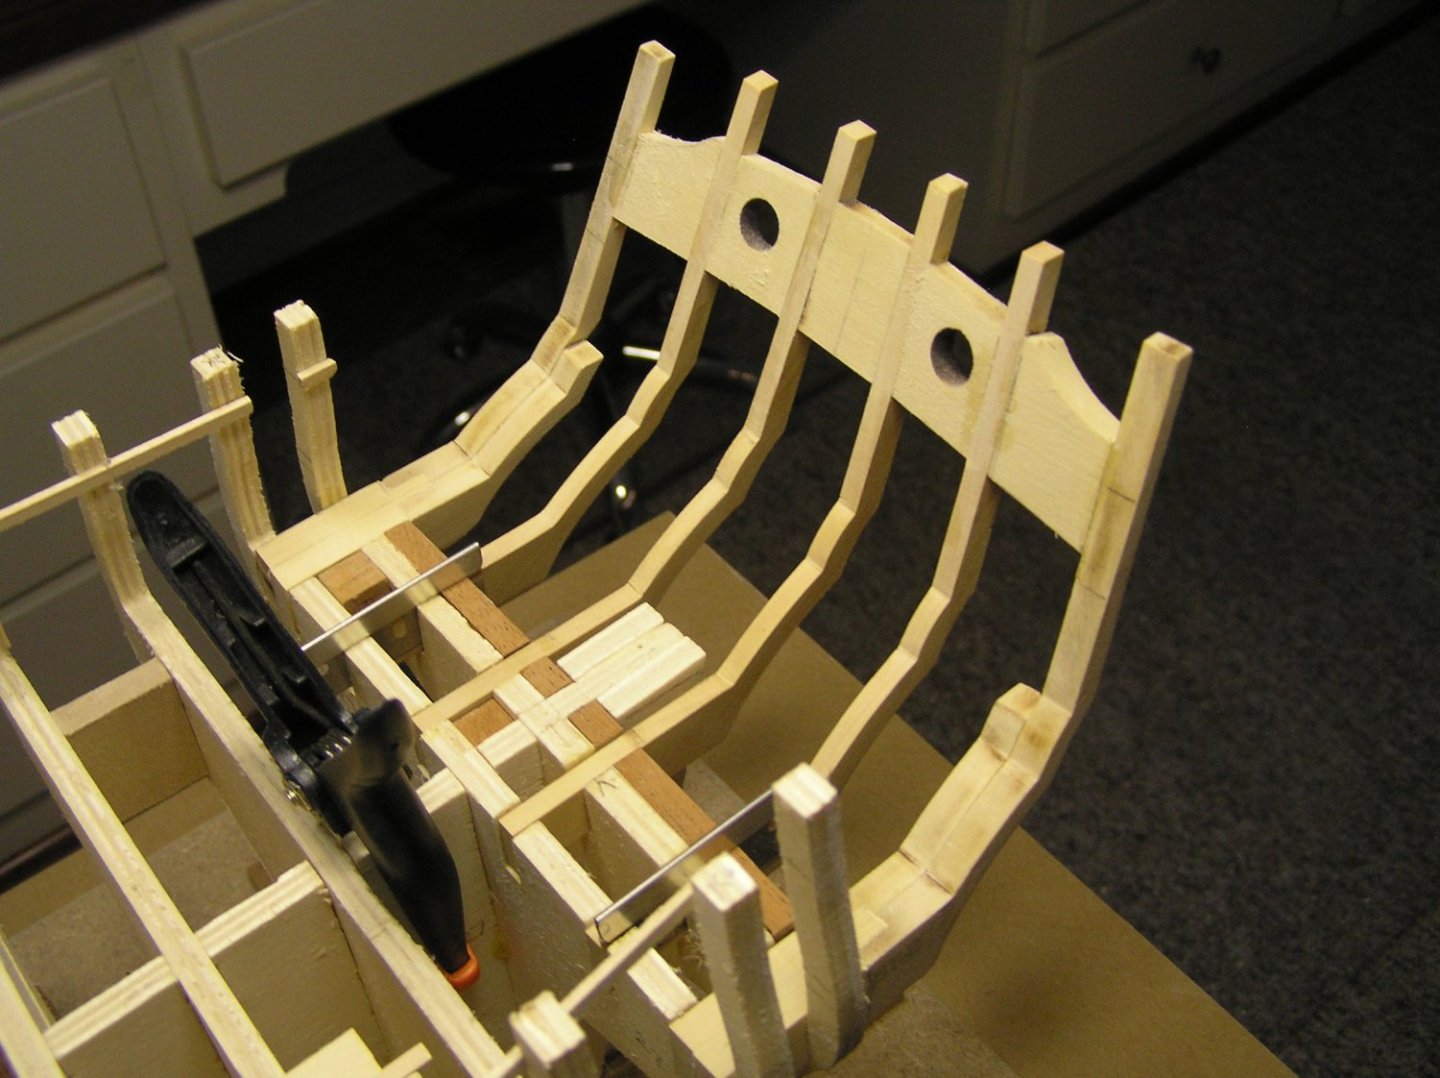
After some 20 days of on and off focus on this build I finally believe I have a worthy transom construction that will carry me through. The first photo shows the transom sub assembly (sans the lower sills) dry fitted onto the frames. If you have been following along my path to this point you are aware it has been a circuitous and not without folly journey. Fundamentally I just did not appreciate the criticality of the transom positioning in relation to the quarter galleys. So anyone approaching this area should be fore warned. Having said that and for what it may be worth to others I would like to share my methodology. I would not say it is the definitive way of doing things for there are a number of ways within the build blogs that worked but for me it replaced the awkwardness of paper patterns especially when removing and replacing the assembly. In stepwise fashion here is how I approached the construction: 1. After making the new frame members and repairing the P and S outer ones I repositioned them in the registration slots on bulkheads #27 through #29. My slots were a bit sloppy from my first try at building the transom so some shims were needed to hold them in place. 2. I then took the transom laser cut outer 'skin' shown in the second photo and clamped it to the outside of the frames. It was positioned so that the relief around windows was equal. The "fit" templates (1 thrugh 5) were then placed in between the clamped frames and the whole was adjusted accordingly to ensure that this piece was placed vertically (aligned at the bottom to the topside of the upper edge of the counter) and again symetrically around each window opening. 3. Lines were traced down the inside of the transom piece where the frames should align. See the markings on the inside of the transom piece. You will also note a center line on the transom piece. 4. Starting with the inner 2 frames the filler piece was sanded to fit the exact opening. It was then glued in place to both 'A' frames. It too was marked with a center line. 5. This assembly was removed from the model and the aft side was rough sanded to nearly its final thickness. 6. This sub assembly was returned to the model and once again aligned with the transom piece via the premarked center lines. 7. The next transom filler piece was edge sanded (with the appropriate taper) using the guide on sheet 1 of the plans and trial fitting on the model such that the port hole concentricity was achieved. This is a bit tricky but doable in carefully repeated steps. The registration guide supplied (i.e. #2) was used to ensure that the sizing was proper. It was then returned to the model and glued to frame 'A' only. 8. Once the glue had securely bonded (I take extra clamp time when edge grain is glued to face grain) I then sanded this added filler off the model to near flatness to its frame. I then reclamped the transom filler to the frames ensuring alignment and clamped the 'B' frame to this new sub assembly to check for edge trueness, port hole alignment etc. If satisfied I glued frame 'B' to the sub assembly. 9. This same process was used for the port side filler of the same type. 10. Iteritively, this process was repeated for the remaining frames and fillers. 11. I must repeat that all along the way I used the spacer registration pieces 1 through 5 repeatedly while fitting and during assembly. And as importantly I used the angle template made from the drawing to ensure that the final assembly would have the correct tilt from vertical. 12. Lastly if one measures off the drawing where the inside of transom piece 'C' must tie into bulkhead #28 with the horizontal member that becomes the header for the quarter galley passage way you will find that it has to be 61mm across its top. Before final gluing that should be checked P and S. Joe Just an editorial comment: Chuck must have had me in mind when he made duplicates of all the transom filler pieces. I used and went through them only having to make the outer ones from scrap on the originally supplied parts blank.

-
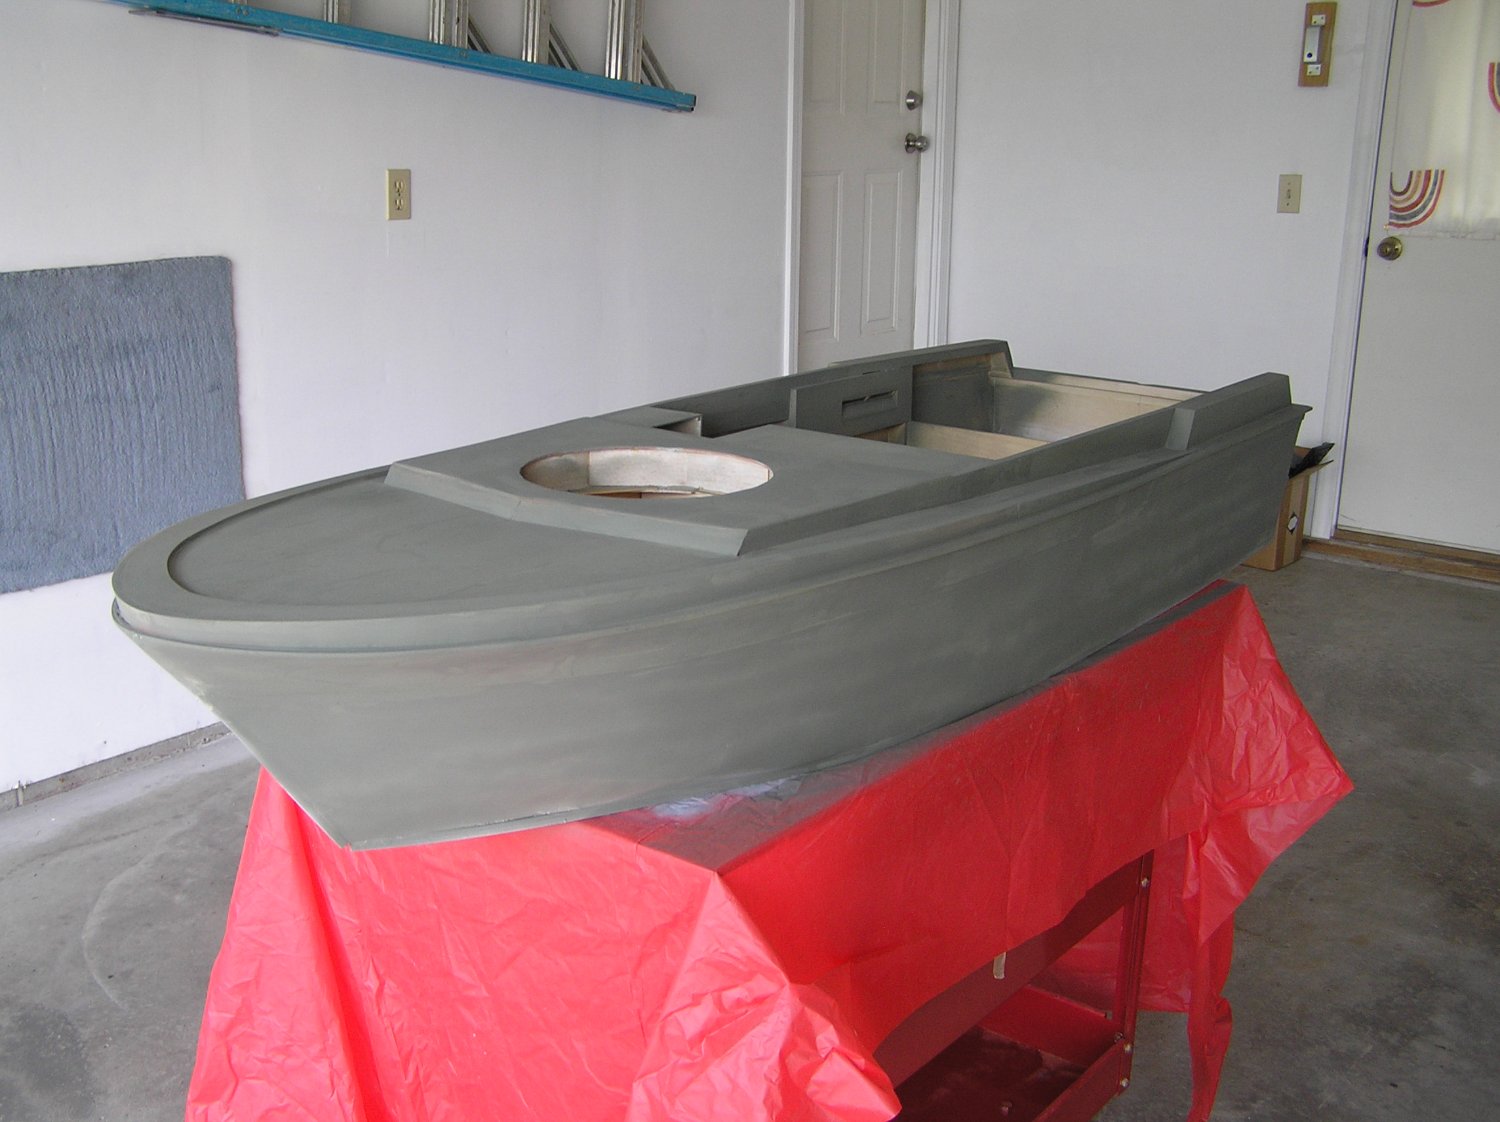
Progress on the PBR hull in just the last day. Out of the basement it came on a very arrid, warm day and we managed to get nearly a full coat of primer on the topsides, insides and some of the hull area at the rail. Not surprisingly voids or "holidays" as the painters trade calls them popped. These were filled with Nitro Stan glazing compound and will be wet sanded and primed once again when the hull is dry. This hull has been in the basement since early days of the Covid lock down and it is time for it to go back to the museum for further outfit. I will be so happy!!!! Note that this primer is amazingly tinted like the top coat so it should be less of a problem for us to finish caot. Joe

-
After preparing all the sistering planks to facilitate use of the existing transom framework I had second thoughts about this method of repair. Knowing that a poorly fit and aligned transom implied problems, possibly unrecoverable, when it came time to include the quarter galleys I scrapped the idea. Instead, using the kit blanks for the intermediate frames I made new ones of boxwood. As stated I never throw away the "blanks" for just such a reason. I remade frame pairs for 'A' and 'B' elements. They were rough cut on my scroll saw, sanded on my disc and drum sanders to the traced lines and they were hand tuned with files and chisels. Finally they were ganged together and fined tuned further for conformity. By the time I finished I had yet more respect for the accuracy and repeatability of laser machining. I was able to repair the 'C' and 'D' pairs as stated earlier so with the spare filler parts included in the Chapter 1 ensemble I will start again to assemble the transom using selected techniques developed by those wiser than me. Joe

-
Nicely done Gary. I also like that bow filler. Besides adding more surface for adhesion it makes the "sweep" so much more true. Joe
- 389 replies
-
- 2
-
-
- winchelsea
- Syren Ship Model Company
- (and 1 more)
-
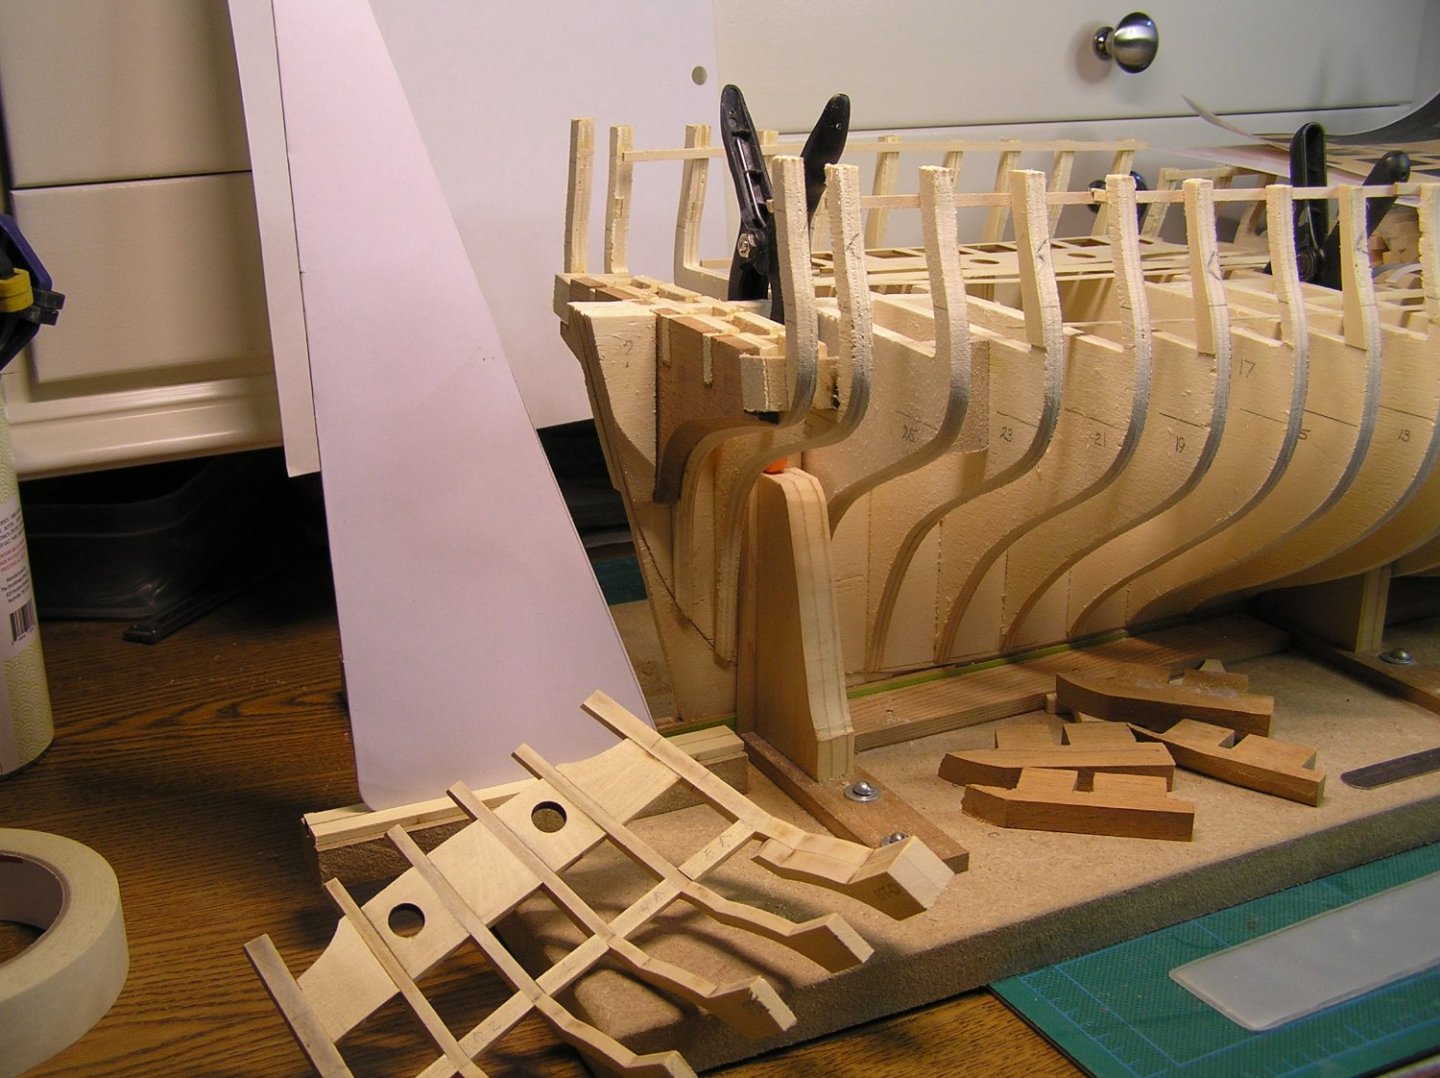
As I was preparing to build anew all the elements of the transom it struck me that I might try to salvage the transom that I had sawn off on my last attempt at assembly. Since my transom angle was the driver for the removal it seemed to be a waste to just abandon it without trying a repair. I first trued up the cutoff ends of the port and starbaord C/D frames. Then I mortised into the cleaned up ends a deep enough mortise to give a tenon a substantial seat but not too deep as to protrude aft. Having saved scrap cedar from the kit I glued up "extenders of the same material thickness and let in the registration socket in each. One "extender" was cut to length (including the tenon length) for the starboard side. It was glued up using the cutout template for the element alignment. Since it had broken away from the transom full assembly it was easy to machine. The fuller assemblage was a bit awakward but it did fit my mill vice with some creative clamping. The port side extender will be cut to length and milled in a similar manner. The mid transom frames would be more difficult to repair with them in an assembled manner so they will be treated differently. Since they require simple extenders I will "sister planks" of appropriate dimension to A and B frame ends. Having done so I will open up the respective bulkhead slots and reinstall the repaired transom. And this time I will use the template guide I fashioned. Hopefully I will be back in business soon. Joe
-
I just tuned into your build and plan to add you to my list of member builds. I don't revel in your problems.The transom is not an easy area to construct as many are finding out. Even the most experienced members have had either issues or have had cause to pause in that area. With those quarter galleys counting so much on transom correctness it separates this model from others such as Cheerful. I have been struggling with the transom on my build. Through some self inflicted wounds, problems related to doing enough homework, moving too fast and the like have me now in a transom restoration. I find your methodology and process instructive. Thank you. Joe
- 389 replies
-
- 3
-
-
- winchelsea
- Syren Ship Model Company
- (and 1 more)
-
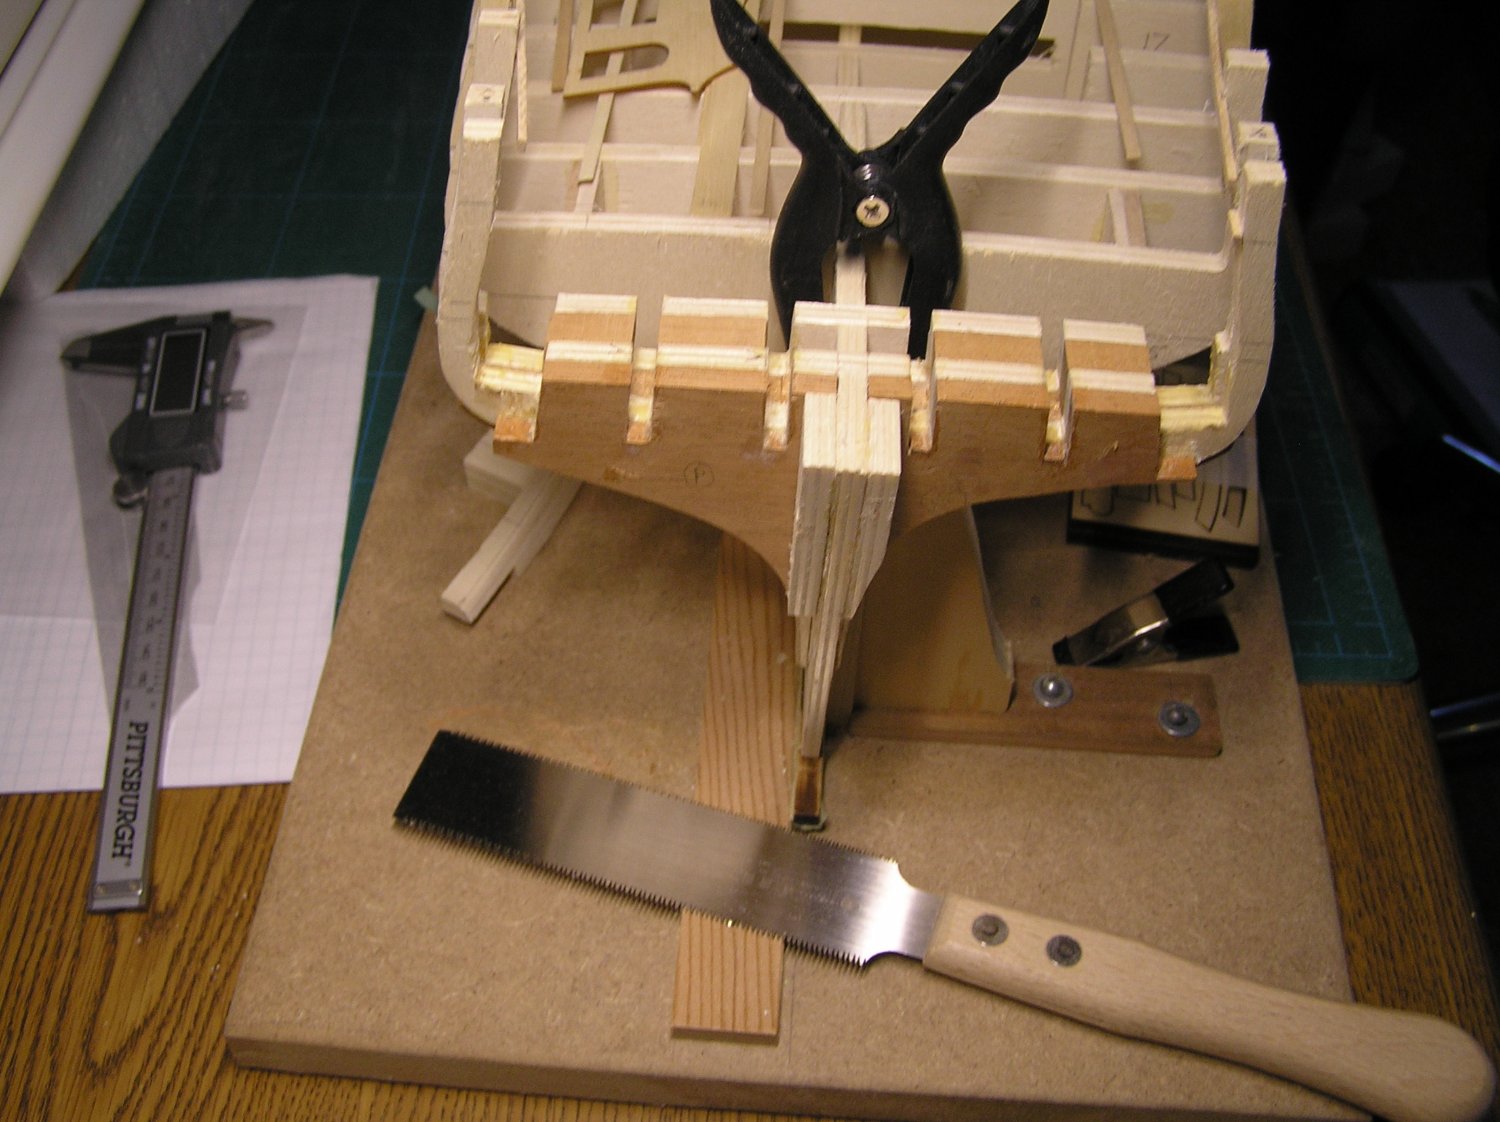
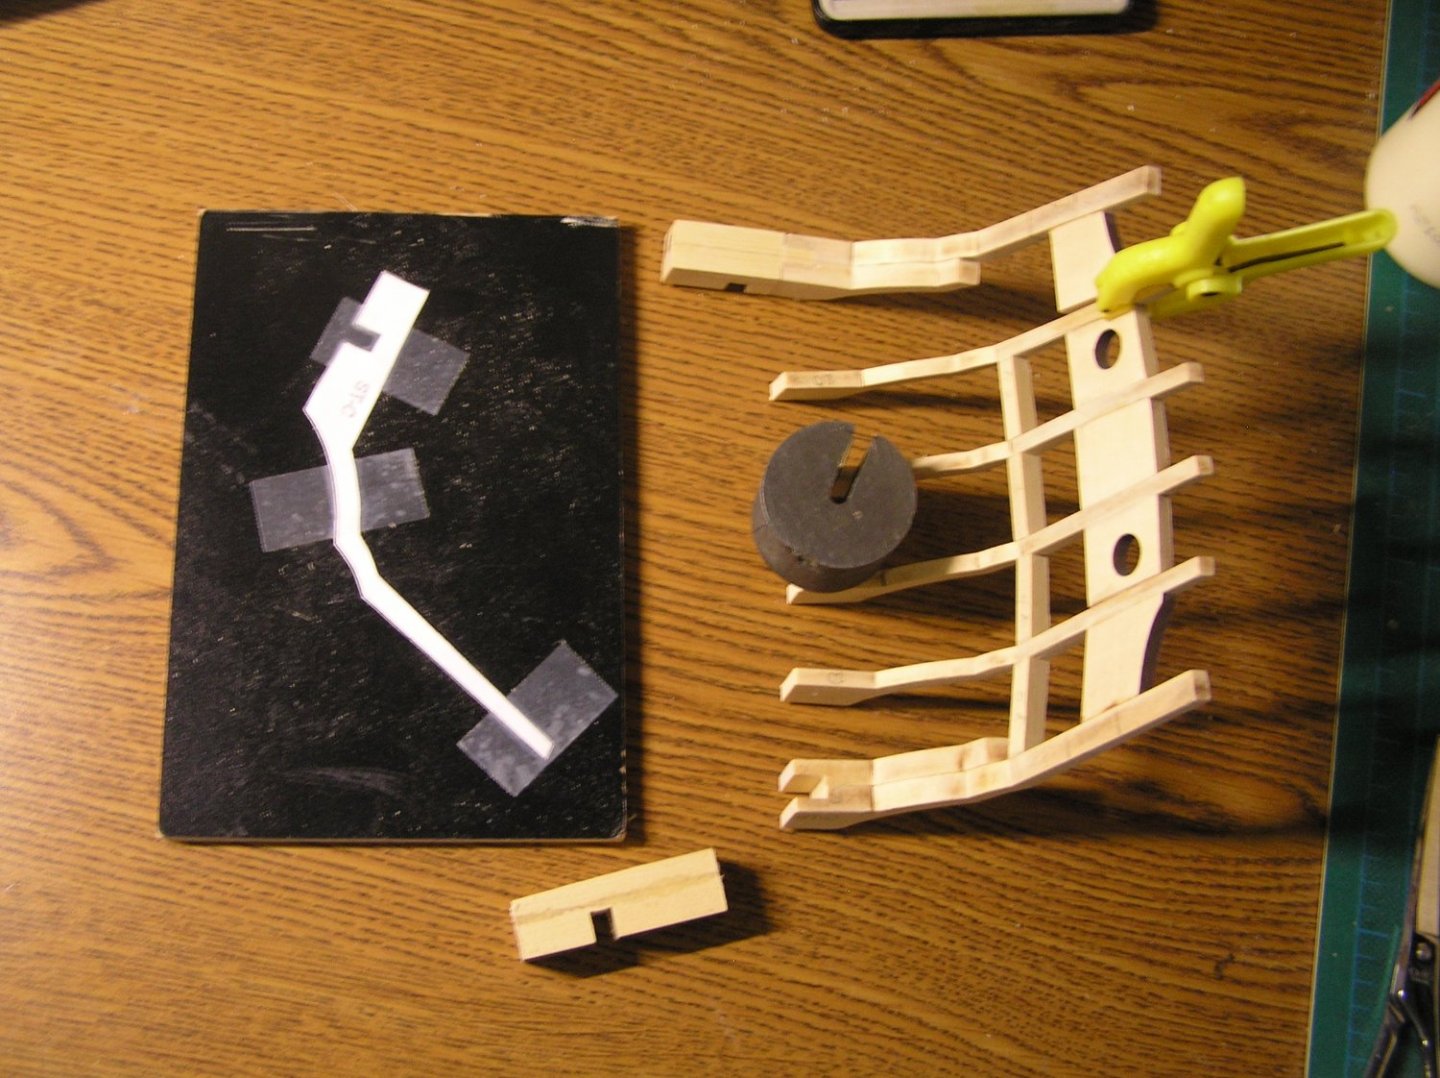
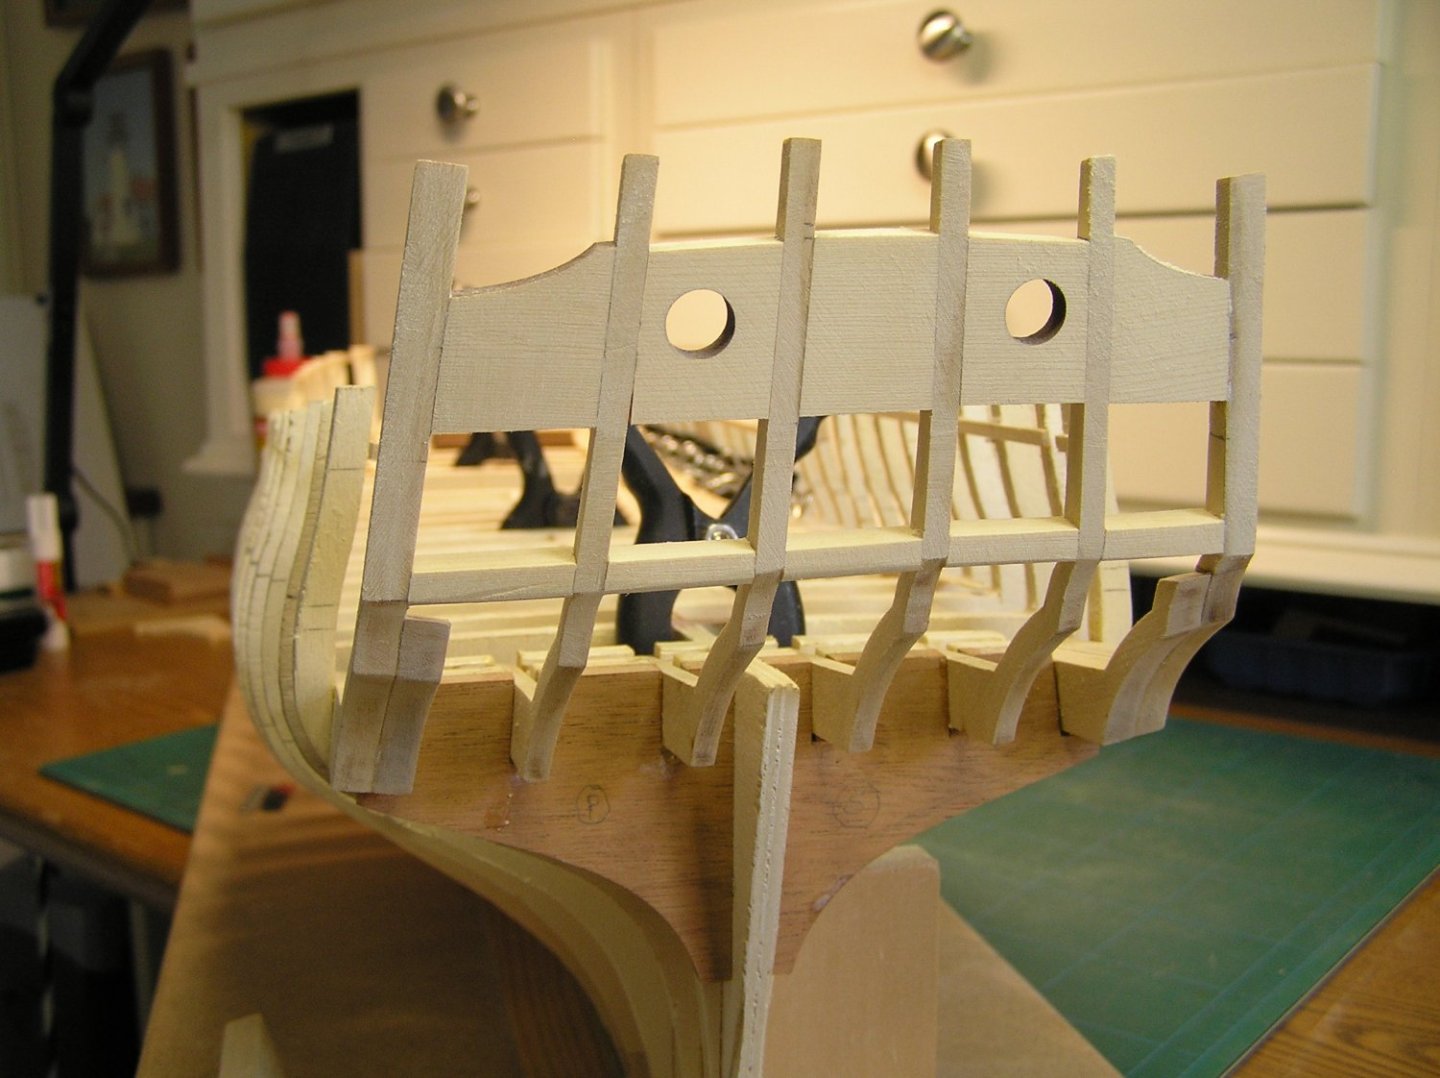
I managed to remove the sawn off frames and preserve the openings in the existing bulkheads. Of course there is residual PVA in the joints which will prevent good bonding of the new frames. I will attempt some remedy without opening up those frame slots. I had mentioned that I had two unused intermediate elements that were meant for the first go around. They are shown dry fit between #28 and #27 bulkheads. While they do not add much as fillers for strength they certainly will give some much needed unspoiled glue surface for the frames. I am milling the boxwood for the frames and will be cutting them out shortly. The saw in the foreground is the one I referenced earlier. It is such a great tool! Joe

-
Glenn I am of your thinking. While I pondered the way out I cleared the slots in the existing framing. It took awhile so as not to destroy any semblence of alignment in the current bulkheads. I also had made some mahogany inserts, that I never used in the first go around, that fit exactlly between bulkheads #27 and #28. They could give me more glue area for the frames. (As an aside I bought through Lee Valley their flushing cutting Japanese double edge pull saw. That has been a marvelous tool for getting fine accurate cuts such as these without wasting away material unneccessarily.) Having reached this point I pulled out saved AYC plates, of chapter 1, that contained the frame elements. I am going to have a go at fashioning the stern frames from that blank. I have learned to hang onto any blanks for just such a use. I do not have AYC of that thickness but I do have box wood that can be used. So, even without that margarita, thngs seem to be looking brighter at the moment. Joe.
-
In the continued fairing process and double checking with template cutouts prior to port hole structural member installation I find I have yet another self inflicted "wound"! I thought I heeded the warning regarding getting the transom postioned correctly as a major factor to get the quarter galleys to come out correctly. But I found the transom angle incorrect after building the simple angle guage. I judged it was not "tweakable". In thinking back I had used my adjustable digital angle guage prior and I can only speculate that the set angle changed from setup. To my dismay I found the transom angle too far off when compaerd to the guage shown. I can trace back some of the creep to my early attempts of fiddling with bulkhead #27 slot depth. It was not much but just enough to give me a cant too sharp to the vertical. Progress came to a scheering halt last eve. This morning I realized there was no opportunity to finesse the error. So off came the transom framing againt bulkhead #29! Now I am faced with the task of how I am to fix this problem. So with Jimmy Buffet's lyric ringing in my head ("Some people claim it's a woman to blame. But I know it's my own damn fault") I have looked at alternatives. None seem to pop at the moment. 1. Start all over again from the skeleton forward. Problem I see is that the framing kit is not even offered on the Syren web site at this time 2. Hat in hand go back and buy Chapter #1 kit for the 3rd time (I just sent it back and got a refund). It includes all the transom parts. How can I do that???? 3. Remake bulkhead #27 through #29 and transom components by hand. Cut out those bulkheads and start again. All need to be cut extremely accurately and identically, especially in the slot areas. So I will let this "cook" for a day or two and proceed. Maybe after sipping a couple of those margaritas it will come to me. Joe
-
If at first you fail to succeed try again...and again...and again! After 2 weeks of on again off again fiddling with the transom framing I think I finally arrived. In no small measure the suggestions and even the "boot in the tail" of the 'master' were the incentives to confront my impediments and move forward. As previously mentioned one key element was the replacement of bulkhead #29. I had adjusted the slots so much of the original ones that I lost the ability for the frames to stay put during construction. So I remade them out of some mahogany that I had gotten from a pattern maker. It took a bit of deliberate hand sawing to get them precise but in the end they proved to be the solution to the loose fit problem of the frames. From that point on it was just a matter of hand tuning the stern upper fillers to get the correct curvature of the stern. In retrospect the 'boot in the tail' also got me to reflect on my state of mind during the prior attempts. As cautioned so many times before slow and steady is the ingredient needed on this model. But I might add one needs to have the right frame of mind and concentration is a must. I just didn't have it before. I was so frutrated about a week earlier that I even ordered the Chapter 1 kit again in anticipation of starting over. It turned out it was not needed. While I am at it I would like to comment on the Syren kit. To have the kit manufacturer design, build and create instructions in a progressive manner is not to be taken for granted. When I finished the stern framing construction I pushed back and mused that Chuck must have had me in mind when he produced the kit parts for this section. Who else adds 'spare" parts and template guides as they perceive that some folk will have trouble in this section? So in the end I think I am where I should be on the transom. I do have some upper counter tuning to do but for the most part it all works. The transom covering piece fits nearly perfect. For me the key was to concentrate on getting the stern port distancing precise. Joe
-
Thanks Chuck. It seems to me I am loosing some concentration in addition to being too cautious and over thinking things as you say. Believe me I am reading the monographs, especially yours. I came back to the model after I'd walked away for an hour and figured it out. Of course when I trim (sand) back the 'C' frames they will give me the relief I need and when I bevel and fit the fillers all should come out well. I have come to be so sensitive to the fit of the elements since if not correct it will be a disaster with the construction of the quarter galleys. What I ended up doing to get the transom frames to have the right fit and sit well was to remove bulkhead 29 and replace them with hand made new ones. That cured almost all the problems with frames "'A' and 'B' as they were too sloppy a fit with all my prior tunning. Joe
-
I believe I have reached a milestone in that I have been able to fit all the stern frames correctly and glue in most of them (save the 'C' frames). I have used just about everyones suggestions along the way to do so. Photo(s) to follow. The reason I have not glued in the 'C' frames is that thinking ahead to the quarter galley, fill pieces that will be glued to the inside of the transom element, I am a bit hesitant without asking the following: "Knowing that the planking is 3/64" the galley fill piece edge has to butt up aginst the planking (I understand I have to taper that edge carfefully for a good fit against the hull). So I assume that one needs to account for that 3/64" plus a TBD amount so the filler creates a relatively even lip for the galley rear window. Now the galley filler inside stile is 3/32". That tells me I have to remove just about 3/64" from that stile. Am I correct?" Joe
-
One word describes your work....elegant! Joe
- 840 replies
-
- 2
-
-
- winchelsea
- Syren Ship Model Company
- (and 1 more)
-
Thank you all for your ideas and thoughts. I intend to employ them in the next round. I ordered the kit parts this AM and have patterns cut for potential replacement bulkheads should I need to go that far. I saw a method on the Tally Ho restoration (YouTube) involving the precise layout of critical opening cutouts of covering boards on her deck that might be something worth trying out as a jig. So Edward we will see. Joe
-
"DON'T TRY THIS AT HOME!". As one might have guessed my idea of assenbly of the transom in the manner I described while not a disaster was not a complete success. It actually fit the bulkhead slots but as I moved outward from the mid transom frames, especially the 'C' transom frames, it became an assembly in tension. So with 'hat in hand' I reordered Chapter 1 parts again and will start the process over. I have found this segement quite a challenge as there are so many ways that this can go wrong. Am I the only one who has tripped up on this? Joe
-
Chuck I understand your doubt. I share it. I did forget to mention that I am tapering the upper stern frame fillers as the on line instructions relate and I am using the guides (1 through 5) to help in the contouring. As I proceed I am taking the partial assembly to the model and testing the fit. So far with one of the 'B' frames correcctly postioned it fits and fits comfortably. As we have discussed my start up has been unconventional and I am paying for that. It was a hard lesson learned that will not be repeated. My escape will have to be some level of do over if it is a disaster. Joe
-
Thanks Glen for that perspective. I did wonder about how the effects of trimming to fit was going to turn out in the end, Your input gives me the caution I need to hear. Interesting comment on the U and W bulkheads. I will watch that as well, Joe
-
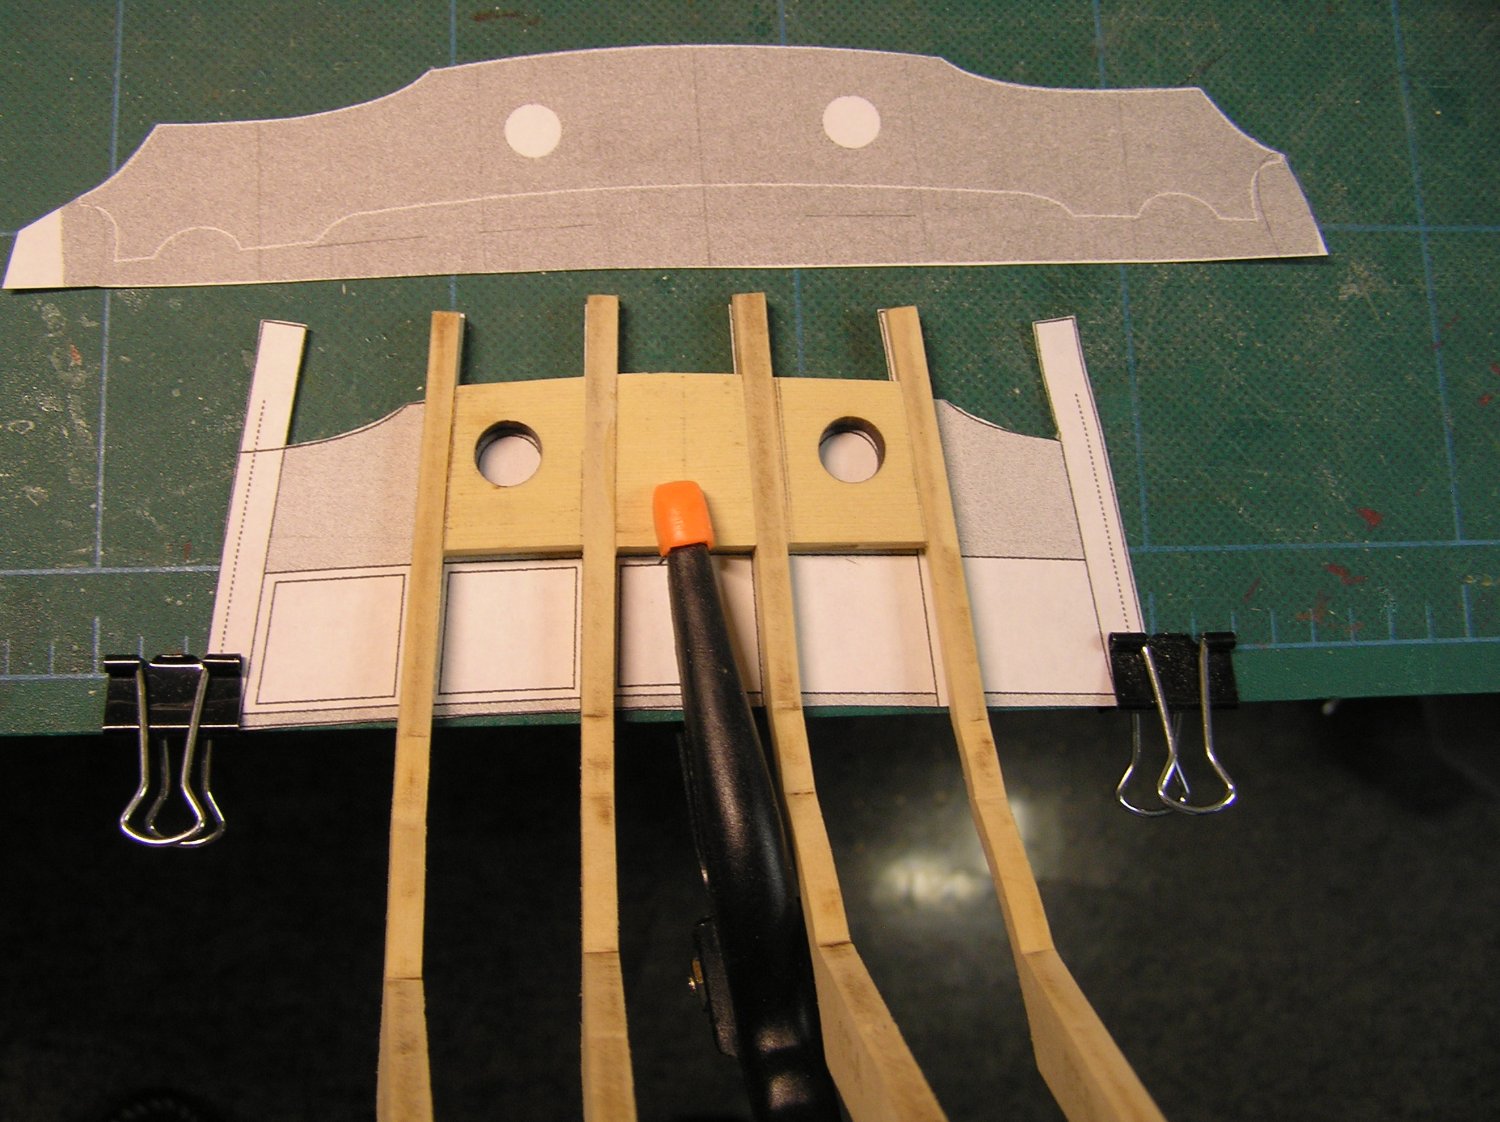
Let me lead in with the following statement before I get into the methodology I have adopted for the stern framing. " In no way am I making any disparaging comments as to the fidelity of the Syren kit parts in my comments herein. I have always found the parts to be well designed and manufactured." Having said that I think many of you might agree that the Winchelsea transom is a bit tricky to assemble and fit correctly. Simply put, it takes quite a bit of care and trial fitting to get it to come out correctly. Not withstanding it all has to take place in mid air! Well it was a bit more of a struggle for me under my circumstances. The problem is unique to my "framing construction" and would not affect others. I only share it for some of you that may be having trouble with "in air" assembly. After a number of attempts to fit the transom frames and fillers in place while all elements were stepwise fit together on the frame. I had to abandon that approach. Before I get further into it I should also say that sanding, chiseling and filing the stern frame slots on #28 and #29 bulkhead resulted in some loose fitting slots. That made the "in air" assembly yet more awkward. So I resorted to an "on the bench" approach. I copied and cut out the stern layout drawing on page 1 of the drawing set. I began with stern frame(s) 'A" and the associated filler for these frames and overlayed them on the drawing cutout. There is no filler tapering required on the filler but to have the frames correctly align I did have to trim the mid filler a bit. Now before going on one has to realize that this is a 2D drawing of a slightly curved transom and has not been adjusted for the concave effects ( I believe this, as the "port holes" in the frieze or the transom covering line up quite well). Successively I am working my way outward and at each step checking by fitting on the stern and with the transom cutout. Note in the picture that the port side filler has yet to be trimmed to fit. I have my fingers crossed that all will come out in the end. Else I may have to repurchase some parts. That will be humbling! Joe