HOLIDAY DONATION DRIVE - SUPPORT MSW - DO YOUR PART TO KEEP THIS GREAT FORUM GOING! (Only 24 donations so far out of 49,000 members - C'mon guys!)
×


toms10
-
Posts
929 -
Joined
-
Last visited
Content Type
Profiles
Forums
Gallery
Events
Everything posted by toms10
-
 Hi Jeff, I did not forget them. I have them built I just did not install them yet. I will probably wait until the rigging needs to be installed to them. They kind of stick out like sore thumbs so I don't want to break them off until I have to... I just tied all the lower shroud lines to their perspective masts last night. Looking into my crystal ball I foresee dead eyes and knots in my future...for a long time. Tom
- 212 replies
-
- 1
-

-
- constellation
- artesania latina
- (and 2 more)
-
Hi Hipexec, I know what you mean. I hang a bright yellow tissue paper on the tip of the bowsprit and the top of the main mast so they are easier to see.
- 212 replies
-
- 3
-
-
- constellation
- artesania latina
- (and 2 more)
-
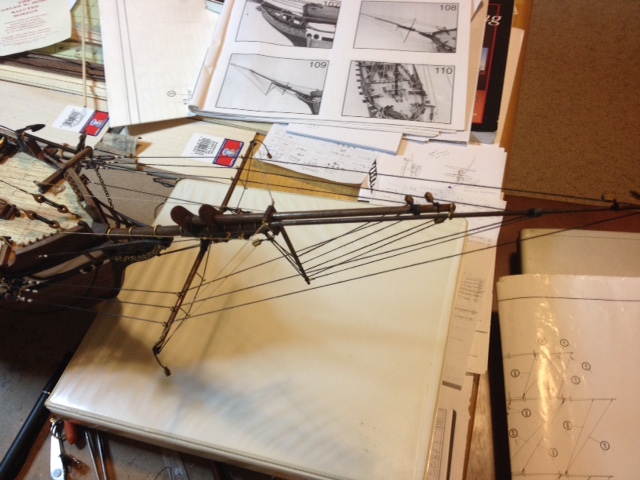
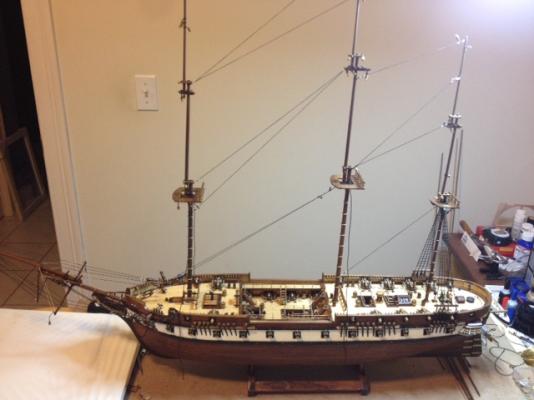
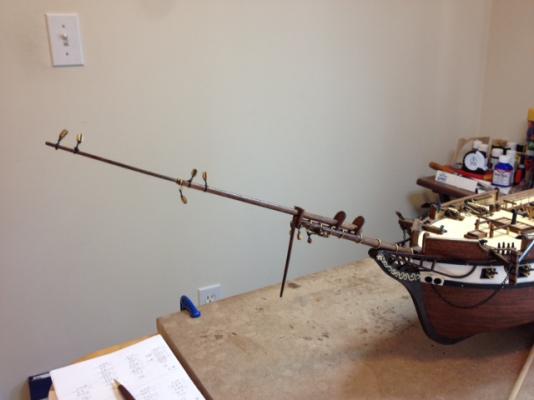
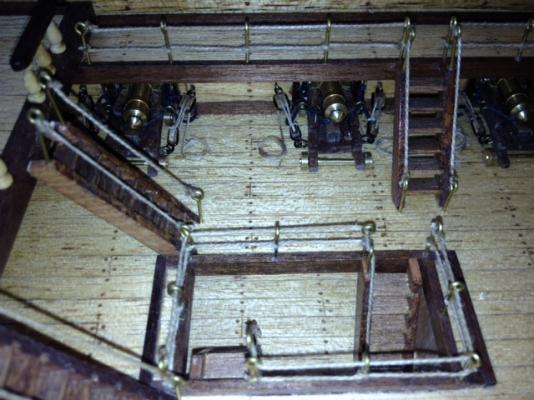
Just a progress post. All the masts are completed I started working on the standing rigging. I just keep telling myself, "Knots are our friends". Since this is my first attempt at rigging, I spend a lot of time deciphering the instructional sketches. Some are a bit vague. I am also referencing the book, "Rigging Period Ship Models" by Peterson. The book is excellent and it really helps us novices understand using very detailed pictures. Some of the bow sprit rigging up close.

- 212 replies
-
- 3
-
-
- constellation
- artesania latina
- (and 2 more)
-
The pencil edgings definitely brings out the decking features. Great decision.
-
Jeff, Nice idea. It is simple and it looks good. The kit instructions want you to put a square hole in the flat piece and insert the square pegs. Making tiny square holes is a bit of a challenge. I overcame this by cutting the square pieces and gluing them on both sides of the flat piece so they looked like they were actually put through a square hole. In reality, there was no hole. Your idea was much simpler and cleaner and it looks great. She is coming along nicely. Tom
-
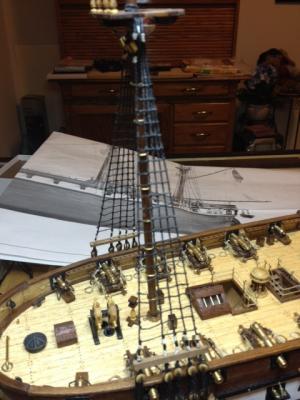
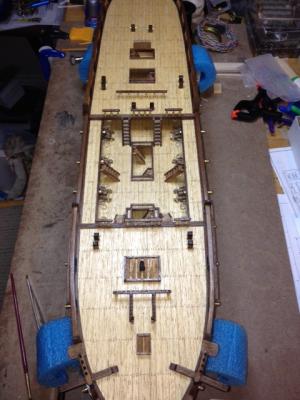
Here is an update as to my progress. It has been a bit slow. The summer weather here has been quite nice so I am taking advantage of it. I have built all the masts and yards for the mizzen and installed the lower mast. I also made my first attempt at rat lines. They came out okay for the first time. Once I got going and figured it out it wasn't so bad... just repetitive. About 220 knots worth so far. I guess my next step is to secure the dead eyes to the top of this mast section and then more ratlines.
- 212 replies
-
- 3
-
-
- constellation
- artesania latina
- (and 2 more)
-
Looking good. Once a mast gets installed the model takes on a whole dimension. Kind of renews the excitement of the build... at least for me.
-
Mark, Thanks for the advice. I will most likely build the most of the masts on the bench and then as you said put the lower ratlines in last. I will probably do a lot of just staring at it too . It is pretty obvious to me now that there really is no "right" way to do most of the build. There are definitely easier ways but if it all comes out looking like you want it in the end then that is the "right" way. This being my first build, it is exciting to be working on something other than the hull. She is starting to take on a third dimension. Patience is more important than ever now that I have so much time invested. Its look is changing quickly and I want to see it progress but there is much to learn before the light at the end of the tunnel becomes bright. Tom
- 212 replies
-
- 3
-
-
- constellation
- artesania latina
- (and 2 more)
-
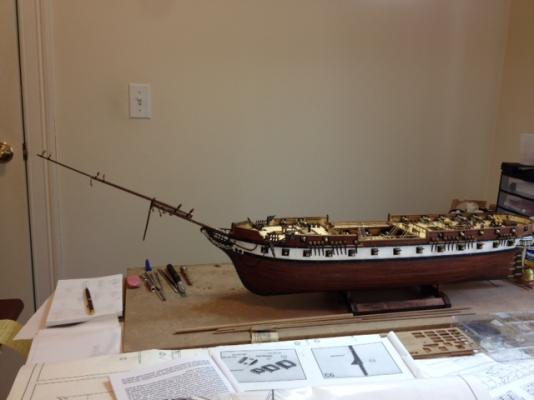
Did my first mast work this past weekend. Bow sprit seems to match the plans. Now on to the Mizzen. I am assuming from the rigging pics that the masts are built and rigged (shrouds) in sections. I mean that the bottom section of the mast is mounted to the deck and then the shroud lines are tied and then slipped over the mast post. Once those are fixed then the next section of mast is attached. Otherwise it would be a nightmare to get the lines looped, tied and seized. I am learning as I go.

- 212 replies
-
- 2
-
-
- constellation
- artesania latina
- (and 2 more)
-
Jeff, It is morphing into a real good looking model. Keep up the good work. You seem to be flying through this build.
-
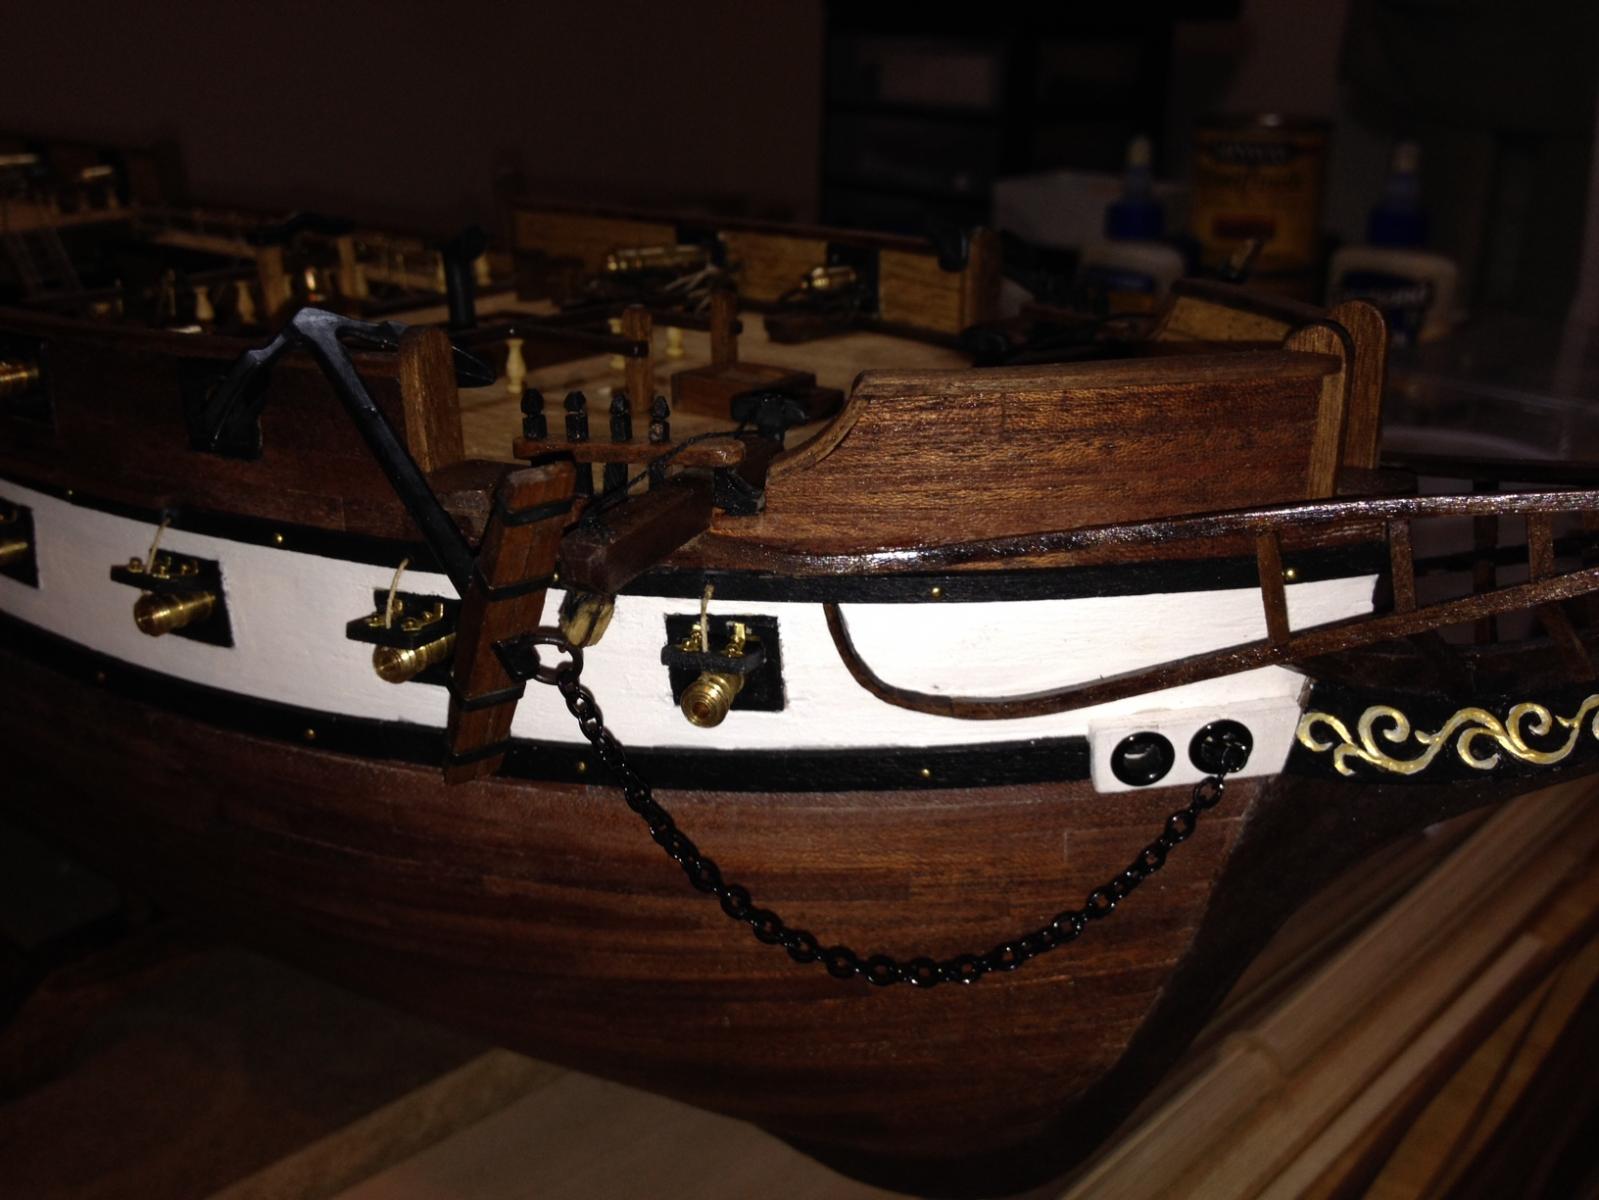
Hi Jparsley, The pics above pretty much show what I did. I drilled 2 holes in the bulwarks and lined them with an extra brass eyelet that I had. Just to the side of each hole I made a cleat and mounted it on the inside of the bulwark so I could tie off the rope. On the other end, I inserted an eyehook into the seats of the long boat. That has a block and tackle set up hooked up to it. The davits have 3 holes drilled in them through which the rope runs through to simulate a double block in the davit. The boat just dangles there. Obviously in real life you can't leave the boat hanging or it would be swinging all over the place during sailing. I am thinking about possibly adding another set of cleats and running some line around the hull of the long boat and through the same hole in the bulwark. That will lock the boat up against the davits and be more secure. I will need to see how that looks. I need to remember that this is a model and will not be in any rough seas! It does however, need to look good. Below are some pics of the chain plates I put in this weekend. They are going to be secured with 2 nails in the end but for now I only used one. This way I can rotate them so they line up with the ratlines after they are installed. Once that is done I will put the second nail in to lock them in position. My boat is starting to get that "busy" look. I also just realized that I need to put in the planks that will hold all the belaying pins on the inside of the bulwarks. The instructions fail to mention these anywhere. Upon reviewing the top view pic of the assembled hull that came with the kit I noticed them... I will never get to the masts! I will use McArdle's book to make these as the pics in the instructions are somewhat blurry and I can't tell how many holes are in each piece. I am sure I am going to need to buy more 8mm belaying pins... I need black cannon balls anyway. The silver ones supplied don't cut it for me.

- 212 replies
-
- 3
-
-
- constellation
- artesania latina
- (and 2 more)
-
Finished the long boat and the rigging for it. I ended up scratch building everything but the hull. The oars I built seem a bit large but I am going to live with them. With some filing and painting, the metal hull was okay. Pics are a bit dark this time, not sure why. Also put the anchors in place. Now I am working on 46 chain plate and dead eye assemblies. Seems I am always finding something to keep me from getting to the masts. I had to jump around in the instructions with this kit or it would have been next to impossible to put together. Now I am going back through the book to make sure I did not forget anything before I start work on the "above deck" items.

- 212 replies
-
- 5
-
-
- constellation
- artesania latina
- (and 2 more)
-
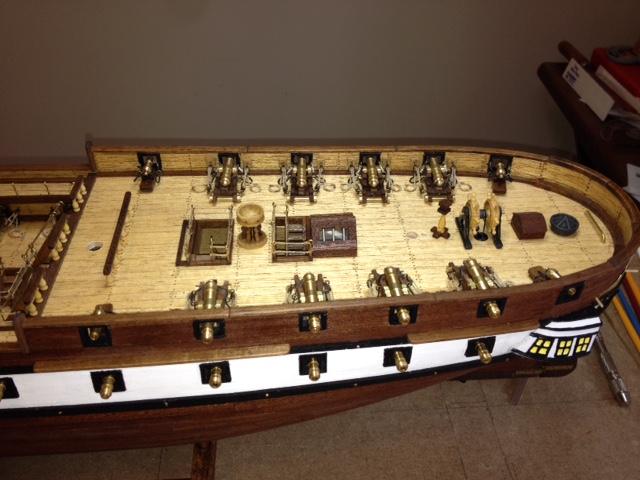
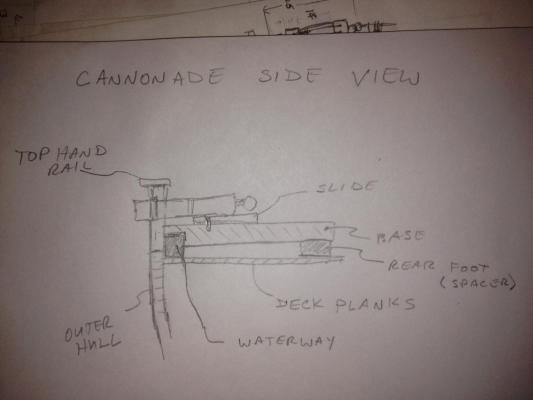
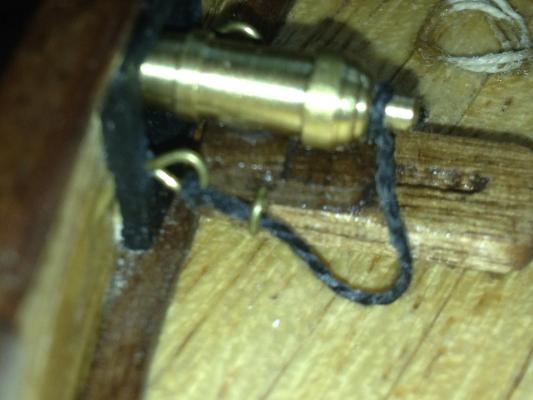
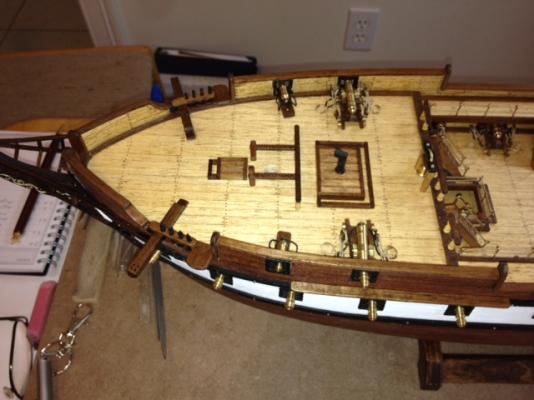
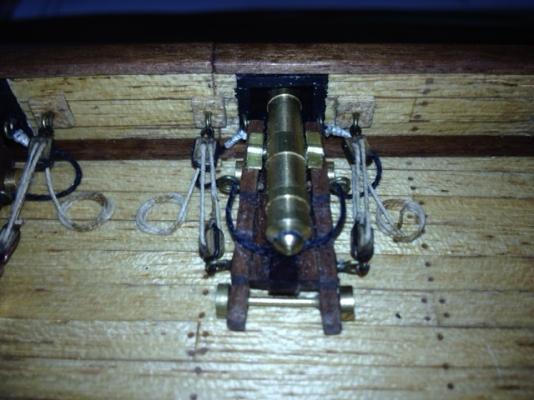
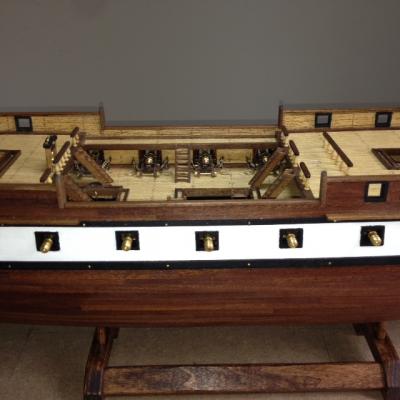
Thanks everyone for the likes and compliments. Hi Jparsley, I put the little square plates with the eye bolts there for 2 reasons. First I did not want to have the stem of the eye to poke through the bulwark and mar the outside. the stem needed to have some length to be stable and secure. Second, it was easier to assemble the block and tackle rigging off the deck and then just glue the plates in plate. As for the cannonades, I kind of improvised a bit. I had to file a notch in the front of the base and lay that on top of the waterway. This allowed me to get the cannonade closer to the bulwark so it protrudes through the bulwark. Just my visual preference. I also did not put any tackle on them because of their size. I don't know if that is correct and I am probably glad I am not the one that really has to move them forward after they are loaded. Here is a closeup pic but it really doesn't show much so I made a quick hand sketch to illustrate what I am talking about. Engineering school is paying off.
- 212 replies
-
- 3
-
-
- constellation
- artesania latina
- (and 2 more)
-
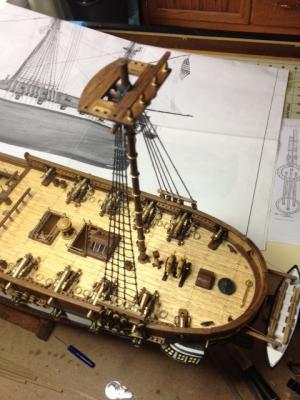
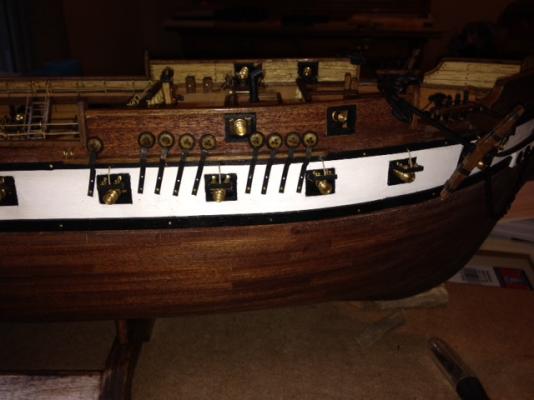
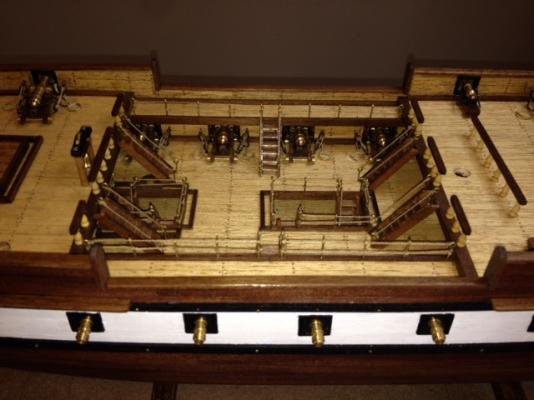
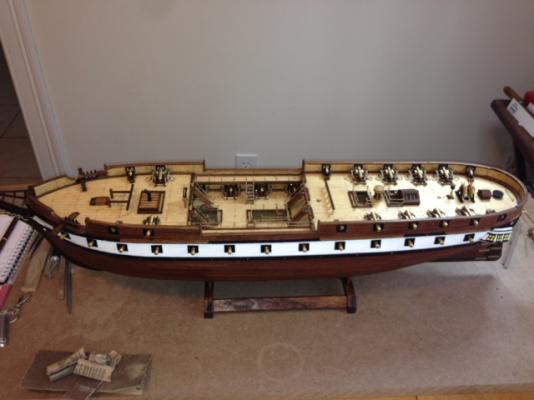
I finally made some progress between all the outside chores. Got all the top deck cannons installed and rigged as well as all the railings. Here are the cannon pics. Here are the railings: And a profile: Next I will need to put the gun port lids on. I waited because I did not want to risk knocking them off while working on the deck. Finally after that I can take a look at the masts!

- 212 replies
-
- 6
-
-
- constellation
- artesania latina
- (and 2 more)
-
Nice job Jeff. It is coming along nicely. As was mentioned earlier, I can vouch first hand that it is a tricky build. Patience and thinking ahead is the key. I also get a bit frustrated when things seem to slow to a crawl either because of the warmer weather chores or just that section of the build that seems to take forever without much to show for it. But then it all falls into place.
-
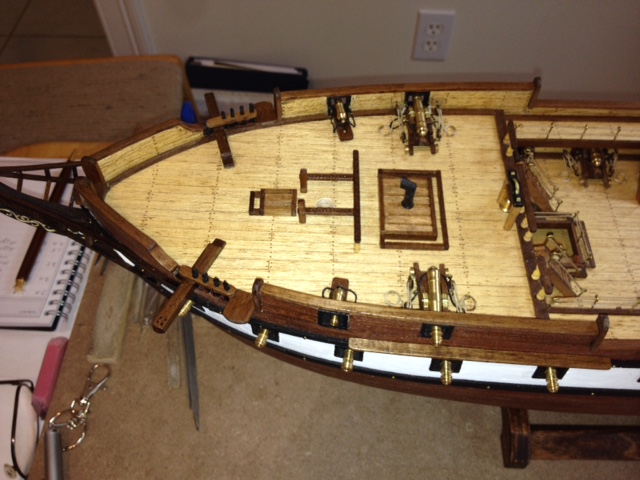
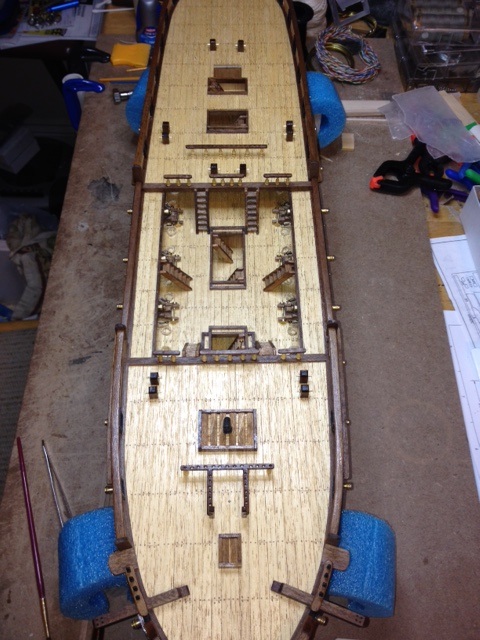
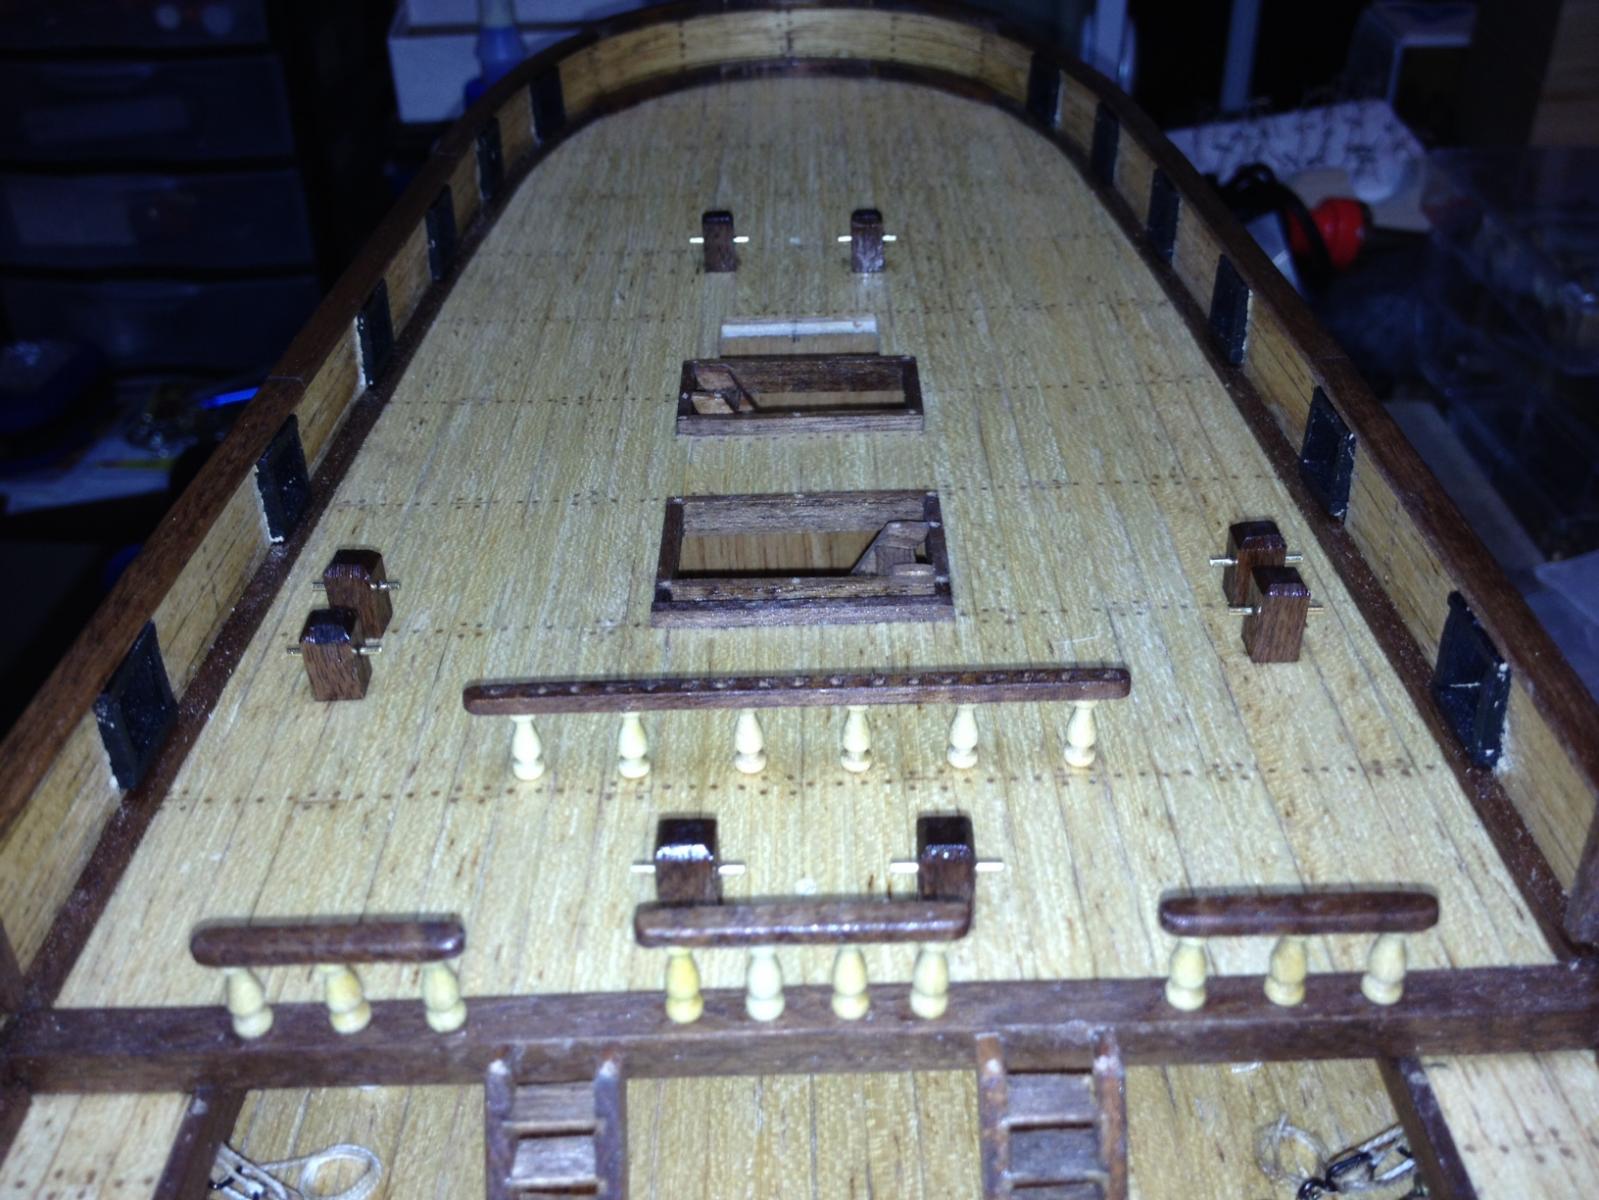
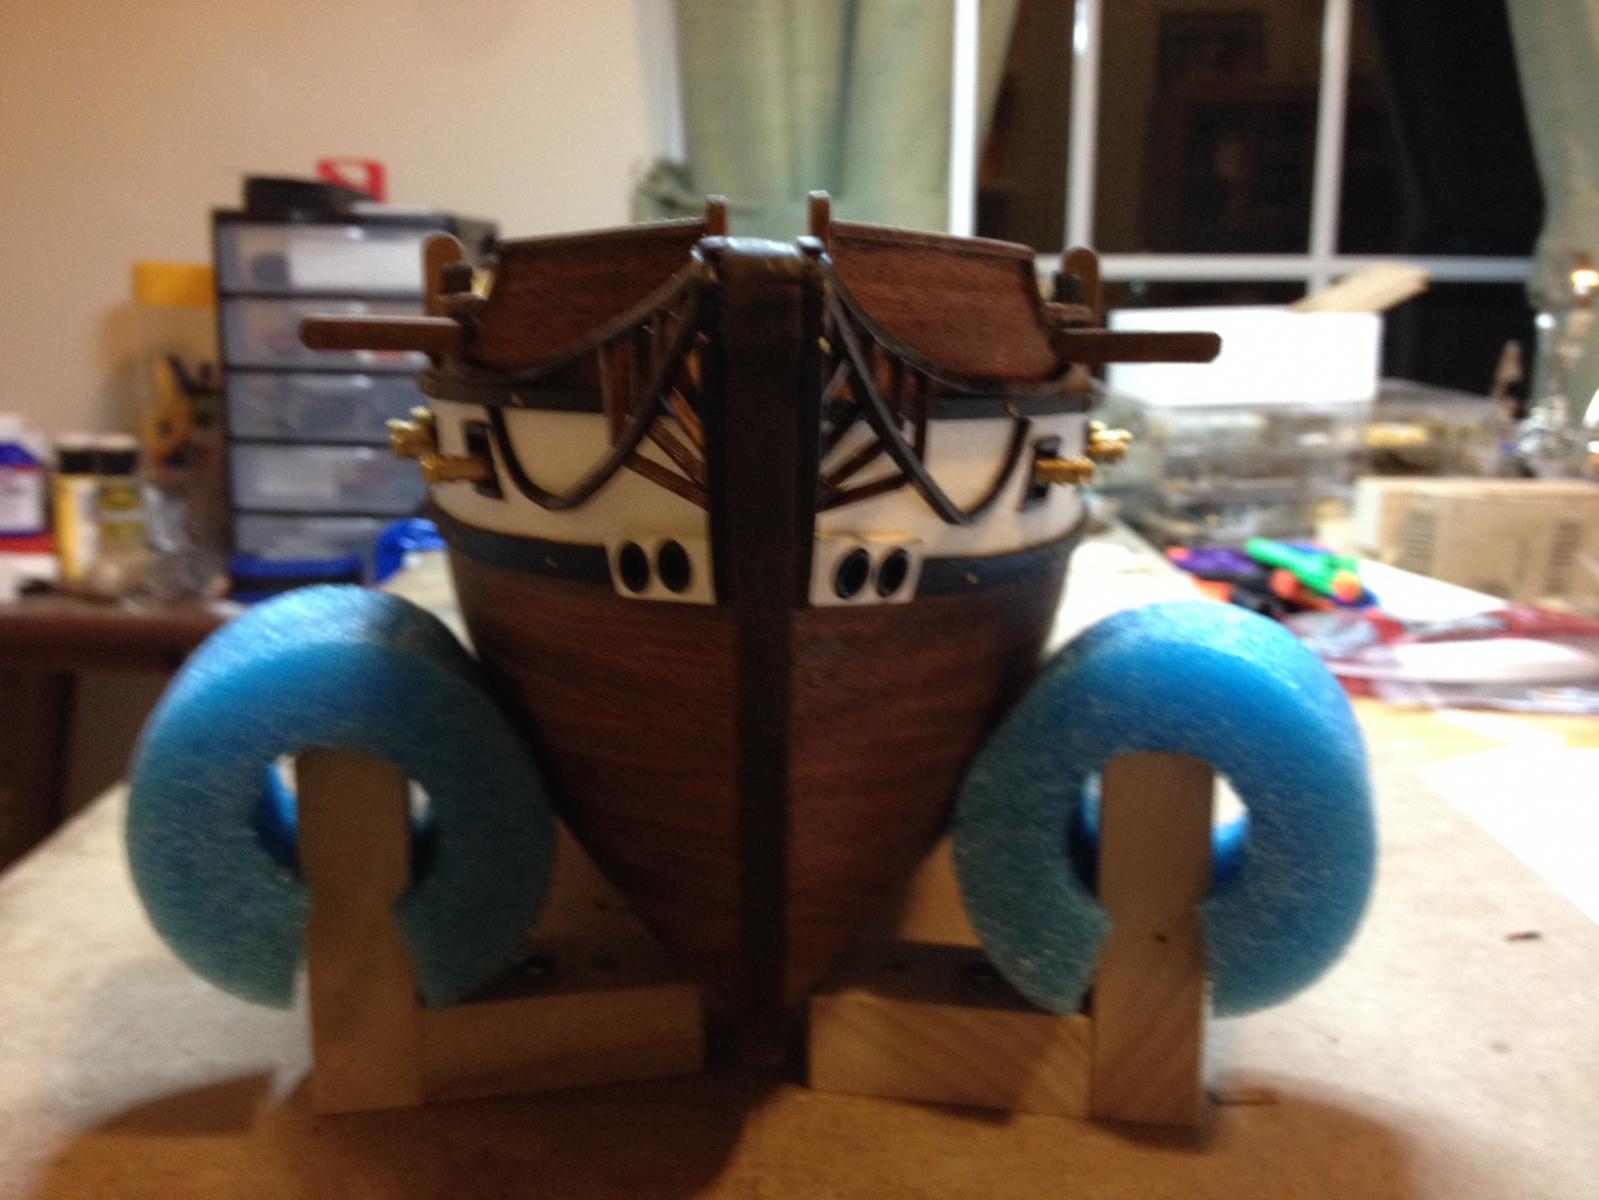
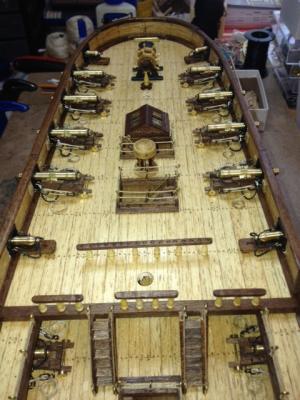
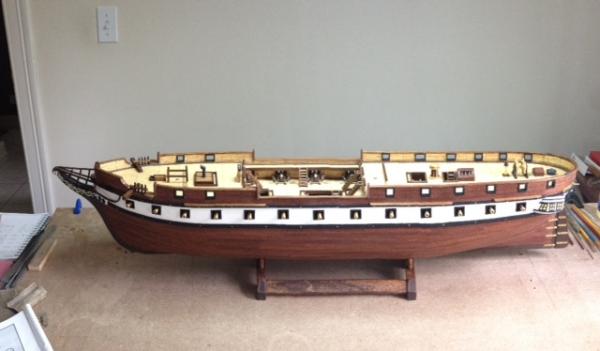
Now that spring is here, the shipyard is only open part time so progress is slow. I did manage to glue down some of the deck items and drill the mast holes at the proper angles (thanks mtaylor & trippwj). I also made a stand for it. I didn't care for the set up that came with it and did not want to go with the metal pedestals so I put my engineering degree to use. Now I will put in the raling posts and start threading the ropes for all the railings. Here are some pics of where I am at in the build. Have a busy week planned so I won't get back to it until next weekend most likely. One of the plus things with keeping a hobby a hobby... it gets done when it gets done.
- 212 replies
-
- 6
-
-
- constellation
- artesania latina
- (and 2 more)
-
Jparsley, some of the pics are washed out from the flash from my IPhone. The 2nd, 4th and 5th pics are more true to the actual color. The natural color of the different woods tends to "pop" with just a coating of urethane so if your wood has good color it should come out nice with just urethane. I started the deck planks with some stain because my wood seemed much too pale. My walnut also had many shades so I used the stain to even them up. Once I started with the stain I was pretty much forced to finish with it. I did end up using the premade stern cabins. There are pics of them on the previous pages of this build log. They look okay... maybe a tad bit small but maybe I am just looking for something to pick on. The builder is never happy.
- 212 replies
-
- 2
-
-
- constellation
- artesania latina
- (and 2 more)
-
Thanks all for the compliments and likes. Mark and Wayne, I will put them at the angle shown in the instructions. I am getting into the part of the build where knowing the ins and outs of rigging these sailing ships really helps. That is where I am lacking so I foresee me starting to ask many questions.
- 212 replies
-
- 2
-
-
- constellation
- artesania latina
- (and 2 more)
-
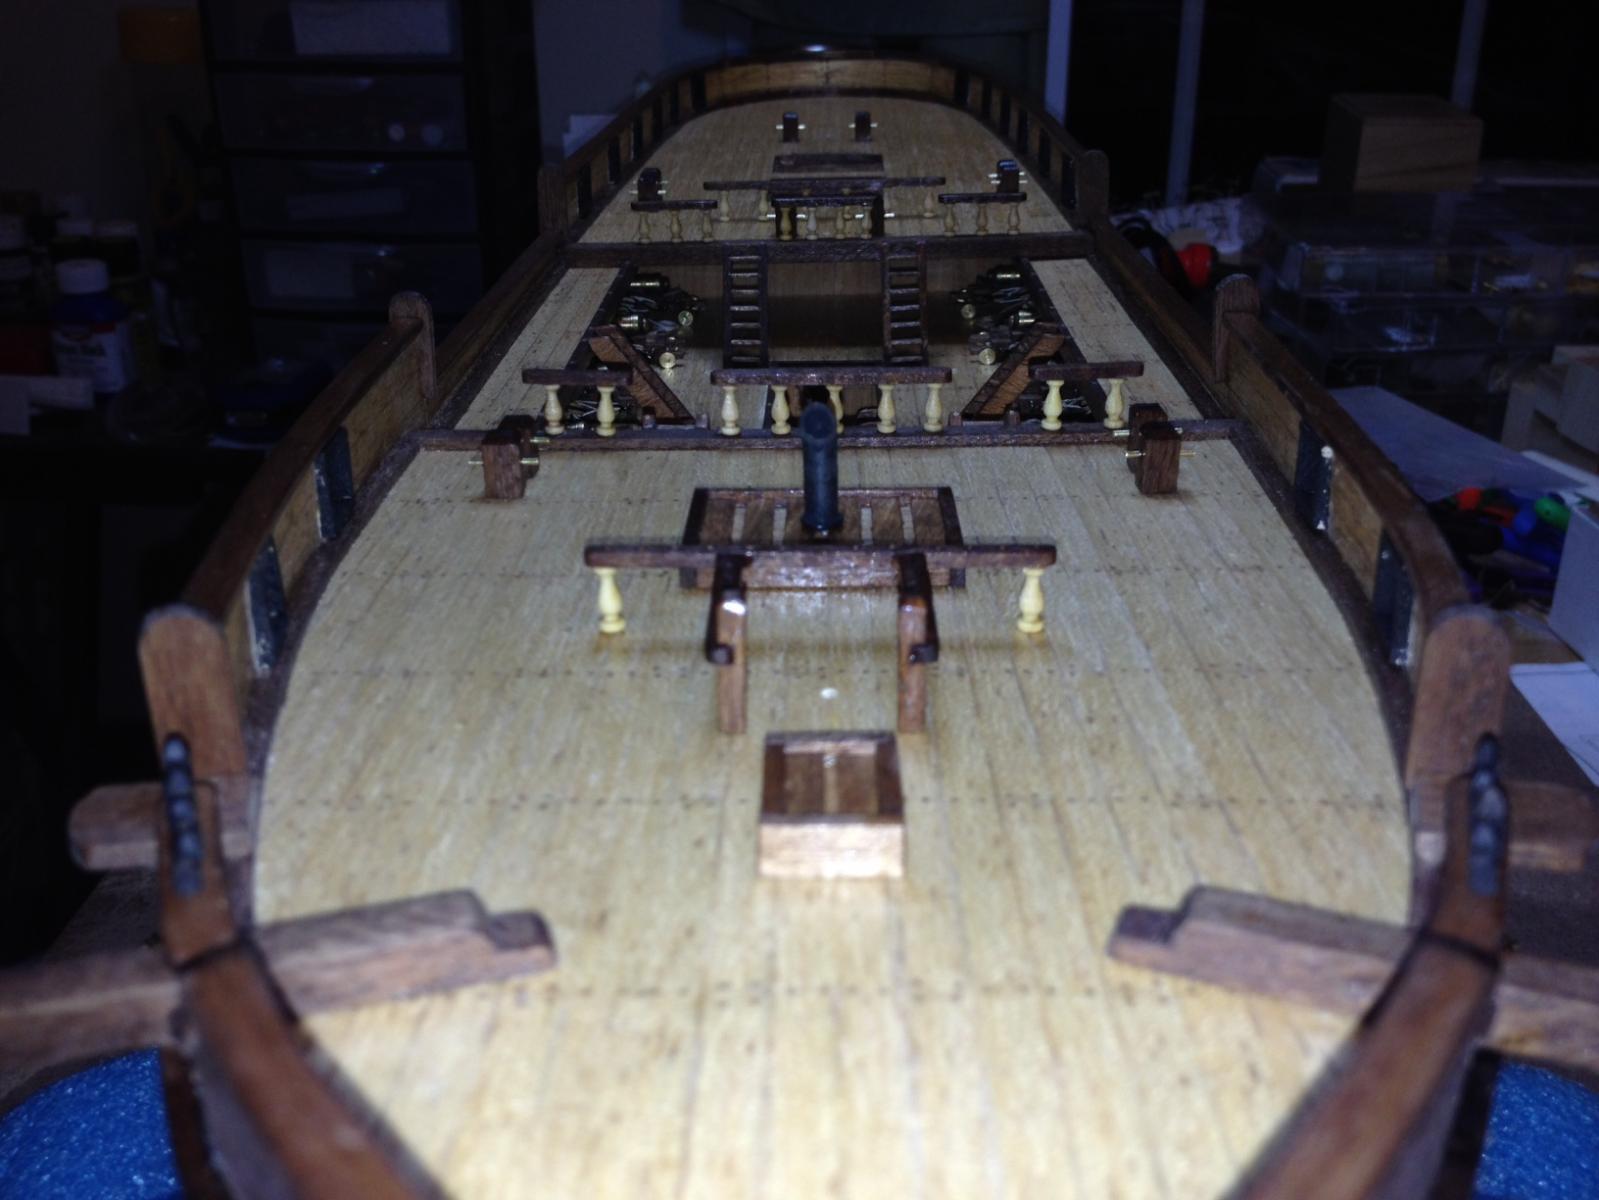
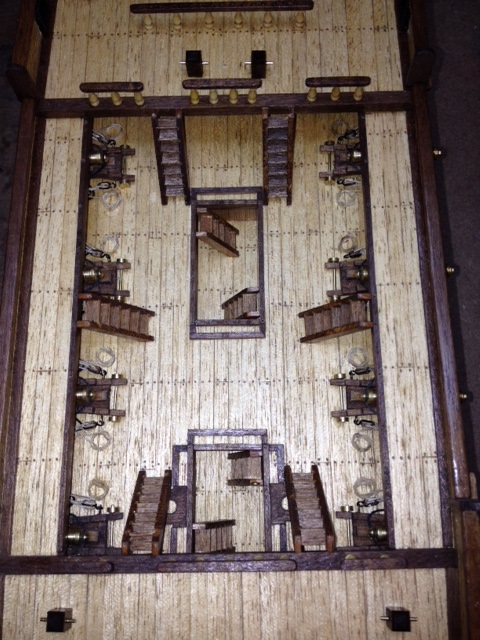
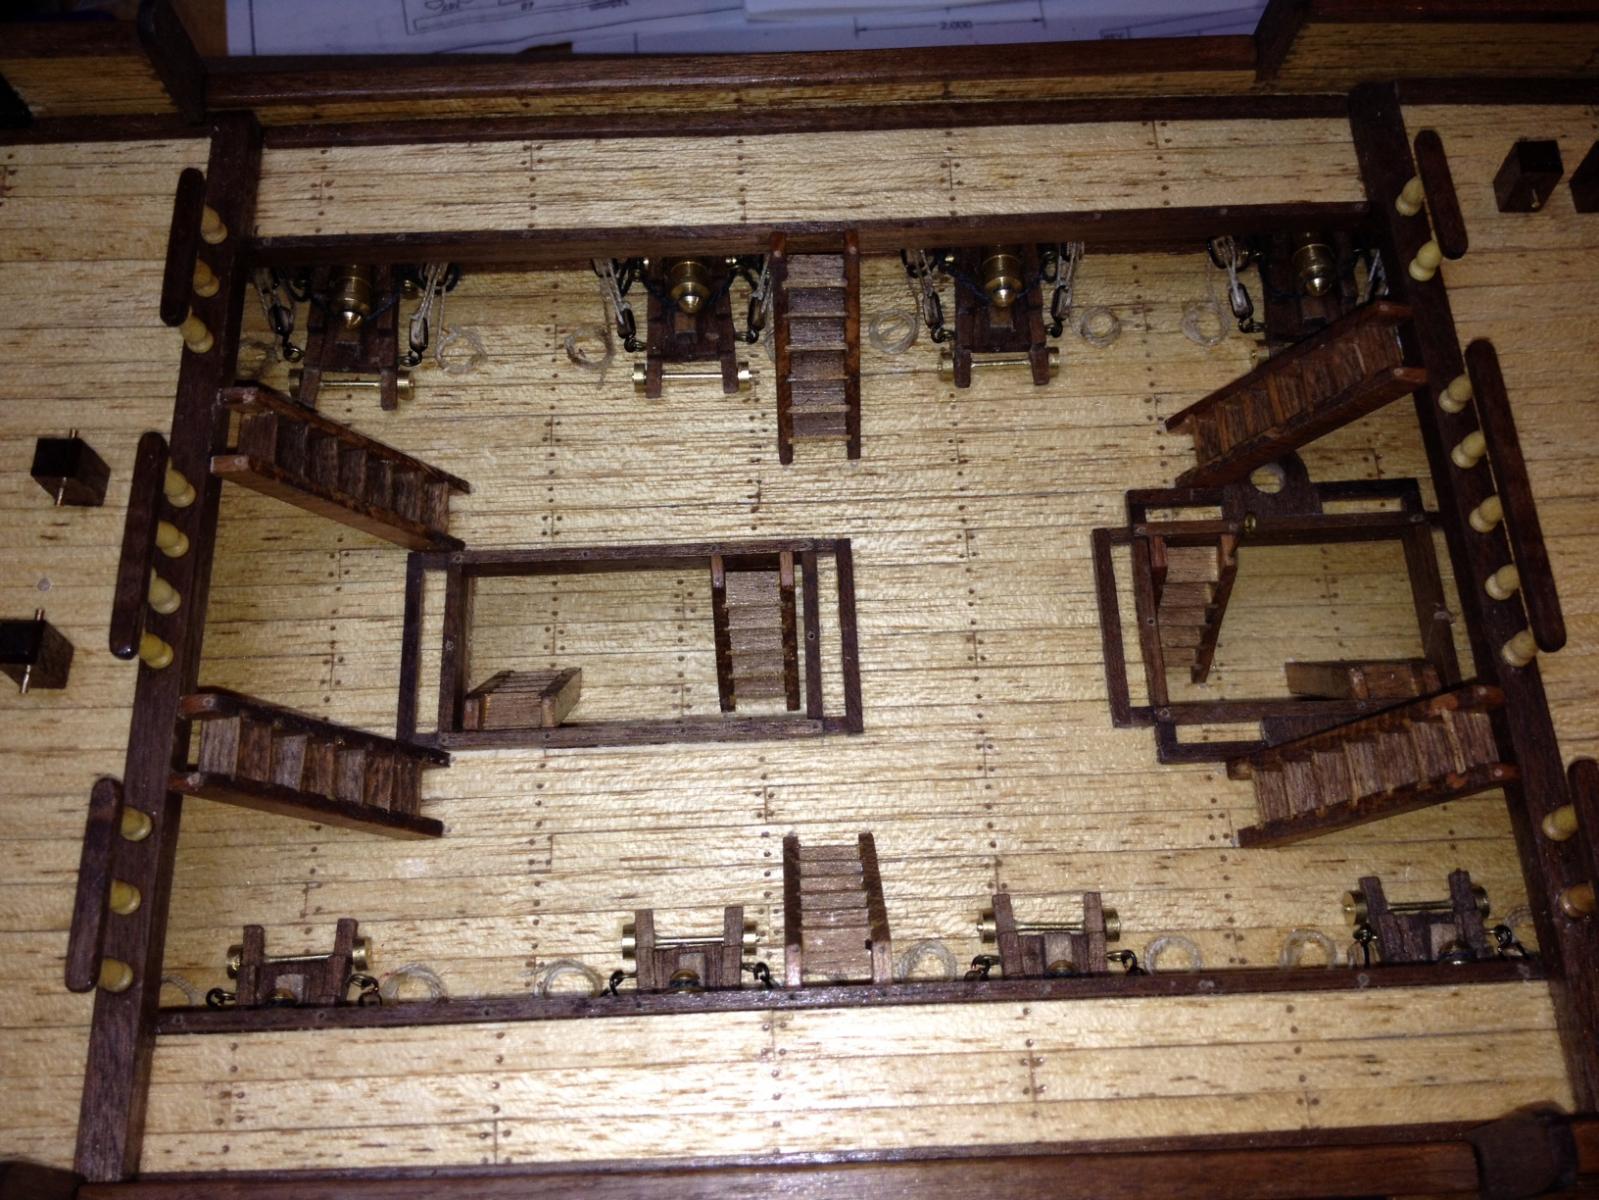
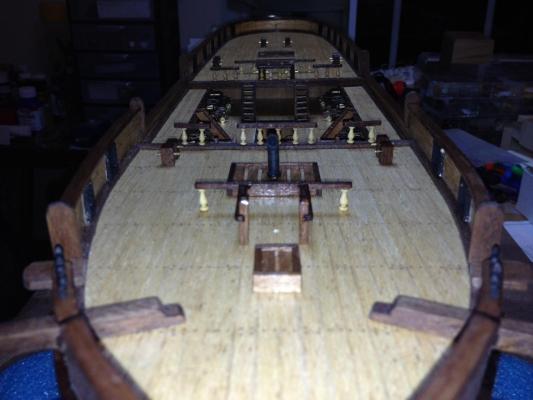
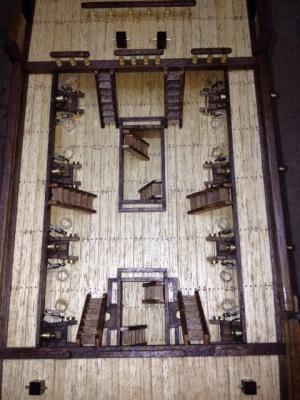
Hi everyone, Spring is finally trying to put the ridiculous winter we had behind us. That means yard work which is cutting into shipyard time. Definitely not a fair trade but it beats shoveling snow in -6°F weather. Jparsley, I just used Minwax stains, Golden Oak and Special Walnut and then covered with a satin polyurethane also by Minwax. I started making many of the deck furnishings. Nothing is glued down yet except the ladders. I have pilot holes (1/16" diameter) in the decks where the masts will be located. I need to open those to size before I start gluing things to the deck. I did have a question about whether the masts should be positioned vertical to the decks or as the instructions show tilted back toward the stern about 5°. I am thinking the reason they are tilted is to allow them to become vertical when the sails are full. I plan on displaying with about 3/4 of the sails full anyway so I will most likely put the masts at 90°. Still thinking about it. Any thoughts out there? Tom


- 212 replies
-
- 5
-
-
- constellation
- artesania latina
- (and 2 more)
-
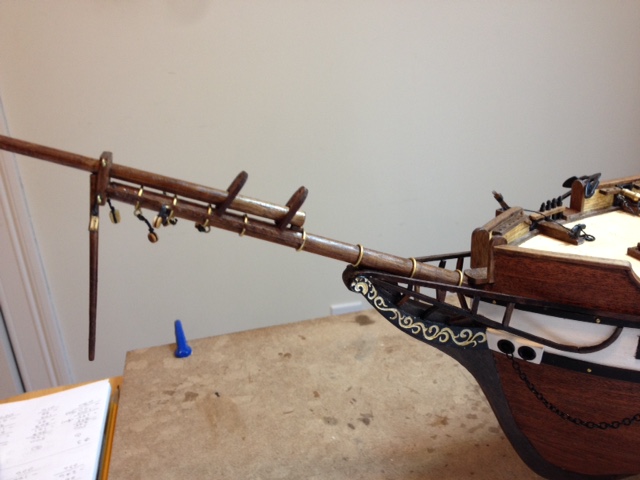
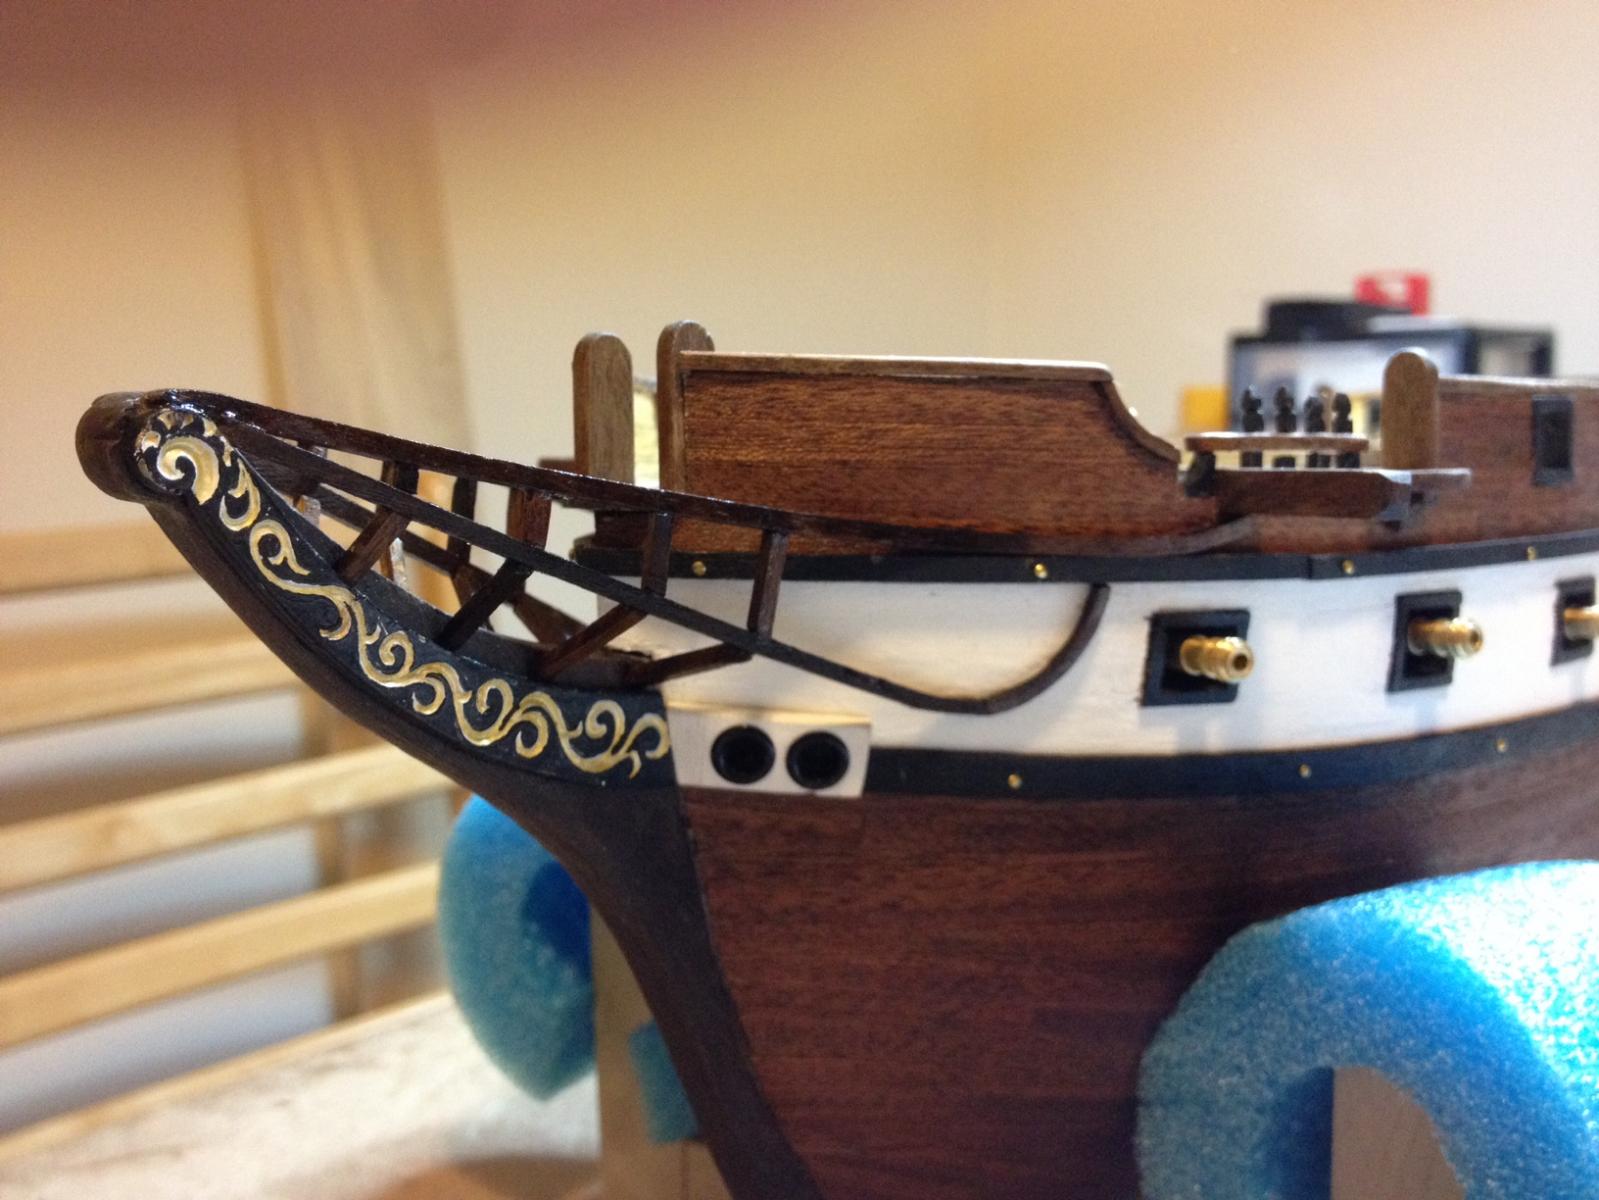
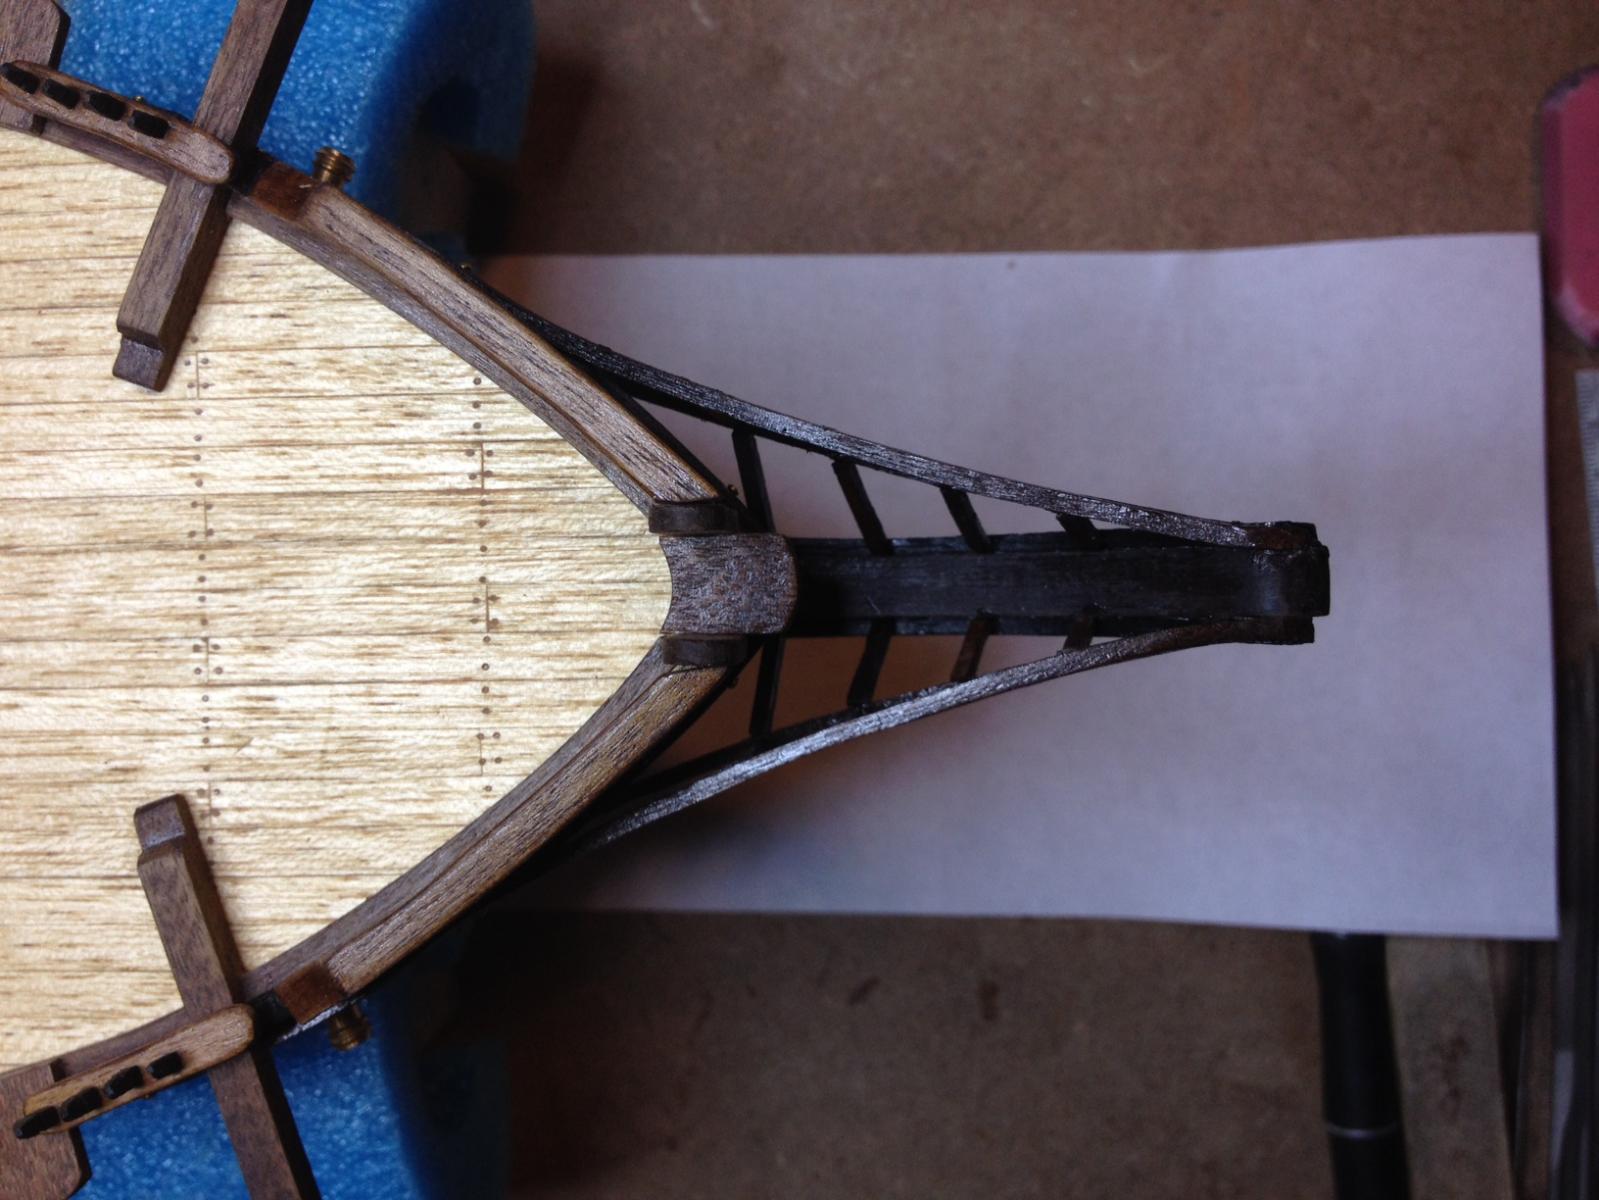
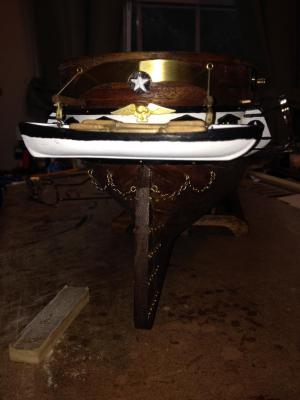
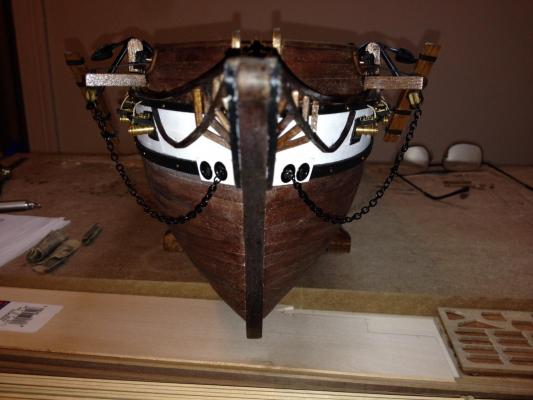
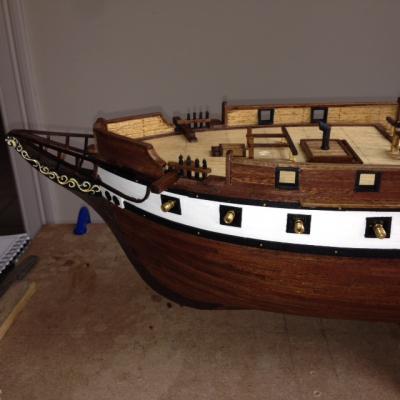
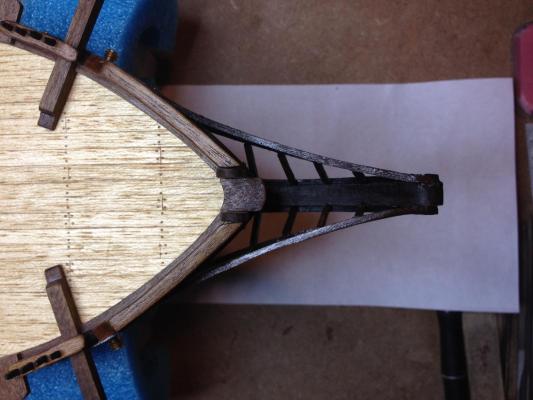
Thank you everyone for all the "likes". I finished the bow head rails. They are not an exact match to the original ship I am sure but the instructions and pics were very poor for these. This part was by far the hardest step so far. I do have the book "Modelling the USF Constellation" by McArdle and he shows the head rails. I just tweaked them a bit to my skill level as historical accuracy is not a big priority with this model. It just has to look good.


- 212 replies
-
- 4
-
-
- constellation
- artesania latina
- (and 2 more)
-
Jparsley, thanks for the compliment and yes it is my first build. I have some hobby experience with making furniture so the wood part isn't real scary. The rigging and such will be the real "fun" for me. I have still learned up to this point so the second build, if I ever get there, will have a whole new set of "learning opportunities". This build has reinforced the importance of patience. You can get into trouble quick if you try to rush, especially if you have never built a wooden ship before because you don't know what is yet to come.
- 212 replies
-
- 1
-
-
- constellation
- artesania latina
- (and 2 more)
-
There is detail and then there is DETAIL! Absolutely an incredible job.
-
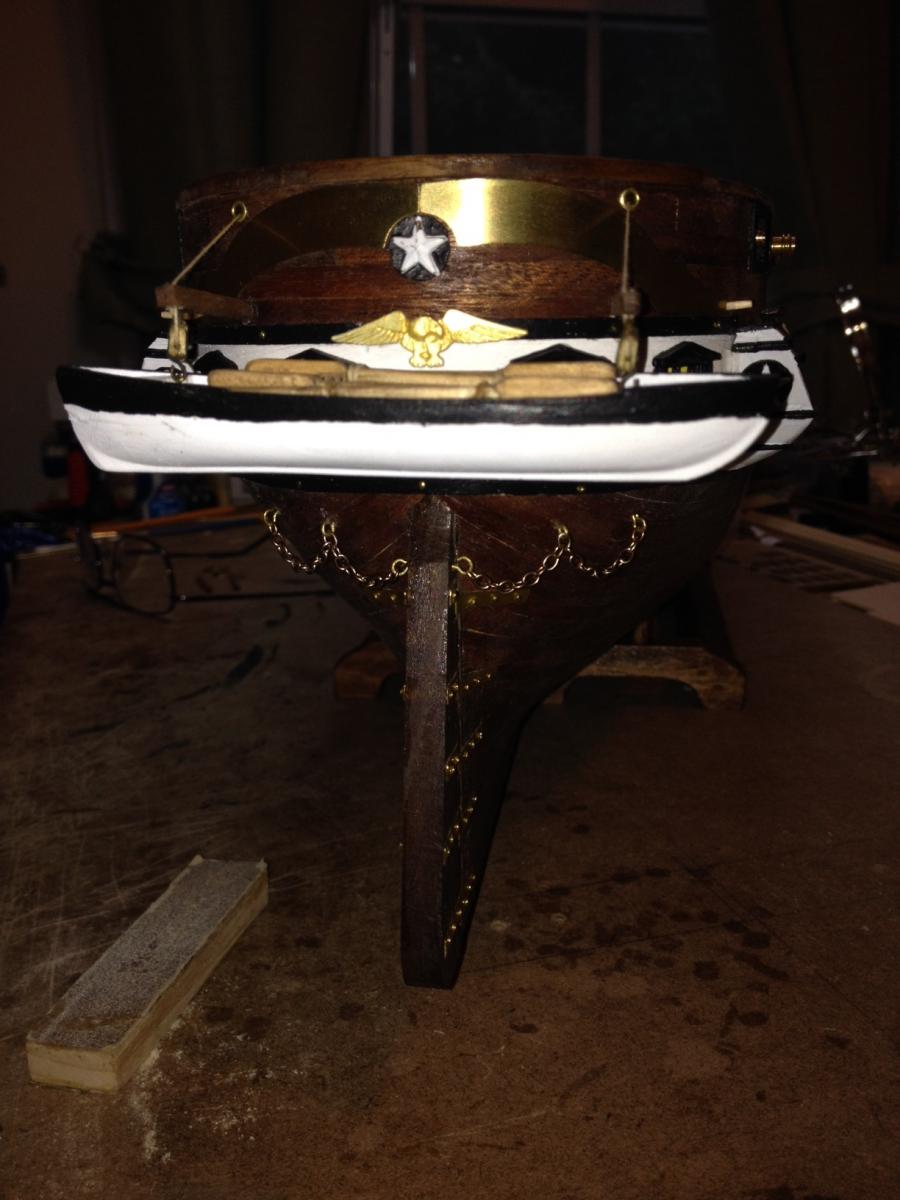
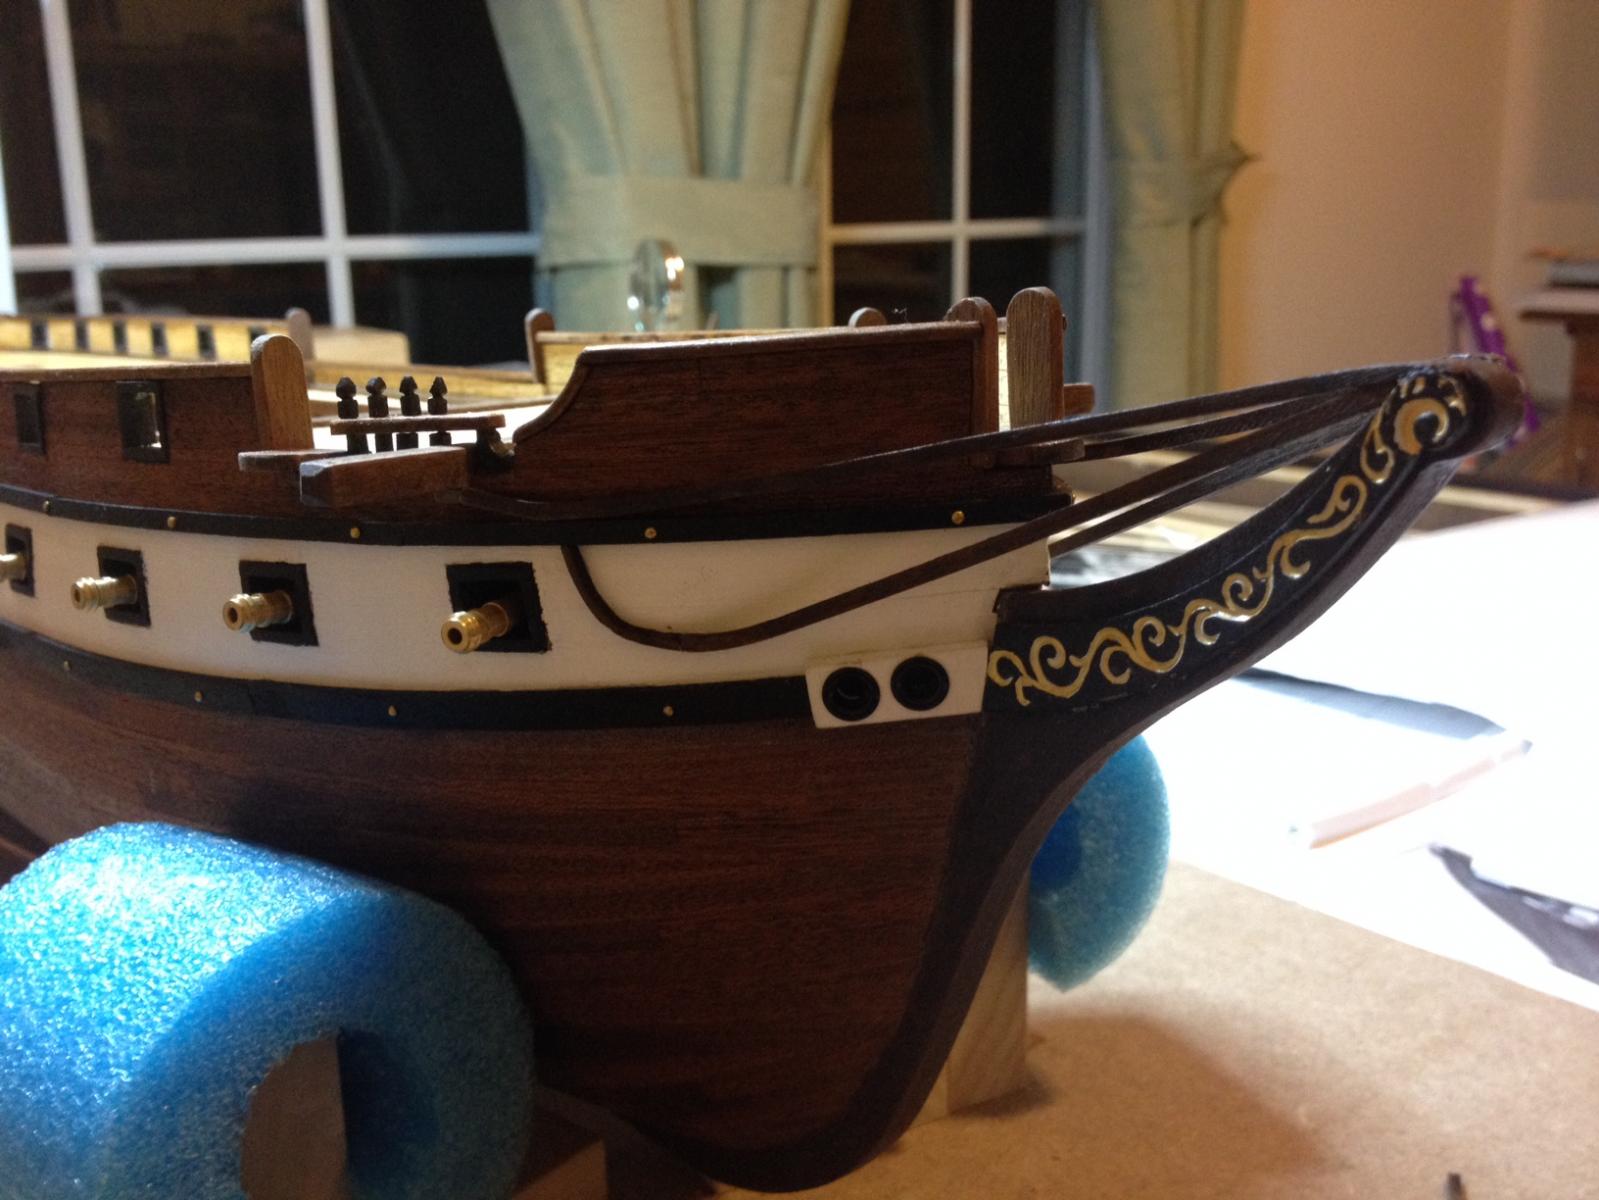
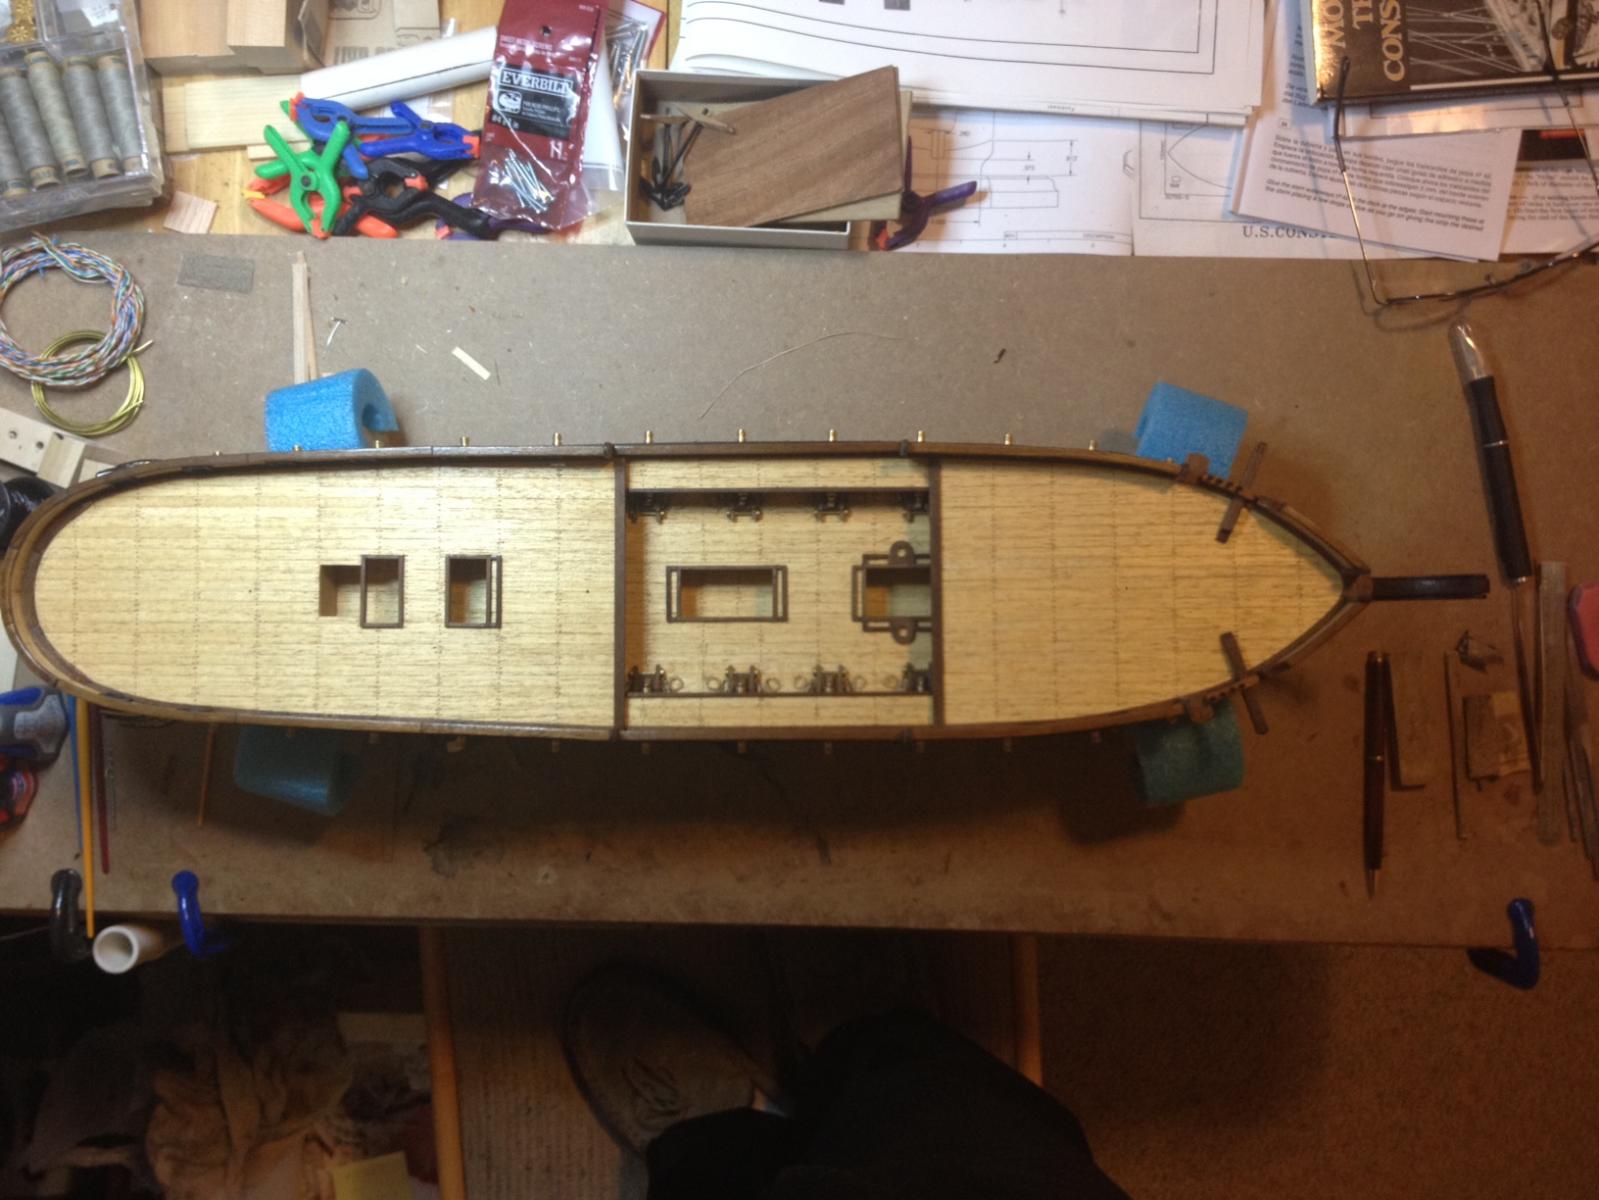
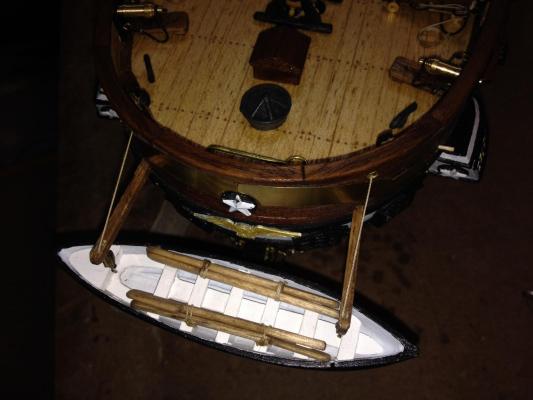
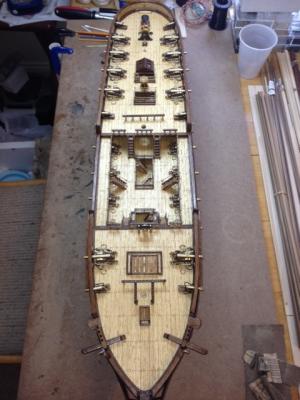
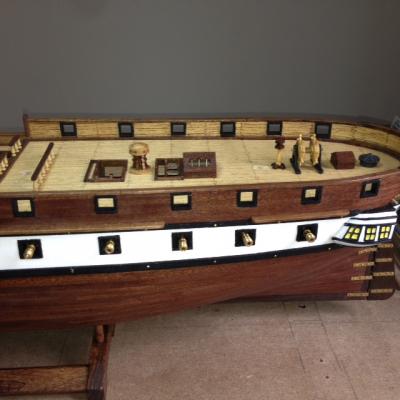
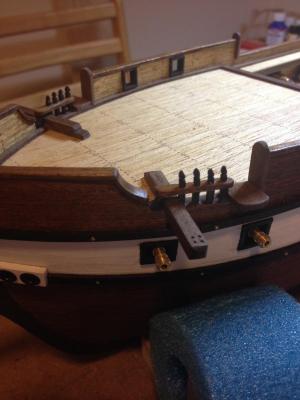
Boyd, your right. The builder sees everything... or at least knows where to look, and everyone else sees nothing. Things went a bit slow this past week but I made some progress around the anchor davit area and finished up all the trim on the bullwarks. Still have some work to do here but this is where I am now. Bending the walnut was a bit "tedious". And this is what a sea gull would see. Once I finish up the bow detail, I will install the long boat davits into the stern. I believe I will most likely next build the stand and mount it to the keel... I think.


- 212 replies
-
- 3
-
-
- constellation
- artesania latina
- (and 2 more)
-
I just realized looking at the close up of the cannon rigging pic that it might have made more sense to coil the rope in the other direction so the section of rope coming out of the last pulley is more in line with the pulley. I guess I will chalk that one up to a first build "opportunity for improvement" on the next build. Nobody will probably notice except for us design engineers and seasoned model builders. Well that is what I will keep telling myself. The coils are glued in place and I would probably do more damage trying to fix them than what it is worth. Should I follow the same pattern for the cannons on the top decks or should I reverse them so they make more sense? Will it look worse if they are in two different directions on the same model? What does the jury tout there think? Am I over thinking again?
-
Thanks for the good words Boyd. Your definitely right about both hobbies requiring attention to detail. But when you do it right the reward is that much greater. My reef has been going for about 23 years. Time flies when your having fun.