HOLIDAY DONATION DRIVE - SUPPORT MSW - DO YOUR PART TO KEEP THIS GREAT FORUM GOING! (Only 24 donations so far out of 49,000 members - C'mon guys!)
×


toms10
-
Posts
929 -
Joined
-
Last visited
Content Type
Profiles
Forums
Gallery
Events
Everything posted by toms10
-
 Thanks to all for the likes. Jedi master Mark, I know you and Jeff are right. I have fell victim to the "Why didn't I" syndrome in the past on many things. I am going ahead with making all the sails first and then let the force within guide me. Based on the time it takes me to make a sail I will have quite a while to learn the ways of the Jedi.
- 212 replies
-
- 2
-

-
- constellation
- artesania latina
- (and 2 more)
-
The next step is to attach the sails to the yards. First I need to go ahead and decide whether to put the head, foot and leech lines on the sails. I am not sure if they are going to be noticeable enough to go through all that work.
- 212 replies
-
- 1
-
-
- constellation
- artesania latina
- (and 2 more)
-
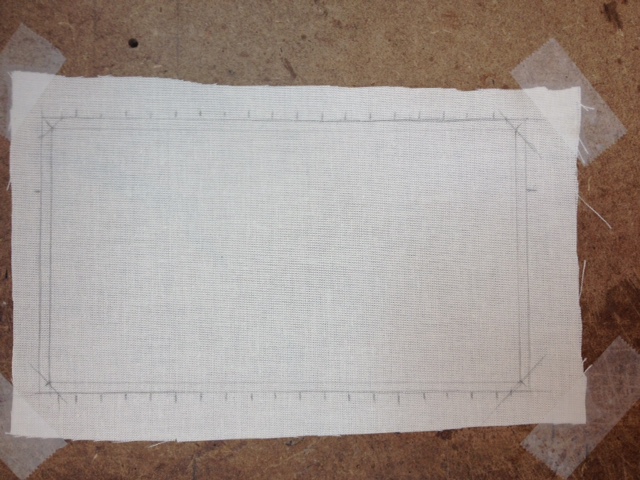
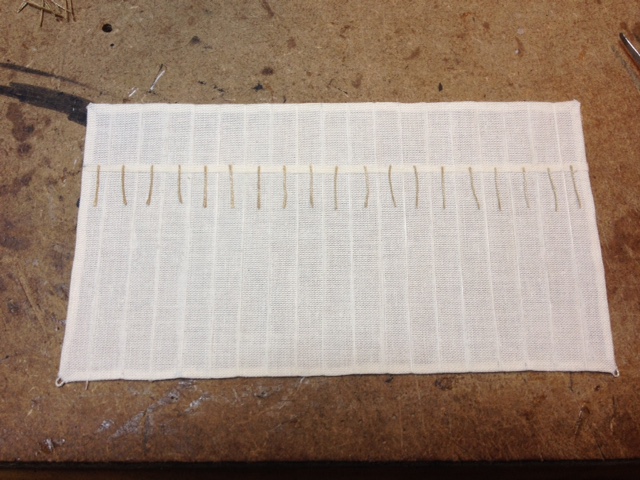
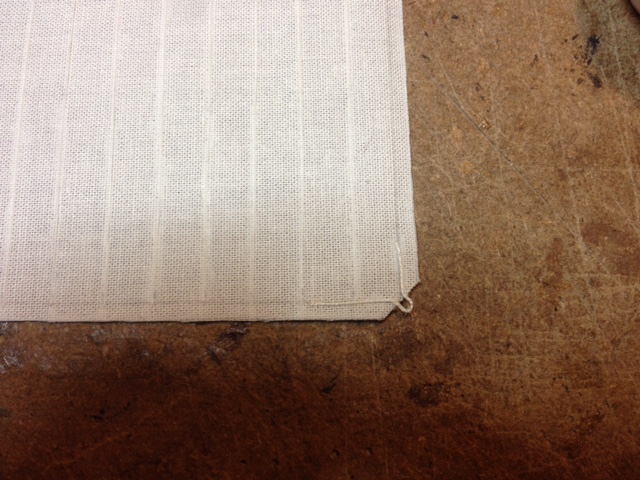
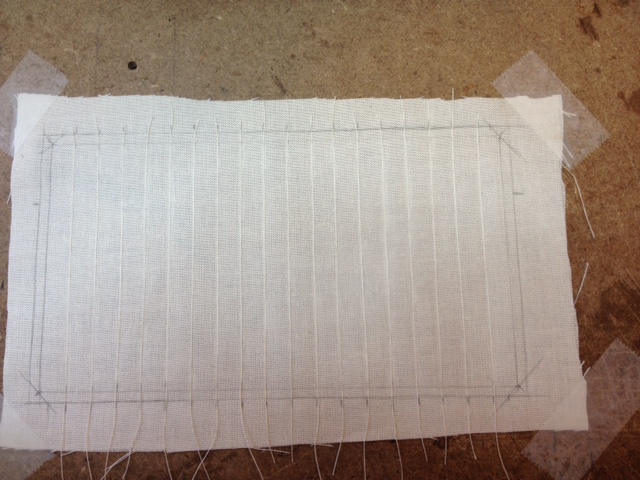
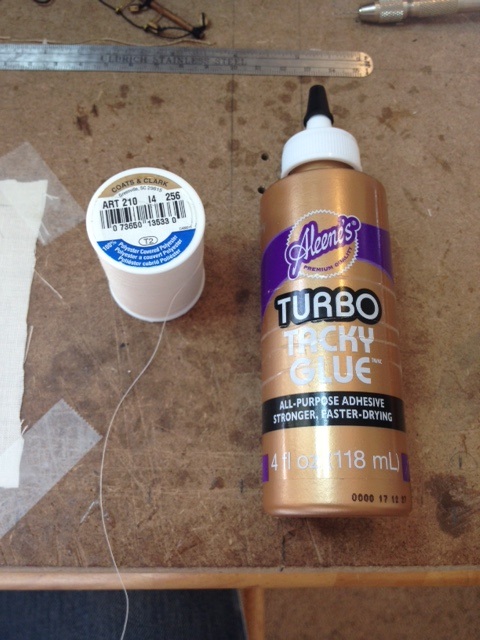
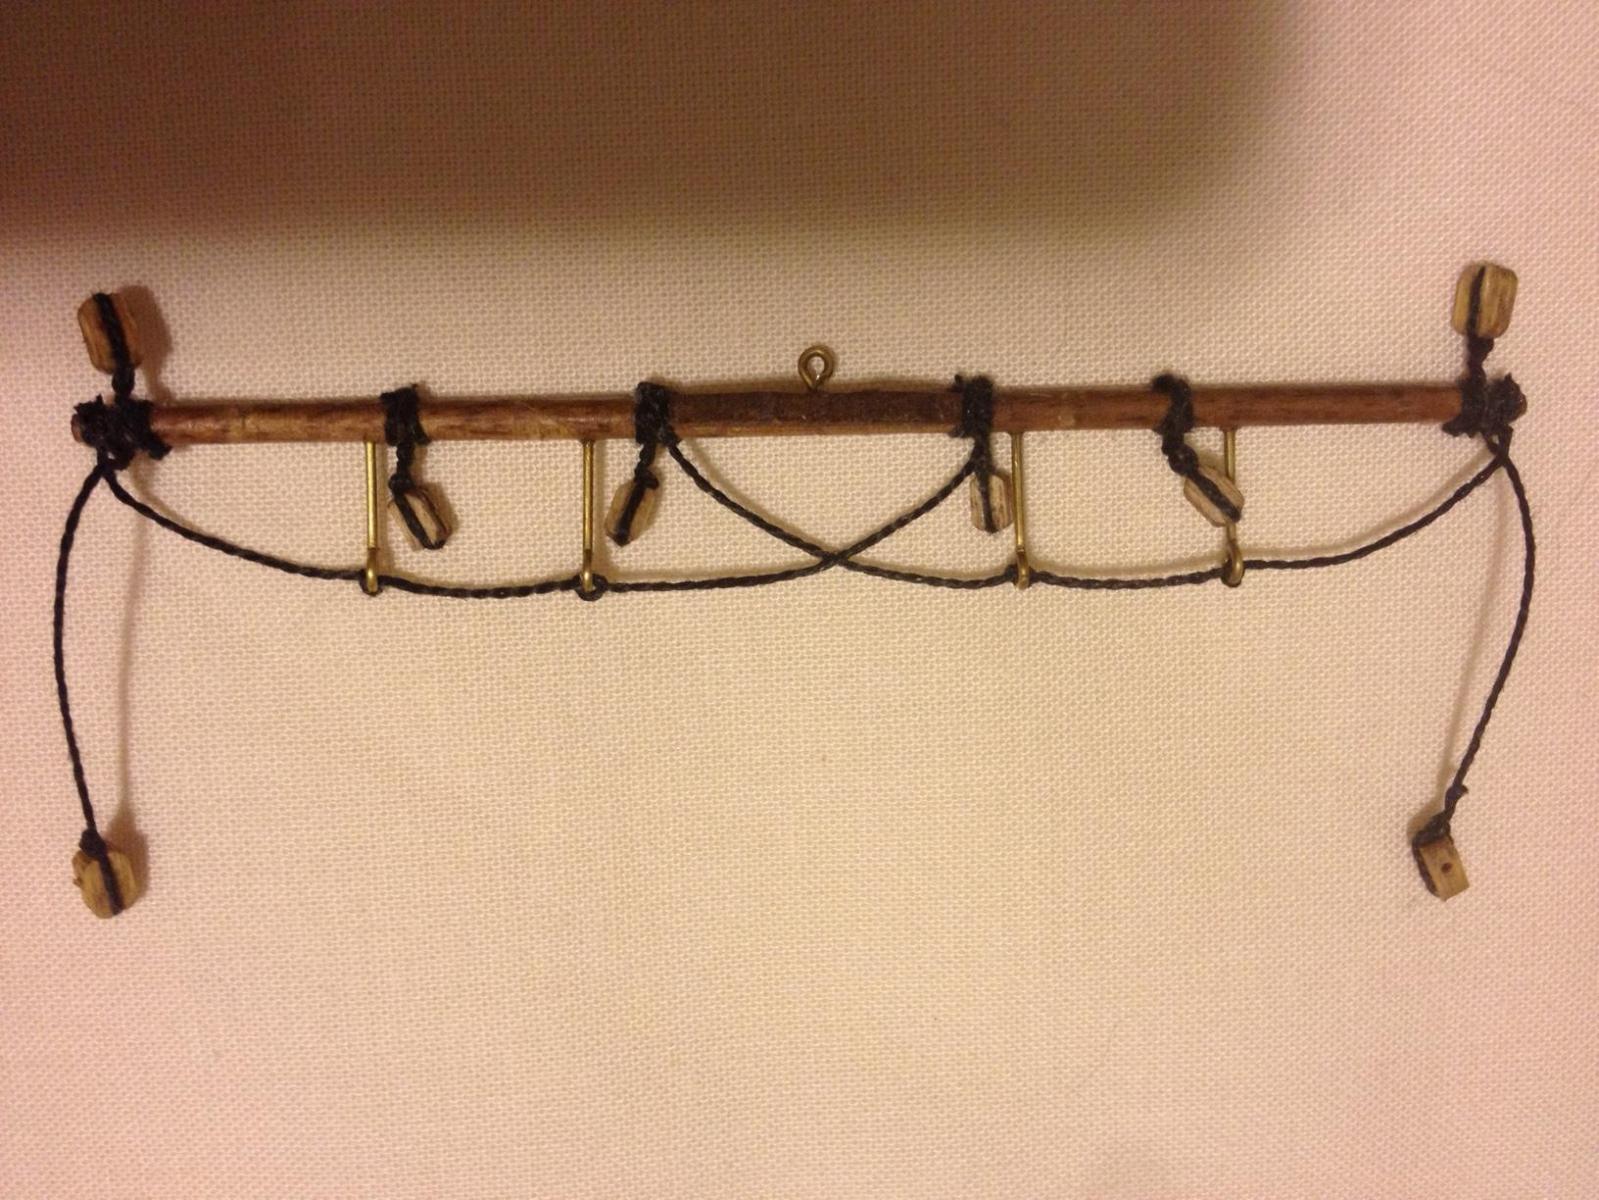
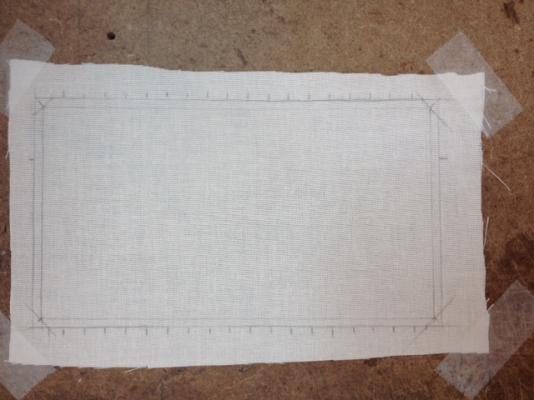
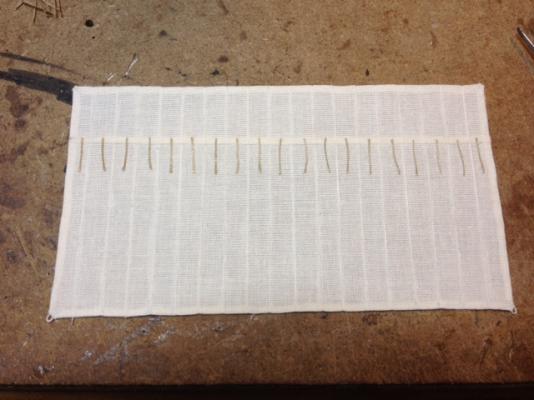
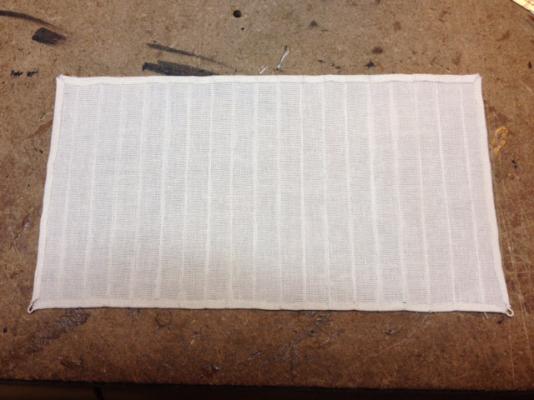
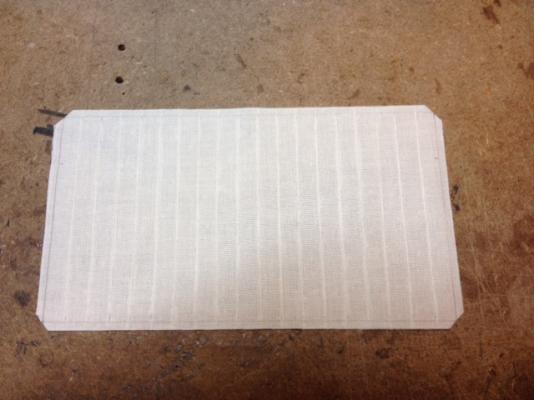
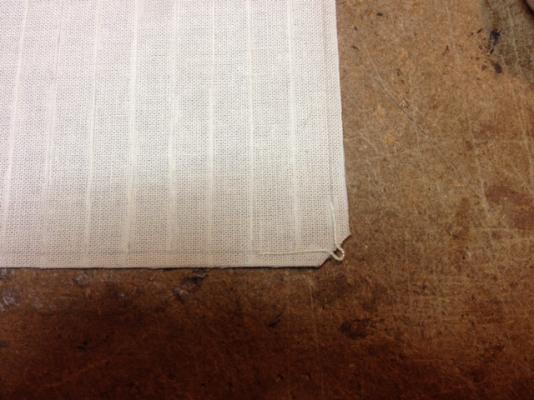
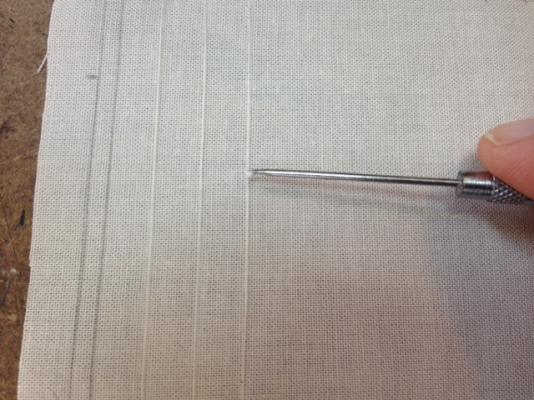
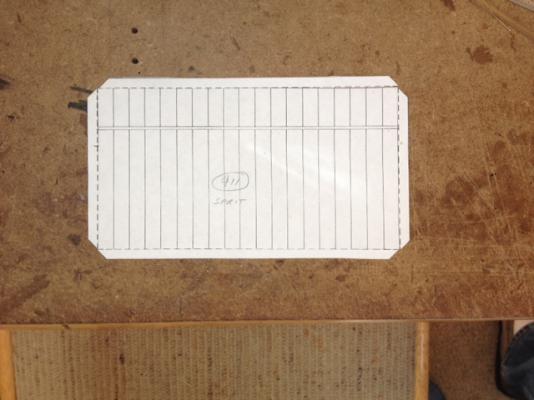
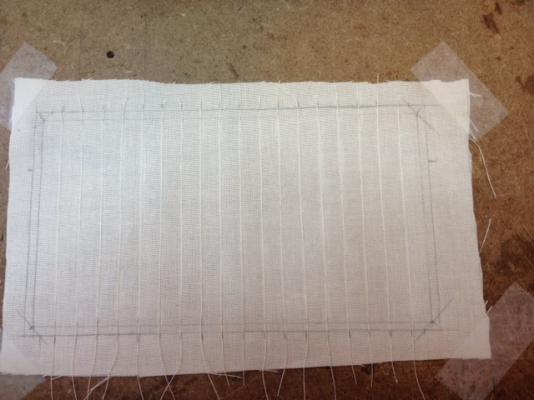
So here is my first attempt at making sails. It is a bit time consuming at about 2 -3 hours per sail but I am in no rush. I made a couple of the smaller ones to start using the technique below. I came up with this sequence based on reading other threads and looking at lots of pics of completed models. It is nothing special but it seemed the easiest way. The cloth was just your typical bed sheet linen you get at Walmart or JoAnne Fabrics. It is a pale ecru color. I laid out the sail configuration on the cloth using the templates in the kit plans. I then proceeded to use regular polyester sewing thread to simulate the seams in the canvas. The thread is passed through some fabric glue and then laid down according to the template marks. If any parts of the thread do not stick to the sail, a straight pick can be used to touch up. The drawback with this method is it is time consuming and has to be done on both sides of the sail so the seam can be seen from either side of the sail. You need to be somewhat careful with the glue application. The glue in the pics is not fully dried so it is still noticeable as thin white lines. The next day the glue was pretty much clear. If you were to sew the seam it would only take one pass for both sides. The downside of that method is it is somewhat difficult (at least for me) to sew a straight seam that does not have any puckering. The next step was to trim up the sail to size. The kit plans allowed for a fold over of about 6mm at the edges of the sail. I thought this was way out of scale and reduced it to 3mm. Before I folded over the glued edges, I inserted a small rope loop that will attach to the sheeting and clew lines. I thought that would be better than poking a hole through the corner of the sail like an eyelet. Finally, I glued the cross rib and reefing lines to both sides if the sail requires. I am not sure at this point if I am going to glue the head, foot and leech lines on the edges of the sails. My OCD and knowing that they belong there will eventually make me put them on.

- 212 replies
-
- 7
-
-
- constellation
- artesania latina
- (and 2 more)
-
Just finished going through your build log and was truly impressed. Very nice work. Love the precision and detail.
-
Thanks Jeff. I am working on the sails now. I am experimenting with different techniques. I think I have settled on one that only involves fabric glue. I have made two small top royal sails for the mizzen and fore masts. I also made the fore mast gallant complete with rib and reef lines. I will post some pics when I get a chance. I like the results of the technique I am using. I kind of made it up based on all the reading and MSW threads. It is kind of time consuming but they come out pretty good... at least to my novice eyes. I will take pics of each step as I go when I start the next sail and post the procedure. As for billowing or furled sails, I am thinking billowing for the top 3 on each mast and reefed or furled for the lower ones. The stay sails and spanker will be full. At least that is the plan for now.
- 212 replies
-
- 2
-
-
- constellation
- artesania latina
- (and 2 more)
-
Mark, Just following you build... I am definitely not ready for something like this. Your work is marvelous. Keep on it, it is inspiring.
-
Thanks Mark and avsjerome2003. I agree with completing as much "stuff" off the model and then working with the sub-assembly on the final model. After sleeping on it I am going to mount the head of the sail to the yard and tie off all the lines I can before mounting. I also like the idea of starting with the fore top gallant sail and working down and towards the mizzen. I have plenty of sail cloth so let the experimenting begin!
-
I am really not qualified to comment on this as I am only nearing the end of my first wooden build; AL Constellation. My frustration is I can't see the point of spending a lot of money on a kit when you need to rebuild, modify parts, buying more parts because enough was not supplied and can't really follow the instructions. Scratch builds suddenly are not so frightening and may end up less expensive and less frustrating (for the wrong reasons) at times. I do like the way the build is coming out but I am considering my next investment to be a scratch build instead of a kit. On the other hand all the kits cannot be bad... but how to choose?
-
I am at the point in my Constellation build where I have all the yards built and rigged and am looking into constructing the sails. I am a bit confused about attaching the sails to the yards. The instructions show putting the rigged yards on the masts before putting the sails on. I would like to have the upper sails on each mast full and the the lowest one on each mast reefed about half way so the deck is easily visible. I am thinking it will be more difficult to rope the sails to the yards if the yards are mounted. I was going to attach the head of the sail to the yard and then install the yard. Finally, I will finish the running rigging (clews, sheets, haylards, etc). I am not sure about when to stiffen the sails in a full blown position. I think it would be easier to get the right look once they are in place and tied. Another option is to build simple "mock" masts and yards out of dowels and simulate the final position of the sails and then spray them with fabric stiffener. This way the stiffener spray doesn't get all over the model. I am sure there are lots of different methods and I have spent many hours reviewing this forum. Was wondering if anybody out there can point me in a direction.
-
I finished the yards and rigging for all 3 masts. Next is to make sails. I am a bit confused about attaching the sails to the yards. The instructions show putting the rigged yards on the masts before putting the sails on. I would like to have the upper sails on each mast full and the the lowest one on each mast reefed about half way so the deck is easily visible. I am thinking it will be more difficult to rope the sails to the yards if the yards are mounted. I was going to attach the head of the sail to the yard and then install the yard. Finally, I will finish the running rigging (clews, sheets, haylards, etc). I am not sure about when to stiffen the sails in a full blown position. I think it would be easier to get the right look once they are in place and tied. Another option is to build simple "mock" masts and yards out of dowels and simulate the final position of the sails and then spray them with fabric stiffener. This way the stiffener spray doesn't get all over the model. I am sure there are lots of different methods and I have spent many hours reviewing what it in the "sails" section of MSW. Was wondering if anybody out there can point me in a direction. I will also start a thread in the "masts, spars & sails" section. I would imagine I would get more feedback there.
- 212 replies
-
- 7
-
-
- constellation
- artesania latina
- (and 2 more)
-
Thanks Joshua, It is hard for me to say if it is a good kit or not as it is my first. I bought it from a fellow member here on MSW who had it for a while I guess and was no longer interested in starting this kit. It was missing some parts (quantities) and I bought some extra blocks to "enhance" the rigging or lack there of. It has been a lot of fun and challenging at times but nothing that a bit of thought and a lot of patience can't overcome. There is plenty of help here at MSW to get you through the "tough" spots. Definitely a good experience for "advanced beginners" I am rigging up all the spars now and then will learn all about sails and attaching them! I though I was getting close to the end but after a little research I believe I have a lot longer to go than I originally thought... no problem, my completion due date is exactly the same day as I finish!
- 212 replies
-
- 2
-
-
- constellation
- artesania latina
- (and 2 more)
-
This person's day job is probably working with something on the molecular level. This may seem enormous to him!
-
Hi Mike, I am currently building the Constellation. It is my first wooden ship so I did find many challenges. The detail is nothing special right out of the kit but that is something that the builder can build upon to the level he/she desires. The price of this kit is a bit less than most which may hint toward the quality of detail and parts. I did have to buy some supplemental pieces especially for the rigging which I am in the middle of now. The kit was short on about 5 or 6 different items. The instructions are sketchy and vague which is why this forum is such a wonderful place. I have thoroughly enjoyed the build and have learned many techniques and would recommend this model for an intermediate modeler. If you do a search there are several build logs on this sight that you can check out.
-
Thanks Mark and Jack. I will take this info and do a little digging. I just want to have the rigging on this model to make some sort of sense. I don't plan on making it functional just sensible and something nice to look at. With some of the "captain's privileges" I have taken throughout the build I am thinking the value should skyrocket because of its uniqueness! Oh yeah, I forgot, it is only worth something if someone wants to buy it. I guess that is why I have a day job.
- 212 replies
-
- 1
-
-
- constellation
- artesania latina
- (and 2 more)
-
Now that I am starting the running rigging the confusion is setting in. I know from other MSW members that have built the Constellation that some of the rigging instructions are not complete. The example I am referring to is there are no clewlines shown for furling the sails. They seem to be omitted or forgotten. I am adding these in and so far all makes sense. Where I am getting a bit confused is when I reference the Pertersson book Rigging Period Ship Models he talks about leech lines and bunting lines. I am thinking these were not used around the turn of the 19th century as there is no where near enough belaying pins to tie up all of these lines. If not how did the sails get furled? I am guessing the yards were lowered to a point and then the sails were pulled by hand and tied to the yard. I am also guessing they used the "tassels" (not sure what they are called) that were attached to the face of the sails in several rows to lash the sails to the yard. Would I be correct in leaving out the bunting lines with this model? I realize the authenticity of it is not all that great but inquiring minds want to know. I am currently suffering from information overload in trying to learn how all the rigging works. The end goal of my model is to have a nice family room piece but would like to speak somewhat intelligently if someone asks a question about it.
- 212 replies
-
- 1
-
-
- constellation
- artesania latina
- (and 2 more)
-
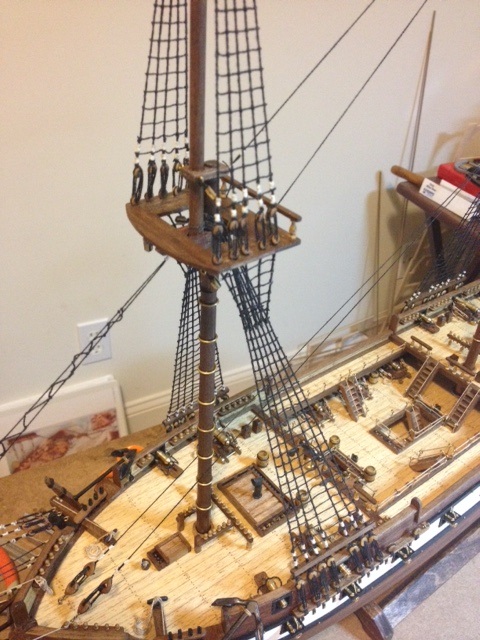
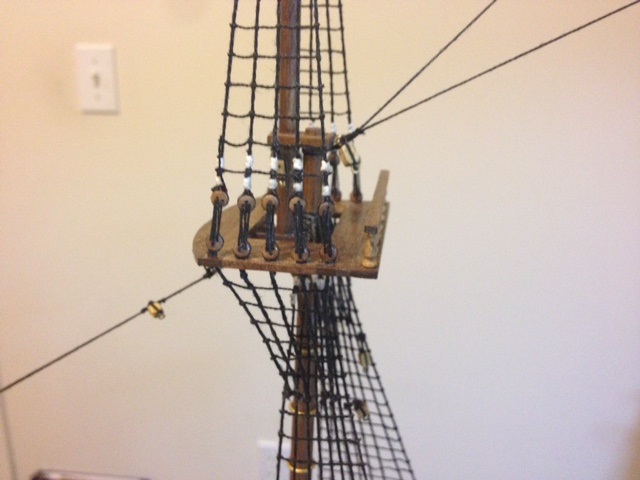
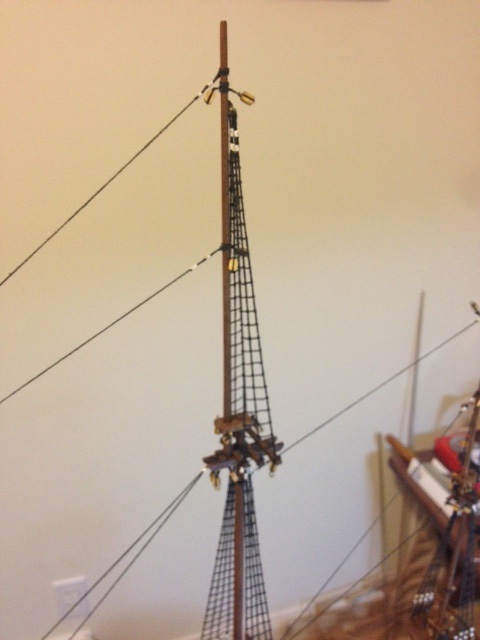
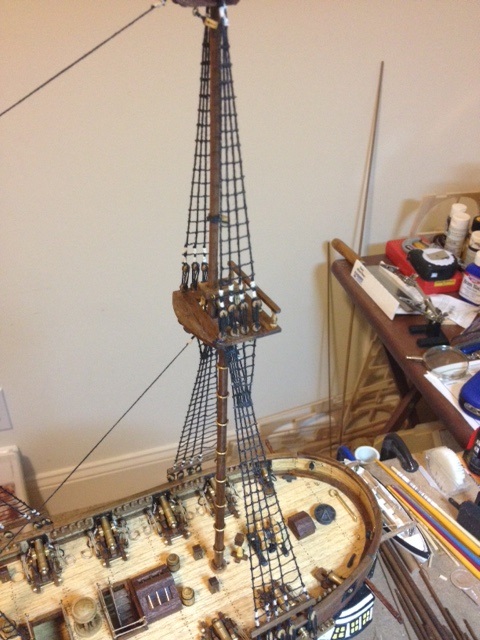
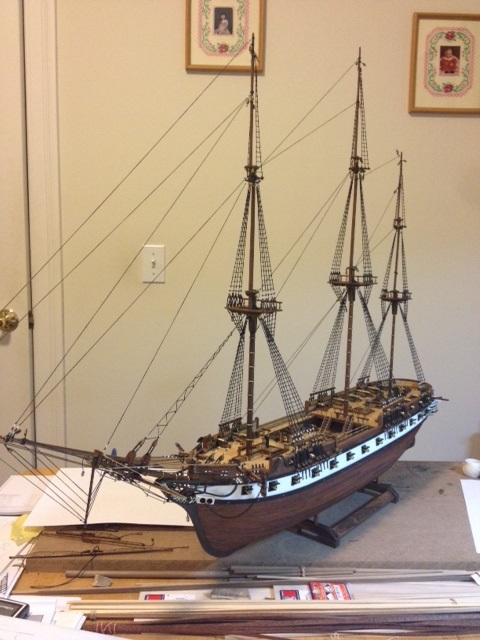
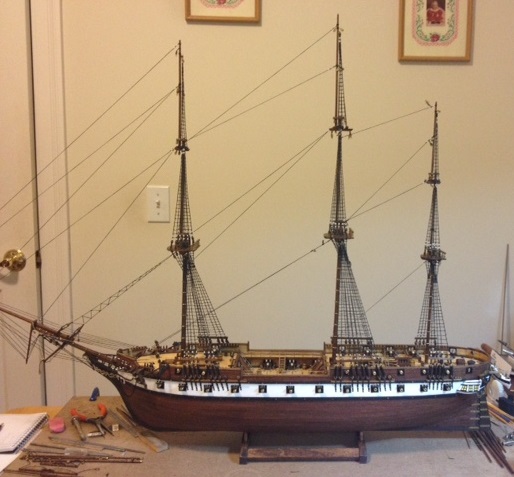
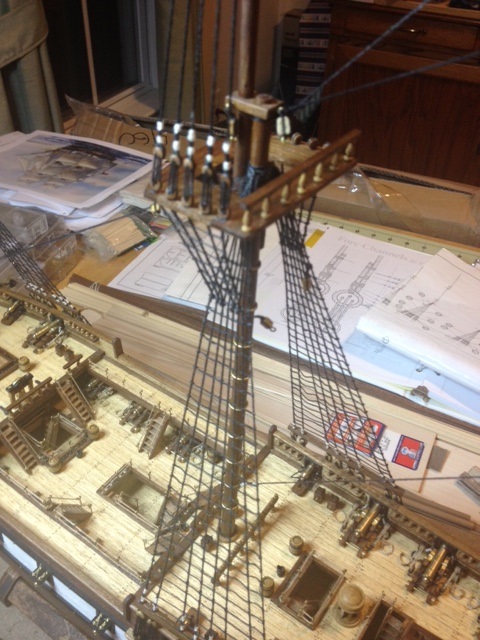
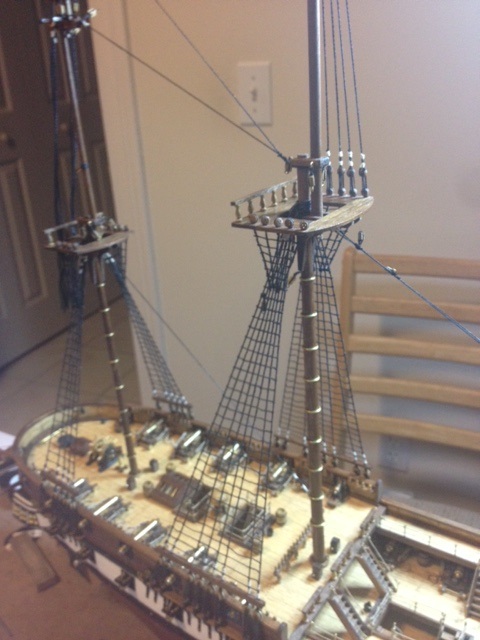
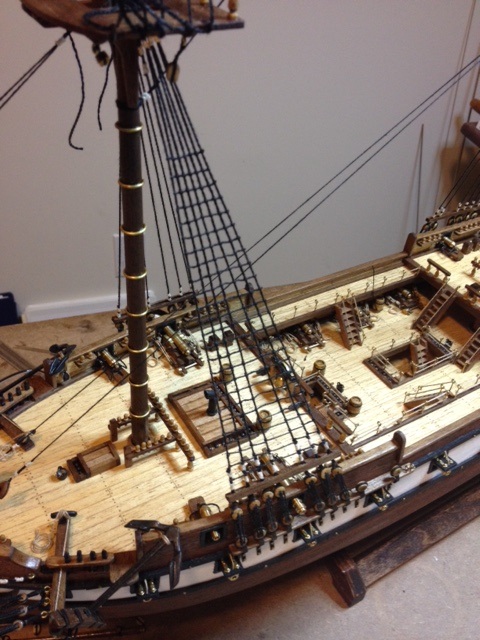
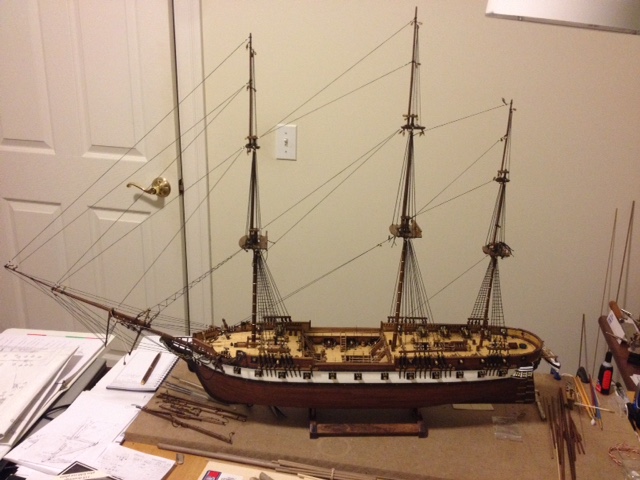
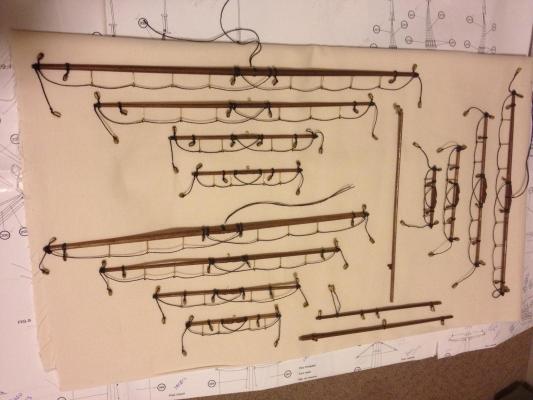
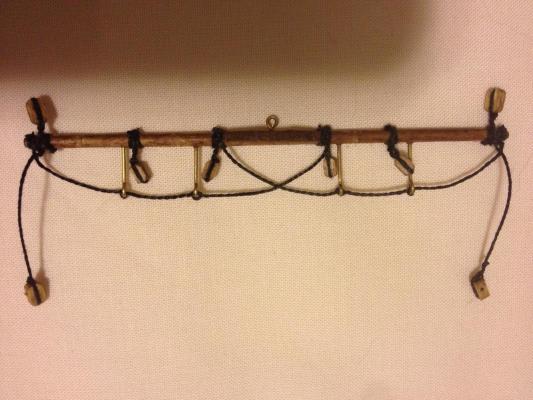
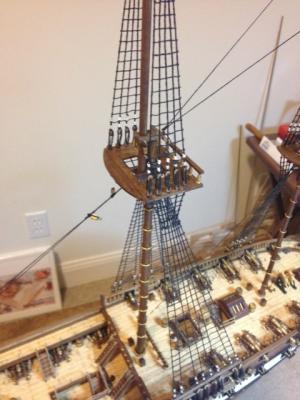
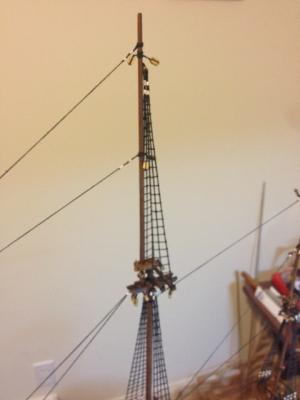
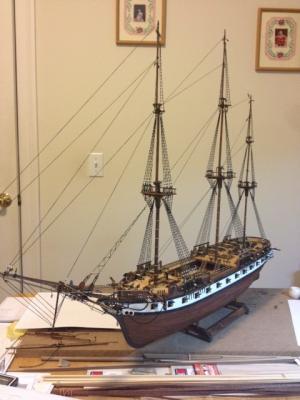
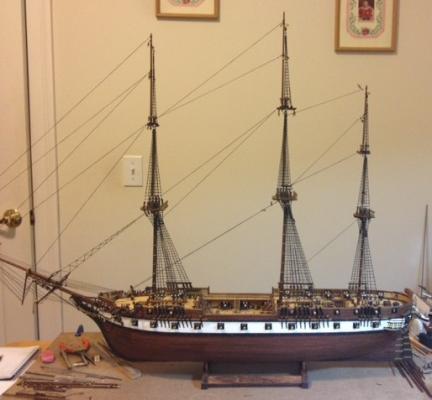
I finally finished all the ratlines!!! It was only 2,158 clove hitch knots. I am pretty pleased with the way they came out. This was a great exercise in proving that you get better with practice and repetition and there was plenty of that. I have a couple more standing rig lines to do then it seems I need to start rigging the yards and then installing them. Back to rookie status as I have never done that before so there will be a new learning curve. That is what keeps this exciting. Below are a few pics of the ratline results. A couple of pics of the fore mast. A couple of the main mast Upper and lower main mast. The instructions only showed to put 3 "shroud" type lines without the ratlines across. Earlier I asked how would someone get to the top? Mark pointed out that it sometimes depended on the captain whether the ratlines were installed or not. Since I am the captain of my ship, it made sense to put them in and more importantly, I liked the look better. Can't leave out the mizzen mast. Here is what she looks like today.


- 212 replies
-
- 6
-
-
- constellation
- artesania latina
- (and 2 more)
-
Jeff, you must be excited and proud. I am sure your girl is elated and you just made a beautiful family heirloom. Nice job.
-
Hi all, Thanks for the likes and comments. I am hoping by the end of next week the ratlining will be done. It will all depend on how much life gets in the way.
- 212 replies
-
- 1
-
-
- constellation
- artesania latina
- (and 2 more)
-
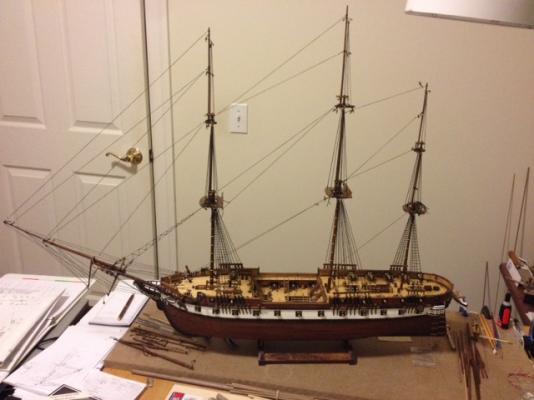
Here is a quick update. I have been tying clove hitches for the last century but all the lower ratlines for all 3 masts are complete including the reversed ones at the top. Those were a bit tricky because the shrouds needed to be kept tight but not pull the lower rats out of alignment. All in all they came out okay for a hacker. I started putting in the upper dead eyes for the middle set of ratlines so we can do it all again.


- 212 replies
-
- 5
-
-
- constellation
- artesania latina
- (and 2 more)
-
Glad to hear she is up and about. Best wishes. Tom
-
Thanks Mark, ratlines it is. Not that I want to tie more rats but I think it just makes sense.
- 212 replies
-
- 1
-
-
- constellation
- artesania latina
- (and 2 more)
-
Thanks Mark and Jeff. I would guess somewhere just shy of 2000 ratline knots. I did notice on the top tier of the mast (the 3rd piece) the instructions only have 2 or 3 vertical lines (shrouds?) to the top of the mast. There are no ratlines tied across them. That does not seem correct to me. How would someone climb to the top of the mast? I would think it is dizzying enough without trying to shimmee up a single rope. I am leaning toward putting ratlines on these shrouds. There would not be many but it just makes sense... at least to me. But then again, I have never done this before. The rigging directions have a couple of mistakes so I don't really trust them. I am following what I read and directions from MSW members. Can anybody shed some light on this?
-
Gundorf, Thanks for dropping by and the nice compliment. It is much appreciated.
-
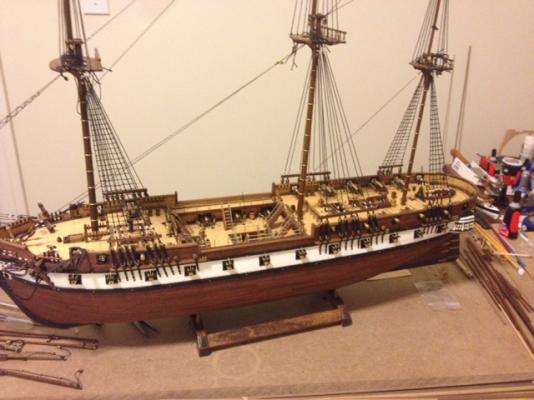
Just updating the log a bit. I installed all of the lower dead eyes an shroud lines as well as the port side foremast ratlines. With 18 sets of ratlines on this ship, I will be tying clove hitch knots into the next millennium. Much of the standing rigging is complete. I still have to tie up the dead eyes for the second level of ratlines and some odds and ends.

- 212 replies
-
- 6
-
-
- constellation
- artesania latina
- (and 2 more)
-
Moving right along. It is coming along nicely. I agree with the infinite learning curve. The old adage, "I wish I knew then what I know now." really applies to this hobby... especially if your on your first ship like me. Keep up the good work. Incidentally, I am using the exact embroidery thread from Joann Fabrics for my rigging. It seems to work well and comes in a variety of thicknesses and colors.