HOLIDAY DONATION DRIVE - SUPPORT MSW - DO YOUR PART TO KEEP THIS GREAT FORUM GOING! (Only 24 donations so far out of 49,000 members - C'mon guys!)
×


toms10
-
Posts
929 -
Joined
-
Last visited
Content Type
Profiles
Forums
Gallery
Events
Everything posted by toms10
-
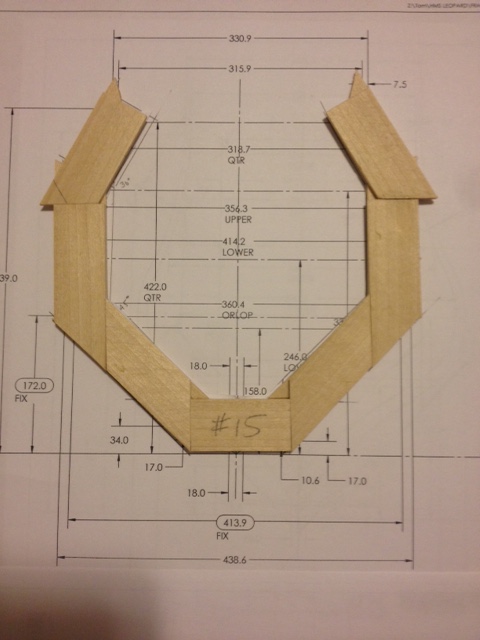
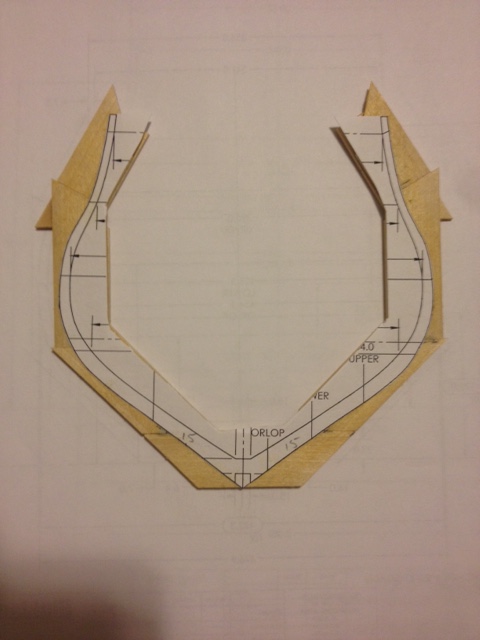
 Hello again MSW, After finishing my first build (Constellation) by AL I finally decided on a second adventure. I finally mustered up the courage and decided to do a scratch build of the HMS Leopard. I had come across the plans and for a first scratch build it seemed to have all the ingredients to test my abilities. There seemed to be plenty of information available to guide me along with my MSW friends so I went for it. Naturally, I have the 50 Gun Ship book by Rif Winfield. I took the 1:96 plans that came with it and enlarged them up to 1:85 scale. The 1:96 was just a bit small to me. I scaled it up to 1:72 and it was bigger than I have room for so I split the difference and ended up at 1:85... same as my Constellation. Working in an engineering office, I have access to the CAD program Solidworks so I transferred the 1:96 measurements from the drawing to the CAD and just played with the scale until I liked it. I have been researching, planning and drawing frames for the past month so there is not much to show at this point. Scratch building is forcing me to learn tons of information on ship building practices which is not a bad thing. My plan is to build the model with both frames and bulkheads. The reason is I want to cut away the center area of the hull on one side to show some of the Orlop and Lower deck arrangements. I figured I have the plans/layouts so why not use them. I will use frames in the area of the cutout and bulkheads on both ends since these areas will not be seen inside. Below is a sketch of my thoughts. The area inside the heavy outline will be the cut away area. Here also are some pics of the frame work I am playing with now. Band saws and belt sanders will be busy! Next is to design the fore and aft bulkheads and the deadwood layout. If I do this right, the summer when the shipyard is open as much, will be spent designing and roughing out the skeleton. Then when the New England winter sets in I will have plenty to keep me busy. Hope you enjoy the build, Tom
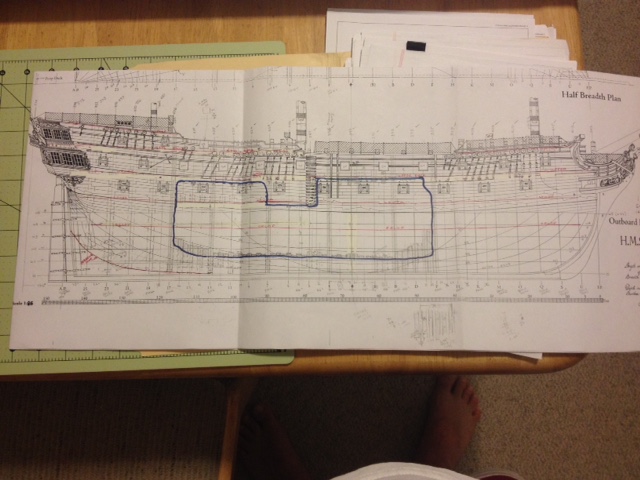

- 385 replies
-
- 17
-

-
RedDawg, Don't want to pirate Bluto's build but those are the plans I am talking about. You pretty much need to get them to whatever scale you are going to build to and then do lots of reading to figure out the sizes. that is kind of where I am right now. This is my first scratch build and I am starting to understand why the kits are so expensive. There is a lot of research that goes into them if they are done right. Tom
-
Jim, The Constellation was fun. To be honest, the Leopard I am contemplating is going to be part POF and part POB. I am working out a plan to cutaway the center 2/3 of the hull on one side to expose the lower and orlop decks and possibly some of the upper deck. In this area it will have to be POF. Once past the line of sight through the opening I can do POB. The walls from the inner cabins will cover up the bulkheads if I do it right. I am thinking pretty much replacing the canted frames with some bulkheads. This will make for a very complicated build because I now need to plank the inside of the opposite hull in the areas that can be seen. I will naturally also be taking advantage of the deck layout plans by Mckay. I figured I would up the stakes for my second build. The one part of the build that scares me is all the carvings on the stern and the figure head on the stem. I have never done any carving before. I am currently roughing out frames using a CAD (SolidWorks) program. Once I get my final concept sketch done I will start and post it on a build log... hopefully next week. Your model is progressing quite nicely. Oh yeah, thanks for starting yours first, your detailed pics make a great "cheat sheet" for me. Keep them coming. Tom
-
Pandora by marsalv - FINISHED - 1:52
toms10 replied to marsalv's topic in - Build logs for subjects built 1751 - 1800
Marslav, You were a machinist in a previous life! Beautiful work. Tom -
Mike, Family always comes first, even second and third. Everything else comes after that. Hope everything works out well for you and your family. Tom
-
Tom ~ it's good to see another 'Leopard Man' on board! I'll also be watching your build log with great interest and I'm looking forward to your log getting under way. Have you decided at what scale you'll be building your Leopard? If you've read the earlier part of my log you'll have noticed that I've said I would have liked to have built at a larger scale than the 1:80 at which I'm doing this one. JIm, I will be doing a 1:85 scale. I started out thinking 1:72 but it was just too big to display for me. I wanted to show some detail and thought that 1:96 was just to small for what I would like to do. I am just sketching frames right now so I am very early in the build. I will definitely start a build log very soon once I have something substantial to post. I am definitely going to use yours as a guide as this is my first attempt at a scratch build. It is going to be a long journey but that is fine because the journey is where all the fun is. Tom
-
Jason, Your work is very neat and clean. Something to be proud of. The "like" button will get a lot of use here. Tom
-
JIm, Thanks for taking the time to put together the detailed build log and great pics. I will be following this build log with great interest. I am in the beginning phases of my next build which is also the Leopard. It will be my first scratch build and I can't tell you how helpful your pictures are. Right now I am reviewing plans and deciding on what I want for a final look then I will start a build log. Keep up the good work. Your model is something to be proud of. Tom
-
Futtocks and riders
toms10 replied to toms10's topic in Building, Framing, Planking and plating a ships hull and deck
Thanks Mark, I will take a look. Tom -
Futtocks and riders
toms10 replied to toms10's topic in Building, Framing, Planking and plating a ships hull and deck
Thanks MSW for the input... and the learning goes on. I believe simplifying the framing with room and space just makes more sense if nobody is ever going to see the frames because they are covered. Bulkheads make even more sense to me in that situation. Around the edges of the breakout area I plan on doing with one side of the hull some of the framework will be seen. My idea was to "peel away" the outer planking to reveal some of the framework/inner planking (ceiling?) for a bit then remove the frames and inner planking for a clear view inside. I guess my goal in the end is to build a nice looking model for myself that is somewhat accurate. It doesn't have to be a museum piece (that would be nice ) or something to teach ship building practices. I can't see spending lots of time on things that are not seen so framing the entire hull as it was done in actual practice is not going to be an option for me here. I am thinking following the Hahn method and possibly "faking in" the actual framing only around the cutaway edges... or maybe just room and space to simulate the Admiralty style model. Decisions, decisions. Thanks again for all the input and help. I knew I could count on my friends at MSW. Tom -
Futtocks and riders
toms10 replied to toms10's topic in Building, Framing, Planking and plating a ships hull and deck
I got a chance to see the plans Druxey mentioned above. There were framing plans for the Jupiter that showed the framing layout as Druxey described with minimal spacing between frames. I also reviewed the material I previously read about model frame spacing. In Davis' book The Ship Model Builder's Assistant, on page 21, it illustrates the "room and space" method. Basically, it seems this is used in model making to represent framing and simplify the model. I noticed that in the book by Winfield, The 50 Gun Ship, all of the pictures of actual models were done this way. Am I correct in my thinking? I was also able to determine from McKay's isometric view of the Leopard's Orlop deck drawing that the riders were spaced approximately 9 feet apart throughout the midship. It showed only a total of 5 of them. It makes sense that they would only be applied to the perpendicular frames at midship for strengthening the frames. I would think the midship area would have the most tendency to flex. Am I right in assuming the room and space idea is only for simplified model building? The reason I am interested in the framing and riders is I would like to show one side of the hull partially open to show off the interior makings of the hull. I was going to use McKay's isometric drawings of each deck to layout the features that would be seen through this opening... at least that is the plan right now. Before I make any sawdust I want to make sure I understand. -
Futtocks and riders
toms10 replied to toms10's topic in Building, Framing, Planking and plating a ships hull and deck
Thanks Antony, Every little bit helps when you are learning. Tom -
Futtocks and riders
toms10 replied to toms10's topic in Building, Framing, Planking and plating a ships hull and deck
Druxey, Thank you very much for your explanation. It helps a lot. I am not sure why I called them risers instead of riders... could it be because I was working on stairs this weekend??? Would I be correct then in assuming that the RIDERS are the same width as the futtocks and only placed on the futtocks that are perpendicular to the keel? It seems I need to go back and better understand "room and space". Was the interpretation I drew just used for model making or did I just "miss the boat" (pun intended) on the explanations I have come across? I have seen some plans with the spacing very tight as you describe but could not figure out how the room and space idea fit. It seems that I may have a lot more frames to make than I originally thought; at least in the area I plan to show with the outer planking removed. I will check out the framing plans at RMG and Yedlinsky's book. Tom -
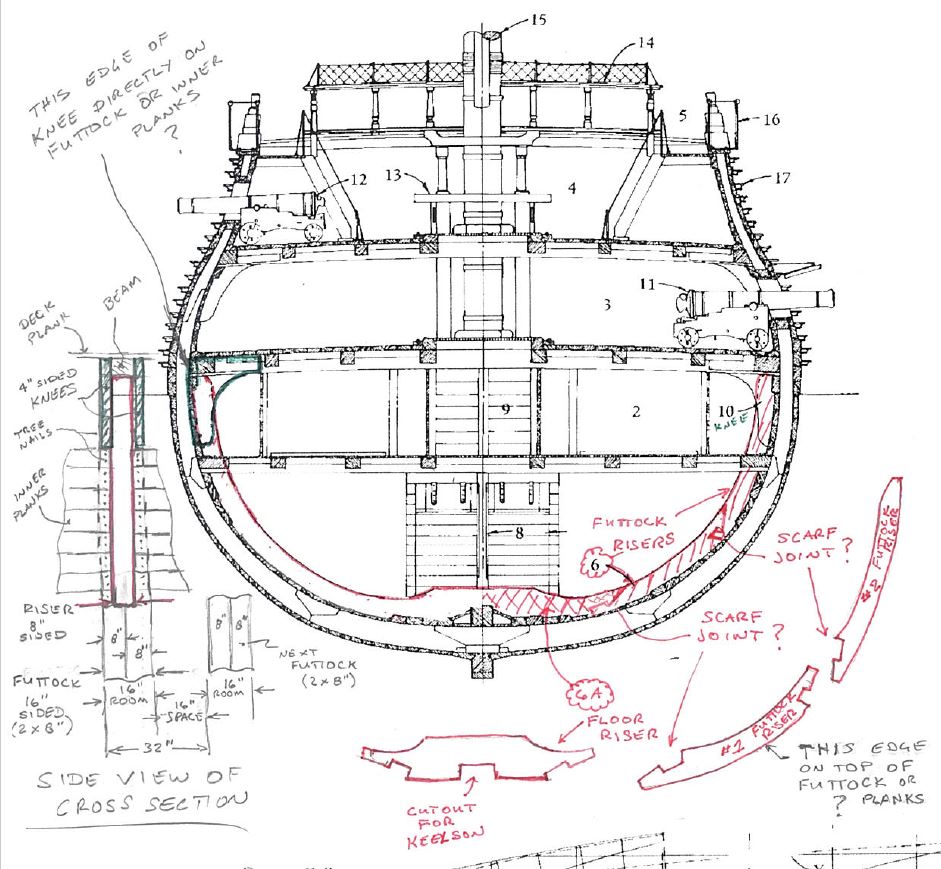
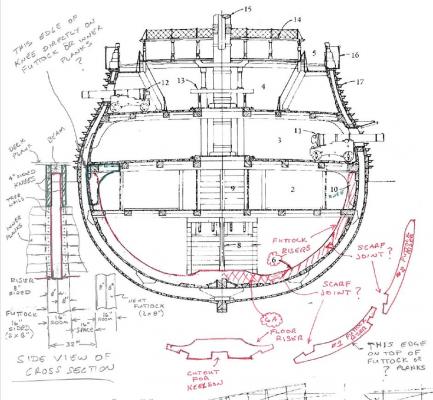
Hello all, I am doing some research on my next build. I would like to try a scratch POF of the HMS Leopard. It will be my first scratch so I have been taking my time and making sure I understand what I am getting into with regards to the plans. I have the the John McKay plans and it shows a cross section view which is very helpful. I am thinking about partially showing the inside of the hull just to make things interesting... The only question I have is about the rider (item #6). I have not found much info on how the riders are are attached to the frame. From the section view and my engineering background I am thinking the floor and futtock riders are attached directly to the futtock frame itself since they are for extra support. I have the book The 50 Gun Ship by Rif Winfield and it shows a cross section but not much different than the McKay plan... still have the same question. I attached a sketch below of how I think the framing should look... is this correct? I can't see it making much sense to put both the riders and the knees over the inner planking. You would have to dismantle 1/2 the ship to replace planks and it would lessen the reinforcing power of these items. I am thinking the sided dimension of the rider to be about half of the futtock assembly. In my case this leaves about 4" on either side of the rider to tree nail the inner planks to the futtocks. The knees would then be 4" sided and be flush with the outer sides of the futtock. Not sure how the inner planks would be attached to the futtocks next to the knees since there is nothing left to nail the planks to. I am thinking another 4" wide "spacer" attached to the face of the futtock and that would be used to attach the inner planks next to the knees. I am also assuming my room and space setup is correct; 32" on centers with 16" sided futtocks ( 2 pieces 8" wide with staggered joints) and then 16" of space. Sorry for the long post and any help clarifying this for me would be much appreciated. Tom Edited the word "riser" to rider so it makes sense. However, the sketch still says "riser".Thanks Druxey.
-
Well I hope something really tempting comes along because I like following your builds. Tom
-
mar3kl, I ran into a similar situation with my Constellation. I found that I was able to take a piece of broadcloth (bedsheet material), tape it to a piece of paper and run it through an inkjet printer. I was able to get a jpeg of a flag from the internet, mirror image it so it was the same when folded in half. It came out pretty nice after playing around. I was able to make it look wind blown with a little thinned white glue on the non-printed side. Be careful not to use too much or the ink will run. Just another option from one who is learning as he goes. Tom
- 249 replies
-
- 1
-
-
- billing boats
- vasa
- (and 1 more)
-
Mark, Very very nice. You must be feeling pretty good right about now and so you should. Thanks for all the detailed pictures and instructions in your build log. It will be a reference for me I am sure. Tom
-
Thanks again everyone for the kind and encouraging comments. Time to decide on the next build. Tom
- 212 replies
-
- 2
-
-
- constellation
- artesania latina
- (and 2 more)
-
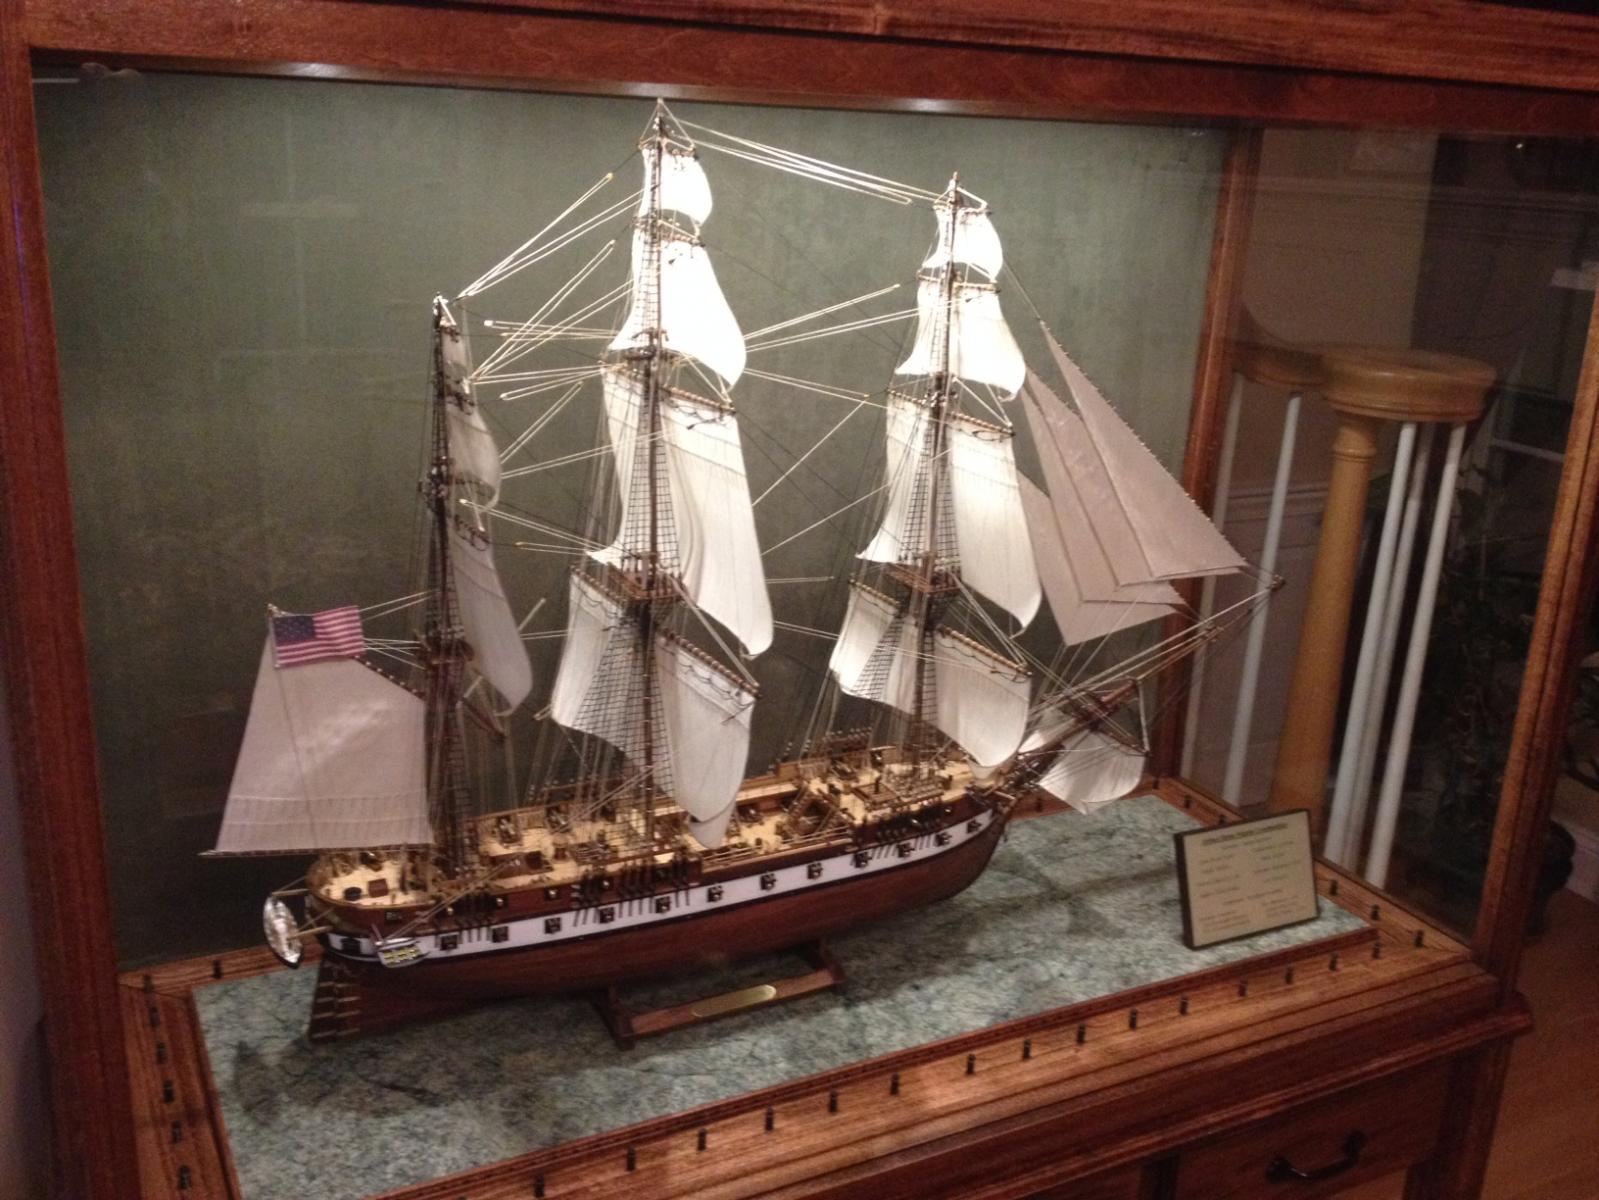
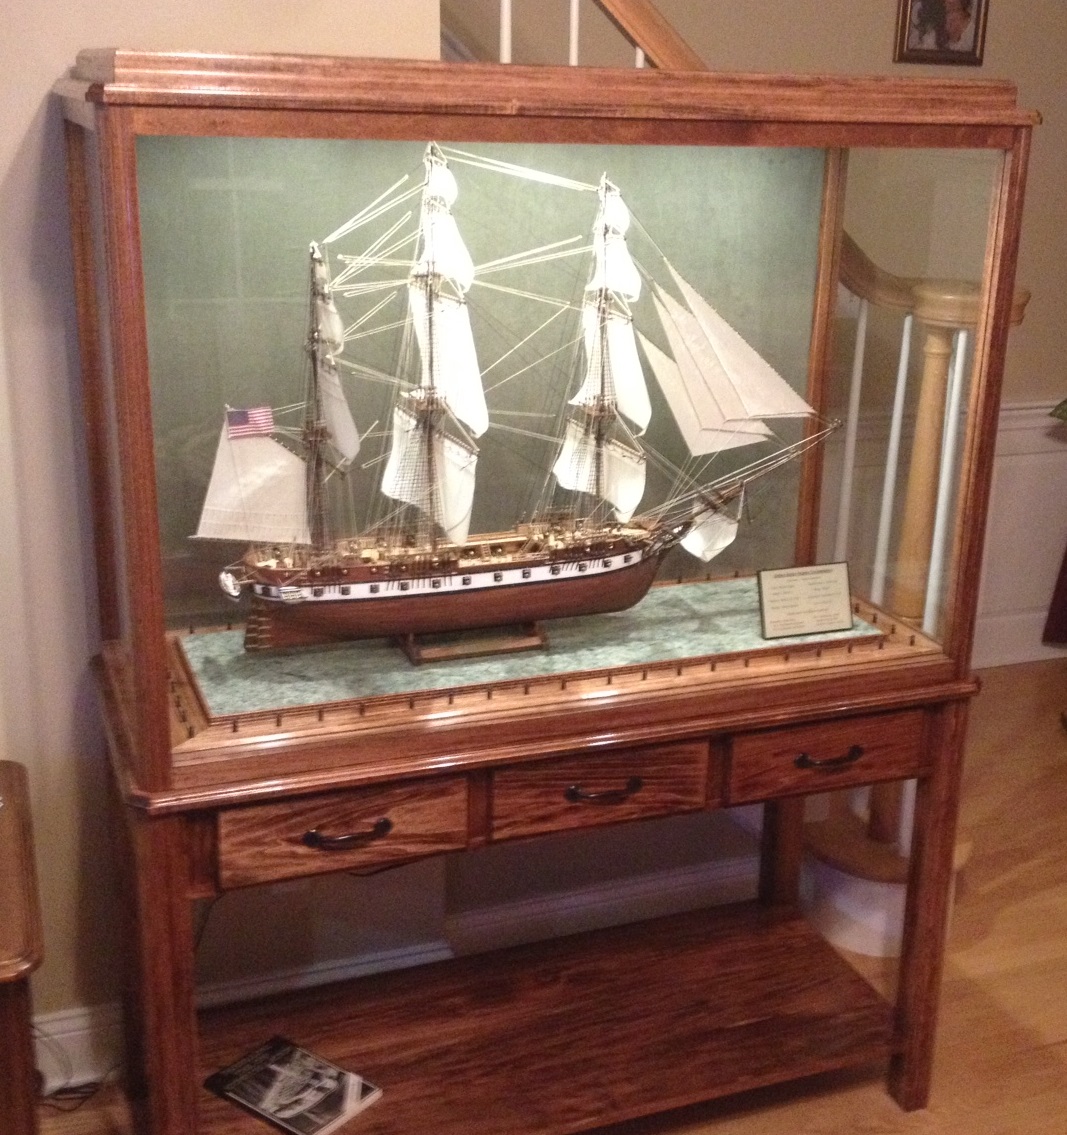
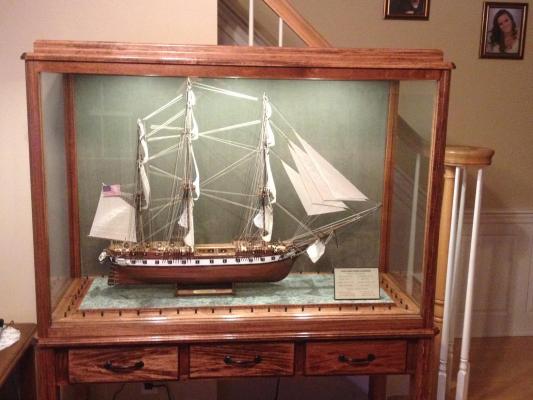
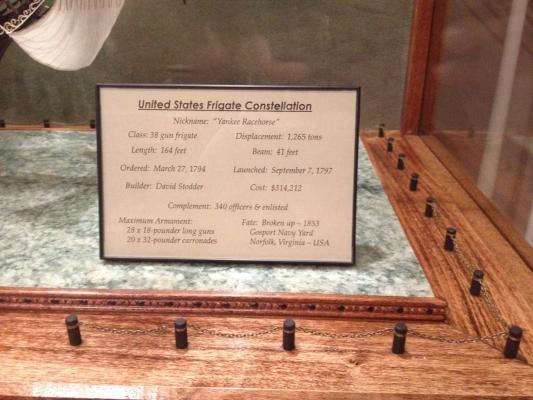
Hello all, This is pretty much the last step to this build log. I have completed the display case and have attached a few pics. The overall dimensions are approximately 51" long x 22" deep x 63" high. It has 3 dimmable LED lights in the canopy. The surface that the boat is actually sitting on is a piece of granite (countertop remnant). Around the granite I installed a "fence" with a small chain to give it the effect that you could easily picture yourself (at scale) walking through a display of the actual ship at a shipyard museum. As all have mentioned in many threads, you need to plan where you are going to display these because the displays can get big quick. Now I have to figure out what the next build will be... Enjoy and thanks to everyone for all the help on this one. Tom


- 212 replies
-
- 9
-
-
- constellation
- artesania latina
- (and 2 more)
-
Thanks Jeff and Jason, I have no beans to spill at this point. I am finishing up the display case this week and then a few projects around the house. I am leaning a bit towards the Montanes but the Nuestra Senora looks interesting. So does the San Ildefonso and the Trinidad.... see my issue???? Tom
- 212 replies
-
- 1
-
-
- constellation
- artesania latina
- (and 2 more)
-
Here is another possible alternative. Just kidding Mike, what Canute said is very true. Take care of yourself. I really enjoy your build logs. Tom