


UpstateNY
-
Posts
466 -
Joined
-
Last visited
Content Type
Profiles
Forums
Gallery
Events
Posts posted by UpstateNY
-
-
-
Guess with acetate it heads back to initial problem!
Your epoxy idea is interesting...I'd just watch the air bubbles as the instructions in the link actually mention given you are looking for a very clear finish. Many years ago, I had to use a vacuum to completely pull out the air after mixing before using similar materials. Another option is perhaps just cast a larger sheet than needed. The cured epoxy film should be pretty robust so you may be able to cut out the windows to size. This way if you had a few air bubbles, you could avoid those areas.
Cheers,
Nigel.
-
Looking forward to hearing how it works out w the cover slips! Be interesting!
I also have to make some windows for my kit as the cast windows supplied by AL are awful so I will give the cover slip idea a try as well! If it fails, then it will be off to the craft or office store for some clear acetate sheet or similar to use instead!

Cheers,
Nigel.
-
Hi All,
Nope, I haven't tried cutting cover slips, it was just a thought. As Greg points out they are very easily broken.
I agree with Keith as a diamond tipped scribe would be my first tool for this as well. Thinking about it some, I would first support the slip on something extremely flat like a microscope slide given any unevenness will cause the fragile cover slip to shatter from the scribing pressure. After scoring, I would also put another microscope slide on top of the slip along the scribe line before trying to gently snap it along the scribe.
I think it will certainly take some trial and error...be interested in what Greg has tried to date.
Quick edit...Dremel make a 545 Diamond cutting Wheel that would perhaps allow the slip to be cut if supported on a flat surface. Would perhaps avoid the problem of the fragile slip shattering from the initial scribe pressure. Again...just thoughts.
Thanks,
Nigel.
-
About thinner glass..rather than microscope slides, have you tried using glass cover slips? They are 0.13mm - 0.17mm thick. At 64:1 scale, should be close to scale.
Link below in case it helps.
BTW...enjoying your build-beautiful work!
Thanks,
Nigel.
-
Hi All,
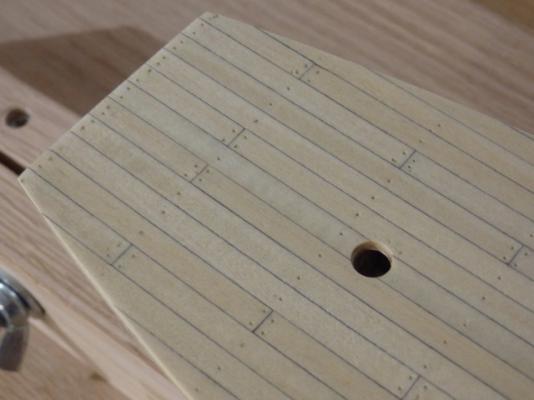
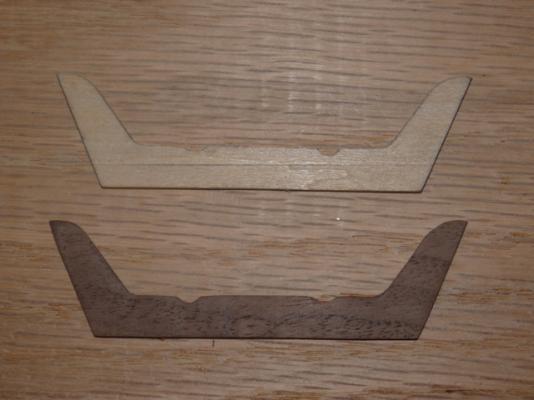
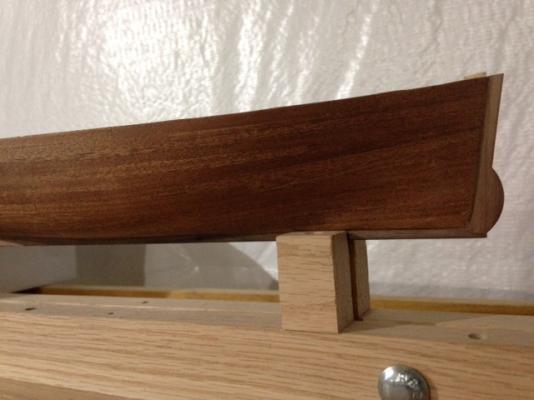
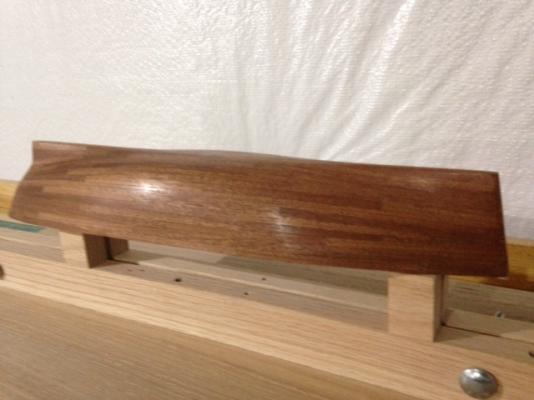
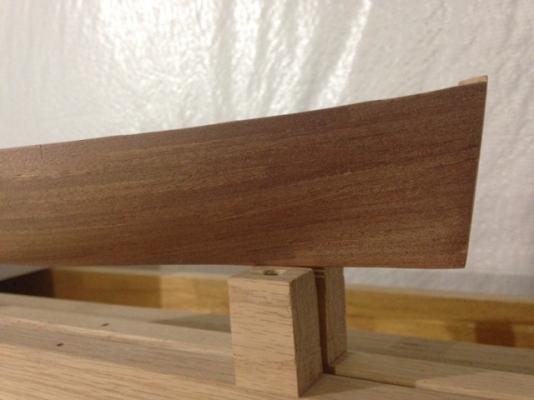
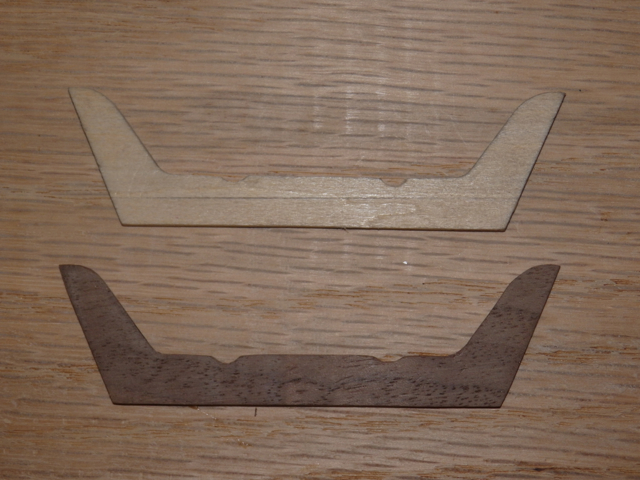
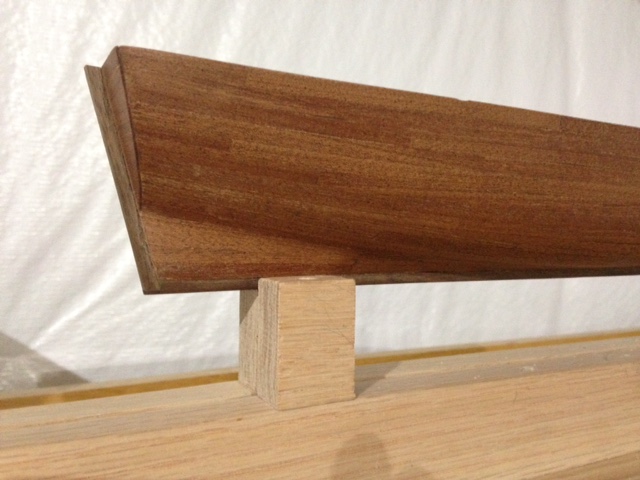
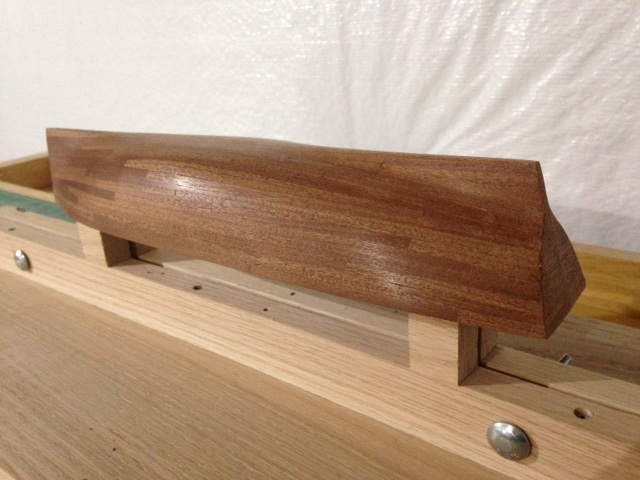
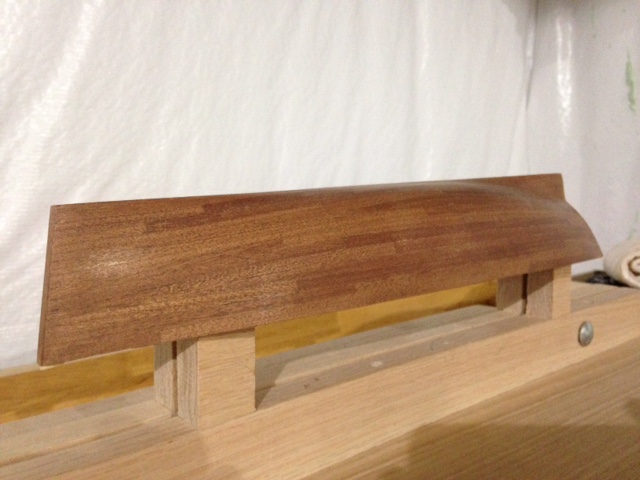
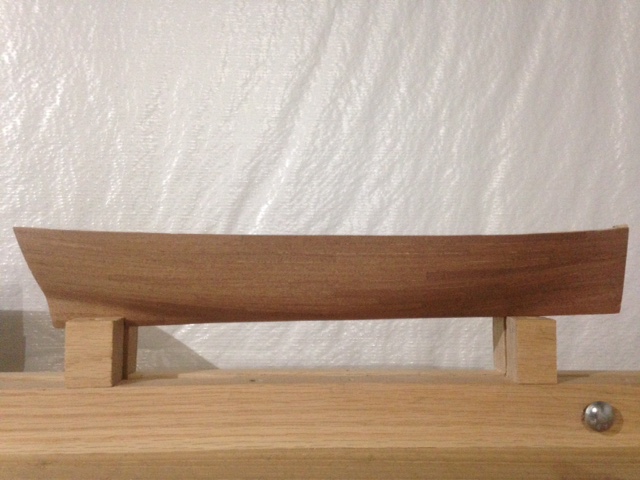
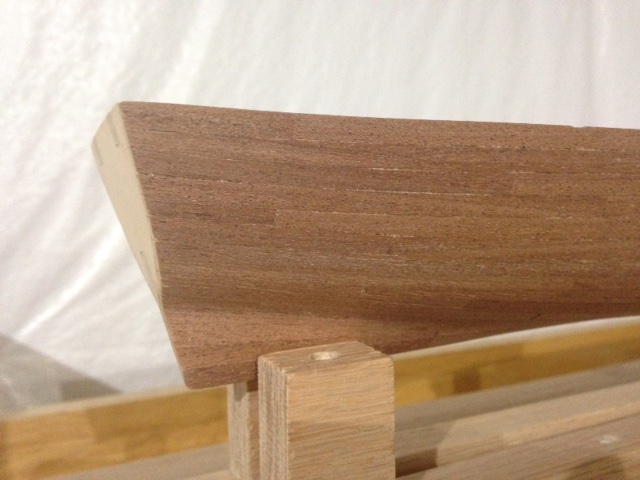
Well, been busy learning how to treenail on the deck! I used my Dremel with a #74 bit in the small Dremel drill press. I had a lot of problems with consistency as I found it hard to see the tiny bit as it approached the deck. I then found I could hit the pencil marks more consistently if I also watched the shadow of the drill bit approach the mark using a light shining at an angle from side.The holes were then filled with a light colored filler, sanded smooth and then several coats of WOP were applied with steel wool being used to lightly smooth the finish between each coat. The final treenail effect is quite subtle at normal viewing distances. Hopefully most of my errors will be hidden under the different deck fittings. I’ll just have to make a few buckets, barrels and boxes to cover anything that is still visible!One fun item is I’ve started on replacing some of the rough laser cut wood plywood pieces that will be very visible. Below is my current effort to build the forward brace in walnut. I still have to completely match the depths of the small cutouts on the top surface, but getting close.Pictures and below and as usual thanks for reading. Next up..hull treenailing!Cheers,Nigel.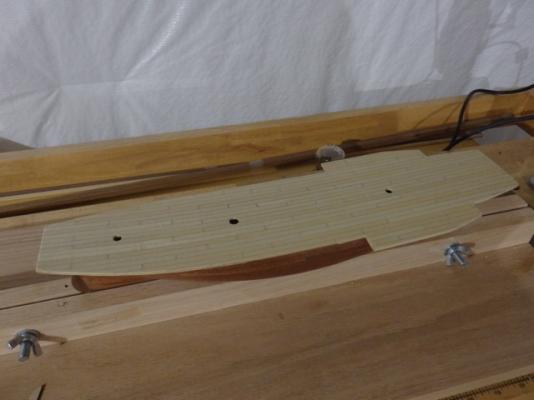

- tarbrush, avsjerome2003, mtaylor and 5 others
-
 8
8
-
Hi Simon,
She's coming together well and you seem to have a great base for your 2nd planking.
As for the clamping issues you mention, take a look at this great video in Chuck's Cheerful log on how he does planking. I learned a huge amount about how to line out a hull correctly and then pre shape the planks using heat. In the end the planks just naturally take the correct shape! Wish I'd seen this before I'd planked my build! Hope it helps.
Cheers,
Nigel.
http://modelshipworld.com/index.php/topic/8131-hm-cutter-cheerful-1806-148-scale-by-chuck/page-22
-
Hi Carmelo,
Thanks for the kind words...just taking my time to try and make sure everything fits cleanly by doing test fits before gluing. If something isn't right after gluing, I just strip the piece off and start again. Your build is coming on very nicely - looking good!
I am just using a thin layer of wood glue on the strip to place the decking. I am letting the glue dry slightly so it is rather tacky before placing the strip. I find this allows the glue to hold the strip down firmly.. It still gives me a minute or so to adjust the strip to make sure the joints are tight. I like the wood glue as I can then clean up any excess using a damp cloth. I'd make a huge mess if I used CA!
Cheers,
Nigel.
-
-
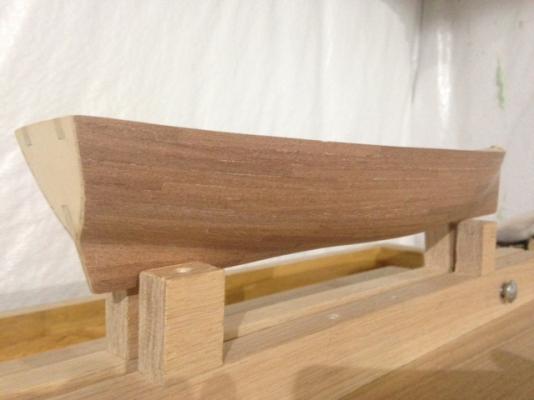
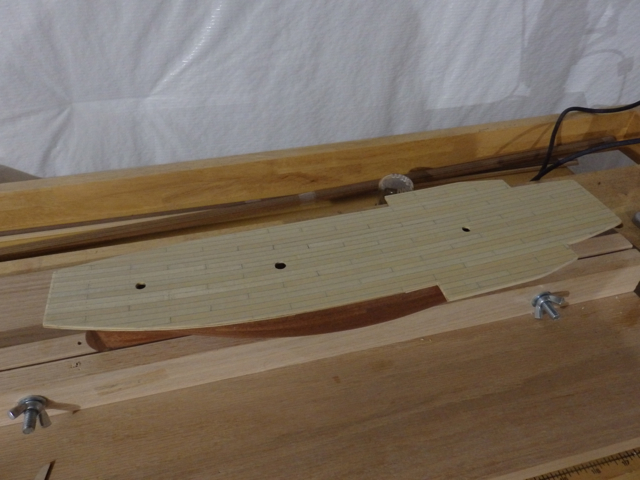
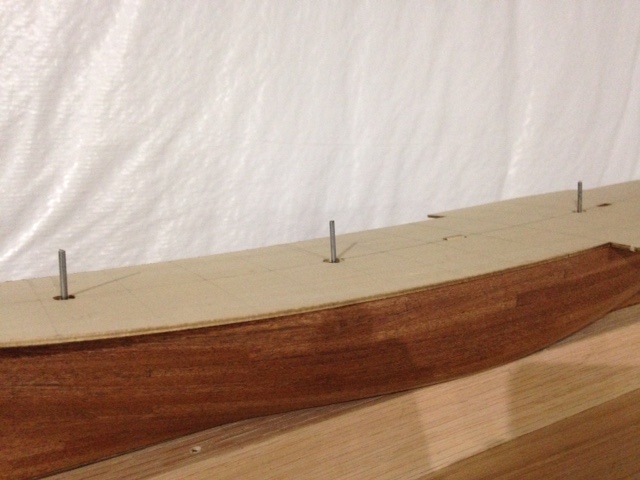
I was able to spend a bit more time than usual in the shipyard over the past week or so and so made a bit of progress.
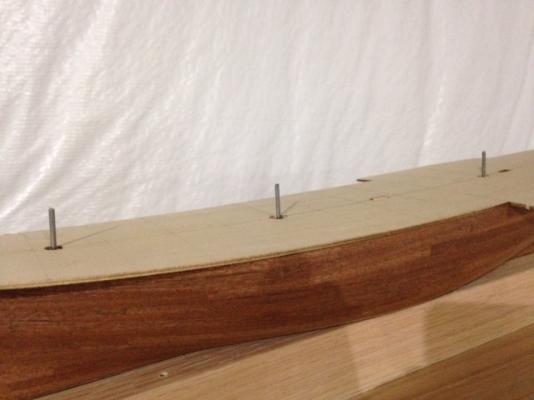
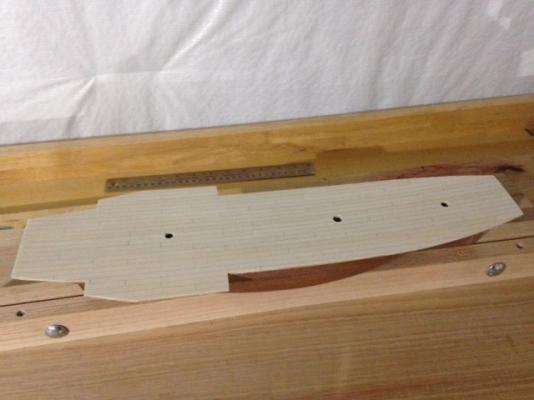
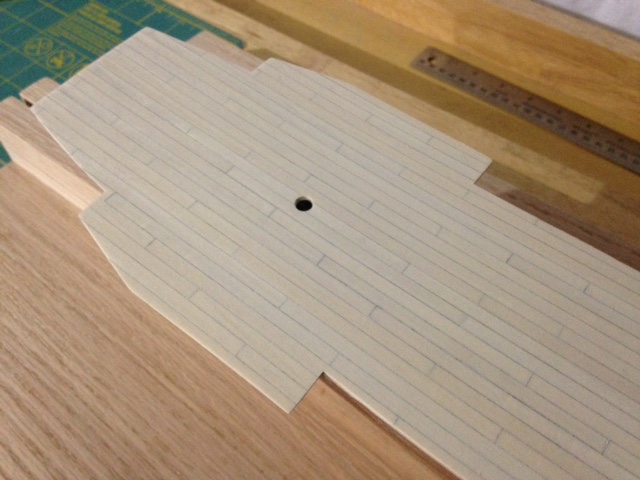
The walnut keel, bow and stern pieces have been attached. Plans and photos in the kit didn't seem show a stern piece, but the model looked a bit odd to me without it.The deck was then attached and I drilled some holes into the plywood keel through the mast holes and made some mast support rods from some small nails. I thought this would be easier now before the decking was done. I am hoping these rods make attaching the masts at the correct angles easier down the road.Finally, the deck planking was completed. This went faster than I expected. I used an HB pencil to line one side of each plank to simulate the caulking. After the first light sanding, the planking pattern seems to be standing out fairly well.Thumbnails below. May be time to dig out the SLR rather than just use my phone camera so the details are clearer.Cheers,Nigel.


-
-
-
Hi Janet,
Thank you for stopping by. I've been enjoying your build log and am looking forward to seeing some photos of your finished sails. Your Dragon is amazing and I just hope mine turns out half as good! I especially like the way your different wood choices complement each other.
On my side, I've decided I am going to do the build mostly using the kit wood to see how it works out. I will scratch build some parts as you have done, for example the windows as I am not very happy with the size or the quality of the kit's cast windows.
Thanks,
Nigel.
-
Hi Max,
I am looking forward to following along on your new build from the start. I am also very impressed you managed to avoid opening the box for even a couple of weeks!

Good luck and enjoy your new kit!
Nigel.
- Dimitris71 and maggsl_01
-
2
-
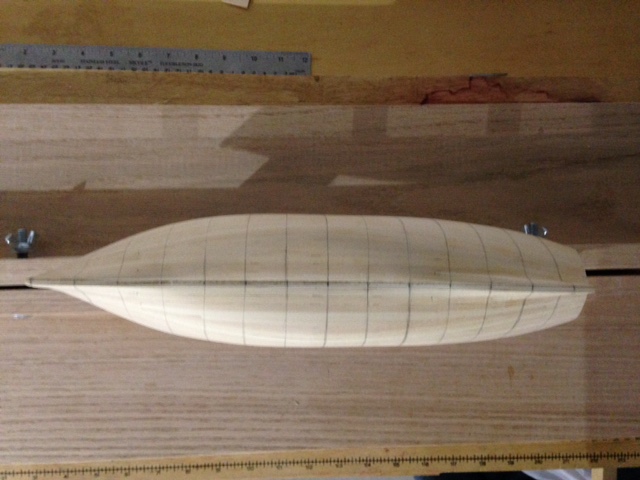
Another small milestone as the second planking is now done. Hull was sanded down with 320 sandpaper and then finished with some wire wool before cleaning things up with a soft cloth which also put a bit of shine onto the hull. Planking pattern is now a bit more visible.
Next time I’ll use 400 sandpaper to do the finish sanding as I found the thin walnut veneer was very prone to light splintering at the edges. Not sure if this is a normal or just because the wood had been in the kit drying out for years. Anyway time for a small celebration with a large single malt as I am rather happy to have completed the planking!
Next steps are to attach the keel pieces and then treenail once my small drill bits arrive as my smallest 1/32in bit looks too big. Will then put a few light coats of wipe on poly on the hull to protect it during the decking work to come.Anyway, so far so good and thumbnails are below. As always, thanks for reading.Thanks,Nigel.


- kiwiron, NMBROOK, Duanelaker and 8 others
-
11
-
Hi Augie,
Of course you helped! I went back through your Confederacy log and looked at your treenailing work which looked great of course!
So adjusting plans here as I like the idea of being able to tweak the color so I can get it to stand out a little.
Drill and fill it is!
Thanks,
Nigel.
- CaptainSteve and augie
-
2
-
Thanks Augie. Fingers crossed the the finish helps a bit.
One question I forgot to post is what wood works well with walnut for treenails? I've read on a log somewhere that walnut can be hard to use with a draw plate so any other options would be appreciated.
Cheers,
Nigel.
-
A short update as one side of the Dragon now has the second walnut planking layer completed and lightly sanded down. Taking my time as the walnut strips in the kit are so thin, I am worried I could sand through them if I leave any rough spots during the second planking.
Overall pretty happy with the results other than the planking shift pattern isn’t very visible in spite of cutting each plank from a different strip to avoid matching the grain patterns. I am hoping a few thin coats of matt polyurethane with more sanding will give me a nice finish and hopefully show the planking pattern more clearly.Cheers,Nigel.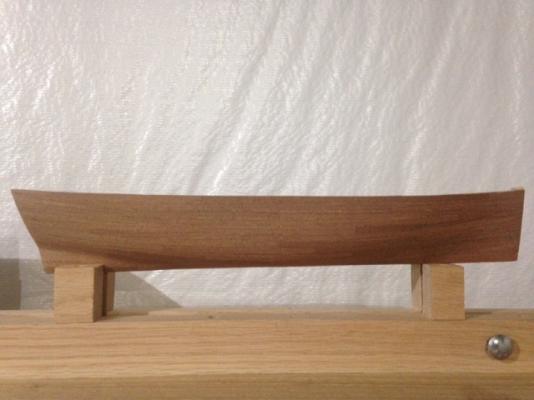

- cdogg, tarbrush, Dimitris71 and 5 others
-
8
-
Looking good Simon. Really like the color of the deck and looking forward to seeing how you will paint her.
Cheers,
Nigel.
-
Hi Keith,
I've been reading your log with interest from afar. As a recent new member, just wanted to say I really like seeing how you are carefully figuring out how to translate the plans into these complex shapes. Great discussion, build looks great to me and looking forward to the rest of your build.
Cheers,
Nigel.
-
I like the wood contrast with blackened hardware standing out against the lighter cherry.
Looking really good and very clean work.
Cheers,
Nigel.
-
Hi Simon,
Glad you are pressing ahead and spending the time now to shape the hull will certainly pay off later when you start the final planking. Planking certainly isn't easy!One thought is I read that some builders coat the inside of the hull with glue before sanding. I followed this advice and I think the hardened glue layer helped stabilize a couple of areas during sanding for me where the planks would have been a bit thin otherwise. Perhaps the same tip will help you.Cheers,Nigel. -
A "like" kinda doesn't cover it!
Looks fabulous!
Cheers,
Nigel.
- GLakie, gjdale, justsayrow and 2 others
-
5
-
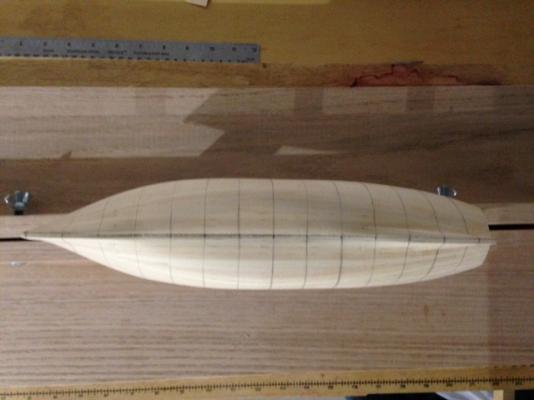
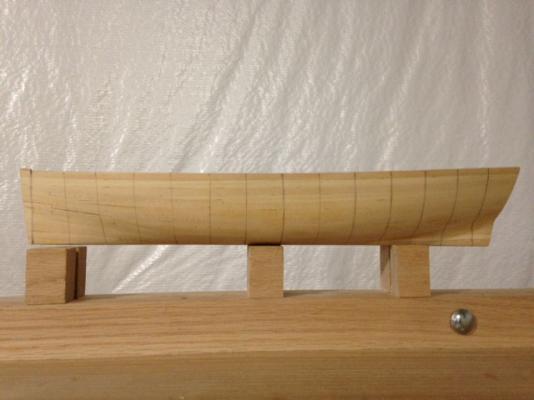
I spent some time planning the decking and 2nd hull planking layout. General theme in many logs is that looking ahead a few steps can help avoid problems down the road so taking that on board.
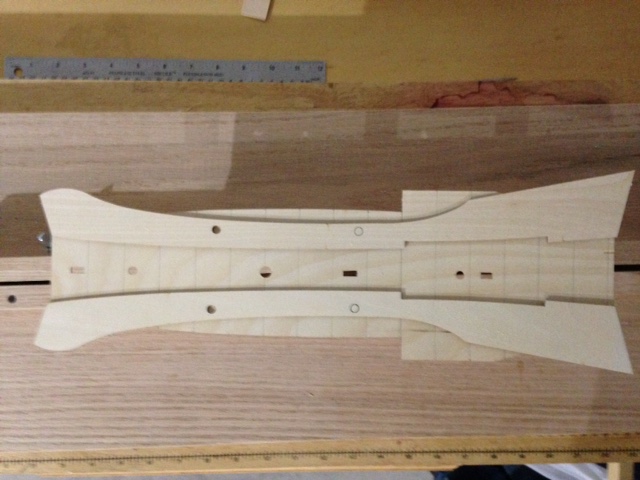
I like the idea of using a 4 shift pattern on the deck and hull using 4in planks. I realized the Dragon doesn’t come with frames that extend above the deck to help me set the decking pattern. I will need to add these false frames and measuring things off it seems spacing them at 1in intervals should work, while still avoiding the cutouts for the cannon’s and so on.The next question was how to transfer this frame spacing down onto the hull. Took some trial and error, but best method I found was to transfer each frame position using the deck marks onto the top plank and the keel. I then traced the frame line along some string stretched tightly between the marks on the top plank and keel to follow the curve of the hull.I expect there is an easier way to do this (please let me know!), but the resulting lines don’t look too bad to me. They will at least let me cut each plank to the correct length. These planks will often be longer than 4in due to the hull curvature.Thumbnails below and thanks for reading.Cheers,Nigel.


Frigate Essex by Rafine - FINISHED - Model Shipways - Kitbashed
in - Kit build logs for subjects built from 1751 - 1800
Posted
Hi Bob,
Late to your build, but starting to follow along.
Your Essex is amazing and I love the detailed pictures showing your beautiful rigging work. Great stuff. Looking forward to seeing the yards!
Cheers,
Nigel.