


UpstateNY
-
Posts
466 -
Joined
-
Last visited
Content Type
Profiles
Forums
Gallery
Events
Posts posted by UpstateNY
-
-
Thanks for all the encouragement and the more than kind words guys. Really appreciated.

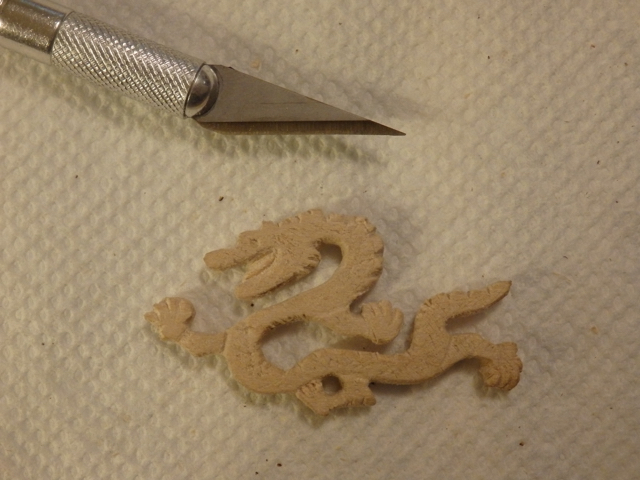
Will take a few more practice turns in basswood and then perhaps try carving "Smaug" using boxwood. I've heard this wood holds detail well.
Now I need to figure out how to redo my wonky ladders....

Cheers,
Nigel.
- CaptainSteve and Dimitris71
-
 2
2
-
Hi Dimitris,
Lovely work. She is a real beauty with so many really great details to enjoy making, including 11 lifeboats seemingly!
Should keep you busy for a week or so!
Cheers,
Nigel.
-
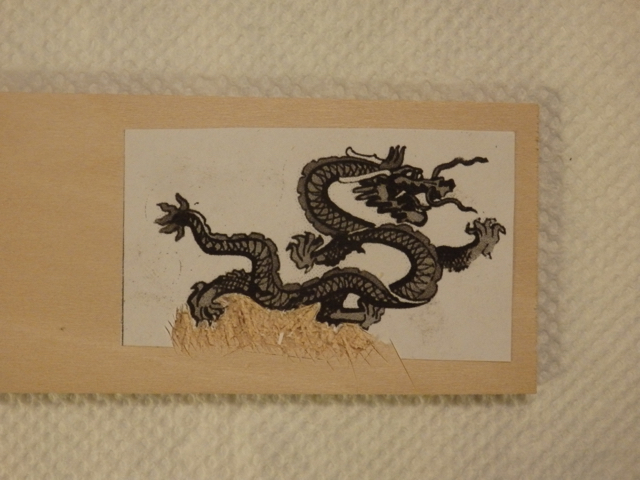
HI All,
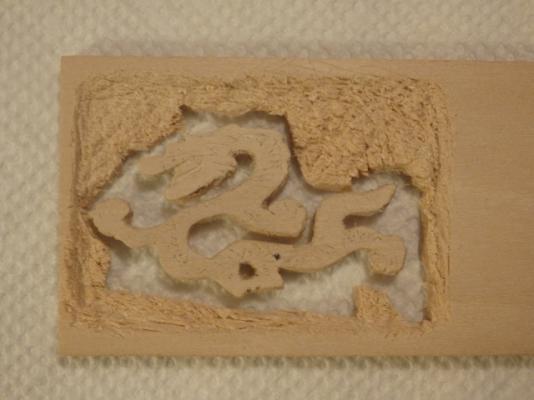
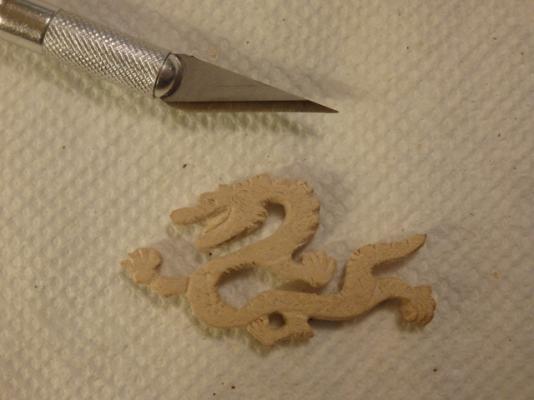
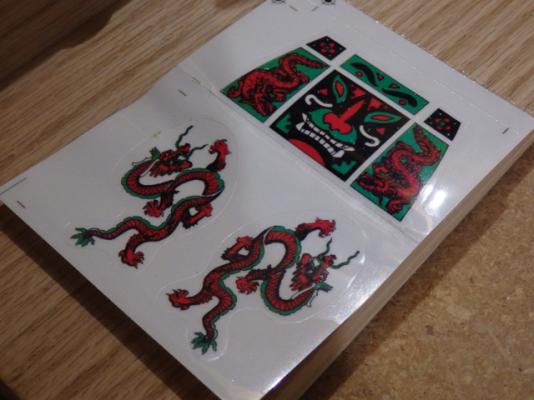
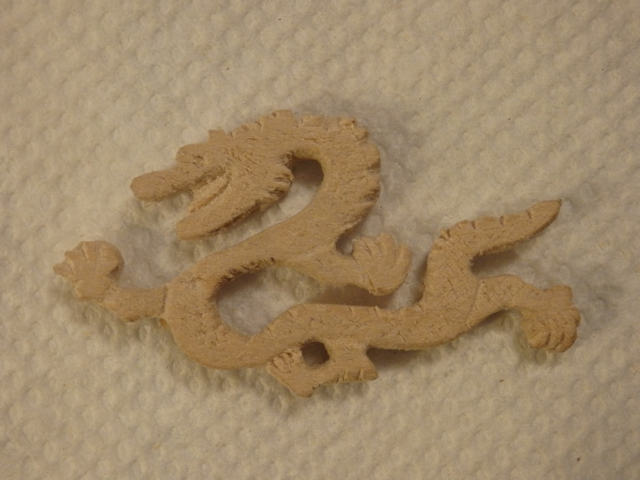
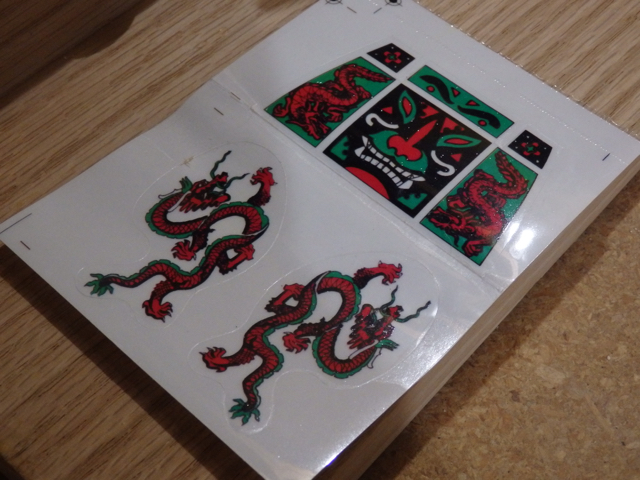
Last few evenings I spent entertaining myself trying to learn to carve. The idea of those stickers has been rather bugging me!
Process I used was to just photocopy the stickers and glue them onto a basswood sheet. I then just slowly chipped out the wood around the pattern until it released. Then using the sticker as a guide, I slowly added in some basic detail using my smallest knife and different shaped needle files. Seems that the basic process will work, but I will need a lot of practice before I can make something that will be clean enough to use. Practice makes perfect as always I guess!

Cheers,
Nigel.


- tarbrush, CaptainSteve, augie and 4 others
-
7
-
Hi Dimitris,
Welcome and thanks for the kind words.
Pretty happy so far with my Dragon, but I certainly have some work to do on those ladders. Your ladders on your Amerigo Vespucci are just beautiful with those curves.
Cheers,
Nigel.
-
Hi John,
Welcome and thanks for the tip on the red sails....I just did a fast search and found some images of the junk you mention. Red sails could be cool given it is a "Red Dragon" and the sailcloth that comes with the kit also seems pretty heavy so replacing it could be an option. Perhaps some practice mast tapering this weekend as well.
Cheers,
Nigel.
-
Thanks for all your kind words and encouragement Augie....best part is if you get a smile out of it all as well.
As for your patented 85-95 degree ladders...I need to graduate from the "measure twice, cut once, oh Rats" school of woodworking before I need to worry about paying you a royalty fee! Perhaps I should just raid your scrap box
.Stay tuned as regards the stickers...more fun on the way here as I figure out what the heck to do about those....
Cheers,
Nigel.
PS...Thanks again to those who have hit the like button along the way and to all for just dropping by. Enjoy your builds!

-
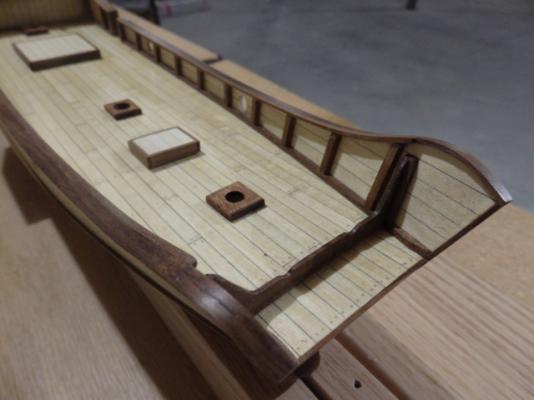
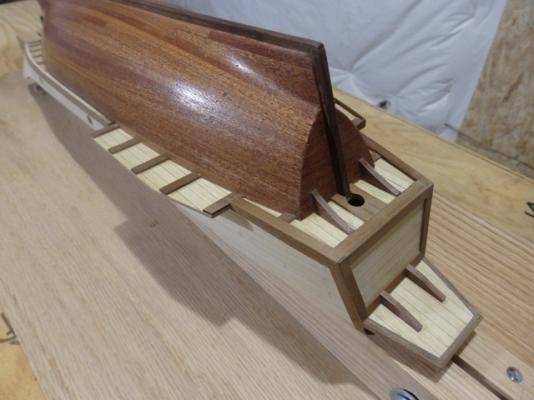
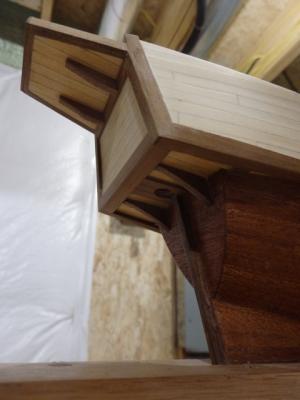
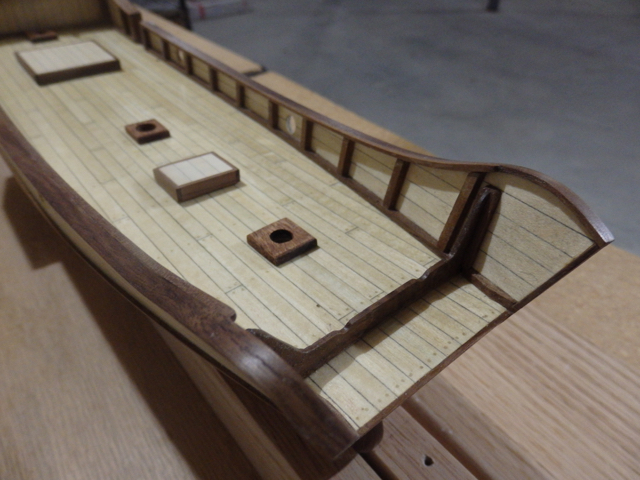
Hi All,
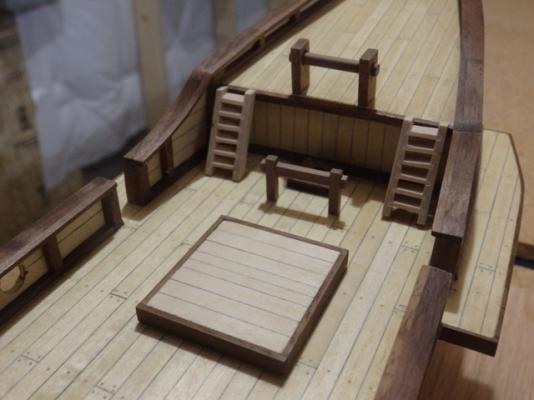
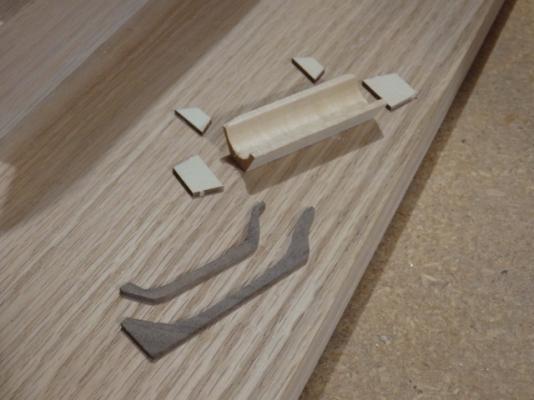
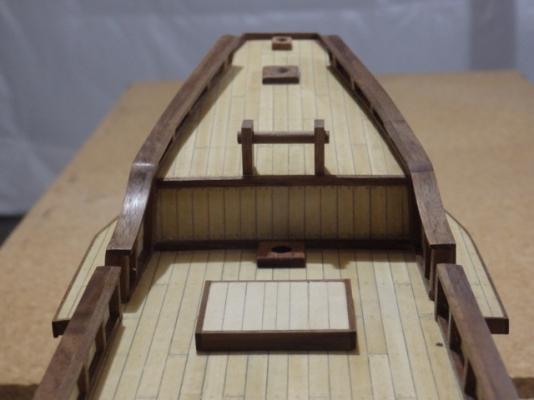
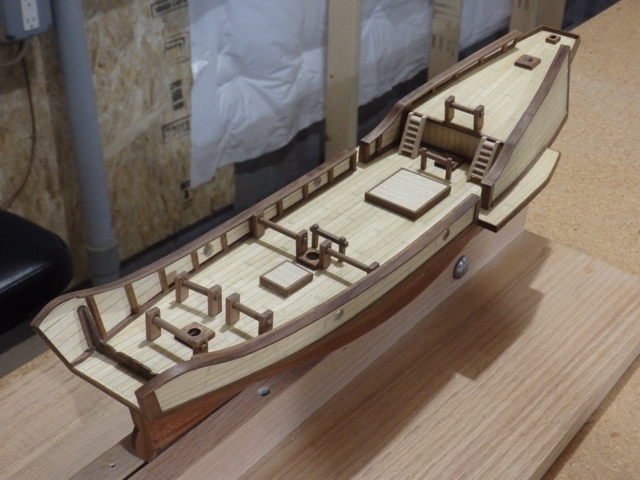
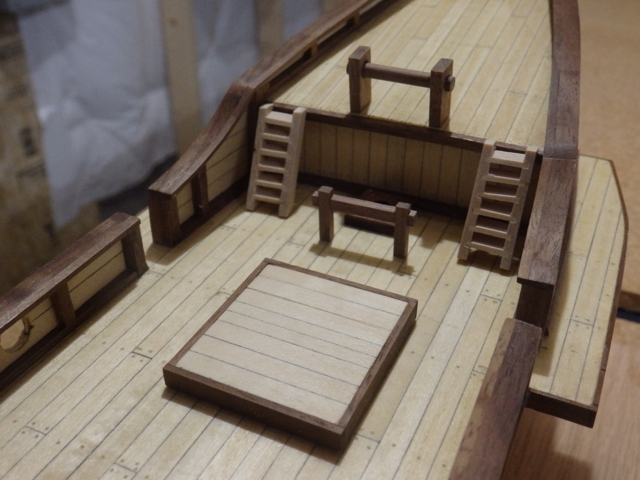
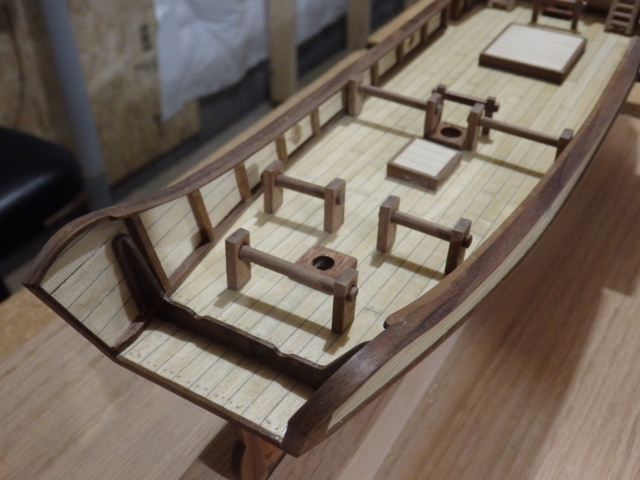
Continue to enjoy putting the decking furniture together. Large and small windlasses are assembled, with the next step being to drill the holes for the various bars. Mizzen and main mast bitts were also assembled.My first try at a ladder however leaves a lot to be desired! I’ve no idea how I got the fourth tread so badly misaligned after getting the first three to look reasonable, especially as the side supports had laser cut grooves. Some corrective surgery is called for! At least the second ladder looks better…I now need to figure out how to add some handrails.I also started to look at the ships boat which is just a piece of rough machine carved basswood w some plywood bow and stern end pieces Um….so I've taken a couple of tries at making a small keel to learn how to build something from scratch. Not good enough yet, but still fun.The other entertaining item is the bow and stern decorations are.....stickers! Looks like Iearning how to carve is in my future….
Enjoy your weekend everyone!CheersNigel.

- msberkman, Dimitris71, hexnut and 4 others
-
7
-
Hi Vic,
Just checked the plans and main mast length measures at 88 ft. I then checked the main yard length which at 86ft 6in also matches the mast/spar specs as recorded by Joshua Humphreys. I also just found notes on the plans showing Corothers referencing Douglas's article so right now I think his plans try to show the Confederacy as built by Jedidah Willets in 1778.
As regards the mast angles, plans show the foremast is vertical. Main and mizzen rakes are the same, but both are very shallow at only 1/8in per foot.
Hope this helps.
Cheers,
Nigel.
-
Hi Vic,
Well, I am not knowledgeable about any of this, but only way to learn is to try new stuff. Part of the fun for me. Your work is beautiful so sure you will do a fabulous job rigging her. I love the Admiralty builds, but will also have to really improve my woodworking skills to do the Confederacy justice given all the exposed timbers.
I've not had time to check the plans, but will do so after work tonight and let you know what I find as regards the main mast.
Finally, a sprung mast is a cracked or split mast which exhausted my knowledge so a quick check on the internet indicated it can be caused by a failure of the standing rigging.
Cheers,
Nigel.
-
Hi Vic,
You, Augie and all the rest of you experts who have built or are building this gorgeous kit by Chuck also inspired me, so I will be building the Confederacy as my next kit build. While I am biting off more than I can probably chew, I am also going to fully rig her as well so it is great to know you plan to blaze the trail here!
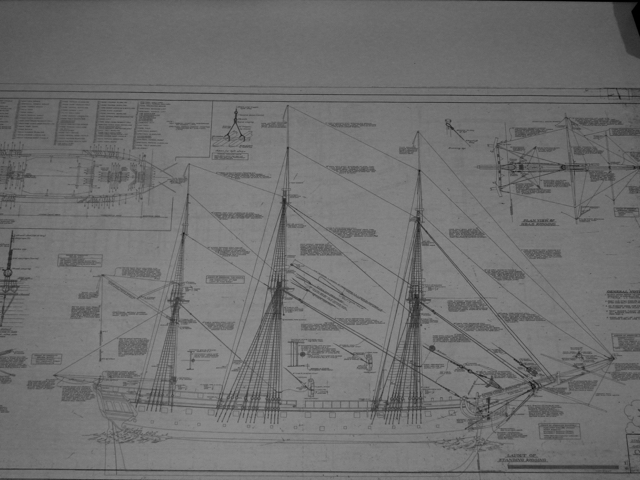
In case it helps you, Chuck was kind enough to point me towards the Corother's plans to follow for the rigging. Note in case you purchase them as well, Chuck warned me the belaying points are wrong, so I am now looking for Hahn reference plans from a similar era frigate, so I can figure out what exactly is wrong! So see the below image of the plans. I can't post anything more detailed given copyright concerns.
For mast and spar dimensions, take a look at the 1956 NRG article by Douglas Robinson. He has multiple measurements from different sources including the Admiralty measurements taken after the Confederacy was captured. Note the main mast per the Admiralty measurements was much higher at 97ft as compared to 88ft noted down by Joshua Humphreys. Robinson notes it could have been stepped in England as seems the main was badly sprung after her capture.
Cheers,
Nigel.

- CaptMorgan, yancovitch, GLakie and 2 others
-
5
-
Hi All,
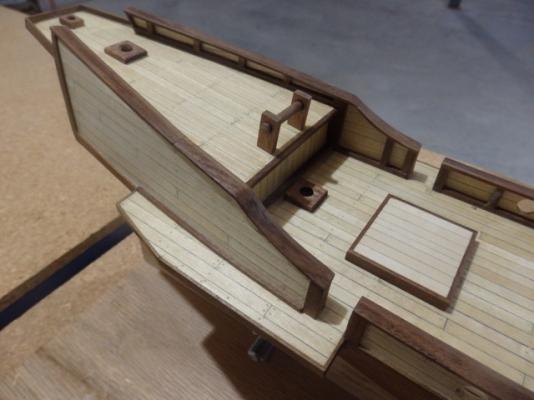
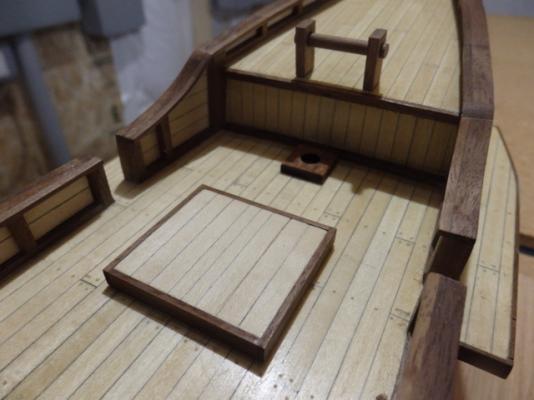
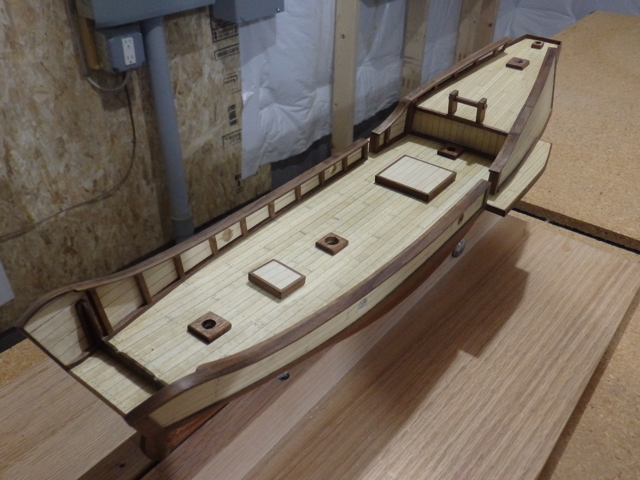
Most of the time this week has been spent scrapping all the surfaces to remove any residual glue. This residue seems to show up as a lighter film after the poly is applied and was especially noticeable on the darker walnut trim. Still seem to be a few lighter areas which need some work, but finish is looking a lot more even now. The bulwark and stern tree nailing was also finished off before a few coats of wipe on poly per applied w steel wool being used to lightly smooth down the surfaces between coats.I then made a start on the fun decking stuff....nothing is glued in yet, they are just placed on the deck to see how they are looking. The deck supports for the masts and rear flag pole were sanded and poly’ed. Deck hatch covers were made up and also poly'ed, but I’ll probably have to redo these as the planking lines look a bit uneven. Finally I made a prototype of the poop deck mizzen capstan. I still have to drill the dowel to attach the brass capstan bars. Looks like it is time to order the brass blackening solution now.Thumbnails below and as usual thanks for reading and the likes.Cheers,Nigel.
- Dimitris71, Mirabell61, GTM and 3 others
-
6
-
Hi Ken,
Very interesting...looks like the technique enables more than enough flex for even a compound curved deck. Fabric backing would be a good precaution to avoid any tendency for the planks to separate over time for these cases.
The final stained deck also looks great against the black, red and ochre colors.
Cheers,
Nigel.
-
Hi Ken,
Your decking test looks great and your entire build looks really clean.
One question is do you think your method would work well if there is significant fore to aft curvature to the deck? You were extremely careful to make sure the deck remained flat so I assume the Niagara deck is pretty flat in both directions.
Enjoying following along.
Cheers,
Nigel.
-
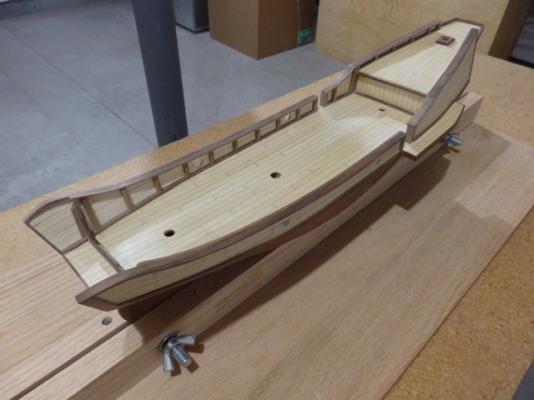
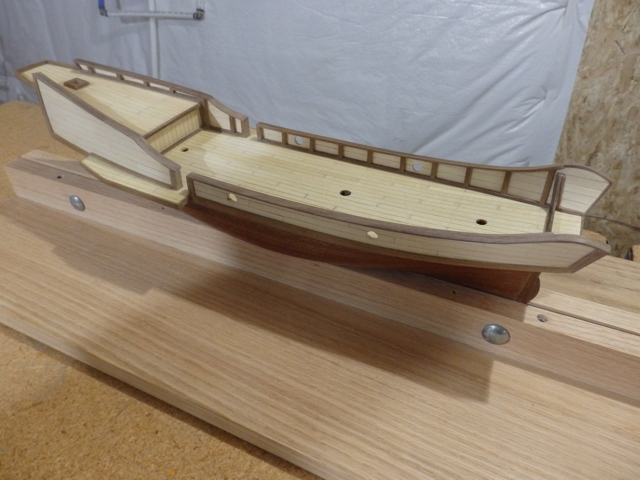
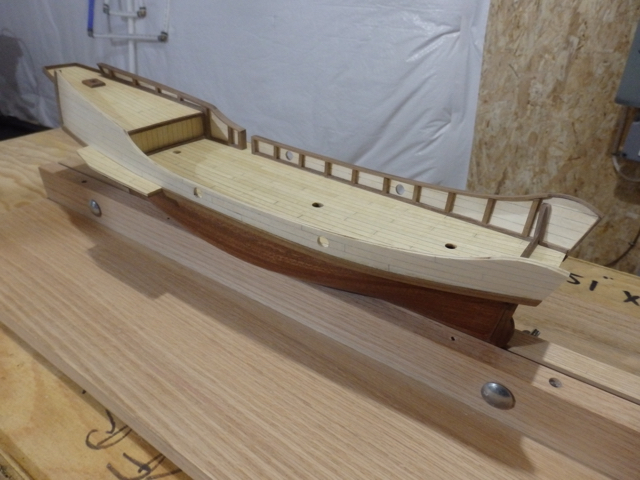
Progress this week has been slowing down as weather has been great so the outside was the place to be. The bosun was very happy about this given he now has his favorite ball back after it emerged from one of the final snow drifts so there's been a lot of ball throwing this weekend!
That being said, the starboard side and final bow trim has now been completed. Next week there will be a lot of clean up before the final coats of poly are applied to the hull and decks before starting on all the fun deck items.
So the usual pictures are below and as always thanks for reading and of course for the likes.
Cheers,
Nigel.


- msberkman, tasmanian, CaptainSteve and 4 others
-
7
-
-
Arrr ..
Thank ye, Gentlemen.
Nigel. Plenty o' room up the back there ...
Or, for the low, low price o' jus' $5000 per week (made payable to MSW), I be certain I can be arrangin' a Deluxe Seat fer ye up front.
(Includes snacks)
Matt. Since you and the Nutz Brothers phoned ahead then your seats have been reserved.
Kudos to Matt and the Nutz Brothers for planning ahead.
Very sensible chaps indeed.Now, I don't think even the Connie has enough decks for me to swab to cover the weekly entrance fee to the posh seats, even if snacks are included! But, never mind, there is space back here so let me see if all is ready.
1) Comfy camping chair w integrated adult beverage holder.
2) Binos so I don't miss any of the action
3) Cooler packed w lots of beverages to share including my favorite single malt and of course some Jim Beam for our host.
4) Snacks...hopefully the Nutz Brothers are OK w peanuts.
Yep..all looks good and the cap is of the first beer...work is done for the day....and so life is good! Looking forward to the build!
Cheers,.
Nigel.
- Jack12477, CaptainSteve, GLakie and 3 others
-
6
-
Permission to come aboard, Captain Steve!
Looks like I have some enjoyable reading to do to catch up with the story so far!
Cheers,
Nigel.
- CaptainSteve and GLakie
-
2
-
Came to this party way too late, but my congratulations as well on your amazing build.
Fabulous detailing and superb craftsmanship!
Cheers,
Nigel.
- mattsayers148 and GLakie
-
2
-
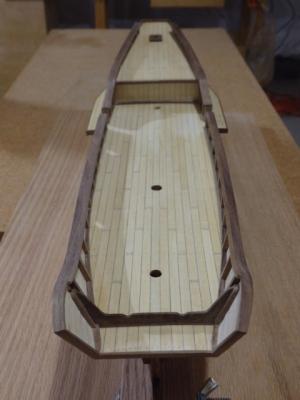
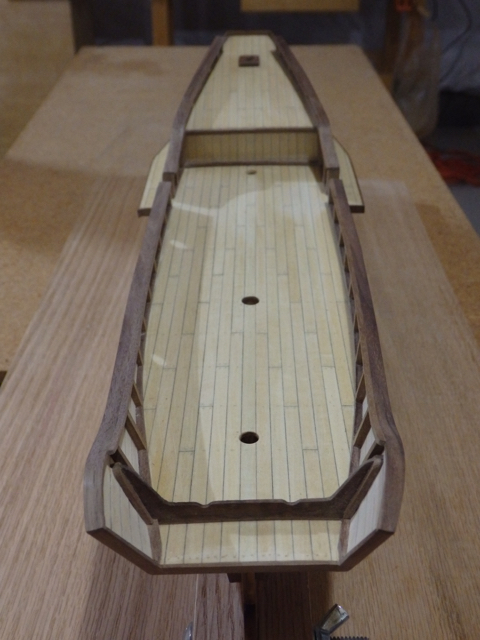
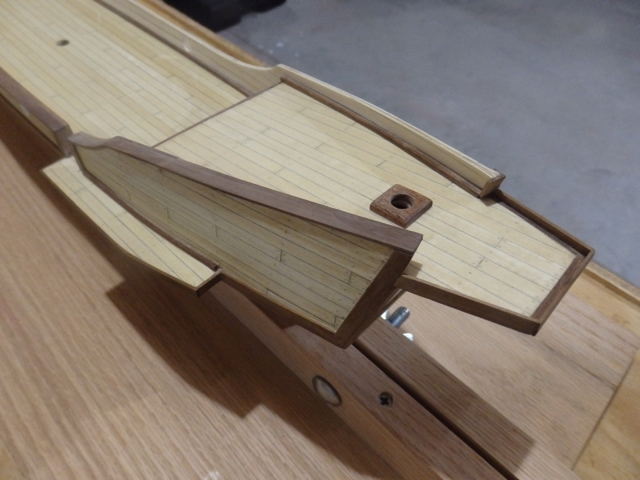
Hi All,
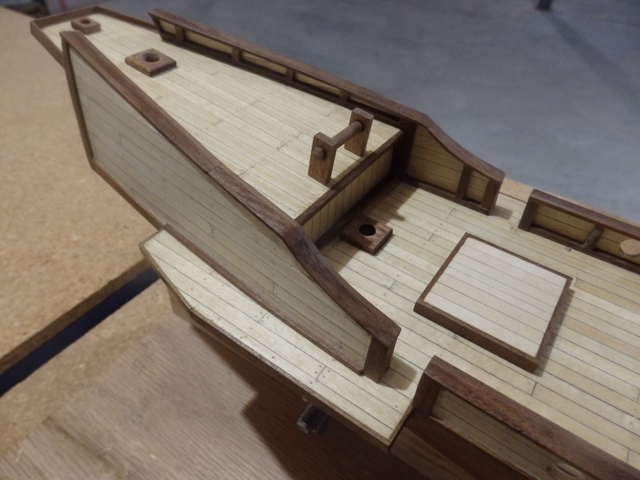
A small update this week as I continue to work on the starboard bulwark. The inboard and outboard planking has been completed and rear walnut trim applied to the stern. This then allowed the underside trim on the stern to be completed to finally link the port and starboard sides.A small celebration here as the last of the winter snow in the yard has finally melted today and there is a new color appearing on the ground - I think it is called green! The outside beckons! Thanks to all for reading and of course for the likes and comments. All are much appreciated.Cheers,Nigel.
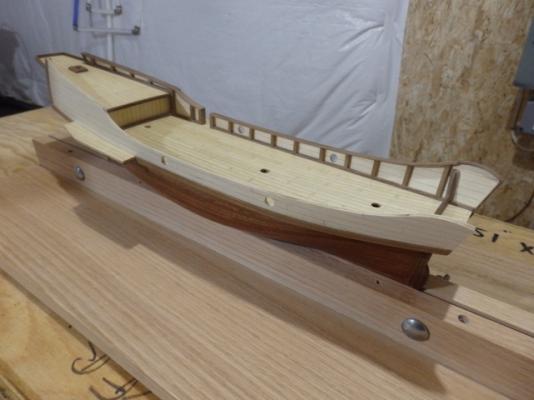

- Dimitris71, RichardG, CaptainSteve and 5 others
-
8
-
-
Looks fabulous Captain! Congratulations!
I'll be sure to sign up early for your USS Constitution build!
Cheers,
Nigel.
- CaptainSteve, mattsayers148 and GLakie
-
3
-
Looks great...just a thought...do you need to close that chest in case that poopin' bird comes back!
Here's to your launch...been a long day so I am starting early!
Cheers, hic...
Nigel.
- GLakie, mattsayers148 and CaptainSteve
-
3
-
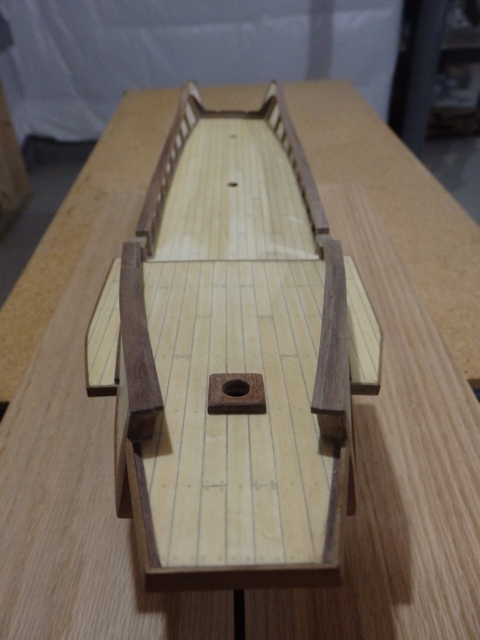
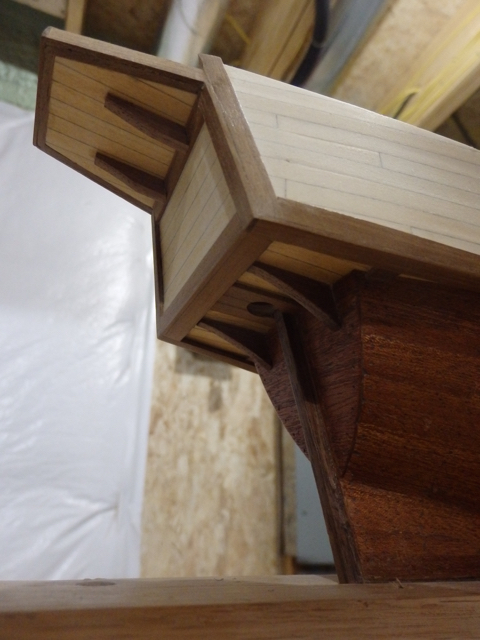
Ah...now I get it!
I know your bow rails will look just as great as the stern rails you just completed.Perhaps I got lucky on the bow rails, but yep, there are more than a few splinters in my ever growing scrap pile from trying to get the aft rails to bend to shape! Perhaps next time I'll try those fancy joints I see you experts sometimes use on rails where they curve quickly..scarf joints I think. Then I can have even more scrap!
Hope spring has sprung for you in Colorado! Snow piles are almost gone here!
Cheers,
Nigel.
-
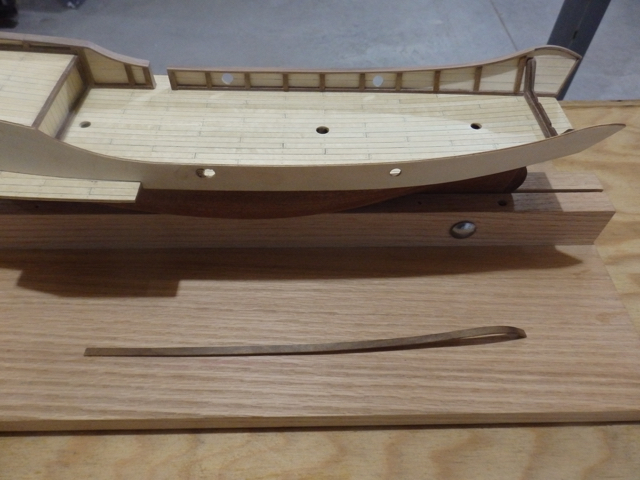
Here you go Augie...couldn't resist doing the other rail!
Now I have to get to the point I can actually glue it on! Hopefully it won't completely spring back over the next week or so!
Back to planking!
Cheers,
Nigel.

- mtaylor, CaptainSteve, NMBROOK and 2 others
-
5


Red Dragon by UpstateNY - FINISHED - Artesania Latina - Scale 1:60
in - Kit build logs for subjects built from 1851 - 1900
Posted
Hi Janet,
Putting the extra little details in along the way has been really enjoyable. I certainly doubt I am going to catch you up!
Thanks for the details on the ladder method. Very nice indeed. I don't have a mill so I am just figuring out how to make these cleanly by hand.
Cheers,
Nigel.