HOLIDAY DONATION DRIVE - SUPPORT MSW - DO YOUR PART TO KEEP THIS GREAT FORUM GOING! (Only 13 donations so far - C'mon guys!)
×

Cabbie
-
Posts
599 -
Joined
-
Last visited
Content Type
Profiles
Forums
Gallery
Events
Everything posted by Cabbie
-
 Looking very good Scott flying along, Don't you have anything else to do😉 Cheers Chris
 -
Thanks Dirk Need to get my act together and finish this part and put an oil finish on, the deck is going to get a light teak stain first. But I have pulled the top 3 strakes off and now replacing them. I didn't like how the gun ports looked. Thanks Chris
-
Hello Joe Top quality work on all all skills, ship builder, painter, sign writer, metal worker. Too many skills needed in this caper! The Seine boat looks like the real thing I hope my small boats come up as good. Cheers Chris
- 140 replies
-
- 2
-

-
- benjamin w latham
- model shipways
- (and 1 more)
-
Hello Bob I have been watching your build so far and keen to see more. Looks very good, don't worry about the pace of the build, just do it as it comes. It will be a big help having Hof on board as the "Chairman of the advisory board" very talented builder. When cutting out for the joggling, nibble at it don't try to do the full cutout in one go. I start small with little cuts across the grain which helps to stop big split outs along the grain. Do a series of little cuts along the length of the cutout and tease out little pieces of the plank until you are ready to do the final neat cut. I cut the curve of the margin planks the same way before gluing, with sharp flat blades and then sanded to the final curve needed. I have a whole pile of the cheap finger nail sanding strips available in different sizes and grits and find them very handy to hold and use on most parts before gluing in place. Hooroo Chris
-
Good evening Bob Thanks for looking in and the compliments. Yes these ships certainly have their challenges, but that makes it more fun!. The margin plank was glued down and then cut as per I saw someone else suggesting on another log Jim lad? Banyan? not sure now, apologies to whoever it was. One thing that i had to keep a constant watch on, was keeping the symmetry of both sides of the deck. equal, easy to get out a bit with tiny variations. You have the technique correct, the deck timbers are actually a bit of Aussie pear a mate gave me. Quite brittle but thicker about .8 mm which i cut myself, so less likely to shatter. Cheers Chris
-
Very nice Jeff glass should look very good, too many new skills in this business to learn.
-
Very nice indeed Scott the color gives her a big lift and the planking came up very neat. Glass looks real in the 2nd pic. Chris
-
Thanks to all for your replies and the mods for keeping an eye on me. Oh well will have to wait for a new batch and pay the bigger dollars Thanks Chris
-
Thanks Mike this is what i am looking at, probably should use paypal rather than the credit card. (LINK REMOVED BY MODERATOR) There are not any others around i don't think certainly not at this price Been keen on one for a while. Cheers Chris
-
M-50 Israeli Sherman - FINISHED - MP Models - 1:35 Scale
Cabbie replied to CDW's topic in Non-ship/categorised builds
Looking good CDW, very keen to keep following and see how you progress. I feel like a minnow among all the other posters here, too many models and not enough time. -
Thanks VTHokiEE Yes vary wary myself. I thought it might have been a new site. Its default currency seems to be Canadian, were you able to see where it is based? The kit they are showing appears to be the real thing, correct name and image for an Occre model. They say to check the sellers listing as though its an ebay type site, but there is no sellers listing active. Thanks Chris
-
Does anybody know about this reseller in title , they have a kit for sale that will cost me 119 Aussie dollar with free shipping to here. Normally, locally this kit is available for about $260 aus dollars plus freight. i have no reason to judge the business, just wondering if they can do as advertised. It is a model i have been thinking about for a long time. Thanks Chris Er right forum I hope
-
Looking very nice and neat Scott, doesn't look like there were any problems shaping the planks
-
Hello Jim i will jump in here, but be warned I am on to my third boat and have not done one in a proper way to date. I would think that the keel would be attached just prior to the 2nd layer of planking. Do a search in this forum for other swift builds to see what others did, in fact look through any ship build for tips. https://modelshipworld.com/forum/10-build-logs-for-ship-model-kits/page/2/ But also start your own build log to let others help. Also some instructions i found along the way.swiftnot (2016_05_23 09_55_48 UTC).pdf for an AL boat swift01 (2016_05_23 09_55_48 UTC).pdf swift02 (2016_05_23 09_55_48 UTC).pdf swift03 (2016_05_23 09_55_48 UTC).pdf
-
M-50 Israeli Sherman - FINISHED - MP Models - 1:35 Scale
Cabbie replied to CDW's topic in Non-ship/categorised builds
I know nothing about the tank or games being talked about, but thoroughly enjoyed every post here. Hmmm some more things i have to find time for to go and look up, funny what comes up when you have a quick random look in another type of model log. Looking forward to seeing more CDW. Cheers Chris -
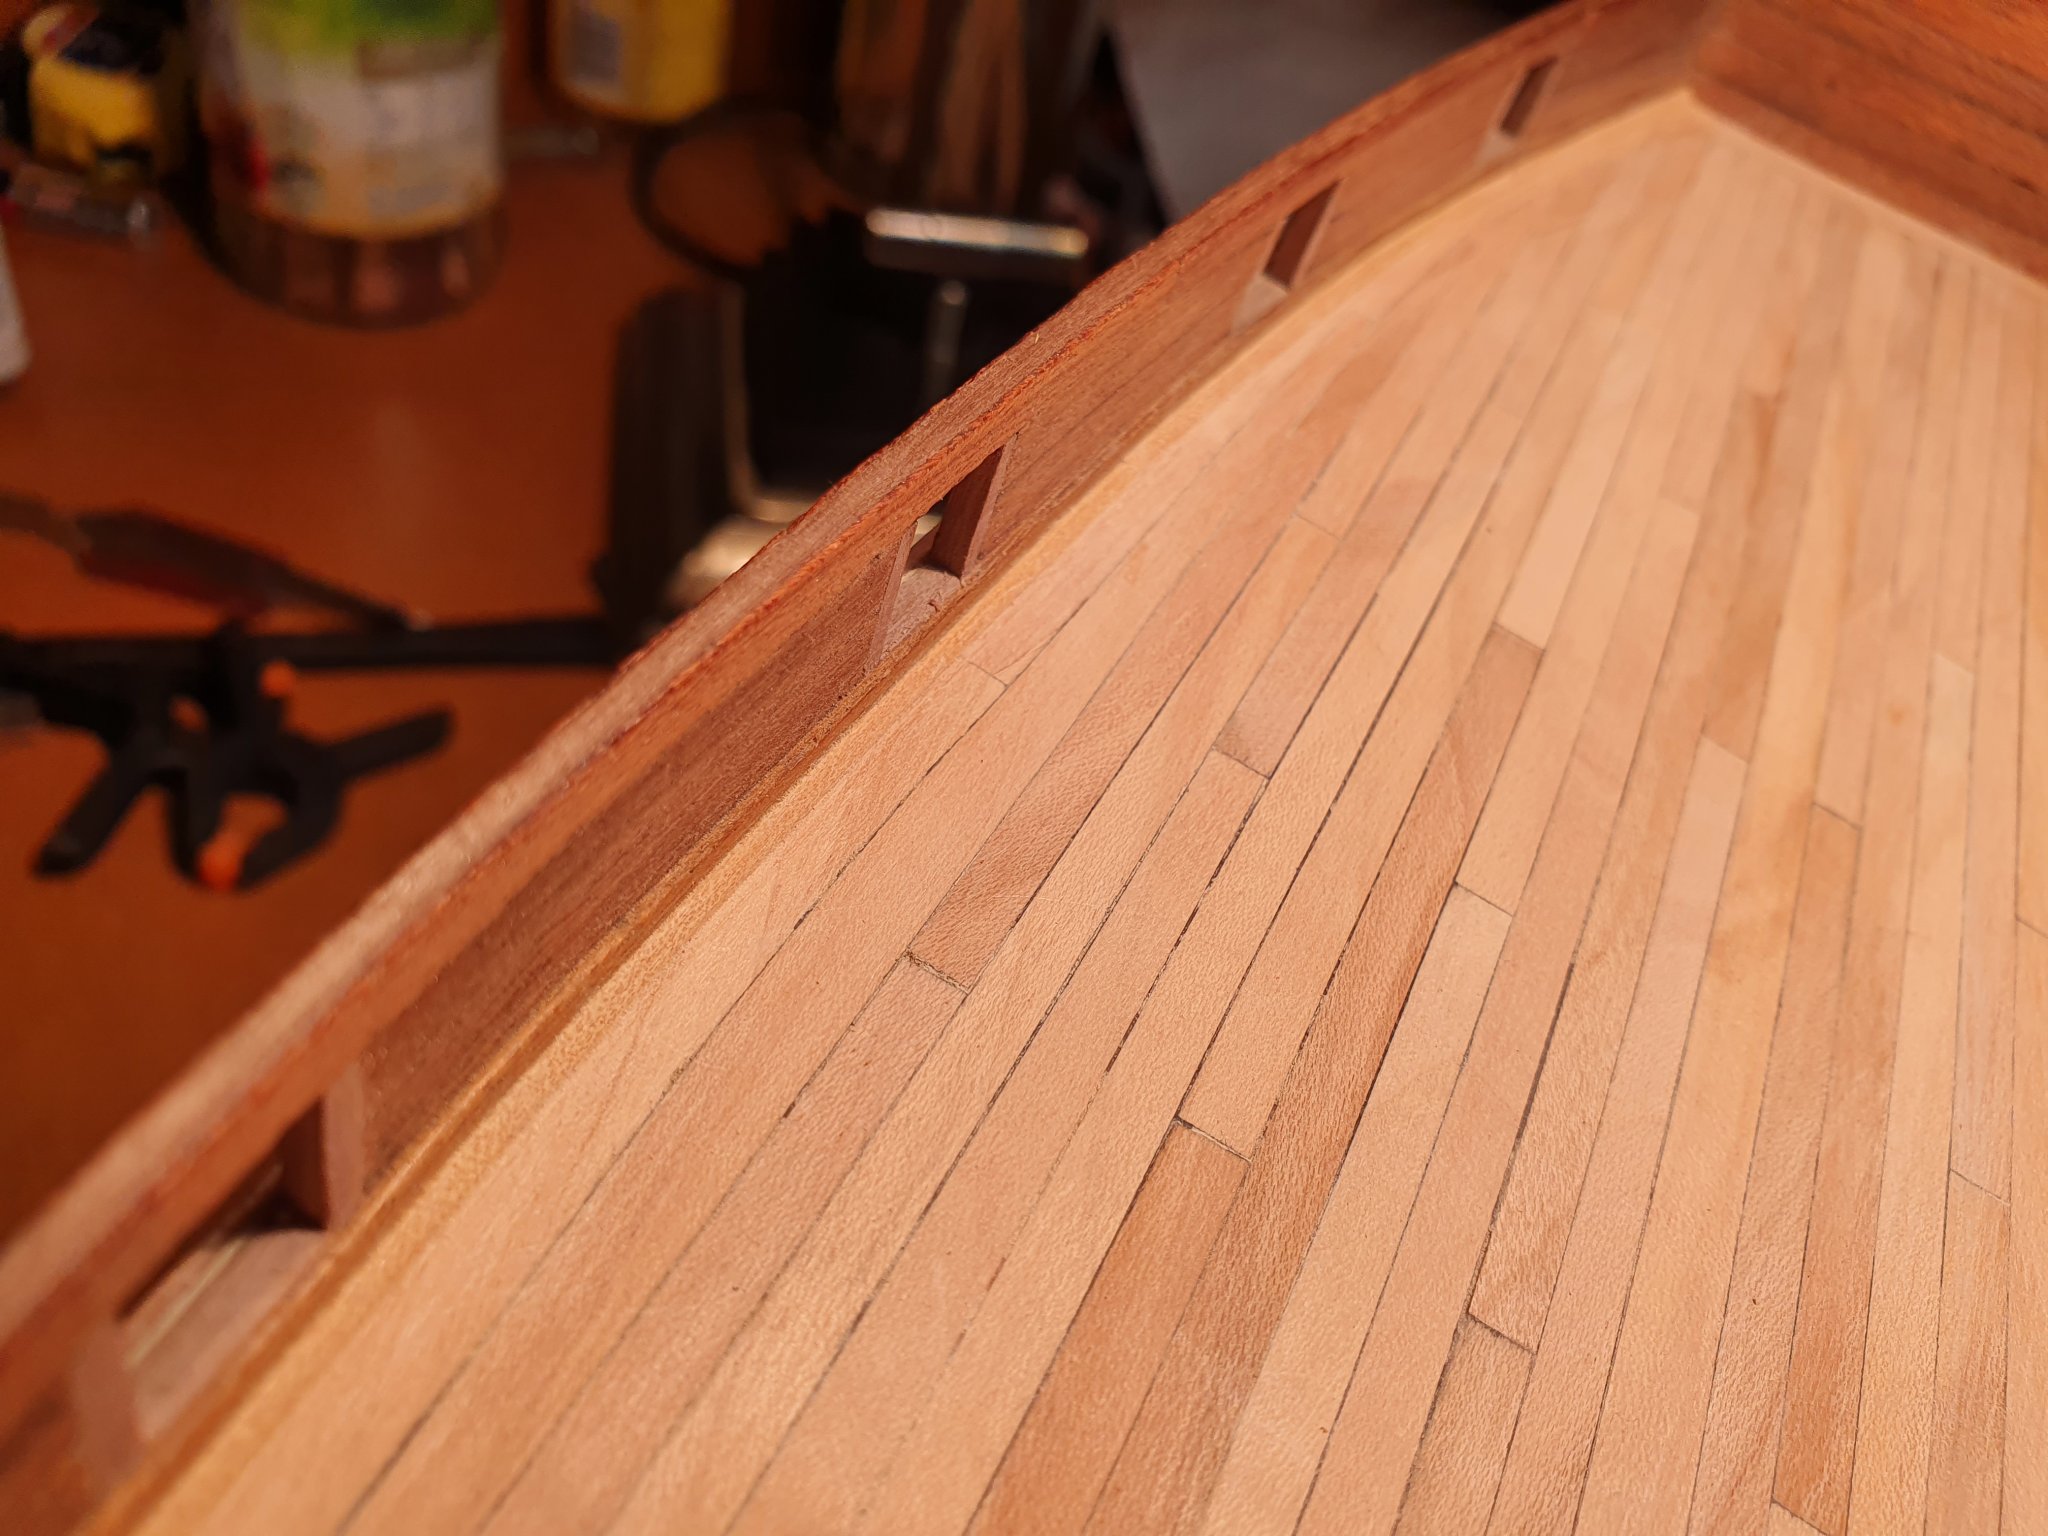
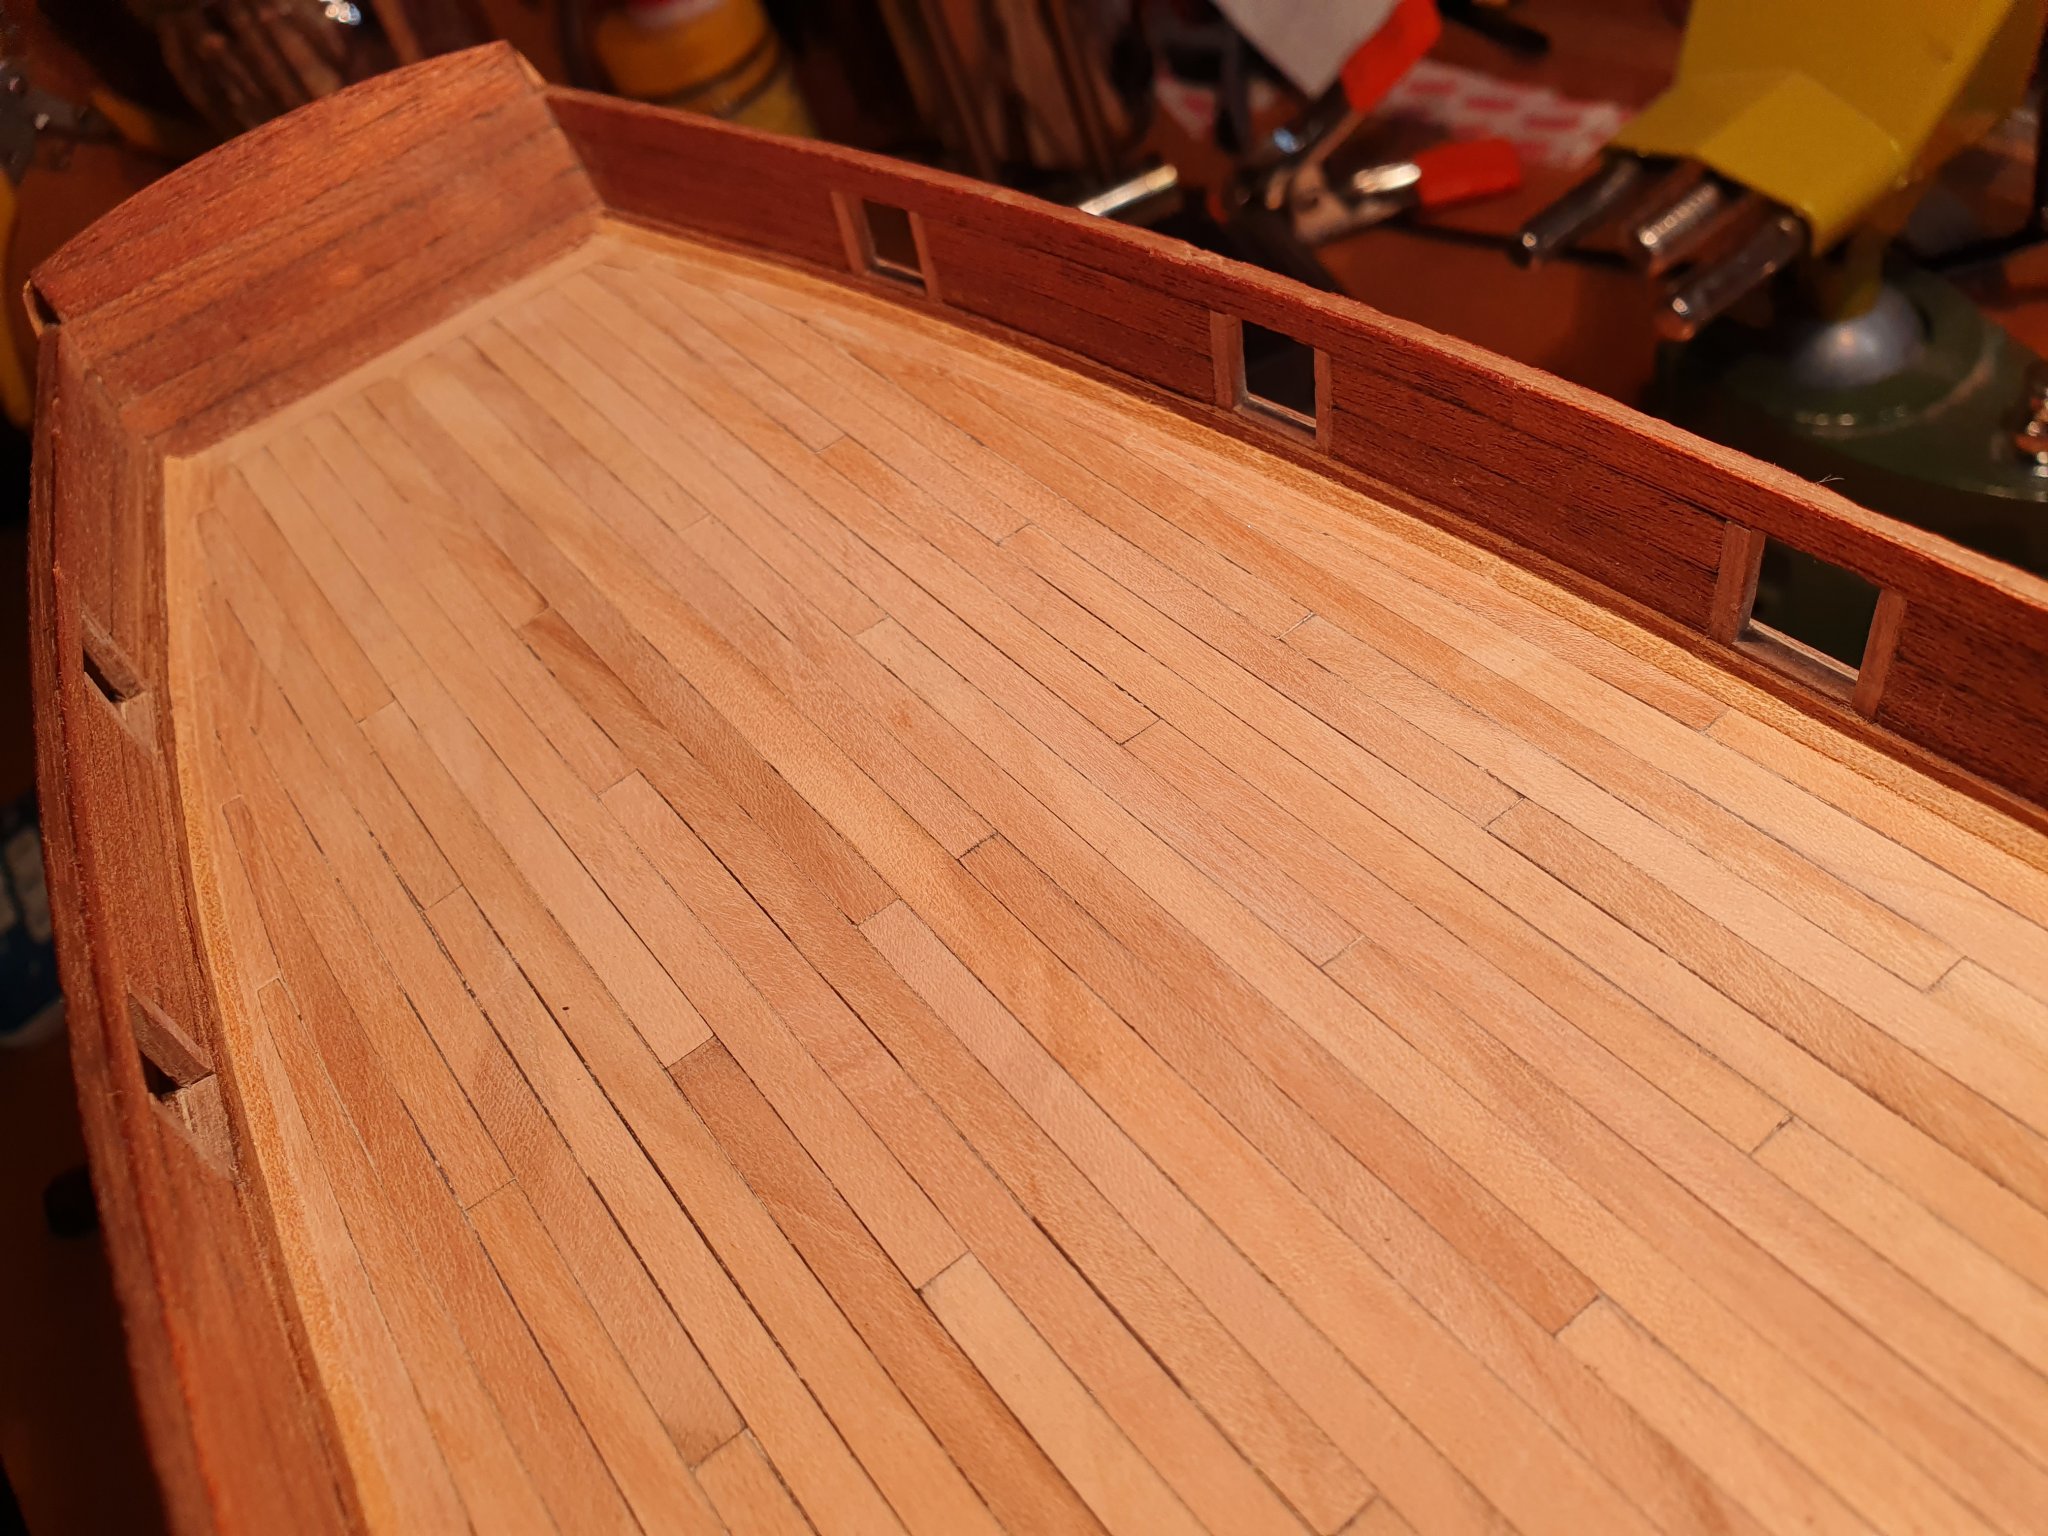
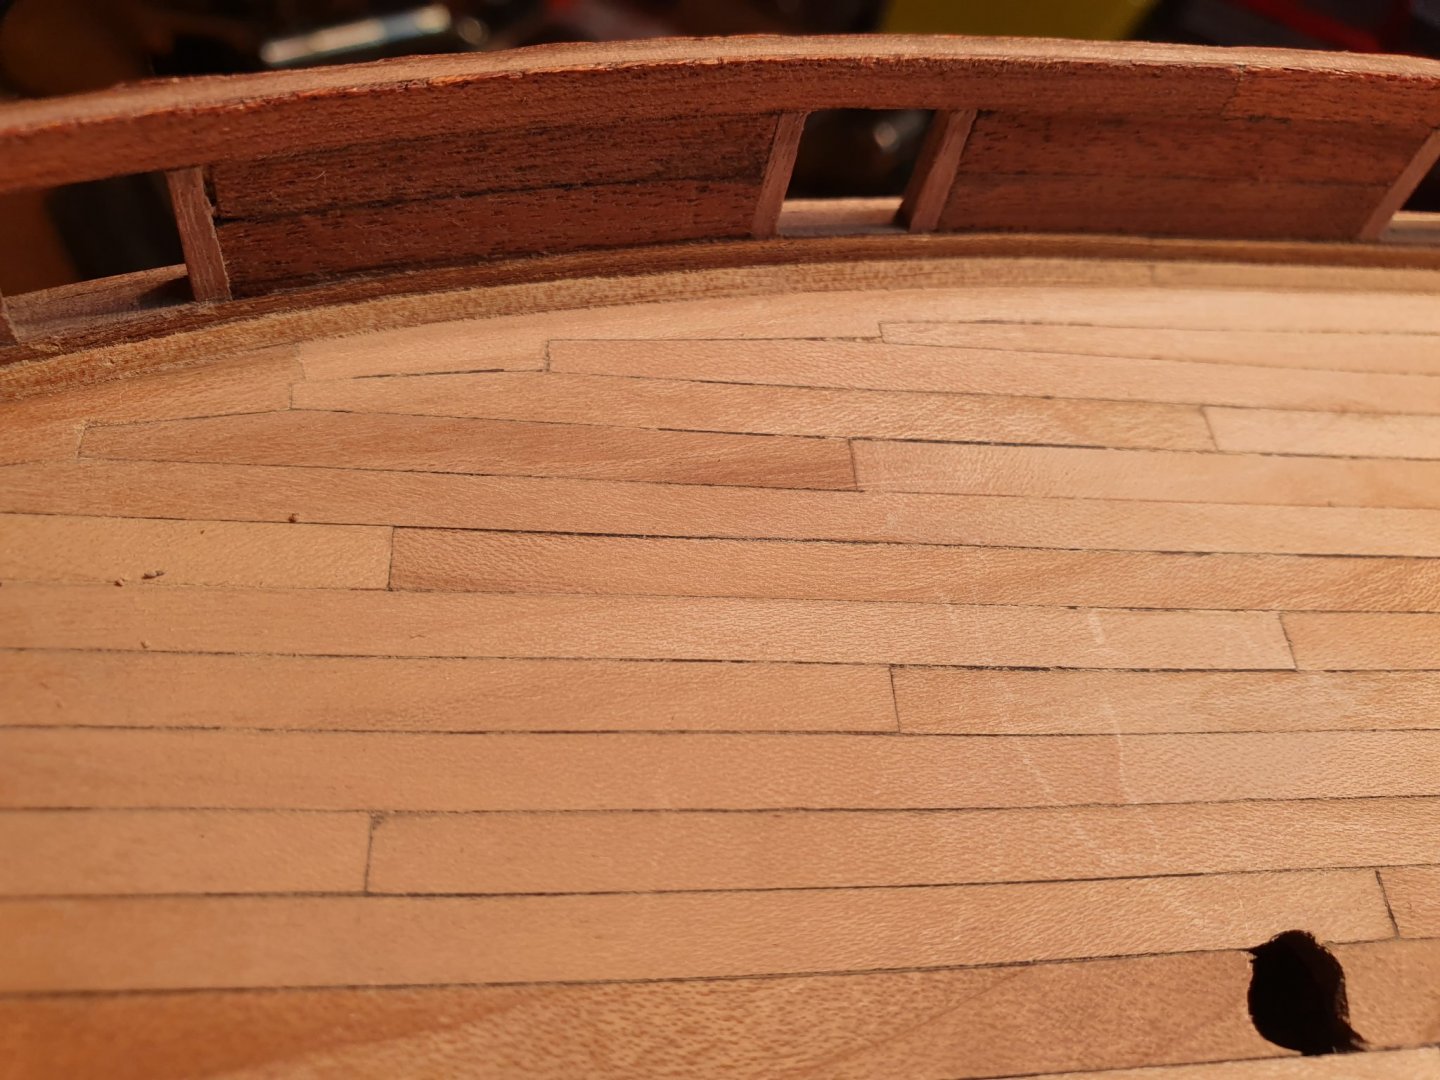
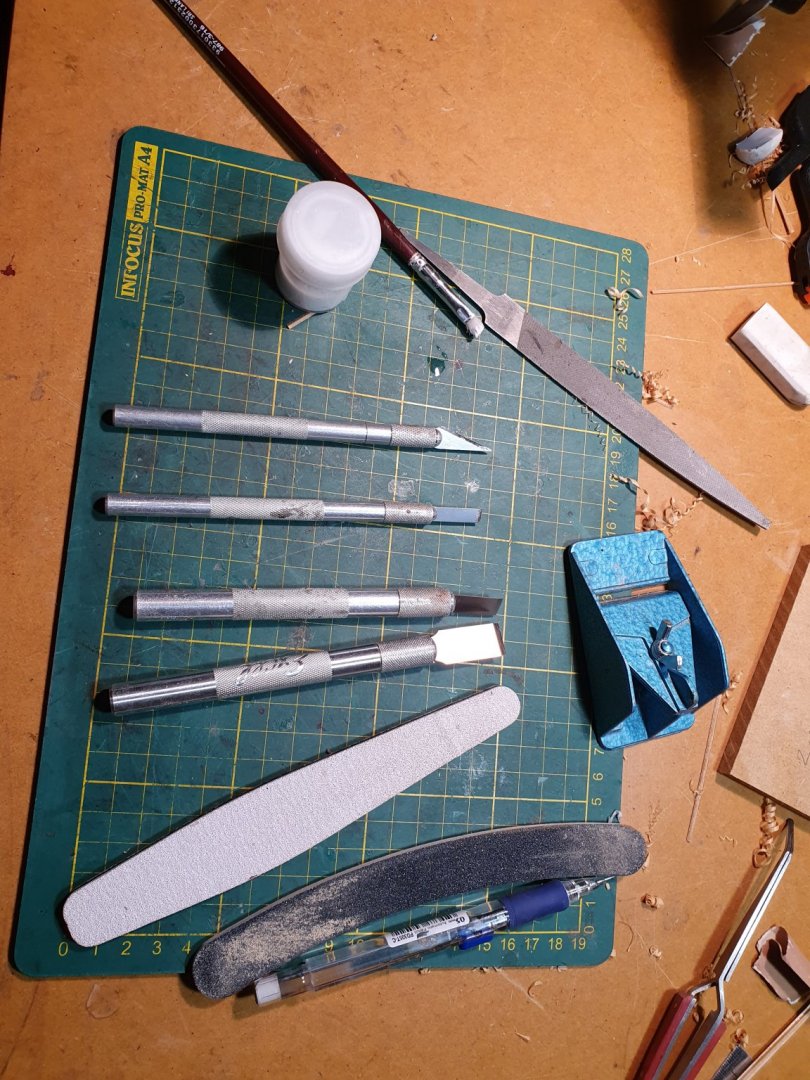
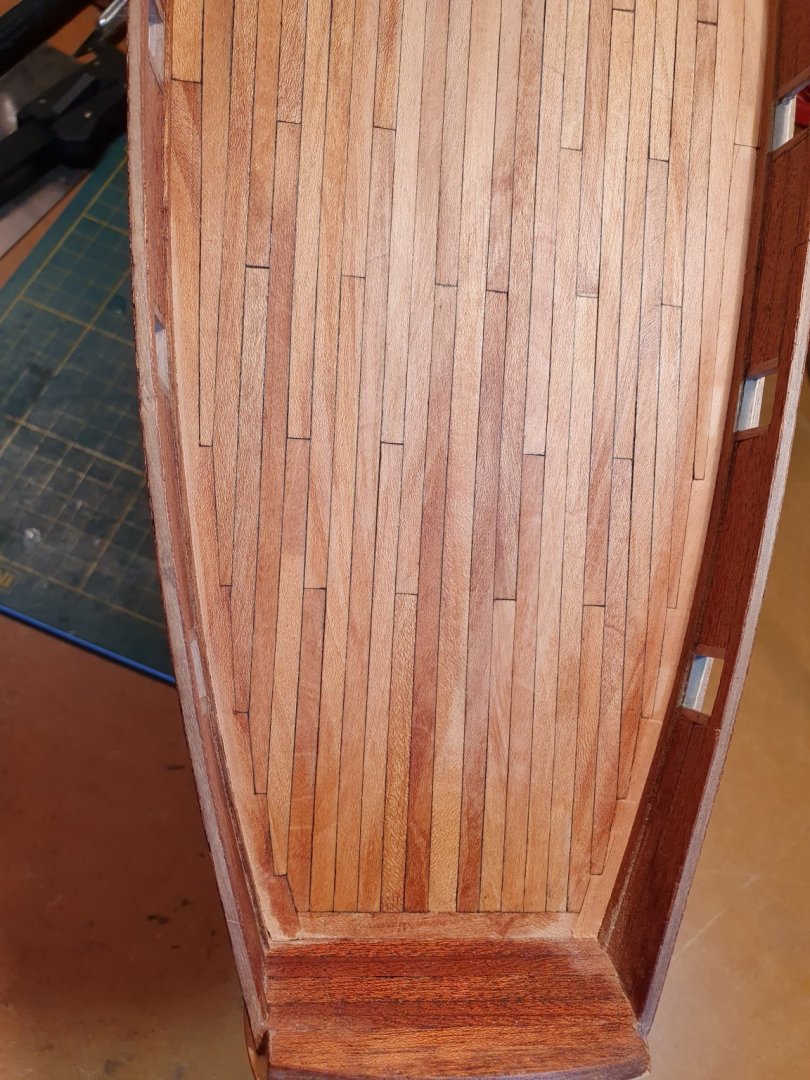
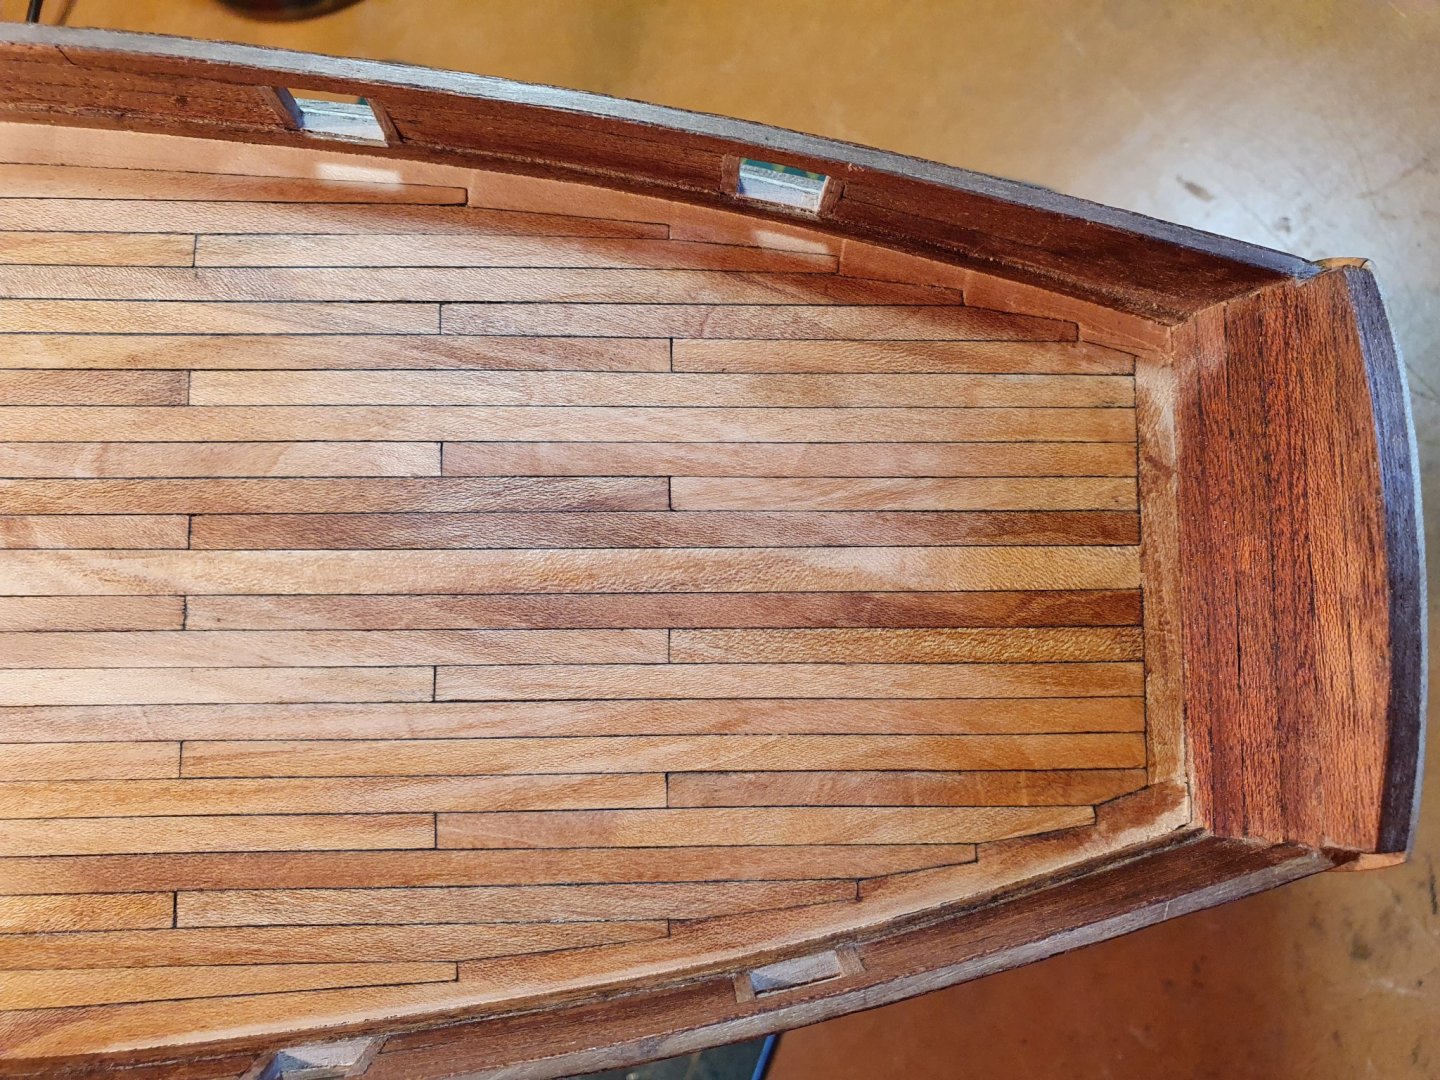
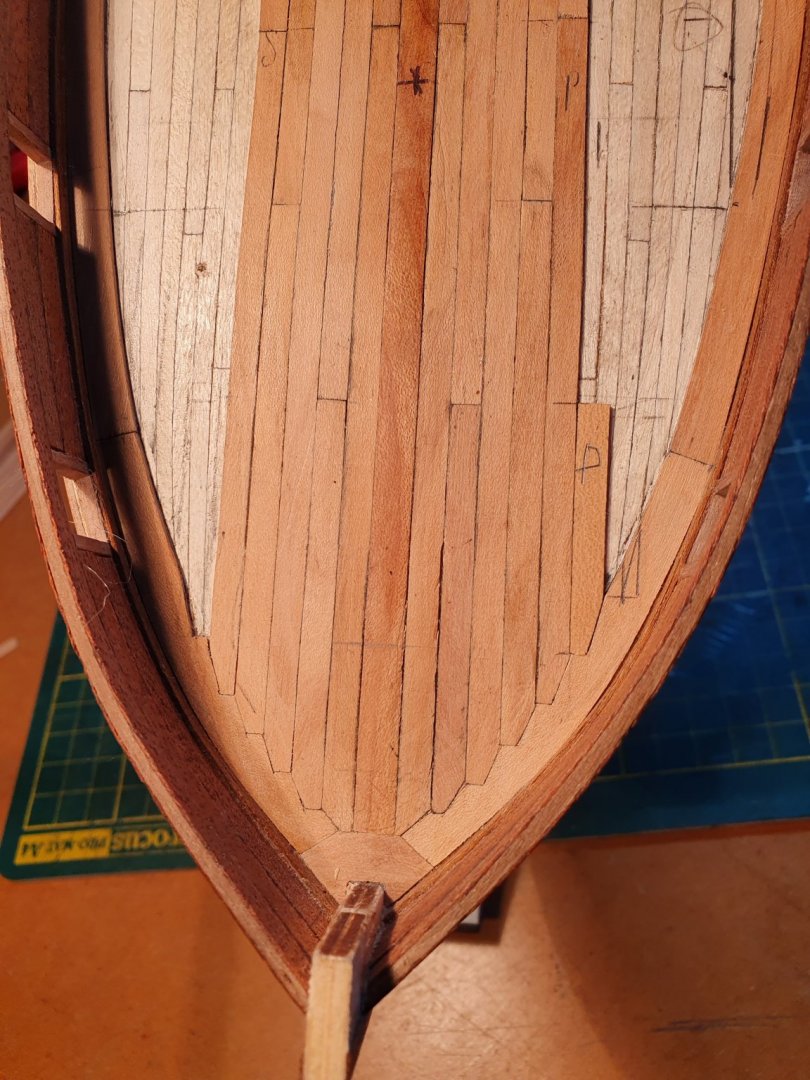
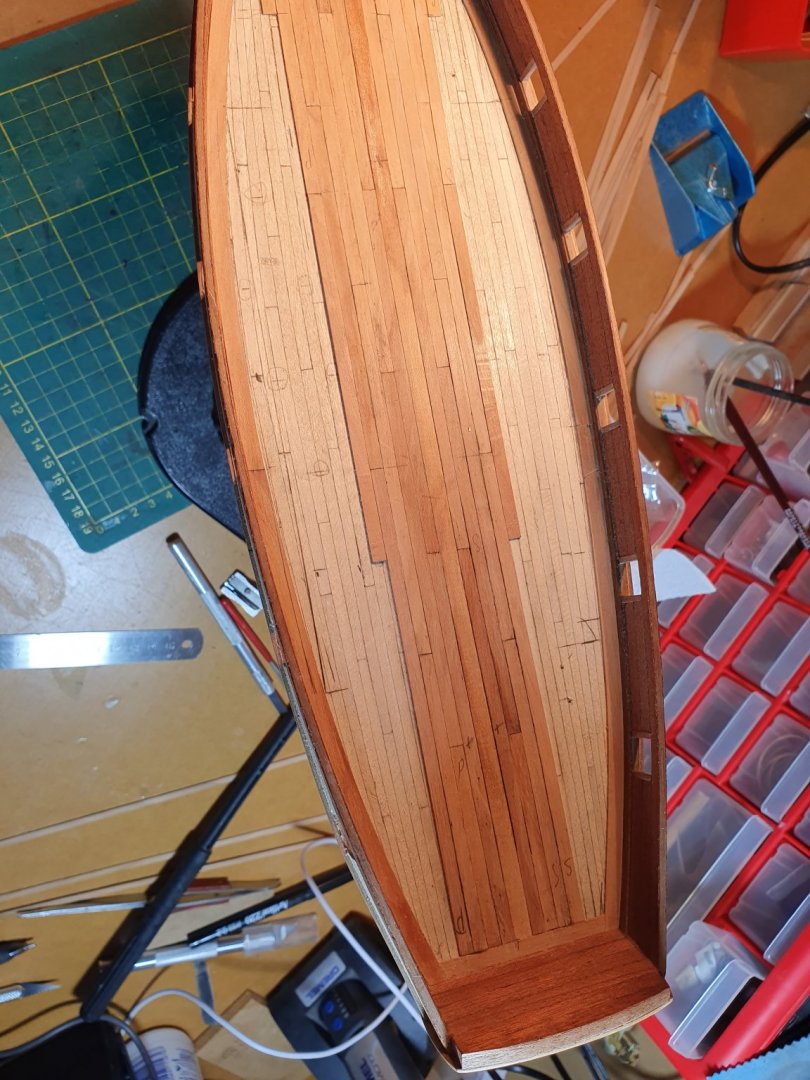
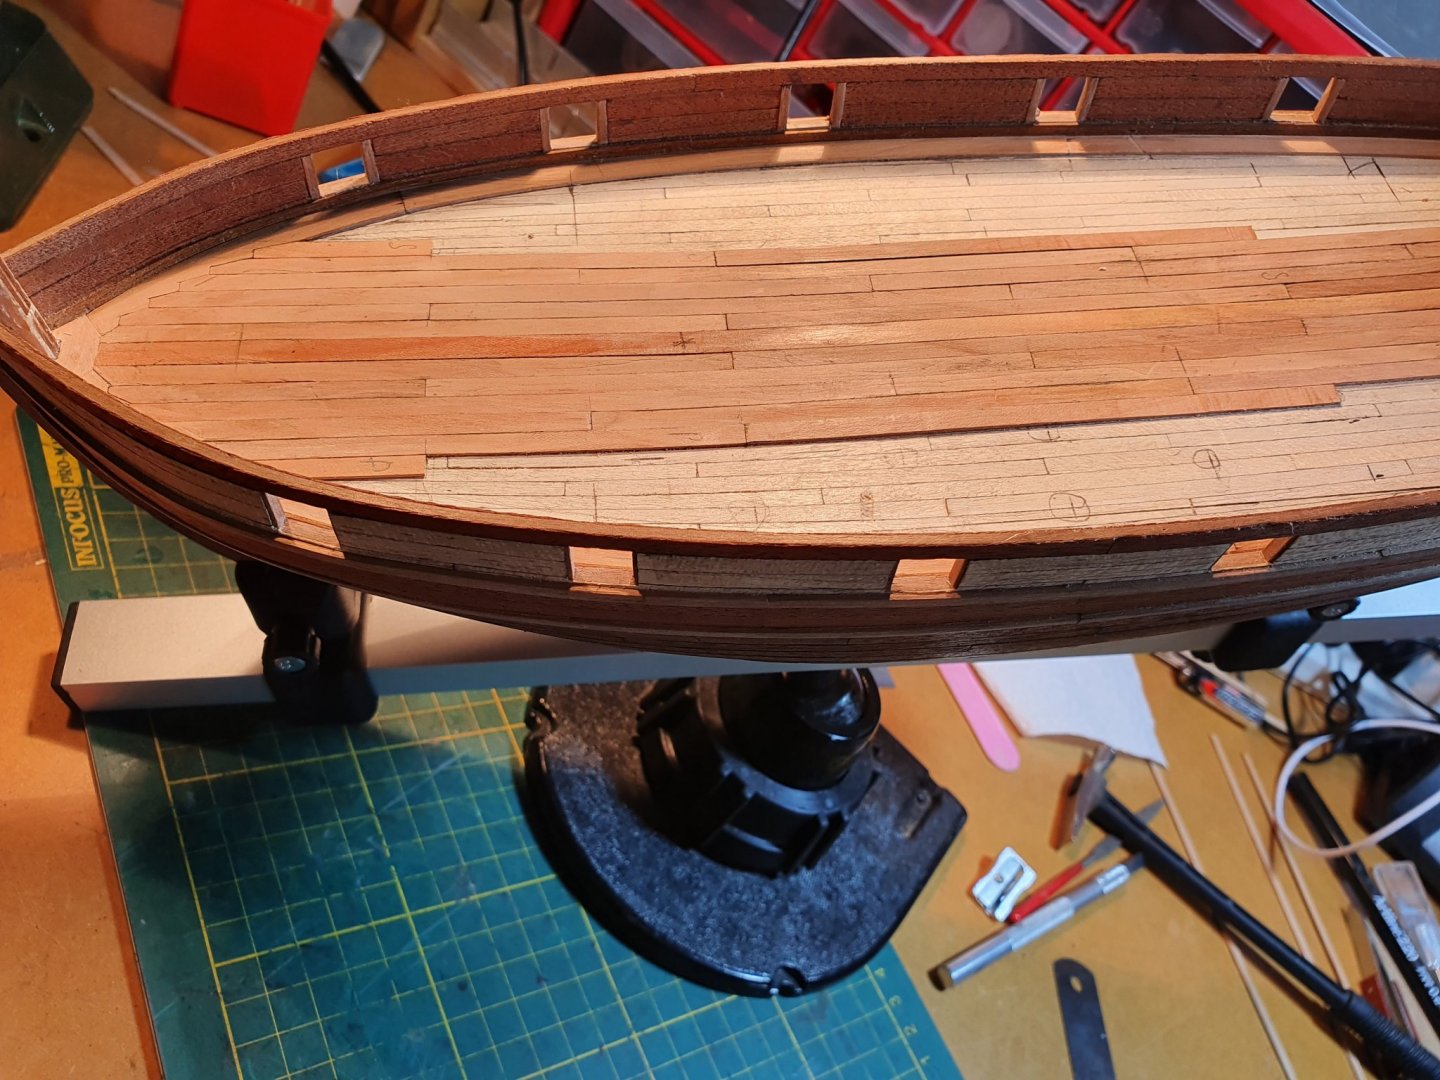
Morning to all 6.52 am here and -1 outside, I hate frosts. Waterways are in, though they blend in a bit and hard to see on photos, broke about 8 pieces before I got 6 glued in. Thanks again for the compliments Harry, hard for me imagine living with earthquakes and volcanoes, I suppose you learn to deal with the extra challenges as they come. Tricky time to be moving house at the moment but it sounds like you have it under control, must be the management and patience lessons you have learnt doing model boat building The joggling wasn't too bad to do, but sorry i didn't take any more photos if you look at the 3rd pic you can see where i marked the next plank to be cut in, on the margin plank. The plank next to it is still loose so that I can remove it to get the blade in to cut out for the plank. I would lay the next plank to be fitted on the deck in place, mark around it, then mark it for a 1/2 plank at the end and use the blades to cut the margin plank out. after that fit the deck plank, cut to length and glue in. The last photo shows the tools used and my trusty disposable blade plane. Hooroo Chris I need to add keeping the symmetry right each side was a constant battle, remembering to look and check and check and look. Come up pretty close in the end.


-
And a big Hi to yourself Harry thank you. Certainly a lot of breath holding doing it, first time for me and just had to have a go. Don't know if it suits the ship or not. Hows life over the water, getting on OK? Certainly not going to back to normal for a fair while. Cheers Chris
-
Thanks For the compliment James and the likes from everyone else. It is looking even better with a the sanding. Yes I am ashamed to say it took this evil virus to make me get on with it, Deciding that there were better things to do in the evening than business book work. Work life is still very busy despite the virus, but model ships need to be built!!!! Hooroo Chris
-
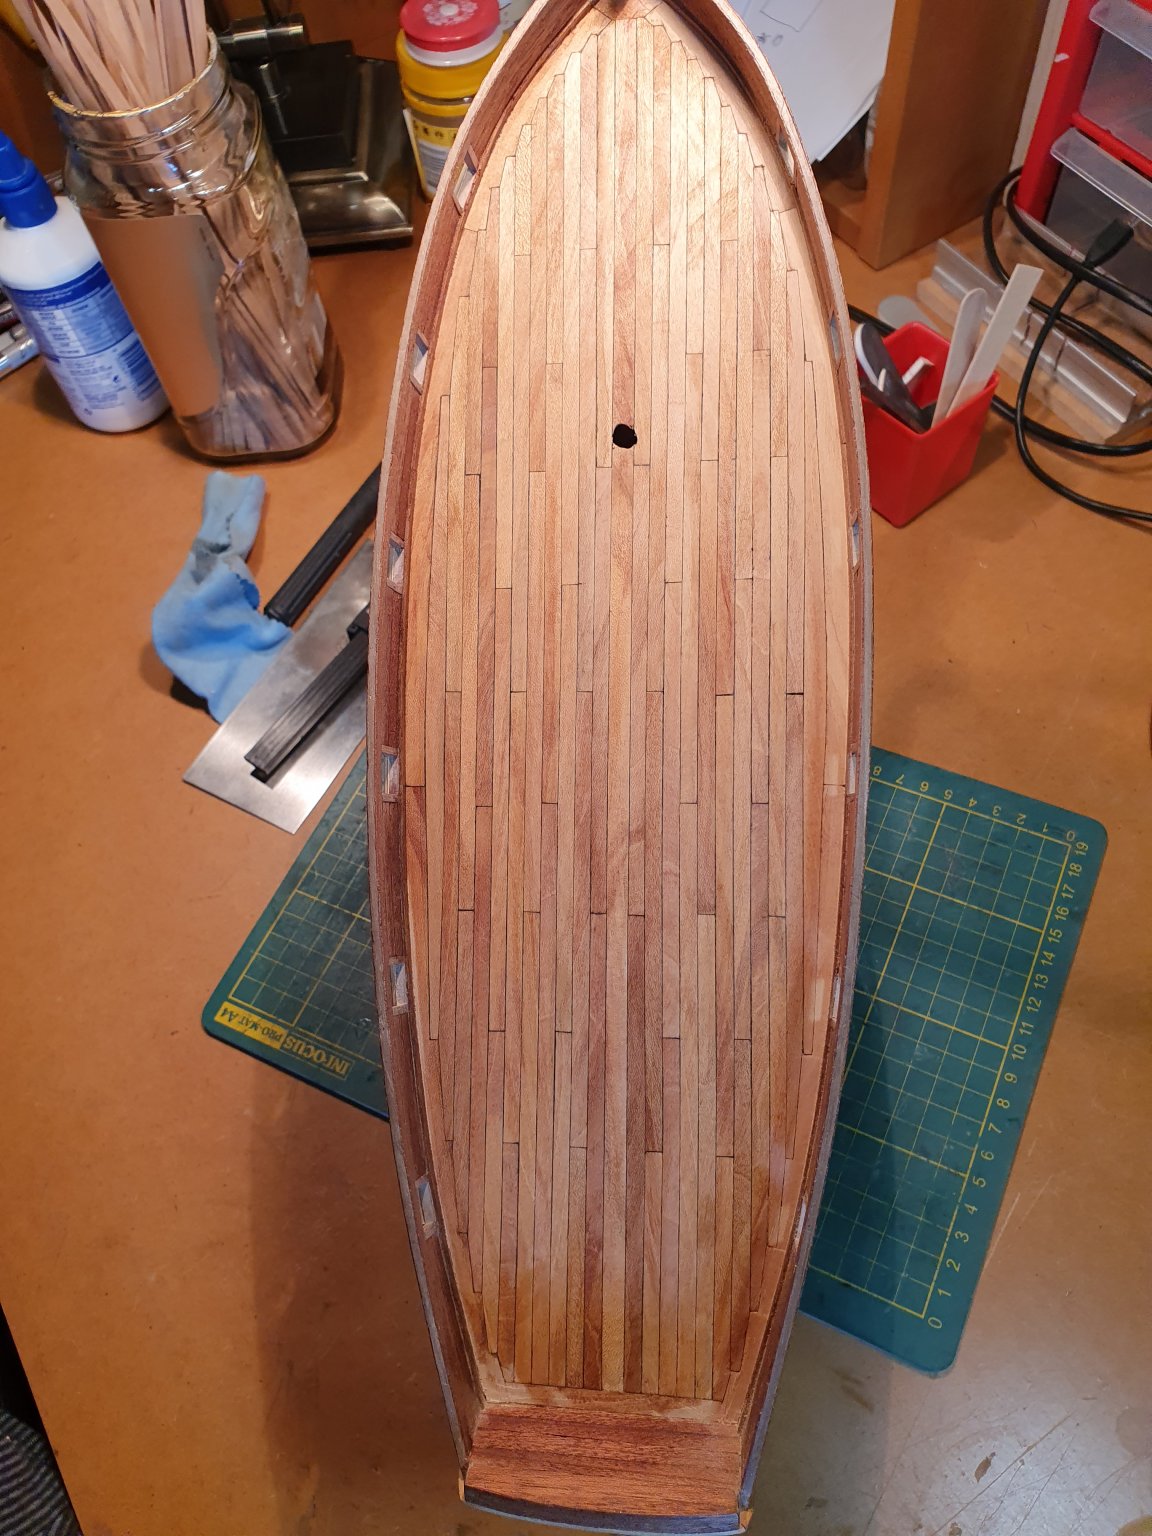
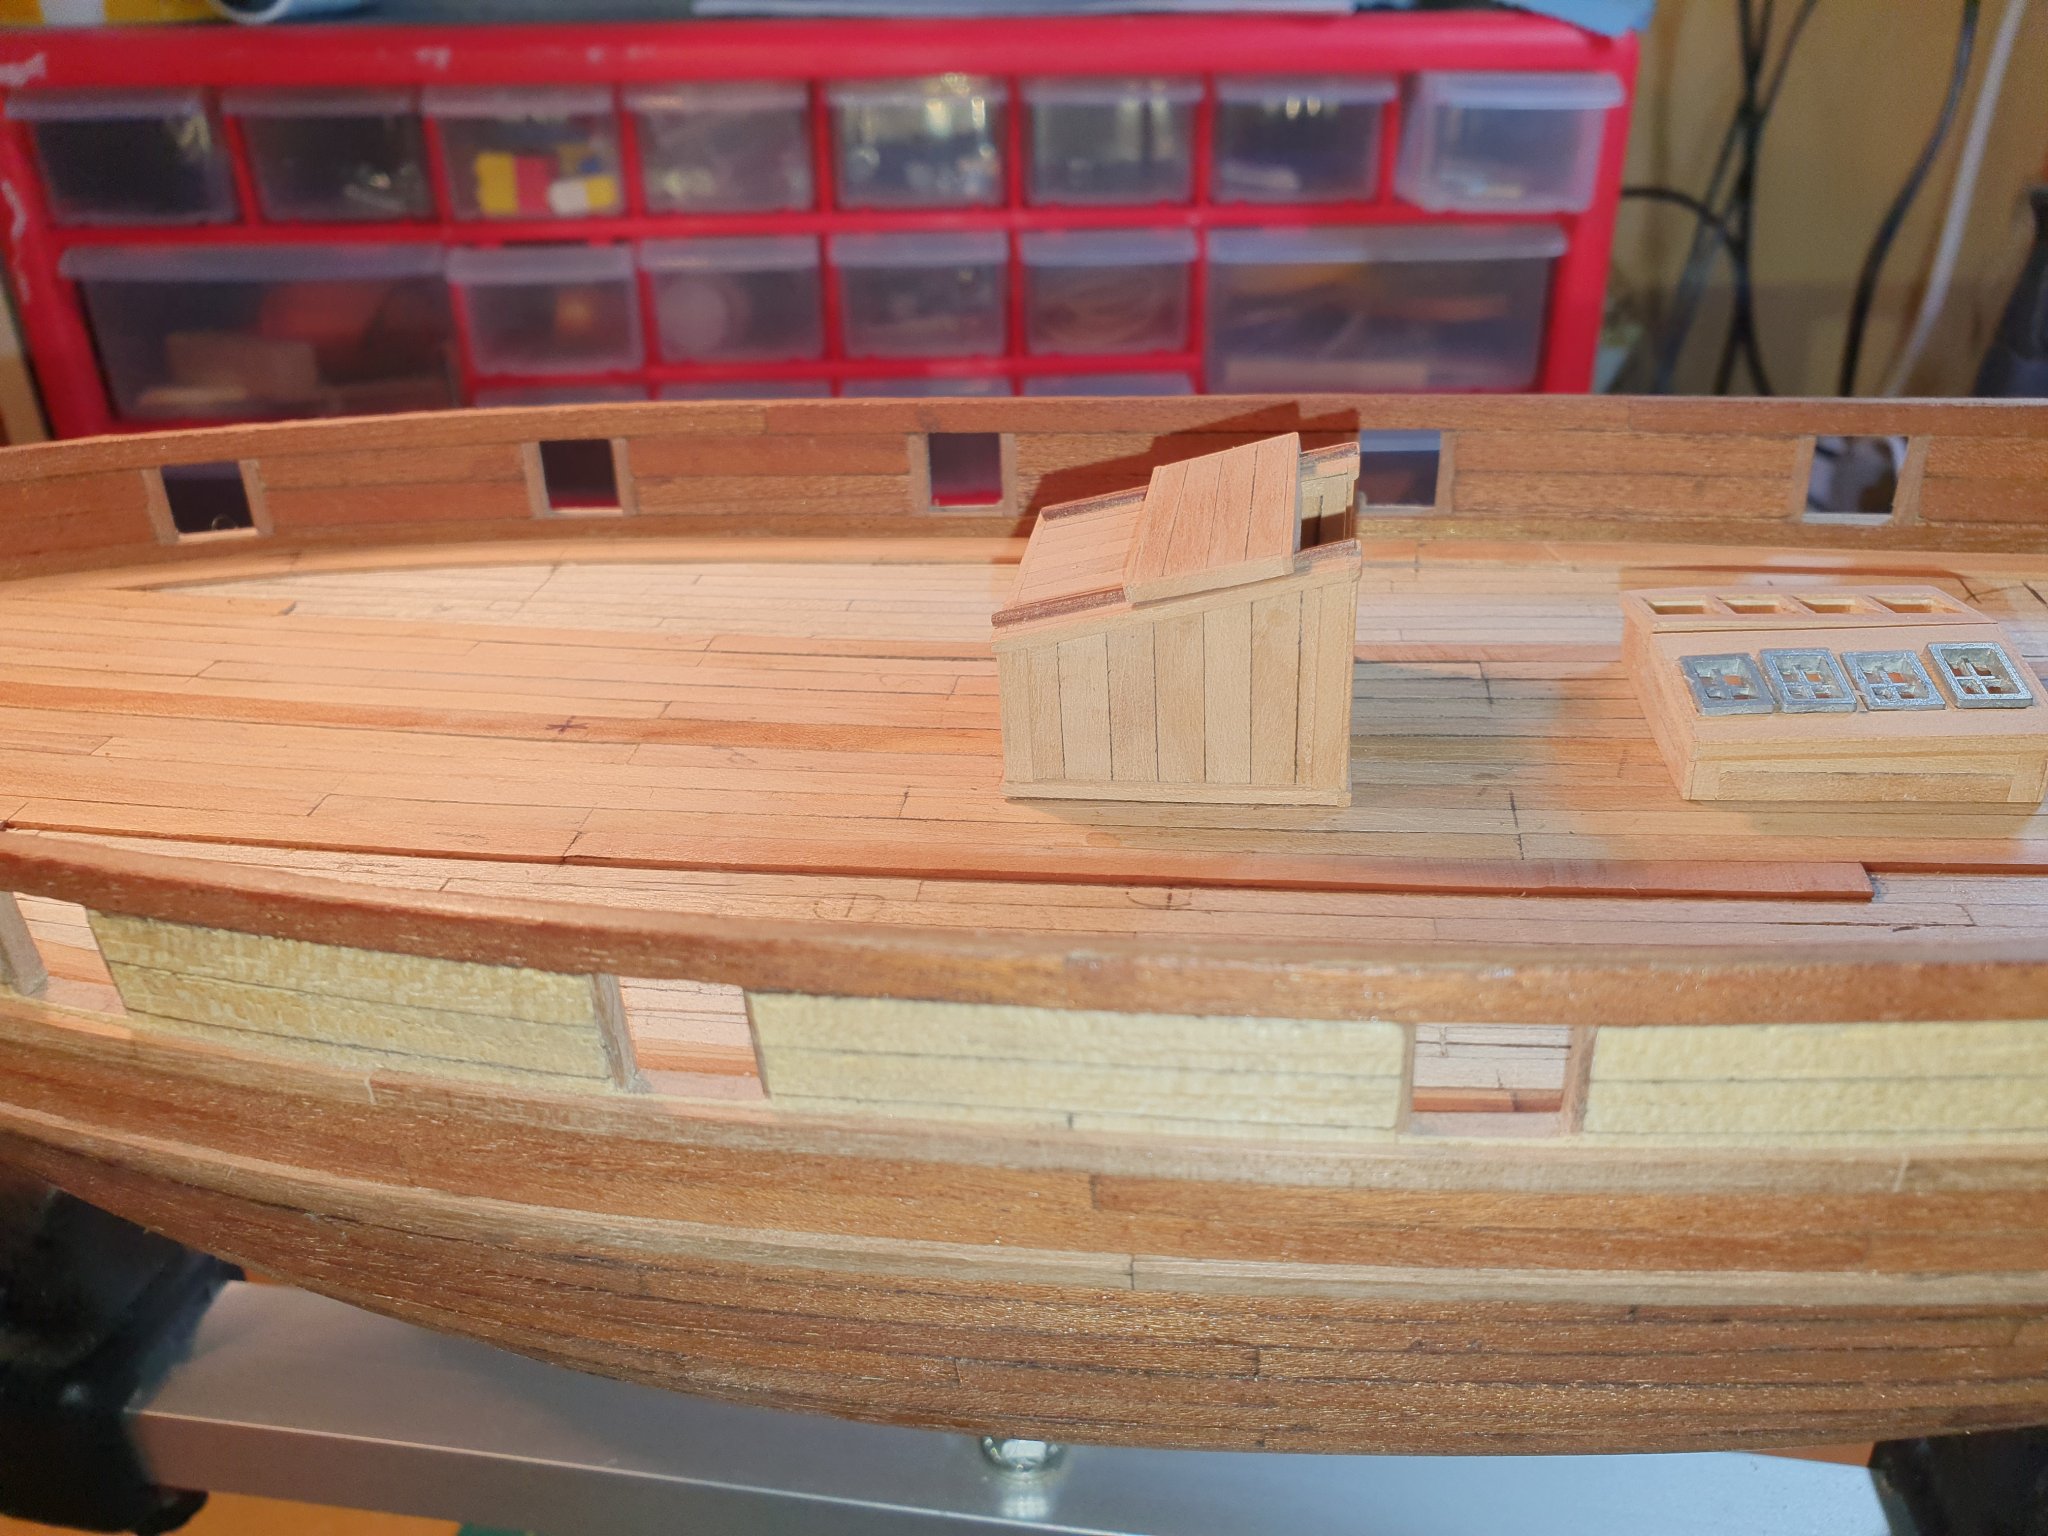
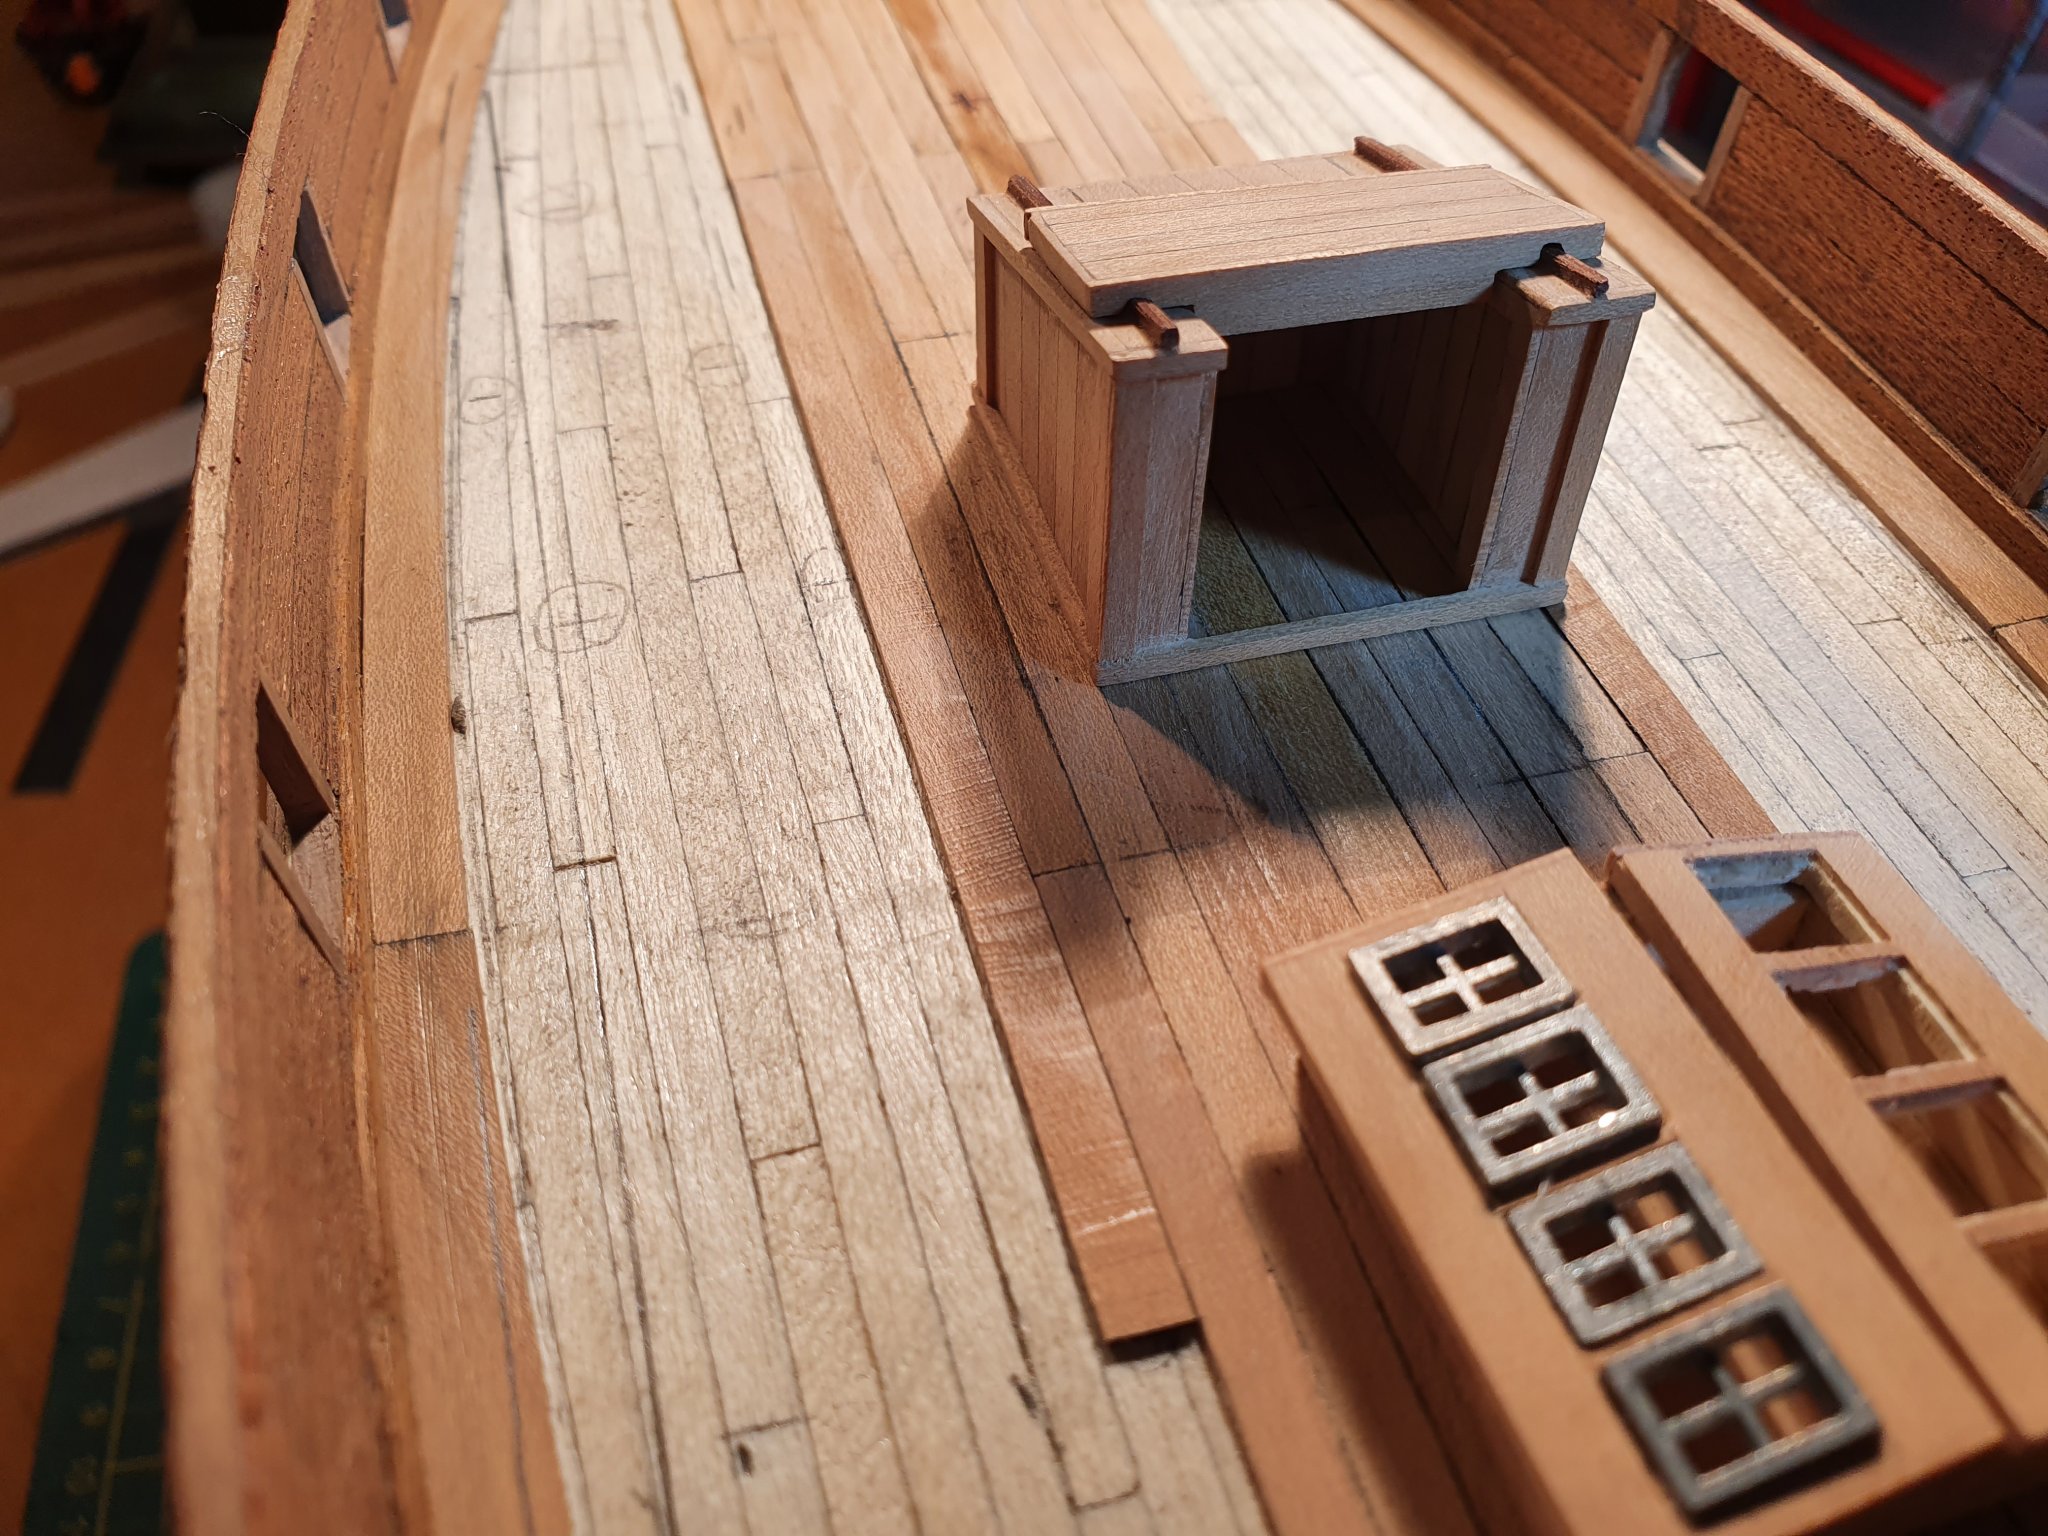
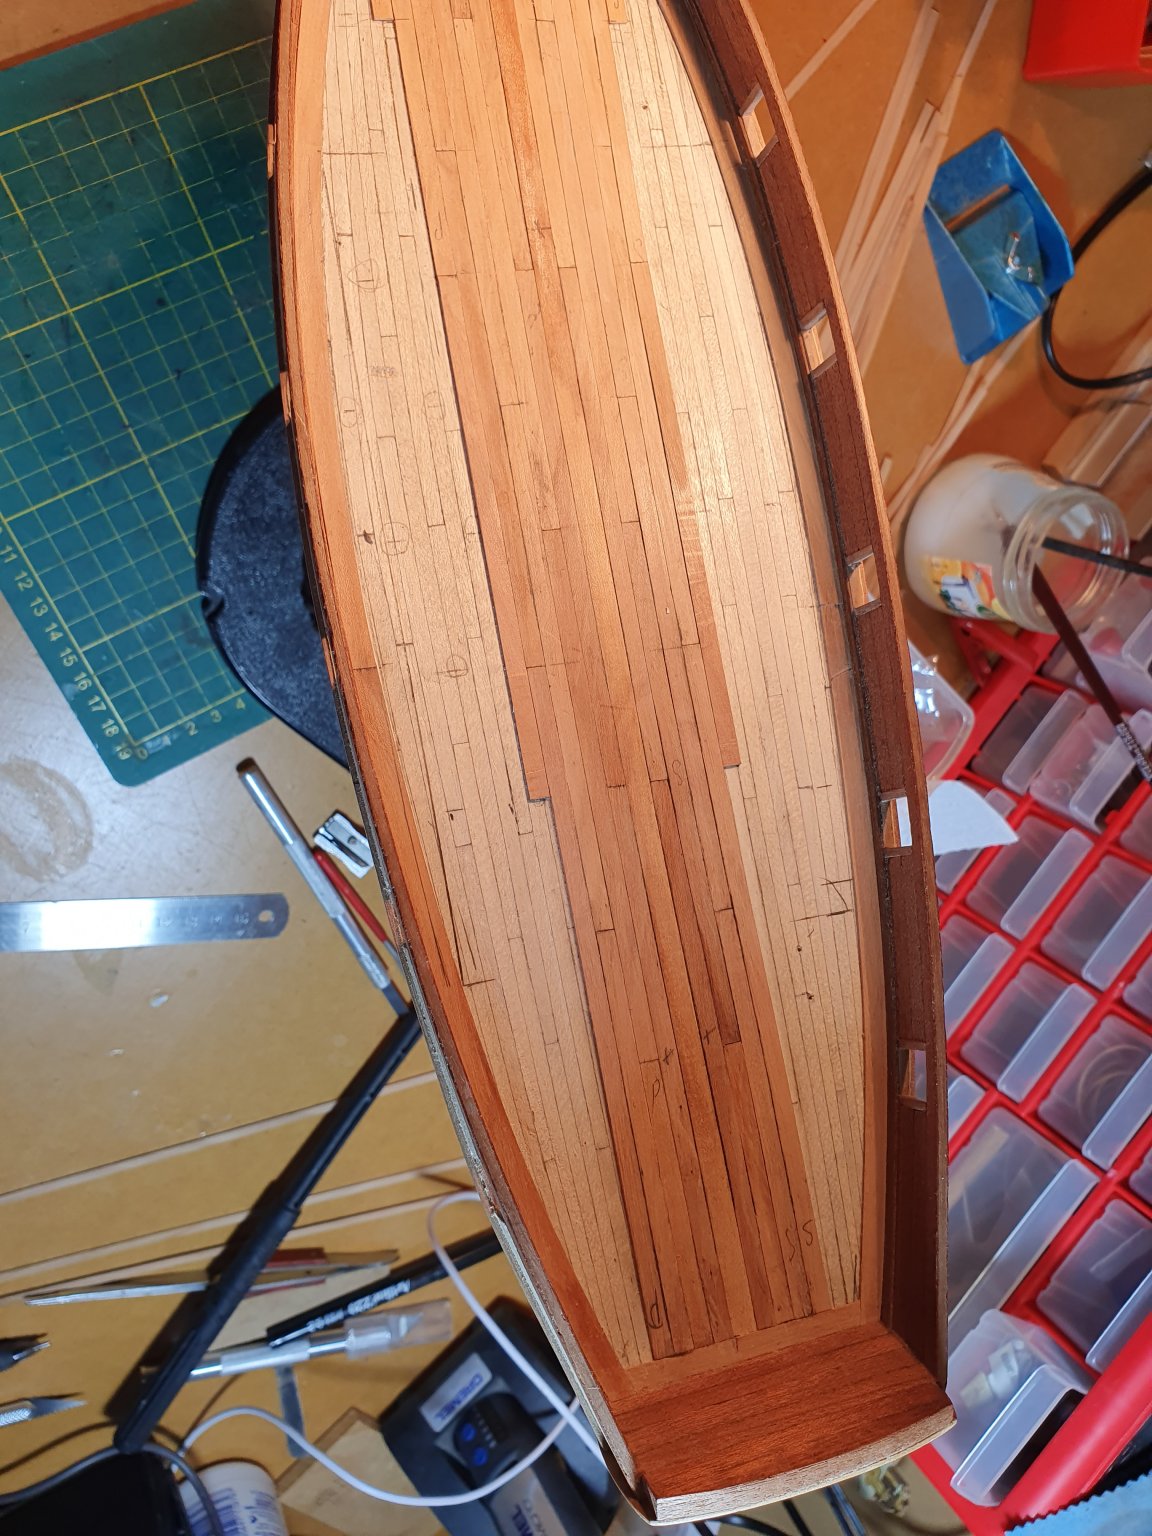
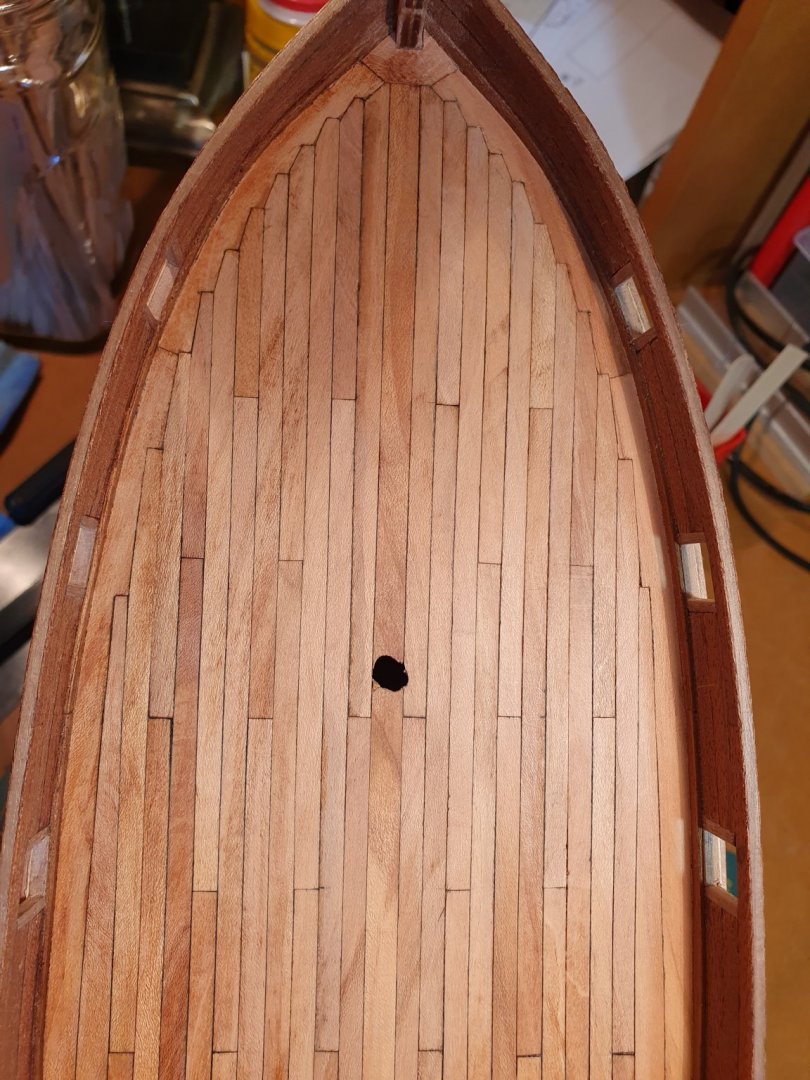
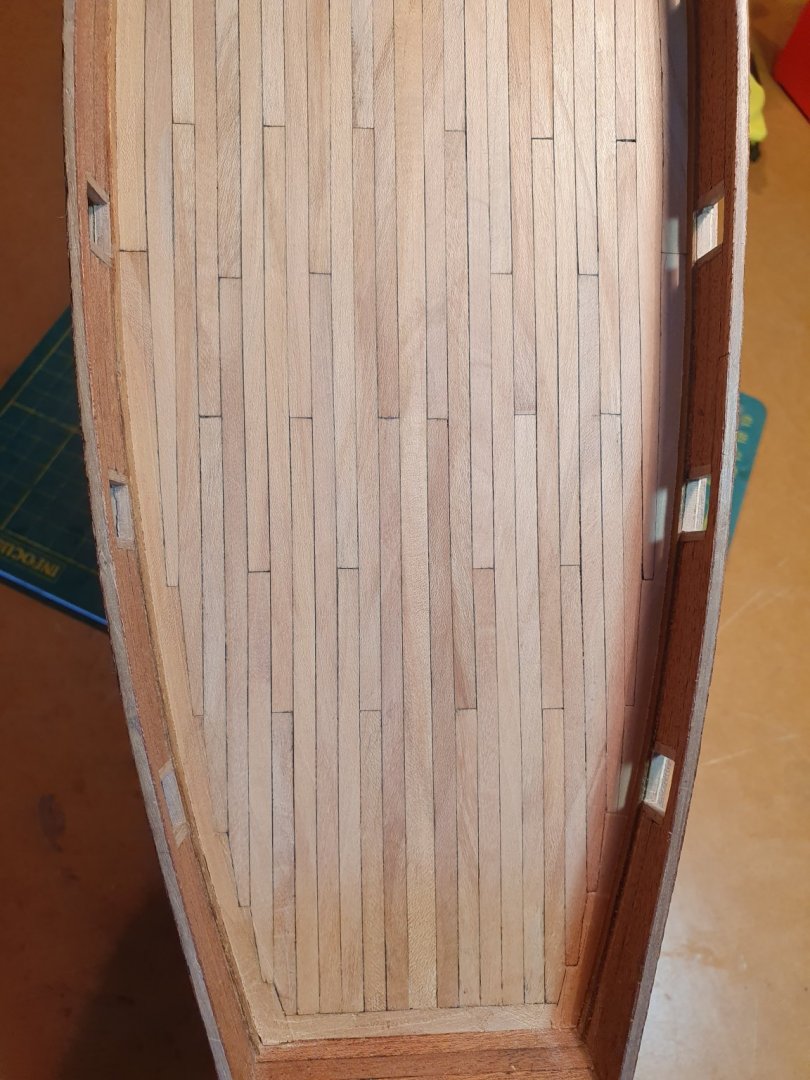
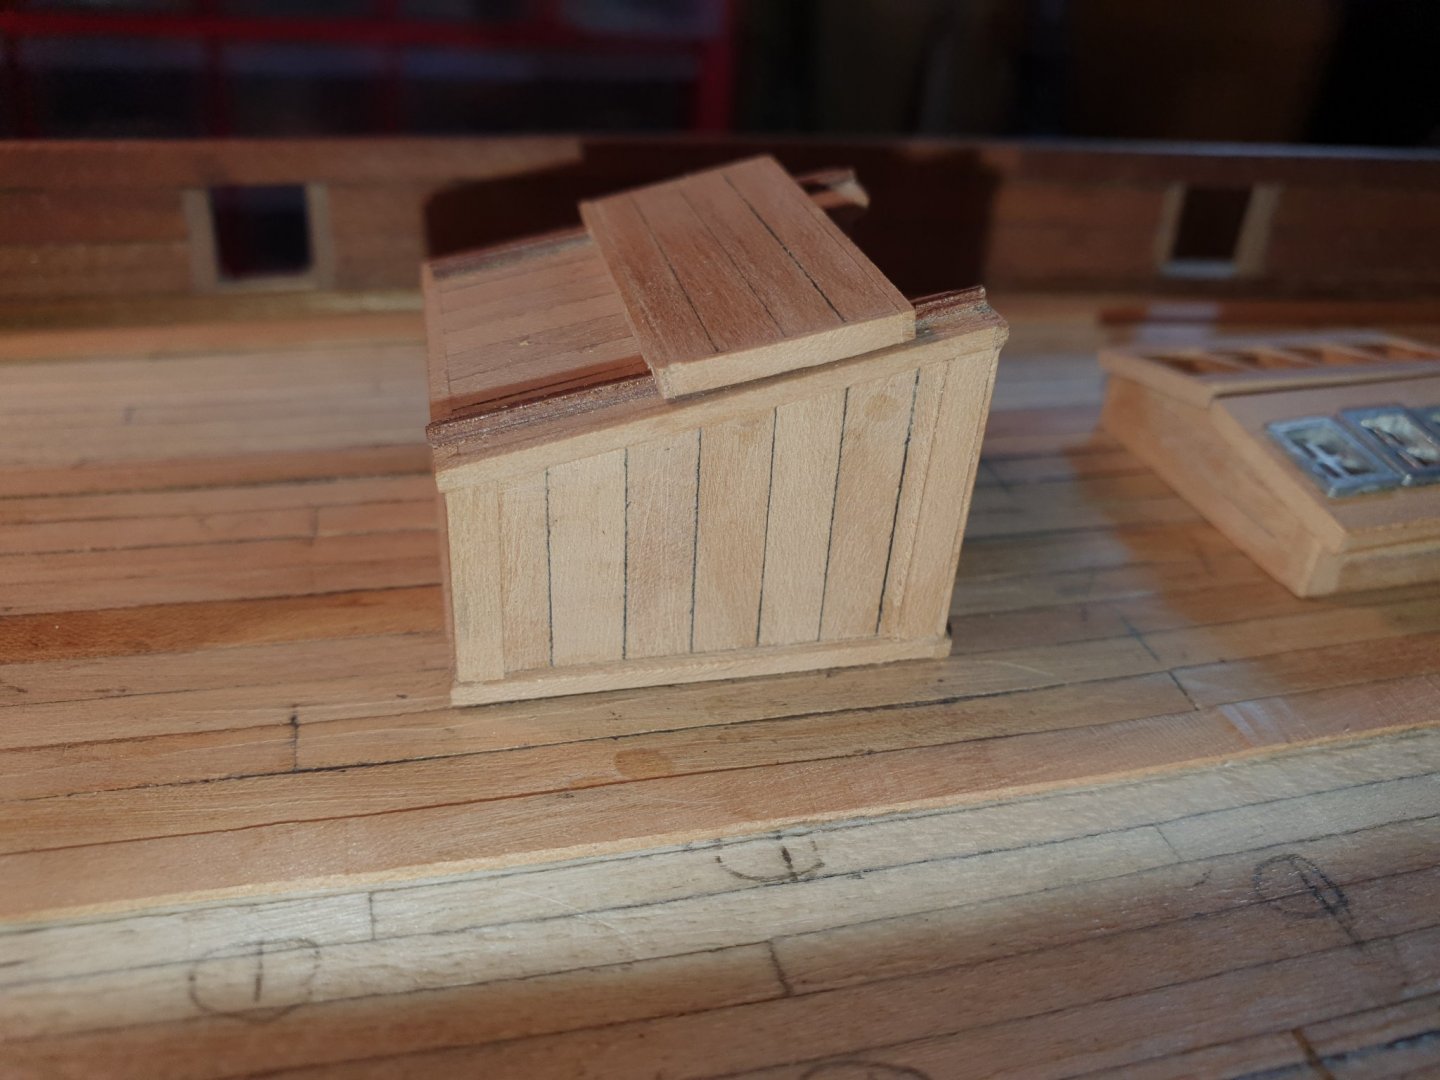
New deck done almost, just needs to be sanded, the scraper has been over it and left a few marks. I have been thinking of putting a teak stain to make it more like the original, but not sure. I think this version is a lot better, waterways to go in and maybe some scuppers, but they are not in the plans. Surely the water has to get off the deck somehow and for similarish reasons gun port lids will have to be made. I wiped over with some turps to bring out the color and quite like it, it will fade over time so will look darker. Time to do a sample planking piece to test the teak stain and then decide. Cheers Chris

-
Yo yes I'm back, Again, hope to keep at it this time. I decided to re-plank the deck, didn't like the last version and have been trying to make deck fittings which are no fun at all. Planking straight over the existing deck, stuck too well to get off.


-
Looks very good to me, no gaps, as long as you keep the planks tight to the ship should be ok. I use contact glue a lot for my planking, goes and stays on, but you have to be right first time. Thicker strips take a lot more work to go around the bow.
-
Ah good, someone who has been away from their log longer than me😉 Your work looks very neat and sharp, its only a little boat but it still has a lot of the building elements in it. Cheers Chris
- 114 replies
-
- 1
-
-
- swift
- artesania latina
- (and 1 more)
-
Yo Scott put up a photo or 2 showing the planks and what you are trying to to do. Even thin strips can be edge glued together to make wider ones if needed, depending on how many you have.
-
Hello Allan I wonder if it was a matter of necessity for the replica, the Jarrah would have been very expensive and naturally bent timber would be hard to get and wide planks would be dear. With my model the top plank under the wales at the point shown had to be spiled or side bent from there to make it go to the bow. Chris
-
bluff_bow_planking_primer (2016_05_23 09_55_48 UTC).pdf Here it is, I thought I might have lost it when computer died a few years back. This is how i did mine, and this is how the planks wanted to lay on the ship. And the stern planked without using any stealers. Hooroo Chris