


dafi
-
Posts
2,292 -
Joined
-
Last visited
Content Type
Profiles
Forums
Gallery
Events
Posts posted by dafi
-
-
... just before you all disappear into the Royal Wedding ;-)For Maurice, they are done the proper way and glued with CA. My litte helper was so kind to lift on grating up to show the underneath:
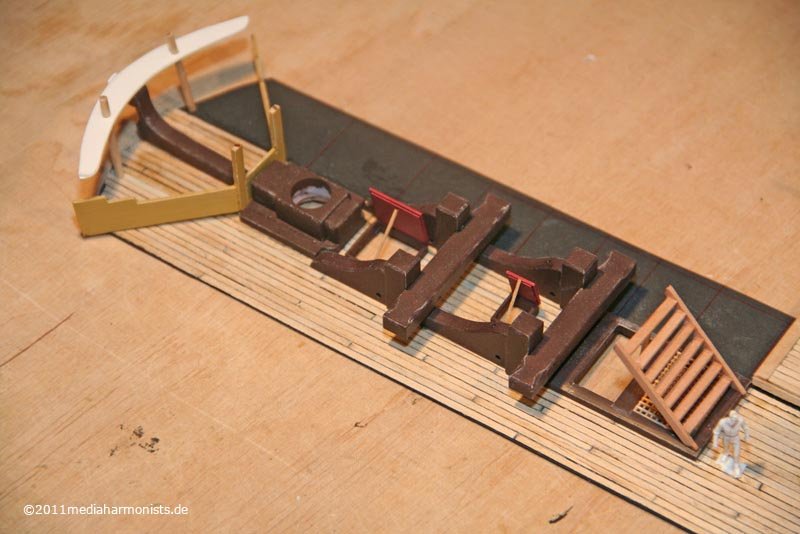
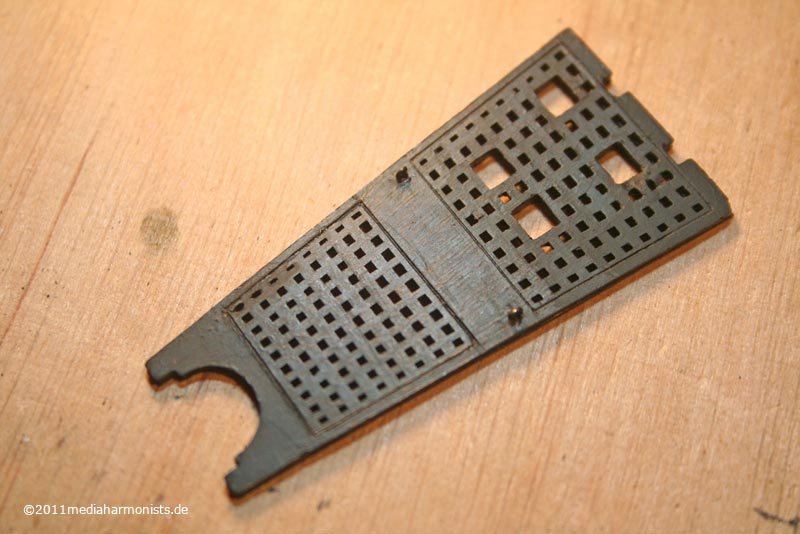
 As promised, here is where the new gratings end up :-)
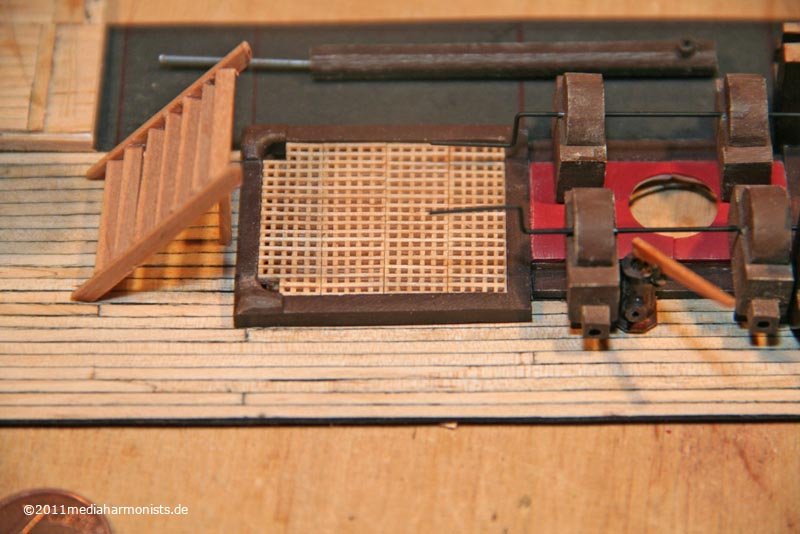 Even the split into four parts can be seen :-)And just some pictures from the rest (the stairs are just mere mock ups) ...
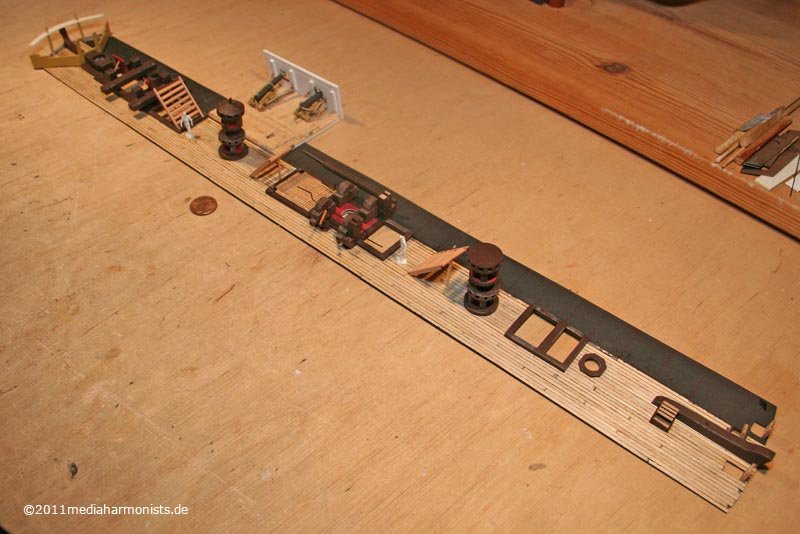

 All the best, Daniel
 -
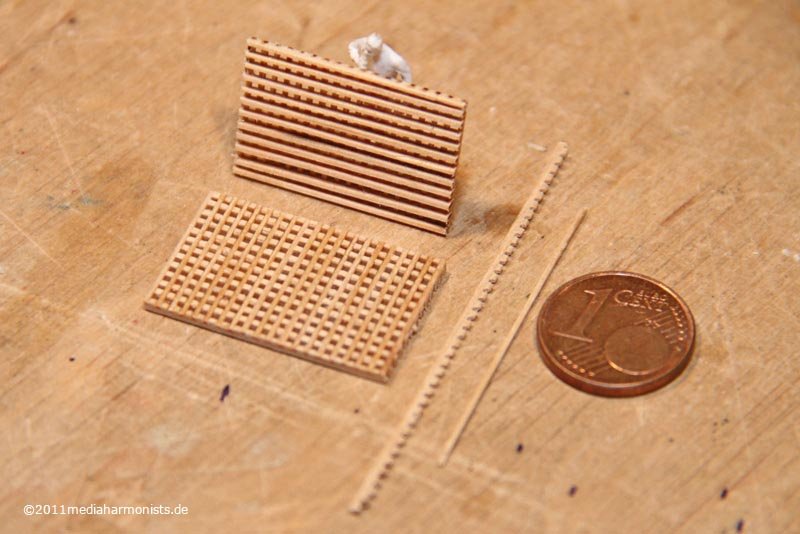
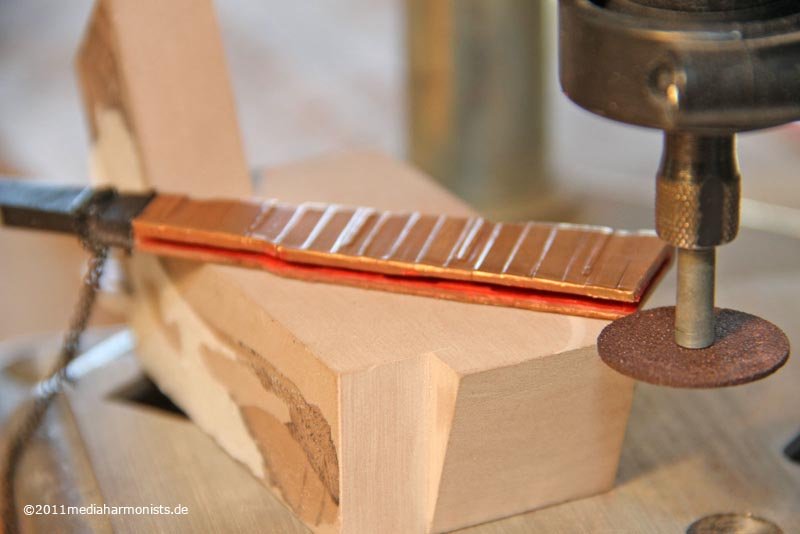
... and believed the 1mm gratings from the shop still were too big ...... and so the tests began ...... and her is the whole story ...Literature always indicates to use the circular saw with a small guide beside the blade. So far understandable and comprehensive and does not sound scary. A first test free hand prooved that my wood was suitable :-)Fastily changed the machine ...
 .... or not that fastily, because untill everything was adjusted to the 0.5 mm blade, the right hight of blade and suitable thickness of the guide, and smooth cutting worked, it took some time. But then putted stripes of 1.5 mm thickness to cut ...
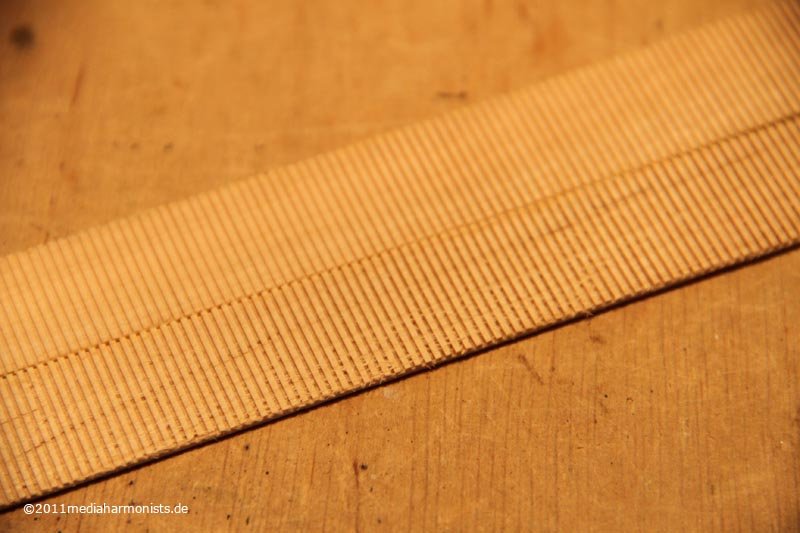 ... and it looked a little bit tattered, see the stripe in the front. So gave it some clear varnisch and the stripe startetd to bend in all directions :-( Used some plastic foil as a separation on the topside and clamped it against another piece of wood to let dry. And luckiely it came out straight and after the second time through the saw it looked clean, see the stripe behind :-)
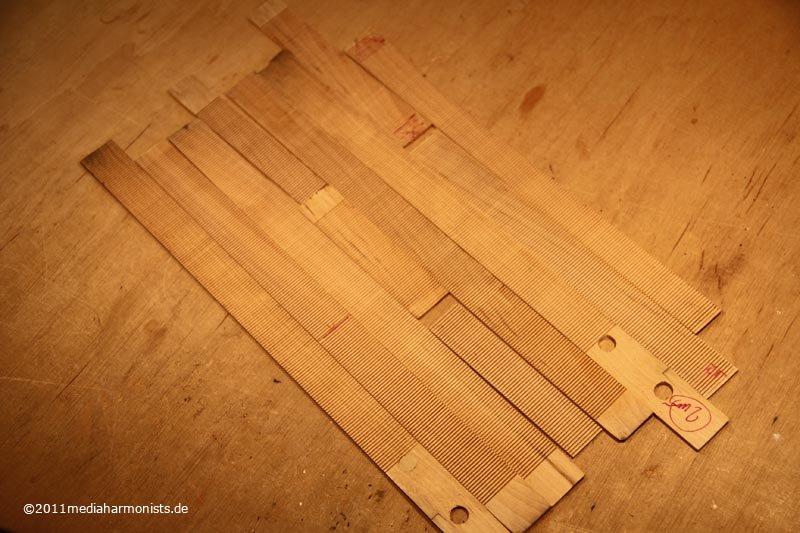 ... and this is the bounty: material for the next years to come :-)So came the next task: Cutting it into 0.5 mm bars without breaking its tiny teeth and without the bars disappearing in the machine. The latter was easily resolved with some tape. The first came out of the problem, that with the standard guide, the line was rubbing against the blade. So made a new shorter guide that releases the bars immediately ...
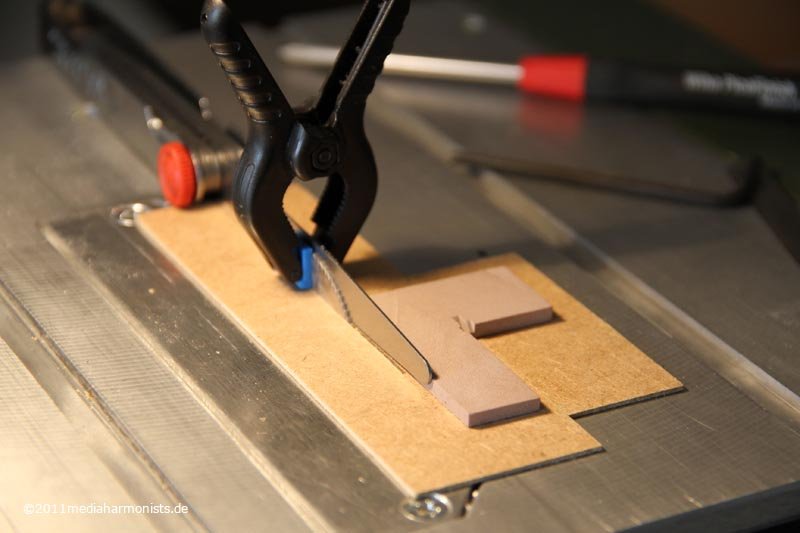 ... adjusted the distance with a 0.5 feeler gauge ...
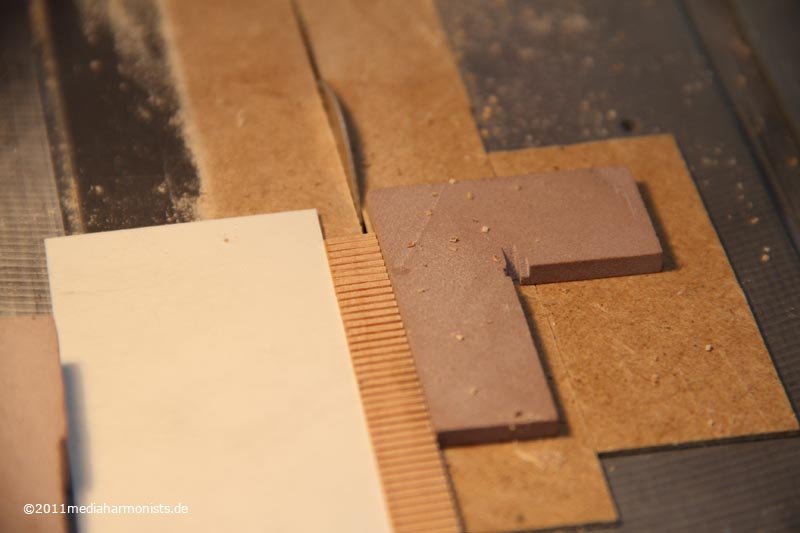 ... and glued same sheet on the side of the wood to get the fingers further off the blade. So managed to cut nice bars :-)Next thing is mentioned neither in any book: The cutting is just one thing - the gluing is the bigger problem ...
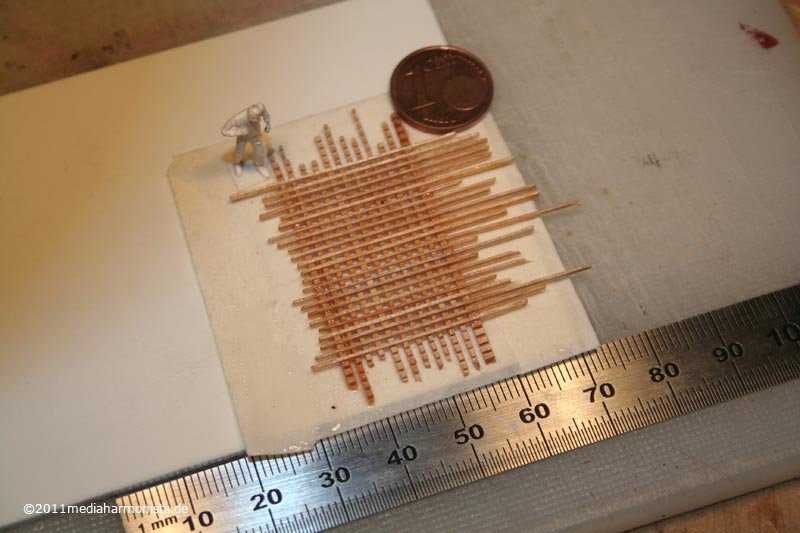 ... used some soft adhesive tape and tried to put it together with 0,5 x 0,5 mm toothless bars - looks nicely uneven ...
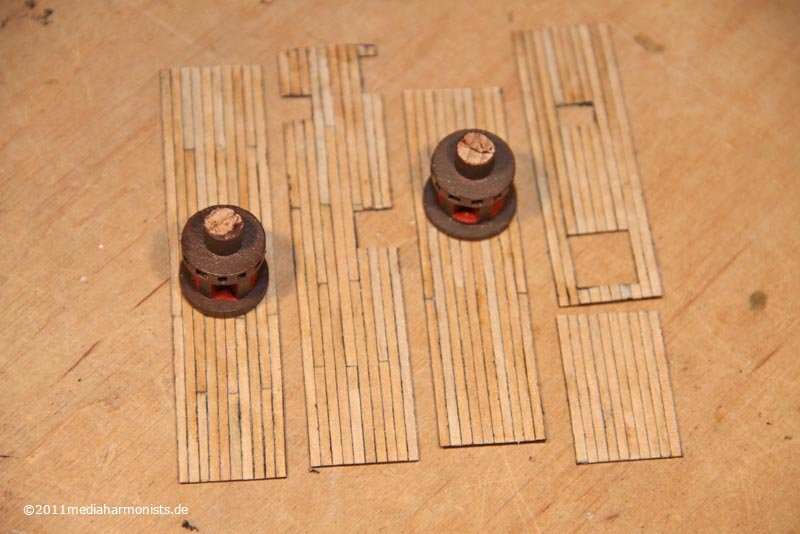
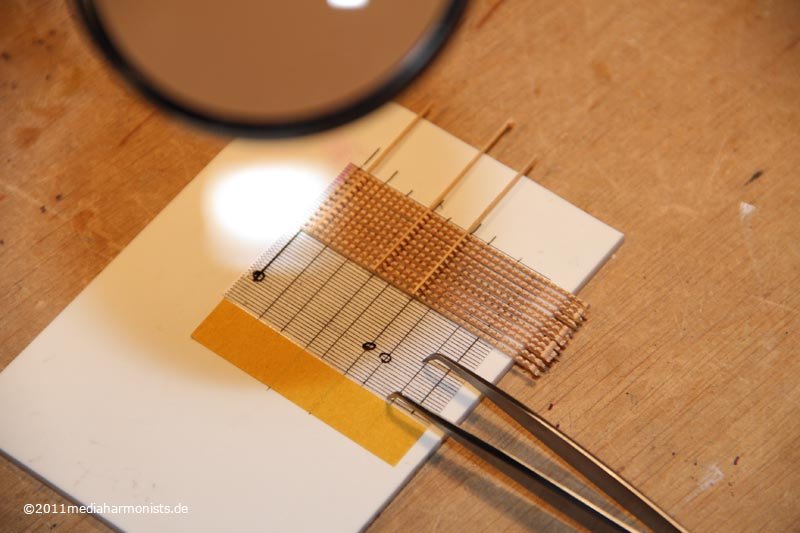 ... so printed a 0.7 grid onto paper and used transparent double sided tape and a loupe to fix them together. Nice meditational work :-)
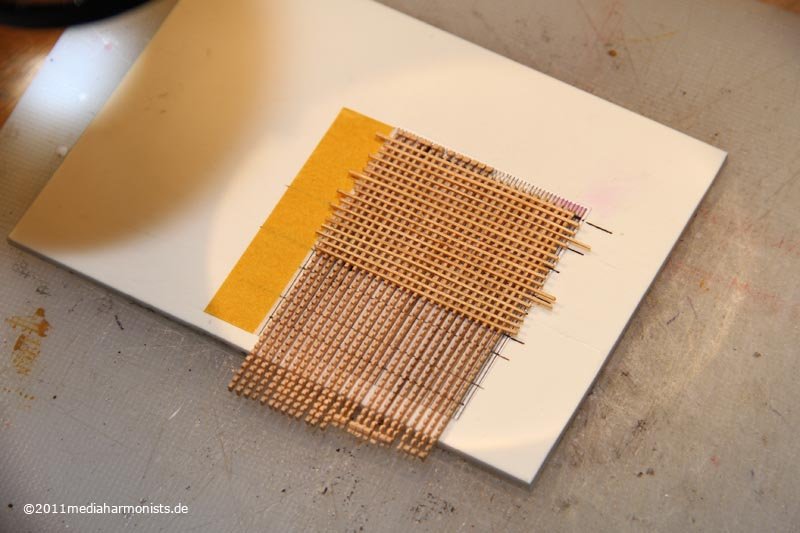 So it is filling up:
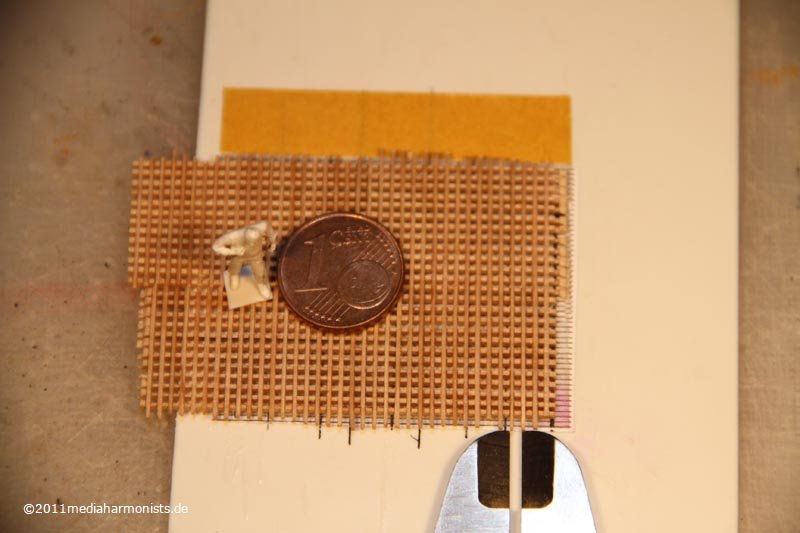 The caliper is set to 1.4 mm.And my little worker was so kind to lift one up to show the underneath :-)... and the result is a cute 0.7 mm grating and soon I will be able to show where it will end up :-)All the best, Daniel
- Kurt Johnson, Izzy Madd and JPett
-
 3
3
-
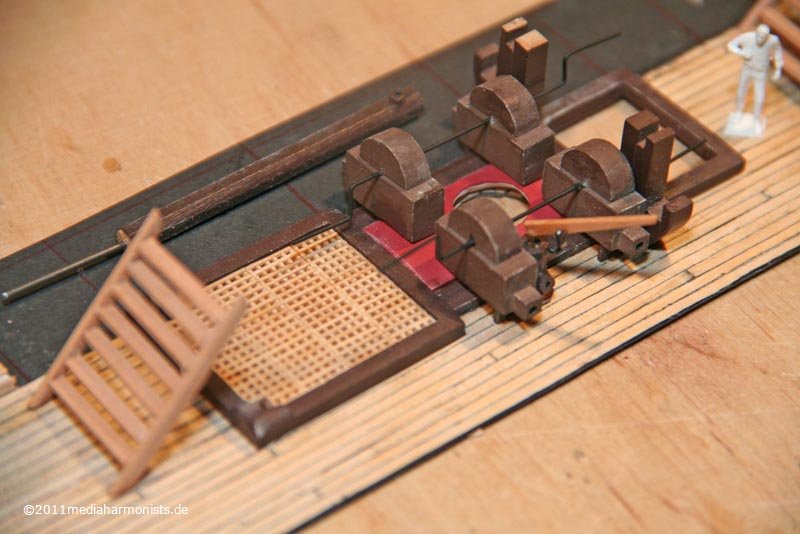
As a small inbetweeny I reworked the rudder.The kits rudder is of equal width from top to bottom. After having it taken out because of the rework of the decks, I took the chance ...In Construction and Fitting Goodwin gives some calculations, but I do not know if I read them right, as it means, that the rudder would only be 12 cm in width at the aft bottom corner ...Did not really dare to do that. All the AOTS show a slimming of the width that is far less extreme, so I copied those. As the sternpost should change width too I had to cheat anyway as even I did not want to touch that ...Also I decided not to show a turbulence groove. Neither Goodwin nor any of the AOTS that I know show it. I only found it in Mondfeld and on french ships, but they do not have this extreme narrowing of the rudders aft end.So, enough said and off we go. First a 2 mm slot along the rudders aft end ...
 ... glueing the tip together ...
 ... filled it up ...
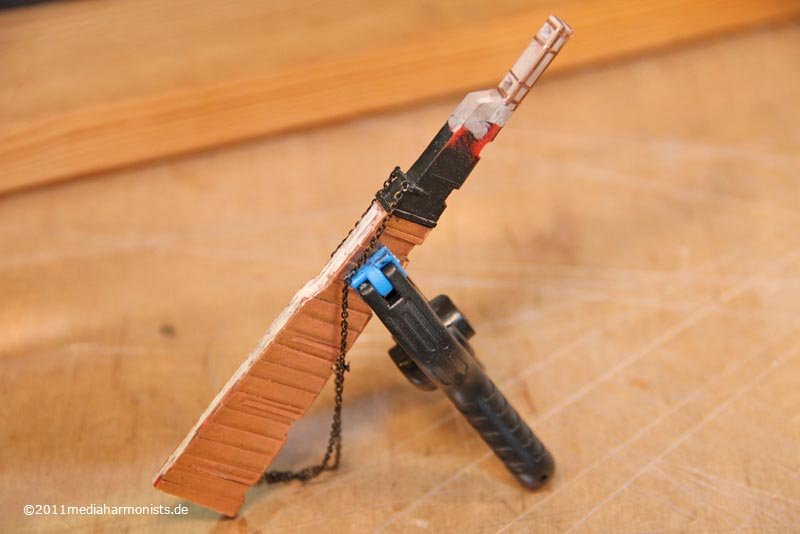 ... fixed a seventh pintle and brace fitting at the upper end where it is red - following Construction and Fitting - and enlarged the top of the blade and gave it a new head ...
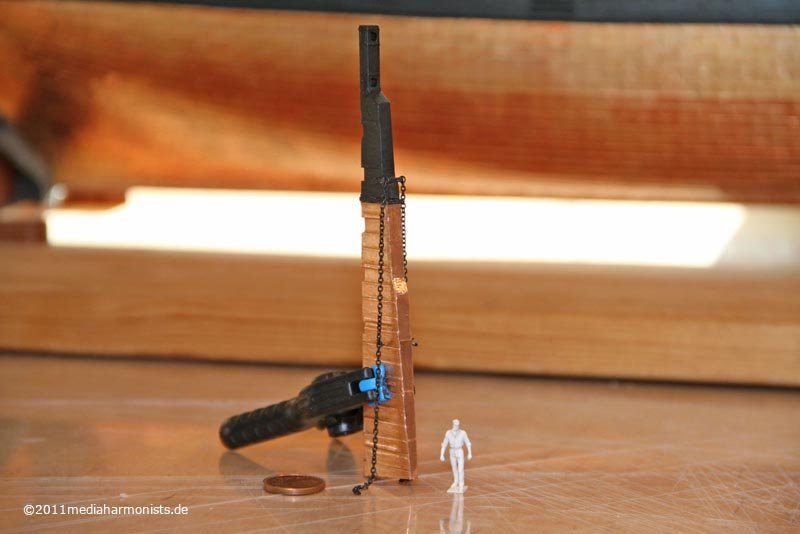 ... and it looks really impressive :-)Of course tried the tiller in conjunction with the beam ...
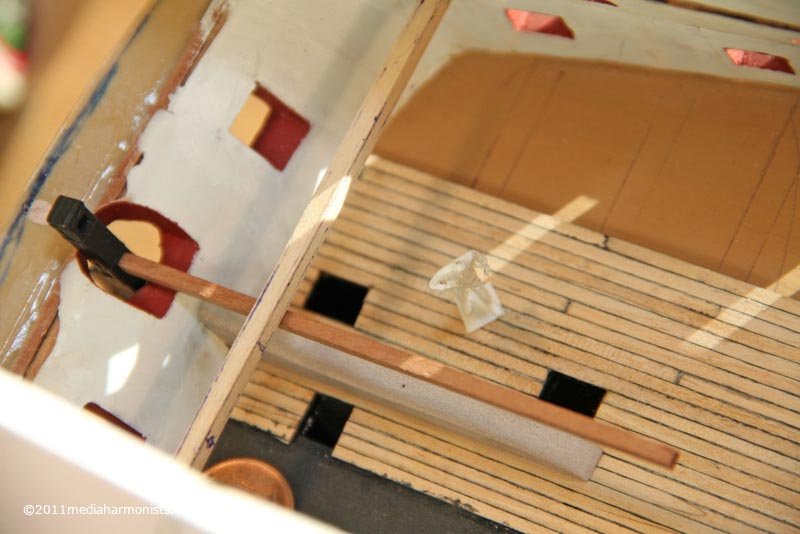 ... and looked at the angle it can take ...
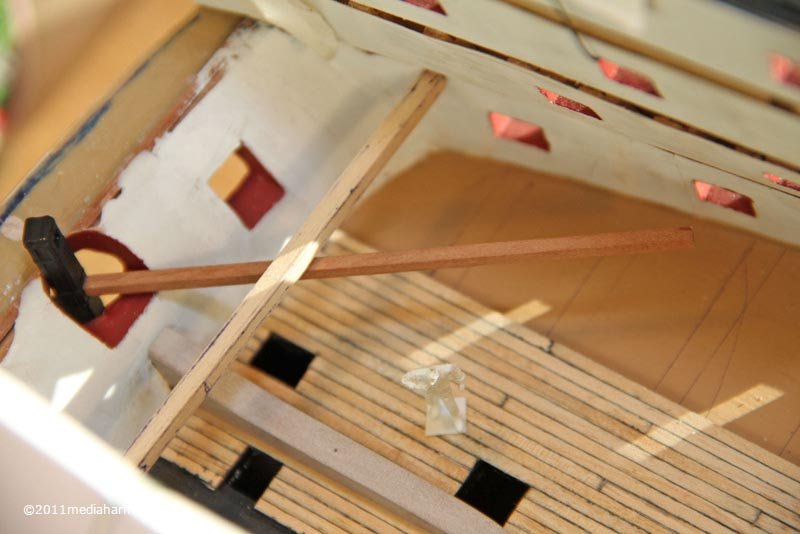 ... and a nice picture to end with :-)
 Yes the small white blop left beside the rudder is my small little shipyard worker.Lieber Gruß, Daniel
 -
Me too, looking foreward for your reposting and everything coming will be welcomed with interest and gratitude :-)
Daniel
PS: The more the better ;-)
-
Hy Ed,
thanks for bringing this one back, as it was a great inspiration for my own endeavors!
Best regards, Daniel
-
Alexander,
I am happy to have your little marvel back!
As I had already the chance to see her on the Stuttgart Modelmaker Exhibition, I have to tell, that she is even more cute in real life than on the pictures! The execution is spotless!!!
Congratulations, Daniel
-
Hello Jarek,
nice to have your build back!
Daniel
-
So i managed to do some little workFirst the discussion about plank length and butts :- There are a lot of hints that planks could be longer than the 6 Meters Mondfeld talks about. Contempoary sources talk about up to 40 feet (Thanx Jörg/Chapman), Goodwin about 36 and most AOTS confirm this.- Butts seem to sit only on beams not on ledges. Fixed with bolts on the beams and with treenails on the ledges (thanks Christian /Anobium)- So my first impressions seem not to be too wrong. Planks of 20 to 30 feet give a nice 4 butt-shift.:-) :-) :-)Here the old first samples, now out of duty ...
 ... an overview with freshly made longer planks ...
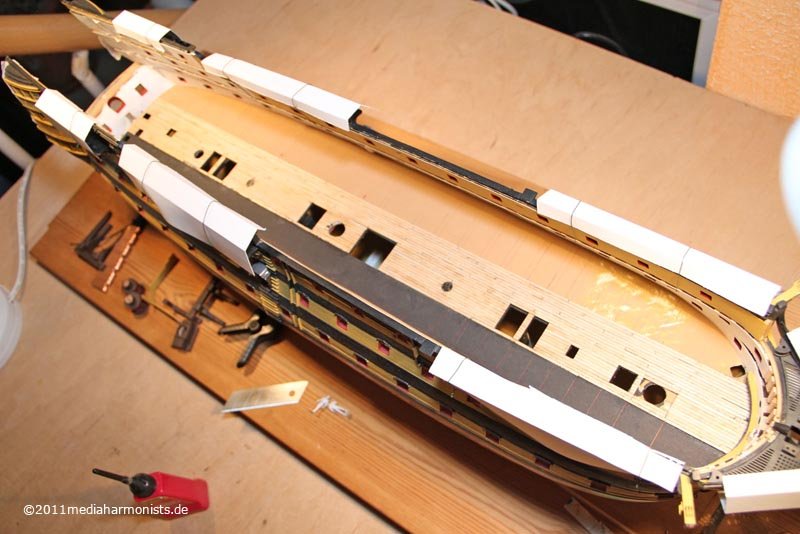 ... and here the different lengths to be seen.
 Then worked on the riding bits, in the back the old one ...
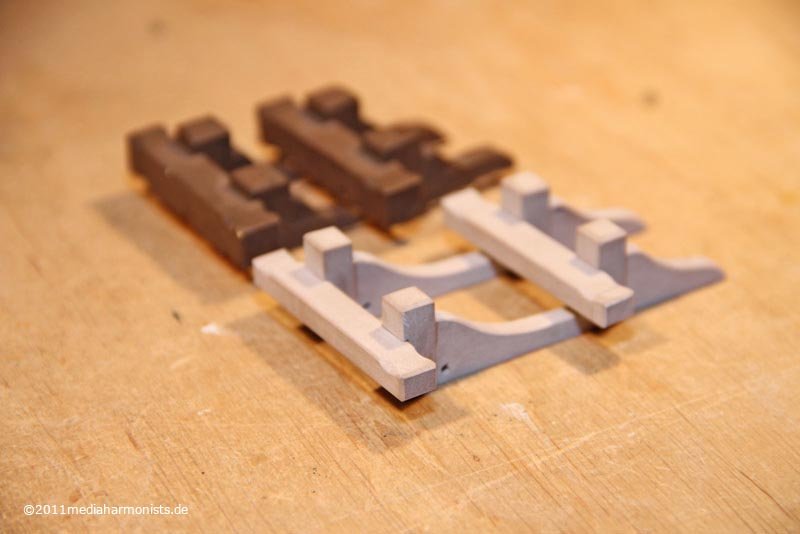 ... and in position, with the foremast support.
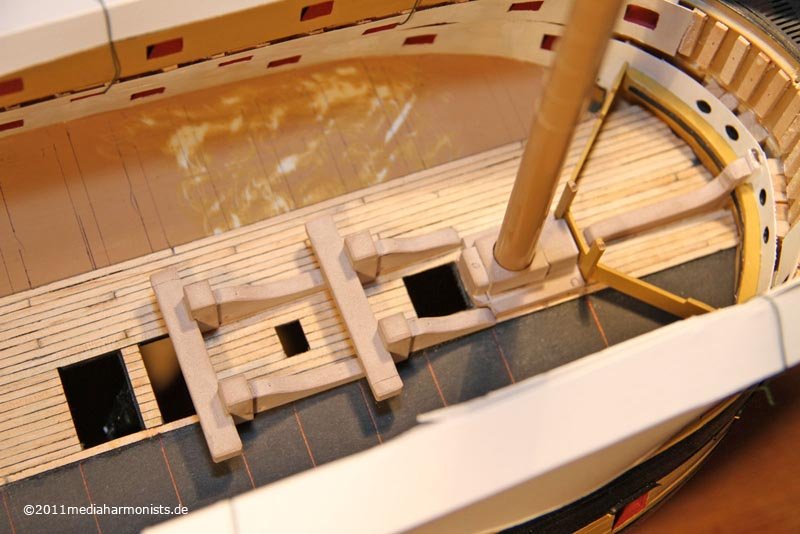 Soon I must go on with the planking :-)Gruß, DanielPS: Sorry folks, still no cannons yet ;-)
-
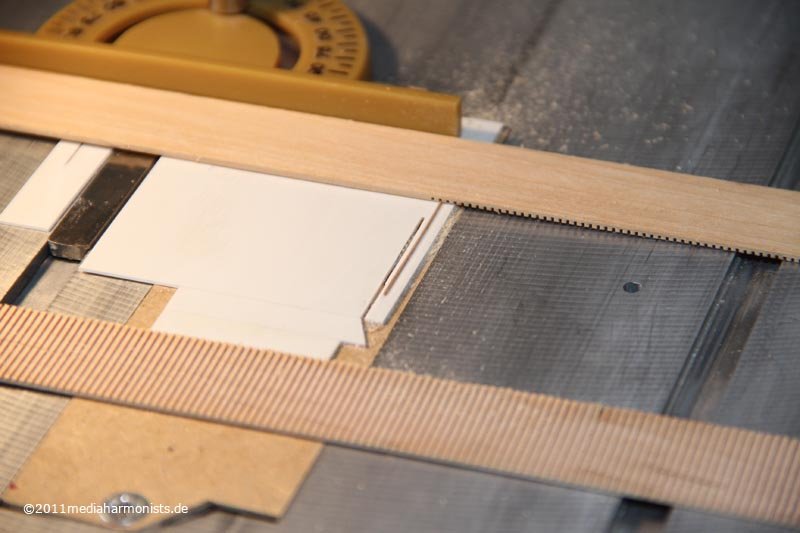
And I already prepared something for clearing the damage :-)I pushed the before mentioned shelf into the saw, aiming for 0,5 mm x 20 mm stripes. those were lengthened to 70 mm, and I build a template with a 2 mm - the intended width of my planks - stop on the underneath side ...
 ... put the stripes underneath ...
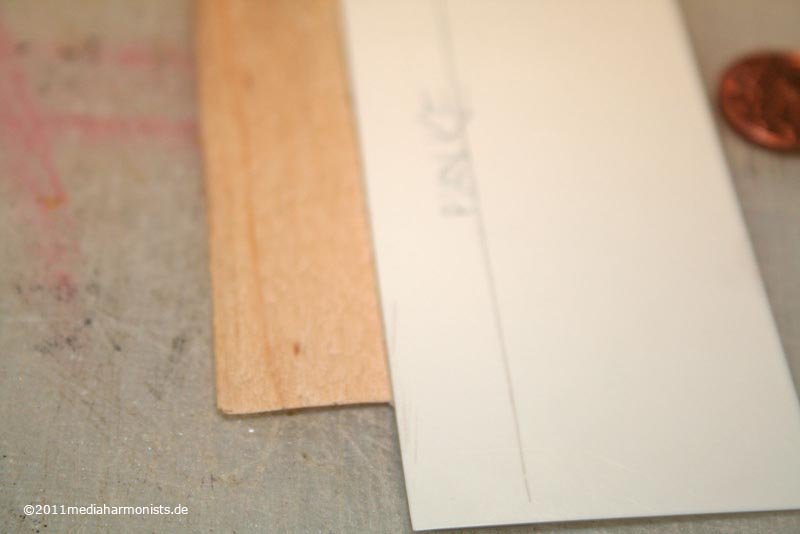 ]... took a second sheet from the other side to hold the wood down (the template proved not suitable for cutting as there was not enough material to squeeze down the wood) ...
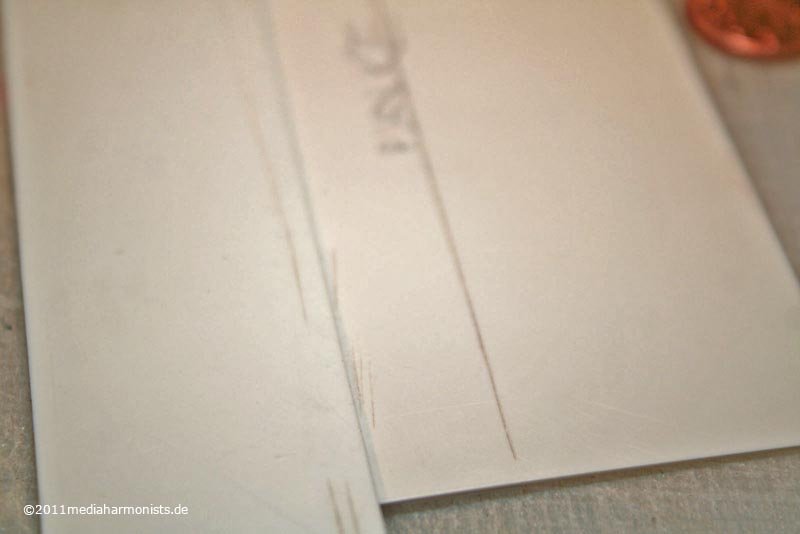 ... took the template away ...
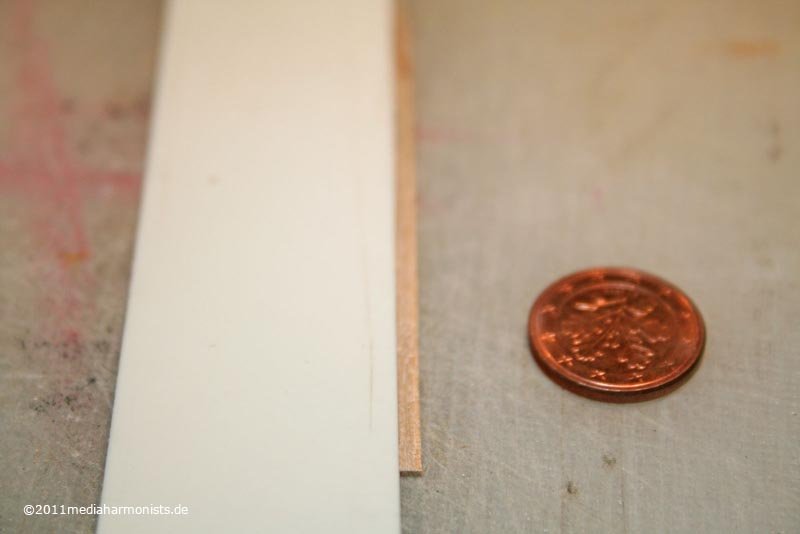 ... and did the cut. And repeat and repeat and repeat - but it went rather quick :-).
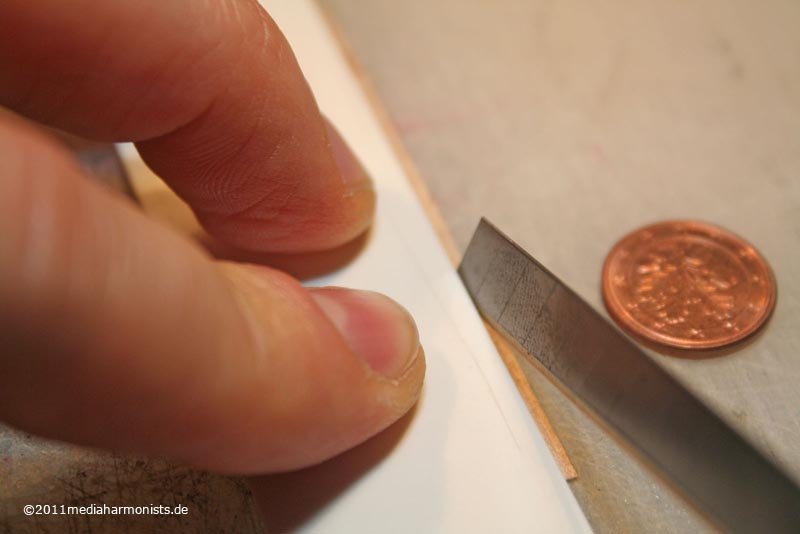 But as the result was still too uneven, I did another template with one fixed stop of 2 mm hight and the second of the same height and squeezed up to three planks upright inside ...
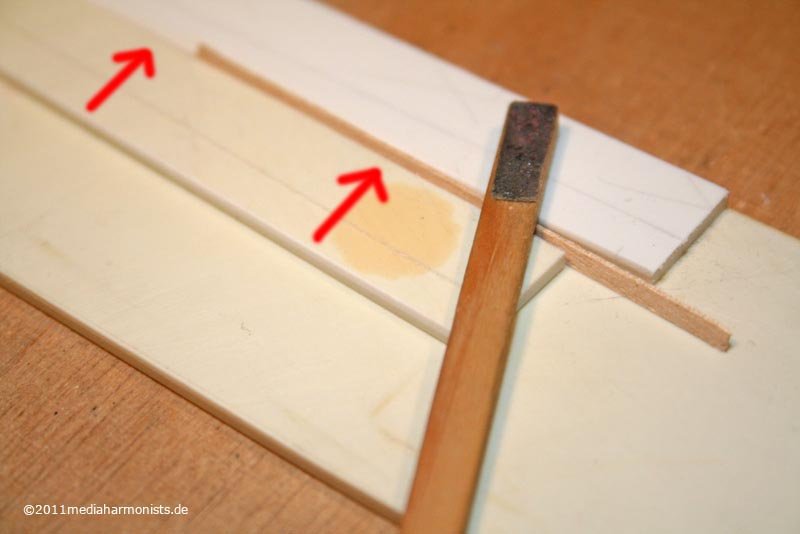 and sanded away the excess widths of the planks ( as I did with the copper plank). So all planks are of equal width :-)And that is the booty ...
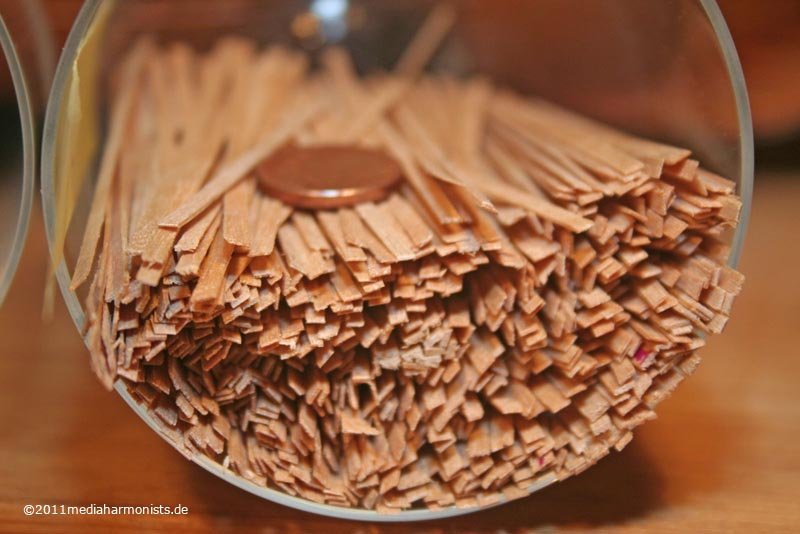 ...as I did nut want to paint all thousands of planks one by one, I glued them ont tape and sprayed them.
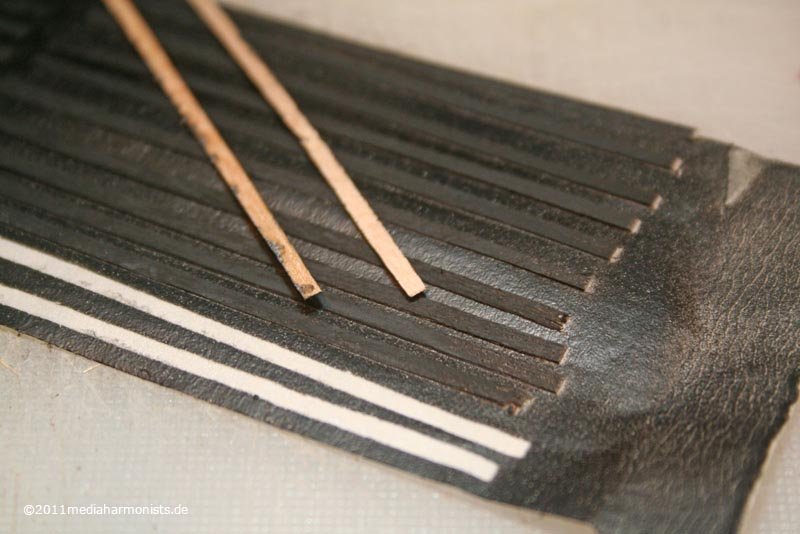 And here is the testing piece (the planks were not yet sanded to equal width before). While cutting I realised a problem: the thickness varied from 0,4 mm to 0,7 mm due to the shelf being a "little bit" torn by age :-(For the test piece I used the thinner ones and immediately sanded through.
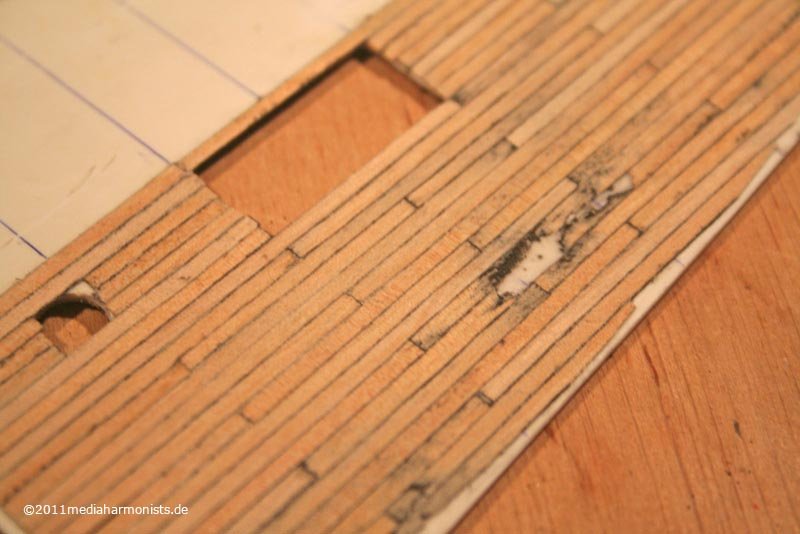 Looks like another after battle picture with fire marks:-)So ok back the slaveryjob, Daniel
 -
And I already prepared something for clearing the damage :-)I pushed the before mentioned shelf into the saw, aiming for 0,5 mm x 20 mm stripes. those were lengthened to 70 mm, and I build a template with a 2 mm - the intended width of my planks - stop on the underneath side ...... put the stripes underneath ...]... took a second sheet from the other side to hold the wood down (the template proved not suitable for cutting as there was not enough material to squeeze down the wood) ...... took the template away ...... and did the cut. And repeat and repeat and repeat - but it went rather quick :-).But as the result was still too uneven, I did another template with one fixed stop of 2 mm hight and the second of the same height and squeezed up to three planks upright inside ... and sanded away the excess widths of the planks ( as I did with the copper plank). So all planks are of equal width :-)And that is the booty ......as I did nut want to paint all thousands of planks one by one, I glued them ont tape and sprayed them.And here is the testing piece (the planks were not yet sanded to equal width before). While cutting I realised a problem: the thickness varied from 0,4 mm to 0,7 mm due to the shelf being a "little bit" torn by age :-(For the test piece I used the thinner ones and immediately sanded through.Looks like another after battle picture with fire marks:-)So ok back the slaveryjob, Daniel
-
What do you want with the axe, James???
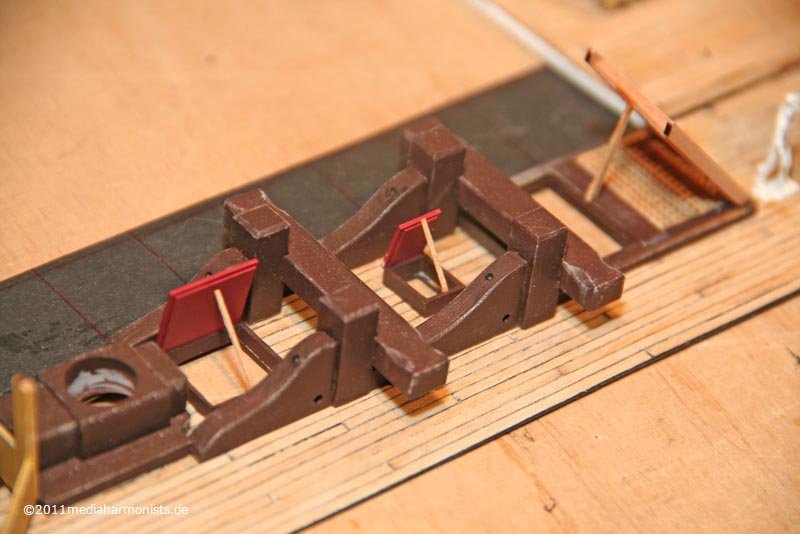
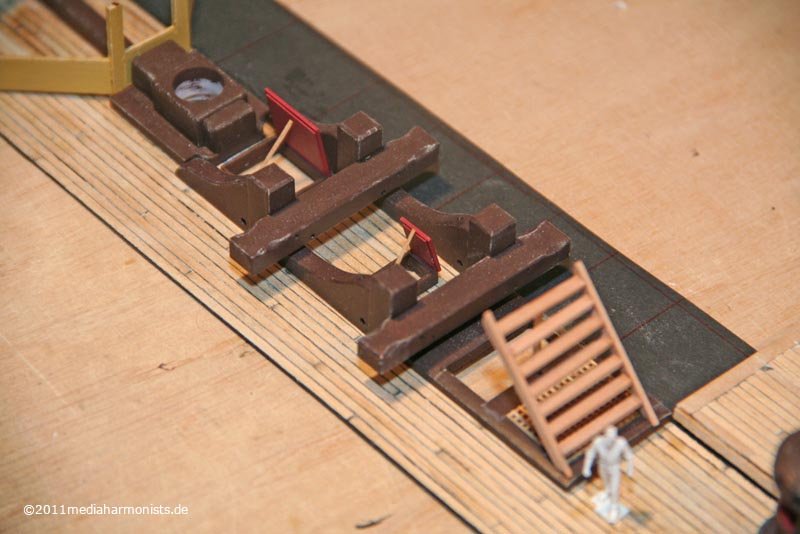
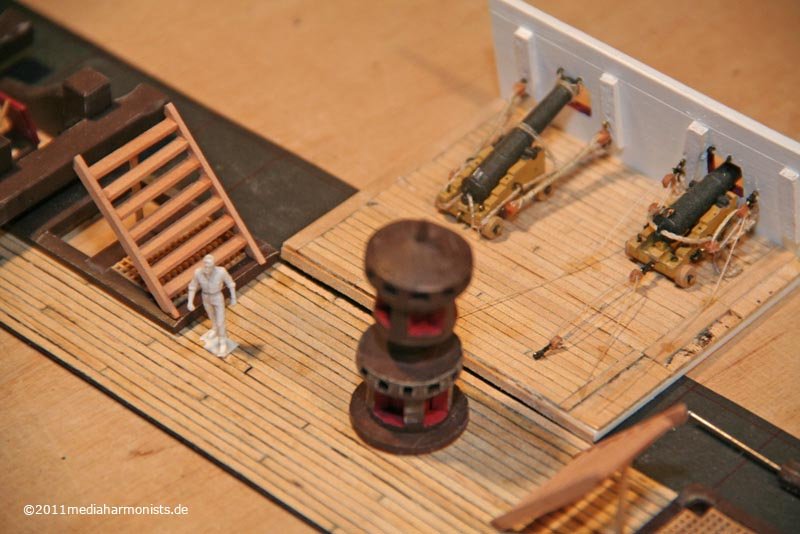
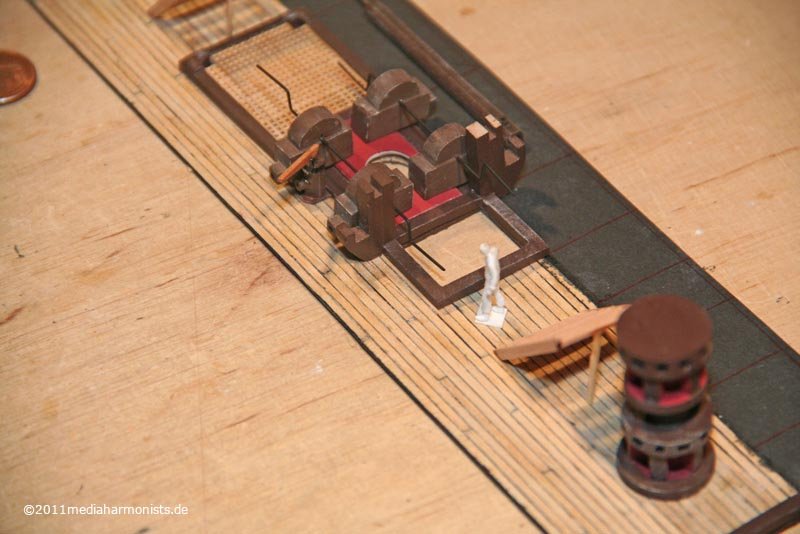
Disclaimer:The following pictures are nothing ror the weak at heart! We will not take over responsibilities from any side effects you possibly may suffer ...Shiver with fear!!!This is the lower gundeck with the riding bits, that are with me now for several years already.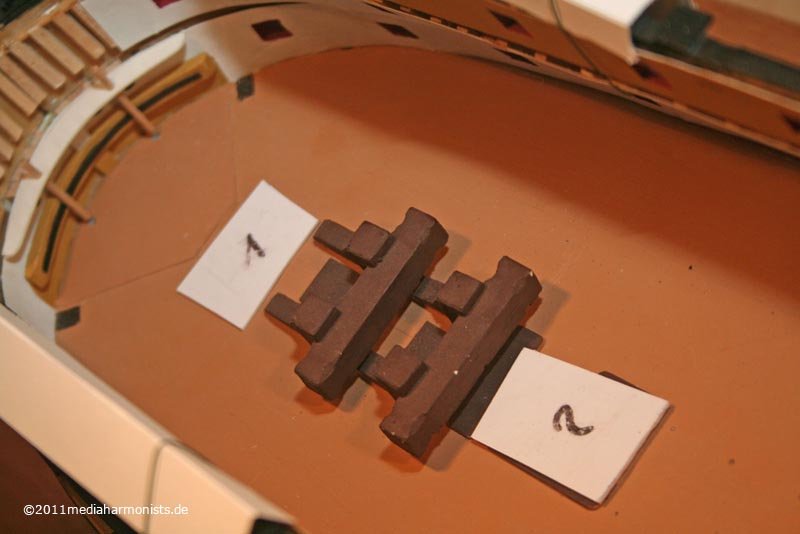 Build as a small detail to create an interesting view through the gunports and shaped roughly out of balsa. As the standard of the model grew, I would like to put a first layer of wooden decks to ecxcercise my technics. For that I do not want to have to plank around obstacles and also to replace the bits by better ones, heavy measures had to be taken ...
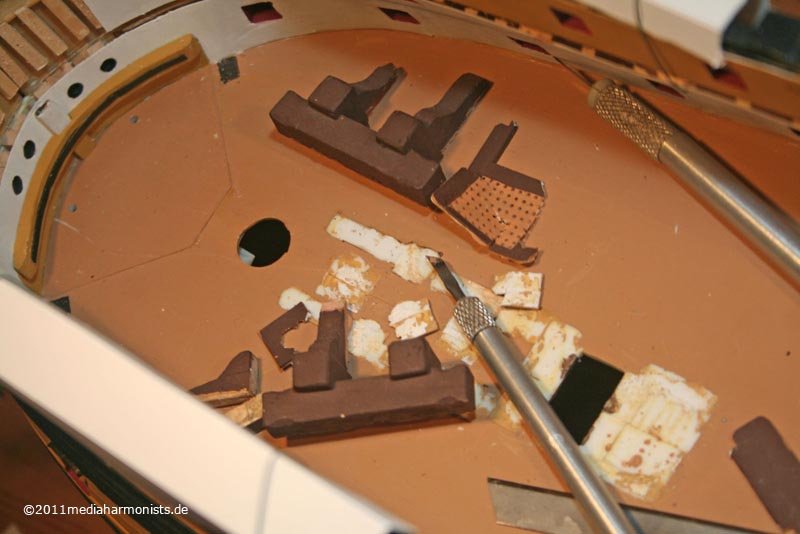 ... therefore got out the heavy tools and realised that the things were well glued onto the deck. So after no blood but loads of sweat and tears the deck was cleaned ...
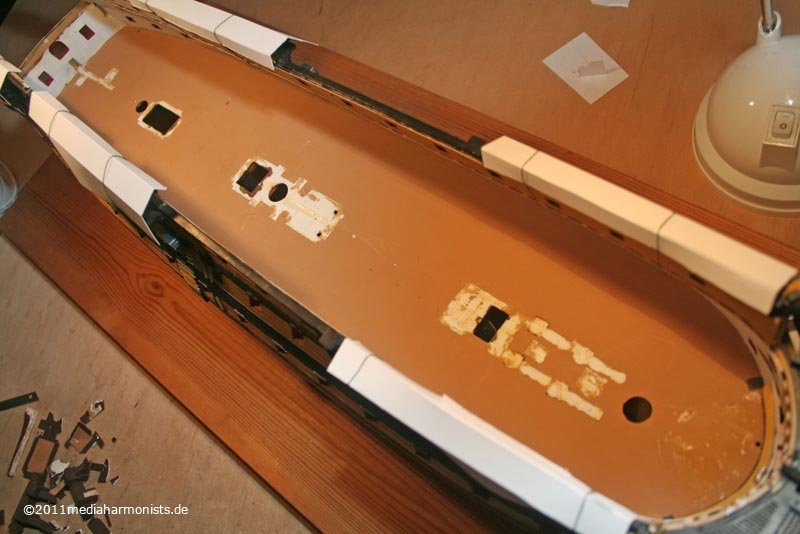 ... and the rubbish big. Real after battle feeling ;-)
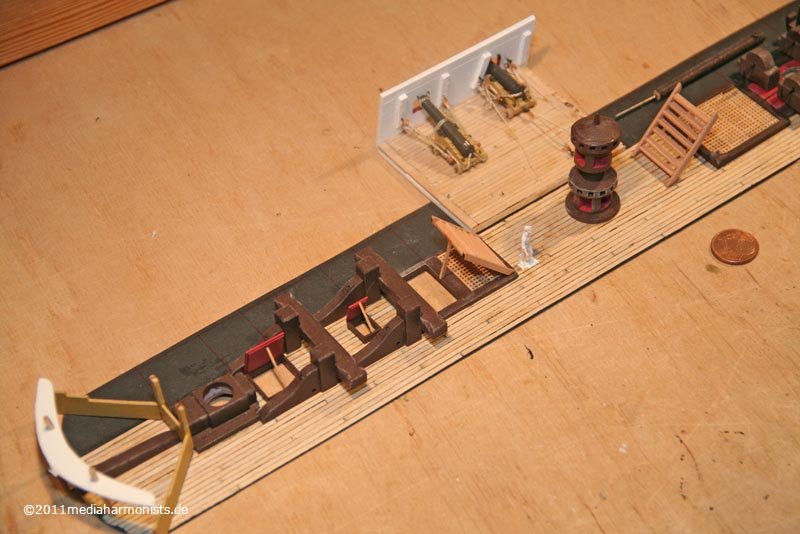
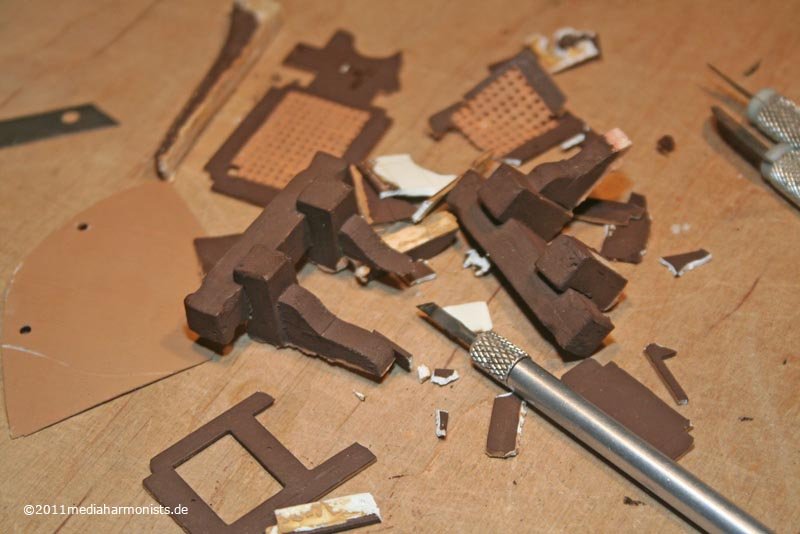 Here the gratings that were taken out: In those days I simulated them by taking a perforated sheet with 1 mm holes as drill template and forced the tip a small recangular file inside ...At least, it did the job in those days :-)
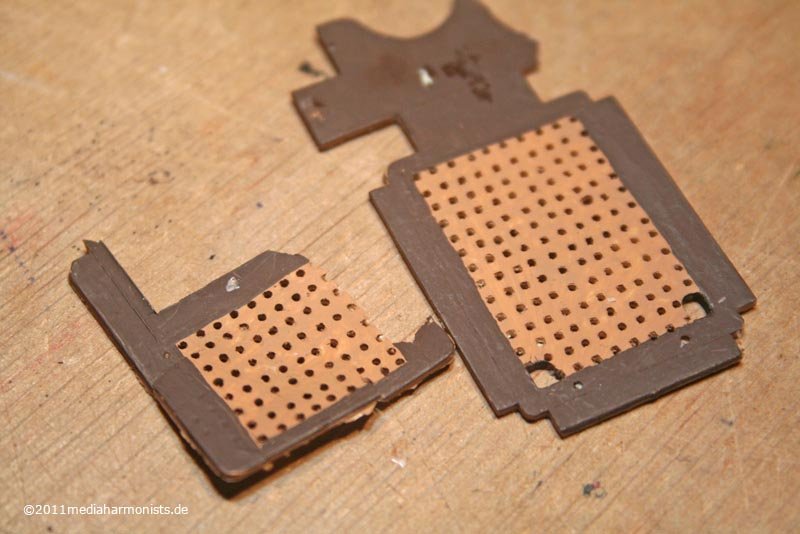 ... ok, I hope, that was not too tough for you???;-)All the best to the brave out there, Daniel
 -
Noted :-)
...hihihihi...
XXXDAn
-
And these are the consequences for my little ship :-)Here the old improved lid, with new fittings , ok looks a little bit scratched by now ...
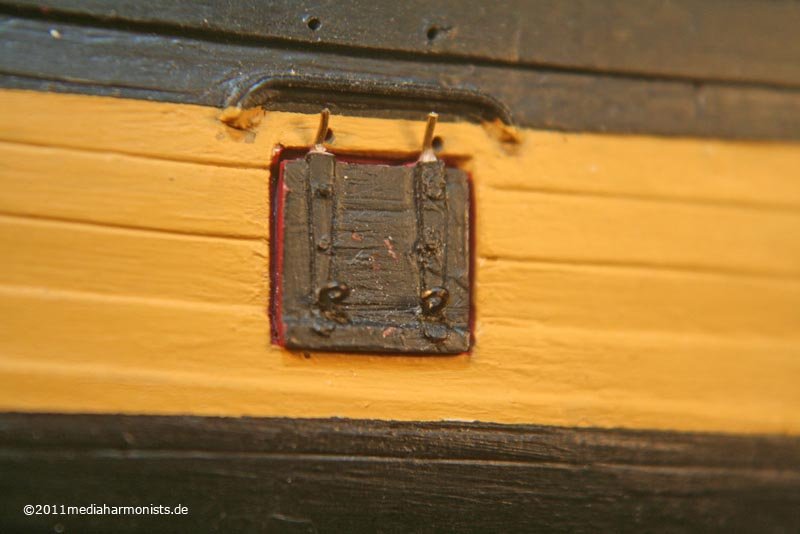 ... with the too wires to fix but still looking a bit thinny.
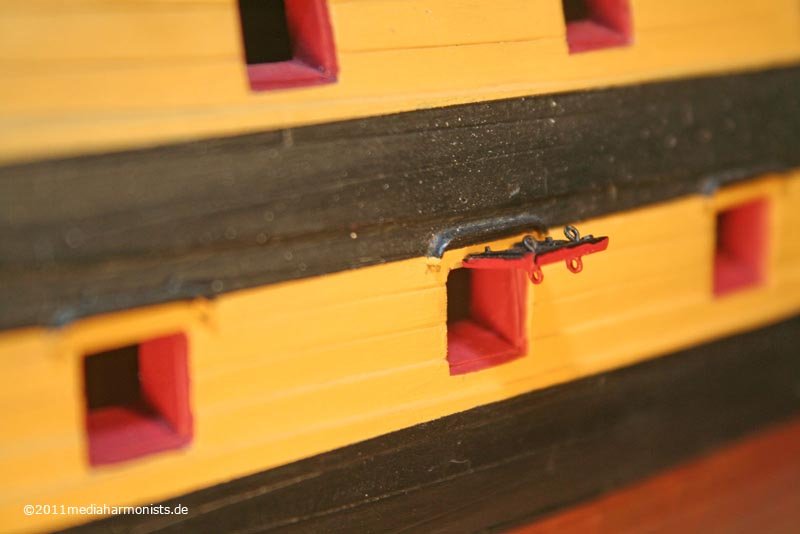 Increased thickness with 0,5 mm sheet ...
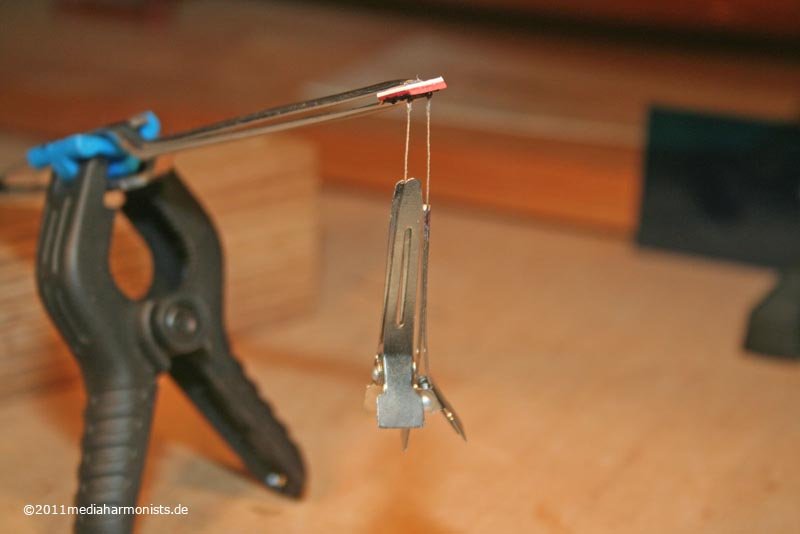 ... the all new lanyards ...
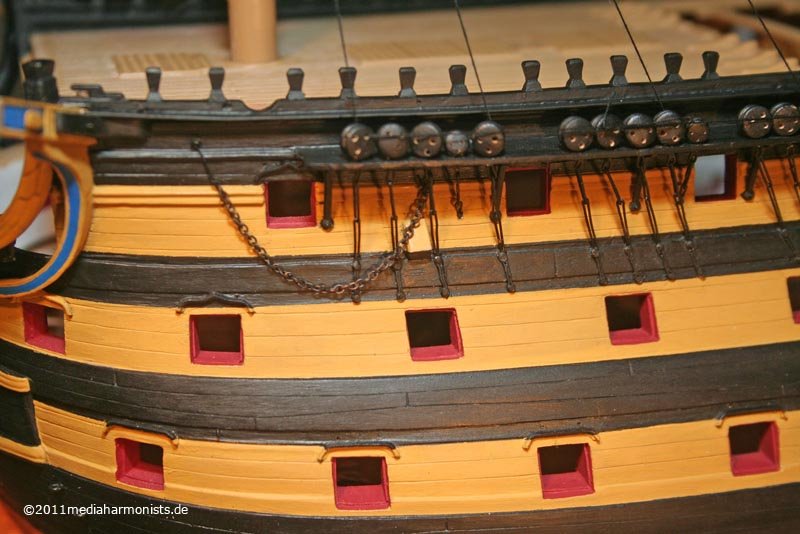
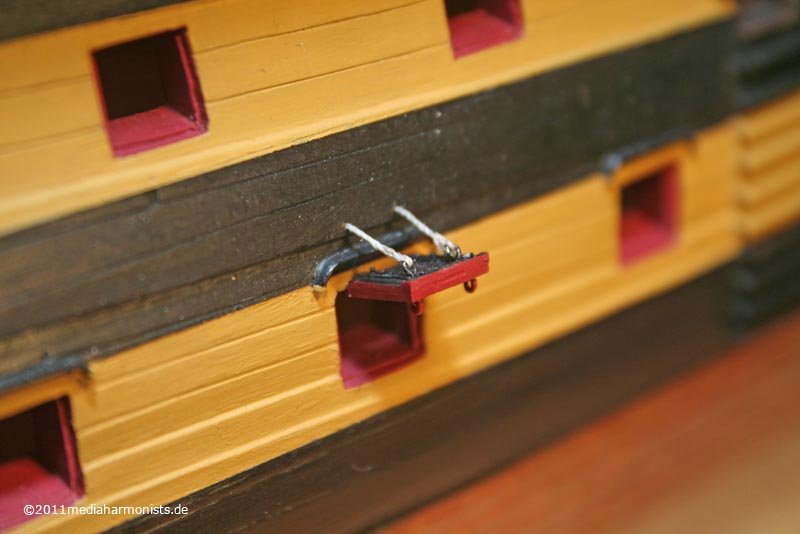 ... and much closer to what I want :-)Using 0,5 mm sheet I can show the decreasing thickness nicely by using 0,25 mm for the second gundeck and by leaving the upper lids "à la nature"Small detail, the two lower gundecks have two tackles on the outside and two rings on the inside, the upper gundeck lids have two tackles but just one ring on th inside, and the lids underneath the poop have just one tackle and one ring :-)And now: Beat to Quarters!
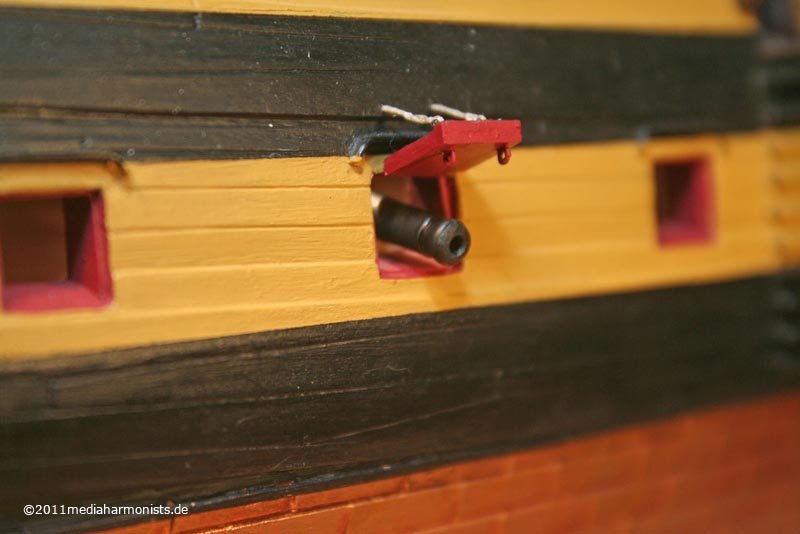 Not as much protruding as often seen ...
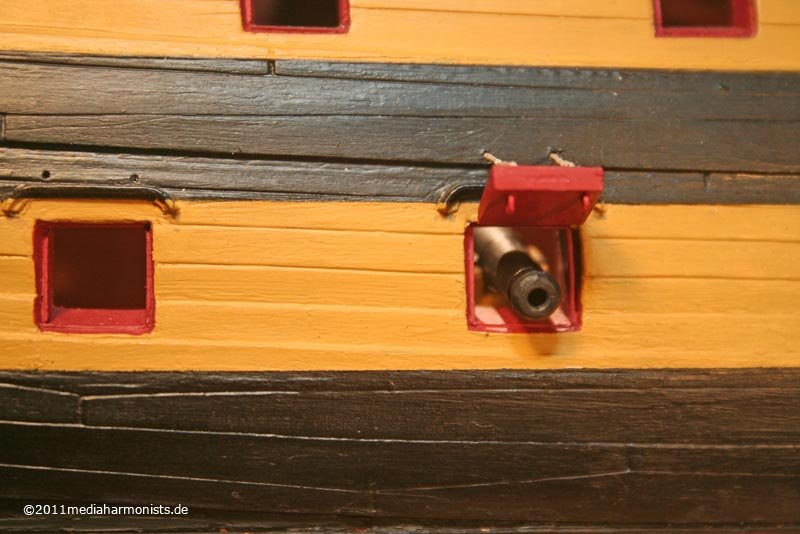 ... and if one sees this view better look for cover!
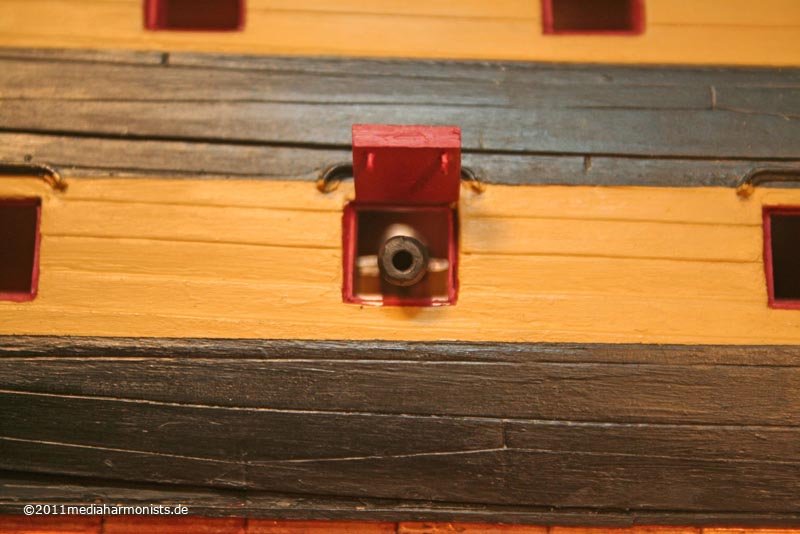 For me even more interesting: what can be seen of the fastened guns???
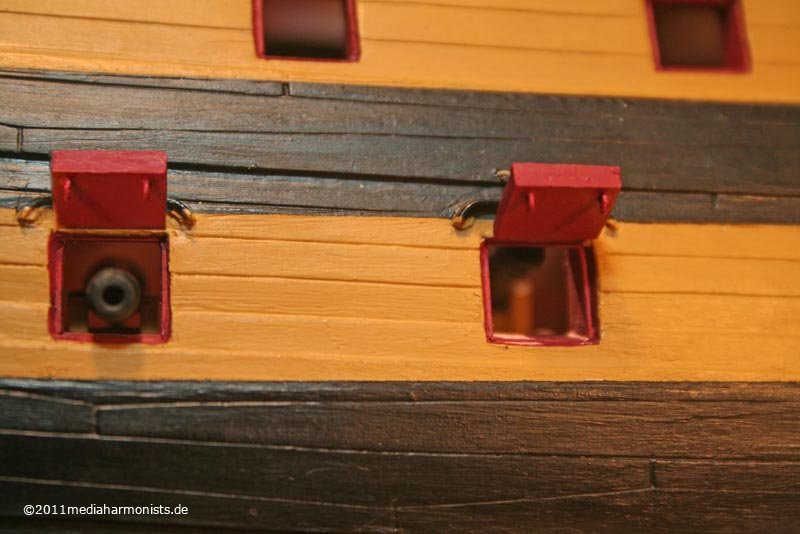 And one can look inside even better than with the guns run out :-)
 "As an ϋber detailer I am wondering if you intend to represent the leather sleeves thro' which the port topping lifts run"Hallo B.E., I think I will do a simple solution for this: just a little bit of white glue and black paint :-)
 You mention leather, I thought these were lead pipes, or are you talking of something different?All the best, Daniel
And to finish just a sum up ...
 Mast, Stern, upper deck, beakhead bulkhead and the small bit of deck are just dryfit ...
 ... this is where the ship starts ...
 ... and here it ends :-)Lieber Gruß, Daniel
 -
And now to something completely different:Halleluja, praise the heavens!Why? Because also small things can make me happy :-)Looking back: A year ago I was already working on the improved gunport lids but had a grandious failure on the gunport tackles:Looks like a ball of hair straight out of the shower plughole :-(
 These days I broused through Gil Middletons wonderful Jotika-Victory and dicovered the splicing that he presents there:We proudly present: The Powersplice
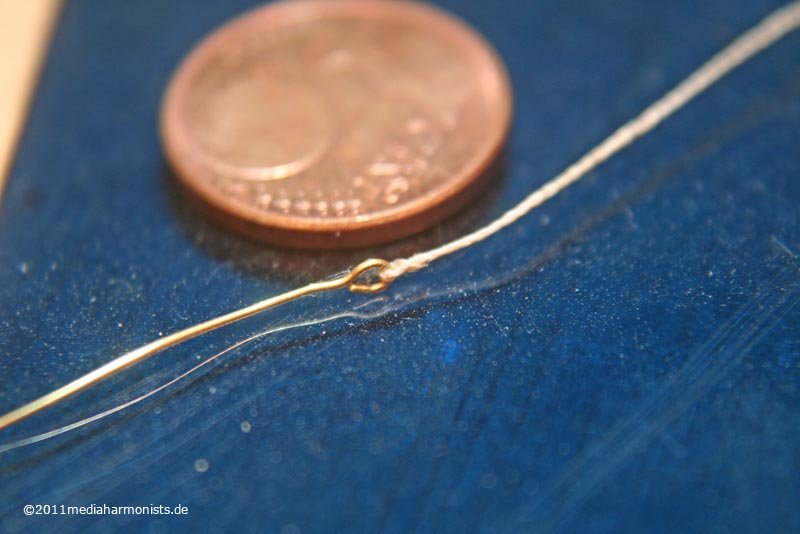 It is simple but effective:Thread - here 0,3 mm - through the ring, neadle through the thread, it is more easy than it looks ...
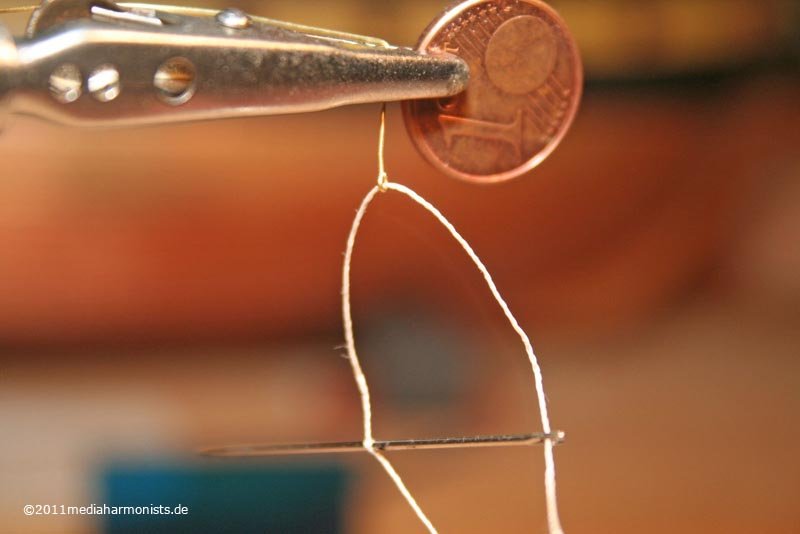 ... make tight, secure with a drop of glue ...
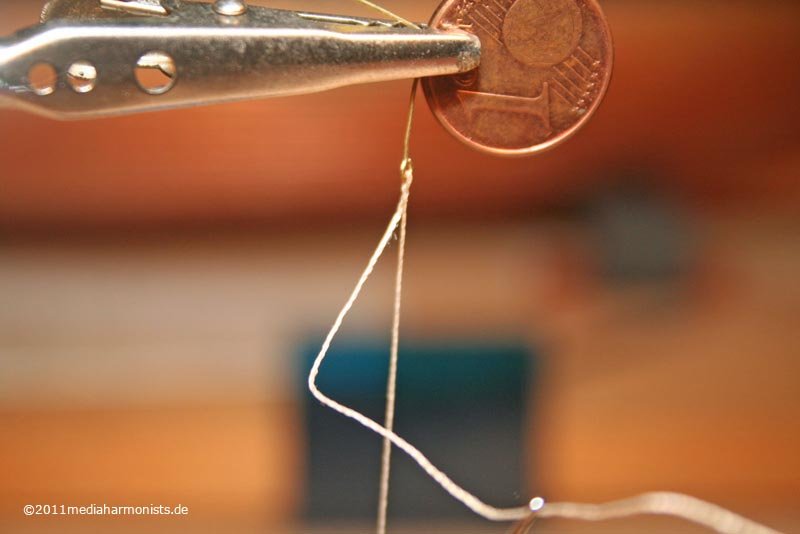 ... and once more through it with feeling ...
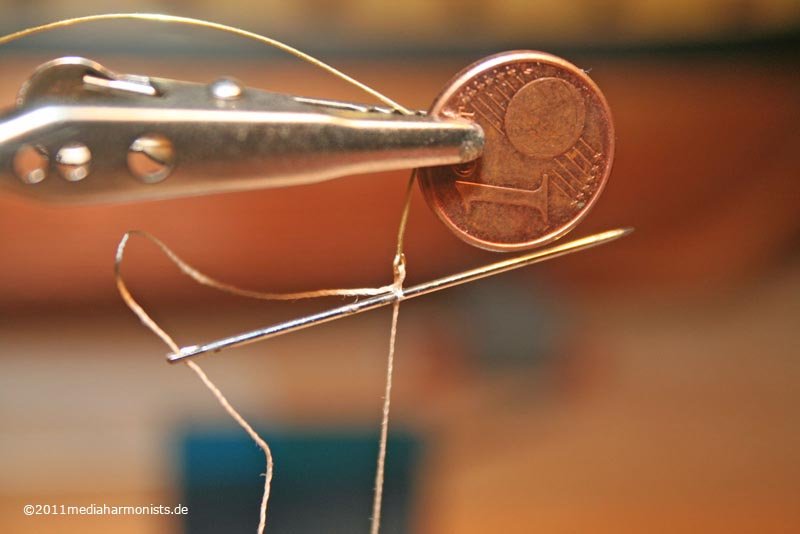 ... pull thight and ...
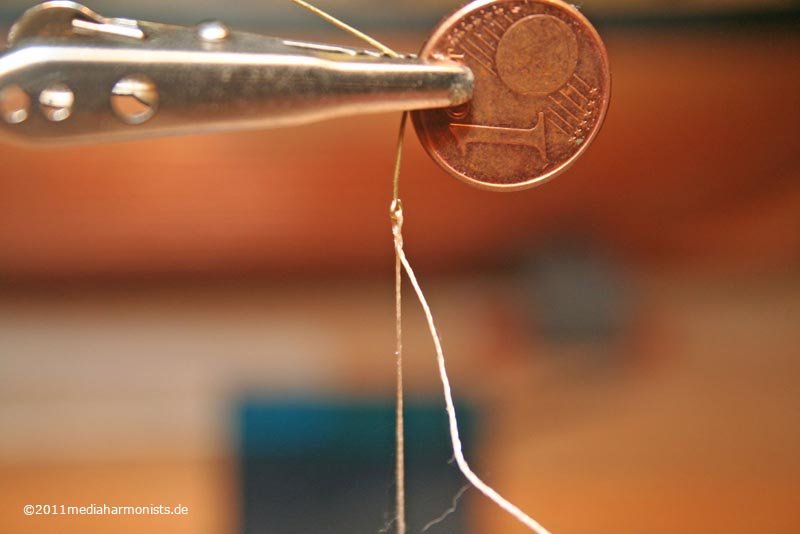 here we are!
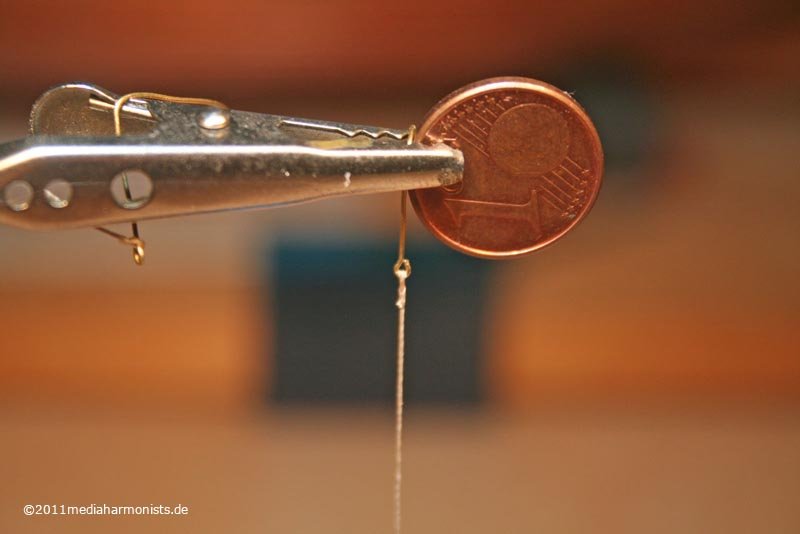 Great, isn´t it???All the best from a happy Daniel with thanks to Gil!
 -
:-) :-) :-)
Luv it!
XXXDAn
-
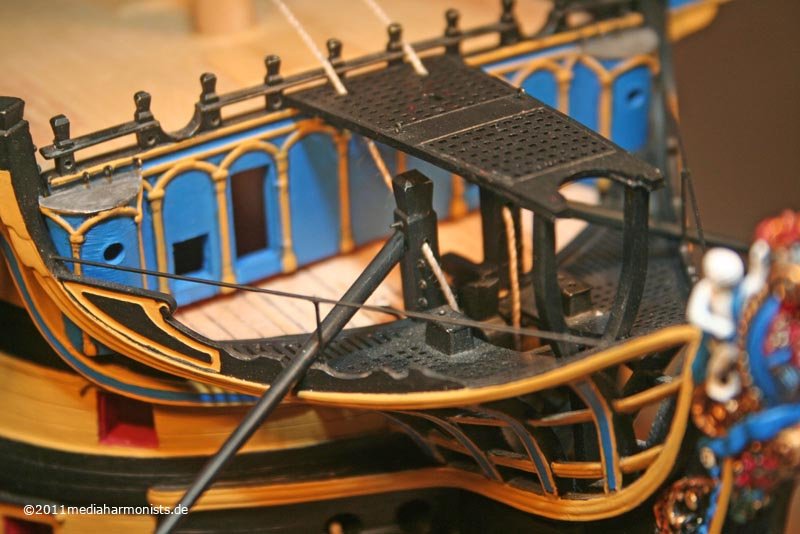
And here is the short lived mariners walk V2 with the not used openings already closed ...
 ... and the heads on place ...
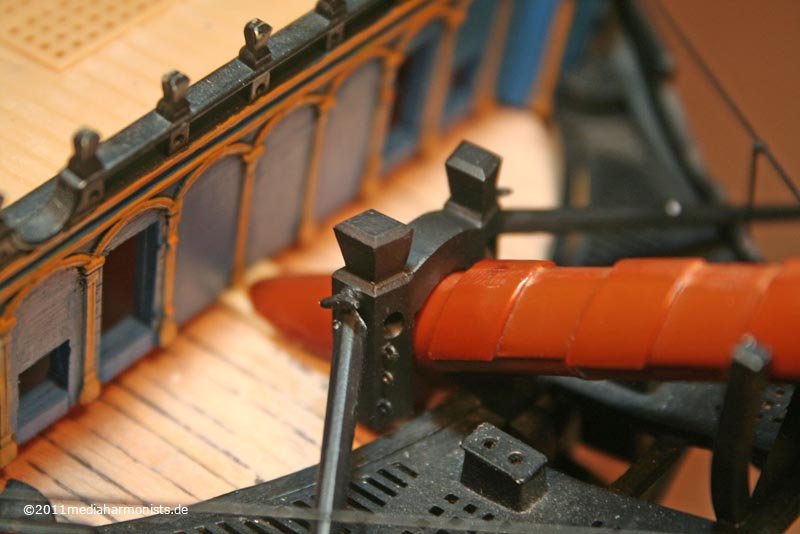 ... and then the shock: The new holes do not fit :-(Especially the main preventer stay just needs one hole! Great, good research dafi ...
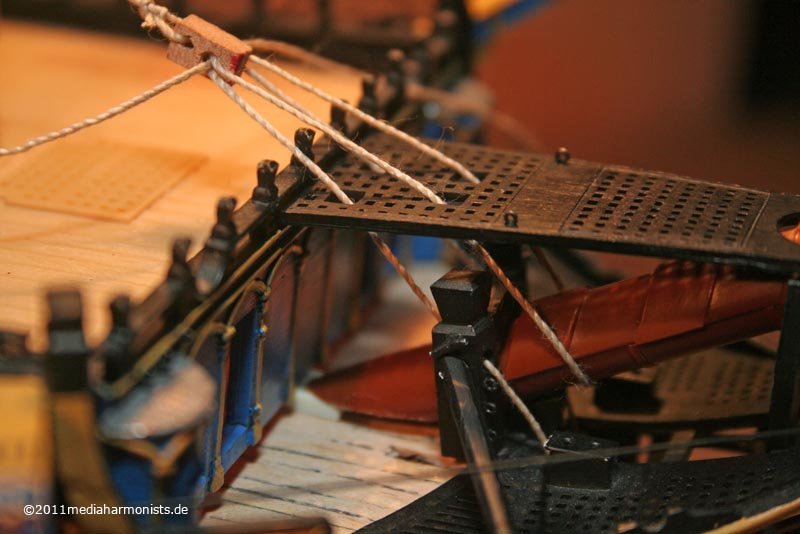 ... fitting the holes better and luckily the old cut-outs were still present ...
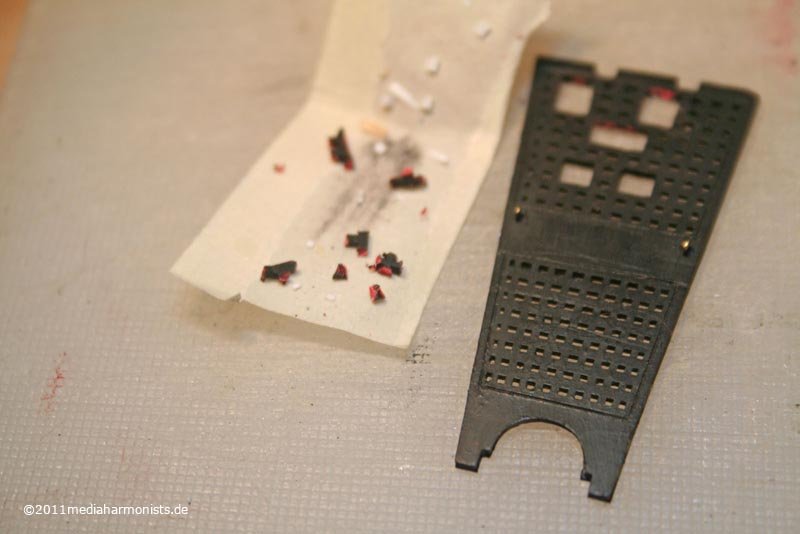 ... being retrofitted, cleaned ...
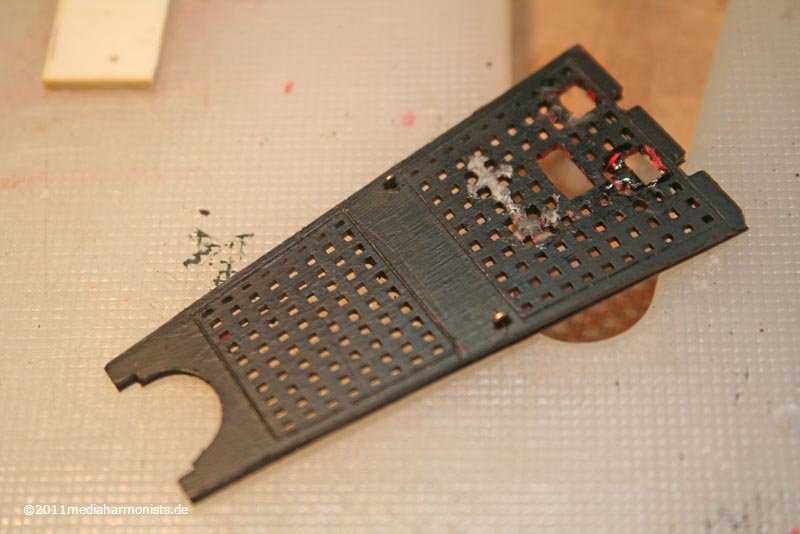 ... and we proudly present mariners walk V3 !
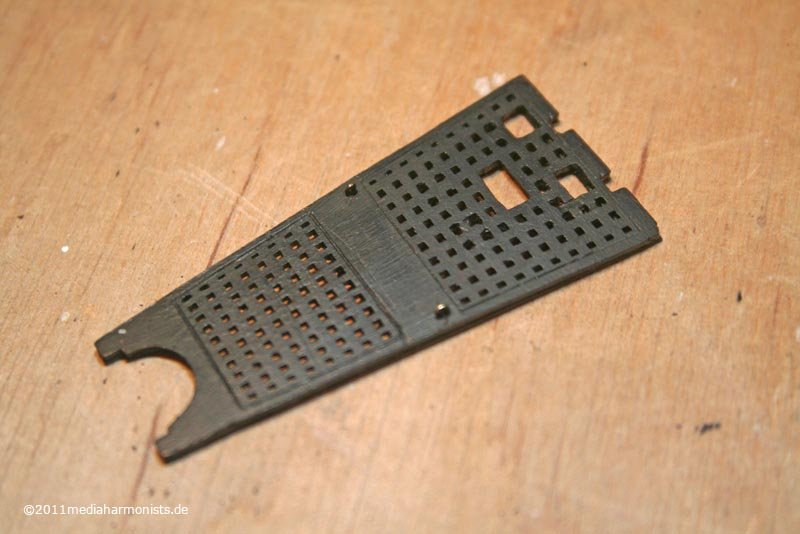 Putting back the stays ...
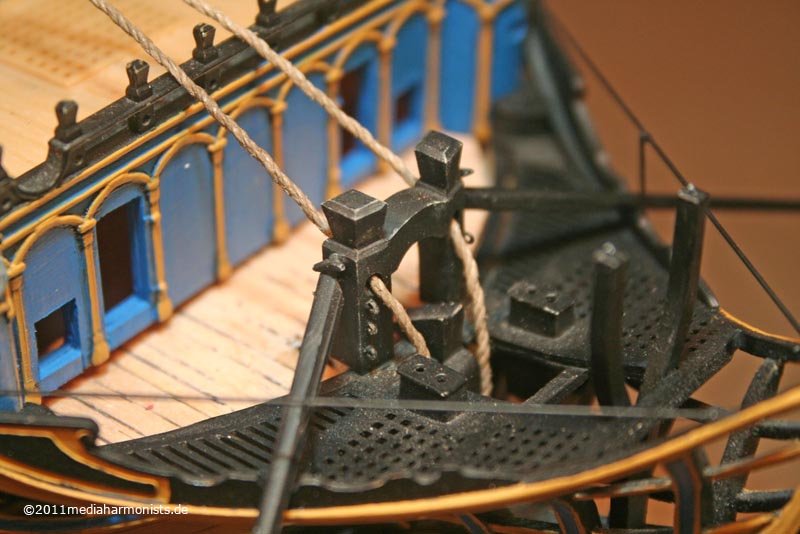 ... brushed some highlights onto the knightheads ...
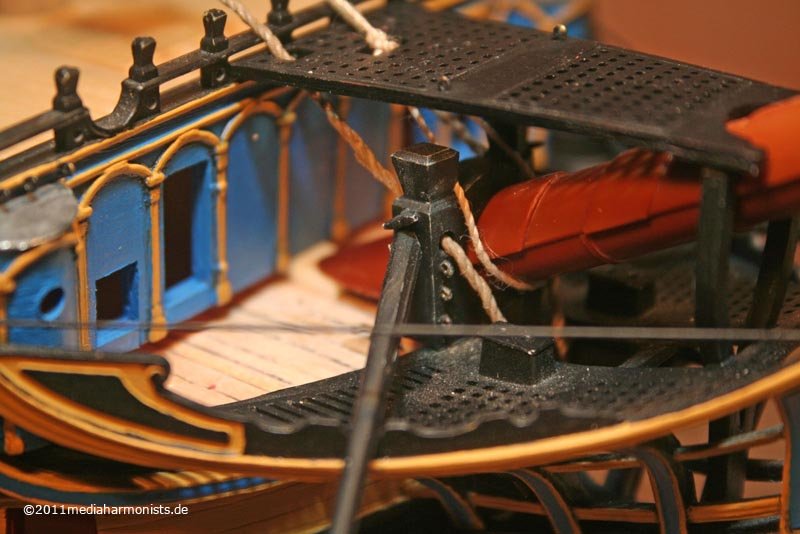 ... and finally the stays fit :-)All the best, Daniel
 -
Thanks gentlemen for your nice comments, very much appreciated!A little bit I kept working lately - just to avoid the 100 big guns - and I found something to keep me distracted ;-)Luckily I found here the remark concerning the openings of the mariners walk. So stuck the parts together including mariners walk V1 ...
 ... and took the chance to tryfix the knightheads, fitting them with the ringbolts, putting the mock up stays and really - it does not fit ;-)
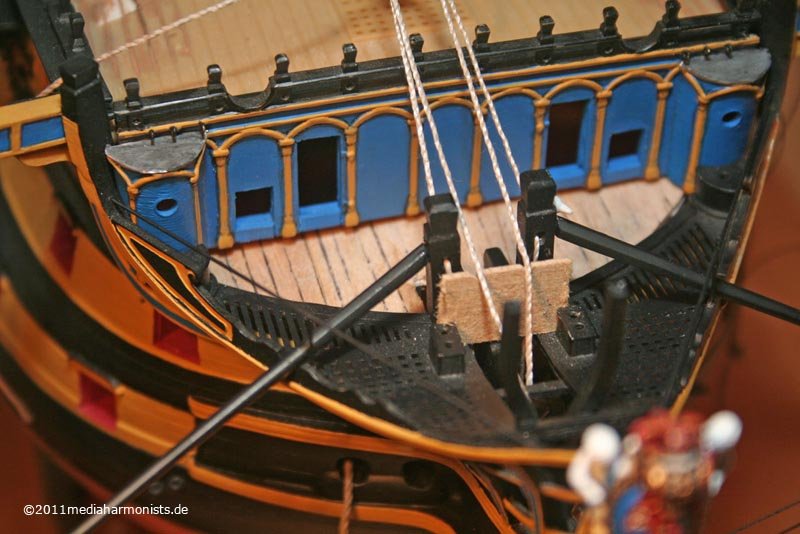 Fitting the stays the proper way on the starboardside, and also fitted the clamps for the knightheads :-)To build these small things it is good to put them on the stick, this one also serves to fix it properly afterwards.
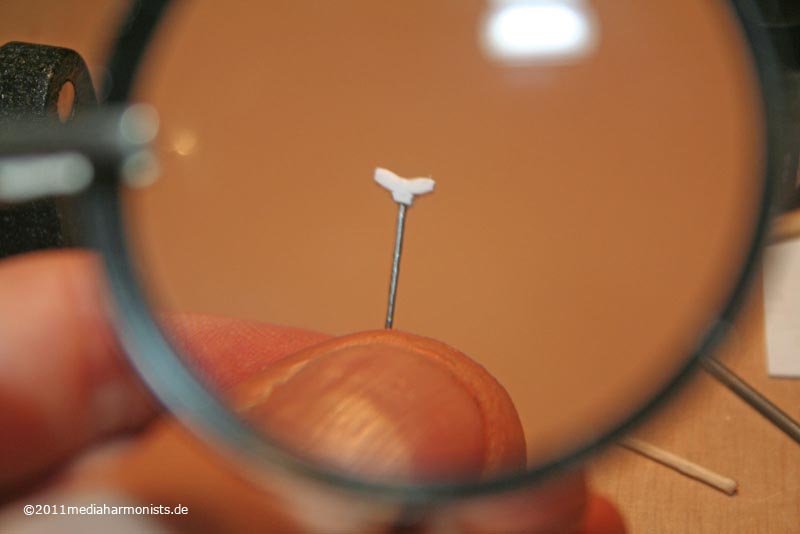 The knightheads completely fitted, the new stays fitted and also mariners walk V2.
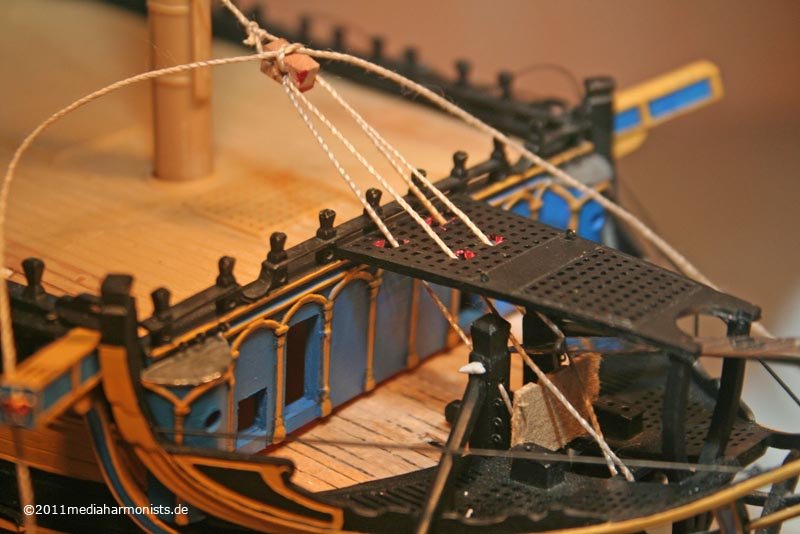 Then I realised the knightheads have square a section. As the sides are parallel to the bowsprite and front and back follow the curve of the hull, the section should be a rhombus.So the knightheads were taken out again, bolts and clamps were amputated and the timbers prepared for reshaping.
 Then I realised the plastic is difficult to work on, and the result would be too thin, so I took a decent piece of Ureol ...... scaled it to 4 on 5 mm sideslengh ...
 ... drilled first with 0,5 mm ...
 ... and enlarged the hole to 2 mm. As the parts are rather small I did not want to take the machines, used tape to mark the line and came with the big file ...
 ... and the sanding paper ...
 ... fitted a bridge and ready it was :-)
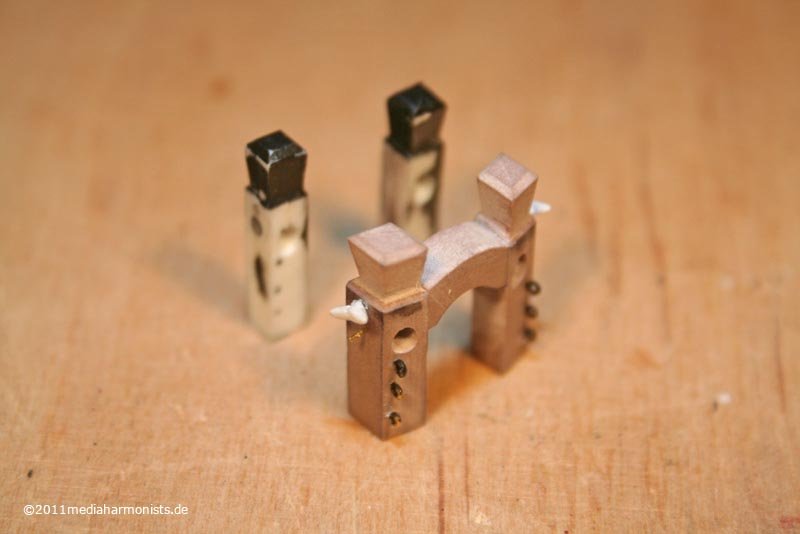 And two more plastic parts for the spare box ;-)
 -
As Rob the Rasper would say, I am just trying to avoid the 100 guns waiting for me around the corner, I found some more itzy-bitzy-tingies to still push the other task a little bit furtherThere I found the MASSIVE lugs of the side davits and the D-block - for the crossjack lifts - much too small to drill a decent hole; That is most possably why heller suggests to fix the lifts in the mizzen top ;-)
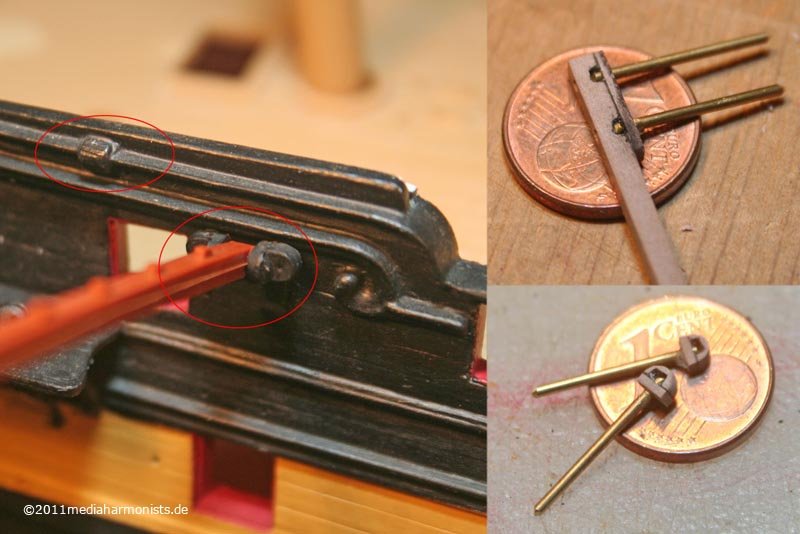 Made a new block, on a handle to be able to hold it properly, and made new lugs out of sheet ...
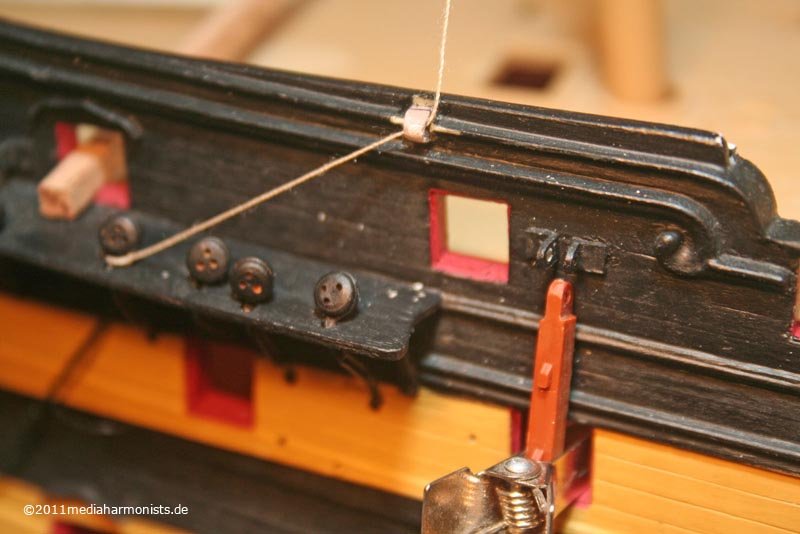 ... and as usual, the rest of the untidyness is coverd up with black ;-)
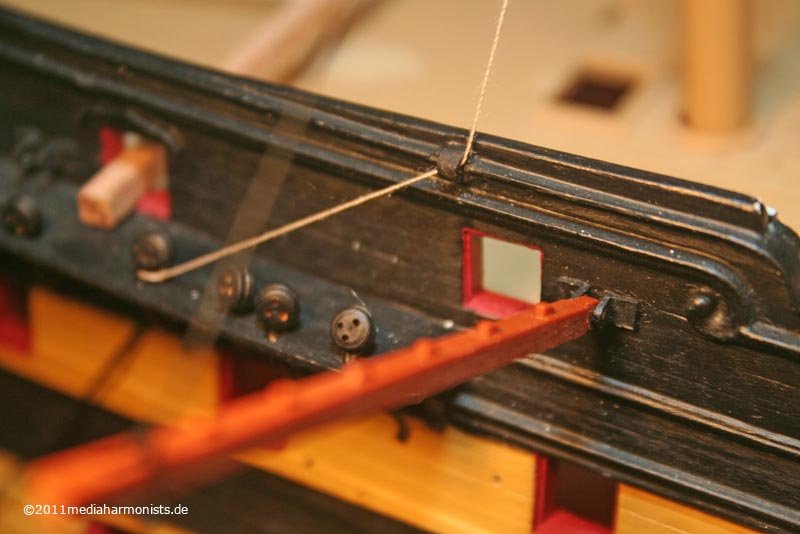 And now my question is: Where and how are those lifts being fixed? On the lanyards? A ring on the channel? A ring on the hull?Amicalement, Daniel
 -
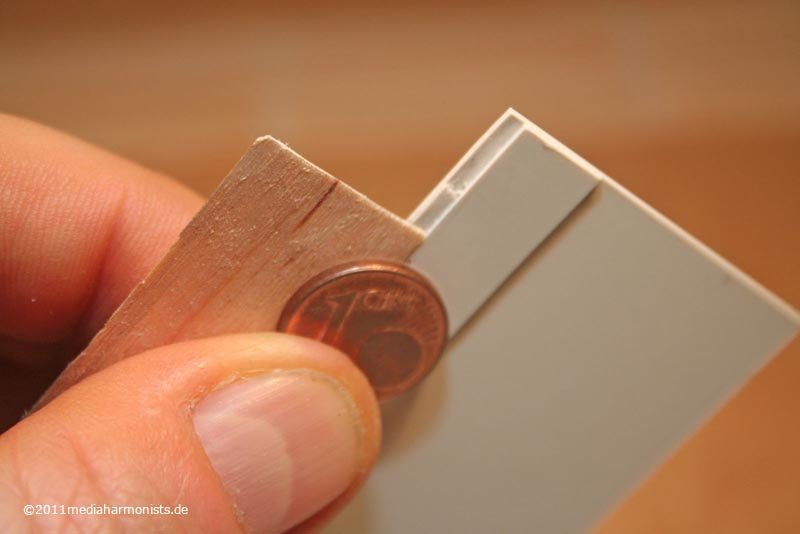
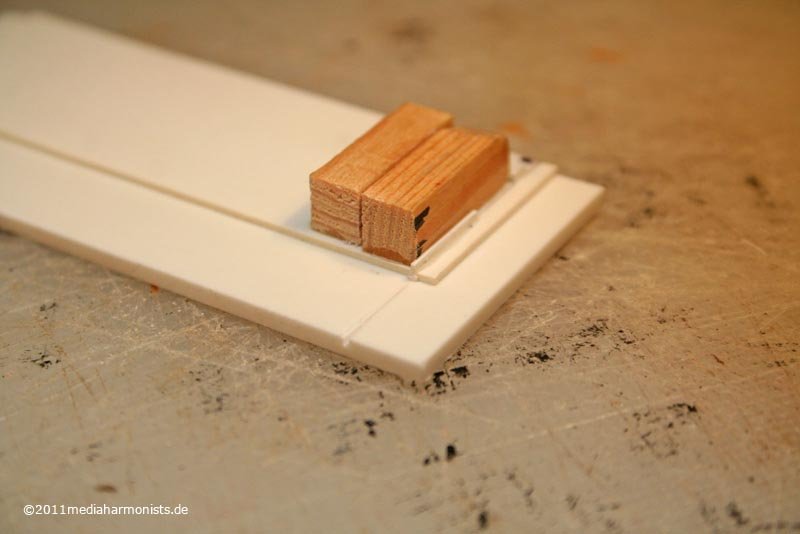
On a model in a german forum I saw the copper held on the top by a thin wooden strip. Once discovered, it can be found on all ships still bearing their copper hulls, nicely to be seen on the HMS Triconmalee.I was preparing this for a while as not to damage the copper. Trials with Polysterol did not work as it was difficult to cut and to flimpsy to glue. Trying wood on the circular saw did give just rubbish as the little thing was meant to be only 0,3 mm thick and 1 mm high - and about 50 cm long.And the result from the last show said: Trust your hands :-)So I found 0,4 mm wooden strips from the trials for the planking that was long enough, glued it onto the cutting board - with help of the cutting ruler - for that nothing can move ...
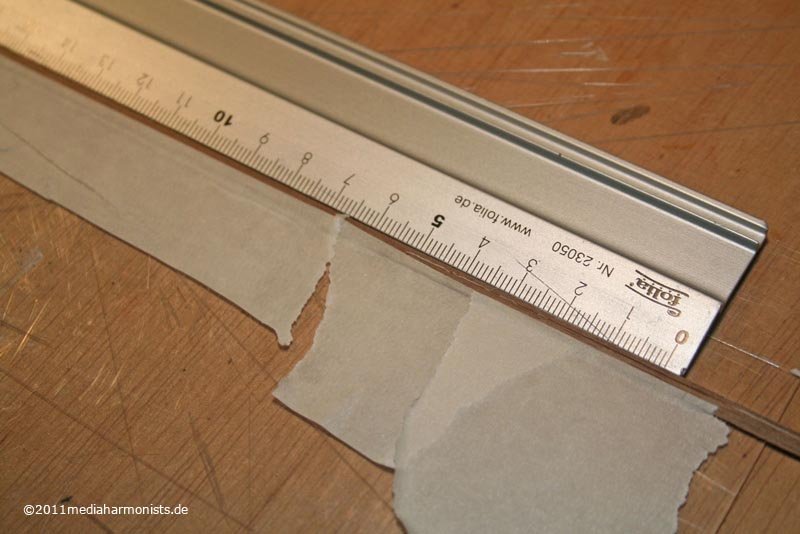 ... and cut with a razor blade. Even though it resulted in different hights ...... so I built a template with a guide 1 mm high, a movable guide in the front 1 mm high to hold, putting the strip vertically in and sand everythig away that sticks out. Gives a very even hight and very even apparence :-)
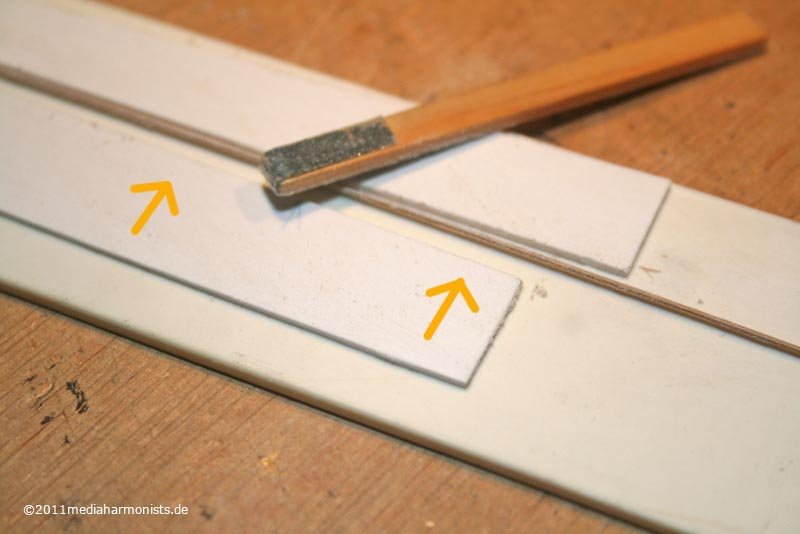 Glued it on immediately which worked fine ...
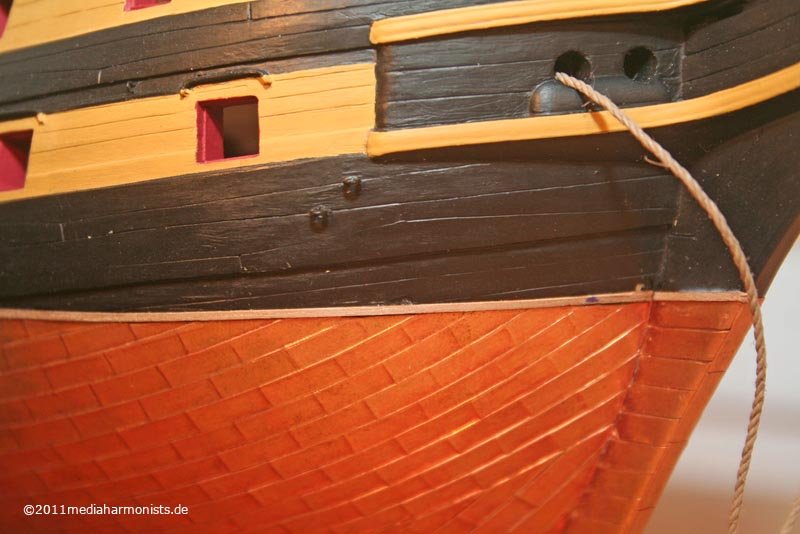 ... at least at the bows. Aft it - have a look yourselves ...
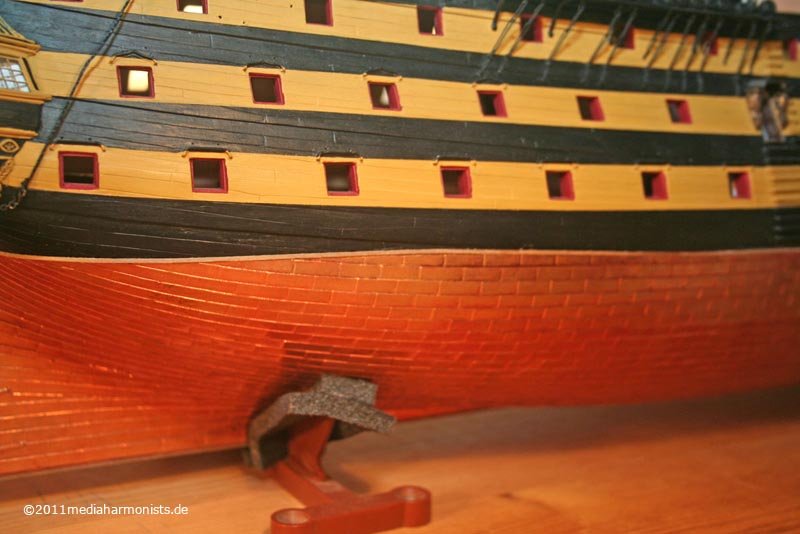 ... this Heller lump always existed, but now it sreamed HERE I AM, so I had to do something - as usual with me ...
 ... looked for the right trace with some tape, difference almost 3 mm (!) ...
 ... striped the strip down , cutting down the copper plates that stood over the stripline and glued the strip back on, this time straight :-)And as it was so much fun, I solved the same ...
 ... Heller-bug at the bows too - luckily only 1 mm this time, ...
 ... lifted the strip with a blade and repositioned :-)And now there is a nice finish to the top border of the copper.
 Have fun, Daniel
 -
What a difference in box-sizes :-)
Compared to mine yours is three times as big!!!
Nice to have you and your great build back too, Daniel
-
Most important messages fast set ...
 ... there she sails, the proud frigate, only the storm jib set, driven by the devastating energy of the elements, riding the crests, her flag beaming with pride, being pushed by her crew to the limit, always facing abyss and downfall!
 The crew is fighting the elements, the earth is splashing high, each hand movement is set with precision. With concision our master guides this pride of the austrian mountain marine towards new shores ...
 ... my Heart will go ooooo-o-ho-o-n ...
 ... and the crew becomes one.
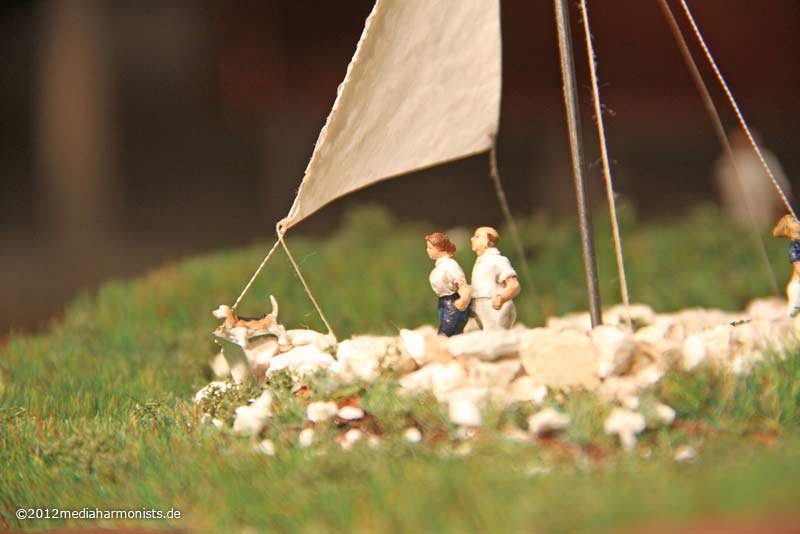 But what is this? The pilot missed the ship? Still stands on the far off shore? This in these extremely difficult waterways? Hastily the crew puts up the blue and yellow flag ...
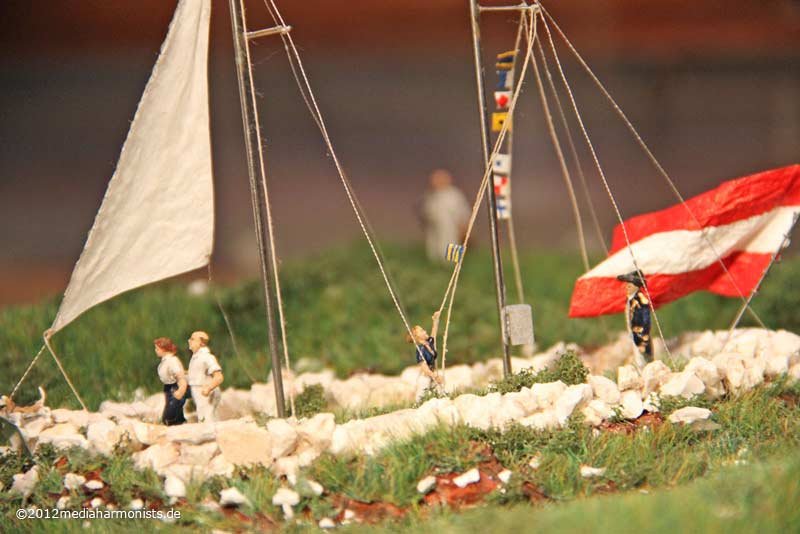 ... but he? He stays calm ...
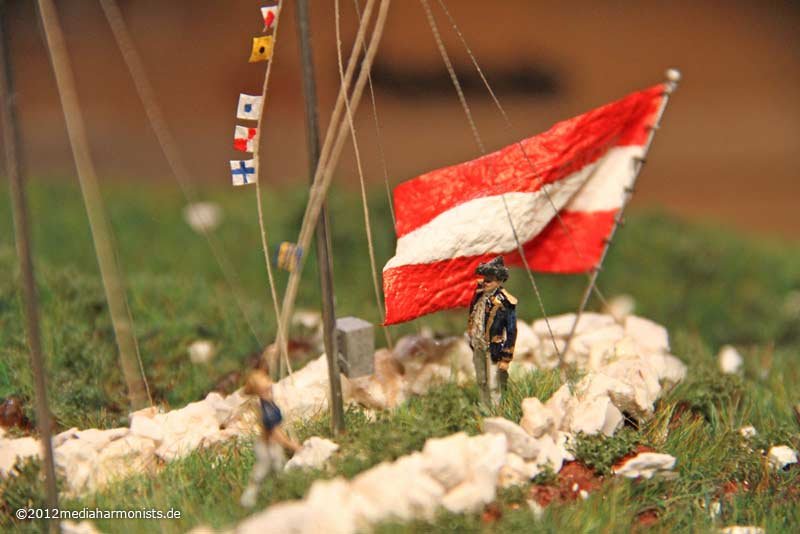 ... he knows that he is best equipped ...
 ... and so he keeps sailing towards Victory :-)
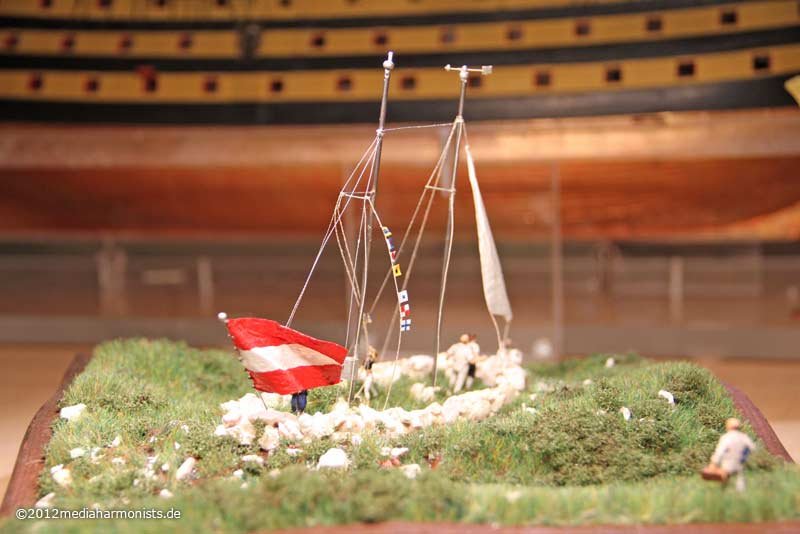 Epilogue:Sometimes later, I was taken out of that wonderful dream, being sent downhill again. But this moment, I took it with me ☺Liebe Grüße, DanielThe complete story to be found in german:
- NAZGÛL, Martin W, CaptainSteve and 10 others
-
13
-
SMS TrinksteinNot too long ago, I was visiting my moms family in the austrian Alps near Vienna. Then trekking a bit the mountains, I found her, in 1850 meters altitude, well hidden in the secret austrian dockyards, the SMS Trinkstein, the proud flagship of the Austrian Mountain Navy 🙂
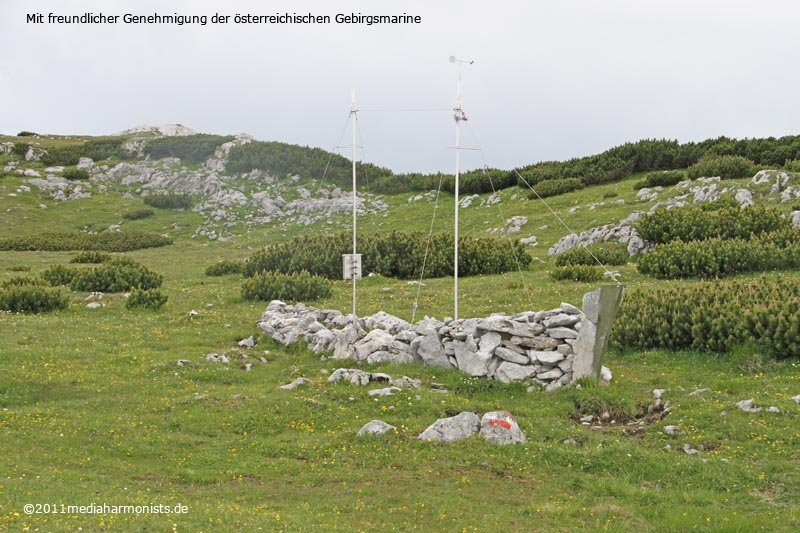
 The sharp lined heavy metal bow and the magnificent curves, build out of the finest local materials that made her as strong and imperturbably as possibly, made my immediately cry of happiness.Later on, in the mountain hotel, after some touristic Germknödel (yeast dough dumpling with a mix of poppy seeds and sugar, filled with spicy plum jam and melted butter on top), some Jagertee (mixing overproof rum with black tea. It is served warm and is typically consumed during winter), some Schnaps (translation unnecessary) and some more Jagertee my mind started drifting away ...... and I saw her, the SMS Trinkstein ploughing with 11 to 12 knots through the transhumance of the Rax-Schneeberg-Plateaus, battering the elements into submission.And I recognised the SMS Trinkstein as a two masted flush deck frigate, a ship of the late Stonehenge-class, introducing the cruiser stern much earlier than any other nation. In many respects these classes were unique in many respects, but it is difficult to gather information due to the secret bases they operate from.Length over all stones is about 7,635 fathom, extreme width about 6,7 ell. The crew usually were some.And my inner eye saw the building up of the mountain waves, the storm-battered ground, cut by the sharp lined heavy metal bow ...
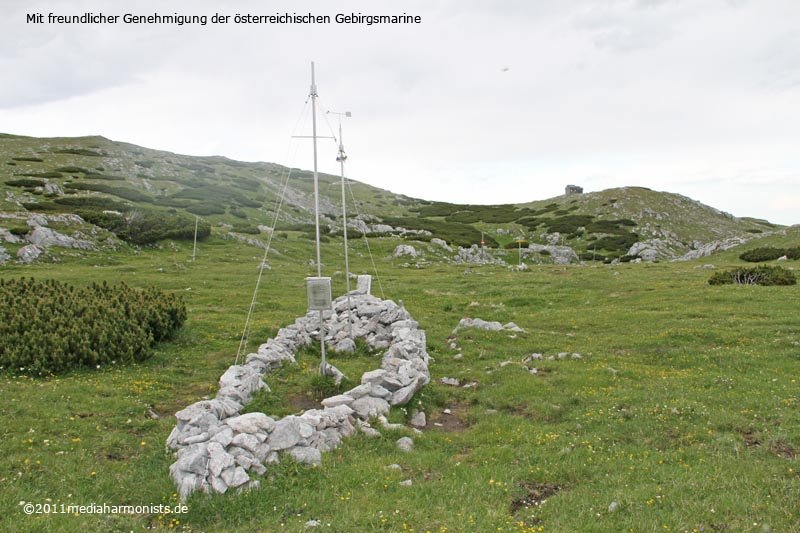
 ... and the massive stone breast hooks, giving the needed strength to the stempost ...
 ... down to the enormous kelsons needed for the ultimate stable installation of the masts
 Also I saw emerging the great bow wave, being pushed forward by the vast brutal strength of the bow though the untouched earth leaving battered earth and scattered stones all over behind. Yes I was able to hear and feel that.The ships mascot was arriving soon ...
 ... as was the rest of fresh pressed crew with their cute blue and white dress uniforms.
 And there he came, with proudly shown chest, our flamboyant master and commander, receiving his hat and uniform ...
 ... and being the proud conquerer of earth, wind and daisies, master of the elements 🙂
- CaptainSteve, ulrich, Omega1234 and 3 others
-
6
-
Act 3Happy EndAnd here they are, our happy actors ...
 ... from the inside ...
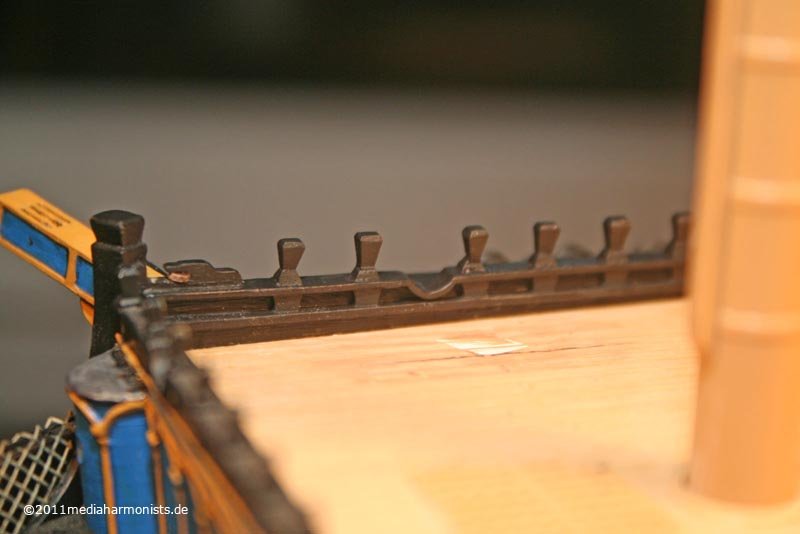 ... and with a mockup crane.
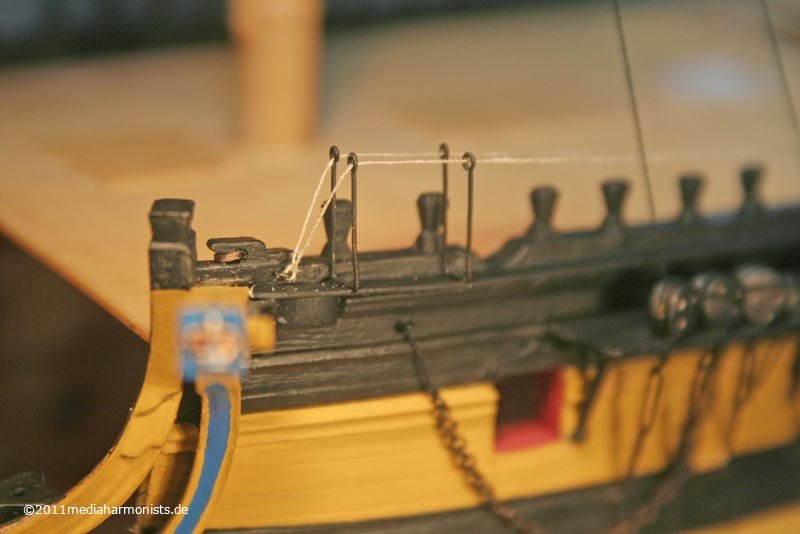 Huuuuooorrrrrraaaaaaayyyyyy!
- Doreltomin, Blue Ensign, zeptraderUK and 1 other
-
4
-
... Gong ...... Gong-Gong ...... Gong-Gong-Gong ...Act 2:Airheaded timberheadsAs metioned before all machine trials went to the rubbish ...So let me tell you one thing - trust your own hands! There is more satisfaction in their work than you might think:-)As preparation I built a small jig ...
 ... longitudinal guidance on the bottom, 0,3 mm sheet for the distance holder protruding over the guidance and two bits in the right distance - 5 mm - ...
 ... as guidance for the saw. The first cuts all around as usual with given distance by the distance holder, the next ones the distance holder snapping into the previous cuts :-)The material is of course my beloved Ureol :-)And now the hands come into play - and a sharp blade - already Brancusi said that the sharp blades are a must - to shape the heads ...
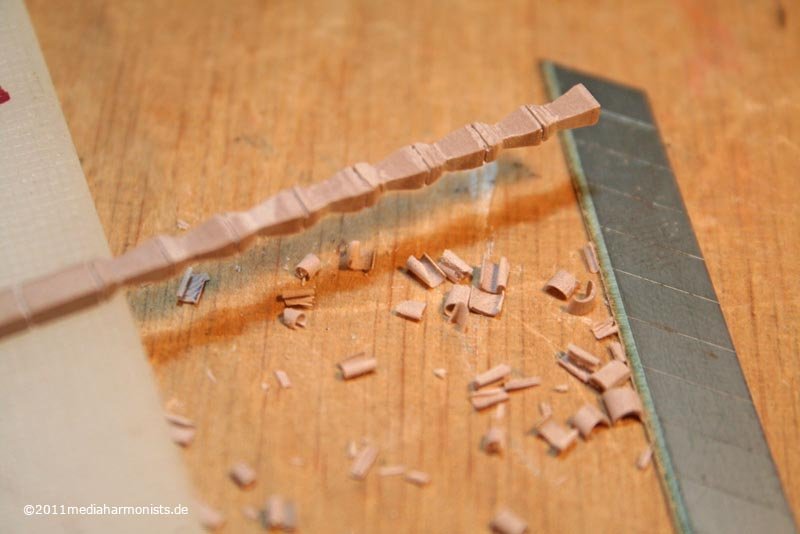 ... and here it is our small piece of art :-)
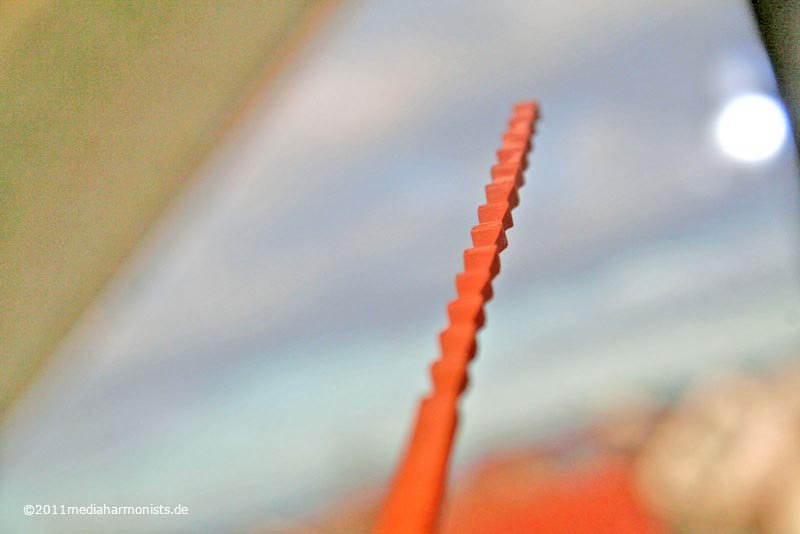 Two cuts for each surface and easy to control as the comparission is always beside.Also looks nice on the desk with all this "wooden" carving bits...
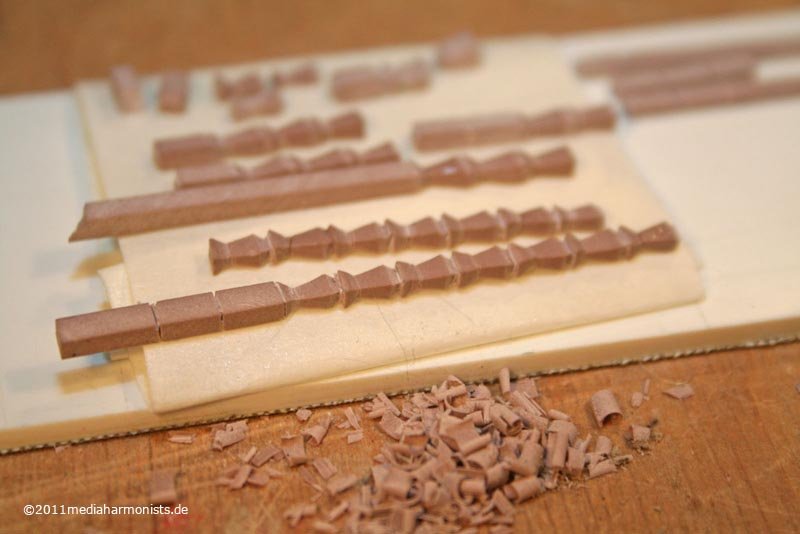 ... and finally the not yet finished results.
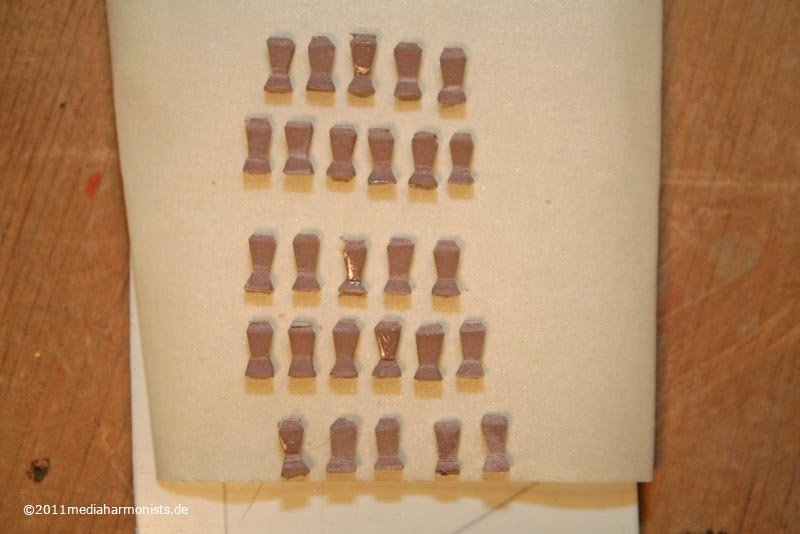 And here already comes the next brave action: Point of no return - guillotine on the old timberheads ...
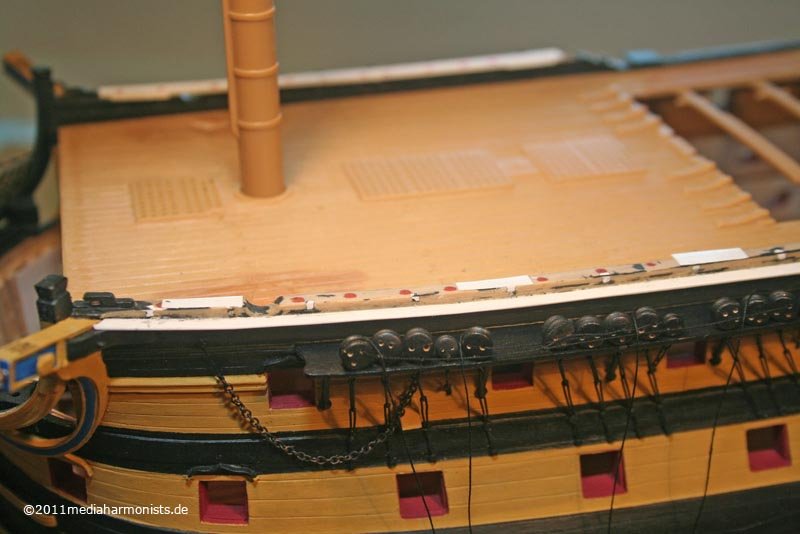 ... glueing the prefinished heads onto a separate sheet that can be taken off ...
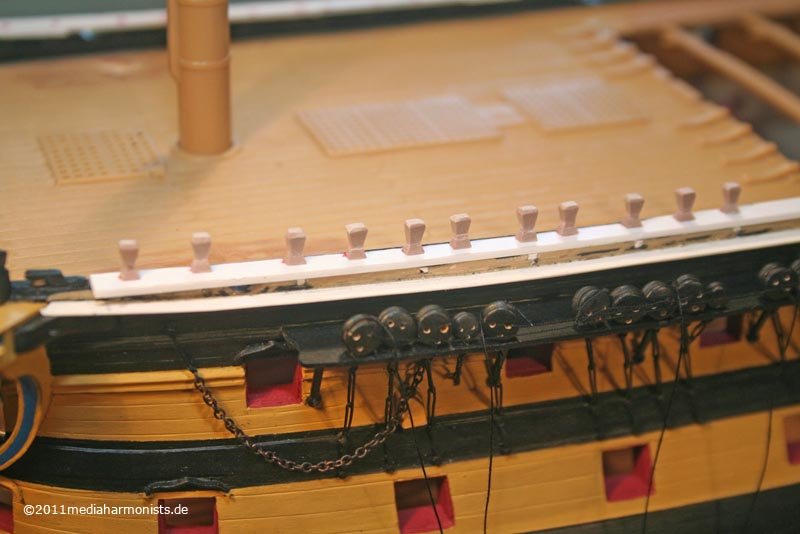 ... taking this to the work bench to adjust heights and angles of the timberheads ...
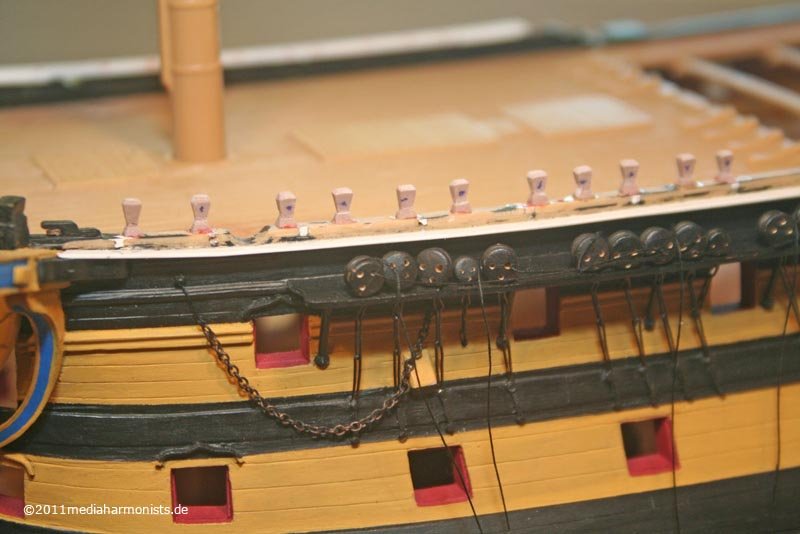 ... and put them back onto the right place. Uffz!
HMS Victory by dafi - Heller - PLASTIC - To Victory and beyond ...
in - Kit build logs for subjects built from 1751 - 1800
Posted