


dafi
-
Posts
2,292 -
Joined
-
Last visited
Content Type
Profiles
Forums
Gallery
Events
Posts posted by dafi
-
-
That is when I realized that the used Krick-deadeyes were drilled too unevenly for my taste ... As I did not want to discard my painfully soldered parts and get better deadeyes, I startet closing the holes with toothpicks and filed them even.
 Just then I realized that because of the size and curved surface the planned drilling templates did not work :-(At least I know by now why they those bastards are drilled the way that they are ...OK, good old solid handwork, putting each part into the vise and mark the central line for the two middle holes ...
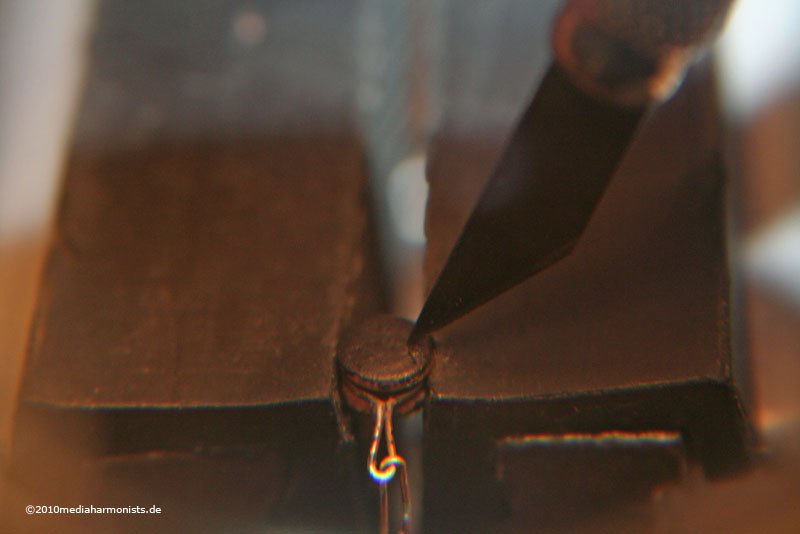 ... and with patience, a template and a good eye drill the preliminary holes with 0,5 mm, set the third hole with a fresh eye ...
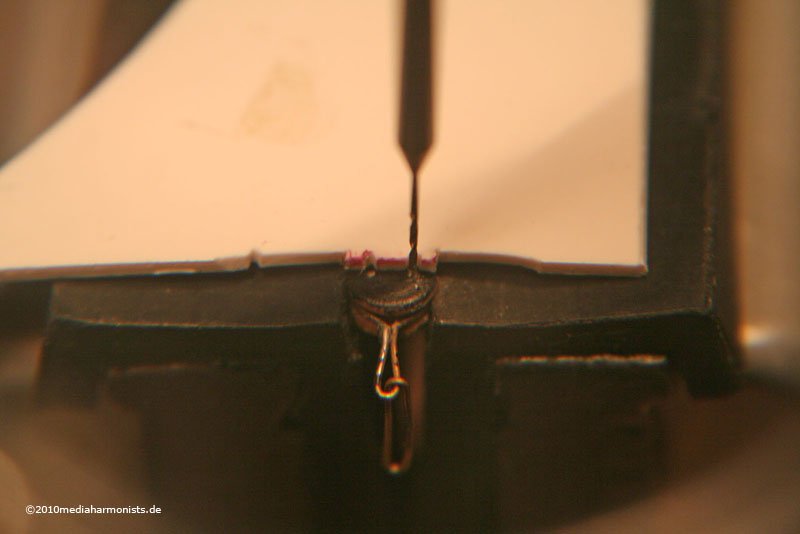 ... and finish the drilling with 0,8 mm.
 I usually drill small holes by hand with the drill fixed on a round material as it gives far more control as any machine! .Now came the tricky part of straightening everything up, worked best upon a cutterblade, even the smallest loops :-)
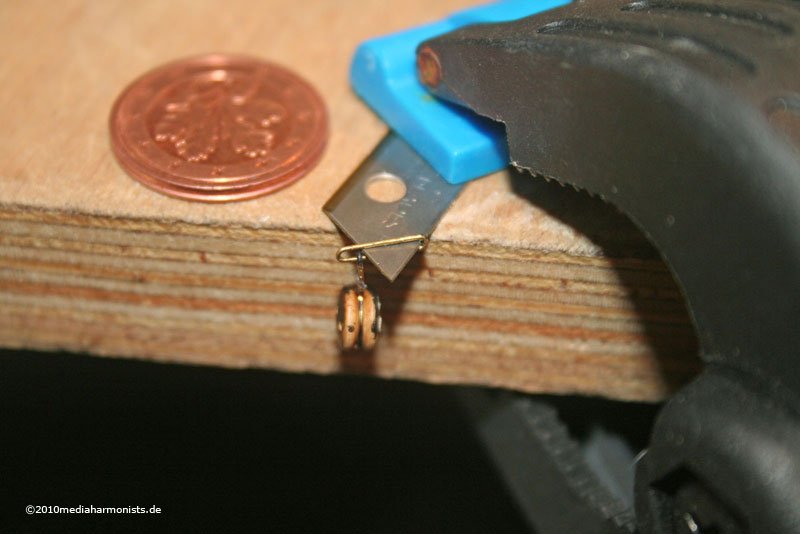
 And finally I had a complete set of deadeyes and preventer plates for the main-mast channel on my adhesive tape. :-)
 Hourray... and finally came the montage :-)First à la nature ...
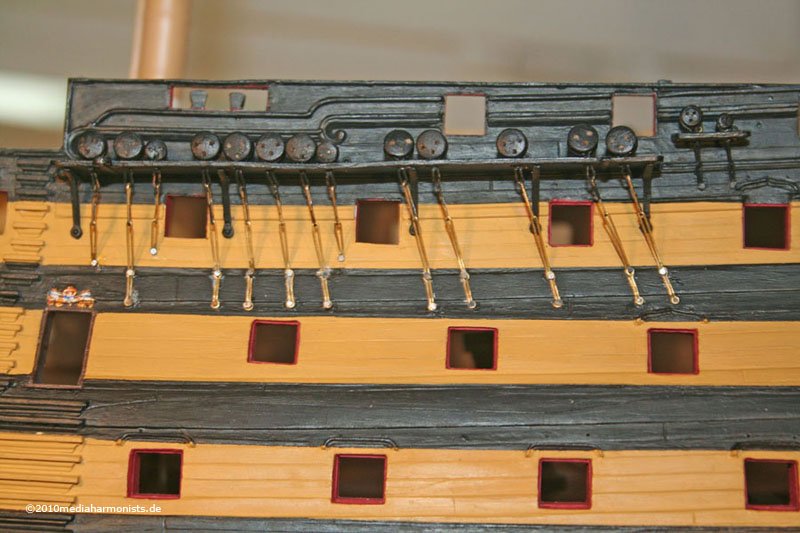 ... then with a little bit of colour ...
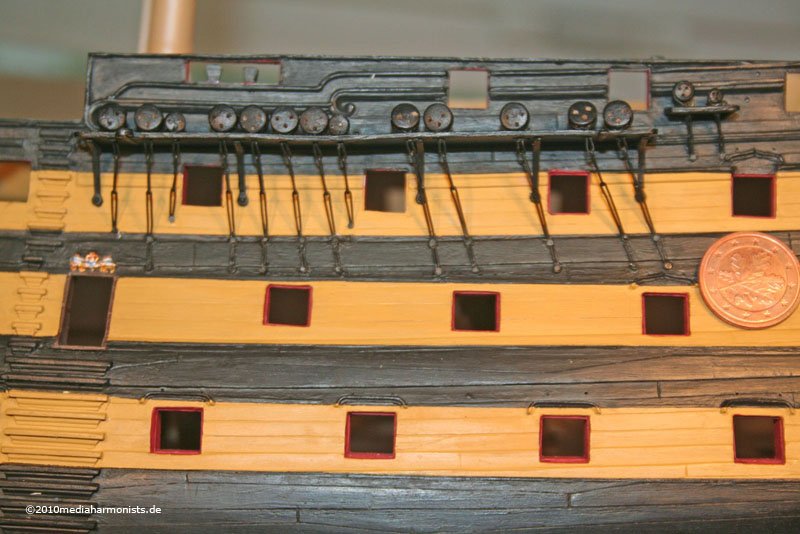
 ... and it looks like it was all simple! ;-)Liebe Grüße, Daniel
-
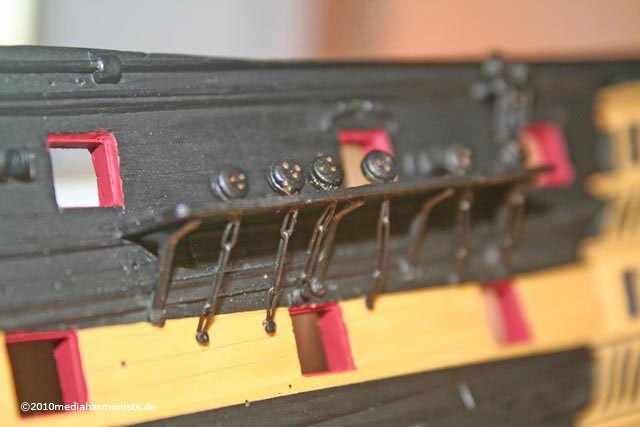
Here comes the lower part for the fore- and main-channels ...
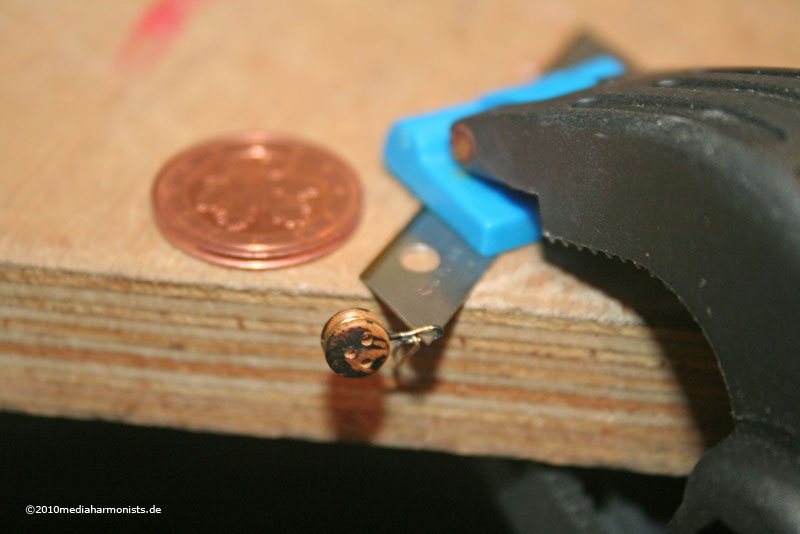
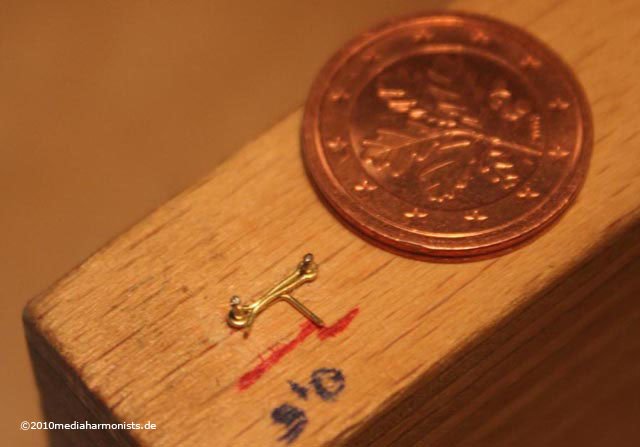 ... bent around two steel pins and squeezed in the middle.
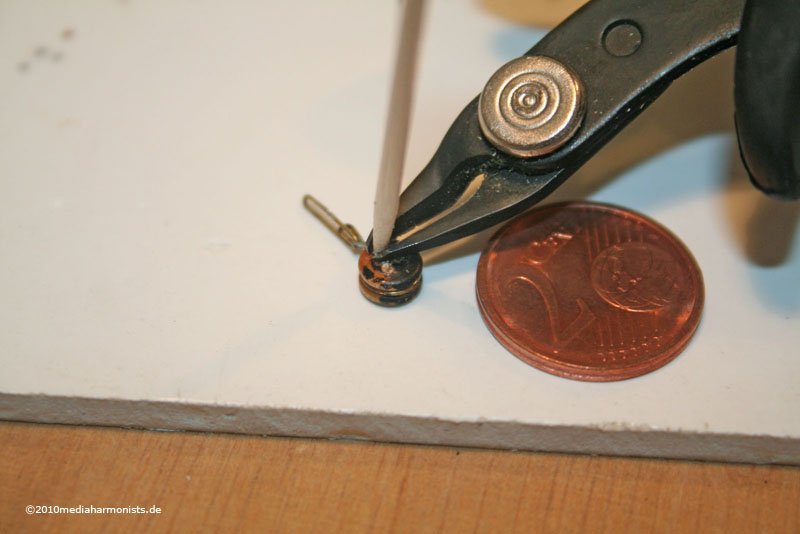
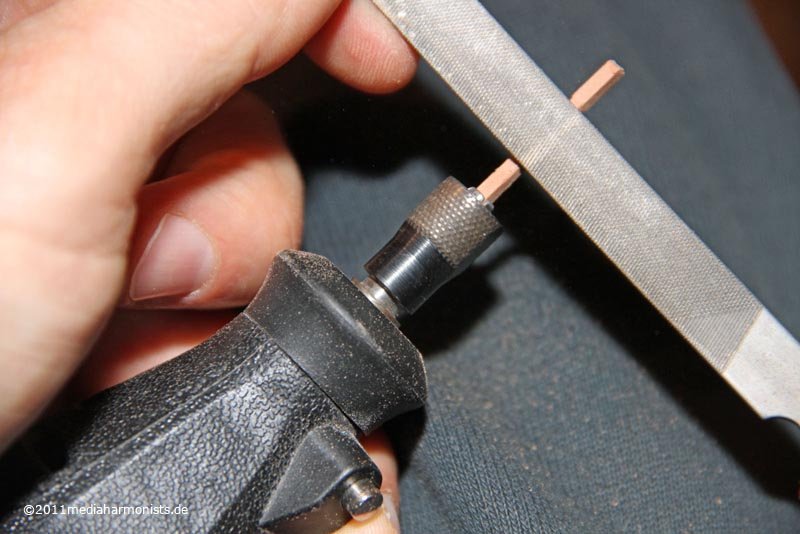
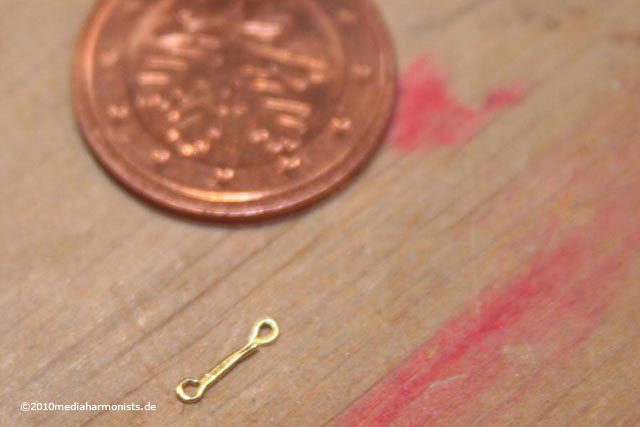 For the bolts I use sewing pins. I grind the diameter on a file by putting the pins into my Dremel and afterwards still reduced the hight. The needed lengh will be around 4 mm. On the left the original needle.
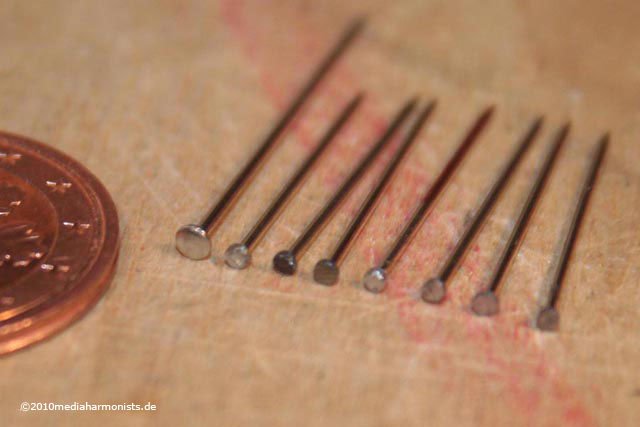 And now the soldering - what a hell to learn :-)First the lower ring, then sliding it into the loop of the deadeye, putting it into the third hand for soldering ...
 ... and ready. Looks sooooo easy ;-) The black is not burnt but just some paint :-)
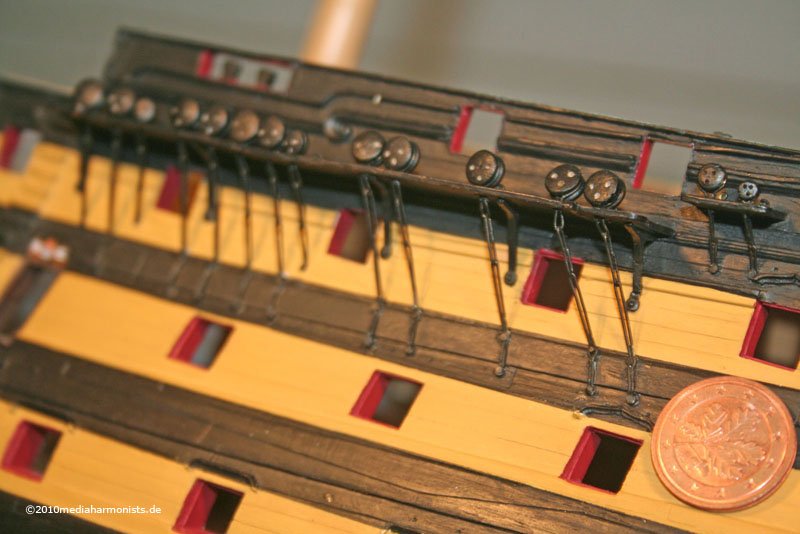
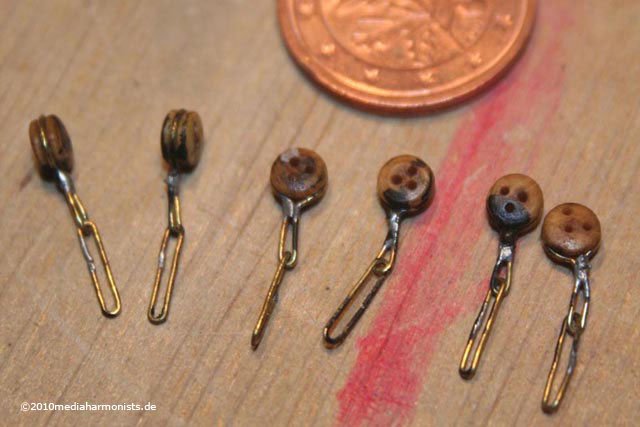 Here the ensemble is already in place, the part that is ment to go into the hole of the hull is lenghend in its place and bent ...
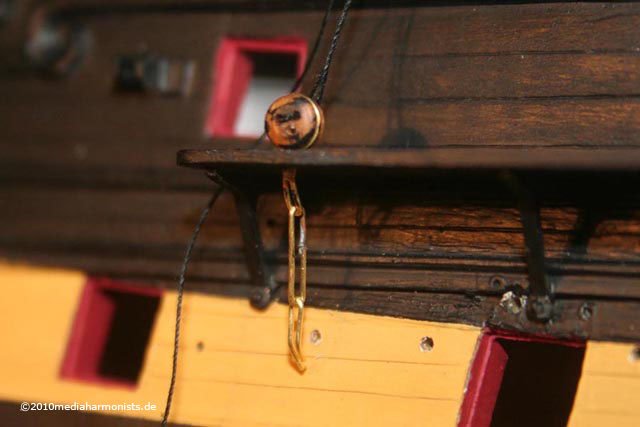 ... putten into the hole and the needle forced in with it. Take a thread and check direction and angle. Secure it with a drop of superglue.
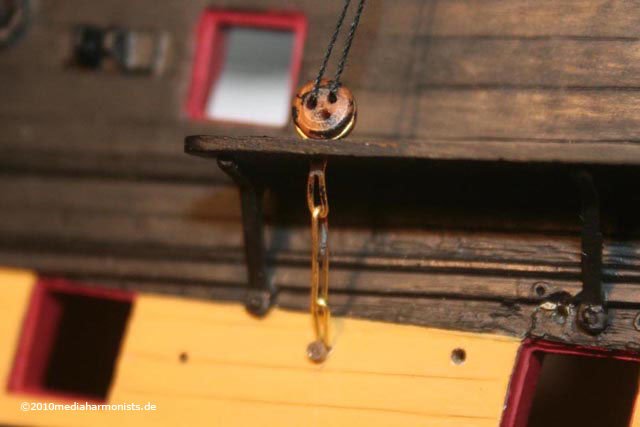
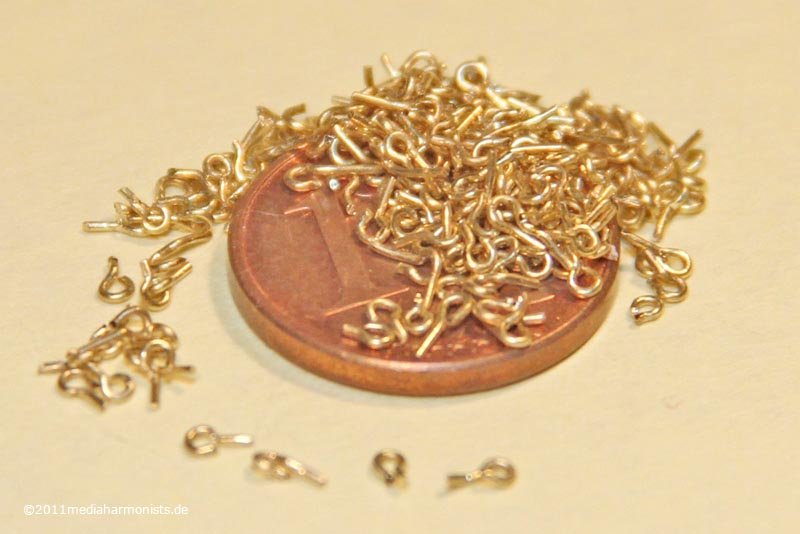
 A package of tree with different lengths.
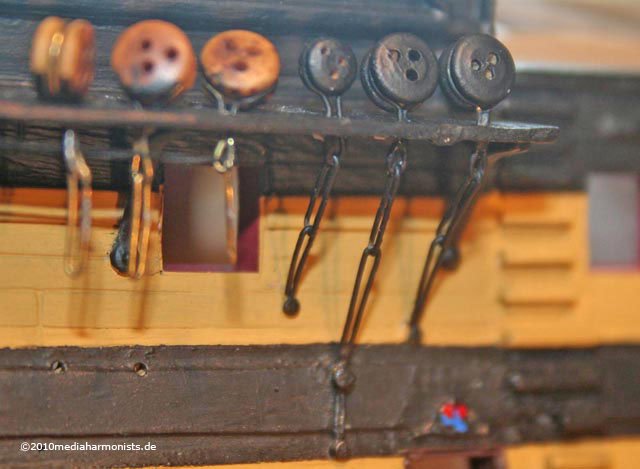
- BareHook, Tigerdvr, CaptainSteve and 2 others
-
 5
5
-
It took me ages to develop the way of doing the chain plates as I did not find any documentation on the internet by the time that I was trying to find out how to do it. Tried lot of work arounds as I did not know how to mass produce in a satisfactory way and tried to avoid soldering which I never really did before. On the other hand I did not want any photo eched parts because they always look "flat" to me.But in the end I realised, the only way that worked for me was to produce it the same way the originals work - just a lil´bit smaller :-)First some 0,5 mm brass wire around the deadeyes ...
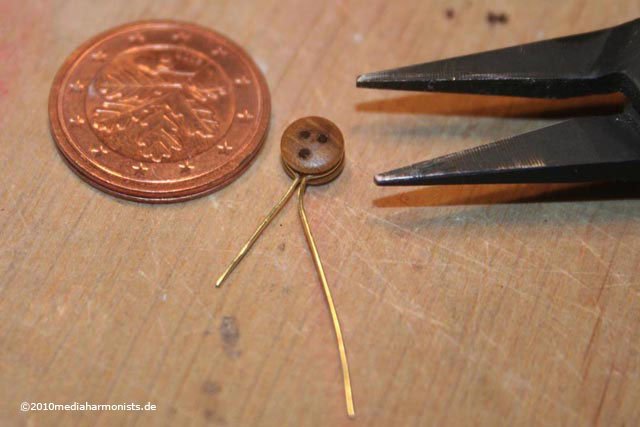 ... putting it in a template with tree steel pins ...
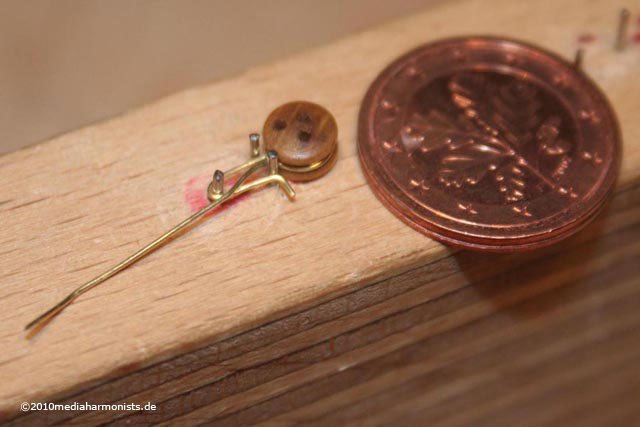 ... cut into lenght and the top part is ready for soldering.
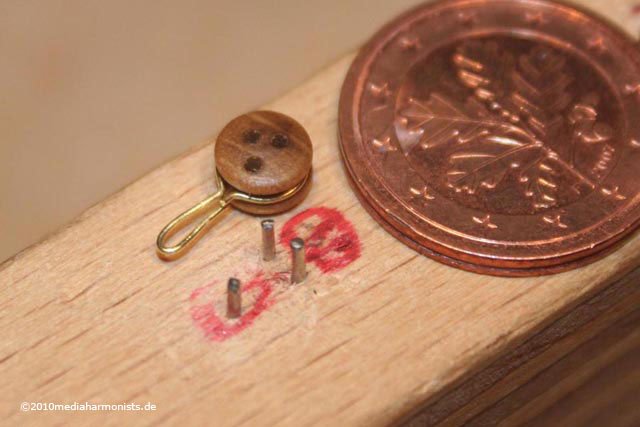 The ring underneath is done out of a couple of rounds around two steel pins ...
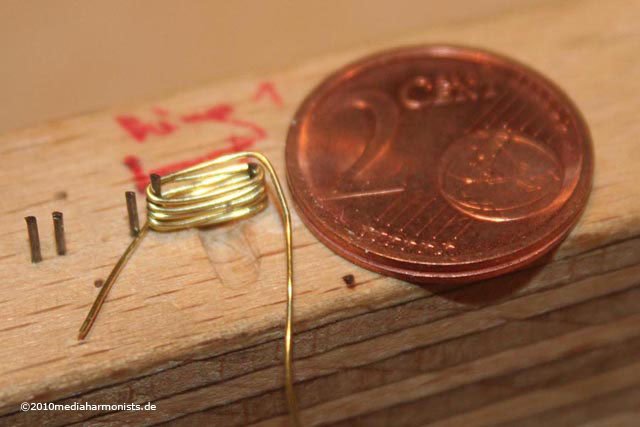 ... cut in one go - the gap underneath helps to access the lower rounds ...
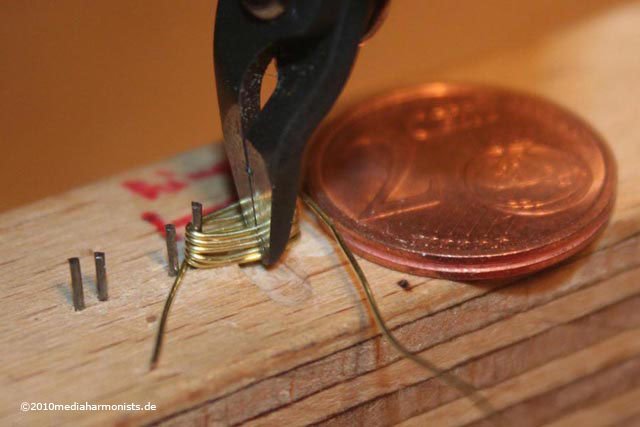 ... first a little bit soggy ...
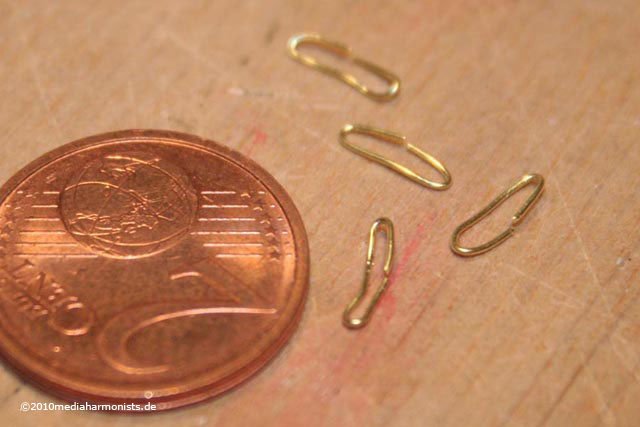 ... and straightend up - The real straightening up will be done just after soldering.
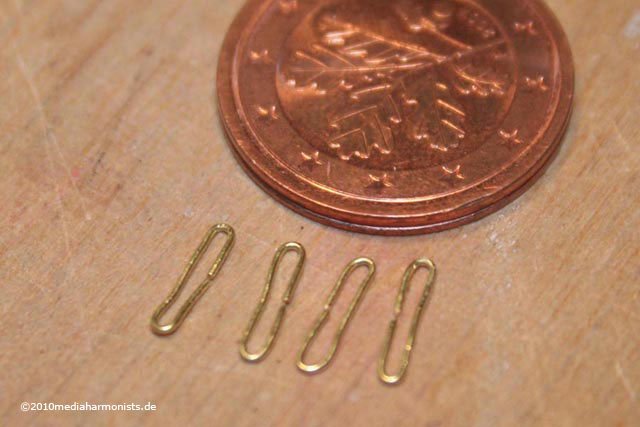
-
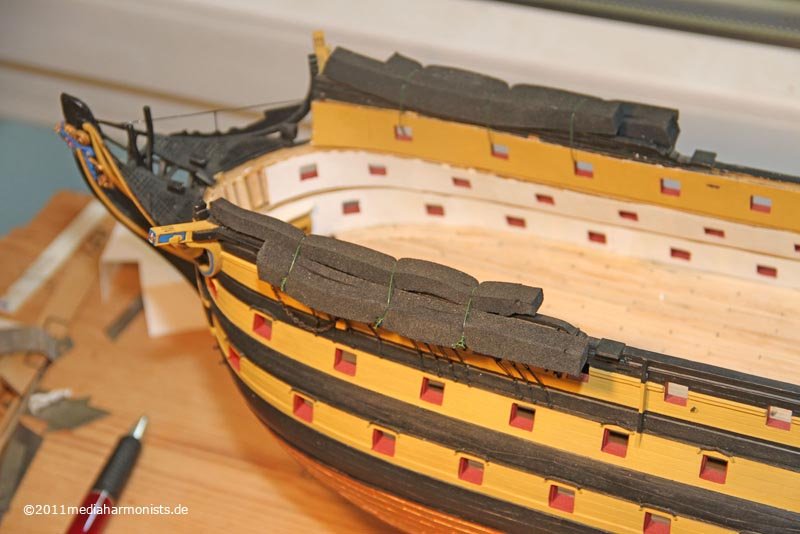
For the coppering I used self adhesive Copper foil from the Tiffany workshop.
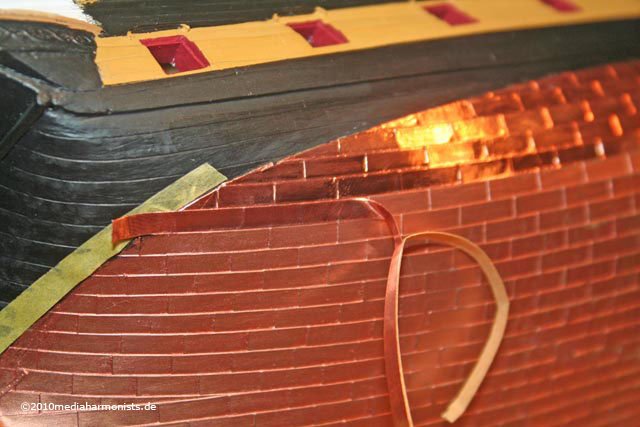
 It is nice to see the difference between the new material and the old copper paint. It was good to have the paint underneath, as to make minimal gaps not too visible :-)I use masking tape to protekt the black paint from the glue, otherwise it will take out good chunks - just guess how I found out :-(BTW: The glory for bringing this ingenious material to my attention belongs to a chap in a german forum, who presented this technik on a wooden Santissima Trinidad.The copper is rather cheap
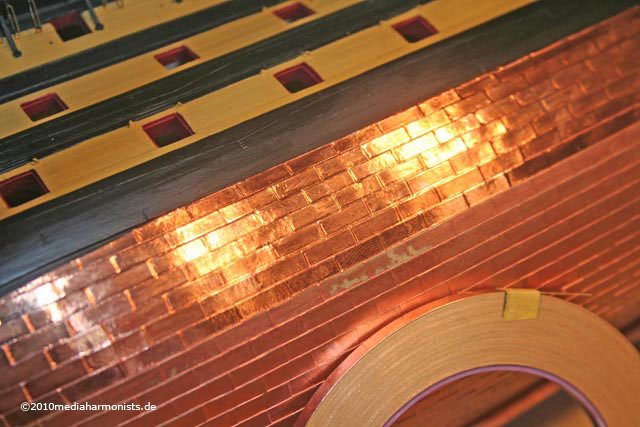
 Look in the internet for suppliers of Tiffany lamp builders, you need two rolls of 4 mm, self adhesive.As in my case the tiles were already in the plastic mould, I was able to use the material in straight lines. Other ones cut the material into the actual tiles.I omitted the clues in my scale, but I saw already great results on this material in imitating them by stamps or cogwheels.Also if the surface is cleand from the protectiv what-so-ever, nice verdigris can be produced on it by a spray of saltwater, lemon air and time.
Greetings Daniel -
-
Halleluja, praise the heavens!Why? Because also small things can make me happy :-)Looking back: A year ago I was already working on the improved gunport lids but had a grandious failure on the gunport tackles:Looks like a ball of hair straight out of the shower plughole :-(
 These days I broused through Gil Middletons wonderful Jotika-Victory and dicovered the splicing that he presents there:(Edit: Later I discoverd this in use by many others too!)We proudly present: The Powersplice
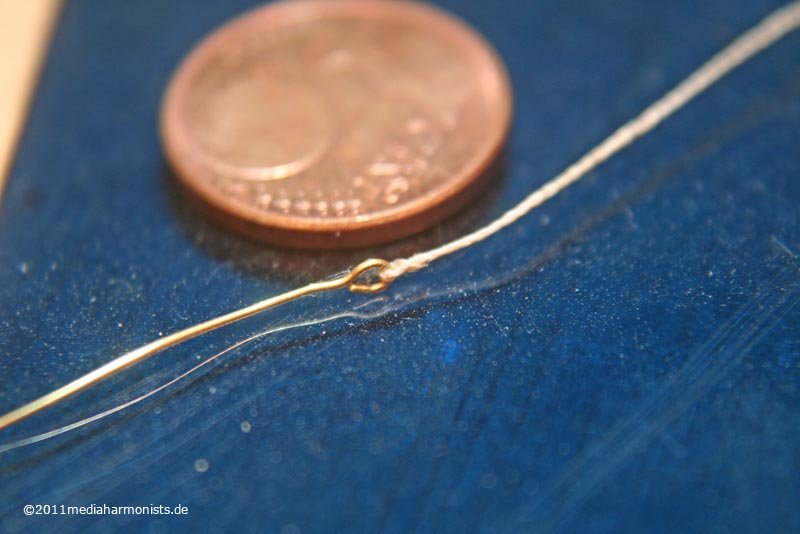 It is simple but effective:Thread - here 0,3 mm - through the ring, neadle through the thread, it is more easy than it looks ...
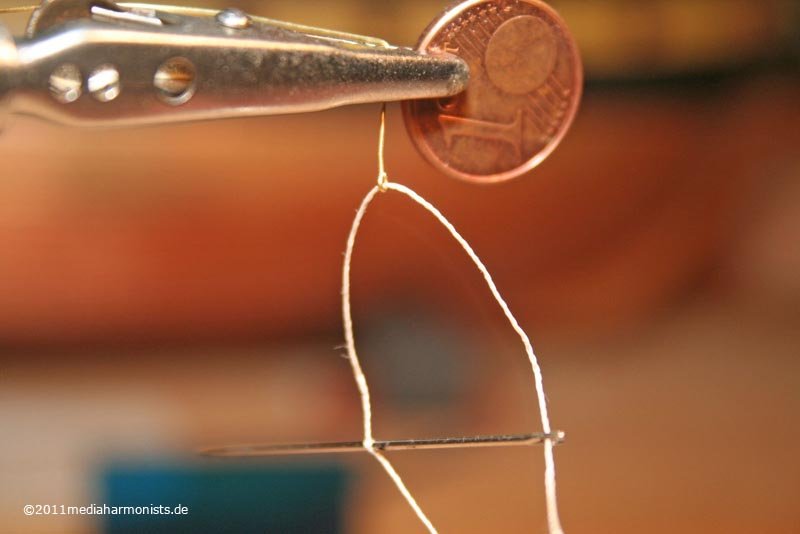 ... make tight, secure with a drop of glue ...
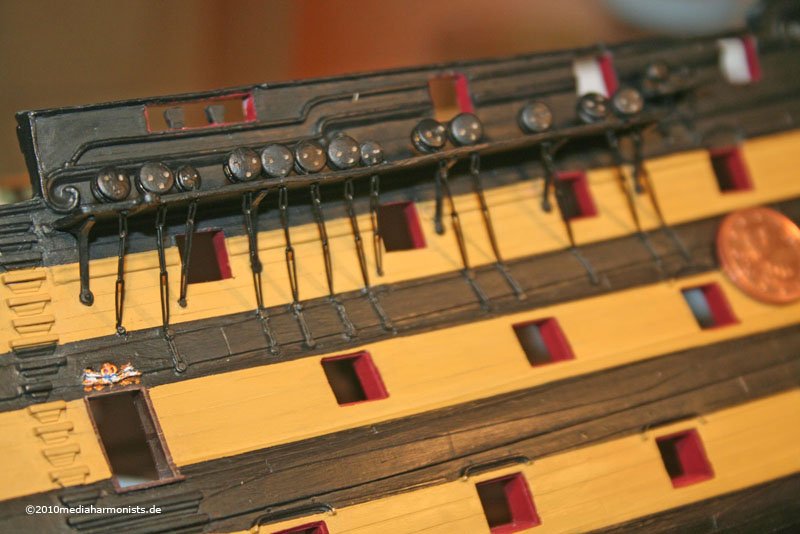
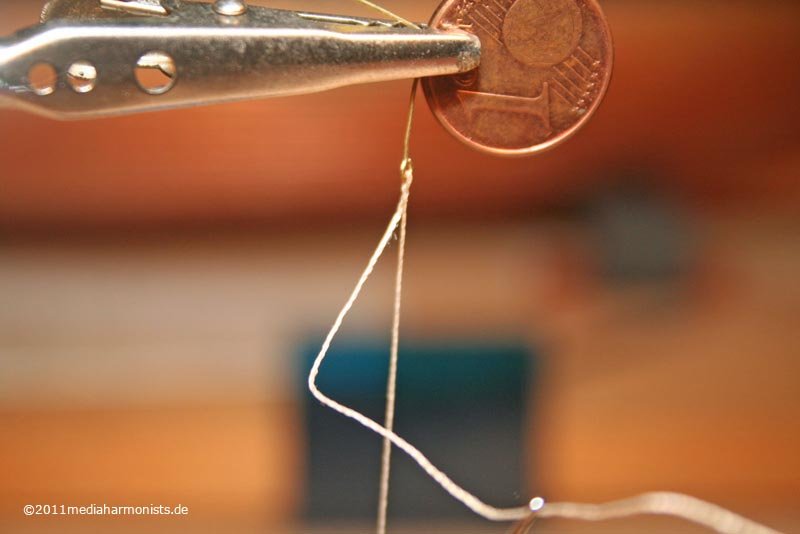 ... and once more through it with feeling ...
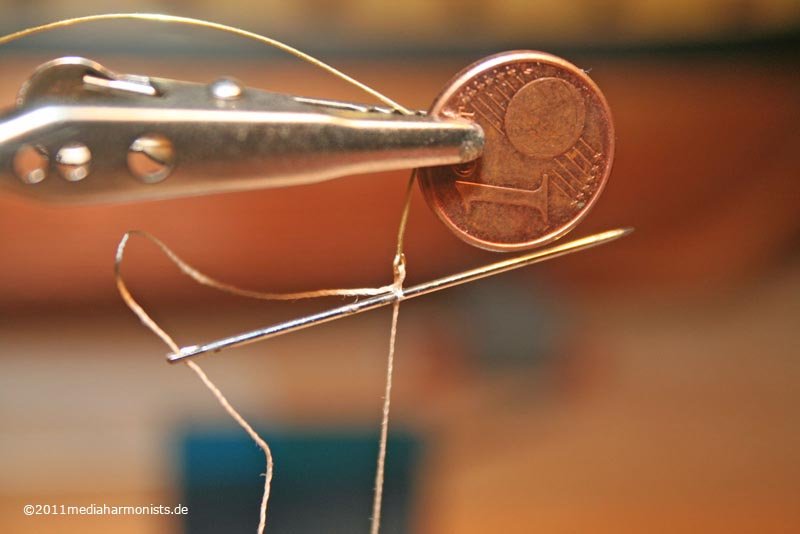 ... pull thight and ...
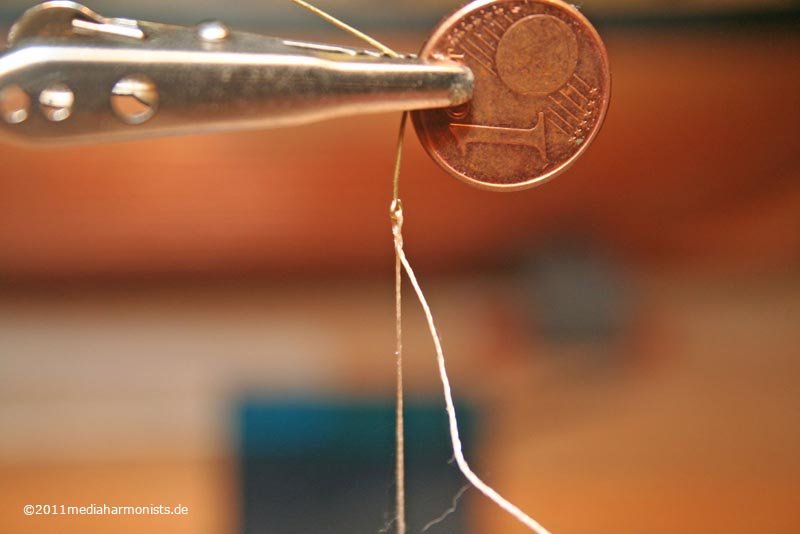 here we are!
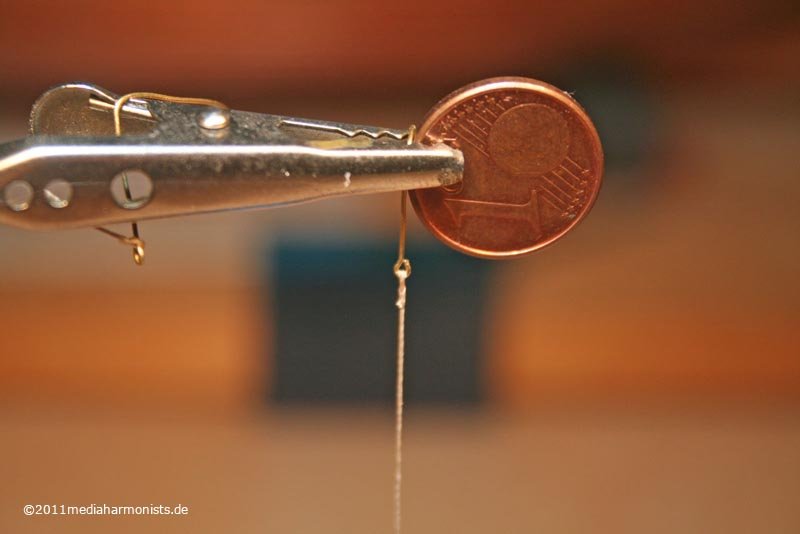 Great, isn´t it???All the best from a happy Daniel to all of those who showed it before!
-
Hello Thom,
I used brown package tape - just try different ones :-)
Liebe Grüße zurück!
Amicalement, Daniel
-
-
... is, that things developed differently than planned, the hanging knees were meant to be simple forms just to accentuate the thickness of the walls ...
 ... just a simple stick, rounded at the bottom end but ...... the beams were diffcicult to fix, the tight space for the gun crews was not to be shown and anyway, the standard of modelling had evolved by the time :-)So worked on some little helpers ...
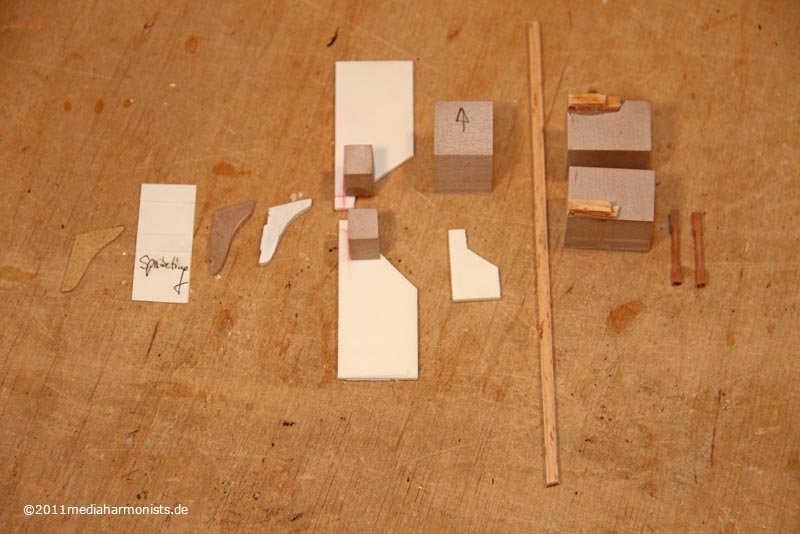 ... the templates and fixing helps as much as the pillars.The inside of the knee I did with the sanding drum ...
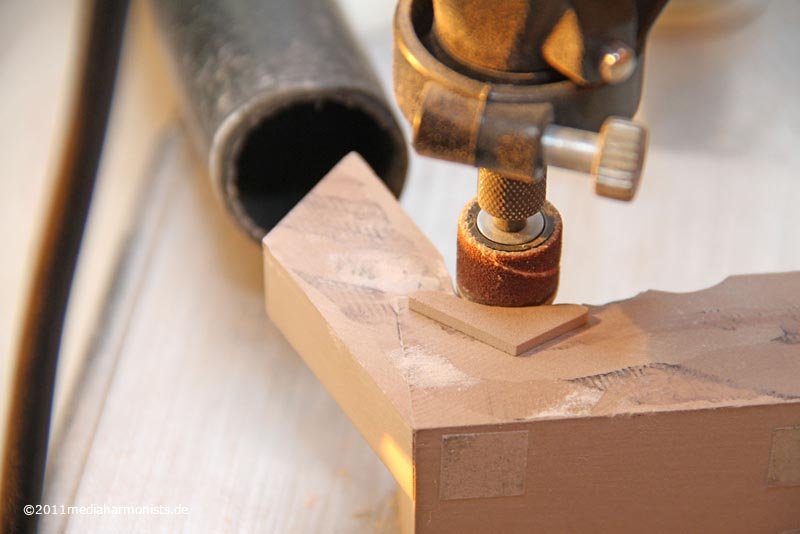 ... the outer edges with the disc ...
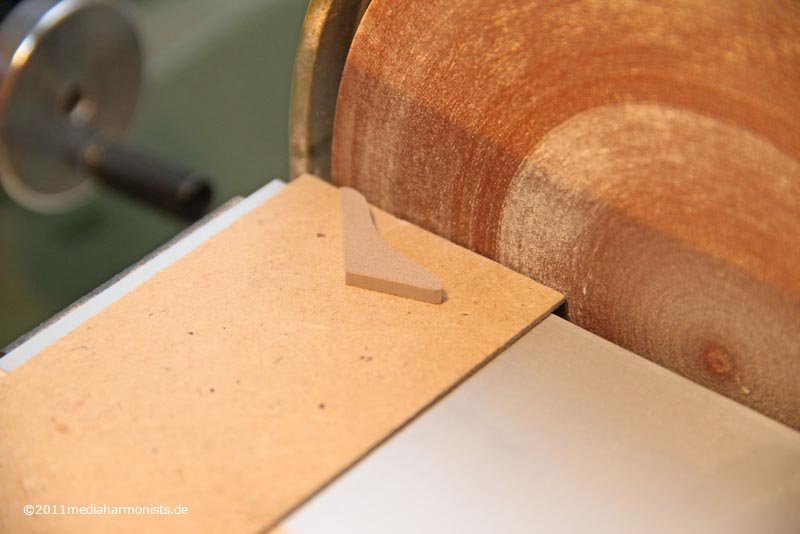 ... and a rounded surfaced sanding block for the beatuy.
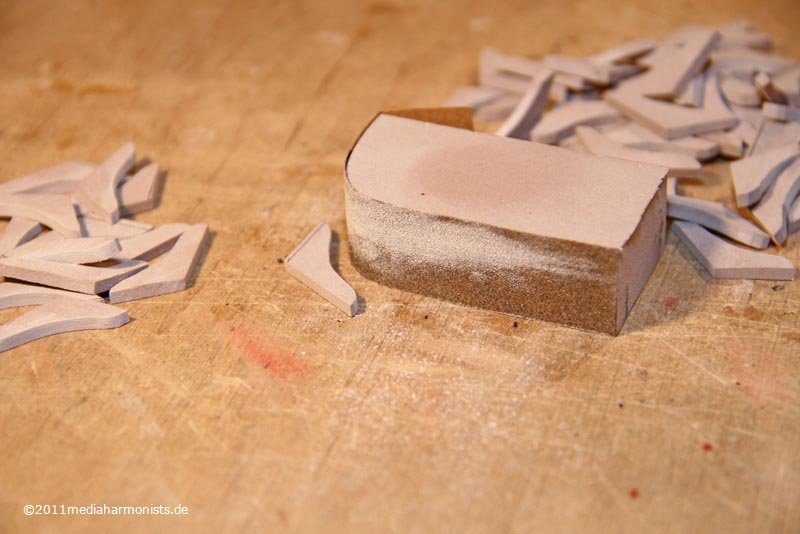 Afterwards ...
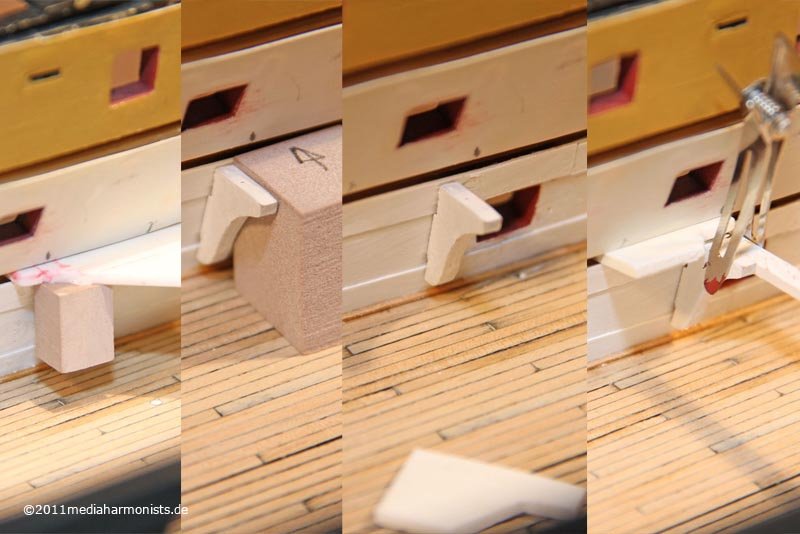 ... 1- using the help for placing... 2- checking the angle towards the beam with the block... 3- the knee glued... 4- and the deck beam glued in place. It is pushed upwards from underneath by the pillars, that are 1 mm longer then the outside height, thus giving a nice curve for the next gundeck.And this comes out:
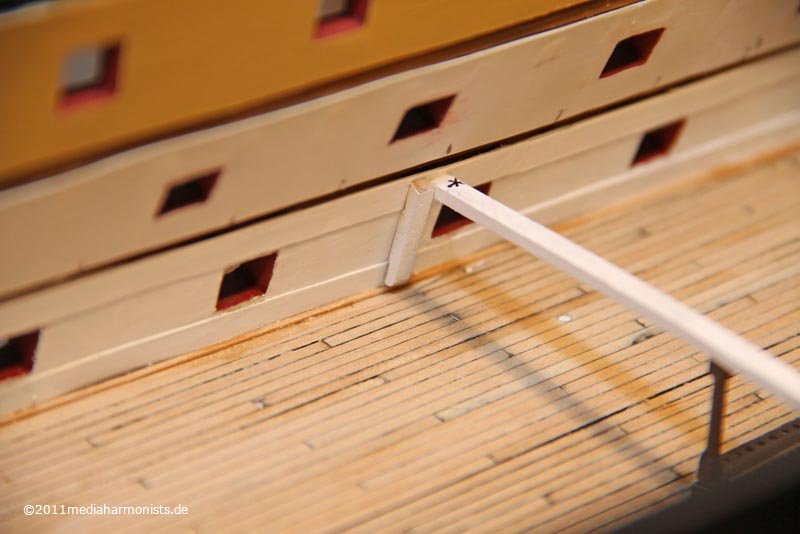
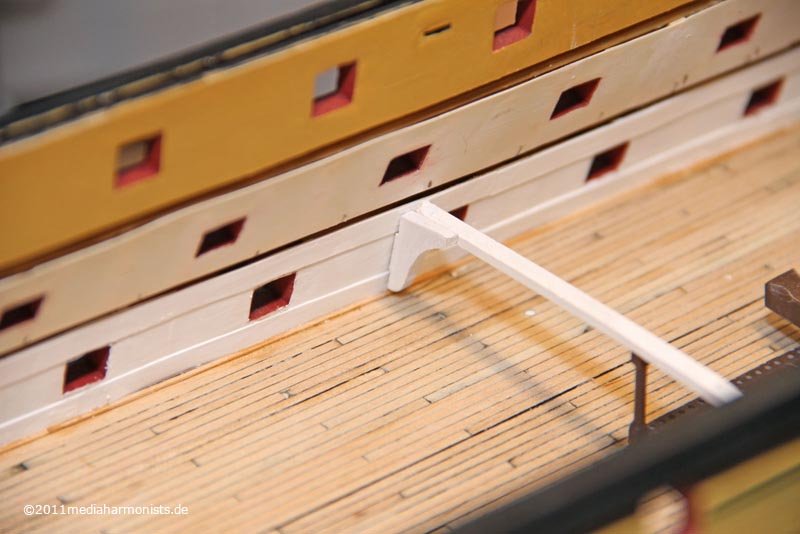 As the beams will be the last thing fixed on this deck, I use two sticks pushed through the gun ports to get the right orientation for the knees.
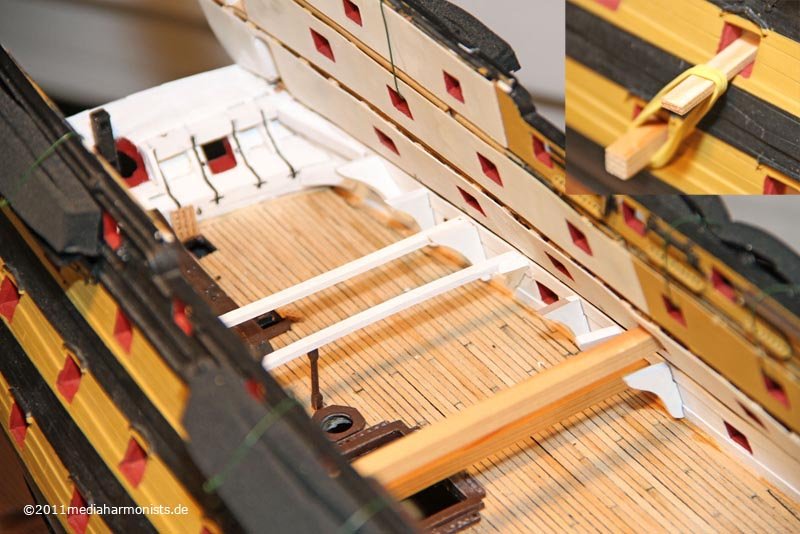 And here we are ...
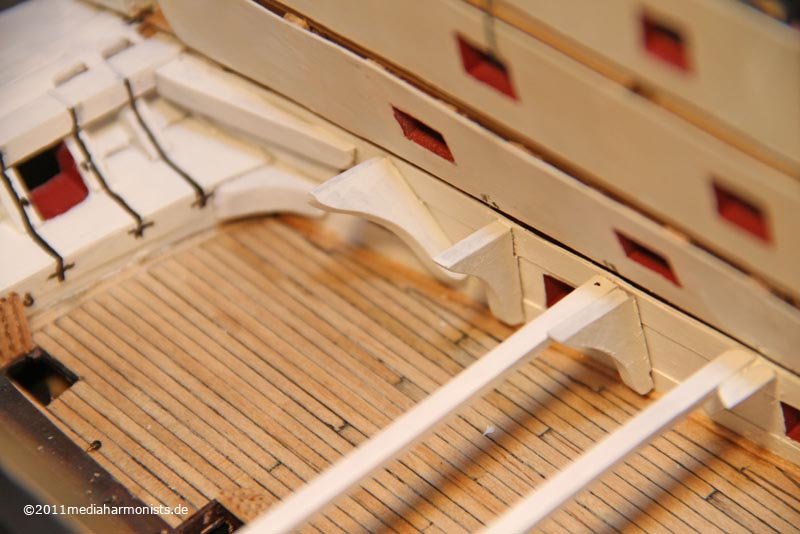 ... just look at the angled knees :-)Result: Good and solid way of fixing the beams and nice enhancement for the deck :-)Amicalement, Daniel
 -
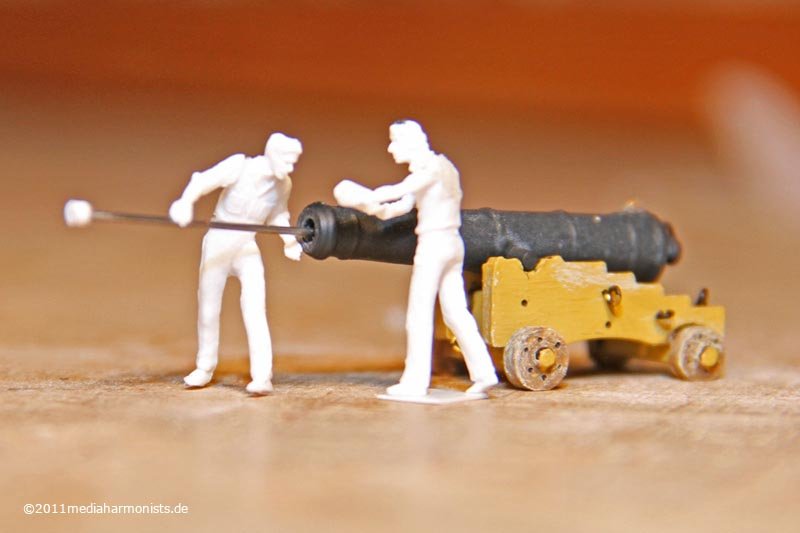
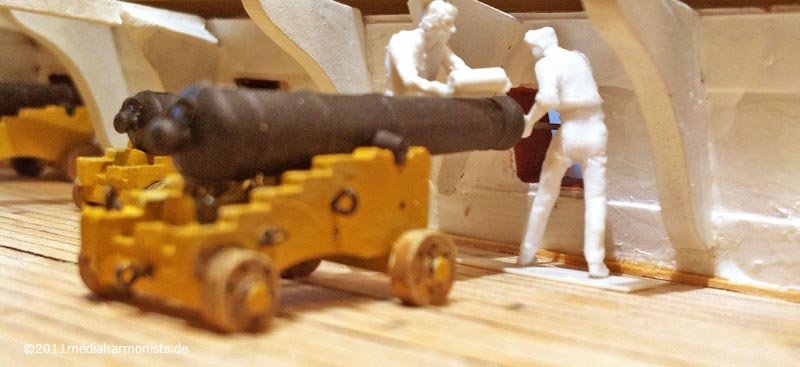
Here is a part of the loading sequence. One guy sweeping and the other member already holds the powder cartridge.
 Looks nice on land, but on the crowed gun deck the gun already touches the fittings ...
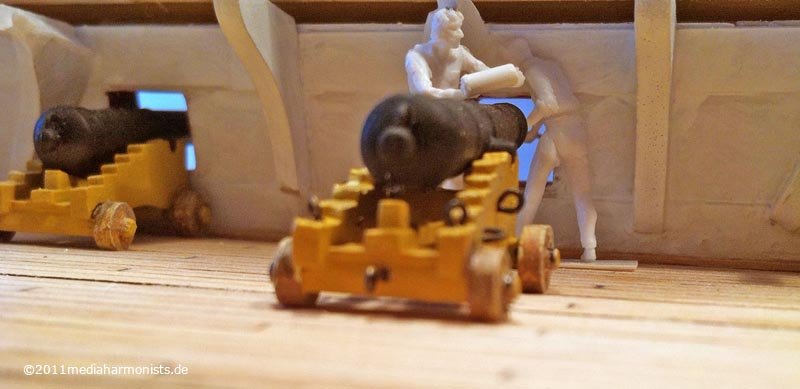
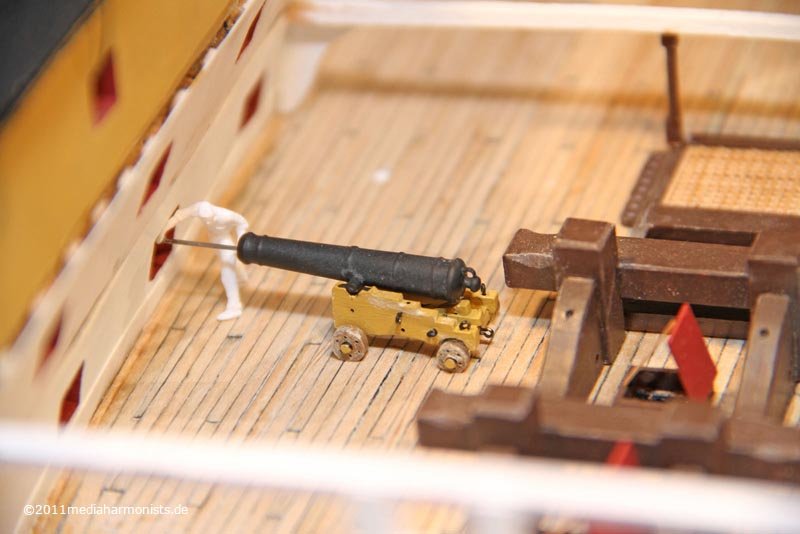 ... this means, the gun is too much back, a look onto the contemporary drawings confirms this.This means, the gun more towards the board, and finding a new position for the little man, for that he fits inbetween.This was a good laugh for my wife: "What the hell are you doing with the brush stick in front of the open oven door ... ?" ...Afterwards I knew: shoulderblade should be turnd backward and the lower arm pointing as backward as possible ...Works wonderfully and does not hurt, I swear :-) I have to state that the gunport is not in a ergonomical good position.
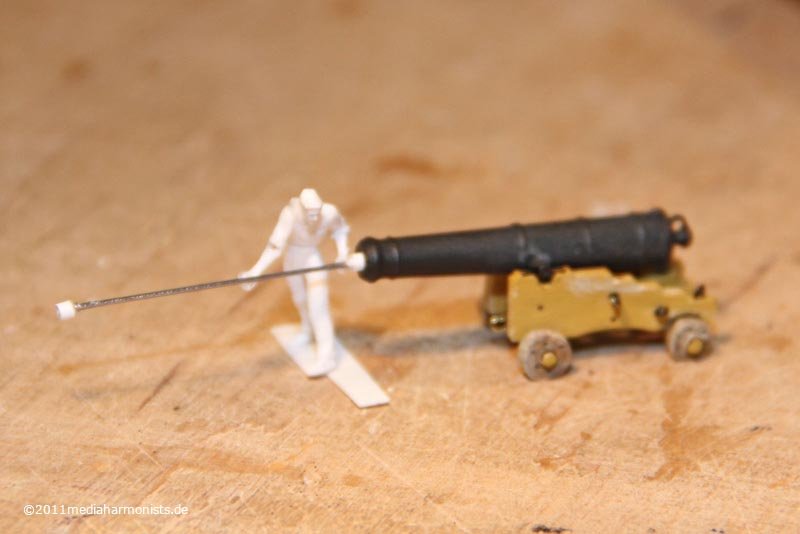 Inside looks better now :-)
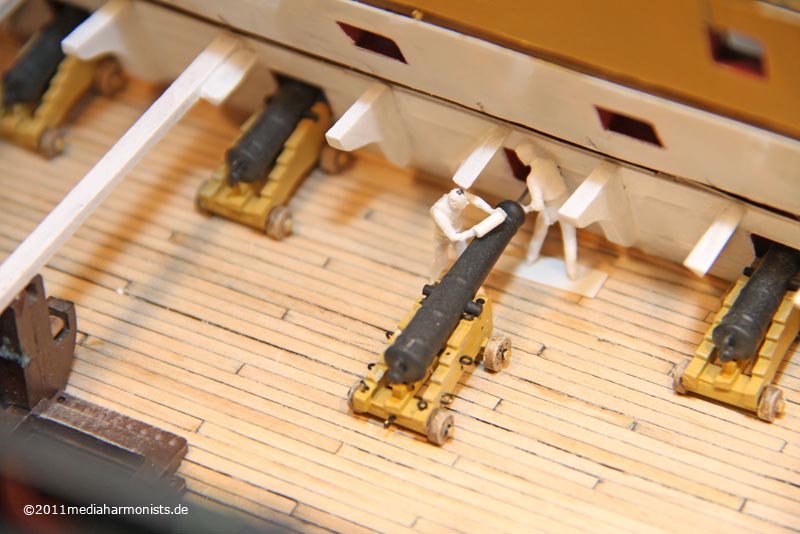
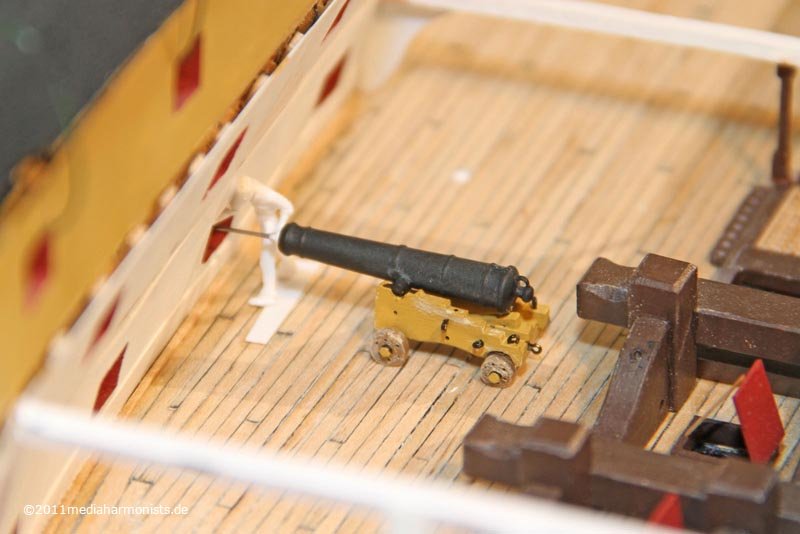 Interesting is also the outside view.
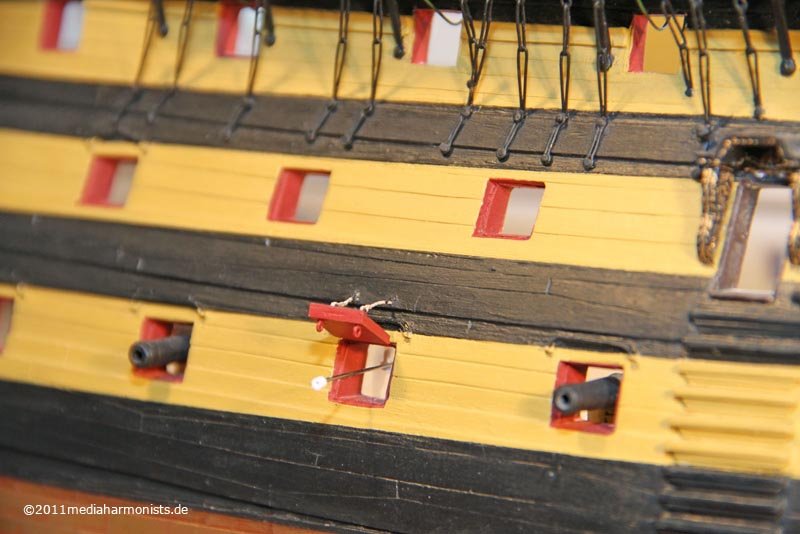 Realise how exposed the gun crew was while recharging ...
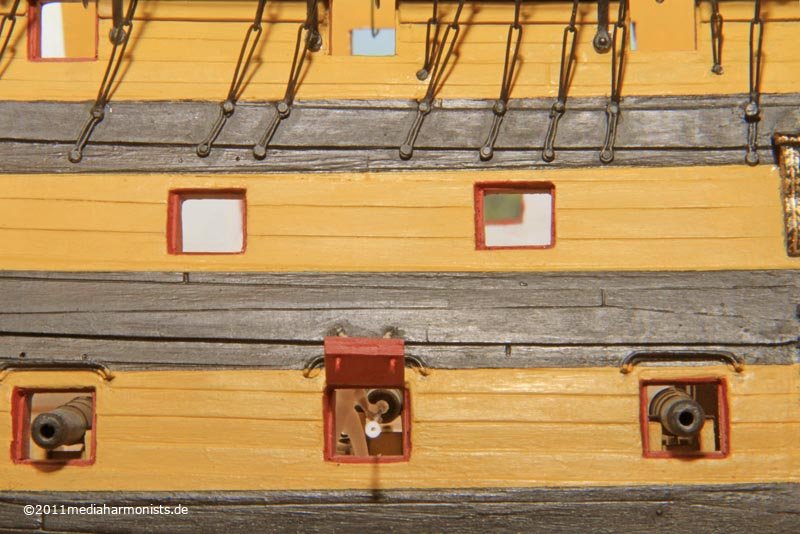 ... and how far the rams stands out ...
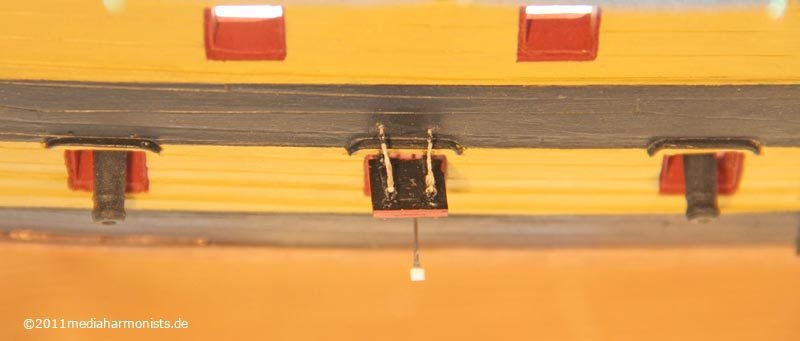 ... much further than the guns and lids.i remember contemporary comments of battles talking about the ships were too close that the rams could not be handled properly. But thats why they still had the flexible rope ones.Lieber Gruß, Daniel
 -
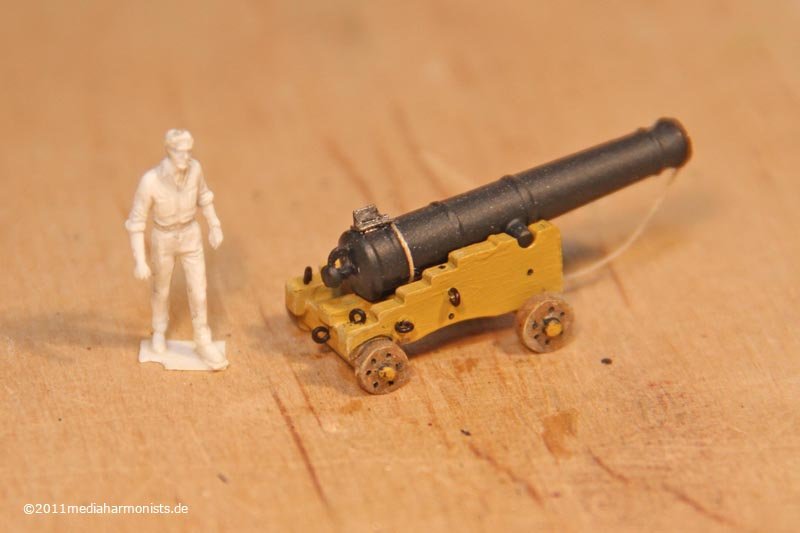
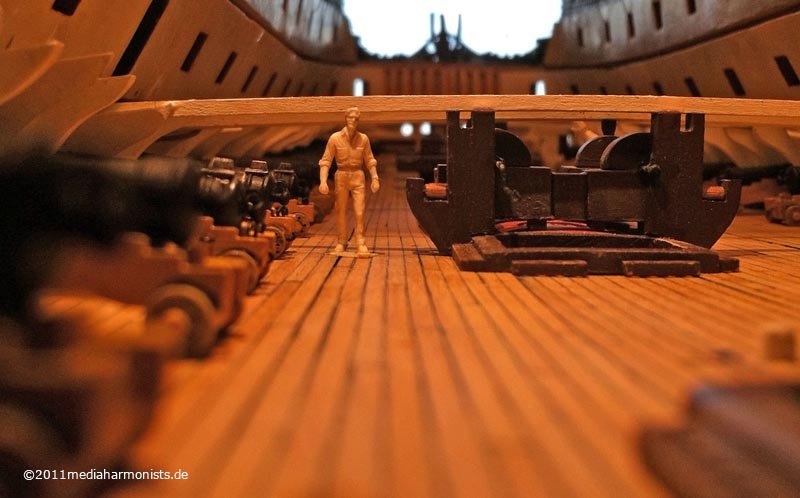
After I had a lot of work to be done lately, no bigger things could be moved, but I found a smaller task to keep myself happy.I realized that a lot of crews for the models were treated with much care concerning the painting and the historical correctness of the uniforms: But still they kept the positions they were delivered in - mostly these are people that were meant strolling along, nothing to do with the hustle and bustle and the action on a gundeck or working the sails.So something to investigated: Take three times the same train passenger with luggage and leave once à la nature (right side) and strip the other ones off their bags, dissect them and reconfigure them ...
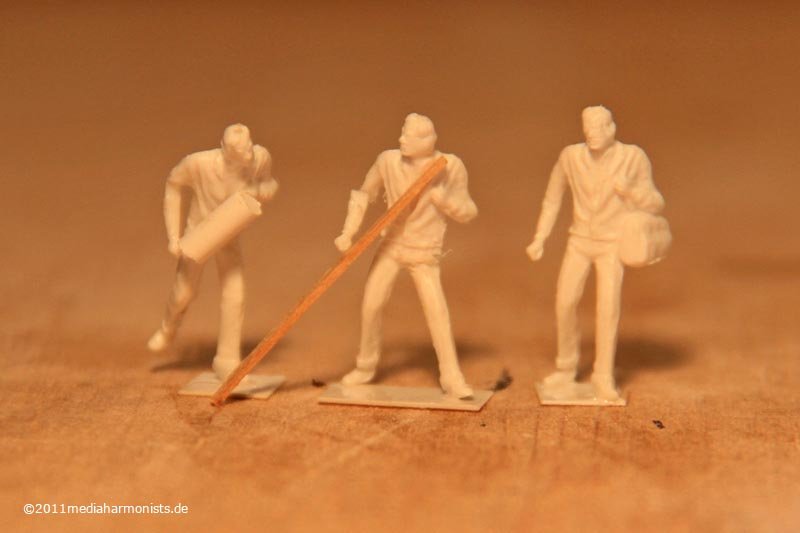 ... and look daddy - some real boys :-)Open the footfall, twist in the upper body, moving the center of gravity to the edge of the standing area, turning the head into an opposite direction, moving the arm ...Here they are helped by a ex-diver, once organizing his equipment, same operations ...
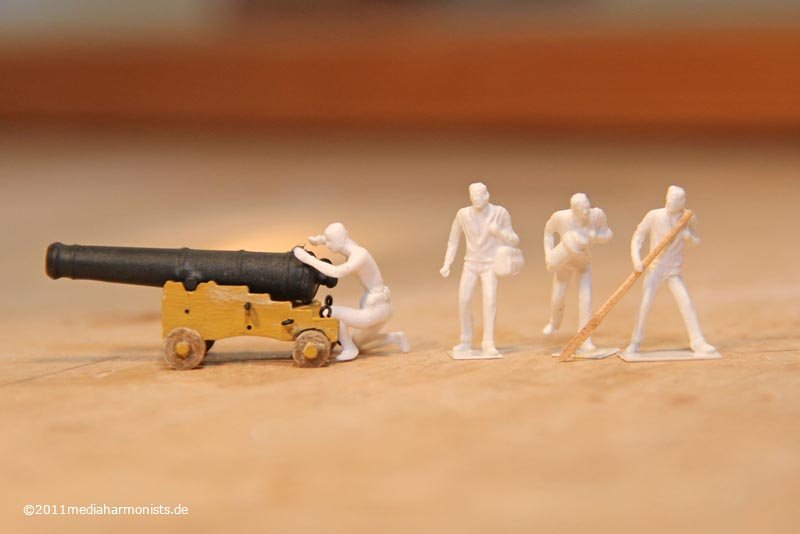 ... and now busy with organizing the flintlok. And a nice blondy, once meant to relax on the swimming-pool towel ...
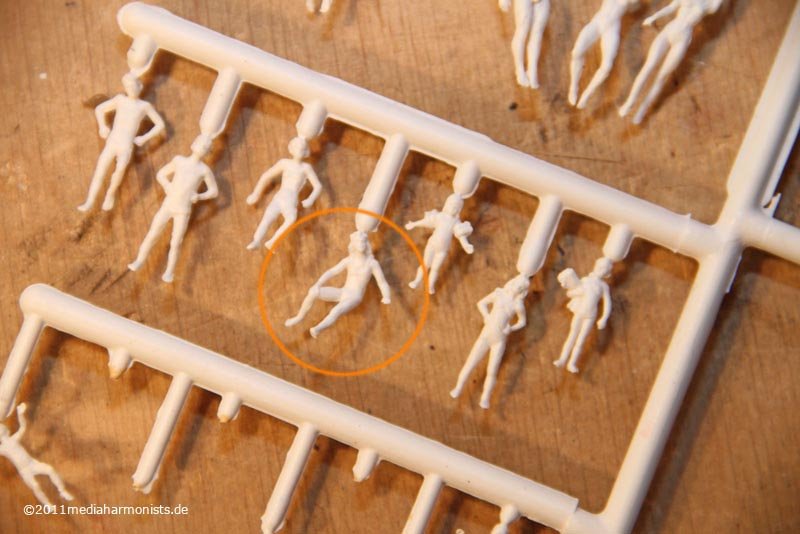 ... and stirred, not shaken, is a useful member of the guncrew :-)
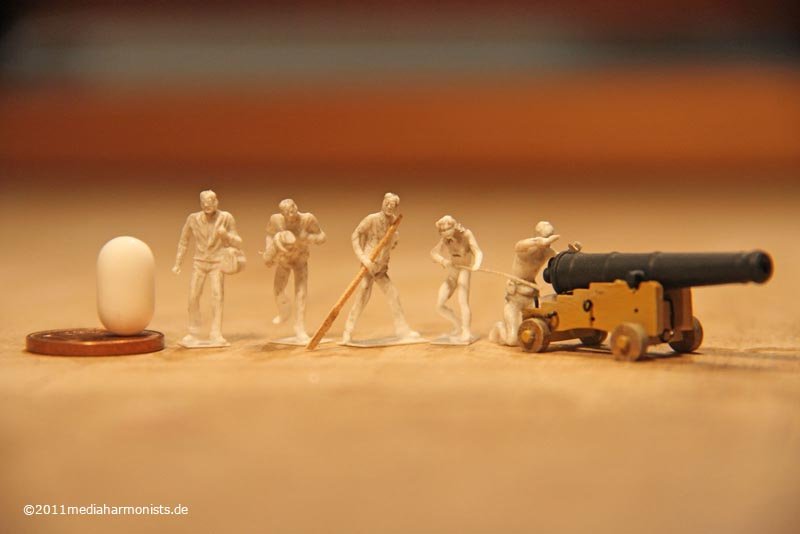 And a small excursus into some moping up ...
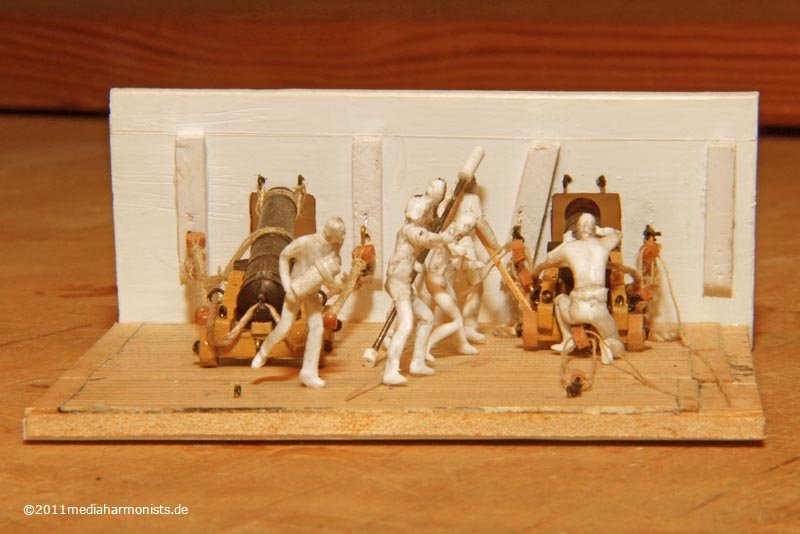
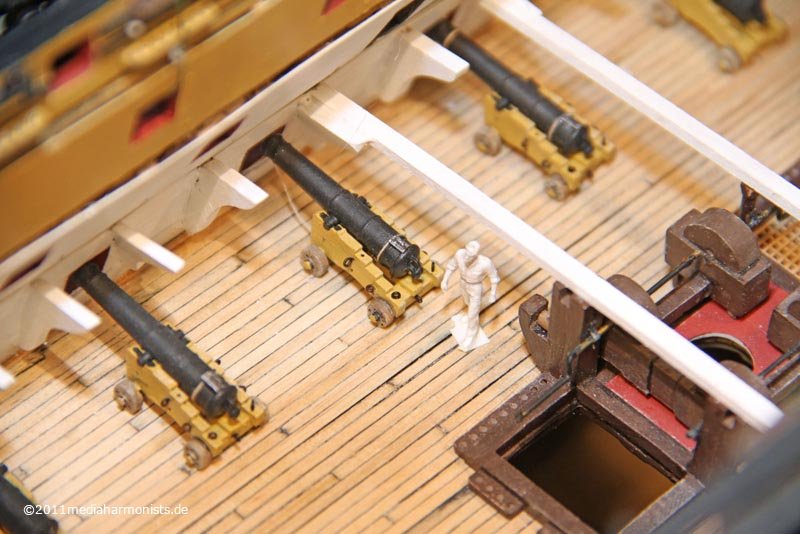
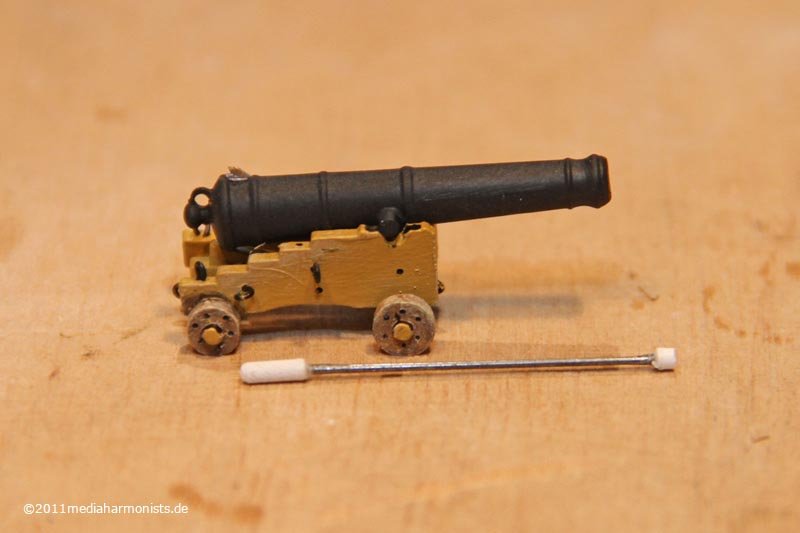 ... and the enlightment, that the sponge can not be held too upright because of the restricted hight of the gundeck - so had to change the first version of arms of the holding crew member.And here it is the hustle and bustle and the action of half a gun crew ...
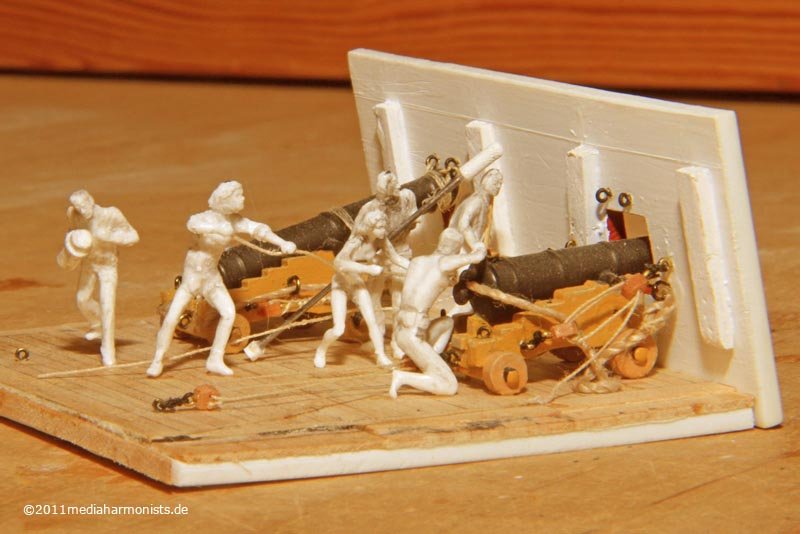
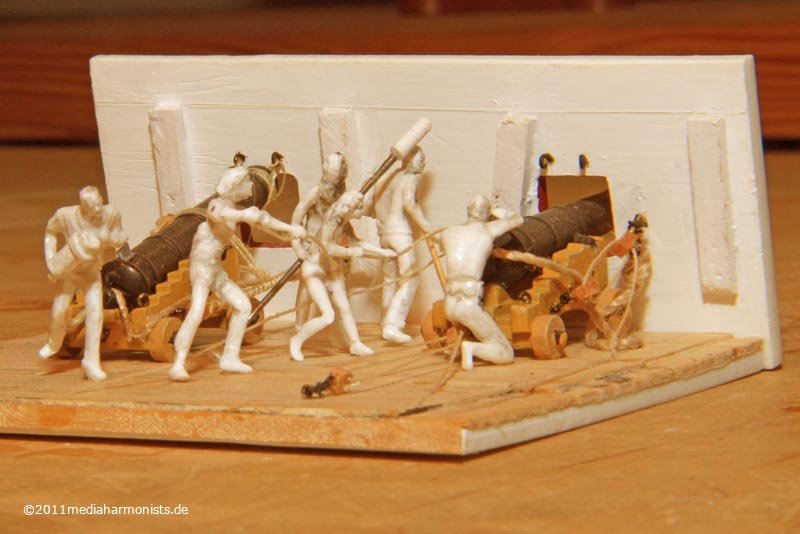
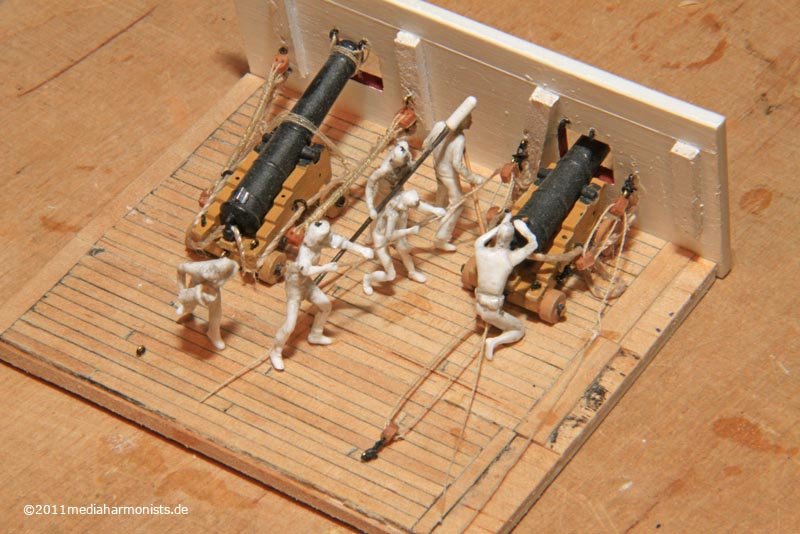 ... and now imagine the melee with the other half also present and the those of the neighboring guns! What a throng ...all the best, Daniel
-
And some more shots from the shipyard.First some pillars for the lower deck are needed. So 2 mm material into the Dremel and with a file we go ...
 ... still have to lenghen them.
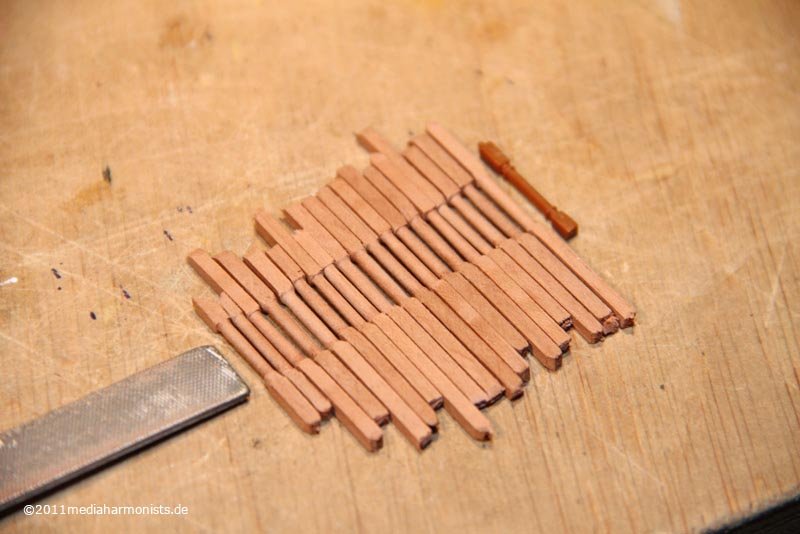 Here is my famous "around-the-corner-drill" in action to drill a hole for an eye bolt:
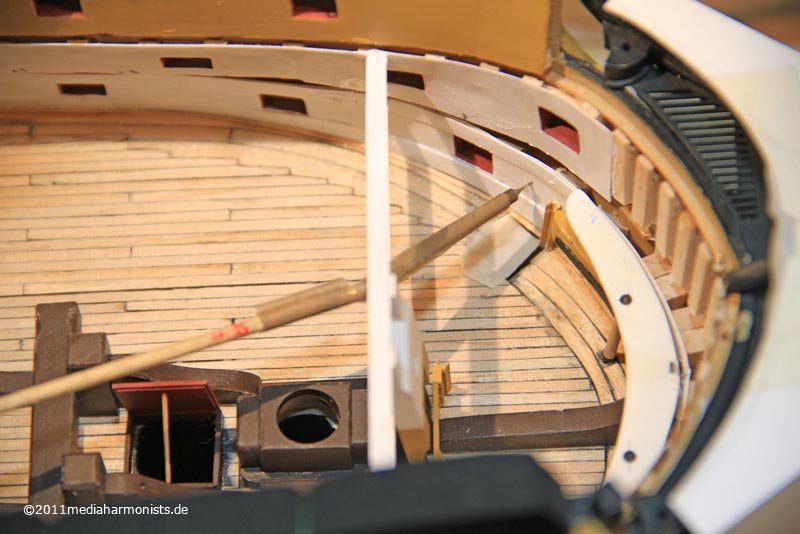 And next I needed some guides. First try out of polystrene sandwich was too thick ...
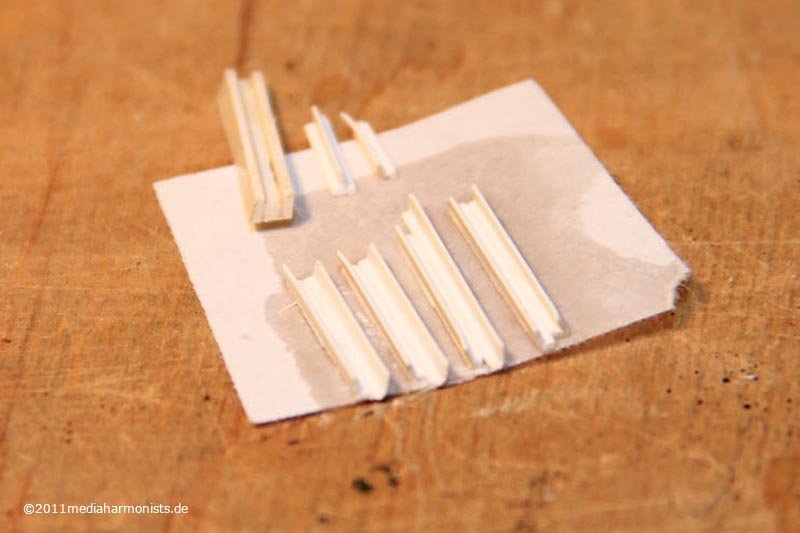 ... so I used the profiles that I made the rigols from and glued them onto paper – heureka.And what are they for?
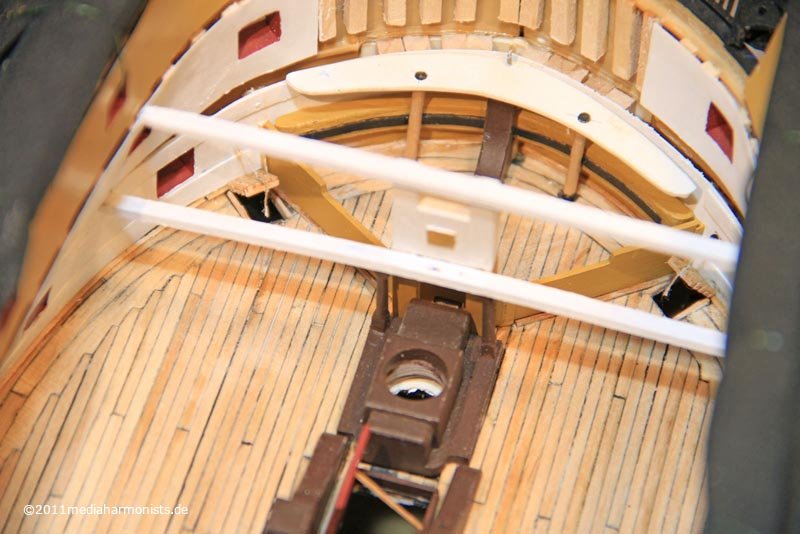 ... these are the guides for the manger side parts ...
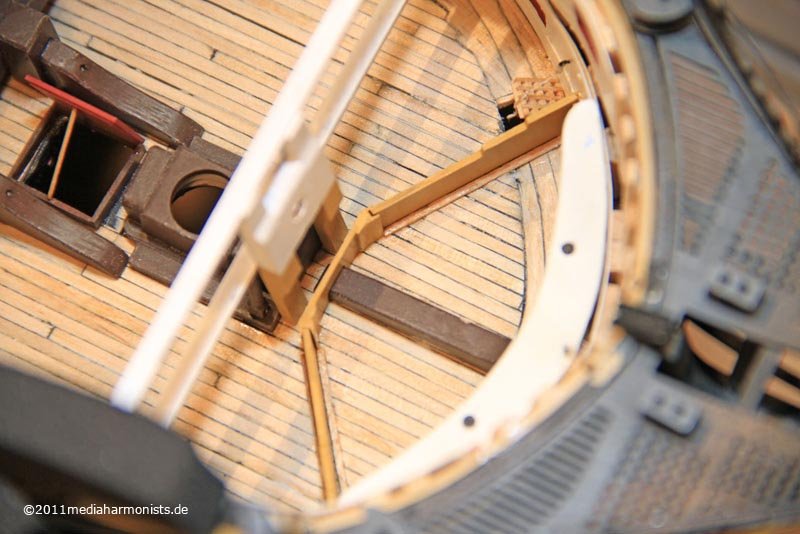 ... hihihihihi ...
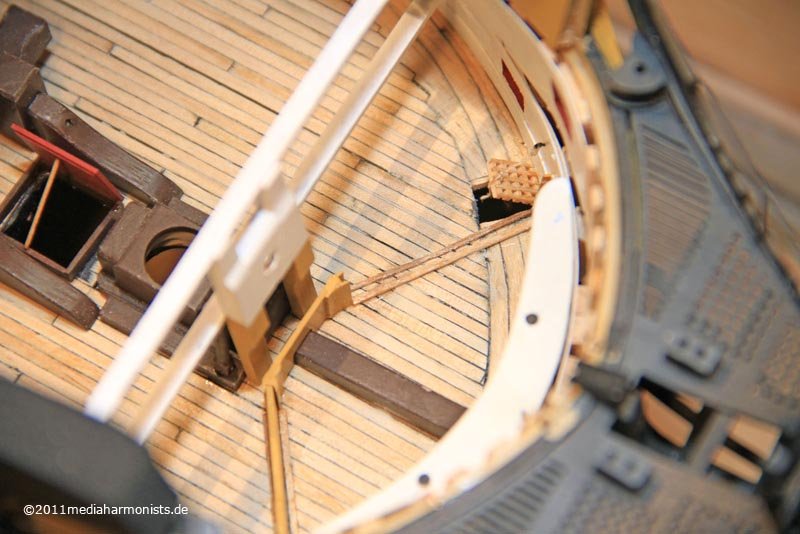 ... those can be taken out - what did you expect down here??!?:-)Seen from the back ...
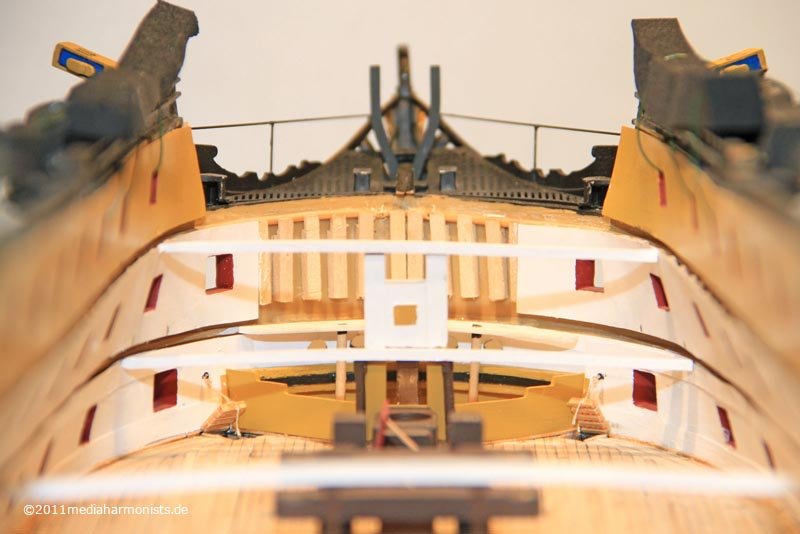
 ... and from the top.
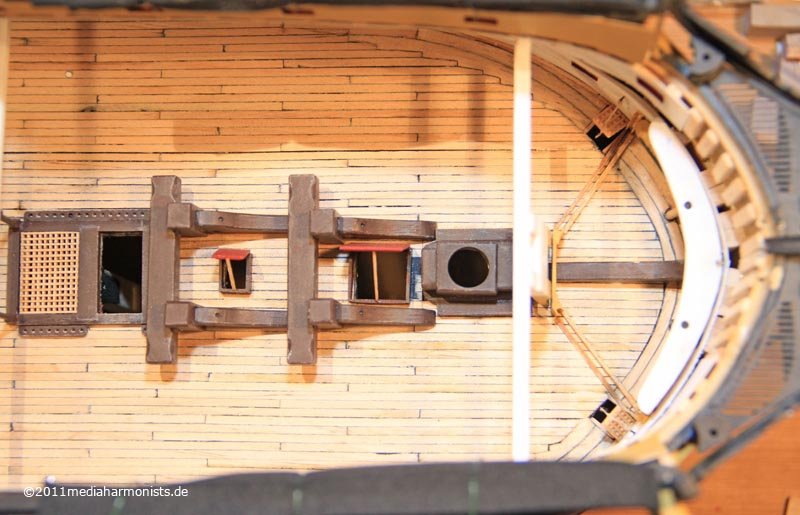 All the best, Daniel
 -
And here they are in their full glory:

 All the best, Daniel
 -
-
Thank you all :-)This gave me the push to update my ringlets. Right the original one (0,4 wire around 0,5 core), middle the next generation (0,25 wire / 0,5 core) and the baby (0,25 wire with 0,4 core) that has an outside diameter of 0,9 mm :-)
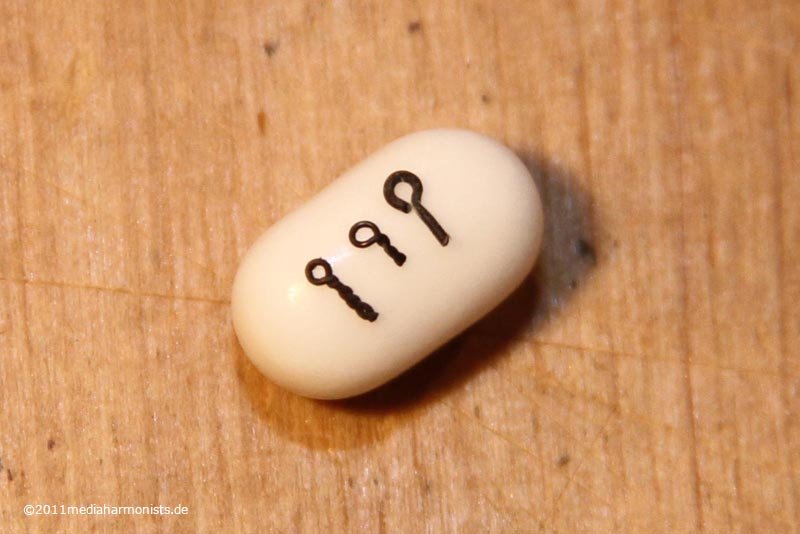 They are even too small for the guns, but great for smaller items like the binnicals.Here are some pictures of the dummies of the guns with good rings from the original production (not the first trials shown in the other gun).
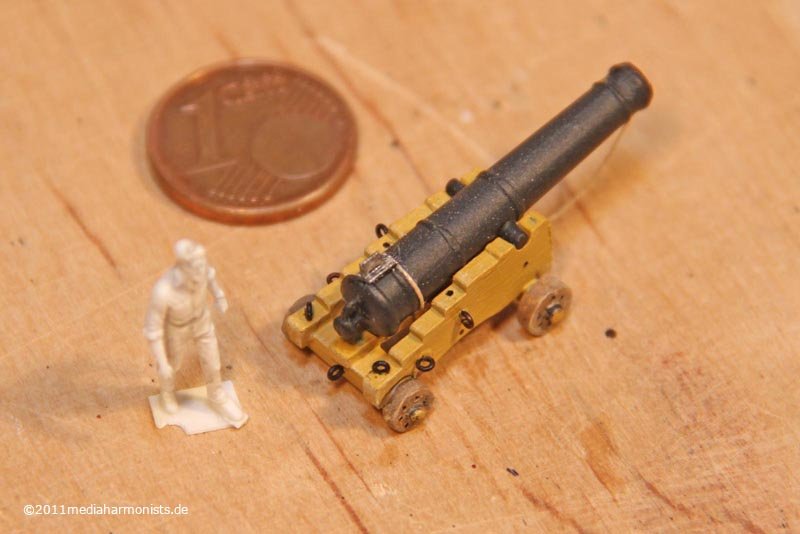
 To the naked eye they work rather well, especially with a uneven background like the deck planking.
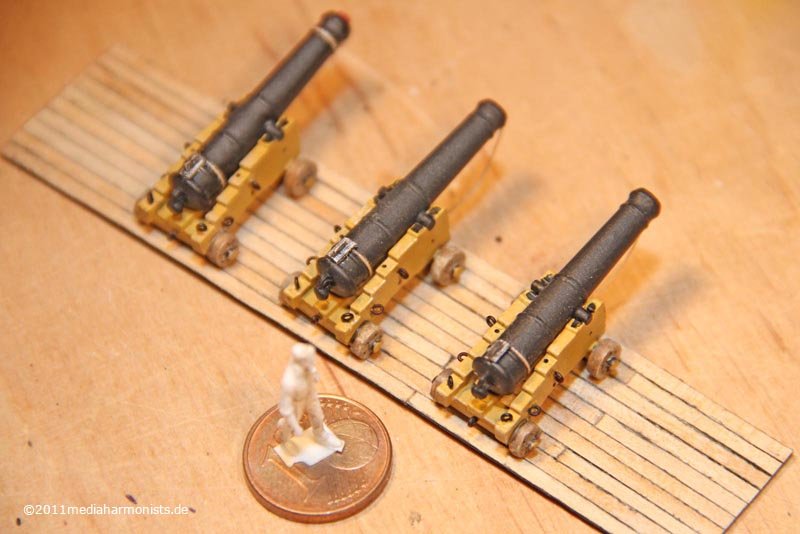 All the best, DanielOne ring to find themOne ring to bring them allAnd in the darkness bind themIn the Land of Mordor where the Shadows lie.J. R. R. Tolkien
 -
Yes this socks :-)Oh yes you got my trick, actually the rings are rather big ...Just to cheat I usually use the big dish in form of a Euro-Cent, the ostrich egg that is claimed to be a Tic-Tac ...
 ... the nitting needle instead of a sewing needle ...
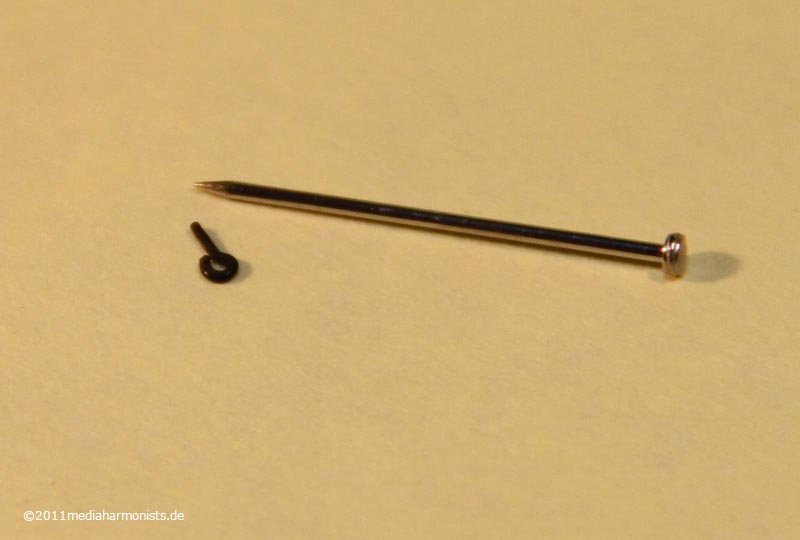 ... the stylo from the gadget-shop with the bowling ball in the front ...
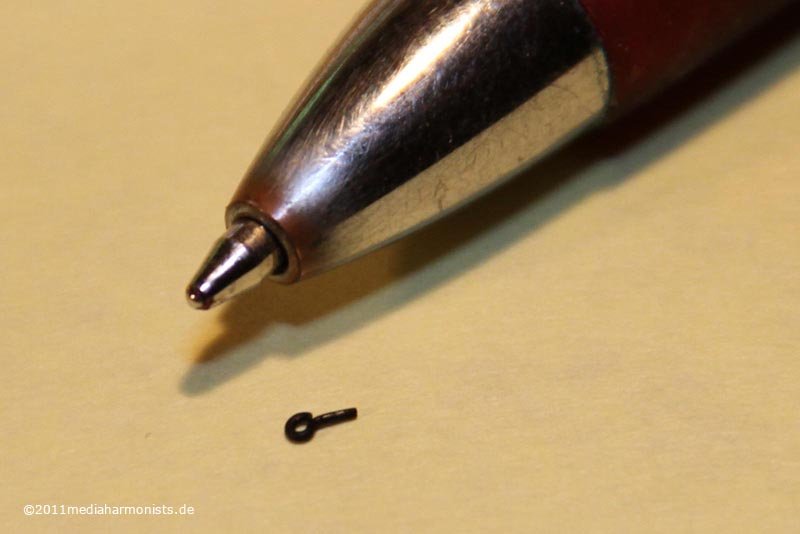 ... and the scale that measures meter instead of mils :-)
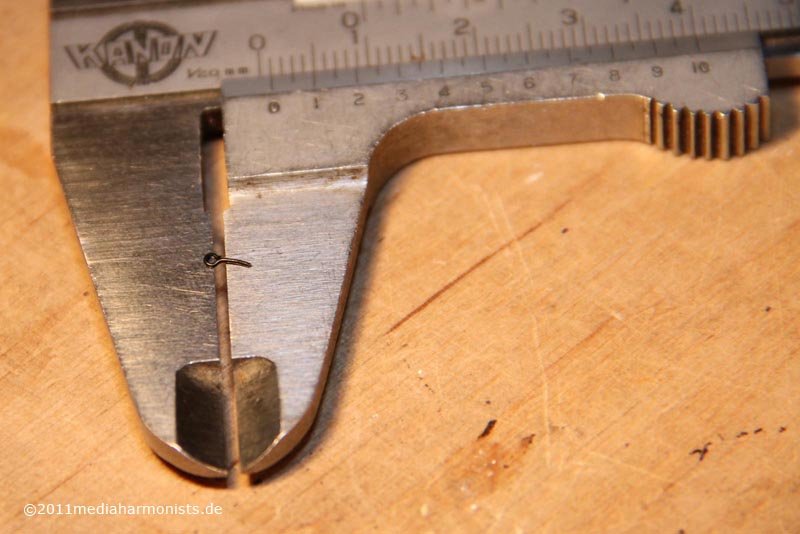 ;-)All the best, Daniel
 -
Last Weekend, there were a lot of good series in the TV, like Warehouse 13, Sanctuary und Ghostrider :-)And what does that mean?
 That I have some 200+ microrings for my built :-)Once started, it really takes off.And this is where they belong:
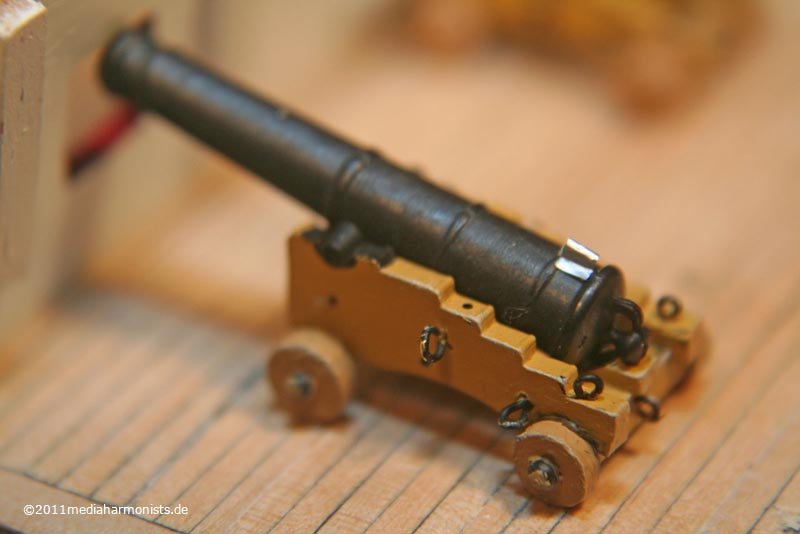 Oh I officially just need 1600+ for the guns including walls, blocks and gunports ...But I already decided to cheat a little bit :-)Somebody got a nice shot from the last shipyard audit, me doing the inspections ...
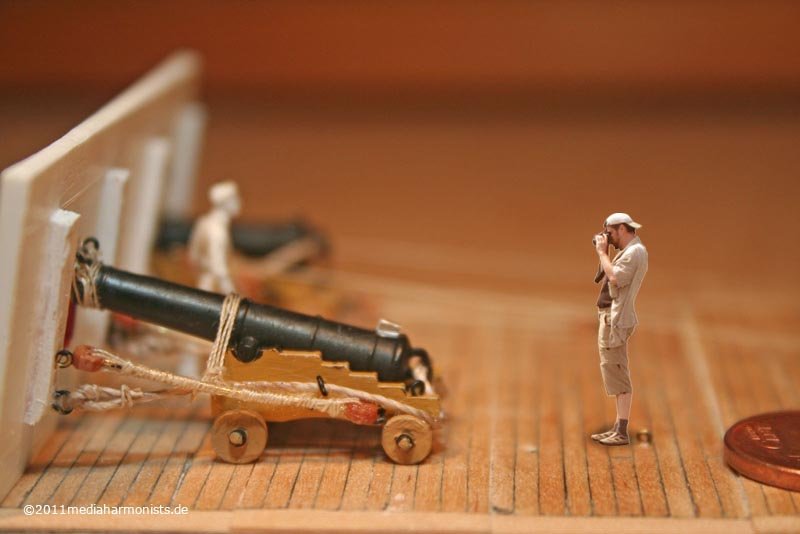 ;-)
;-)
-
Hallo Rosmarie,
nice to have you and your great build back online!
Daniel
-
... and it continued the cruel way ...
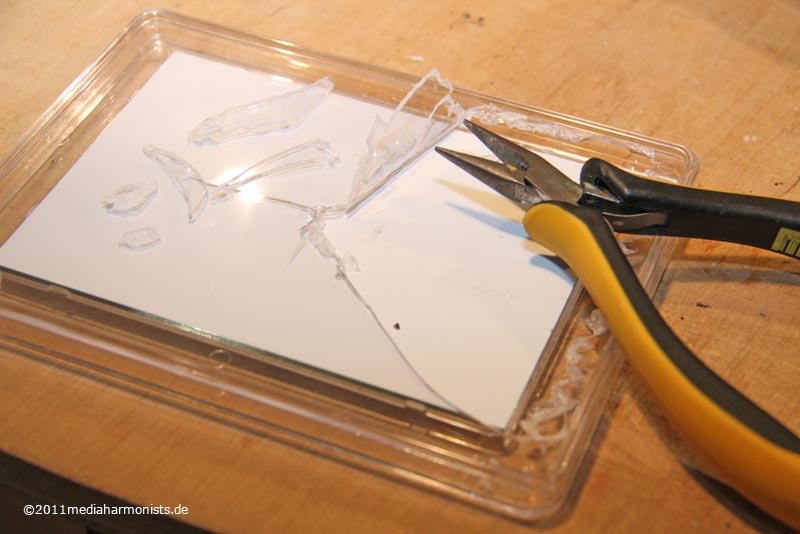 ... a brand new mirror being slaughterd in the most cruelful way ...
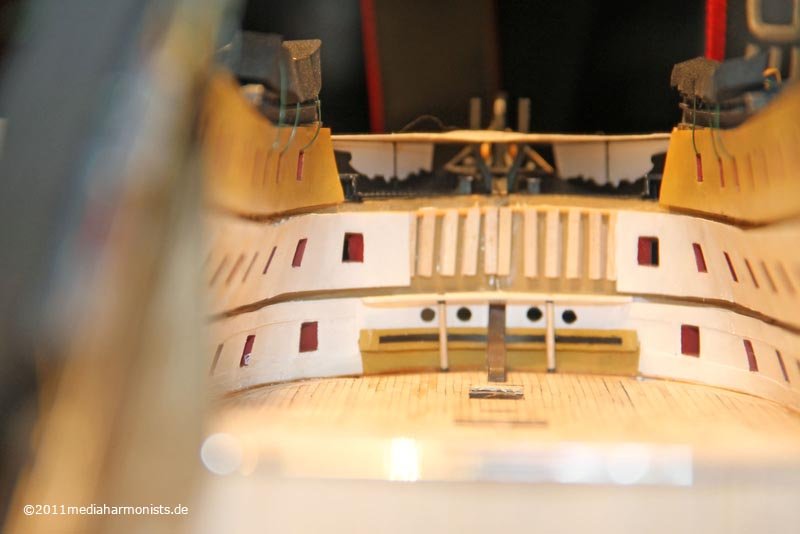 ... and what does it has to do with my Vic???
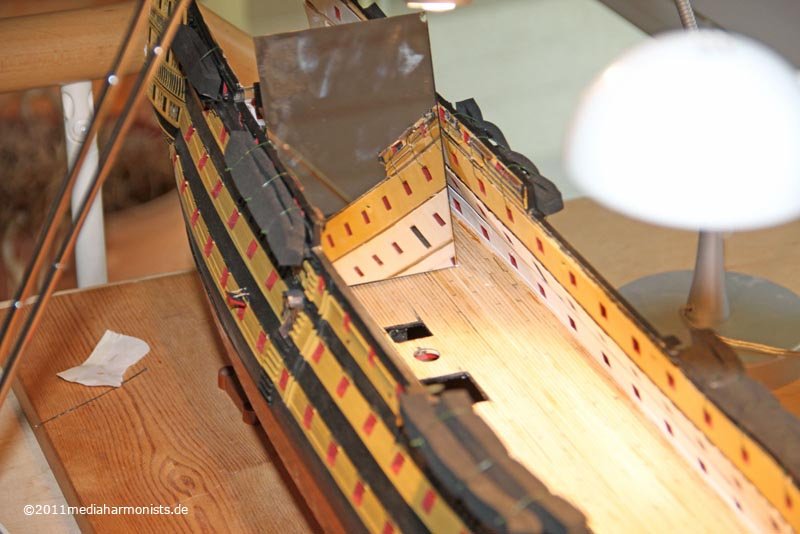 Aaaaaahhhh, for that the big camera is able to shoot deep inside the bowels of the ship :-)But first some pictures from the outside: The dentist would say: SHOW! YOUR! TEETH! ...
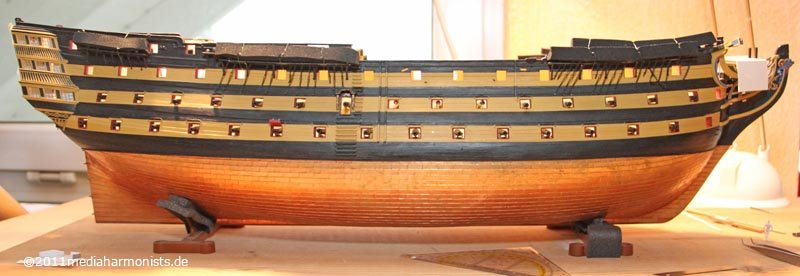 ... and as my sweet one is a well mannered cuty, she usually does not show everything that she has, but I could not resist to see her at least once as a porcupine ...And as she looks rather pretty like that, here some more close-ups ...
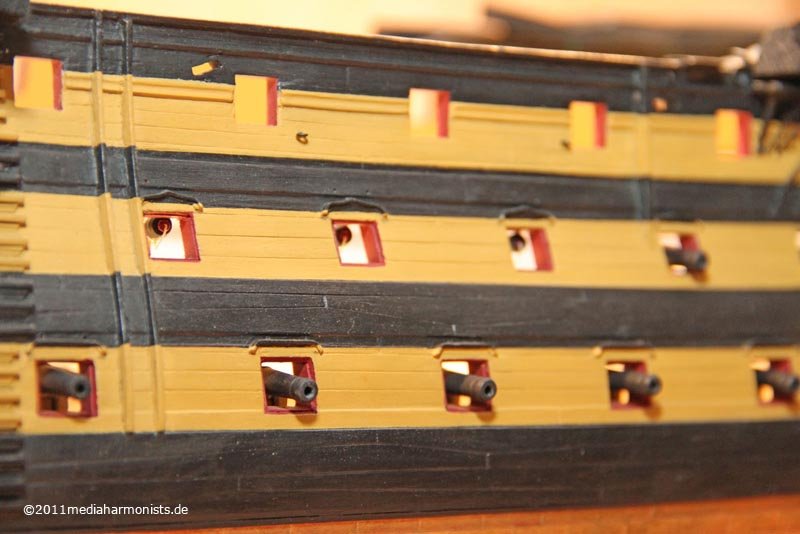 ... please forgive the gag with the gun in the side entrance ;-)
 All the best, DanielPS: One more thing ...I forgot to solve last weeks cliff-hanger ...... thaaaaaats who it looked inbetween ...
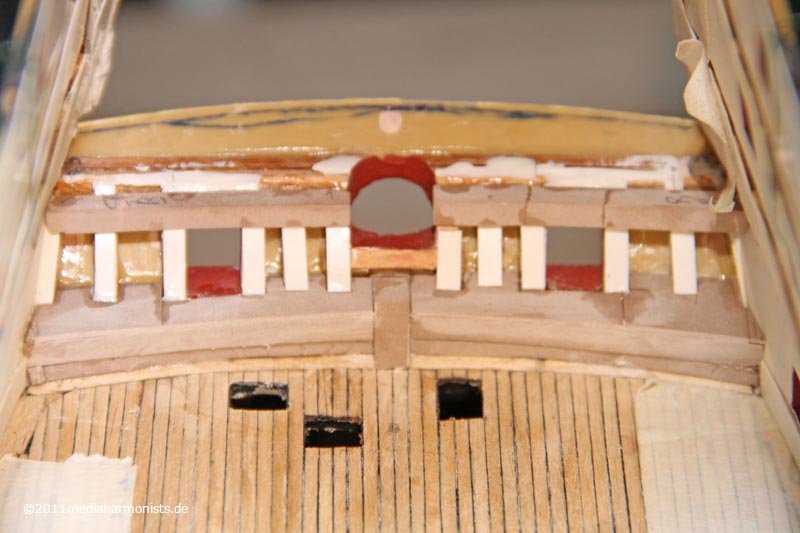 ... and that came out finalemente:
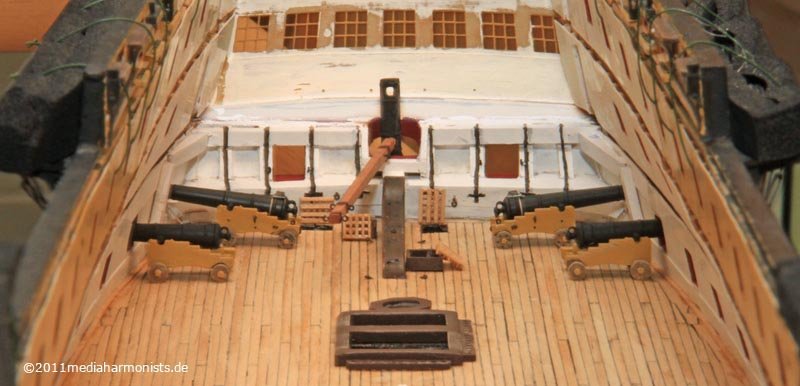 A little bit more overview ...
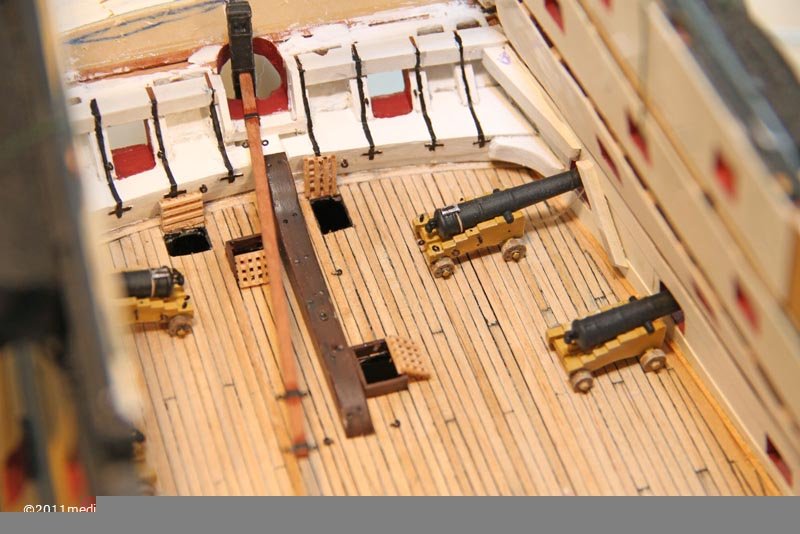 ... and the view from the decks thanks to my new mirror :-)
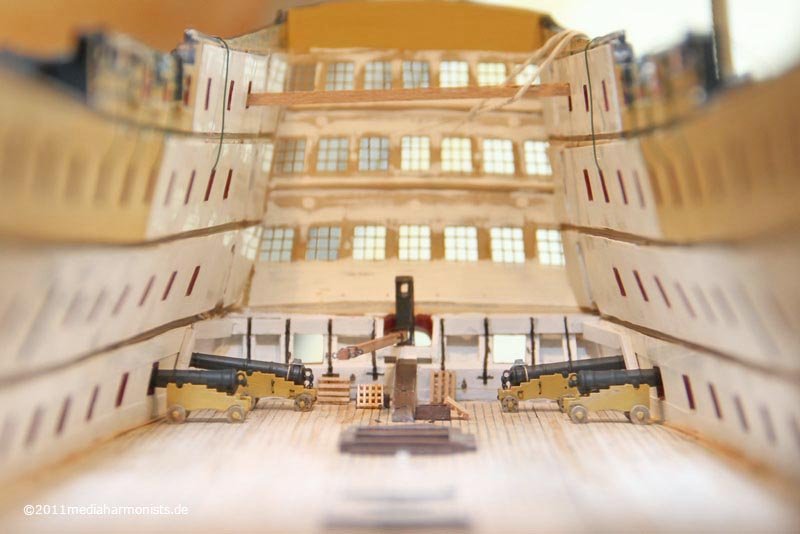 And to not forget the size the usual 1 Euro-Cent-piece ...
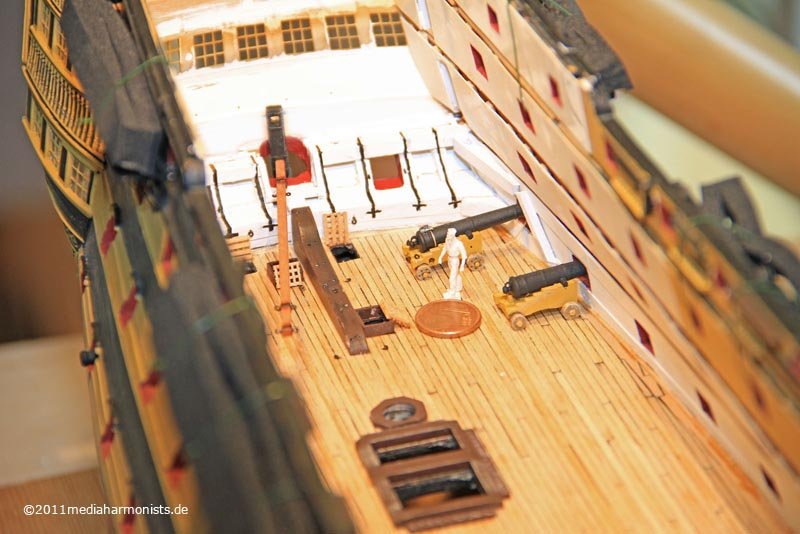 ... :-)Lieber Gruß
 -
Drama, craziness and desperation ...... and no moment to relax! Next I simply wanted to glue the decks in.In some tests Pattex proofed to be suitable. So dispensed it onto the decks and the cardboard underneath of the deckparts.And then this: Long ago I painted the decks with Humbrol and afterwards with Revell Aquacolor ...... and stupid Pattex did dissolve the old paint ...... nice waves and no idea what to do other than simply continue. Then I was disturbed just before putting in the third part and when I came back I simply continued ...... and it looked succesful ...... until the next day, when the third part came off again :-(
 So carefully operated out this part. Rubbed of the old Pattex with tte finger from the deck ...
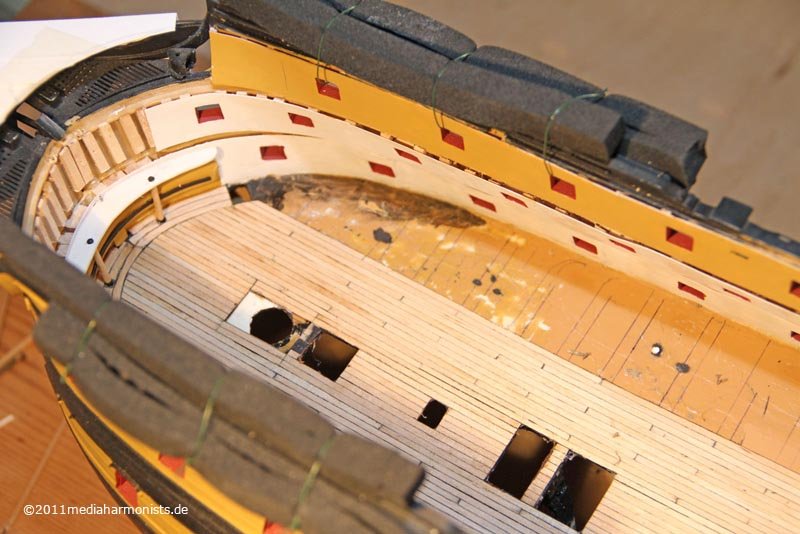 ... and cleand the cardboard with sandpaper :-)
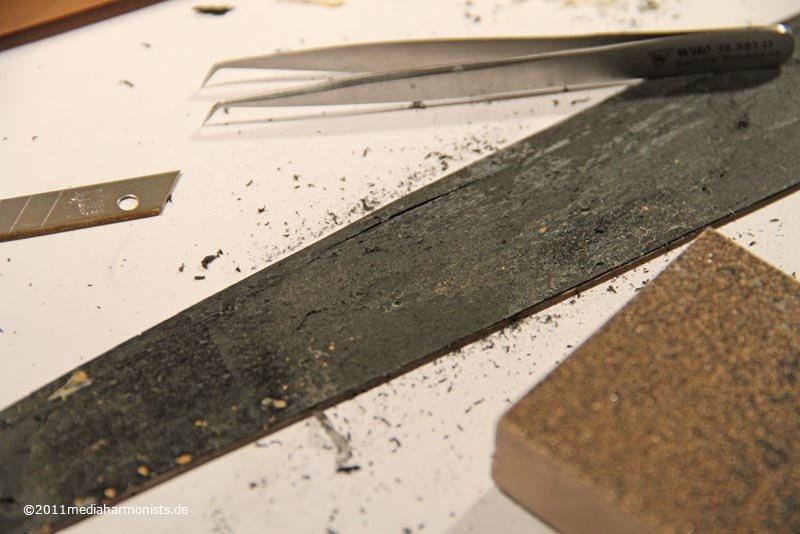 And reglued and succeded :-)- at least until now -... and it continued in a brute way*Disclaimer - as usually we warn sensitive modelbuilders about the following disturbing pictures*The aft end of the lower gundeck was done quite a while ago. As the idea about the ship evolved further, I wanted to change it :-)So looked for the transoms underneath and then attack, no prisonors!
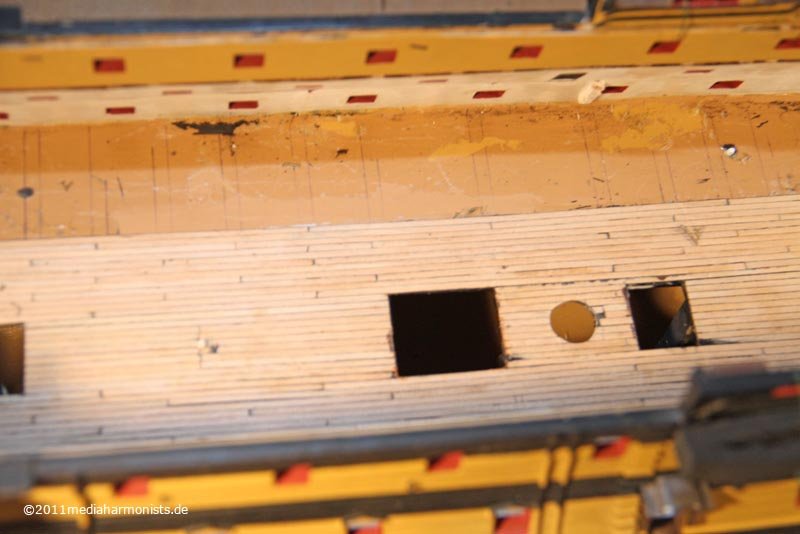
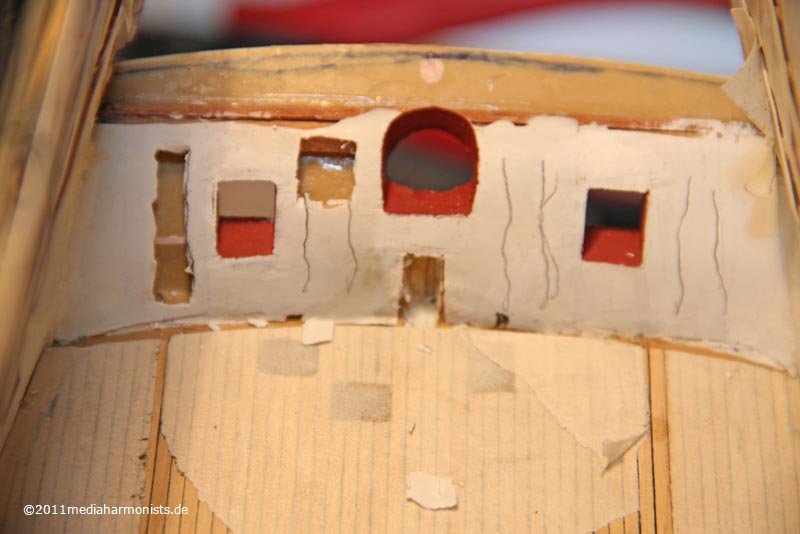 Why does my work always looks like battle damages ?!?
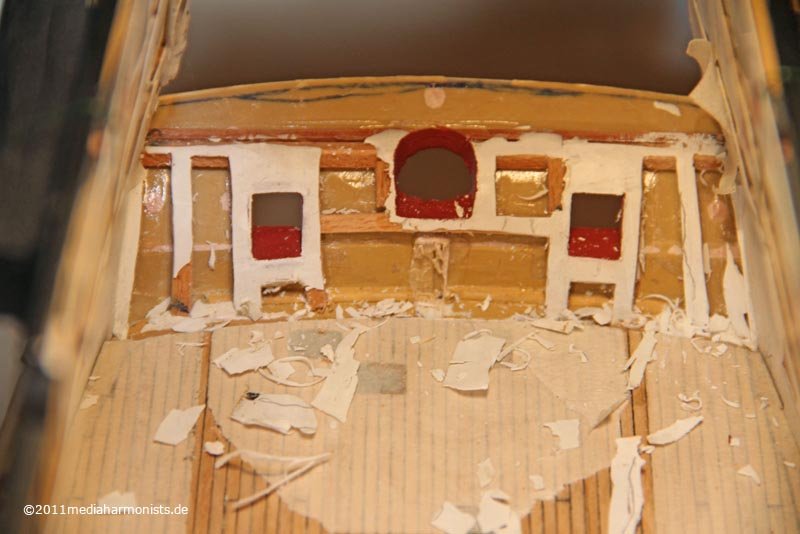 And so the wooden deck turned out to be some millimeters to short for the now longer deck so I had to fix a fix
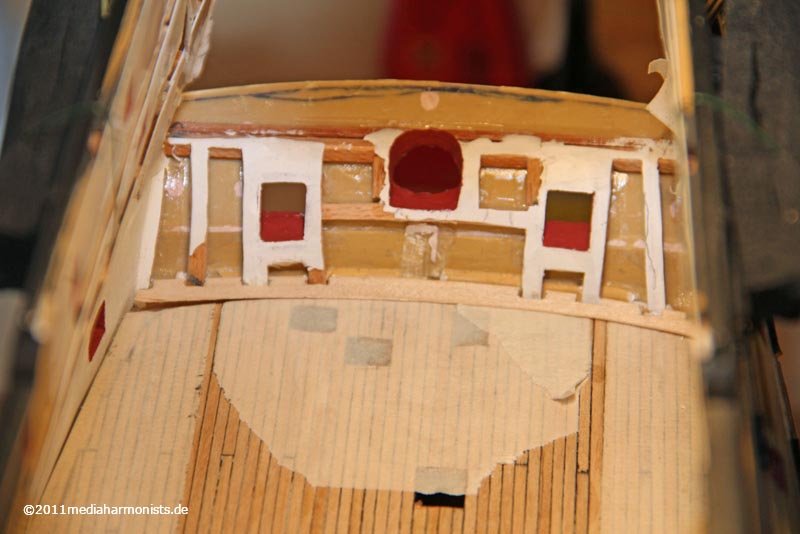 ... and this gives a nice cliffhanger until the next update ;-):-) All the best, Daniel
 -
... ah by the way, one more thing ...
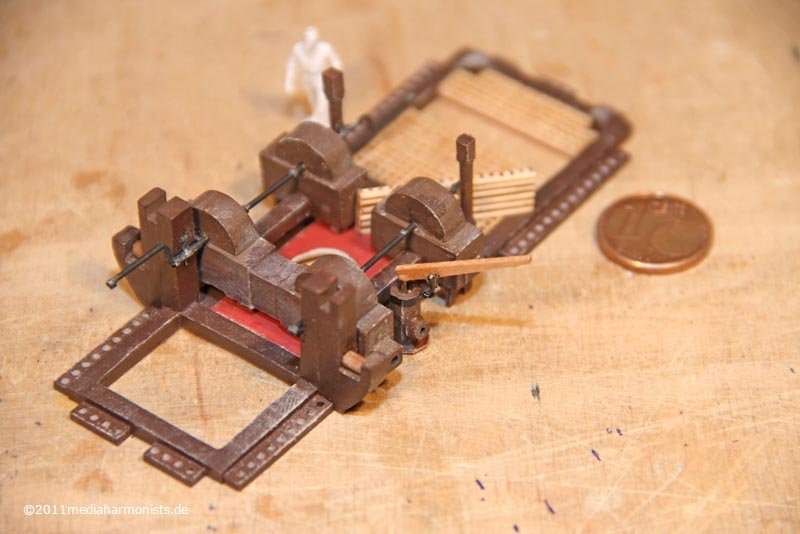
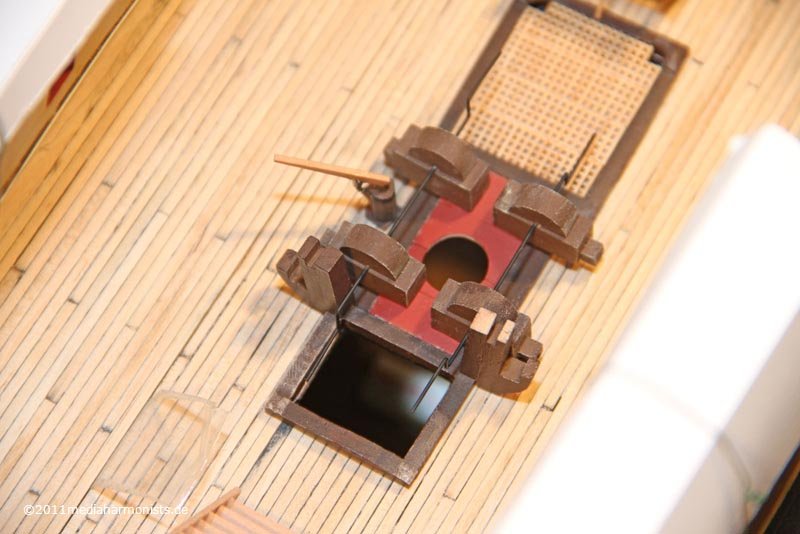
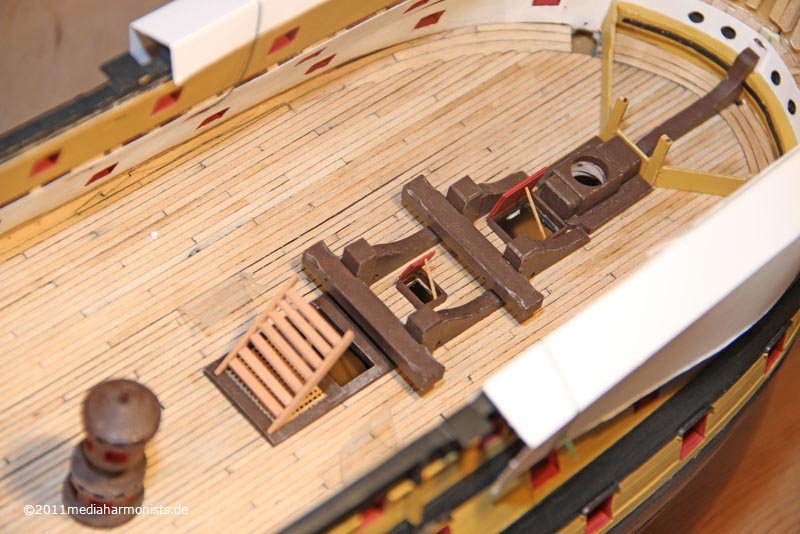
... worked on the pump station ...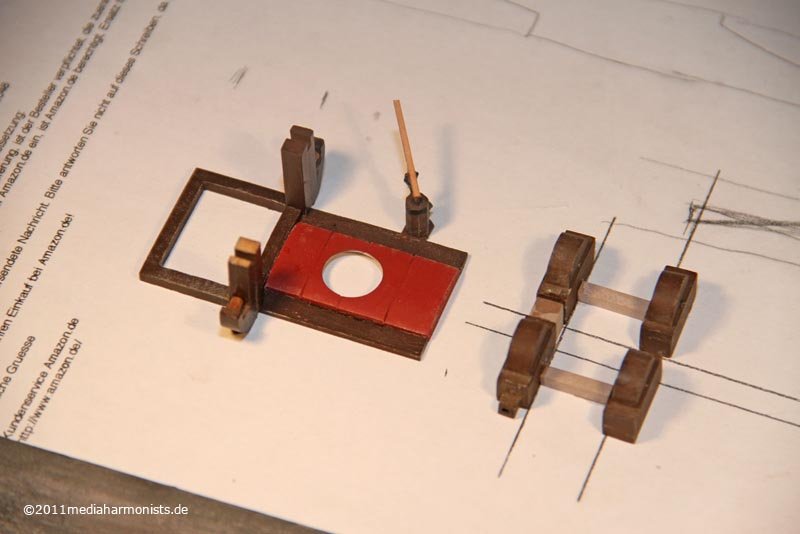
... my cute little pump - presented in one of the first posts finally found her place, the 4 chain pump casings are interlinked which makes sense as now the discharge can be directed to lee ...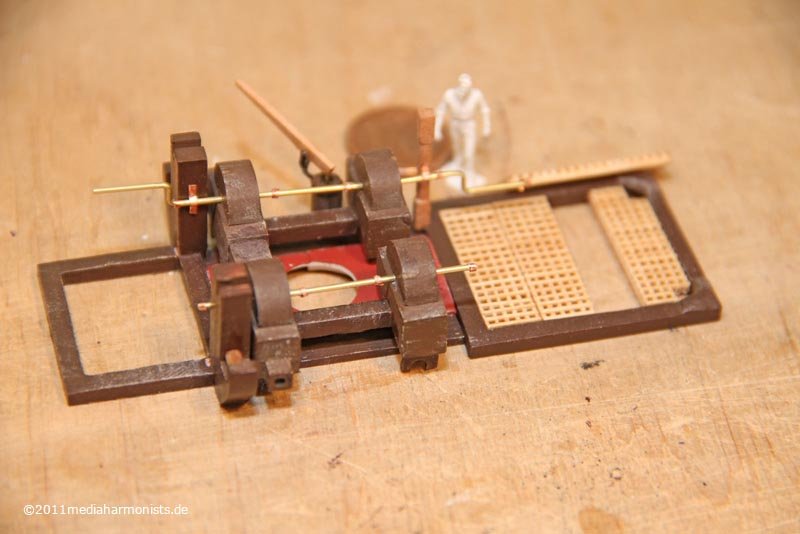
... the handels became their fittings and the shotracks are fixed ...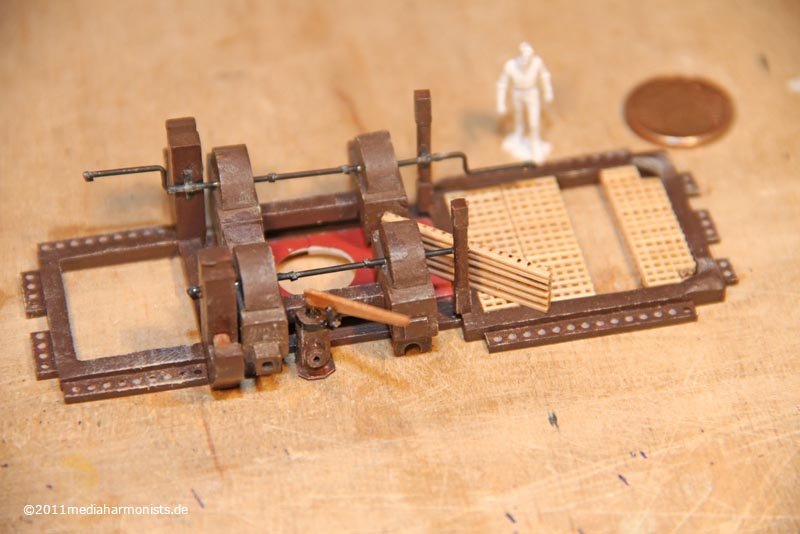
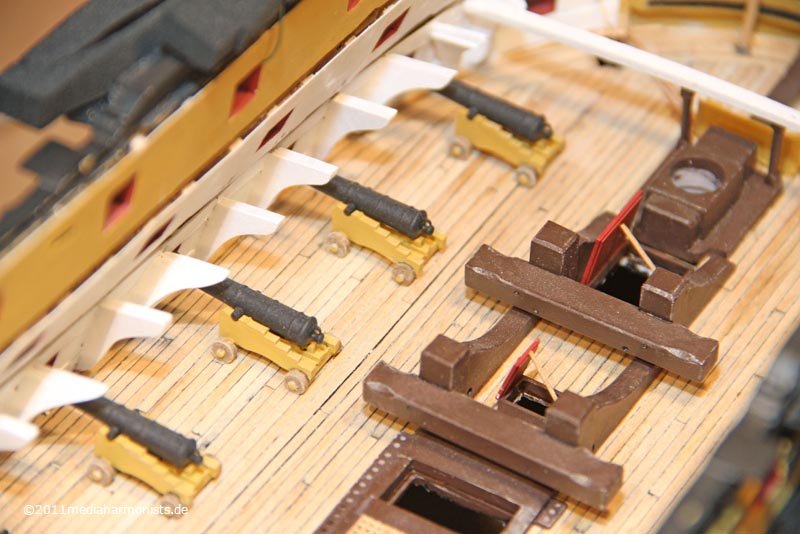
 ...Ladies and Gentlemen ...Hurray, it took off again!!!... AND: Partytime for Rob ;-)After lots of work for the office I found small time to continue my build. From time to time painting some carriages, spraying the barrels, and - once I had enough of them done - trying them on the decks as reward :-)
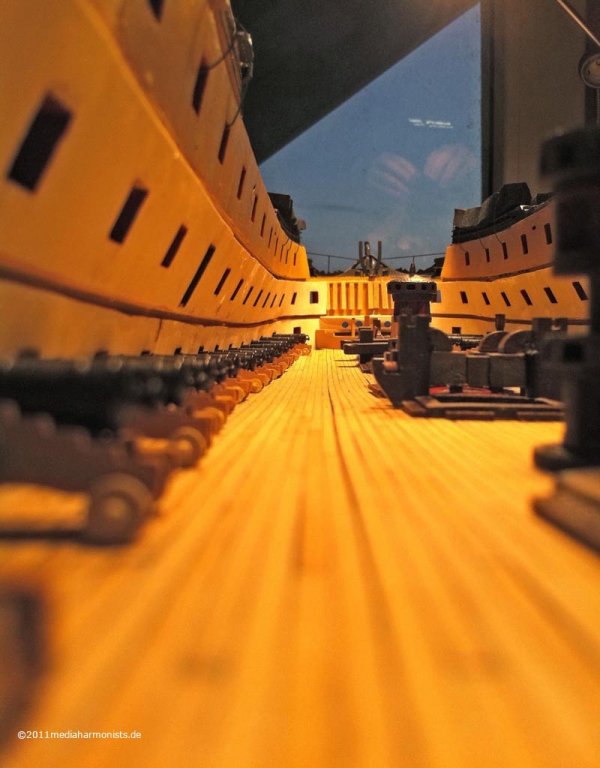 ... and risking an eye ;-)
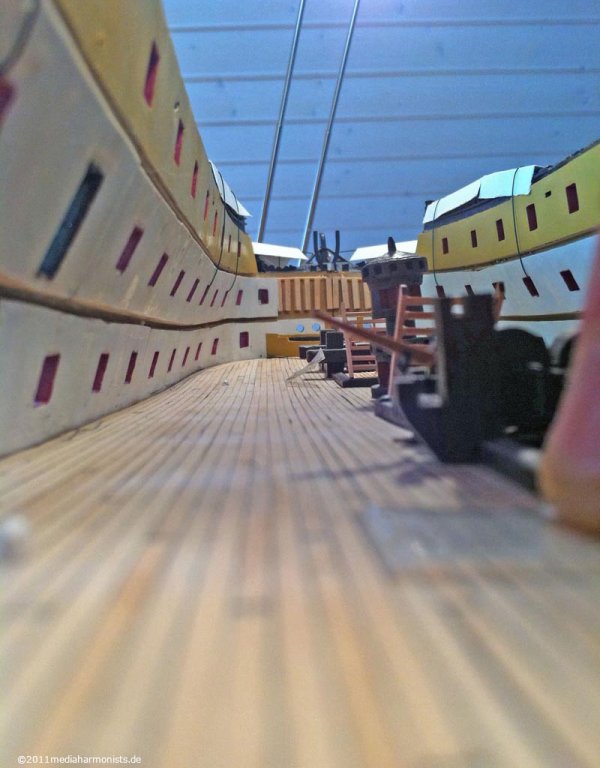
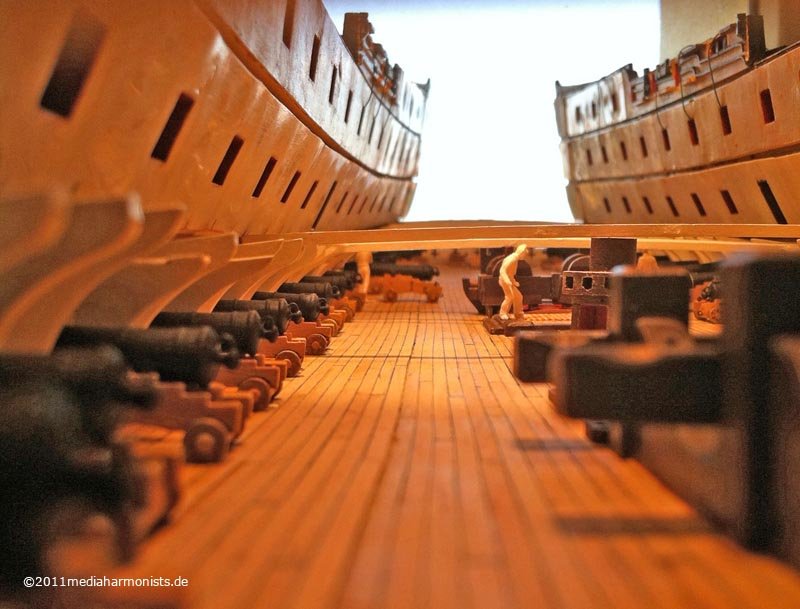
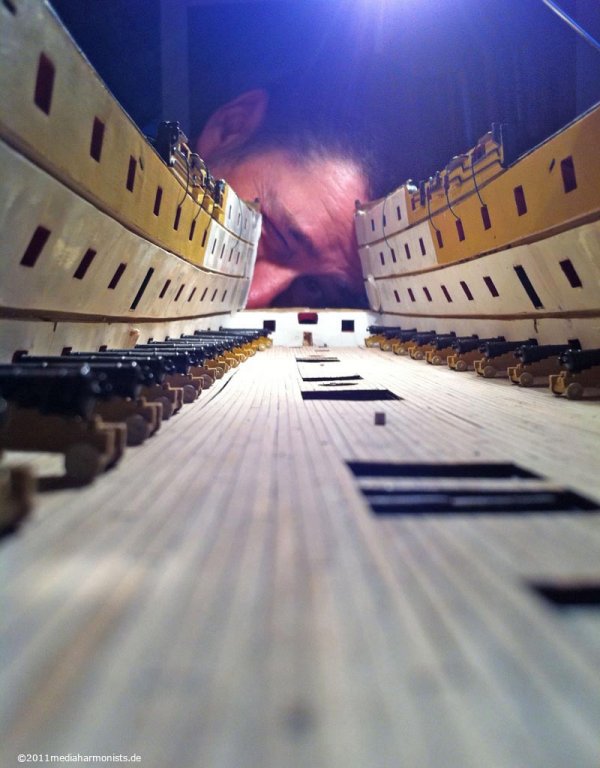 One can see how litte place there is, once the guns are run in ...
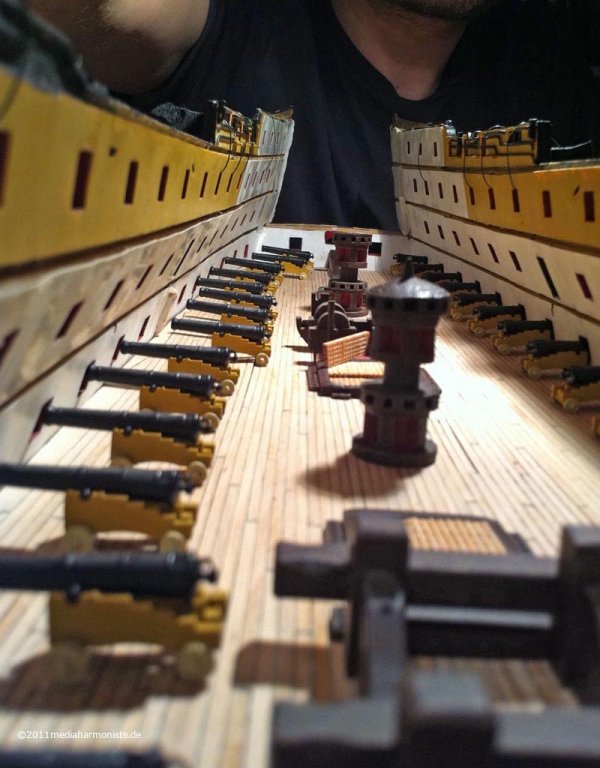 ... especially in the area of the pumps.
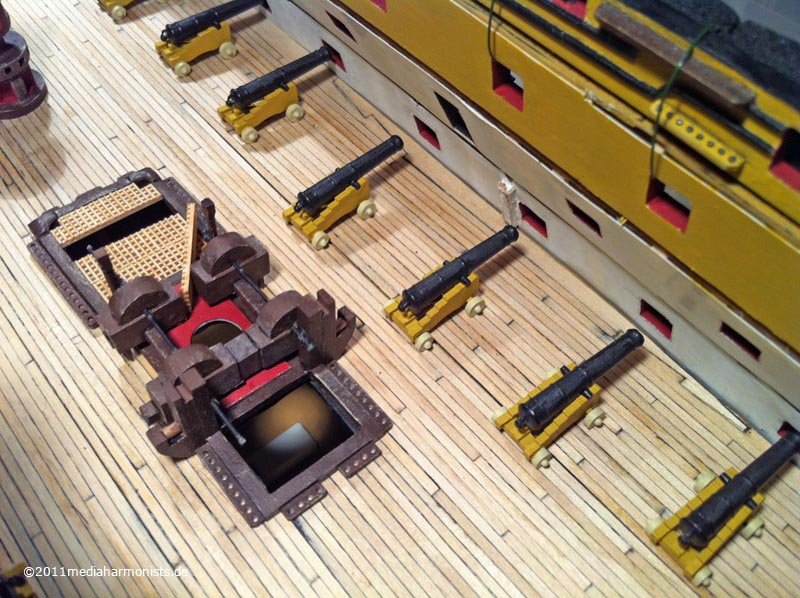 The carriages are just with the basic color, but it already looks great, doesn´t it ?!?Next were the tompions:Either as seen in Portsmouth on the front of the barrel or inside as Arming und Fitting and other sources indicate? So one version with flat on the muzzle and one with the tompion more in. The thin securing line fixed on the barrel and once on the muzzle itself.
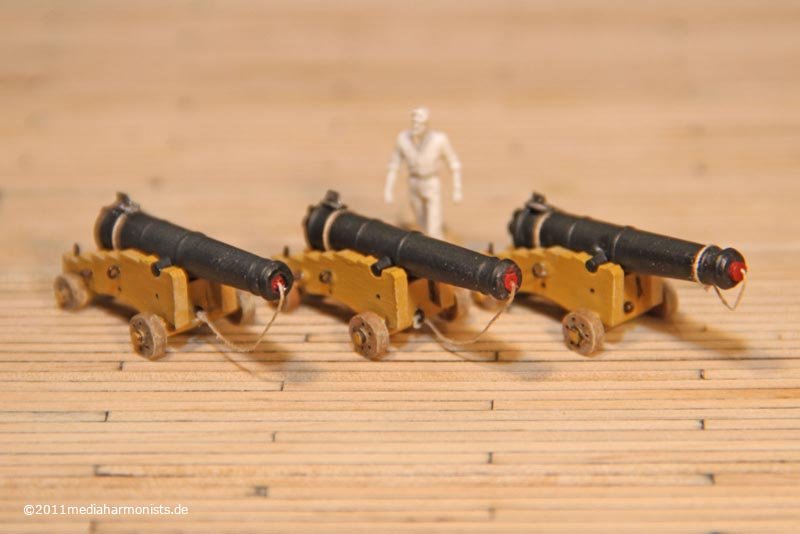 This is who it looks from the outside ...
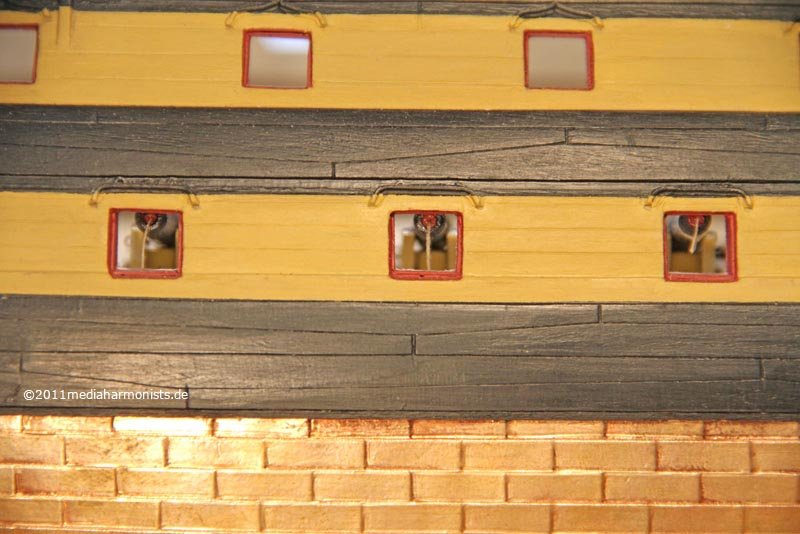 ... and with the gunport lid. The small red dot inside the muzzle simply looks great, looks like the captain had some spare money left from Christmas :-)
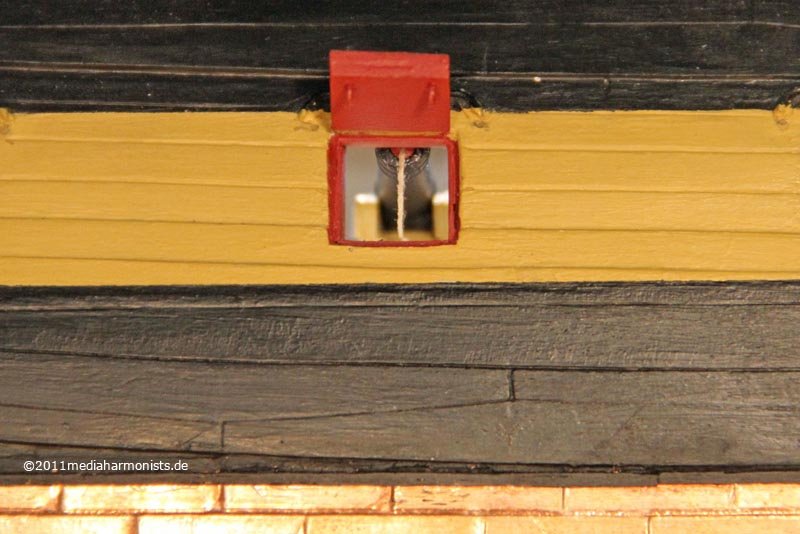 Even the wheels can be seen...
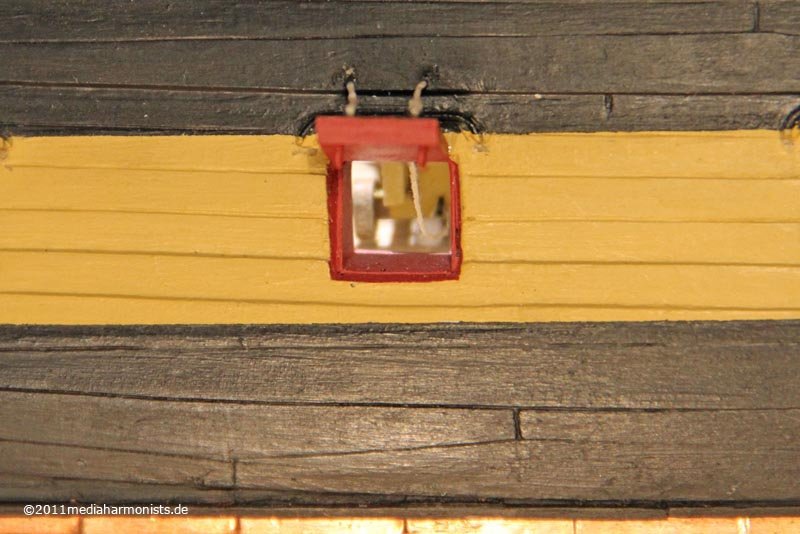 ... and that is the inside.
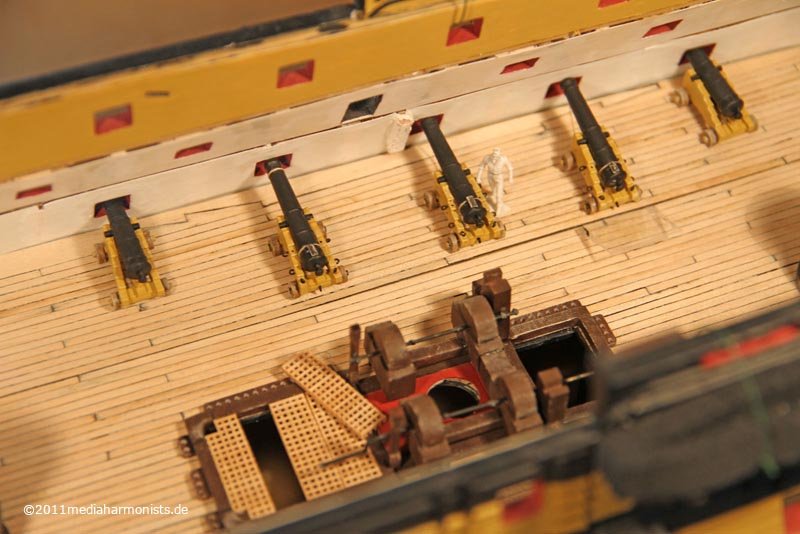 Hey-ho that´s fun :-)But sometimes things can go differently ...
 -
Just two technical hints:Repacked the channels and timberheads after I heard a nasty crk underneath the old white cardboard protection ...
 ... and I managed to construct my special fittings for the saw in a way, that I can remove them and refix them with double sided tape :-) :-) :-)
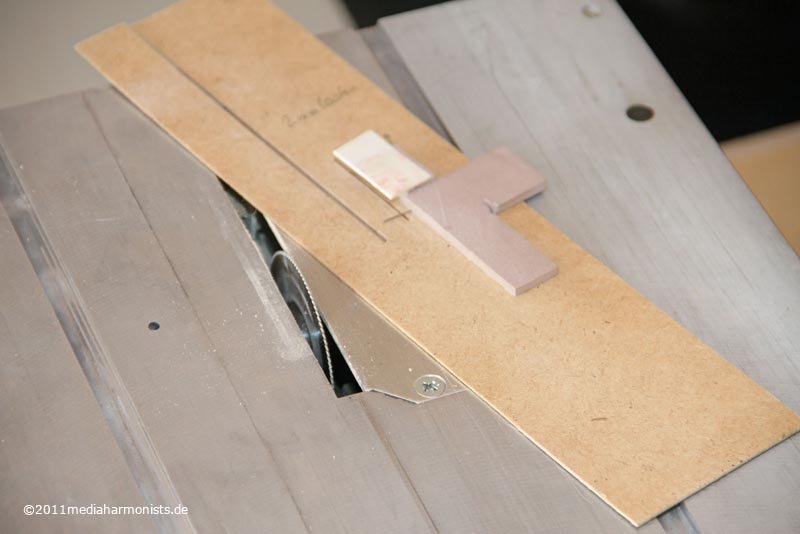
-
Hello Popeye,
great to see this again, I am actually enjoying all these déjà-vues :-)
Great work, daniel
-
... so that gives me a little bit time still ...;-)So things blopped in place ...
 ... and for that the enormous thing fits, I devided it already in an early stage into 3 parts: center with the openings and the side wings. For that everything is always on the right place I added two pins for guidance per part and I also fixed tape as handles to remove the side wings :-)
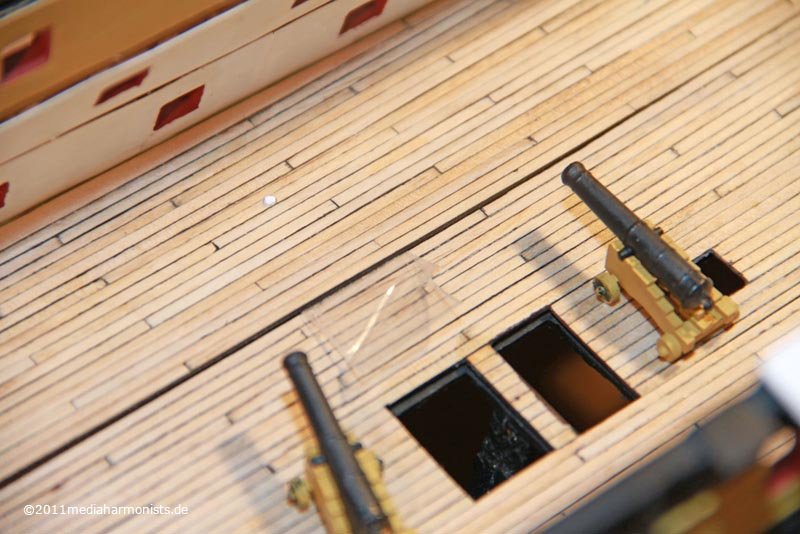 I took small steps to find the right form resulting in an interesting patchwork.
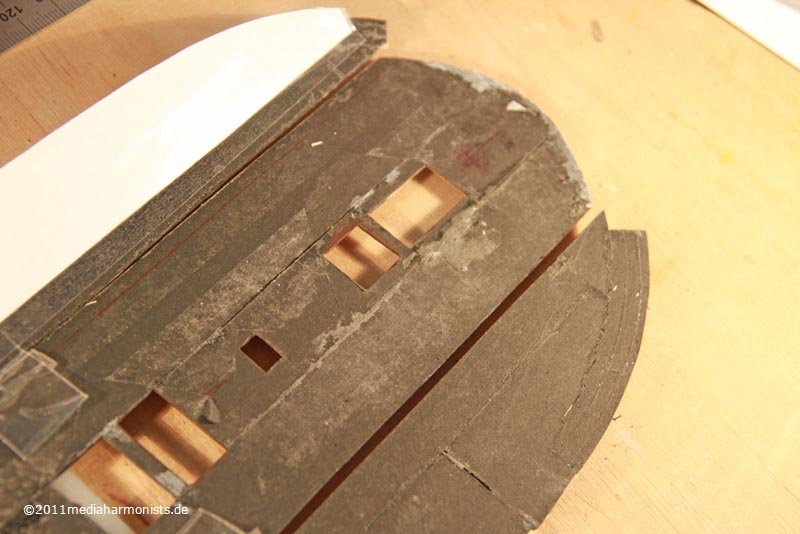 As first step to find the form I used normal paper, and devided it into smaller parts to have easier working. Next putted double sided tape on it and placed the wings upon and so fixed tha paper on the right place underneath ...
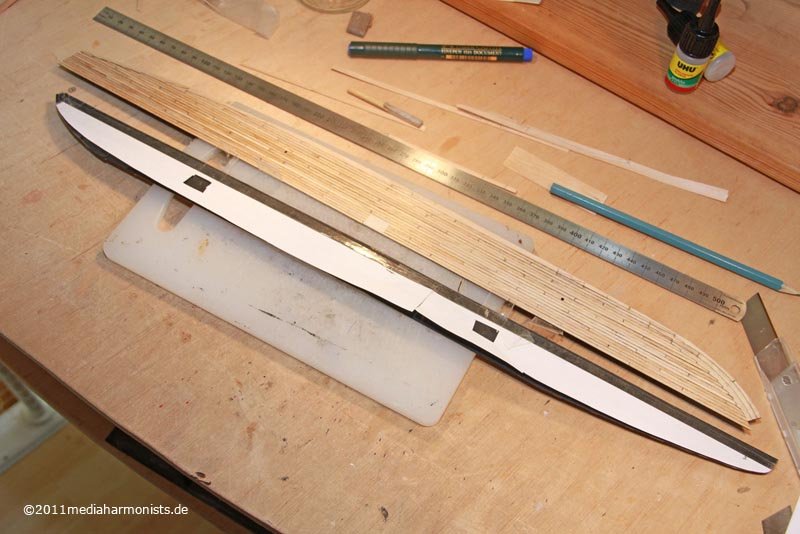 ... checked the upper side ...
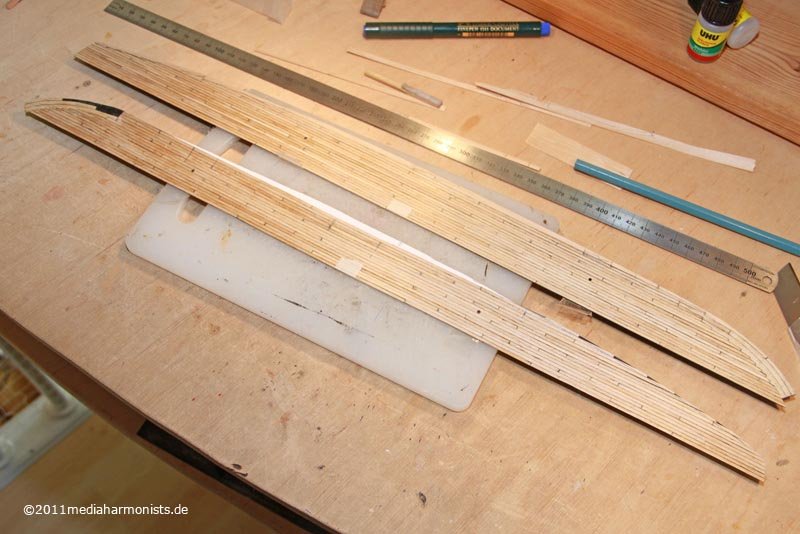 ... placed the black cardboard inbetween ...
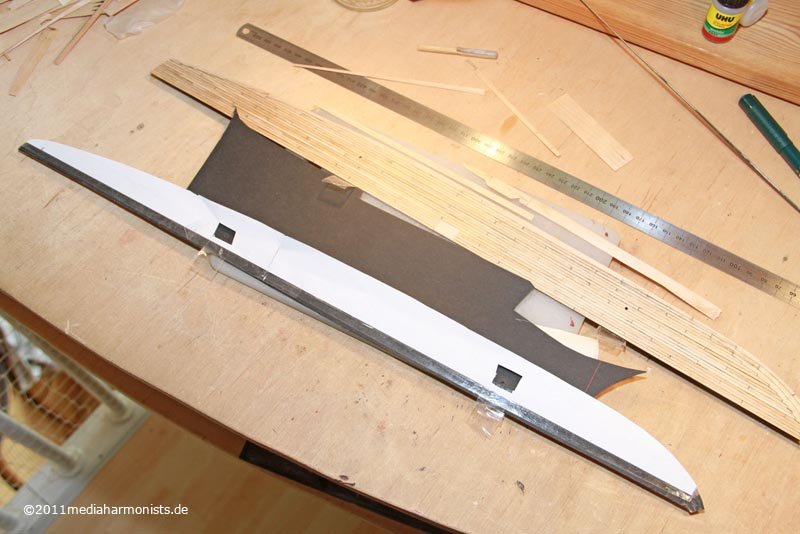 ... used the white paper to trim ...
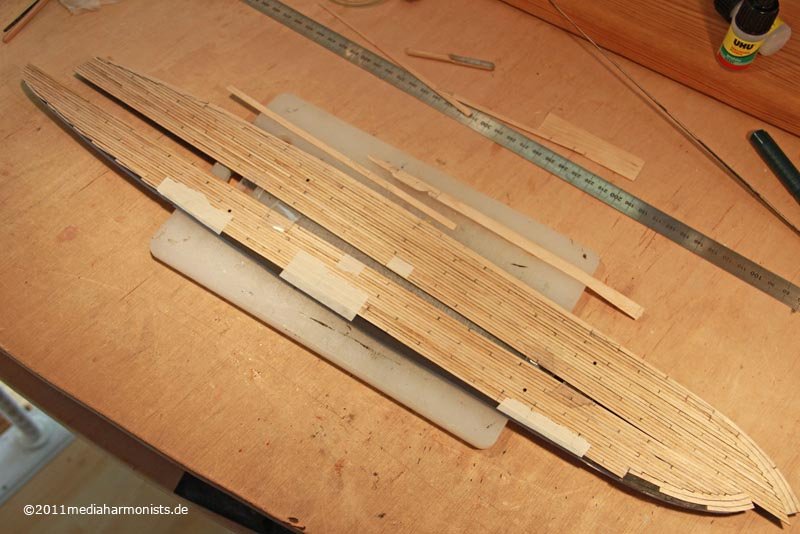 ... and got a nice outline for the planking.Next came the waterway ...
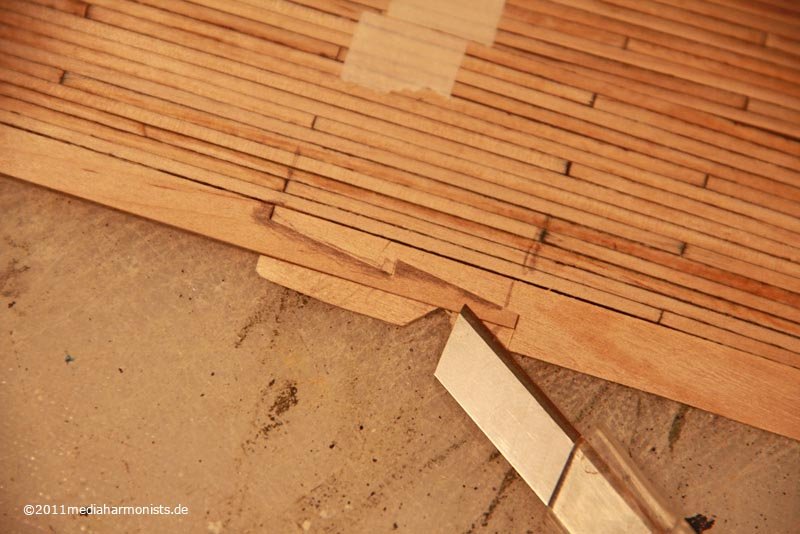 ... used the upper plank as a template to cut with the knife - went really smooth ...
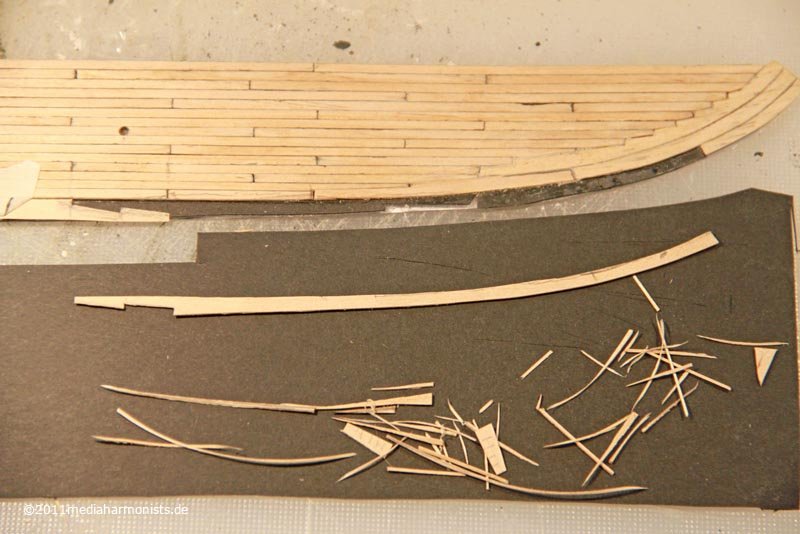 ... and worked ma way round the curve. The teethy parts are much easier :-)Even thoug mcKay is quite sloppy with his drawings concerning the planking, I liked the triple waterway at the heads and I want that ...
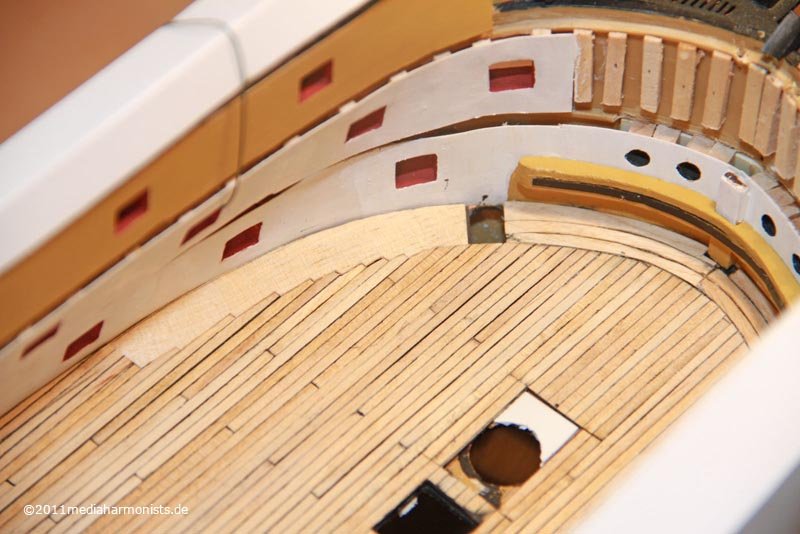 ... slowly getting closer ...
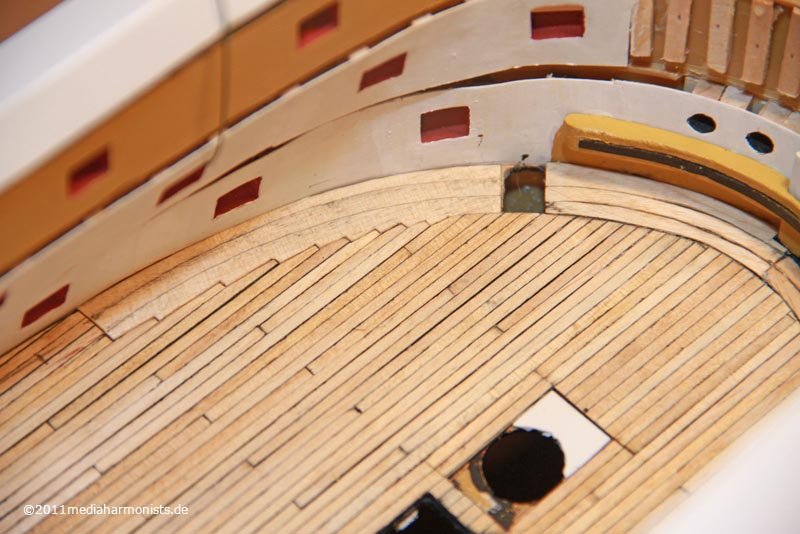 ... YEAH Freestyle ... what a mess in the first trial ...
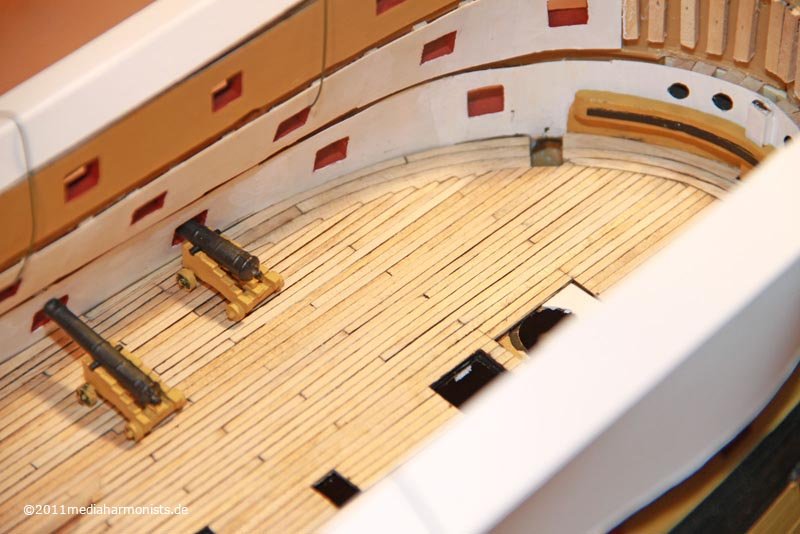 ... the other wing went down a little bit better - below on the picture - so afterwards I ripped out that part on the first wing and replaced it by a better version ...
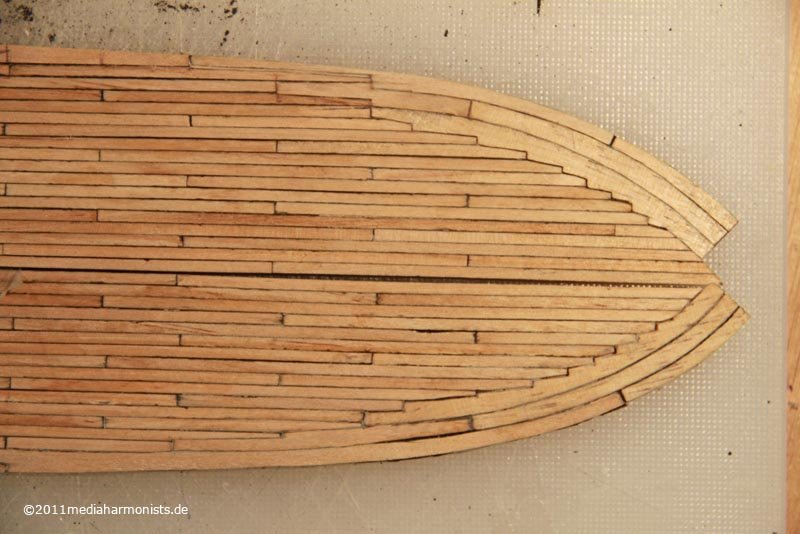 ... and got something in the end that could look like a planking scheme ;-)
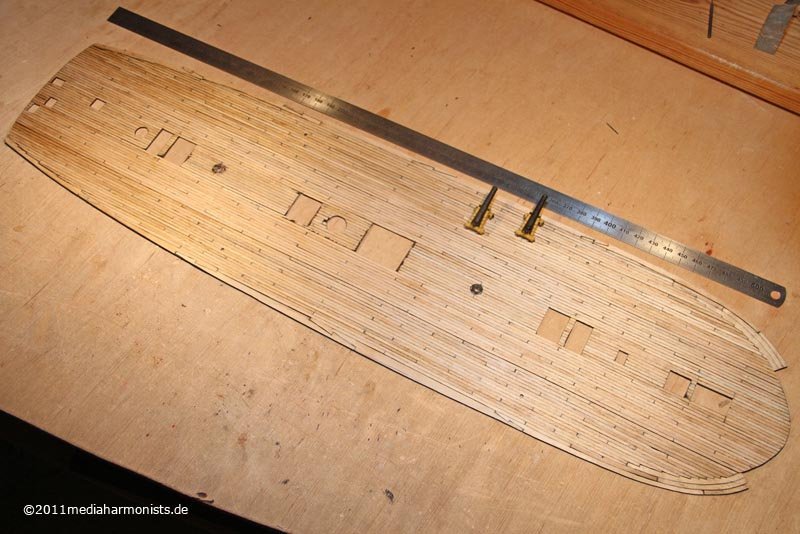 Of course - immediately throwing in my small parts ...
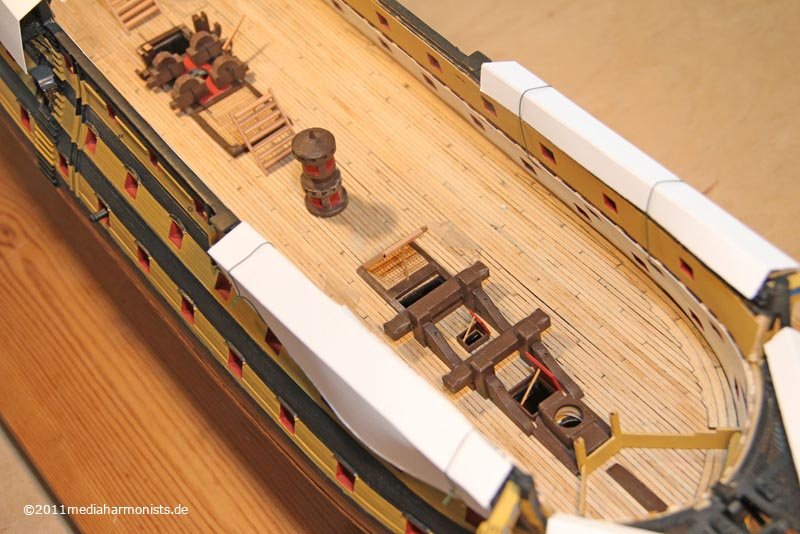
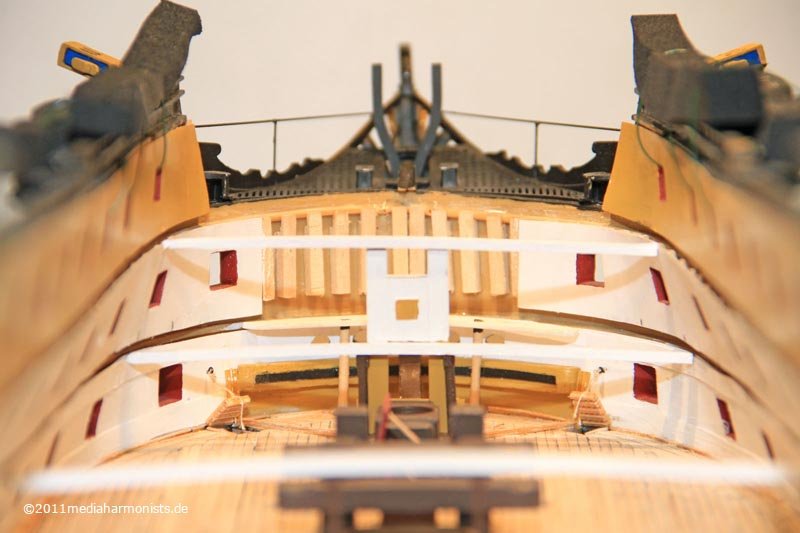
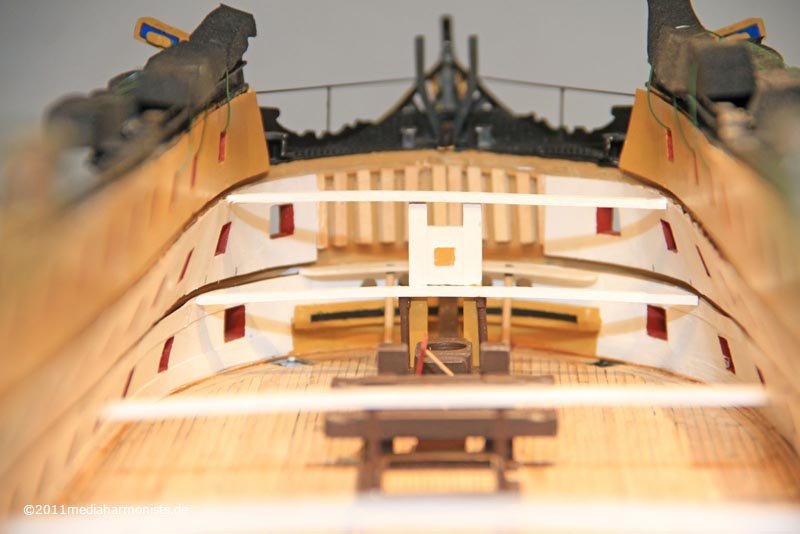
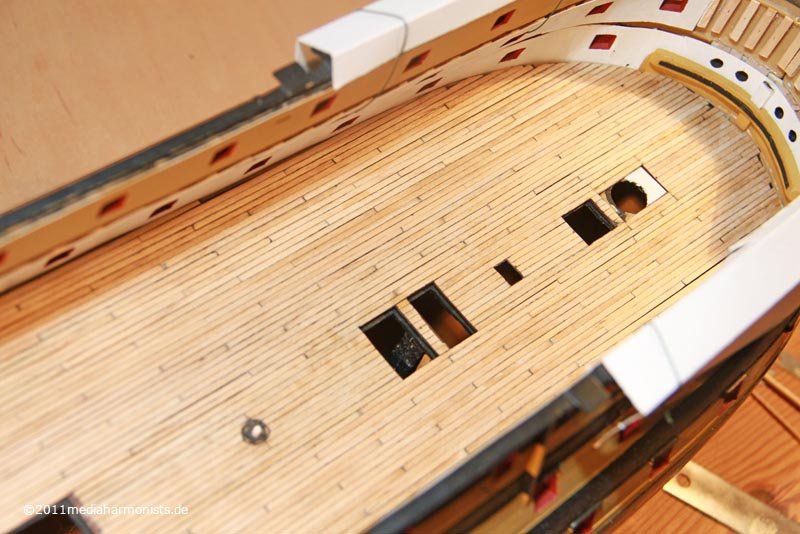
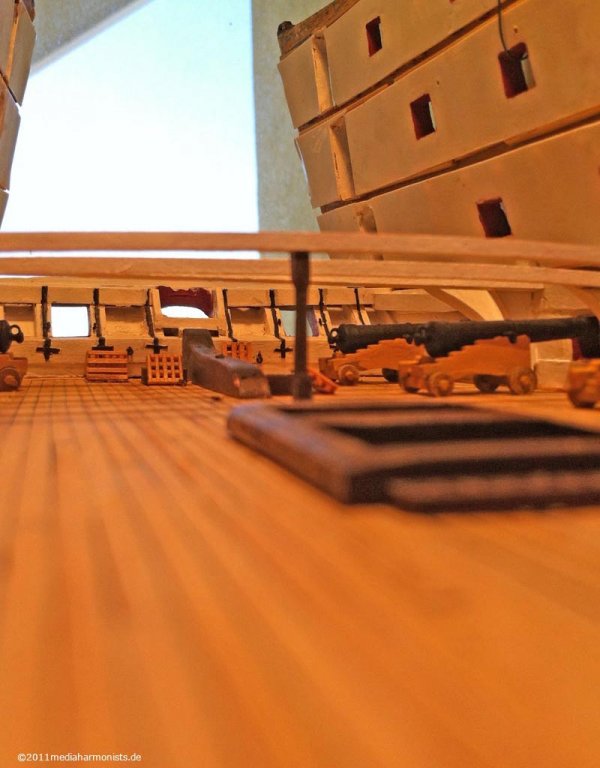
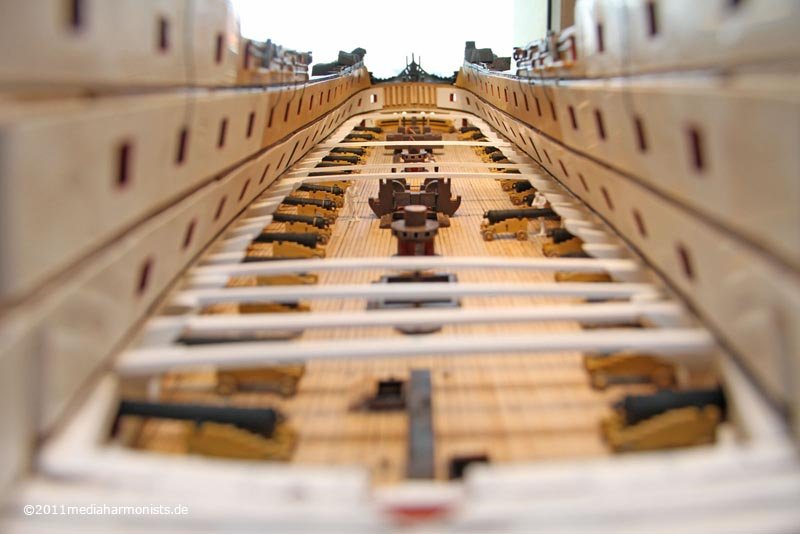
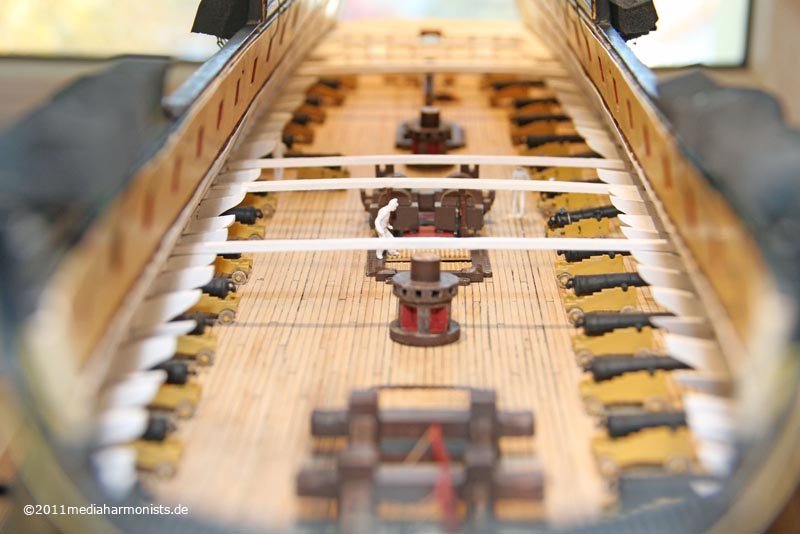
 And as you are usually nice guy with me, here are some pictures as a goody ;-) One can realize that we are basically in a four floored house ...
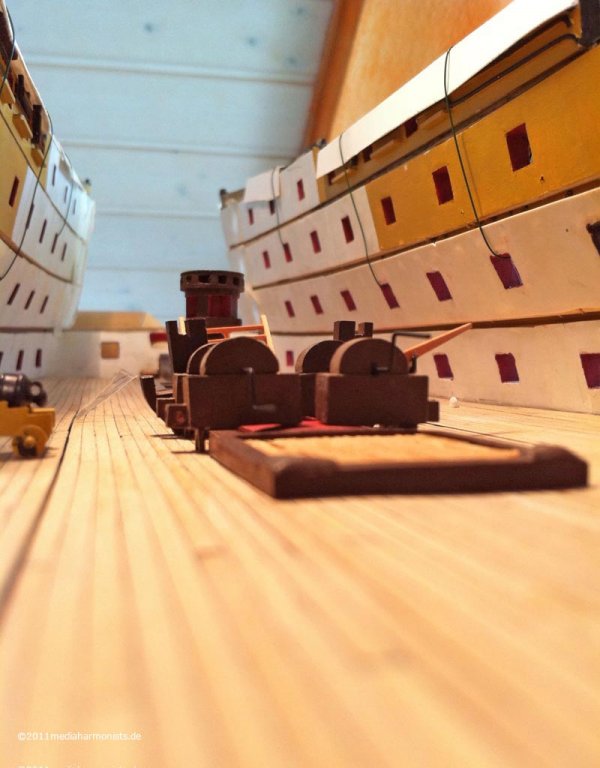
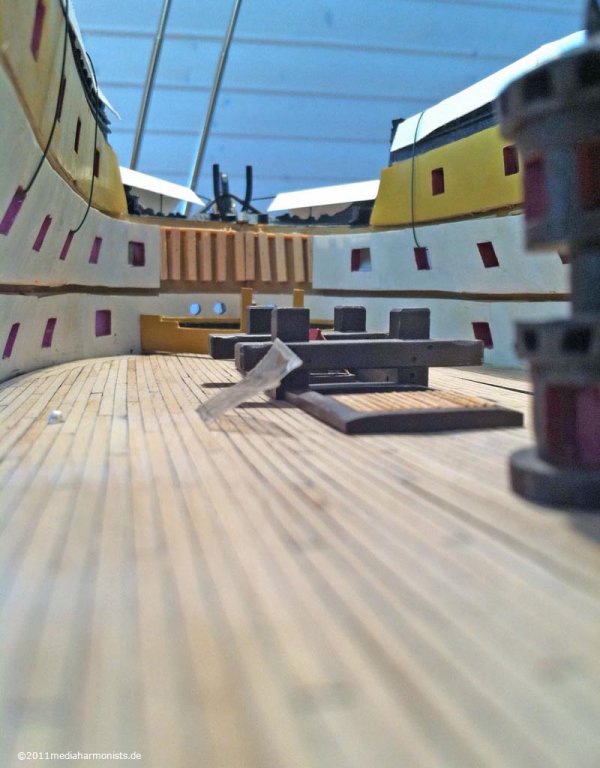 So I still have to sand the decks and the result will be aceptable -at least I hope so.All the best, Daniel


Painting Templates
in Painting, finishing and weathering products and techniques
Posted · Edited by dafi