HOLIDAY DONATION DRIVE - SUPPORT MSW - DO YOUR PART TO KEEP THIS GREAT FORUM GOING! (Only 13 donations so far - C'mon guys!)
×


Gaetan Bordeleau
-
Posts
1,307 -
Joined
-
Last visited
Content Type
Profiles
Forums
Gallery
Events
Everything posted by Gaetan Bordeleau
-
 Alde, you must try it, you will be surprise of what you can do!
 -
http://www.gessweincanada.com/category-s/10519.htm

-
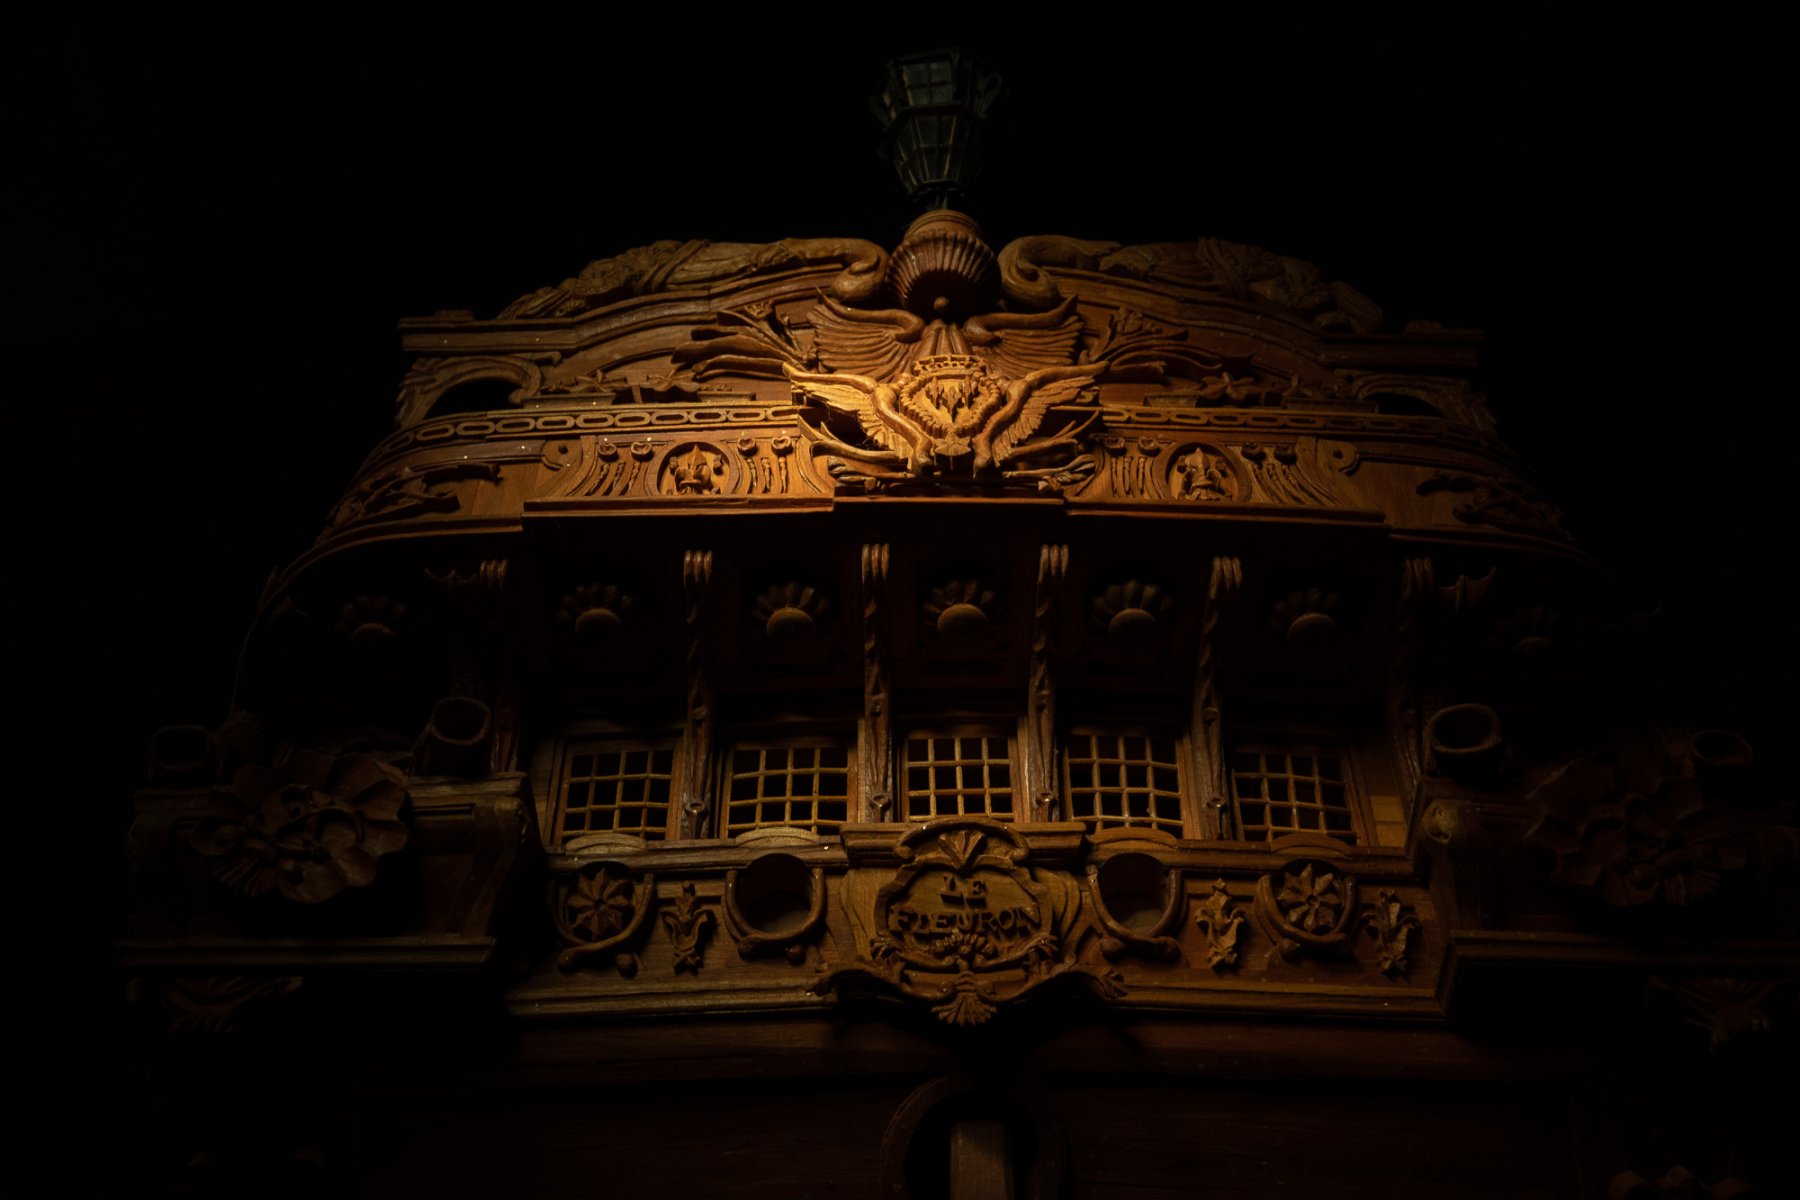
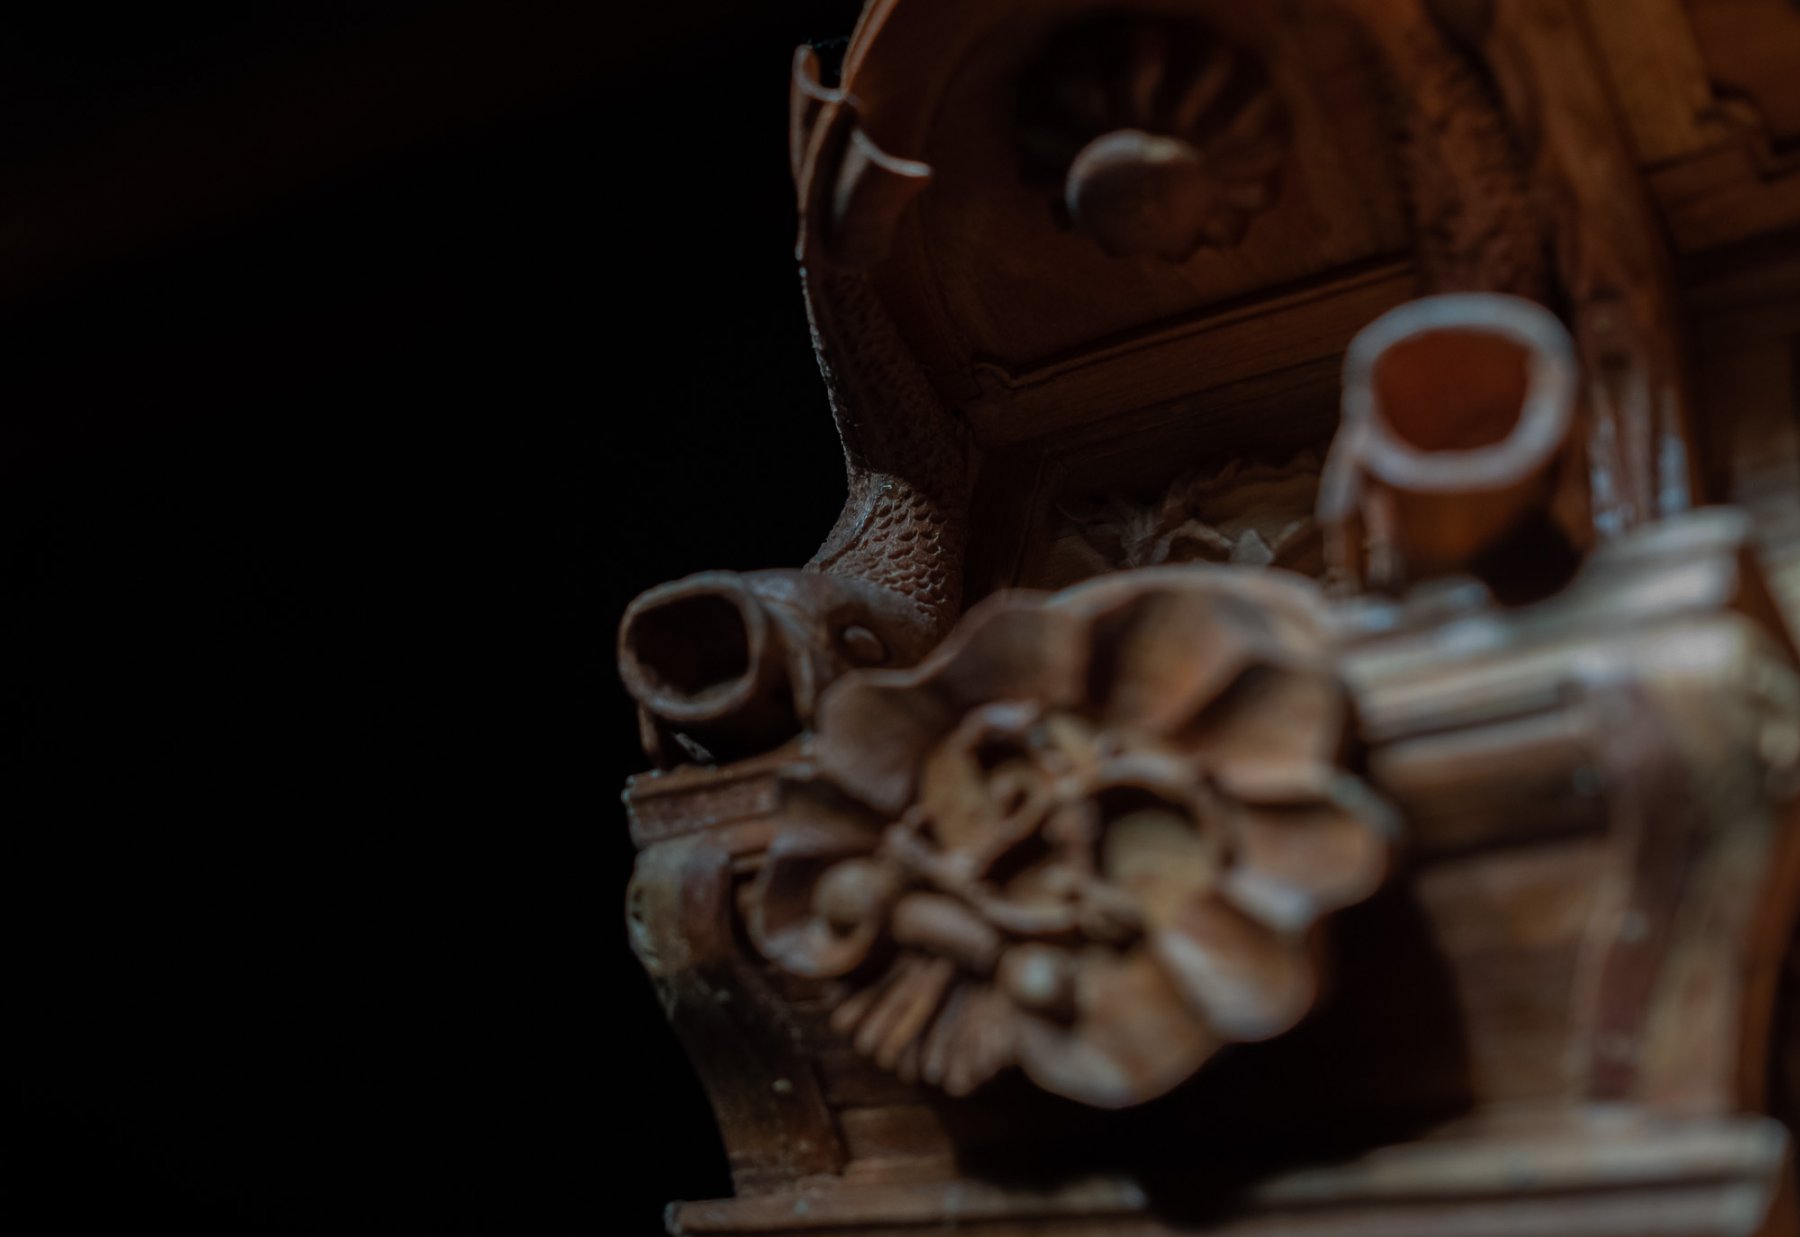
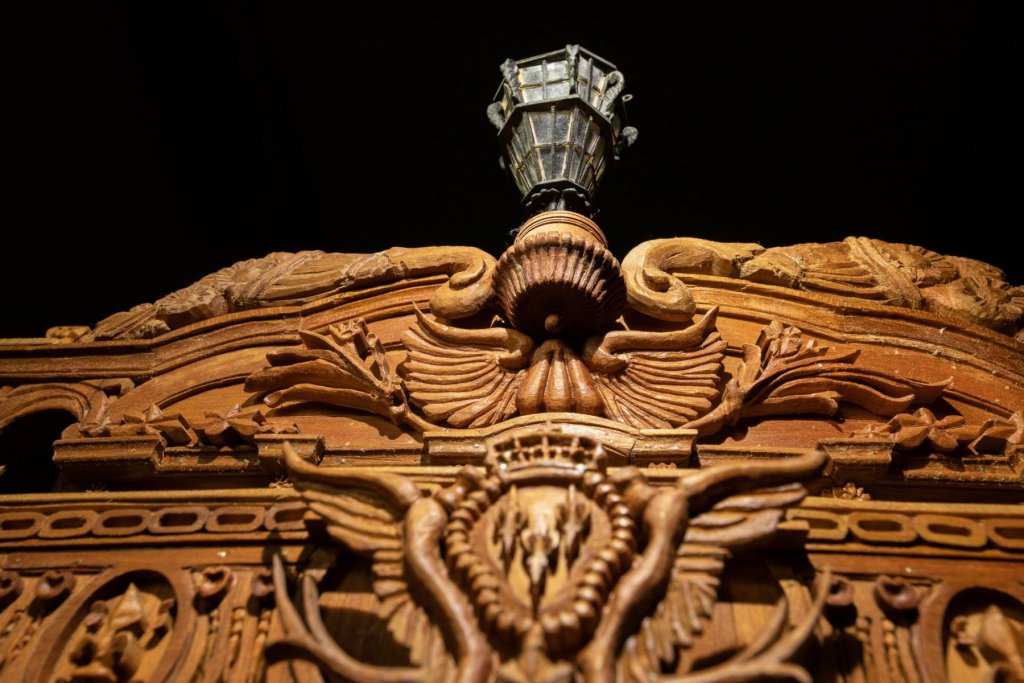
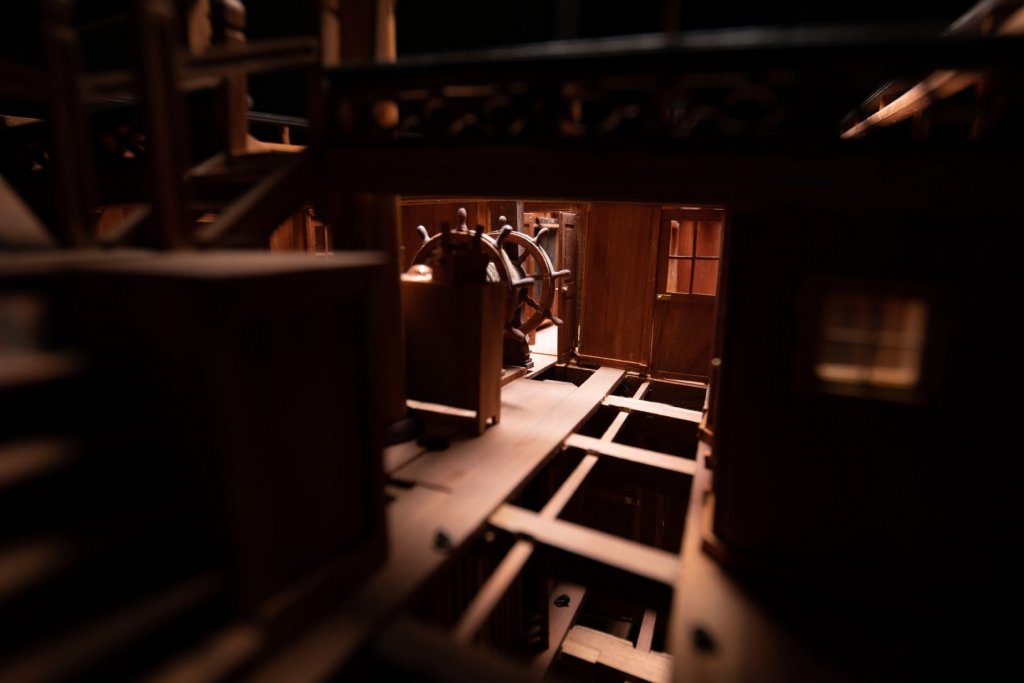
Thank you for the likes. Be reassured, I will not do a setup every day! Today I used a flashlight; 1000 lumens. Power is not the most important factor to take picture. Nature of the source is; in this case LED, which will be closer to daylight, meaning more natural color. Today I chose a model 100% cherry wood to show the color… that I like.


-
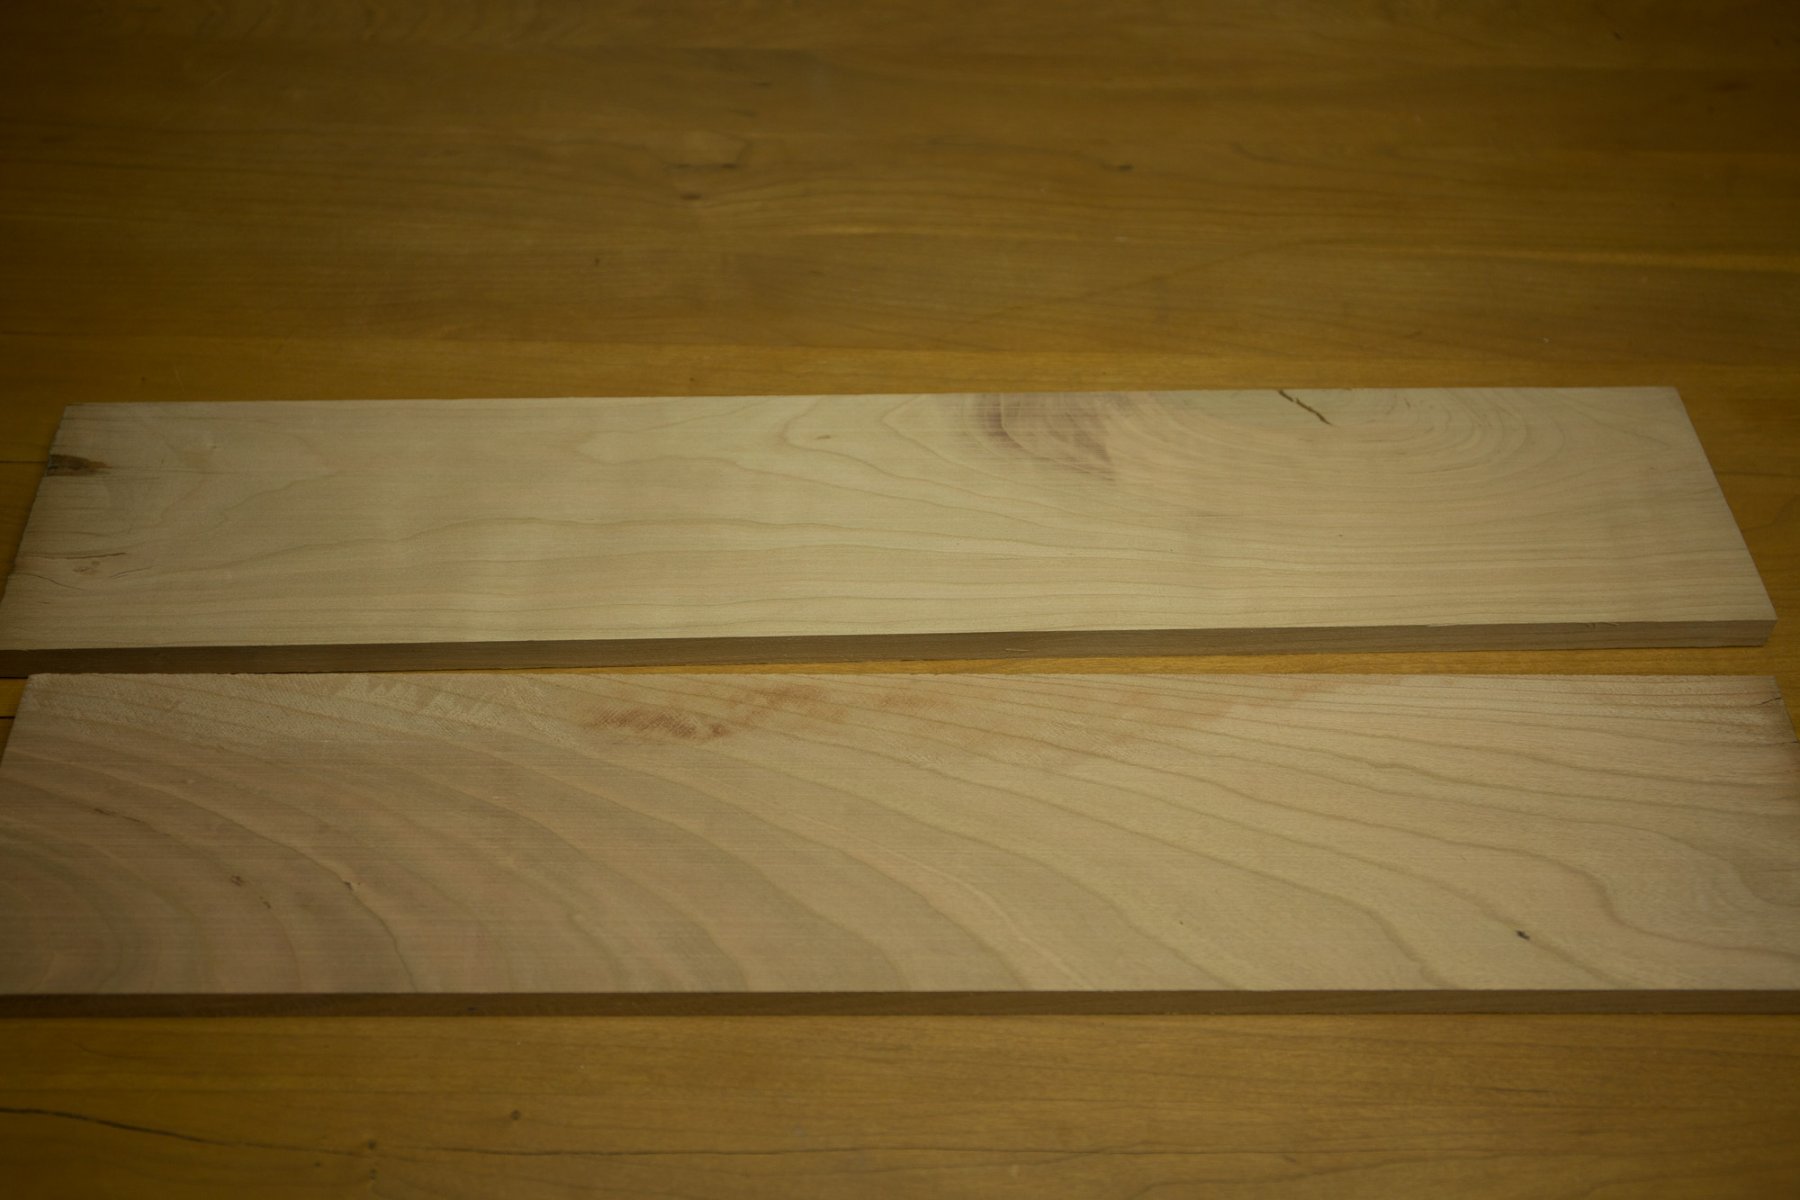
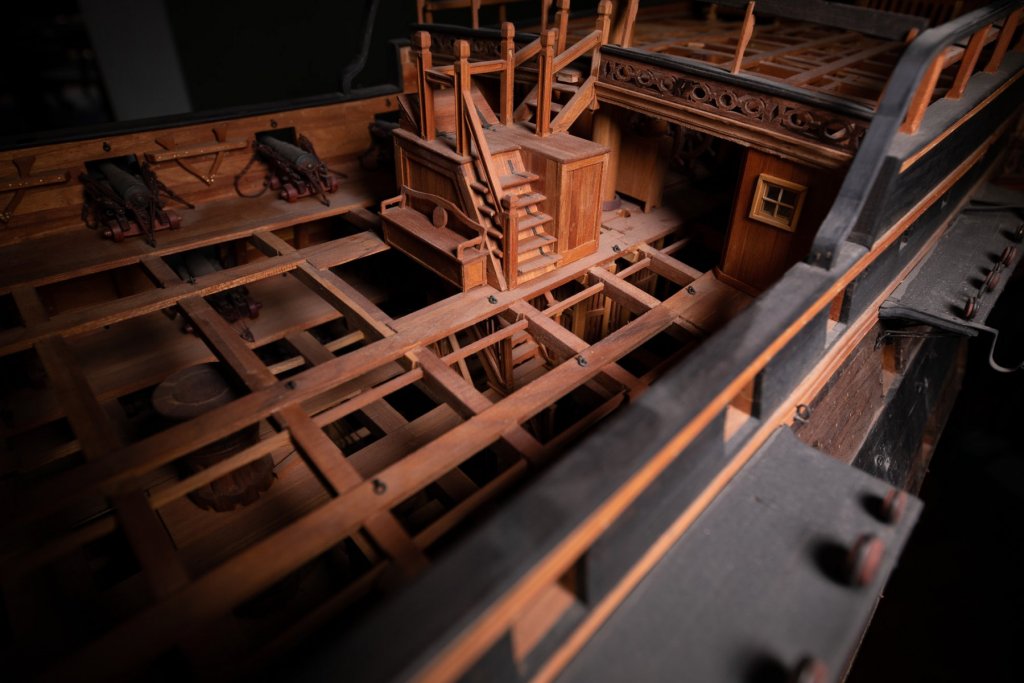
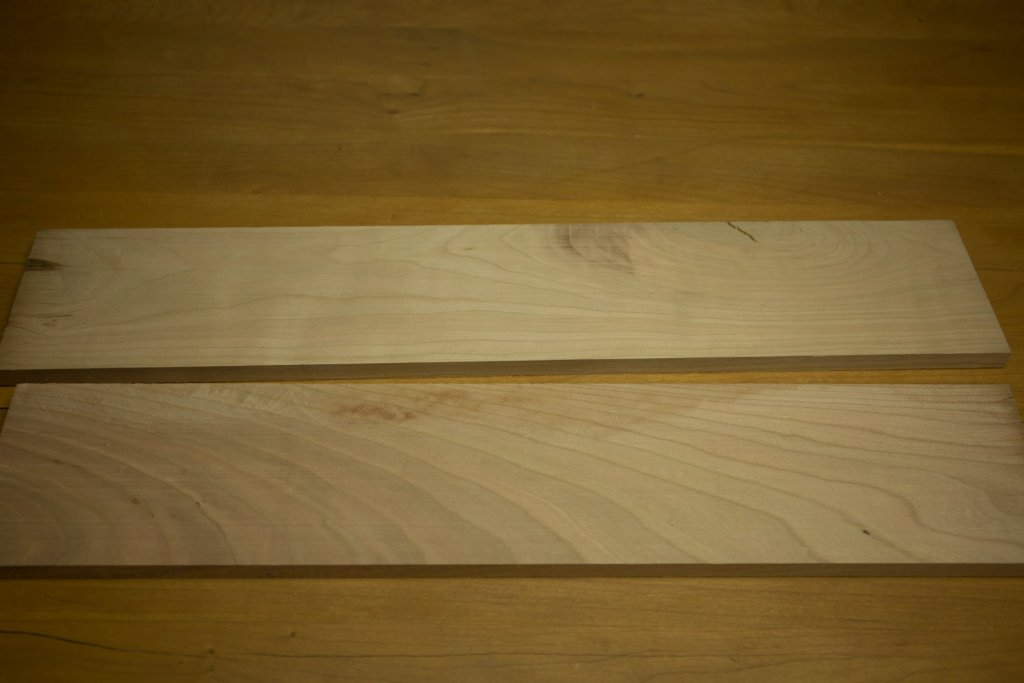
Thank you for your comments. Another part of the set up, one light is use only. the last model where I used exotic woods. Bocote was used for the planking, the color was superb, the smell was enchanting, the price was very high. I remember few years ago when I first tried to use cherry wood, it was quite a challenge. Today, when I see the results, I am very happy to have tried this road. Color is very hot. This wood has few faces. There is only one which should not be use especially for the planking as shown in one of the last post. Since that 74 guns, I learned to use this cherry wood and now I only use this wood. We can say there in a simple way that there are 2 ways to represent a model ship : 1 color monochromatic or more than one. Both methods have their own charms. As many subjects, in model ship fabrication, there is no right or wrong, it is just a matter of personal preference.


-
Amazing optivisor light
Gaetan Bordeleau replied to Kurt Johnson's topic in Modeling tools and Workshop Equipment
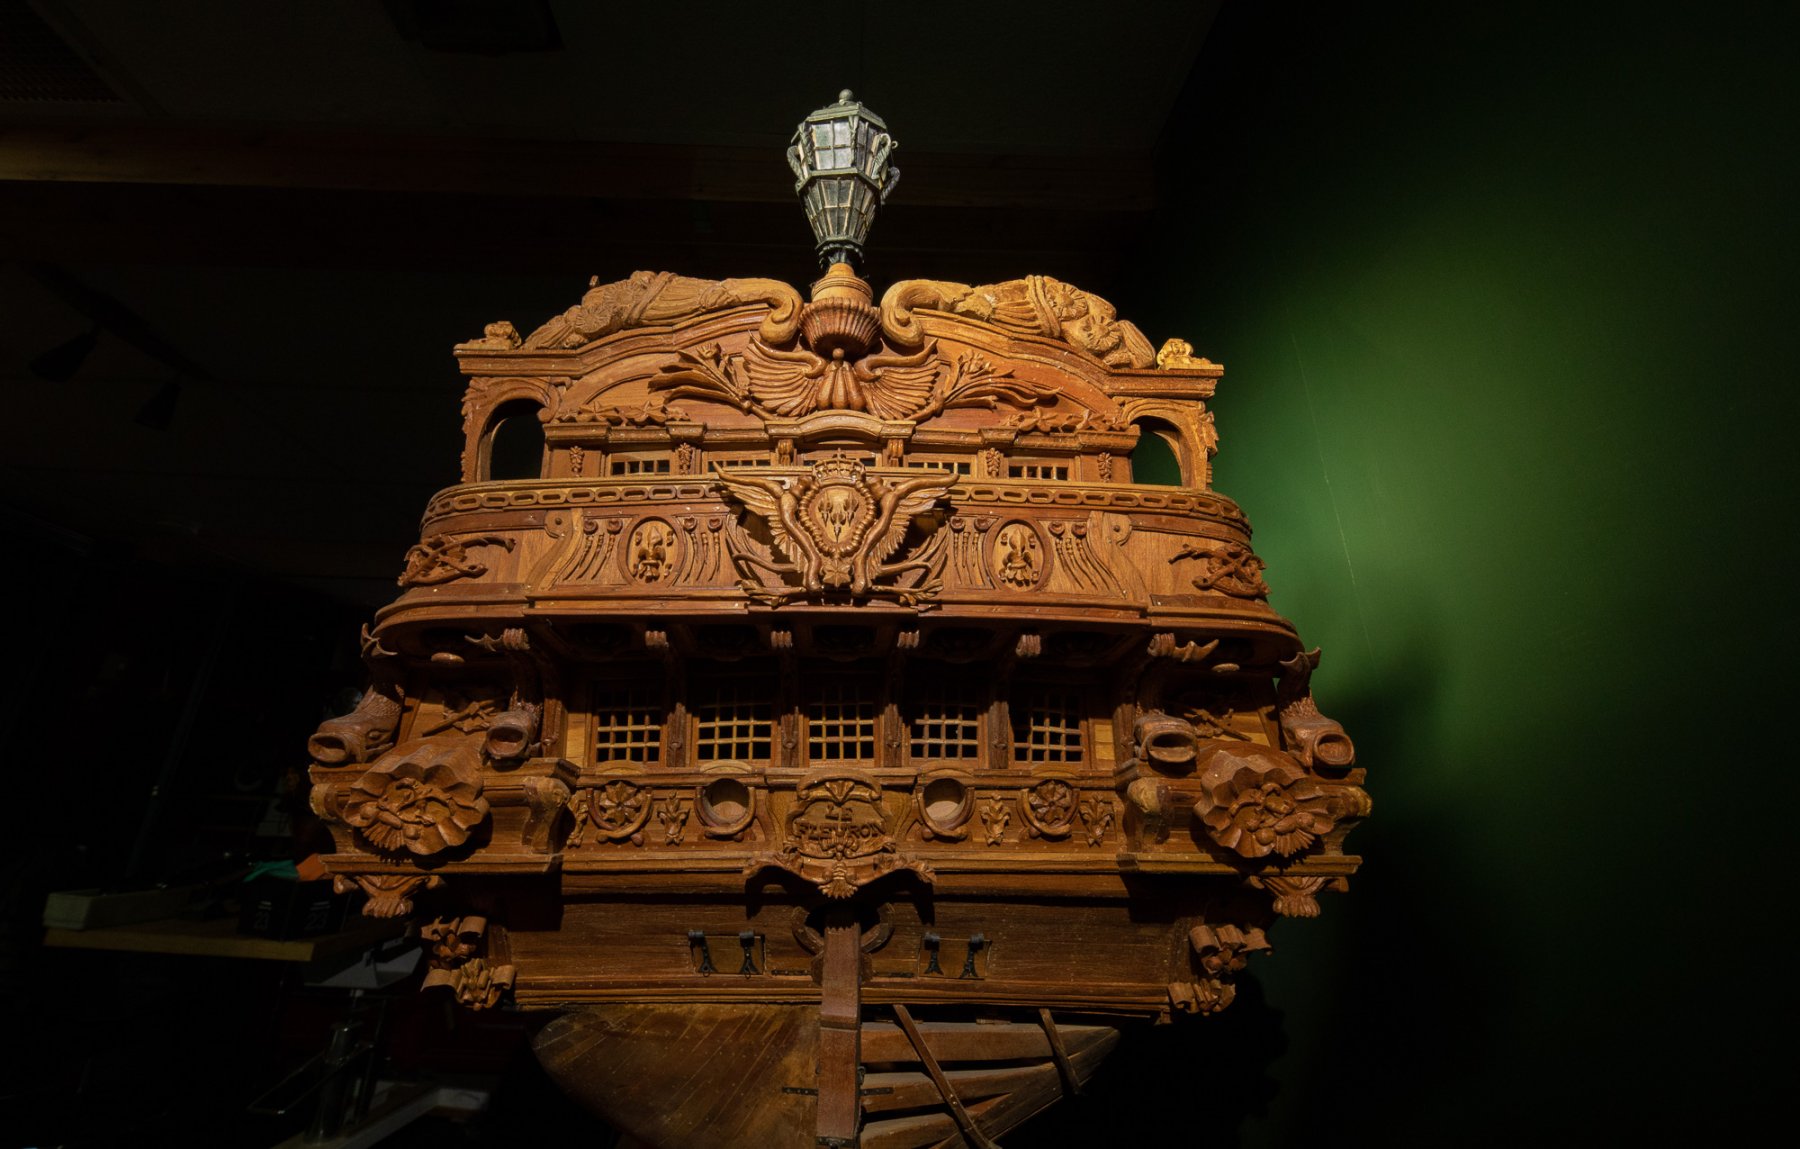
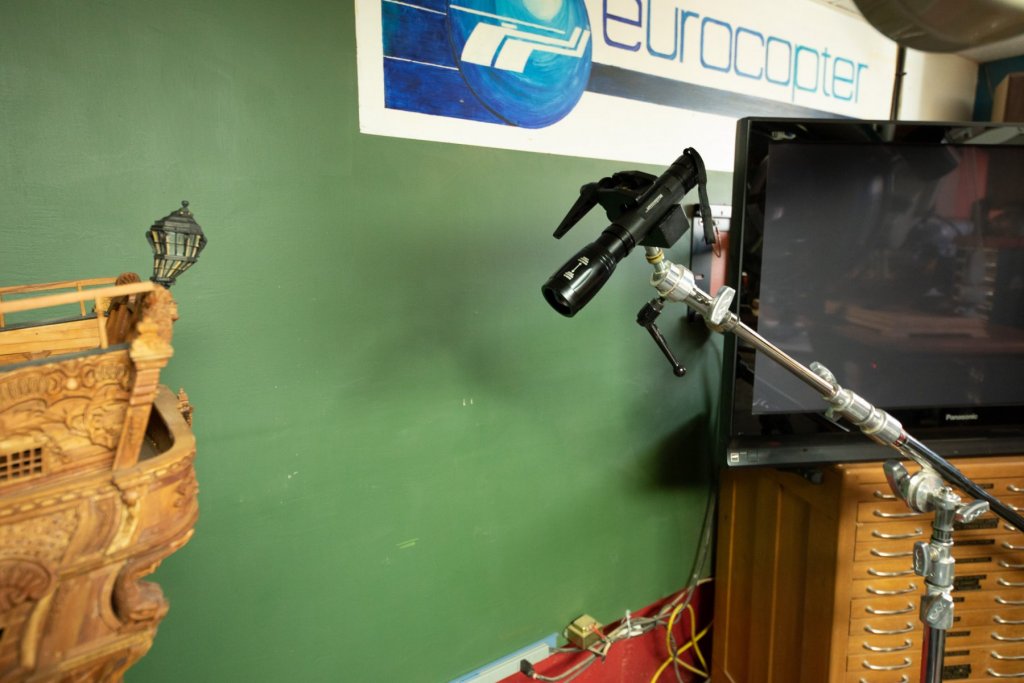
At Canadian tire, a store where you can buy all kinds of things, you can buy a flashlight at 1000 lm for $60. At 1000 lm, you will see things that you cannot see at 350 lm. The more you increase the lumens the more details you will see. -
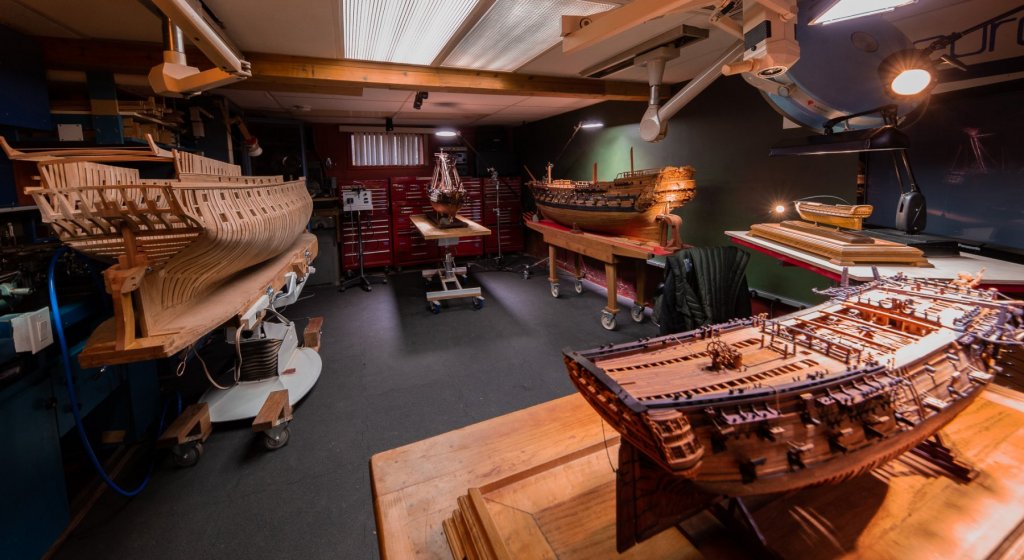
Here is a part of the set up; Each model is set with his own light Neon lights are then turned off The $20 led light from Ikea is still used plenty for light adjustment


-
Best Spindle Sander for Ship Modelling
Gaetan Bordeleau replied to whaynes's topic in Modeling tools and Workshop Equipment
-no oscillation means that the sanding drum will wear in a small fraction of the drum moving up, down or stationary are all the same to control; easy -
Amazing optivisor light
Gaetan Bordeleau replied to Kurt Johnson's topic in Modeling tools and Workshop Equipment
In comparison, I measured in lumen at 1 foot my Xenon light, it can deliver 261 times more light: 91500 lm. -
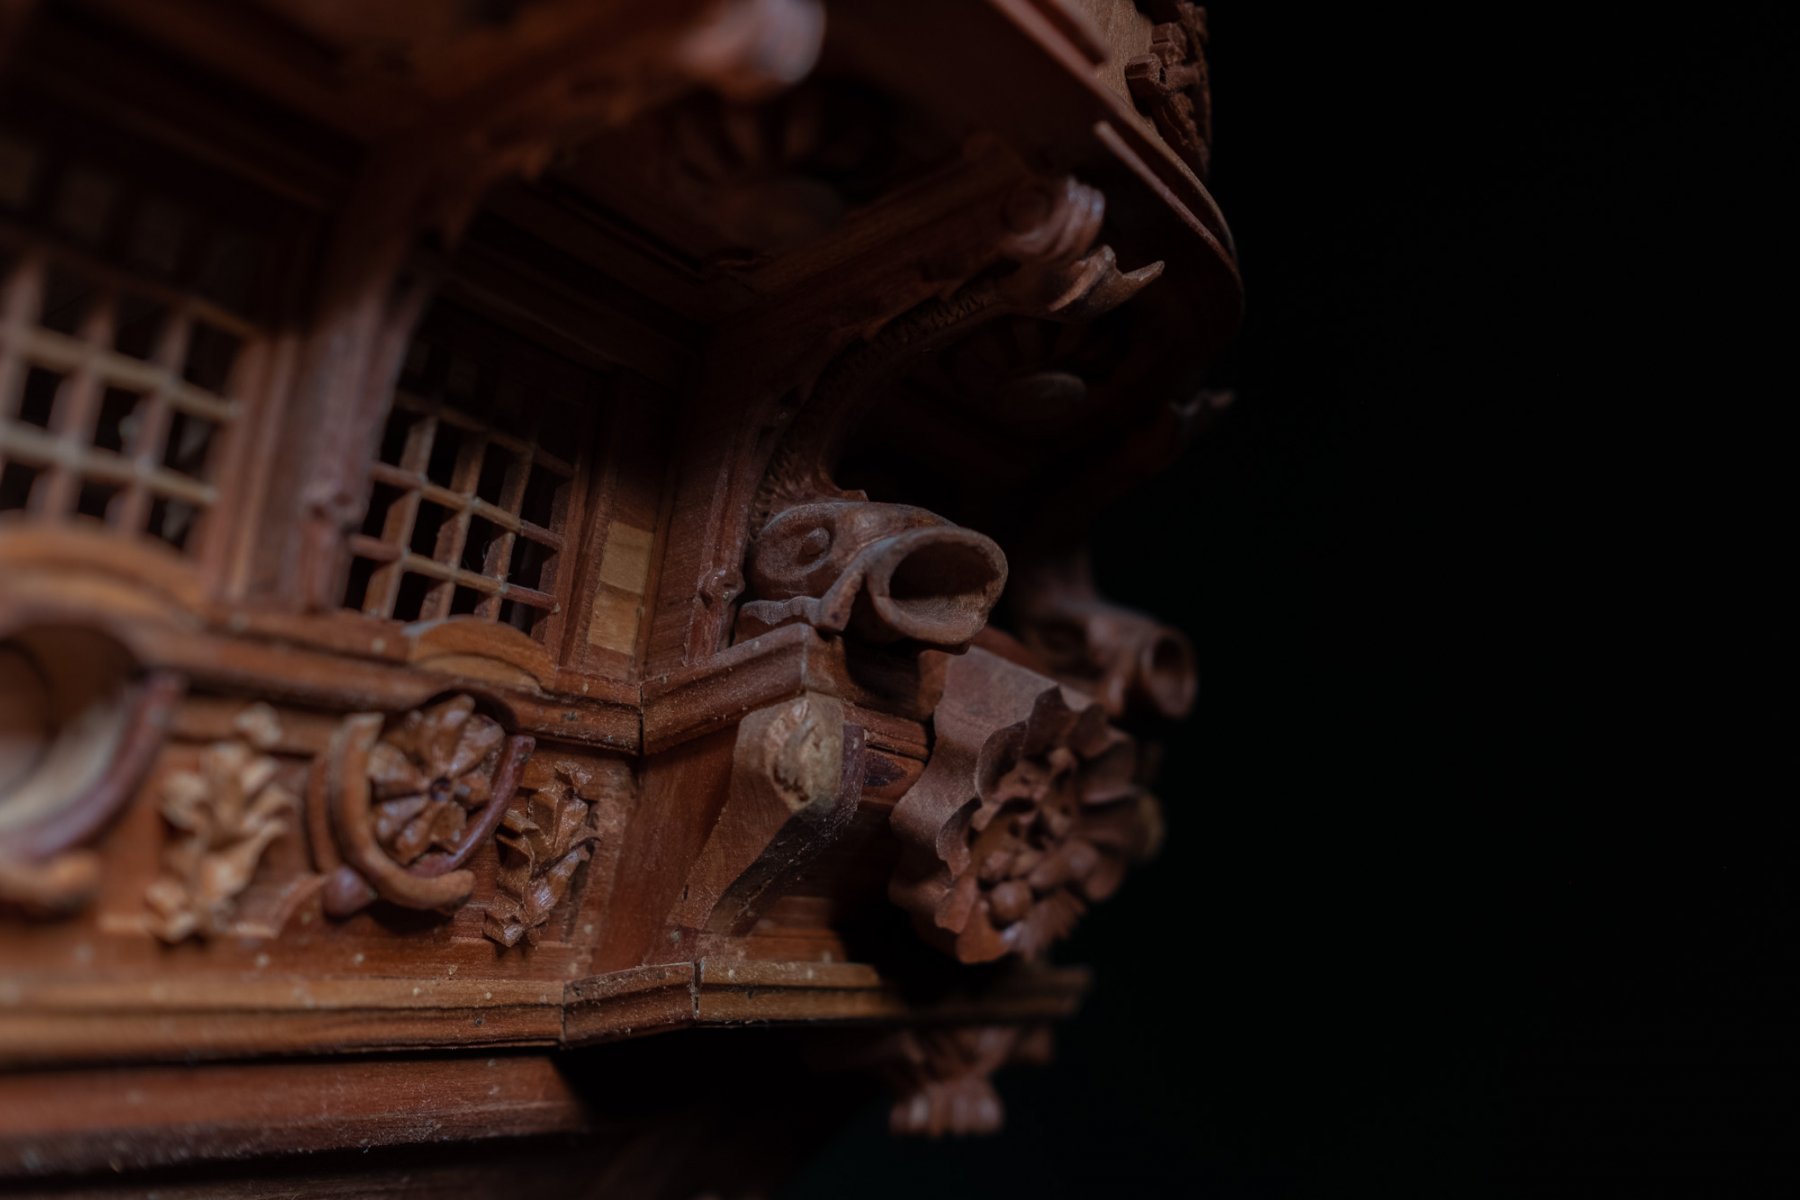
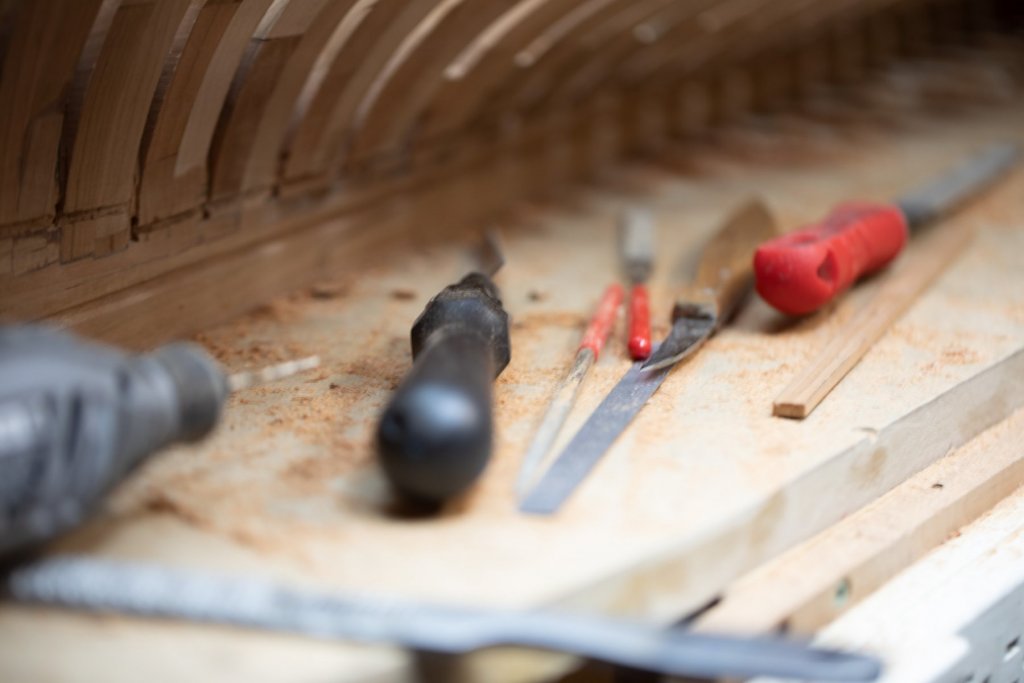
Some steps in window framing with tools used. Beginning the planking, sorting carefully the cherry wood is important. Example of a plank which would be a very bad choice.
-
Hi Mike Very nice case. Very nice color. Knowing the story, I like to see both models in the case. Is it difficult to remove the model from the case?
- 968 replies
-
- 2
-

-
- hahn
- oliver cromwell
- (and 1 more)
-
May be it depends of which wood stains, there are a lot of kinds and effects, some are good and some are bad. You can even formulate your own one.
-
Machining copper stock.
Gaetan Bordeleau replied to mtaylor's topic in Modeling tools and Workshop Equipment
When turning small jobs, small diameters I never use cutting fluids. For milling, I always use cutting fluid, mainly to preserve the cutters life and over heating both the part and the cutter. For drilling, especially deep holes, I always use cutting fluids for the same reasons. Also it is much easier to do the job with fluids. In the old time, they were using all kinds of grease and fluids. These old tables that we see were made for LARGE parts turning not really for Hobby jobs. Today, it is a lot easier, Only one solution for every thing. It look like oil, we add water to it and it turns white just like milk.I also tried other kind which turned blue. For small diameters, it is not really necessary. The most difficult part I turned is a 2 inches rod of copper. Cutting fluid was a necessity to keep the part cool.I guess that if we put the part in the cooler it would help to begin the turning. If nothing is use copper will become hot and sticky very fast and it will be difficult to make clean cuts but this is for large diameters only. -
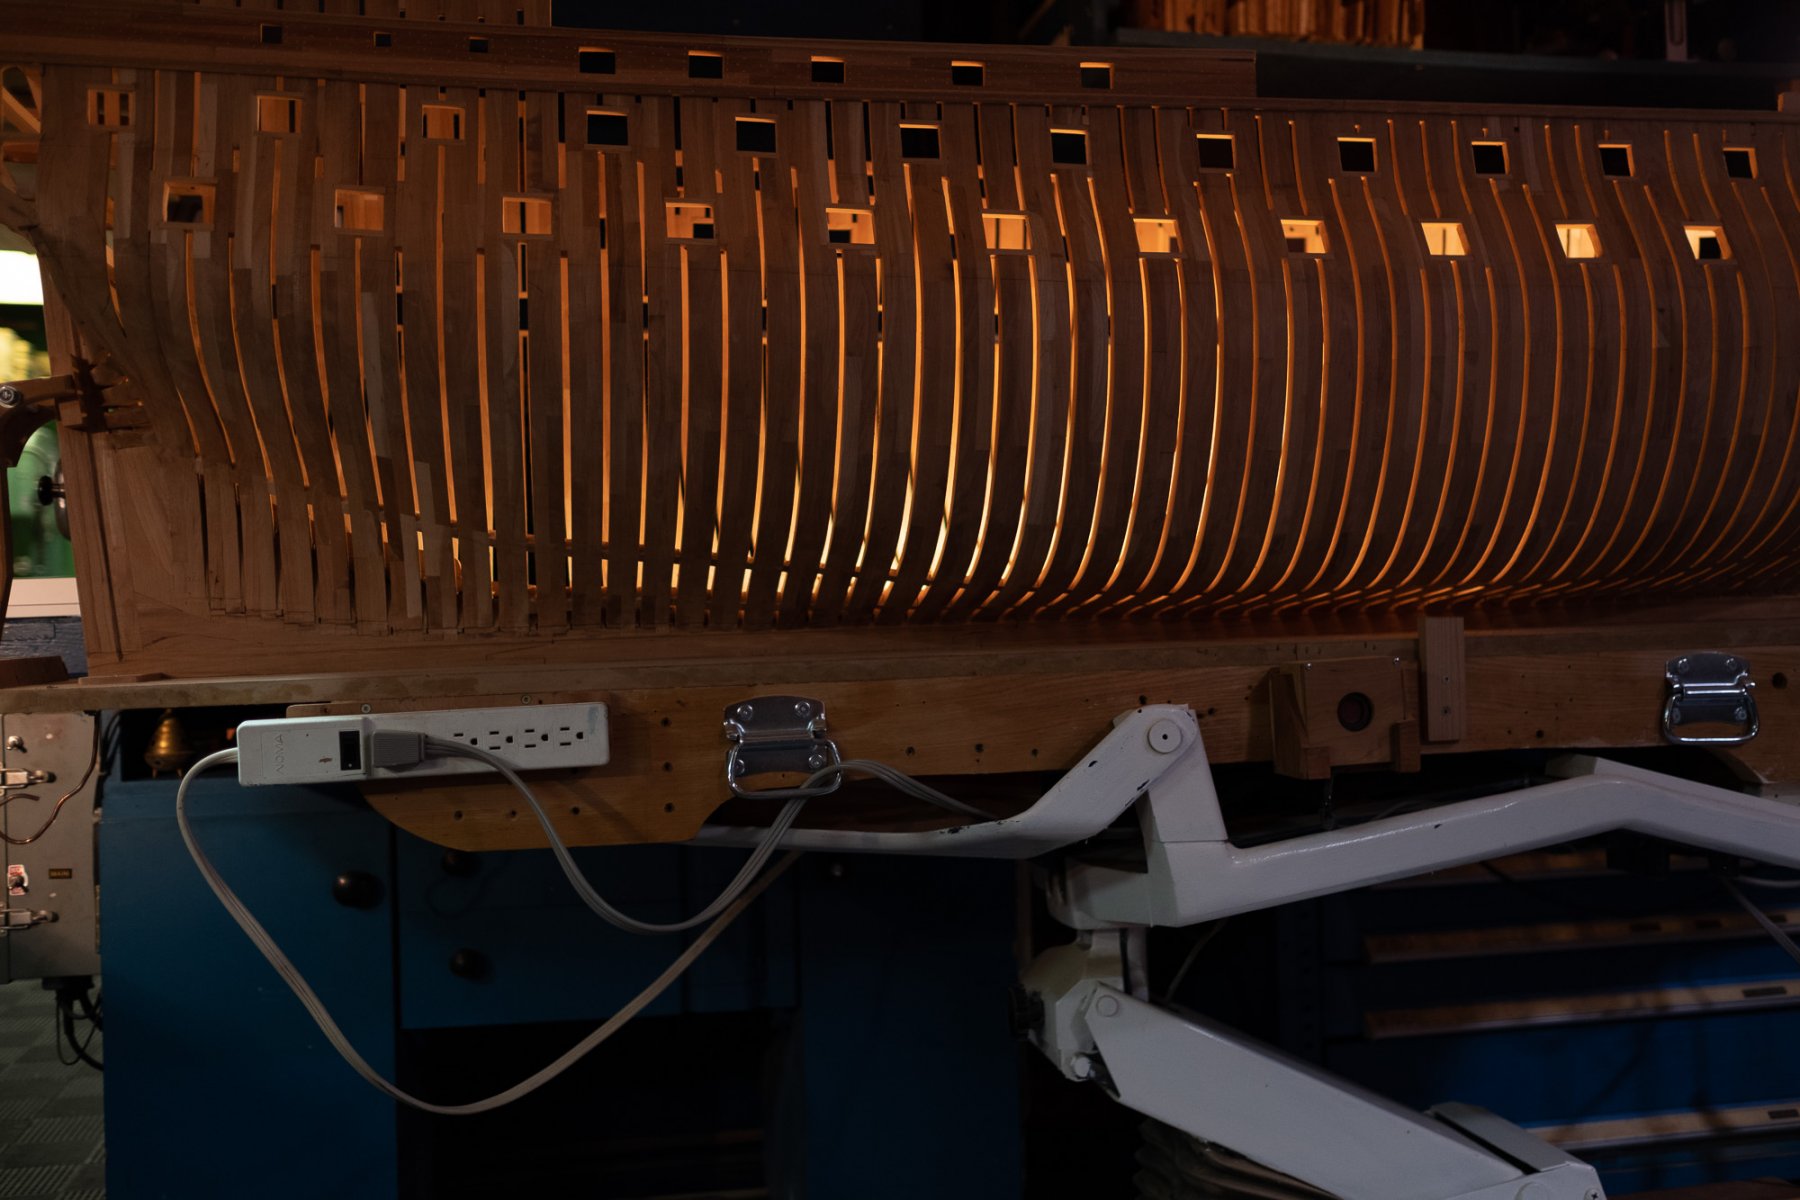
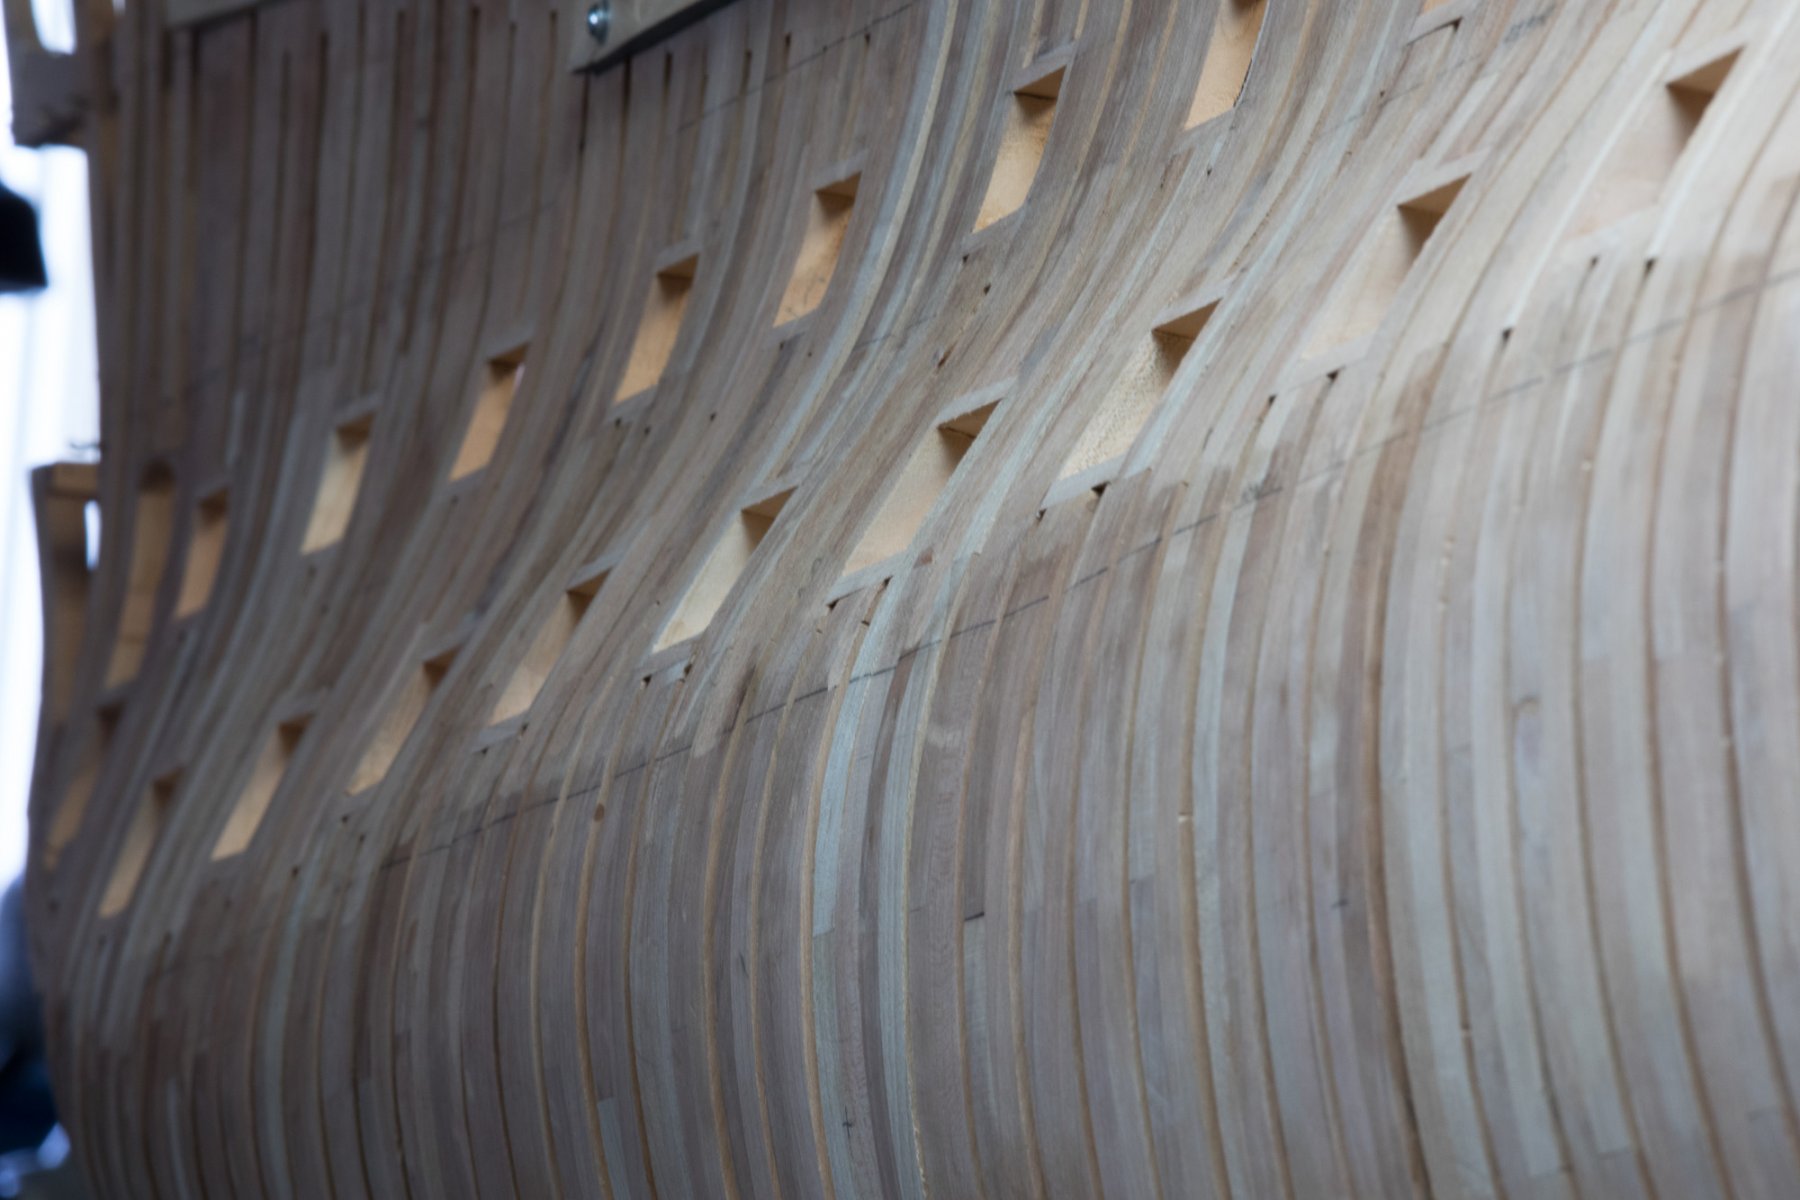
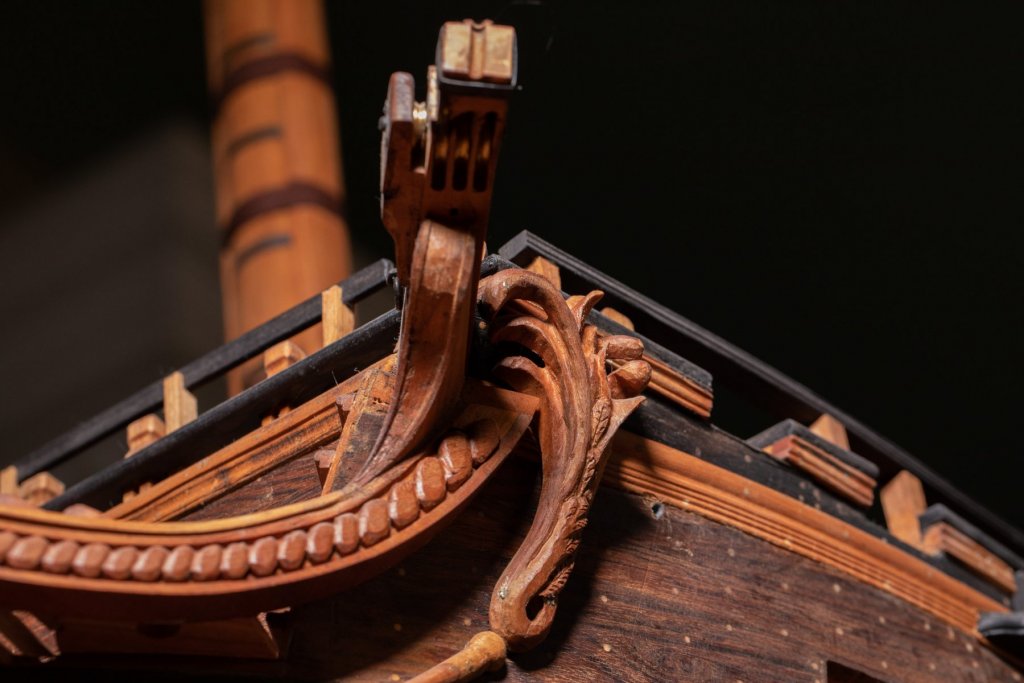
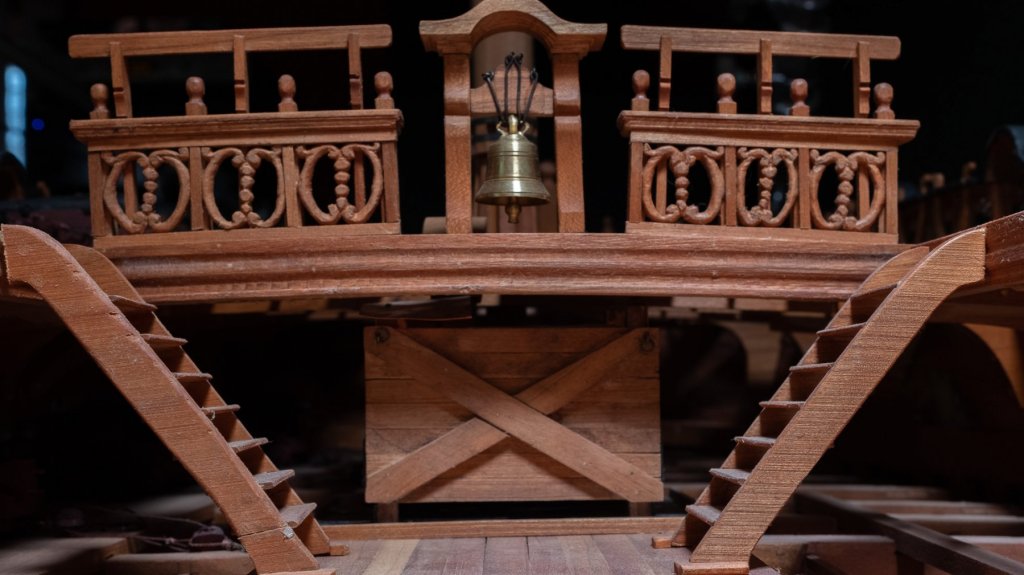
I totally agree with Druxey, this piece had to be shaped, how could you bend almost 180 degrees on few feet a beam of few inches thick. Also it is much easier to fit this piece with the model upside down.
-
My sister assembled and I glued it on a board with a frame many years ago. It is a very nice image, at least to my taste.
-
Hi Gary, did you know the family name of Mark, it is Boudriot.
-
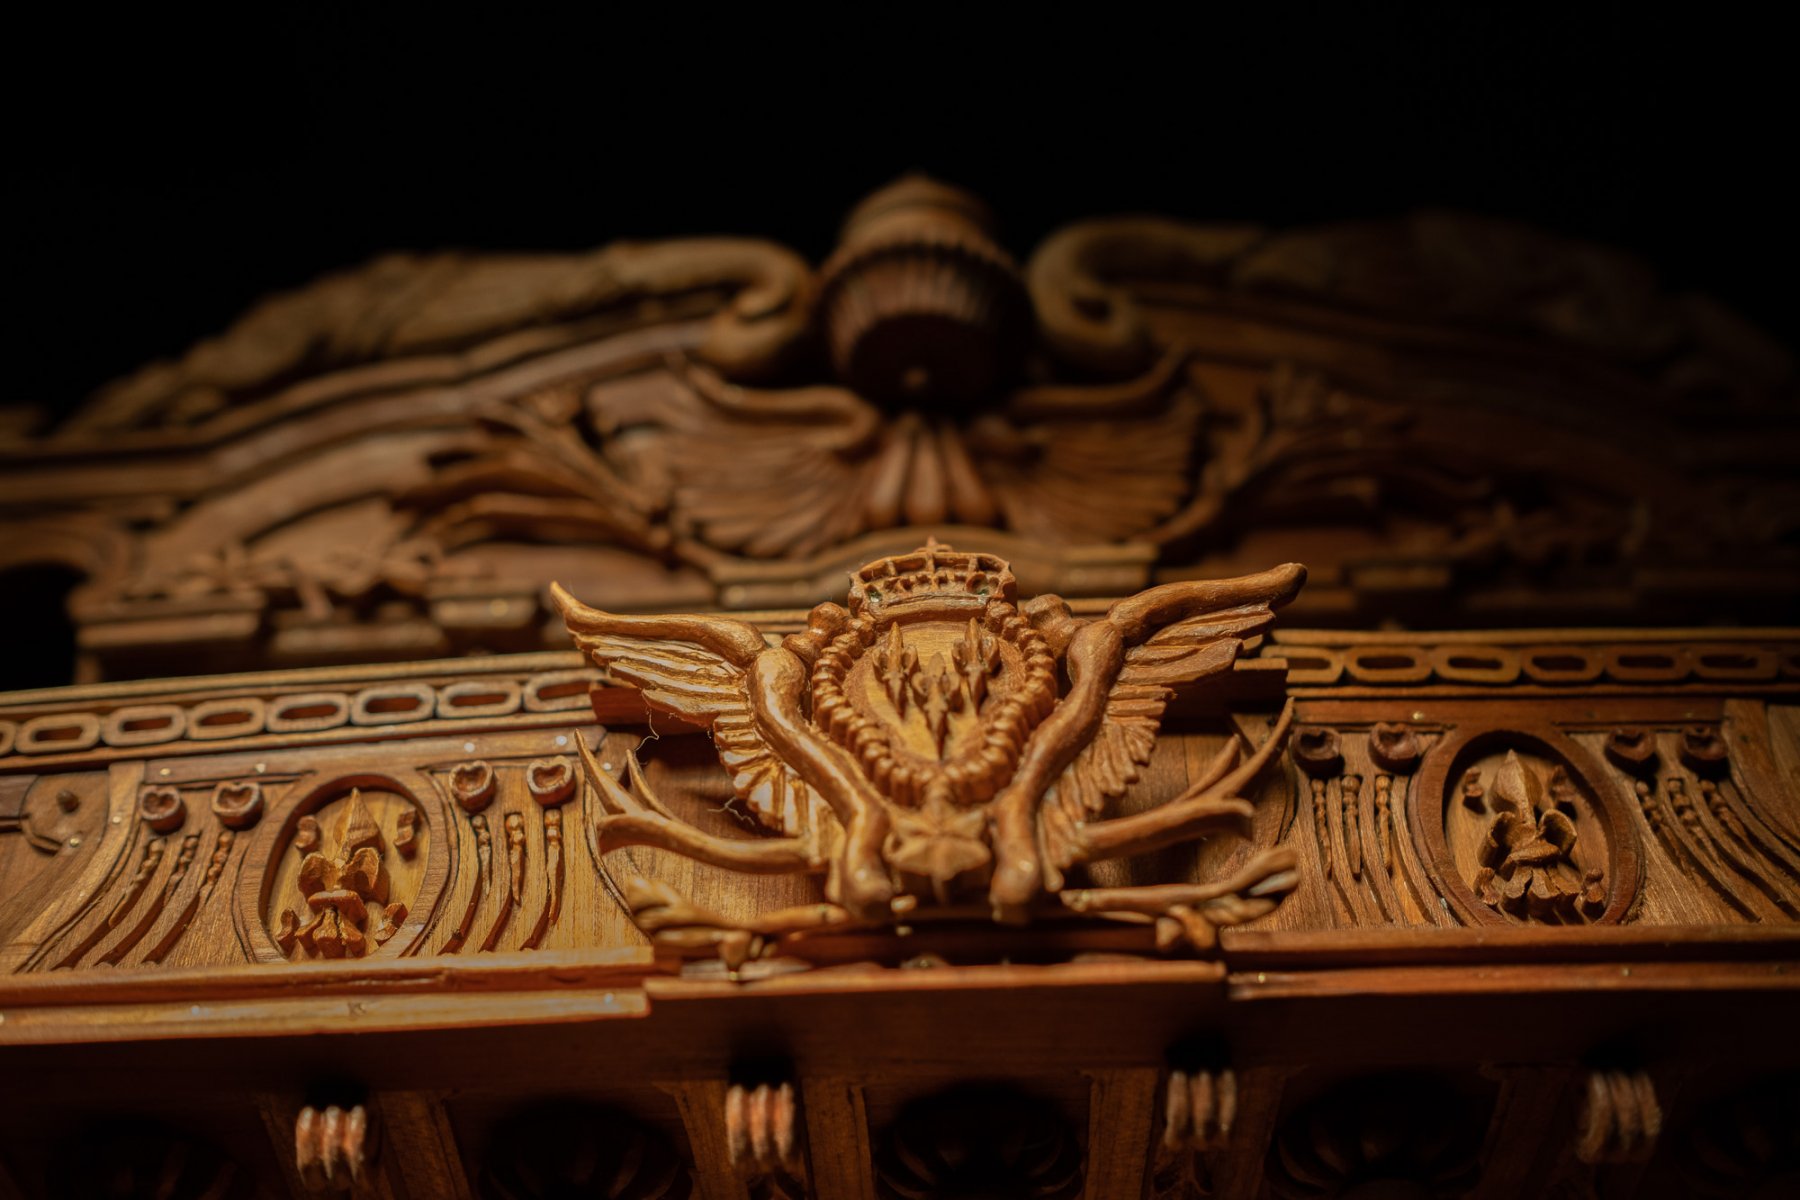
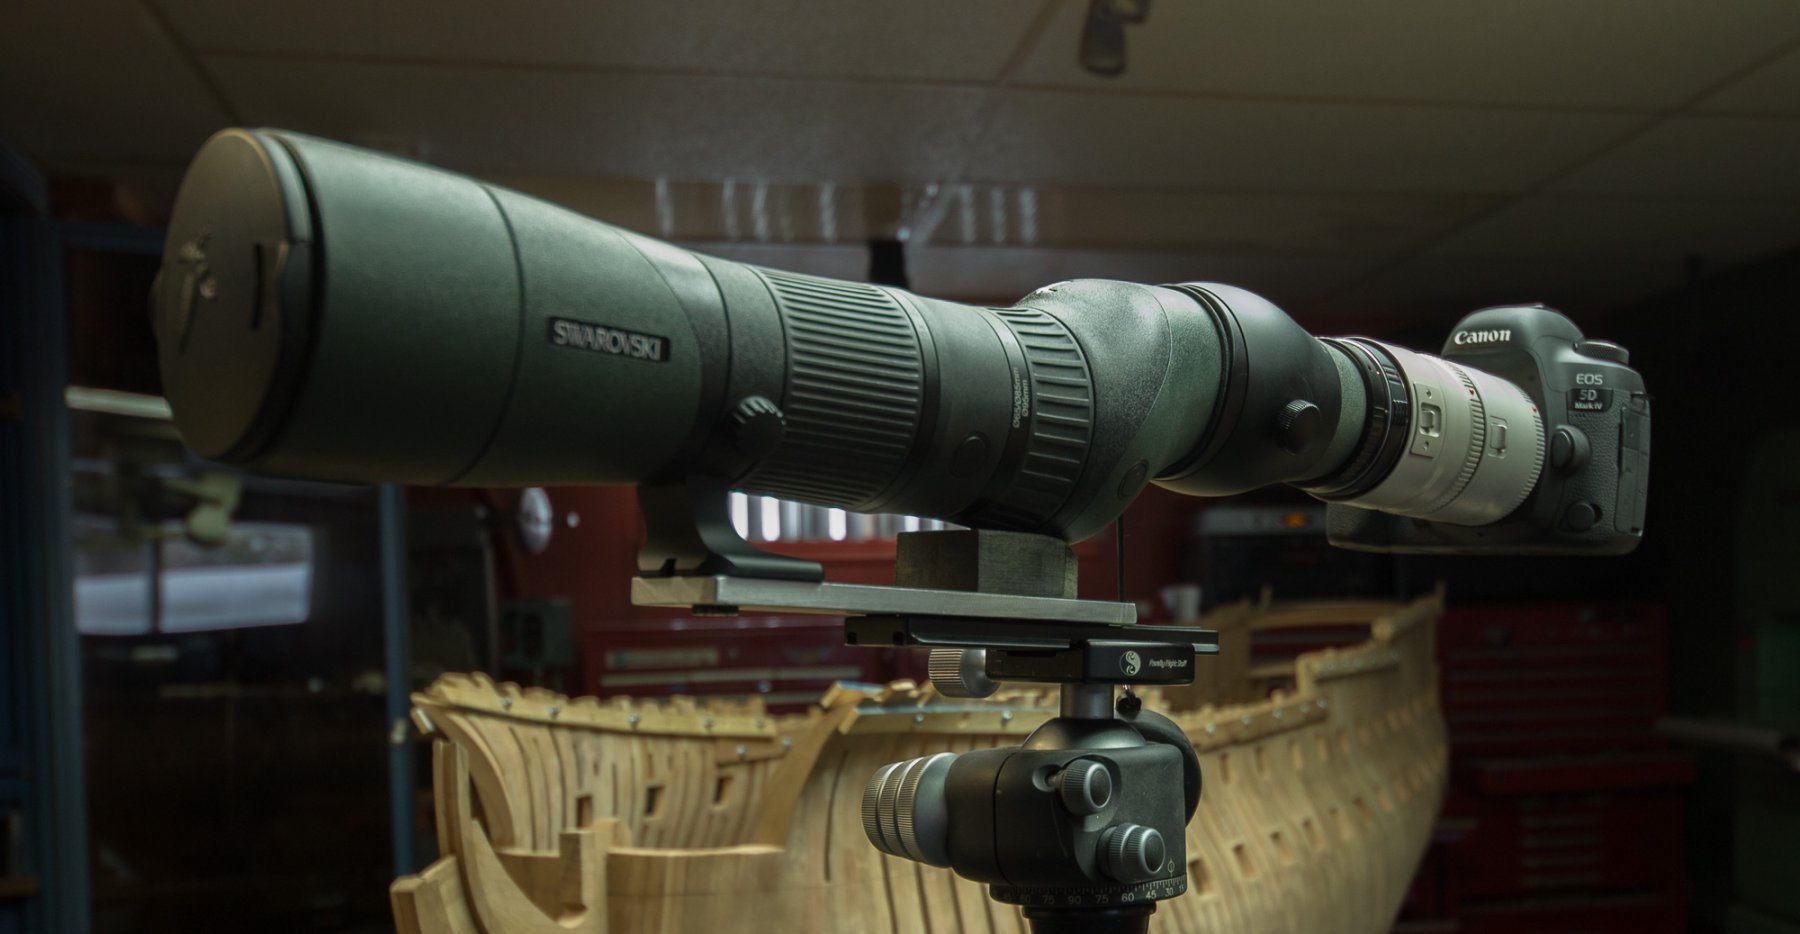
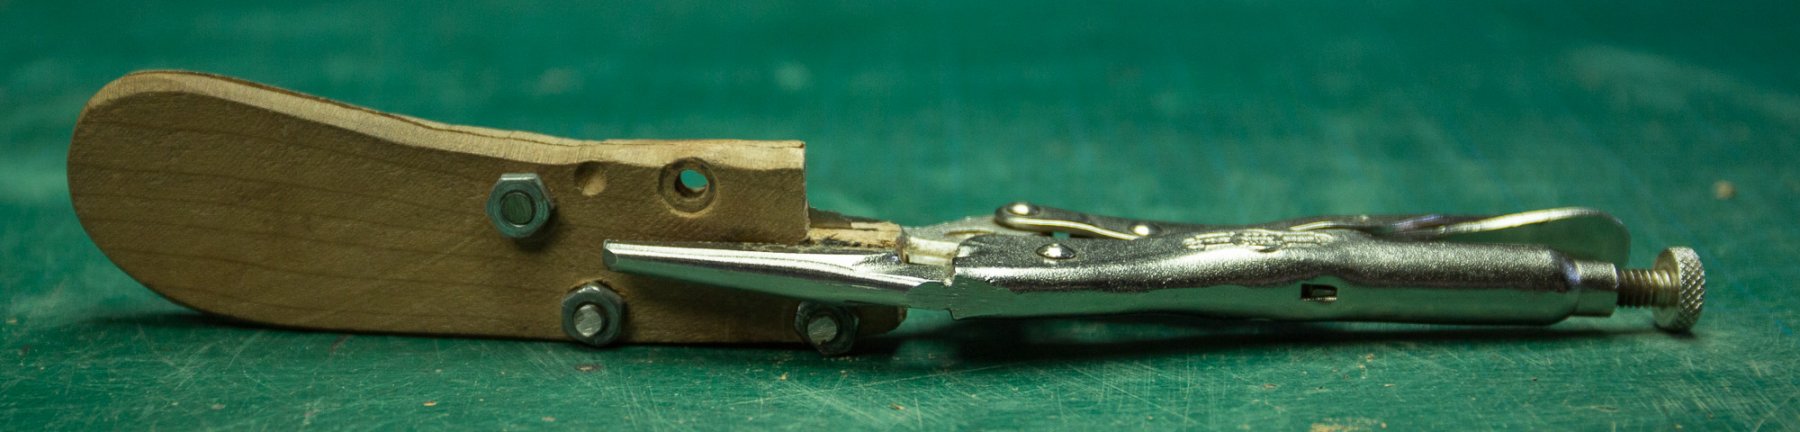
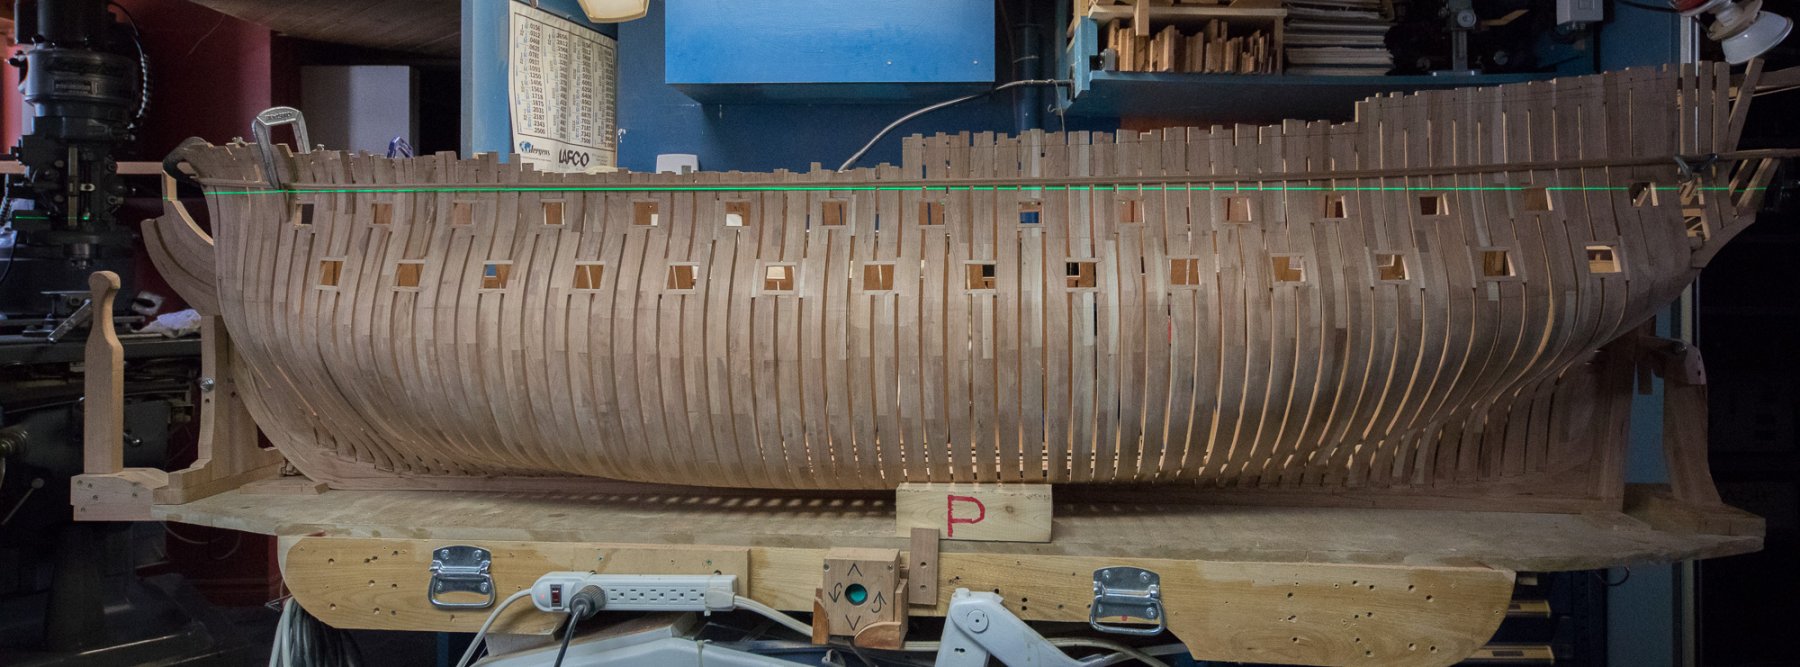
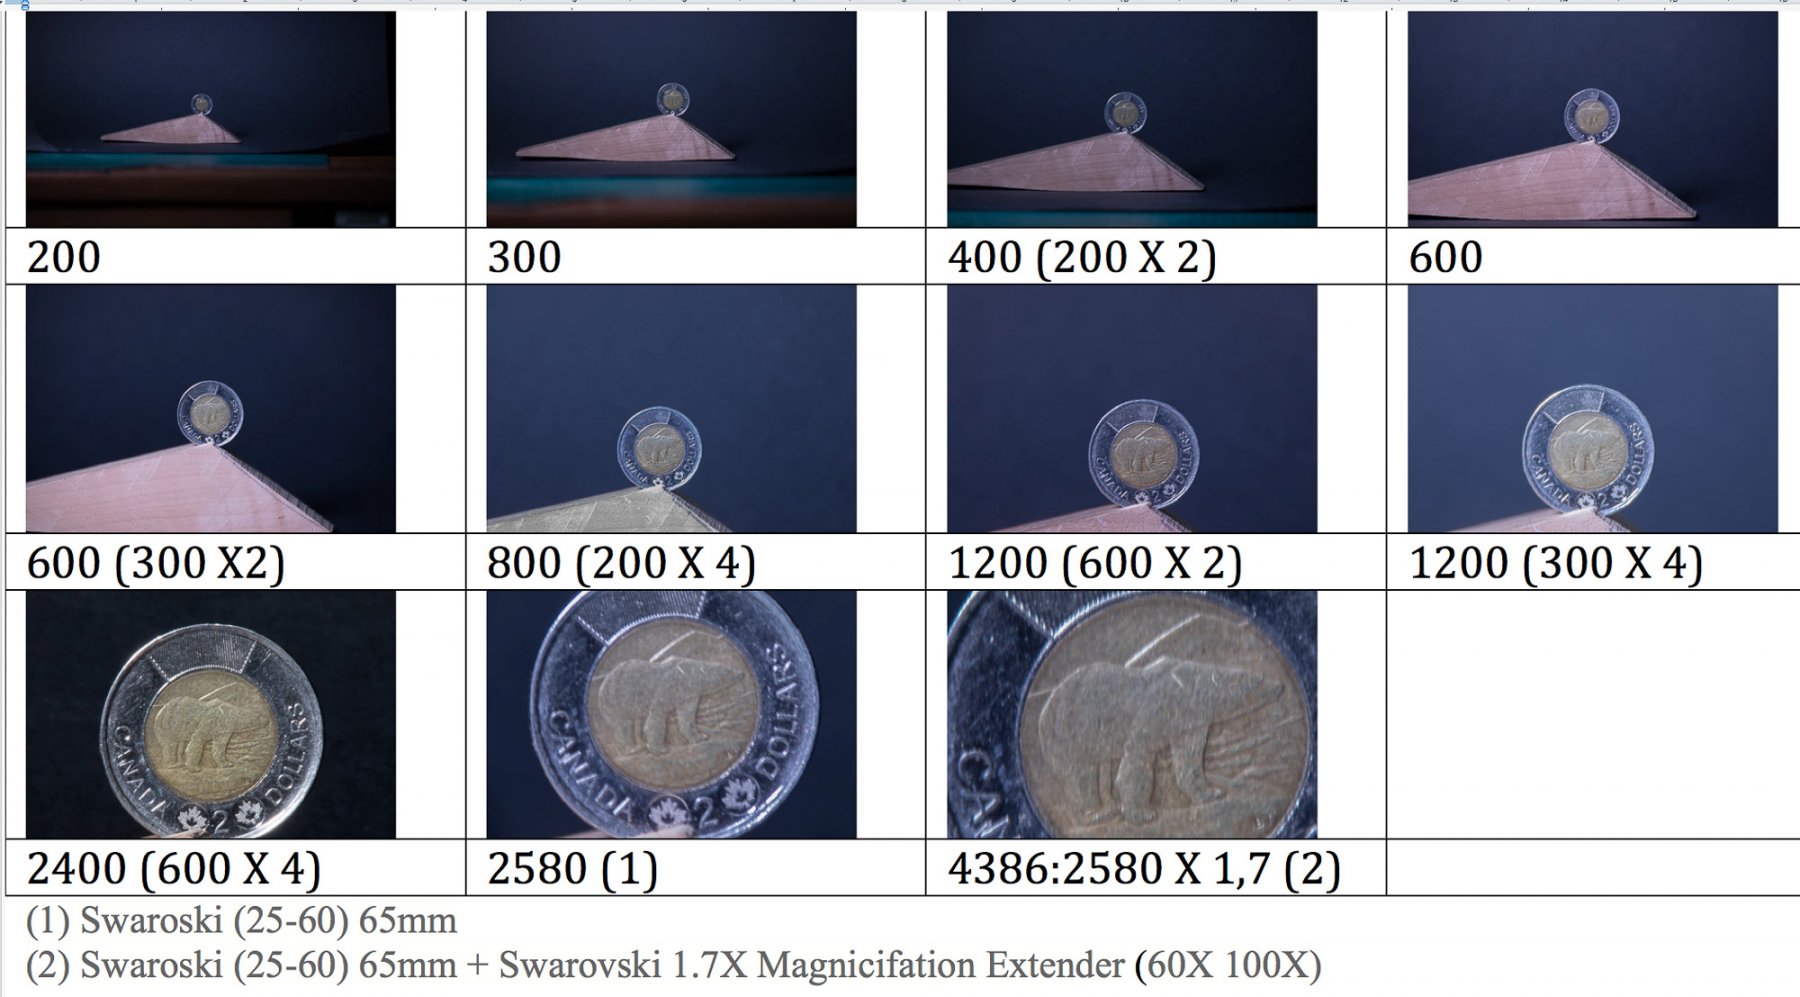
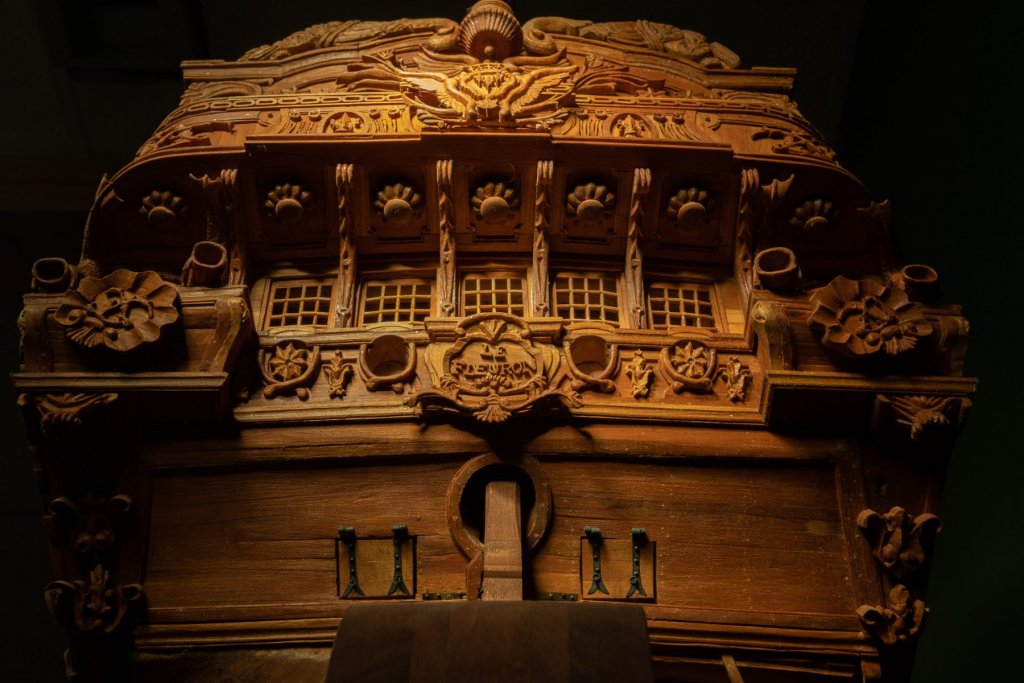
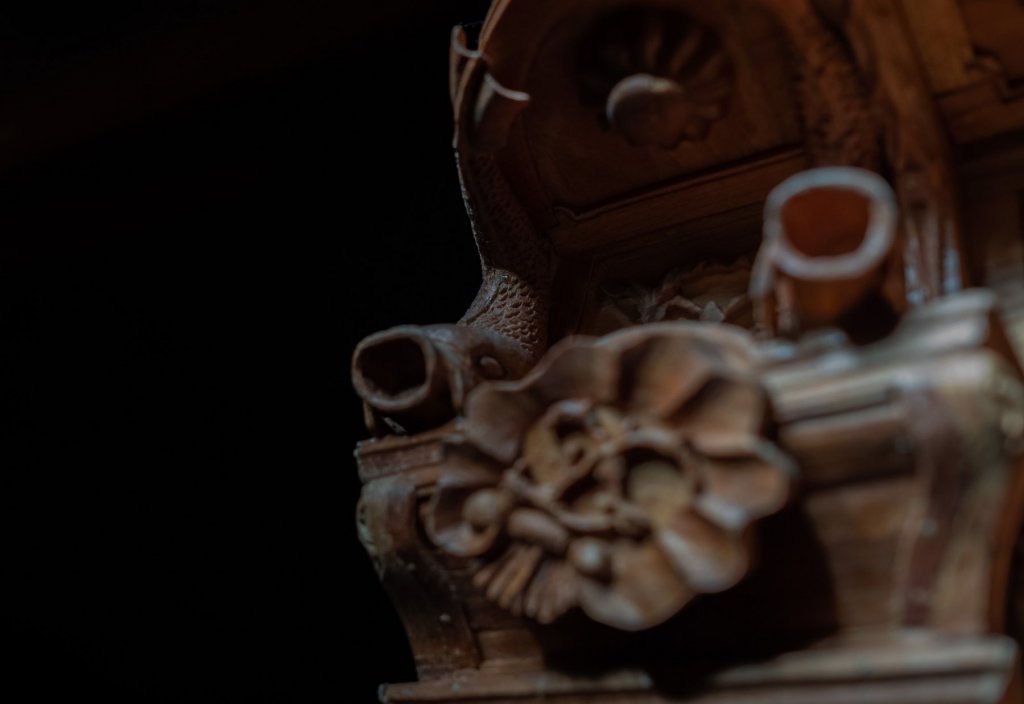
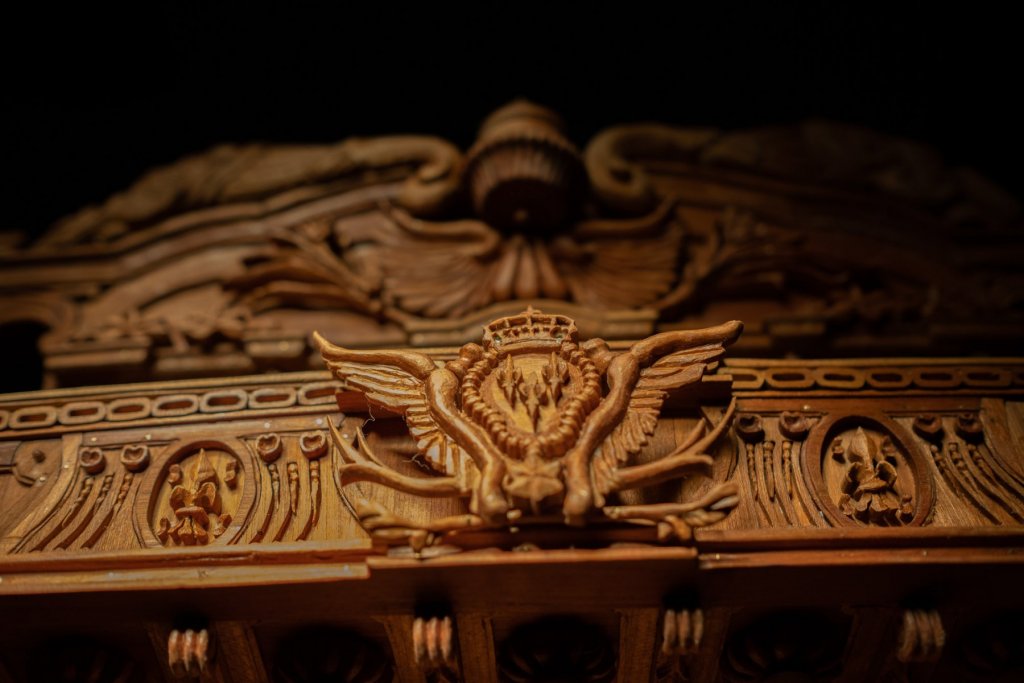
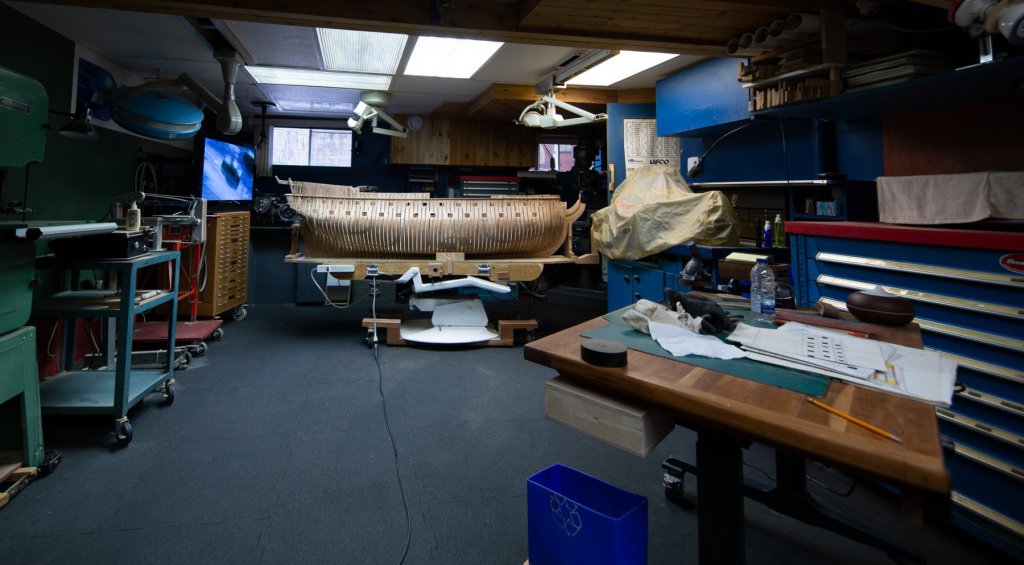
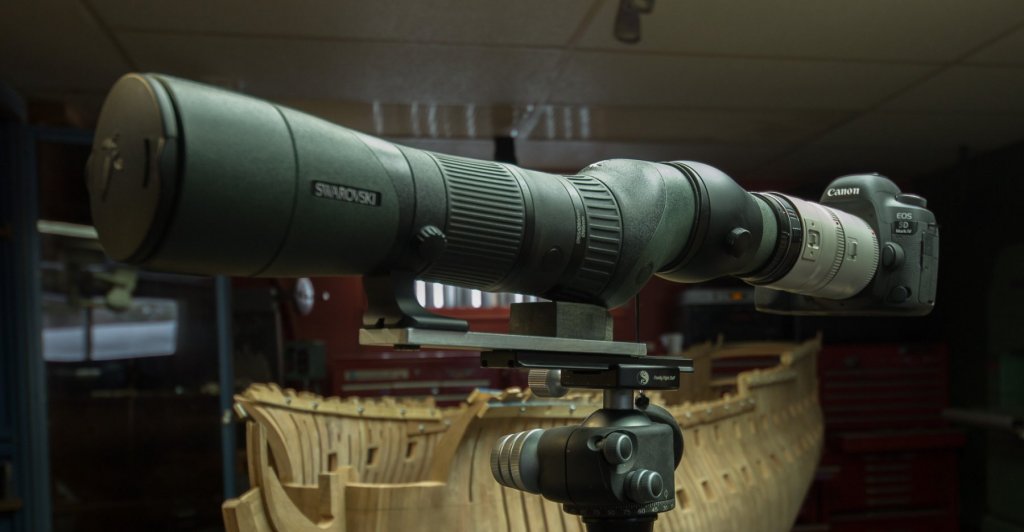
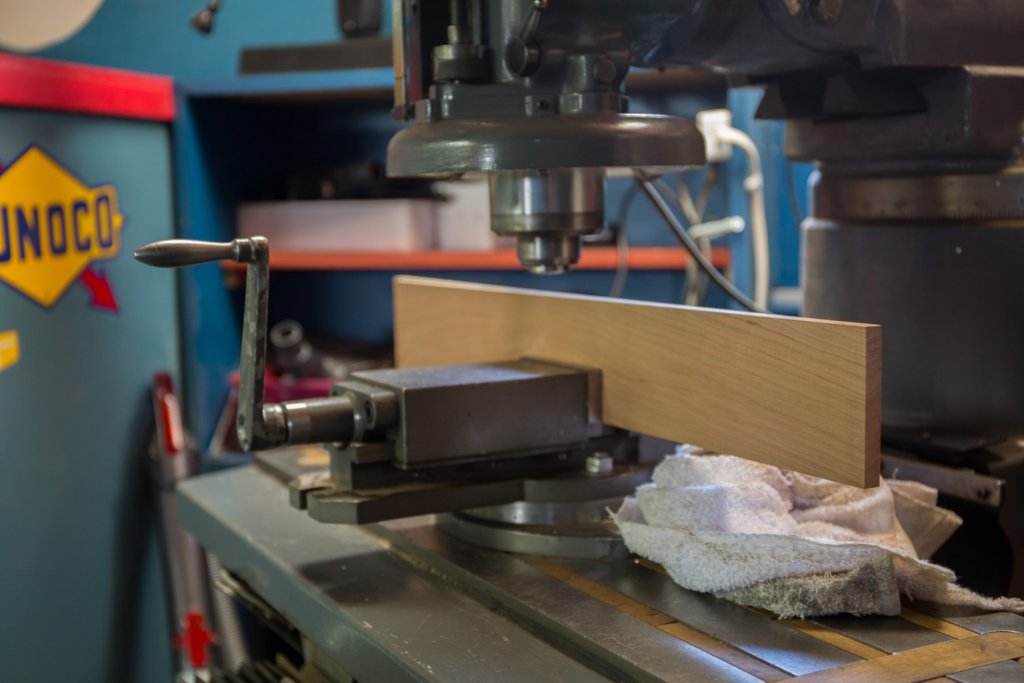
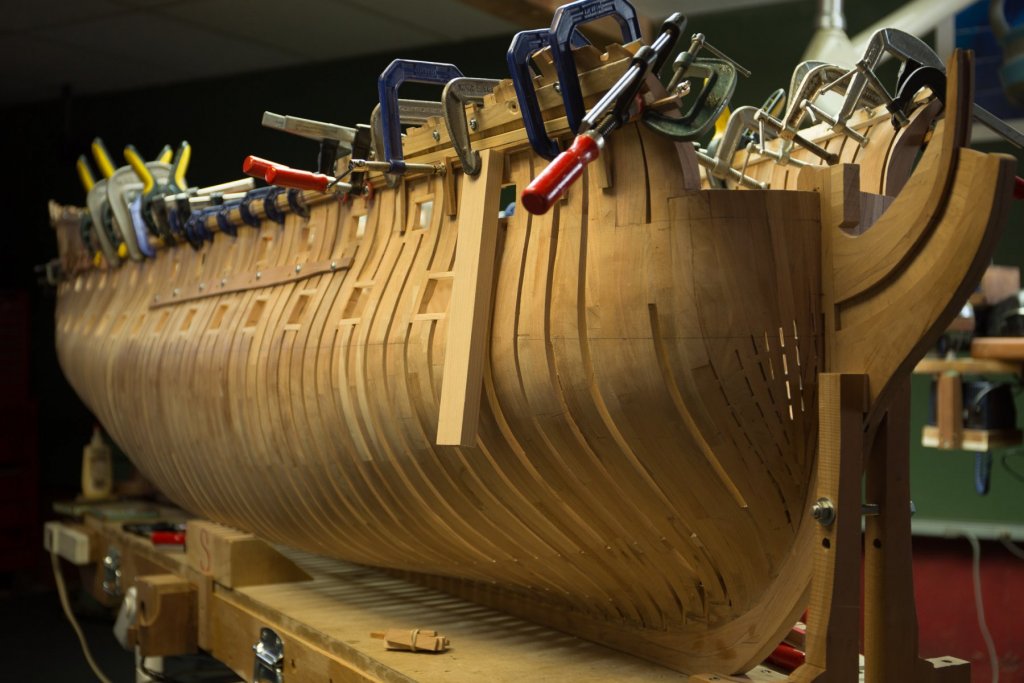
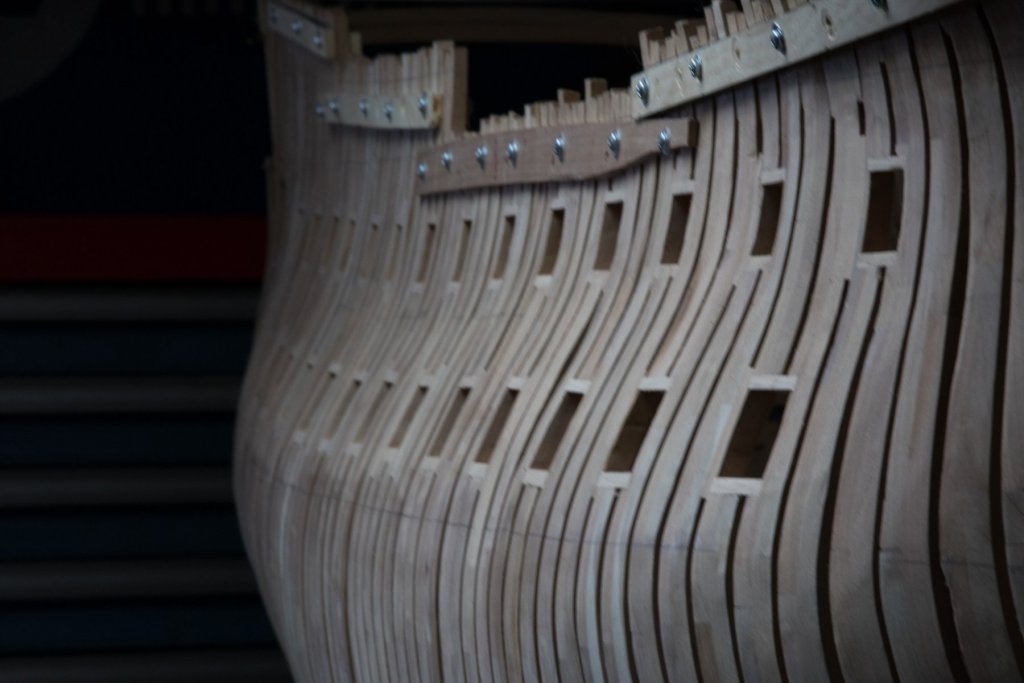
My experiences are not finished yet, I pushed the limit by adding two 2X extender in the spotting scope assembly. Installation of the first molding The position of the top frames will be final. All the frames are now glued together as a whole, even if before, many were not glued together by the top spacers. I think I gave the frames enough time to stabilize, with also the stability of the humidity before the spring begins, not really began here, it was minus 15 this morning. The blade profile exist simply because I did it few years ago. The idea for the holder is that it can be hold by both hand. It runs on the top of the plank as in second picture. In fact, I used my biggest vice on the height table. The vice is a secure method to hold the plank. When the molding is done, then the width is cut on the saw. Before the installation of the moldings, a batten was installed as a guide as we have in many other modeler, just like Mark. Even if the line was already traced, the beauty of this batten is that it can be adjusted more precisely before simply because the batten is not glued. Also the batten is in one piece only to assure a smoother curve. Another advantage, the curve is easier to follow with the molding because it can rest on a existing curve well fixed with clamps. The laser line is also very helpfull it helps to see the regularity of the curve, ad ecerything can be corrected before all is glued. It is much more difficult to install the molding with the correct curve without a guide.


-
Hi Mark, All the extenders do not perform the same way. Some will not include all the functions. I use two Canon extender 2X, one version II and one version III because I can stack both together. At the opposite, I could not stack two version III together. As an example Sigma lens 600mm with Sigma extender will lose autofocus. But Sigma 600mm + Canon extender; autofocus will be working. The only way to know this, is to try it, it is not written anywhere. The main degradation when you use an extender is that you will loose 2 F stop with each extender, the quality of the photo will still be very good. If you use one extender, no function will be lose, if you use two 2X extender, Auto focus will not be working 100%. By using an extender, I can get 1200mm 2 ways : 300mm + 2 extender or 600mm + 1 extender. The main reason to use extender is the cost : Sigma 600mm + two 2X extender : $1800 Canon 1200mm : $180000. Of course, glasses will be better quality, but I cannot afford that quality! Gaetan
-
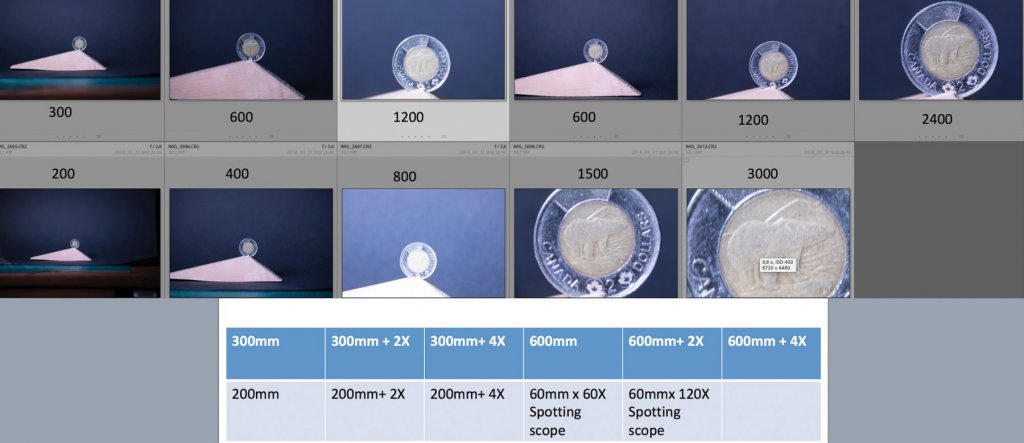
OK, I did corrections with the help of the Naturalist market manager from Swaroski Optics which is actually in Costa Rica. Ratio from the spotting scope are even higher than previously and photos have been rearranged by lens size. As we can see, the difference between a Telephoto of 200 mm and a spotting scope can be quite big!

-
Today I did some other test in macrophotography with telephoto zoom lenses and 1 spotting scope. The subject is a Canadian 2 dollars photographed at 2,5 meters. The main objective was to see what happens with two 2X Canon extender behind a lens. Test are done with : -200, 300, 600mm lens alone, with one 2X and 2 2X -20- 60X 65mm spotting scope alone and with one 2X Ratio looks like OK but there is a difference between lens and spotting scope. Lens 2400mm look like smaller than spotting scope at 1500mm. I do not know how they did the conversion in mm with the spotting scope. 600mm lens is from Sigma, and extender are from Canon. I did not buy a teleconverter from Sigma because it is not clear if it will works; but with a teleconverter from Canon it does work, but nobody wants to tell you this. All the lens have a good autofocus with 1 extender but it is not very good with 2. If autofocus is done when with 1 teleconverter, adding the second one does not disturb the autofocus.
-
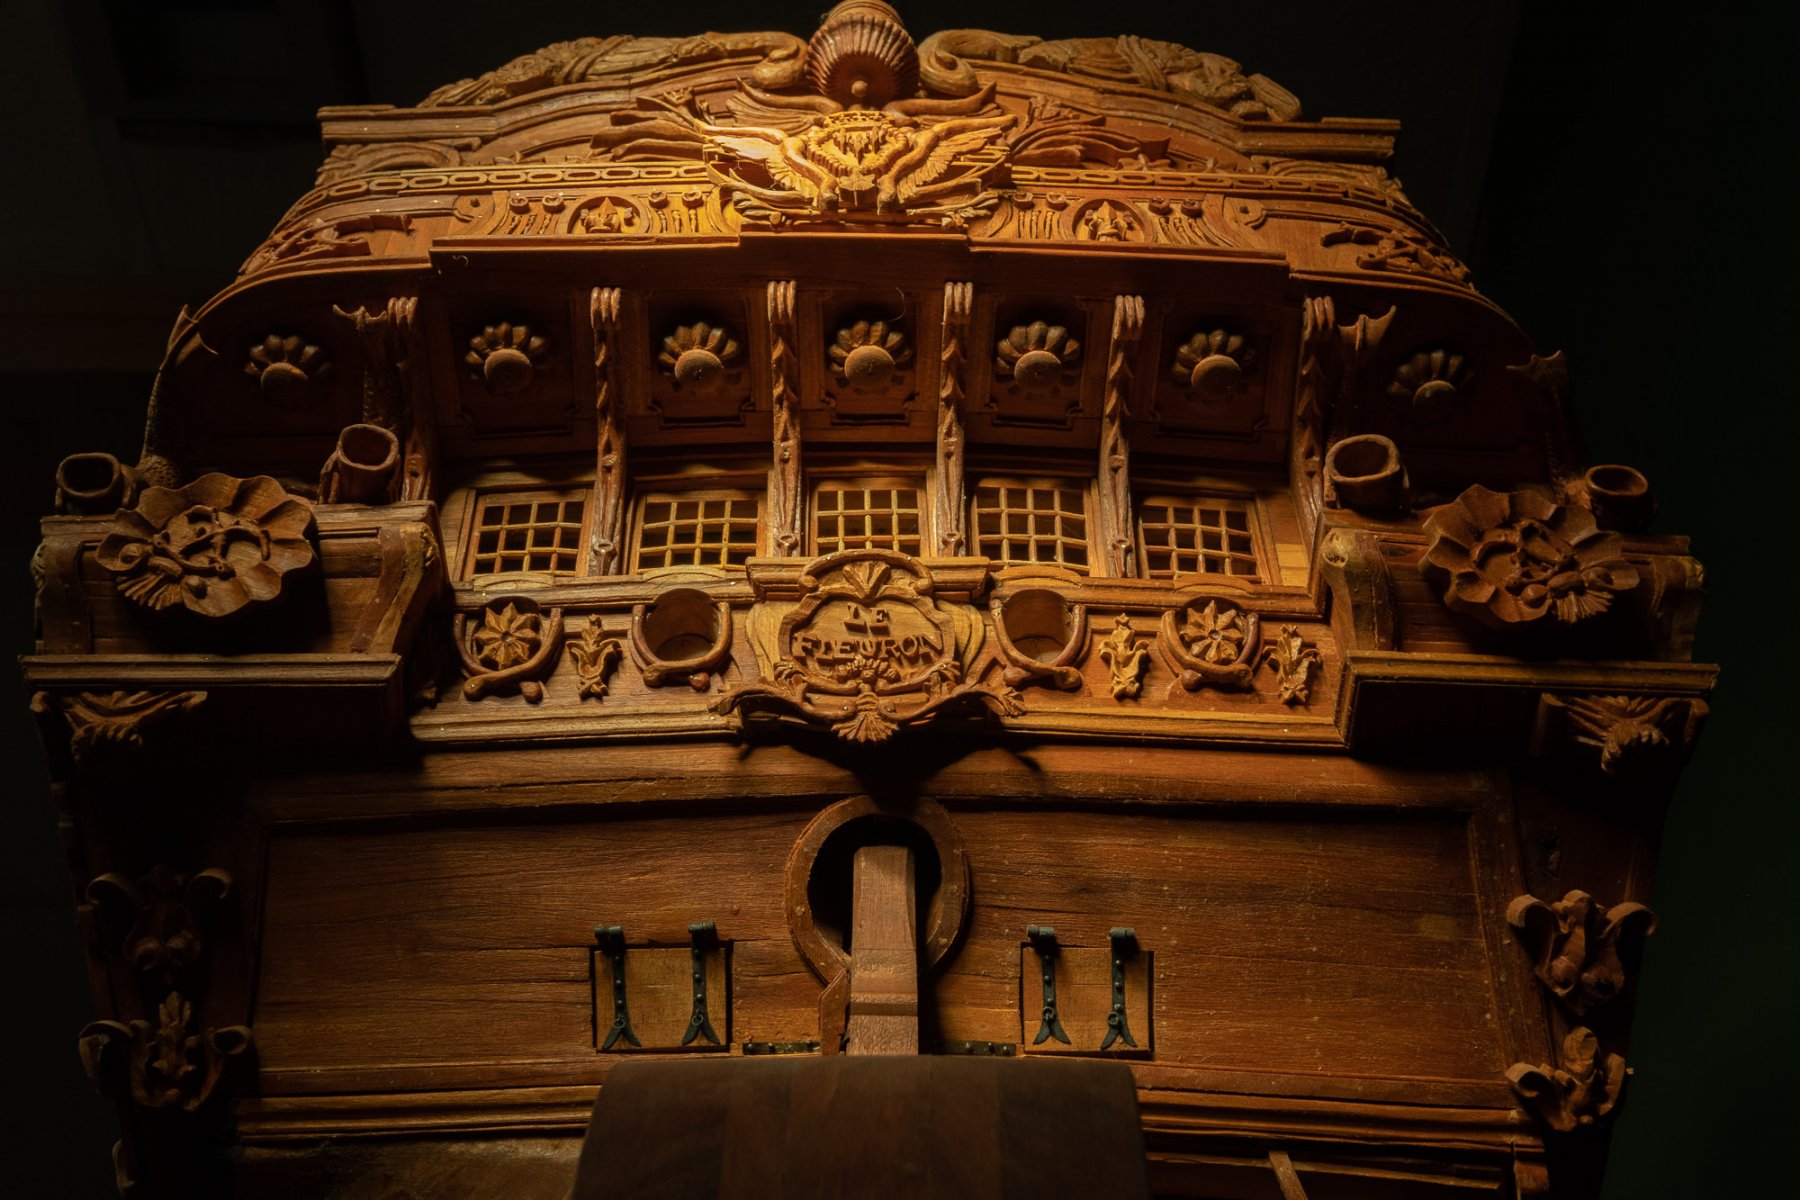
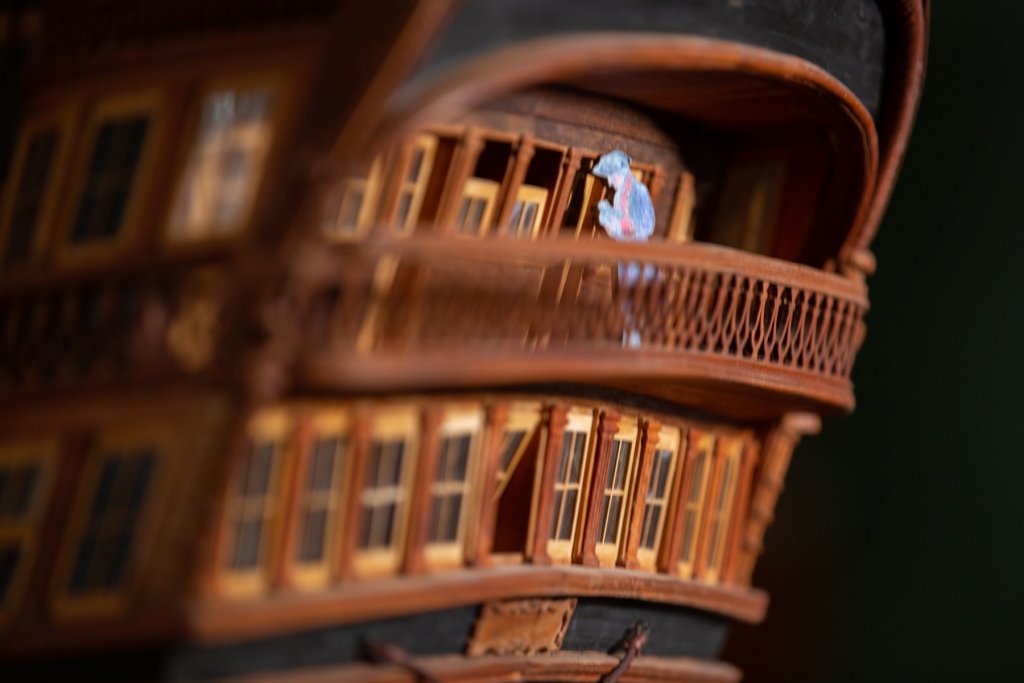
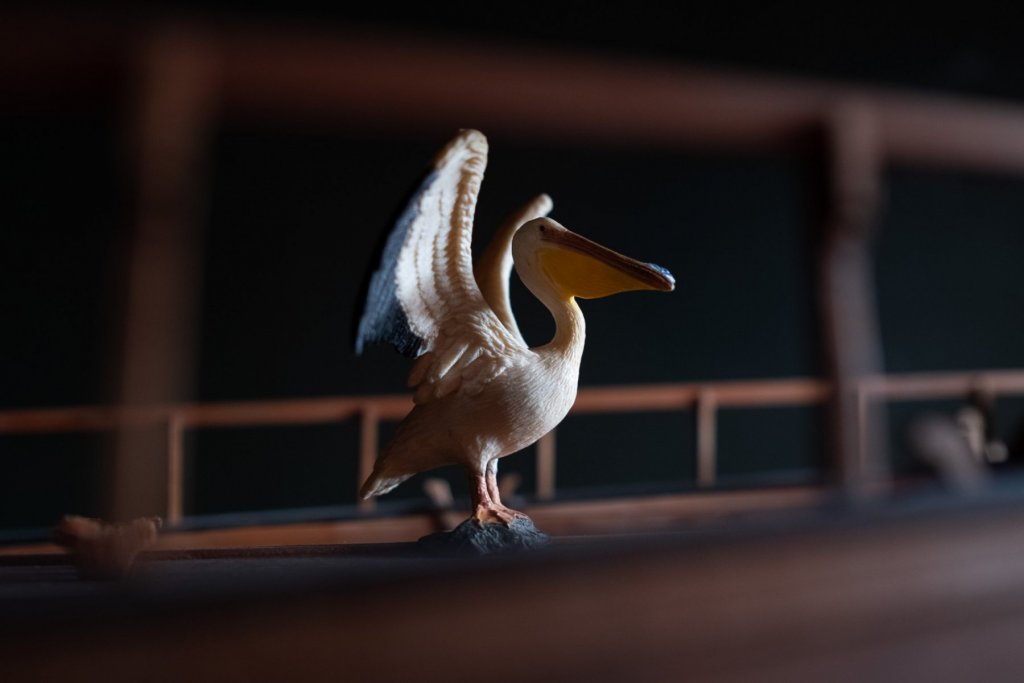
Thank you, Michael, In photography, we try to learn to use the light at his best but the perfect light is not necessarily always the best light. Learning to use less light can creates a more dramatic effect.
-
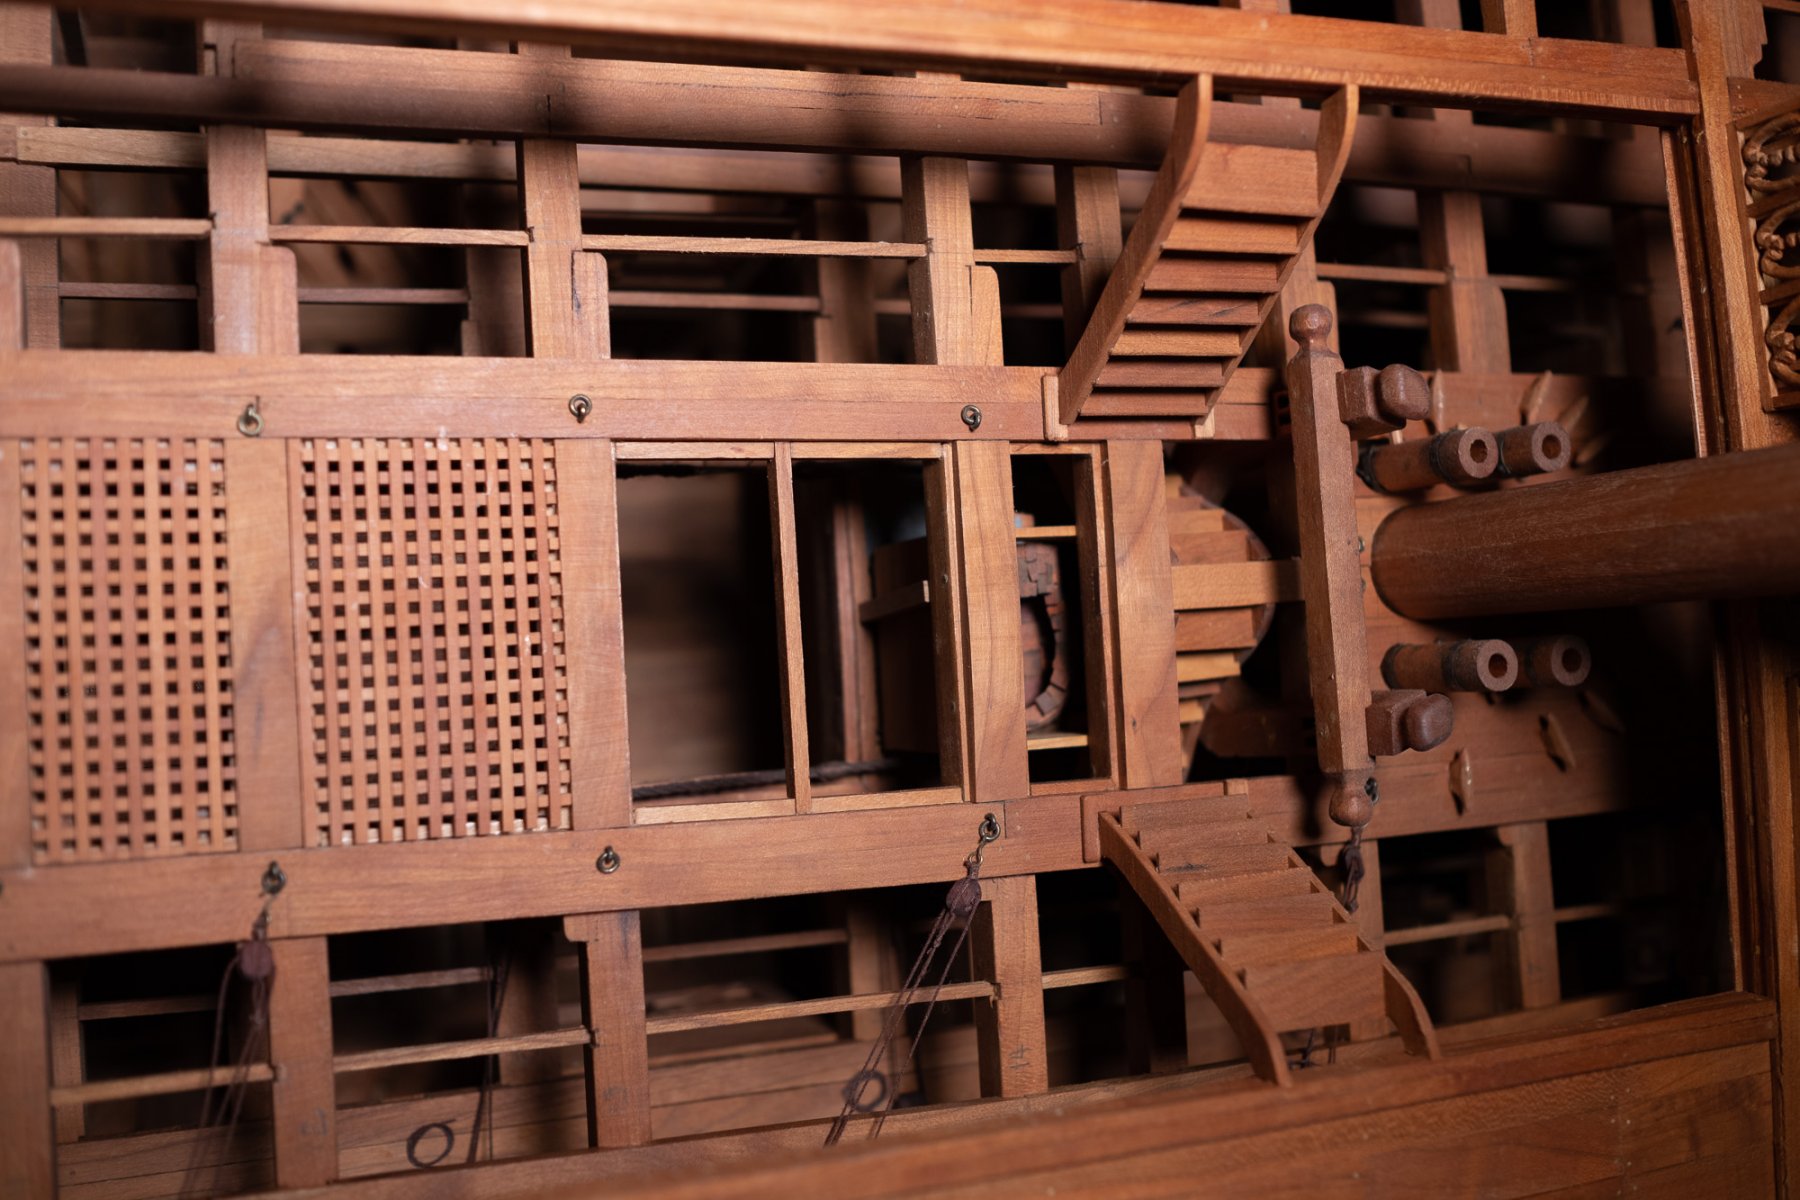
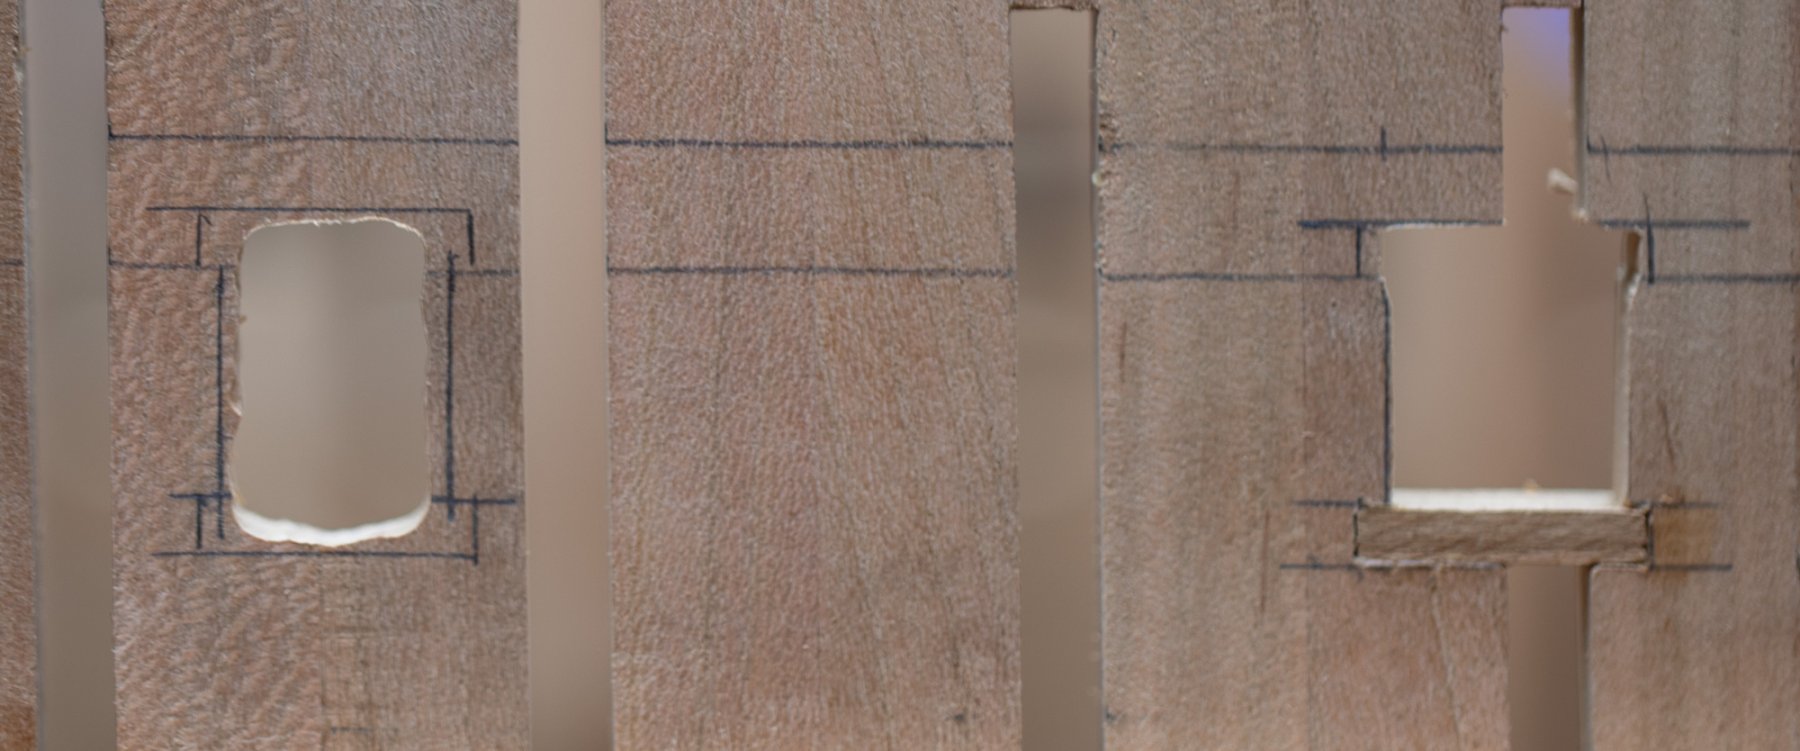
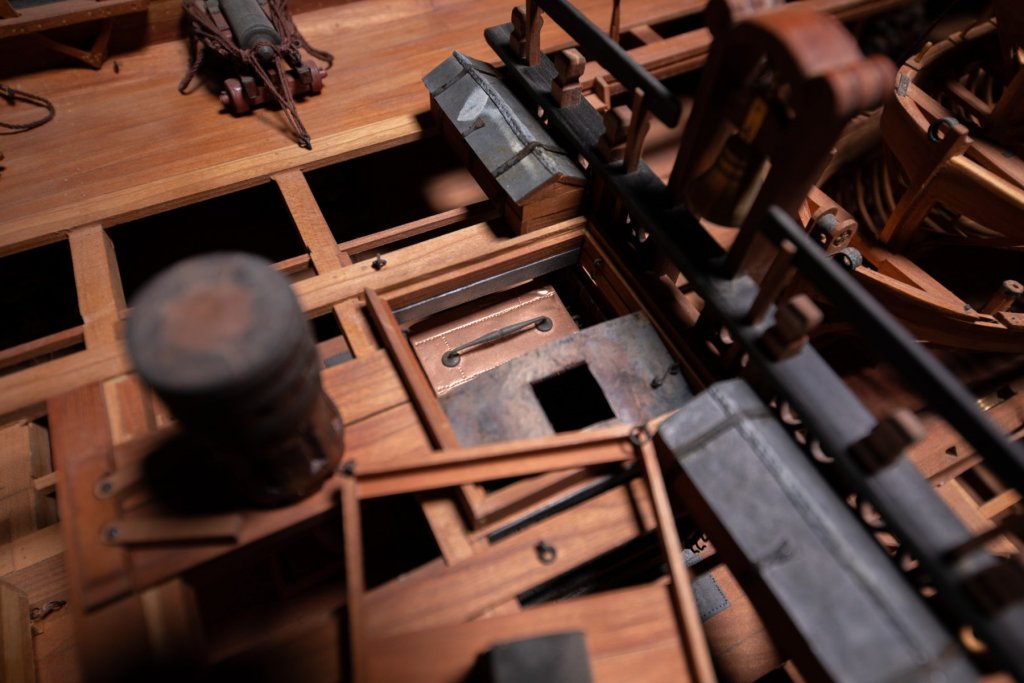
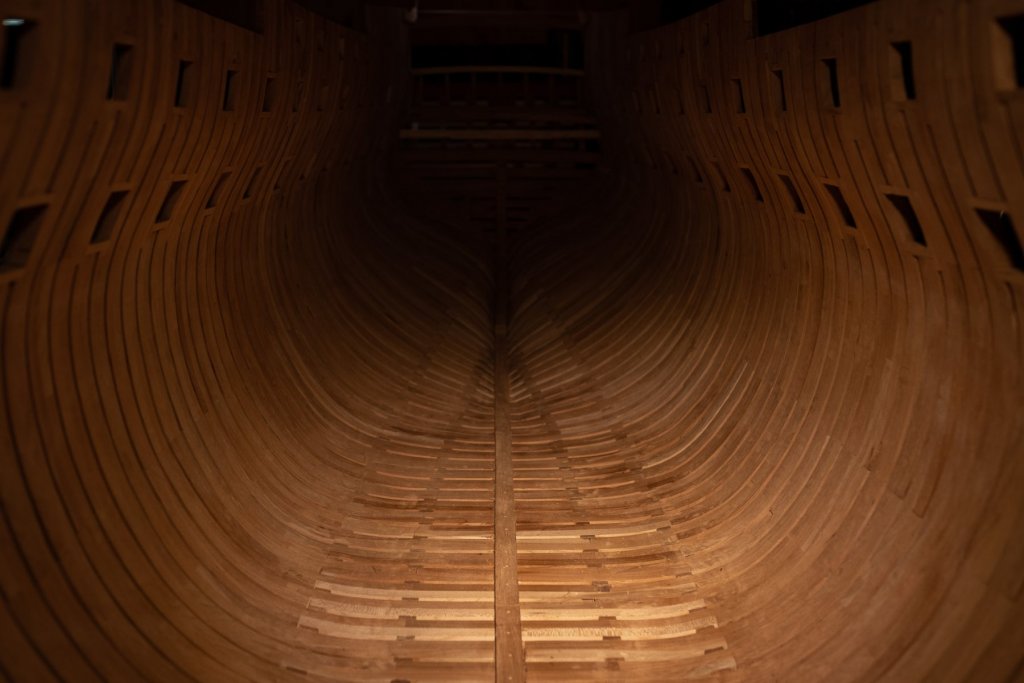
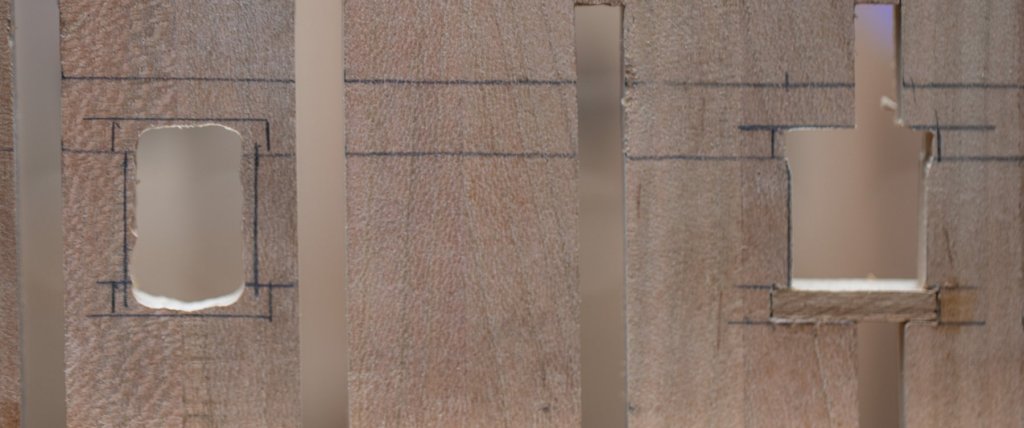
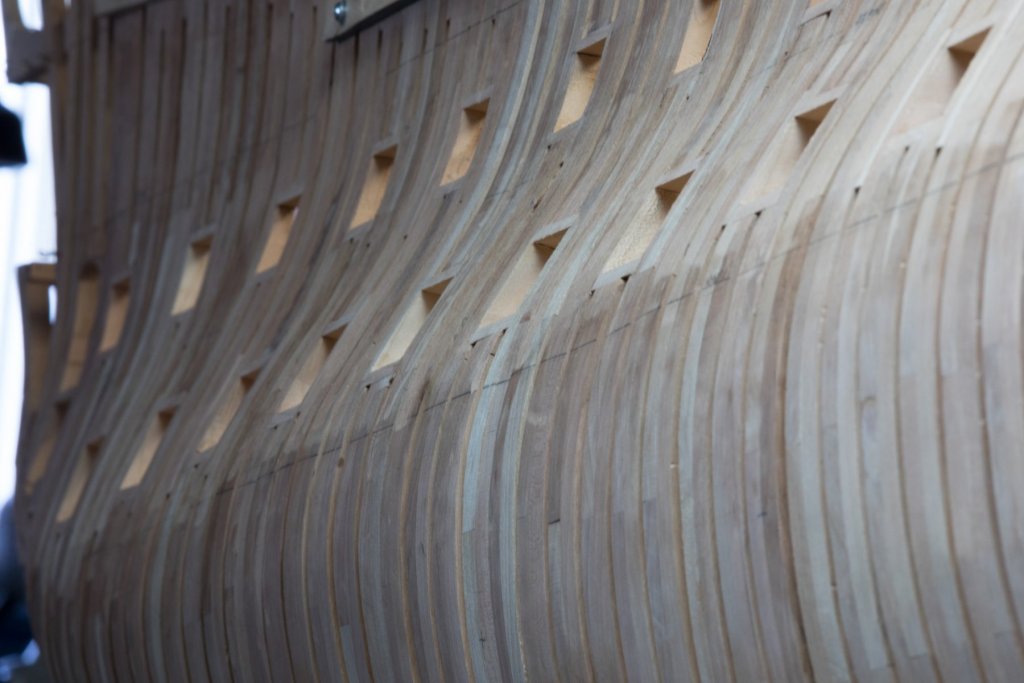
For the Gun port openings, I would say, there are 2 ways to align each opening part. An upper part and a lower part are inserted horizontally. I did trace the parts inside and outside, as it can be seen on the last picture of the previous post. The alignment of the gunport can be done on one or the other part but I think greater precision can be achieved with the inside line because this is the part which will be seen, If we check the alignment , we will check it with the inner part not the outside one, planking being installed or not.

-
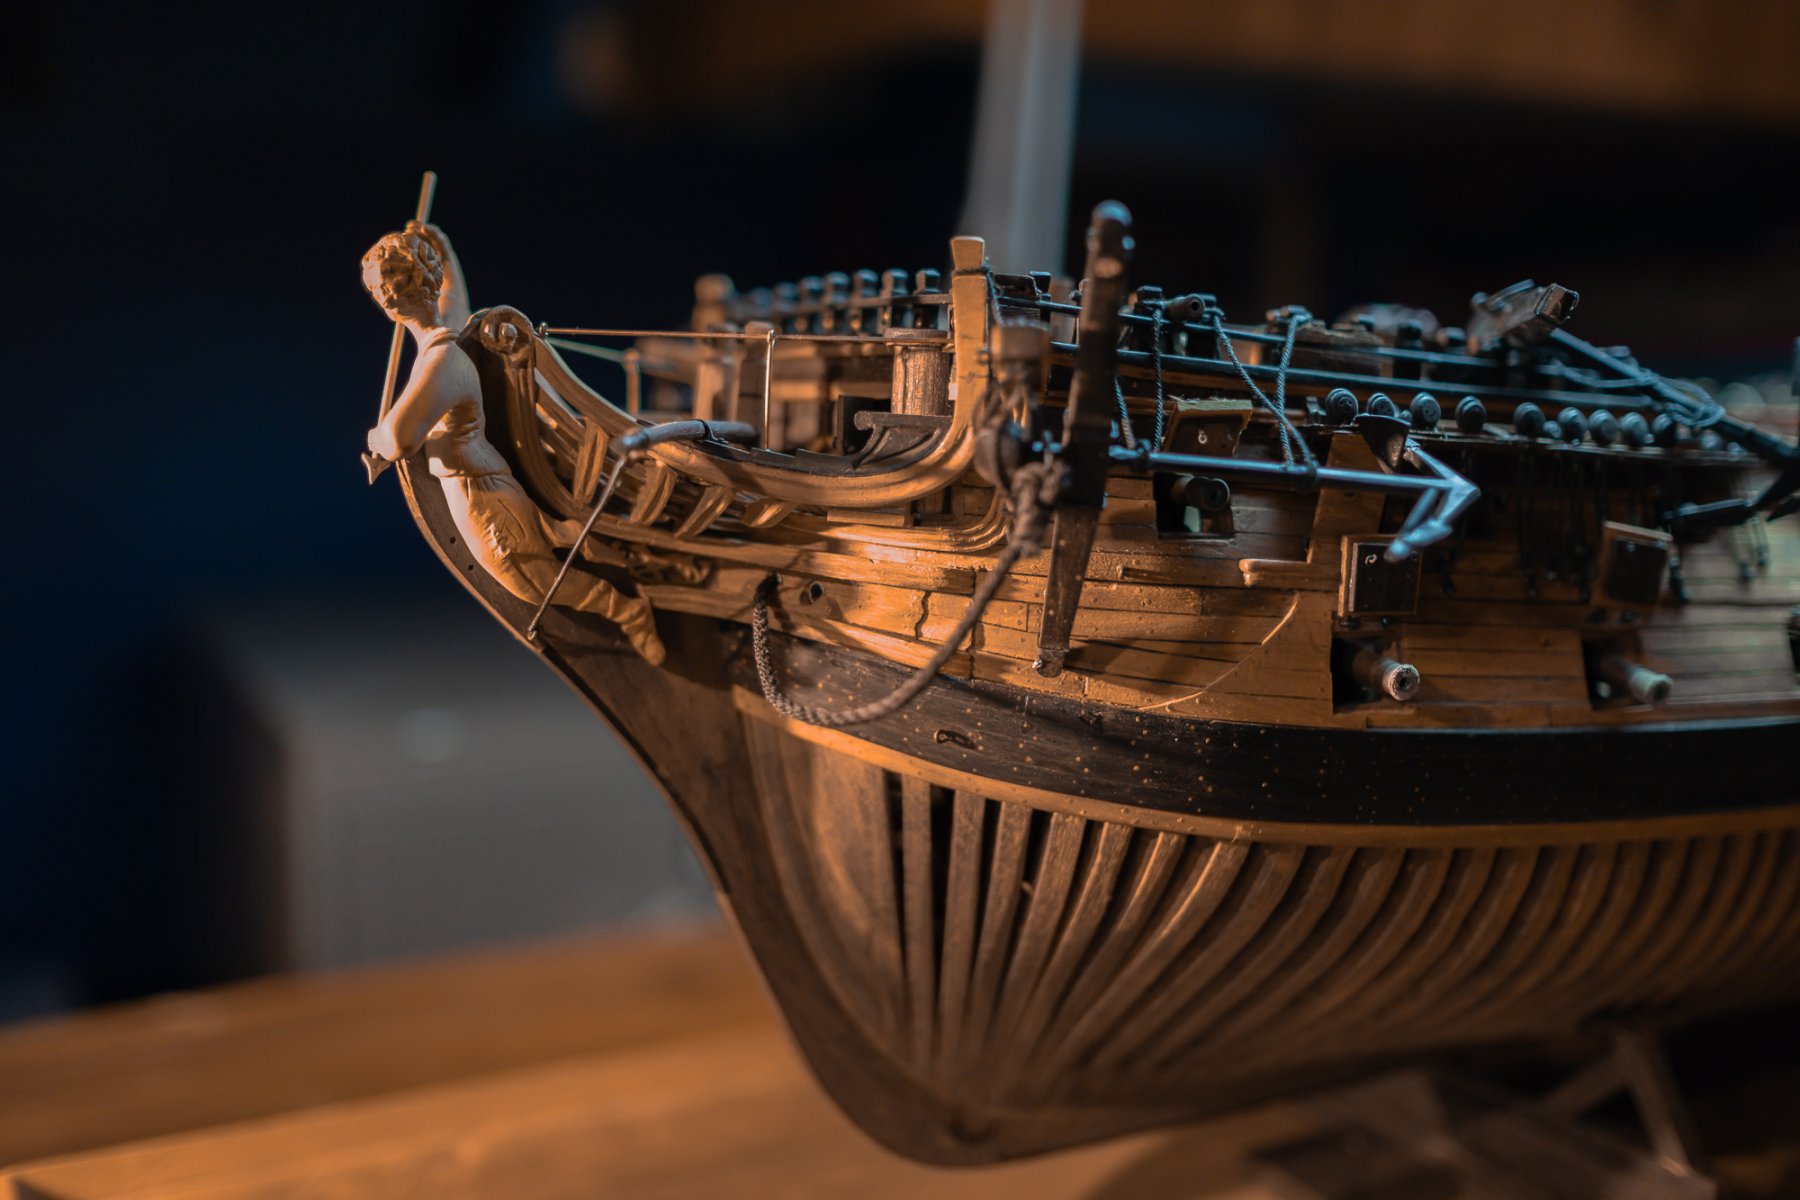
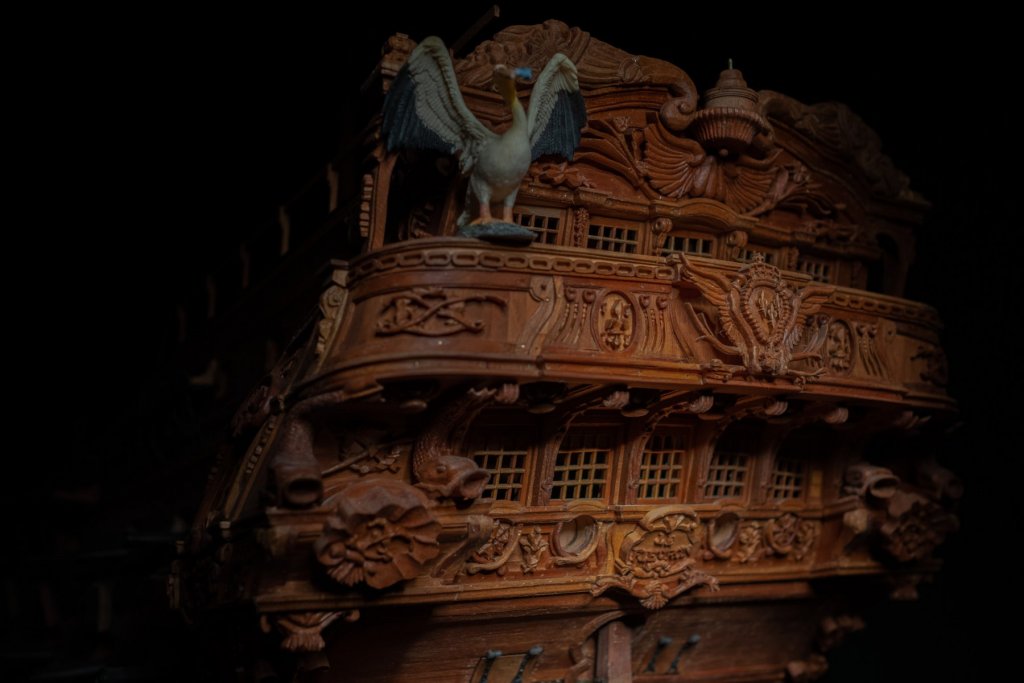
I am more traditional builder than a 3d builder. It does not mean that I would not like to use 3D. If I would be a good user like HJX, I would like to ''program'' a 3D figurehead. Every day 3D becomes more accessible and more affordable. I remember the first time I saw a 2 feet long 3D dolphin made by a 5 axis milling machine. The program used was costing at 20 or 25 thousands dollars and there was a physical key to install in a port. I do not recall the exact year, but I would say it probably more than 20 years ago.
-
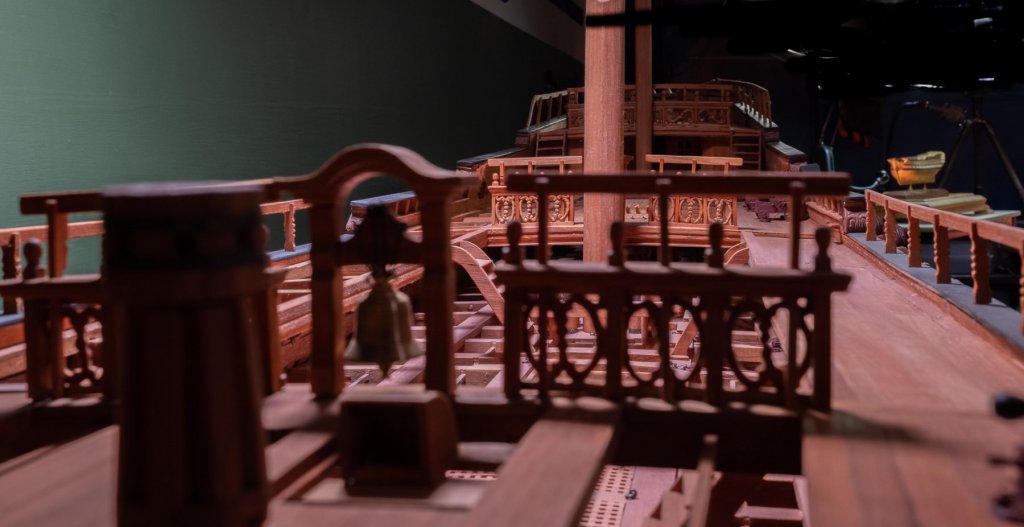
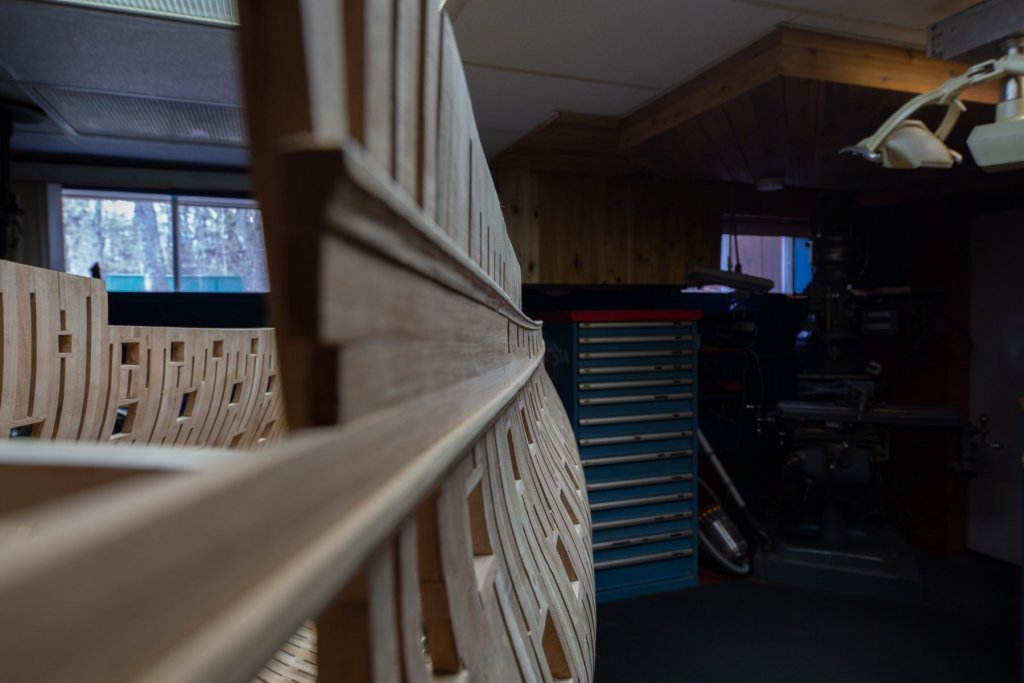
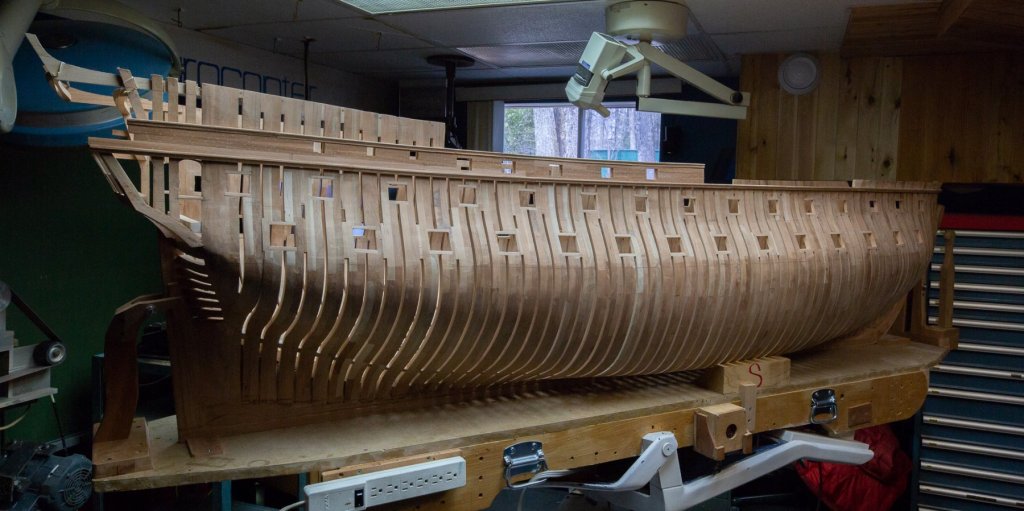
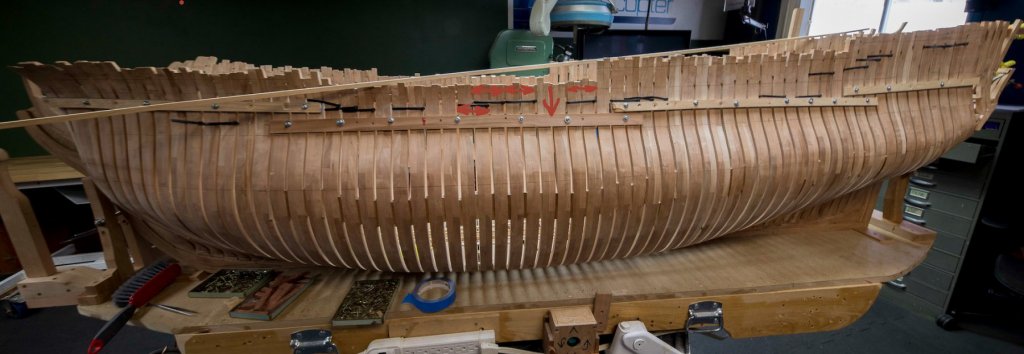
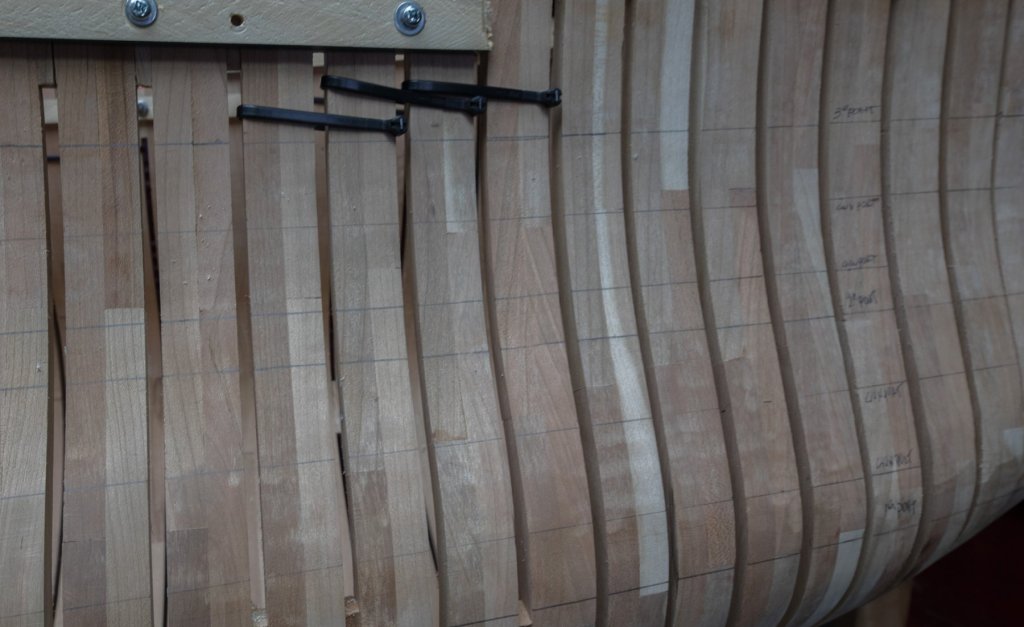
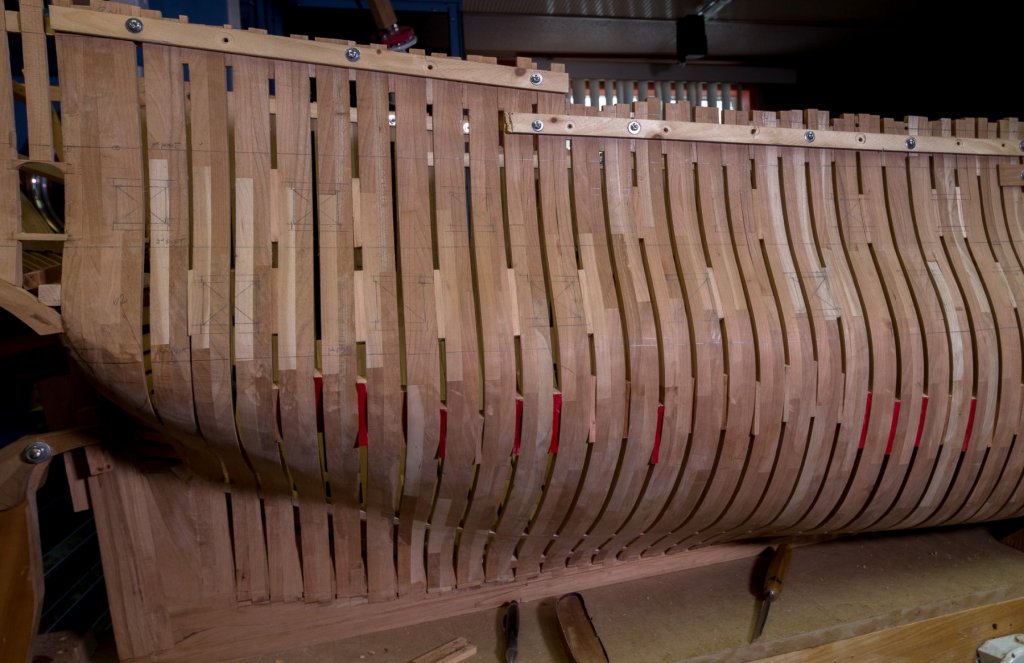
Marking of decks and gun ports opening is on the way. To do the marking of the top rails, the stick which keeps all the frames close to each other, had to be lowered. The lower the stick is, the greater the distance between frames has the tendancy to want to expand. This is why tie wrap were added temporarily and this is why we always set these sticks at the top.
-
Almost Carl, this method being the long version, I will only use the short version: Height transfer on a stick The stick is set at 90 degrees in both axes a horizontal laser line transfer the line on the model But it would have been nice to do it a bit faster
-
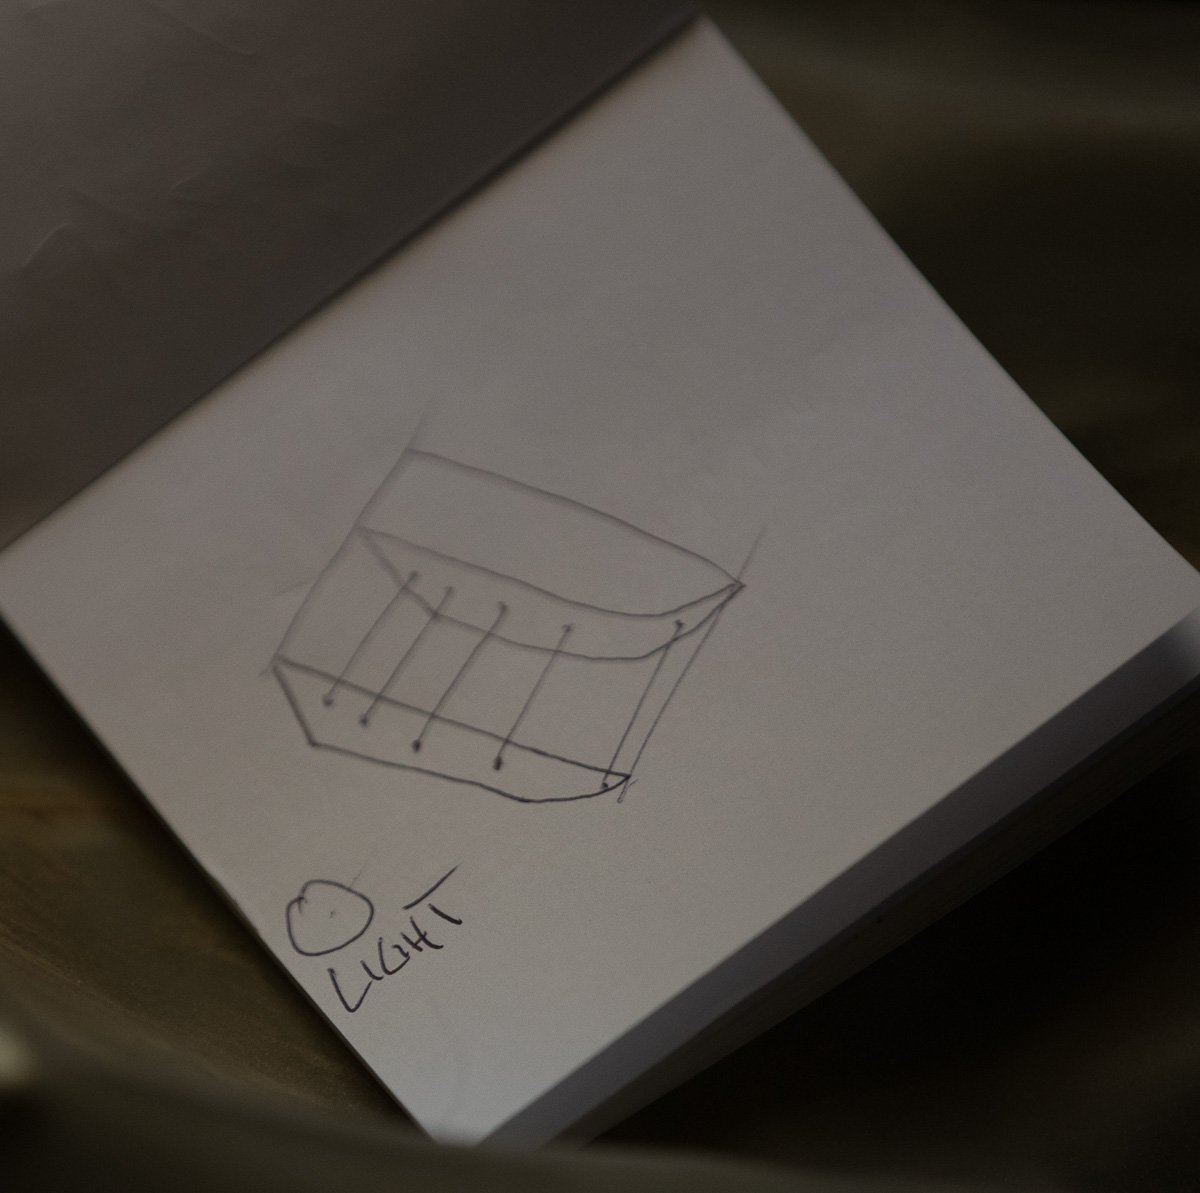
Carl you understand many things. Let"s see if I understand what you mean: The problem with the projector is that there will always be a projection angle in the ray of light. To correct this each point is set by first setting the light in front of the point to set and at 90 degrees of the keel and at the same height level. The goal is to project a point without distorsion. The light must be set for each point... drawing: light 2d drawing beam light through the drawing to the 3d model.