Gaetan Bordeleau
-
Posts
1,308 -
Joined
-
Last visited
Content Type
Profiles
Forums
Gallery
Events
Everything posted by Gaetan Bordeleau
-
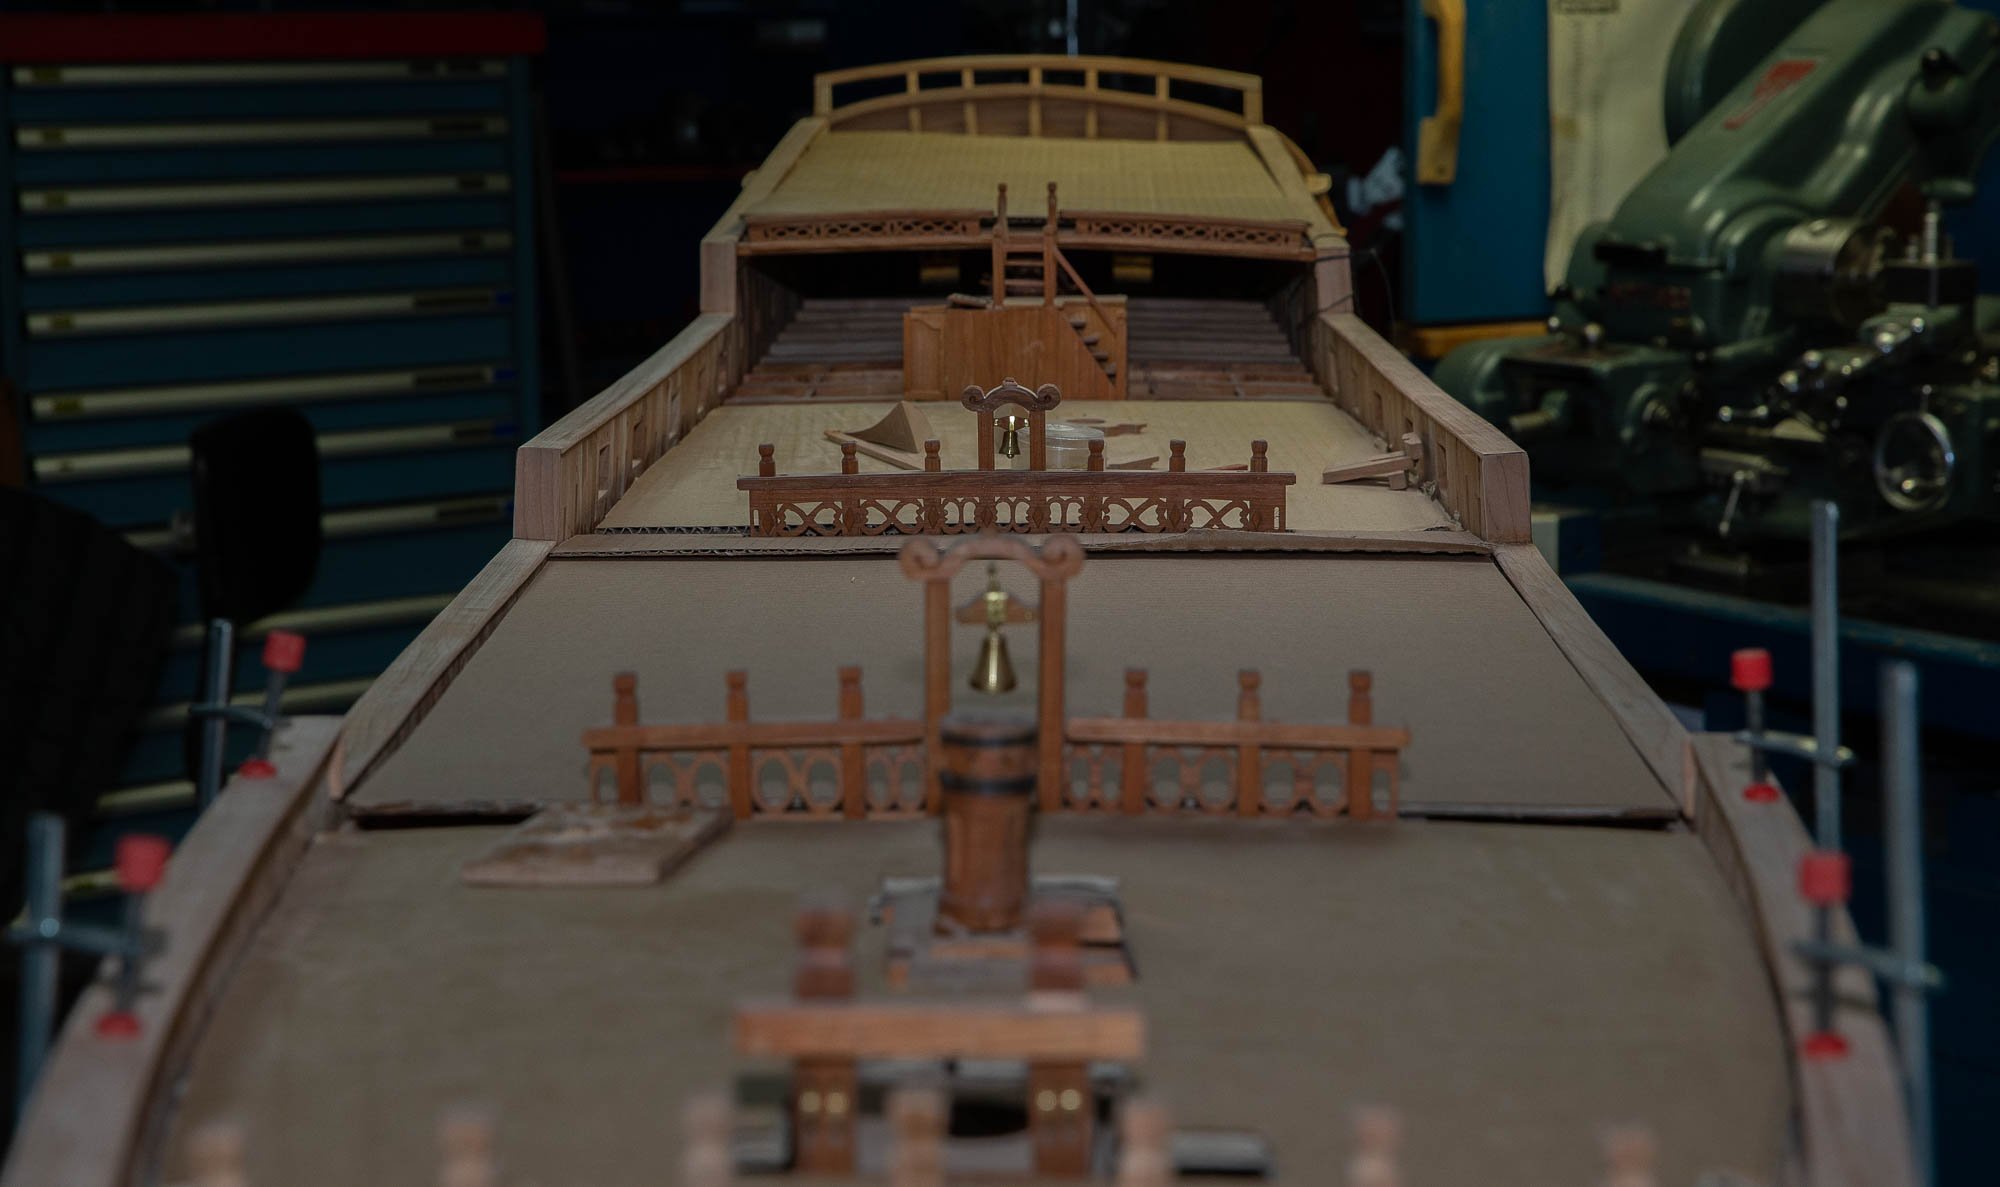
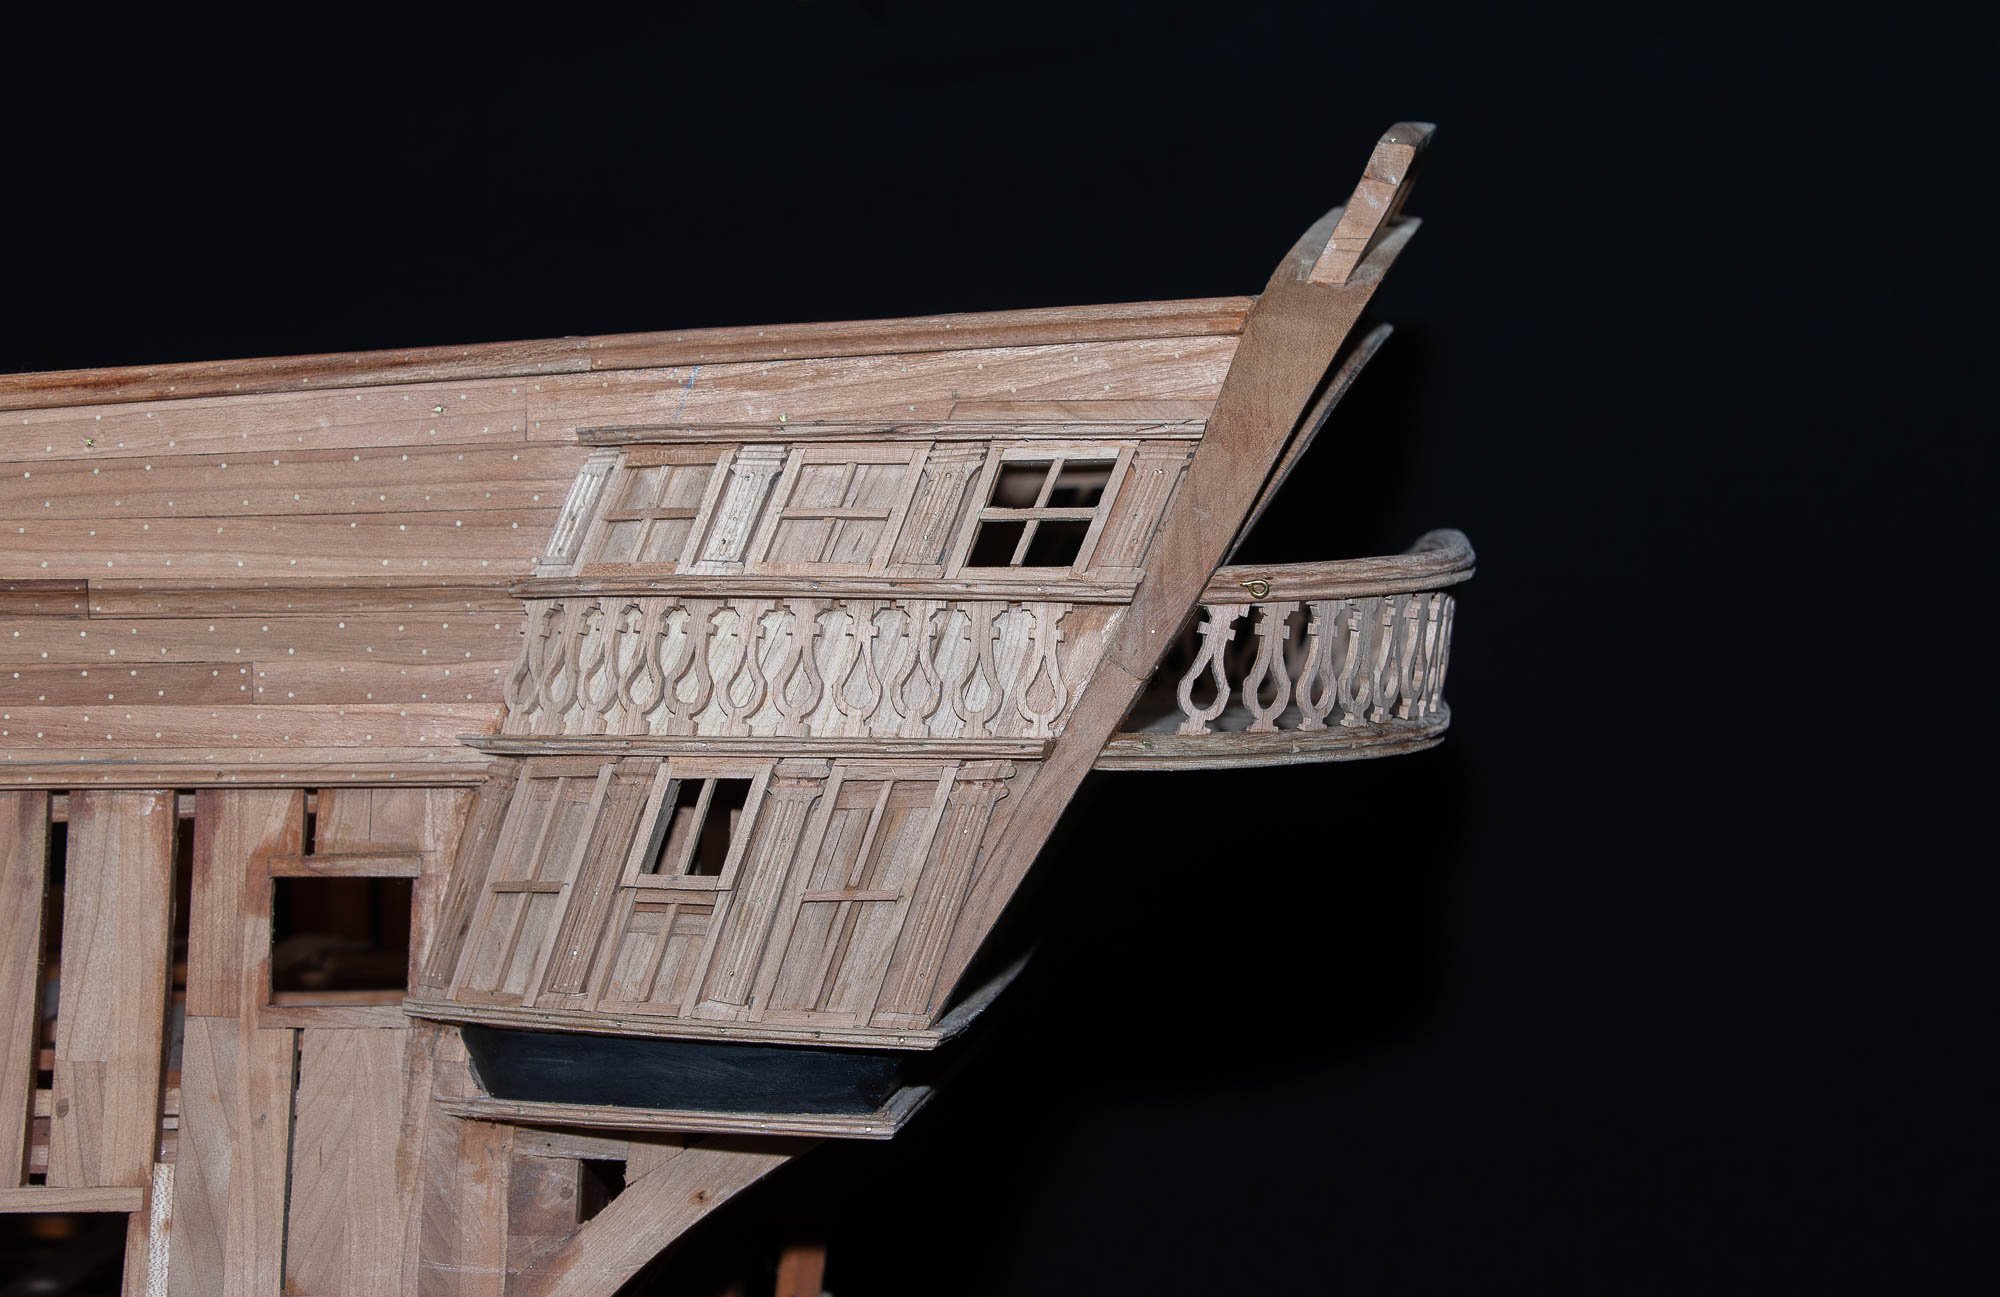
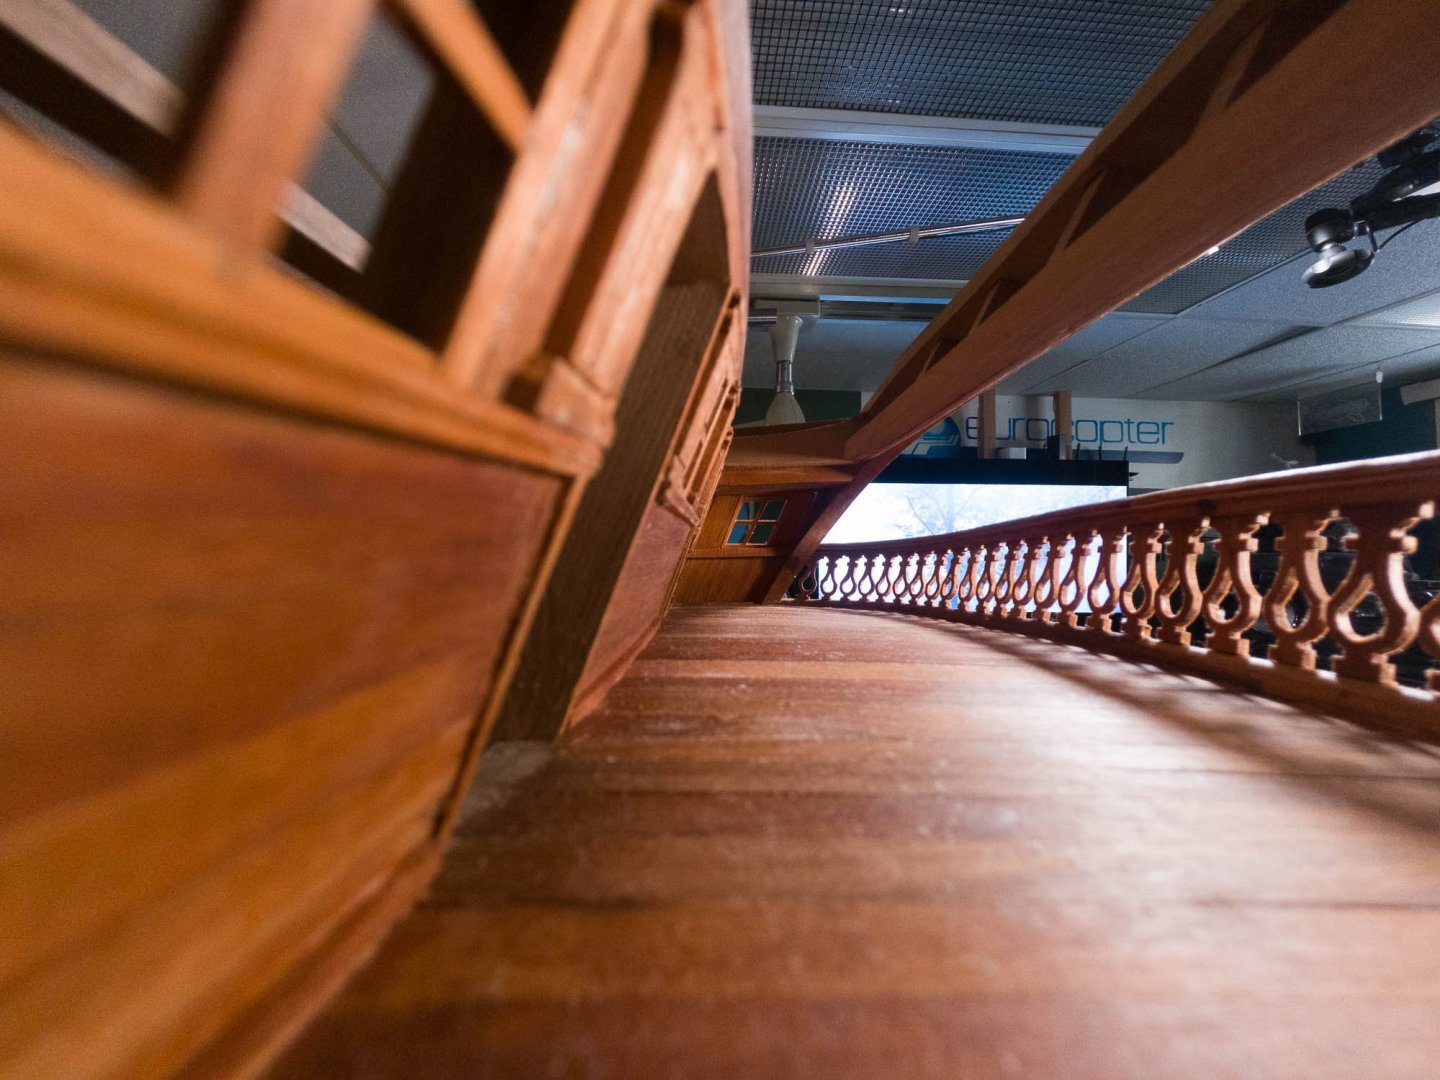
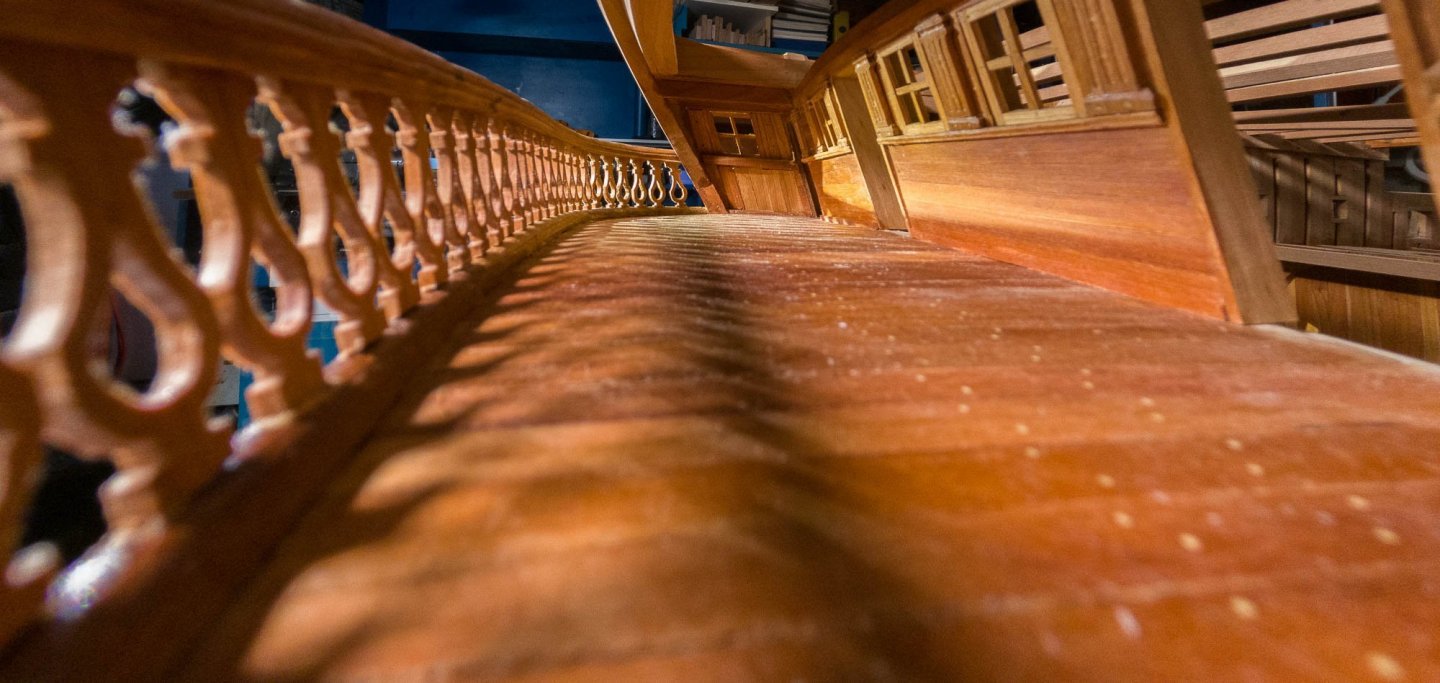
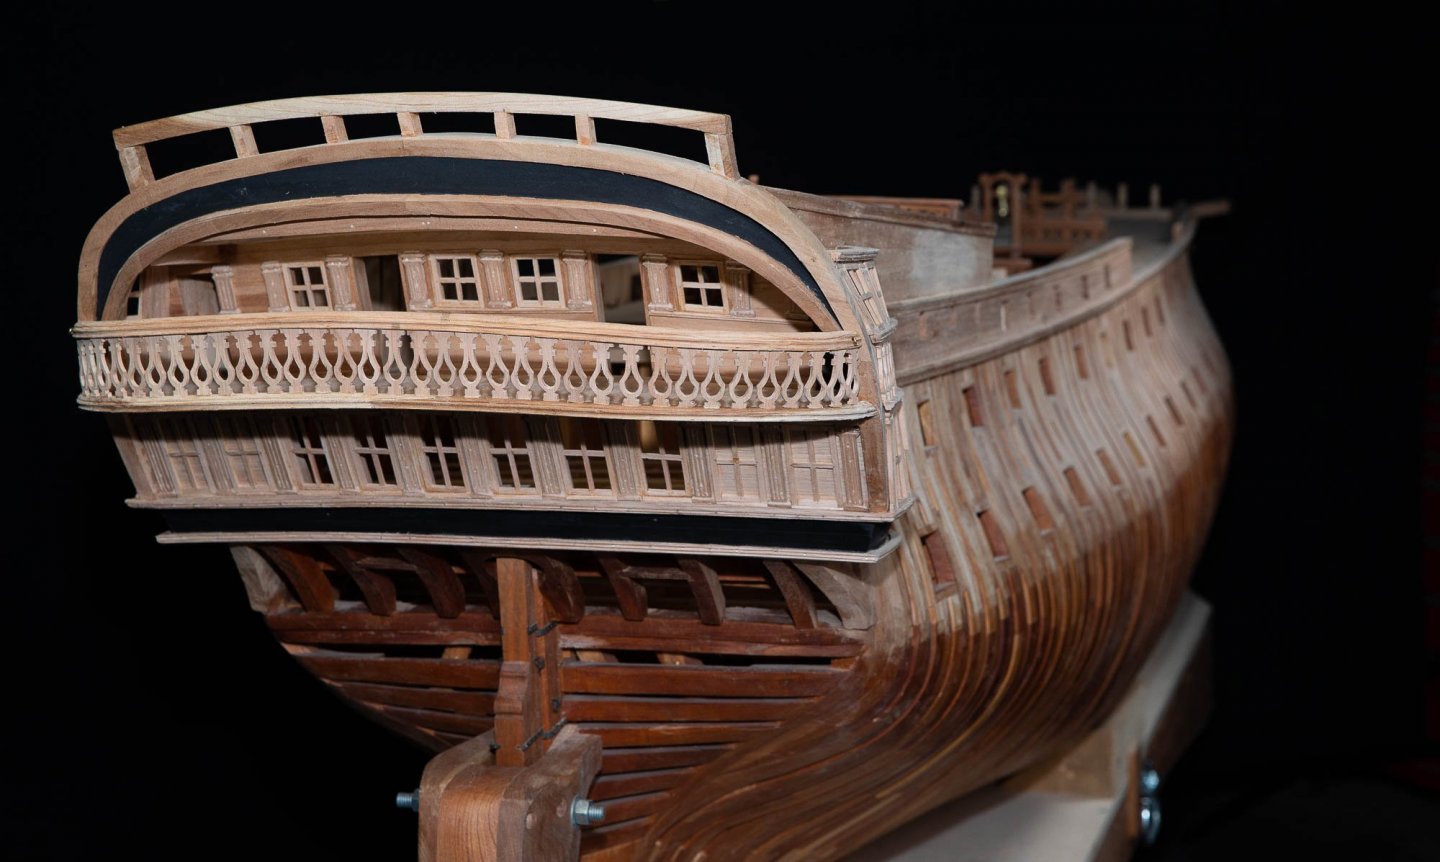
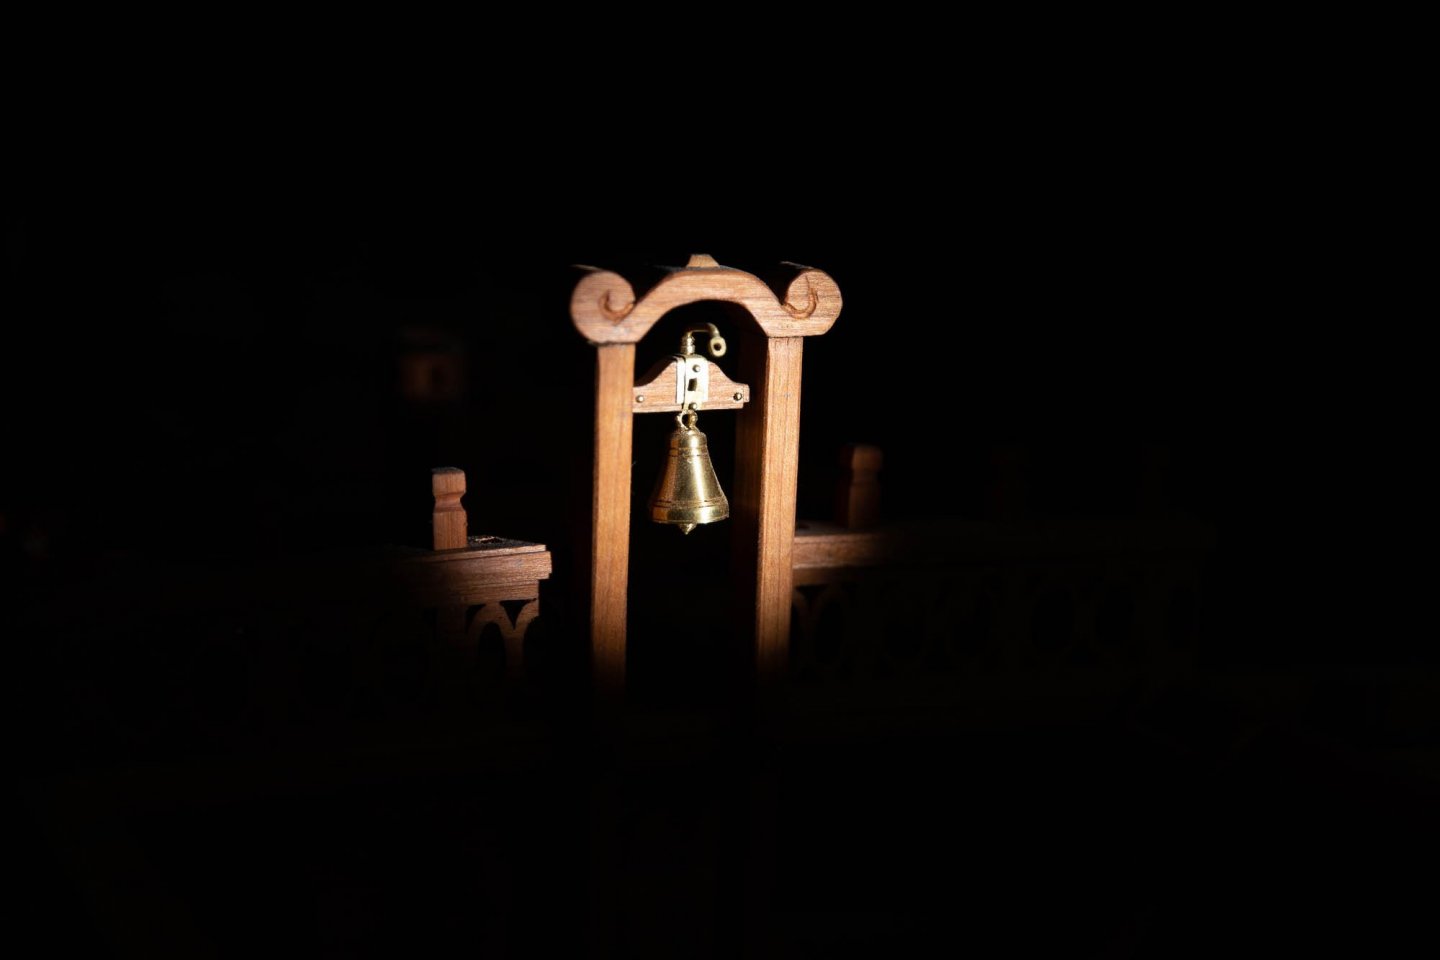
 Thank you for your comments. You need to take many photos to get one good one that you will like. Sometimes it is very difficult, sometimes it is much easier. Practice, again, is the key word. I like to experience different "tools" for photography. As we know Lighting is the base to get good results. Expensive equipment is not mandatory. I had some surprisingly good results with a flashlight and a $10 LED lamp from IKEA. This week, I started the railings:


-
Roger, you are right about this, big tools are heavy and are not really suited for model making. I had a Unimat SL-100 in combination with the milling post. What I hate the most was to turn the handles and also that .001" is about the maximum capacity to remove in a pass. Now I have 2 lathes and my favorite one is a tool lathe suited to make tools... and I did a lot of tools with it. The point is that there are a lot of different size of Lathe and this is the same with other tools. The size of the tool is determined by the size of what you want to turn.
-
You can find a chuck that close to 0 for a big drill press but trying to do a #65 hole with a big drill press, there will not be enough sensitivity in the handles and you will break many drill bits. For this you will need a sensitive chuck. But this is not the best way to go. For a small job, a small drill press and for a big job, a $100 drill press will be able to do few big holes but will not last many years. A small drill press is rated very few material at the time and a big drill press can remove a lot of material. For big jobs, in turning, milling or drilling holes, you need rigidity. At home, I have a Bridgeport milling but I do not have a drill press. The milling machine can drill holes but the drill press cannot do milling. So it depends of what you intend to today and in the future.
-
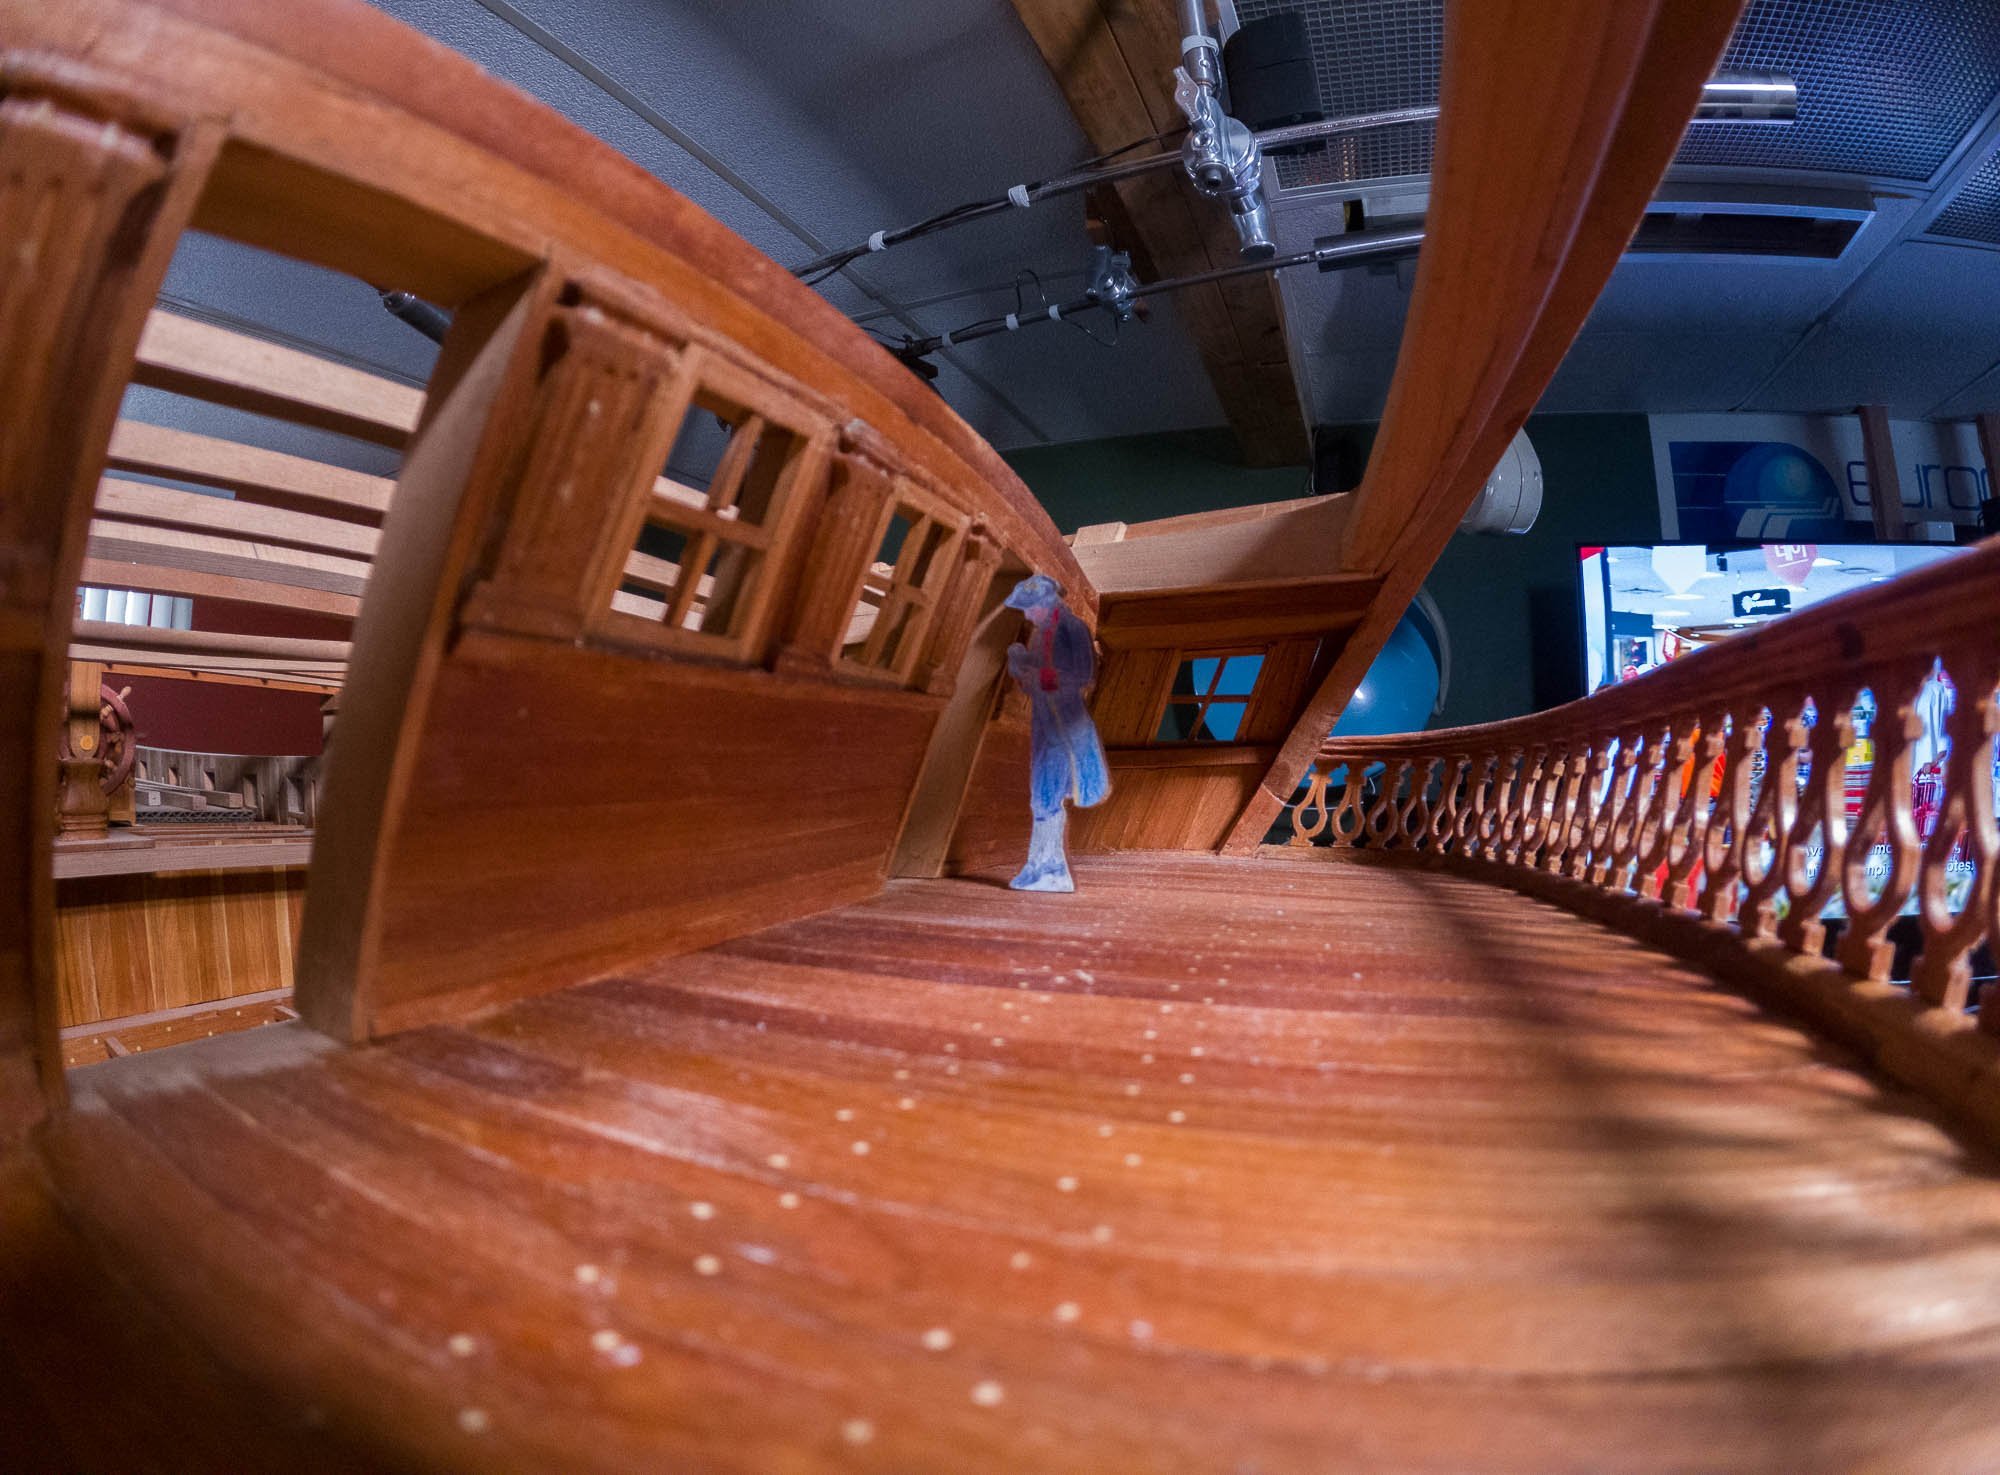
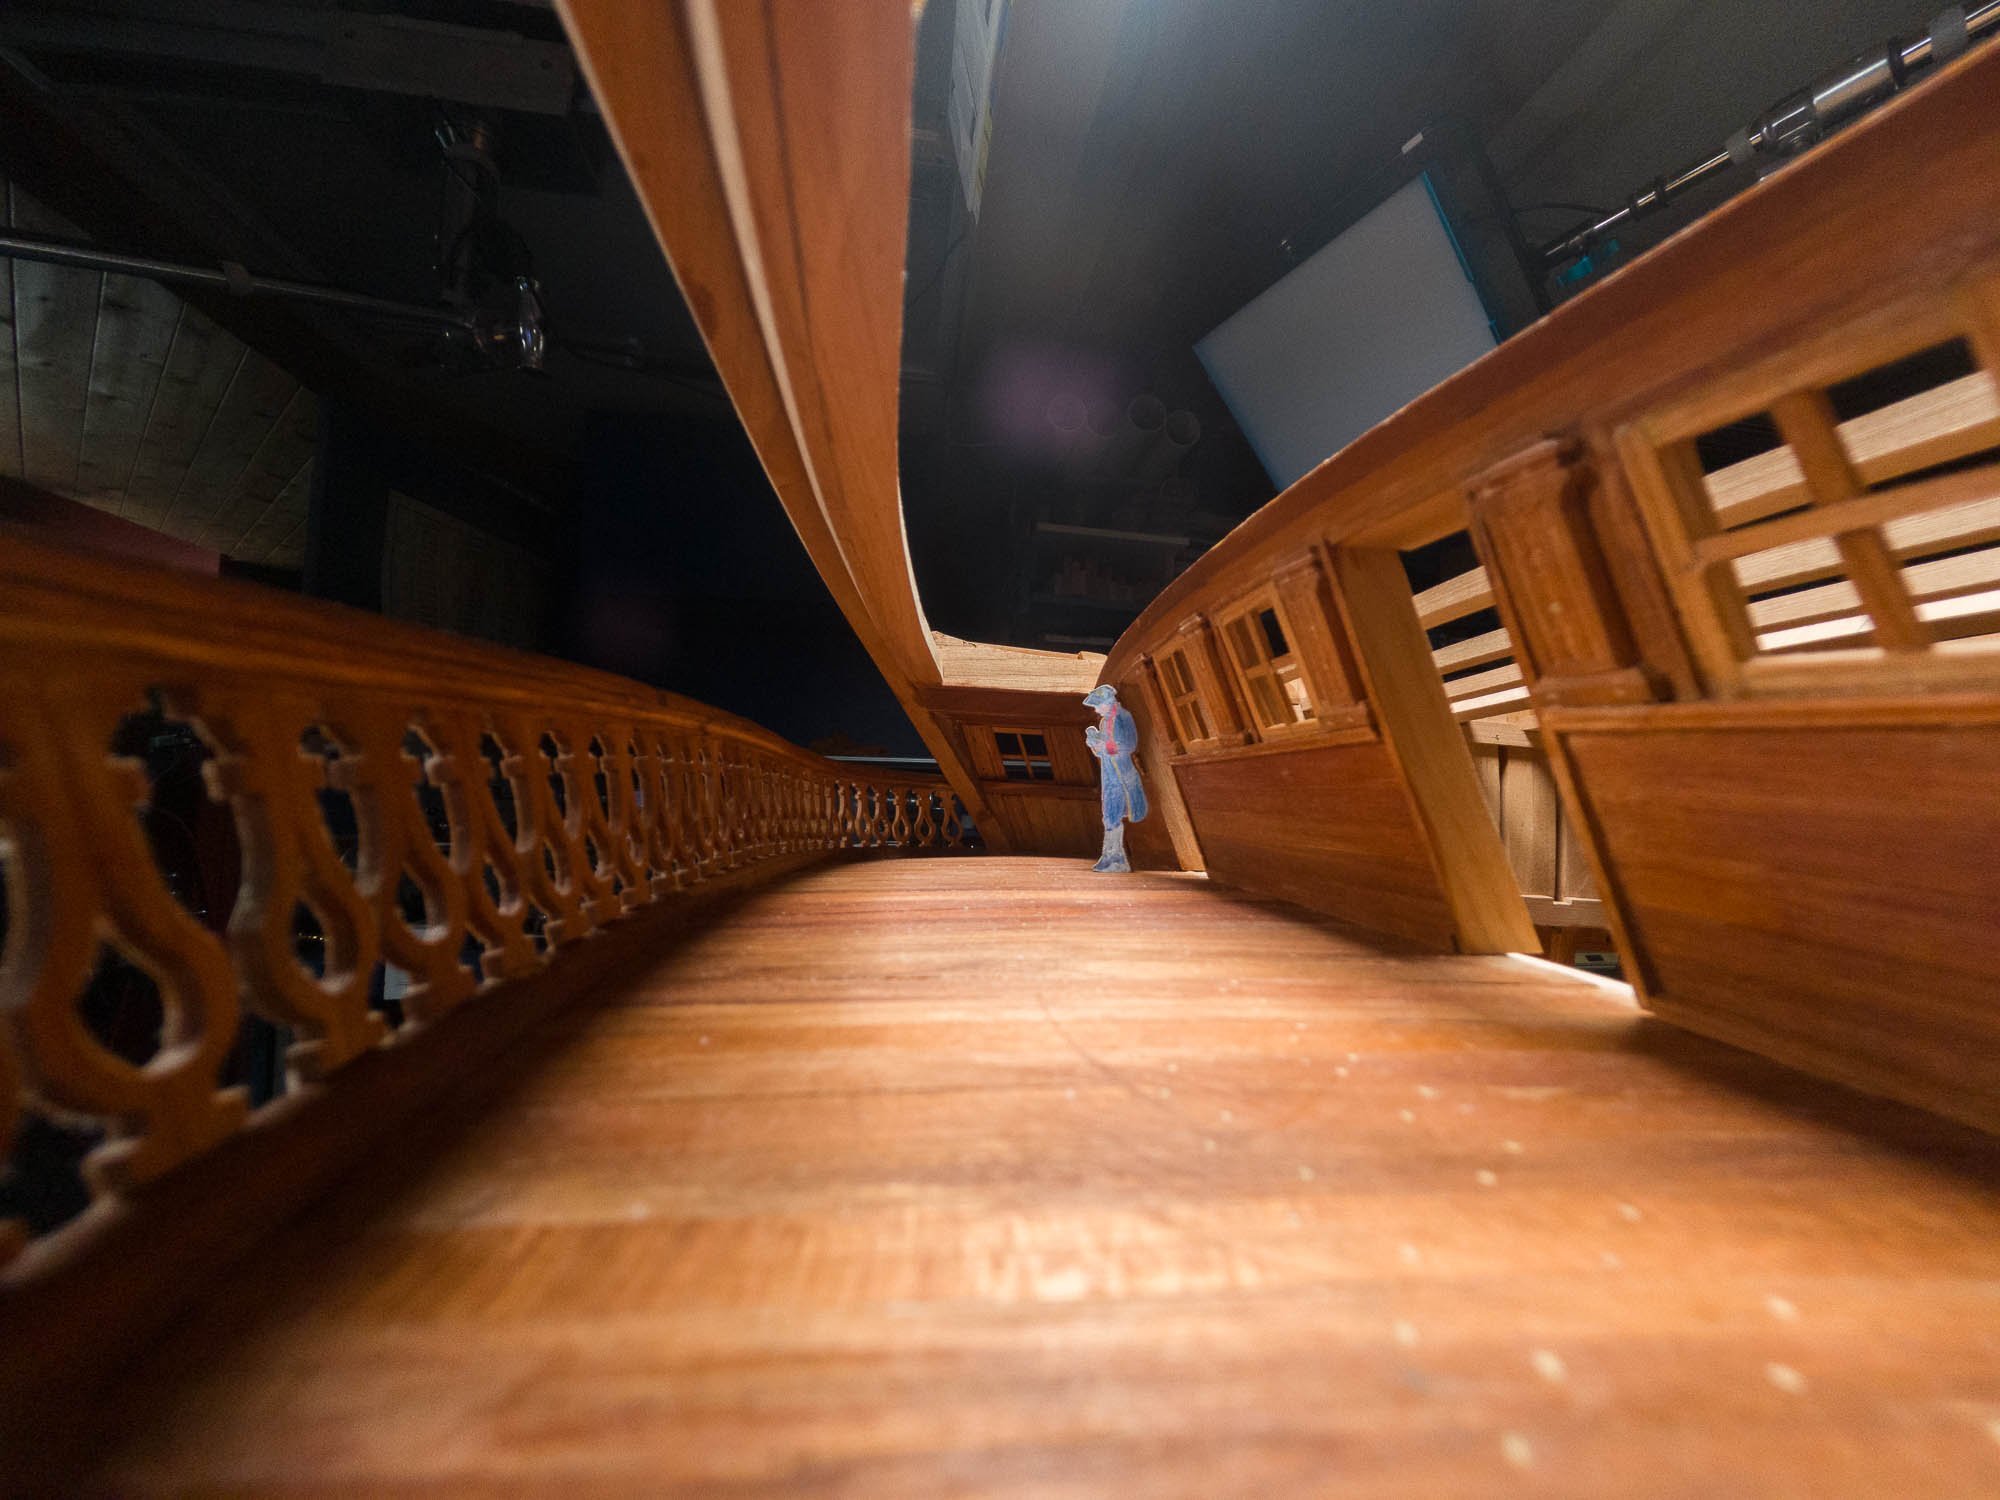
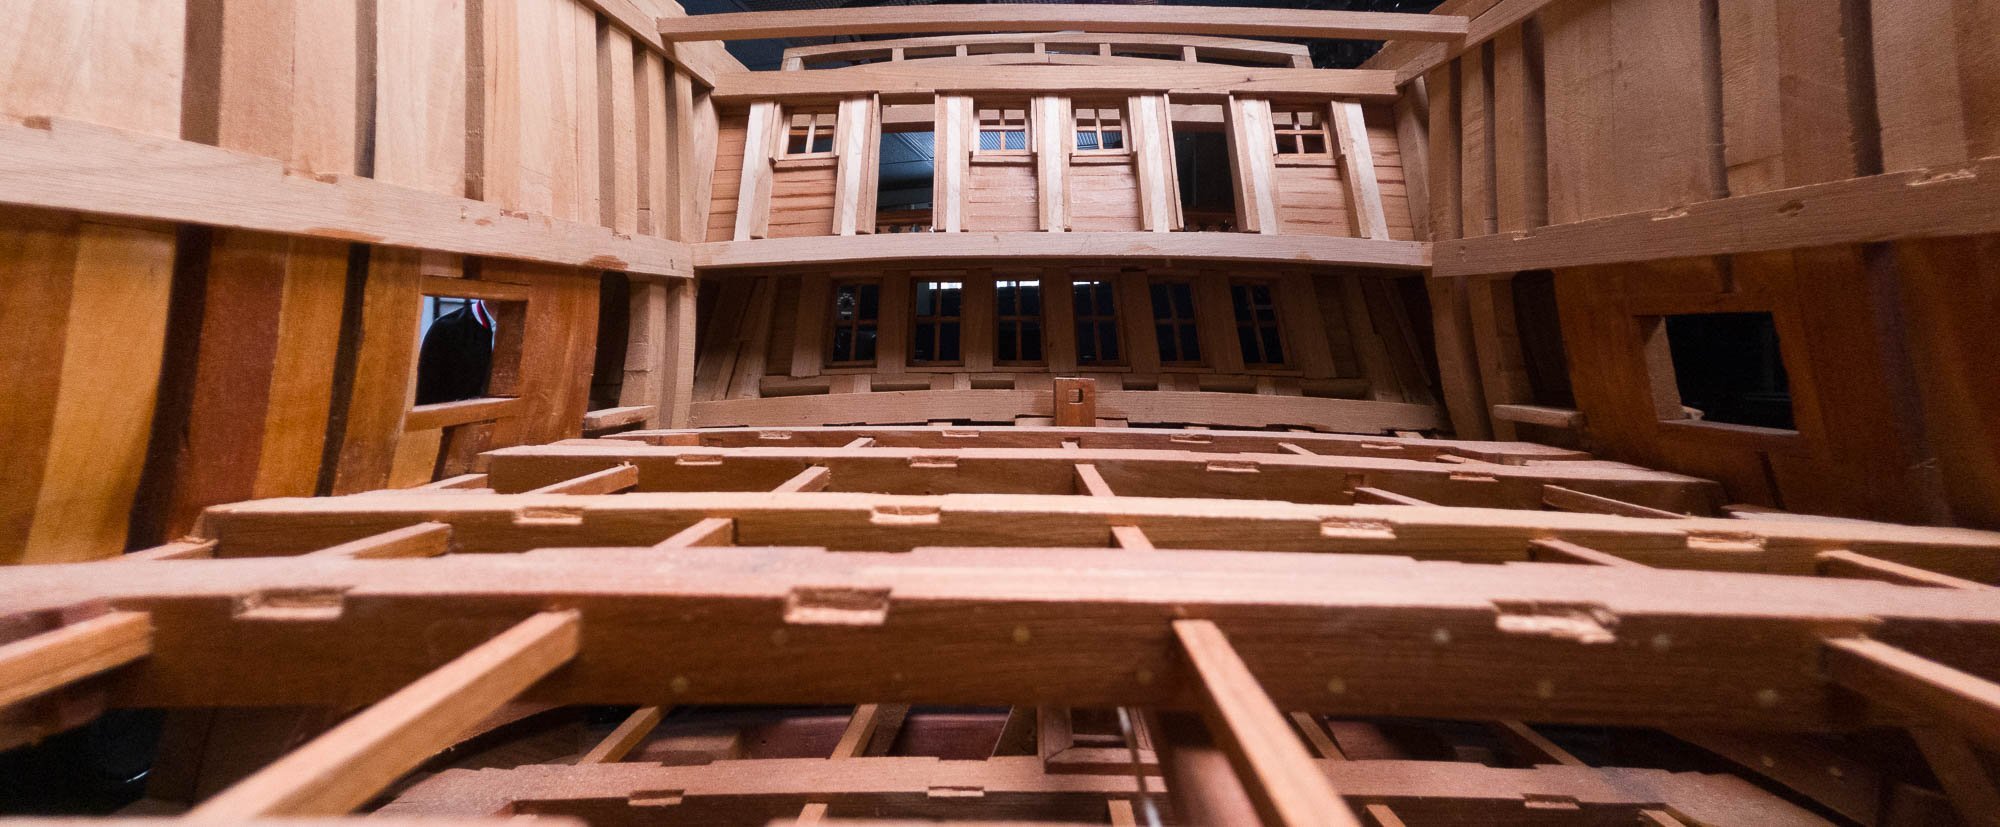
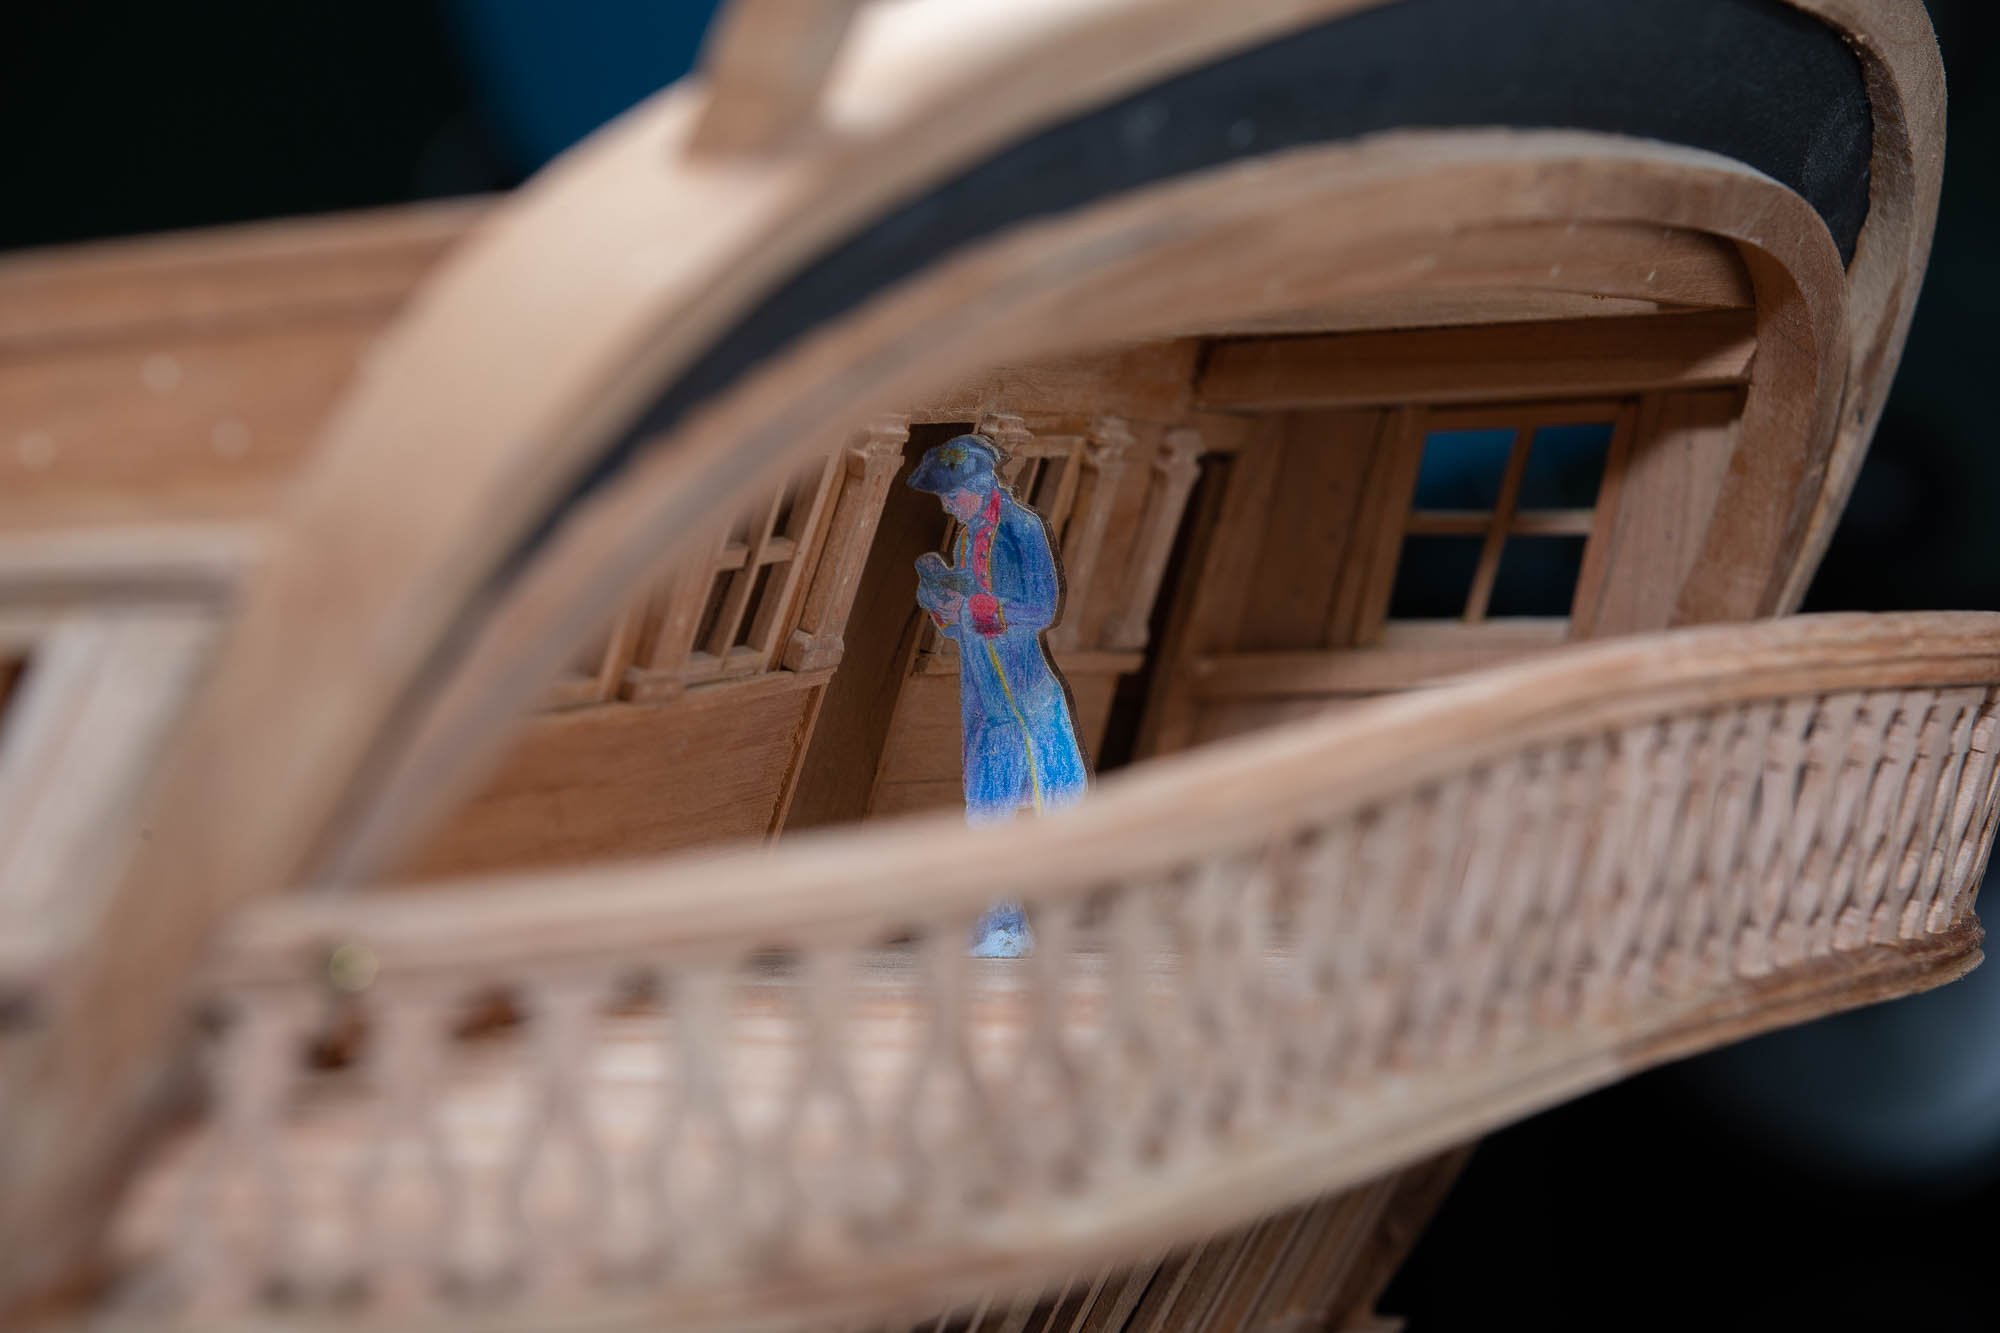
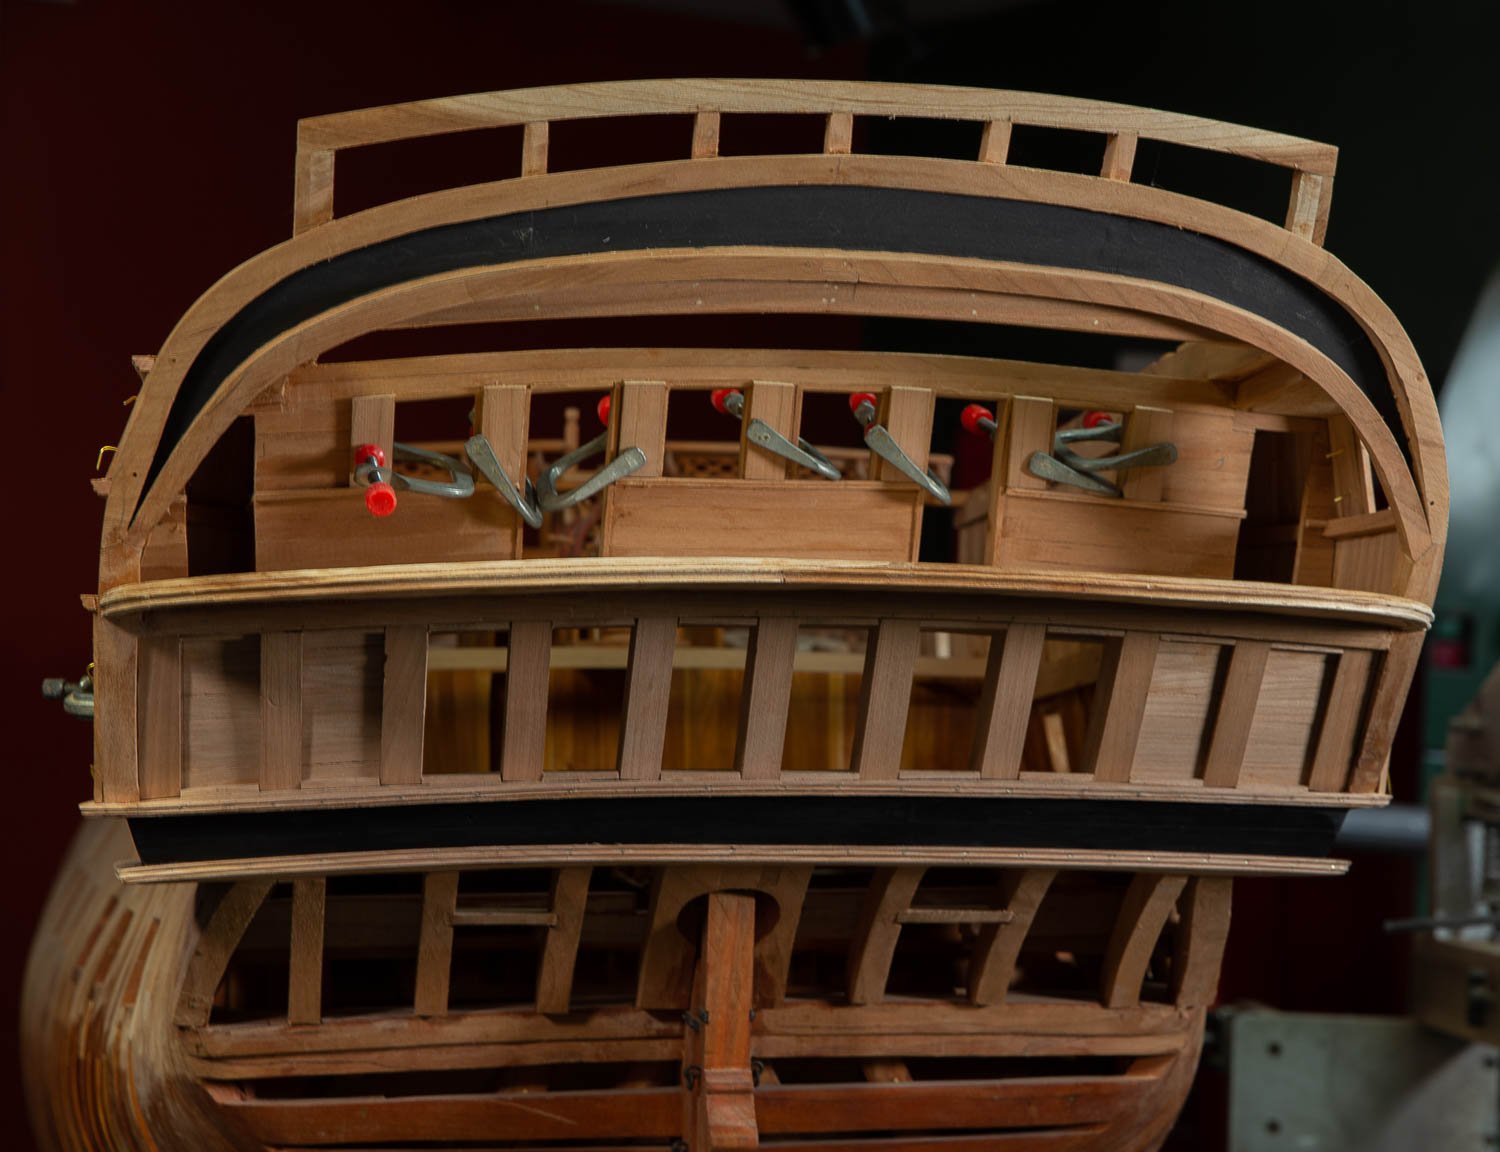
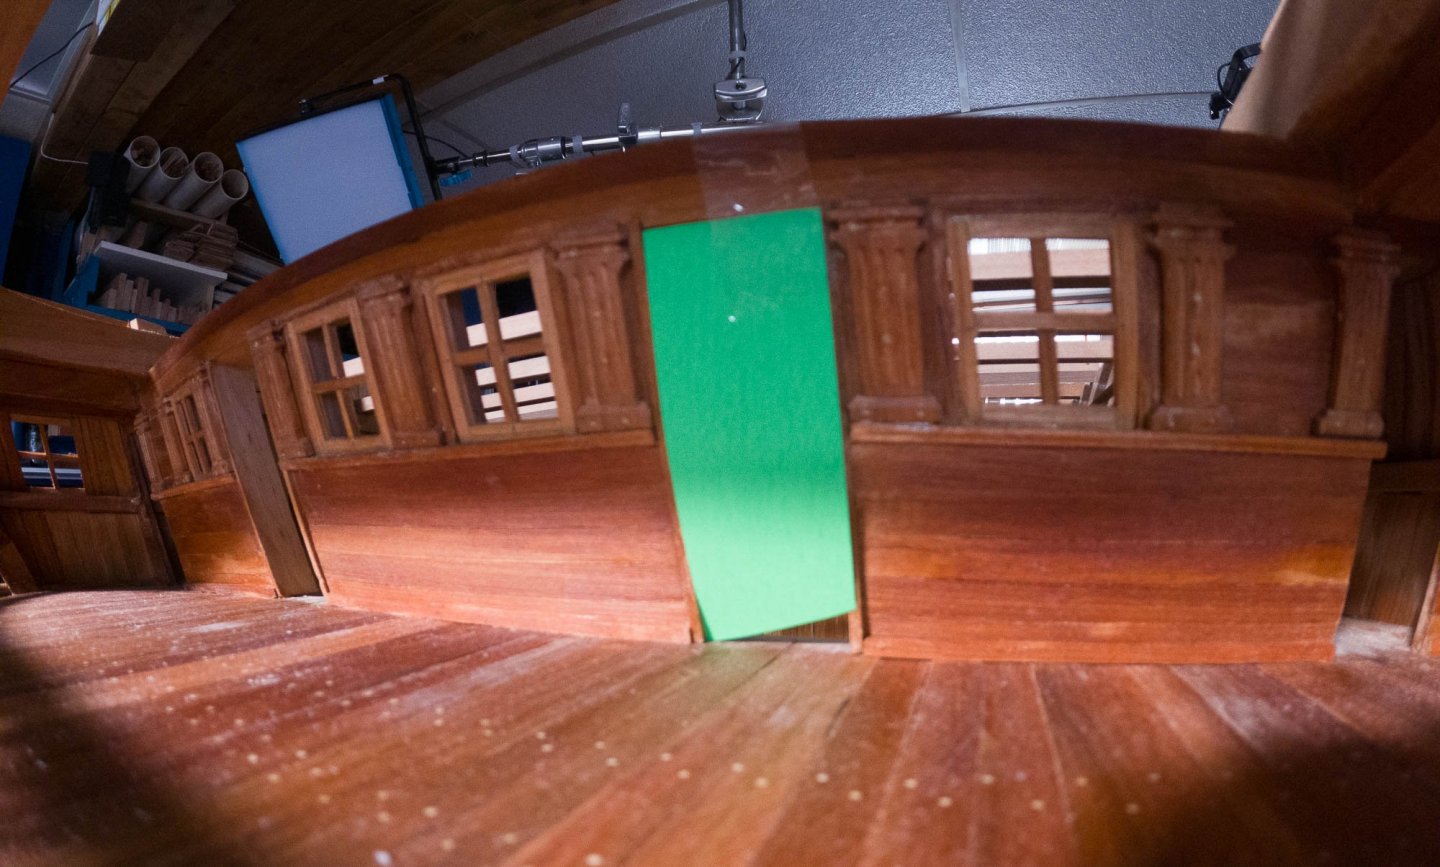
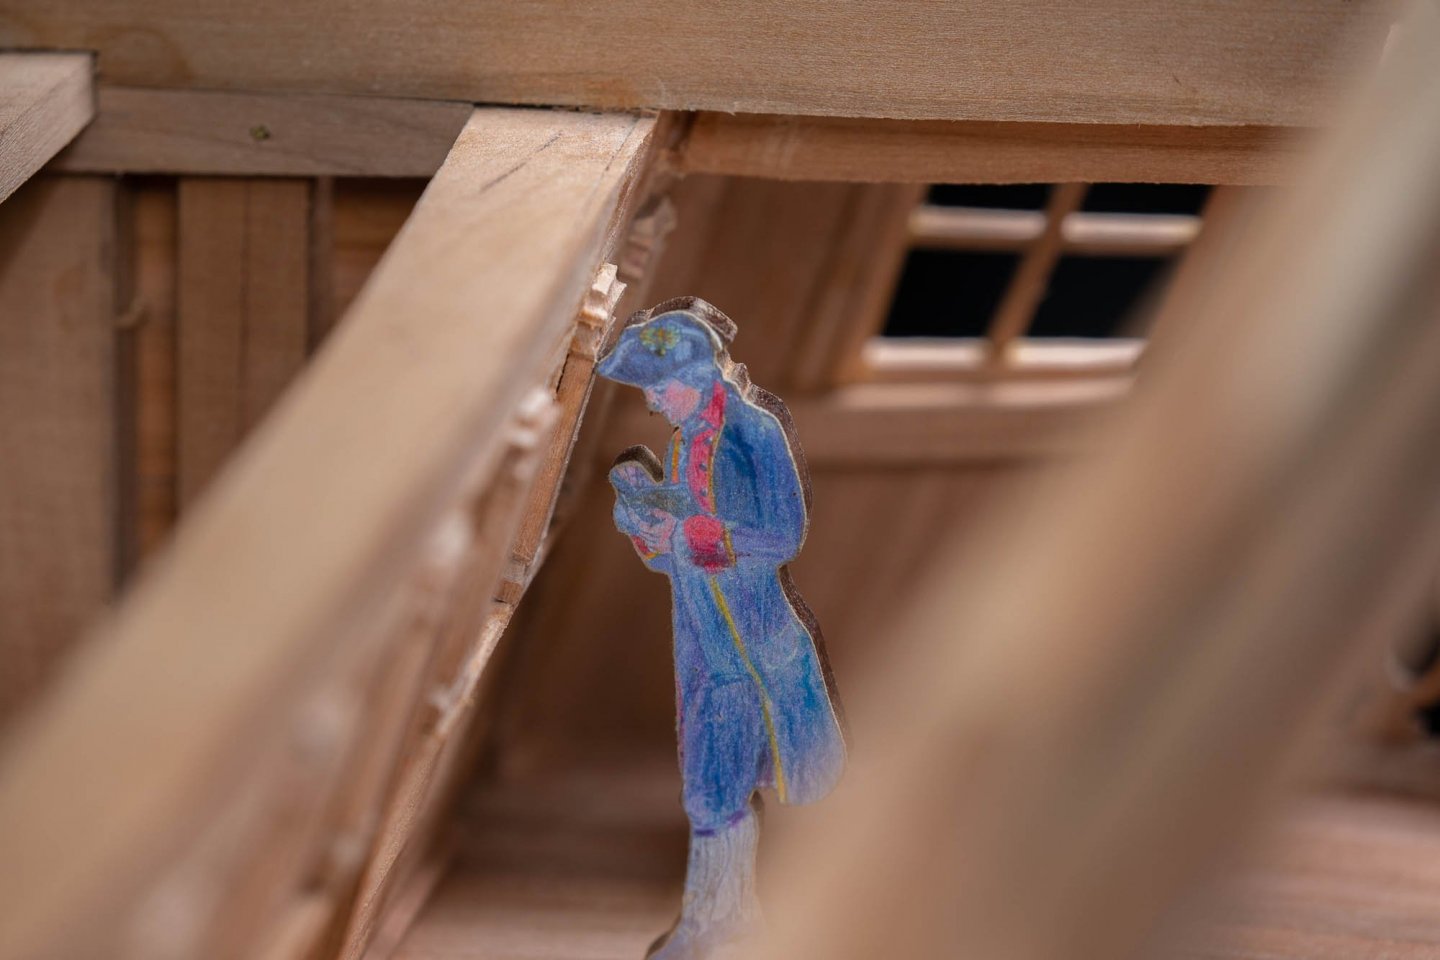
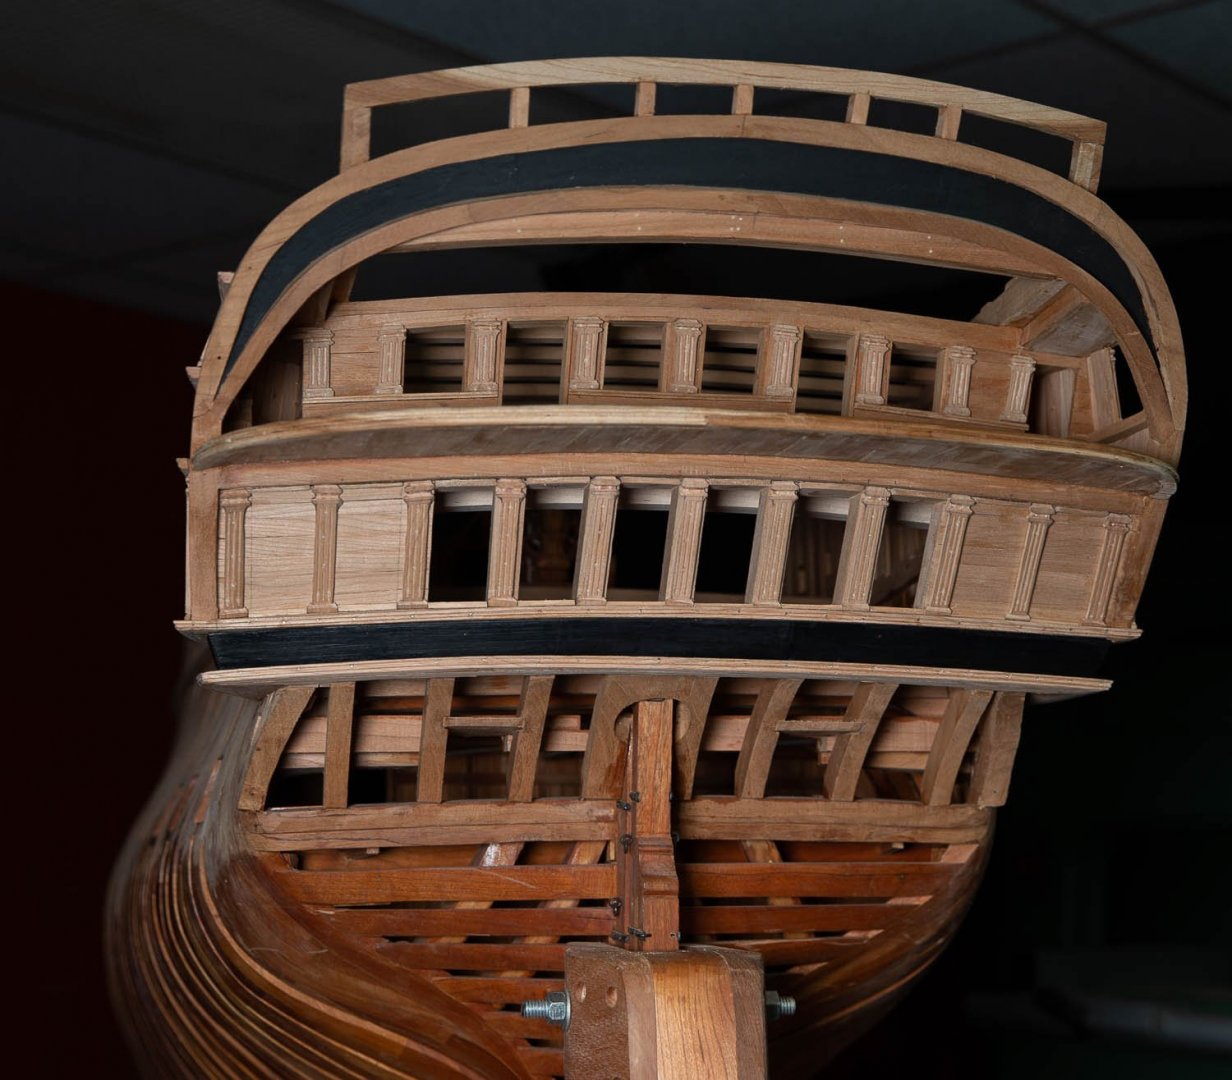
Hi Rick, Yes, it would be possible as they do on the second deck for the toilet room door but I do not think that they would do it because it is the great room where the highest rank officers meet and we would not want to risk to stumble because of a sill. You can see on the first photo taken by the Gopro camera what the height would need to be.


-
https://www.amazon.com/Mini-C-clamp-1-3-piece-Set/dp/B00VUGKIKA
-
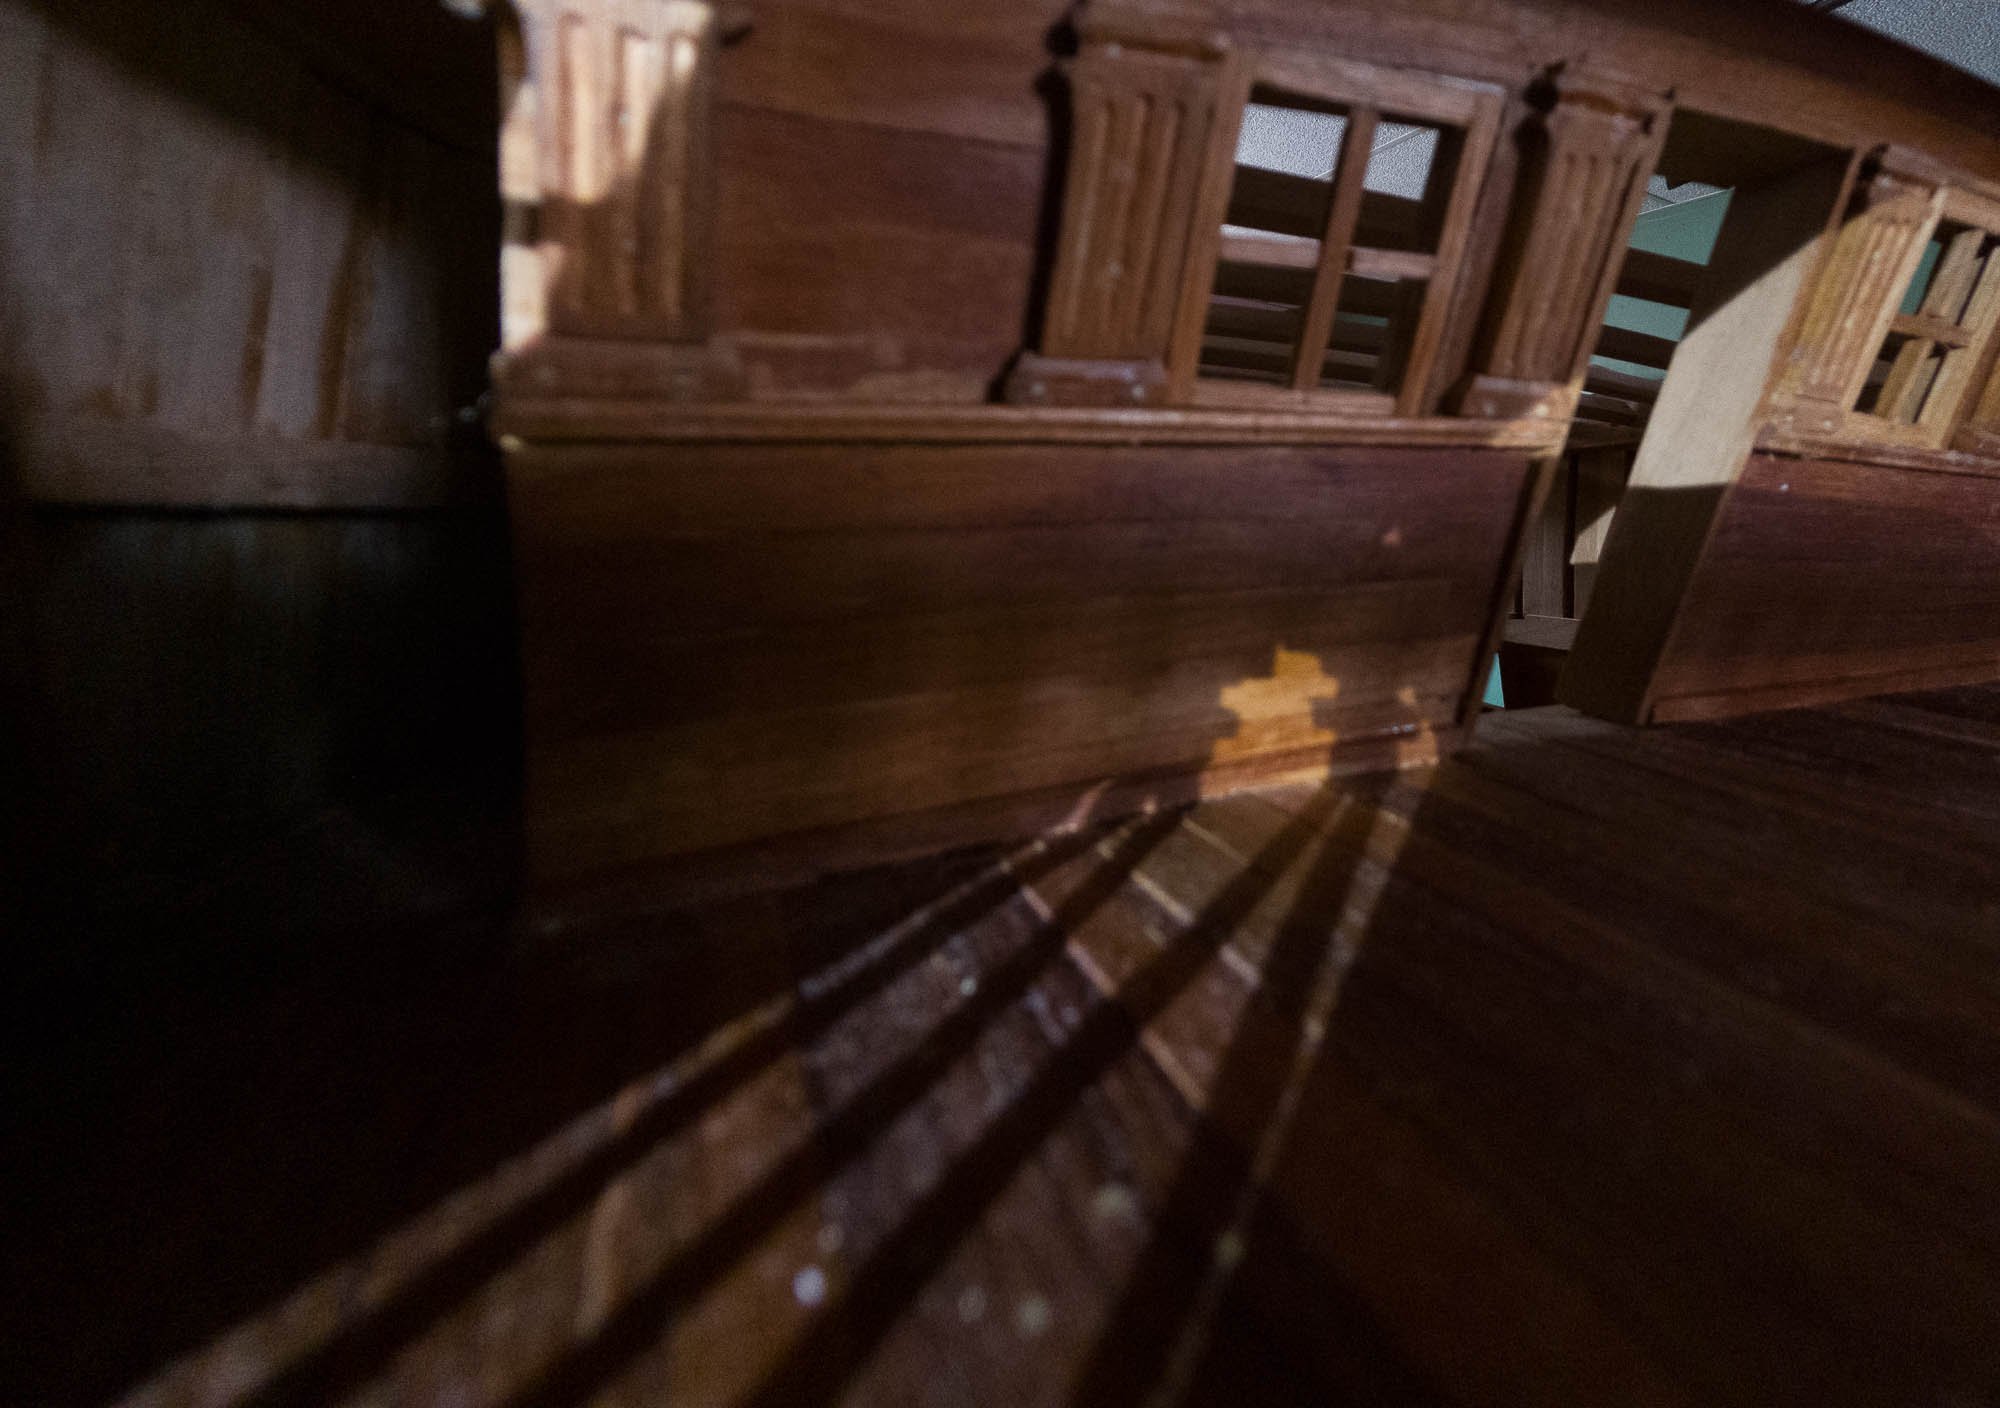
In the last 2 photos, inclination of the wall can be noted... the doors, not yet installed had to be opened towards the inside, impossible to open towards outside.


-
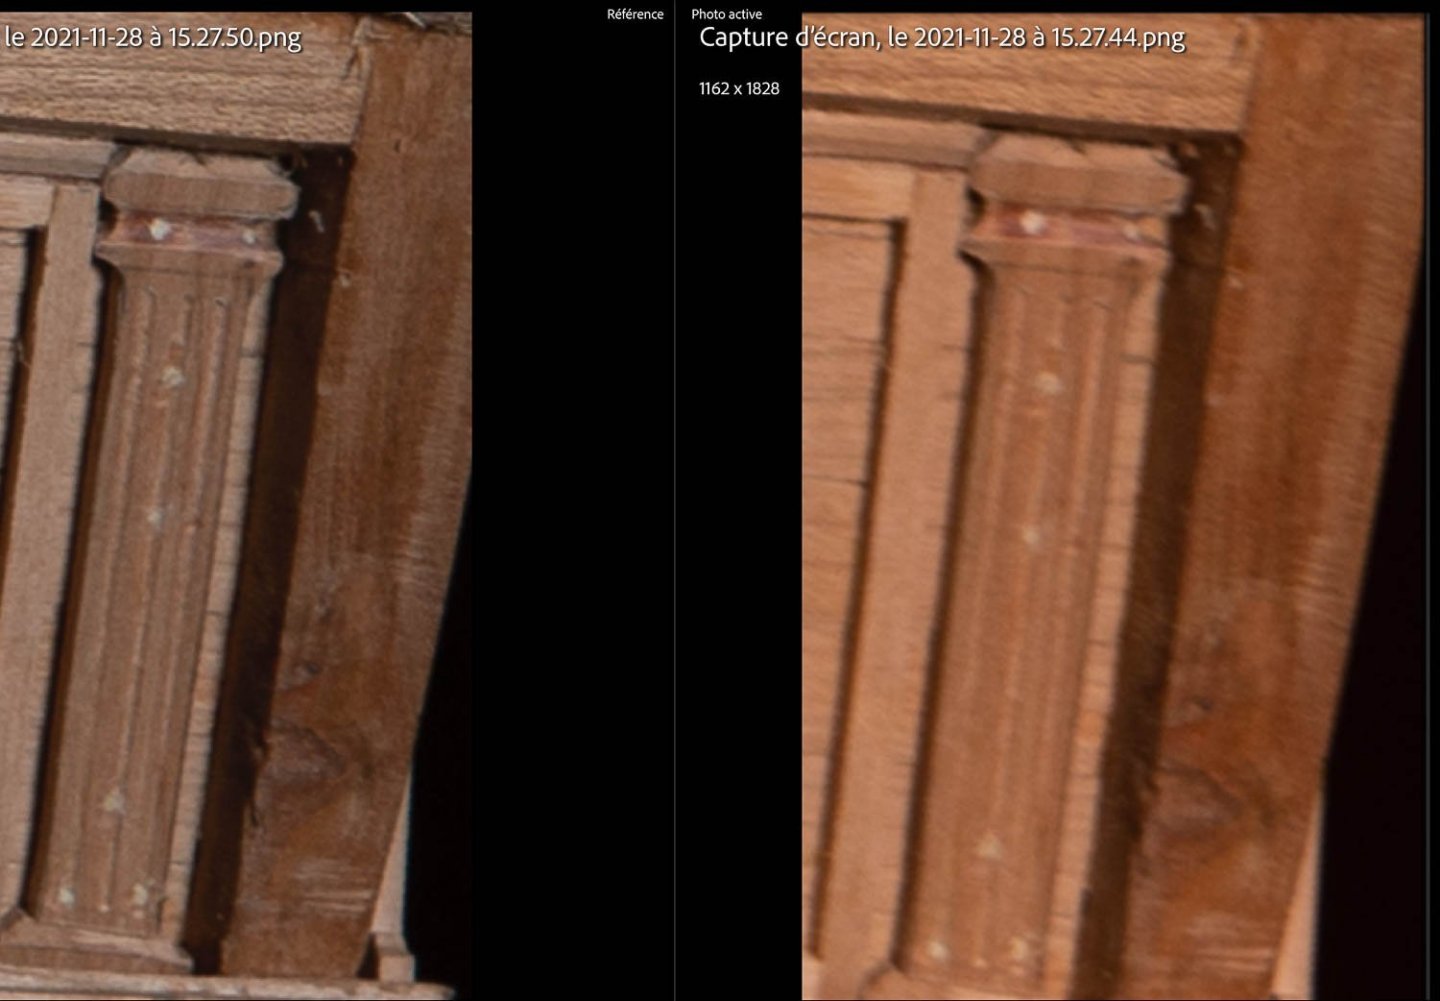
Roughly, I chose 4300 Kelvin because 5500 is too "clear". Also, it is not because you buy a light rated at 6500 Kelvin that it will measure really 6500 Kelvin. They often take measure in ideal conditions and this is usually not the case at home. I did a simple test to try to verify if there are advantages to work with the correct color range: 2 identical photos, except one at 4300 Kelvin (left) and one at 3400 (right side).. One parameter is also different the speed: 1/60 sec and 1/20. Lower degrees needs a longer shutter speed. Are there advantages to work and see more accurate colors? I would say that the answer is yes. More accurate colors also means more accurate details. The same way the more light the more details we can see, there is also another variable which can increase the amount of details,: the color range. Here is another example: During the construction stage, I shoot some photos. At the end, I also shoot some global views. Then I examine the photos results on a computer screen. By having more accurate color, I can see more accurately the details and easily see where corrections are needed. Strangely enough, the first tool a new model maker will buy is probably some kind of saws. There are many ways to make the task much easier for the aspiring model maker and they are not all tools. Before beginning to work, there are 2 tools that I would absolutely want to have: an electric height table "to work at the good height". and few LED light to easily see what I am doing.
-
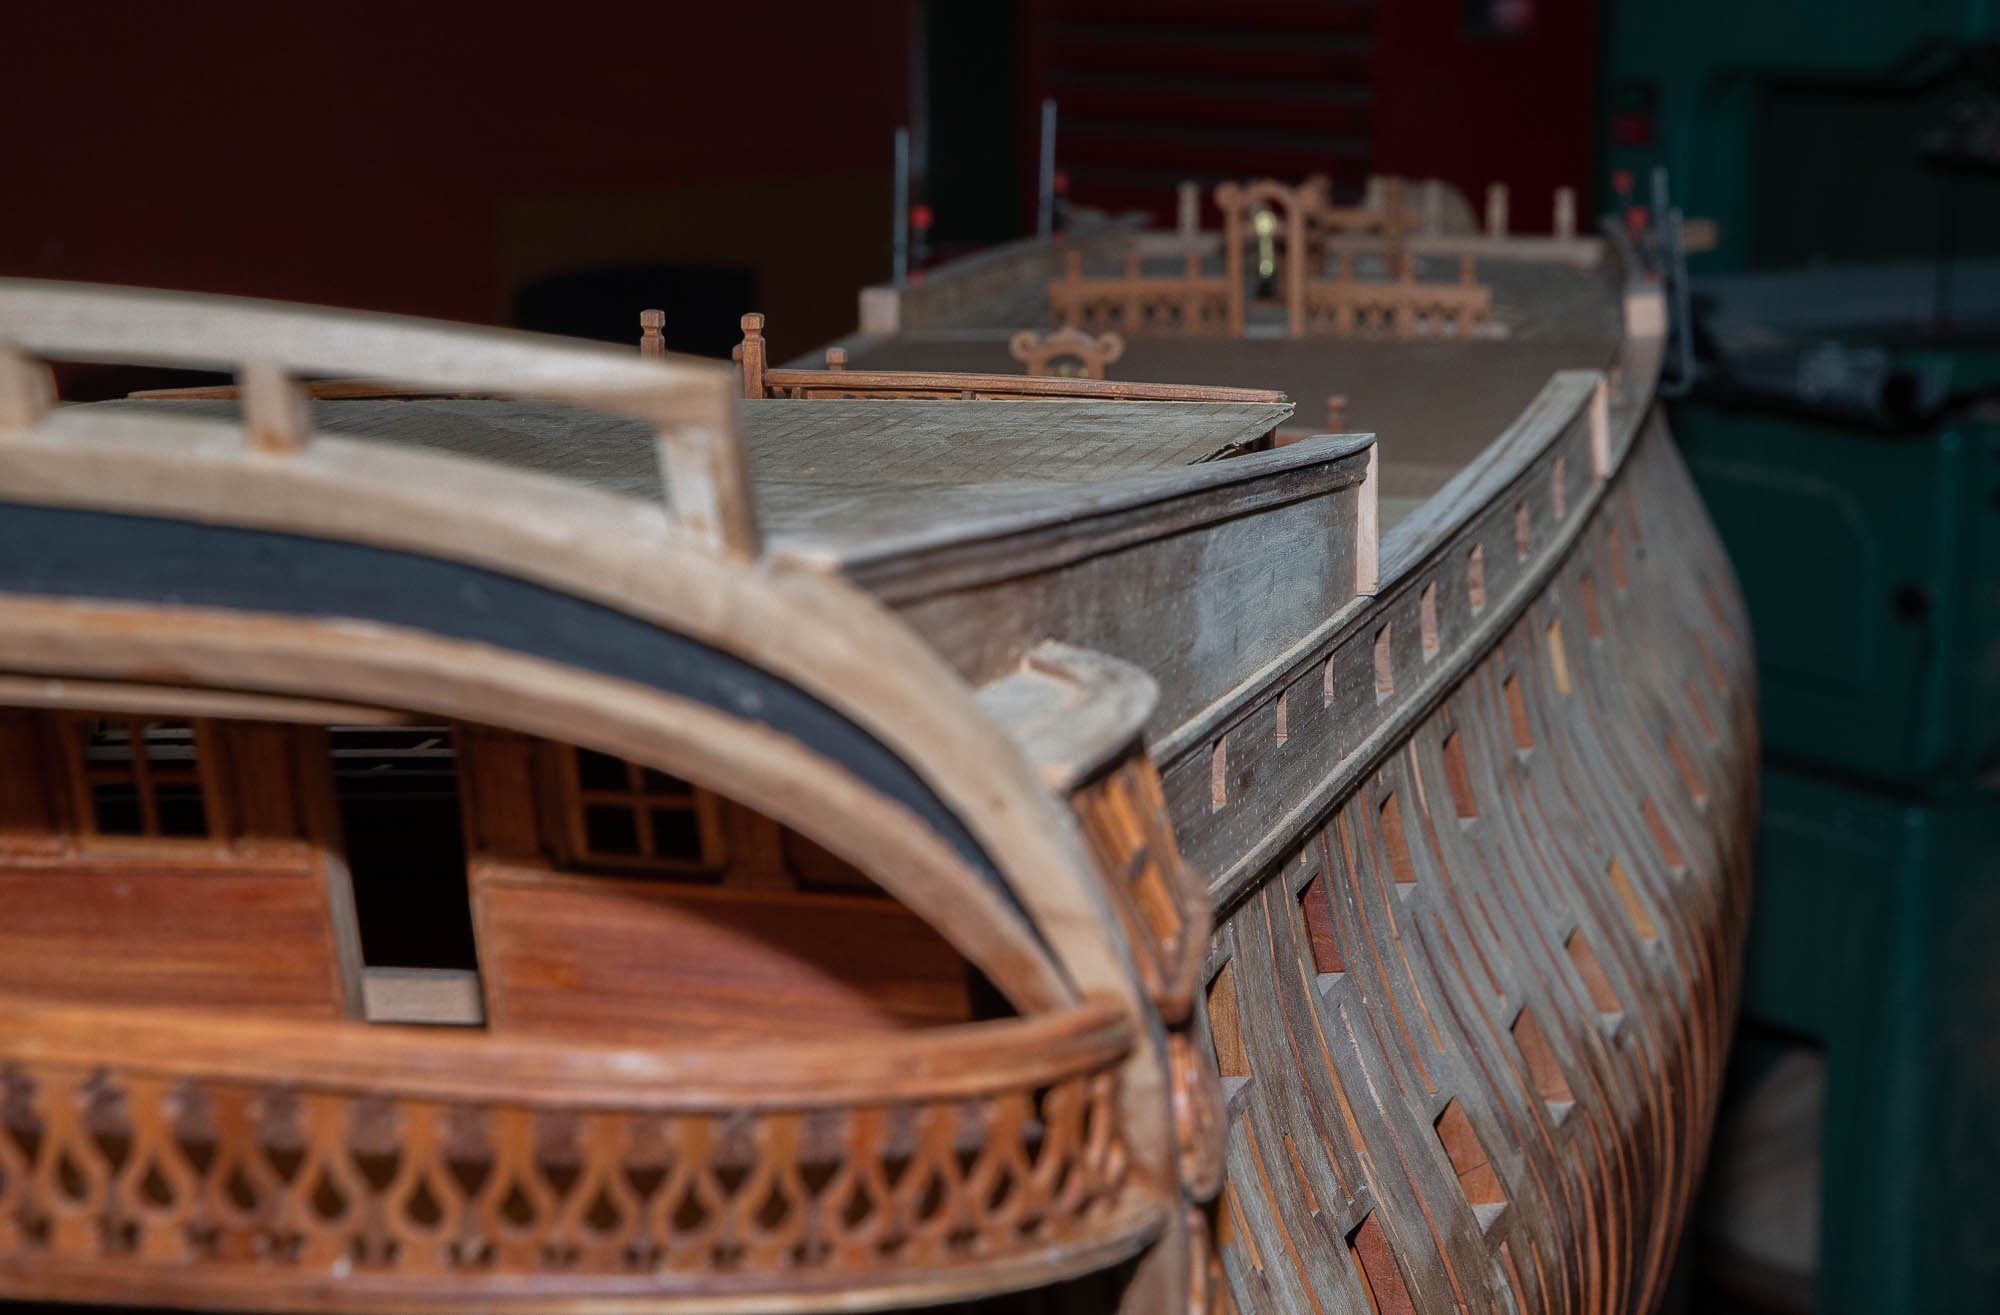
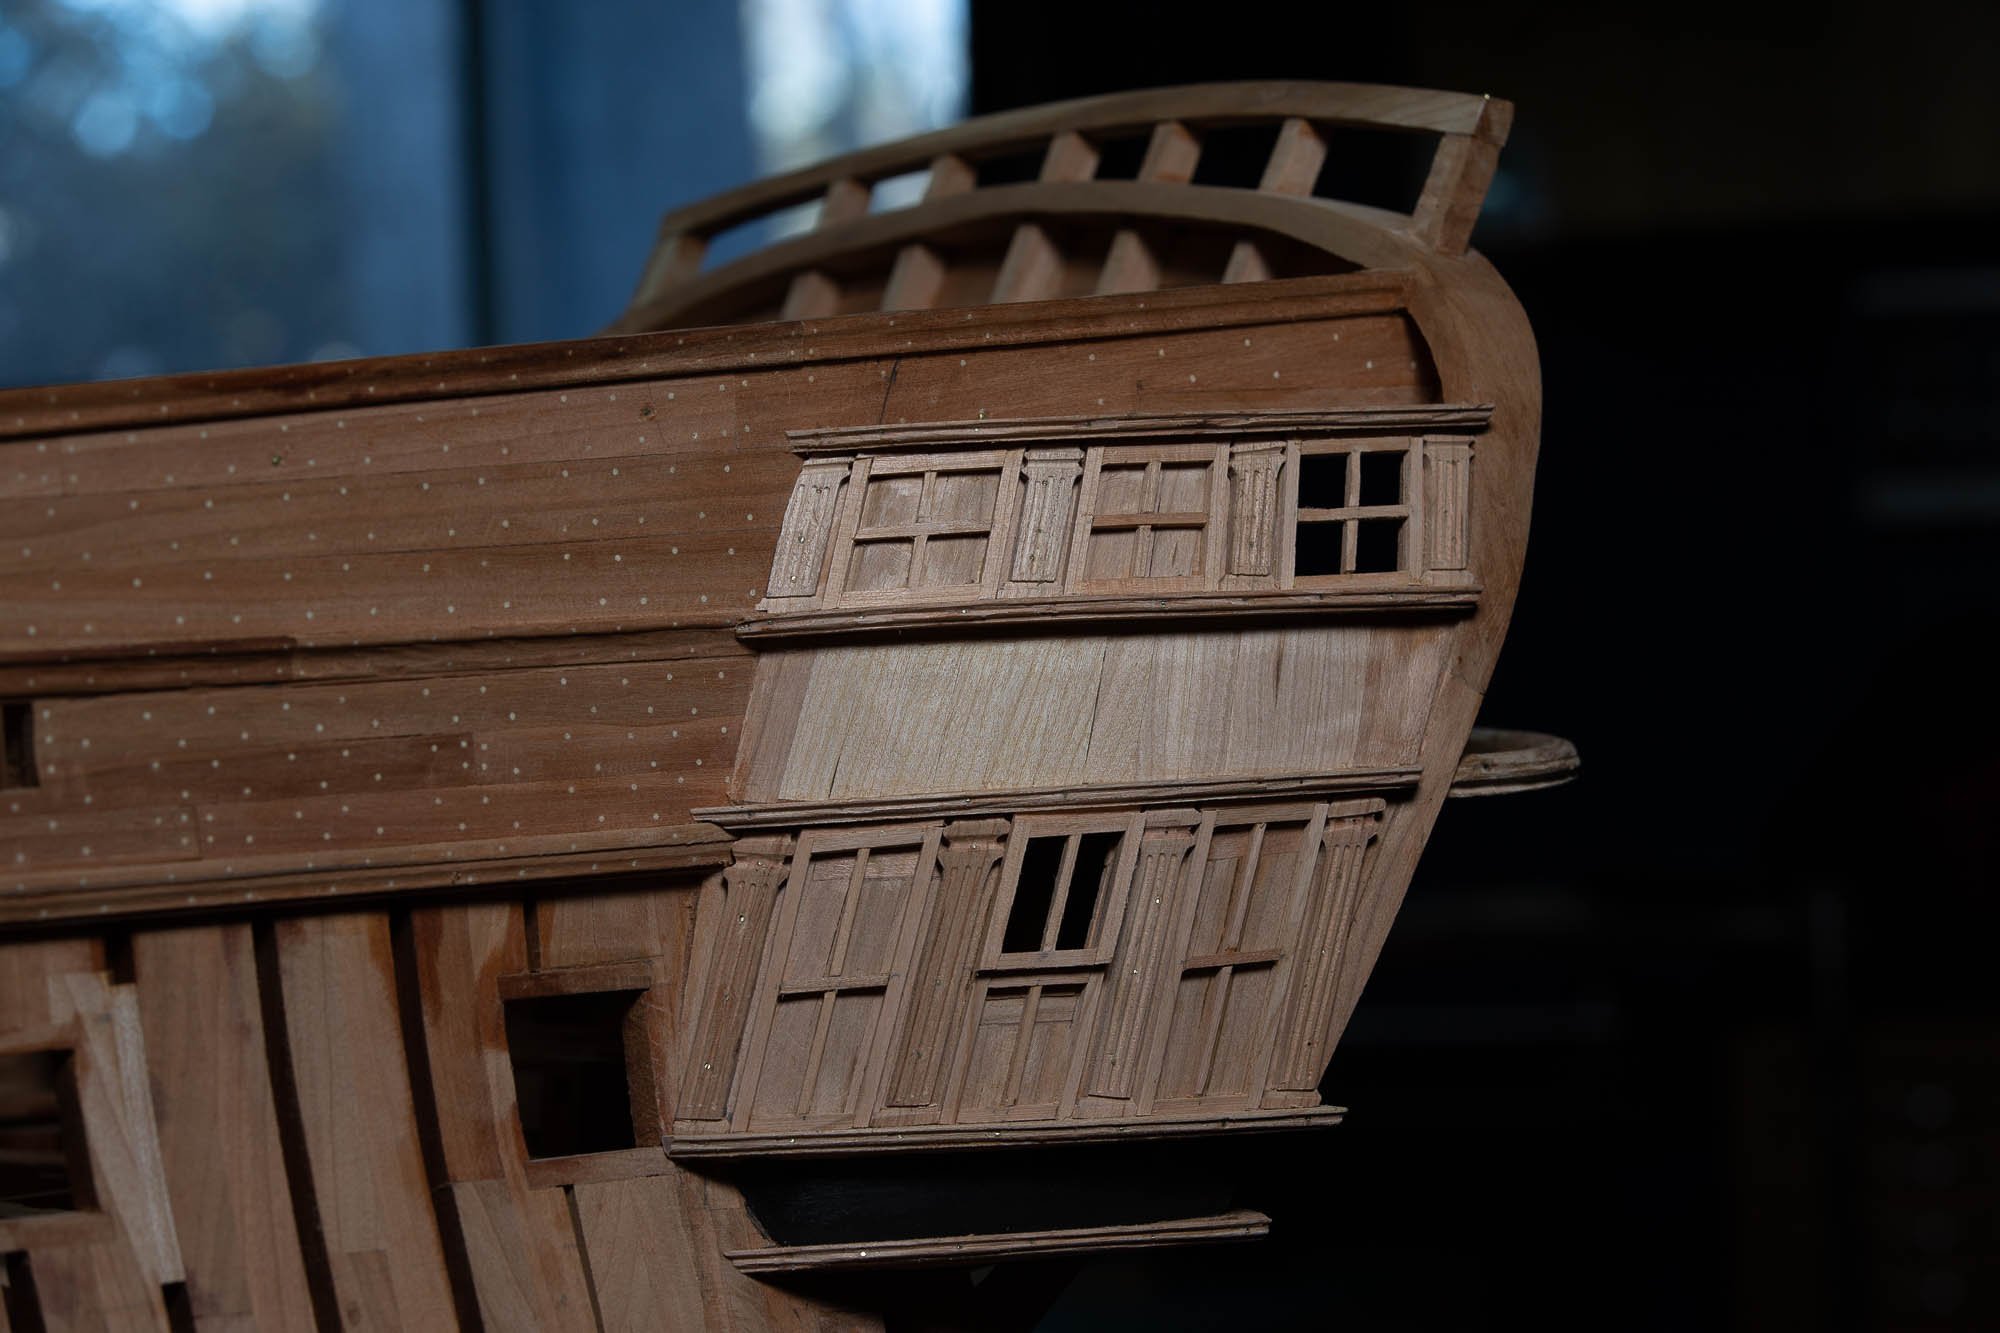
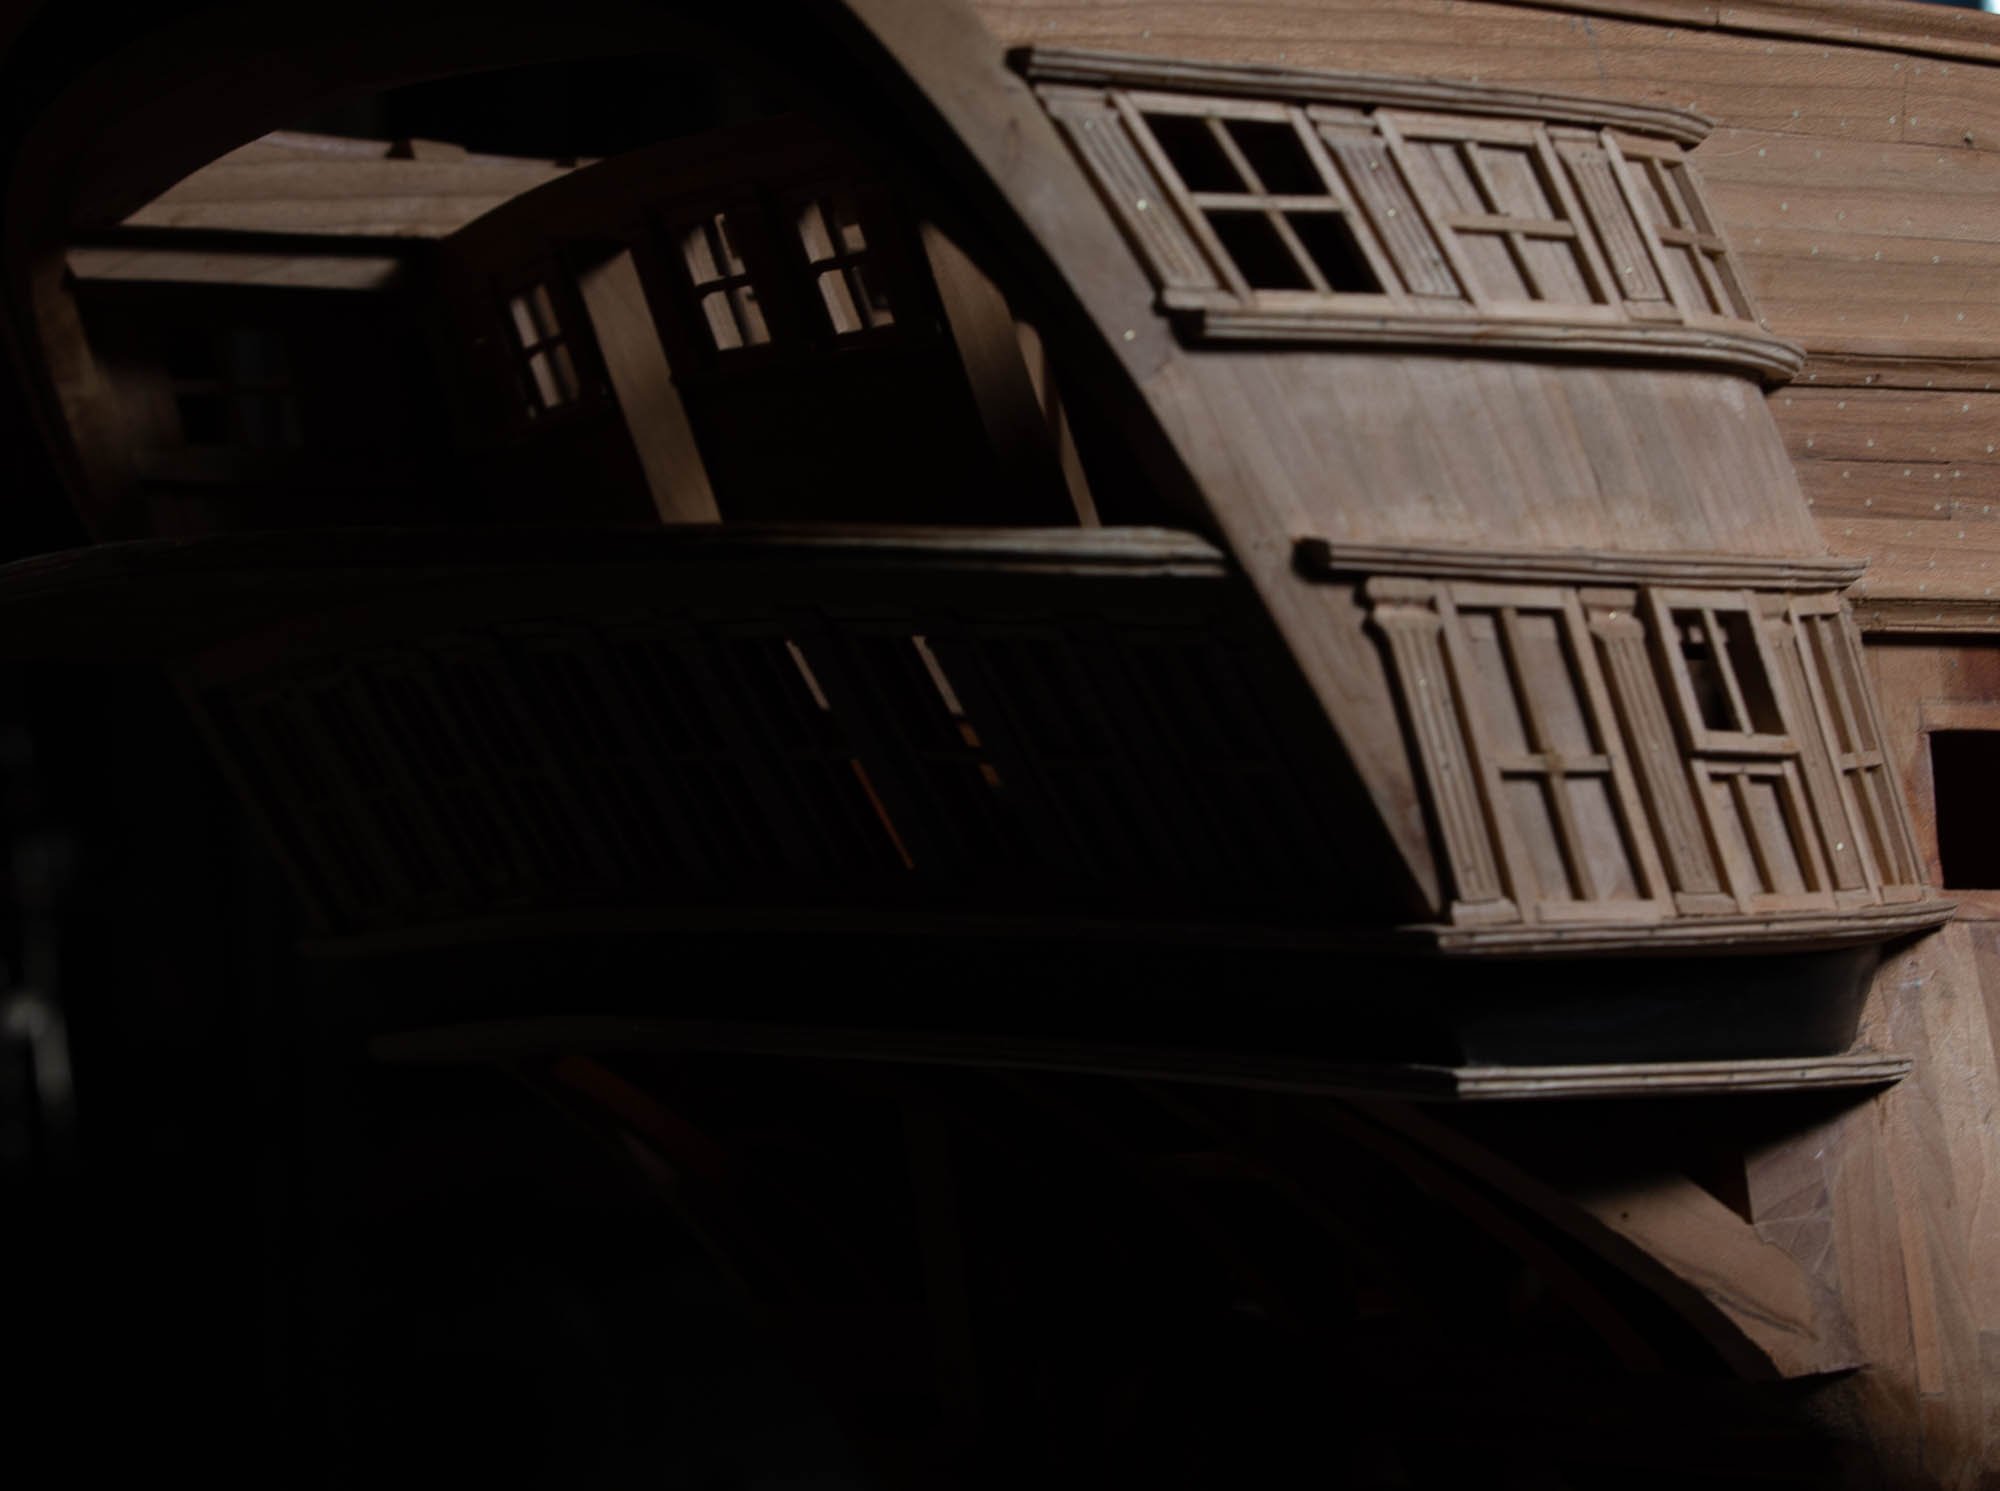
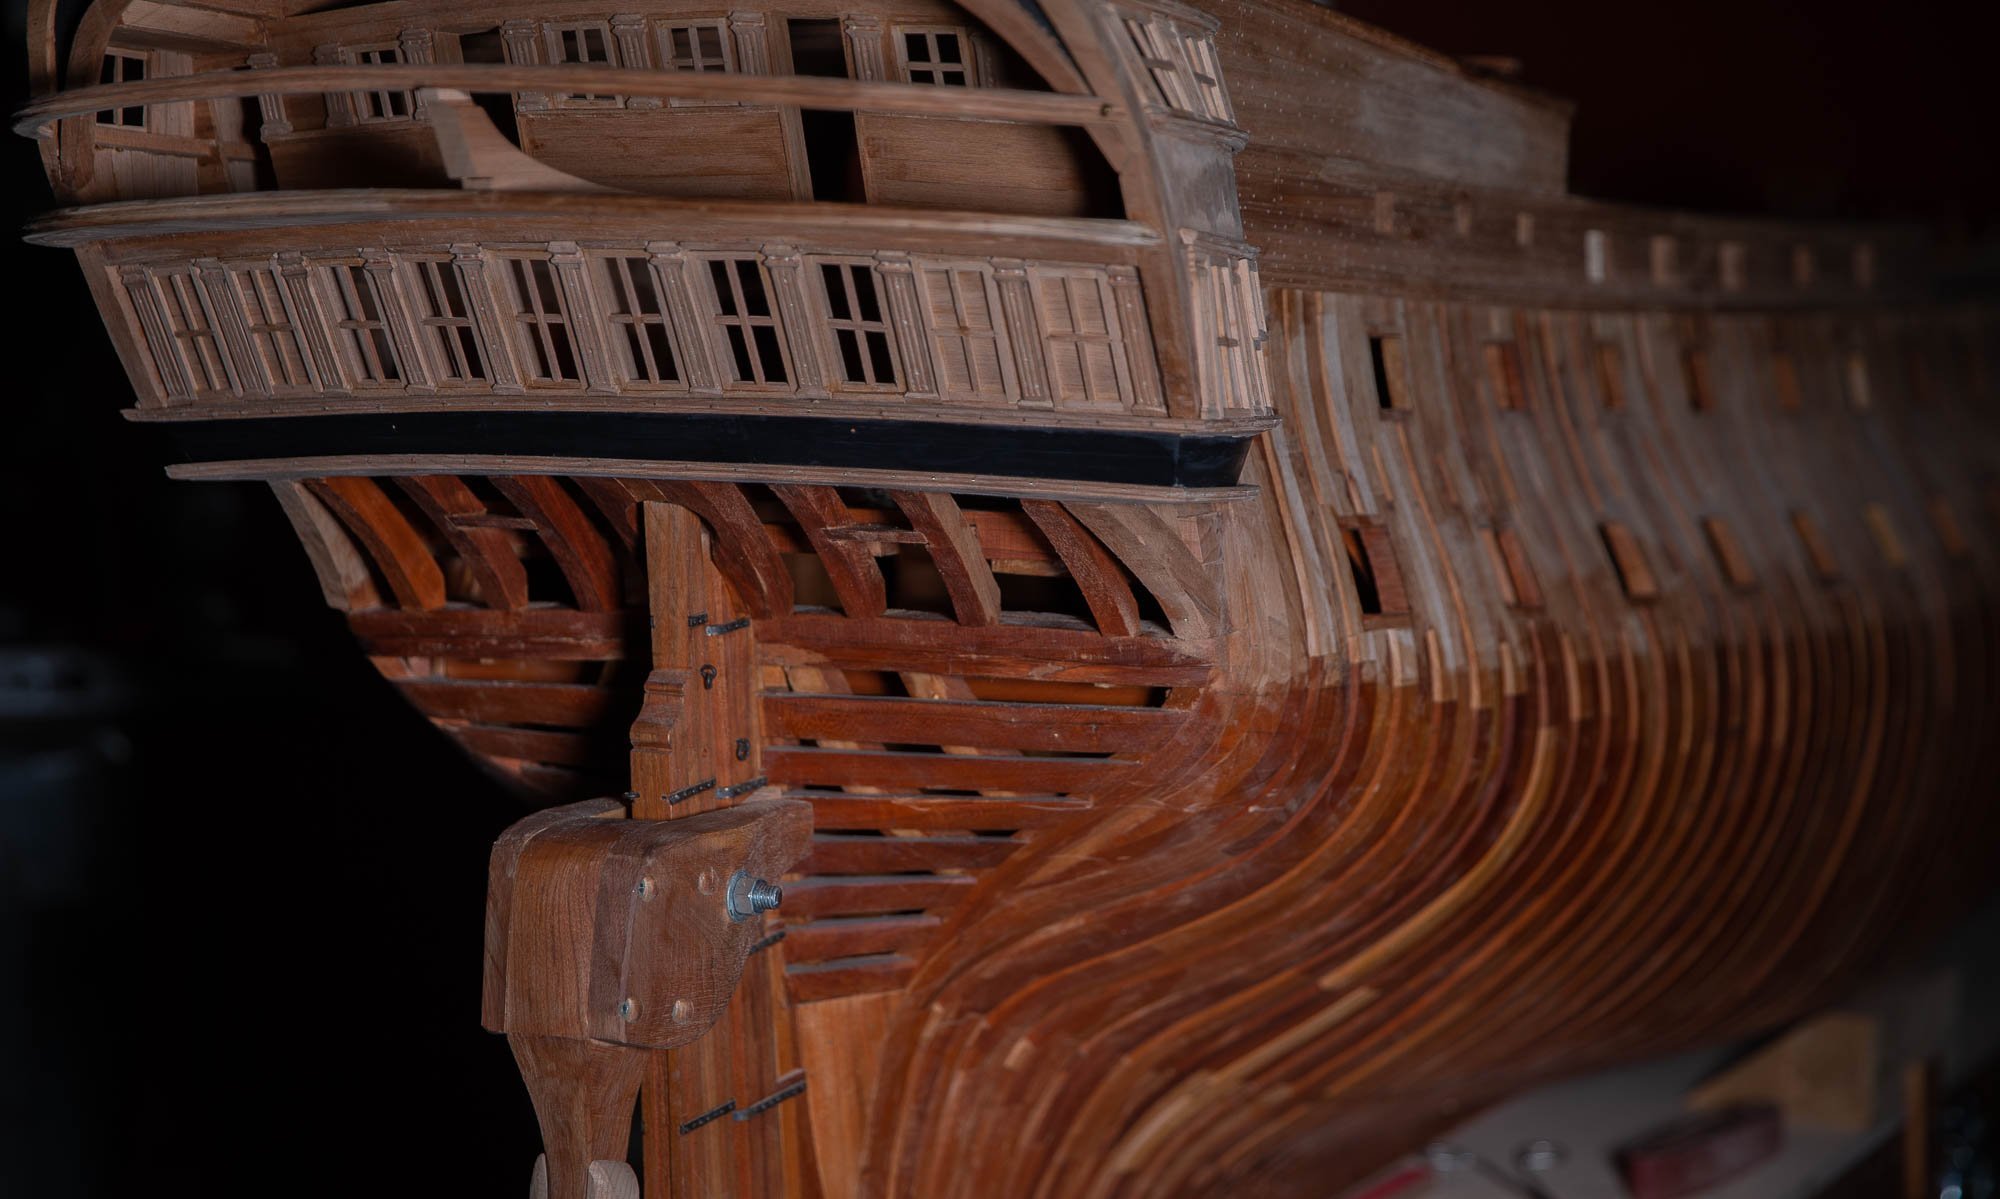
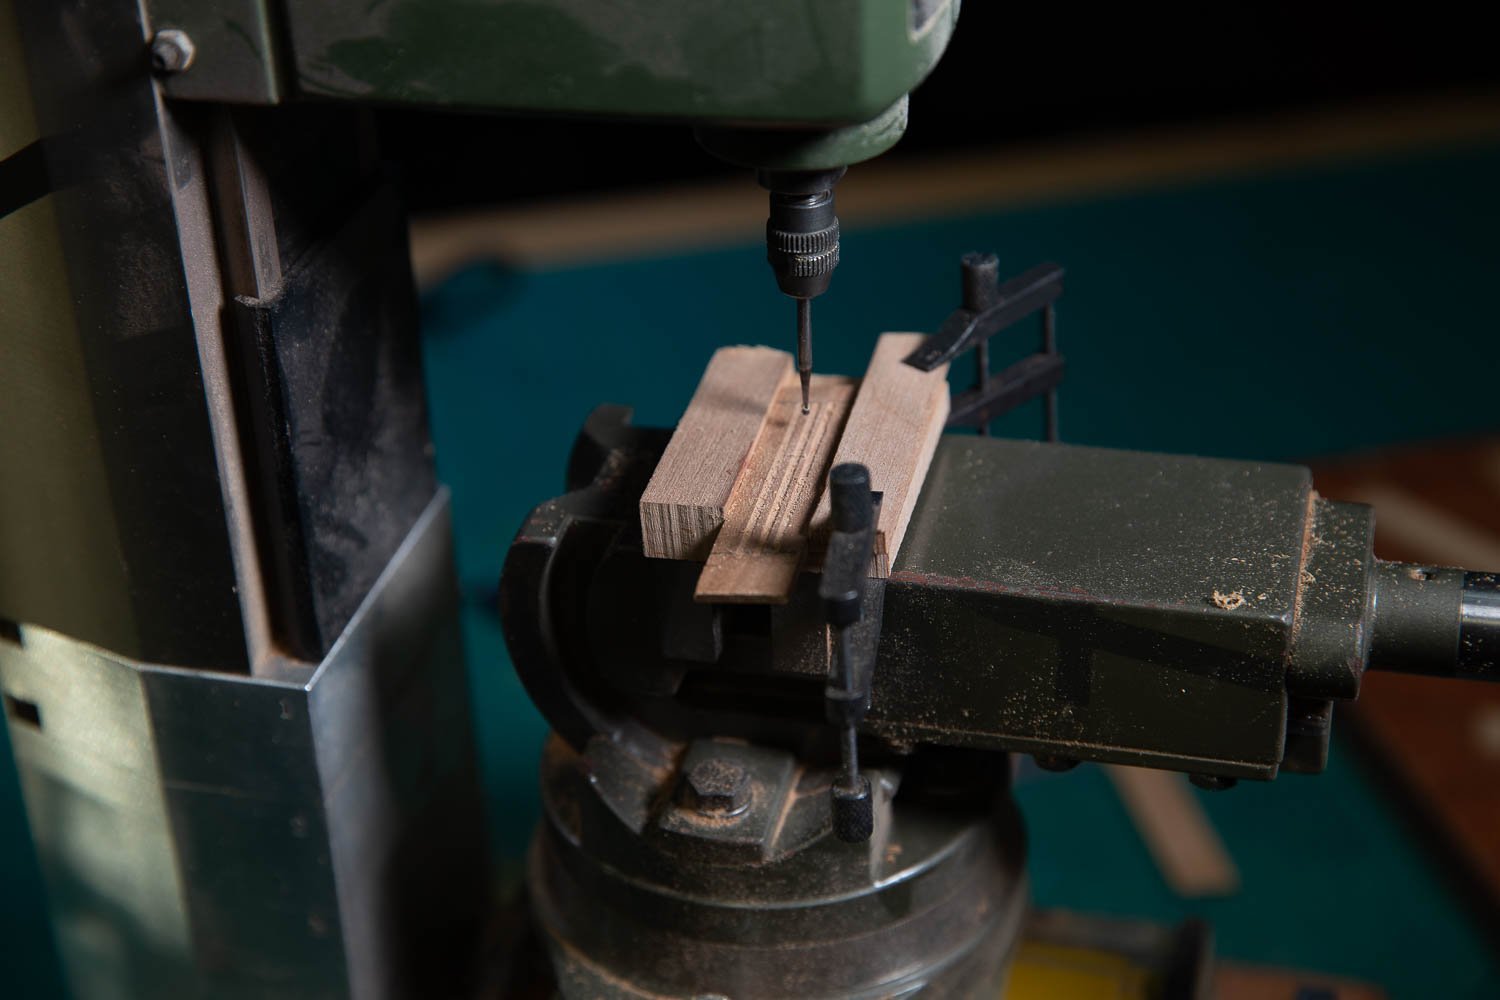
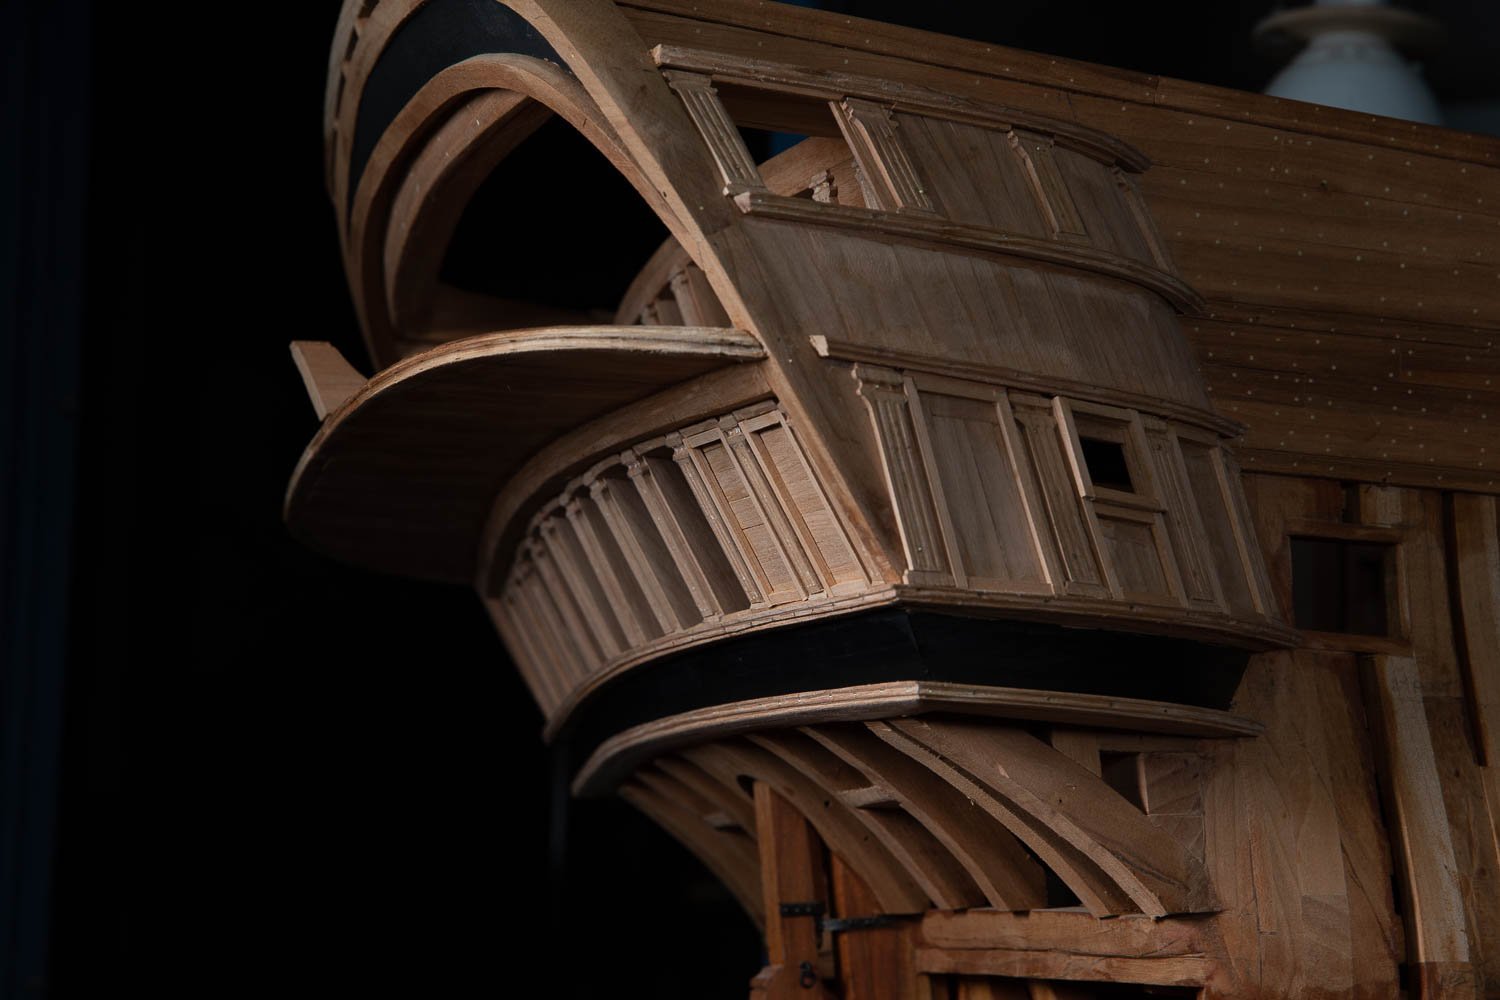
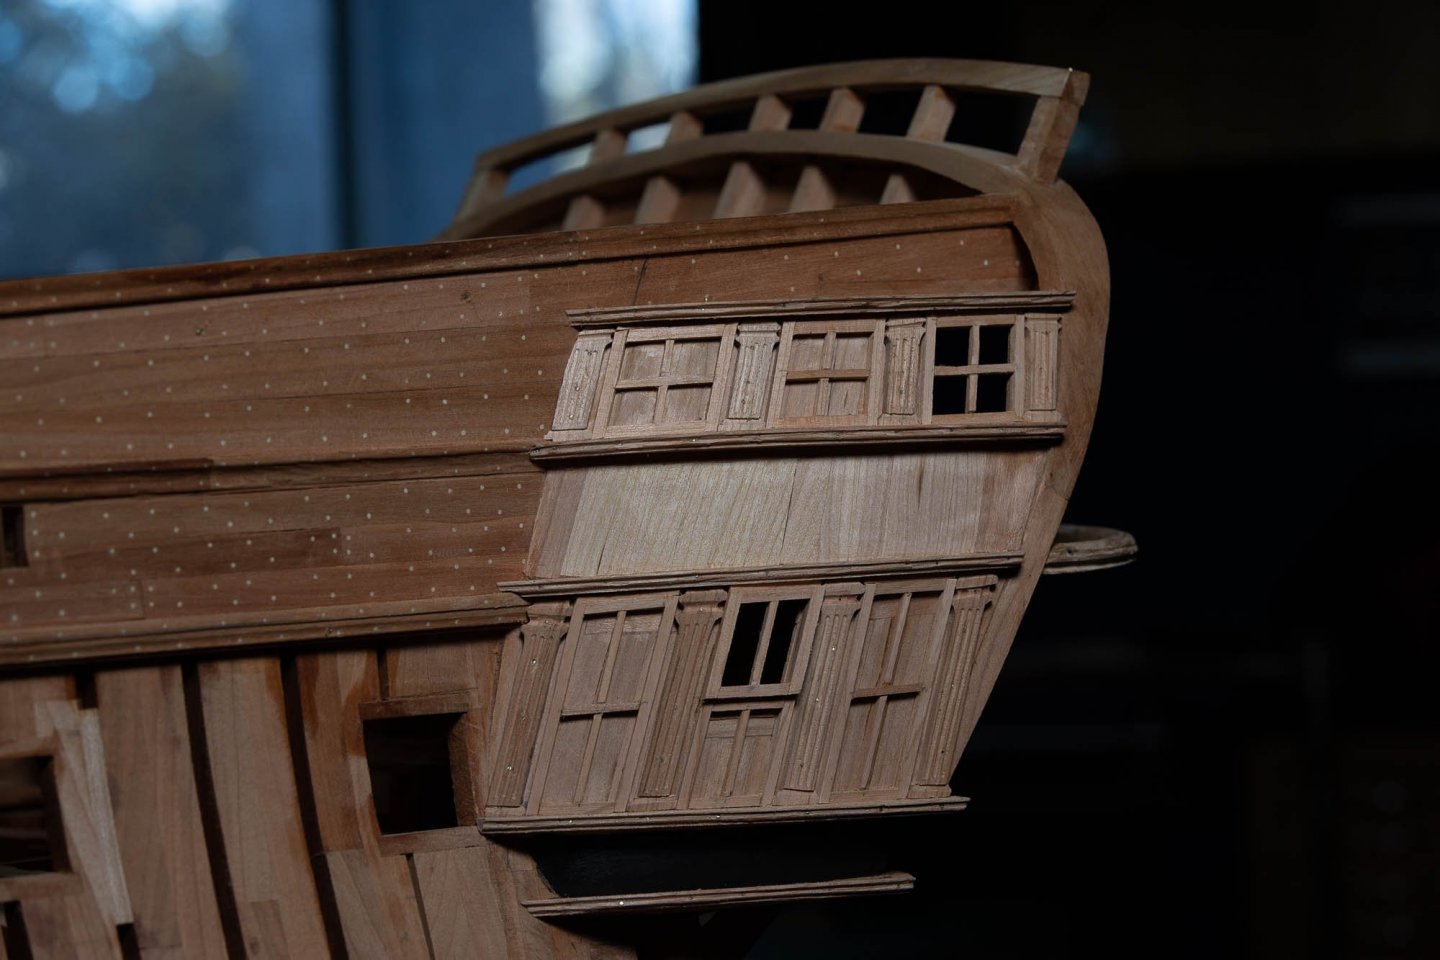
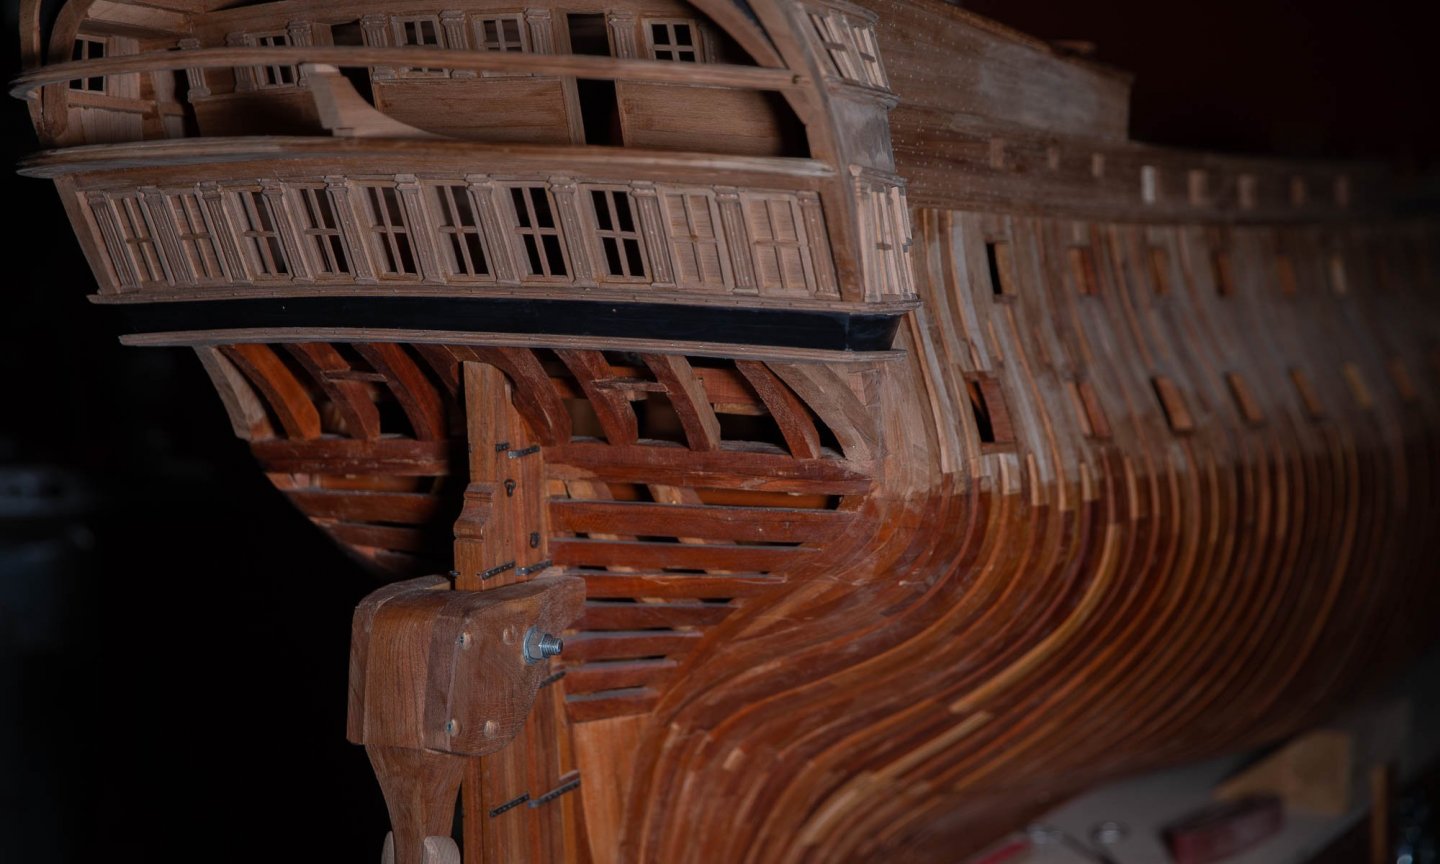
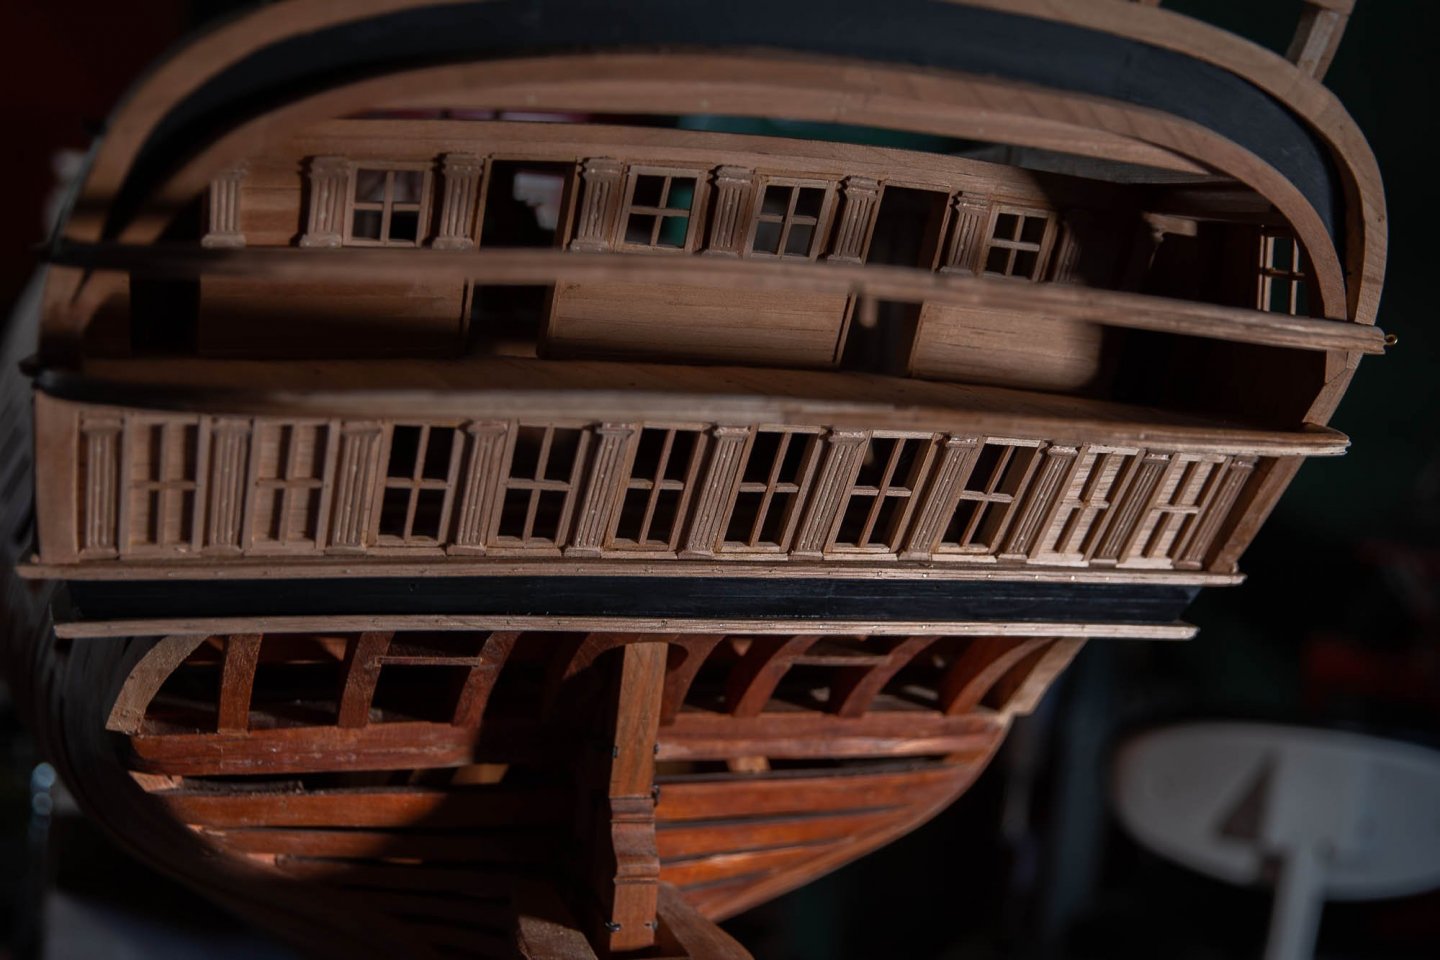
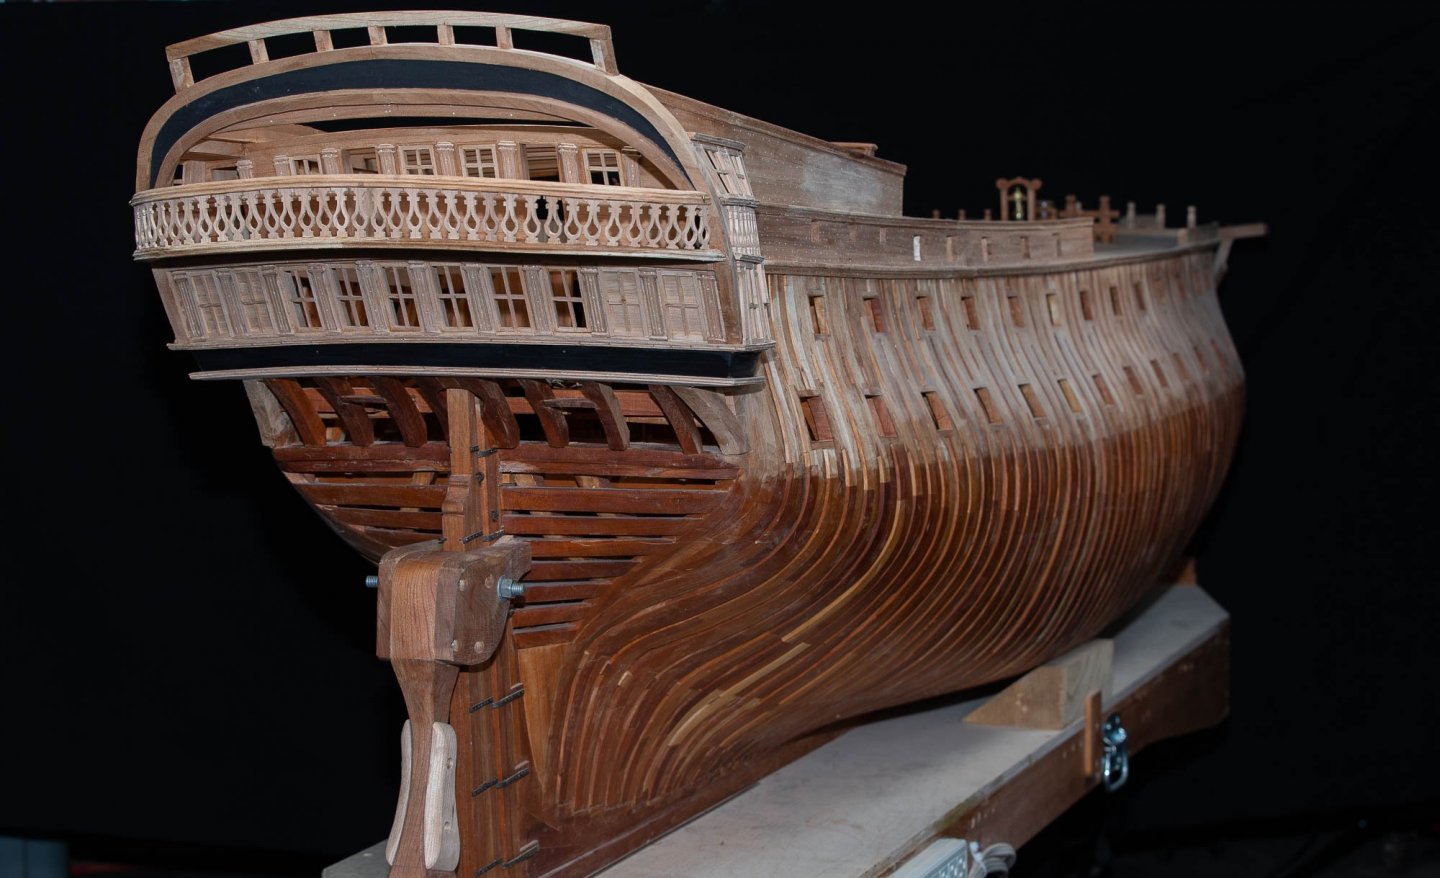
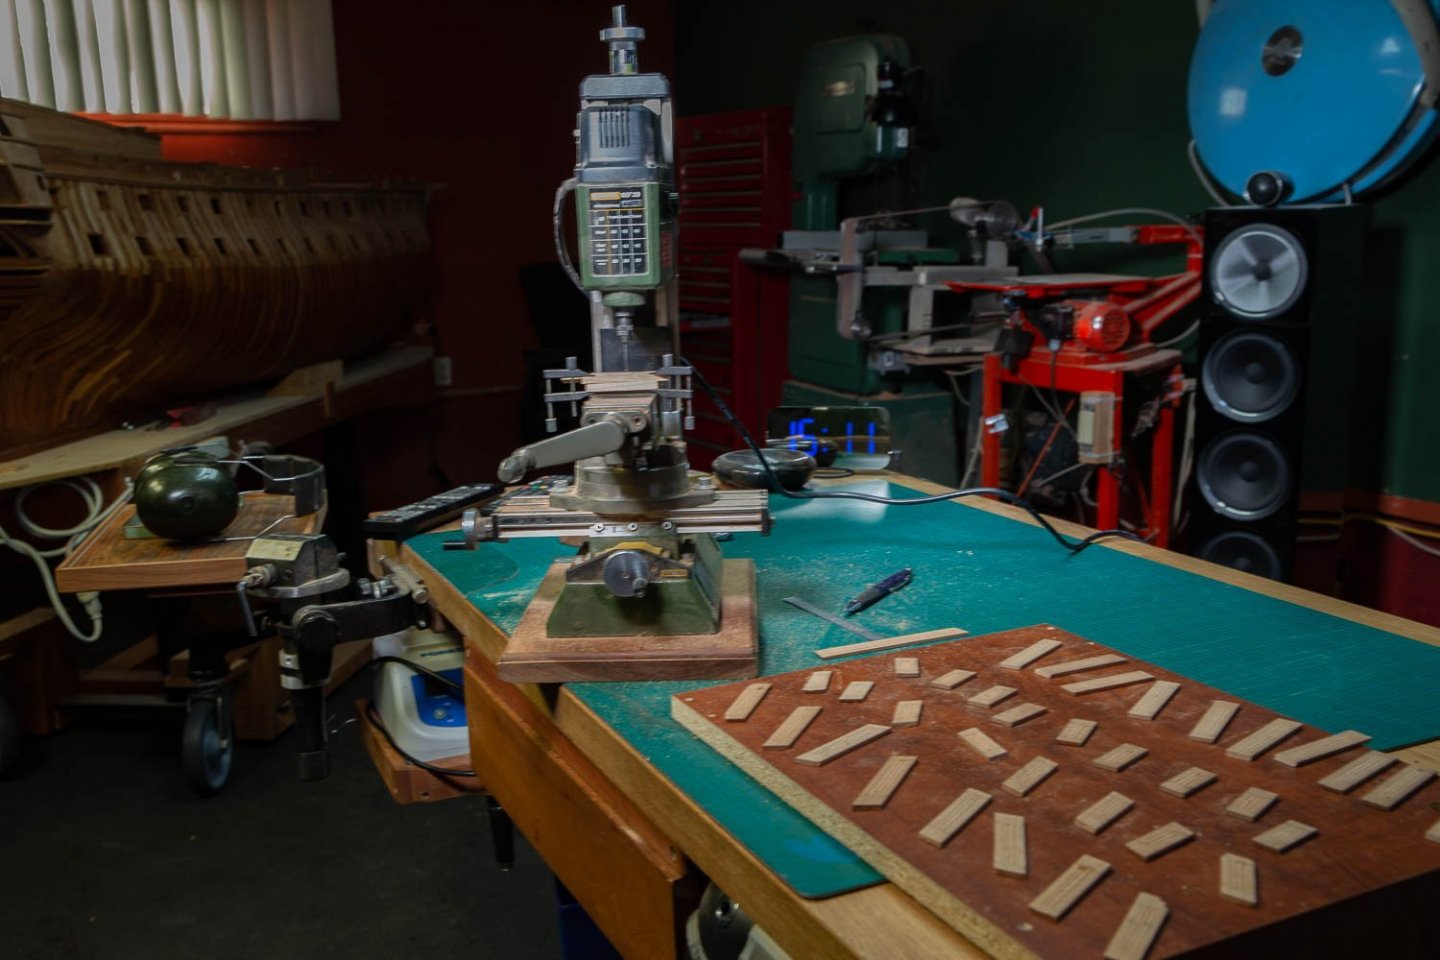
Thank you popash42 This forum is a great place to learn model ship building. Many excellent model ship makers participate. I like to take photos of the construction progress in different styles of photography and I also try to take photos during construction process to show how to get to build a part. This way, there is more to learn than just looking at the part completed. By example, I took a photo during the construction of the pillars to show How I slide the part to make parallel grooves. I like to try new tools and I also like to try new photography equipment. The main camera I use is a Canon.For general photos, the main lens the 40-70mm 2,8. I also like to experience new lens. I remember the first time I used telephotos lens which at first glance seems insane but many good photos can be successful. During the last 10 years, I learned a lot about photography and I also experienced a lot. There is a common goal between the construction of a model ship and photography. There is an aspect which is essential for both: LIGHTING. If lighting is unsufficient during the construction, there are many details which are going to be missed, simply because, you will not see it. The same applies for the photography. During the years, especially the recent years, lighting took a giant step with LED. With LED lights, you can take photos without any expensive flash. It is not only the lens which will provide the details but also the lighting. This forum has been on line for more than 10 years now but It is only this year that the administrators agreed to add a section for the photography. I strongly believe that a camera is an important tool as much as a saw can be for the model ship builder. There are many types of saws, there are many types of camera and it is worth to learn how to use it. The construction of the windows continues. For this particular 74 gun ship, do you know how much false windows there are? The number is quite high: fourteen, 5 each side, 4 in the back. If they had pushed, they could have even go up to sixteen false windows! On the previous build of the 74, black paint was applied behind the false windows to fool the eye. This time to understand the construction process, I will not apply paint.


-
In the workshop, if I want to see the color as the eye sees it, I will use around 4500 Kelvin but most importantly, if I want to be able to see all the details, I will use LED lights with high lumens.
-
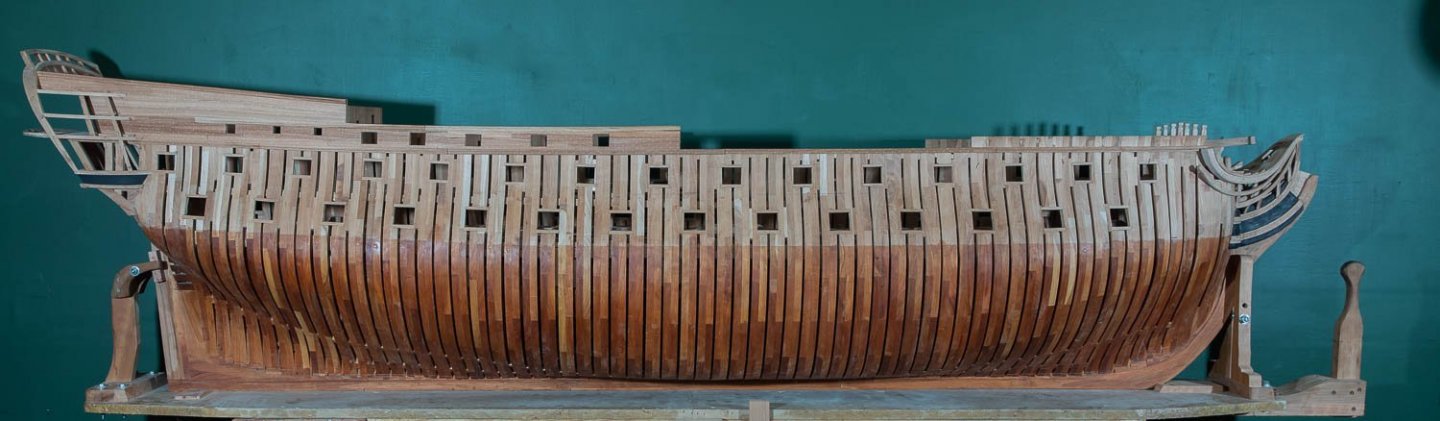
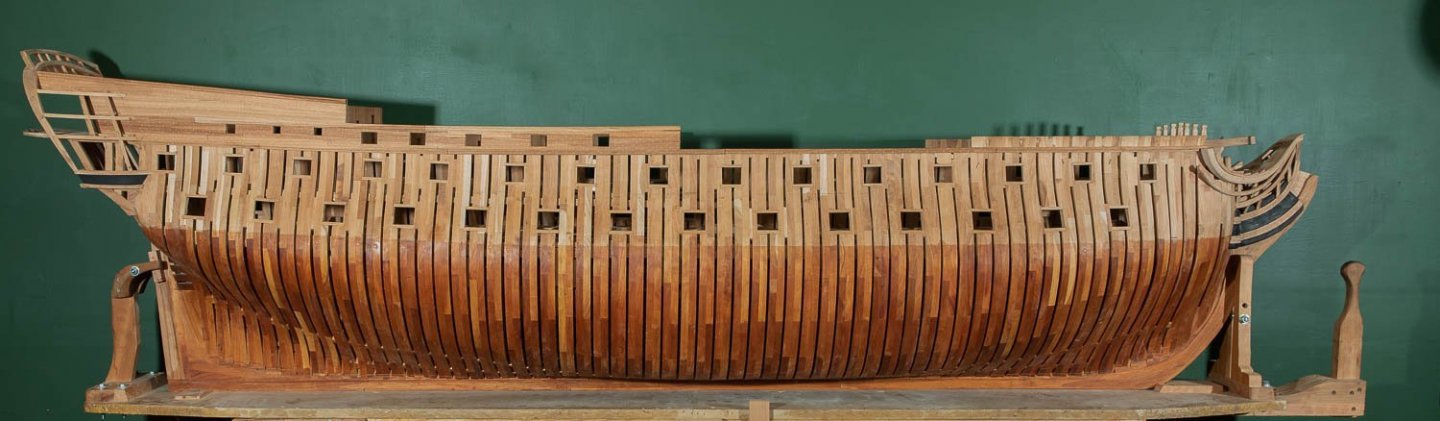
Photography can be a very capricious subject. Some days I prefer the first photo and some other days I prefer the other one. One is at 3100 and the other one is at 4300 degrees Kelvin. The color I see with my eyes is closer to only one of these 2. I often had that dilemma when taking photos of model ship building with neon lighting depending of the color correction given in the camera. This model ship is 100% cherry wood. When I cut cherry wood it is white and after aging it becomes more red. Tung oil has also the same effect as aging the wood on its color. So, I could say if I want a recent construction, I will go white and if I want an older one I will add some red. There are so many way to change the colors... Actually, I did upgrade the neon lighting and added LED lights and the degrees Kelvin are always set at 4300. Which photo is which is not important, if I can find one that I like!
-
As many kinds of cars there is, there is probably as many kinds of shooting styles and everyone choose what is appealing to him. In the category of personal choices, there is no good or bad answers... even if a choice is not necessary the best of the class, it can be the best for me, if it meets the goal I am looking for. I took thousand photos of model ship building, sometimes very carefully and some other times very fast, sometimes the results were very good and some other times, the results are ver poor.
-
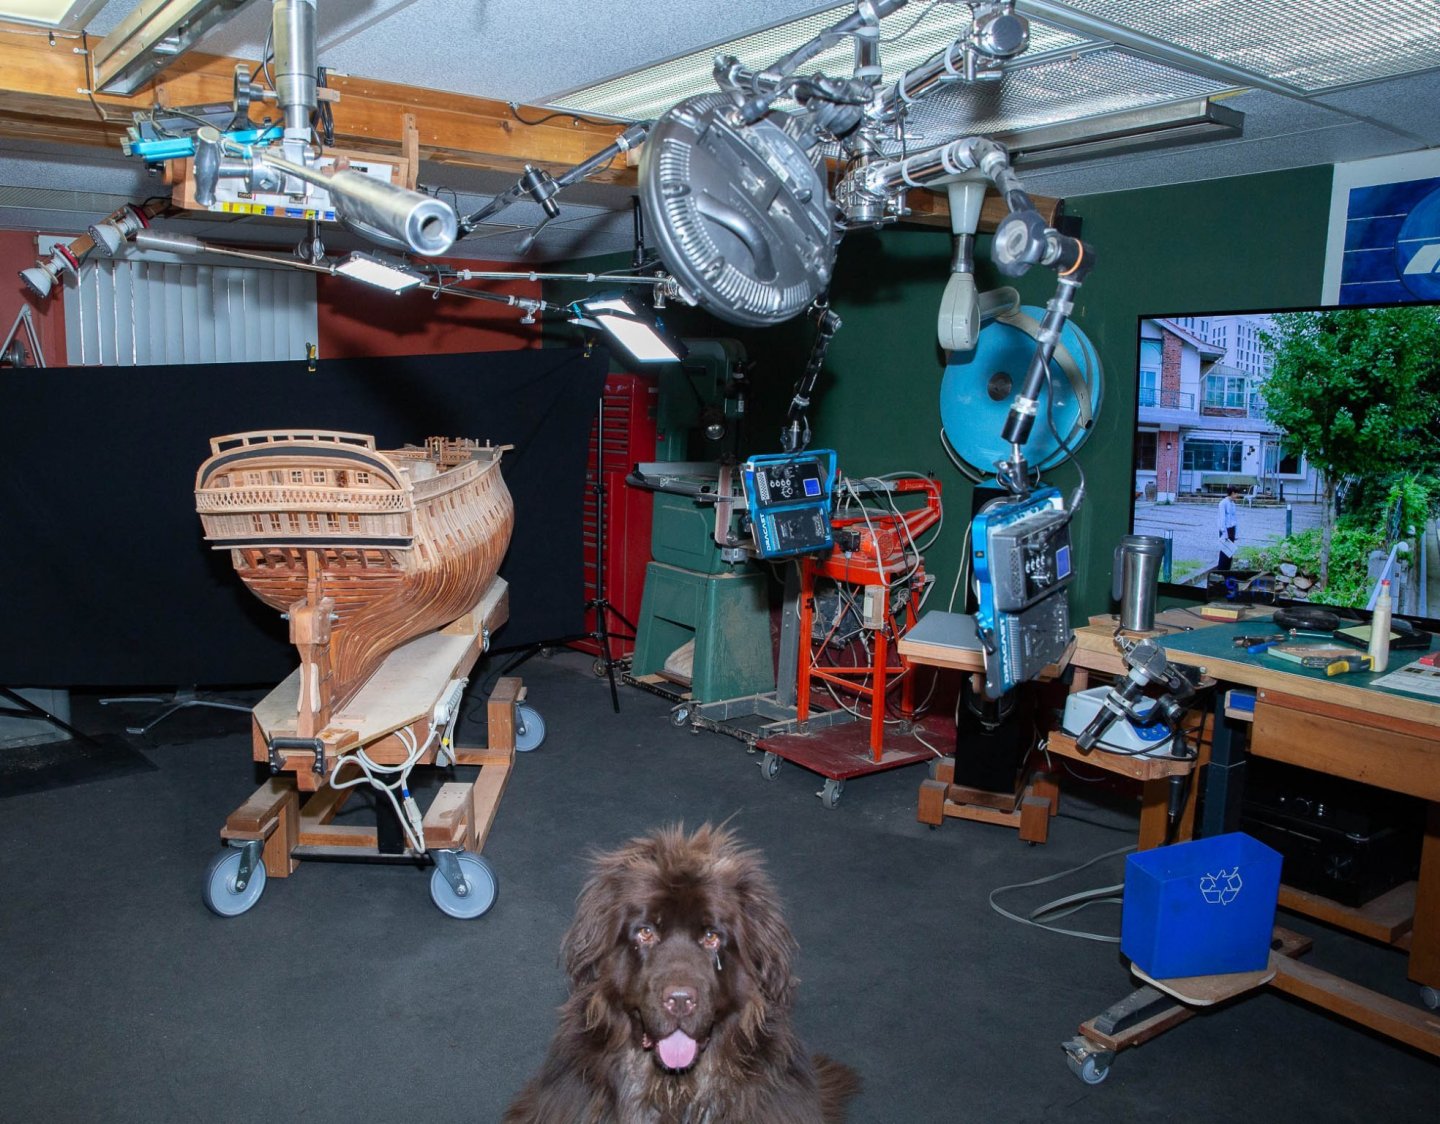
Taking a correctly lighted photo can be difficult but we need to try to make the process as simple as possible. Lighting is the first step which will ease or complicate your task in post processing. This is about what I like to do: I light the parts I want to photograph with LED lighting. This way, the background is black, without any black paper. With adequate lighting, there will be no dark area to correct only the highlights when necessary. For this Lightroom is very good.
-
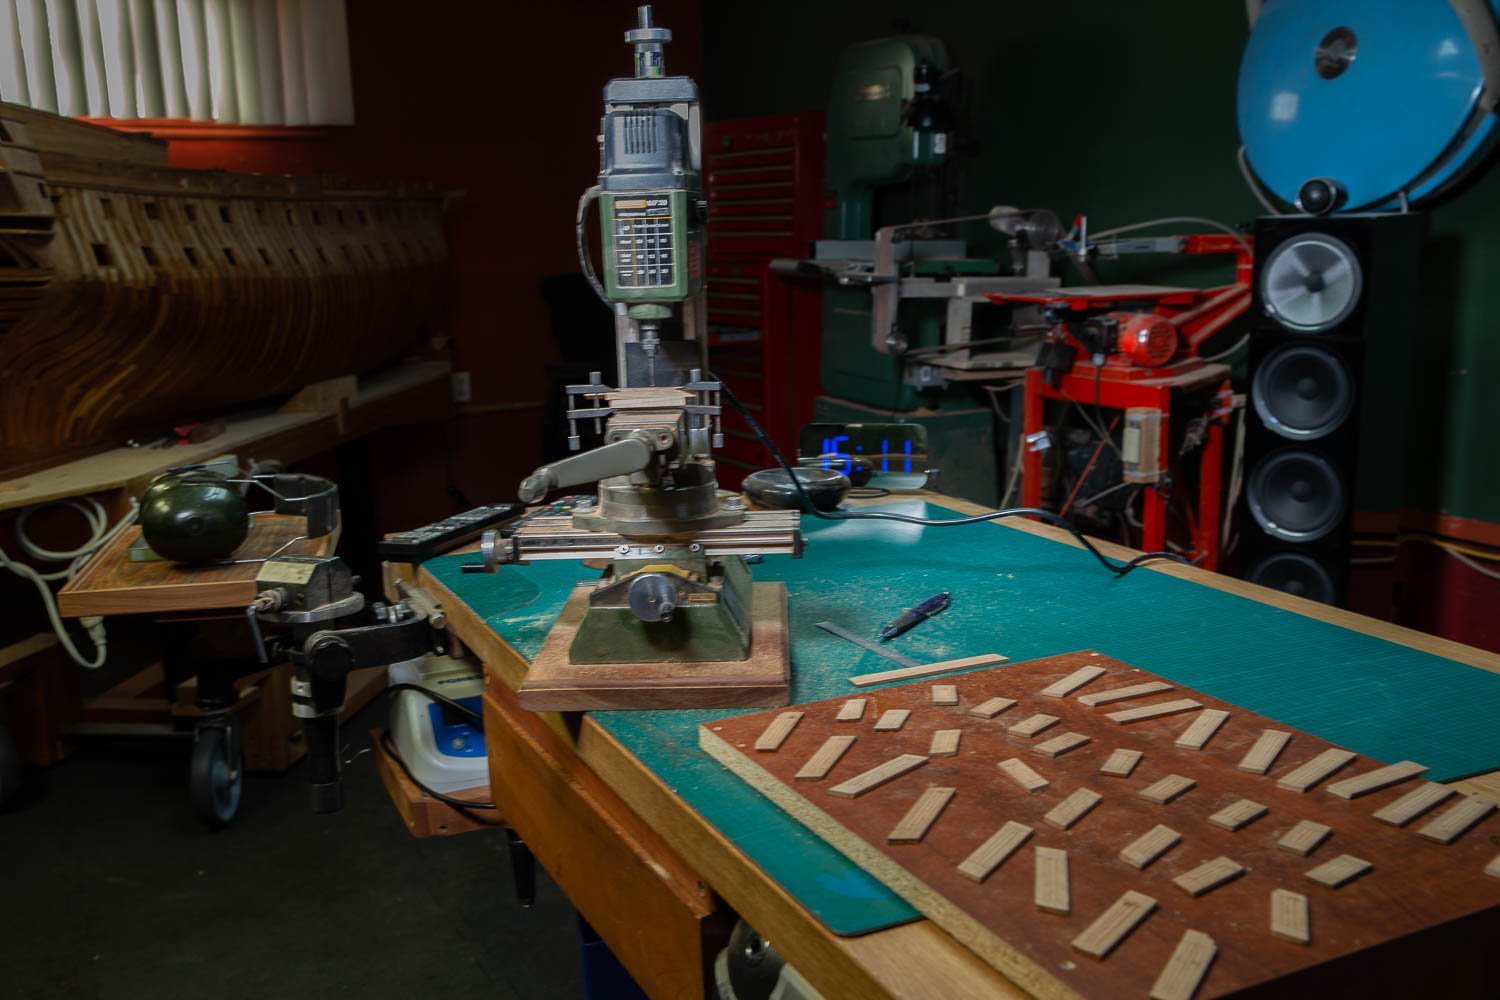
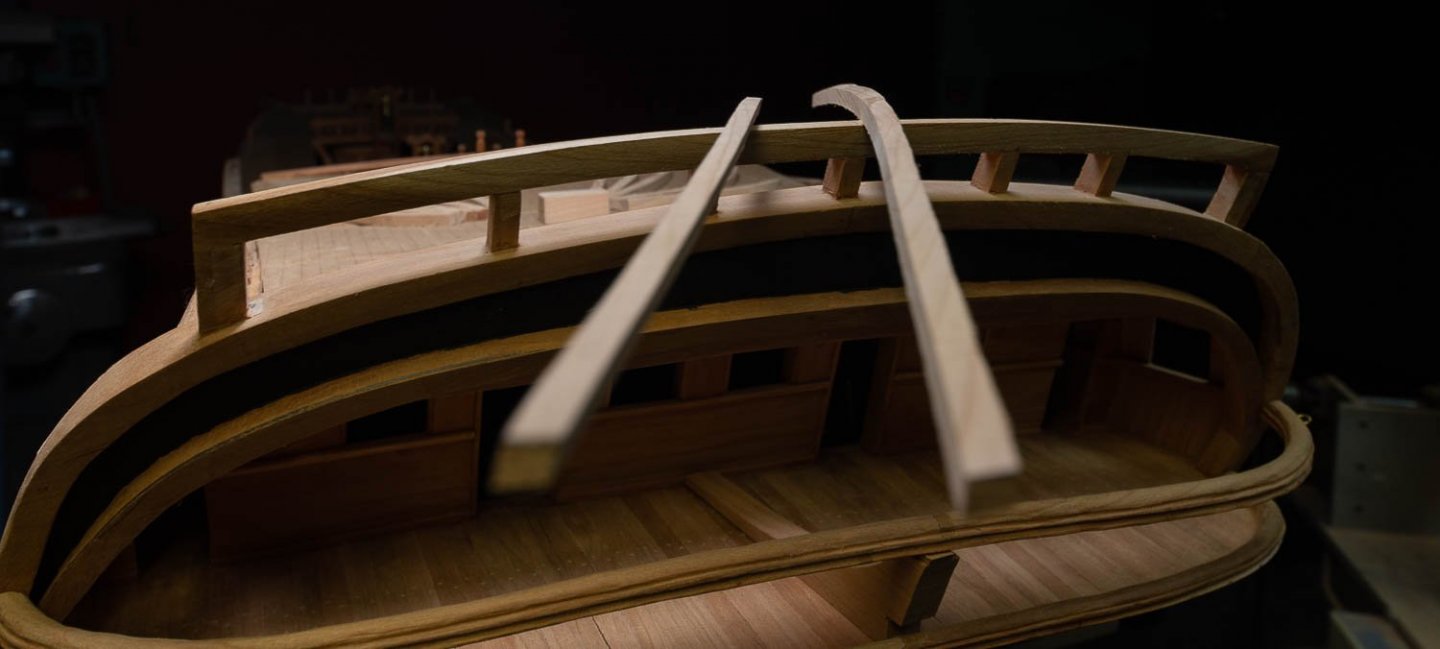
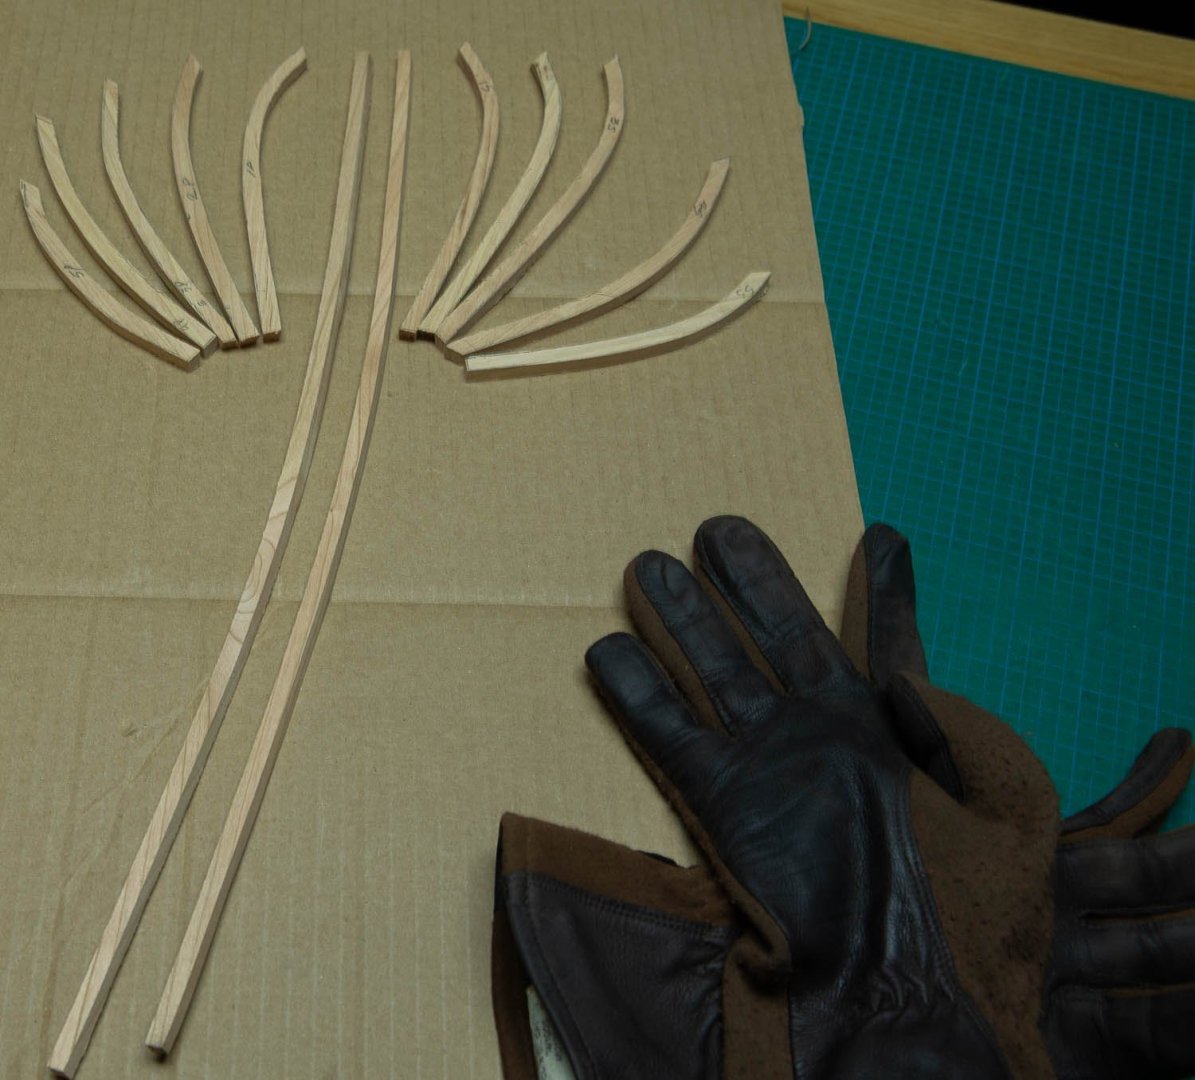
It is time to clean the spider webs and continue the work. The goal for the moment will be the windows but before we need some moldings. The longest one are cut from a 3/4 by 3/4 inch plank.

-
This forum was created more than 10 years ago. It is only this year that a section devoted to photography has been created. I guess that one of the reason they did not want to do it is simply because this a forum about model ship building and not a forum about photography. Another reason is that photography is not the most popular subject among the model ship builders. I do not believe that White Balance has to be explore, in this forum, in his greatest depth.I consider photography to be an essential part of the model ship building journey. If we frighten people with too much details, they will run away instead of wanting to understand the basics. The first post of this subject was written with the intention to explain as simply as possible what is White Balance, so that a model ship builder can also understand his value. Even if there are over 40,000 members in this forum, only few really like the photography.
-
Too much is like not enough. The idea is to take a photo with similar colors as what the eye sees, there is no need to go to the extreme. The main goal of all that, is only to adjust the camera... and the white balance, before taking photos and when the camera is well adjusted, there will be no need to retouch the photos after. Everyone is free to use the calibration he prefers, some of it would fit in the category of the "personal preferences" and as in the truth, everyone has his own truth and everyone has his own preferences.
-
A photographer will set his camera before taking pictures and the the color will be set, because one of the goals in taking a photo is to get the good colors. But then, if I look the photos on a cheap tv monitor, it will be worthless. On the other hand what you call a subjective process is in fact just a matter of personal preferences, and in this domain, everybody is right.
-
Proxxon compound table KT 70
Gaetan Bordeleau replied to Dziadeczek's topic in Modeling tools and Workshop Equipment
2 problems: -jaws parallelism? -tightening pressure: it will be difficult to tighten hard by hand, so a plier of some sort will have to be use and it will probably scratch the handle. I have seen 2 good ones over the years: Unimat had one for the SL100 and GRS multi purpose vise. I still have the Unimat one bought over 30 years ago. I modified a stand for the GRS so it can tilt in the 3 axes.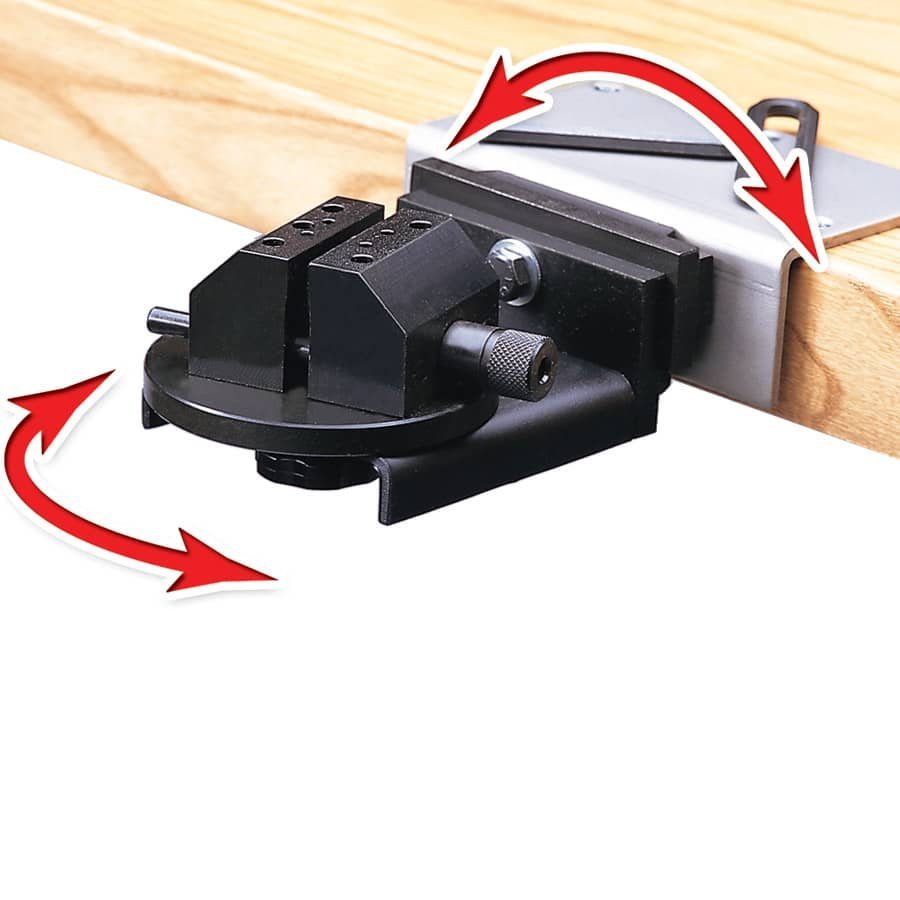

-
Focus Stacking
Gaetan Bordeleau replied to Dennis P Finegan's topic in Photographing your work. How to do this.
1 km long, in focus from start to finish, no photo stacking spotting scopes do not have similar depth of field as camera lens I use it sometimes for my model ships for and it works great
-
On my drum sander, I use #80 grit, sands in the grain direction and gets much better results than we would expect. The paper comes in rolls and last for months. As for sand paper, Diablo makes excellent saw blades and I discovered few months ago, that they are making a higher quality of sand paper, also red in color. They also make sanding paper for orbital sander of a very good quality which last longer than any other brand I tried. Wood is not made for the finest sanding paper, metal and paints are.
-
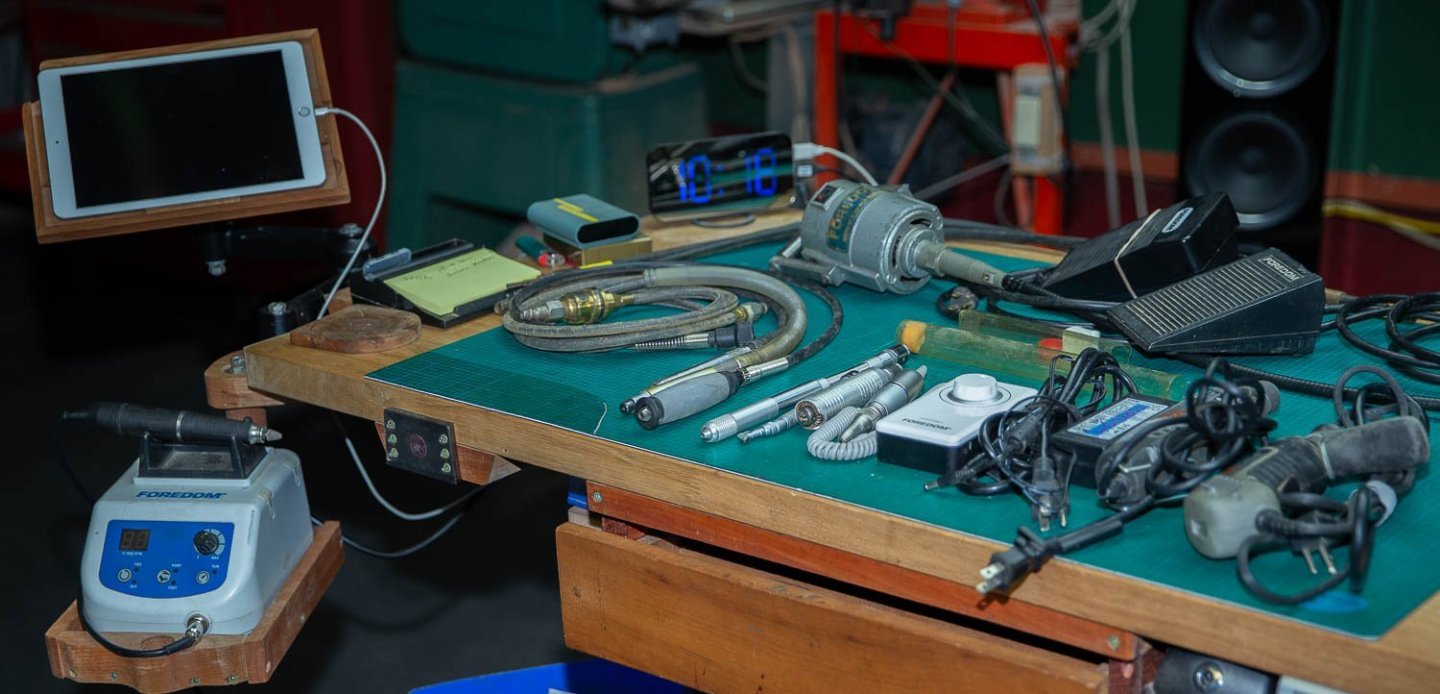
Among those I tried, 1 stands out: no shaft to reduce flexibility, 0 to 50000rpm, brushless delicate and very strong at the same time: Foredom brushless micro motor, to the extreme left, all the others are in drawers.
-
Macro photos with an iPhone
Gaetan Bordeleau replied to Tomculb's topic in Photographing your work. How to do this.
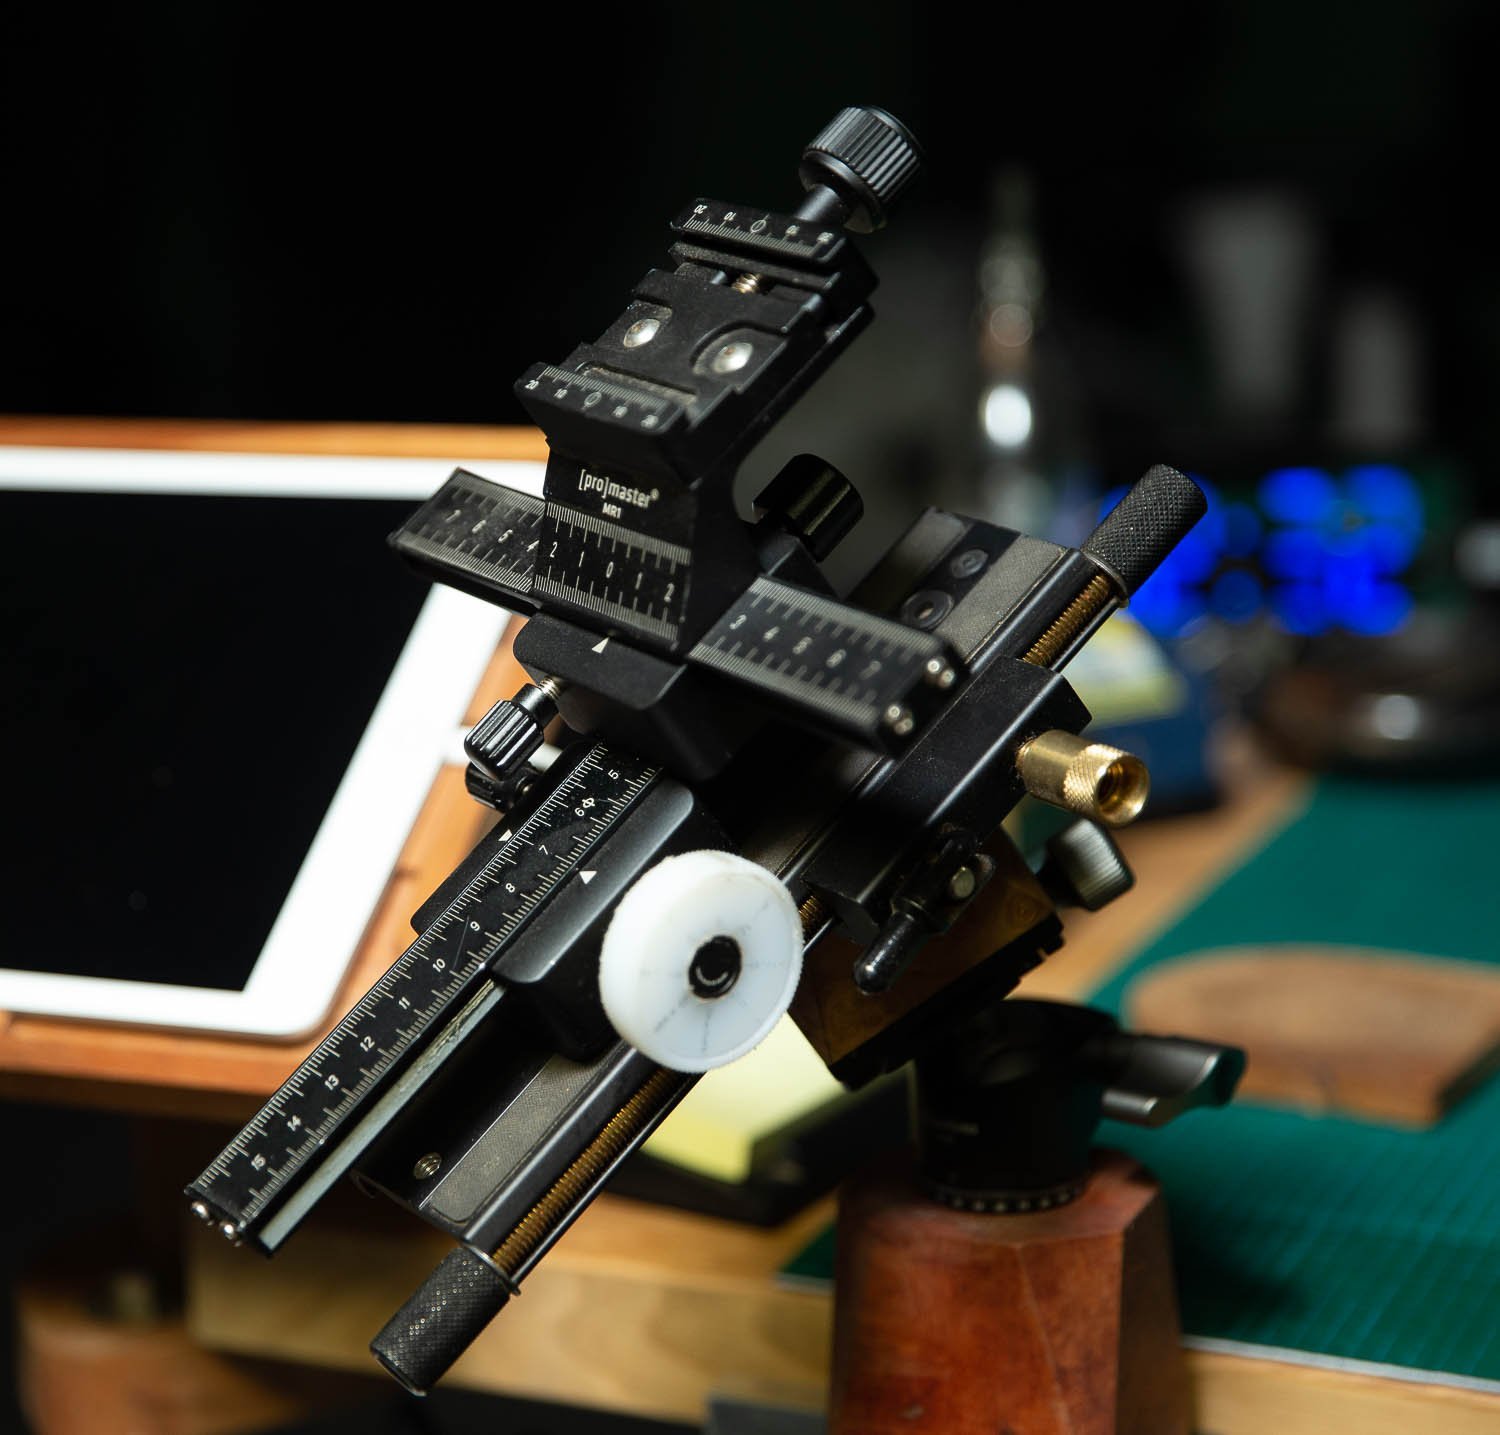
You need a focusing rail, here are 2 on top of each other. The idea is to have a cart sliding on a rail with a screw or a motor to adjust the focusing distance.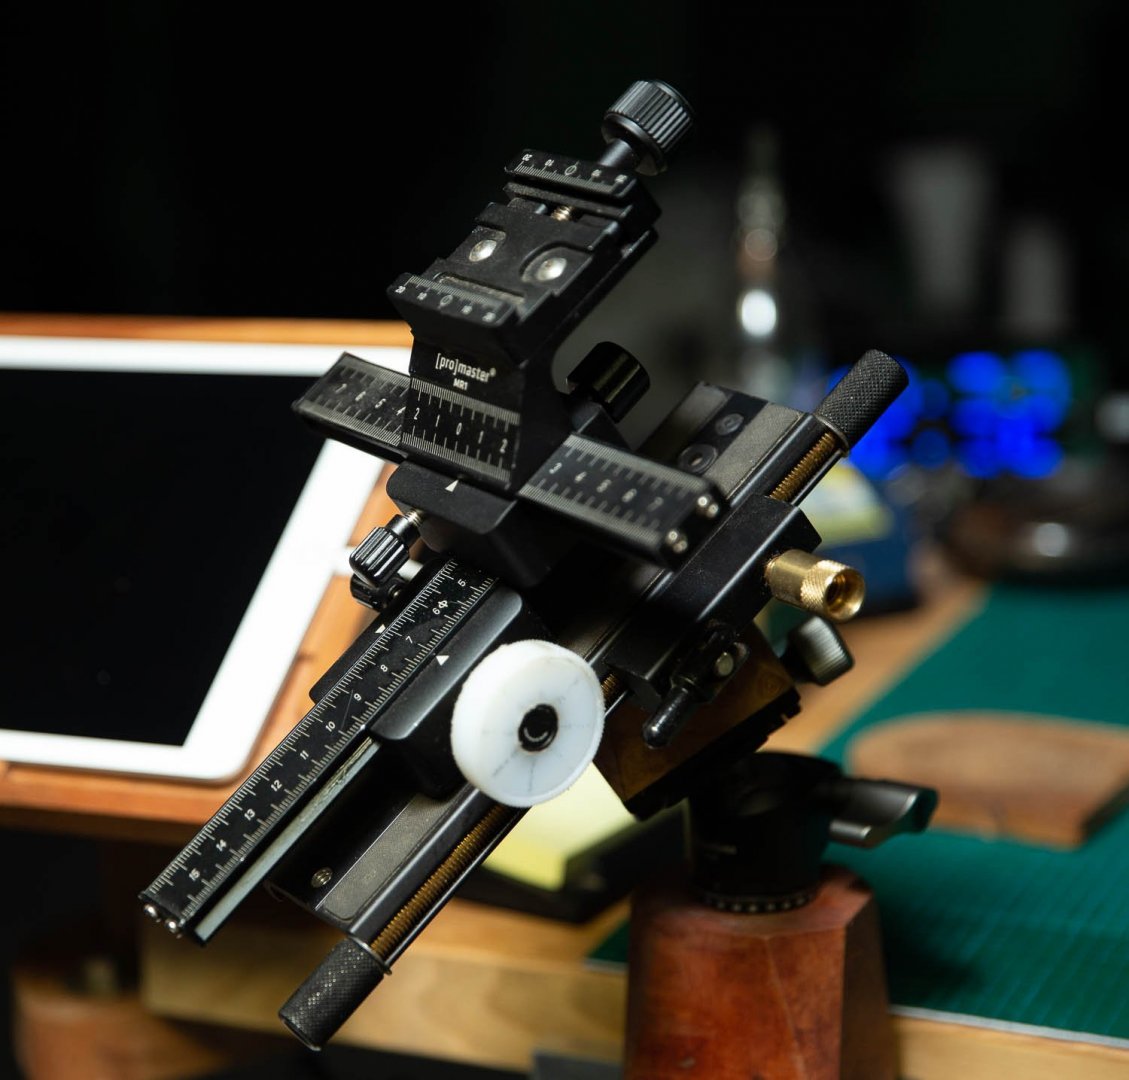
-
Macro photos with an iPhone
Gaetan Bordeleau replied to Tomculb's topic in Photographing your work. How to do this.
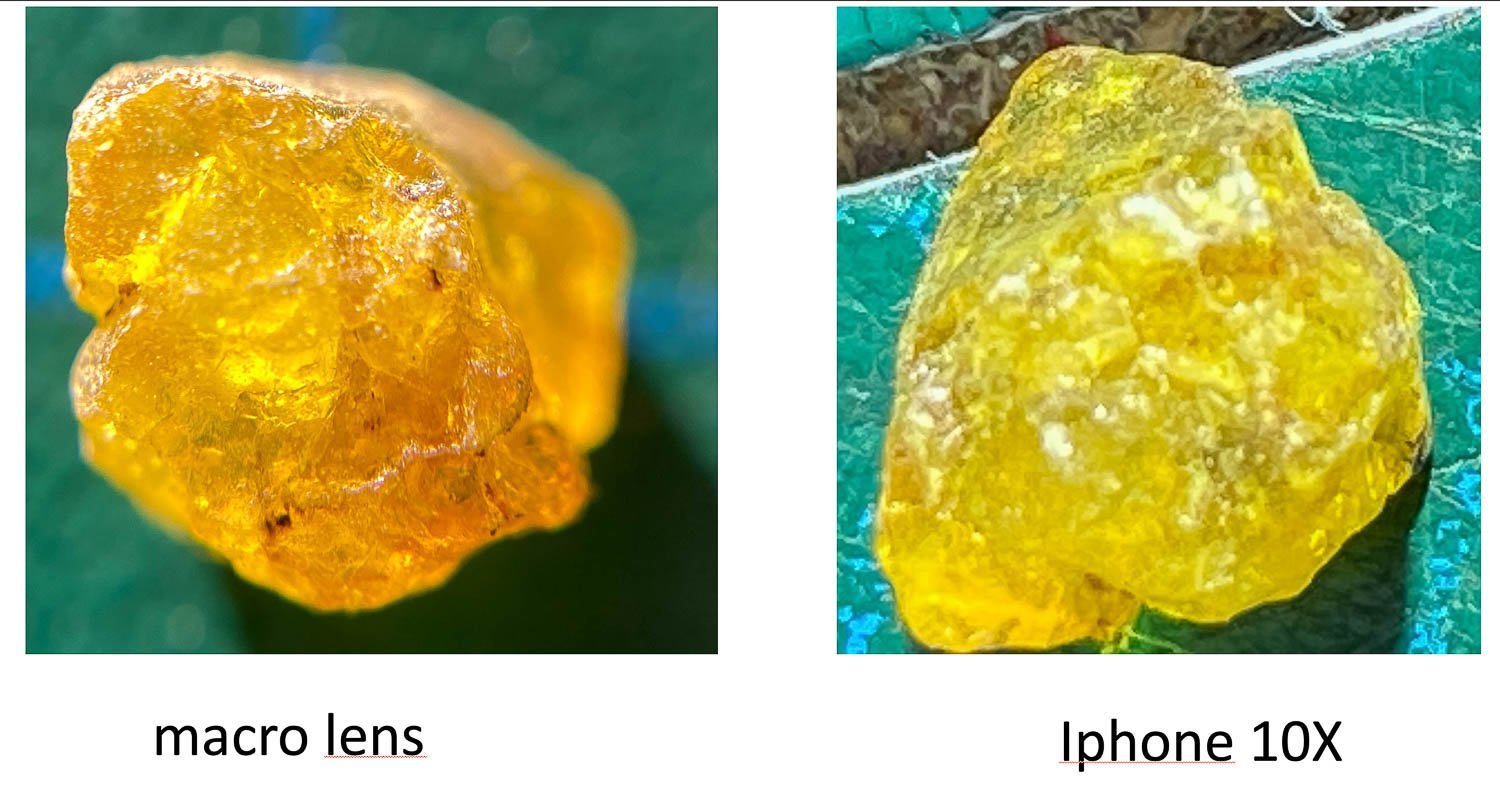
I just tried 1 of these kits and compared the macro lens 25X vs the Iphone at 10X. For the price, it is very good! On the second photos, a photo with a macro lens from Canon.

-
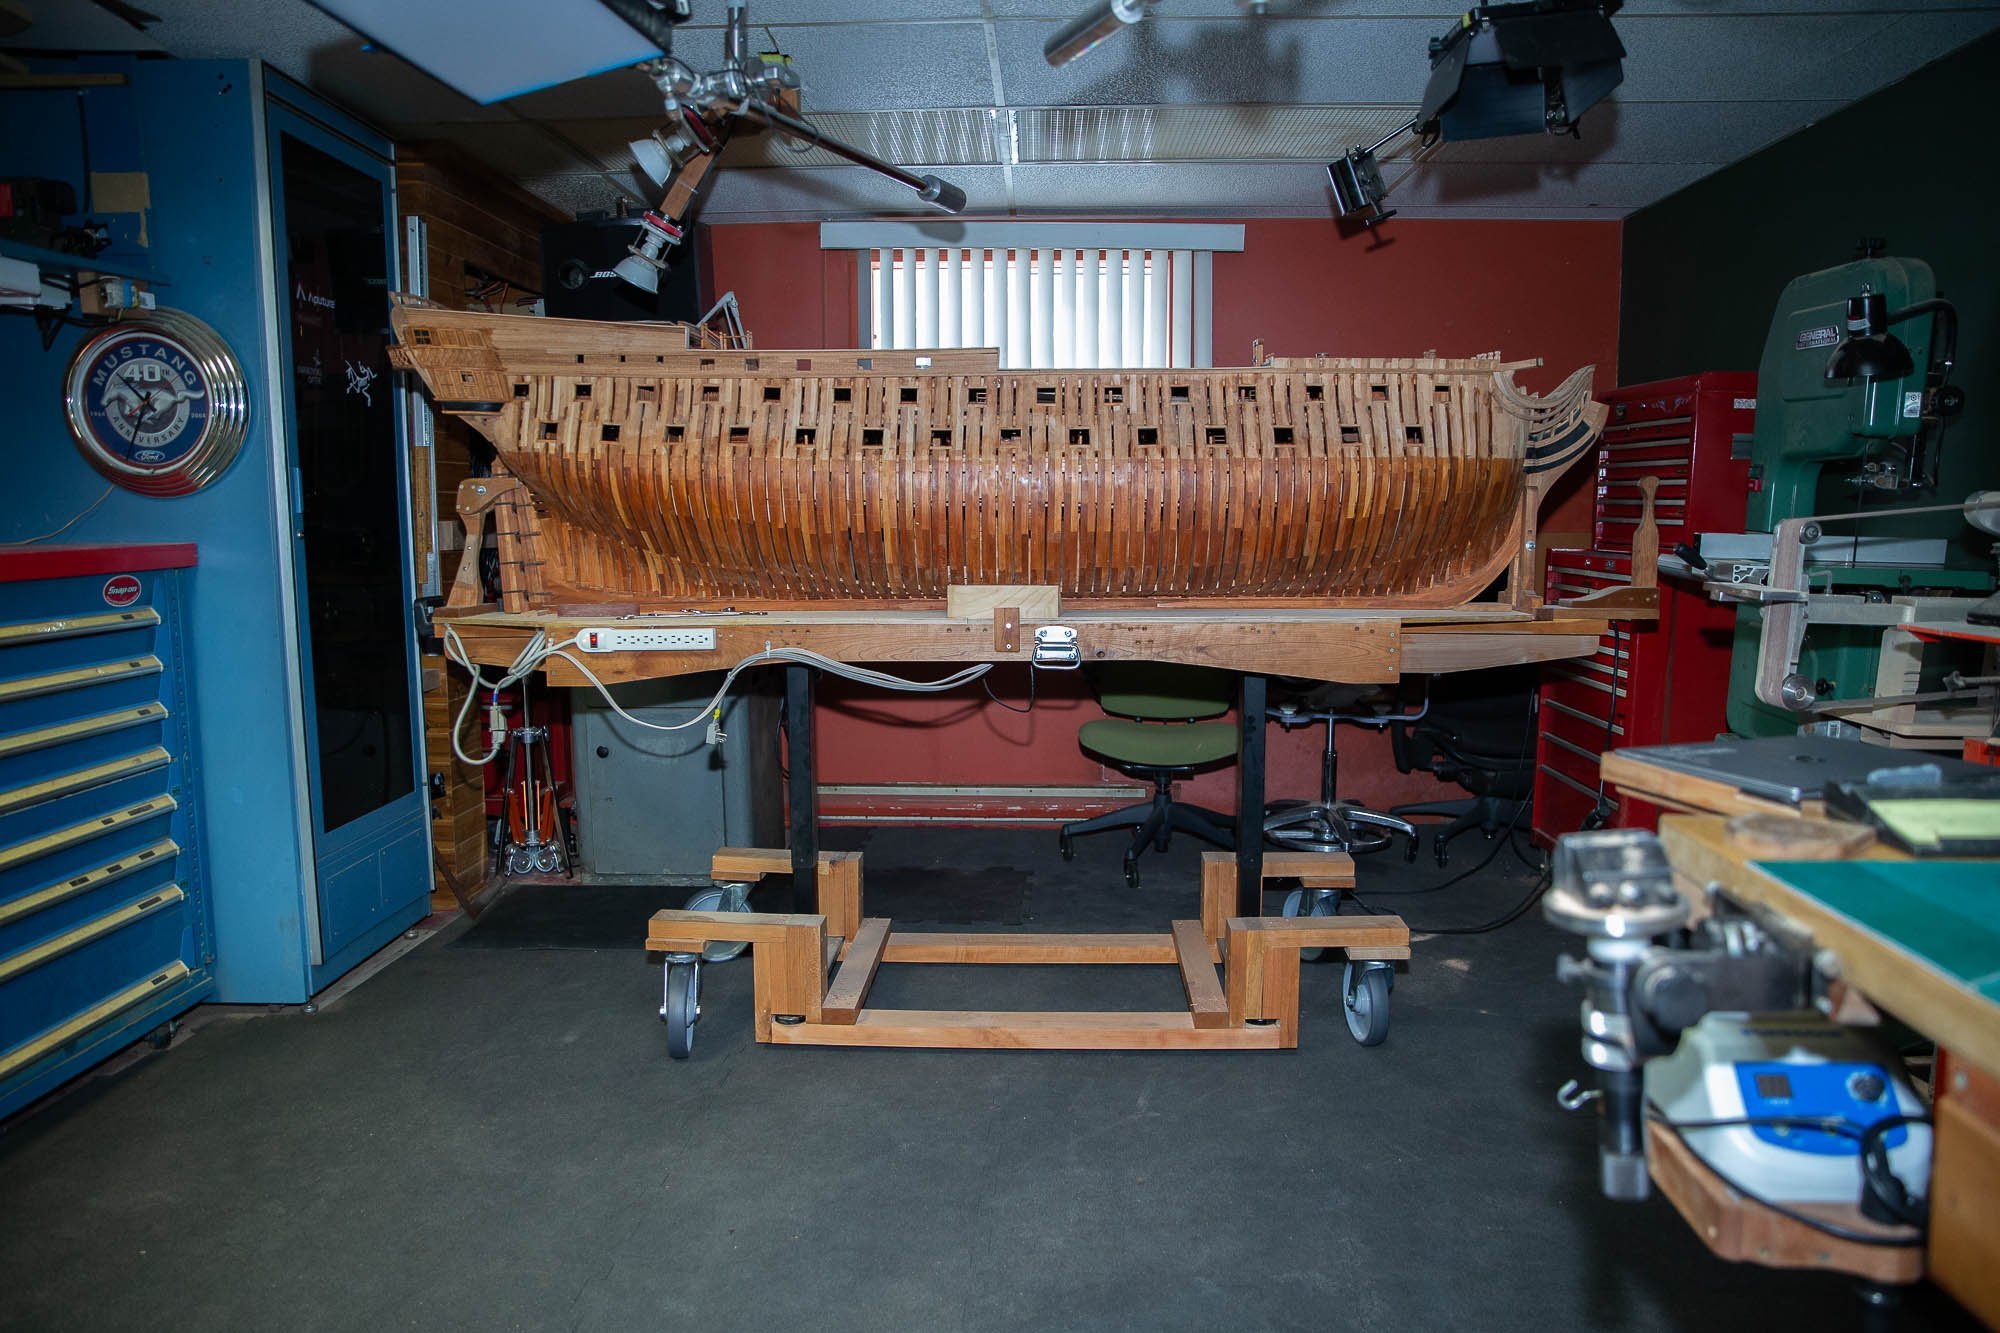
adjustable height work area
Gaetan Bordeleau replied to Johnny Mike's topic in Modeling tools and Workshop Equipment
This was made for long typing period on a keyboard , plus a small table for the mouse. This model is for a table and there is also a model for a chair. The idea is to transfer the arm weight to the forearm on the pad and to reduce the distance so that the hand can easily move. At the opposite, if you would try by example to carve with the arm fully extended not resting on anything, your arm would get tired much faster and with pain as an extra. This way the hand is "free". Very good for long figurehead carving period by example. There are different kind of height adjustable table: cylinder, hydraulic jack but electric are the most versatile to adjust the height. Working at the good height is so much easier to work... and not only for the rigging!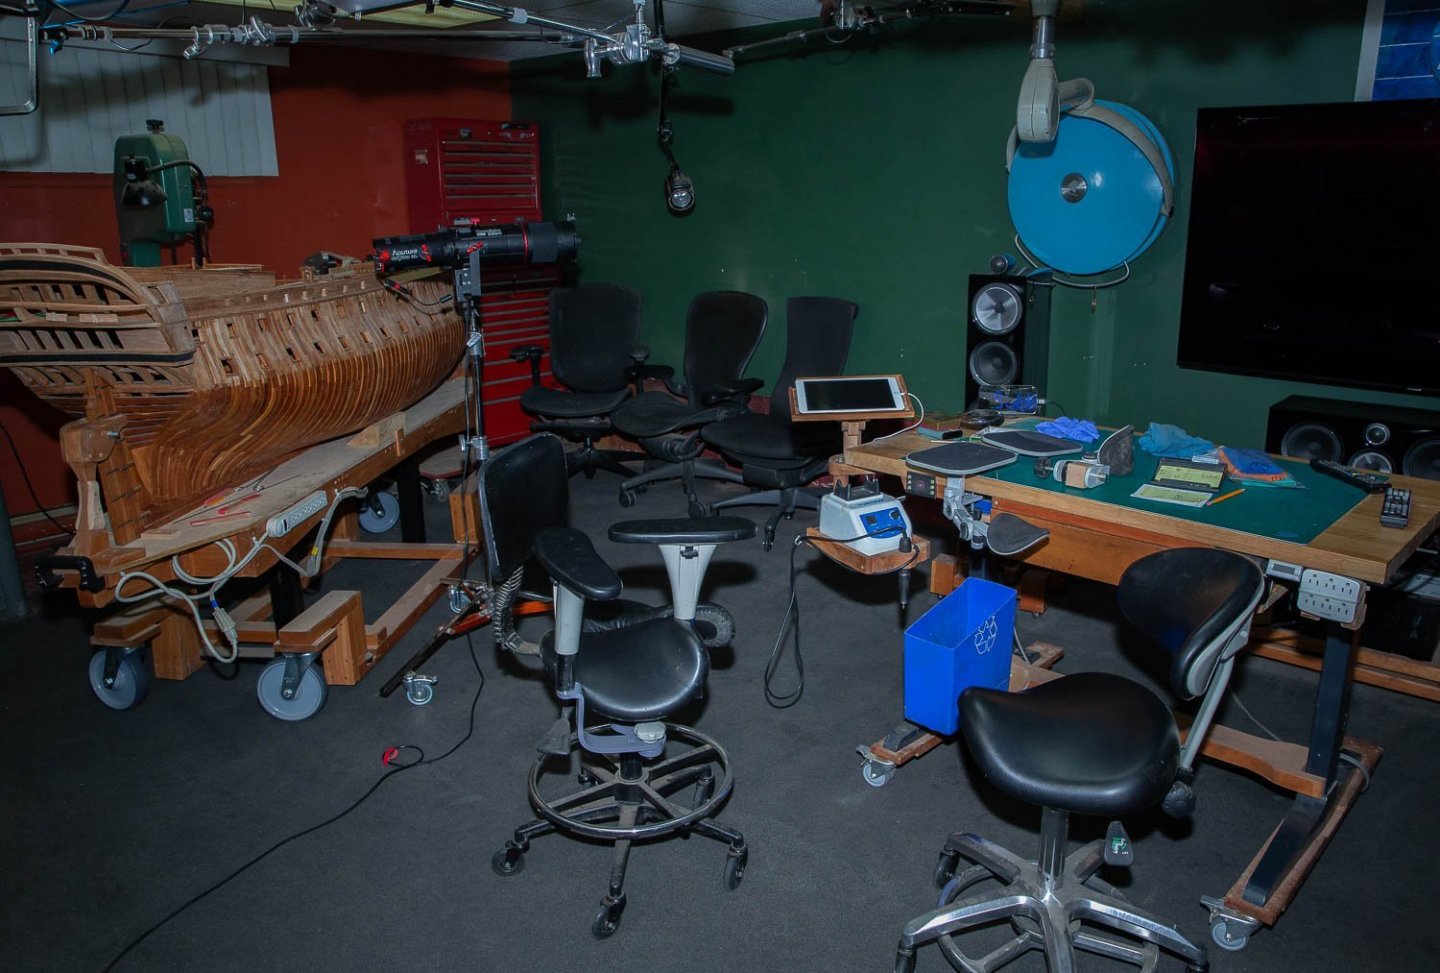
-
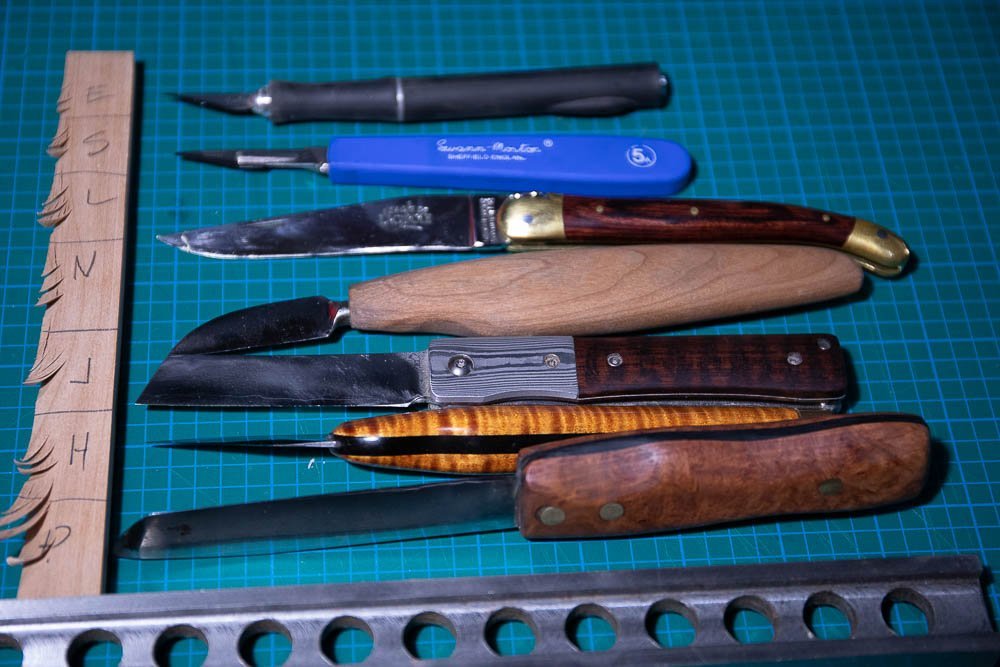
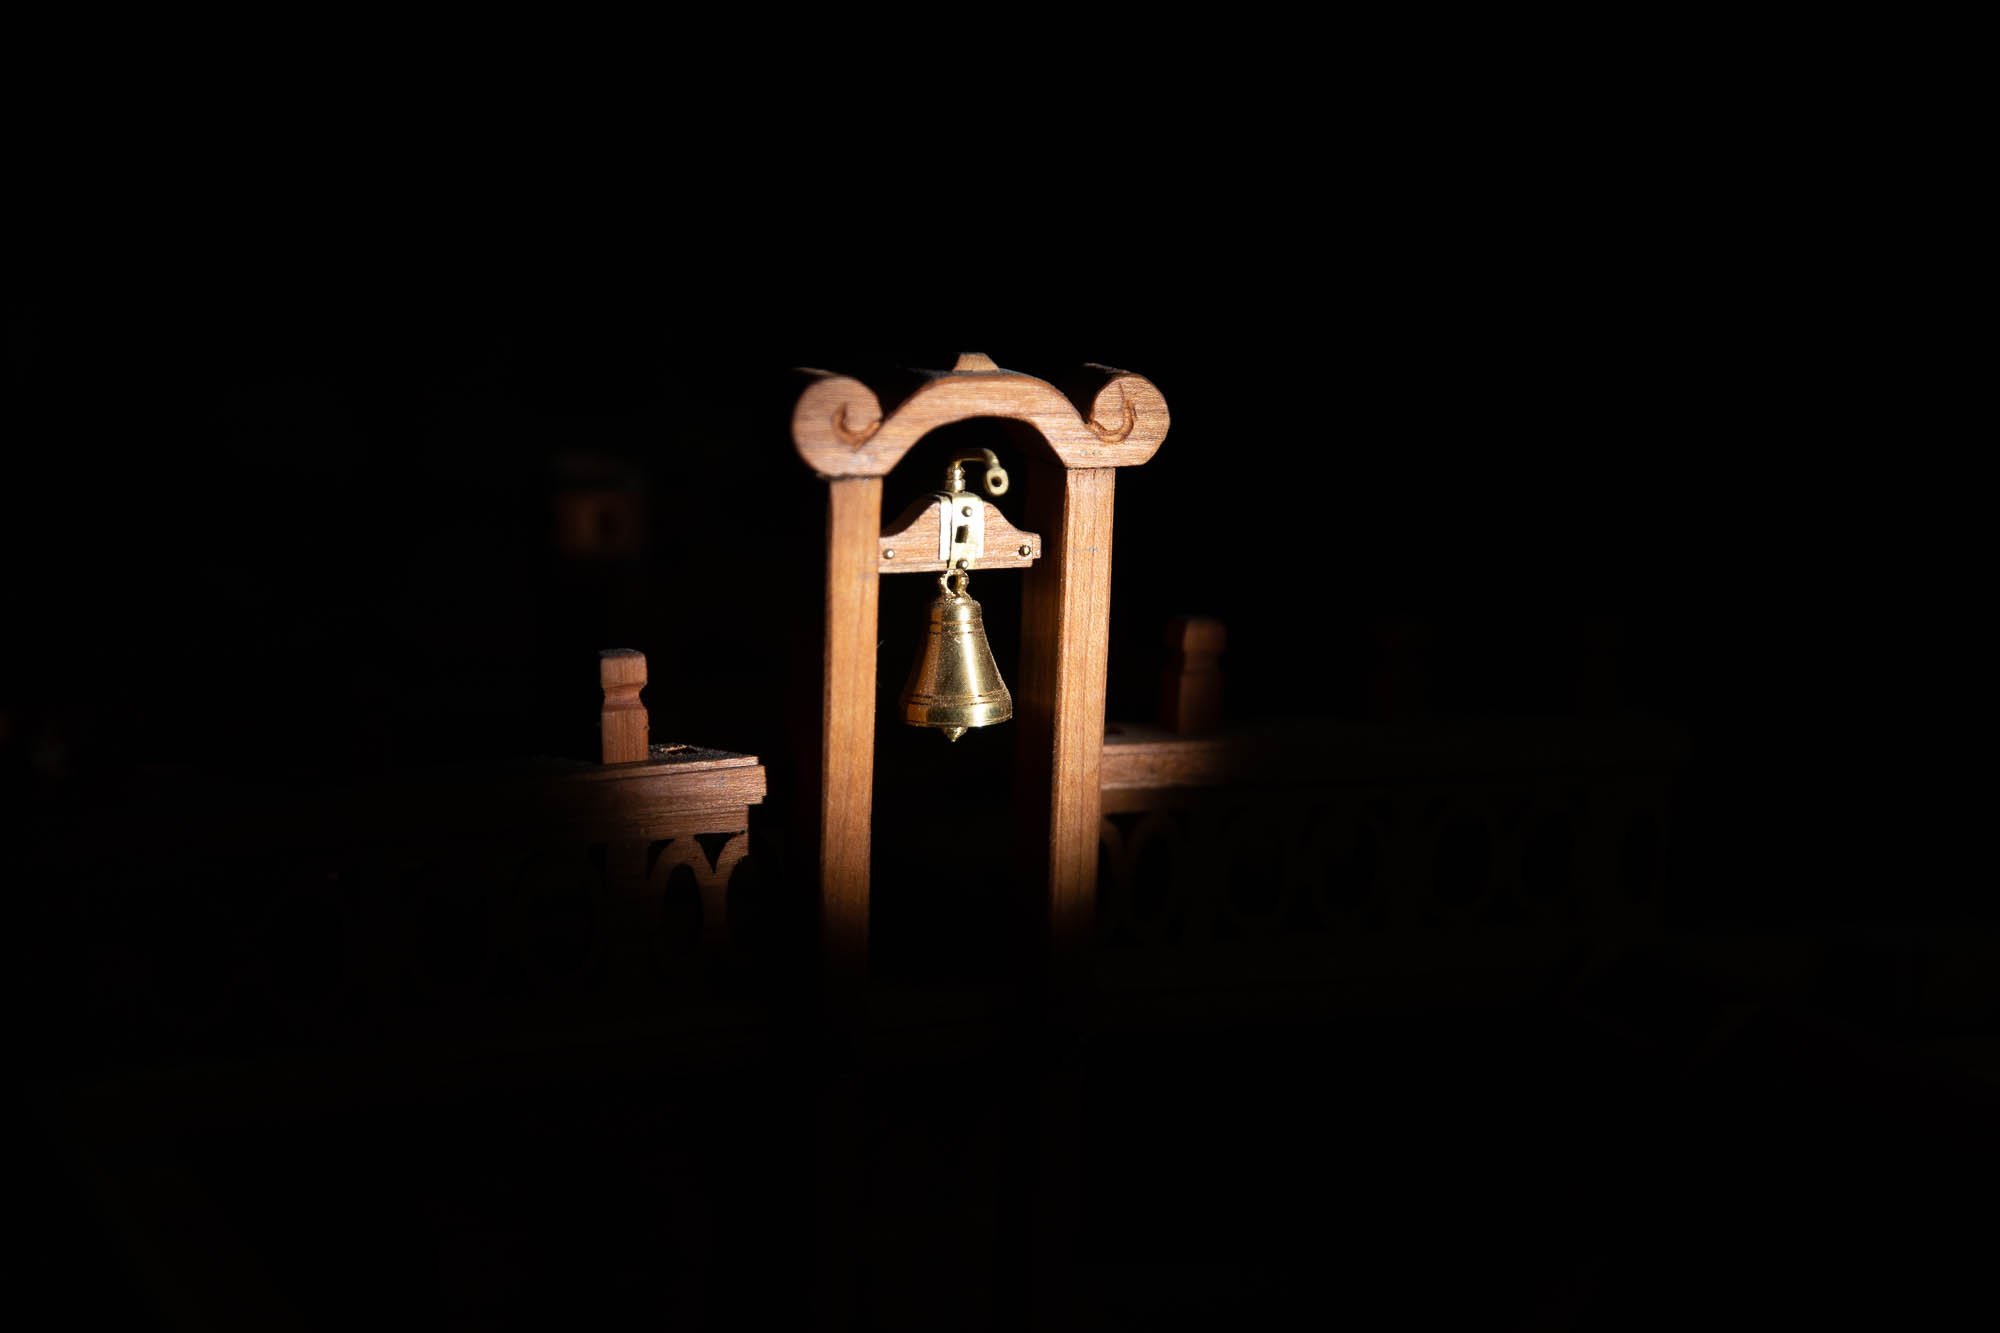
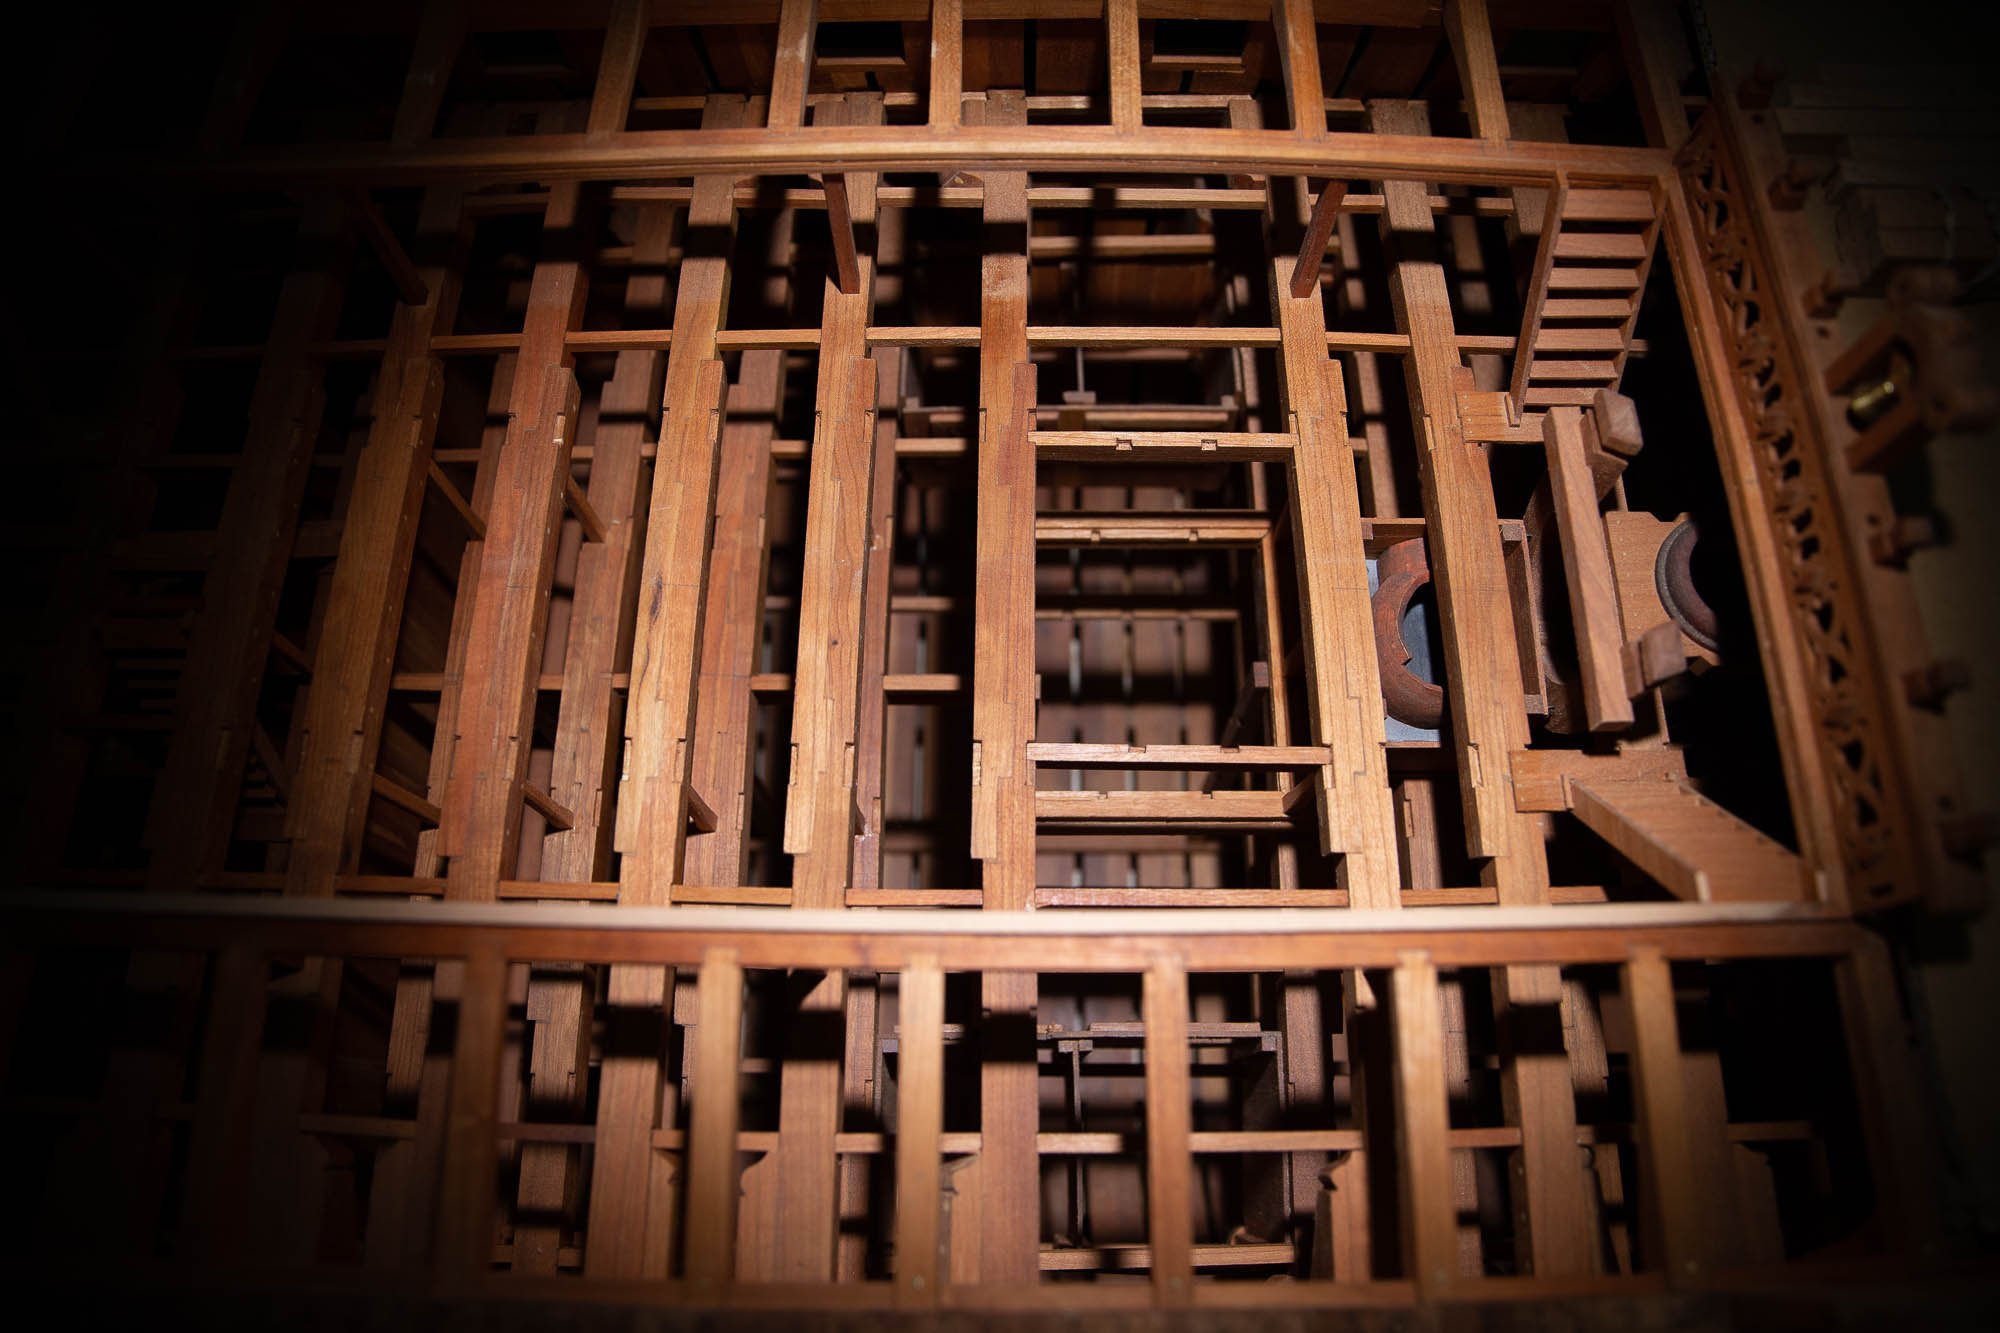
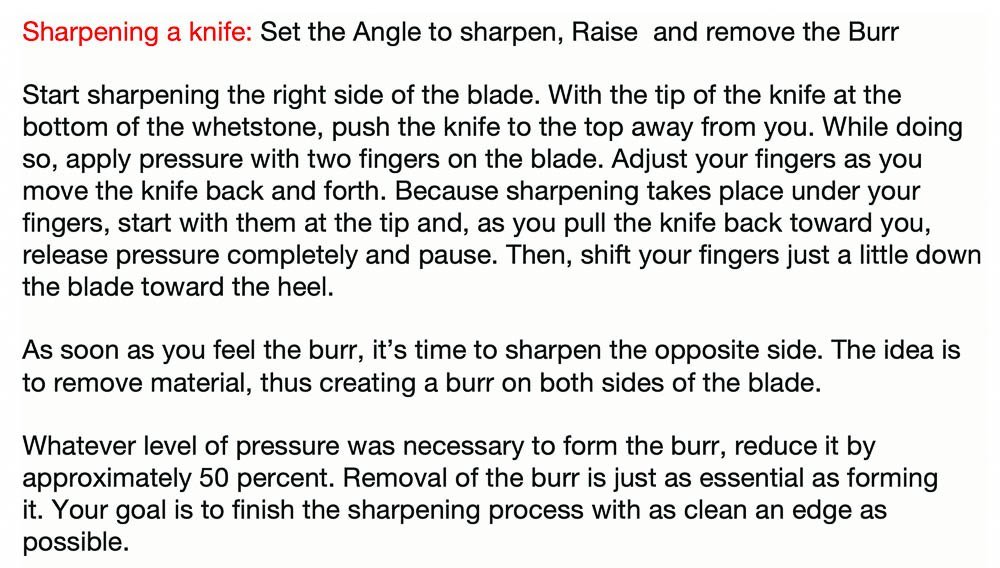
For the last few months, I tried to get a new spot for lighting. Made of 2 parts, the first one was already available but the second part just came out on the market and I finally got one. The difference with the other LED lights is the power, much more. The light is in 2 parts, a spot and a zoom also the shape of the light can be adjusted in many shapes like circle, square rectangle and so on. With only 1 light now, I can take photos inside the model. On a parallel path, I tried some new knives: japan kitchen knives and I am still pushing the art of sharpening which consist in raising and removing the burr. I can sharp a knife which will have no resistance passing through a tomato but I cannot do it on a regular basis. I watched many videos on you tube and everybody has his own way to do it. Sharpening a knife can be a very satisfying experience when you see what is a sharp knife. I am still learning the process and I learned new words in sharpening: Edge leading sharpening vs edge trailing.

-
I did many test with knives. An Exacto does not cut very much. On the photo, from top to bottom, the less to the most cutting. Cutting is mostly about the blade but it is also about the handle. With a small handle with no grip, you cannot deliver a lot of power to cut.