HOLIDAY DONATION DRIVE - SUPPORT MSW - DO YOUR PART TO KEEP THIS GREAT FORUM GOING! (Only 72 donations so far out of 49,000 members - Can we at least get 100? C'mon guys!)
×

Gaetan Bordeleau
-
Posts
1,307 -
Joined
-
Last visited
Content Type
Profiles
Forums
Gallery
Events
Everything posted by Gaetan Bordeleau
-
 In addition, you have an artistic eye to show your drawing at angles which are simply incredible!
 -
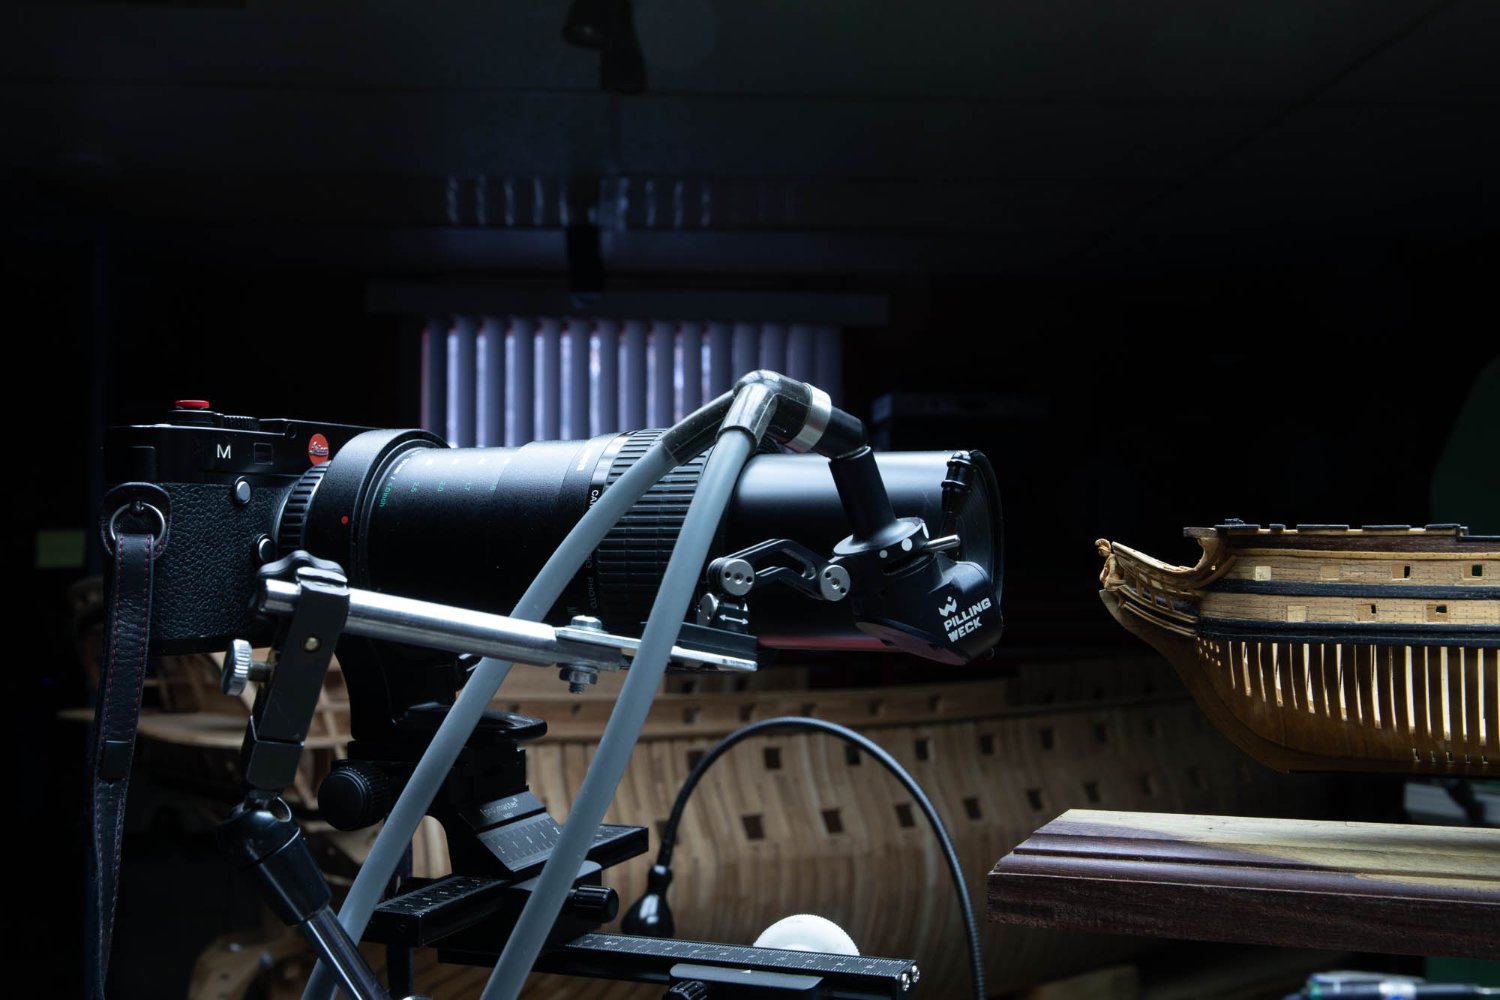
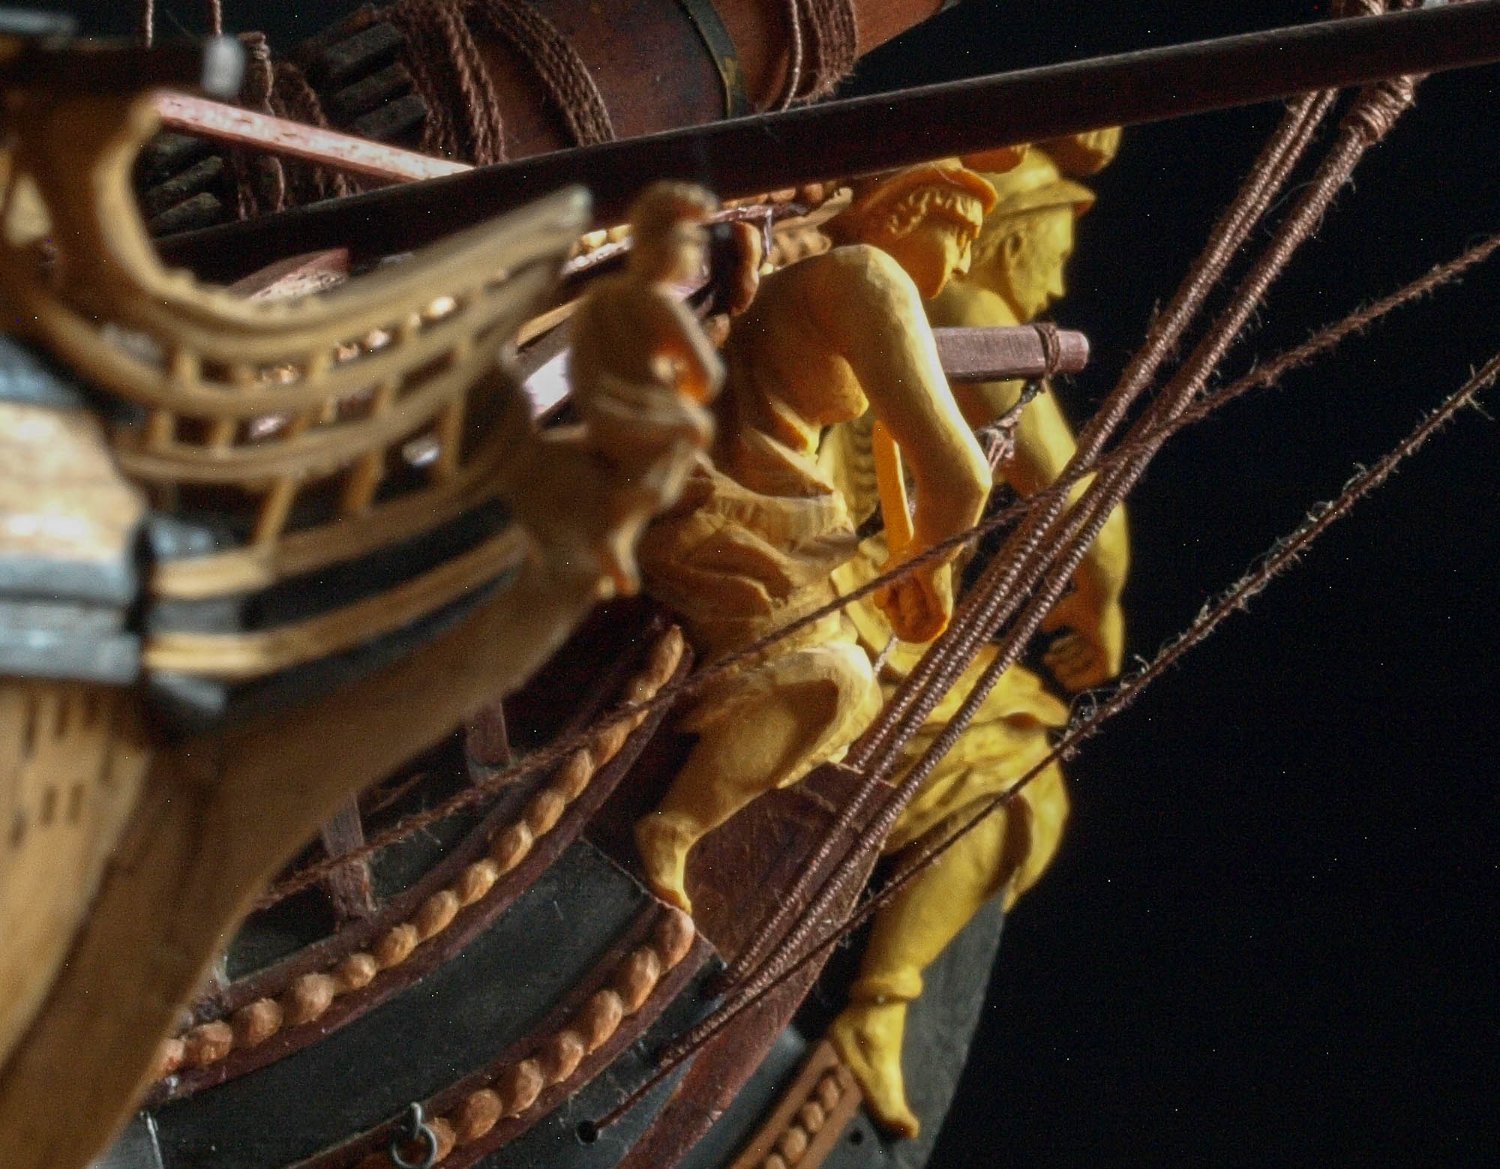
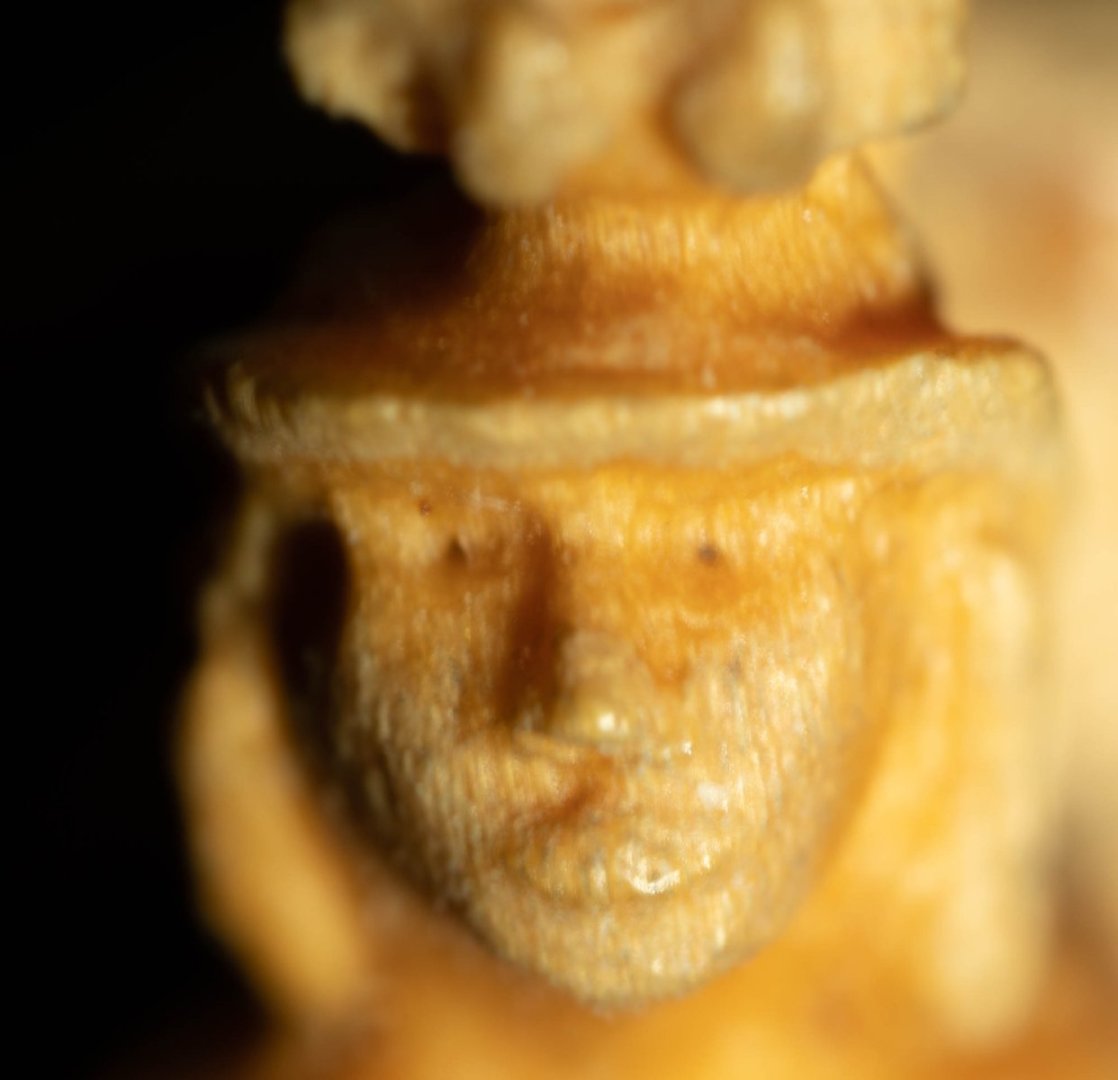
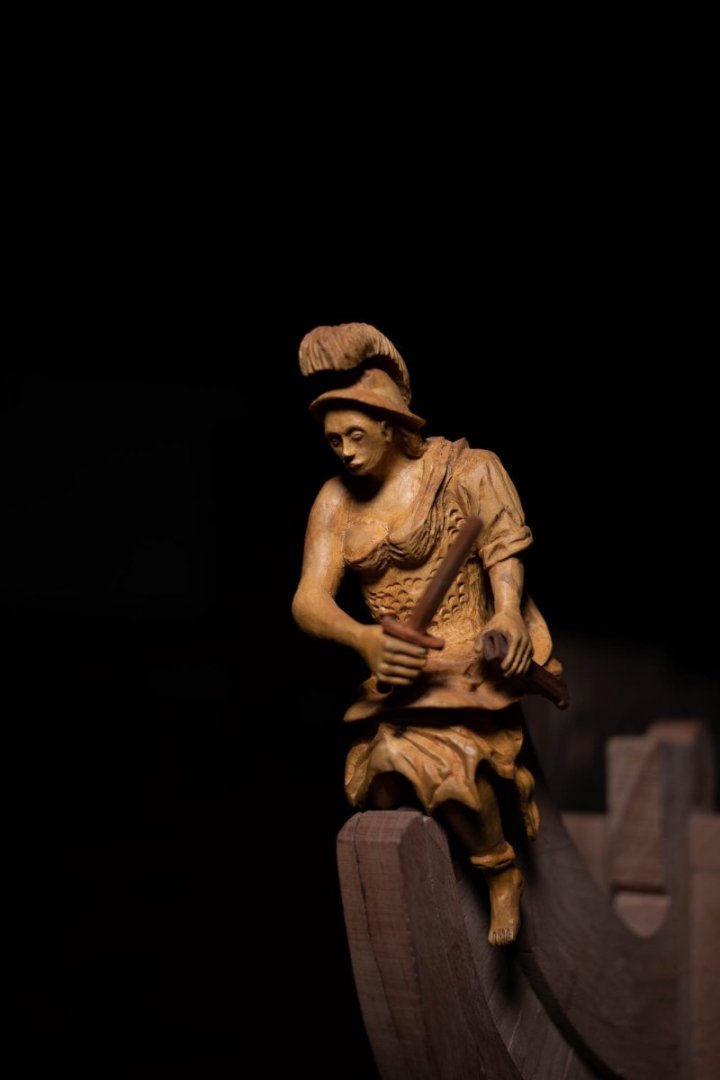
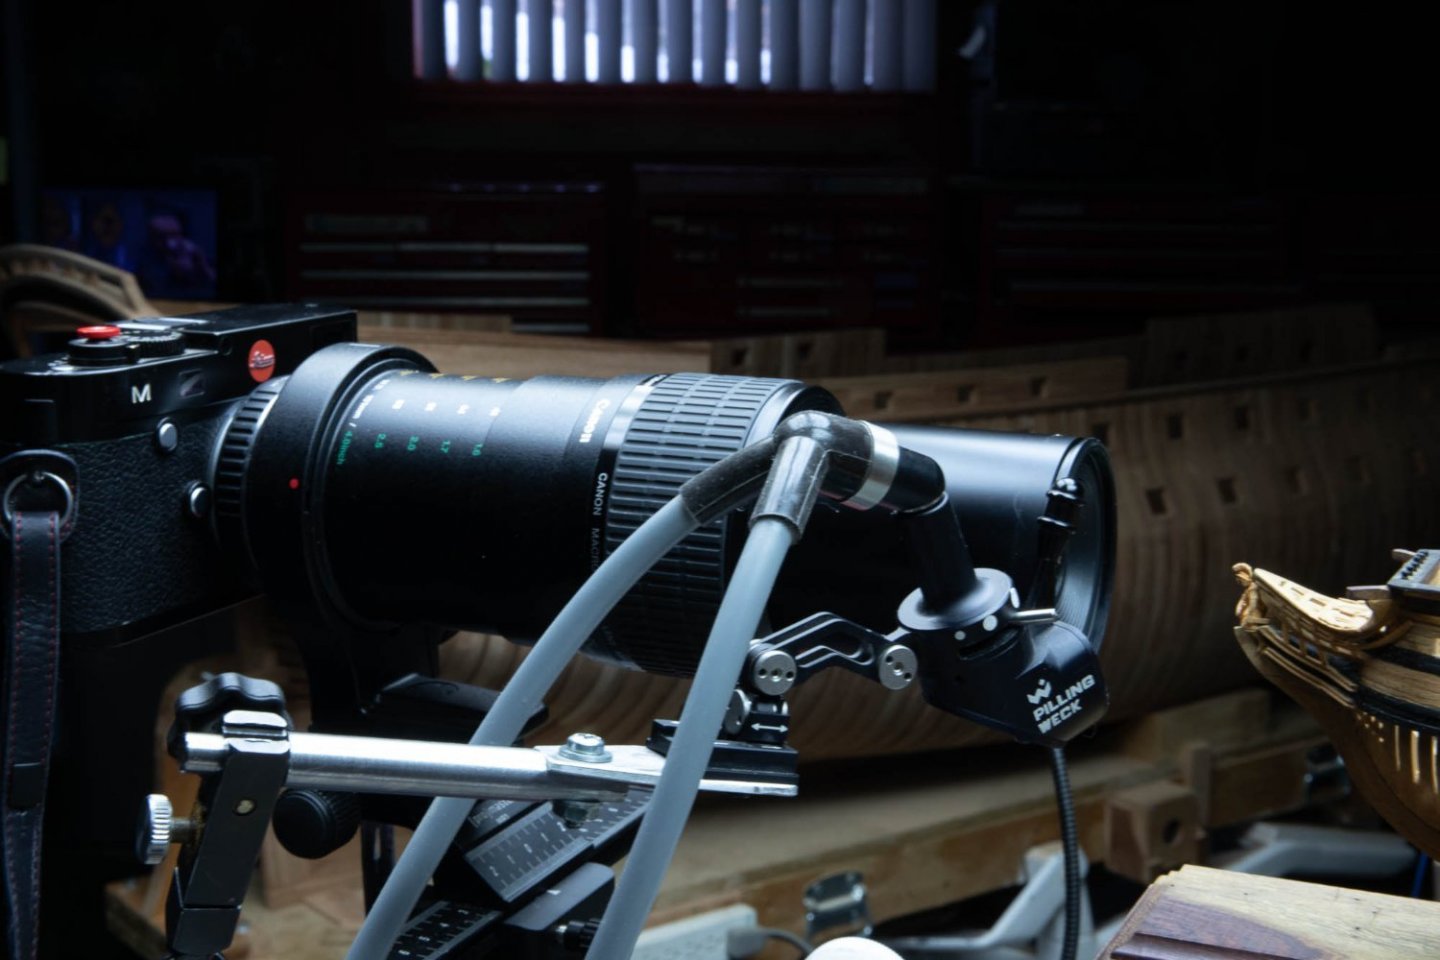
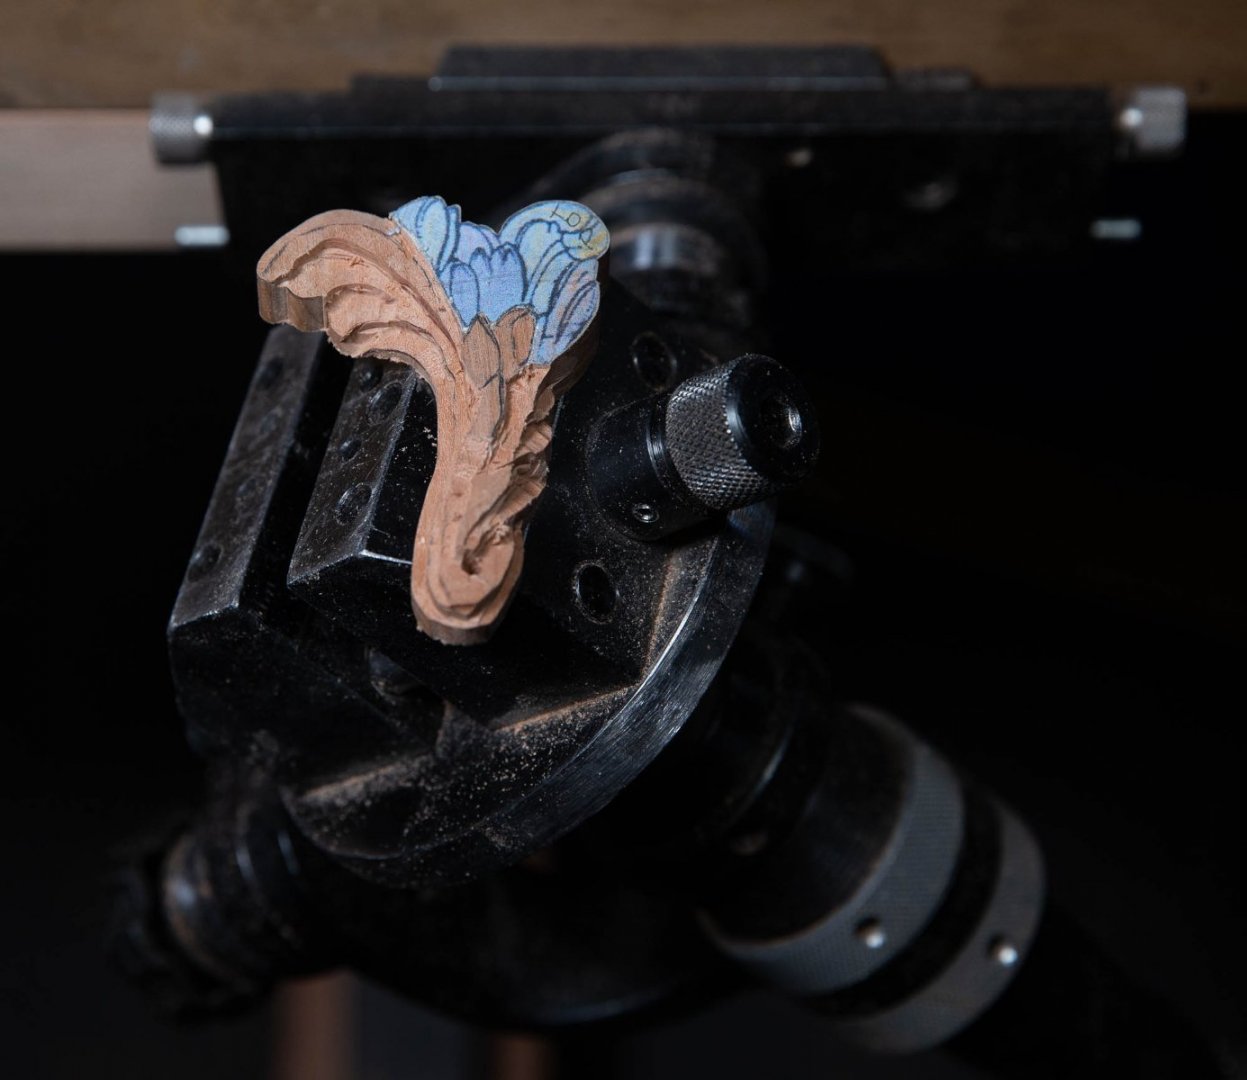
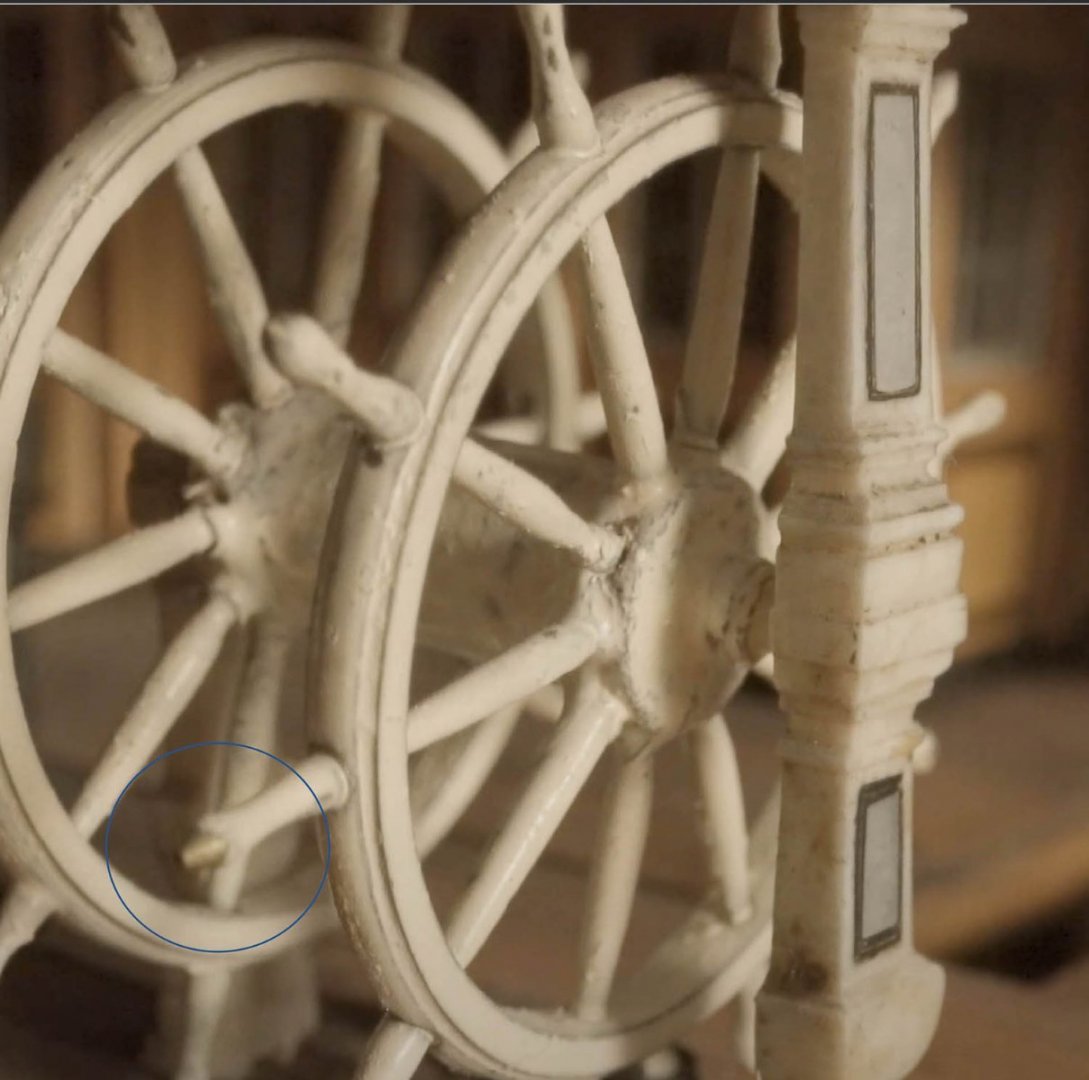
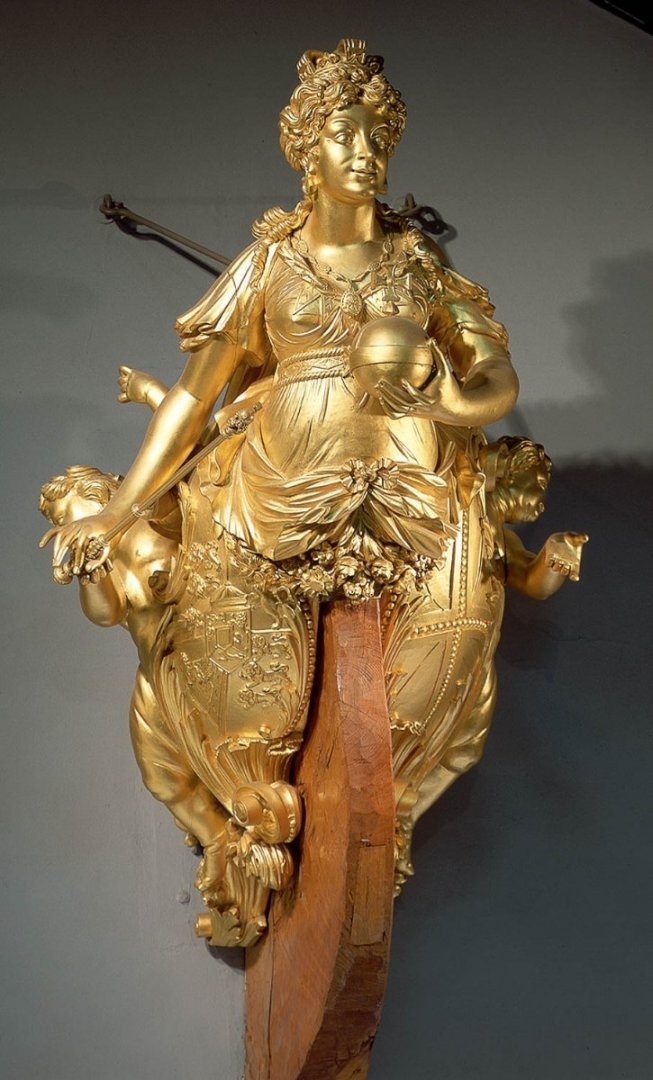
Hi Ron, yes I saw these but opted for Canon MP-E 65 mm F/2.8 x 1–5 x. Here is an example of a figurehead at 1/192.

-
High torque, really low speed drill
Gaetan Bordeleau replied to Brinkman's topic in Modeling tools and Workshop Equipment
50,000rpm is for metal. Many operations works better at that speed instead of a lower speed 1000 rpm is the lower speed 2 ways to adjust the speed: roughly by the pedal or precisely by a control knob this one has a lot of torque , it extremely quiet and it is brushless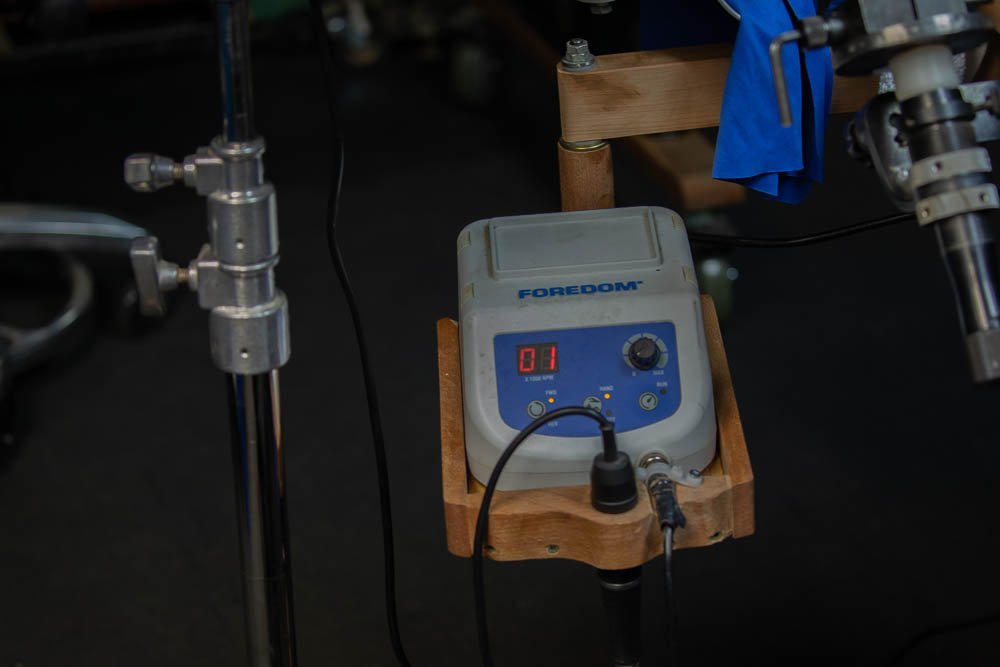
-
Dremel rotary tool?
Gaetan Bordeleau replied to Mark m's topic in Modeling tools and Workshop Equipment
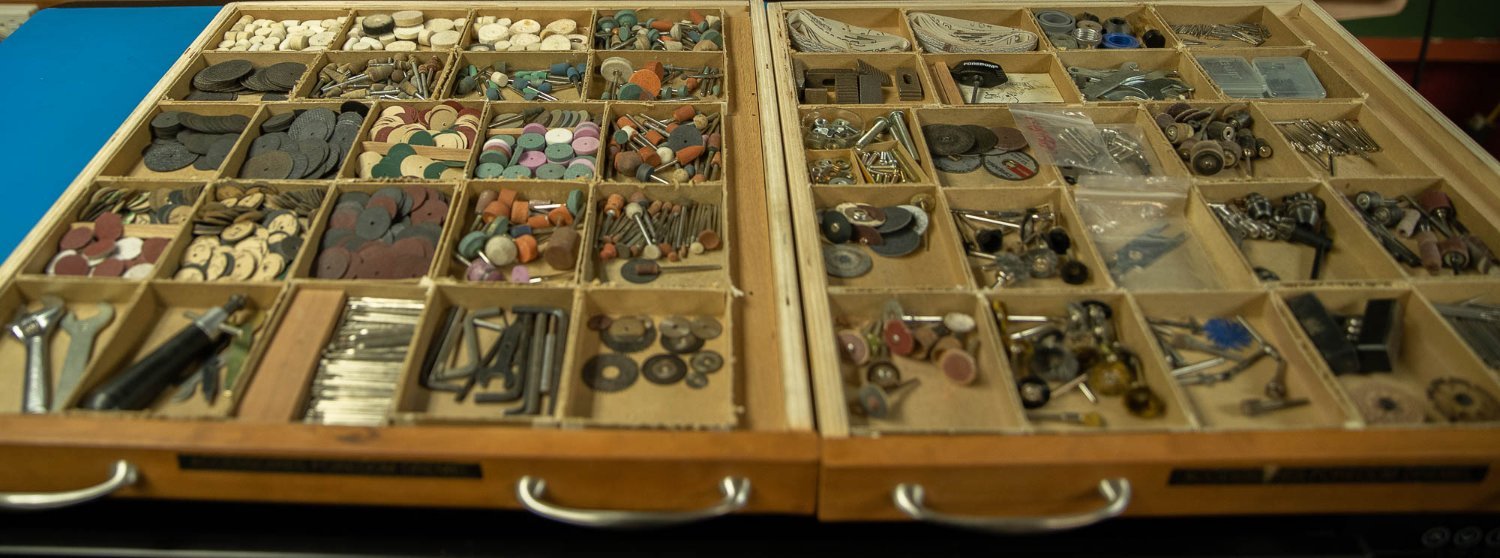
I am surprised by all these answers. The fear to ruin a part looks like to be a stop to use a "Dremel". Knowledge of this kind of tool also looks like to be missing, and writing that it is not intended for delicate work is a good example. There are many kinds of rotary tool. Dremel have always been popular and affordable. Again, jewelry tools come to help us in our hobby. Foredom offers many kinds of electric motor. Flex-shaft were very popular but the biggest problem is the rigidity of the shaft but still, it is possible to do extreme delicate work with it. By example, I did a figurehead at 1/192. Speed is control by a pedal and, personally, I do not like this system. We rarely need to change speed during an operation and it is easier to change it with a dial. Then torque of these engine is great. the low speeds are very useful. Foredom, since few years, came with a new electric brushless micro motor: much lighter than a Dremel, as strong as flex-shaft and adjustable speed up to 50,000 rpm which is use to remove metal. I think that the best advise I could say would be dare to try and experiment this tool, you will be surprised how precise and useful it can be. -
Dremel rotary tool?
Gaetan Bordeleau replied to Mark m's topic in Modeling tools and Workshop Equipment
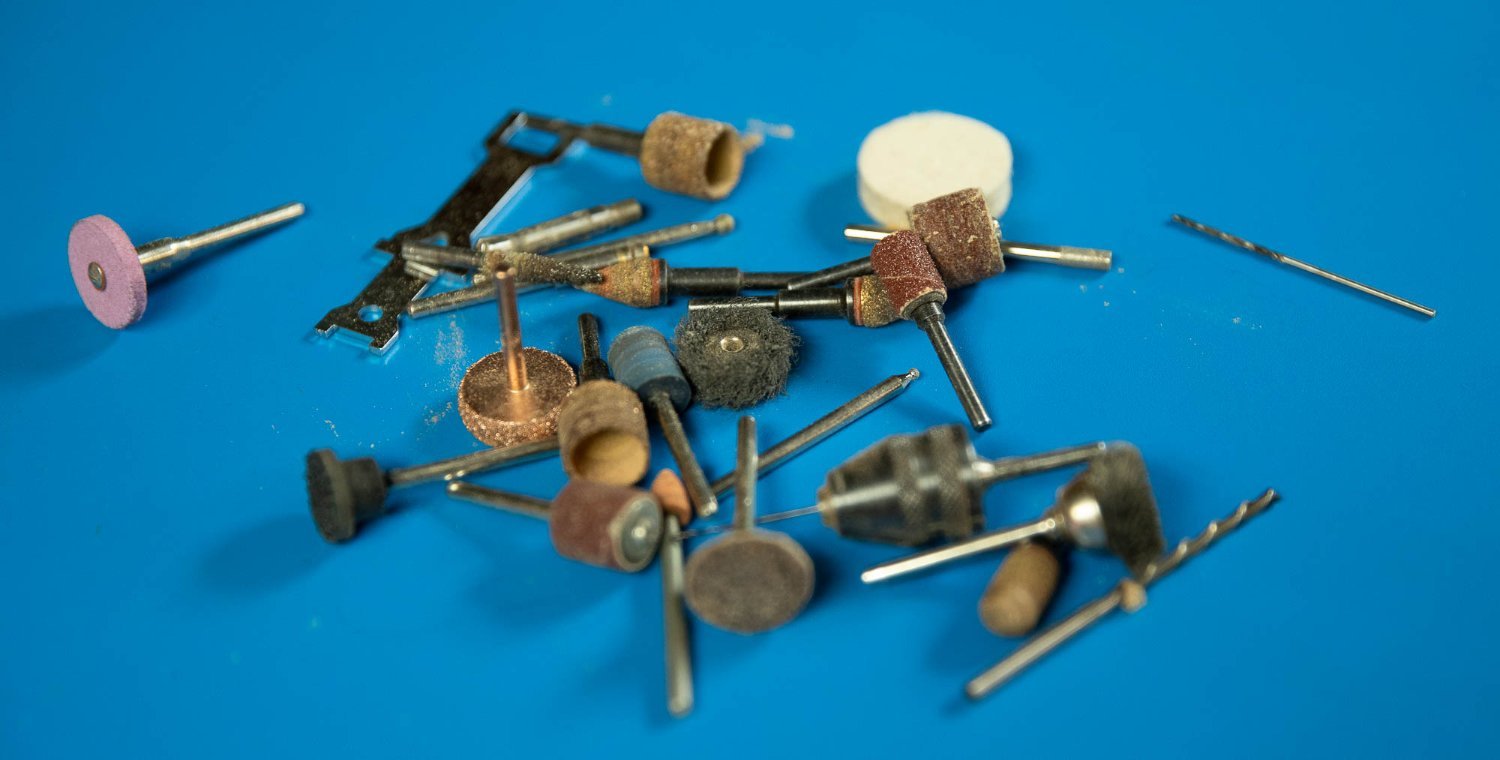
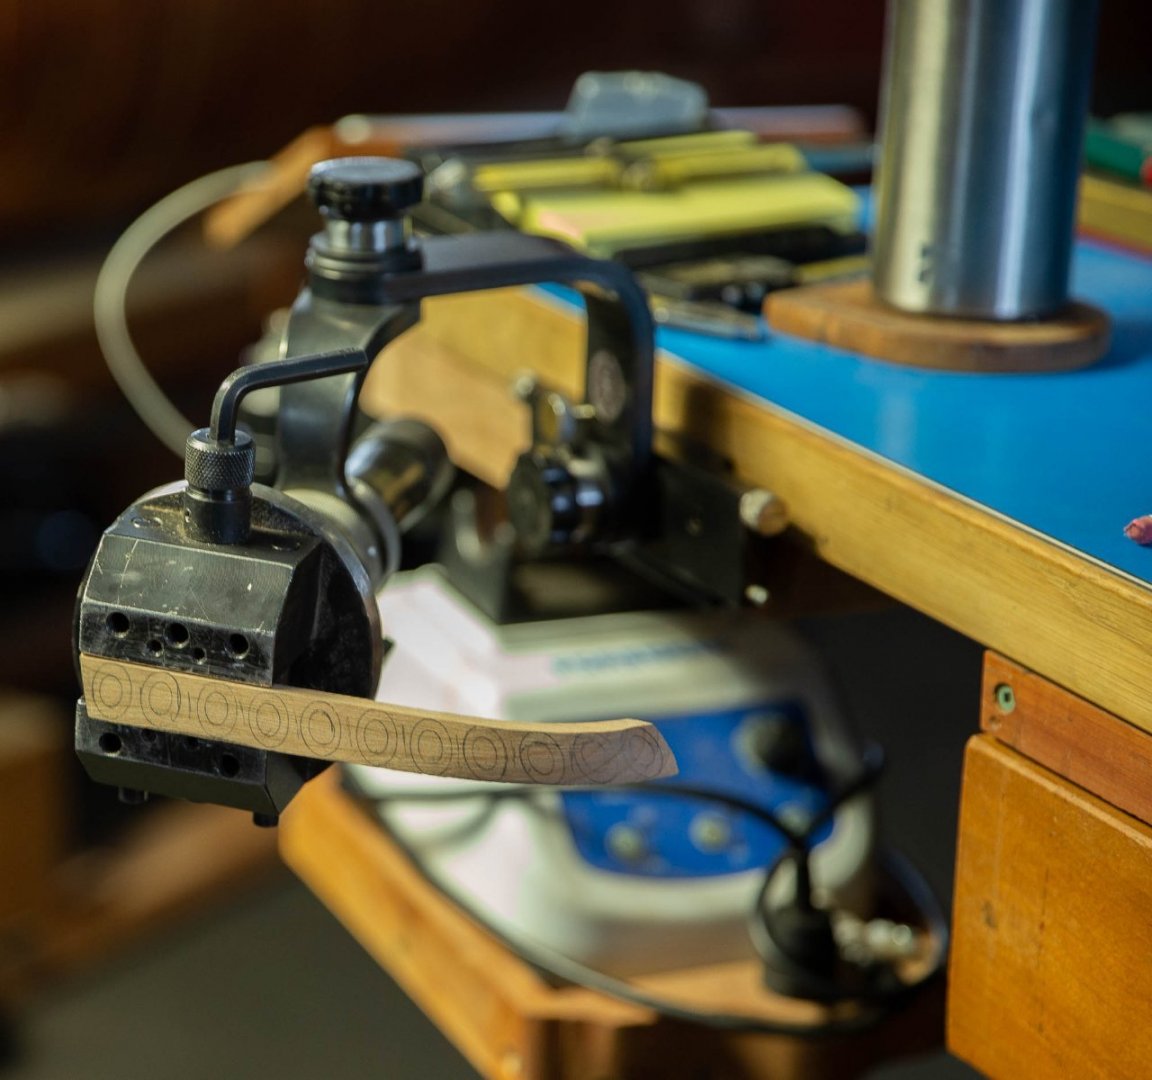
A rotary tool by itself is useless. It is the diversity of the bits that you use that makes it very useful. On the second photo are the most commons ones, that I use almost every day for wood and metal.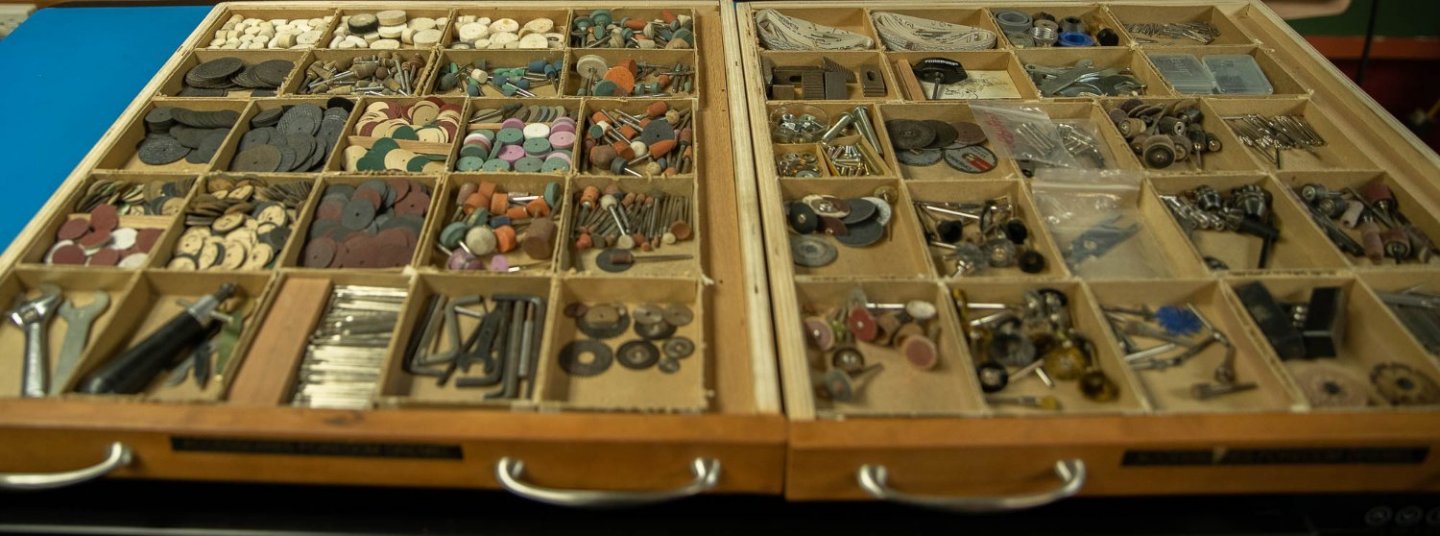

-
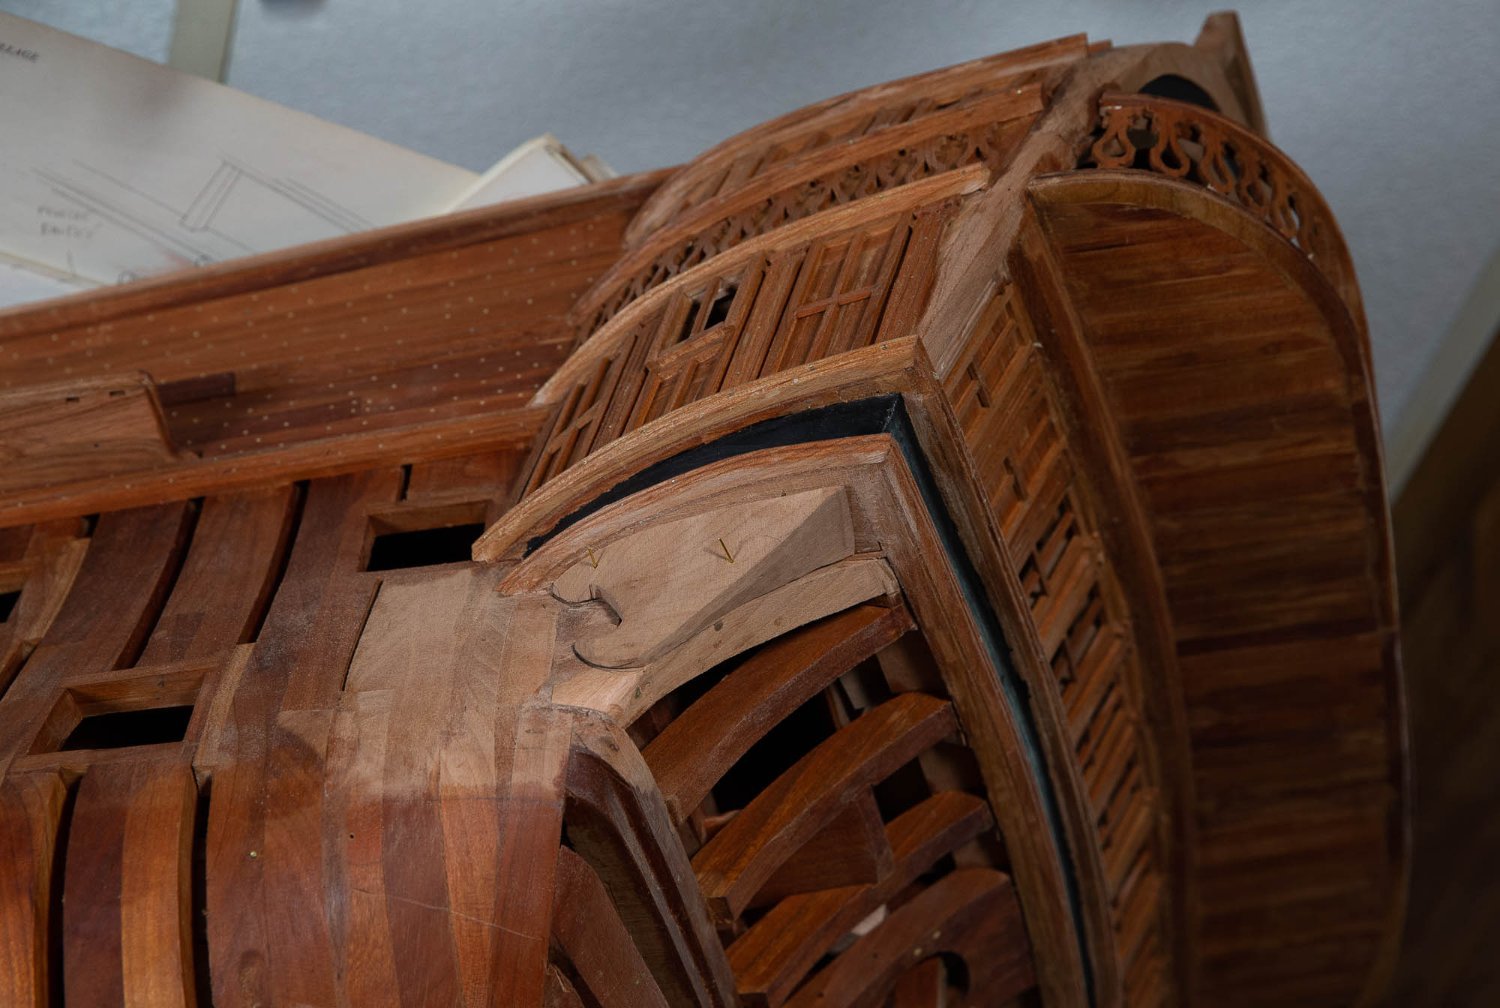
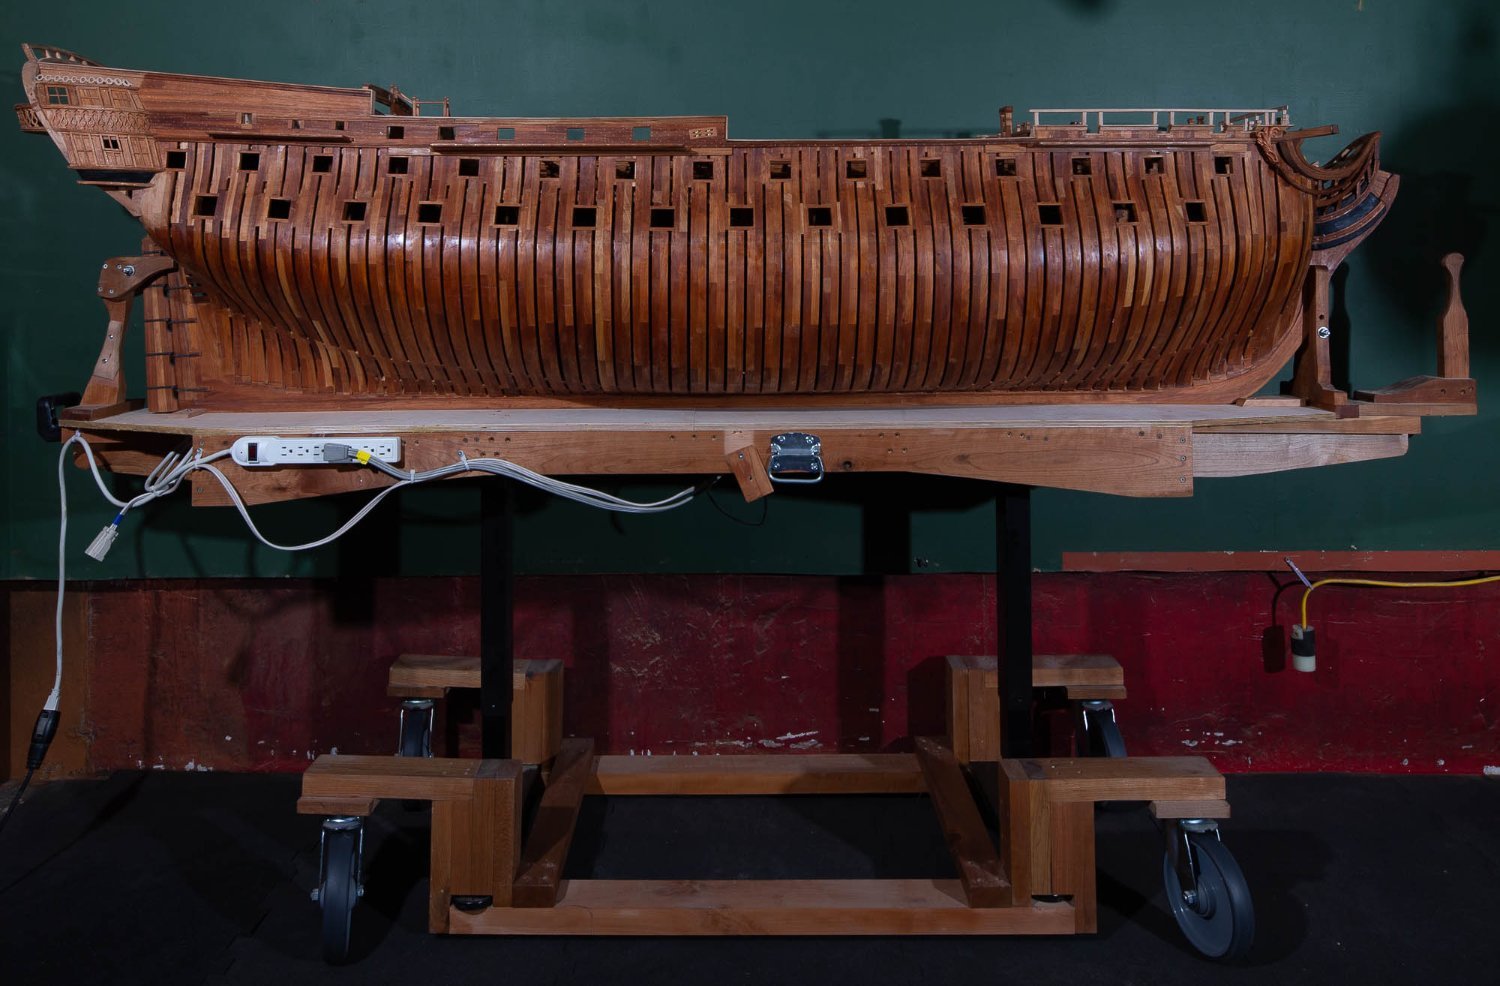
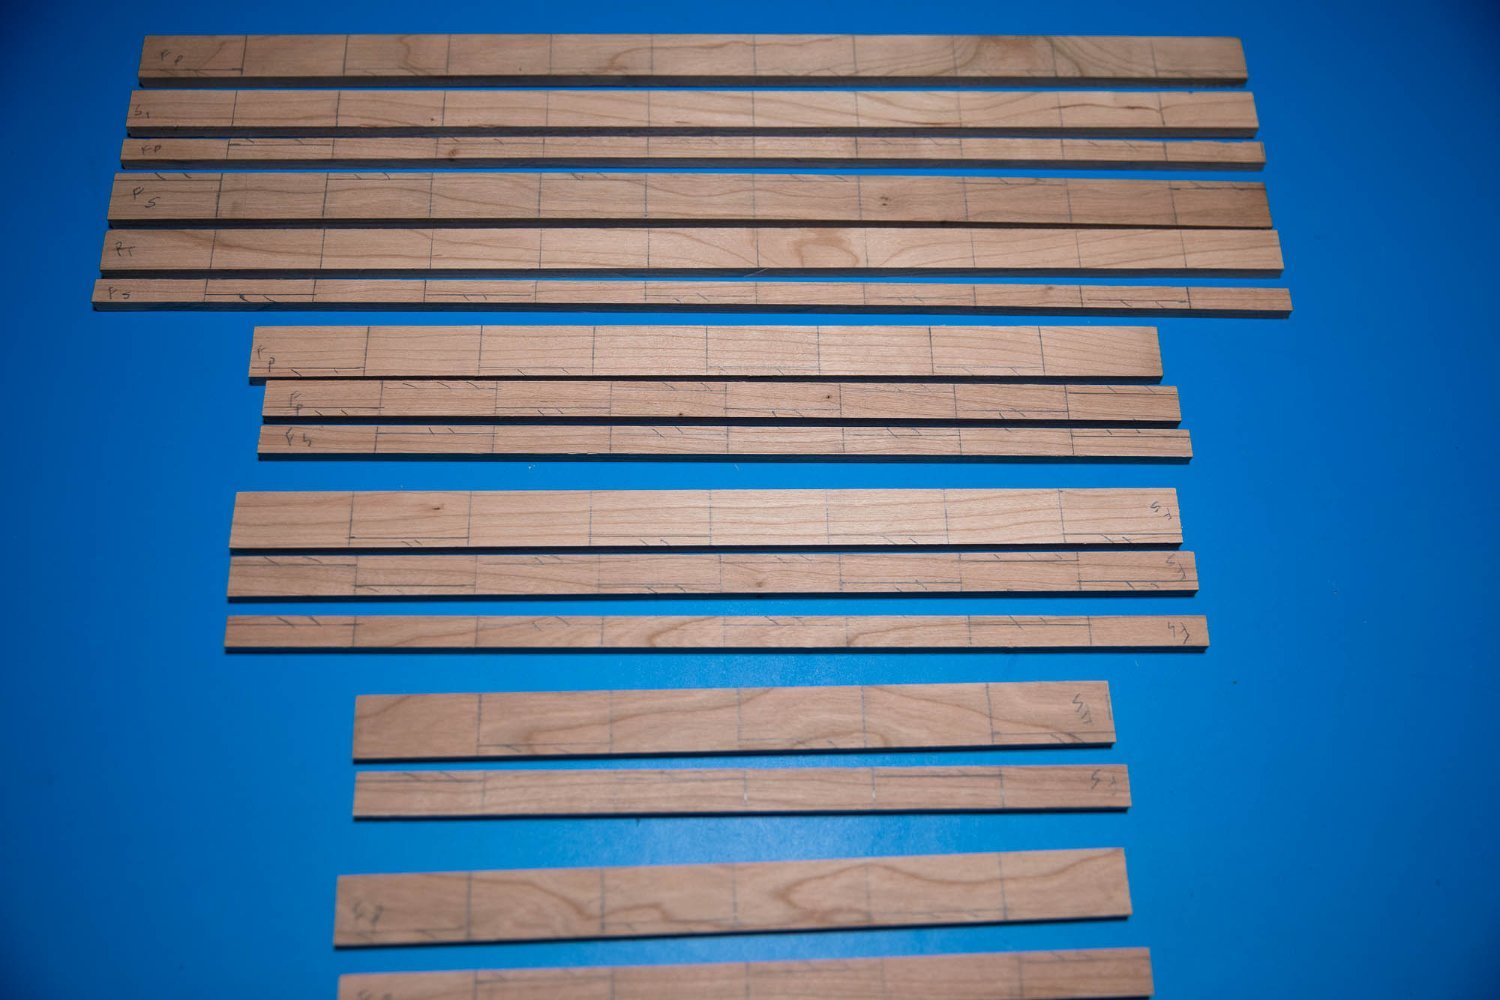
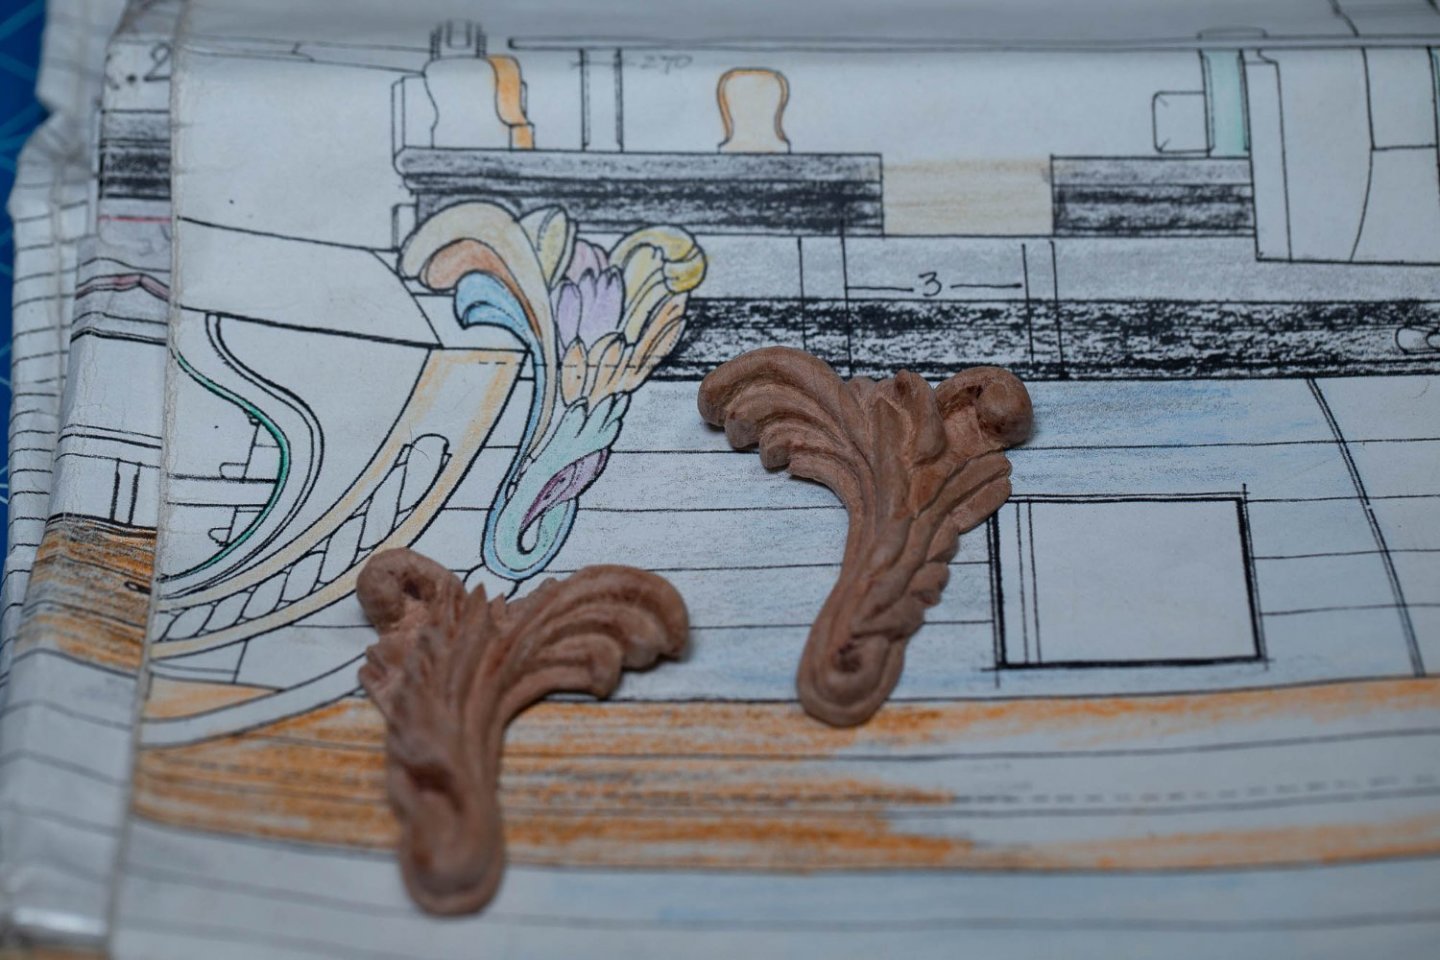
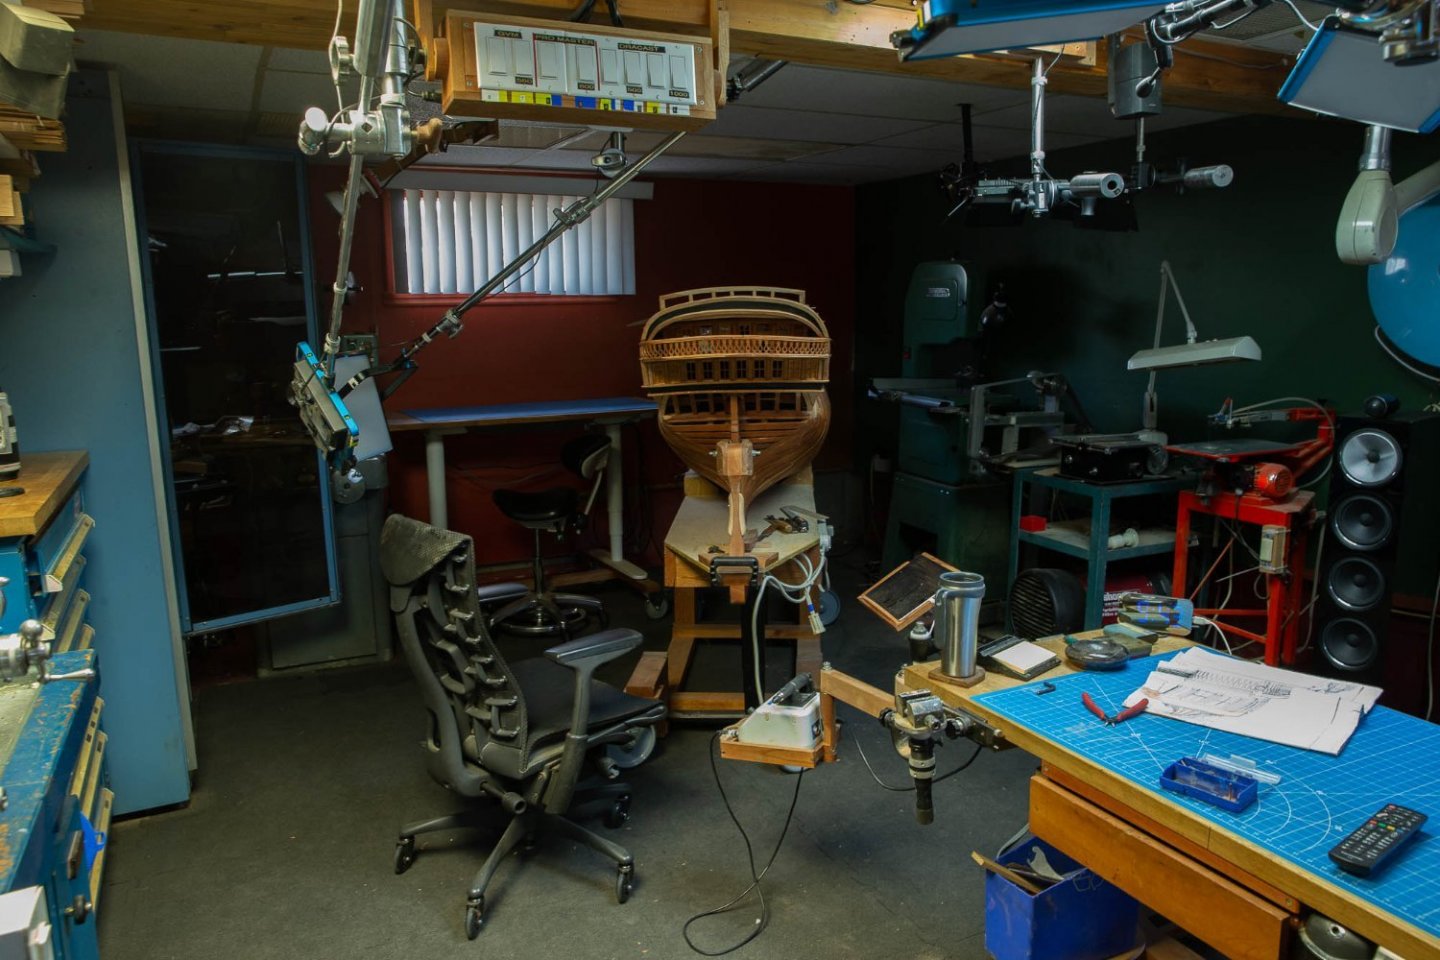
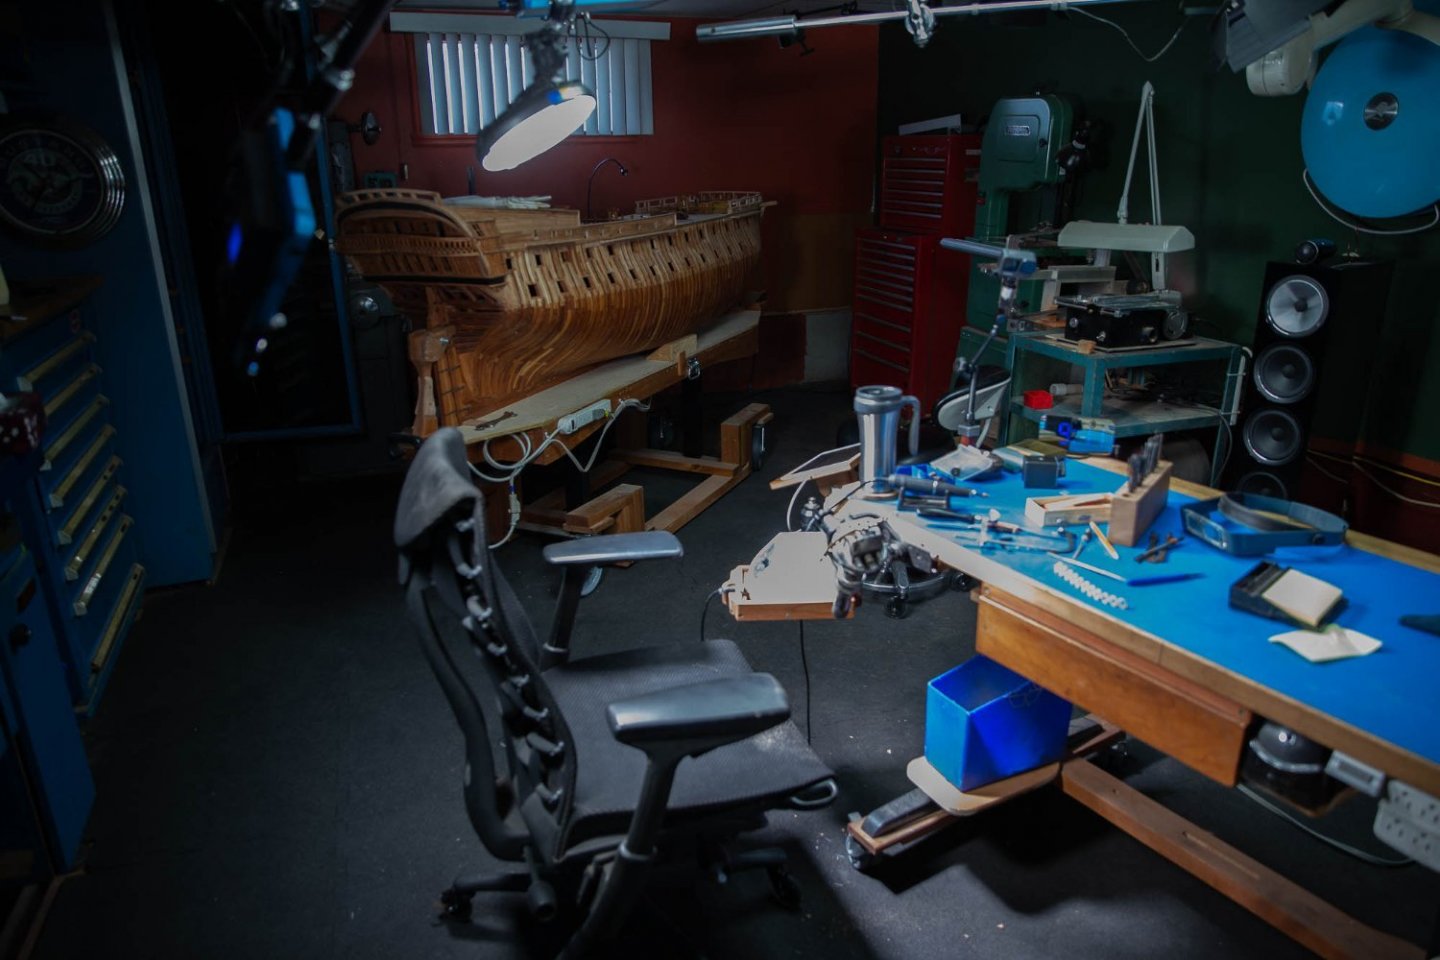
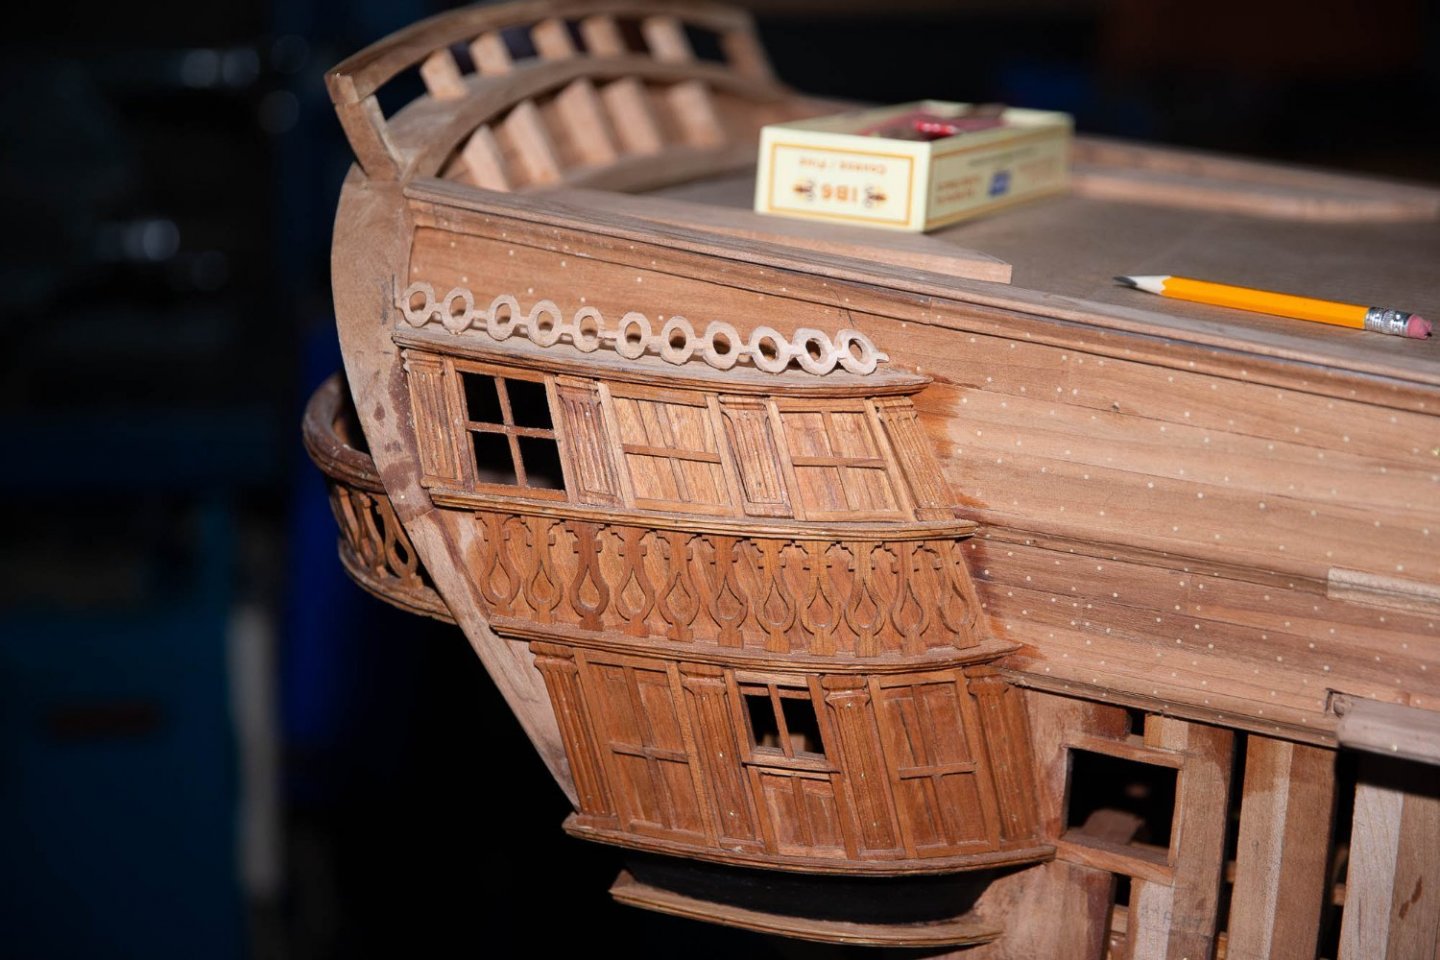
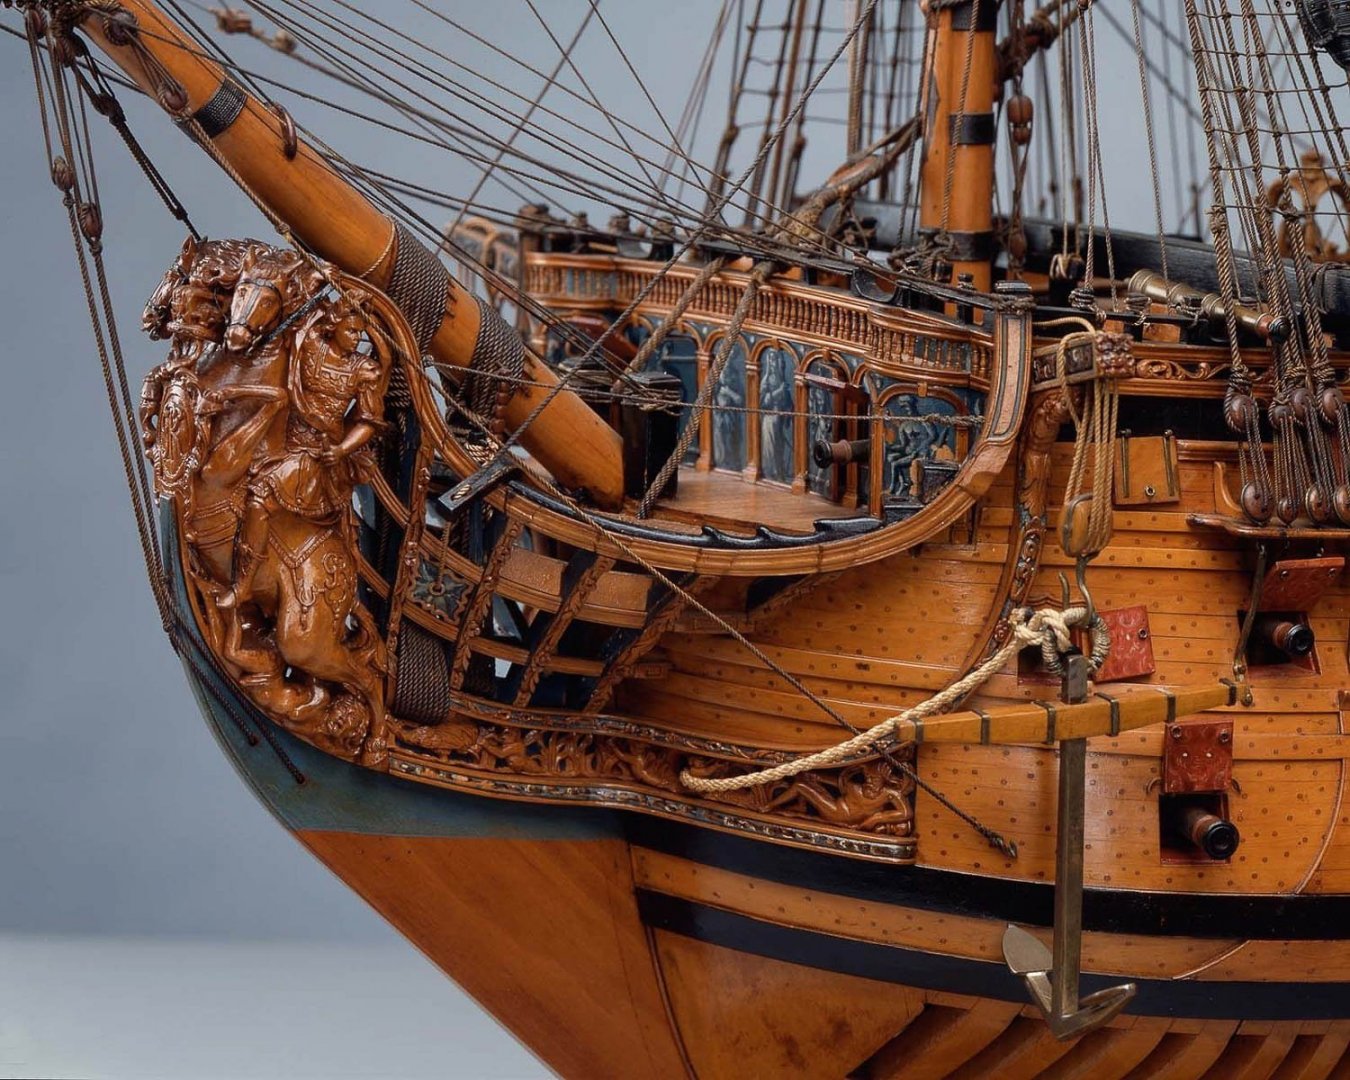
Scale is the first factor to consider. Which part with what level of details is the second one and finally what wood to use? Roughly, we can divide the carvings in 2 parts: human with fine details like the hands and face, decorations like flowers. There are still many experiments to be made with different woods than boxwood. Pernambuco, ivory wood could be good examples of dense wood with fine grains which could be good. The safe way to use a wood that can take small details is to use boxwood. Boxwood takes details of a figurehead as good as at 1 /192 and 1/24 scale. But all the carvings do not need extreme fine details. Cherry is perfectly suitable for general carvings One last point, Color, for this build, up to now, is made 100% from cherry wood. Ideally, I would like to use cherry for all the carvings, but unfortunately this wood will not take the fine details. The same thing is true for apple wood, I tried it for another figure head. Ideally, I would prefer the figurehead would be, also from the same wood, as the ret of the build: cherry wood, so that int this specific build, every part could be the same color. There are many choices that a model ship builder has to deal with and the main rule should always be: it has to look harmonious. Tree nailing is a good example. It should be visible from close but not from far. If the contrat is too big, the eye will only see the nails, not the ship. What is the last photo? Lighting in the working area is done by 8 LED lights mainly. Lat week, Our electricity company installed new thermostats, switches and electrical outlets. Every device is controllable via an app. I used the 4 electrical outlets to control the lighting with an Ipad, near the desk


-
next step will be some carving


-
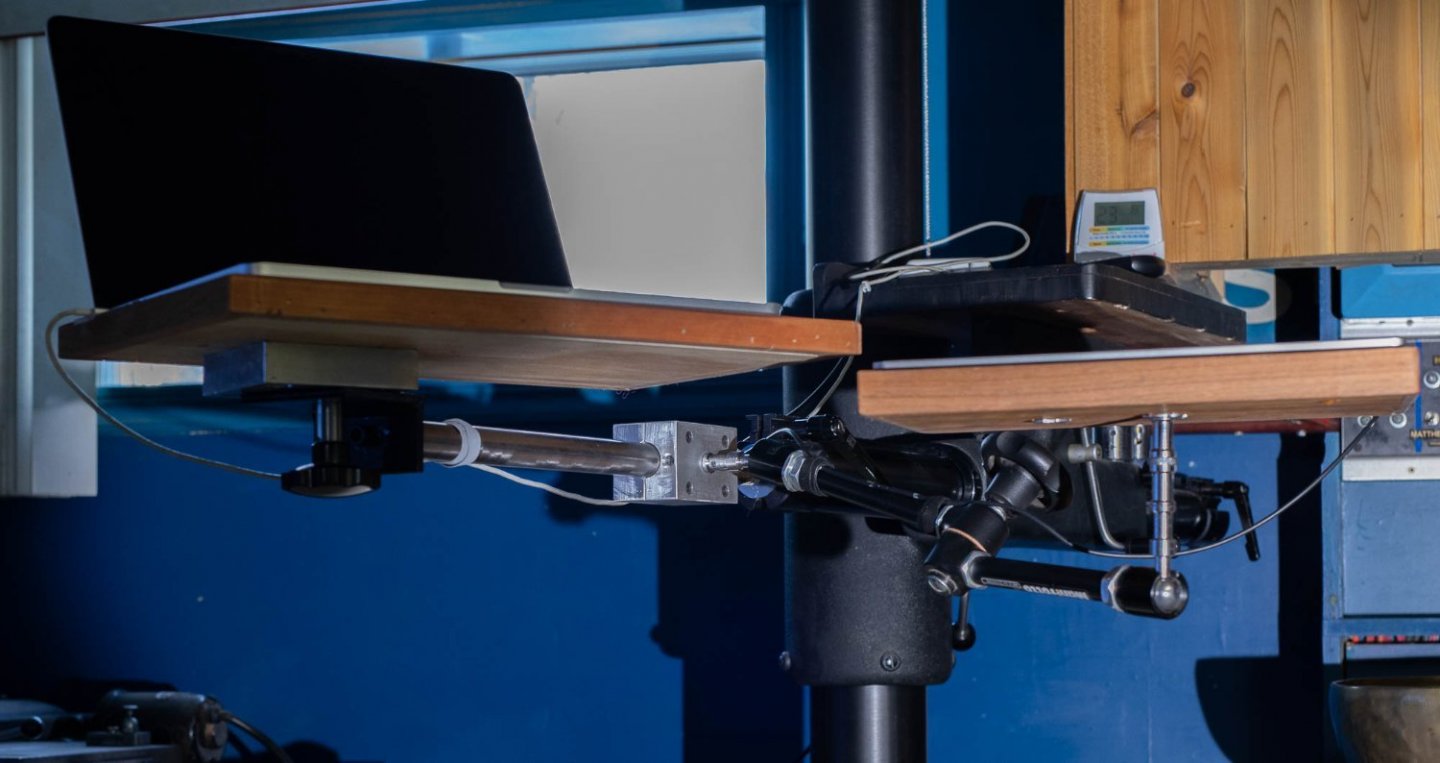
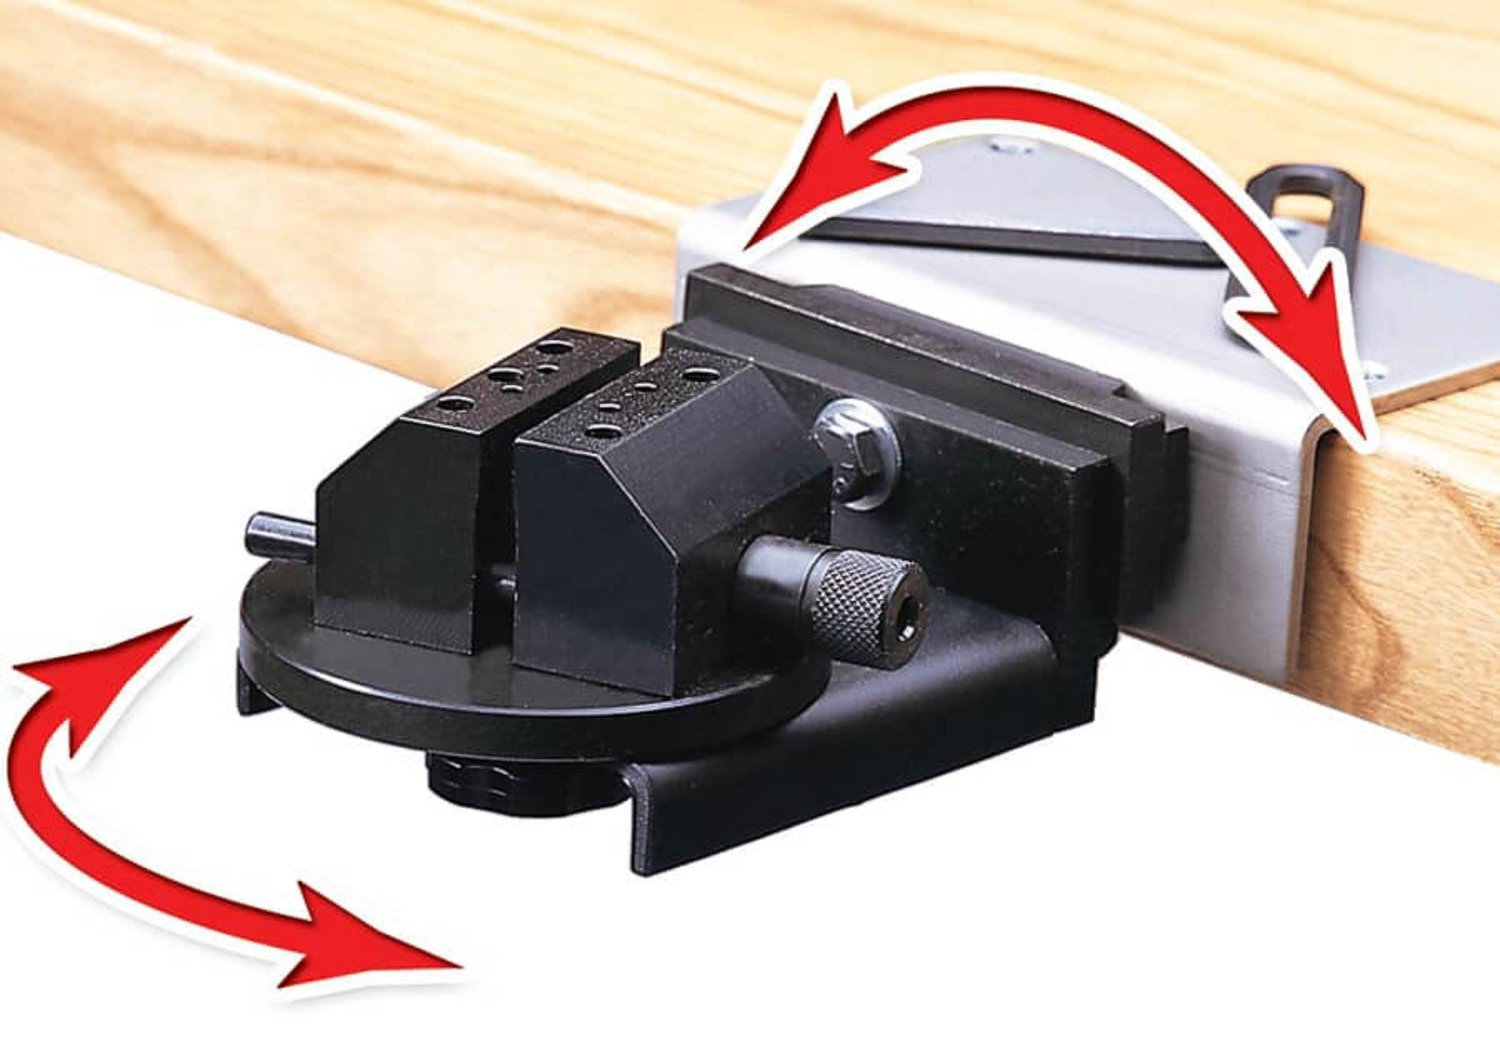
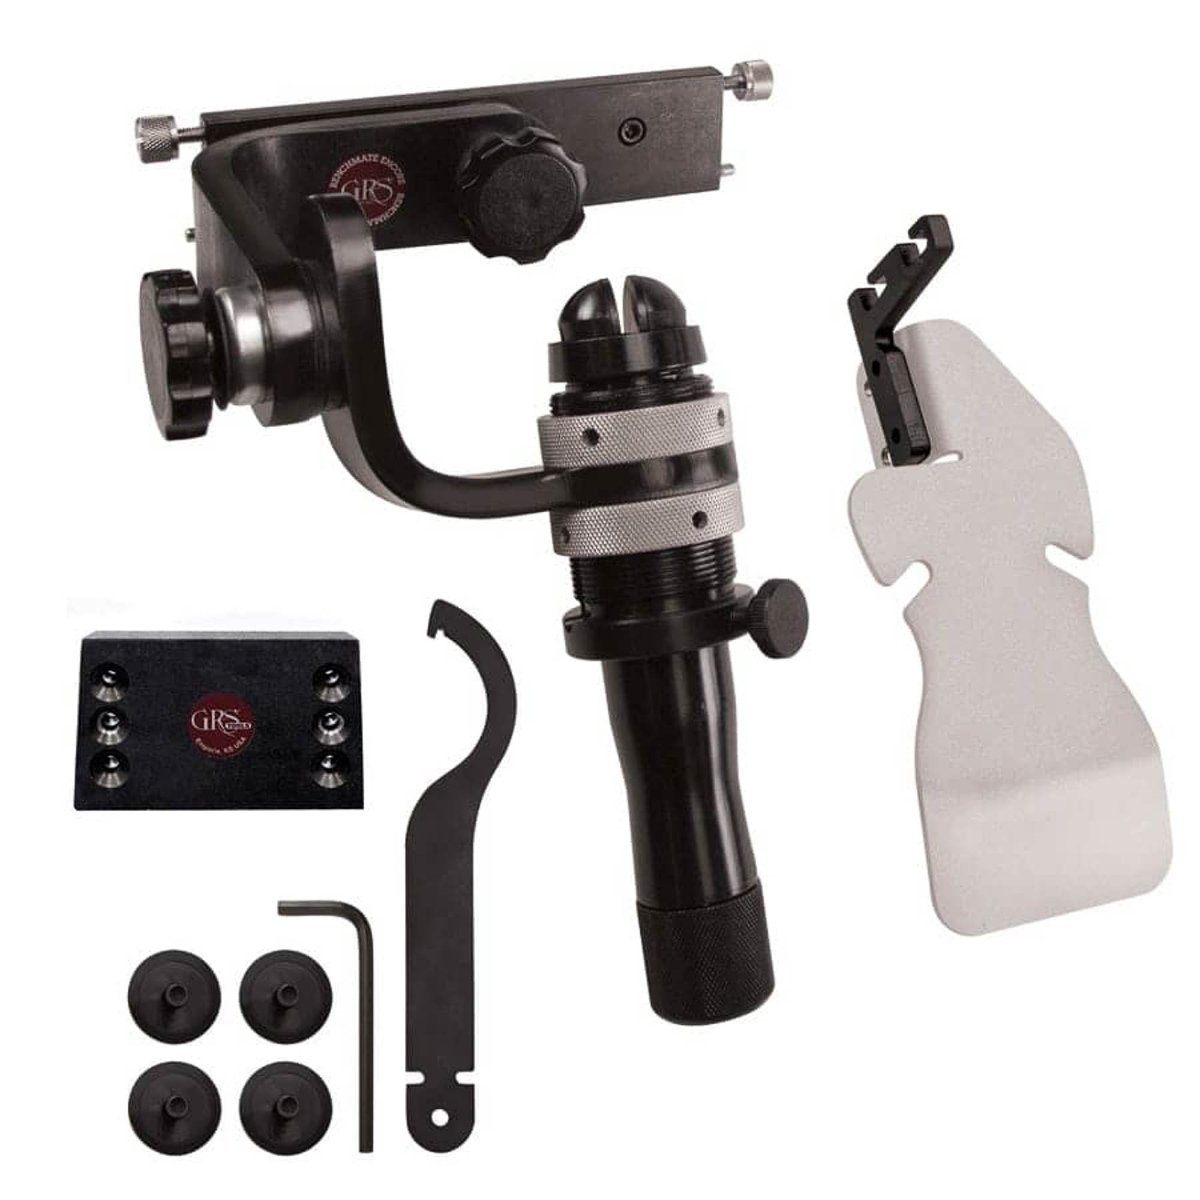
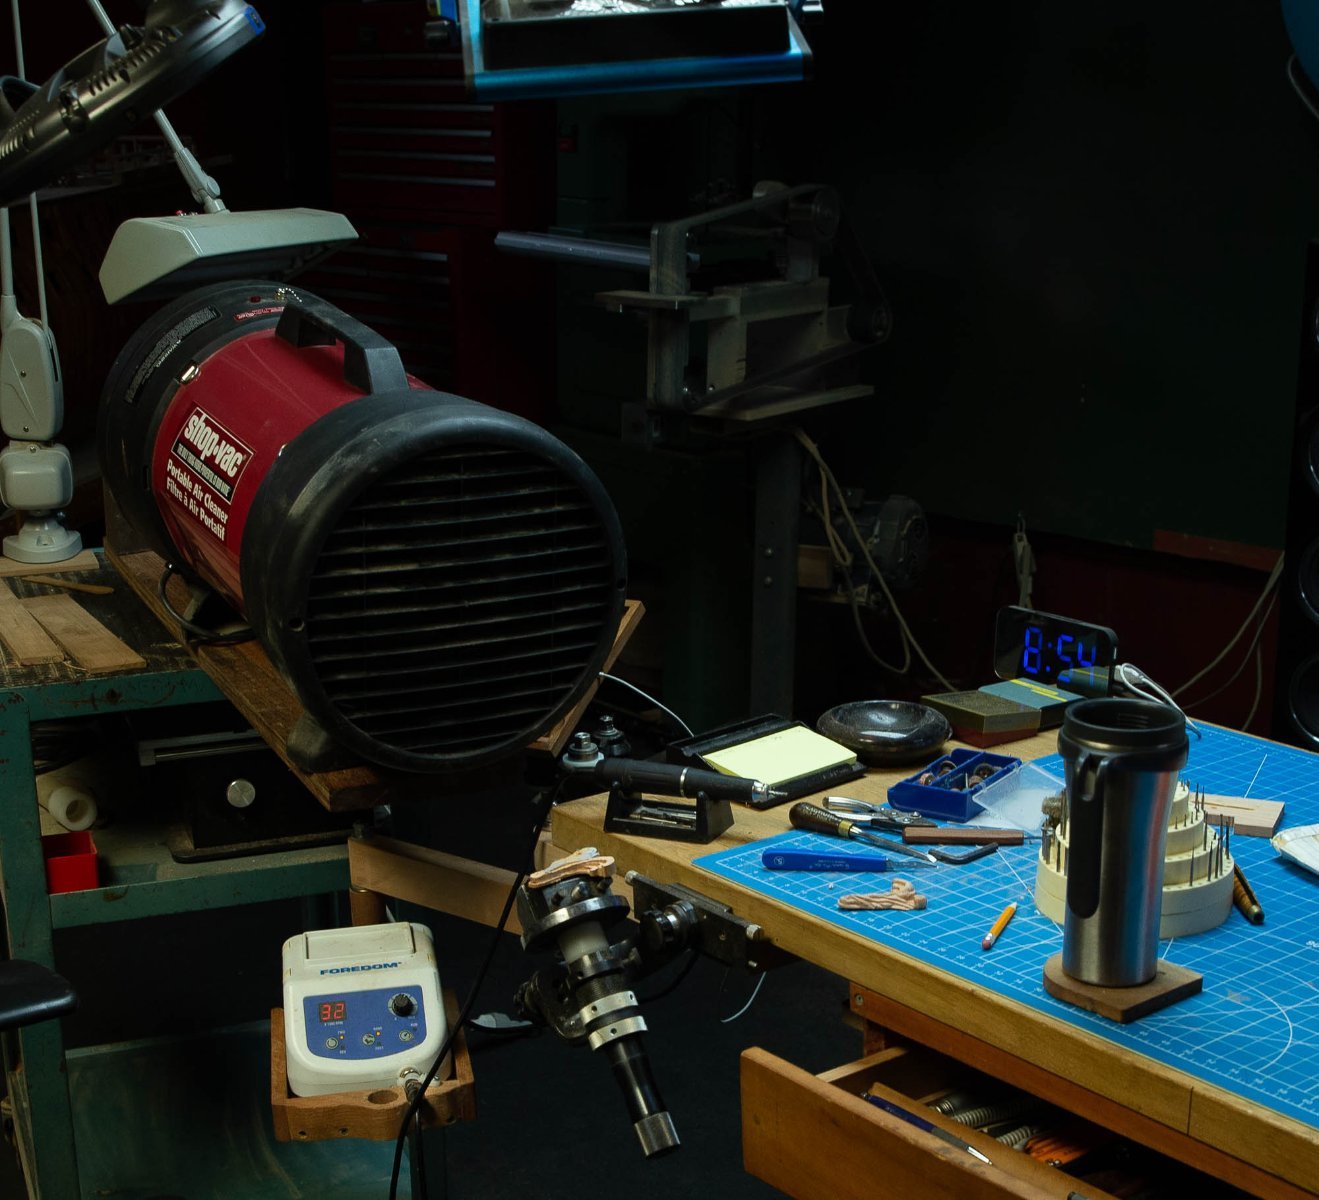
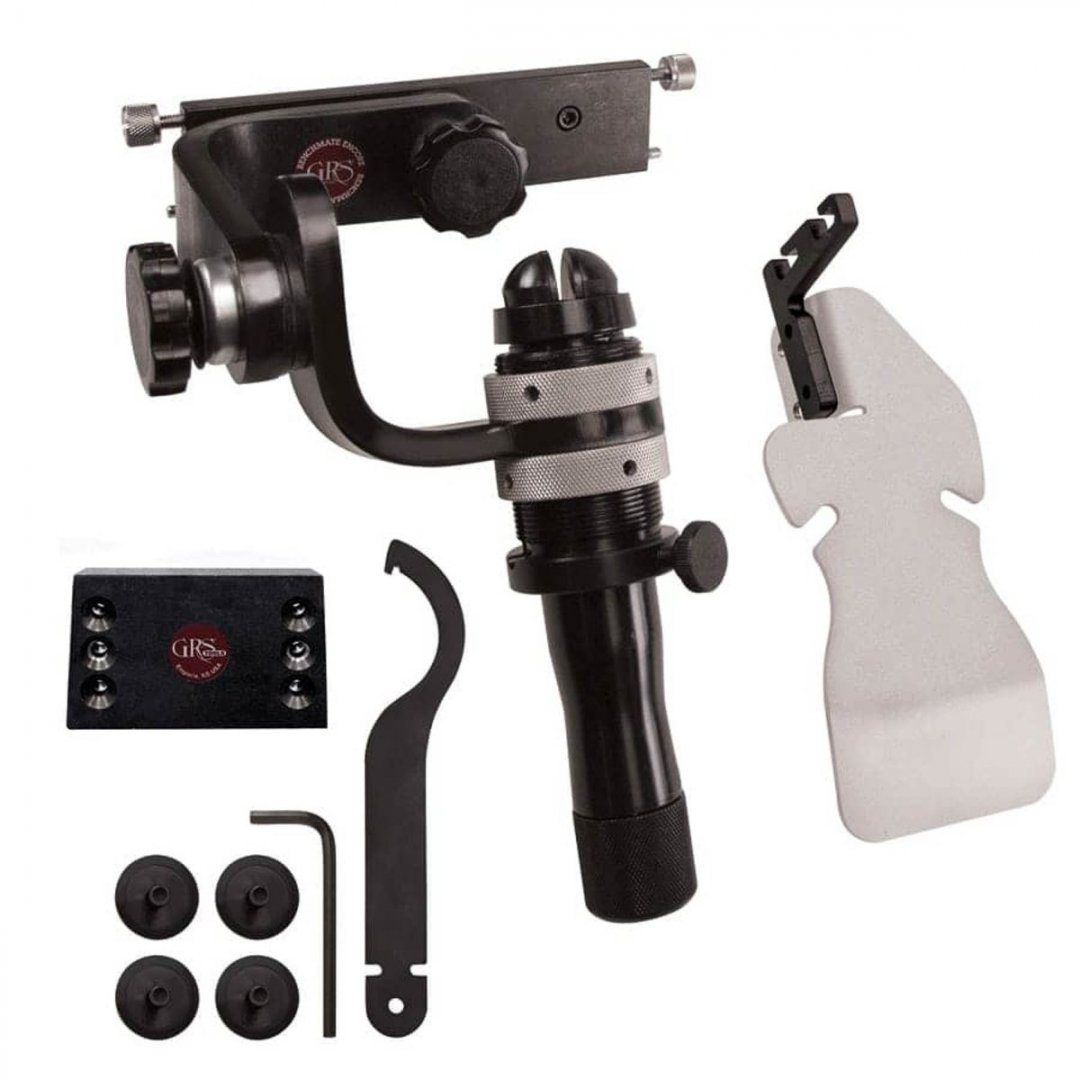
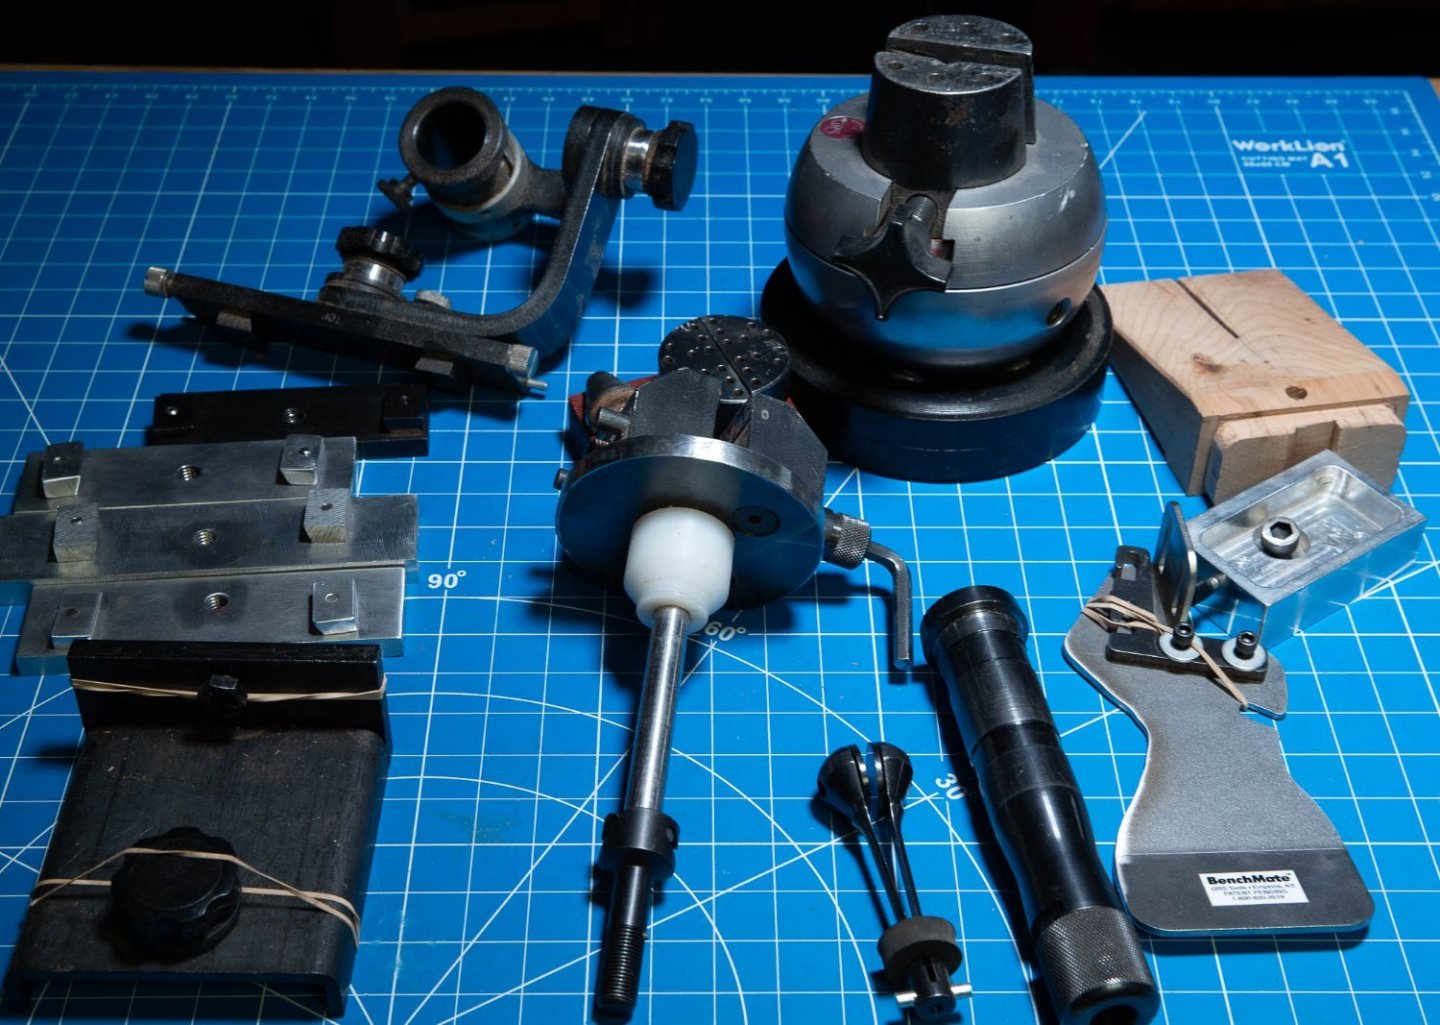
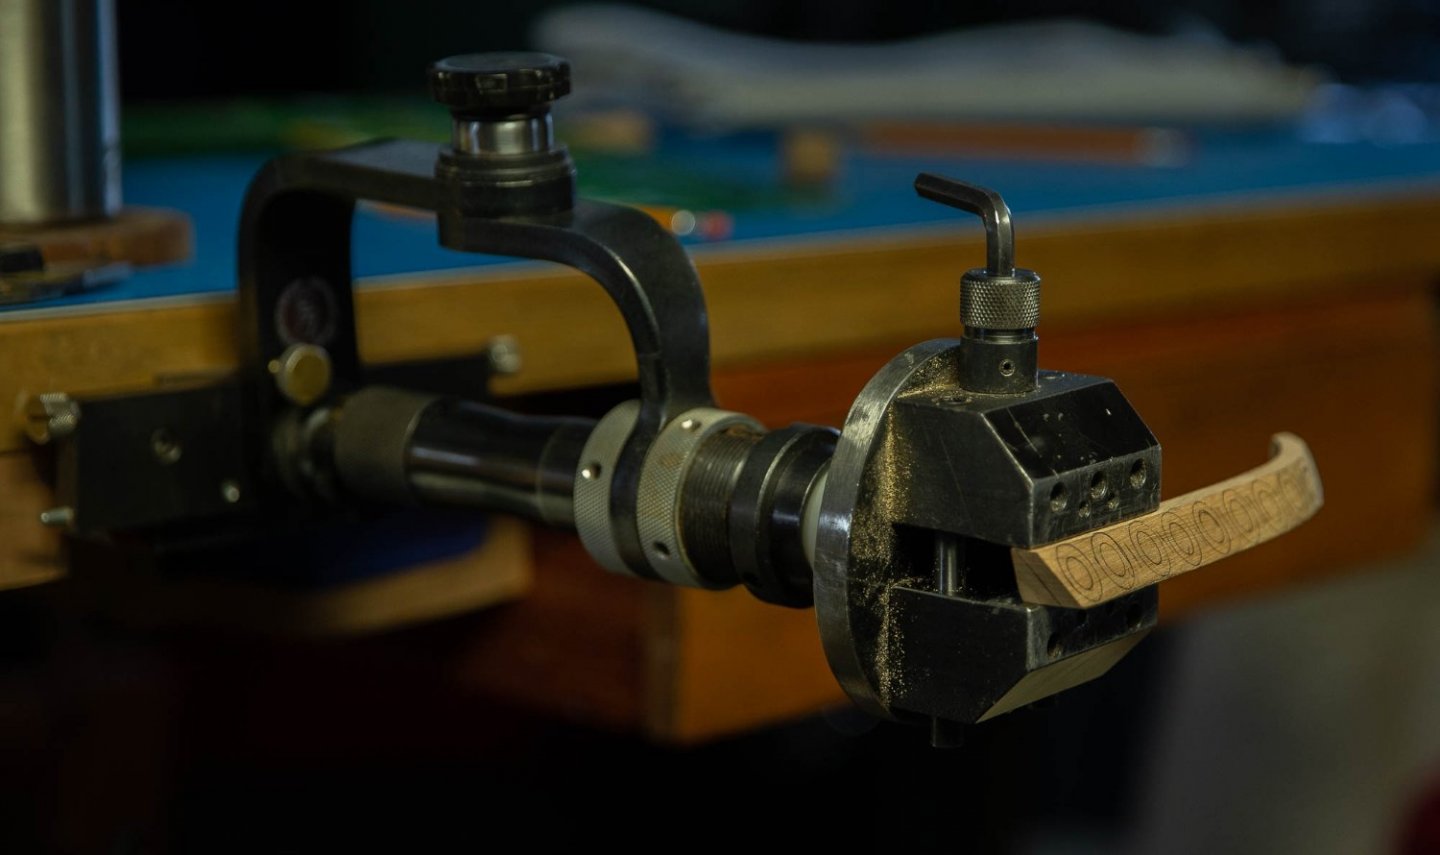
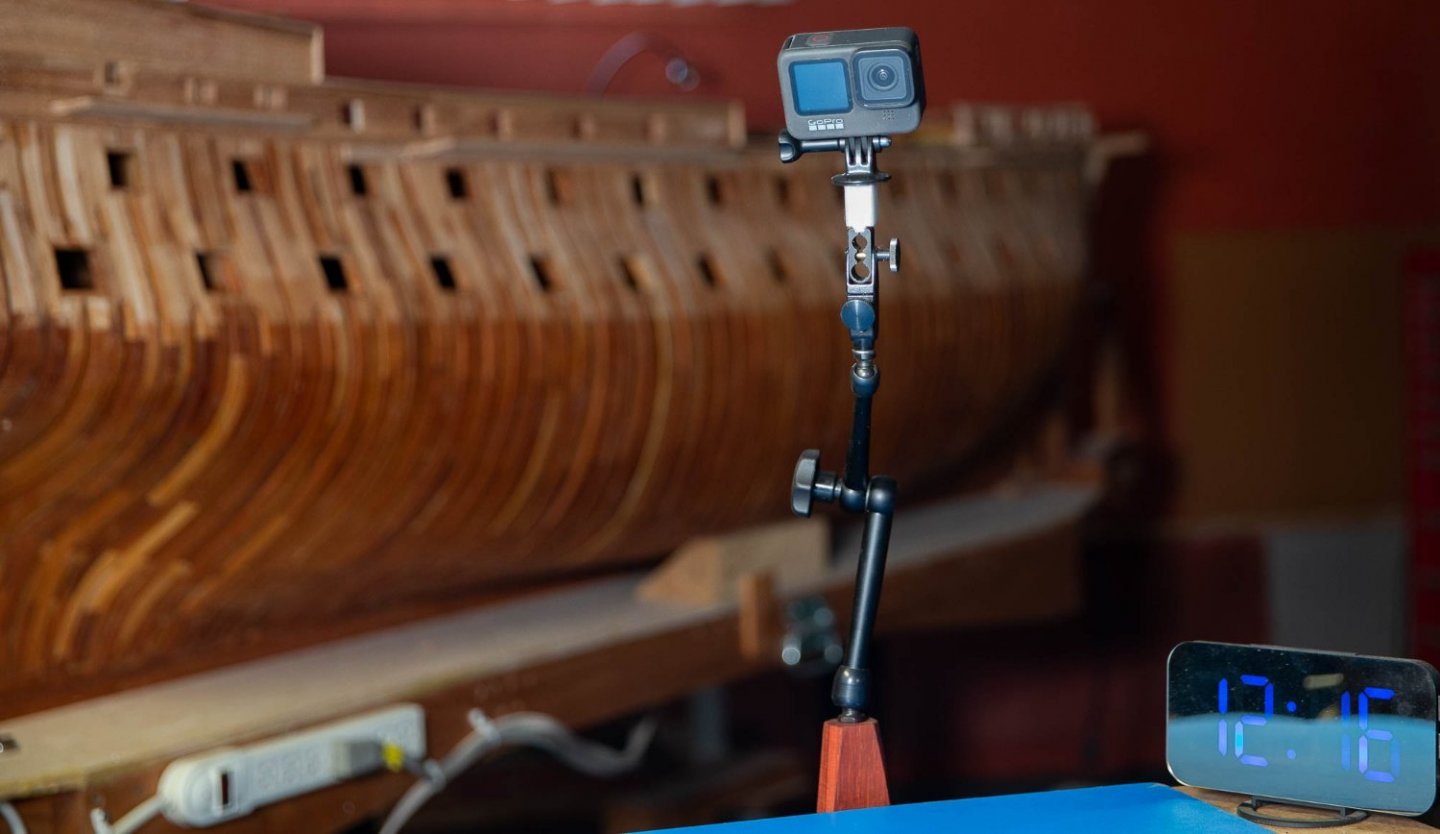
GRS makes some good vises for the jewelers. Rigidity is the first factor and the second one is the positioning. I began with a GRS Microblock Ball Vise. Although it can take 3D positioning, it does not lock on a position. I guess it was created for the engravers making circles. Then I tried the multi purpose vise. The vise itself is very well done and sturdy and it is done to rotate in 2 axes. Then, I discovered the BenchMate Encore QCX. It does have 3D positioning but it could be improve by rescaling some parts. Although this vise is very good for positioning, it is made to be used for a jewelers making rings, it does not have a vise. For years, I wanted a vise that could adjust in #D and always be lock. Finally, I saw that there was 2 tools which could the job, I just had to make an adaptor to combine the holder and the vise which is a screw rod between the vise and the holder. Also, this vise is easily remove from the table. A tapered plate easily hold the assembly. I can easily fix on the side of the table other combination. I did many variation to hold camera tripod heads.

-
figurehead


-
Before, if I remember correctly, it was 2000, which is a good size for a monitor, now at 1500, it is less flexible. Very few people used 2000, so adding the fact that there are a lot of photos on this site, there was probably no reason to keep it at 2000.
-
what is the maximum size to post a photo?
-
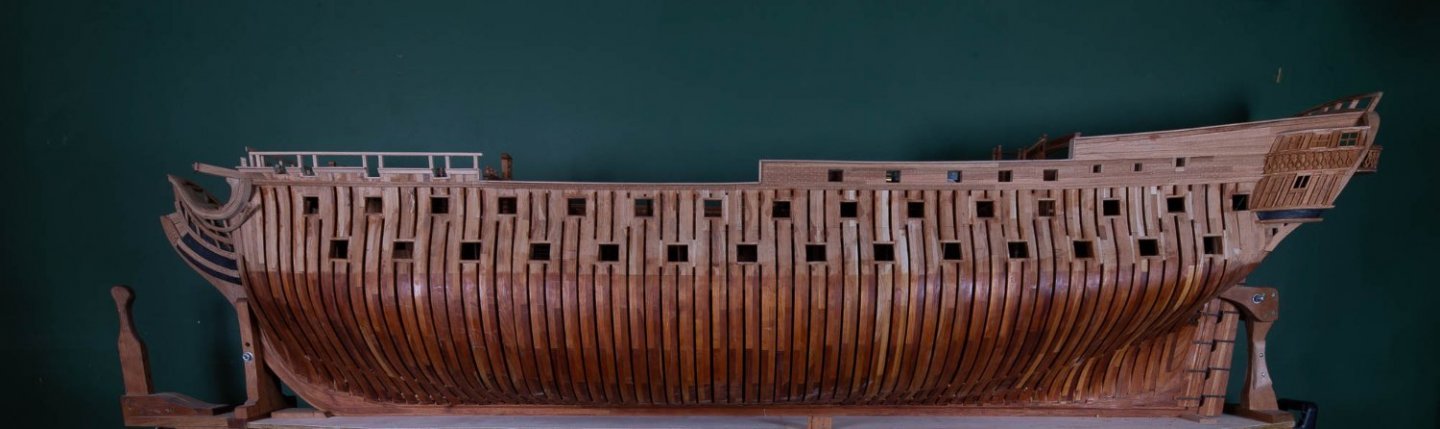
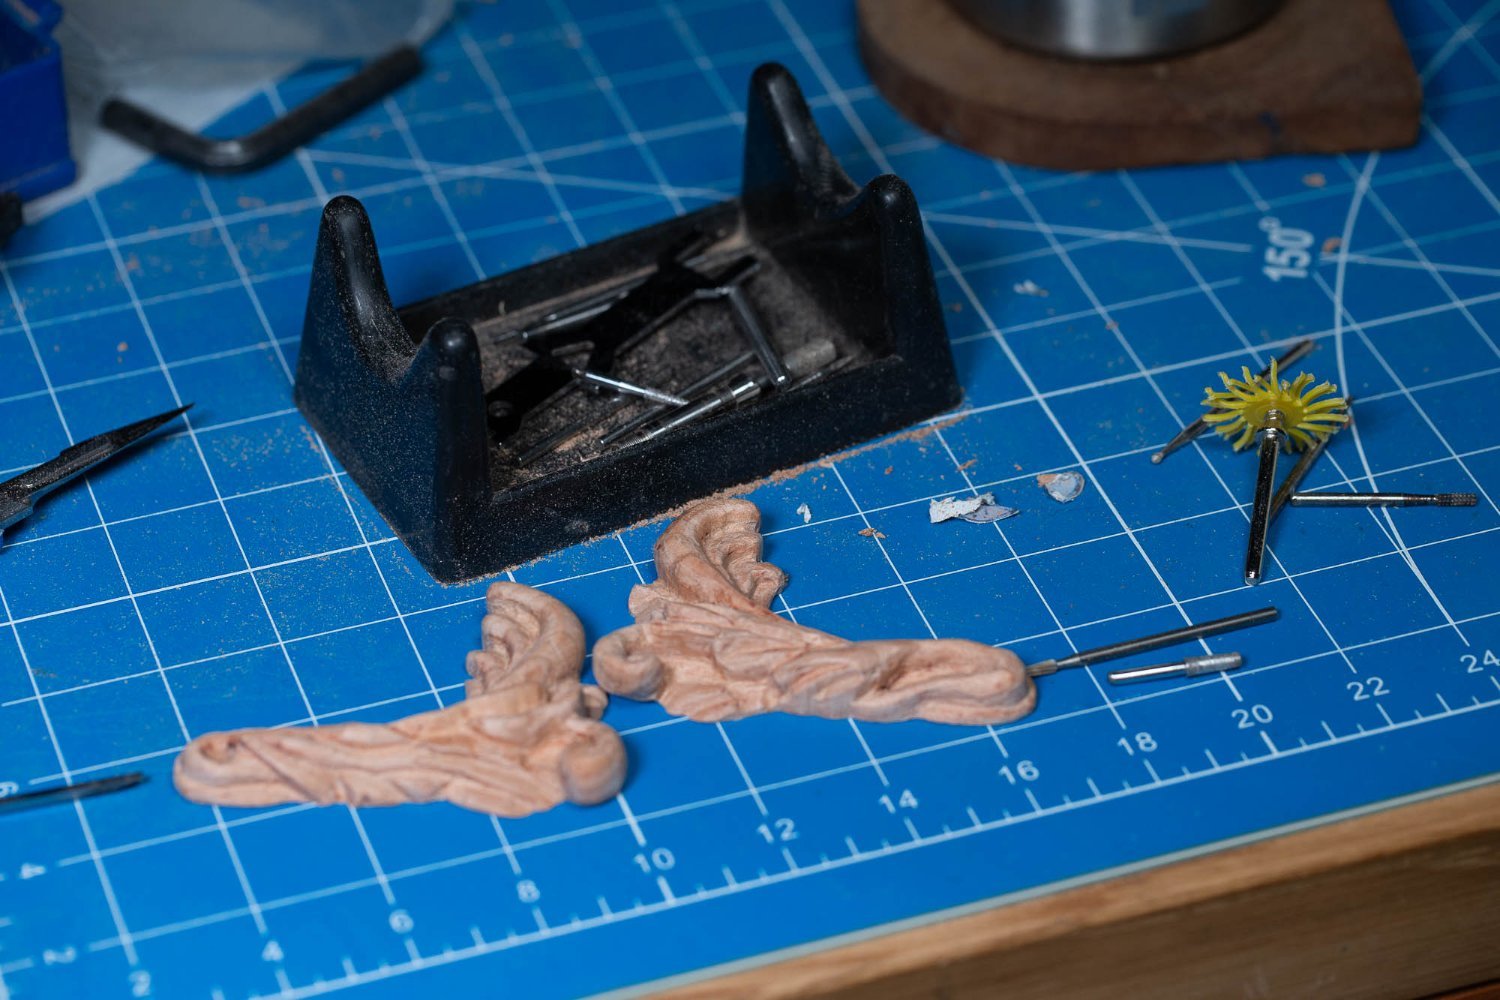
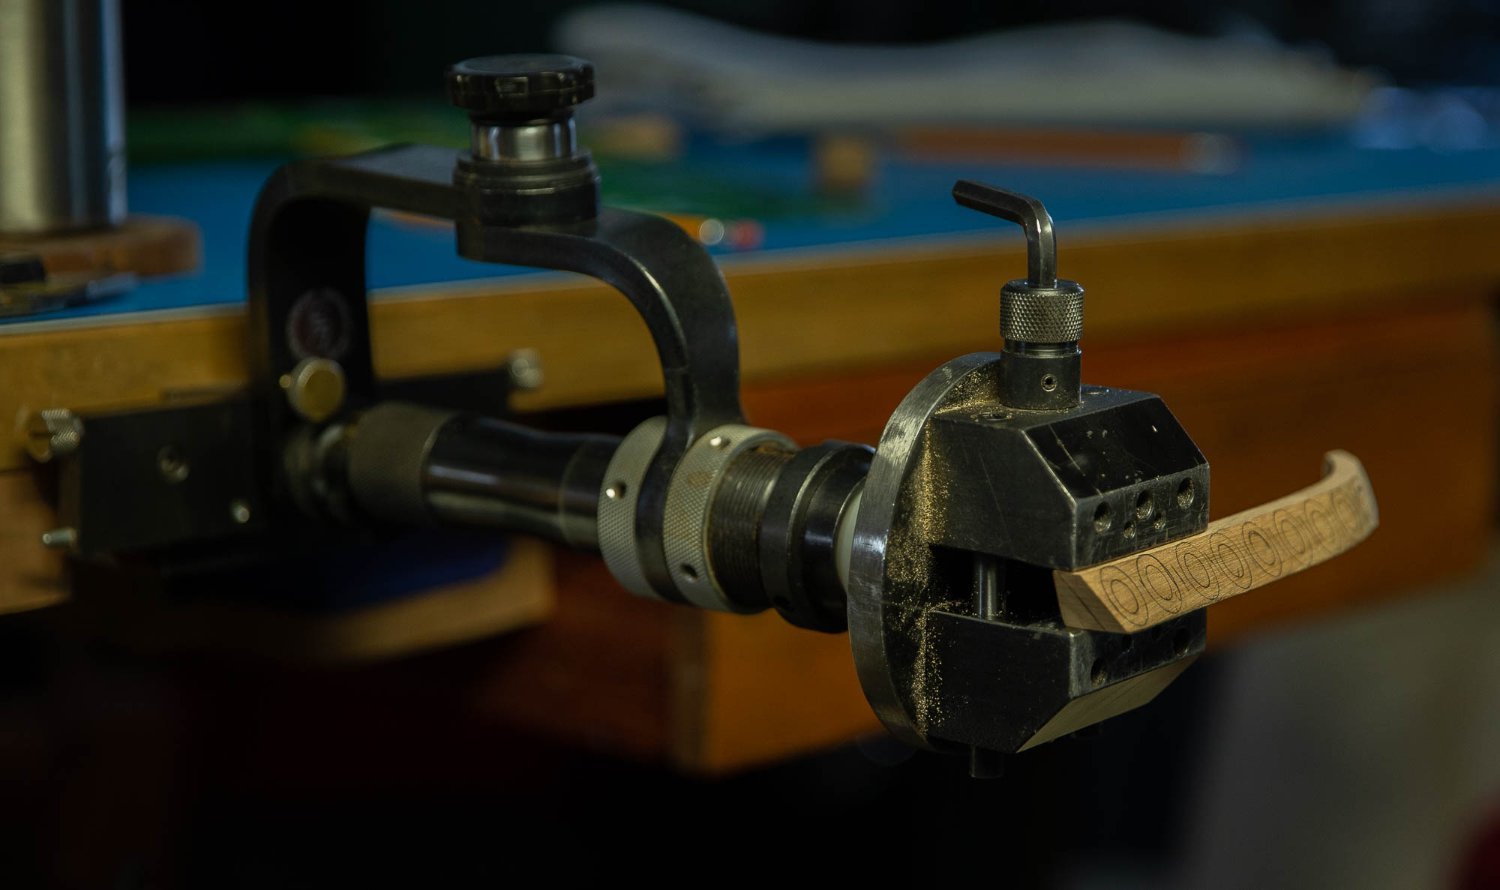
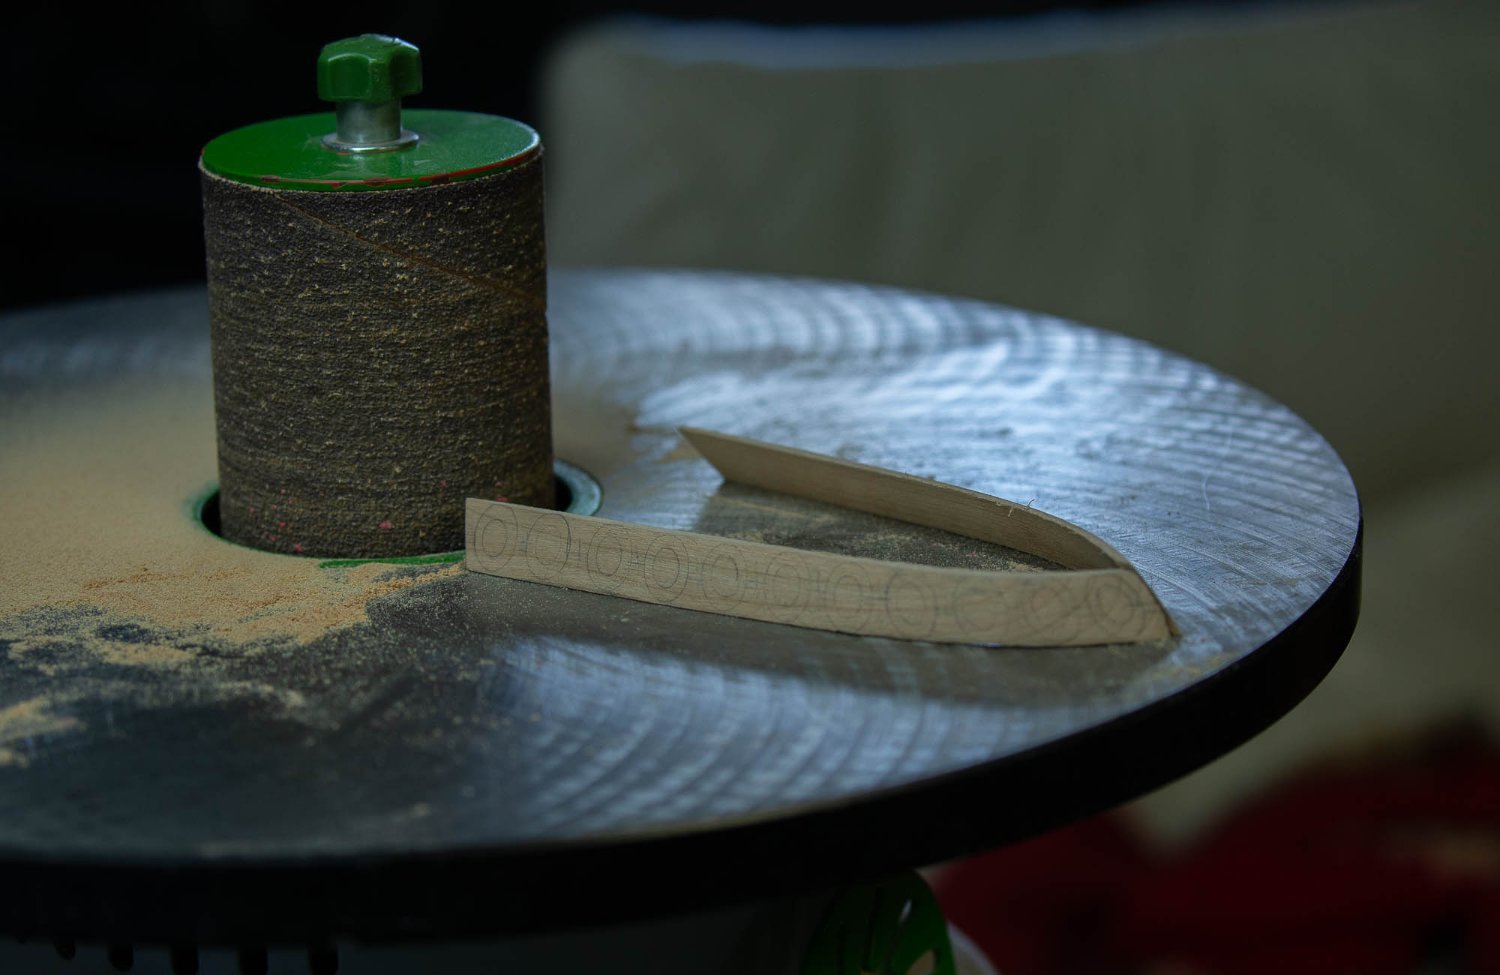
Carving is made mainly with a Micromotor, it is a lot easier than knives. no need to use strength, you let the burs work for you. the first part is always the most difficult. Then you gain trust and it gets easier. An image is applied with rubber glue and each part is shaped at different thickness . This way every element are located. Then you uniform the shapes and clean. We now have a very good idea of what the use of cherry wood looks like. By carefully select the wood , especially for for planking, I would say that it is perfectly suitable to use for model ship building. I have been using this wood for a few years and to simply classify it , I would say simply do not use the wood when the grain lines run perpendicular. 1 coat of tung oil darkens the wood beautifully.


-
Lighting upgrade to Proxxon band saw
Gaetan Bordeleau replied to Kevin Kenny's topic in Modeling tools and Workshop Equipment
I saw some advertisement on tv from these kind of light showing 15,000 lumens. They take a reading very close to the light and it is probably true. In comparison in the photography world where they also have LED lighting, they also rate the lumens. To give a true reading, you also need to give the distance because 15,000 lumens at 1 foot or 3 feet is completely different. Still to compare with one of these photography LED light at twice the price, I measured one: 3 times more lumens: 45,000 lumens. So the distance is a major factor and price is also an indicator. -
brass rod in ivory?
-
1 more photo


-
If you give 1 point for every good guess made about an 17th ship construction like Soleil Royal and you give 1 point for every good guess for an 18th ship construction like the 74 guns Plus, if we subtract 1 point for every wrong guess Who would be the winner?
- 208 replies
-
- 5
-

-
- le soleil royal
- 104 guns
- (and 2 more)
-
I think you ask yourself the wrong question. Where could I find good tools for the model ship maker? The first place you could try are the jewelry tools.
-
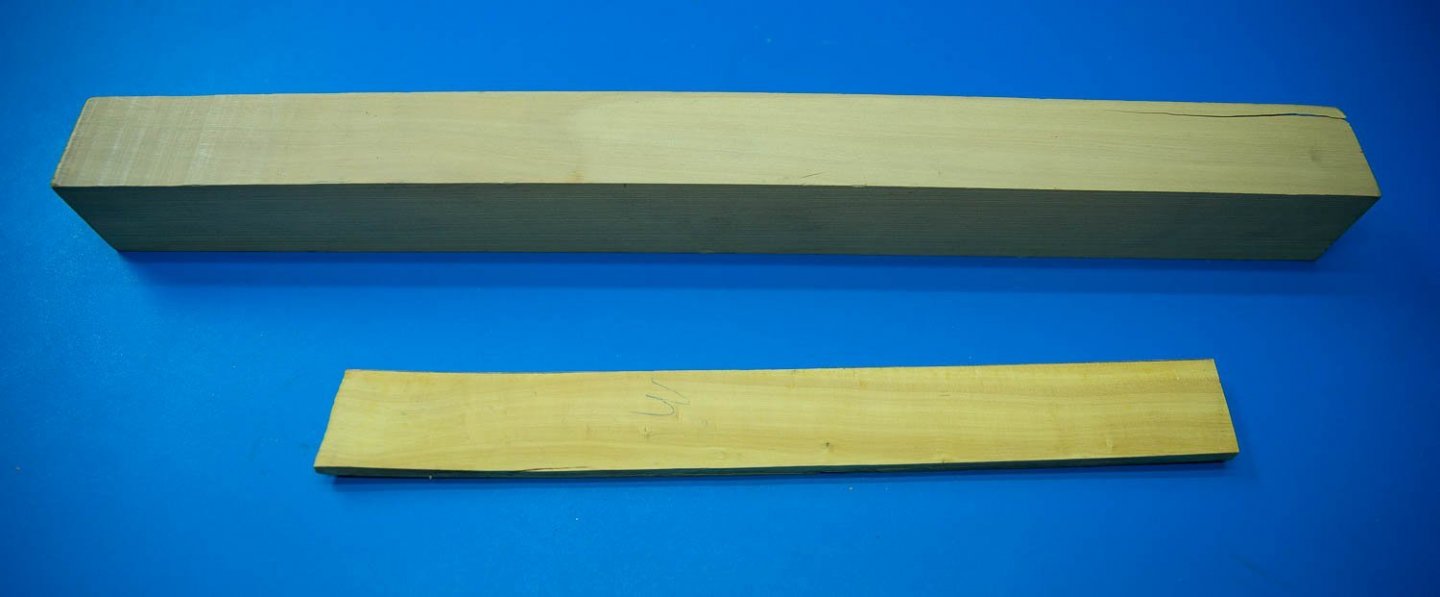
South American or castelo boxwood (Calycophyllum multiflorum) is also known as palo blanco or ivorywood.
-
I bought what I think is the same wood also about 30 years ago. I still have a few pieces. I took a photo of one near boxwood. Palo blanco was the name if I remember well.
-
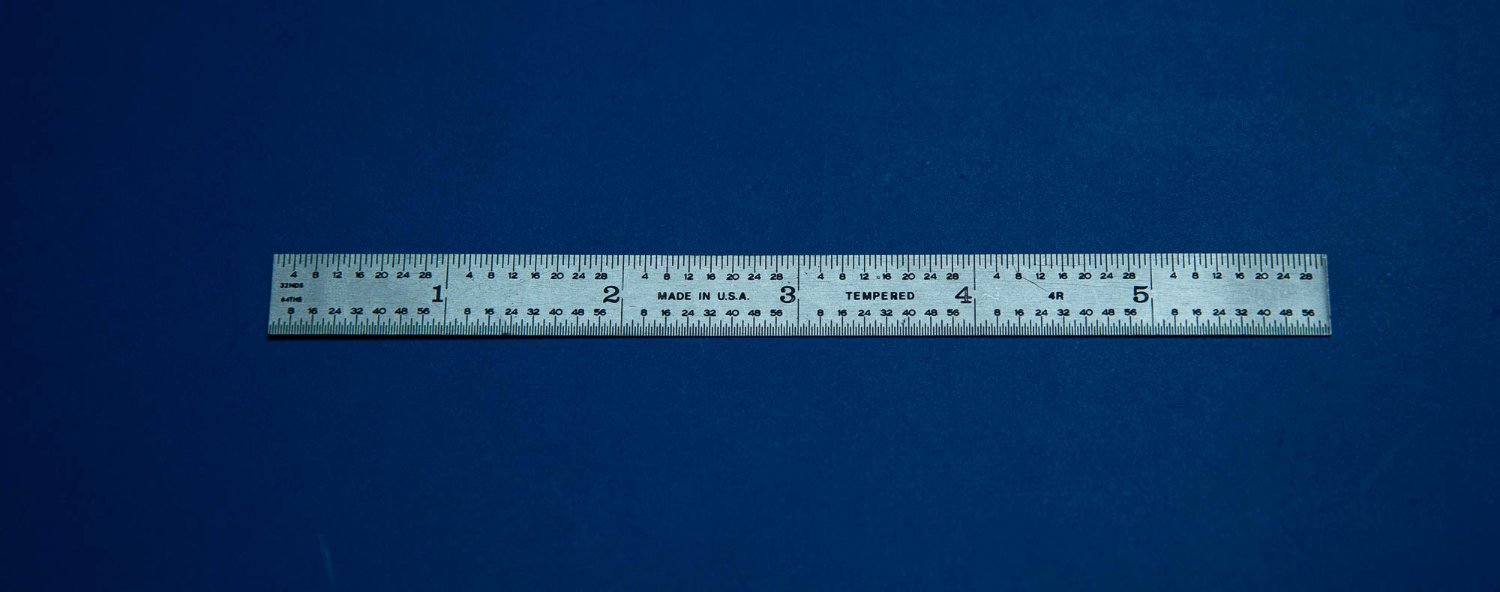
My metal ruler was wrong.
Gaetan Bordeleau replied to modeller_masa's topic in Modeling tools and Workshop Equipment
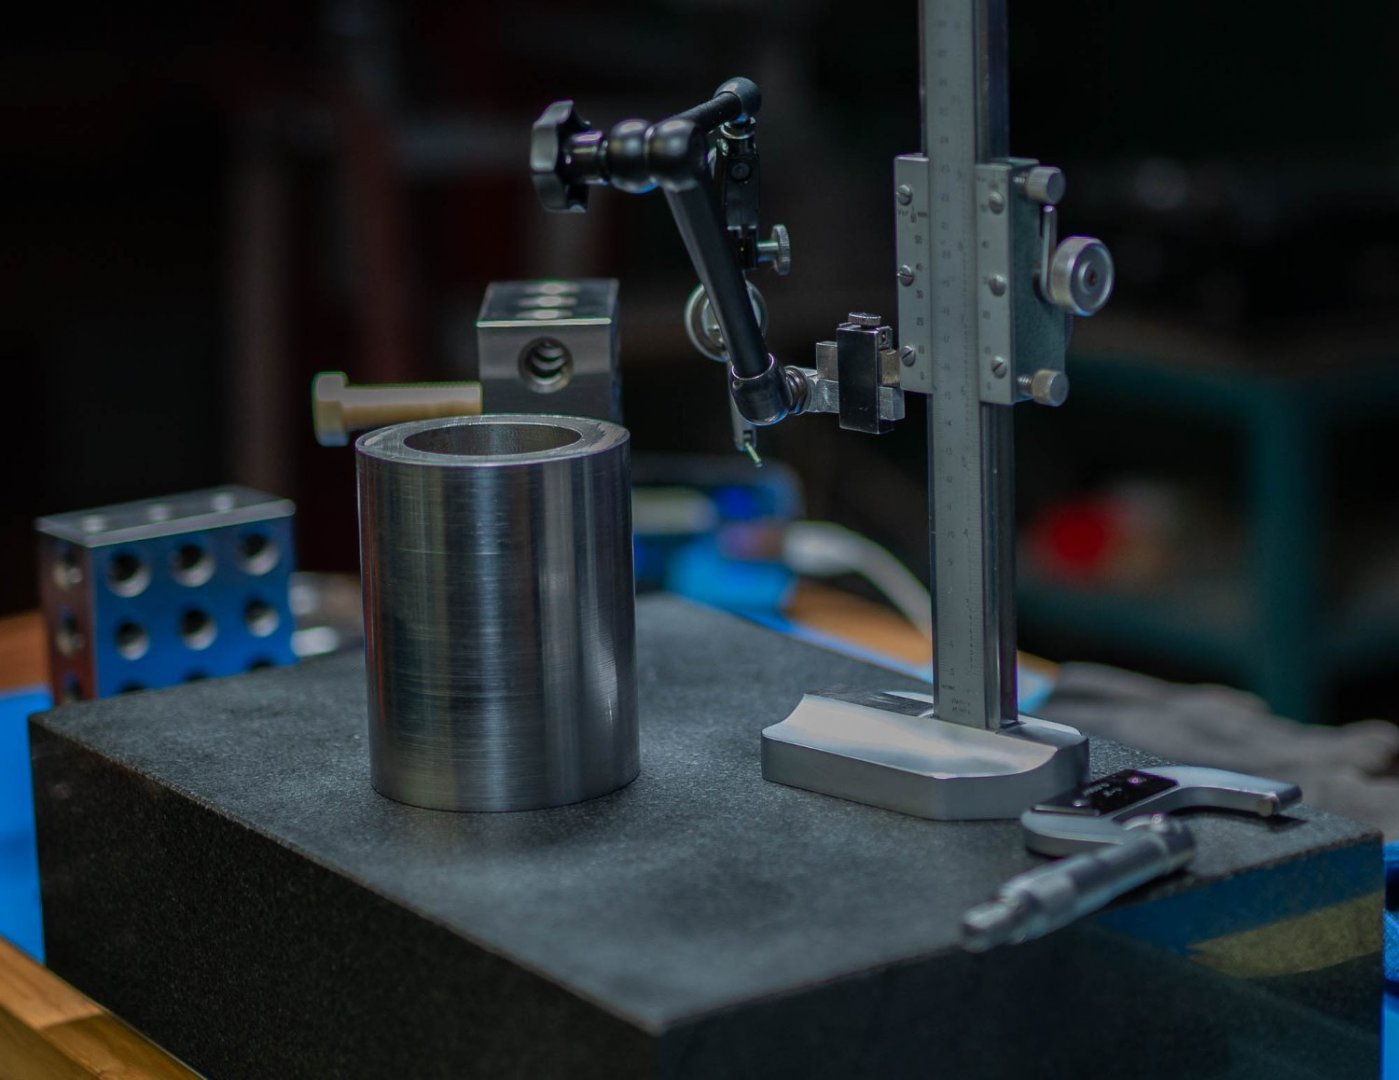
Accuracy and ruler can be very much different. A ruler with 1/64": 0,015" To measure with accuracy, you need to first make sure that the tool you use is calibrated by measuring a standard measurement; a gage block. Different precision grades of gage block are available; ,001, ,0001, ,000004, etc. Calipers are good for ,001", micrometers can easily measure ,0001". Even if calipers are made to read ,001", it is very easy to apply the wrong pressure and to get a wrong measure. The easiest way to know how much pressure to apply is by measuring a gage block. For model ship building, construction with wood does not need a micrometer. Calipers are very useful to measure the thickness of board. For the daily use, a ruler is perfect and 1/32" is easy to use 1/64 is much harder to use, you need a sharp pencil and it is very easy to trace the line next to the division. In fact it is easier to use 1/32 and to be relatively sure of the measure than using 1/64 and to have doubts about it's accuracy. photo of my favorite ruler for daily use
-
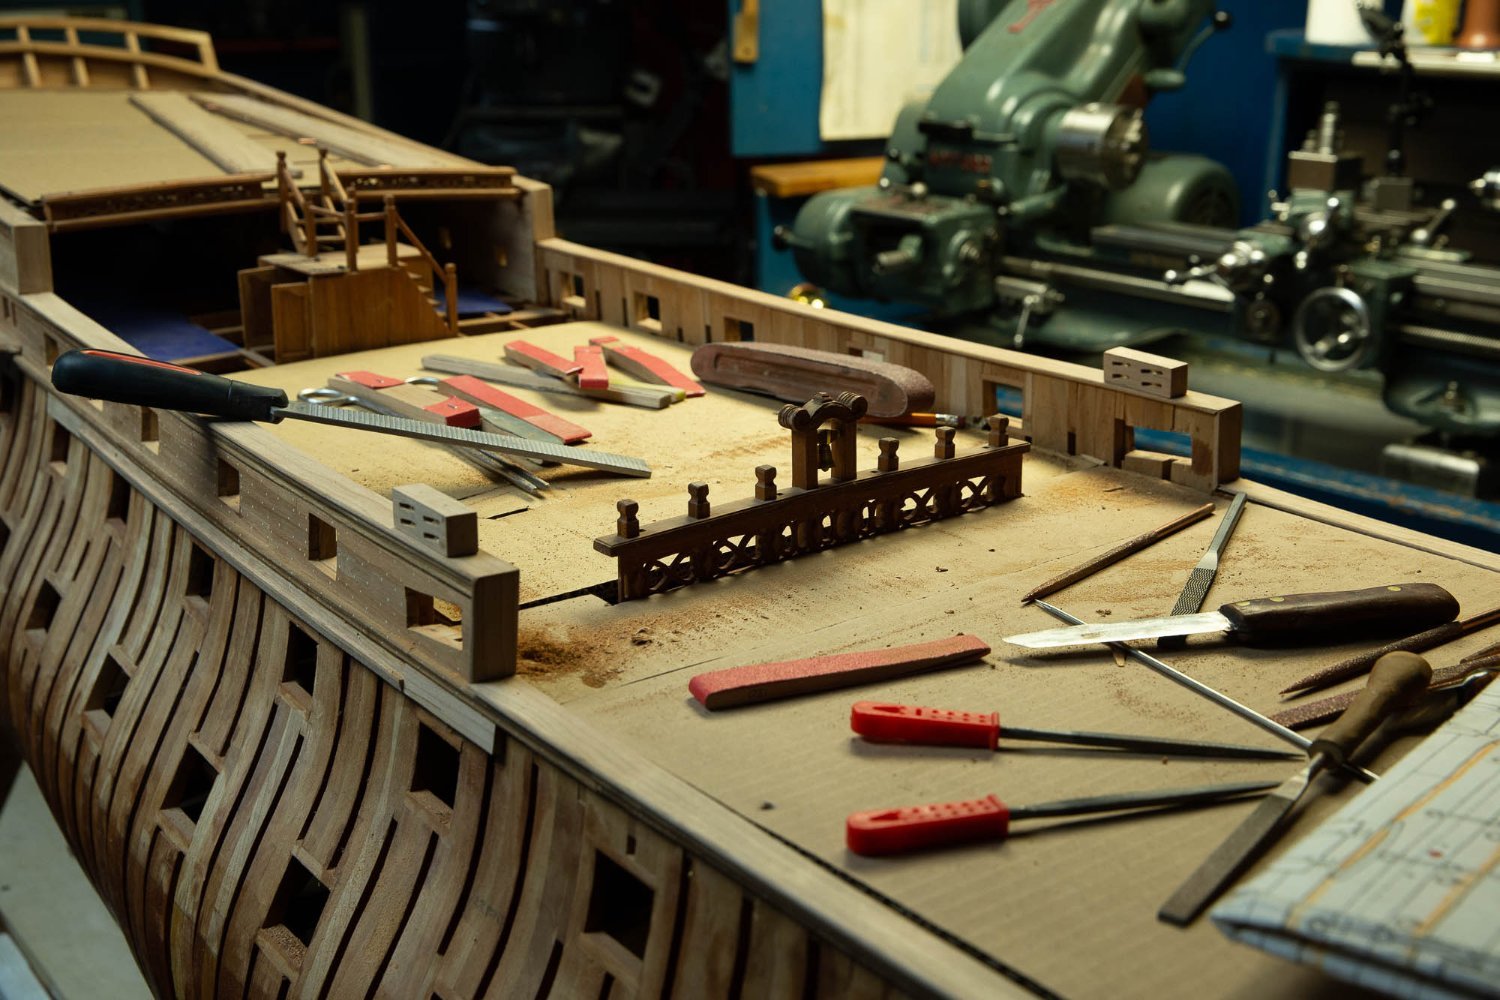
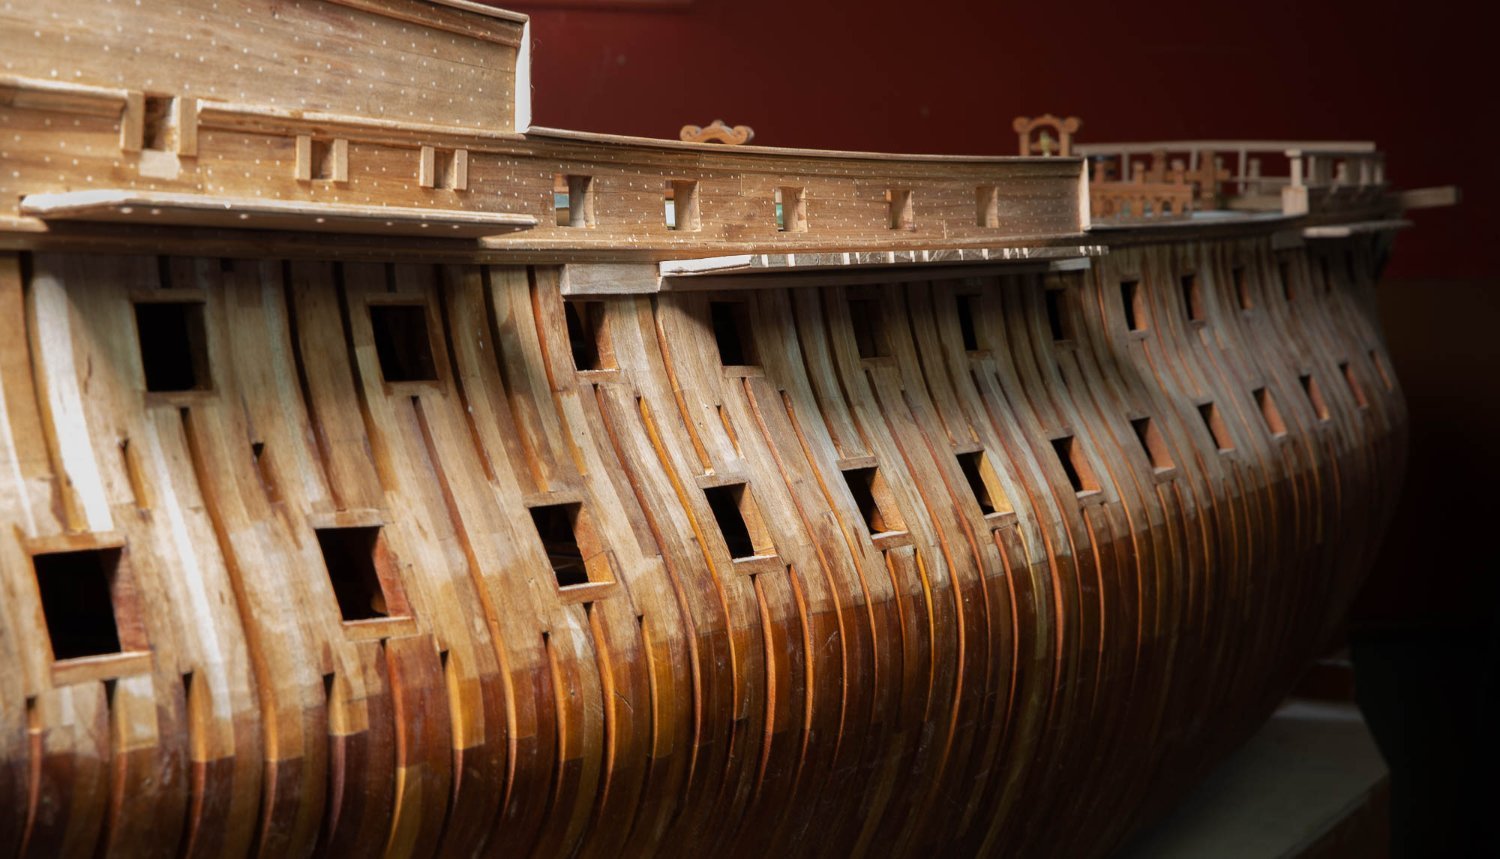
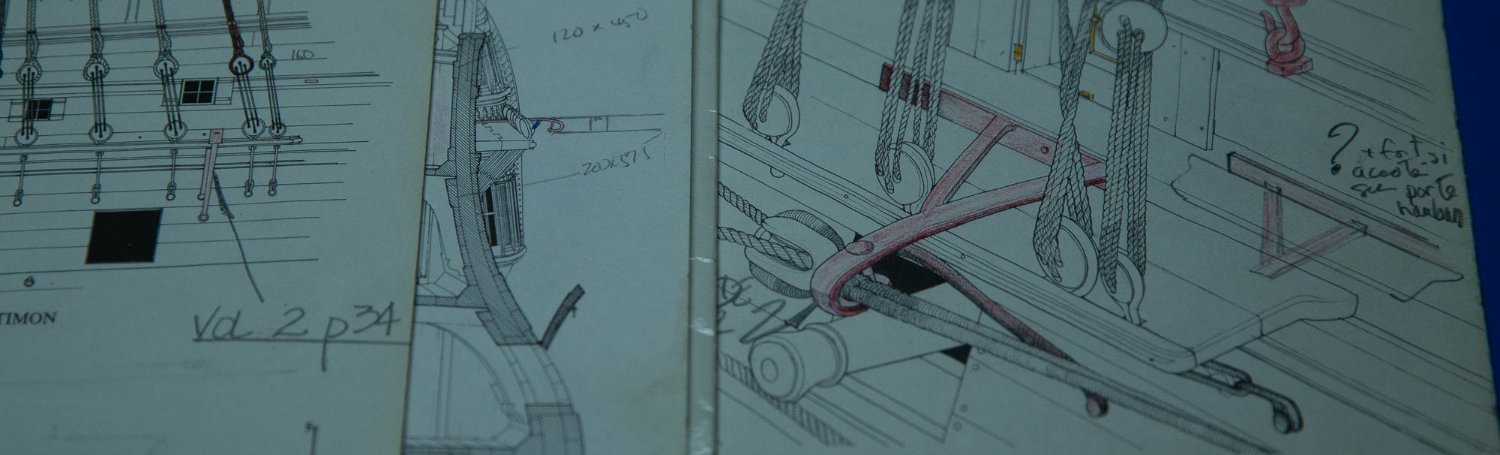
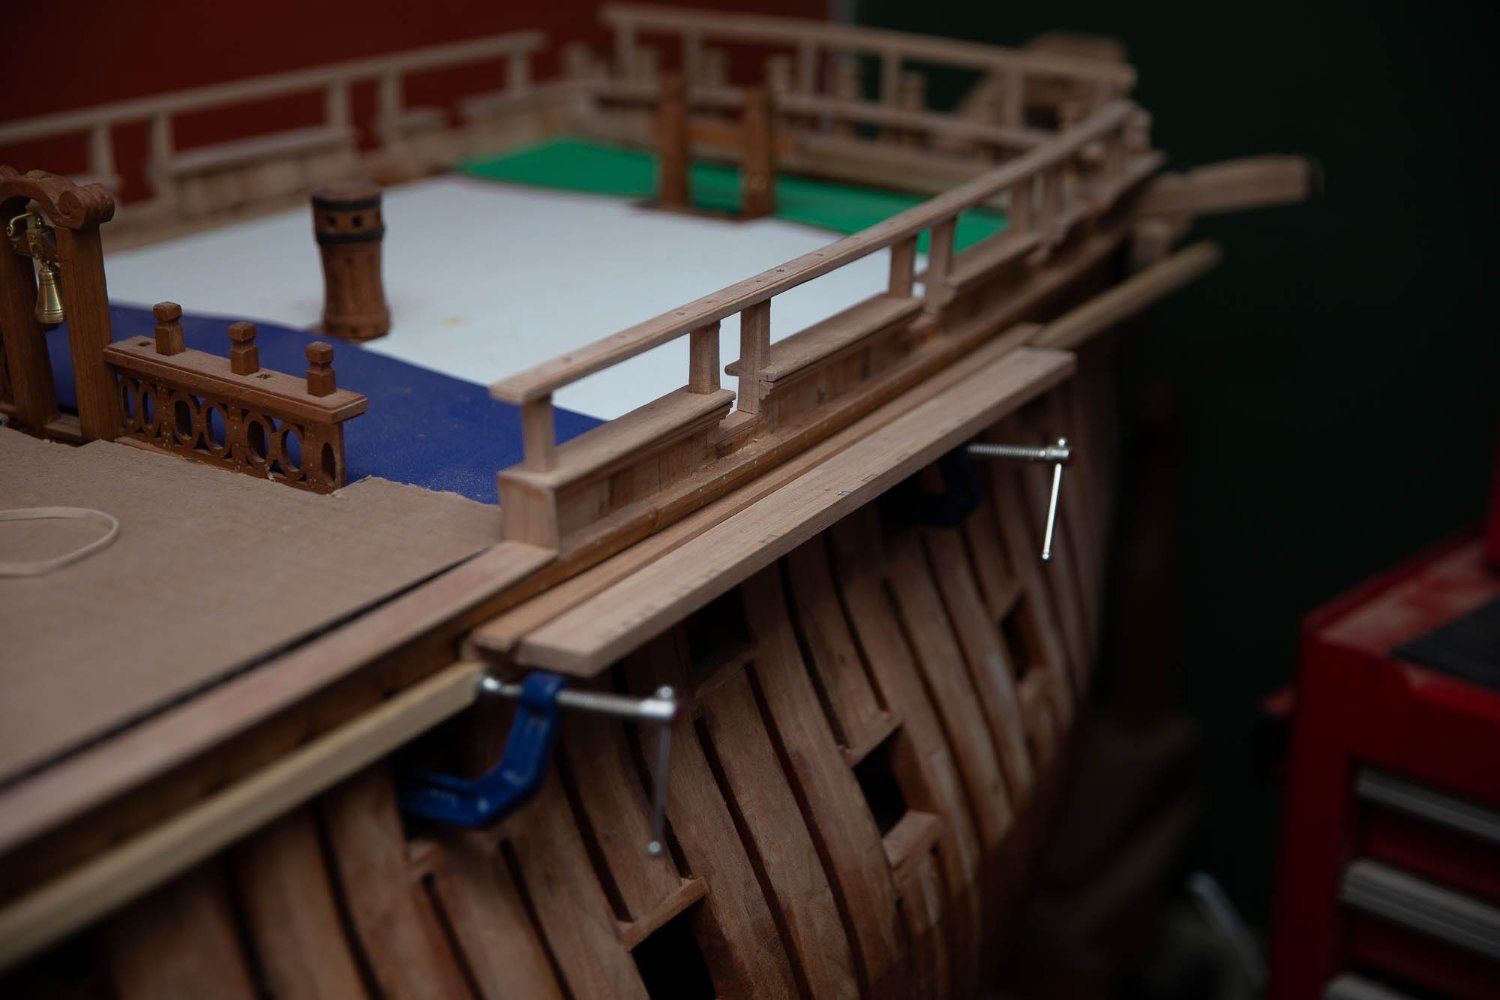
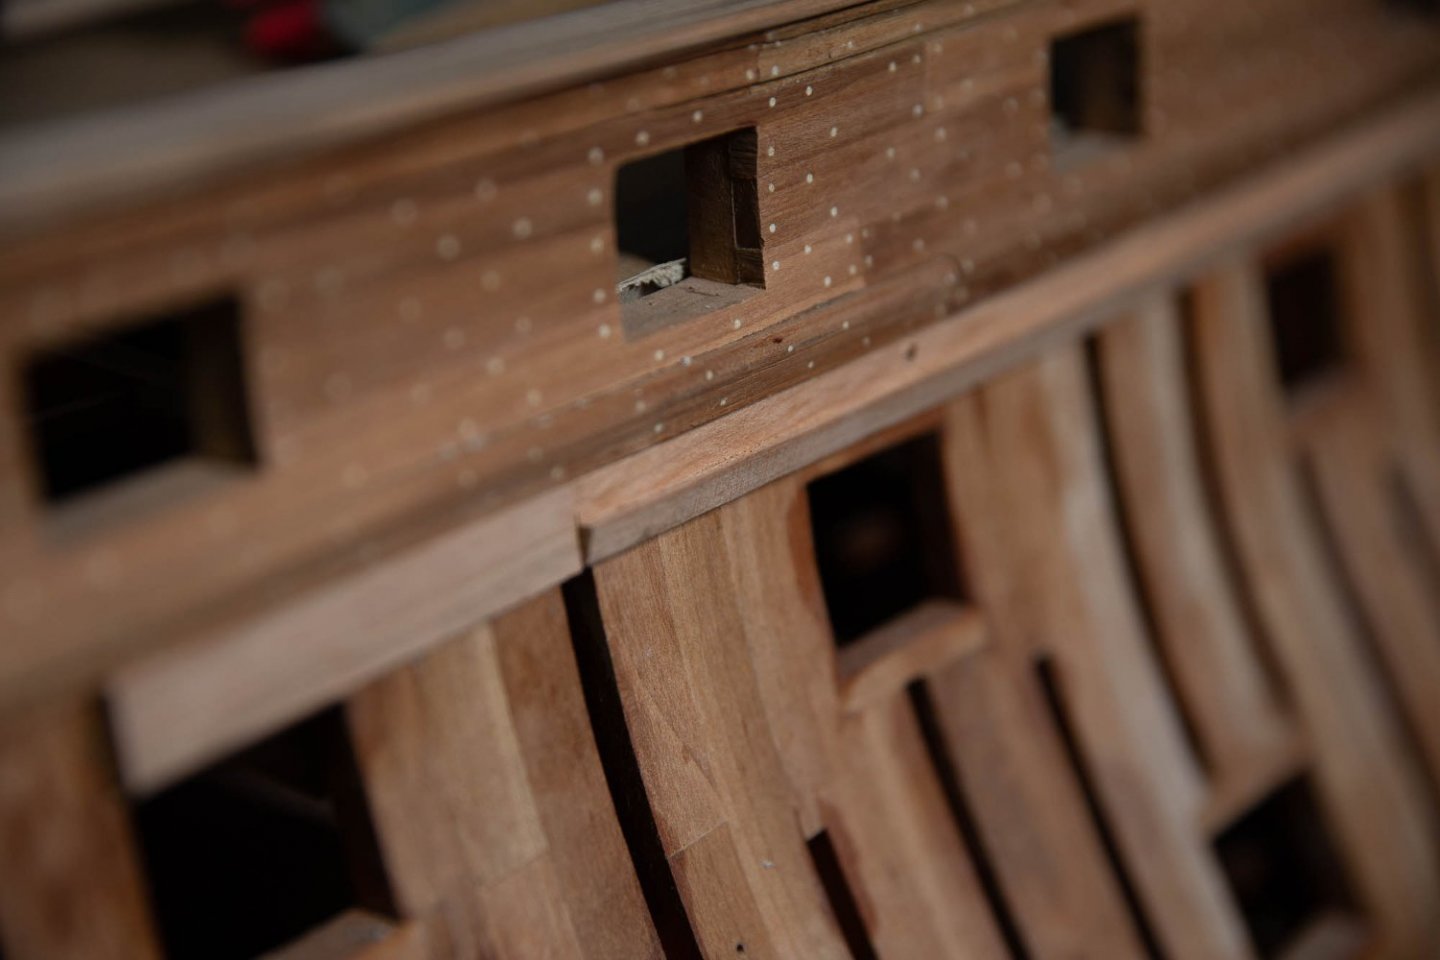
Thank you Tony, to build metal parts, is one of the many aspects of the model ship builder. To be a model ship builder, you need to understand many kinds of works and it is extremely difficult to master all of these. Model ship building can take an infinite variety of roads. We often modelers who are very good in few departments and this is why many modelers are recognizable by their work and their style. In my case, I just like to build a part of the ship and especially inside and take some photos. Let's come back on the channels. There is one interesting part on the mizzen channel. I think it is a very example to show how Boudriot worked. There is an iron hand just over the mizzen mast. There are 3 drawings showing it. In the index, it refers to vol. 2 fig.123 p.34. We could say that we have a general idea of the part to begin and when we are ready to fabricate it, we go to the "construction drawing". I do not know how many years it took to write the 4 books for the 74 guns but it was surely more than one. I often saw a part represented many times through the books and often at different stage of construction and sometimes there is only 1 drawing showing the final or the correct way it was done. To say that all the other are wrong is not necessary true. On the figure 123, I have some difficulties to understand why they built it this way, floating just over the mizzen channel, instead of being fix on or under it, and this even though, there is a support bracket to hold it.


-
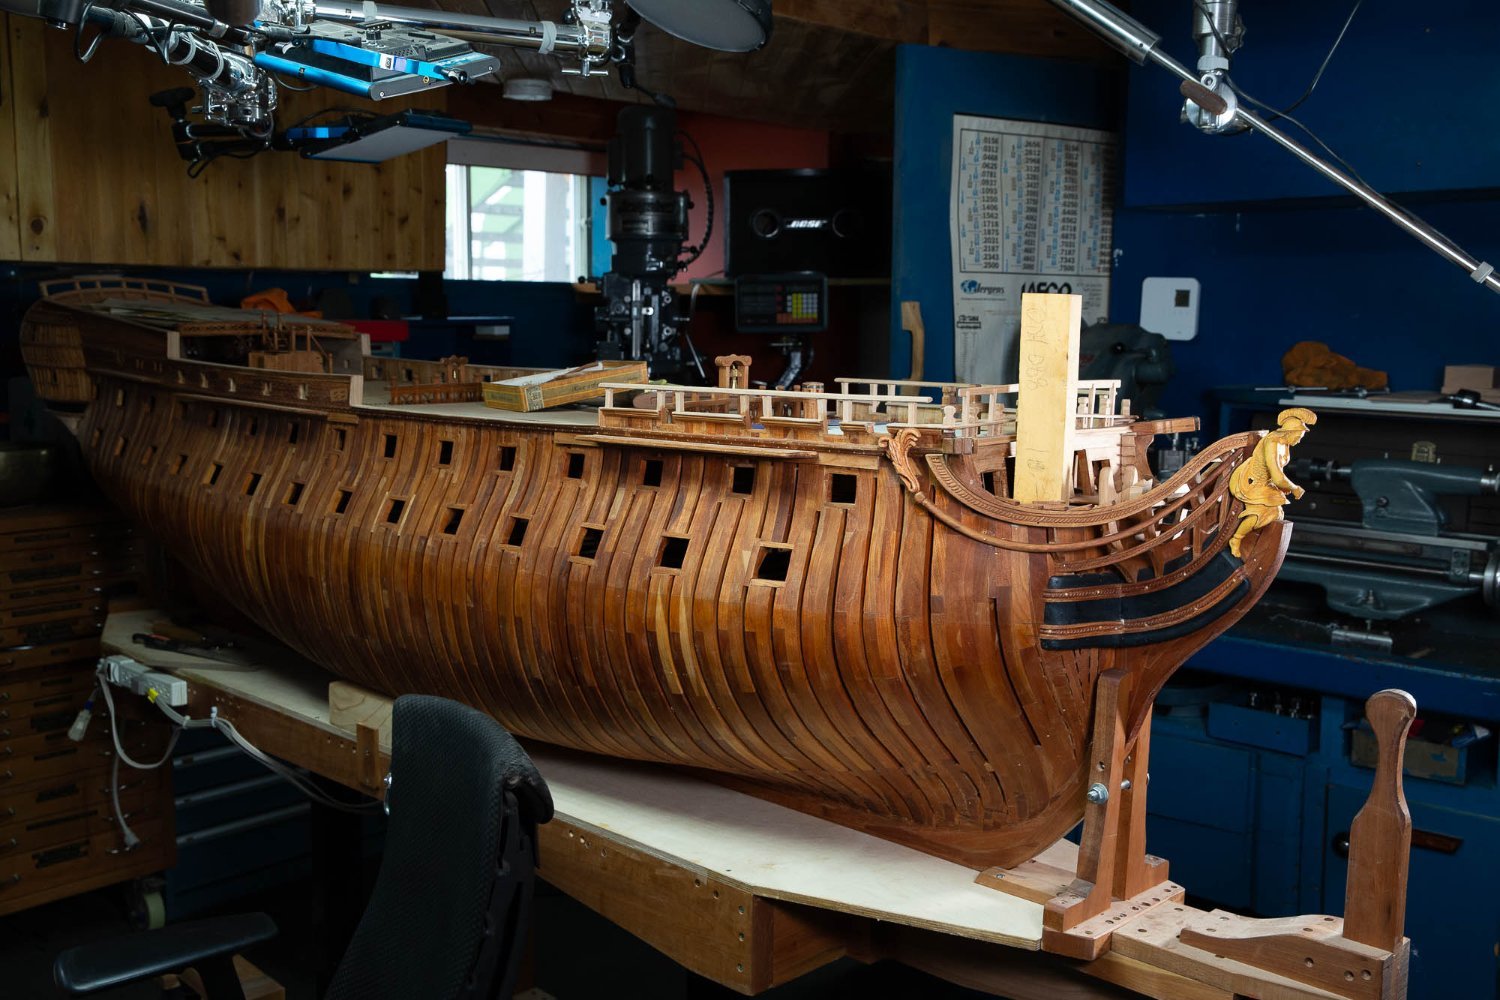
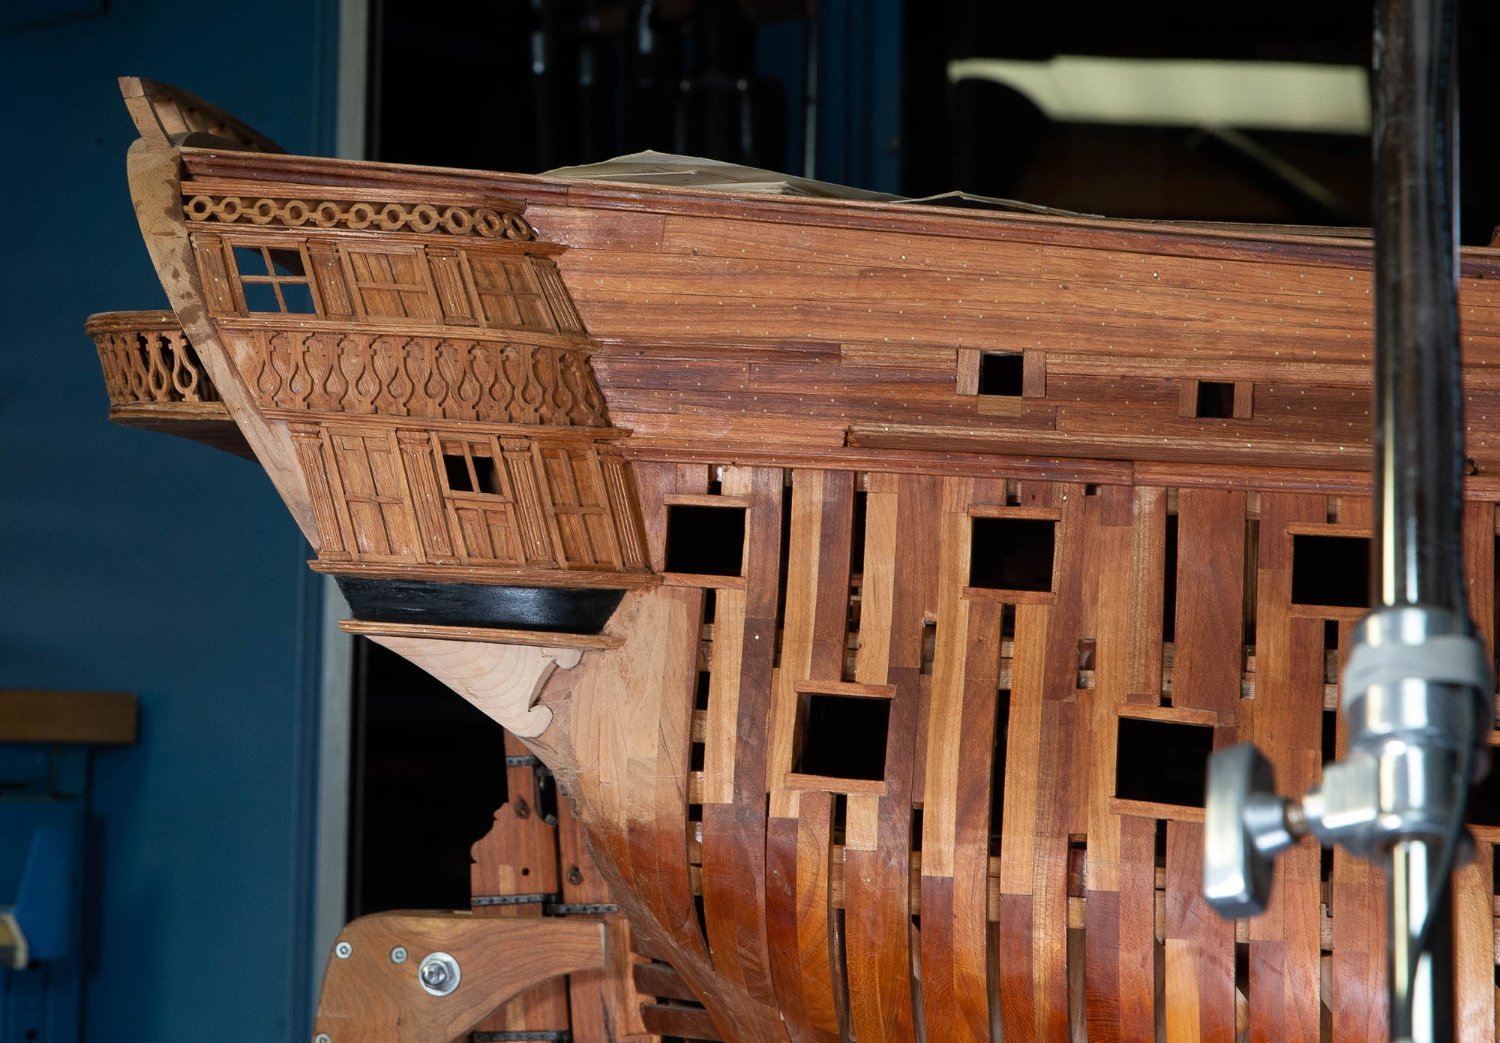
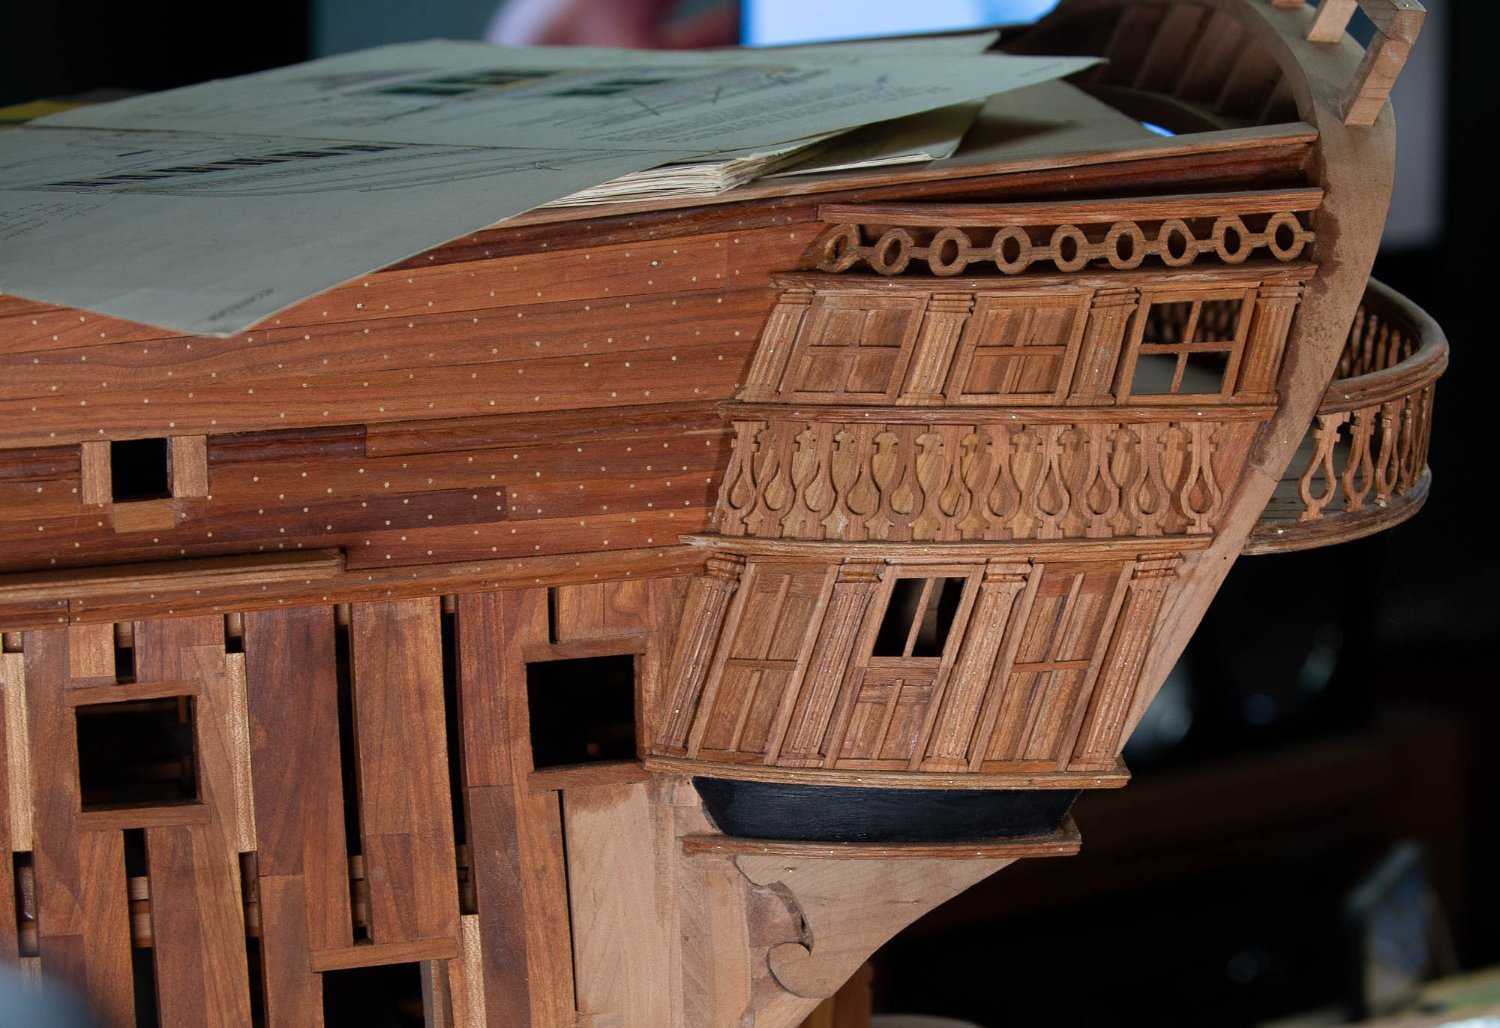
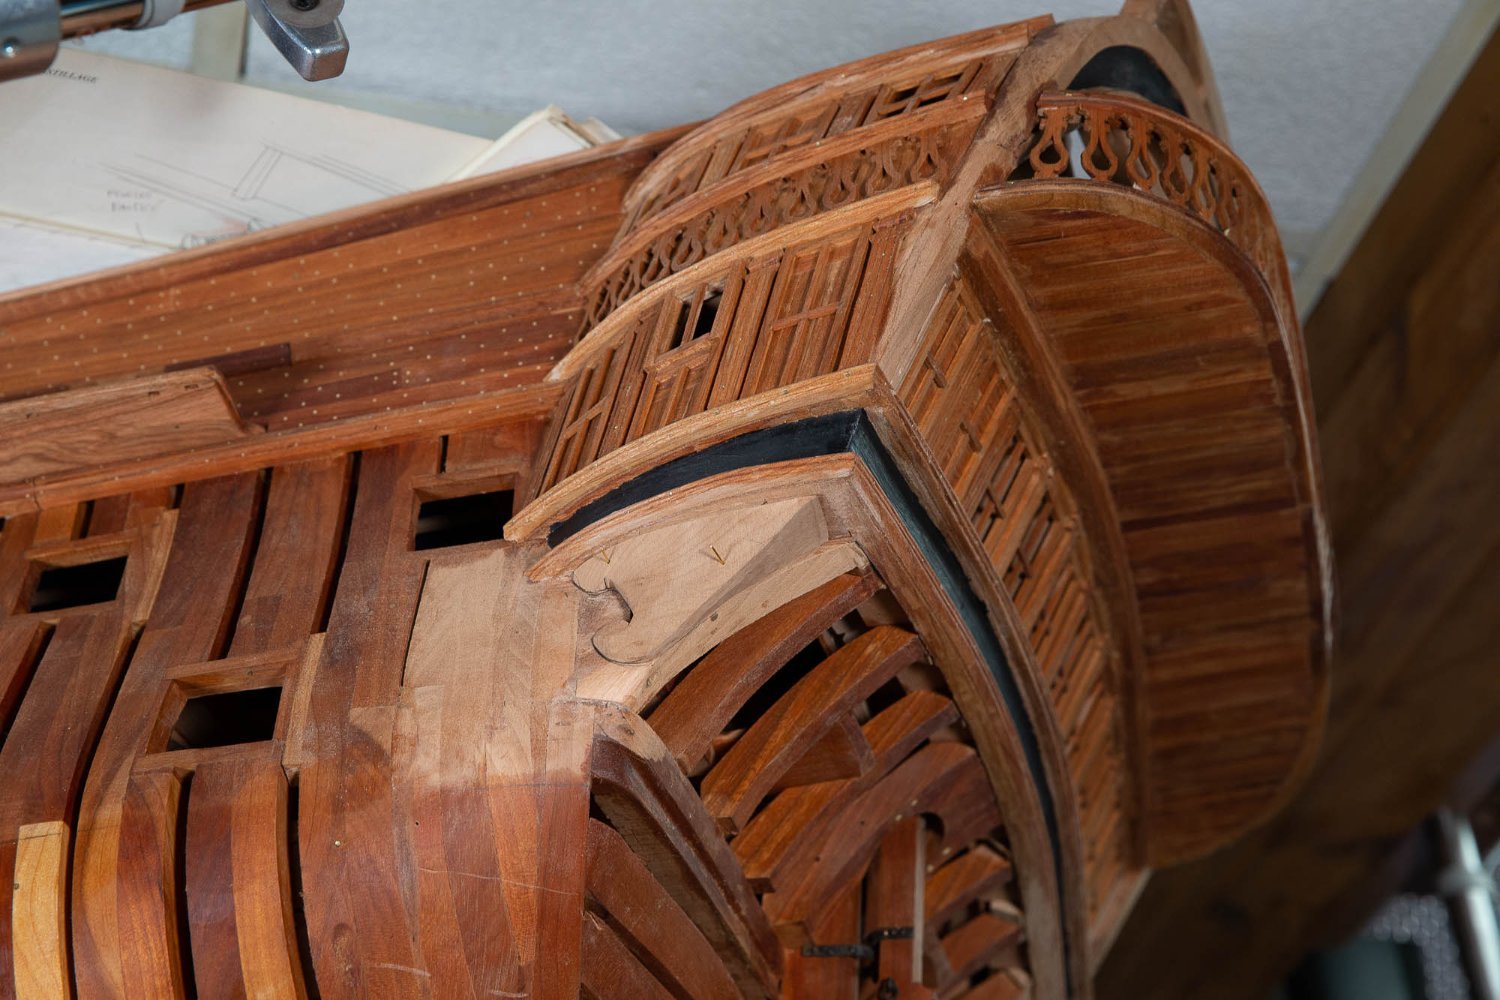
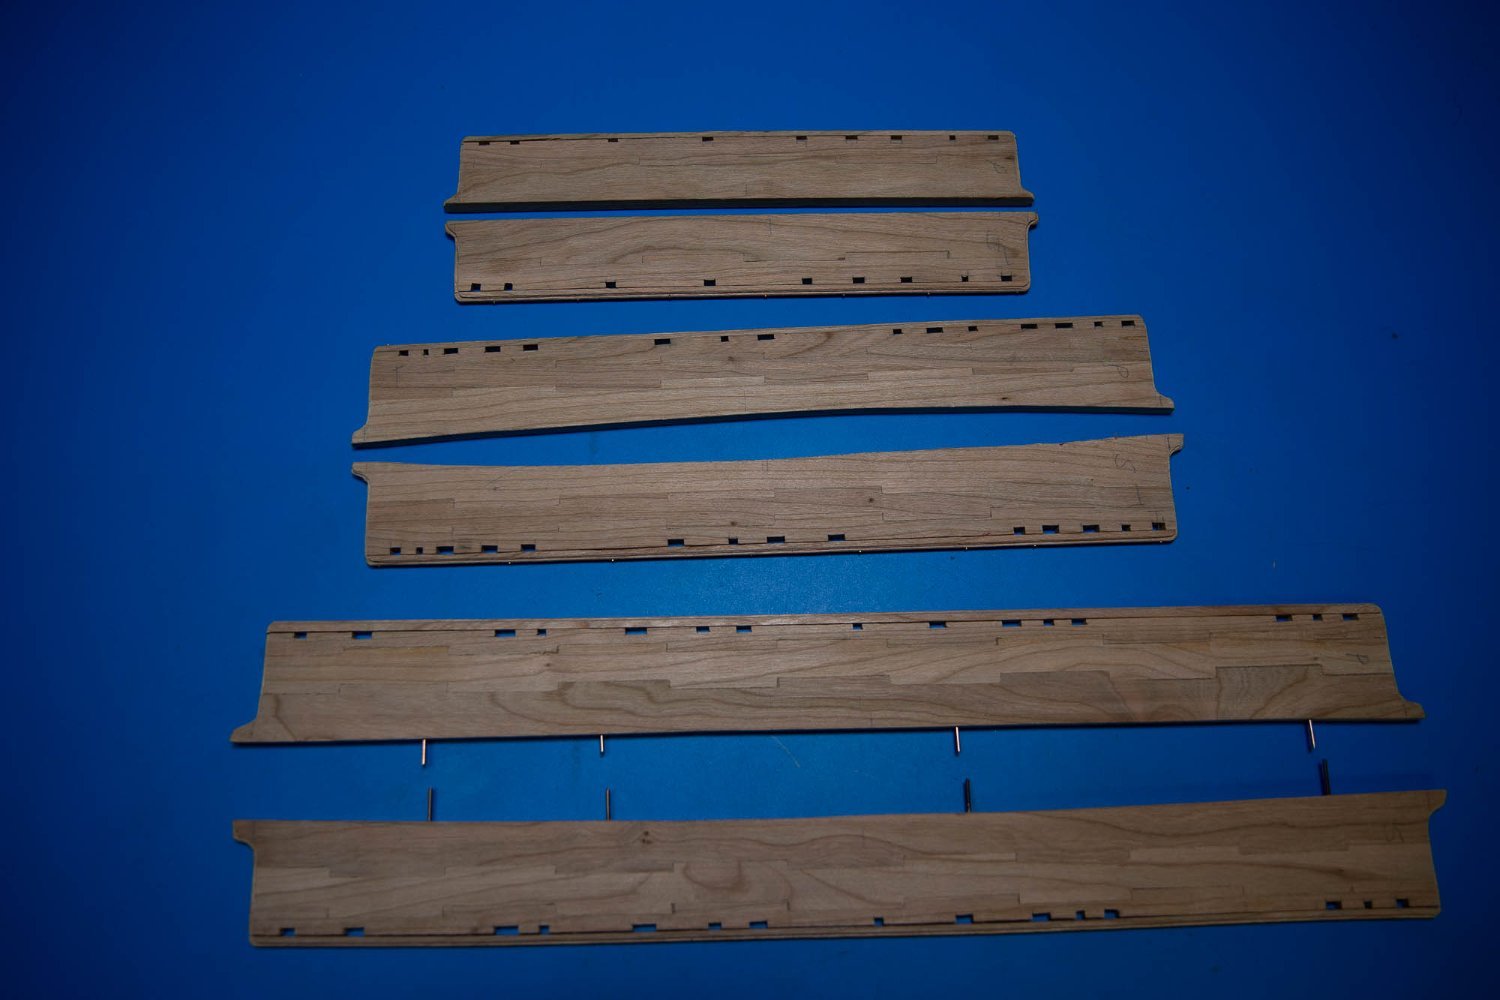
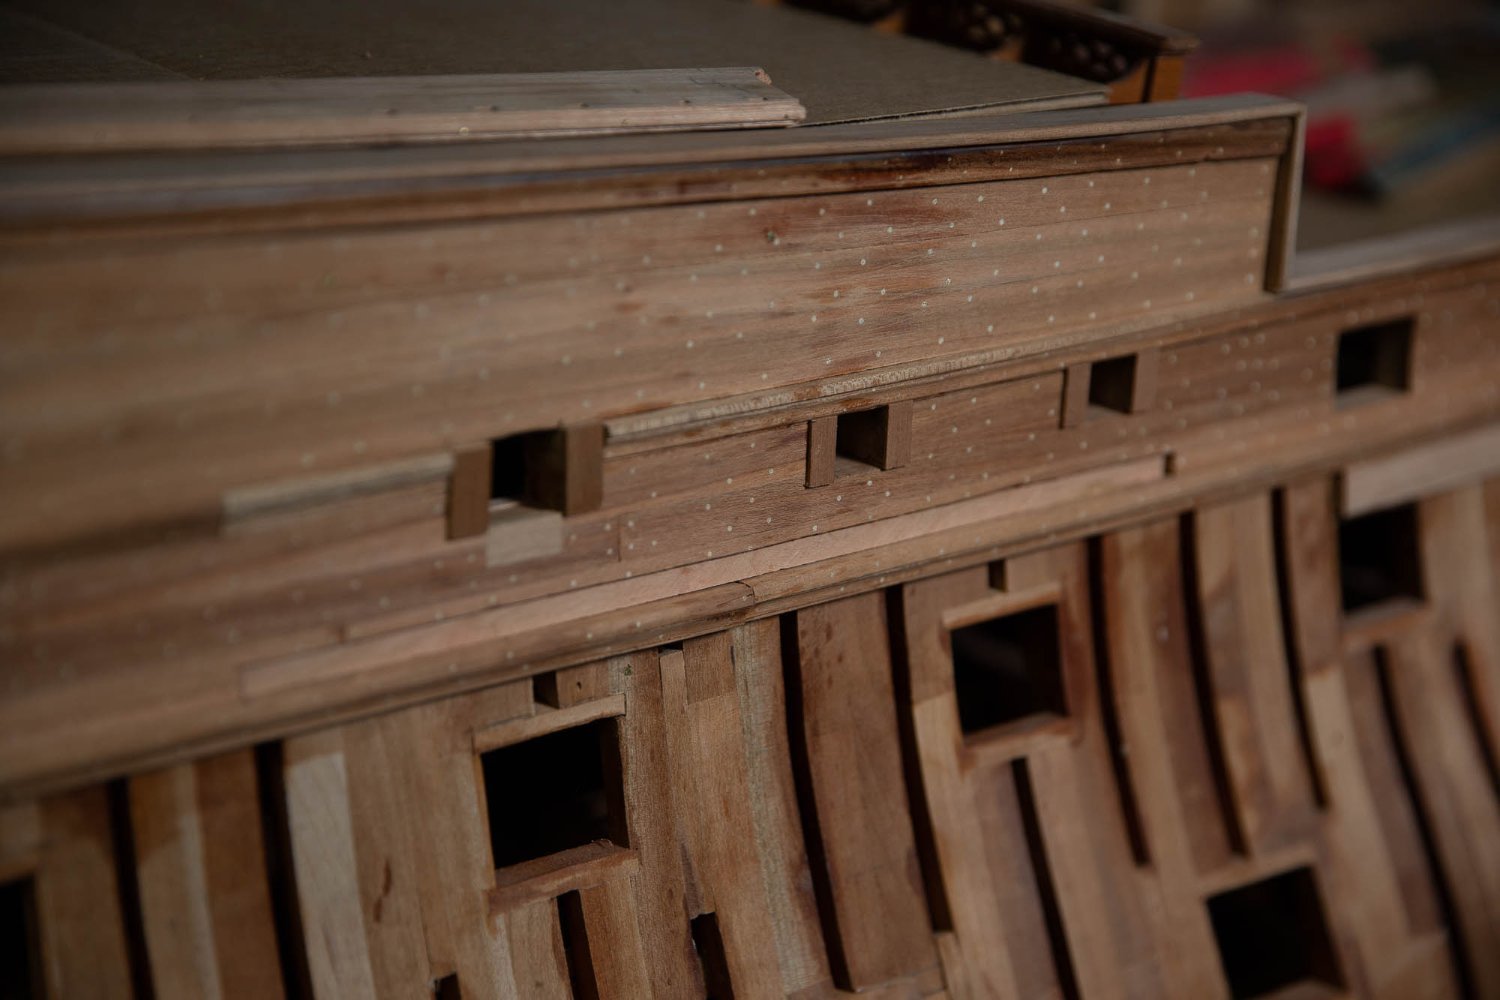
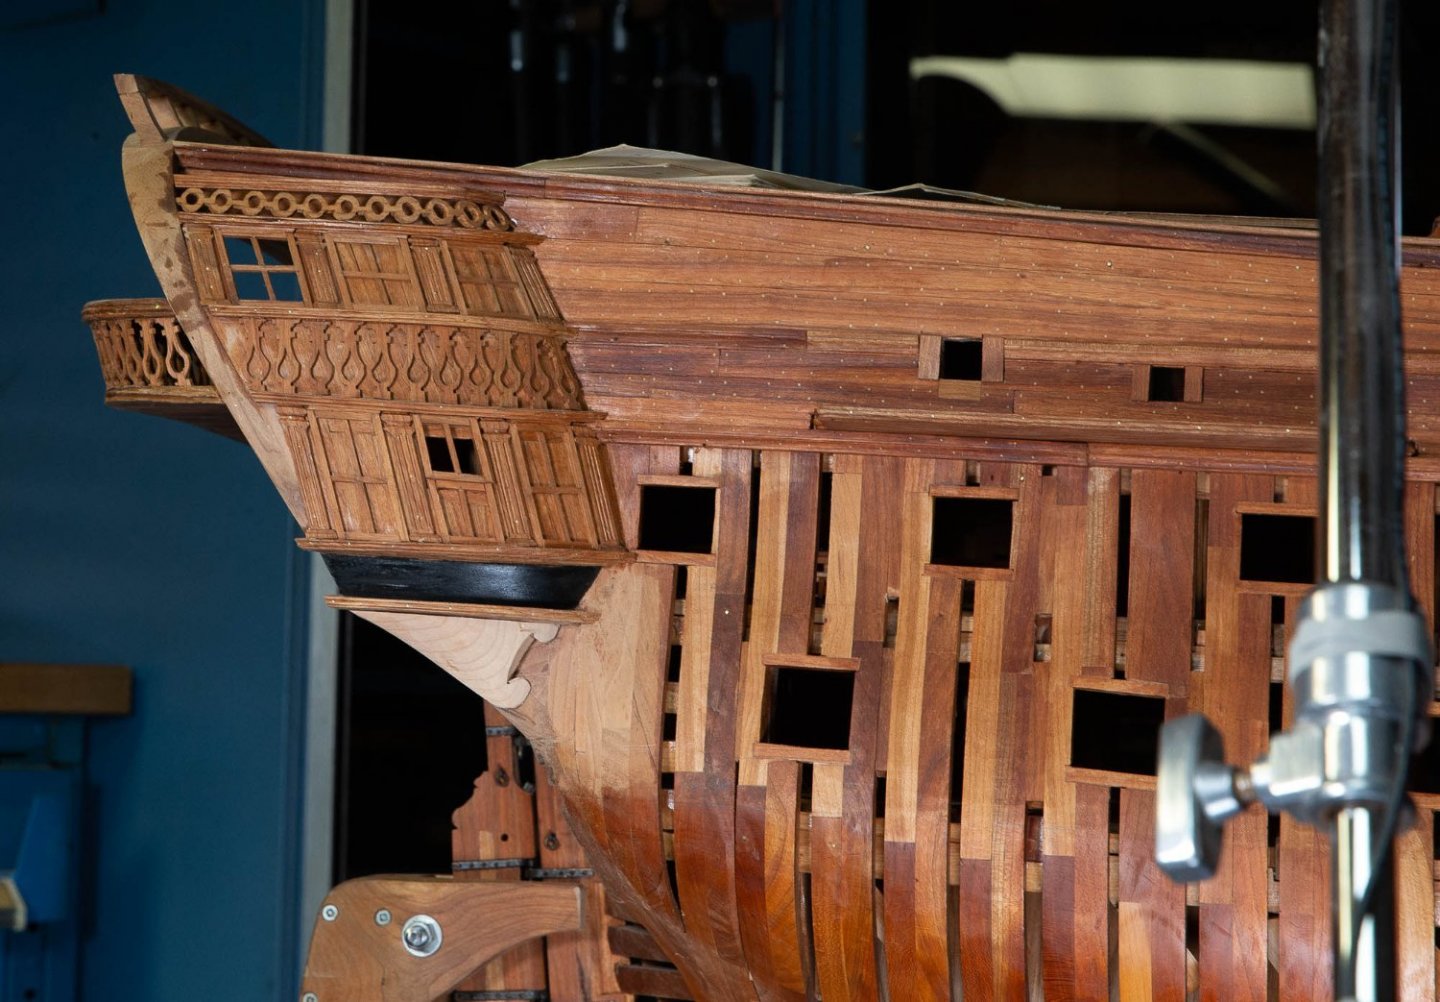
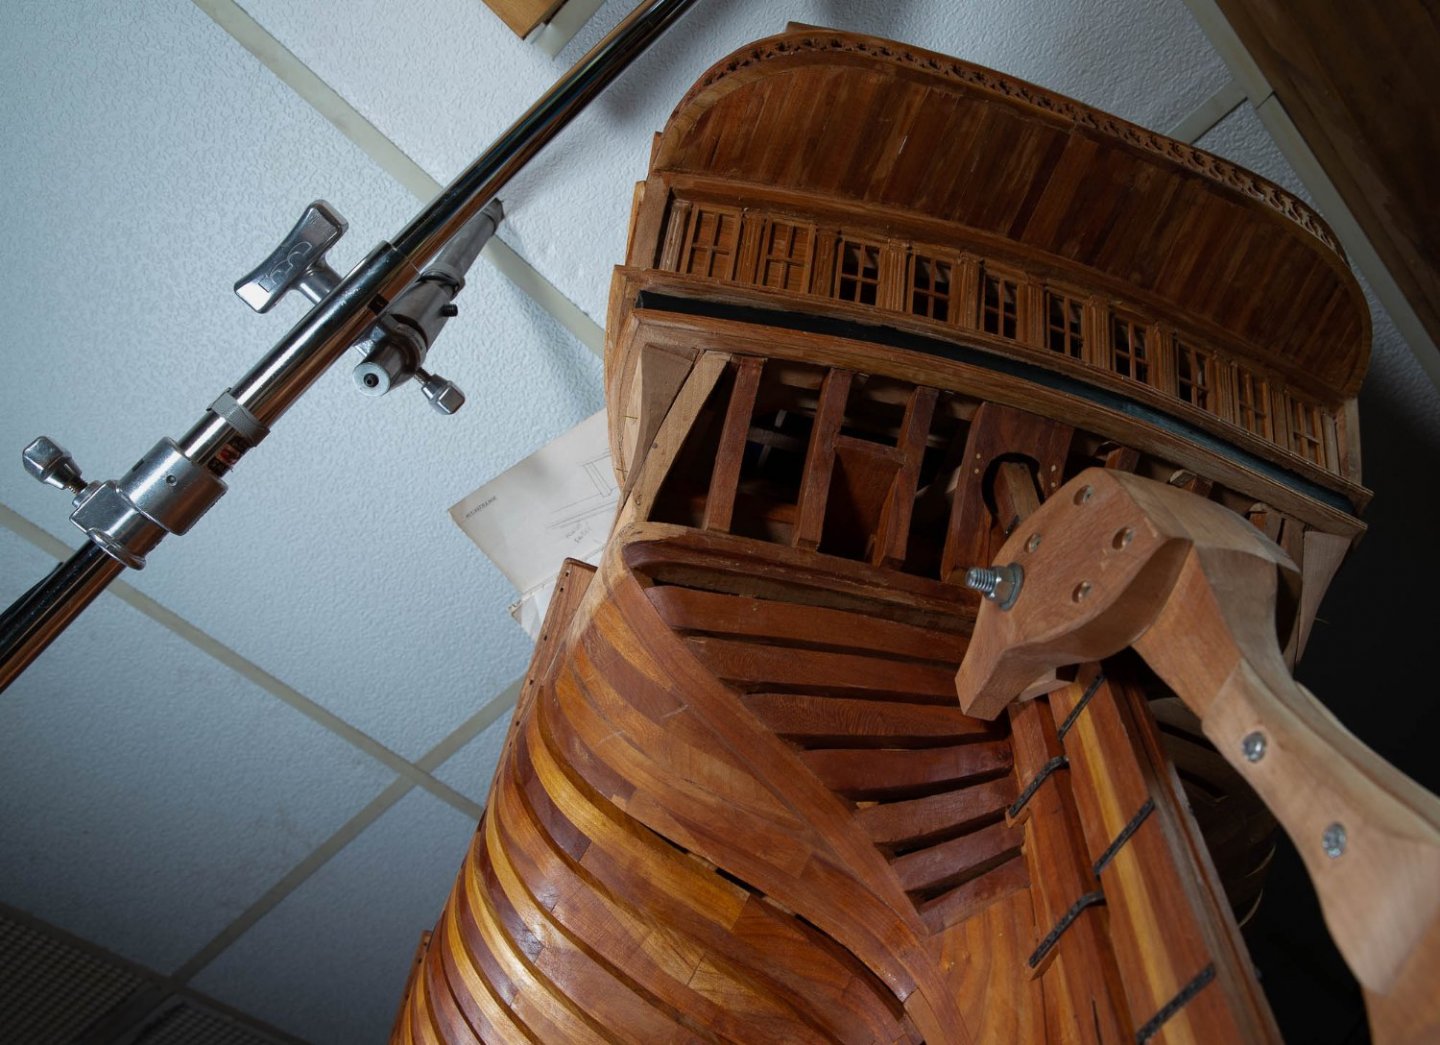
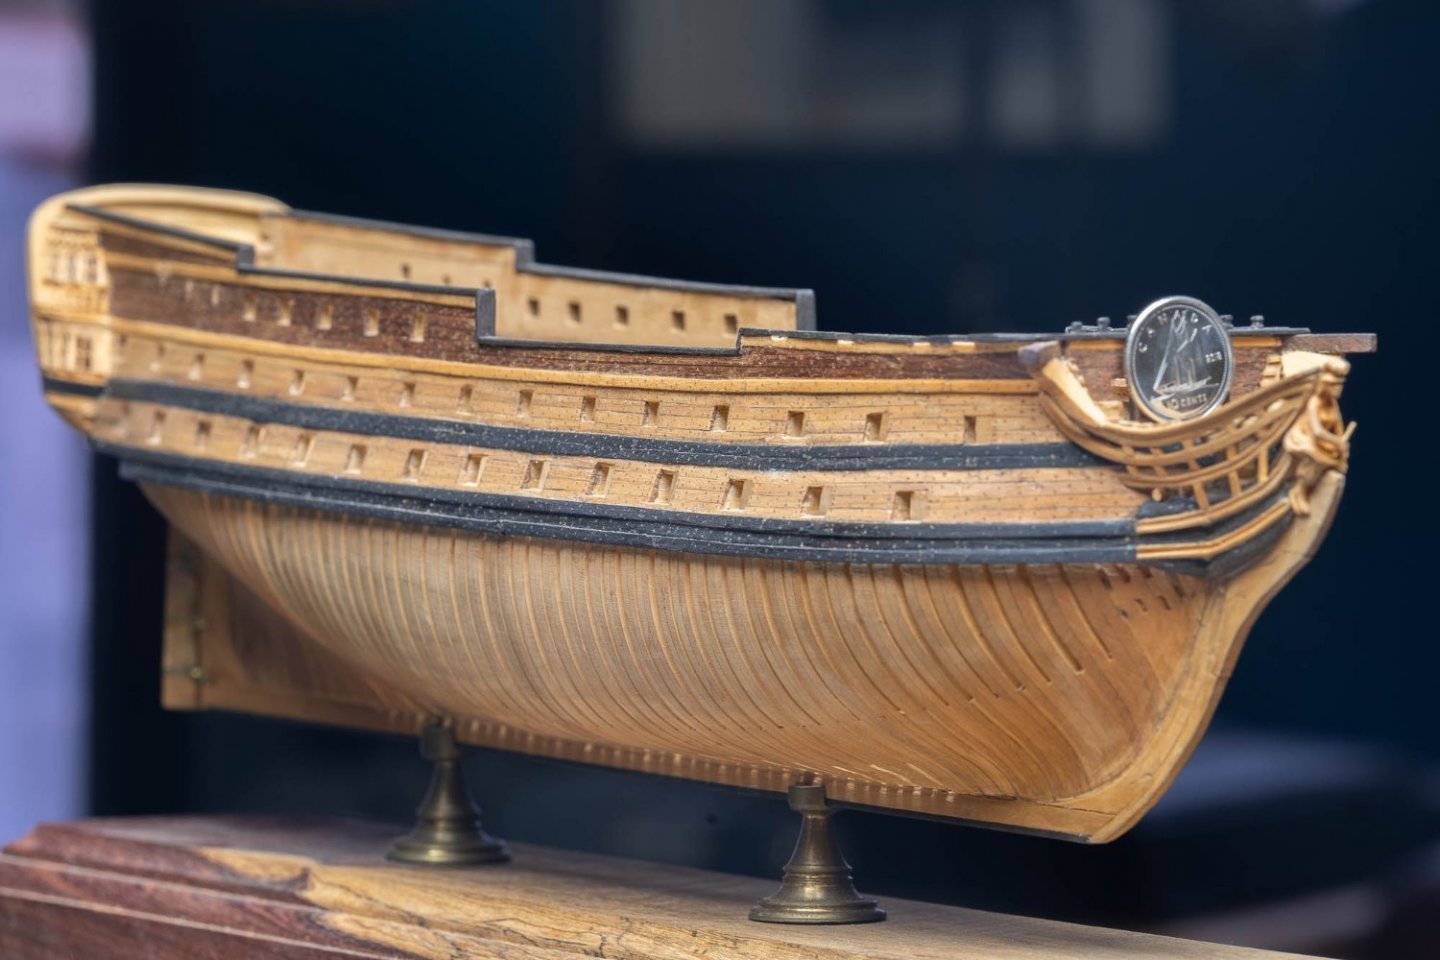
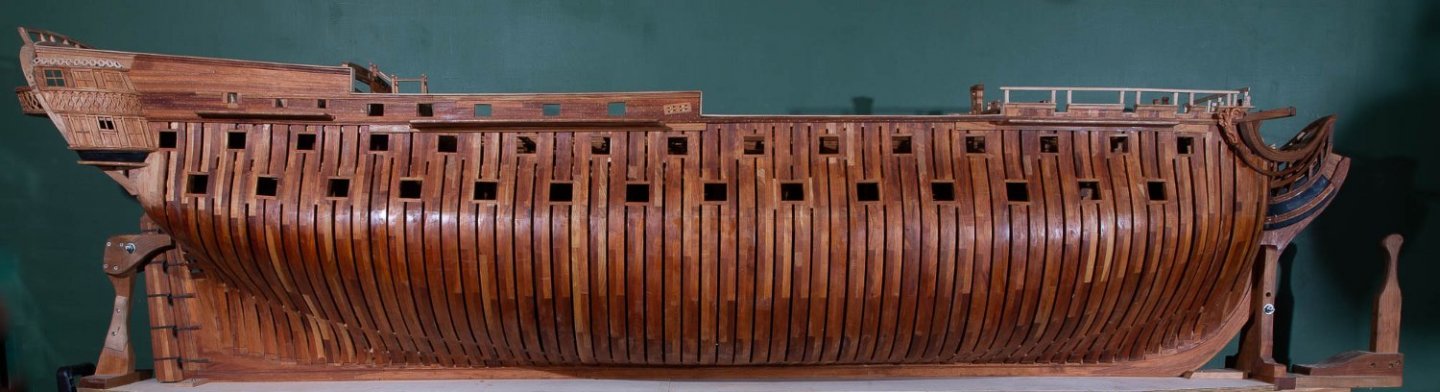
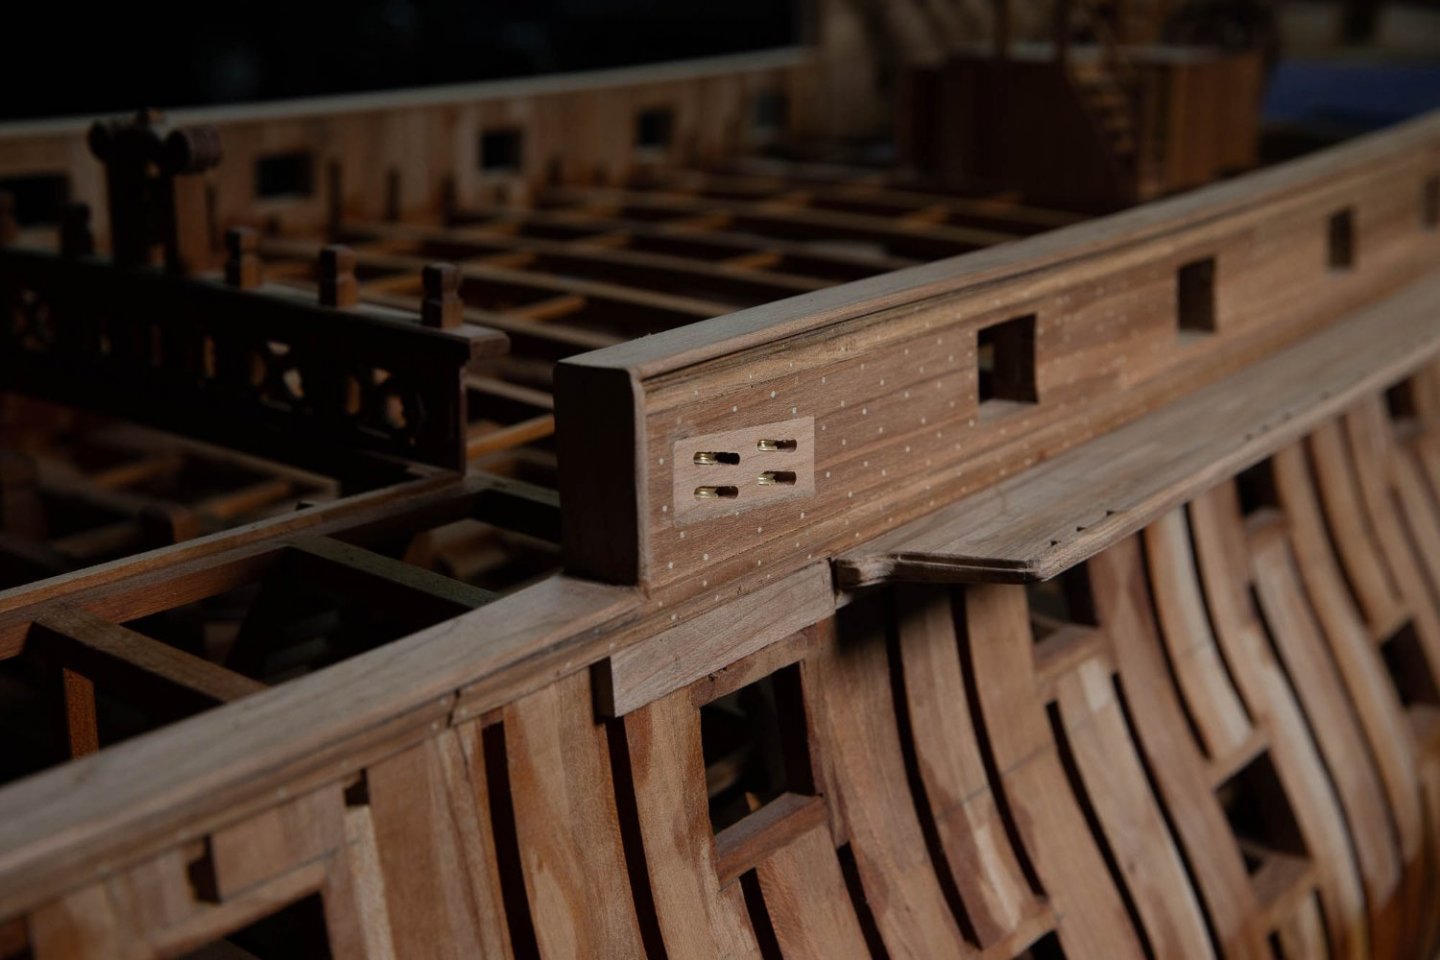
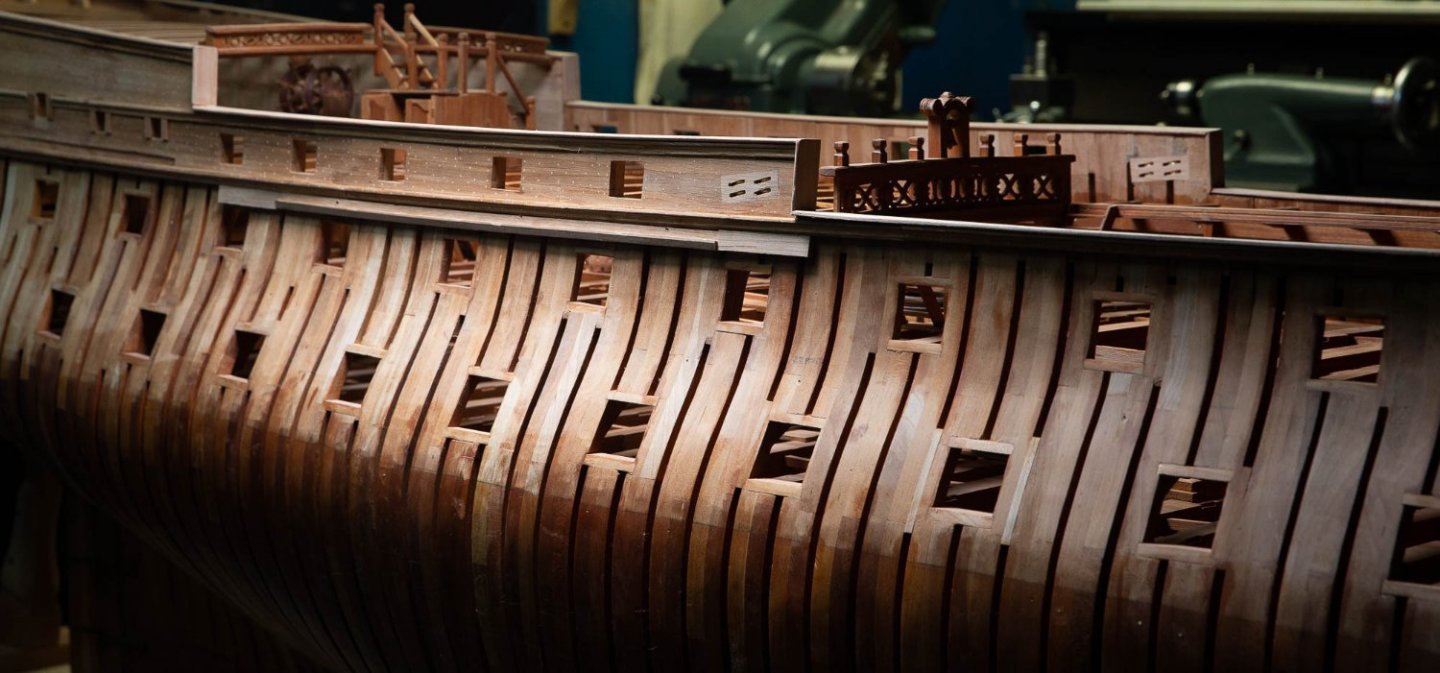
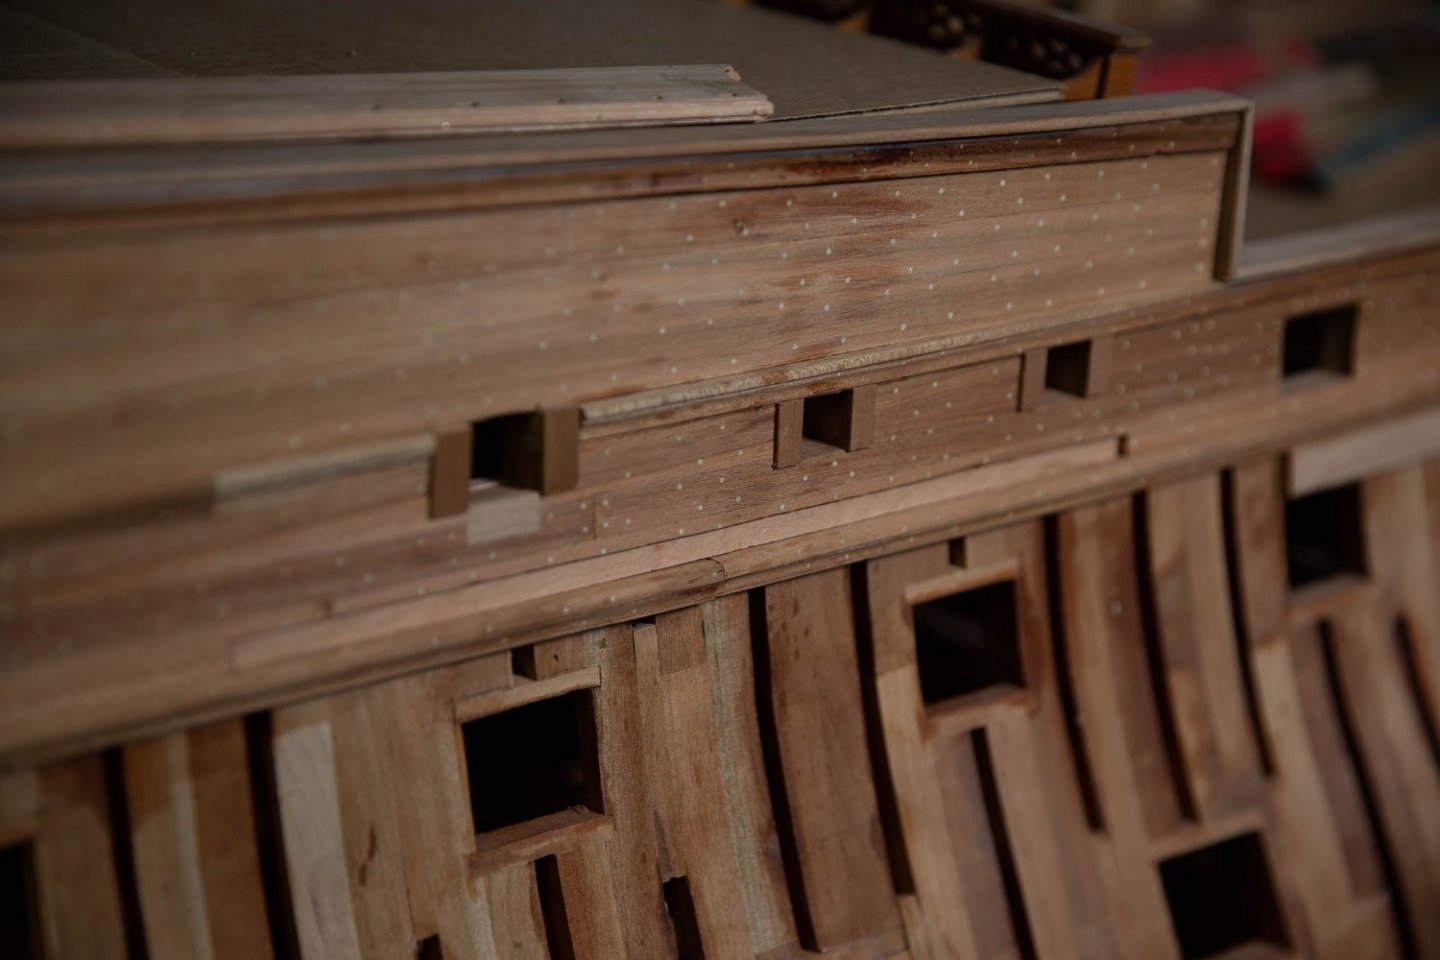
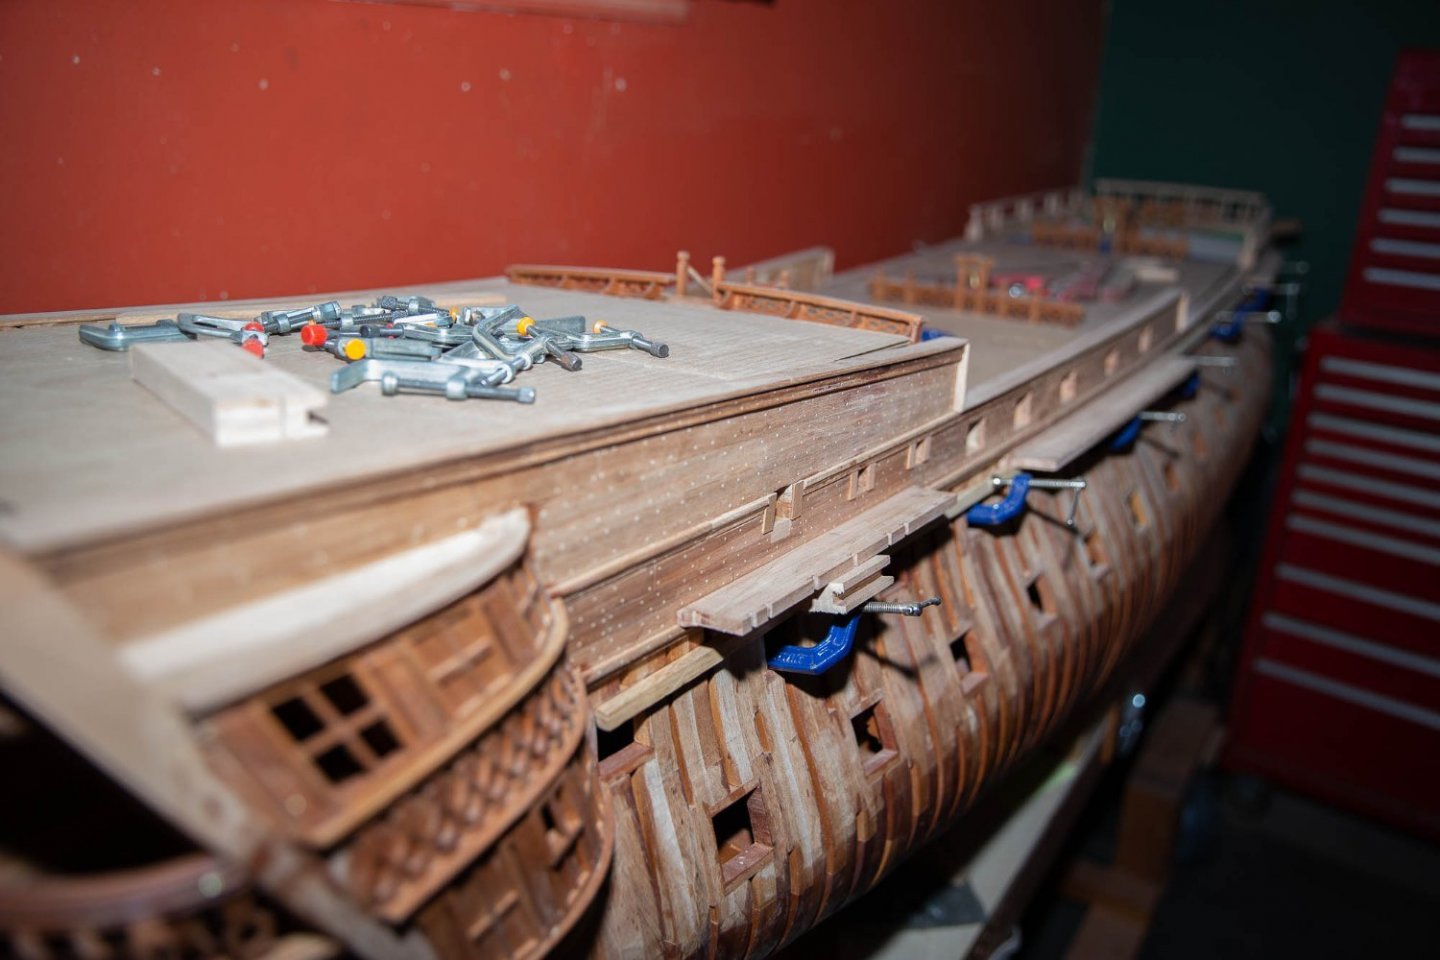
When I began model ship building, I was covering all the decks with planking simply because there is planking on a deck. Then I followed Harold Hahn representation, for the guns and in the middle. Then only for the guns, not in the middle and surely not when there is nothing that comes on the deck. Today, I do as less as possible of planking, the downside: no guns, the good side, I can take a photo and see everything up to the keel.
-
There are figureheads painted gilded varnished unpainted, I prefer boxwood unpainted aged by time. I would classify color in the column of the personal choices. Some peoples choose paint other just the color of the wood. They are both right, it just depends of what do you want to represent.
-
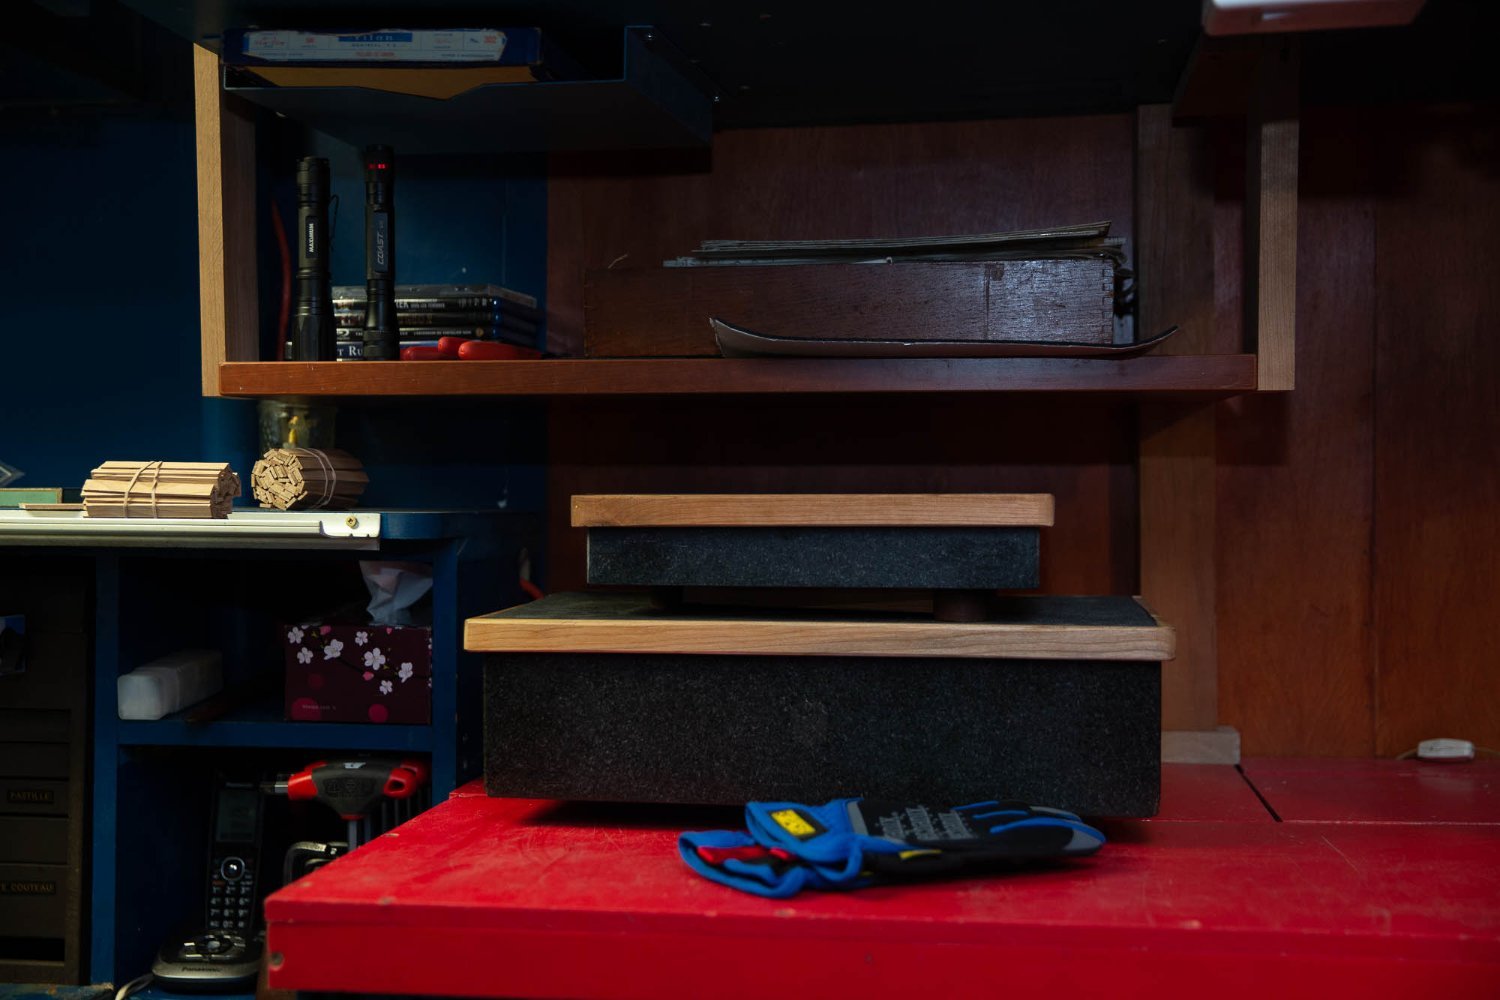
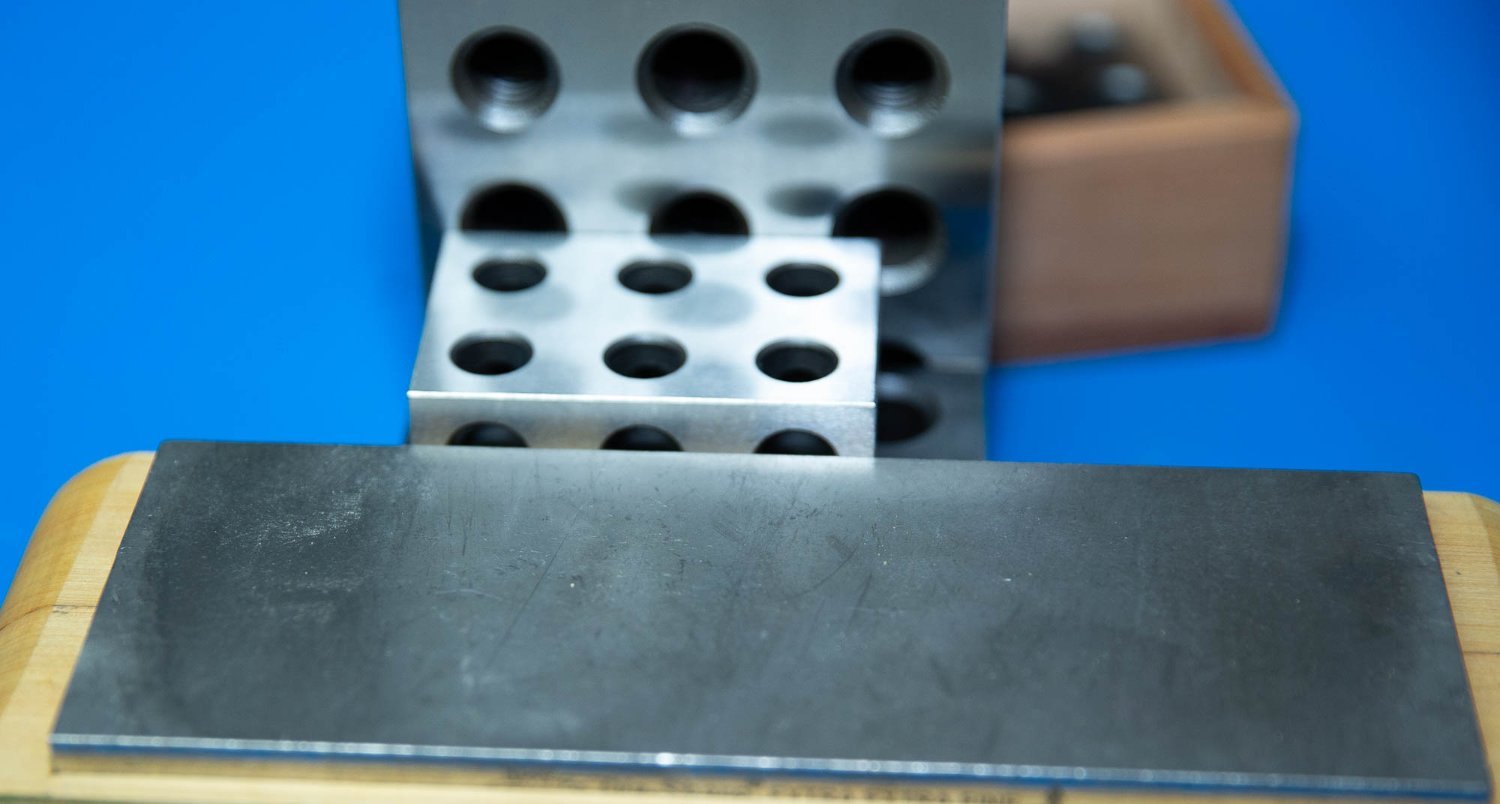
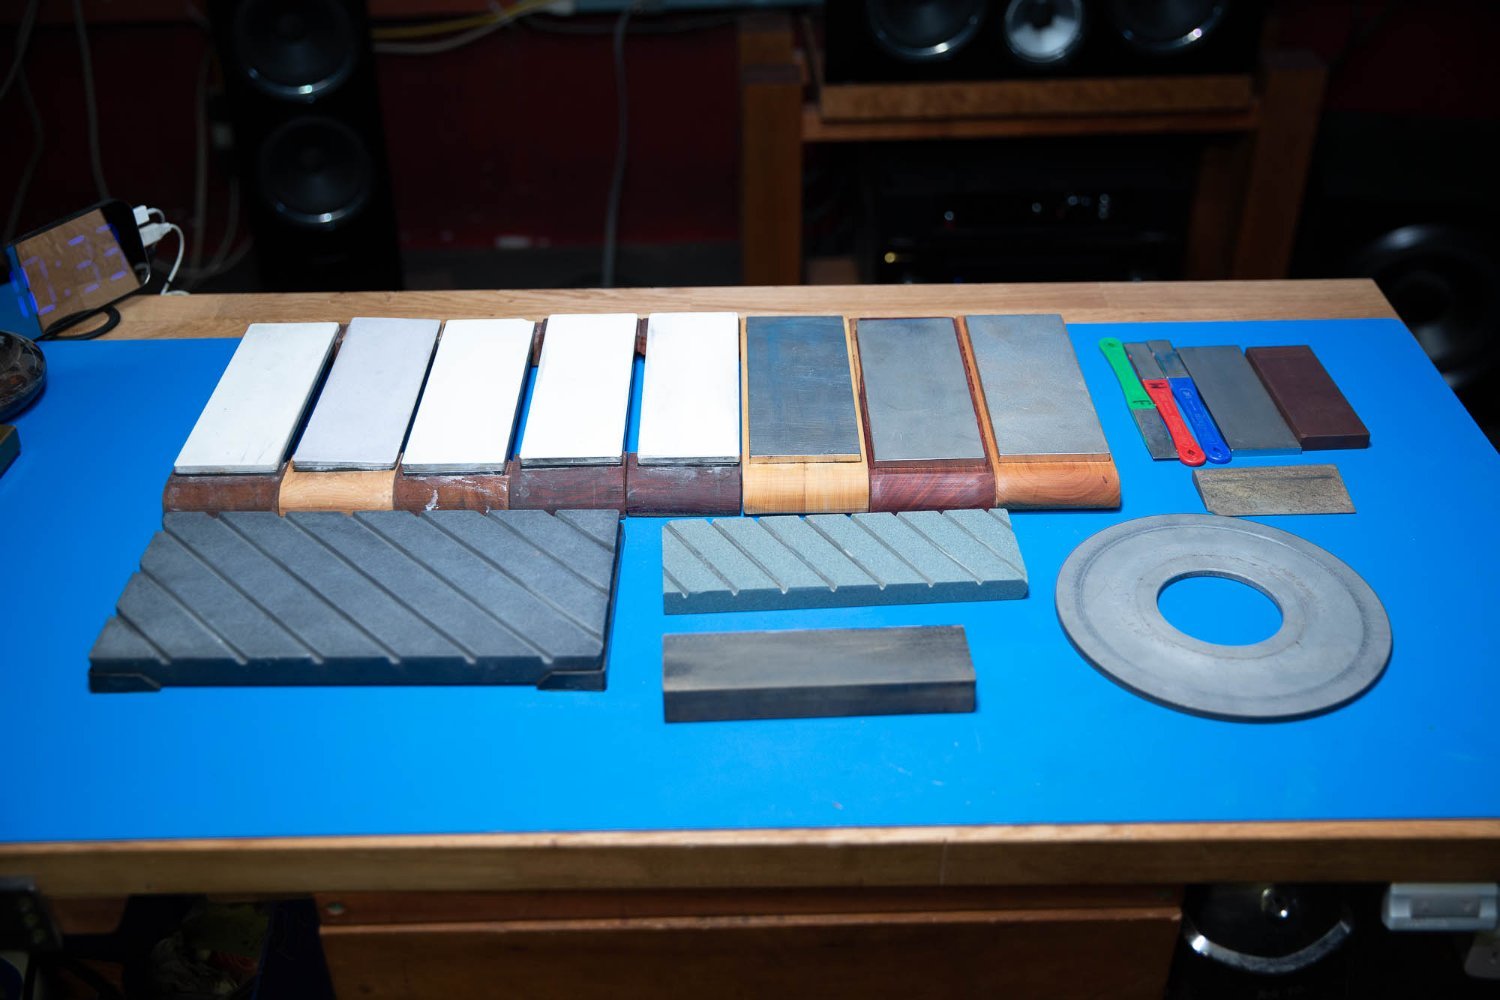
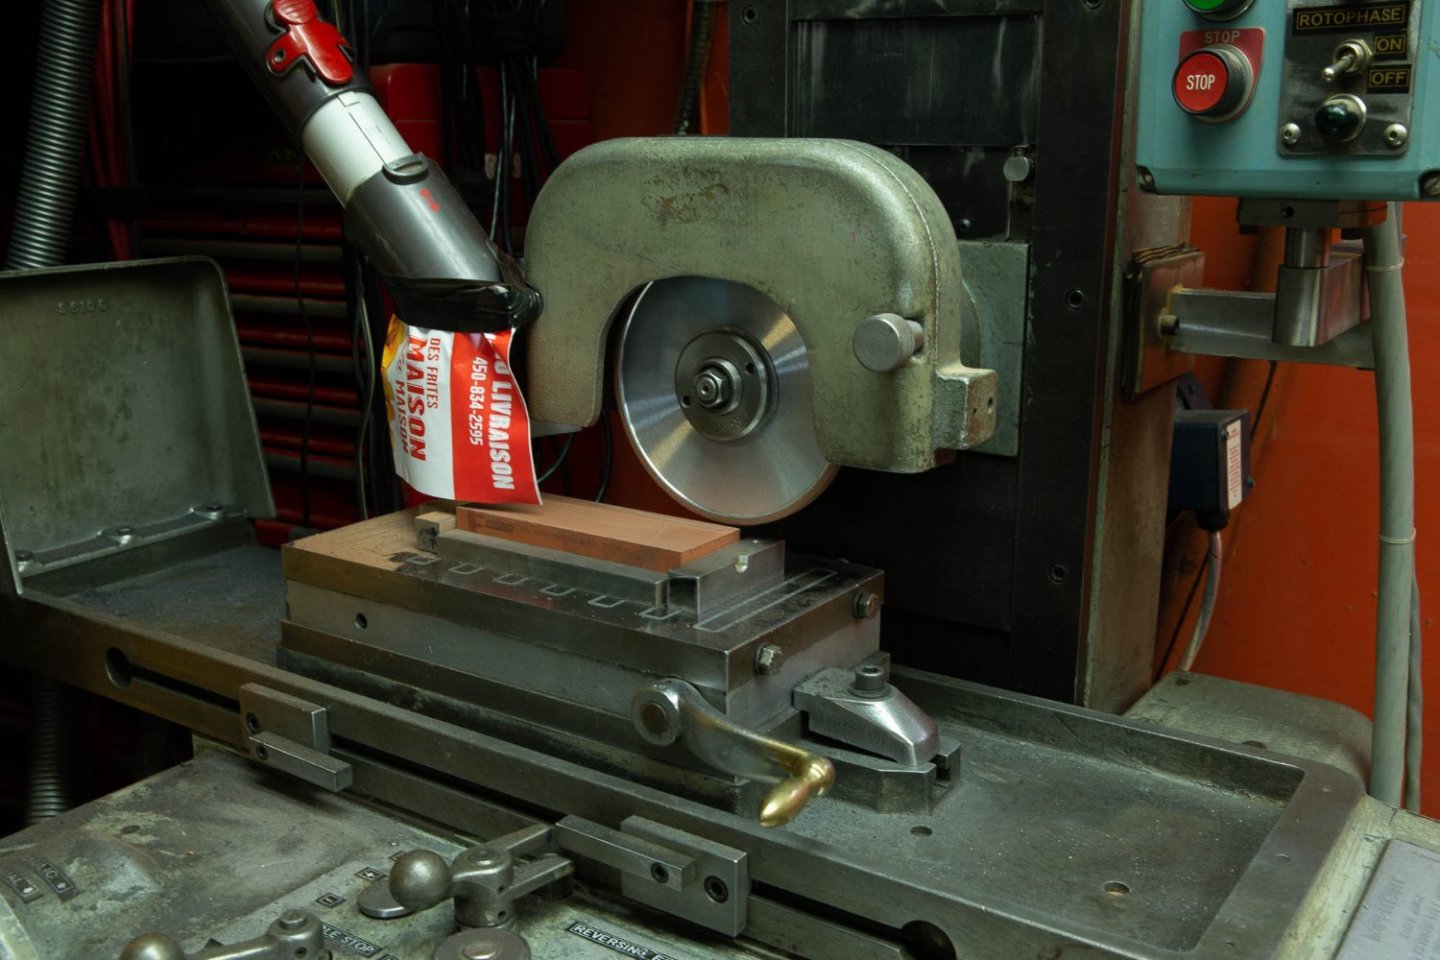
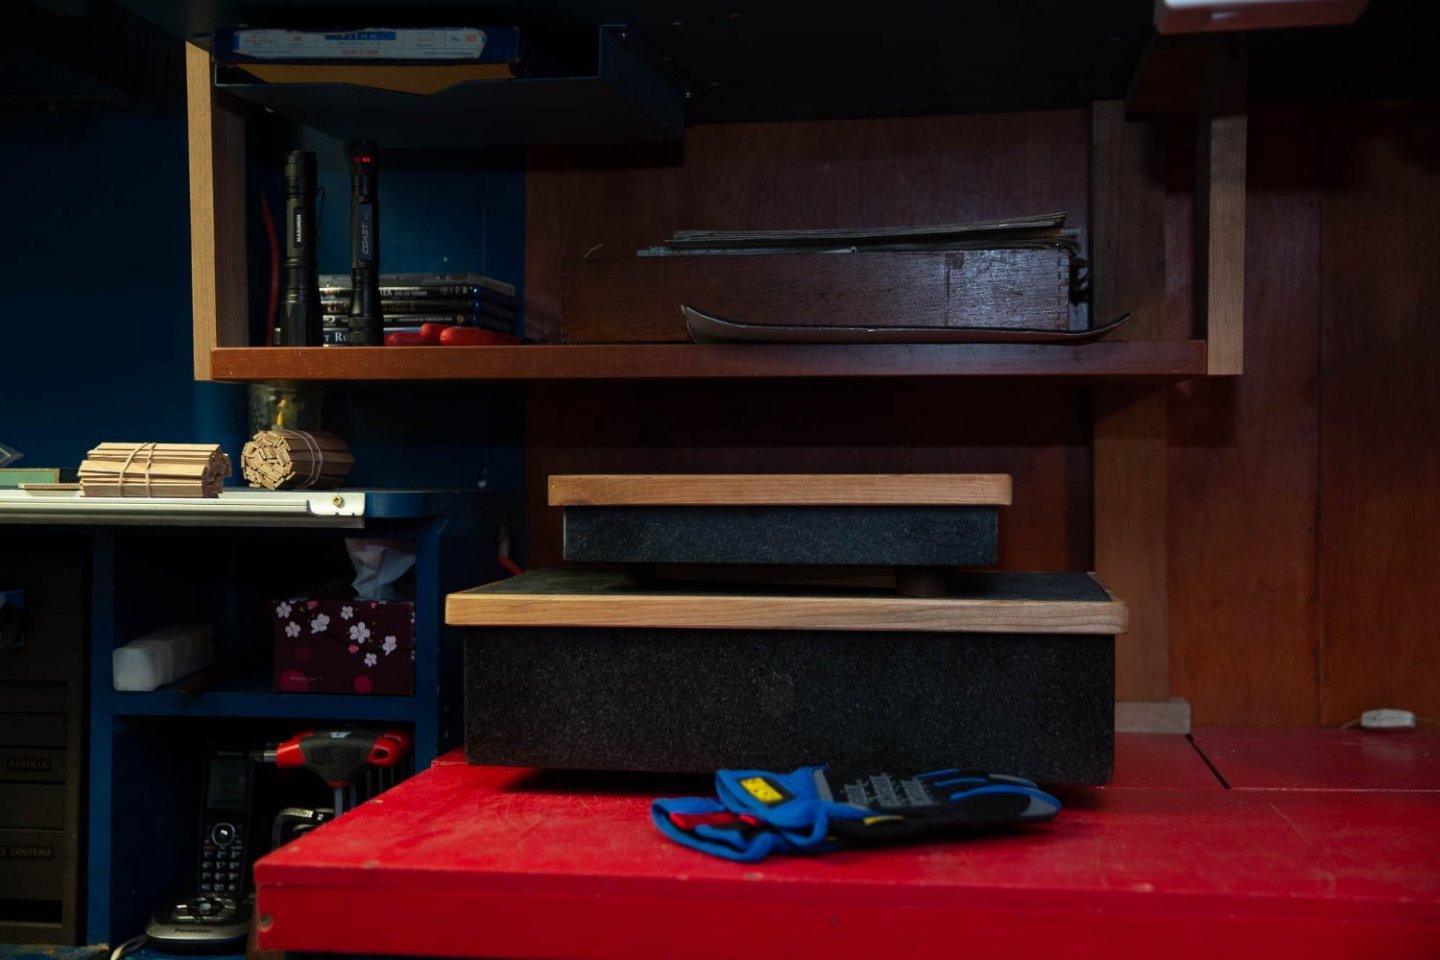
Working on the channels and the next chapter of sharpening not a knife this time but a flat surface.


-
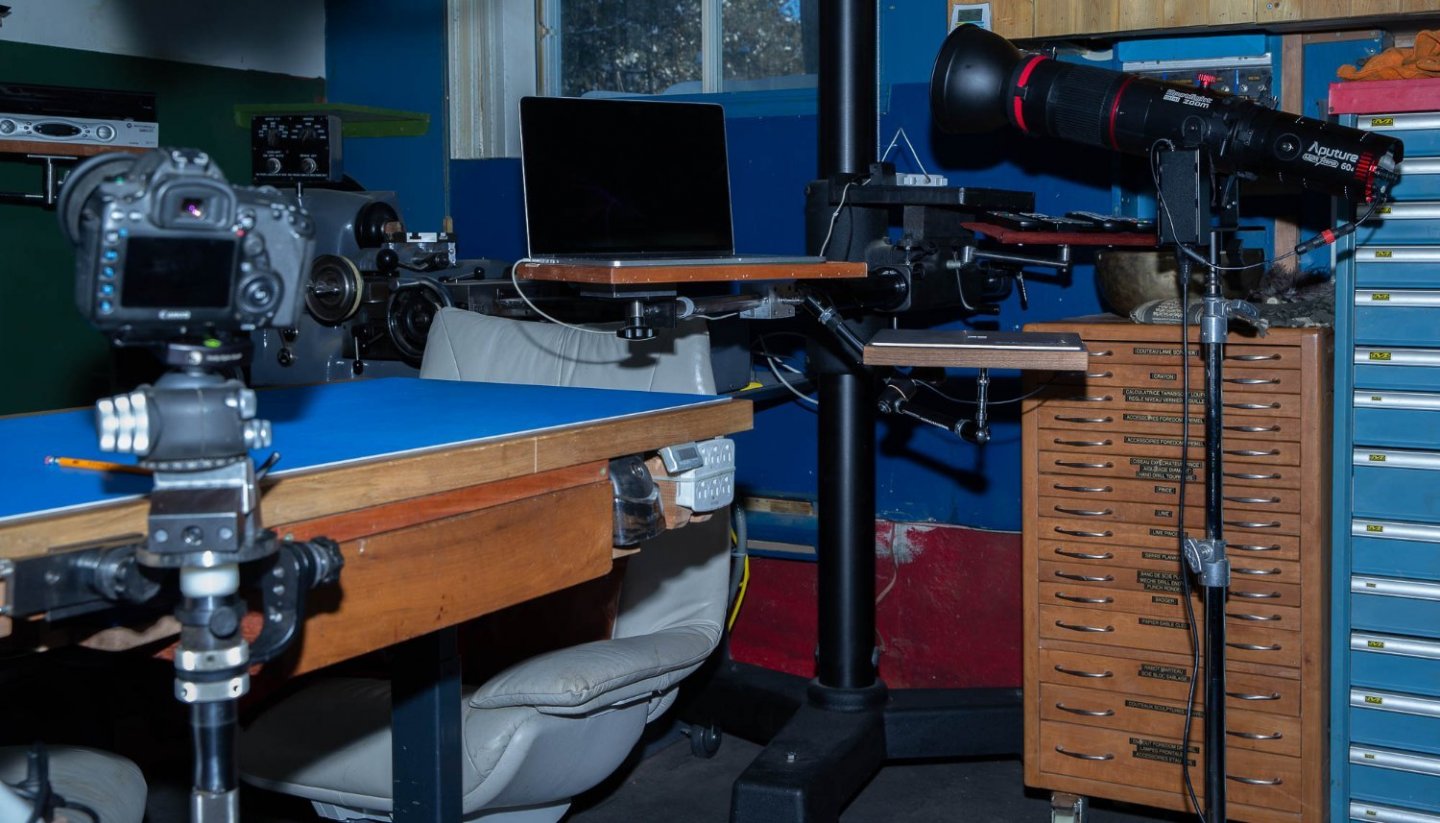
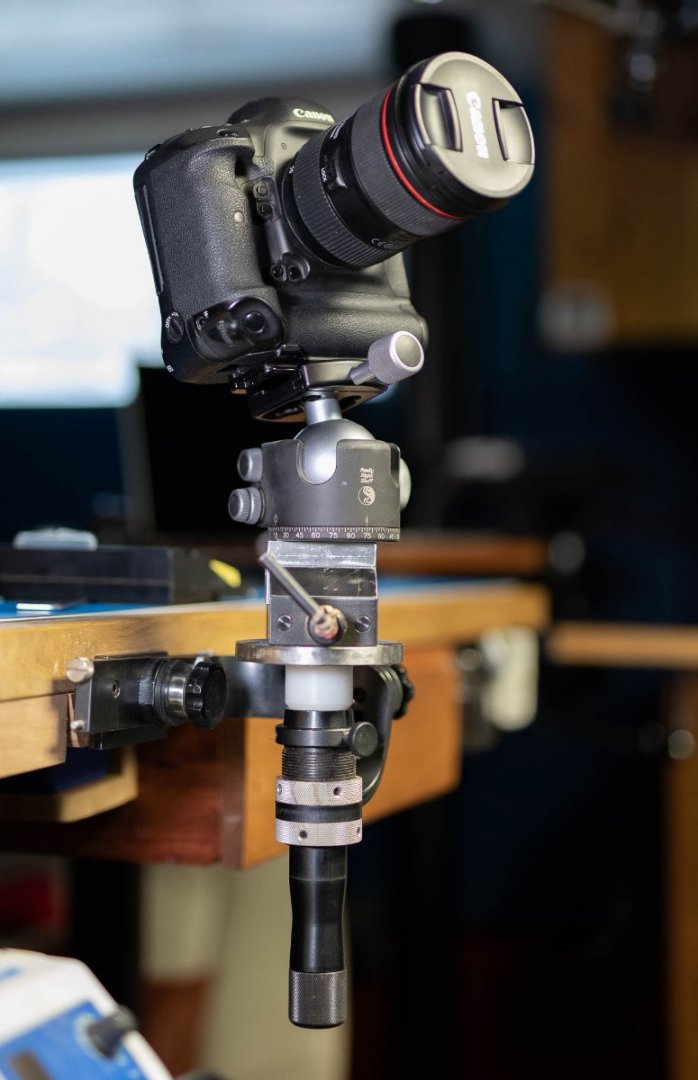
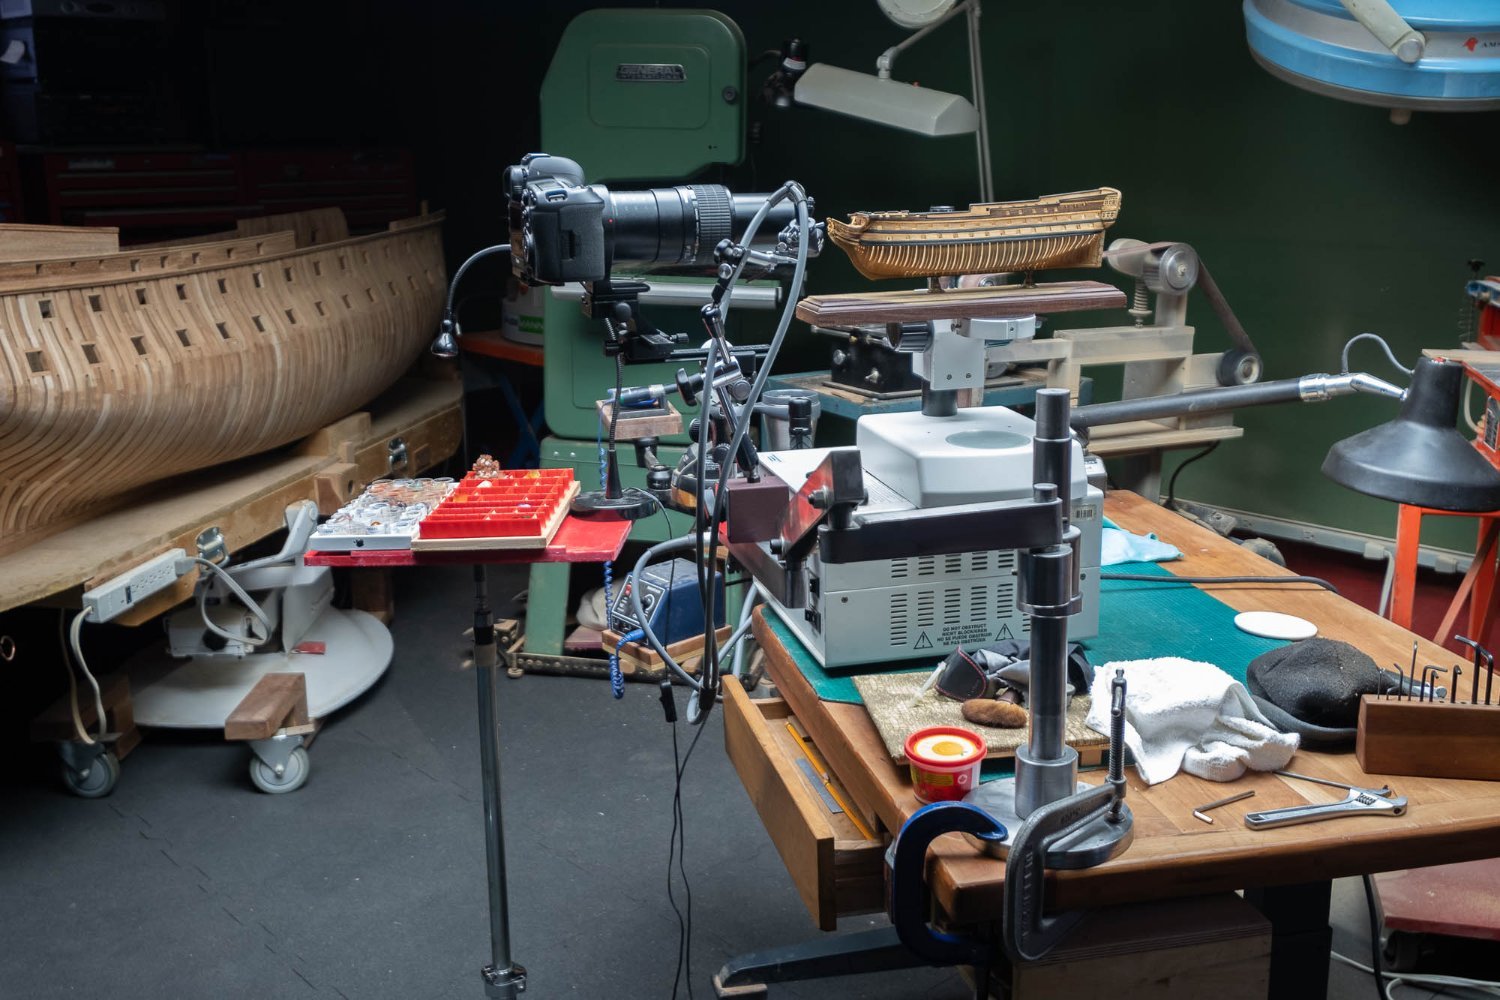
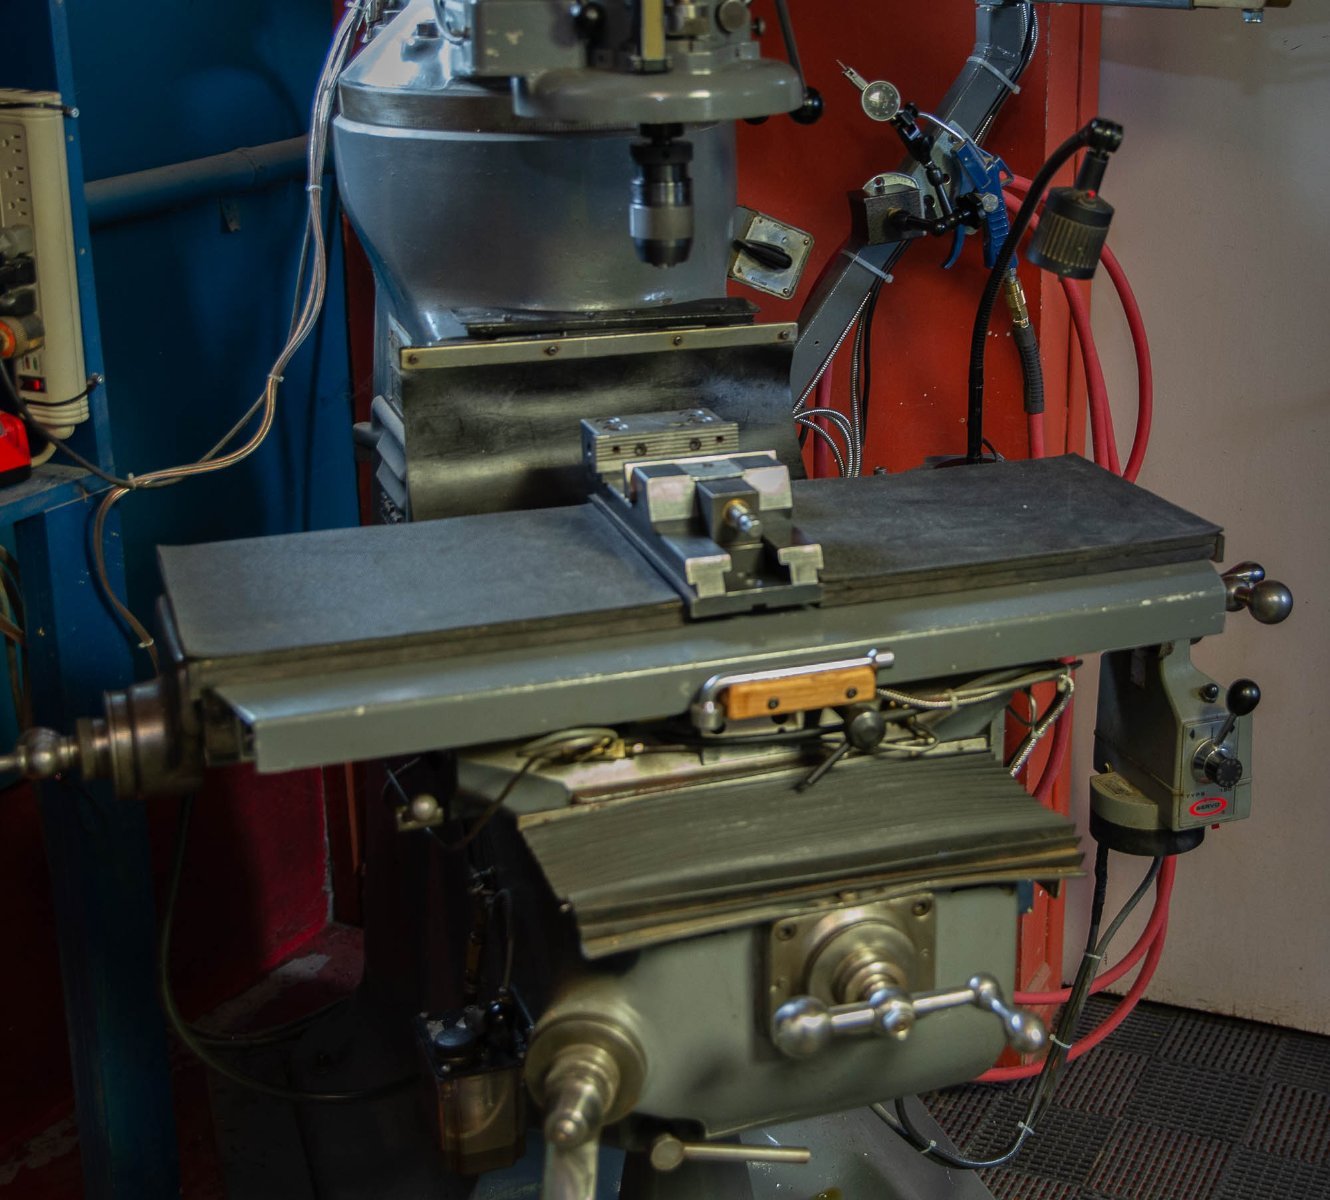
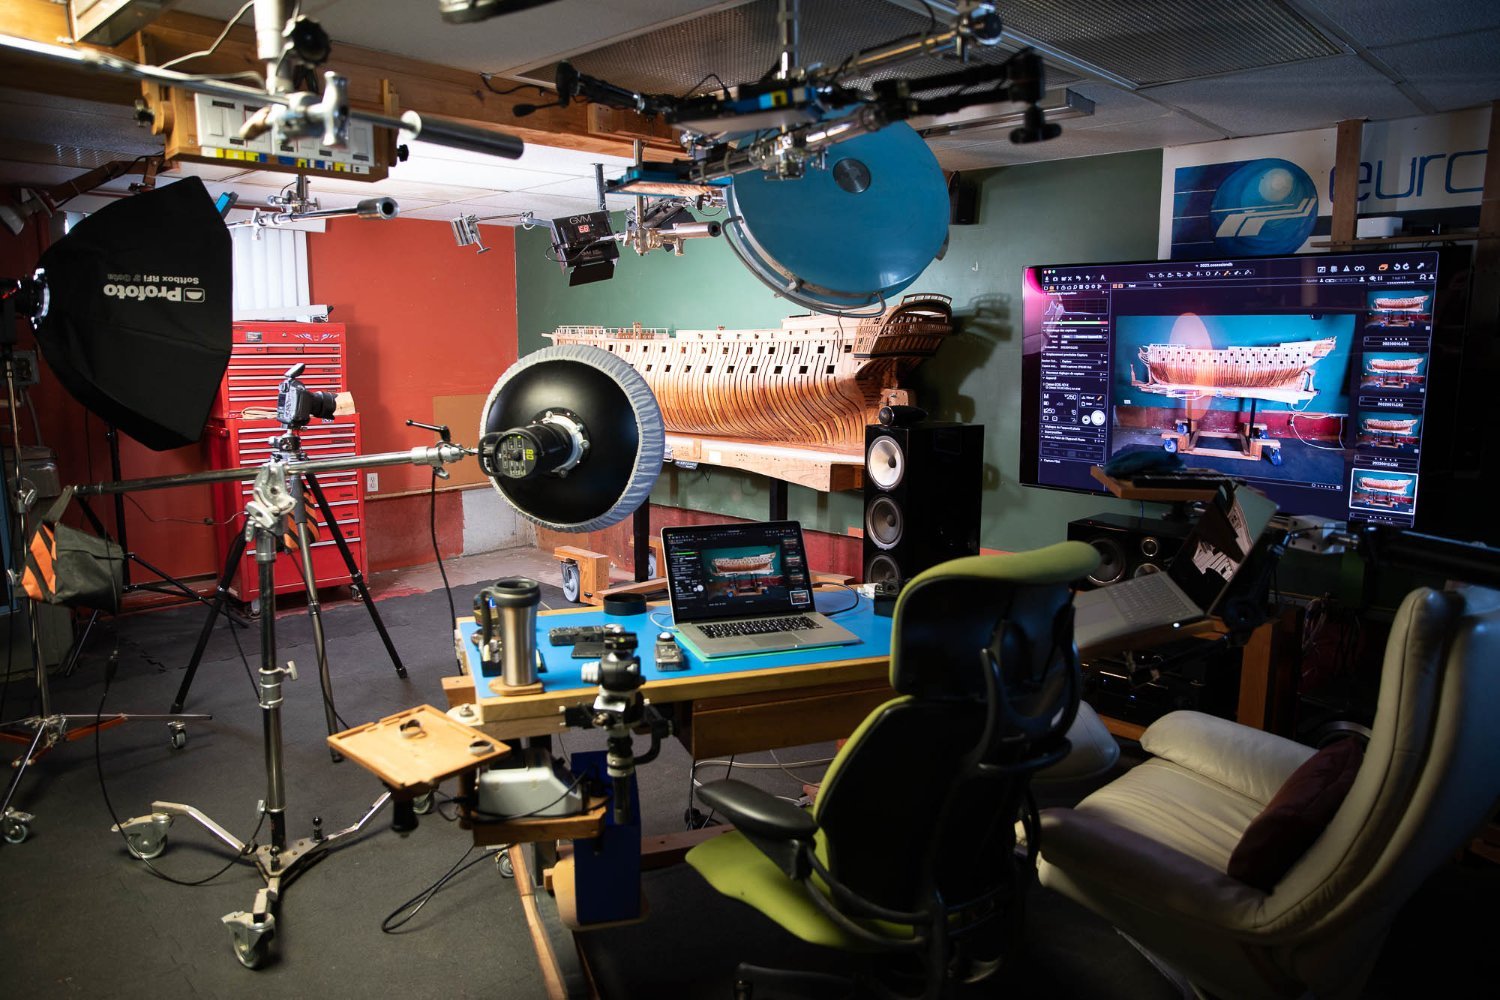
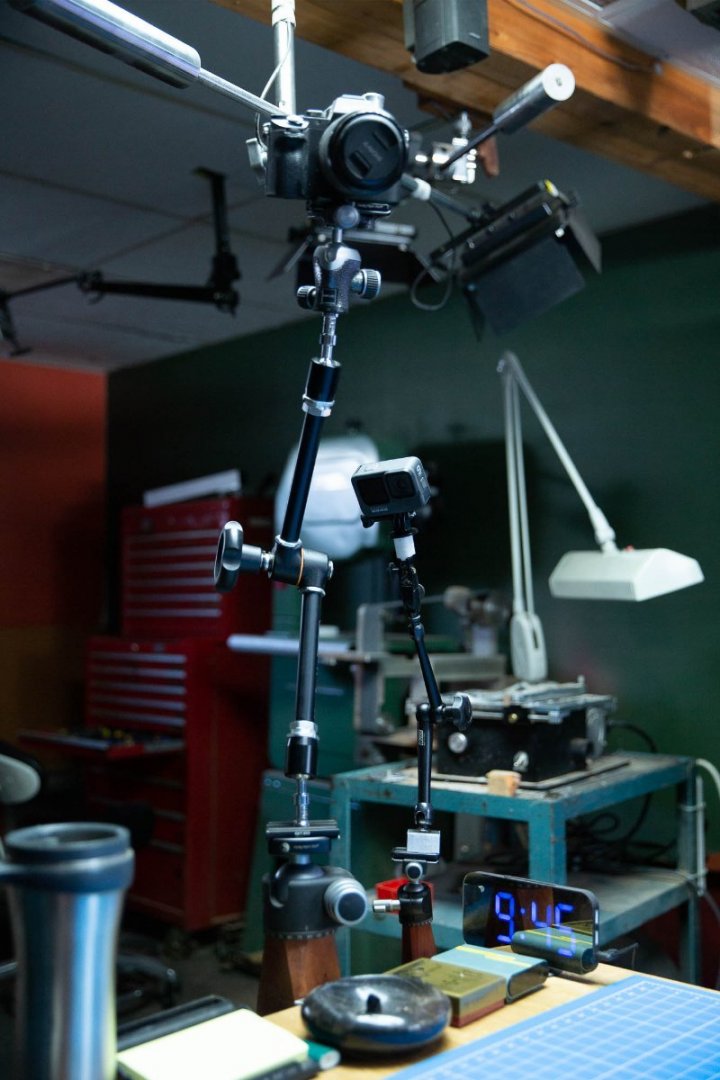
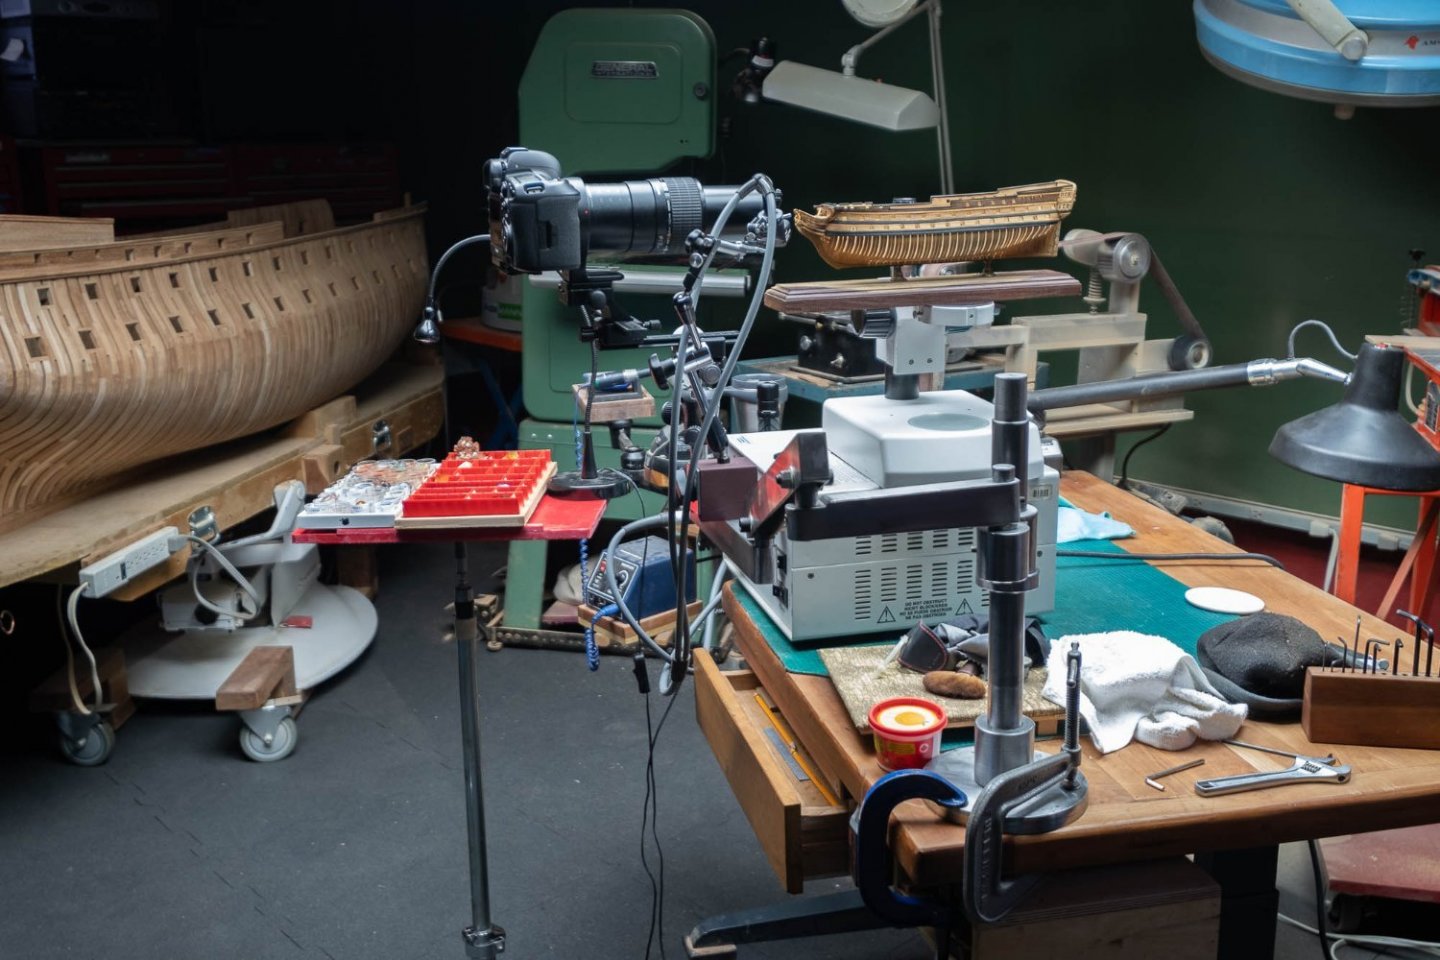
Building WOOD model ships is a process I enjoy very much working with wood. Photography is also another process I like to experiment. And lastly, milling and turning metal like aluminium and plastic is also something I enjoy. As a side note, you can turn plastic with high precision. Just like in car products, where you cannot install a door mirror of a car from one kind to another kind; the same thing appears with photography adaptors. Fitting adaptors or adapting some new ones to experiment further in photography of model ship is also an interesting avenue that I like to explore. Some examples are following to show trying to take photography a model ship and getting a photo with exactly the same colors as what you see. Of course you do not need all these adaptors to take photos but I like to experiment.