HOLIDAY DONATION DRIVE - SUPPORT MSW - DO YOUR PART TO KEEP THIS GREAT FORUM GOING! (Only 27 donations so far out of 49,000 members - C'mon guys!)
×


M. Pajulahti
-
Posts
126 -
Joined
-
Last visited
Content Type
Profiles
Forums
Gallery
Events
Everything posted by M. Pajulahti
-
 George, Unfortunately, all the mistakes in plans were in bulkheads also, at least in my kit. Amazing, how MS can produce that kind of crap. They should redo the plan sheet 1 and their bulkhead laser cut program to make these kits better. It's kind of cheating feeling when we compare the parts to plans and everything is correct there, but It's hard to see that all the mistakes are in the plans also and everything is wrong. The good thing is, our material is wood and so it can be fixed. Of course the best way is correct all the right shapes first before building anything, but that's not possible because some of these mistakes appear later during the build. Markku
 -
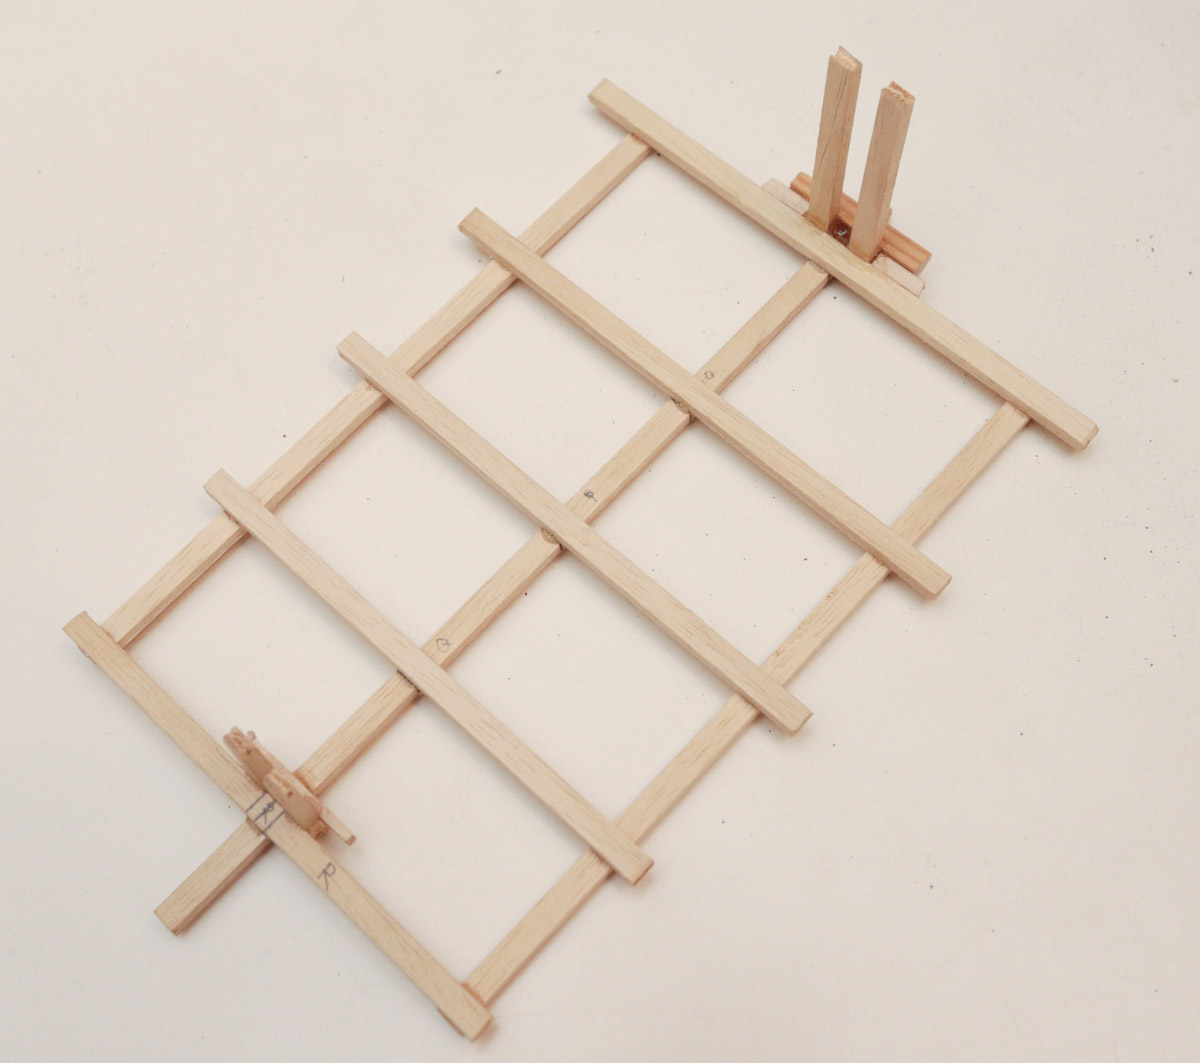
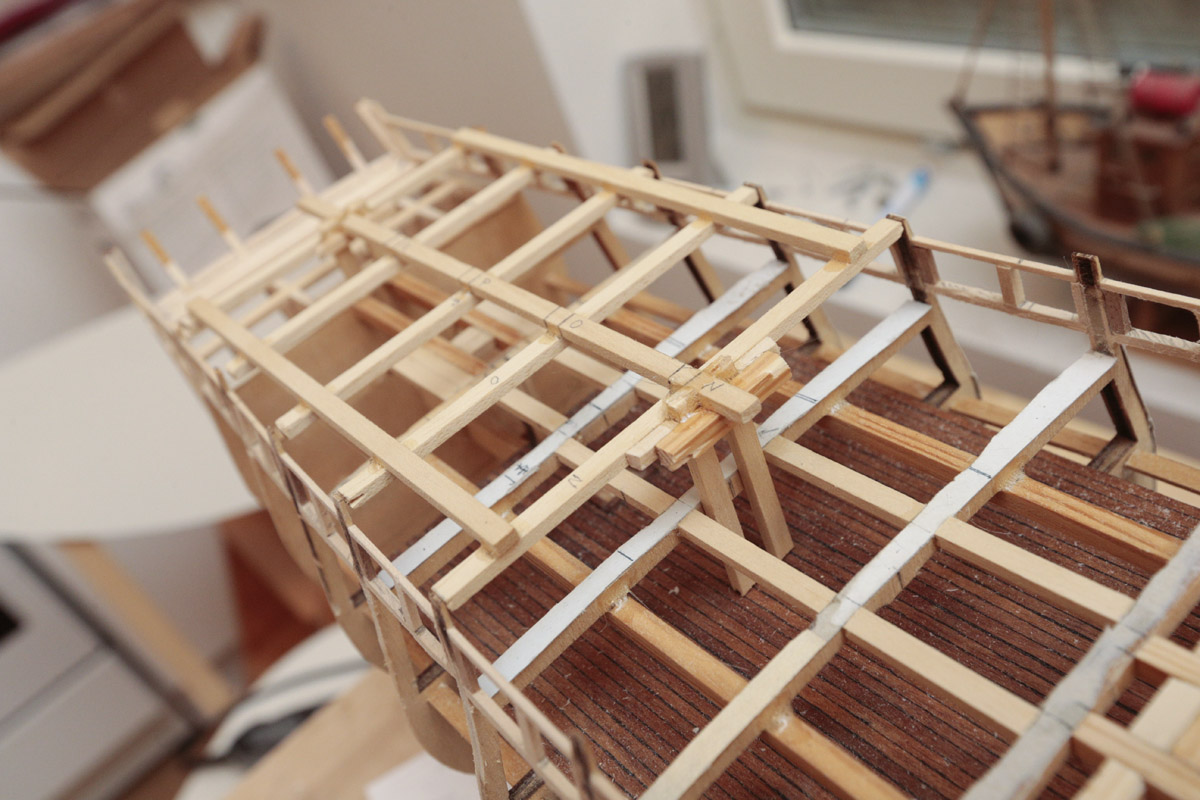
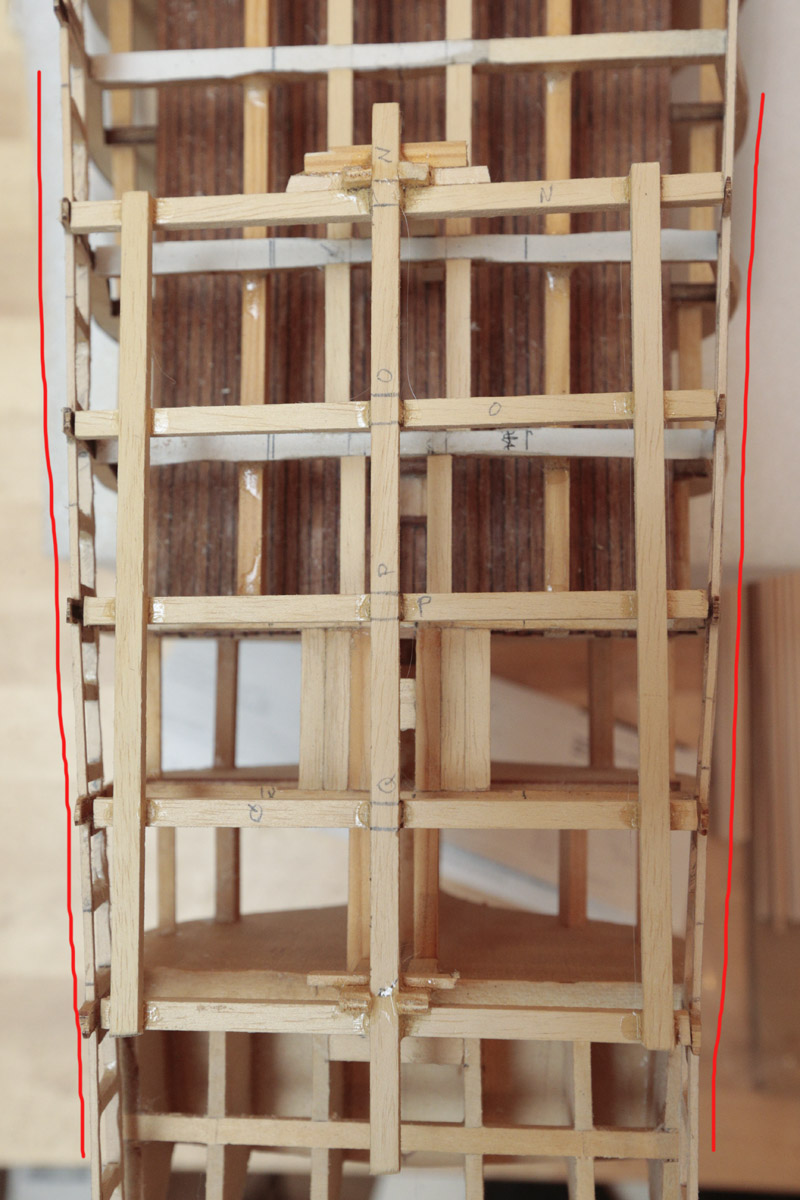
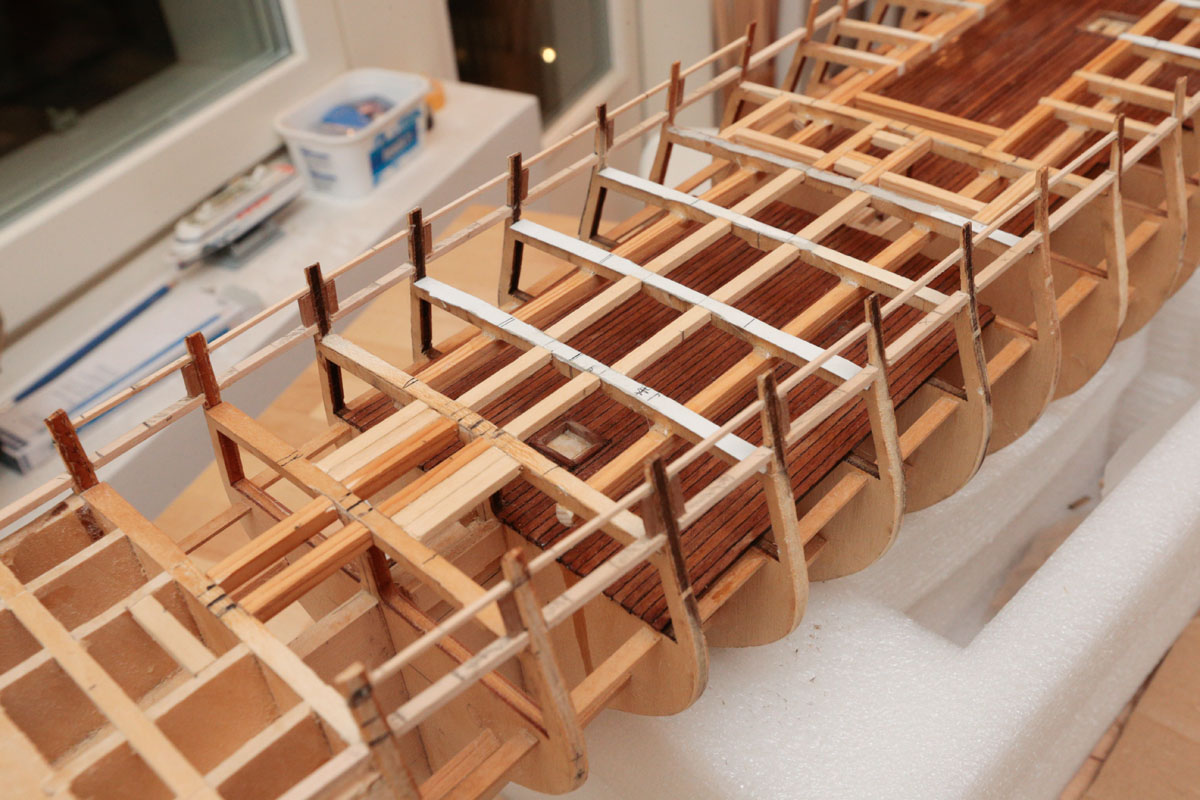
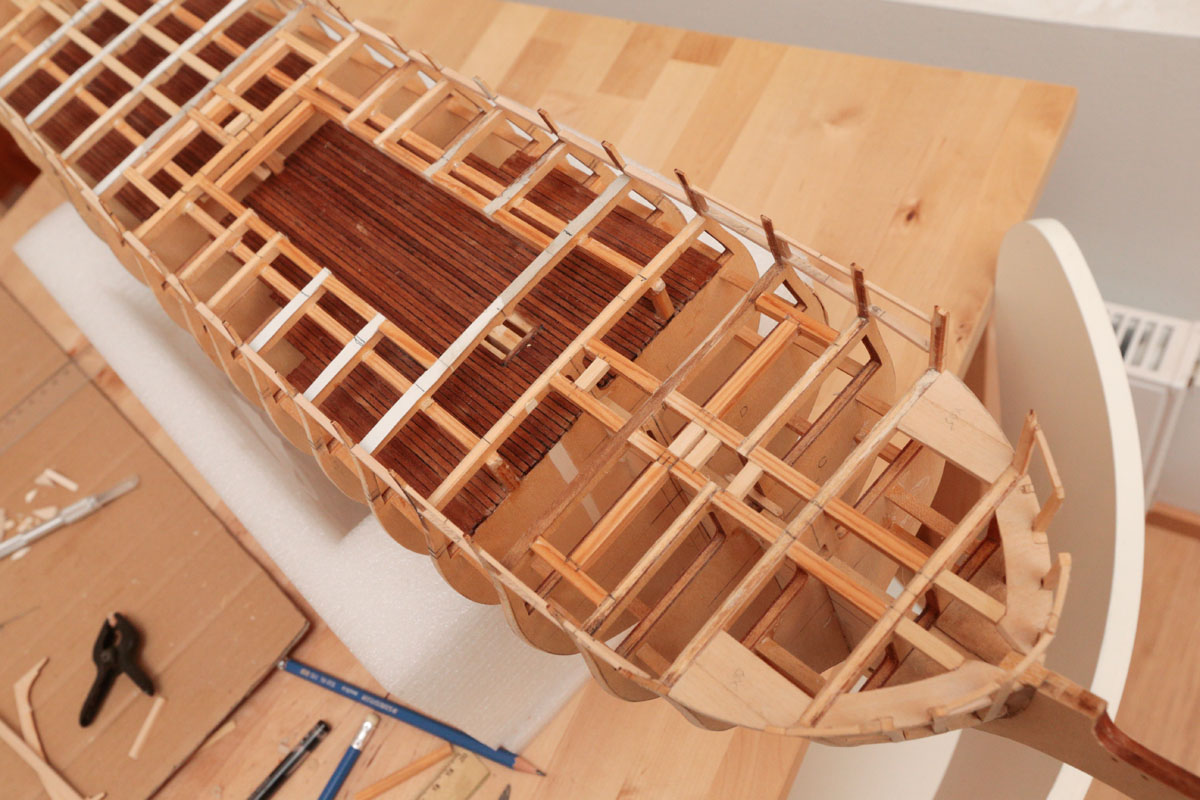
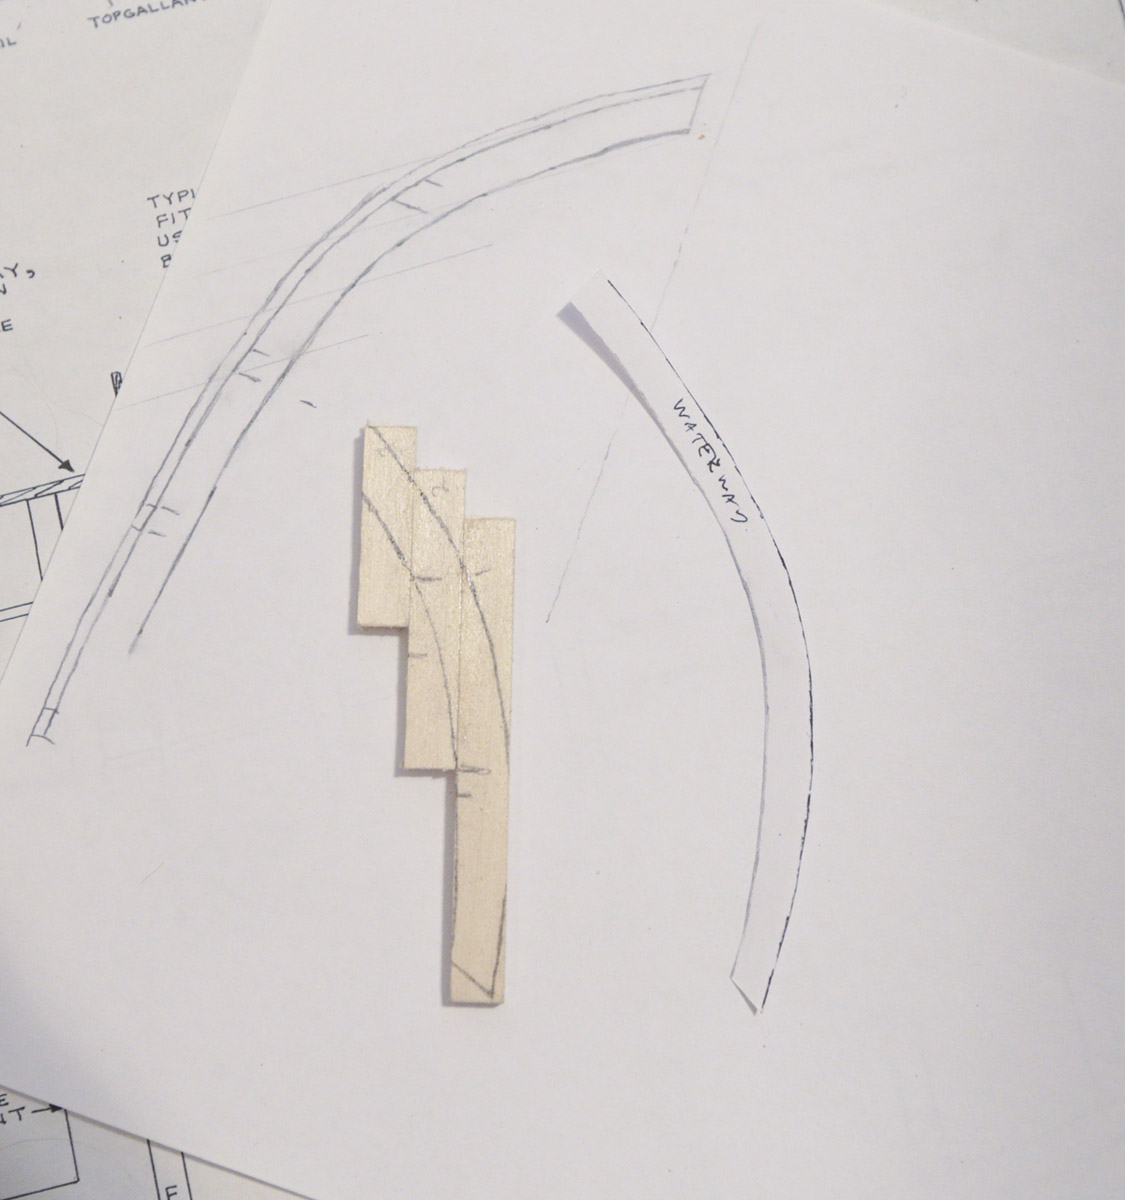
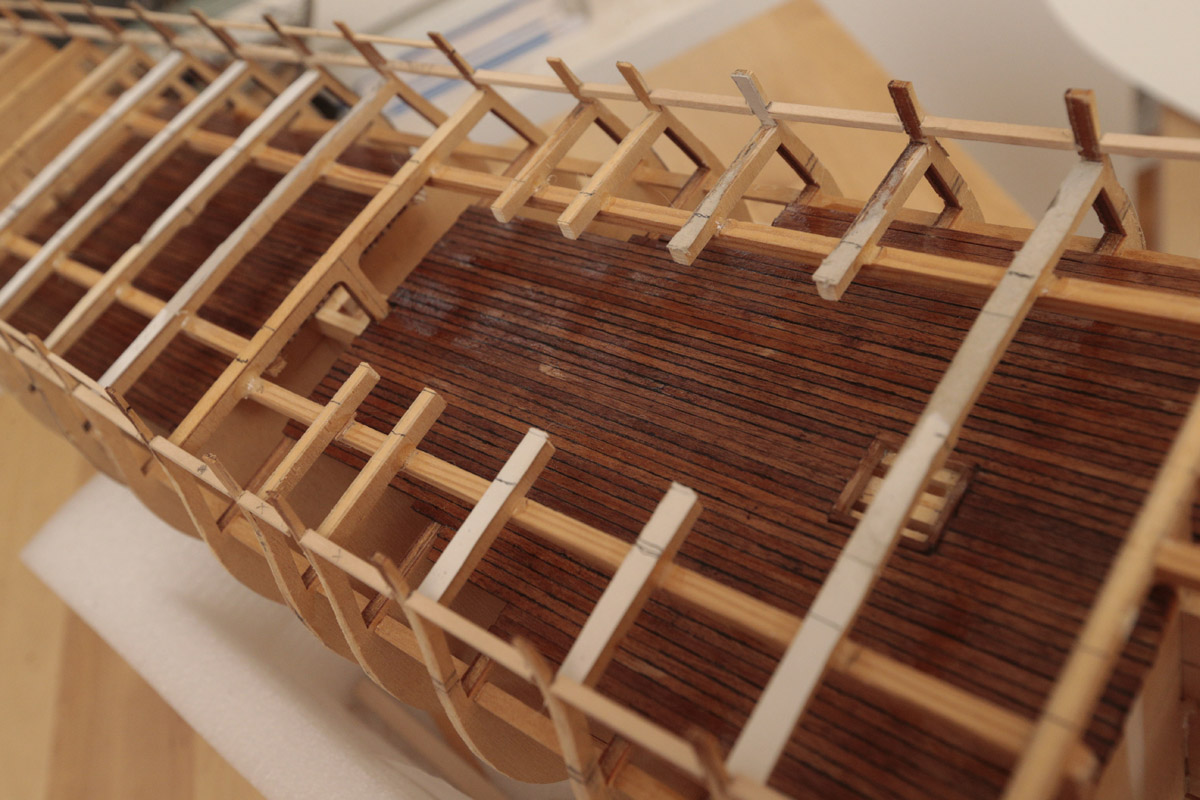
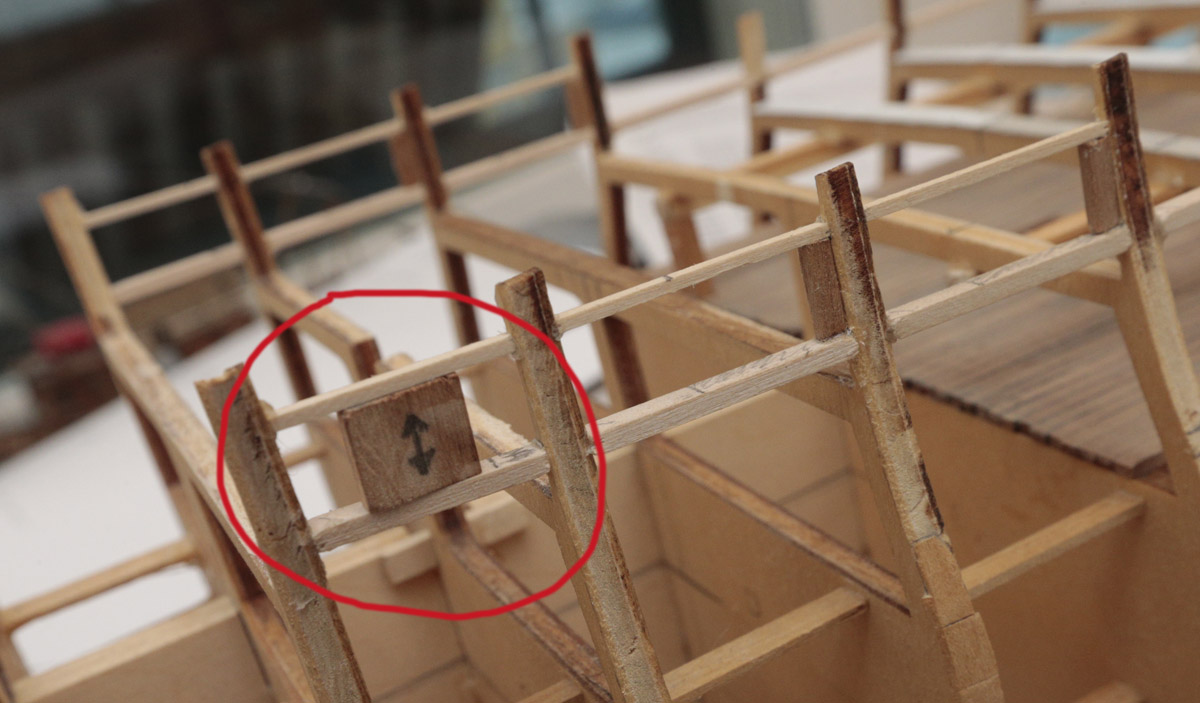
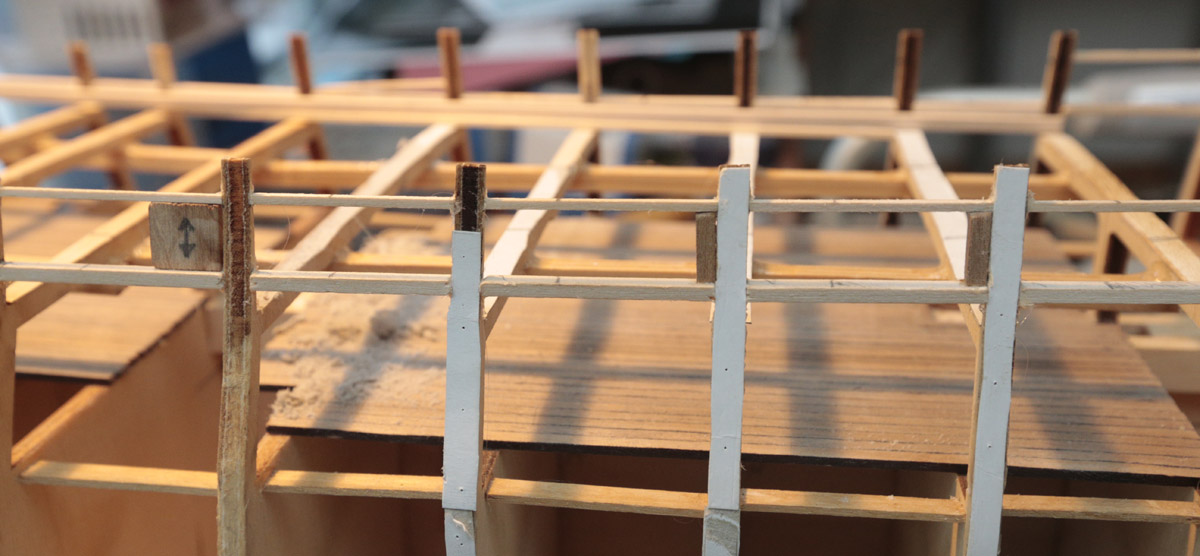
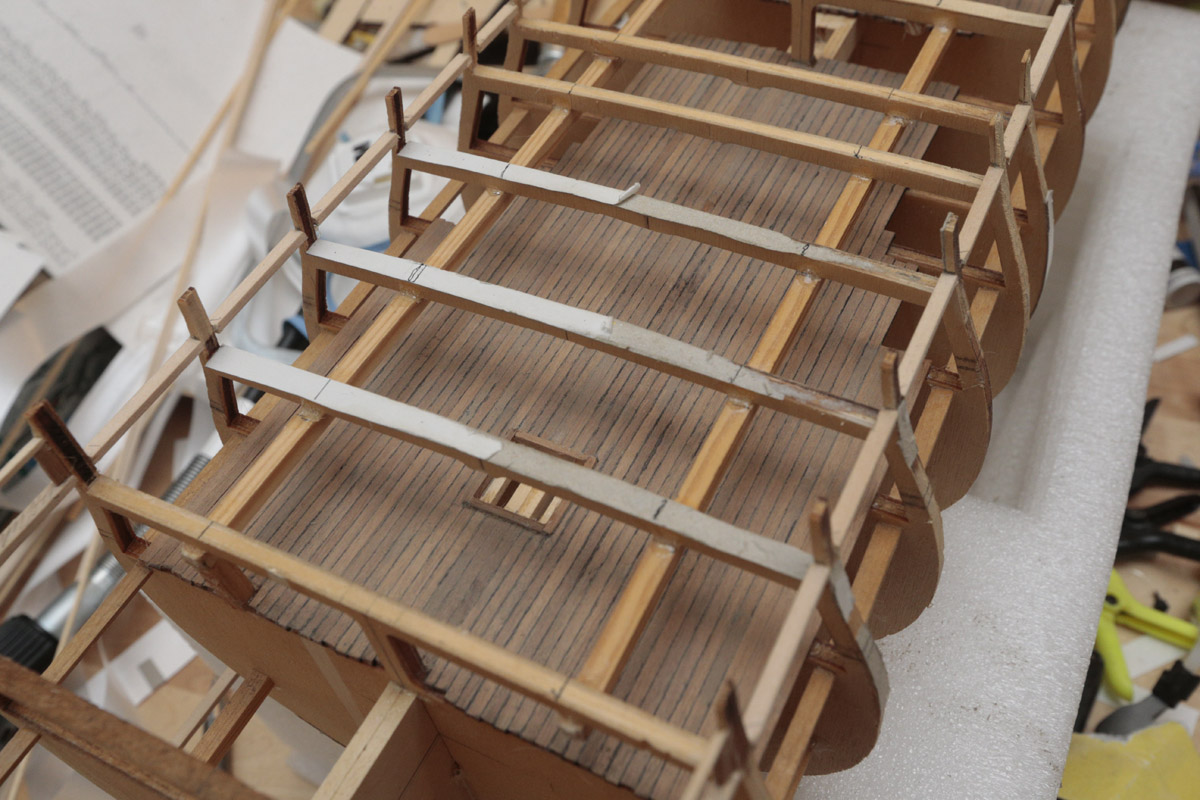
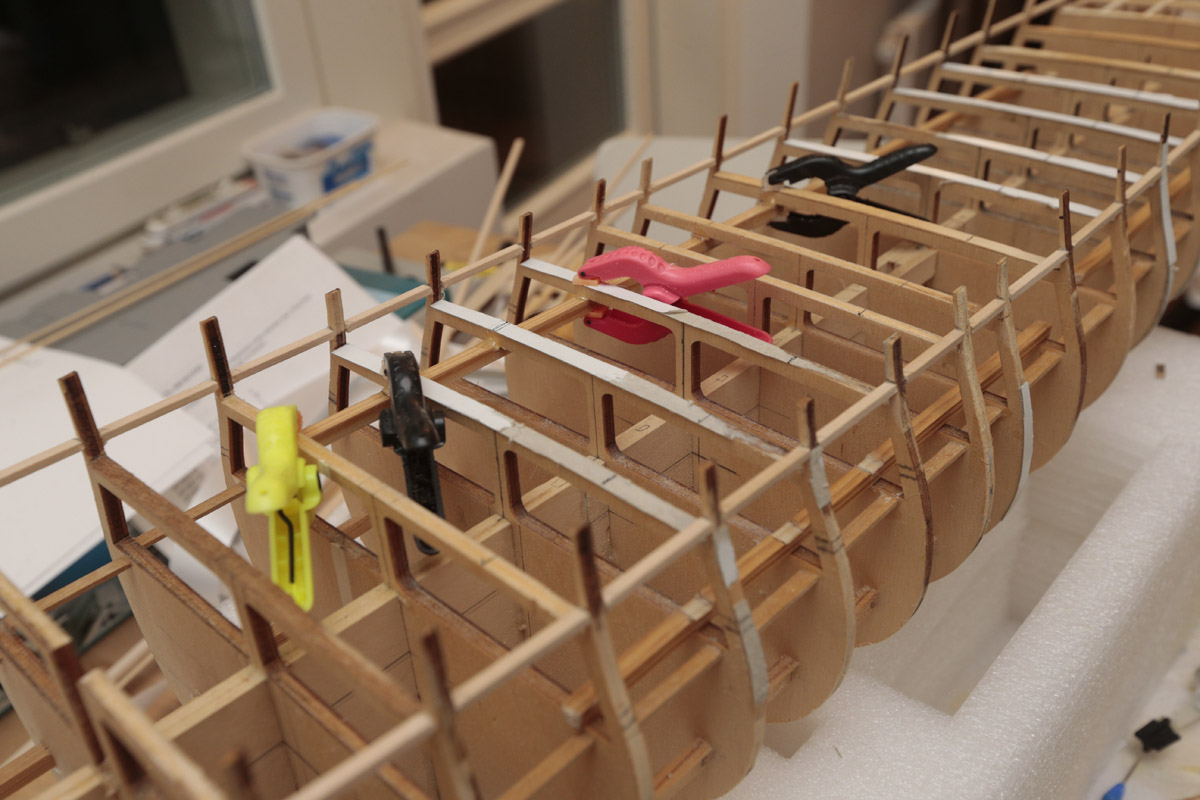
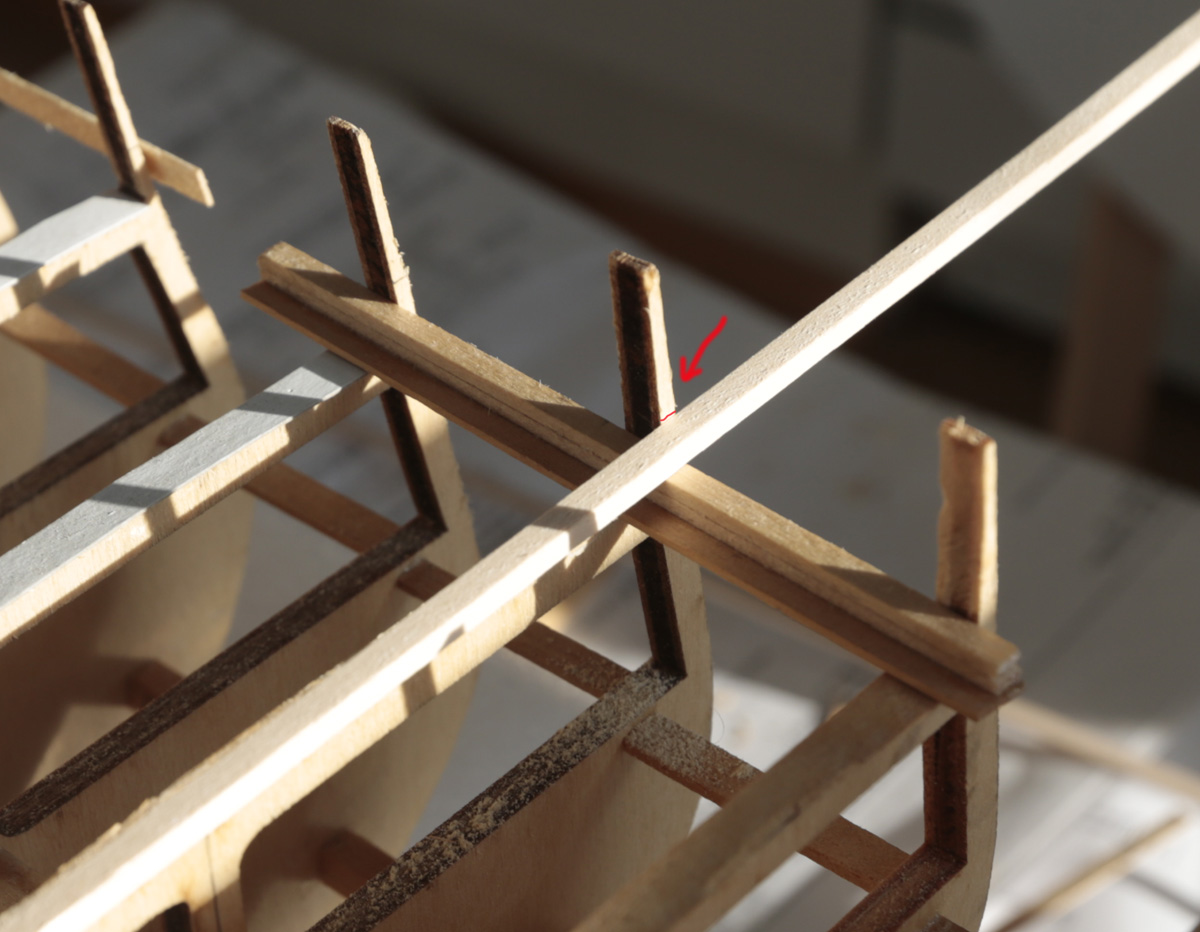
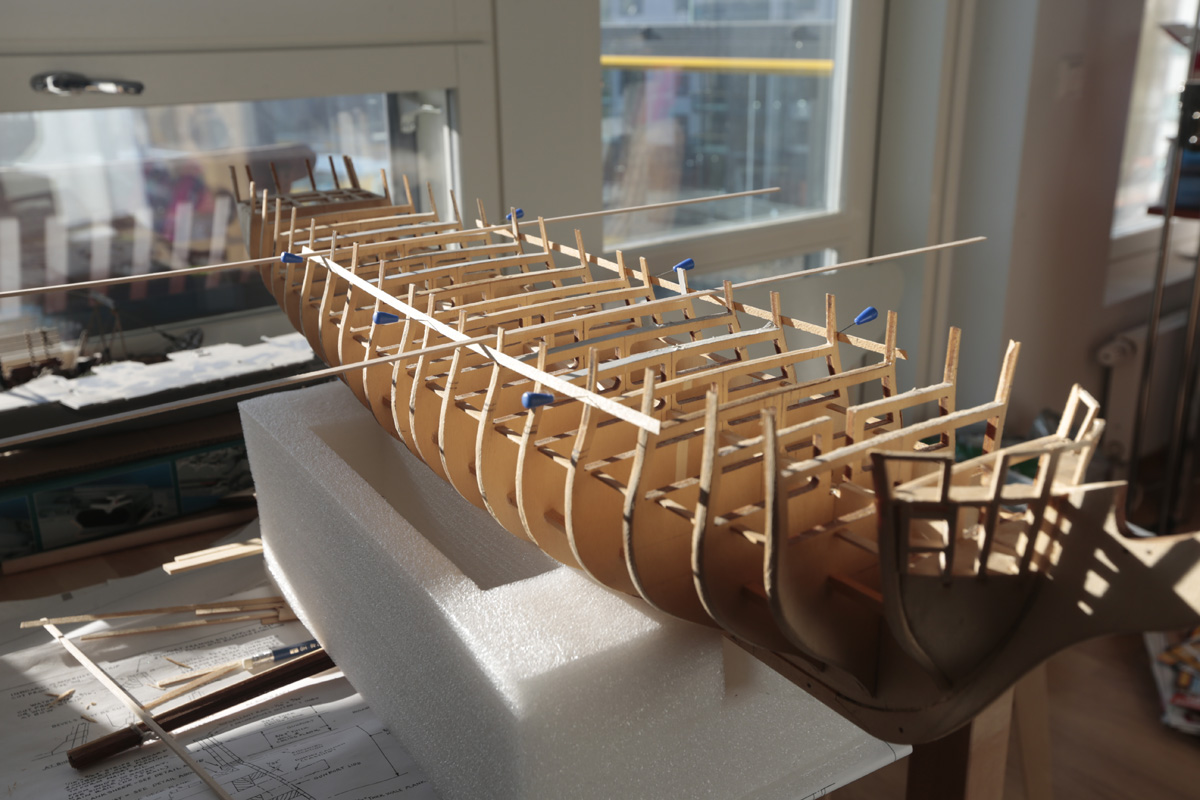
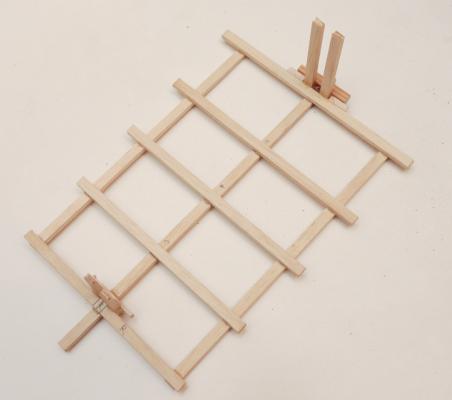
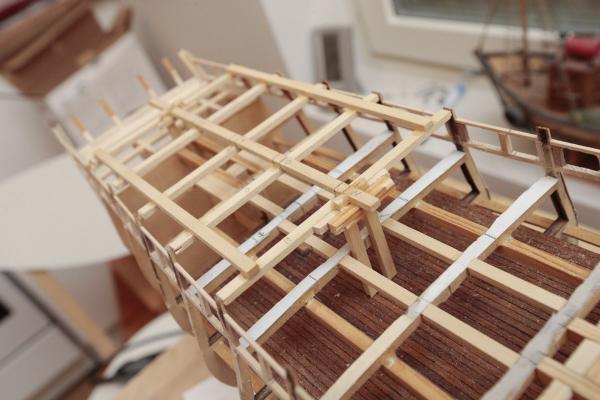
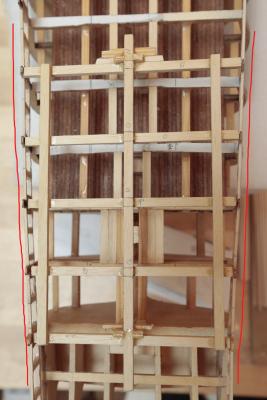
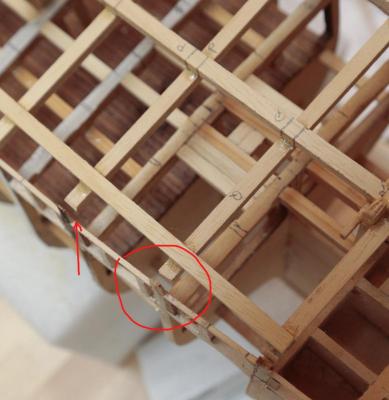
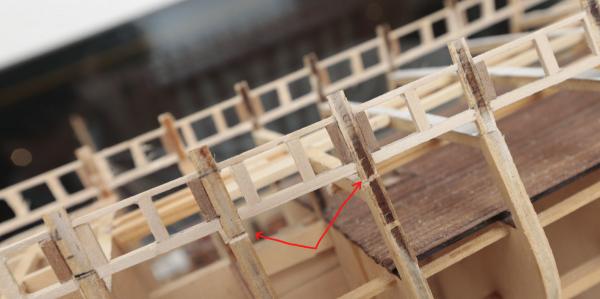
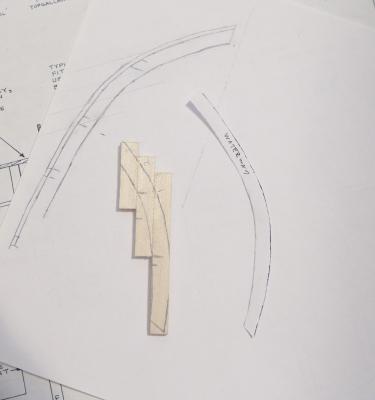
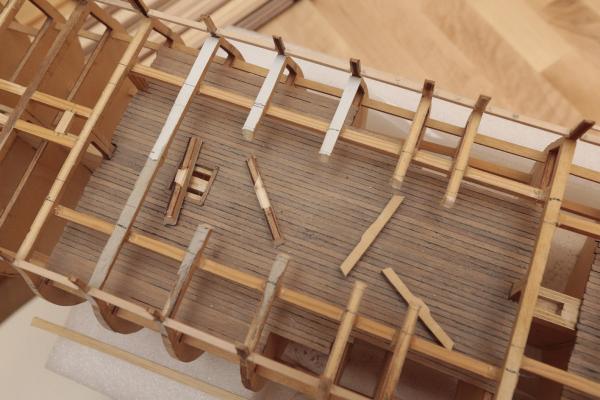
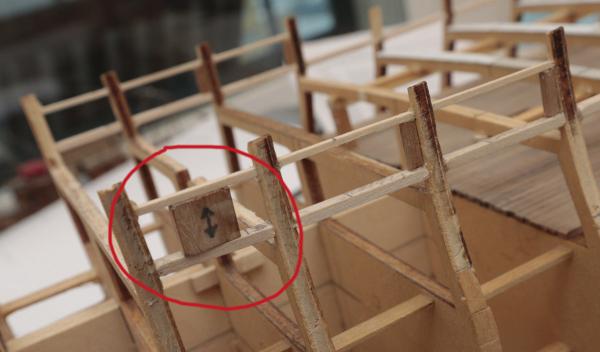
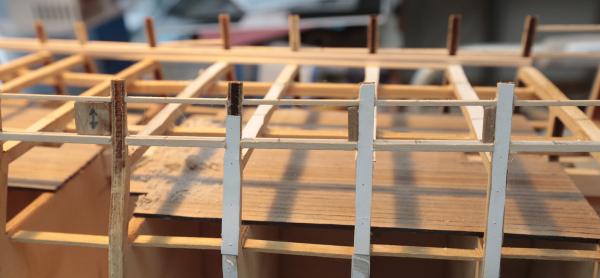
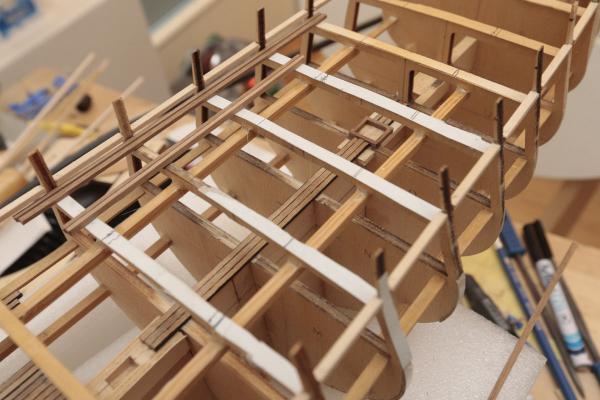
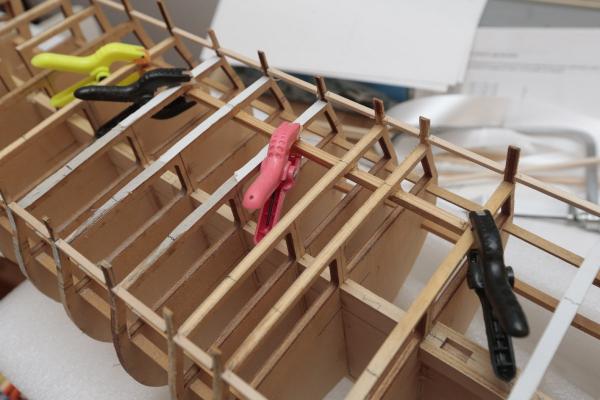
Not much progress here... I've done just some small corrections and found out some problems (again) with the bulkheads. First I'll show you what I've done today. Here is result of my work: And I know you have no idea what that is. It's my way to find the right angles on bulkhead extensions. A temporary "roof" for the spar deck which will show where bulkhead extensions should be underside of topgallant rail, and it also supports my corrections to move the bulwarks. Here is how I'm gonna use it: And here we see the main problem. Starboard side of my Connie's outboard edge on bulwark extensions goes pretty straight, like it should go based on the plans. But on port side there is a large curve: On this detail photo you can see there is 2mm gaps between the extension tops and where they should be based on plans. The angle is wrong. The problem is especially on bulkheads O, P, Q and R. Anyone else even tested the extension tops are they where they should or did you just build the bulwarks and be happy with the result? Everything seemed to be OK for me also until I found out the differences on port side extension angles compared to starboard side angles. So now I'm trying to fix this problem... I'm adding my temporary roof to show the right distances between extension tops and support the bulwarks when I'm turning them to better angles. I've cutted some of the extensions already, ready to turning: Then I'm going to use the waterways and their glue to get the extensions on better position. No idea is this gonna work, but I want my ship being properly straight! Markku

-
Indeed, looks good! Markku
-
Nice work on the deck! Markku
-
Artesania Latina uses only 5mm planks for deck, and they do that for ALL scales and all ships. That's because AL ships aren't even ment to be to look so realistic. However, they usually do show the right plank width in the plans! It can be seen if there is a photo about the deck. In some other AL ships 1:89-1:90 the real plank width will be something like 2,5mm. So you can always cut the planks for 2,5mm wide or buy some new planks to use if you want more realistic result. Markku
-
Hello, and nice to see a build log about that ship. Your kit looks excellent. Good luck with your build! Markku
-
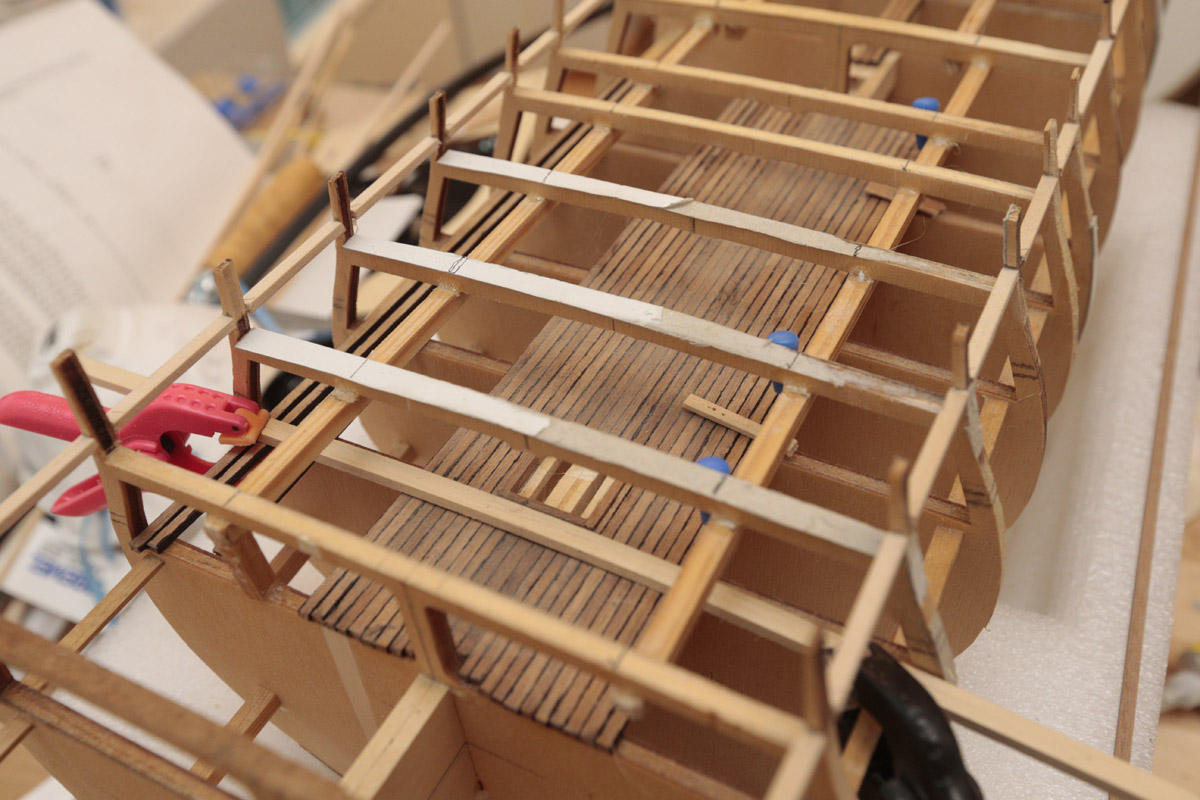
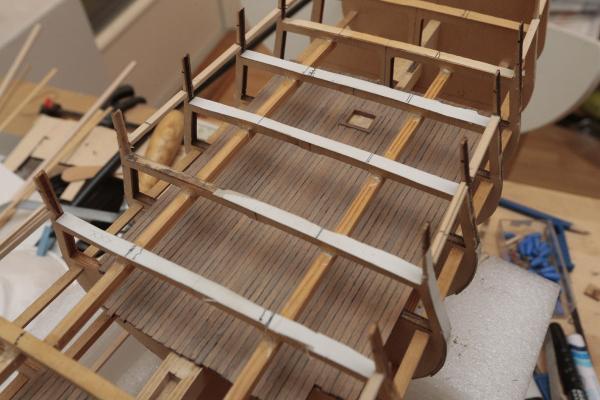
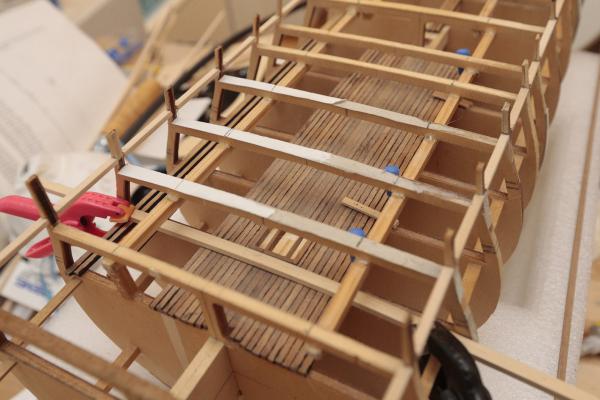
All supports under coamings done. Next will be the waterways... Markku


-
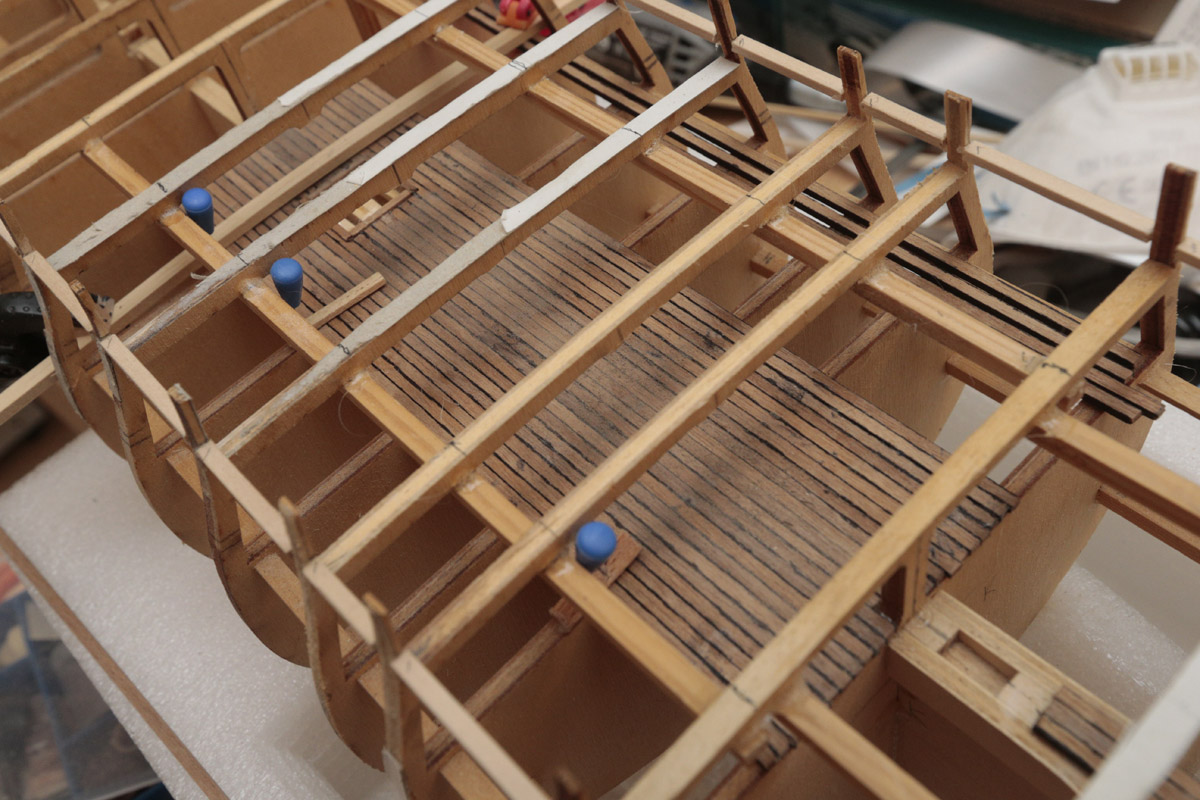
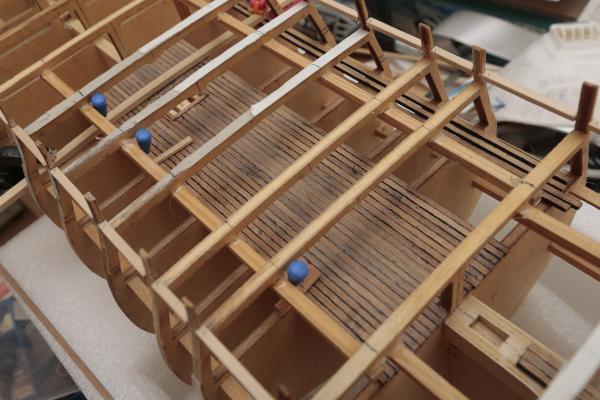
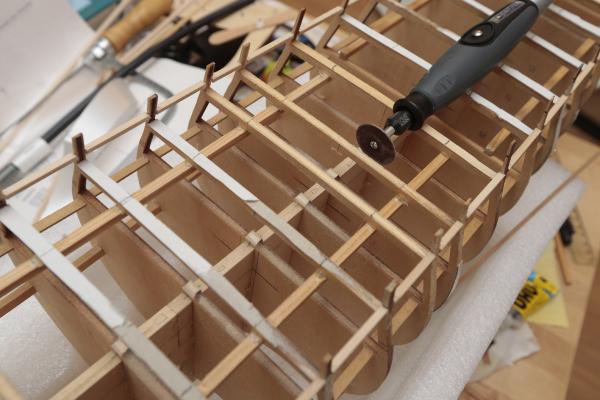
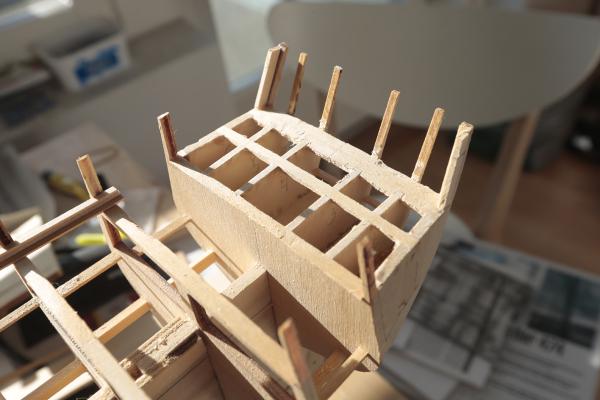
So there comes supports under coamings, I started them at the bow. But before I continue any further... Cutted off four bulkhead tops. I will add my own supports there. This was also one of the reasons why I added those bigger supports under the spar deck earlier. Here you can also see the gun deck floor before. After wood wax the result was pretty impressive. This is the first time for me using wood wax. Before I used varnishing. Pretty nice, huh? Markku


-
Looks you've been busy! Everything looking good. That rope walk seems to be very handy, guess I need to purchase one for myself. Markku
-
Good luck with your build. I'm following also. Markku
-
How's your build going? I think the stern part is dryed already. Markku
-
Thank you, CaptainSteve, glad to hear. Go ahead, I'm just sharing my way to build this ship here. I think my next move is adding all the supports under coamings. It's easyer to do before adding waterways. Markku
-
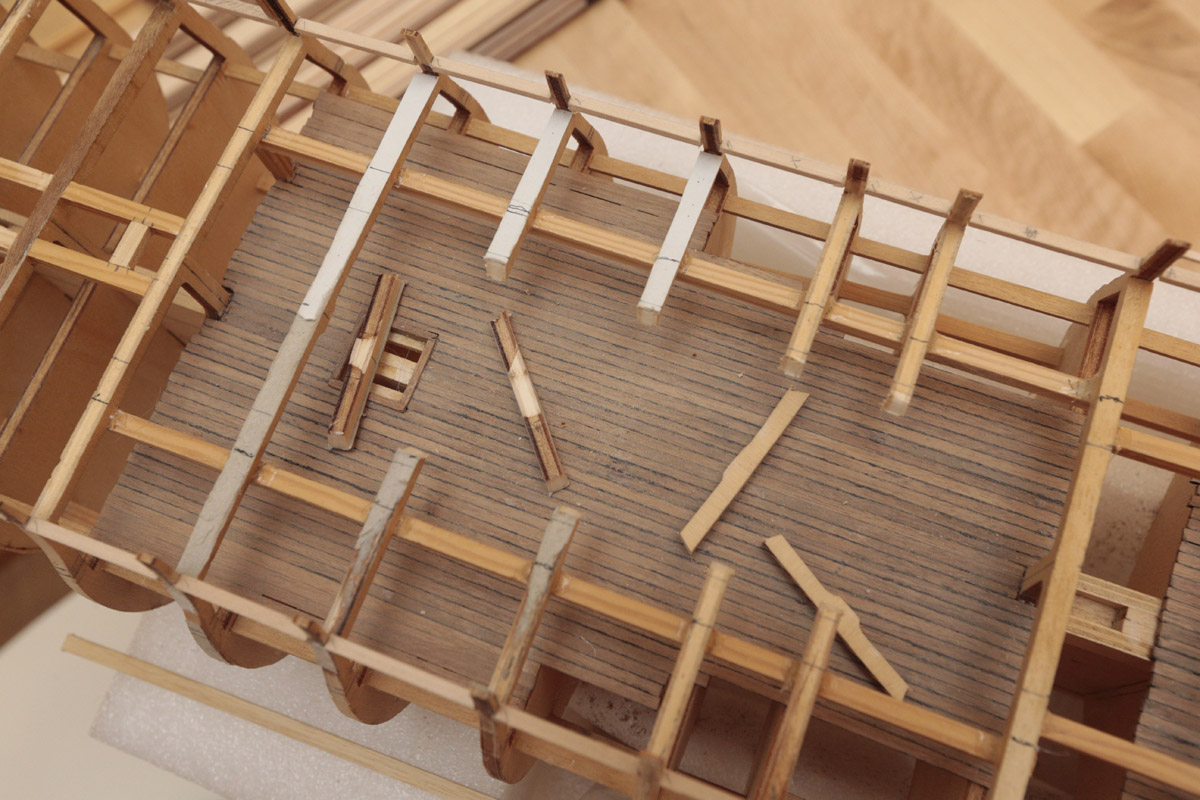
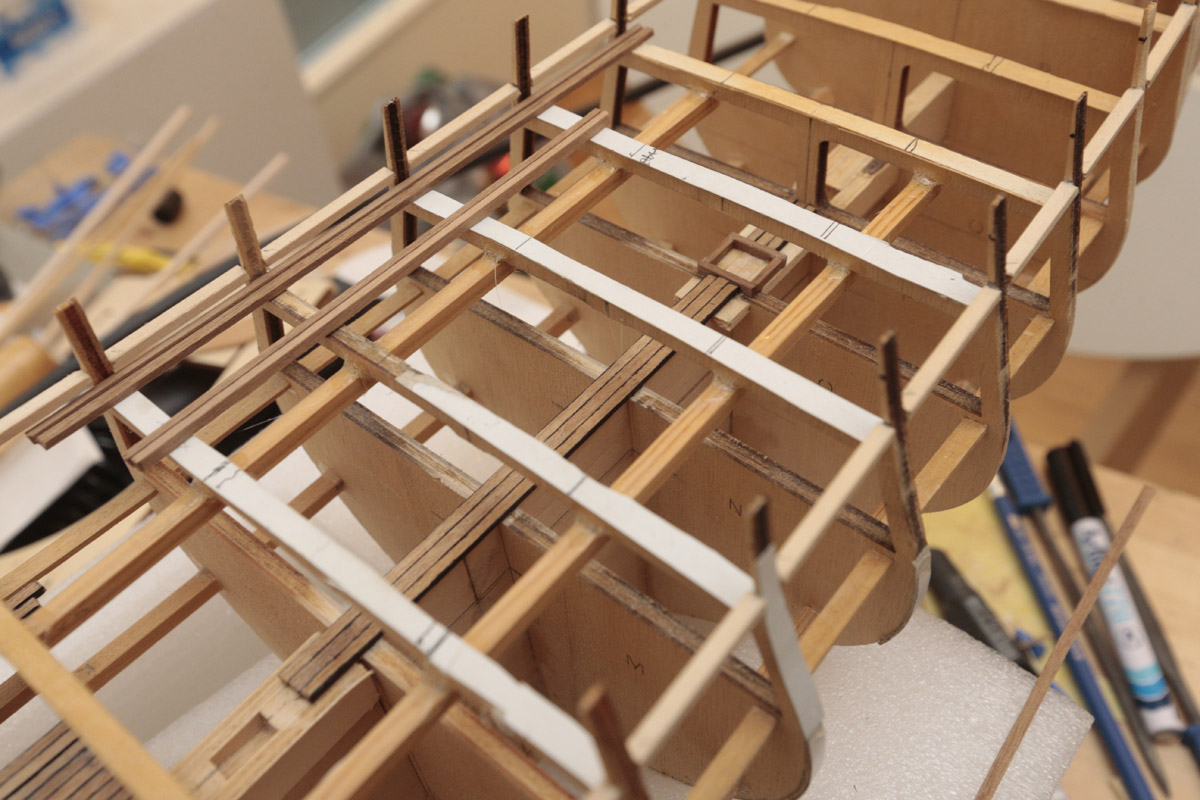
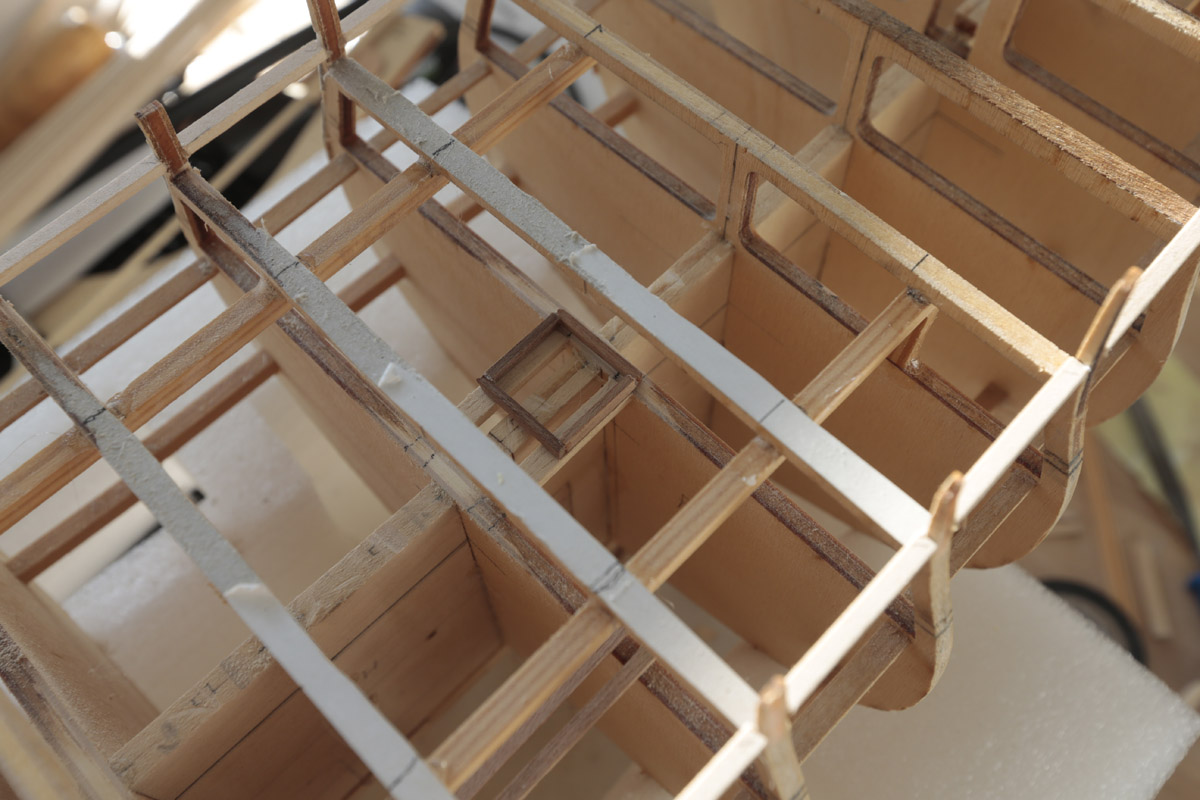
Let me introduce one of the importantest parts so far. This little block is a template for gun ports. I'm using it mounting the spar deck gun ports. Now when there is lower parts in place, just add this block and mount the other parts around it. Very handy. Gun port progress. Then I made some other additions using paper template. Now continuing the spar deck gun ports. Markku
-
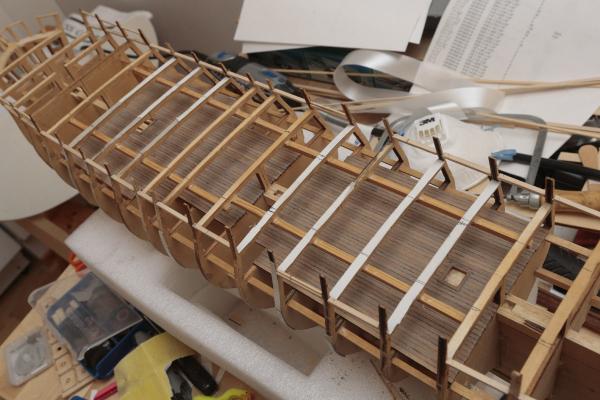
Gun deck floor ready. I think that's enough and a bit more than what would be visible when the model is ready. Imagining how it will look like when watching thru the companion ways, and I think it will be very nice. Markku


-
Some progress at gun deck. Markku
-
Yes I know it will be pretty difficult. But i'm not building around them, i'm building the gun deck inside of everything else. What a fun challenge. However, I'm not adding guns or anything else to there. And because that gun deck floor will be hardly seen in the finished model, it don't have to be perfect. I just want there is a solid floor under the ladders. Markku
-
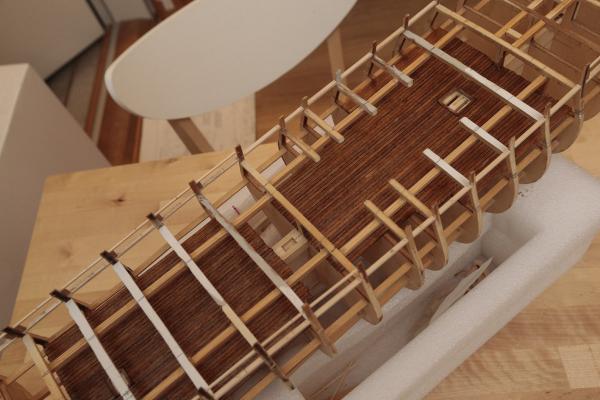
I added lower part of fore hatchway to gun deck, and started planking the deck around it. I like the colour of these planks, it's pretty close to the real gun deck. Markku


-
Mundie, thank you from your message. So am I waiting to see how this one will come. It's my first big ship model. Markku
-
Cutted the bulkhead middle supports off from the area where main hatch will be. I'm planning to do the same with companion ways area, where also will be ladders down. My new spar deck supports are excellent, since the top part of bulkheads seems to be very strong now, even they have no middle supports at all. Those were very good to add there. Markku

-
Thank you Tim. I'm starting to be in love with this kit. Markku
-
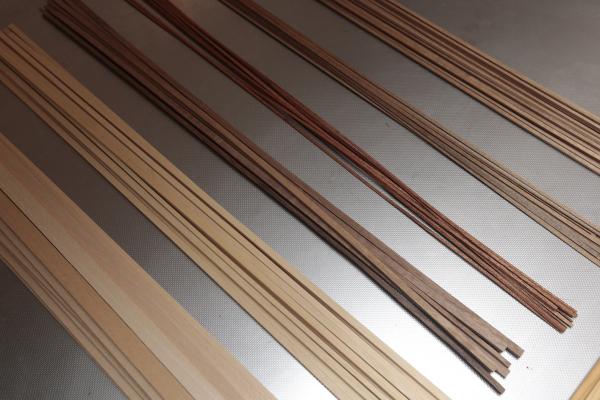
So i've added the spar decks gun port lower support strips. Hoping they support the bulwark extensions a bit, because I often accidentally hit my hands in them And I also ordered more wood to play with. First i wasn't gonna make any gun deck, but because I want to make the ladders to there, it means there will be some of the gun deck floor visible (I think), so what we need then to do. At least some parts of the gun deck floor. I started that glueing supports under the spar deck, so when i'll cut the bulkhead middle supports off, there will be enough endurance to hold the spar deck construction later. Markku

-
Indeed, looking good. Markku
-
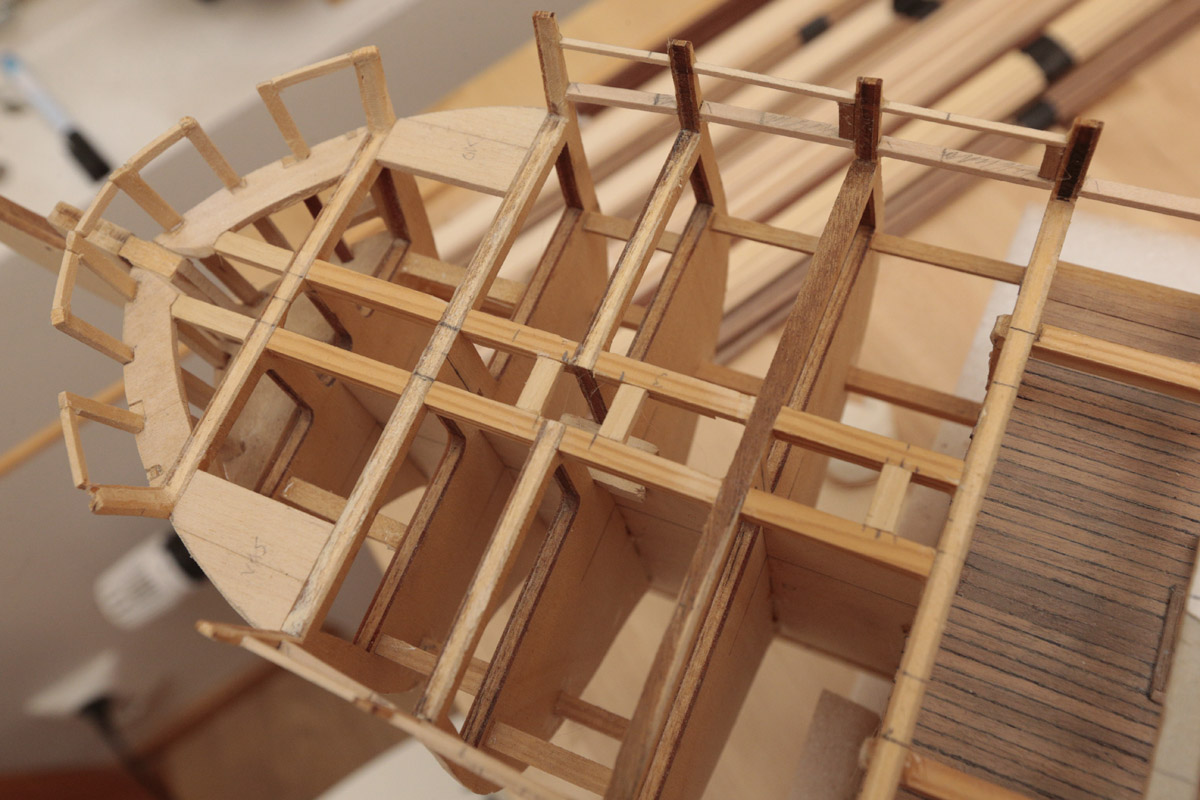
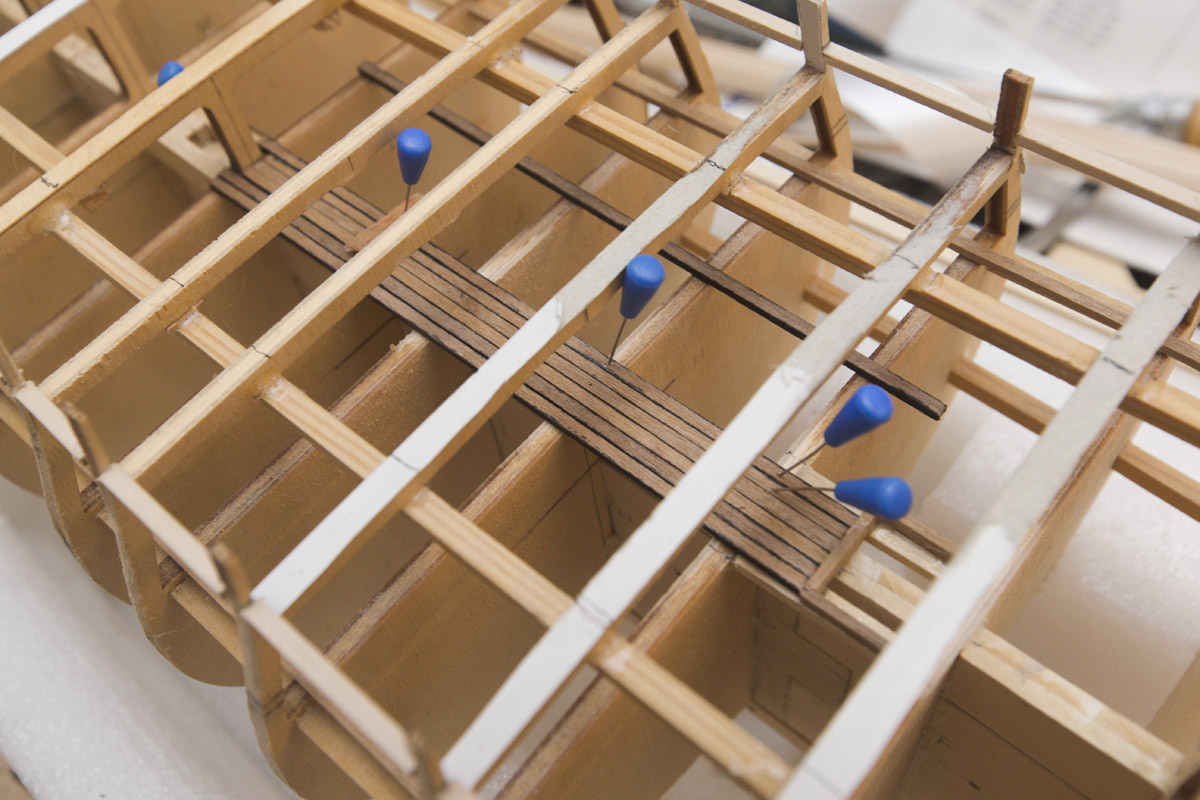
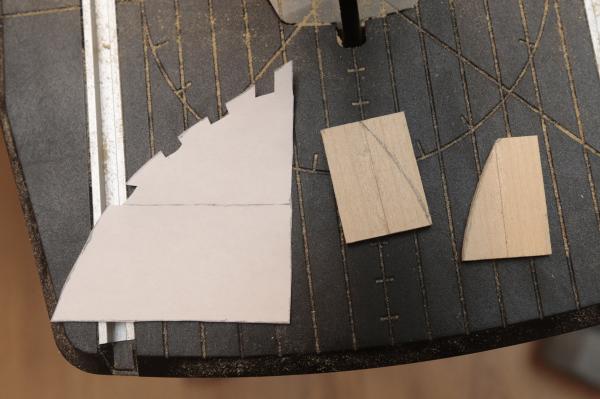
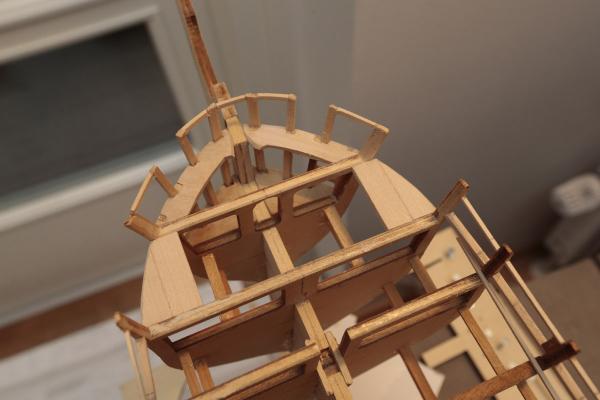
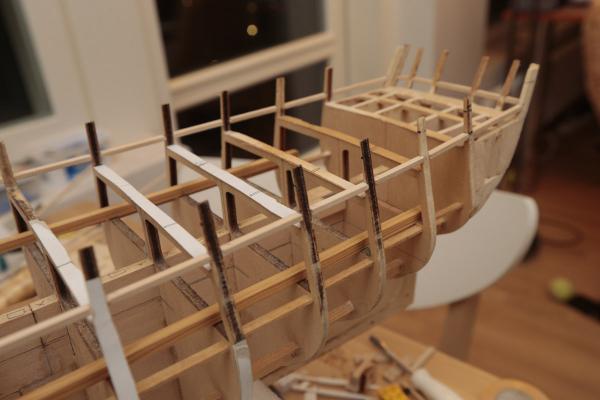
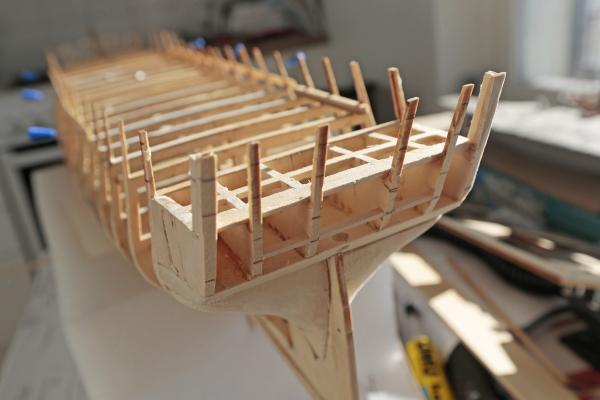
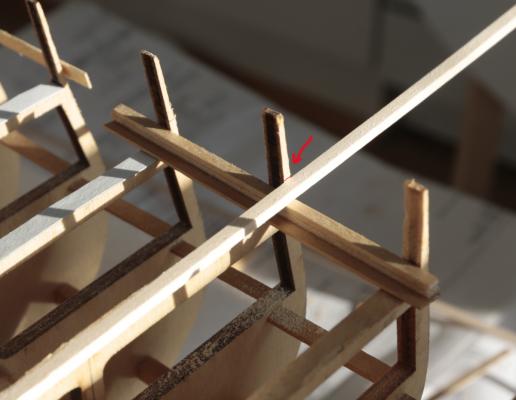
It's been a while since my last post. I've been busy with my work, but finally i'll have more time to continue my build. So i've done the stern framing: And now i'm starting to make the spar deck gunport framing. I've been thinking how to get all the gunports to the right level, and after few attempts i've decided to use the deck level as the main start. Because everything there starts from the deck. I made a little "waterway+planksheer-simulation" which is very easy way to mark the spar deck's lower gunport frame places. Just draw a line there (red mark): After this i've added 2 planks to just for a test that both sides are in the same width and it seems to be in balance. Markku

-
Hey, actually you can nail those planks, because this is a double planked boat. What i liked about this kit, was there is many mistakes you can do in the beginning, and they won't be visible in the end result because there is always something that covers the mistake-areas. That's why this is a great kit for a beginners. I agree about the poop deck side angles. They should be lower, now there is a gaps between the bulkhead. Keep your build going.