HOLIDAY DONATION DRIVE - SUPPORT MSW - DO YOUR PART TO KEEP THIS GREAT FORUM GOING! (Only 24 donations so far out of 49,000 members - C'mon guys!)
×


ken3335
-
Posts
314 -
Joined
-
Last visited
Content Type
Profiles
Forums
Gallery
Events
Everything posted by ken3335
-
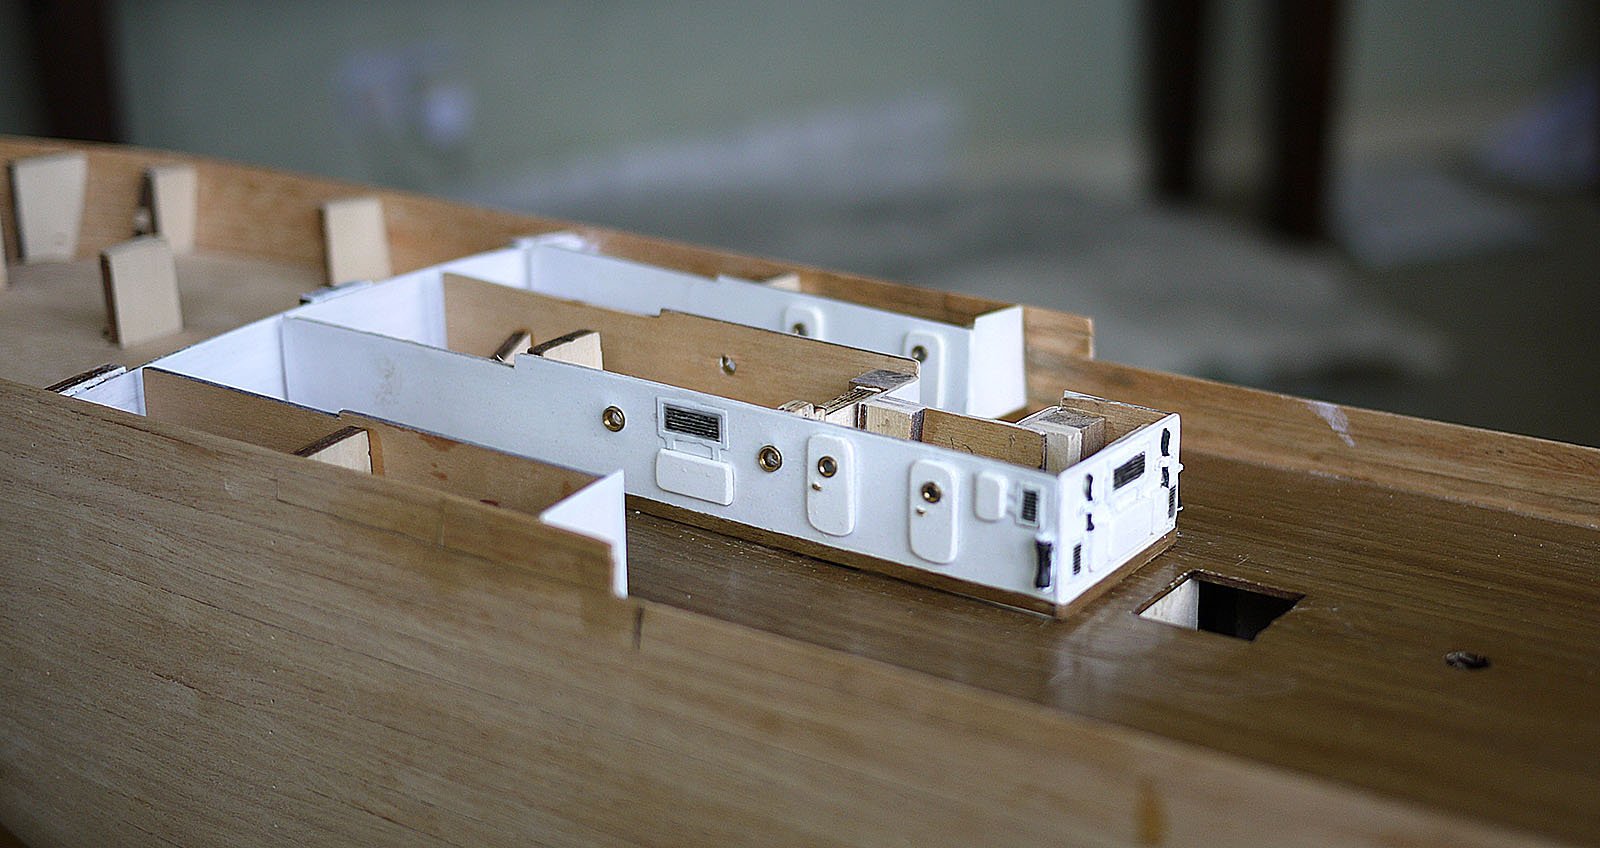
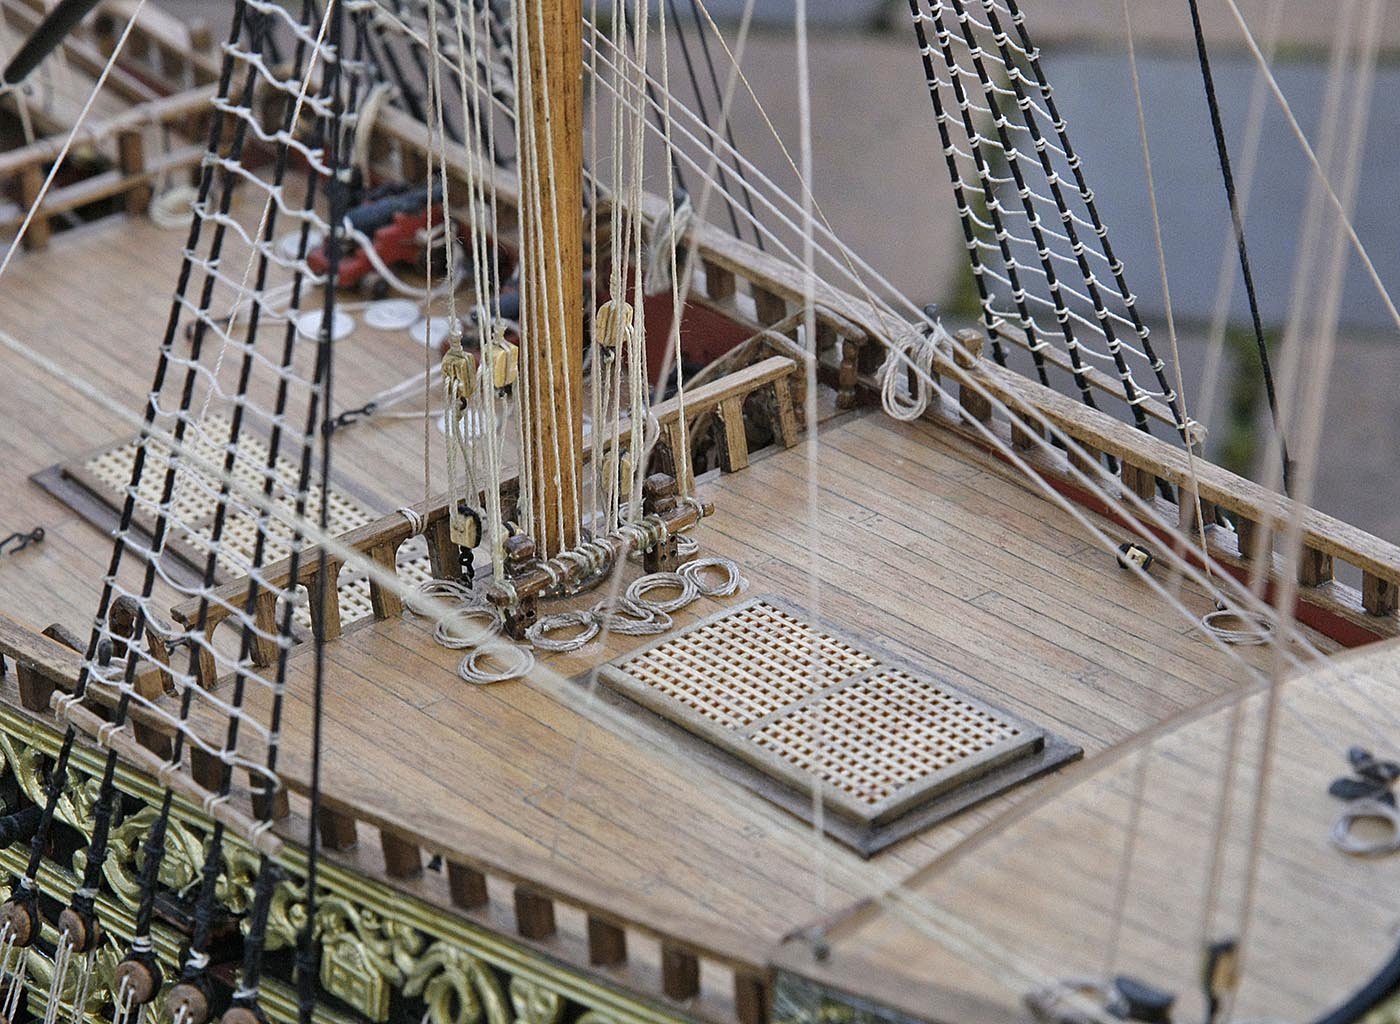
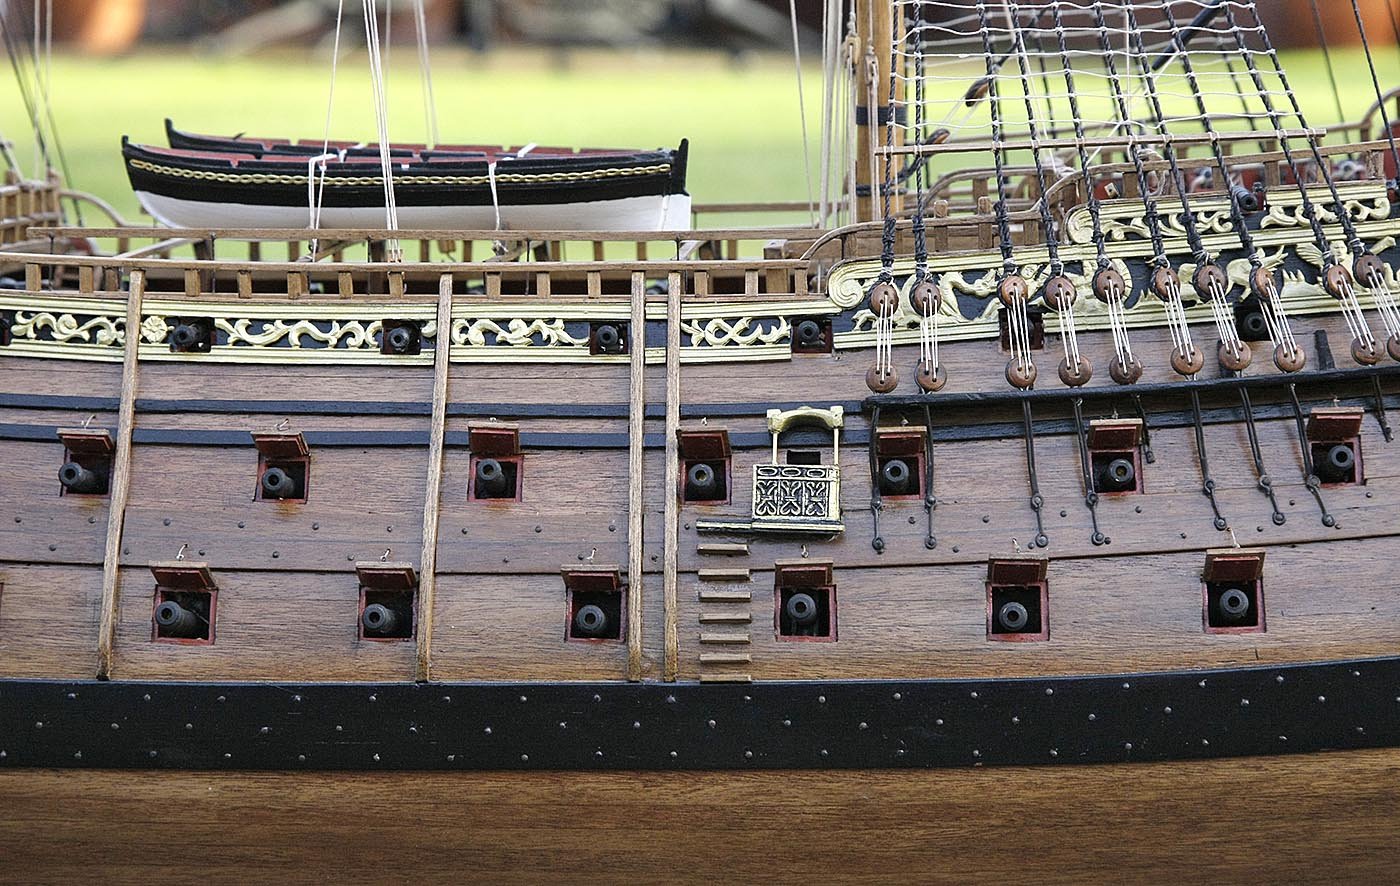
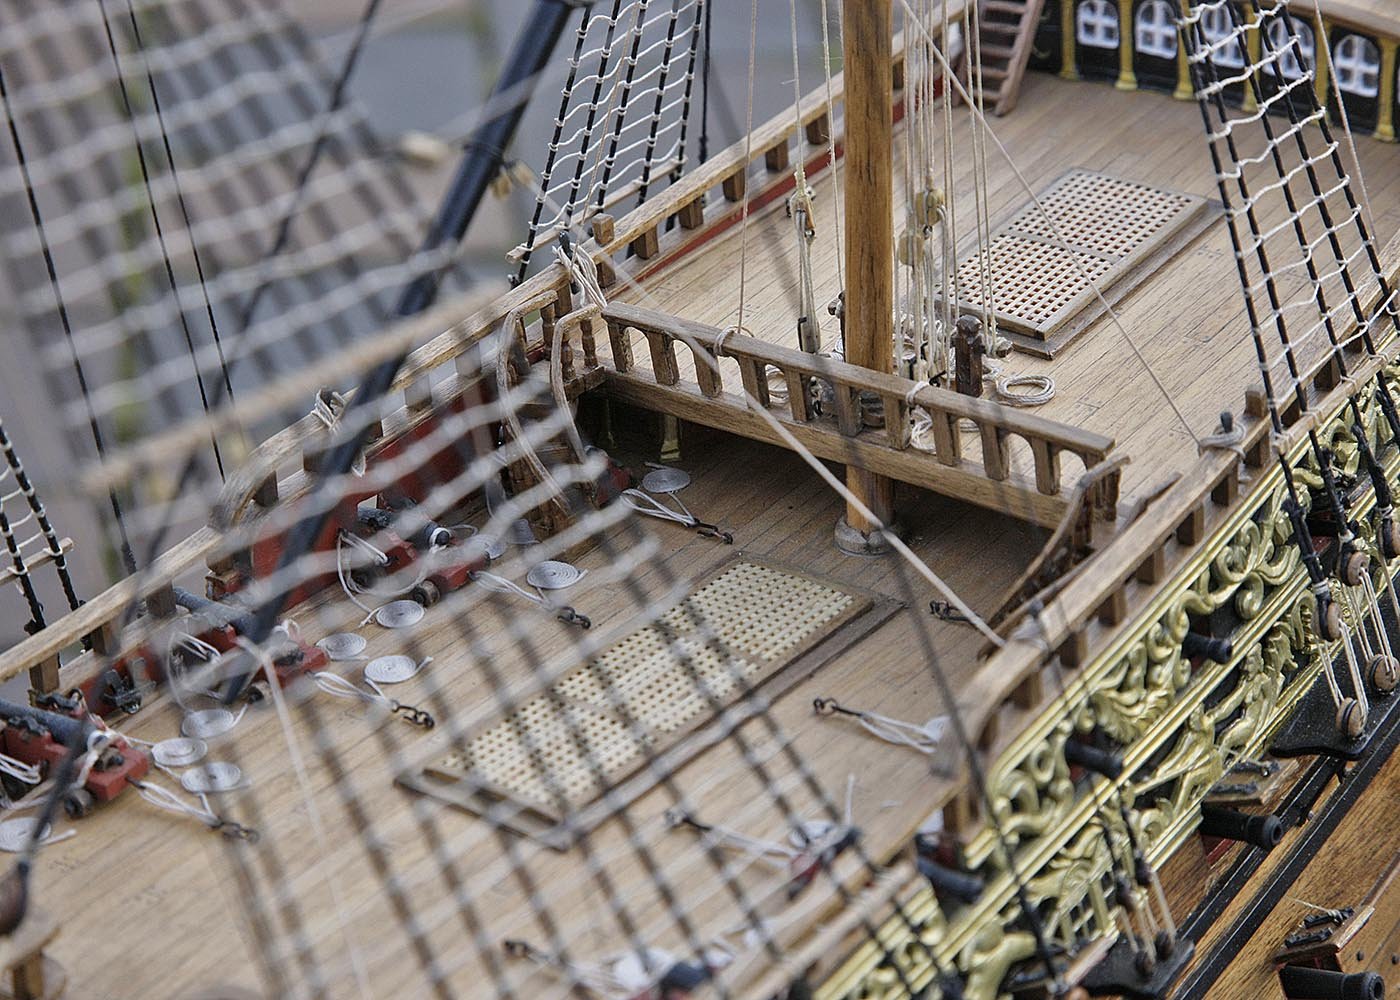
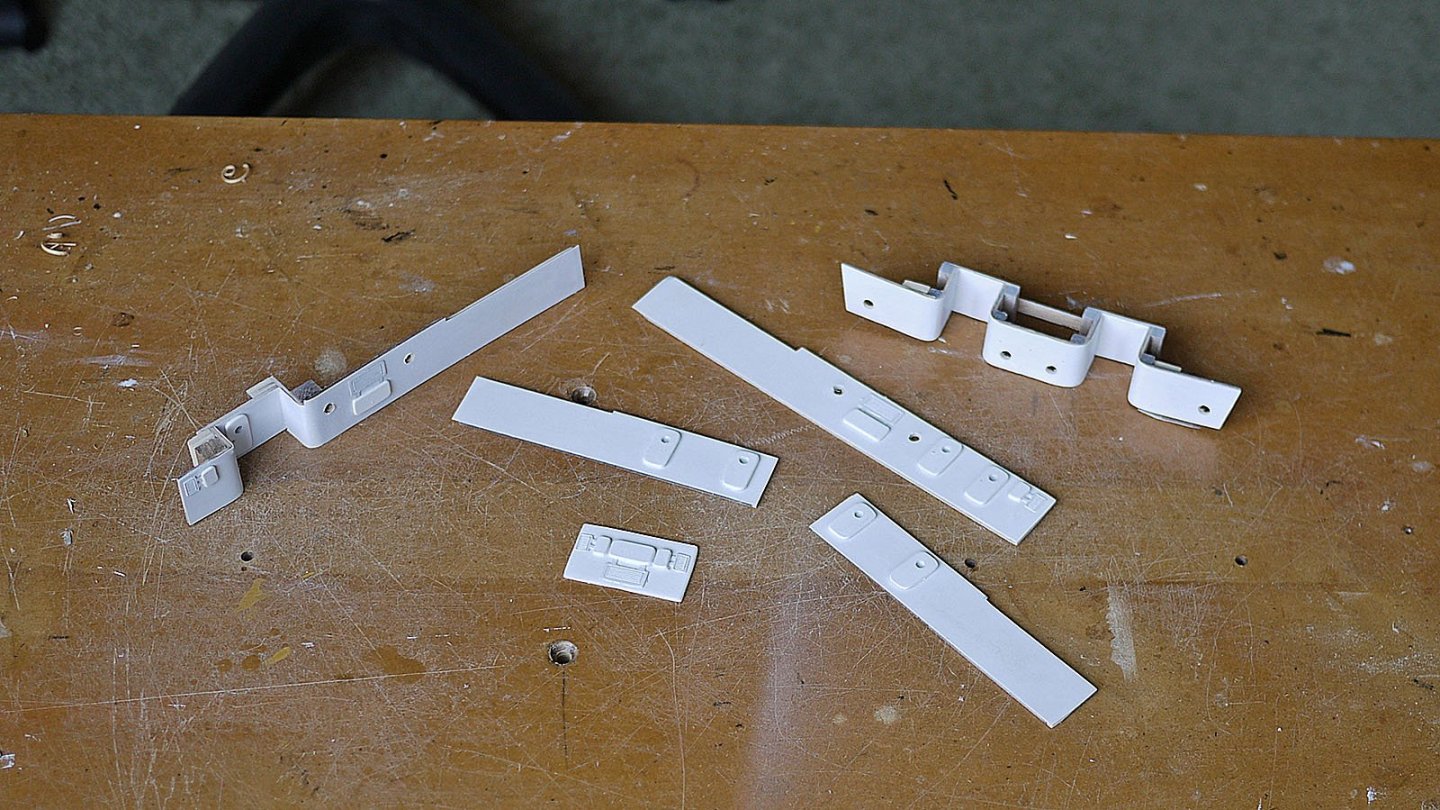
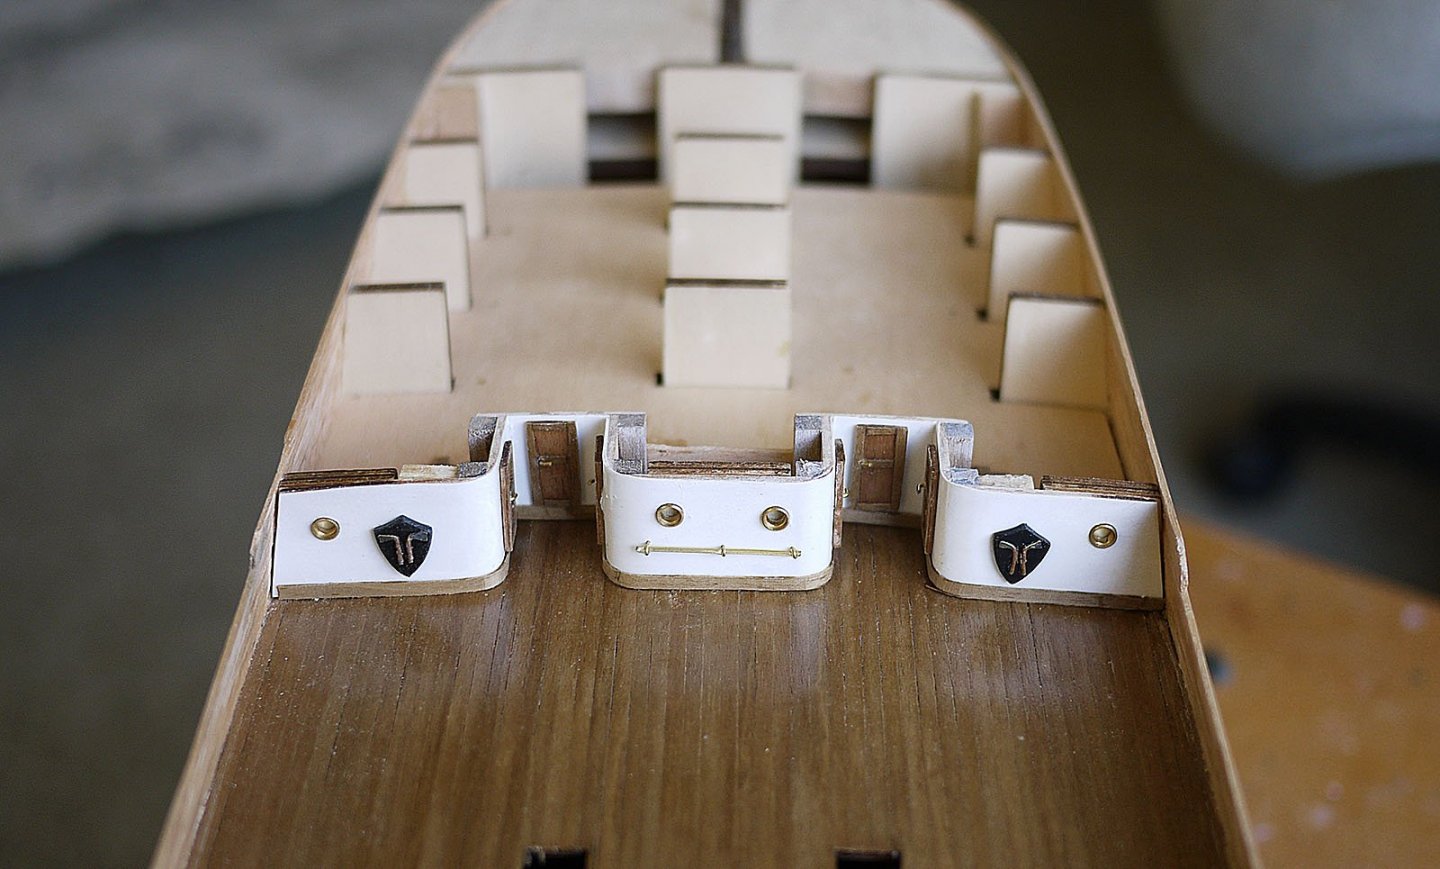
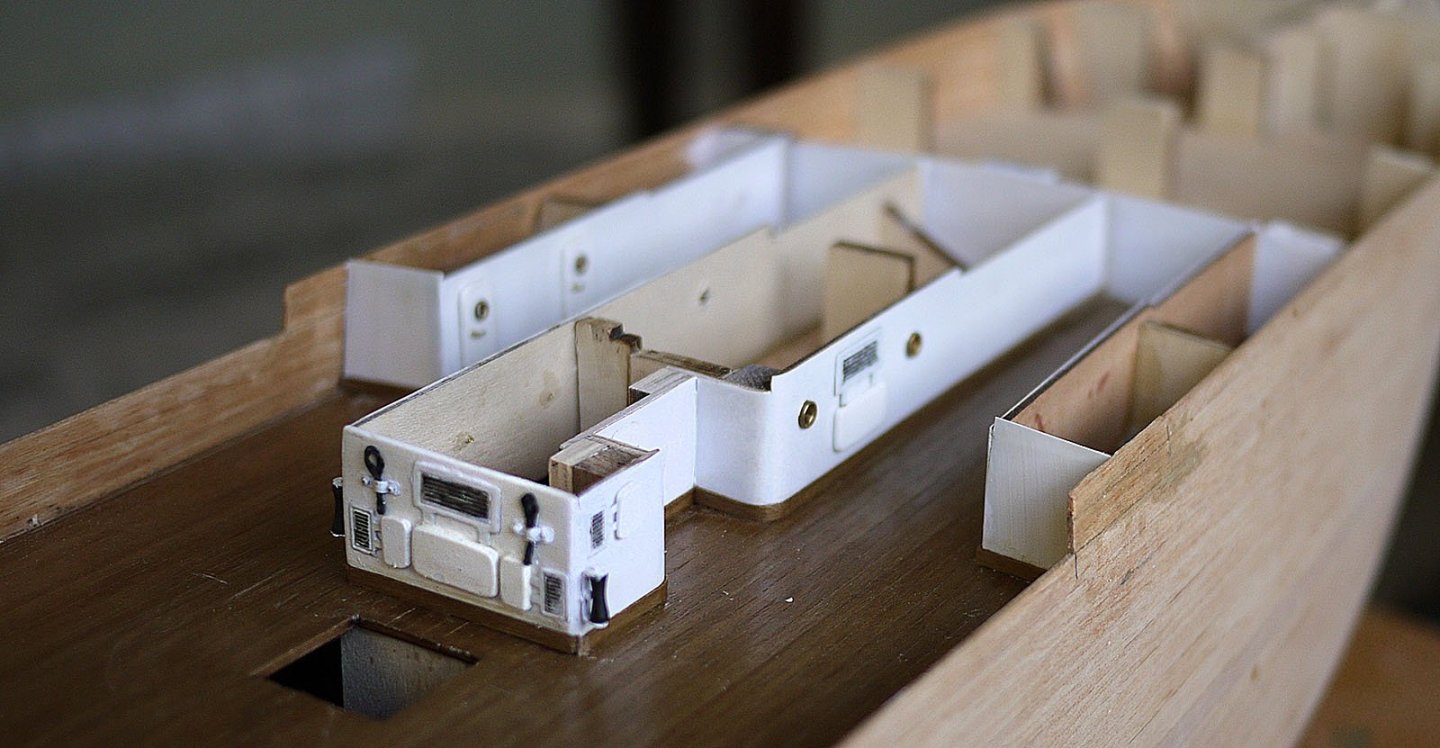
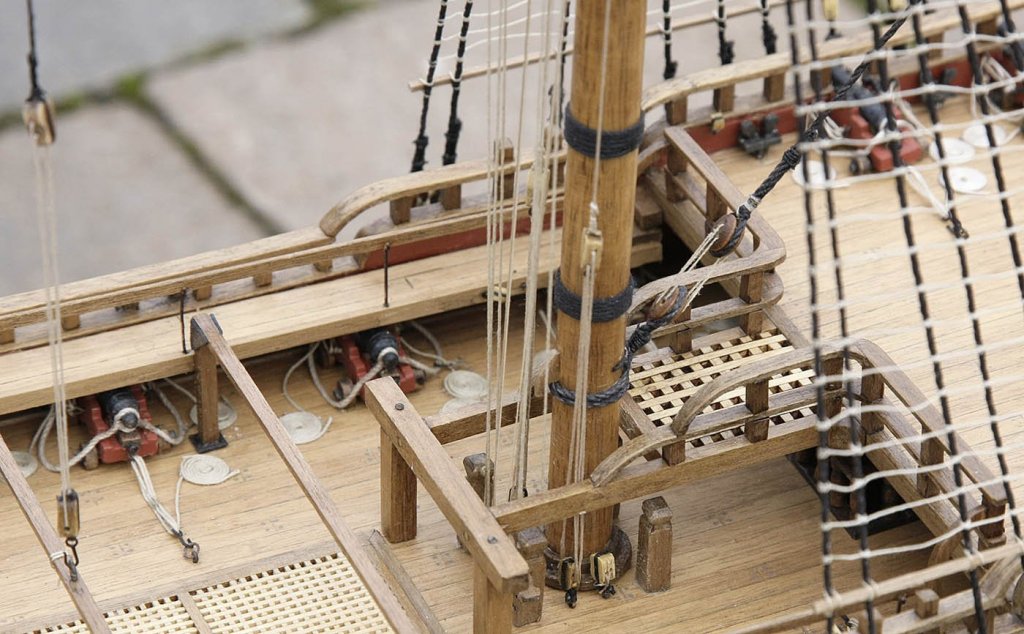
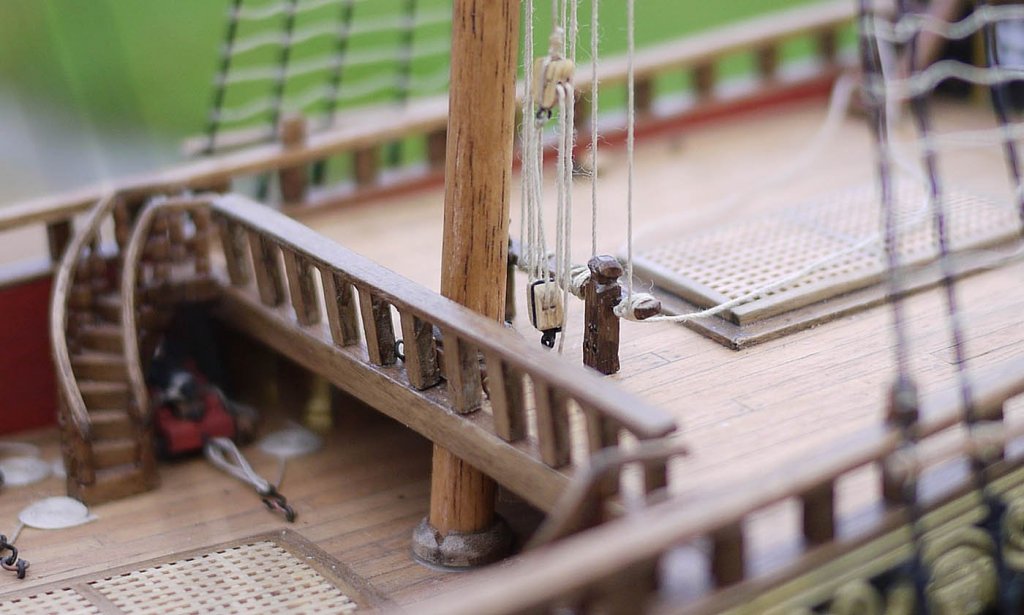
 Hi, The Next task was to plank the waist deck. The planks supplied were 3x.5mm dark walnut, the wood was ok but I really don’t like the colour. I don’t understand any kit manufacturer thinking that this colour would be ok for decking as it looks so obviously wrong. I was stuck with it as the shops can’t supply an alternative at the moment.. I laid these planks, I didn’t darken the edge as pencil wouldn’t show up against that dark colour, I sealed, sanded and varnished with a satin poly. I then started on the cabins. The instructions would have you put in place the upper decks first but this would make would make the placing and finishing off the deck planking quite difficult. The cabins are made up from ply and were supposed to be covered with the 3x.5 strips. Rather than do this and then try and get a smooth finish for painting I decided to face them with very thin styrene sheet and then trim them to shape, it worked well. The doors and vent covers were also made from styrene, they painted up well, the windows, vents axes and rails were the added. Ken Ken
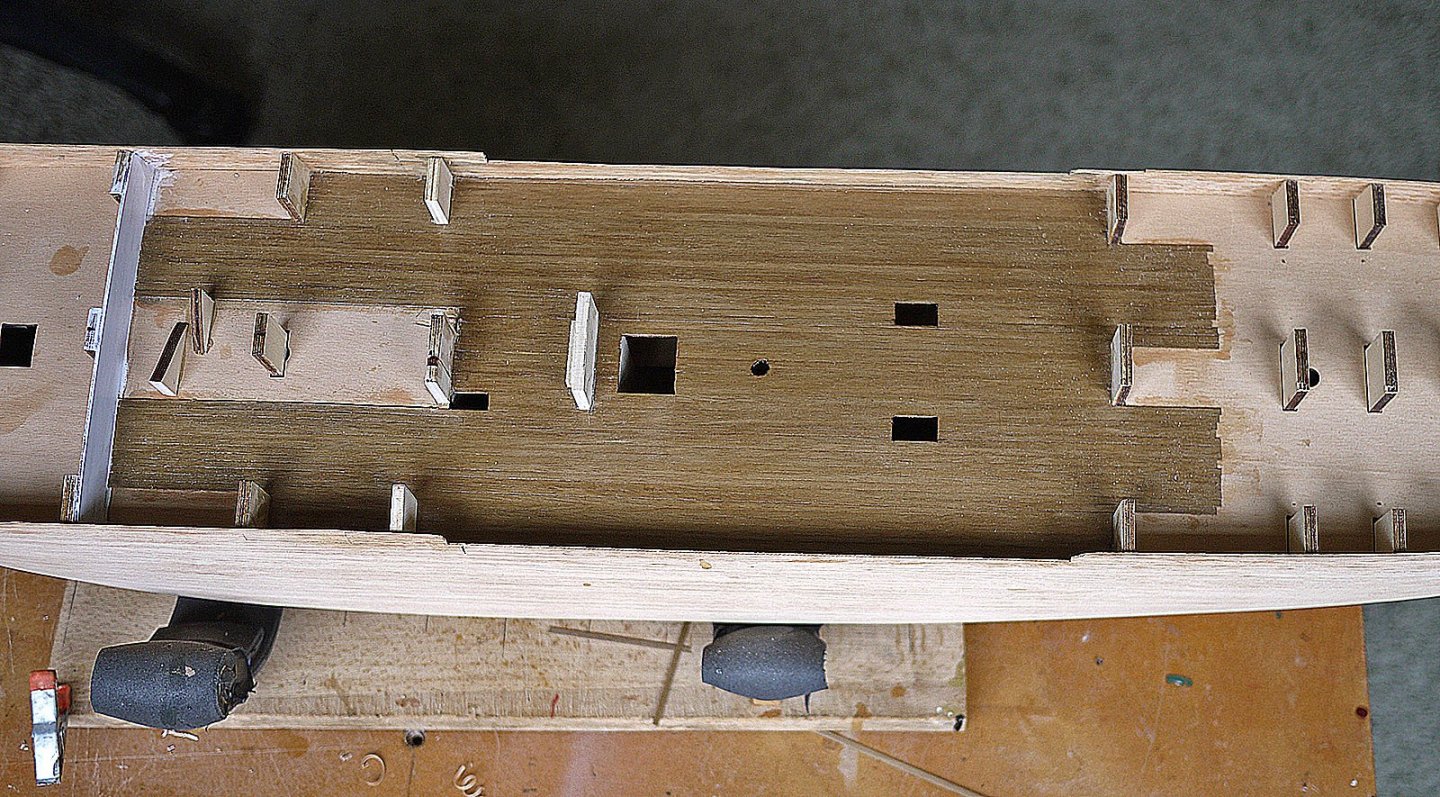


-
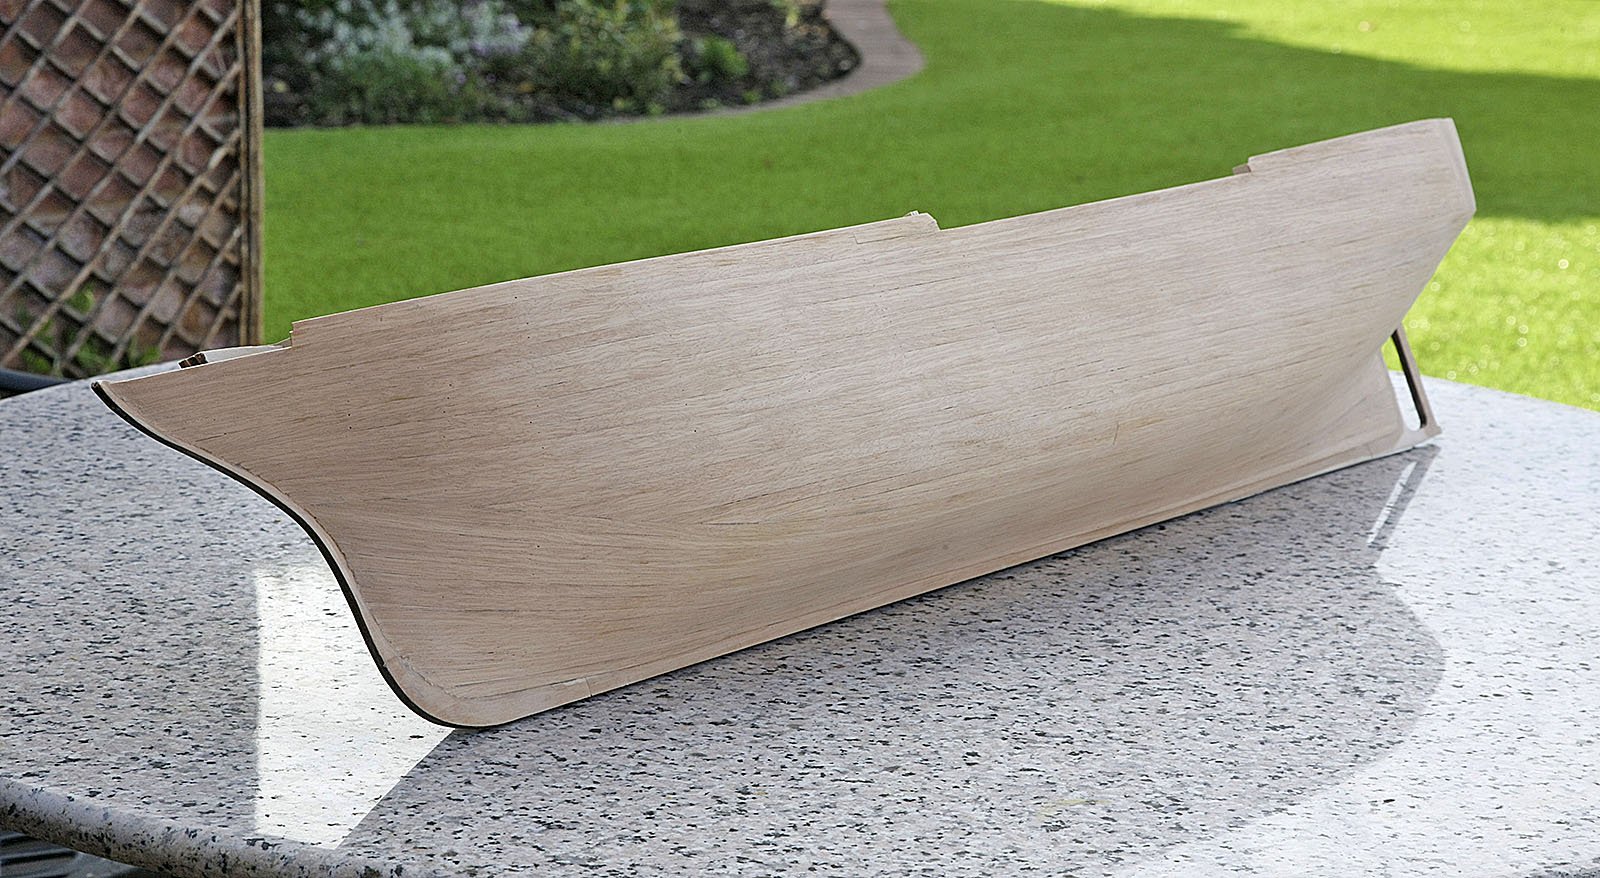
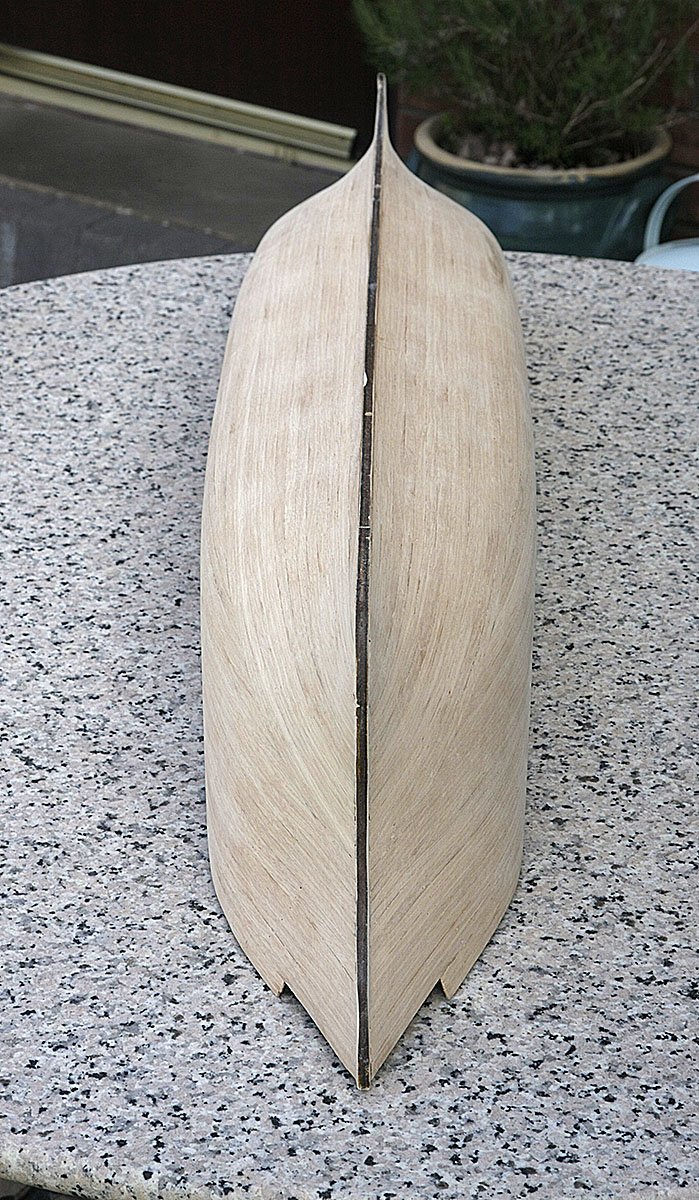
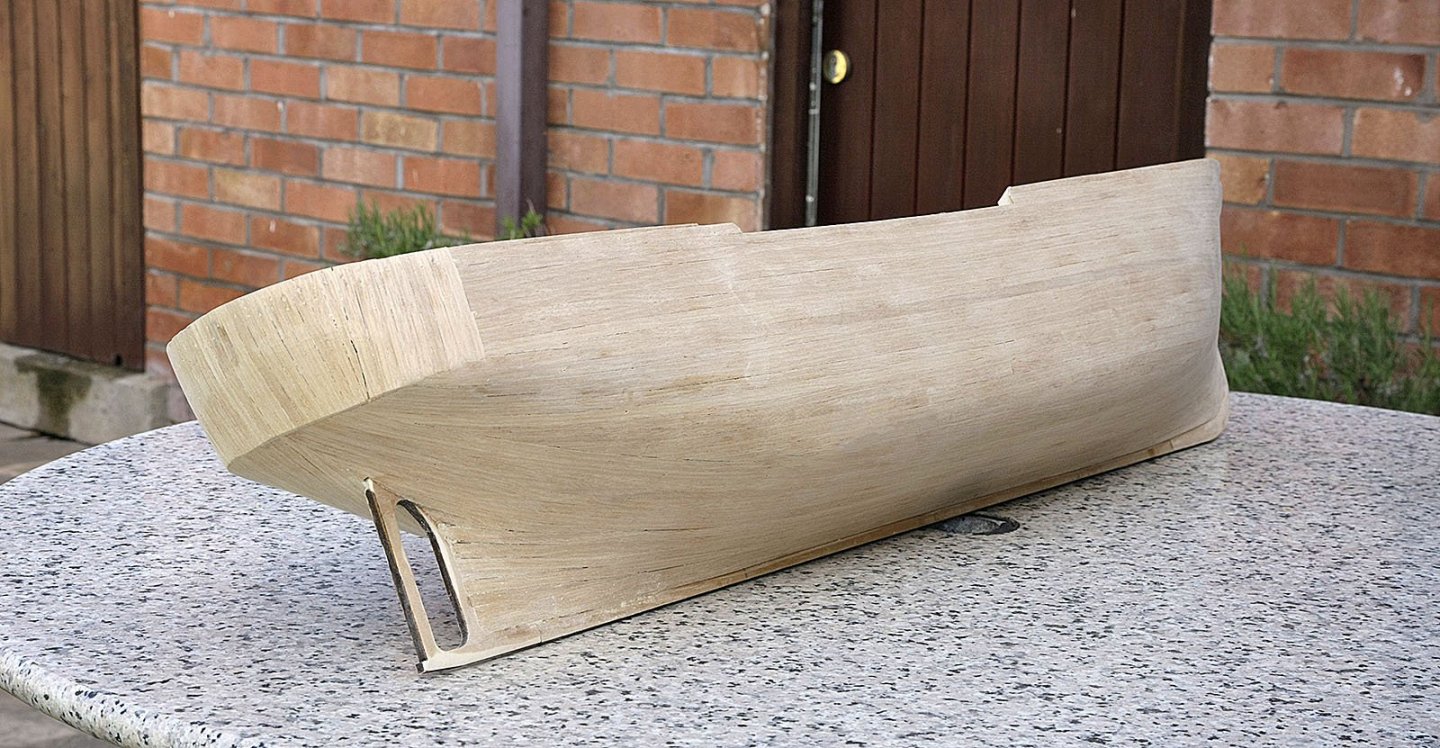
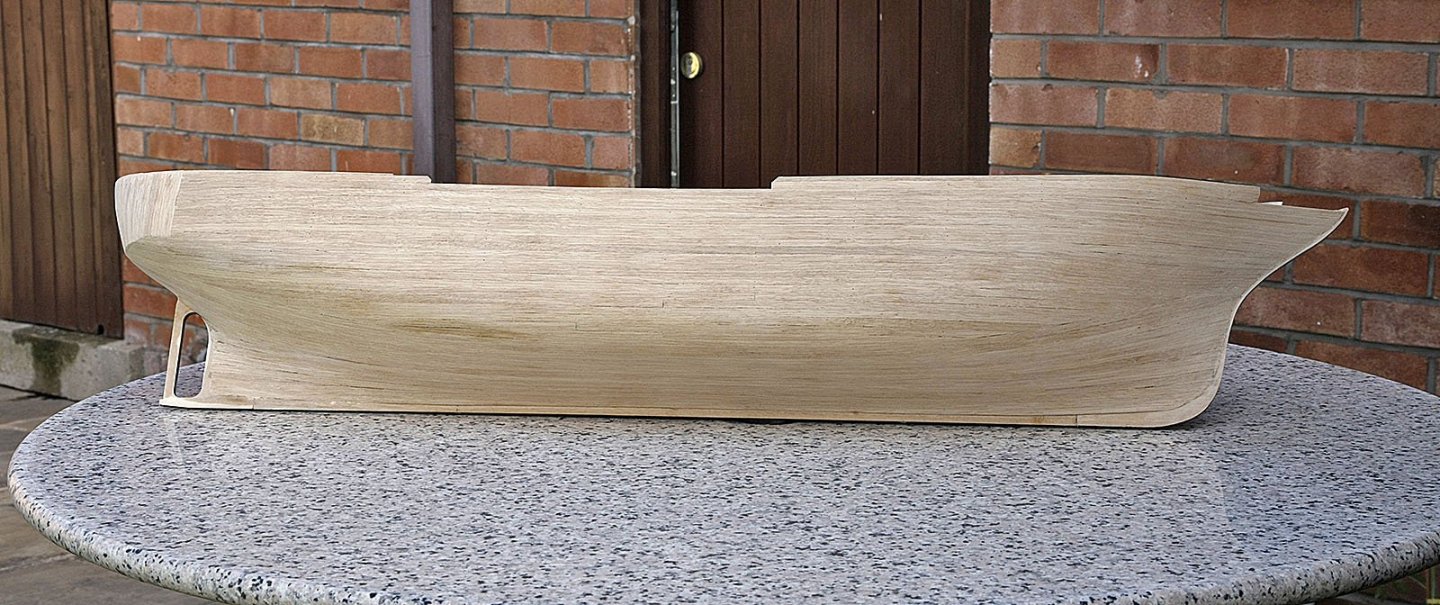
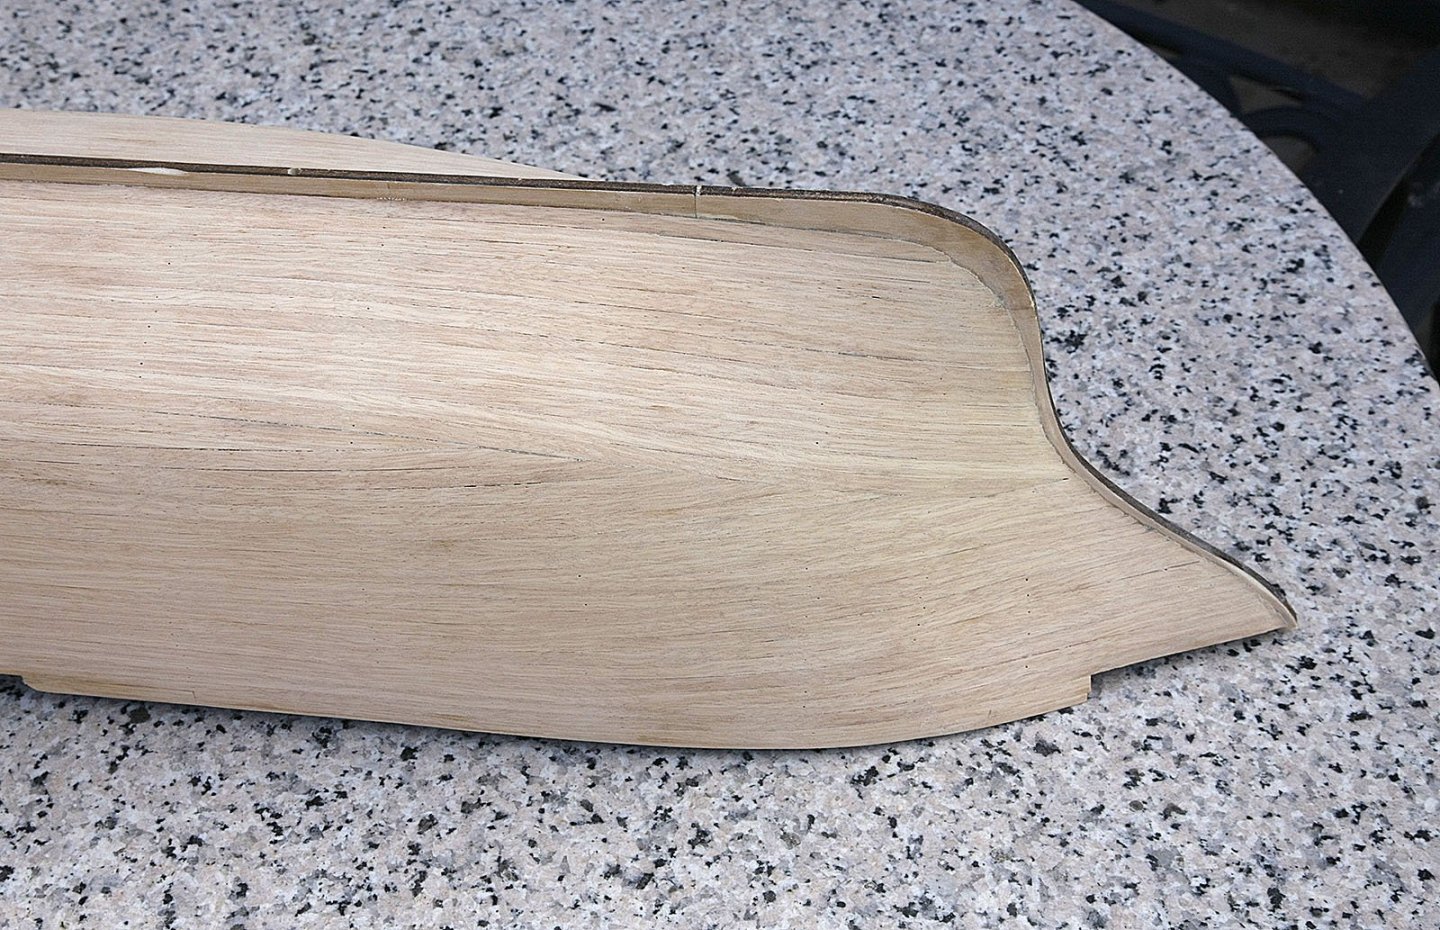
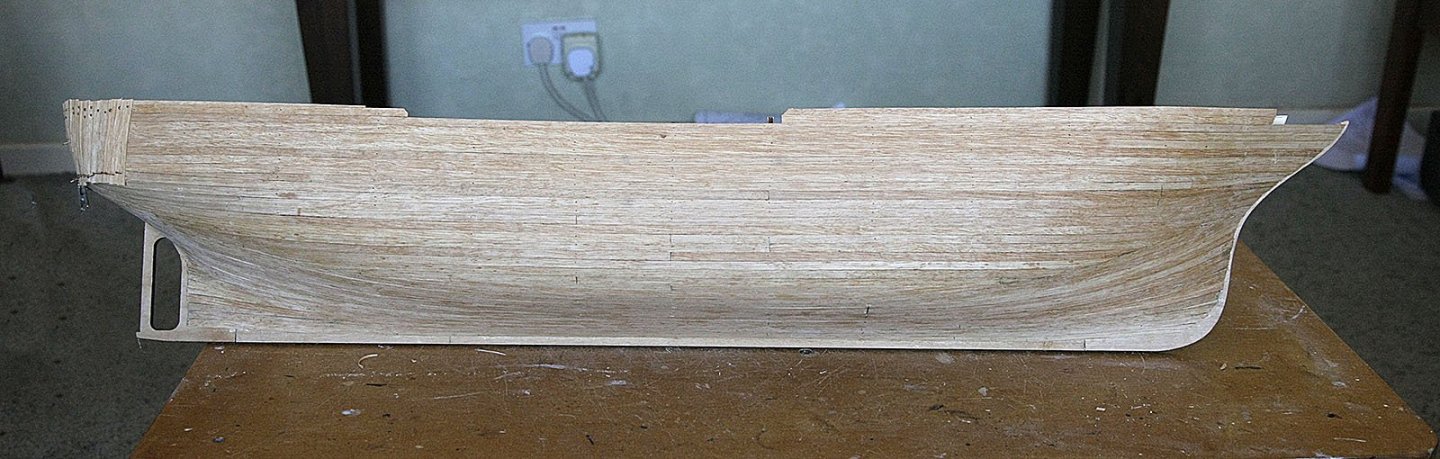
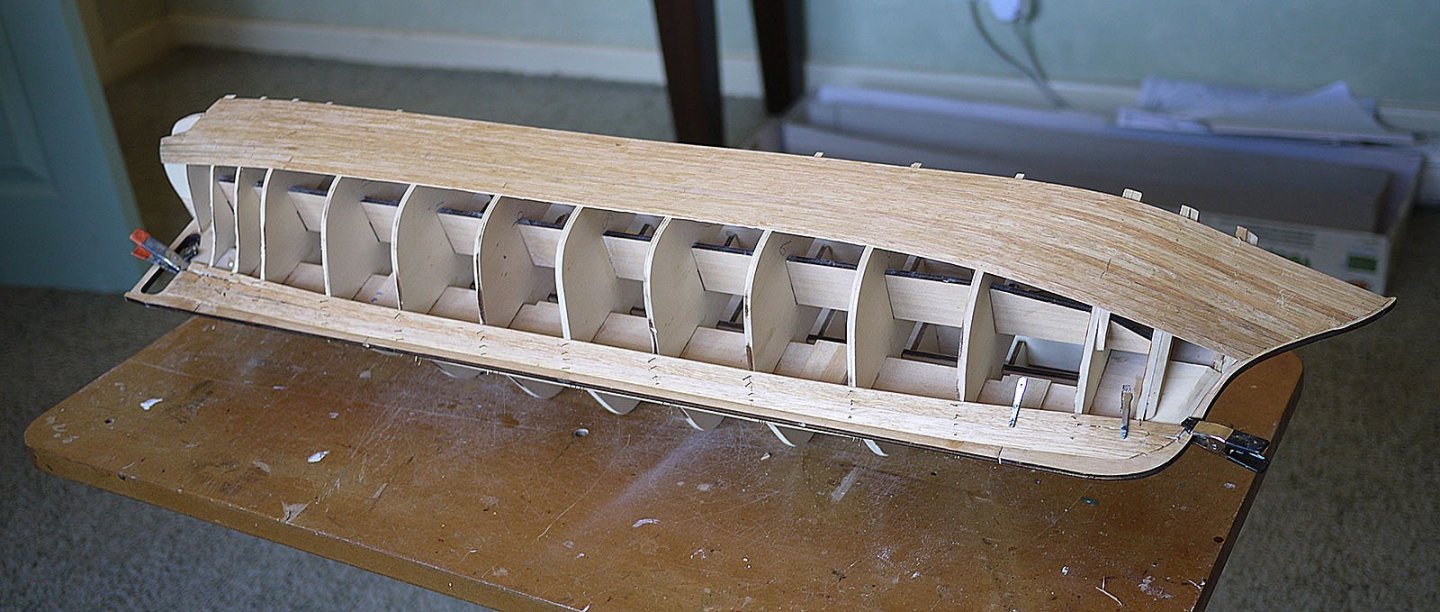
Hi, I managed to get a good sanding session done and I'm very pleased with the result. No filler was needed at all to get this to what I think is a very good first layer. Ken


-
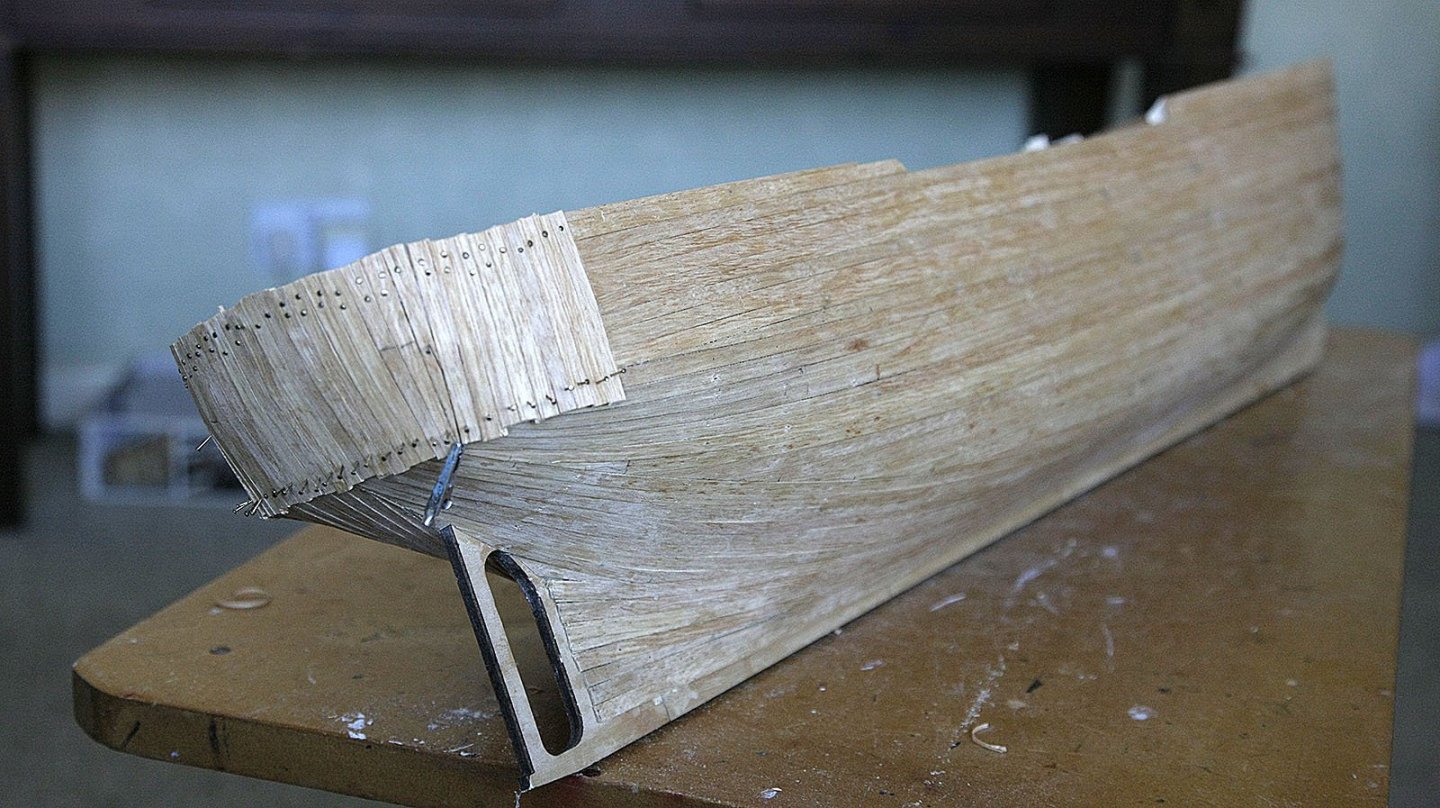
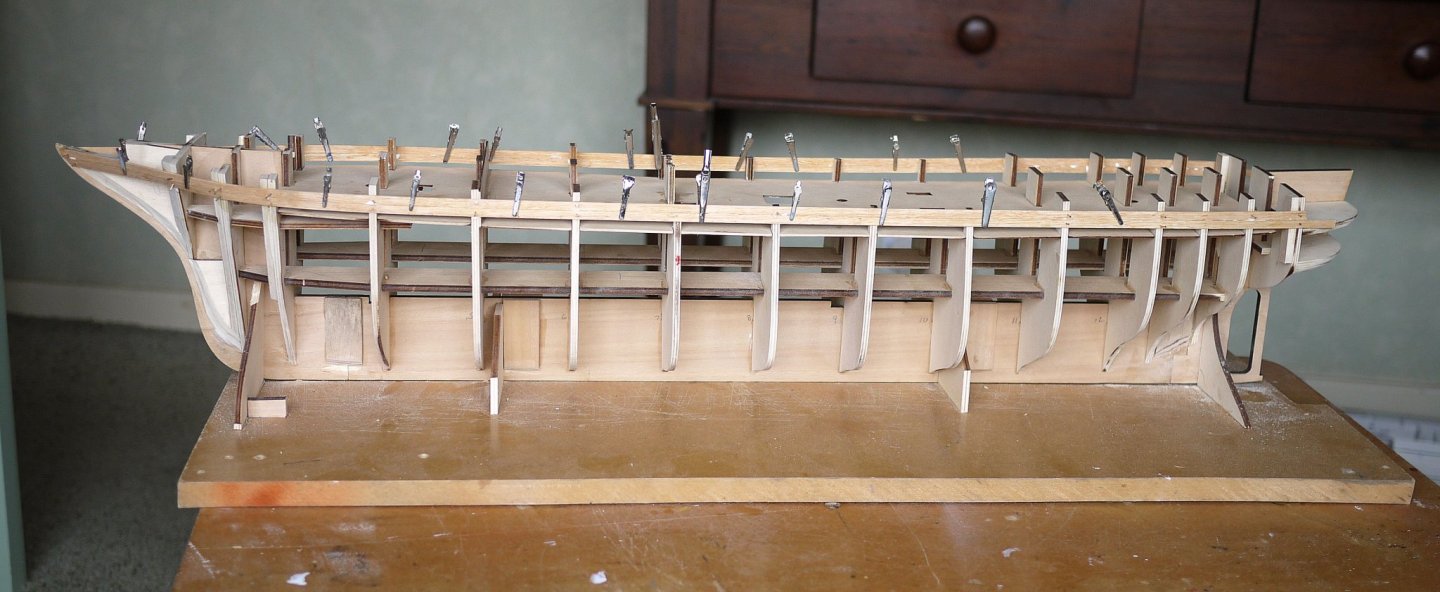
Hi, Kevin, our kits are quite different, it doesn't have half of what you're showing, mine is a much older version. I’m making quite good progress on the planking. The first layer has been completed without any issues, it went on quite easily and looks like it will be a good base, in fact I could almost get away with just this one layer, the stern looks a bit of a mess as I built it oversize, the strips butt up tightly and are well fixed to the frame, it all just needs sanding. I’ll wait until I can do this outside, too much dust for inside the house. Ken

-
Hi Kevin, Thanks for your comment on my AV. I like knowing that there are others out there who struggle as much as I do, it makes me feel normal after looking at some of the expert builds on this site. Ken
-
Hi, Thank you very much for your reply, and for posting the pictures, it has really given me the motivation I was hoping for. I know that I won’t be able to compare what I build to your magnificent model but it does give me something to aim at. I particularly like the way you present the the brass parts as a feature rather than painting over them, it suits the model. As I’m aiming to achieve a good looking model to display at home and not worrying about accuracy this is now the way I will go. Ken
-
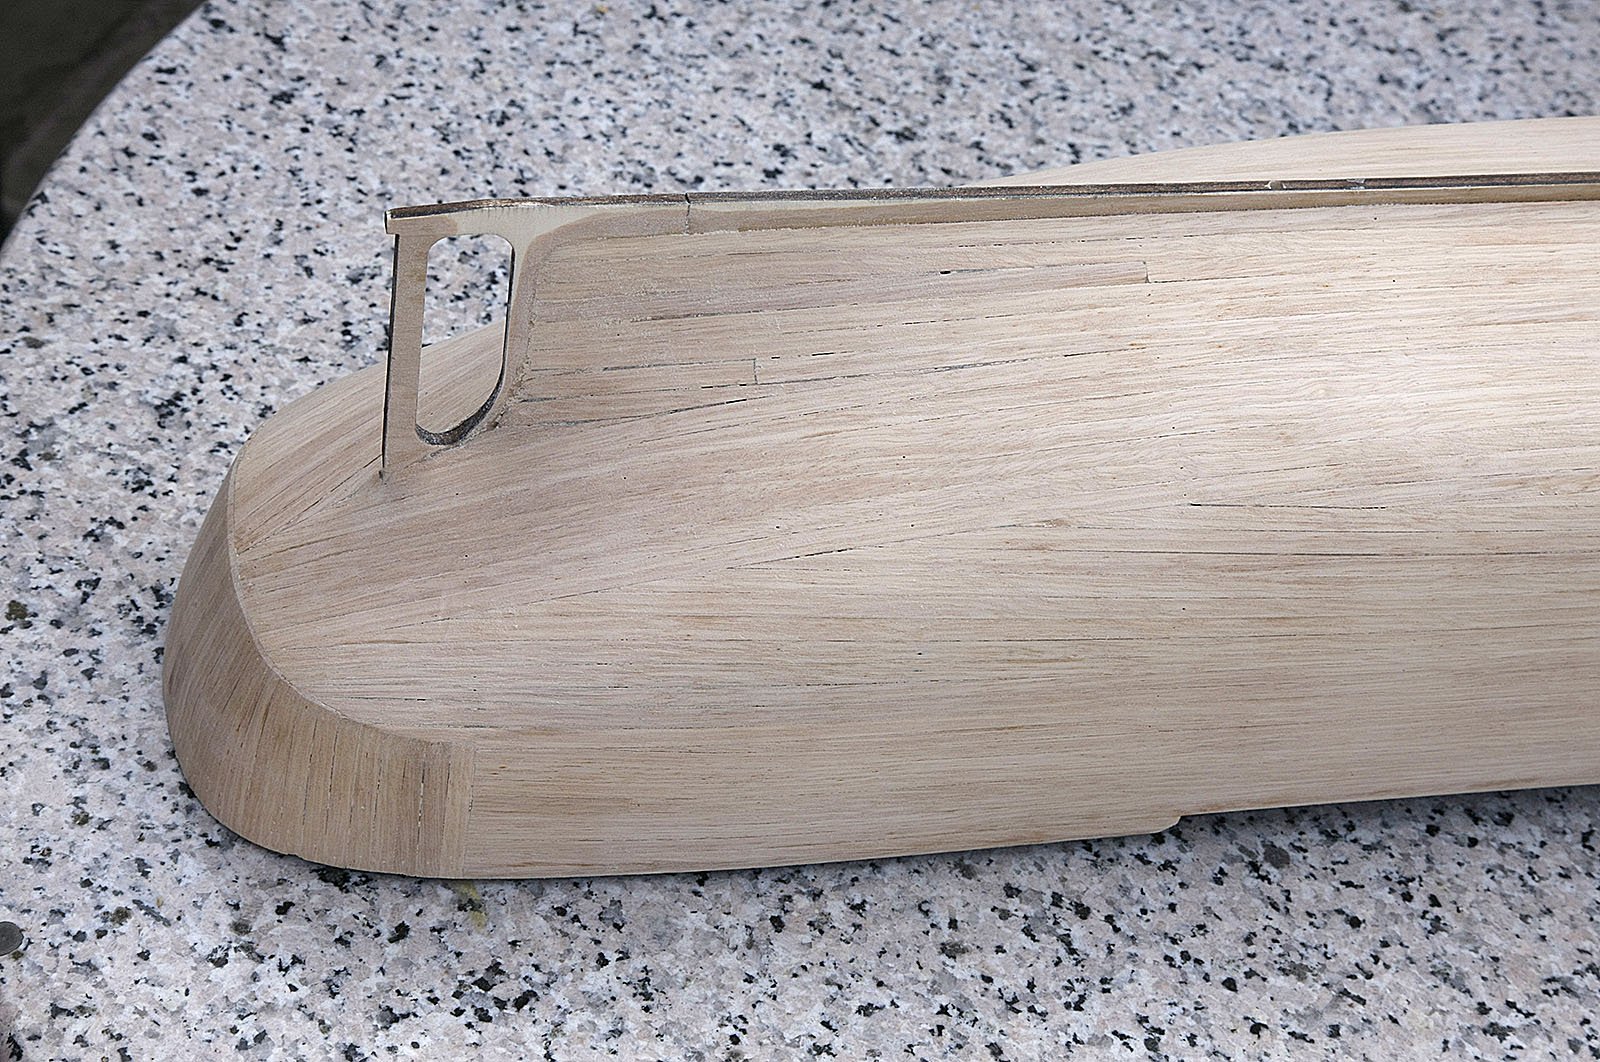
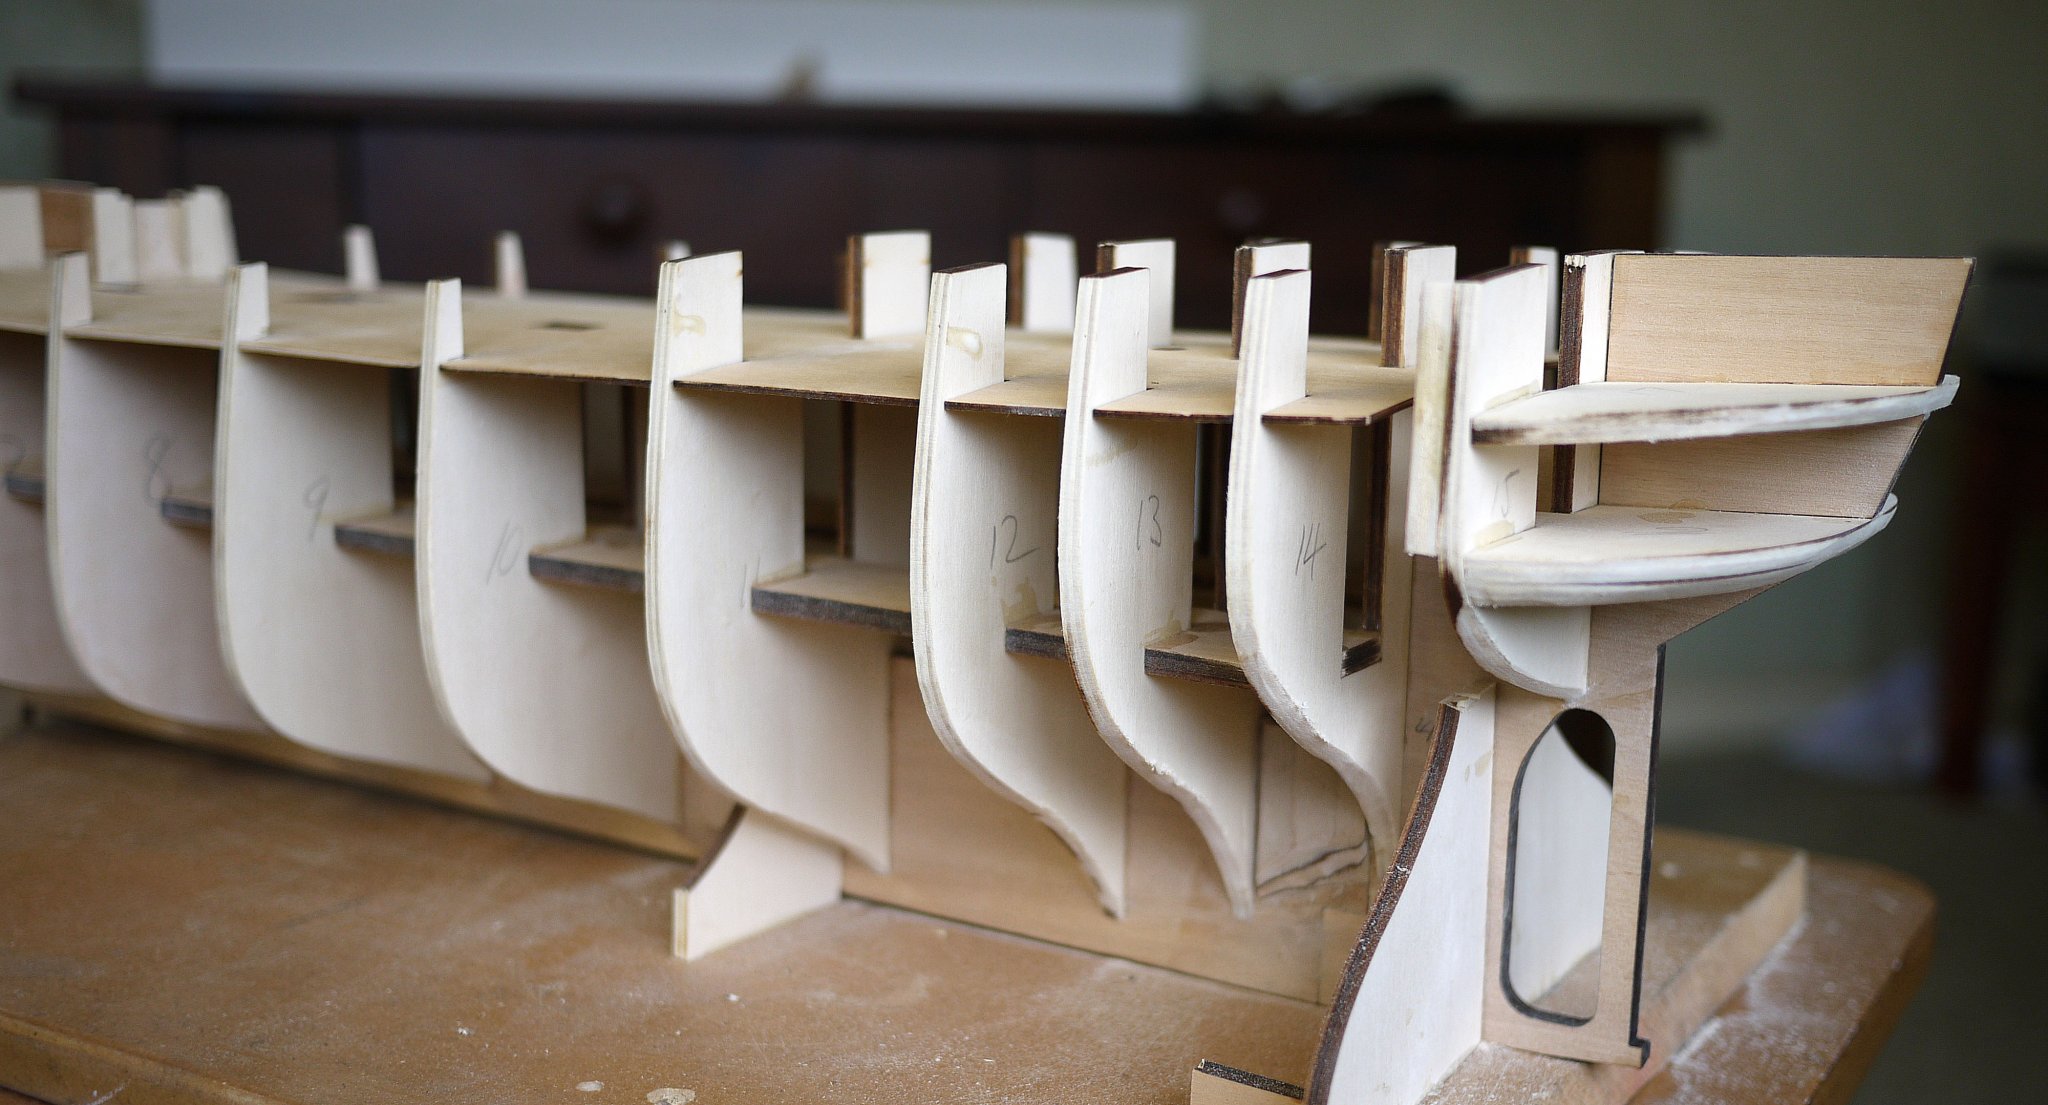
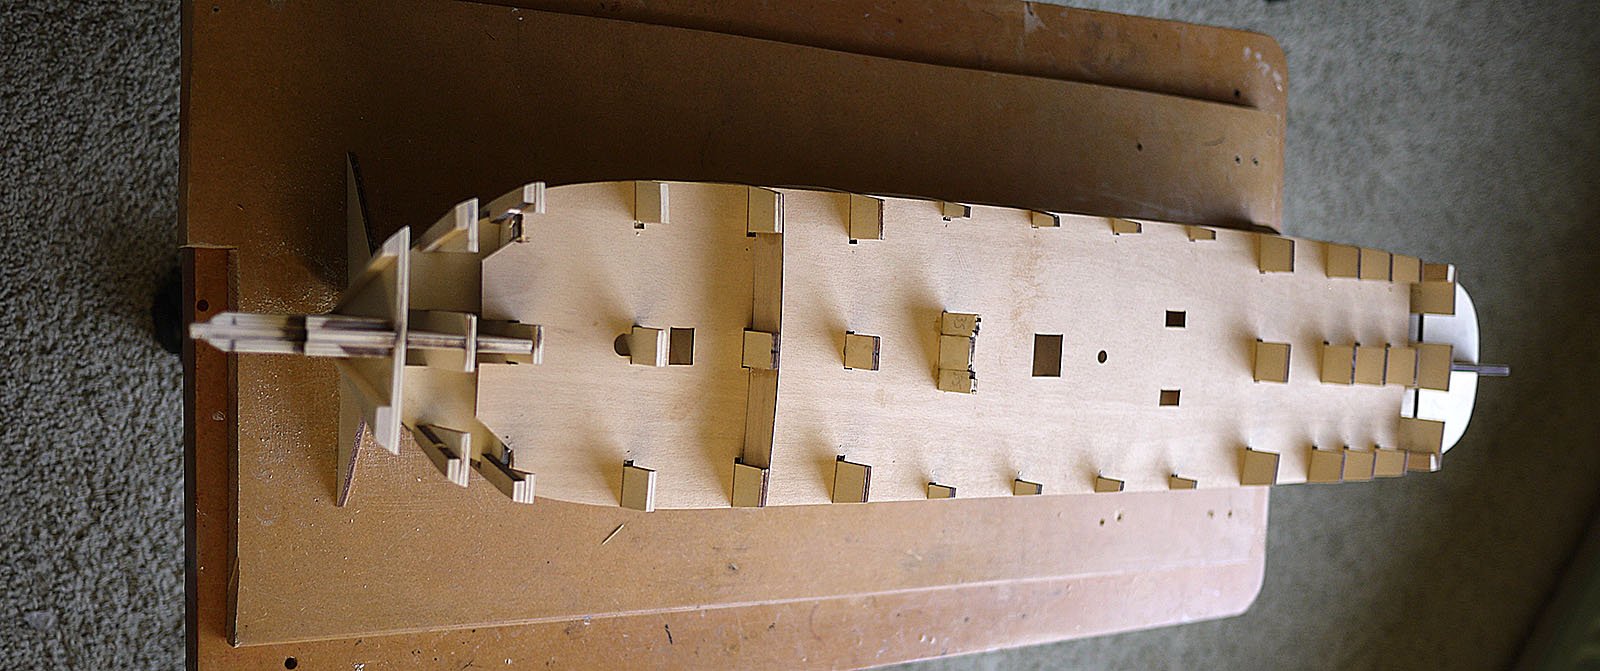
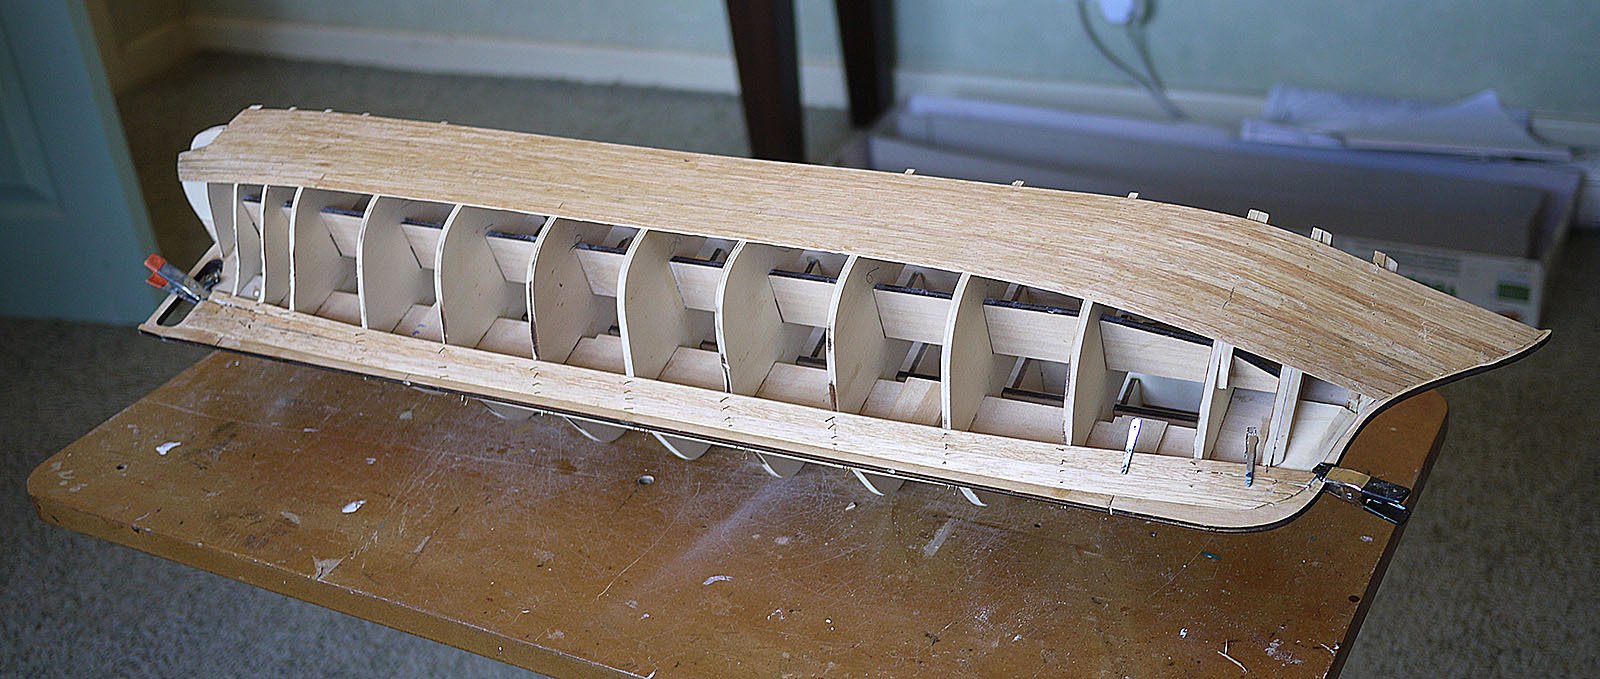
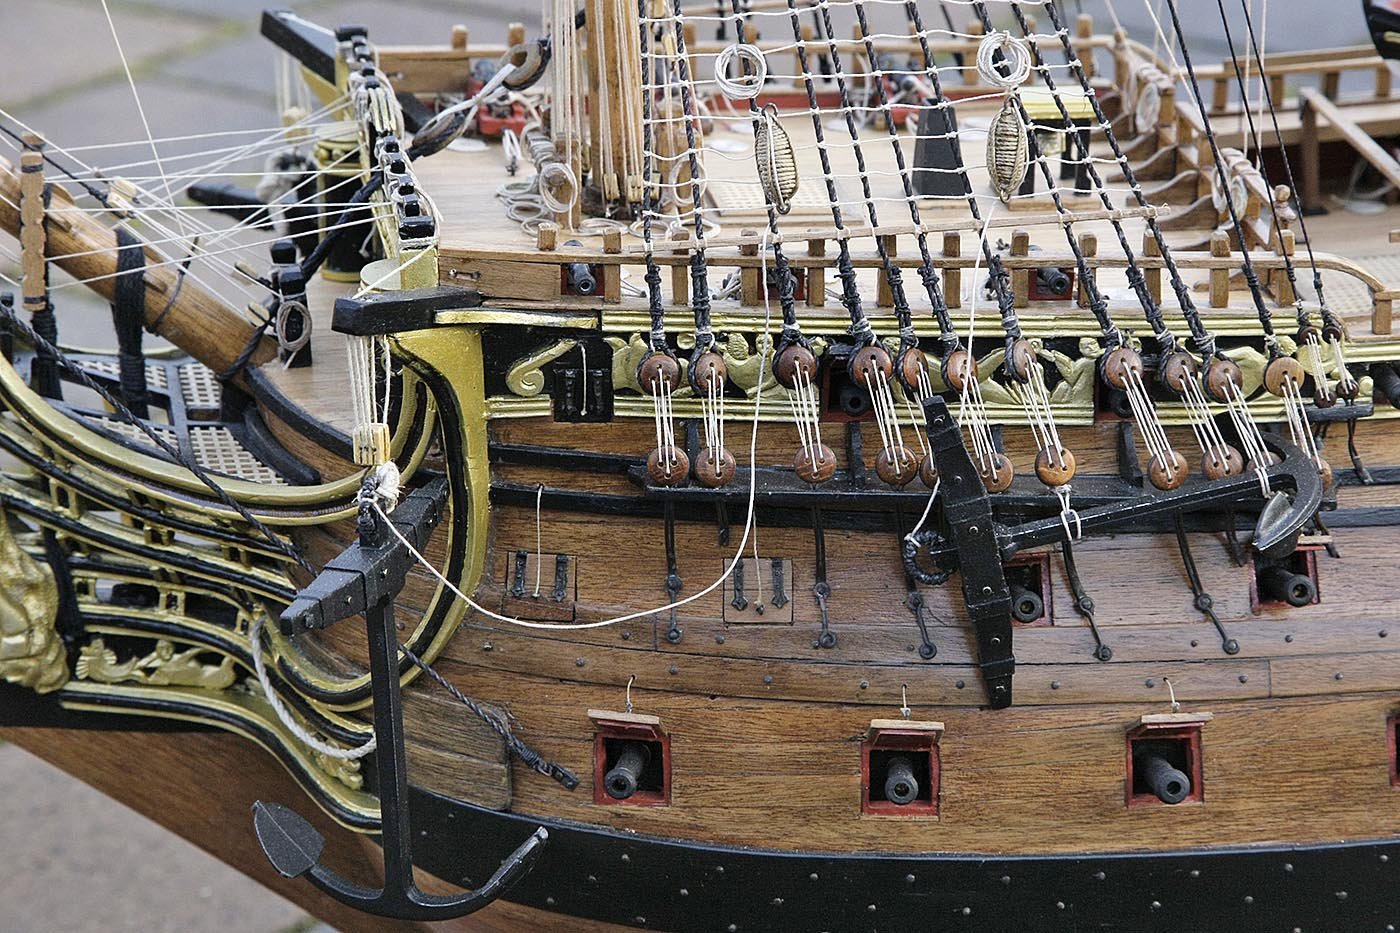
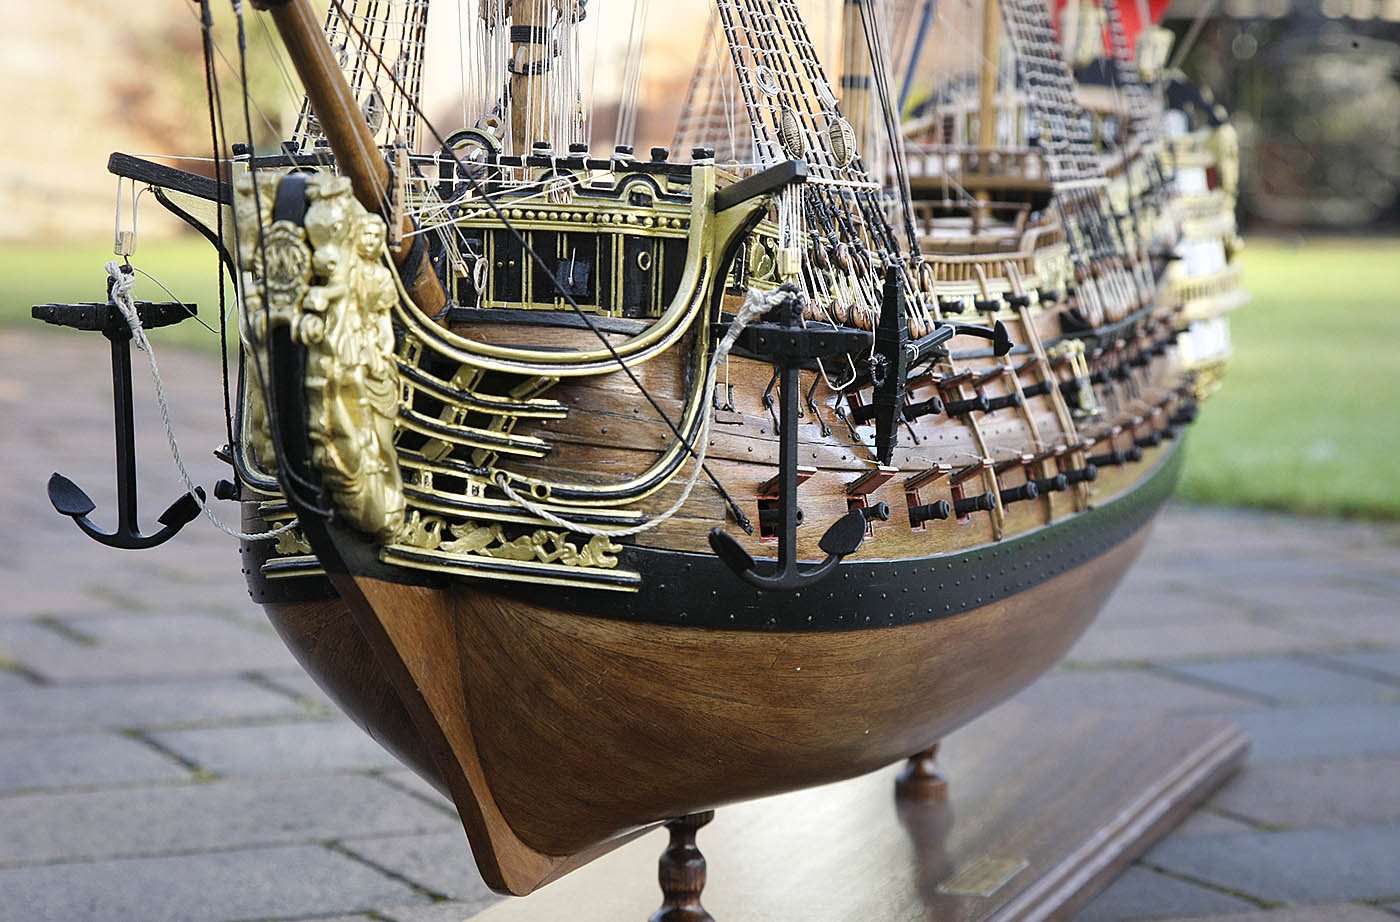
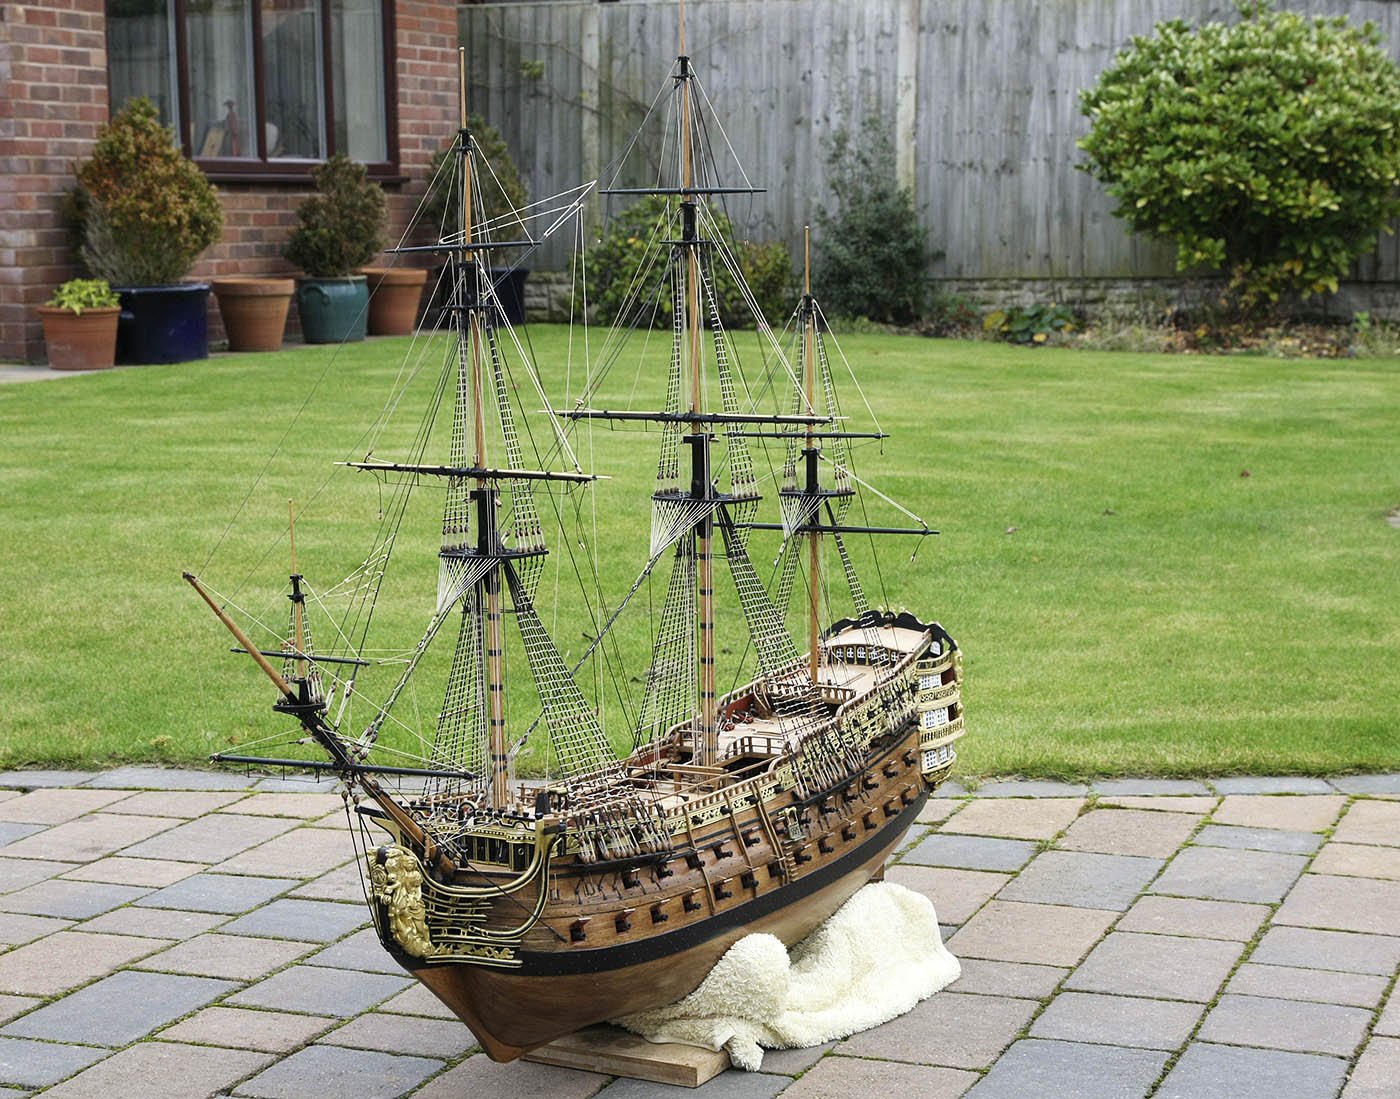
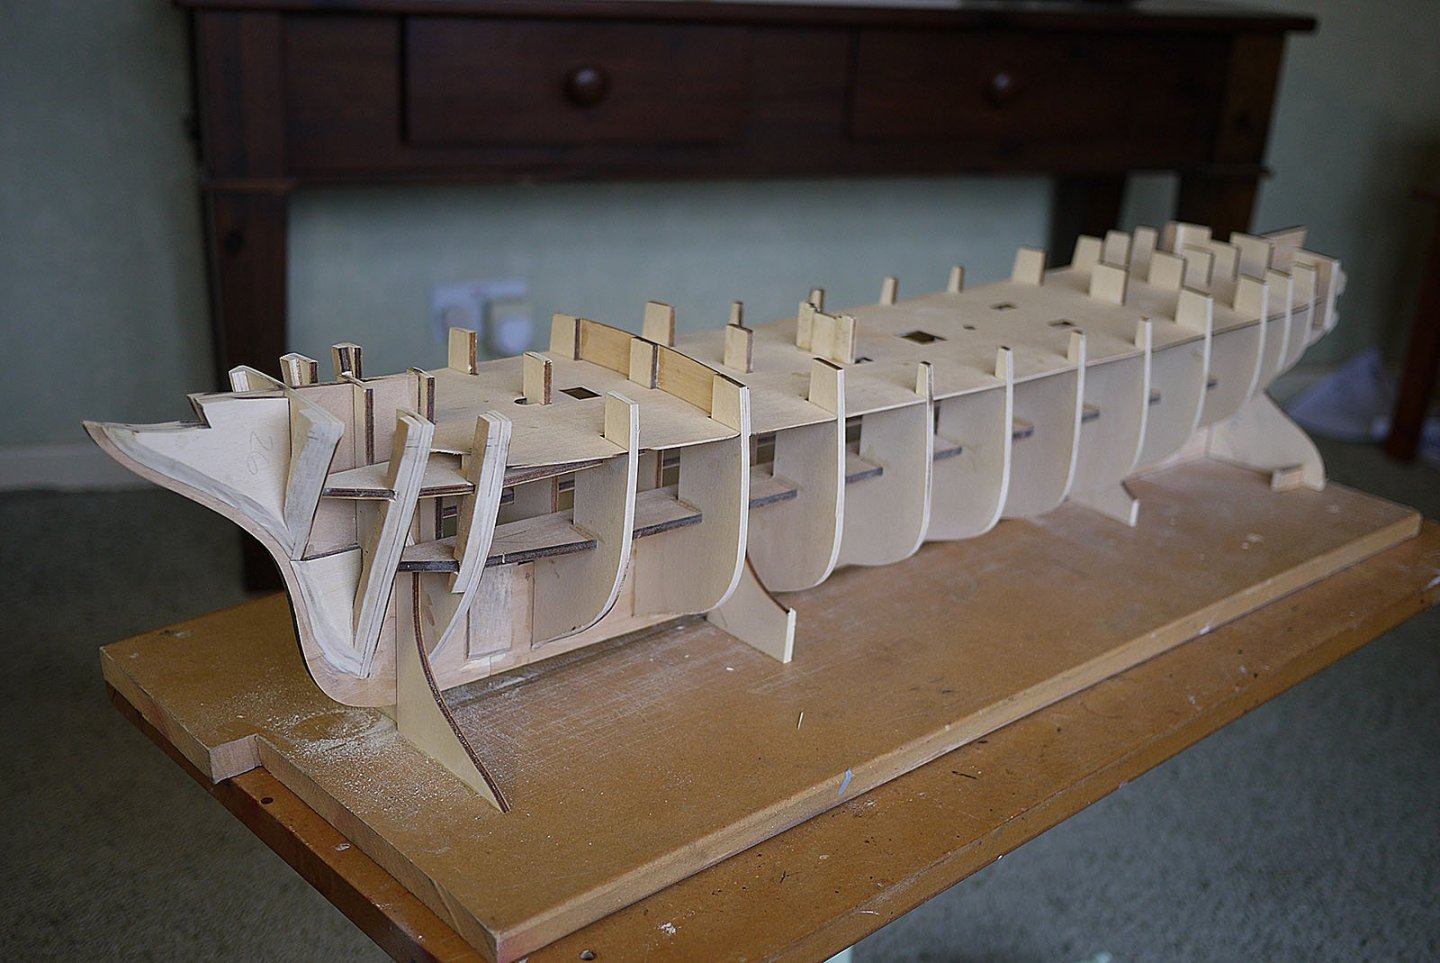
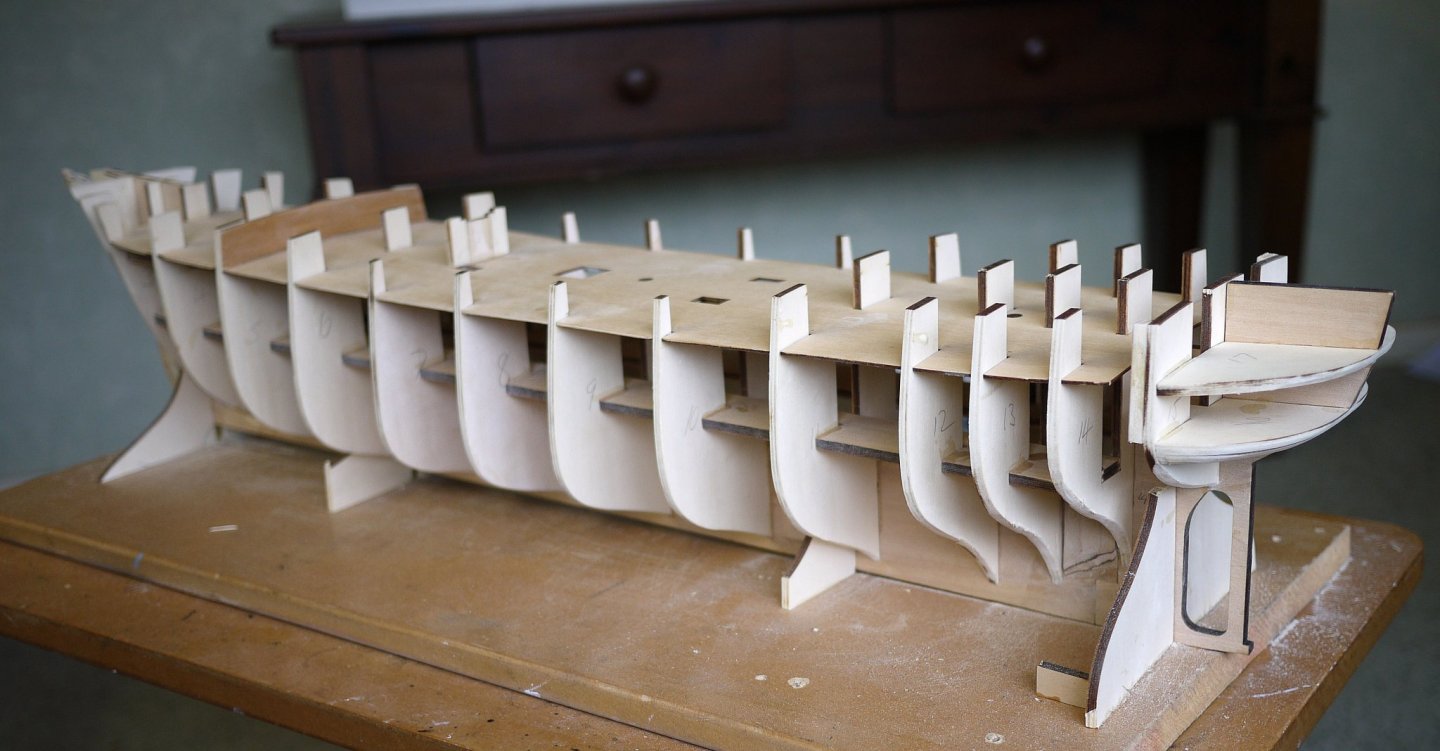
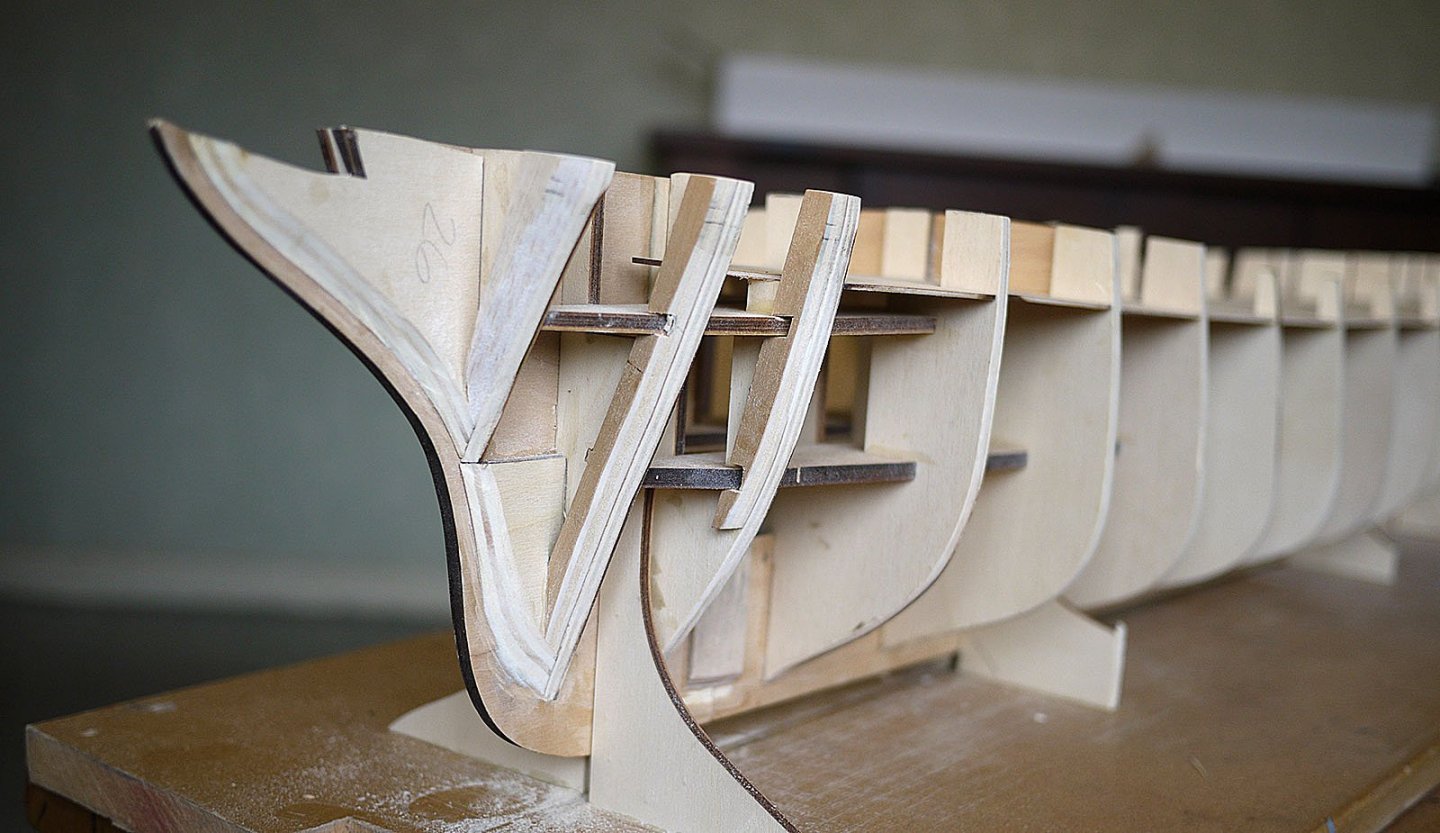
Hi, I have recently started the Amerigo Vespucci, 1:84 scale from a Panart kit. I quite enjoyed the interaction I got from members on my Royal William log so I’ll again share my build with you. I bought the kit off Ebay for a good price, it is an early version about 20 – 25 years old and differs quite a bit from their current version, I think for the better. Lime for first planking, not balsa, etched sheet brass for the plating not ply, planked deck instead of printed ply and 12 sheets of plans many 1:1, but poor badly translated instructions instead of the step by step guide. Although old everything was in very good condition, straight keel and bulwarks, which were very well laser cut, matching the plans perfectly, the strip wood is very nice, straight cleanly cut and still flexible enough although has hardened quite a bit. There are hundreds of castings and machined brass fittings all nicely bagged, these will need a serious cleaning as they have become badly tarnished. A very comprehensive and well presented kit. I admire many of the builders on this site for their skill, painstaking dedication to detail and accuracy but I’m afraid that’s not me. My build will be as simple as I can make it, mostly straight from the box with just enough detail to make it a nice looking well made model that will not take me years, with the chance of getting fed up and quitting. I wanted to start the build by first preparing the mounting. I want to mount it on brass pedestals on a large mahogany plinth so needed to do the preparation for this prior to planking rather than risk damaging the model at a later stage by turning it upside down. My first problem is that due to the lack of availability of stuff due to the Covid restrictions I can’t get anything, the wood yards are closed and even popular online modelling suppliers have run out of anything I want, glues, sealers wood strip and my columns. I started by joining together the three sections of keel, I reinforced the joins then beefed up the area where the pedestals will be fixed with rods, I drilled them out and hope that they line up later. I dry fitted the bulkheads, they only needed the lightest of sanding before becoming a perfect fit. I made up a keel support out of scrap, not very neat looking but works well enough.. I glued all the bulkheads into place, I added extra support on the outer edge of the front three and stern bulkheads. I usually infill these areas with balsa but the lines of the hull are so friendly that I didn’t think that it would be needed. I spent quite a bit of time fairing the frames making sure that they were as perfect as I could make them. I have now started the first layer with the 6 x 1.5 lime planks provided, so far so good. That’s me starting my journey please feel free to join me. Ken


-
Hi Mark, It's very obvious why your RW has taken you much longer than mine to build. The detail and finish is simply superb, a real work of crafted art to be proud of. Each time I see pictures of it I just have to sit back and admire, I'm glad that it will never be shown next to mine. Ken
- 652 replies
-
- 2
-

-
- royal william
- euromodel
- (and 1 more)
-
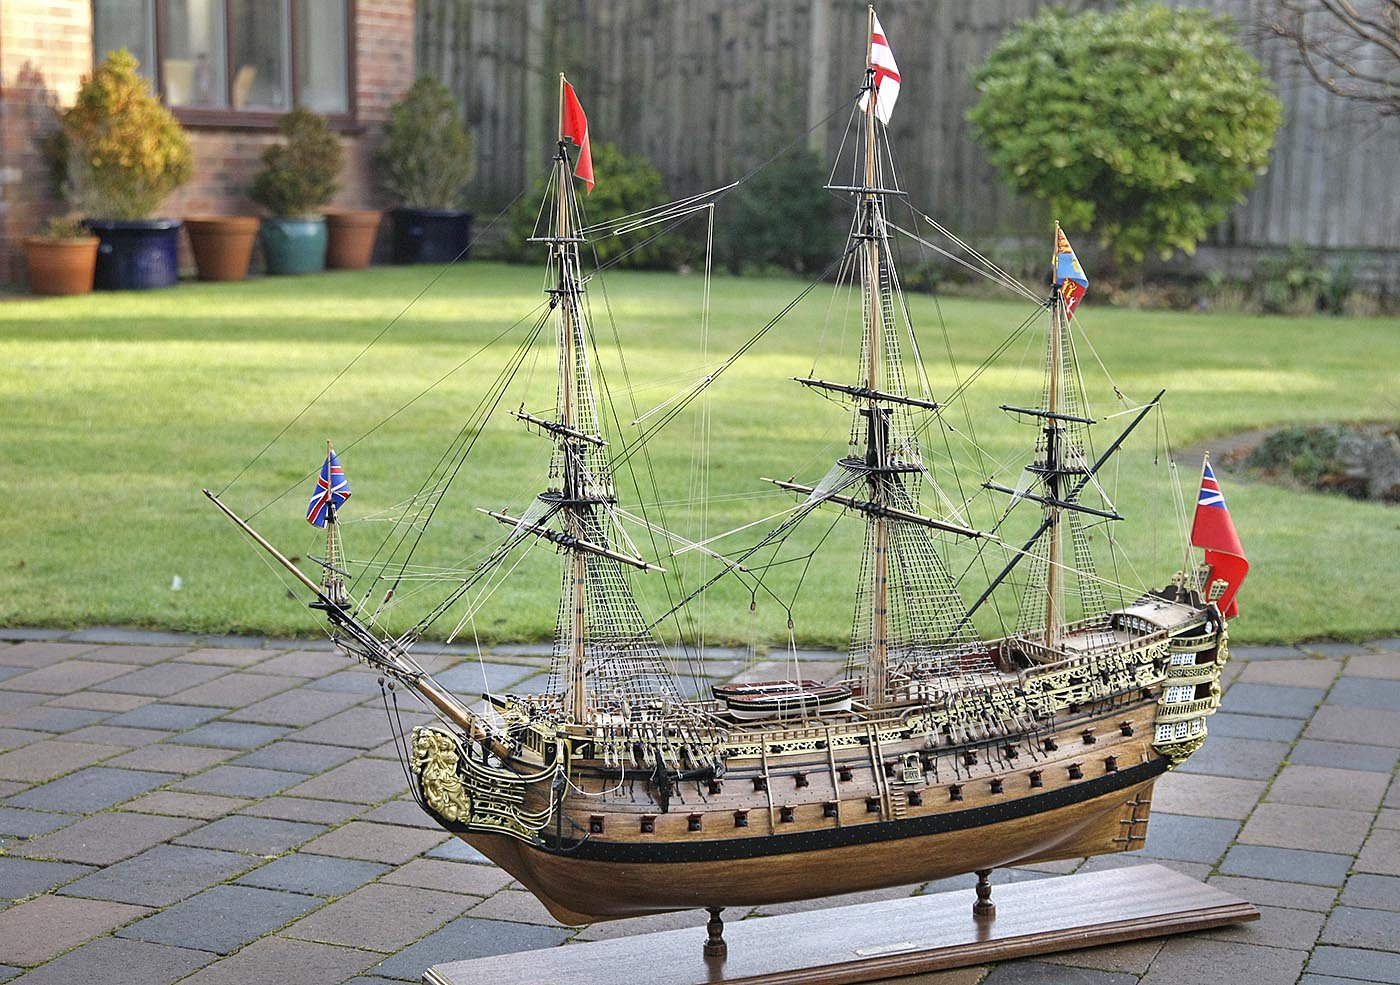
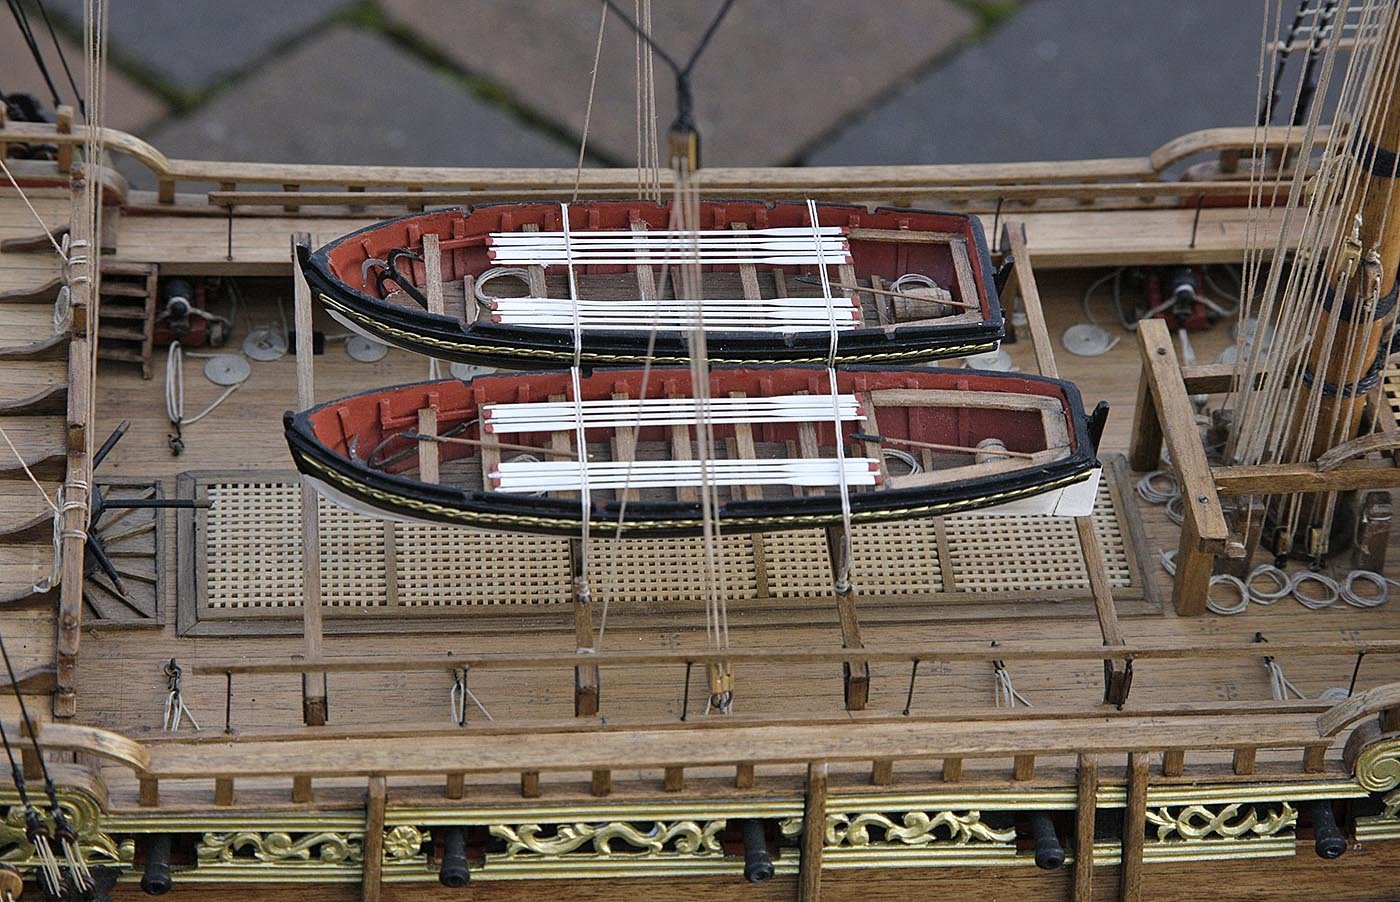
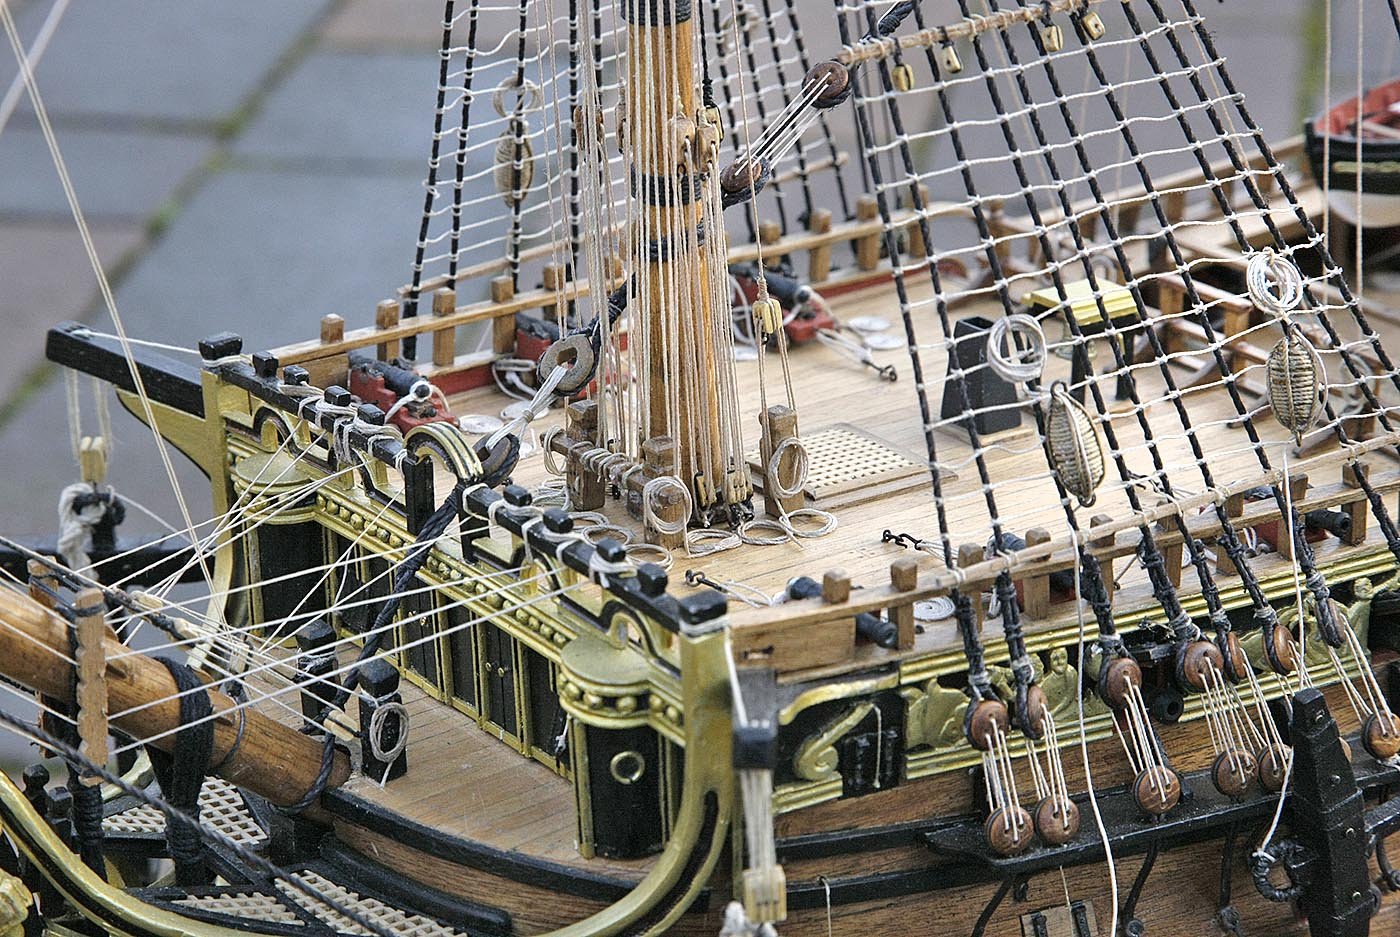
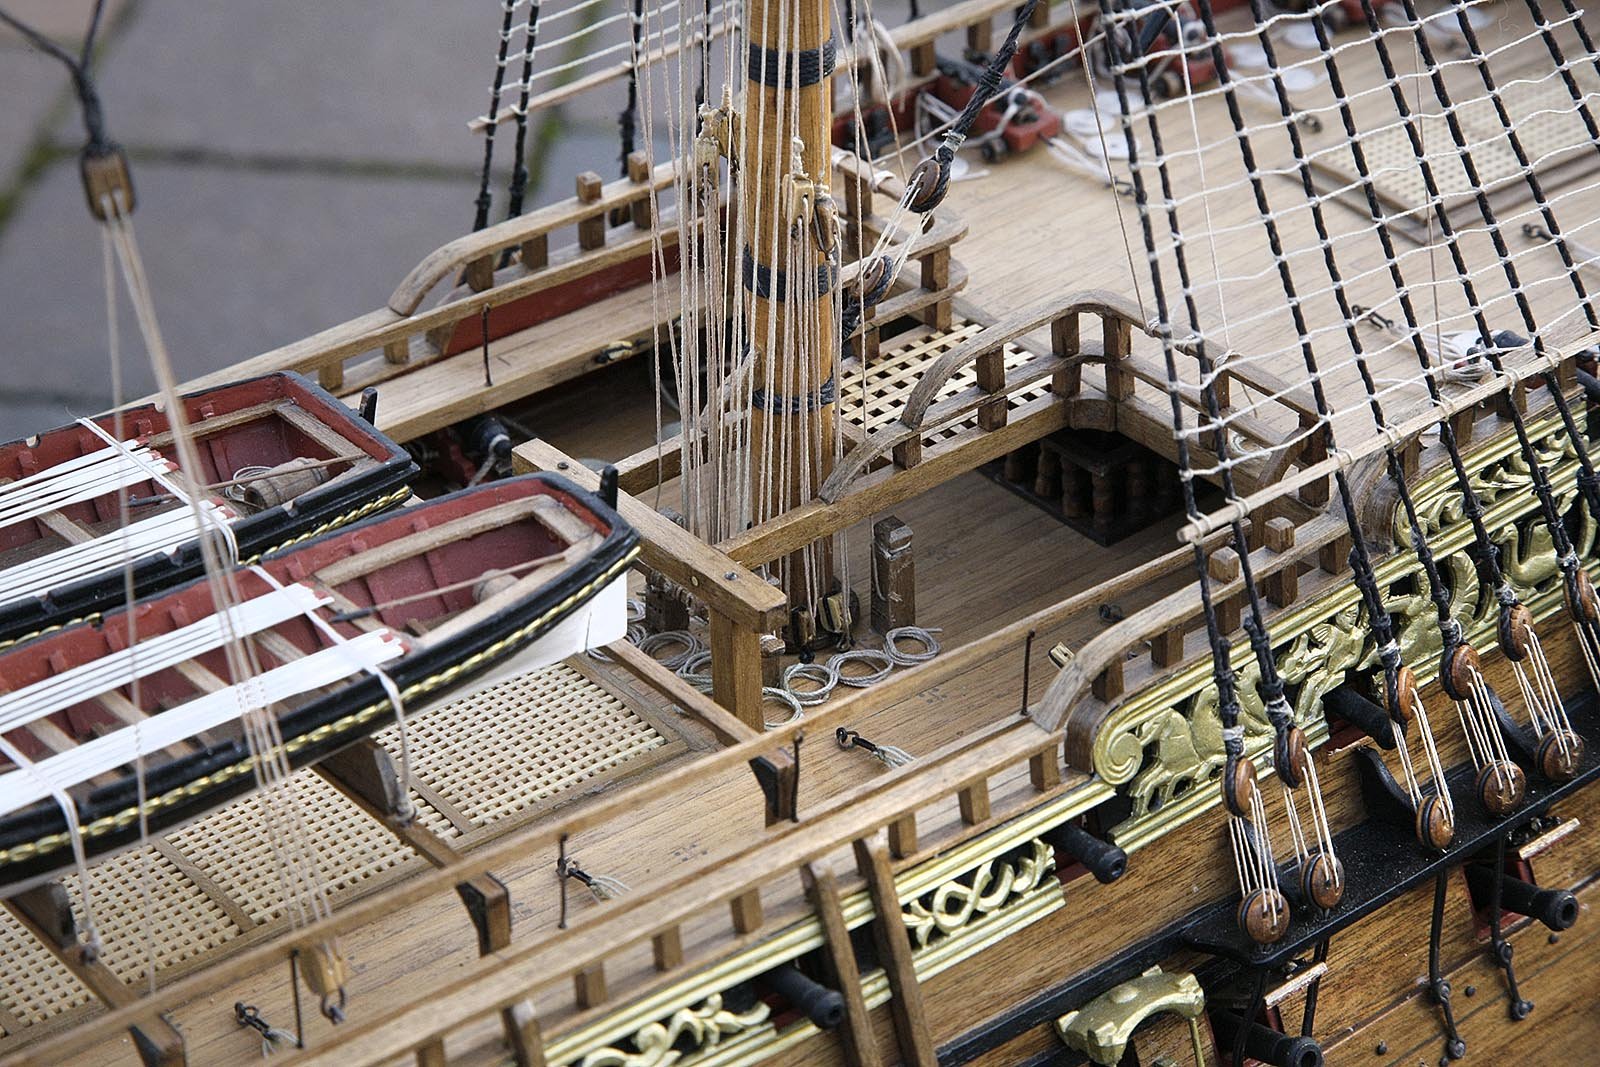
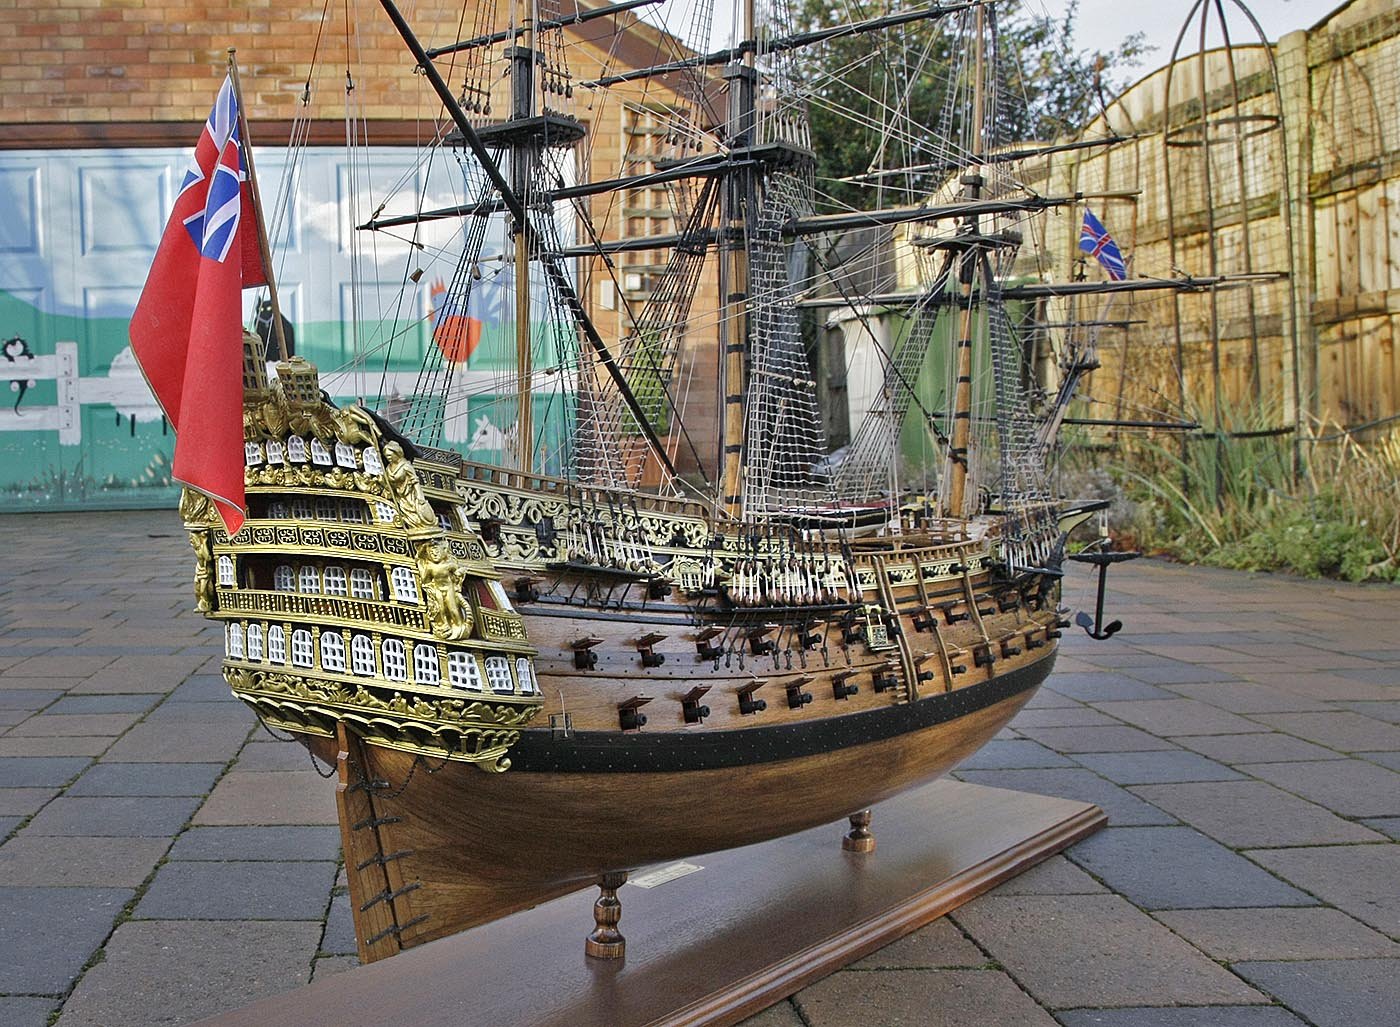
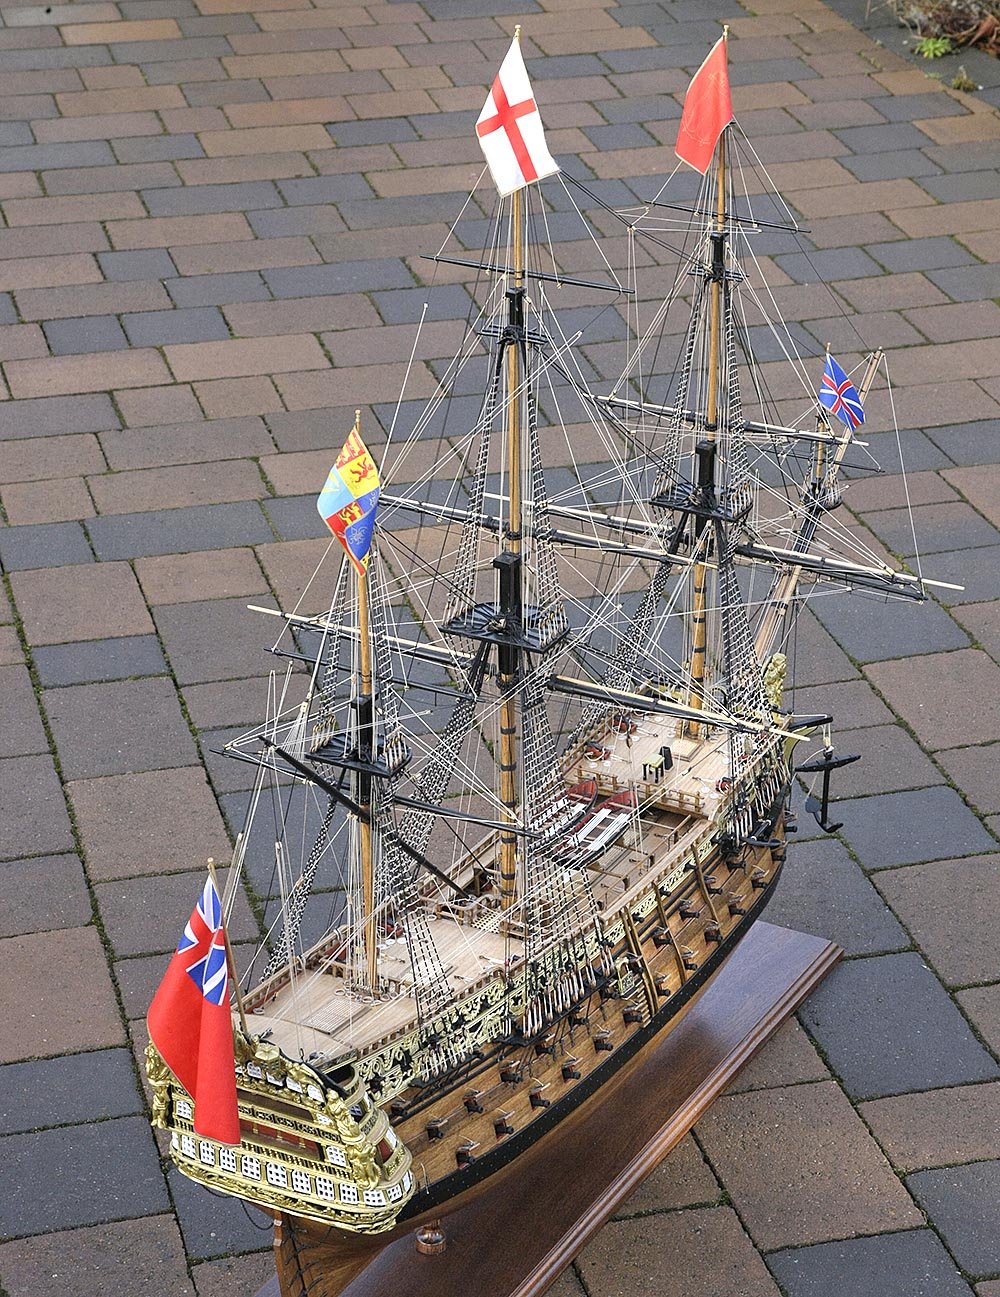
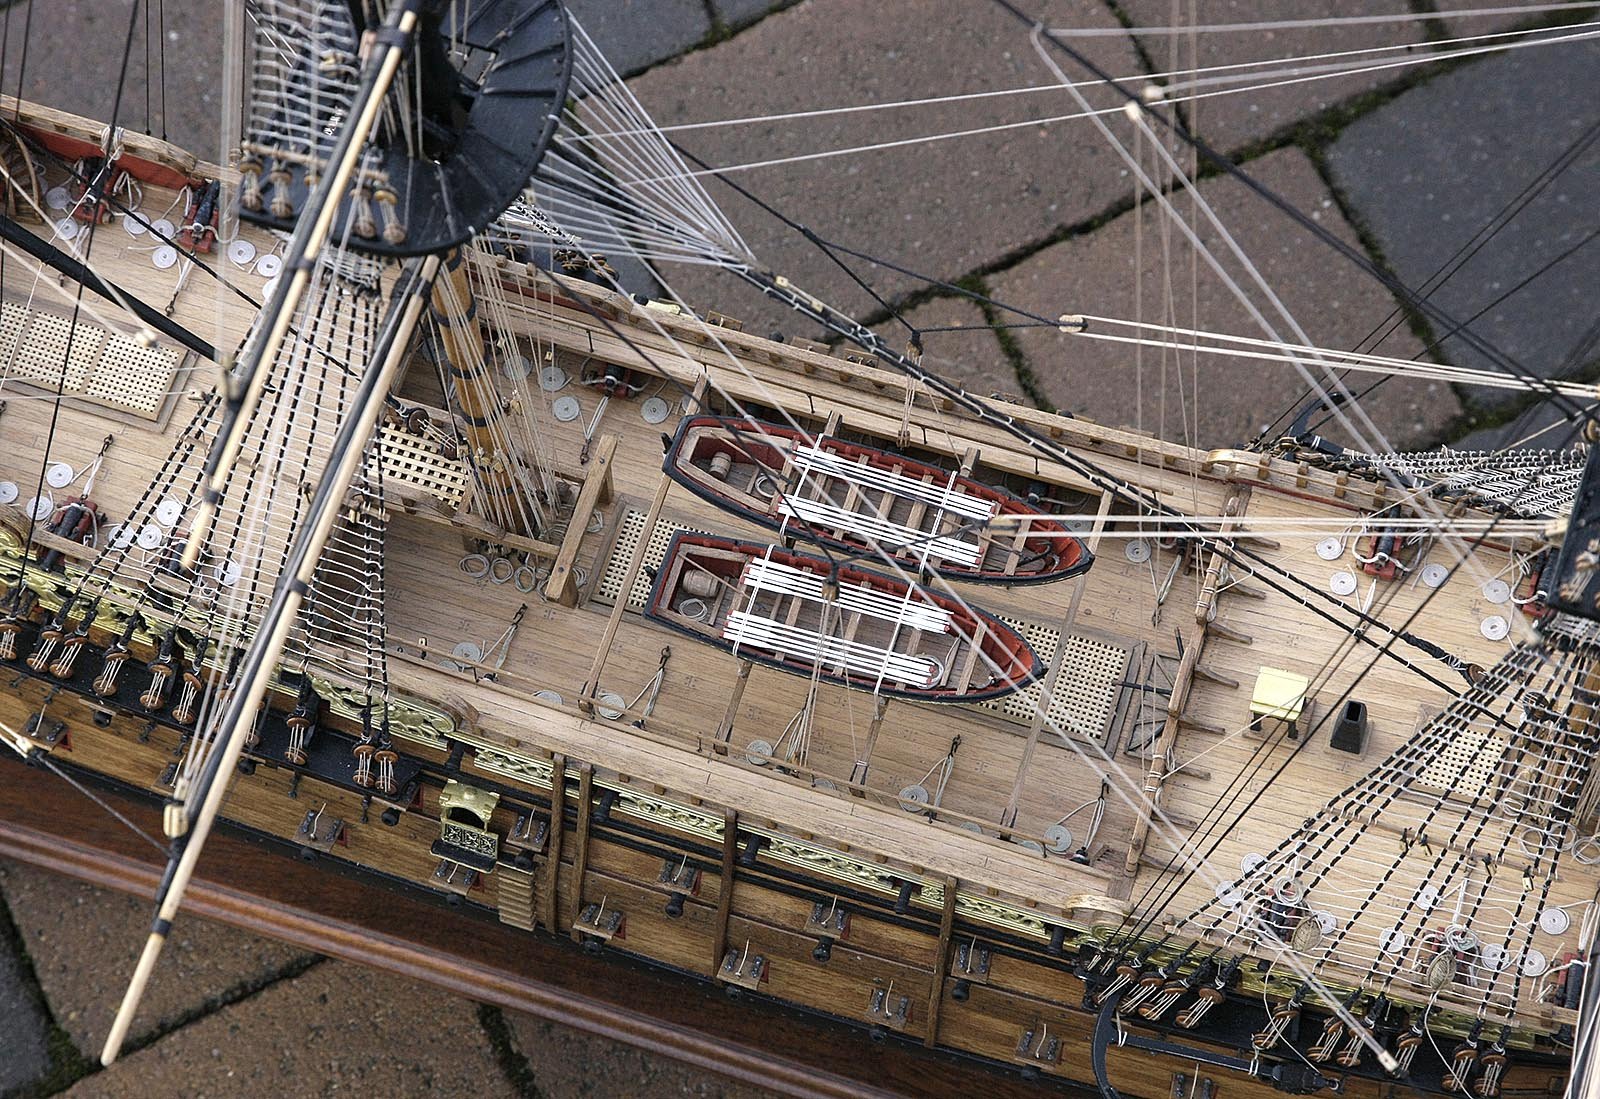
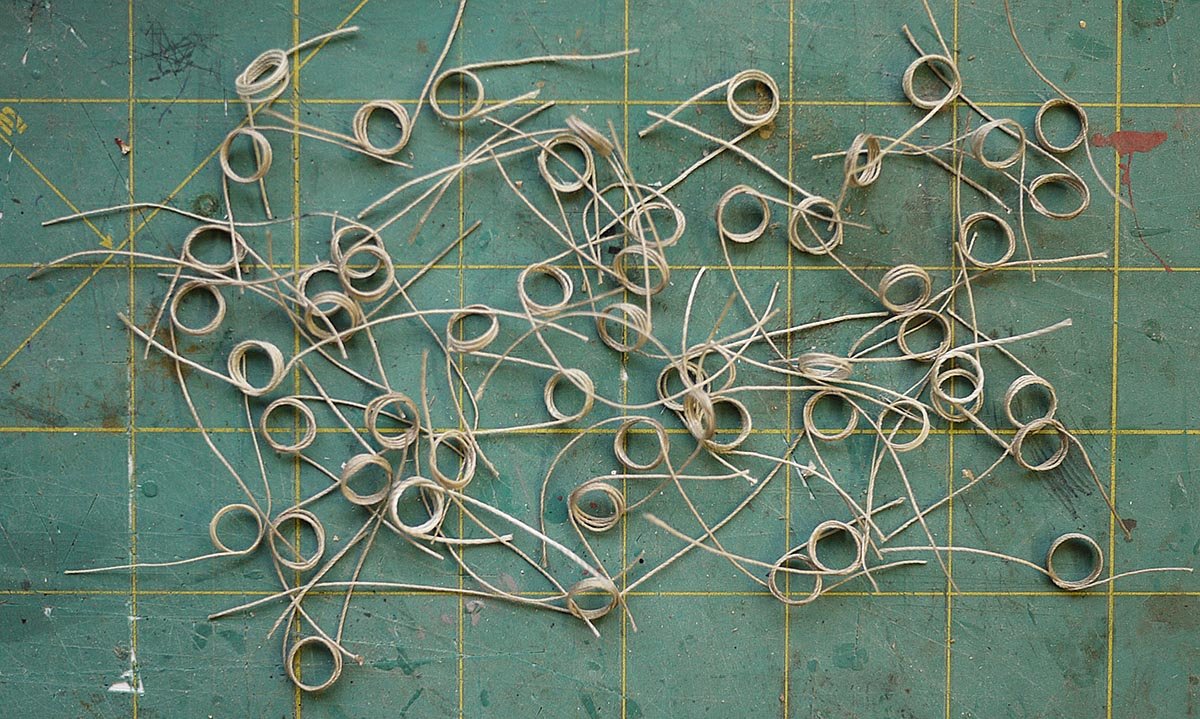
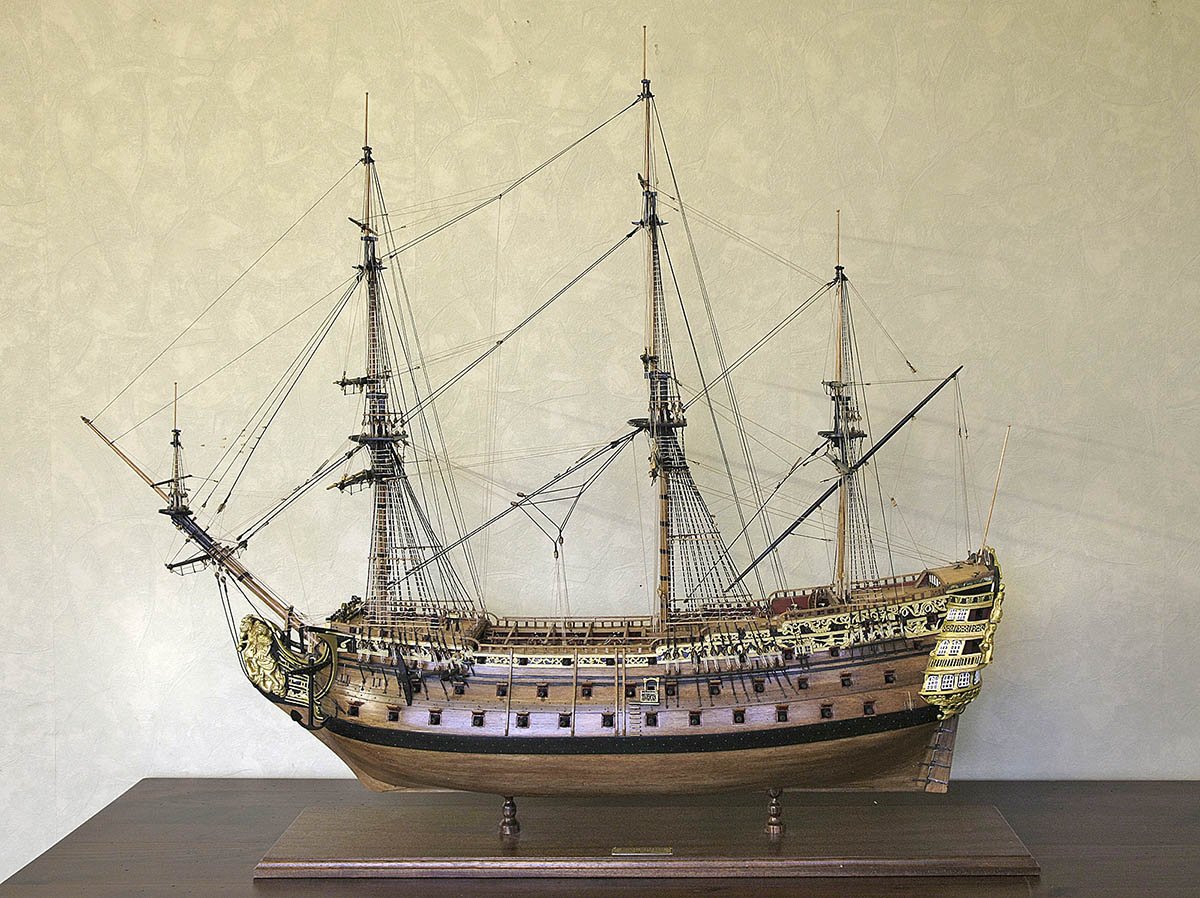
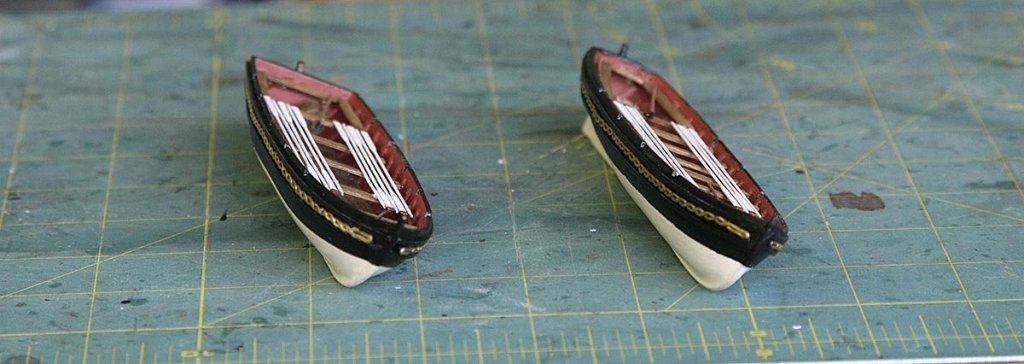
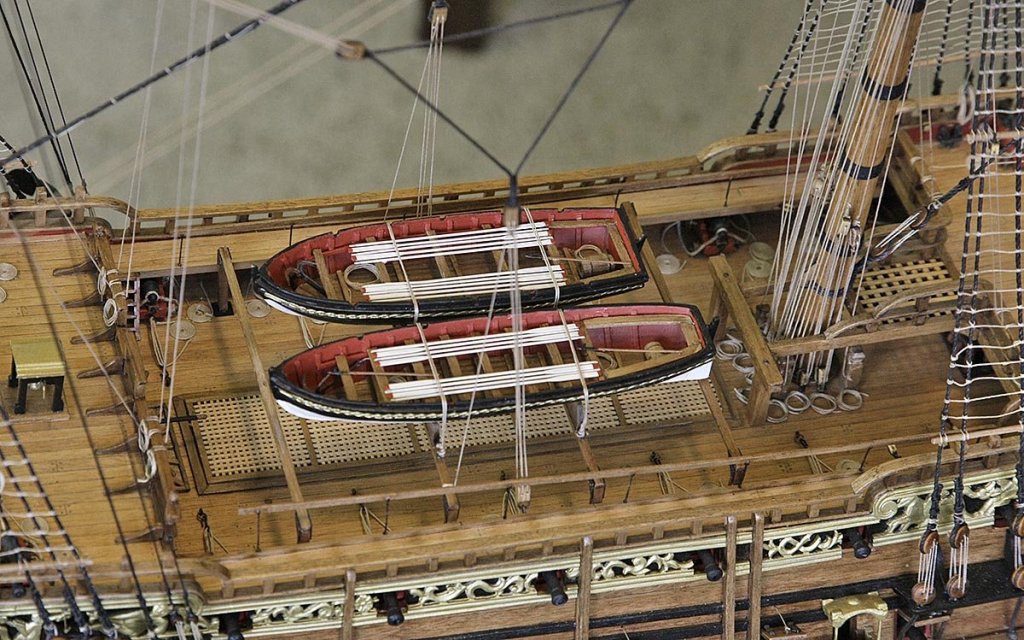
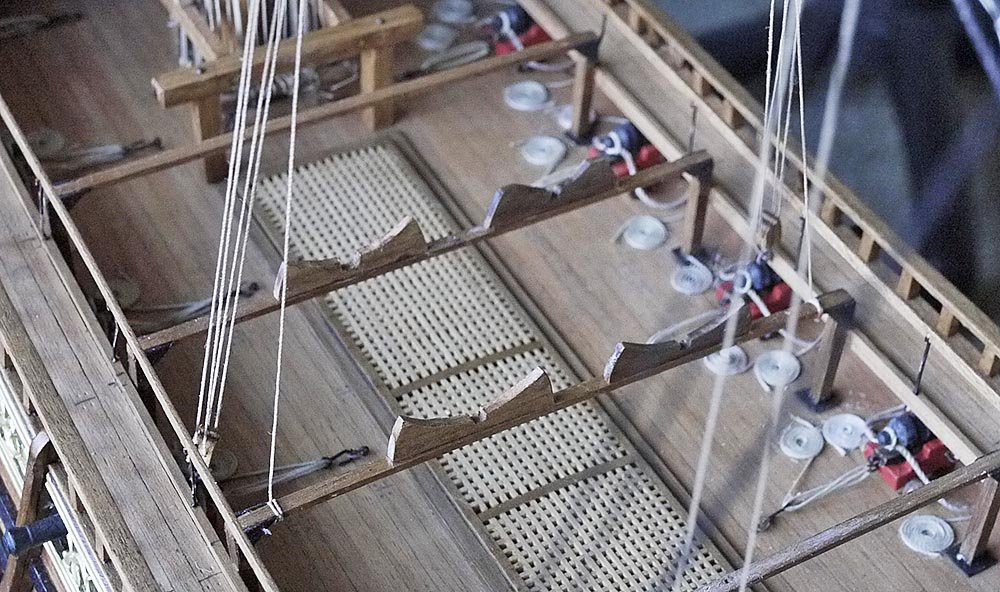
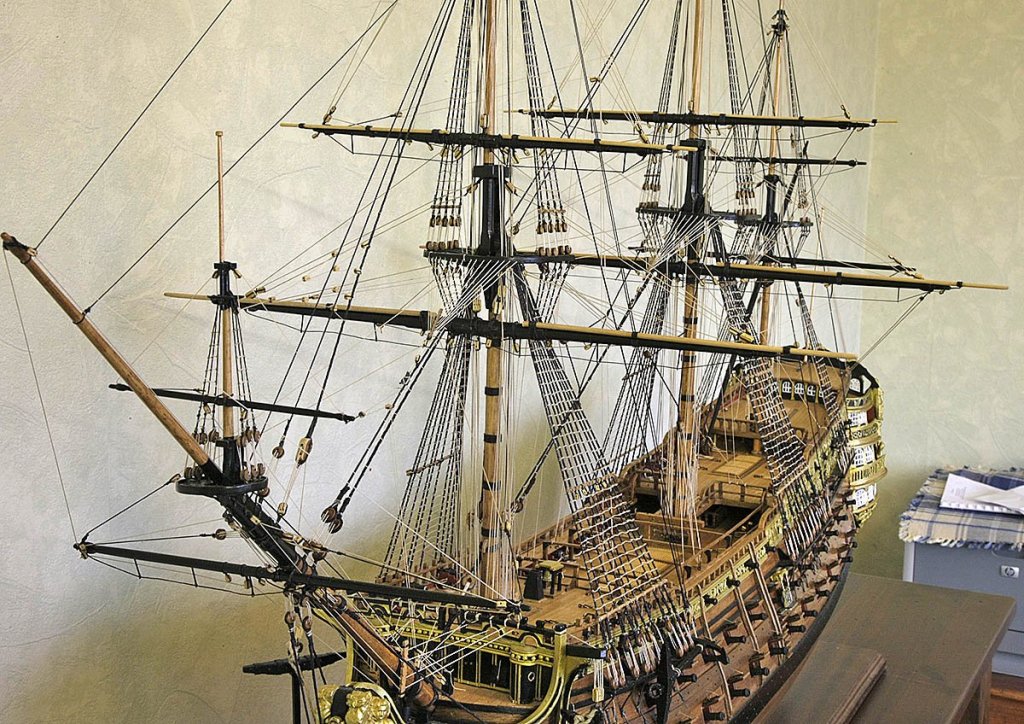
Hello Everyone, FINISHED!!! The boats have been completed and are now mounted on their beams. I think that they worked out quite well and I'm glad that I made the two. The rope coils have also been placed around the deck and give it a finished look. As far as I can see RW. is now finished, I'll leave it in my workroom for a couple of weeks casting my eye over it to see if I spot anything that I need to do, I'll clean it up then when I get some decent light I'll do a photo session. I'll also put my mind to writing up my conclusion. It's been quite a journey and thanks for coming along for the ride. Ken


- 424 replies
-
- 14
-
-
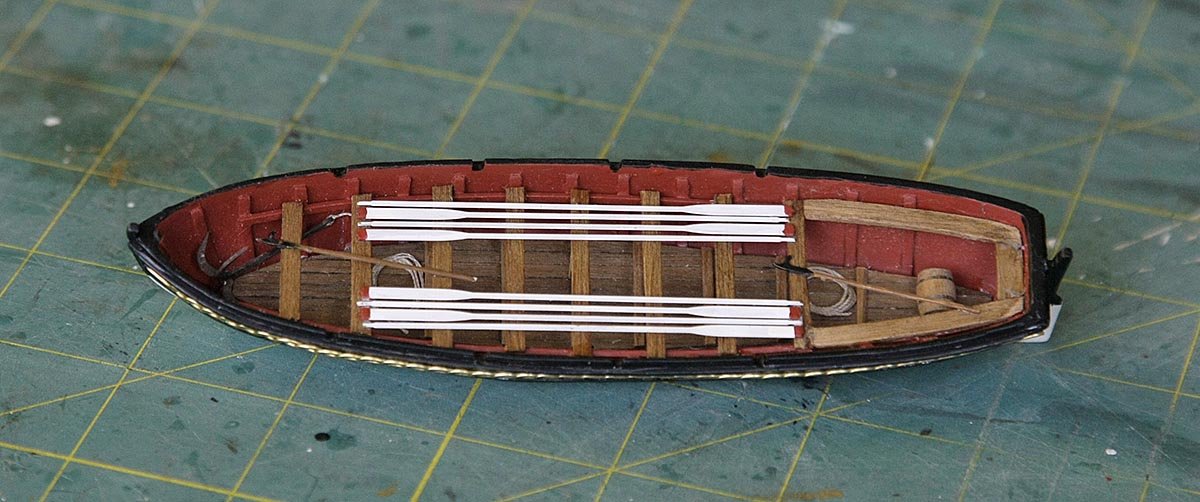
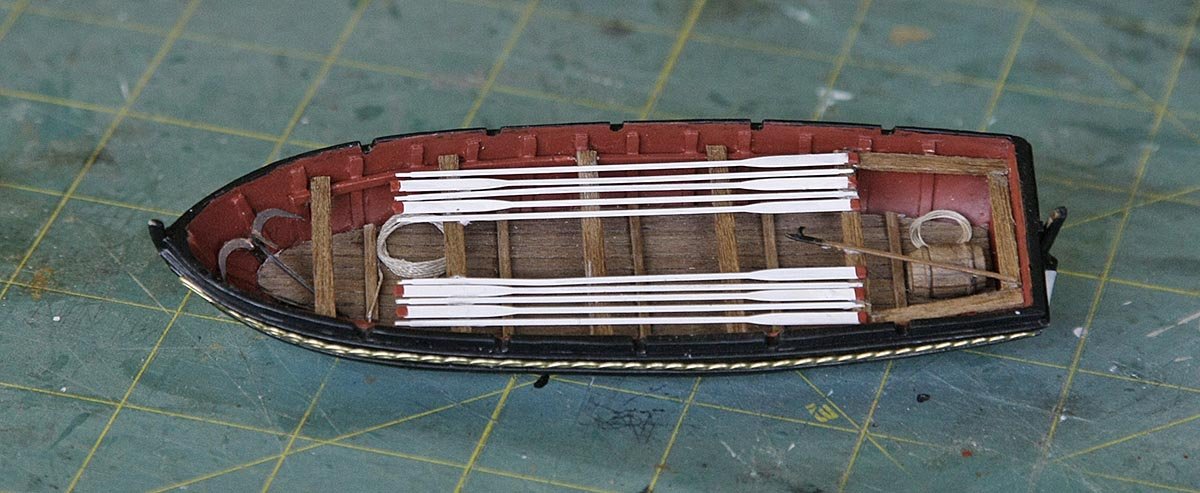
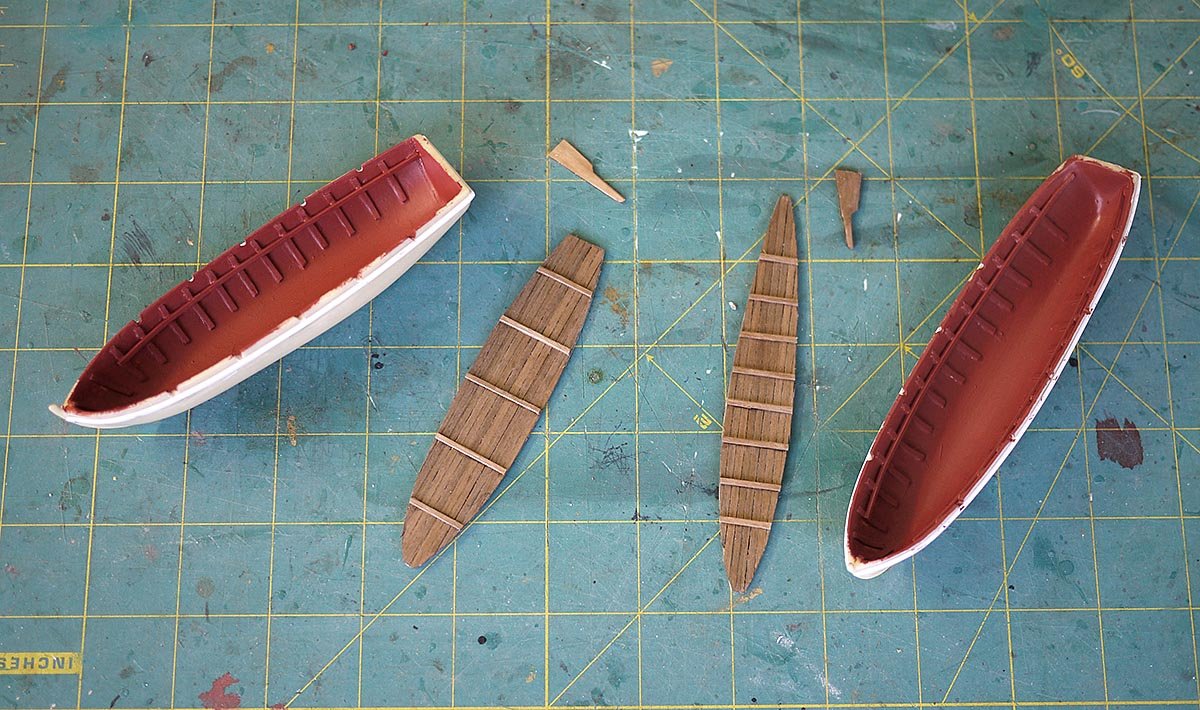
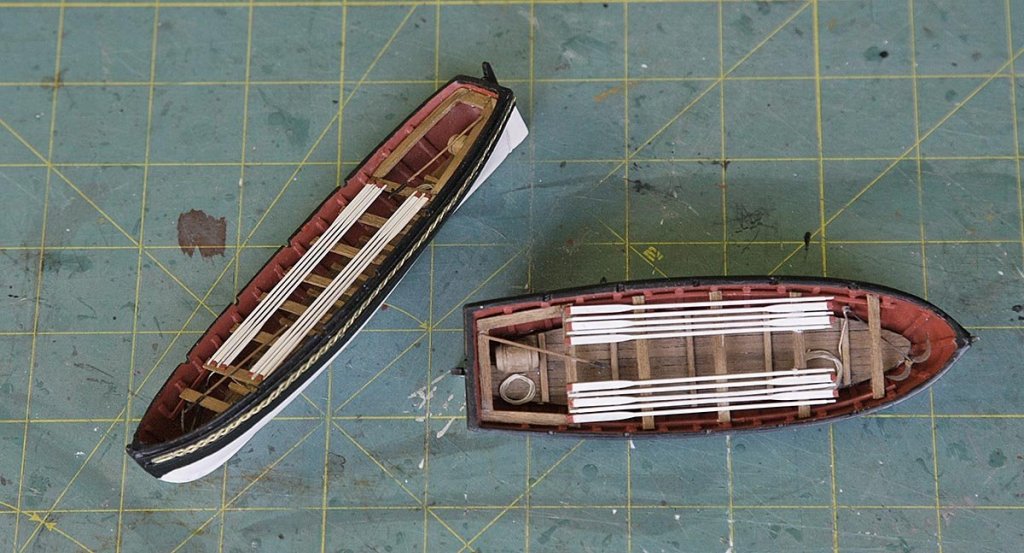
Hello Everyone, Again thanks for your likes. Welcome aboard King David, your probably the last crew member to come aboard before we're ready to sail. I think it's natural that when you can see the finishing line you put a spurt on, well that's what's happening here in my workroom. A bit more progress on the boats, the photos show how I'm doing, I've also made up and fitted their supports on the deck beams. I'm in the process of collecting all the cord off cuts and I'm starting to make up the rope coils. Ken


- 424 replies
-
- 10
-
-
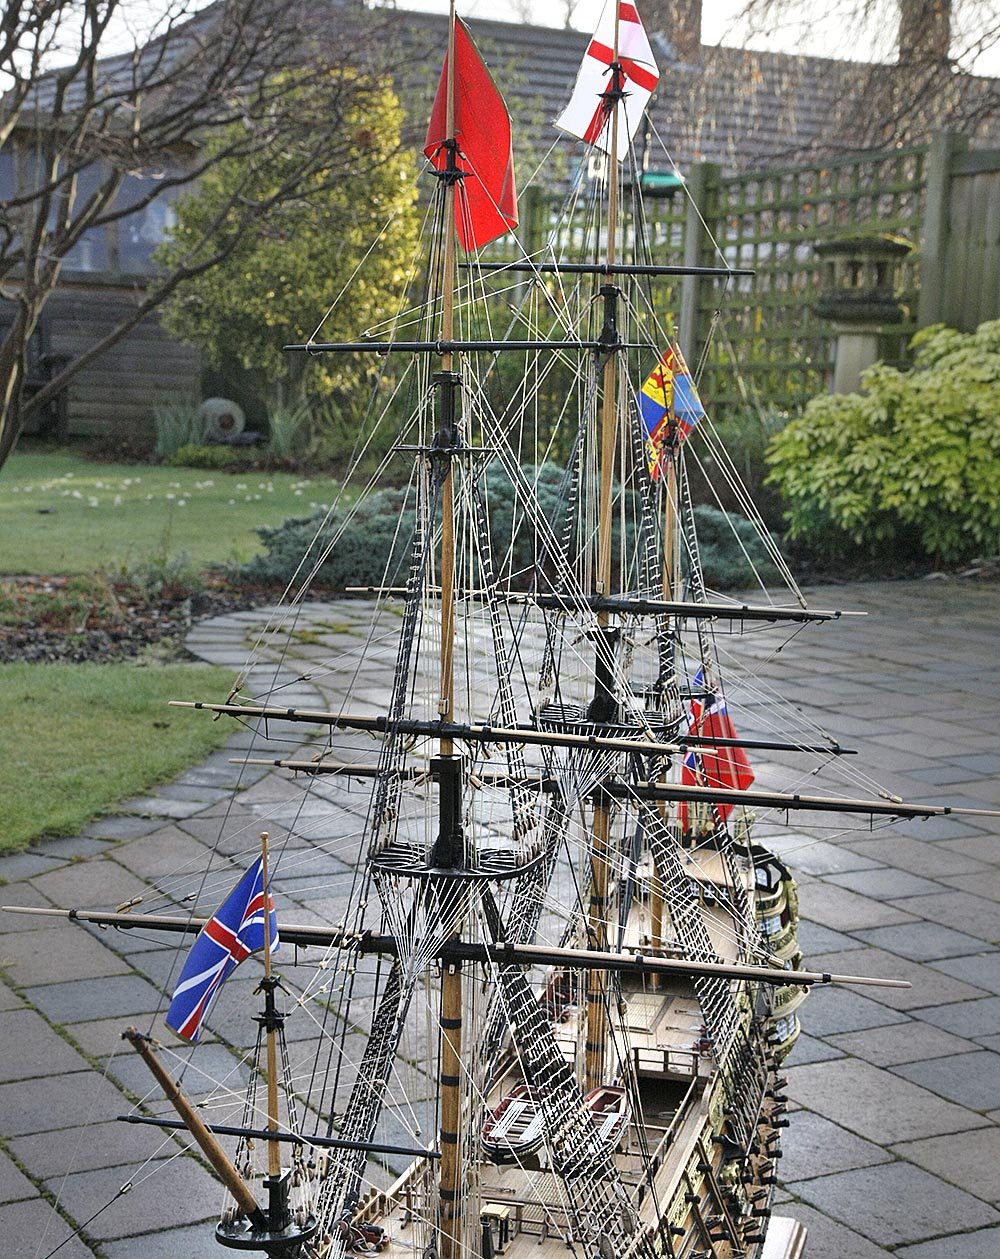
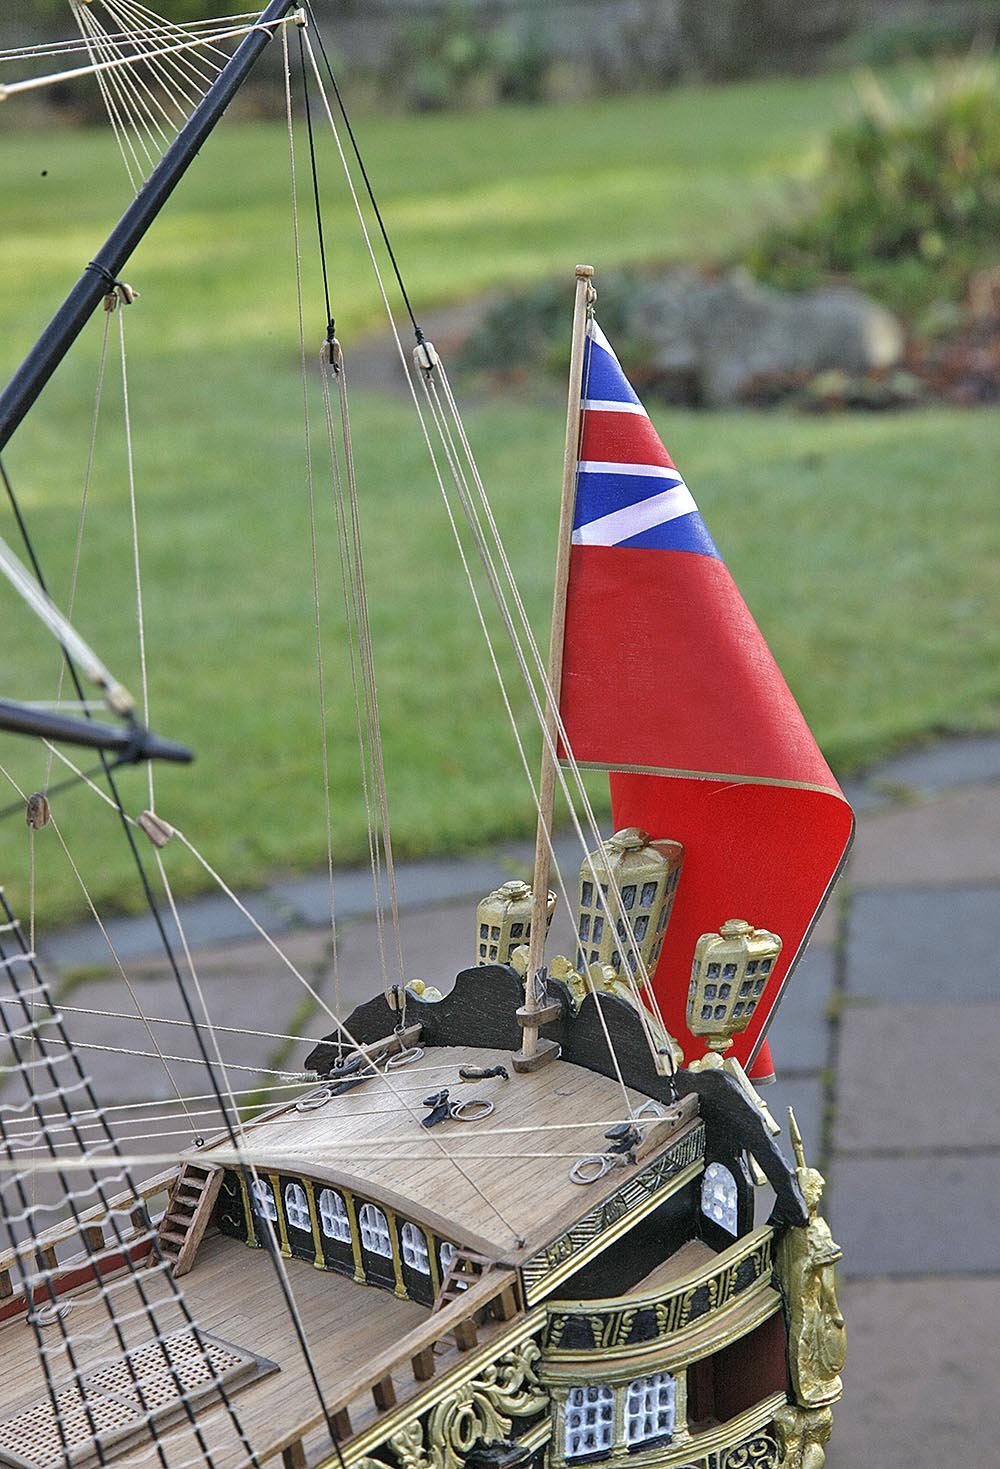
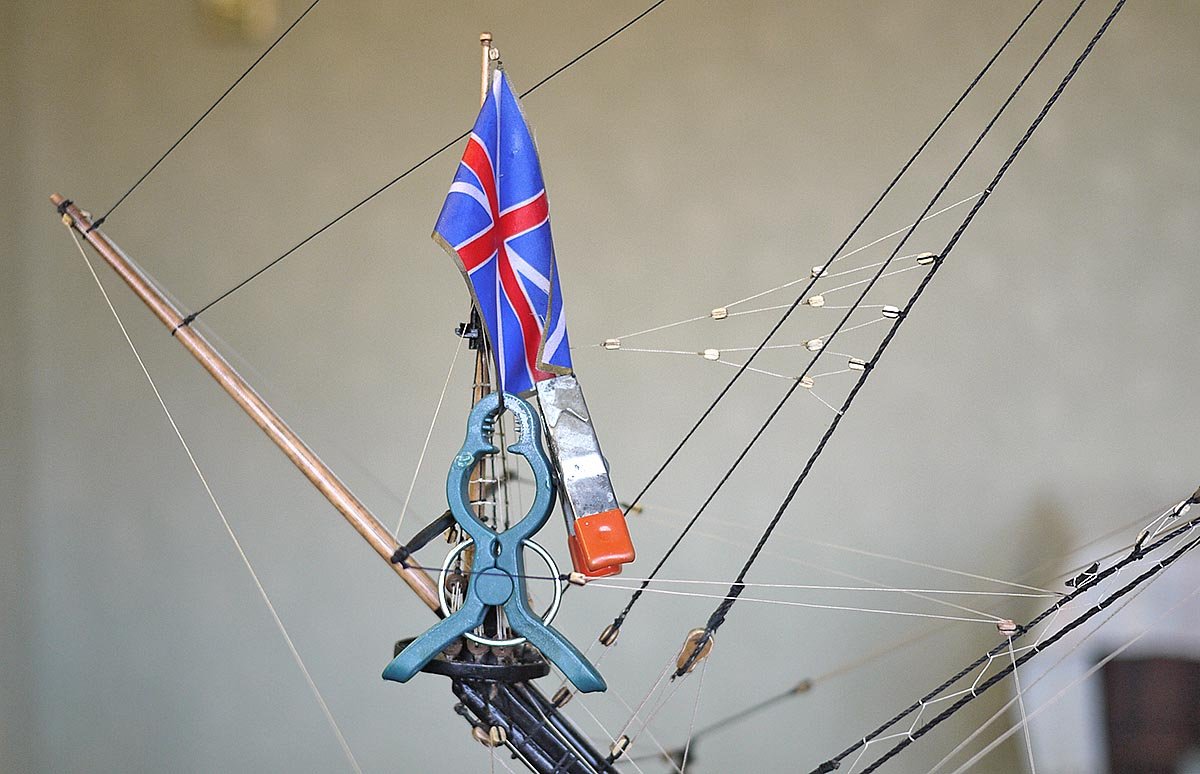
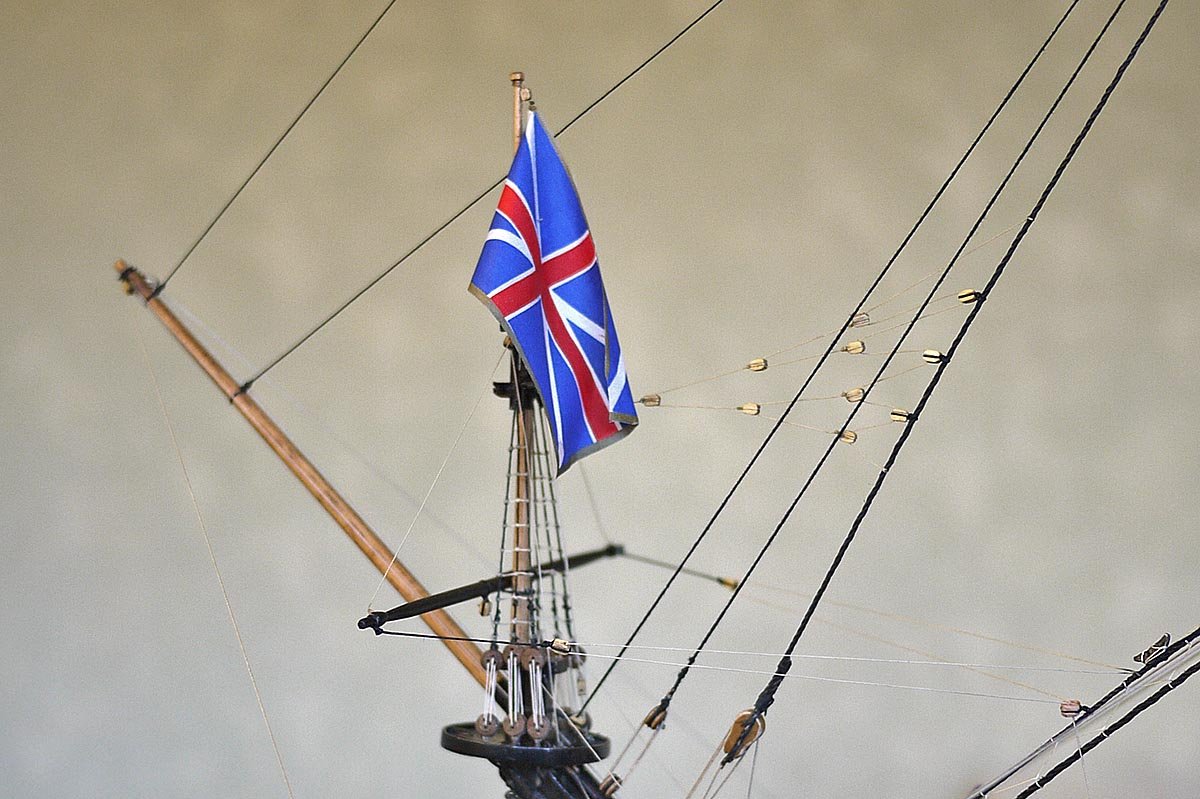
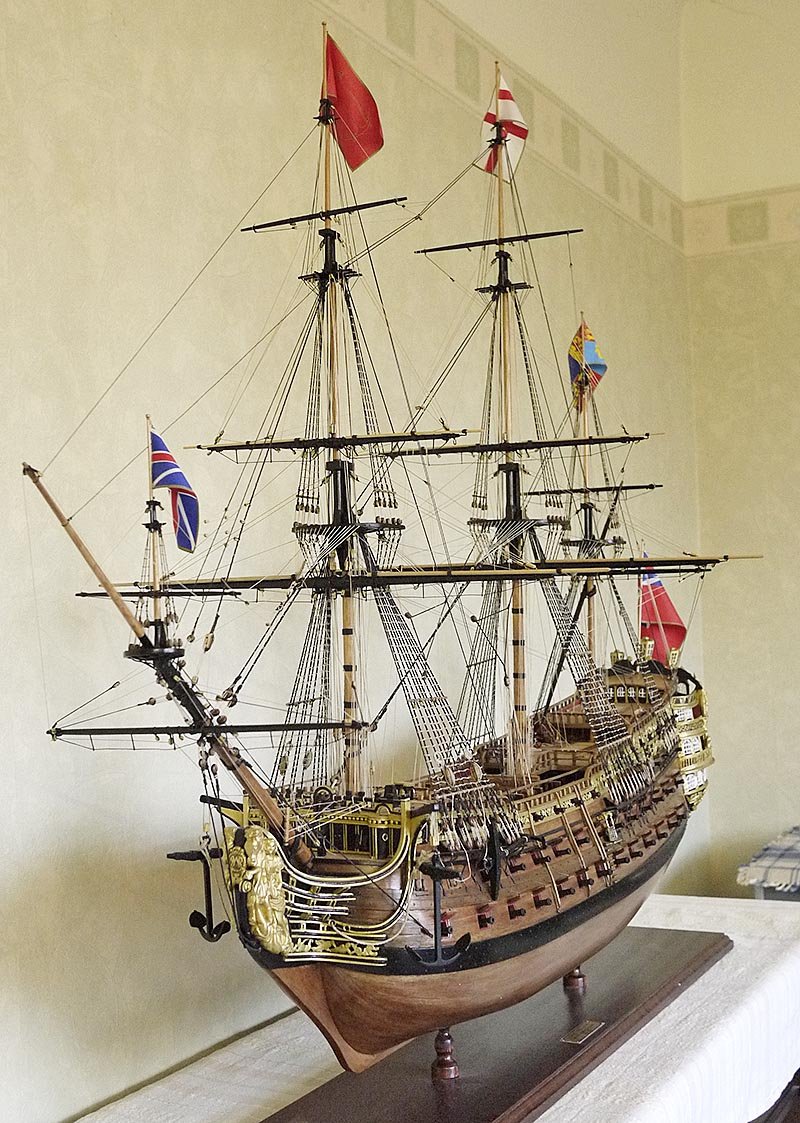
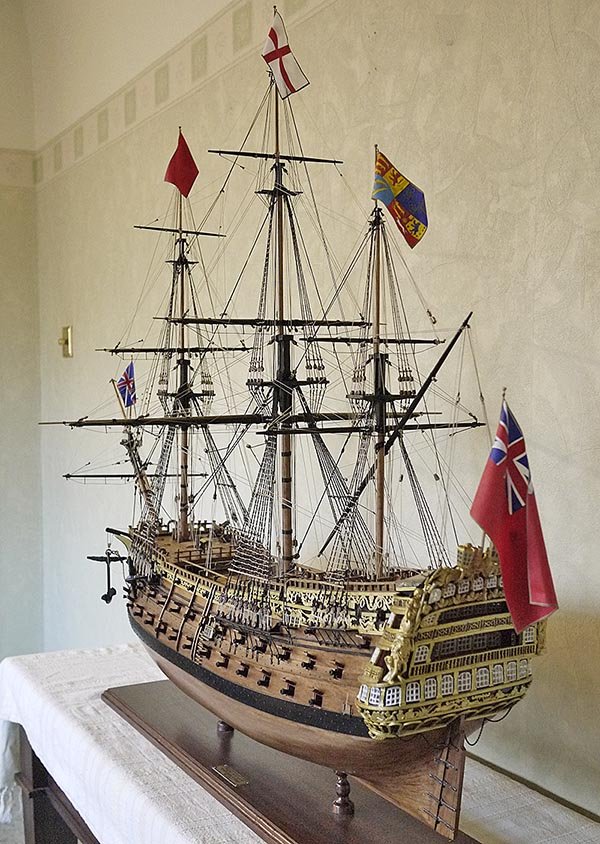
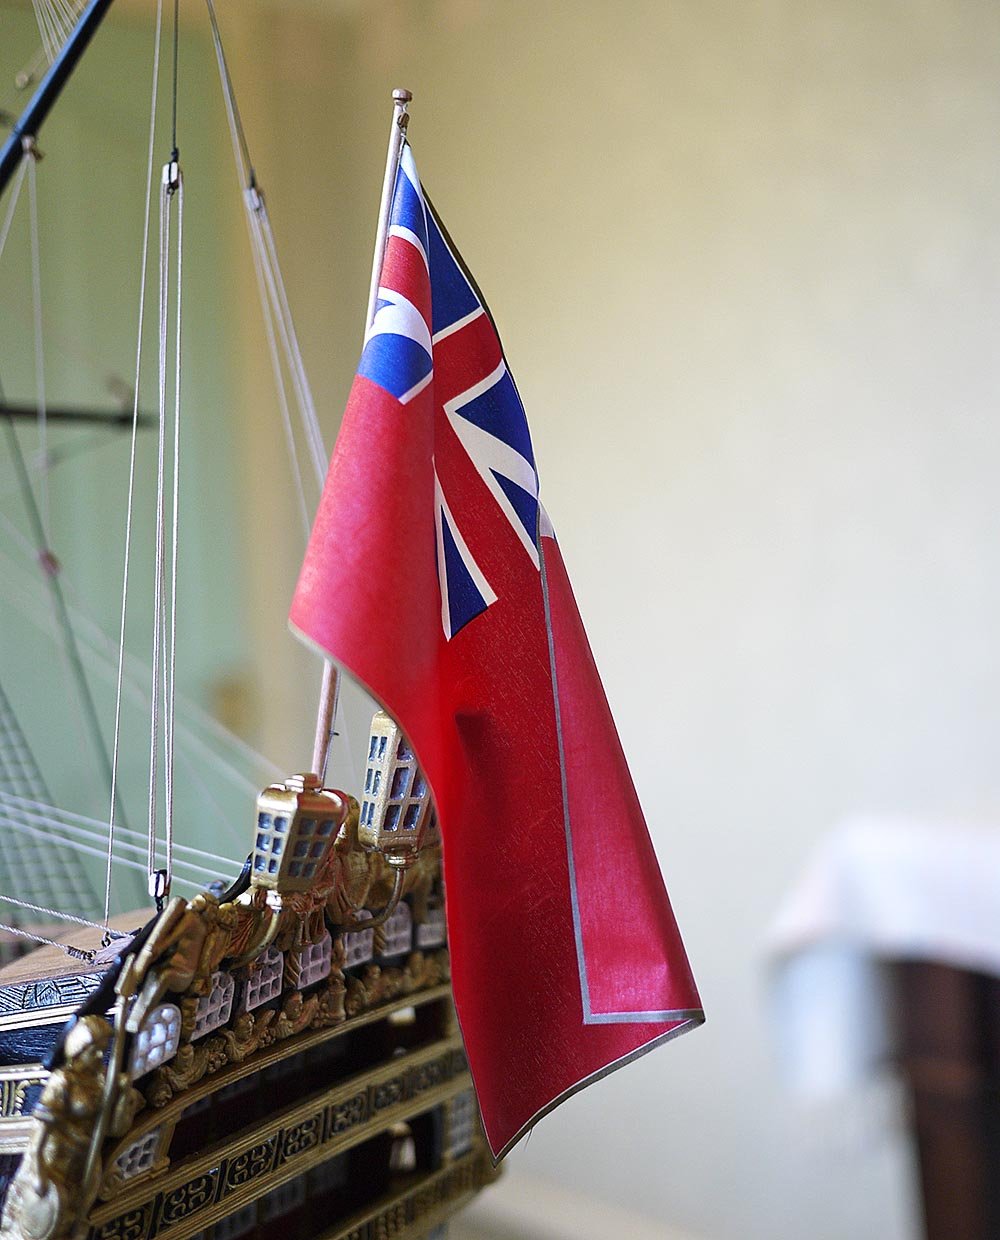
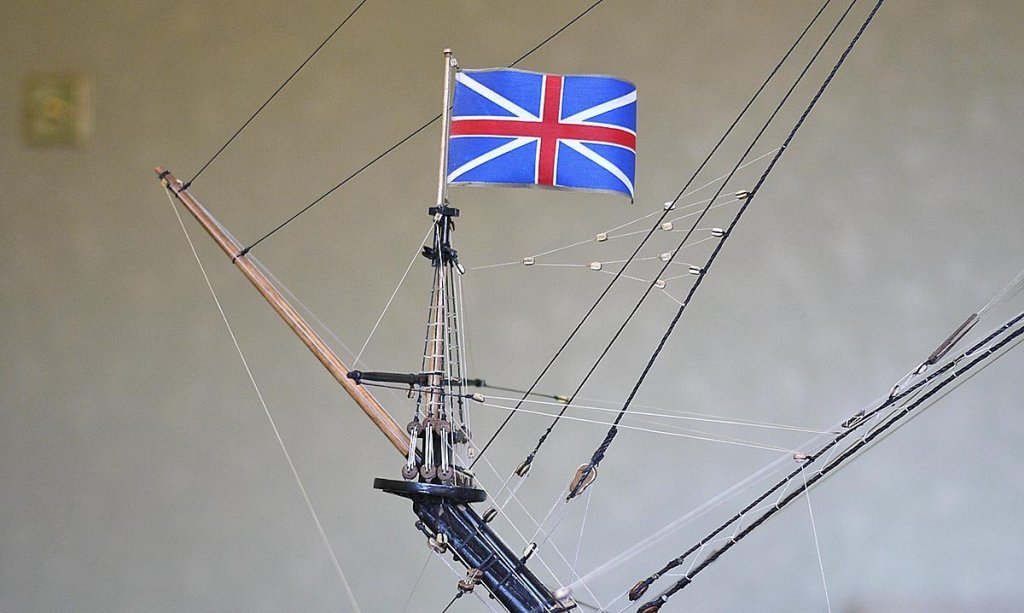
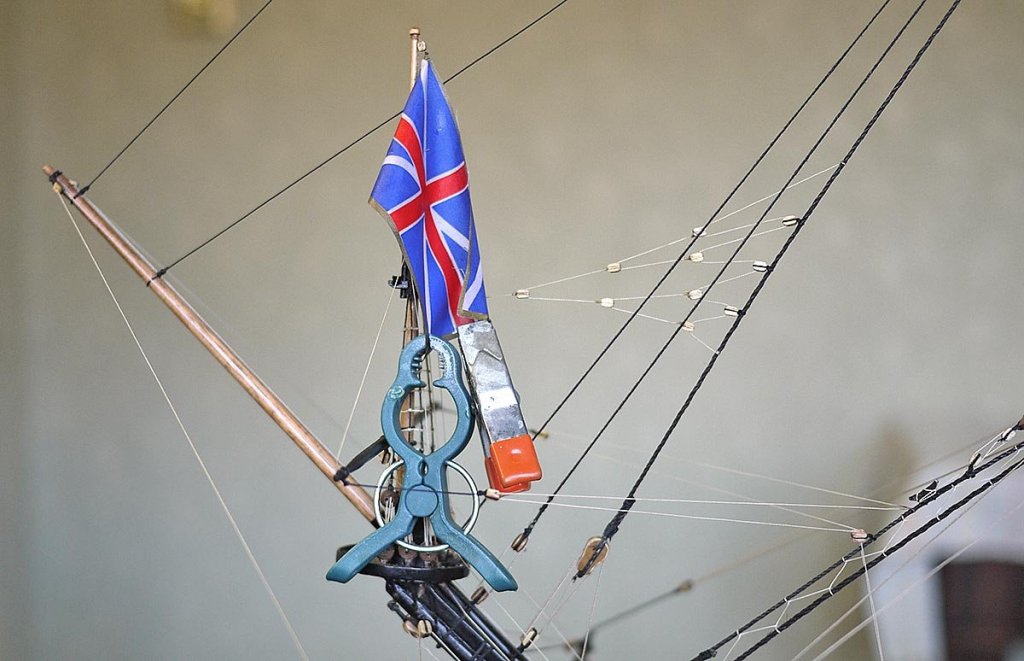
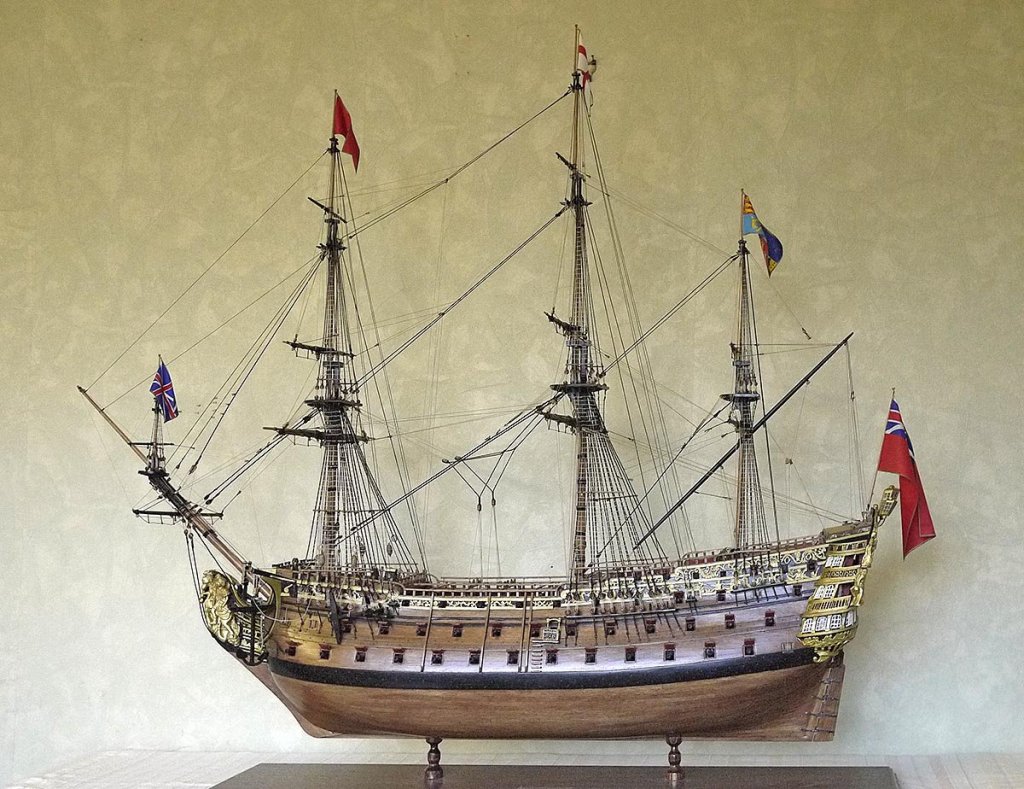
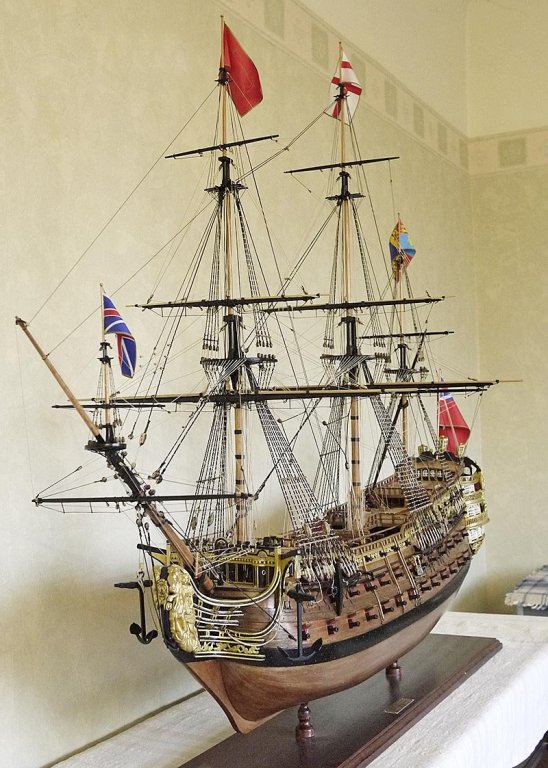
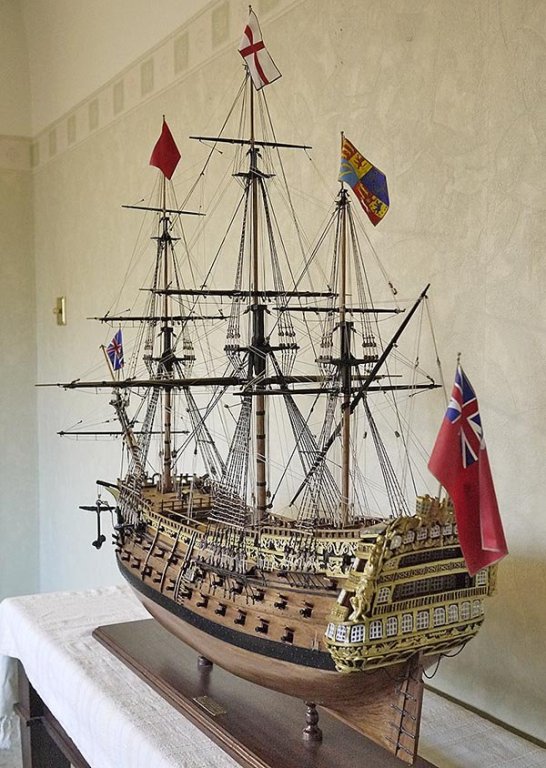
Just a few pictures of the fitted flags, the RW's crowning glory. The first three show how the starch transforms the flags making them hang more naturaly. Ken

- 424 replies
-
- 18
-
-

-
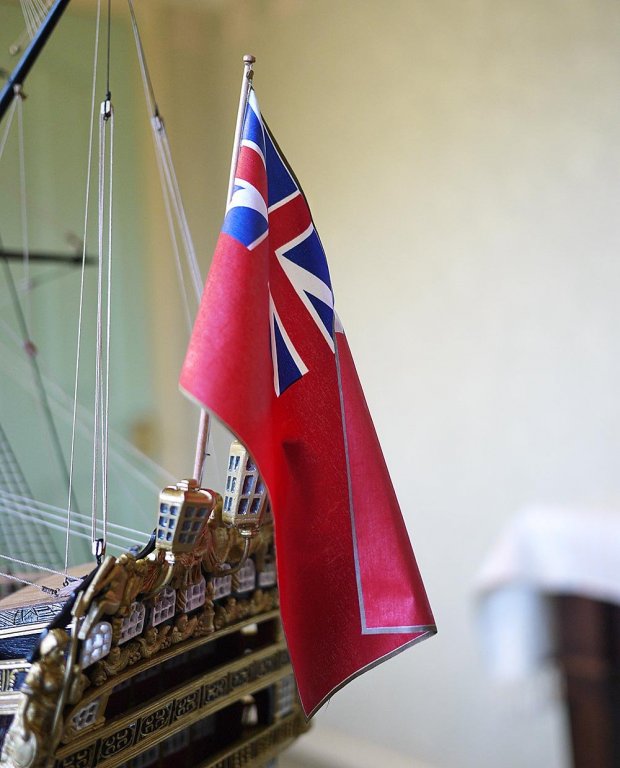
Hi Hubac, It's difficult with modern fabrics to tell with certainty what they are but these flags I think are made from silk. Ken
-
Hi Again, I just have to show you my first flag, I'm actually excited by it and must share the moment. I ran out of styrene strip and need to order some more so the boat build came to a stop. In the meantime I opened the packet of flags, I can only say wow! I was instantly impressed. They were wrapped around some very nice sailcloth which I didn't know was there, I'm pleased that they were rolled and not folded, it's difficult to get creases out. The flags are something else, bright, vibrantly printed on both sides not the usual one side, there are five of the best quality flags that I have seen, I just had to put one on. I used a 2mm block at the staff head, glued the flag to some thin cord, using contact glue and a small fold over the cord. To get it to hang naturally I used my wife's spray on starch, I soaked it well until it was quite limp, put some clips on the lower corner to keep it weighed down, arranged the folds then let it dry. The end result is I think a natural looking hang rather than it sticking out looking rigid. Only another four to do. Ken

- 424 replies
-
- 12
-
-
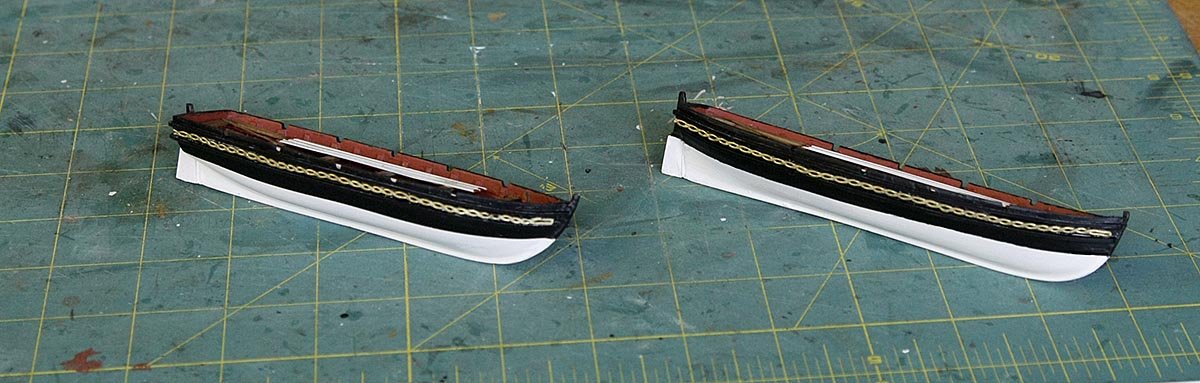
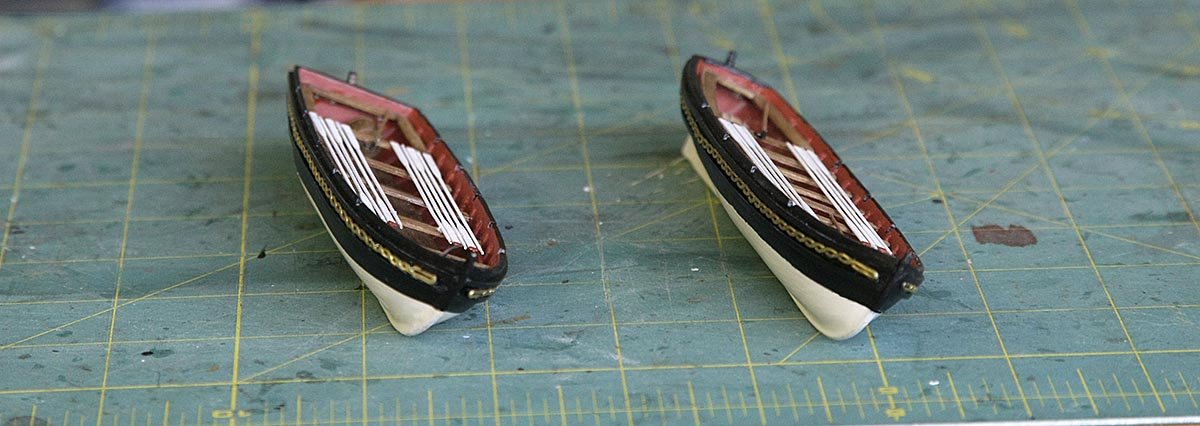
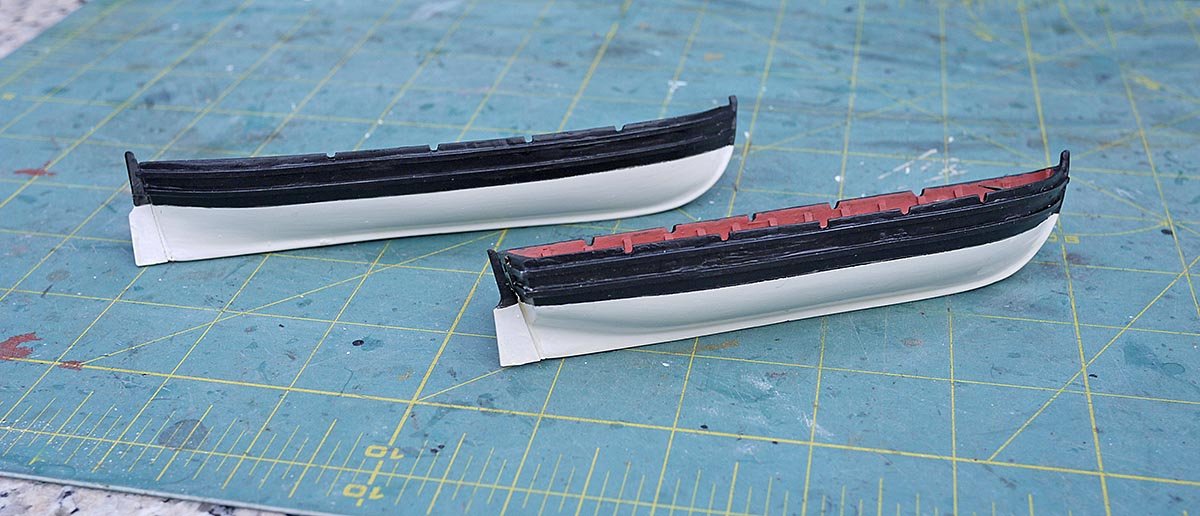
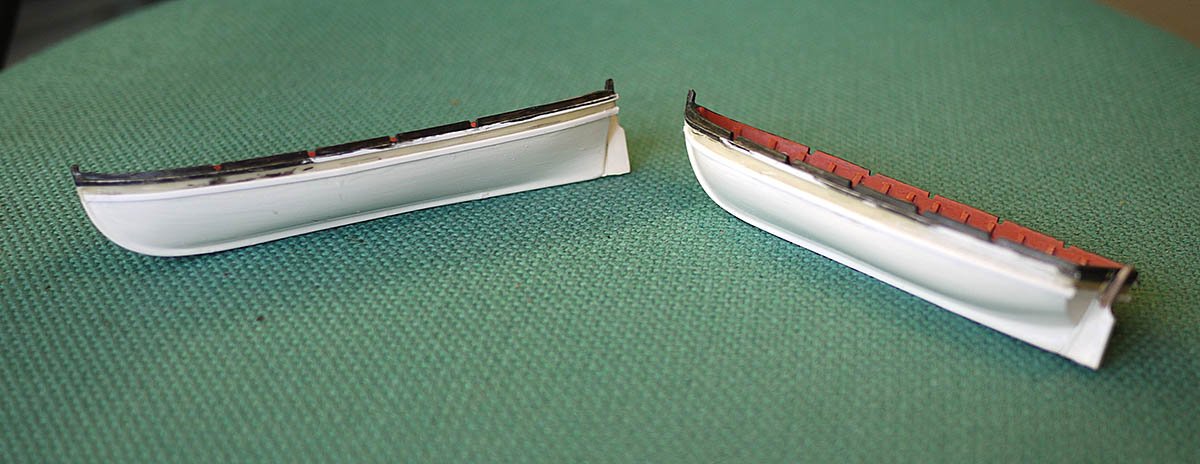
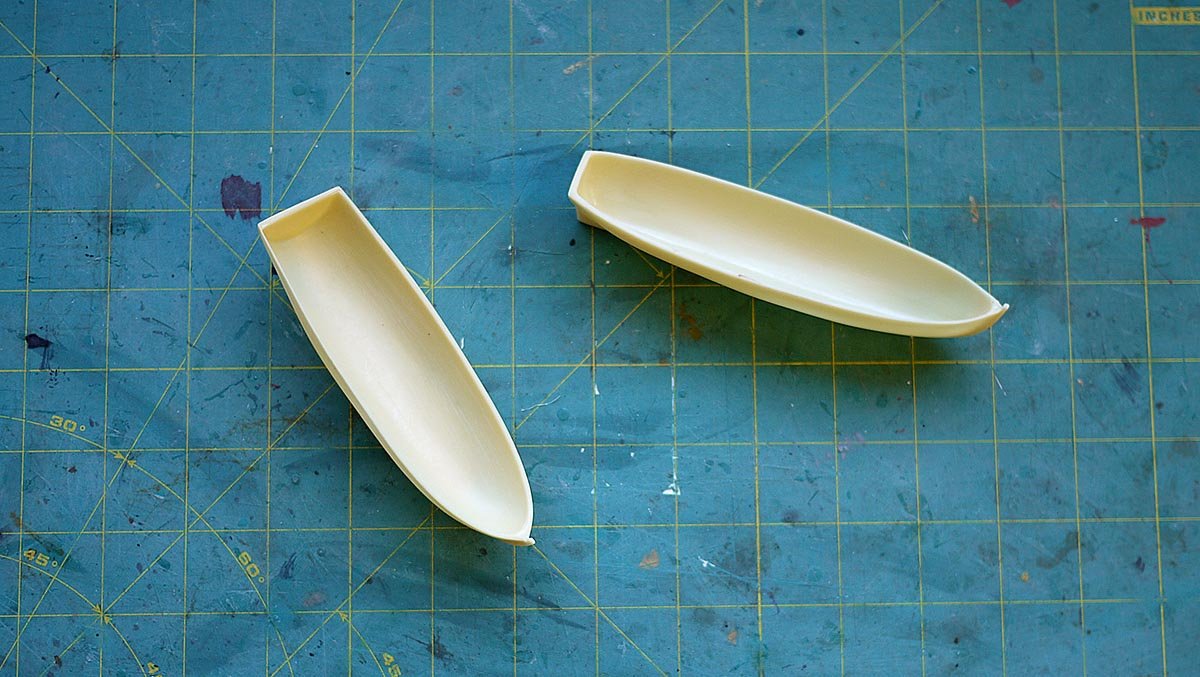
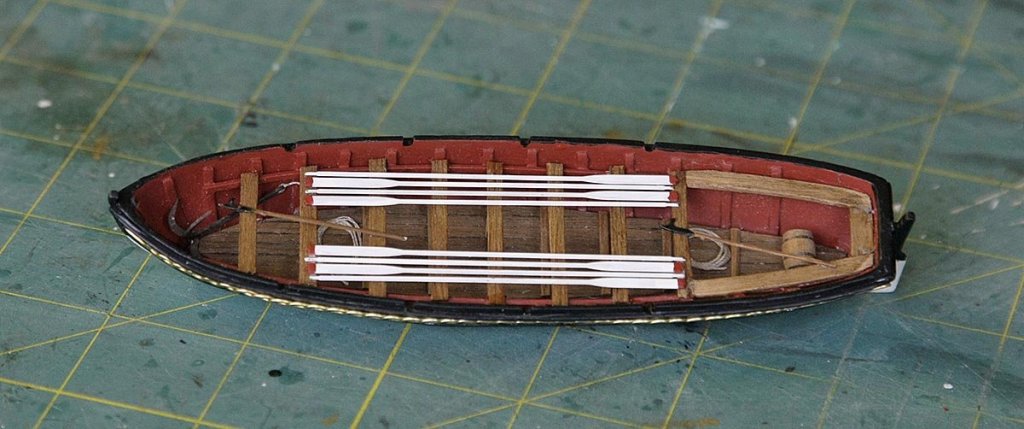
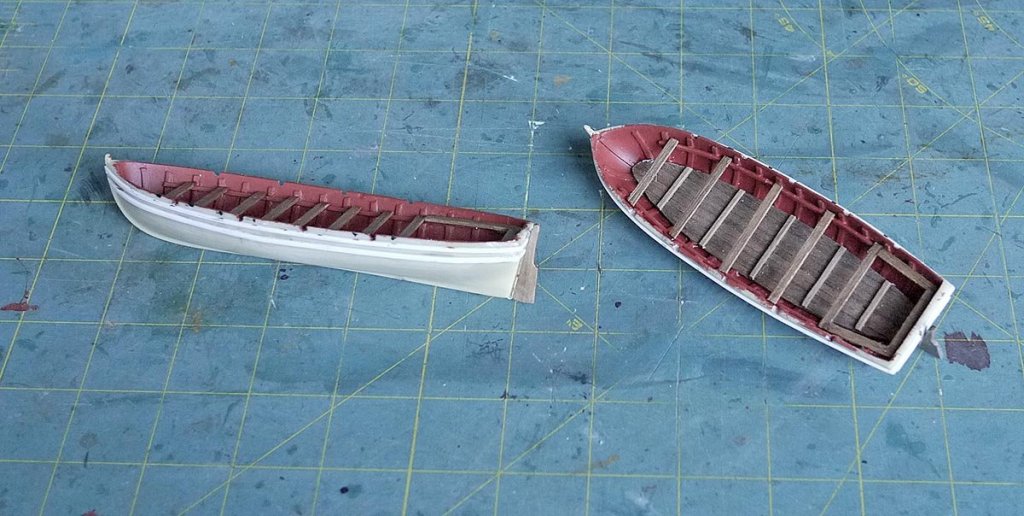
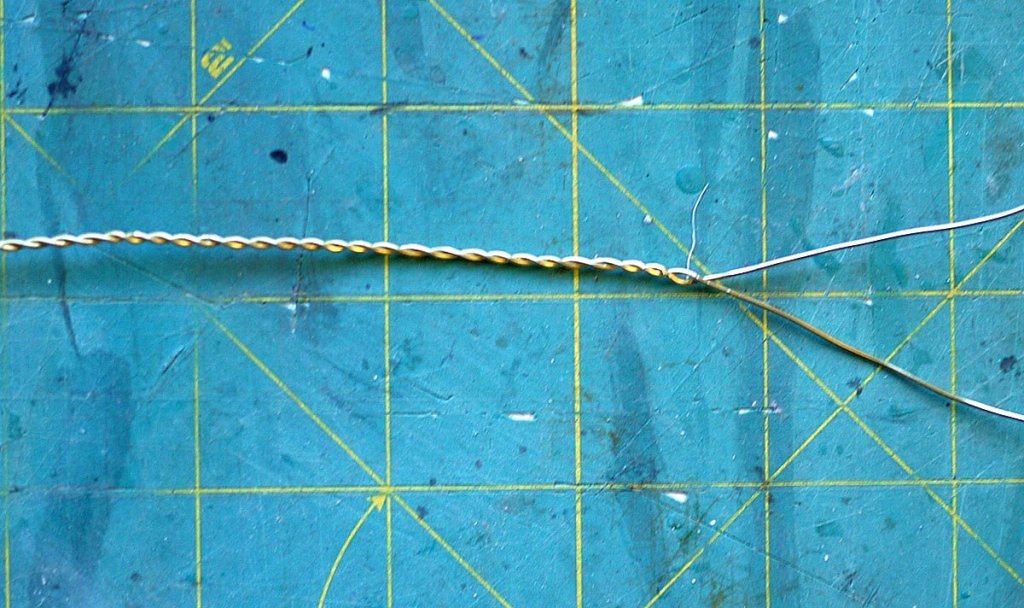
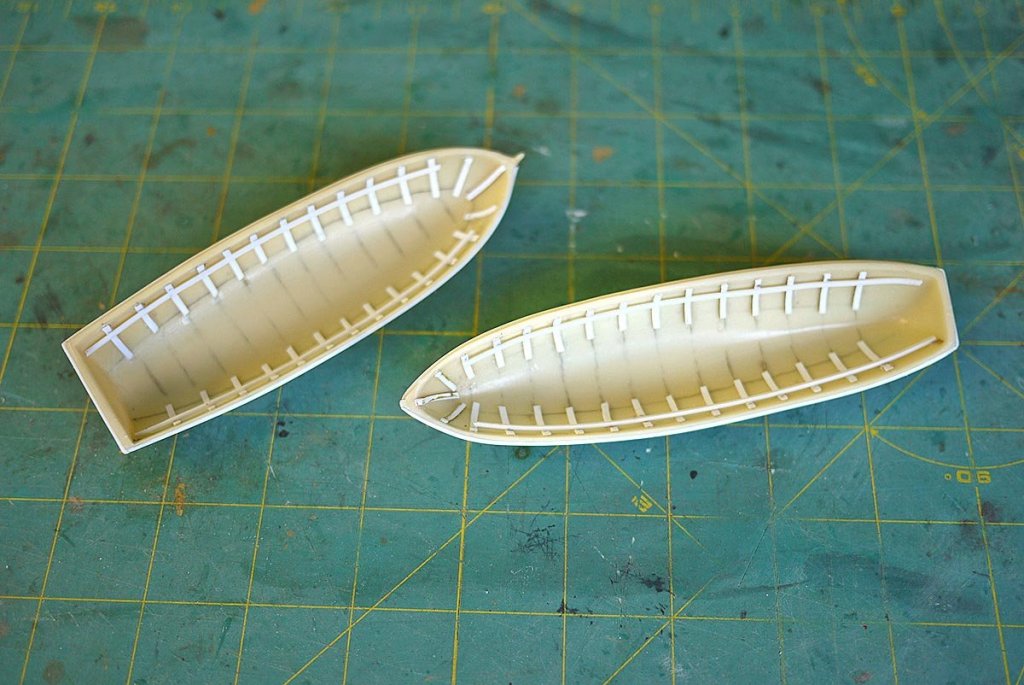
Hello Everyone, I've started the ships boats, a Pinnace and a Launch, I saw these resin hulls on Ebay and that's what gave me the idea of having two boats on the RW instead of the one supplied. I'm using styrene strip to make up the ribs and gunwales and wood strip for the rest. I'm going to put some decoration along their sides to match the ships decorative hull. For this I've twisted two strands of brass wire together then hammered them flat, it took a bit of experimenting but I've now got the result about right. I'll put up pictures of my boat building process so it should be self explanatory. Ken


-
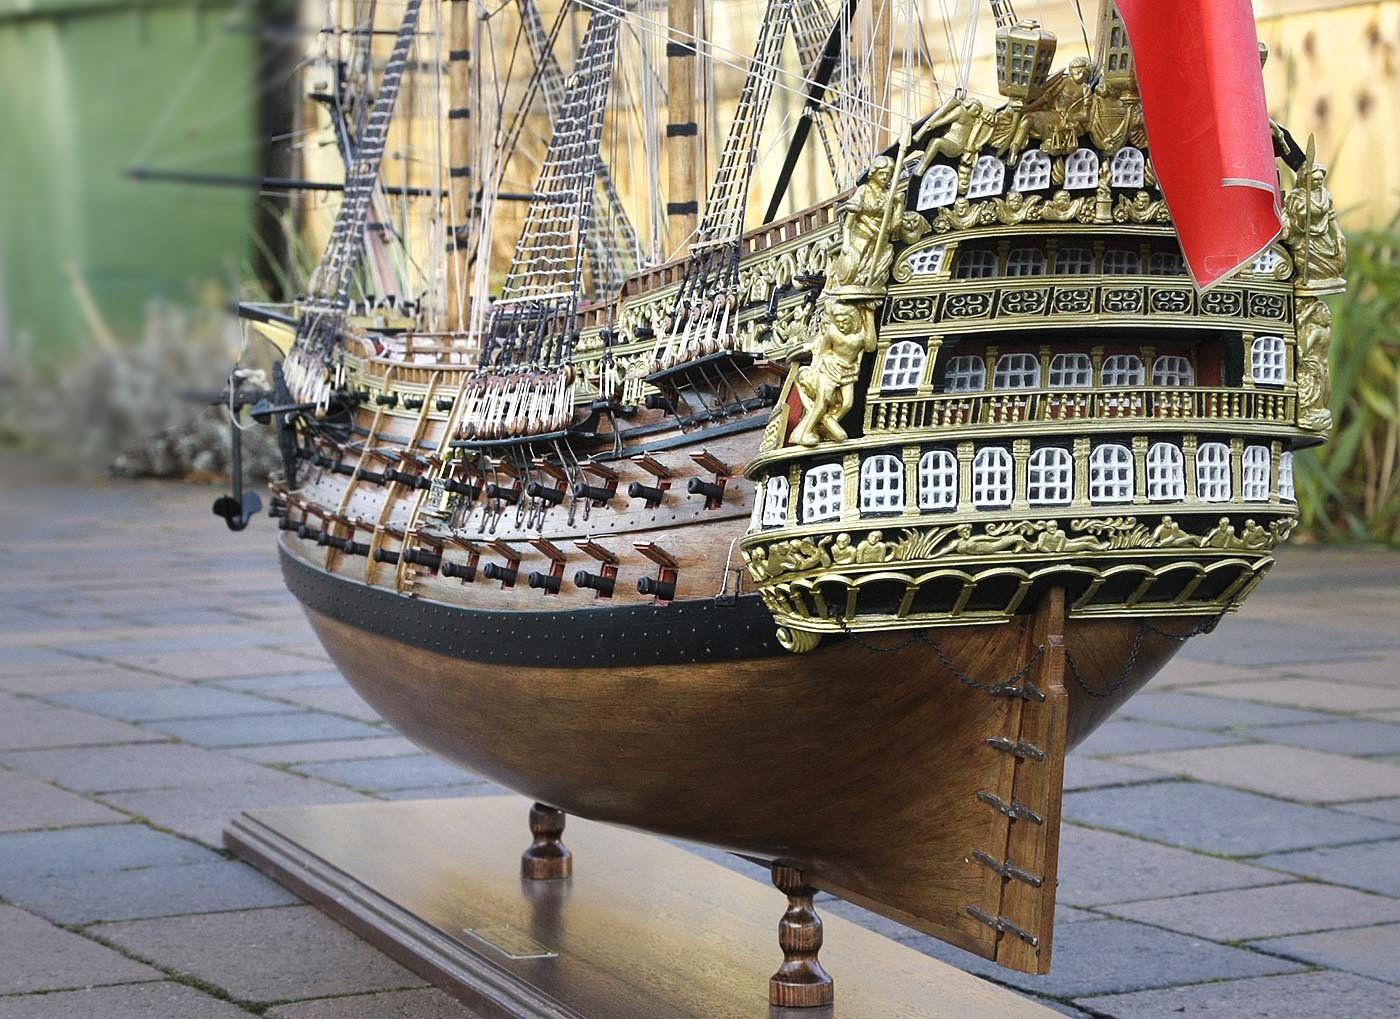
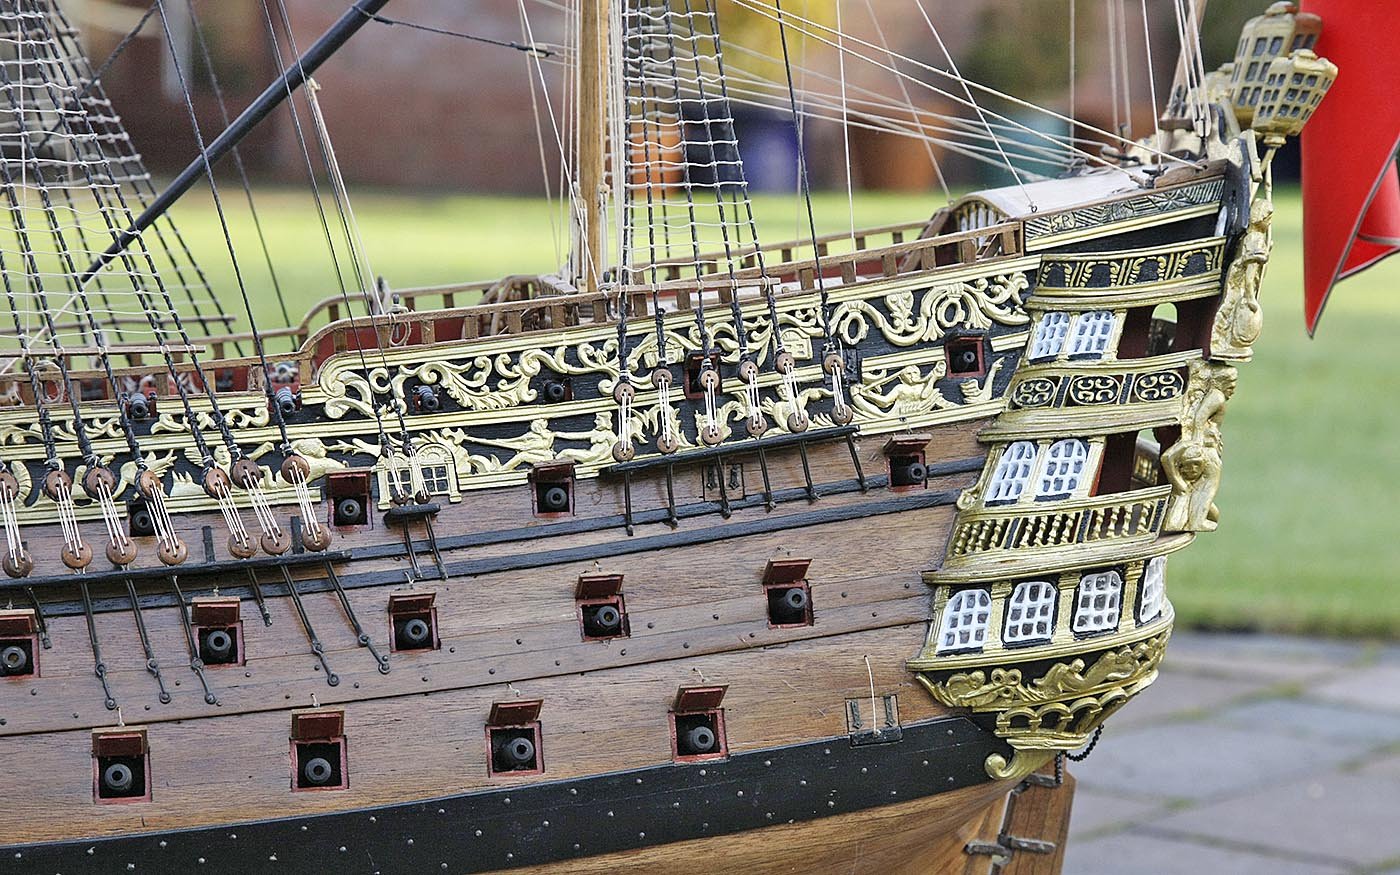
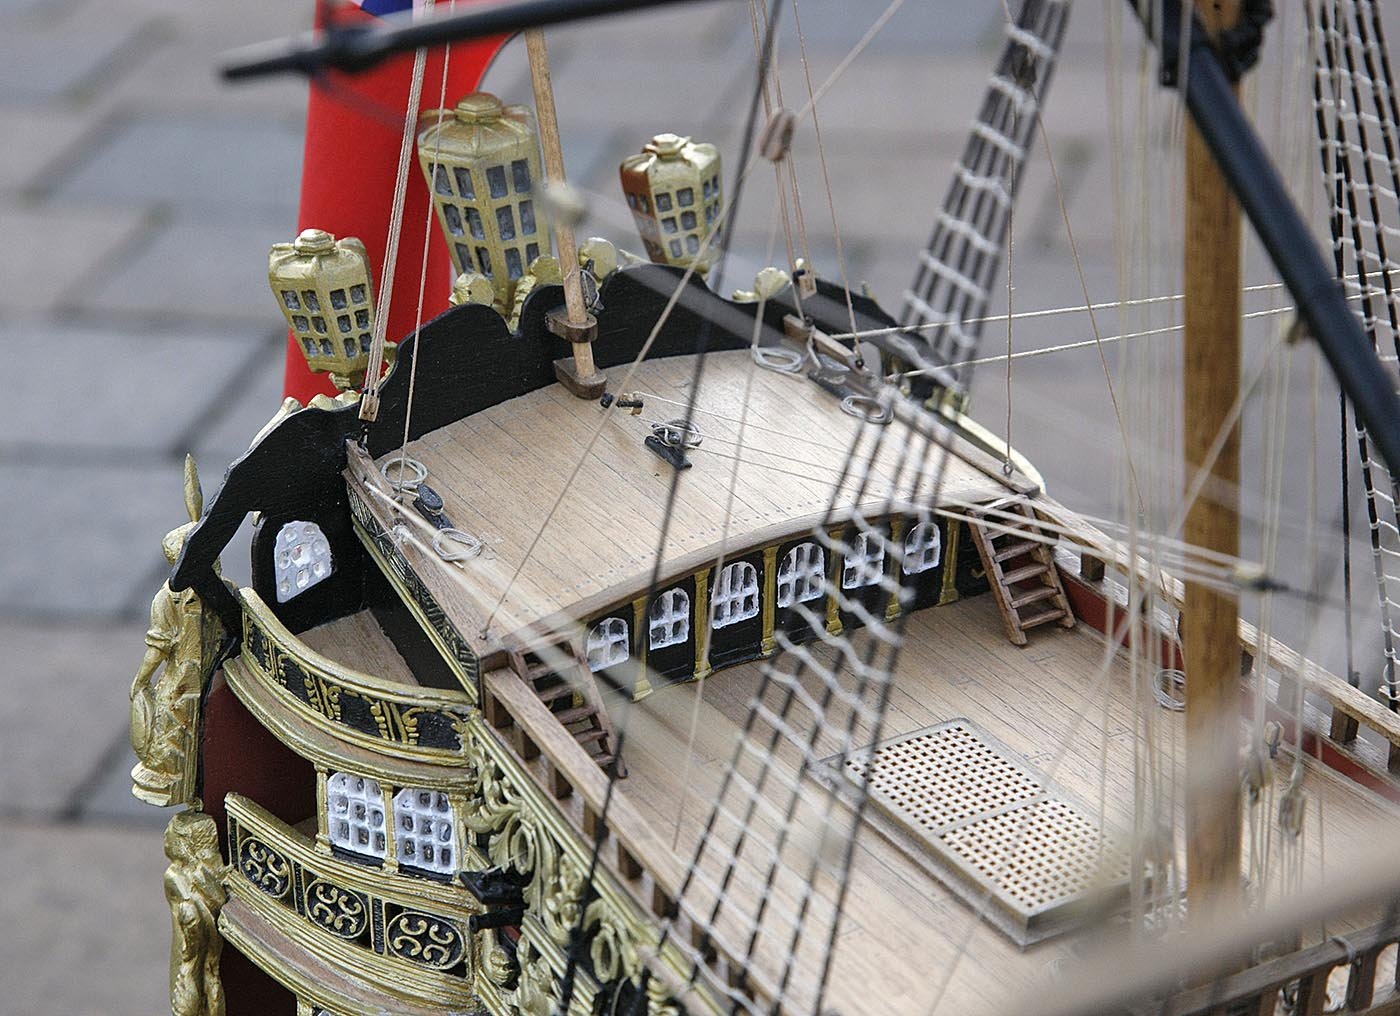
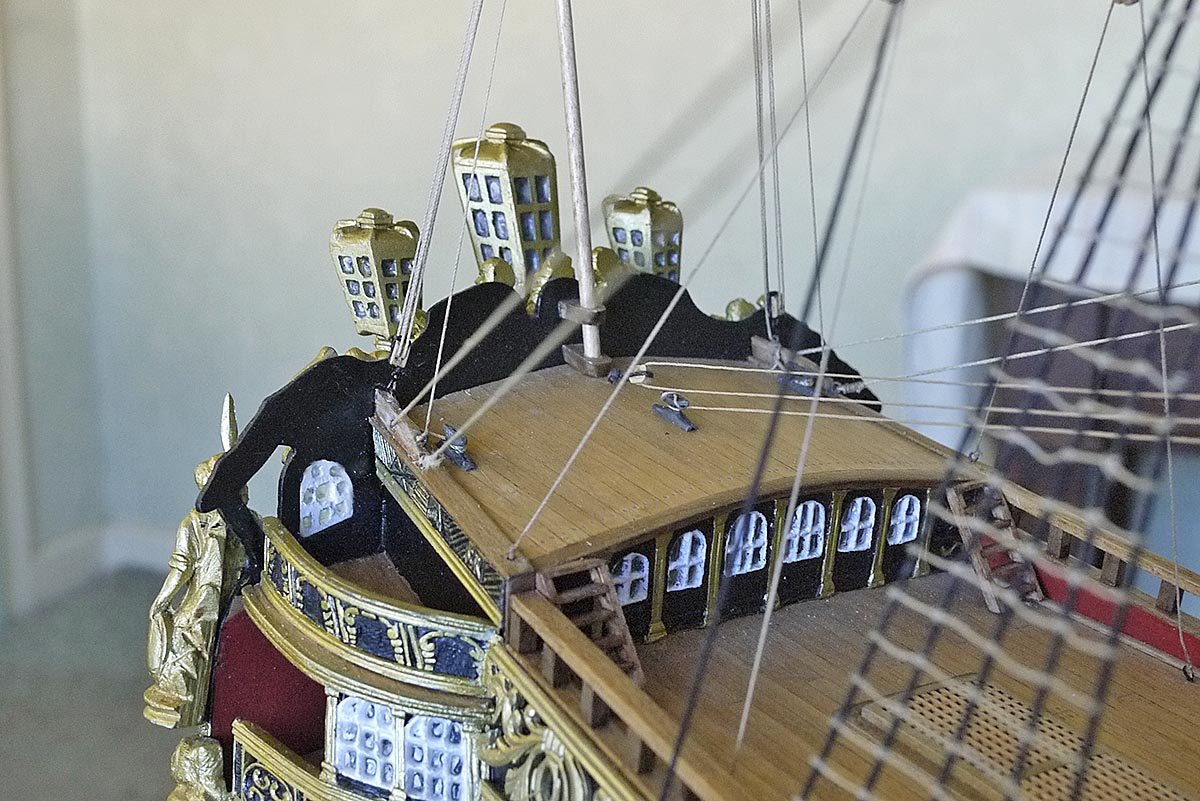
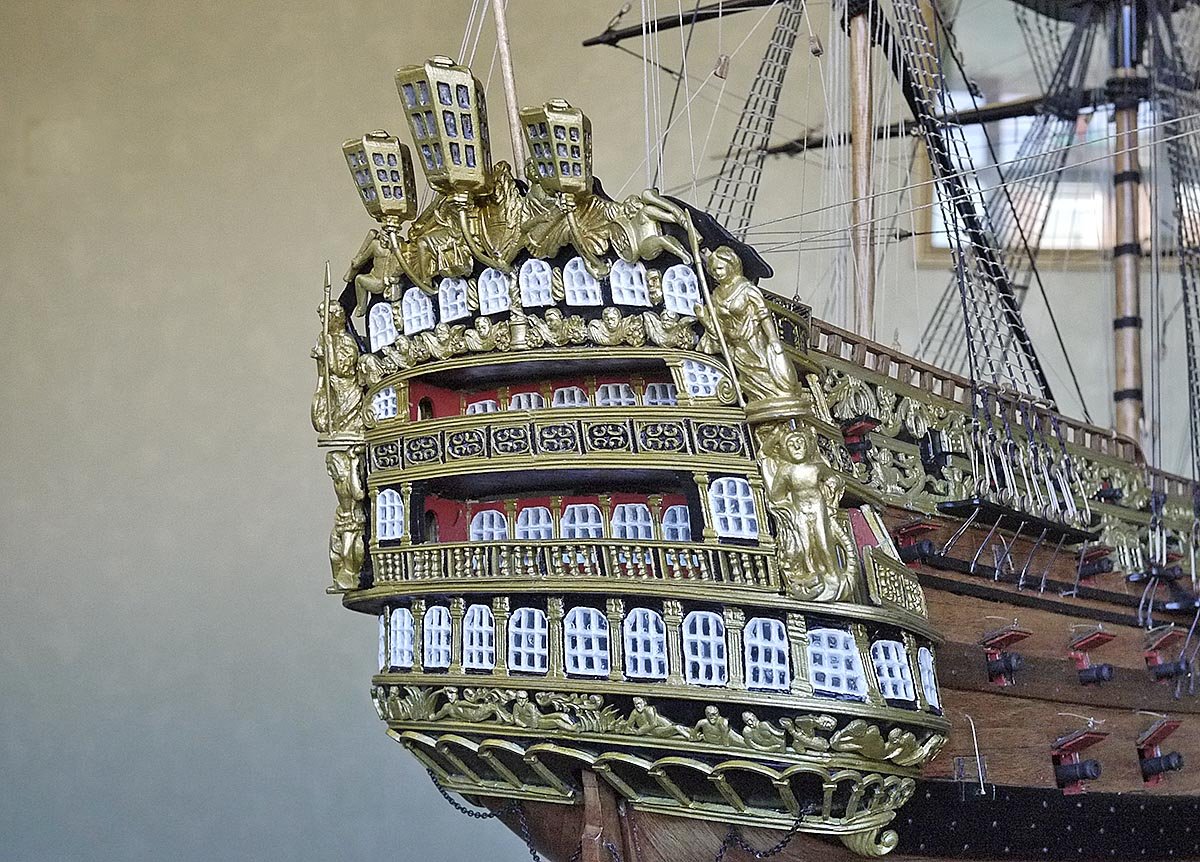
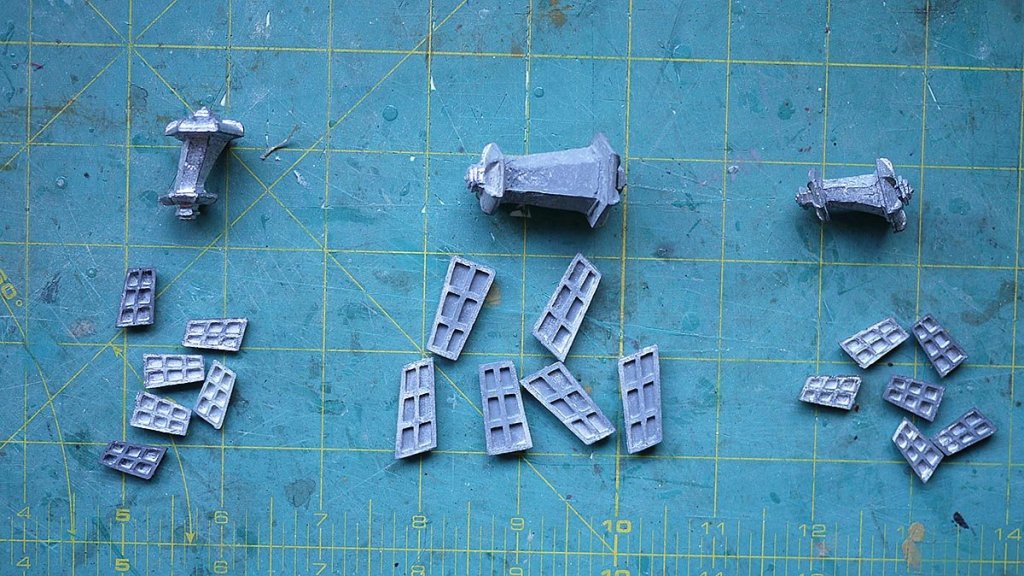
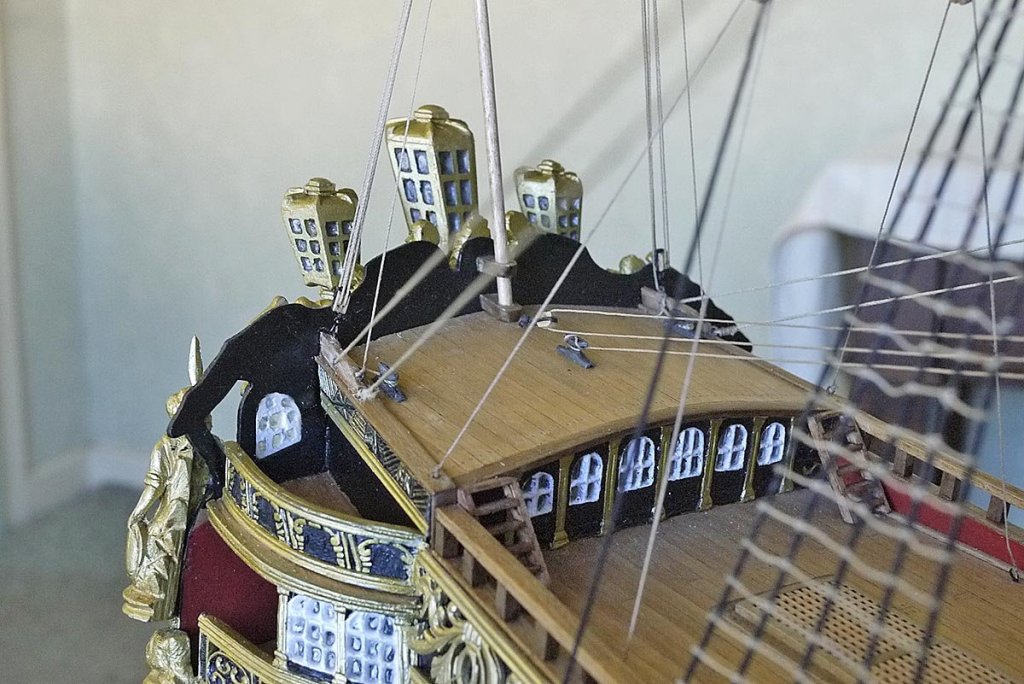
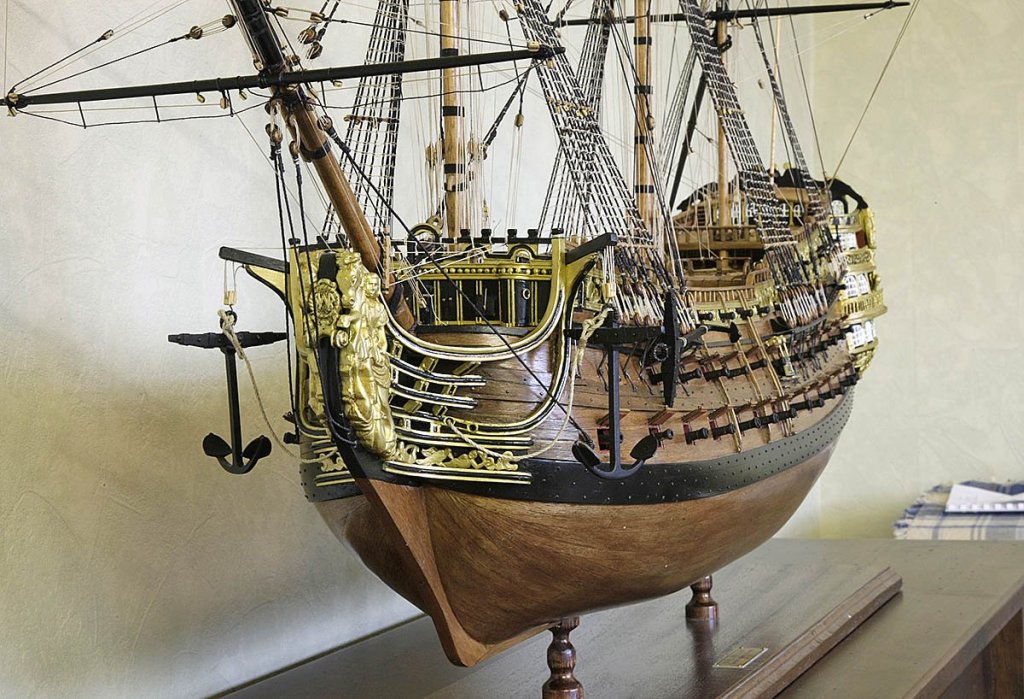
Hello Everyone, Today's progress is the making up the lanterns and fitting them to the stern. As you can see they come as several cast pieces needing making up. The opportunity is there for the frames to be cut out and the windows glazed. As I'd already done the windows I didn't think that this was going to be an issue but I was wrong. When I tried I found that the outer frames without the support of the cast windows had no strength and when handled they just broke up. I ended up painting them and just putting my liquid glass into the recesses straight onto the metal surface. This works ok for me, the silver metal backing gives it a bit of a sparkle through the glass and it looks quite ok, better than I'd hoped. I used pieces of strong piano wire for the mounts as these lanterns are very heavy and I wouldn't have been confident using brass wire. Now I'll get cracking on with the ships boats. Ken


-
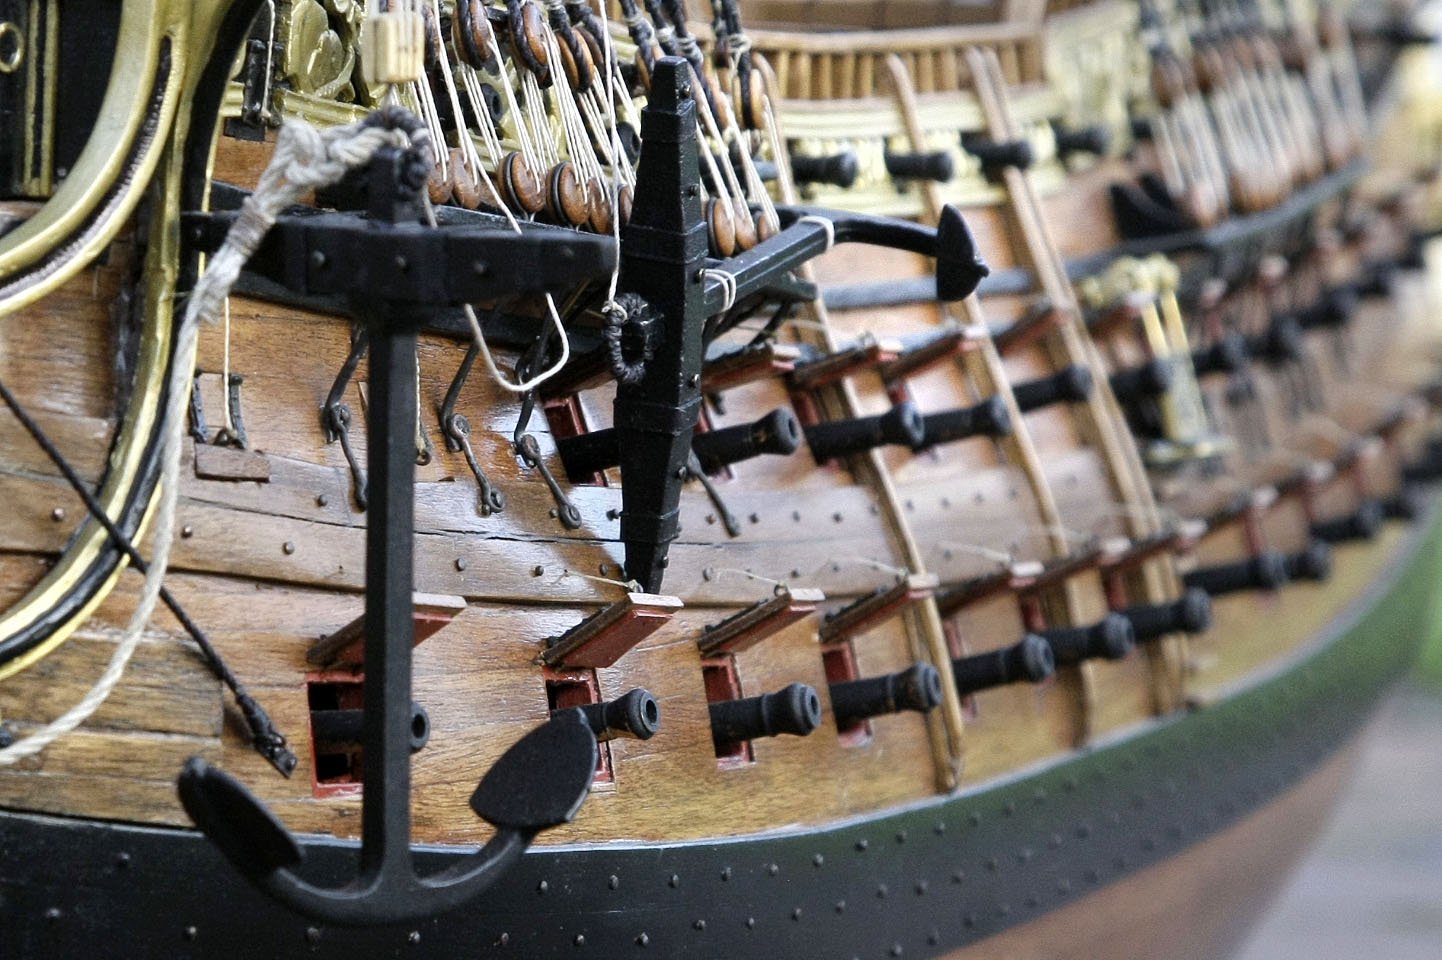
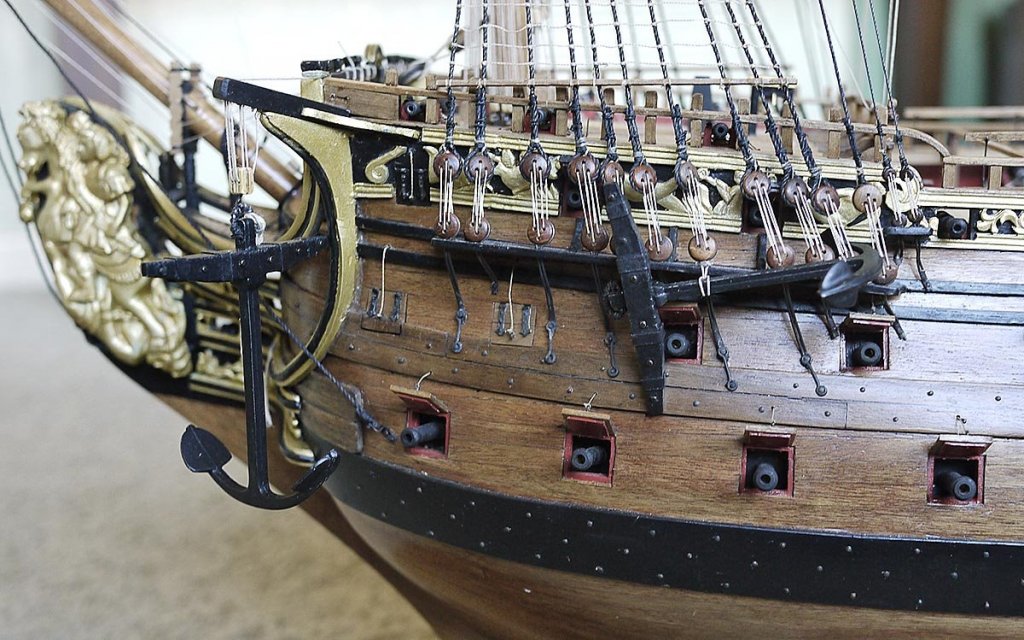
Hello All, Just a quick update today. I made up and fitted the anchor buoys. I tapered some small pieces of dowel, put eyelets into each end then just wrapped cord around finishing off by running the ends of the cord down the sides. I know they look a bit rough but at actual size and mounted they look quite good and they were simple to make. Ken

-
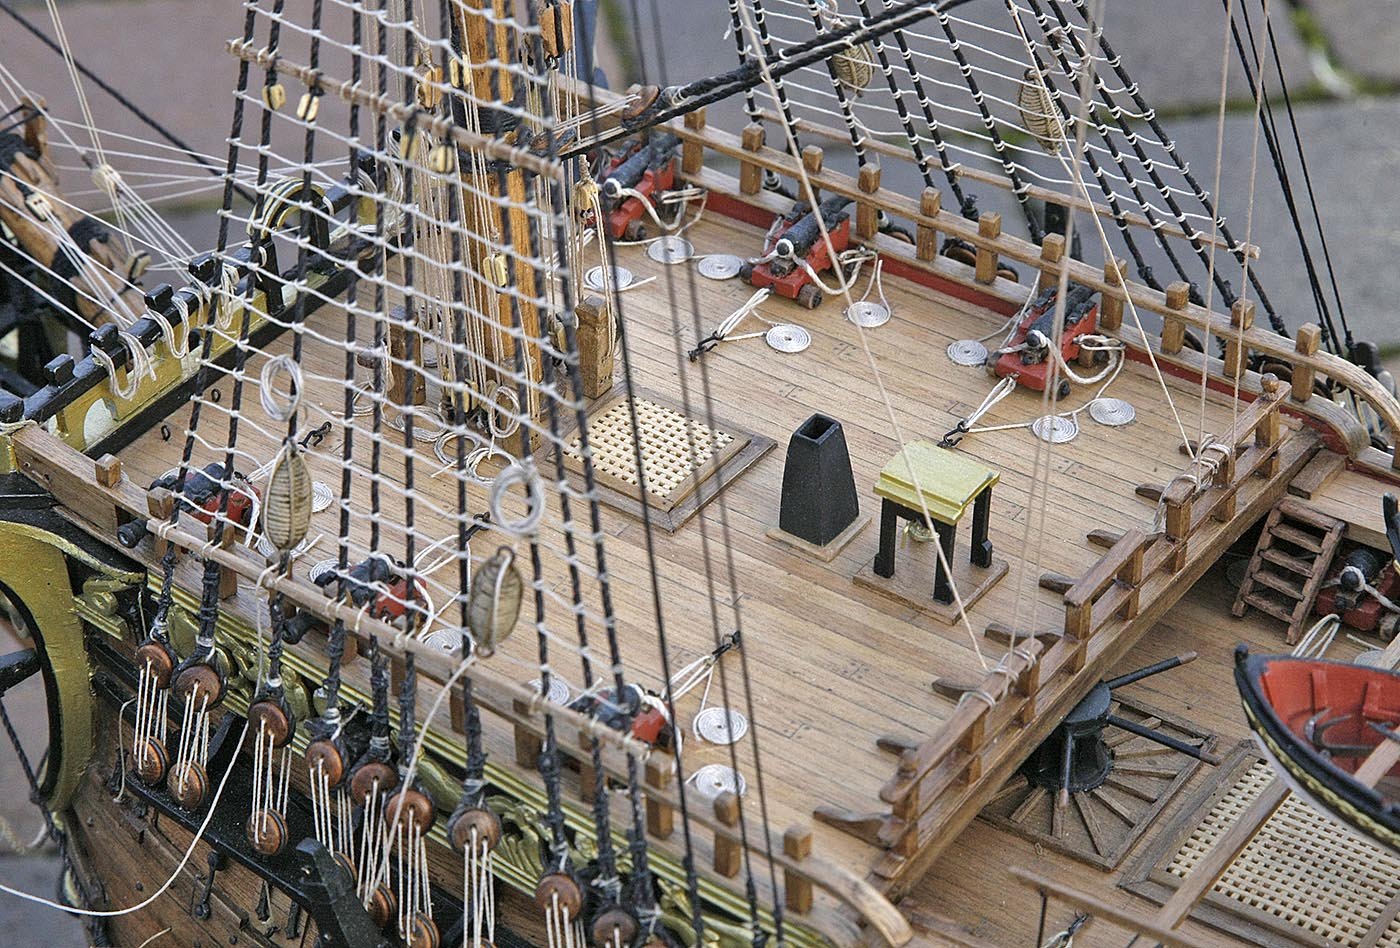
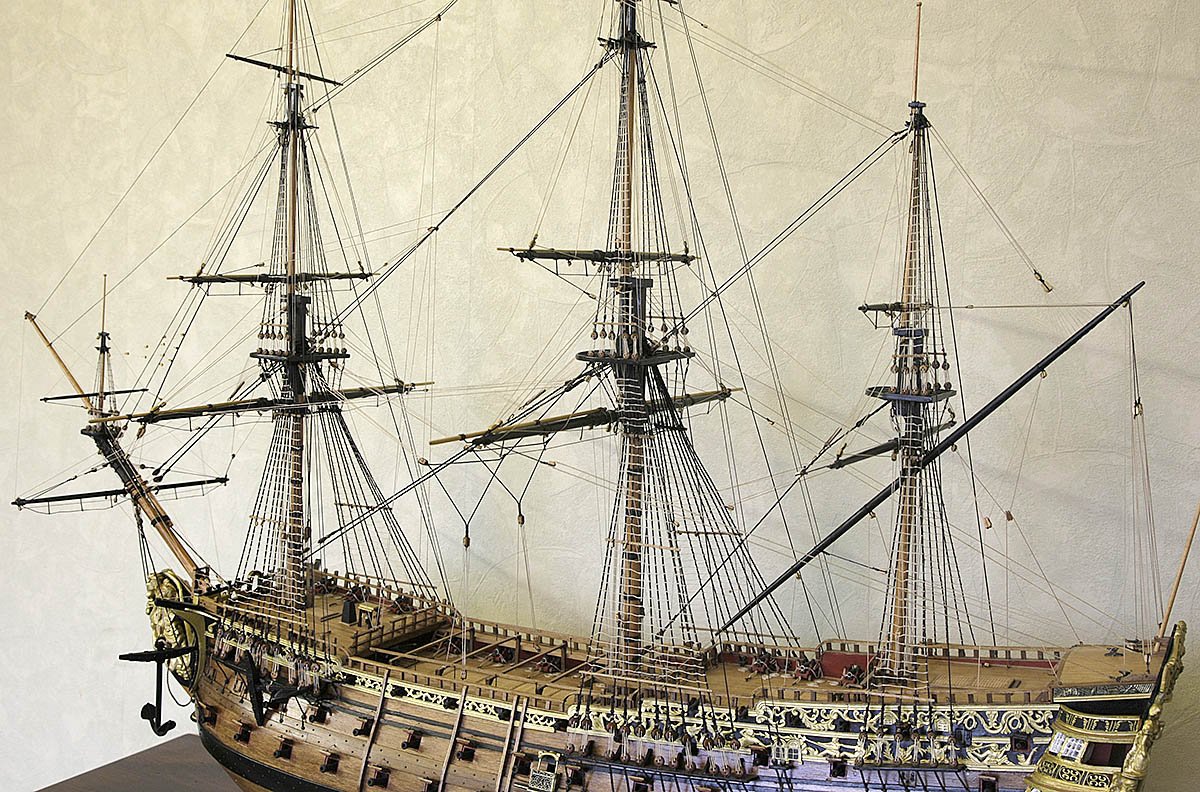
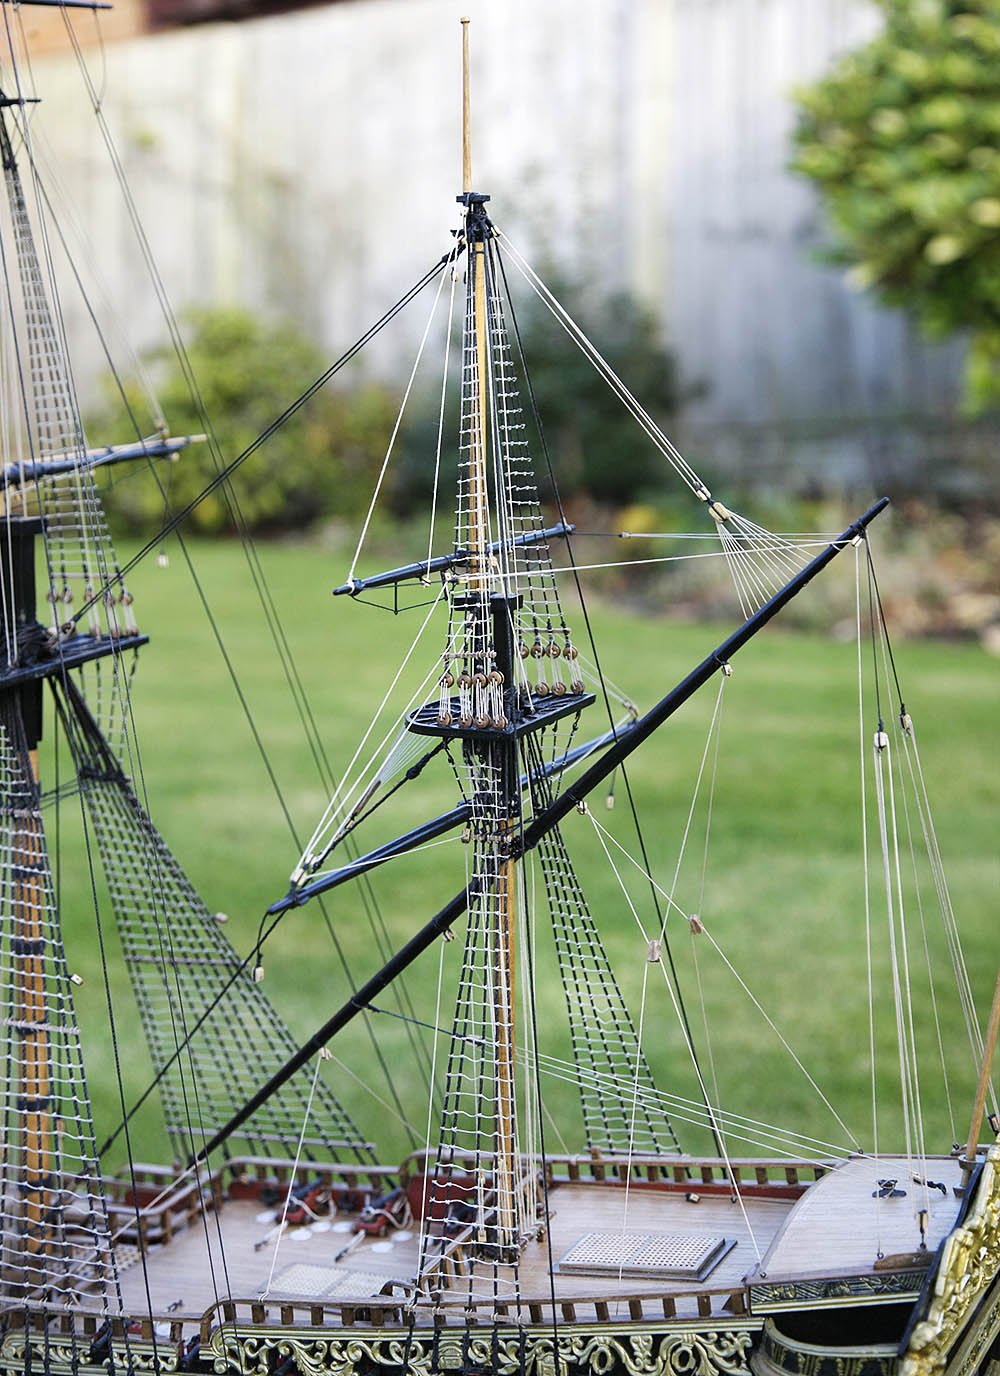
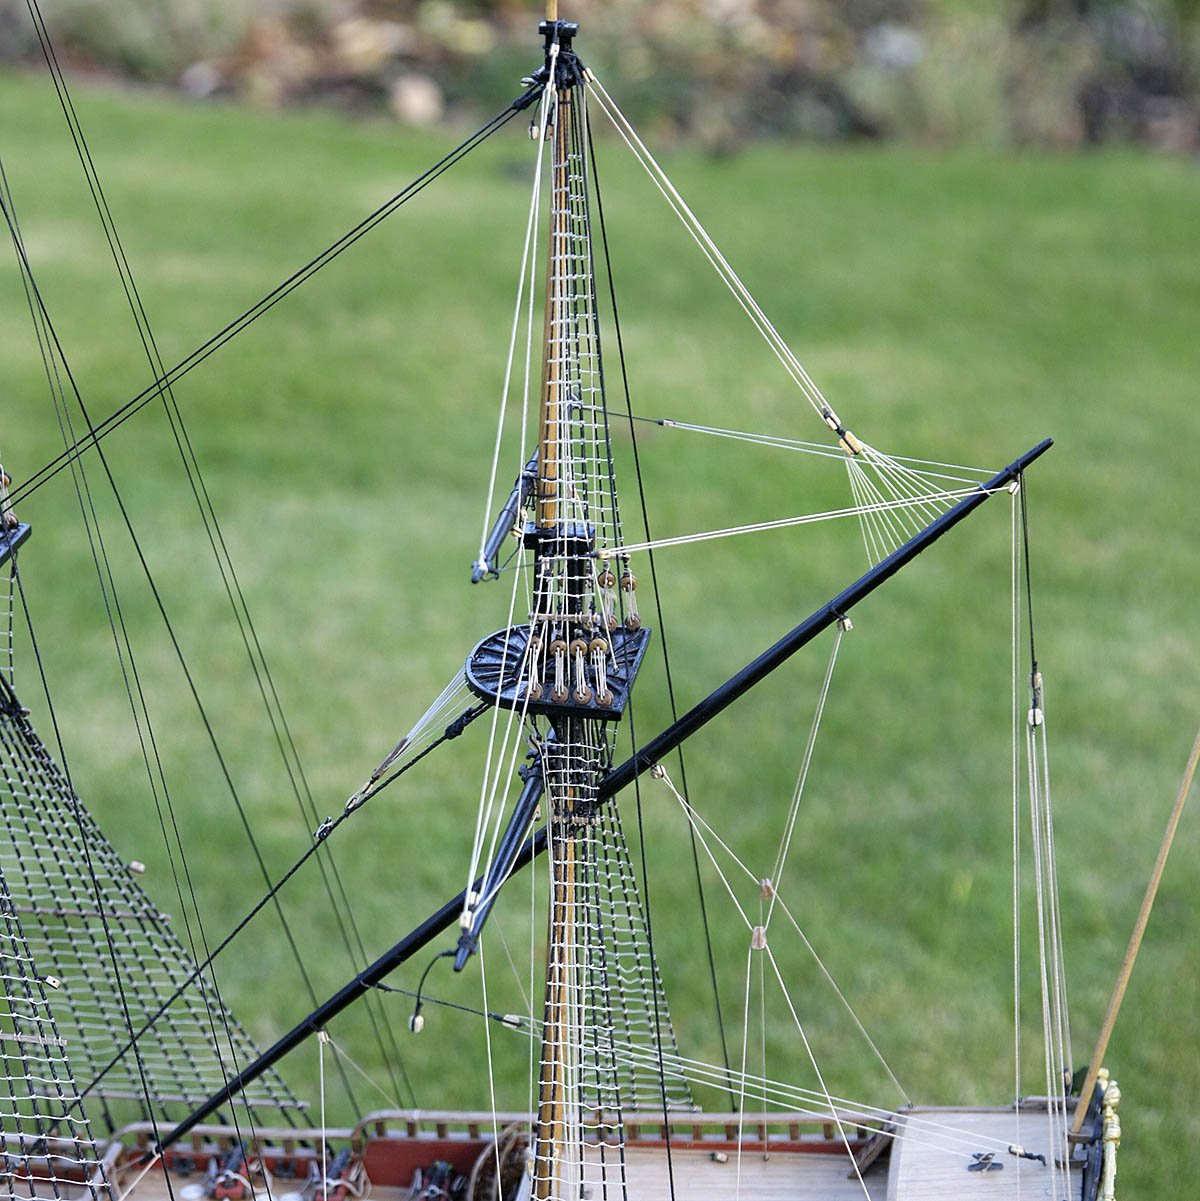
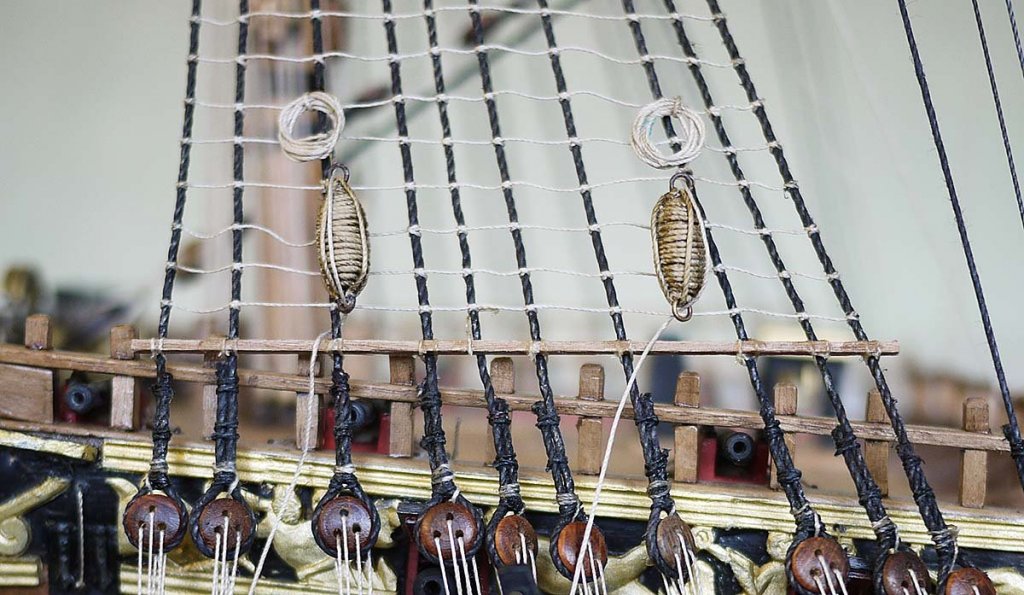
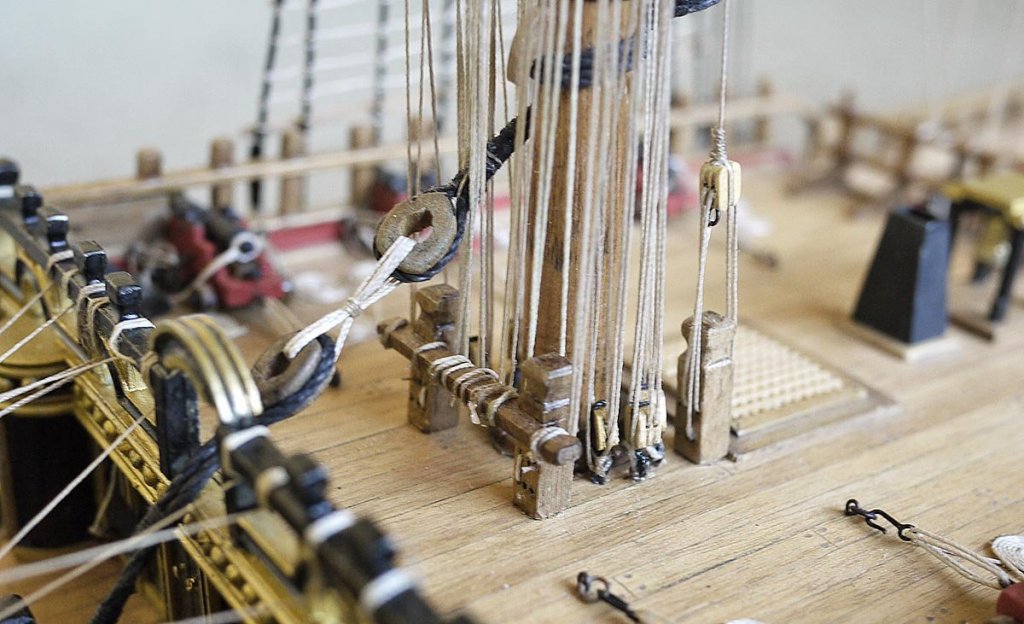
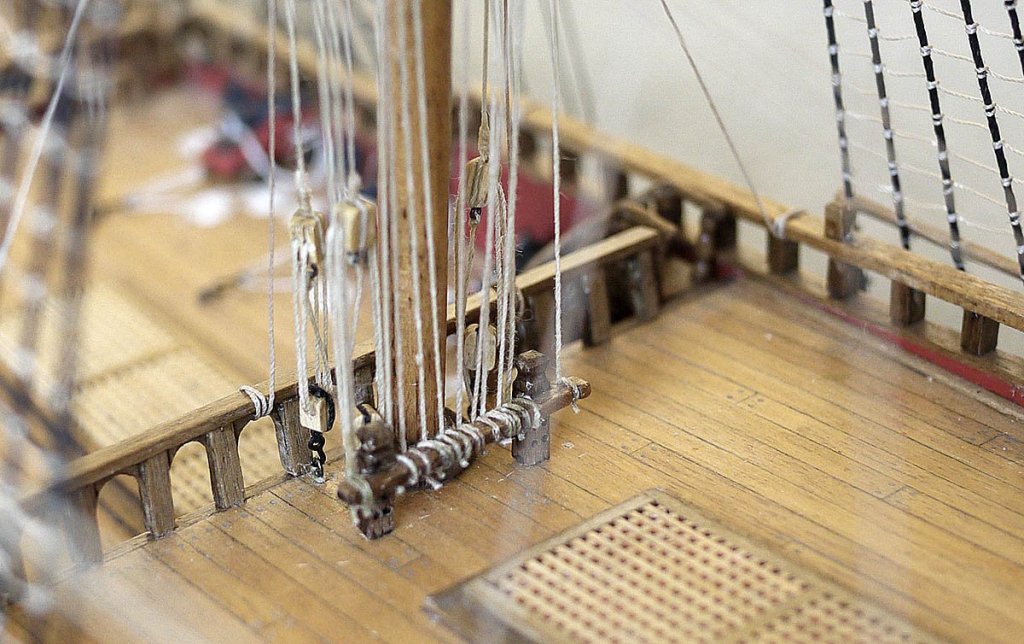
Hello Everyone, Thanks for your likes and kind comments, much appreciated. I've got a bit more light in my room today, enough for my compact to get some close ups, so as promised here are some better pictures of the rigging. You'll see that I've trimmed the ropes right back, I found that there were just too many to keep neat for the scale, I'll add the rope ends and coils separately, easier to keep track of them that way. I'm making up the anchor buoys at the moment so they'll go on next. ken

- 424 replies
-
- 15
-
-
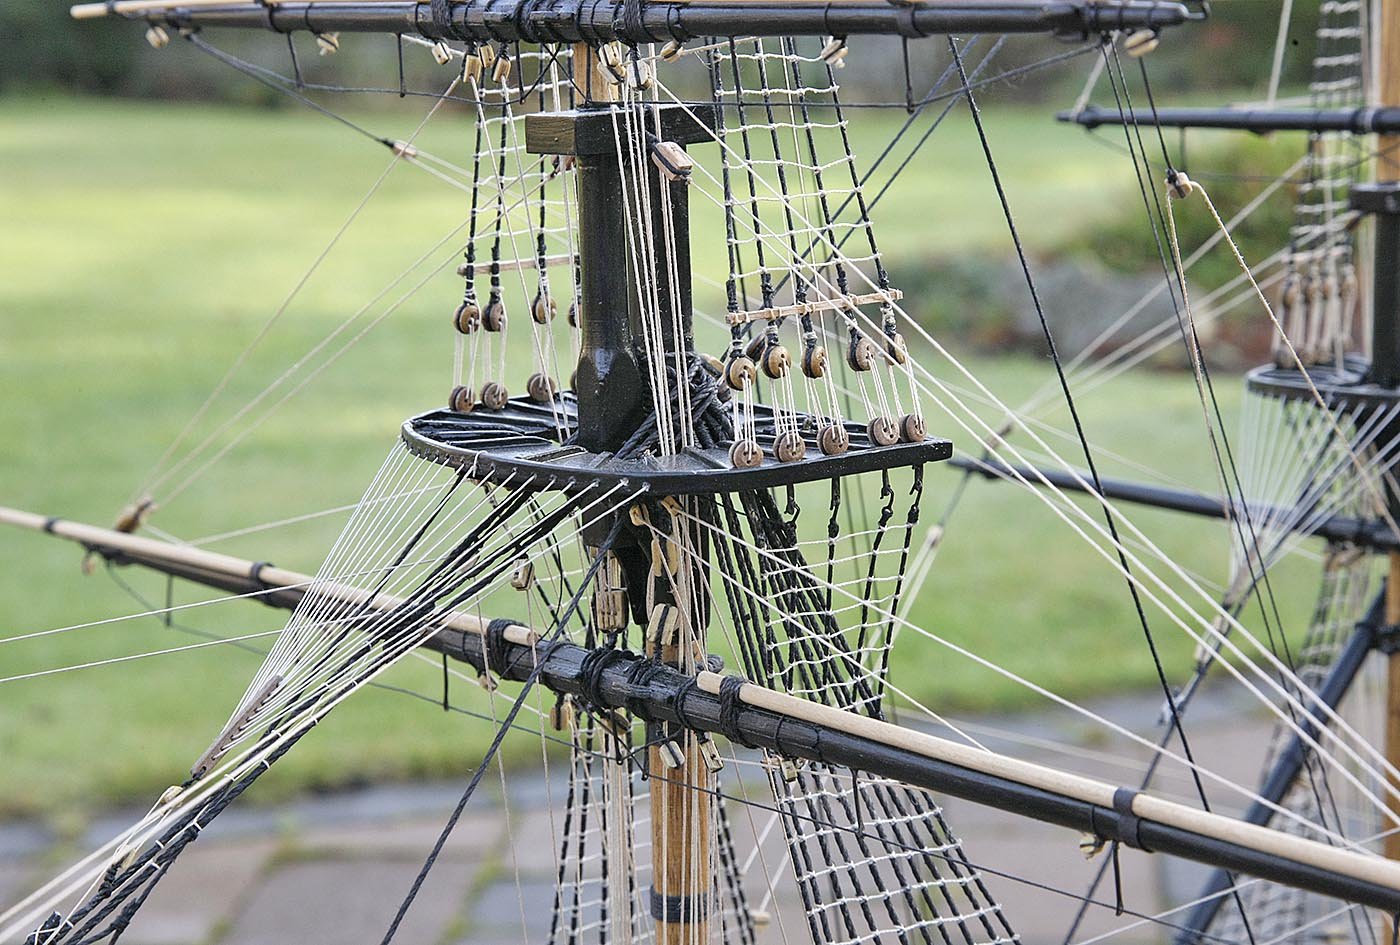
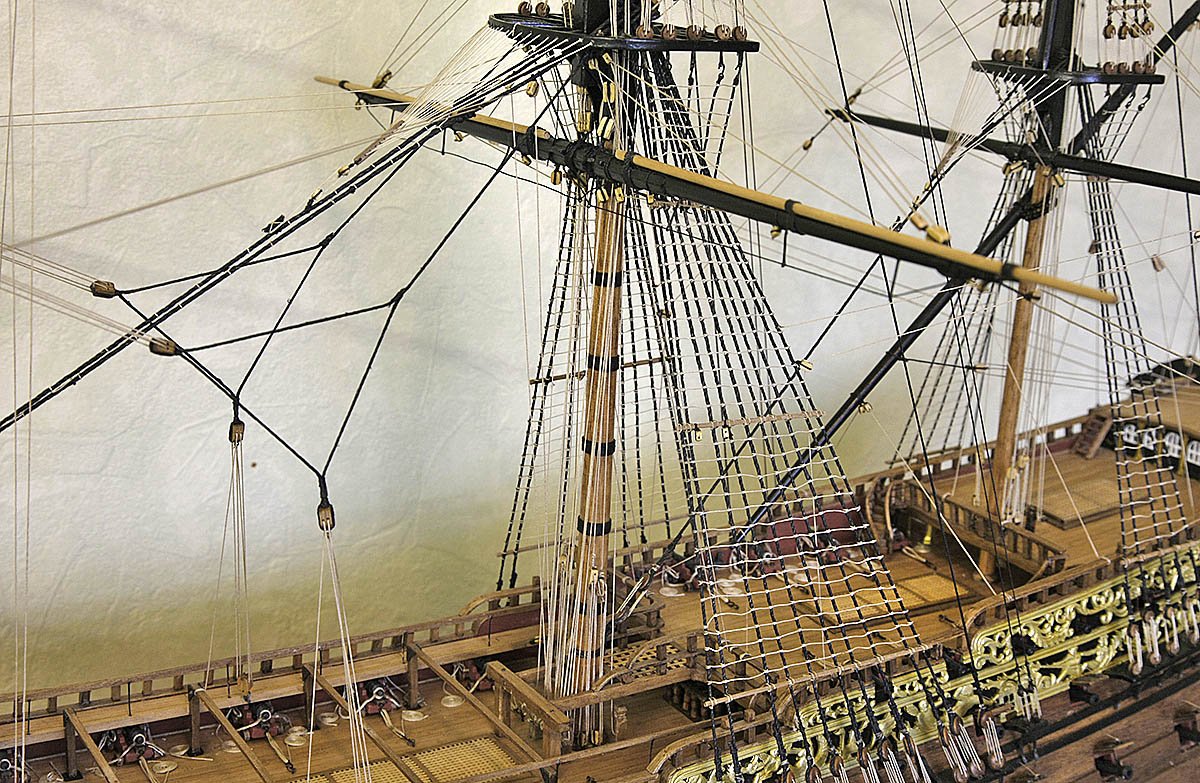
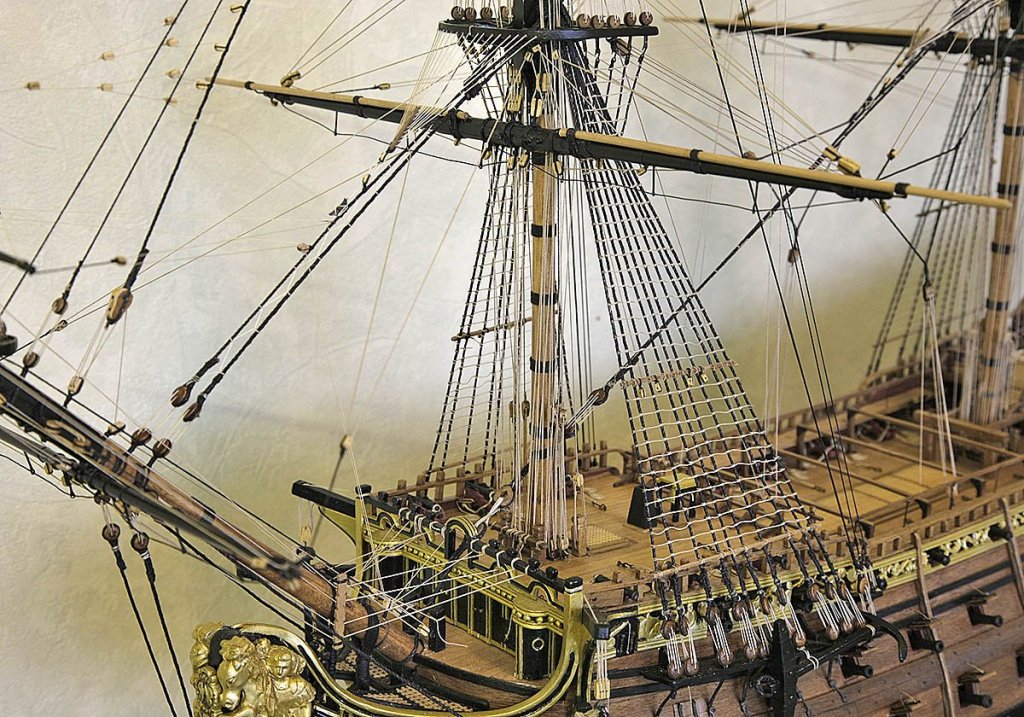
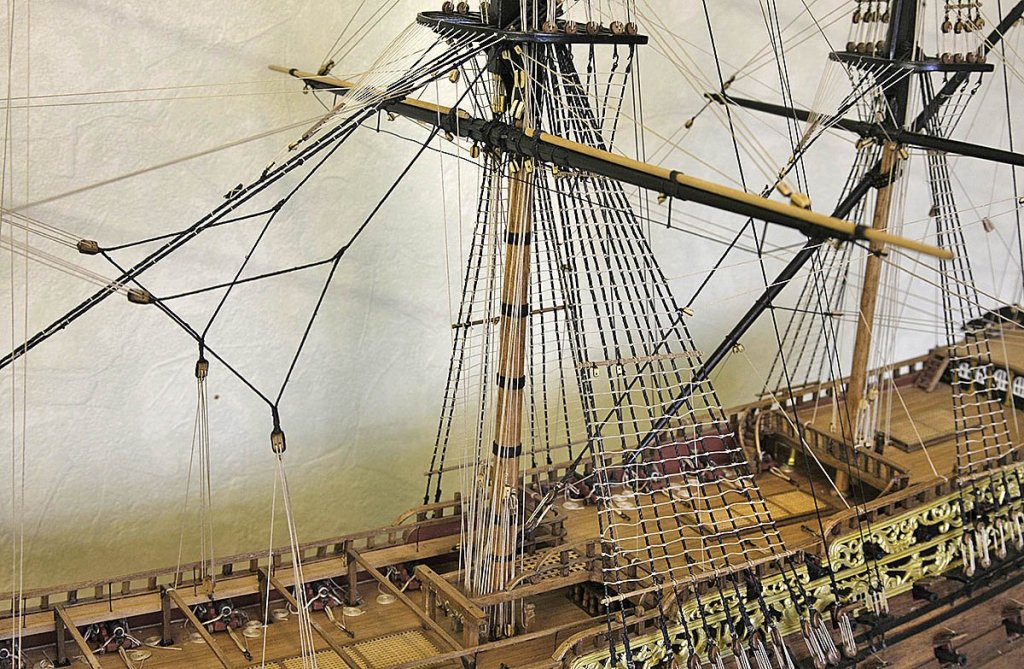
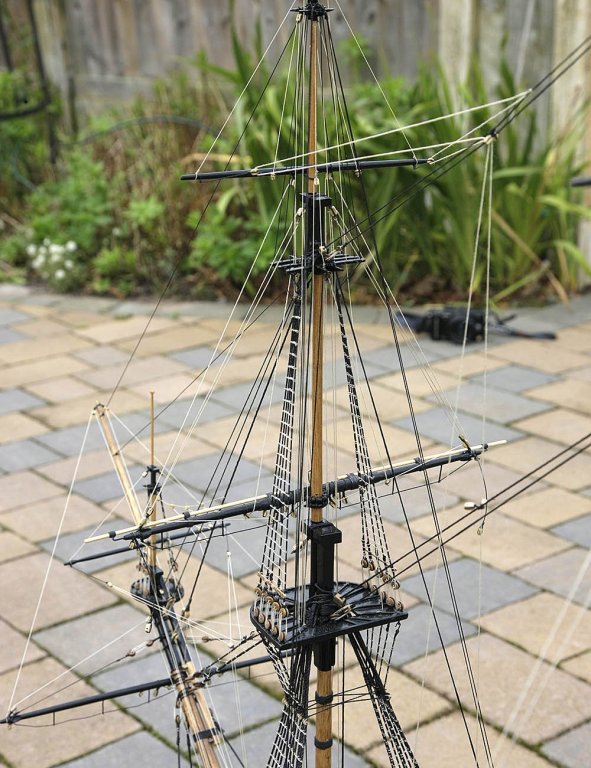
Hello Everyone, I've managed to finish the rigging to my complete satisfaction. As you were aware I was very apprehensive about this part of the build as I just couldn't figure it out at first from the plans. I said that I wasn't concerned about accuracy and was going to do a sort of generic rig based on the Victory, but like the rest of this build once I stopped worrying and got stuck in it revealed it's secrets. I started following the plan from the upper yards downwards, at first it wasn't overly difficult to get about right, being encouraged I continued with the RW plans and not my own ideas. It was like a crossword, the more words that you get done the more clues as to the next words you get, so as I worked downwards the sequence and reasoning of the lines became clearer and I understood the plans more. I think that I ended up with a reasonably accurate rig that looks good. The boat lifts that I'd made earlier now looked too simple and not in keeping so I made them up again to look something like they would have been. I'll be making up two boats, a pinnace and a launch next rather than the one launch supplied in the kit, it's just a personal preference. The anchors which I'd made earlier are now also in place. The weather at the moment as quite bad and the light in my room is so poor that it's difficult to photograph detail, I'm having to use a tripod so I can't get the angles needed or get in close. I've managed these but I'll post a better selection when the conditions permit. Ken


- 424 replies
-
- 11
-
-
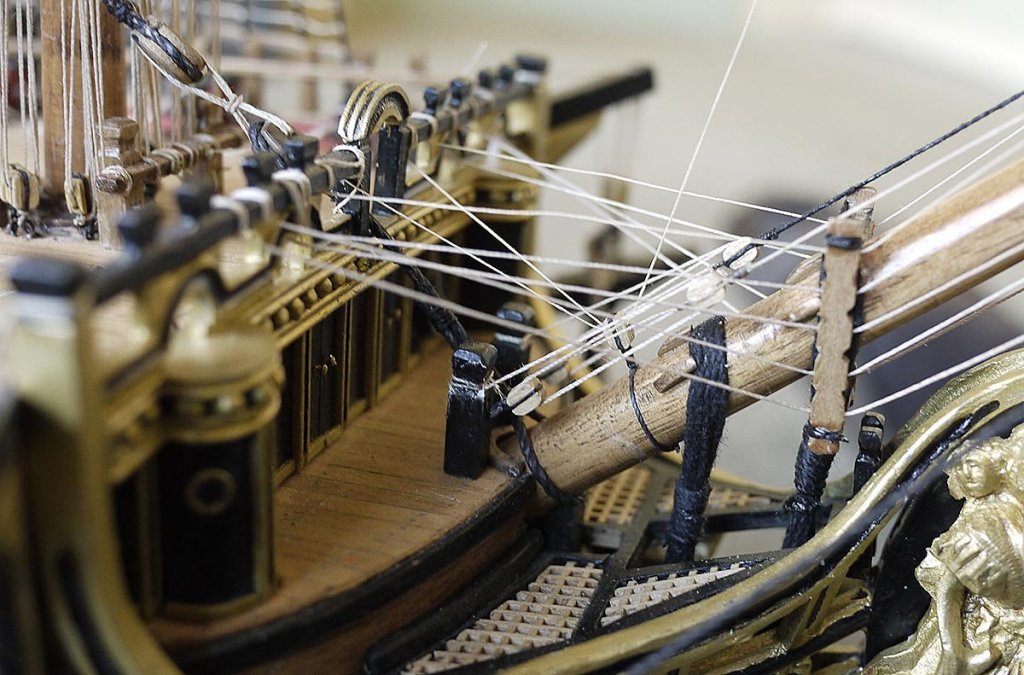
Hello Everyone, The rigging is progressing nicely. Except for the braces I've completed all the upper yards and all the mizzen rigging. The mizzen took quite a bit of working out, the Victory wasn't any help here. It's my version, it looks ok as if it would work so I'm happy with it and can now move on. I'll sort the tie offs and rope coils later and hope that they'll give me a more realistic look. I now feel like I'm on the home straight with my RW and can now start making hints as to what needs to be put in my very large Xmas stocking. Ken


- 424 replies
-
- 13
-
-
Hello Everyone, Thanks again for your likes and for those very kind comments. As you may know this is my first build log. I decided to do one as over a few years I have followed other logs, enjoyed them, learned a great deal and were motivated by them so I thought that I should give something back to MSW members. I was concerned at first thinking that my attempt would fall short and that I may have taken on a project that was beyond my skill level. At first it felt like I was doing homework that was going to be critically viewed but as the build progressed I found that I actually enjoyed doing it and it soon became as much a part of the project as the build itself. To make it a little more interesting I've tried to add a little bit of who I am in my posts. It's those very nice comments that members post that makes all the extra work seem worthwhile, so thanks again. No Zappto I don't intend to make a case for it, it would be much too large for me to display. I have quite a large bay window at the front of my house and it will easily sit there for all the world to see. It is north facing so doesn't get direct sunlight and I have a compressor which I use for blowing dust off so I can get away without a display case. Michael, Yes I have put sails on a model, my last but one build was ALs Bounty but that rig was simplified, I think that it was intended for intermediate builders like I was. They came out ok, I thought that I might put them on the RW but when I saw the rigging set up and realized the enormity of the undertaking I chickened out. Autumn is now here in the UK, for a few weeks nature displays itself in full colour, to capture some of this I've been to one of our many local parks with my camera, here's a few of the scenes from around its lake. This is Birkenhead Park, it was built in 1847 and was the first known publicly funded community park in the world. Olmstead and Calvert Vaux the designers of New York Central Park visited the park in 1850 to see how it had been done and their design was heavily influenced by seeing Birkenhead. Ken


-
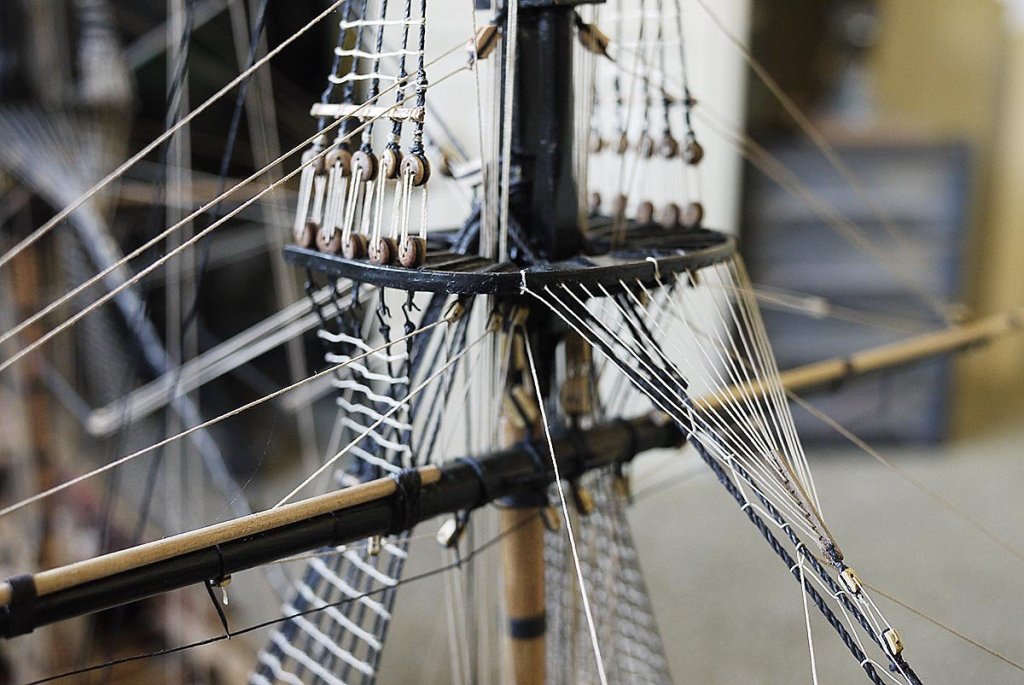
Hello Everyone, I've made quite a bit of progress on the rigging. Once I'd stopped beating myself up about trying to get it something like historical accuracy I felt a whole lot more relaxed with it and started to enjoy the build again. I'll follow the supplied rigging plan as best I can but for the sections that I can't decipher I'll note how the Victory was done in that area and adapt the RWs to something similar. There's plenty of info on the Victory so I should be able to come up with a reasonable looking, workable rig. One thing I've found is that there is a awful lot of rigging!!! Some pictures of my efforts so far. Ken


- 424 replies
-
- 15
-
-
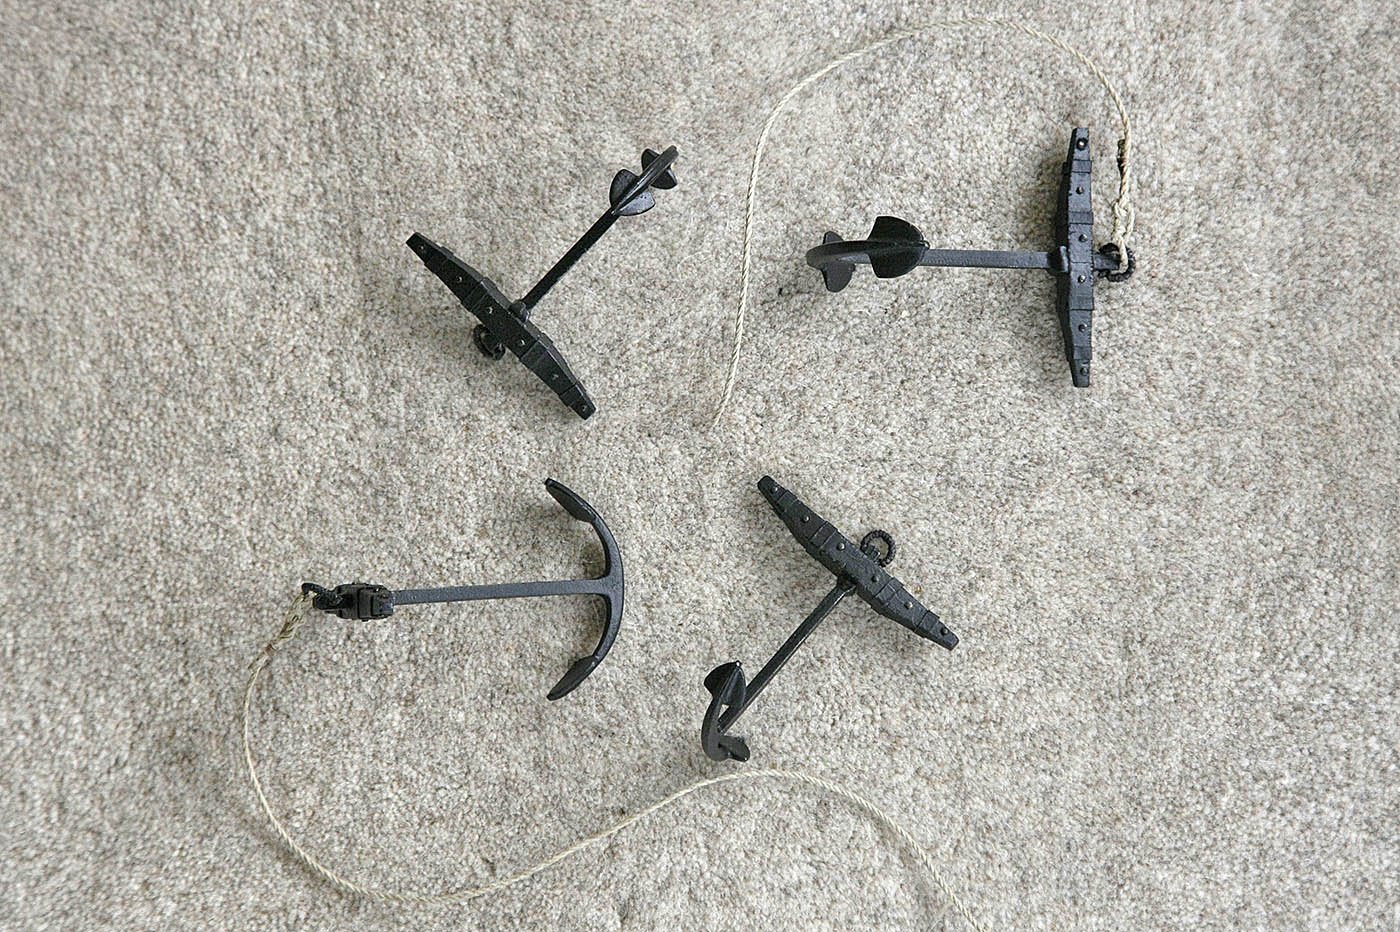
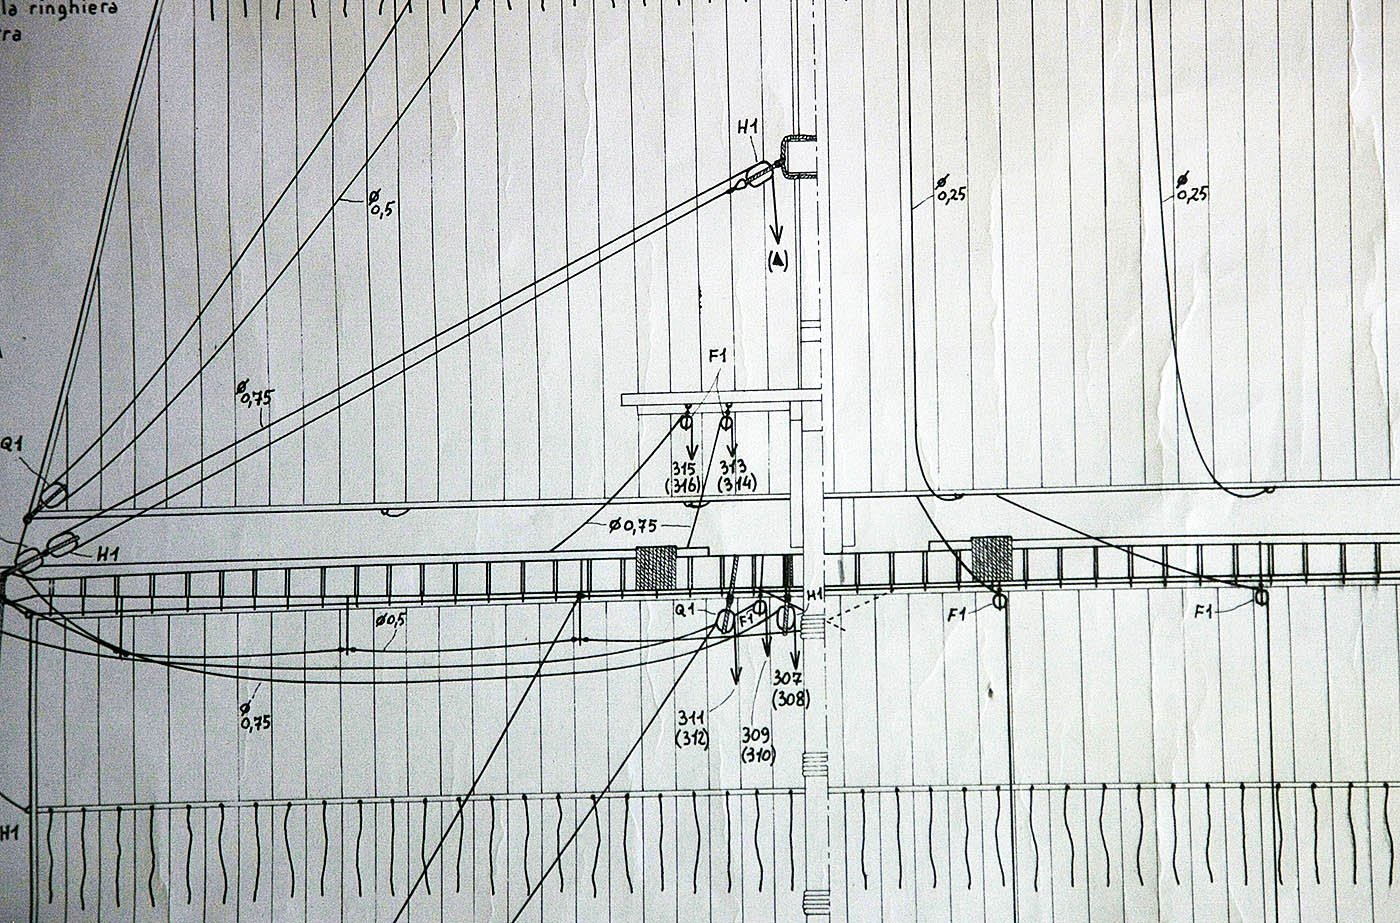
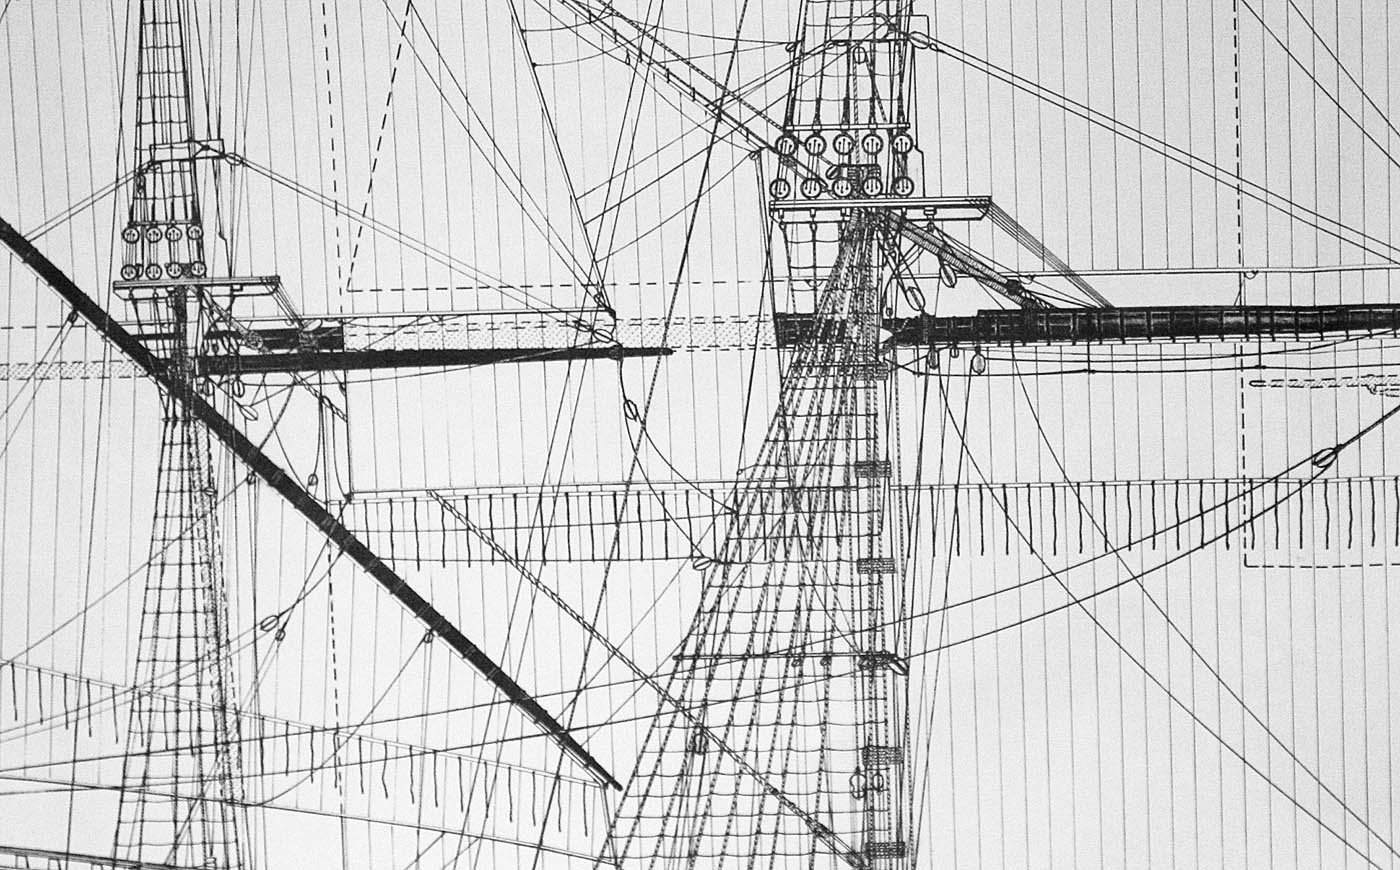
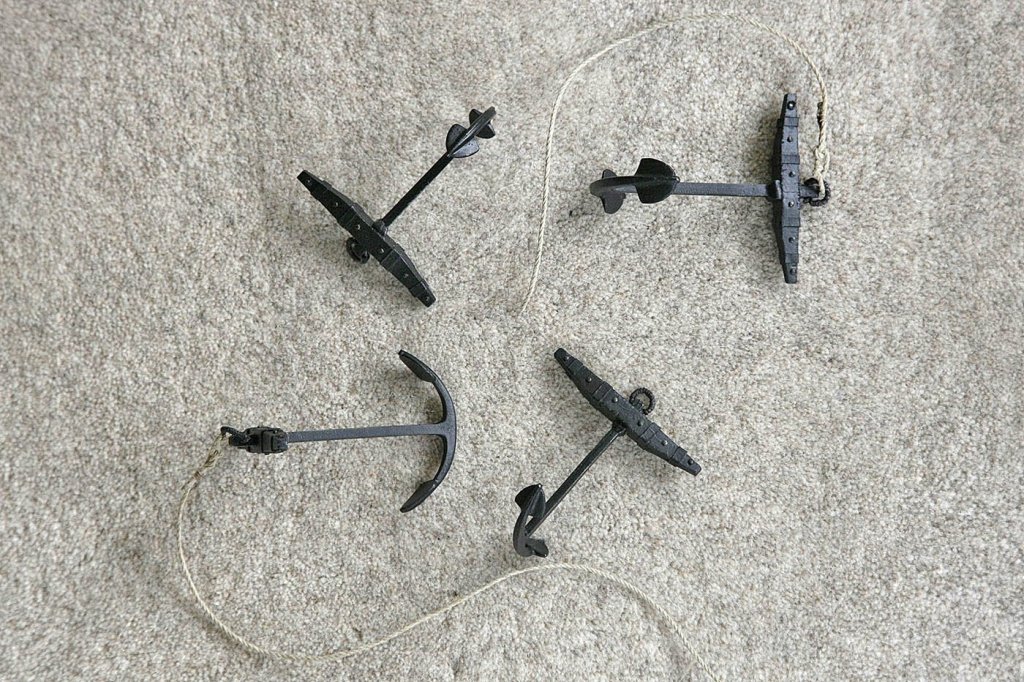
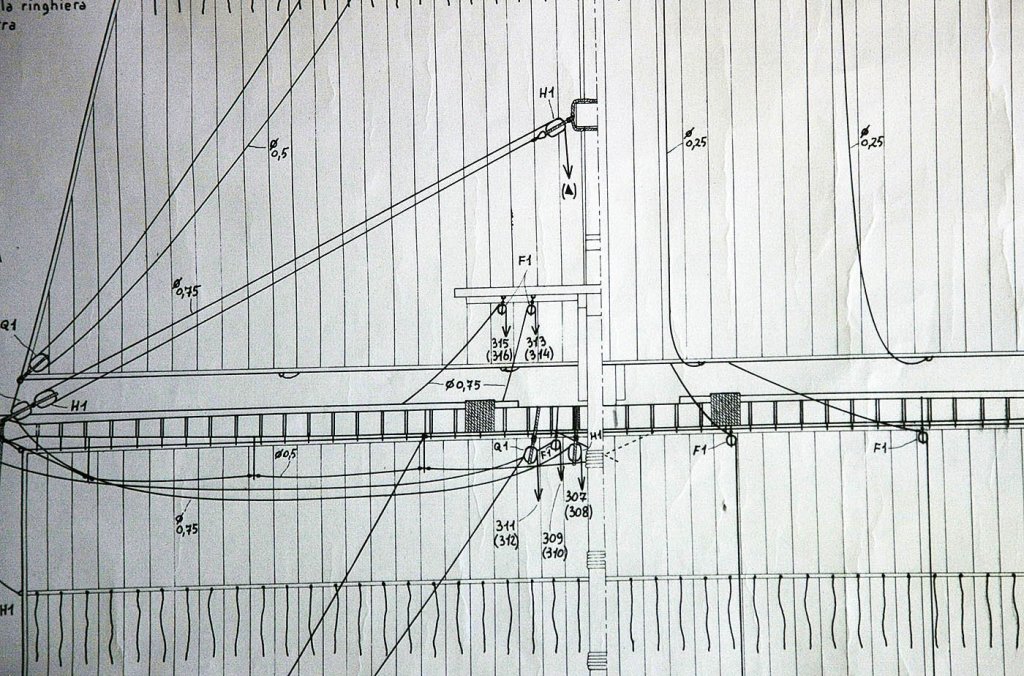
Hello Everyone, Again thanks for your likes and kind comments. Not much to show today, just the four anchors completed and ready to fit, can't say much about them really. I made the anchors now as I was getting so frustrated trying to figure out the rigging that I needed a break from it. The more I looked and searched the more confused that I became. Pete made a good comment, he suggested that I would know roughly where things went so go for what I felt was right. So rather that try for historical accuracy I'm going to follow a fairly generic rigging sequence and just try not to foul or cross the yards. This was never going to be an accurate depiction of RW and nobody that I know will be know the difference. I've shown parts of the rigging plan, the two are used in conjunction together, you may understand my confusion. Ken

-
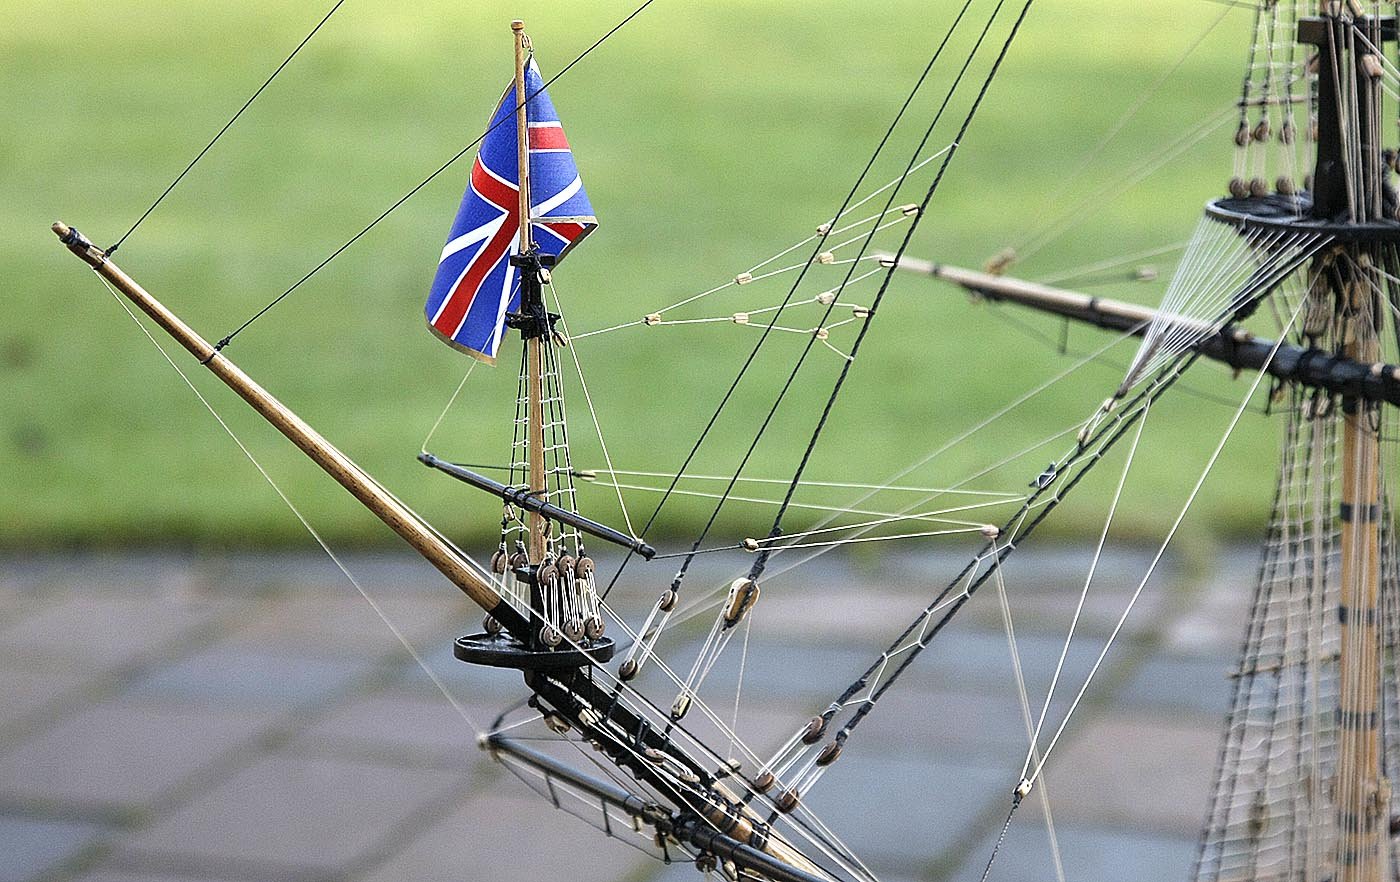
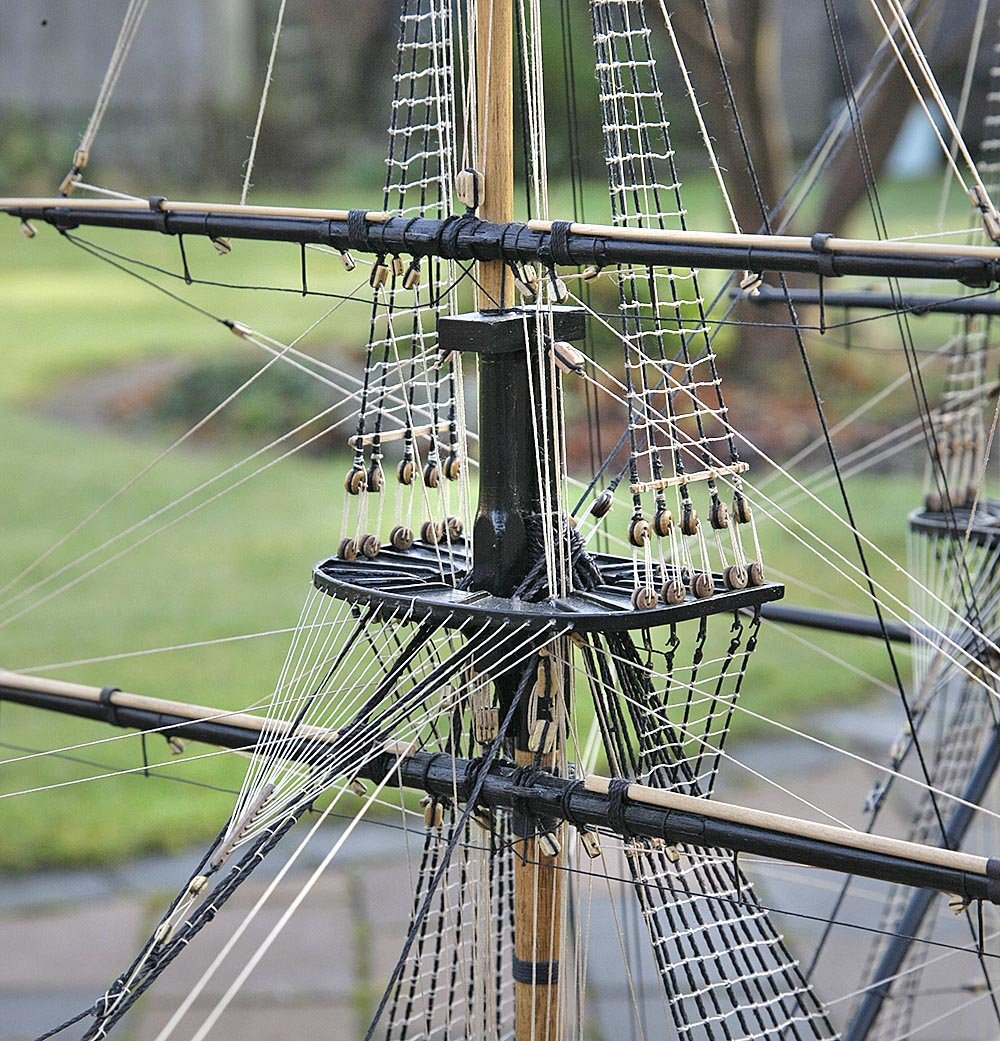
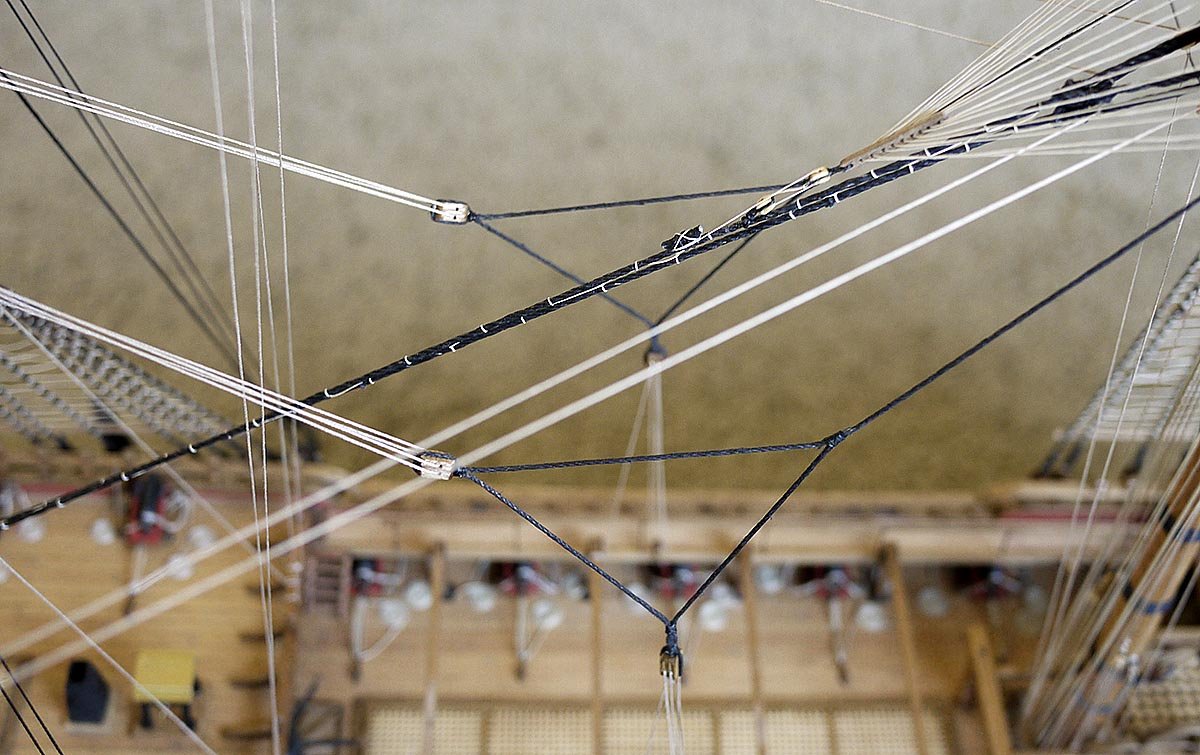
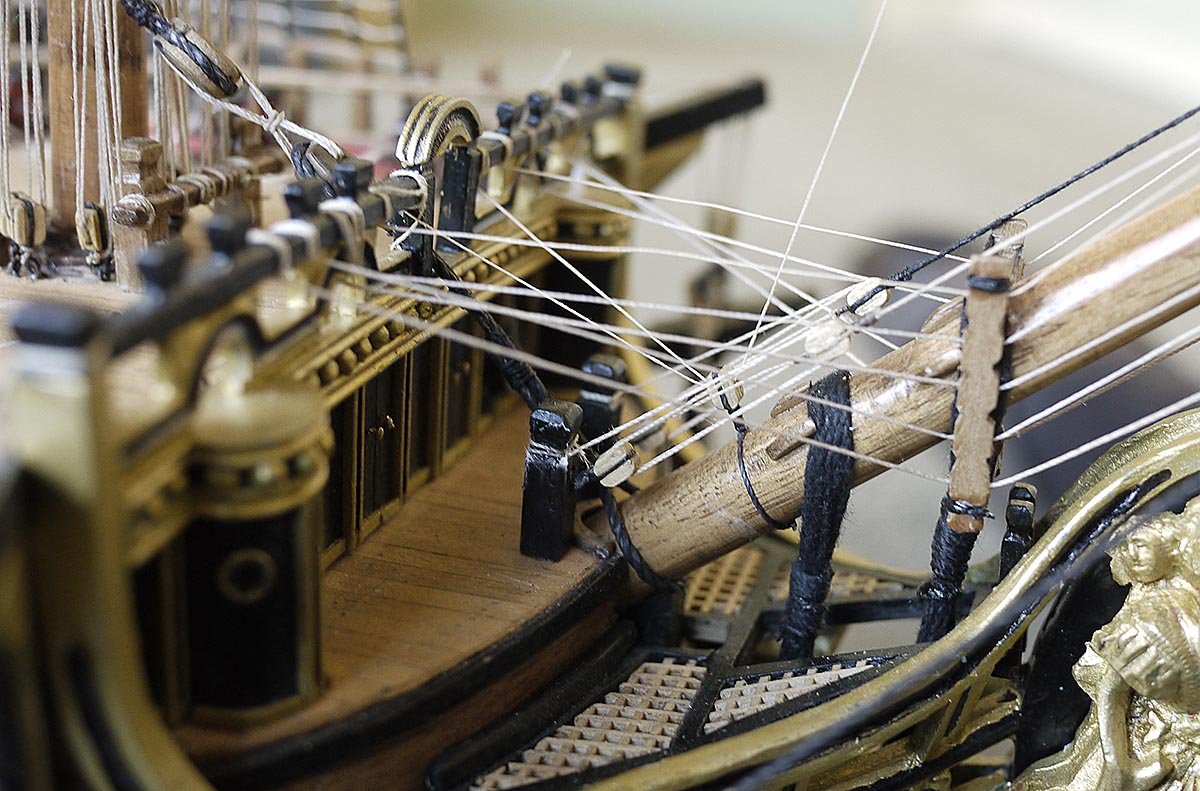
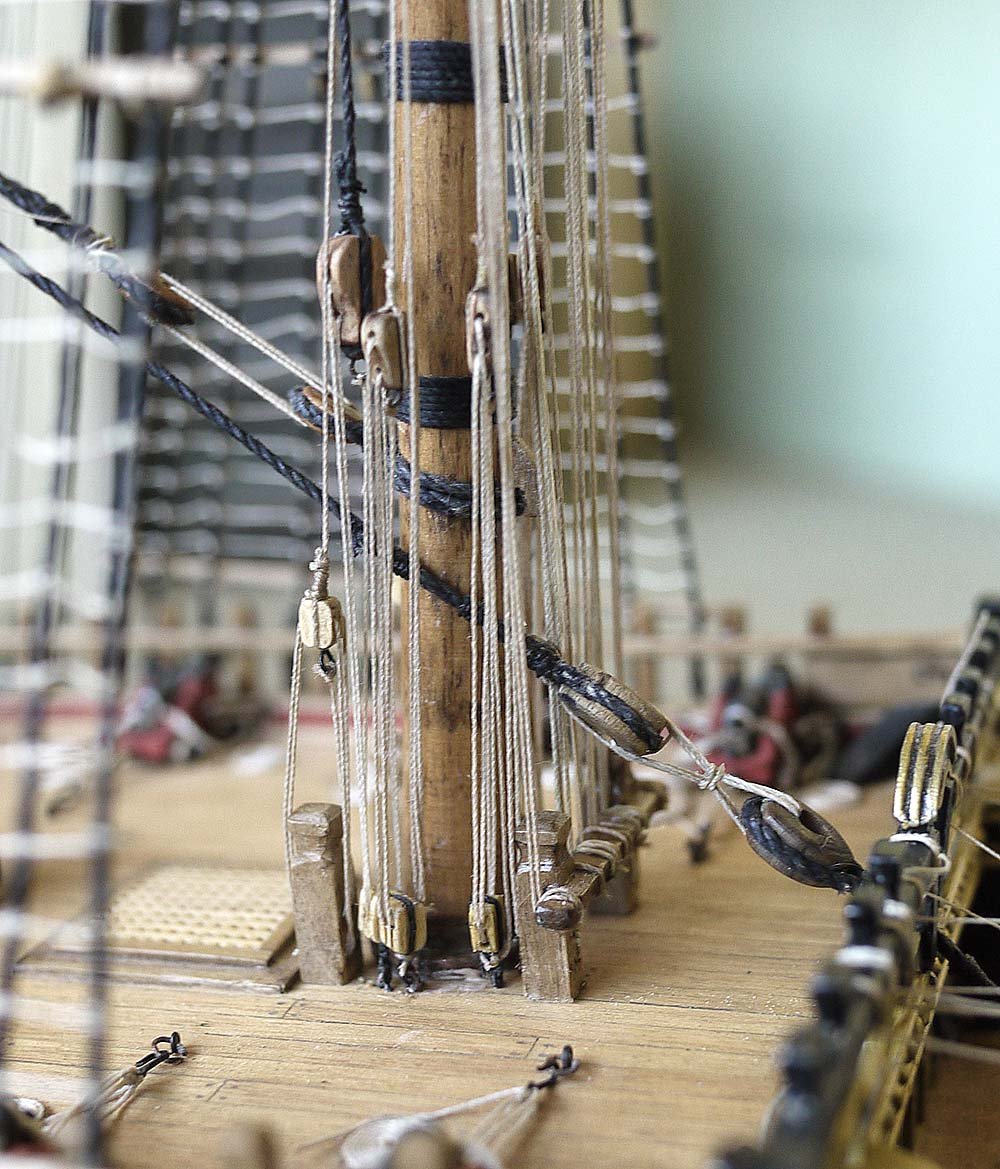
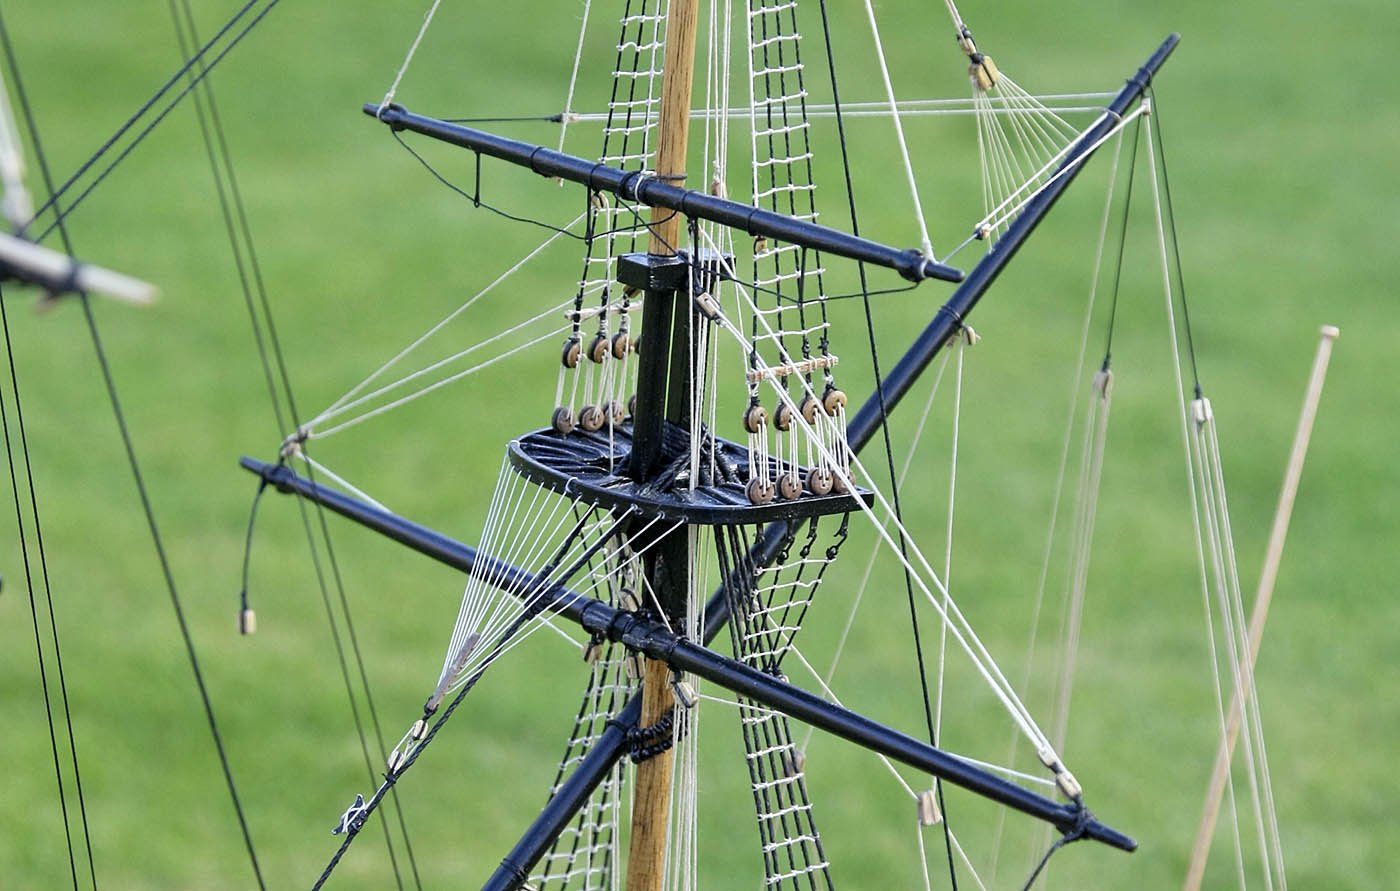
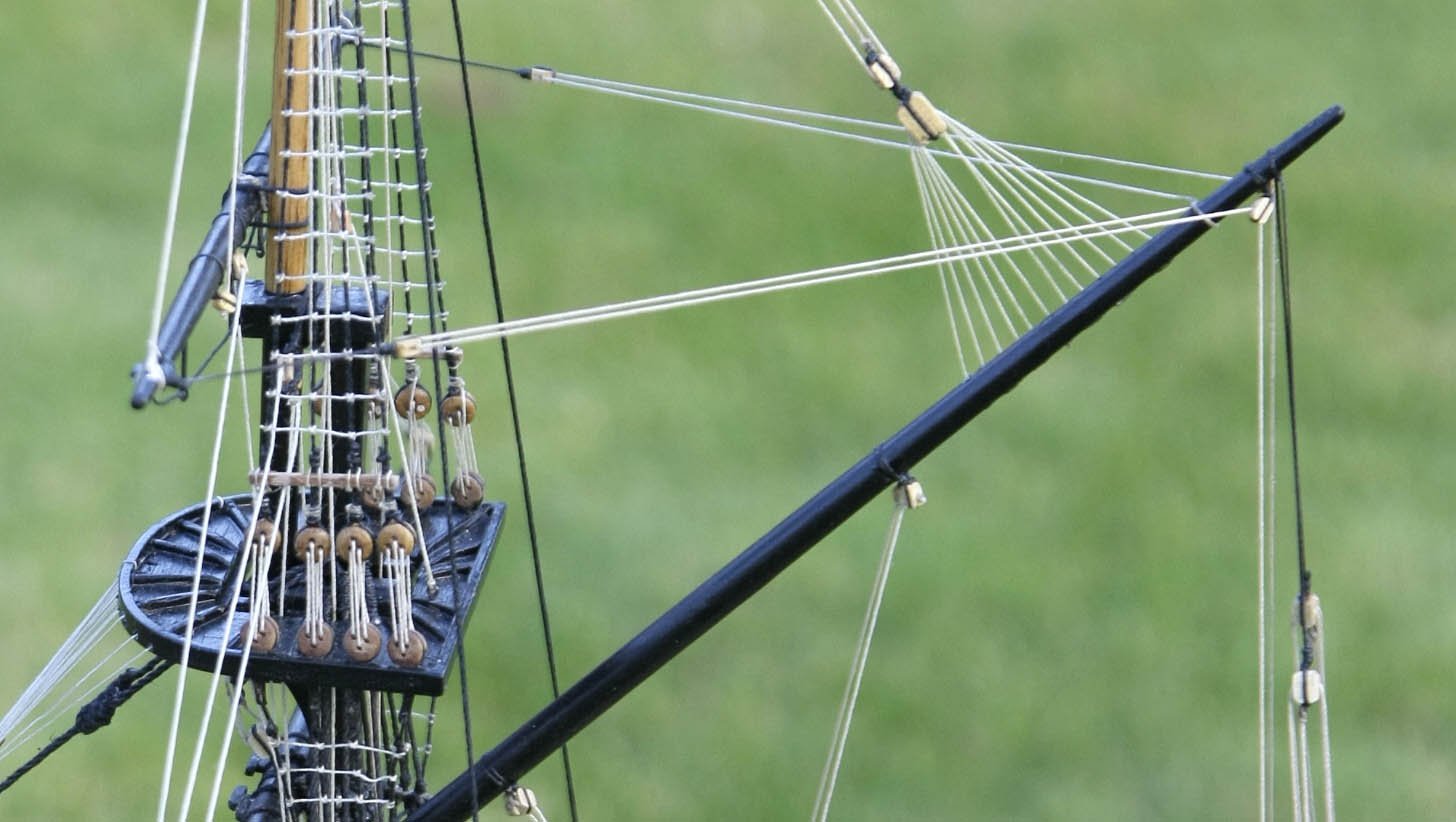
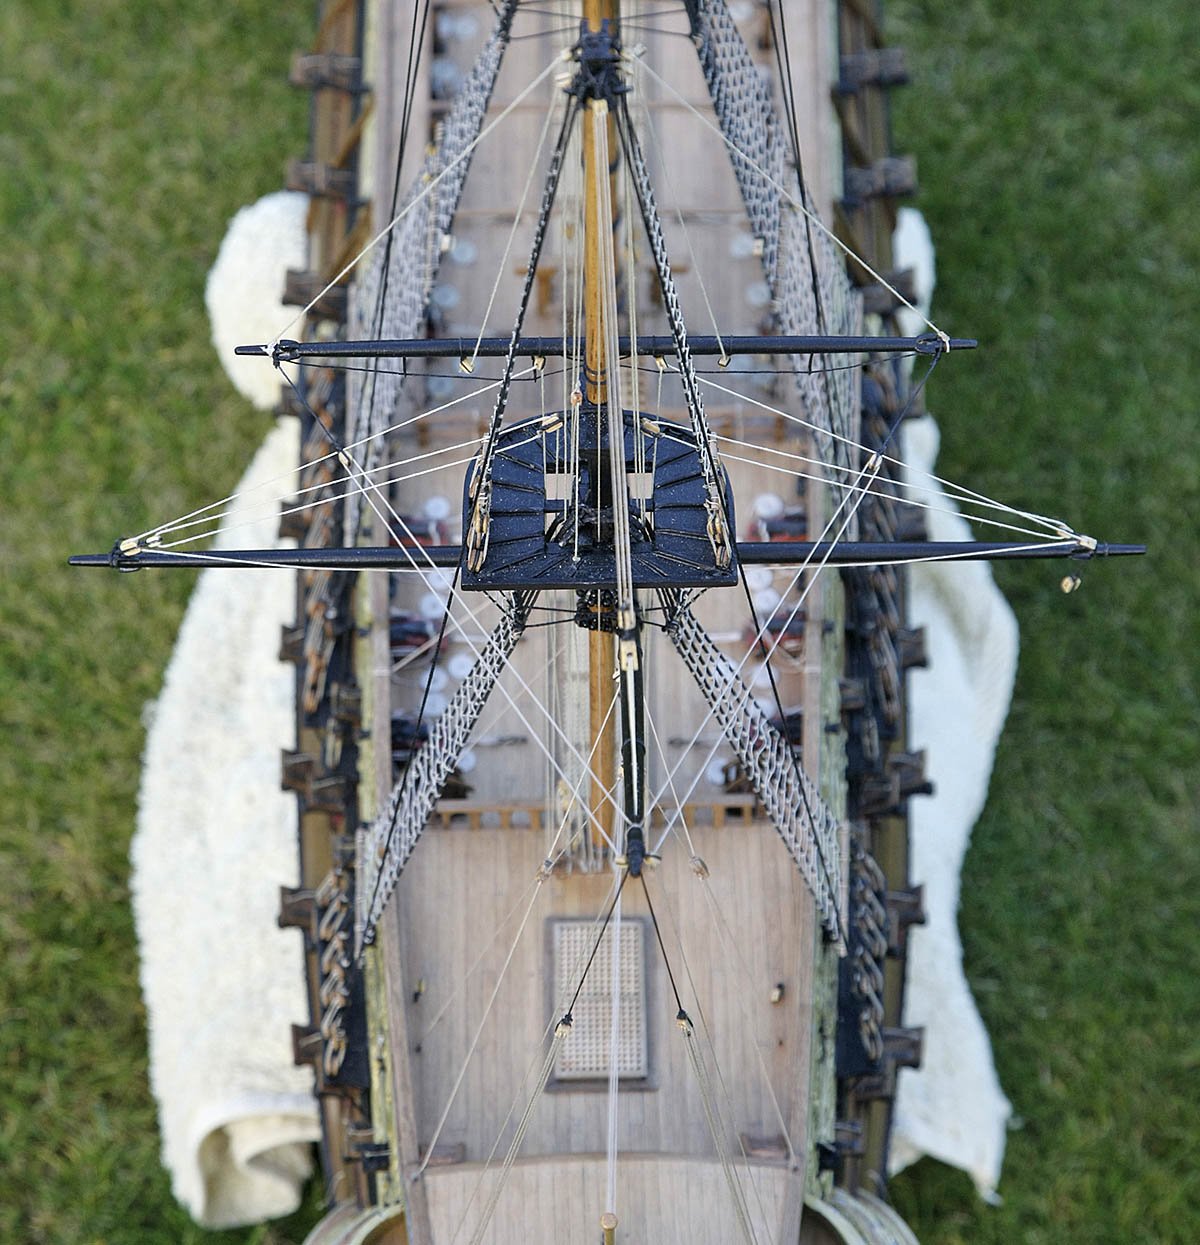
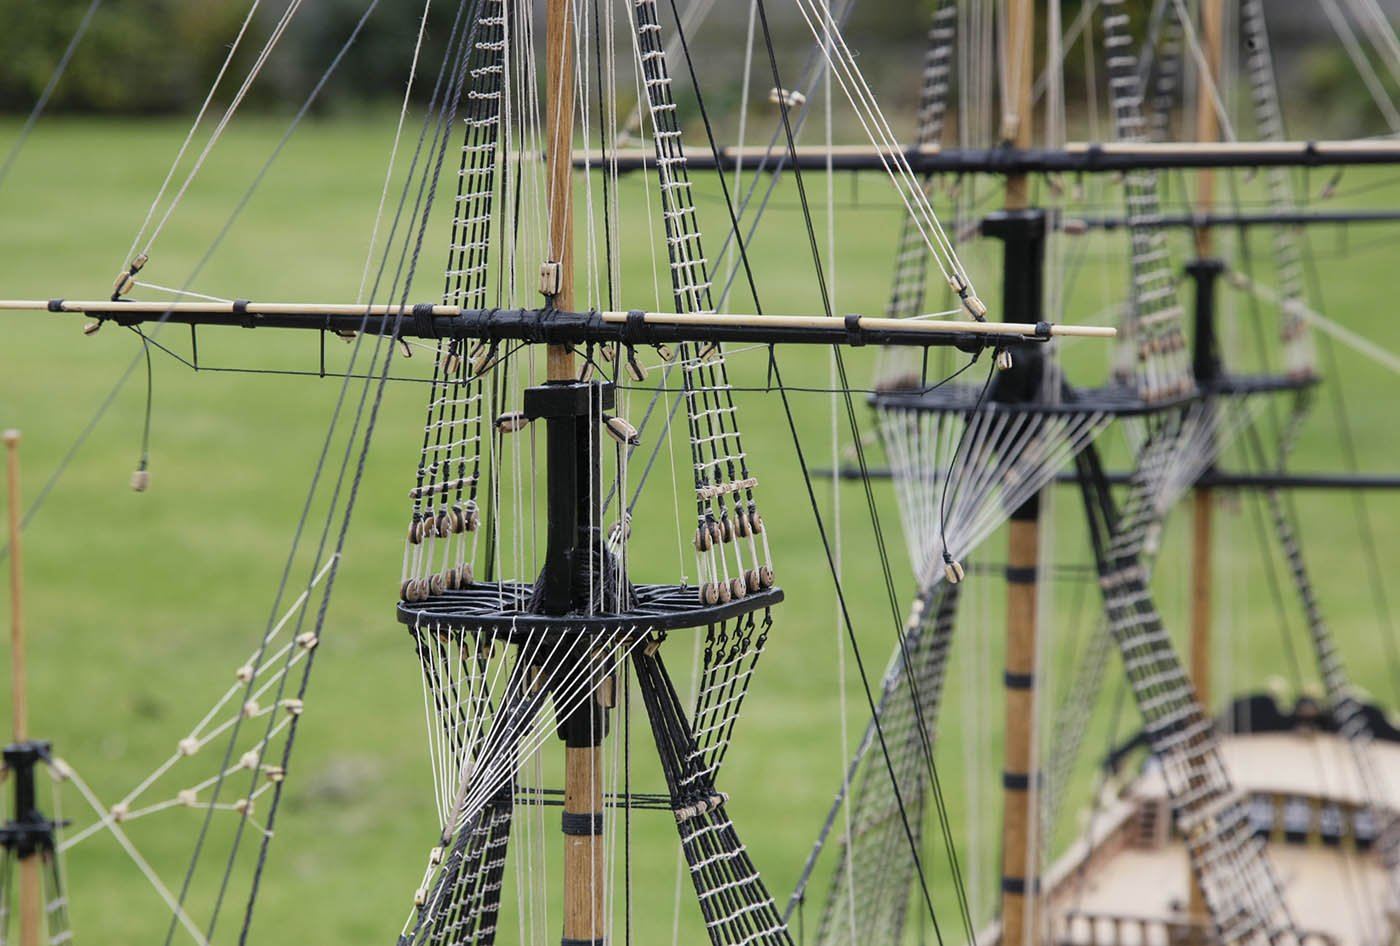
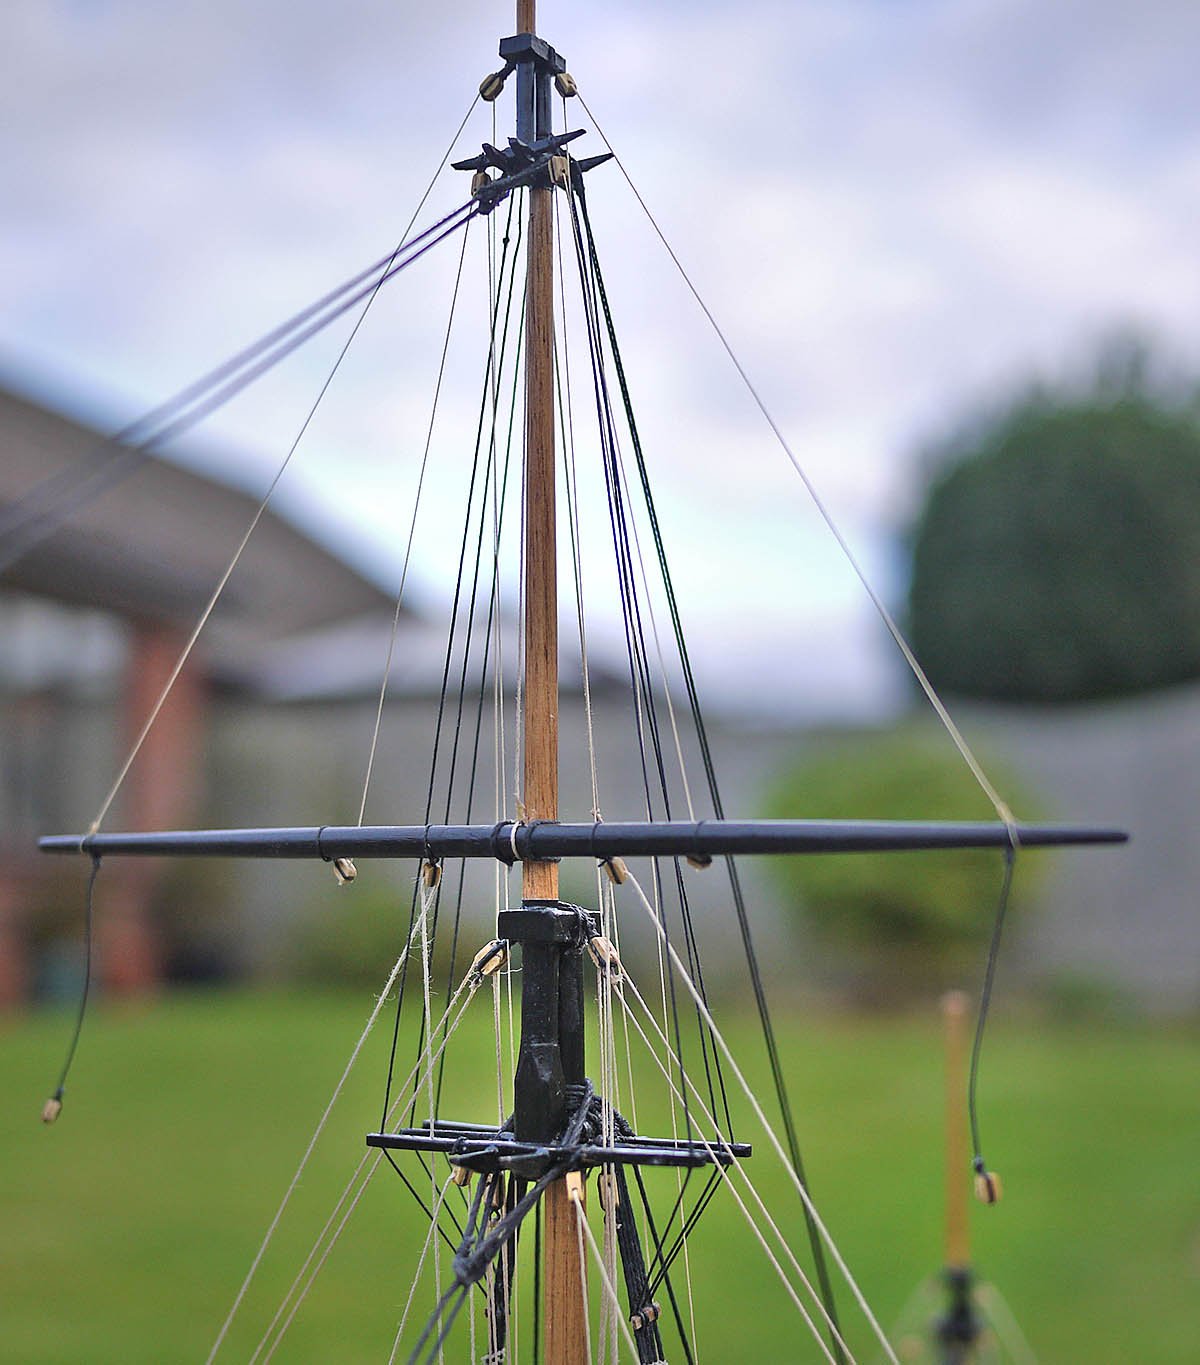
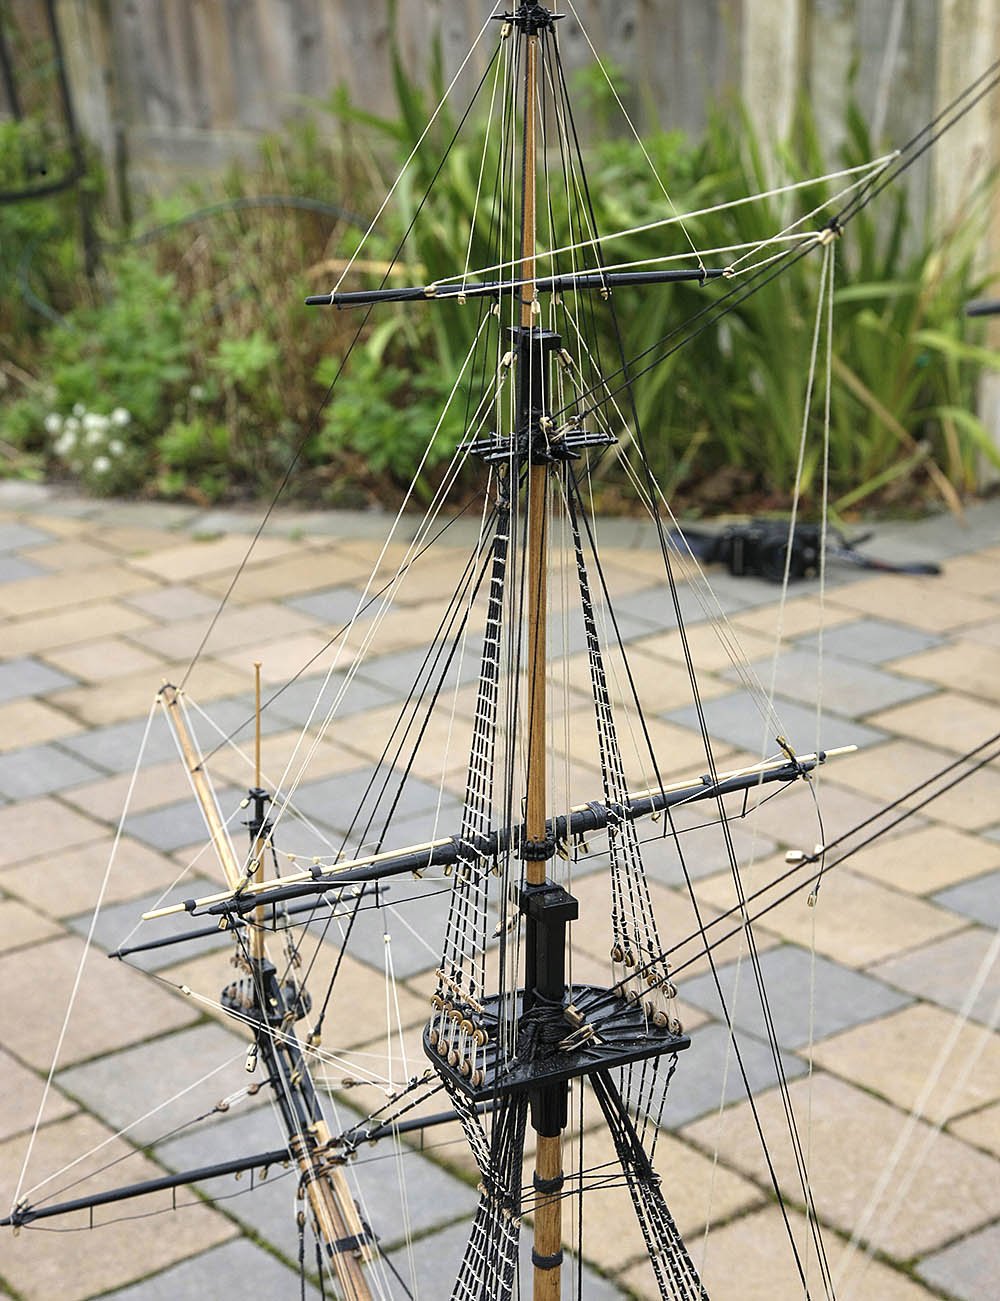
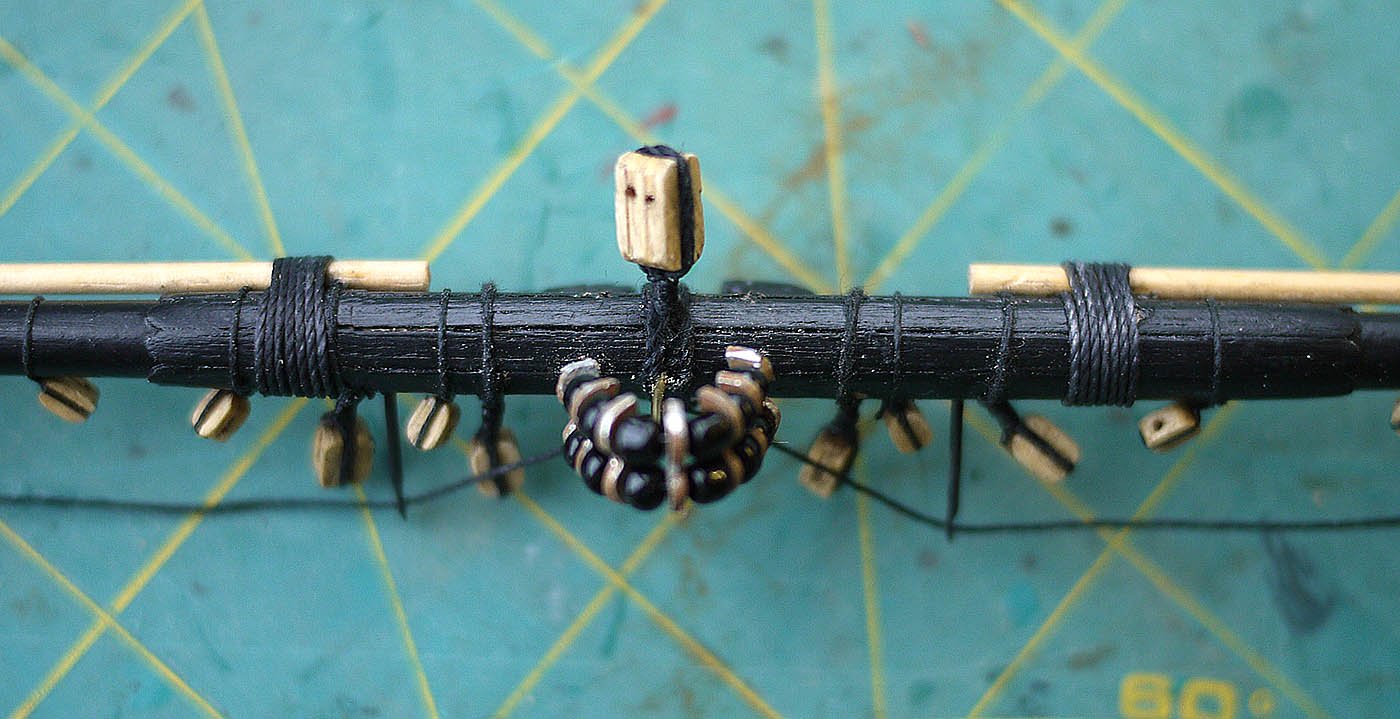
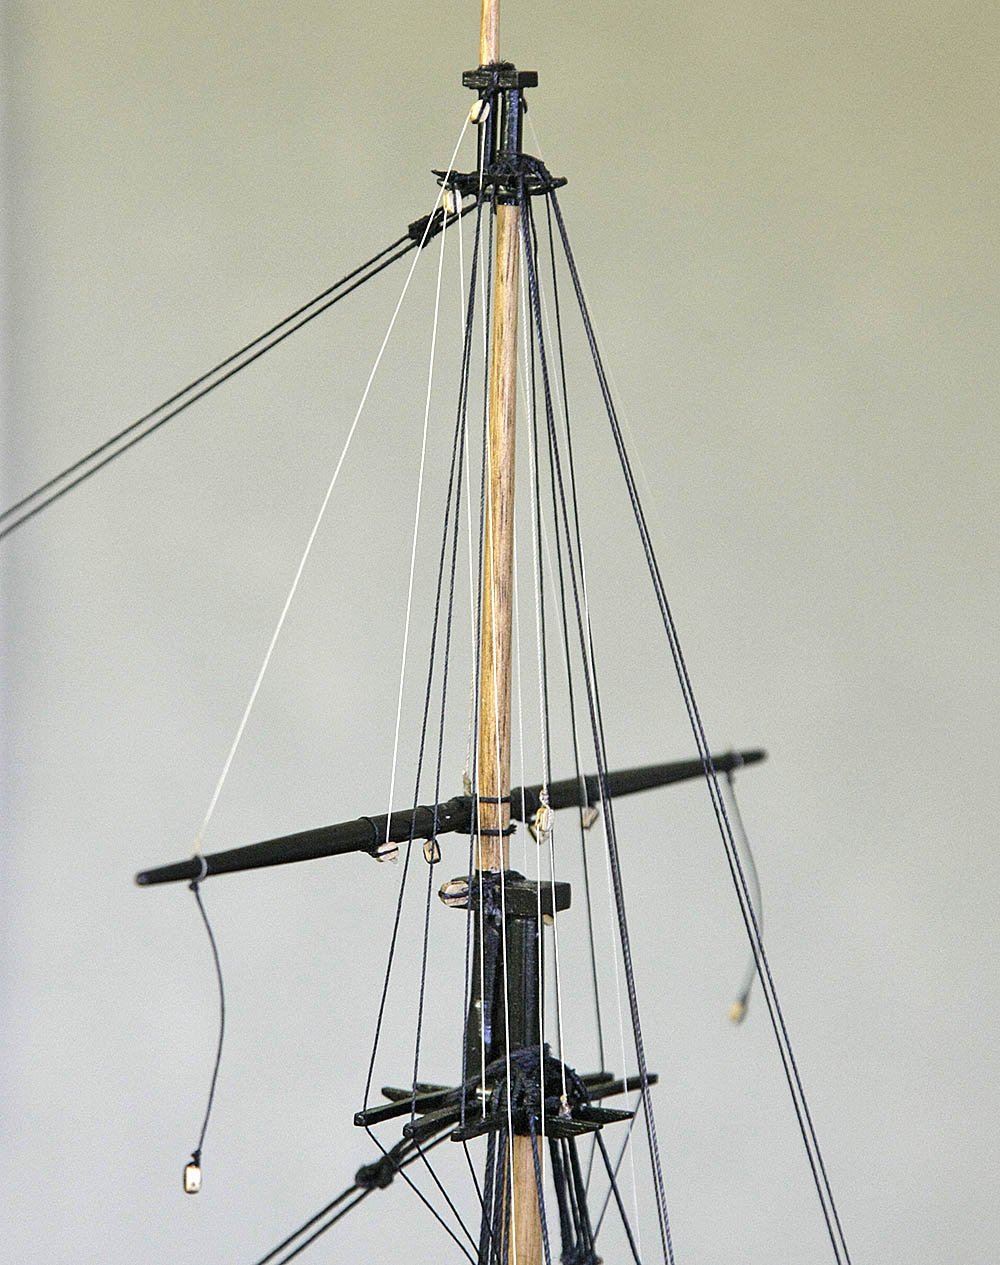
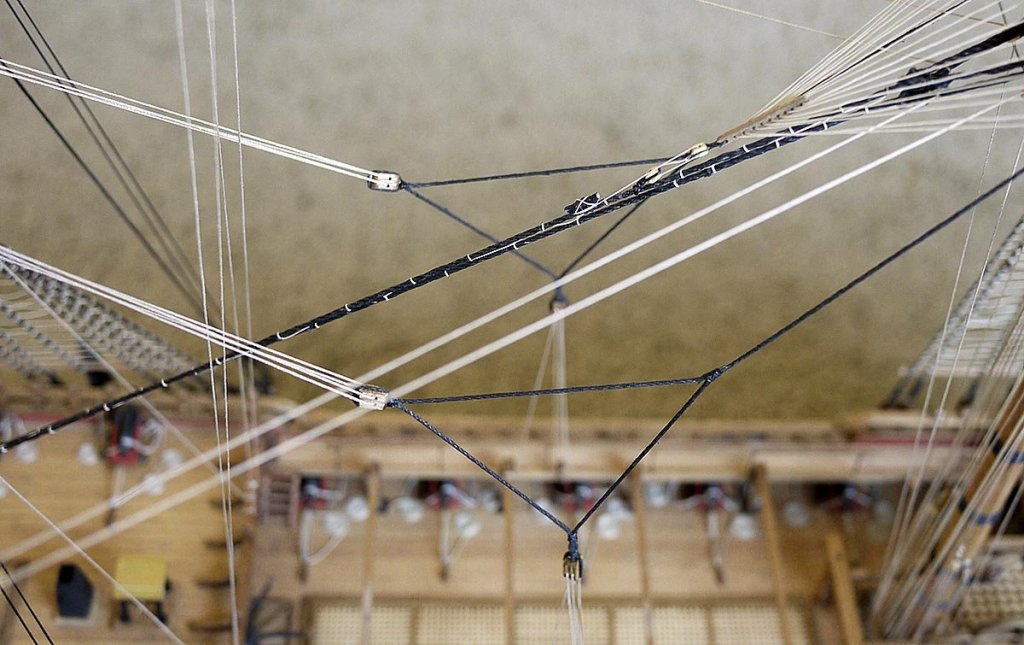
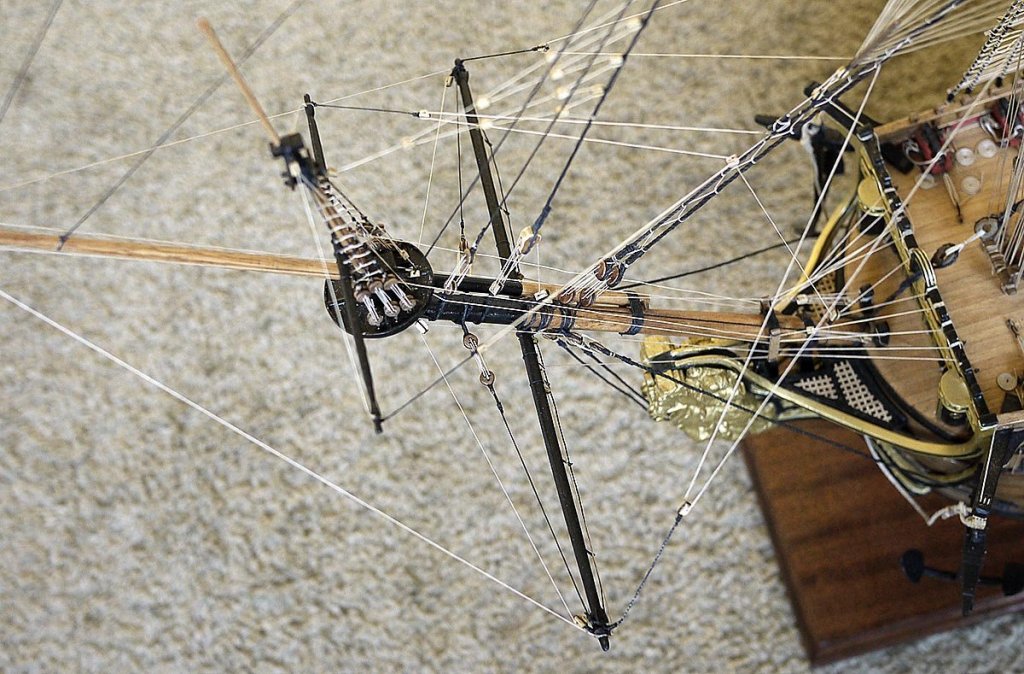
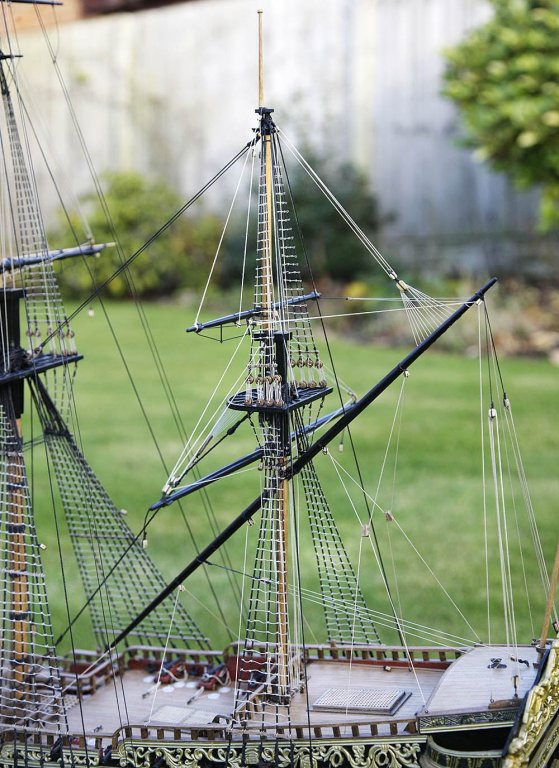
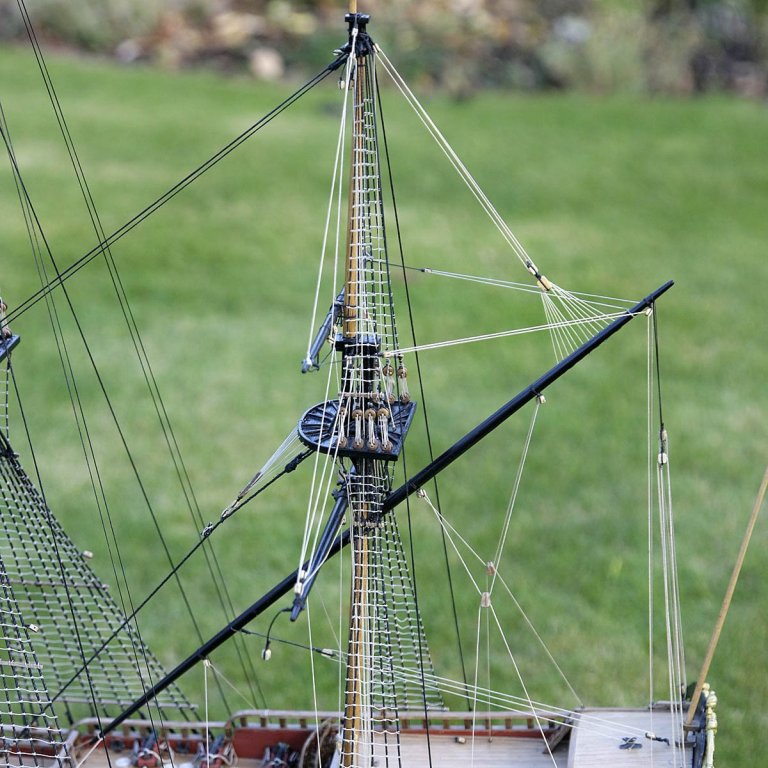
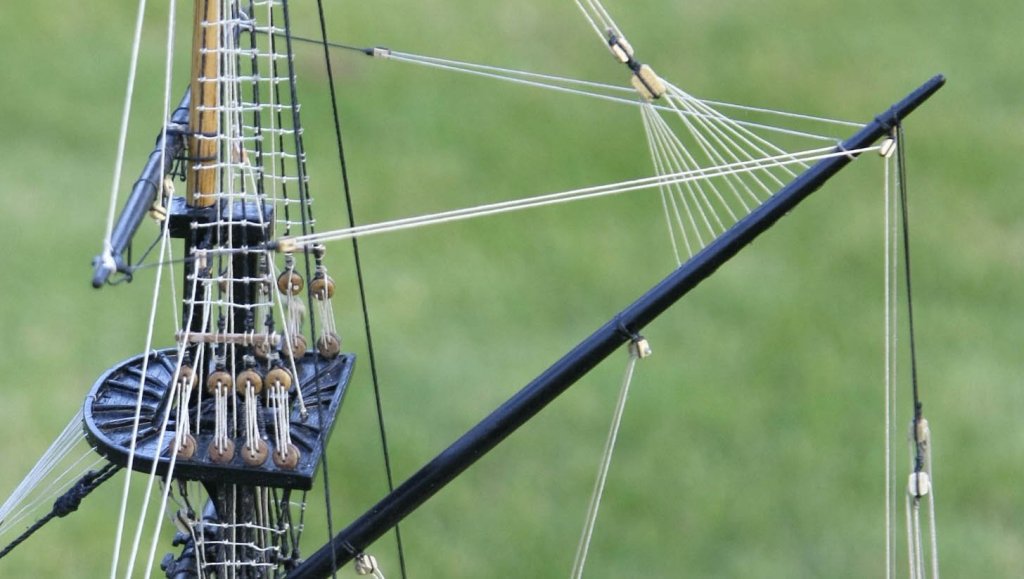
Hello Everyone. Again thanks for your likes and comments. I'm moving along quite nicely now that I've got the confusing bowsprit out of the way. The rigging of the masts looks not too difficult to follow, just the finer points that need studying, mainly where and how the lines finish on the decks. As you'll see from the pictures I've put in and rigged the upper yards, this was achieved by following Pete's diagrams. Next up are the middle yards. Because of my hand issue I've previously had great difficulty in making up and attaching the parrels to the point where I decided not to include them. Here's the easier way that I came up with. I use a small piece of wire glued into the spar to insert it into a hole in the mast to hold it in place whilst I rig the spar, I thought that why not do something similar with the parrels. Instead of cord I used blackened wire this was much easier to thread the beads and spacers. After threading I twisted the ends together to form small shafts which I trimmed, I then bent the whole thing to fit around the mast, we now have a solid unit with two wire rods facing forward, I drilled two holes in the spar for these to fit into. I fixed the spar to the mast then from the rear I slotted the compete parrels unit into the prepared holes in the spar, to finish off I wrapped some cord around the spar to make it appear to be lashed on. I can't tell even close up that it's anything but traditionally made. I think the pictures will clarify things. Ken