HOLIDAY DONATION DRIVE - SUPPORT MSW - DO YOUR PART TO KEEP THIS GREAT FORUM GOING! (Only 24 donations so far out of 49,000 members - C'mon guys!)
×

ken3335
-
Posts
314 -
Joined
-
Last visited
Content Type
Profiles
Forums
Gallery
Events
Everything posted by ken3335
-
 Hi Zappto, This is becoming an interesting log to follow. Some very clean, neat work going on here and it's showing great promise. Keep it up. Ken
 -
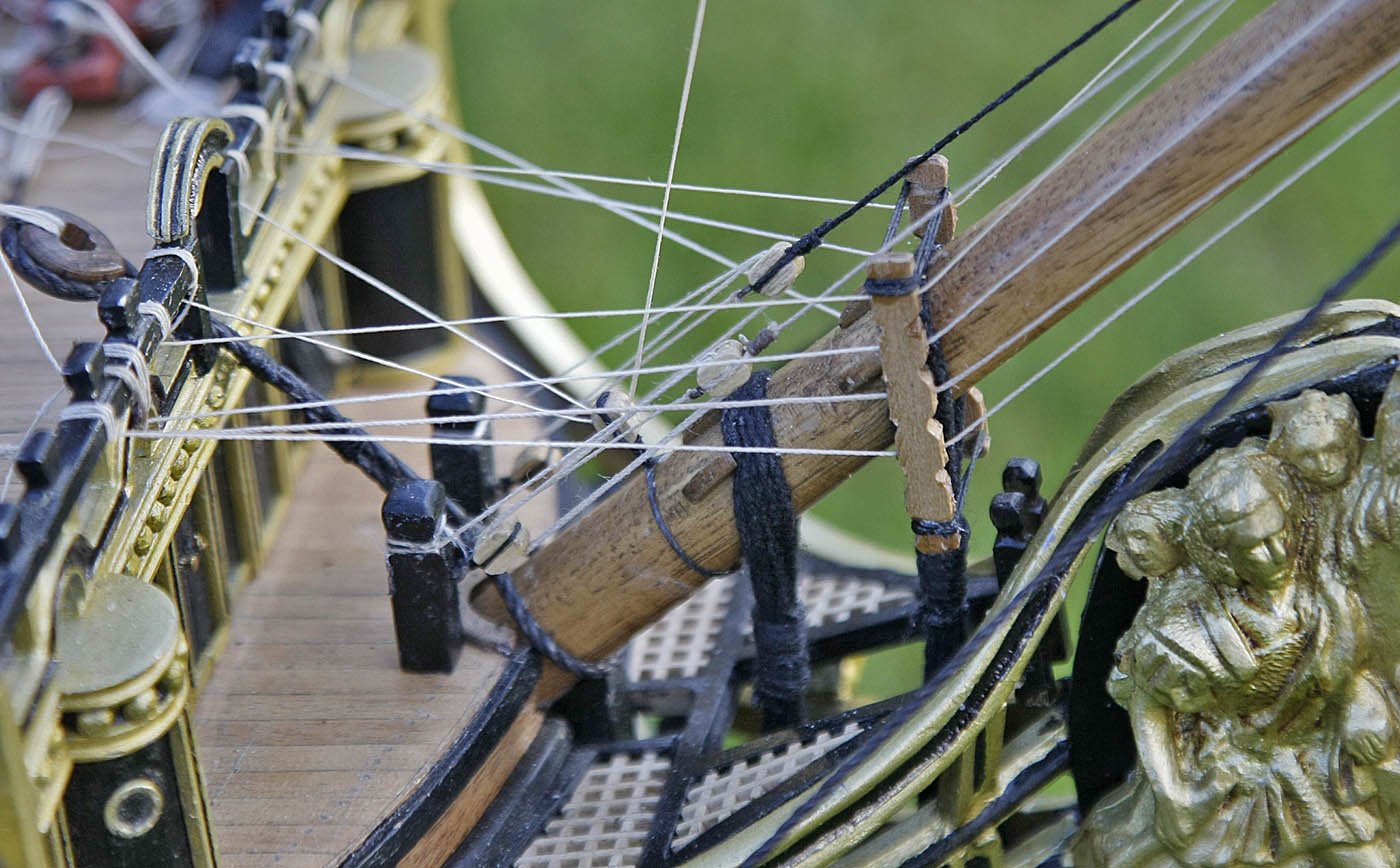
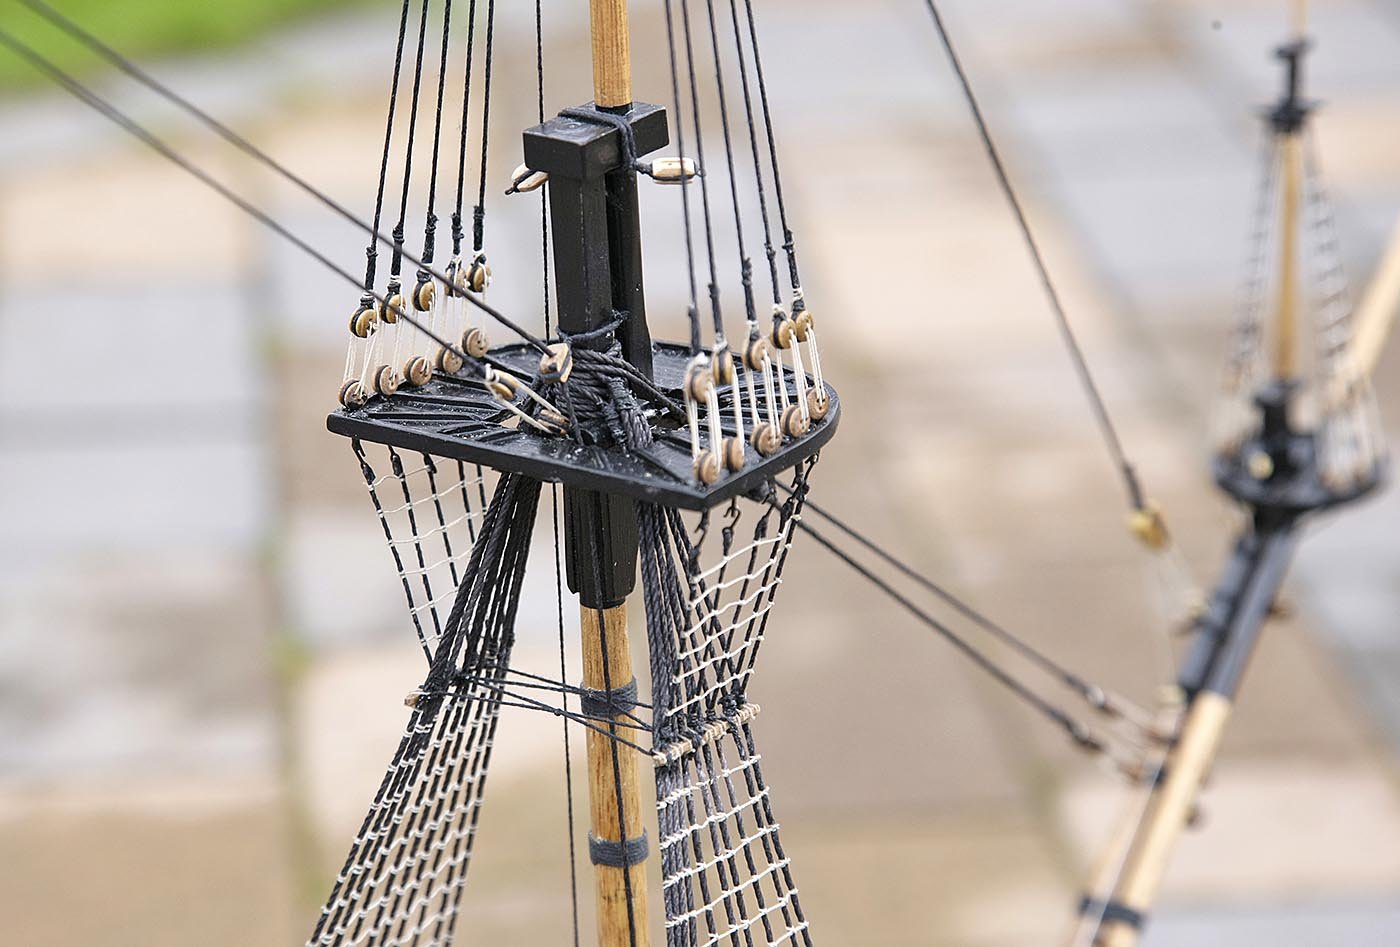
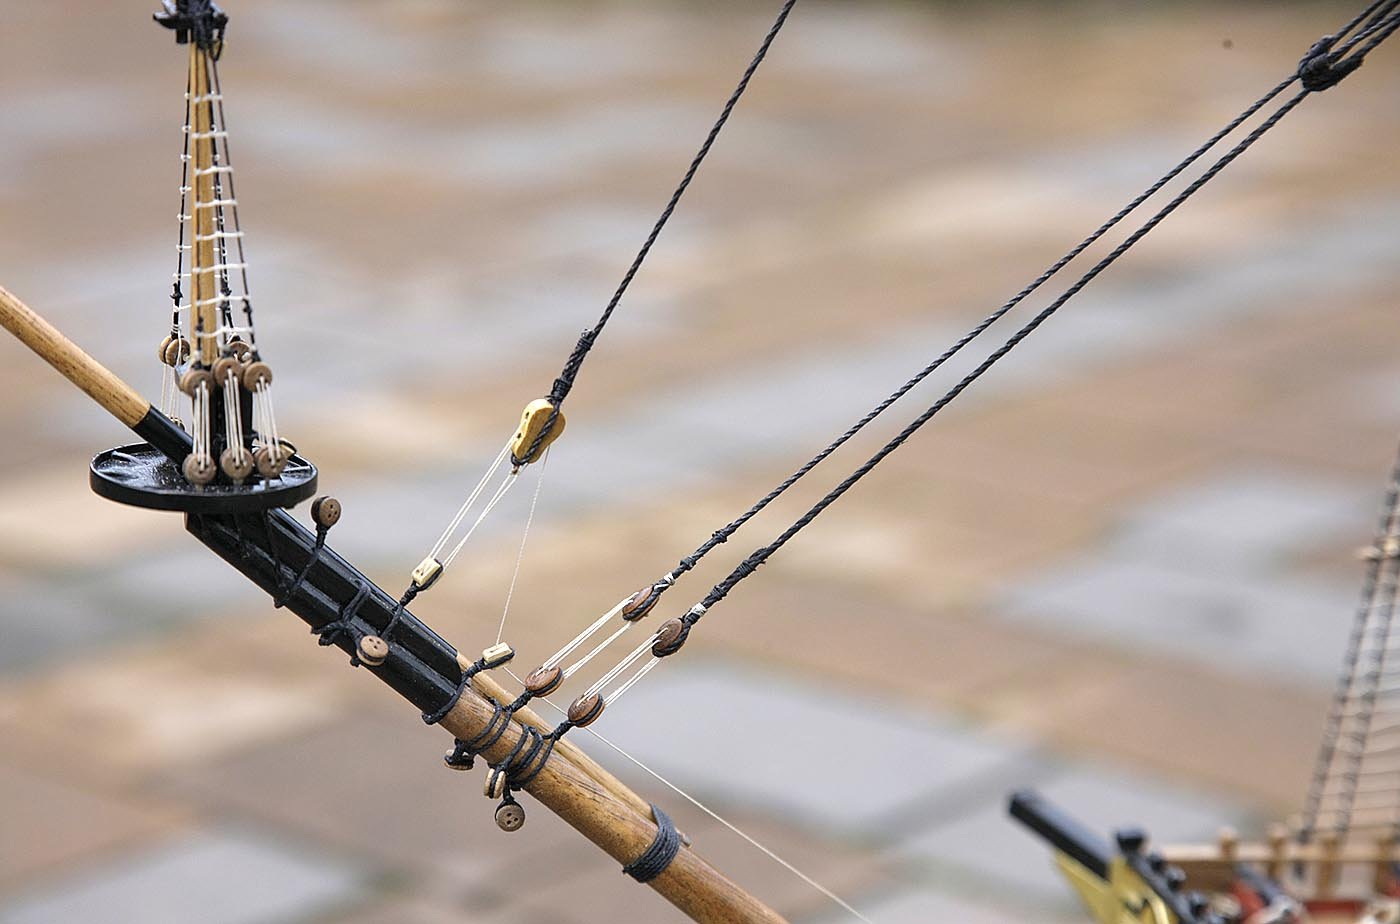
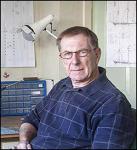
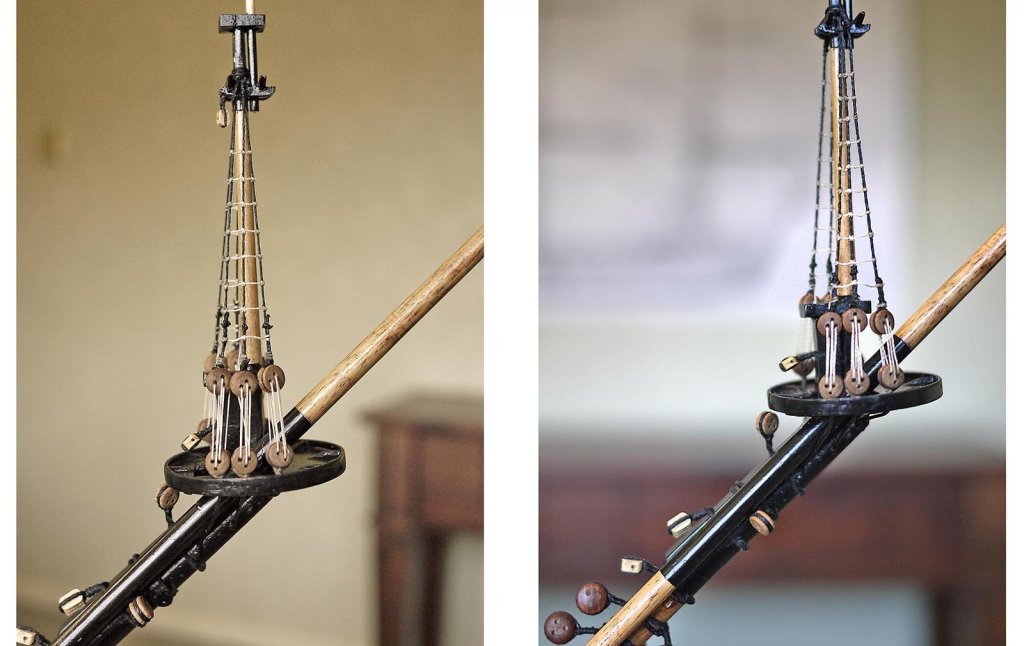
Hello Everyone, I think that I have now finished all the rigging relating to the bowsprit area. Just when I thought that the rigging plans couldn't get more confusing they did just that. As Mark mentioned the plan gets very crowded as there is so much in one area, then when you think you might have it worked out the lines disappear behind the sails which are also drawn in. I think that I could have deciphered the Da Vinci code more easily. It was only with the excellent pictures posted by Mark and the guidance given by Pete's very helpful interpretive notes that I was able to do this area with I hope some semblance to how it should be done. I have mentioned Pete's notes, for those that have made a Euromodel kit you will probably be aware of what I'm talking about, but for those who don't I'll explain as they are well worth looking at for many build solutions. If you visit the excellent Euromodel Como Italy, website on the homepage there is a link headed Manuals, when opened you can select your model. Royal William is there and when selected it gives you access to a whole selection of downloadable PDF files each one covering in great depth a part of the build. There are many hundreds of pages that explain and show how that section can be done. It shows different ways of doing the same piece to achieve as much detail as you want. There has been a lot of research gone into this and it draws from experience of actually building the model, it includes many pictures, methods and tips from other modellers many from MSW. This was all compiled by our very own Piratepete007, it is freely available to all and he should be applauded, it's well worth a visit you might learn something. Ken


-
Mounting Stand to the Hull
ken3335 replied to mikiek's topic in Building, Framing, Planking and plating a ships hull and deck
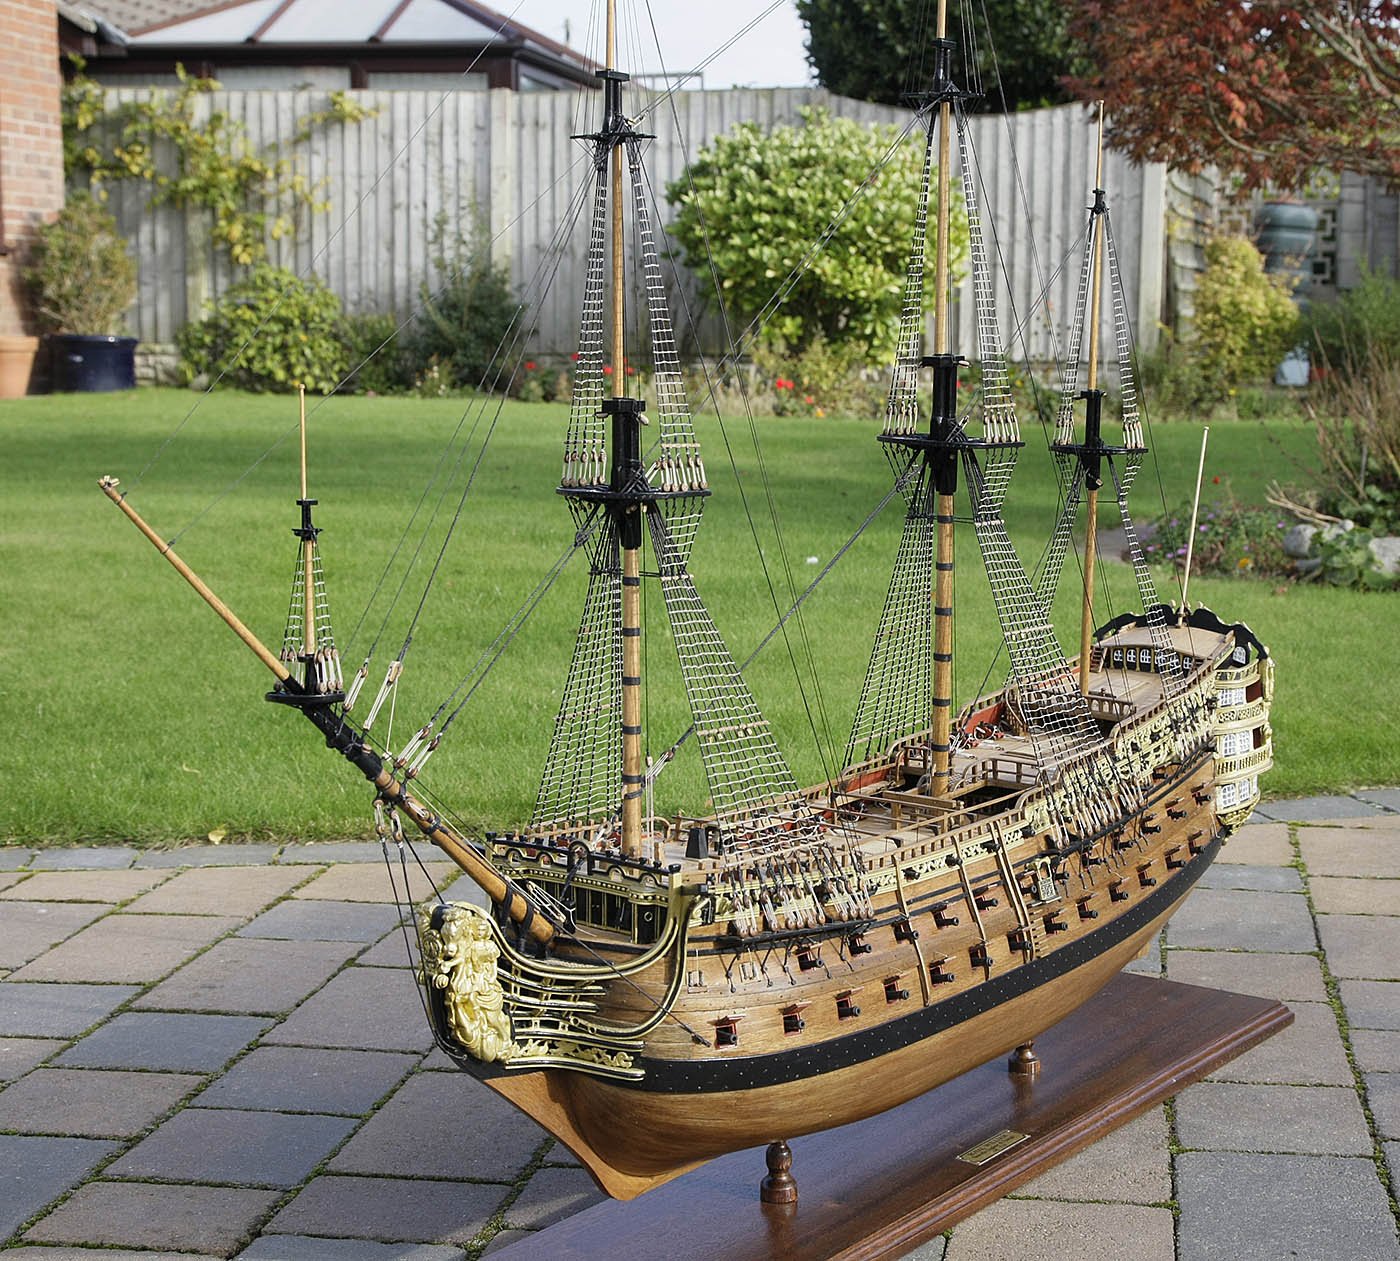
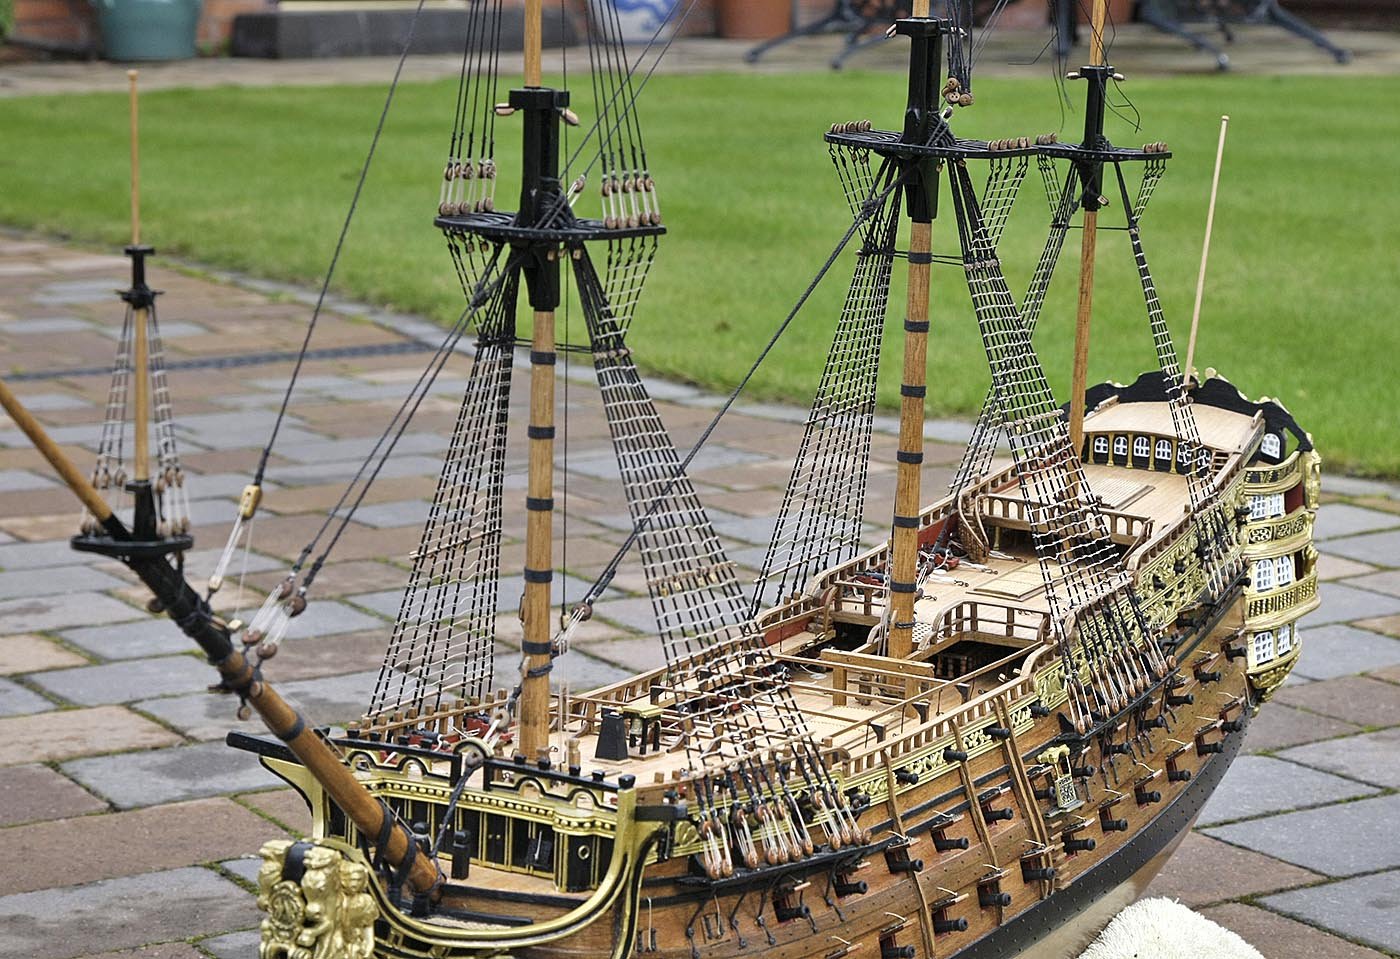
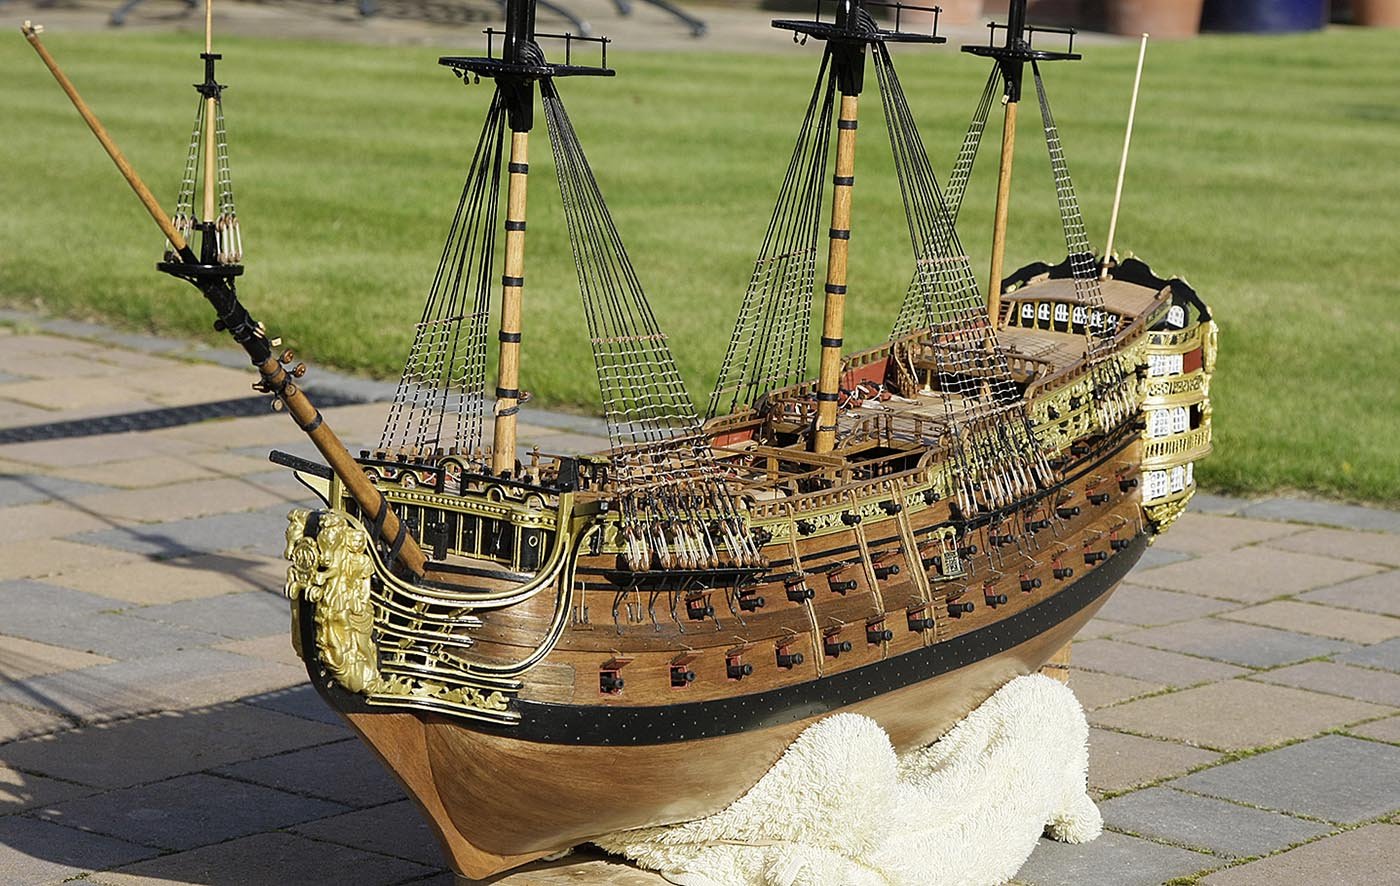
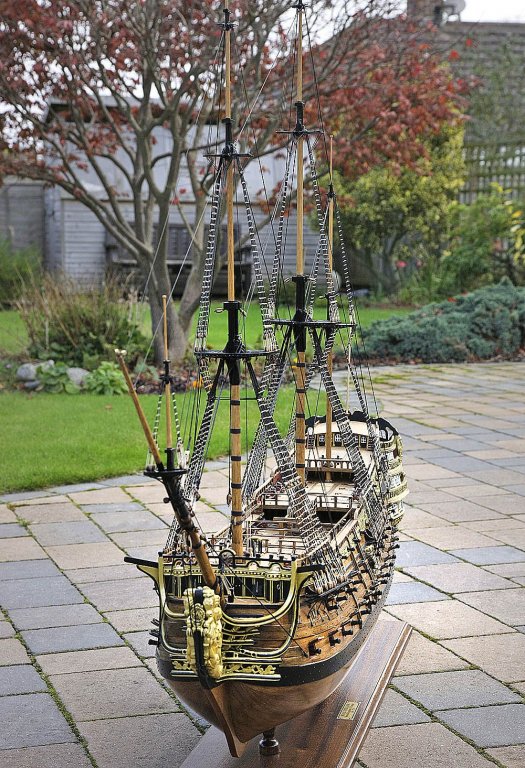
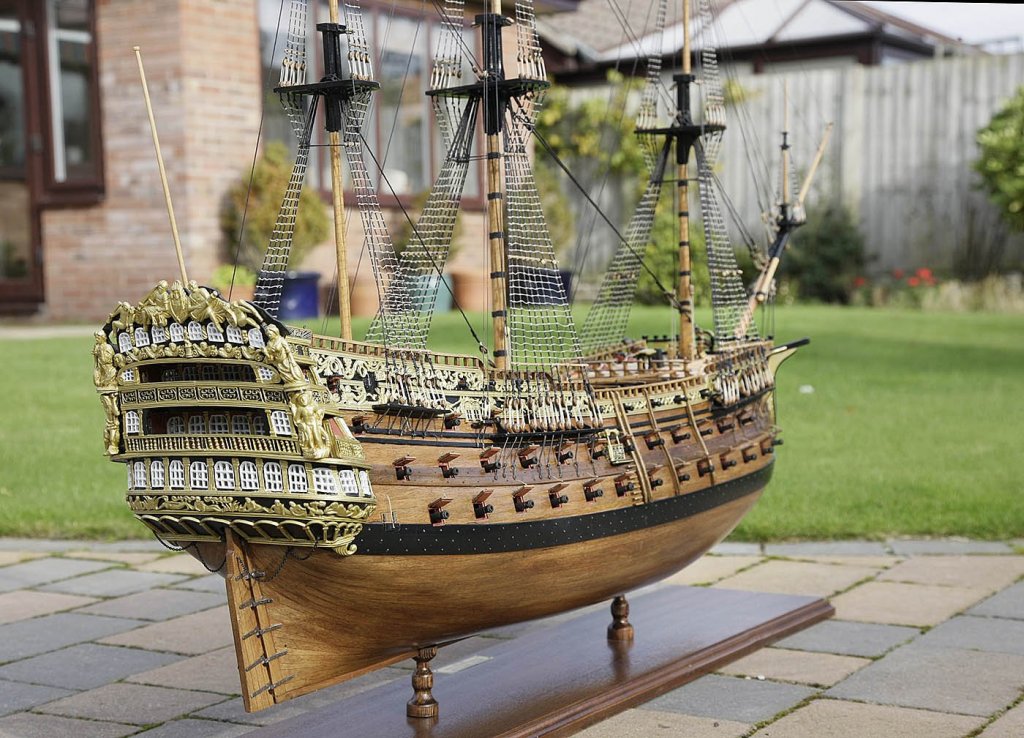
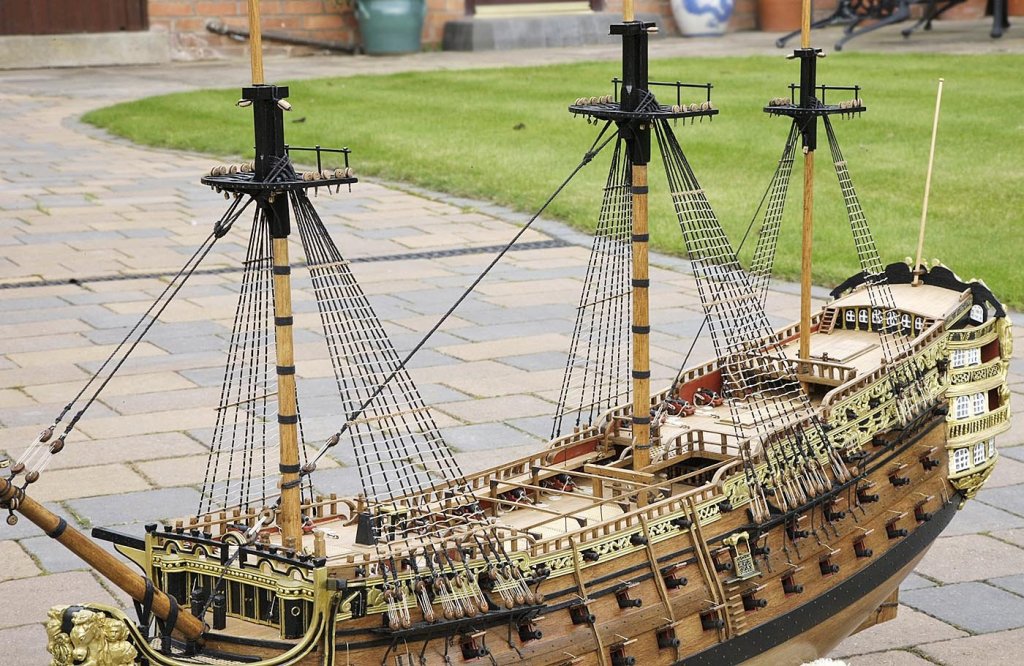
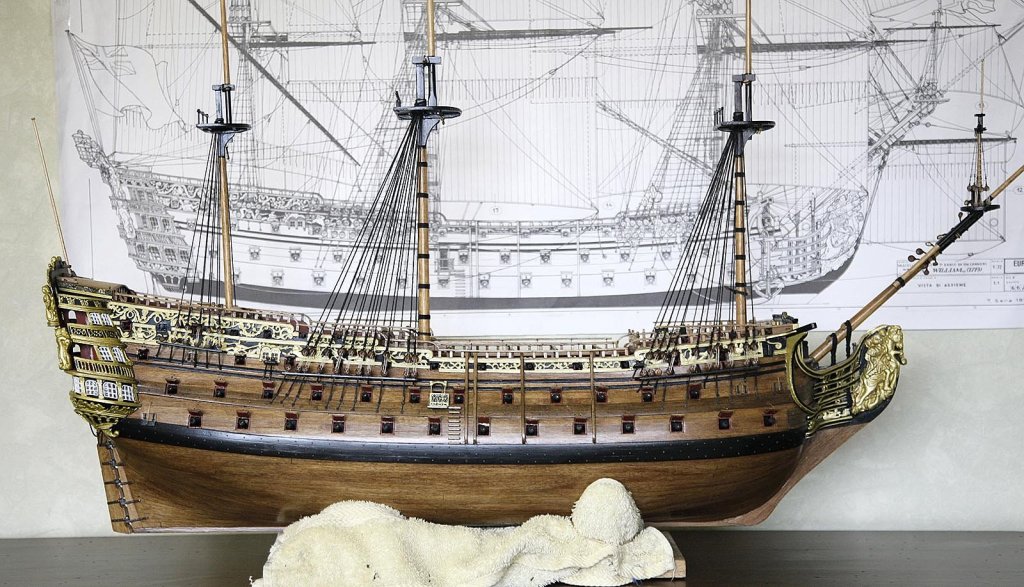
Hi Mike, I've shown a few pictures of how I mounted my Royal William, I think that they are self explanatory. Like yourself the stand was a very late addition. The Royal William is a very heavy model and this stand has proved to be very strong and stable, it is also quite easy to lift off. Ken

-
Hi,, Thanks Mark and Michael, for your comments, they're very welcome. No I'm not going to do any sails, even the thought terrifies me, I want to finish this build with some sanity left, which at the moment is a close run thing and with enough enthusiasm remaining to start a new project.. Ken
-
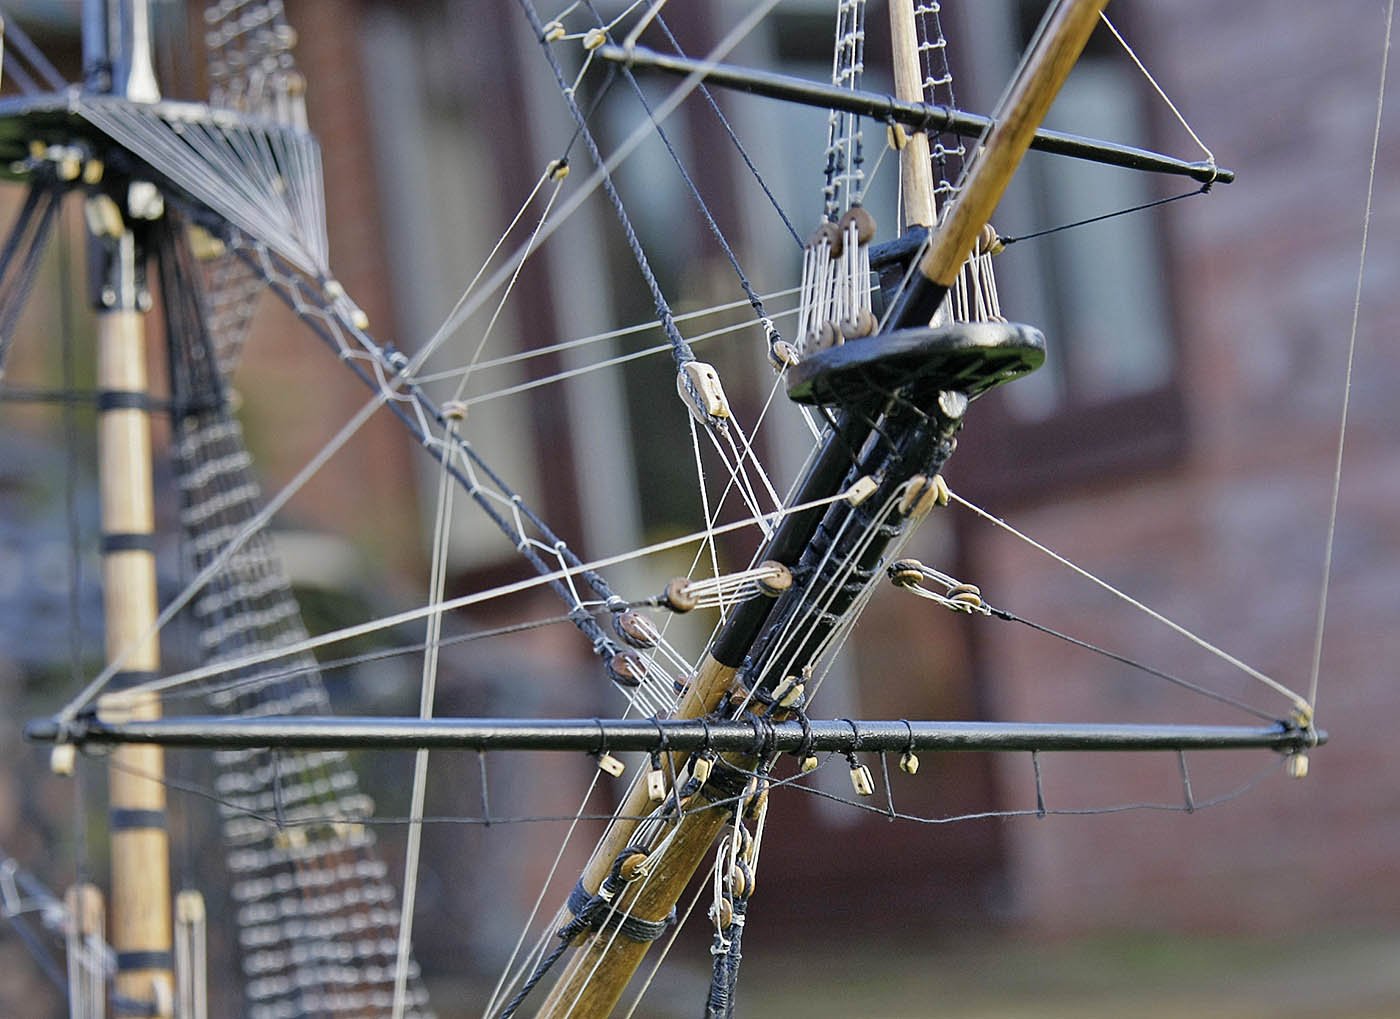
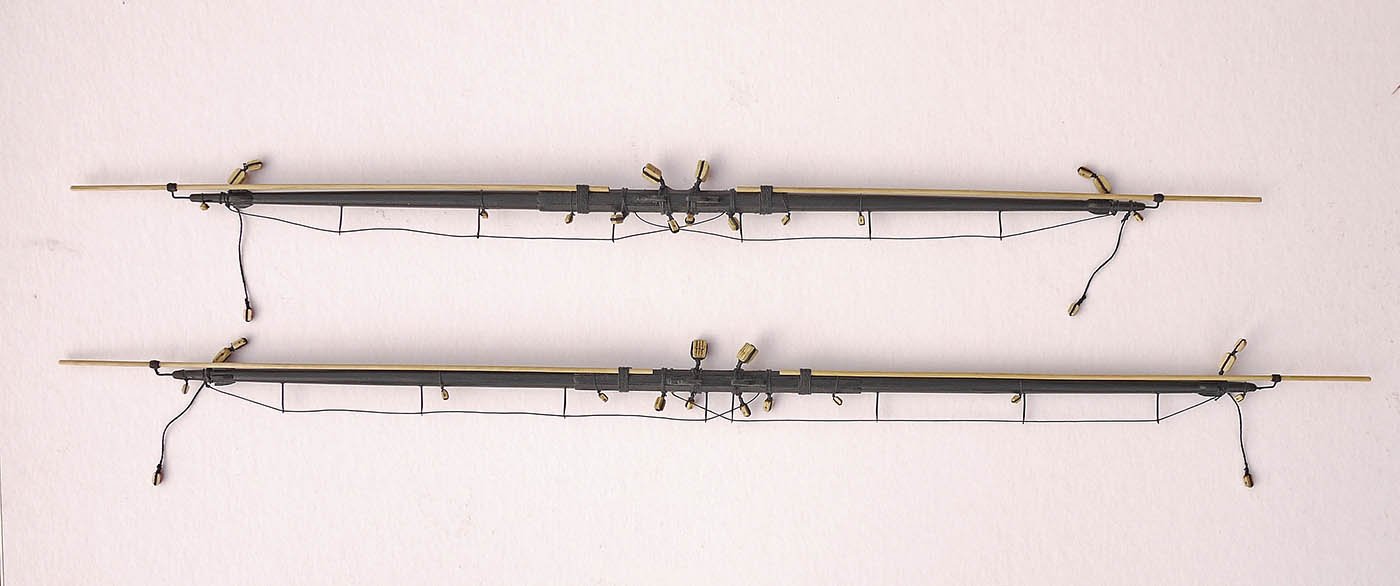
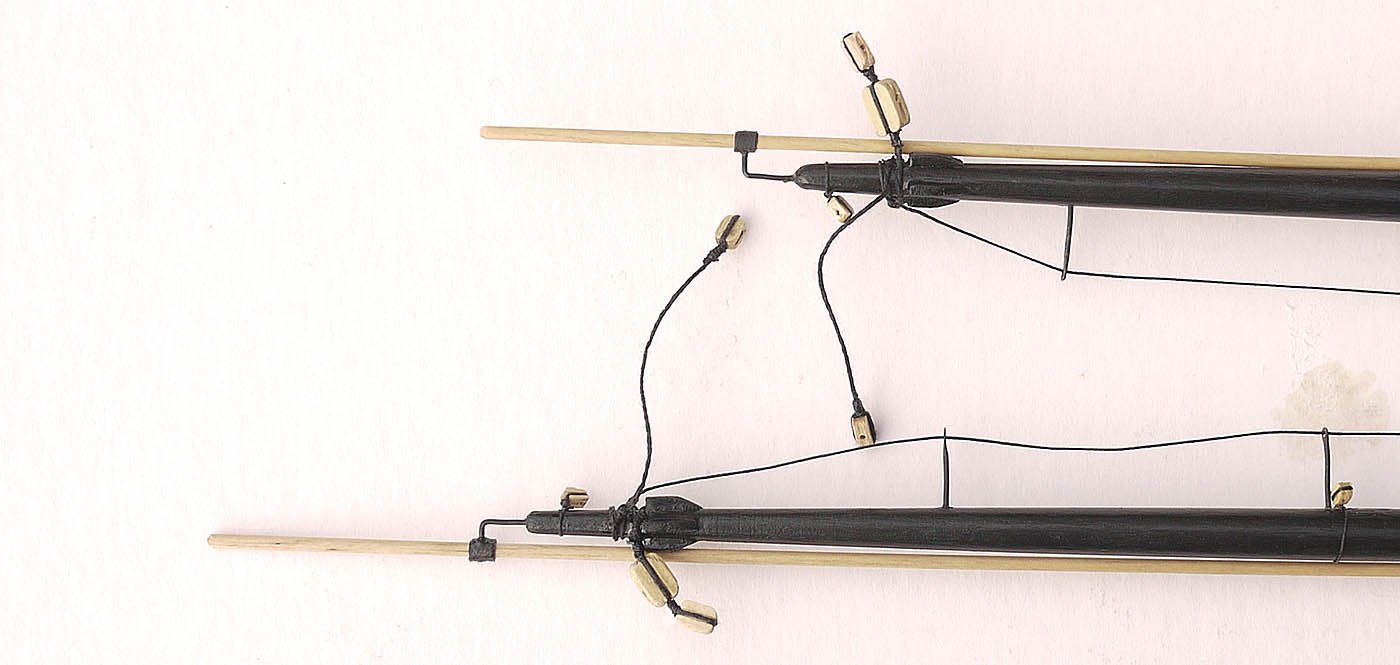
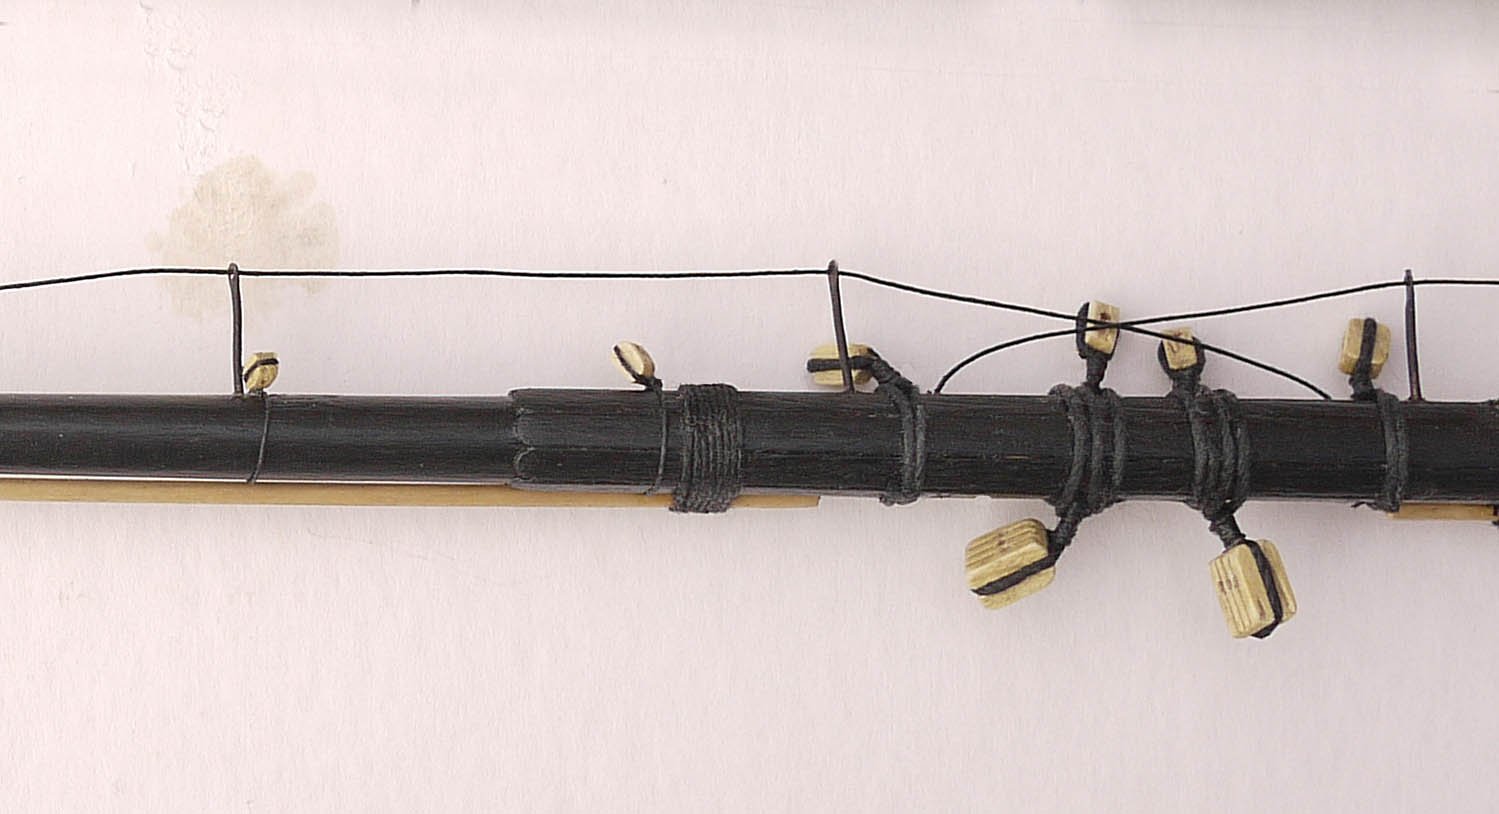
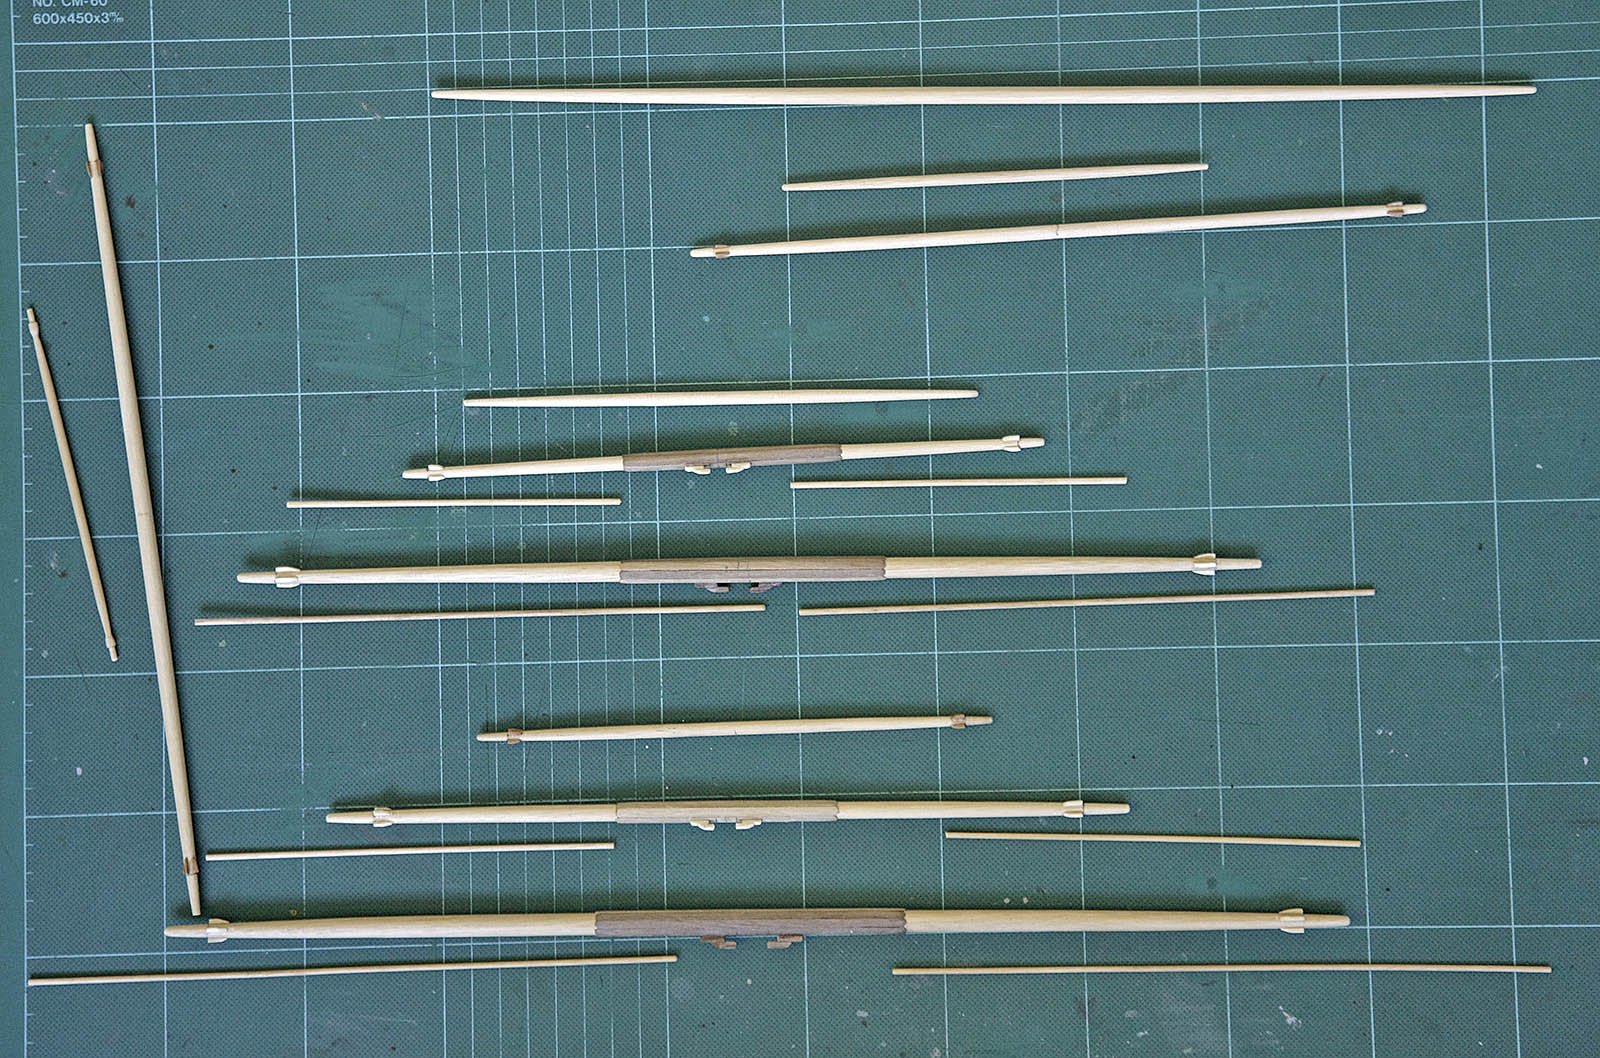
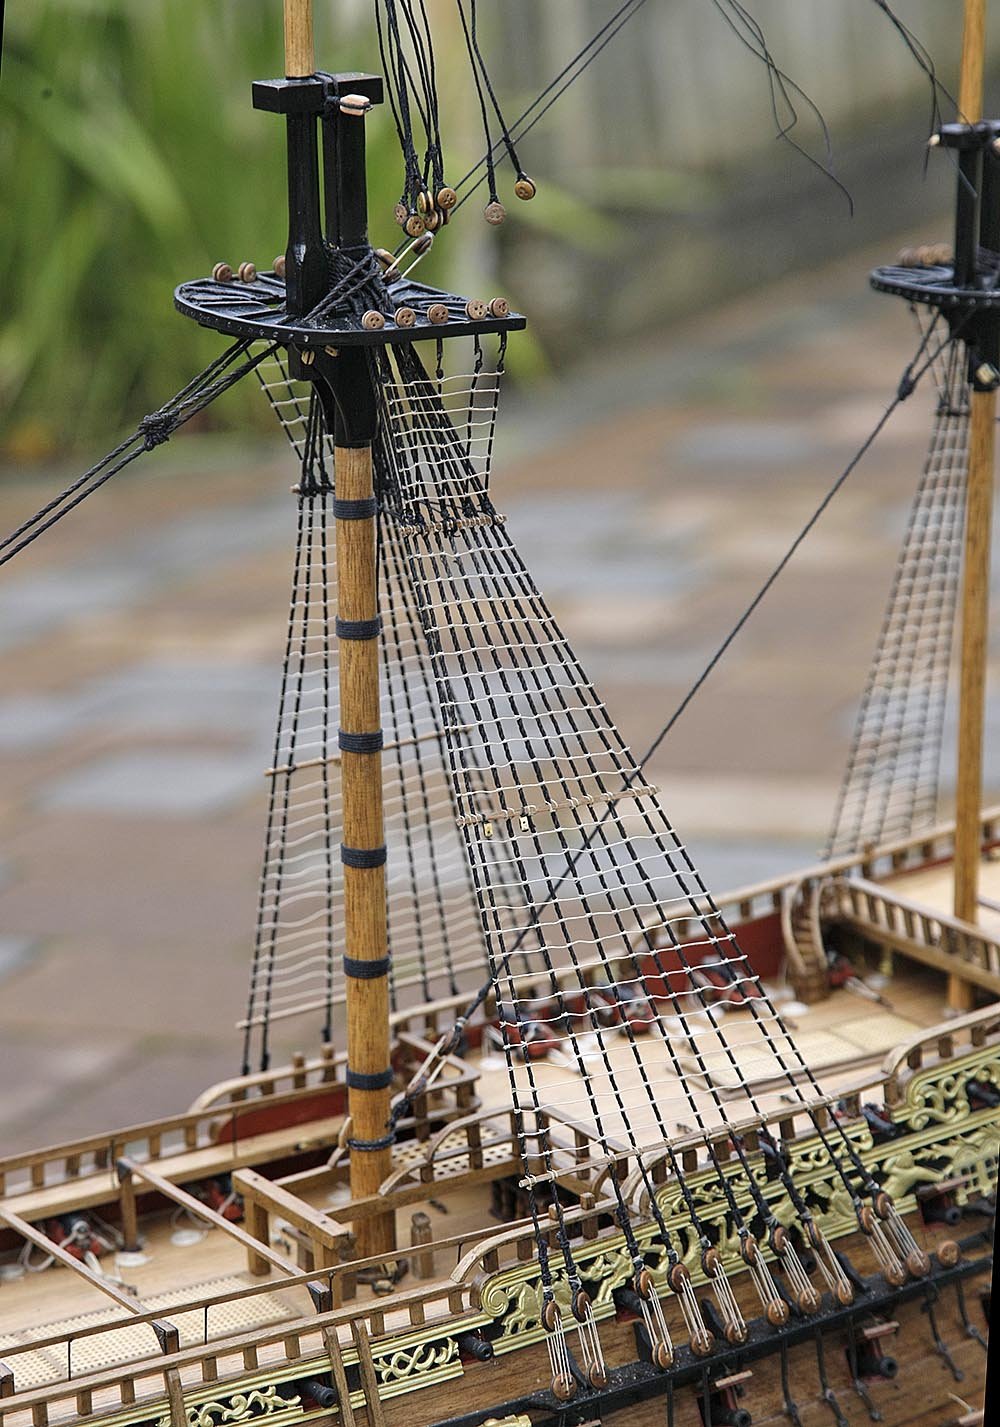
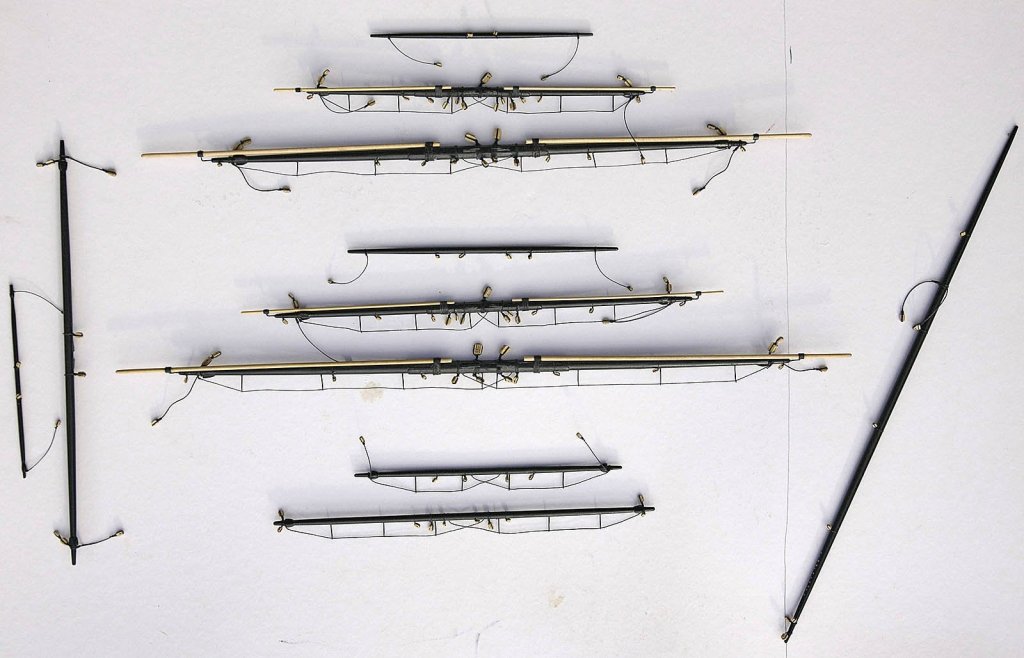
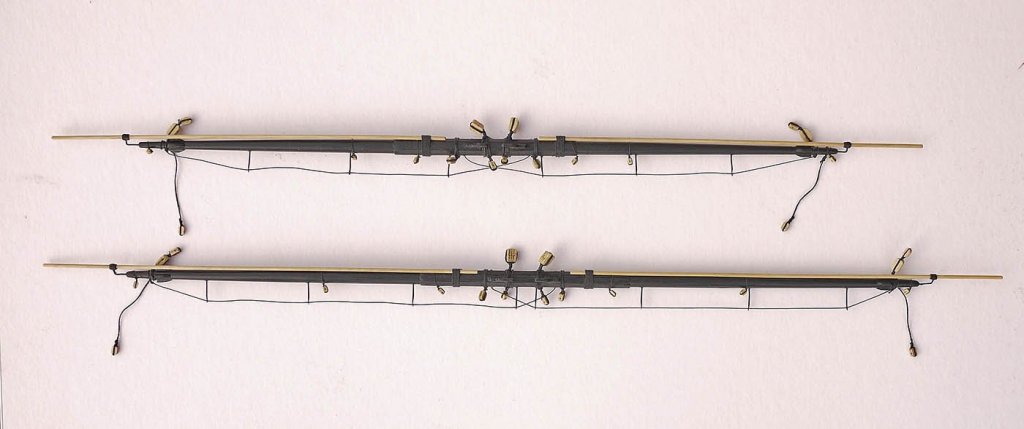
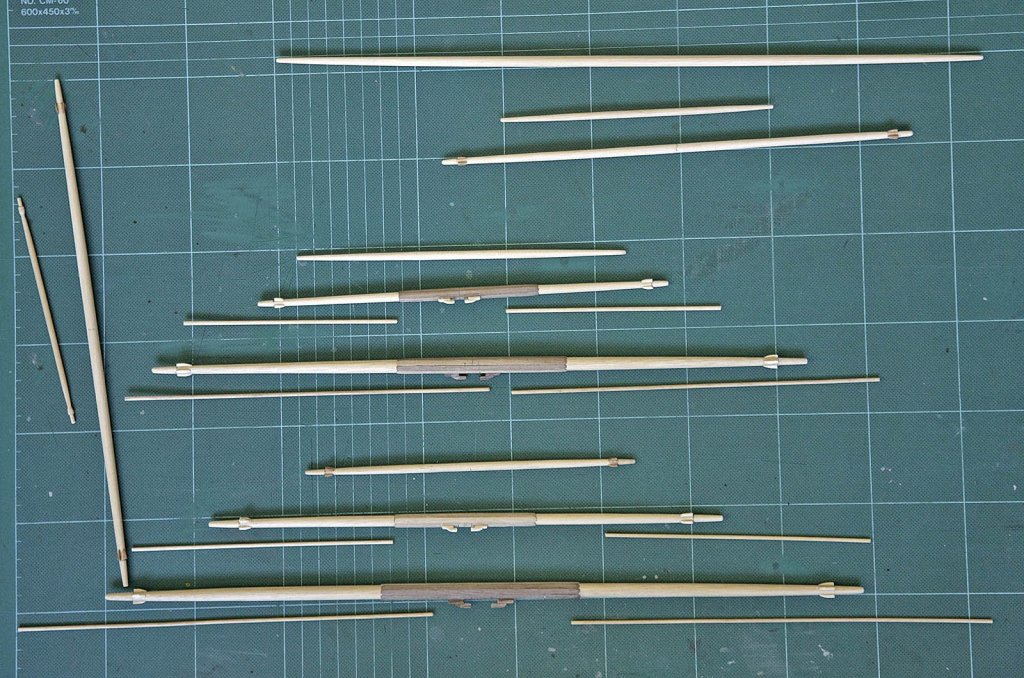
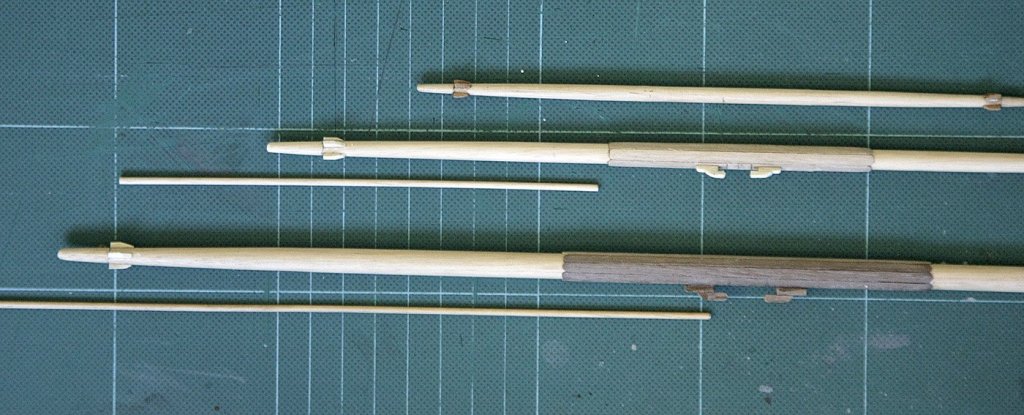
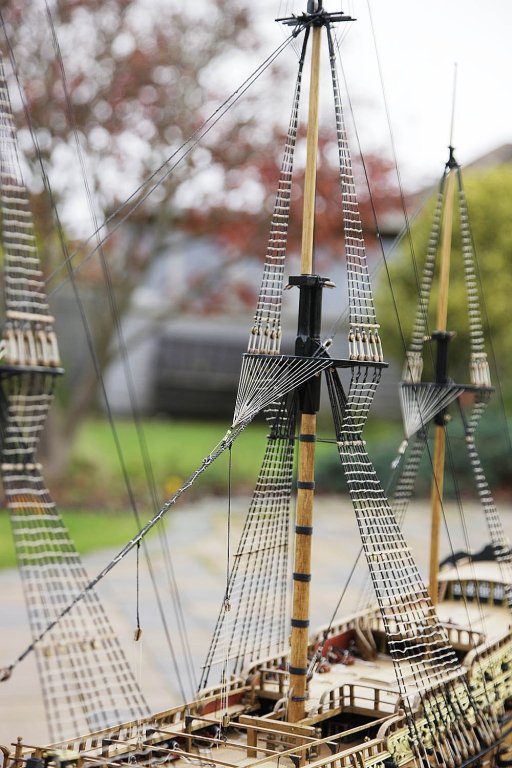
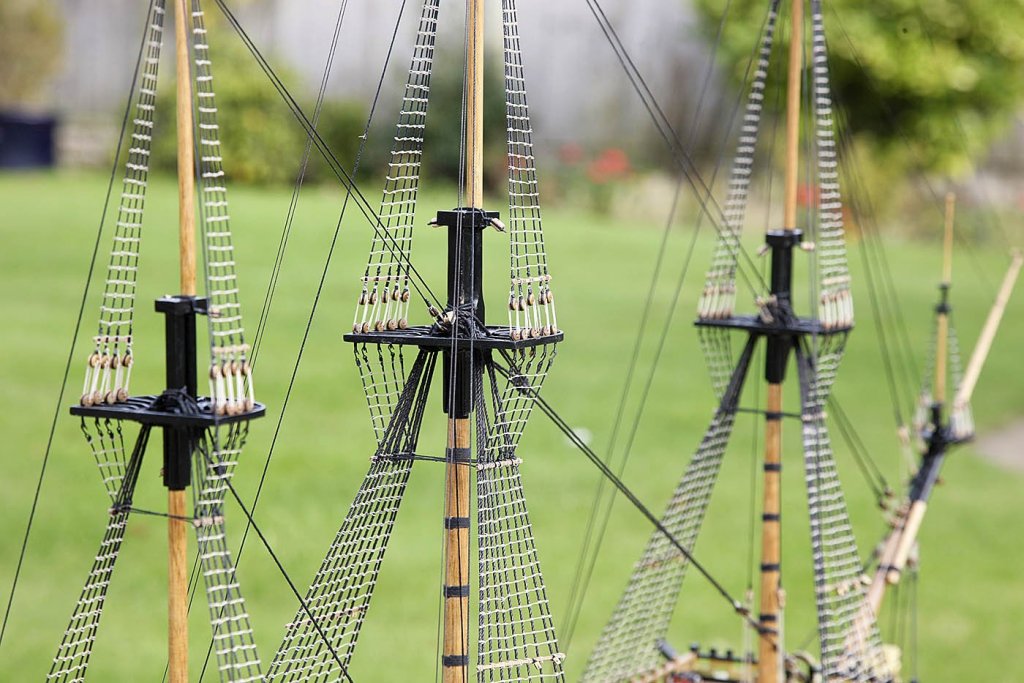
Hello Everyone, All the spars have now been made and the necessary blocks attached and are ready to mount. I took on board Mark's comment about the yard arms being vulnerable to getting knocked and breaking and gave mine some thought. The arms are only 2mm diameter so aren't very strong, mine also have holes drilled near the ends for the irons weakening them even more. I could be careful whilst rigging but when its finished and on display, getting moved or being cleaned these WILL get broken off so I decided to make them stronger. It's the lower arms that stick out quite a way that are vulnerable. These arms are the same diameter as they are on the upper ones, thinking that they would look ok a little thicker I looked to see what other similar models had. I saw that Caldercrafts Victory had 2mm for the upper arms but 3mm for the fore and main lower yard arms, Caldercraft have a reputation for accuracy so I decided that it would also be about right for RW. Once fitted they look right, more in proportion and I'm happier about them being stronger. The plans for the standing rigging I felt after using them were very good and fairly easy to follow, I wish that I could say the same for the running rigging. This is always going to be a difficult task for the less experienced but I feel that Euromodel has made it very confusing and much more difficult than it need be. The placing of all that is needed on the masts, spars and the rigging is shown on one sheet of plan for each mast which is a good idea, but on that sheet it includes not only the standard running rigging but the full set of sails and all their associated rigging. If that wasn't difficult enough to confuse you more it is illustrated by using the left of the plan as a view from the rear whilst the right side of the plan shows the view from the front. Both sides are showing a different make up, for example you can't see any of the blocks on the right side that are shown on the left side because the sails are being shown, you have to in your mind mirror image them, the same for the front view which shows a different set of blocks. All the correct info is there but you need to be extremely careful in using it, I found myself making so many mistakes that I was getting annoyed and that doesn't happen often. I feel better now having got that off my chest! Ken
-
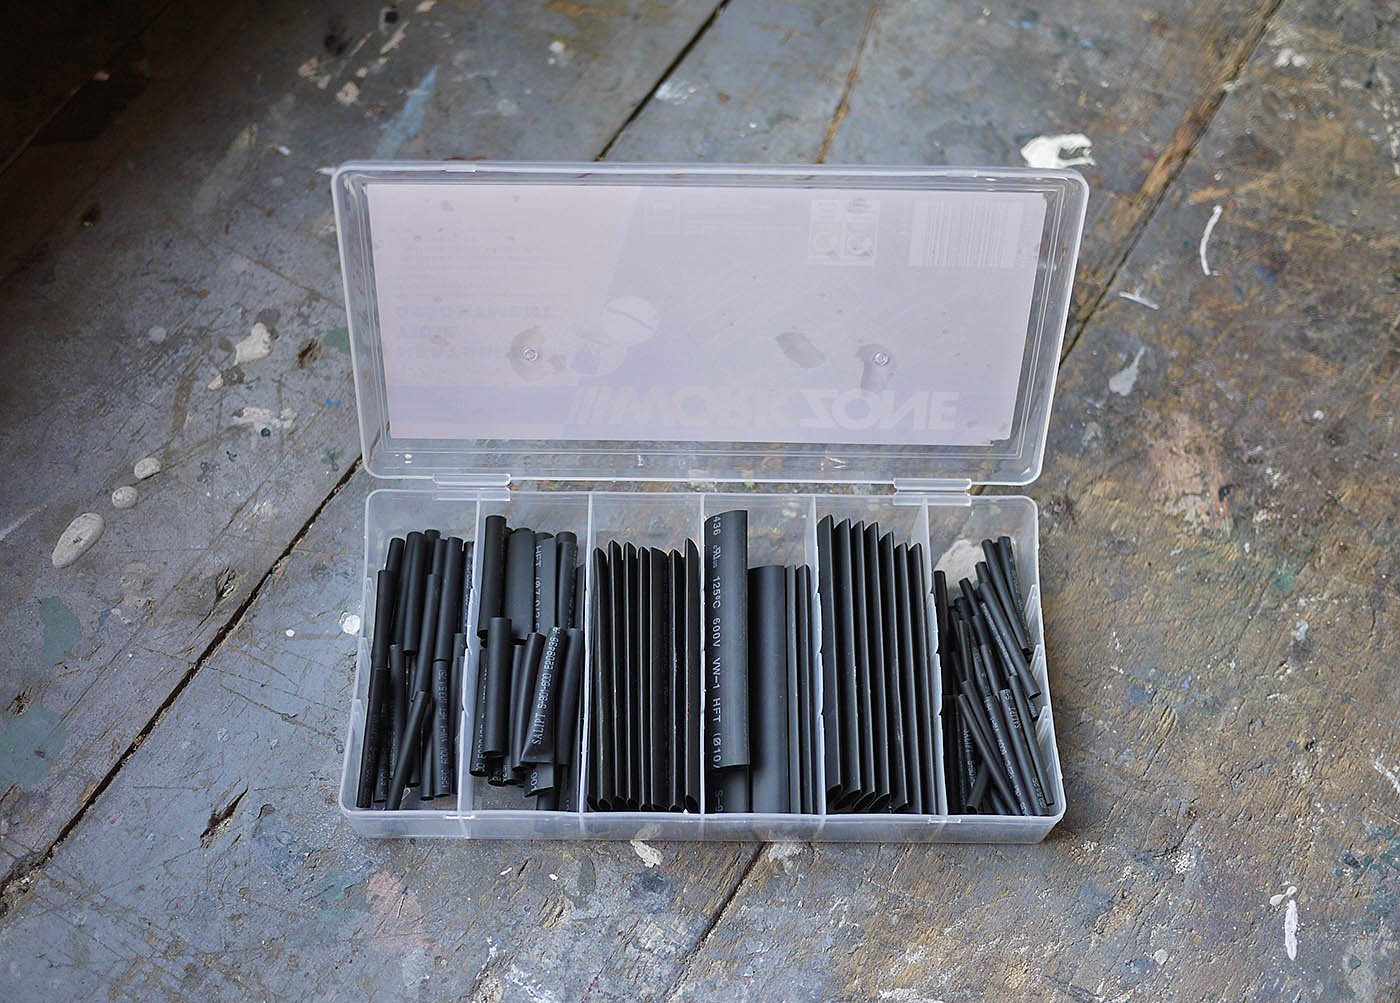
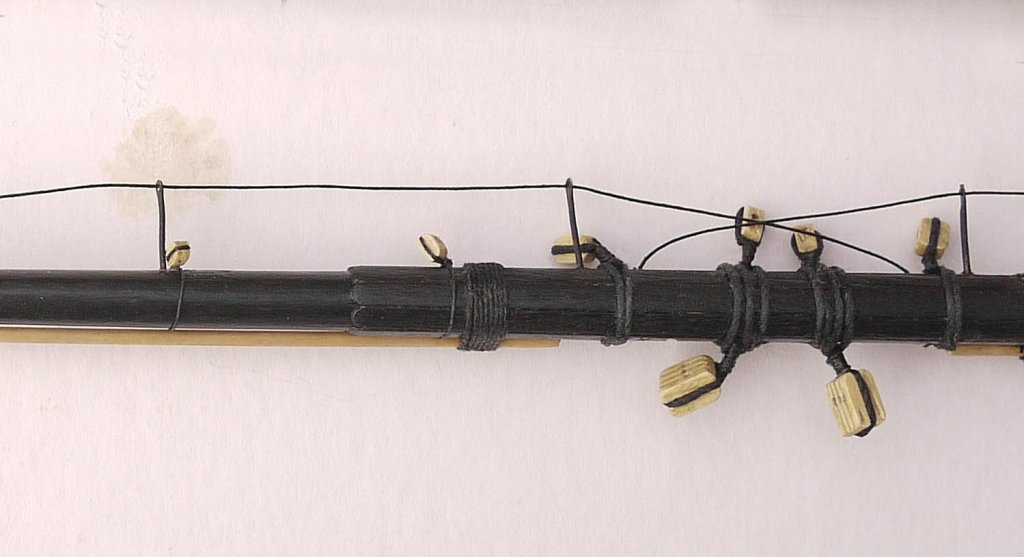
Hi Dilbert, No, I don't mind at all you asking what my working background was. I wish that I could tell you that I was a rocket scientist then you would be able to say, " Ah yes that explains a lot." but alas no I was a police detective, so no clues there, ha ha. Inspiration comes to us all in different and unexpected ways, the heat shrink idea was a very recent one. I went with my wife to the supermarket, I'm not very interested in food shopping so once inside I wandered off to the small hardware section that they have just for a browse, they had on offer boxed selections of nails, screws and all manner of small items at £2 each, one of which was a selection of different sized heat shrink tubing, I thought that the partitioned box alone was worth the £2 and I thought that they would be ideal to use for the metal bands around ships masts. When I first made up the yard arms I tried using thin strips of black card as the irons but as they were only 2mm diameter I couldn't get it to wrap around and stick down it was then that I remembered that I had the tubing and that I could try the smaller ones for the bands, hey presto! it worked. I now think that they will probably work as the metal bands on the anchors as well. Not all of my ideas work, most don't but you don't get to see those. Ken

-
Hi Kier, Thanks for taking an interest in my build. The finish that I use is my personal preference, one that I have arrived at after trial and error. I always use a sanding sealer on every piece of finished wood, it soaks in, toughens the surface a little, it seals the grain, gives better edge definition and after a light sand you don't get those fine fibres that give a slightly rough surface finish. It's the poly varnish that gives the surface texture that you want, matt, satin or gloss. I find that I only need one coat of varnish rather than at least two if I don't use sealer and I think that it's absolutely needed if you are going to paint and want a smooth finish. If you are going to use stain then you must put it on prior to sealing as after it won't penetrate the wood. I use a cellulous type of sealer as it dries very quickly and is ready to sand in about 8-10 minutes. I hope that this is a help and answers your question. Ken
-
Hi Mark, For me it was the other way round, I considered first using cord for the footropes, I saw how you did yours and the amount of fiddly work that was involved, it looked really good though but I thought better of it. I'm afraid it's usually the easiest options for me each time. Ken
-
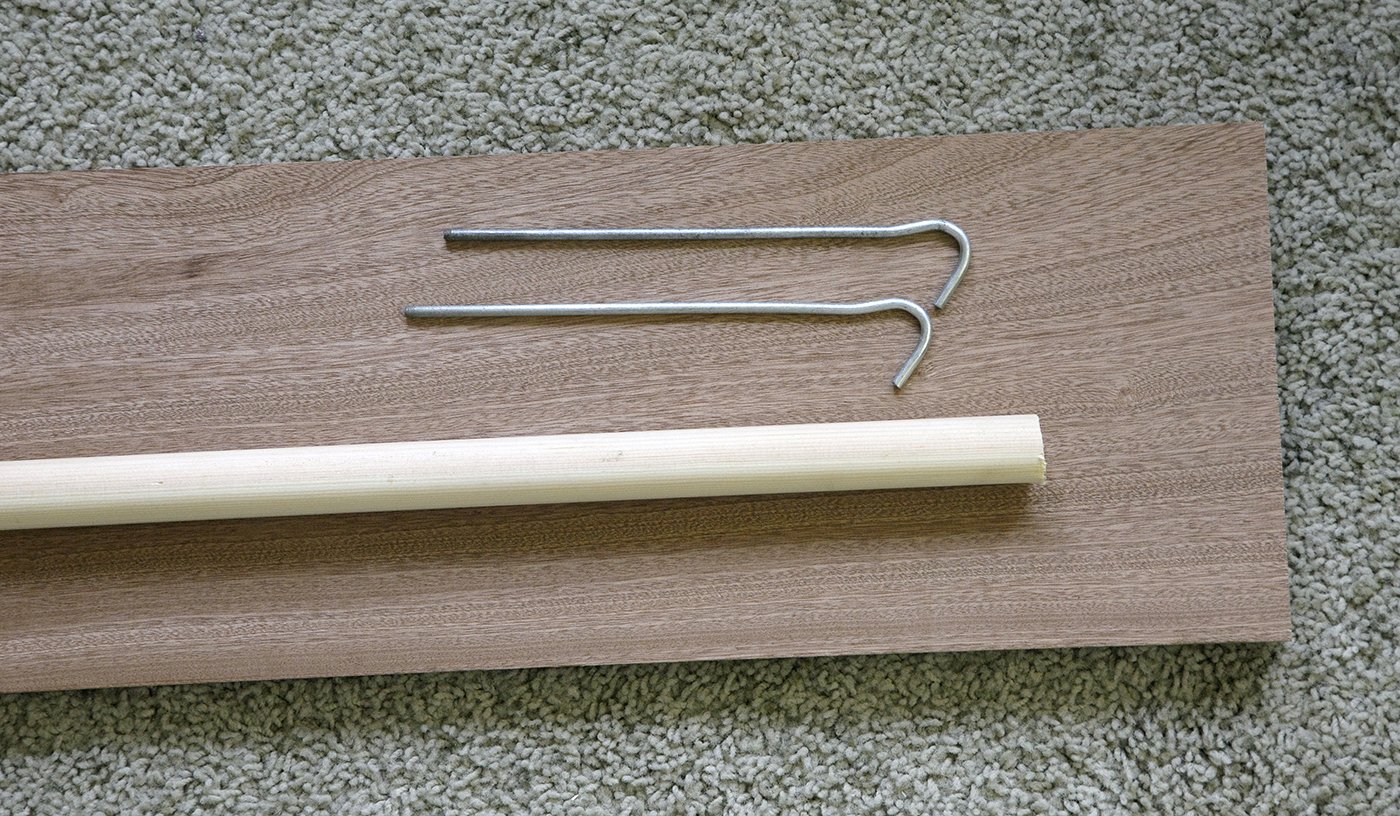
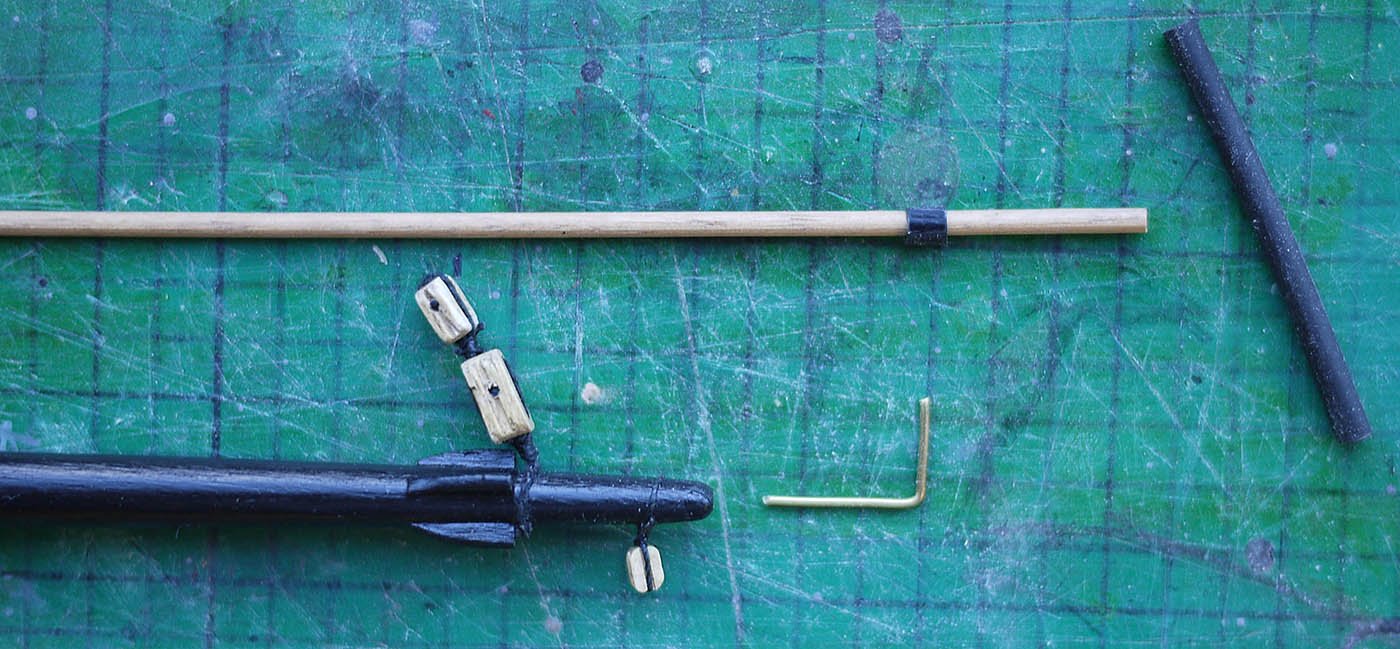
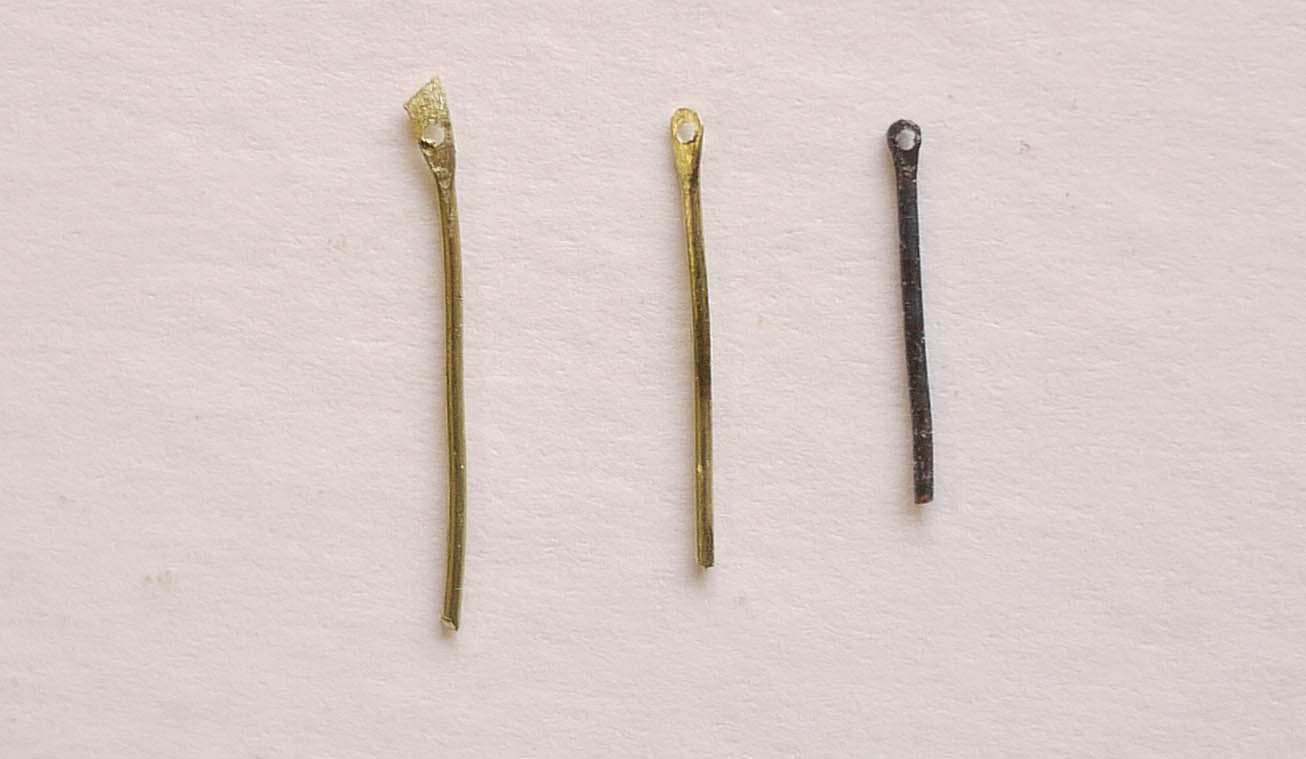
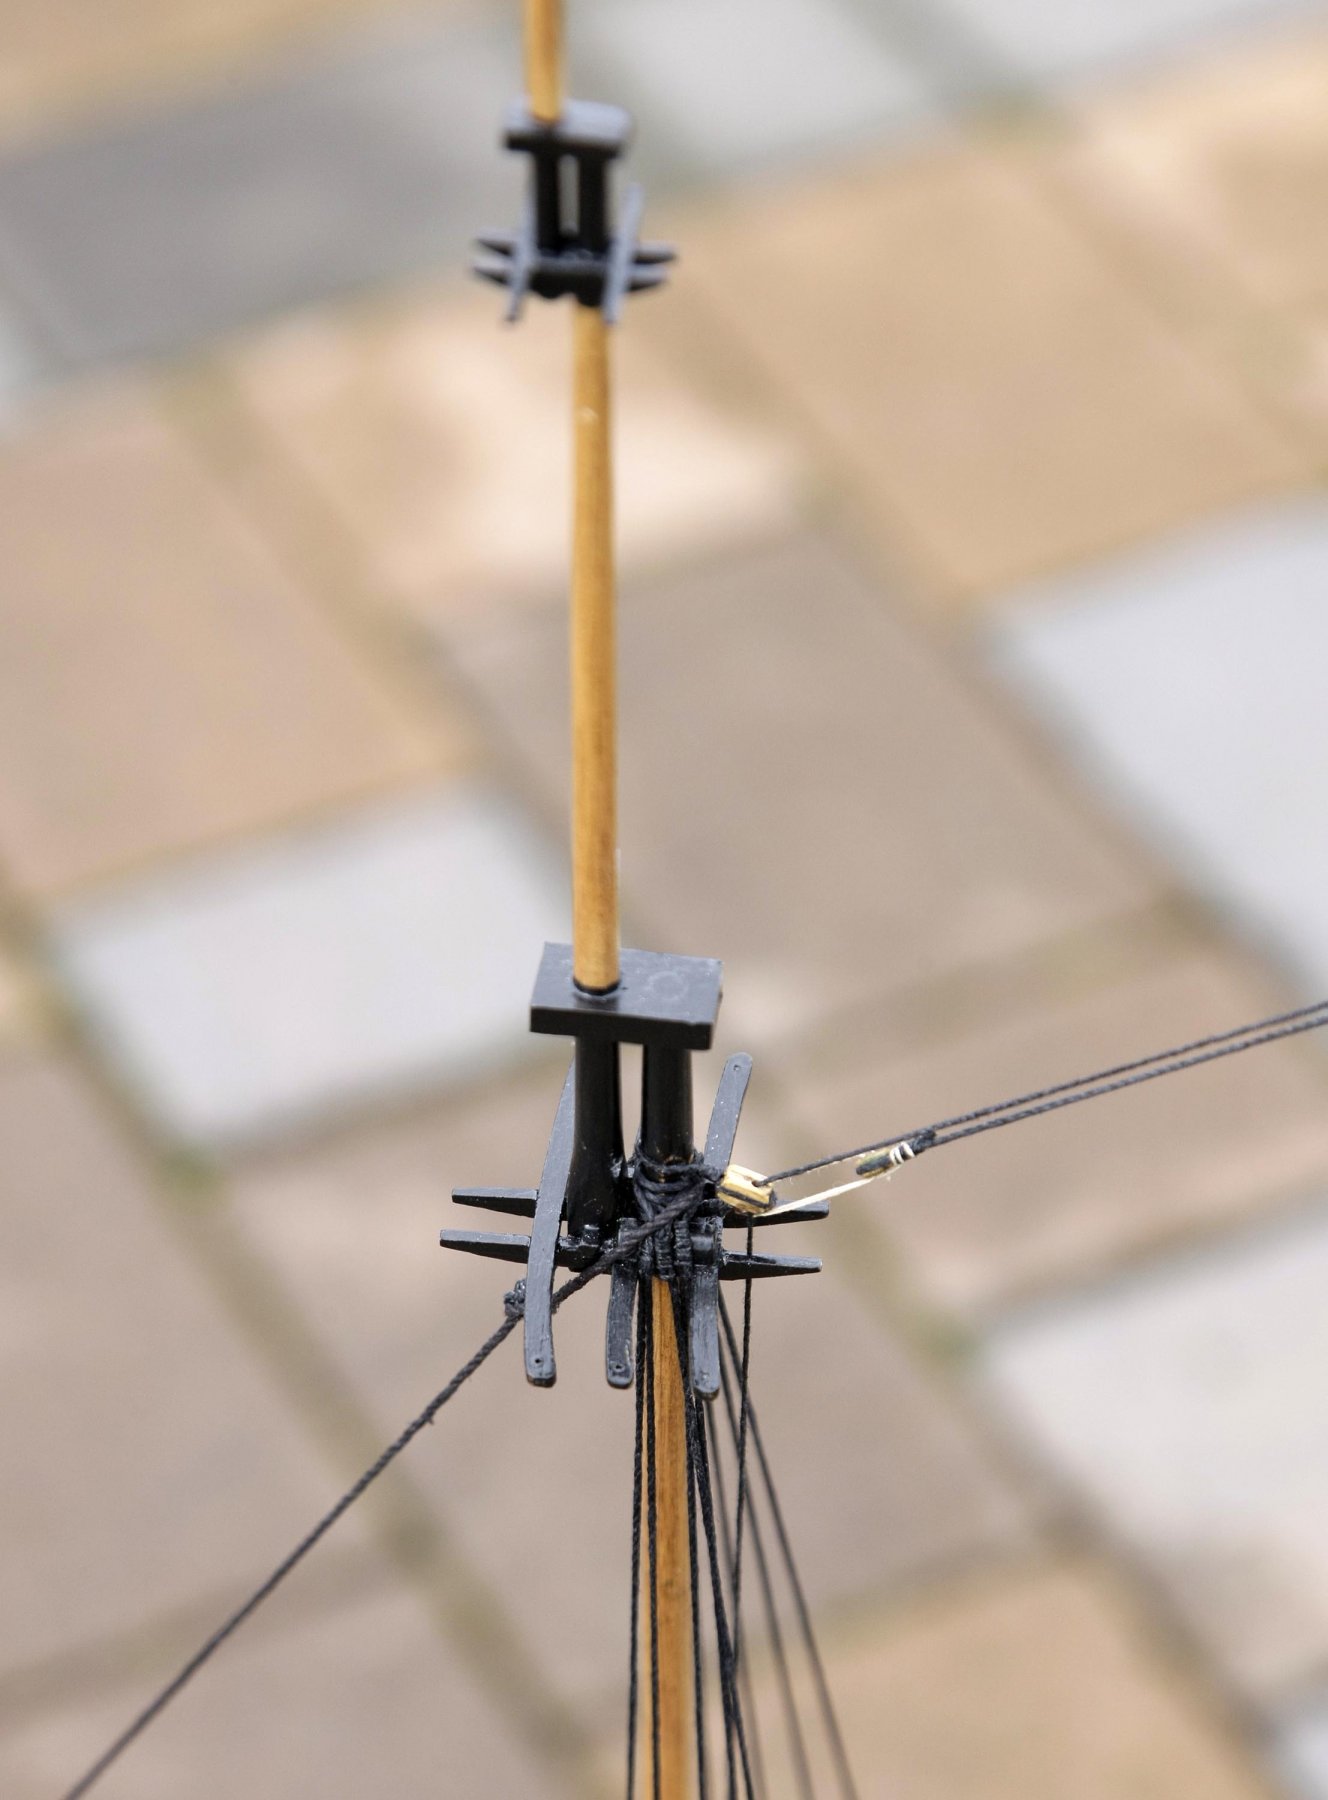
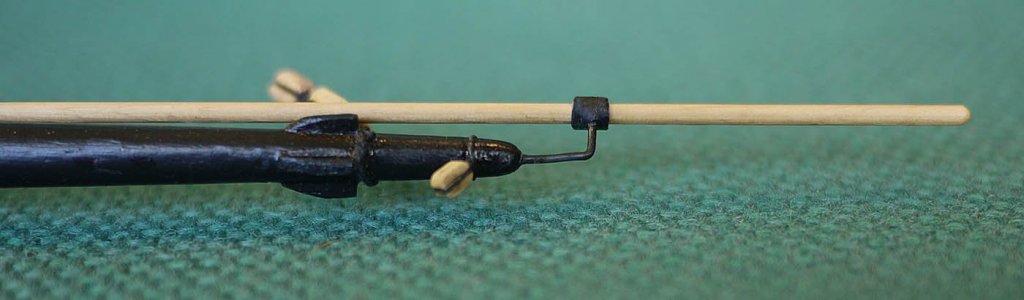
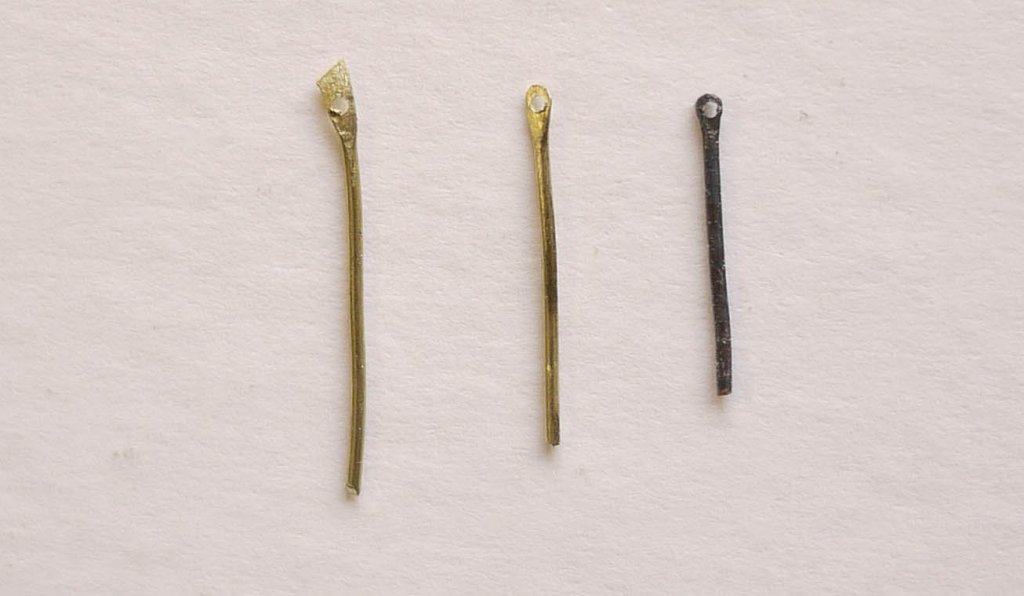
Hello Everyone, Once again thanks for your likes and thanks to Mark and Zappto for putting in a reply. I think I'll start from the top, the yardarms are only 2mm diameter and I've already broken off one so the least time that they're on whilst working the better. I've now completed the main and fore lower yards with all their associated blocks and footropes. After some thought I came up with my own simple method of making the irons that support the yardarms. I bent a piece of brass wire for the arm and used heat shrink tube for the hoops. I cut a small piece of tubing and heat shrinked it into place on the arm, it was quite thin so I put another one over the first, this gave a good thickness. I drilled a hole through it and passed the wire through, I drilled a hole in the end of the yard then slid the wire into it, I could move the wire in or out to get the correct size rod and I could move the yardarm up or down and rotate it until It was in the right position, a drop of cyno then fixed it in place. Lastly I trimmed the protruding wire and put a drop of matt paint over the end. Unless you knew how it had been made you would even after close examination think that it was a neatly made metal piece. For the foot rope supports I used pieces of brass wire, I flattened one end, drilled a hole through, filled it round then blackened them. They were easily made and fitted. I think that they look uniform and neat and you need to be fairly close to know that they aren't rope, that'll do for me. Ken


-
Hi, Could anyone tell me if there is a best sequence for mounting the yards, having regard to access and routing of the ropes. Ken
-
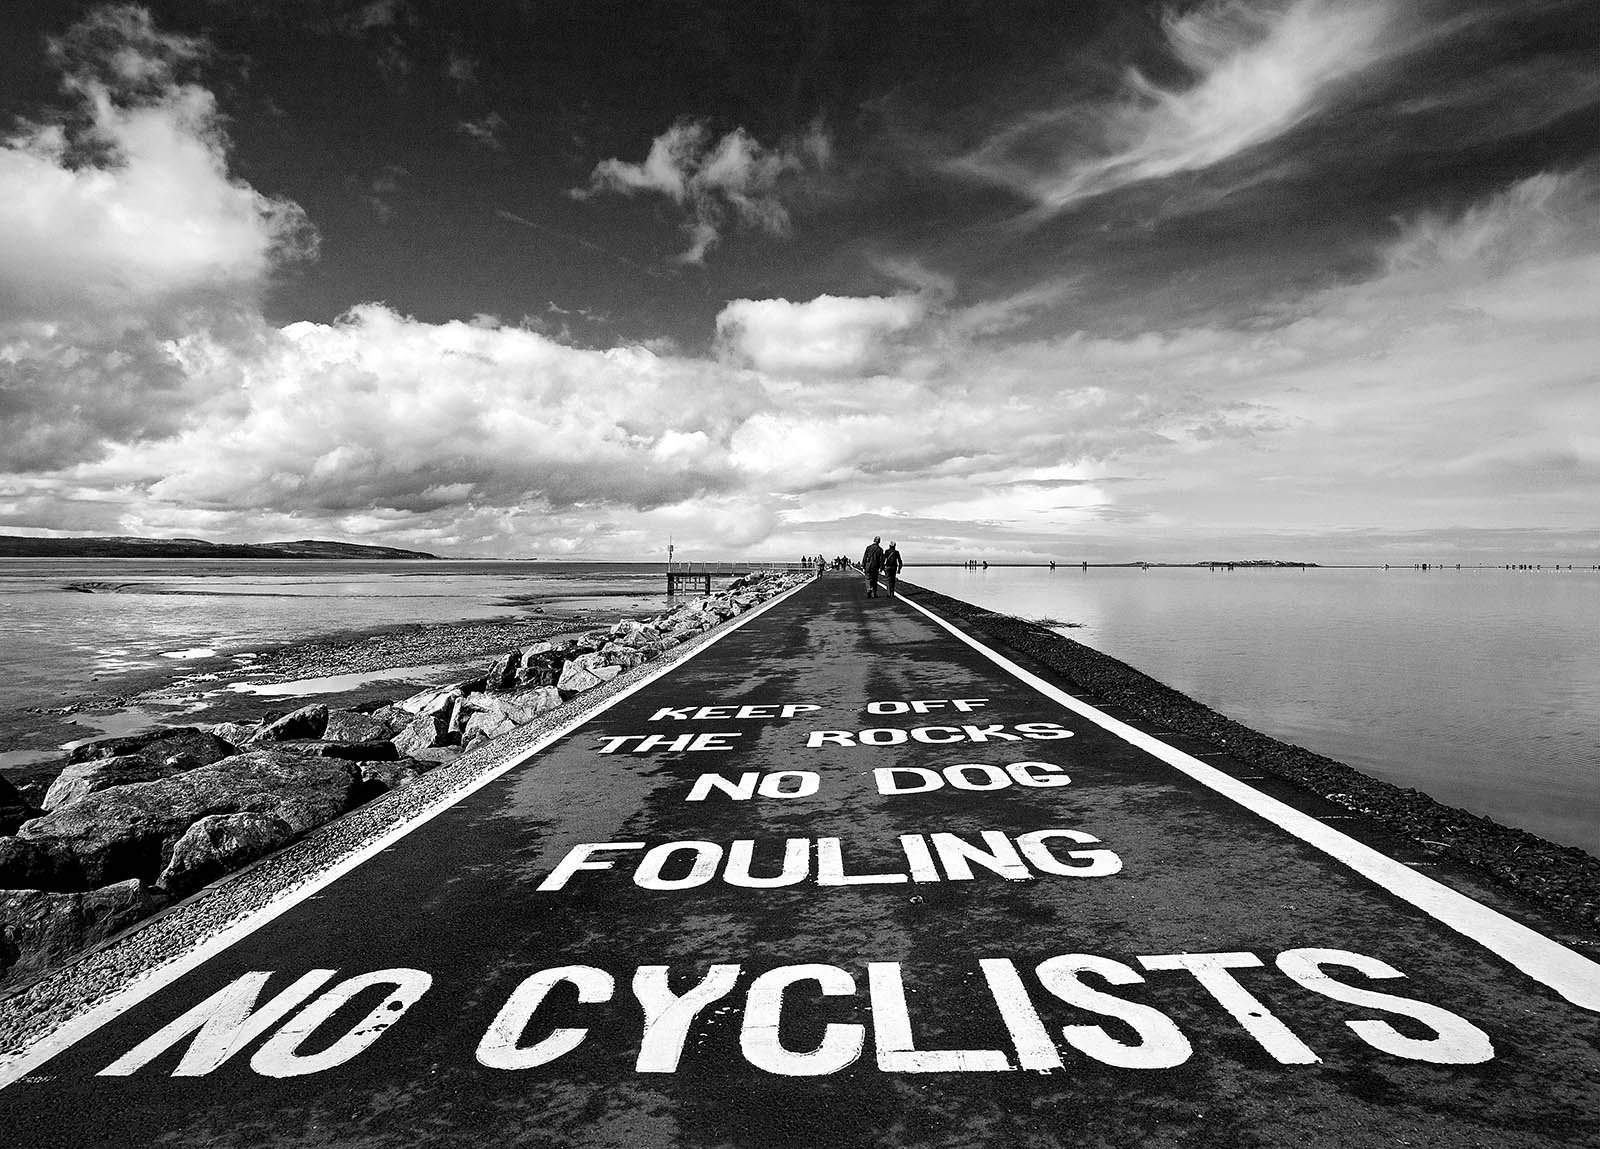
Hello Everyone, Just a small update, a lot of hours spent shaping and making up the spars but I'm afraid not many photos or techniques to show for it. You'll just have to do with another picture from my home town. This is of the path around the marine lake, I used a wide angle lens and shot in black & white for a dramatic effect, this one won a photo comp that I entered. Ken

-
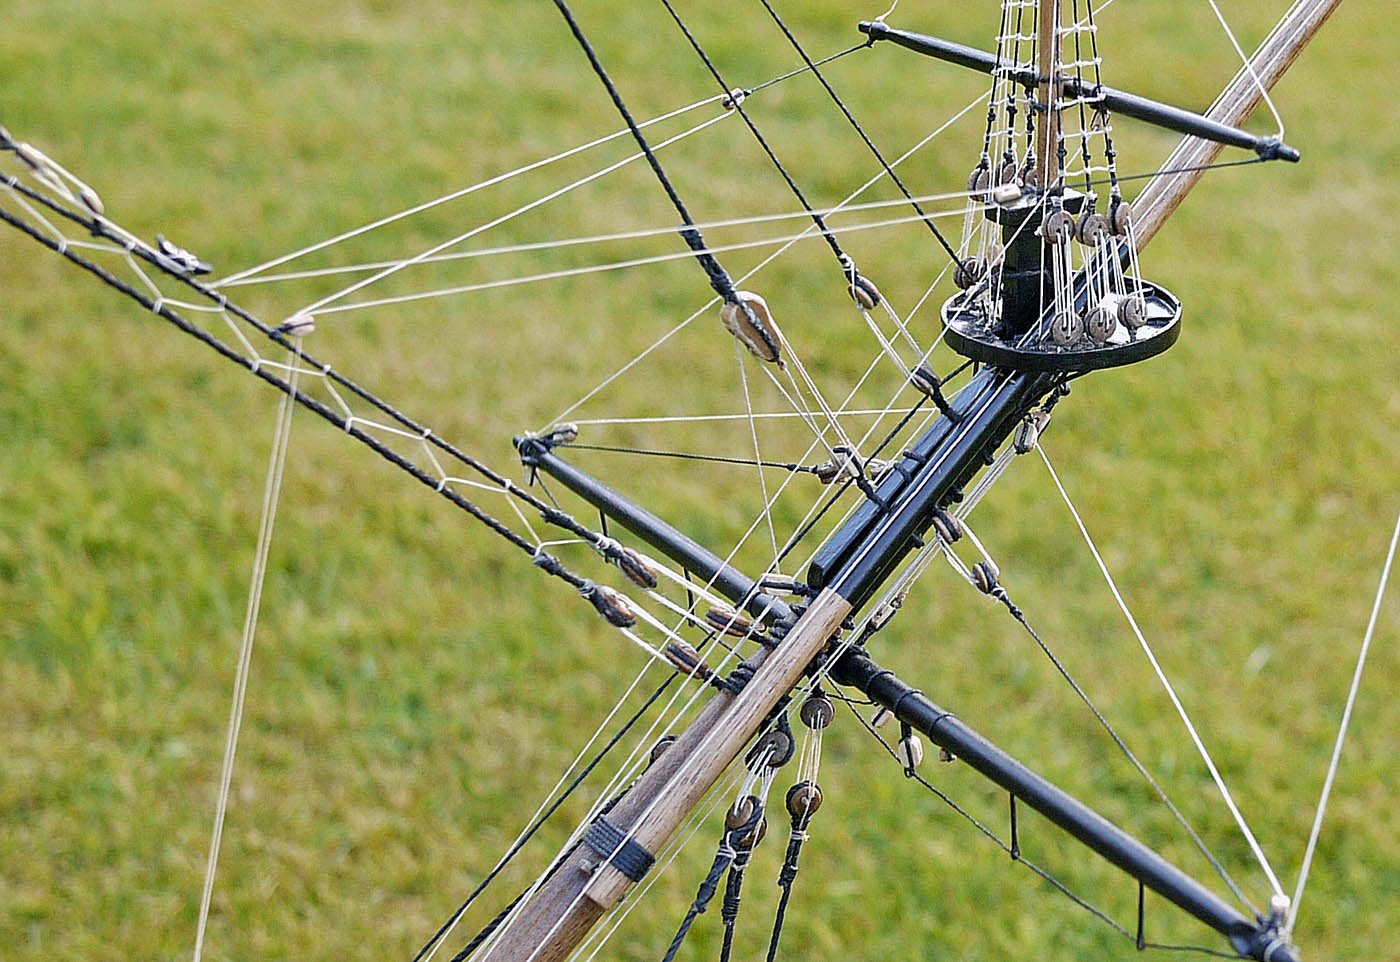
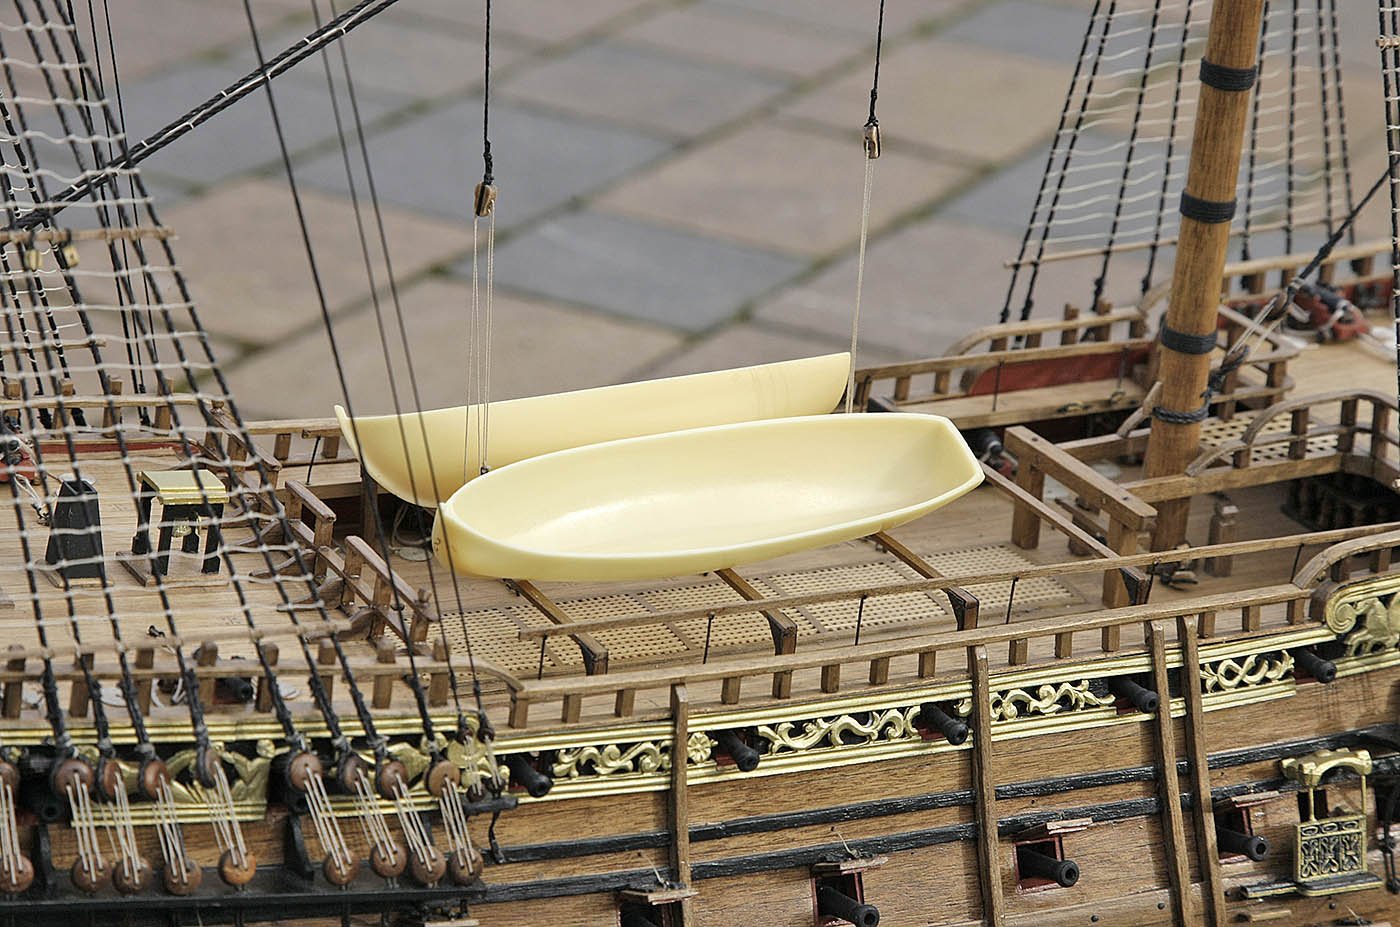
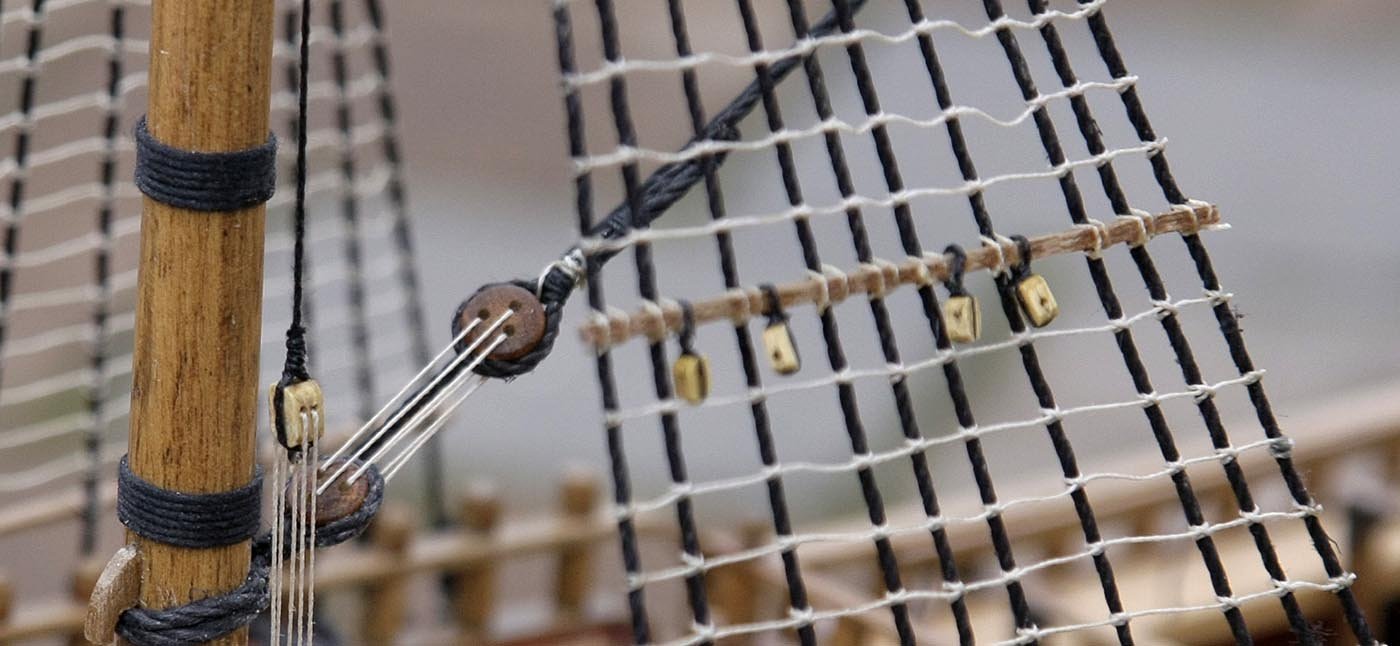
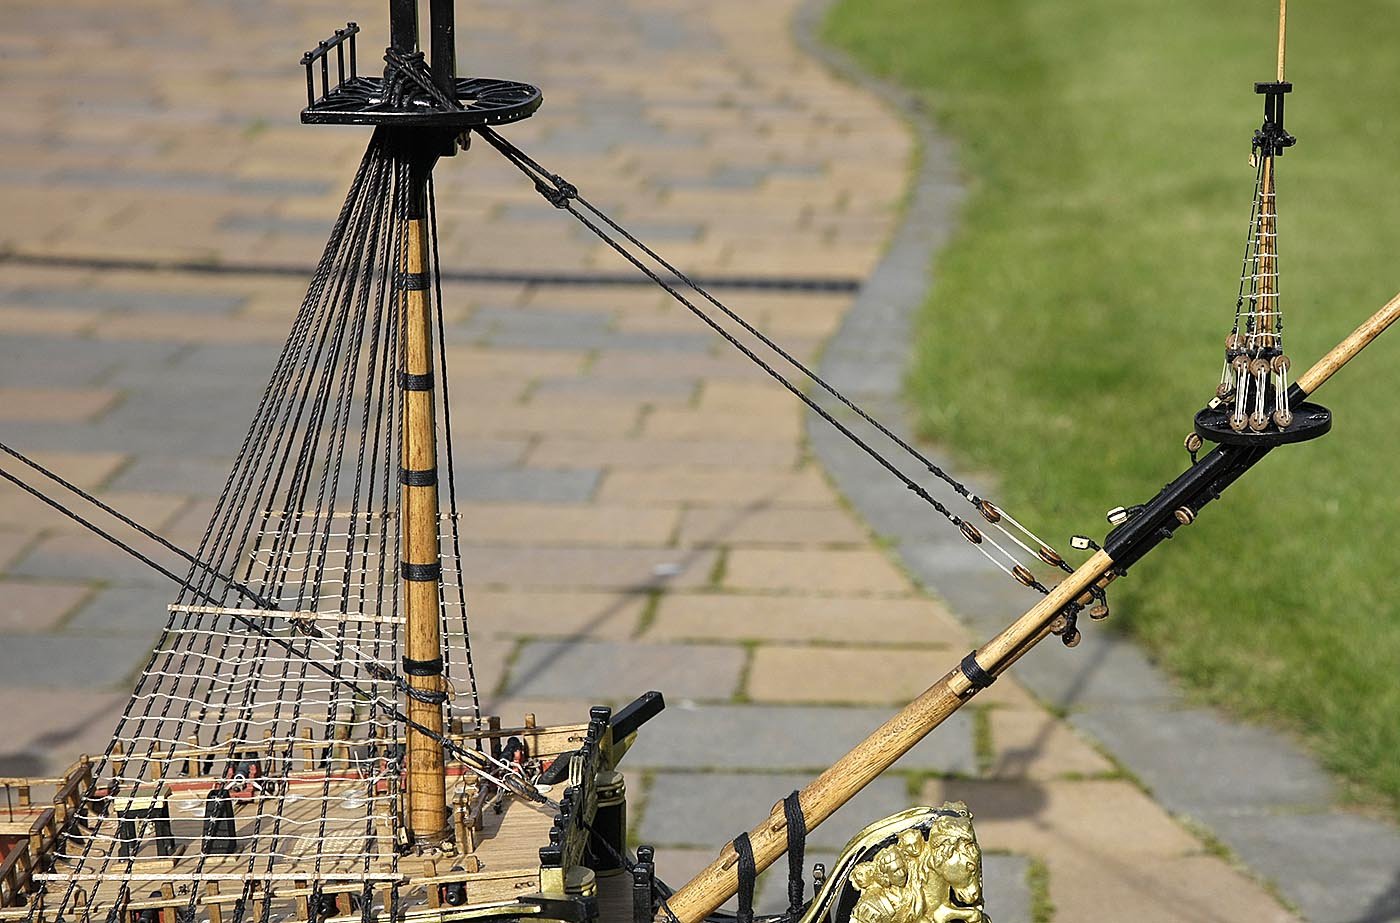
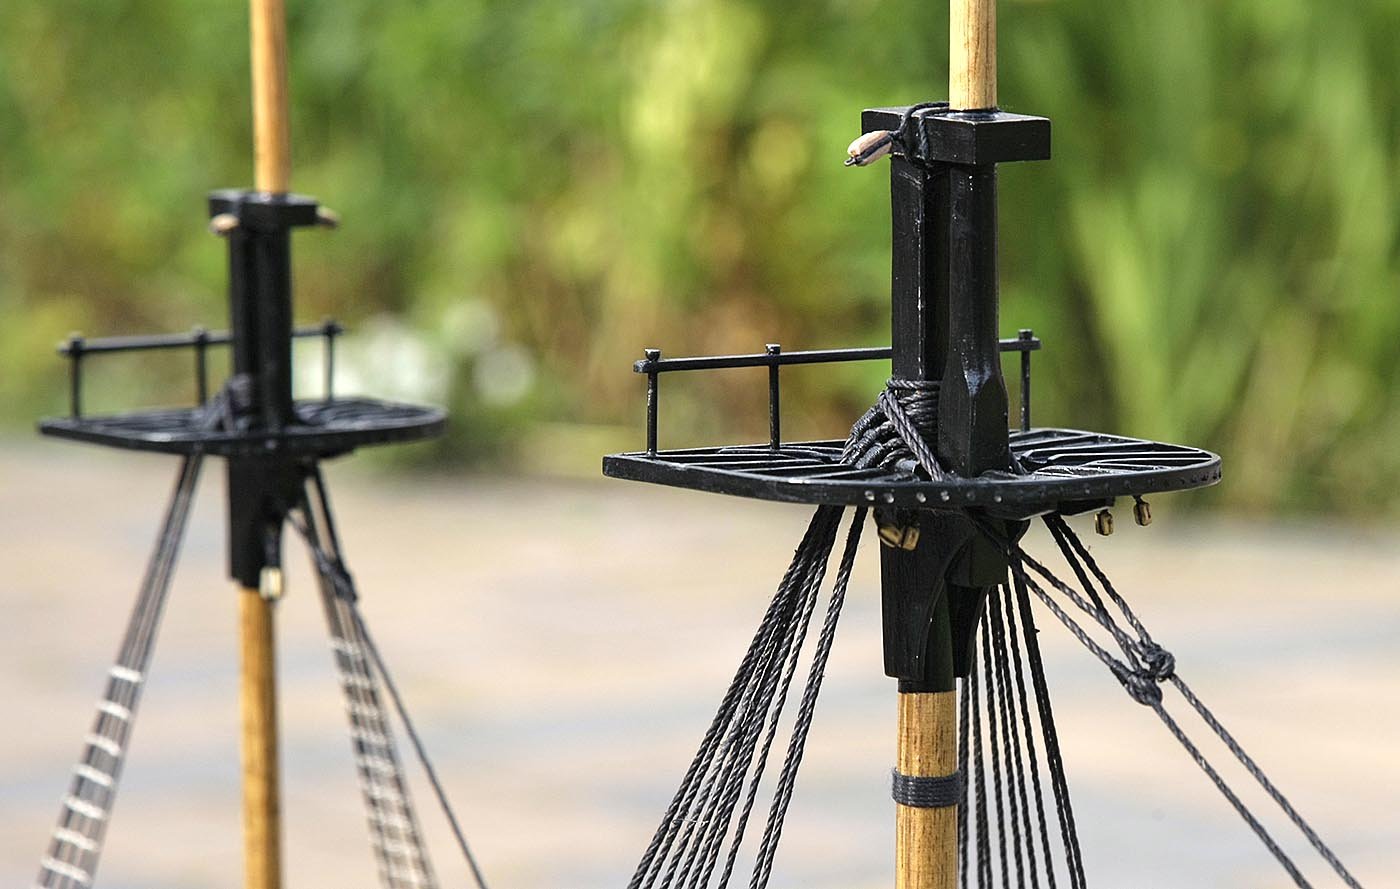
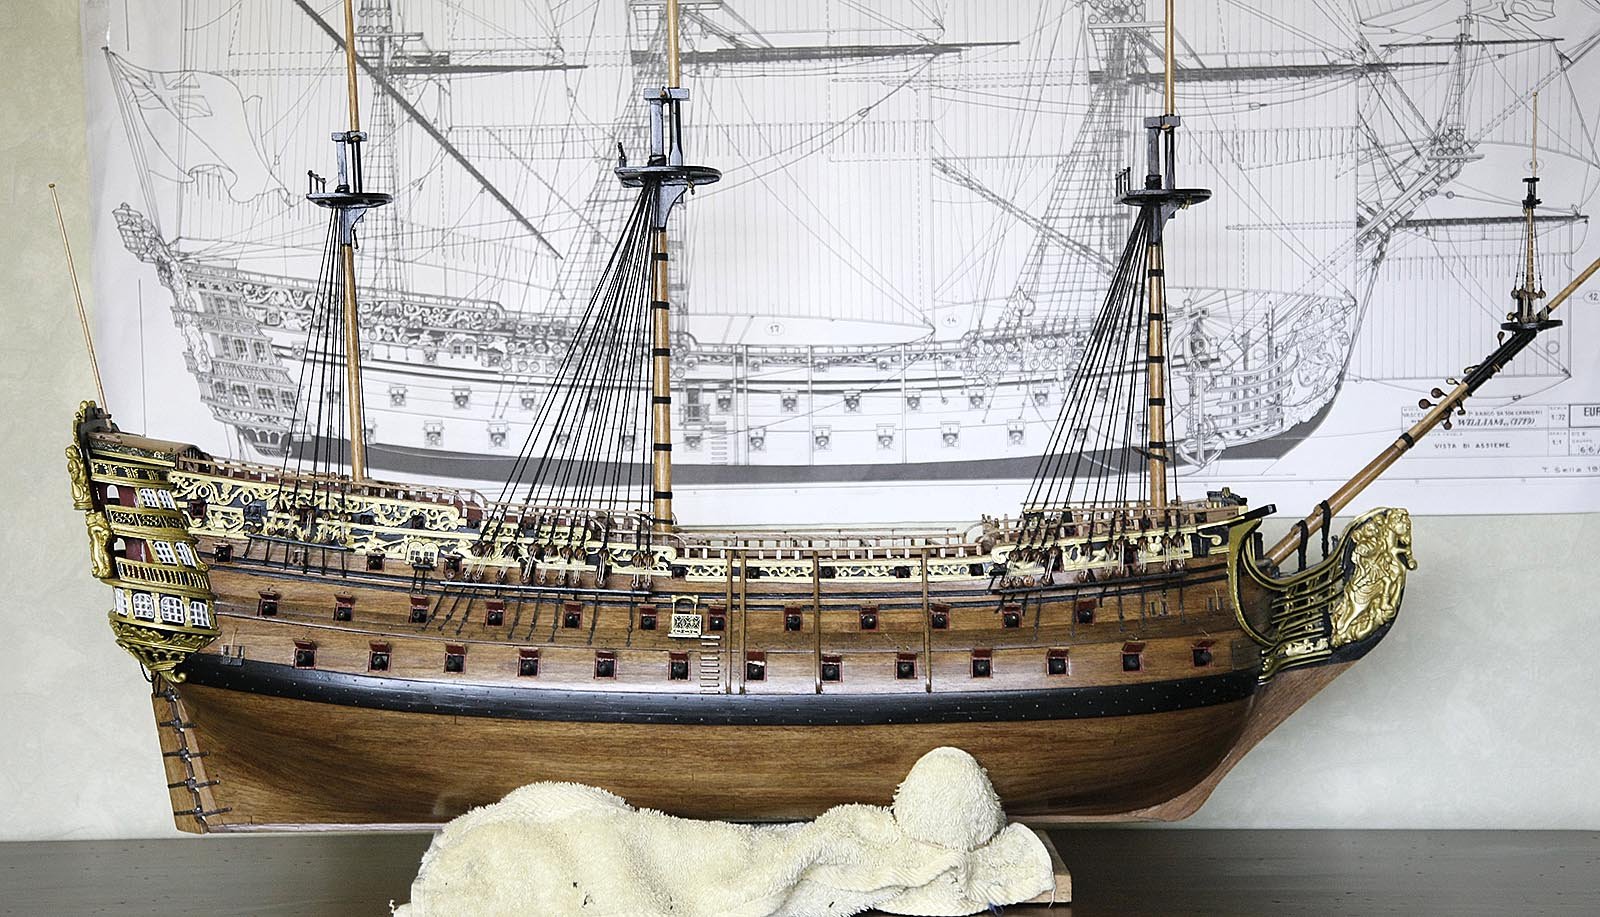
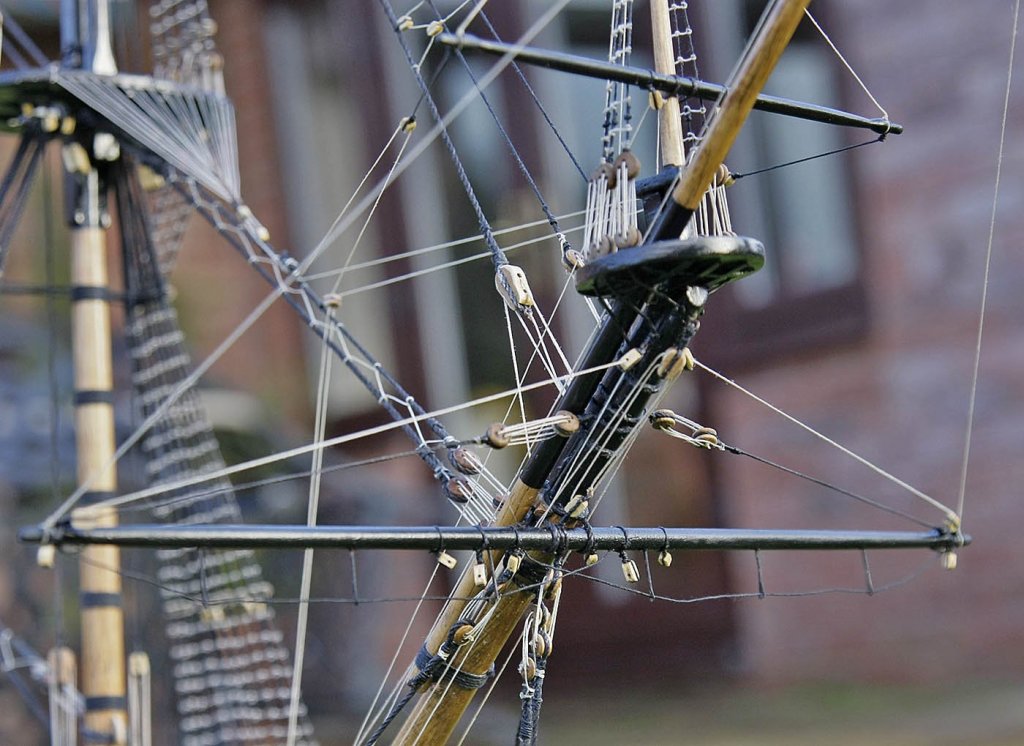
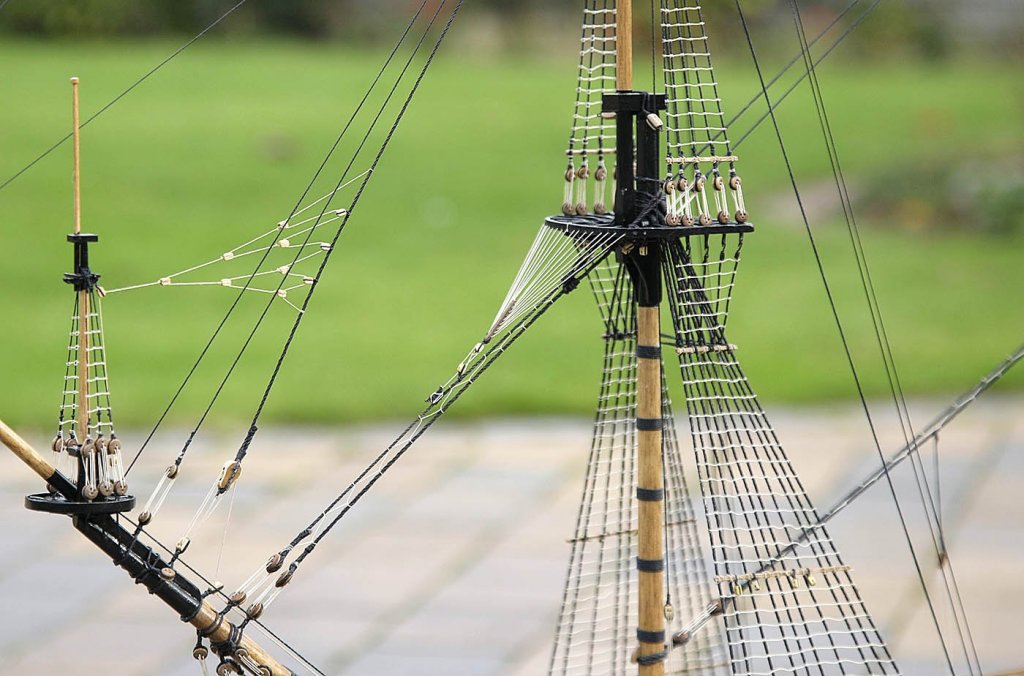
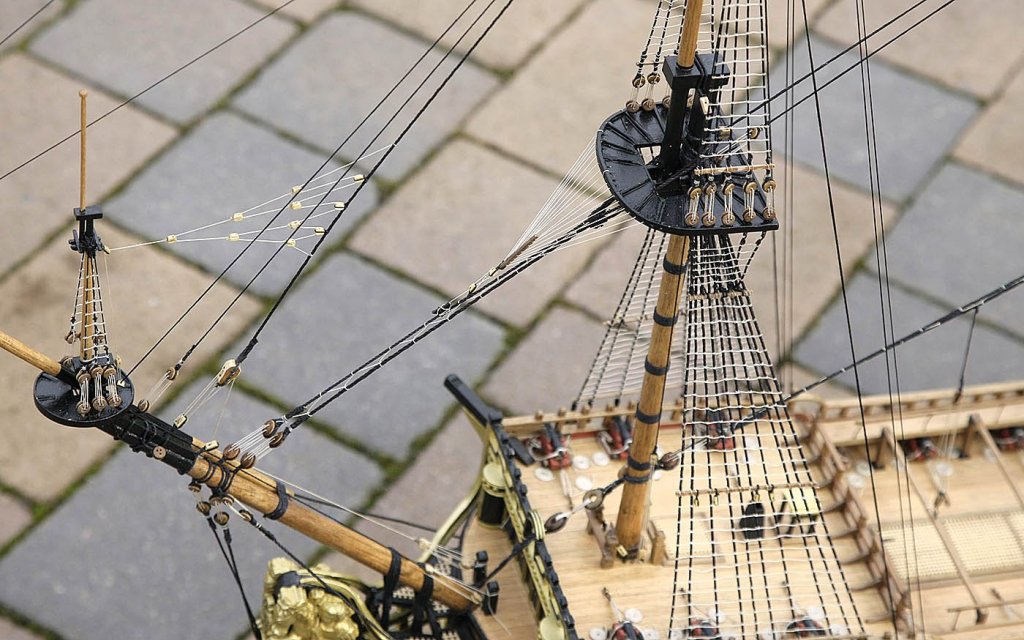
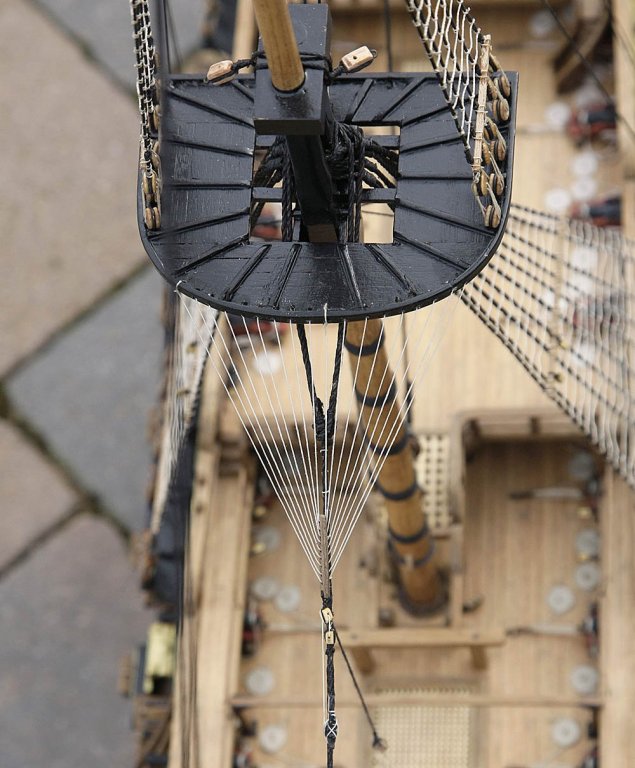
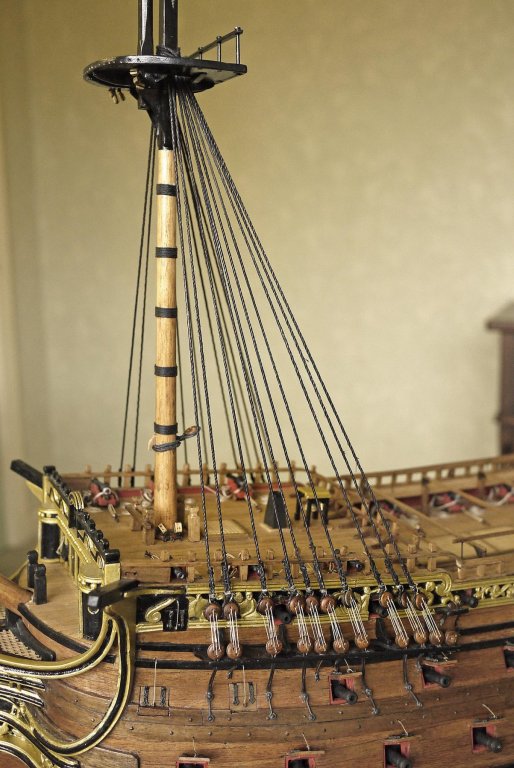
Hello Everyone, Big day today, I think that I've completed the standing rigging, a major milestone, have a beer Ken! I started with the snaking but quite soon realised that it wasn't going to be easy to keep an even distance between the stays. First I tried just looping the thread around, that didn't work, I then tried stitching through the stay using a needle, that didn't work, I then tried tying the thread on, no joy the stays still came together. I tried stiffening the middle sections of thread with cyno, that made things worse and with all the work the stays were starting to look frayed. As a last resort I cut the stays off and made new ones but this time made sure they were as taut as was acceptable. It was worth the extra effort, tensioning the upper stays had obviously slackened the lower ones, with the extra tension and a little care all went well. After my experience on the forestay I first re-tensioned the mainstay. Because of it's extra length I again couldn't keep the stays apart so I decided to fit some boat lifts, when fastened down and tensioned these pulled down the mainstay, I knew that when I fitted the crows feet that they would pull the top stay up a little thus giving the separation needed. I fitted the uphroe and blocks then made up the crows feet. This took some time and thought but proved to be easier than I'd expected and for once I didn't need to redo something. Next up was the crowsfeet from the sprit to the preventer stay. I made this up on the plan then fitted it, all I can say is it got done and I'm very pleased with the result. It was like trying to do a Rubicks Cube for the first time, get one part right and all the other sections move out of alignment, over and over again. I picked up two resin hulls, a cutter and a launch at the correct scale that I intend to fit out and mount instead of the one large one provided with the kit. I think that it will give a more balanced look again make a different version of the RW. Ken


-
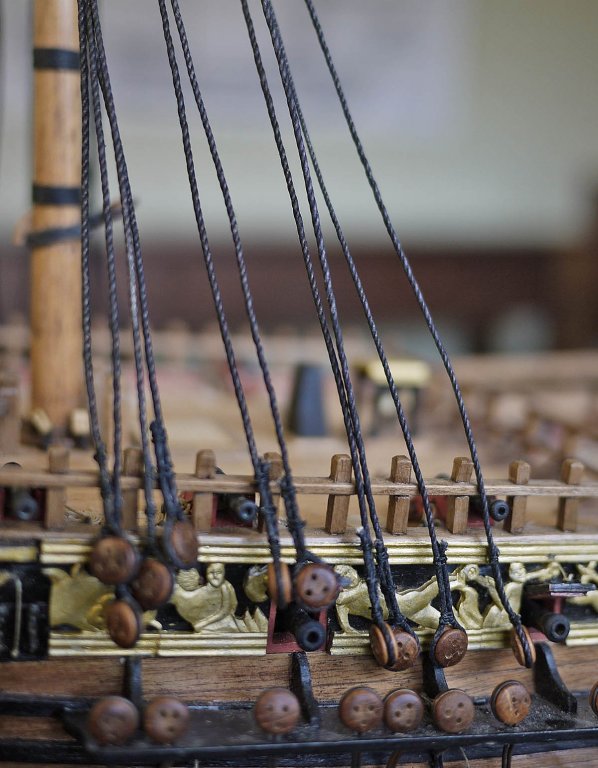
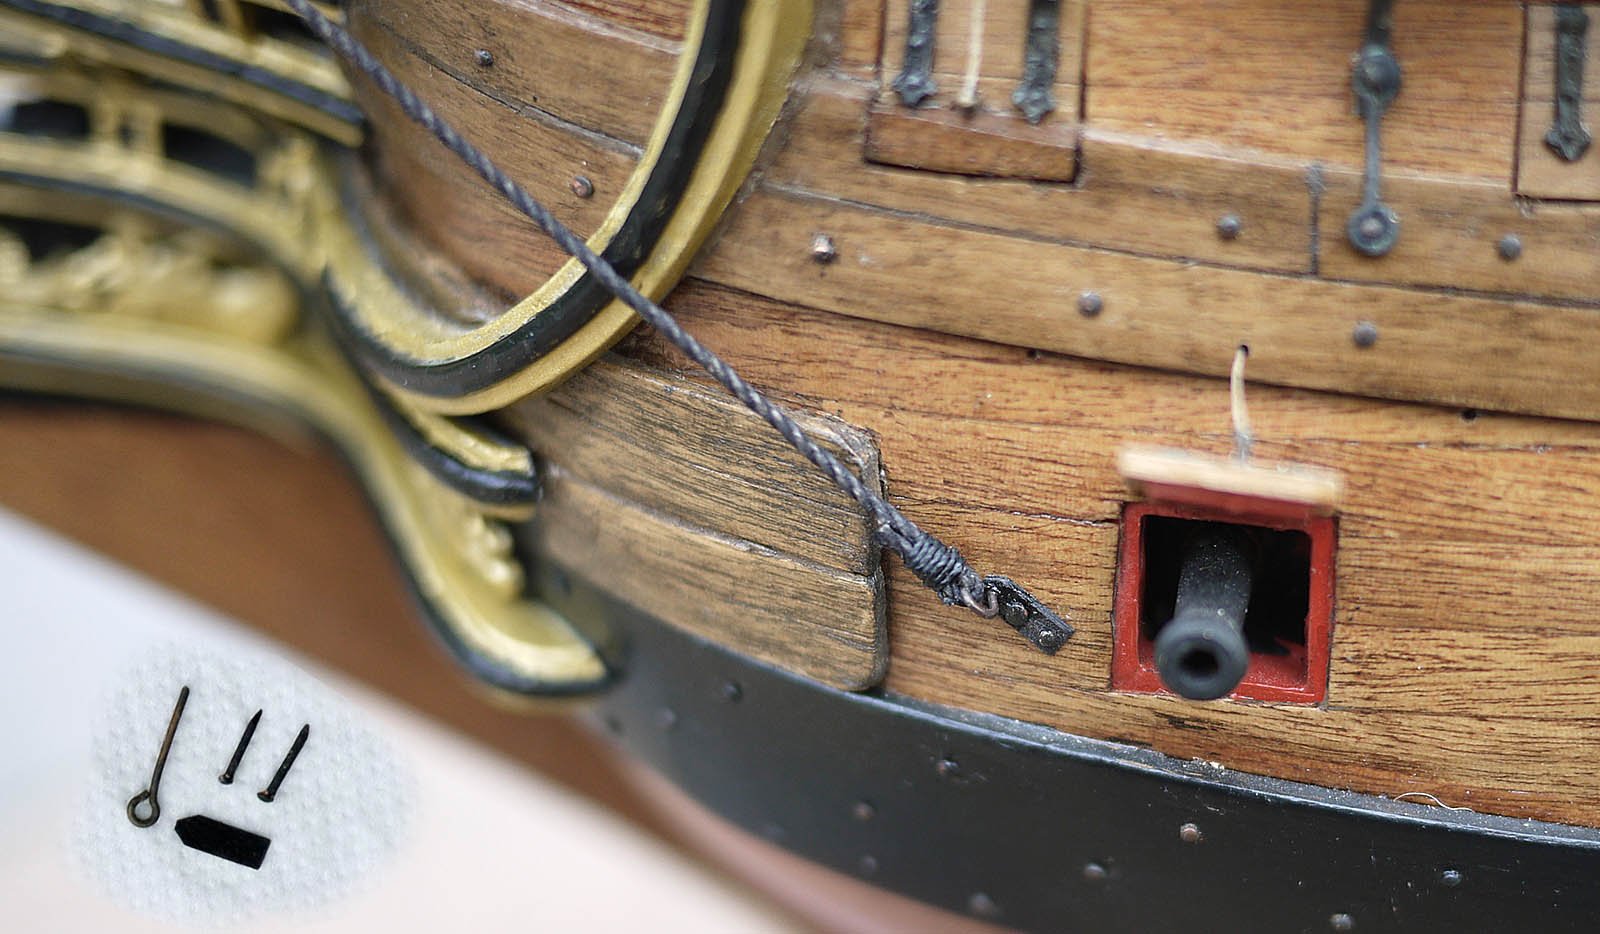
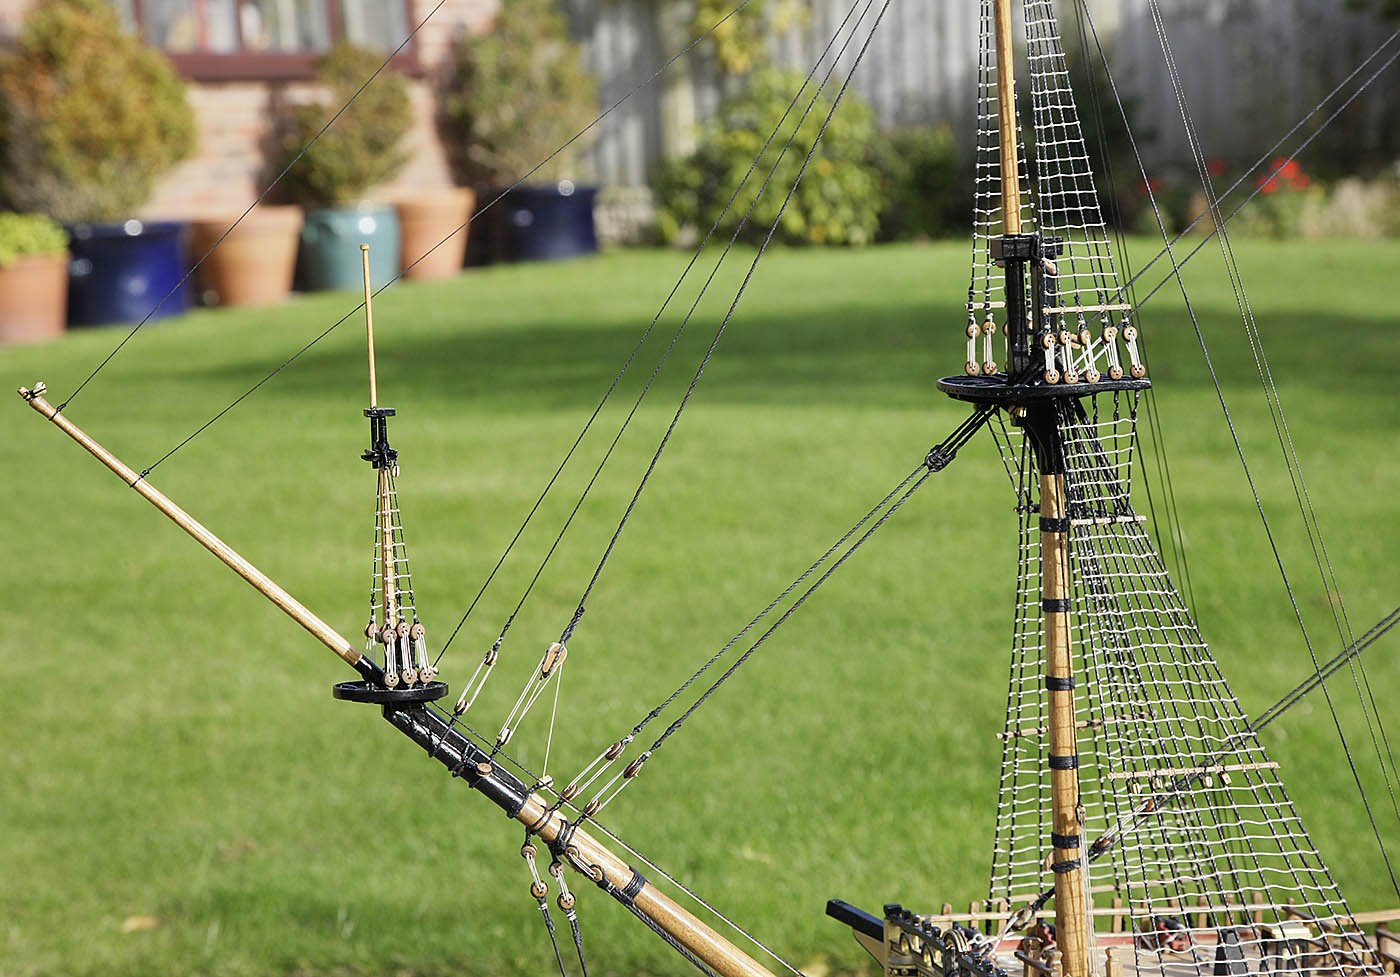
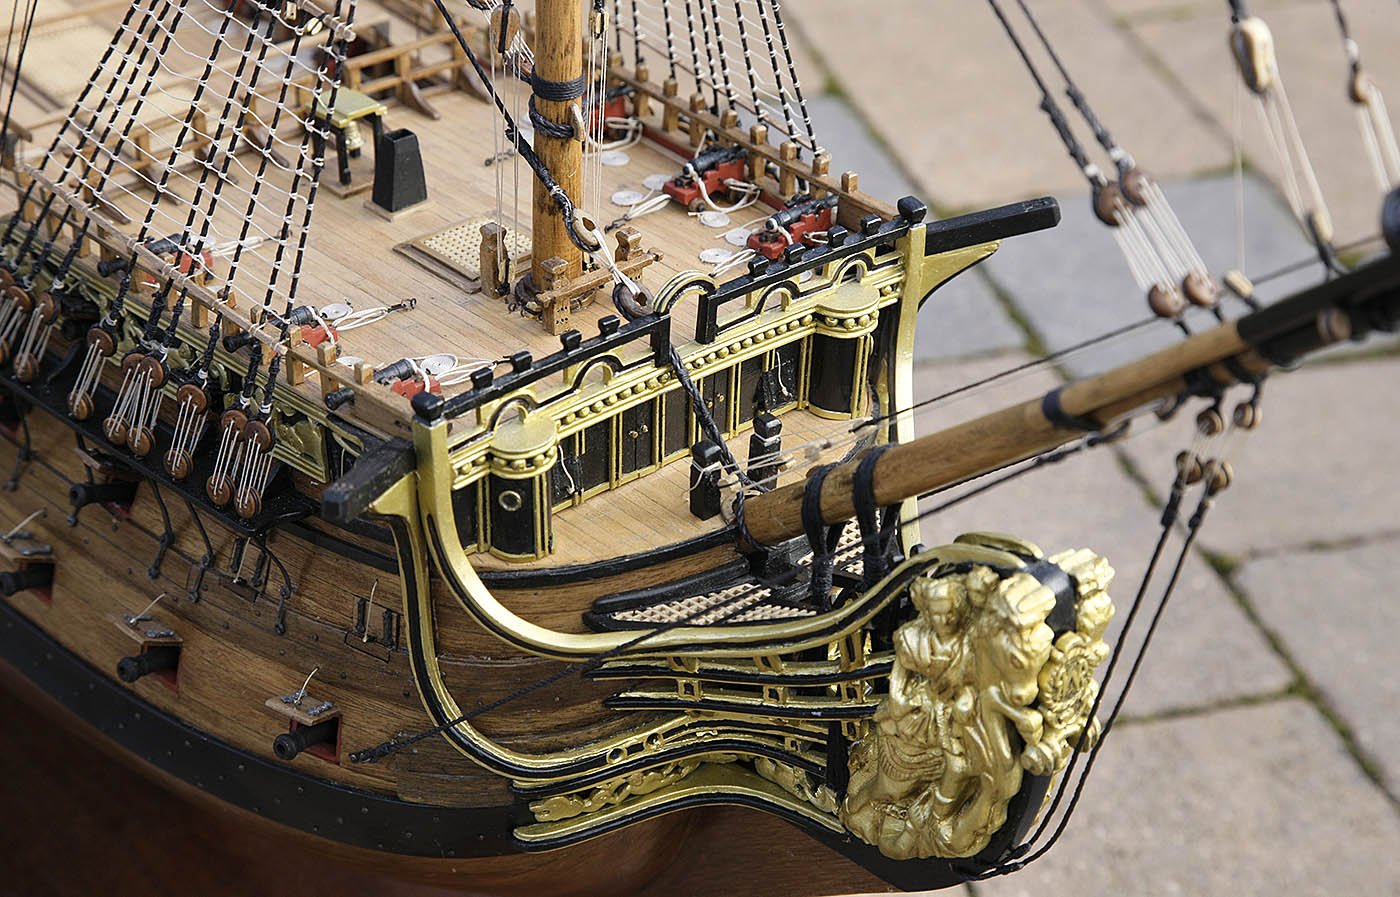
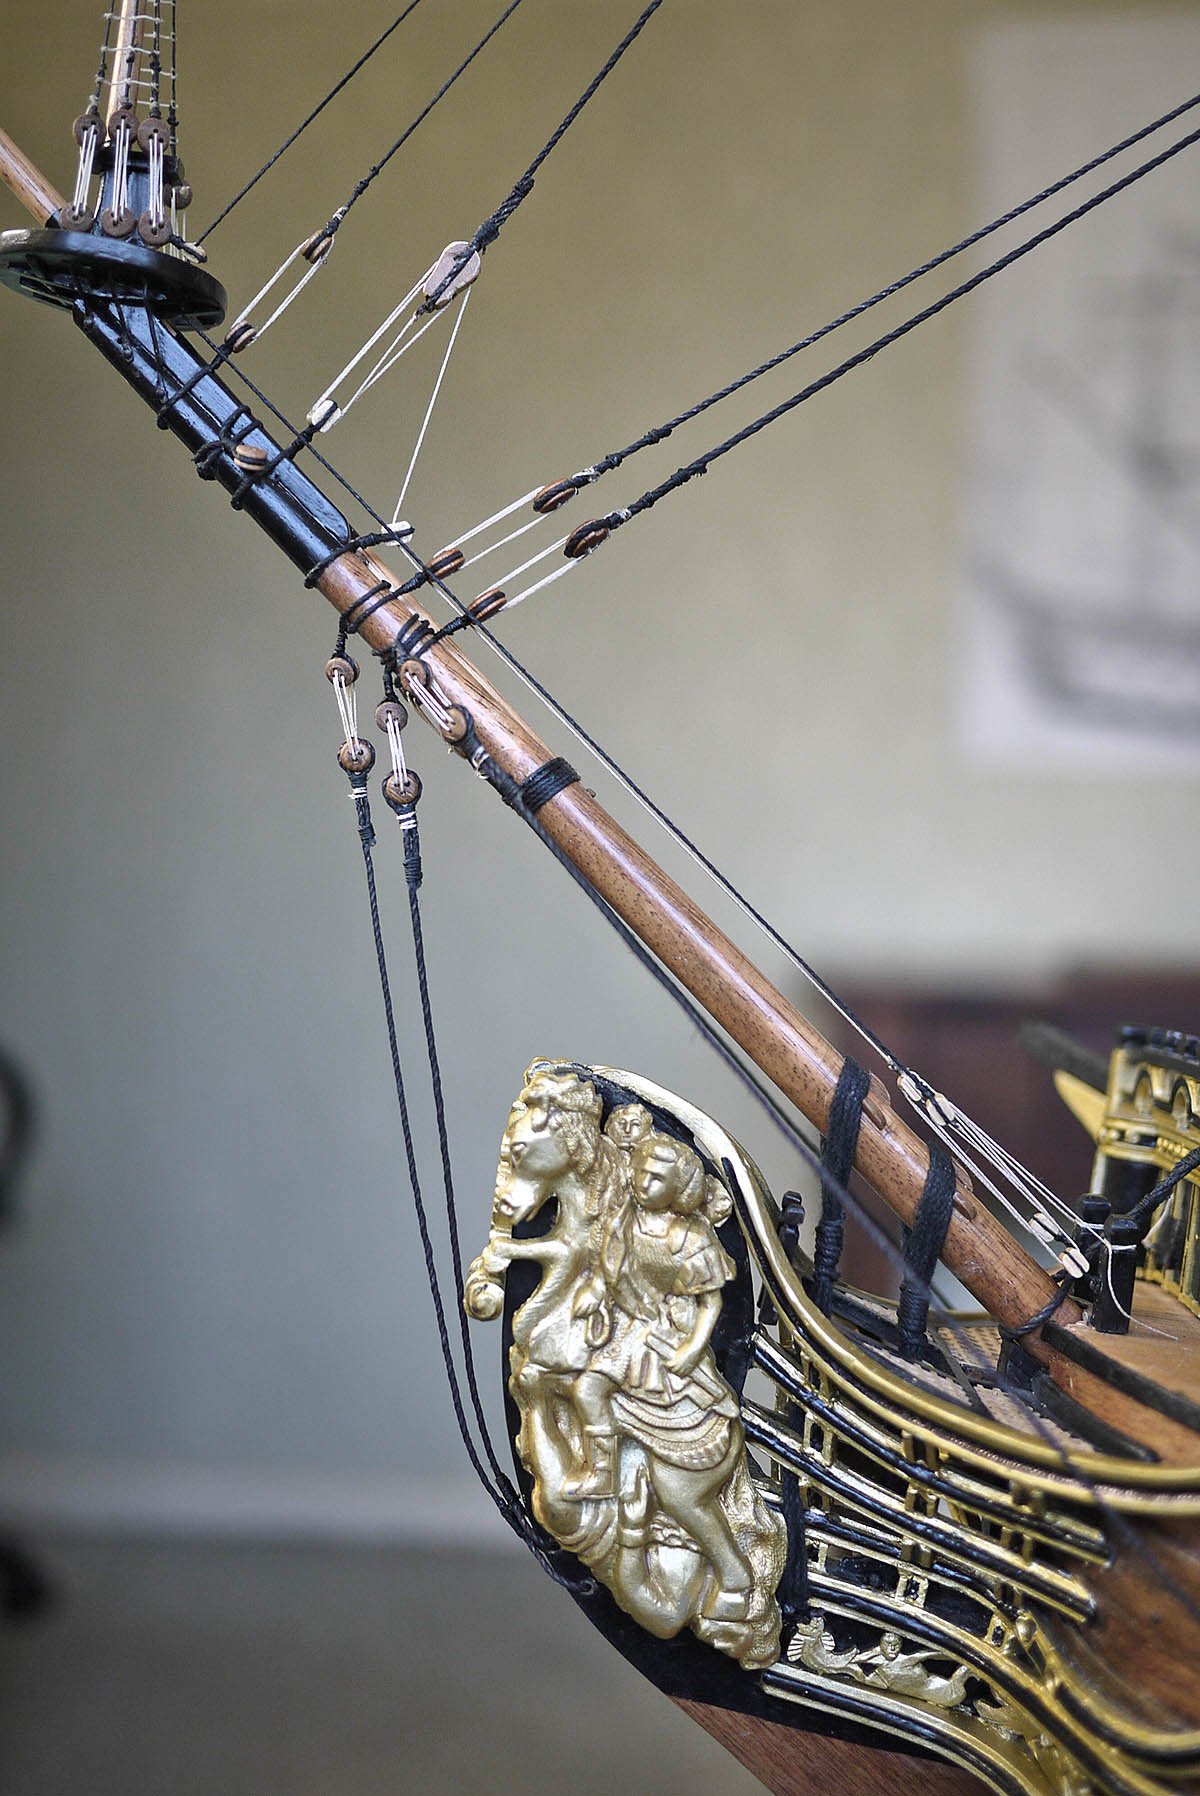
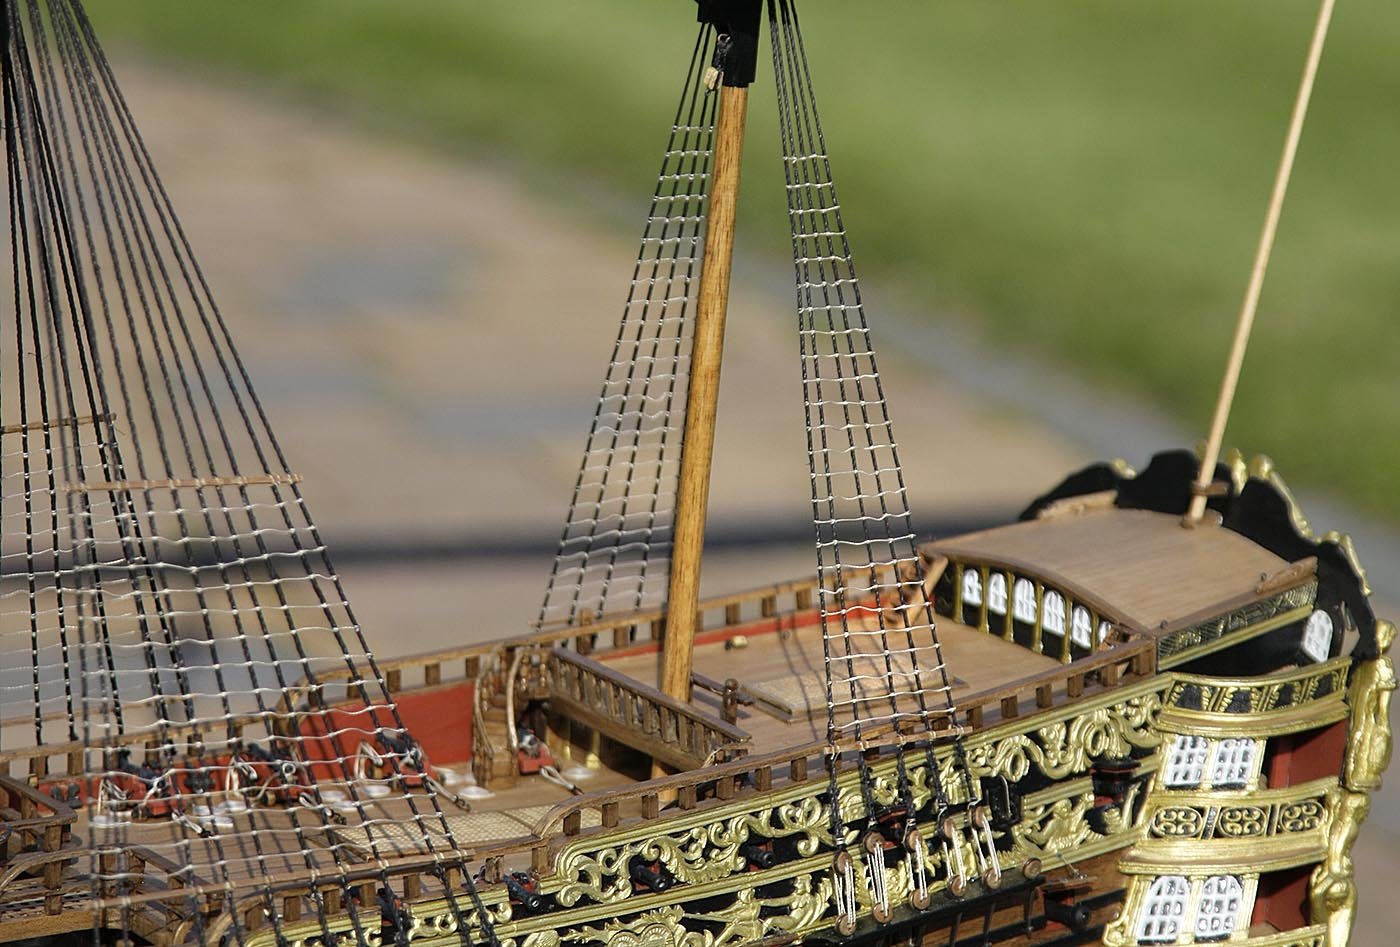
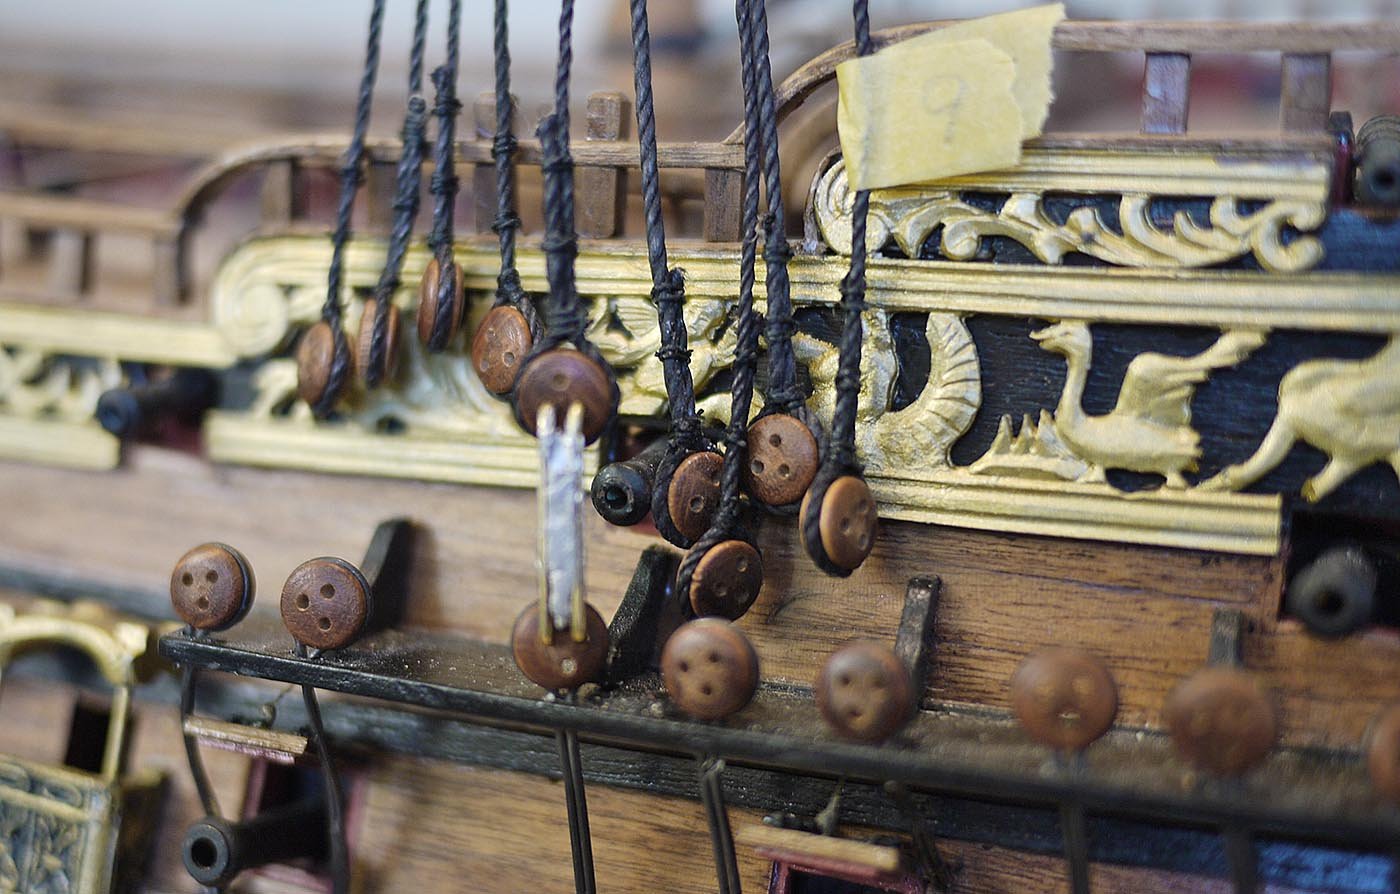
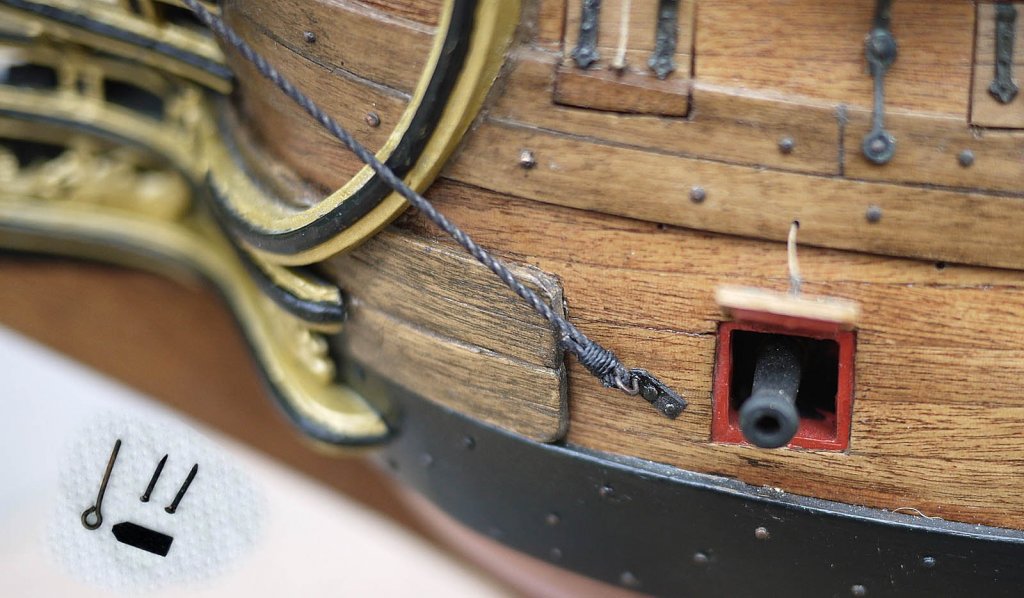
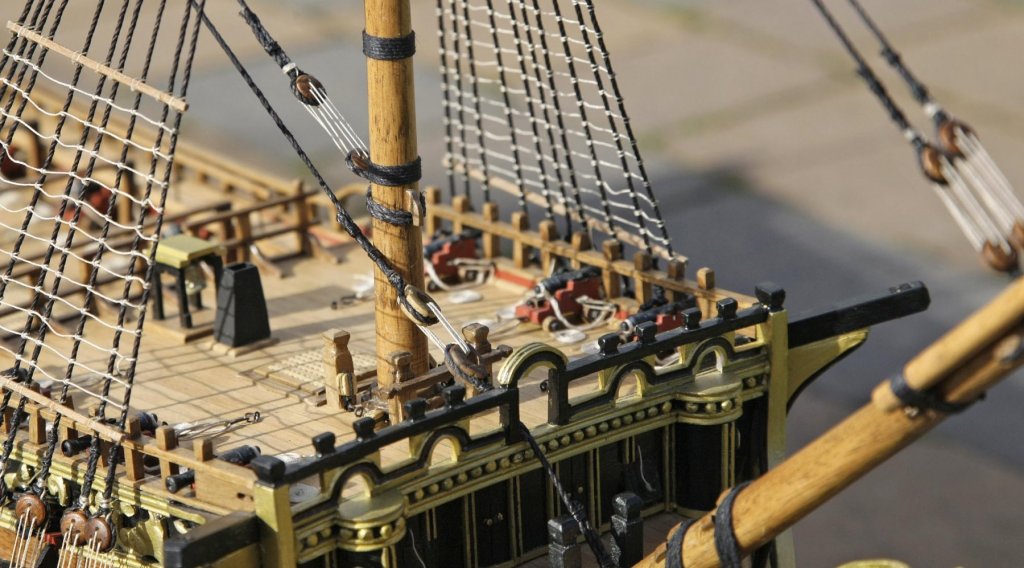
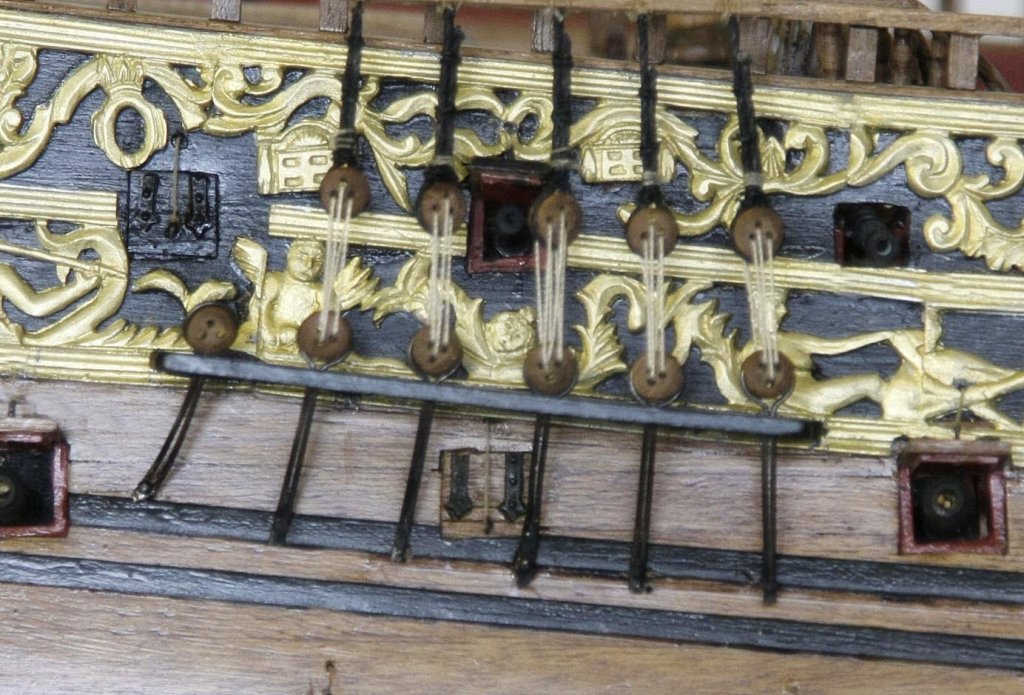
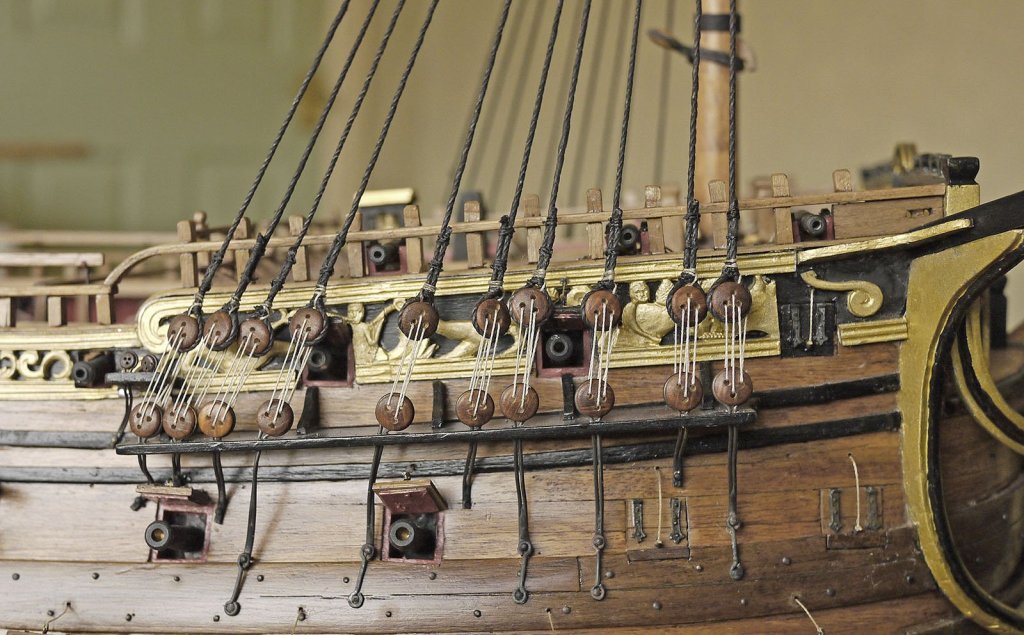
Hello Everyone, Again thanks for your likes. Two things happened today, I finished the backstays and it stopped raining, so plenty of photos. The first picture shows the attachment on the hull of the bowsprit stay, the picture inset shows how I made it, the black strip is just black card cut up, easy to do and you can't tell that its not metal. The rest went pretty well to plan, the only difficulty for me were the 3mm dead eyes for the upper stays, they were too small for me to hold. I got my wife to assist with these, between us we managed. I wonder what she'd be like with making spars! Michael, Pete's right, this kit is only as difficult as you want it to be, the difficulty would be in the fine accurate detail which it gives you the opportunity to do, I've seen your work and it's here that you would excel, I'd love to see you do a version. I'm making mine as simple a version as I can so that at least I'll be able to complete it. It's the style of ship and the quality of the kit that makes it look so good, I'll only take a small part of the credit. Ken


- 424 replies
-
- 12
-

-
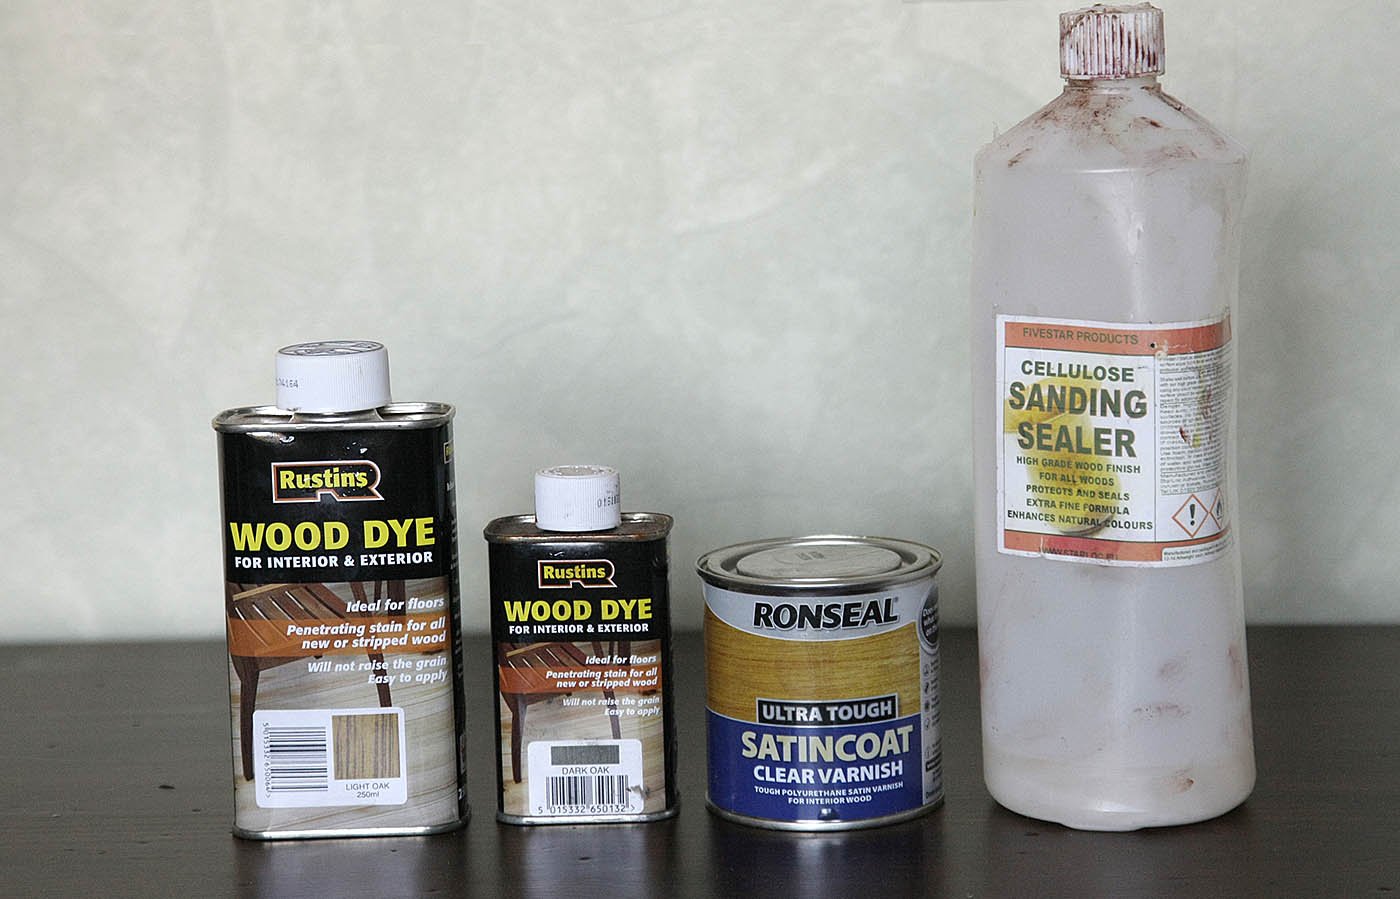
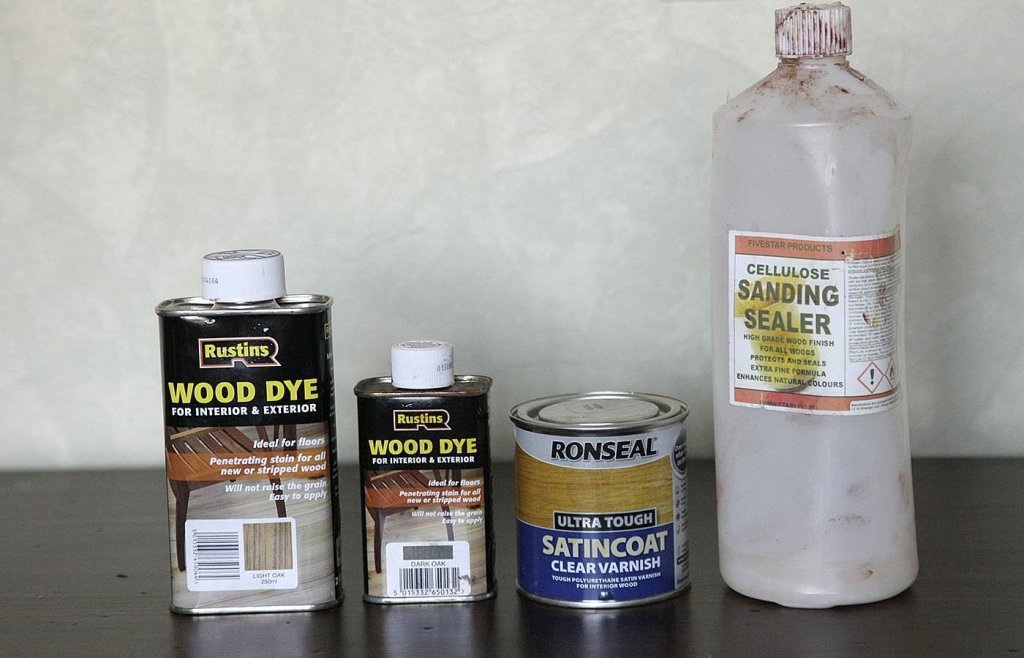
Hi Mike, These are the products that I use, I've tried others but found these to be the best. The dye is the type that soaks into the wood so gives some depth, it must be used first as after the sealer has been applied it doesn't stain. The varnish is pretty tough, self levelling and has the right amount of sheen for my taste. Ken
-
Hi Mike, Thanks for liking my finish, I've mentioned my finish method before so it's easiest for me to repeat that post. I've used the light oak wood dye on everything, hull, decks and masts. With regards the prep for my wood, it's been a lot of trial and error but what I've settled for is first make sure that there is no glue in the grain, I make sure that I wipe away any excess after use, I give it a good sand mostly with a solid block with 120 grit attached. I then always rub in a thin penetrating wood dye, a light oak, this doesn't change the colour of the wood much but it makes it look richer and really brings out the grain, for contrast on rubbing strips etc. I'll use dark oak. I then always apply sanding sealer, this dries quickly and after a few minutes I give a light rub with 180 grit just held in my fingers. To finish I use a poly satin varnish. On the decks I use acrylic matt varnish, this dries quicker and is easily re touched when I end up marking the deck. I'm not an expert on finishes but I think this looks good for displaying, for a more realistic finish perhaps matt may be better, I hope that this helps ken
-
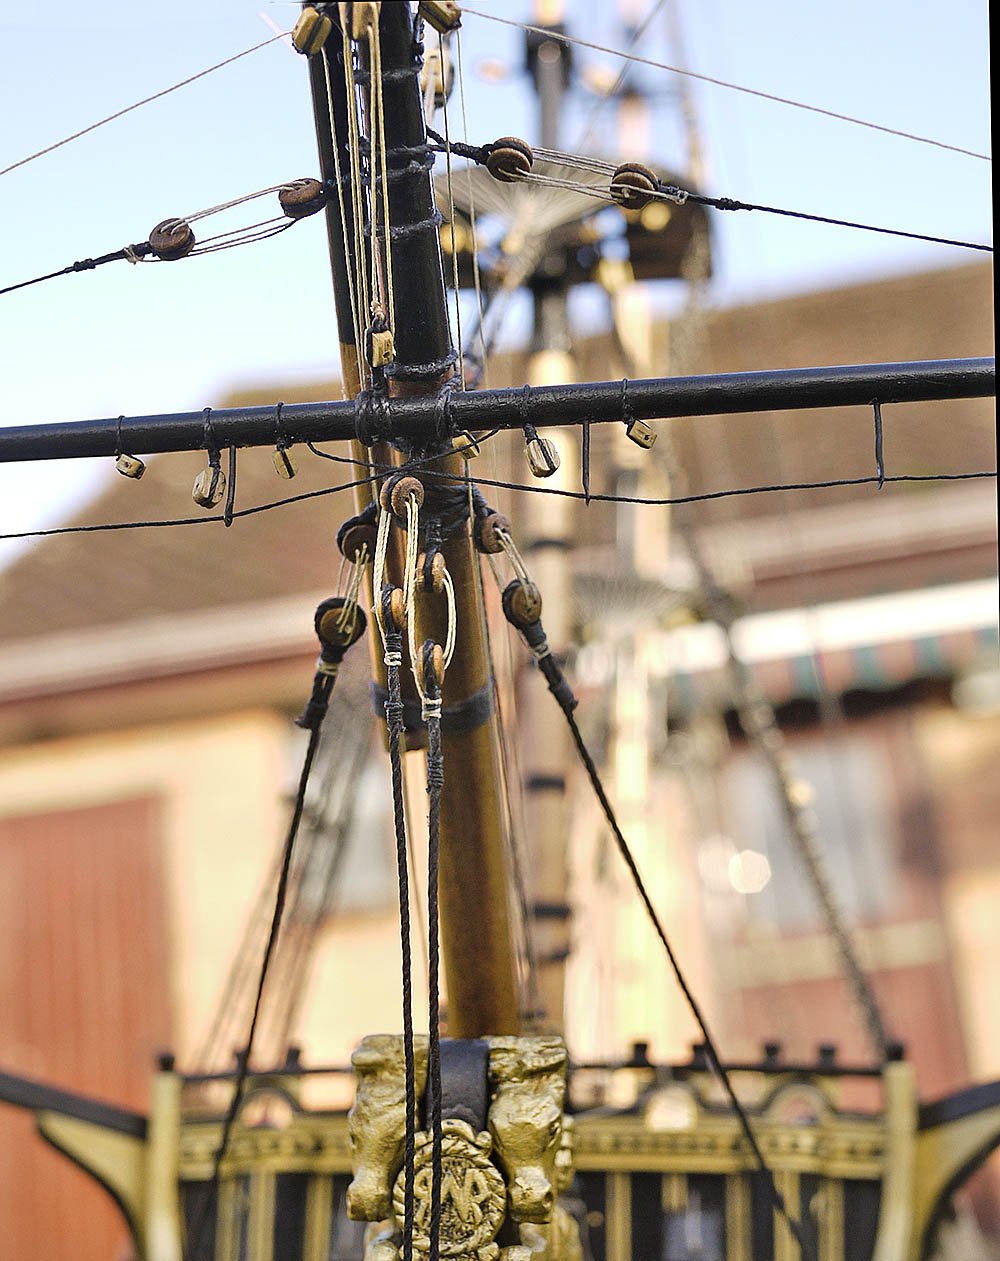
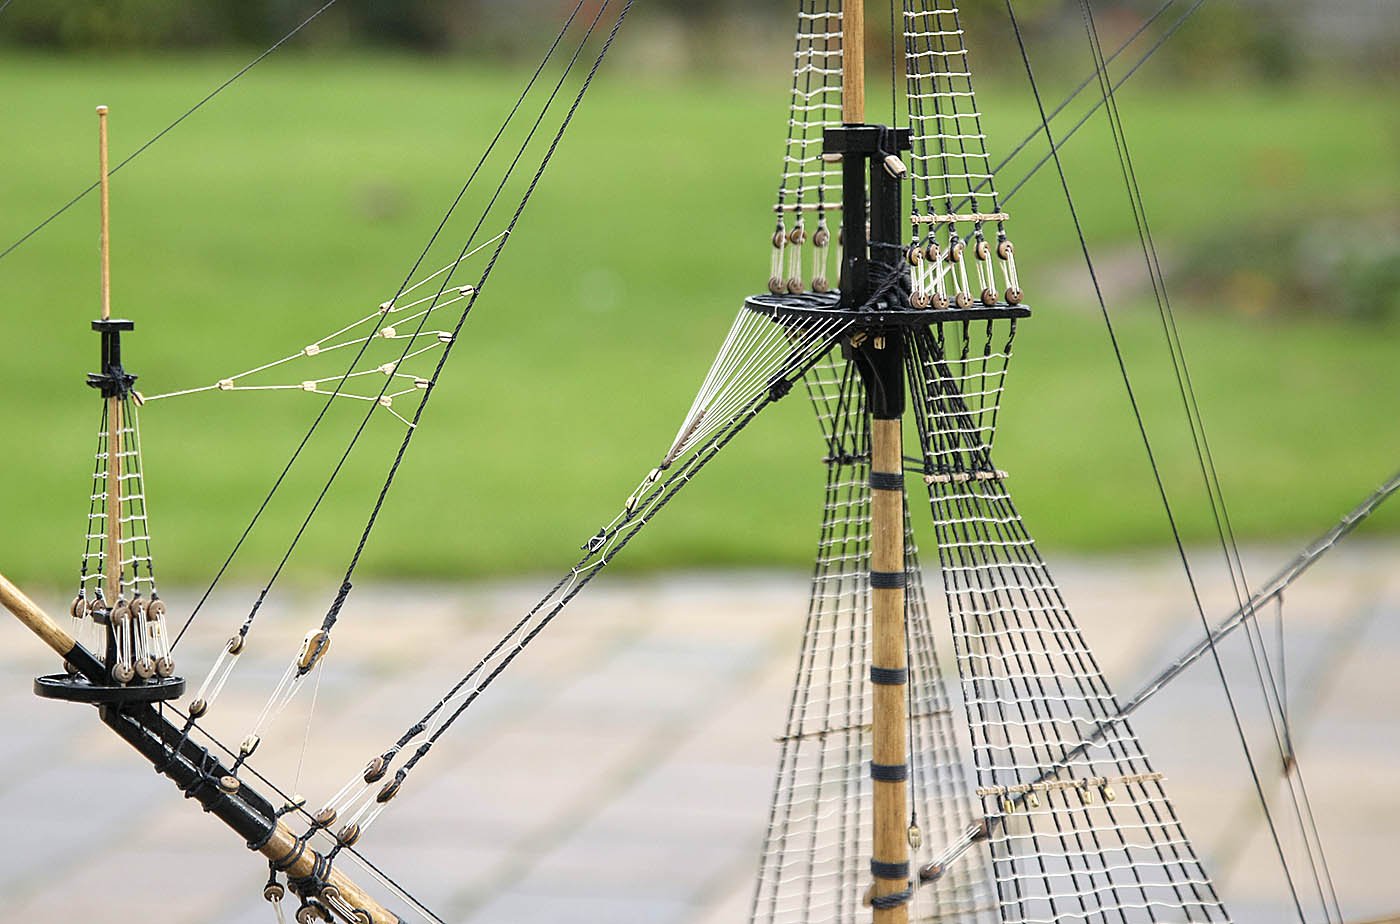
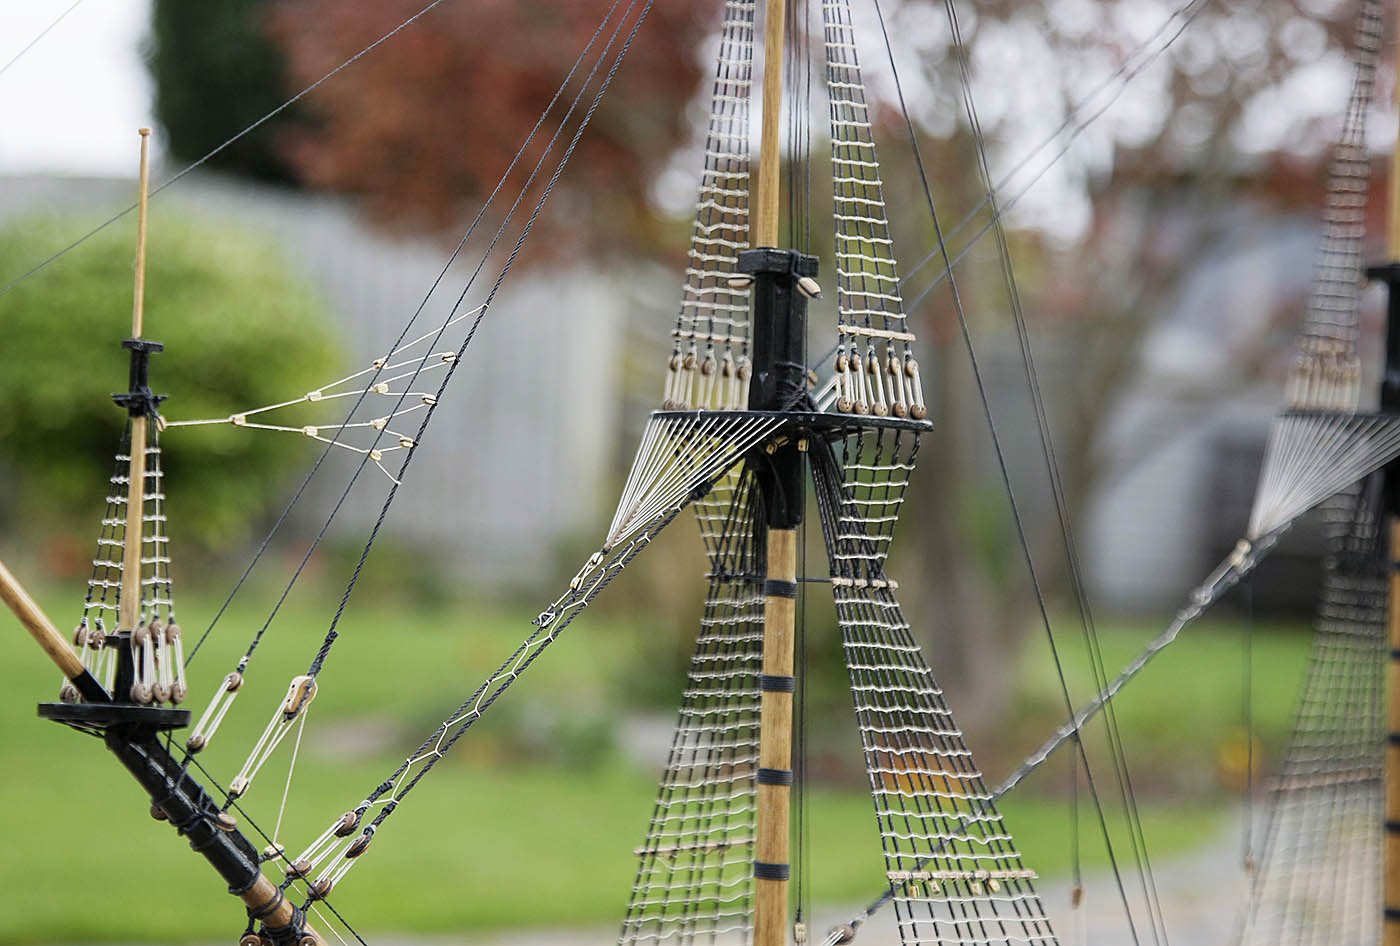
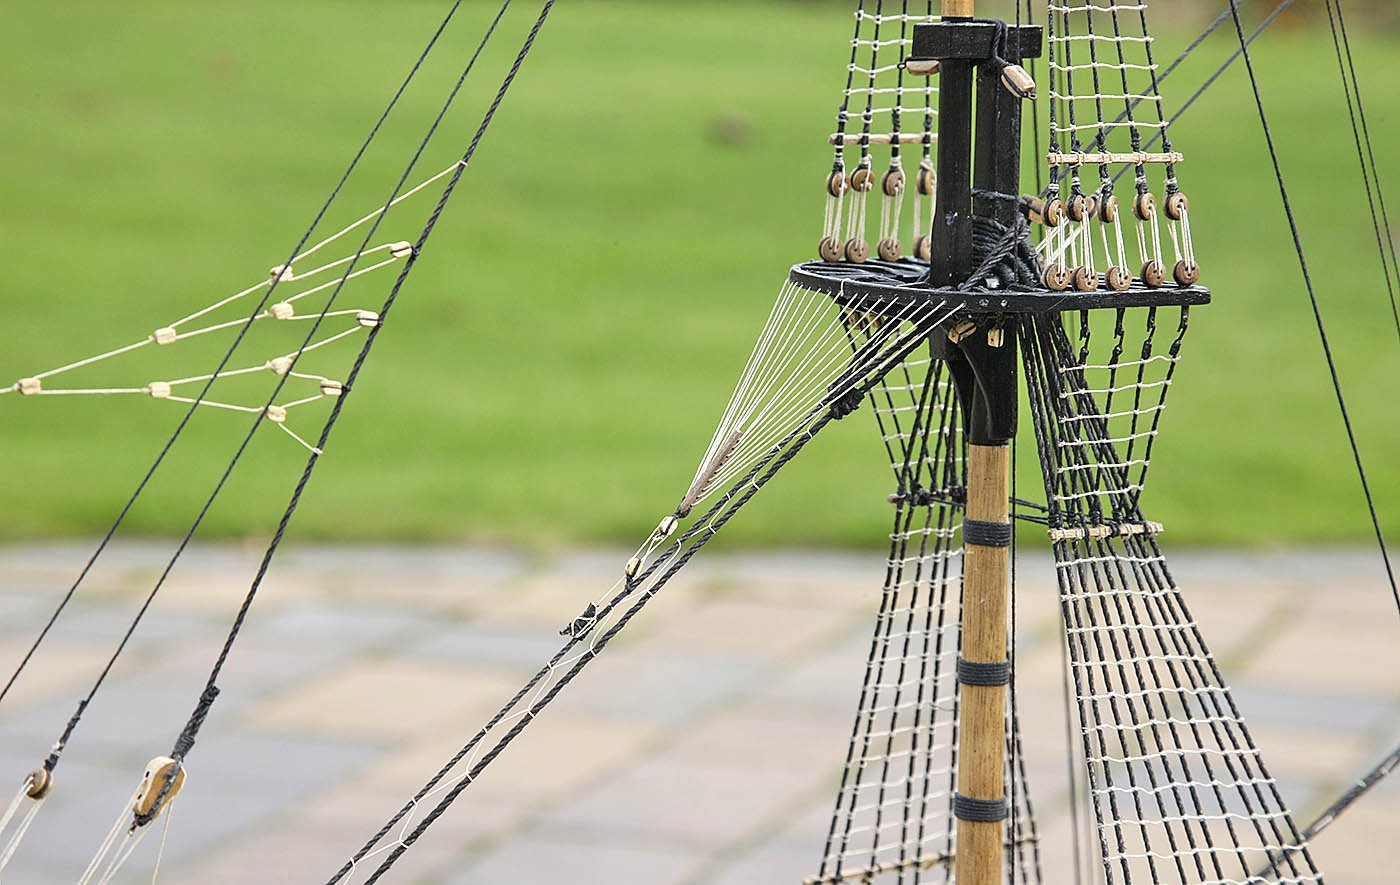
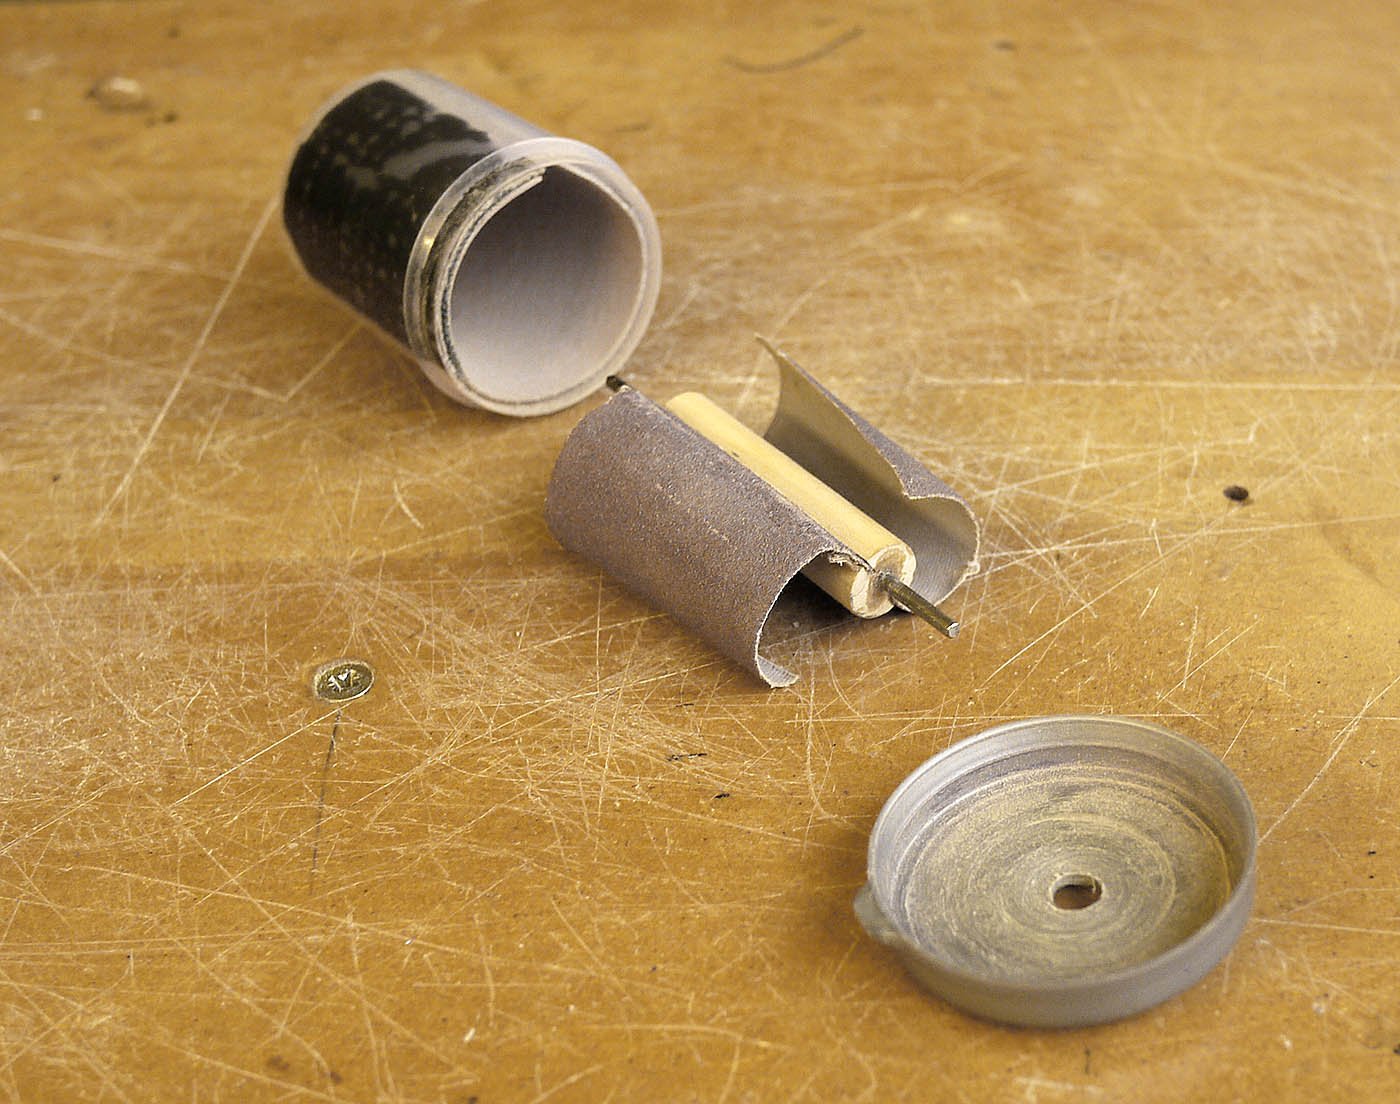
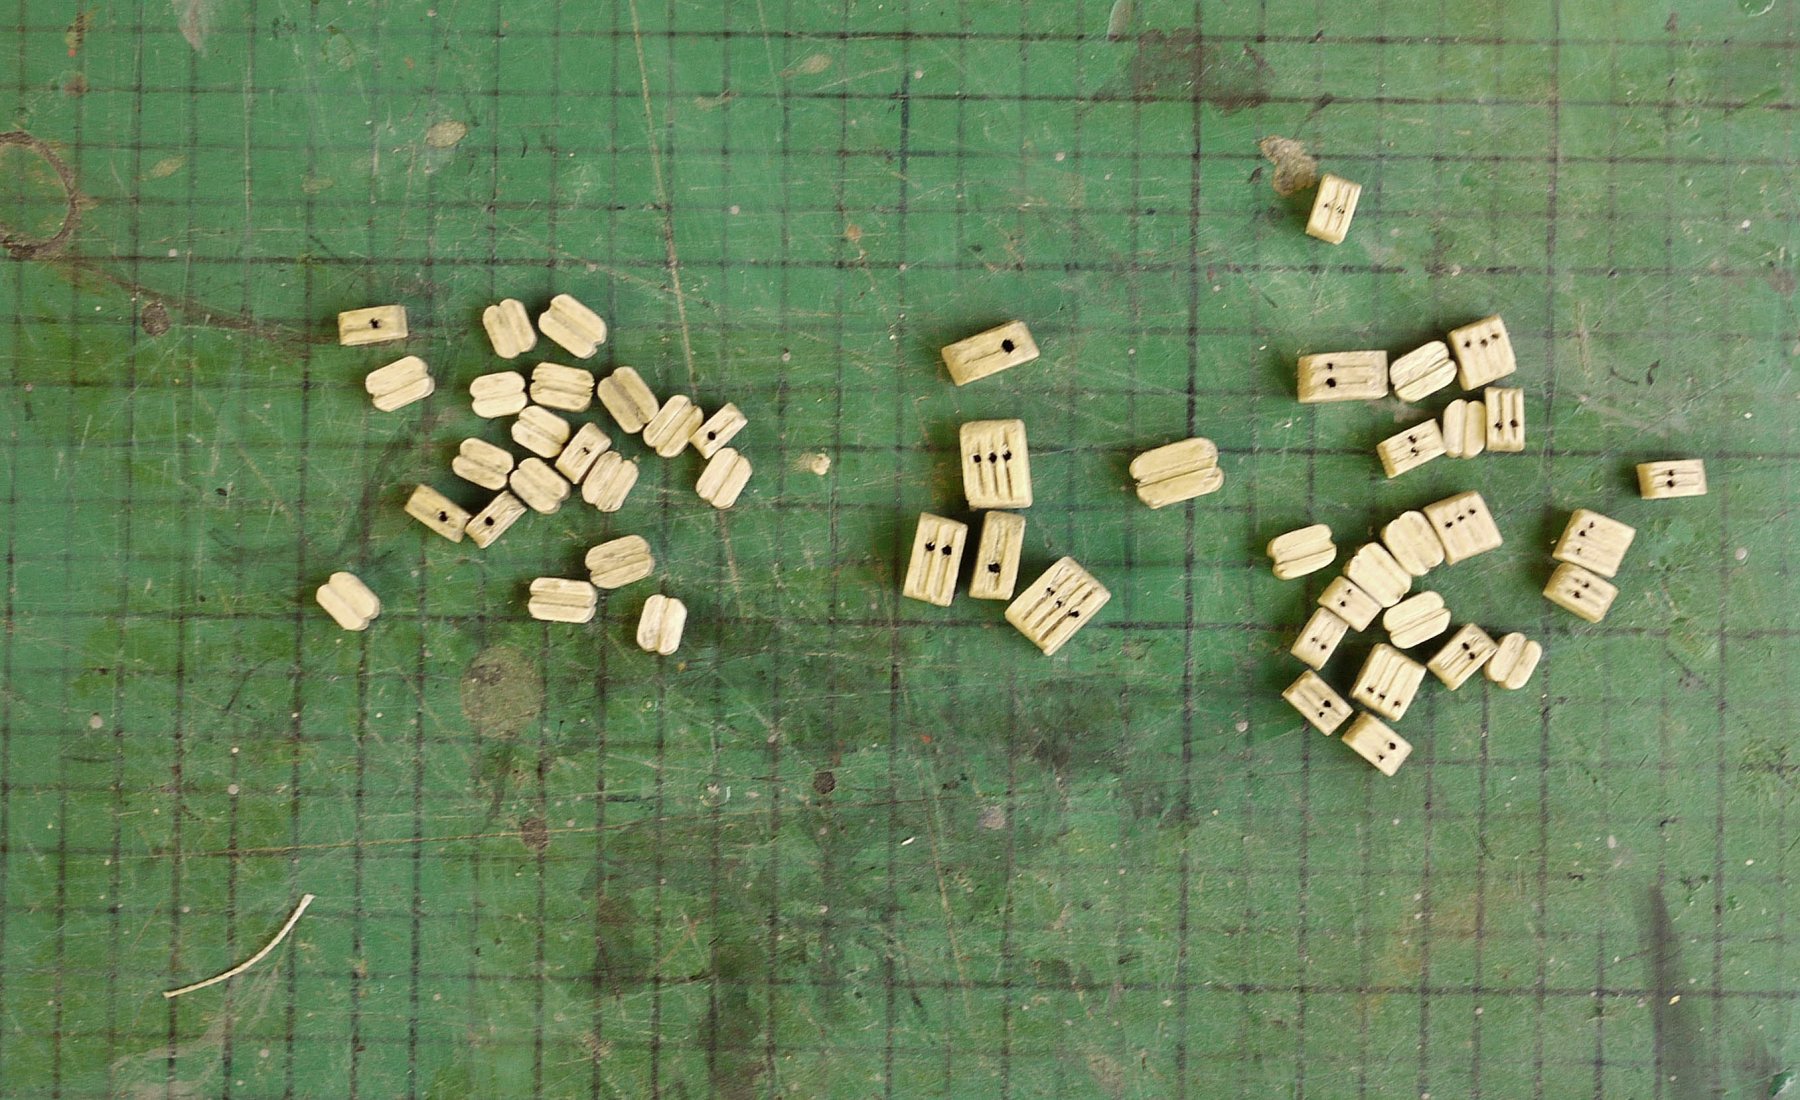
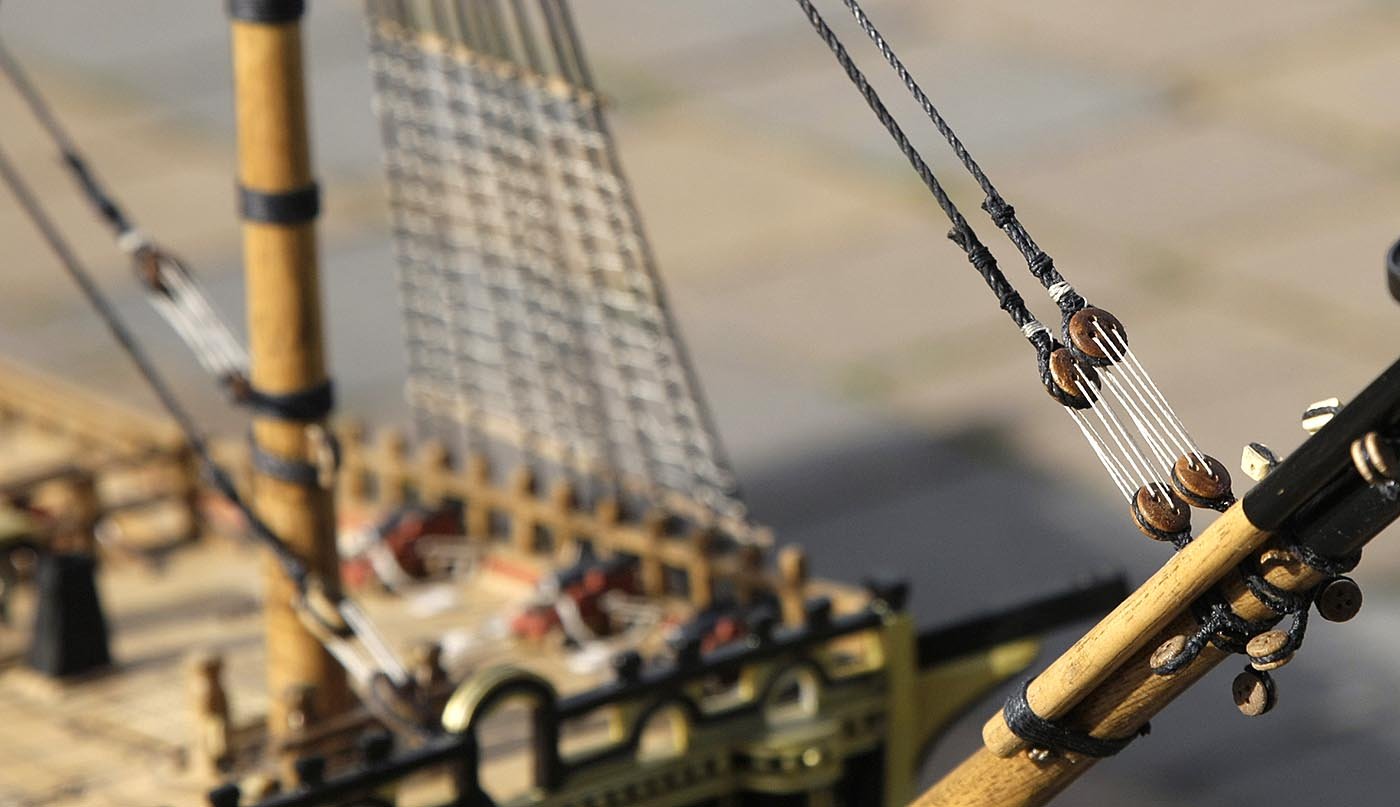
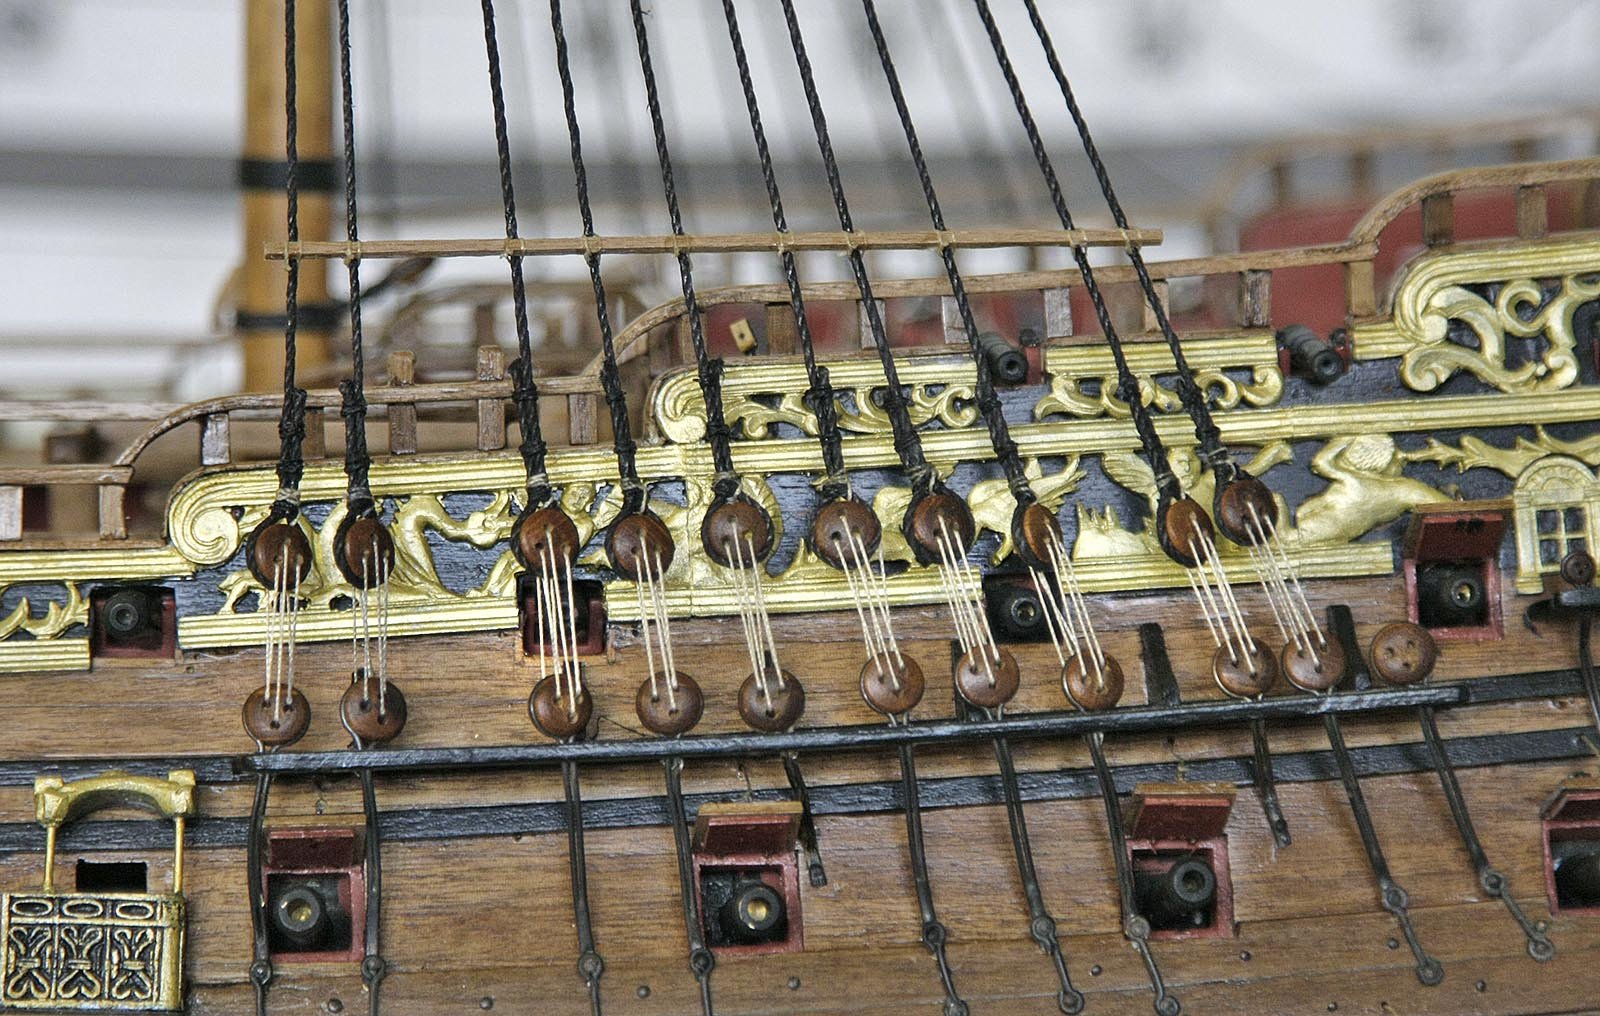
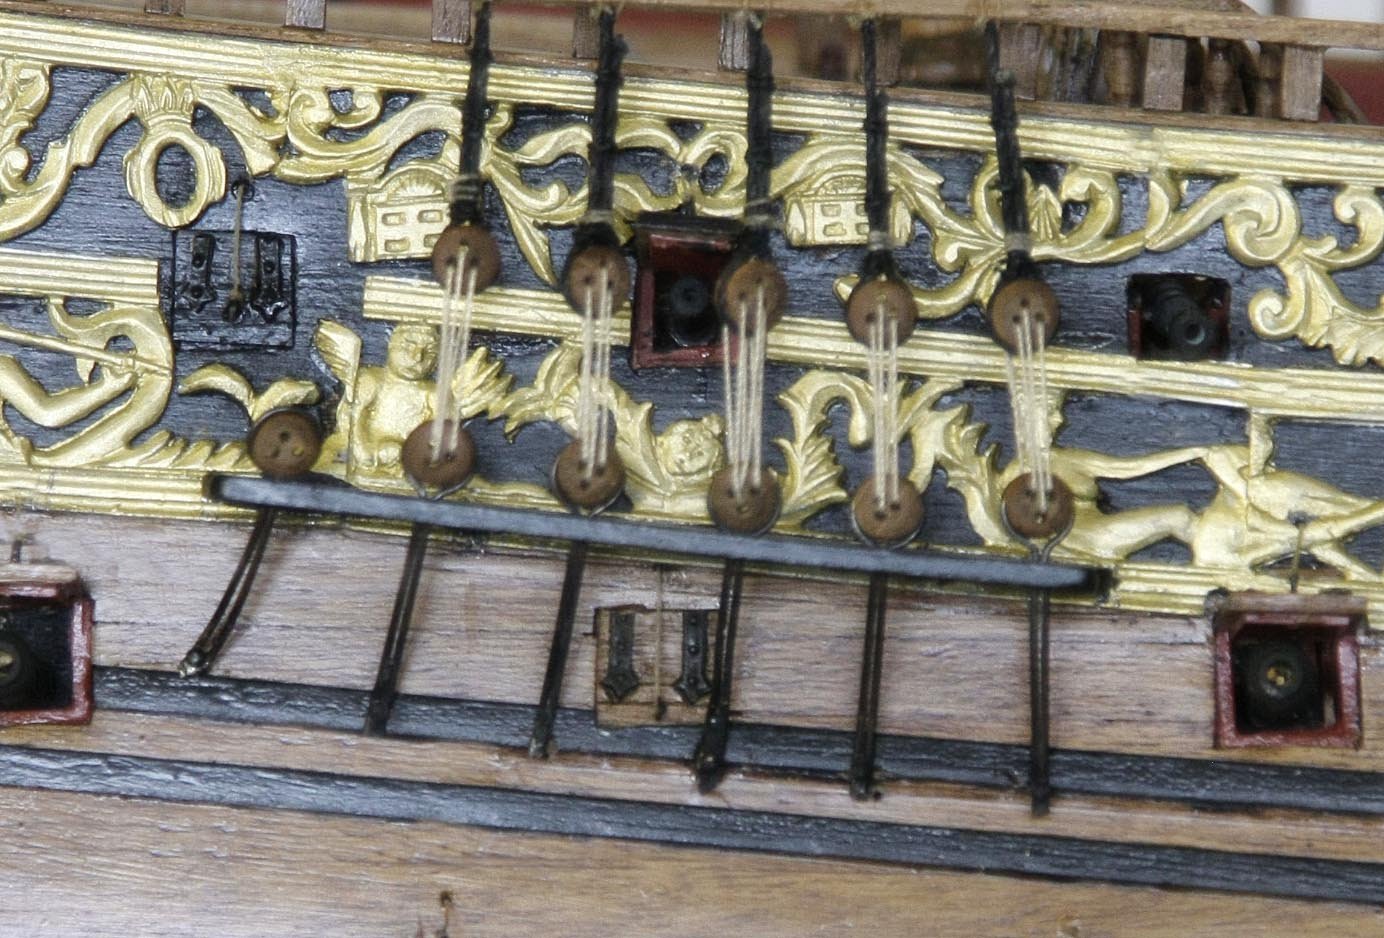
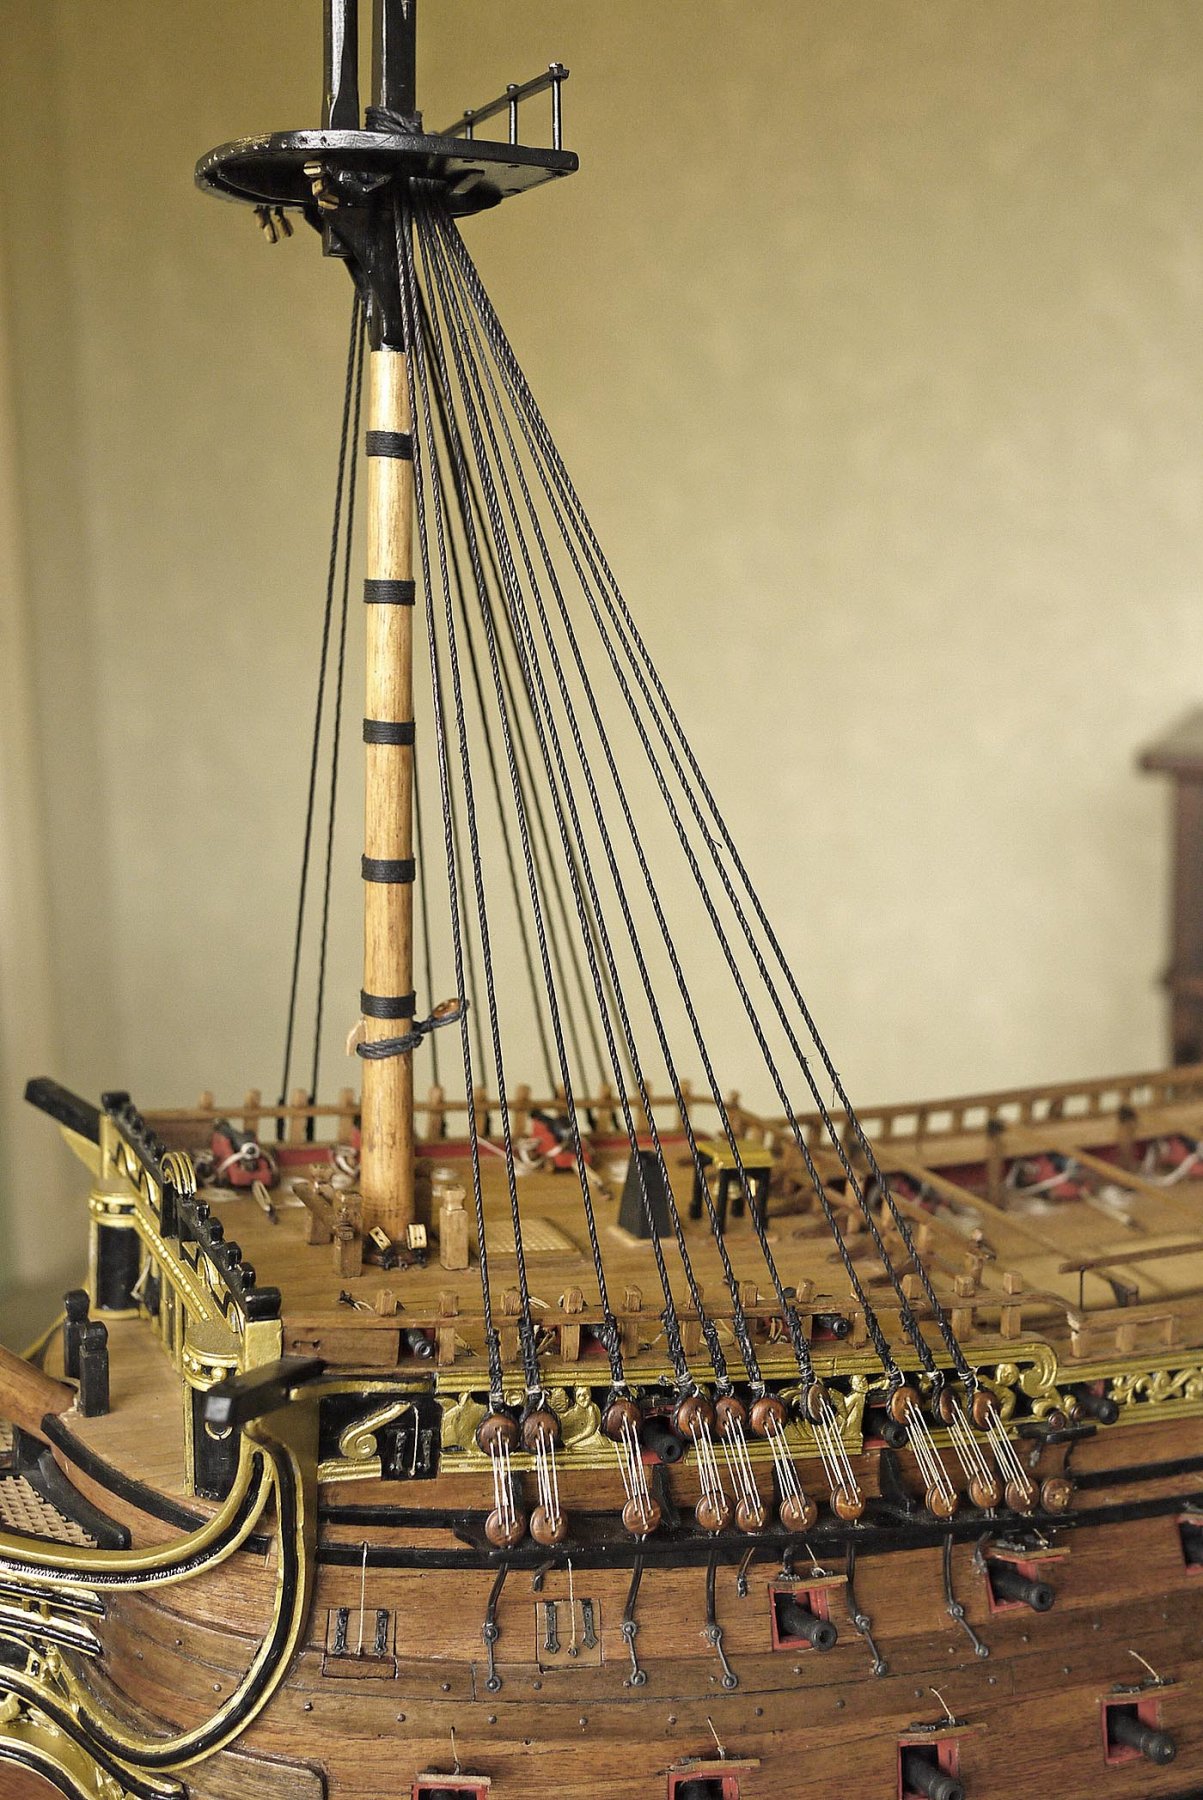
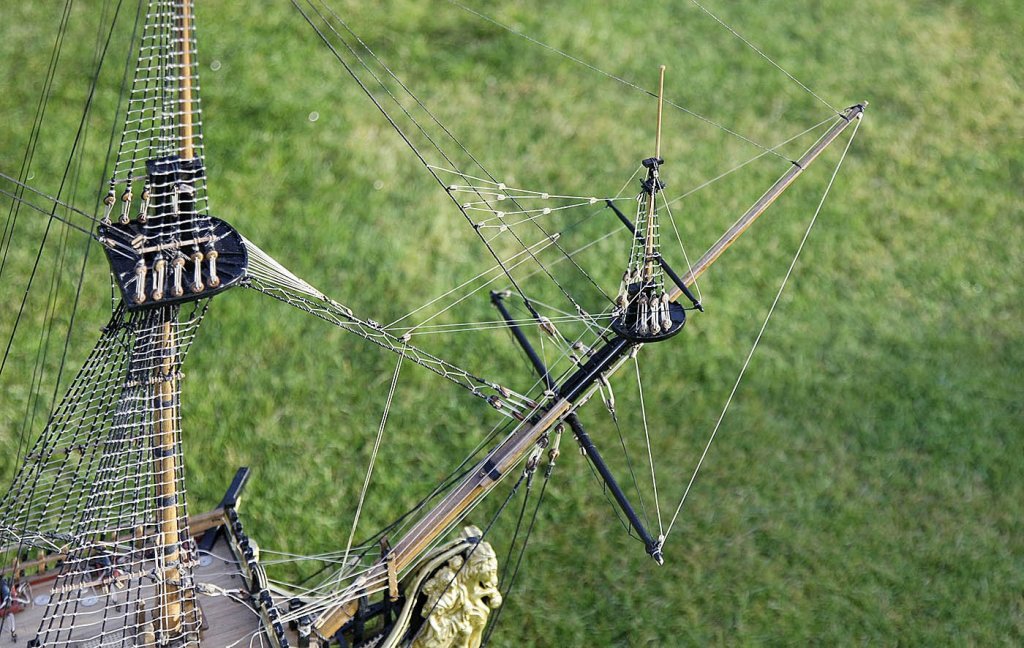
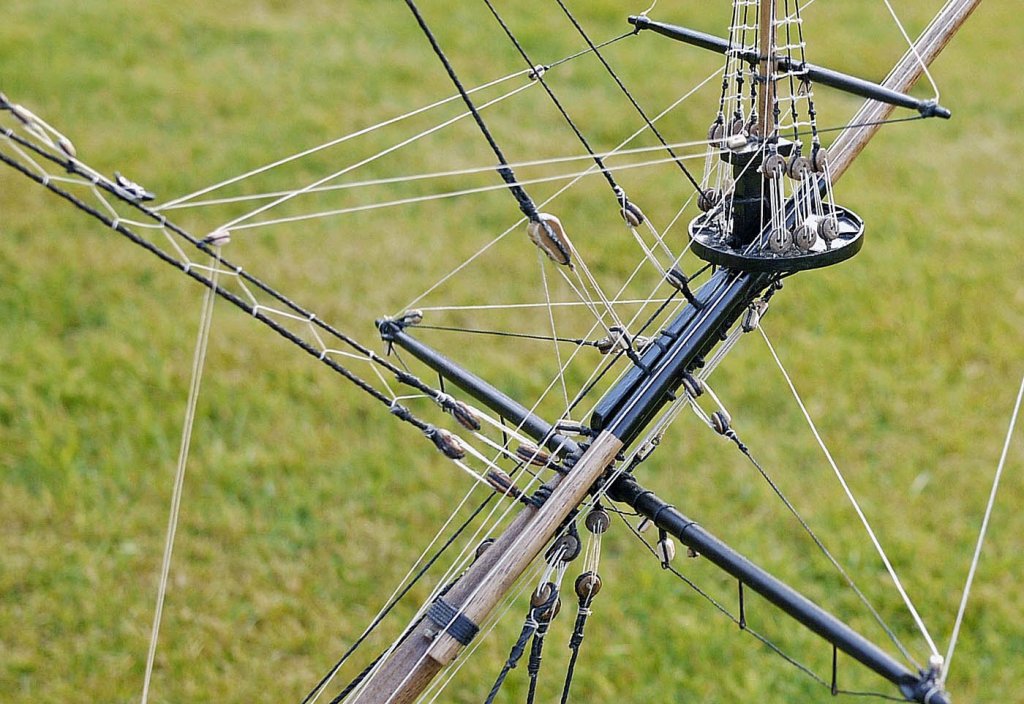
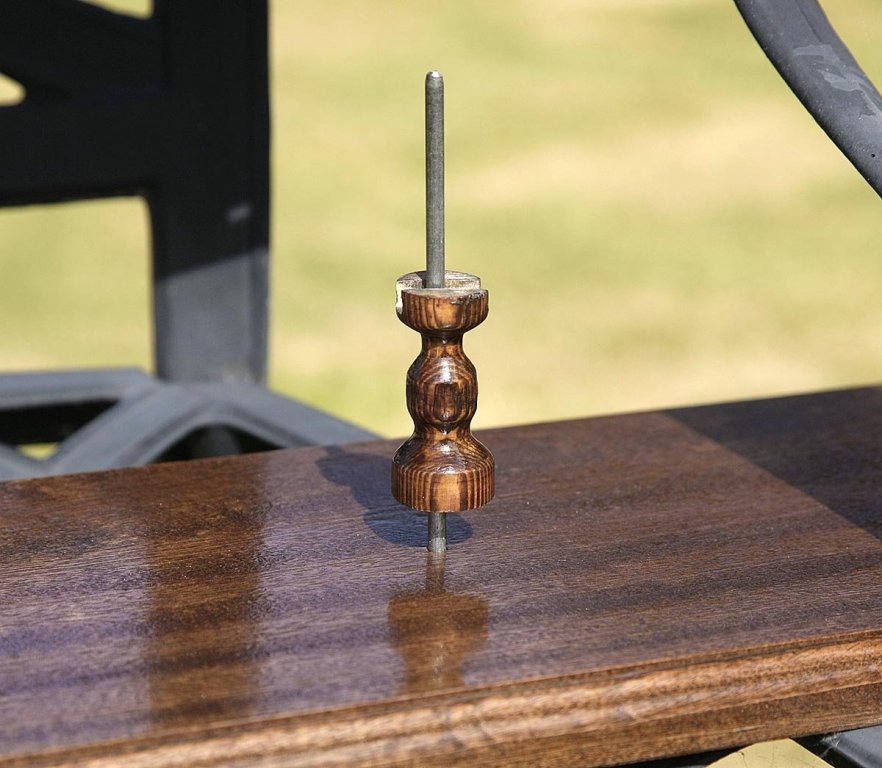
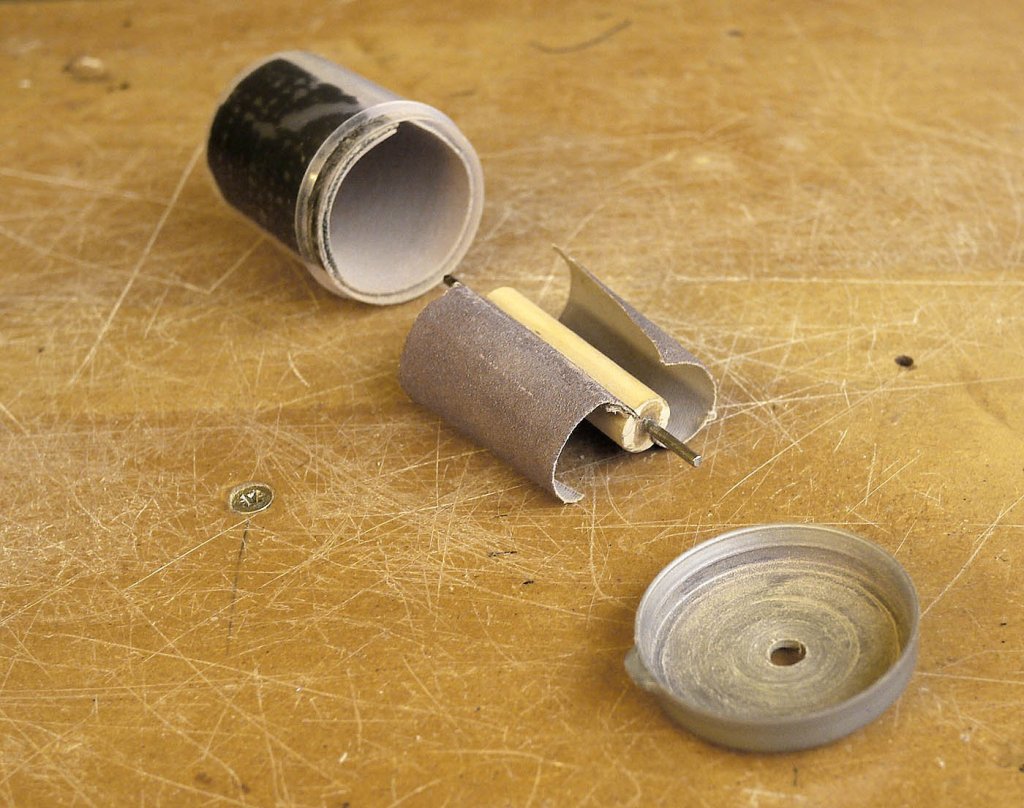
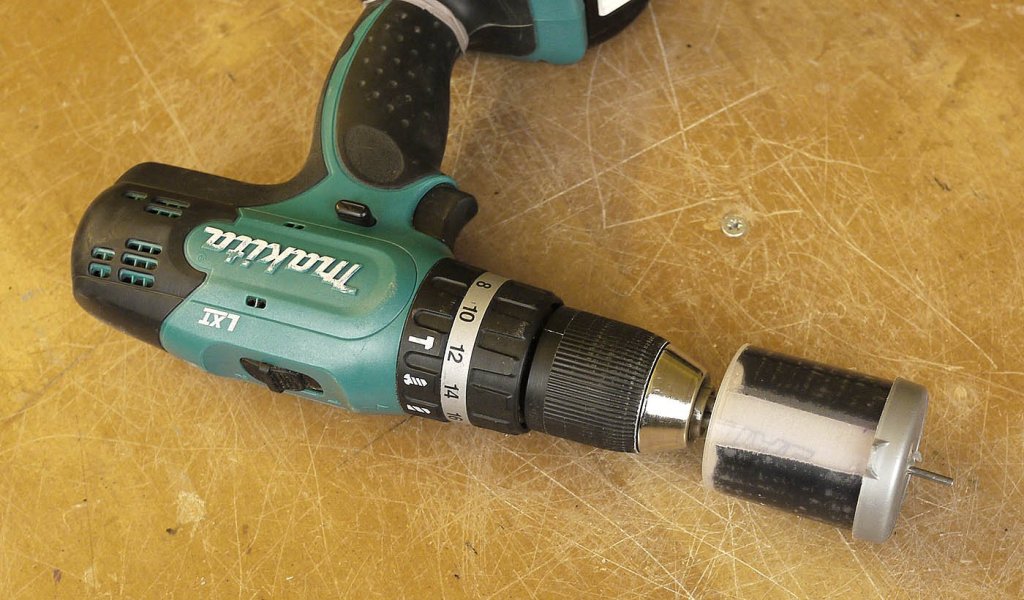
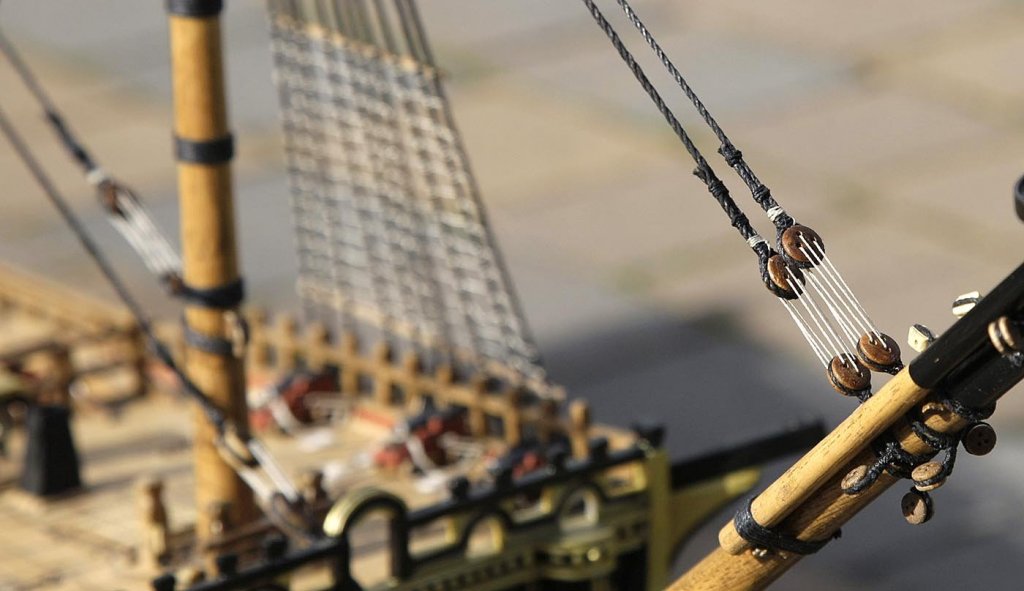
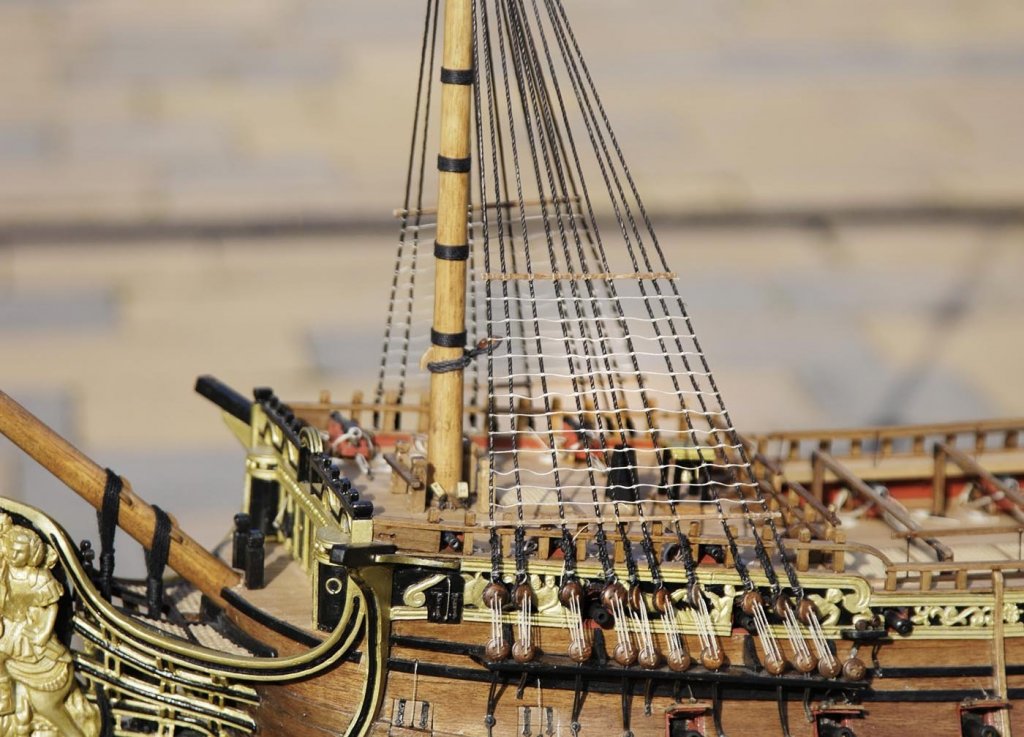
Hello Everyone. Thanks very much for your likes and kind comments about my photos, I think that you've guessed by now that photography is another of my hobbies. I do make quite an effort to get good pictures so I appreciate you liking them, that's all an amateur photographer wants. Zappto, I use a cheap unbranded cyno de bonder, when applied it just softens the hardened glue enough to work parts free, you then need to wipe the goo away after, for that I use acetone. I bought it initially to get the stuff off my fingers, it works great for that but I don't think that it would work on white wood glue though. If your wood glue isn't waterproof try soaking the part, if you can't immerse it wrap it in a piece of wet cloth I find that this usually works. I have now finished all the ratlines, all the forward stays and all standing rigging of the bowsprit. I had no idea how the fore preventer stay was attached to the knighthead. The plan showed it as the fixing point but does not show how, this is .75mm thick black cord, I couldn't imagine this just being tied off, as hard as I looked for images of this I couldn't find any, not even searching online. I did see that on the Victory it was fastened using double pulley blocks so that was how I decided to fit mine, they look ok and functional. No doubt someone will tell me they are wrong but they are done and are staying that way, if they were good enough for Nelson then they're good enough for me. I decided to refine the supplied blocks a bit so I made up my version of a block sander. Using a small round container I lined it with 150 grit sandpaper then using a length of dowel I glued sandpaper flaps into slots that I'd cut then glued a nail as a shaft through its centre. A hole was drilled into the base and lid to take the shaft. In use I put in some blocks fastened the shaft to my drill and spun it for about 20 seconds. When done I saw that all the small surface roughness had been removed and the edges were slightly less square, I think that if I spin them a little longer the edges would get rounder. This only took about five minutes to make and it worked so I think it was worth the effort. I tried to photograph the rigging but because of the current bad weather it is so dark indoors I've only managed to get one acceptable picture of the rigging so the rest will have to wait until another post. Of the standing rigging I have the back stays to do, I'll need to do the snaking on the main and fore stays and the crowsfeet then I'll be able to move on to the spars. Ken


-
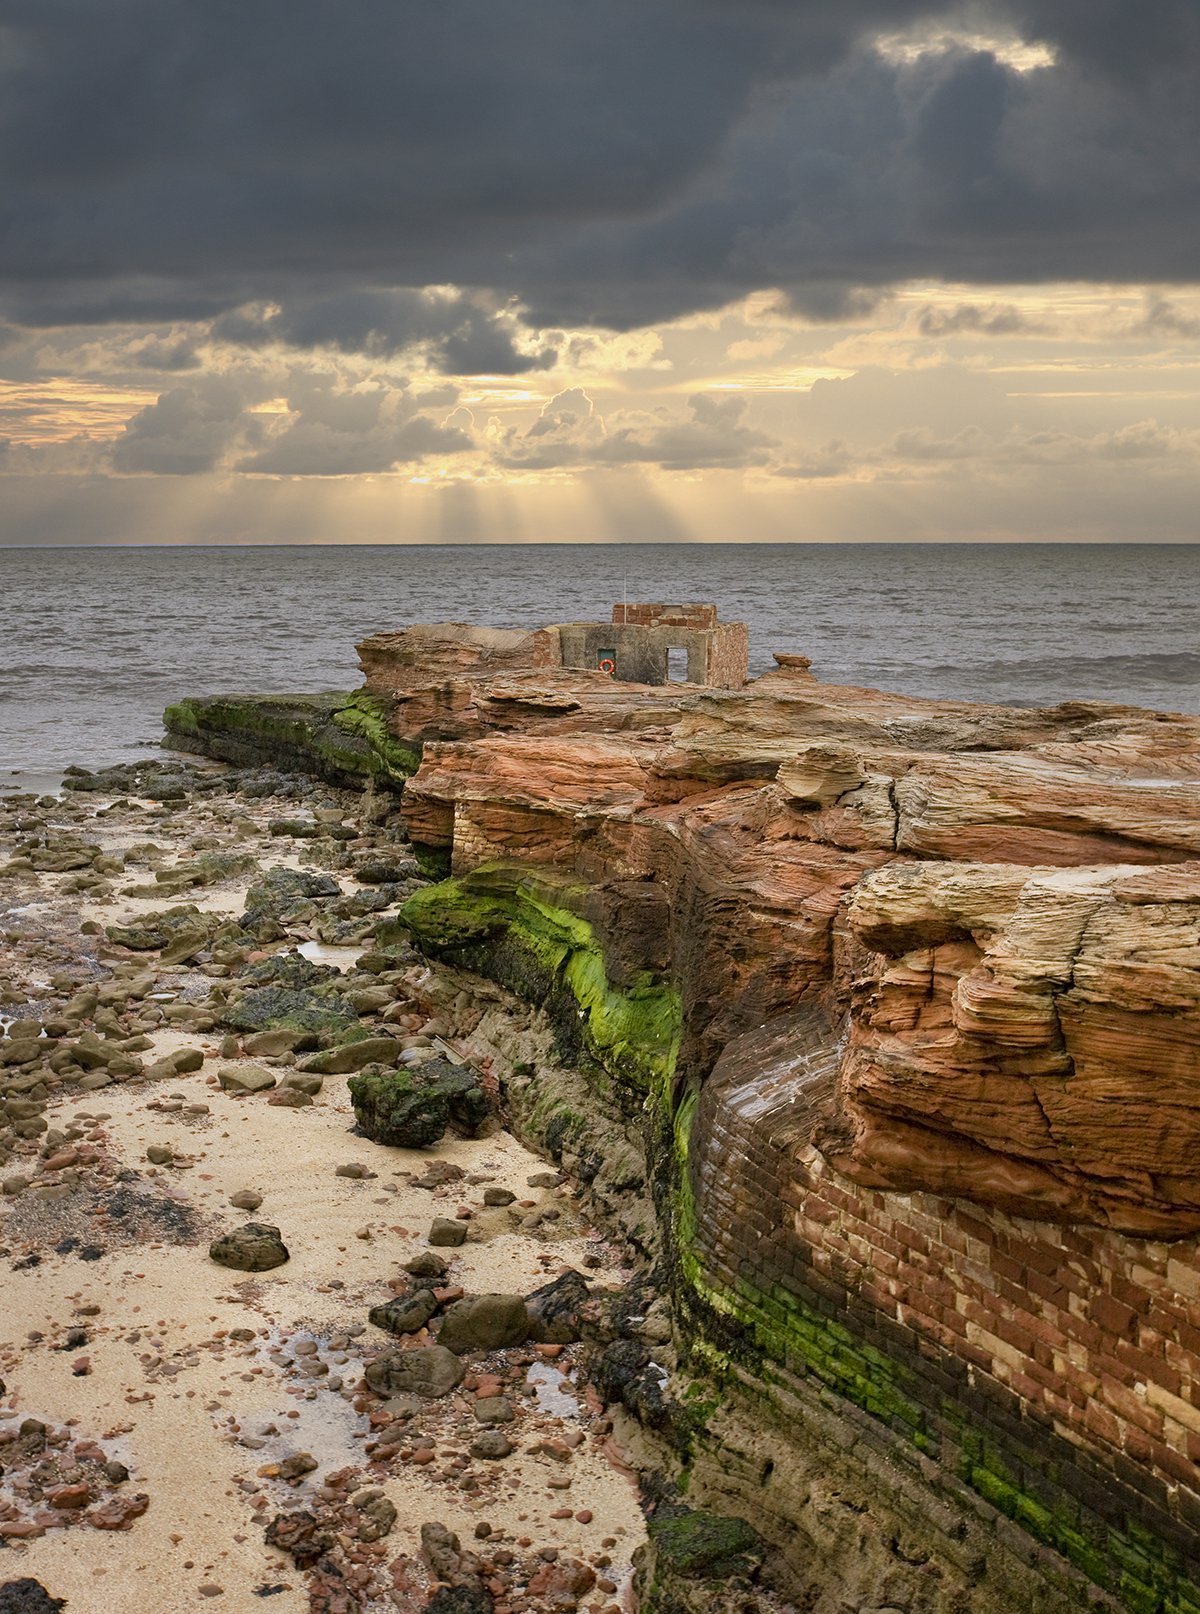
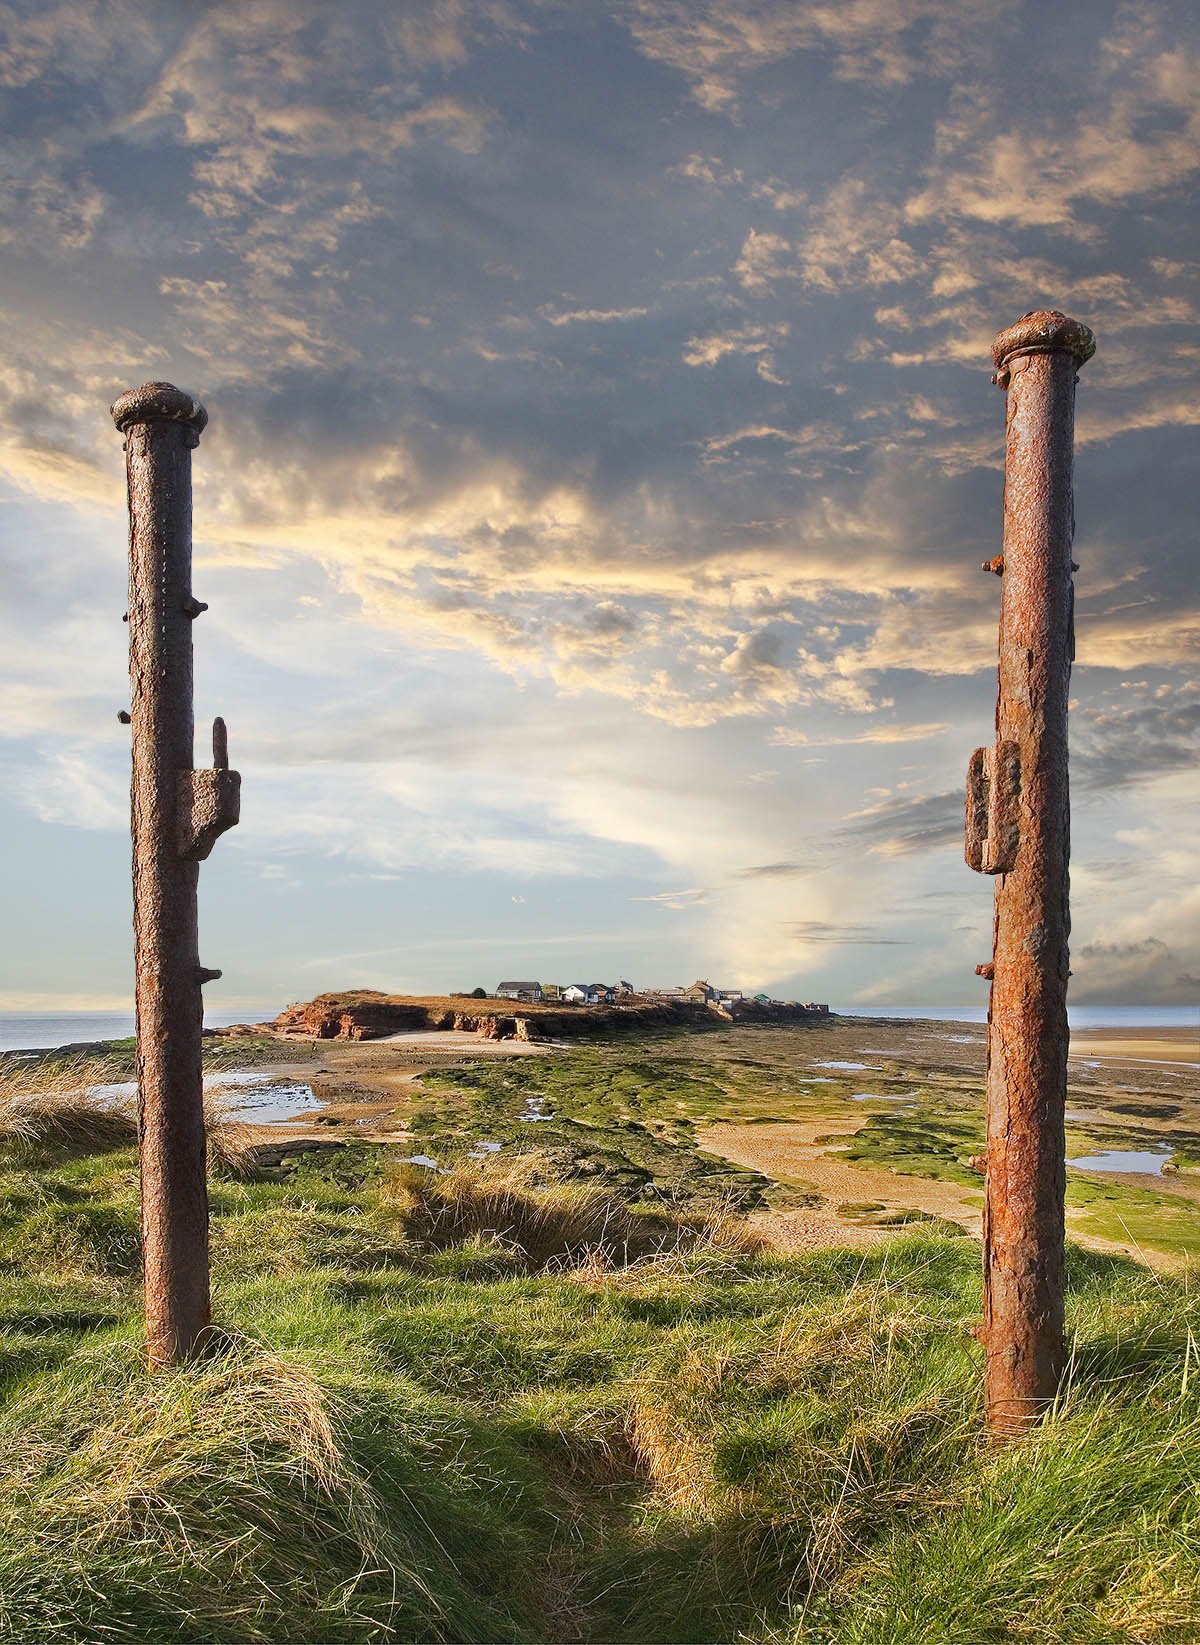
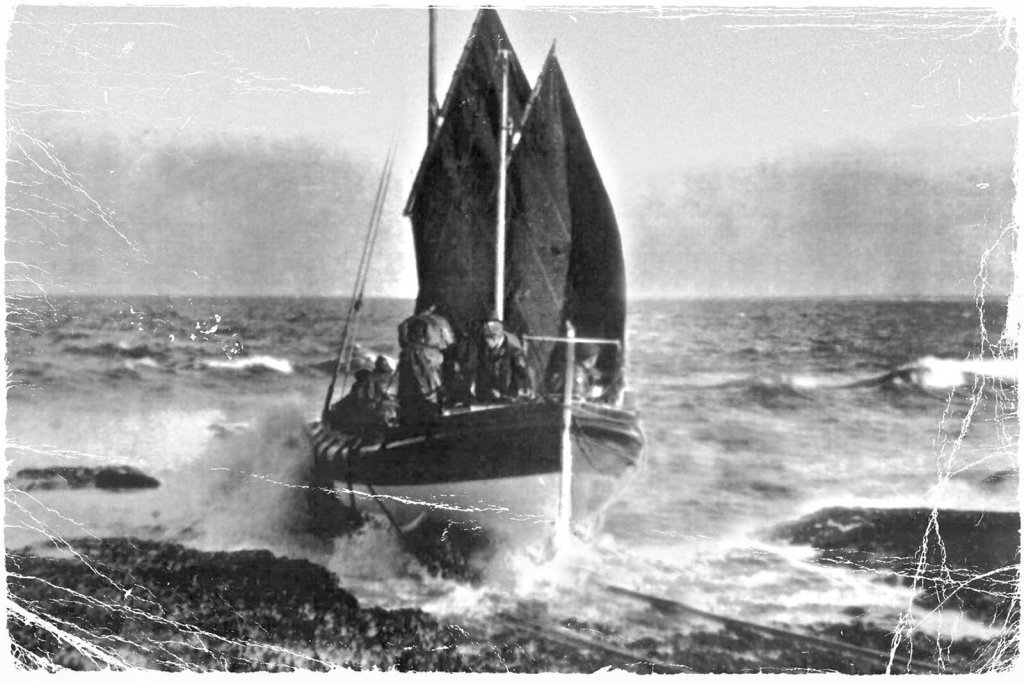
Hello Everyone, I'm working away at the upper ratlines at the moment so it will be a short while until I've got anything of interest to show. I'm taking a coffee break at the moment to rest my shoulders, so in the meantime I'll show you some more pictures of my home town. In the last set I showed you Hilbre Island about half a mile away in the estuary, here are some closer pictures. At the tip of the island you will see an old disused lifeboat station, this hasn't been used for about a hundred years, in its day it was fully manned as it was a busy shipping area, the lifeboat was man powered, oars, very brave men. I've included a picture of the old lifeboat. As I've already said, it's hard but someone has to live here. Ken


- 424 replies
-
- 10
-
-
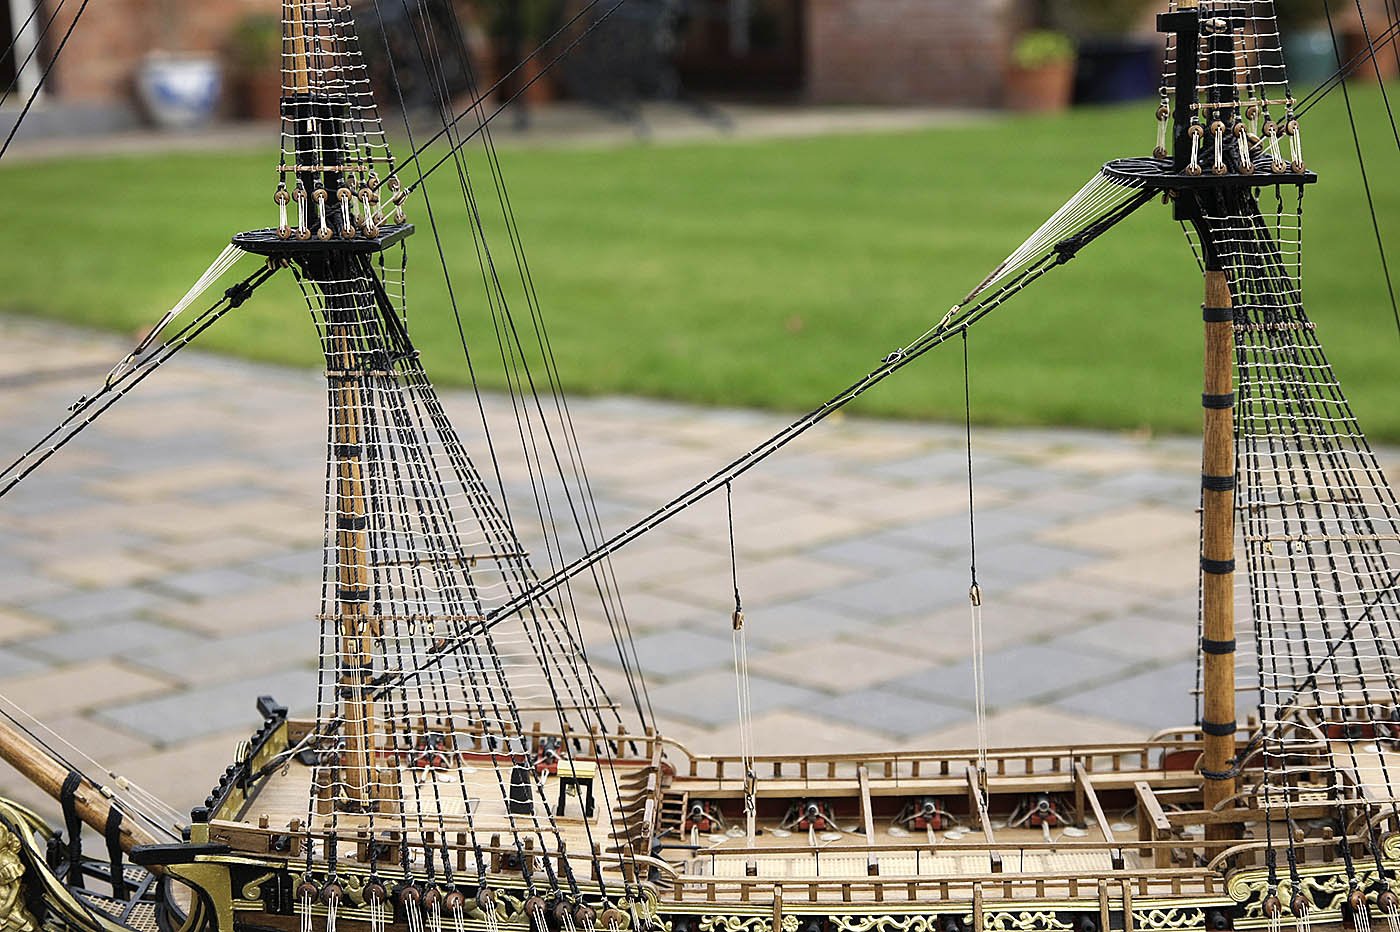
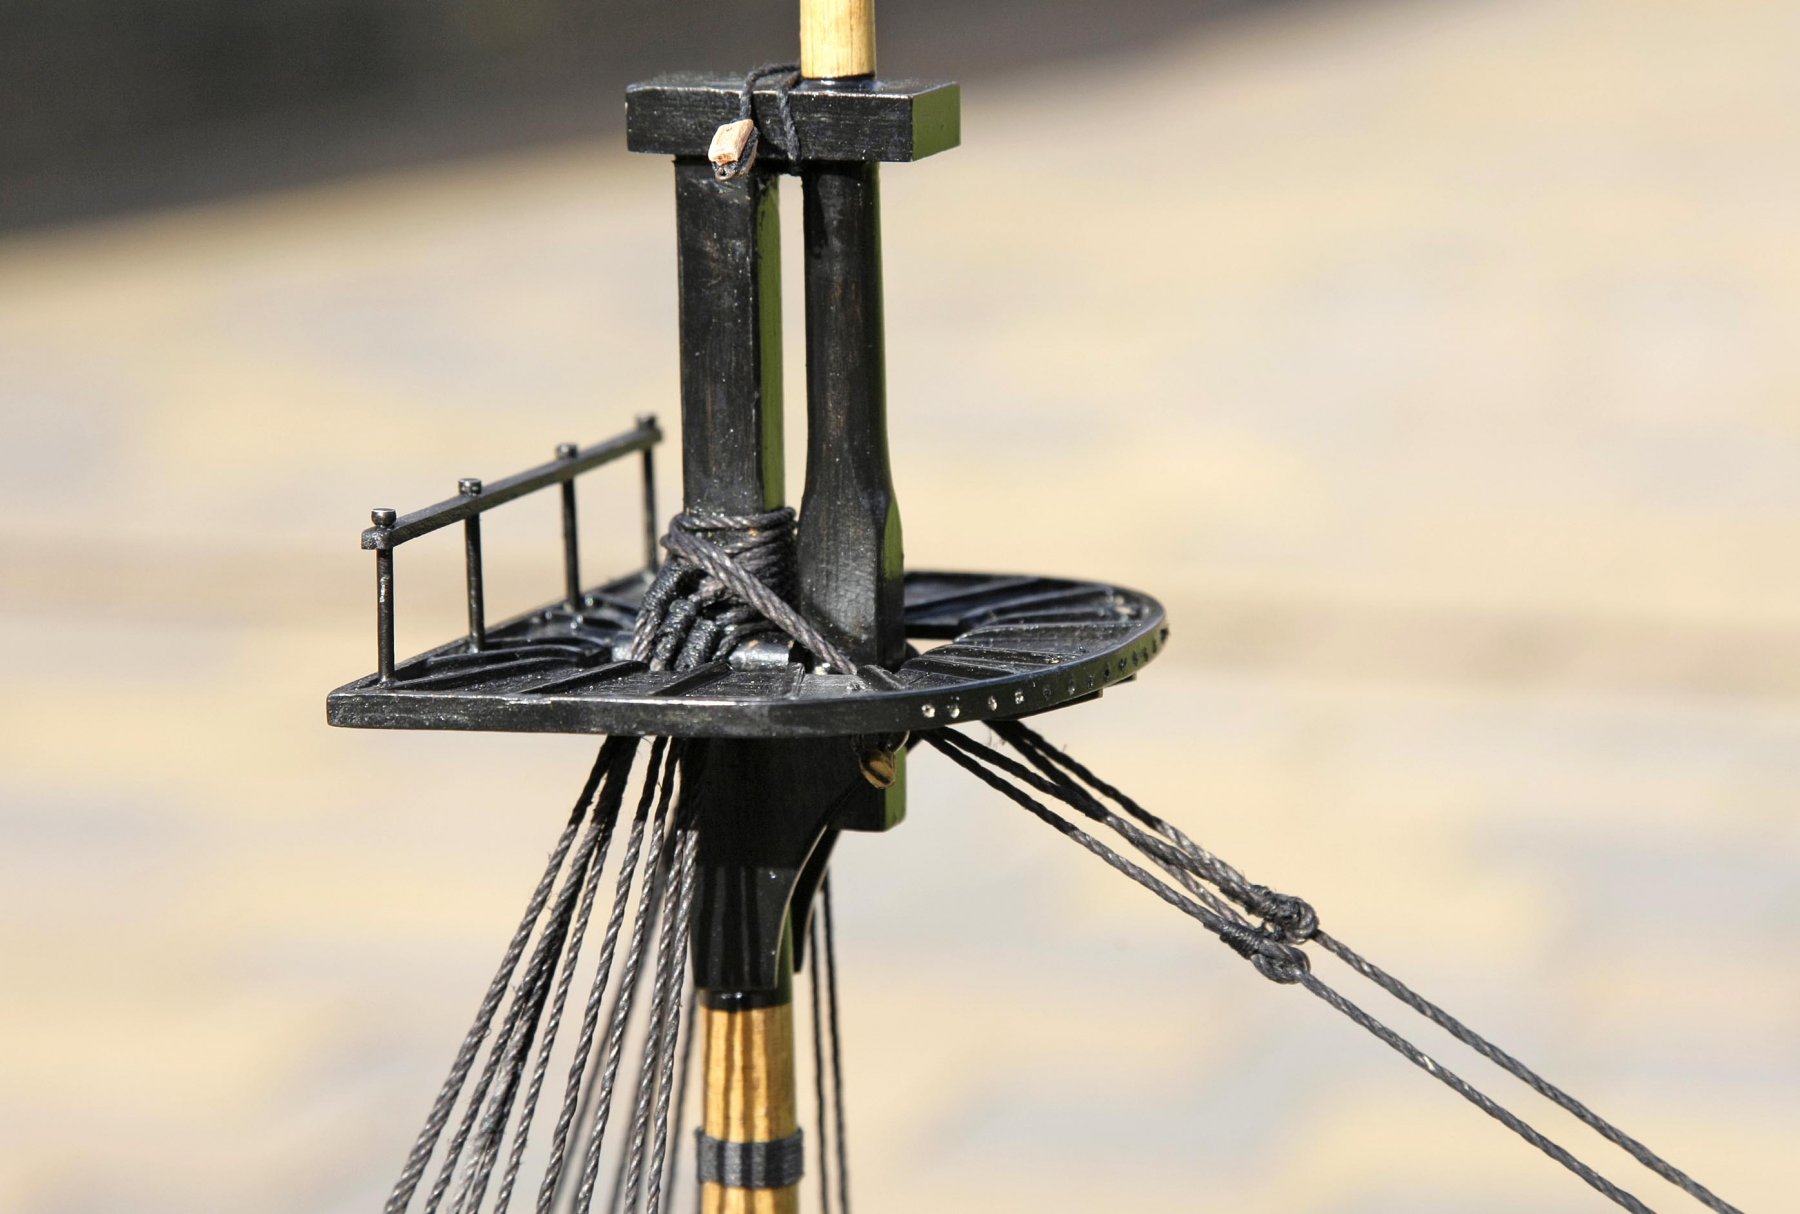
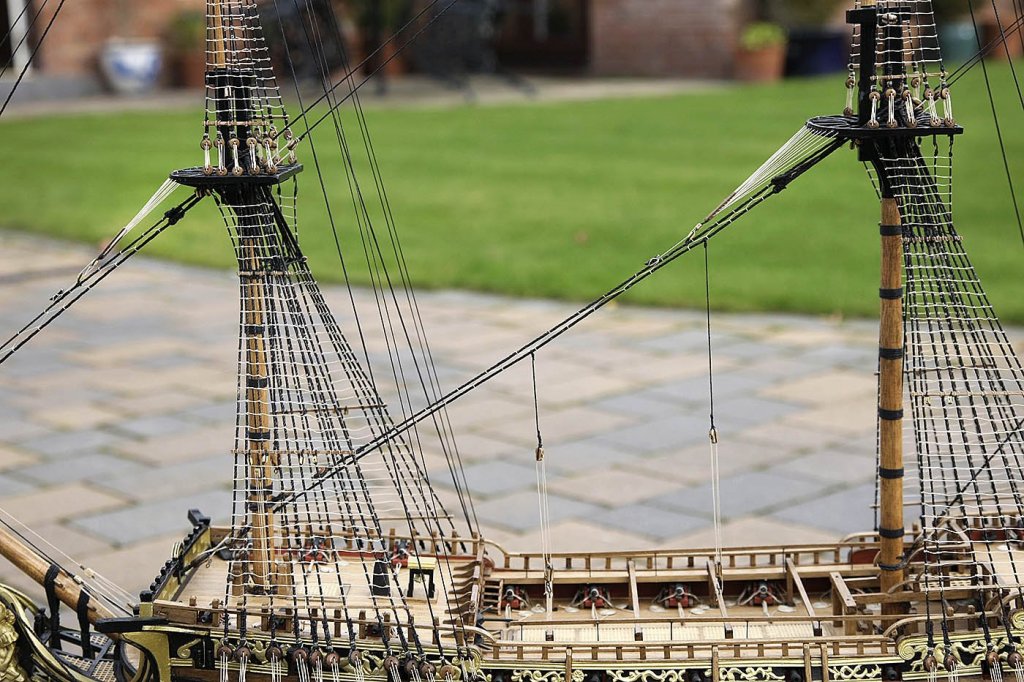
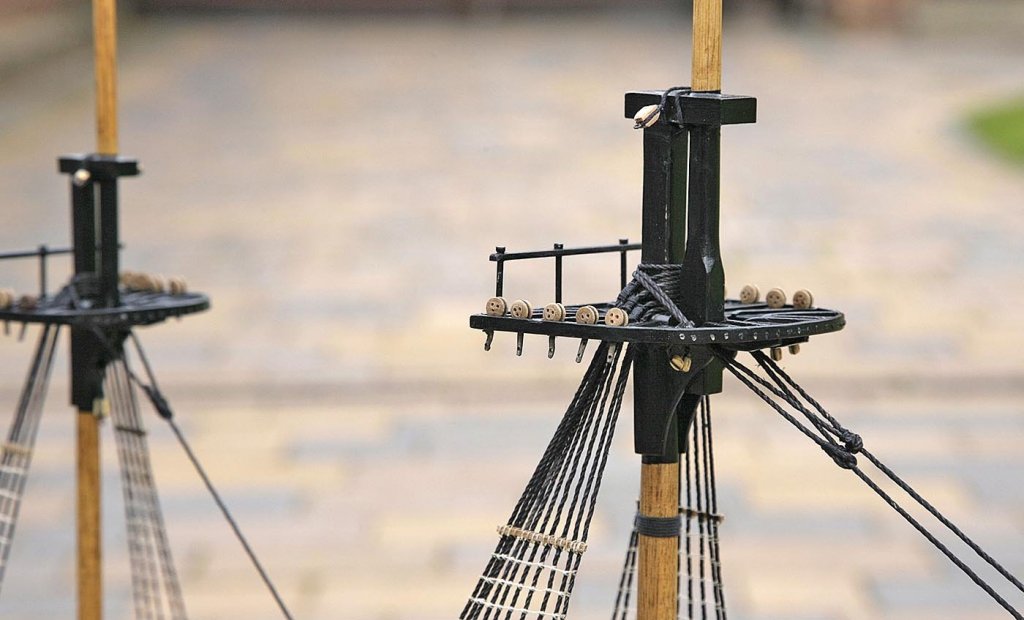
Hello Everyone, Again thanks for your likes and kind comments. Yes Zappto I spend quite a bit of time building my Royal William, followers think that I'm making very rapid progress but I spend at least four hours, sometimes much more each day on it so actual building time has been quite long. It's become a bit like a drug habit, I have to keep at it to get my fix, often I do a part over again many times until I get it how I want, sometimes I hate it and want to weep with frustration, it's been some journey so far but I can't remember a project that I have enjoyed as much, this really is some build and will be a difficult act to follow. I feel that I've made progress since my last update but it's been hard going, I've finished the main ratlines, fitted the catharpins, I had great difficulty and frustration around this area so I've now just made them up simply, more of a token than of anything realistic. The futtock shrouds and ratlines are in place and most of the stays are fitted. The shrouds deadeyes and most of the lanyards for the upper masts have also been done. When all of this was done I thought that the railings that I'd made up and fitted into the tops looked too out of scale, too big, so I've removed them for now. It all sounds easy now that I've written it down but it was far from it, at least half of the deadeye lanyards were done twice to get the height and tension right. I can't believe how many times that you can make different mistakes on the same length of rigging, the mainstay I had to redo twice and the front section that attaches it to the bowsprit I did four times. I must have made every error in the modellers handbook and one that I think must be a first ever, so strange that you couldn't make it up, I'll explain. I had fitted the futtock staves then went on to do the catharpins, I only wanted to put in a simple version so I fitted two pairs into each mast. When I looked at them the next day I saw that the thread that I'd used was too thick and looked out of scale so I decided to change it for a thinner one. I'd seized the knots with a touch of Cyno and they were difficult to undo, I didn't want to go near that area with a scalpel, ( another lesson I'd learned ) so I put a drop of de bonder on the knots and left it soak, the Cyno started to soften but not enough, I put more de bonder on and left it for about an hour. When I returned to my consternation I saw that the de bonder had wicked down the shrouds, it had taken on the black dye which then leached into the white ratlines turning them black. I was obliged to take away and remake the upper staves and four or five rungs of the ratlines, this repair took me about five hours of extra work. I have to ask myself yet again just what I have done to offend the Modelling Gods! Ken Here's one for you Pete.


- 424 replies
-
- 15
-
-
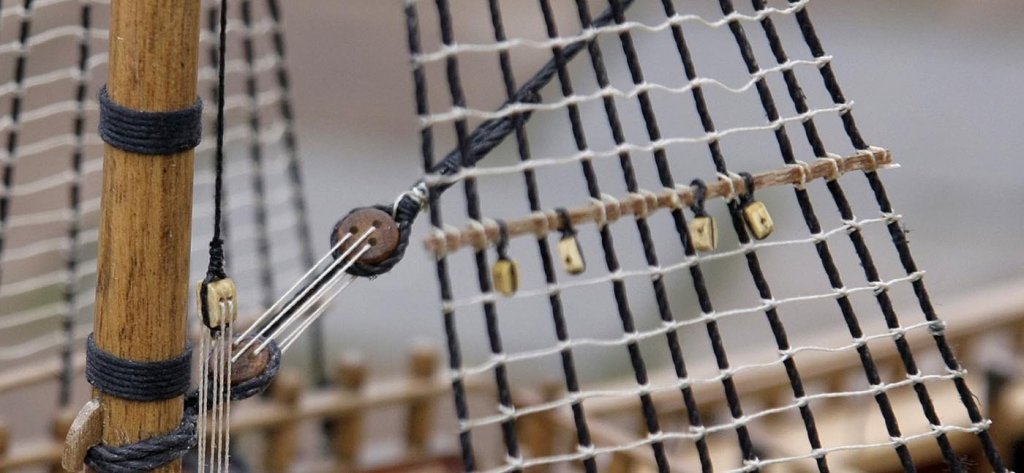
Hello Everyone, Another small update. I finished off the rest of the lower ratlines, I'm glad that they're now out of the way, I again did them by eye, I had no issues and they went in fairly quickly. I then made up the 28 strops that mount the dead eyes to the tops. I used 0.7mm copper wire this time as it was easier to wrap around the dead eye, I soldered the two legs of wire together, cut to size, drilled holes for the hooks, cleaned them up and blackened them. The rigging hooks that I'm using are from the Caldercraft accessory range, they come as a photo etch sheet and can be got from Cornwall Model Boats. Ken

- 424 replies
-
- 14
-
-
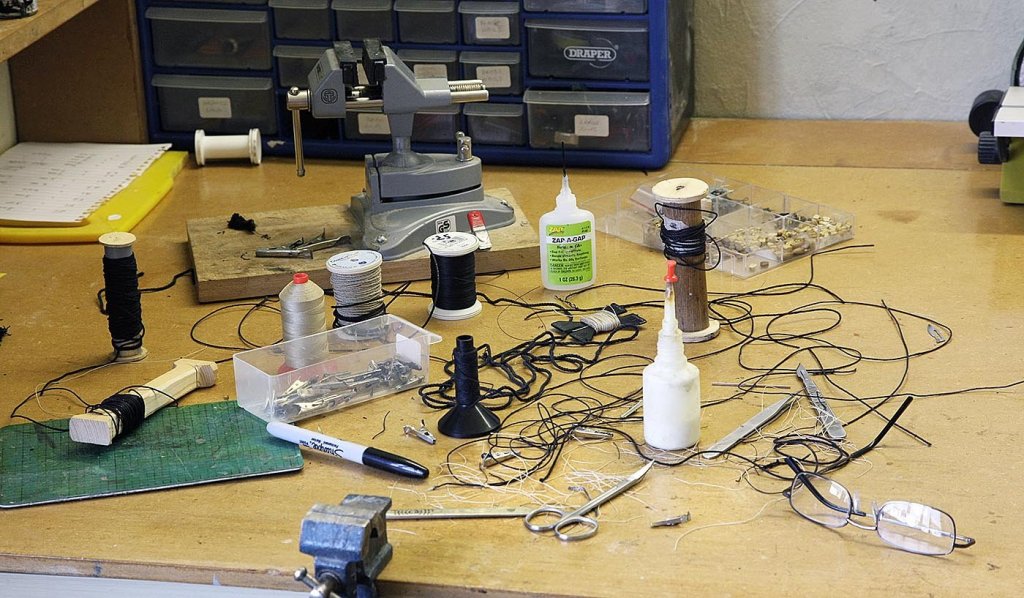
Hello Everyone, Here's today's update. I've now fitted the lower stays for all three masts. The only difficulty that I had was deciding which thread to use as the ones that I had were either a little under or a little over what the plan stated and I found it hard to measure the actual diameter of it, anyway I just did them so that they looked in proportion to each other rather than use the actual scale size. I don't think that anyone who looks at the model will get out callipers to measure. When I'd finished and was getting ready to photograph the work I noticed what a tangle my bench had become and just how much different threads that I'd tried and the amount of cut offs that there were. I took a snap of it, I'm sure that you'll smile on recognising the state that I presume you sometimes get into. Again a nice sunny day so plenty of snaps. Ken


- 424 replies
-
- 10
-
-
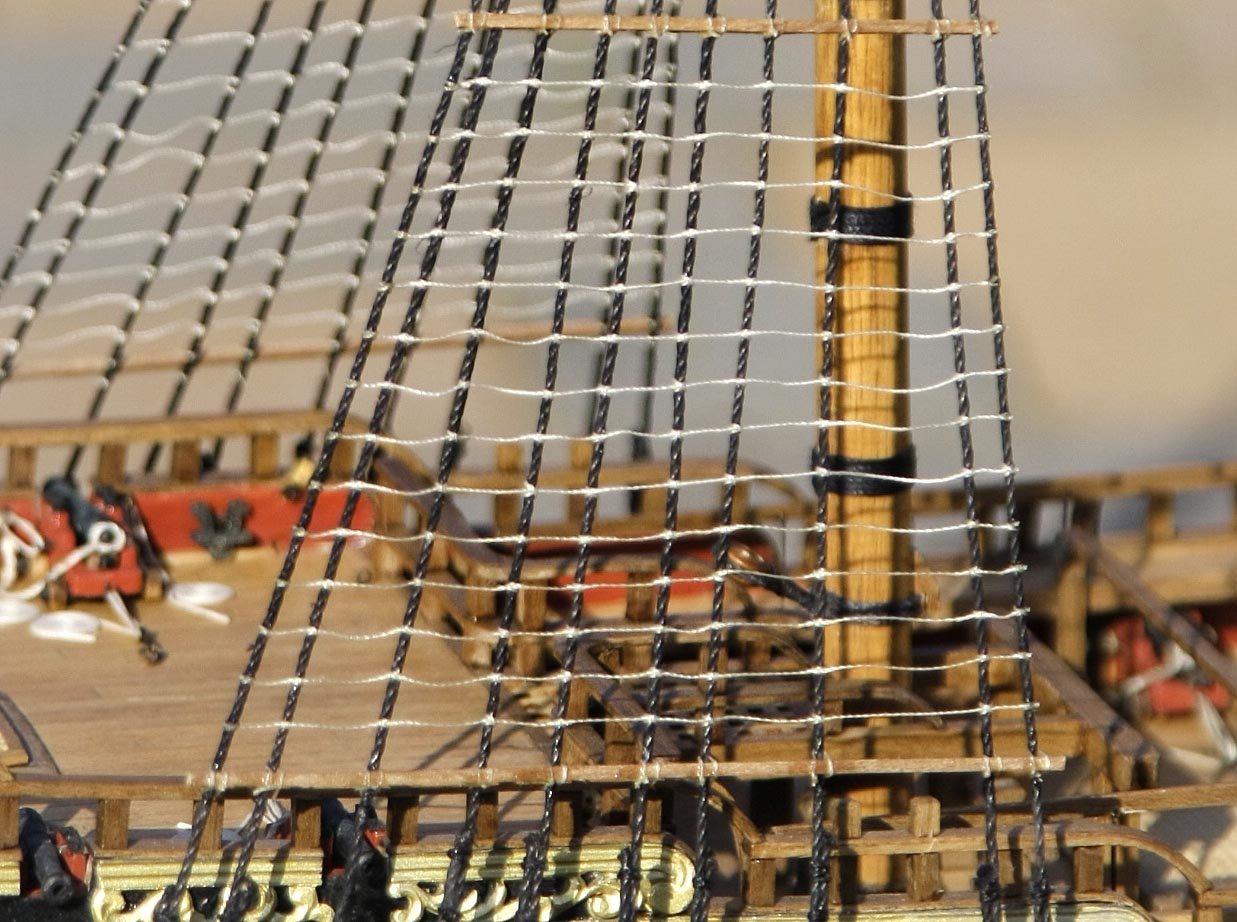
Hello Everyone, Again thanks for your likes and helpful comments. I've made a fair amount of progress today on the ratlines, I know there's still a fair way to go but I think that after today's work I have broken the back of it. I've completed all that I set out to do at this stage. I tried the method using marked grid lines behind the stays to get the correct spacing, in theory it sounds like a good idea but in practice I found it impossible. To make it work you needed to place the lined paper immediately behind the shrouds but this prevented passing the cord through and guiding it from behind with your other hand. In order to be able to thread them the paper needed to be placed and supported away from the shrouds, but this then gave a different perspective of the spacing especially as you're working from slightly above. I gave up and just did it bye eye, I found them fairly quick and easy to do and only needed to slightly adjust a few when done. I put the sheaves in last to line up with the upper ratline and I didn't have much problem getting the tension right to keep the shrouds even. I'll need to reflect a while as to the next step, I'm not really sure at the moment. It's a nice sunny day here so the photos were taken outside for a change, better light. Ken


- 424 replies
-
- 10
-
-
Hello Everyone, Another progress update. I've just finished the lanyards and put in the lower batons on the shrouds. I made fewer mistakes this time around, I got about 80% right first time, the other 20% I had to redo, sometimes more than once, but it's now done to my satisfaction. The shrouds have three batons, lower, middle, and top, I think at this stage it would be normal to put each of them in and then do the stays, but I think that I'll do things in a different order. I'm going to put in the lower section of rat lines up to about where the middle baton goes, then I'll put the baton in as if it was the next rung in the rat line that way I won't have to judge the exact distance between the lines up to the baton, I can just space them as I see fit. I'll do this part now, that will get me half way through those tedious ratlines, I can then change tack and put in the stays, that way it will give me a break before I continue with the lines to the bitter end. I'll then do the upper shrouds and their rat lines. I don't Have a vast experience of rigging but I think that this would be my preferred approach, can anyone see a problem with this sequence. Ken

- 424 replies
-
- 12
-
-
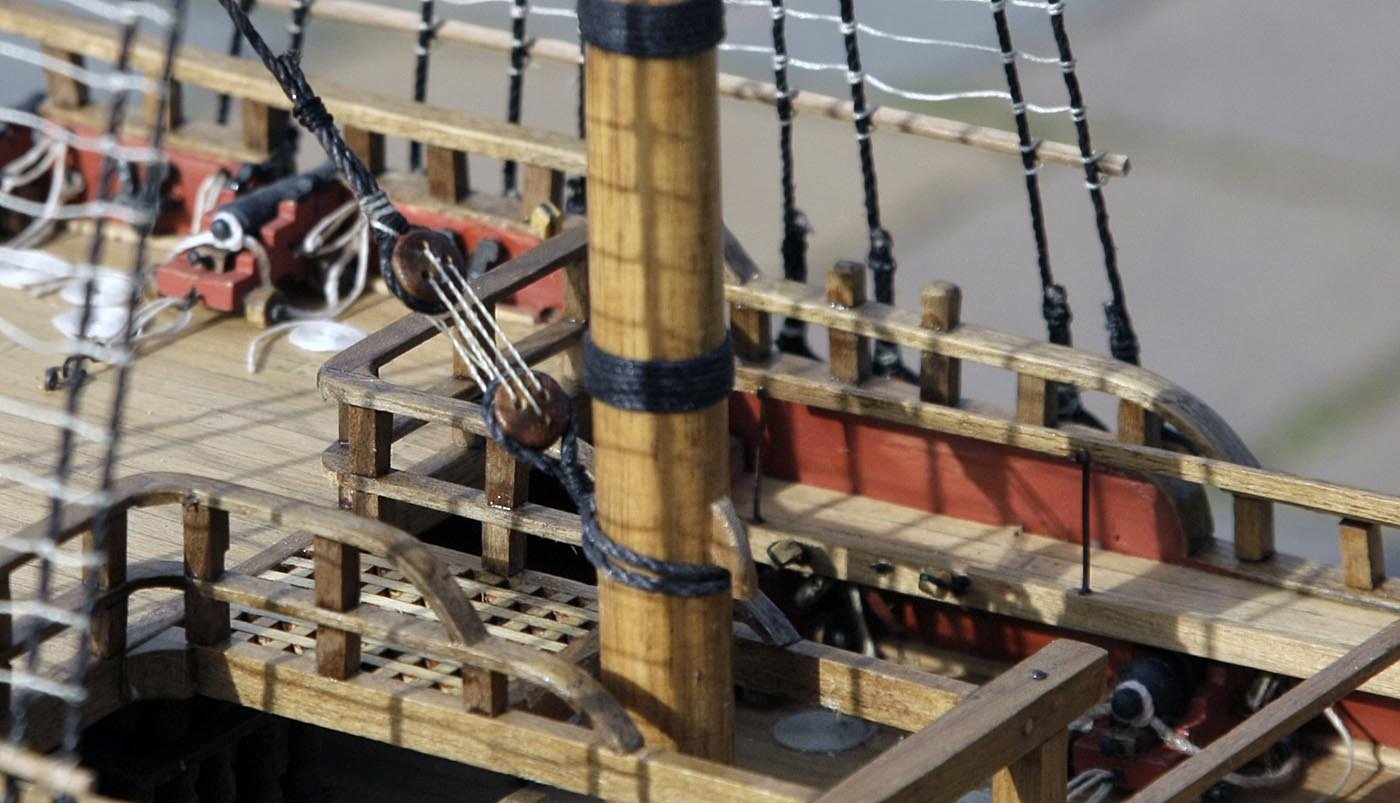
Hello Everyone, Just a short update to let you know how I'm getting on. I've finished the lanyards on the fore mast shrouds, after quite a few re fits they eventually came out ok. I hadn't realised just how many mistakes that one could make doing what looks a not too difficult task, not just mistakes but making the same ones over and over again. I found that getting the height of the deadeyes uniform was the trickiest part. The next set I think will prove to be easier as I think that I now have an idea what I'm doing. Talk about doing things over again, I decided that I needed to redo the bowsprit rigging again. After I'd fitted the mast shrouds I realised that I'd used the same diameter thread for the bowsprit as for the mizzen, I'm not concerned about exact scale but I think that things should look in proportion, in isolation they looked ok but against the rest they looked too thick, anyway I think that the second time around they came out neater, that's practice for you. The pictures show the different versions, see if you can spot which is which. Ken
- 424 replies
-
- 10
-
-
Hi J, With regards the prep for my wood, it's been a lot of trial and error but what I've settled for is first make sure that there is no glue in the grain, I make sure that I wipe away any excess when using, I give it a good sand mostly with a solid block with 120 grit attached. I then always rub in a thin penetrating wood dye mostly a light oak, this doesn't change the colour of the wood much but it makes it look richer and really brings out the grain, for contrast on rubbing strips etc. I'll use dark oak. I then always apply sanding sealer, this dries quickly and after a few minutes I give a light rub with 180 grit just held in my fingers. To finish I use a poly satin varnish. On the decks I use acrylic matt varnish, this dries quicker and is easily re touched when I end up marking the deck. For paints I use Caldercraft dull acrylic for wood and Tamiya Gold gilt on the decorative castings. I only ever use brushes but good quality ones and build up the colour using thin layers. I hope that this helps. Ken
-
Hello Everyone. Again thanks for your likes. I'm back with another update much quicker than I thought that I'd be. I've completed fitting the dead eyes to the shrouds. It didn't take too long after I got the hang of getting the finished height and tension about right so that when the lanyards are attached they will be a uniform height. I used a wire jig for this, from what I've seen this seems to be the simplest and preferred method of doing it. The first ten took me about the same time as the next forty. I'd made it a bit difficult for myself, I don't know why but I'd made up twelve shrouds for the fore and main masts instead of the ten needed and got a bit confused. In fairness to Euromodel this was why I found myself very short of cord and there was perhaps sufficient if I'd done it correctly. Next I'll start the lanyards. Here's a picture of a west Kirby sunset looking out over the small island, Hilbry. Ken