HOLIDAY DONATION DRIVE - SUPPORT MSW - DO YOUR PART TO KEEP THIS GREAT FORUM GOING! (Only 24 donations so far out of 49,000 members - C'mon guys!)
×

ken3335
-
Posts
314 -
Joined
-
Last visited
Content Type
Profiles
Forums
Gallery
Events
Everything posted by ken3335
-
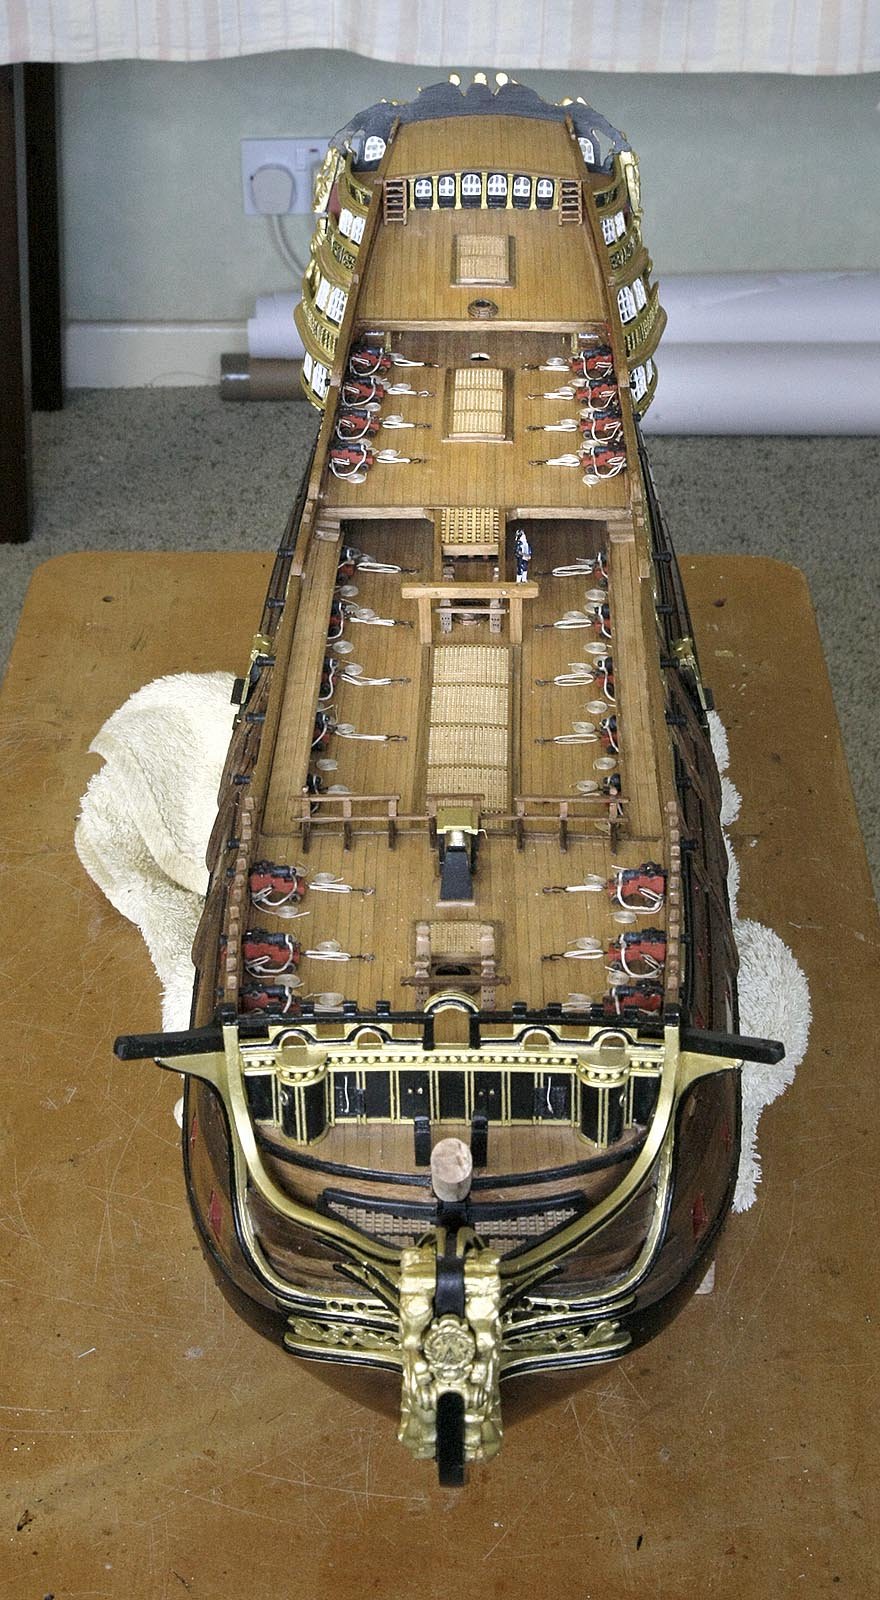
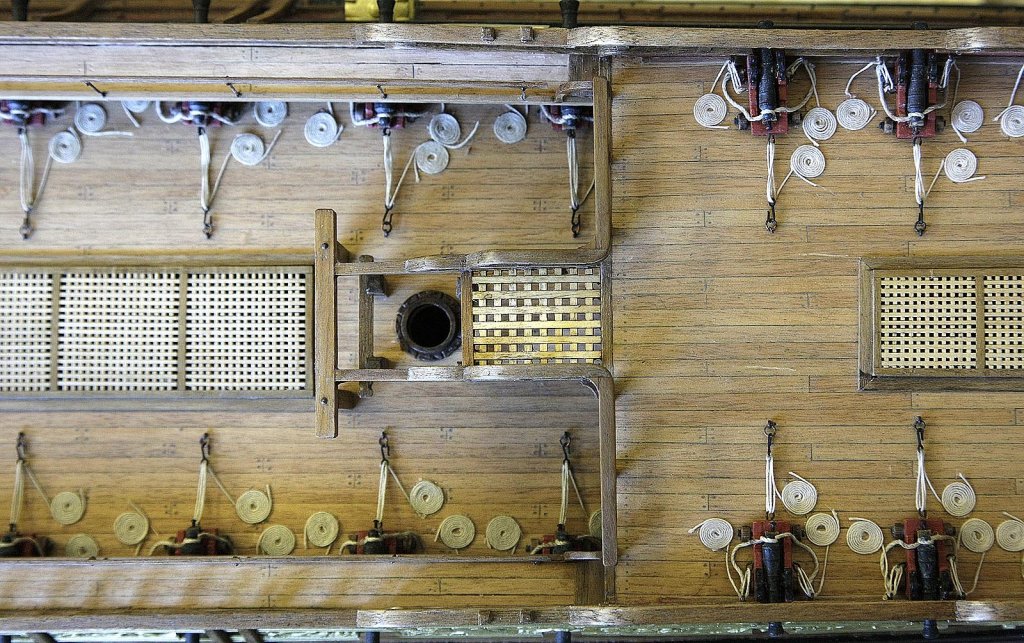
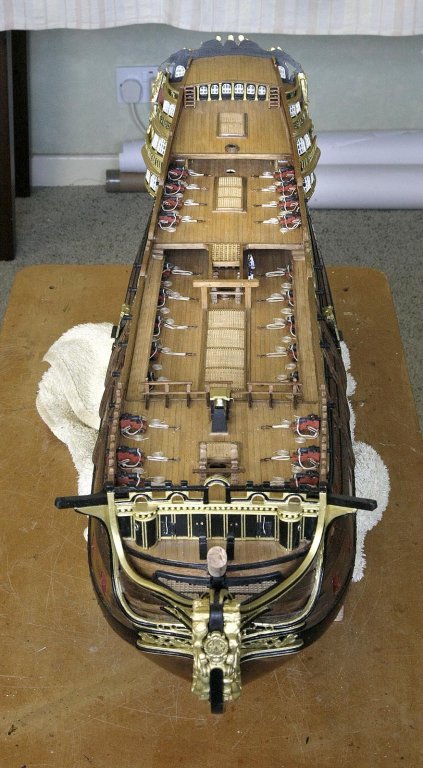
 Hi Jack, No tripod, macro or close up add ons. The model ones are hand held indoor shots that are taken at high ISO because of the poor indoor light, mostly at least ISO 1250. The camera is a well used Canon 1Ds and the lens that I use as default is 24-105L. It's a good full frame sensor so that even at high ISO there is rarely any noise. The outdoor shots are a variety of my Canon and compacts that I sometimes carry, the last picture, the one with the pink sails was taken using a Panasonic micro 2/3 compact, I also used this recently for the overhead shots of the deck fittings. If it of an interest to you I can give some details with the pictures that I post. Ken Canon 1Ds taken with Panasonic Lumix on auto, hand held indoors.
-
Hello, Yes Dilbert, your right it's a very small world, I'll keep the pictures coming and it might get even smaller. I've made up and fitted the breast and gangway rails. I didn't do them as accurate or elaborate as others have done but as with other detailed sections I've kept it as simple as possible. I think that by keeping things easy I don't get intimidated by the build and I can just concentrate on getting the sections neat, it's working for me so far. Ken


-
Ah yes, just re read it, must have been a senior moment. Strange term though, 'pore sealer' Ken
-
Hi Dilbert, Coming along nicely, looks like your doing a thorough job. As for pore sealer I'm sure that it refers to Sanding Sealer. A clear coat that is absorbed by the wood, when dry a light sand gives the surface a nice smooth finish having filled up the pores so that when you varnish or paint you don't get a rough finish but a very smooth tough surface. You can use it to slightly toughen up small pieces to stop them splitting. Use it after you put on any stain though as it stops the wood from absorbing it. It comes in both water or spirit based, I prefer the spirit based stuff it dries ready for use in a few minutes. Every surface of my Royal William build has it applied, once you try it you'll love the stuff. Ken
-
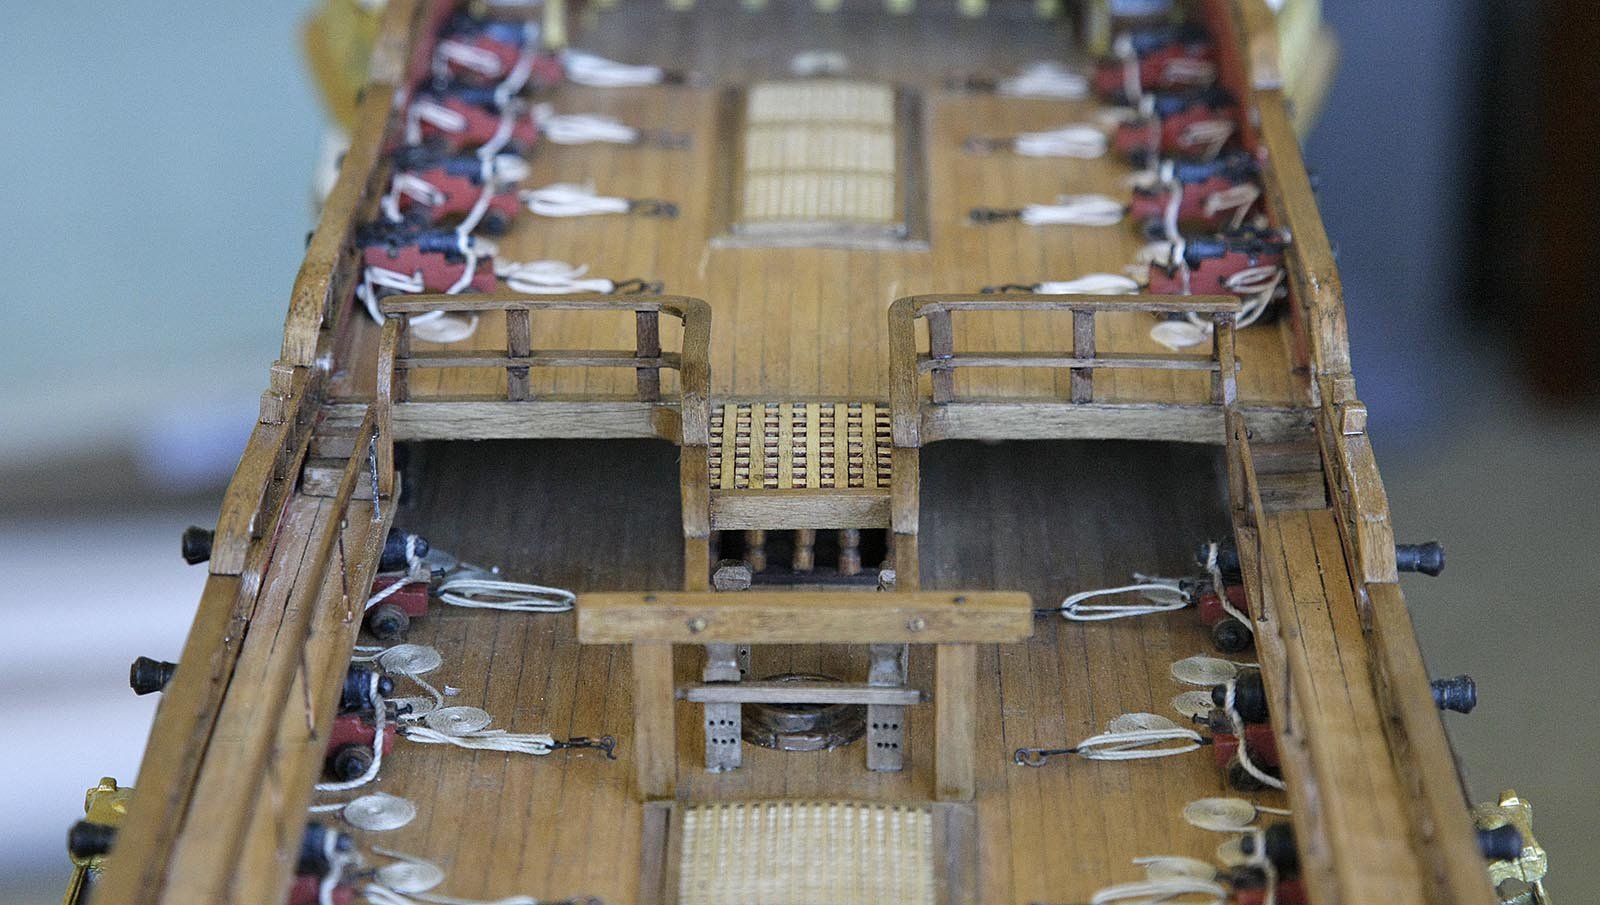
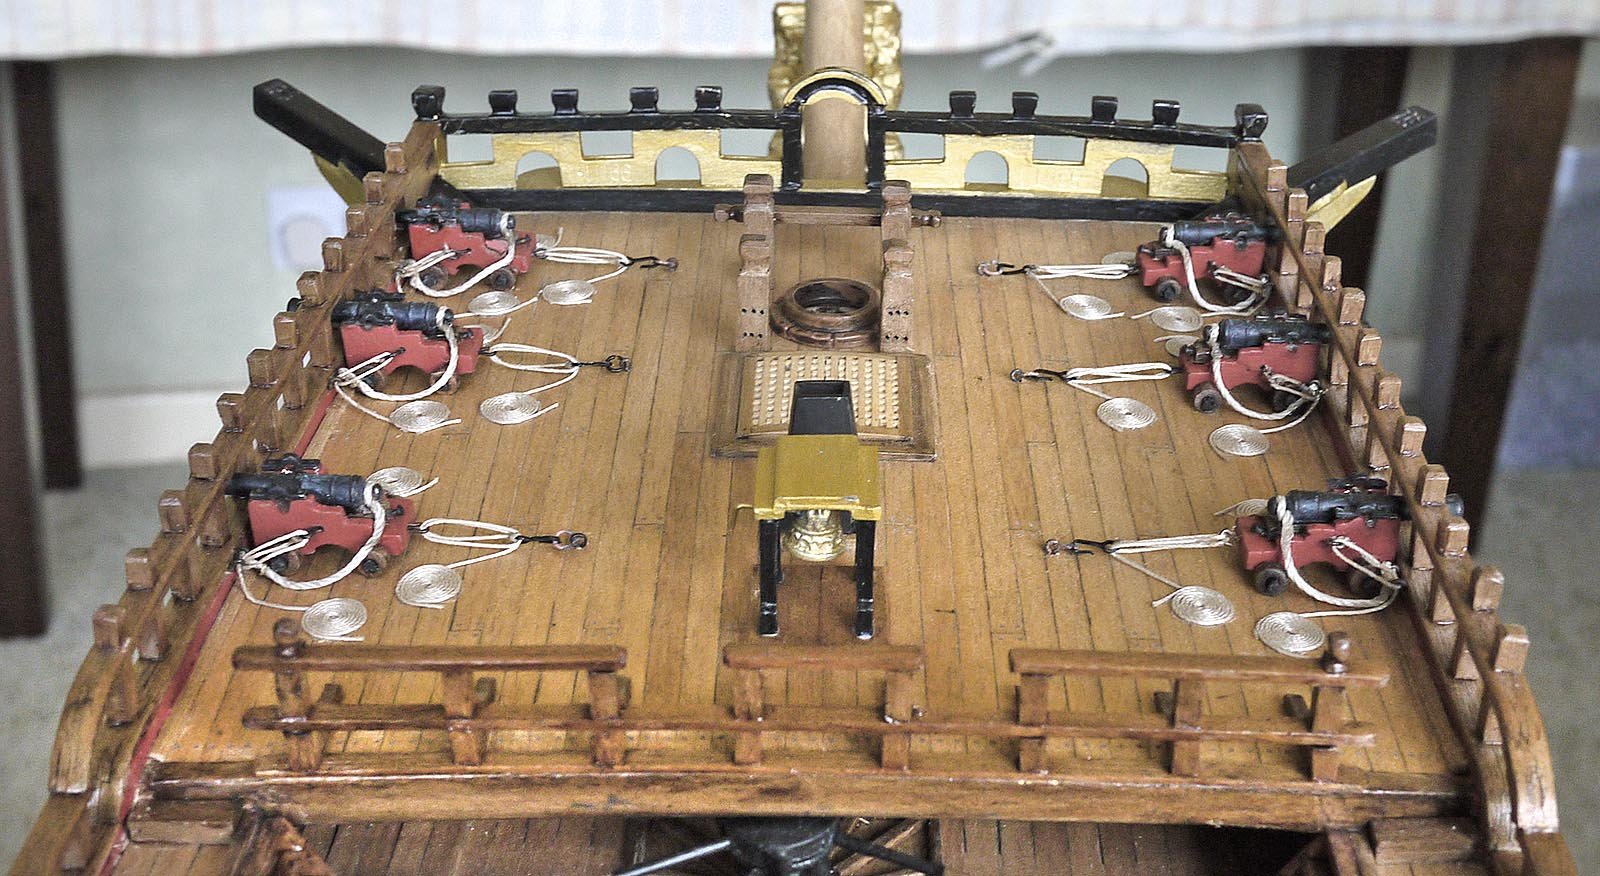
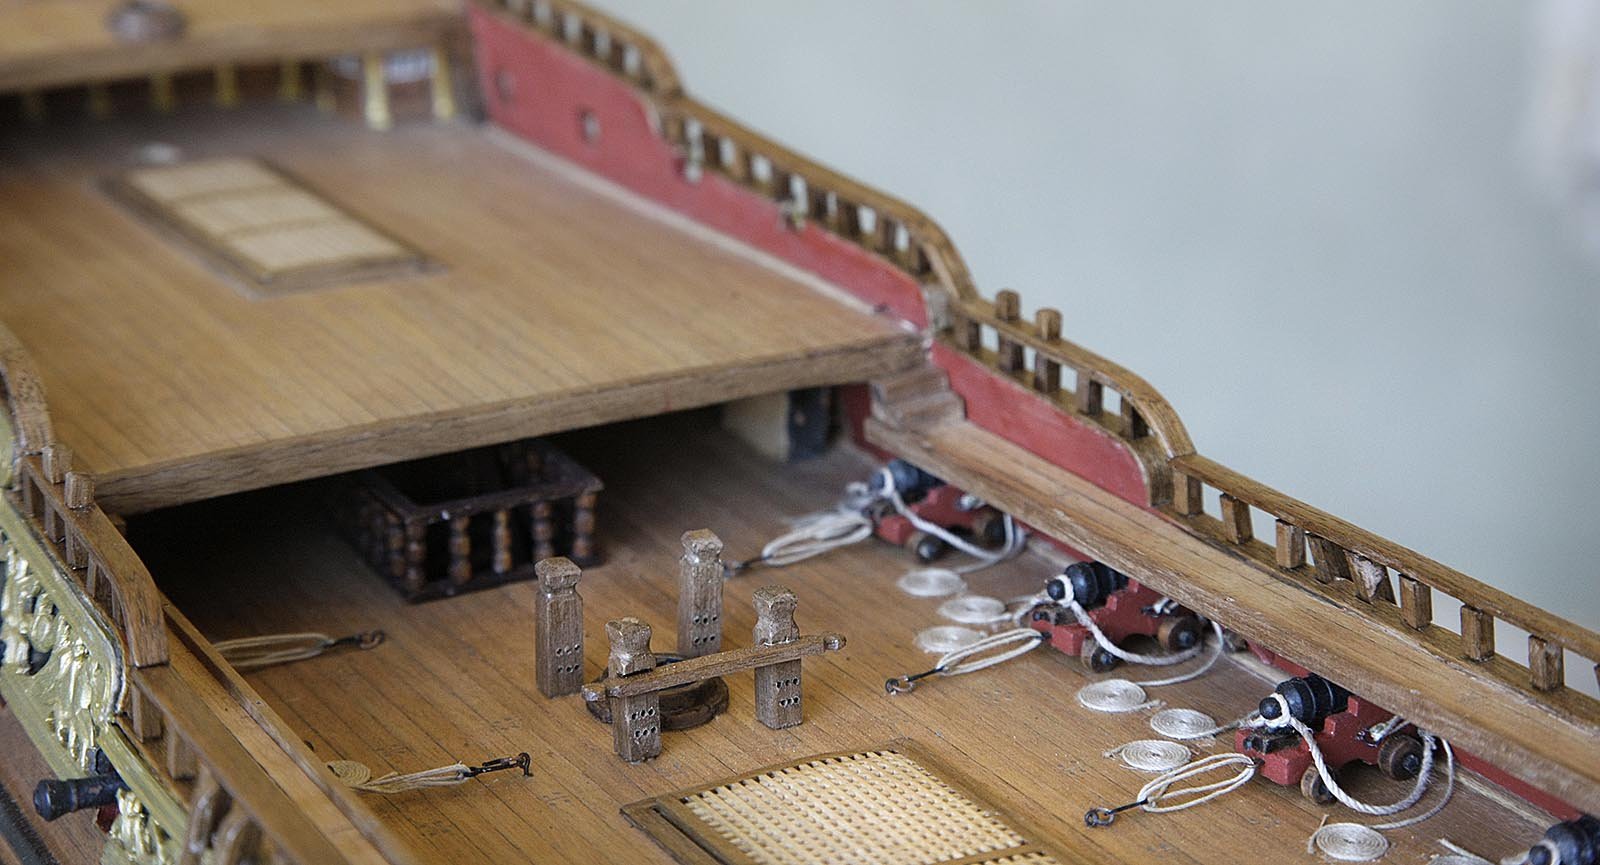
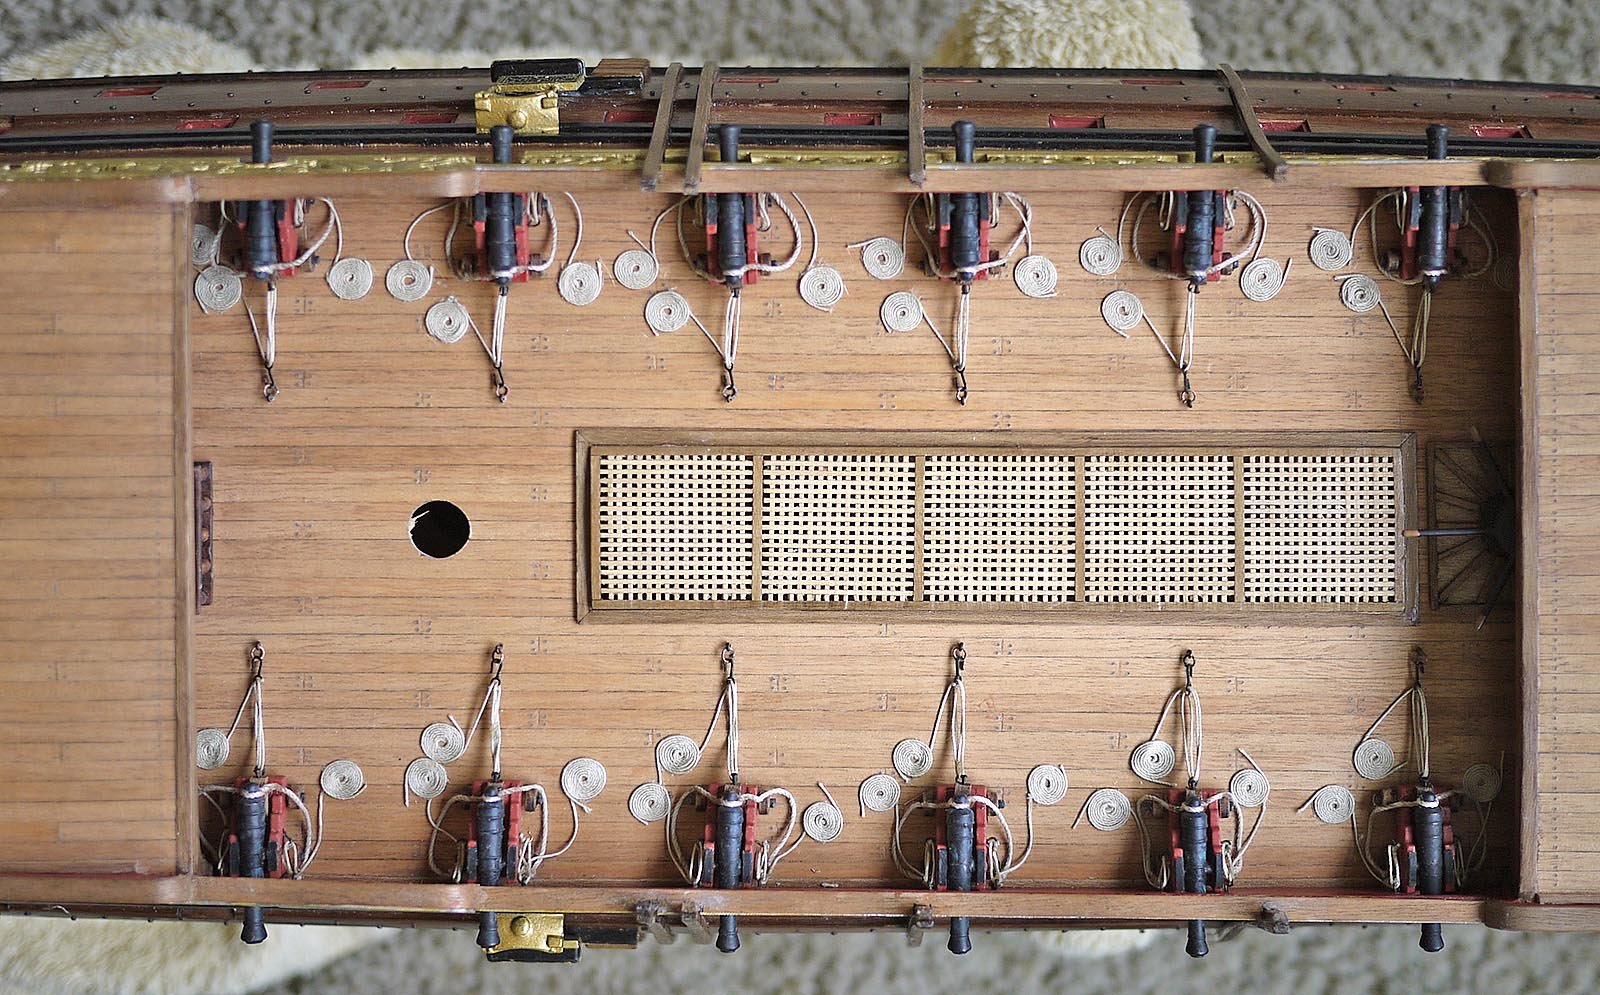
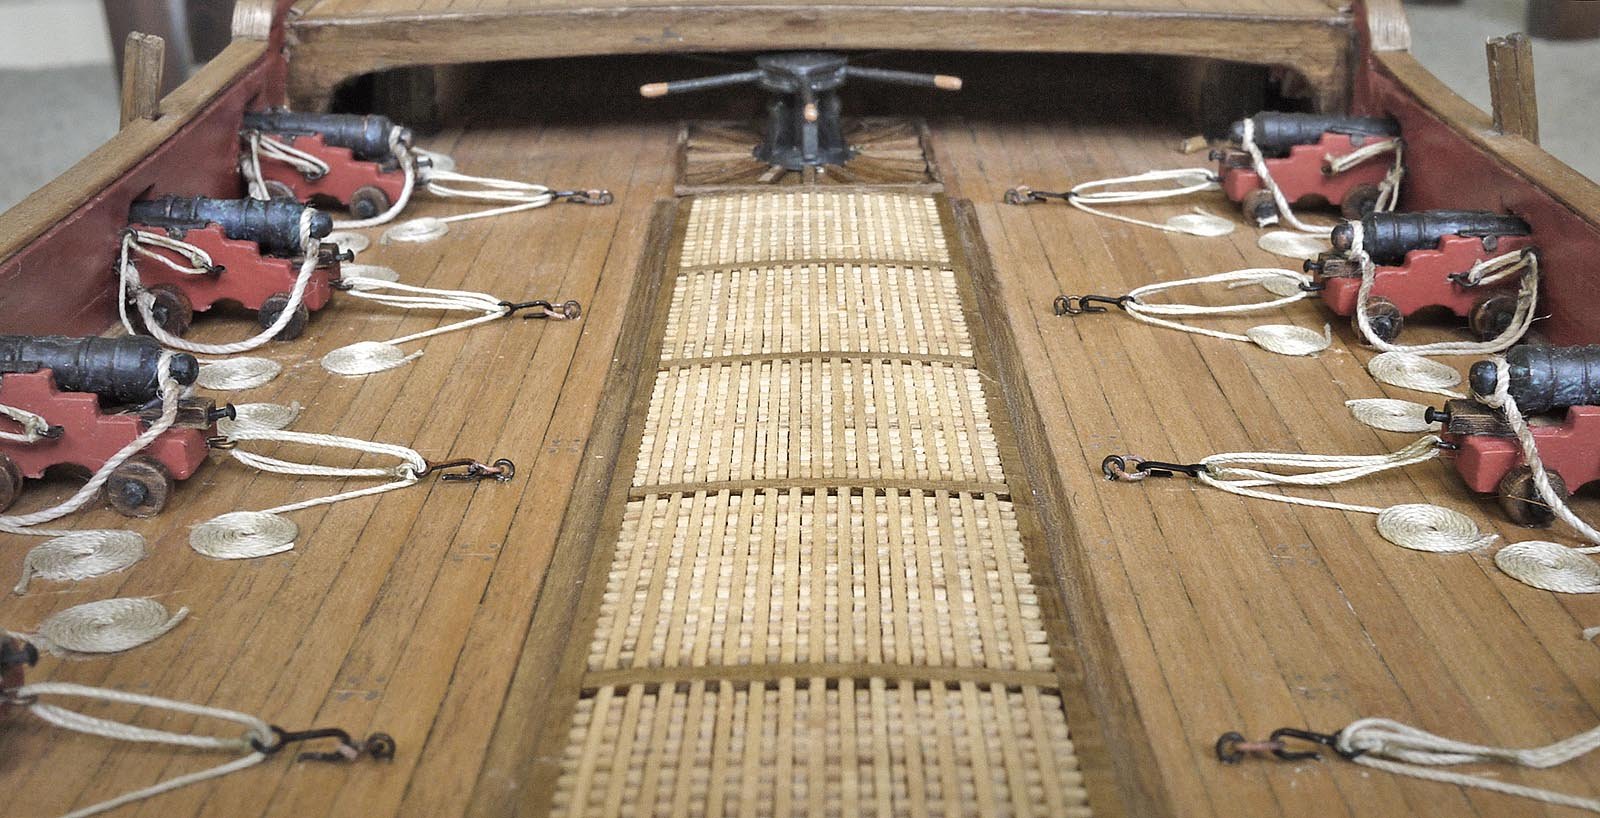
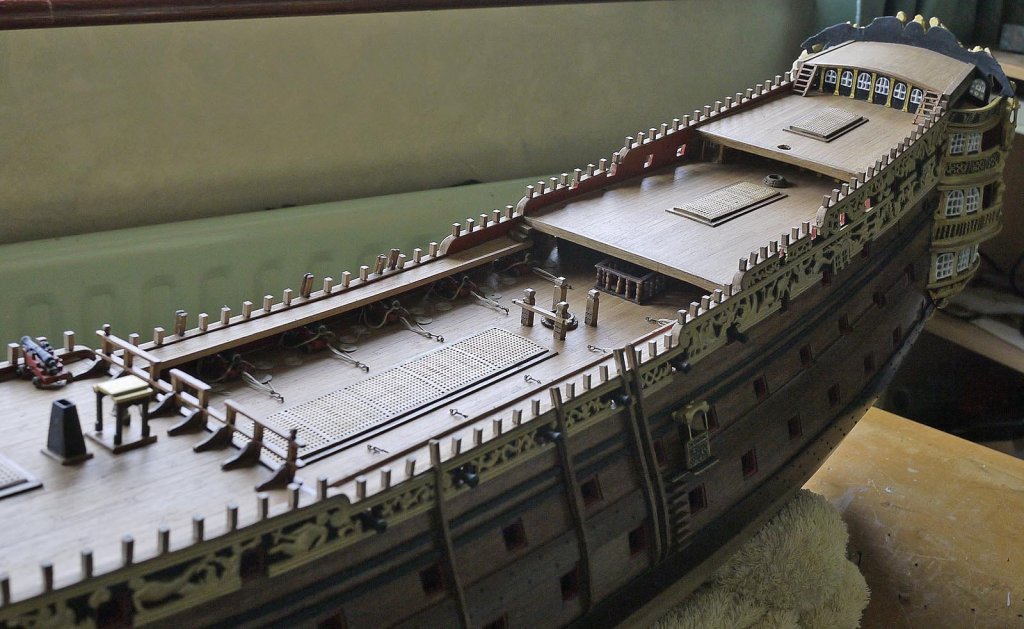
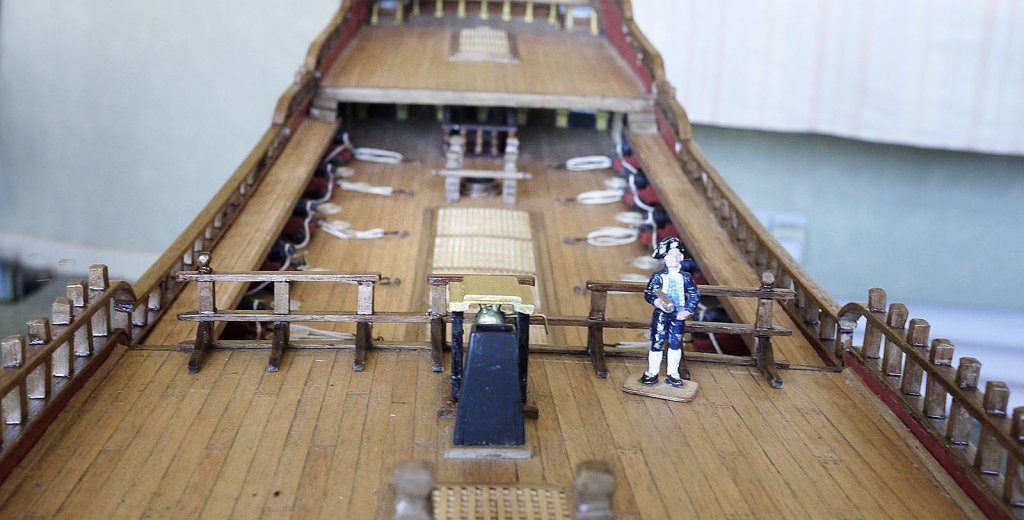
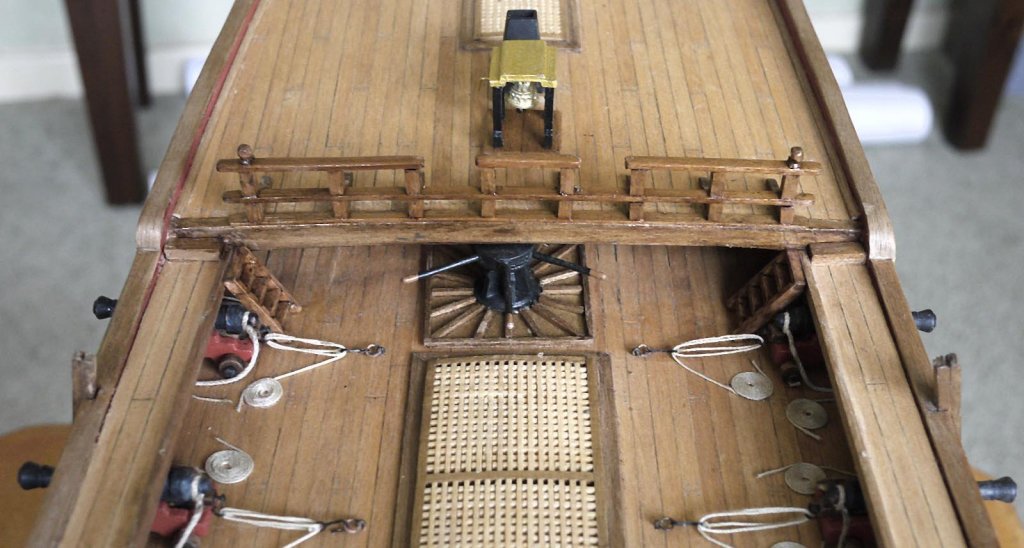
Hello All. More progress to report, must keep moving forward even if it's only a bit at a time. I've completed the last of the visible canons, the eight on the quarter deck. They have been rigged the same as before so that they'll be consistent in appearance. I have also completed the grated walkway off the quarter deck. Nothing of note, the pictures will show the build better than me describing it, but once again without others pictures I would have struggled a bit. Pete that was a timely update of yours, your photo showed it well. Next I'll need to get my head around the rails for this section and for the gangway. Ken

-
Hello Everyone, Back to the shipyard today. I've now built and finished the six canons that occupy the fore deck. I rigged them the same way that I did those in the waist so nothing new to report. My camera now works well again so just a few pics of them. Ken


-
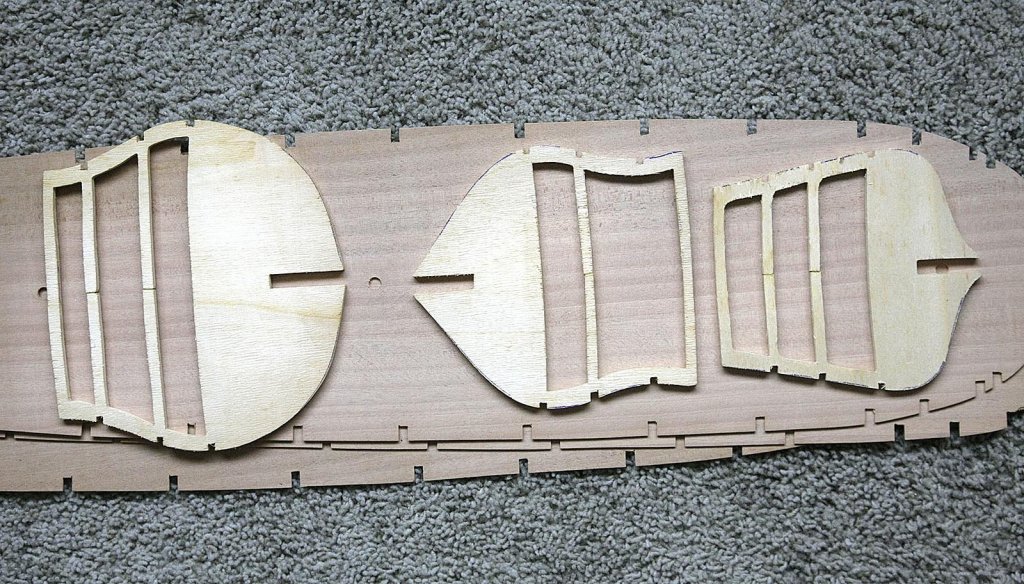
Hi mark, No there isn't any laser cut parts in the kit everything has been hand cut some pretty rough but none cut smaller than the correct shape so can easily be sanded to a good finish and to fit the plan, in fact the wood parts look like what you'd expect from a small cottage industry. The wood seems ok but only time will tell. I'll be replacing the decking strips anyway, the first planking won't be an issue so that only leaves the second planking that might perhaps need buying but on first appearance I think that it looks fine. Ken
-
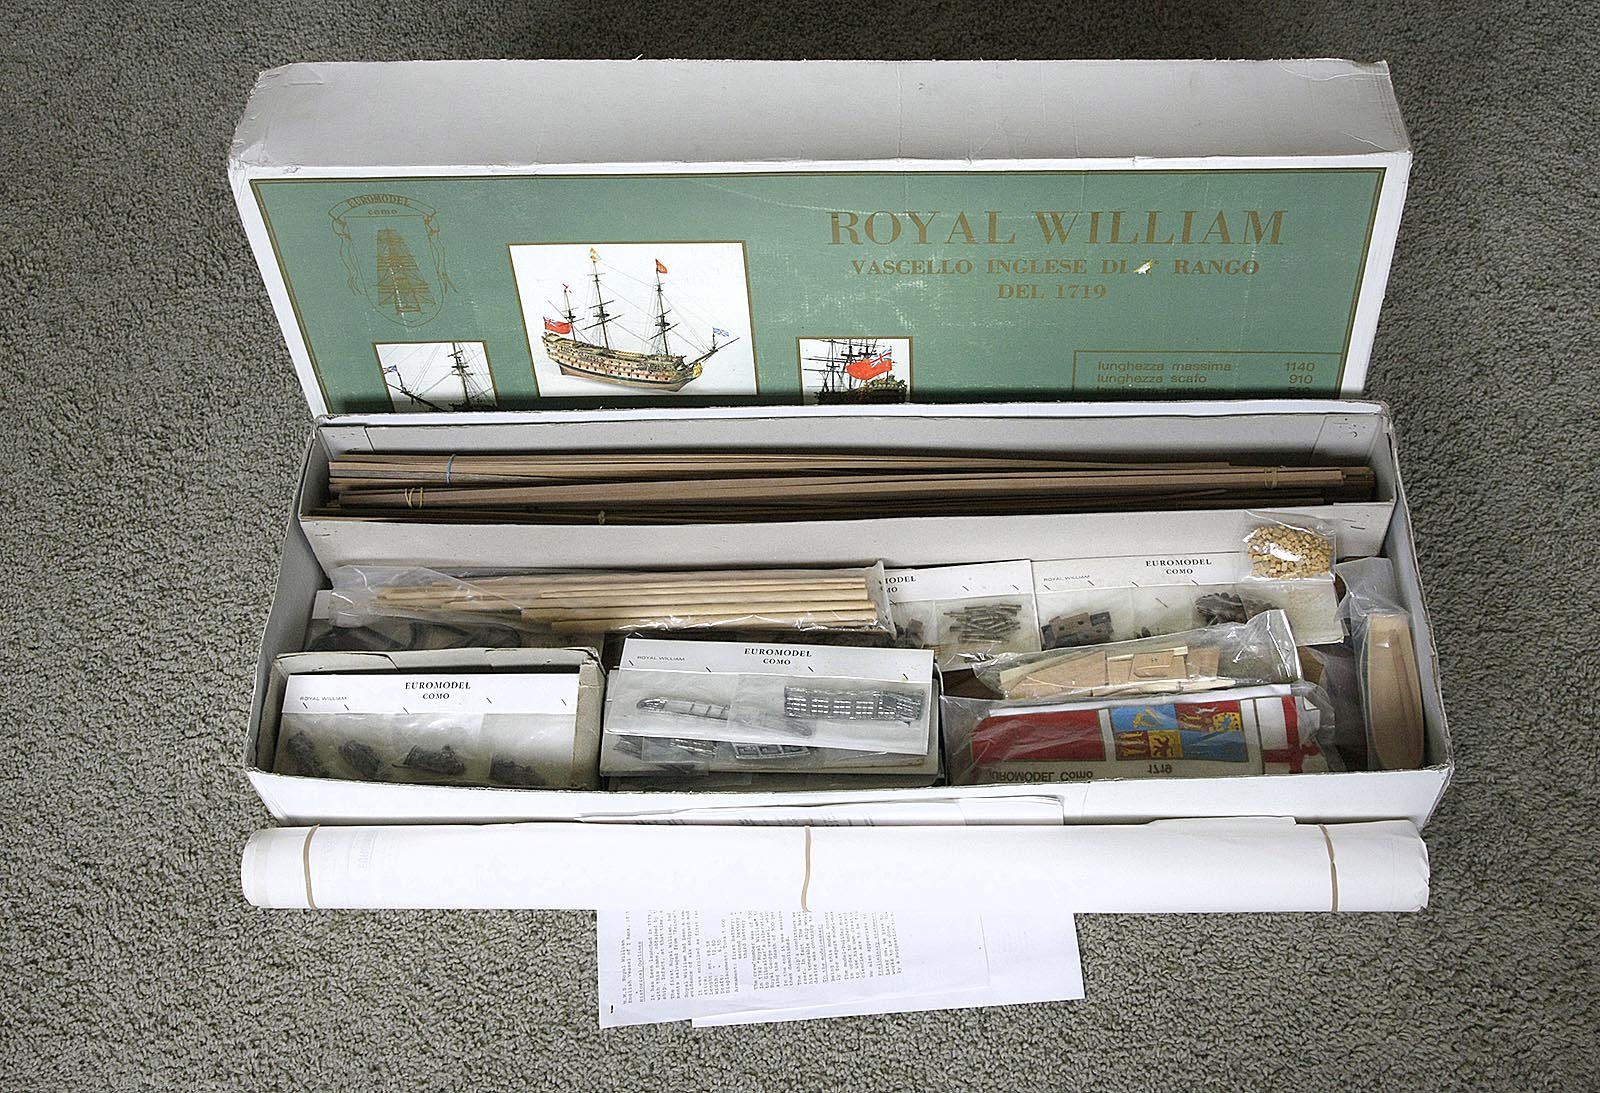
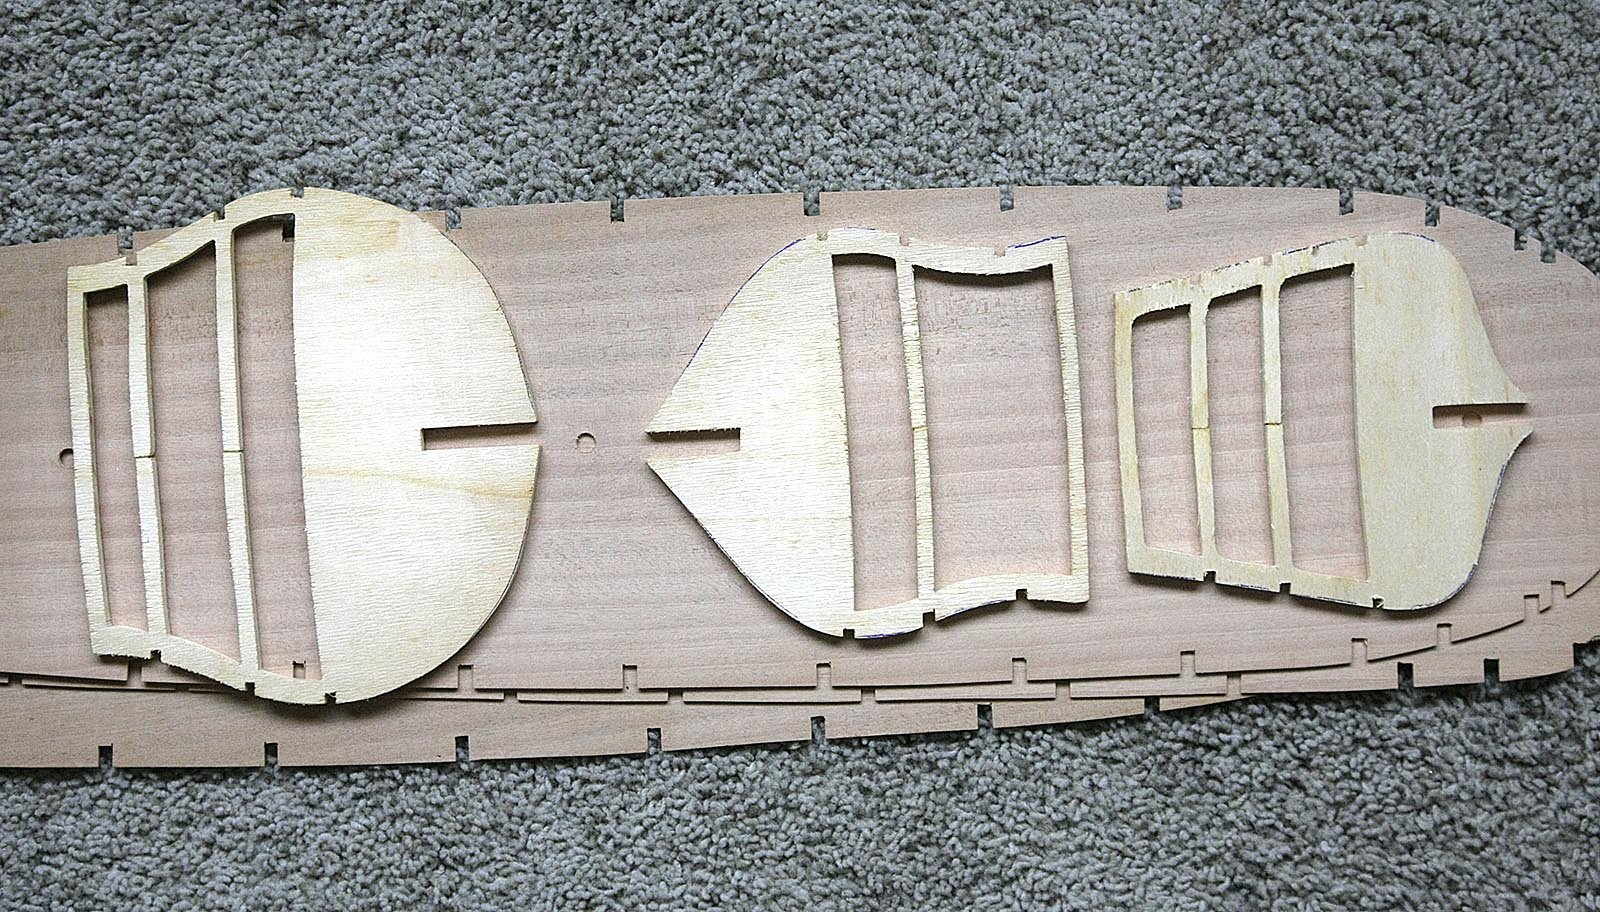
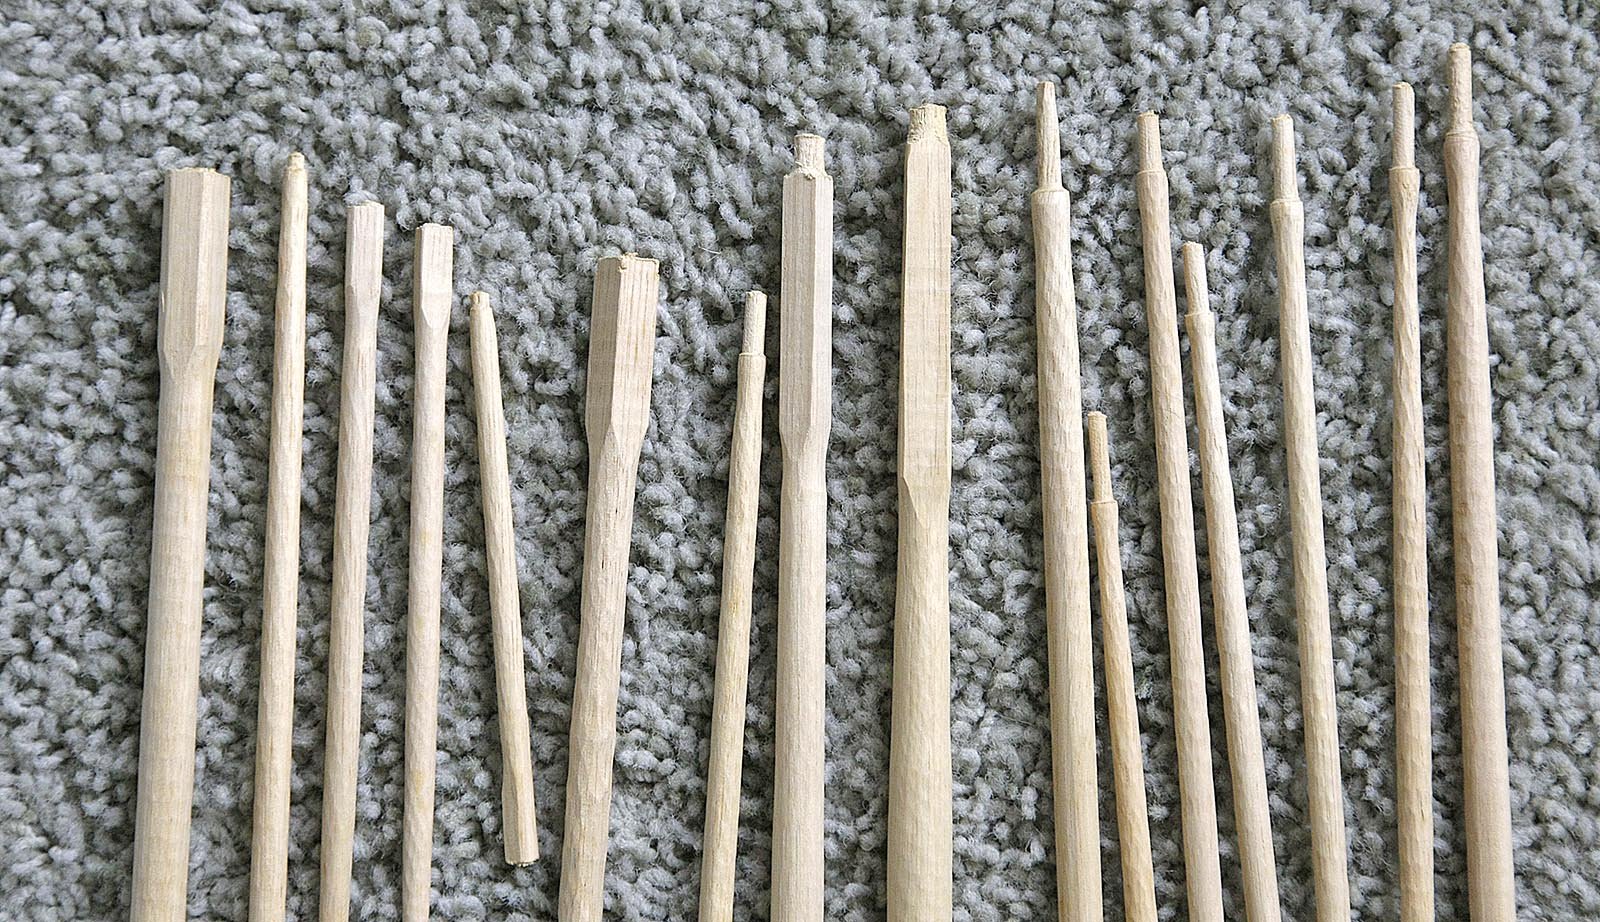
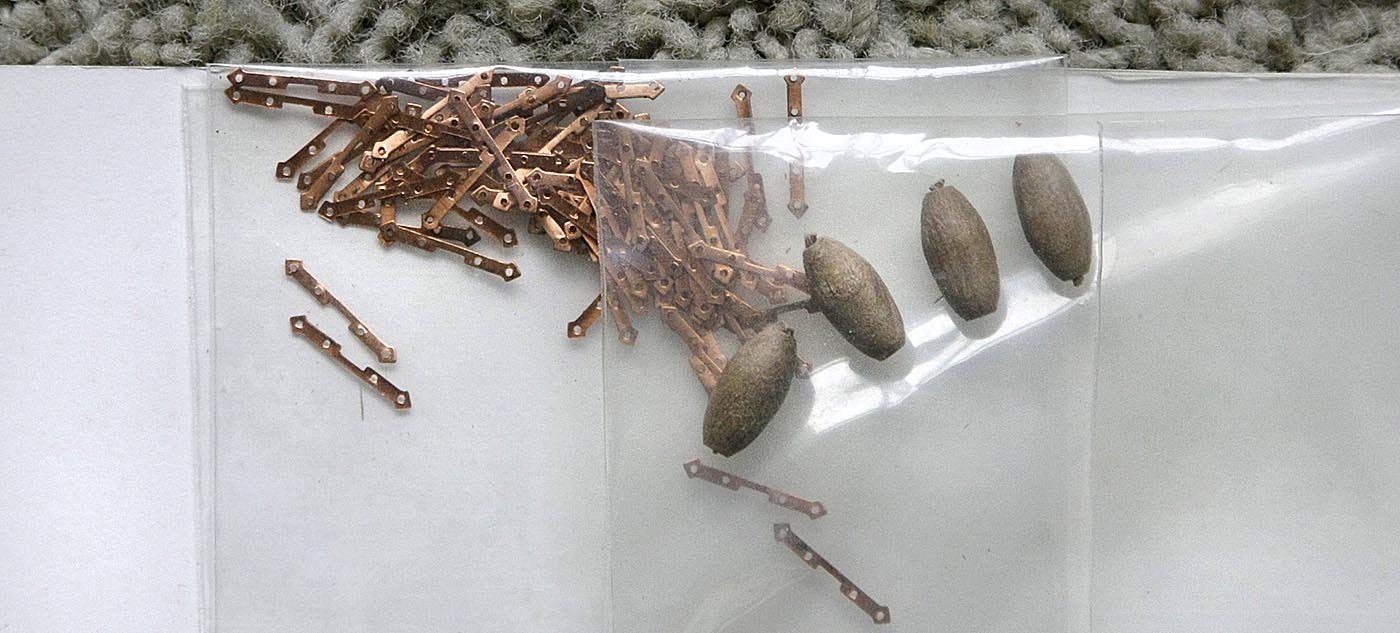
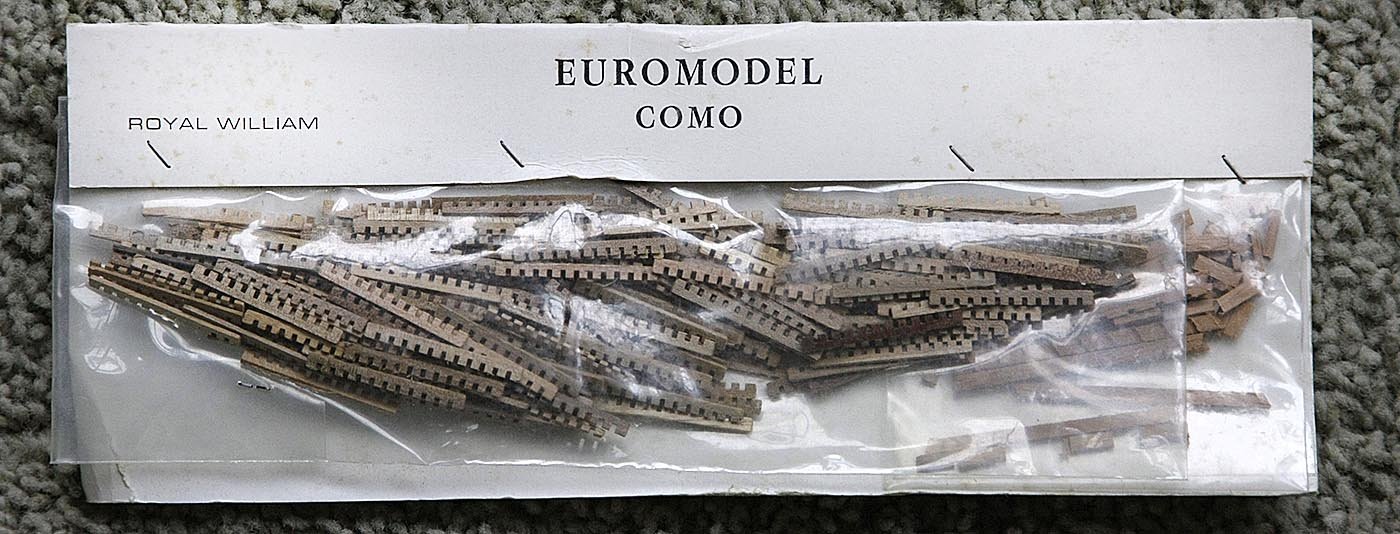
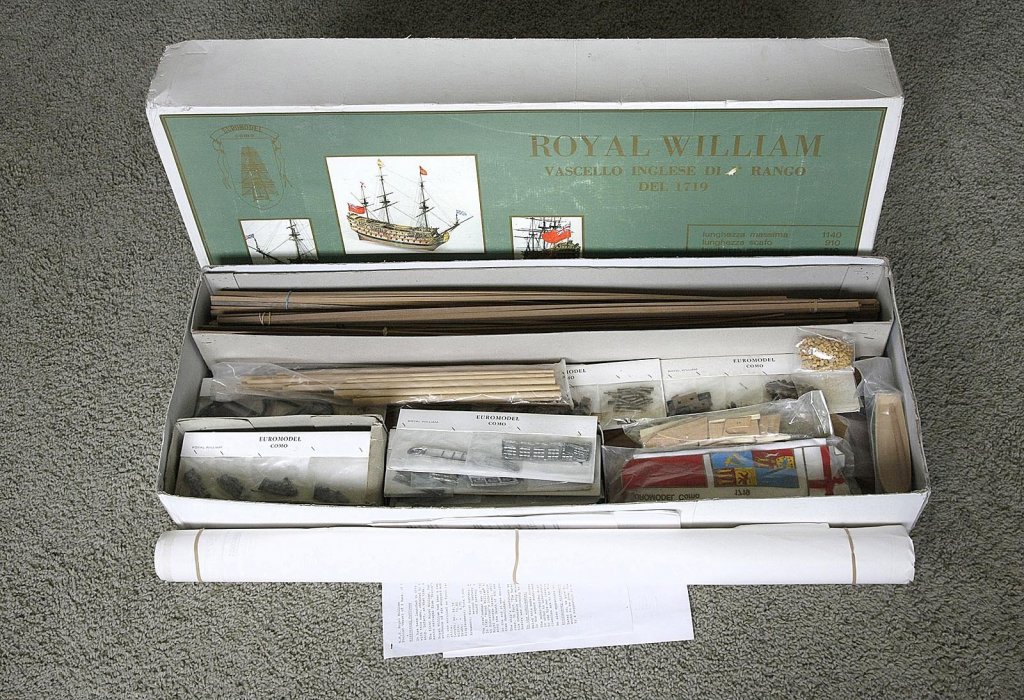
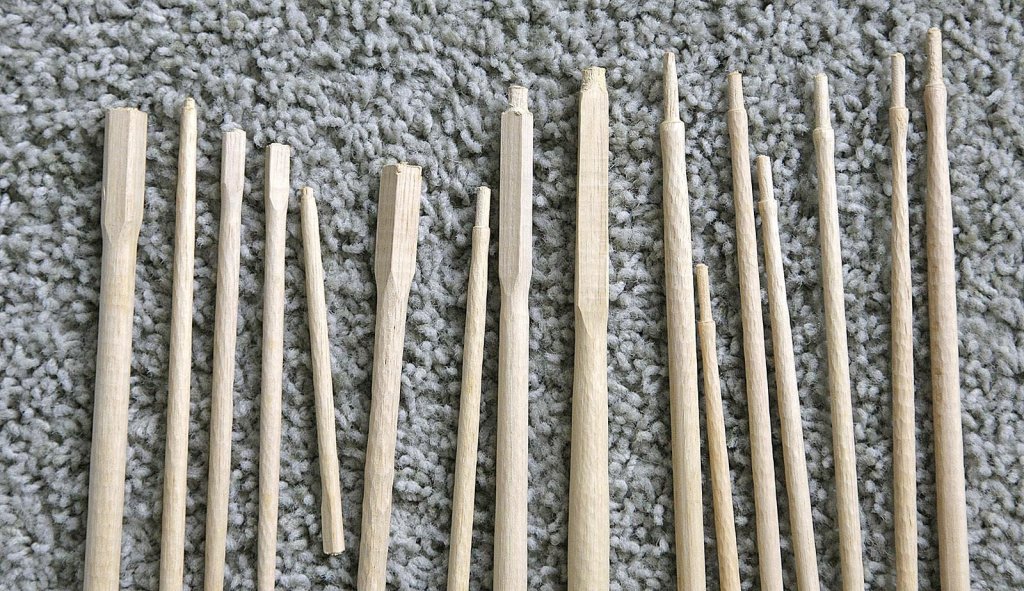
Hello Everyone, As requested I'm going to have a day off from my build and drink beer instead, the two don't really go together as I make enough mistakes as it is. I told you that I would explain my acquiring those plans, no mysteries or intrigues I'm afraid just honest very unexpected good fortune that came my way. I got them from a house clearance of an elderly gentleman who died some time ago. Nobody seems to have claimed his possessions and there was some legal arrangement for there to be an auction. My daughter who lives in that area told me of it as she had heard that he had been a model maker, I thought that it was worth my while to make the trip and see if there might be something of interest for me. There wasn't a great deal but Wow! a Royal William kit and these plans, I tried not to show too much interest but I nearly wet myself. The kit I think must be one of Euromodels very first from the early 80s and was completely untouched, like new. Of course I bought it. As I have often said in my log, after I had built up parts of RW I always felt that having learned how to do them I could then do them better if I did them again, so here's my chance. I couldn't think of a better project than when my current RW is finished just start again. At least I'll know where there is a good log to follow. Some say that if I fell in a cesspit I'd come up smelling of roses! The kit differs slightly from the newer versions so I thought it might be of some interest to mention them. The packaging is still the same, only slightly faded, the plans have the same drawings but arranged differently. All the hinges are copper, I was very short in my kit of grating pieces, in this one there seems to be at least twice the amount, they are made from walnut not light coloured wood, might be difficult to buy extra. Some of the castings are slightly different, for example the lanterns are solid and will be difficult to glaze. The castings though are extremely crisp and defined, probably as the moulds were newer then. The bulwarks had been drawn or printed and then hand cut with a scroll saw, the deck supports have been cut through to get into the next level for cutting out leaving them very weak and will be easily broken. I've put some glue into these cuts to add a little strength for when they are first handled but they will need reinforcing. These are all quite rough and will need some work and final shaping from the plan before they can be used. What surprised me most is that all the masts and spars are pre shaped, they need a good sanding to final shape but a very nice touch and will save a lot of work. Ken


-
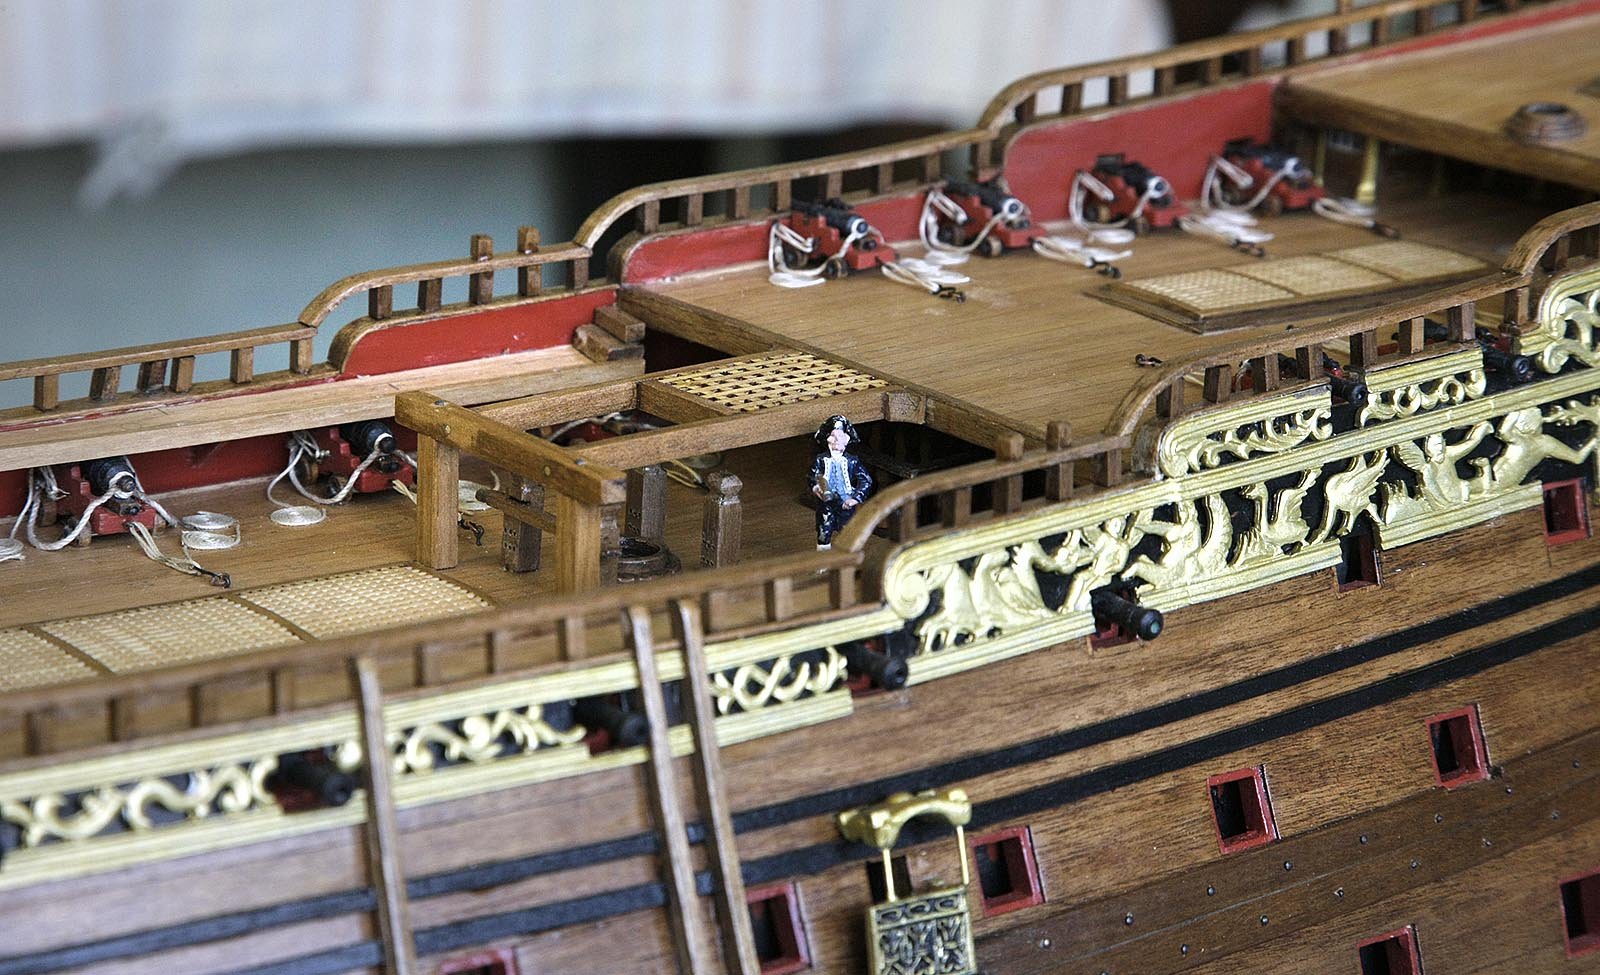
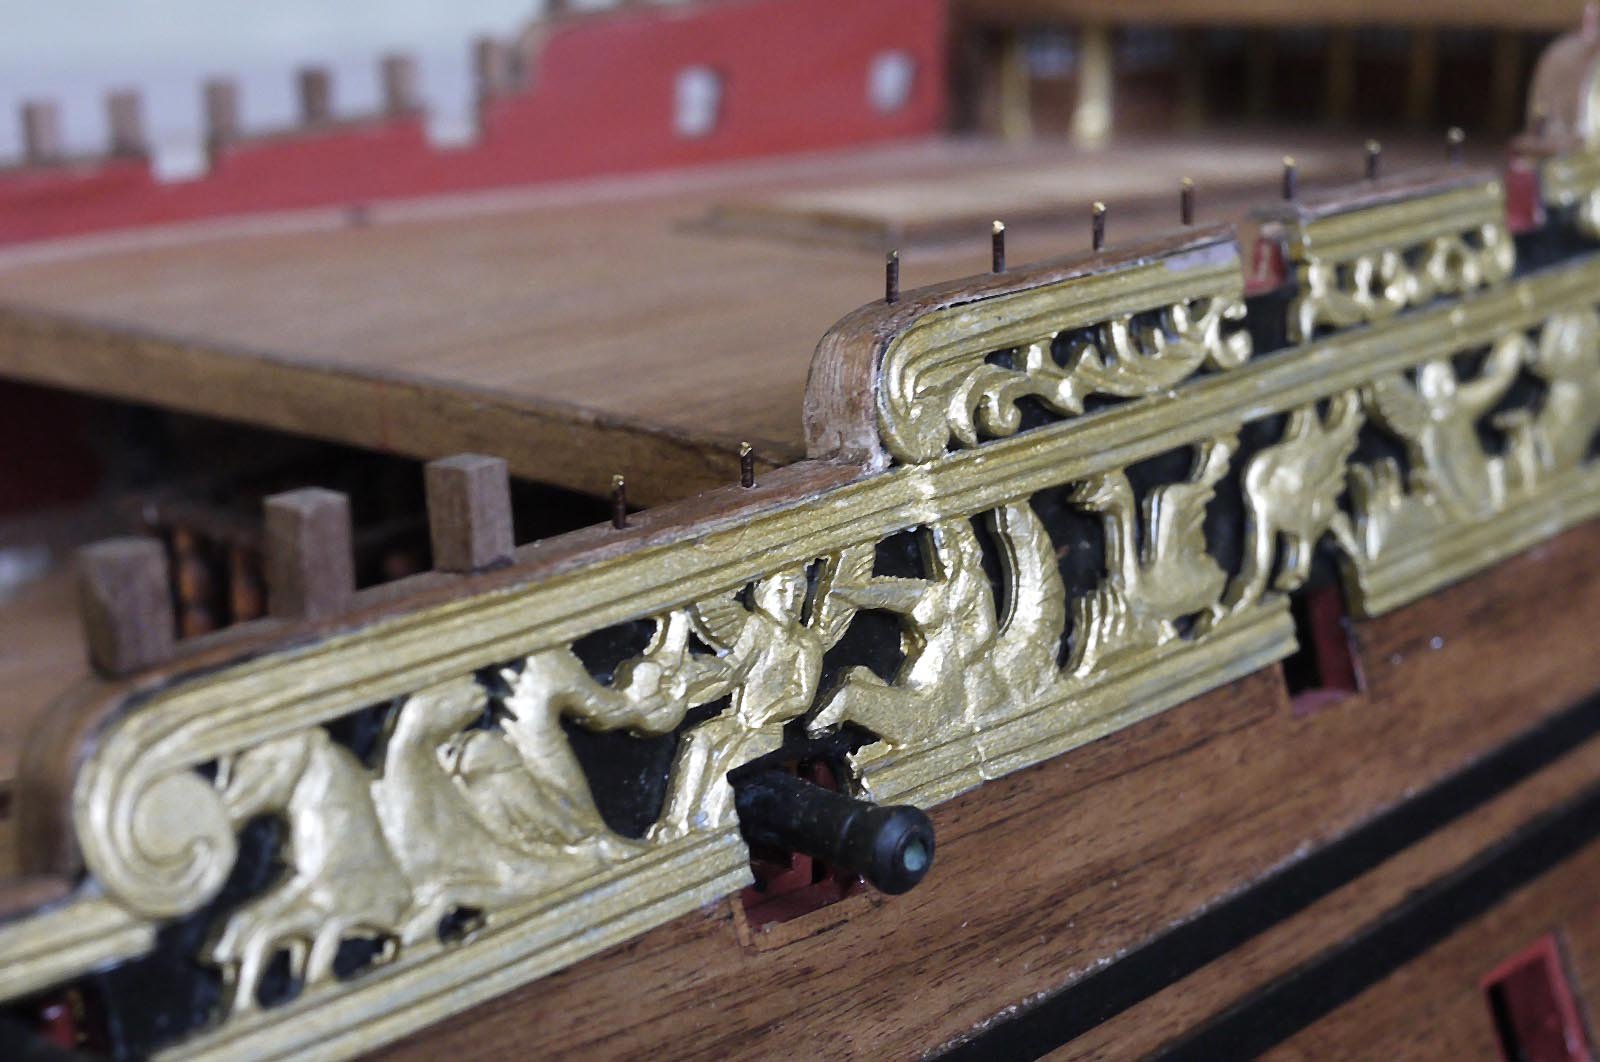
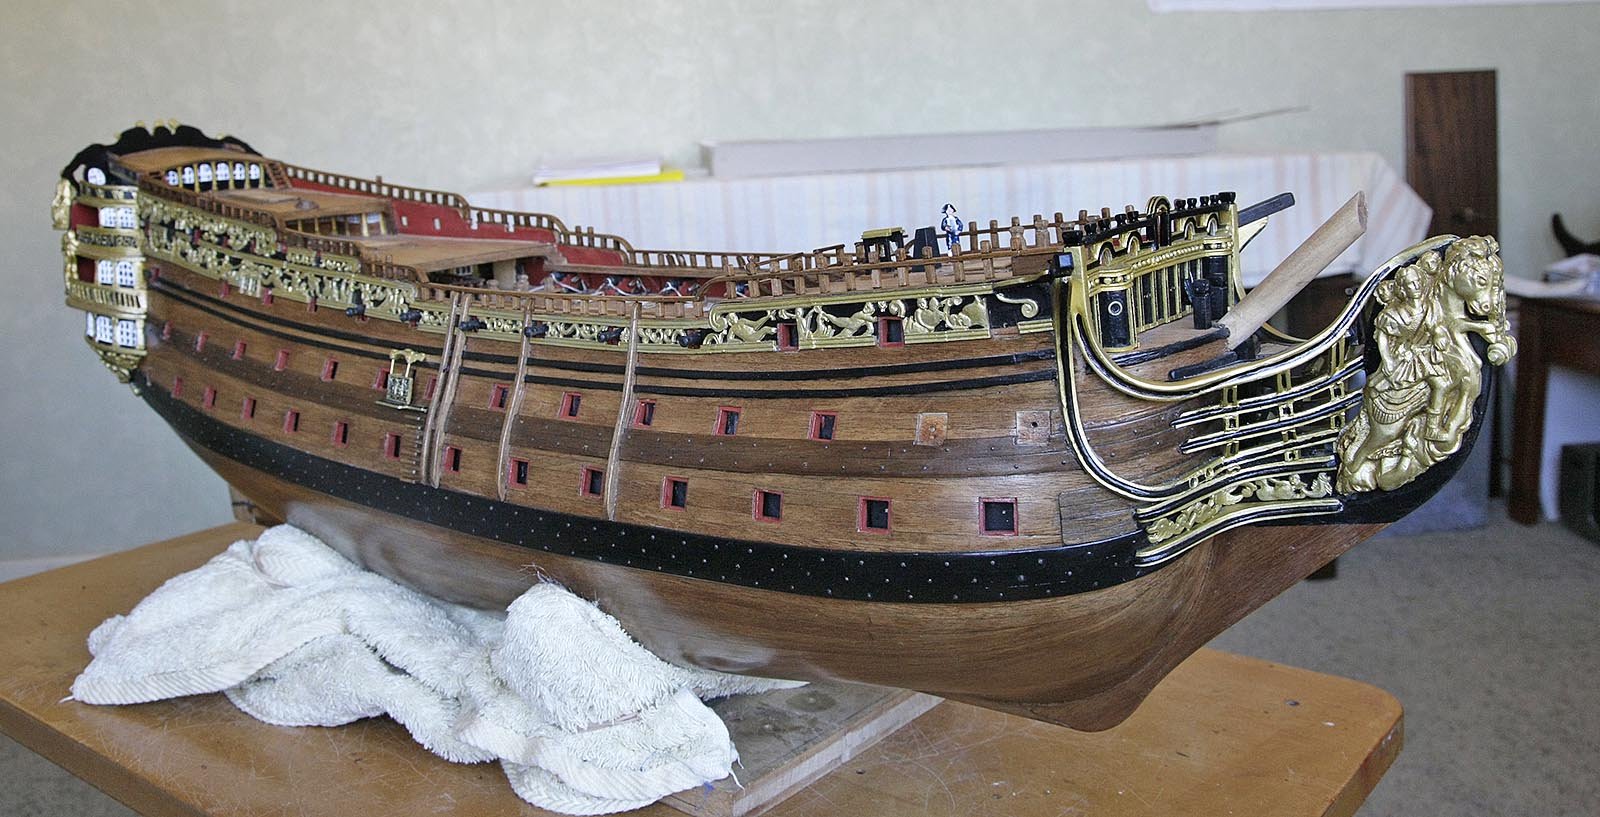
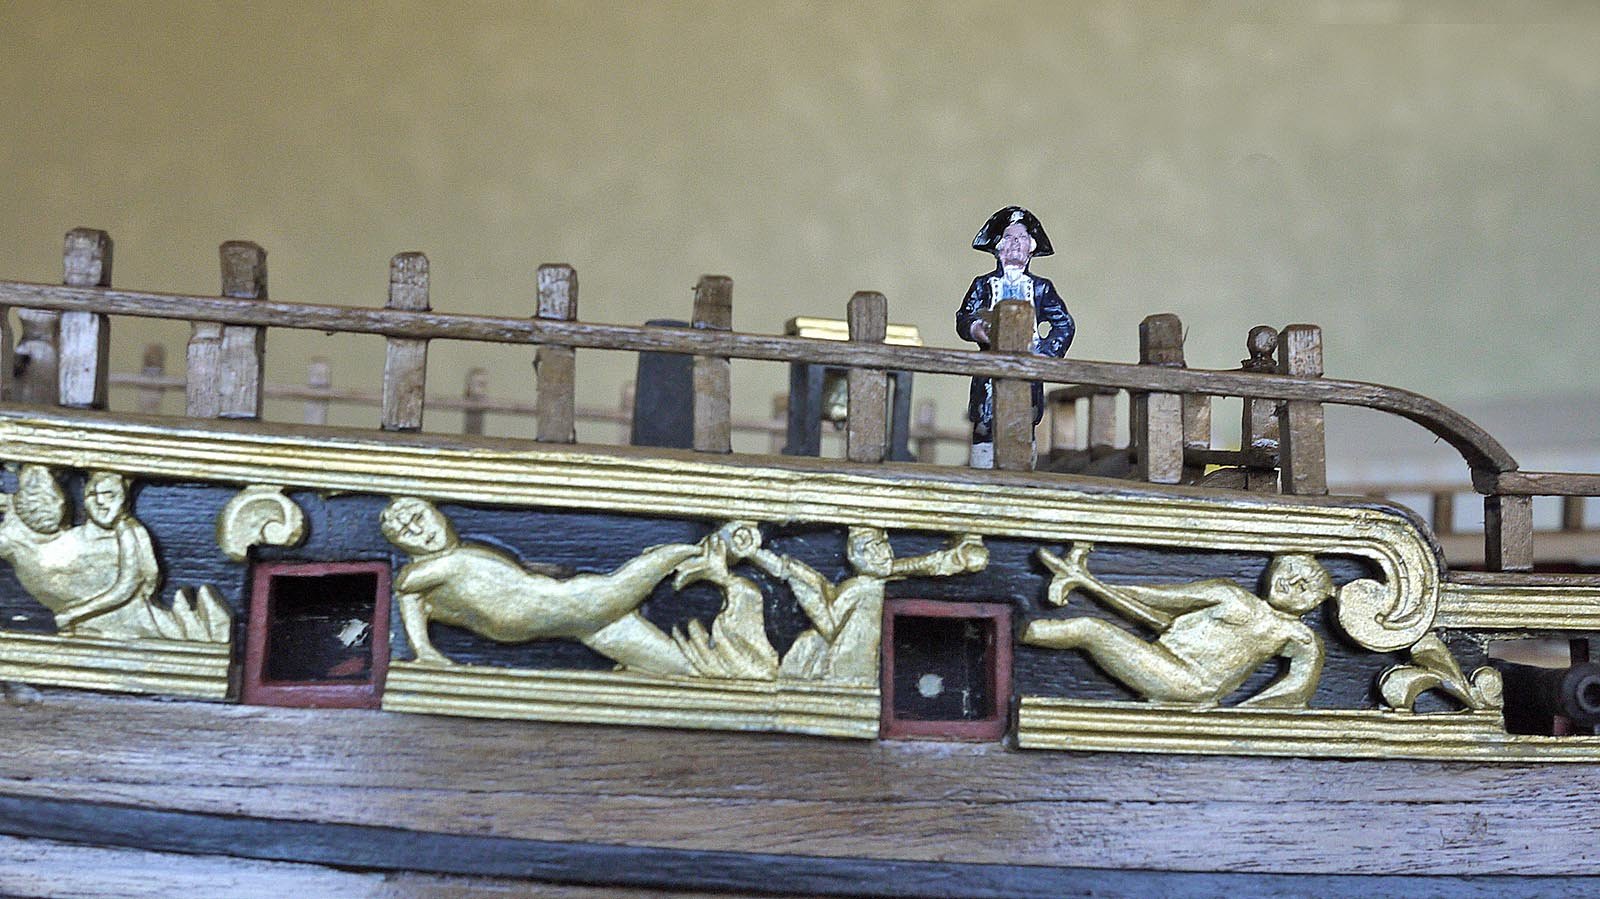
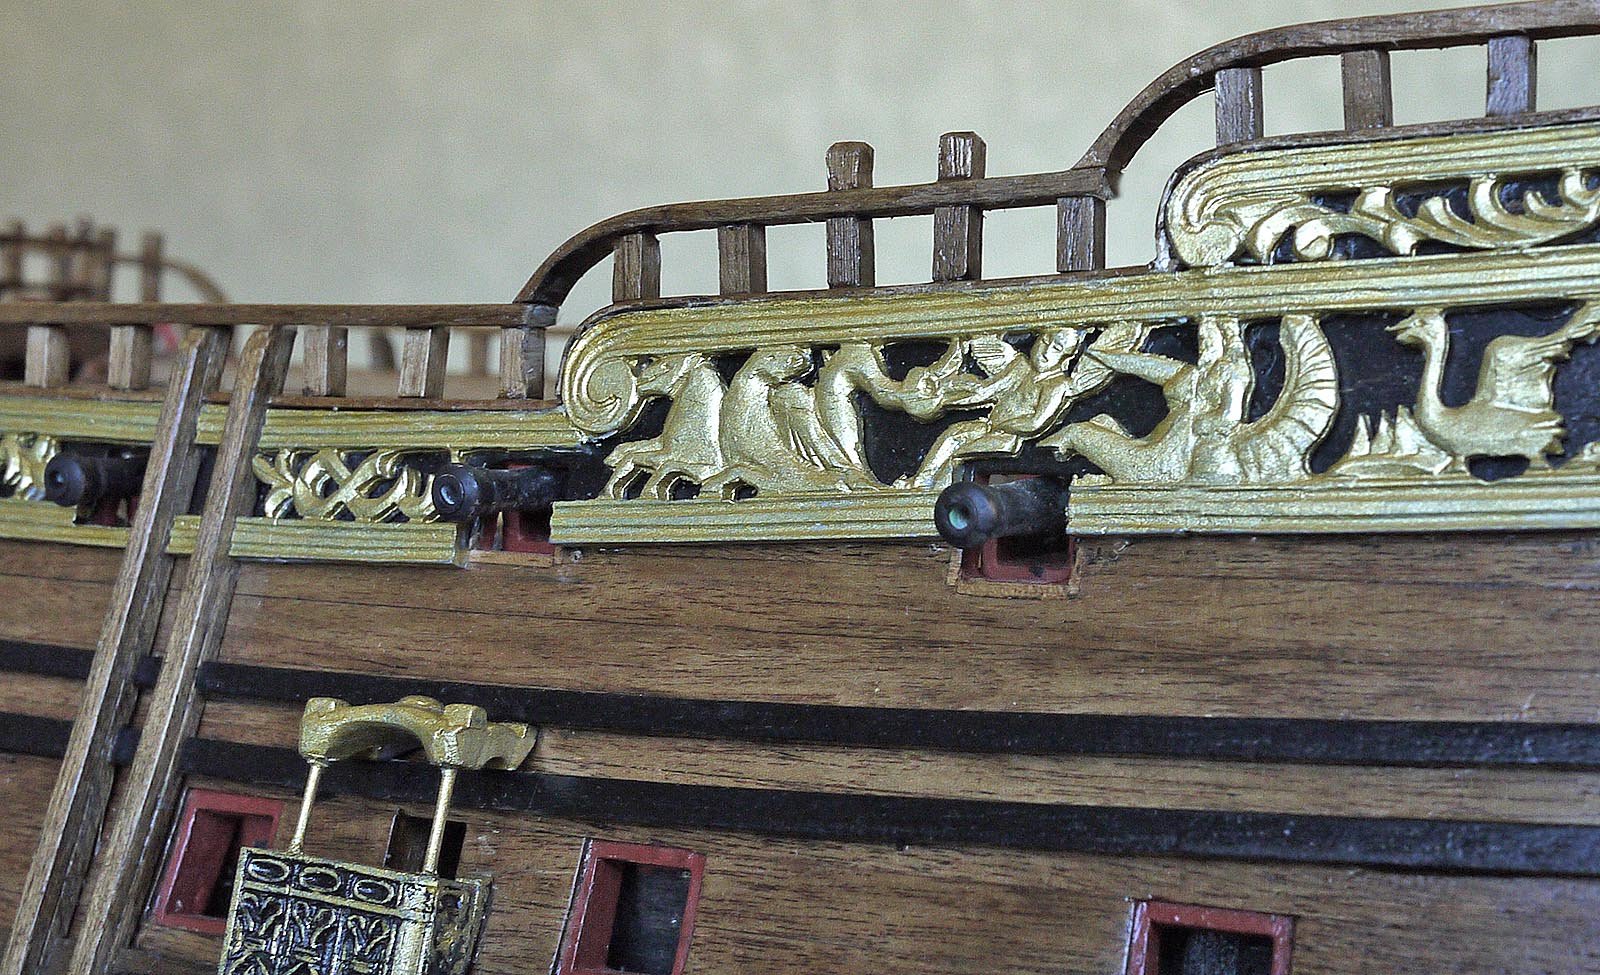
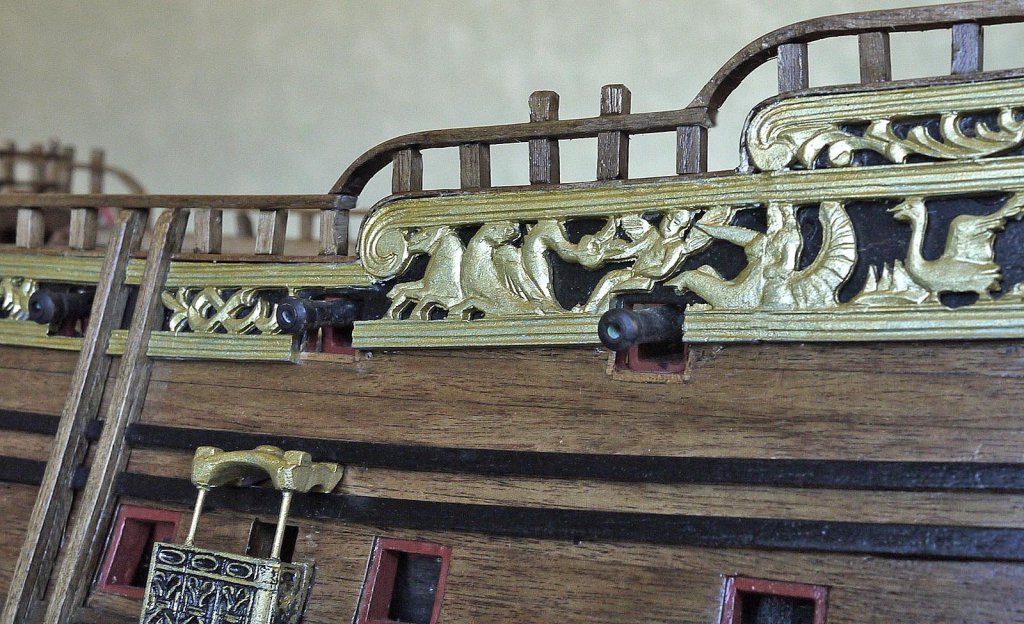
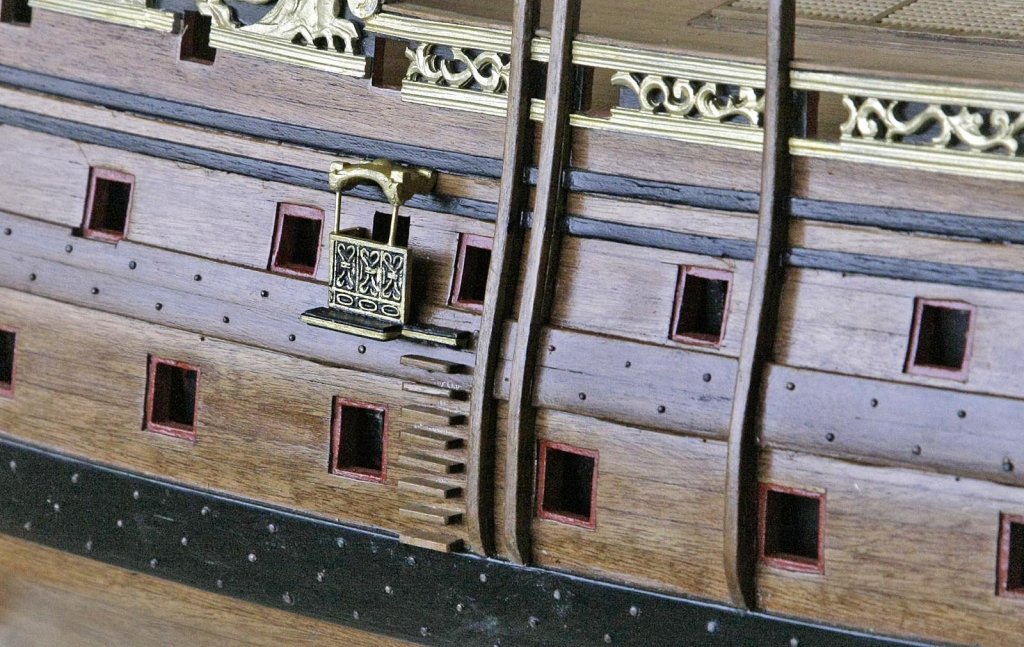
Hello Everyone. Another progress report, this time the completion of the side rails. This was a part of the build that I thought would be a problem but as it turned out it was not as difficult as I had expected, just a lot of work. Again I'm very happy with the result. Some comments. You will be aware that I had built my sides about 4mm too low, this has caused slight issues, hopefully the last being the height of these rails. to get them to finish at the correct height at the fore deck the uprights needed to be 3mm taller but at the quarter deck the side height was correct so an extra 3mm would have looked wrong. I sized them so that the foredeck was correct then reduced them very gradually through the waist until they were near the correct height at the quarter deck. By doing this I didn't get a sudden change of height in any section and the transition isn't noticeable, when the shrouds and anchors are added at the fore deck the extra height hopefully wont be apparent. I felt that because of the different heights, angling them in at the top according to the plan would be very difficult so I opted to make them from straight 3x3mm strip to make things easier for me. On checking my recently acquired plan I noticed that the rail uprights were not all angled in but only those aft of the waist, so at least I'm half right. I felt that the rails might be vulnerable to a knock so I decided to pin them as well as gluing them into place. I used 2x4 strip for the top rail. As I mentioned I am very pleased with the result. Ken


-
Hi Mark, It's difficult but your build just gets better and better. This is a really difficult act to follow but it's where I get my inspiration to keep my build going in the hope that some of you excellence rubs off. Ken
- 652 replies
-
- 2
-

-
- royal william
- euromodel
- (and 1 more)
-
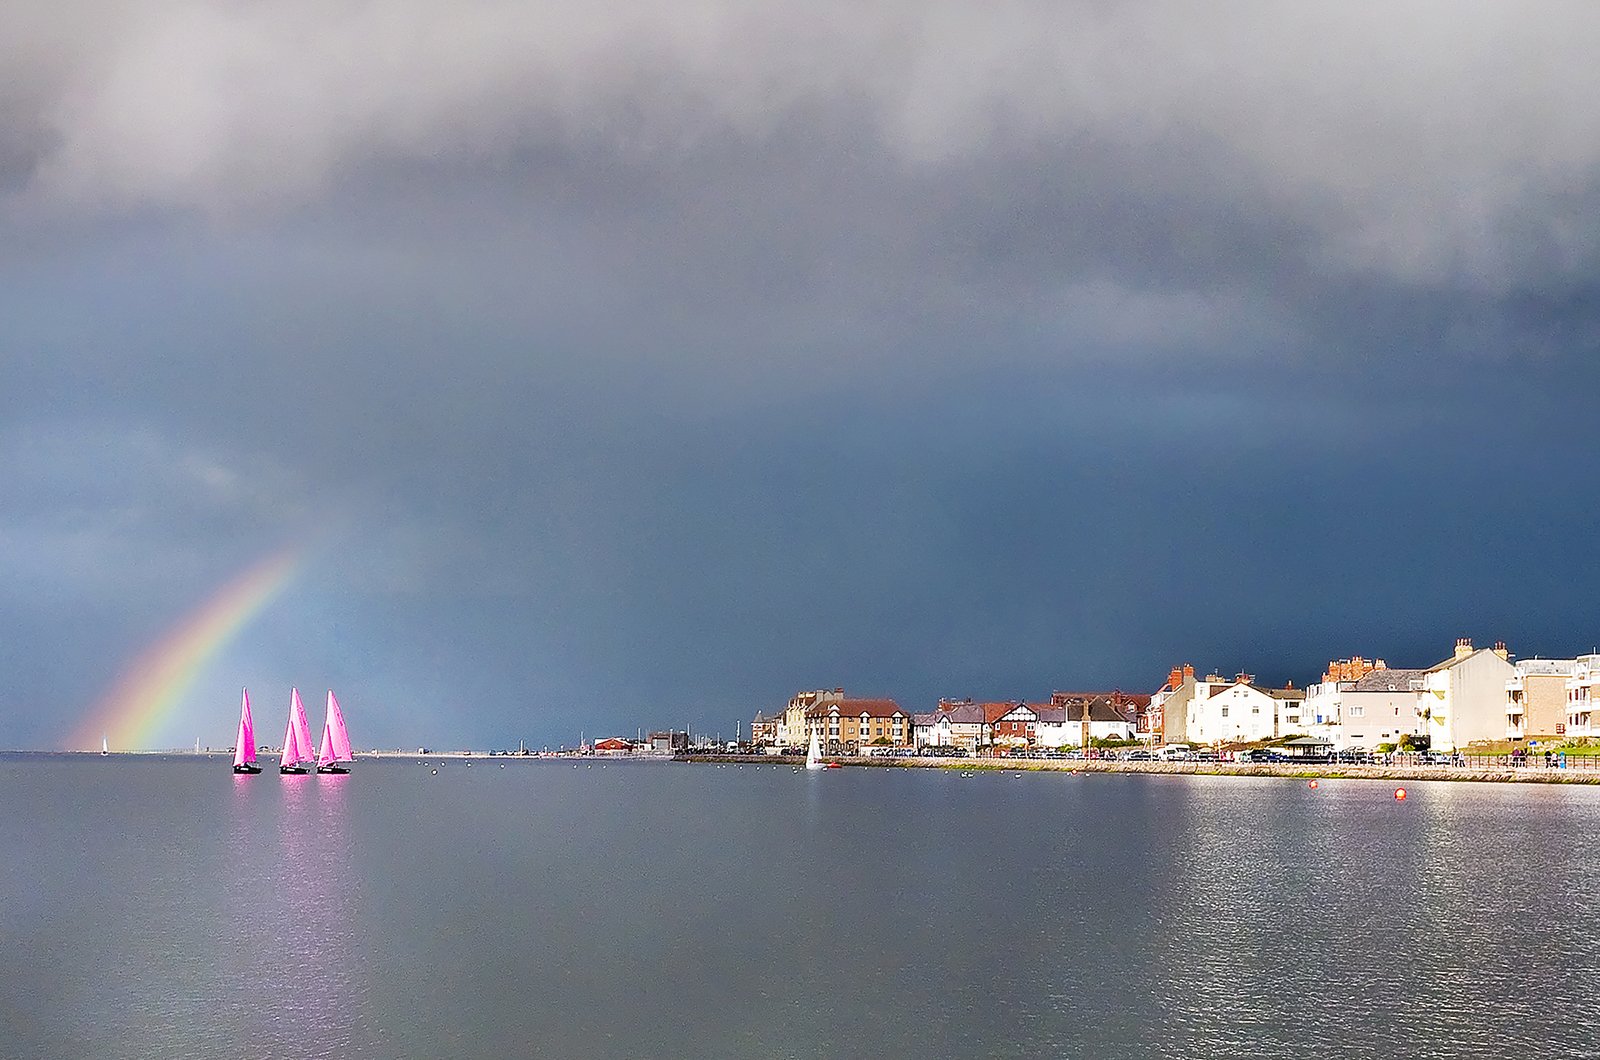
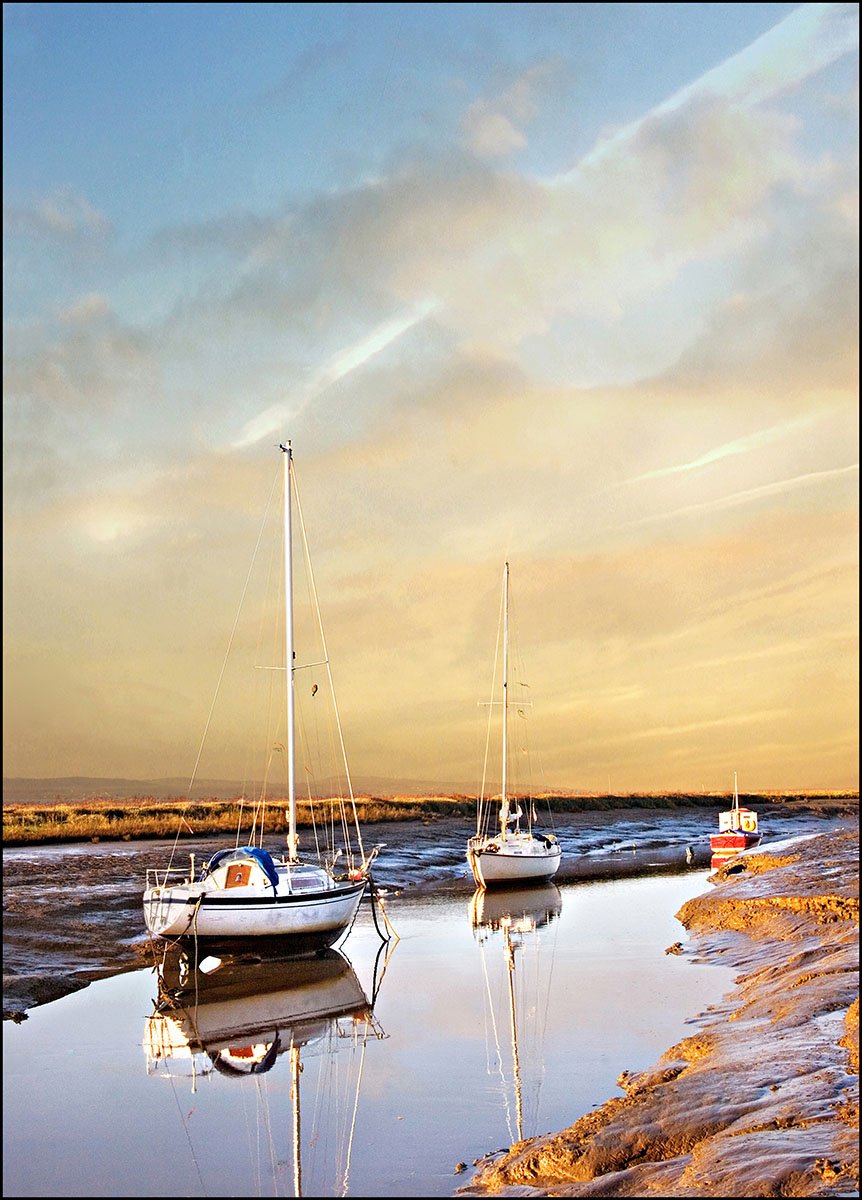
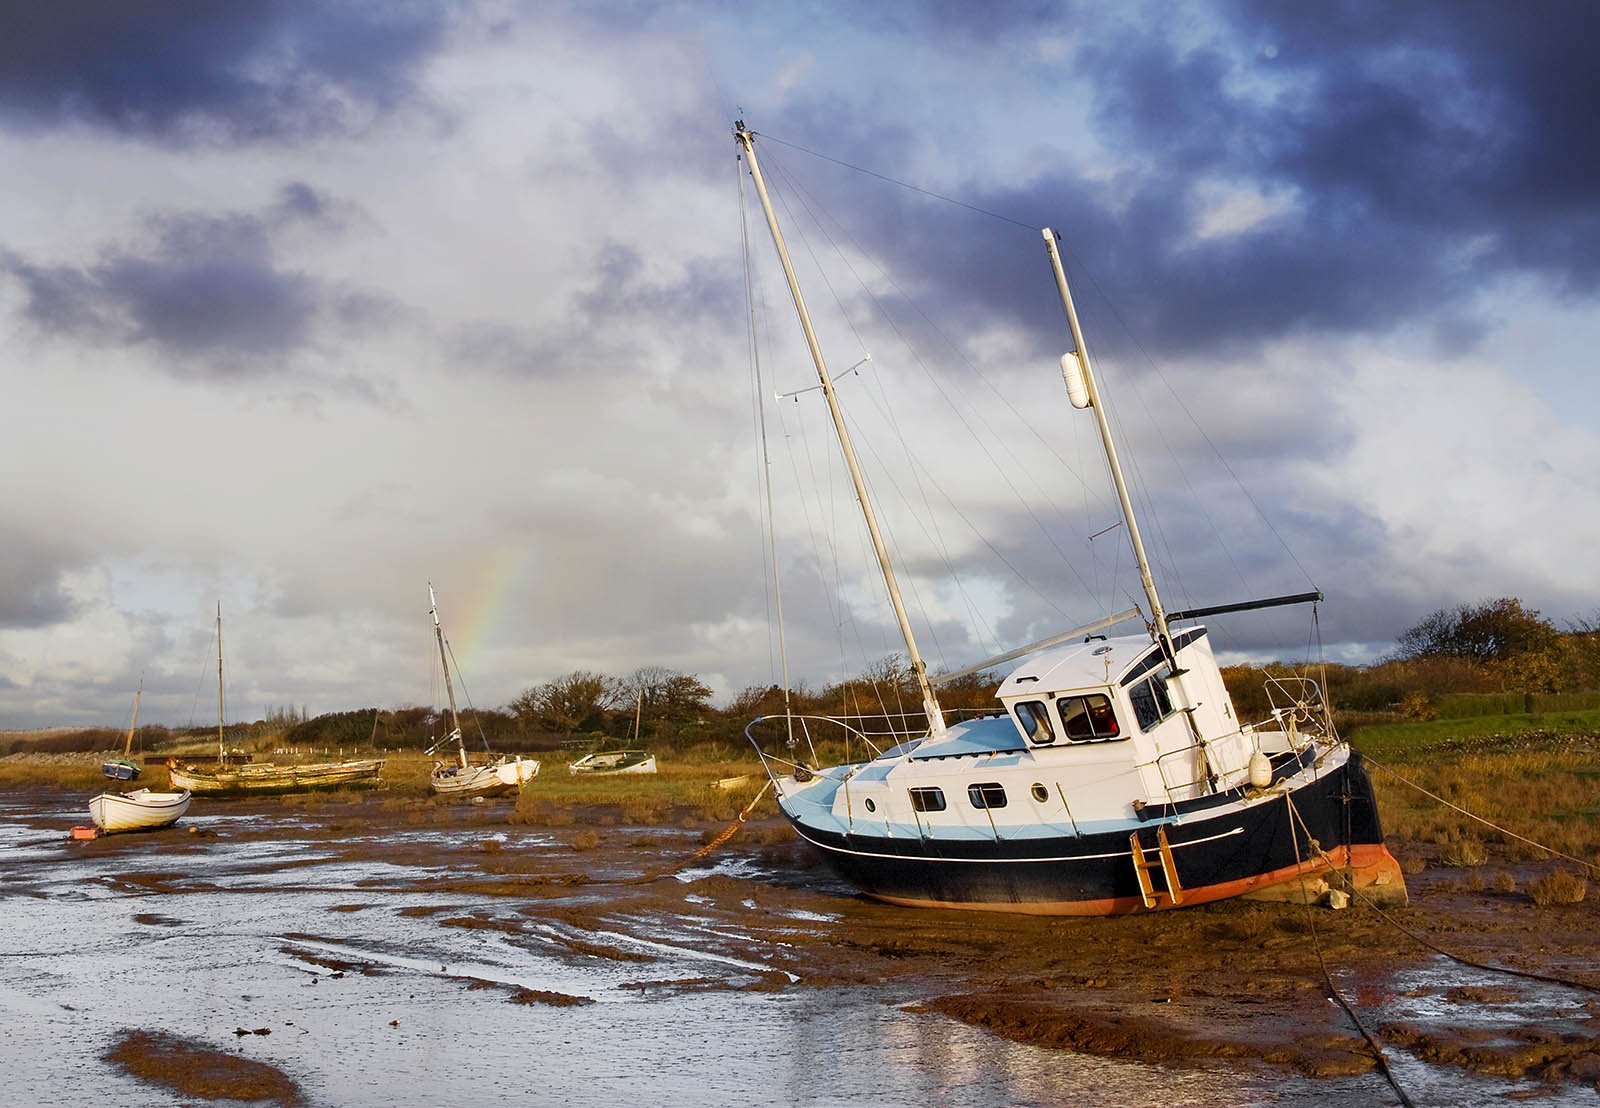
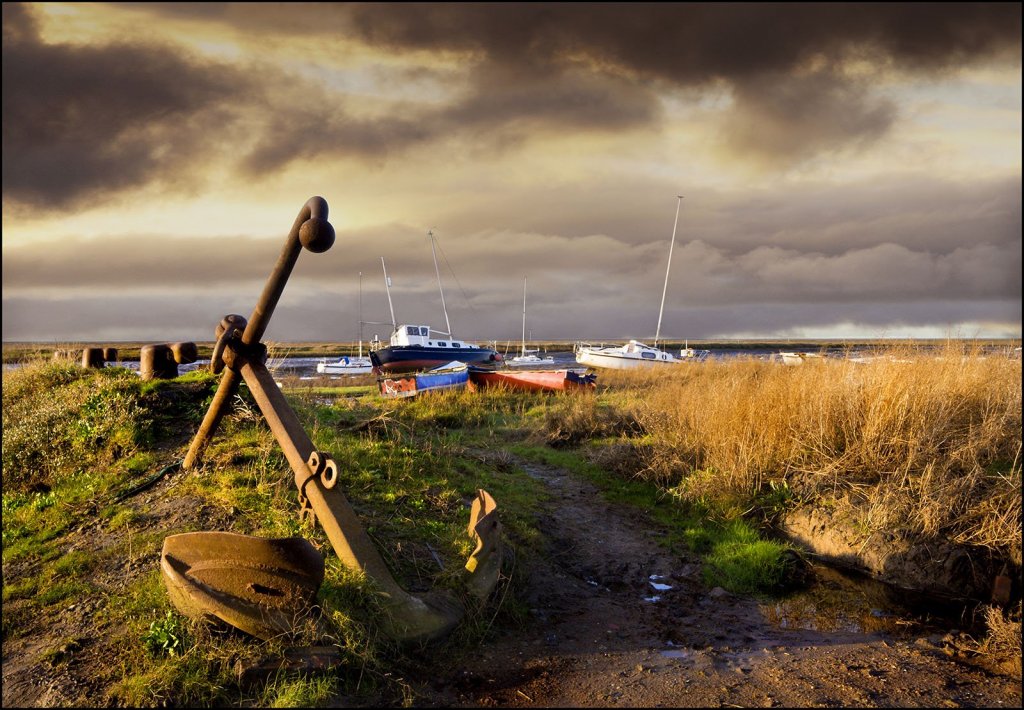
Hi, Just got my camera back, hooray! I felt lost without it. Going through my recent pics I thought that you might like this one, its the sea front of my home town, West Kirby. Yes the storm broke before I got back to my car. Ken

-
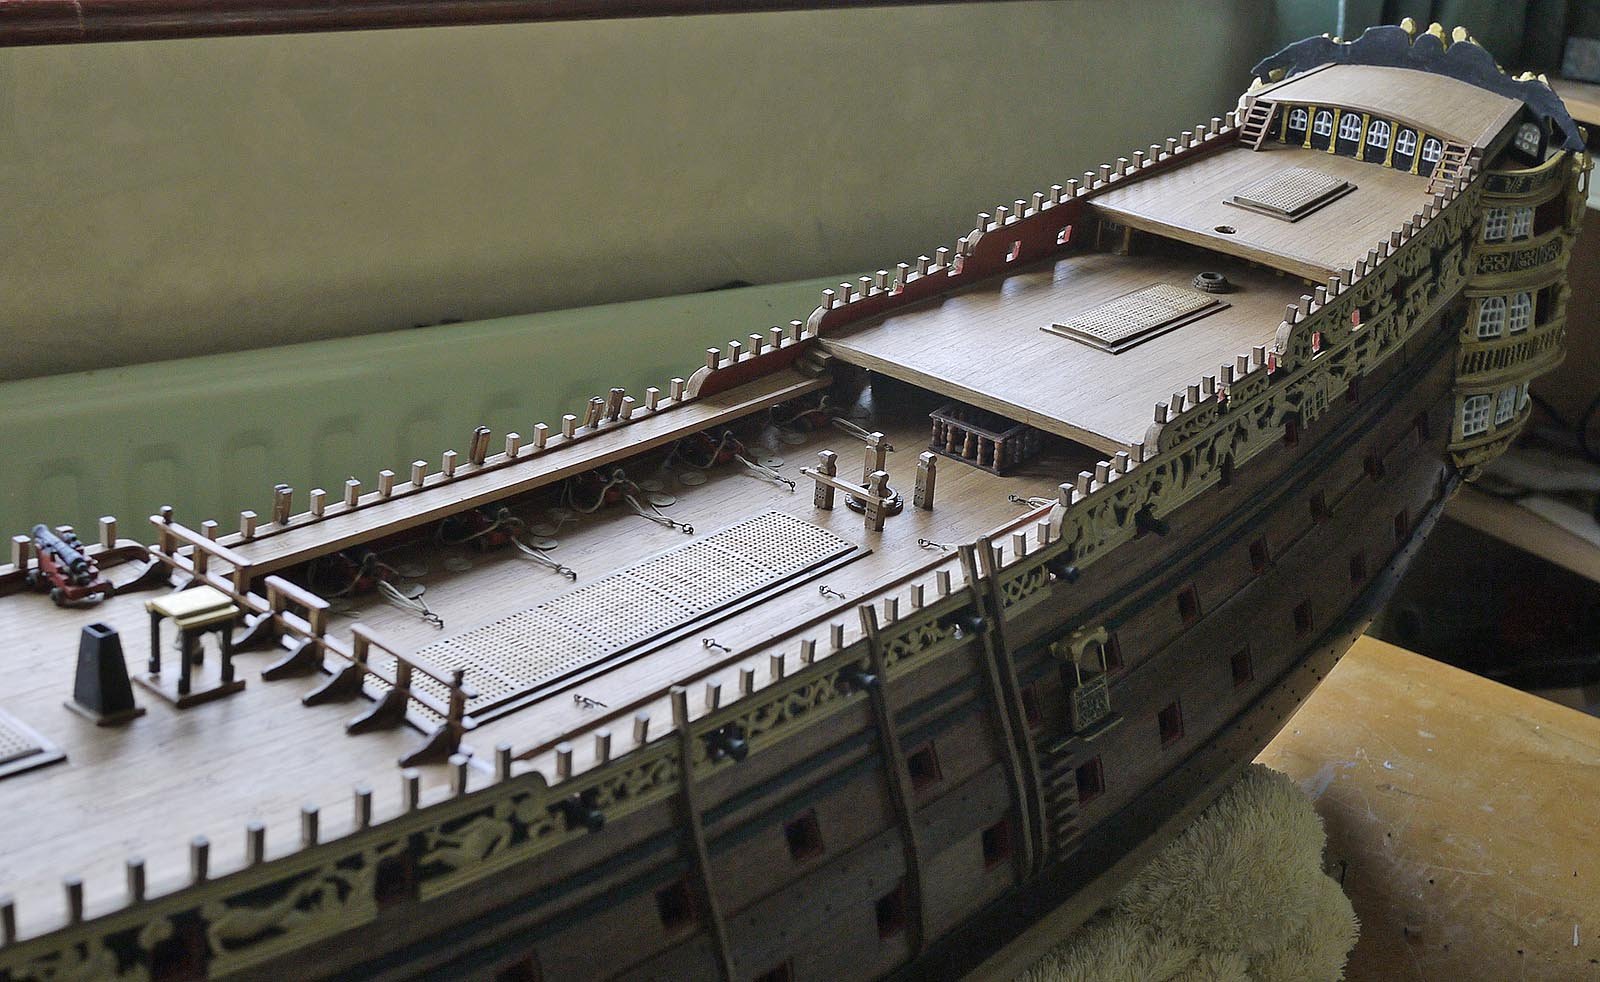
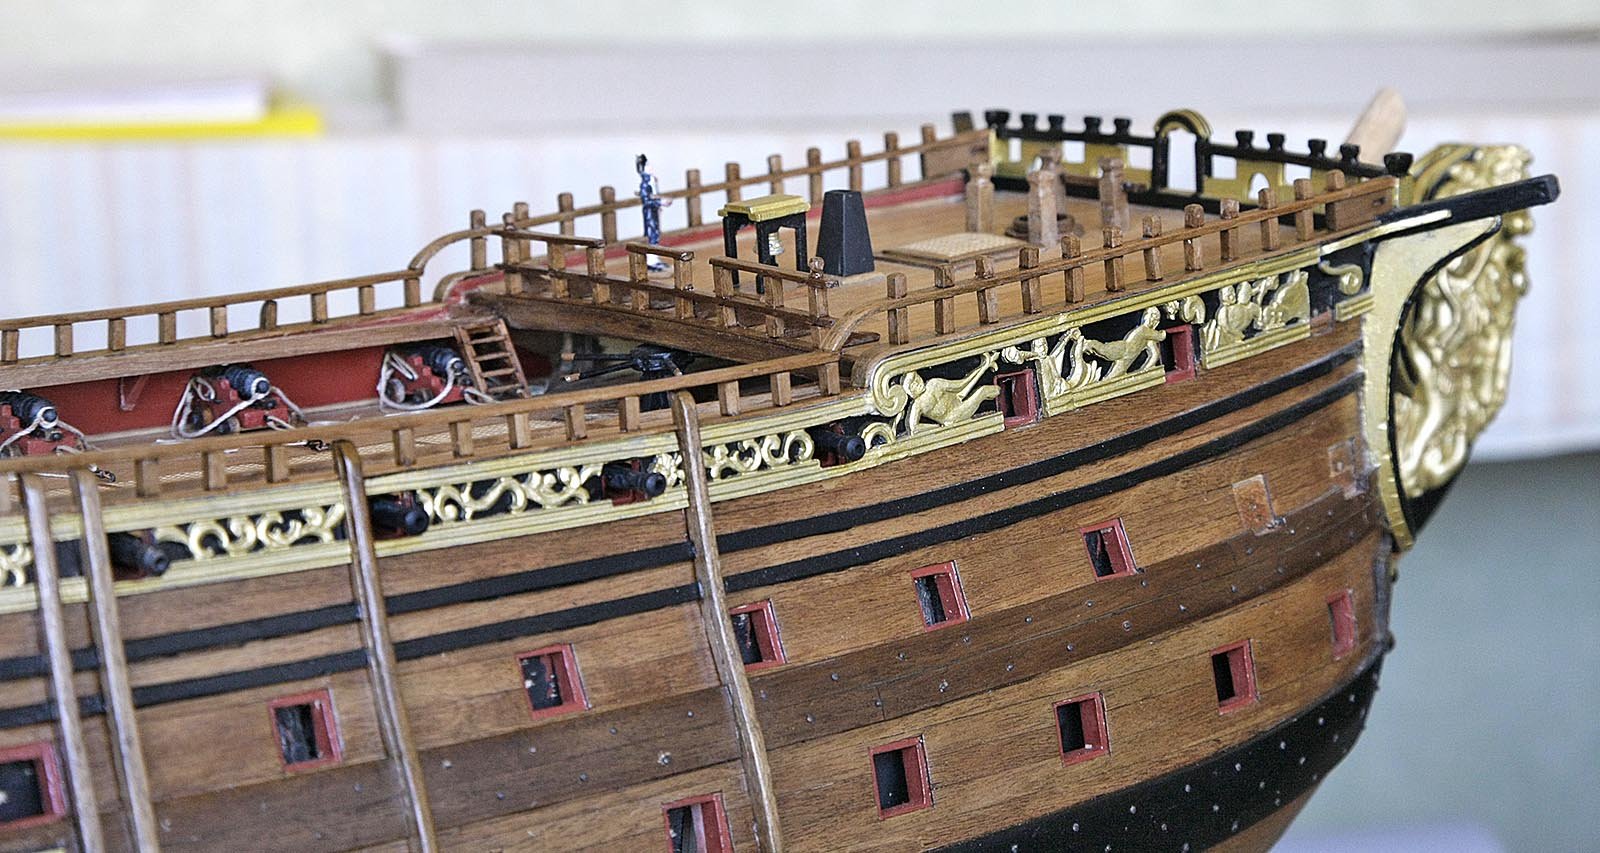
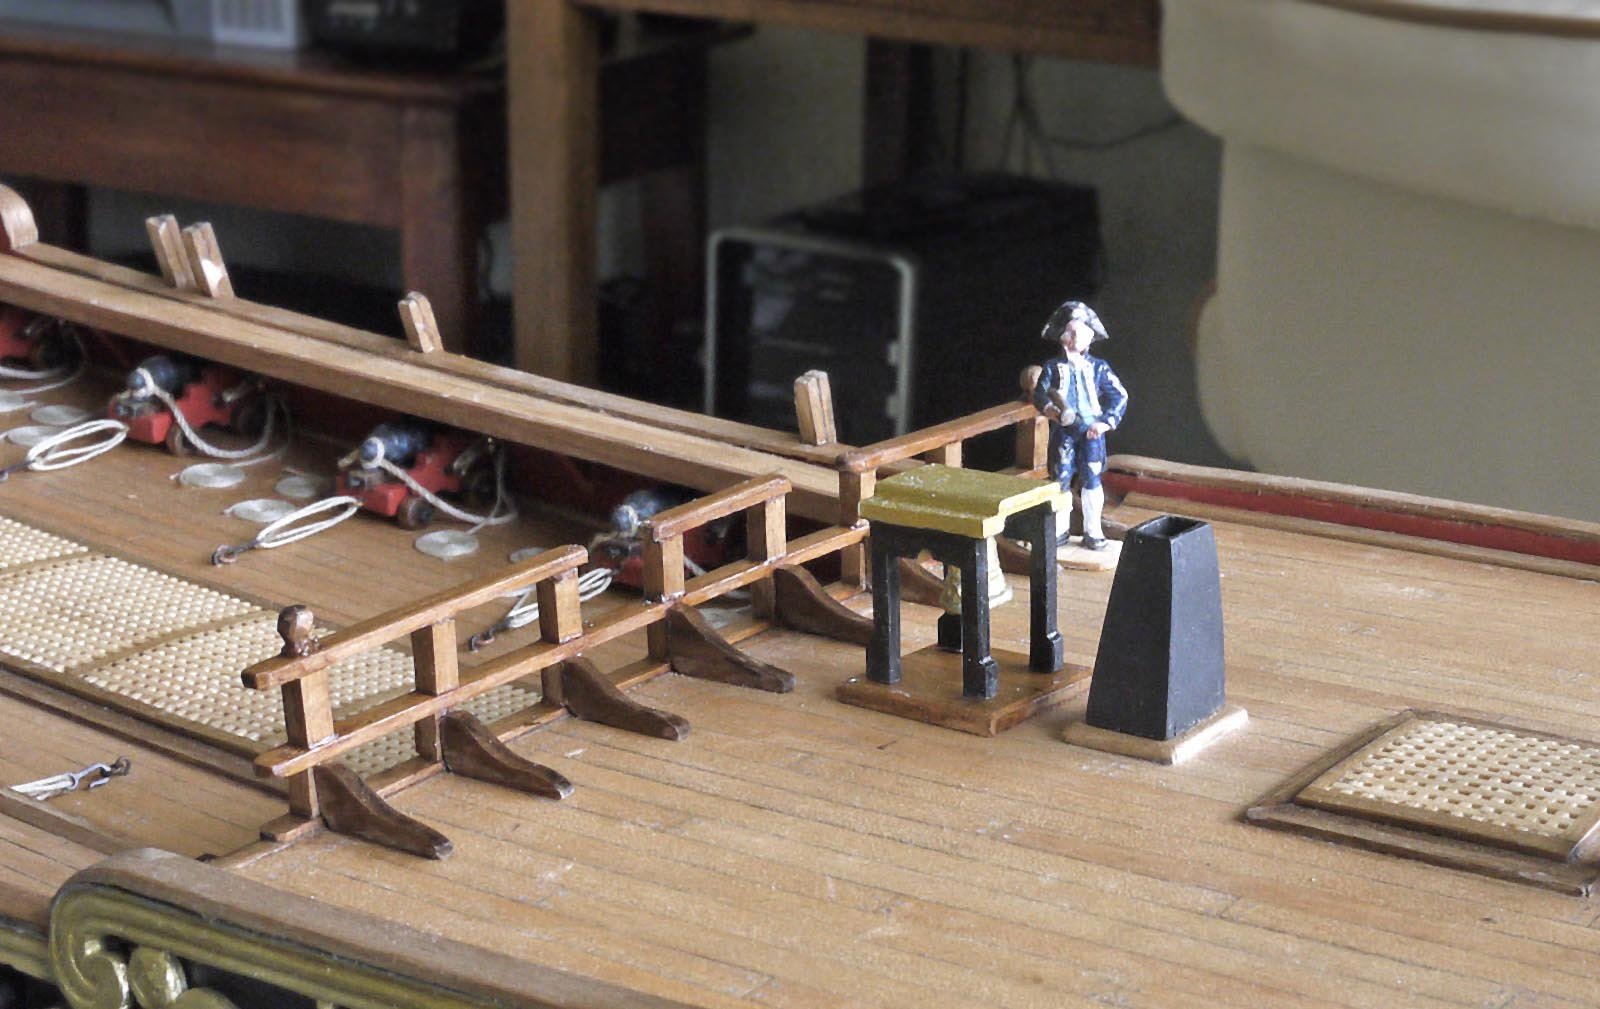
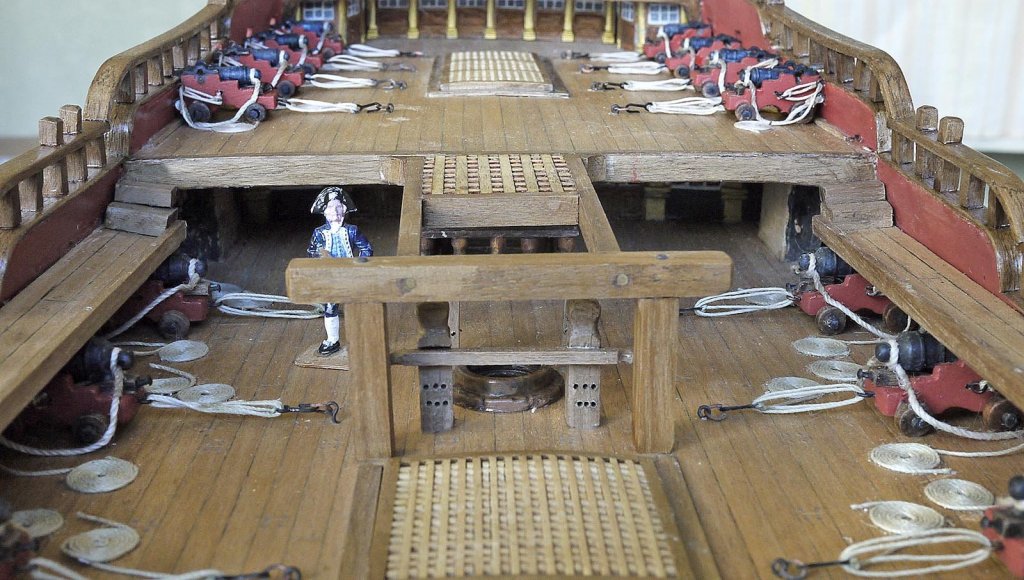
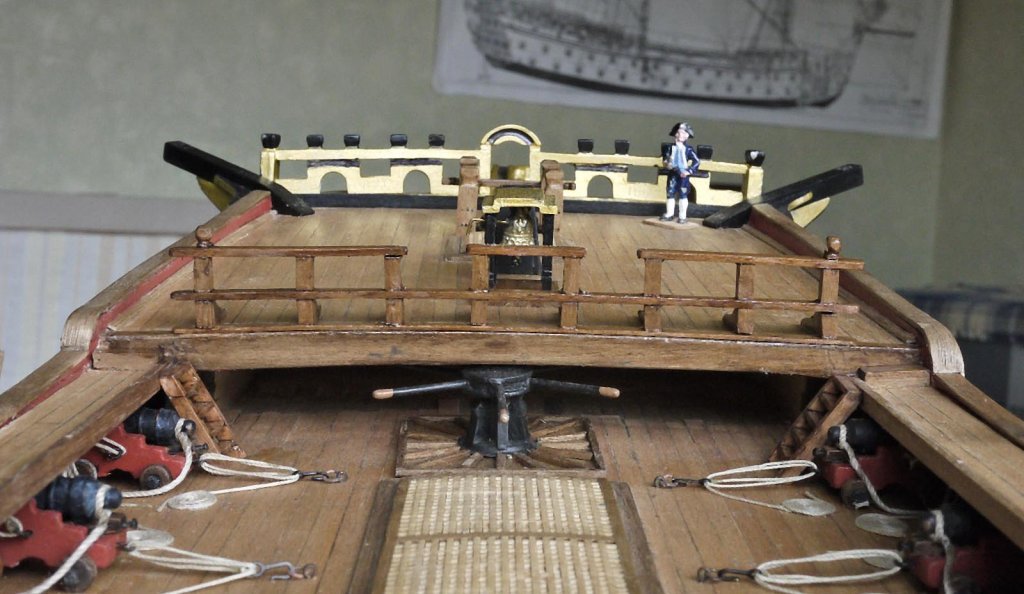
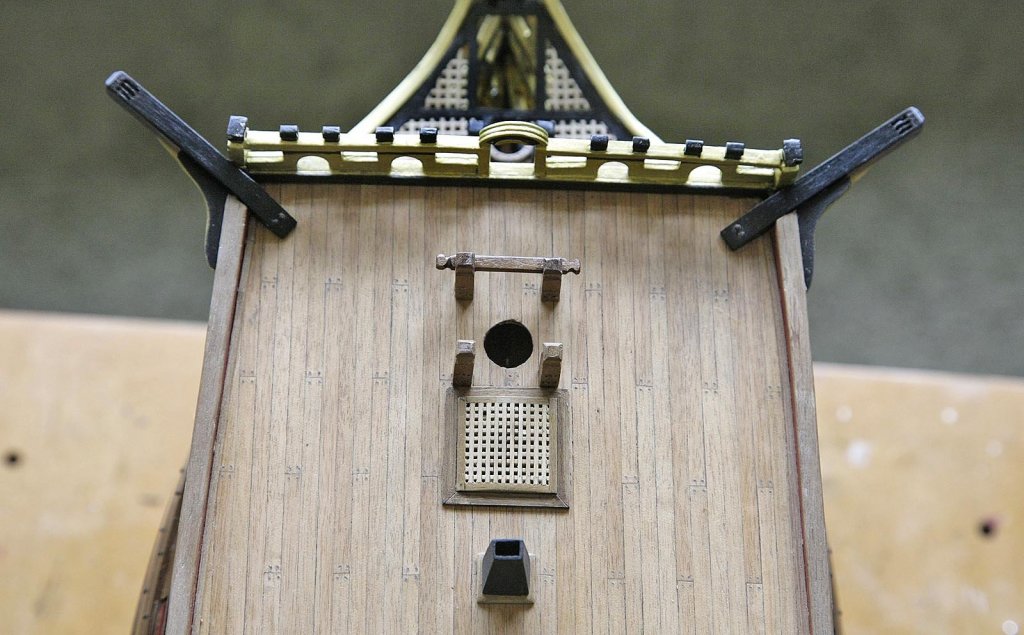
Hello Everyone. Once again thanks to everyone for your likes and kind encouraging comments on my log so far, it's good to know that members are enjoying my efforts. I am now moving into my 5th month of the build and it now feels like part of my everyday life, I look forward to each days building and can't imagine being without it. Today's progress report tells of the completion of the waist gangway, ladders, waist bitts, belfry and I think they're called breast rails. Still encountering the effects of the low sides, the gangway is about 4mm too low, it isn't really noticeable unless you can imagine the height of the gun crew, they would have constant headaches banging their heads, the only solution that I can think of is that the next pressgang should round up all the dwarfs that it can, I think about 40 should do the trick. The bitts and ladders were pretty standard fare. The belfry was built from the kits cast parts. I put a plinth under the belfry, it wasn't called for but it just looked more complete with one. The rails are a feature of the foredeck so I was very disappointed that Euromodel did not show it on any of the planes or refer to it other than to show a plan view from above which only really showed the top rail. If it hadn't been for members previous builds I wouldn't have known what it even looked like or how to go about building it. It was made up of 31 pieces ( uprights, crosspieces and braces ) cut from supplied strip material, I had to guess the sizes to cut those pieces by looking at members photos of it, it wasn't really very difficult and looks okay now that it's done, I'm now getting use to making things for this model as I go along, it just seems to be a normal feature of the kit and is not causing me any insurmountable problems, YET. I'm still using the compact for the pictures and I think it's ok. It does have some advantages over my SLR, first it works, the depth of field is much greater, it has a macro feature and given its size I can get it right down onto the deck, anyway you can see the results for yourselves. Ken

-
Hi John, Thanks for showing interest. I googled the fault and found that on this particular lens a Canon 24-105L there is a known and very common fault with a weak circuit ribbon. Canon deny it although it is well documented and most repairers know of it. It's going to cost me £100 for the repair, disappointing for an L series lens. I'm glad to have had the opportunity to get that off my chest.
-
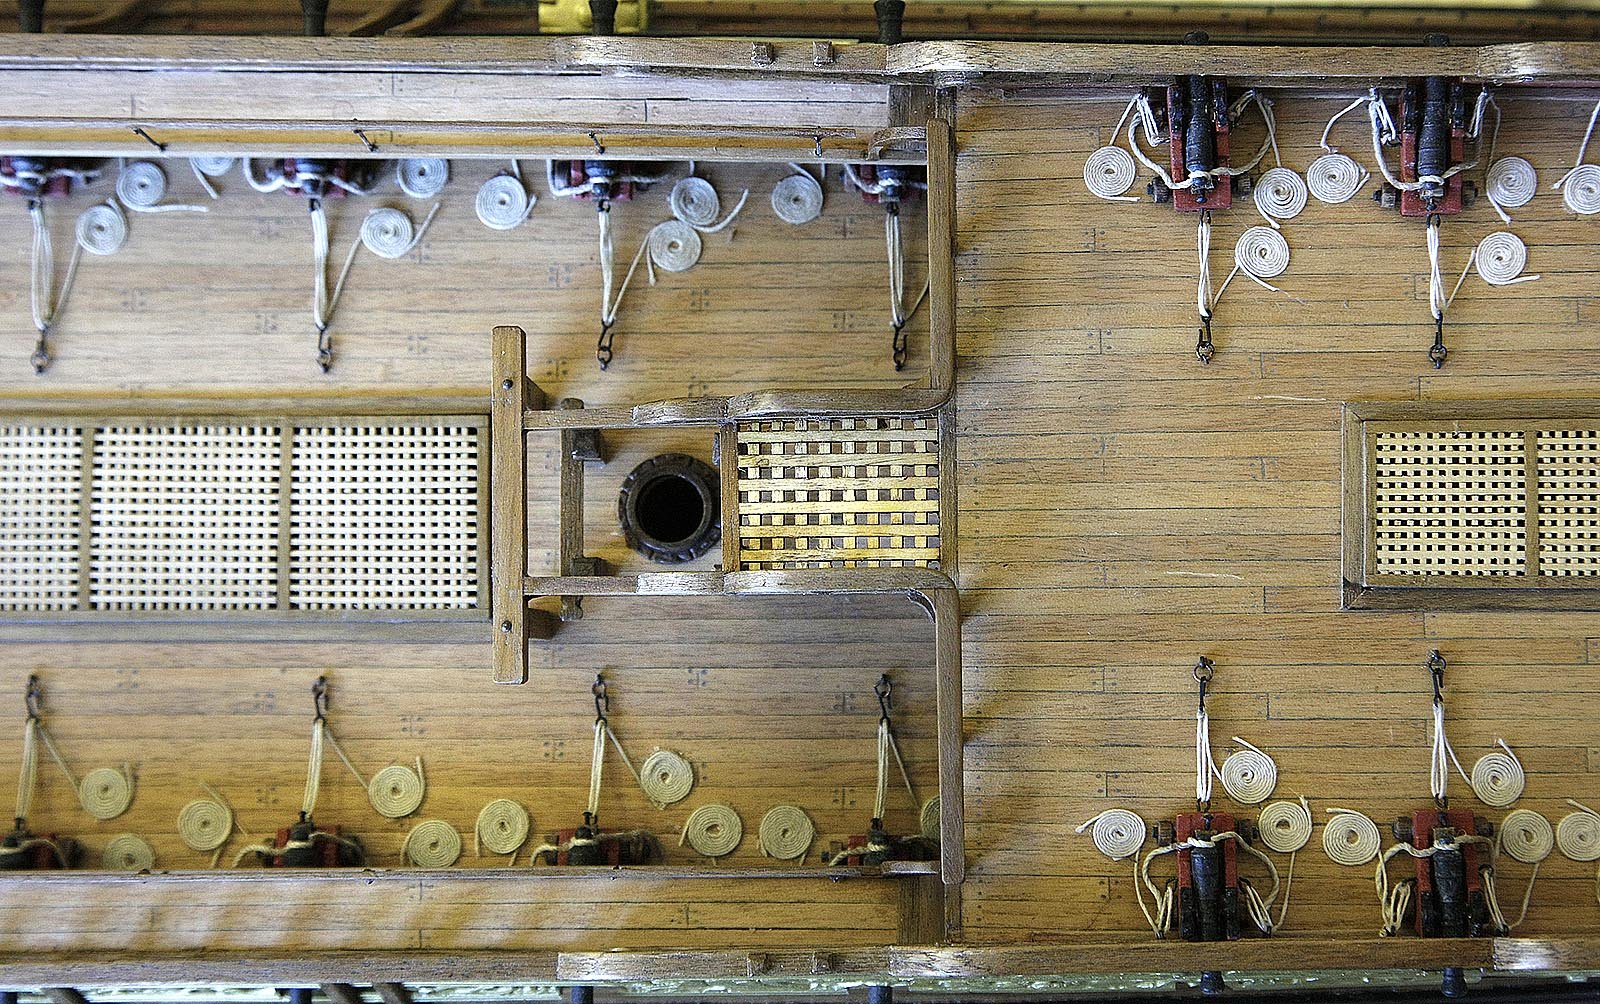
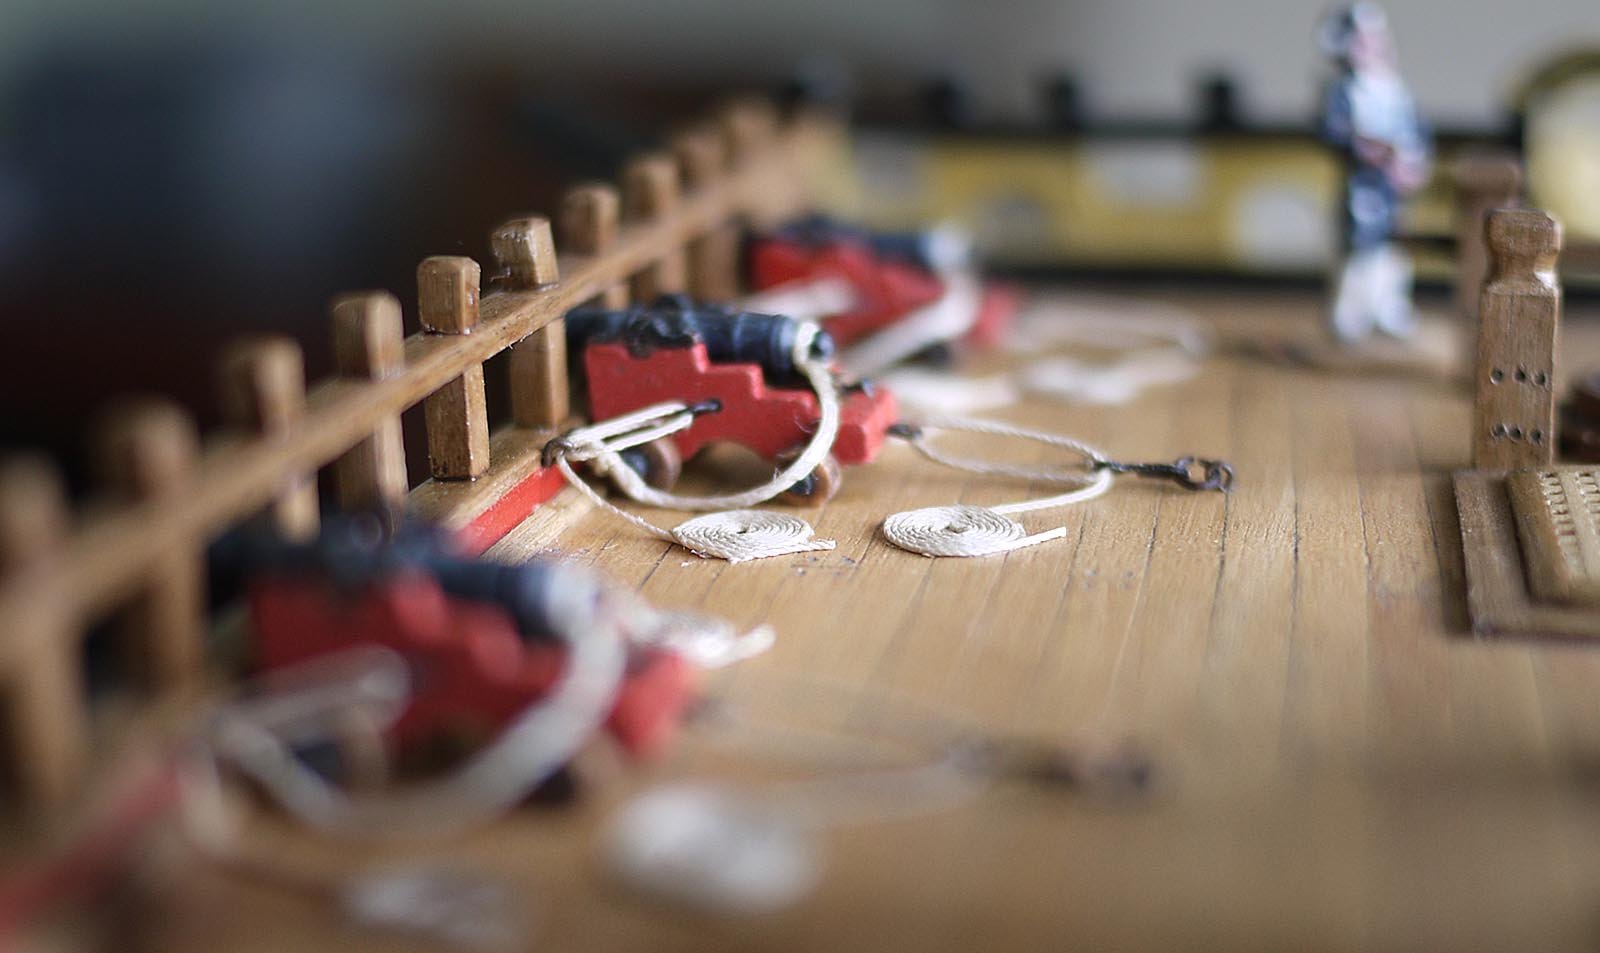
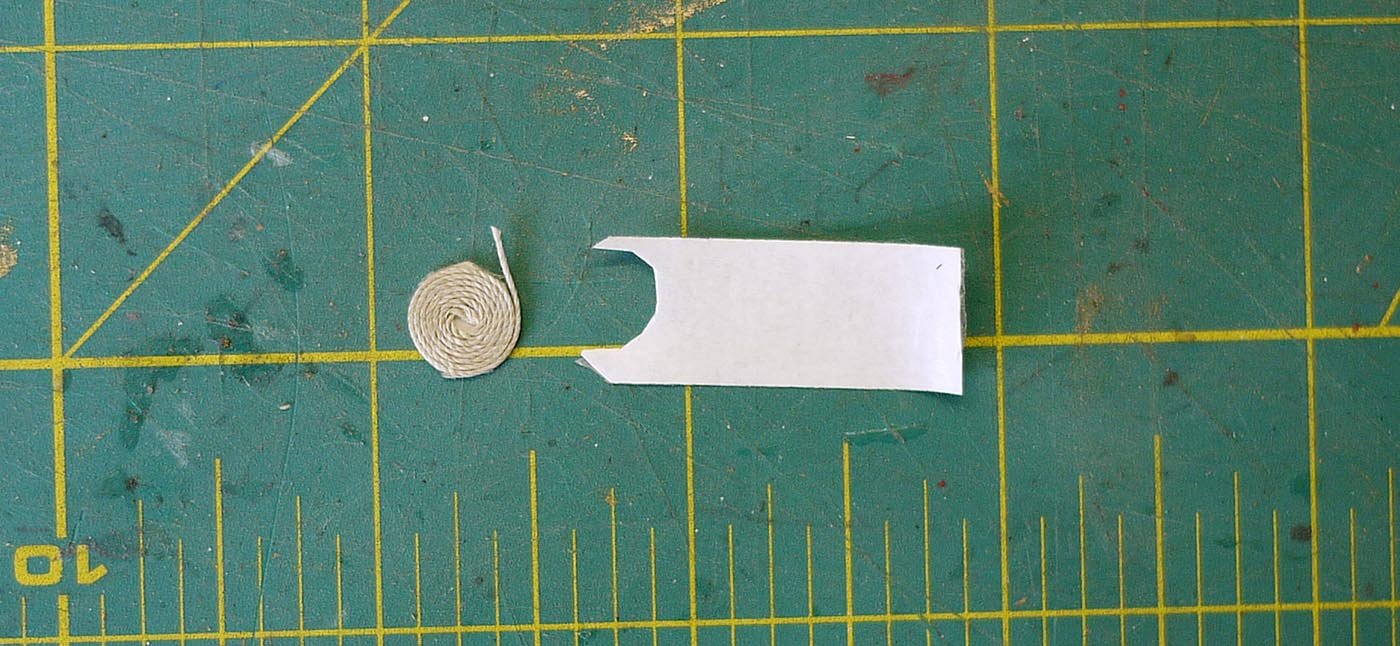
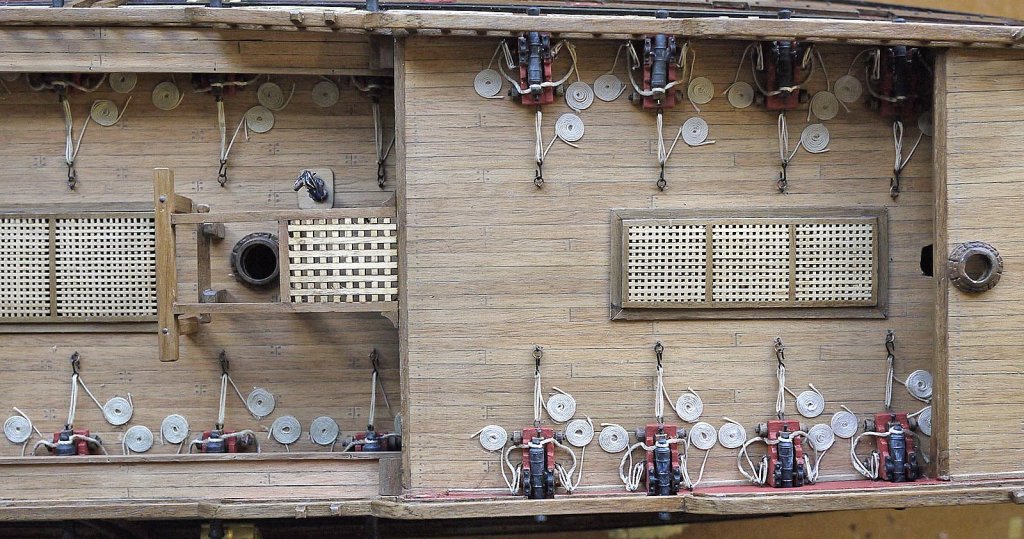
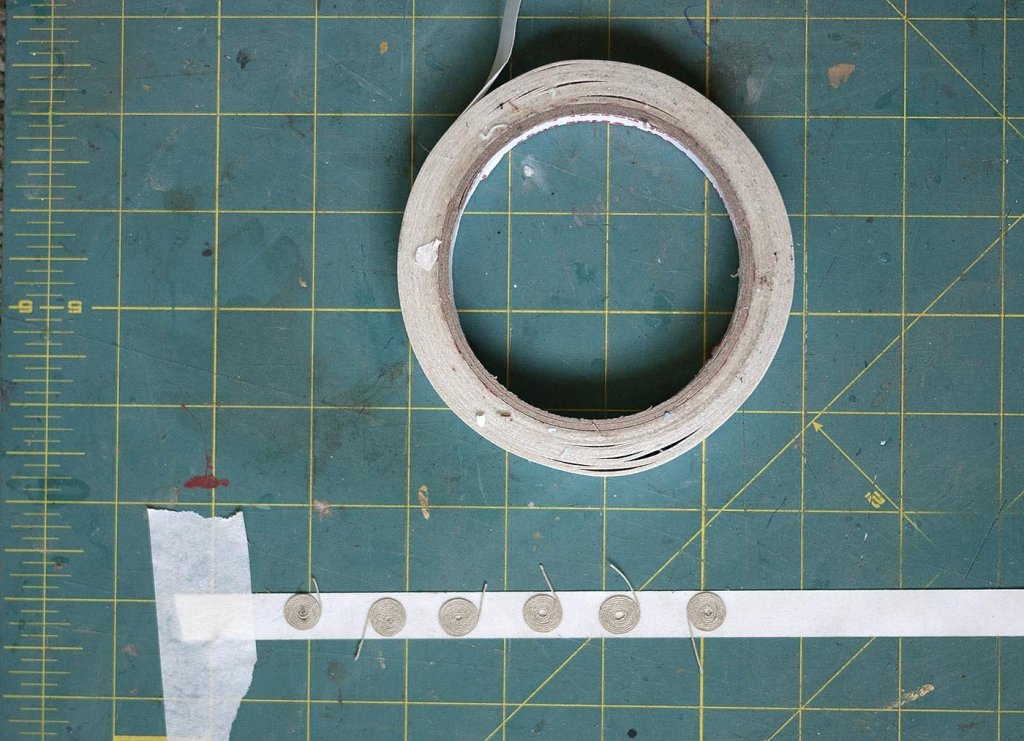
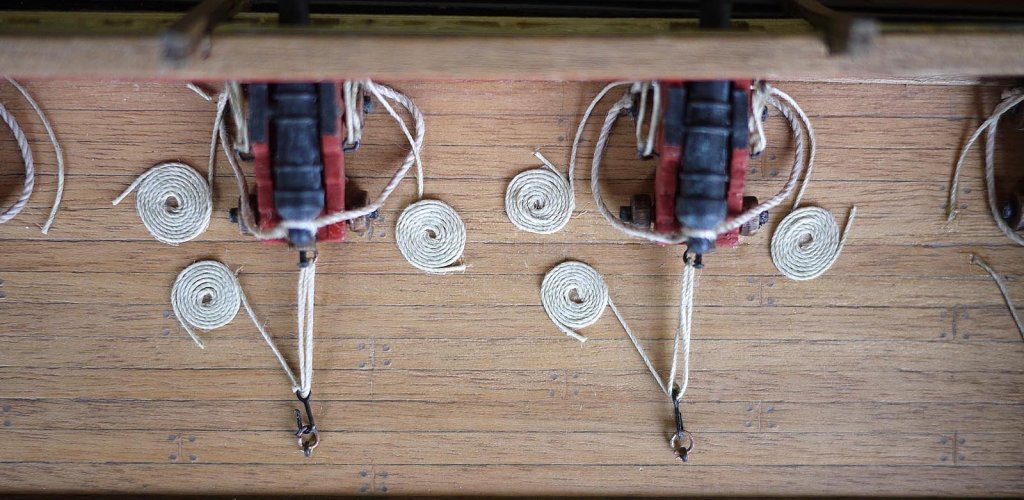
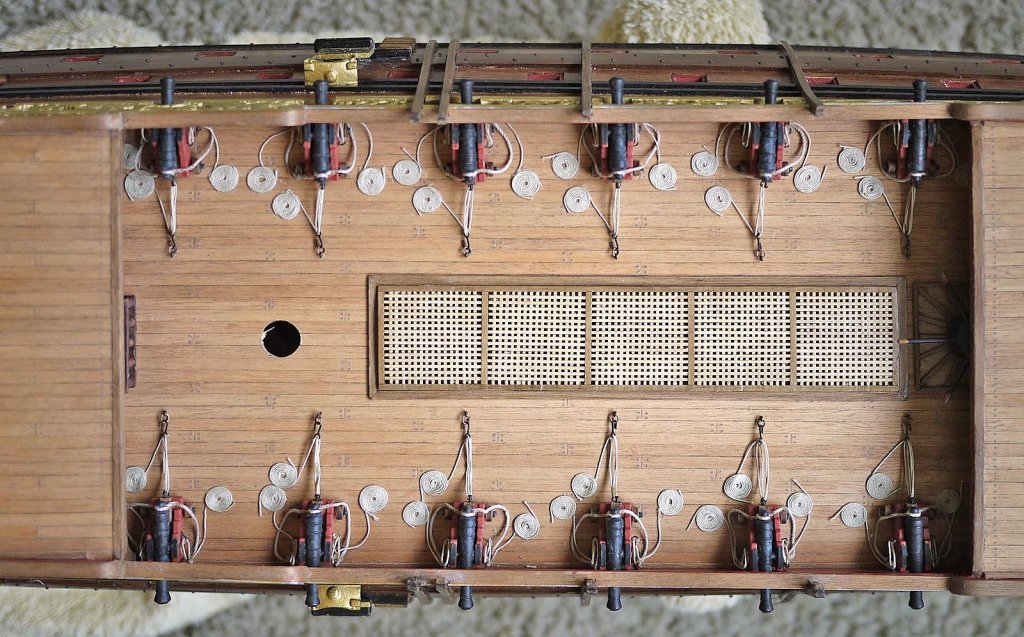
Hello Everyone, Again thanks for your likes and kind comments. I'm having a bit of a problem with my camera at the moment, the lens won't talk to the camera. I keep getting message Error 001 no info from lens, clean contacts, but that doesn't help. Anyway I'm having to use my compact for now, the pictures seem to be coming out ok but it's quite limited. I've completed the 12 canons on the main deck. I've painted, mounted and rigged them. Those of you who've been following my log from early on will know of the problem I have with my hands, handling the small blocks needed for full rigging was going to cause me a great deal of frustration, 72 of them needed! I decided to rig the canons as best as I could without using blocks, a few different methods were tried and the one that you see was the most effective, I think that unless you are actually looking for the blocks you wouldn't know that they weren't there. There will be the overhead walkway and the boat in the waist to distract the eye so I'm happy with my compromise. The method that I adopted for making the rope coils was with double sided sticky tape. I run out a length of tape sticky side up, leaving the backing on and held it down in place with masking tape. It was quite easy to start and make up the coil using tweezers, this tape is very sticky and when the backing is removed is invisible. I cut the coil out, removed the backing and then pressed into place. In the end I was making a coil in about a minute and it's so sticky you can't get the cord off it when coiled. Ken


-
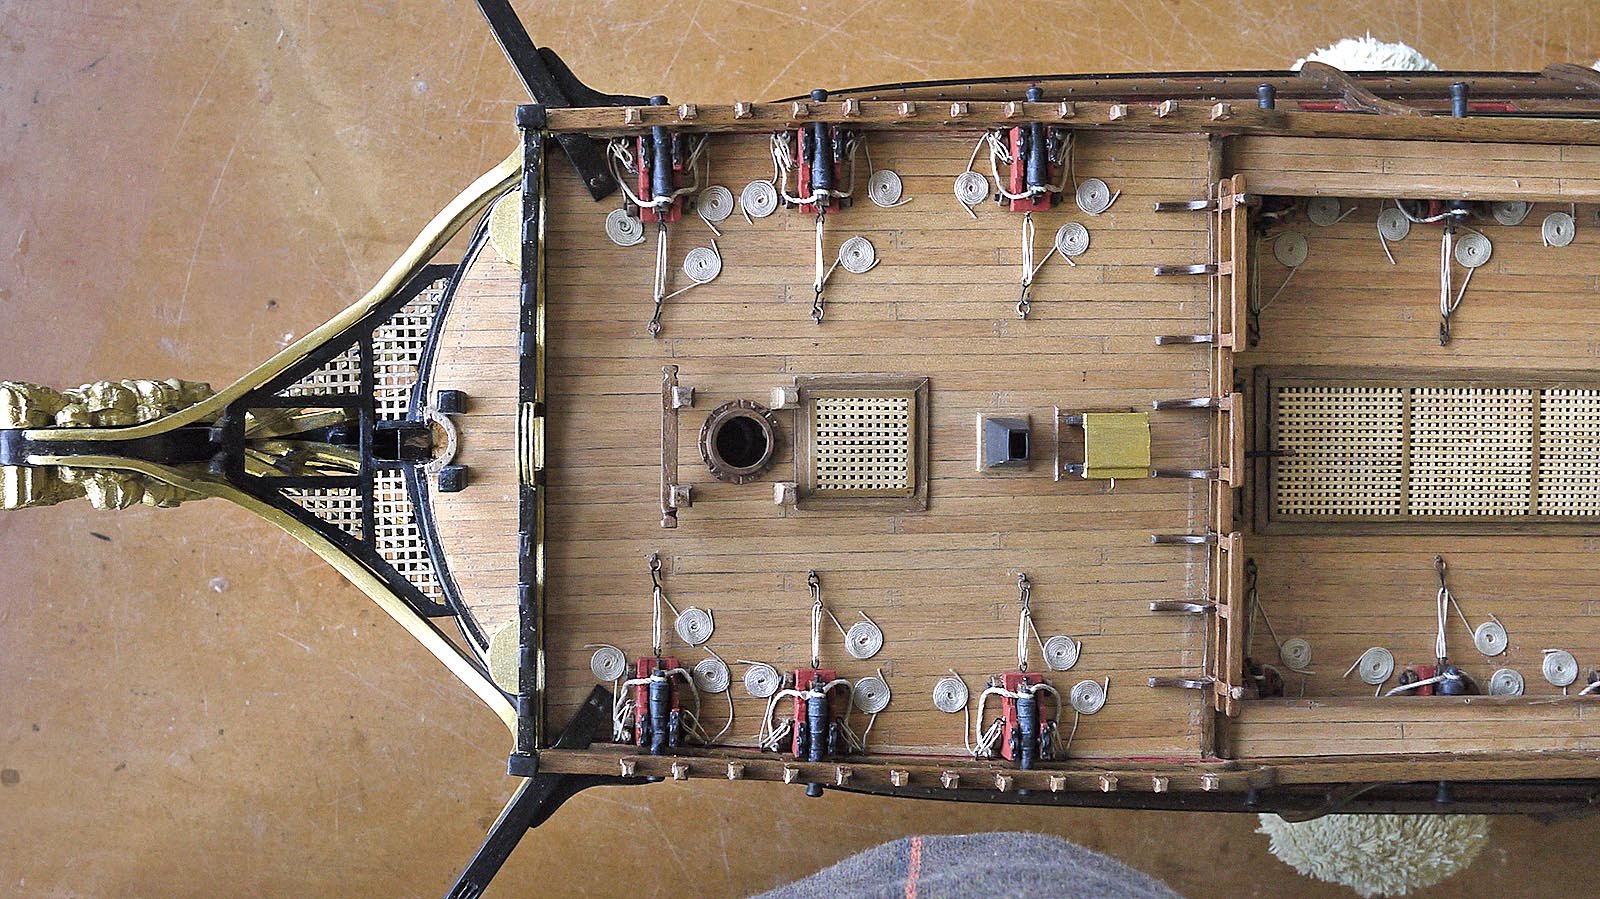
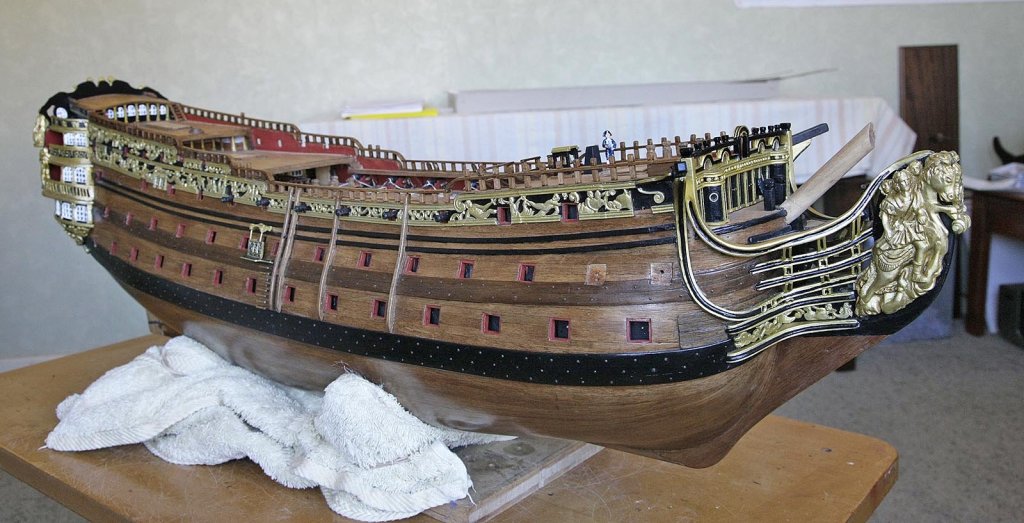
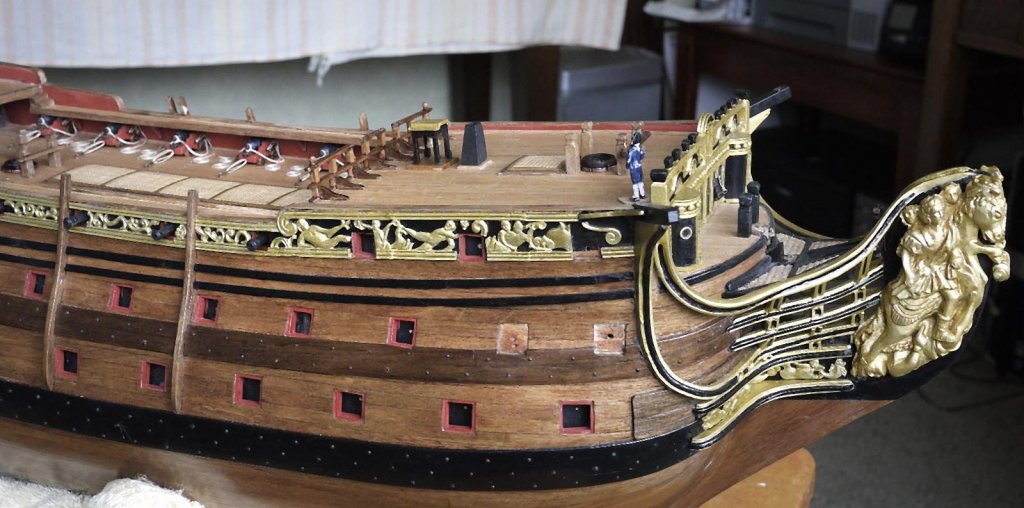
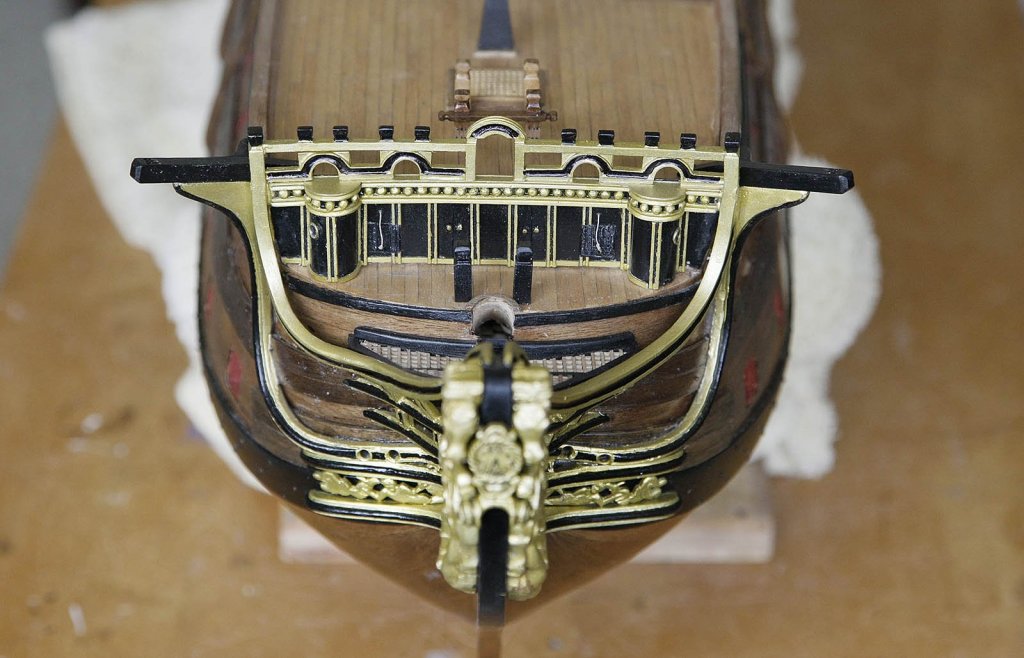
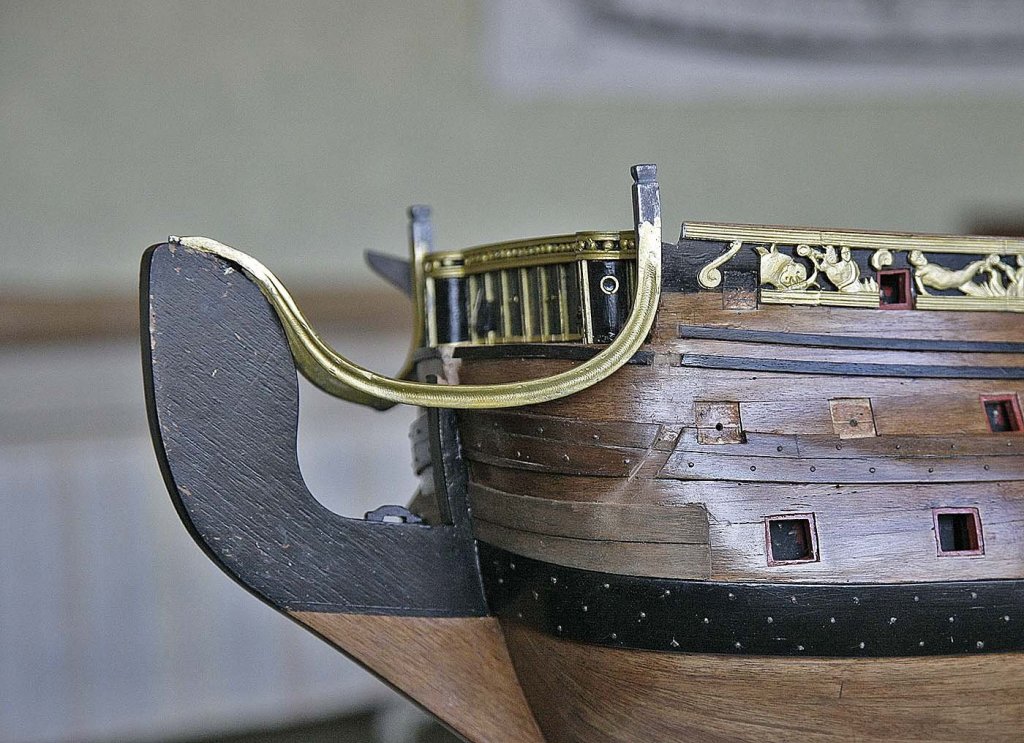
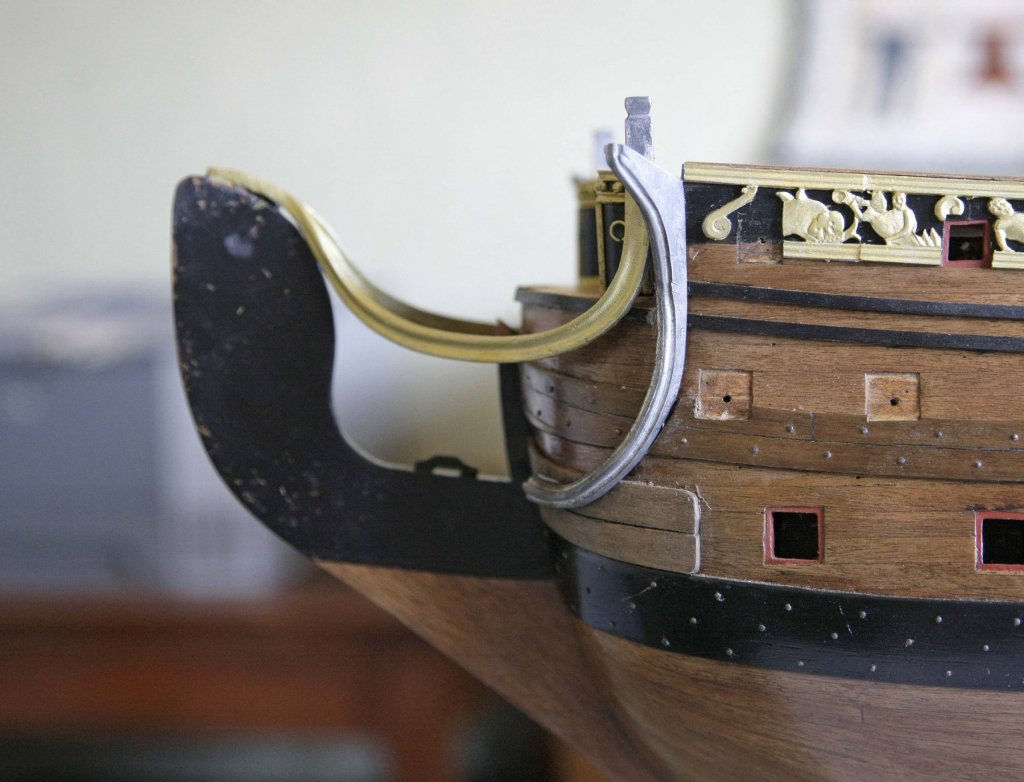
Hello Everyone, Here's the pictures of my efforts on the foredeck. The front rails were assembled and painted, the bitts were made as per plan and the catheads were made, TWICE. Due to an earlier mistake by me I hadn't made the sides high enough by about 4mm along the foredeck and waist area, you may remember from the fitting of the side decorations that they ended up too low, I was now facing the knock on effect of that. On the plan the catheads go through the sides under the cast strip and about 5mm below the sides capping strip. As my sides were too low the catheads when in place came in just above the capping strip height. To get some sort of ok fitting I cut a groove in the cathead so that the capping strip would pass over it. It didn't look great but I thought that as there would be rails above it and with a strategically placed coil of rope it wouldn't be readily noticed. I then got hold of that plan and to my relief I saw that on it the capping strip would finish butted up and flush with the side of the cathead. This design would fit well into my lower sides so I stripped out my first effort and did just that and the result made that area much better. Again I'm happy with the way things are going, I only hope that there are no more surprises. From time to time I been making up the canons so that I didn't end up with a load to do at once, they are now ready for rigging. Don't expect too much here as I'm only gong to rig them simply and quite basic. Ken

-
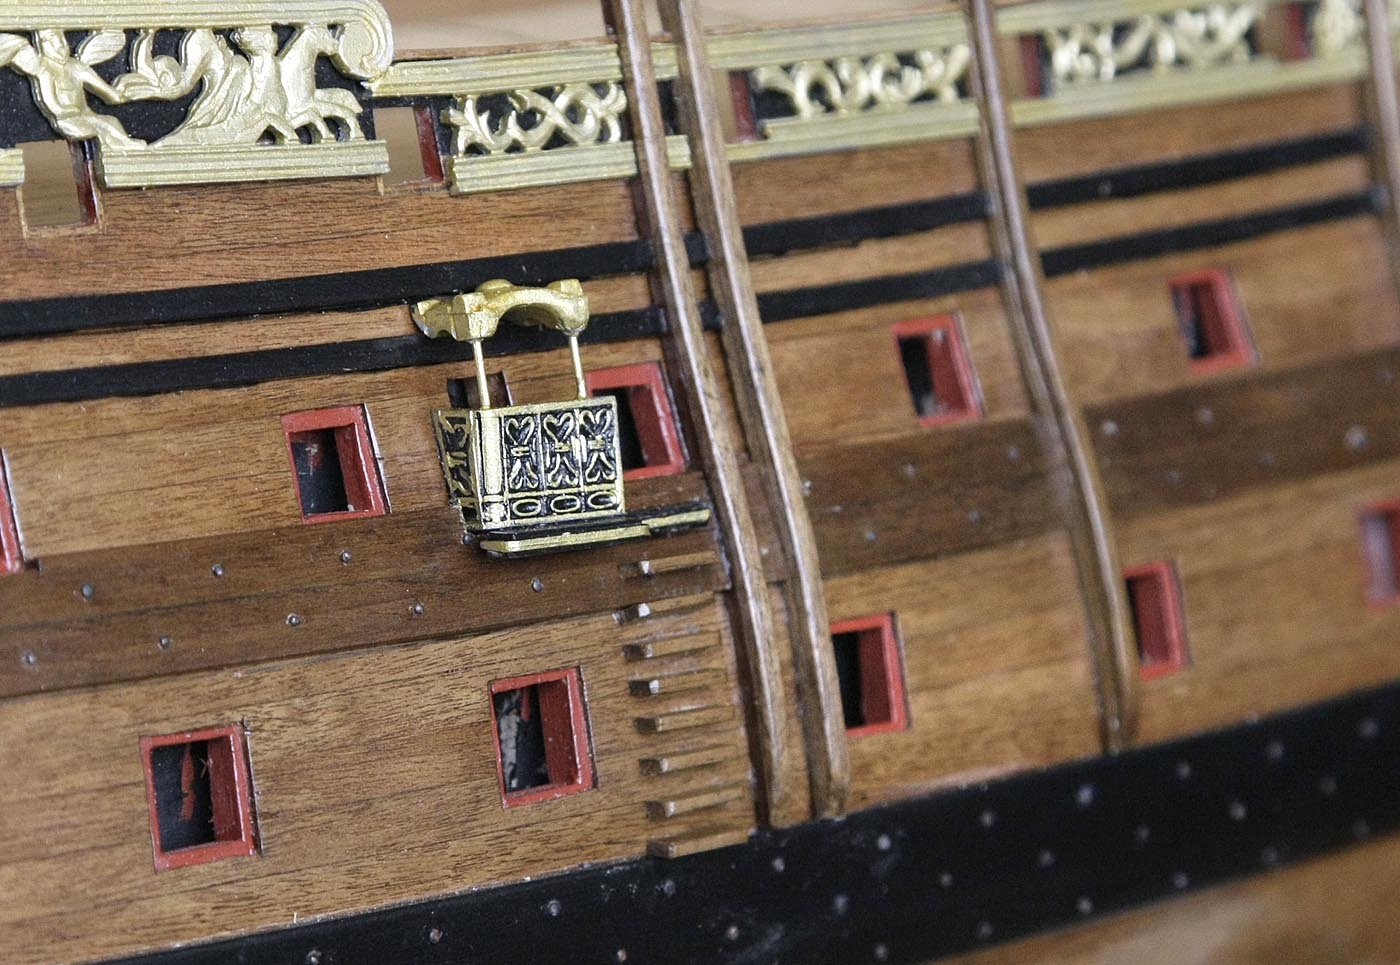
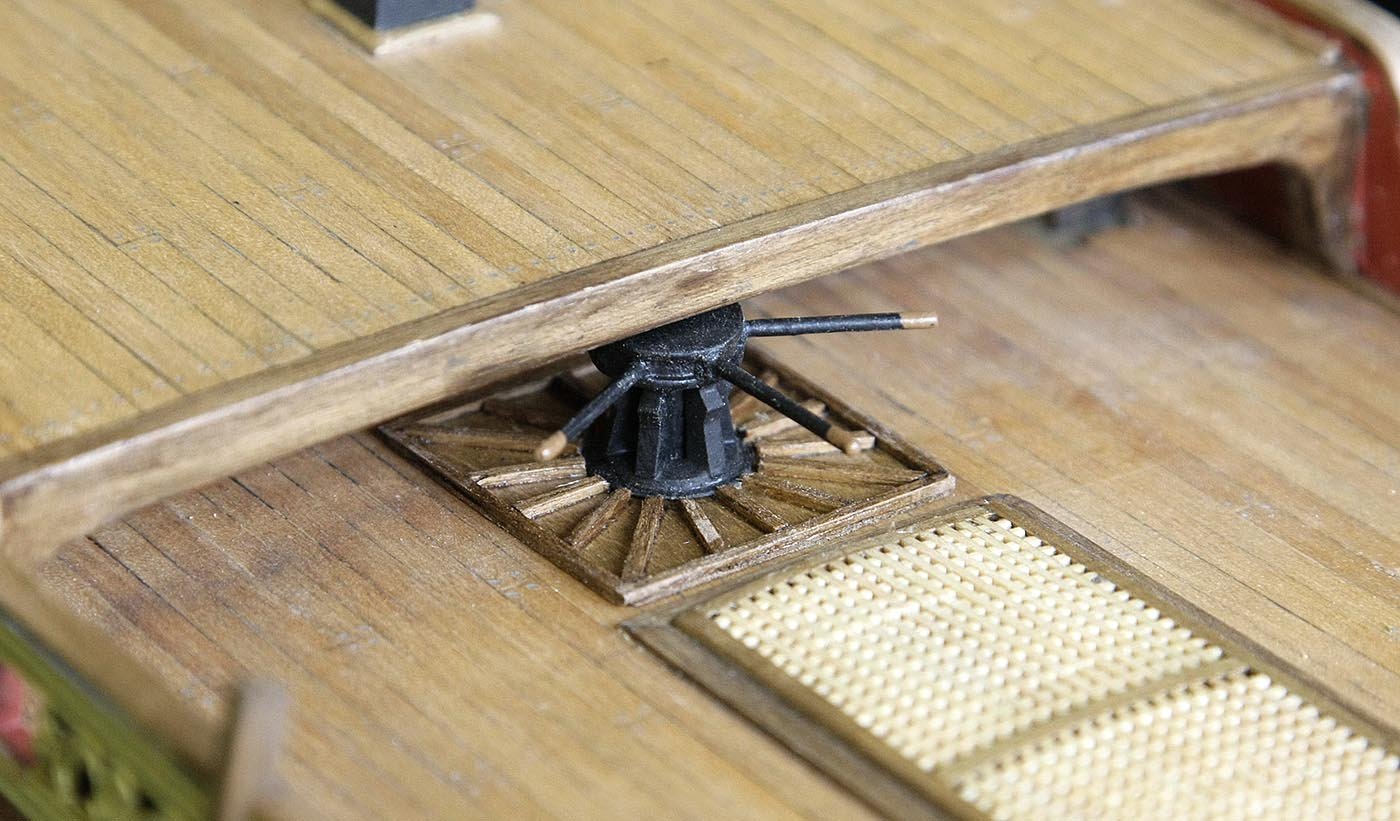
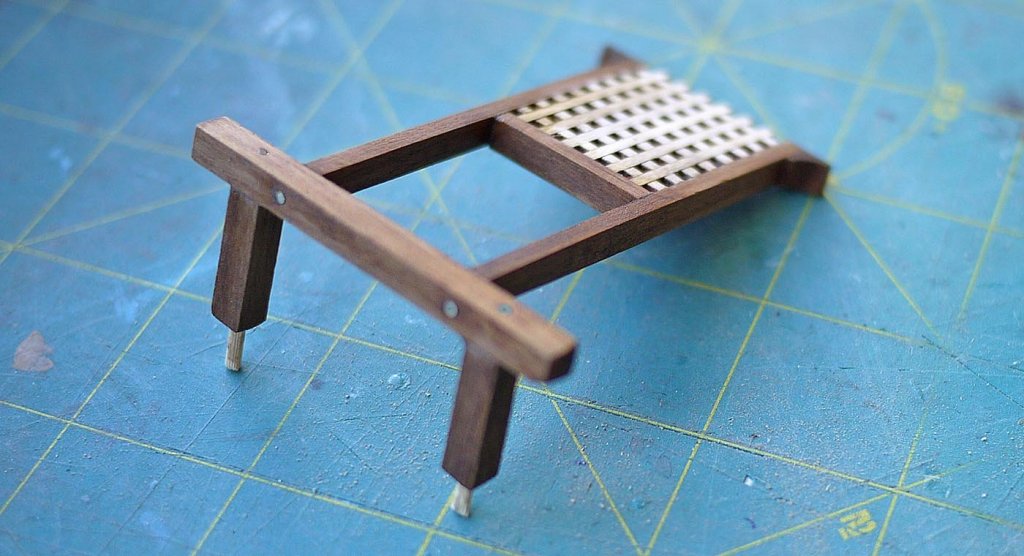
Hello Everybody. Pete, Yes that's interesting research, it's good to know what one's making and as you said, in life there are always unexpected surprises. A small update, I've re-made the capstan, for the third time! Each time I look at the build I feel some things could be improved on from my original attempt but I'm getting better. Also the entrance ports and steps. I've done the front, rails, catheads, bitts etc but need to sort some pictures for that before I post them. Ken


-
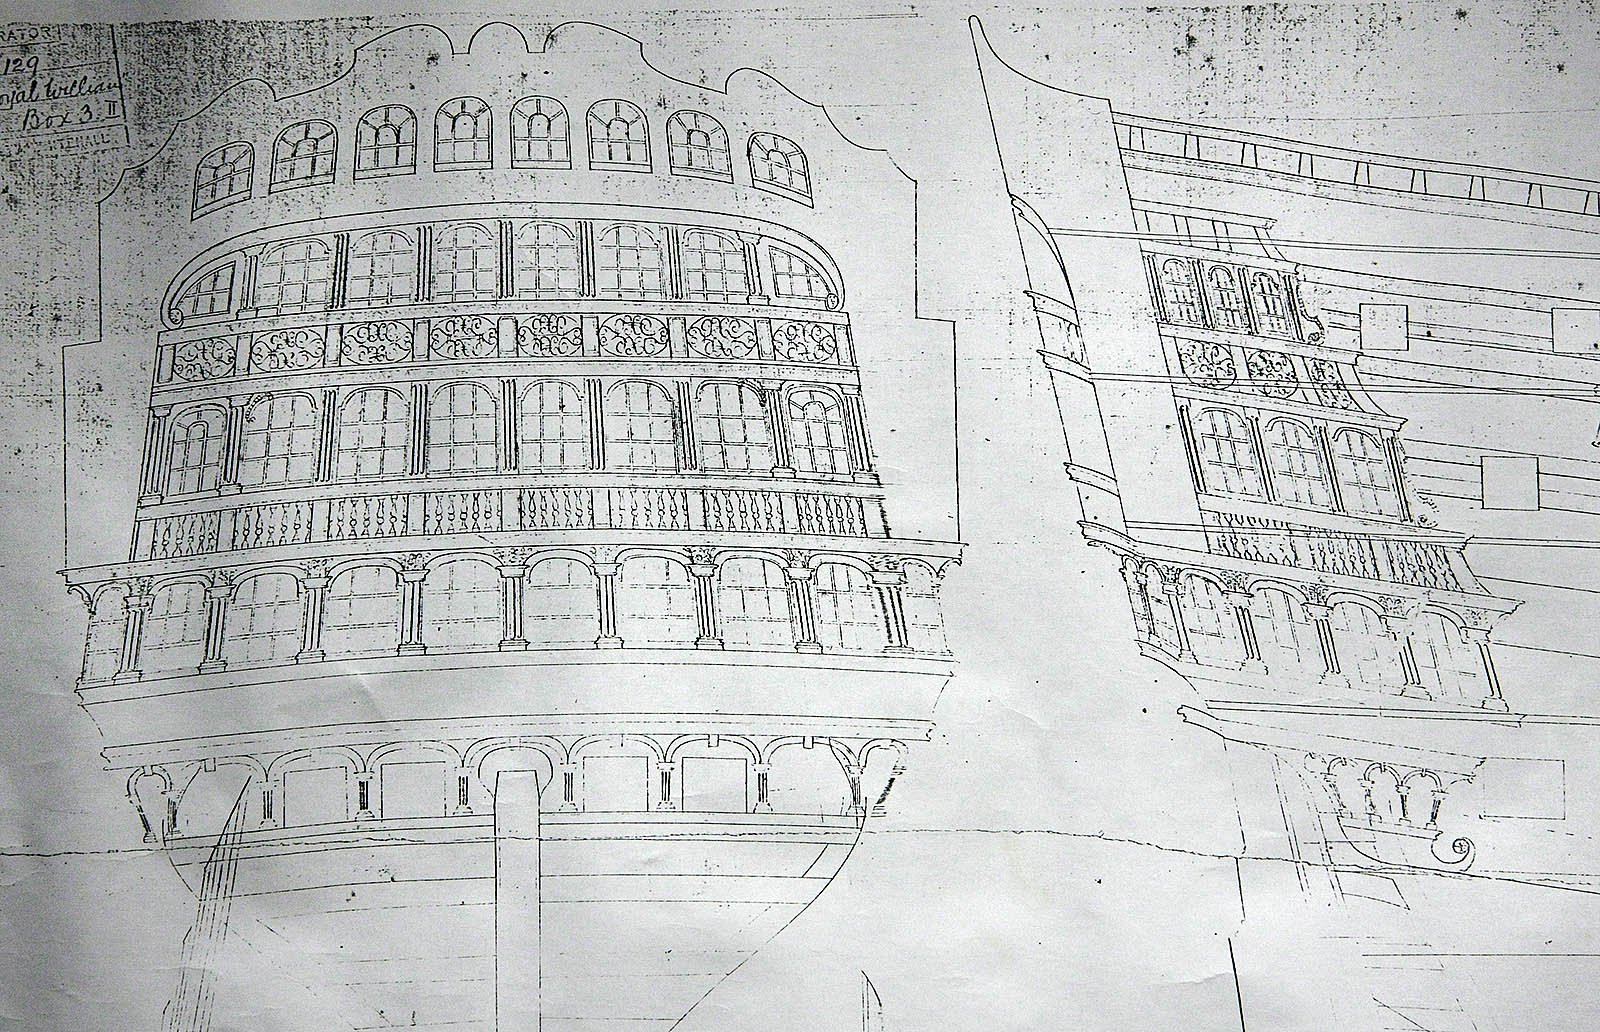
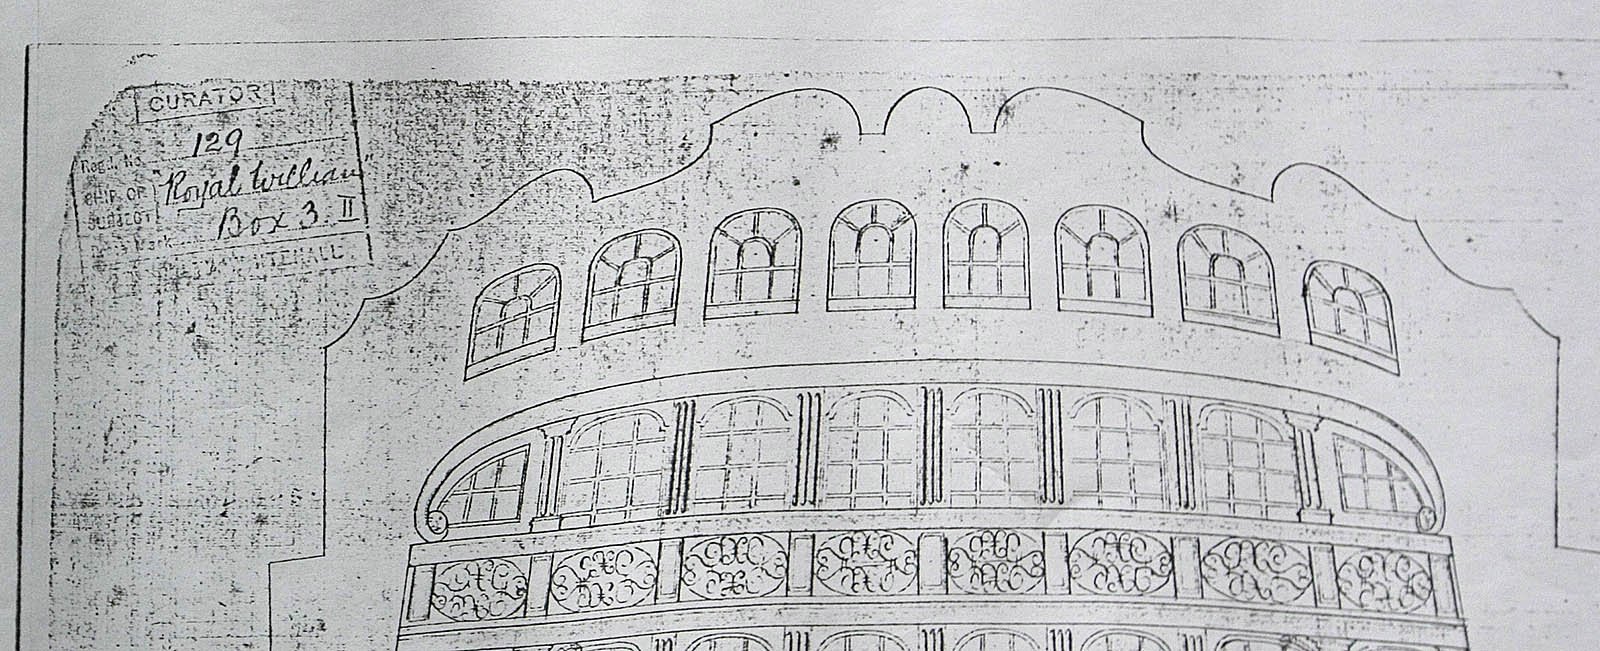
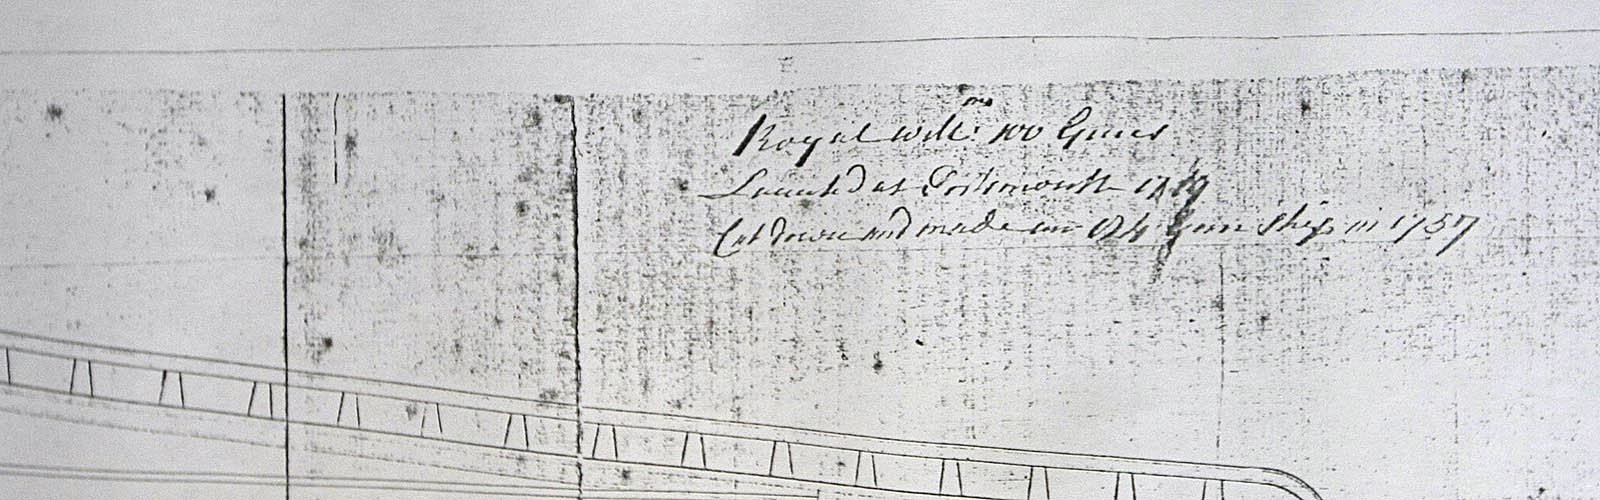
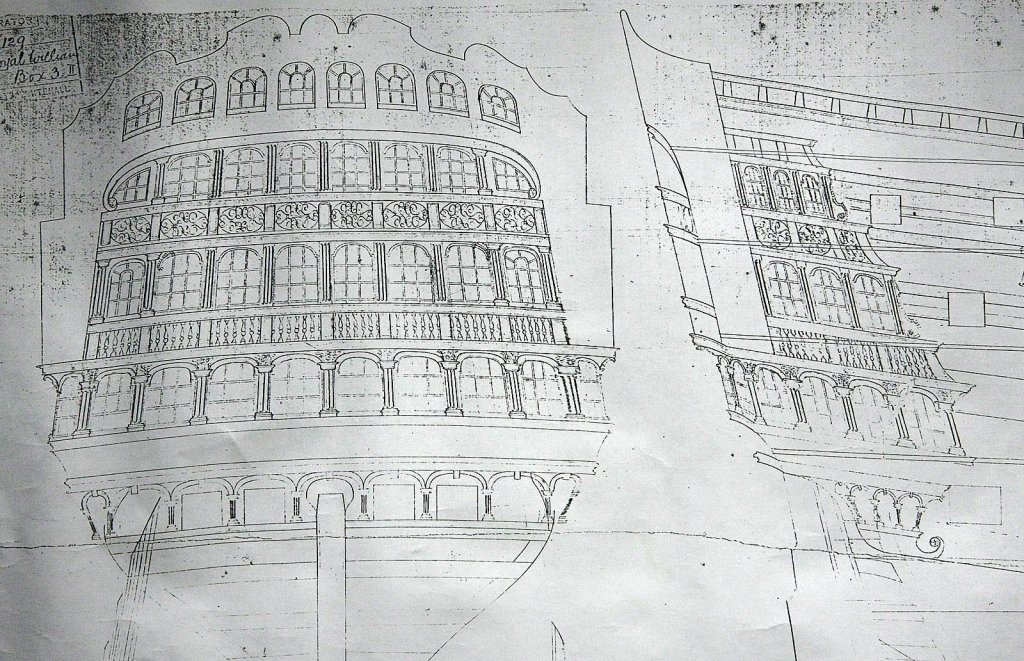
Hi Pete. Here's a shot of the quarter and stern galleries, I hope that the quality is good enough for you. I've had time to think about these plans and have come to the conclusion that they would be of more use to you than they would be to me. I'd probably just end up sticking them in my attic and they'd be lost to future modellers of the RW so I've have decided that when I've finished my build I'll send them to you, I'm sure that you'll make good use of them. Ken
-
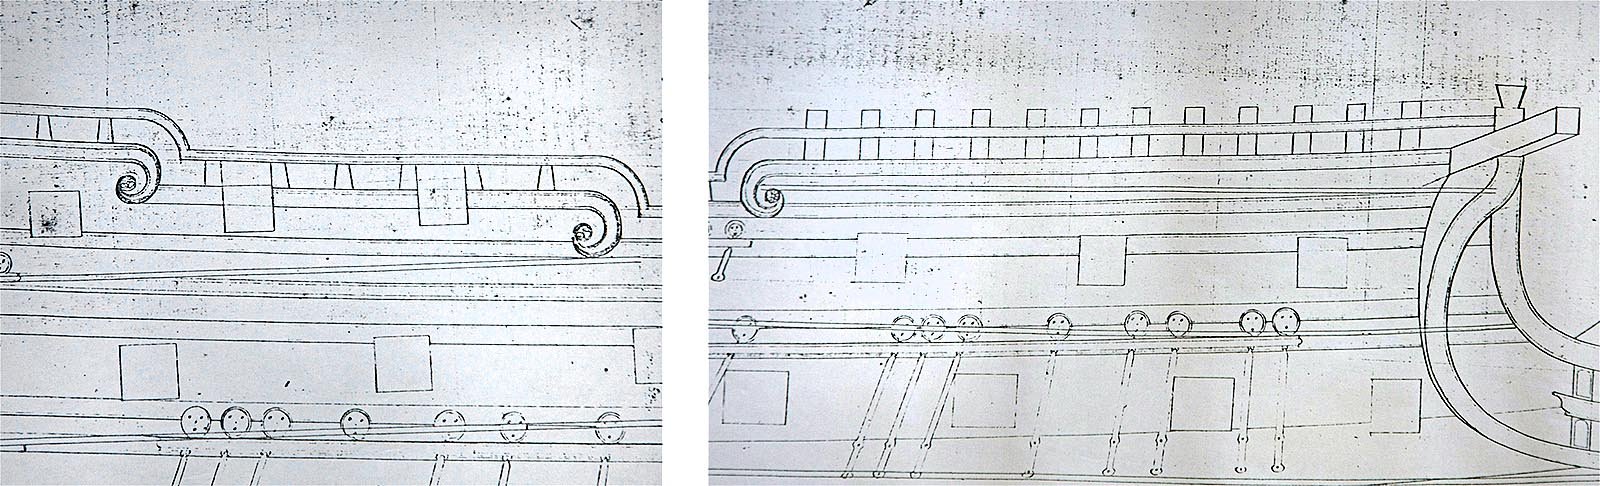
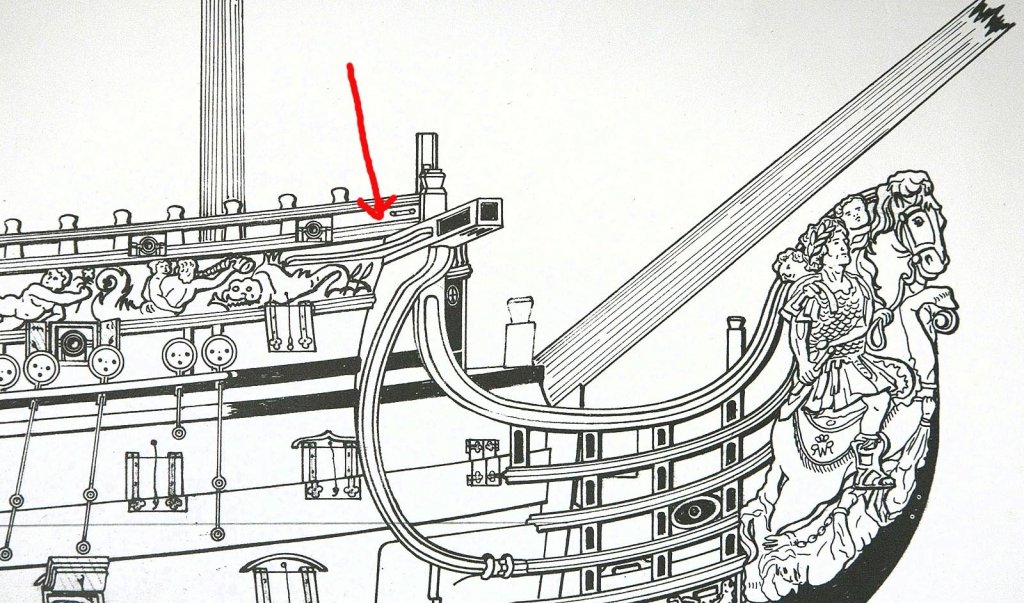
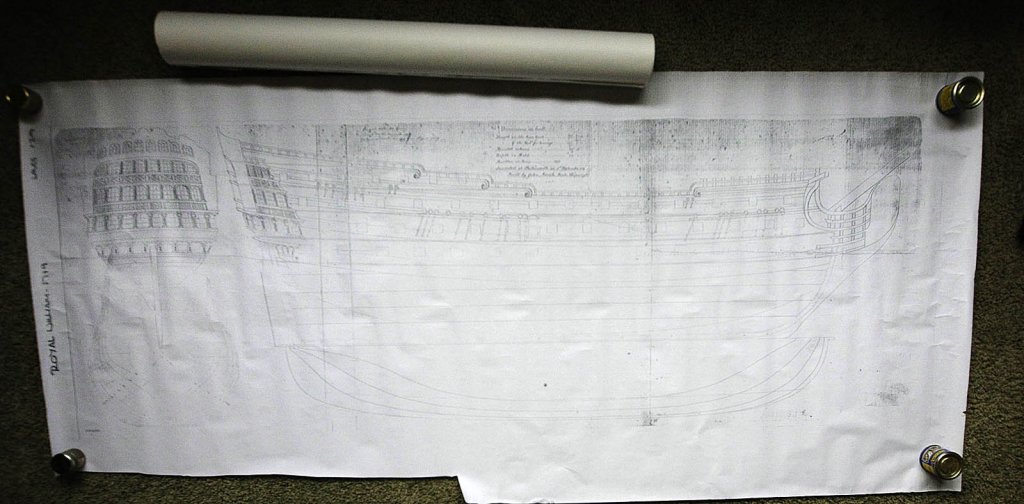
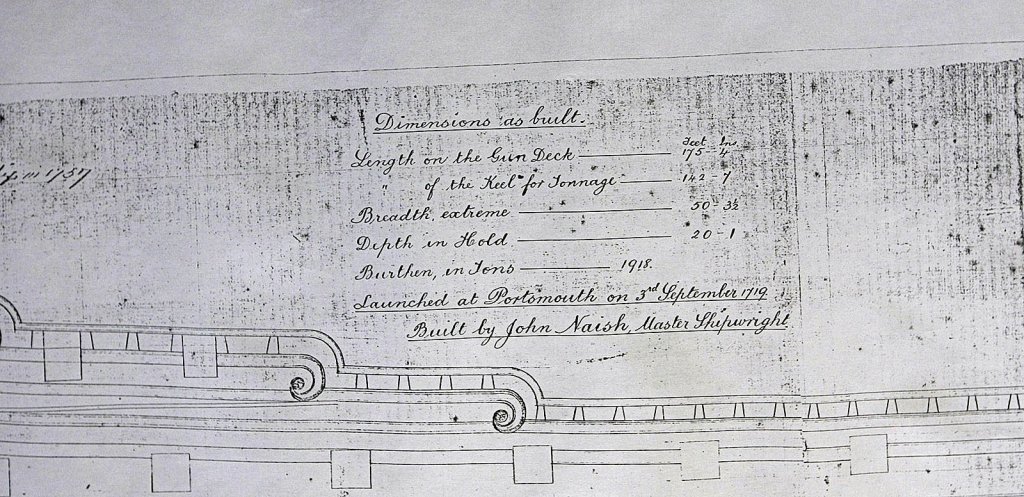
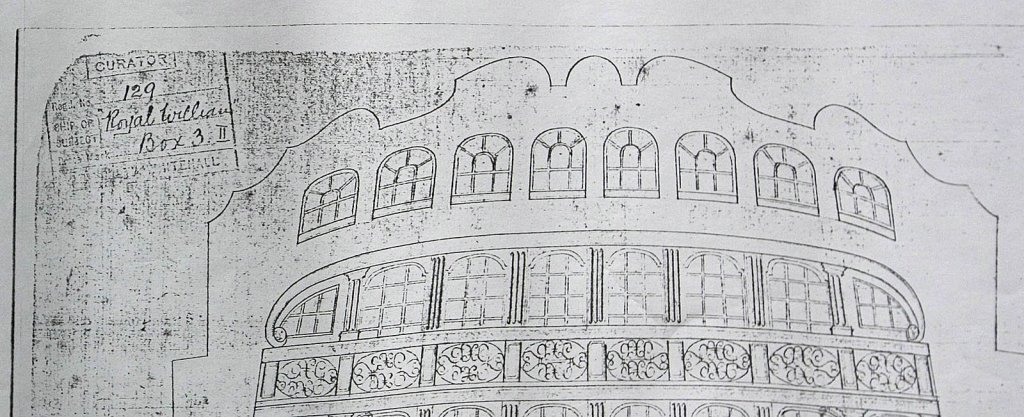
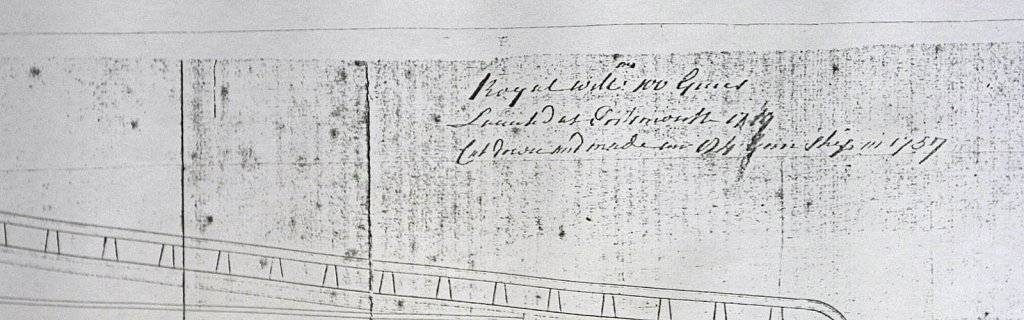
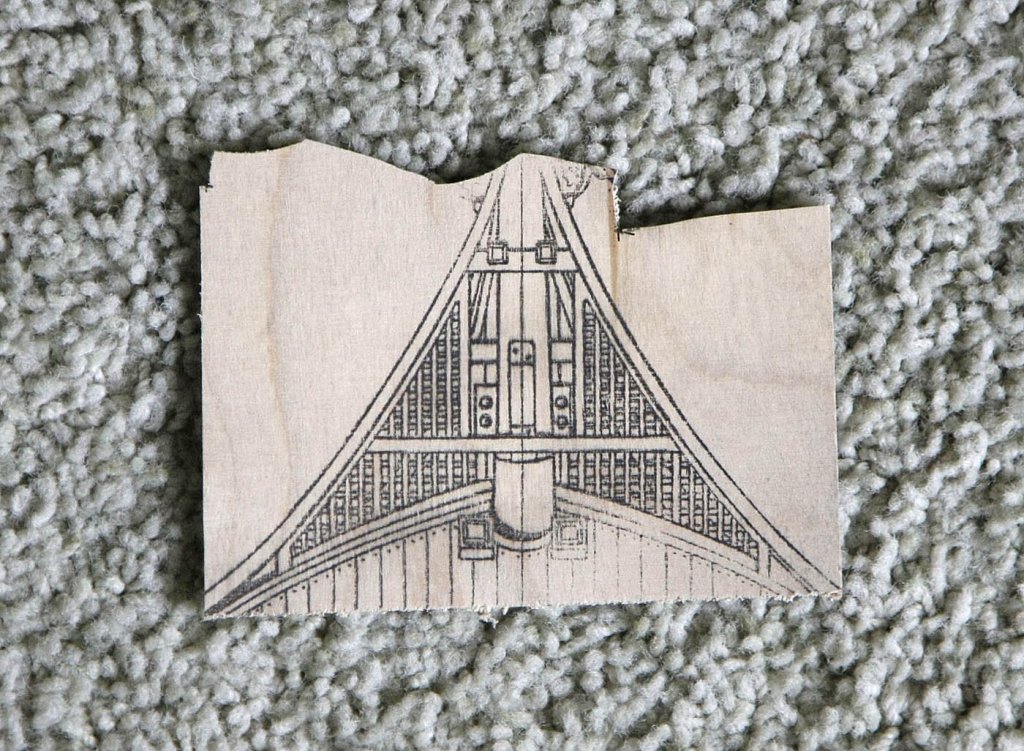
Hi, Something of interest. An old set of line drawings has unexpectedly just come into my possession, how is for another time. I'm sorry for the poor quality photo but the lines are lightly drawn and although they are good clean lines my camera isn't showing them well. They have come from an old attic and their origin isn't known. So the detectives out there get your Sherlock Holmes hat on and maybe come up with an answer. The copy is about 6 feet in length and I can see that it was authorised by a curator from The Admiralty, Whitehall, so it is official probably a copy of one from The National Maritime Museum at Greenwich. I have already found it useful in positioning the catheads as they seem to differ from these plans. Ken
-
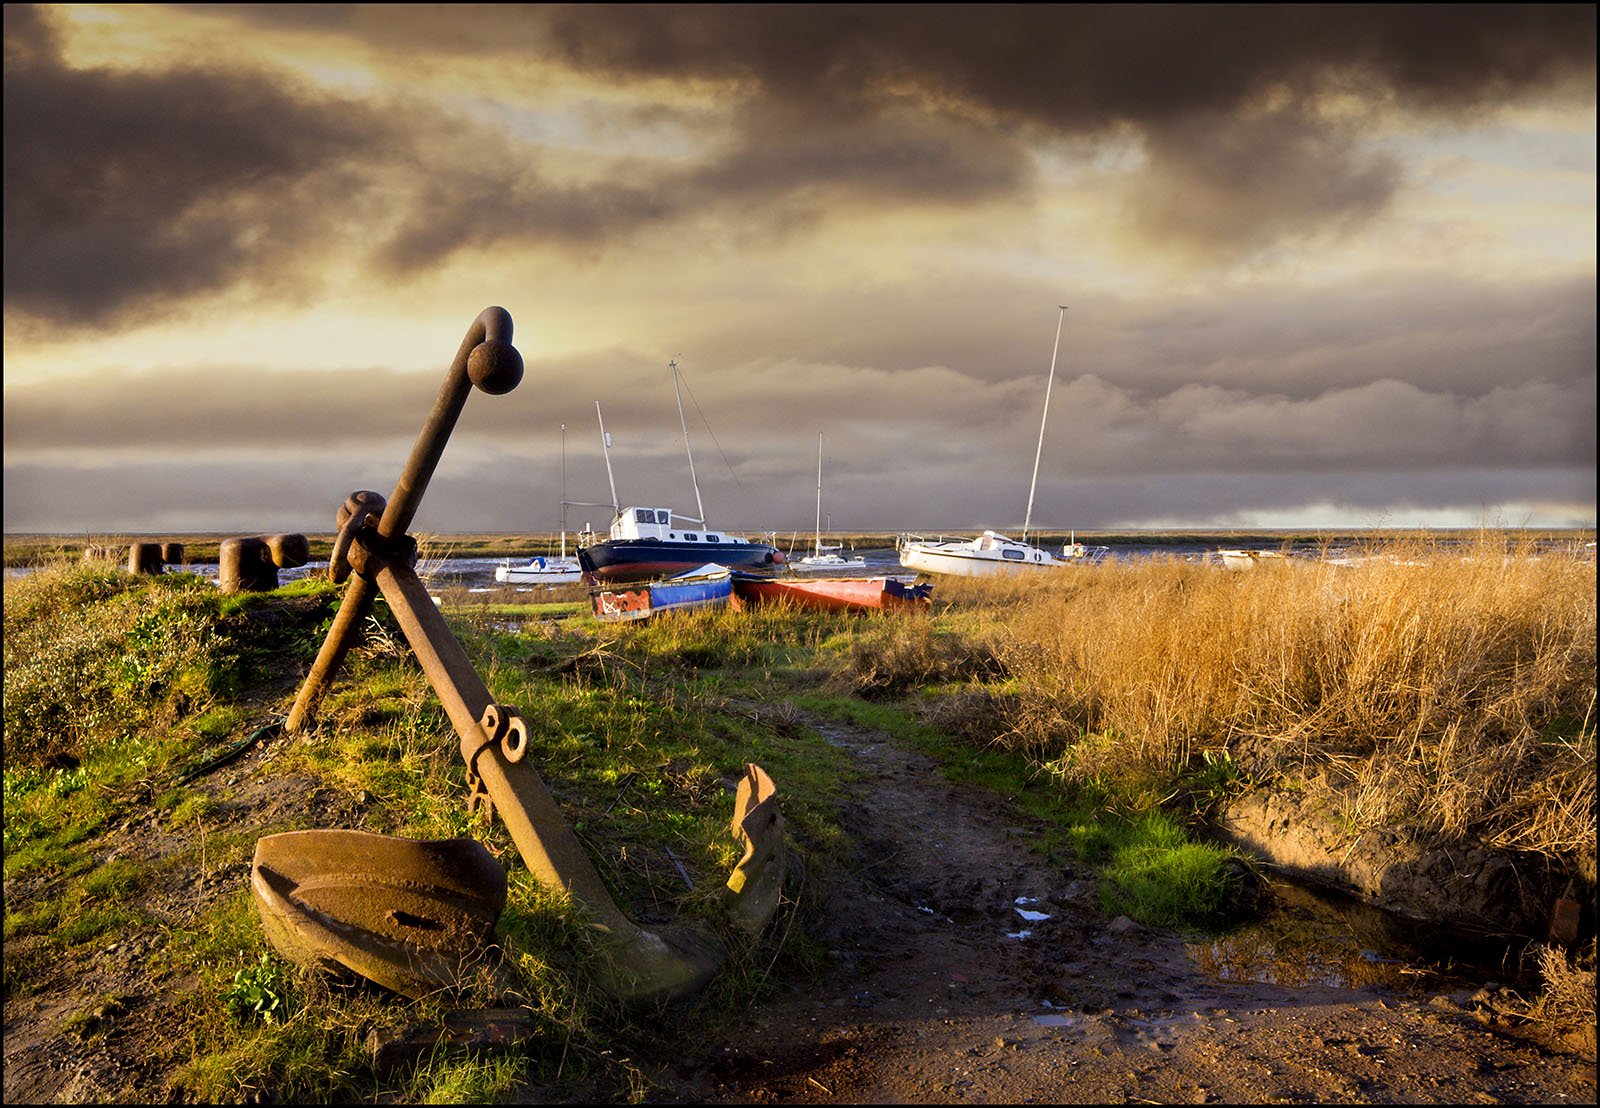
Hello Everyone, It's been a while since I posted a picture from my area. As I've mentioned I live on a peninsular that is opposite Liverpool, it is a different world, it is very old, quite rural with plenty of coastline, you wouldn't think that there was a city nearby. Anyway here's a taster of what I have to put up with, well somebody has to. Ken


- 424 replies
-
- 10
-
-
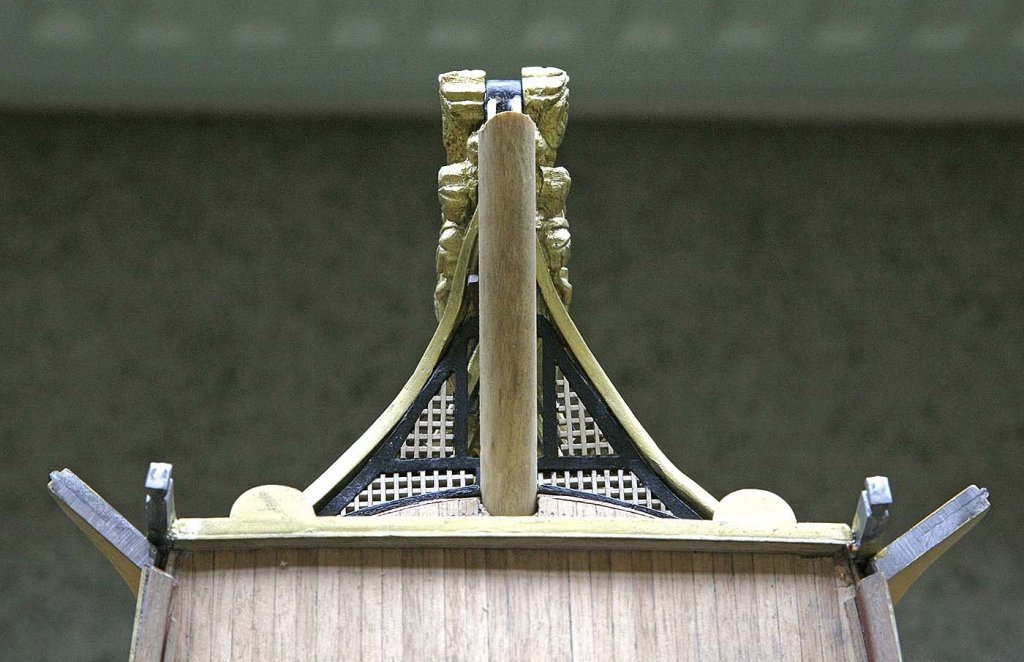
Hello Everyone, Not much going on today but still moving forward. I tidied and touched up the bow section, made up and fitted the knighstheads and a collar for the bowsprit. That's it I'm afraid. Ken
-
Hi, Yes Sjors, just finished watching the TT, a good eventful and interesting tour, can't wait for next years. Mark, I can see how good a heat gun would be, on/off heat on demand and a good even spread. I knew that's what I needed but it will have to go on my ever lengthening list of useful toys that I want. Ken
-
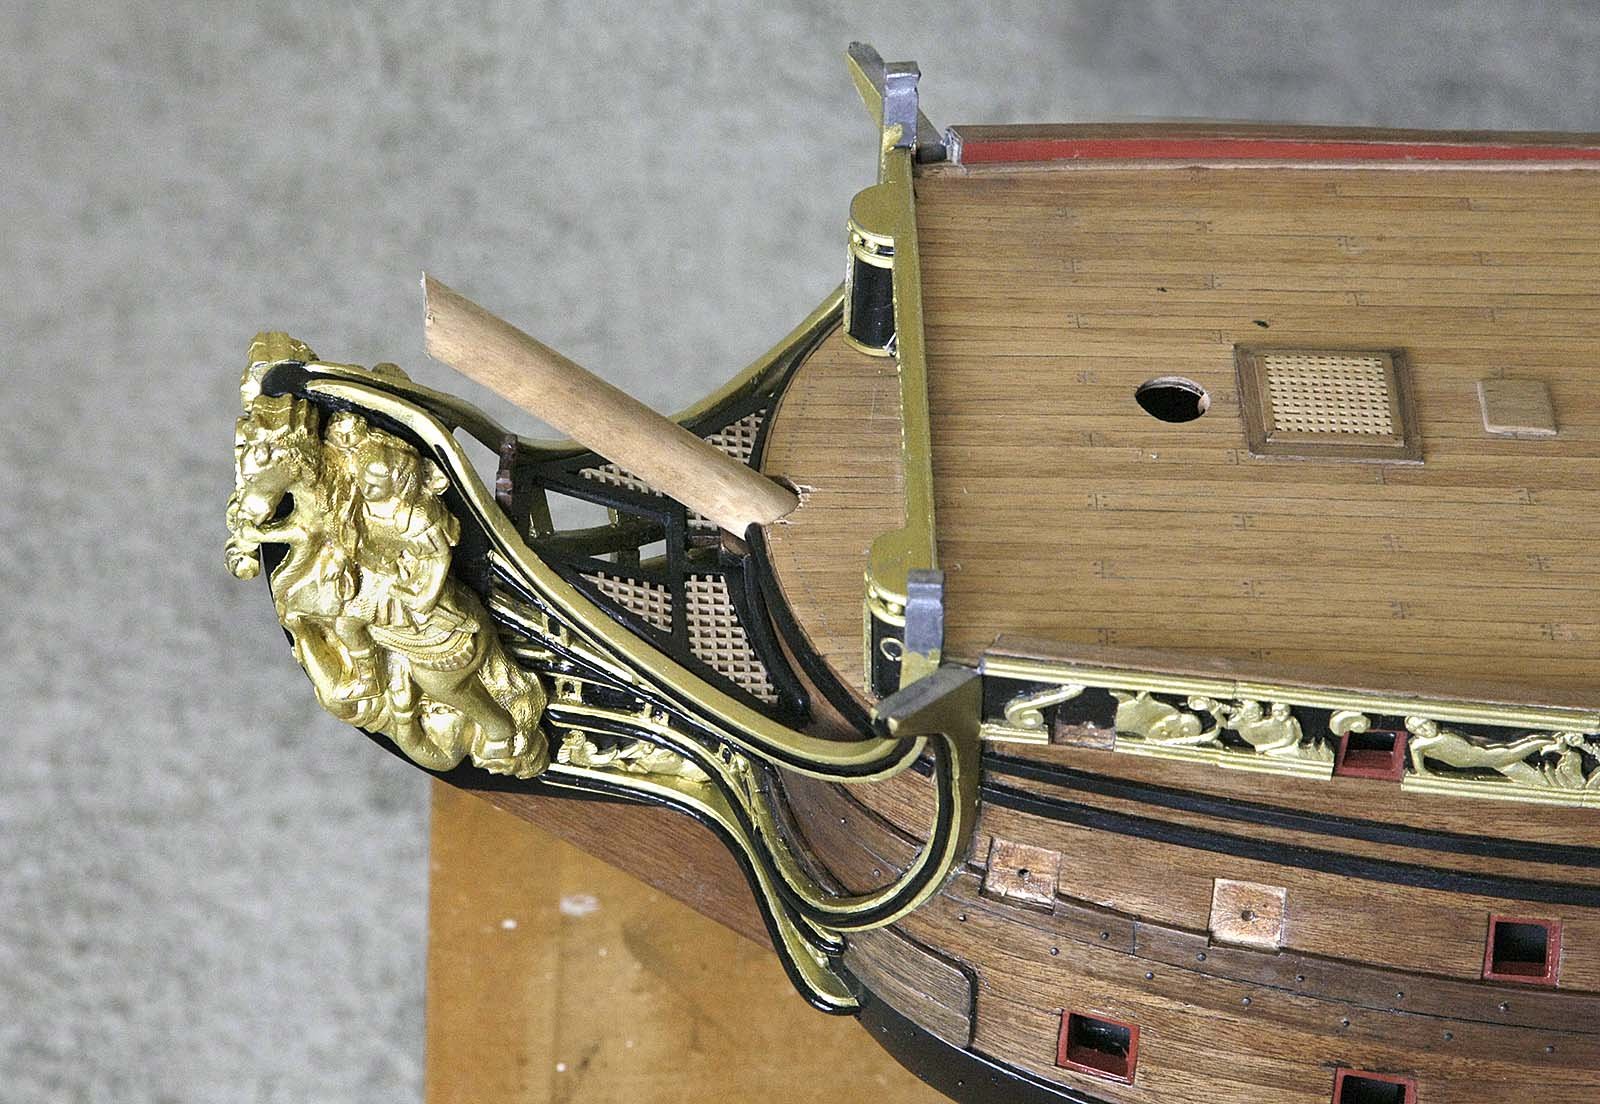
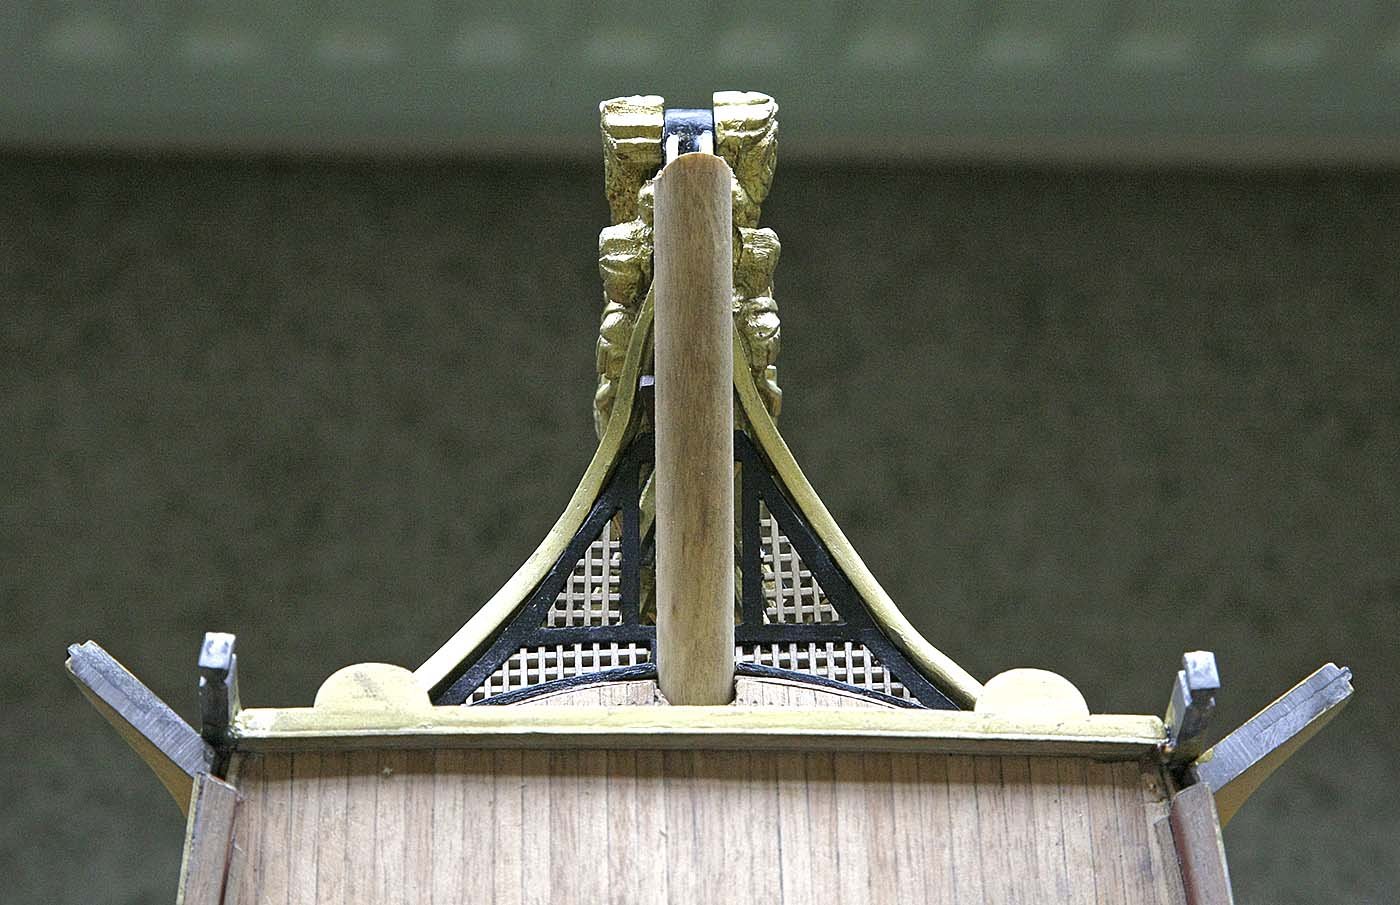
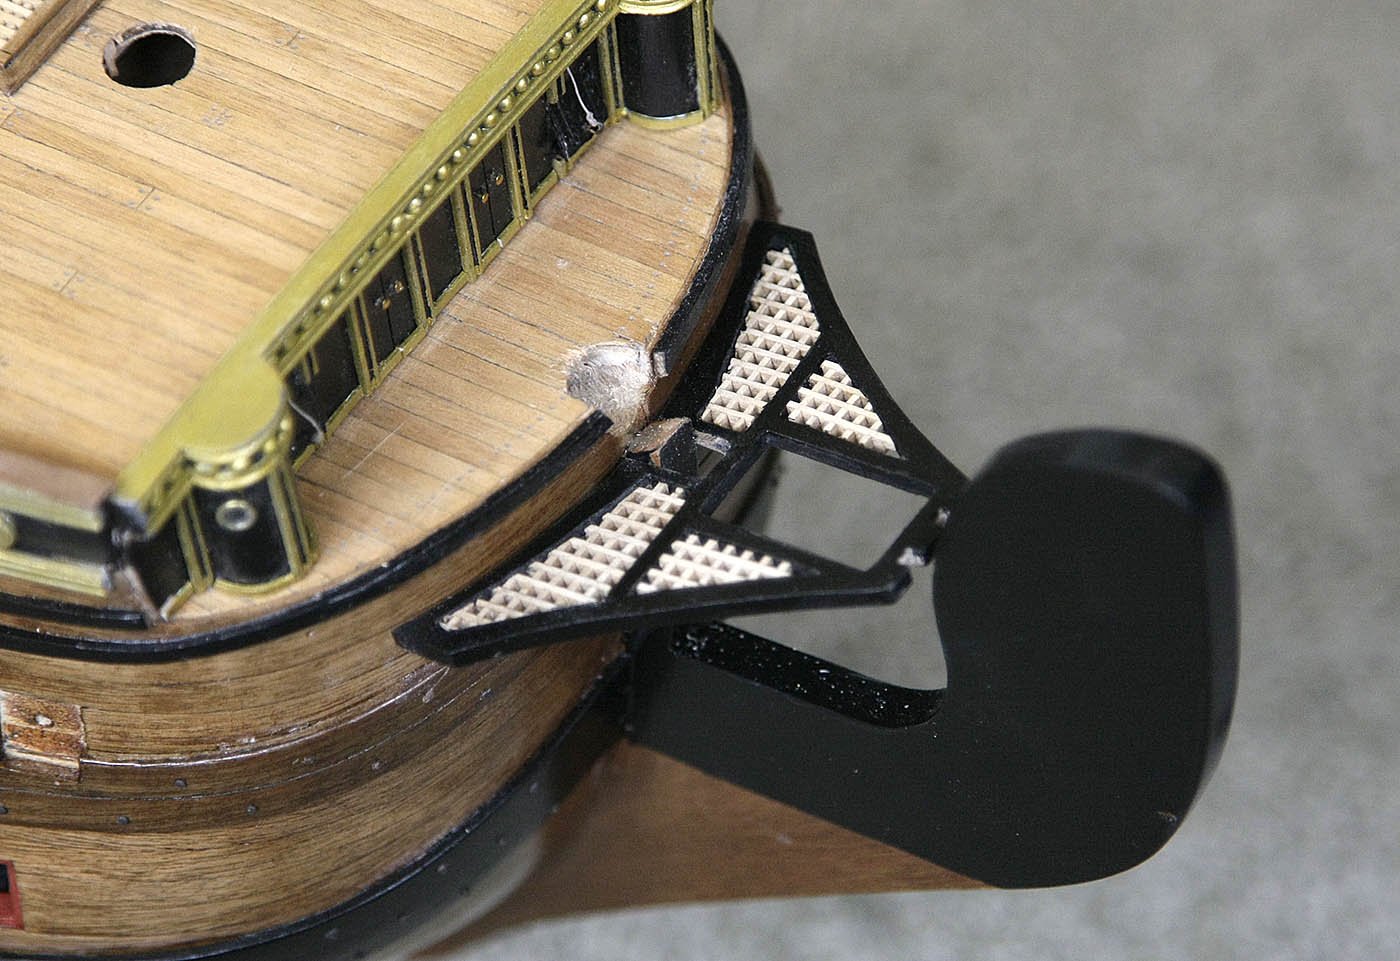
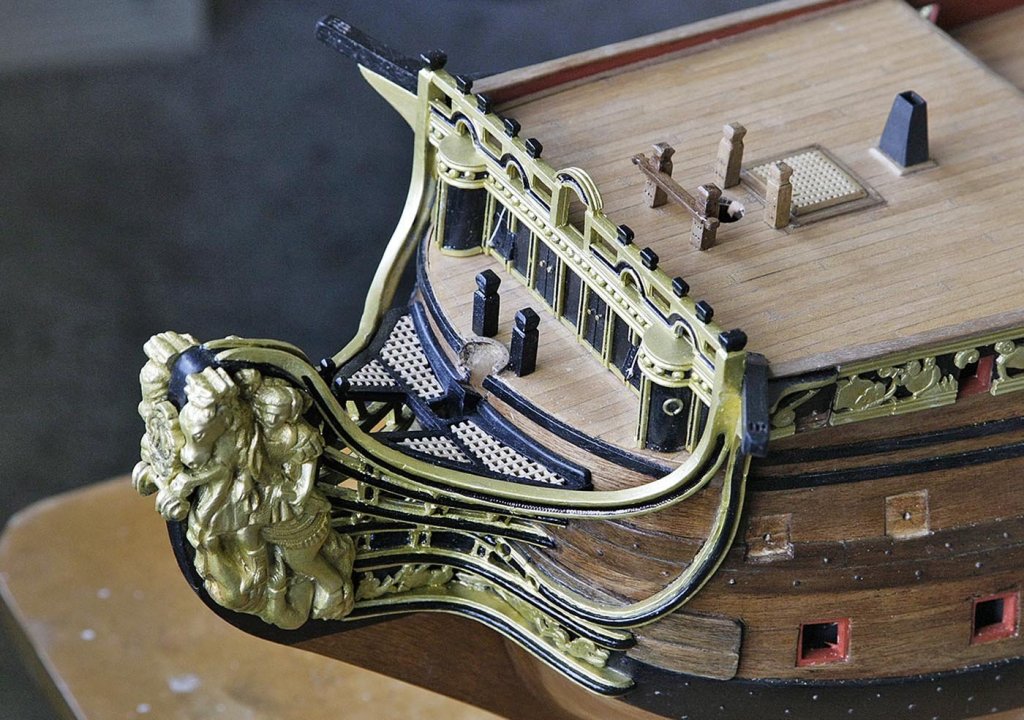
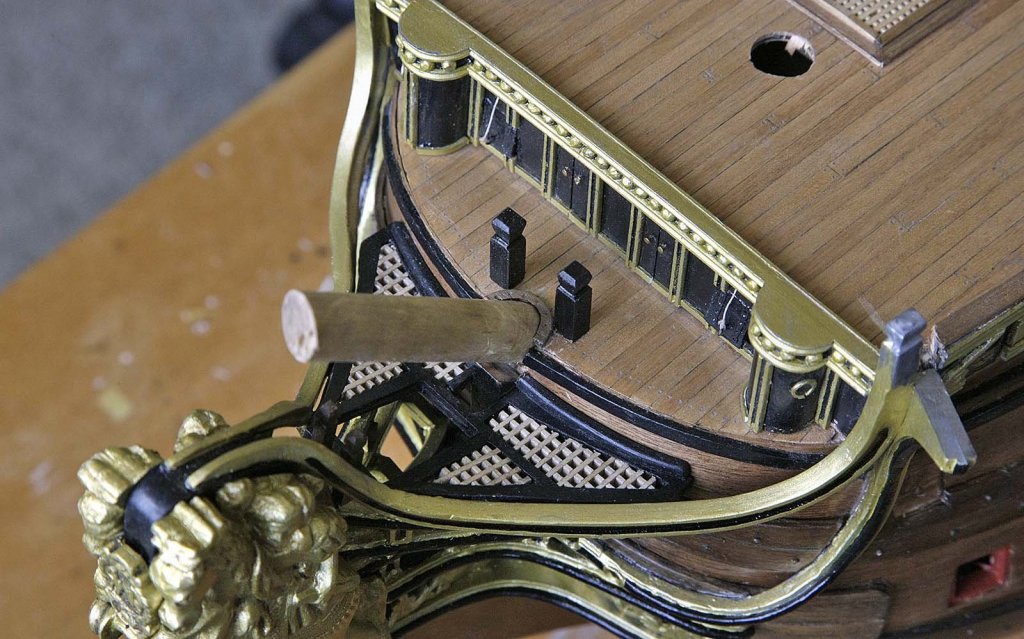
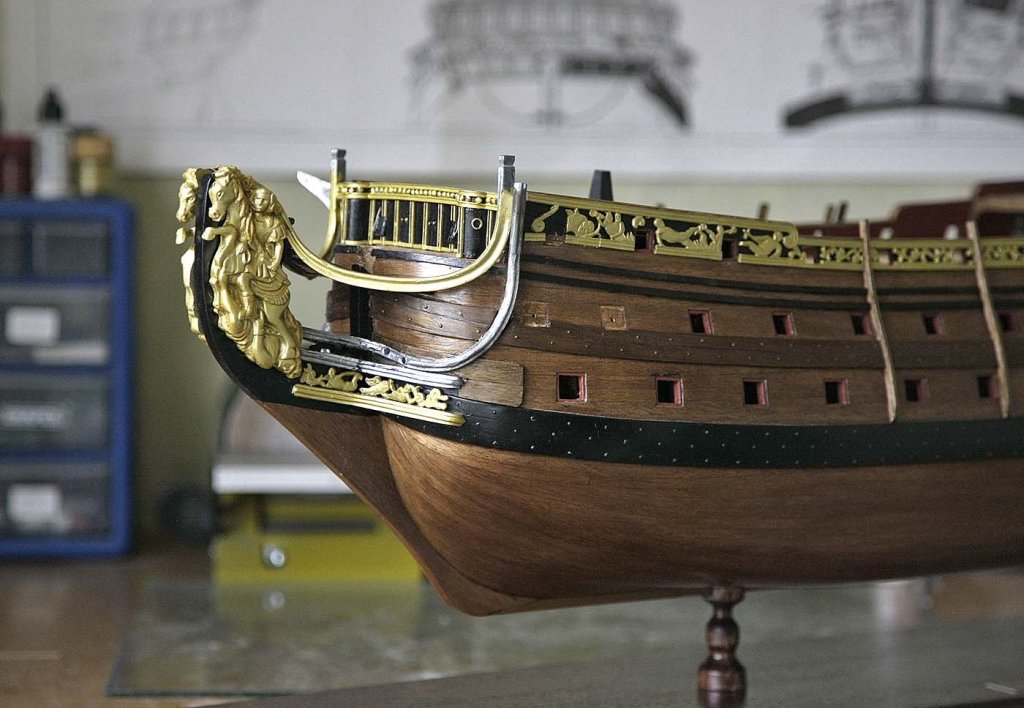
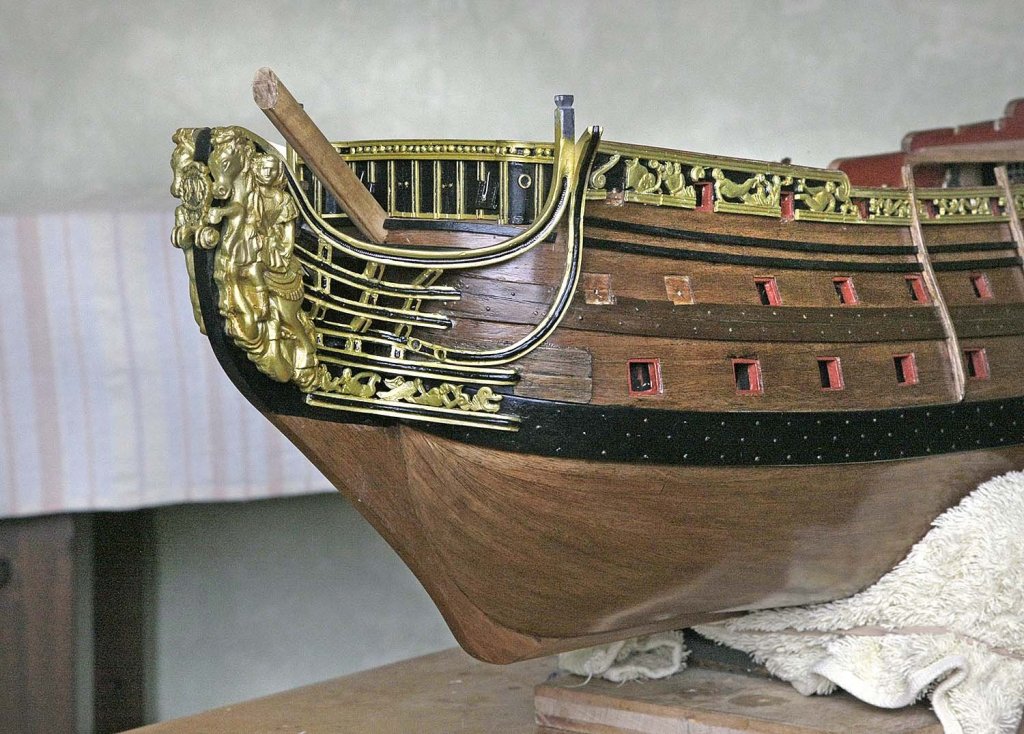
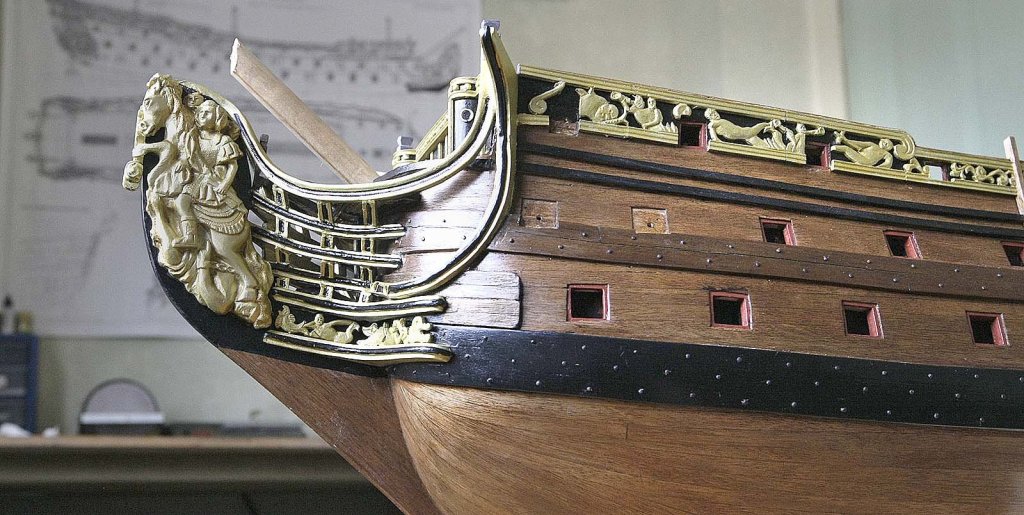
Hello Everyone, I left off having just finished the head gratings, here's the continuation. The rails were far more difficult to build up than they first appeared. The cast pieces needed to be bent forming what were three dimensional curves and each in some sort of relation to the others so that they eventually fit together forming the structure, this was done by eye as there was only a 2D plan. I tried heating the castings with my solder iron, the heat it gave was too localised and I managed to snap the first top rail which caused me quite a problem. I ended up using a gas BBQ lighter to heat the casting, it was trial and error, too hot and they quickly melted, not hot enough and they snapped. I eventually ended up with an acceptable structure. The uprights are made up again from cast strips which needed to be cut and angled to fit between each rail, I think that they would have been easier to cut and sand by using 4x4 wood strip instead. I painted them and then fitted that beautifully cast figurehead. When viewed closely it looks like it's made up from spaghetti, but from a pace away it kooks quite good. It's like everything else on this build I am managing but feel that if I were able to do each section again I could easily improve them knowing what was needed and how it should be done, I think it's called a learning curve. Ken


-
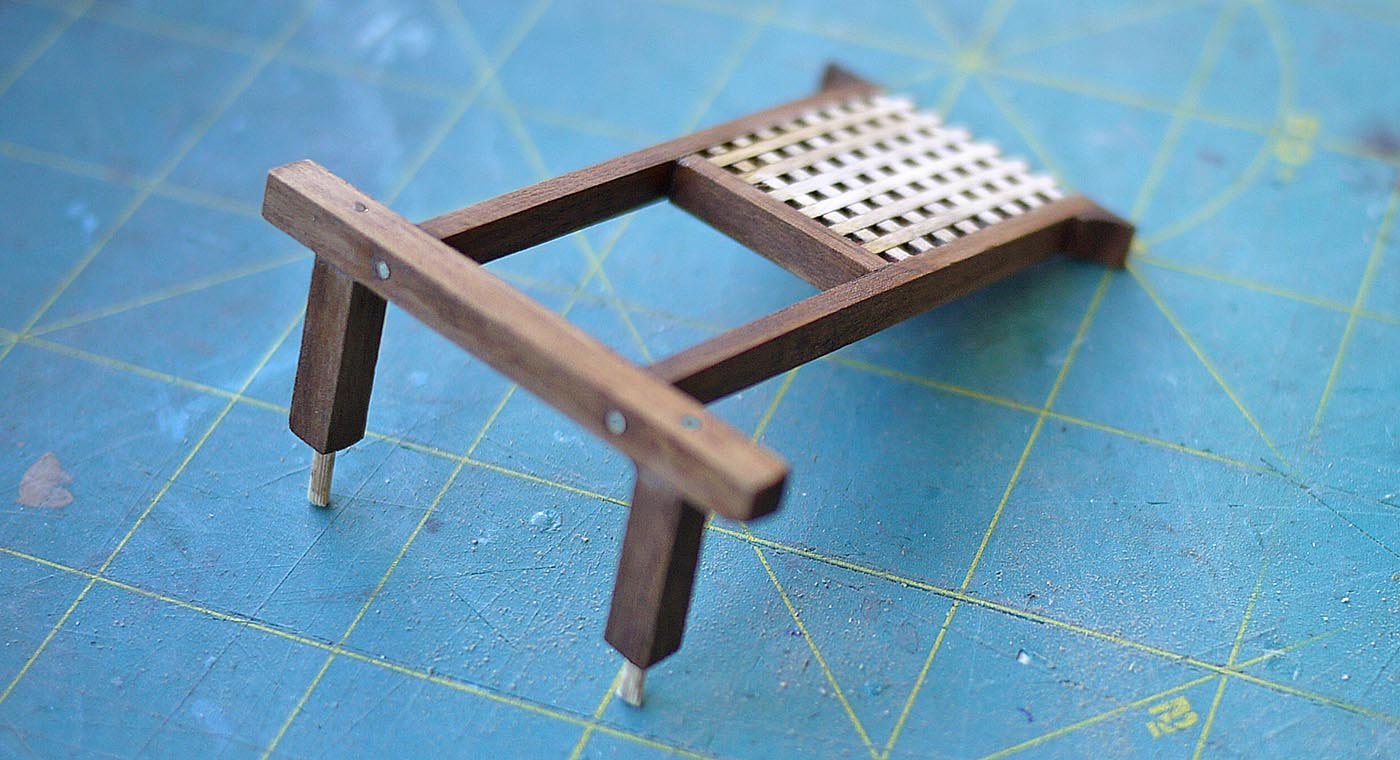
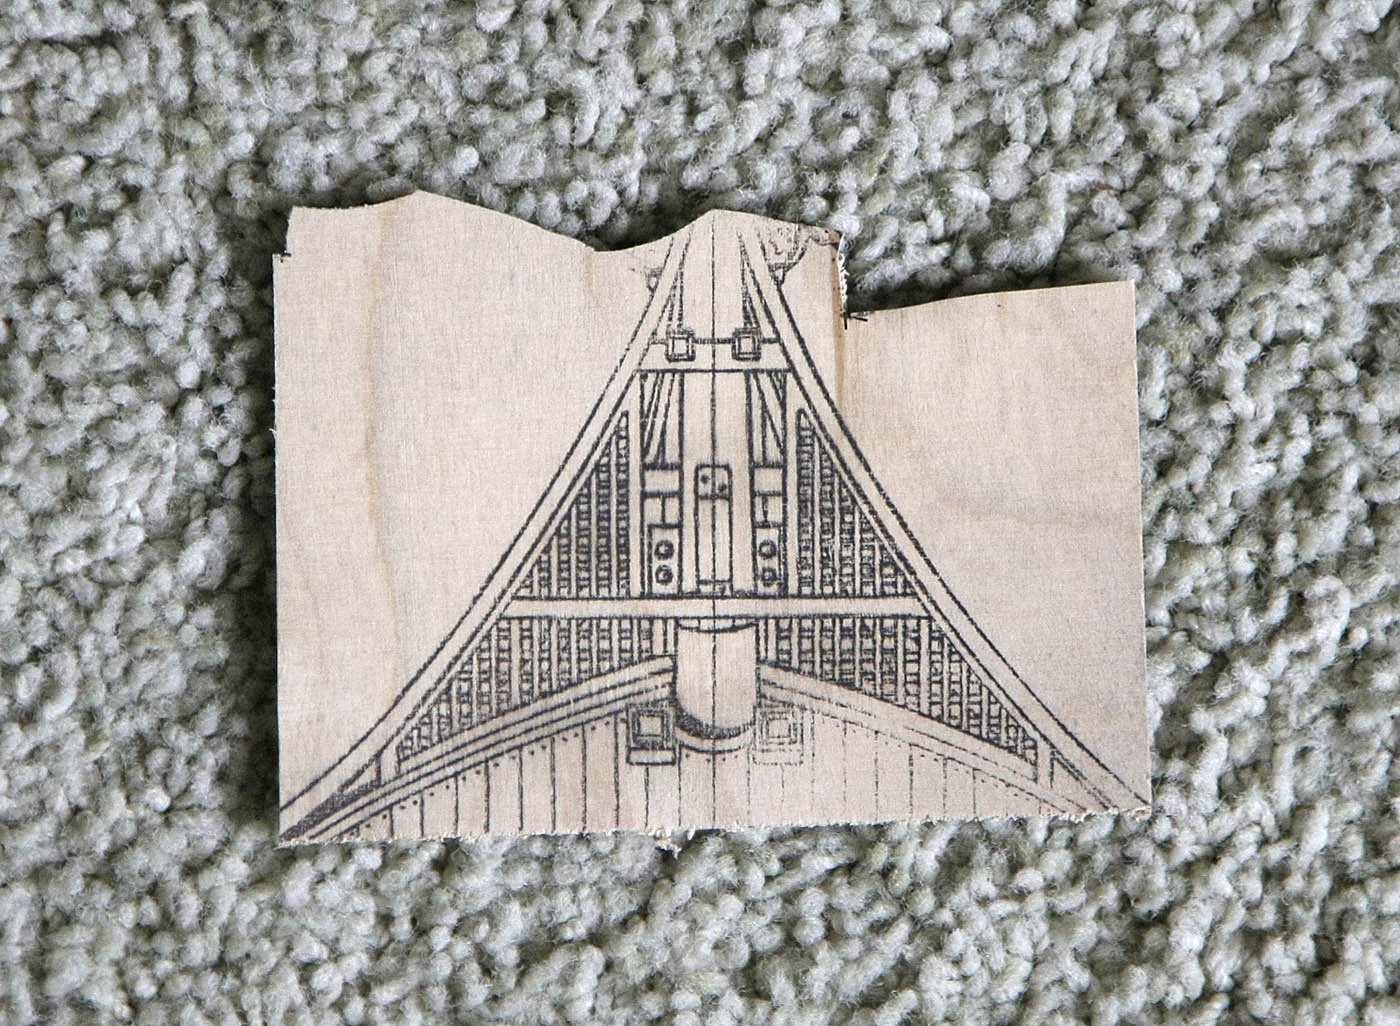
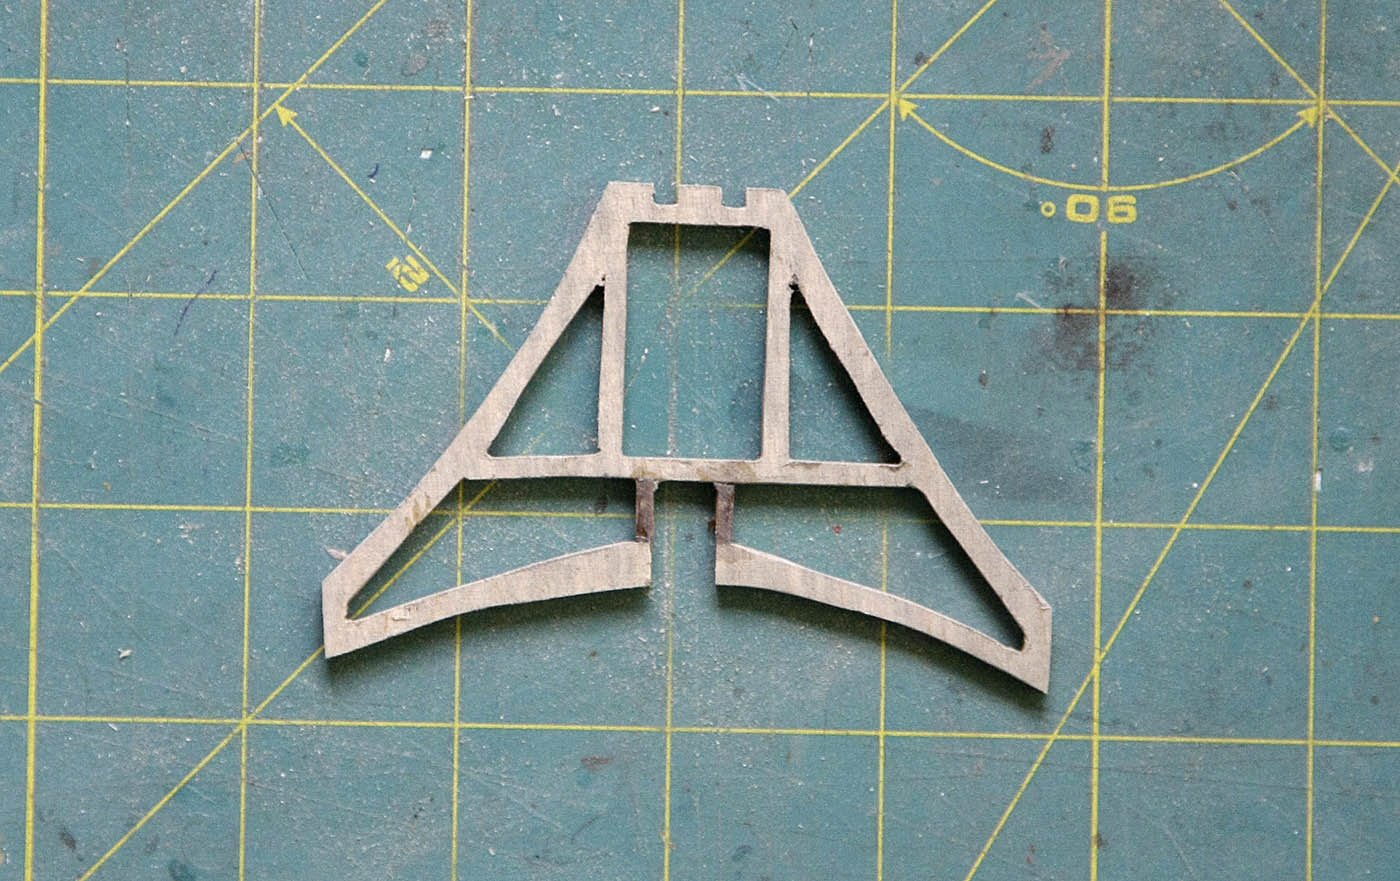
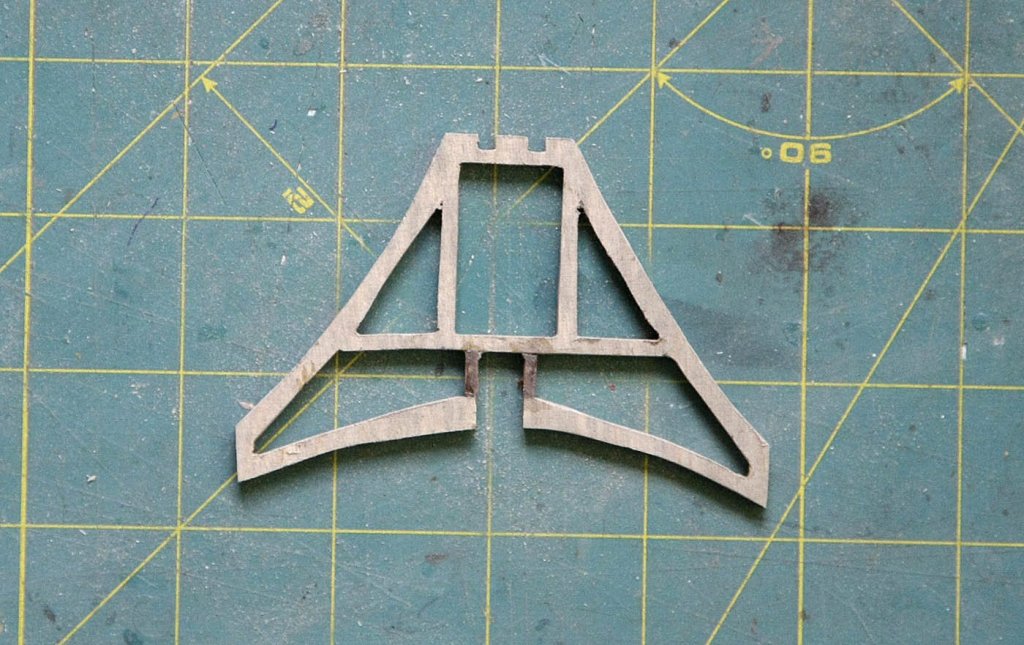
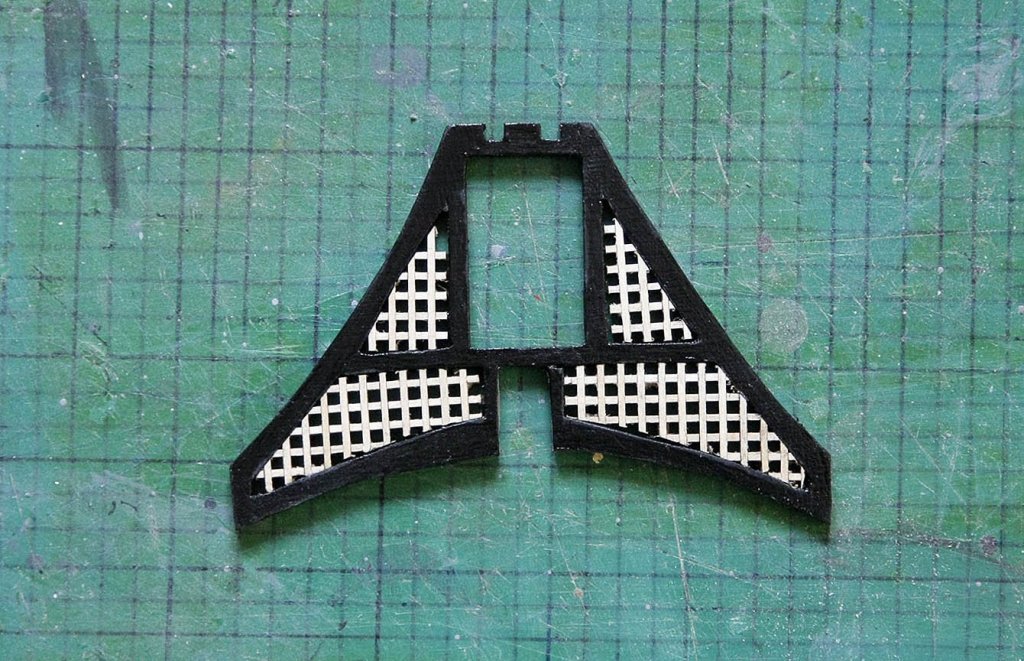
Hello Everyone, Thanks again for your kind comments and likes. Sjors, yes I do lots of different things, stick around and you'll get to find out, I'm a Jack of all trades but I'm afraid I'm not a master of any. Todays update is the head gratings. Again I looked for an easy way. I decided to cut it out from ply and paint it. I transferred the plan onto a piece of 2mm ply and cut it out. There wasn't enough grating material so I had to buy some, I made them up and cut to shape. I sealed and painted the frame before fitting the gratings. I know it was a sort of cheats way of doing it but I think it looks good and is probably better than I could have managed by building it up the traditional way, it was certainly much quicker. Next job is the head rails. Ken

-
Hi Dilbert, I got mine through EBay, I've just looked and it's selling there for £13, free postage. That's UK though, may be worth checking out. Ken
-
Hi Dilbert, The stuff below is what I use. It's what I first bought so I can't compare it with anything else. I dilute about 2-3 part water and keep in a jar, it seems to stay usable for quite a while. It doesn't work on everything though, good on Amati and Caldercraft nails but not on some others, is ok on most photo etch, worked well on my white meta castings, ( see my rudder hinges ) but is a bit hit and miss on cannon barrels. Ken