HOLIDAY DONATION DRIVE - SUPPORT MSW - DO YOUR PART TO KEEP THIS GREAT FORUM GOING! (Only 36 donations so far out of 49,000 members - C'mon guys!)
×


mnewsholme
-
Posts
62 -
Joined
-
Last visited
Content Type
Profiles
Forums
Gallery
Events
Everything posted by mnewsholme
-
Looking good. You're making quick progress. Have you seen the NRG half hull planking project. looks like exactly what your looking for to practise fairing and planking. Its in the NRG online shop at top of page although shipping to us in UK may make it expensive.
-
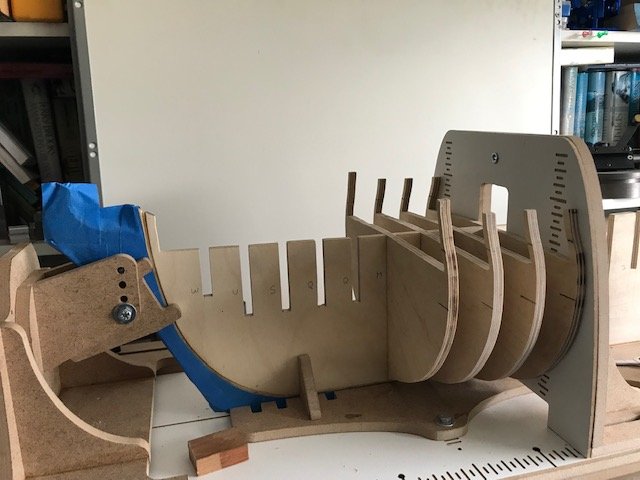
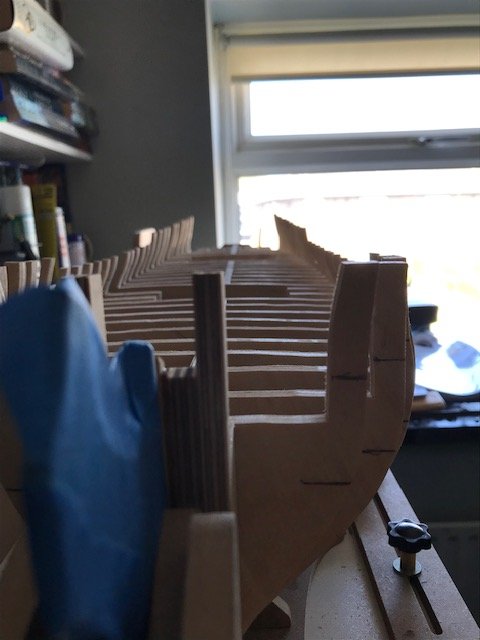
Managed a little more progress. Port side rough fairing done. Bow needs a little more work. Stern needs a fair bit more work.
-
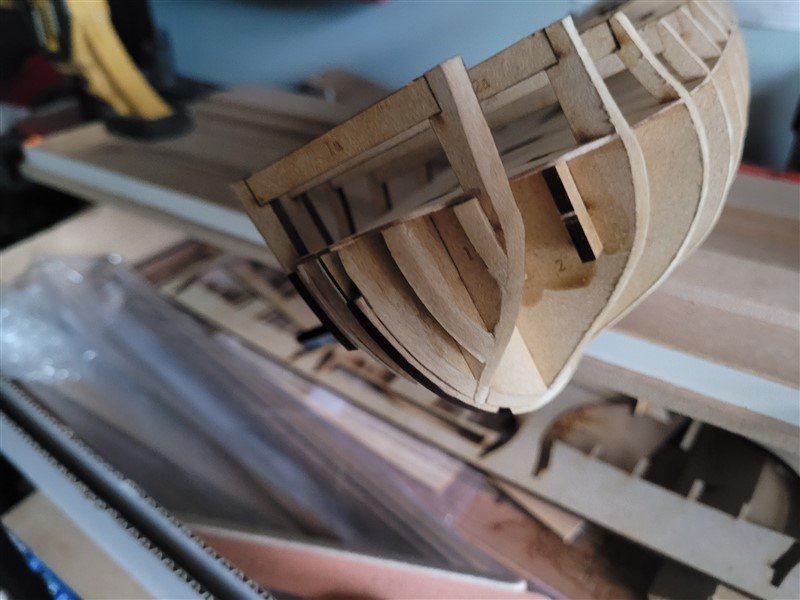
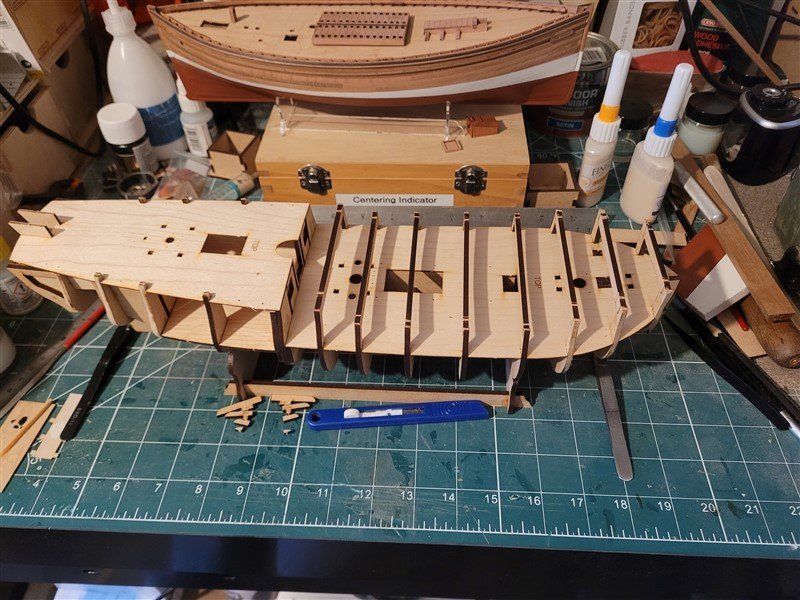
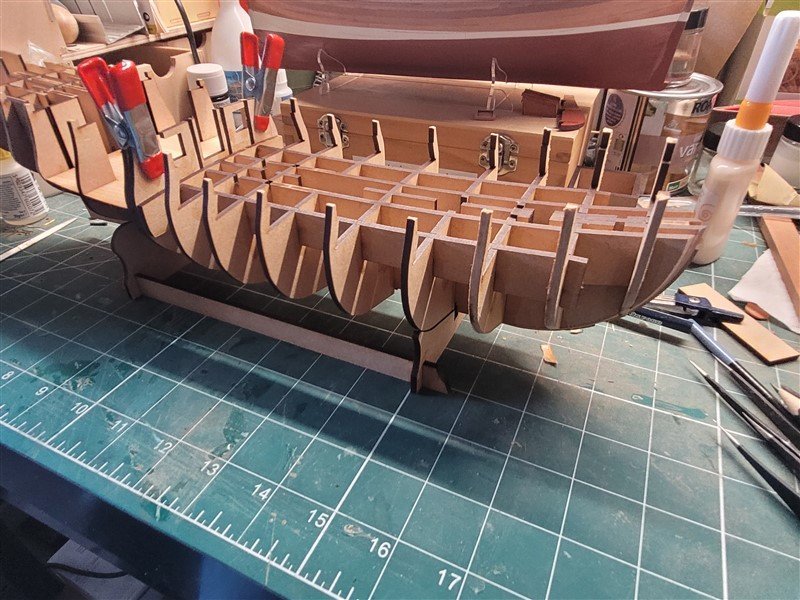
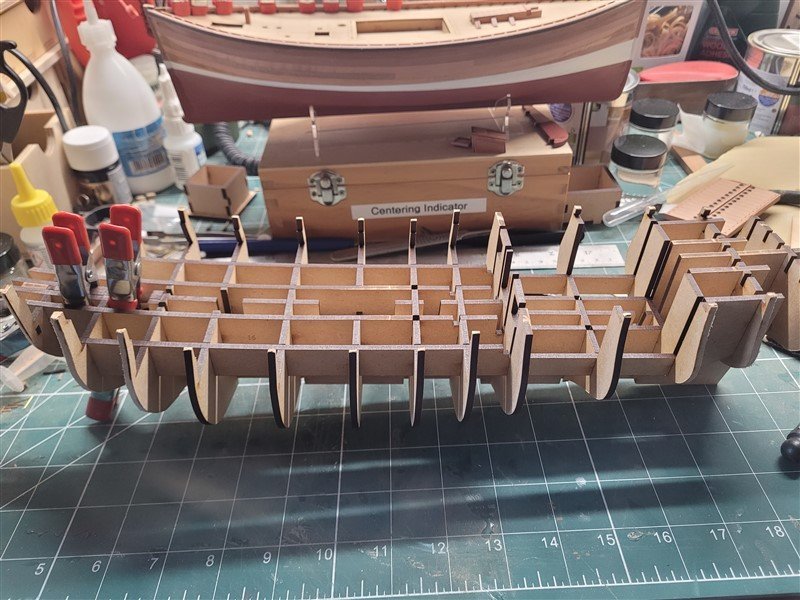
Added the stern filler pieces. Found I had a little fillet of glue build-up in the corners so bevelled the corners slightly to get them to fit easily. Then added the rear deck. Made a satisfying click as it settled into its final position. Then added the temporary cross bars to protect the bulkhead extensions. Then added the final stern filler pieces. Added a couple of bits of scrap under the rear deck to fill gap in the corner to the outer stern piece. Something I saw in someone else's log and seemed a good idea. that pretty much completes the underlying structure. Got to wait for a dry day now to do the fairing outside so next update may take a few days.
-
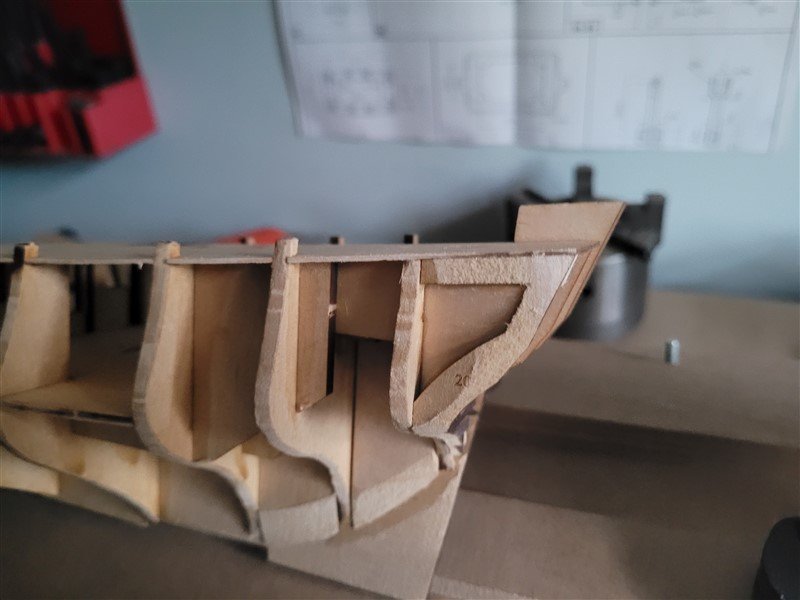
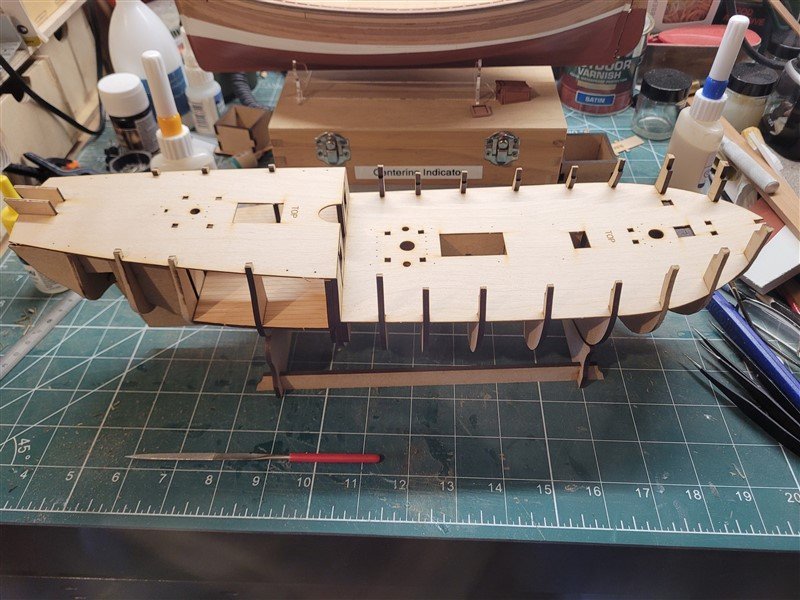
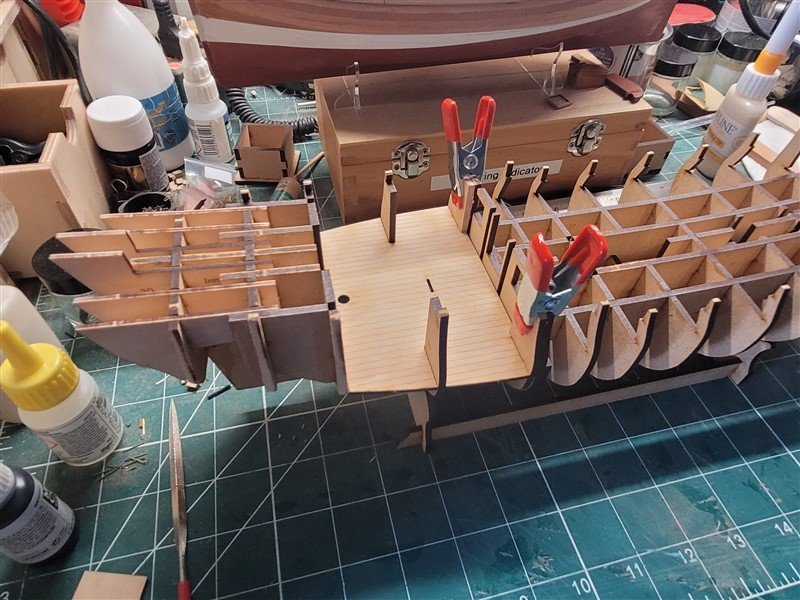
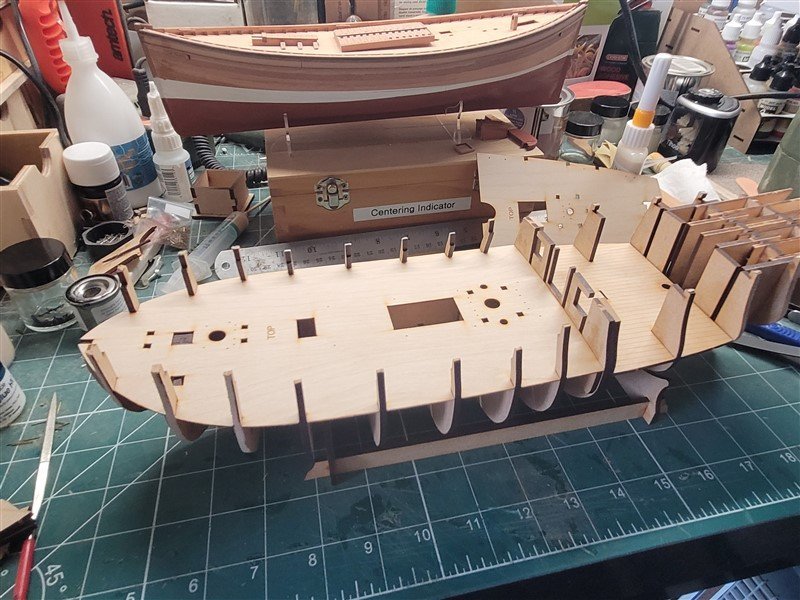
Bit more progress to report. Firstly want to mention with regard to the sheet I showed in last post that wasn't fully cut through. Chris contacted me within minutes and offered to replace it. Wasn't necessary in this case but thought it was worth highlighting the outstanding customer service offered by Vanguard Models. on to to the model. Added the remaining back framing and the cabin floor. Gave it a quick coat of WOP even though it wont really be seen. Then added the forward deck support pieces. And added the foredeck which is now glued and weighted down for good measure whilst it dries overnight. Was surprised and a bit nervous how much I had to bend it to get it in, but all went ok and it made a satisfying click as it seated fully.
-
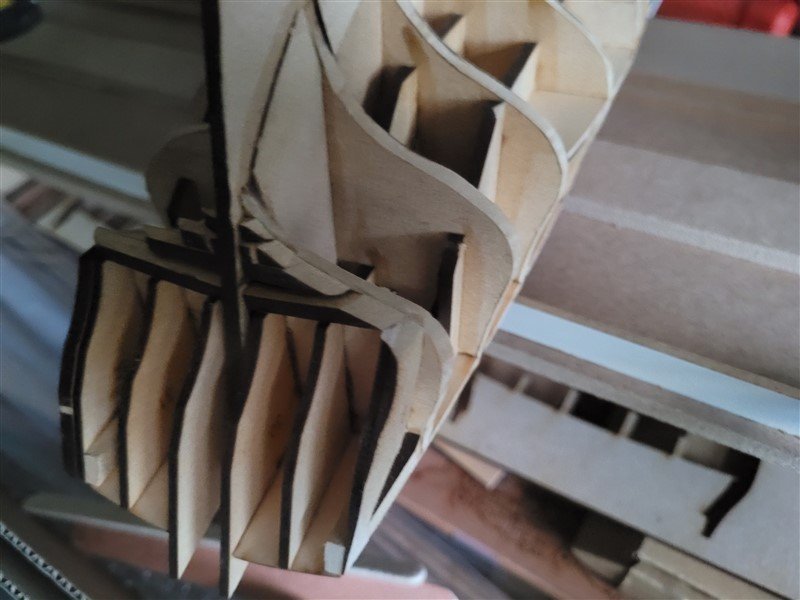
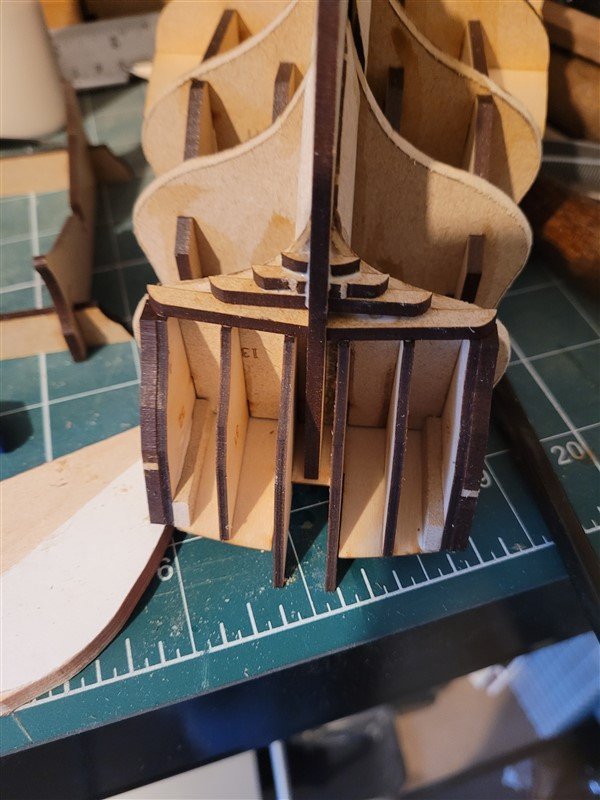
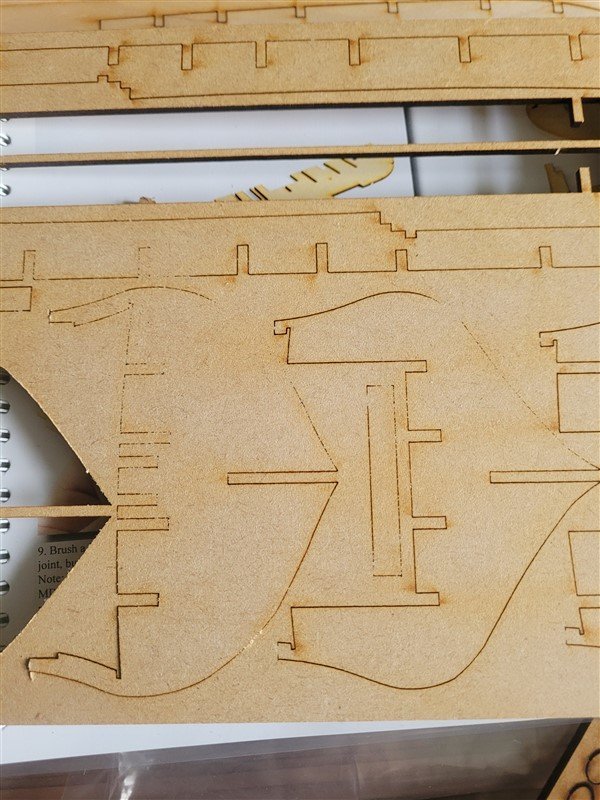
Little bit of progress made. Bevelled bulkheads as indicated in manual. Have deliberately done a bit less of a bevel than I think will be eventually needed to leave some to take off when I fair the hull. Then did first assembly of the bulkheads and longitudinal stringers. Only bits glued at moment are the mast steps and the front bulkhead cheeks. Amazing how quickly it comes together and how strong it is. Going to brush glue onto joints and let it set up overnight. Only minor issue I had was with one of 3mm MDF sheets where laser hadn't fully cut through on an area of the board. Easily fixed by running a knife round the outlines from the front side.
-
Getting ready to make a start on the Duchess. Just finishing off Lady Eleanor hull. Once I start on rigging then will make a start on Duchess. Find it helps to have two models on go at different stages so I can take a break from one and do something different for a bit. Plus I really do need to get going on Winnie again and get fairing done whilst we have some fine weather. Probably wont be much content added to this log until I make some progress but want to get in habit of keeping a log.
-
I think Vanguard Models stock Master Korabel blocks. Not as good as Syren but better than ones Cornwall model boats list.
-
stalled at moment. Bit snowed under at work. Hopefully it's going to ease of in next couple of weeks, then can start making some progress again.
-
received a package from Syren today with planking blanks stock and chapter three parts. Ordered on 22nd with expectation it would take 6-8 weeks due to Cov-id, but arrived in two. So looks like shipping to UK is pretty much back to normal. Hopefully I can get some time to progress things a bit now and get chapter one finished.
-
Standard practice to wipe our feet whenever we return to Gods county 🙂
-
Small world James. Drove past Horwich just a week or so back 🙂
-
cant help but laugh at those guys on SOS. They realised they weren't getting anywhere trying to cast doubts on whether kit would be released or quality of design so they've shifted tack to slating it because Framework is MDF and it might warp if it gets wet, ( sounds like they play with their models in the bath 🙂 ), and the cutting edge superior Chinese kits use plywood 🙂
-
Hi B'E. Not strictly related as this is a bigger Zulu class so more applicable to the 'Lady Isabella', but this rebuild log for a full size boat may give you some details as to construction and details like mast footing etc. http://forum.woodenboat.com/showthread.php?166562-Kate-LK-126-A-Zulu-Herring-Drifter
- 195 replies
-
- 3
-

-
- lady eleanor
- vanguard models
- (and 1 more)
-
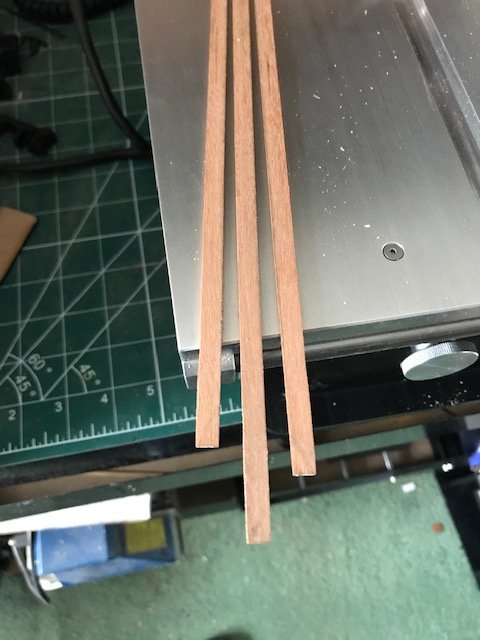
making steady progress. Stem assembled and added to keel former. Then fitted bulkheads to keel former. Pretty happy with how level and square everything turned out. Hobbyzone slip makes it easy to check alignment as you go along. Now for fairing. Ordered some extra sanding blocks. Once they arrive I'll crack on. Had a test run in meantime at ripping planking stock. Used a bit of scrap cherry and came out pretty nice and consistent in thickness. Finish left by saw is pretty much flawless. One question I have reading ahead a bit in chapter is when I come to add the stern framing do I add two stern planking fillers on each side of keelformer behind bulkheads 29 or is it just one each side and other two are spares?. Looking even further ahead at work Chucks doing on chapter 4. Is there a ply subfloor below the planking in the two wells below the hatches?. Just wondering if it would be worth adding these subfloors now to help stiffen up skeleton before fairing, although its remarkably rigid already.

-
Thanks Chuck.
-
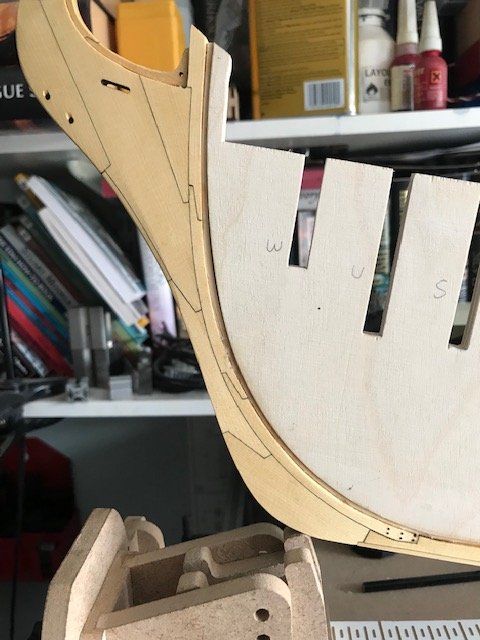
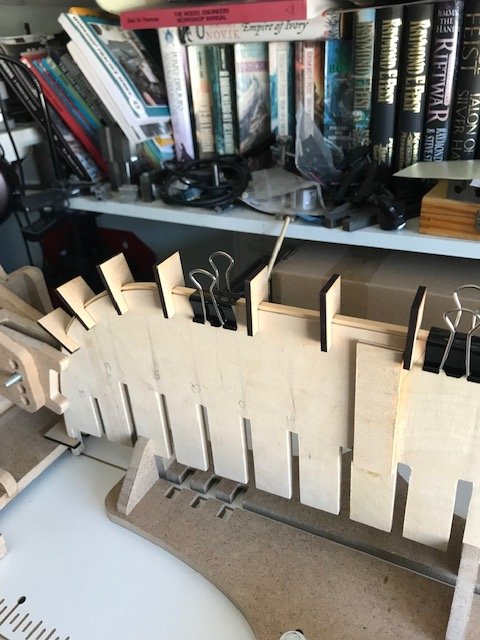
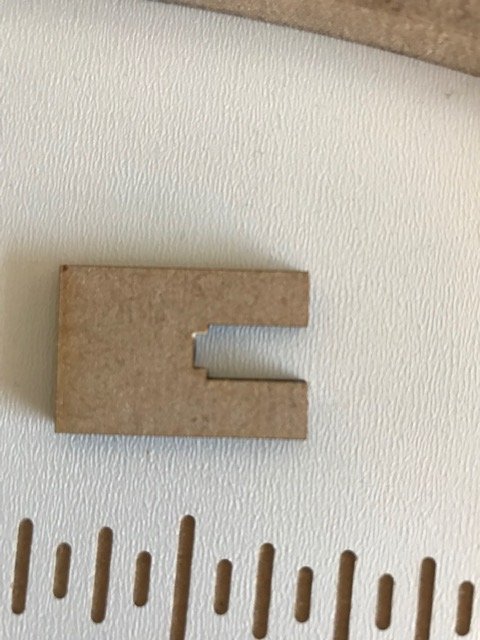
Slow but steady progress. Bulkheads all sanded back to lines and slots adjusted for fit. I'm now fitting Rabbit strip to keel former. Felt a bit tight bending round so I've steamed it and now allowing to dry before gluing on. I put a strengthening piece on either side of the dovetail joint in the keel former just as belt and braces. Little MDF tabs are an idea I saw on Chris Wattons Speedy kit and shamelessly borrowed with a slight modification. I struggle a bit getting the rabbit strip central all the way down the keel. So I lasercut the tabs with a notch to hold the rabbit strip central to the former whilst the glue dries. Just a snug push fit and tabs are removed as soon as glue has set a bit. bulldog clip stays on to hold strip down until glue fully set. Has anyone got any photos that show the stem looking vertically down from above?. I've assembled the stem and I'm struggling to visualise how its tapered. I can't see any overhead views of this detail anywhere on the plans. Is it a smooth taper from the back edge of the stem (1/4") to the front edge of the Bobstay (1/8"), or is just the front half of the assembly that's tapered?
-
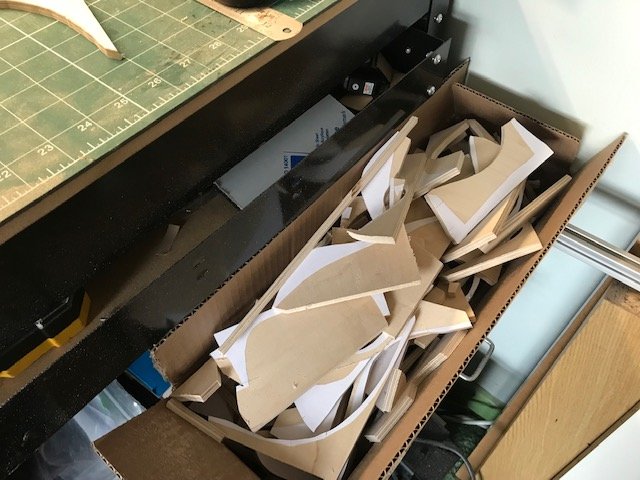
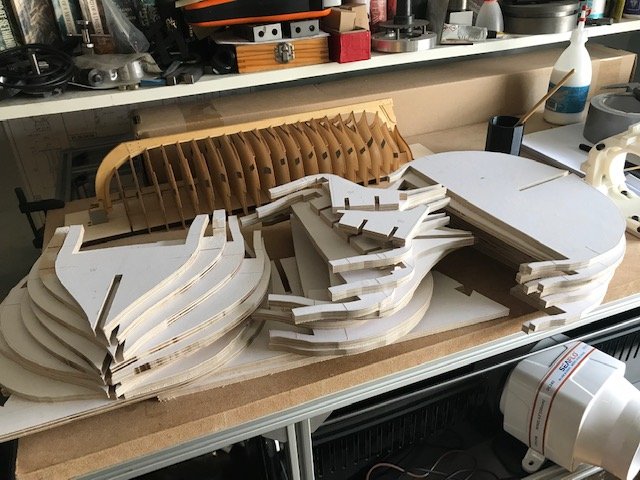
Bit off progress to report. Side effect of lockdown is I've had more freetime so managed to get bulkheads cut on scrollsaw. Hopefully a dry day tomorrow so I can use disc and oscillating spindle sander outside to fine tune upto the lines. Has anyone got any tips for sanding slots other than files and sanding sticks. Their all going to need adjusting as Plywood varies between 6.5mm and 6.7mm thick, unfortunately 1/4" ply pretty much unobtainable in UK so went with closest metric size ( 6mm is available but its always undersize typically 5.5mm or less, weirdly 6.5mm tends to be on size or slightly oversze). Plenty of scrap generated cutting bulkheads 🙂
-
And so it starts. Plans back from printers + chapter one and two parts in from Syren. And a new toy in the workshop 🙂 Just got to learn how to use it now. Matt

-
Thanks Chuck Couldn't think what other settings I could adjust. Good to know I was over thinking it.
-
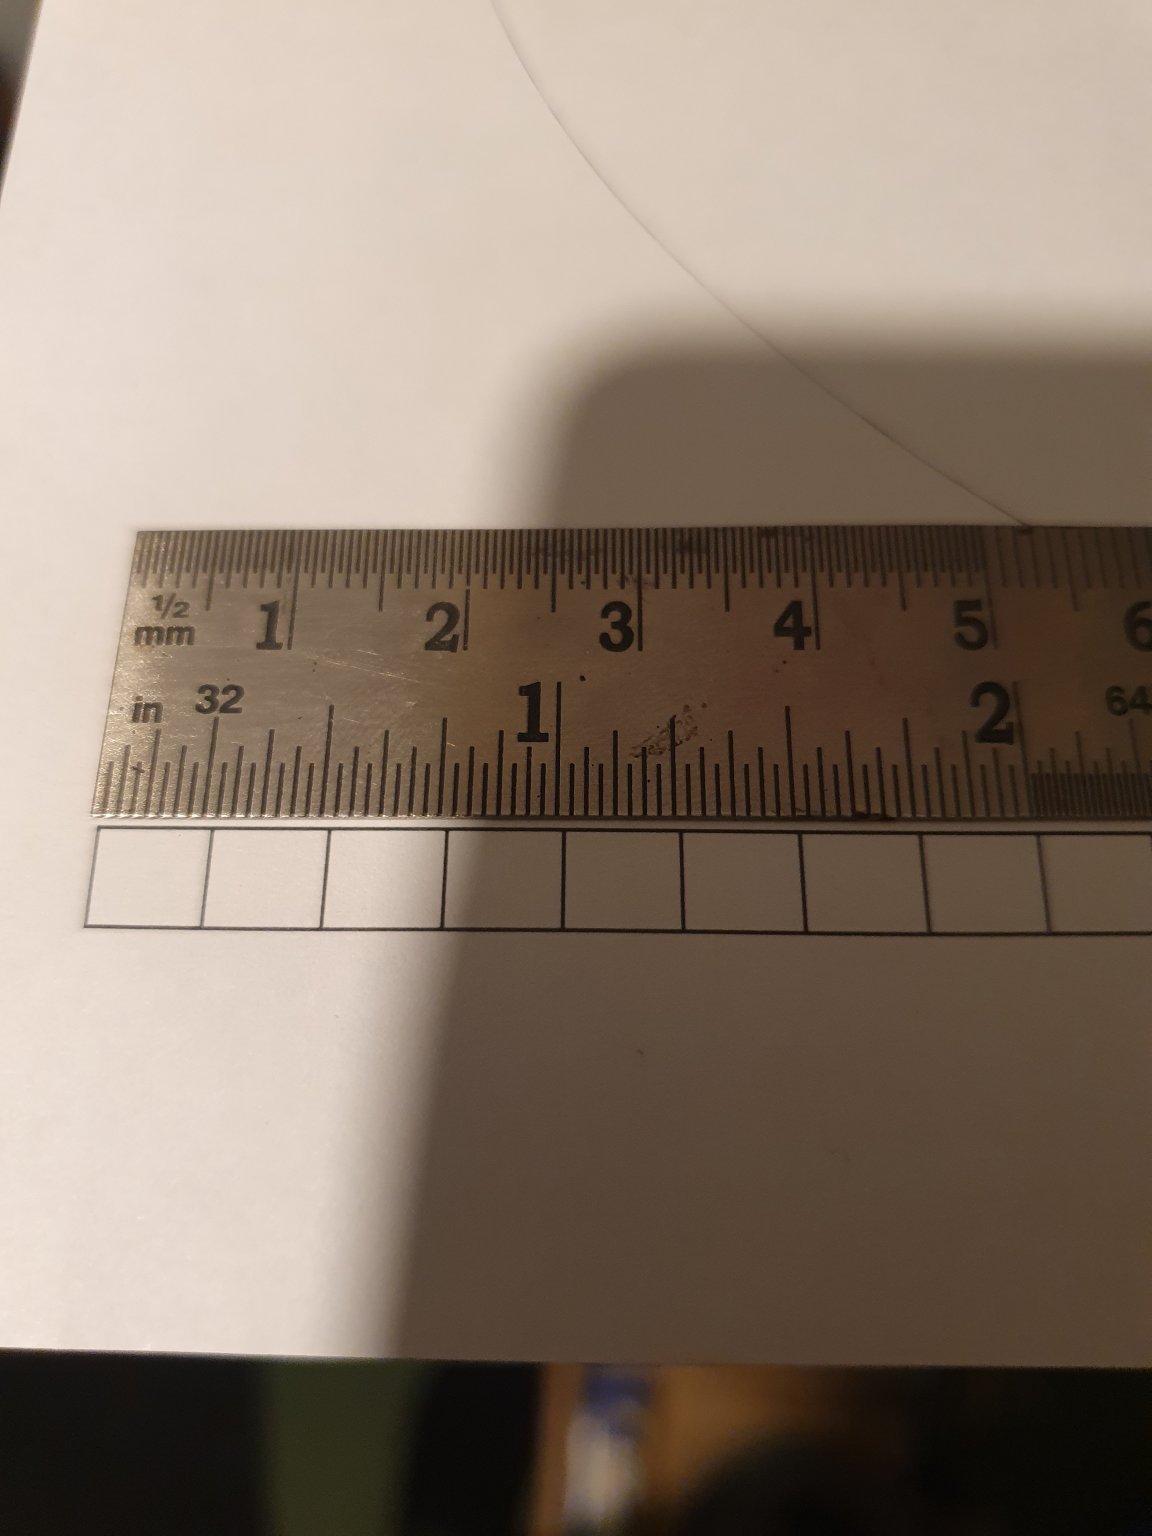
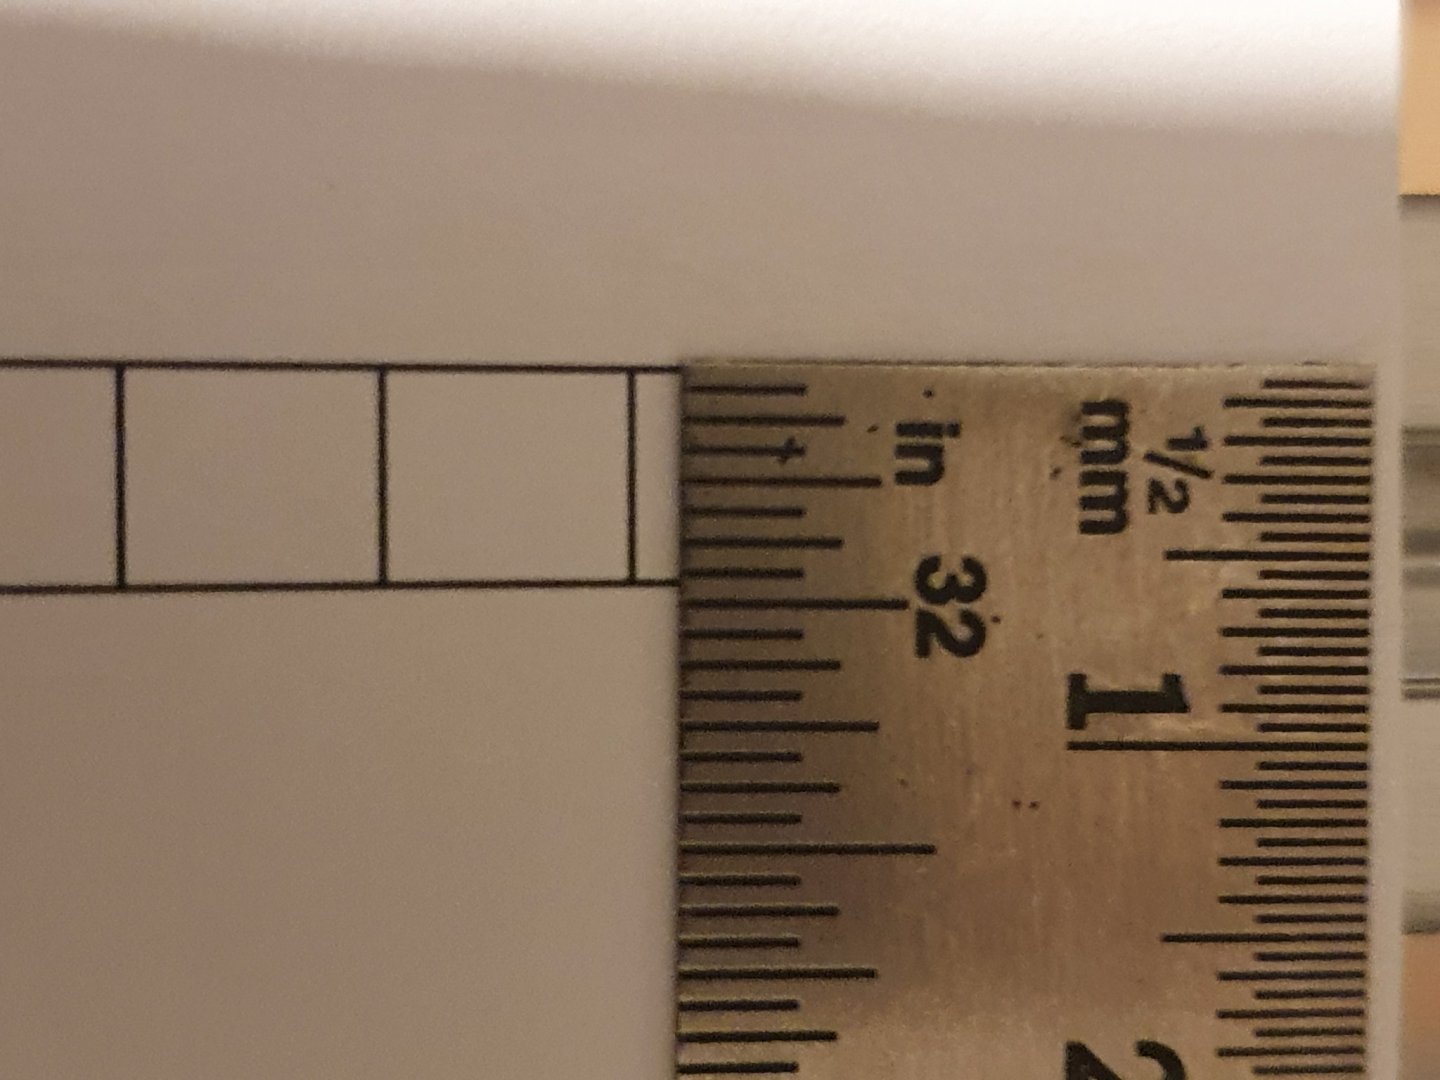
Started looking at printing bulkhead drawings out and not sure if I have a problem. Printing them as actual size with no scaling. length on scale block on bulkhead 1 looks spot on. Ruler slightly offset to left in this photo but each block is 1/4". However when I measure the vertical dimension it looks to be slightly short, approx. 1/32" undersize. I understood the scale blocks to be 1/4" squares?. Is this correct?. weird thing is they look to be shorter in vertical dimension when I look at the PDF's on the monitor too. I cant see any options in printer settings to only scale in one dimension and I've printed on two different printers with same result.


-
Thanks Chuck Superb service as usual. Now have a rest - It is Sunday after all 🙂
-
Bit late to the party but I've taken plunge and ordered laser cut parts for chapters 1 and 2. Plans downloaded and ready to print. Looking at scrollsaws now as costs for laser cut bulkheads plus international shipping would virtually pay for saw (and its a good excuse for a new toy 🙂 ). This is very much a long term project so don't expect fast progress. Have a vanguard models HMS Alert on the go at the moment with a Medway Longboat in early stages too. Cutting bulkheads for Winnie will be a filler project when I want a break from smaller scale stuff. I don't expect to seriously start building until the summer.
-
Proxxon TG125 Bench Disk Sander
mnewsholme replied to pompey2's topic in Modeling tools and Workshop Equipment
Nick I've got one of these and it works great. reasonably quiet and easy to change disks. whilst both axminster and chronos are uk stockists itsusually cheaper to get proxxon stuff from tbs-aachen in germany, even after paying the postage. Mat