
.jpg.1288f2f3342cd7901c13b9acfc9852a3.jpg)
PietFriet
-
Posts
82 -
Joined
-
Last visited
1 Follower

Recent Profile Visitors
1,632 profile views


-
 PietFriet reacted to a post in a topic:
Shore Leave forum is on temporary hiatus until further notice.
PietFriet reacted to a post in a topic:
Shore Leave forum is on temporary hiatus until further notice.
-
mtaylor reacted to a post in a topic:
Technical drawings & Dutch shell first
-
trippwj reacted to a post in a topic:
Technical drawings & Dutch shell first
-
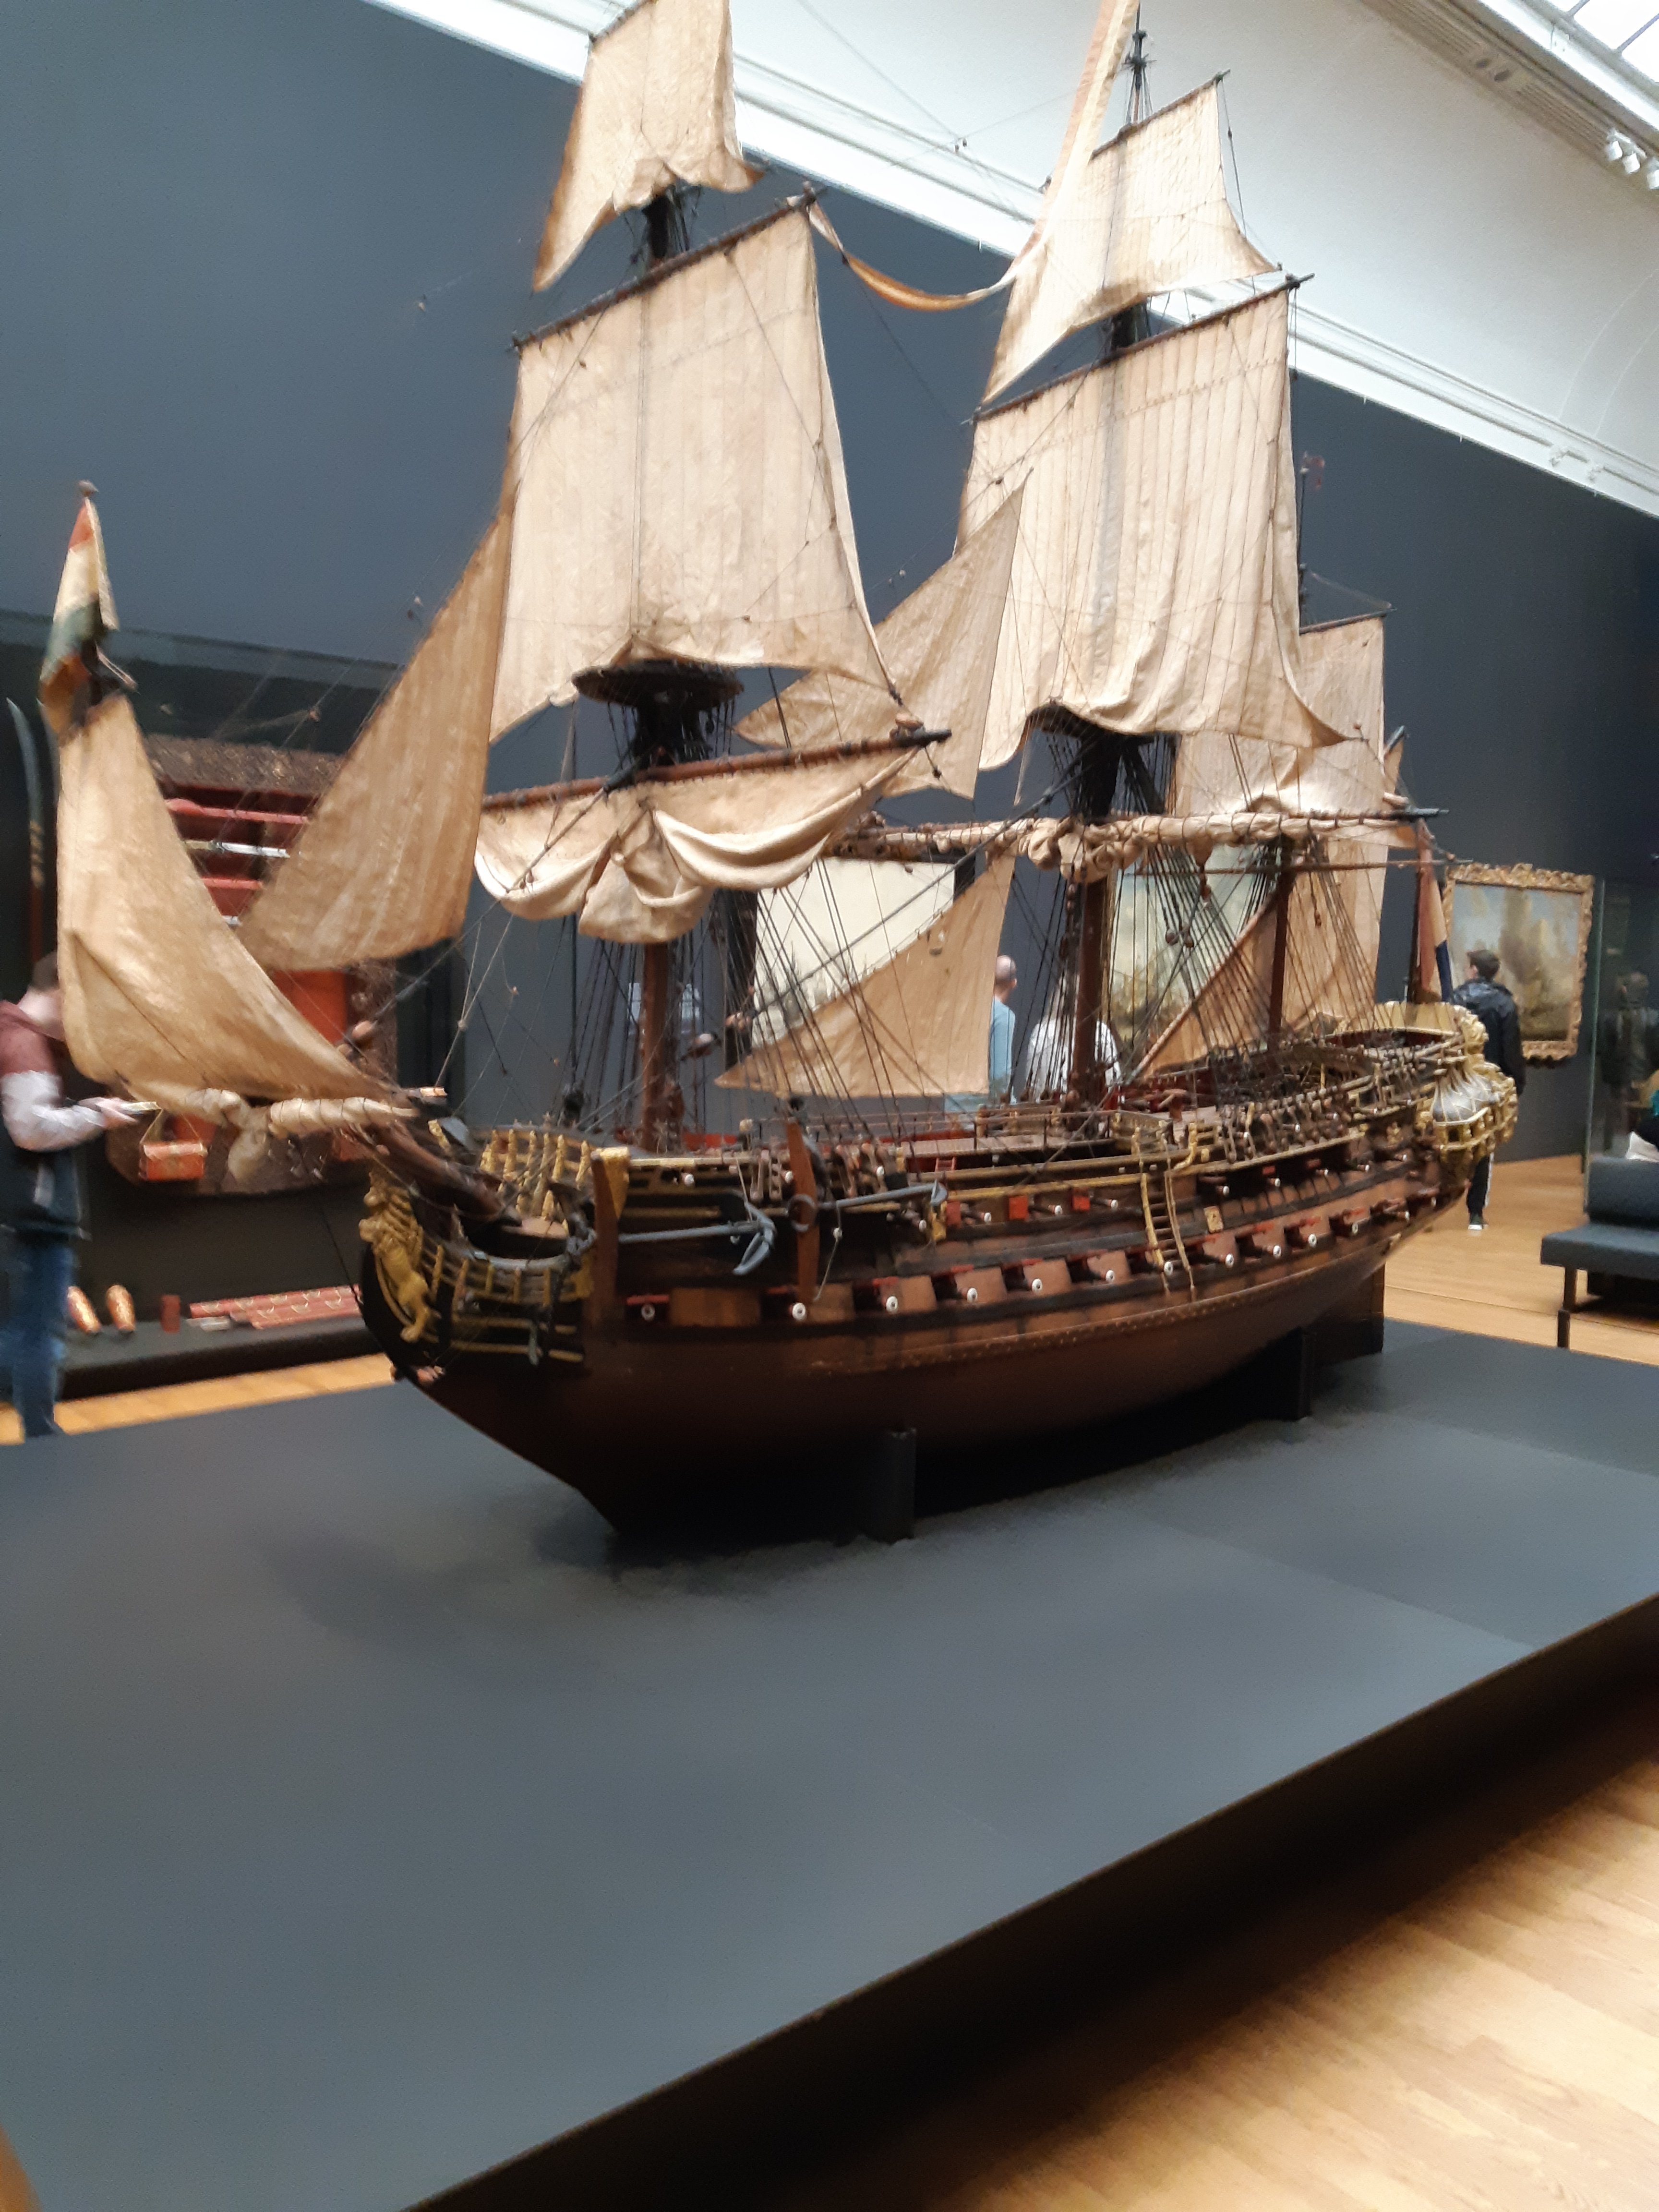
.thumb.jpg.891f66d64fd4486179970eca1dfee43e.jpg)
Technical drawings & Dutch shell first
PietFriet replied to Jules van Beek's topic in Nautical/Naval History
Feels a bit like a chicken and egg discussion. Is the drawing a representation of a ship that was built, or is the ship built based on the drawing. I am still not convinced that the drawings in Witsen's book demonstrate that ships were built based on design drawings. They could be a graphical representation of the tools used to build a ship, providing insight in how that results in a shape. Is a couple of frame drawings proof that the ship was built in accordance with a design? Where do we have examples of drawings based on a contract, which presumably was the starting point of ordering a ship? Have these all been lost? I am not saying that your point of view is wrong. It just seems strange to demonstrate a point of view, largely by undermining the credibility of someone else's point of view. -
thibaultron reacted to a post in a topic:
Modelling a cannon cypher in Fusion 360
-
PietFriet reacted to a post in a topic:
Modelling a cannon cypher in Fusion 360
-
PietFriet reacted to a post in a topic:
Modelling a cannon cypher in Fusion 360
-
They look fantastic !!! Your approach creating a 3D effect in the letters certainly pays off when viewed in close-up (I had not expected that). It seems the only limitation now is our eye-sight 🙂.
-
druxey reacted to a post in a topic:
Modelling a cannon cypher in Fusion 360
-
druxey reacted to a post in a topic:
Modelling a cannon cypher in Fusion 360
-
thibaultron reacted to a post in a topic:
Modelling a cannon cypher in Fusion 360
-
 thibaultron reacted to a post in a topic:
Modelling a cannon cypher in Fusion 360
thibaultron reacted to a post in a topic:
Modelling a cannon cypher in Fusion 360
-
mtaylor reacted to a post in a topic:
Modelling a cannon cypher in Fusion 360
-
mtaylor reacted to a post in a topic:
Modelling a cannon cypher in Fusion 360
-
PietFriet reacted to a post in a topic:
Modelling a cannon cypher in Fusion 360
-
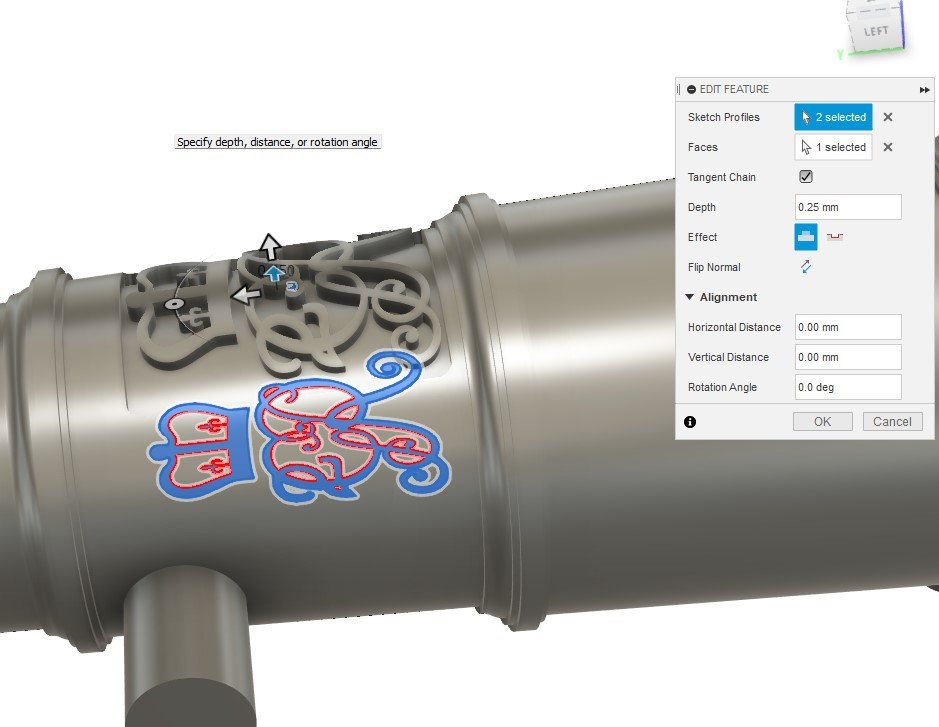
Kevin, The flat topped result worked for me because the height is only 0.25 mm, but I can see that if you want a variation in height your technique is more precise. I am actually thinking of reducing the height even further because 0.25 mm is too high for scale 1:48 (12 mm). But with a printer resolution of 0.05 mm (x-y) there is not much to play with. Peter
-
In the spirit of sharing alternative ways of doing the same thing. You can use the Emboss tool to project a sketch directly on a curved surface.
-
PietFriet reacted to a post in a topic:
Making ship drawings in the seventeenth century Dutch Republic.
-
PietFriet reacted to a post in a topic:
Making ship drawings in the seventeenth century Dutch Republic.
-
Thanks for sharing. What a fantastic way to showcase your modelling skills and your son's graphic skills.
-
A critique of the works of Nicolaes Witsen
PietFriet replied to Philemon1948's topic in Nautical/Naval History
Except for yourself of course. -
PietFriet reacted to a post in a topic:
How to develop frames without buttock lines?
-
PietFriet reacted to a post in a topic:
How to develop frames without buttock lines?
-
One thing you could do is to enter all information you have in Delftship and then shape the hull respecting the given data (you can lock data points). Once done, you can create frames at every location and I would imagine it is sufficiently accurate for a model. I found Delftship quite intuitive and worth the effort to get to know how to use it (I used a ship contract to determine the hull shape only with no requirement for fancy looking ship in 3D software). The free version is sufficient to do this. Piet
-
Tony, My thoughts on this are that you need two 2D drawings (or offset tables) to get the 3rd dimension. In that case it would also work if you had the water lines instead of buttock lines. Otherwise, I don't know how you would get the frames so hopefully I learn something new as well!
-
What Glue is Best for Rigging Ropes?
PietFriet replied to Bill Jackson's topic in Masting, rigging and sails
Hi Bill, I use diluted PVA (white wood glue), minimum of 50% water and a needle applicator. One drop at the time will soak in the rope and will not leave visible traces. -
Are you sure about that? I have no problems exporting and .stl is still shown as a format you can export in the free version.
-
Try this link or Google 'Fusion 360 for personal use'.
-
In my experience, it depends on what parts you want to make. Blender's sculpting module is very well suited for designing and printing ship decorations (you can ignore the animation part). I found Fusion 360 more suited for things like cannons, ship's bell and stern lanterns.
-
Best bet is that they are both wrong😏
-
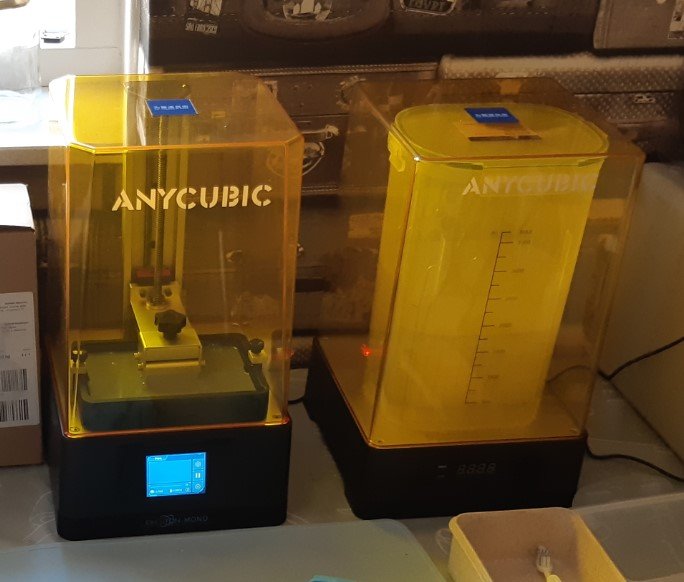
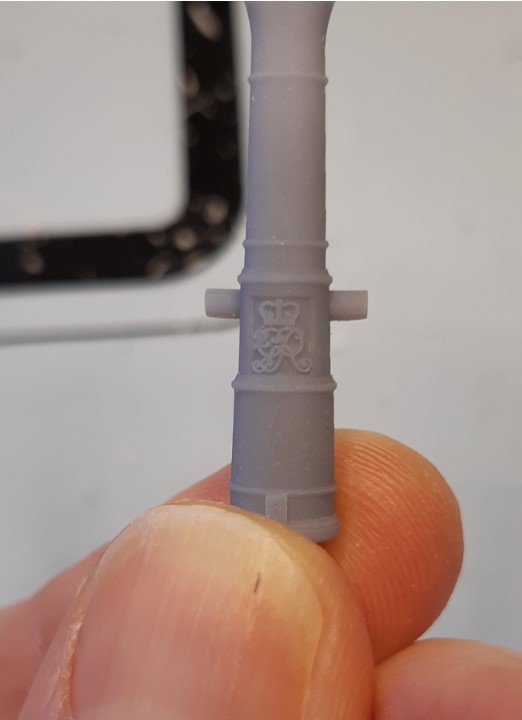
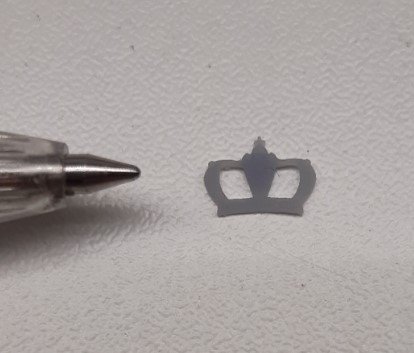
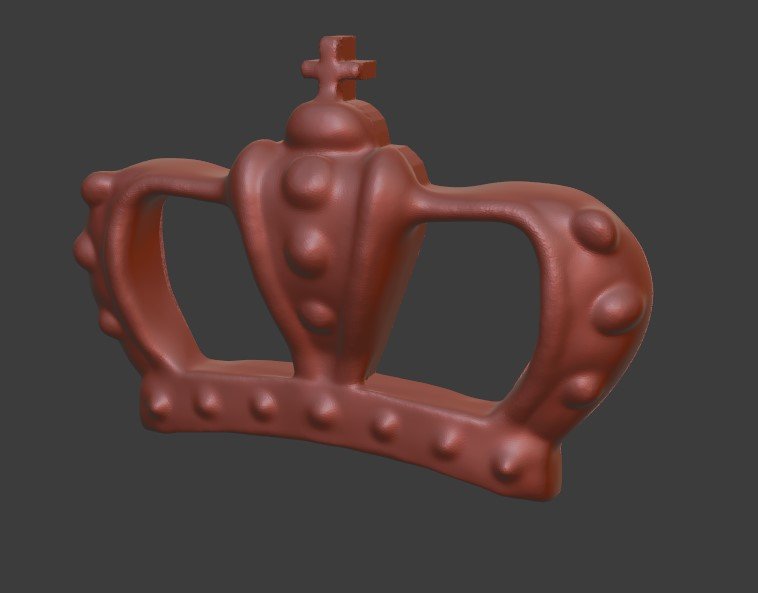
I bought a 3D printer in January, without really knowing what I was getting into. There is plenty of information available, but it is generally not aimed at ship modelling so I ended up with more questions than answers. At the end I decided to just buy one and go for it. Since then, I have been depressed, frustrated, elated and excited; often all in the same day. But recently I feel I have turned a corner and really see a way forward to make it a great tool for modelling. I thought I share some of the knowledge I gained, which hopefully is of use for anyone who is also considering it as their next tool. It is a fairly long post that will take about 5 minutes to read. The printer There is little doubt that you need a resin printer as it is the only type where you can achieve the required resolution without having to buy a high-end model. The main brands are Elegoo and Anycubic with a nice range to choose from. Most of them now have a monochrome LCD to cure the resin and I would advise to get one of those. The older RGB LCD screen has much longer printing times (about 3-4 times) which is relevant when printing takes easily two hours on a monochrome LCD printer. As with TV’s there is a race going on with the LCD resolution. My now ‘low-end’ version has a resolution of 0.05 mm in all directions which seemed well beyond what I needed. However, I have discovered that when designing an object, you easily go down to 0.1 mm in detail. It is not so much that you can see it all, but that what you print represents the original in appearance/feel. The 0.05 mm resolution satisfies that requirement, but I would not want anything with a lower resolution than what I have now. The build plate size may be another consideration; I don’t think you do need the XL version for ship modelling, unless you want to print a hull. But if there are other uses then realise that the standard build plate of a resin printer is fairly small. One of the main disadvantages of a resin printer is that post-processing can be messy. The liquids (resin and IPA) are irritants and you should avoid contact with your skin. Gloves, glasses and a half face mask are a must. Cleaning the object after the print proved to be a nerve wrecking process; I clearly watched too many YouTube videos telling me what not to do. I solved this by buying a ‘wash and cure’ machine, which have recently halved in price. I can highly recommend this as it has taken virtually all the messiness out of the process. I used to print once a week to mentally prepare myself for post-processing, now I print (sometimes) twice a day. The 3D objects It is impossible to find ready made items to print for my ship model (Royal Caroline). There is stuff around, but the whole idea for me is to have very specific items which are an improvement from what is in the kit ( e.g. a gun barrel with the royal cypher of King George II). With so few items available, it is very (very) likely that you end up having to design your own objects. It may change in future but this is not a large market so I would expect it to take a long time. This is important because if you are not prepared to design your objects, then the printer may be of limited use for ship modelling. For the design phase, it is useful to split the objects into two groups. The engineering type objects like a gun barrel, a ship’s bell, a stern lantern and the artistic type objects like the decorations that you would carve or make from clay. Each group needs a completely different approach and skill in 3D design that you will have to learn. Generally speaking, an early 18th century ship and before, will be heavy on the decorations, whereas later ships are heavier on the engineering items. There is no hard and fast rule between the groups but it helped me to understand what software to use (and what ship to build next 😀). The software This ended up by far the biggest headache of 3D printing. What software to use and how much effort does it require to learn; neither was obvious from anything I read or watched as it is all very much tailored to individual applications. I knew what I wanted, but not how to get there. Also, the software needed to be free of charge and preferably only one software package to learn. As a result, I started with FreeCAD but that just did not work for me; I spent a lot of time to find workarounds for things that should be simple. Given that there are examples on this forum where people achieve great results with FreeCAD this is clearly my shortcoming. The breakthrough was when I realised that the two different type of objects require two different CAD packages, each having their strength in their area. The disadvantage is that you have to learn to use two software packages, but it does avoid the frustration of using software that was not primarily designed for what you use it for. I now use Fusion 360 for the engineering type items and Blender for the decorations. There is no doubt that it will take some time to learn the software and there is very little overlap in the design technique of Fusion 360 (drawing lines that are extruded) and Blender (sculpting). I found that watching videos only works if you can follow along yourself. The time lapse videos are of limited use as they only make you end up being impressed at the persons skill level without really gaining a lot. I can recommend the beginner tutorials of YouTuber Lars Christensen for Fusion 360 and Grant Abbitt for Blender (only for sculpting videos) as they allow you to follow along. For a couple of weeks, I resisted diving into the design myself and just followed the tutorials. I find Blender a lot more difficult to learn, but that is also because I do not have an artistic background. In that respect I actually do like CAD because you can undo anything you don’t like and the scale you work on (screen size) is much better than the 7 millimetres of an object. The printed crown in the picture below is 5 x 7 x 1 mm. The raised lines and jewels/blobs are printed and hopefully will show when painted. Unfortunately, that is not the end of it. It is also useful to know a bit about Inkscape as this will expand the use of Fusion 360 by embossing 2D drawings on your object (e.g. the royal cypher on the barrel pictured above is done that way). When the design is completed, you end up with an .stl file that needs to be converted to something that the 3D printer understands. You also need to support your object to ensure it is printed properly. Popular packages (slicers) for this are Lychee (free limited version) and Chitubox. I find Lychee better for the automatic tools but only when you are not concerned where the supports are placed. If you want to manually place supports Chitubox is more convenient. Fortunately, the software is very similar in use so it is easy to swap between the two and you can't go wrong with selecting either of them. The printing Without going into too much detail, it is a bit of a skill to properly prepare the object for printing. It is not uncommon for a print to fail although it is something that becomes rarer after practice. Orienting and supporting the object has a big impact on the quality of the print or whether it comes loose from the supports during printing. Because every object is different, it is something you have to get experience with. I probably spend too much time watching videos to get it exactly right whereas no video will tell you that for your object. The resin cost is quite low, so you might as well try and learn. Just don’t expect to design and print without having to go through a couple of cycles (initially). That’s about it. This is certainly not to discourage anyone going into 3D printing but I believe there is more chance of success if your expectations are more realistic than the ones I had when I bought a printer. Despite some of the frustrations I do not regret buying the printer!!
- 1 reply
-
- 10
-
-
Allan, The barrel itself is done in Fusion 360 (3D). The Royal Cypher is traced using Inkscape (2D). You can import the resulting .svg file in Fusion and use the emboss command to place it on the barrel (and turn it into 3D). I hope this is clear, but let me know otherwise. Piet