hdrinker
-
Posts
232 -
Joined
-
Last visited
About hdrinker

Recent Profile Visitors
1,397 profile views


-
 AnobiumPunctatum reacted to a post in a topic:
Pegasus by hdrinker - FINISHED - 1:48 - POF - Swan practicum
AnobiumPunctatum reacted to a post in a topic:
Pegasus by hdrinker - FINISHED - 1:48 - POF - Swan practicum
-
She’s coming along! Nice. I like the white deck framing. Makes that really pop. I have a grandson who’s handy with a 3-D printer and was happy to print me up a ring in black for that capston. Henry
-
mtbediz reacted to a post in a topic:
USS Constitution by mtbediz - 1:76
-
USS Constitution by mtbediz - 1:76
hdrinker replied to mtbediz's topic in - Build logs for subjects built 1751 - 1800
The work you are doing is truly inspiring, Mustafa. I have always wanted to do a model of this iconic vessel, having visited her many times over my lifetime. You have inspired me to now think seriously about it. Where would I find original framing plans and deck layouts? Henry -
JacquesCousteau reacted to a post in a topic:
Pegasus by hdrinker - FINISHED - 1:48 - POF - Swan practicum
-
dvm27 reacted to a post in a topic:
Pegasus by hdrinker - FINISHED - 1:48 - POF - Swan practicum
-
cotrecerf reacted to a post in a topic:
Pegasus by hdrinker - FINISHED - 1:48 - POF - Swan practicum
-
Knocklouder reacted to a post in a topic:
Pegasus by hdrinker - FINISHED - 1:48 - POF - Swan practicum
-
druxey reacted to a post in a topic:
Pegasus by hdrinker - FINISHED - 1:48 - POF - Swan practicum
-
Desertanimal reacted to a post in a topic:
Pegasus by hdrinker - FINISHED - 1:48 - POF - Swan practicum
-
ccoyle reacted to a post in a topic:
Pegasus by hdrinker - FINISHED - 1:48 - POF - Swan practicum
-
scrubbyj427 reacted to a post in a topic:
Pegasus by hdrinker - FINISHED - 1:48 - POF - Swan practicum
-
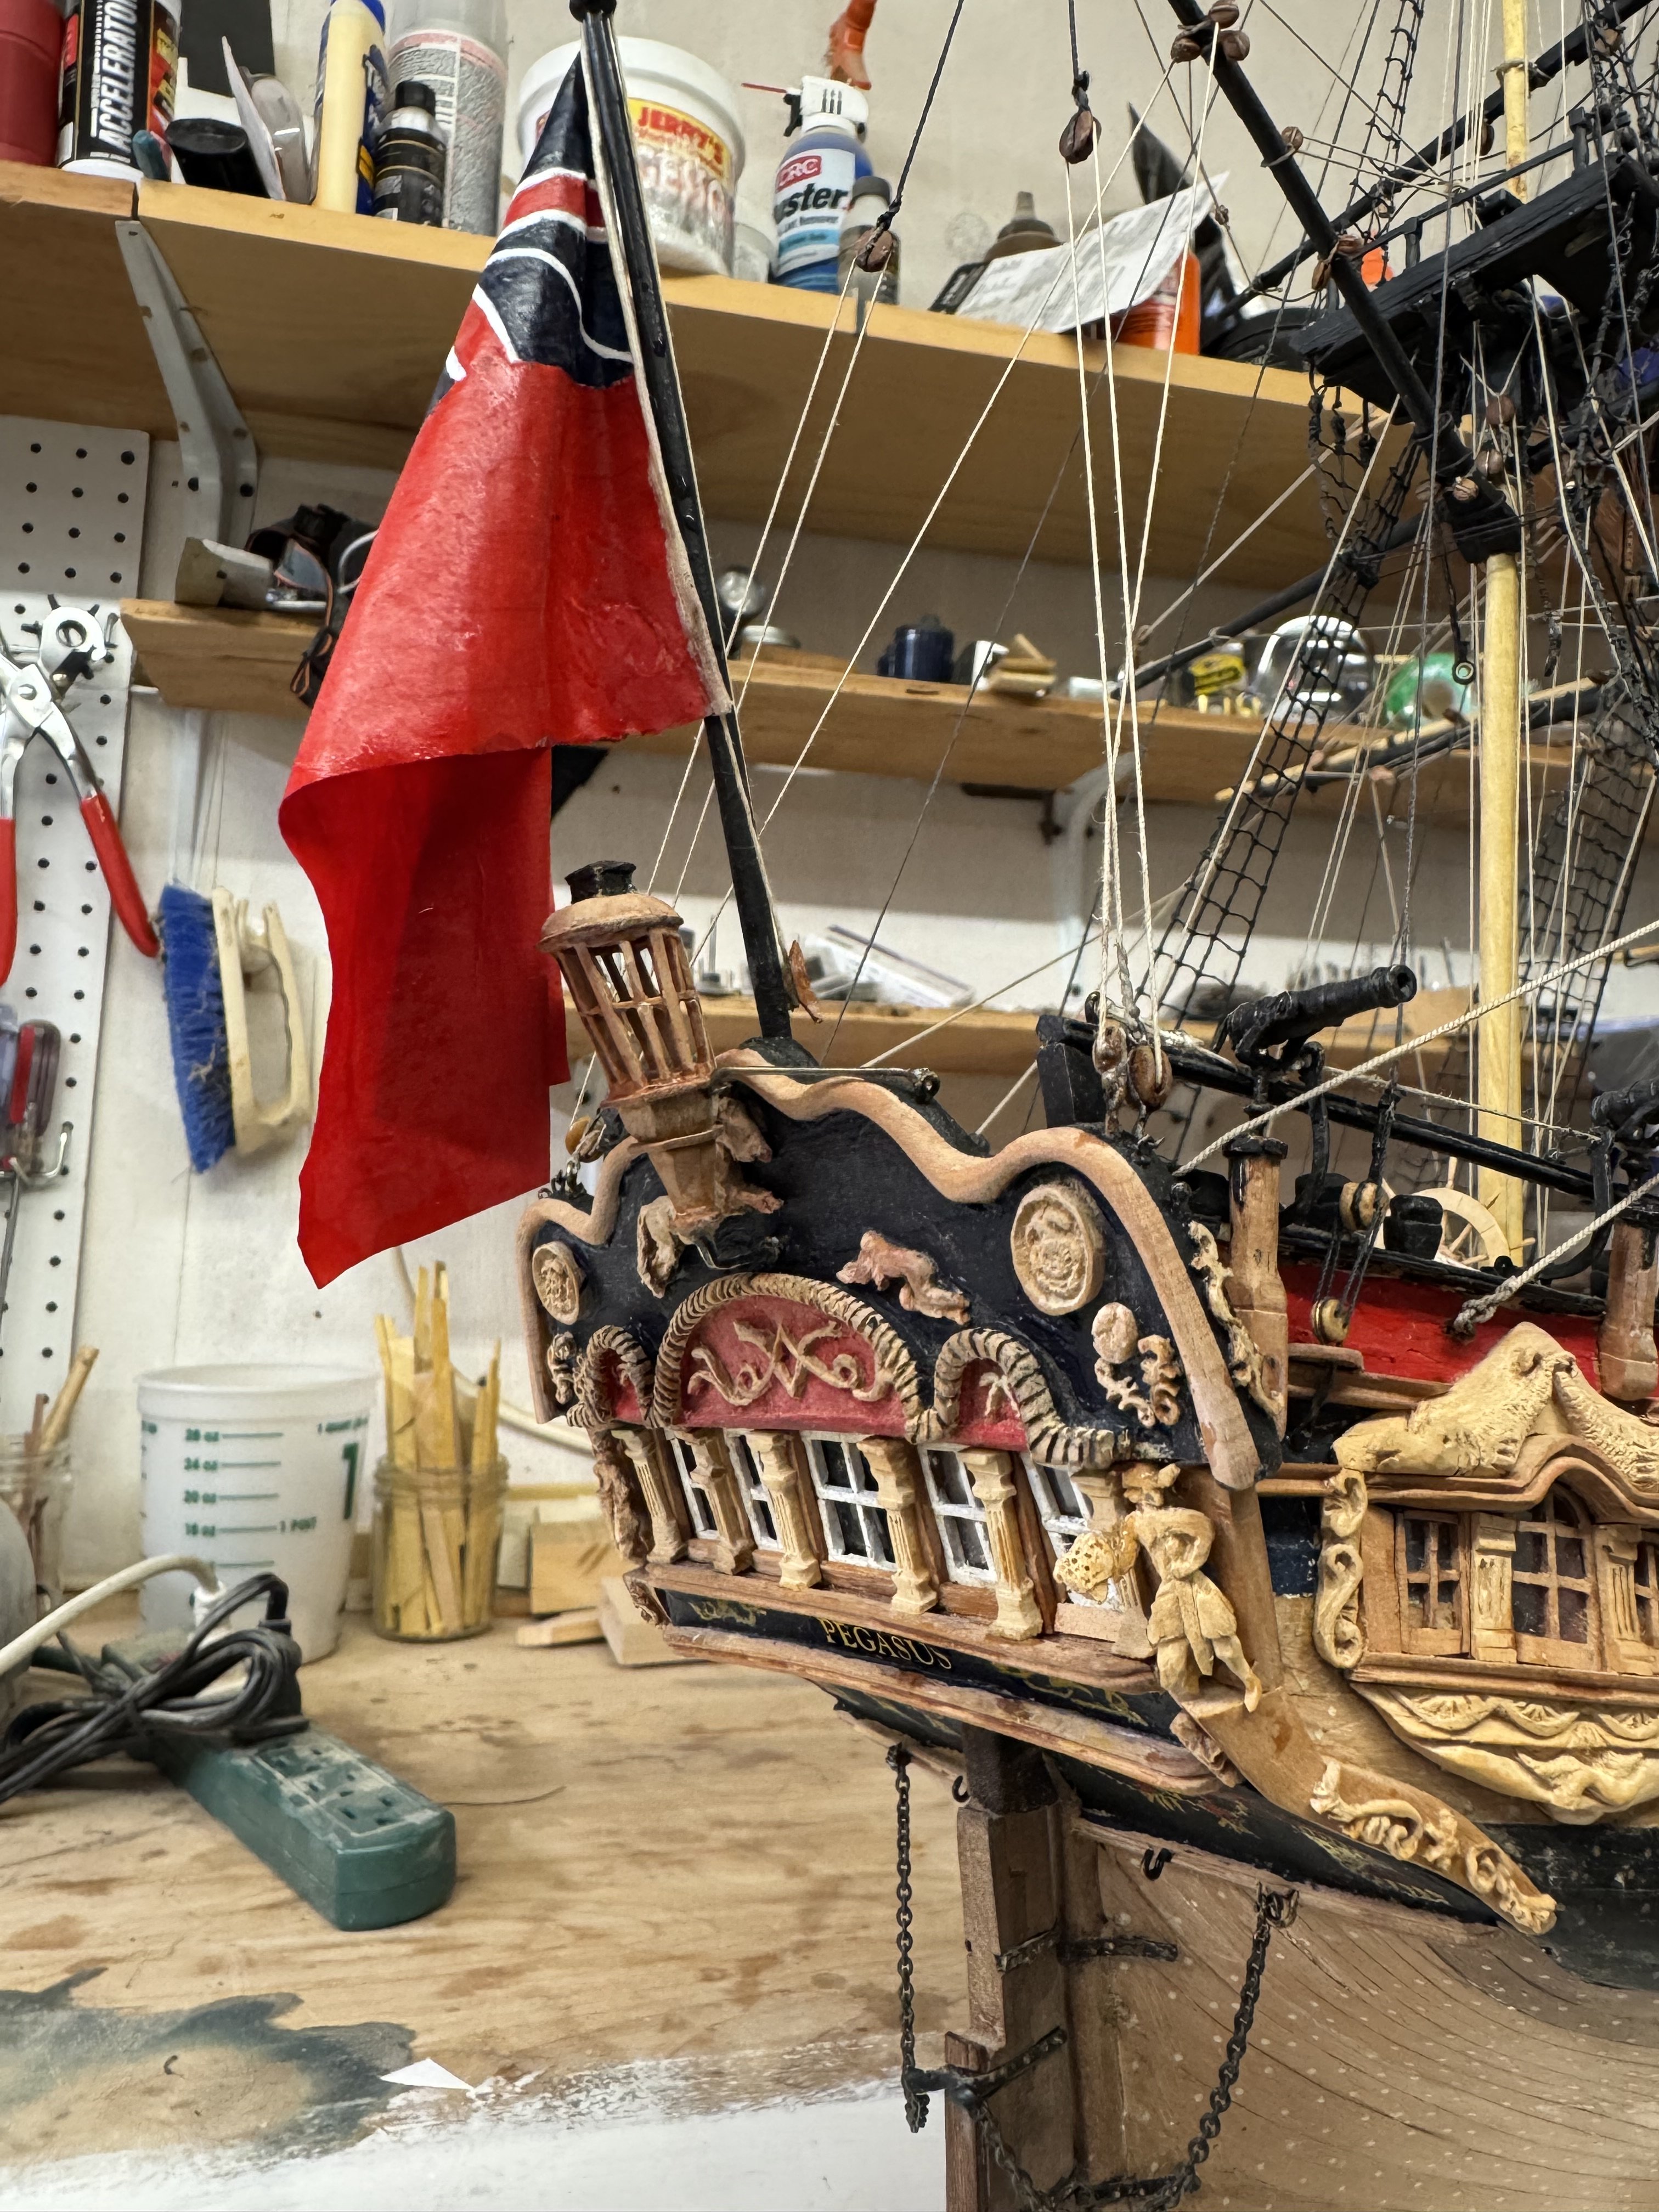
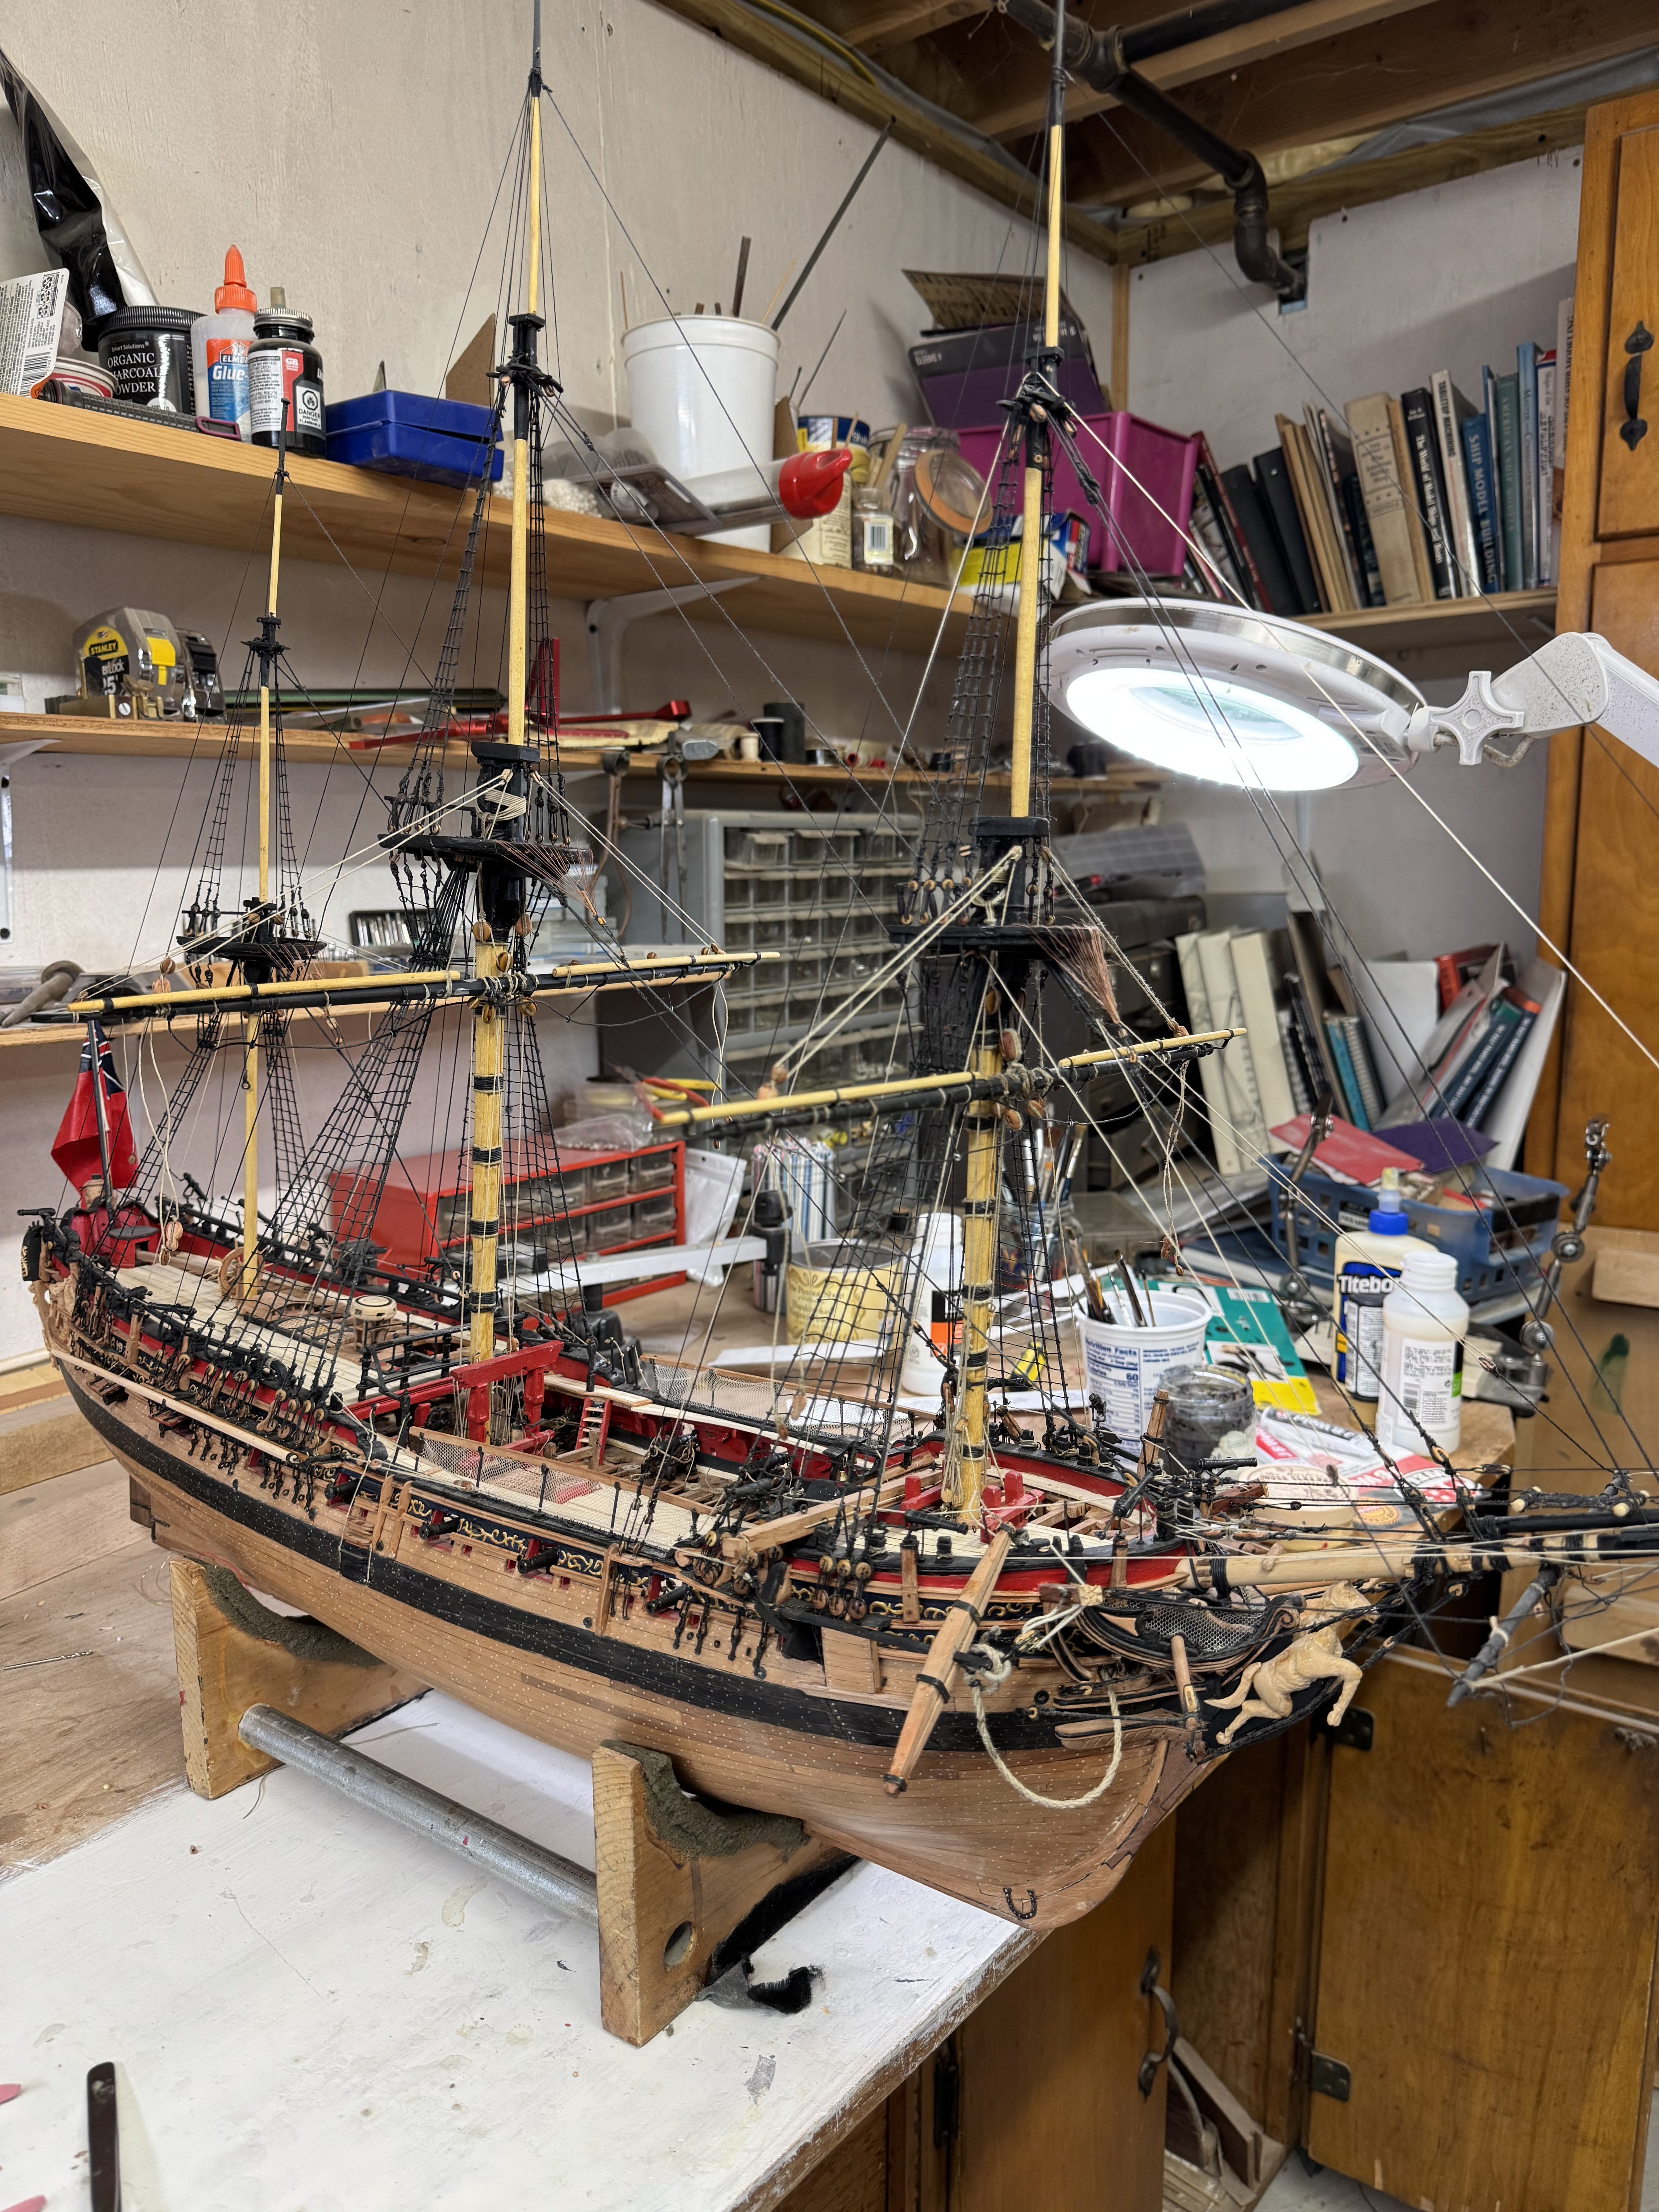
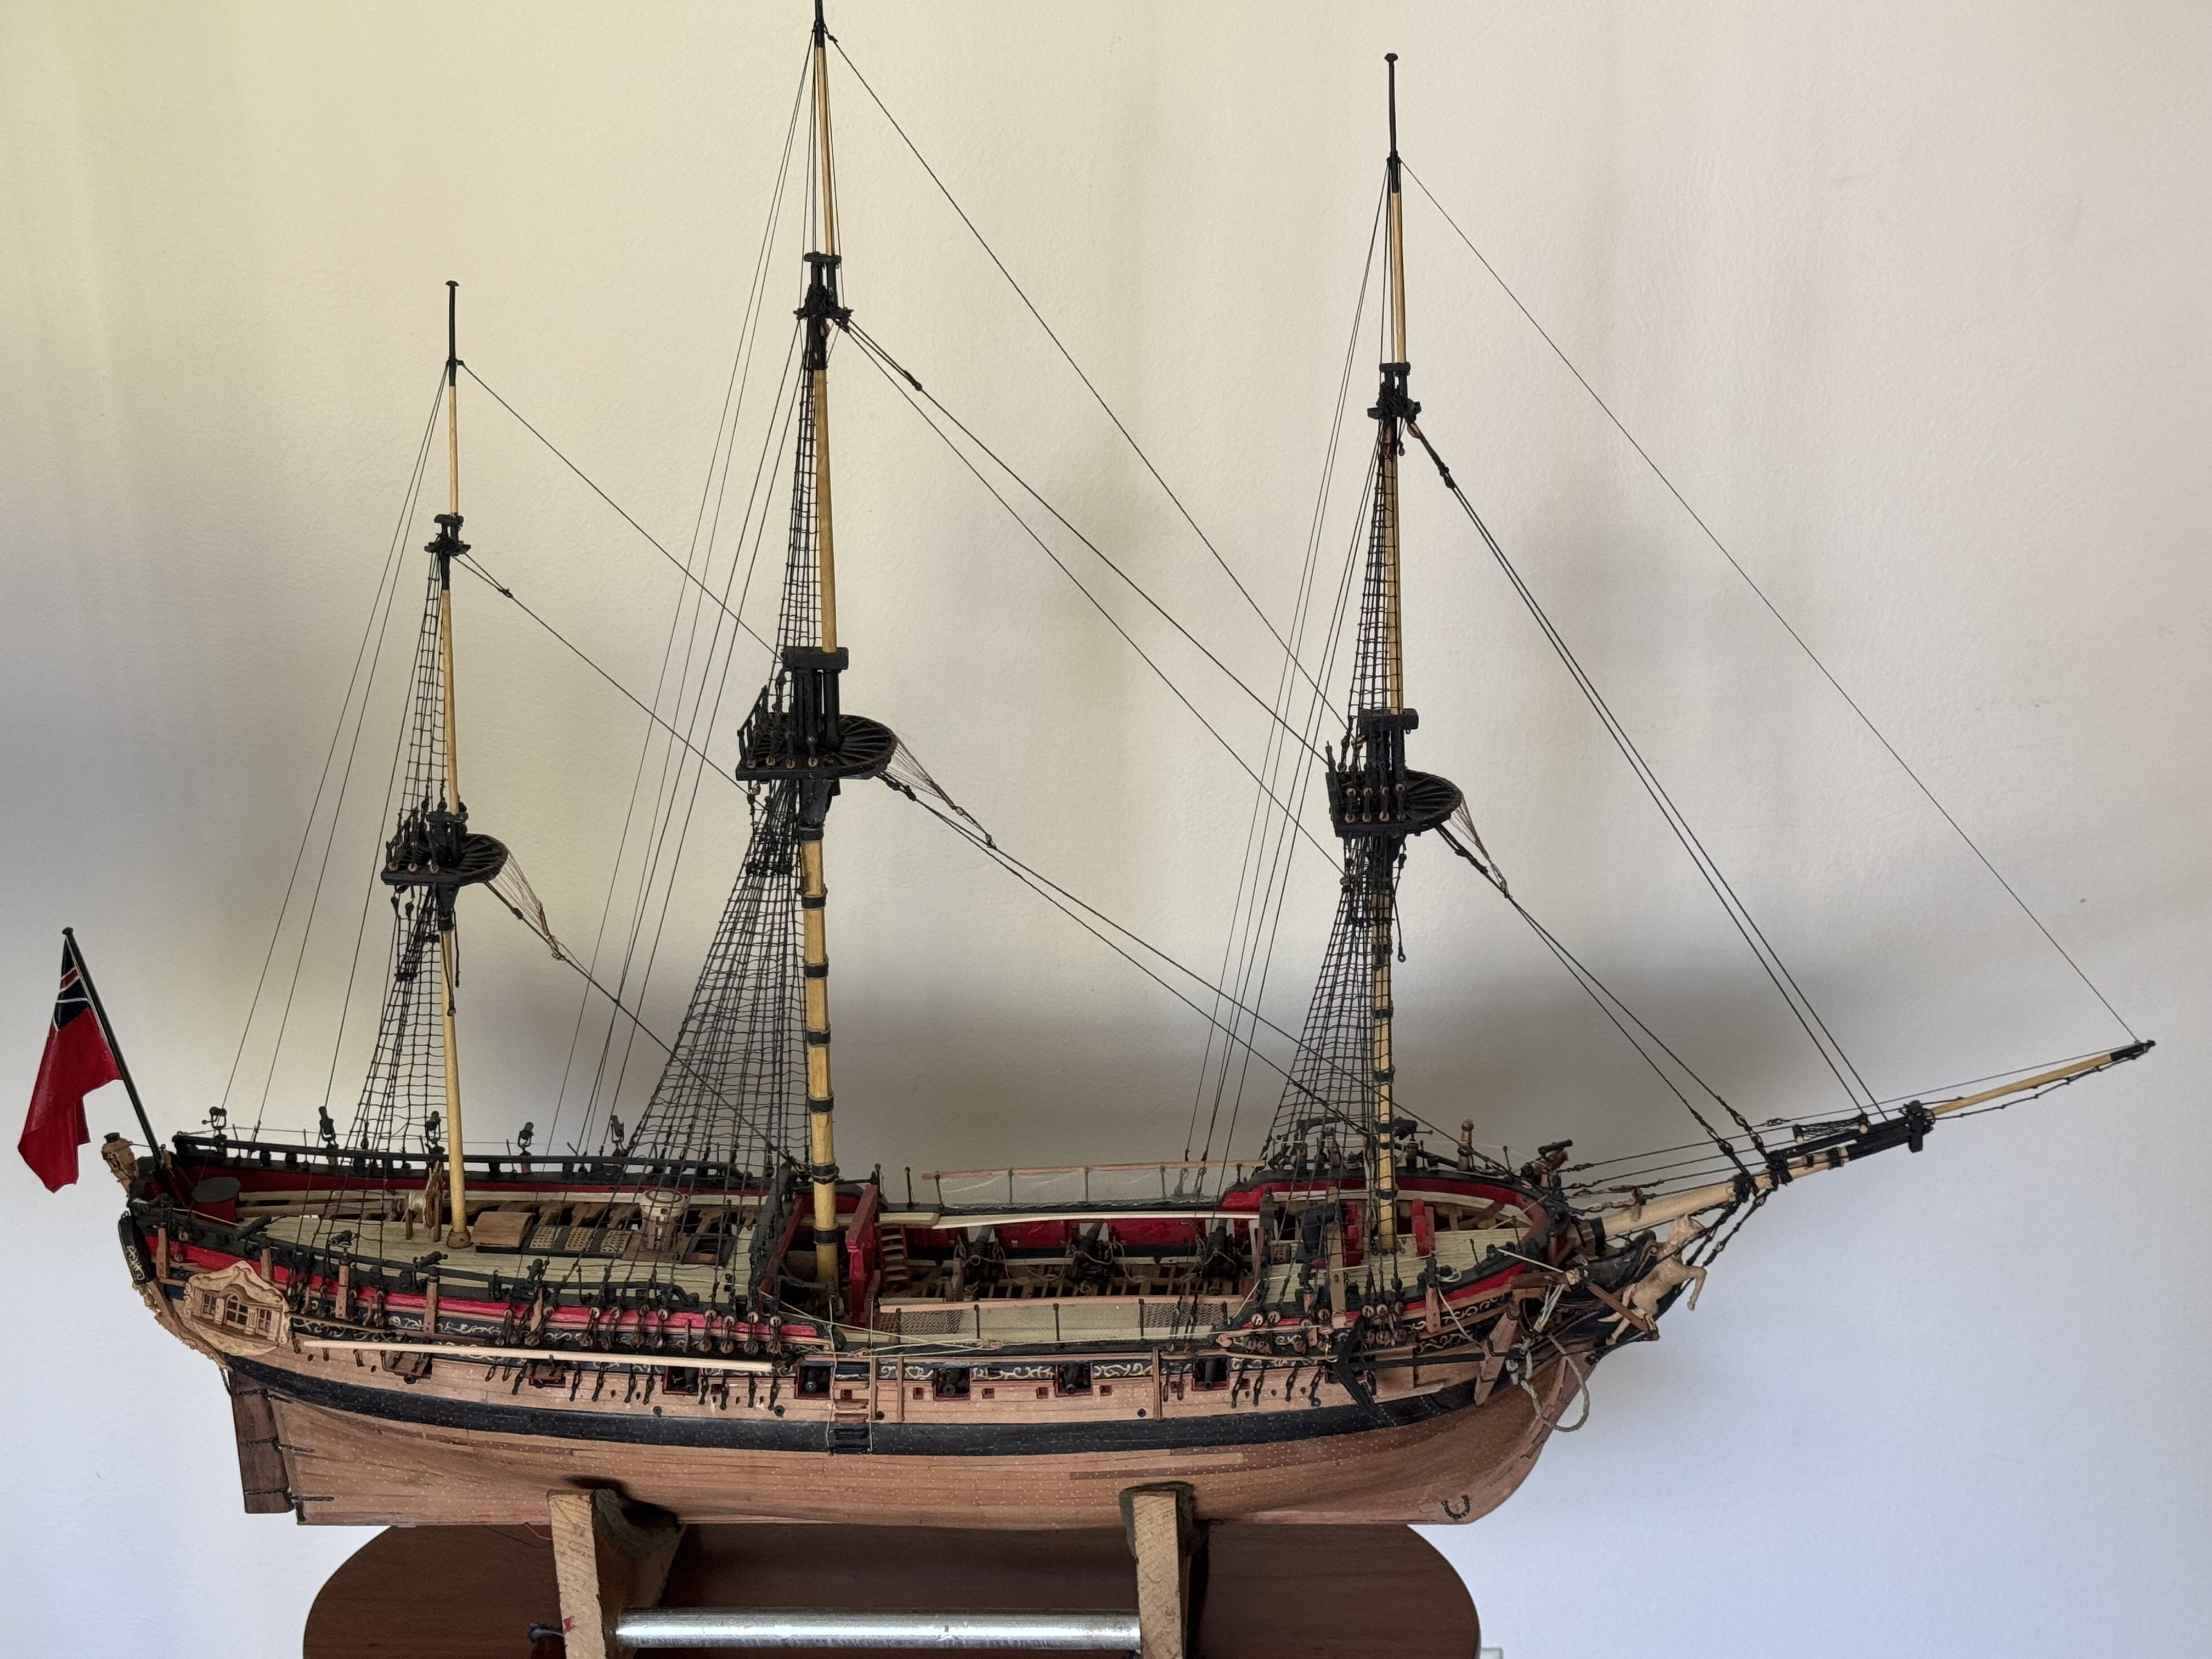
I was bringing Pegasus up from the shop for some proper photos and tripped. Down she went. What a mess! Landed stern first, shearing off the taffrail, light, mizzen gaff (broke). Mizzen topmast, main T’gallant mast and fore T’gallant masts broken. Luckily, the bow was undamaged, including the figurehead and bow sprit. No damage to any of the carvings, all of which were simply repositioned on the repaired raff rail, which by dinner, was back in place with a couple of improvements. Starboard mizzen chains will need to be redone. The rest will be easier. My wife was a witness and was much more upset than I was.
- 257 replies
-
- 14
-

-

-
-
- pegasus
- Swan-class
- (and 1 more)
-
Many thanks for the kind words. I’m awaiting delivery of piece of wood for a base and the use of a regular sized lathe of friend to shape a pair of brass pedestals before taking final photos. Henry
- 257 replies
-
- 1
-
-
- pegasus
- Swan-class
- (and 1 more)
-
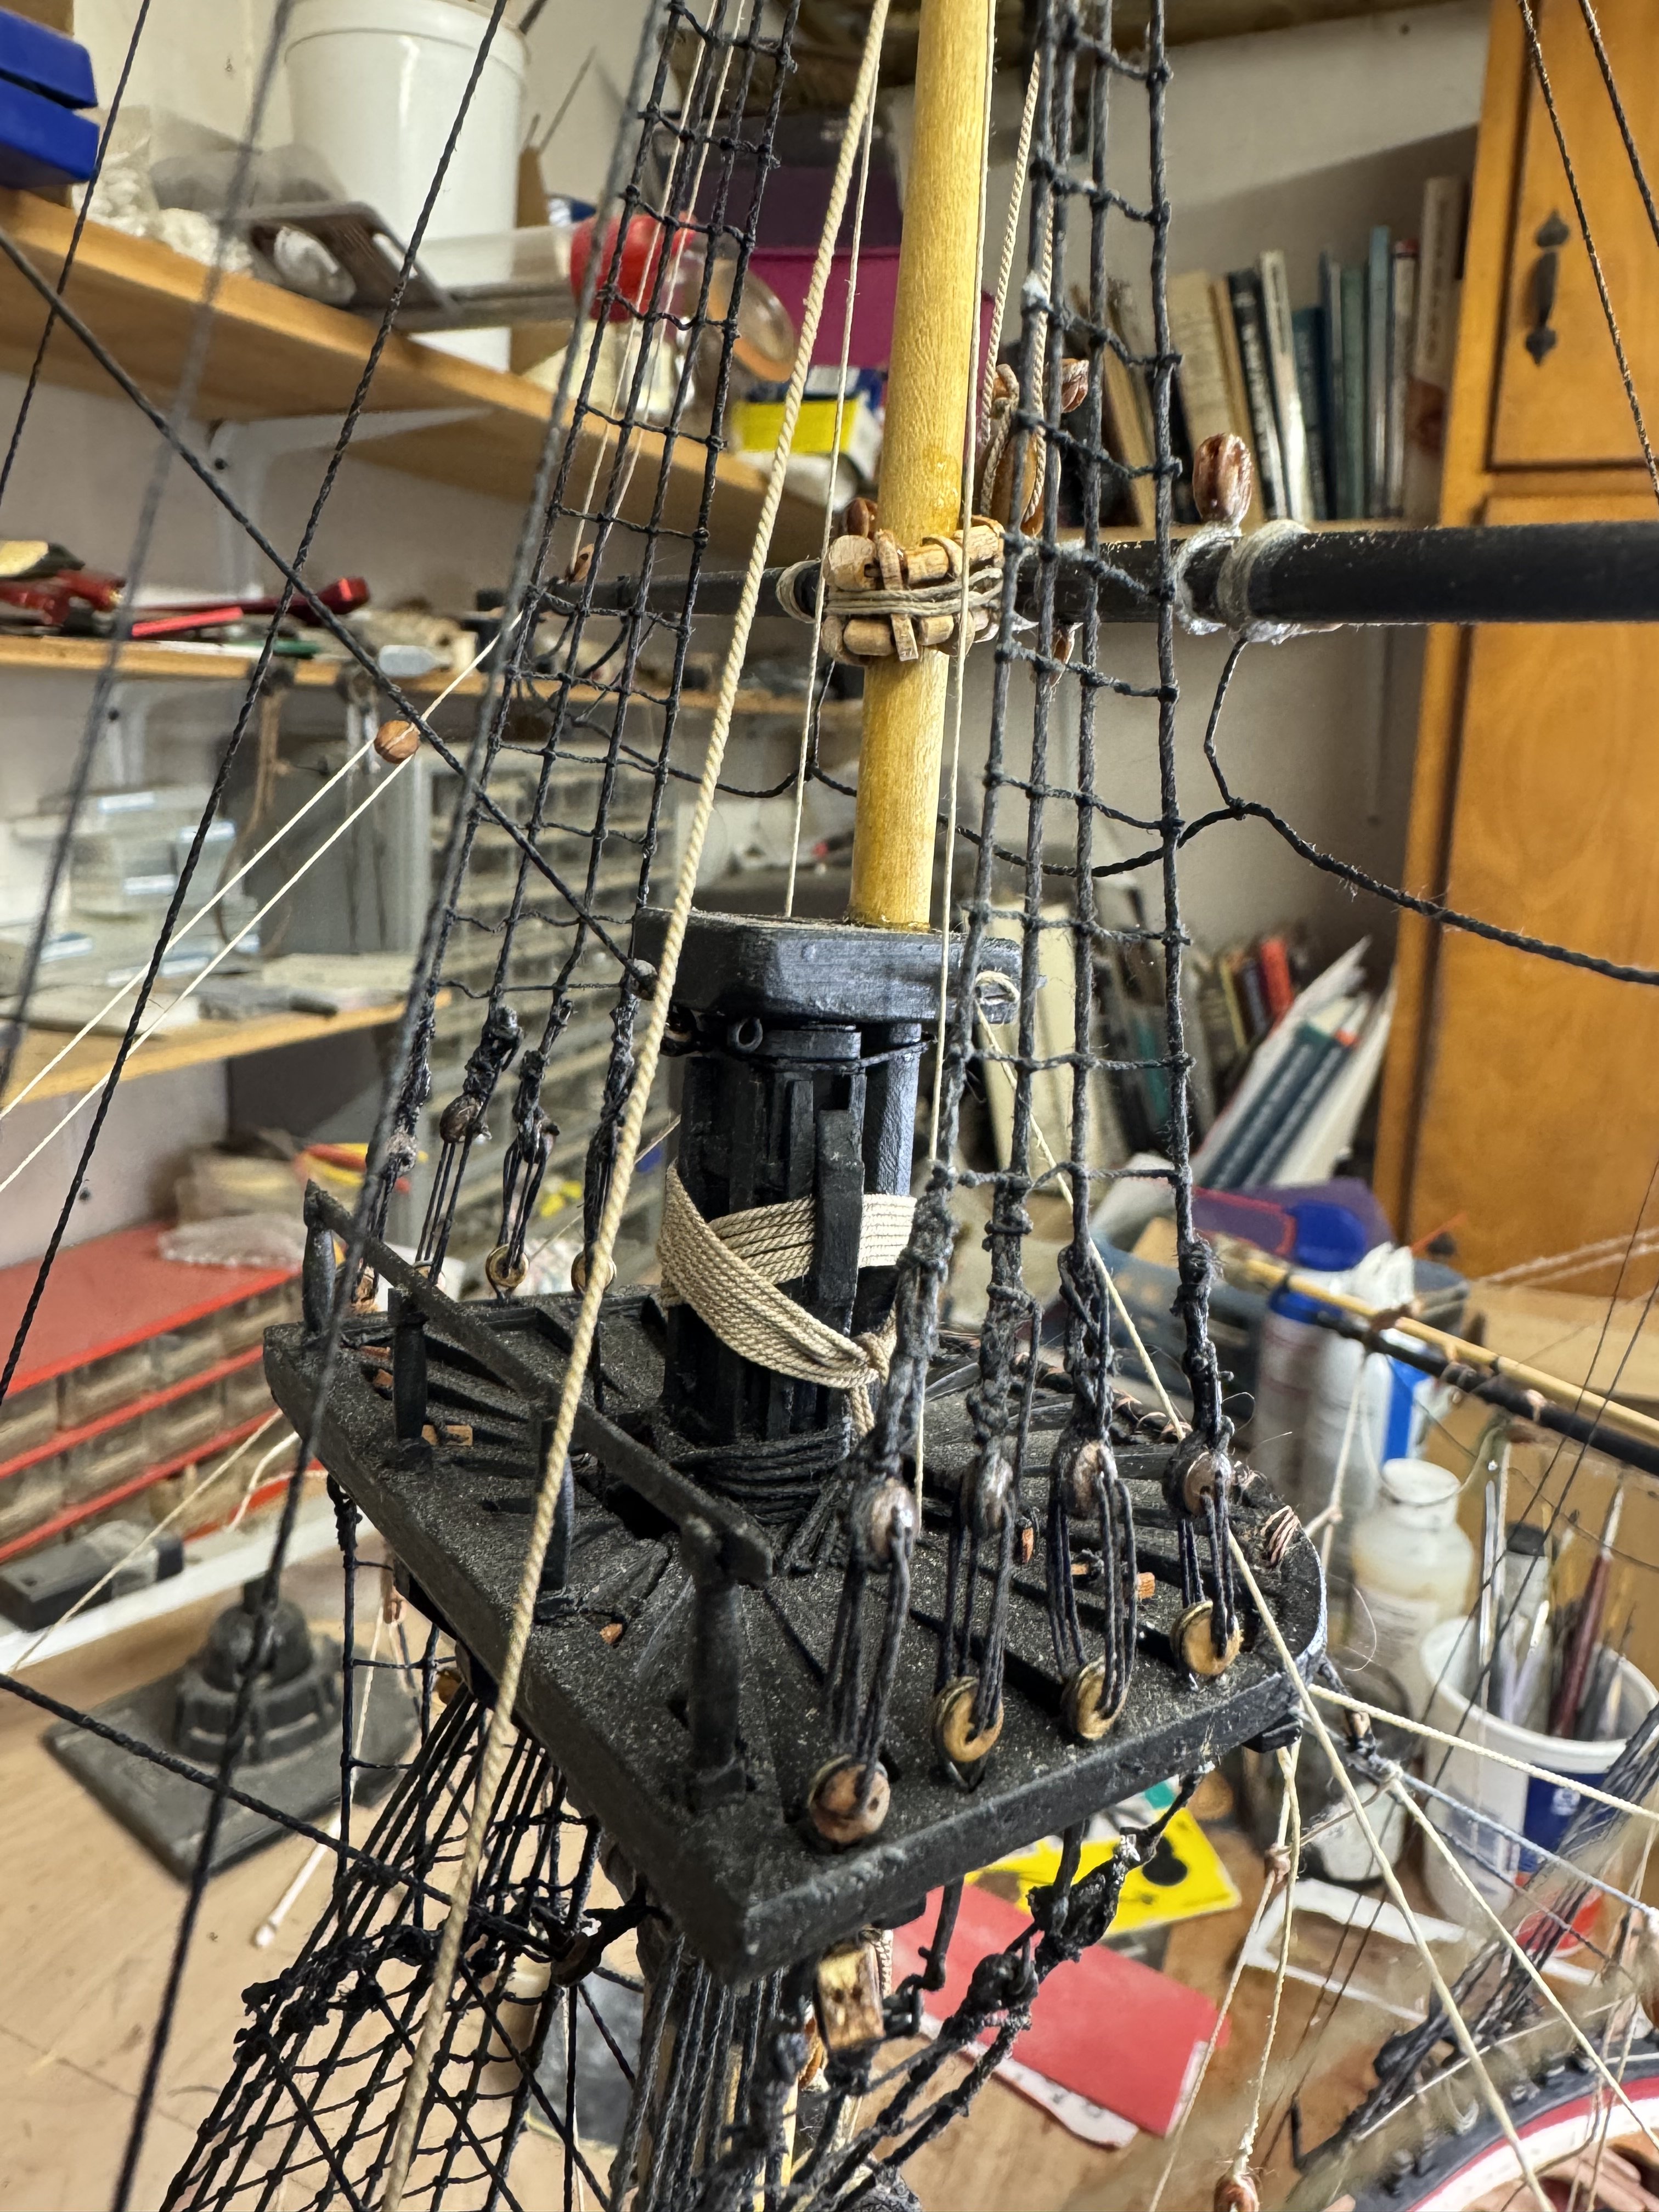
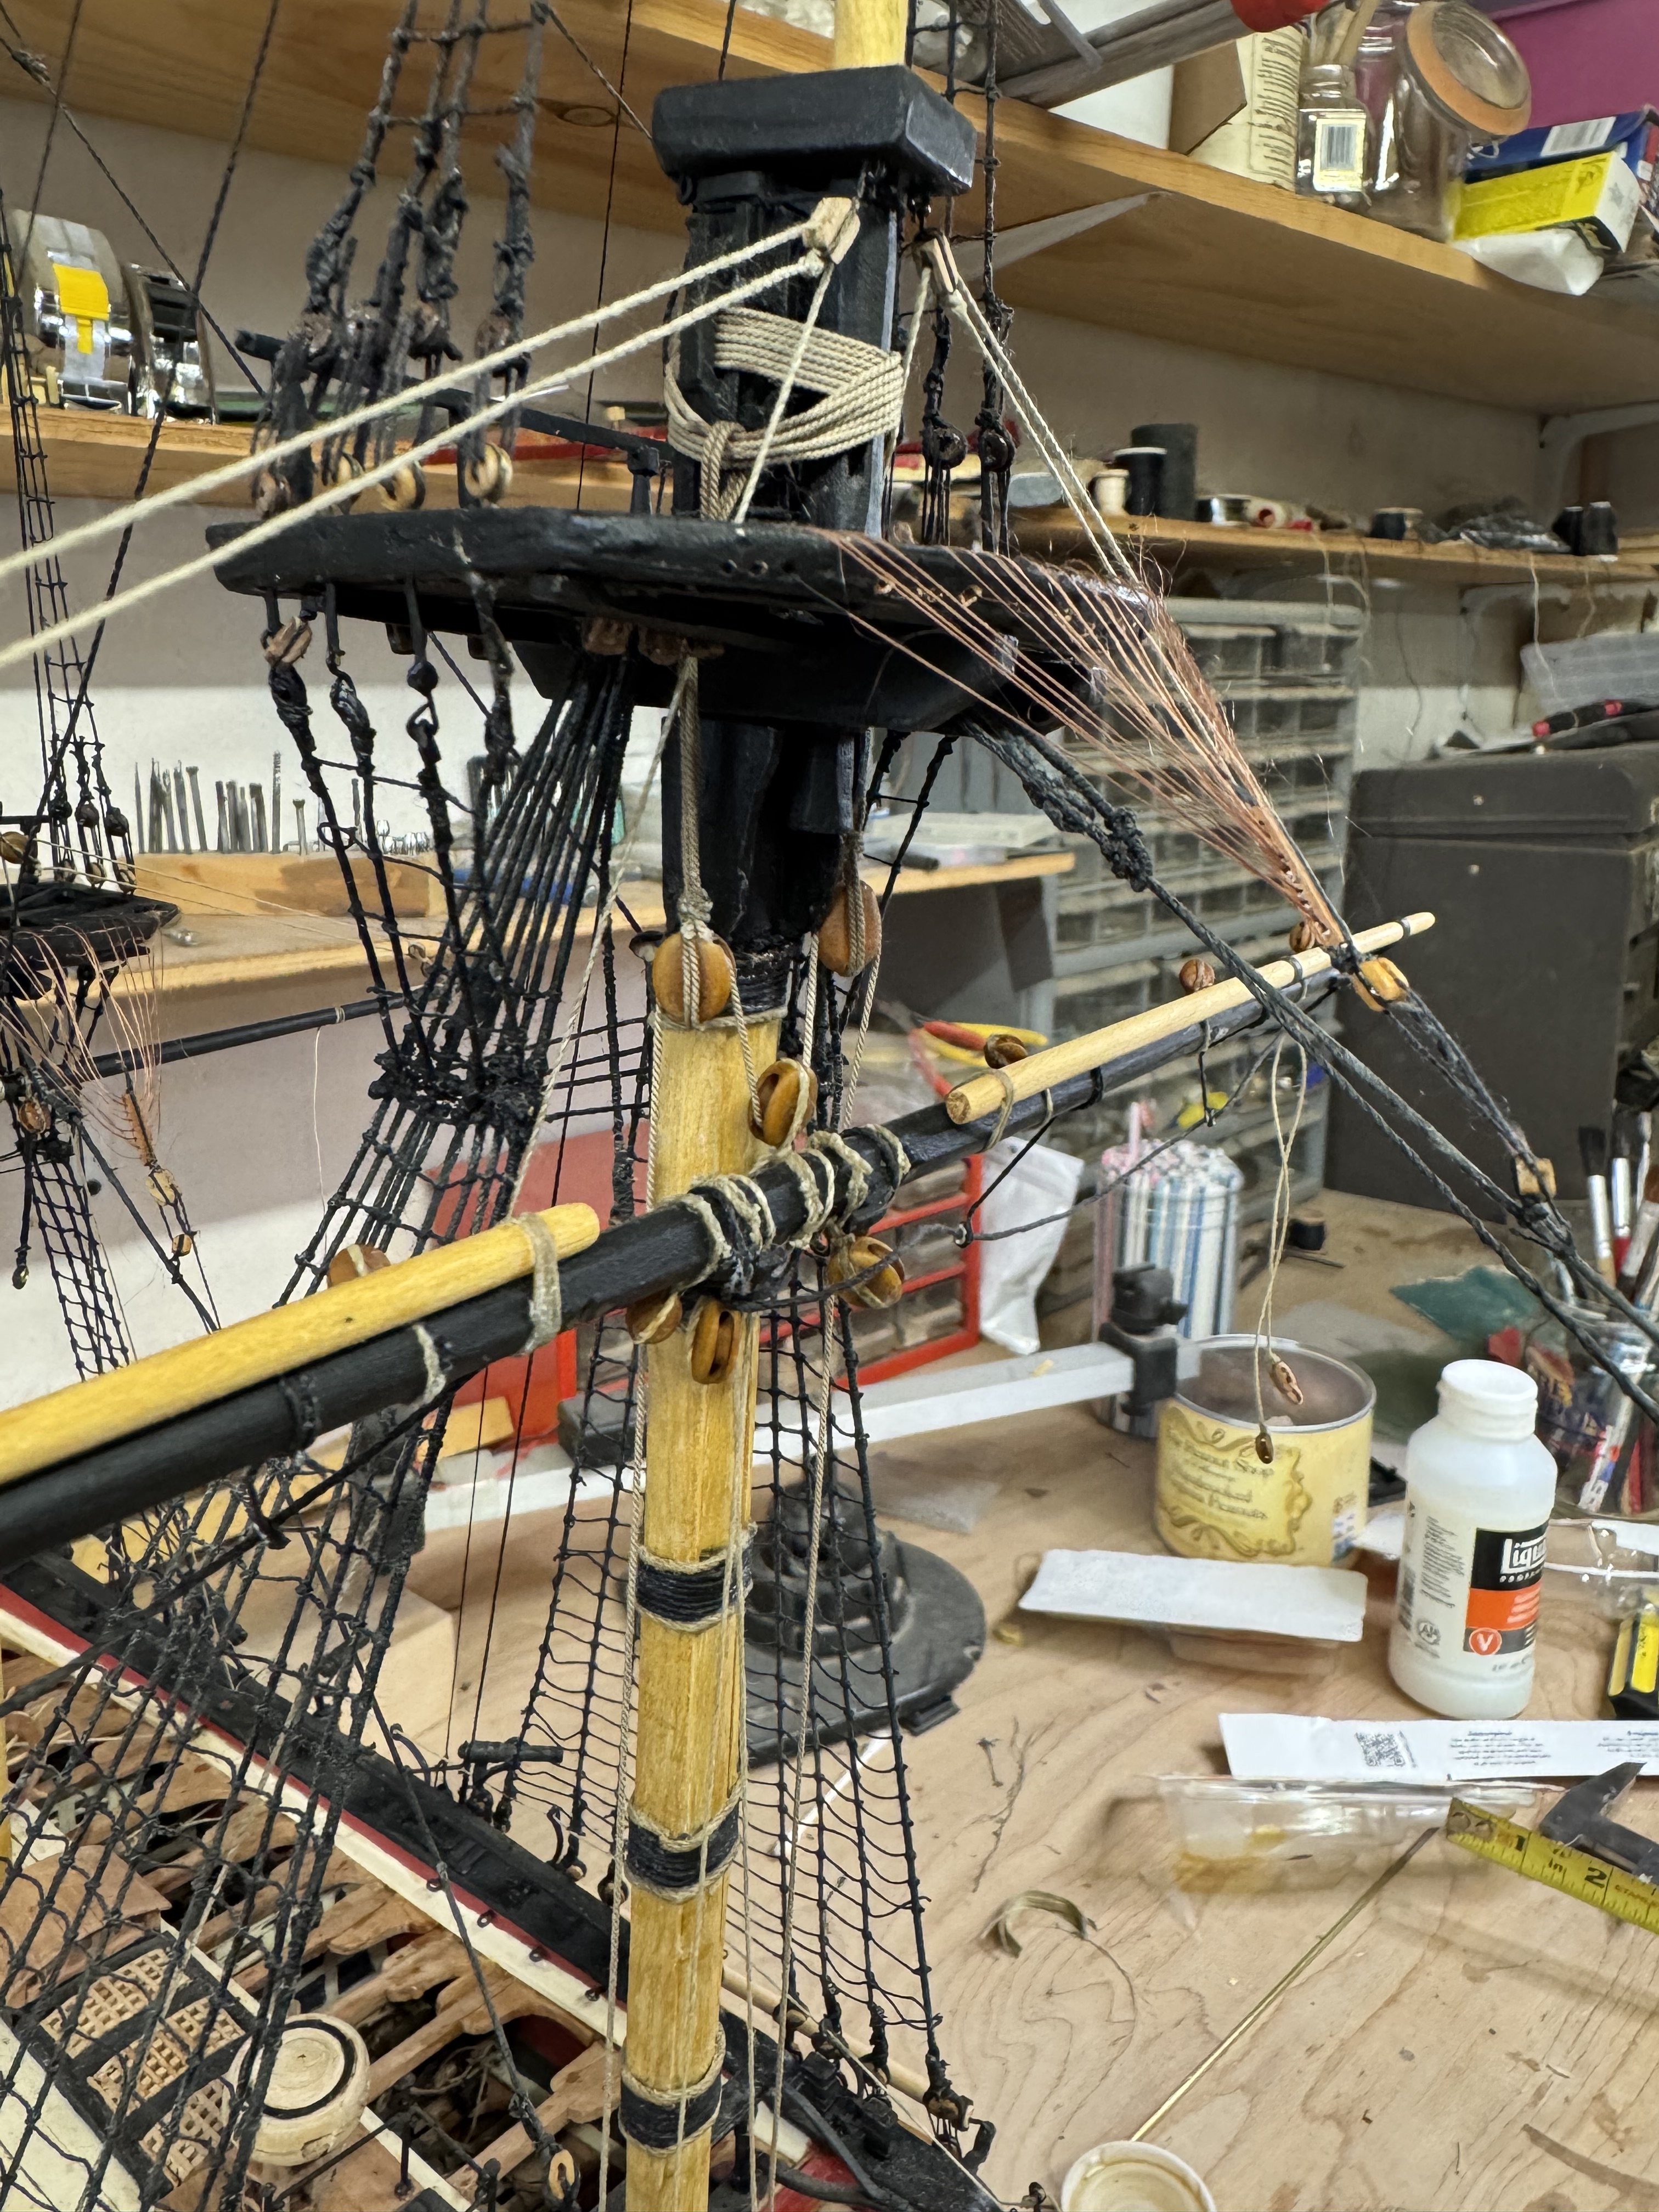
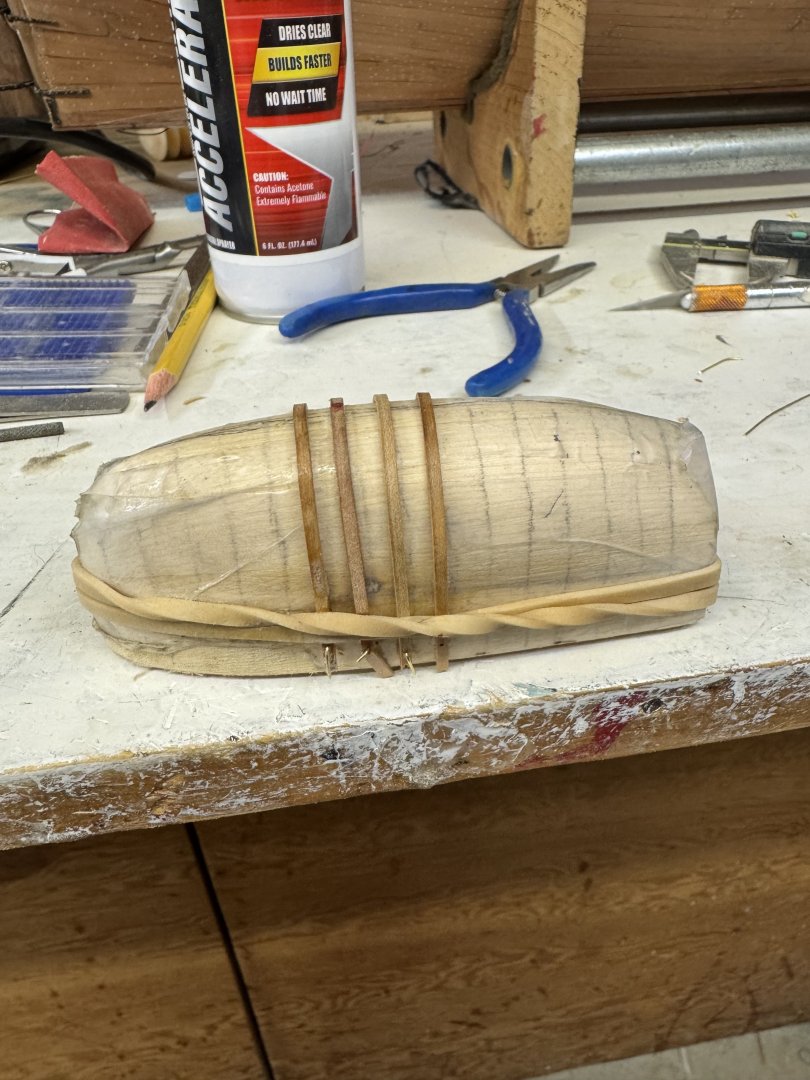
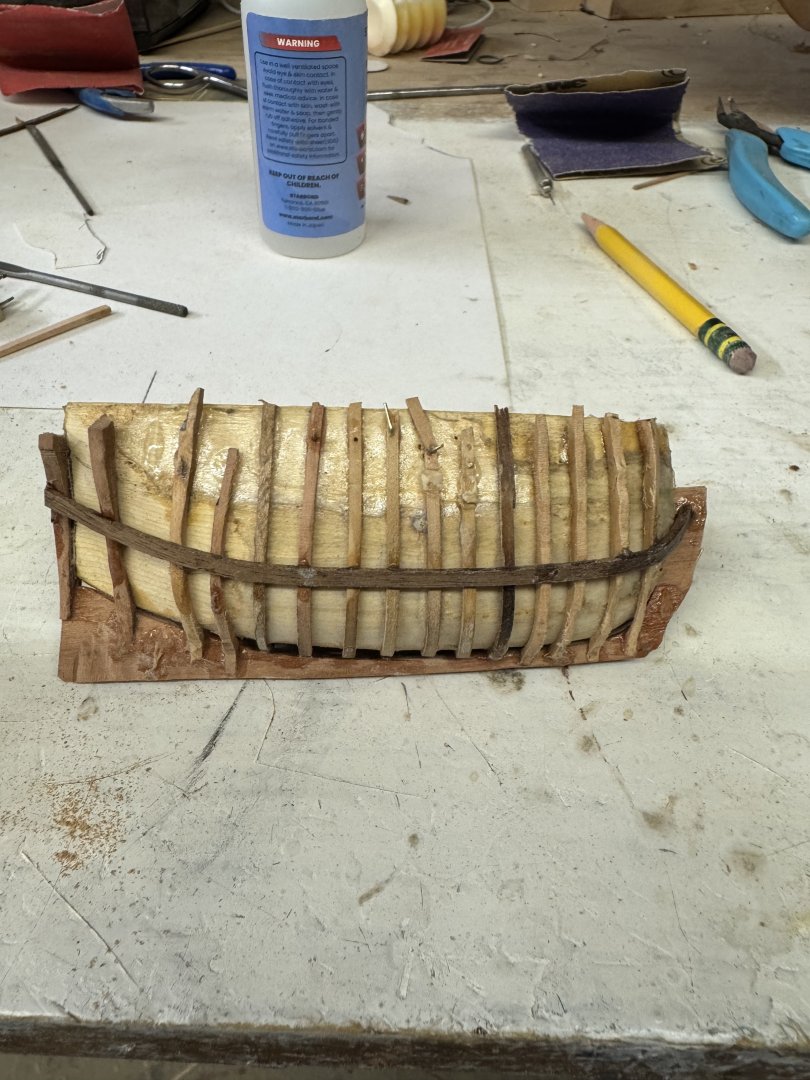
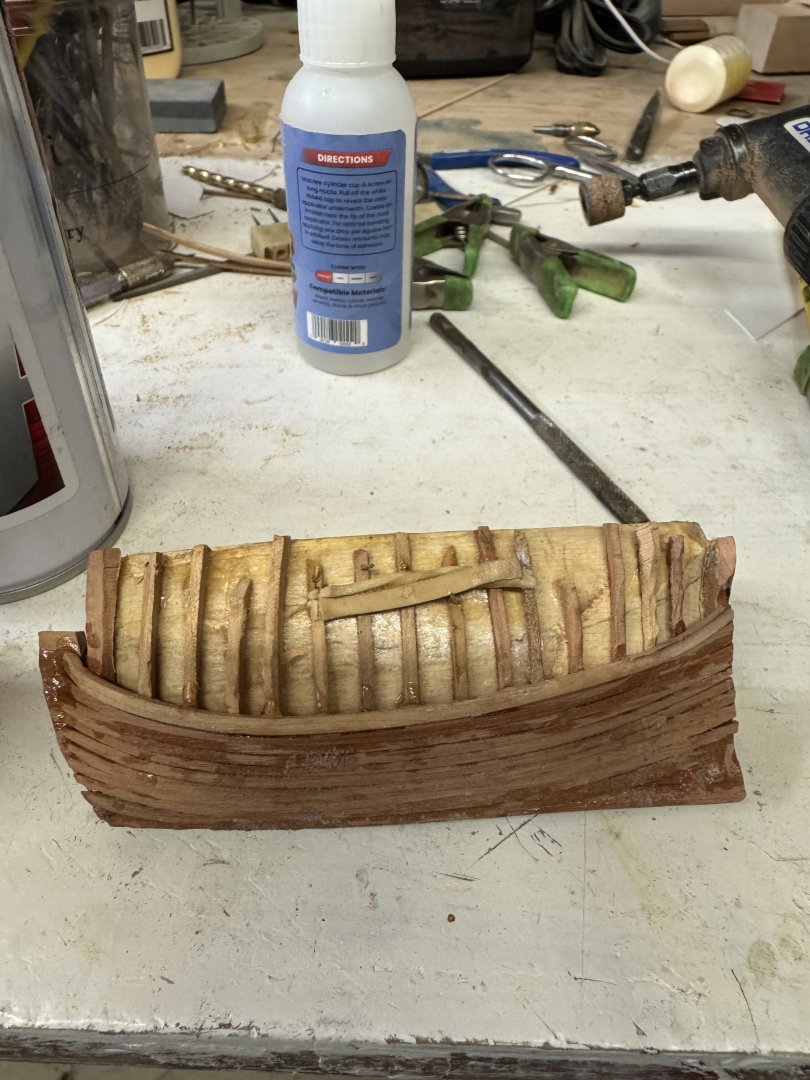
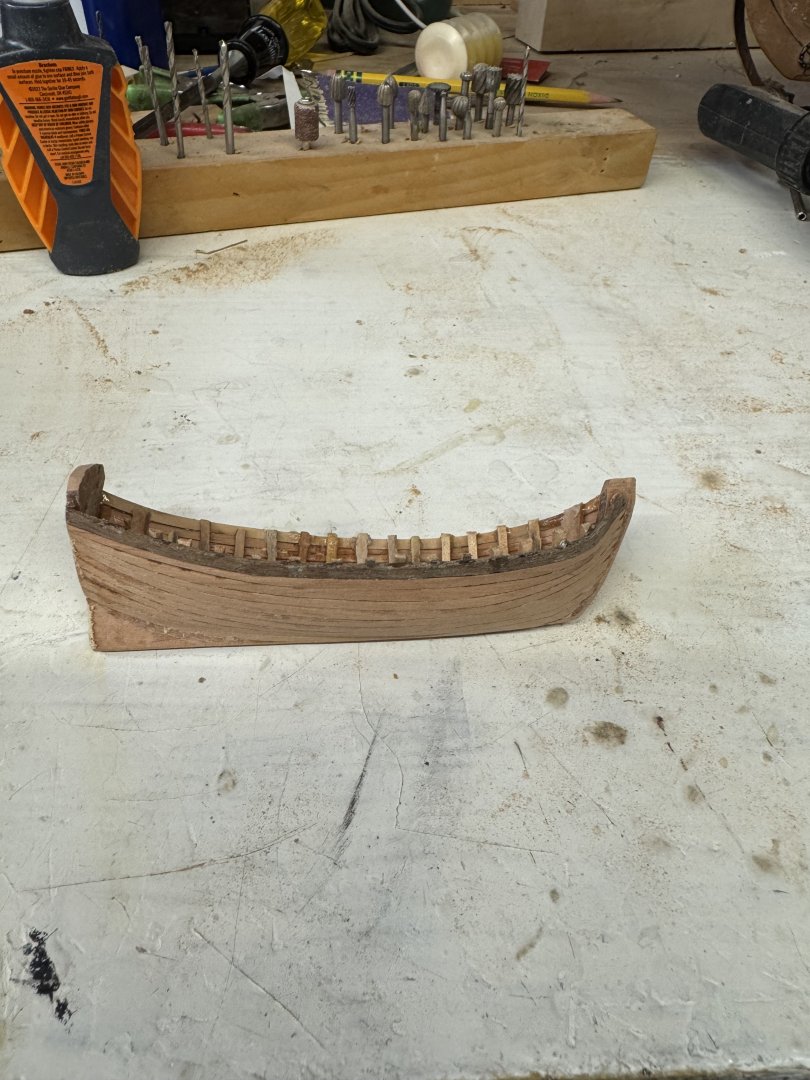
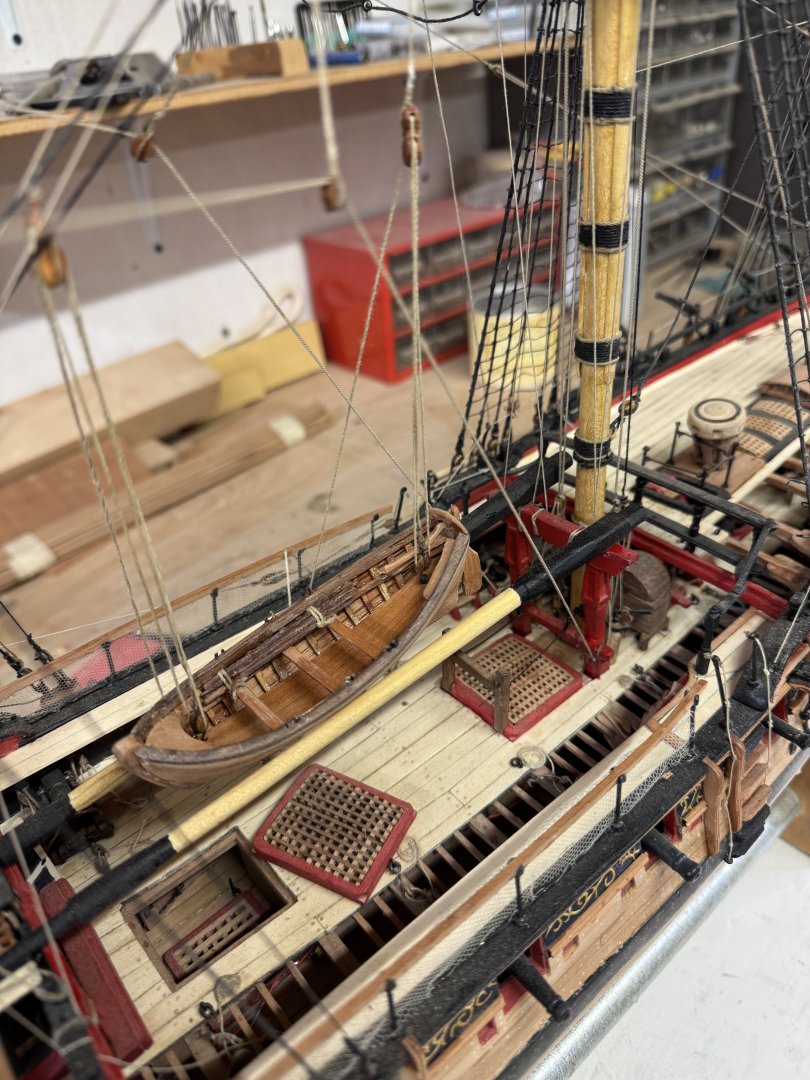
With the topgallant rigging complete, attention was directed to the ship’s boat. I had a plug left over from the same task on the Gros Vendre build, so that was shortened and the stern modified. Midship frames were dry steam bent and the rest sawn with the lot glued to the keel with.CA. I used Swiss Pear for the bulk of it, with the shear and cap in Walnut. It was then glued amidships to the spare top masts and rigged to the mainstay pendant tackles. That pretty much concludes the build except for repairs, dusting and paint touch up here and there. Final photos to follow.

- 257 replies
-
- 7
-
-
- pegasus
- Swan-class
- (and 1 more)
-
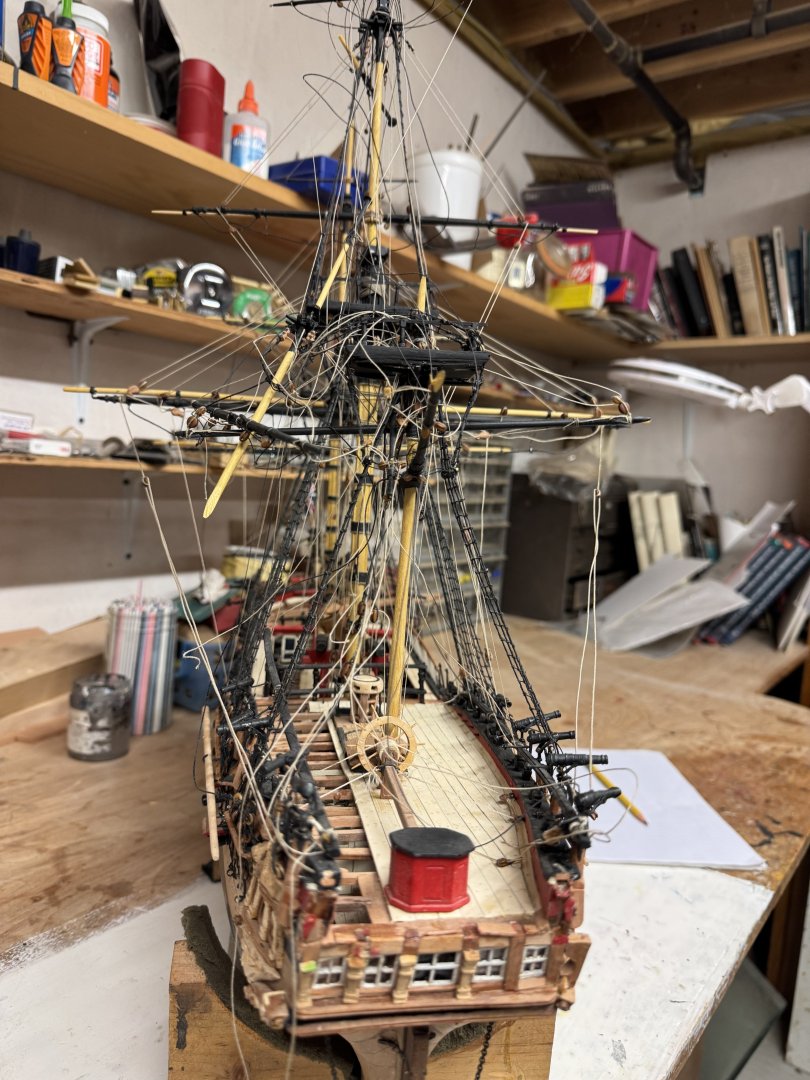
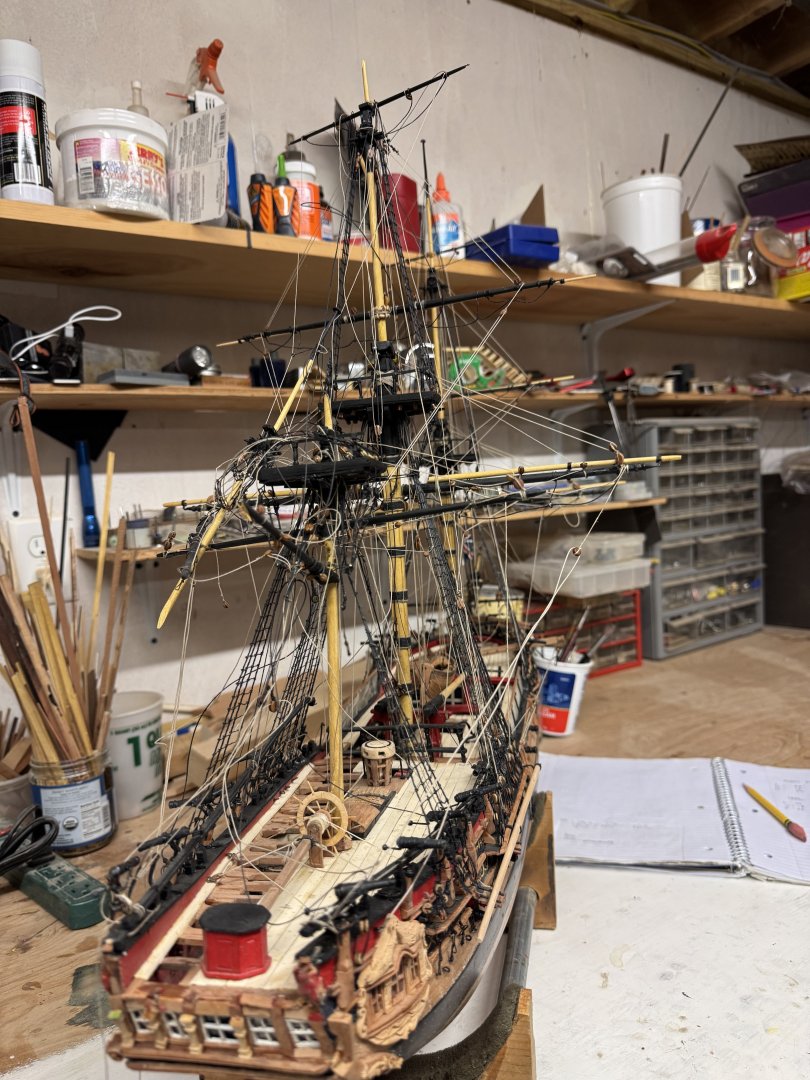
Now the t’gallants!
-
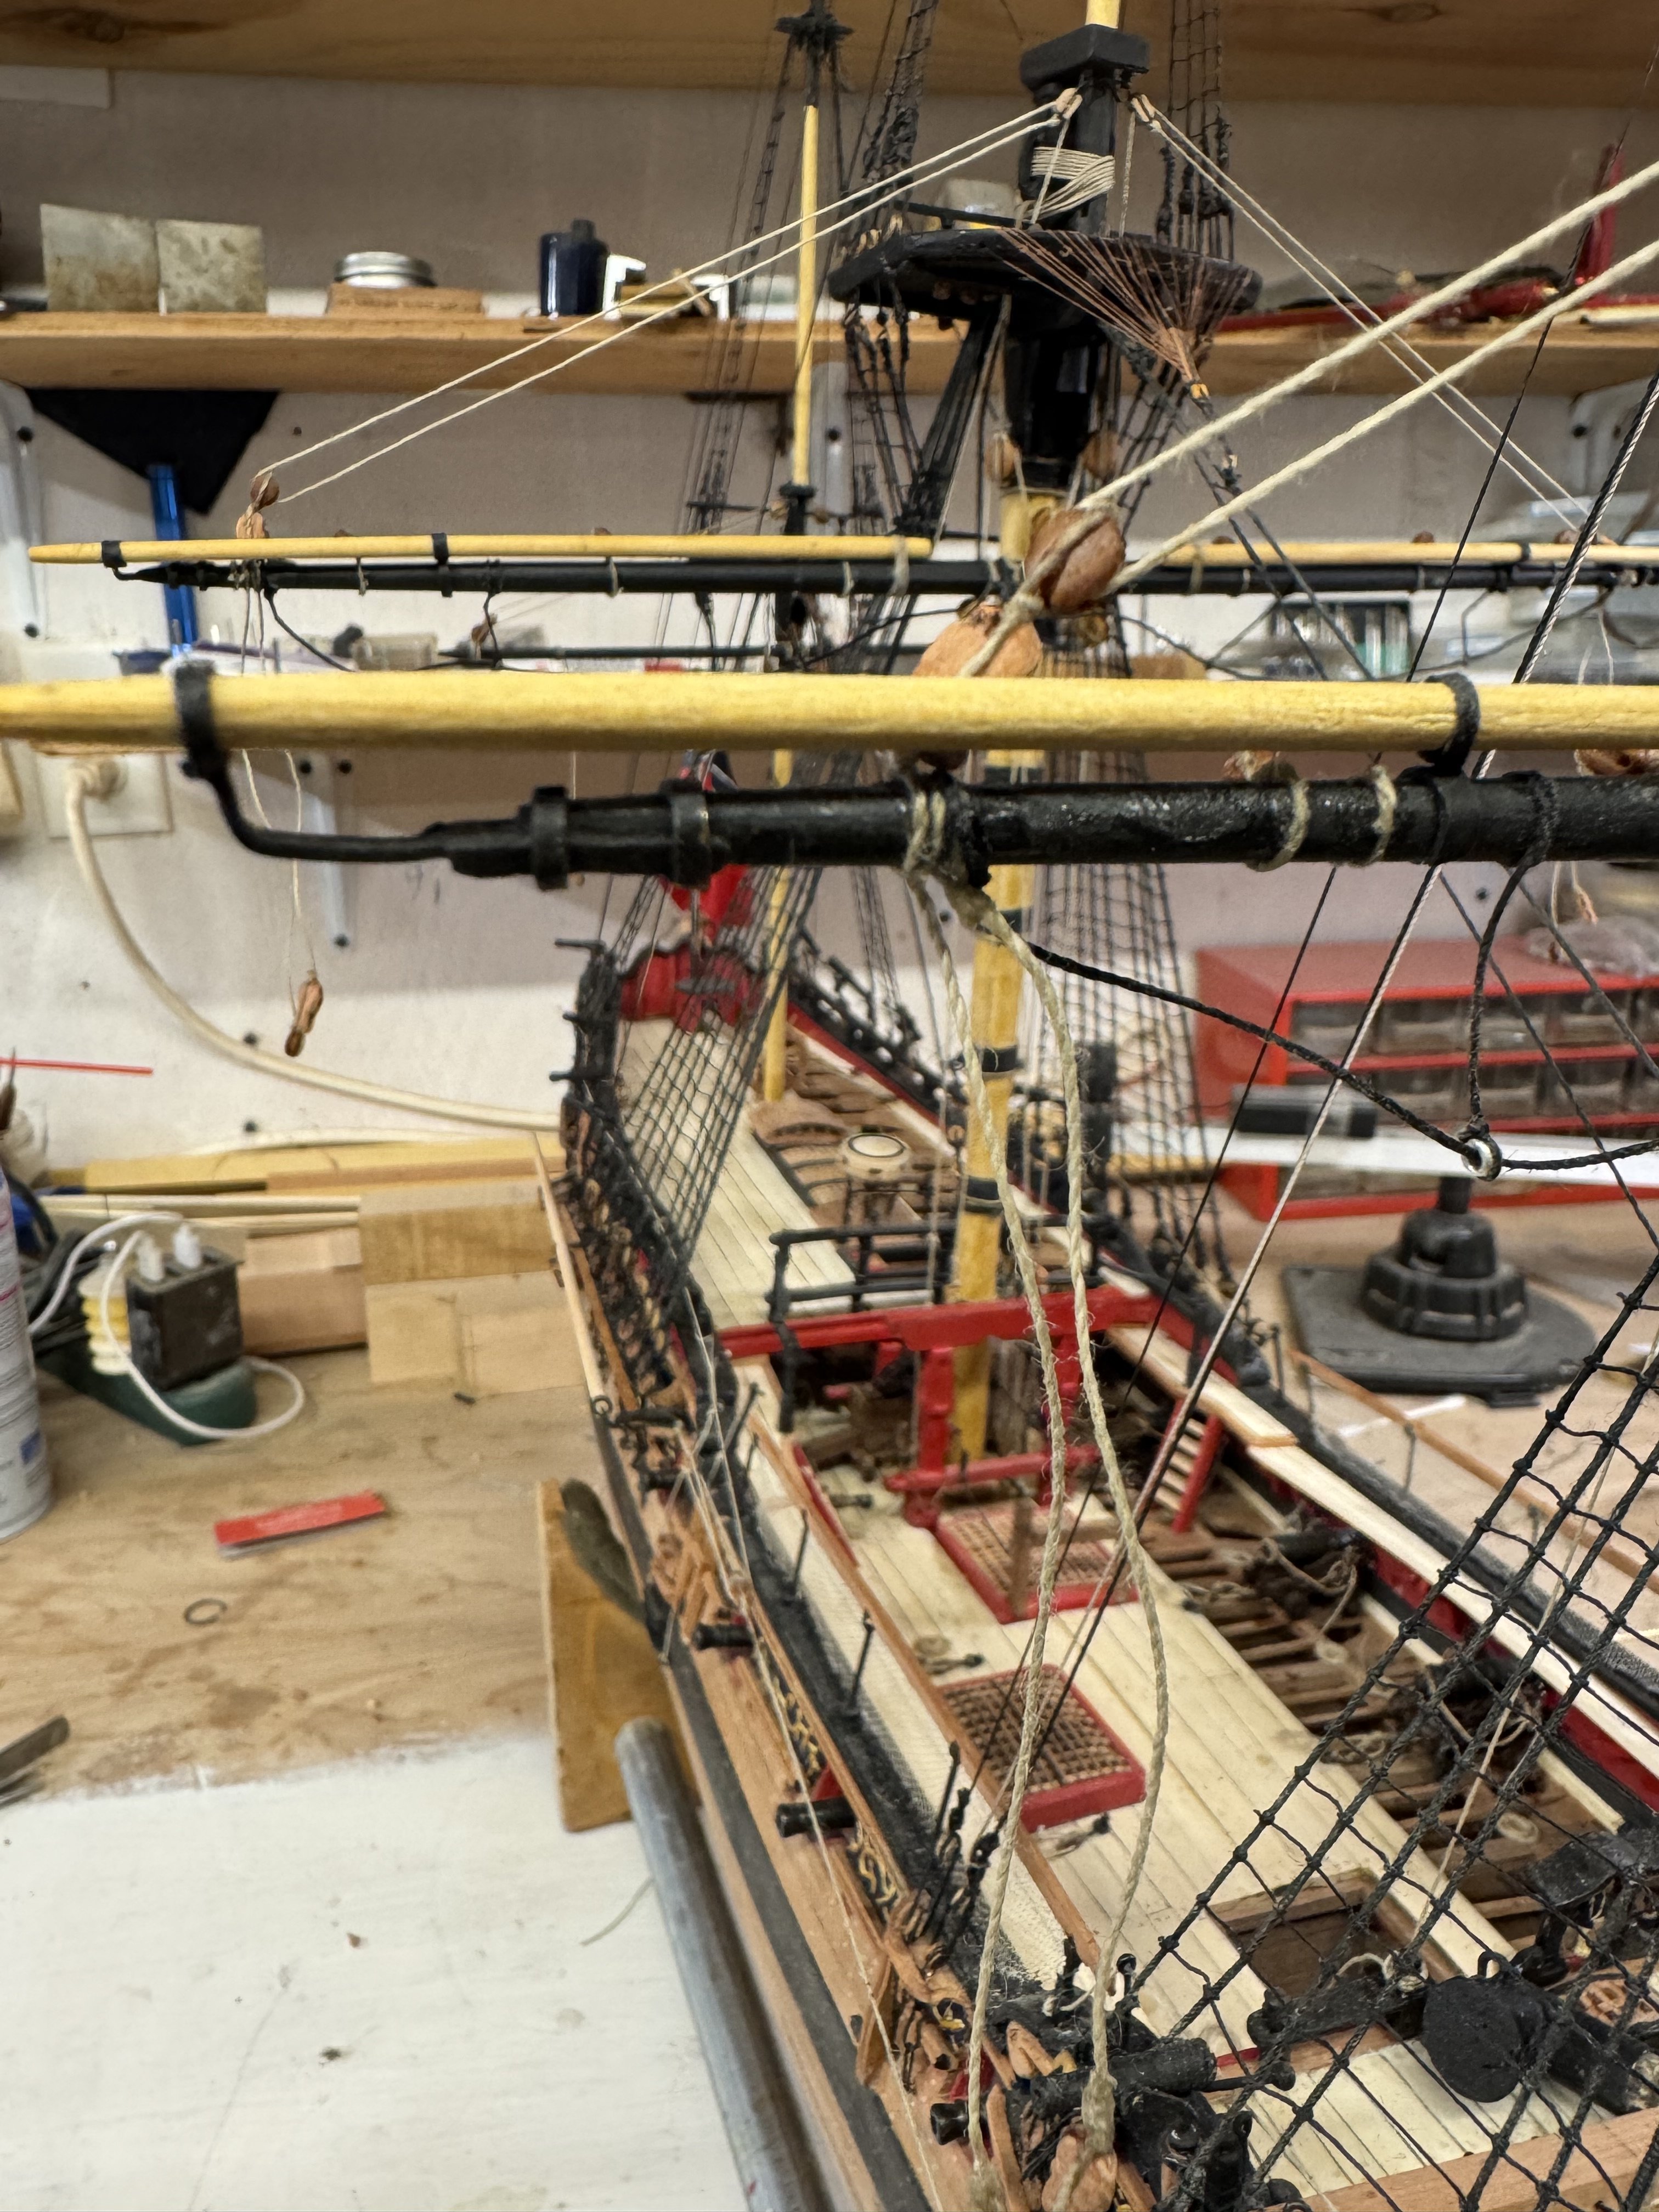
Having completed the lower yards and mizzen gaff rigging, it’s on to the topsail yards. Nothing particularly complicated about this, but to get the details right, a lot of time and fuss. It’s a pleasure, tho, to see it come alive.


- 257 replies
-
- 9
-
-

-
- pegasus
- Swan-class
- (and 1 more)
-
I like your practice of pinning the gun carriages to the deck. I’ve just used glue under the wheels, but no matter what type of glue I use, they seems to come lose all too often, which creates a super headache particularly under a planked deck! I also pin the trunion caps, with glued pins, but have had the same issue. Henry