HOLIDAY DONATION DRIVE - SUPPORT MSW - DO YOUR PART TO KEEP THIS GREAT FORUM GOING! (Only 24 donations so far out of 49,000 members - C'mon guys!)
×


aydingocer
-
Posts
916 -
Joined
-
Last visited
Content Type
Profiles
Forums
Gallery
Events
Everything posted by aydingocer
-
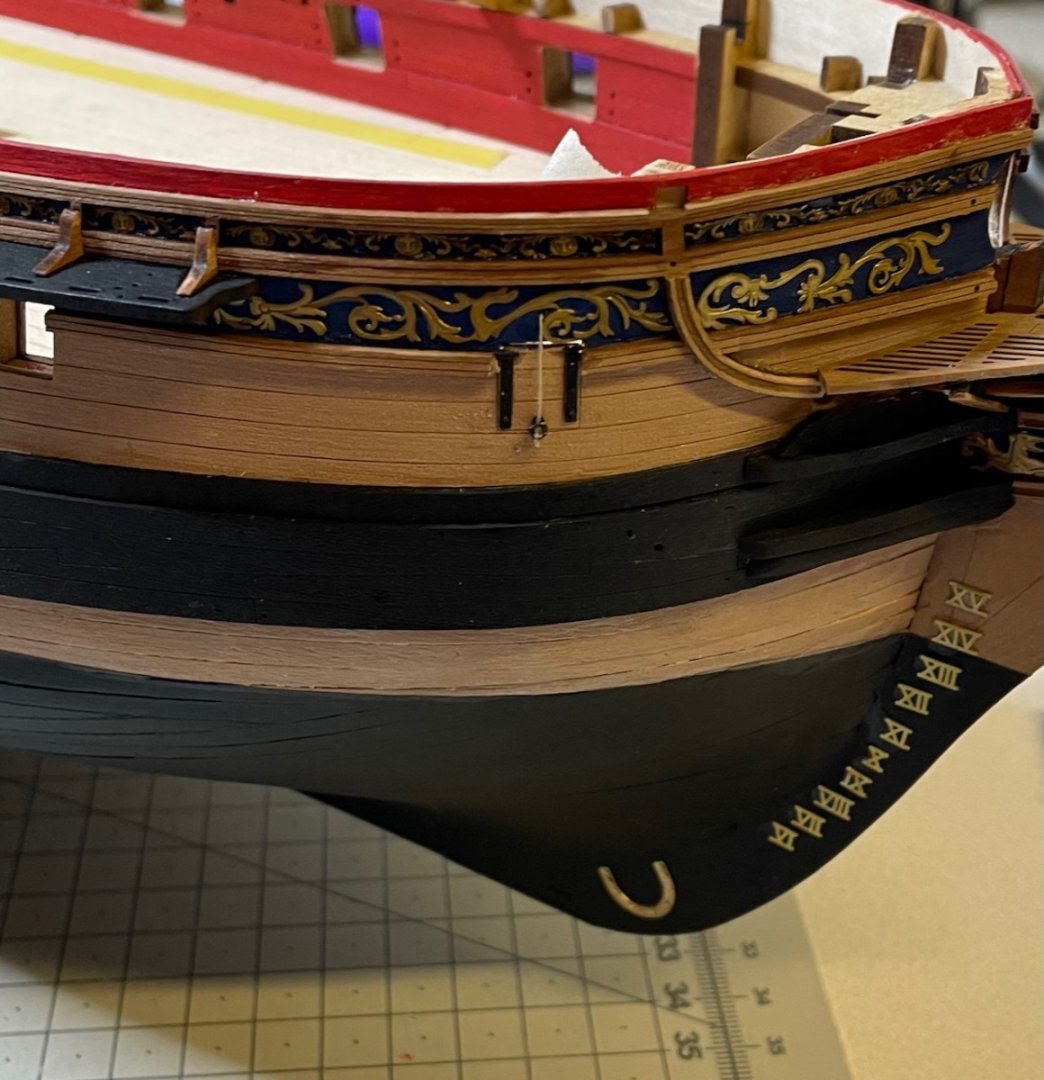
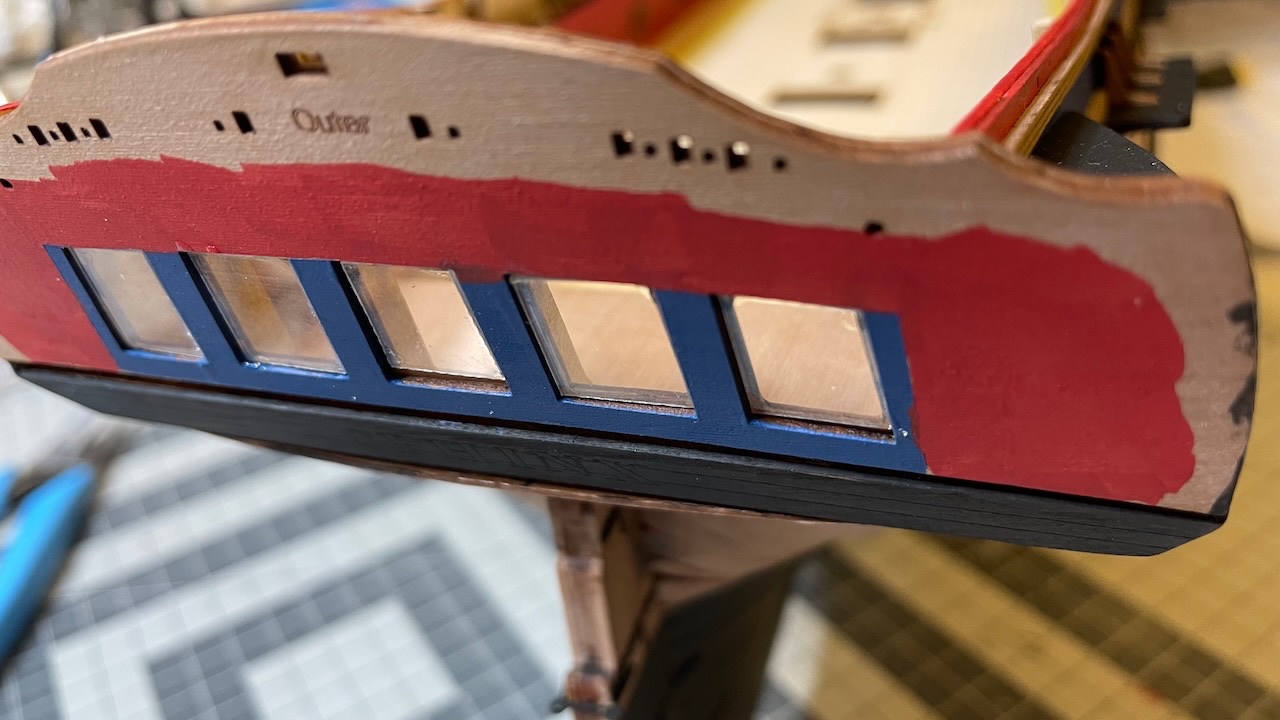
 Photo 469: I wasn't able to avoid these glue stains on the stern. I tried sanding them away slightly but didn't help much, as looks like the glue stain penetrated deeper than just on the surface and I don't want to ruin the engravings. I am considering to paint that rectangular area to black, so that it would look as an extension of the black wales, this way at least covering the disturbing glue stains. @James H or others, does it sound like a reasonable idea or you have any suggestion?
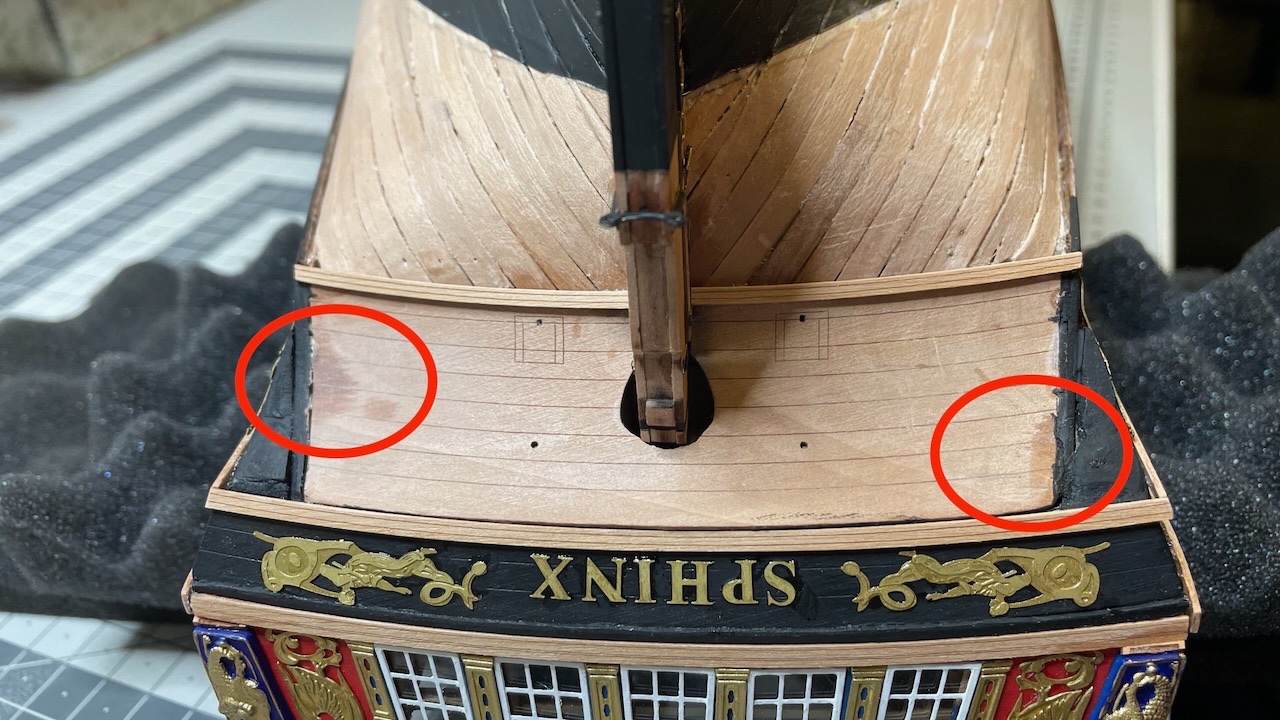
- 426 replies
-
- 4
-

-
- Vanguard Models
- Sphinx
- (and 1 more)
-
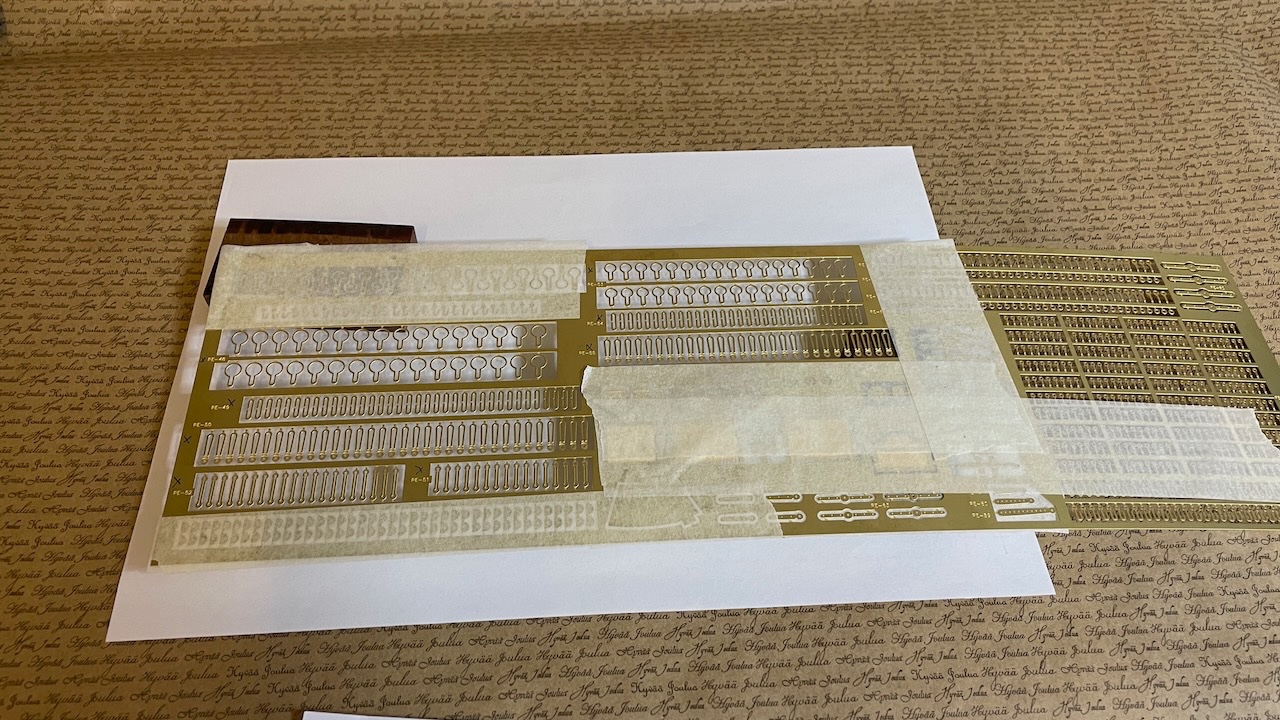
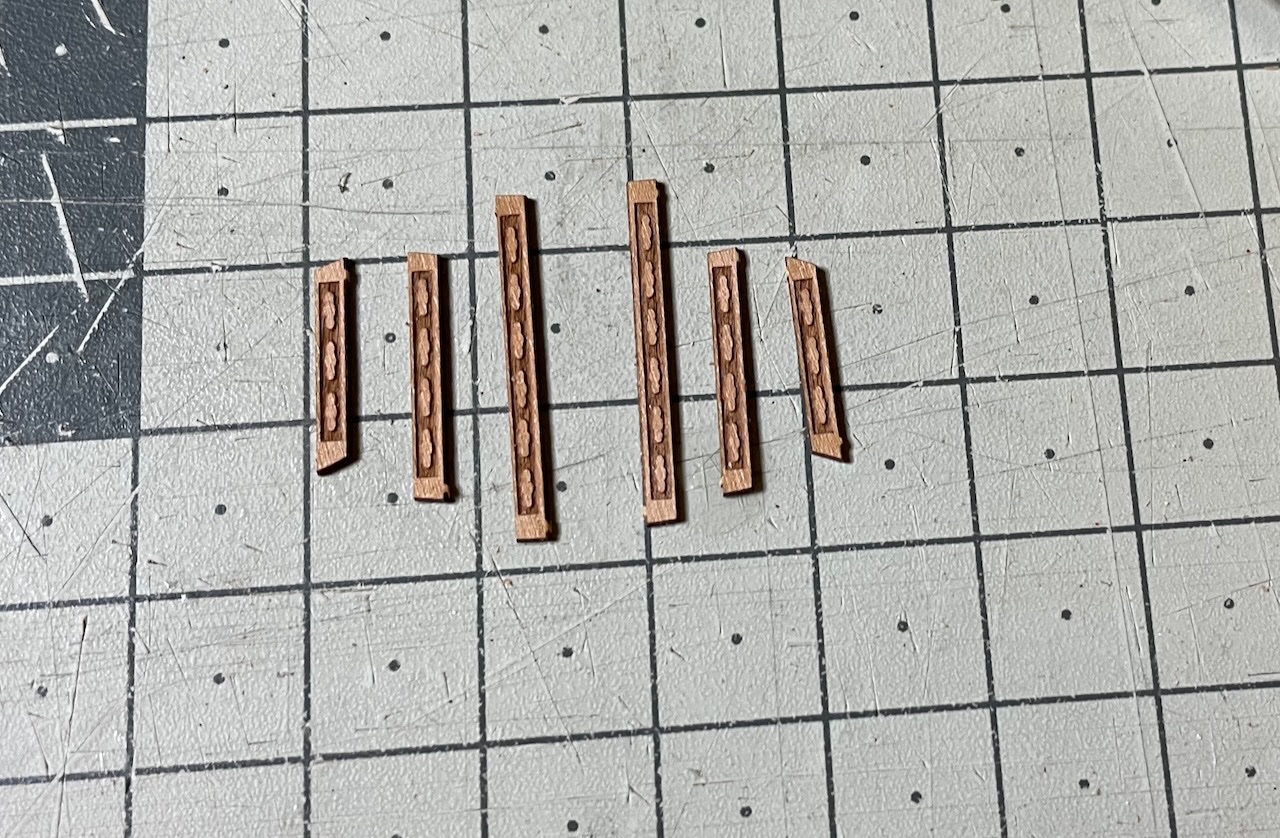
Photos 467-468: In the mean time painting the necessary parts for my next task: deadeye installation
- 426 replies
-
- 4
-
-
- Vanguard Models
- Sphinx
- (and 1 more)
-
Build Day 45: 1 hour / Total 97 hours Football World Cup is going on with less busy schedule, allowing me to resume my Sphinx build slowly. Photo 466: First Gun Port Hinges. It has a tiny rigging with 0.1mm natural thread.
- 426 replies
-
- 4
-
-
- Vanguard Models
- Sphinx
- (and 1 more)
-
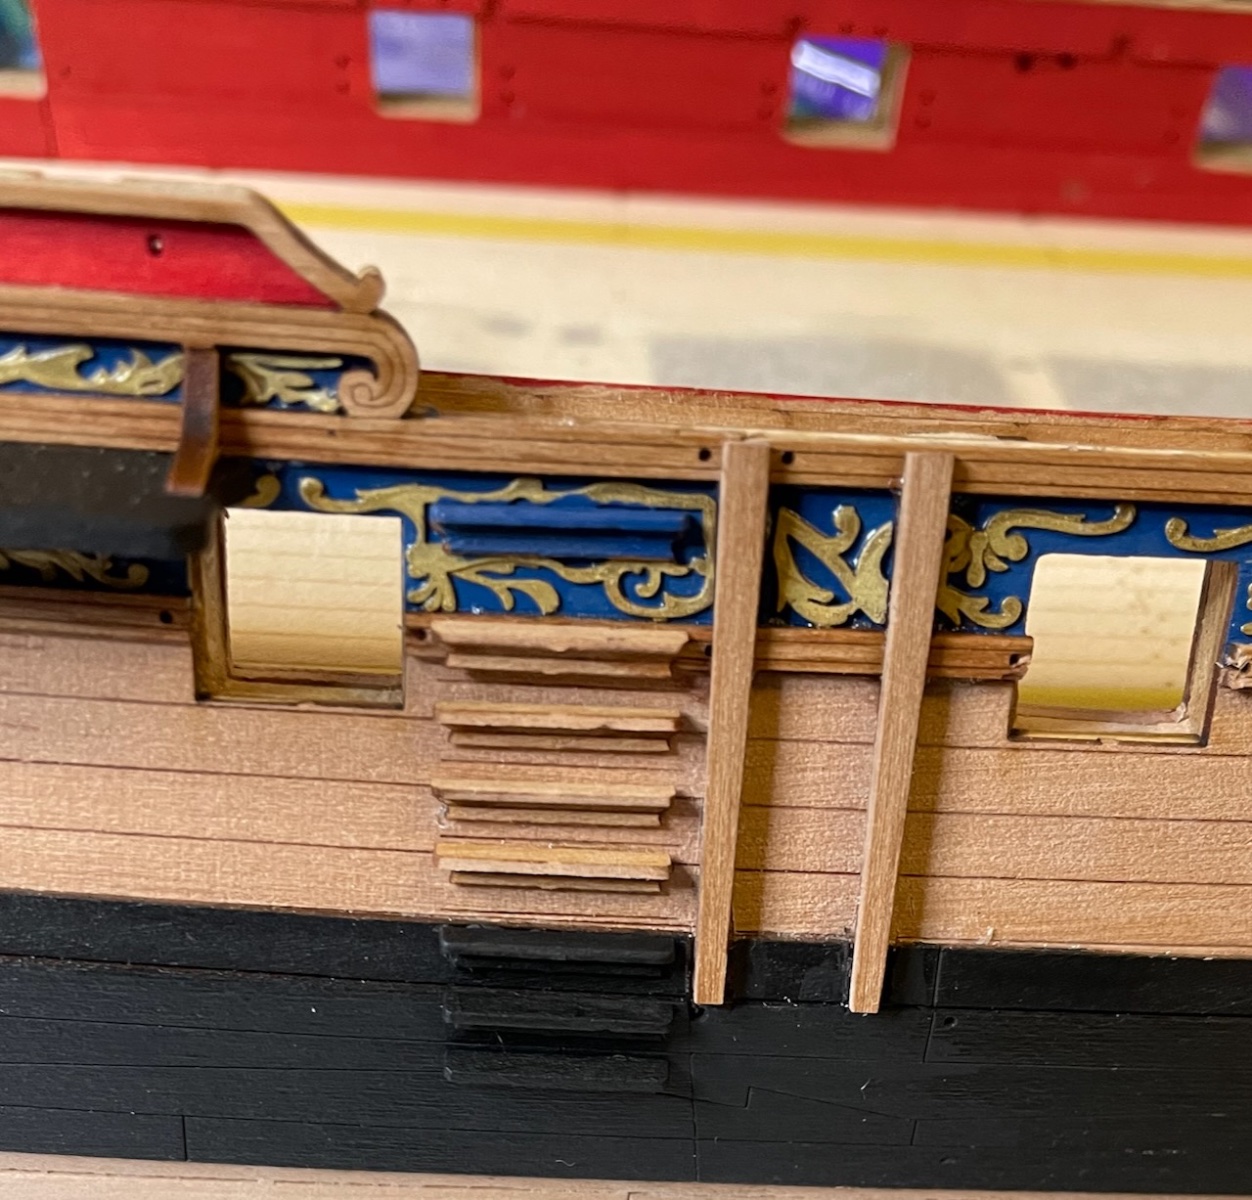
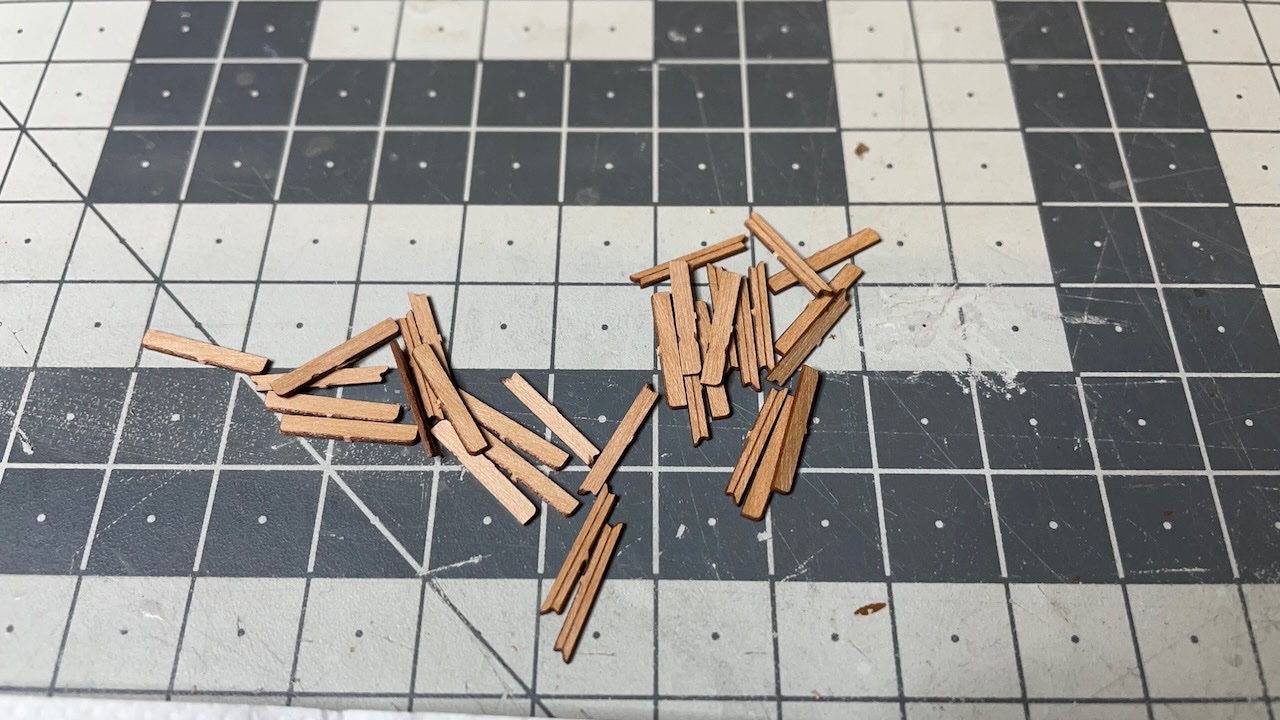
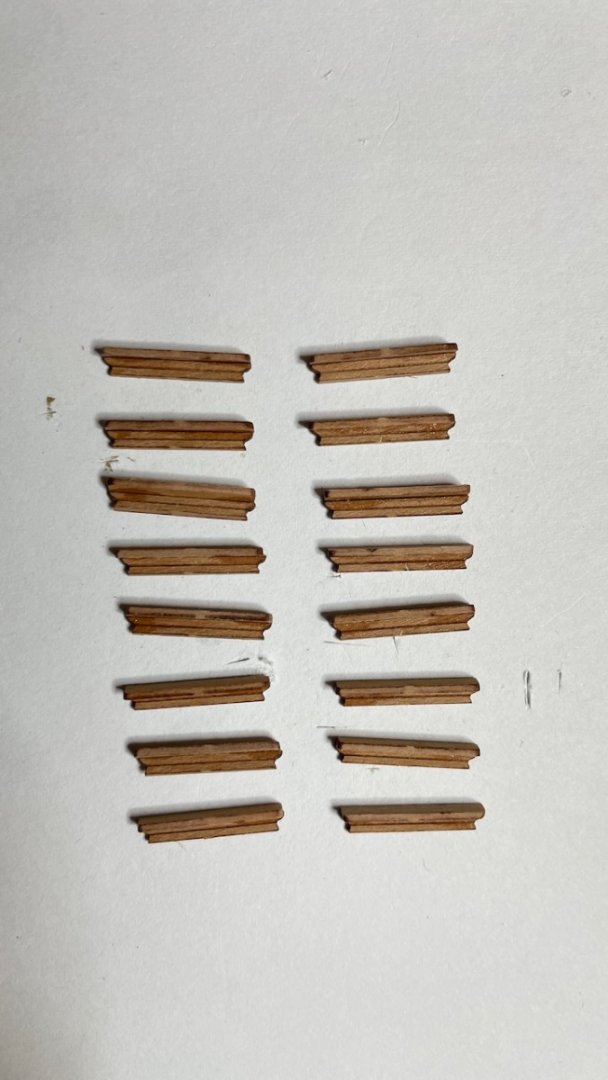
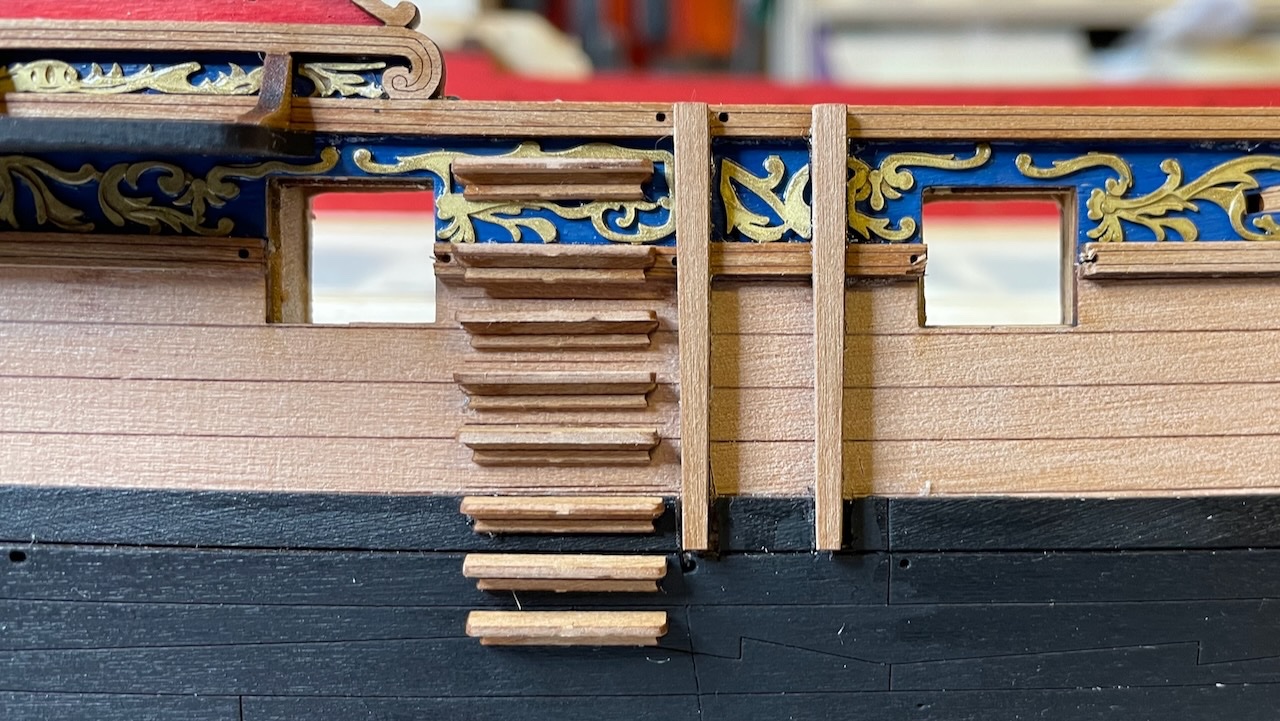
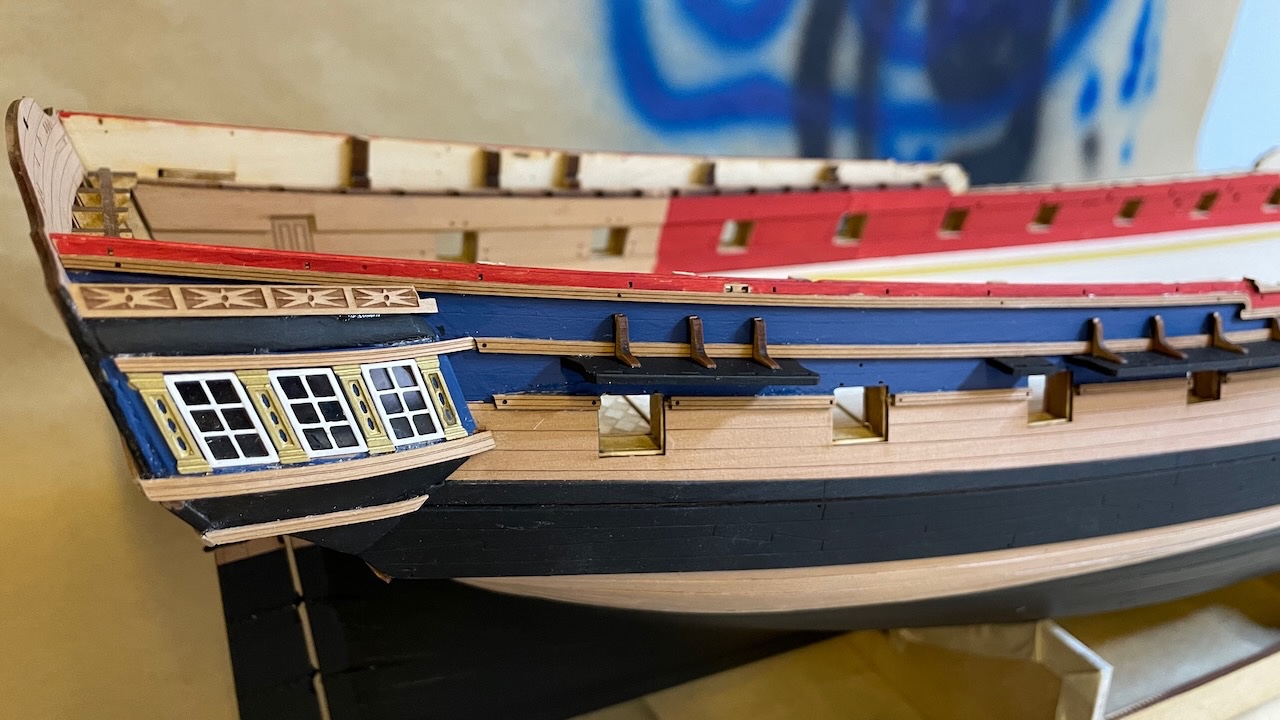
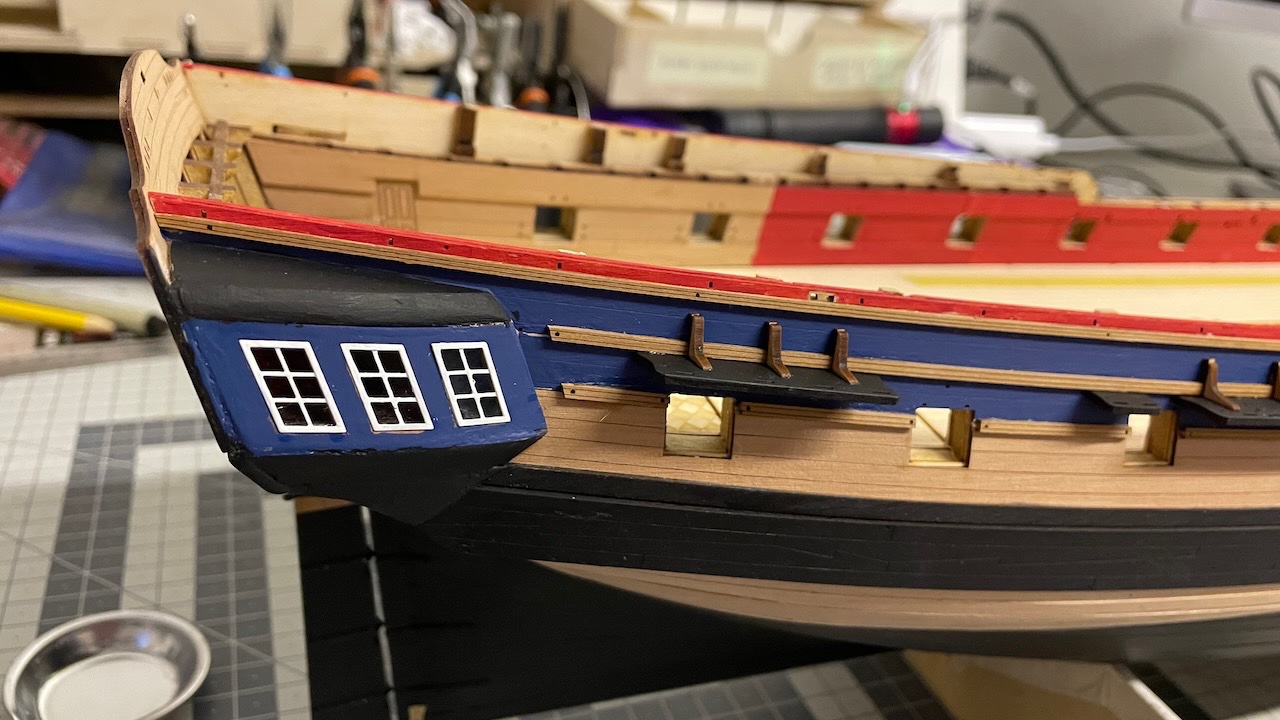
Photos 452-455: Hull side steps prepared, glued and painted. It is essential to refer to the plan sheet for accurate and correct positioning of these.

- 426 replies
-
- 7
-
-
- Vanguard Models
- Sphinx
- (and 1 more)
-
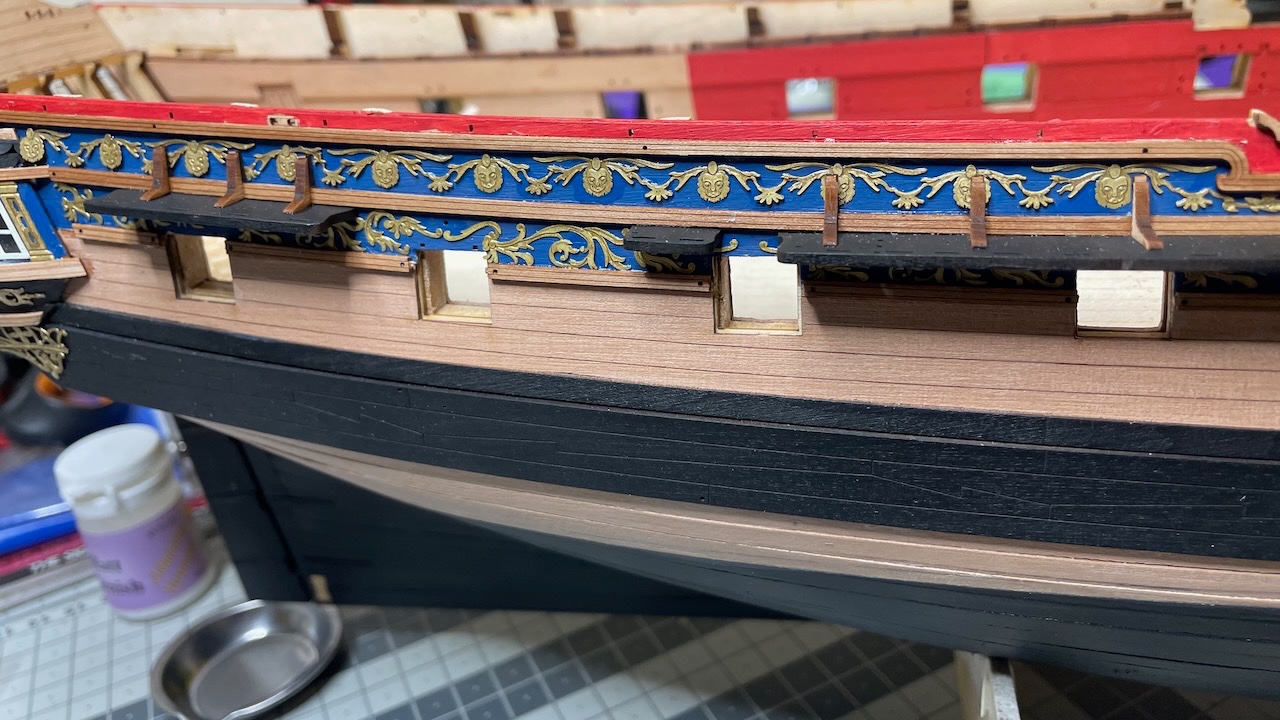
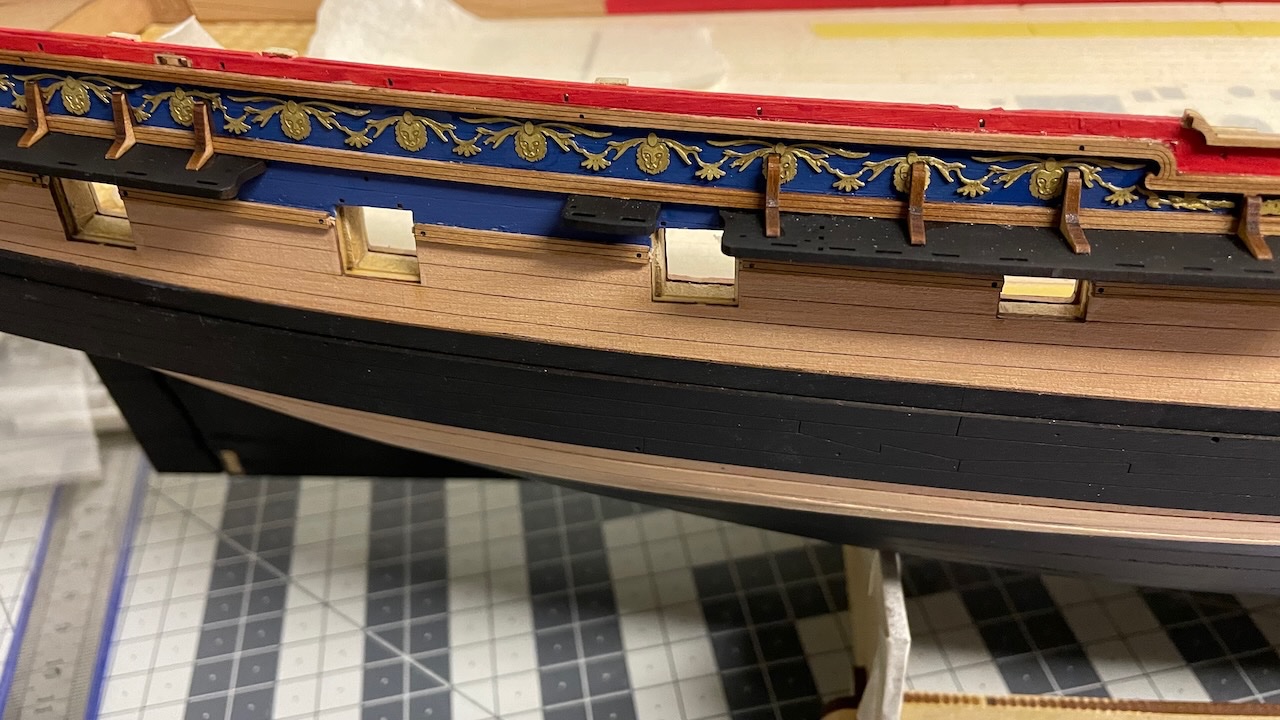
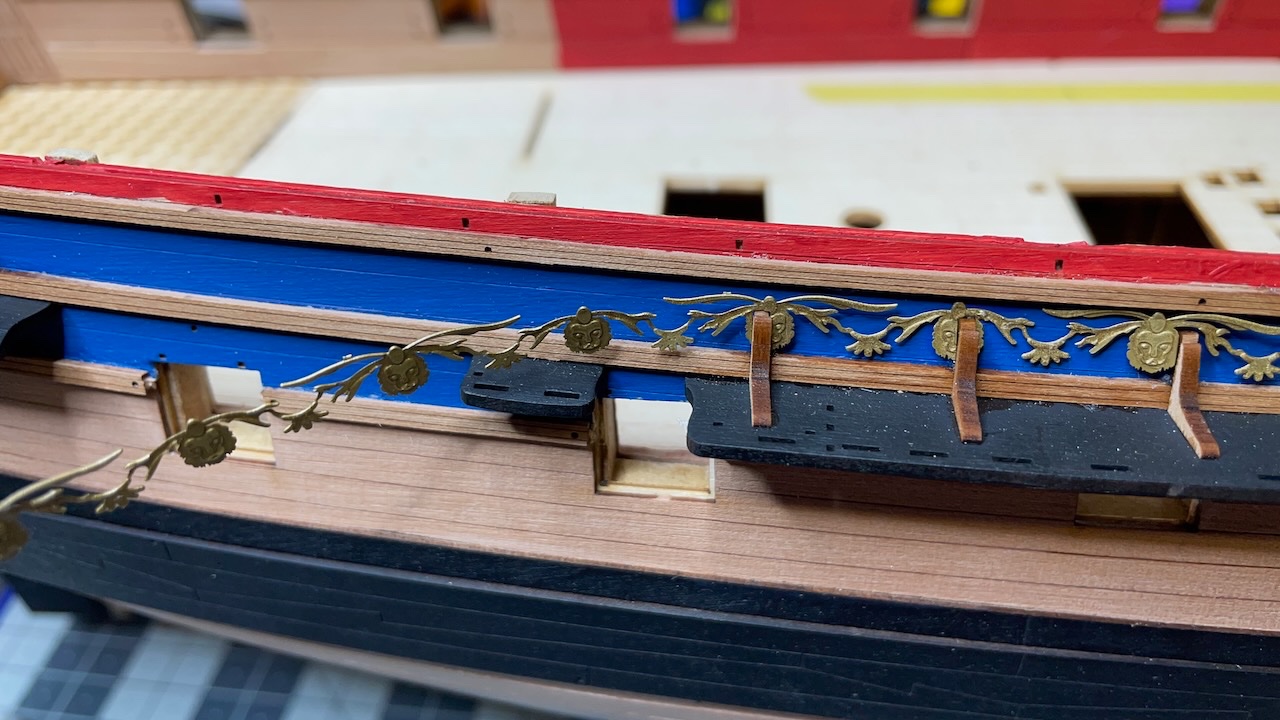
Build day 44: 2 hrs / Total 96 hours Finished hull decorations. Installed Hull side steps. Photos 449-451: Some photos showing the hull decorations. The whole process went rather smoothly. In s few spots I had to trim the PE to fit in place. They were mainly under the channels.
- 426 replies
-
- 4
-
-
- Vanguard Models
- Sphinx
- (and 1 more)
-
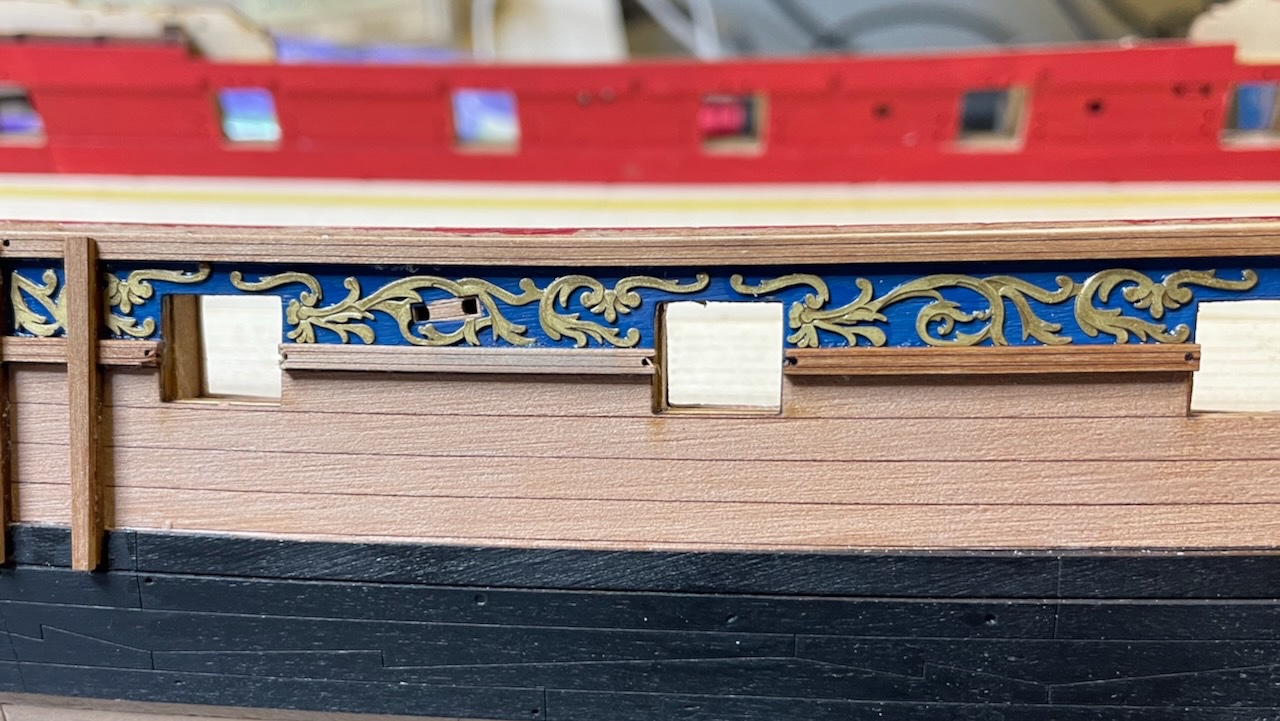
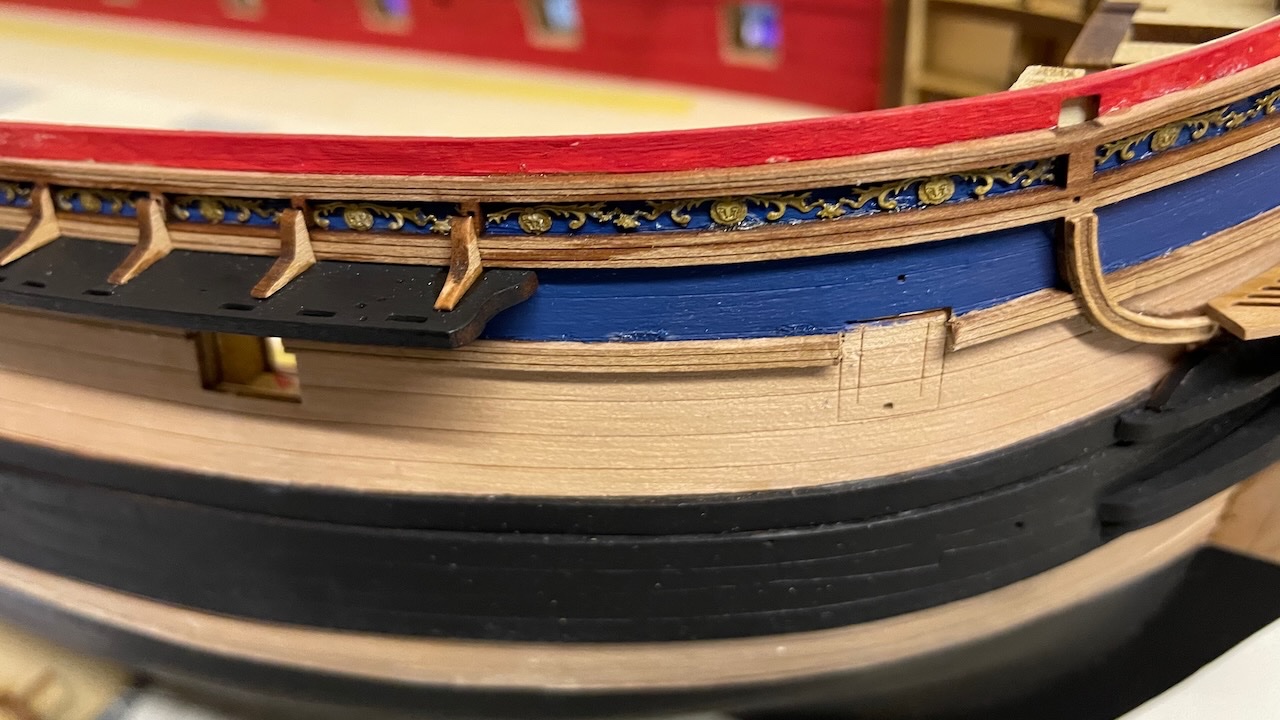
Photos 447-448: Two photos showing the current state. This is only the right side at the moment.
- 426 replies
-
- 5
-
-
- Vanguard Models
- Sphinx
- (and 1 more)
-
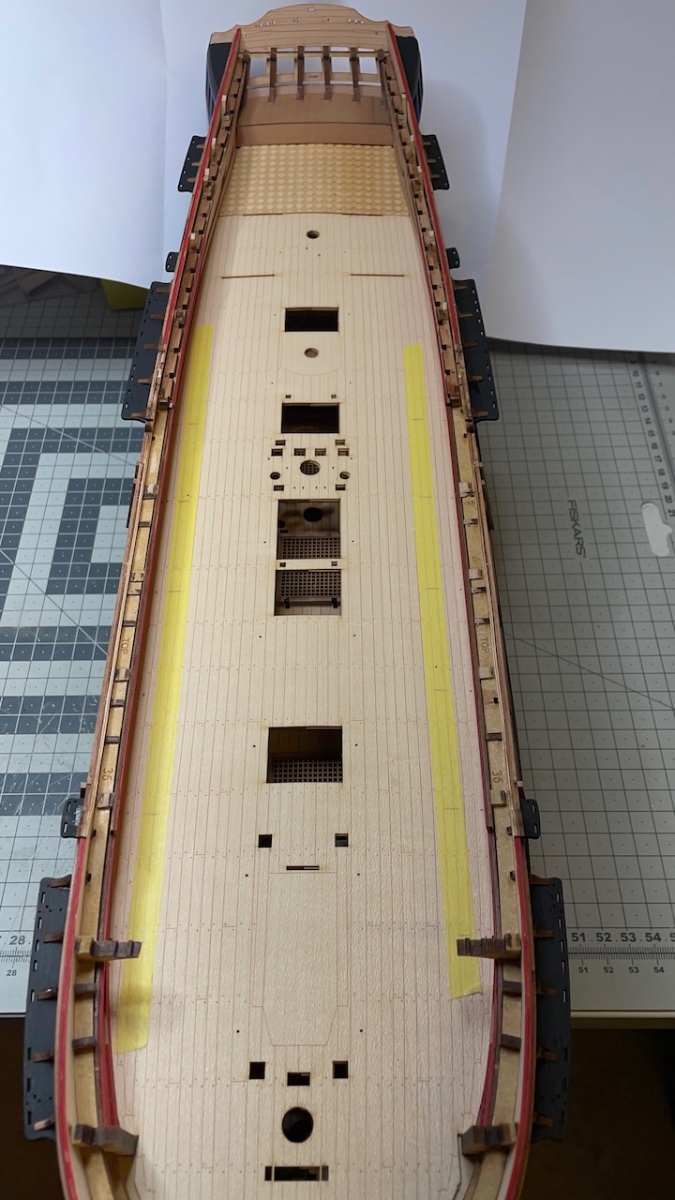
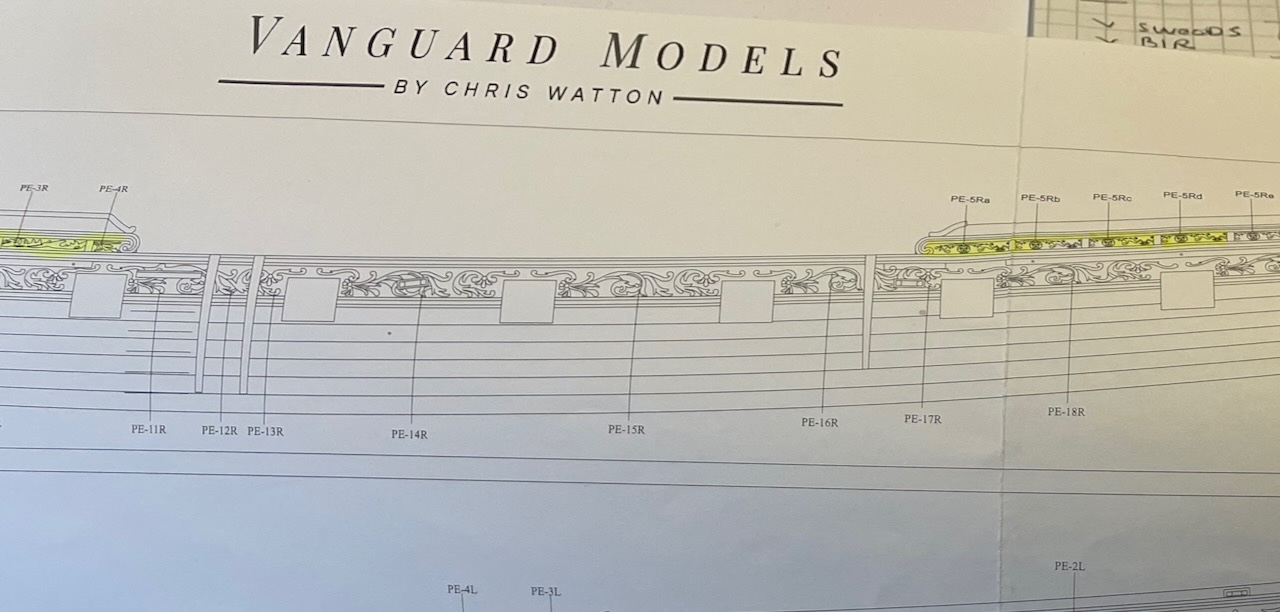
Photo 446: So many similar shaped parts, I thought it would be wise to mark the progress on the plan with a marker in order to avoid wrong placements.
- 426 replies
-
- 2
-
-
- Vanguard Models
- Sphinx
- (and 1 more)
-
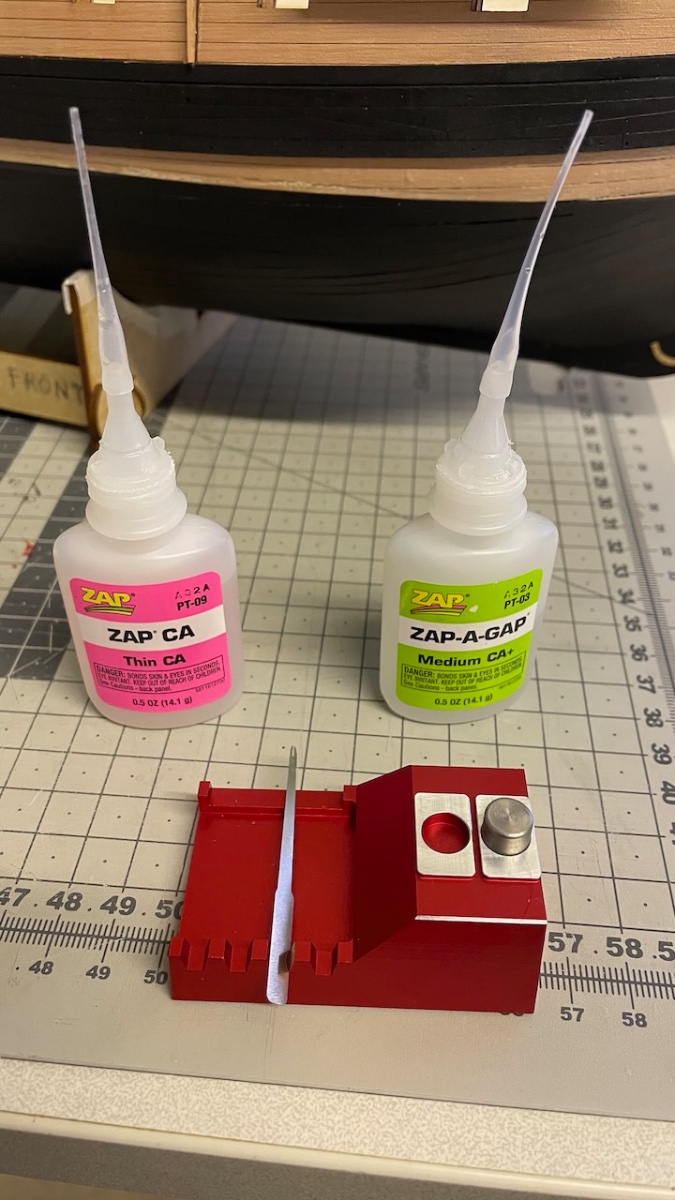
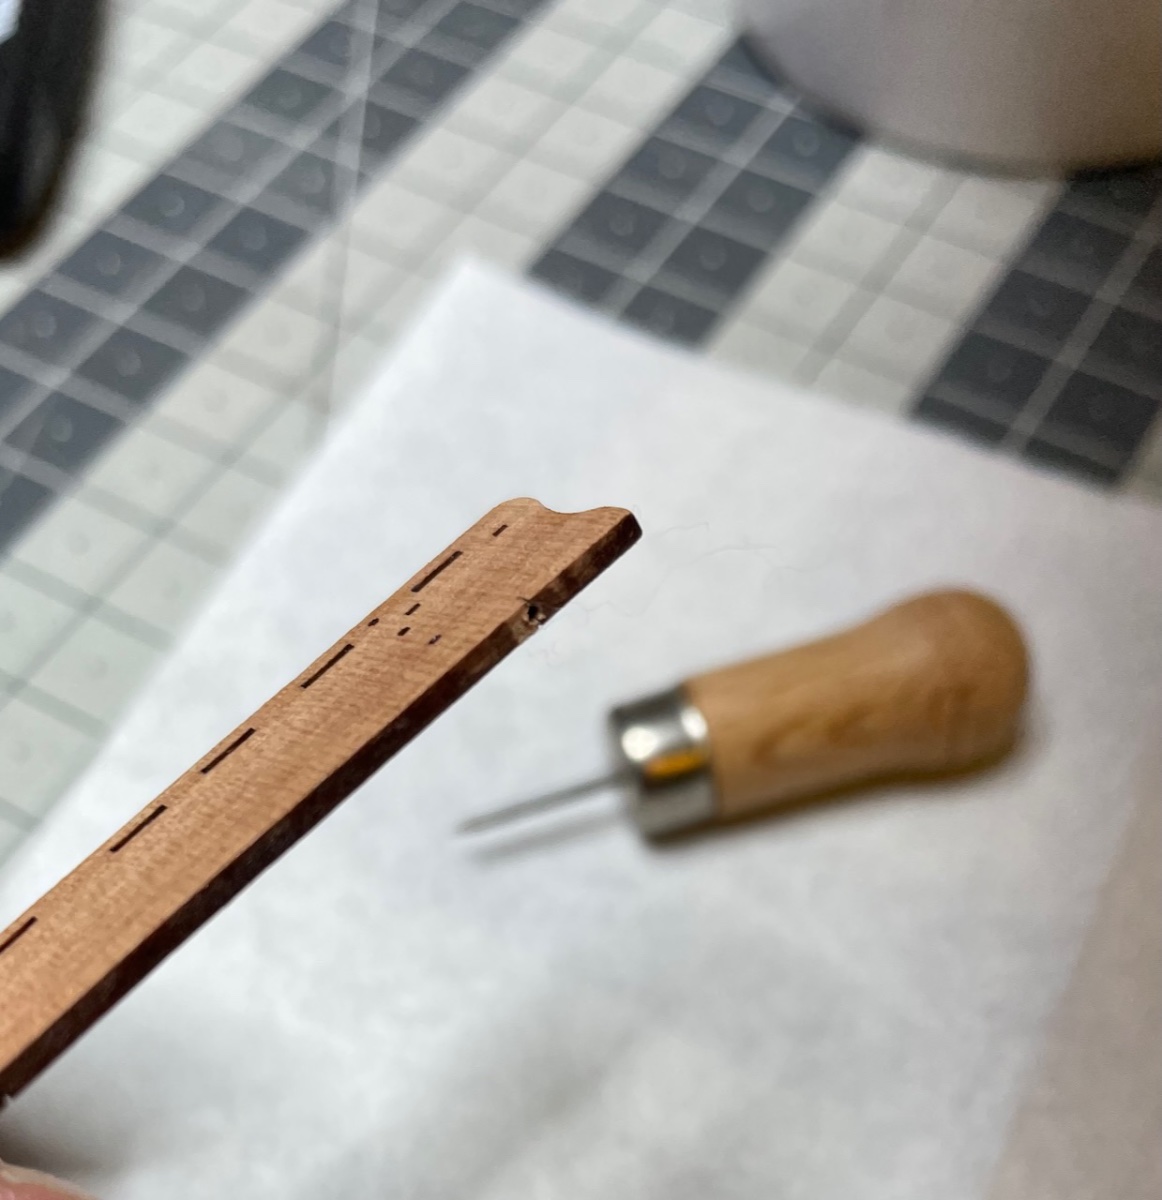
Photo 445: I am using normal and thin superglue with thin nozzles for this purpose and so far it is going well. In more detailed areas I also use this "superglue applicator" from DSPIAE. It allows applying tiny amount of glue.

- 426 replies
-
- 3
-
-
- Vanguard Models
- Sphinx
- (and 1 more)
-
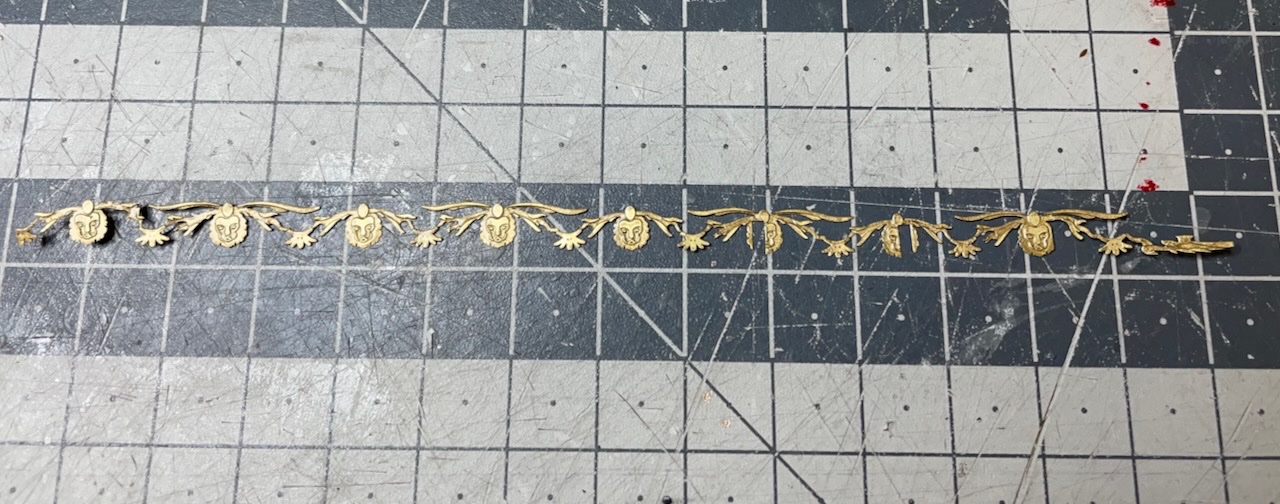
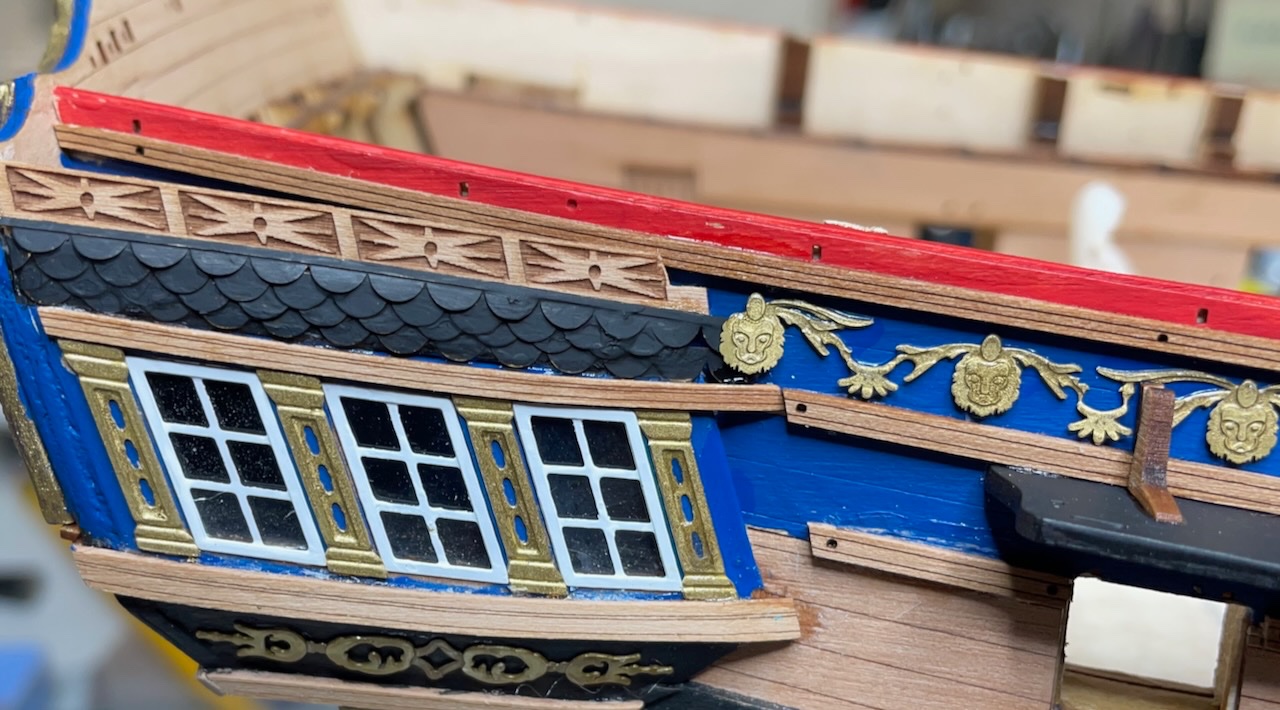
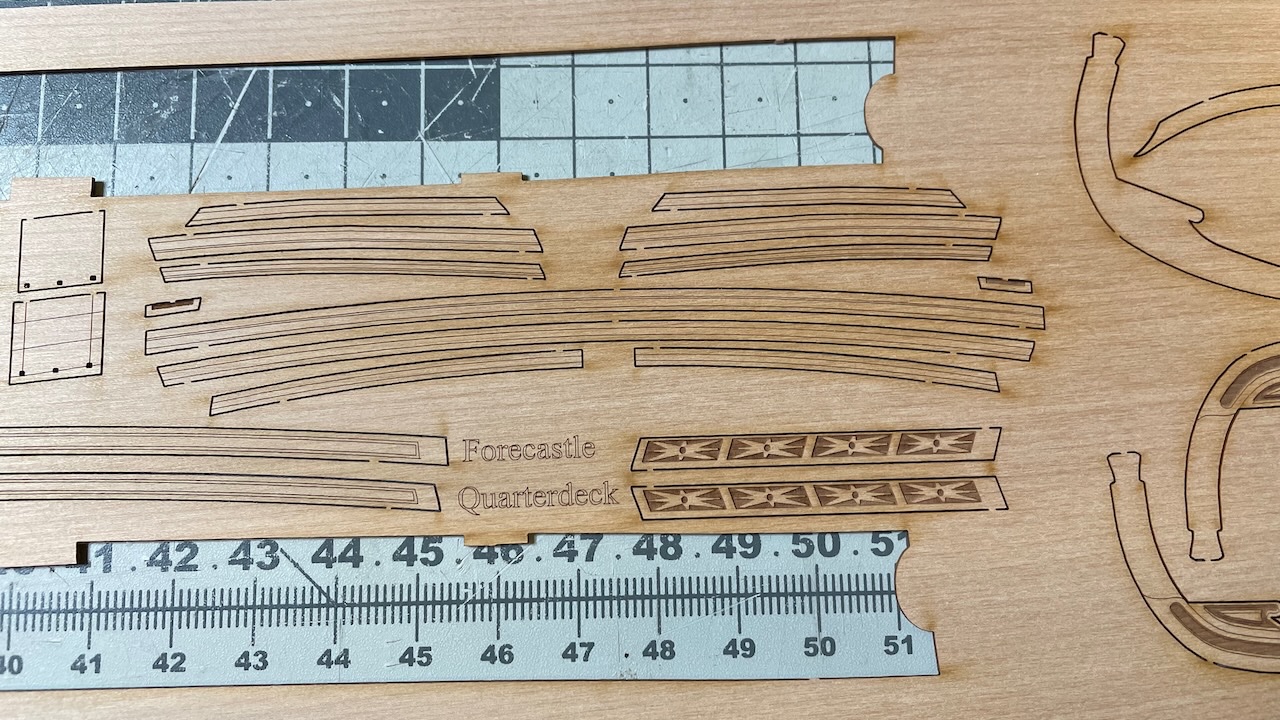
Build day 43: 3 hrs / Total 94 hours Continued with Quarter deck roof structure Hull decorations preparation (prime, paint, seal with varnish) gluing Photo 442: Quarter deck roof tiles, from photo etched sheet. The photo was taken after I had already started fitting the hull decoration, as seen on the right side. Photo 443 : One of the longer parts. With 0.2mm thickness and even less on the engraved areas, these parts deserve replacing the knife with a new sharp blade before removing. Photo 444: Gluing in progress.
- 426 replies
-
- 2
-
-
- Vanguard Models
- Sphinx
- (and 1 more)
-
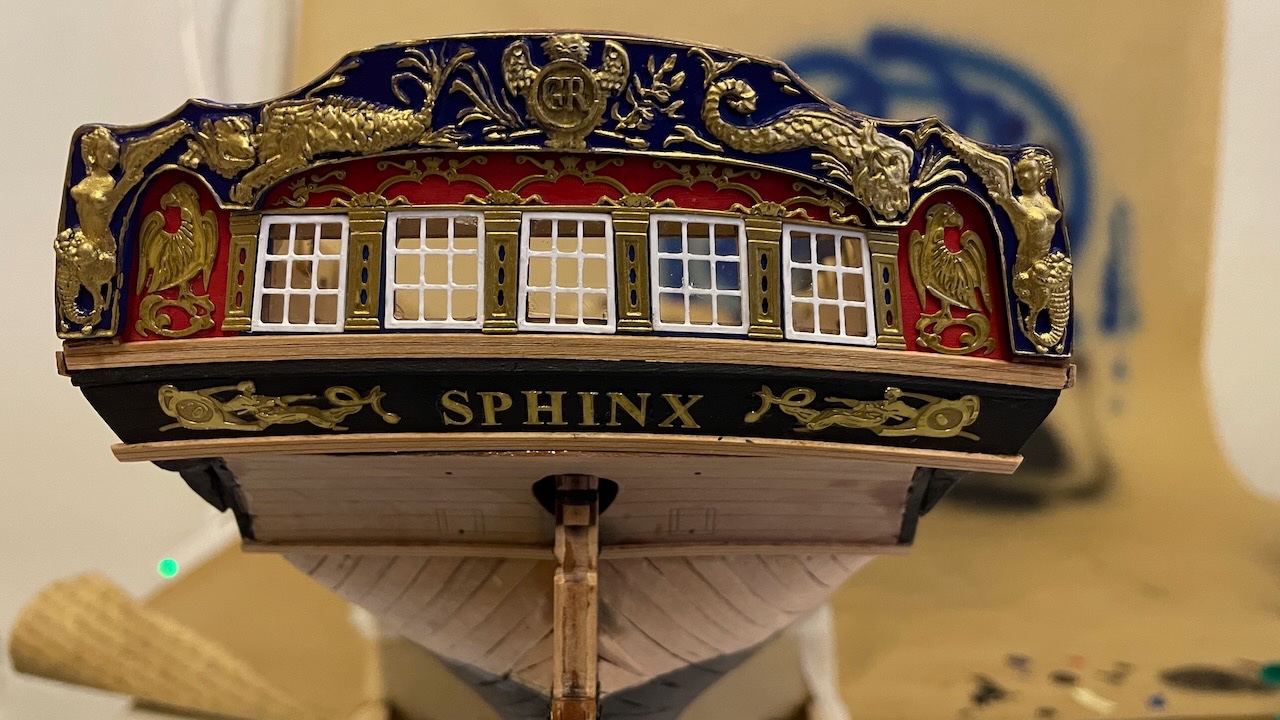
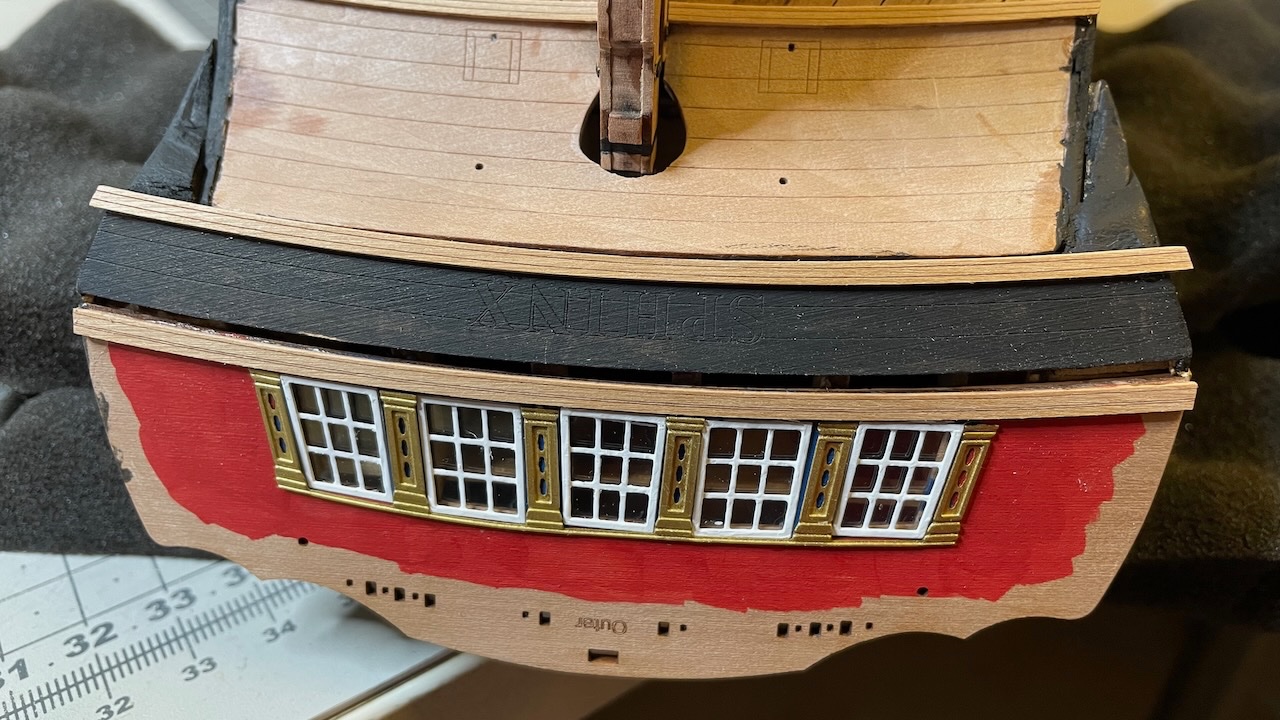
Build day 42: 2 hr / Total 93 hours Photo 441: All stern decorations in place and with the name plates installed, now my ship is officially SPHINX! . I will need to rest my eyes for a while after this tiring work. But after all I can confidently say the result was worth it.
- 426 replies
-
- 8
-
-

-
- Vanguard Models
- Sphinx
- (and 1 more)
-
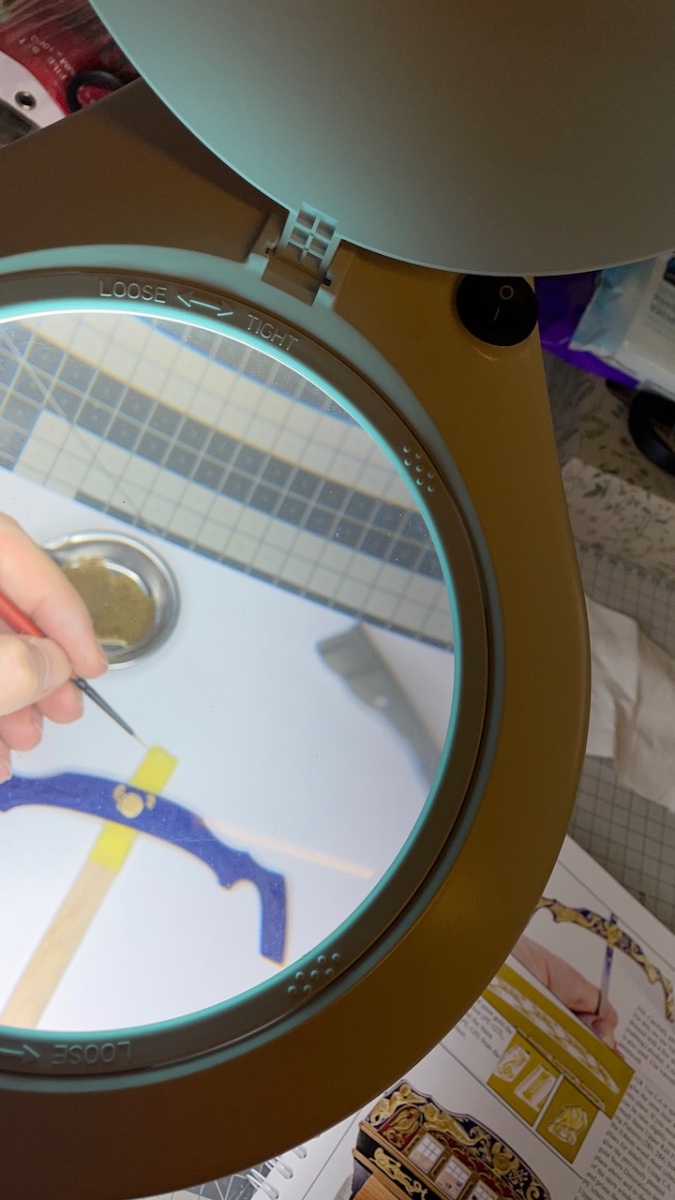
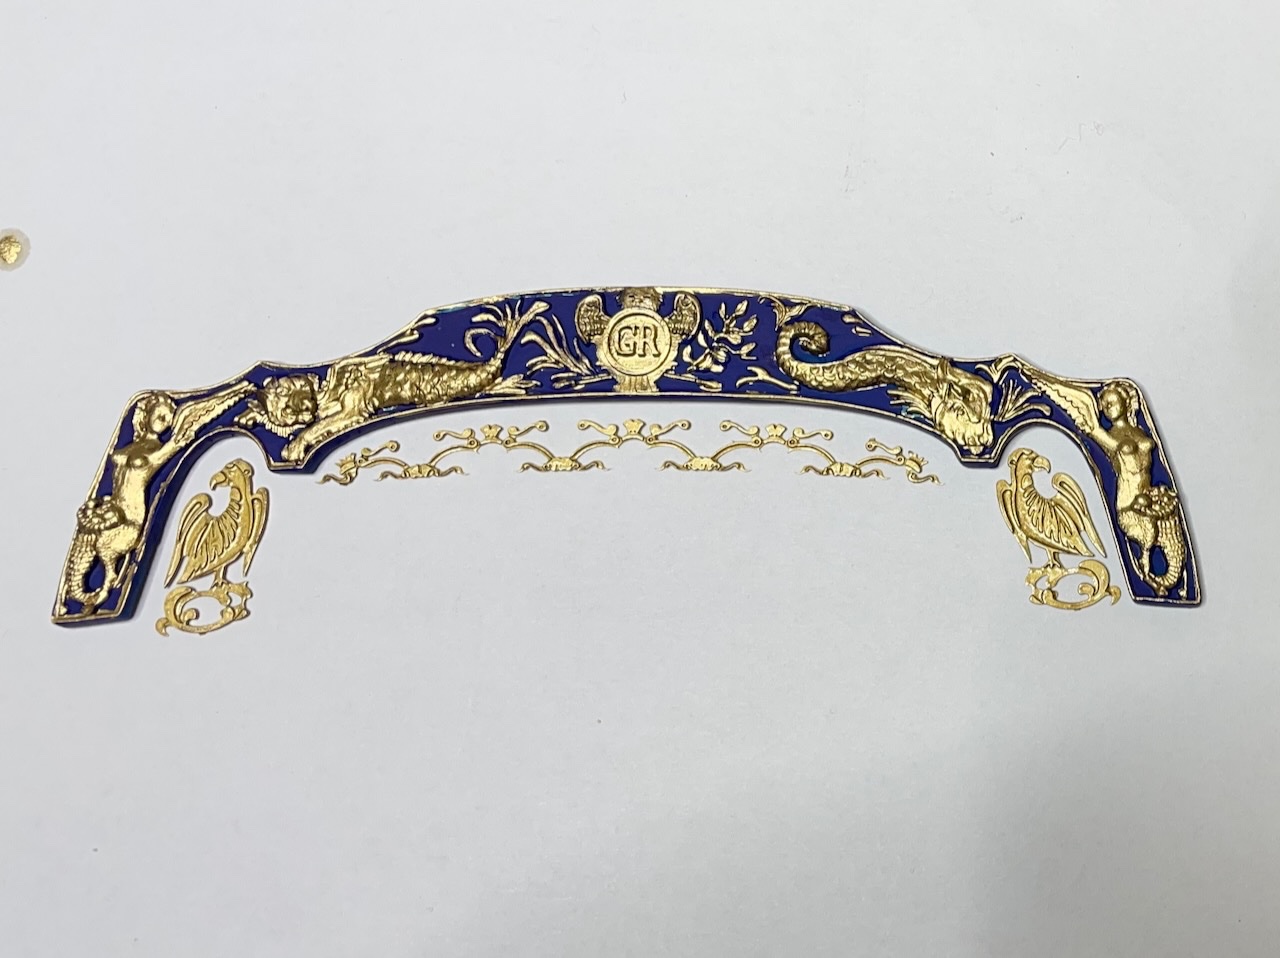
Photo 439: This is the first time ever for me to do such an intricate paint job. I use 3/0 (or 000) paint brush and do it under magnifying table lamp. Before that, as instructed, I rested the resin stern decoration in very hot (just boiled) water briefly (10-15 seconds) to bend it to follow the stern fascia curve. Photo 440: Overall I am happy with the result.

- 426 replies
-
- 8
-
-
-
- Vanguard Models
- Sphinx
- (and 1 more)
-
Build day 41: 1 hr / Total 91 hours Football World Cup started yesterday and will certainly impact my pace Today I managed to glue the Quarter Gallery Rails, Quarter Gallery Upper Fretwork and paint the Stern Decoration between the games. Photo 406: Quarter Gallery Rails and Quarter Gallery Upper Fretwork. I haven't taken a photo from the back yet but two rails align nicely with those rails on the stern.
- 426 replies
-
- 4
-
-
- Vanguard Models
- Sphinx
- (and 1 more)
-
Photo 403: Stern Wing Transom Rails – Left & Right, the Stern Lower Counter Rail and the Stern Upper Counter Rail. (the 4 parts in the middle of the photo) Photos 404-405: I have a slight gap between the stren facia and the the black part. This is from when I was installing the inner pieces. Normally it should not be there. But anyway, now is the time to take care of that gap. I copied the contour of the upper counter rail where I had removed the part from the sheet and used a scrap part from 0.6mm wood to make a filler strip. With painting it to black, it is difficult to notice it, looks quite good. With the gap: Gap filled with custom strip:
- 426 replies
-
- 4
-
-
- Vanguard Models
- Sphinx
- (and 1 more)
-
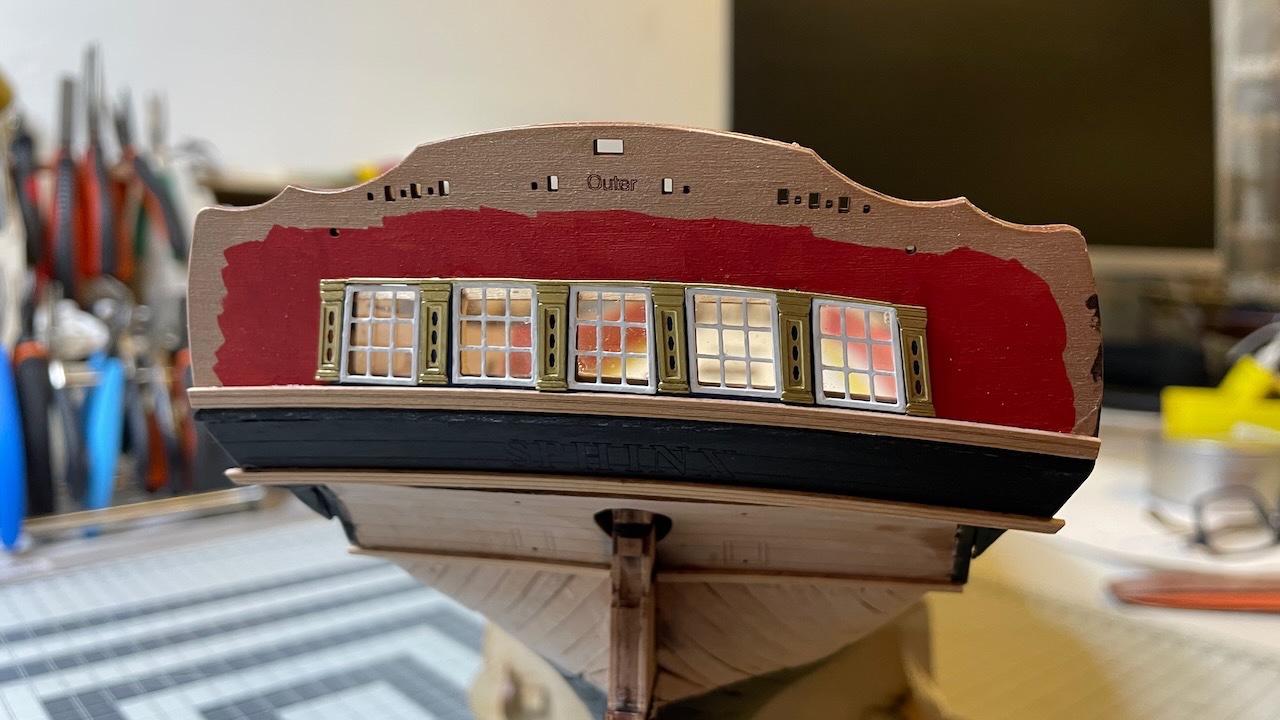
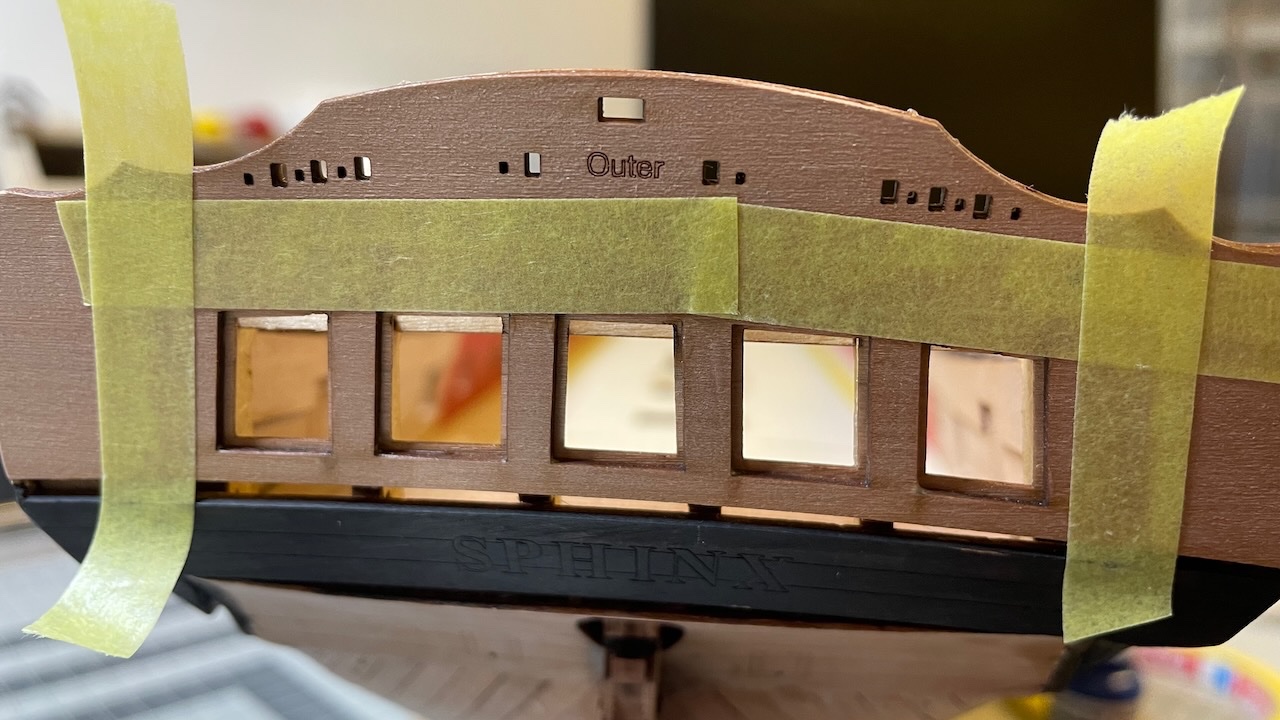
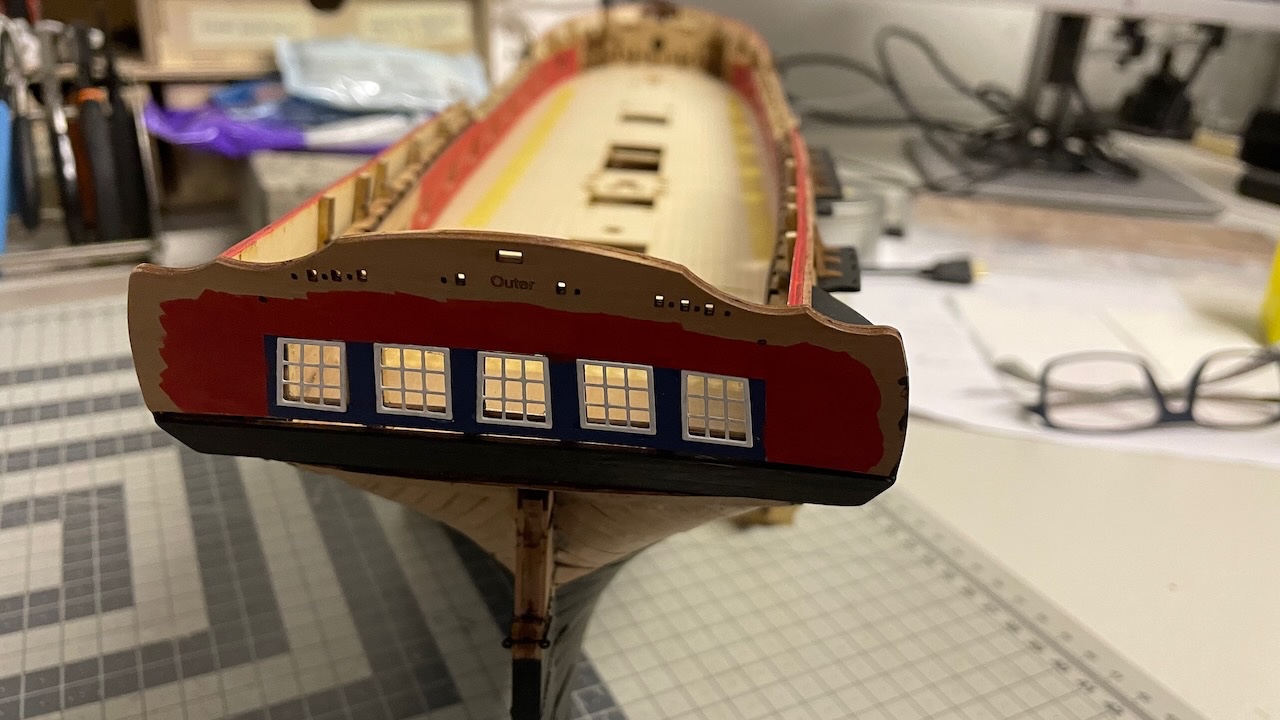
Build day 40: 4hrs / Total 90 hours I am logging two days' work today. This is build day 40. More stern work. Instructions recommend to use acrylic transparent varnish for gluing the window glasses (made of PVC) and for the frames instead of CA glue, to prevent fogging of the PVC windows. However I tried with scrap piece of PVC a tiny amount of CA only on the corners and didn't experience any fogging, therefore I decided to use CA. Note that use a pecision glue nozzle, which allows me to apply the glue in really small amounts. Photo 398: Started to install windows and frames. Photos 399-400: At this stage you also paint the stern to its colors. Photo 401: Stern window frames also in place.
- 426 replies
-
- 2
-
-
- Vanguard Models
- Sphinx
- (and 1 more)
-
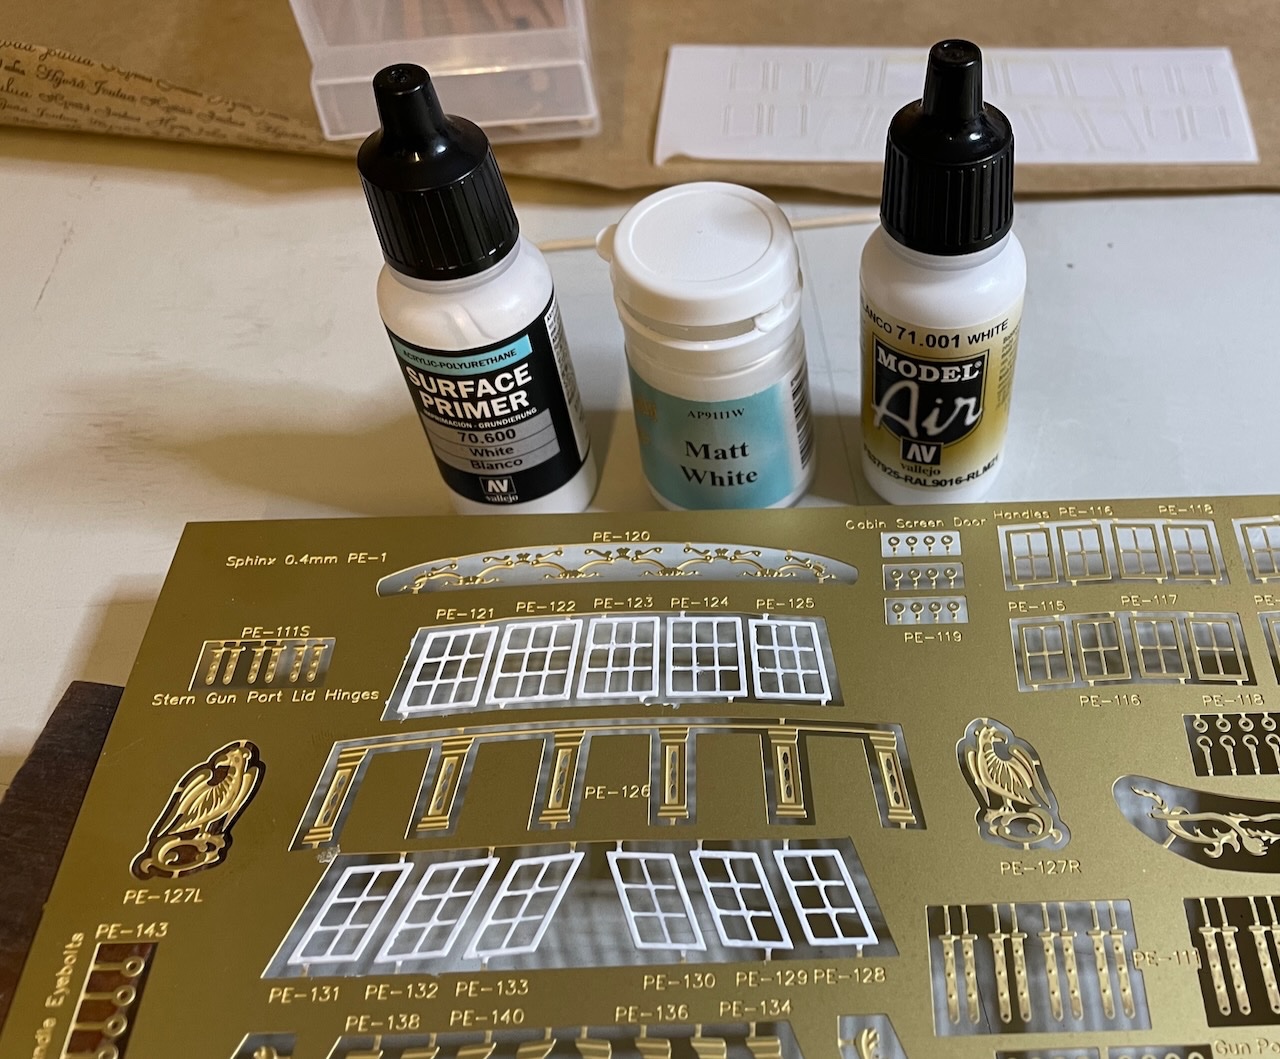
Photo 397: Last task of the day is to paint the deck window frames. For these I used Vallejo primer, followed by Admiralty acrylic white and finished with Vallejo Model Air white. Model Air, with its thin consistency, provides a more smooth finish on tiny surfaces like these frames.
- 426 replies
-
- 2
-
-
- Vanguard Models
- Sphinx
- (and 1 more)
-
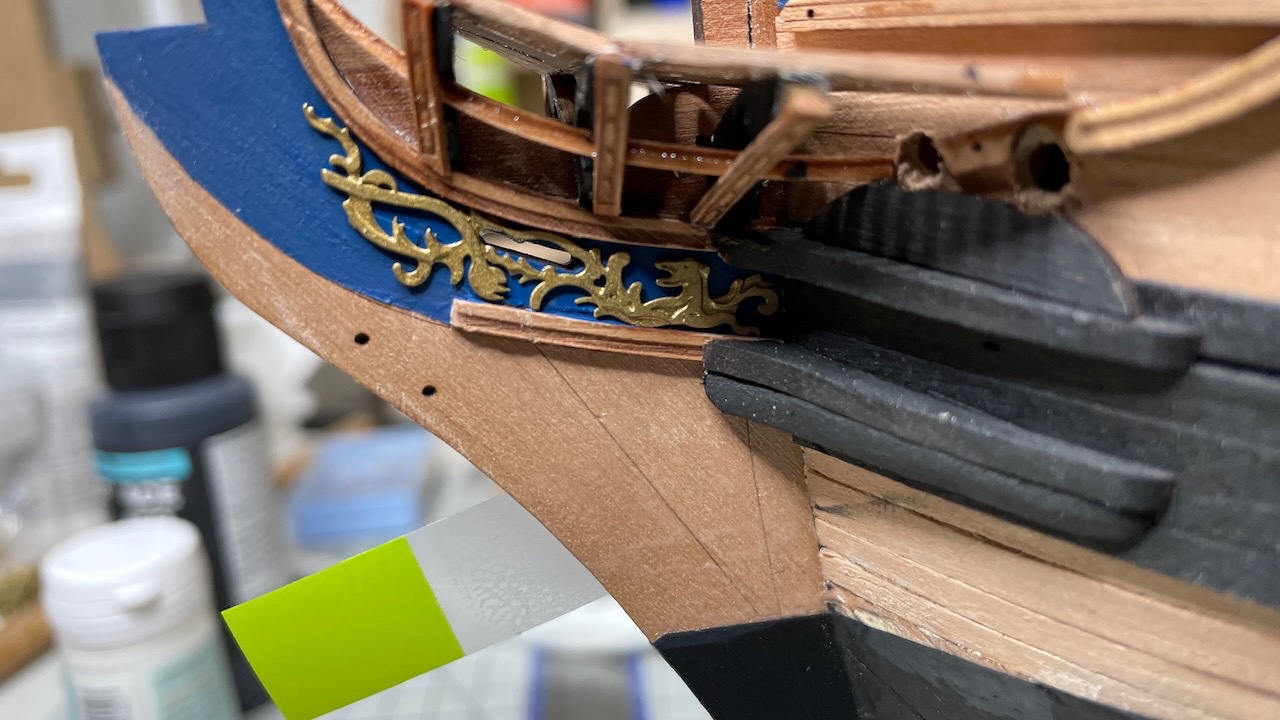
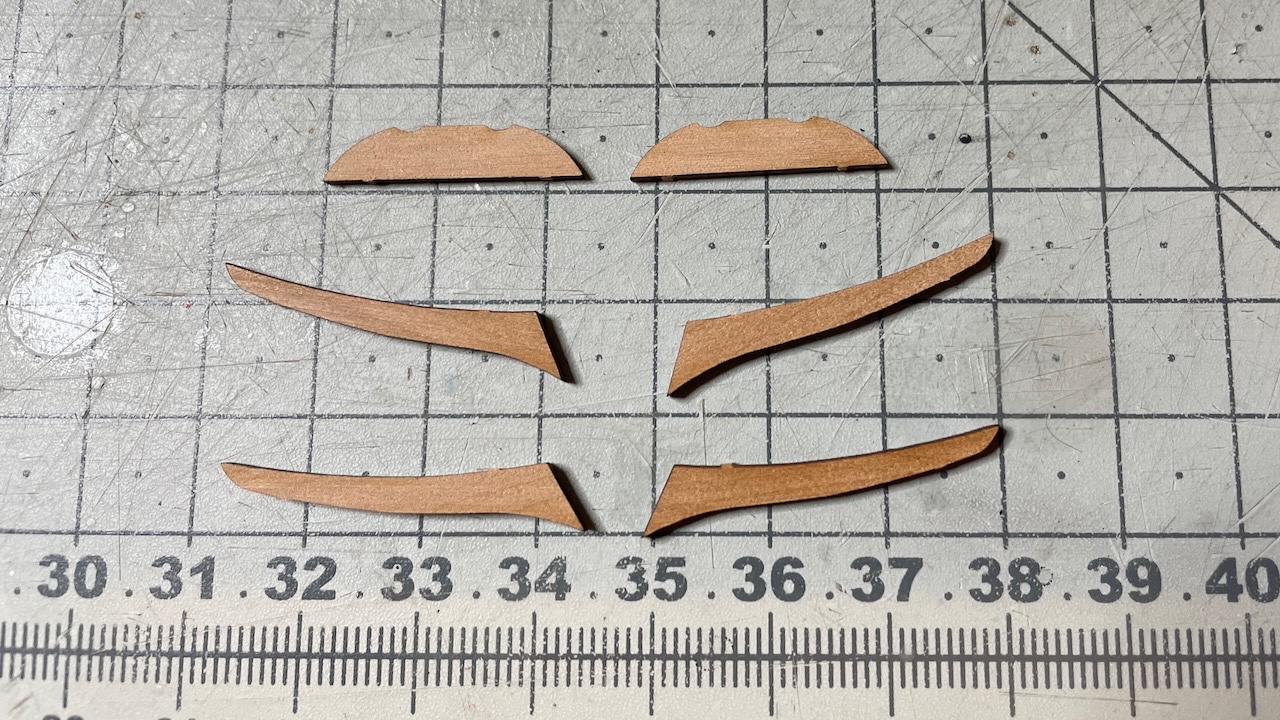
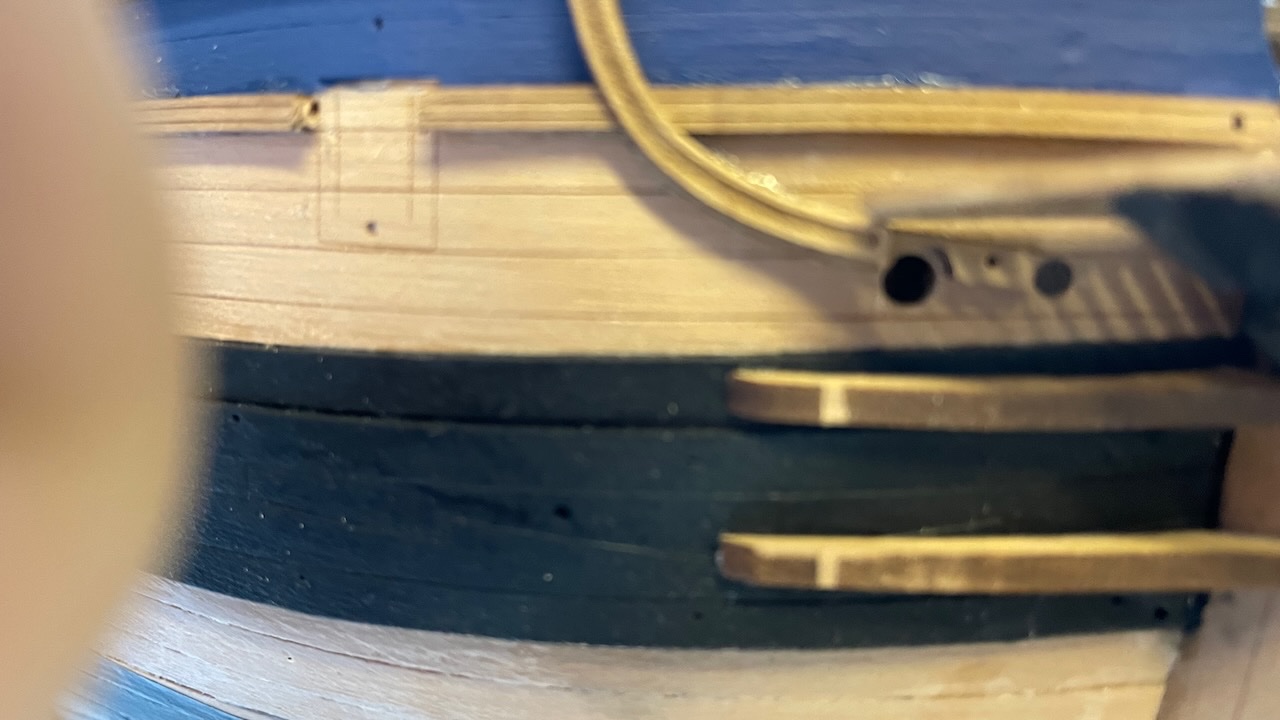
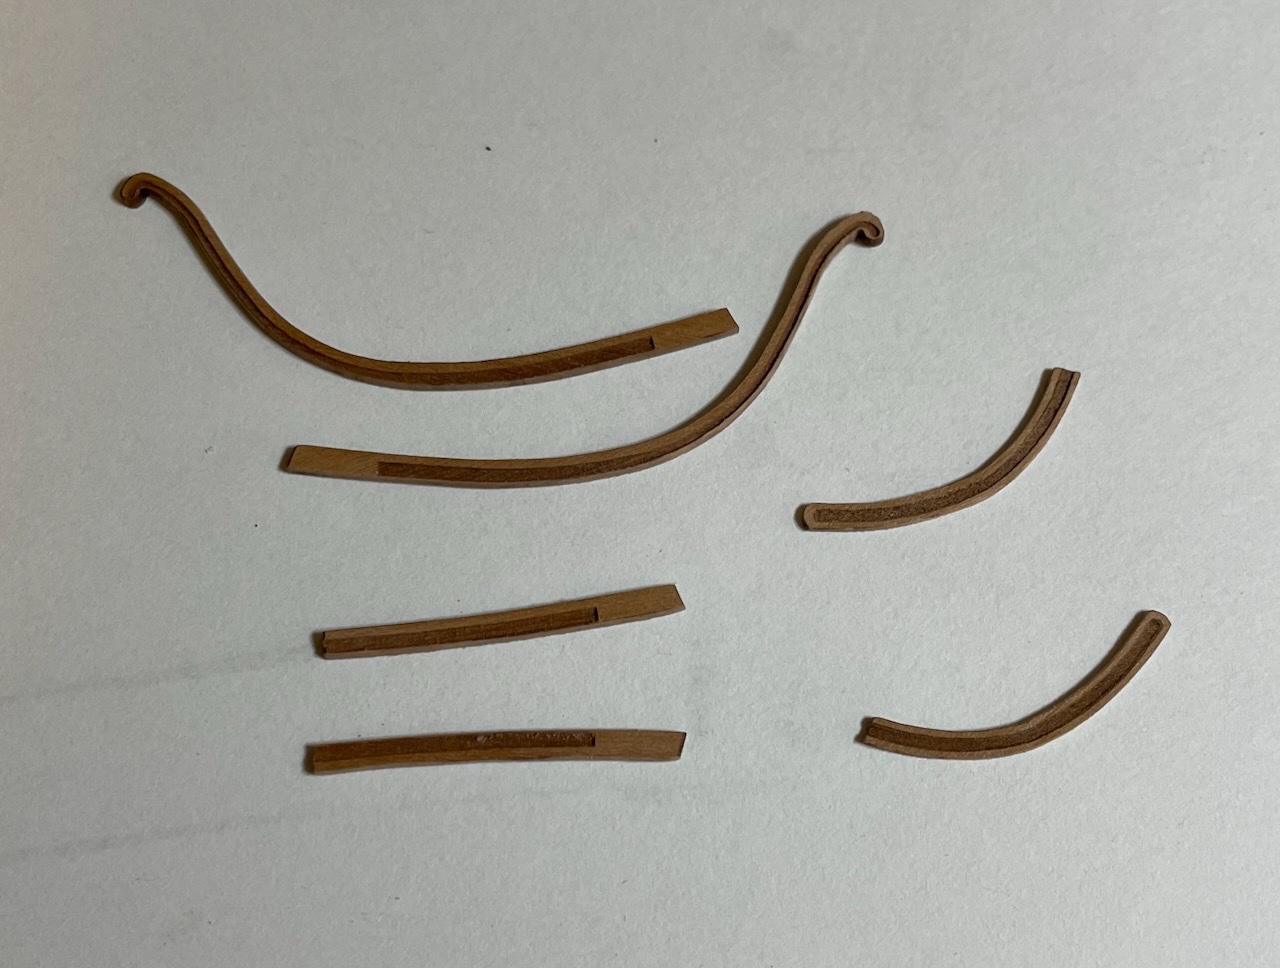
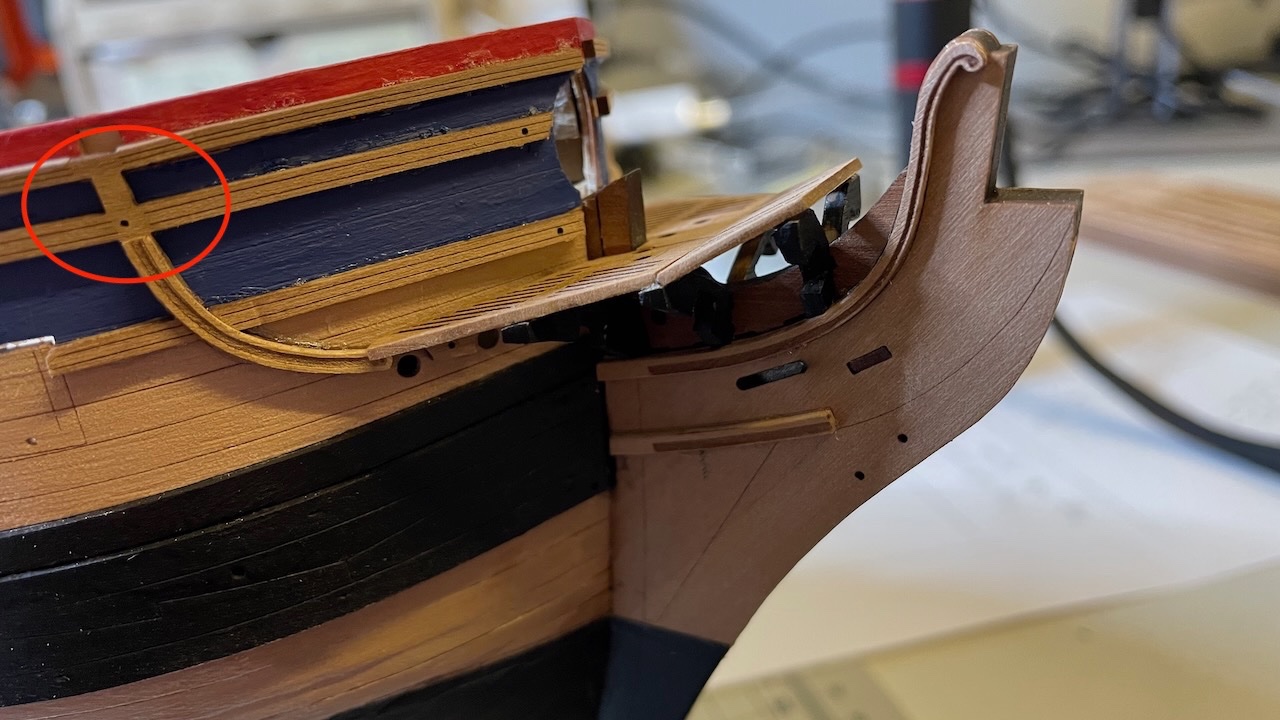
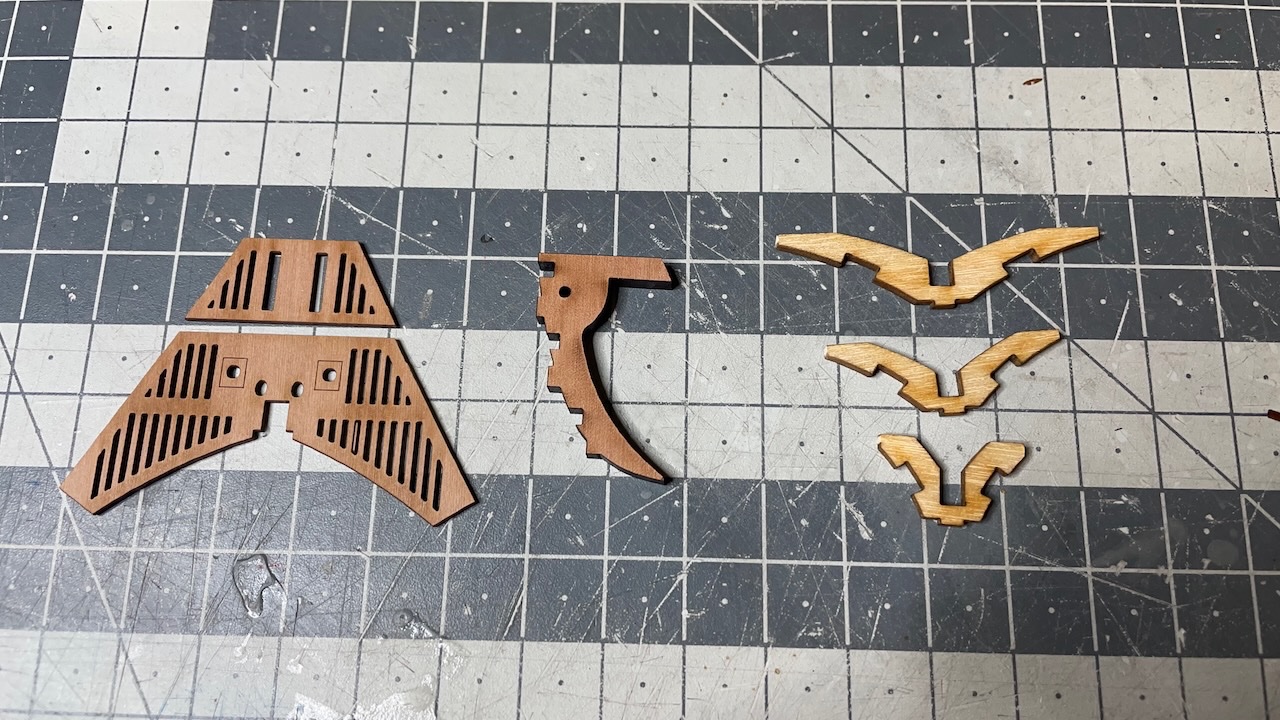
Photo 394: Bow Lower Rails – Left & Right. Photo 395: Pattern parts for the V-shaped head rails. Photo 396: Photo showing both in place.
- 426 replies
-
- 2
-
-
- Vanguard Models
- Sphinx
- (and 1 more)
-
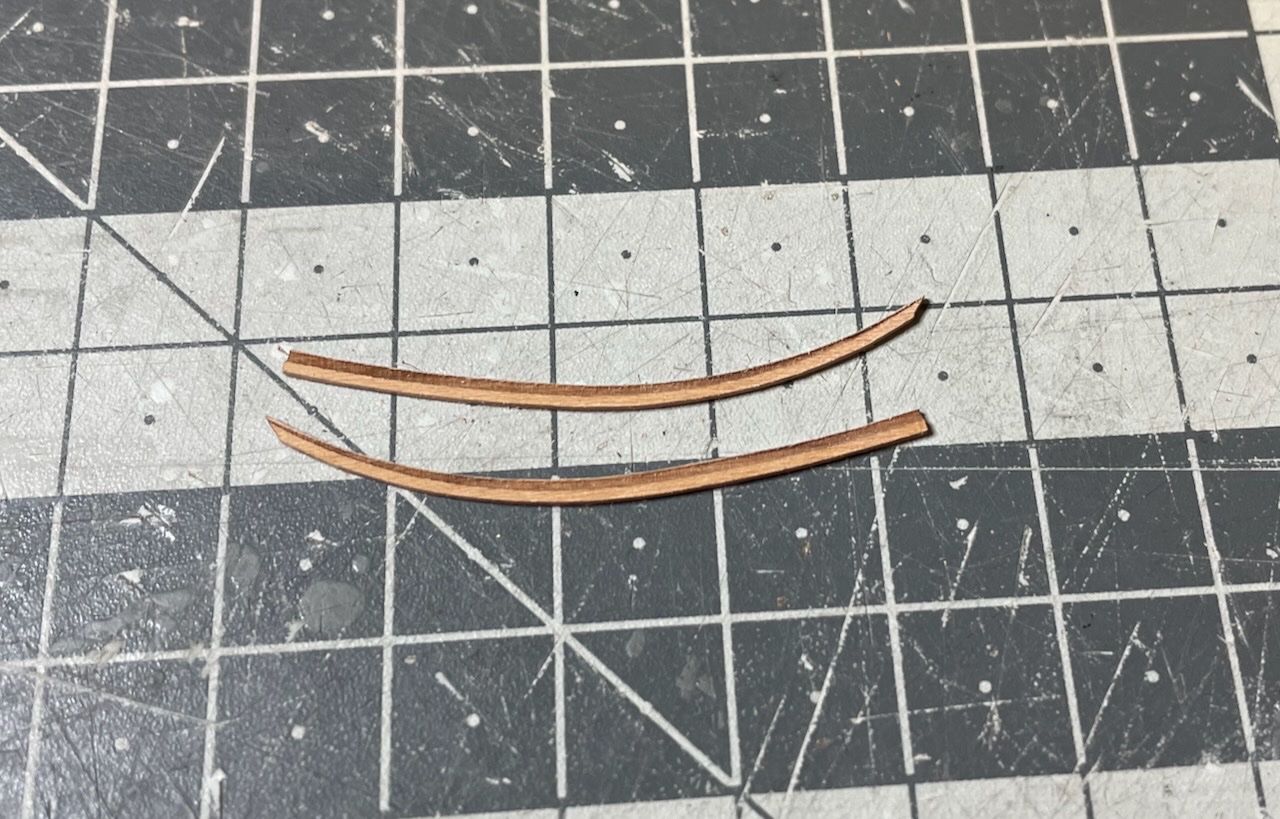
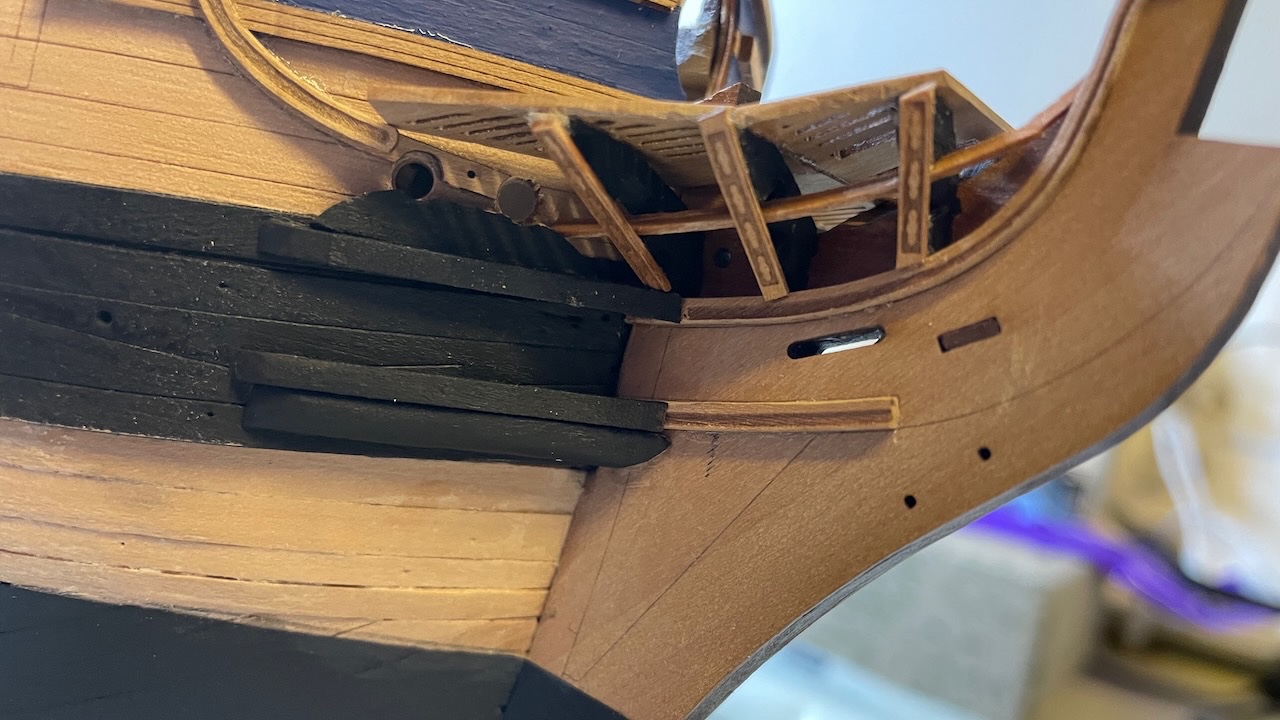
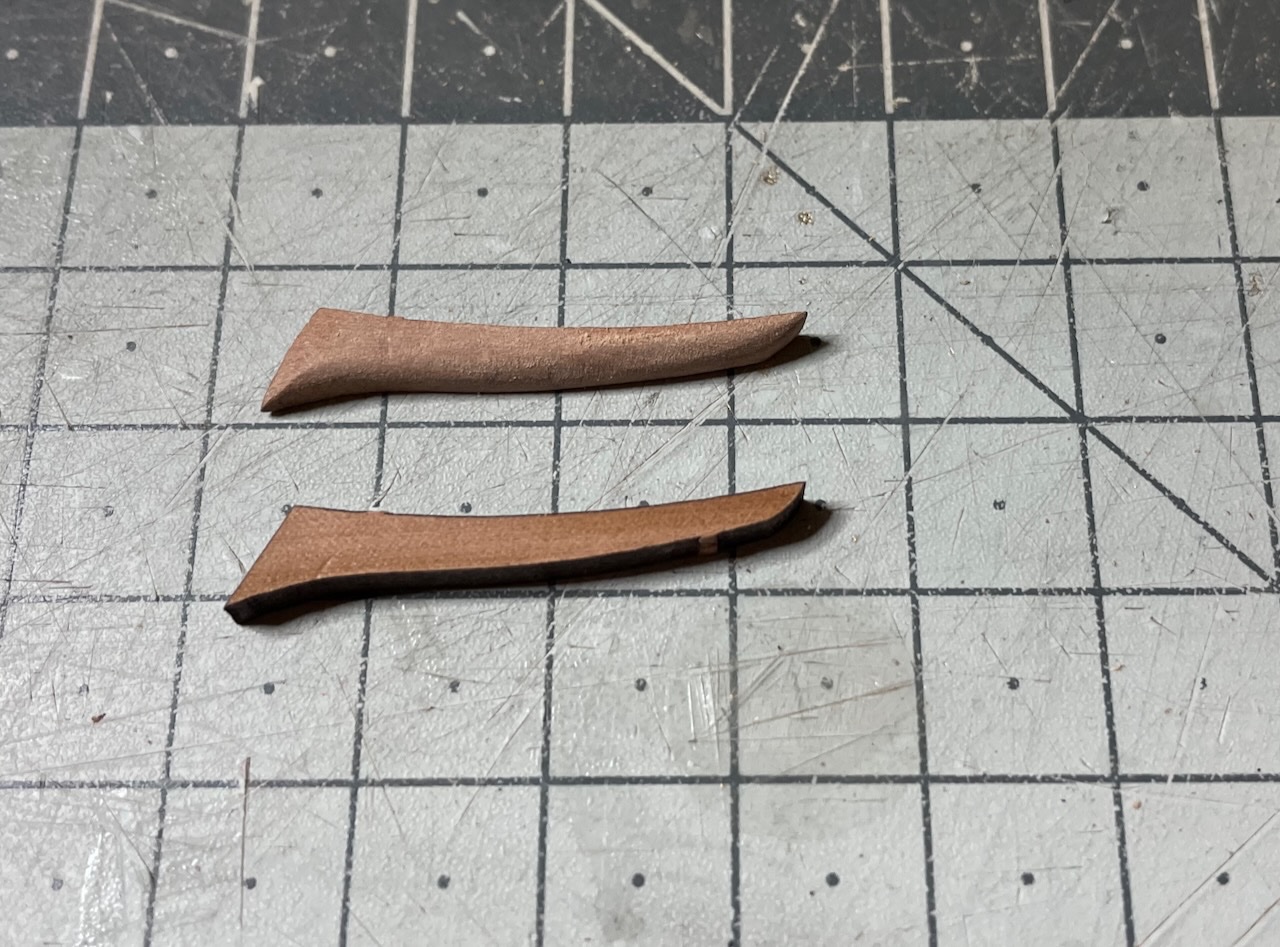
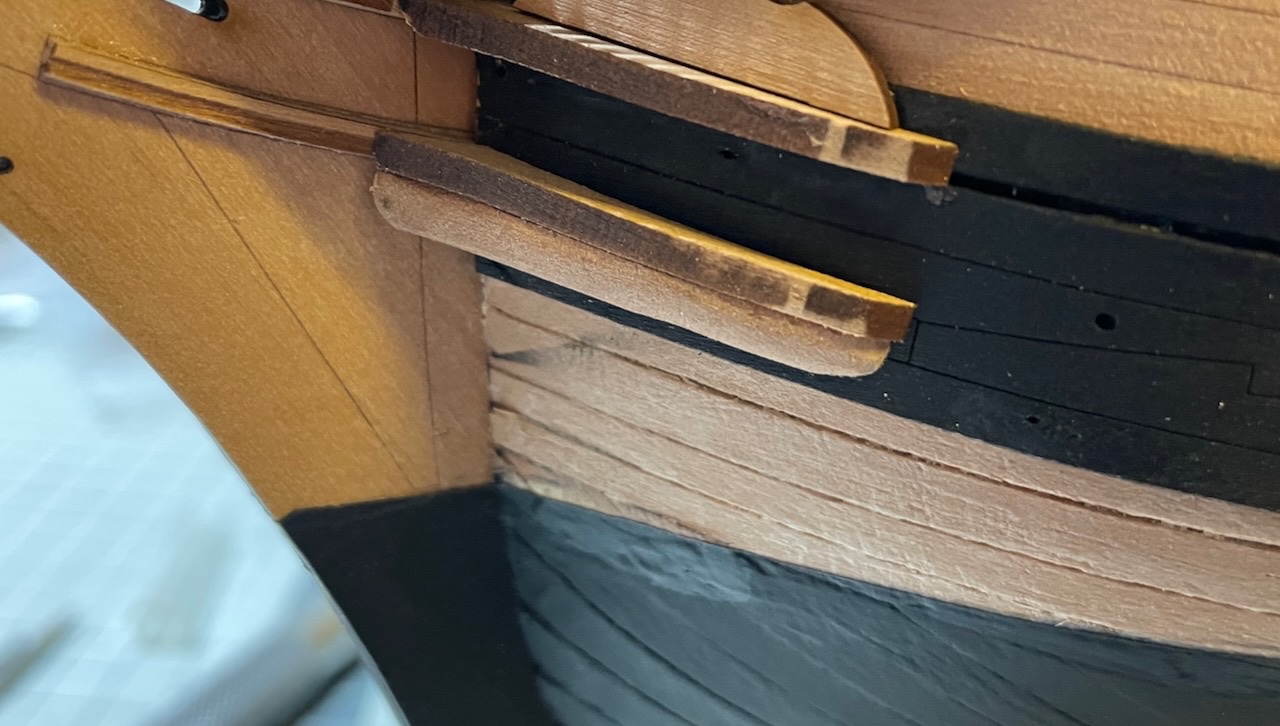
Photo 392: Wash cants. They need a good amount of bevelling, like the one above in the photo. Photo 393: Wash cants in place. They will be painted in black,too.
- 426 replies
-
- 2
-
-
- Vanguard Models
- Sphinx
- (and 1 more)
-
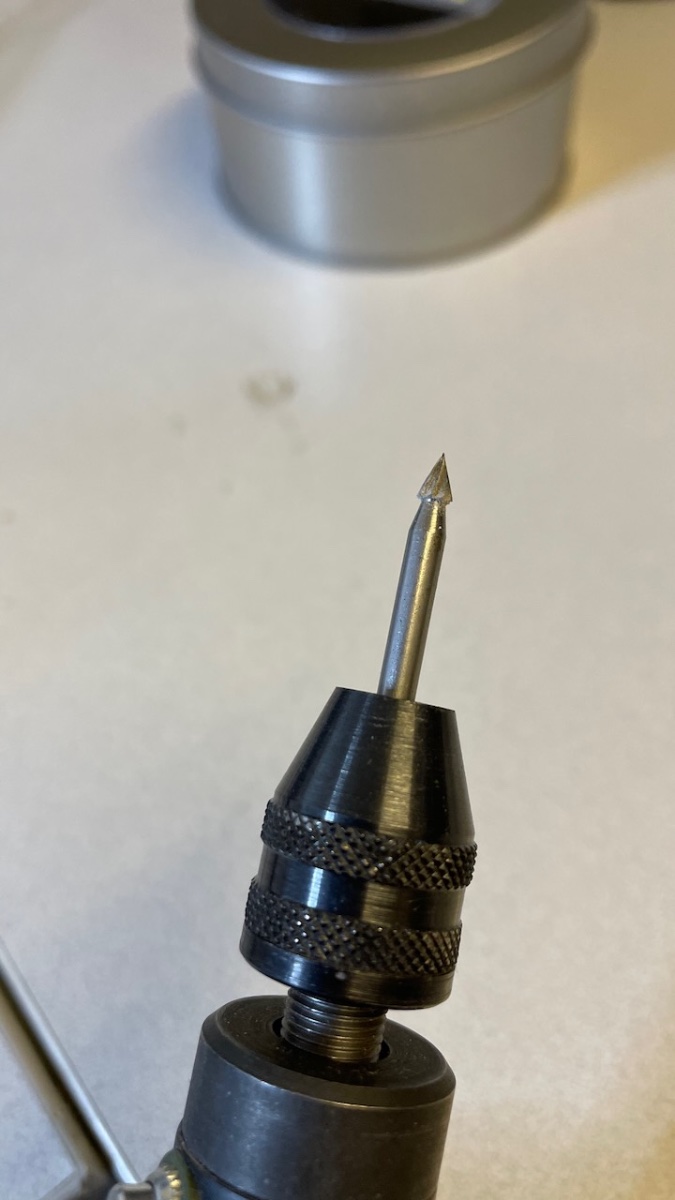
Build day 39: 3hrs / Total 86 hours Photo 335 : Bow Cheeks and Hawse Bolsters. These are going to be painted in black therefore no need to remove the laser chars. Photo 336: Bow cheeks in place. Before installing the Hawse Bolsters, you'll need to enlarge the two hawse holes to around 4mm diameter. Currently they are around 2mm diameter. I wonder why they were not laser cut to the correct diameter at first place. Maybe because you'll need to open up the wood behind it anyway. In the photo you see the hole on the left has been opened up, while the one on the right is in original size. Photo 391: I used this blade for this work.

- 426 replies
-
- 2
-
-
- Vanguard Models
- Sphinx
- (and 1 more)
-
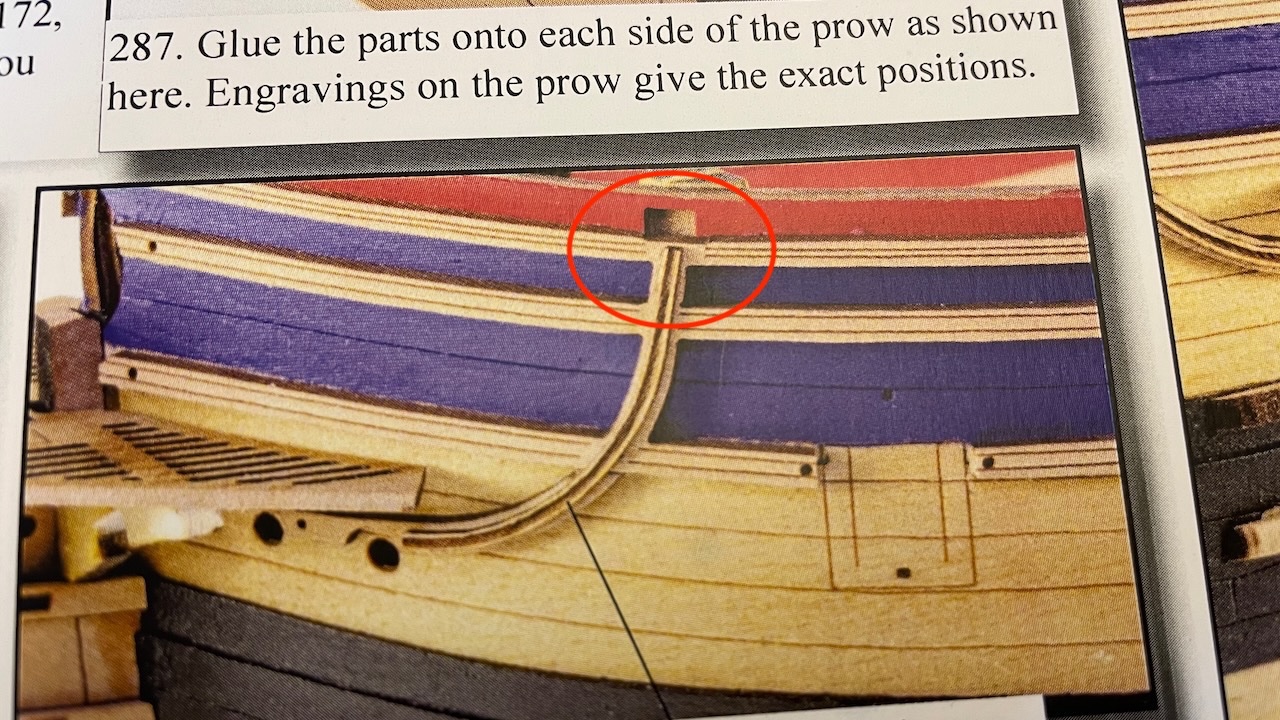
Photo 332: Next, Bow Hair Brackets, Bow Lower Rail and "Ekeing Mouldinf Patterns". Took about half an hour to remove the laser char carefully from the edges. I used 400 grit sandpaper for this. Photos 333-334: In the first photo below, see the Ekeing pattern, ending at the lower rail, while in the instructions (second photo) it goes all the way to the upper rail. I wonder if this is something changed since the prototype. There is also one pair of them in spare, should I cut from the spare part and amend it to the upper end so that it looks the same as in the instructions? Any suggestions?
- 426 replies
-
- 1
-
-
- Vanguard Models
- Sphinx
- (and 1 more)
-
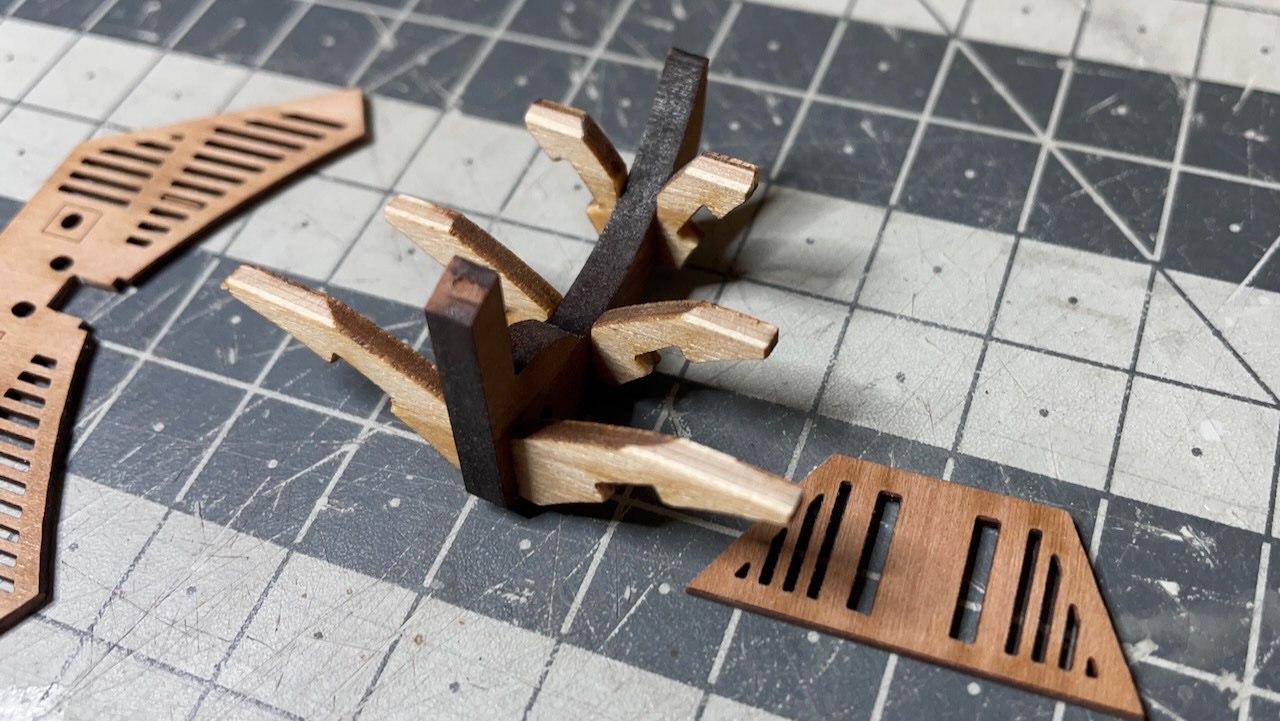
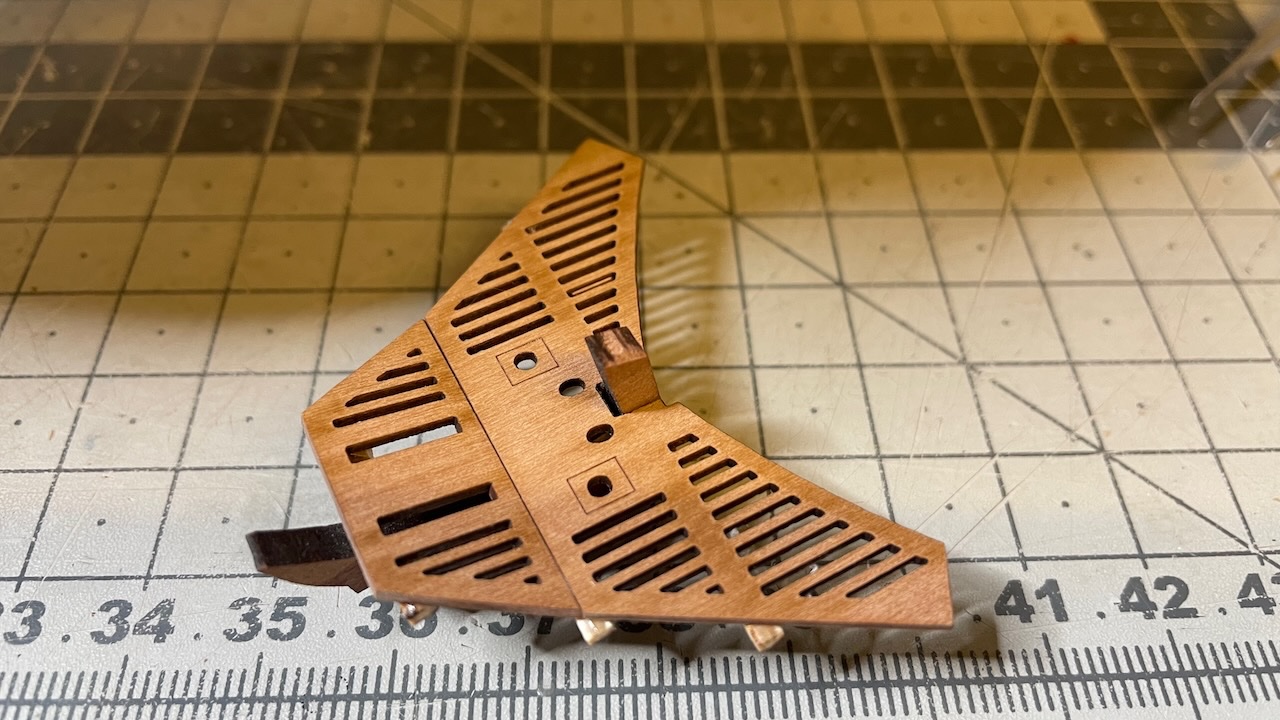
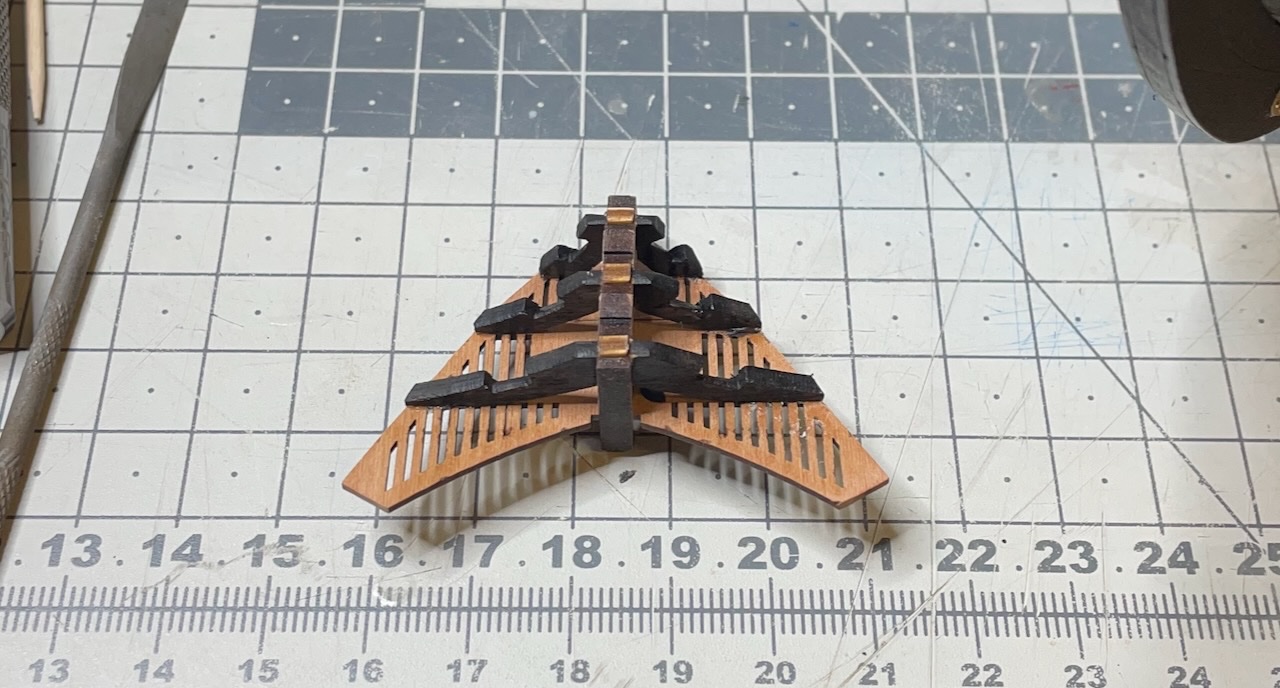
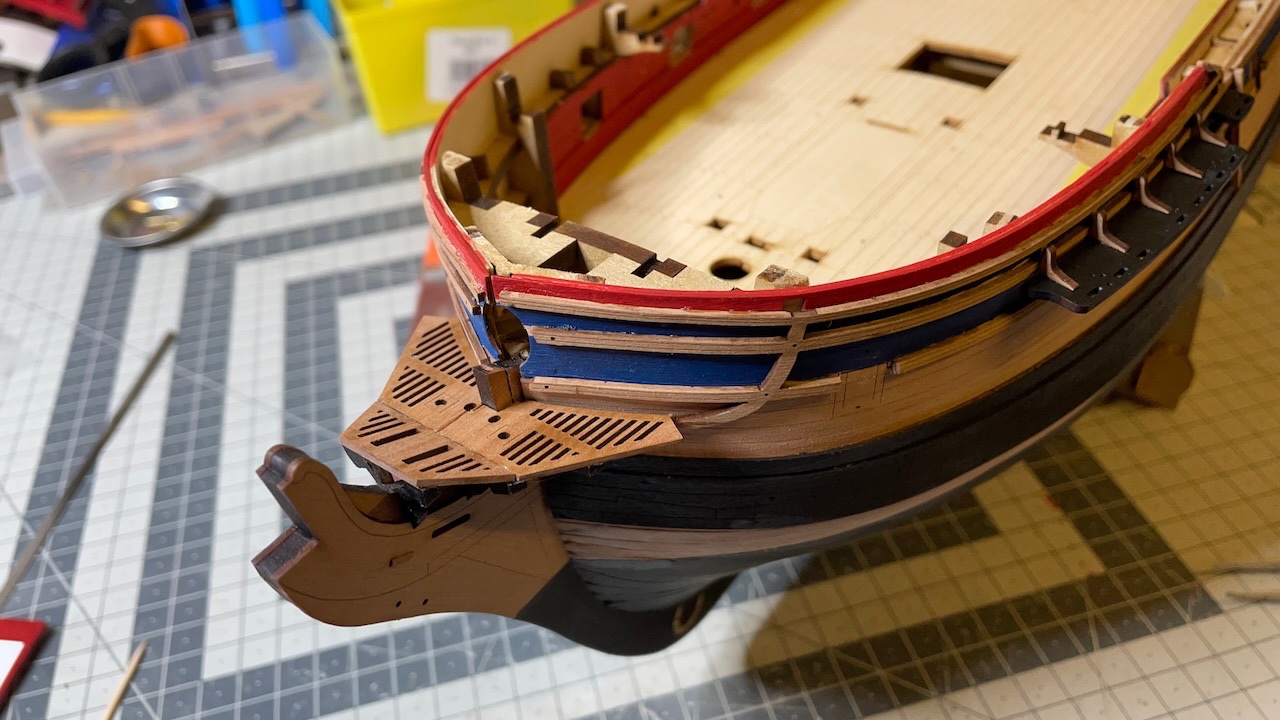
Photo 326: Parts for the bow section. The wings (on the right side) take some bevelling from several areas. Photo 327: Wings fitted to the "Gammoning knee" Photo 328: Dry fit to adjust the bow gratings Photo 329: Bow gratings glued in place. Note the wing ends visible from the sides. They will be filed flush with the grating. Photo 330: Wings painted in black Photo 331: Grating in place. I managed to break the inner piece while inserting the structure back in its place, hence the crack line in the middle. Not a big deal.

- 426 replies
-
- 1
-
-
- Vanguard Models
- Sphinx
- (and 1 more)
-
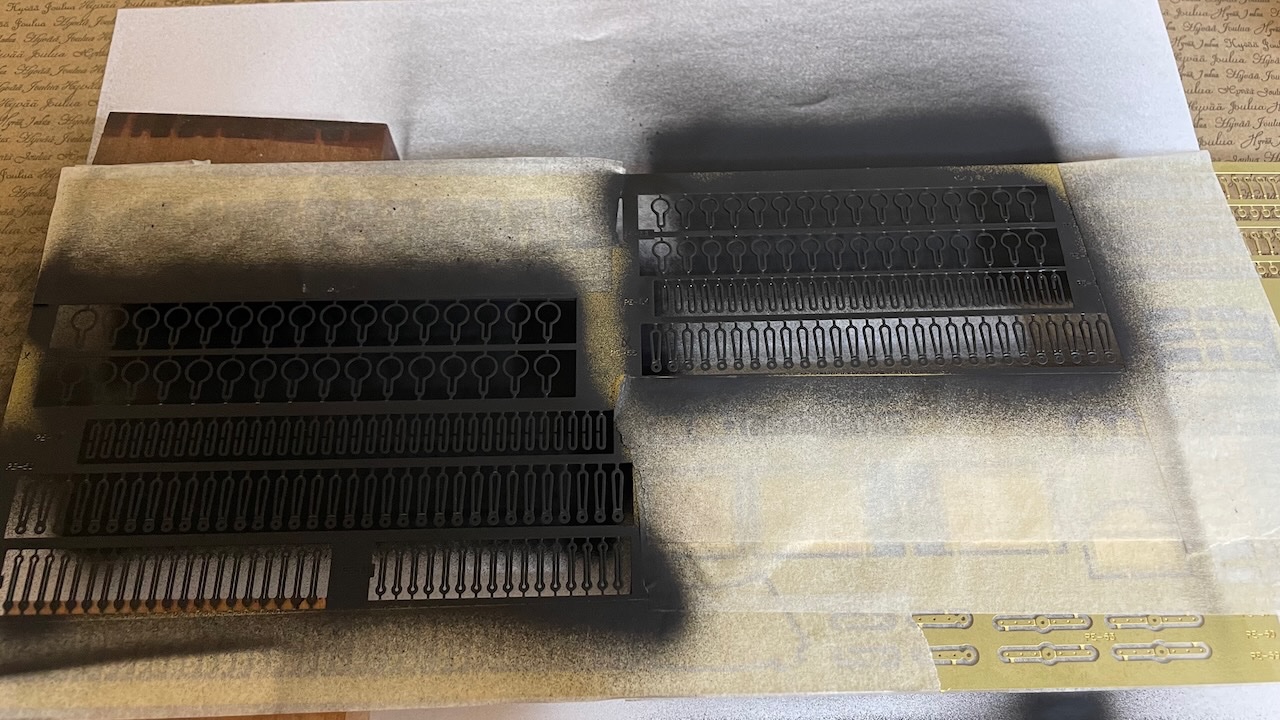
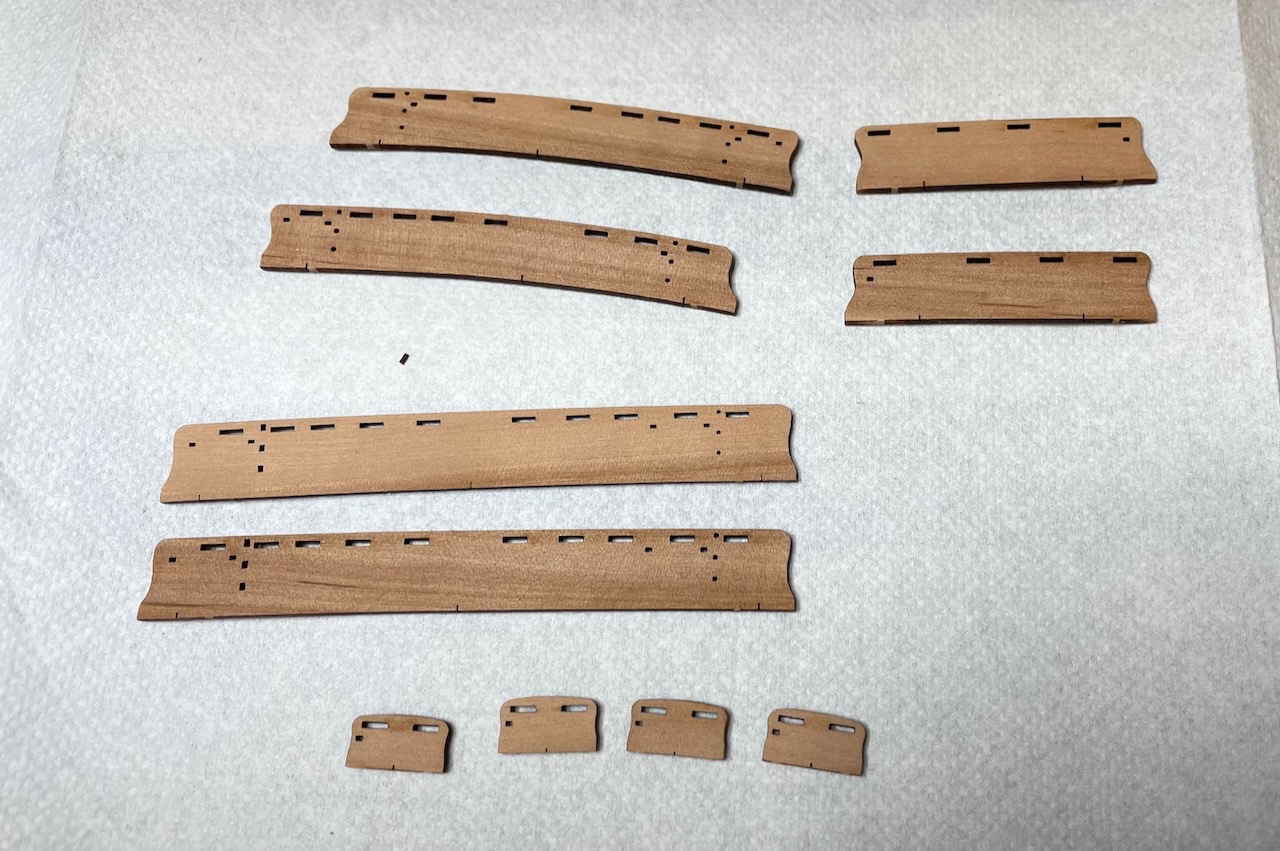
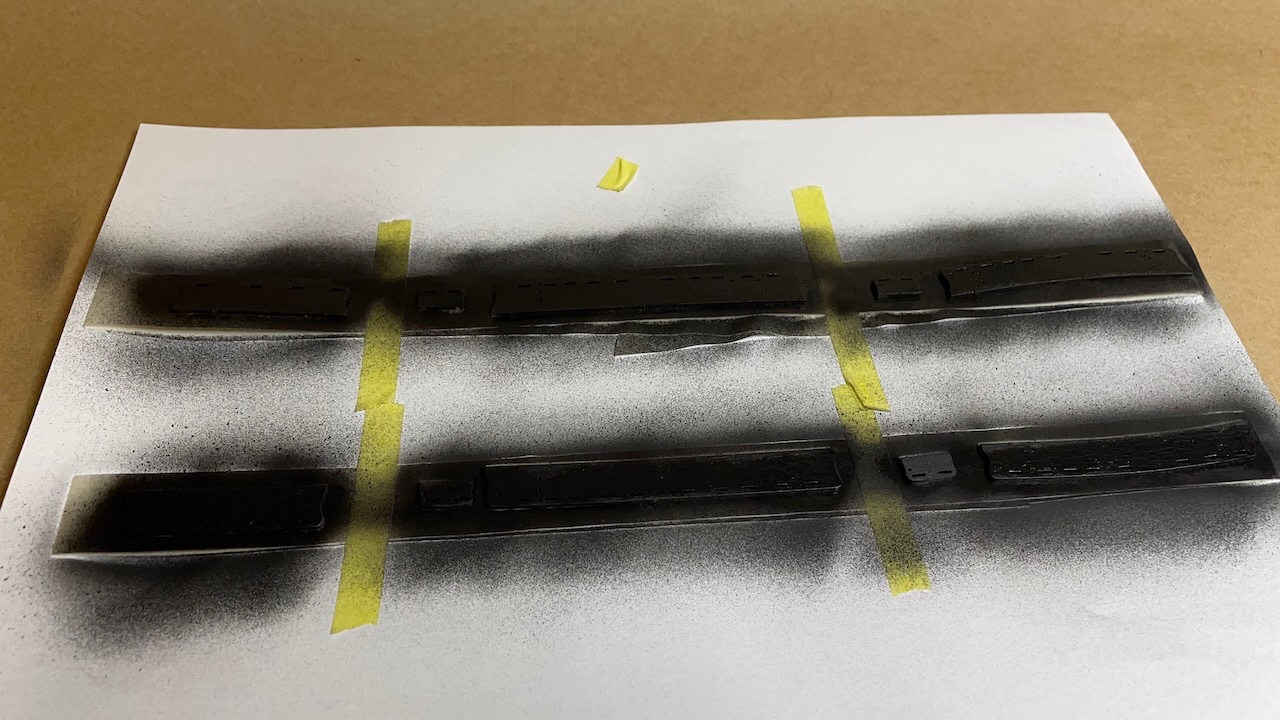
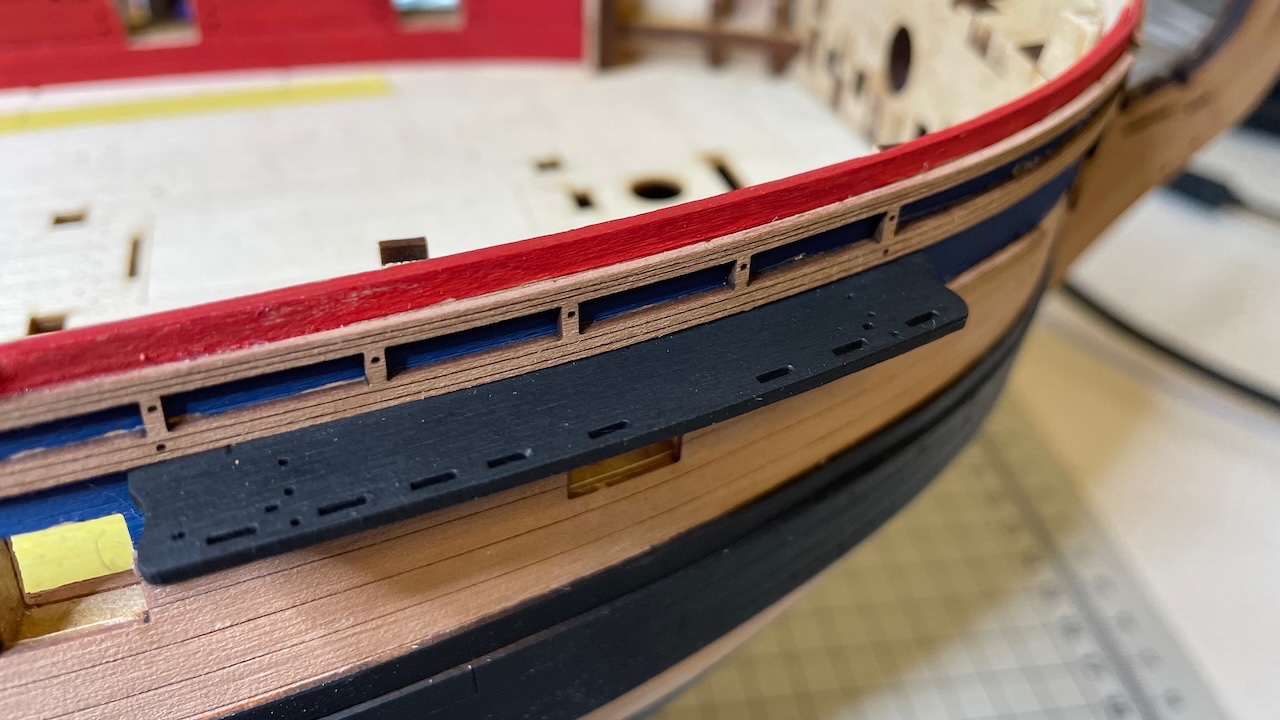
Build day 38: 5hrs / Total 83 hours Today's activity: - Fore-, main- and mizzen channels, - Bow area gratings. Photo 320: Channel parts removed from sheet and sealed with matte varnish Photo 321: You drill holes on the side from spots marked with laser. In these holes we insert the nail cut-off leftovers from earlier stage. Photo 322: Parts painted in black using airbrush. Photo 323: Pin cut-offs inserted. They will help install the channels precisely in place by fitting into the ready holes on the hull. Photo 324: First channel in place. Photos 325: All channels installed including the so called "Channel knee parts" (those L shaped parts resting on the rails and the channels)


- 426 replies
-
- 1
-
-
- Vanguard Models
- Sphinx
- (and 1 more)
-
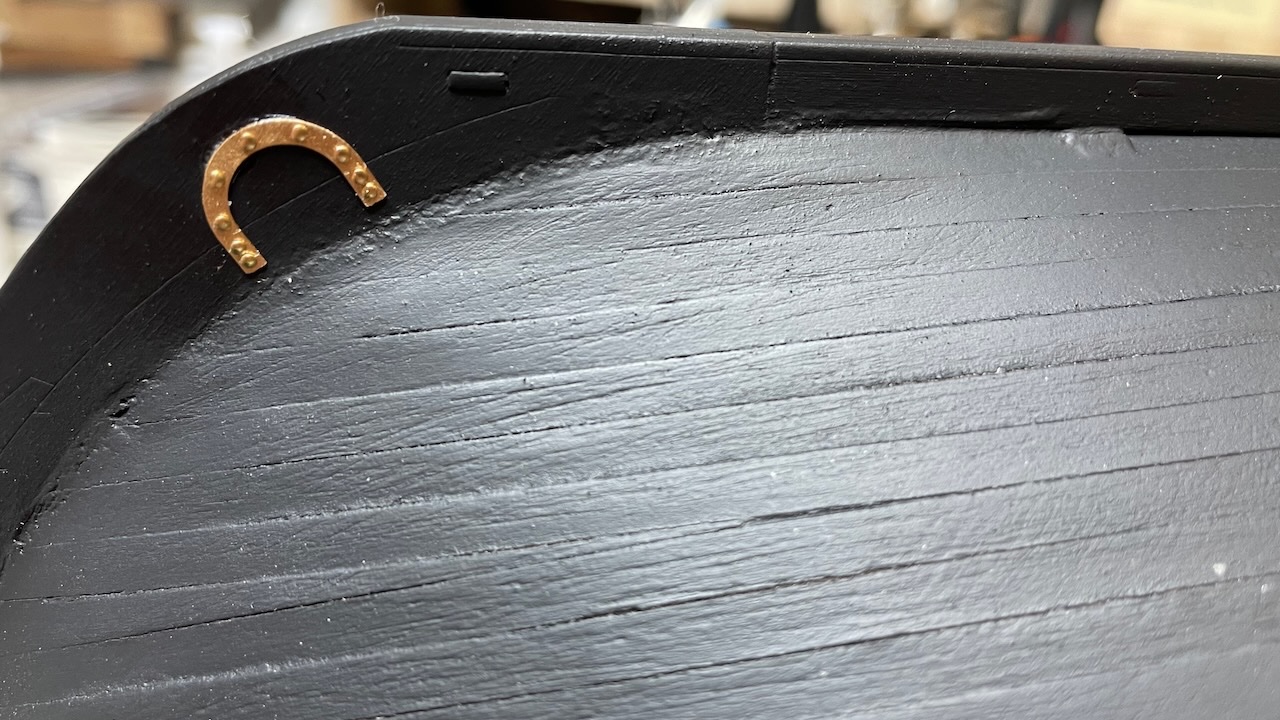
Build day 37: 2hrs / Total 78 hours Rudder ready and installed in place. Also glued the horseshoe and fishplates in their places. I don't have a copper color so I chose a Vallejo Old Gold which was available in my paint box. It is a bit more on the red spectrum and looks good enough for copper on small surfaces such as these ones. Photos 318-319: Rudder, fishplate and horseshoe

- 426 replies
-
- 4
-
-
- Vanguard Models
- Sphinx
- (and 1 more)