aydingocer
-
Posts
916 -
Joined
-
Last visited
Content Type
Profiles
Forums
Gallery
Events
Everything posted by aydingocer
-
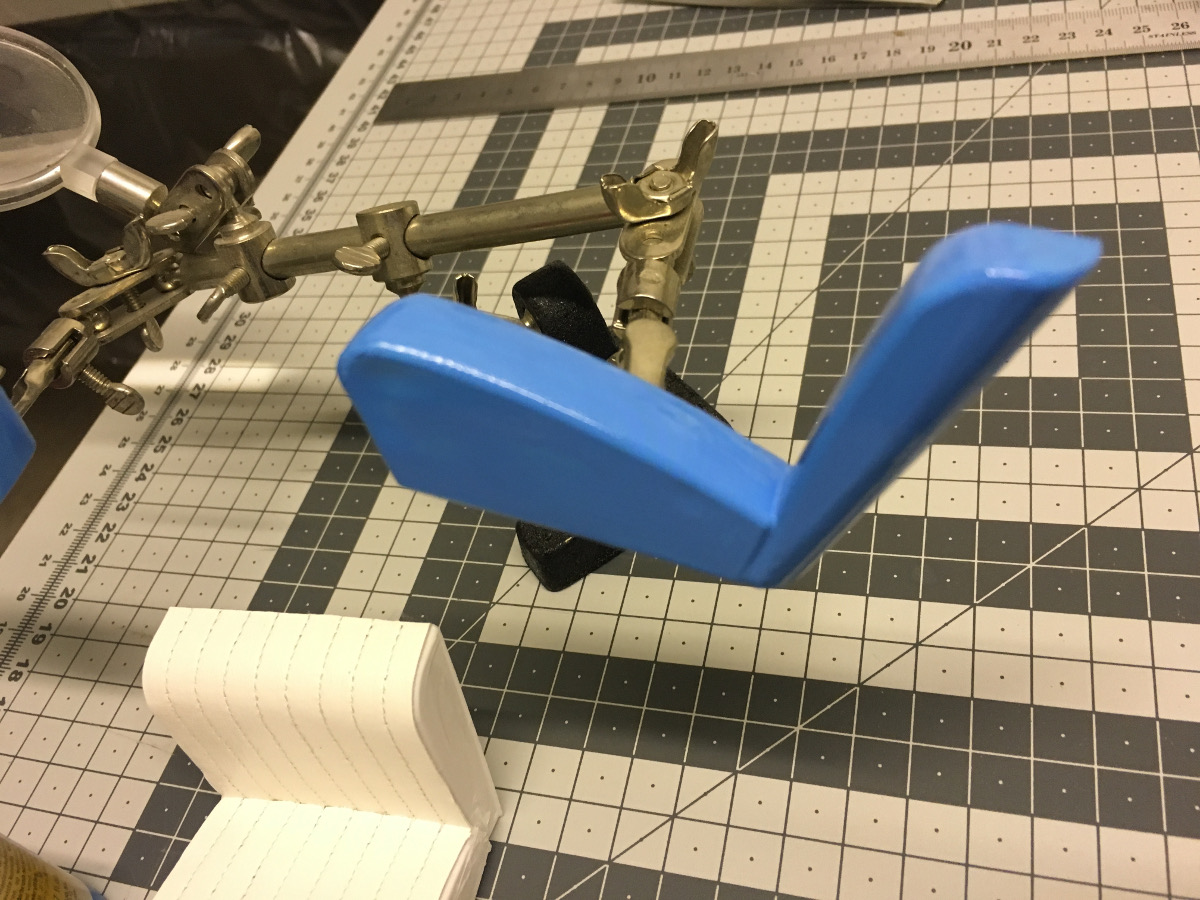
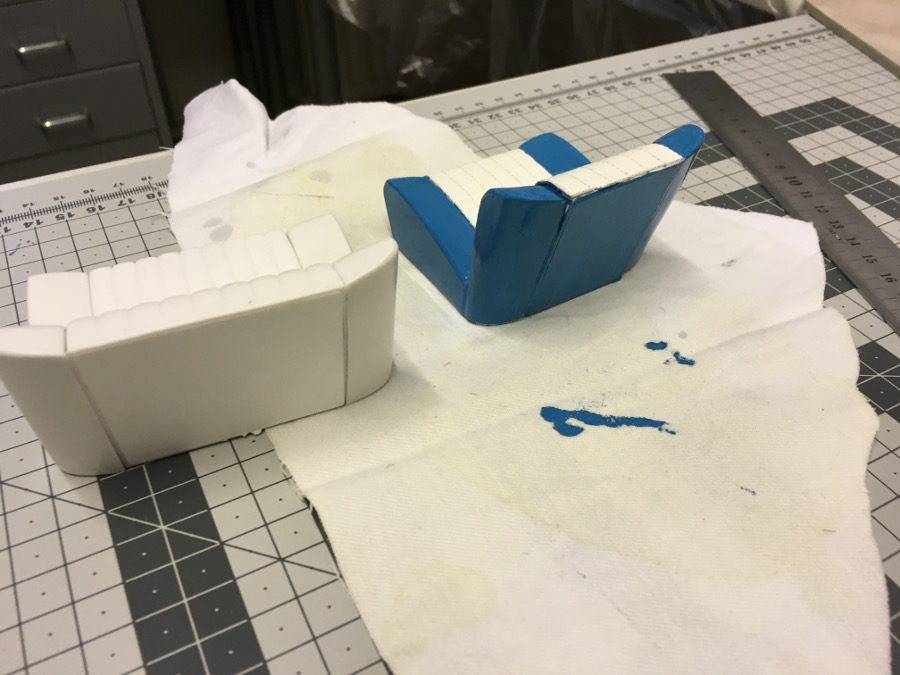
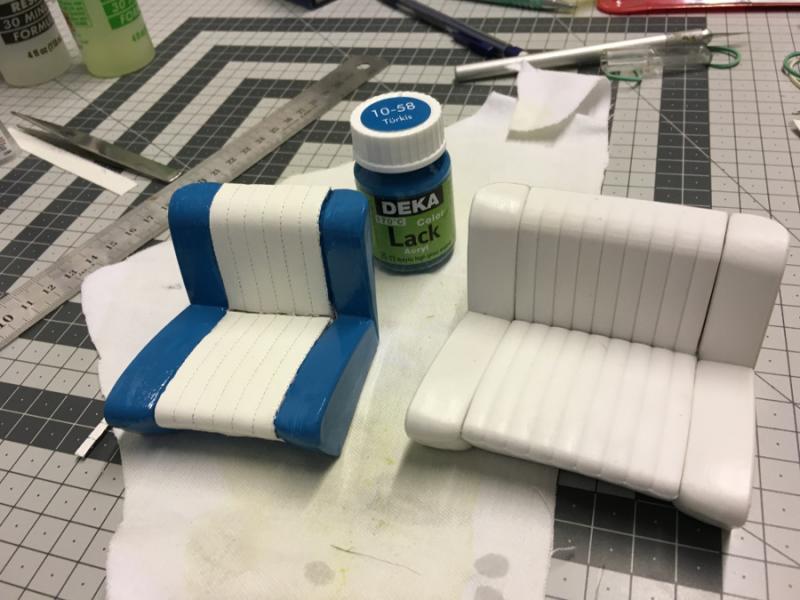
 Actually, before hearing any comments, I tried which I believe a better approach on the passenger seat: I ripped off the sides (they were apparently just glued to the center piece) and worked on 3 pieces separately, hence eliminating the risk of accidentally painting the leather or spreading glue on the sides. I have also used a different paint than the previous one. It is a water based airbrush paint which I happen to have found among my color collection from previous projects. This one is easier to apply (I used normal brush) and the color feels more.... how can I say... "fresh". Yes, that's the word! The seat looks much better now, with flawless leather cover and fresher blue: I will glue the pieces together once the paint has dried. I will also do the same to the driver seat.
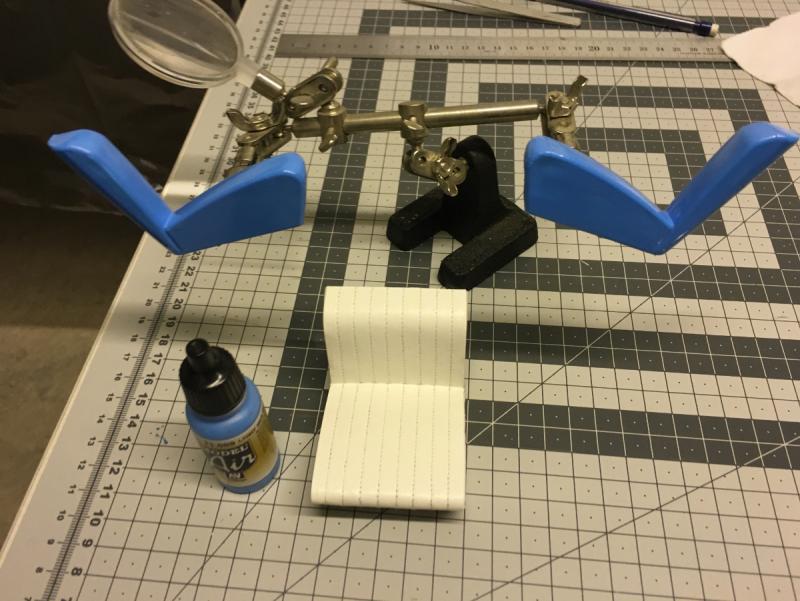

- 414 replies
-
- 7
-

-
- riva aquarama
- amati
- (and 2 more)
-
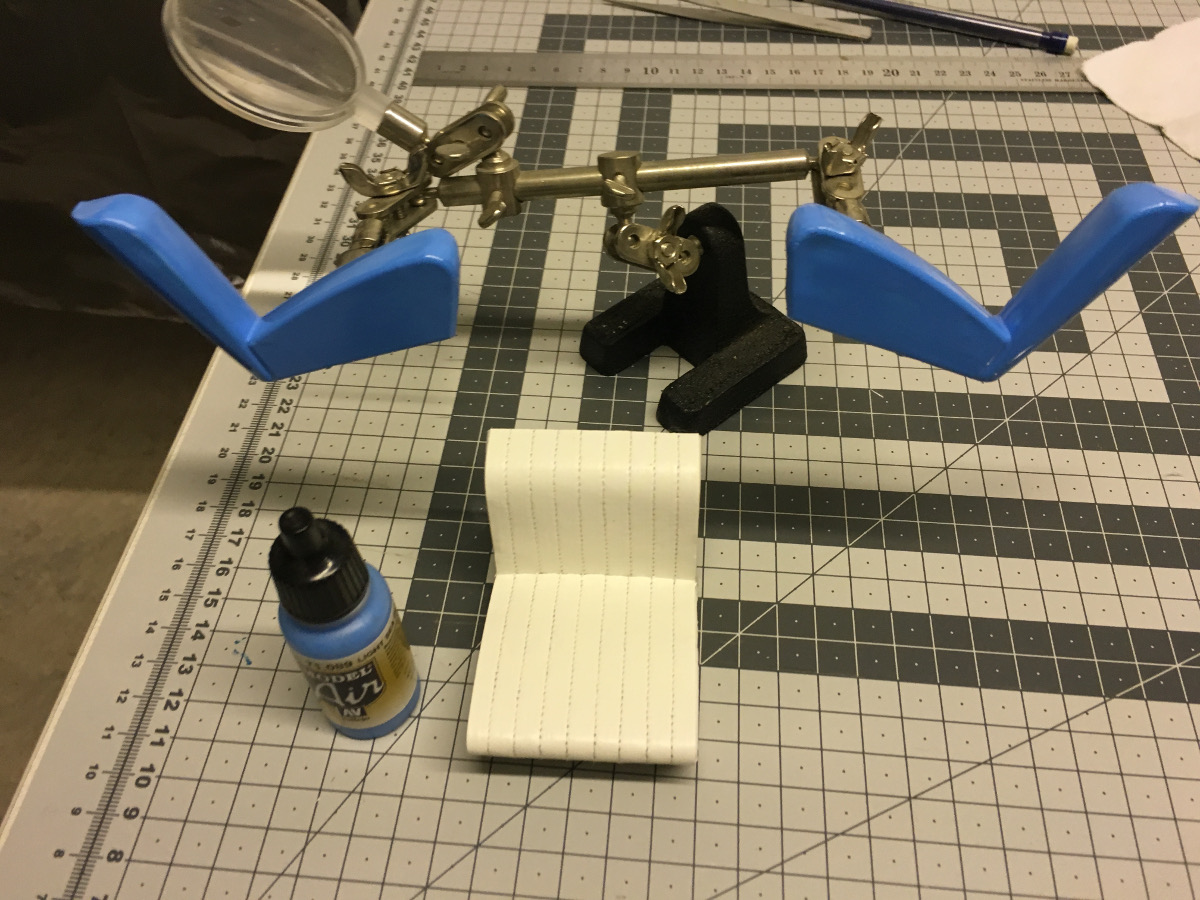
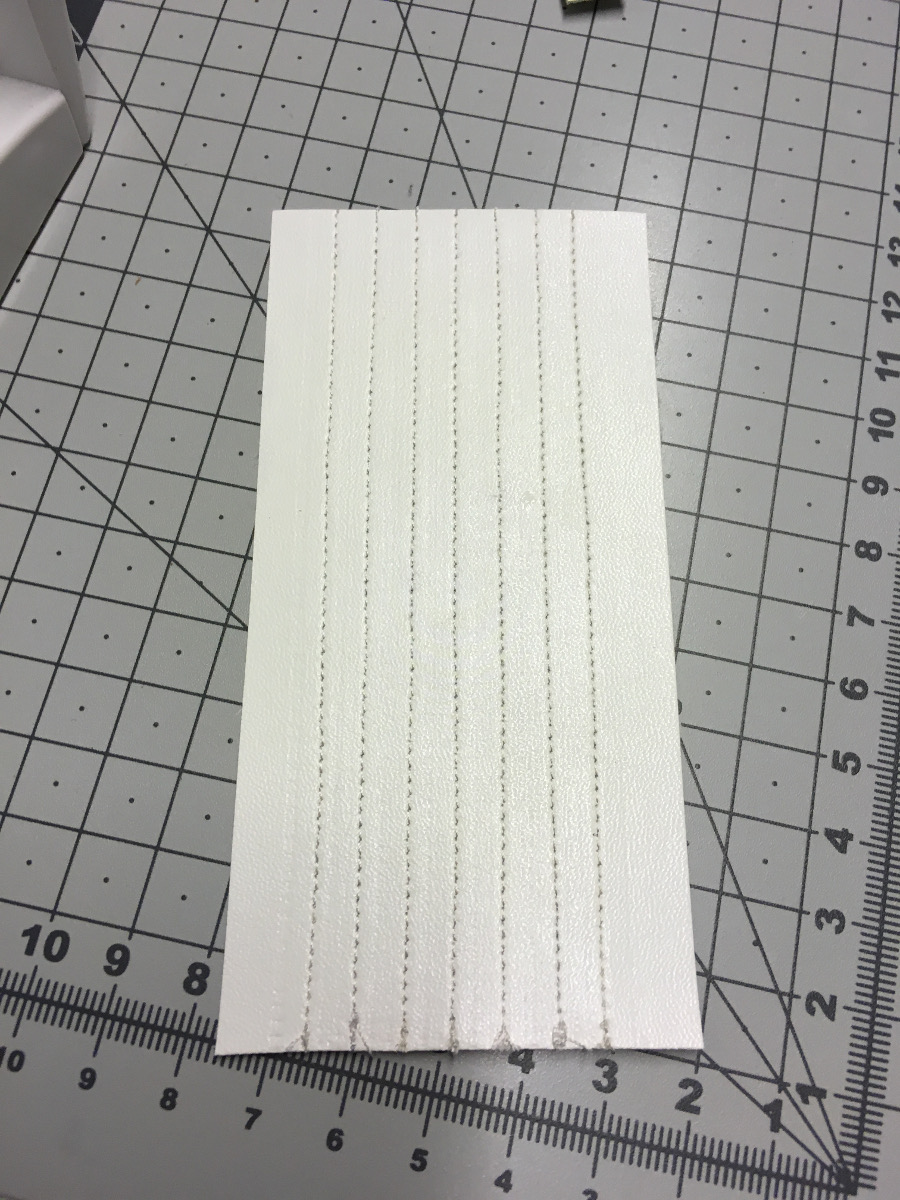
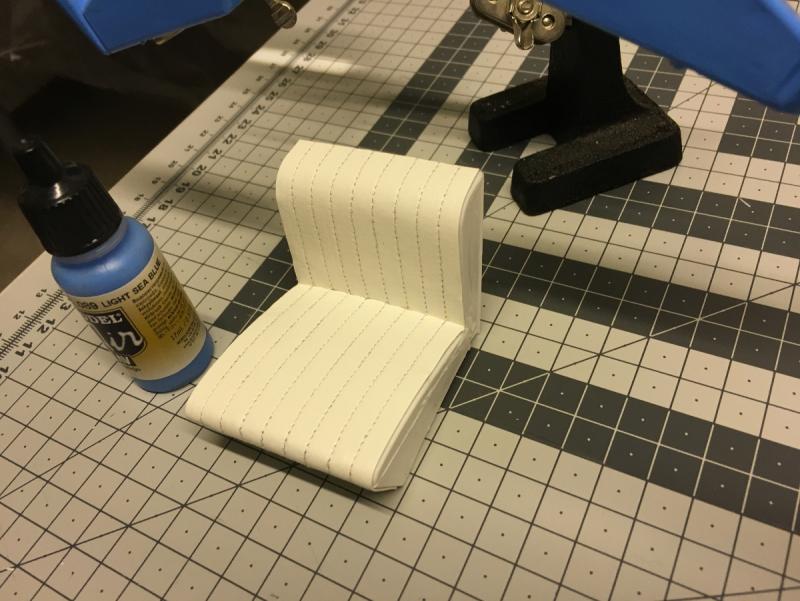
Trying my luck with the faux leather sheets which I had mentioned earlier that I had a tailor run stitches through to simulate the seat covers. This is the leather sheet as it sits: And here is the "driver's seat": I have glued the leather and painted the rest with turquoise (the true color is lighter than in the photo). But I am not sure. On the one hand, it looks quite retro, just like the way they should be on a 70's Aquarama, on the other hand, they are not perfect. The other seat is the way they come in the kit. I have the possibility to wash the paint, rip the leather and do it from the start, though. The foldable trays will be installed on the back. What do you guys think?


- 414 replies
-
- 9
-
-
- riva aquarama
- amati
- (and 2 more)
-
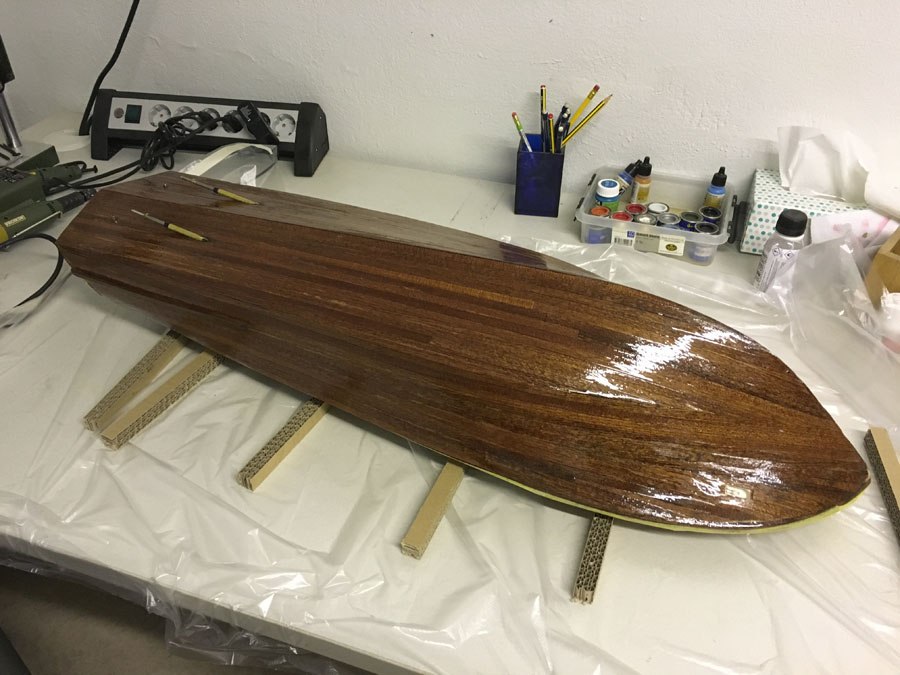
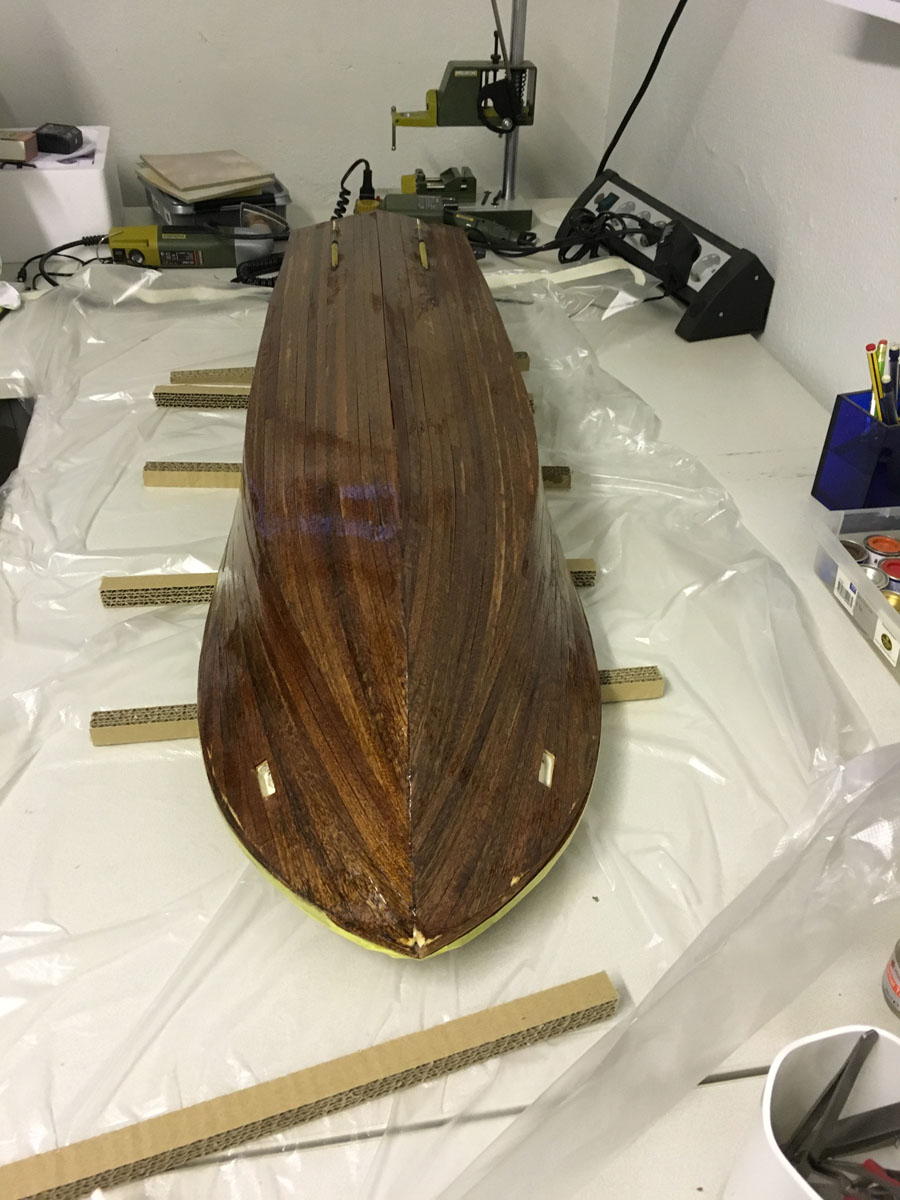
End of build day 39. 2-3 hours today. 120 hours into build in total. At the end of these 2 days, I brushed the hull with 1 layer of GIT-ROT and 1 layer of Epoxy mix (50% Zpoxy and 50% denatured alcohol mix). I am thinking of 1 final layer of Zpoxy mix and then continue with varnish (water resistant Hempel Dura-Gloss Varnish). This is the status at the end of the day. Thanks for watching.


- 414 replies
-
- 10
-
-
- riva aquarama
- amati
- (and 2 more)
-
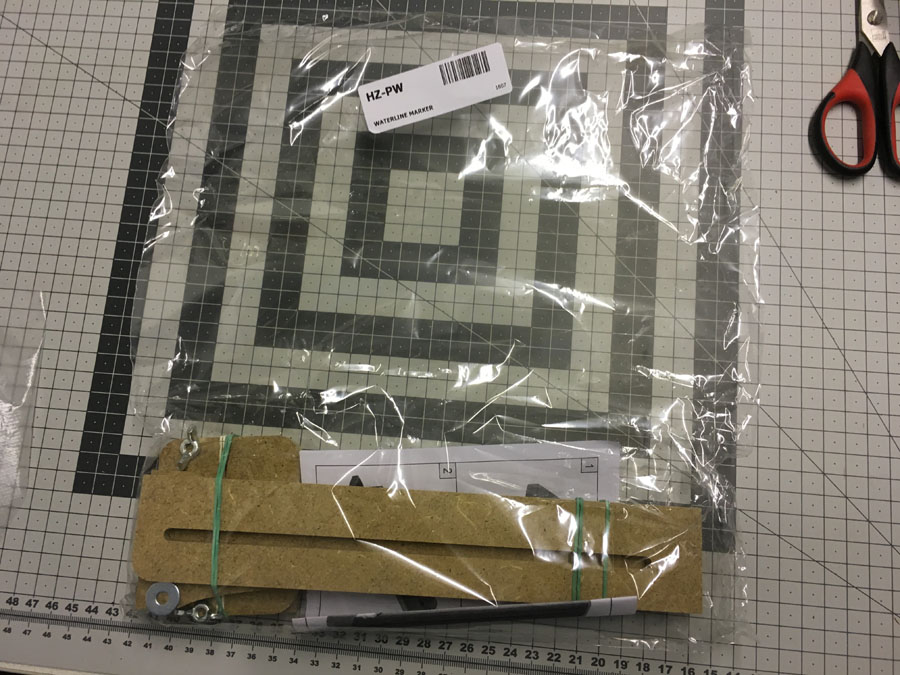
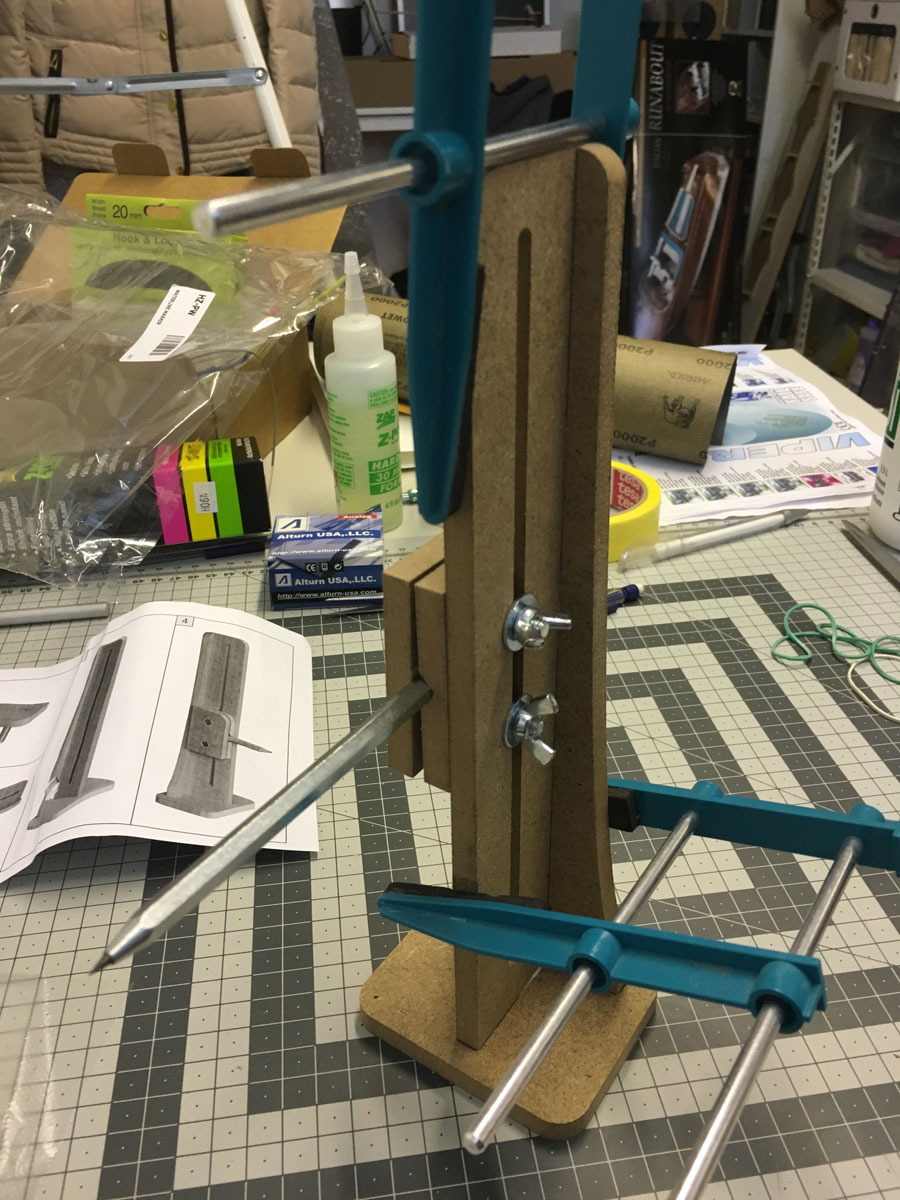
I have also received the waterline marker from Hobbyzone (www.hobbyzone.pl). It is a small kit in its own. This Hobbyzone has some nice products for the modellers, if you haven't checked already. I actually have my first blog in this forum about their building slip here : http://modelshipworld.com/index.php/topic/13422-hobbyzone-building-slip-for-wooden-ship-models/ So now I have my watermarker ready, once the glue has dried.


- 414 replies
-
- 5
-
-
- riva aquarama
- amati
- (and 2 more)
-
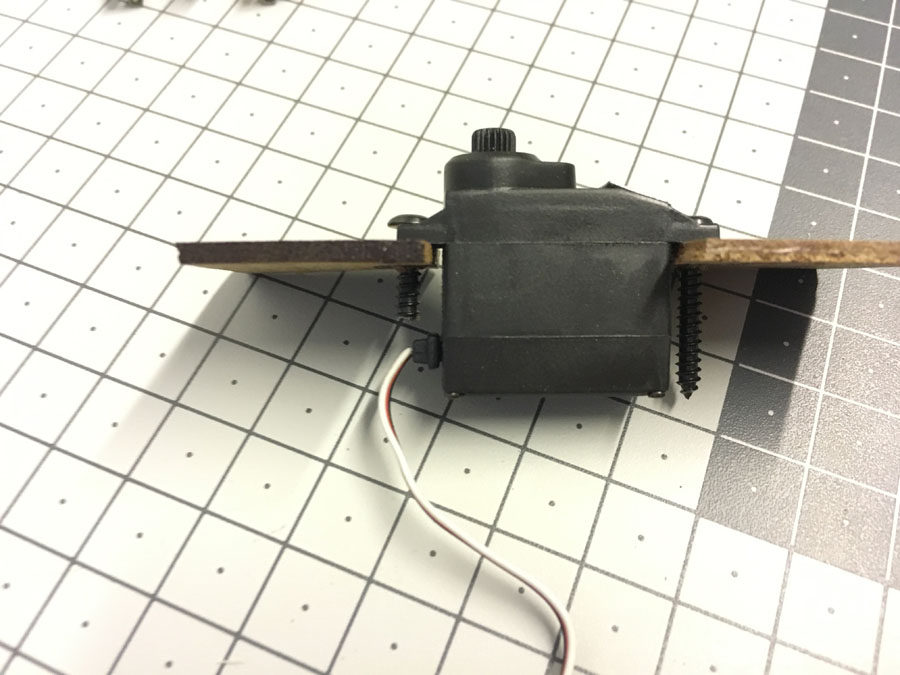
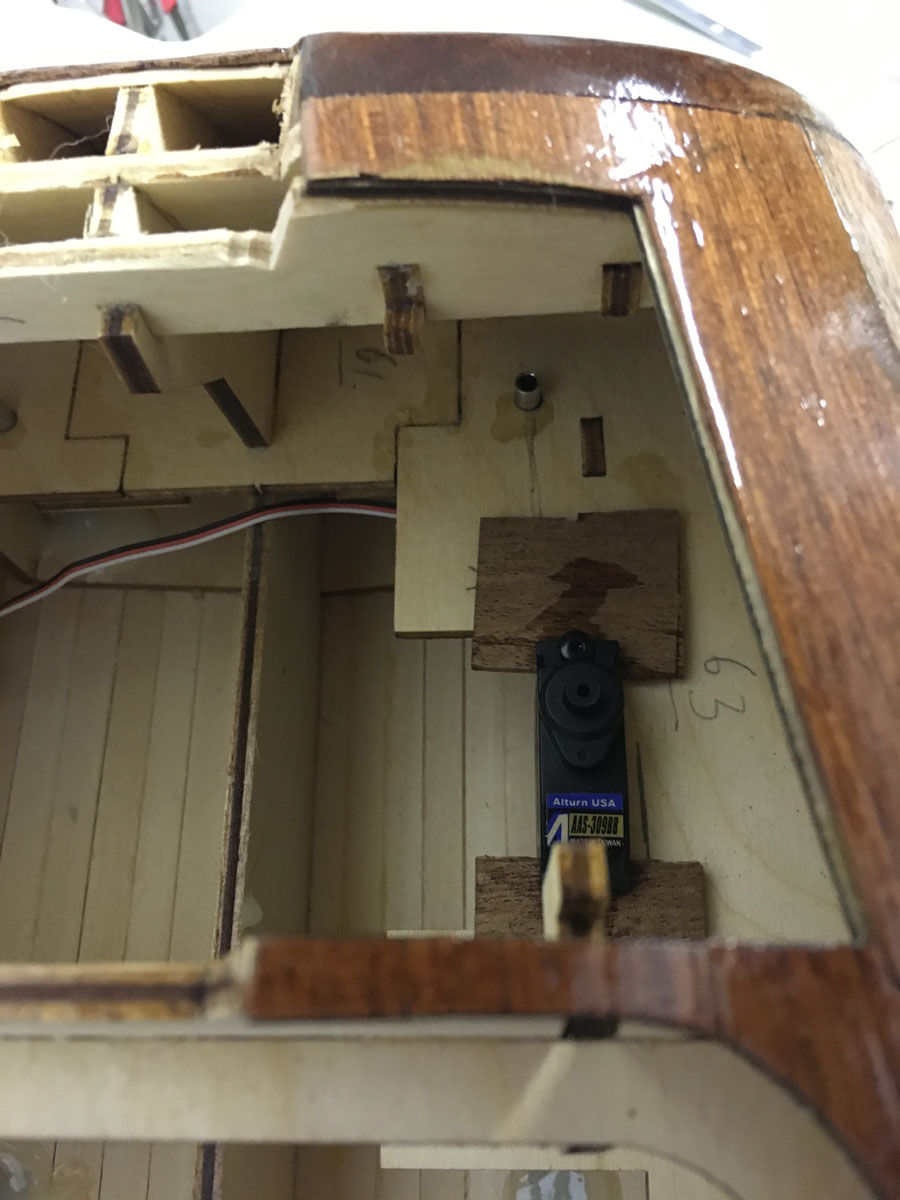
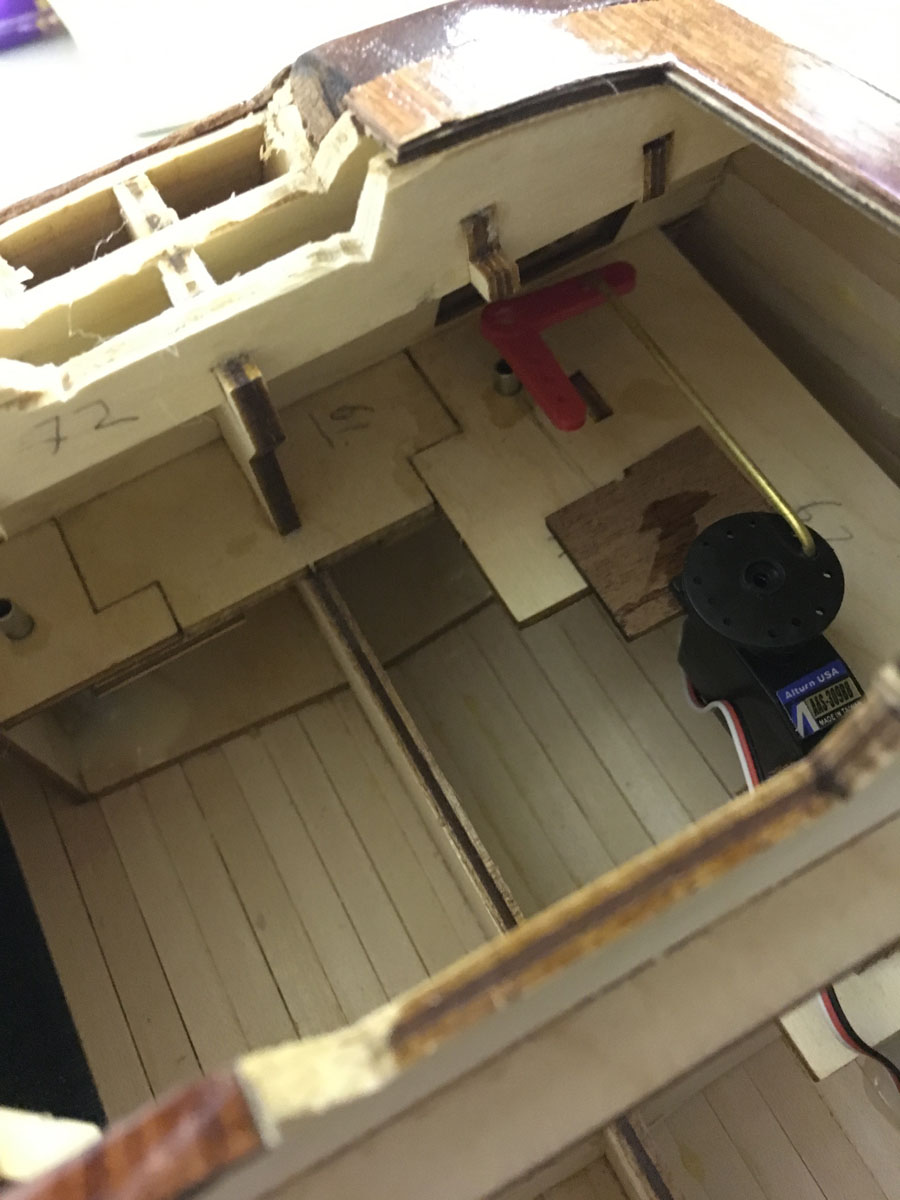
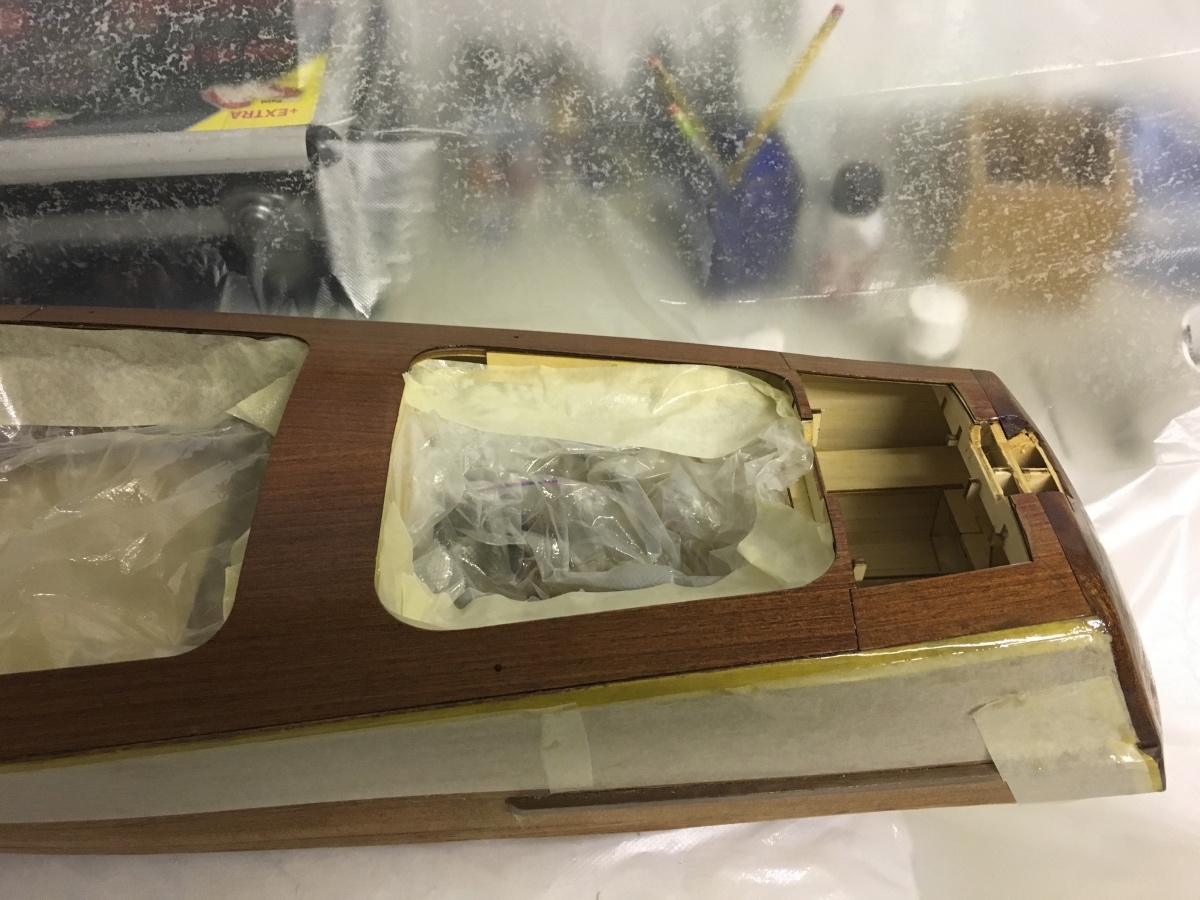
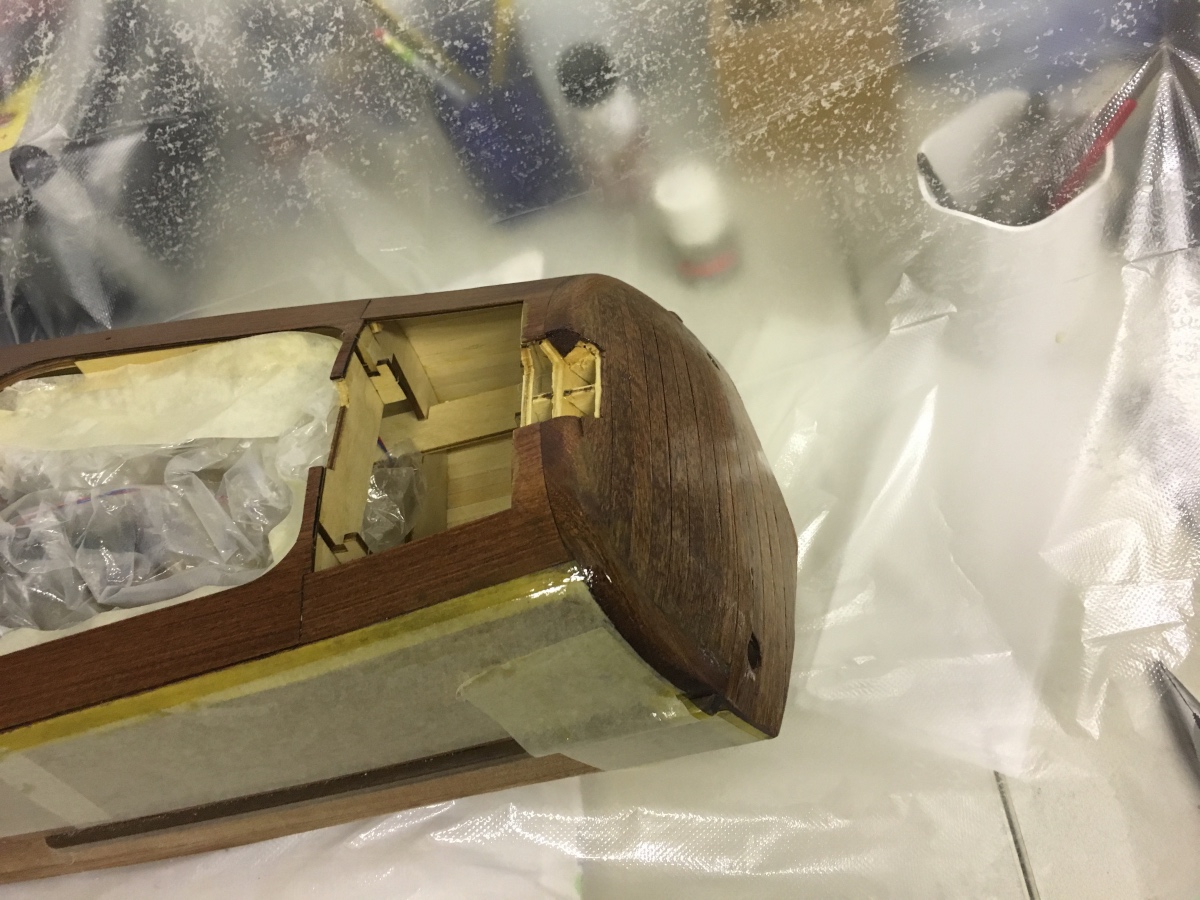
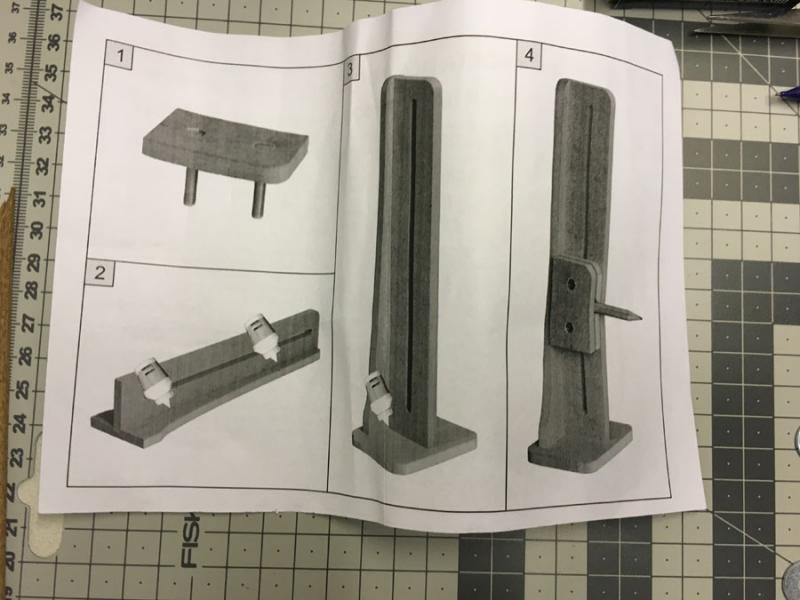
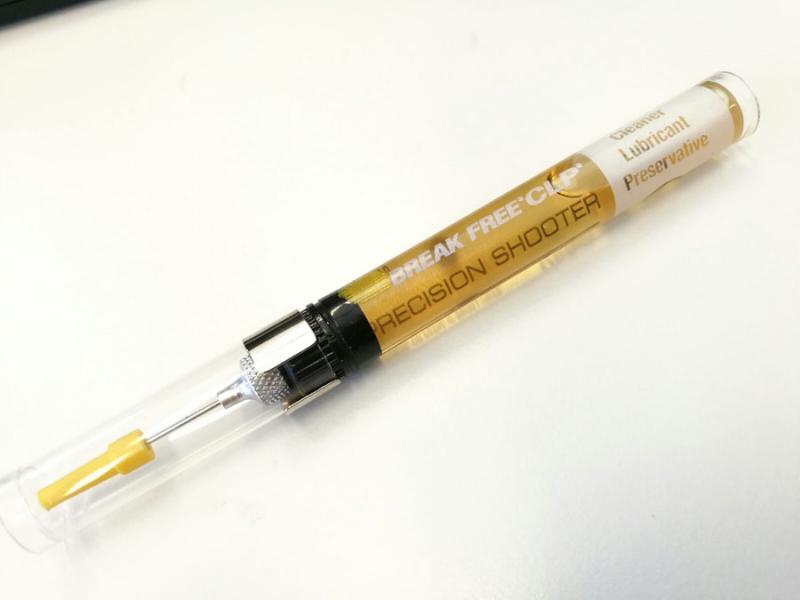
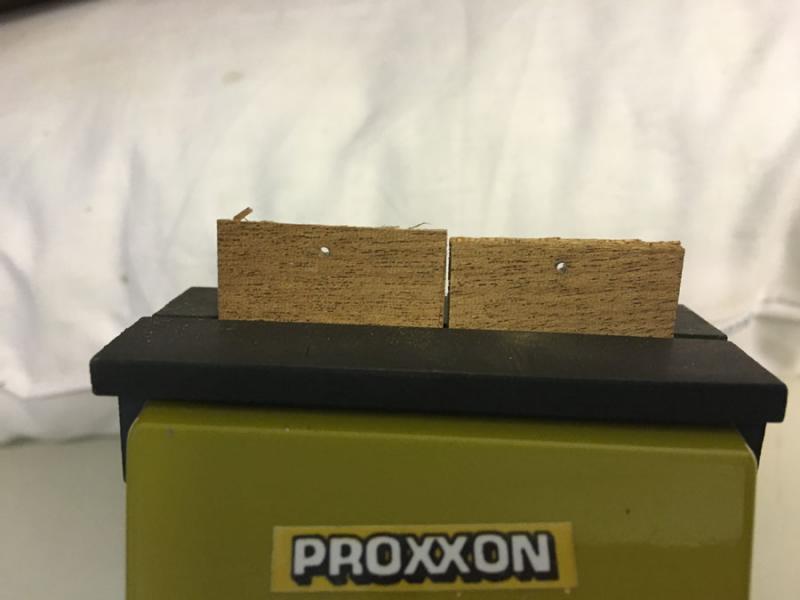
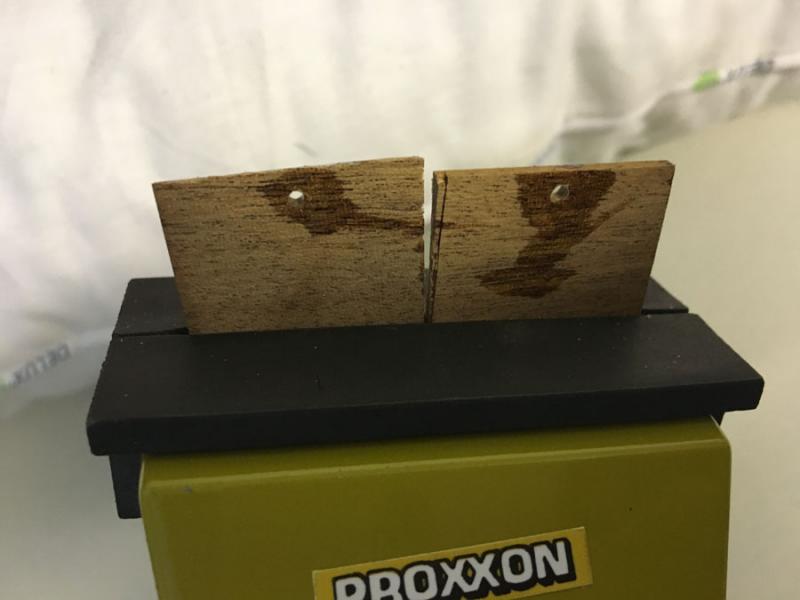
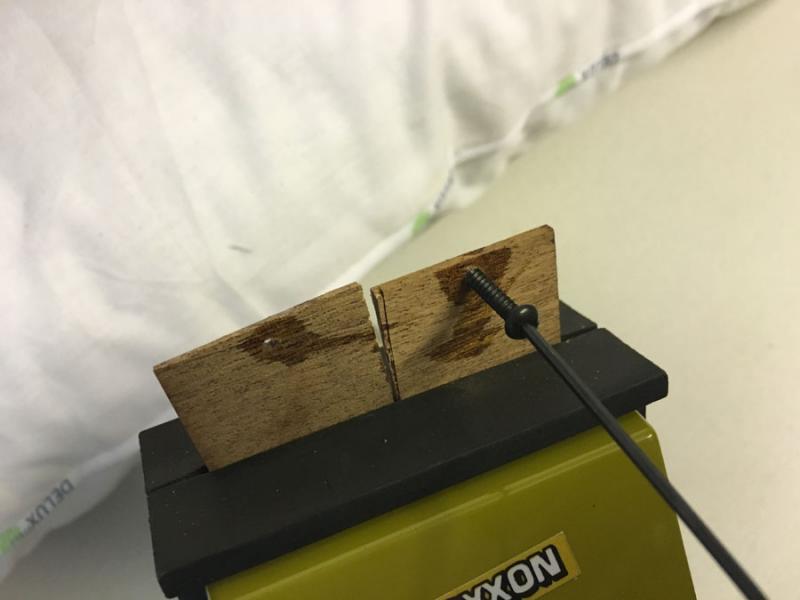
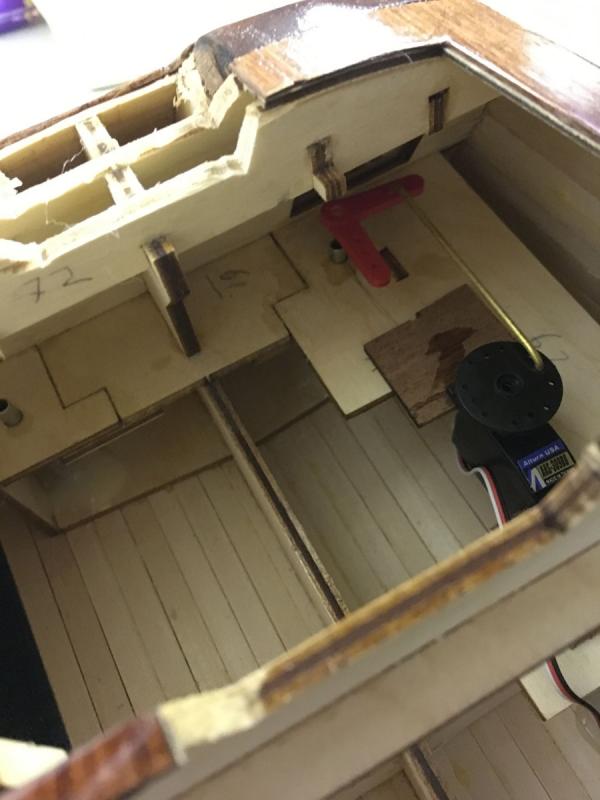
Build Days 38-39. Continuing with other tasks while waiting for the new electronic speed controller to arrive.... always waiting for something. I had been looking around for an oil dispenser which can deploy oil with precision, since the oil supply holes on the propeller rods are quite small. One idea was to use a syringe with needle but sales of syringe needles is strictly under control in Finland. Then a close friend of mine who works in a hunter's gears supplier here in Helsinki came up with this professional stuff: A gun oil with precision dispenser, apparently so called CLP (clean-lubricate-protect) grade. After all, I think my Aquarama deserves more than just ordinary sewing machine oil so I accepted the gift: Anyway, then I decided to make a suitable slot for the servo using some scrap wood since the dedicated slot in the kit appears to be too big for my small servo. Here are some photos of the progress, after some measurements: 1. Drill 2mm holes for the M3 size screws: 2. Enforce the holes with some super glue so that the screw won't break the wood (it actually did break at first try, you are looking at the photos from my second try now): 3. Test: 4. And the boards are in place. Note I had to saw off one of the screws as it would otherwise hit the wiring: 5. Measure and cut the brass chord between the right rudder and the servo: 6. Servo dry fit in place:


- 414 replies
-
- 7
-
-
- riva aquarama
- amati
- (and 2 more)
-
Thank you for the information, Sunsanvil. Everyday is a learning process
- 414 replies
-
- 2
-
-
- riva aquarama
- amati
- (and 2 more)
-
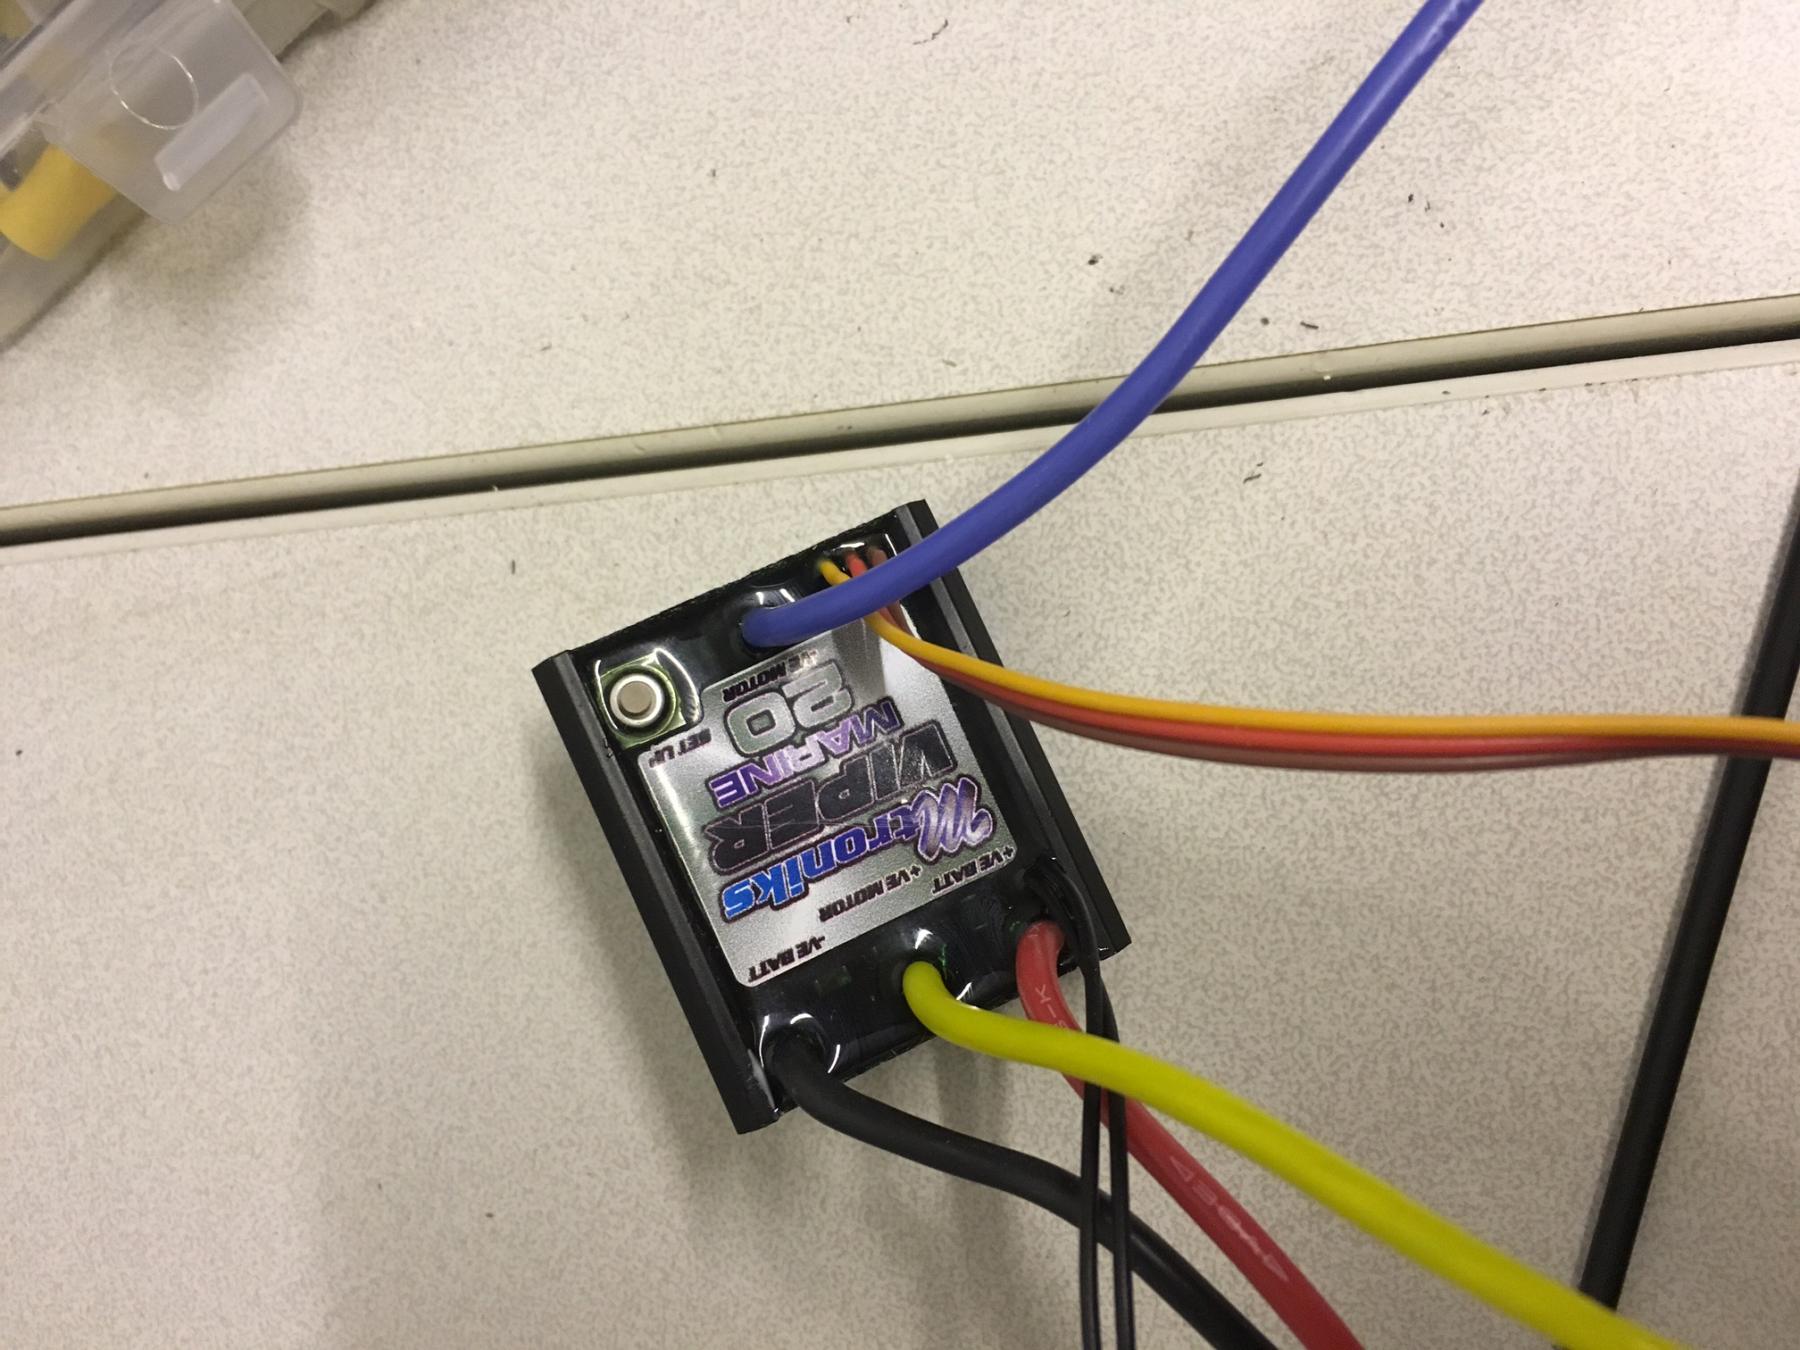
I burned the Electronic Speed Control yesterday. Luckily there was no damage to the boat. I was just demoing the LED lights. After a few seconds there came a huge smoke. The yellow wire's solder melted and came off. And when I checked the manufacturer's page, it was apparently not LIPO battery compatible! I have now ordered another model which is LiPo battery compatible. I had no idea that the battery type could be so important! I bought LiPo battery just because I read that they are supposed to be better. I would only check the voltage and amperes. Heh This was what came in the kit: http://www.mtroniks.net/prod/Boat-Speed-Controls/Viper-Marine-20.htm This is what I ordered now: http://www.mtroniks.net/prod/Boat-Speed-Controls/tio-Marine-15.htm My GIT-ROT Epoxy has arrived by the way. I will start soon to apply it on the hull. Can't wait, but it is quite busy at work nowadays... long days. So let's hope.
- 414 replies
-
- 4
-
-
- riva aquarama
- amati
- (and 2 more)
-
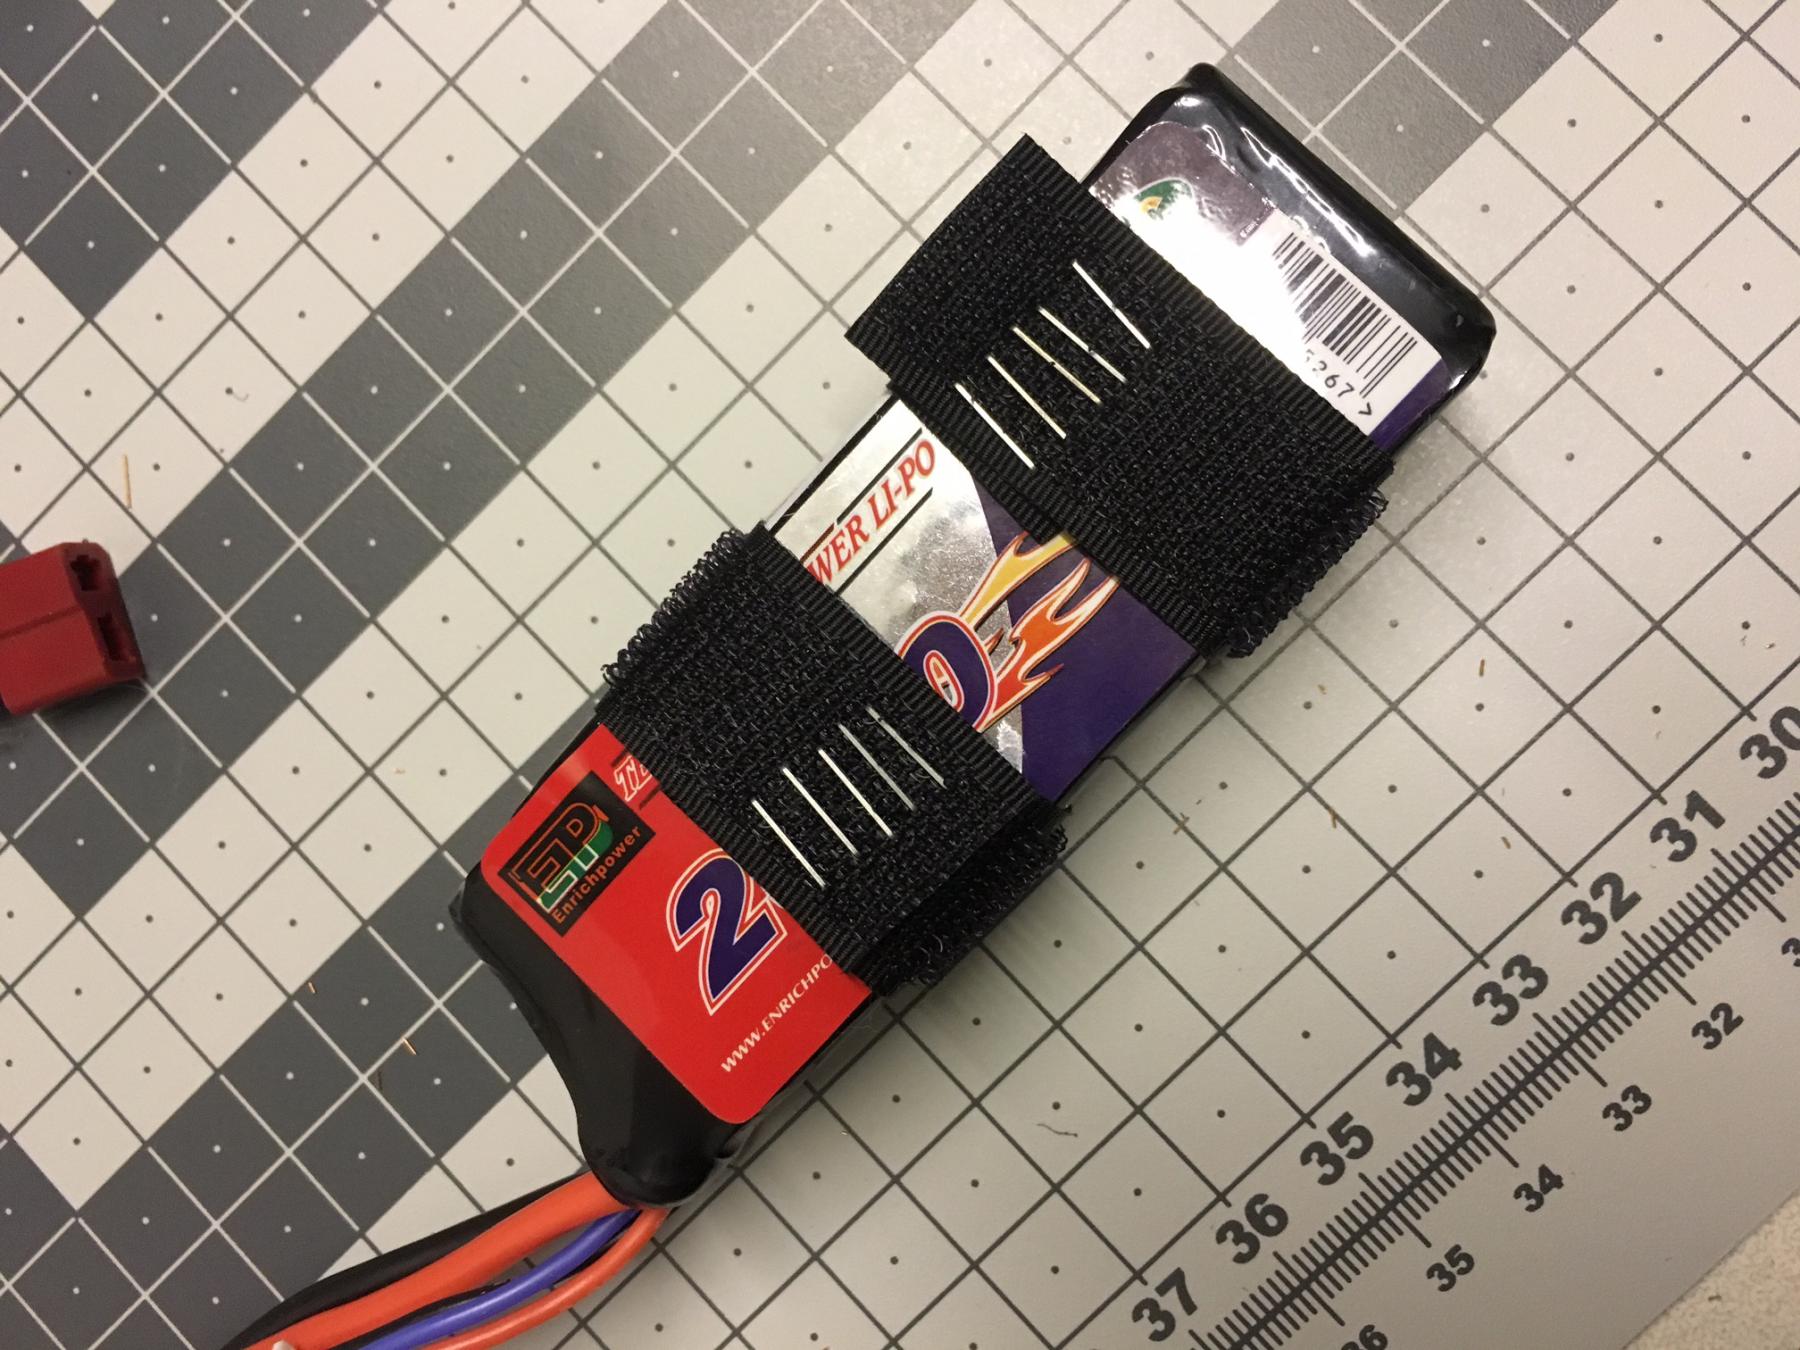
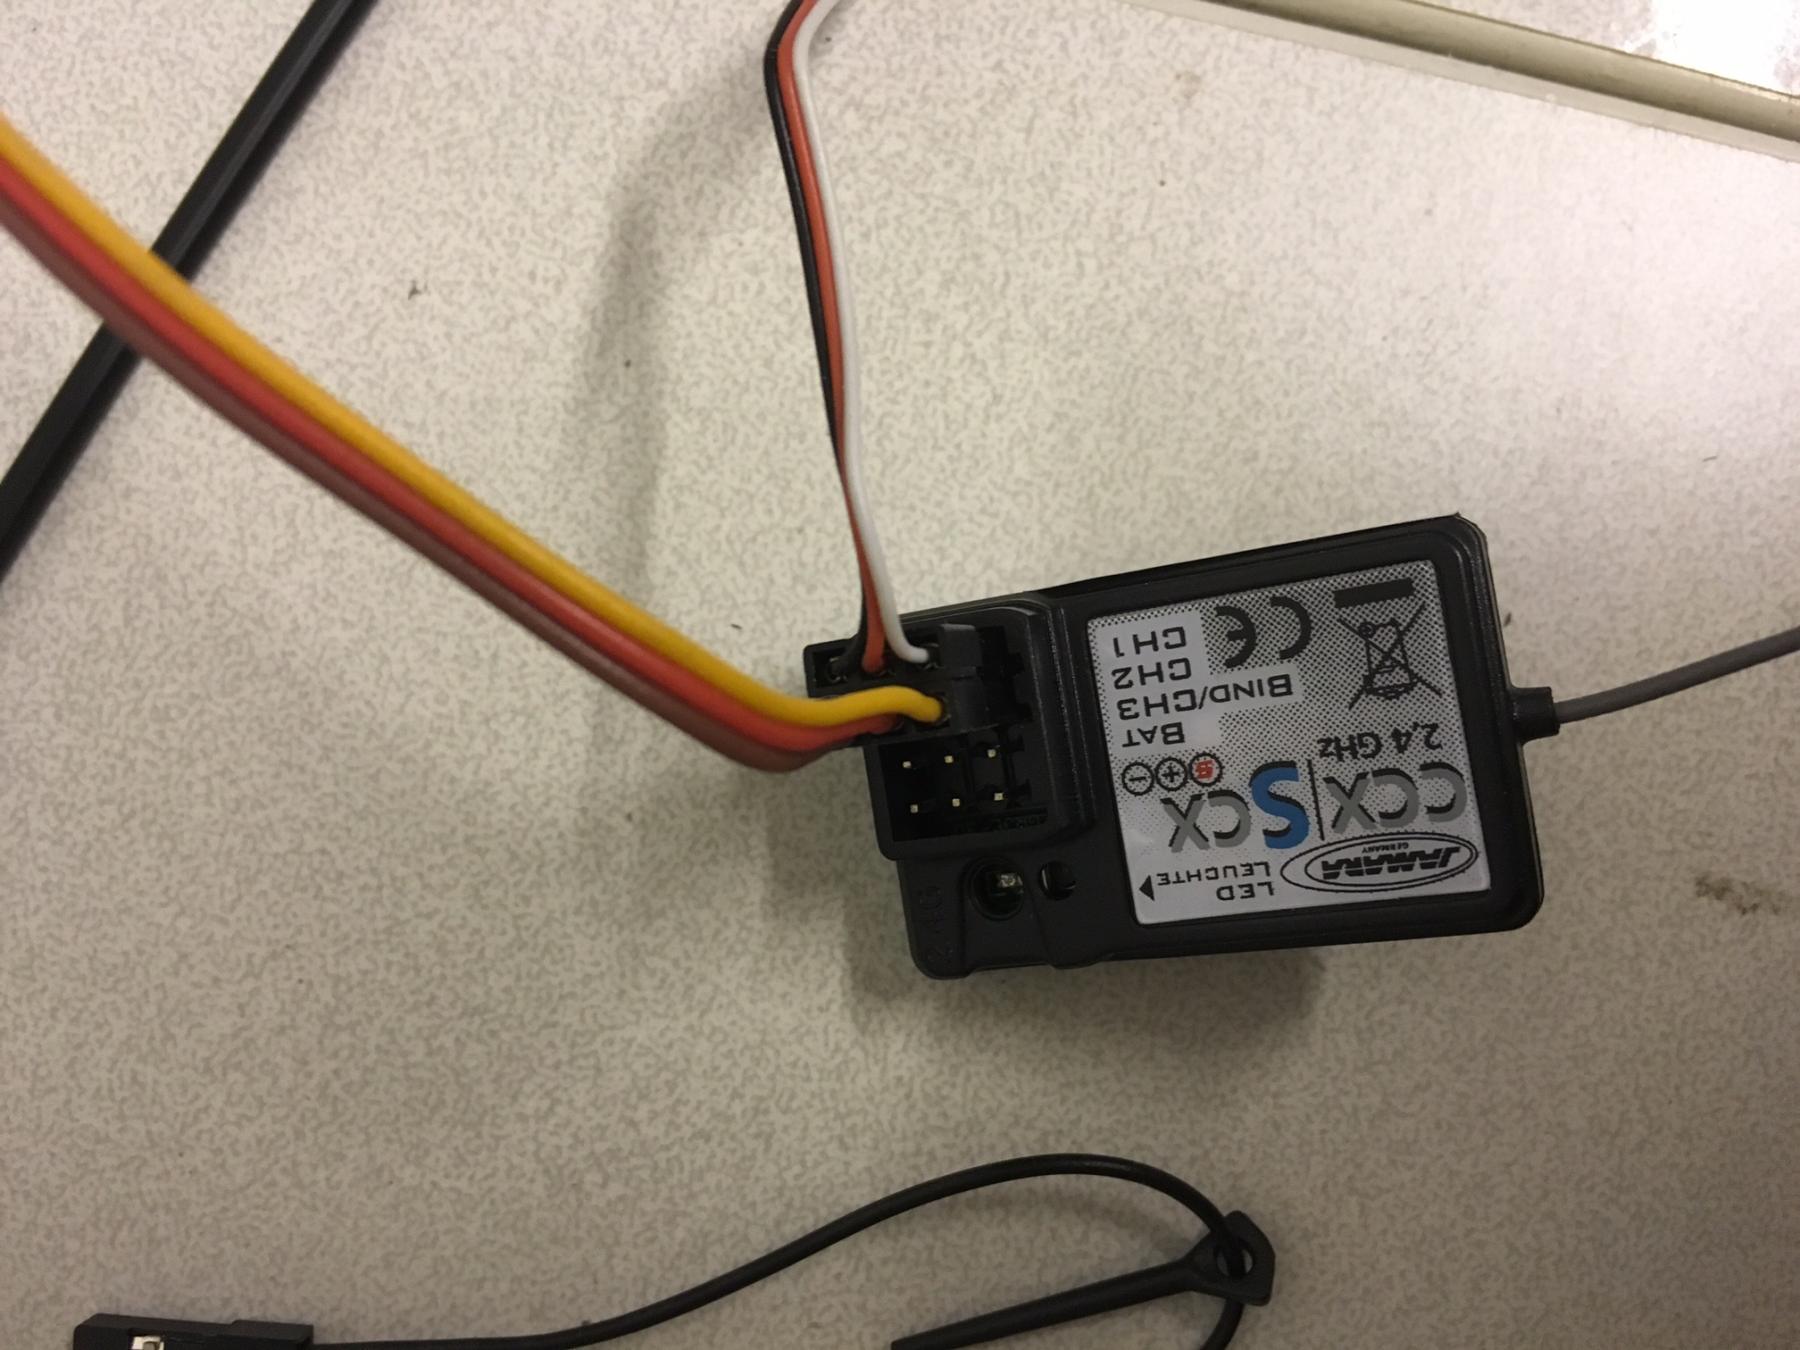
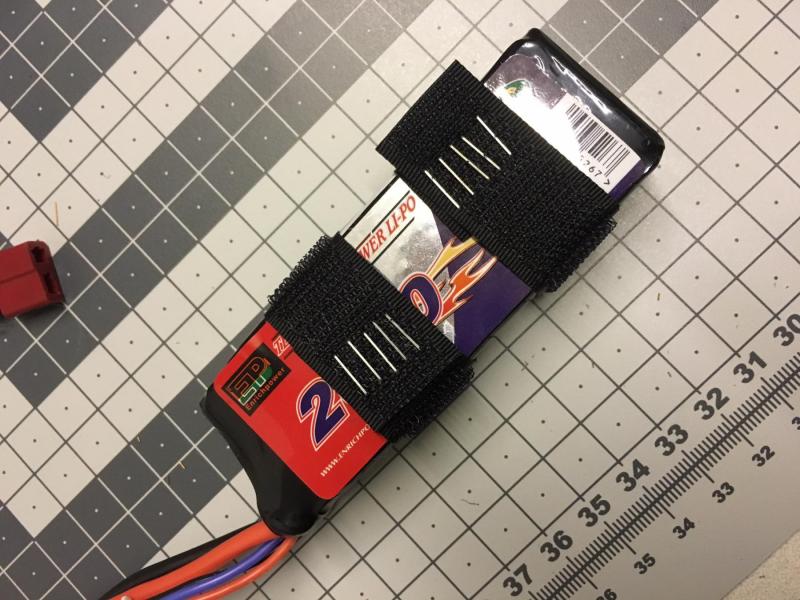
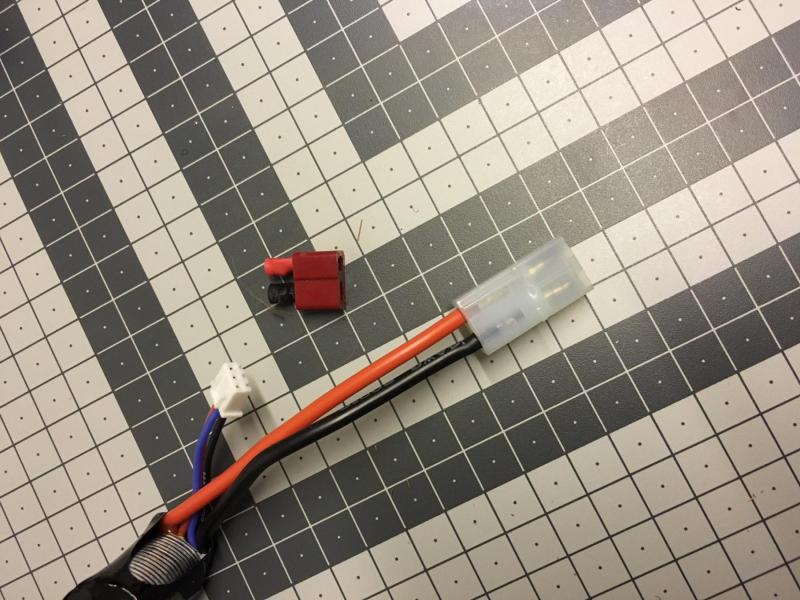
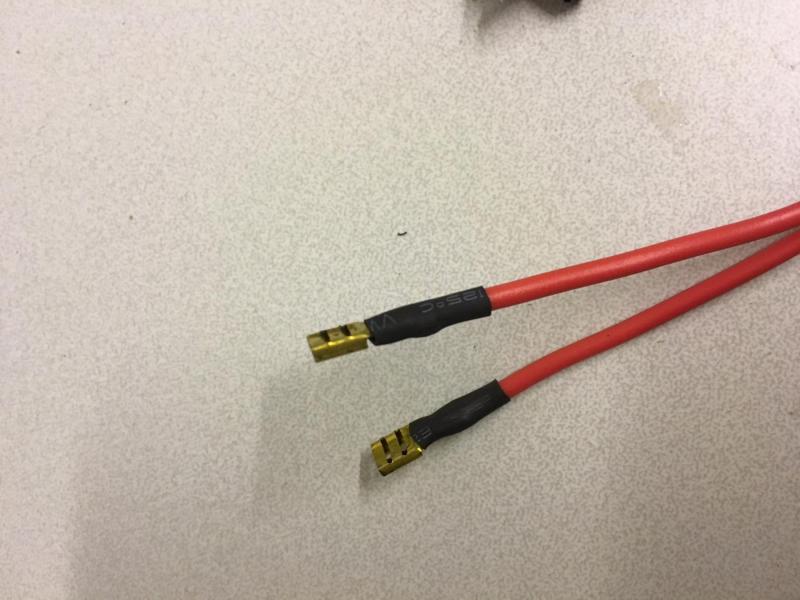
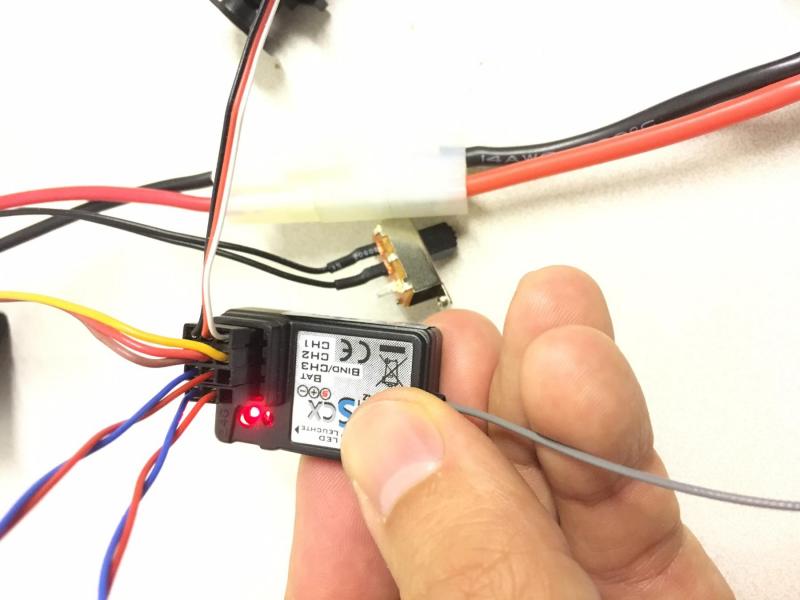
Build Day 38. 3 hours. 117 hours into build in total. While waiting for my GIT-ROT epoxy to arrive from the post with still a few days to go, I spent some time to get the radio control connections in place, together with invaluable help of a friend who is very handy in electronics. Now after the photos and testing with dry-fit everything works. I am able to speed up the propellers with one channel, rotate the servo (which will feed the rudders) with the other channel and even turn the front light leds on and off. Next job will be to fit them in the boat after applying the epoxy inside the hull. Here are some details: wrapped the battery with velcro and secured with staples. This way it will be possible to install it in any orientation in the boat (either on narrow face or on wide face depending). The battery connector was a different type than that of the electronic speed controller (ESC), therefore I had to cut if off and install a compatible one (red cut-off piece is the old one which came with the battery): Then I strengthened the connectors to the motors with real solder and heat-shrink tubes. Previously I had just squeezed them with a pair of pliers but it was apparently not good enough. They are solid now: Receiver: The "yellow-red-brown" set going to ESC and the "white-red-black" set going to the servo. The ESC: I noticed some more available slots on the receiver and decided connect the LED wires to it (in the below photo the "red-blue" pairs, one for left headlight and one for the right). So no need to hook them separately to the battery. The switch at the back belongs to the ESC. ESC is the only component which is connected to the battery (the others get the energy from the ESC, depending on how much it delivers), so its switch turns the entire circuit on and off. Well, this is all for now. I will post more photos of course, once they are in place. But first I still have to wait until the epoxy has arrived. Thank you for watching, /Aydin


- 414 replies
-
- 8
-
-
- riva aquarama
- amati
- (and 2 more)
-
Thanks a lot for the nice words, folks. I can't wait to finish the entire varnishing sequence to see the shiny look
- 414 replies
-
- 3
-
-
- riva aquarama
- amati
- (and 2 more)
-
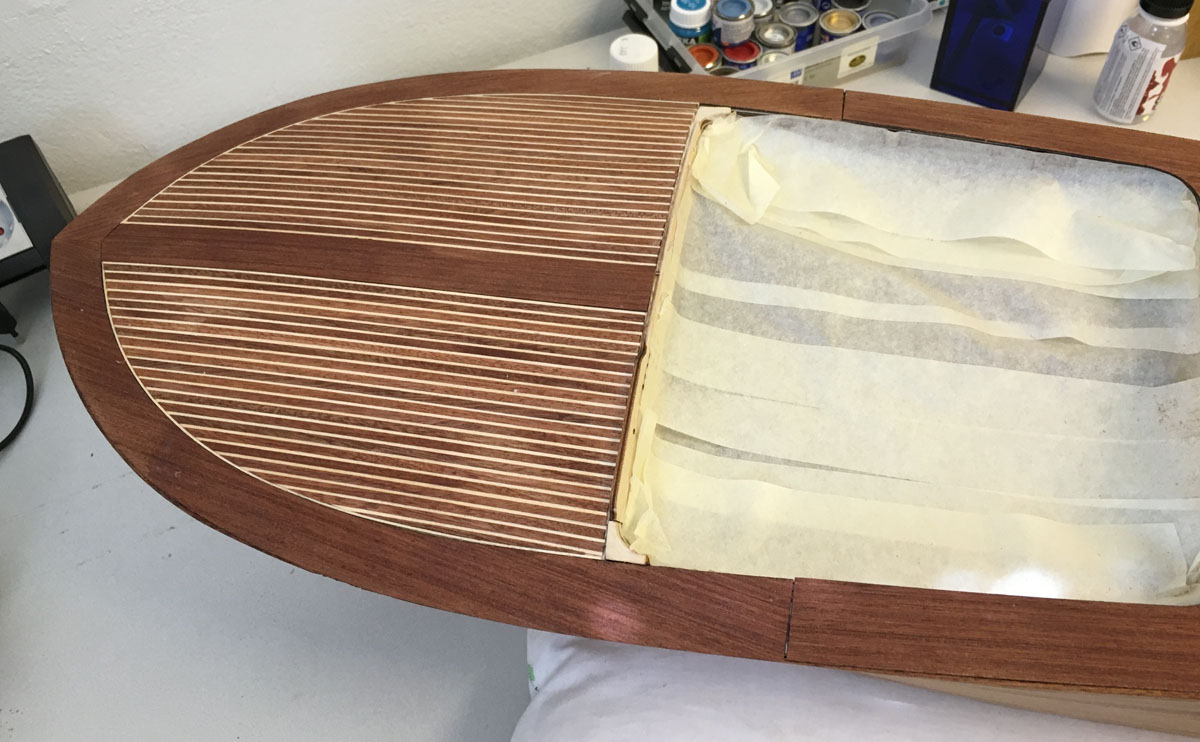
Build Day 33-37. 5 hours in 5 days. 114 hours into build in total. I continued with deck varnishing while waiting for the GIT-ROT which I ordered from eBay to arrive for applying on hull (after testing, of course). In these 5 days I put - 2 layers of Z-poxy (diluted 50% with denatured alcohol), - 3 layers of Hempel gloss varnish (water resistant) and - 2 layers of spray gloss lacquer. I used 240 grit and 500 grit sanding between the coats. I think the deck is good enough now, although it could've been better, but I am not that experienced in surface finishing. There are some impurities which a pair of careful eyes will notice. However this is as good as it gets for me.

- 414 replies
-
- 10
-
-
- riva aquarama
- amati
- (and 2 more)
-
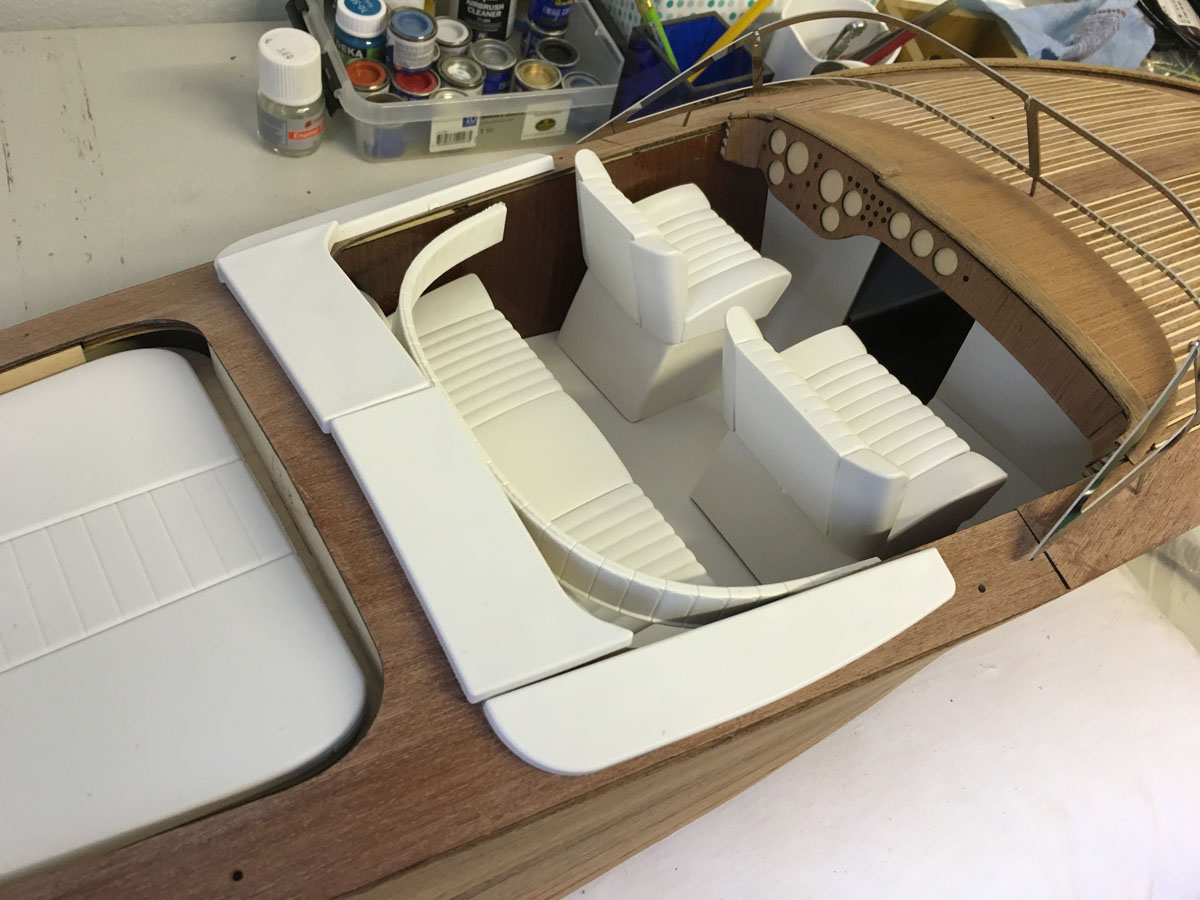
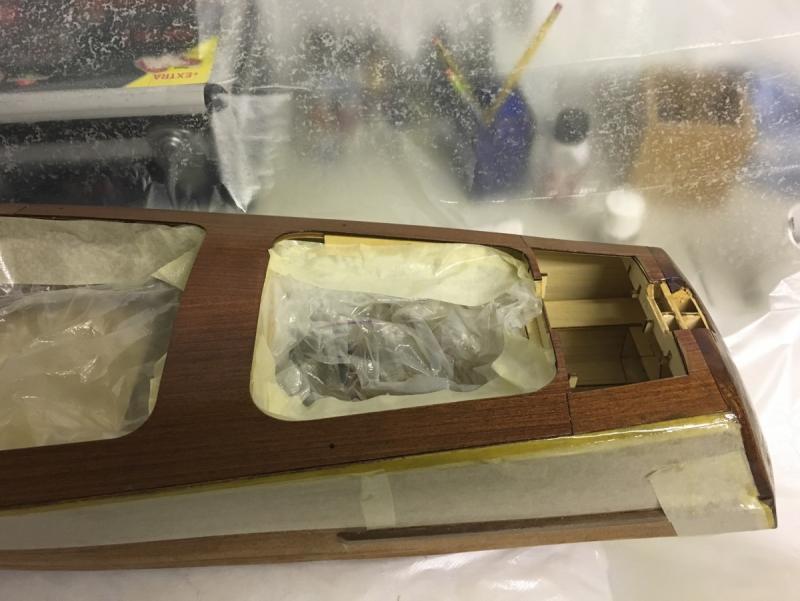
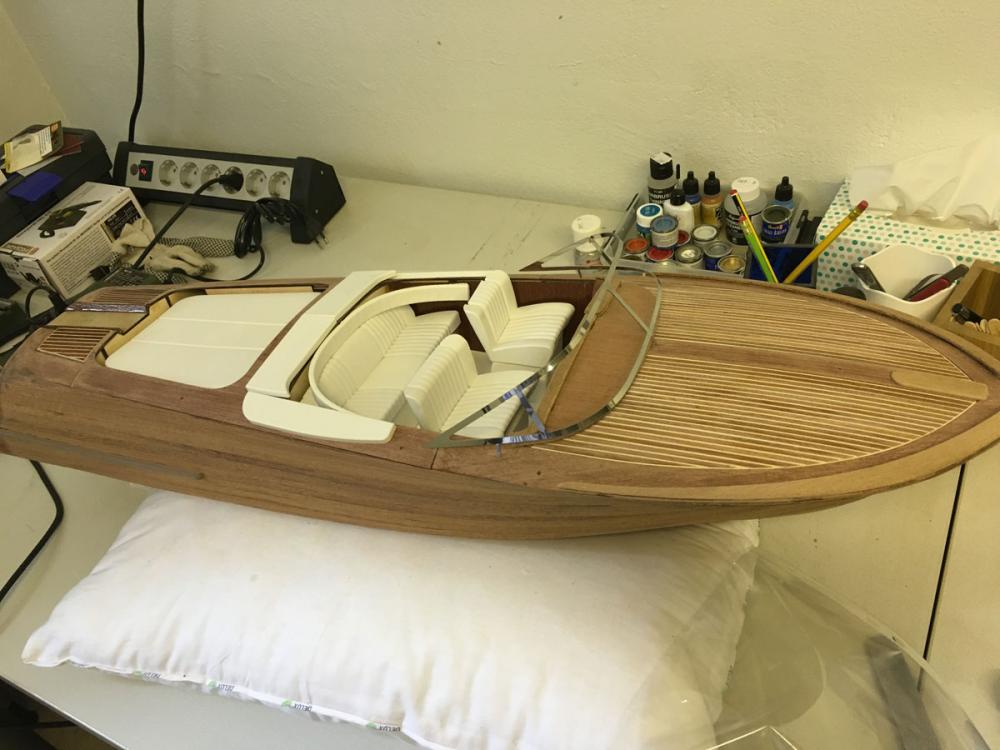
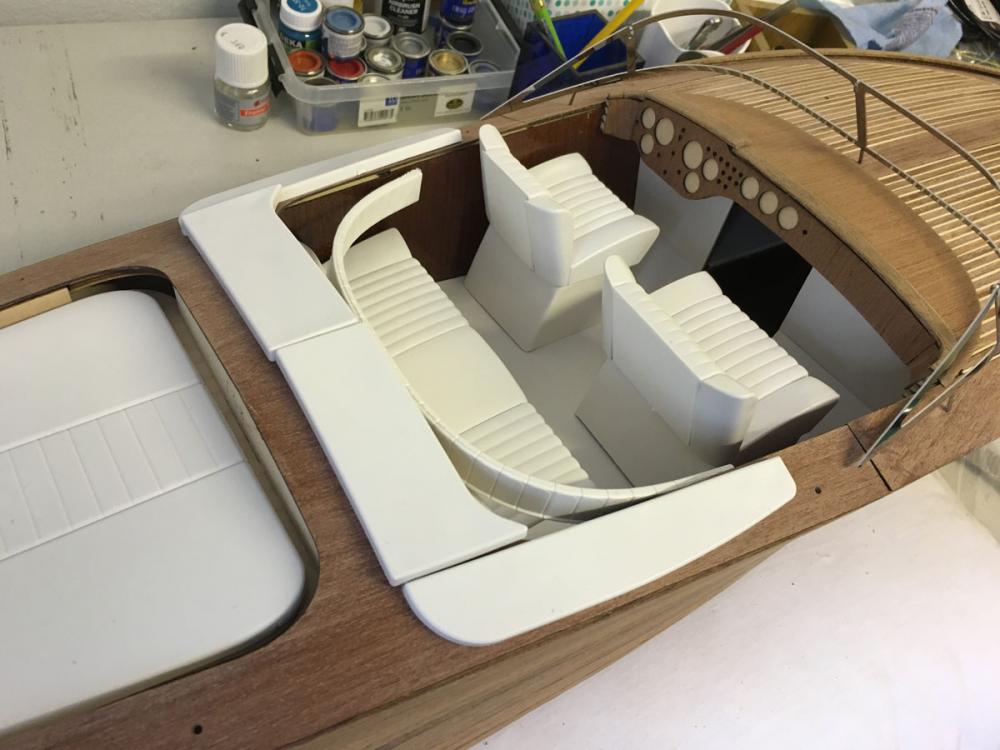
End of Build Day 32. 4 hours today. 109 hours into build in total. I just wanted to play a little bit with the upholstery (dry-fit) just out of curiosity. This is the status at the moment. Thanks for watching.
- 414 replies
-
- 10
-
-
- riva aquarama
- amati
- (and 2 more)
-
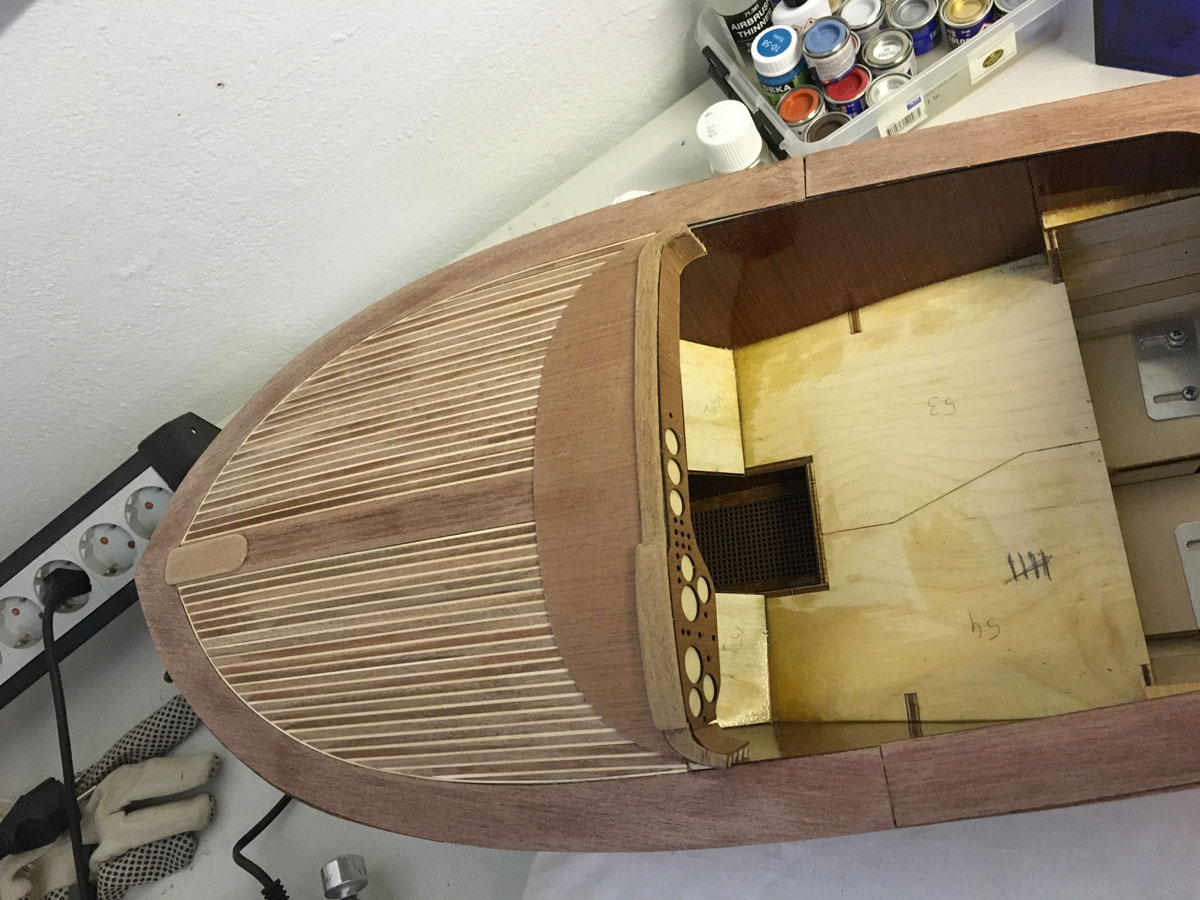
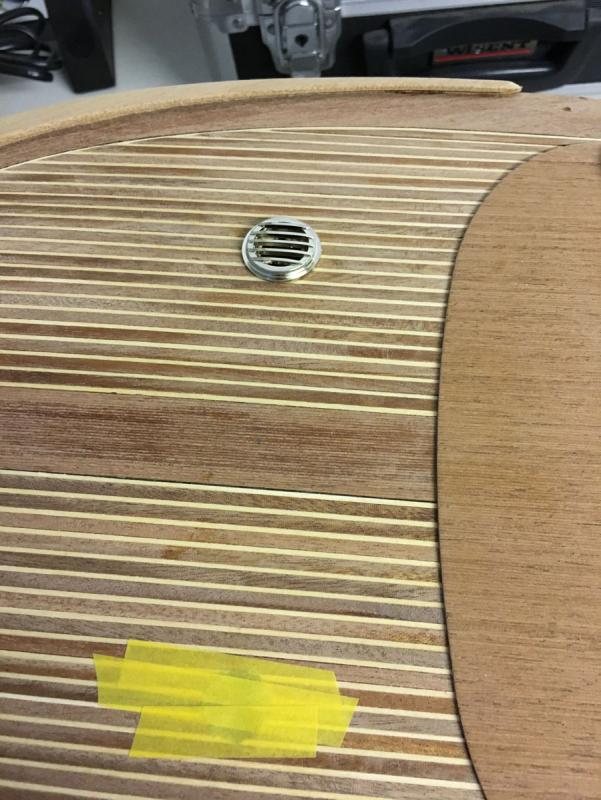
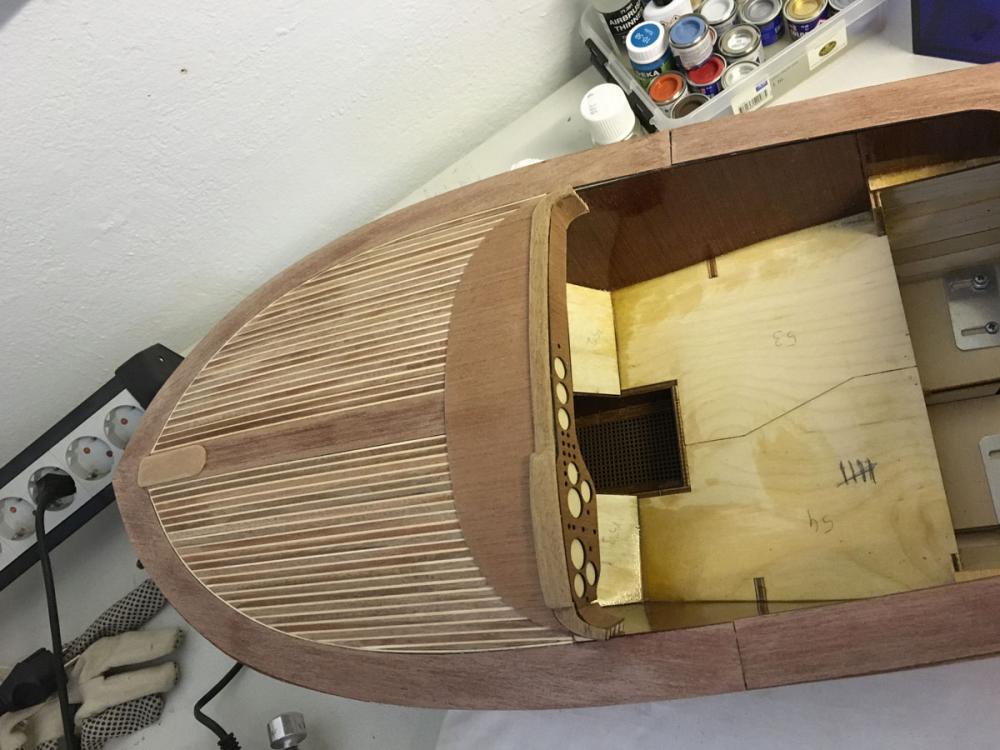
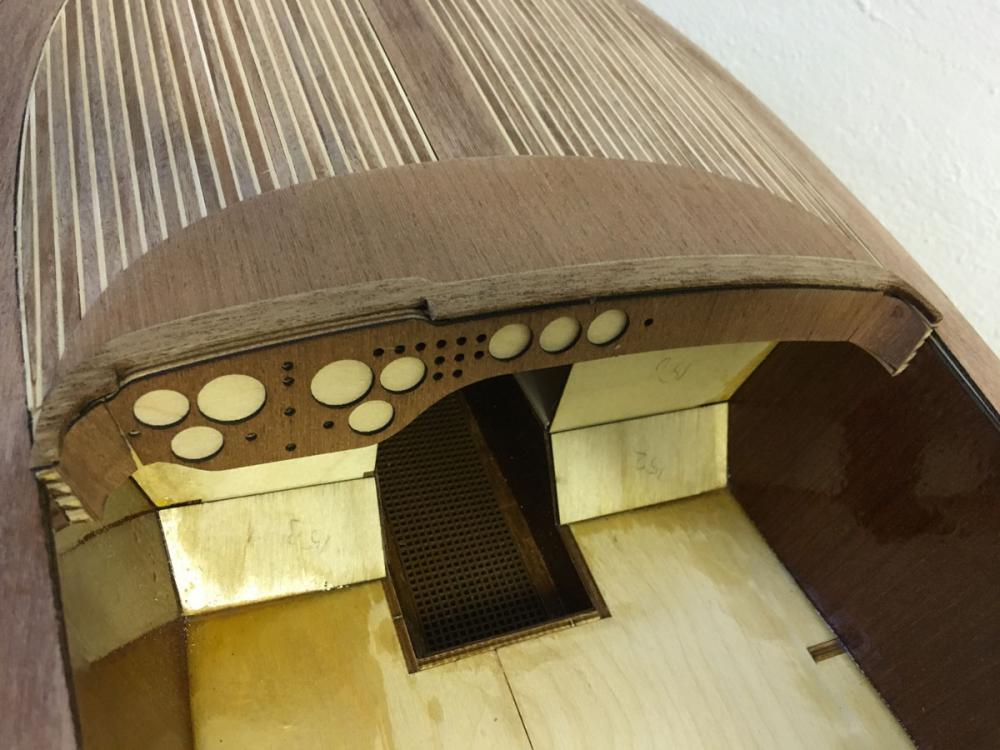
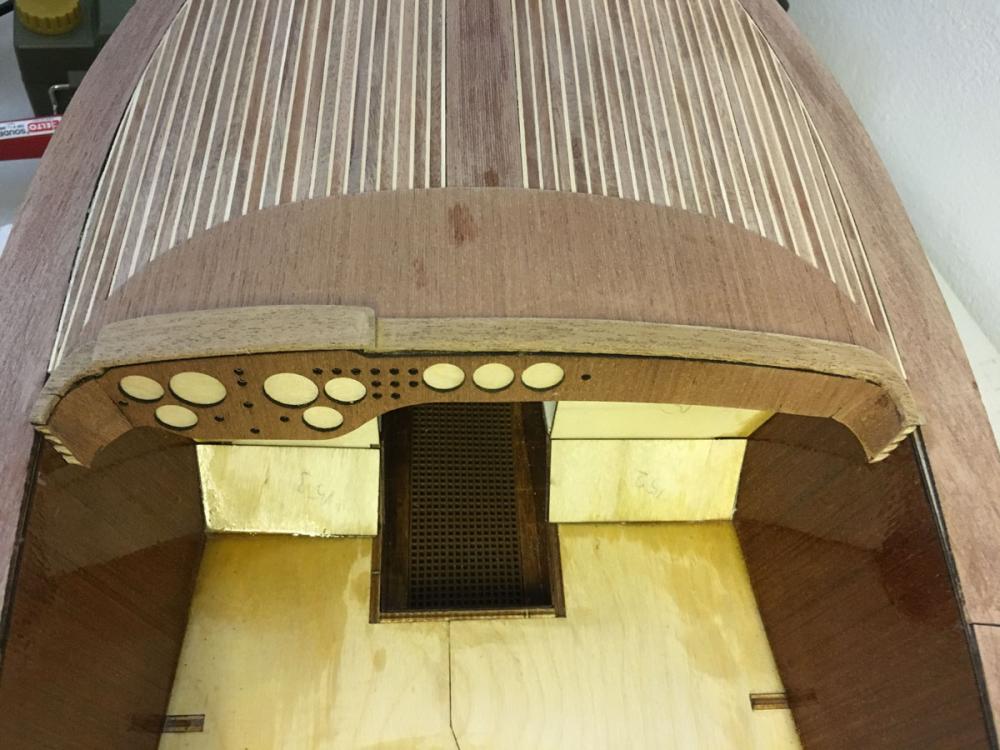
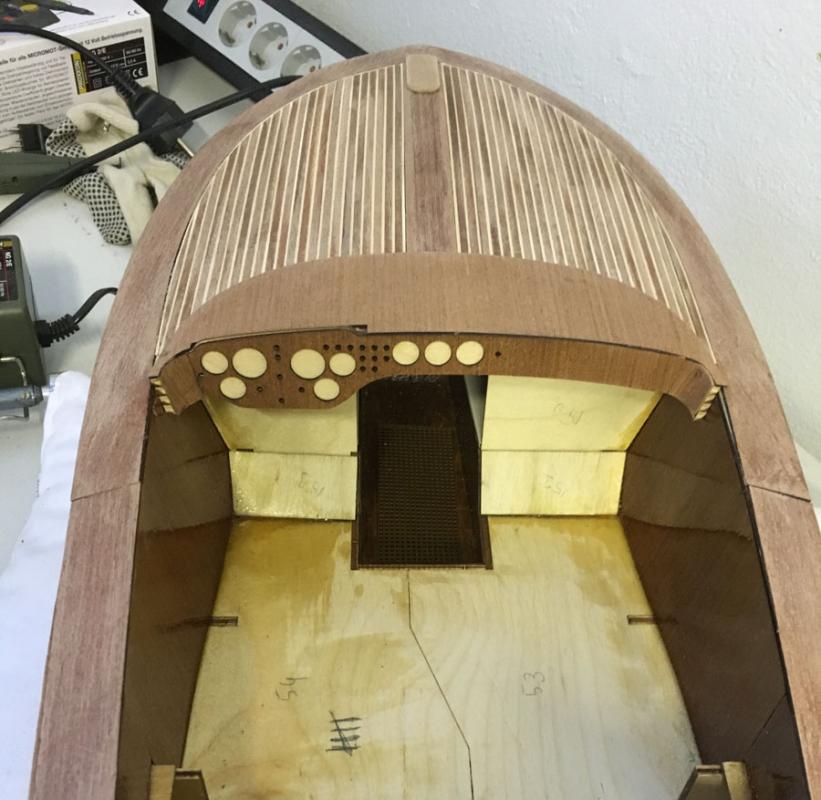
Ventilations for the front "bedroom" beneath the deck. It is also possible to just paint the surface black in order to simulate a hole, but I went the extra mile and drilled real holes. It looks cool when you put on a light in the bedroom. The metal blind dry-fitted:

- 414 replies
-
- 8
-
-
- riva aquarama
- amati
- (and 2 more)
-
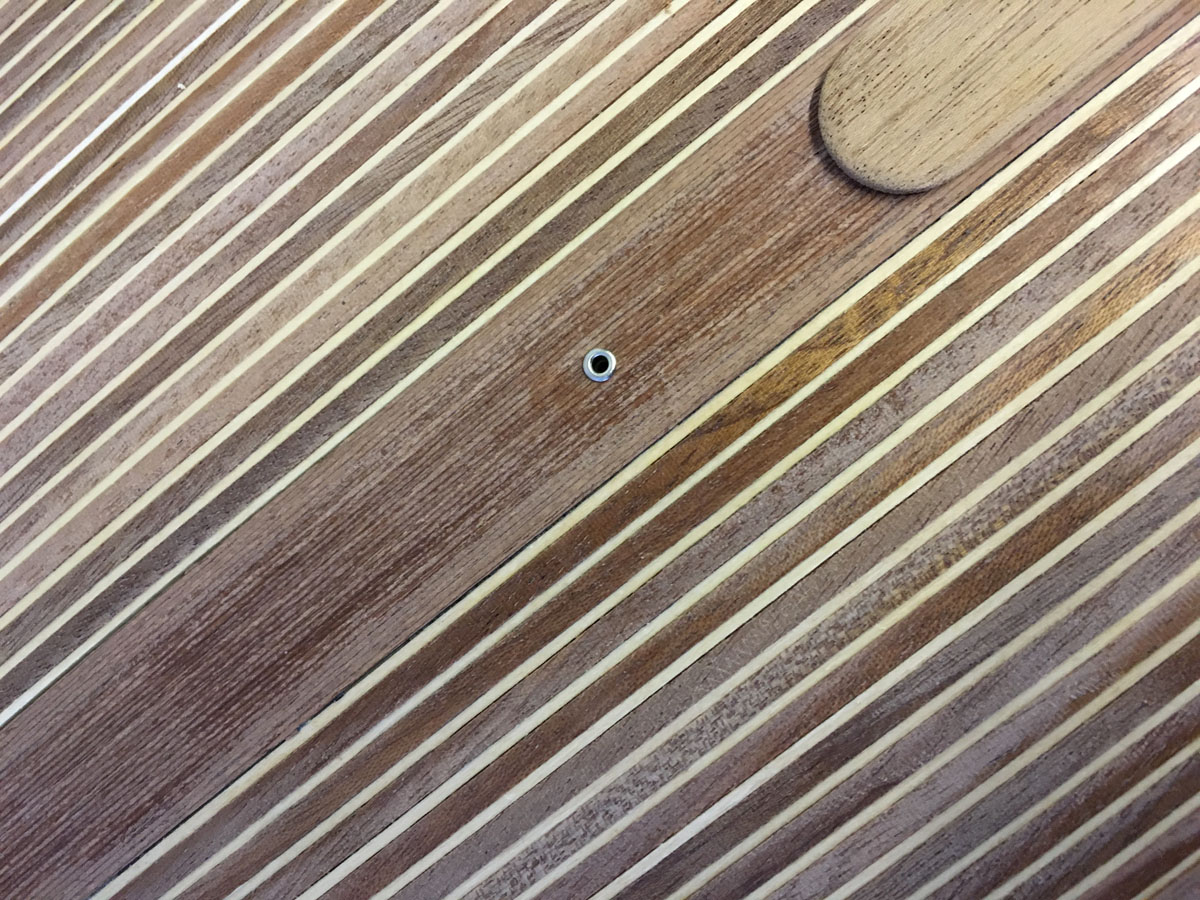
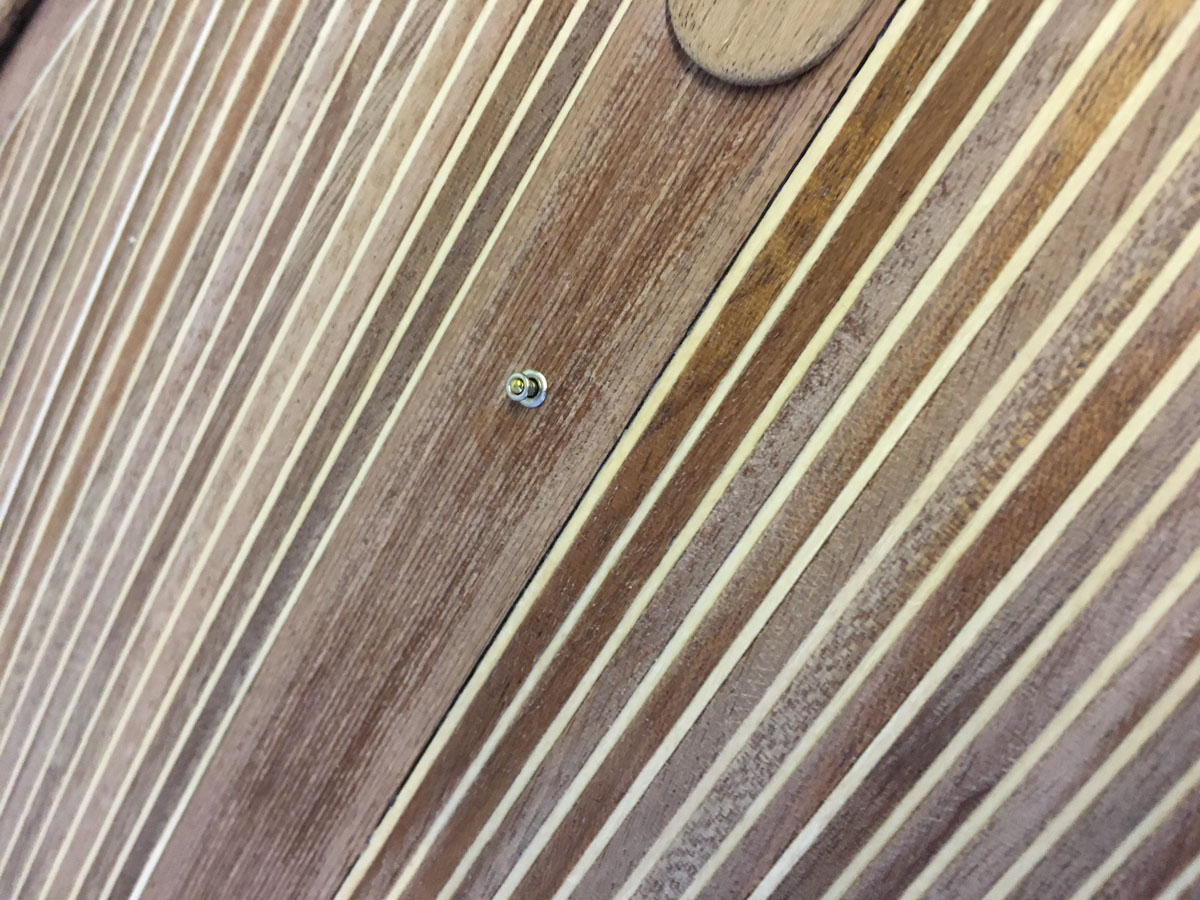
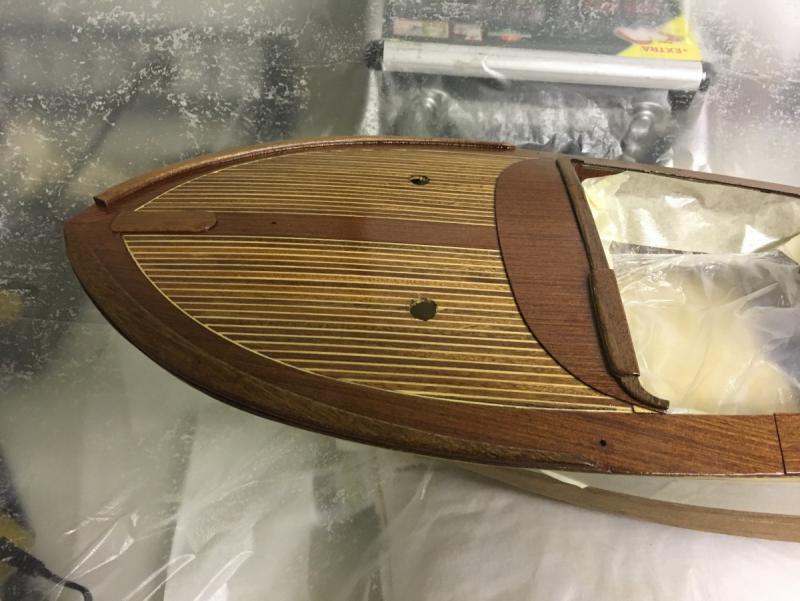
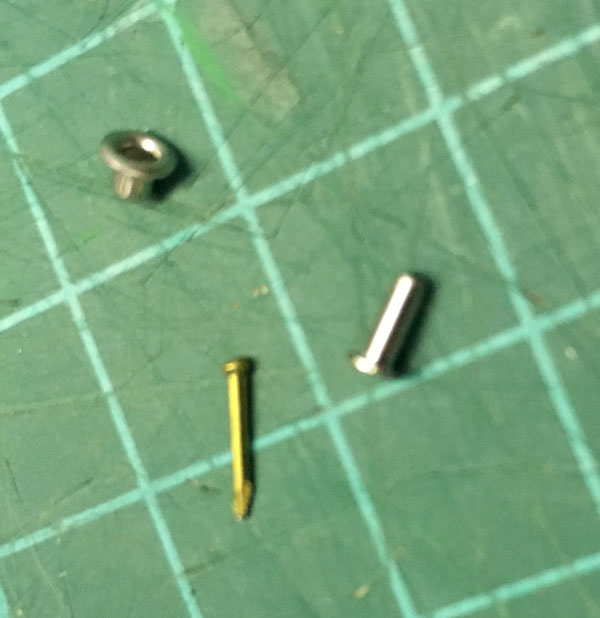
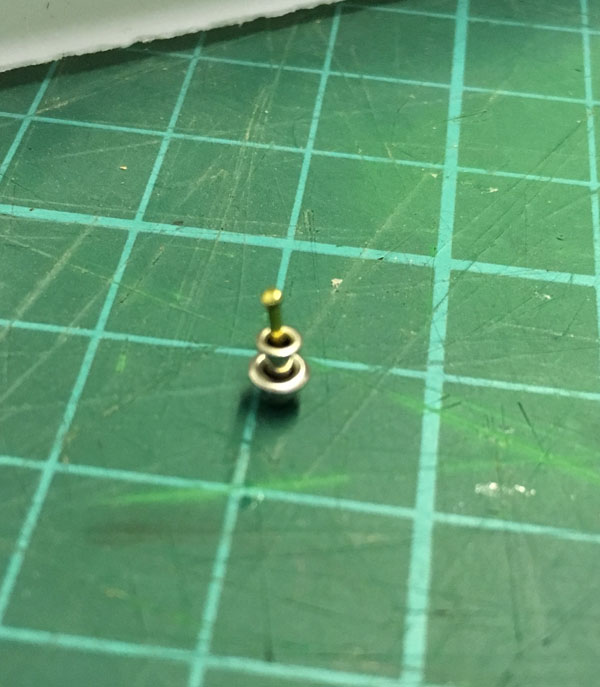
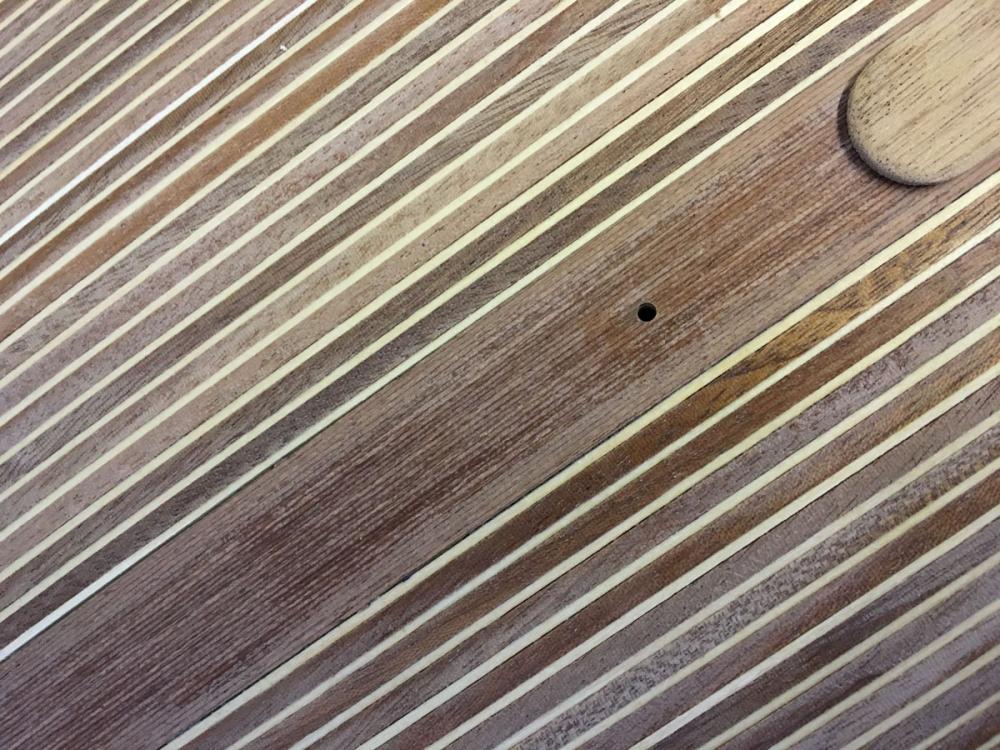
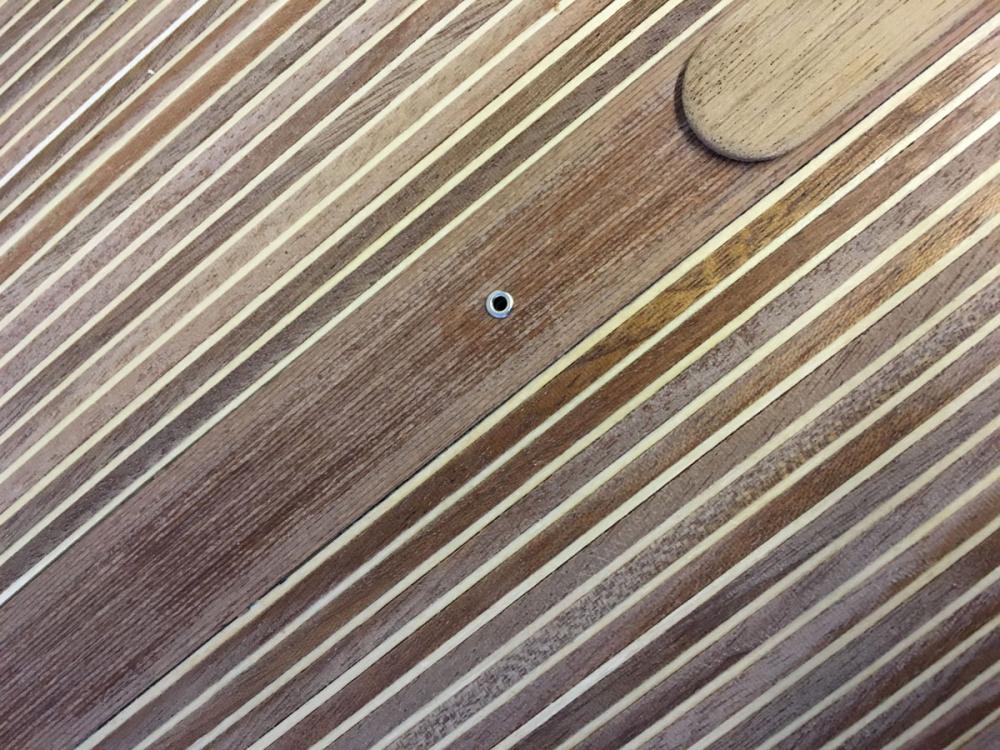
Several holes of diameter 2,5mm should be drilled here and there on the deck to accomodate the following metal parts: They will be pushed when installed. This is just a dry fit to check that the holes are good enough to fit them:

- 414 replies
-
- 7
-
-
- riva aquarama
- amati
- (and 2 more)
-
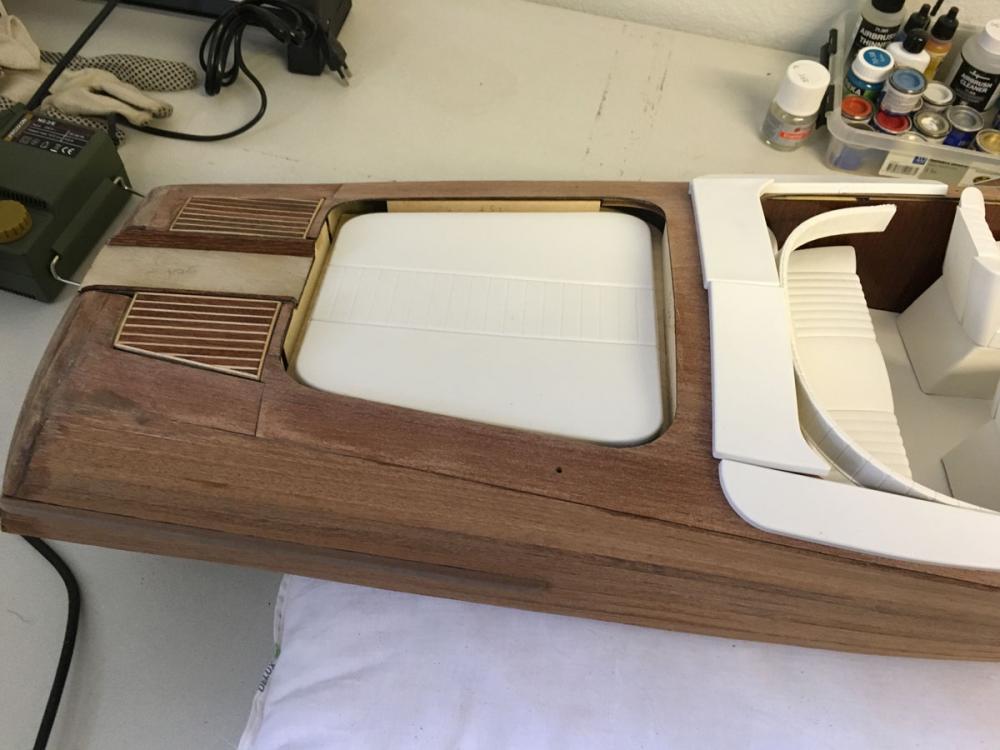
Build day 32 - More deck components Today I continued with installing sax boards, drilling several holes for metal ornaments and a little bit of trial fit of the upholstery. Saxboards, 2 each side, 2 pieces each. The upper saxboard component is actually wider than the one below and forms a slot between the deck and the upper saxboard:

- 414 replies
-
- 5
-
-
- riva aquarama
- amati
- (and 2 more)
-
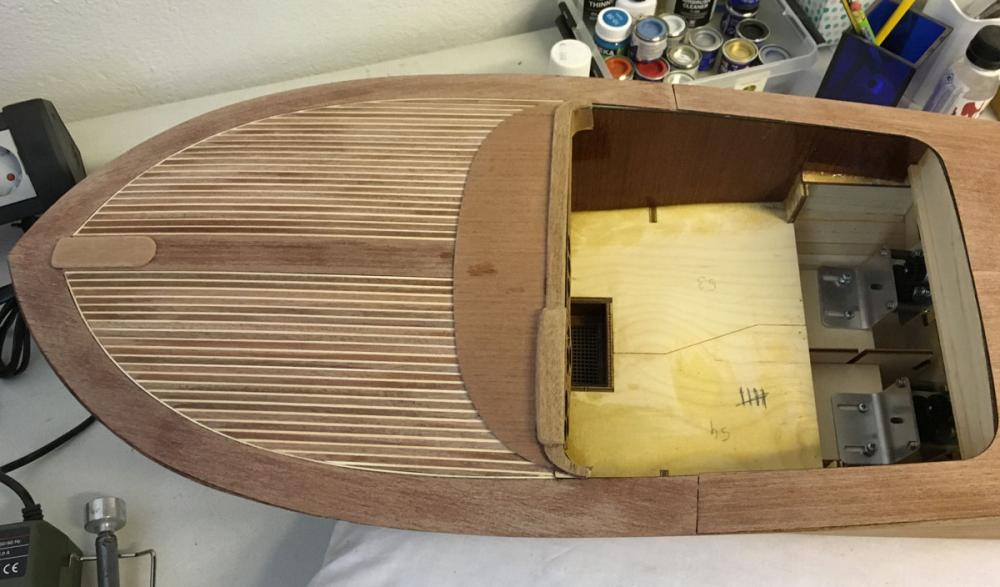
End of Build Day 31. 3 hours today. 105 hours into build in total. This is the status after today. Tomorrow I hope I can proceed more with deck details. Thanks for watching.
- 414 replies
-
- 9
-
-
- riva aquarama
- amati
- (and 2 more)
-
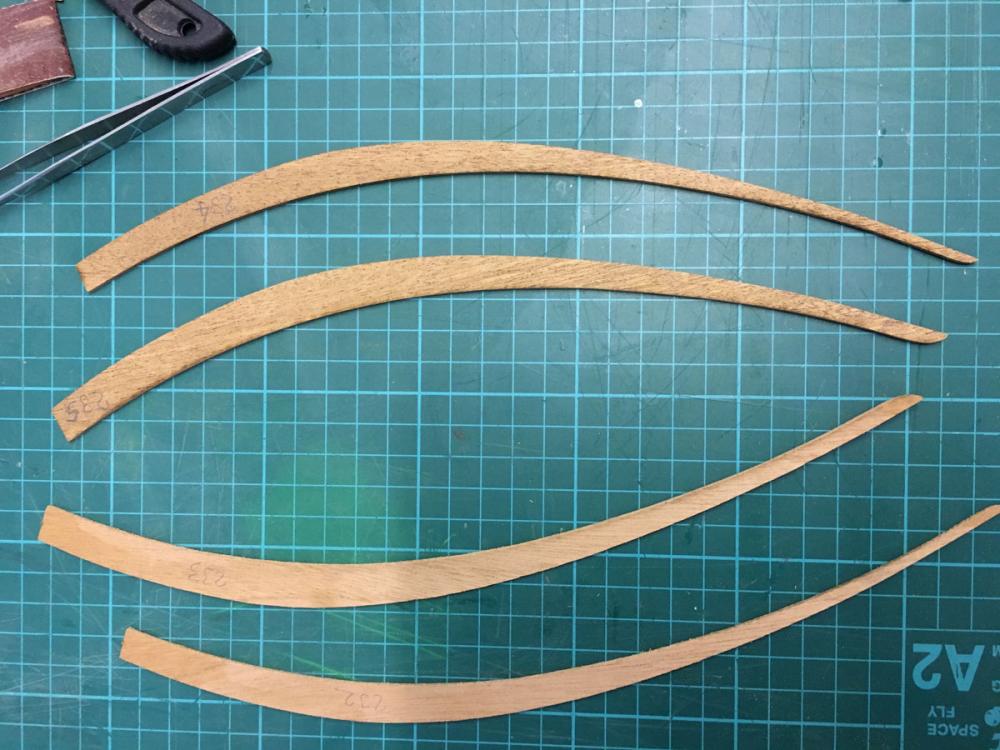
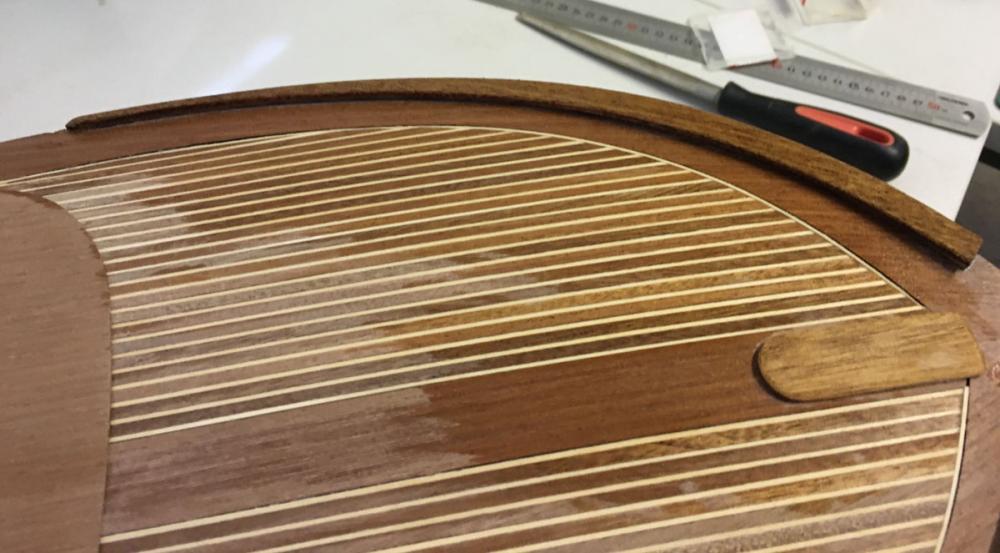
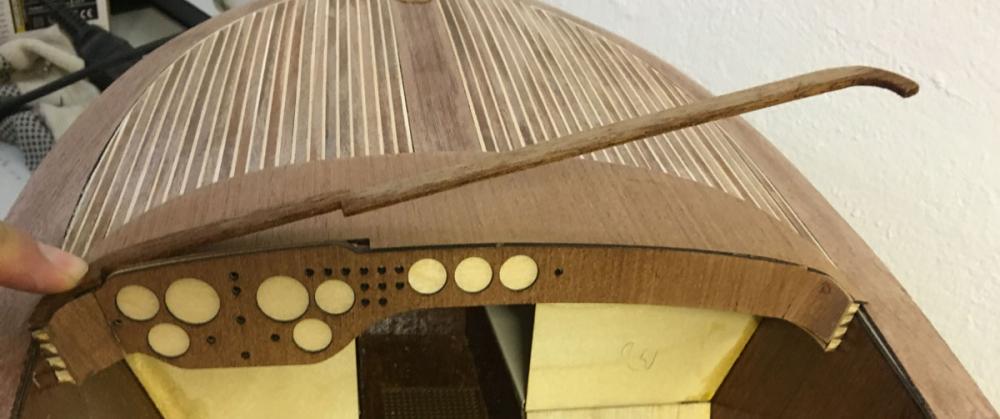
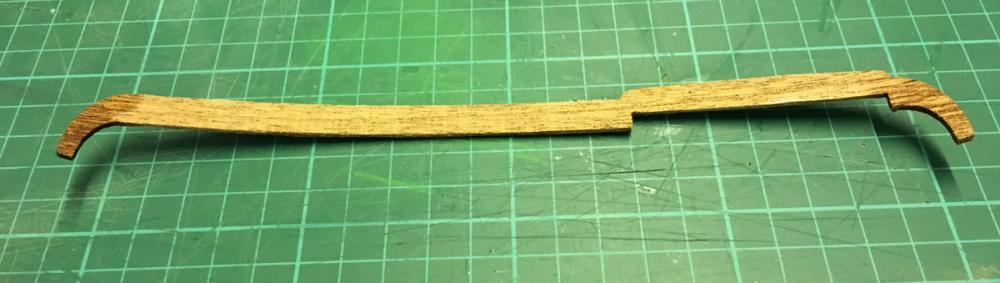
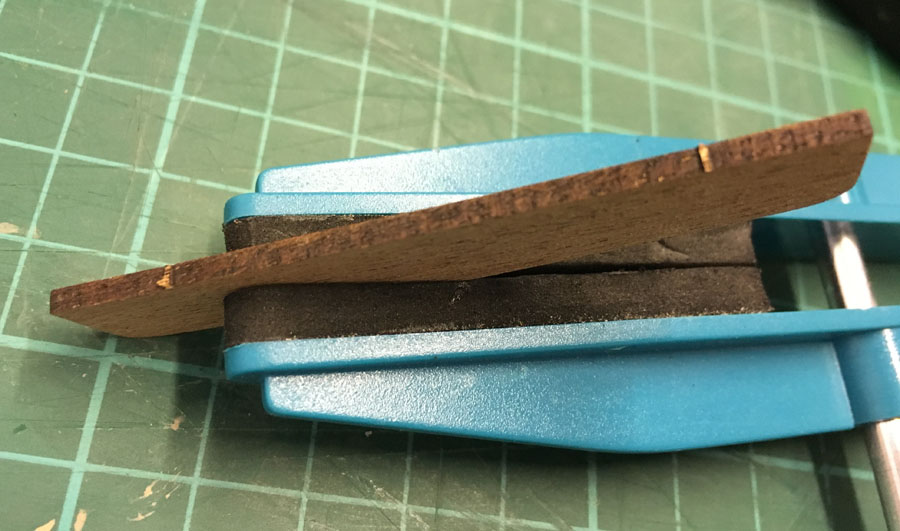
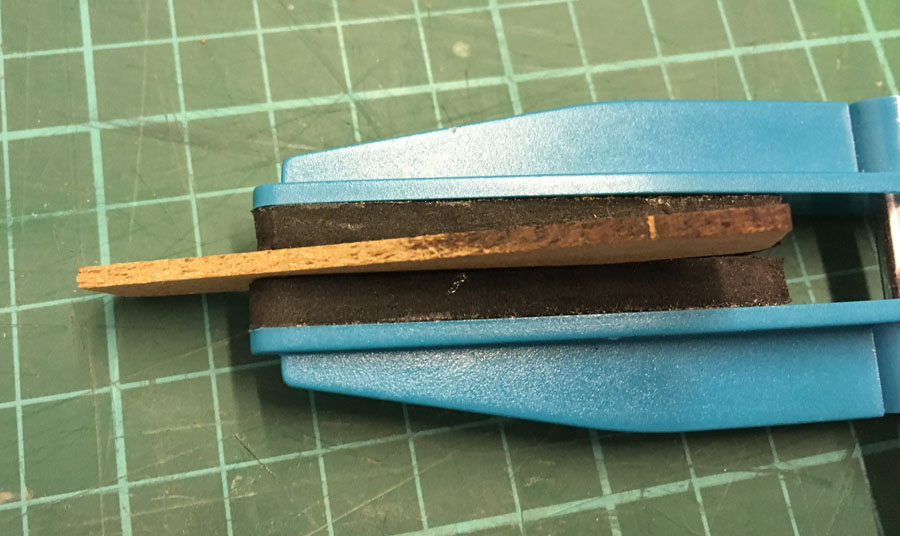
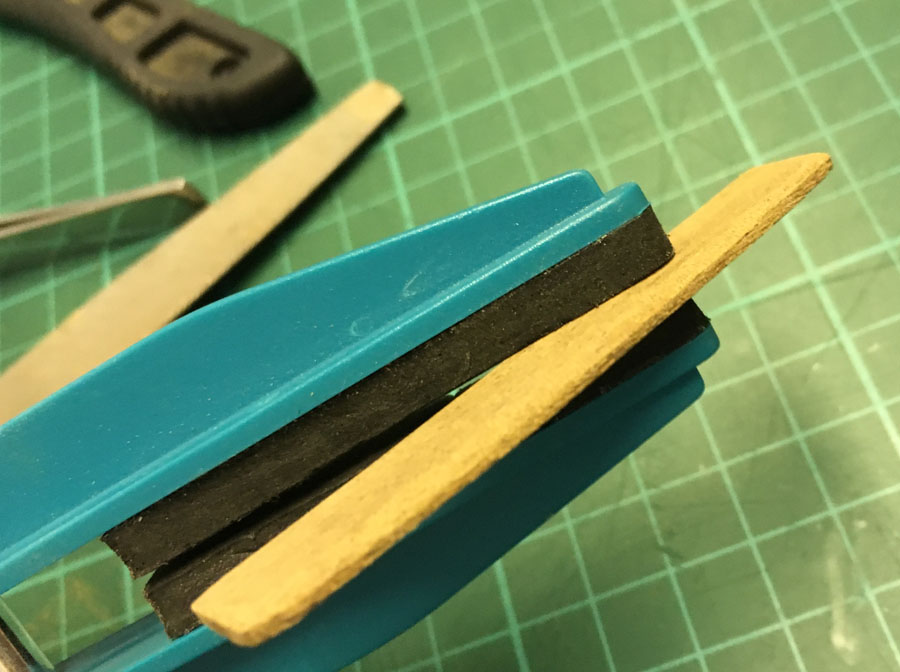
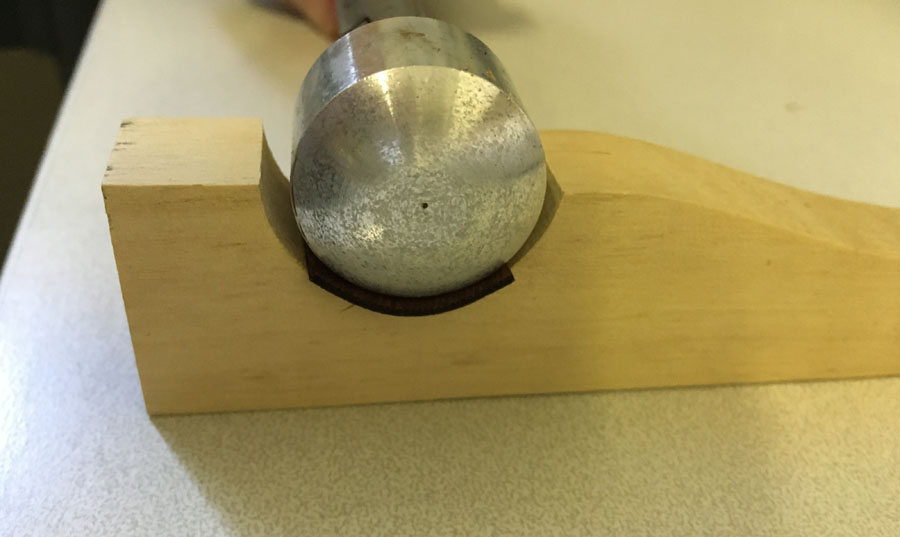
Moulding of bridge (#230 and #231). Their edges are visible hence I had to file and sand the edges in order to get rid of the burn marks caused by laser cuts. These edges will also have to be rounded. Here is the process: The moulds need to be bent, too. For example as it stands, the bigger piece looks like this: Bent: Dry fit after bending: .. and finally glued in place. Here is a demonstration of filing away the burn marks. This is the smaller piece: Before: In progress: After rounding the edges: Both parts glued in place:
- 414 replies
-
- 7
-
-
- riva aquarama
- amati
- (and 2 more)
-
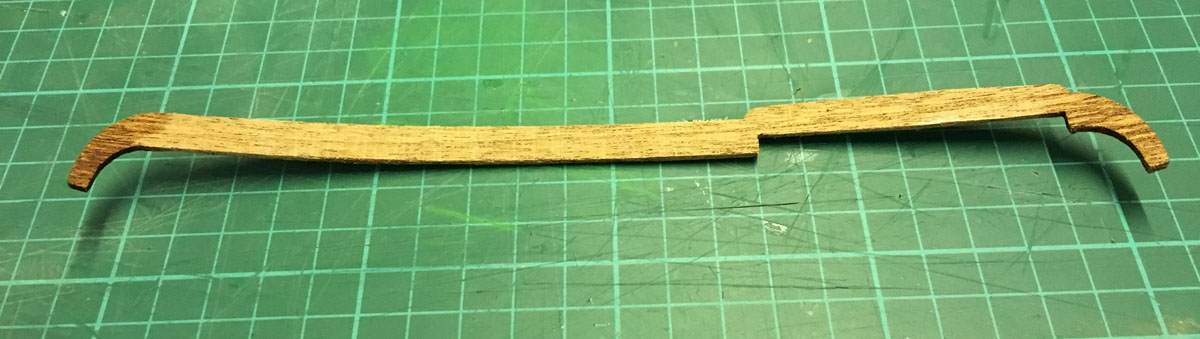
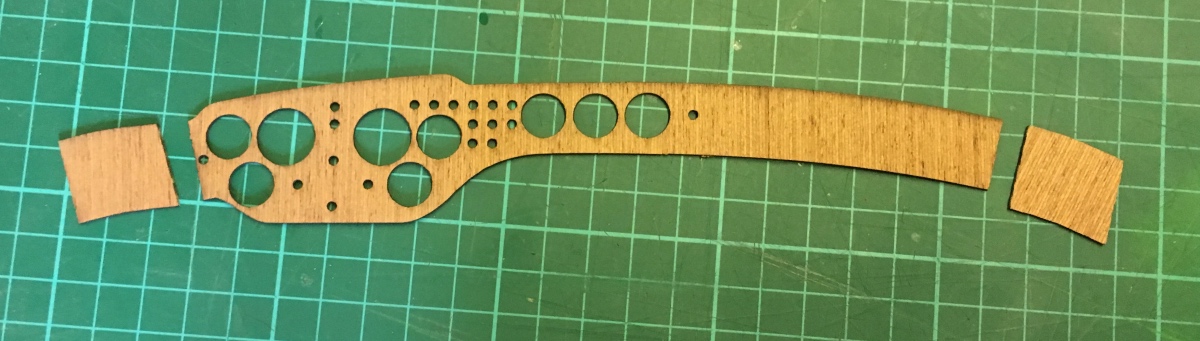
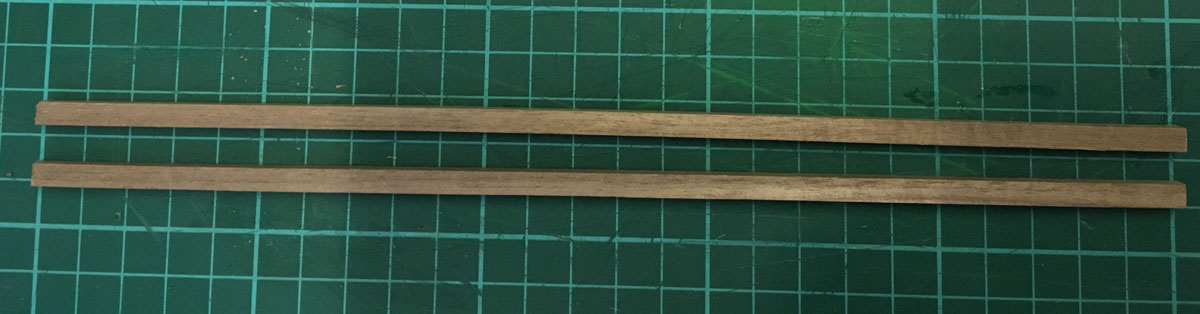
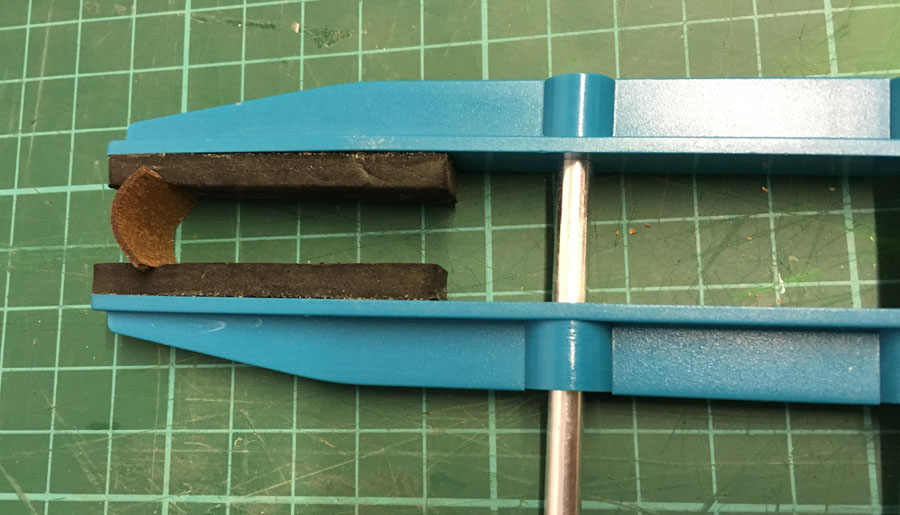
Dashboard section: The two pieces on either side look and are identical, however they will need to be trimmed to different shapes to fit on the deck, since left and right side of the dashboard have different heights. But first, there is some extensive bending to be done for these pieces. Wetting and using plank bender is almost a must to accomplish it without breaking the pieces: I used a pair of clamps to let them dry in shape: ... and in place:

- 414 replies
-
- 7
-
-
- riva aquarama
- amati
- (and 2 more)
-
Deck components 236 and 221. Sanded, rounded (#236) and glued in place.

- 414 replies
-
- 7
-
-
- riva aquarama
- amati
- (and 2 more)
-
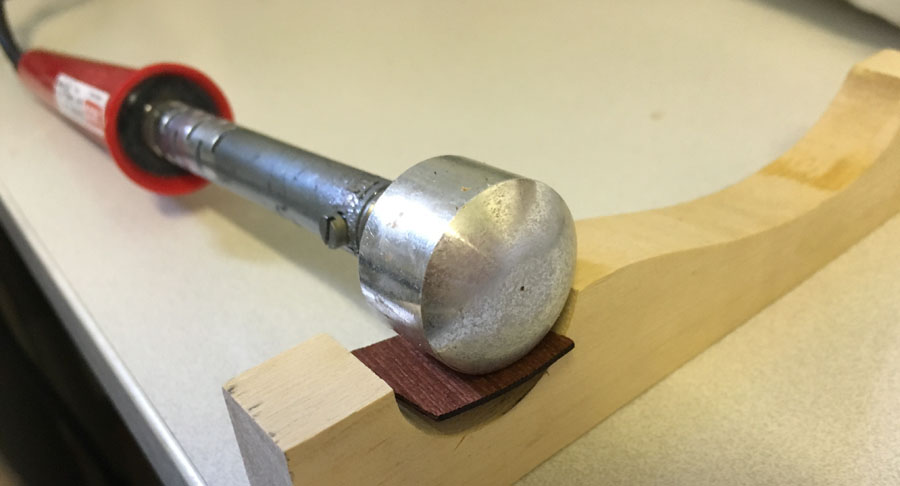
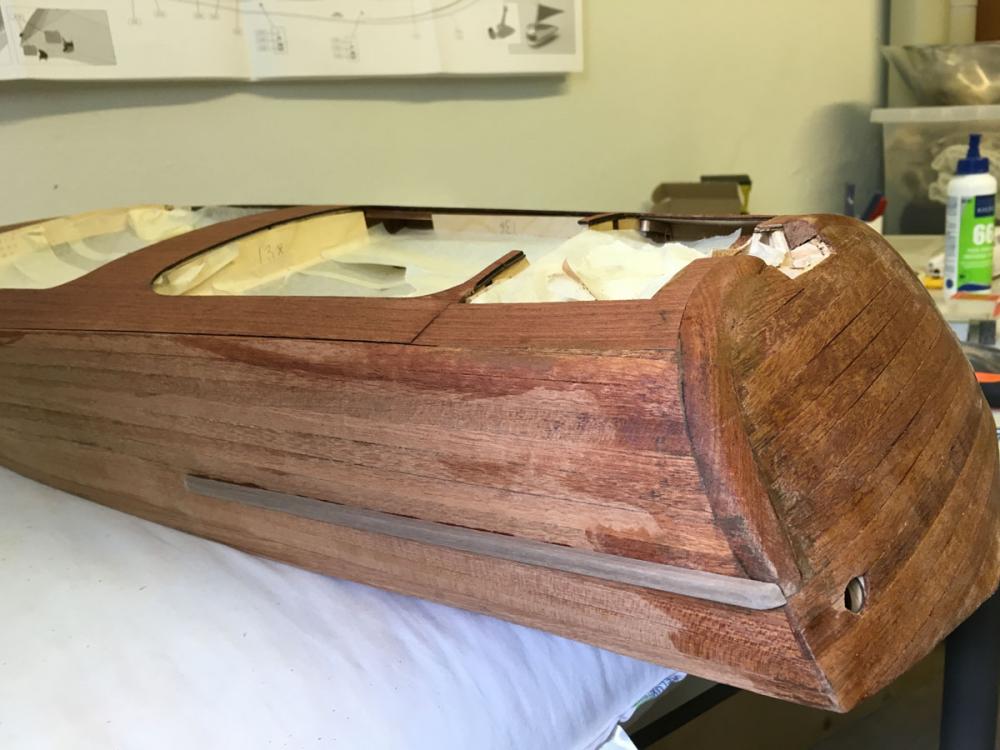
Next: Fenders on both sides using 5x5mm mahongay strip. Cut to size: Shape the edges Glue in place. There is a significant color difference with these strips compared to the hull but most of it will be painted in white therefore I don't worry about it too much.


- 414 replies
-
- 4
-
-
- riva aquarama
- amati
- (and 2 more)
-
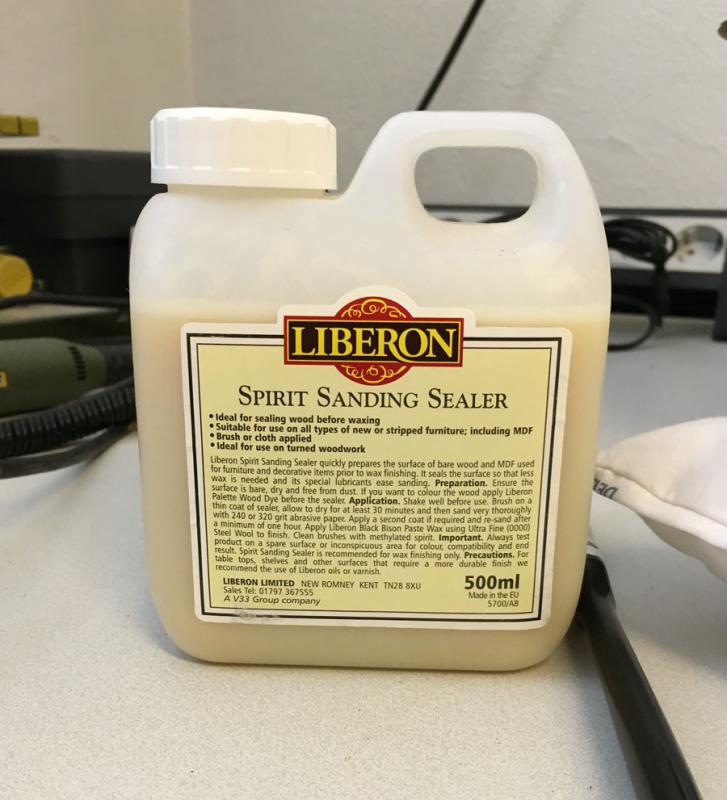
Build day 31 - Sanding and more deck components I continue with fine sanding and then the plan is to assemble more mahogany deck components. The reason why I did not include them to the sanding process is that I thought it would be better to sand them individually and glue afterwards since they form bumps and bulge over the flat surface, otherwise would make sanding process more painful. For 240 grade sanding of the deck I use this sanding sealer: Sanding sealer brushed and waiting to dry: After waiting for about 30-40 mins (as instructed) I sanded the deck using 240 grade.


- 414 replies
-
- 7
-
-
- riva aquarama
- amati
- (and 2 more)
-
Thank you in advance. That'd be great. I will look into local shops and see if there is it or any equivalent, before bothering you.
- 414 replies
-
- 3
-
-
- riva aquarama
- amati
- (and 2 more)
-
Build day 30 - Sanding. 2 hours today. 102 hours into build in total. Today I continued with final fillings as well as first sanding of the deck. I think the filling job of the body is complete now and it is ready to proceed to finer sanding (150 grit). I also made a test of glass fibre + epoxy on a piece of scrap plank. Looks OK so far but I will know better after I have done 2-3 layers.
- 414 replies
-
- 2
-
-
- riva aquarama
- amati
- (and 2 more)
-
Hi Andy, So you have the front seat experience of an Aquarama! Cool! I have checked the online stores for this GIT ROT but it is available only in US shops which either do not ship to Finland or at ridiculous shipping rates. I will ask the marine shops around if they have that or soething equivalent. /A.
- 414 replies
-
- 2
-
-
- riva aquarama
- amati
- (and 2 more)
-
Build day 29 - Sanding. 2 hours today. 100 hours into build in total. Today I celebrate 100th hour! Cheers! Thank you Keith, for the kind and encouraging words. Today I spent around 2 hours for consecutive filling of the gaps. Nothing much to show. Just for the record.. and of course for the honour of 100th hour .
- 414 replies
-
- 4
-
-
- riva aquarama
- amati
- (and 2 more)