Chris_P
-
Posts
19 -
Joined
-
Last visited
Recent Profile Visitors
458 profile views


-
 Chris_P reacted to a post in a topic:
HMS Agamemnon by Boris279 - Caldercraft - 1/64
Chris_P reacted to a post in a topic:
HMS Agamemnon by Boris279 - Caldercraft - 1/64
-
Chris_P reacted to a post in a topic:
HMS Agamemnon by Henke - Caldercraft - 1:64
-
Chris_P reacted to a post in a topic:
HMS Victory by Will Ferris - Caldercraft - 1:72
-
Chris_P reacted to a post in a topic:
HMS Agamemnon by Henke - Caldercraft - 1:64
-
Chris_P reacted to a post in a topic:
HMS Agamemnon by Chris_P - Caldercraft - Scale 1:64 - My First Build Attempt
-
Ian_Grant reacted to a post in a topic:
HMS Agamemnon by Chris_P - Caldercraft - Scale 1:64 - My First Build Attempt
-
GrandpaPhil reacted to a post in a topic:
HMS Agamemnon by Chris_P - Caldercraft - Scale 1:64 - My First Build Attempt
-
GrandpaPhil reacted to a post in a topic:
HMS Agamemnon by Chris_P - Caldercraft - Scale 1:64 - My First Build Attempt
-
GrandpaPhil reacted to a post in a topic:
HMS Agamemnon by Chris_P - Caldercraft - Scale 1:64 - My First Build Attempt
-
EJ_L reacted to a post in a topic:
HMS Agamemnon by Chris_P - Caldercraft - Scale 1:64 - My First Build Attempt
-
Chris_P reacted to a post in a topic:
HMS Agamemnon by Henke - Caldercraft - 1:64
-
mort stoll reacted to a post in a topic:
HMS Agamemnon by Chris_P - Caldercraft - Scale 1:64 - My First Build Attempt
-
Henke reacted to a post in a topic:
HMS Agamemnon by Chris_P - Caldercraft - Scale 1:64 - My First Build Attempt
-
drjeckl reacted to a post in a topic:
HMS Agamemnon by Chris_P - Caldercraft - Scale 1:64 - My First Build Attempt
-
gieb8688 reacted to a post in a topic:
HMS Agamemnon by Chris_P - Caldercraft - Scale 1:64 - My First Build Attempt
-
gieb8688 reacted to a post in a topic:
HMS Agamemnon by Chris_P - Caldercraft - Scale 1:64 - My First Build Attempt
-
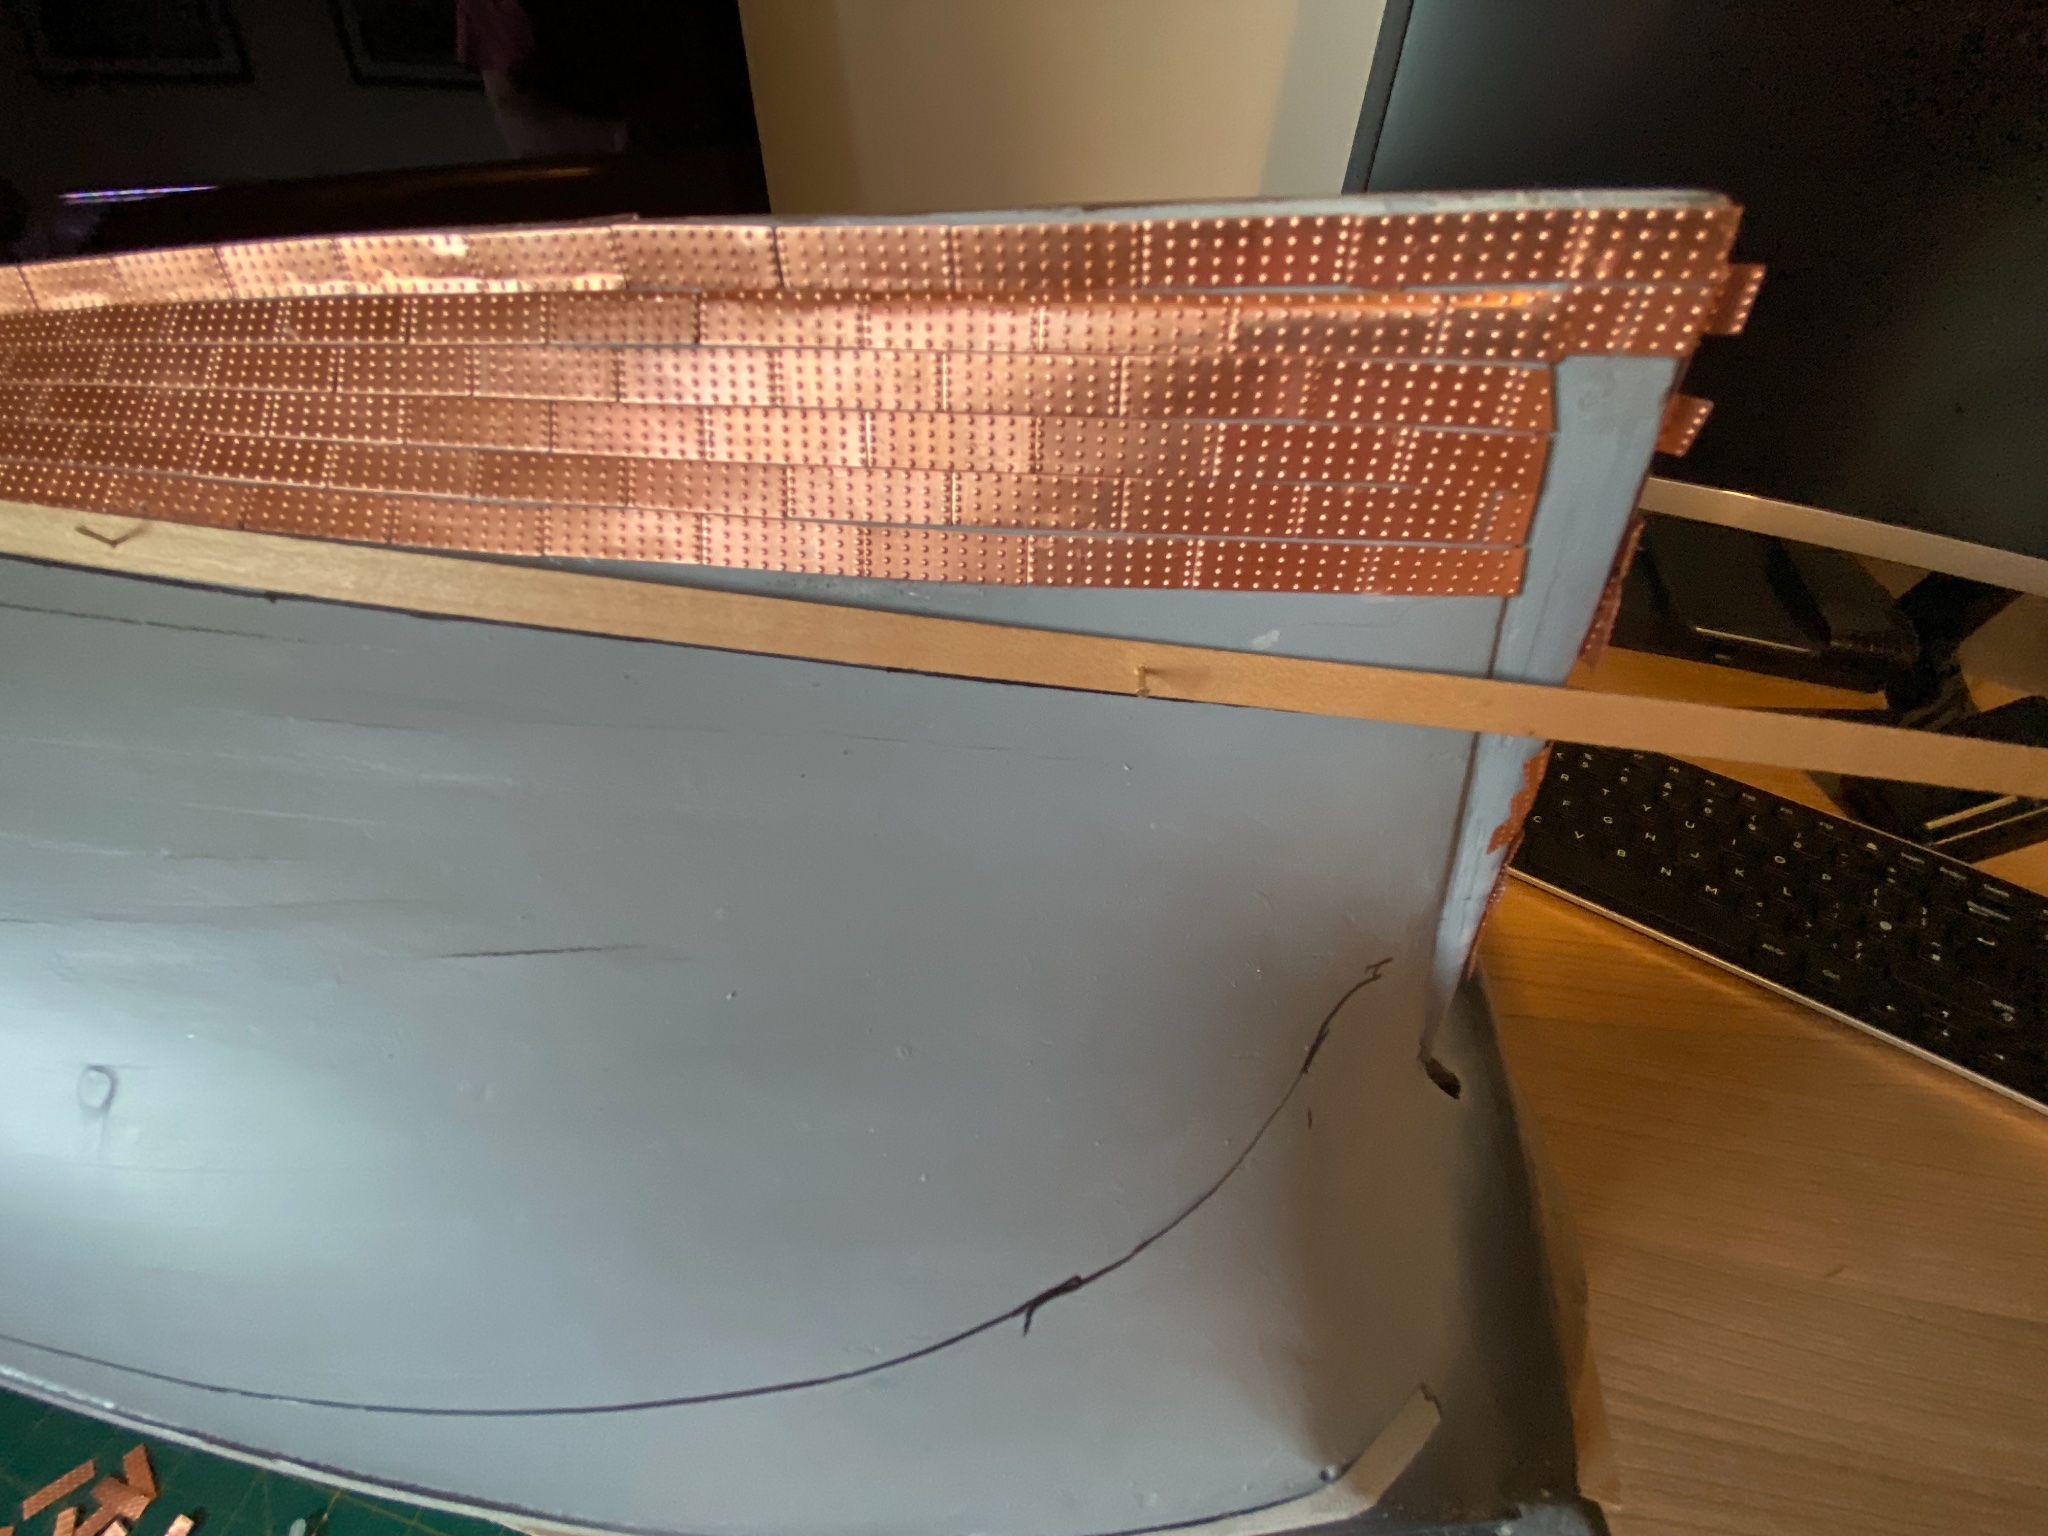
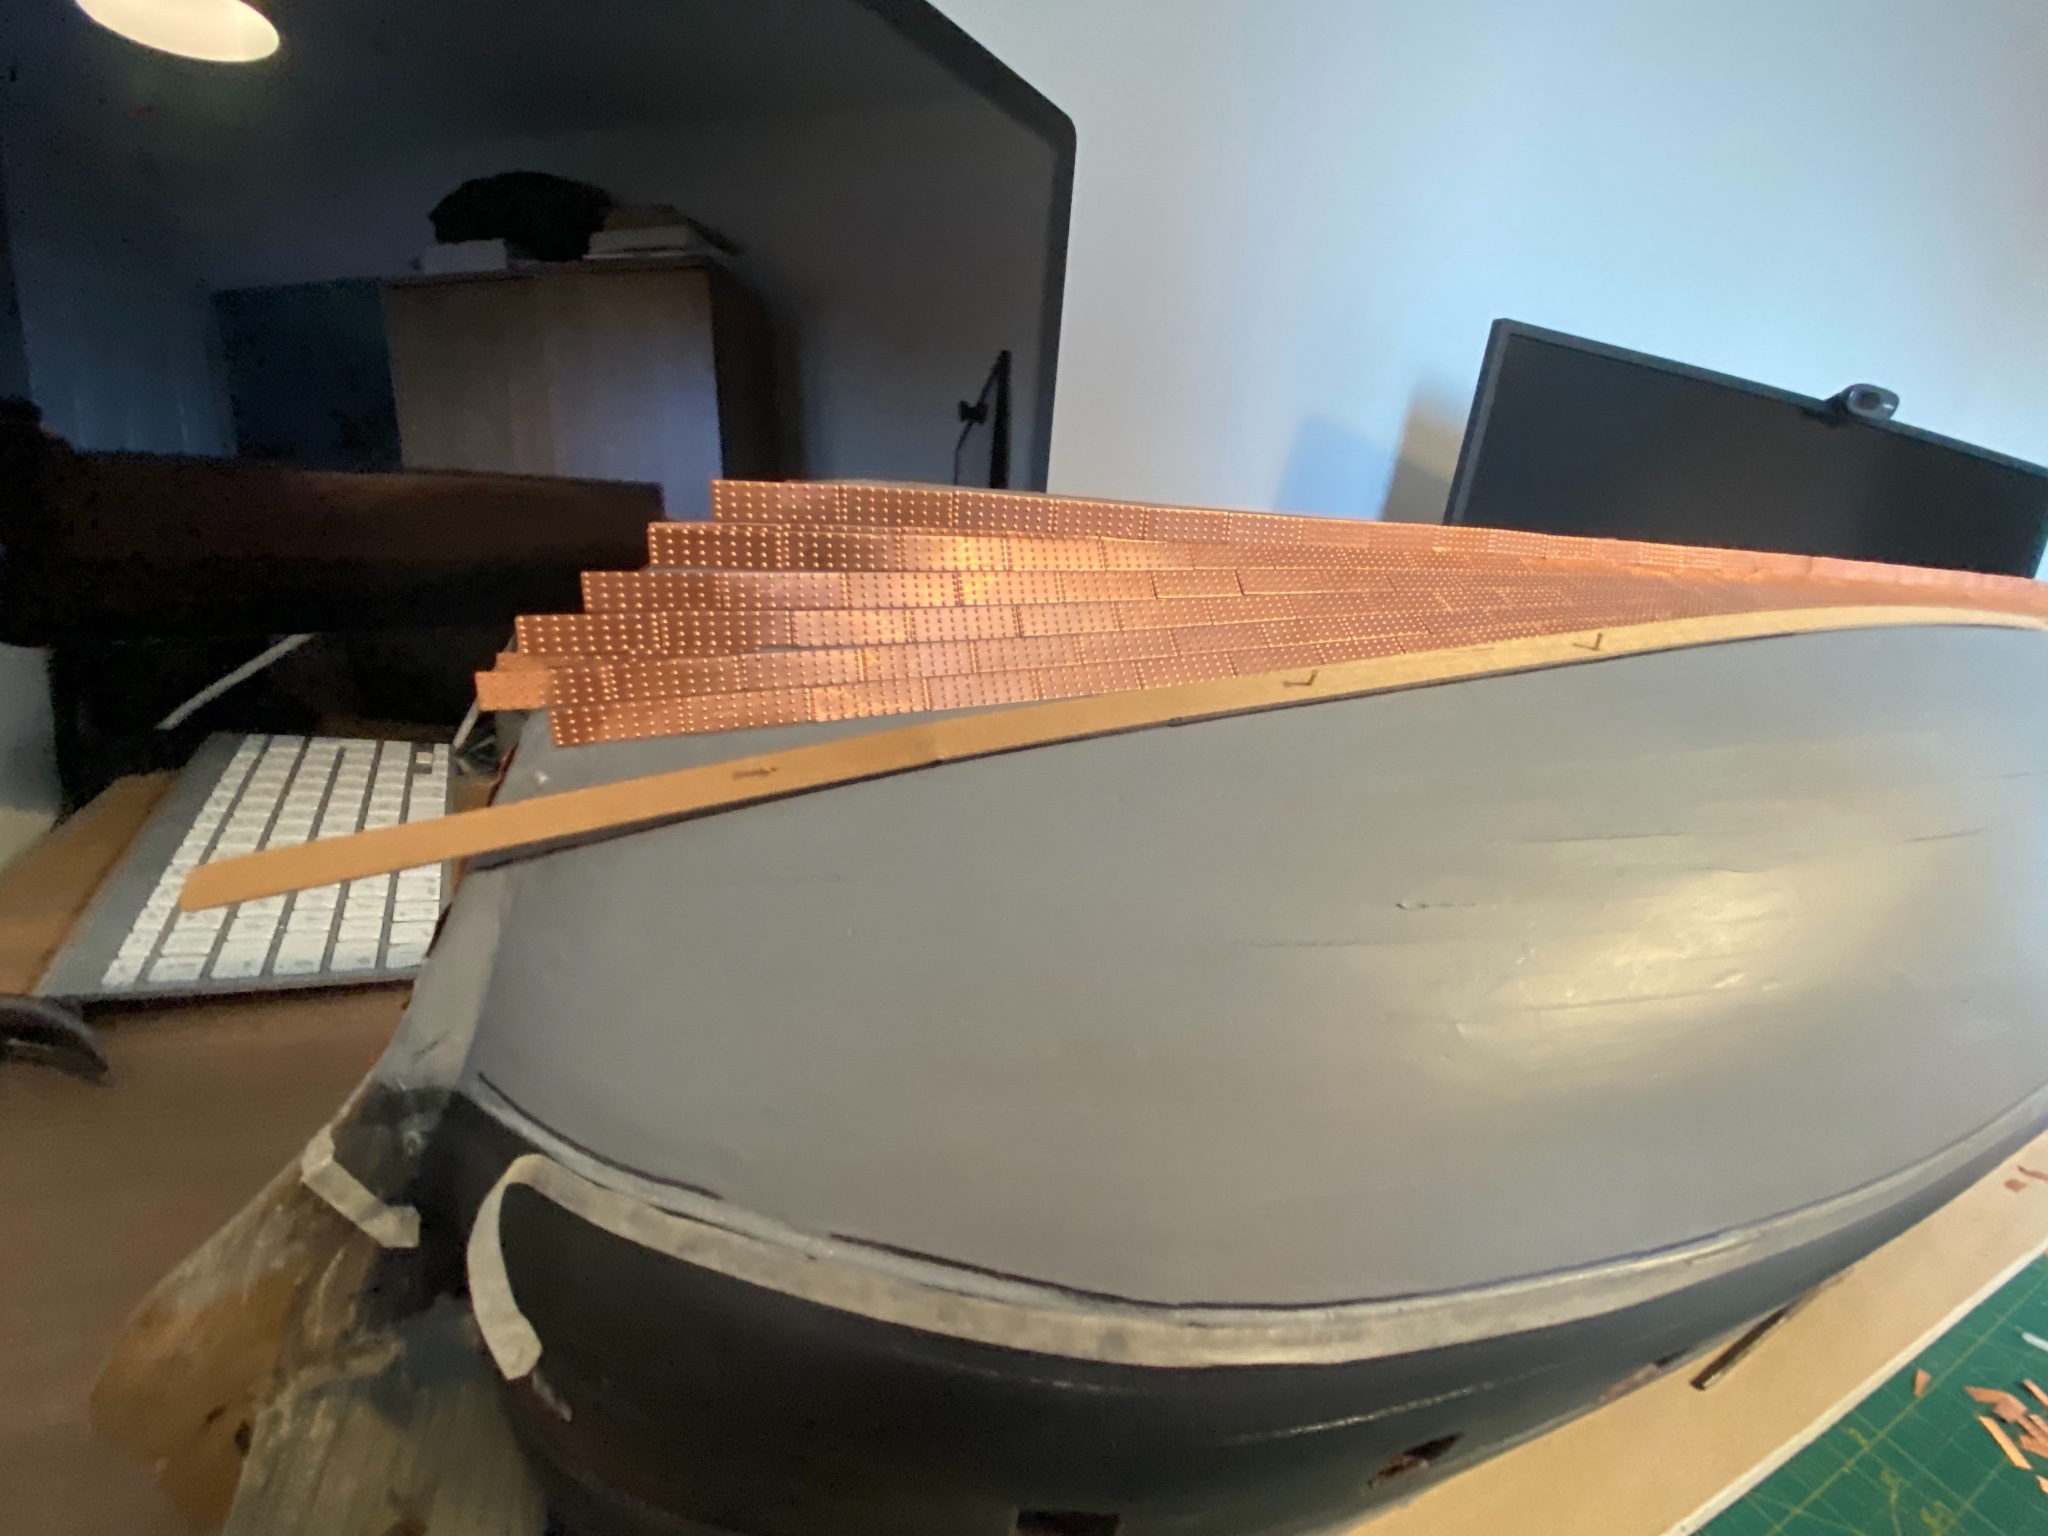
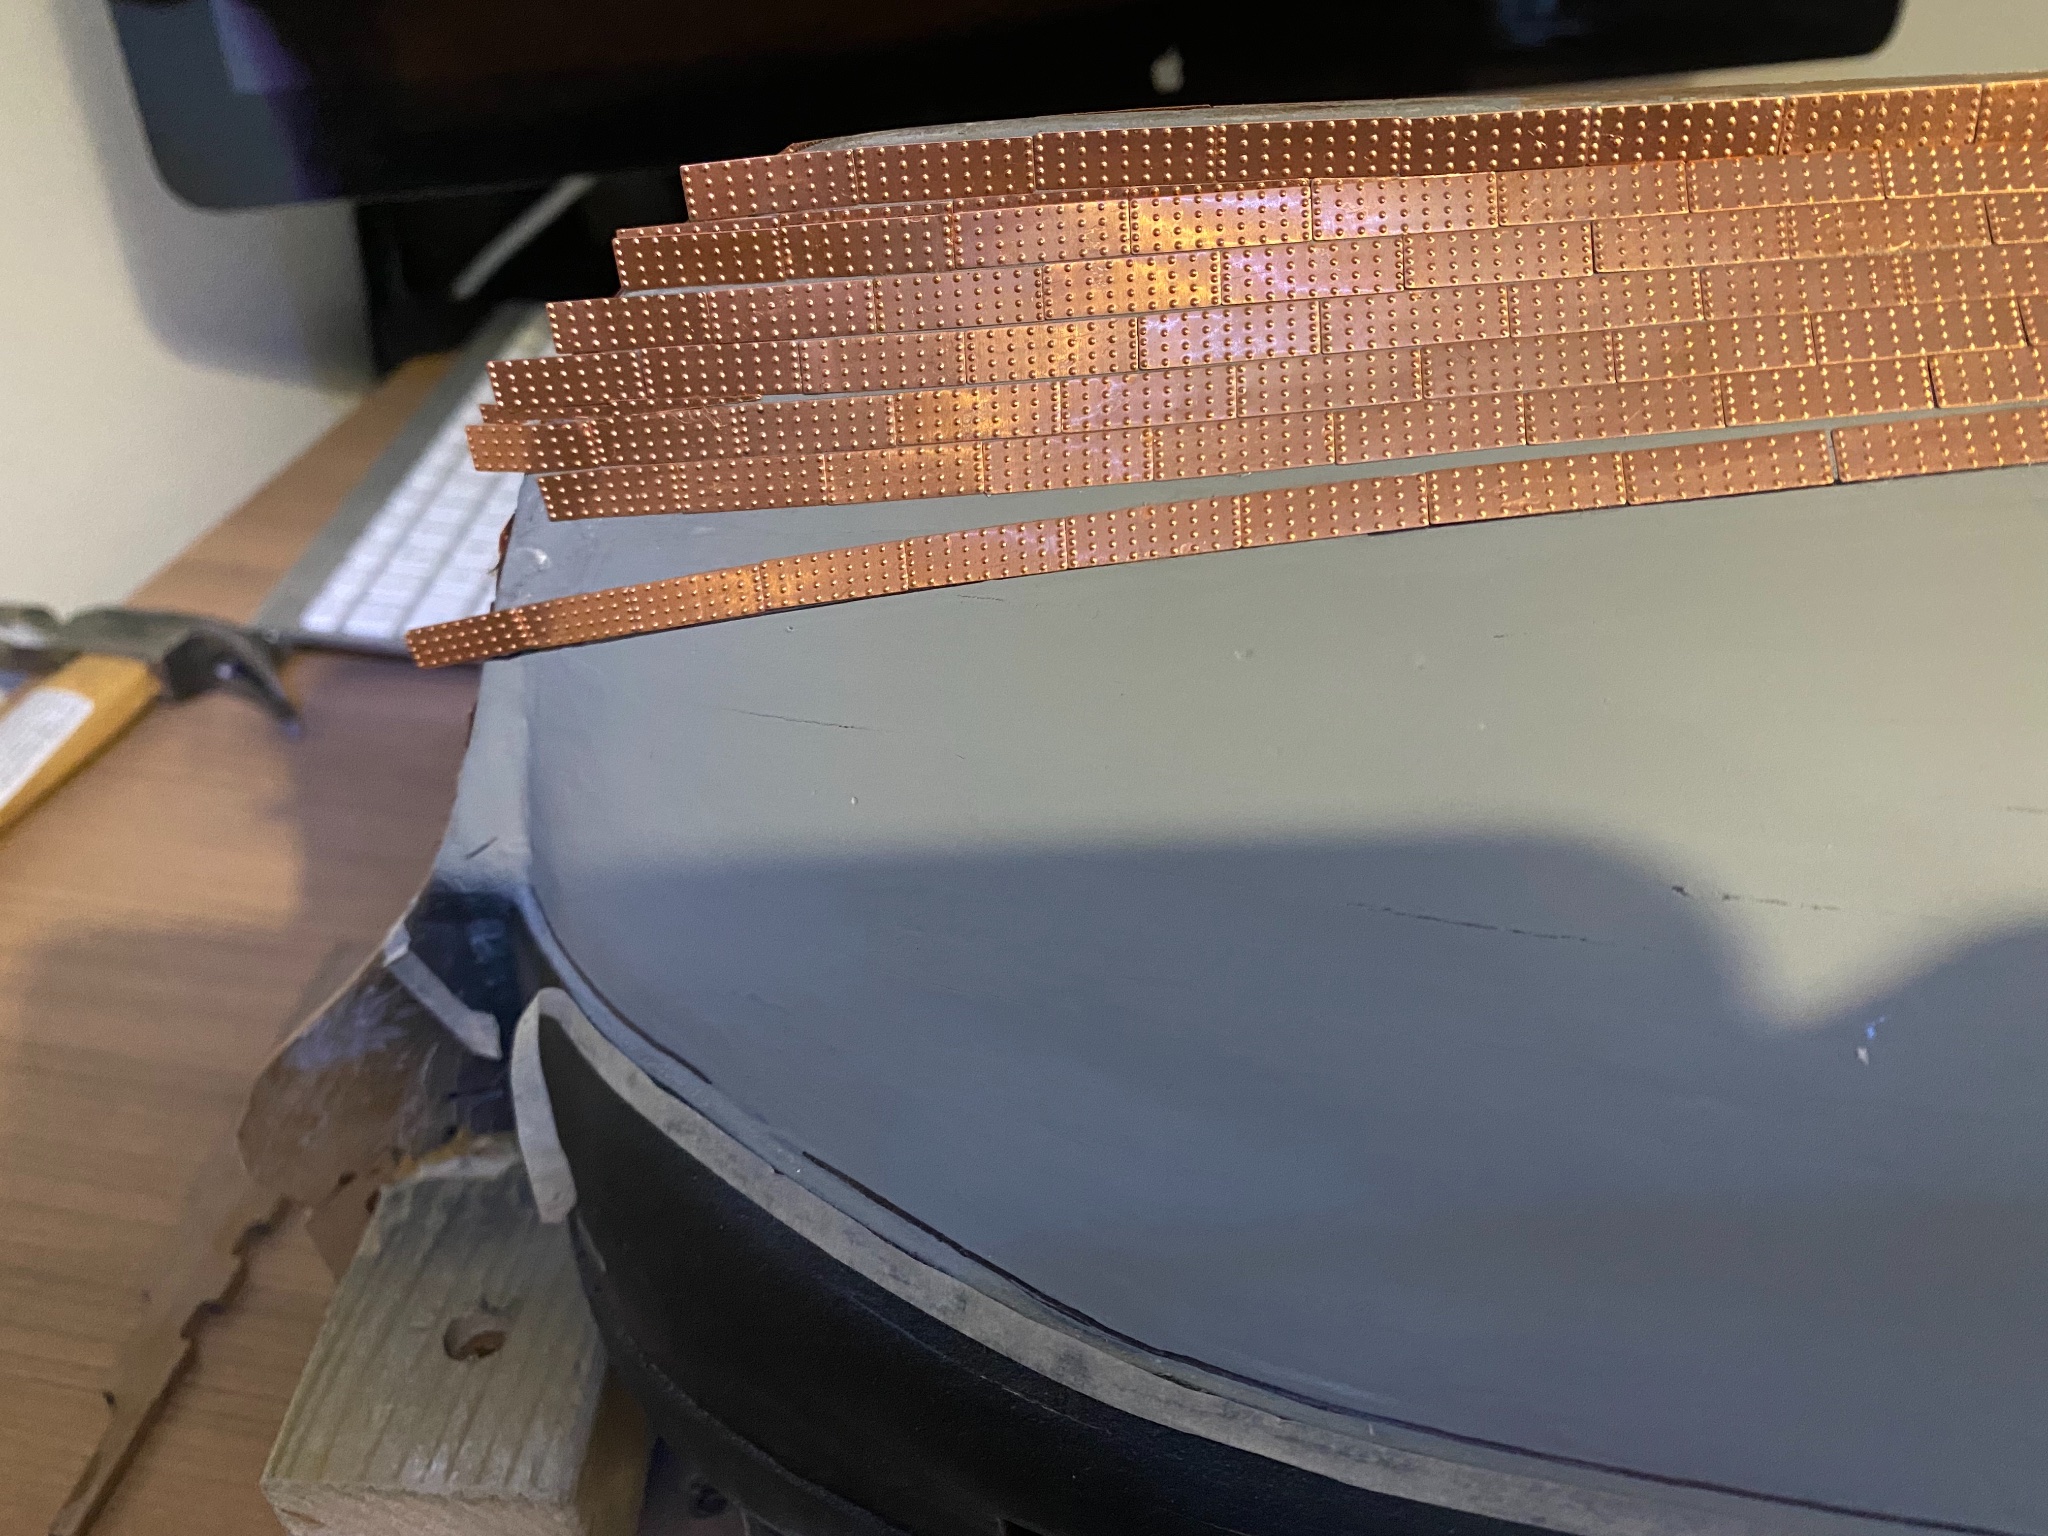
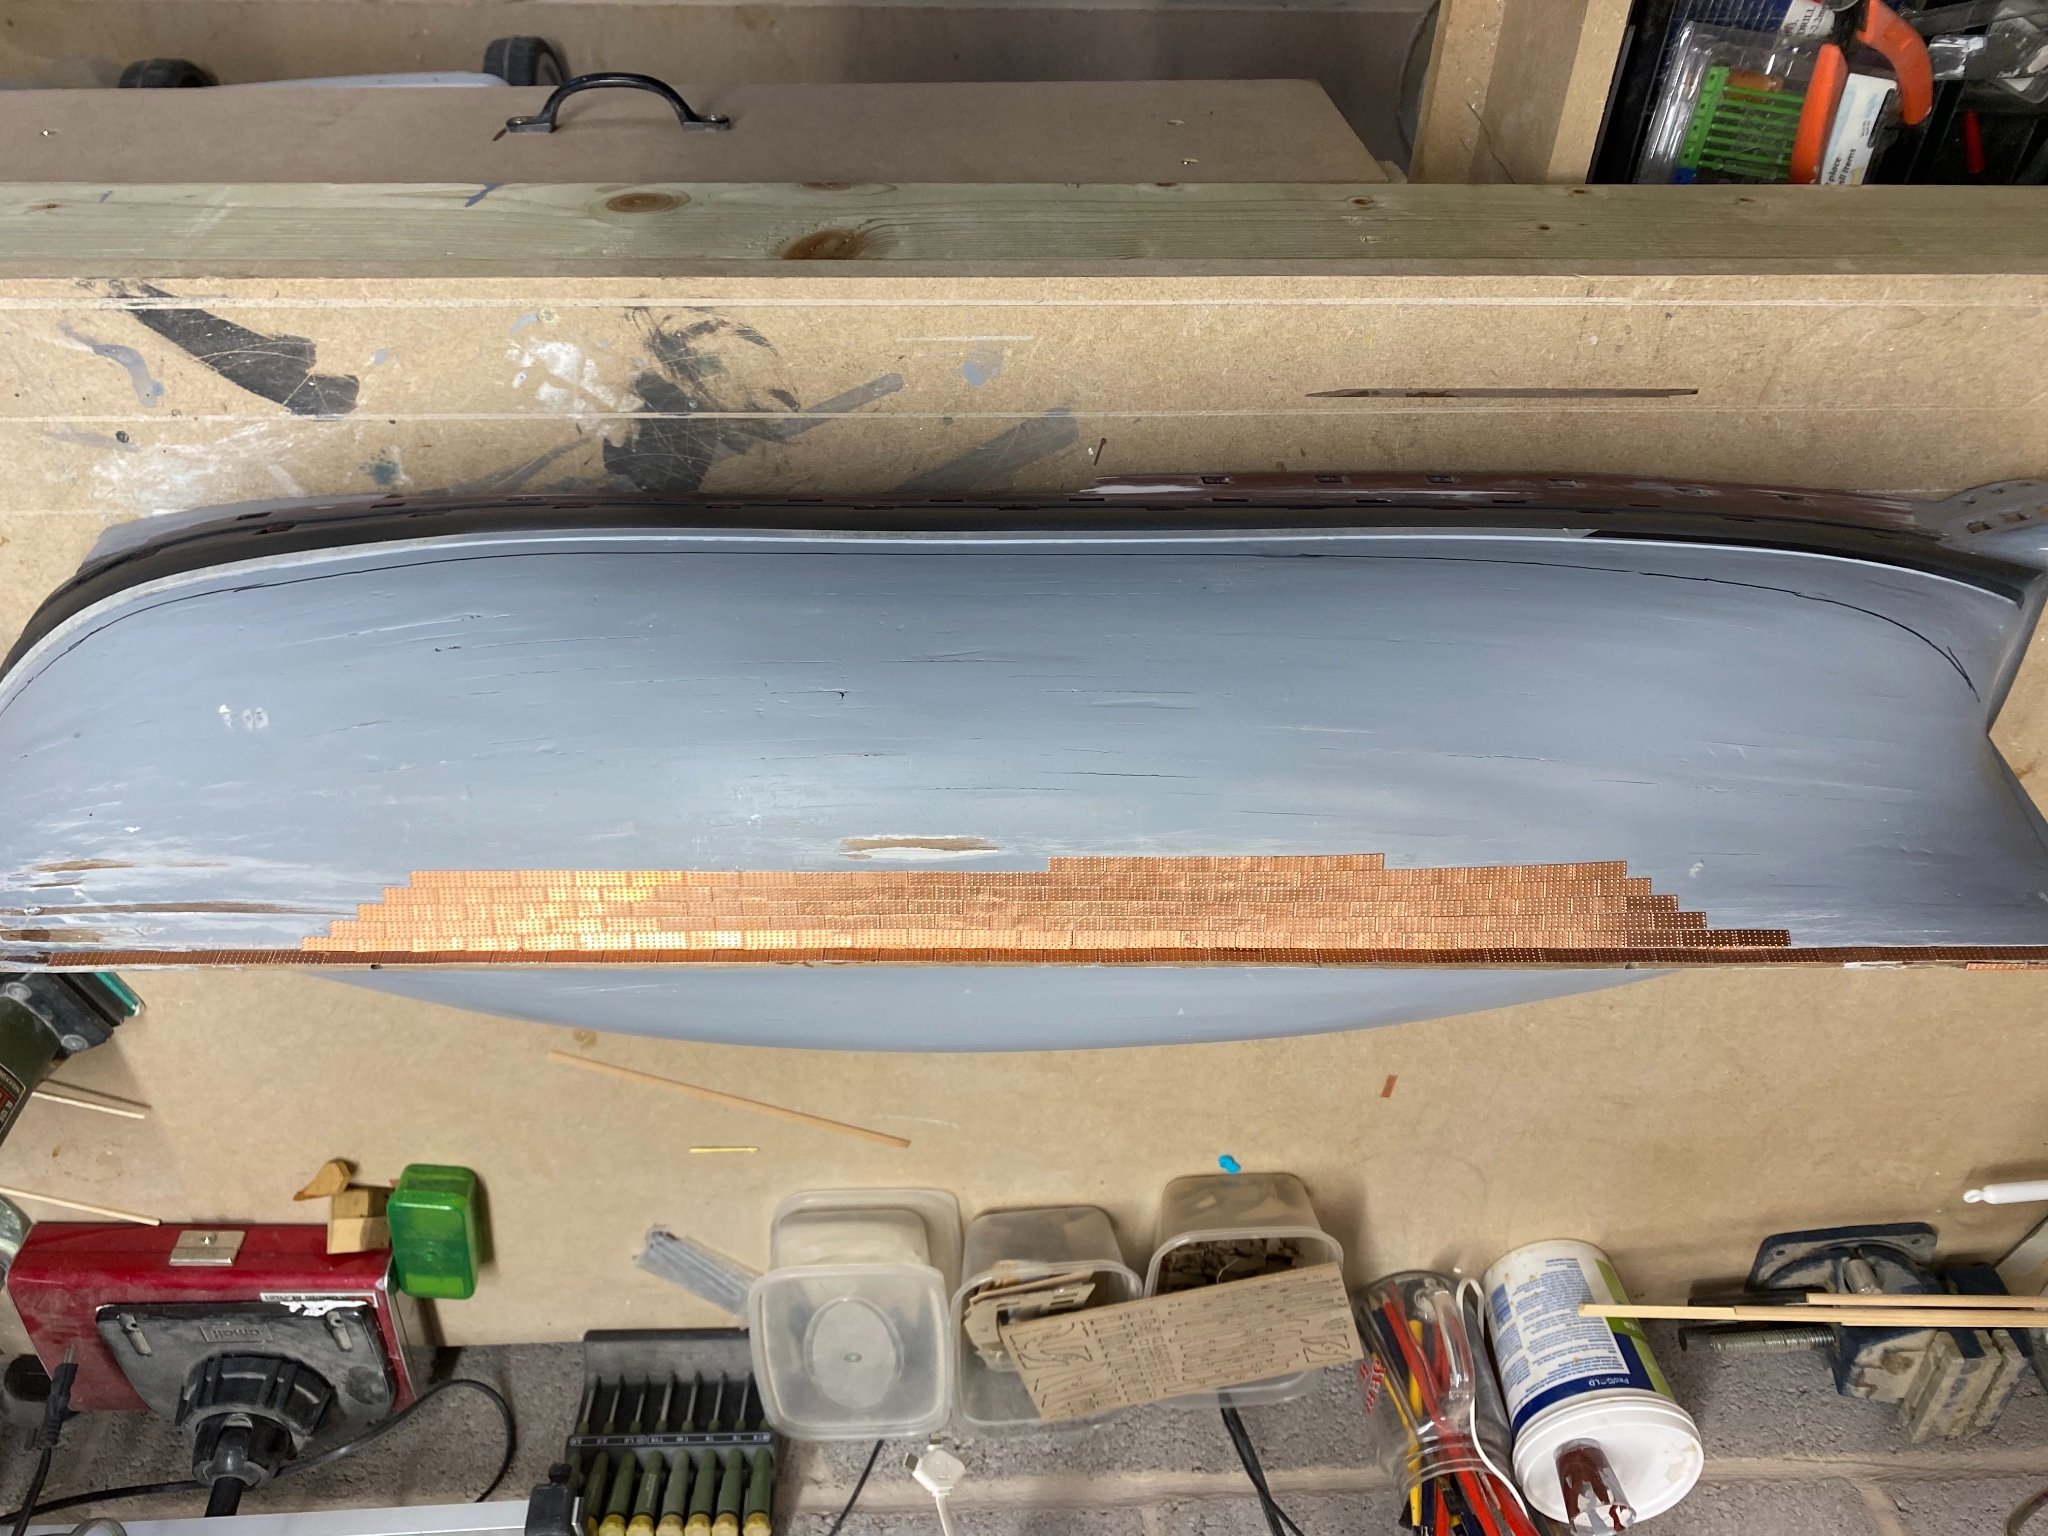
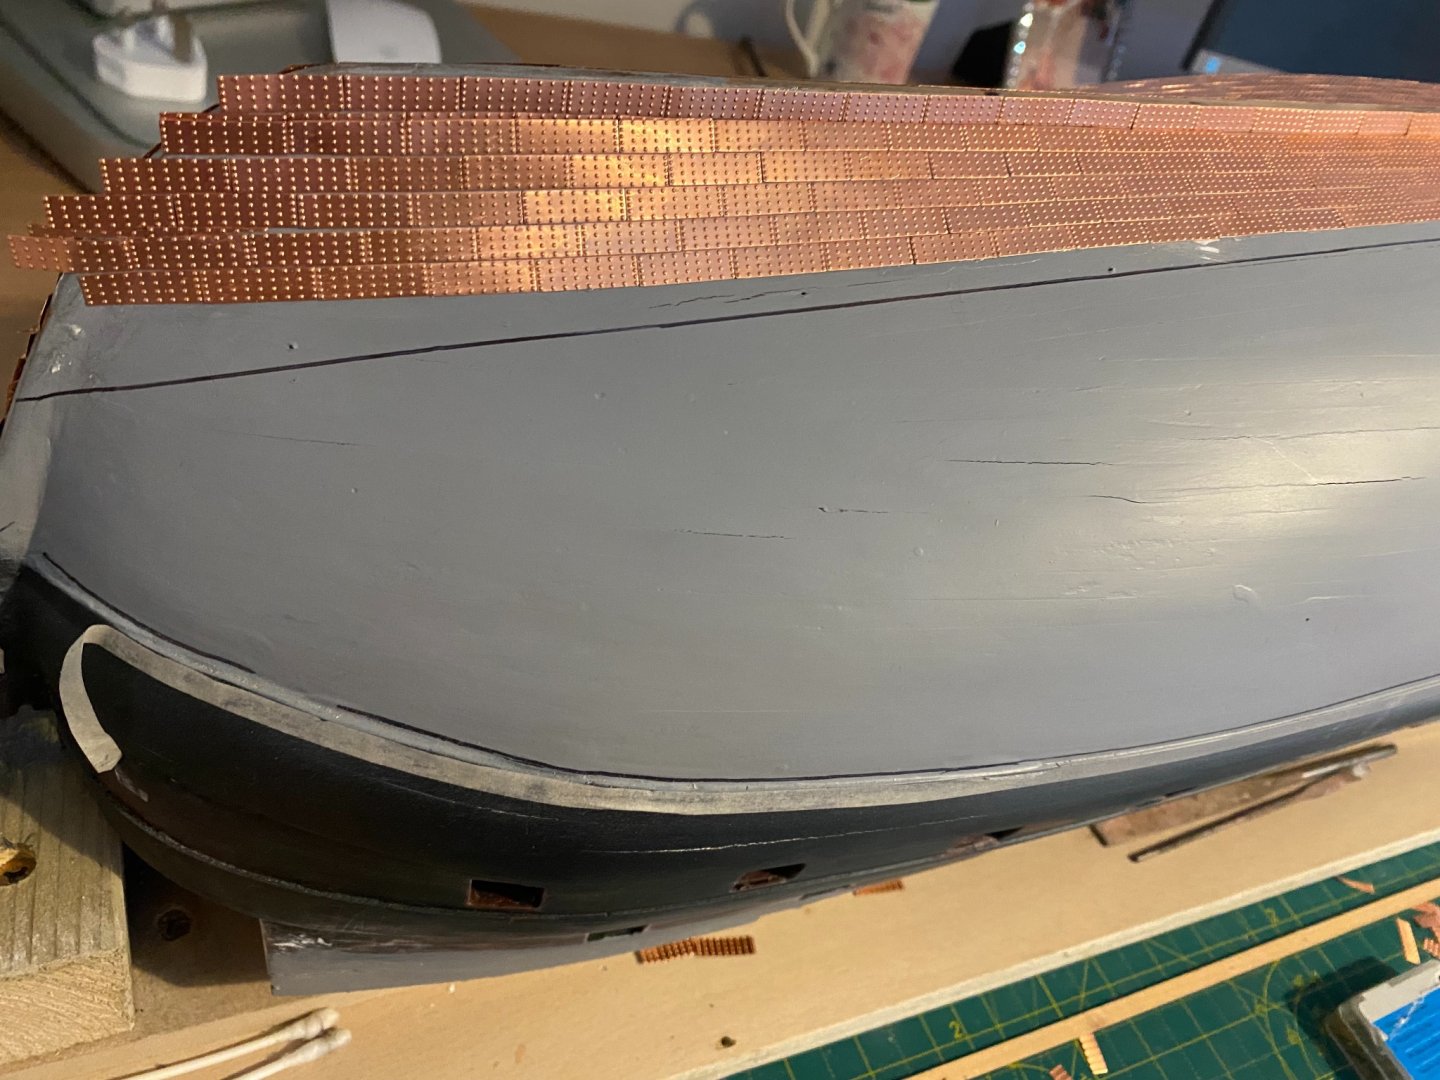
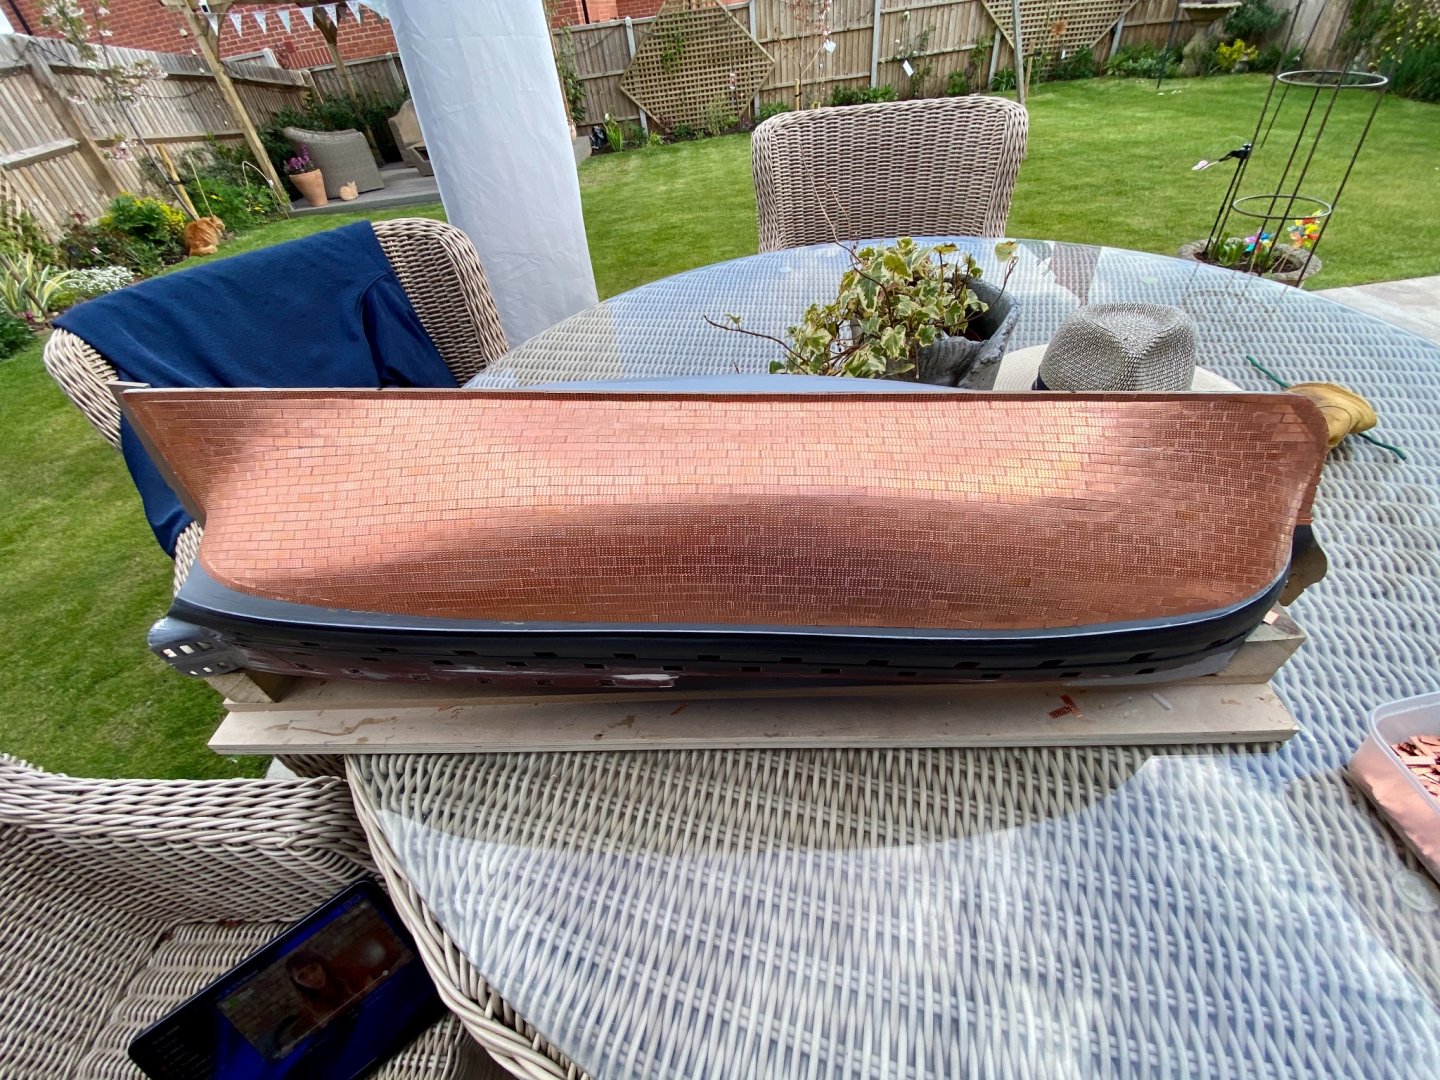
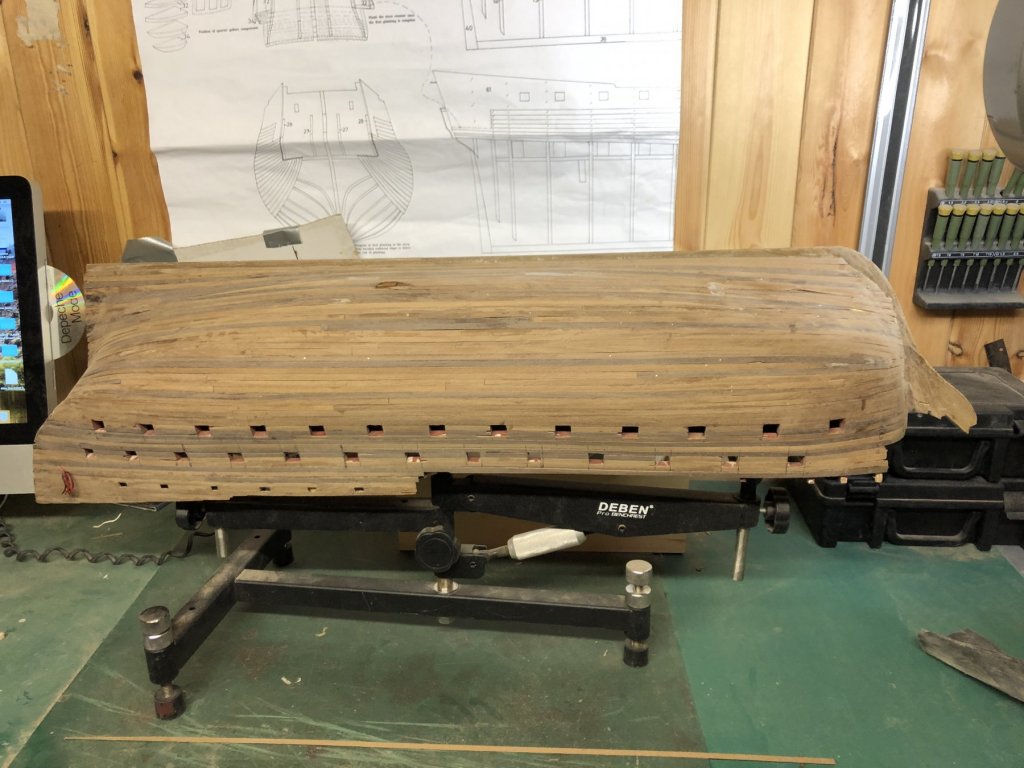
Little update to show how I tackled the coppering on the next phase. after 5 rows I temporarily pinned a piece of spare lime allowing it to follow the hull naturally. It also helped to match up the rows to the stern and bow. Leaves me a few stealers to fill in.


- 29 replies
-
- 7
-
-
- agamemnon
- caldercraft
- (and 1 more)
-
Chris_P reacted to a post in a topic:
HMS Agamemnon by Chris_P - Caldercraft - Scale 1:64 - My First Build Attempt
-
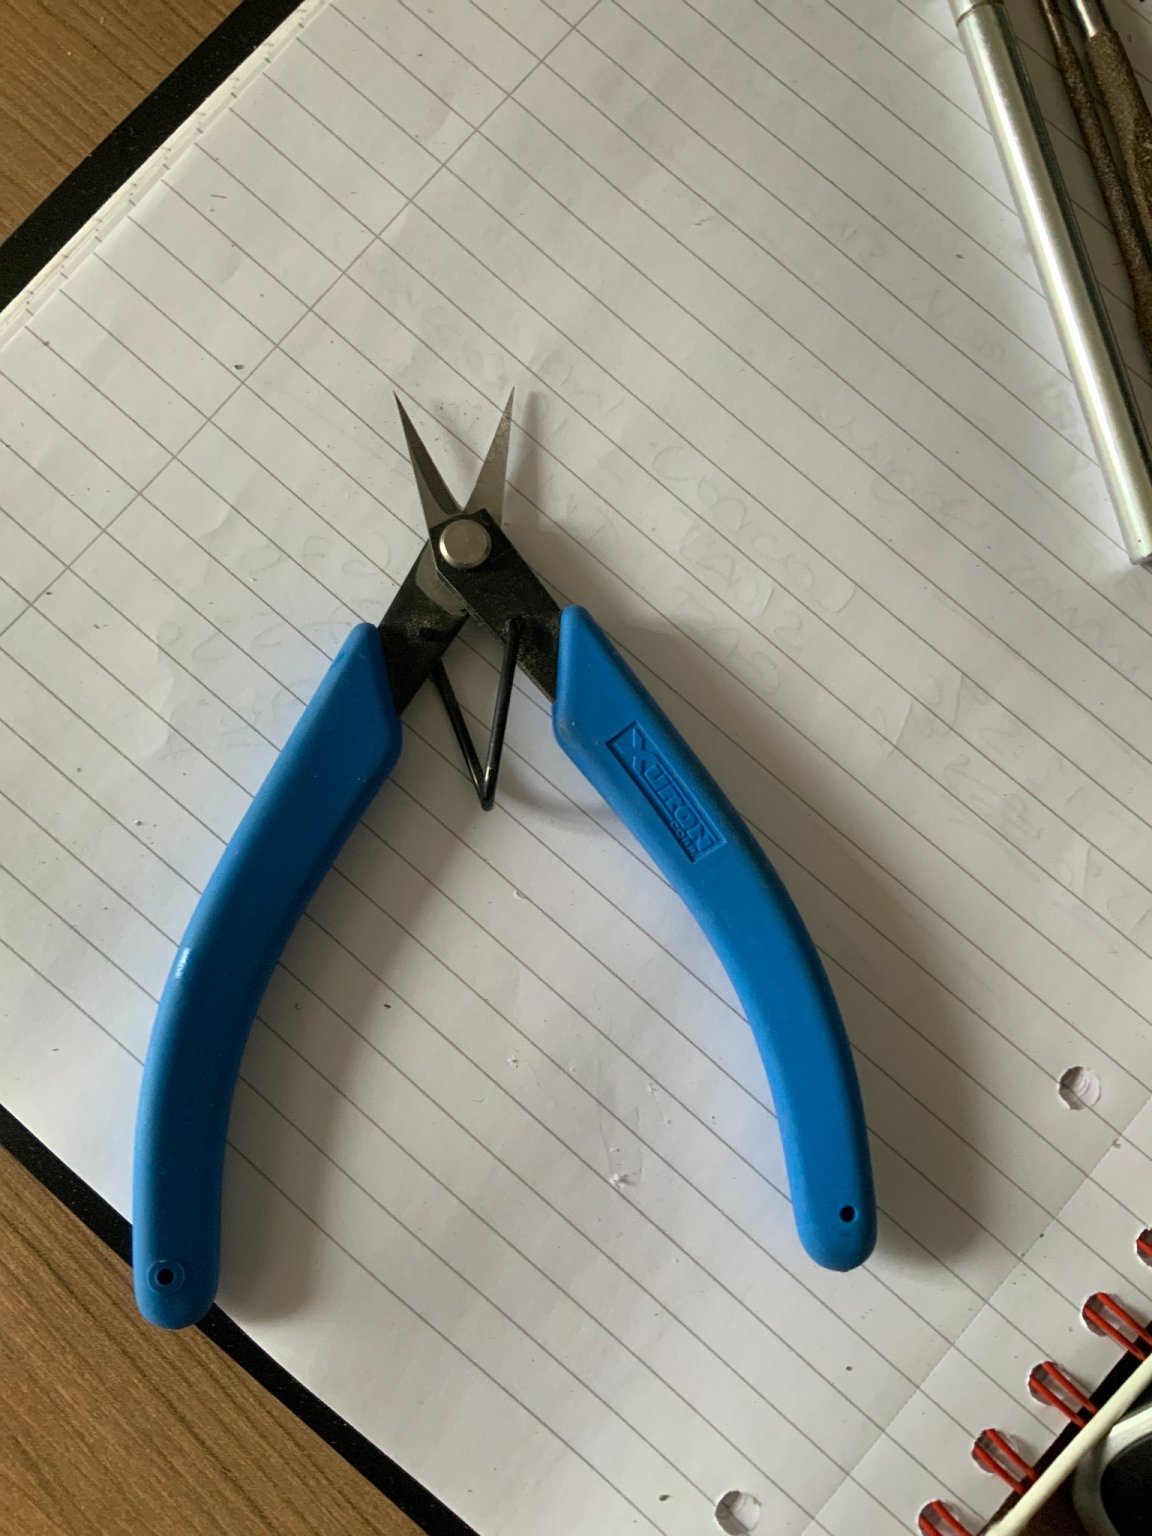
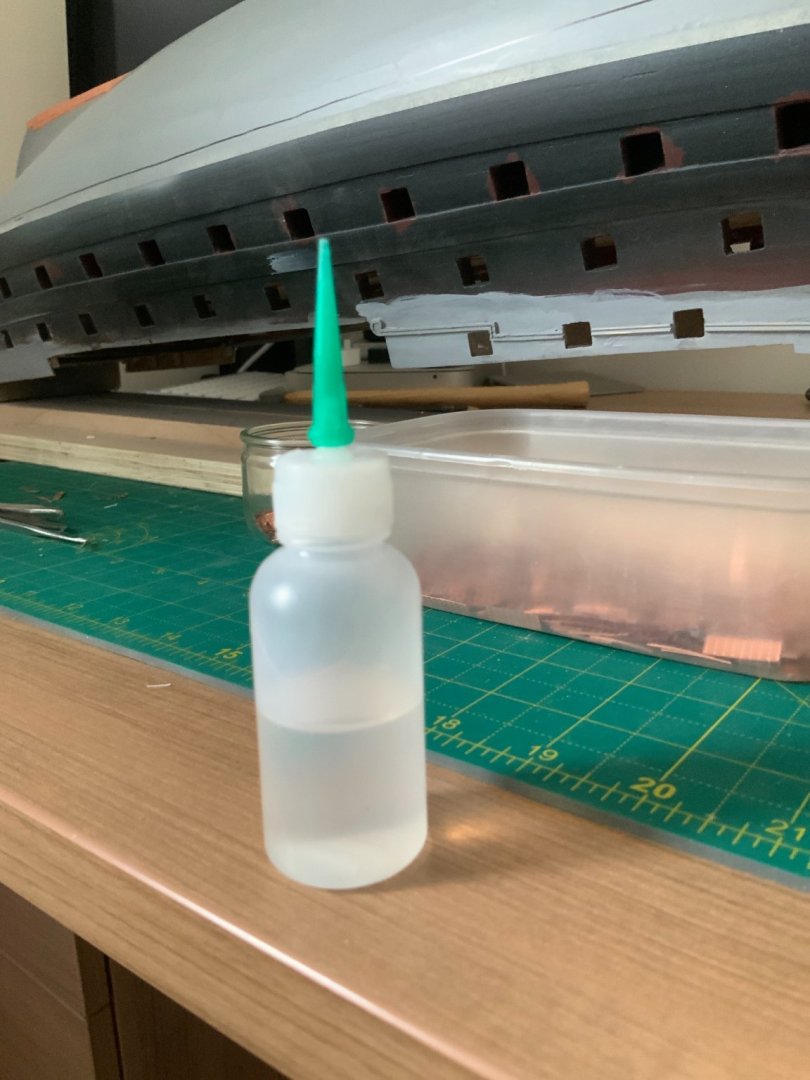
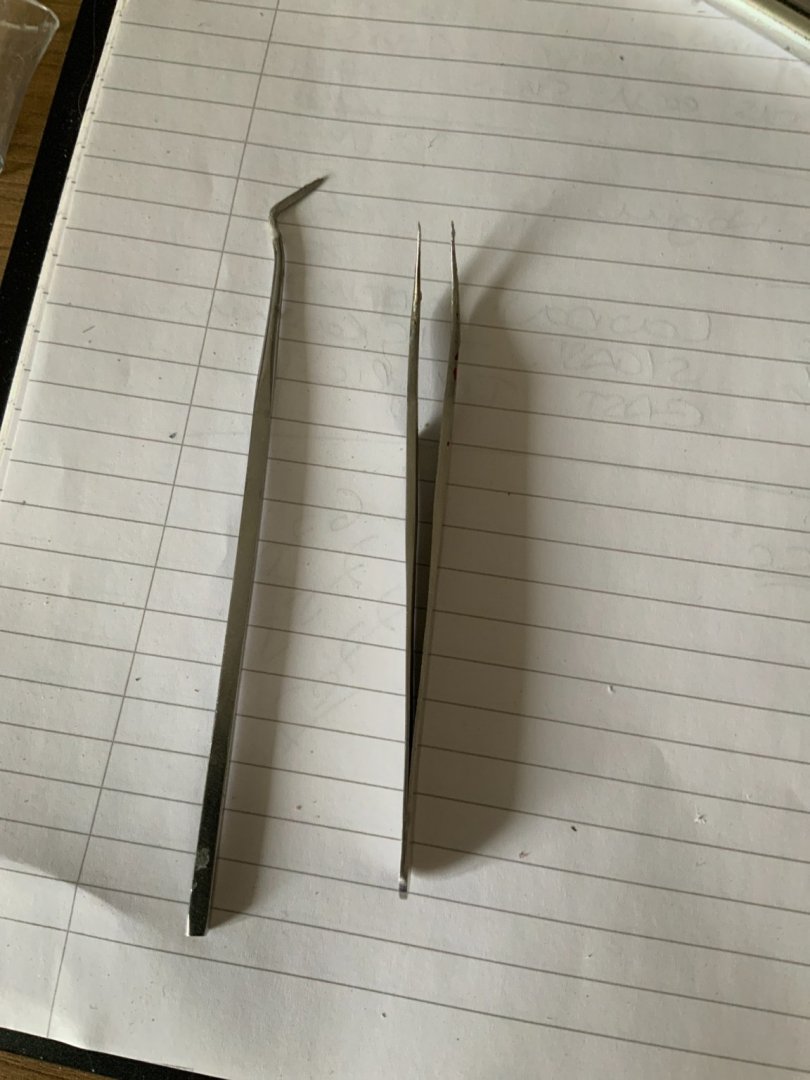
Will, honestly i have learnt soo much ! I found the suction pen quite useless as it wouldn’t pick up the copper sheets. I am still waiting for the powered one ! I used thin cyano and a very small tip which I changed every session. three small drops on the hull or for the awkward tiles direct. I found that for cutting and trimming to a fine detail were these Xuron XUR2175B cutters. Extremely sharp ! Generally I picked up each tile with fine tweezers and applied a small amount of cyano, positioning the tile and holding in place with a sharp pointed pick. Another useful purchase was some cyano debonder with some q tips which I used for any over spill from the cyano. I used a piece of spare wood the same thickness as the tile and temporarily pinned onto the hull and marked a line to follow after the first 7 rows. I followed this and used a few stealers at each end.

- 29 replies
-
- 2
-
-
- agamemnon
- caldercraft
- (and 1 more)
-
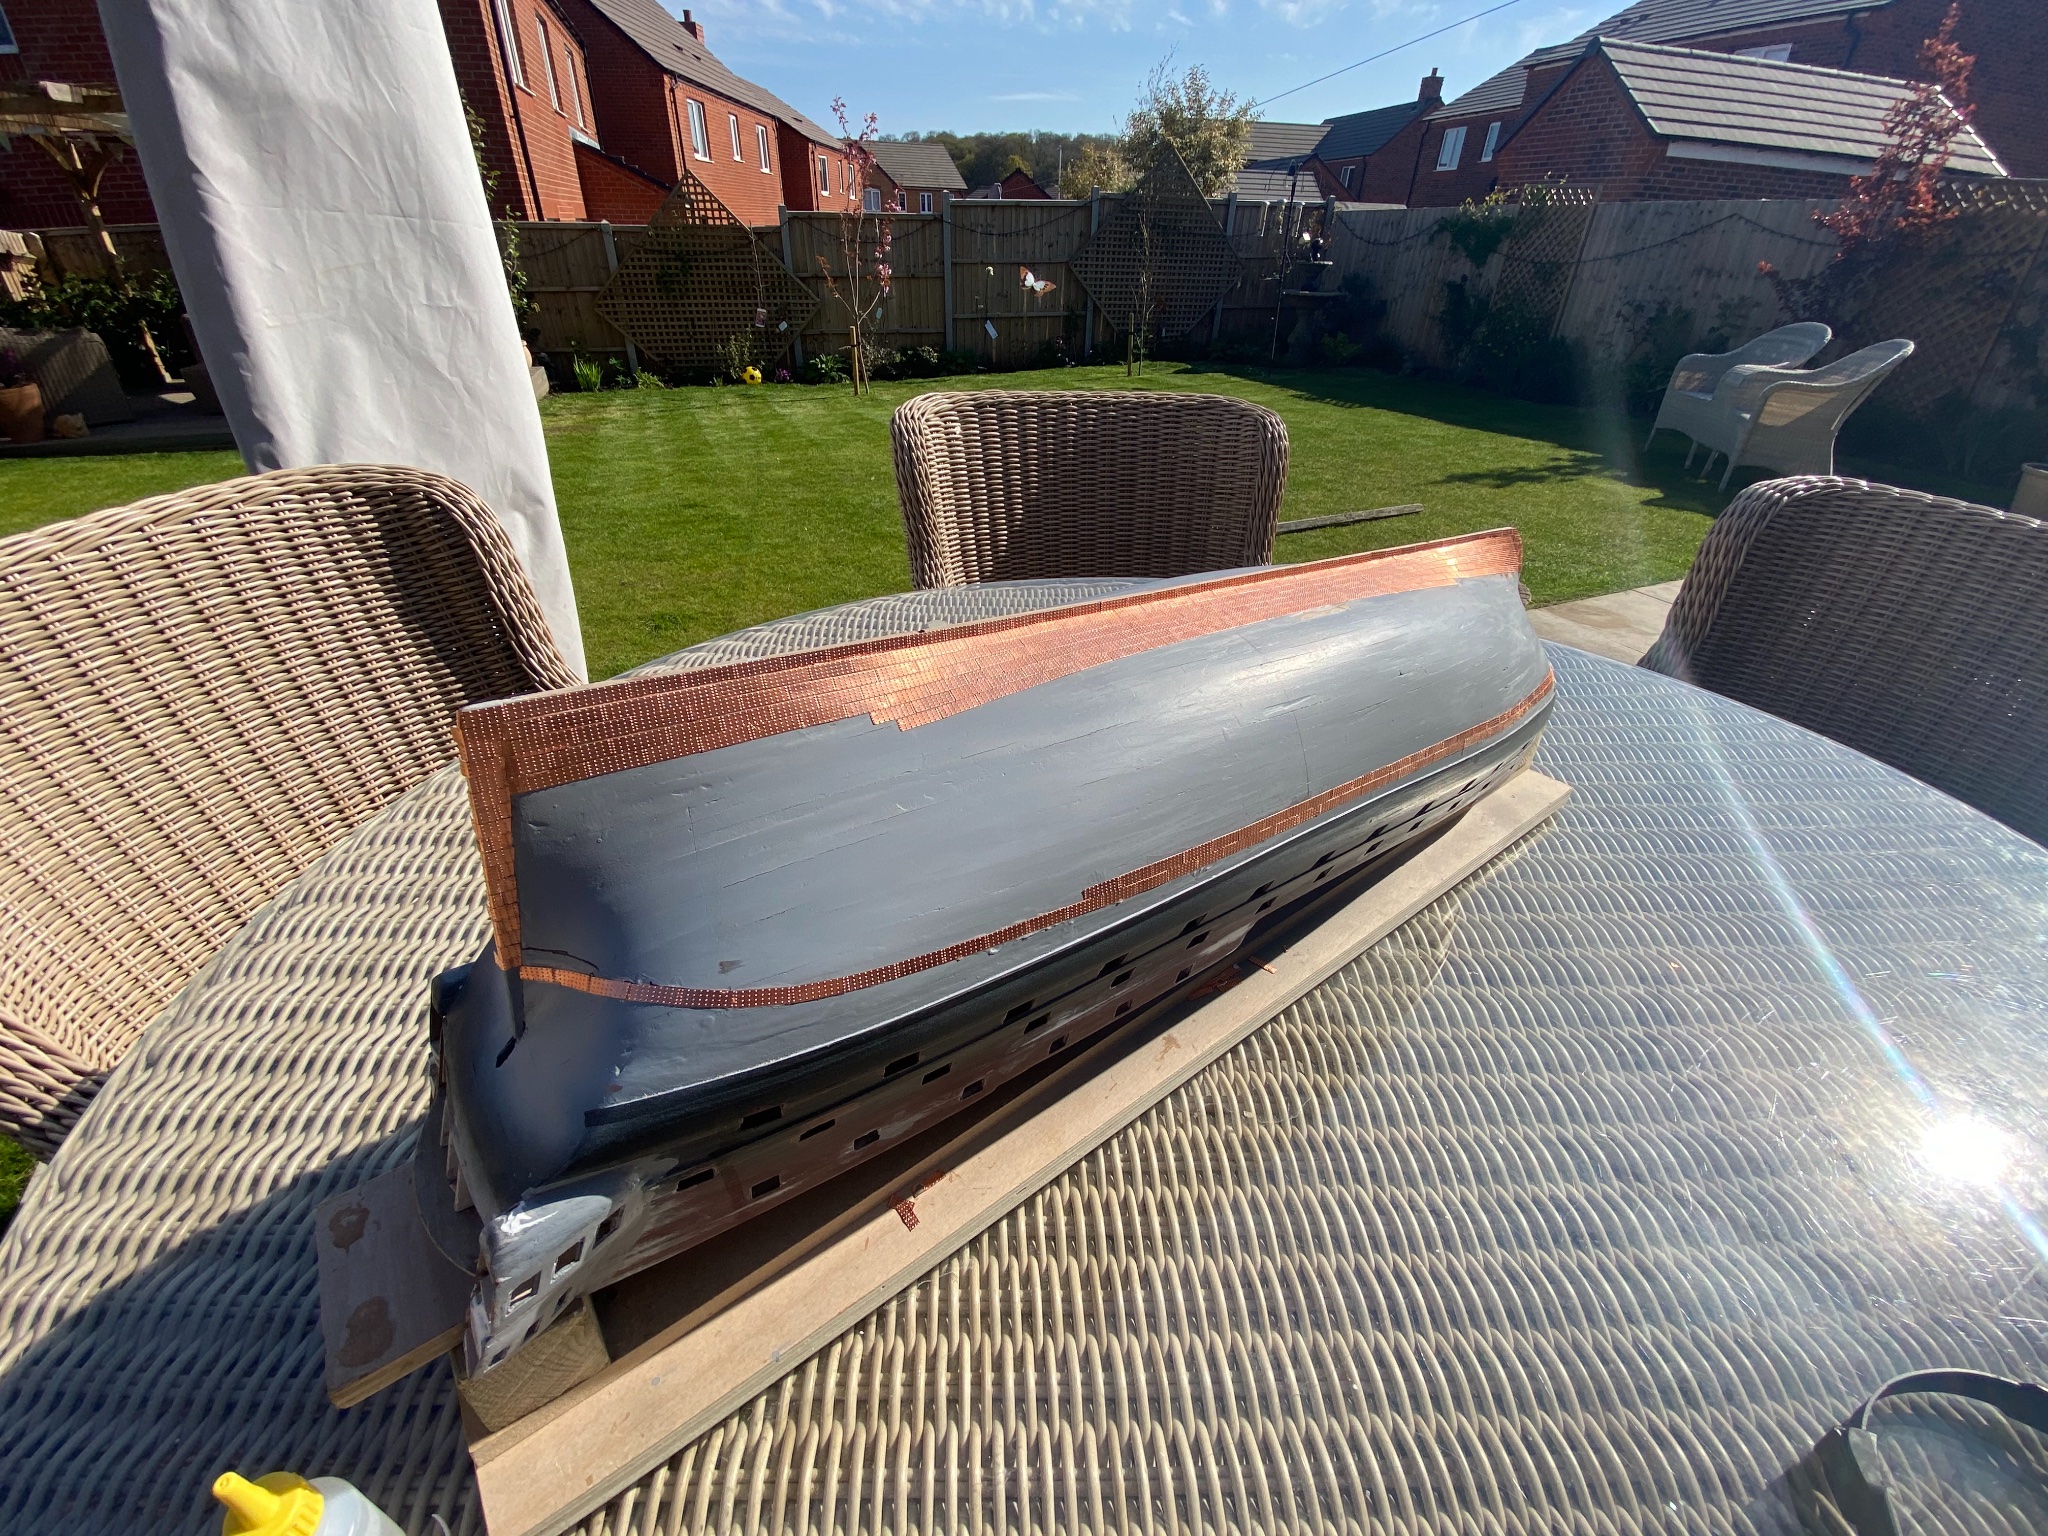
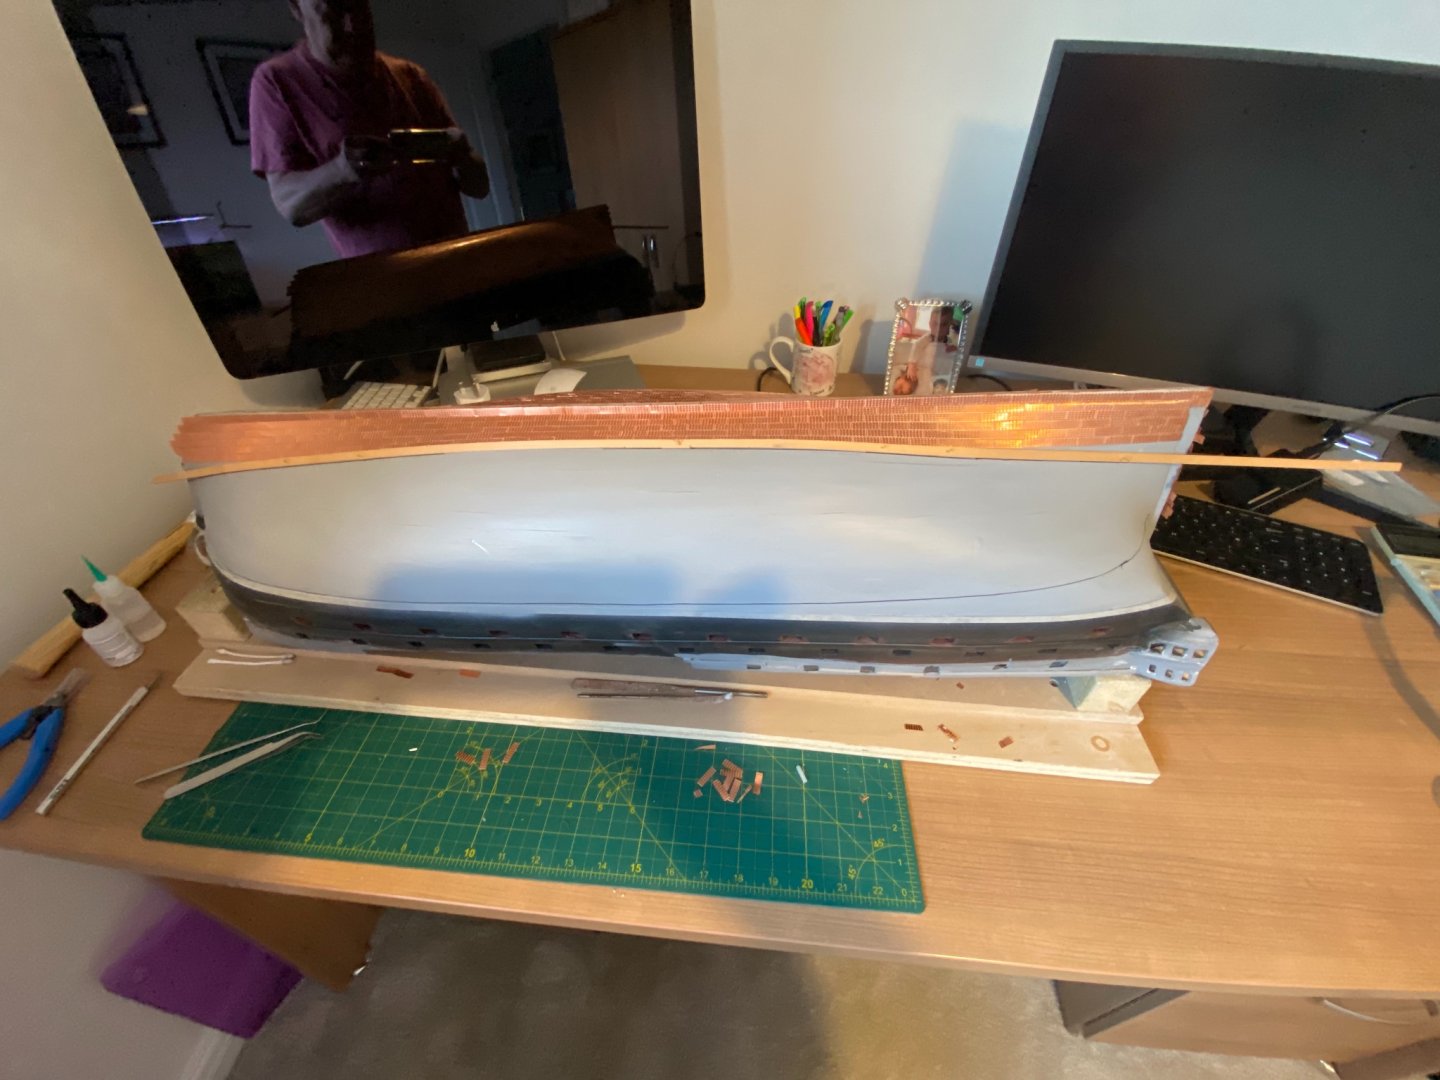
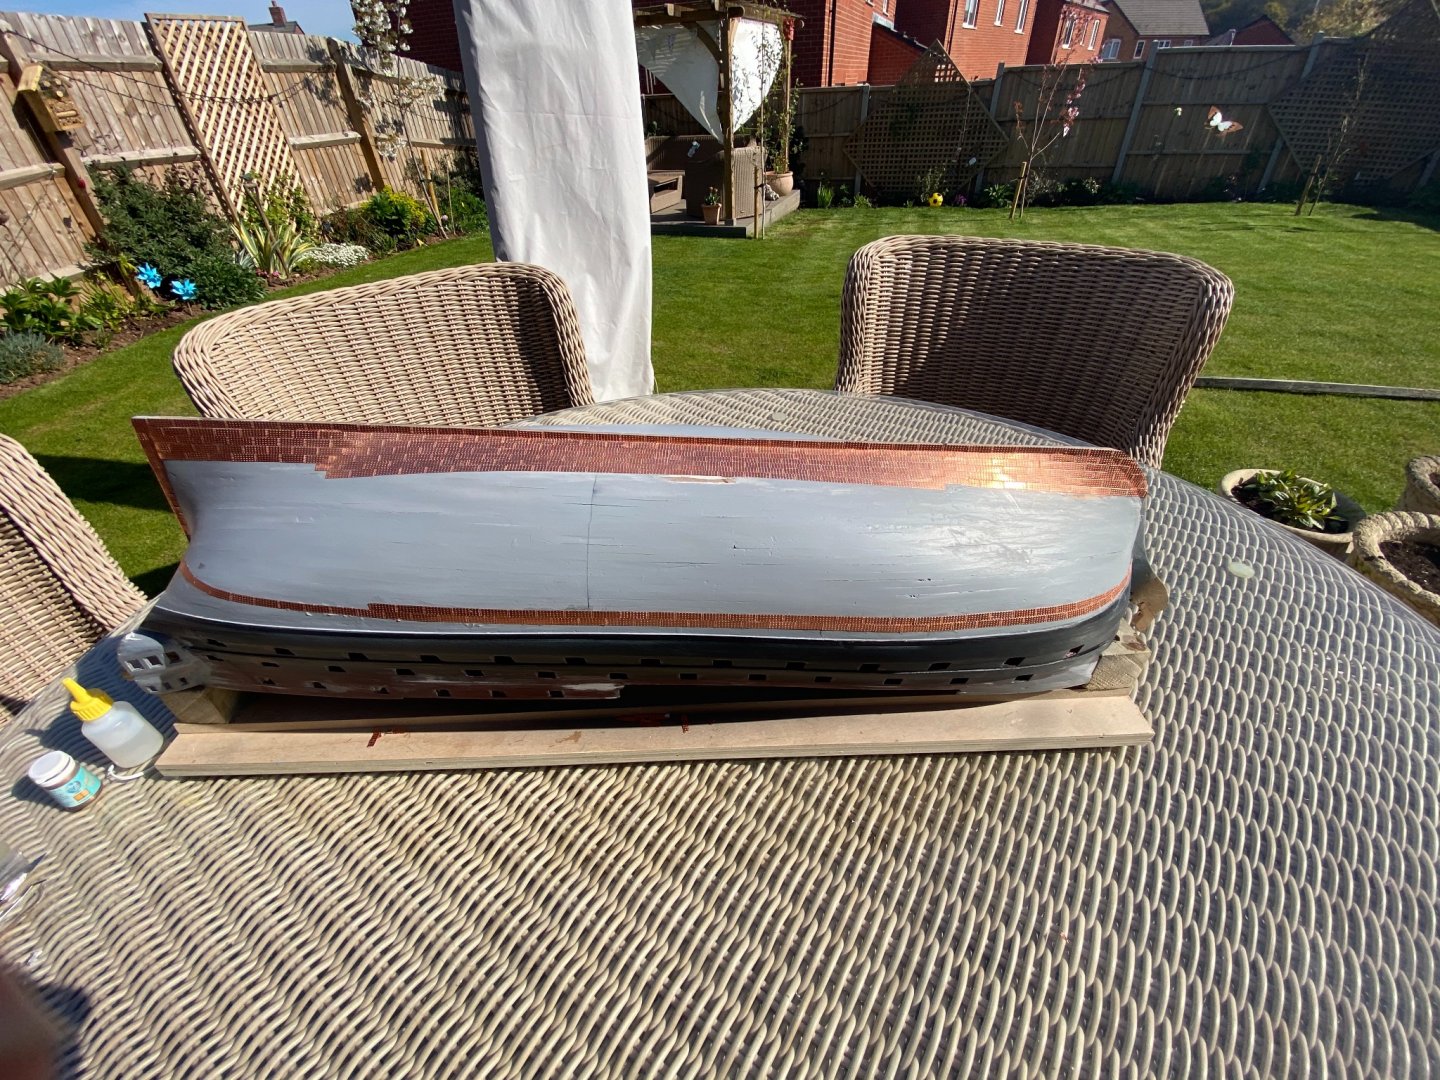
Well another week and a great couple of days in the great British summer I have completed the first side ! I have learnt soo much so my port side should be even better !

- 29 replies
-
- 10
-
-
- agamemnon
- caldercraft
- (and 1 more)
-
Chris_P reacted to a post in a topic:
HMS Agamemnon by Chris_P - Caldercraft - Scale 1:64 - My First Build Attempt
-
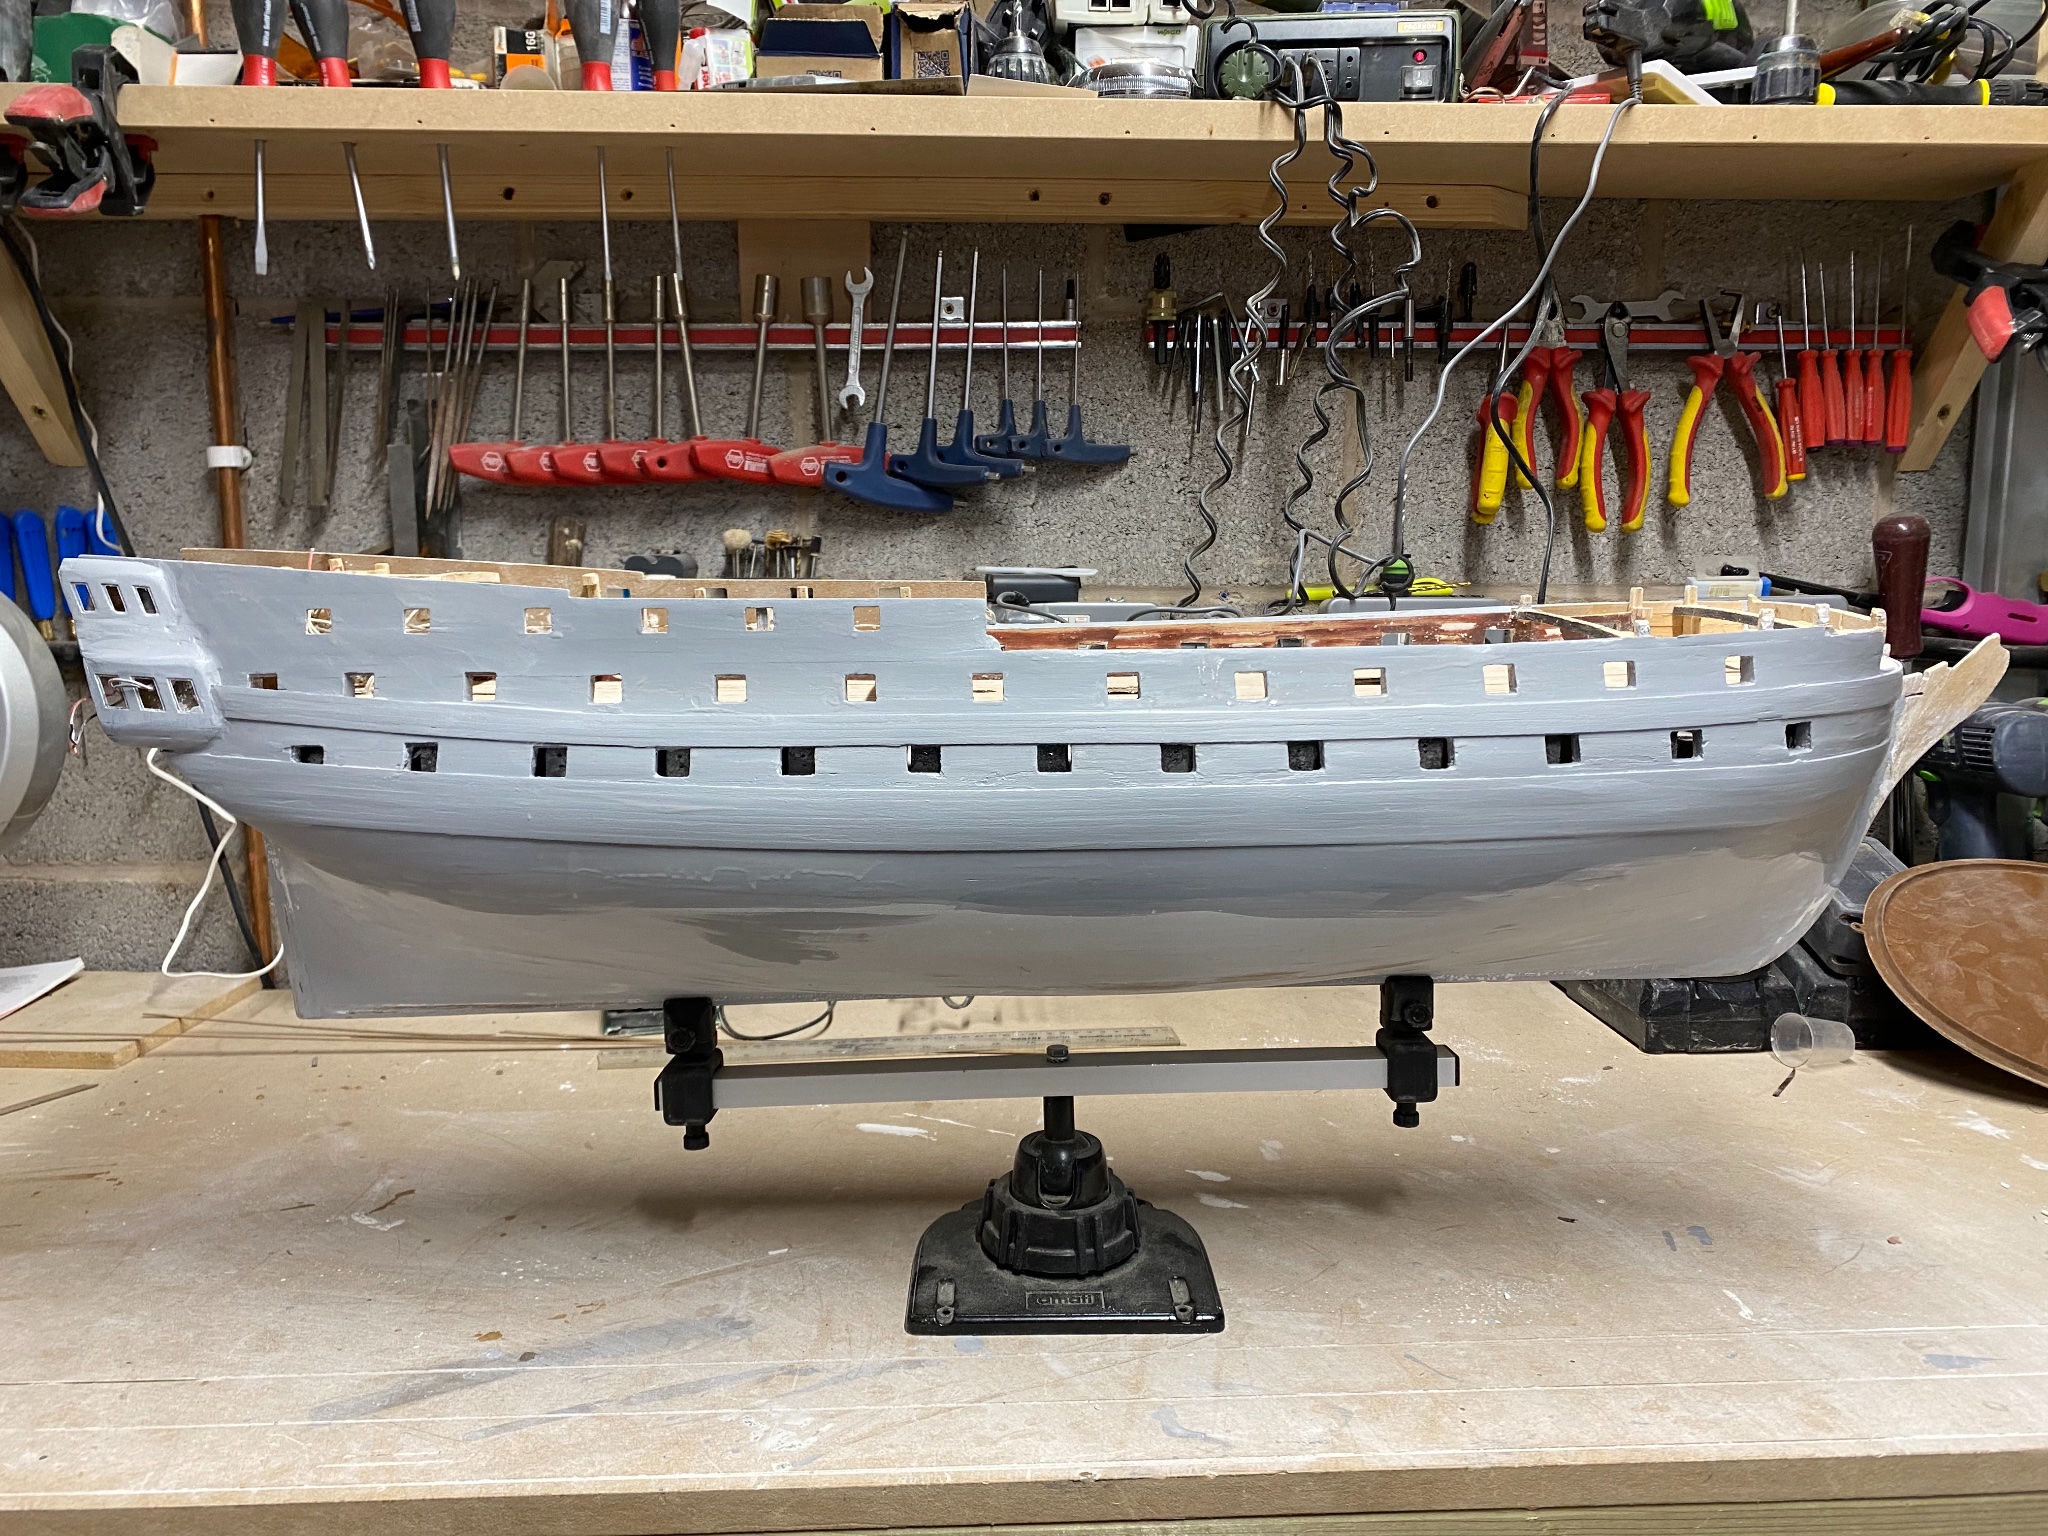
Will, your deck looks great ! Thanks for your information on coppering my Agamemnon it’s helped me enormously. Nearly two weeks and stripping off and restarting it’s been a hard journey for me. I made a stand to help keep the hull steady when upside down. With regard to your next stage I would suggest that you start the coppering. It would be good to watch your progress ! Always willing for suggestions and how you will start yours. PS I have been offered a Caldercraft Victory which a neighbour has started but due to health issues won’t be able to complete. One for my next build possibly
-
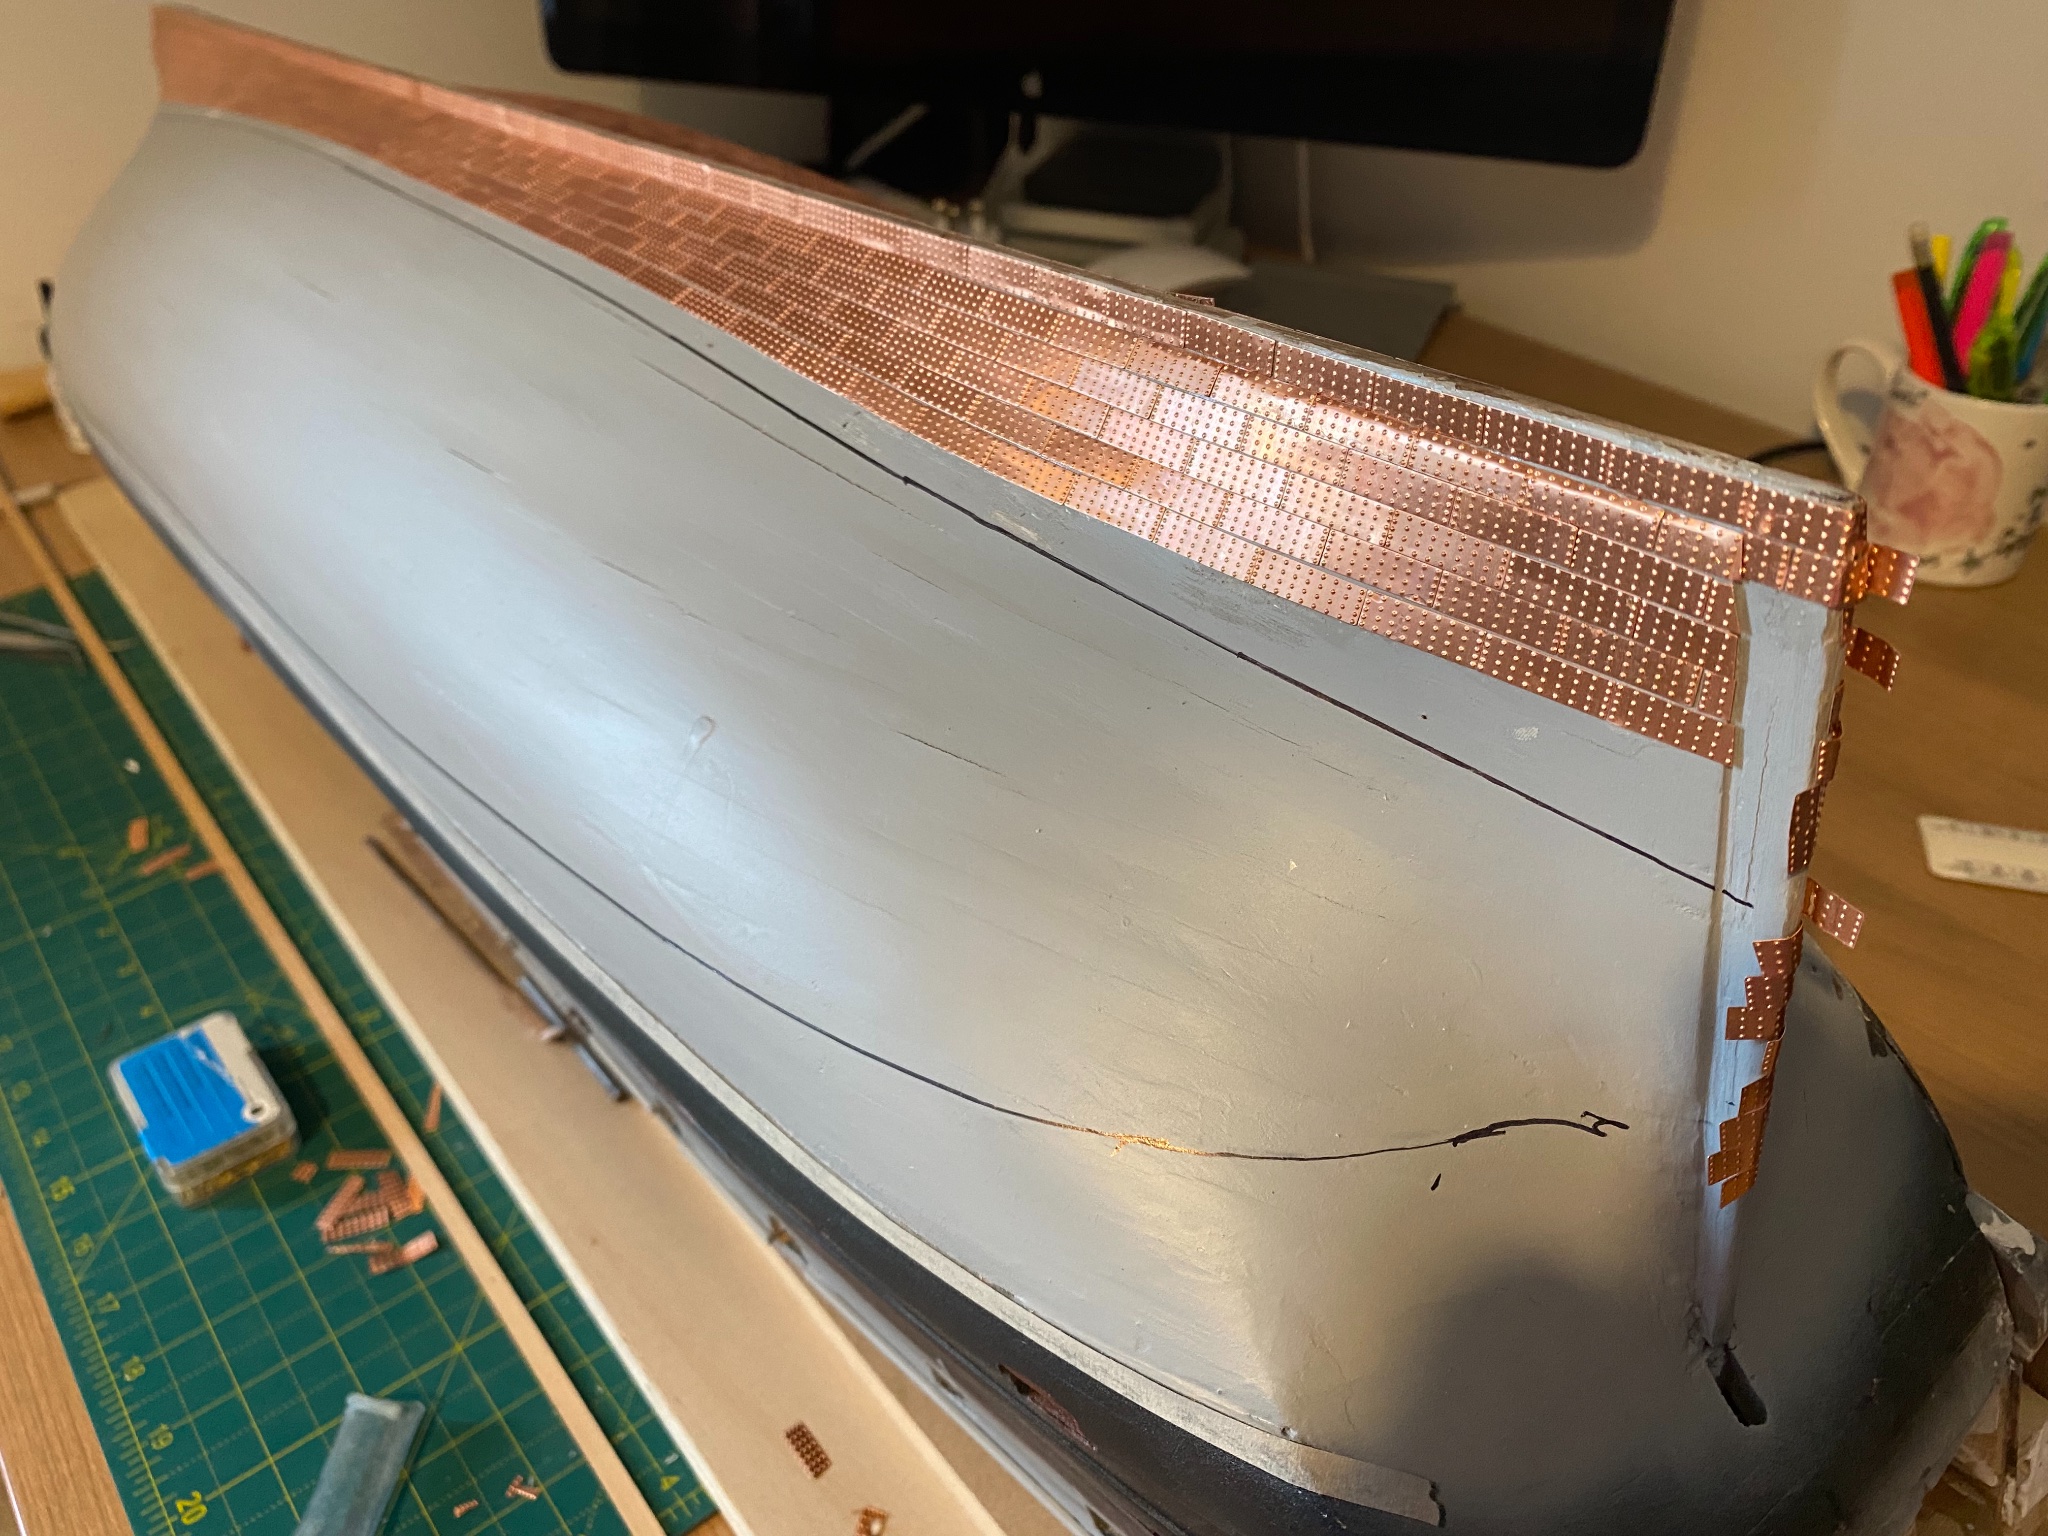
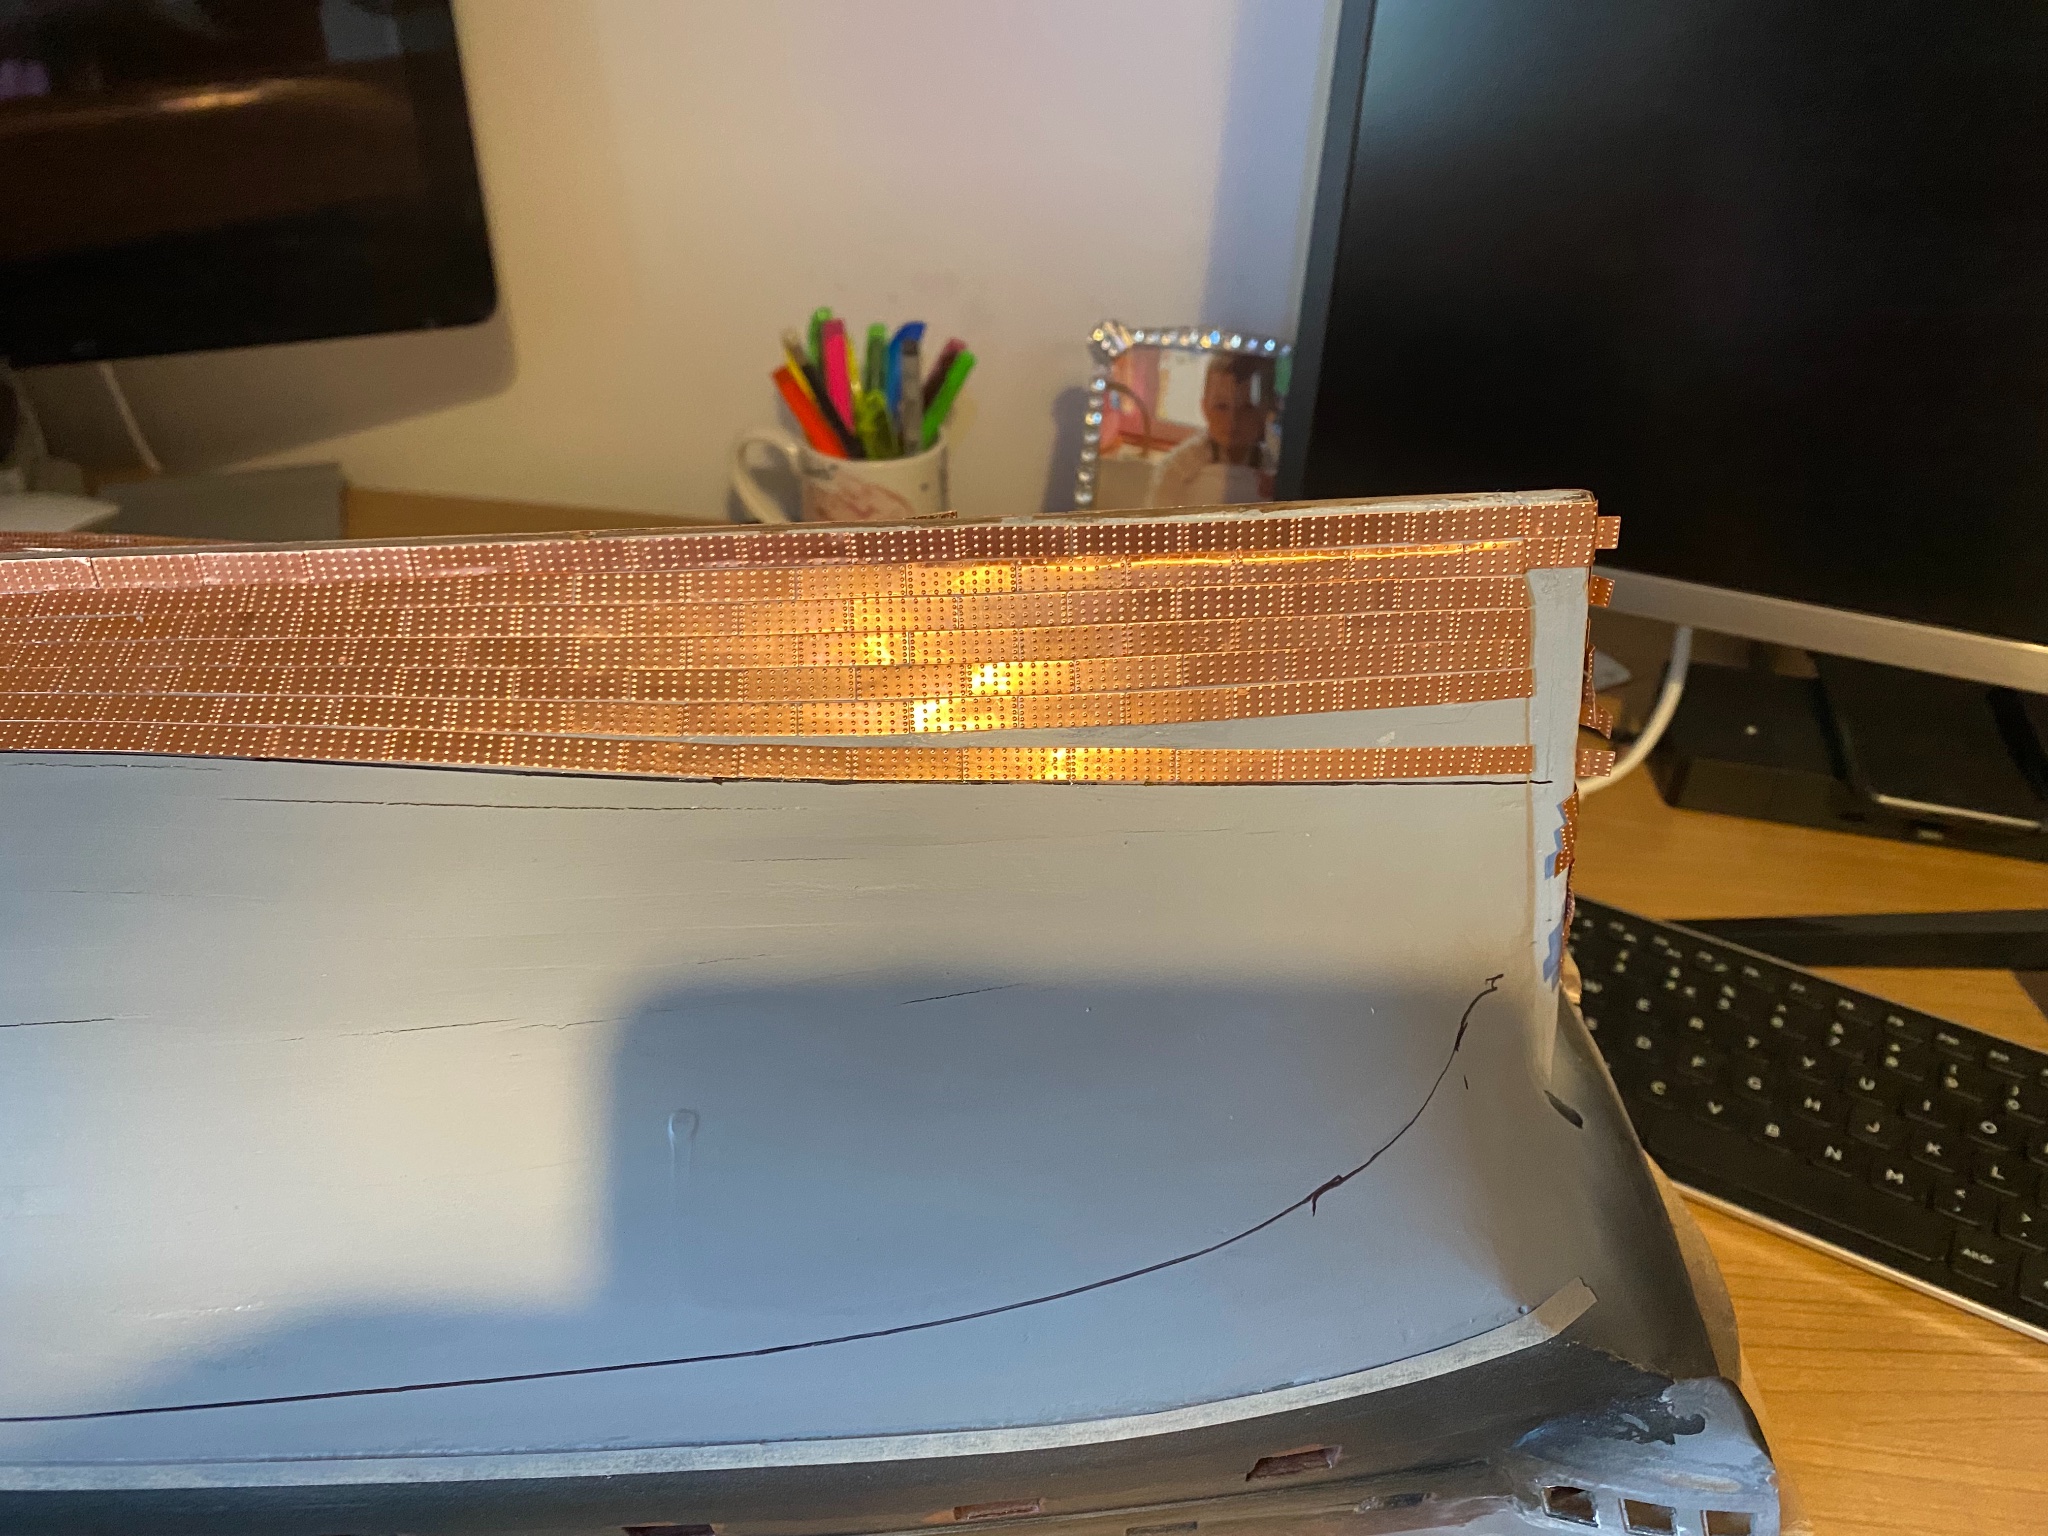
Lovely day in the sun, think it’s finally getting there with the coppering !

- 29 replies
-
- 4
-
-
- agamemnon
- caldercraft
- (and 1 more)
-
Chris_P reacted to a post in a topic:
HMS Agamemnon by Chris_P - Caldercraft - Scale 1:64 - My First Build Attempt
-
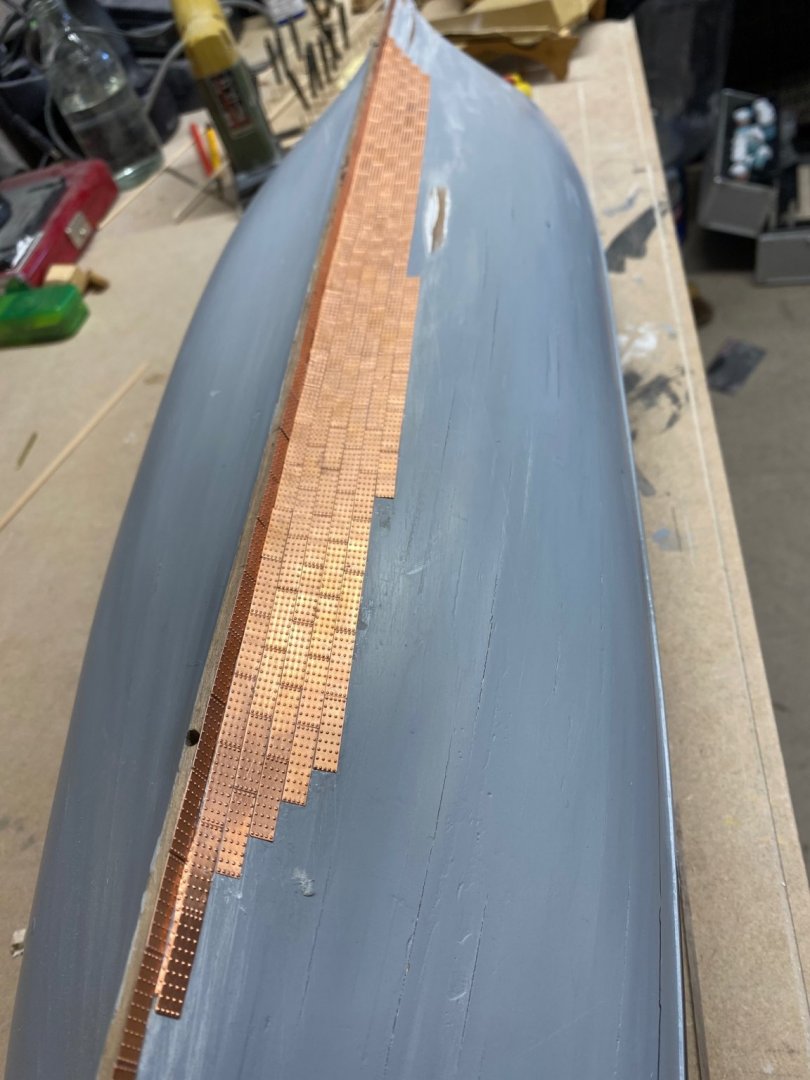
Will, these are really useful. I like the idea of the straight line of tiles at waterline. I think it will really make a difference to finishing off. The main issue I have found is some stick straight away with no chance of adjusting! Others seen to take a while. Some adhesive has over spilled but I’ll clean this up when I am nearly done. I am going to add a gore line today as suggested also. I have found that a pair of brass etch snips are best for cutting and trimming opposed to a knife. The way I have found the best so far is with a pair of tweezers and a pick. Slightly bending the tile and pushing to the edge of the existing, then releasing the tile they seem to “spring” down. I’ll post an update later showing this method.
- 29 replies
-
- 1
-
-
- agamemnon
- caldercraft
- (and 1 more)
-
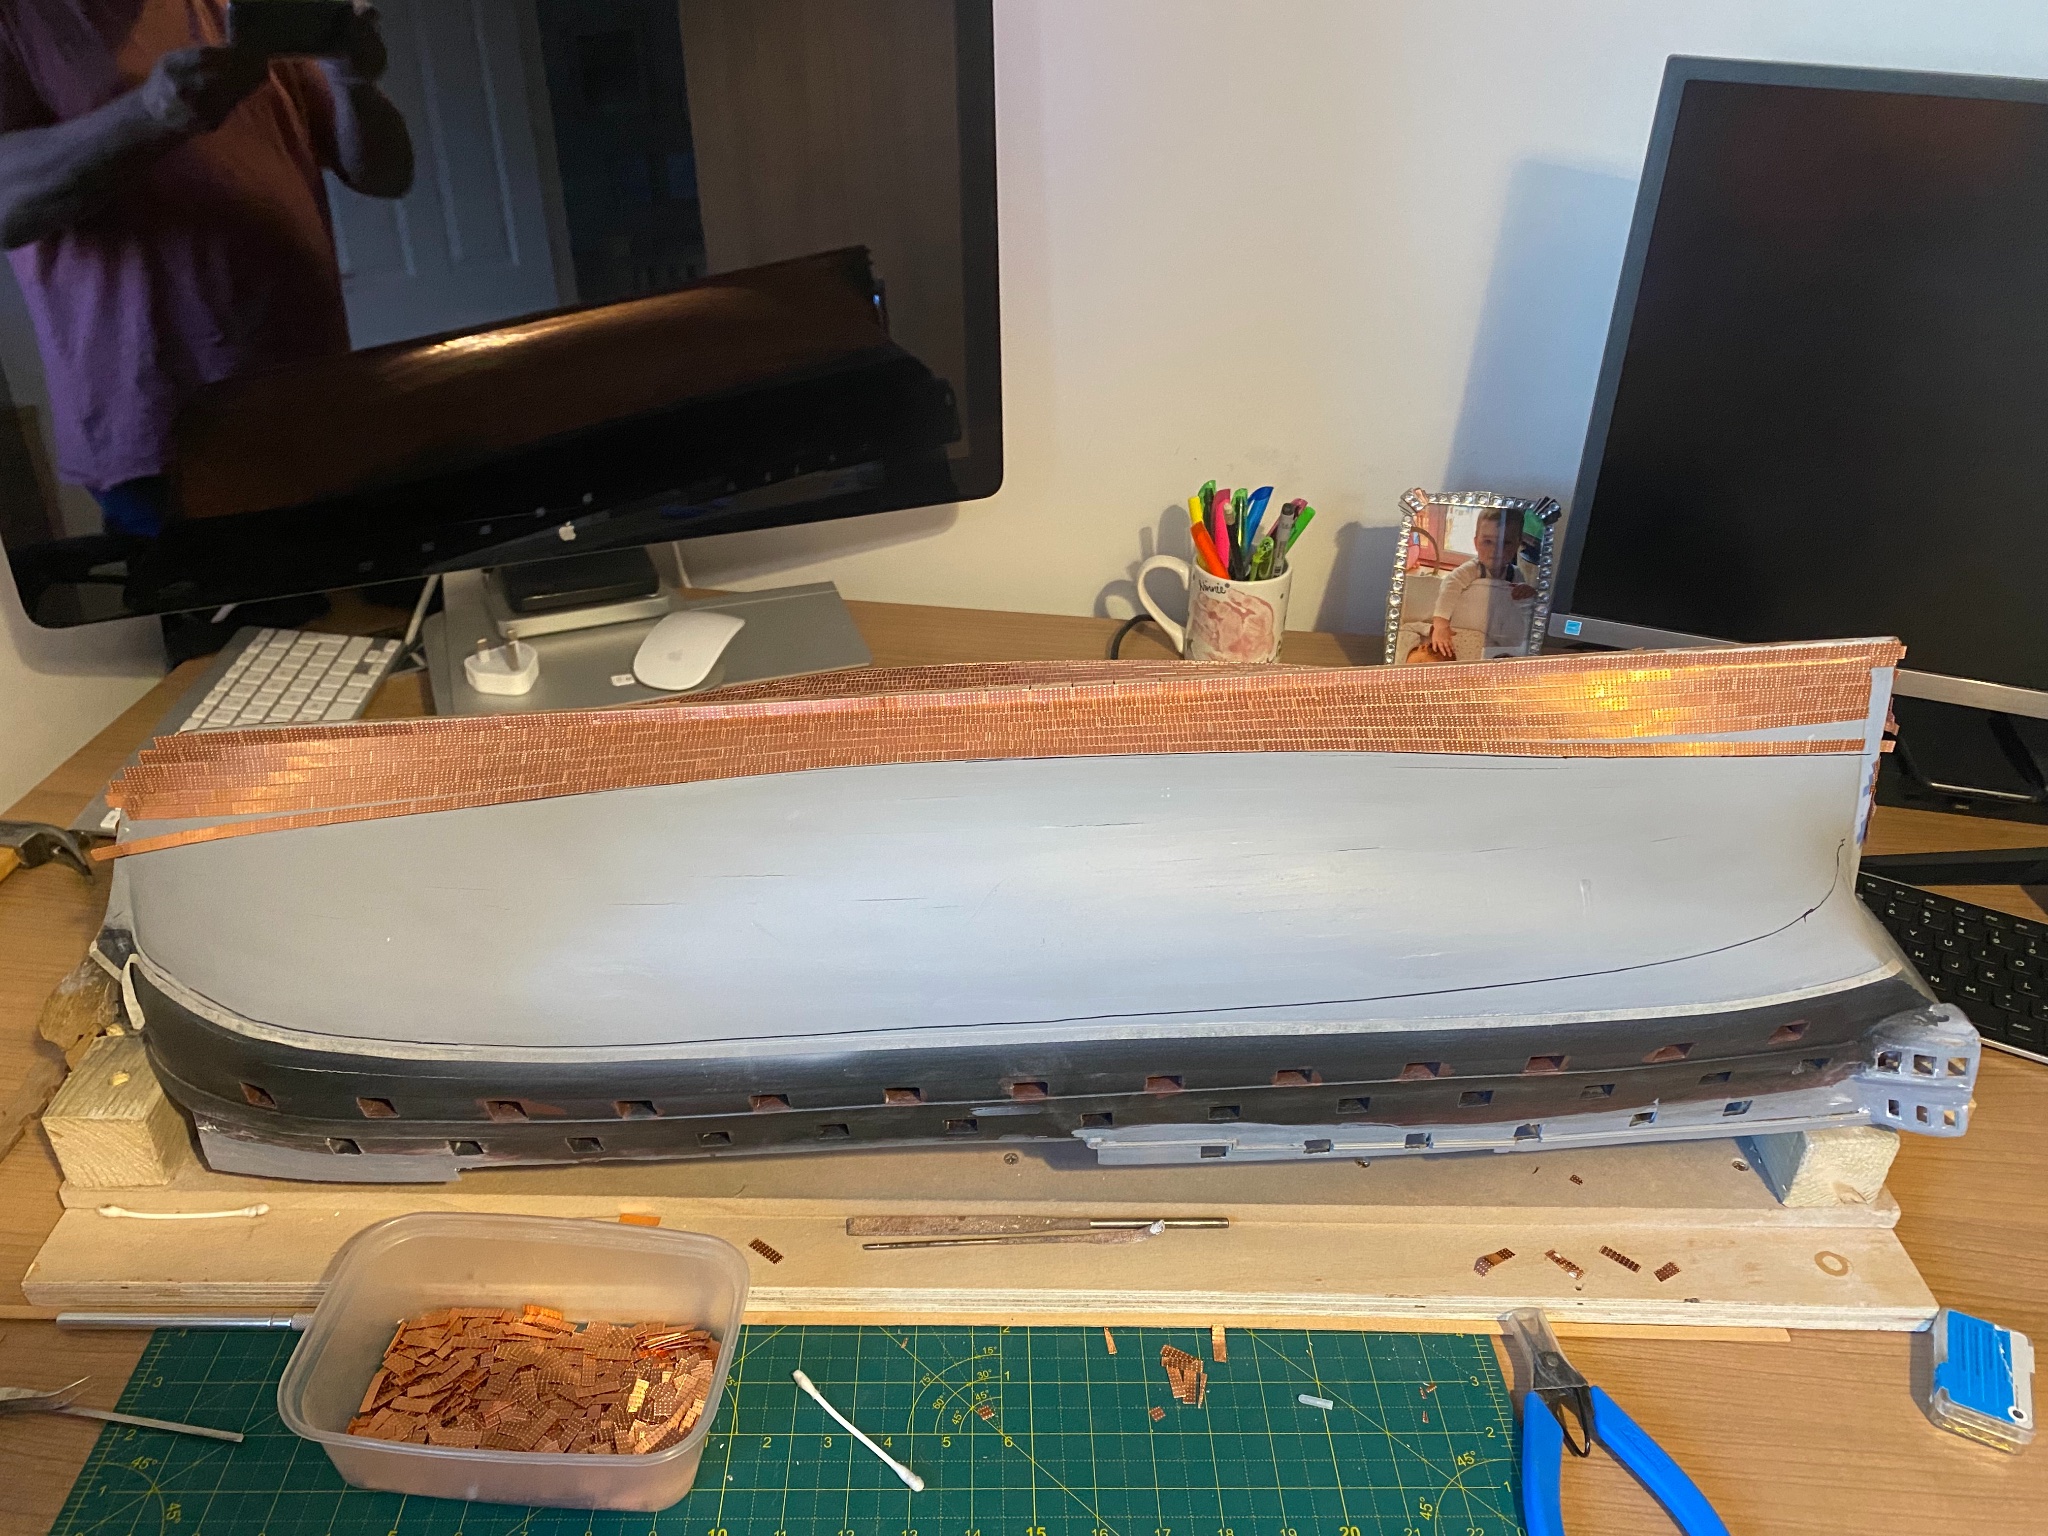
Just started the coppering ! Well what a disaster it’s been so far. It have removed circa 60 tiles and started again. Below is the result of nearly 8 hours. They seem uneven but the hull is as flat as I can make it. Any ideas or do you think I am going in the right direction ? I was going to finish with a satin clear laquer ?

- 29 replies
-
- 5
-
-
- agamemnon
- caldercraft
- (and 1 more)
-
Chris_P reacted to a post in a topic:
HMS Agamemnon by Chris_P - Caldercraft - Scale 1:64 - My First Build Attempt
-
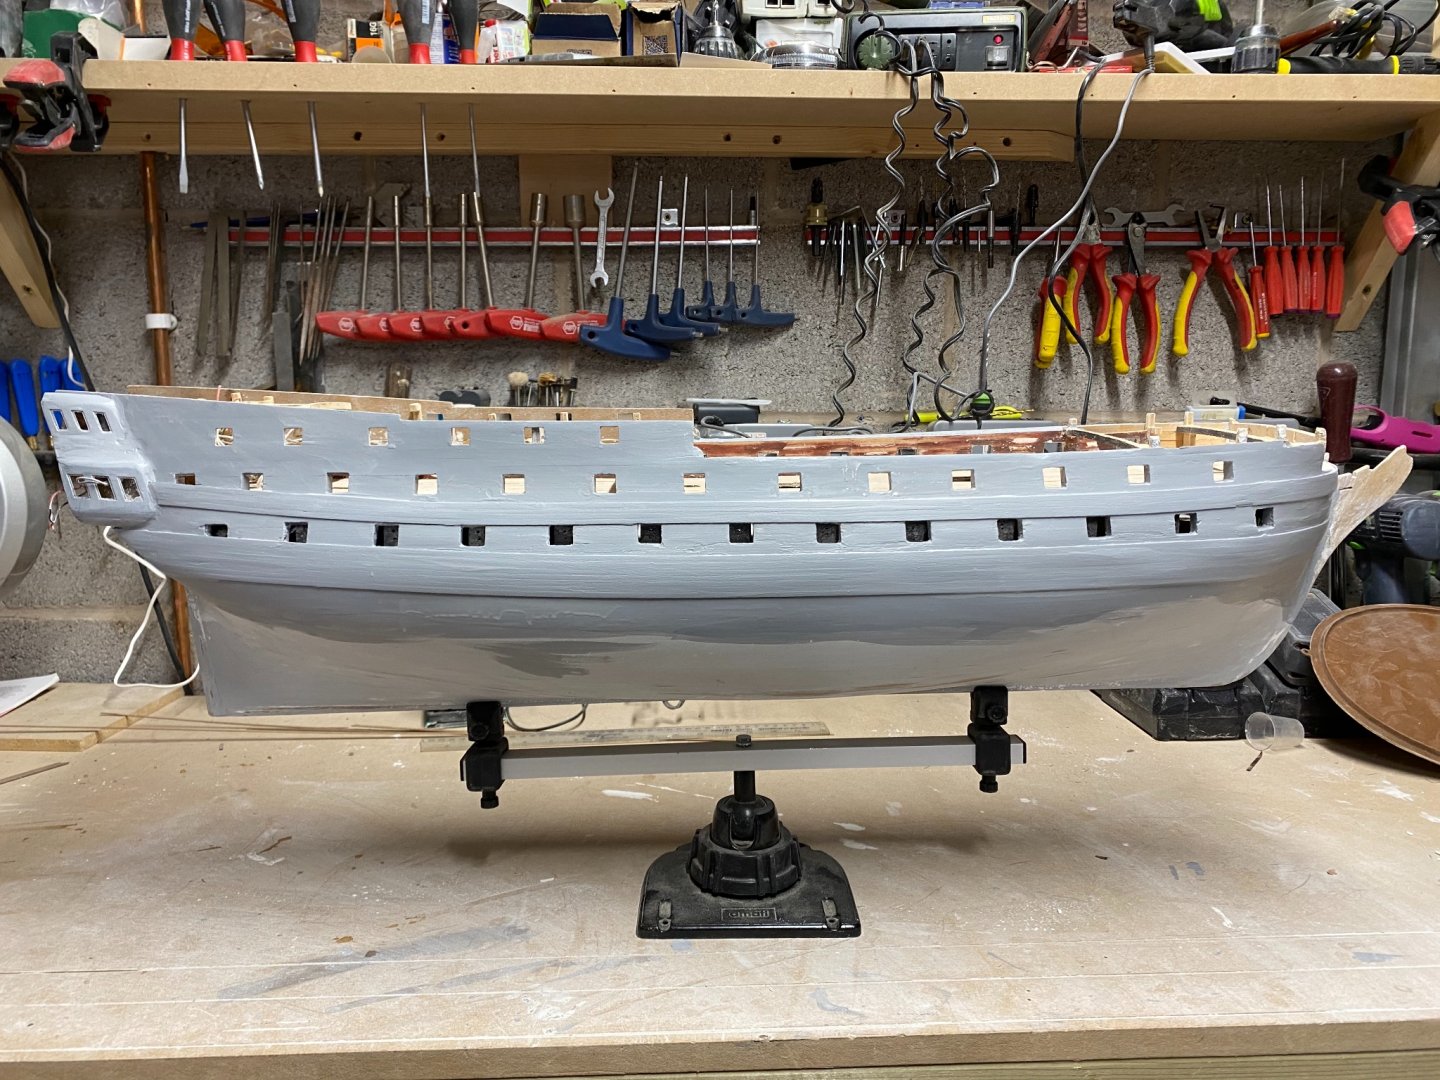
Thanks all for your kind comments, it’s not until i started back up that I realised just how much I missed this great hobby. Already started painting the gun ports and applying the hull details getting ready for plating. I’ll update some pics later
-
Well, first of all apologies for not updating my post. Last was September 2018 ! However I have an excuse as I moved home which has been the most stressful thing I have ever done. My Agamemnon suffered in the move and it’s taken me a while to repair and get sorted, mainly surface damage but nothing which can’t be repaired. I have added the qtr galleries and both wale lines. However I think I have added an extra line of 3mm walnut so might remove ? I have missed working on my Abby soo much but I am looking forward to continuing.
- 29 replies
-
- 7
-
-
- agamemnon
- caldercraft
- (and 1 more)
-
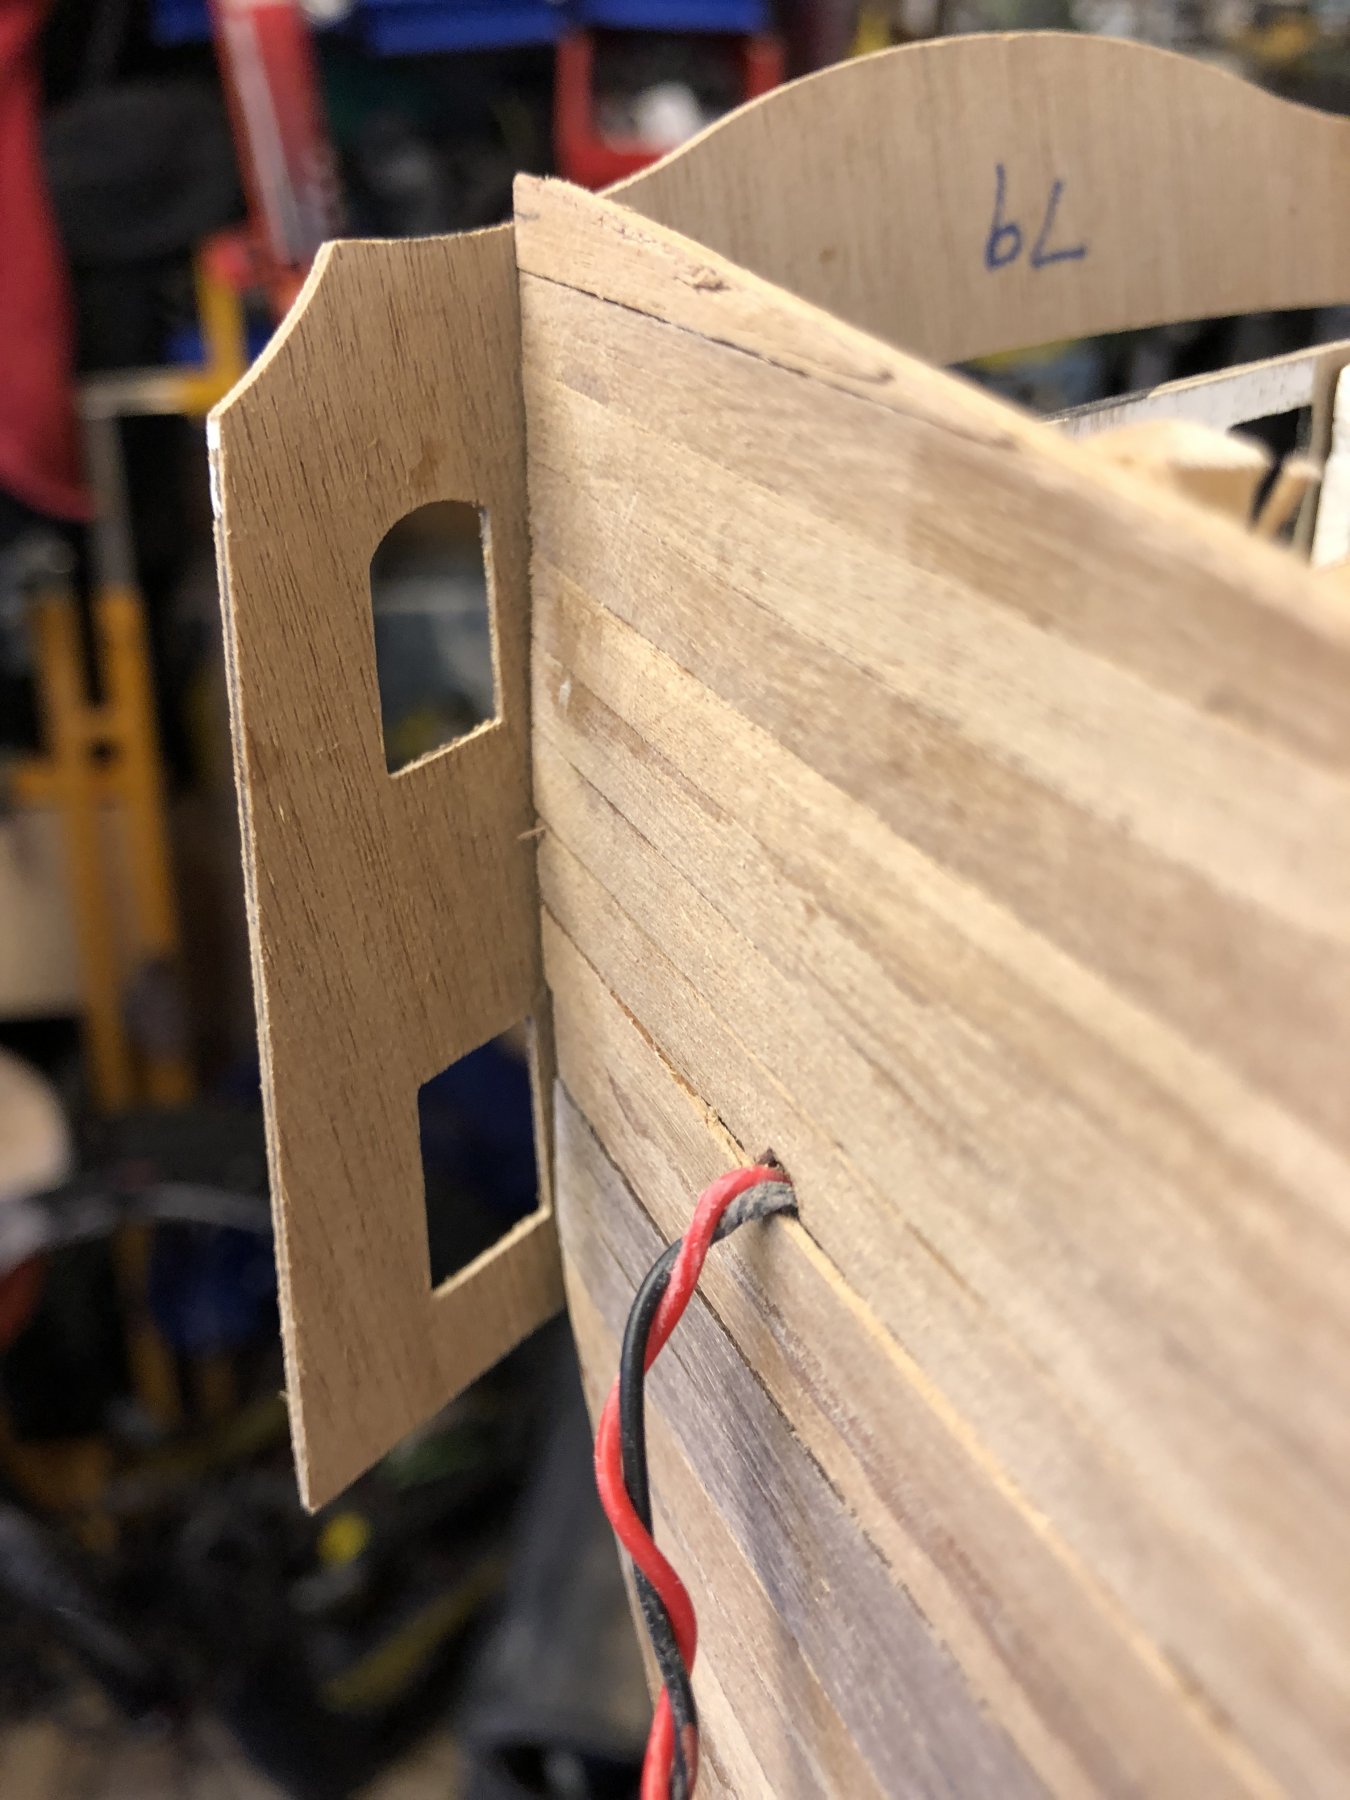
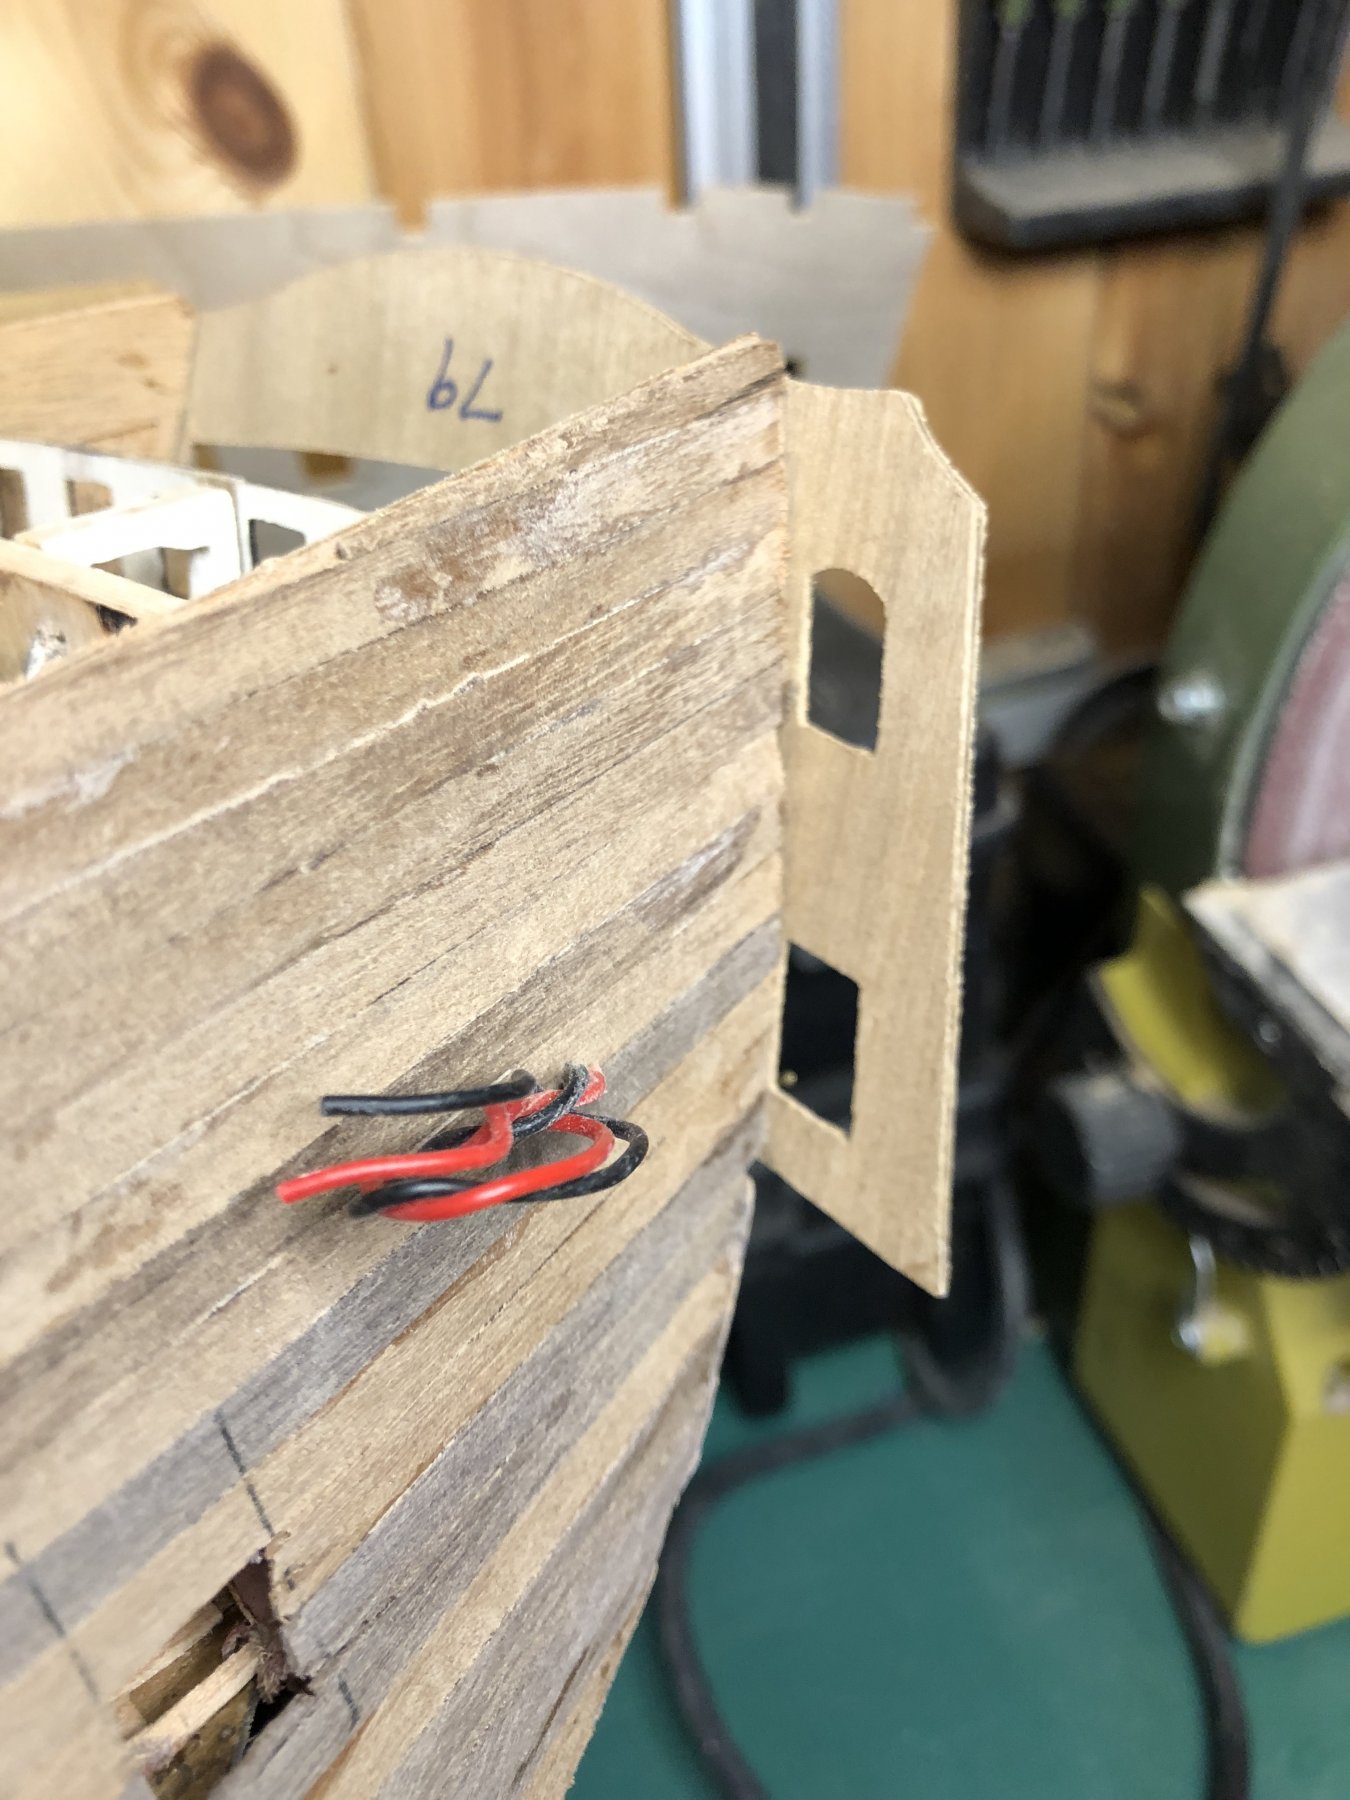
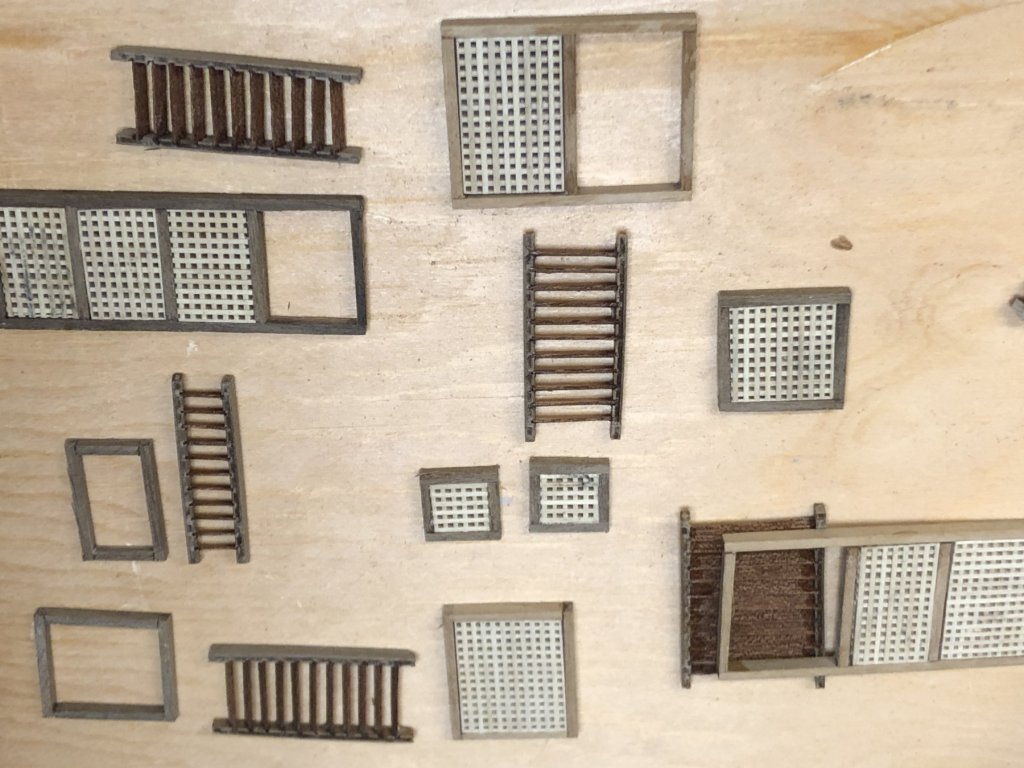
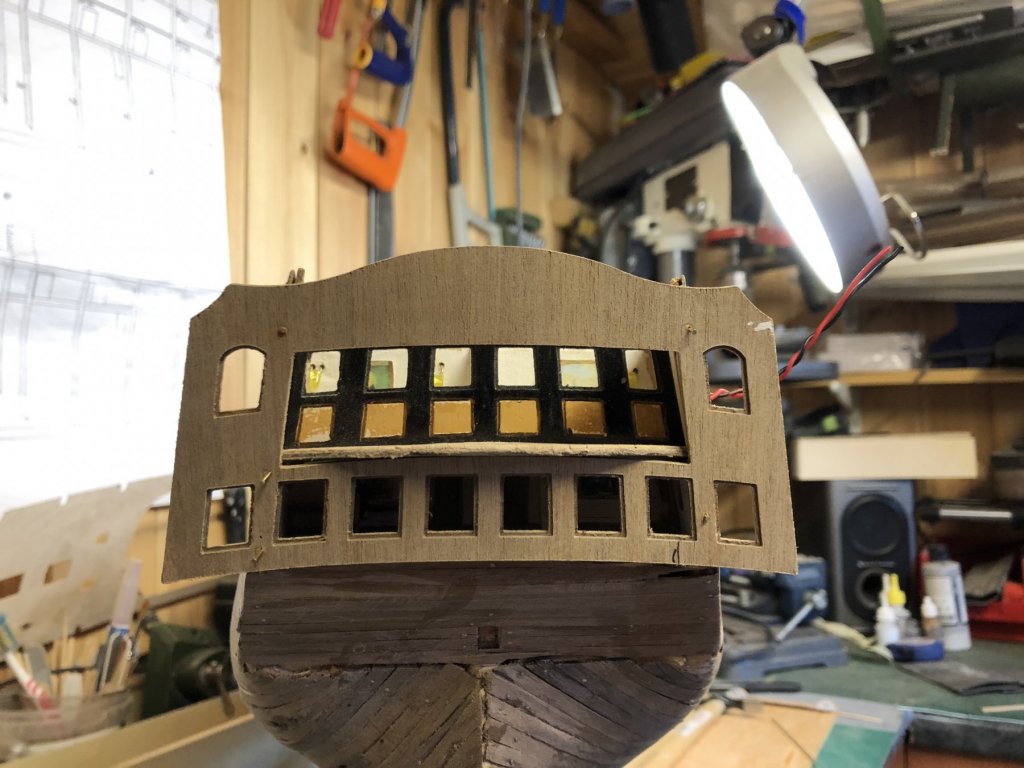
Spent the last few days making up some of the deck fittings, grates, ladders. Didn’t use the suggested 3x1mm walnut for the ladders as I thought it was too thick. Used some 0.5x2mm instead. Think I am going to stain the deck as I am not too happy with what I have done for the ‘nails’ I used Indian ink, have any of you any suggestions ? I am going to try a watered down walnut on the fittings to finish. Looking at the quarter gallery next, I have temporarily pinned the rear as the instructions, does this look about right ? Just before I trim the two top edges. The cables are for a set of candle flicker bulbs. Thanks Chris


- 29 replies
-
- 4
-
-
- agamemnon
- caldercraft
- (and 1 more)
-
Hi Don, thanks for the kind comment. It’s a little rough in places but I am sure a little filler and sandpaper will sort it out. It’s all a learning curve. The second planking was a lot quicker than the first but I am sure that’s to be expected.
- 29 replies
-
- 1
-
-
- agamemnon
- caldercraft
- (and 1 more)
-
Ahh thanks for that Ben, I didn’t think of that approach. I’ll try that out on a few imperfections around the gun ports. Been mithering me a bit to be honest as I wanted something which would be quite hard and most fillers I have used have been a little soft.
- 29 replies
-
- 1
-
-
- agamemnon
- caldercraft
- (and 1 more)
-
Had a great day yesterday as it was chucking it down I spent most of the day until early evening finishing off the second planking. What a feeling ! It’s like a major milestone I didn’t think I would get to. It will need a little tidying up, filling etc. I have learned so much and on my next build will definitely be better. What do most if you use to fill the walnut ? Be interested to know. Mext will be the round house’s for the front. Thanks Chris
- 29 replies
-
- 4
-
-
- agamemnon
- caldercraft
- (and 1 more)
-
Thanks, I know it’s goung to be a long journey and has been already but I’m full of optimism and hope I’ll get there in the end !
- 29 replies
-
- 3
-
-
- agamemnon
- caldercraft
- (and 1 more)
-
Thanks all for the warm welcome ! It’s very appreciated Chris