Remcohe
-
Posts
612 -
Joined
-
Last visited


-
 Stavanger reacted to a post in a topic:
HMS Kingfisher 1770 by Remcohe - 1/48 - English 14-Gun Sloop - POF
Stavanger reacted to a post in a topic:
HMS Kingfisher 1770 by Remcohe - 1/48 - English 14-Gun Sloop - POF
-
Trussben reacted to a post in a topic:
HMS Kingfisher 1770 by Remcohe - 1/48 - English 14-Gun Sloop - POF
-
Timmo reacted to a post in a topic:
HMS Kingfisher 1770 by Remcohe - 1/48 - English 14-Gun Sloop - POF
-
BANYAN reacted to a post in a topic:
HMS Kingfisher 1770 by Remcohe - 1/48 - English 14-Gun Sloop - POF
-
BANYAN reacted to a post in a topic:
HMS Kingfisher 1770 by Remcohe - 1/48 - English 14-Gun Sloop - POF
-
Wintergreen reacted to a post in a topic:
HMS Kingfisher 1770 by Remcohe - 1/48 - English 14-Gun Sloop - POF
-
Cpt.Barbossa reacted to a post in a topic:
HMS Kingfisher 1770 by Remcohe - 1/48 - English 14-Gun Sloop - POF
-
CiscoH reacted to a post in a topic:
HMS Kingfisher 1770 by Remcohe - 1/48 - English 14-Gun Sloop - POF
-
Mike Y reacted to a post in a topic:
HMS Kingfisher 1770 by Remcohe - 1/48 - English 14-Gun Sloop - POF
-
 Mike Y reacted to a post in a topic:
HMS Kingfisher 1770 by Remcohe - 1/48 - English 14-Gun Sloop - POF
Mike Y reacted to a post in a topic:
HMS Kingfisher 1770 by Remcohe - 1/48 - English 14-Gun Sloop - POF
-
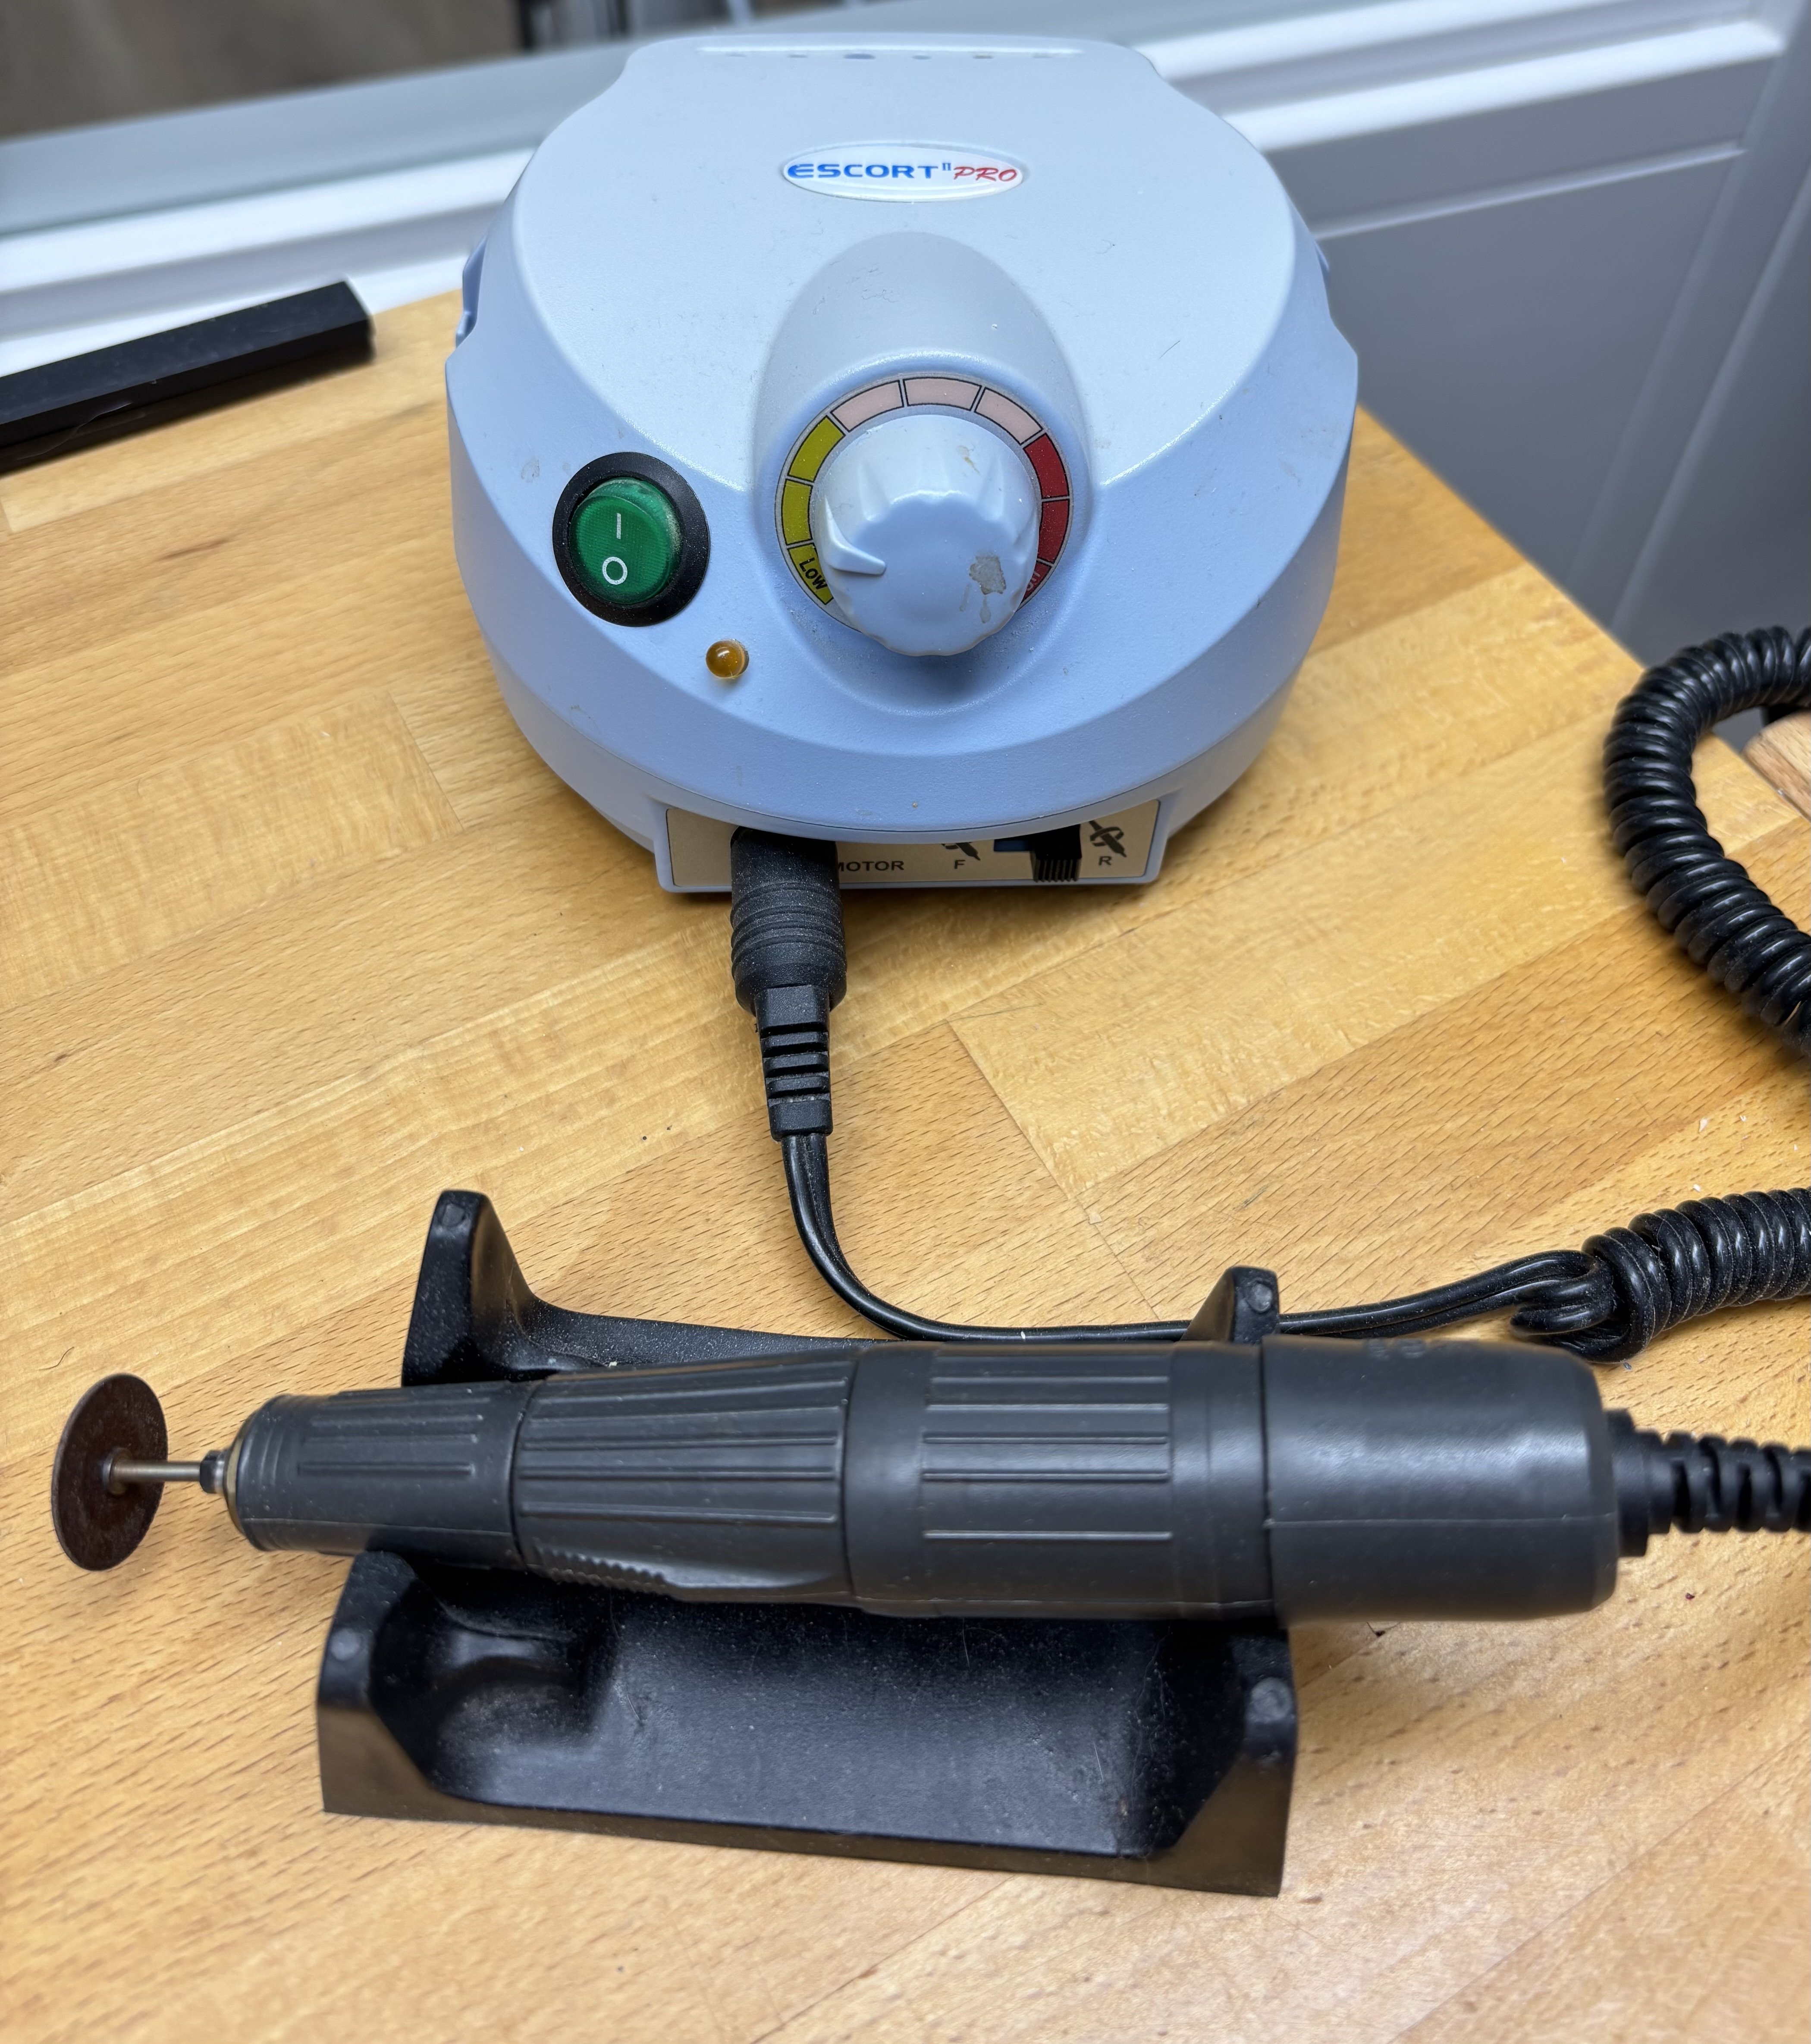
 This was discussed a long time ago ;-): Short story my plans suggest the stove was on the lower deck. @CiscoH I used a Dremel like tool and a little patience: And thanks all for the kind words
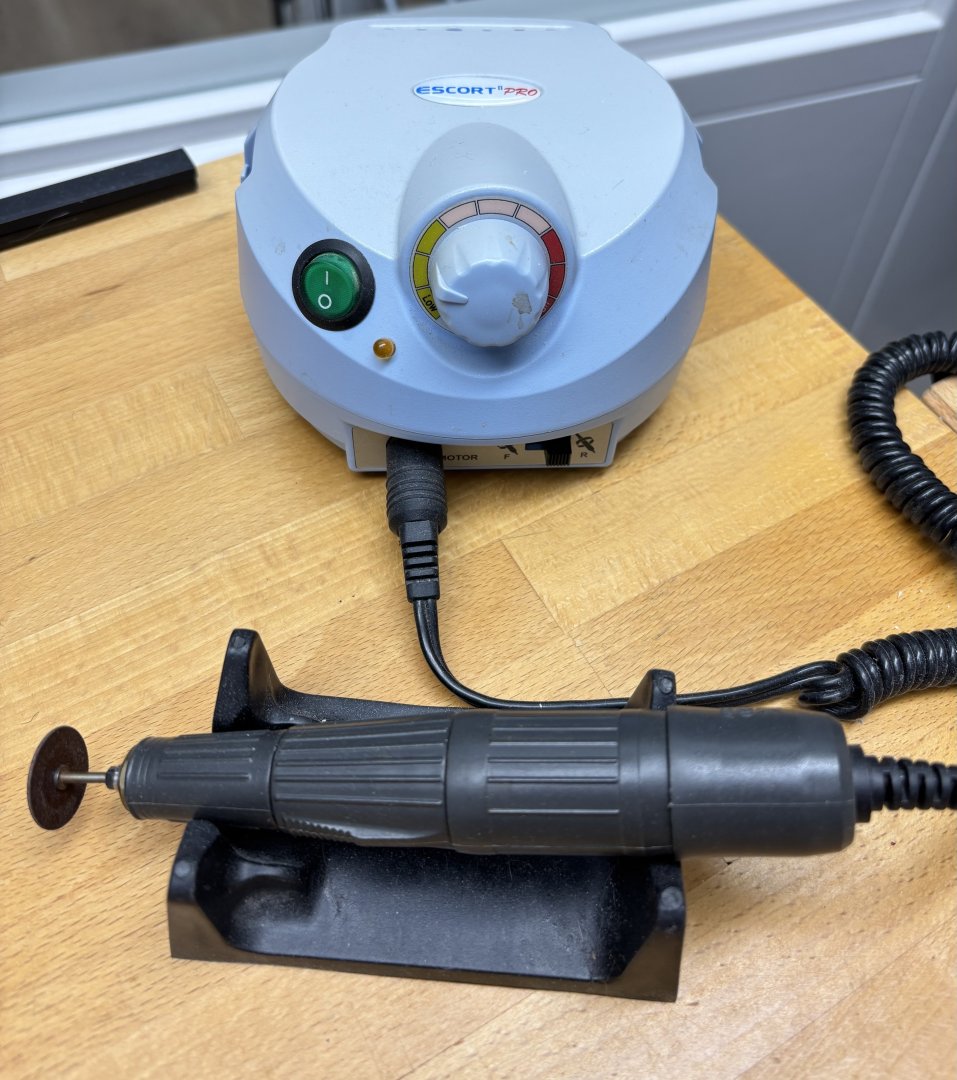
- 1,215 replies
-
- 9
-
-
- sloop
- kingfisher
- (and 1 more)
-
Remcohe reacted to a post in a topic:
HMS Kingfisher 1770 by Remcohe - 1/48 - English 14-Gun Sloop - POF
-
Remcohe reacted to a post in a topic:
HMS Kingfisher 1770 by Remcohe - 1/48 - English 14-Gun Sloop - POF
-
Remcohe reacted to a post in a topic:
HMS Kingfisher 1770 by Remcohe - 1/48 - English 14-Gun Sloop - POF
-
Remcohe reacted to a post in a topic:
HMS Kingfisher 1770 by Remcohe - 1/48 - English 14-Gun Sloop - POF
-
Remcohe reacted to a post in a topic:
HMS Kingfisher 1770 by Remcohe - 1/48 - English 14-Gun Sloop - POF
-
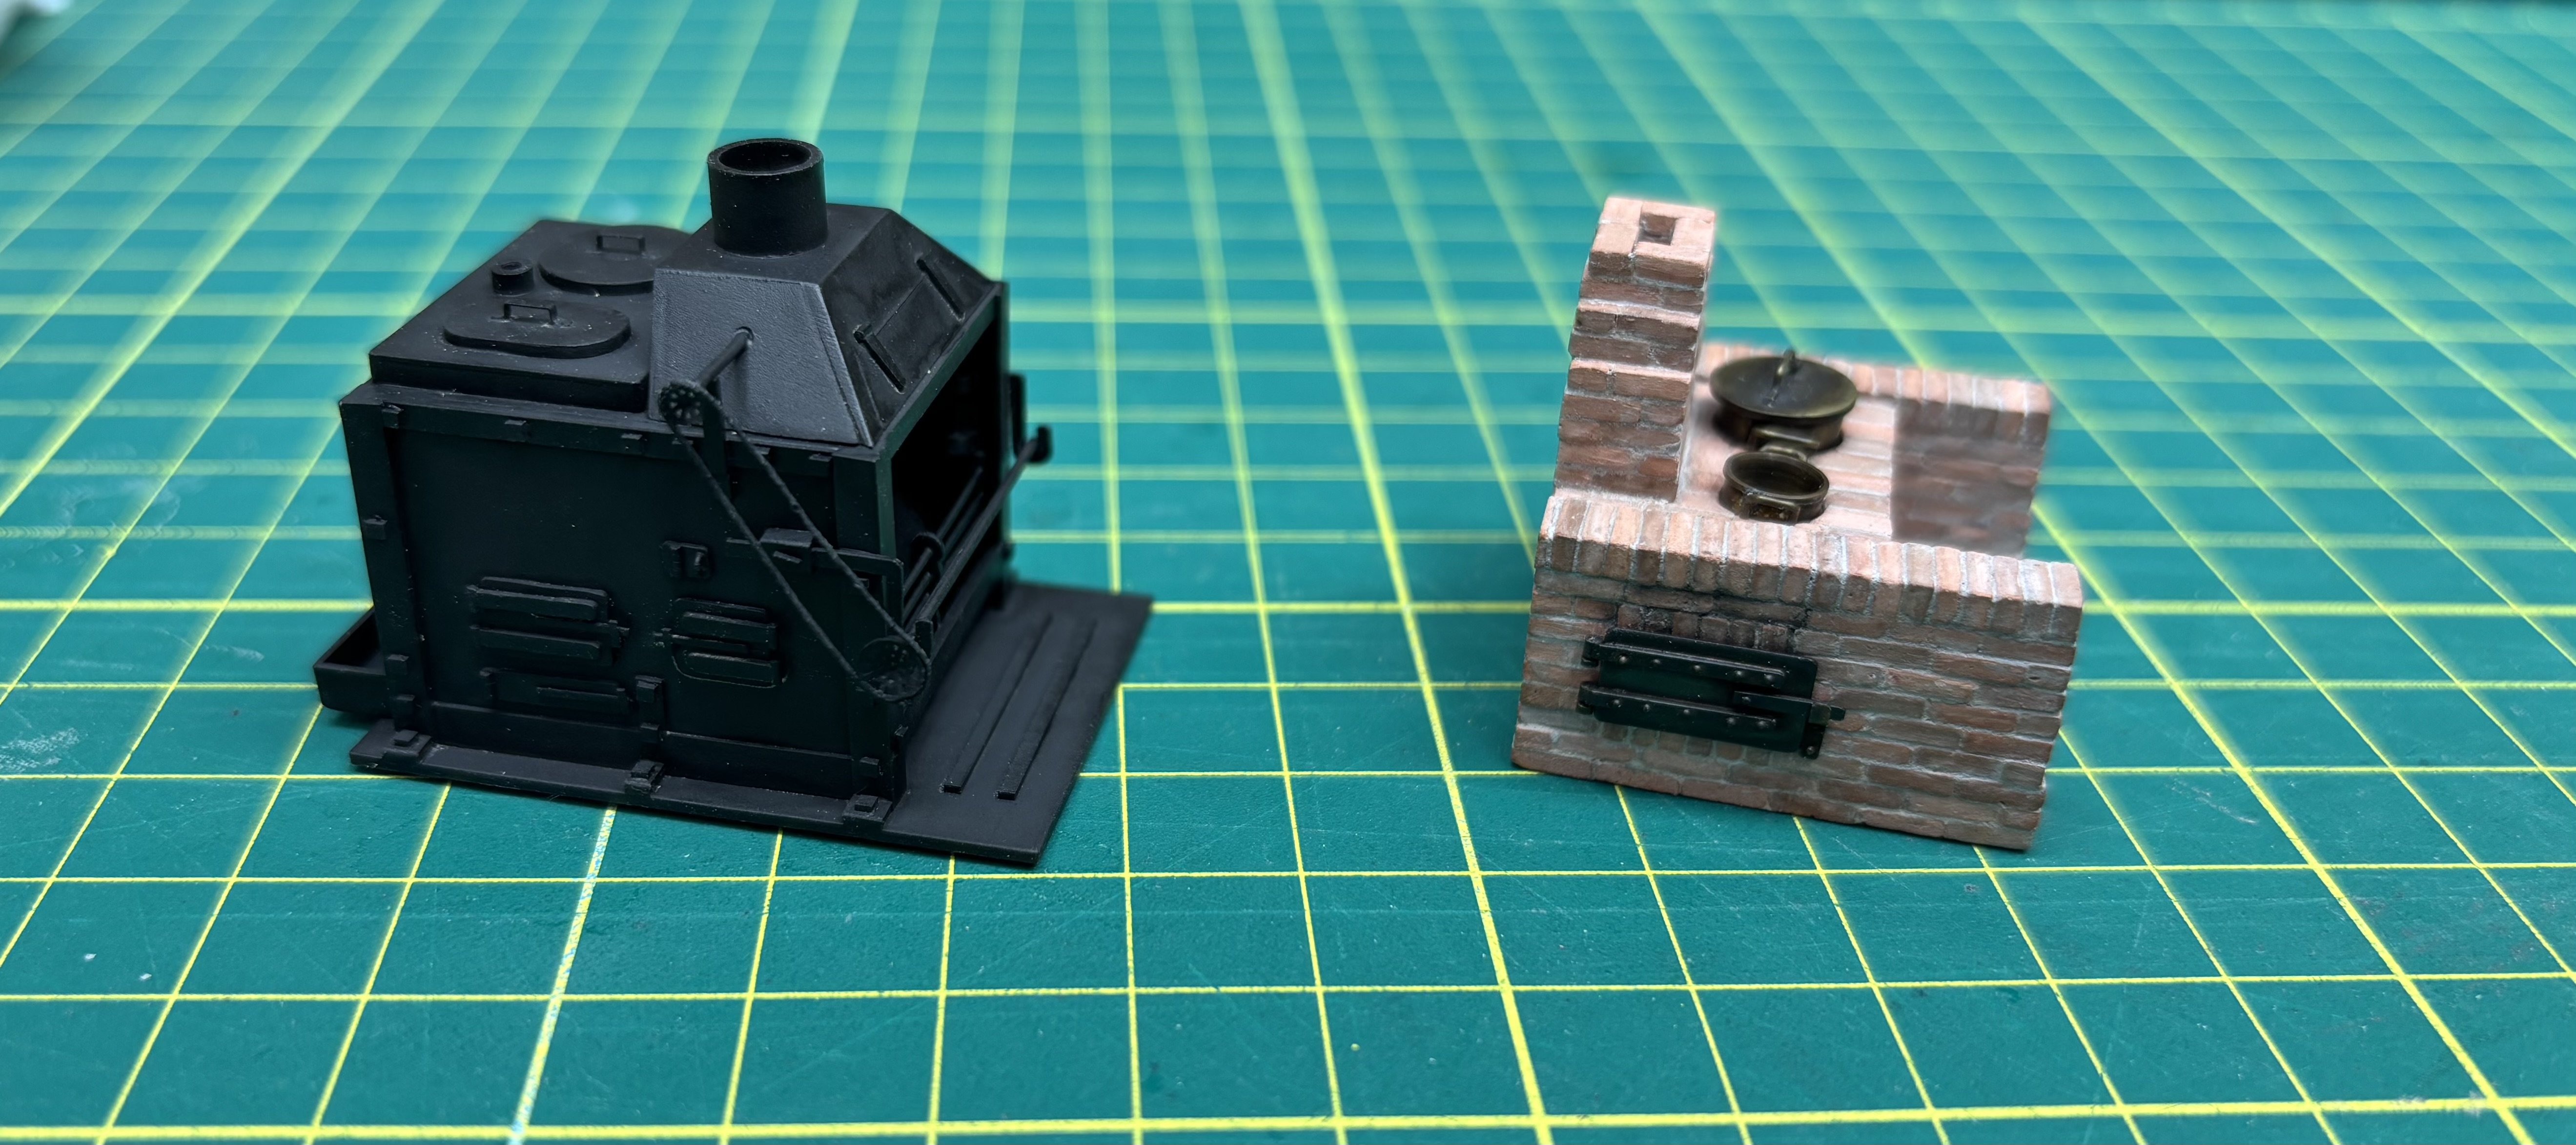
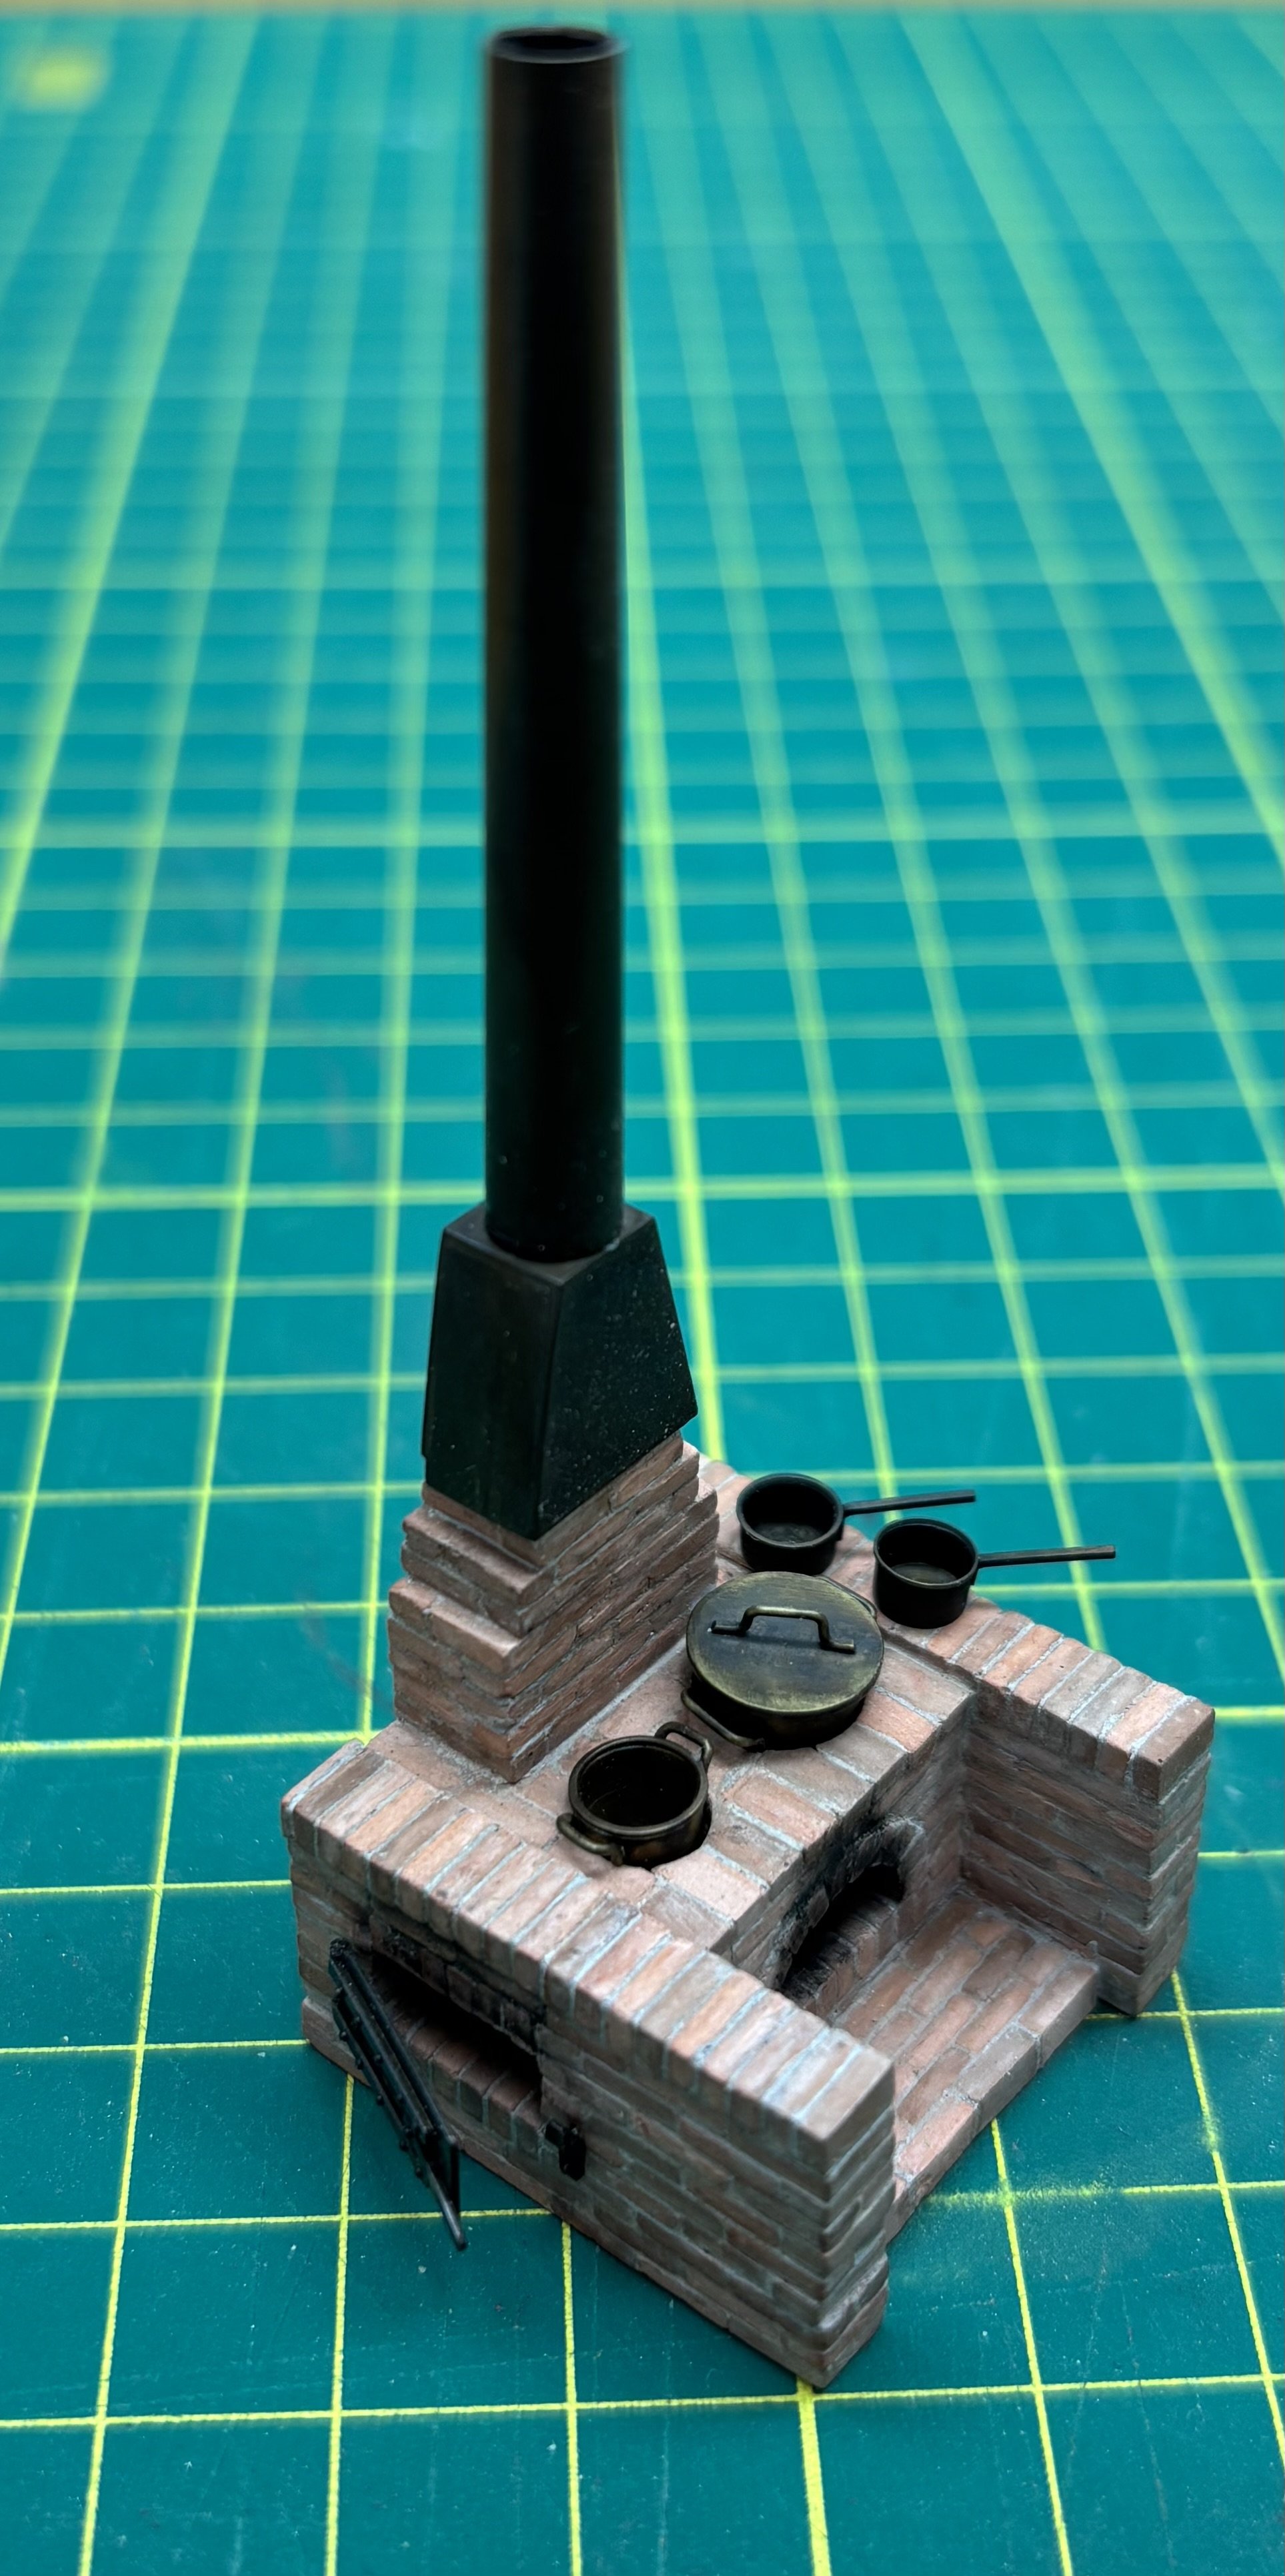
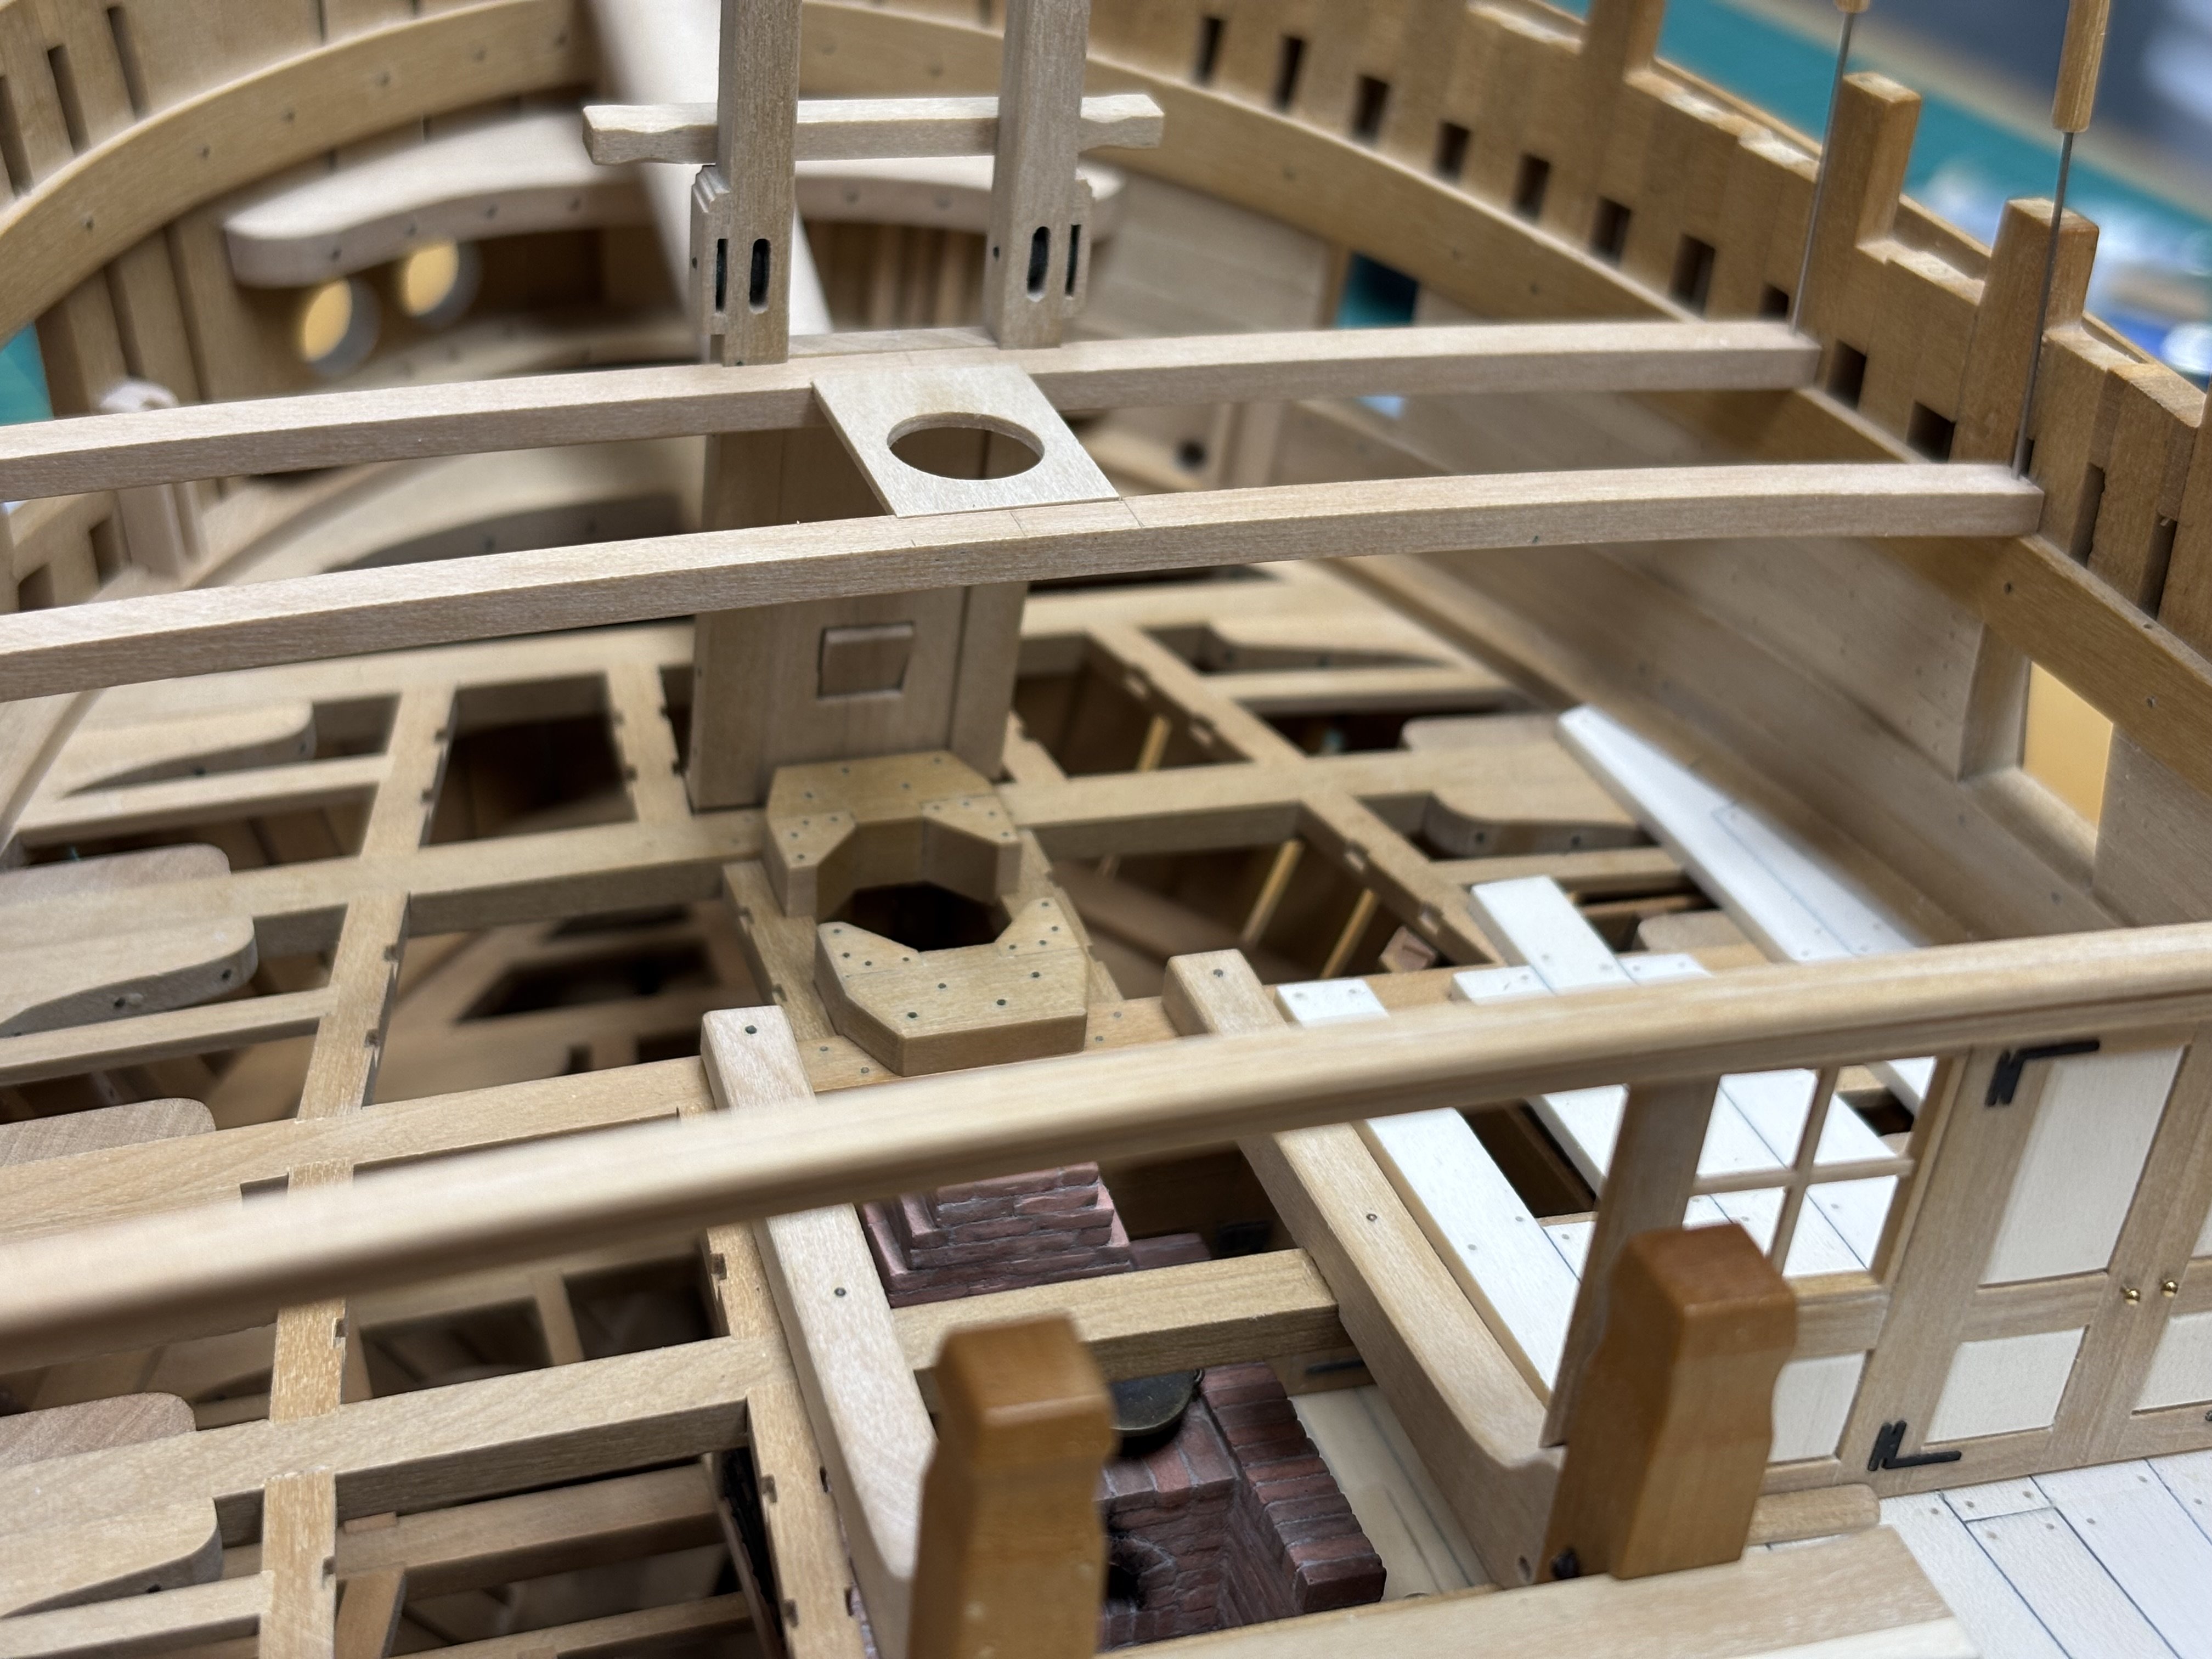
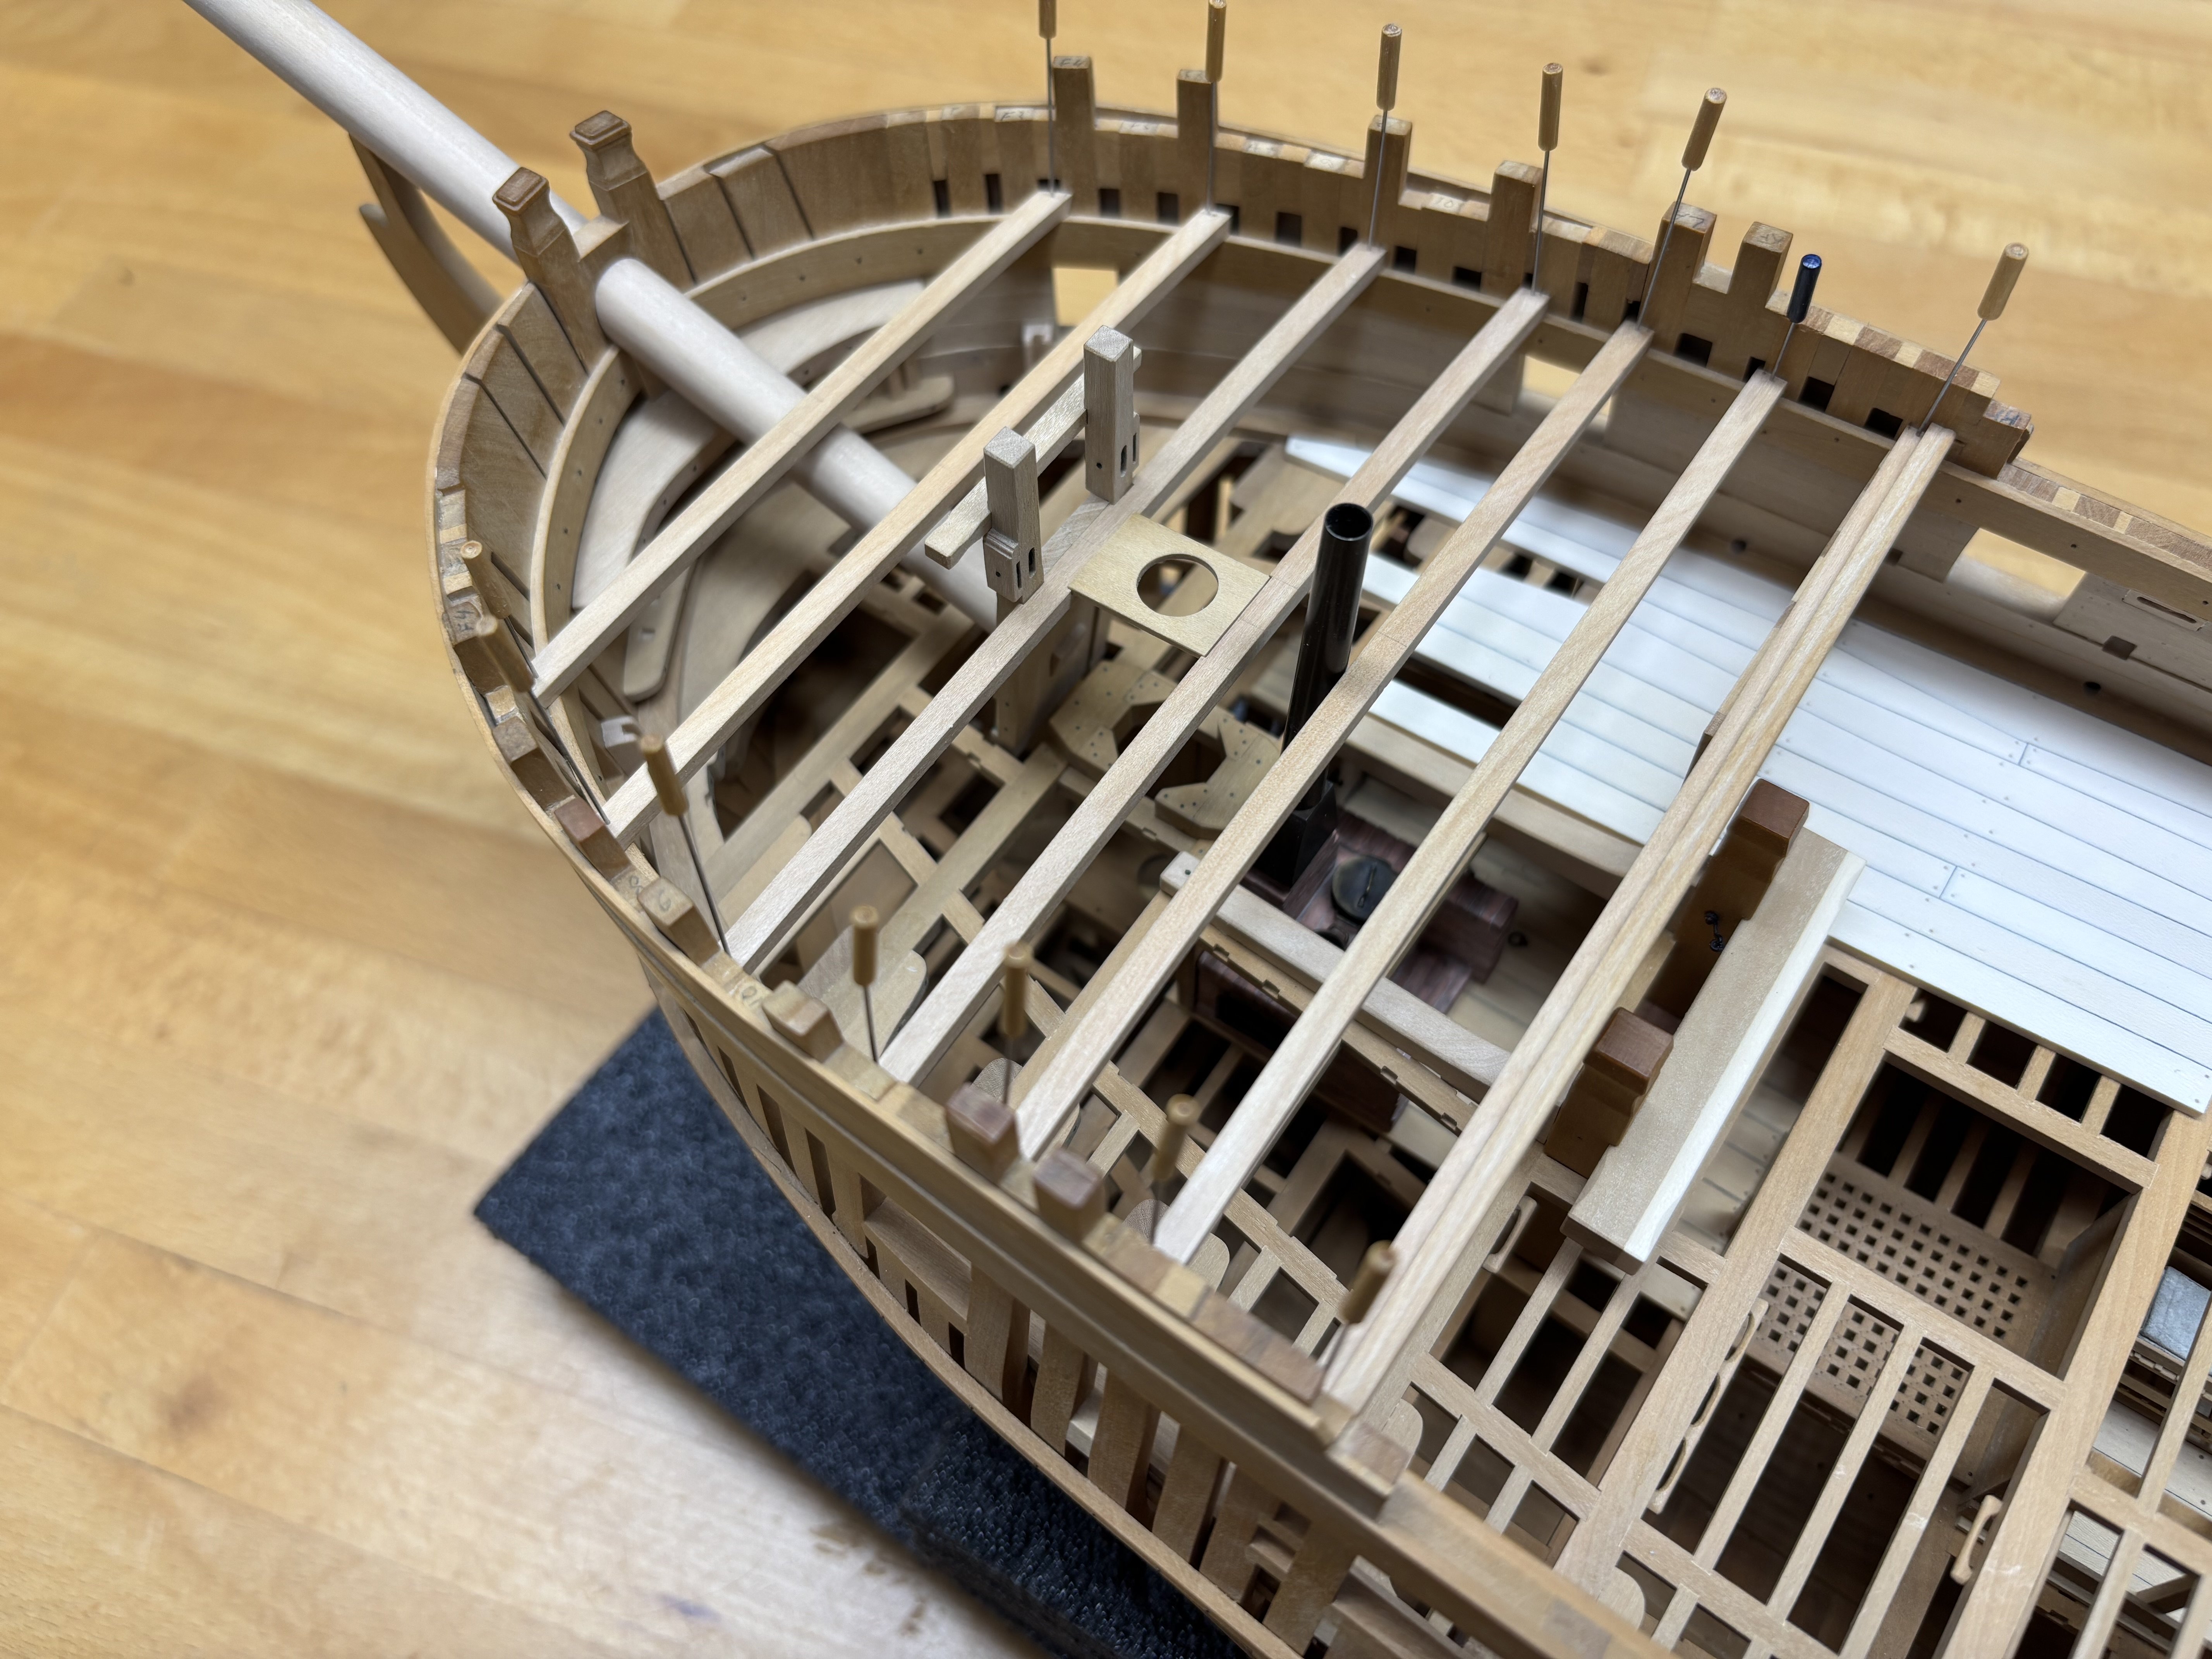
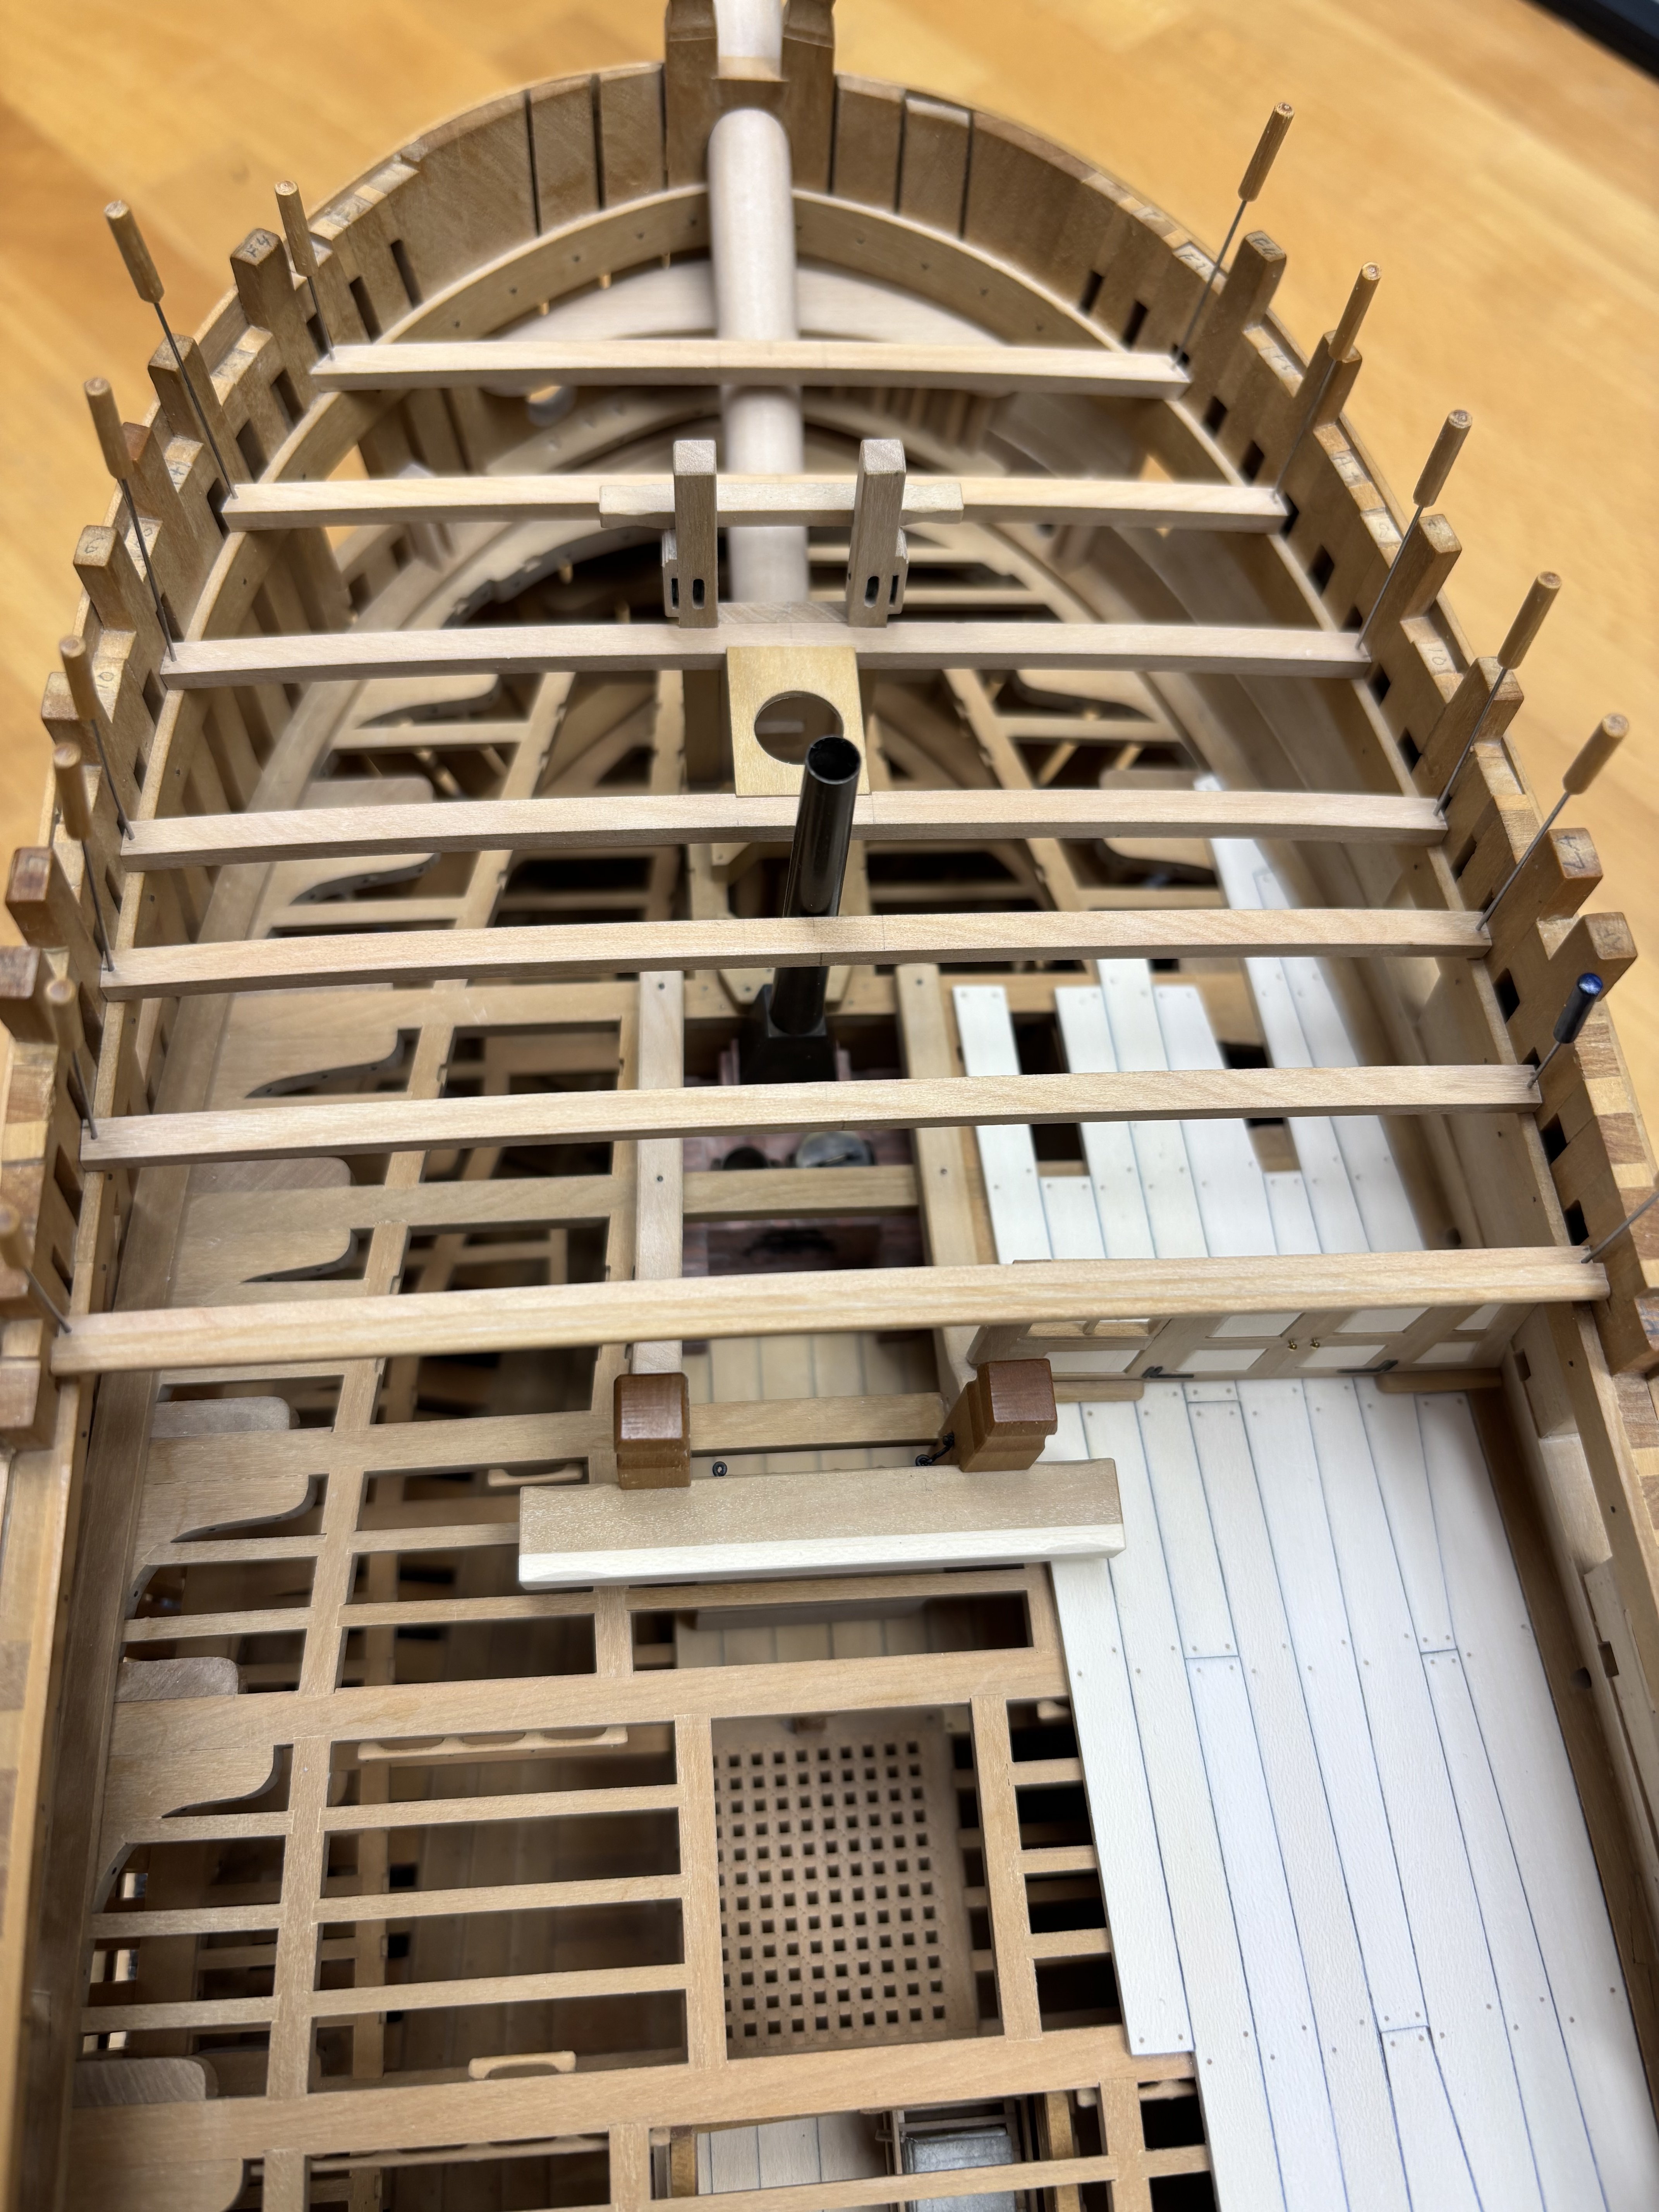
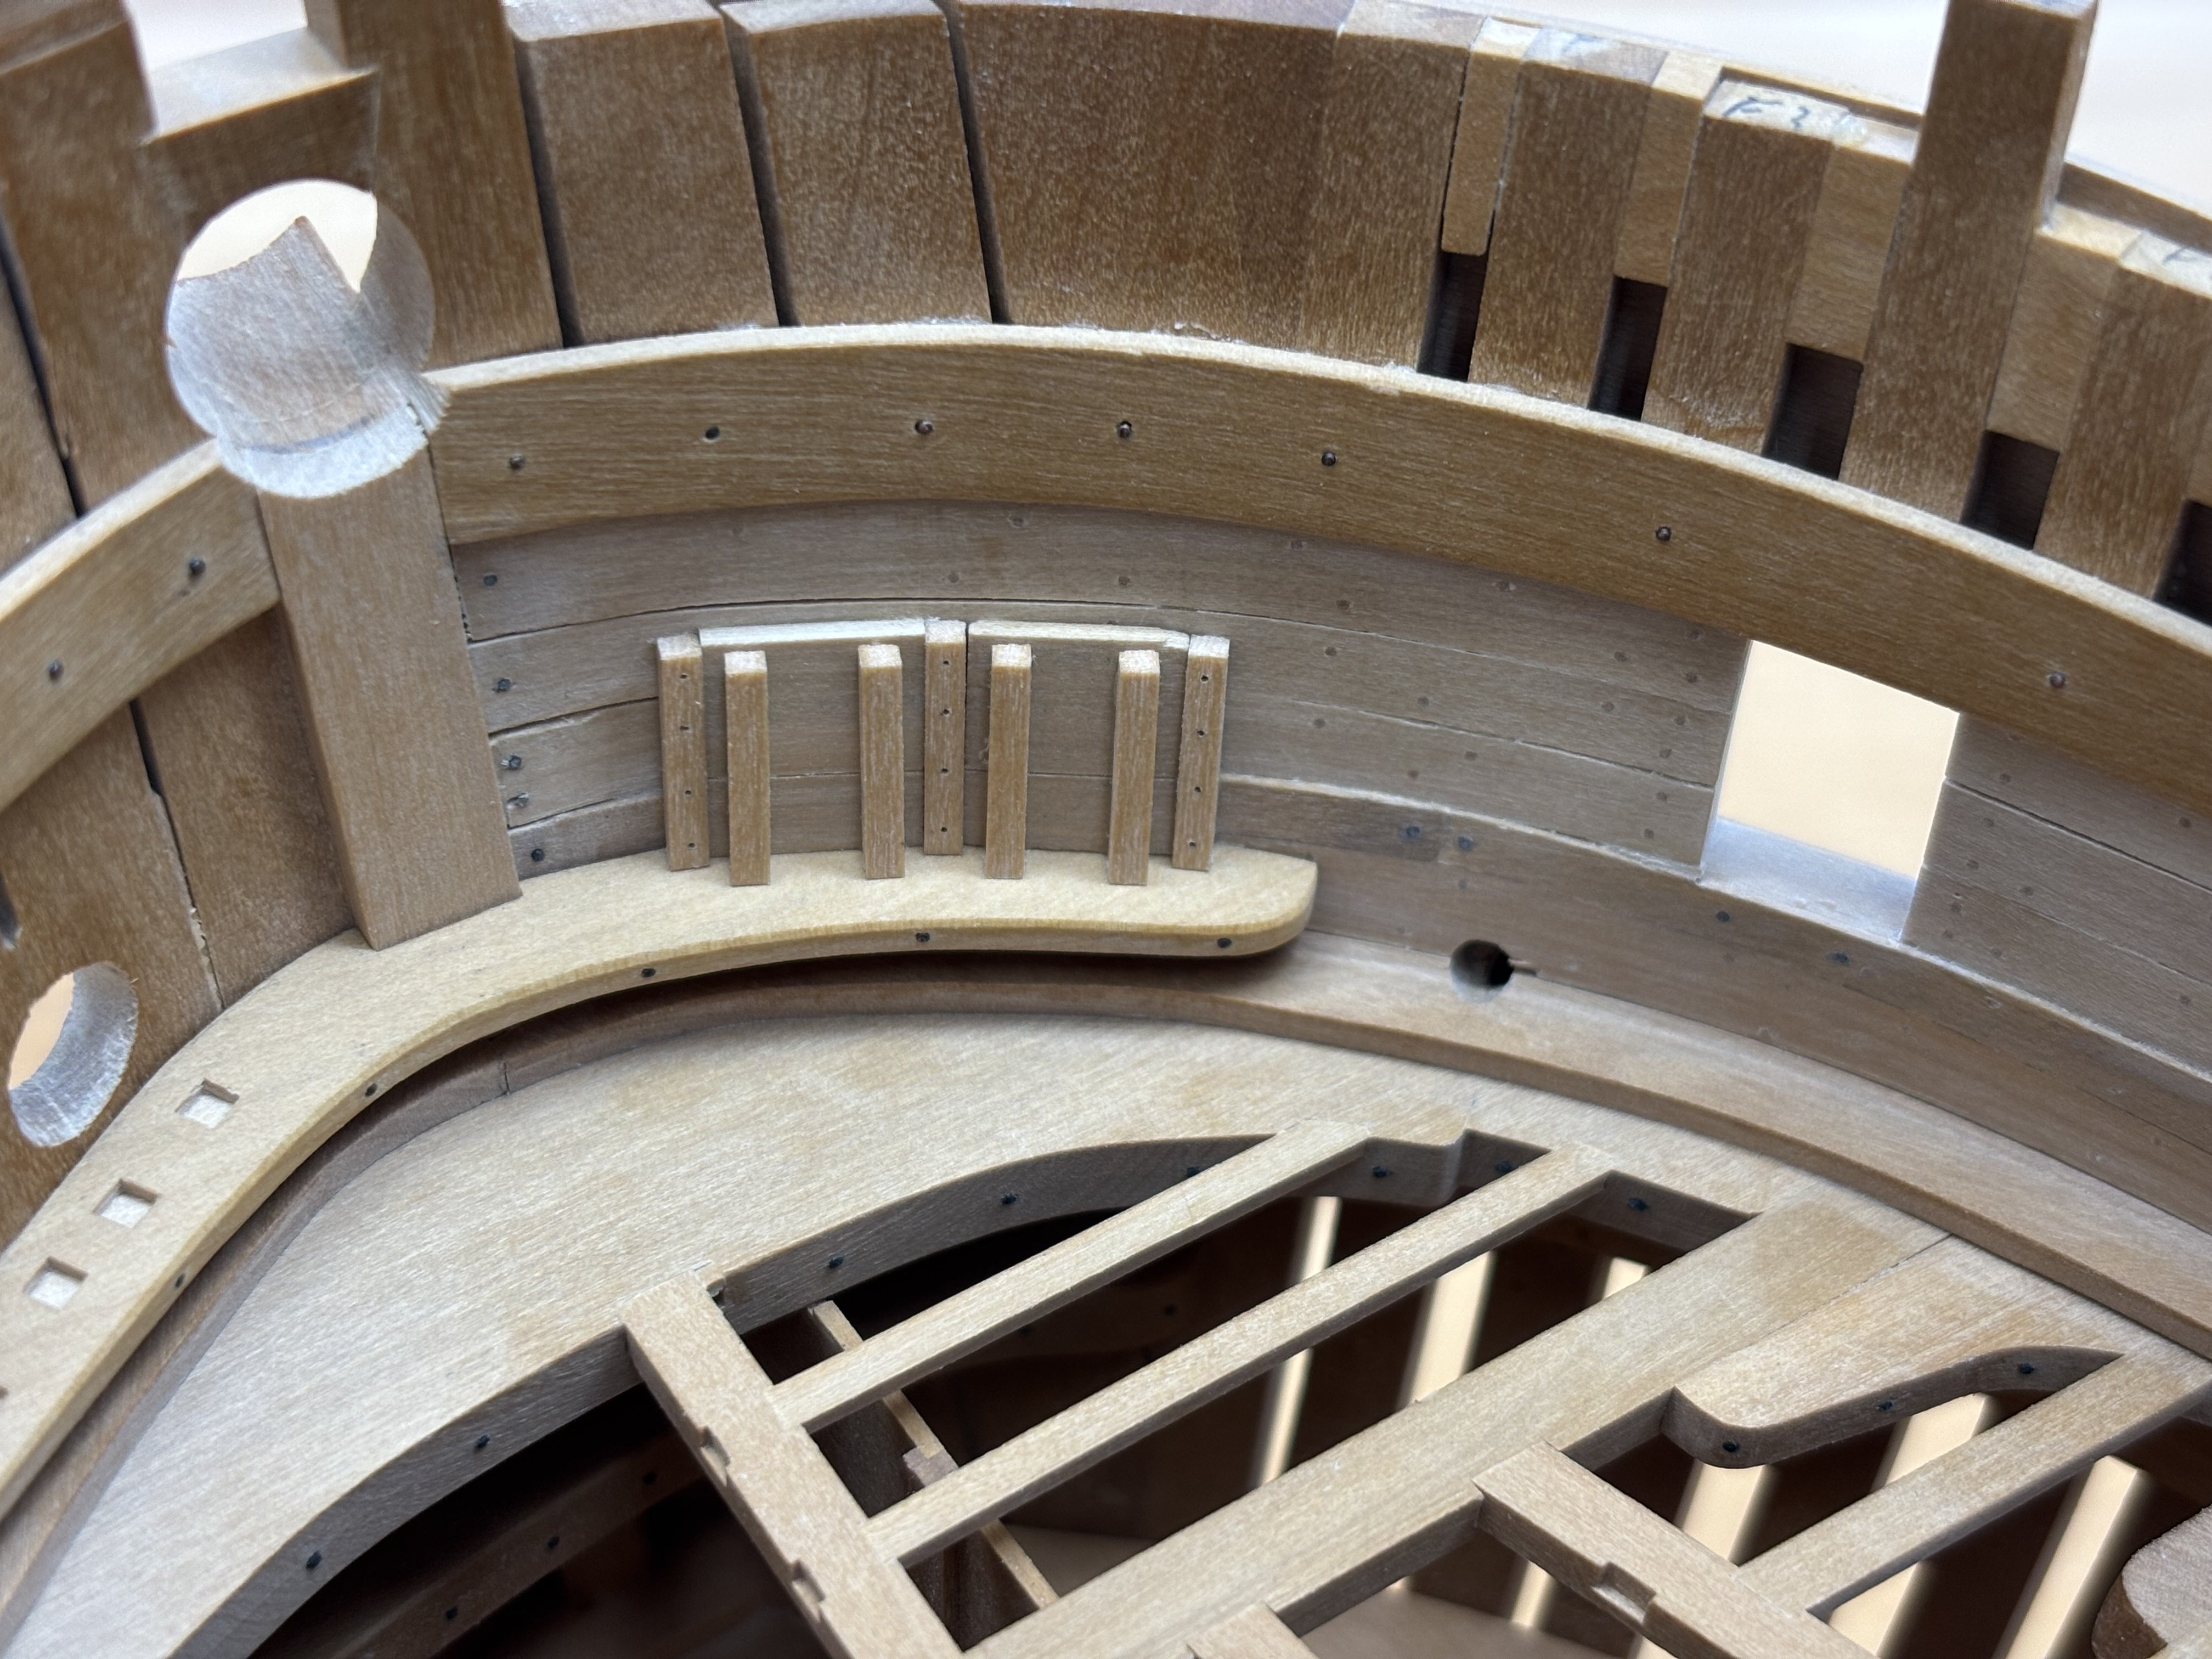
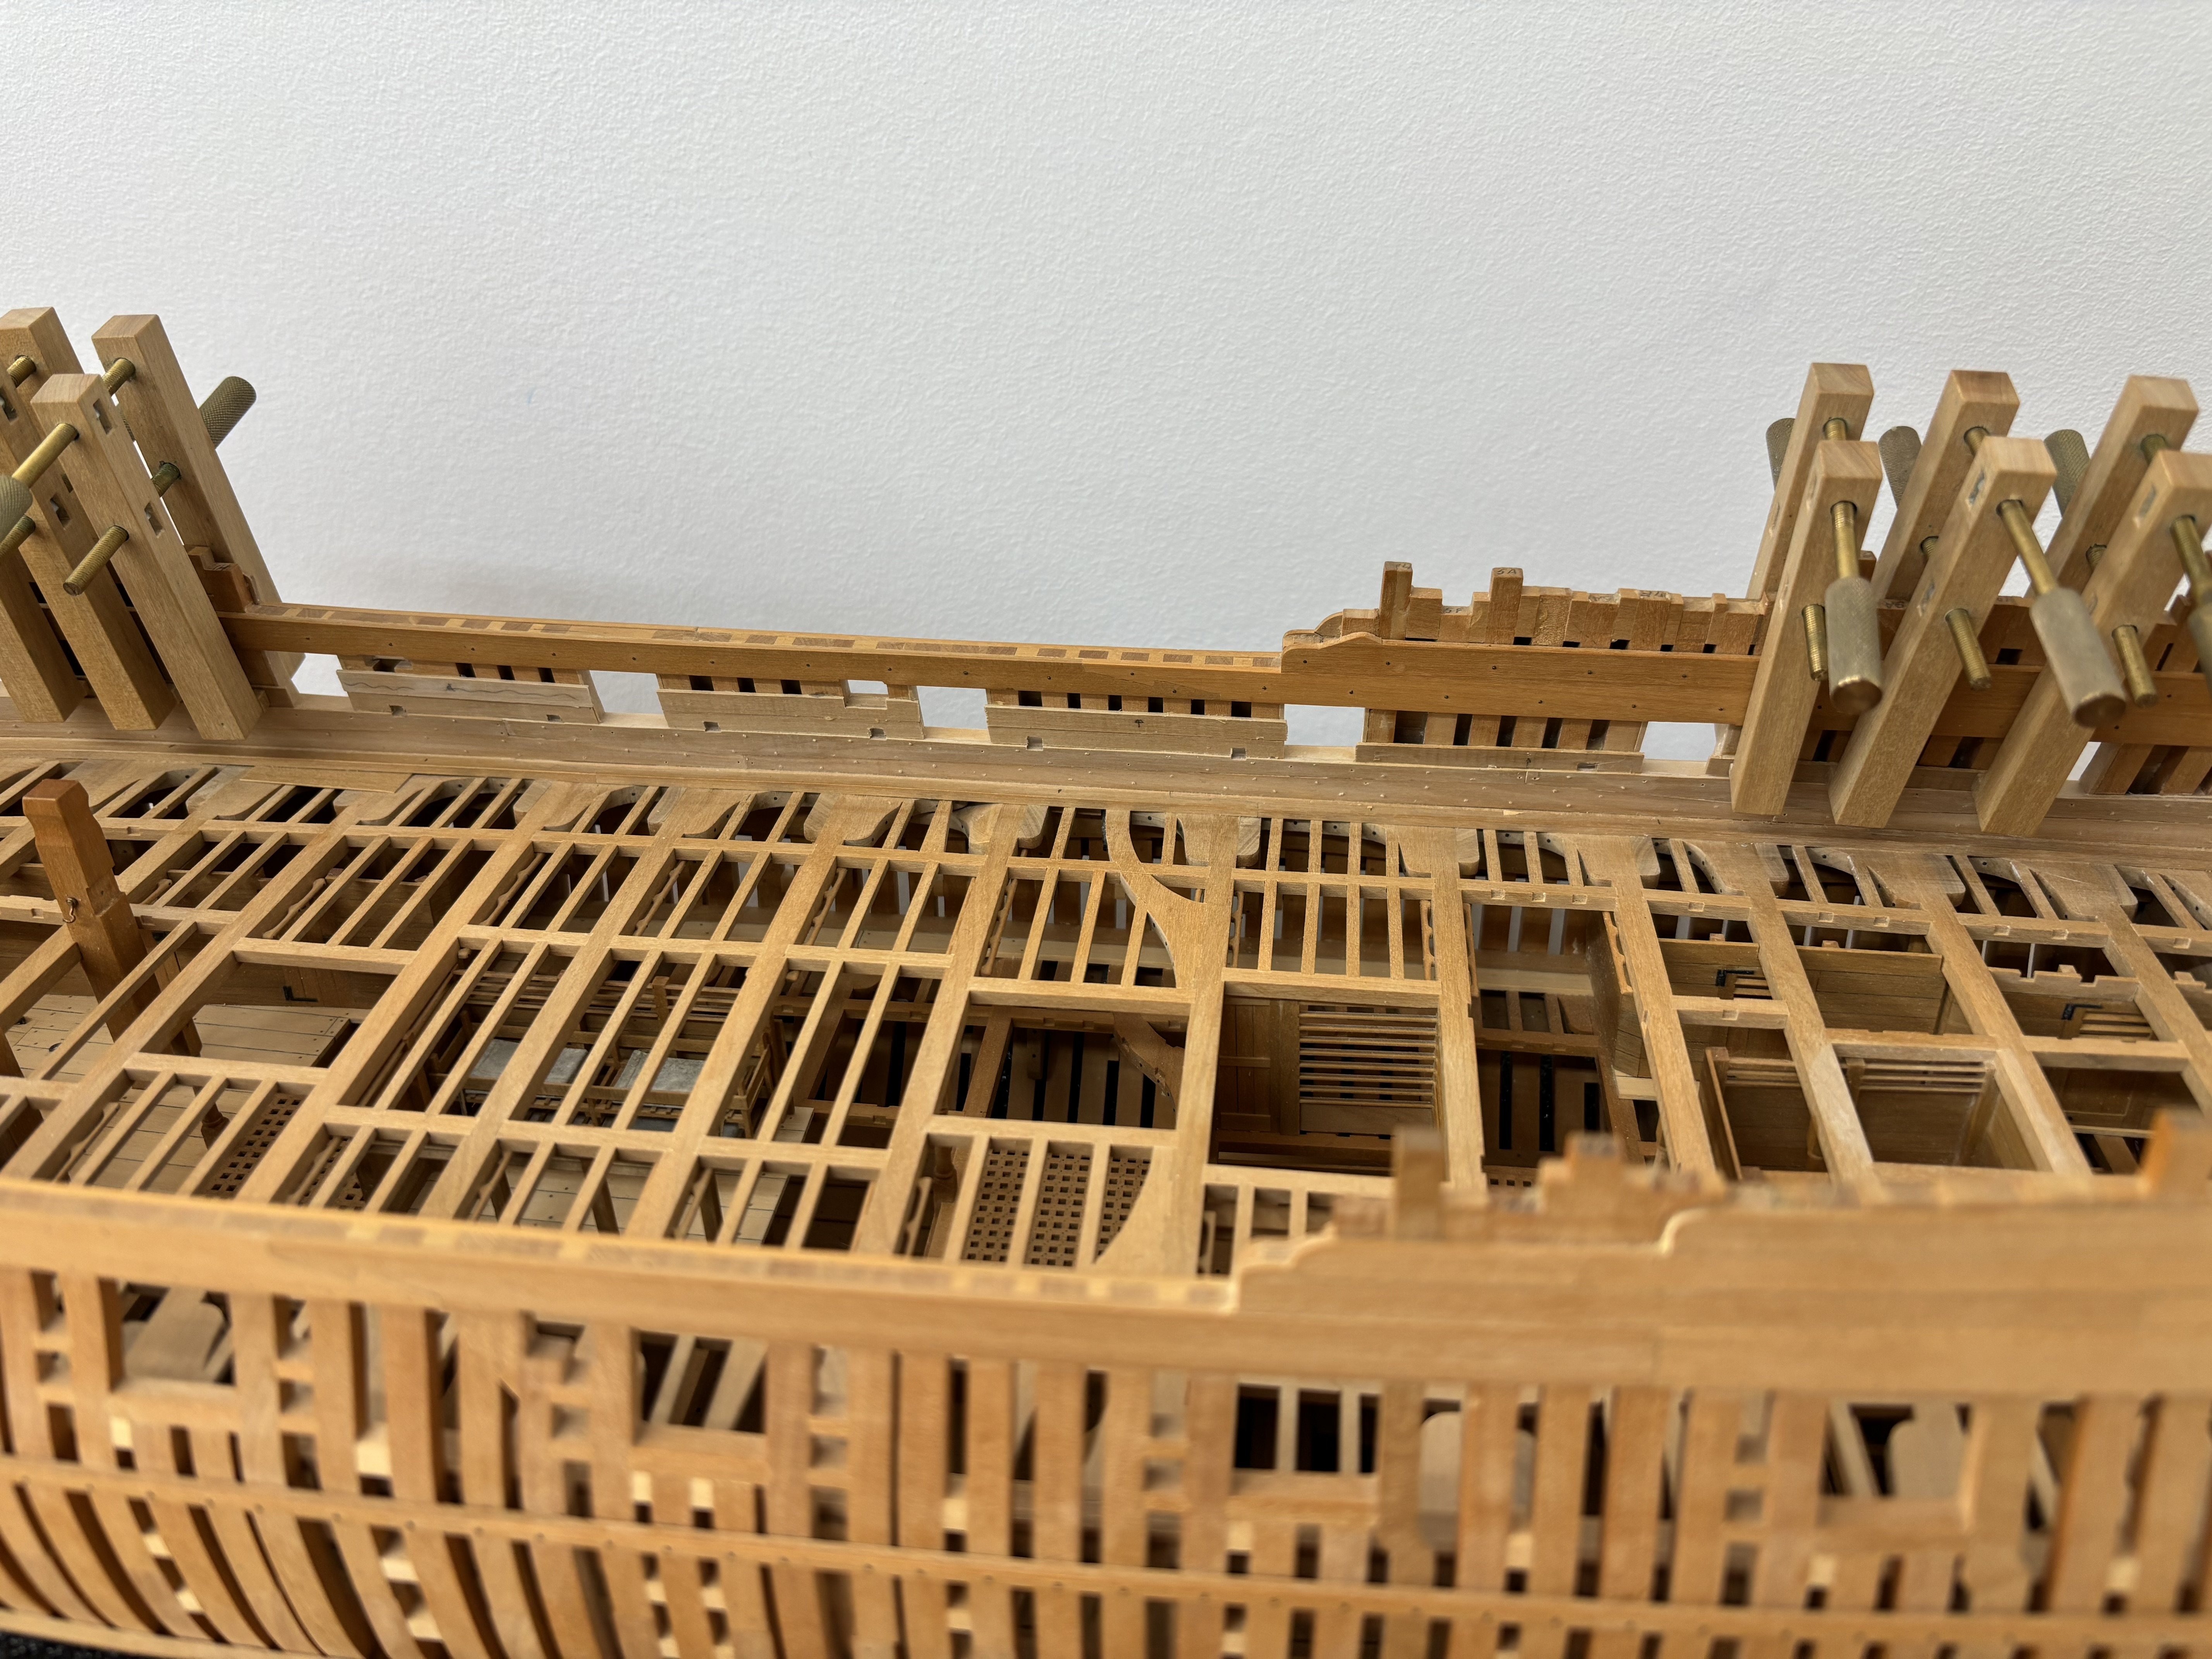
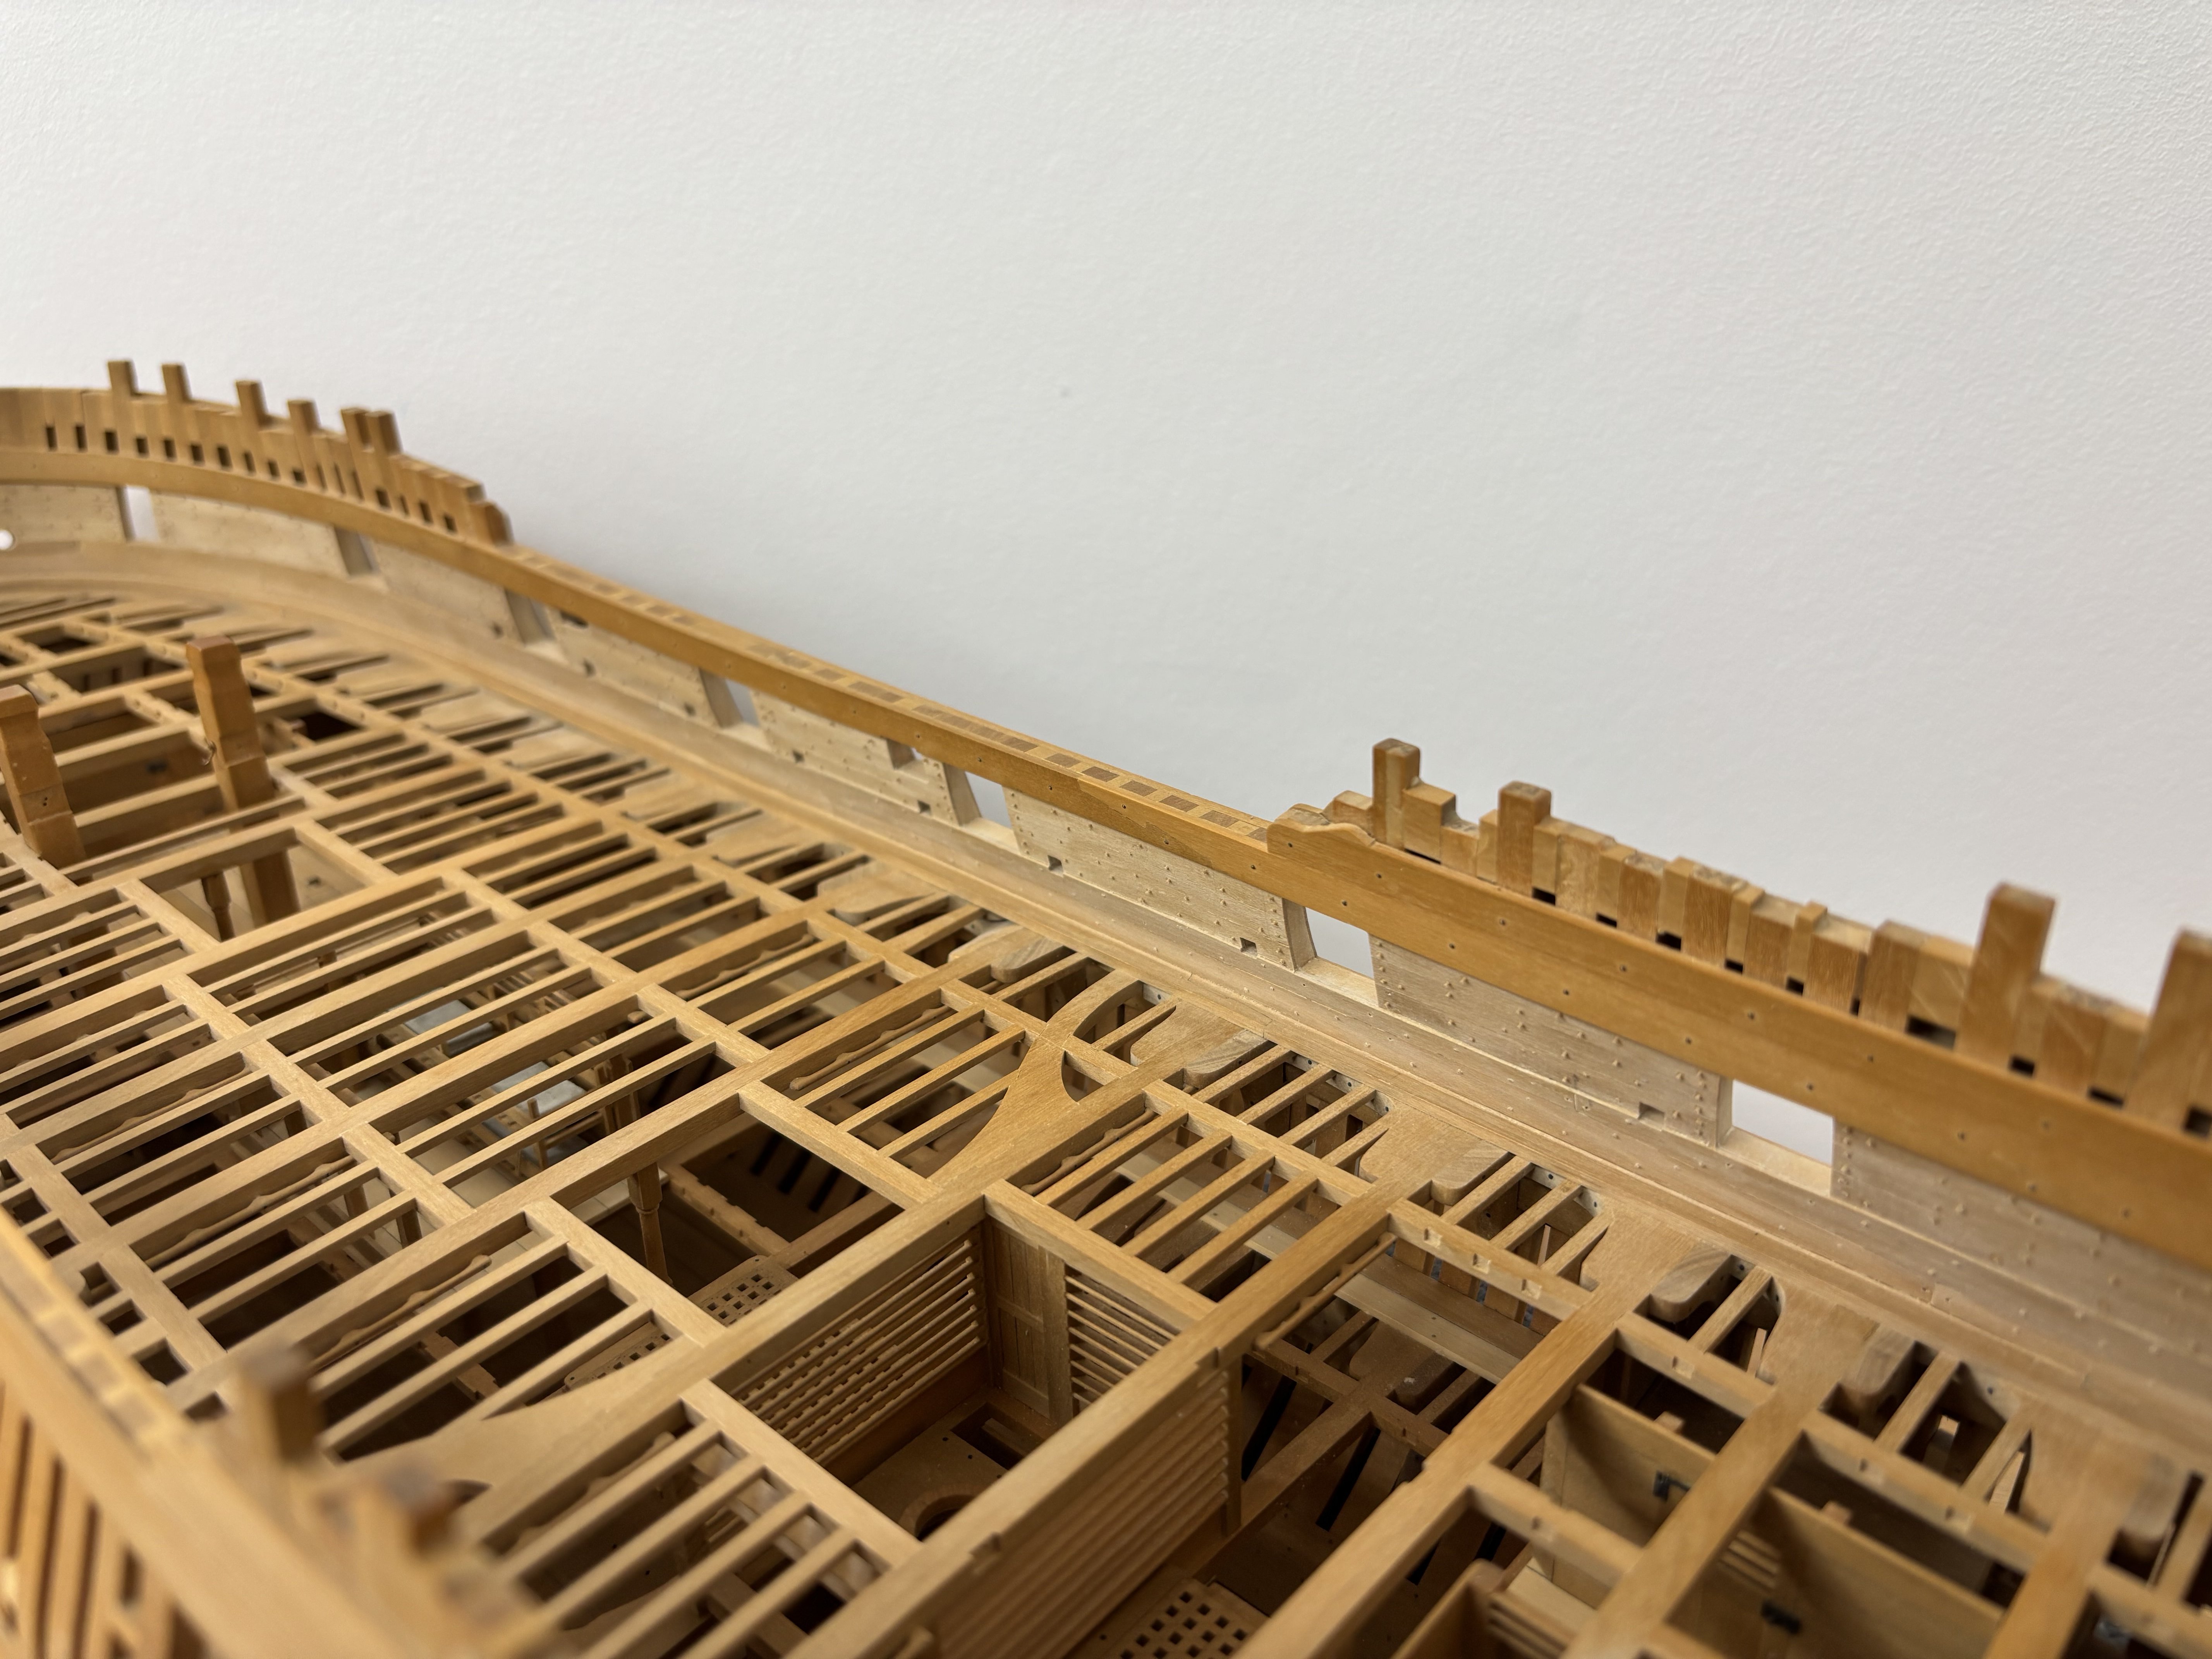
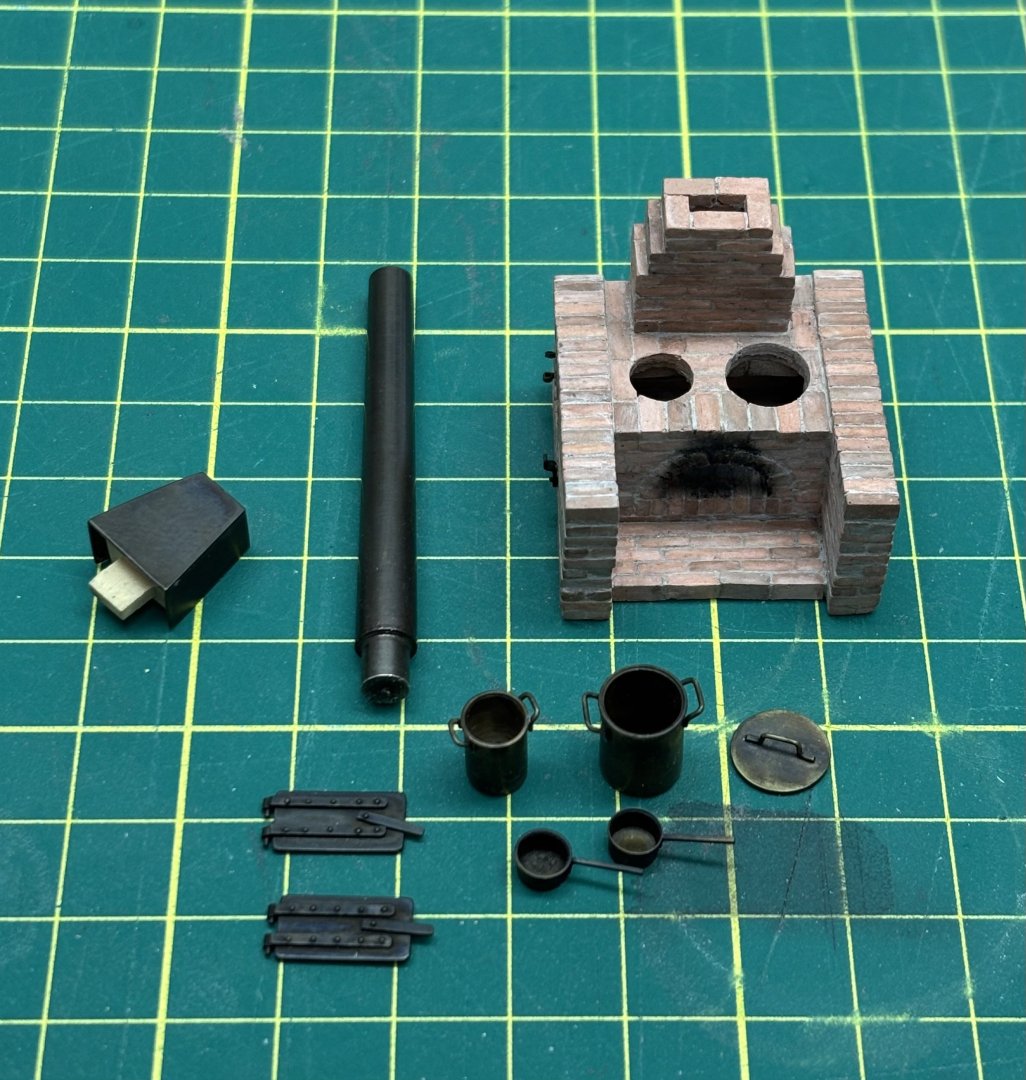
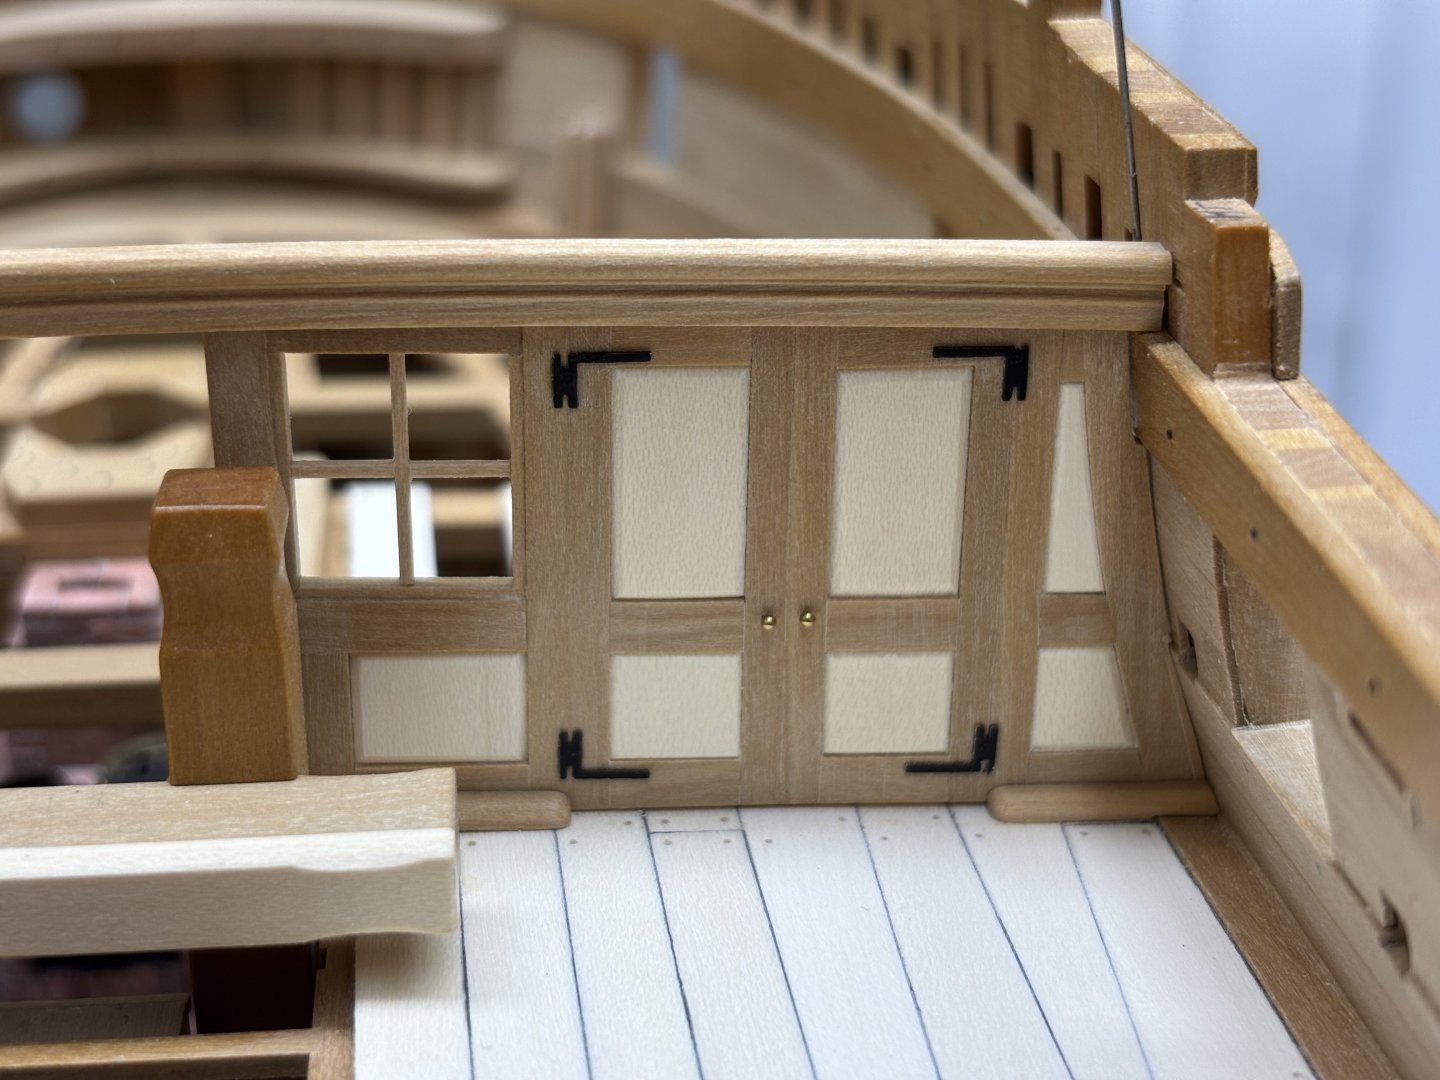
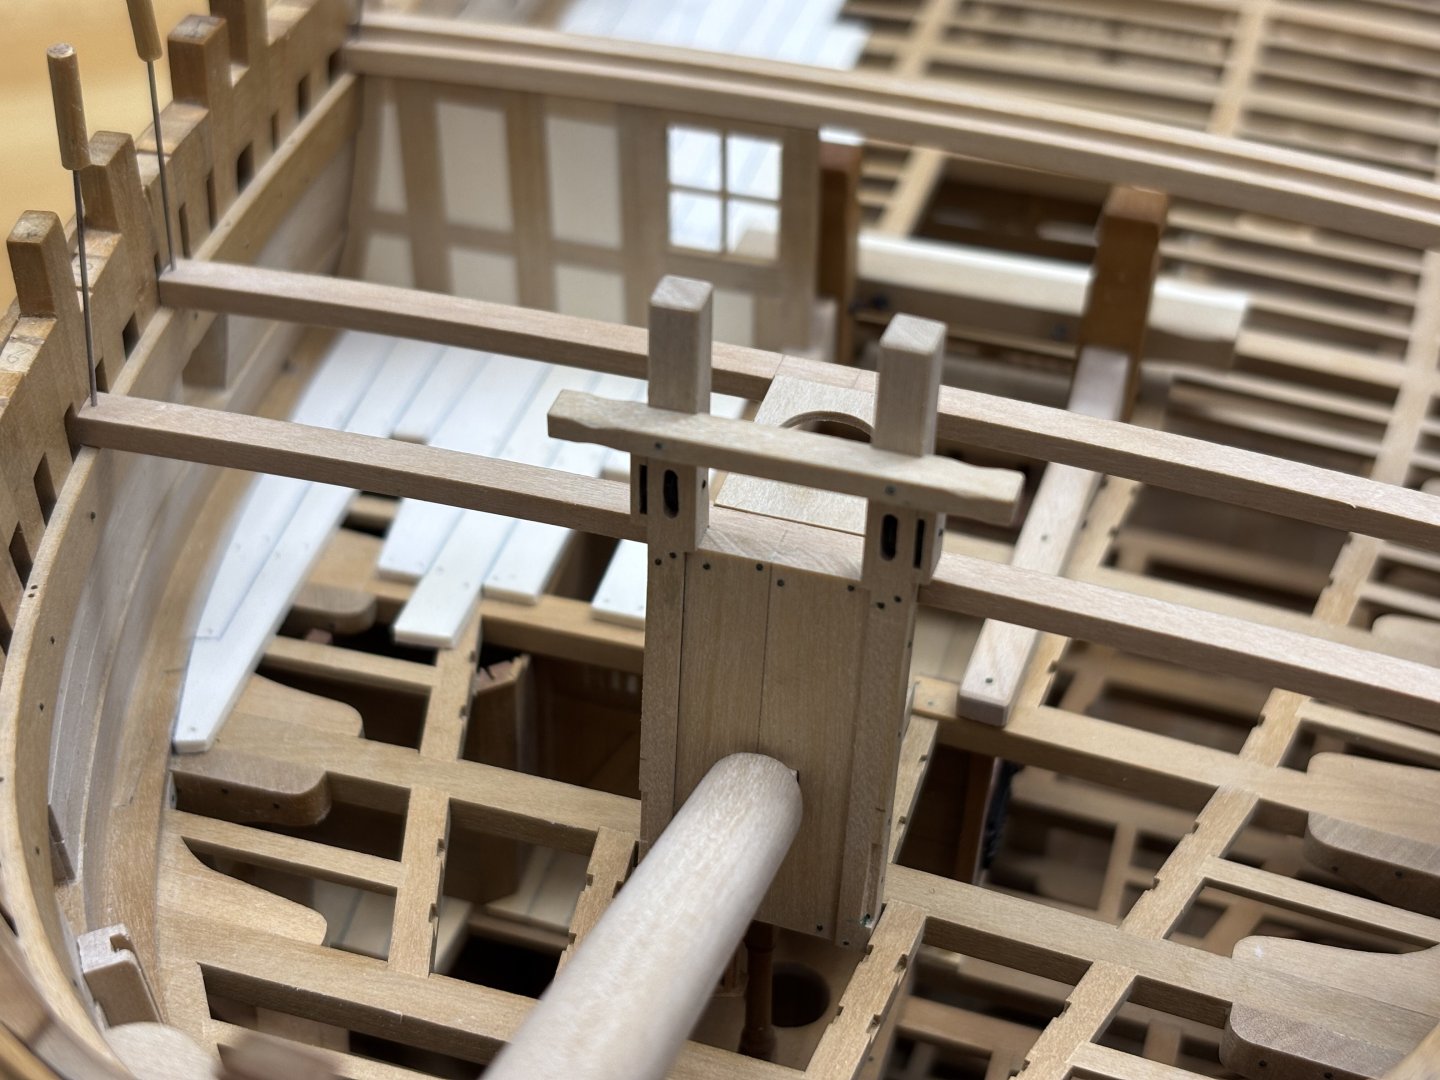
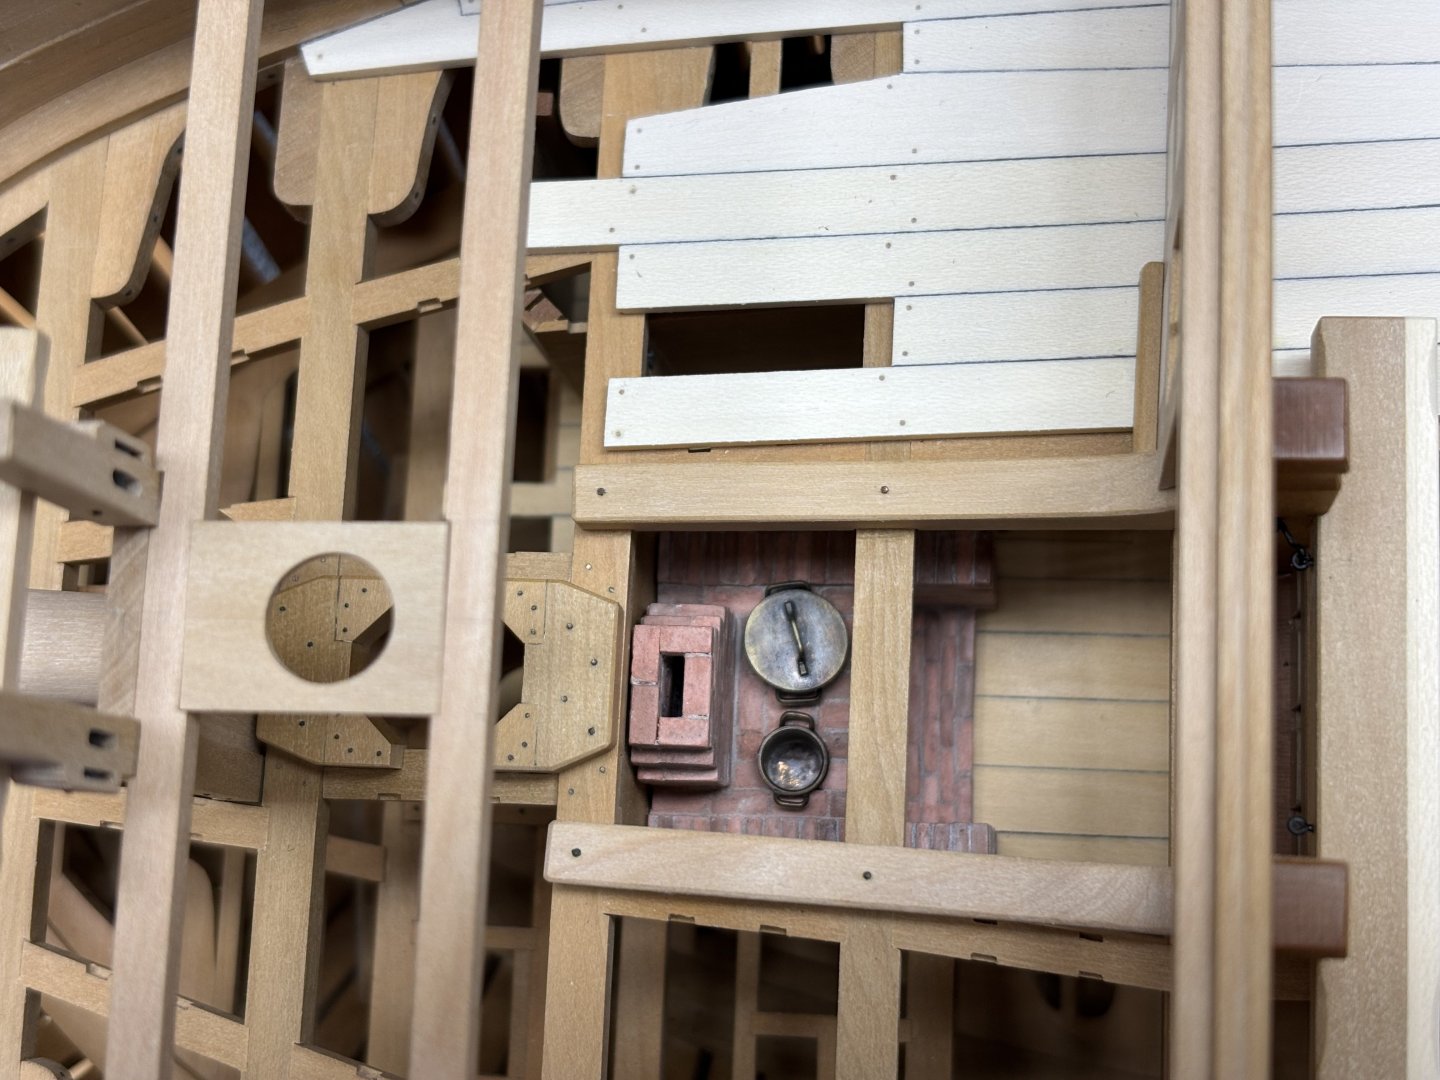
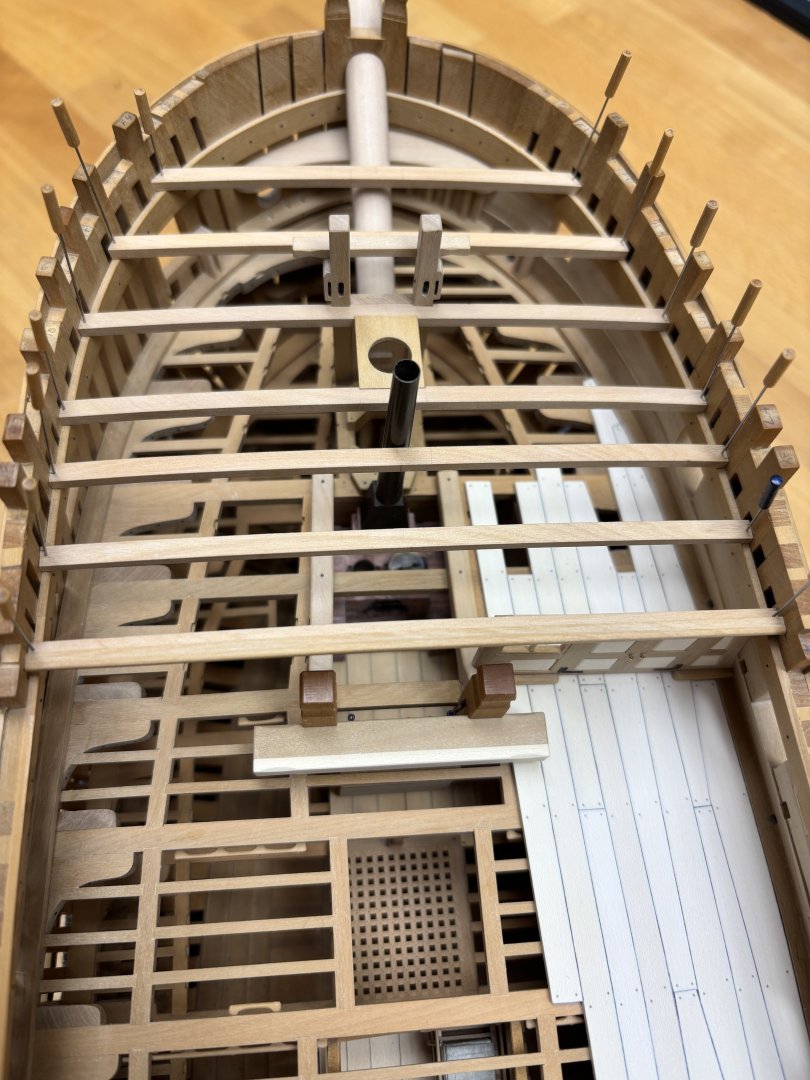
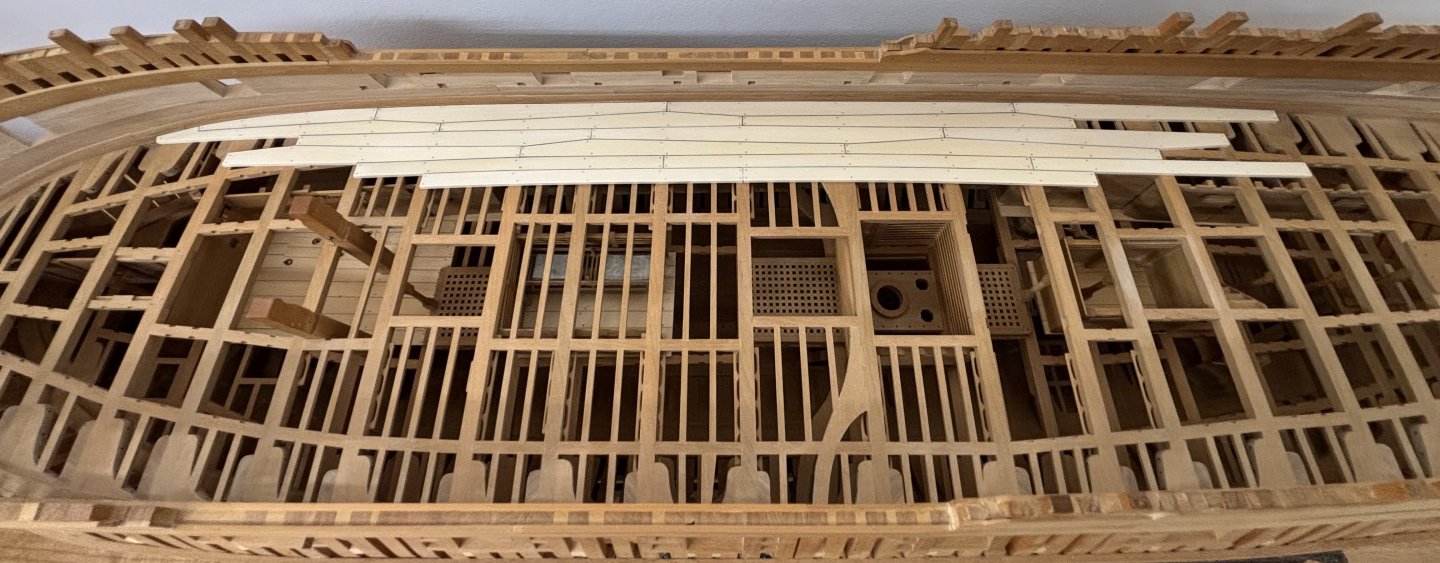
A long overdue update..... I added the bowsprit step, finished the riding bitt standard, the stove was finally put in place. I made the stove a long time ago, based on the NNM plans I decided not to use the Brodie stove but a brick stove. The Brodie stove I have made too, eons ago, but it will stay in the parts drawer. Also the forecastle bulkhead was build and added. The Breastbeam (the aft most beam on the Forecastle deck) took some extra care because it has a molding. This was carefully added with a custom scraper Remco


- 1,215 replies
-
- 33
-
-
-
- sloop
- kingfisher
- (and 1 more)
-
 Remcohe reacted to a post in a topic:
HMS Kingfisher 1770 by Remcohe - 1/48 - English 14-Gun Sloop - POF
Remcohe reacted to a post in a topic:
HMS Kingfisher 1770 by Remcohe - 1/48 - English 14-Gun Sloop - POF
-
Remcohe reacted to a post in a topic:
Young America 1853 by EdT - FINISHED - extreme clipper
-
What a beautiful accomplishment Ed
-
Remcohe reacted to a post in a topic:
HMS Kingfisher 1770 by Remcohe - 1/48 - English 14-Gun Sloop - POF
-
Remcohe reacted to a post in a topic:
HMS Kingfisher 1770 by Remcohe - 1/48 - English 14-Gun Sloop - POF
-
Remcohe reacted to a post in a topic:
HMS Kingfisher 1770 by Remcohe - 1/48 - English 14-Gun Sloop - POF
-
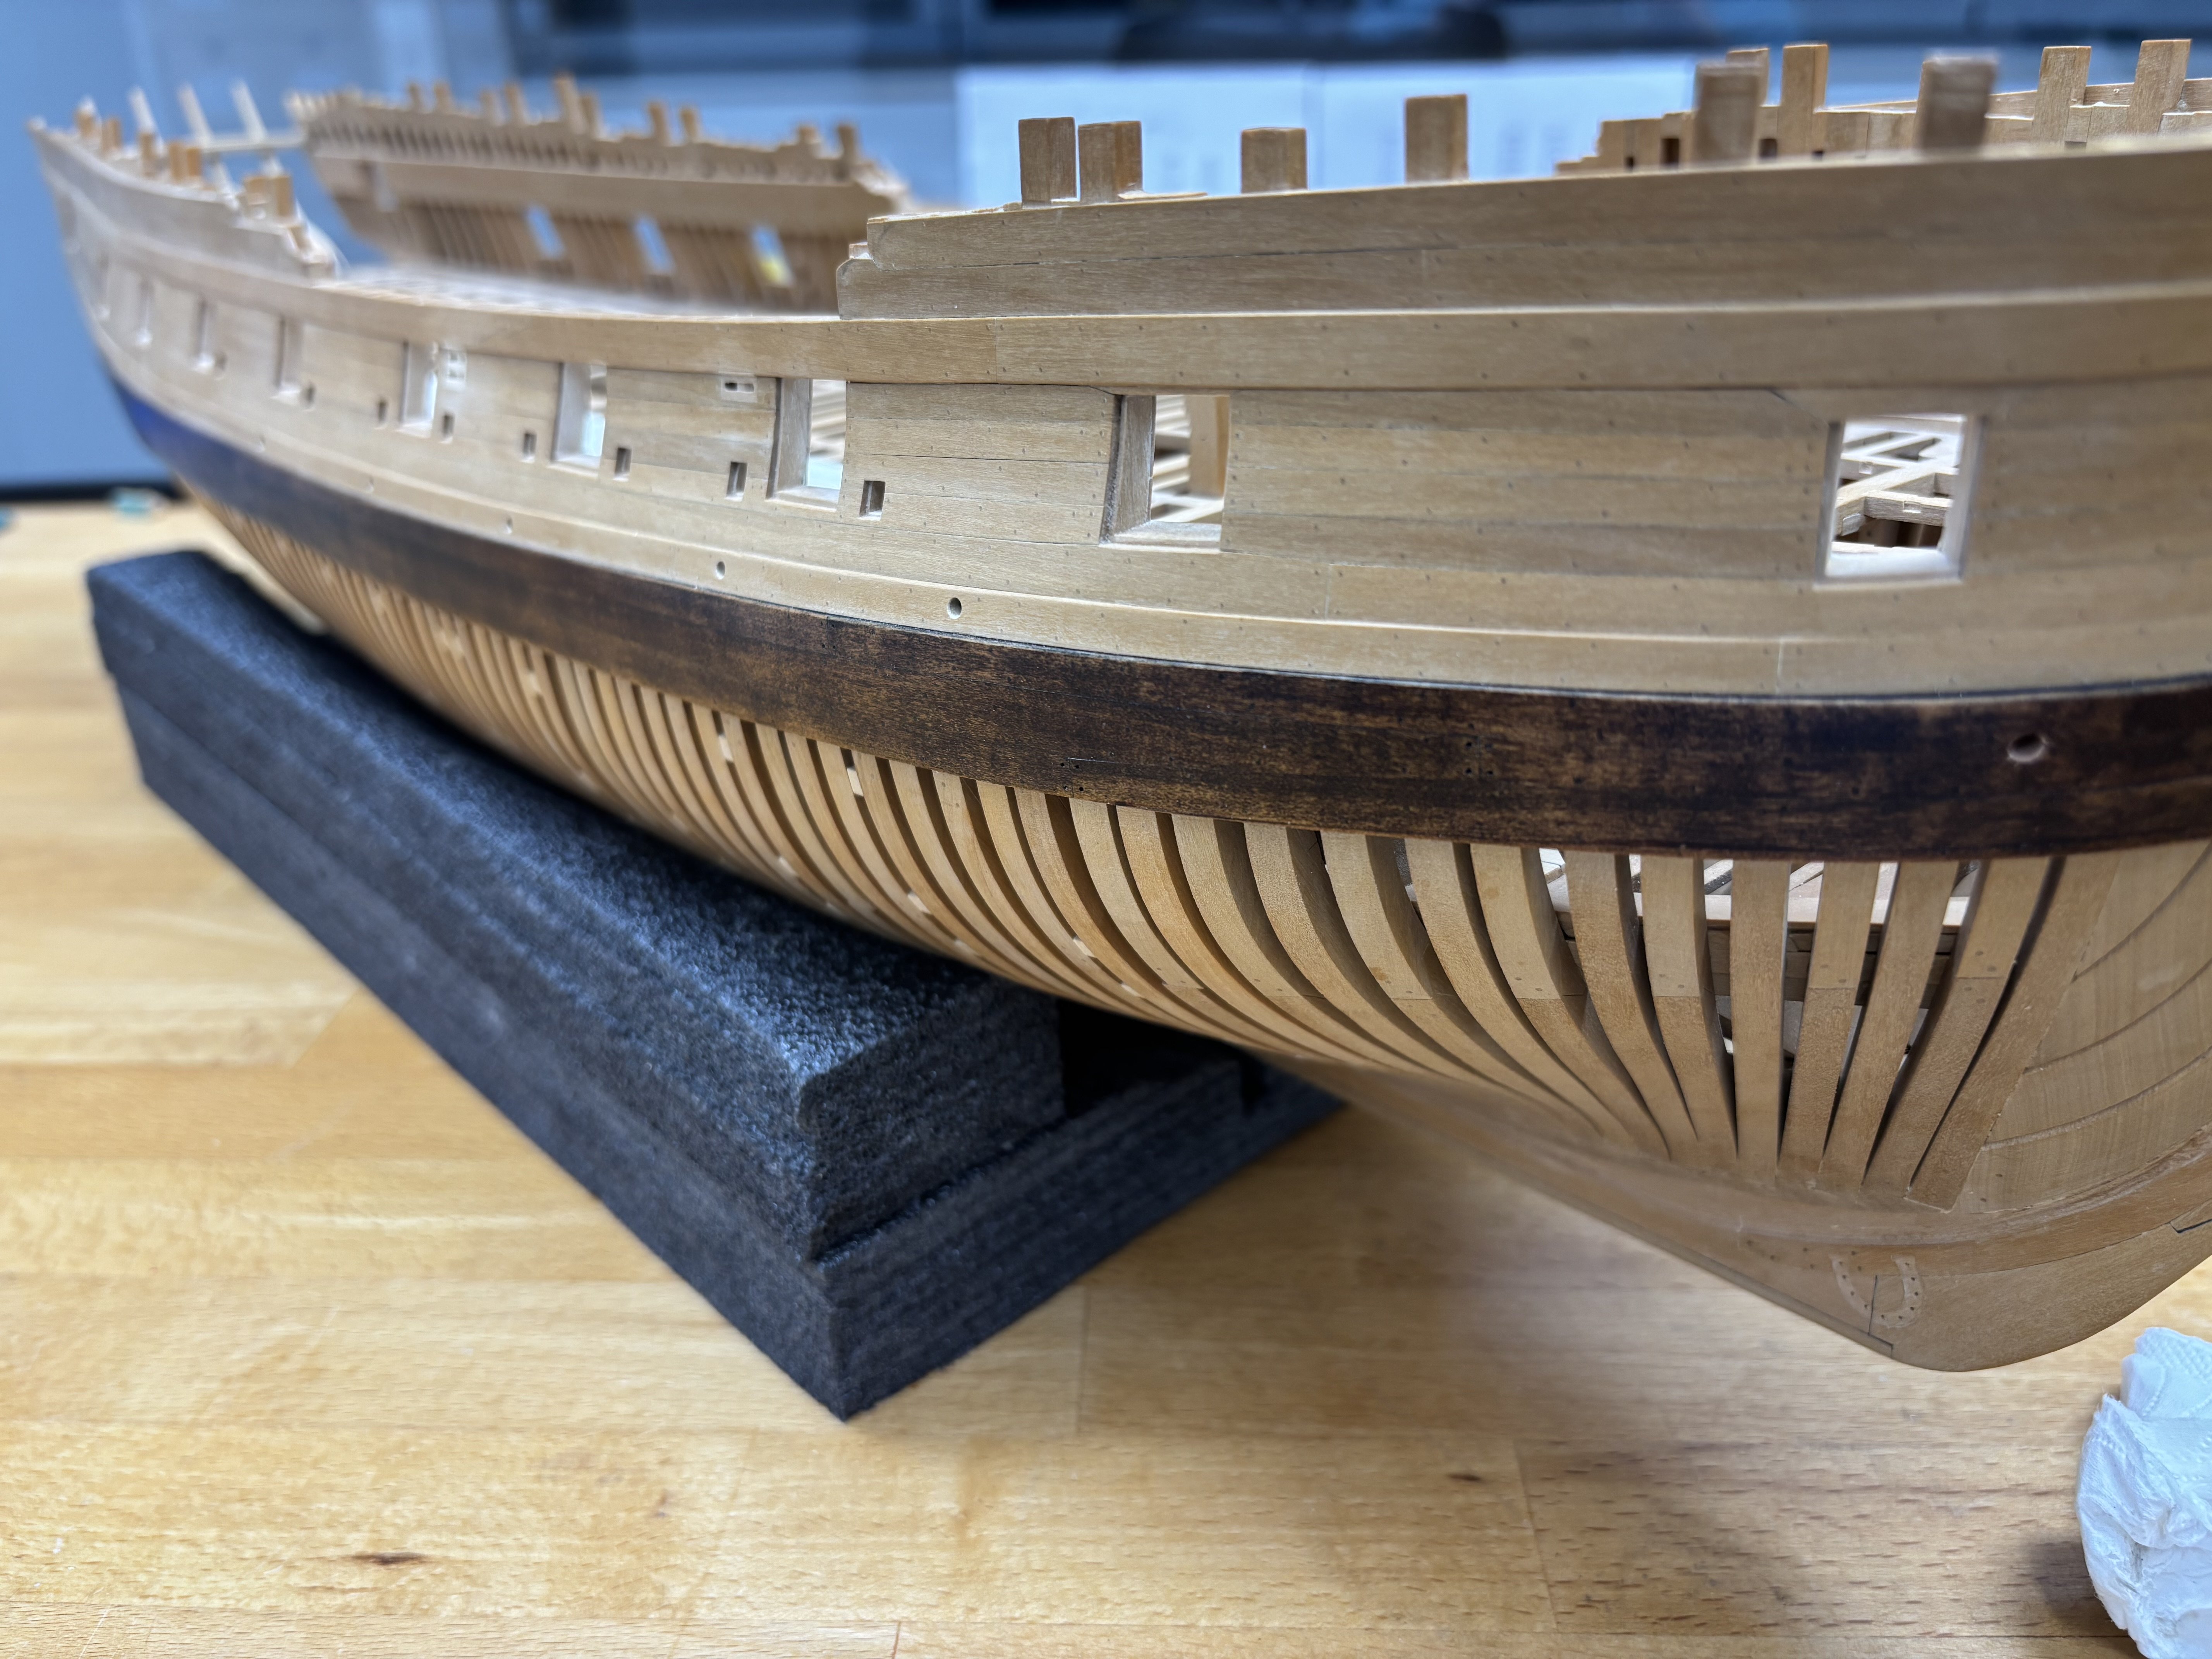
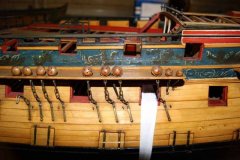
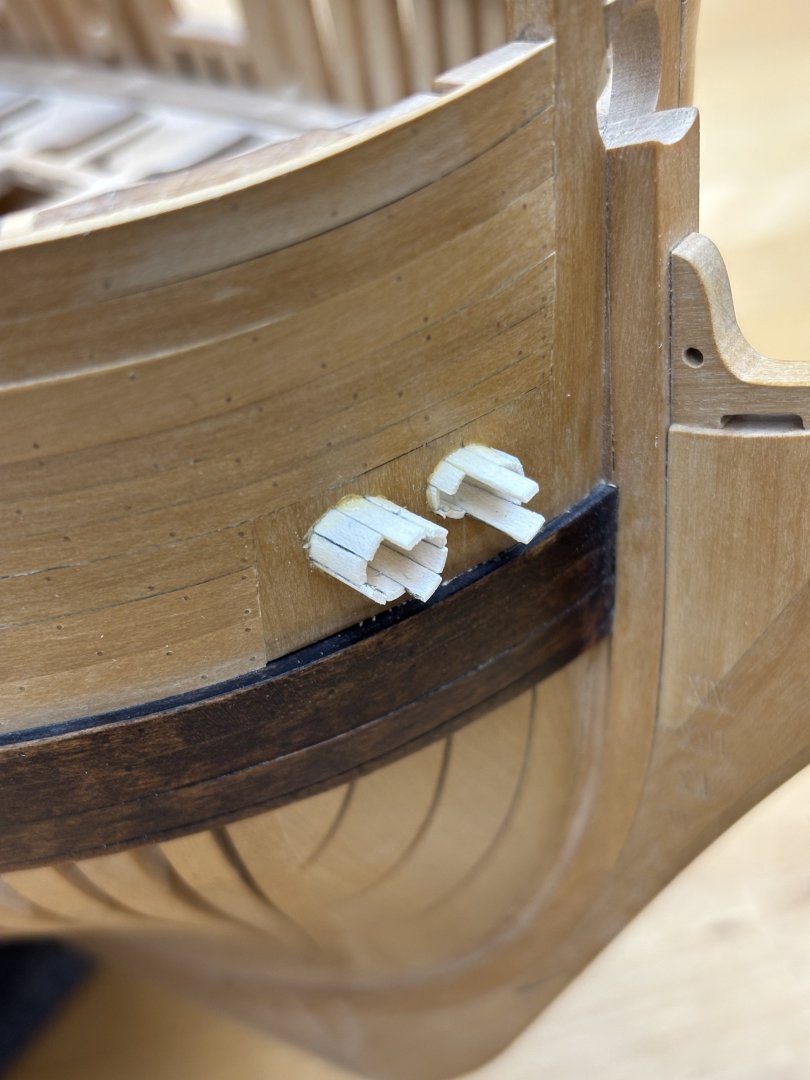
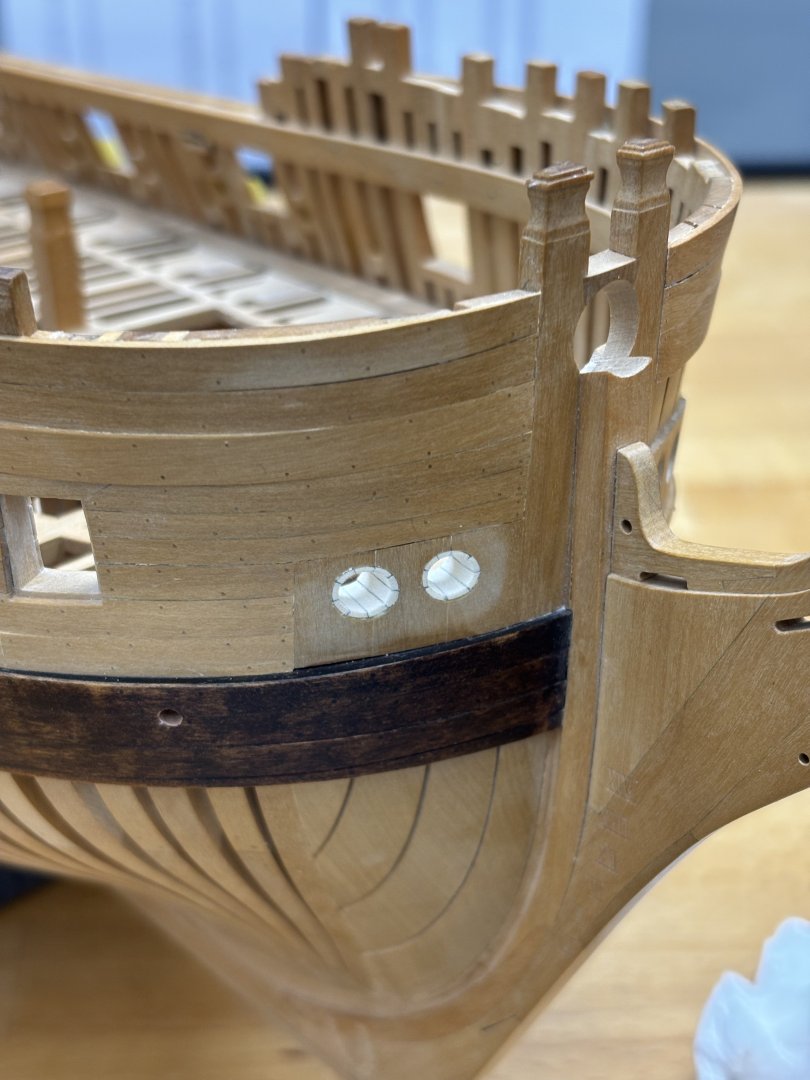
Thanks all for the warm welcome back. Yes Greg the whale will be getting a touch up when I have the nerve to stain it on the model... And no Grant I don't think the rat survived the harsh conditions the model was stowed on for at least a year off-site. It was in an open storage facility suffering the seasons. I'm very surprised that there only some very minor cracks in the planking. The scuppers were drilled from two sides (don't tell not all the way through because they did not line up very well in all places. The hawse holes are lined with holy. I soaked a thin sheet of holy in water, rolled it up when it was soft and then let it dry in my food curing oven. This gave a nice curve to the planks. I tinted the seams with pencel lead to make them stand out a little more. Deck planking added Breast hooks and bucklers installed Remco


- 1,215 replies
-
- 34
-
-
- sloop
- kingfisher
- (and 1 more)
-
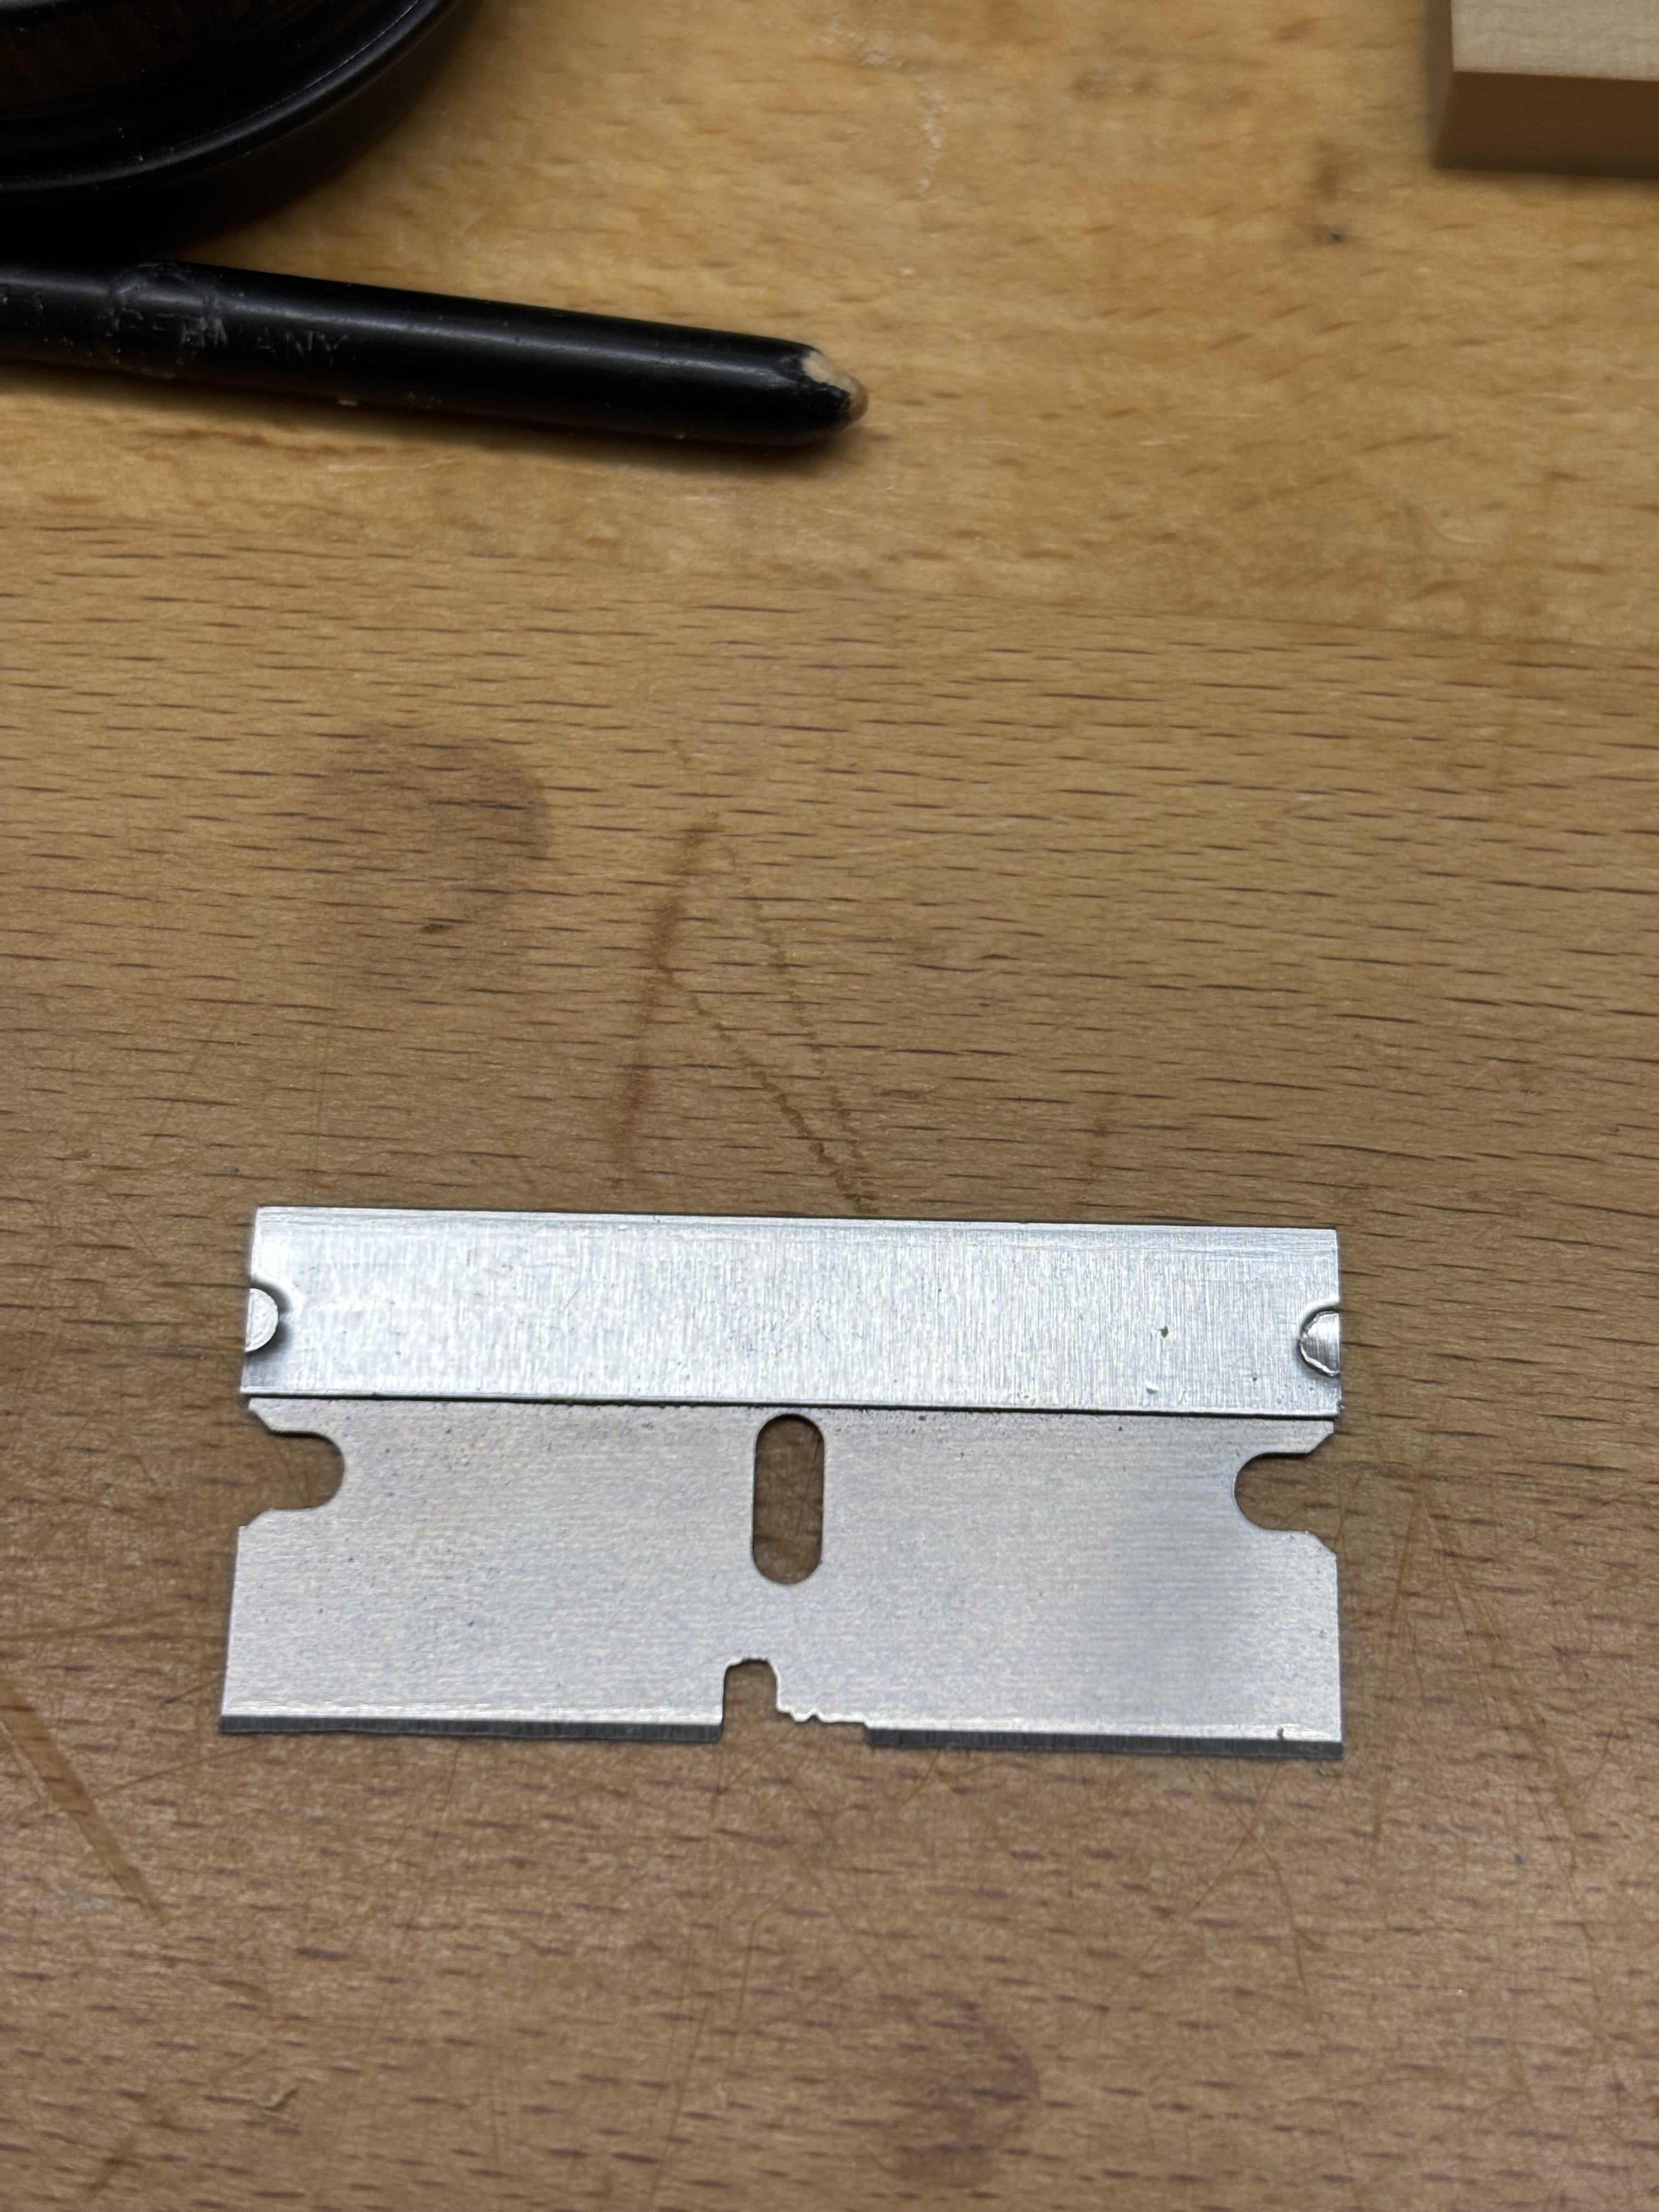
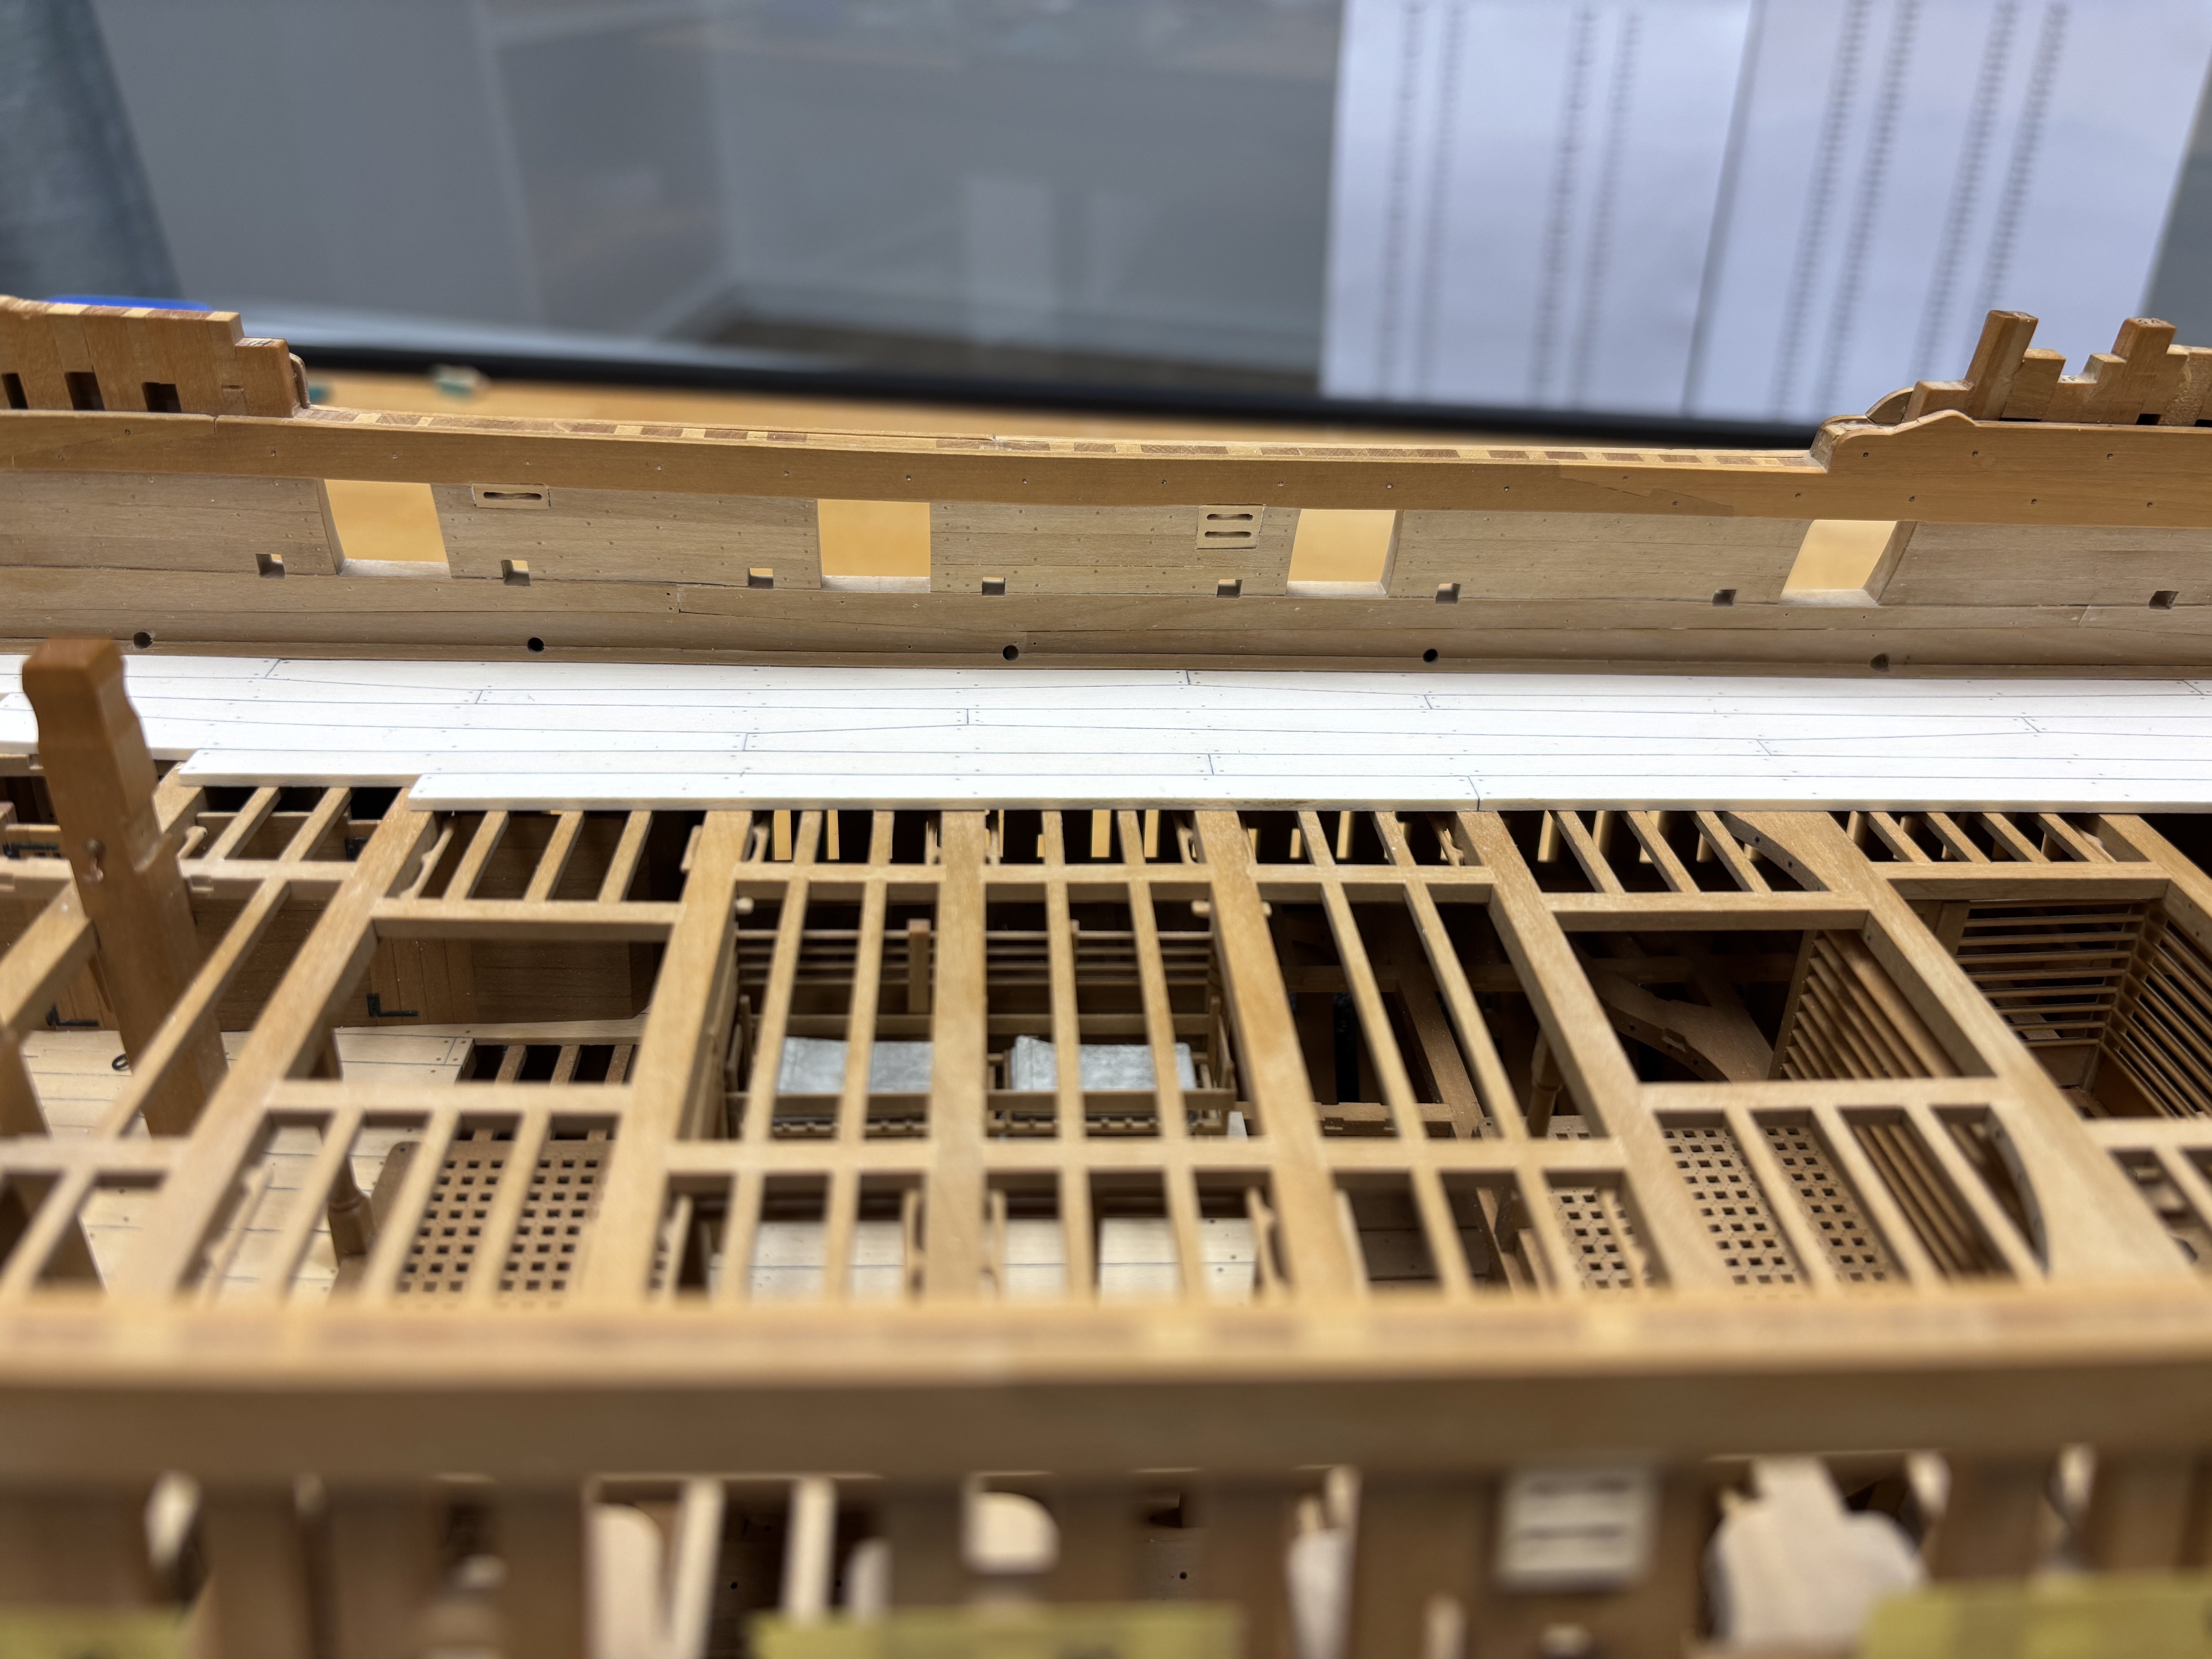
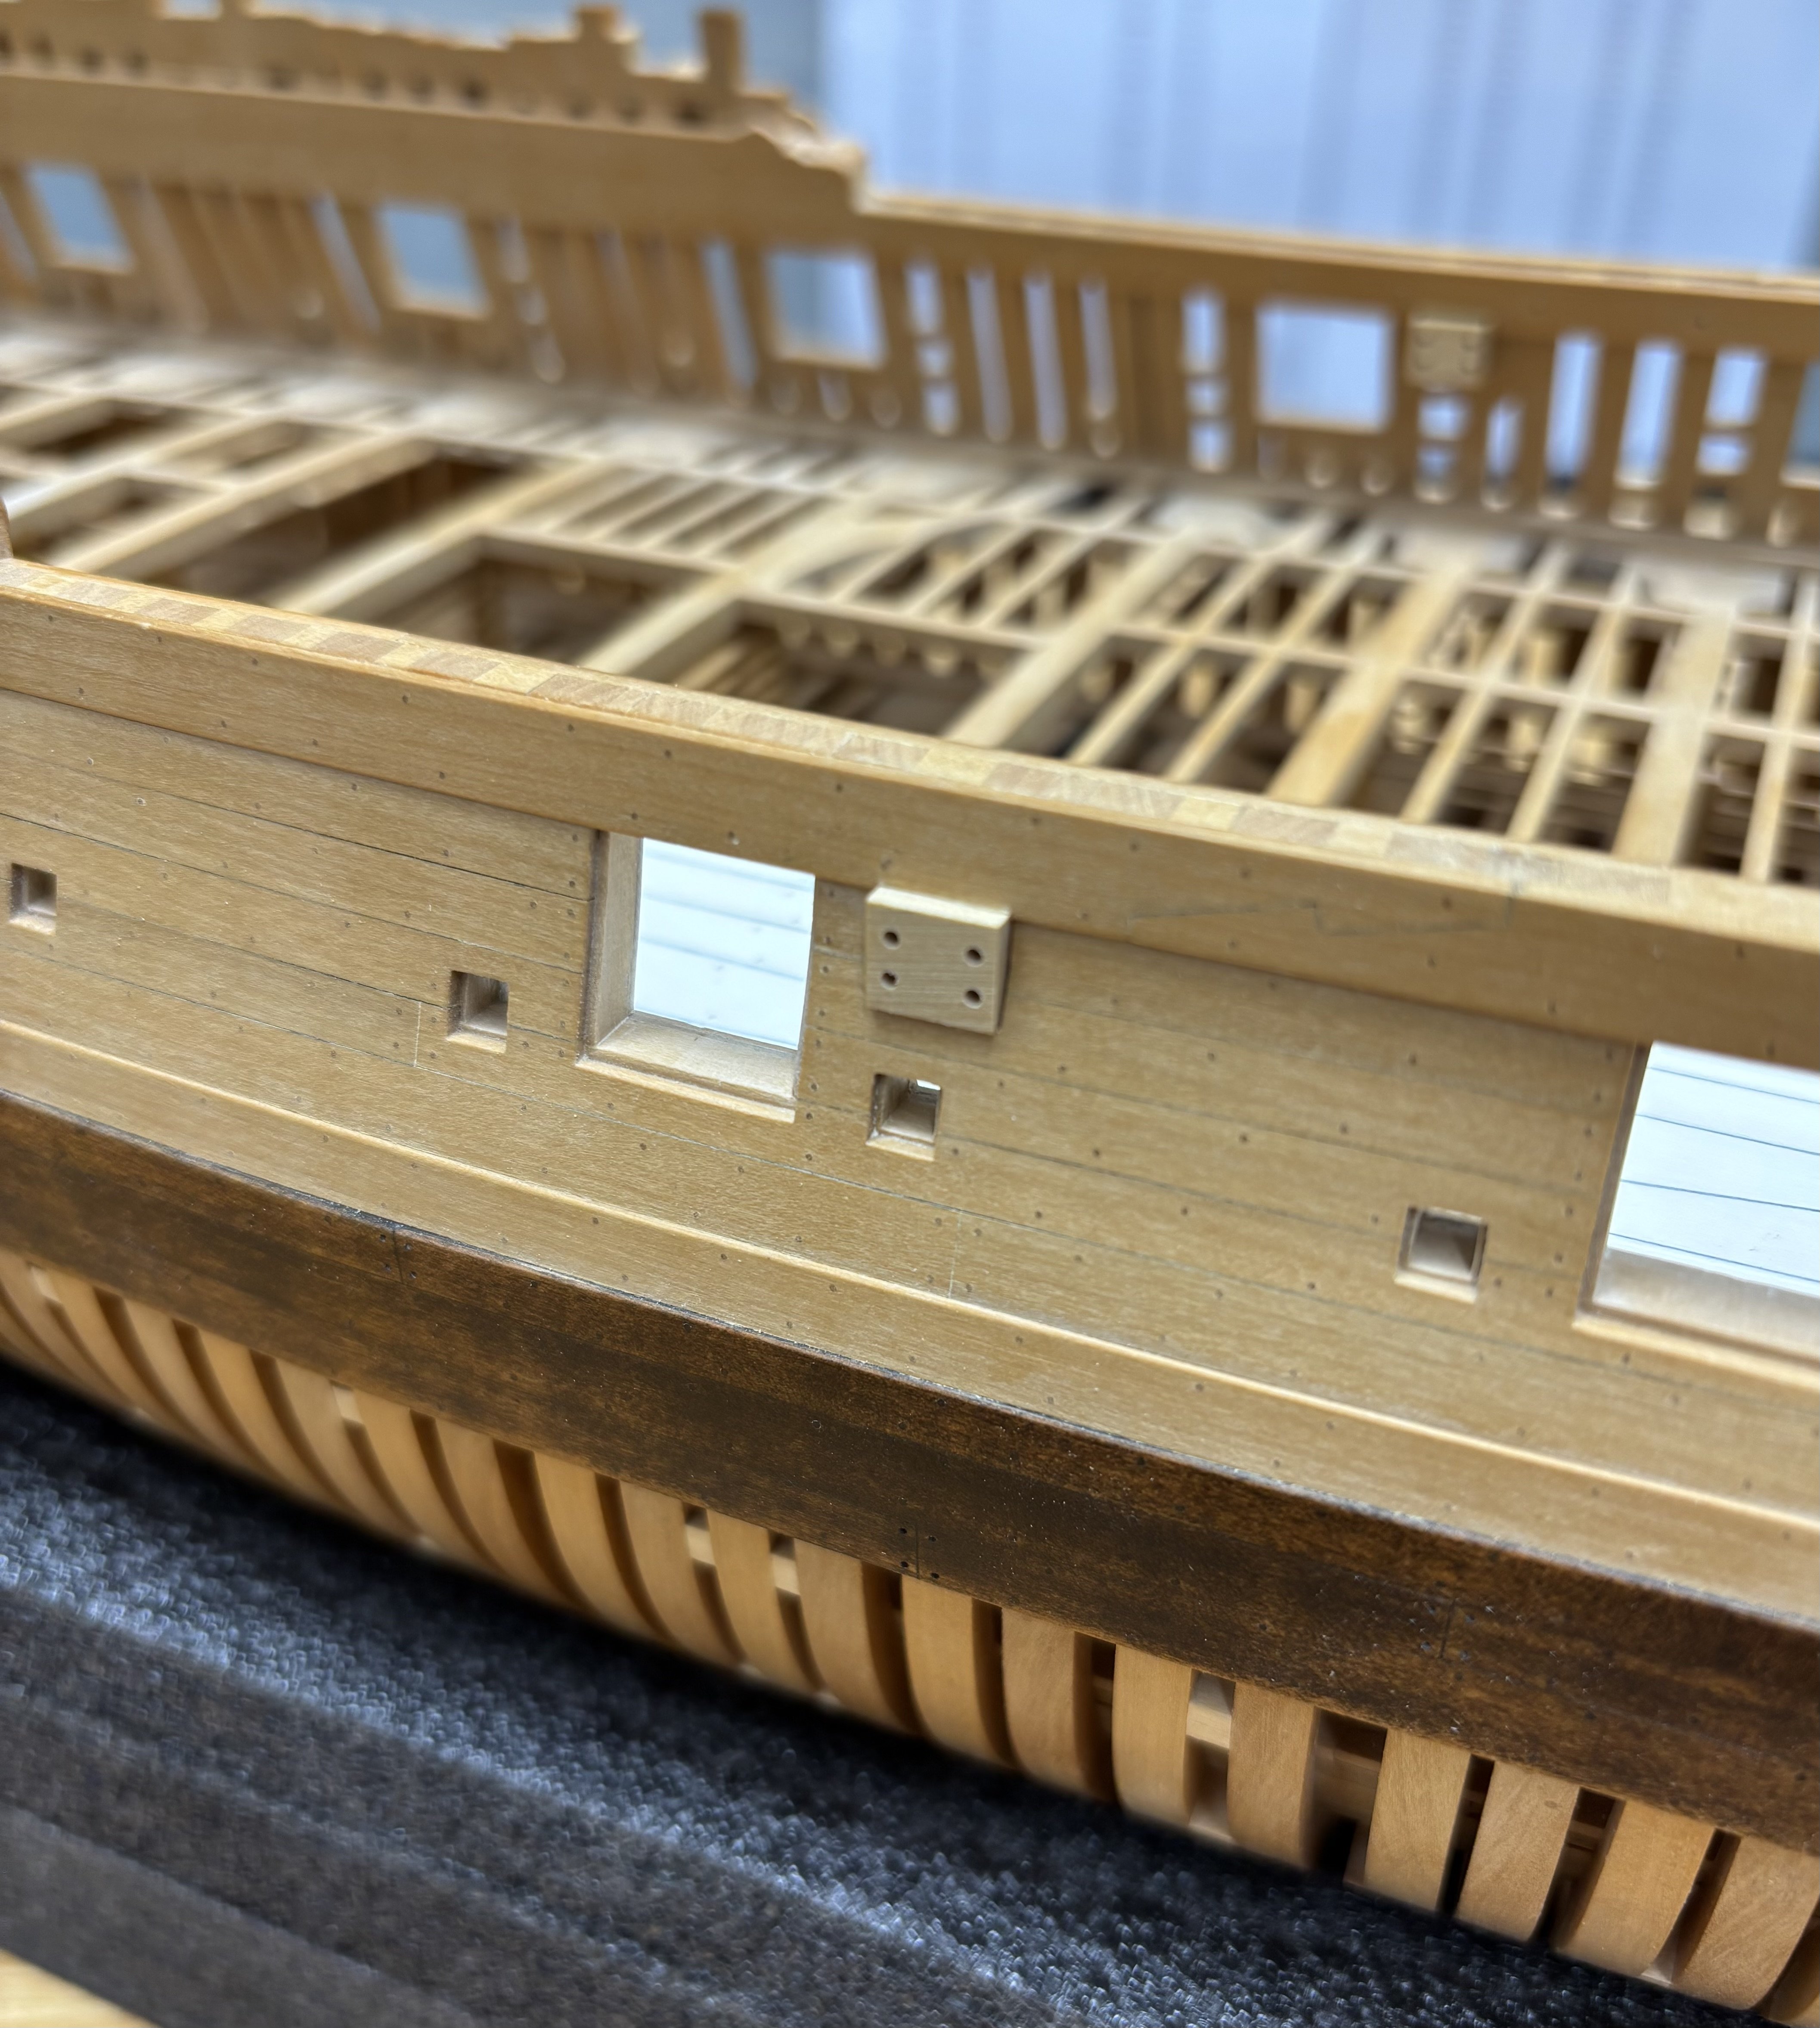
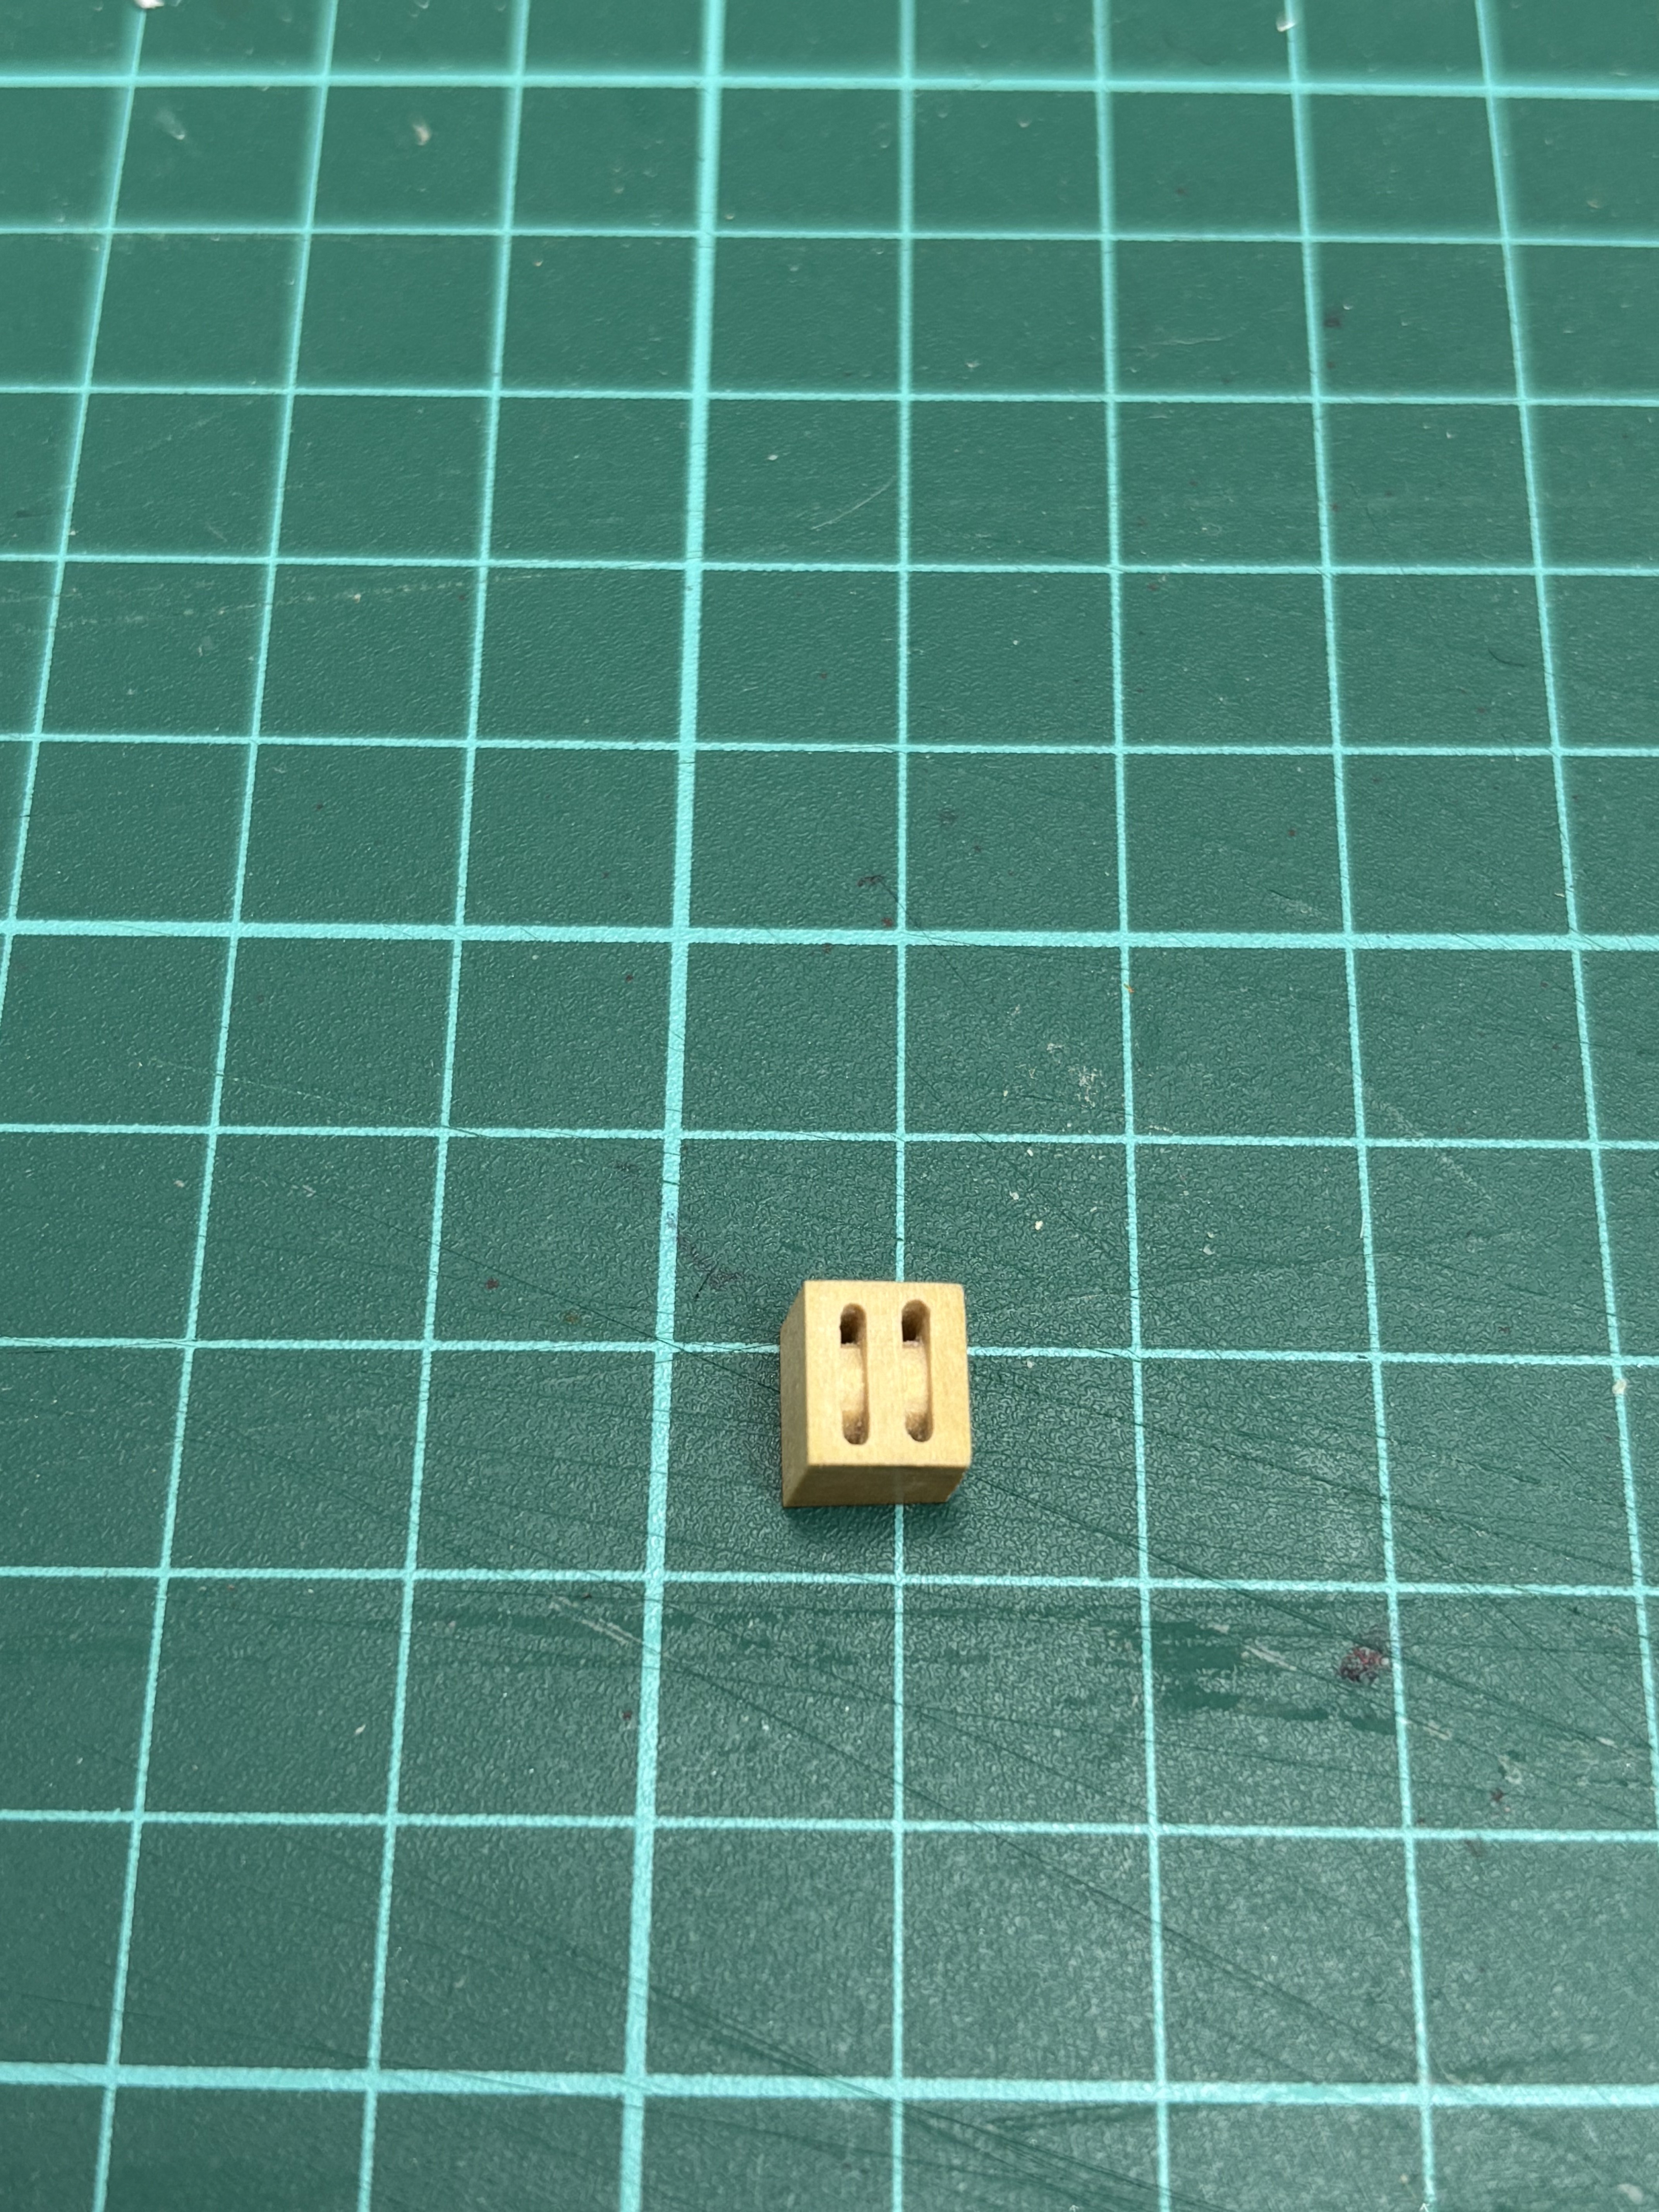
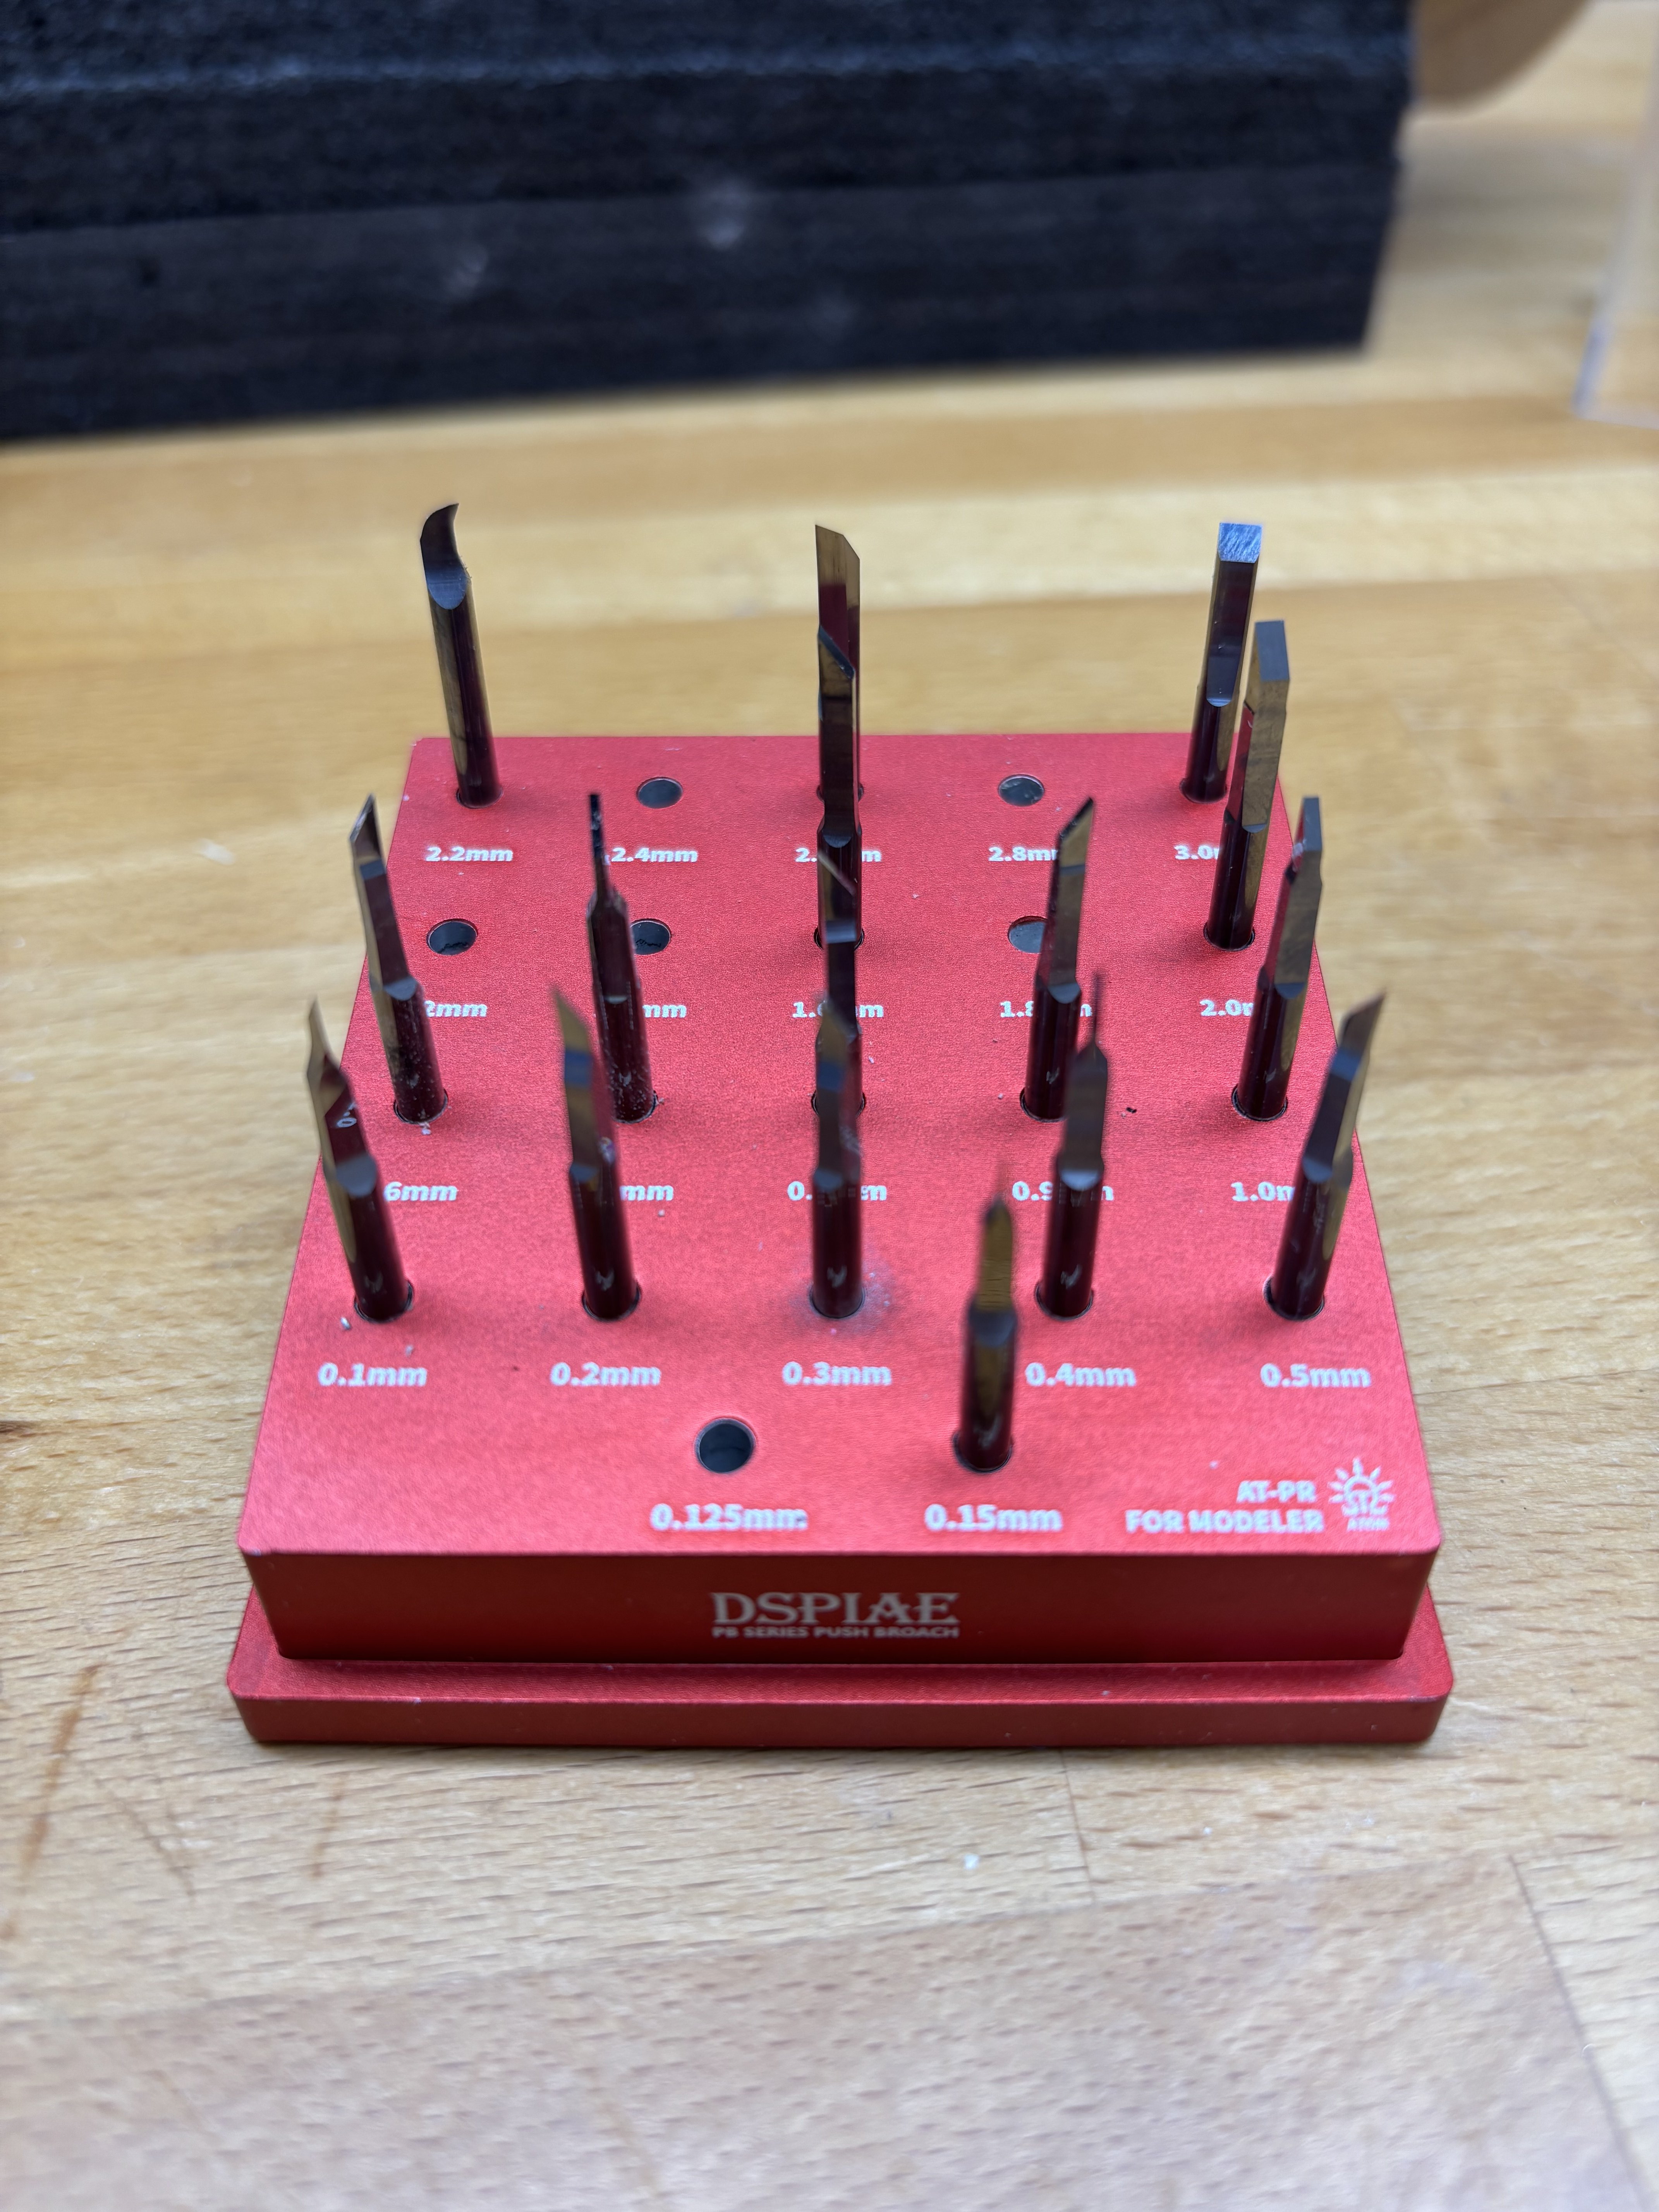
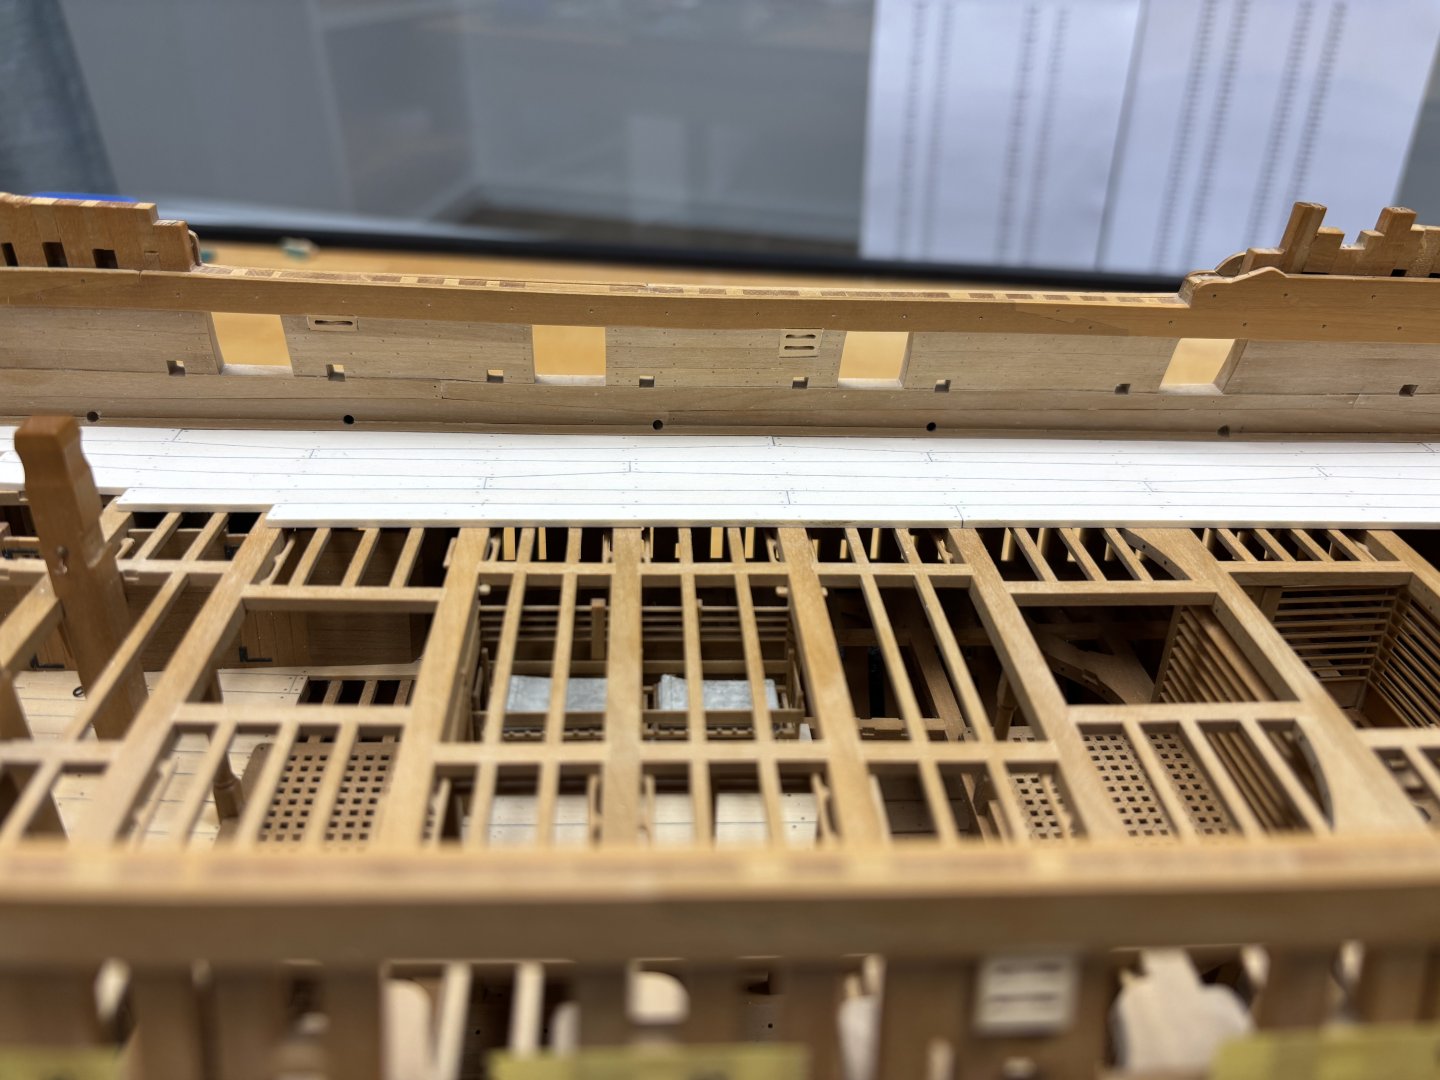
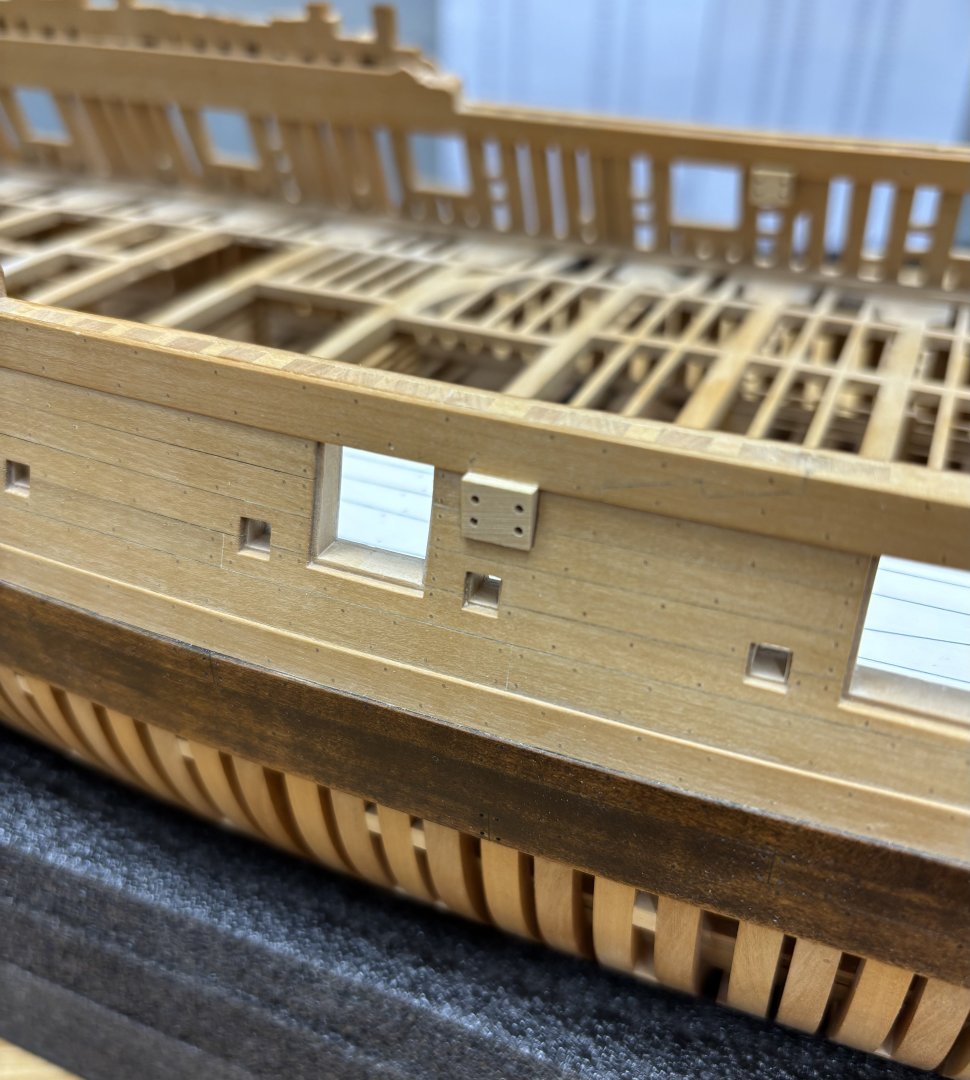
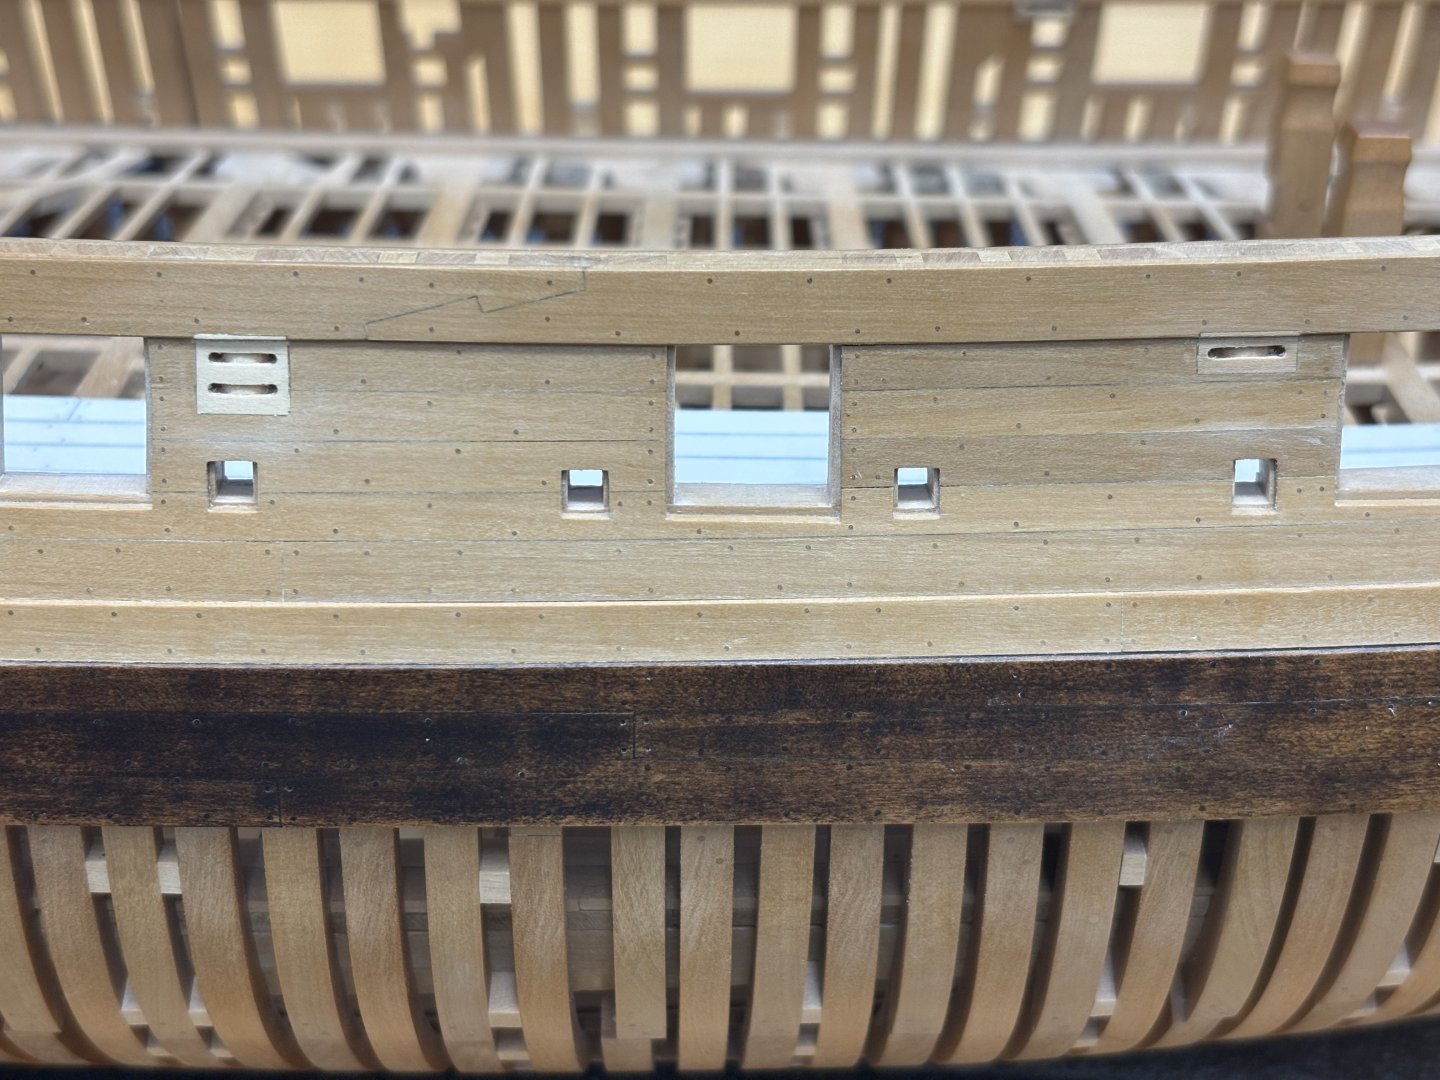
After a long (way too long) interruption my Kingfisher is back on the bench. I have still been busy modelling but with other (plastic related) topics not fit to portray here, still it was al lot of fun. But it was time to return and make some wood dust again. So over the past few week I managed to get back into the build, did a lot of head scratching trying to remember where I left of and more important how things were done. Some of the procedures got lost in time and I have to figure out again. After taking the model out of storage ( it was stored in a dark place) I noticed a few things, the boxwood turned darker, the holy I used for the lower deck planking turned dark almost to the color of the boxwood. The wale that was stained with Fiebing ink turned much lighter. Overall a few cracks have appeared between the outside planing, but nothing too serious. Not bad after 5 years in storage and moving 3 times to different locations. So the upper deck spriketting and quick work was finally finished. I did not dare to drill holes for the scuppers as I'm afraid the inside and outside planking is not completely aligned the way it should be and the suppers might hit the wale. Upper deck planking installed and treenailed. I used thin black paper for caulking. The fixed blocks were remade as the previous ones had fitting issues. I decided to make them from one piece and carve the sheaves in situ. Unfortunately I discovered too late that the wood I used for the double block was much lighter. Now it looks like it was an off site repair job. Whilst working with plastic and specifically with Gundam models I picked up there plastic scribers. They also function as great mini chisels for wood. They come in many sizes and are super sharp. Due to the high angle of the blade they cut very aggressive in wood so care must be taken but a great addition to my woodworking toolset. Remco


- 1,215 replies
-
- 29
-
-
-
- sloop
- kingfisher
- (and 1 more)
-
Thank you all for your kind and encouraging words. As per request I openend a post for the bike build: https://modelshipworld.com/topic/27075-ducati-1199-panigale-s-tricolore-by-remcohe-tamiya-112/ Remco
- 1,215 replies
-
- 5
-
-
- sloop
- kingfisher
- (and 1 more)
-
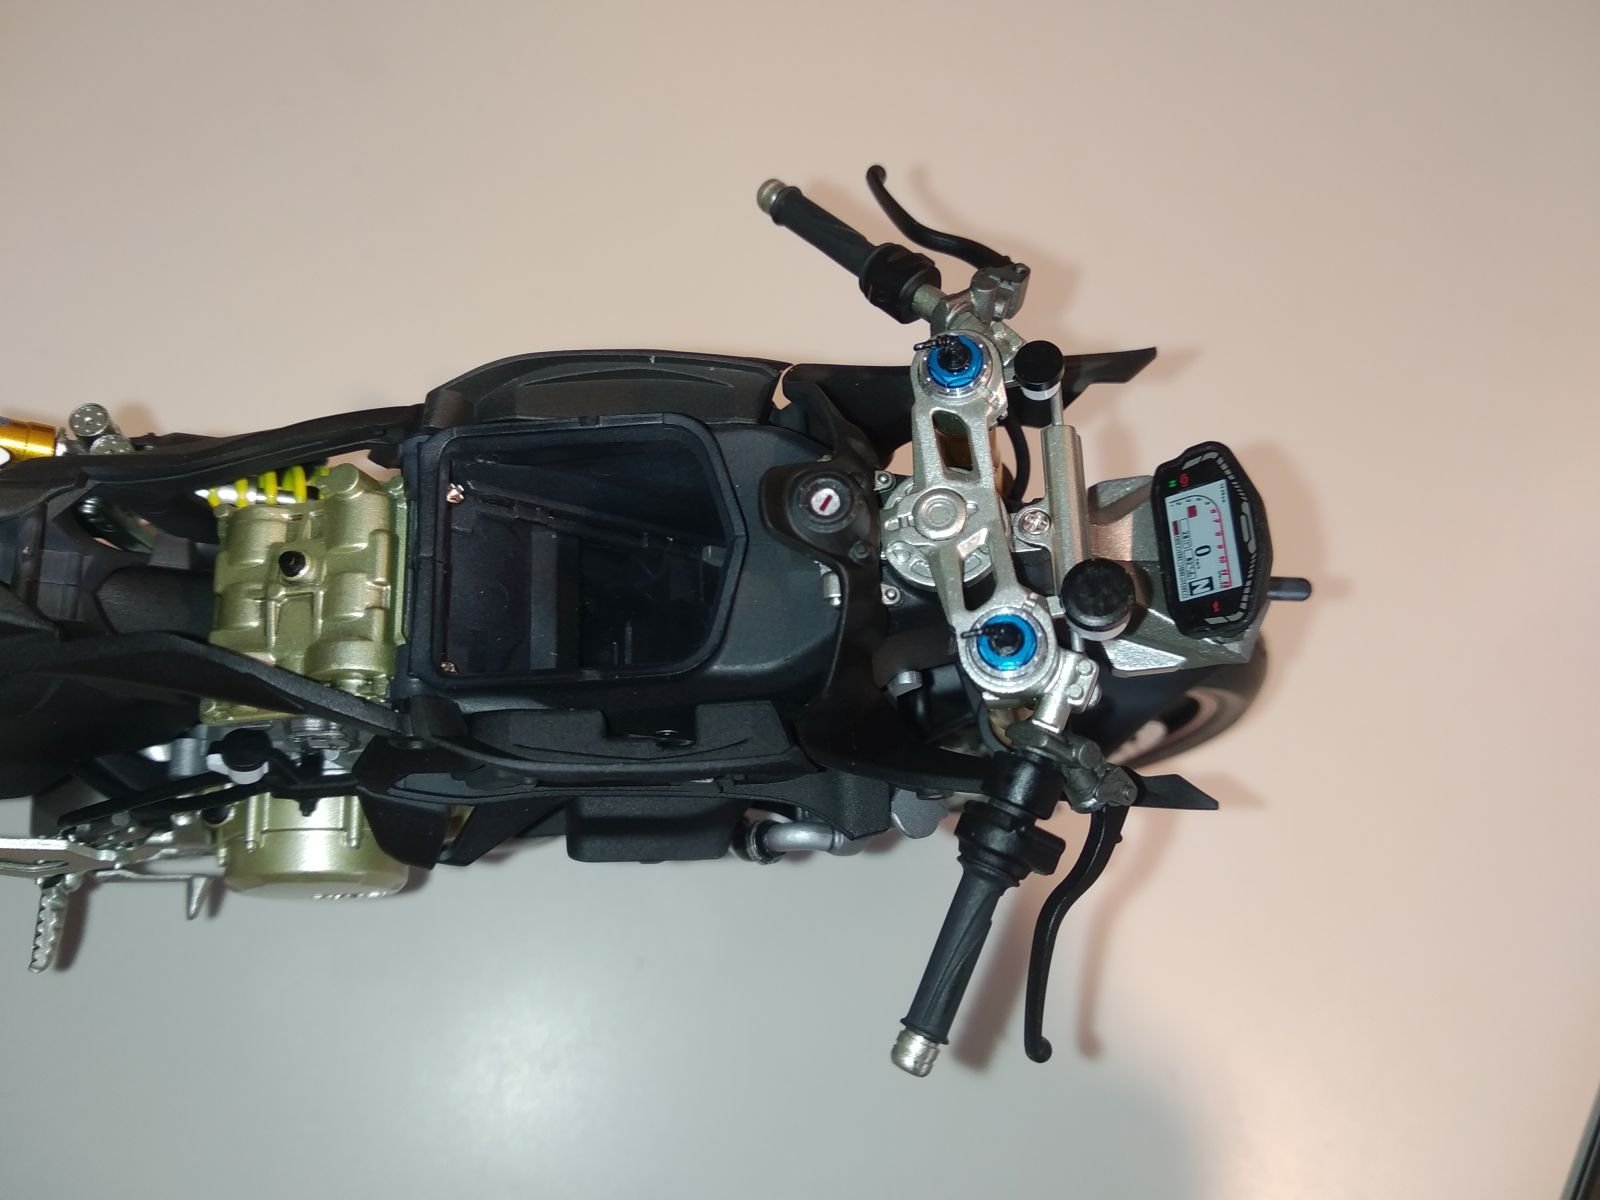
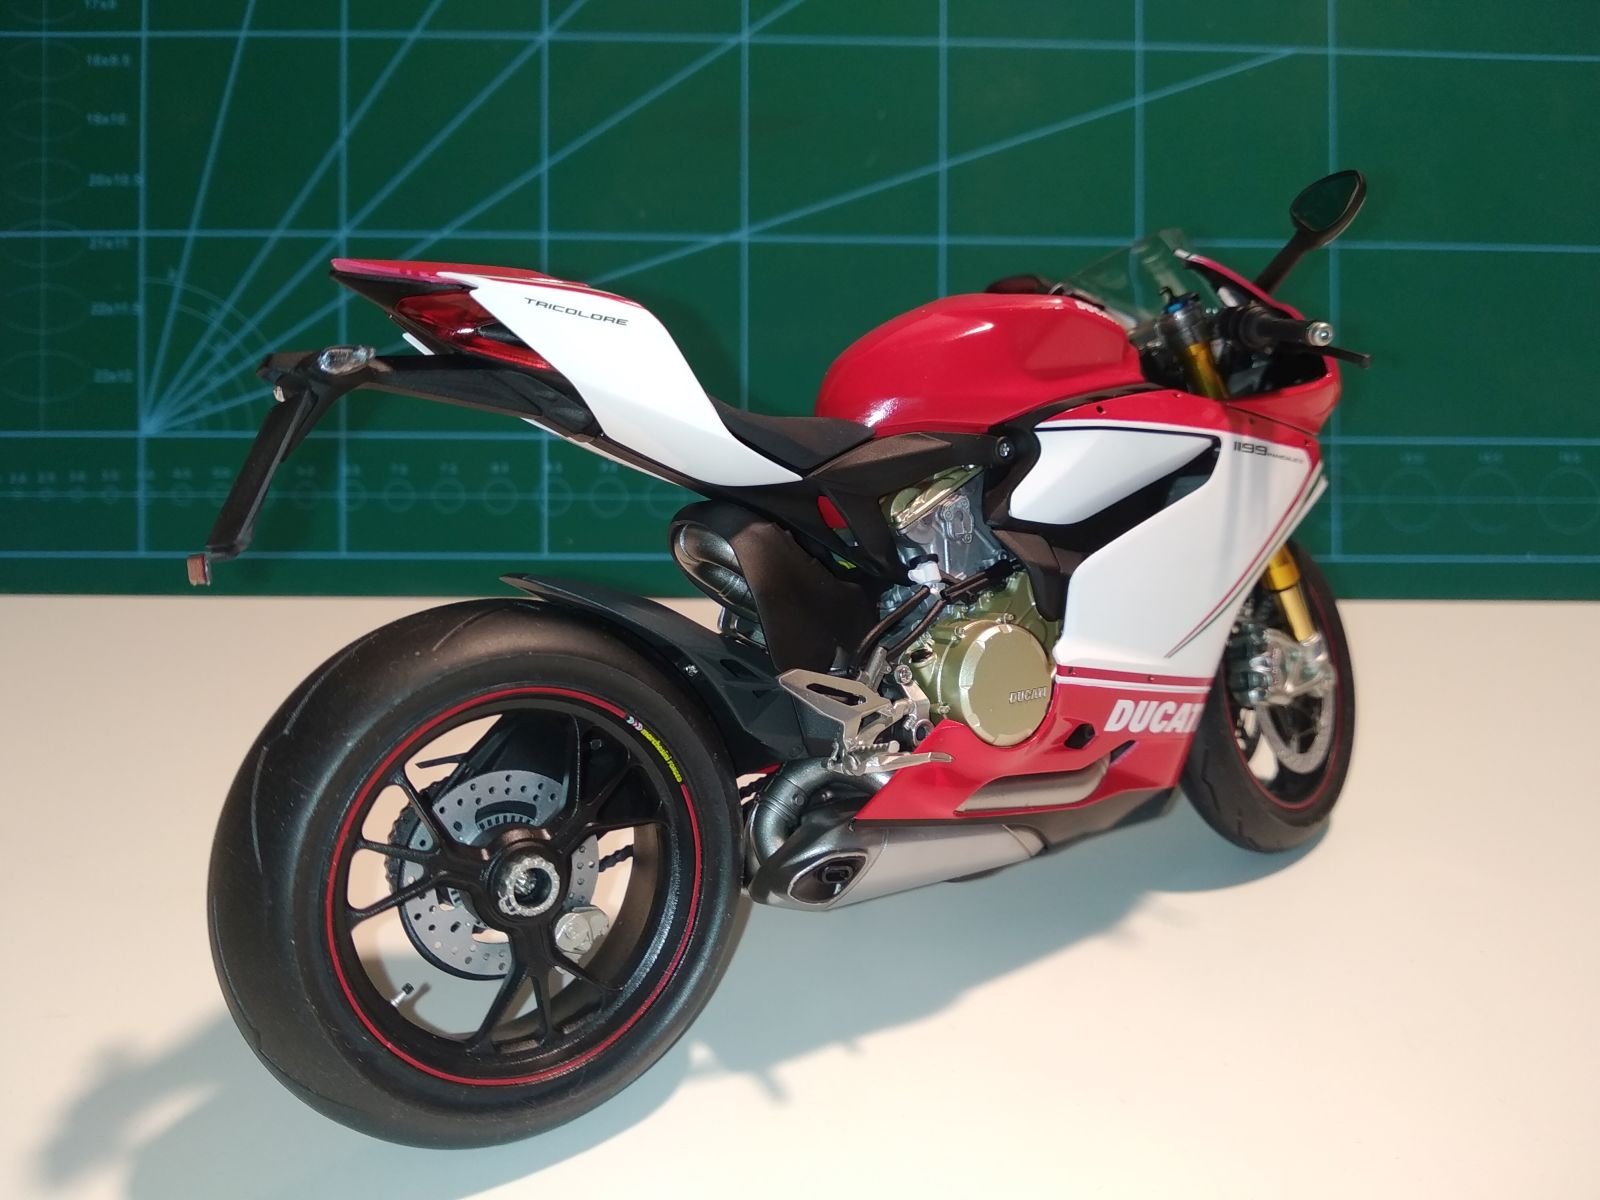
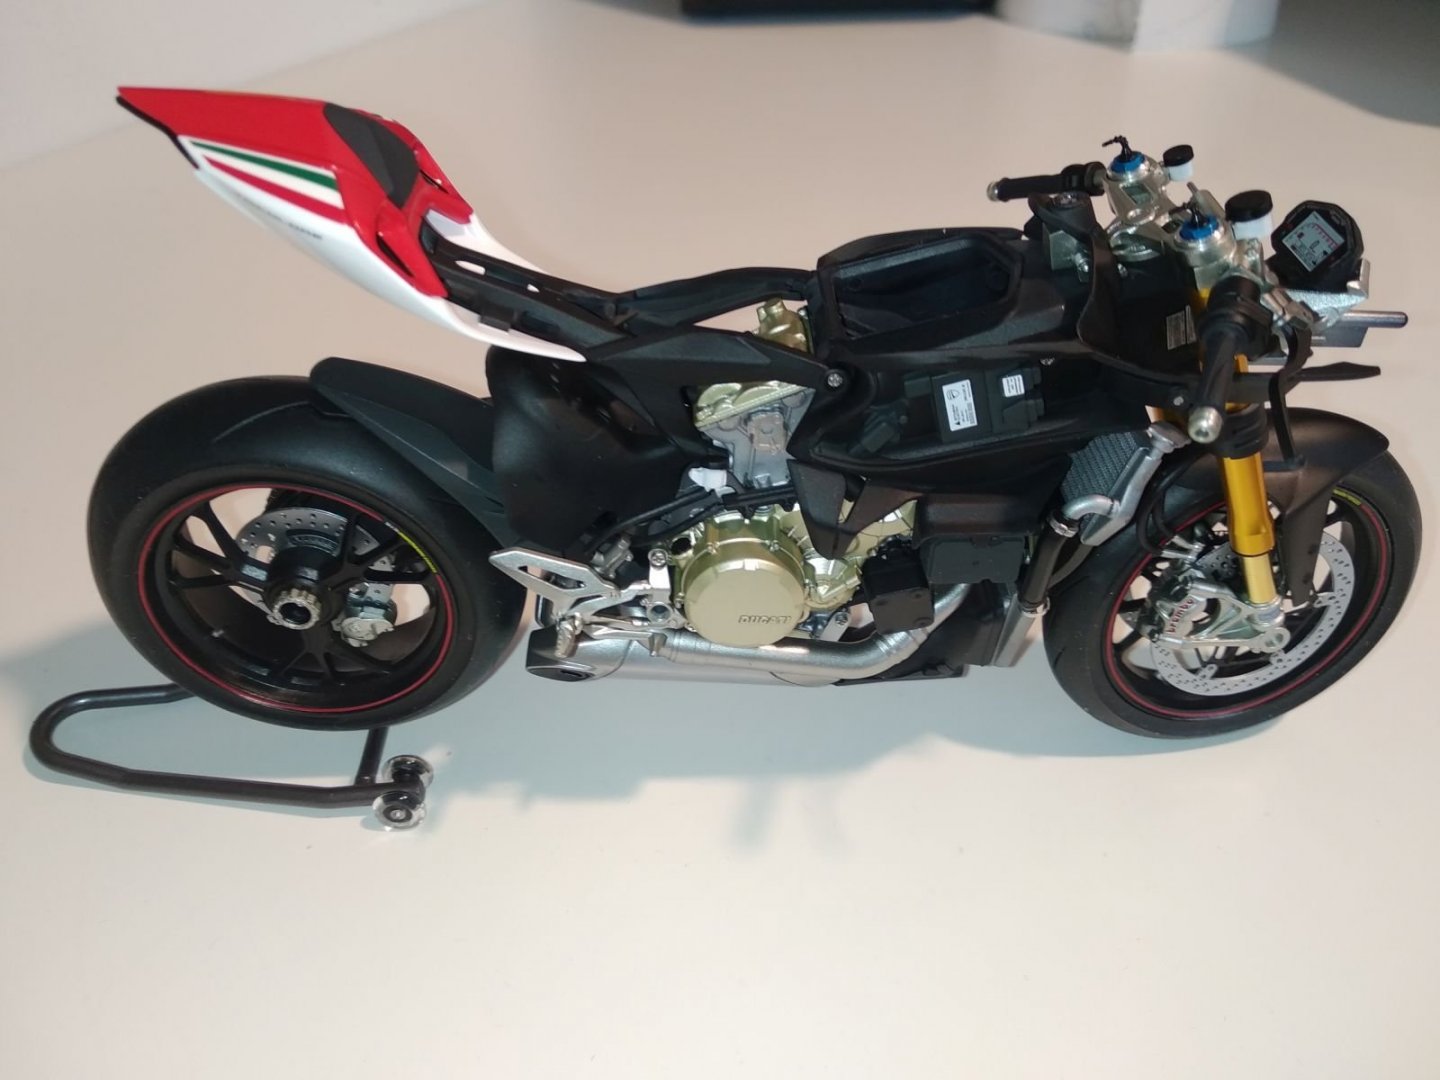
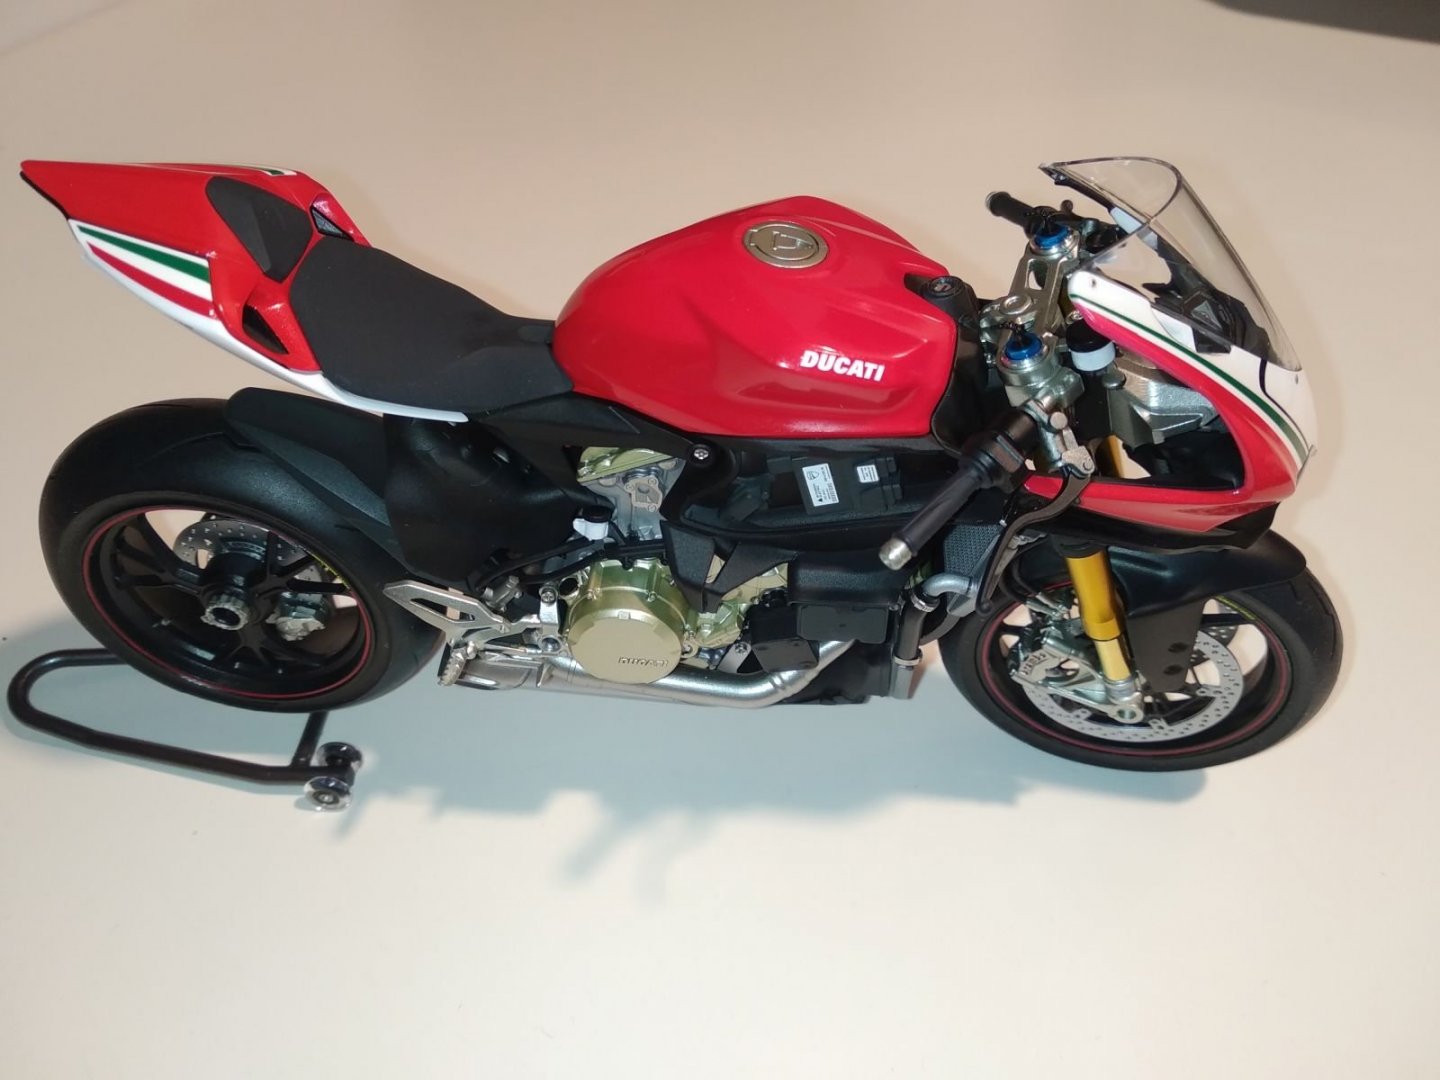
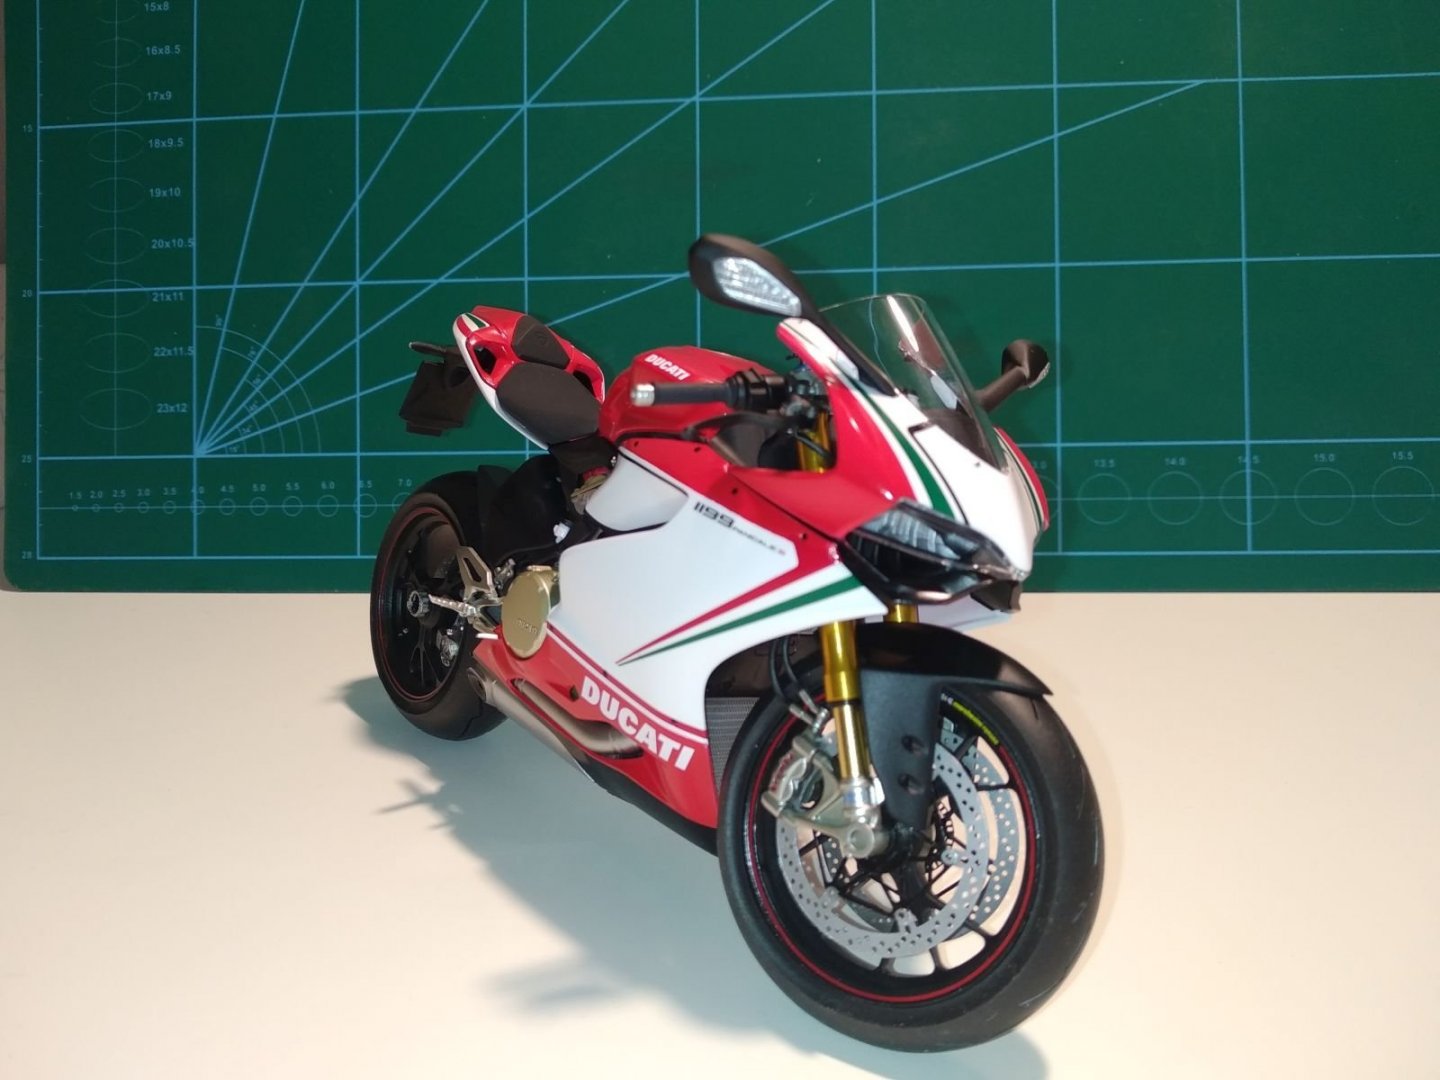
Hi, While waiting to get back at my Kingfisher I got back into plastic modeling. I never was interested in motorcycles, but from a modeling perspective they are very interesting. The painting is challanging and putting the thing together is not easy. On top of the kit I used tamiya's Detail-up frontfork set set for this bike and Topstudio's Detail-up set to replace the brakediscs and add some nuts and bolts. Both additions are recommended especially the frontfork set. For painting I used Tamiya's laquer paint, excellent paint especially for the metal colors. Alle the body panels were polished using Infini sanding and polising sticks to remove the orange peel. I'm sorry that the pictures are not of the best quality, but this was the best I could do in my temporary shop with my phone. Remco


- 6 replies
-
- 23
-
-
So a little sign of life. In the past two years a lot has happened that has nothing to do with shipbuilding unfortunately. So in a nutshell this is what happened. A year and a half after I had moved to Sweden I got redundant and I have been searching for a new job since. Understandably not an easy task under the current economic circumstances. To cut costs I moved back to The Netherlands and moved in with my dad. All my stuff including the things from my workshop are in storage and I'm praying my Kingfisher will survive this mothball experience. To keep my hands busy between the times I'm job hunting I am building some off topic plastic kits as they don't require so much tools. I found out that Tamiya's 1/12 motor cycle kits are the best painting challenge I can find and they kept me busy. After I have found myself a new job and a new place to stay I can get my workshop up and hopefully have time to get some progress done on Kingfisher. For now I wish you all a safe and healthy holiday season and a good 2021 for the hobby. Remco
- 1,215 replies
-
- 15
-
-
- sloop
- kingfisher
- (and 1 more)
-
Thank you Lawrence. Jan, my build is currently going at a crawling pace. There is so much else to do and going on in my life at the moment. But every once in a while I have the opportunity to make a few fixed blocks, so at least there is progress. But not something worthwhile to show here... Remco
- 1,215 replies
-
- 7
-
-
- sloop
- kingfisher
- (and 1 more)
-
Thank you Lawrence, Montañes, The hinges on the shotlocker are not workable. Back then I didn't have the soldering skills to do that. Now I could make them workable if I wanted to, just like the hinges on the stove. But what you see in the picture is a combination of stock card painted black and brass rod. Remco
- 1,215 replies
-
- 2
-
-
- sloop
- kingfisher
- (and 1 more)
-
Thanks Danny. I’ve taken Greg’s approach, but it iis pretty confusing if you try to do this with the book and the supplied drawings. I’ll make some extras and pick the ones that turned out best. Currently this is what I think I will need: 4” 7 single blocks 5” 11 single 6” 30 single 7” 11 single 8” 27 single 9” 10 single 10” 4 single 11” 4 double 12” 12 double 14” 11 single and 4 double 15” 1 single 20” 10 single 138 in total and that is not a lot I think so I might have forgotten some. And this is only the rigging of the masts so the gun tackles would need another 32 🧐 Remco
- 1,215 replies
-
- 7
-
-
- sloop
- kingfisher
- (and 1 more)
-
I have a question for the group. Has anybody figured out the number of blocks and sizes that are needed to fully rig a Swan class? I thought it would be a good project to get into my build again to make them all in one go. Remco
-
Sure Greg 😉 I was trying to avoid going down that road. I will take that as a last option if needed 😁. Remco
- 1,215 replies
-
- 1
-
-
- sloop
- kingfisher
- (and 1 more)
-
I have a question for the group. Has anybody figured out the number of blocks and sizes that are needed to fully rig a Swan class? I thought it would be a good project to get into my build again to make them all in one go. Remco
- 1,215 replies
-
- 3
-
-
- sloop
- kingfisher
- (and 1 more)