HOLIDAY DONATION DRIVE - SUPPORT MSW - DO YOUR PART TO KEEP THIS GREAT FORUM GOING! (Only 53 donations so far out of 49,000 members - C'mon guys!)
×


antanasp
-
Posts
66 -
Joined
-
Last visited
Content Type
Profiles
Forums
Gallery
Events
Everything posted by antanasp
-
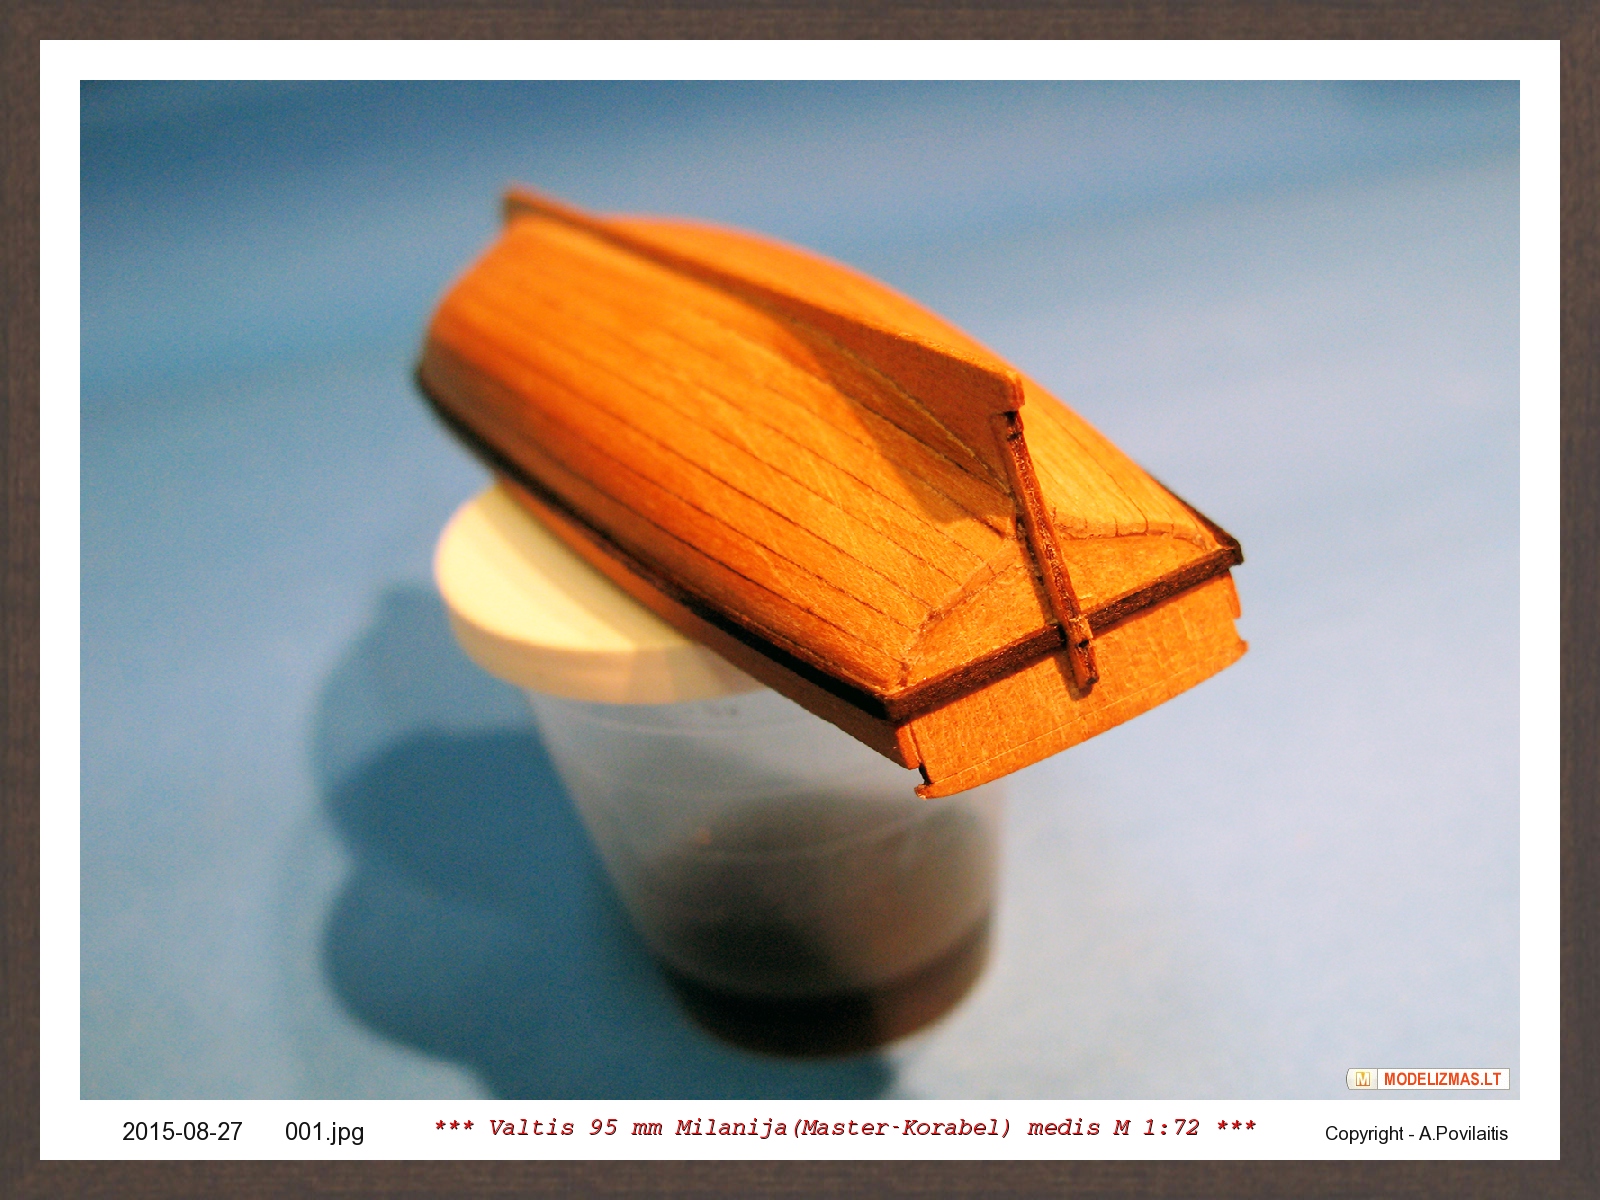
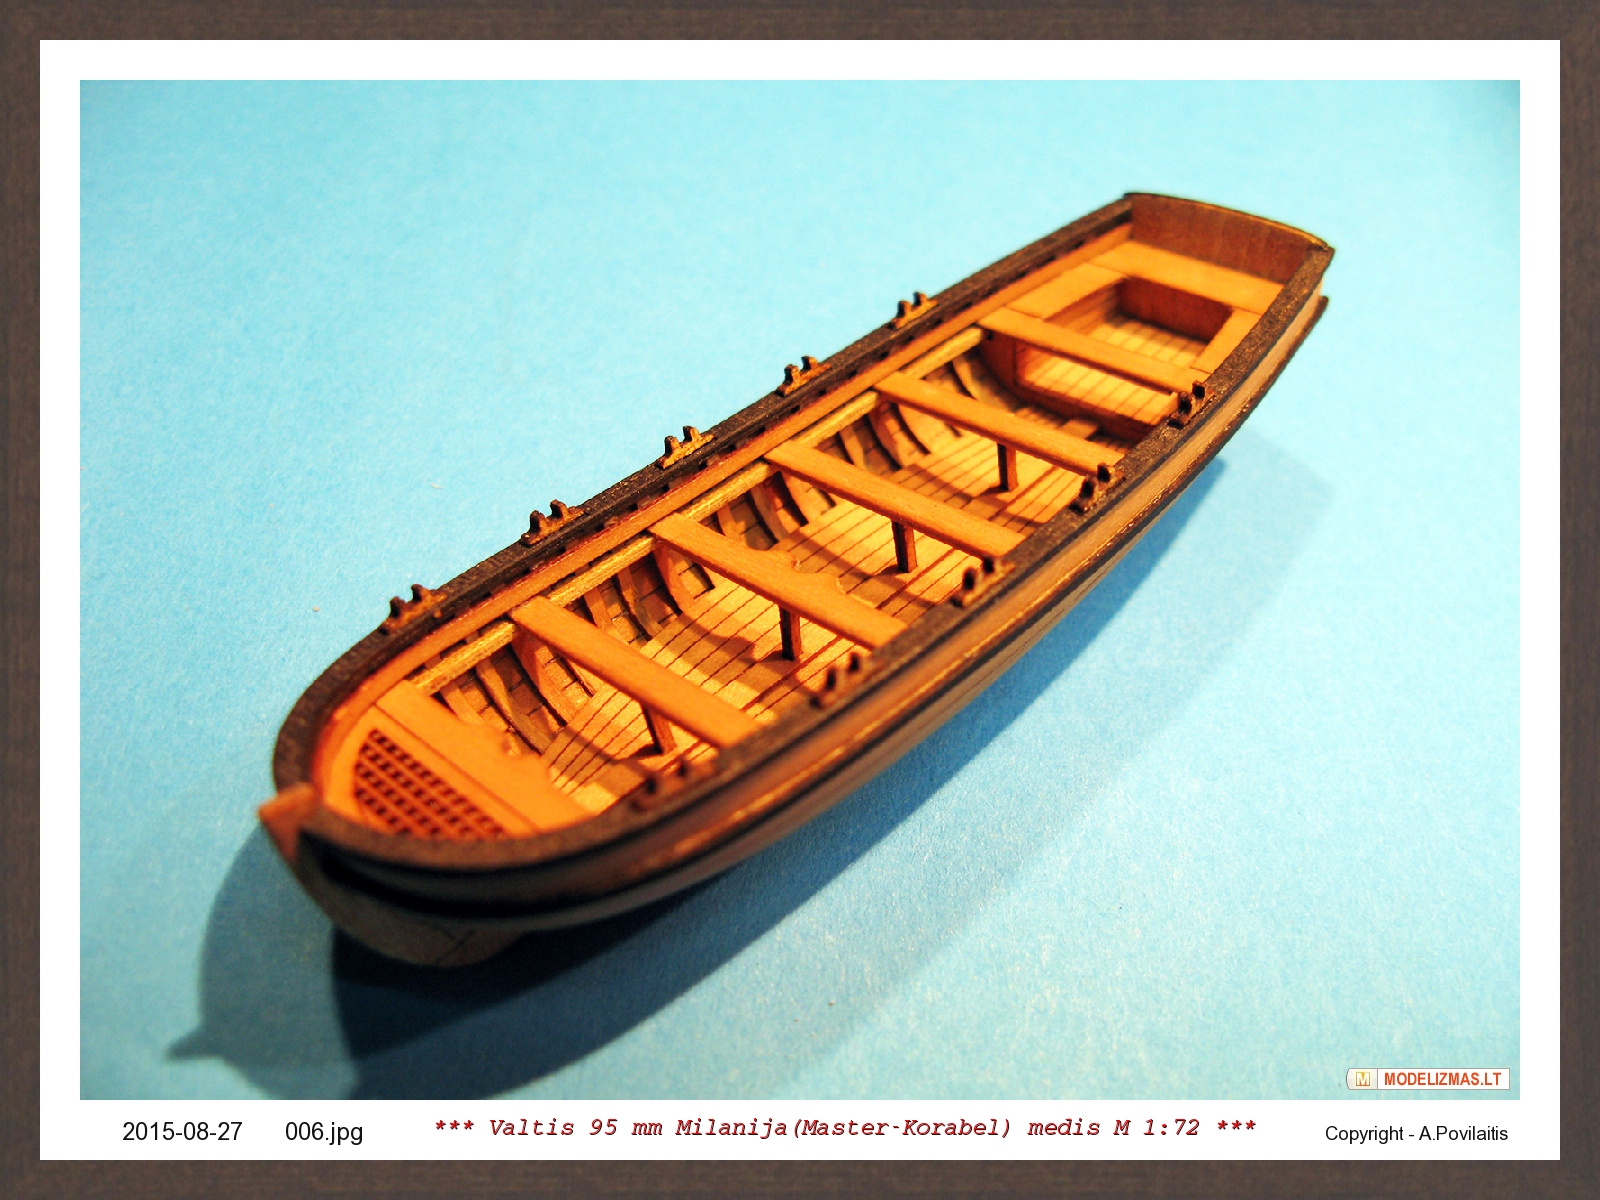
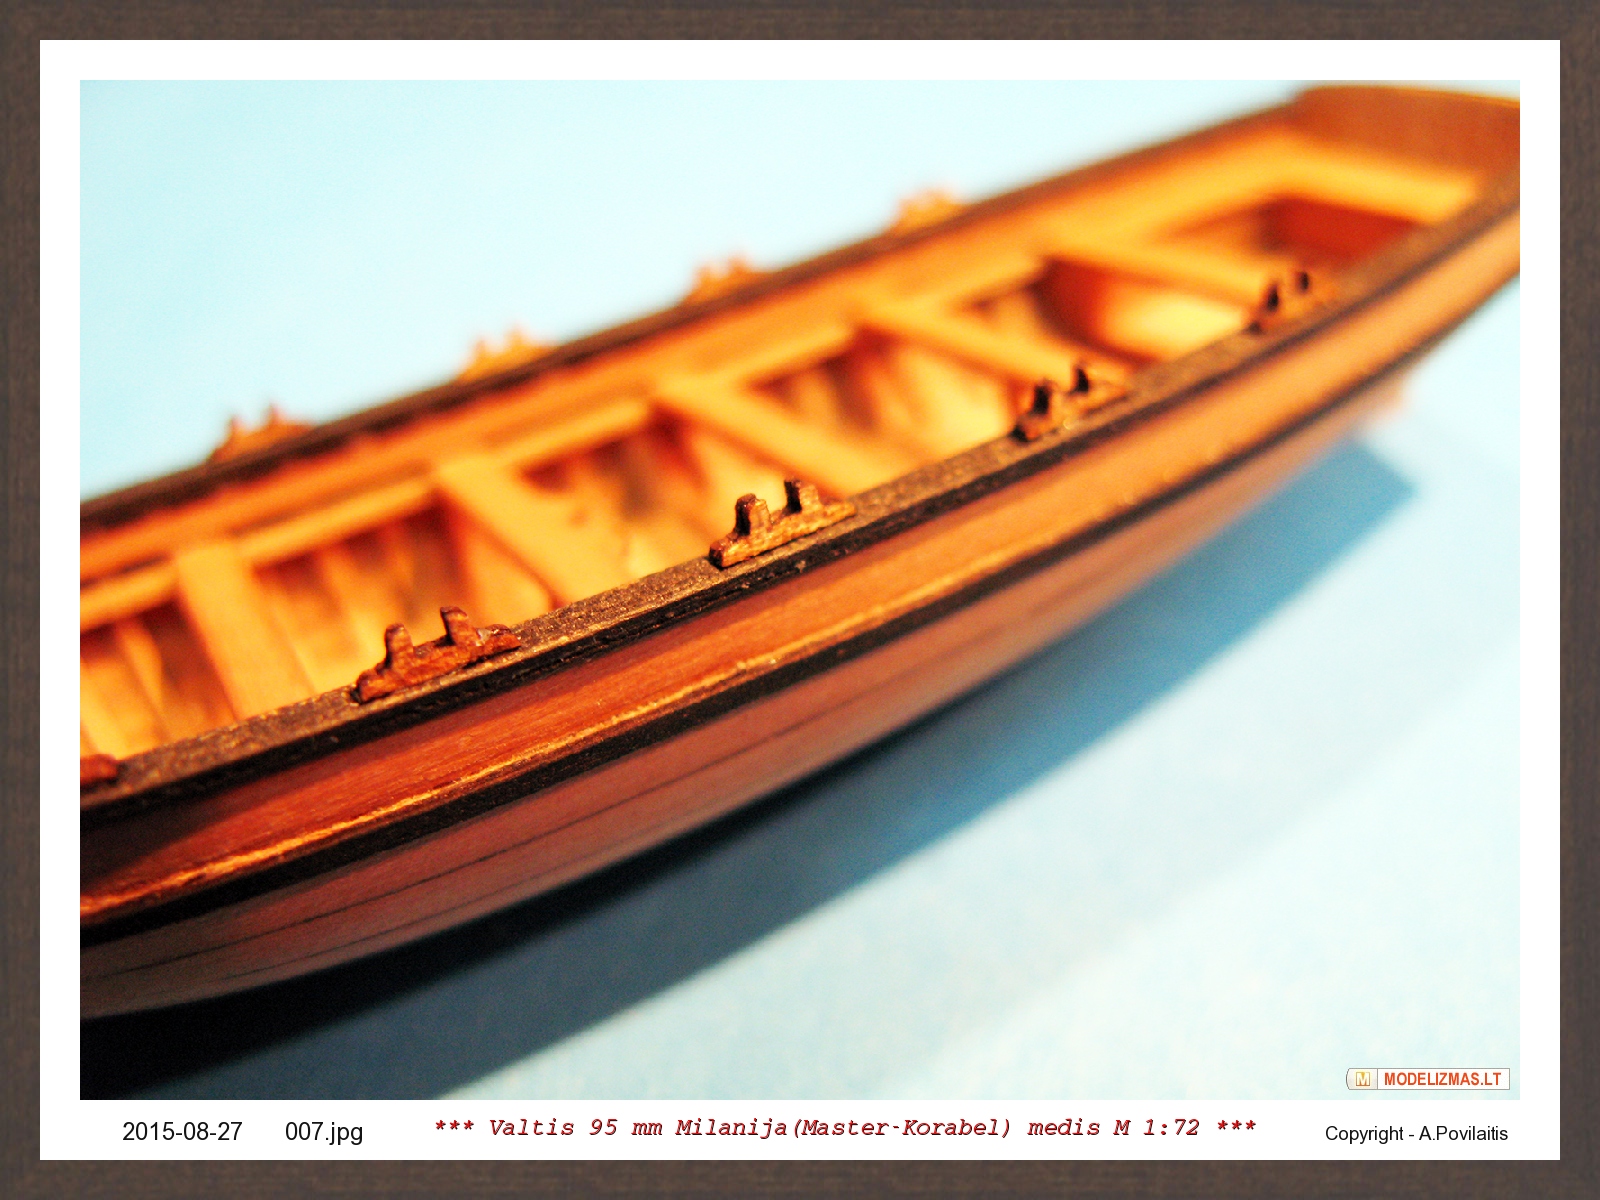
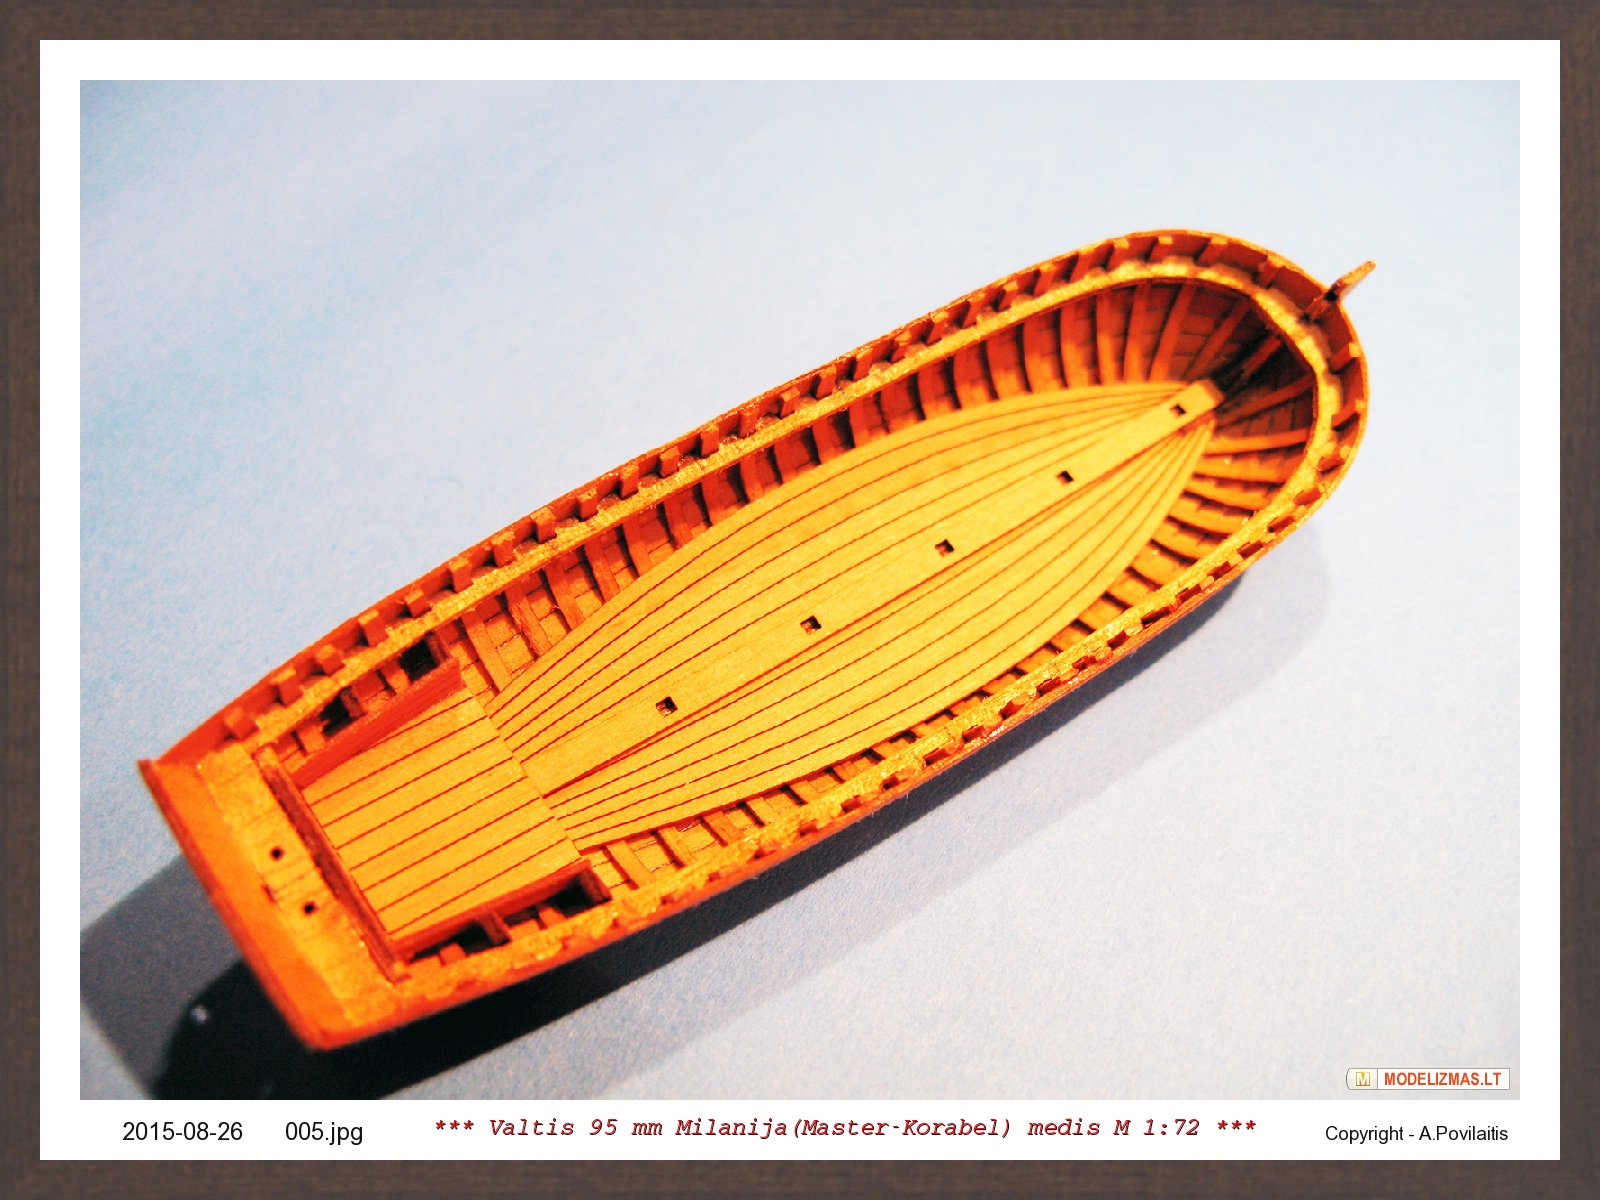
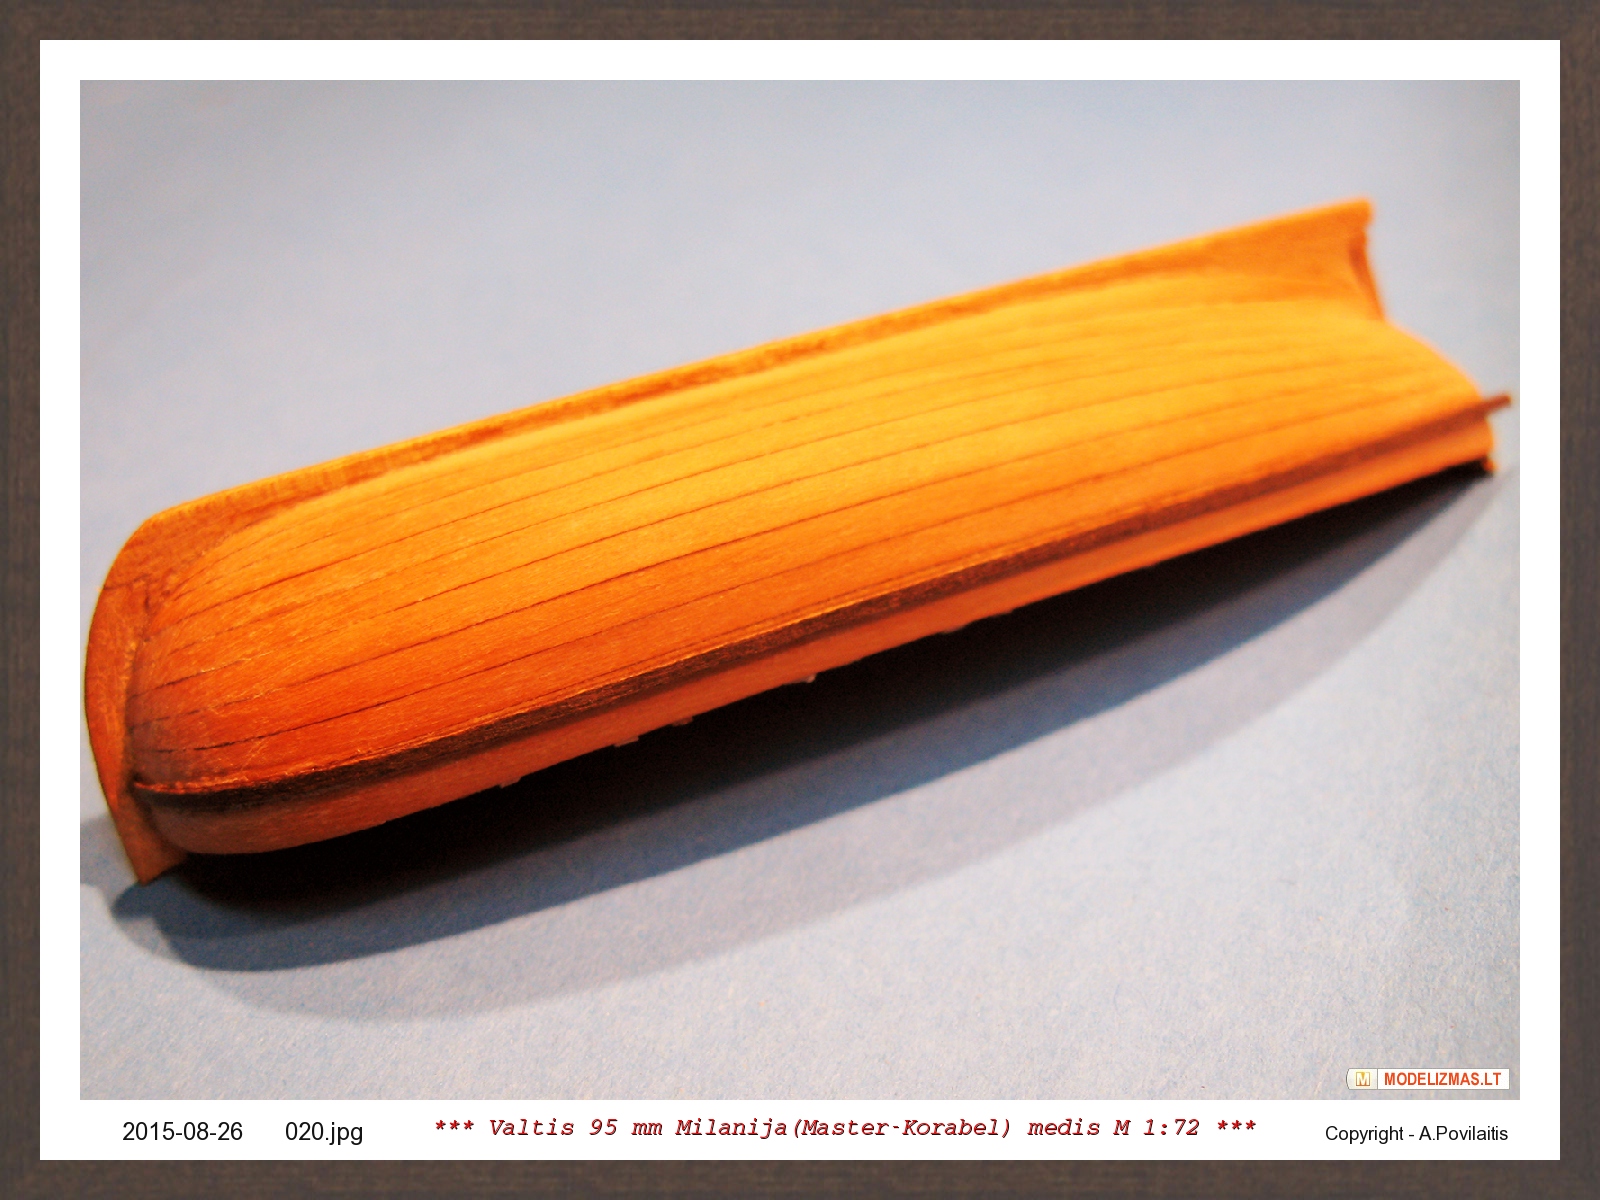
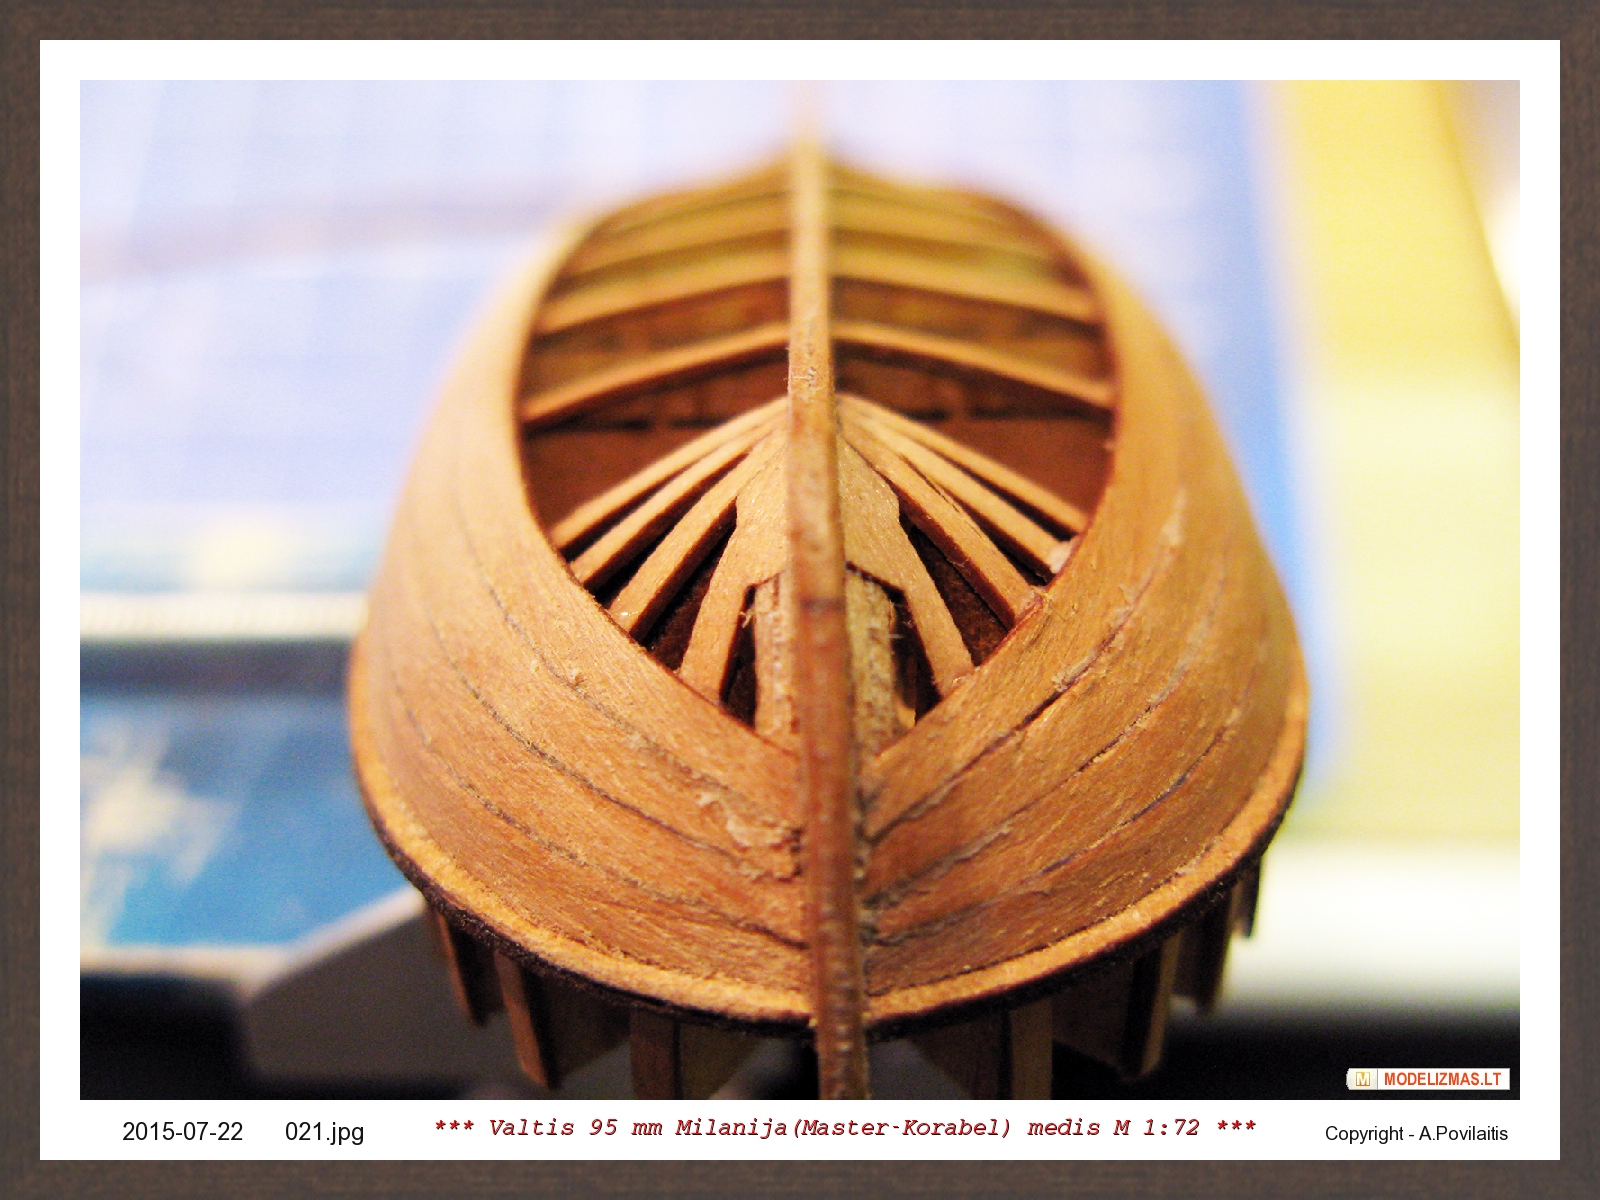
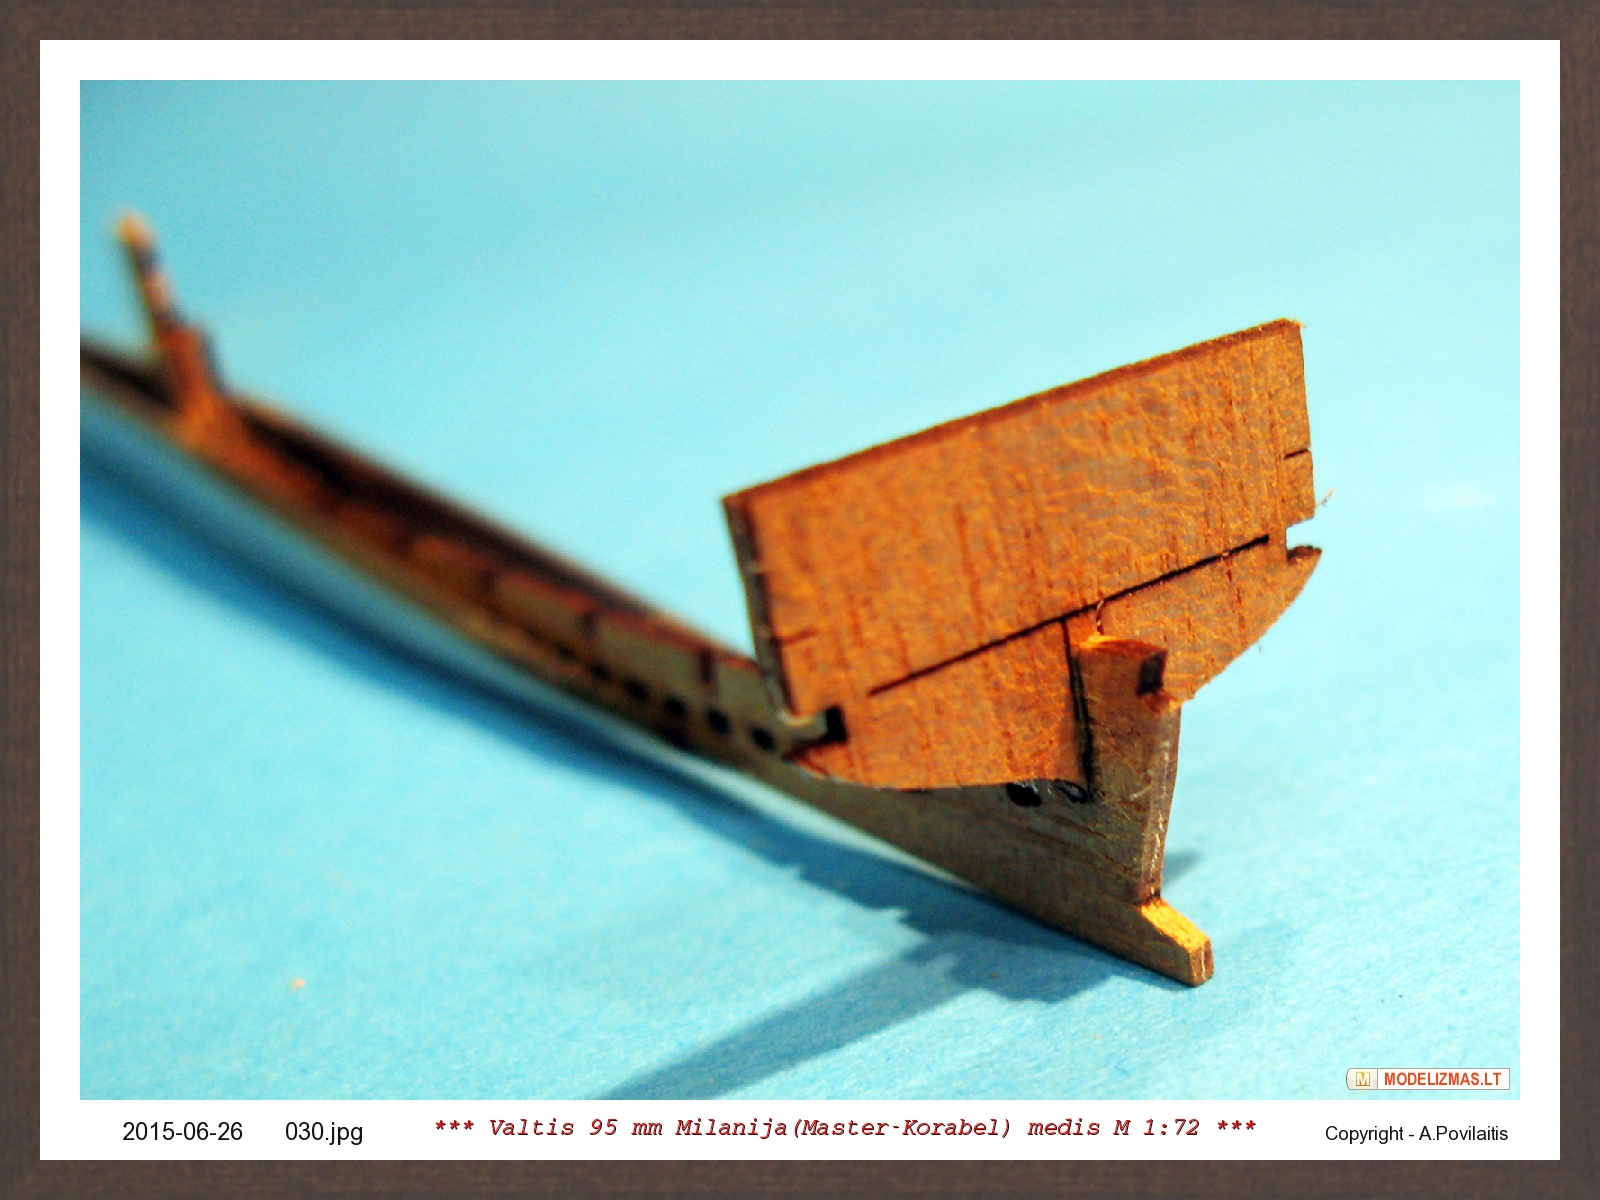
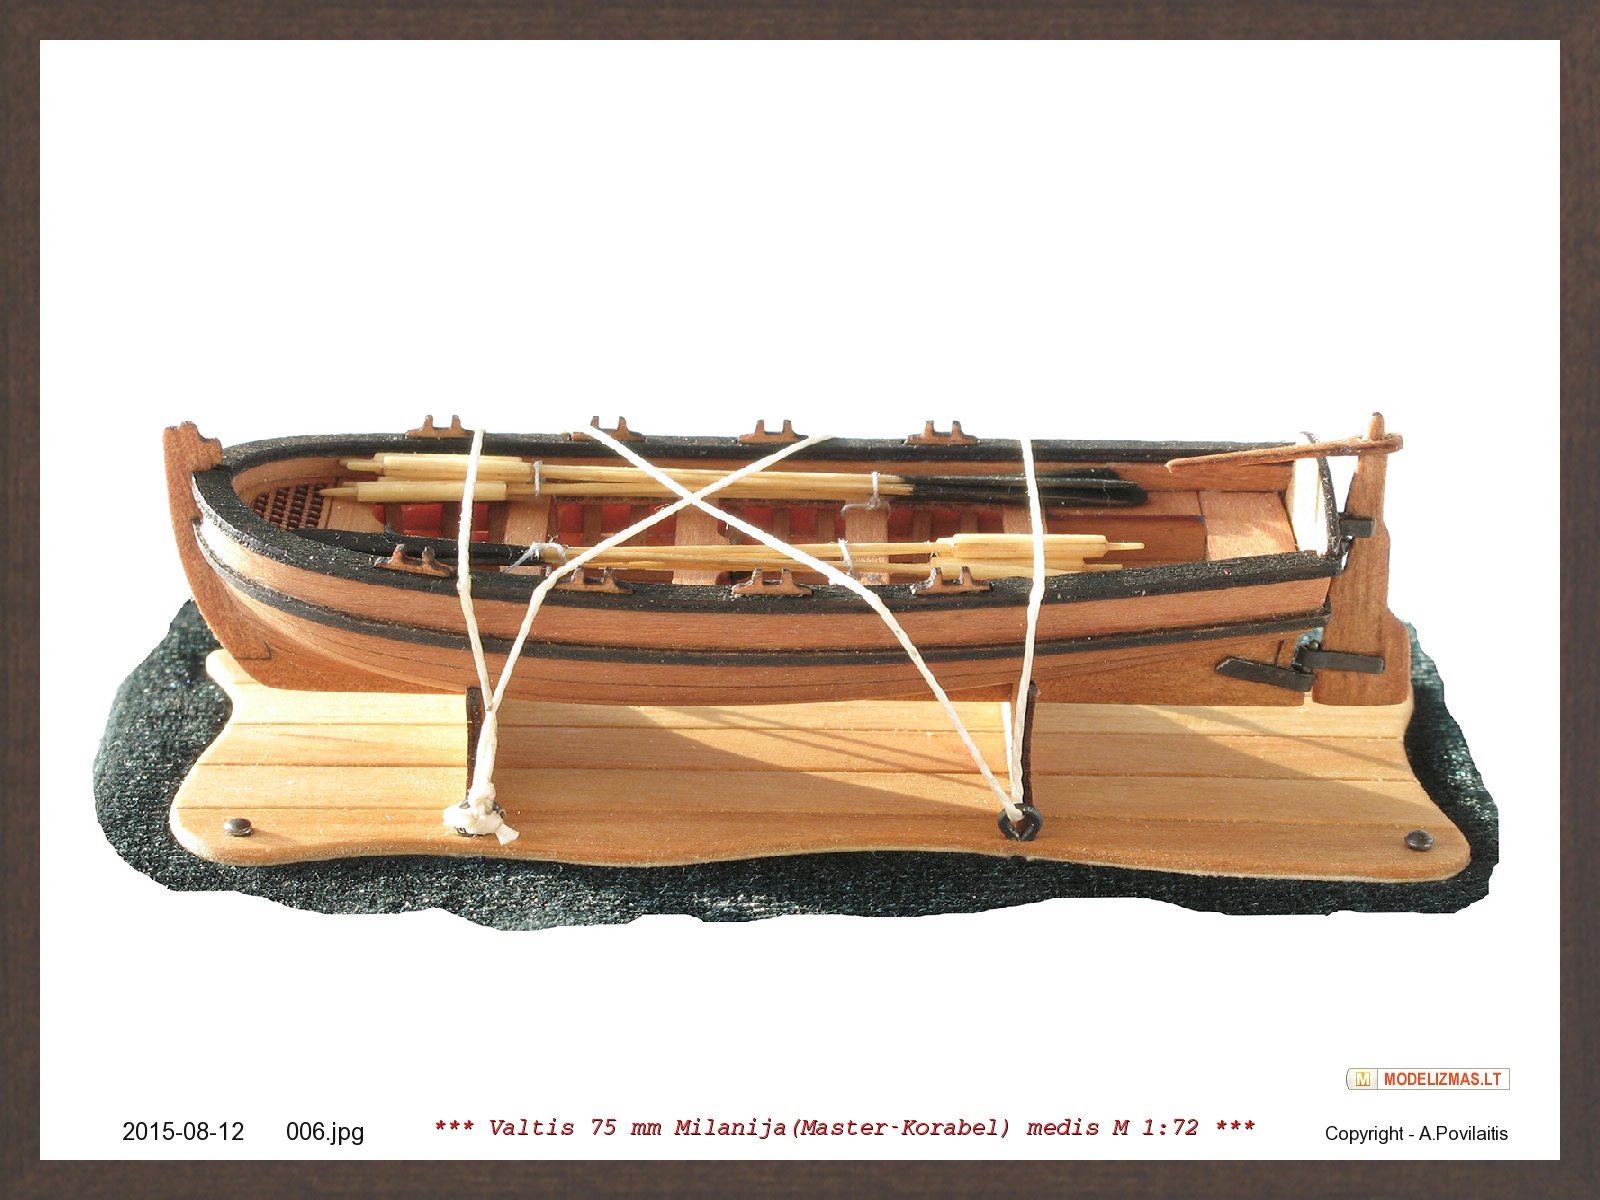
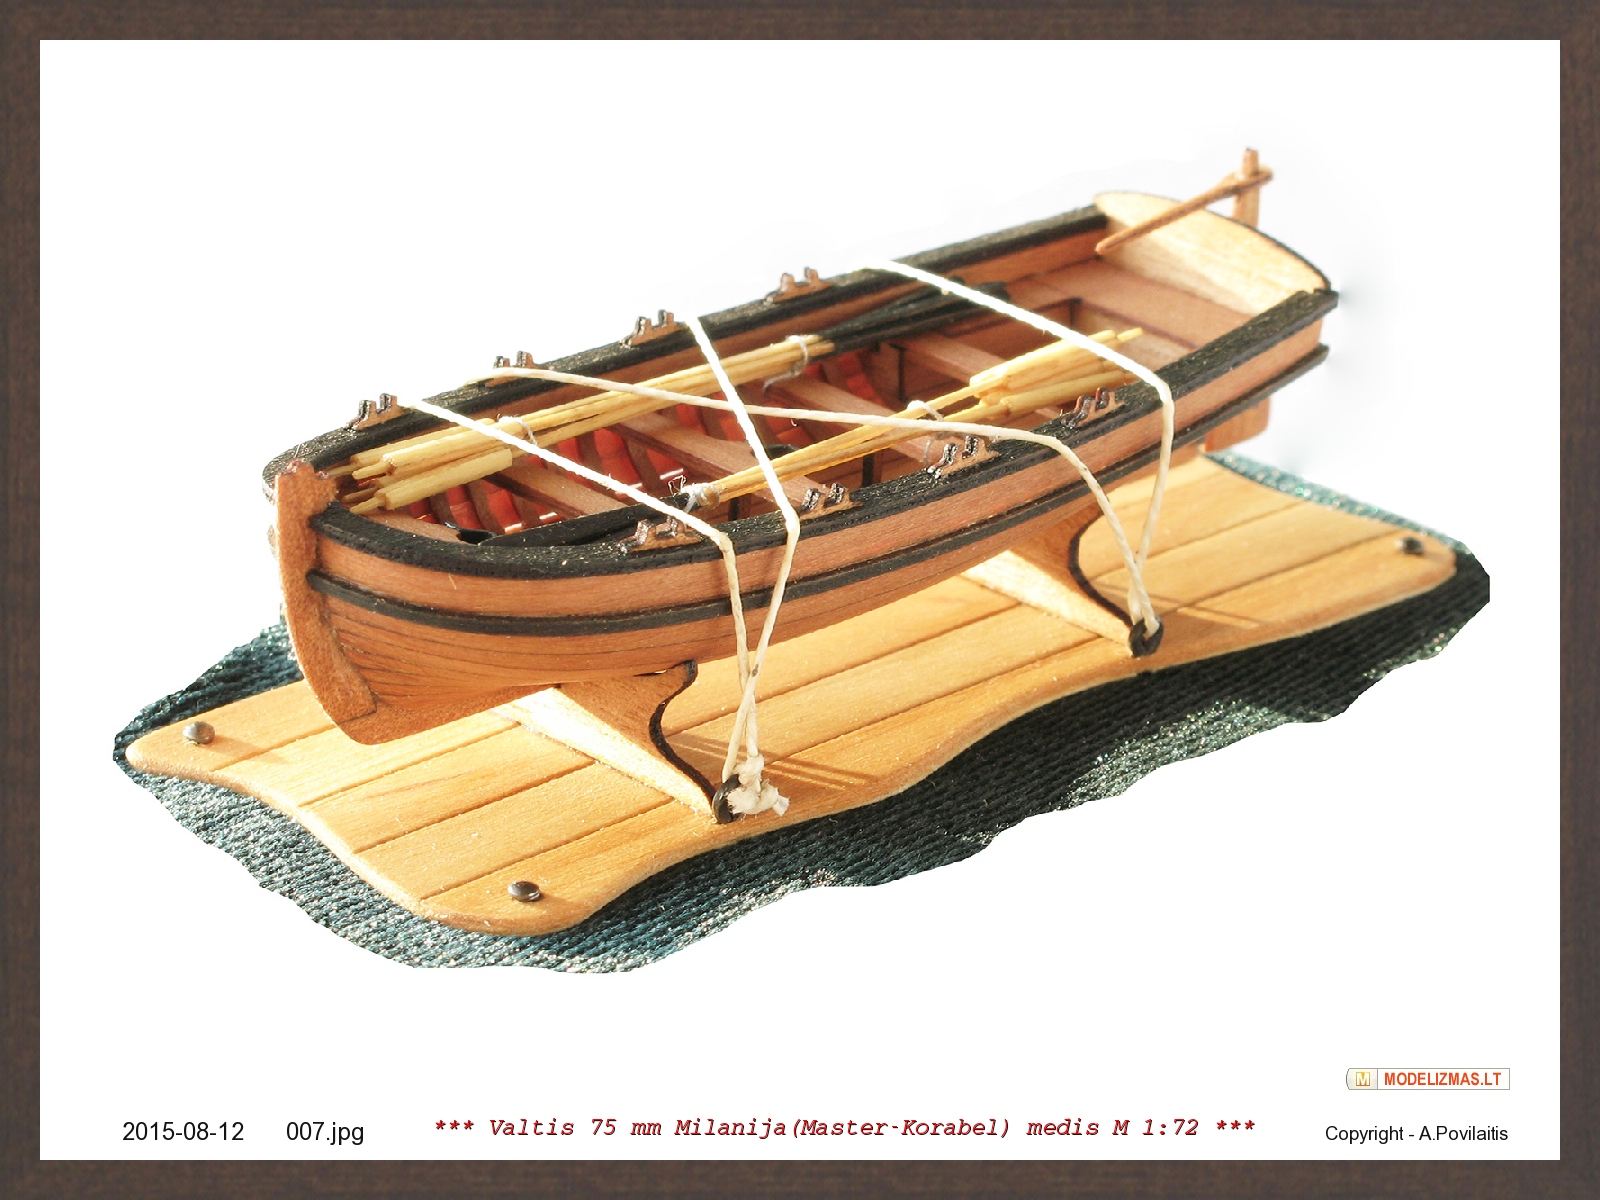
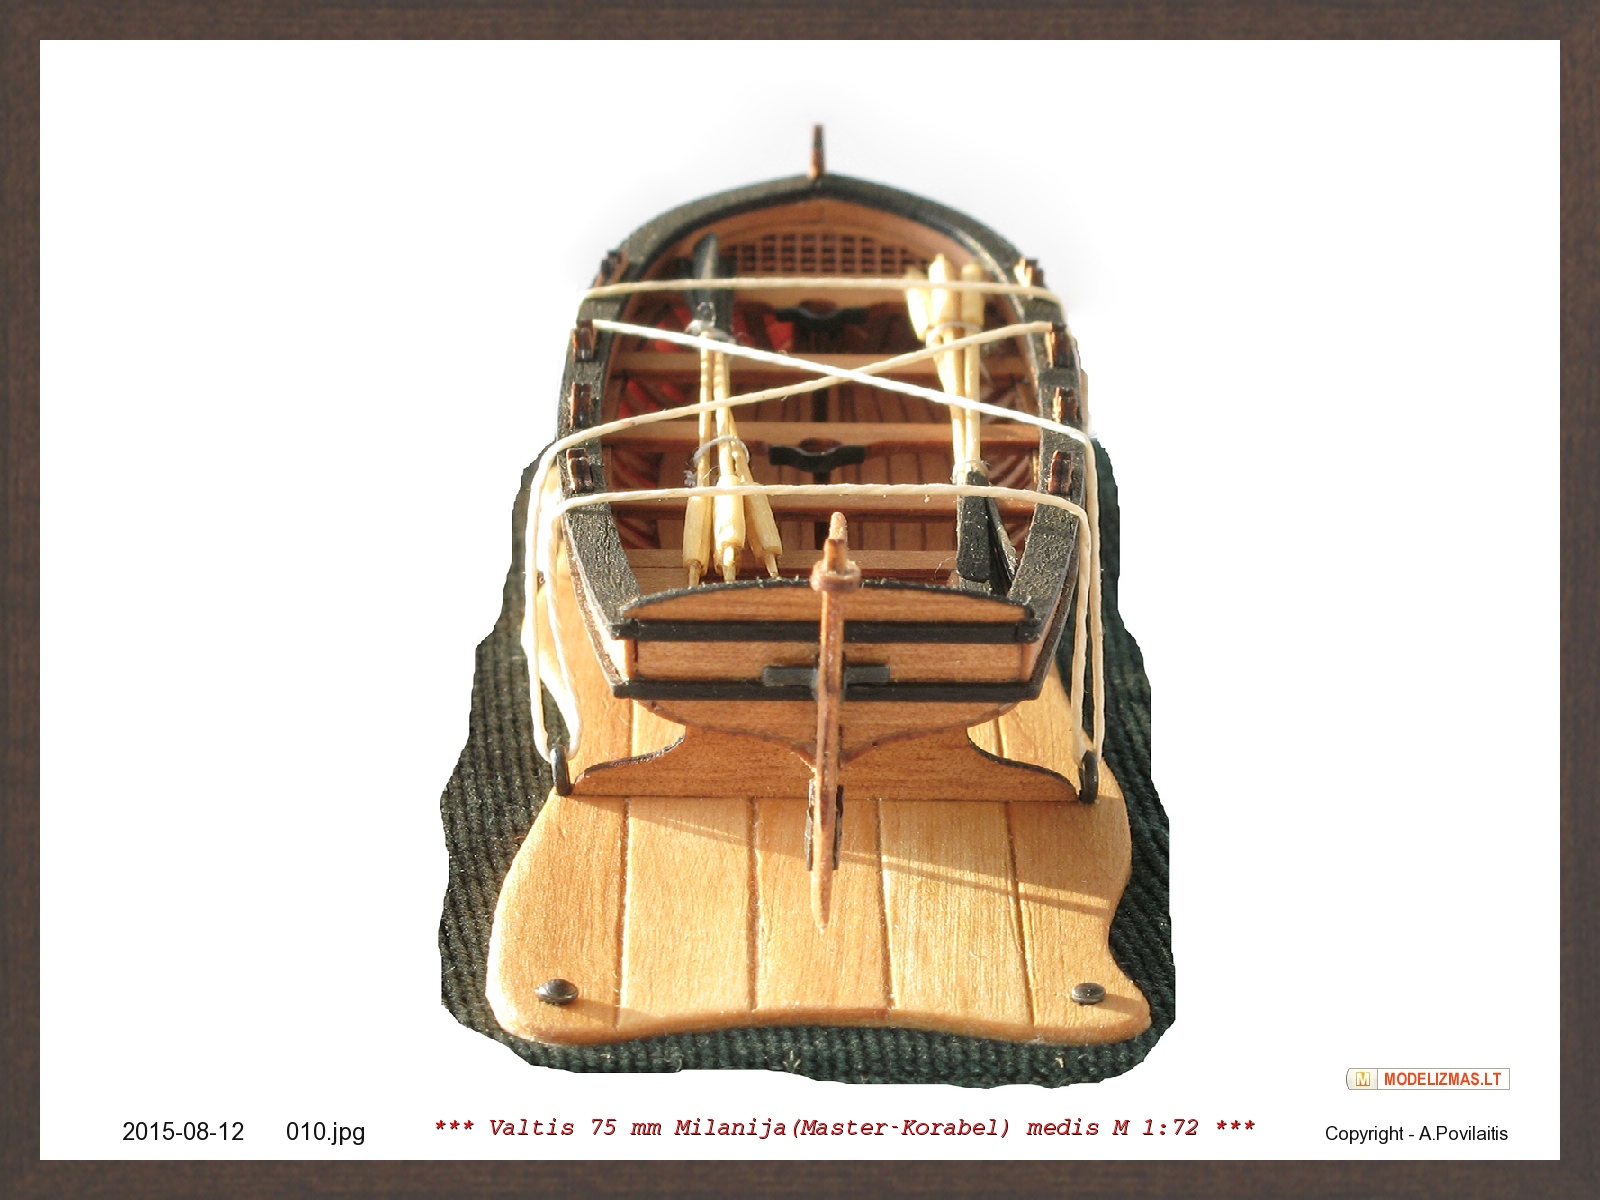
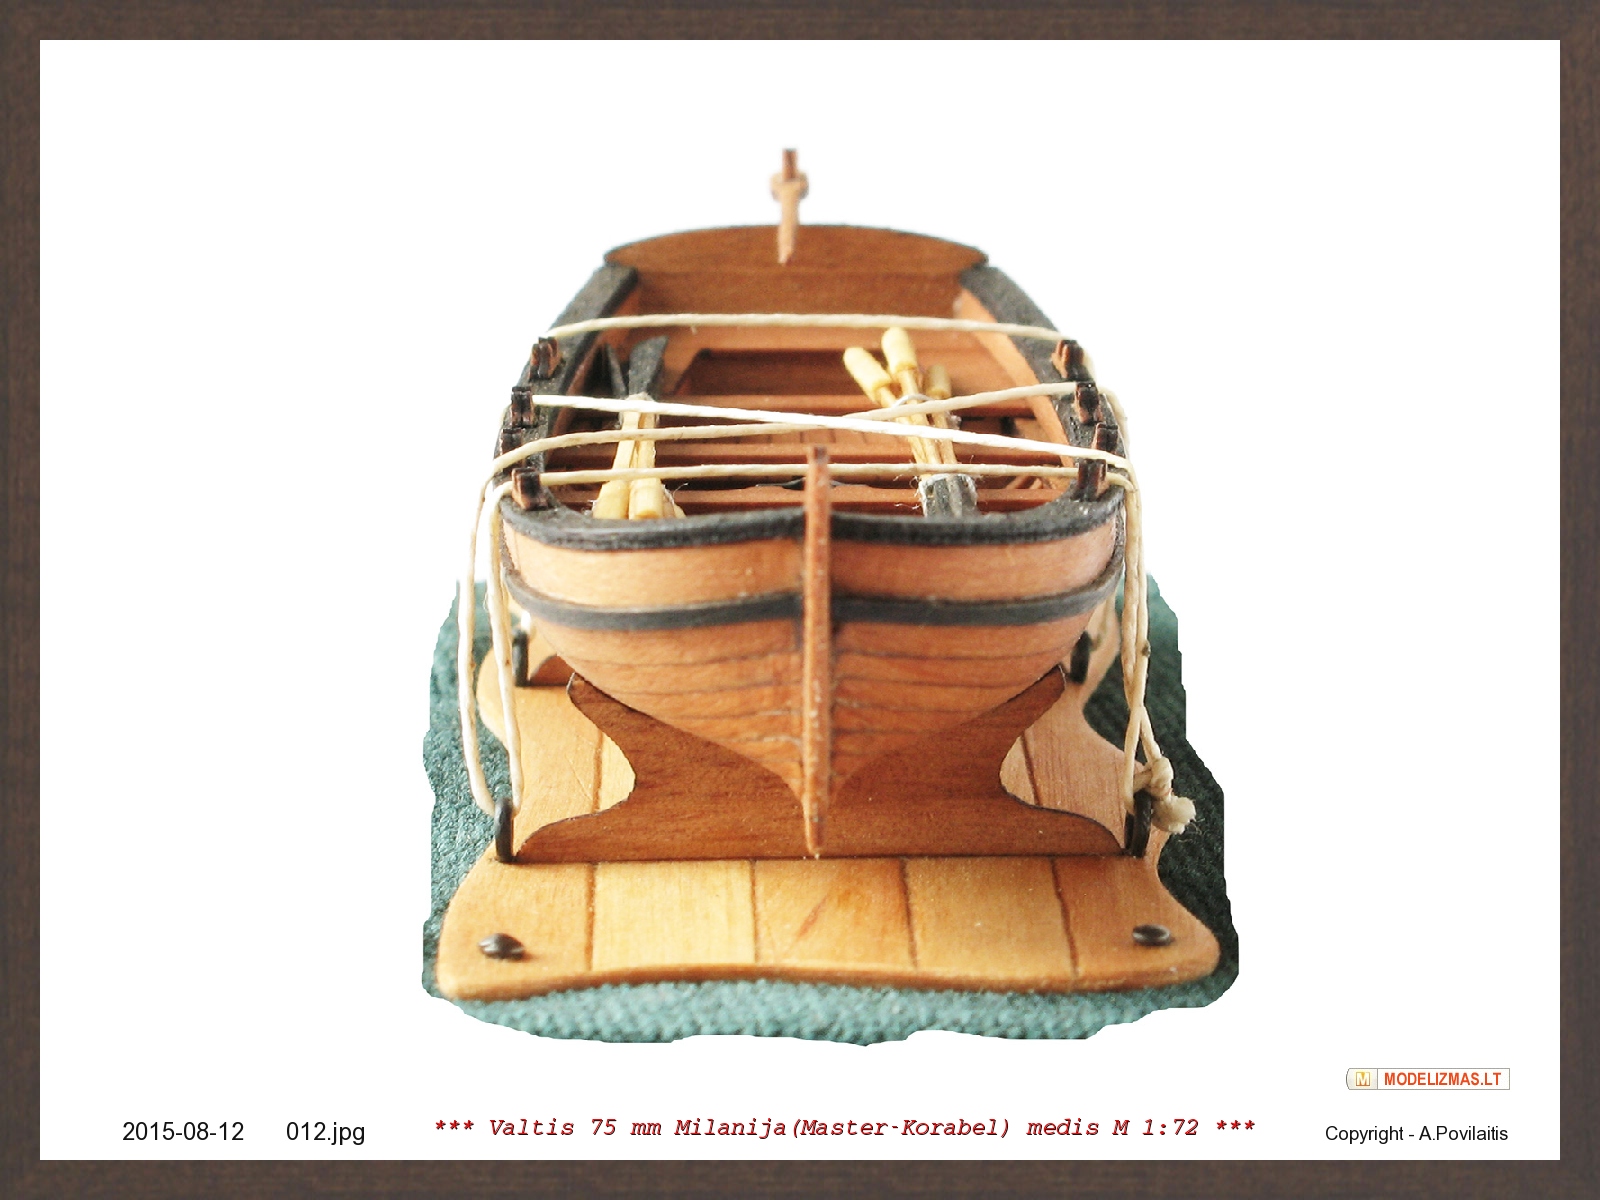
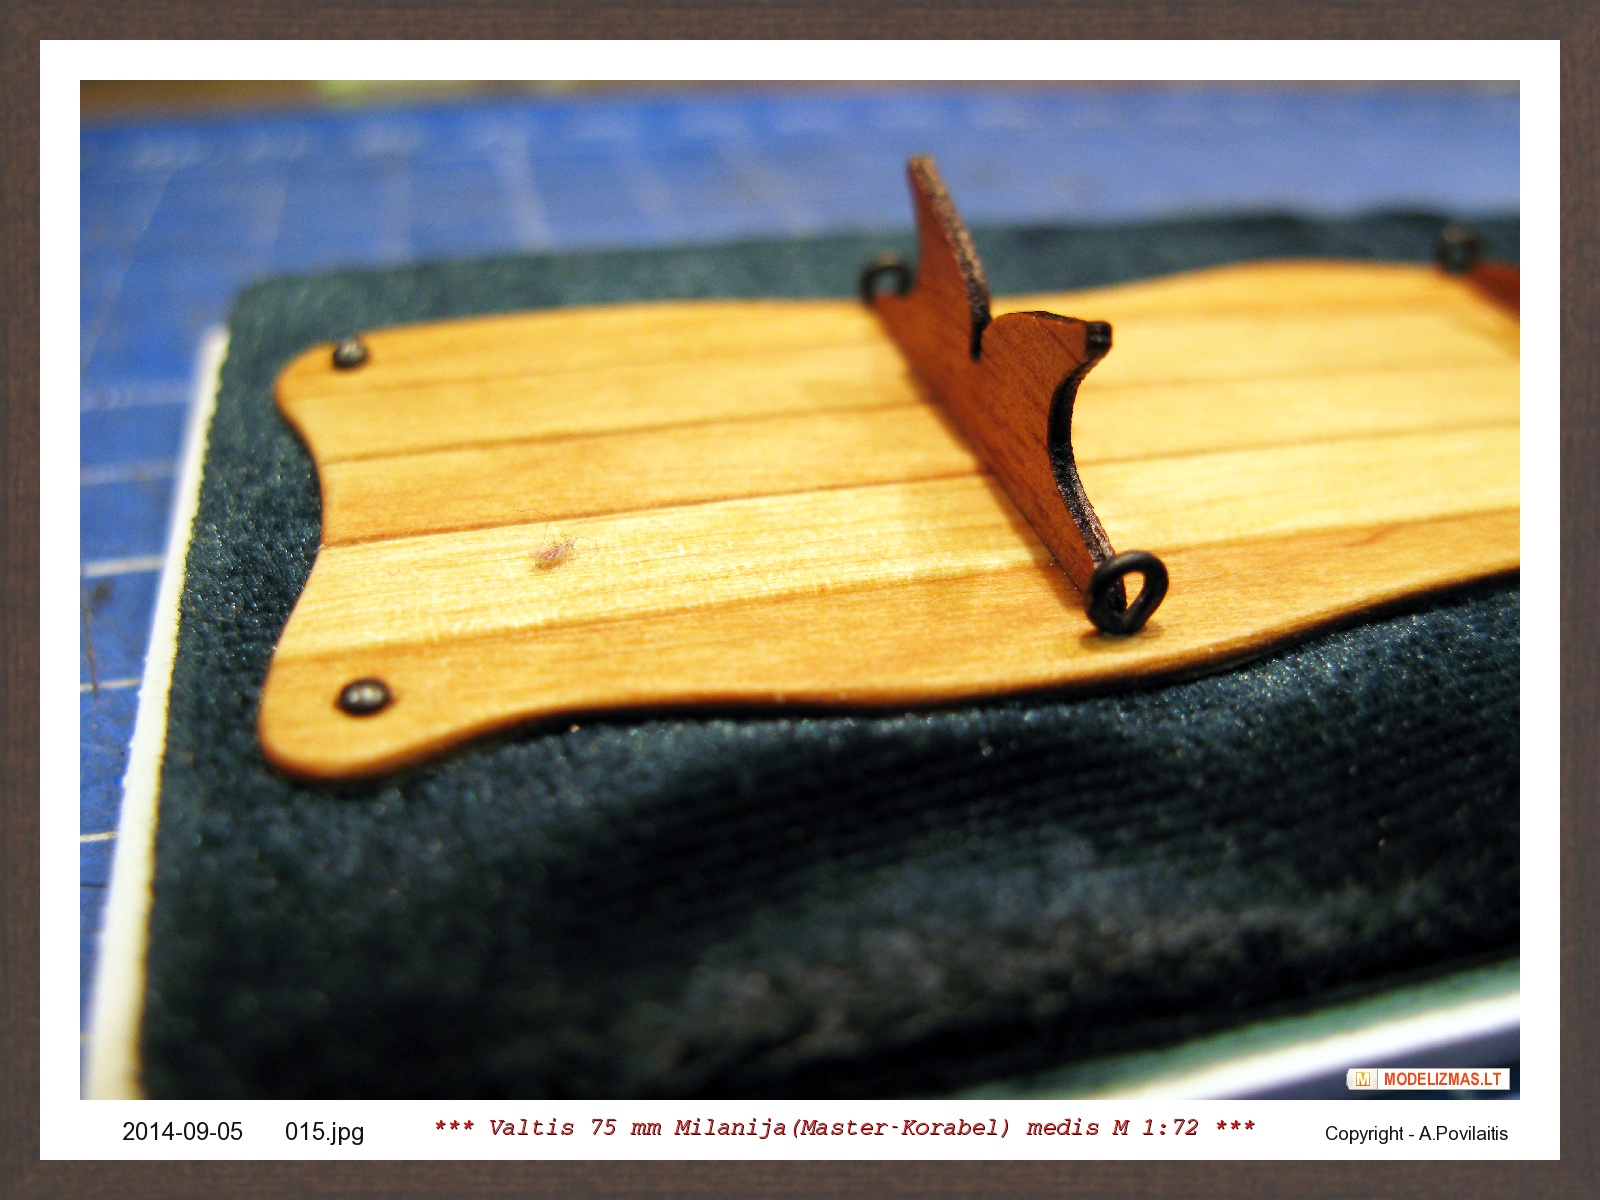
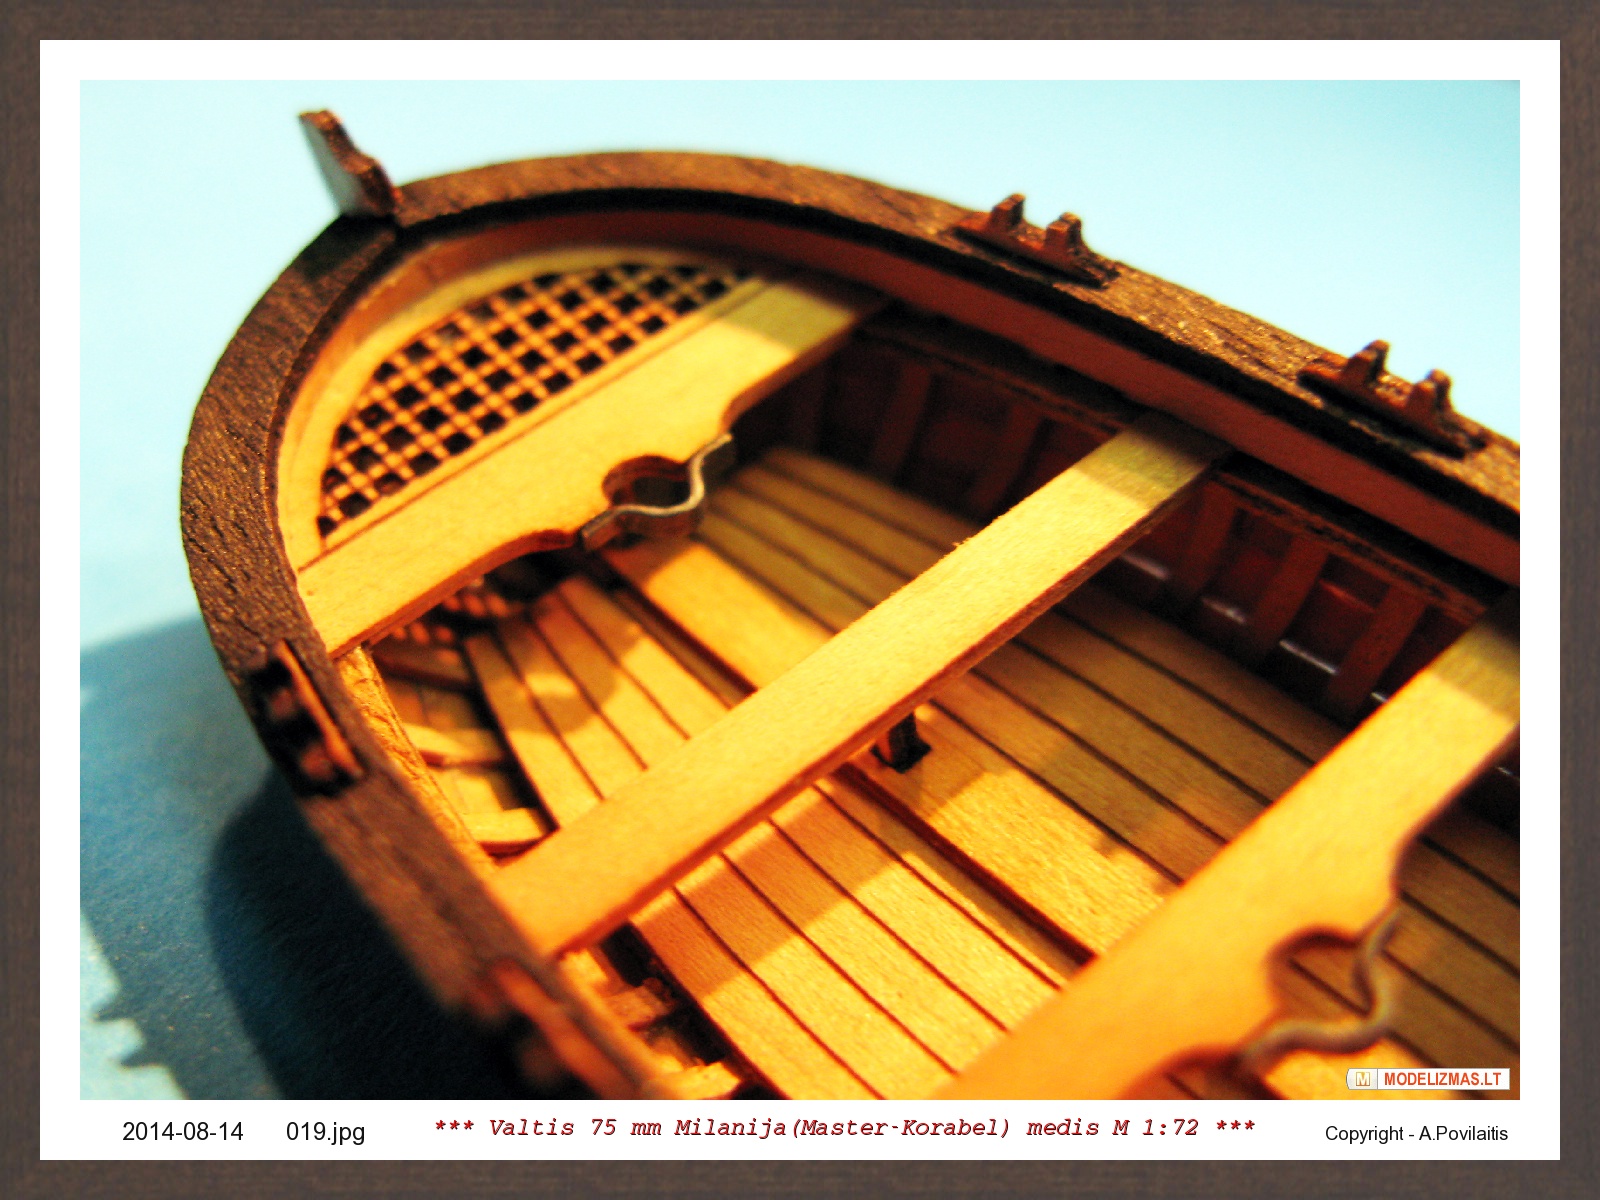
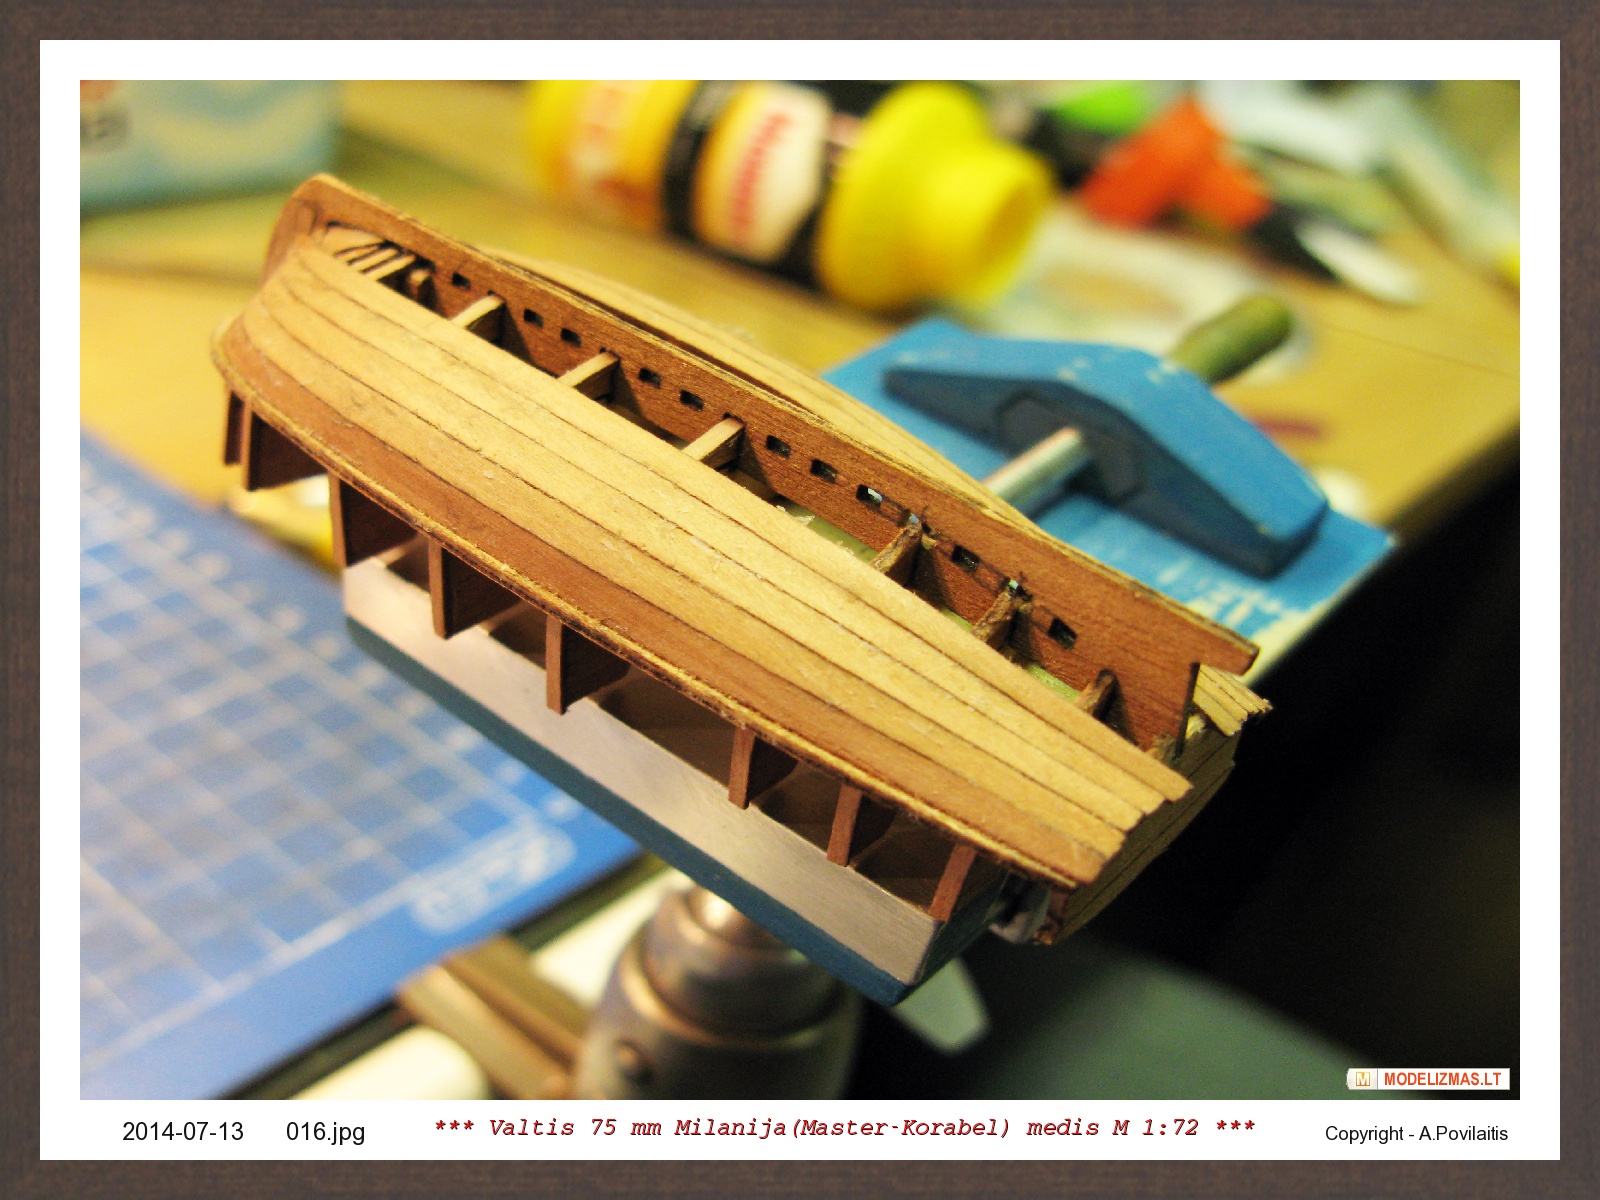
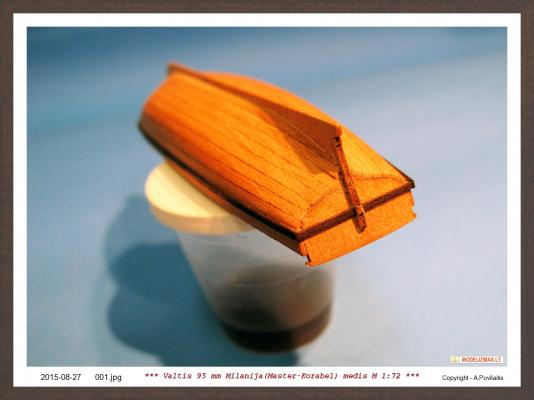
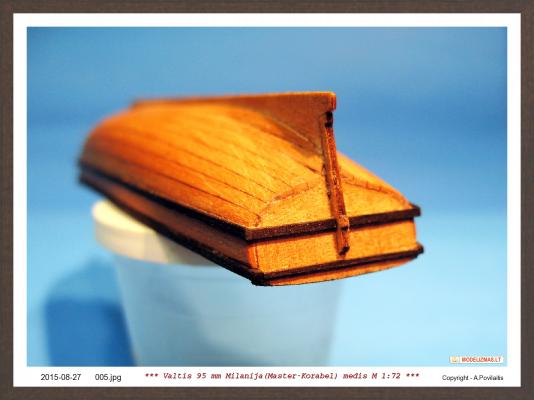
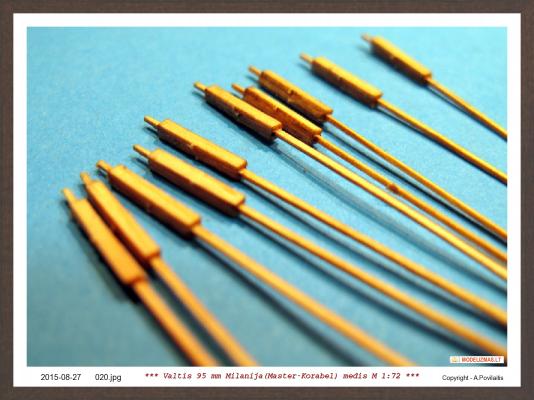
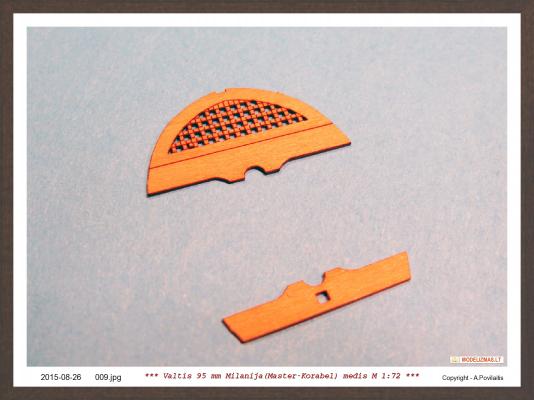
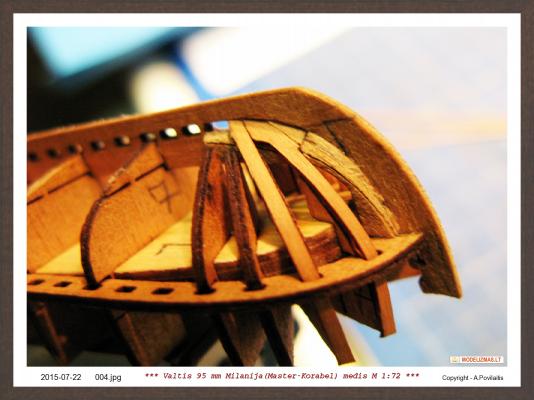
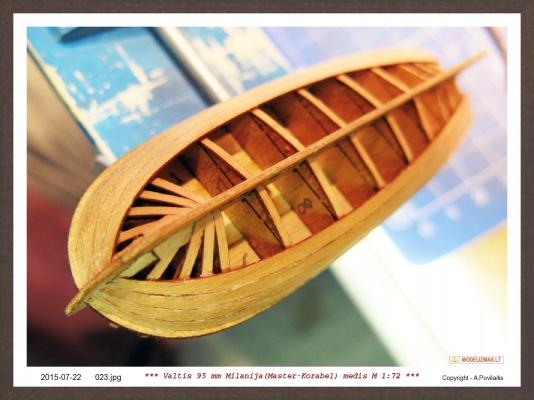
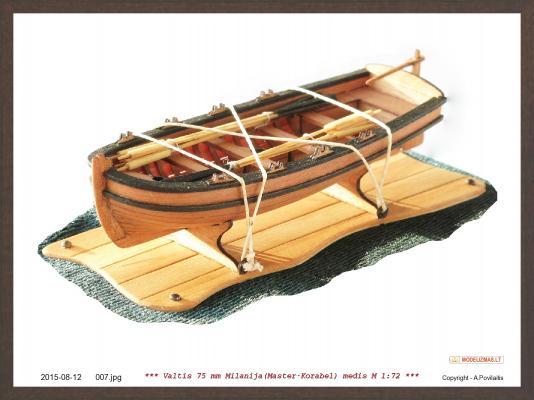
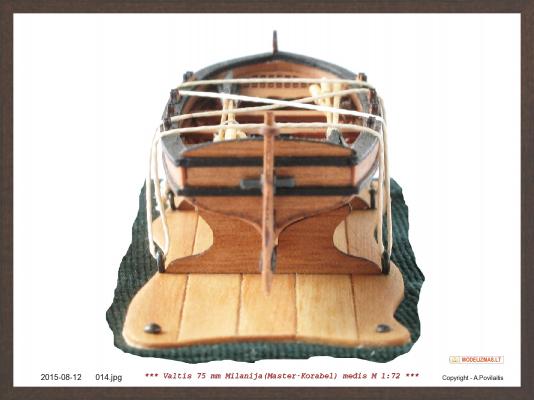
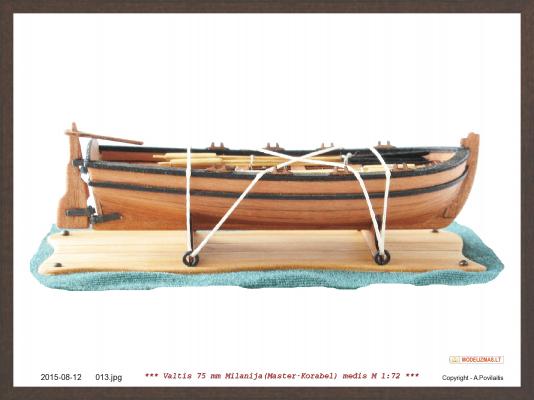
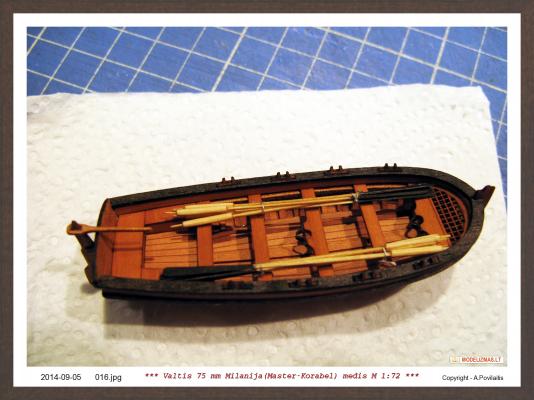
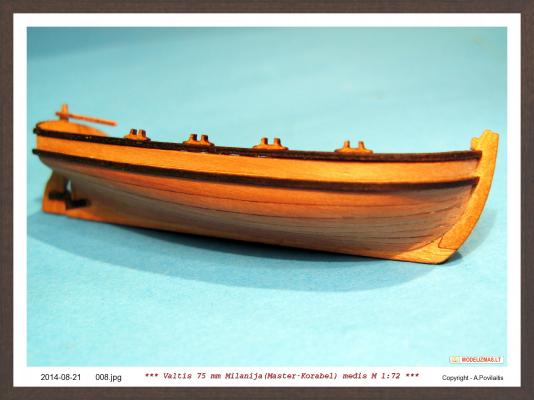
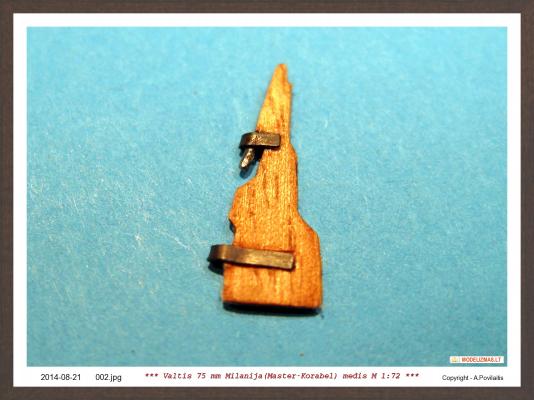
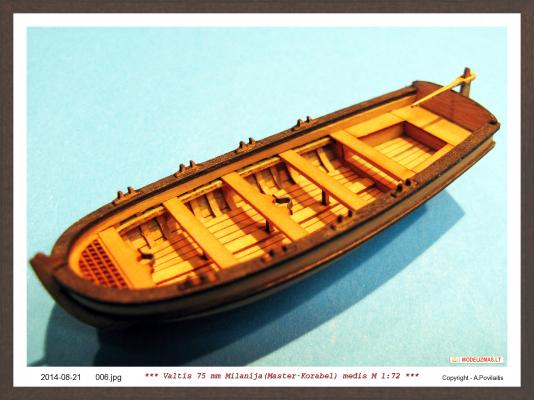
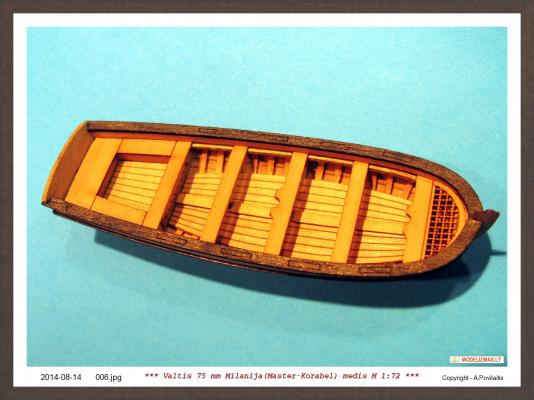
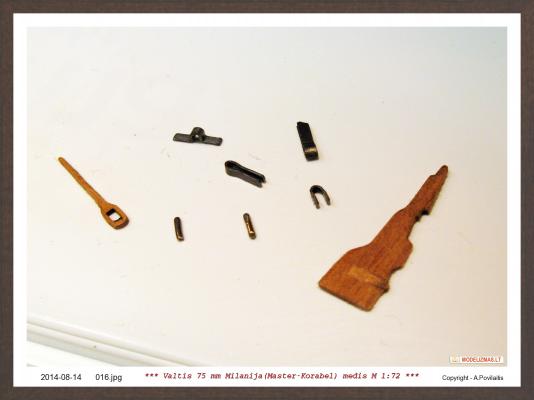
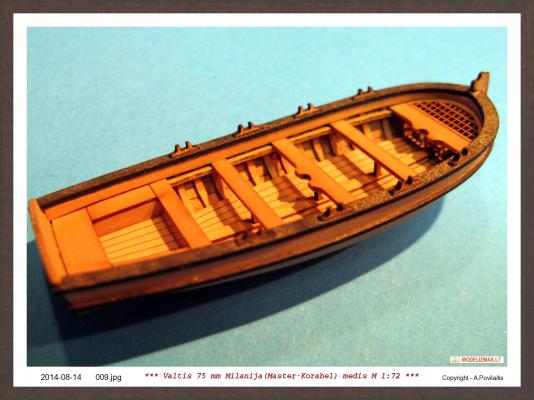
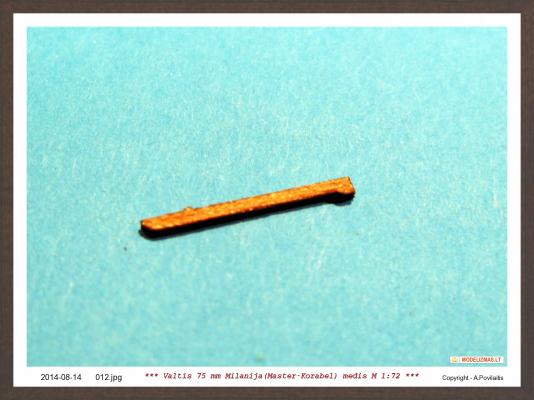
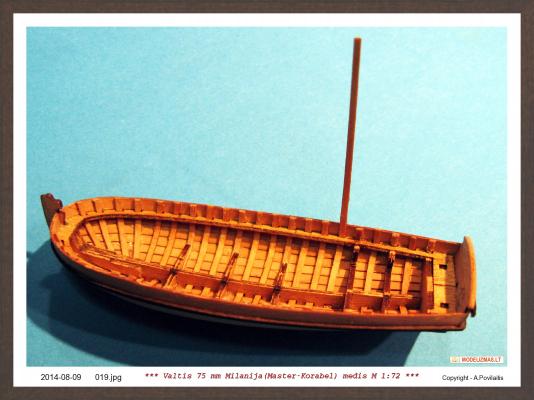
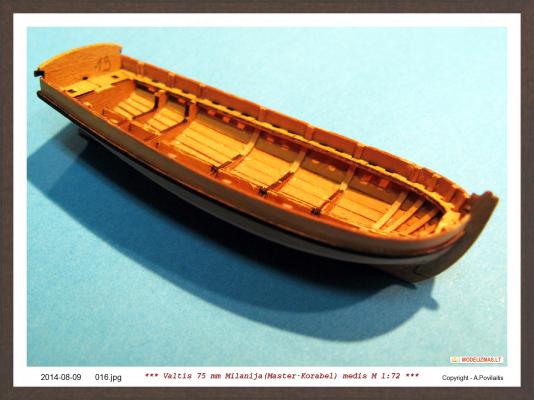
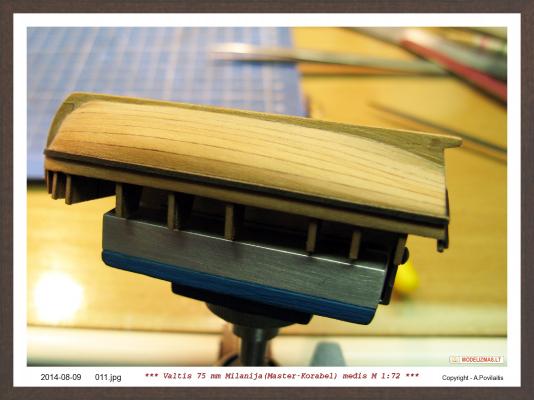
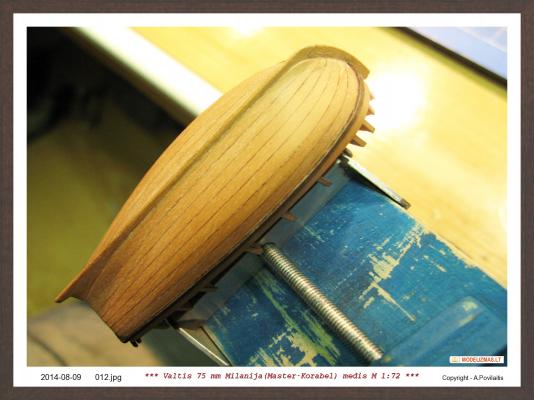
 Now the last works. Added planksheer and some small details. Maked masts brackets. They are from steel pins. And glue brackets and the rudder metal parts in the place. The rudder metal parts are not very good. They must be thiner. And made oars. At the last will produce the base and display case. Regards, Antanas
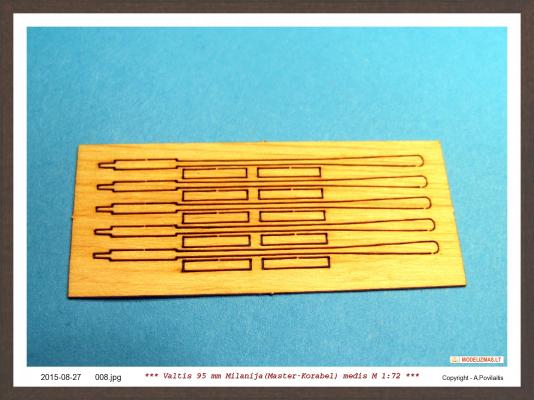


- 13 replies
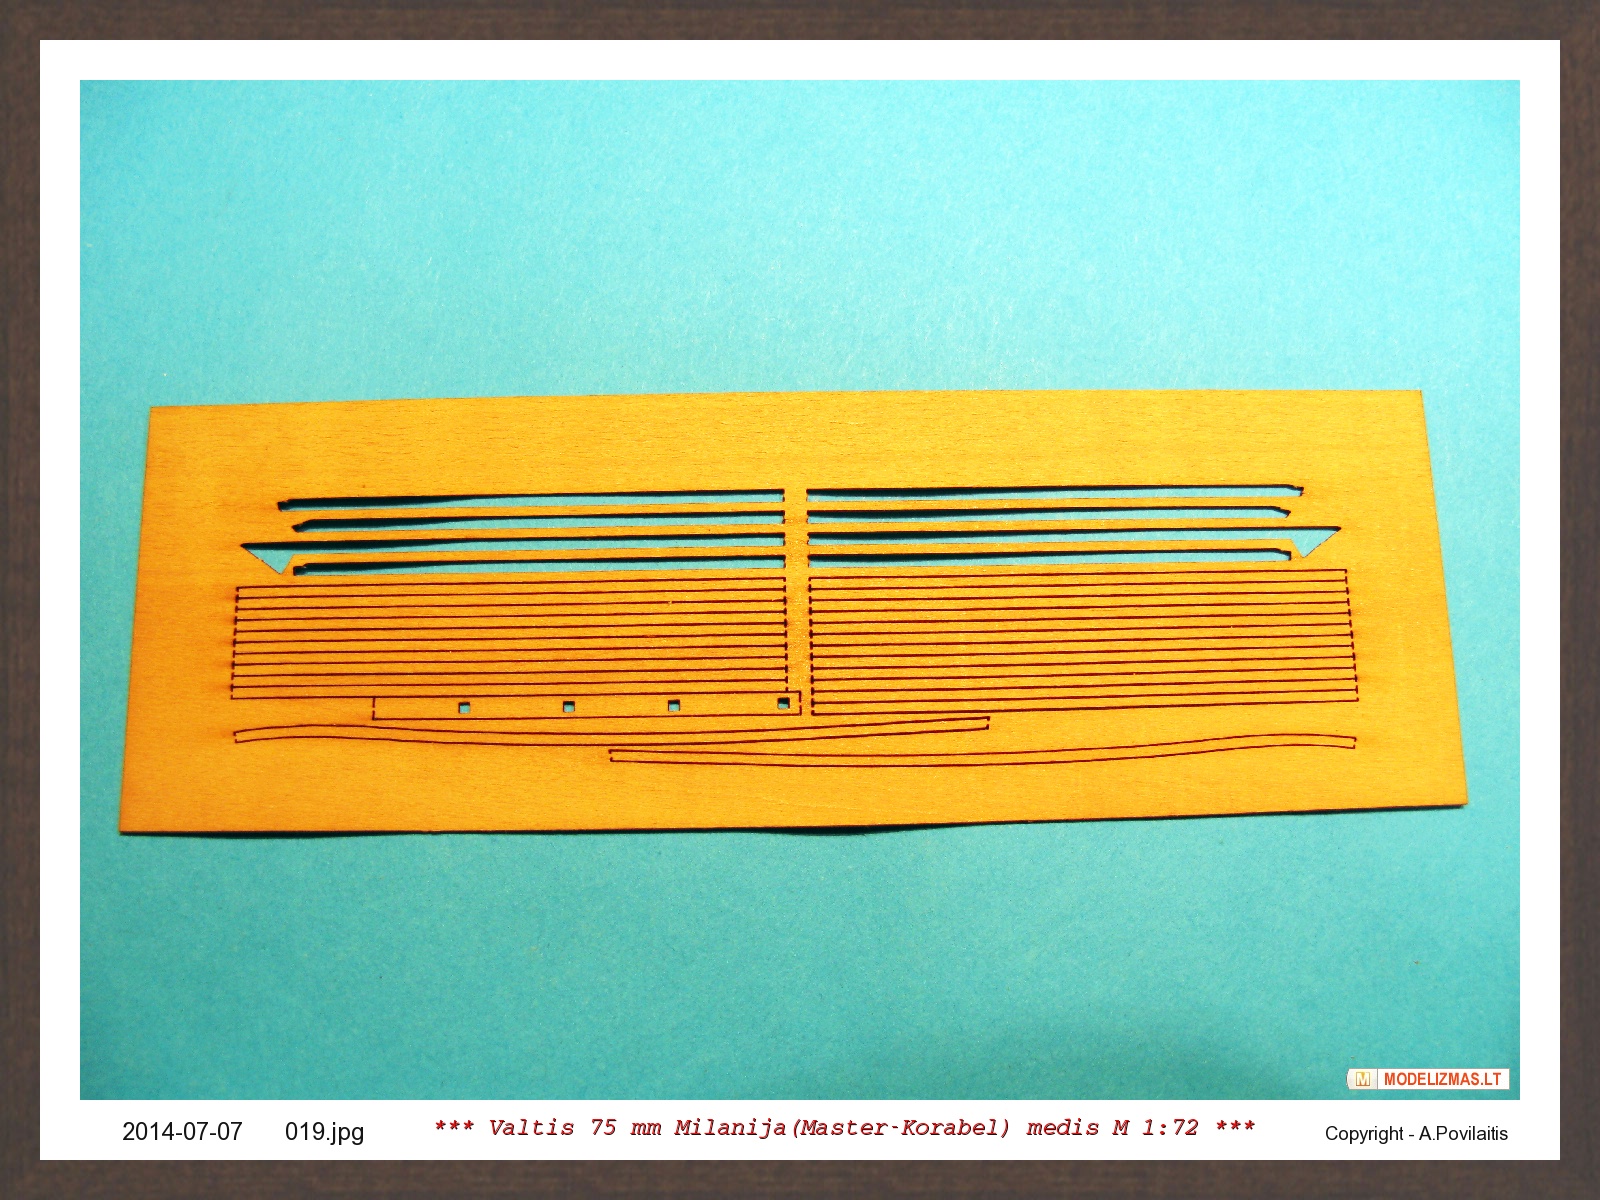
-
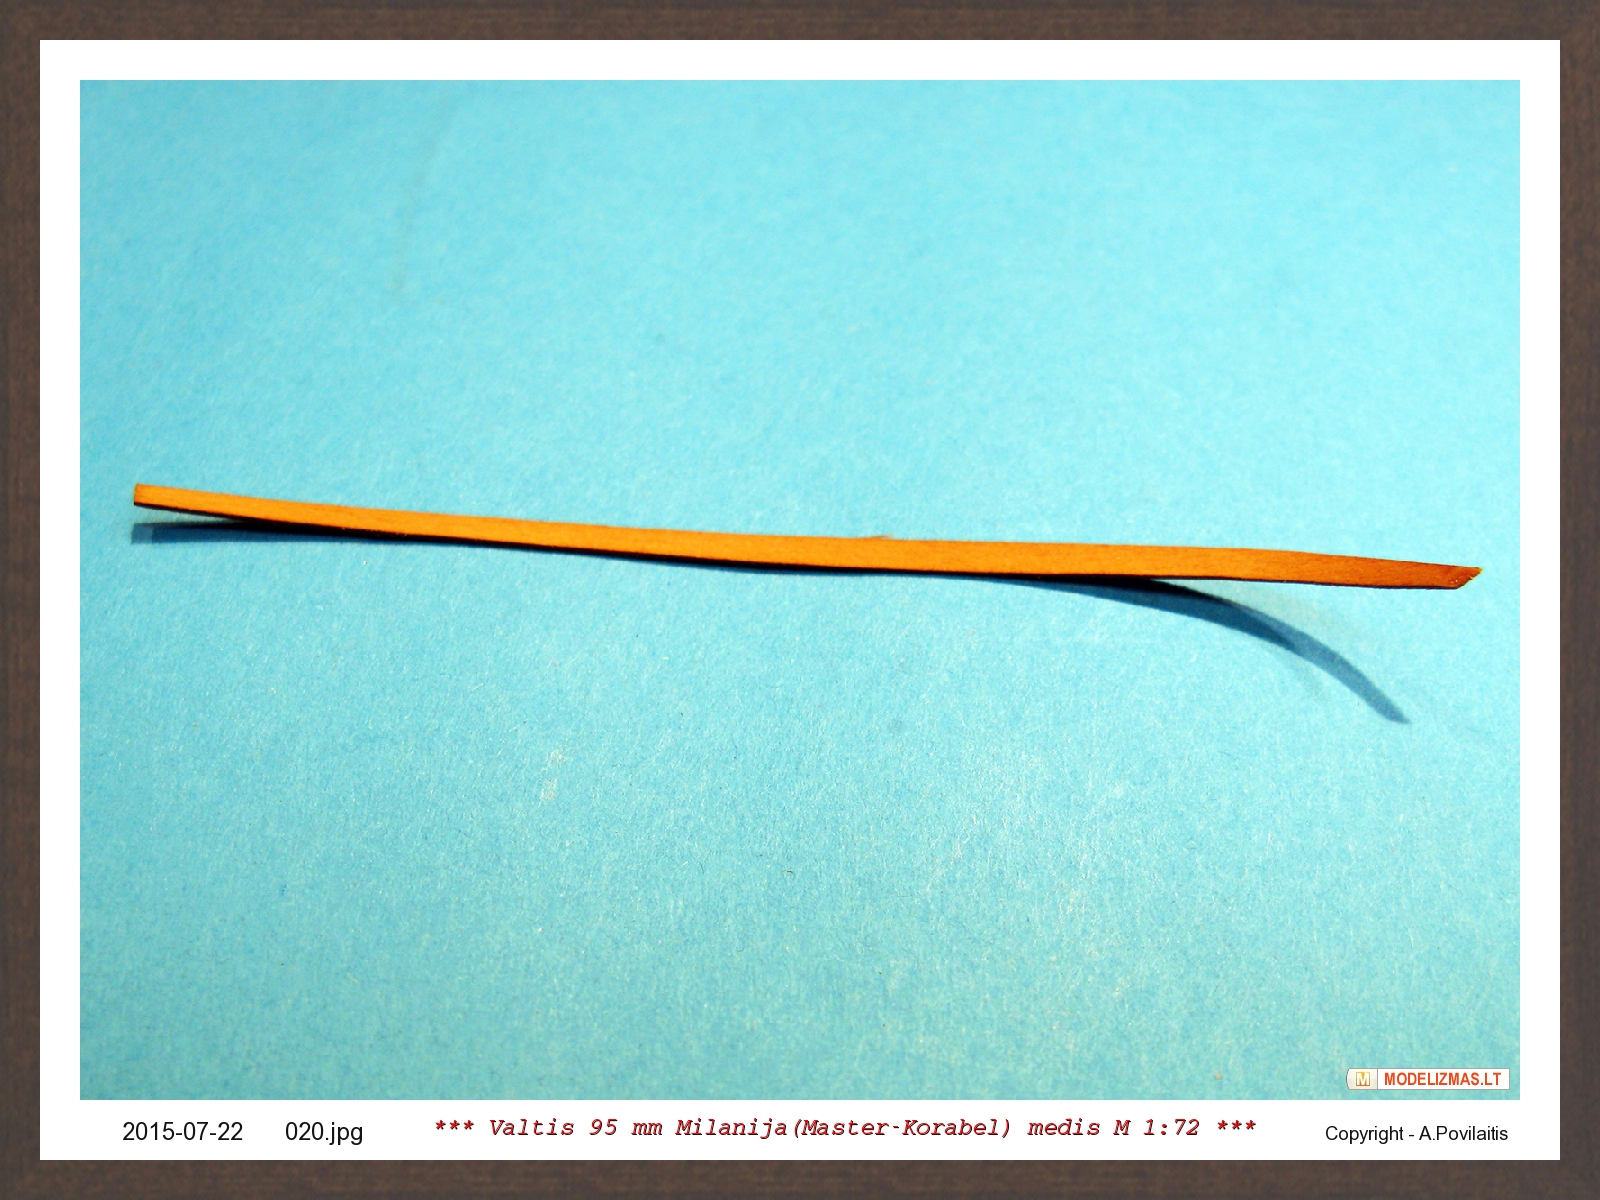
- 1
-

-
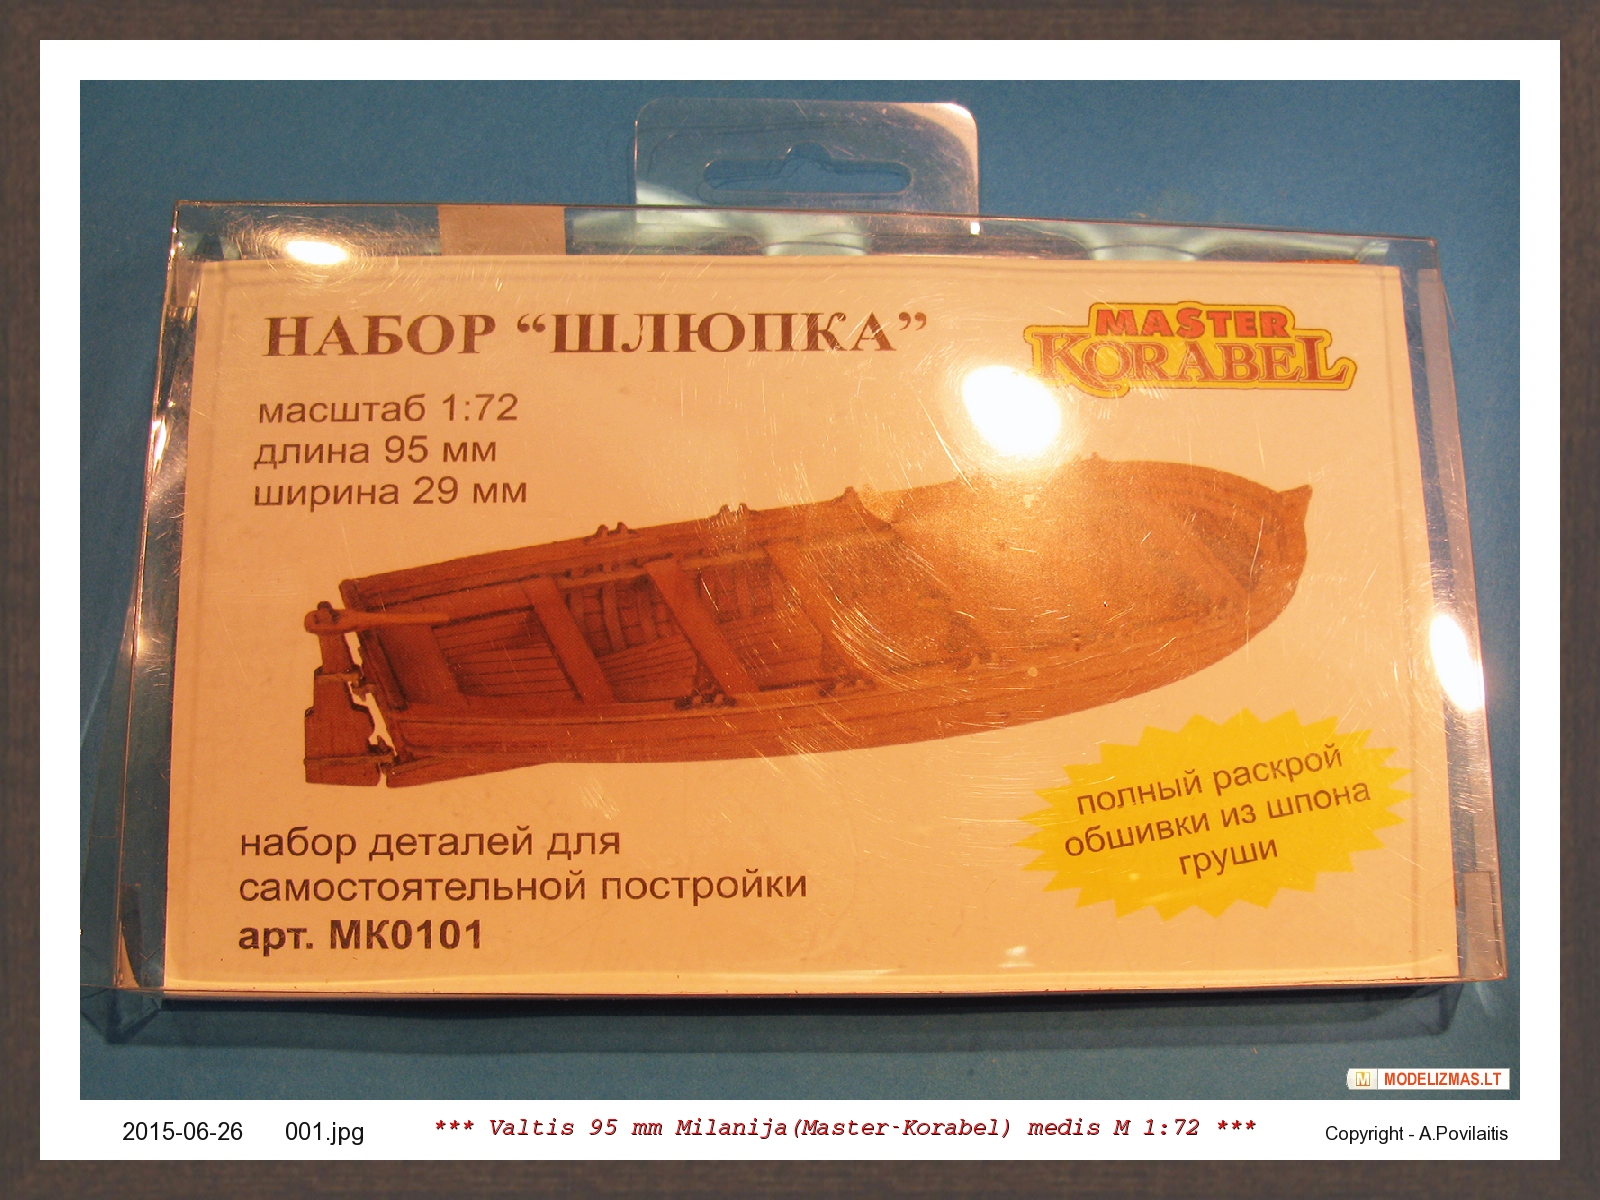
- 95mm boat
- master korabel
- (and 1 more)
-
Thanks Brian. The Master Korabel kits realy are fantastic. I fell in love with them... . And I decided to build them all. Maybe... There were still four. Deck boat St.Gabriel, canon Yawl, schooner Polotck, brigantine Phoenix. But within half a year will be released in four kits. Tender, yacht Queen Victoria, galleon Santiago and cutter Mercury... So, I will not be sad . But Master Korabel kits have one huge disadvantage. After their hard assemble kits of other firms. I'm serious here. I agree with Chris. And not just in the same situation with small boats. For many years on the market the company does not change its drawings, technology, attitude and philosophy. But modeling has long been changed... Today may not be necessary to assemble a set of tools so much as during the whole model of the drawings. And even stranger buy kit and use only the drawings. Here's Brian in his wonderful work and kit drawings will probably not use. Found better information. In the forum is a lot of wonderful builds of these kits. The only pity is that they have spent too much time and effort by using the ancient kits. Of course, maybe I'm exaggerating a little, but really the situation should change... If you need more information about Master Korabel write PM, please. We will be happy to respond and help. Best regards, Antanas
-
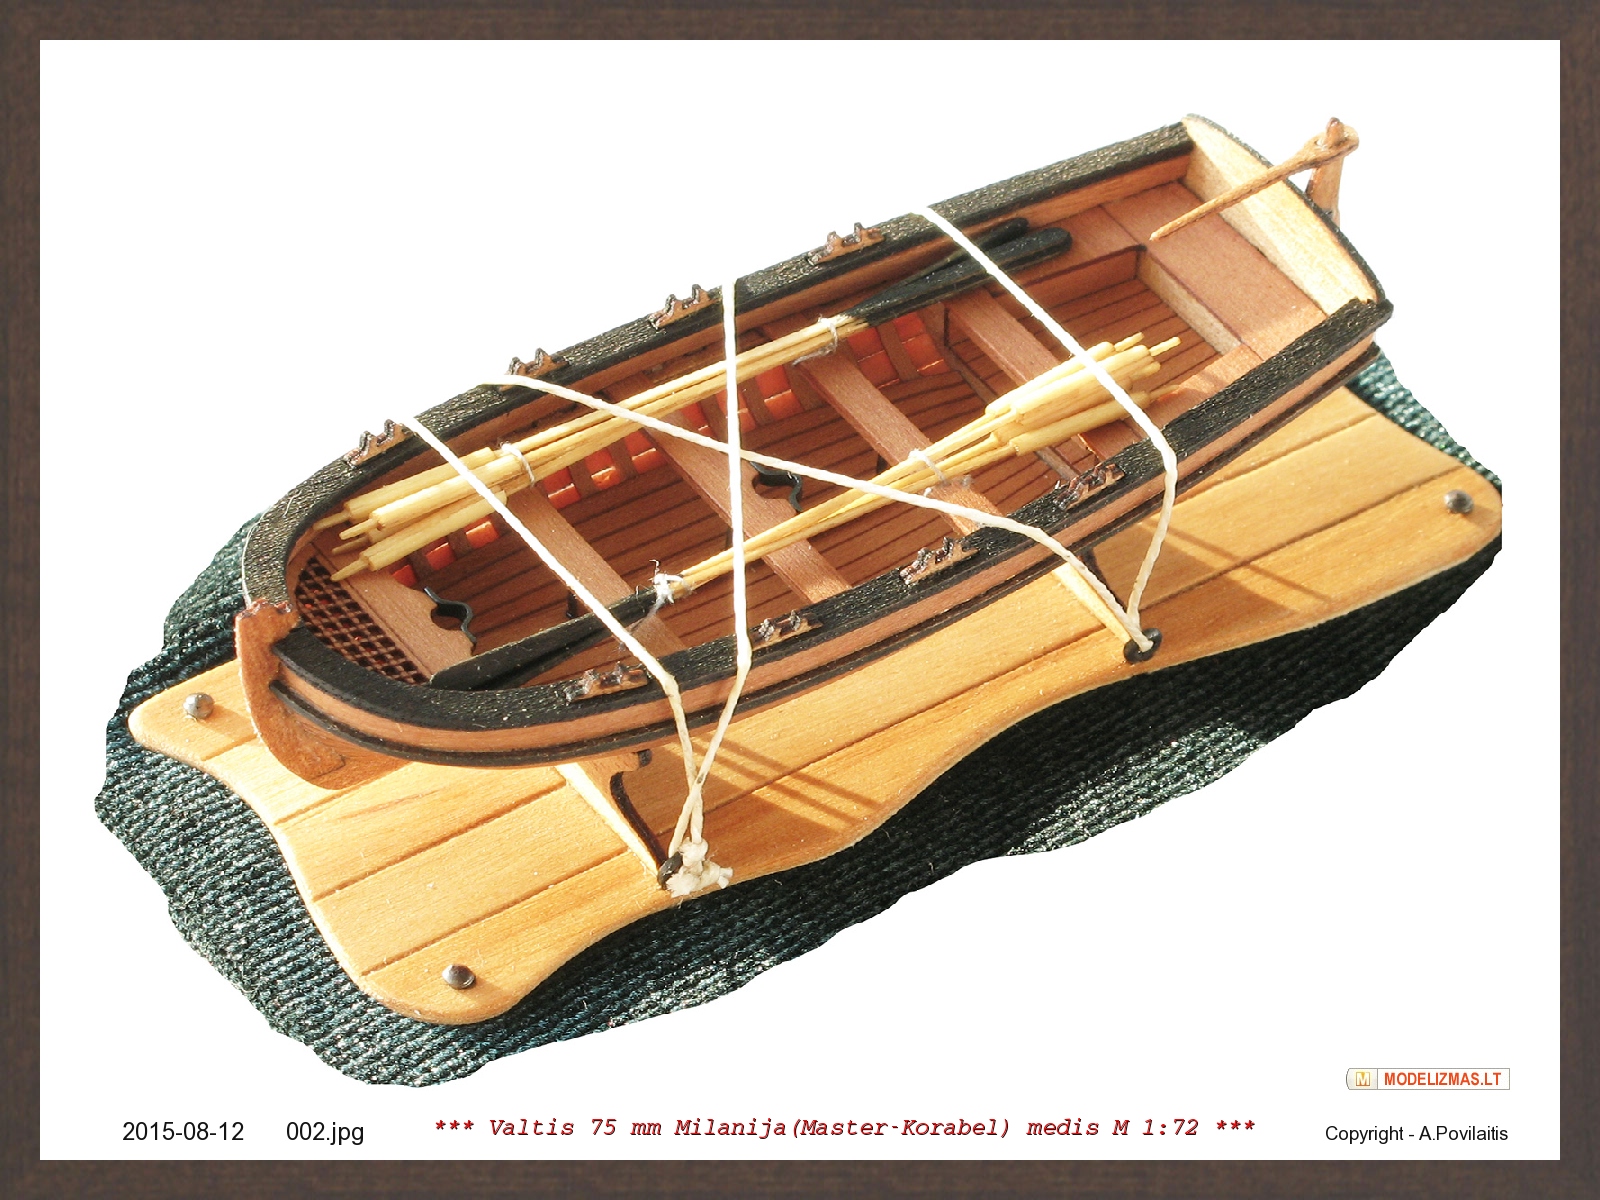
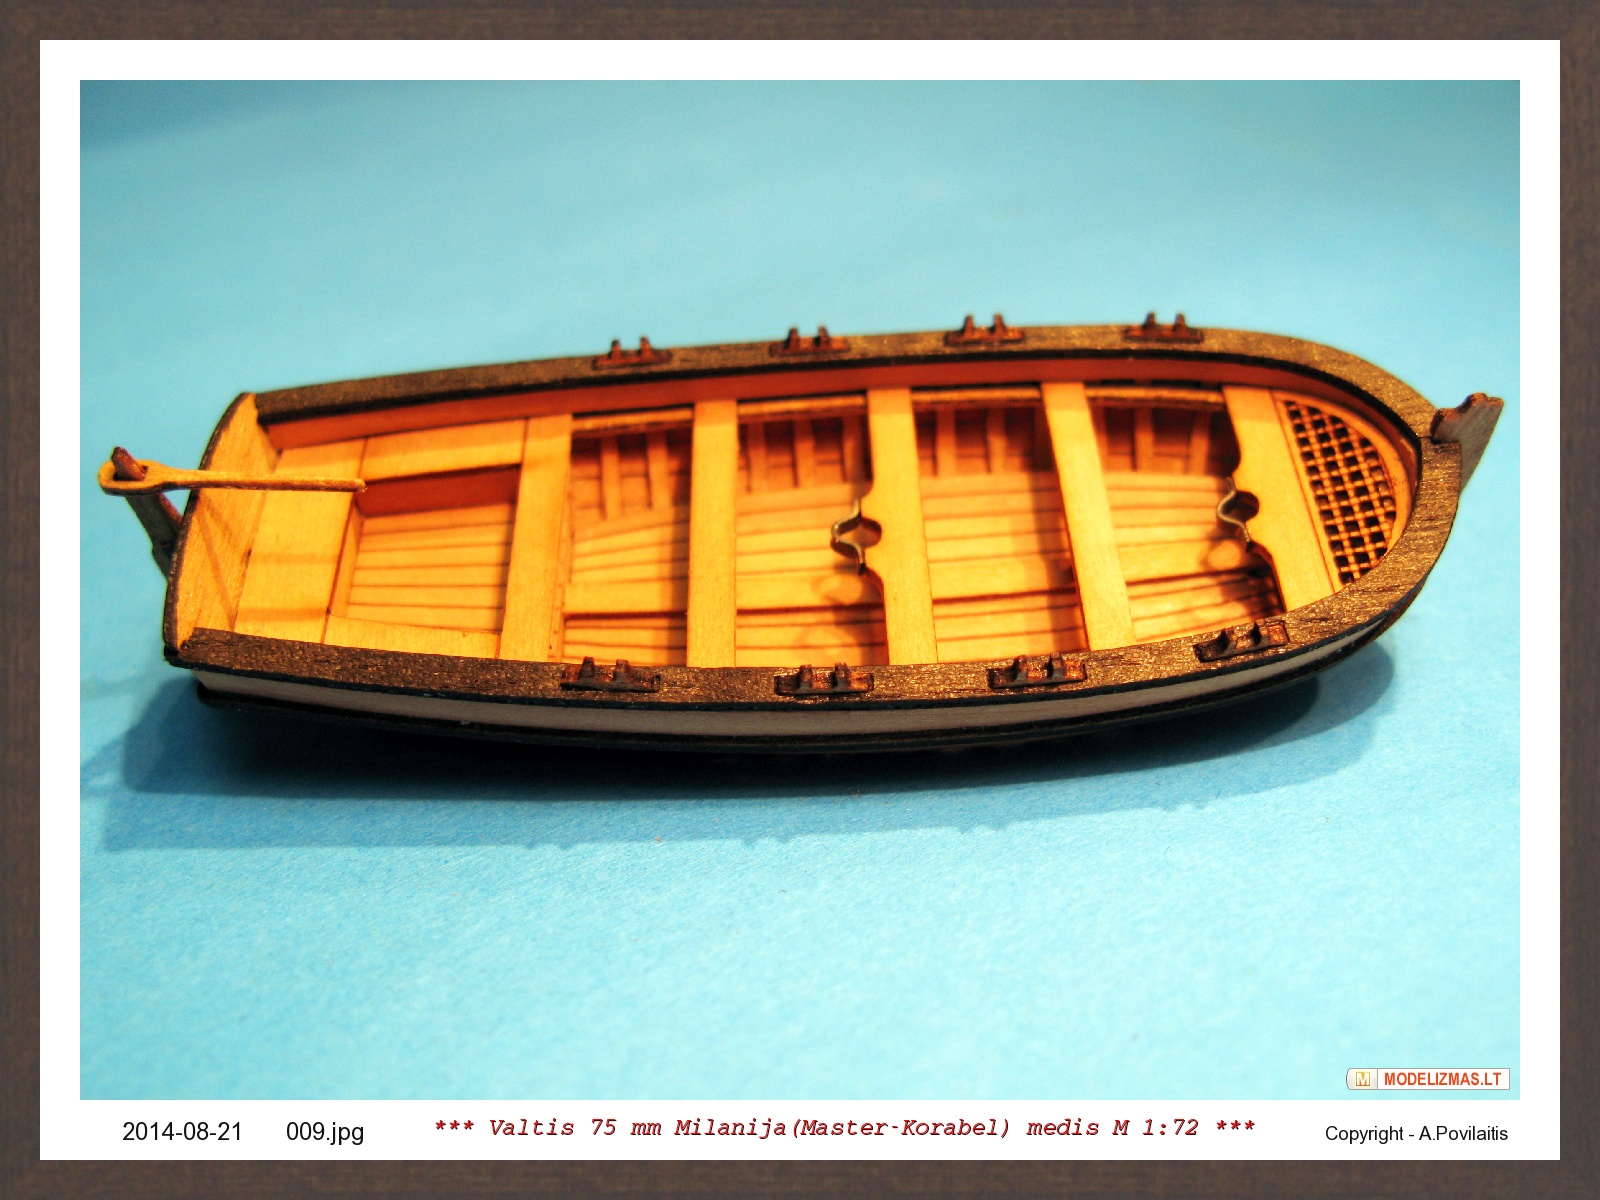
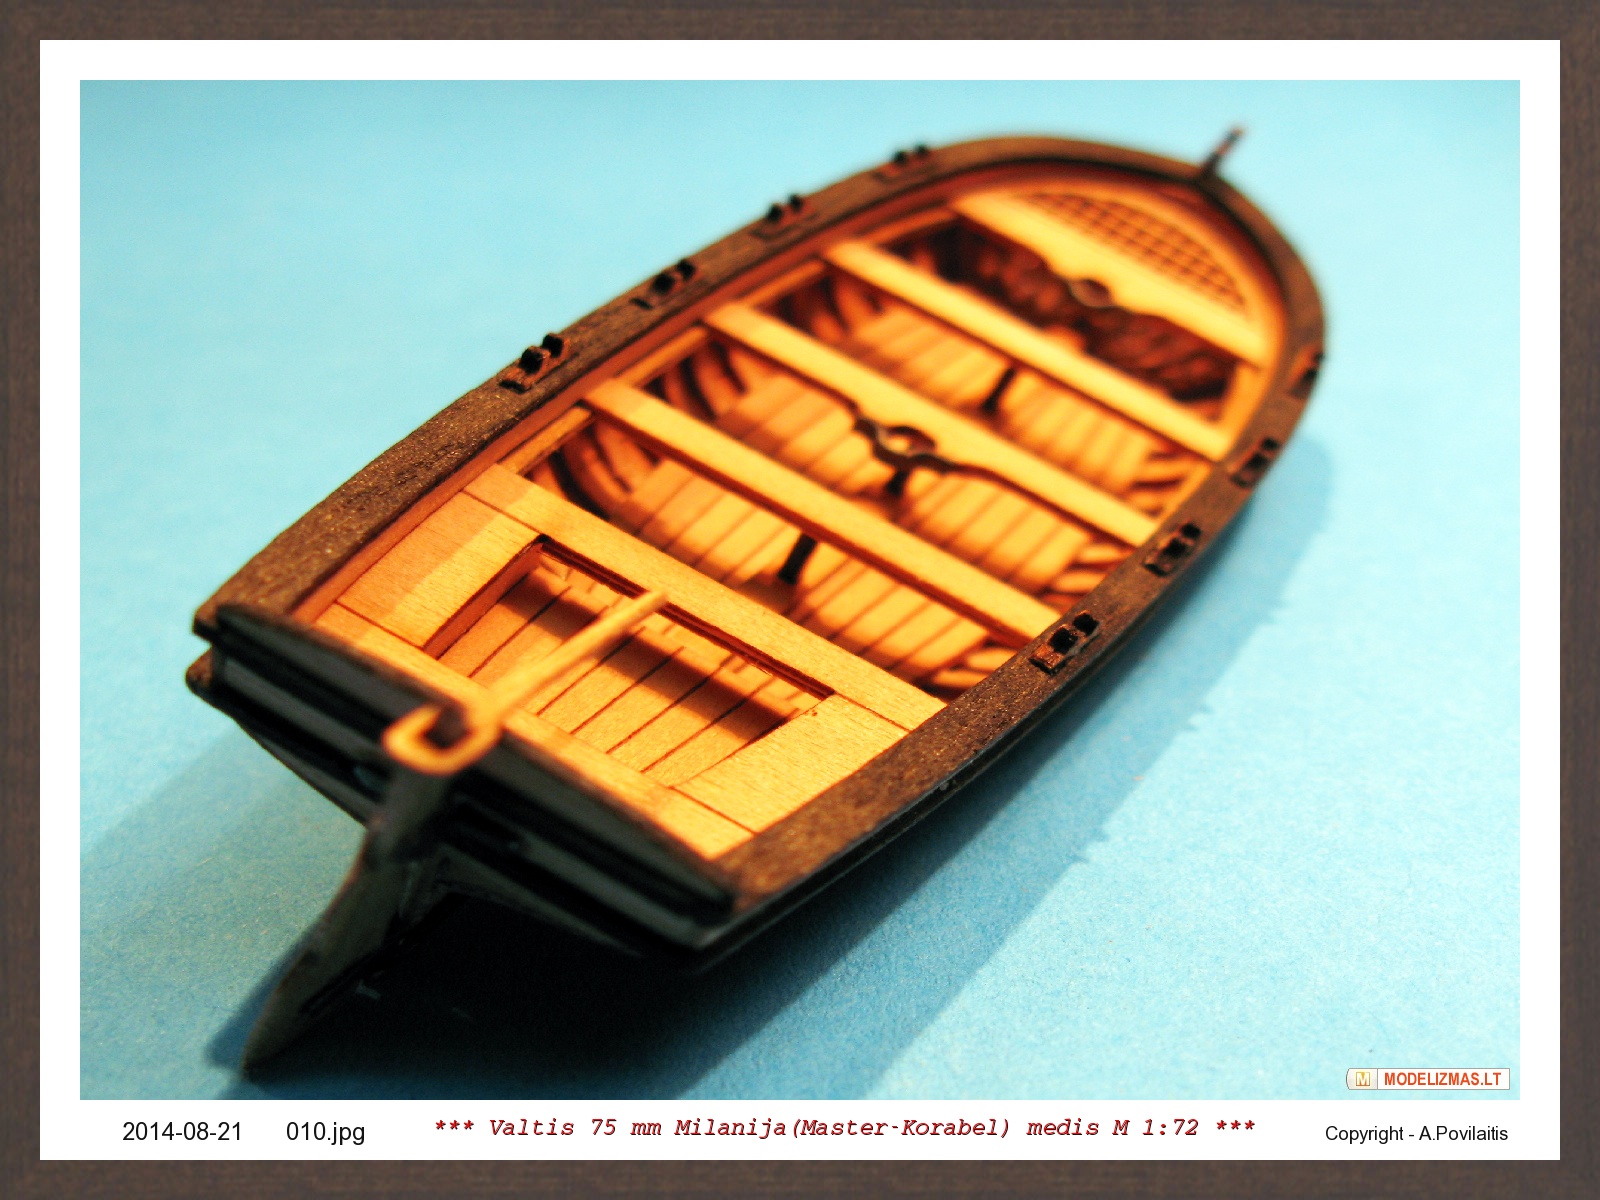
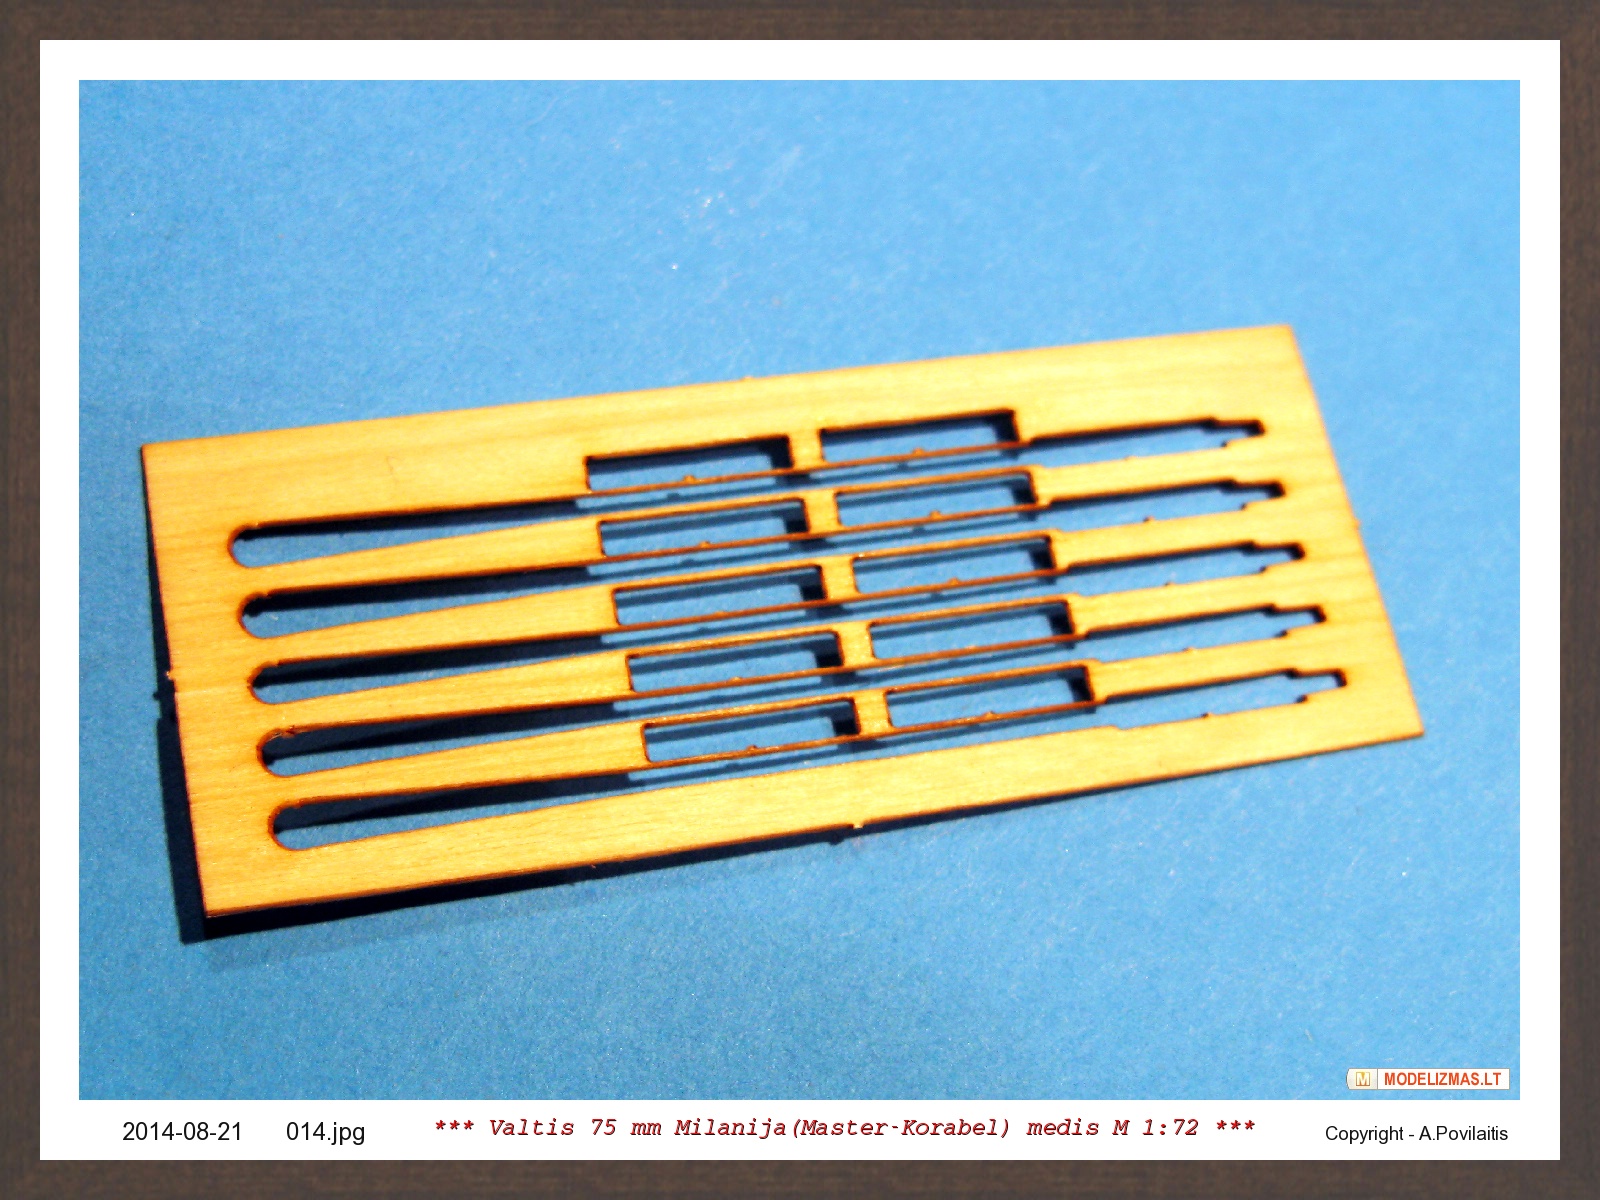
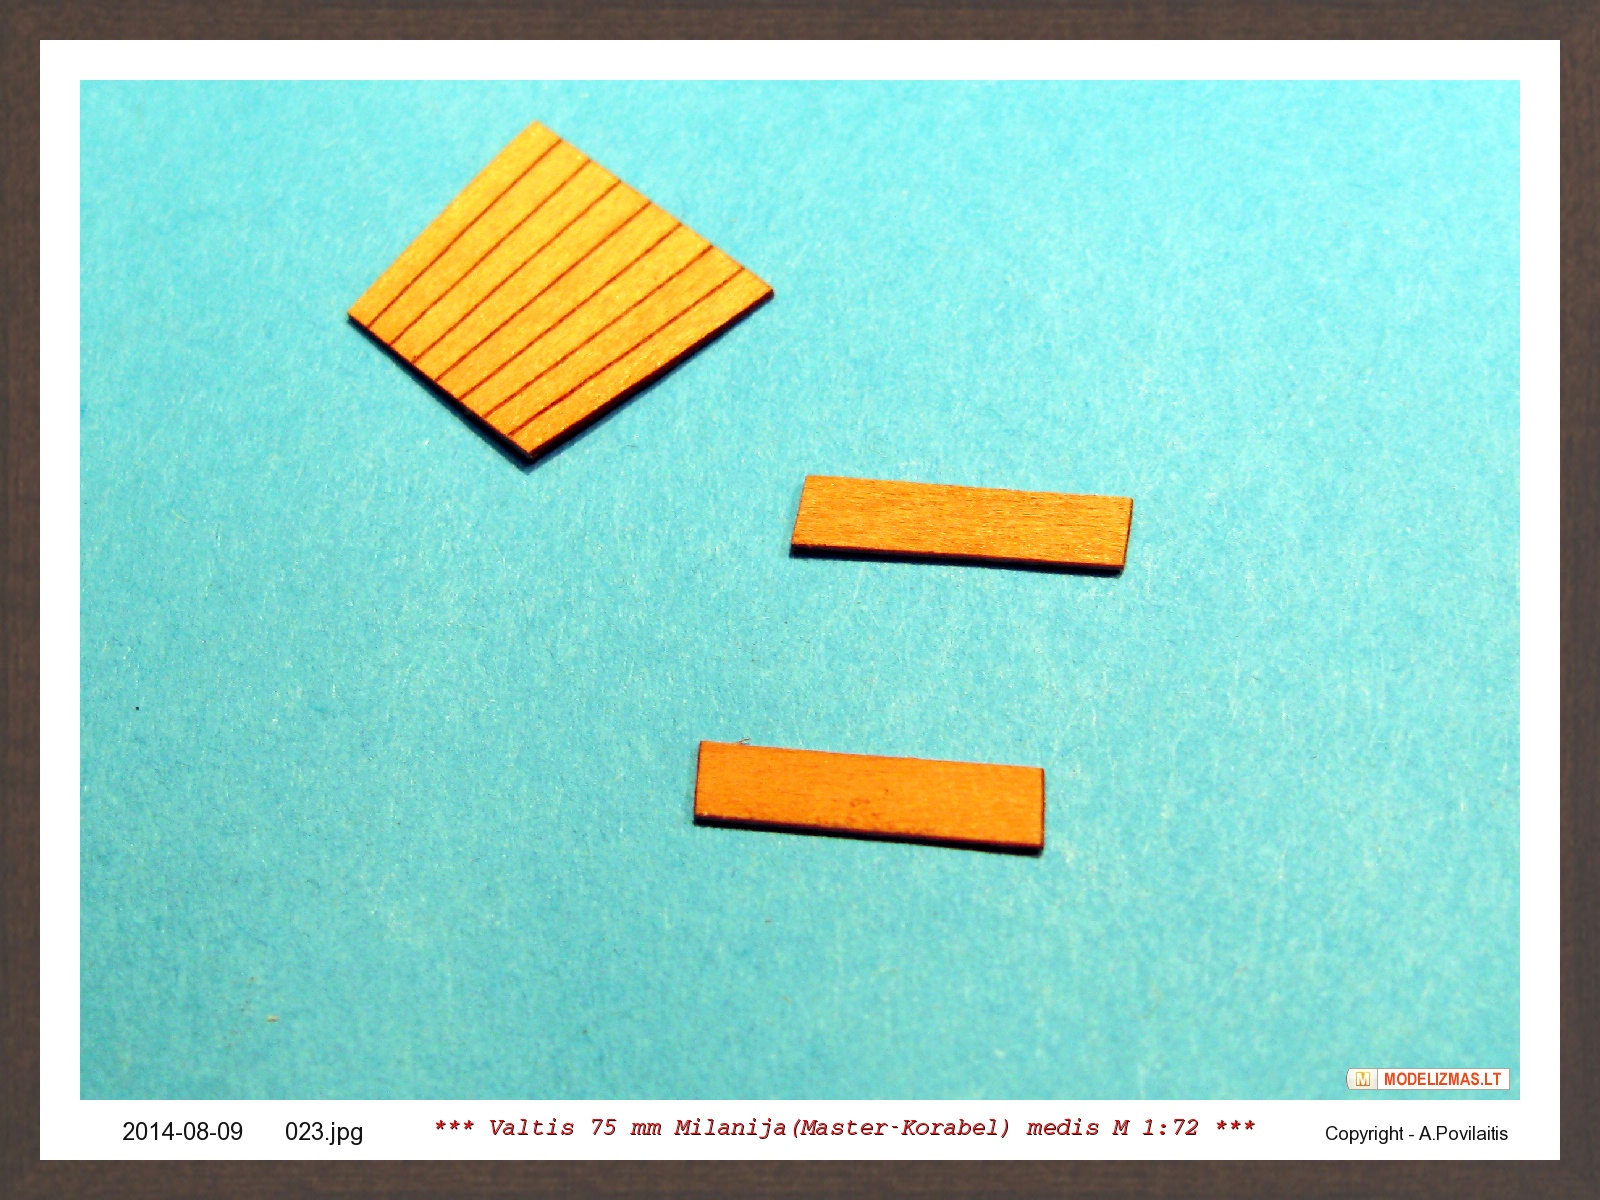
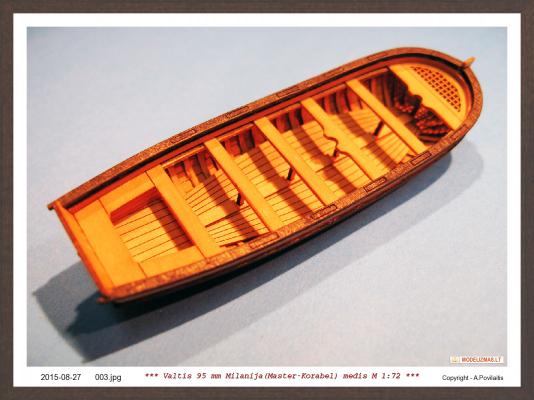
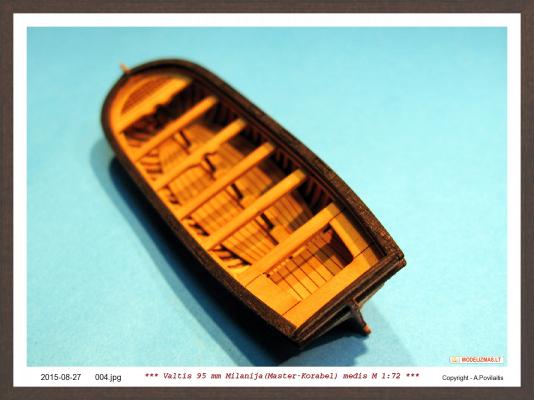
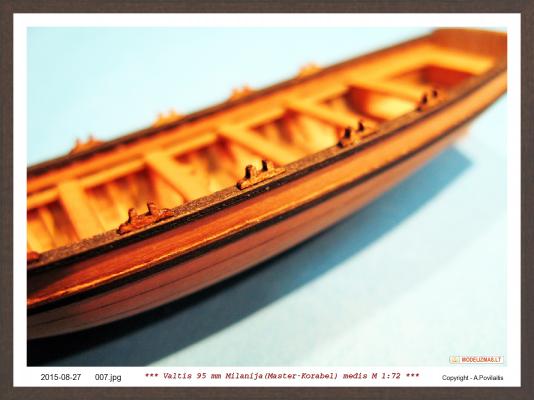
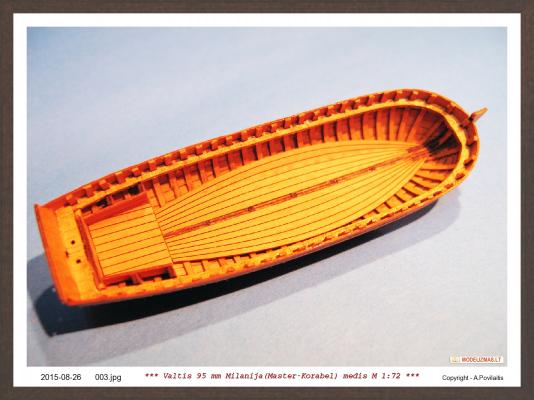
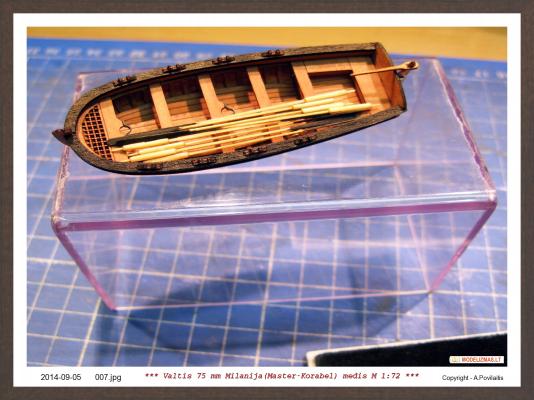
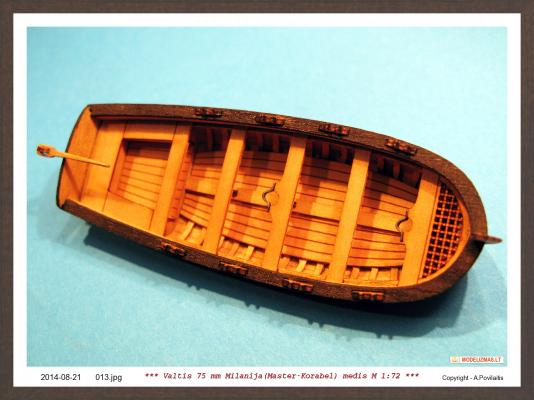
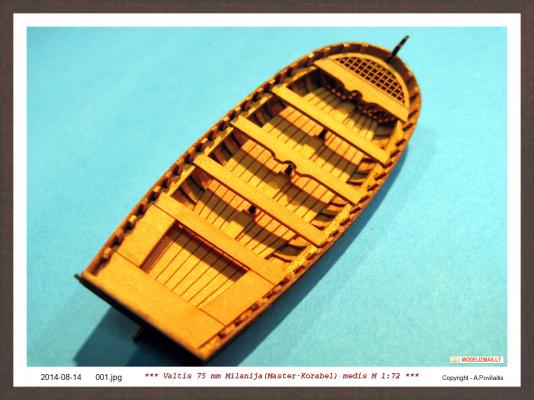
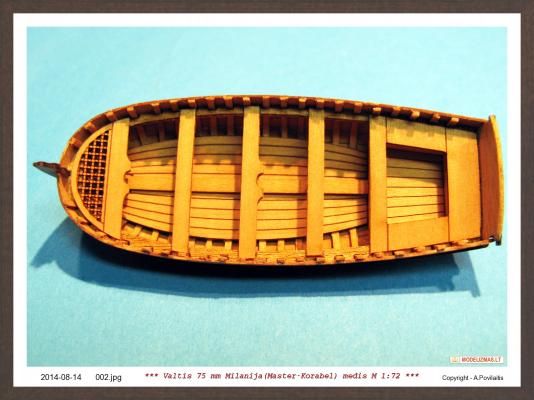
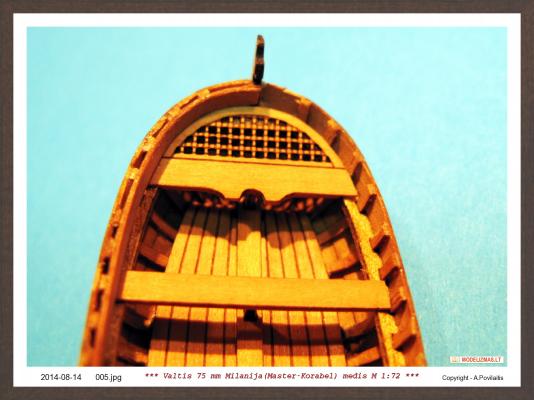
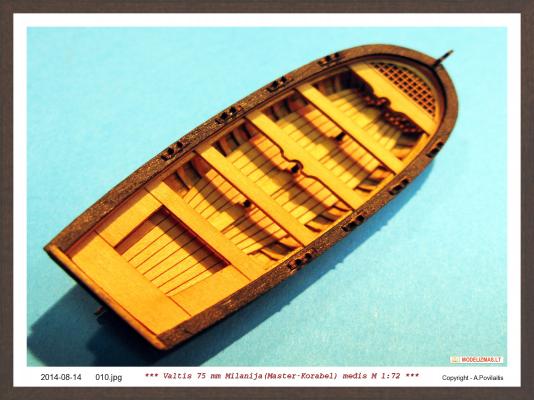
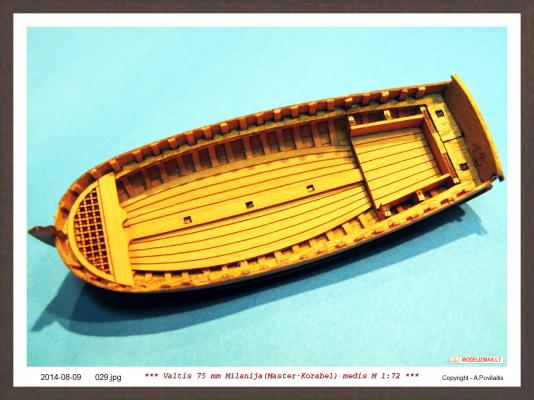
After sanding prepared and glued inside seats and other elements. This is easy. Painted in black some other pieces. Result today. Regards, Antanas


- 13 replies
-
- 3
-
-
- 95mm boat
- master korabel
- (and 1 more)
-
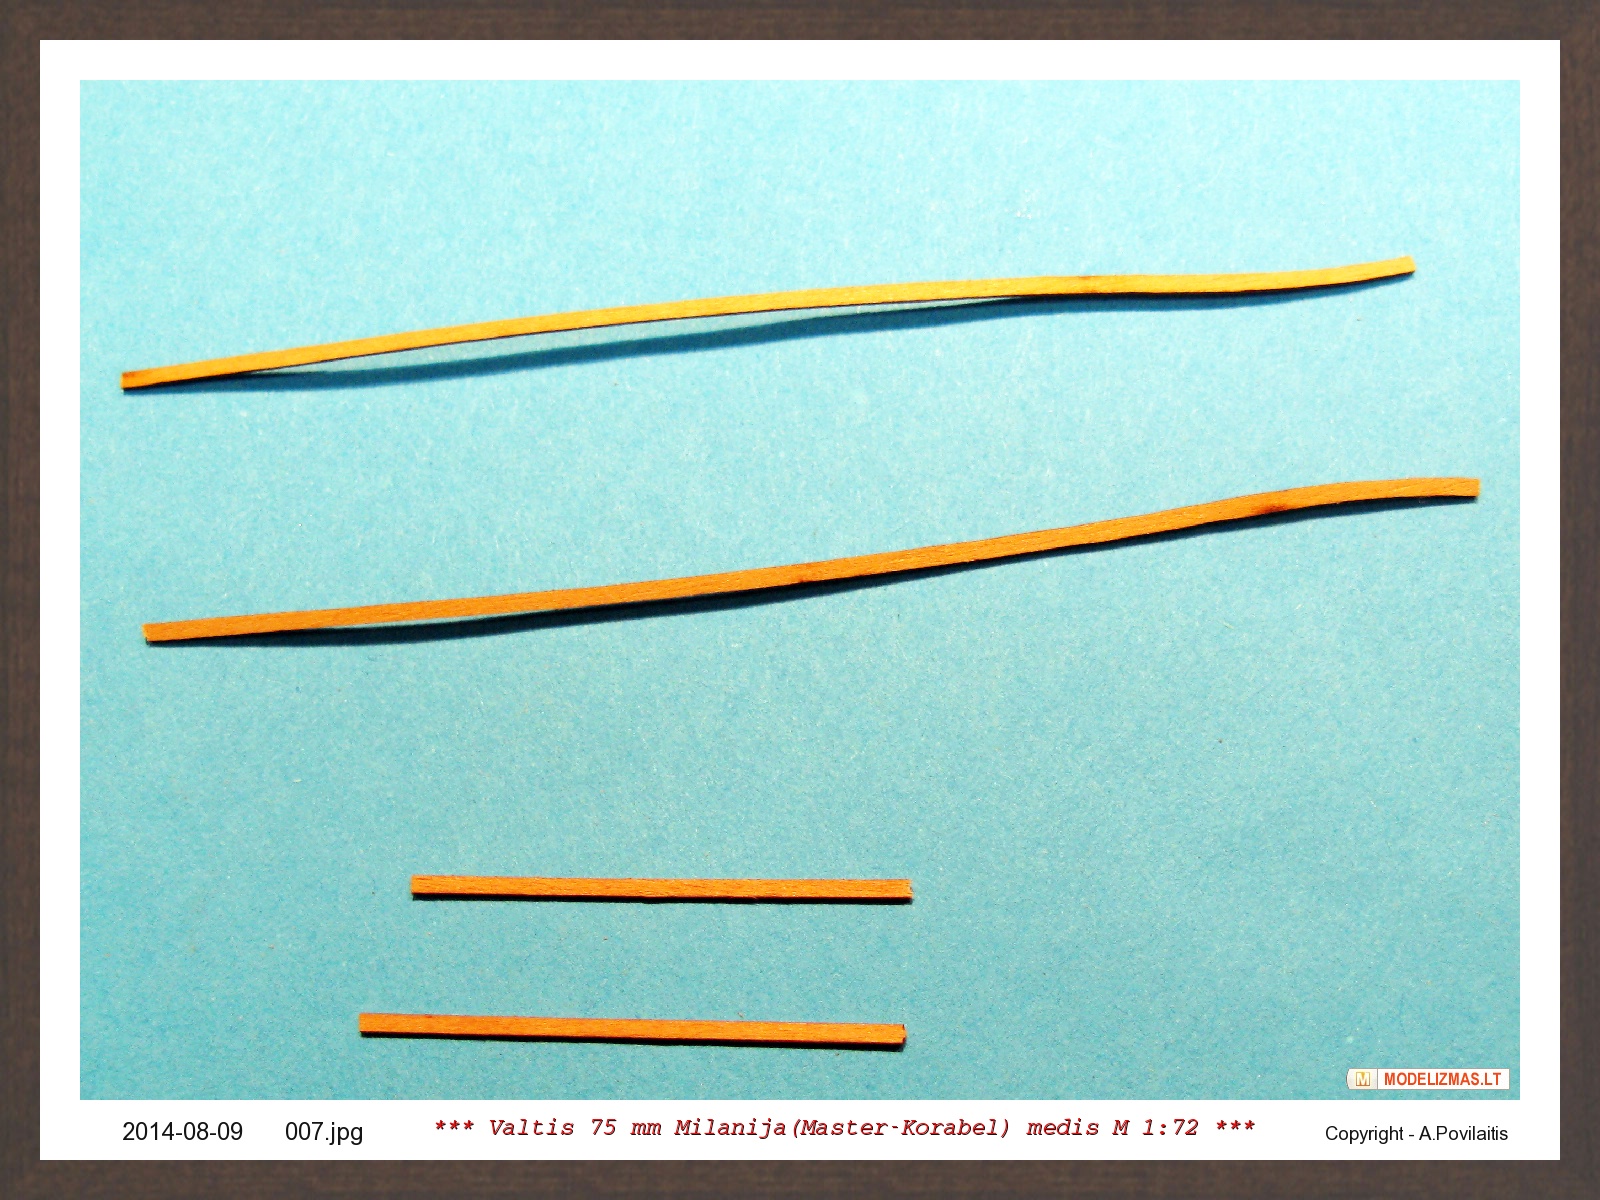
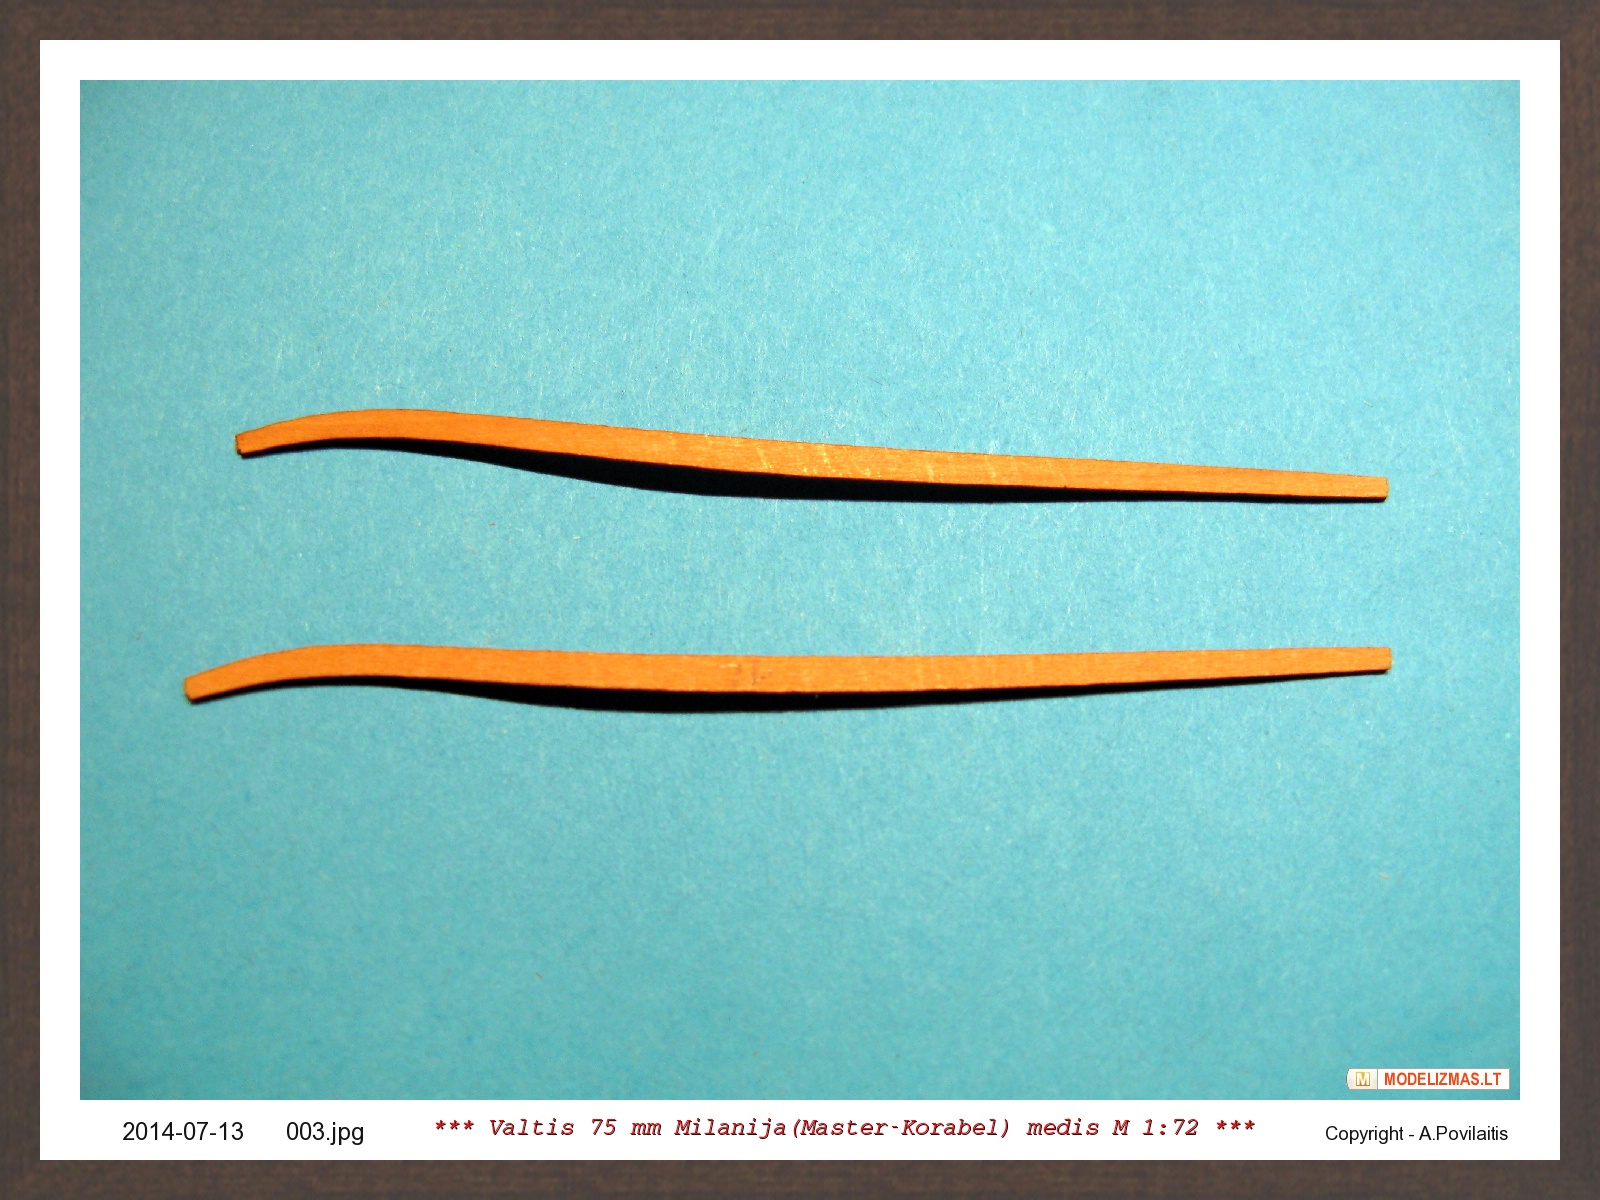
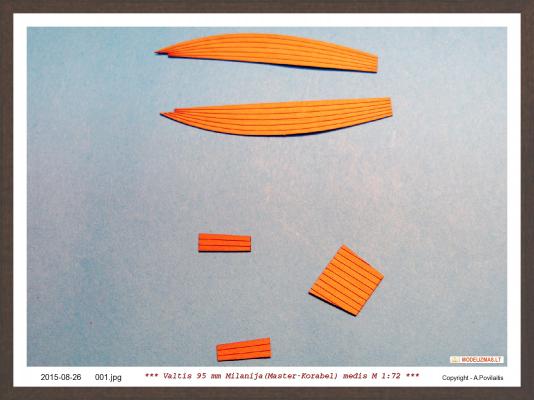
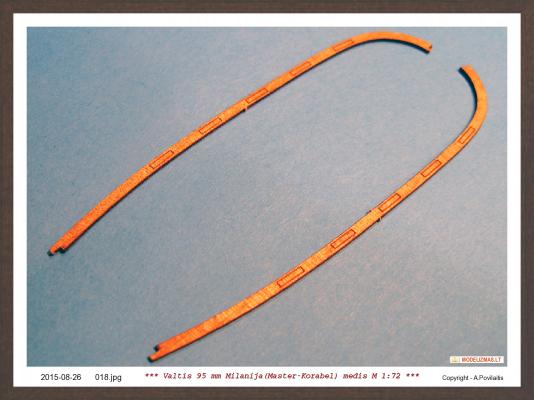
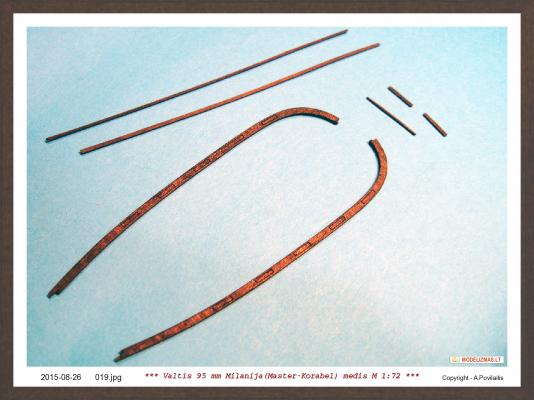
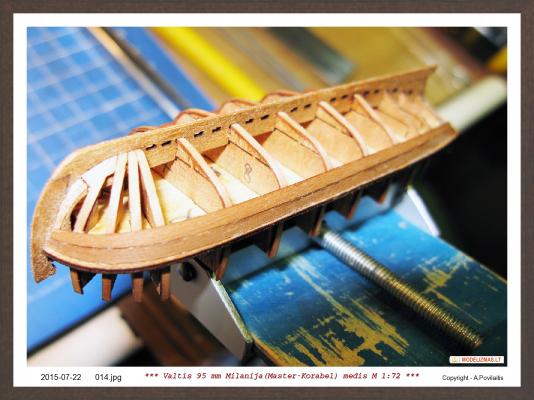
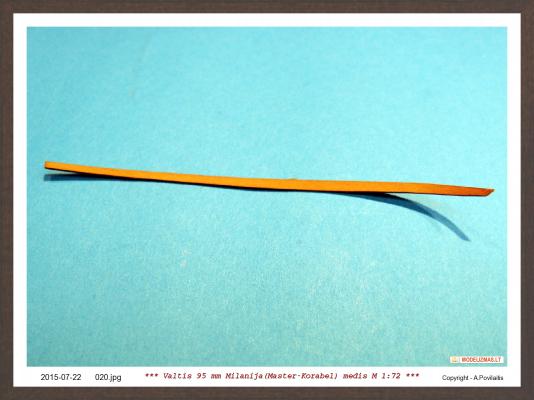
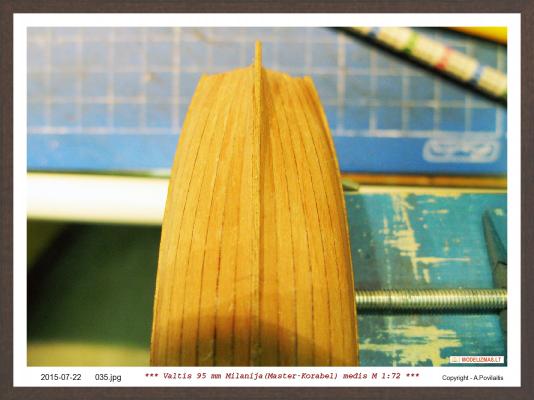
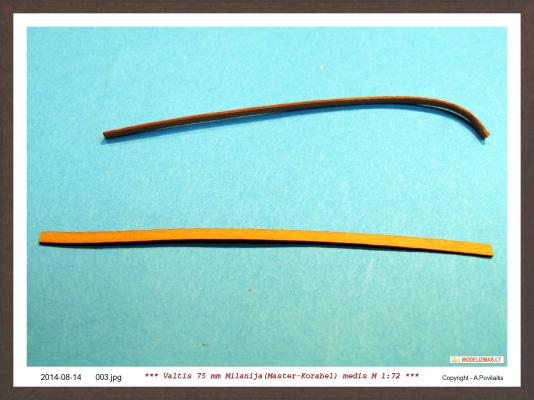
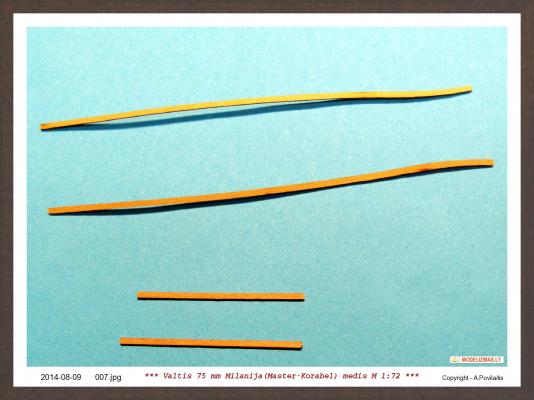
Bended and glued frames. They are from the pear strips. And begin planking the hull. The second and third frame has a wrong shape... Or maybe I make some mistake. Between frame and the plank are the small gap. But this is not the big problem. Some amount of the glue repaired this. The next problem is the first plank lenght. The lenght is about 0,1 mm less then needed. Regards, Antanas


- 13 replies
-
- 5
-
-
- 95mm boat
- master korabel
- (and 1 more)
-
In my opinion, it will also be faster. After the week delay, tommorow it will be continued. Regards, Antanas
-
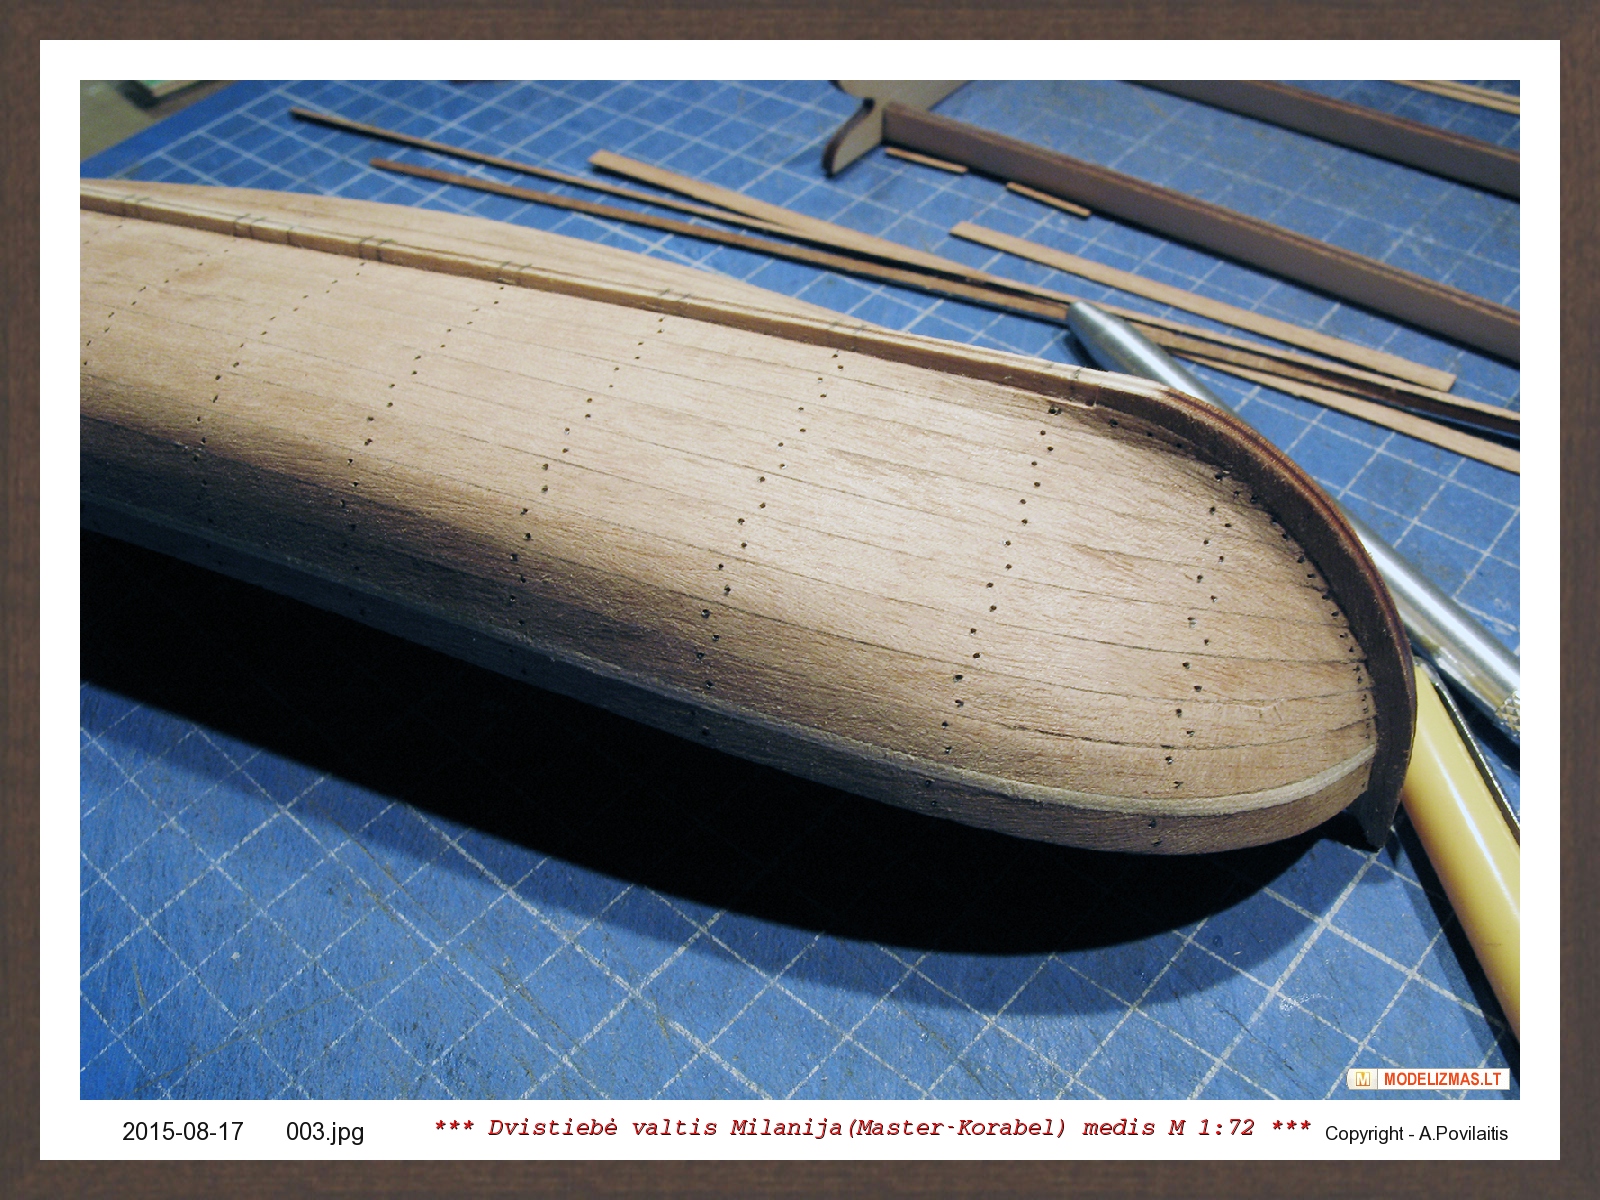
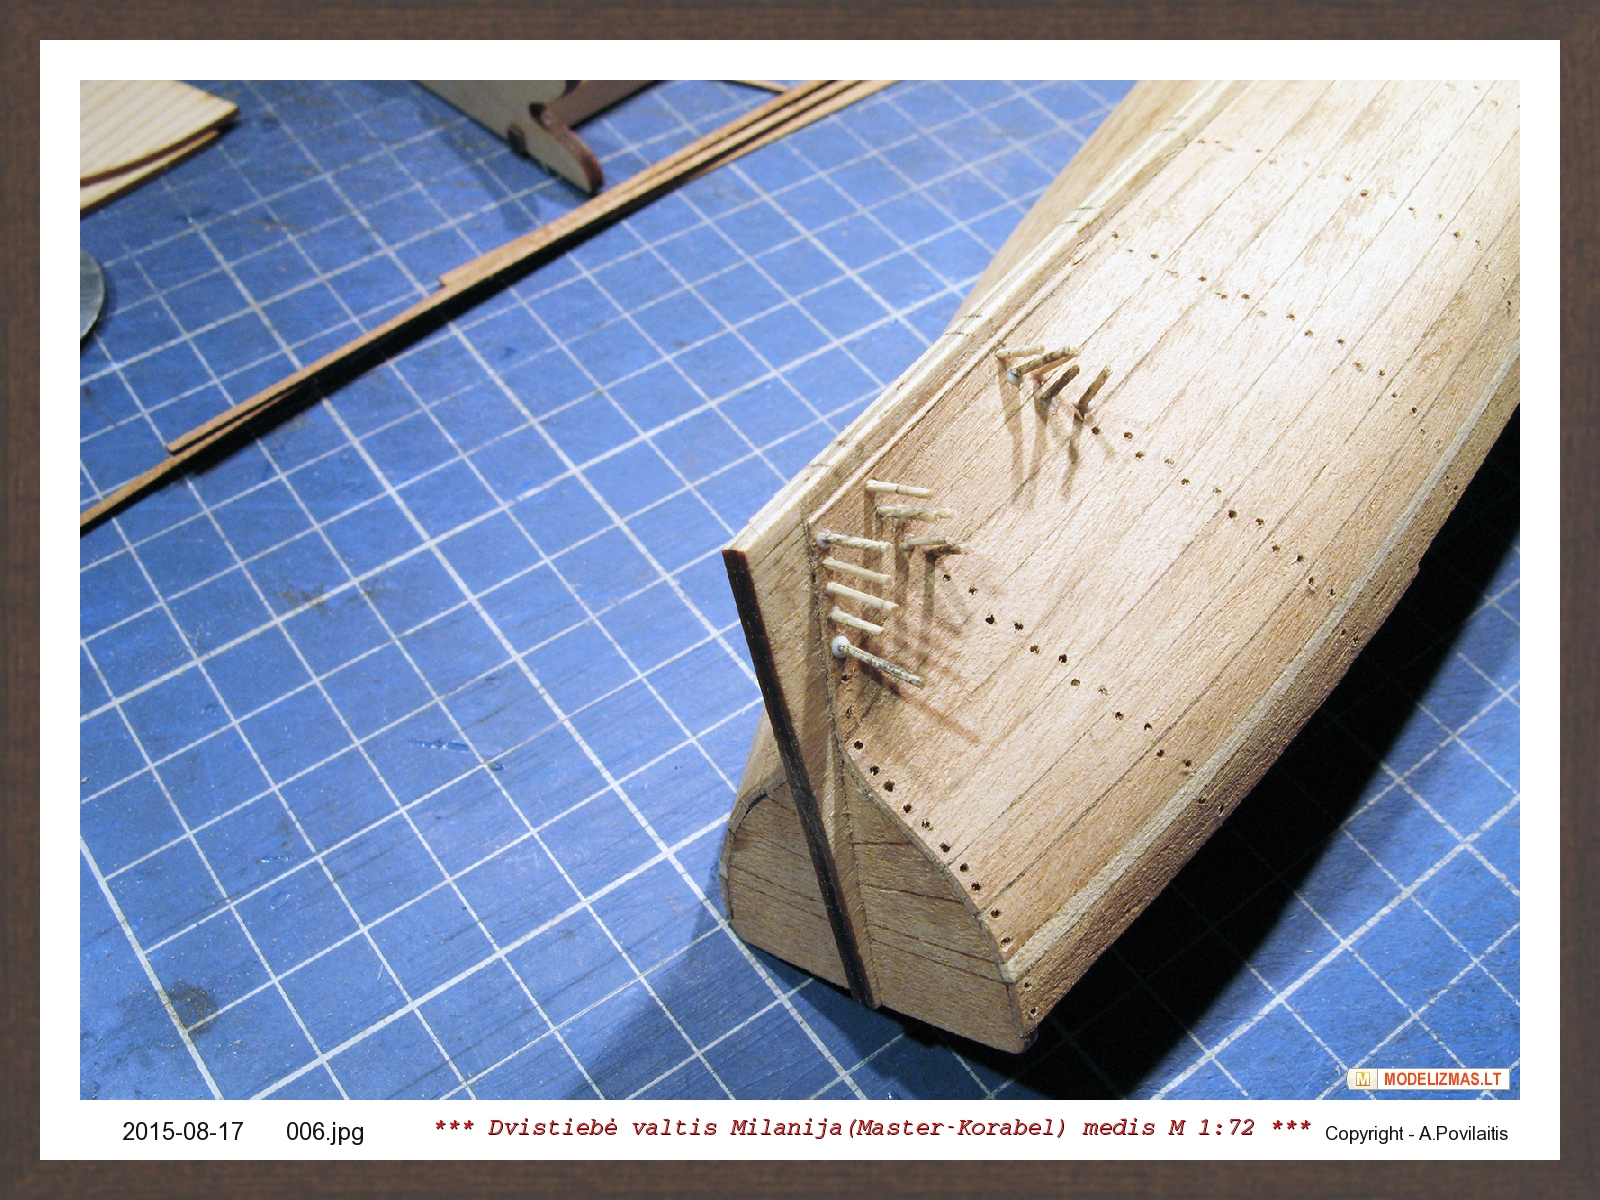
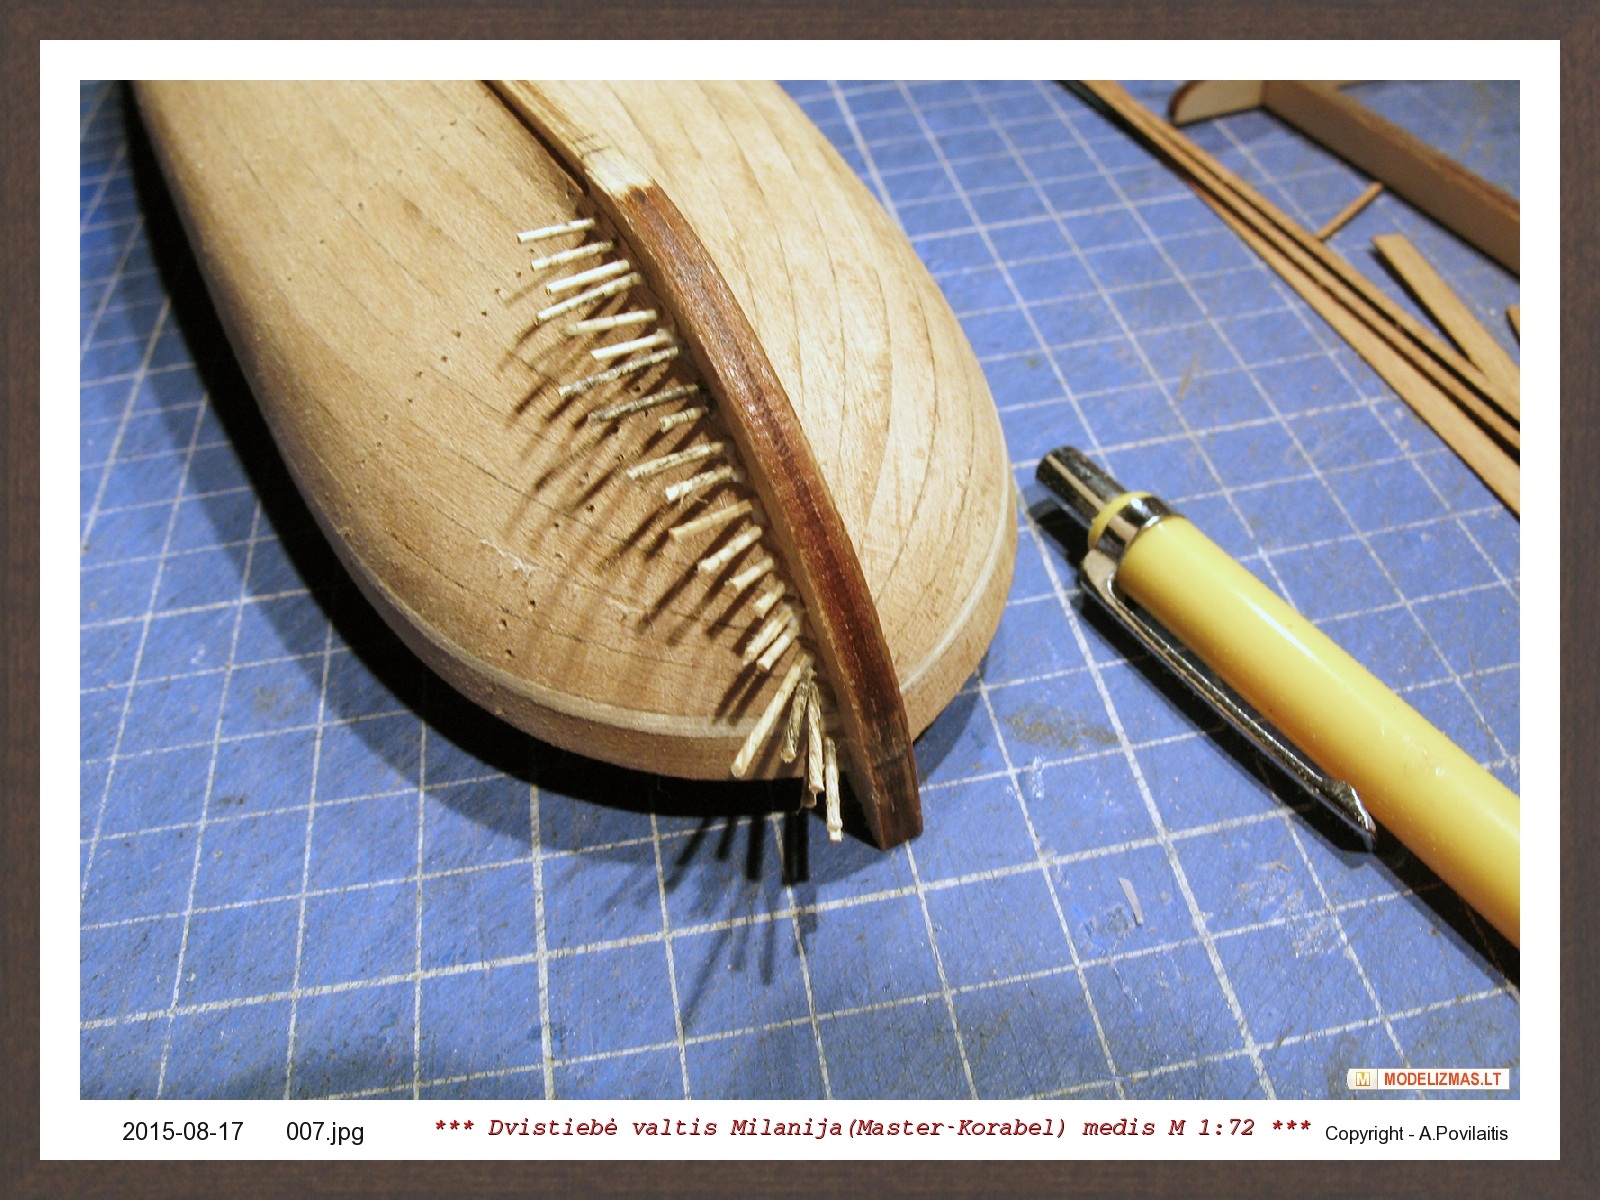
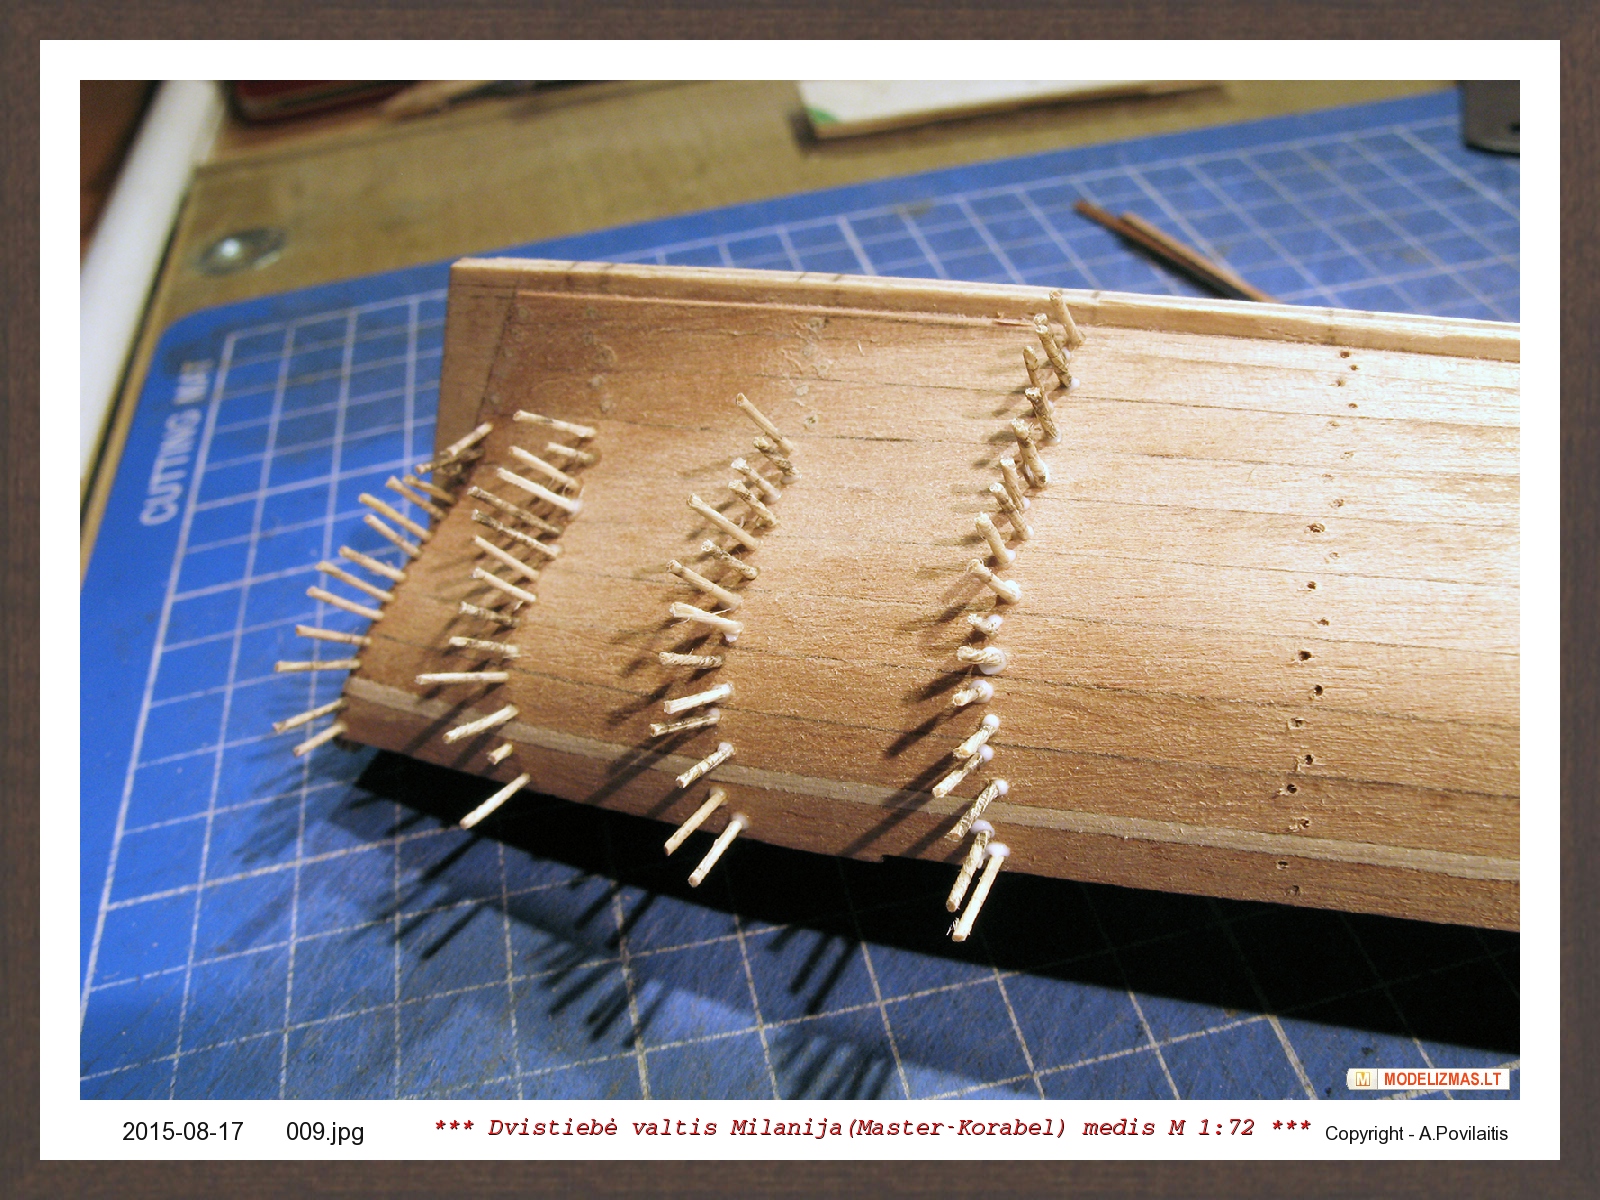
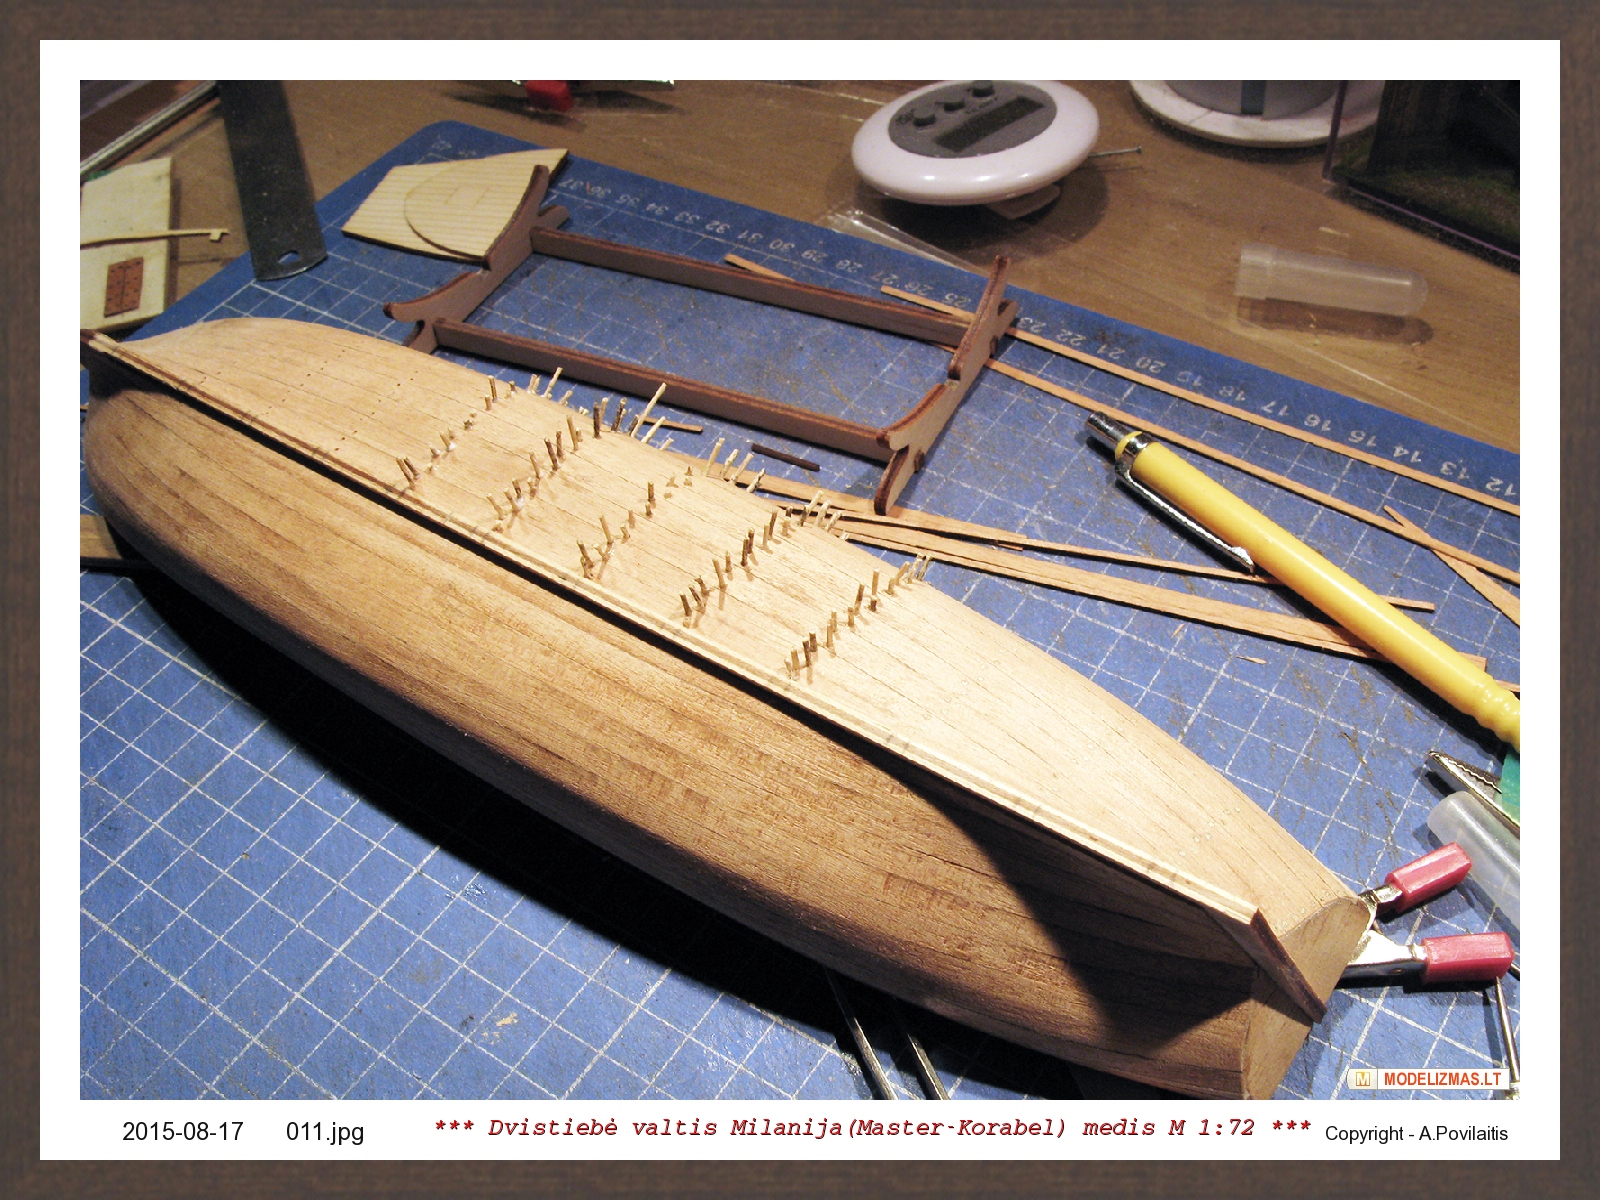
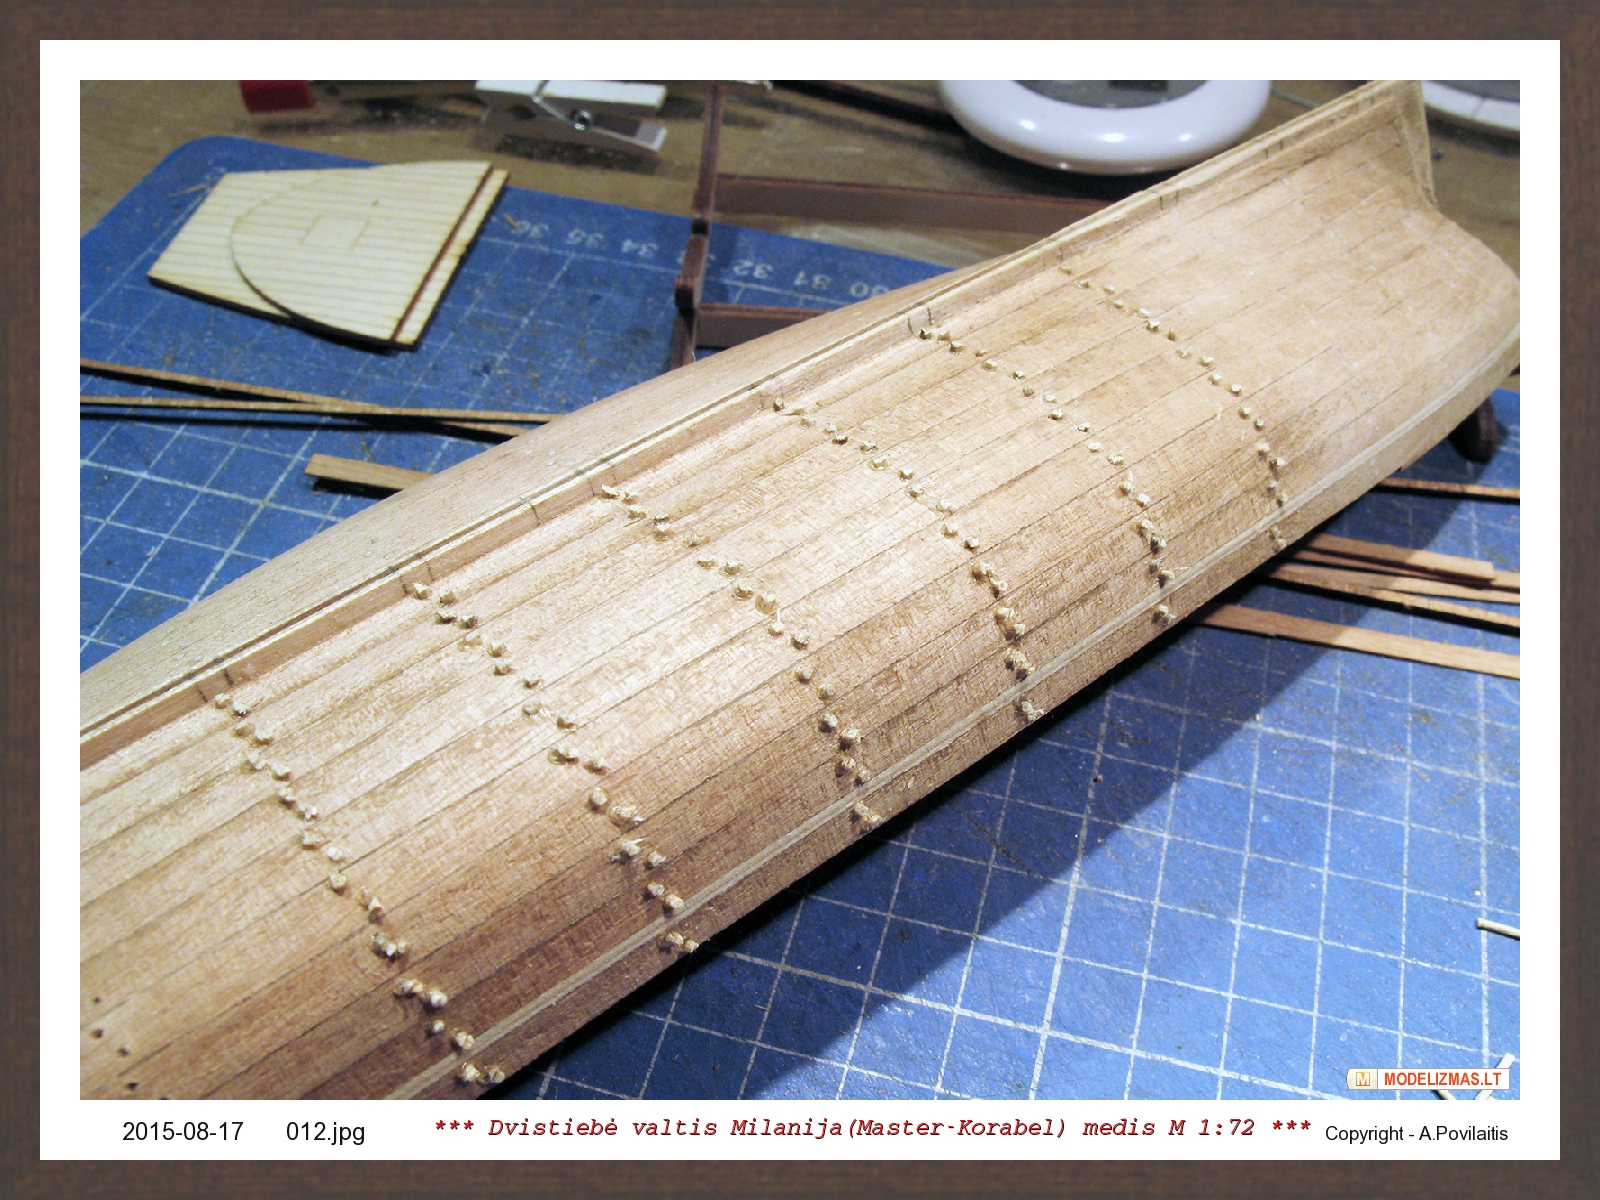
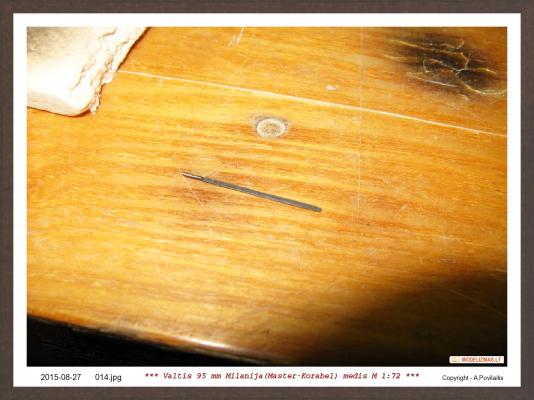
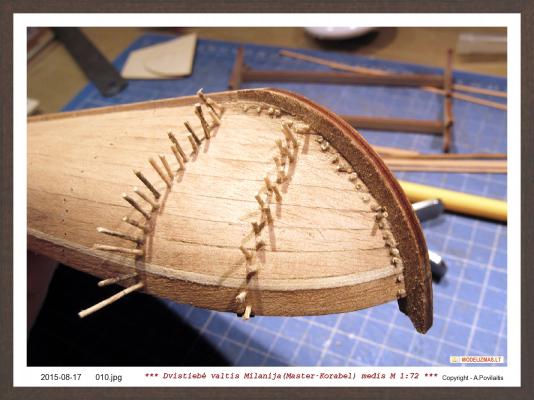
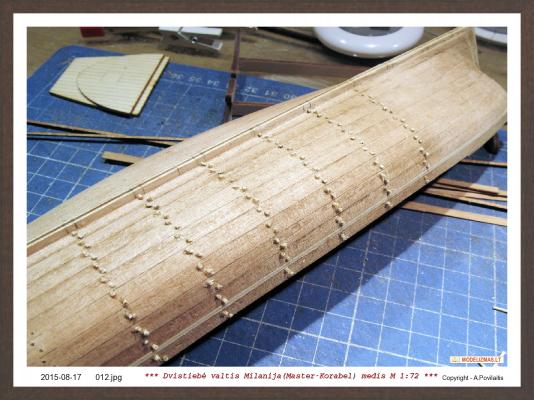
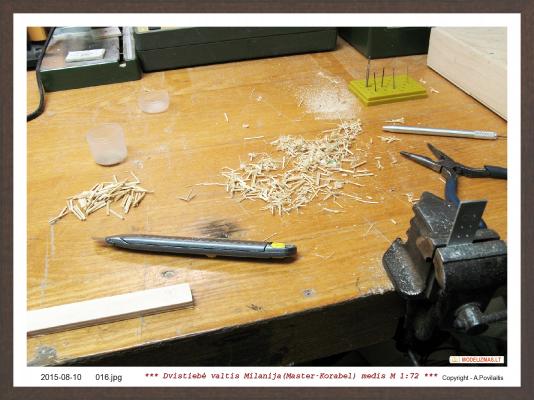
All strange situations with my connection to MSW are solved and I returned to my build. And so - nails. The process are simple and well known. Because the hull has only one layer of planks, I can place the nails only on the frames. Marked and drilled holes. Then glue wooden nails. Cut and sand. The final sanding will be later. Regards, Antanas


-
All done very very vell! Wonderful! Only maybe the shrouds there are too small in diameter. Maybe... I like Your approach to modeling, Brian. Good luck. Regards, Antanas
- 831 replies
-
- 4
-
-
- Armed Virginia Sloop
- Model Shipways
- (and 1 more)
-
Wow!!! Awesome! You'll be able to make a true "renaissance" ... Regards, Antanas
- 59 replies
-
- 3
-
-
- norske lowe
- billing boats
- (and 1 more)
-
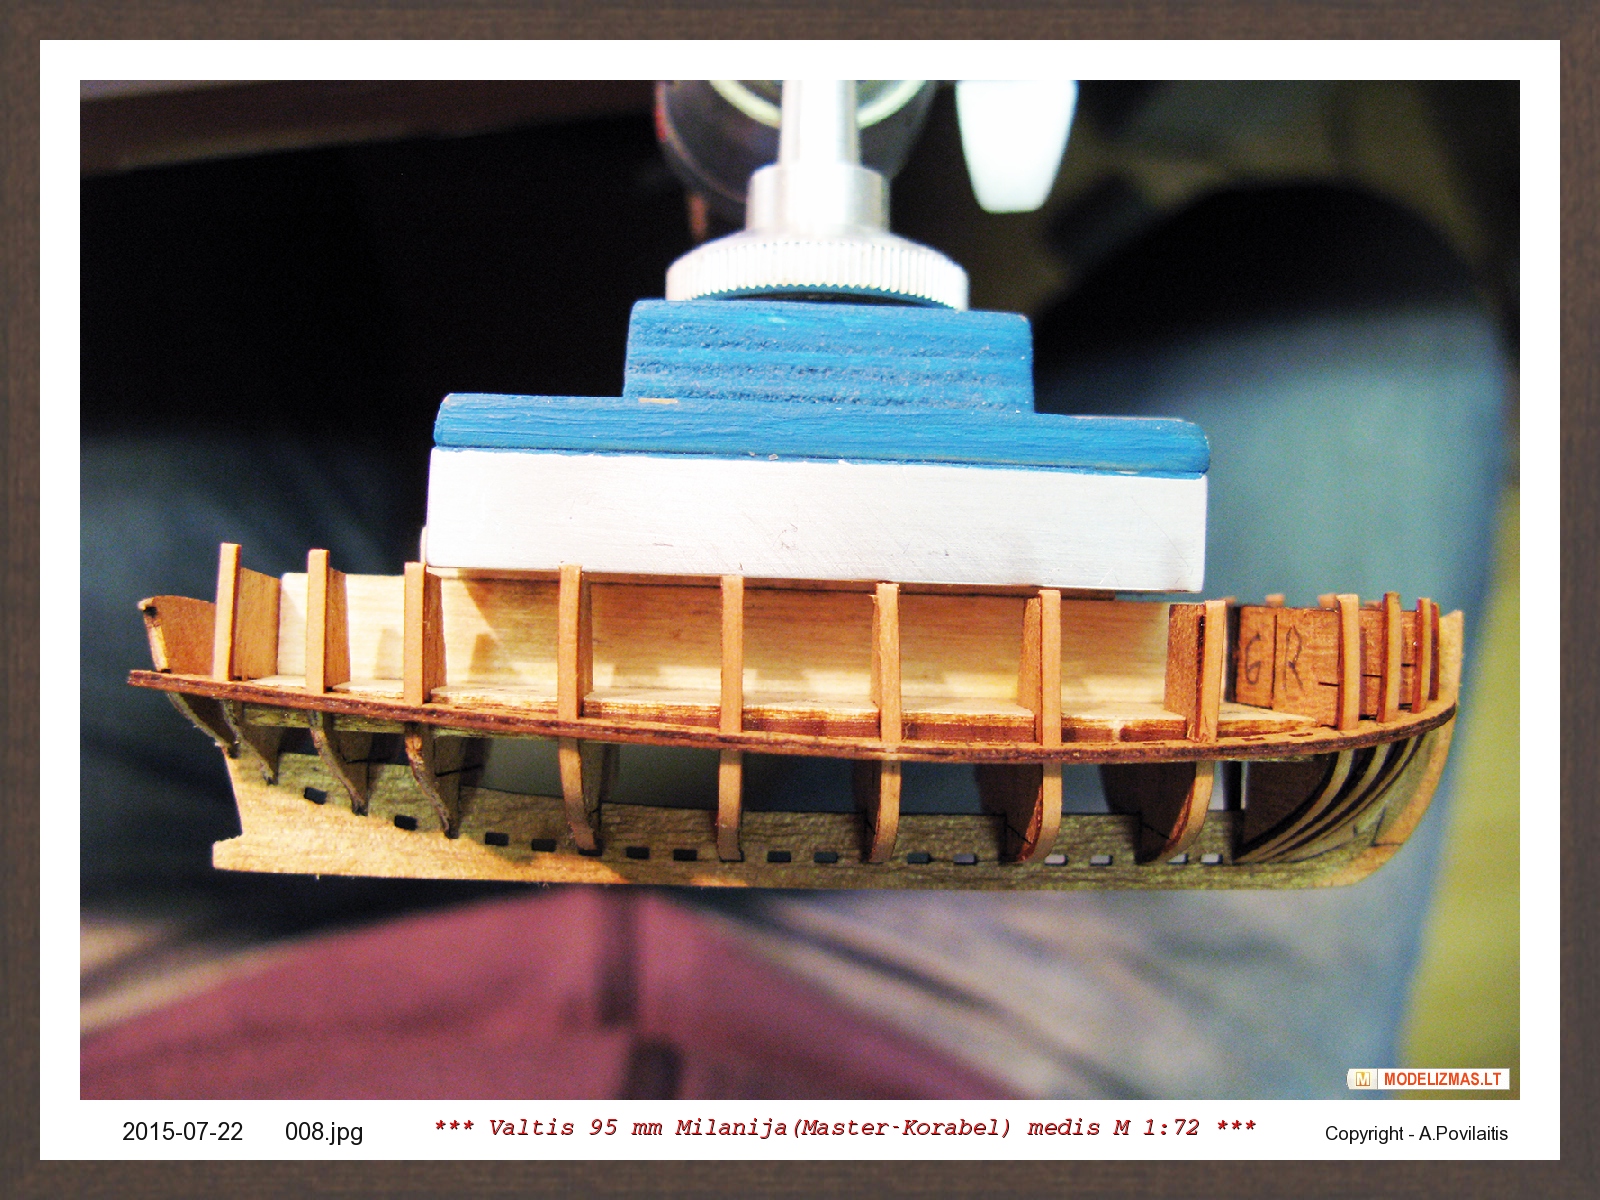
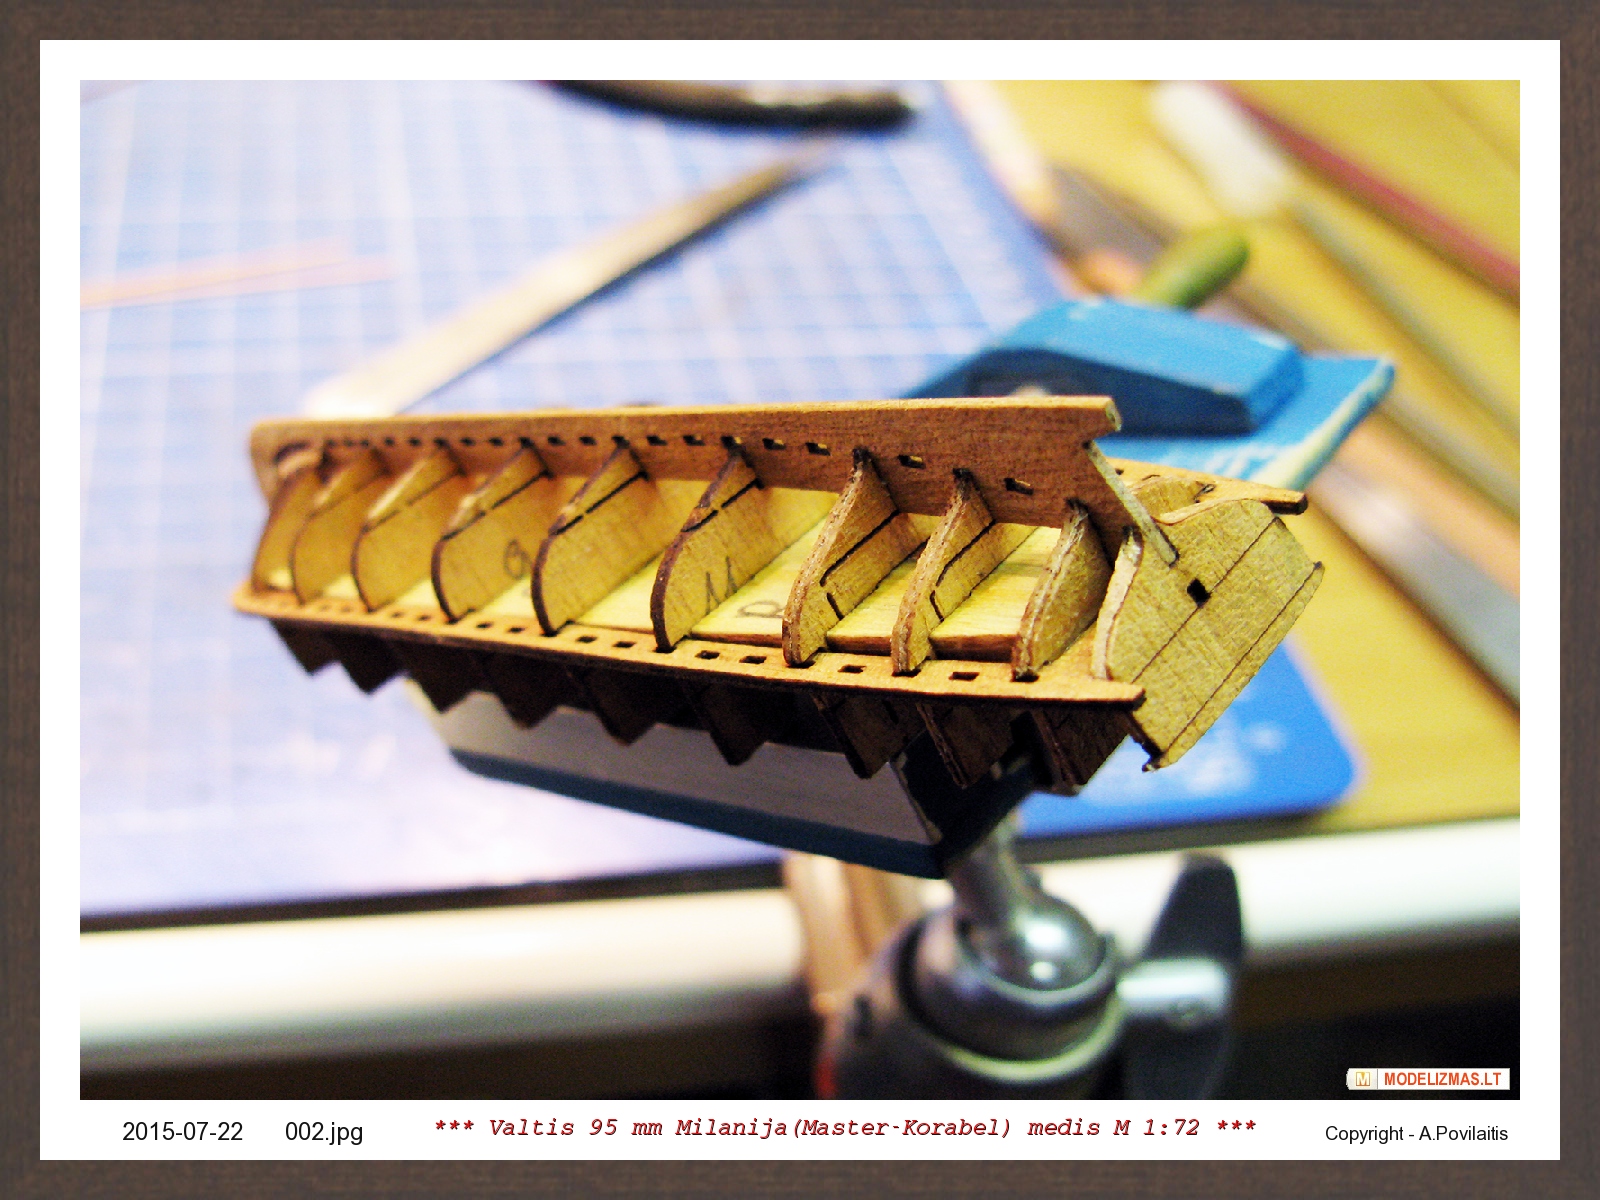
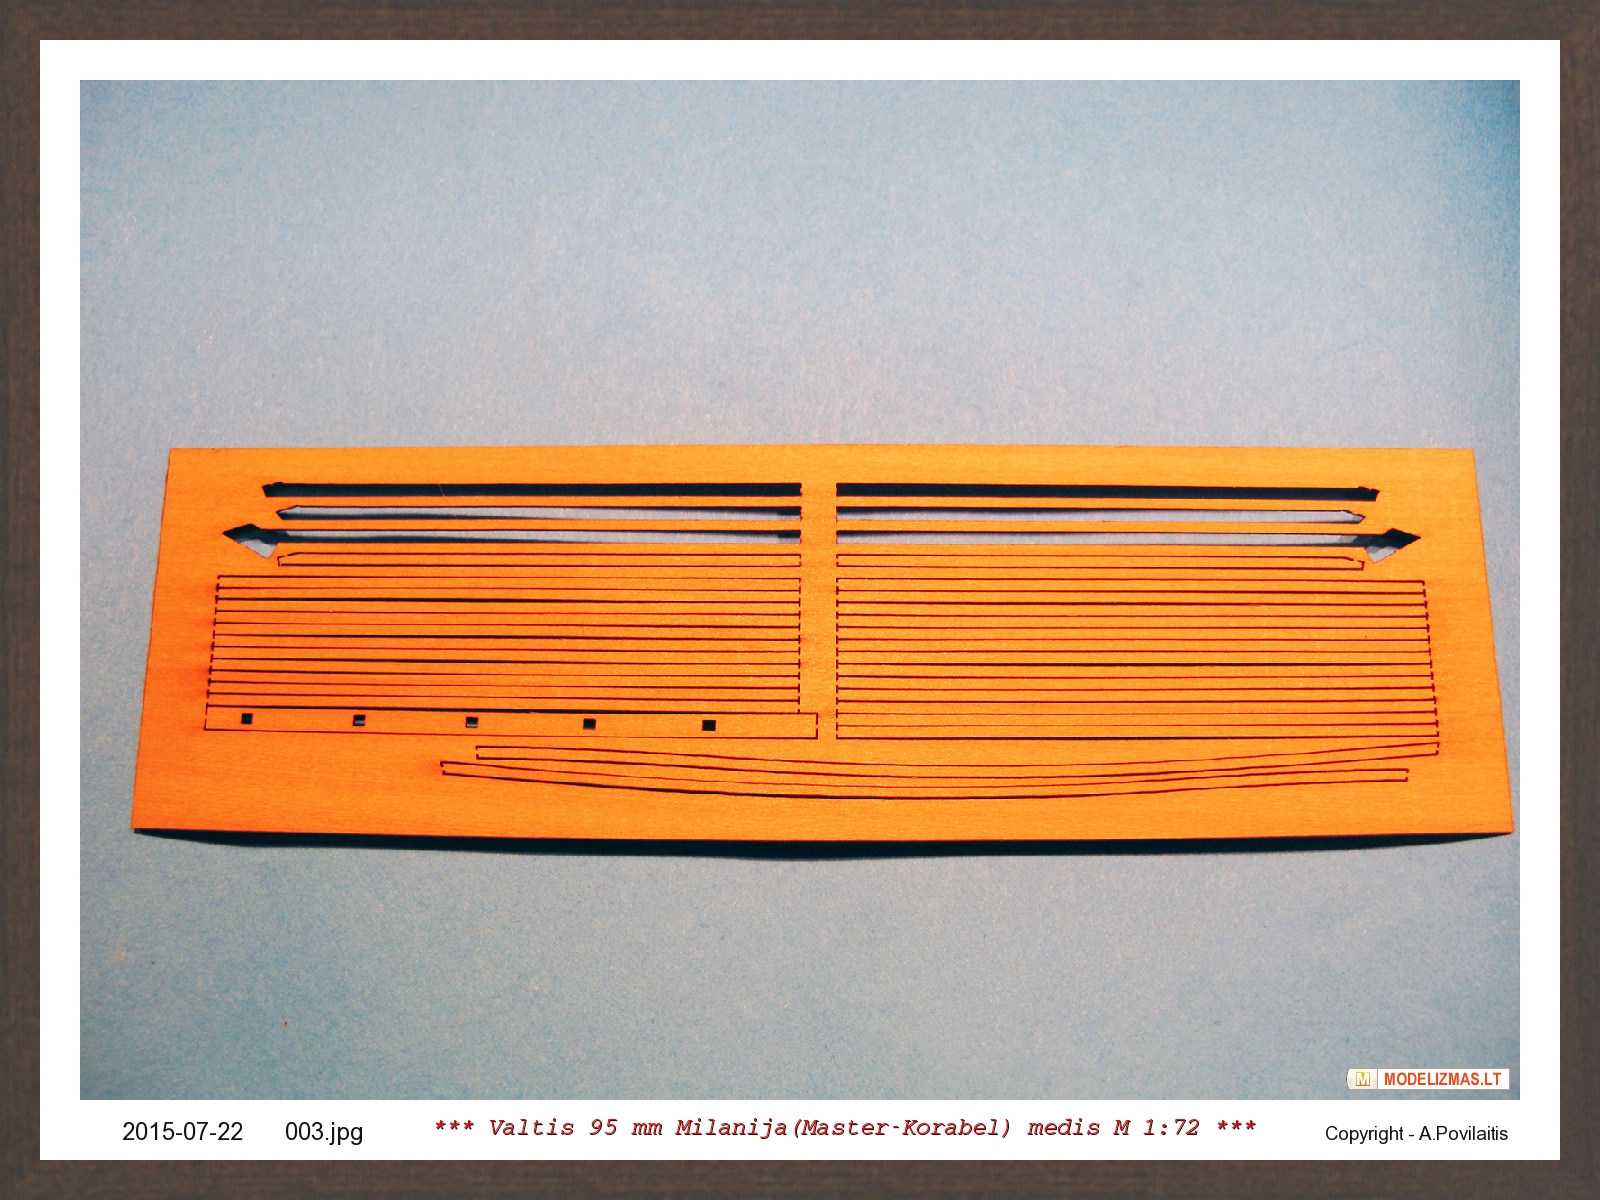
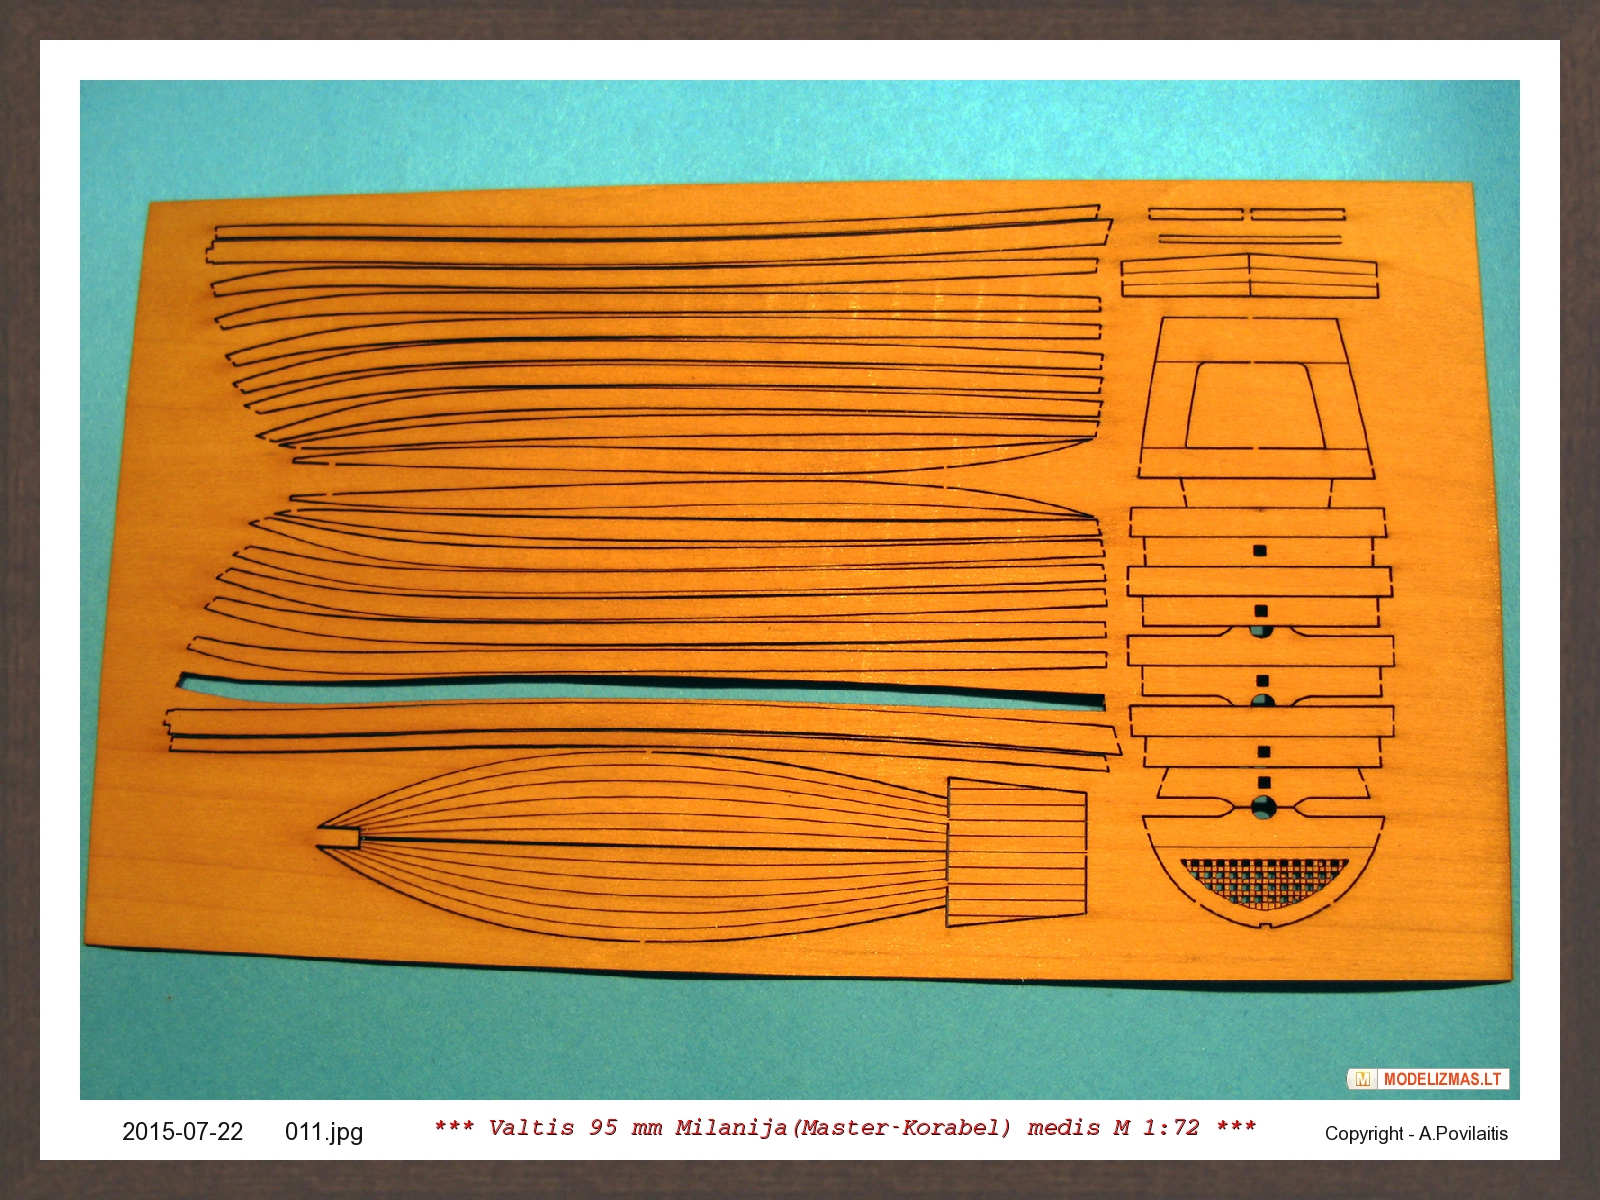
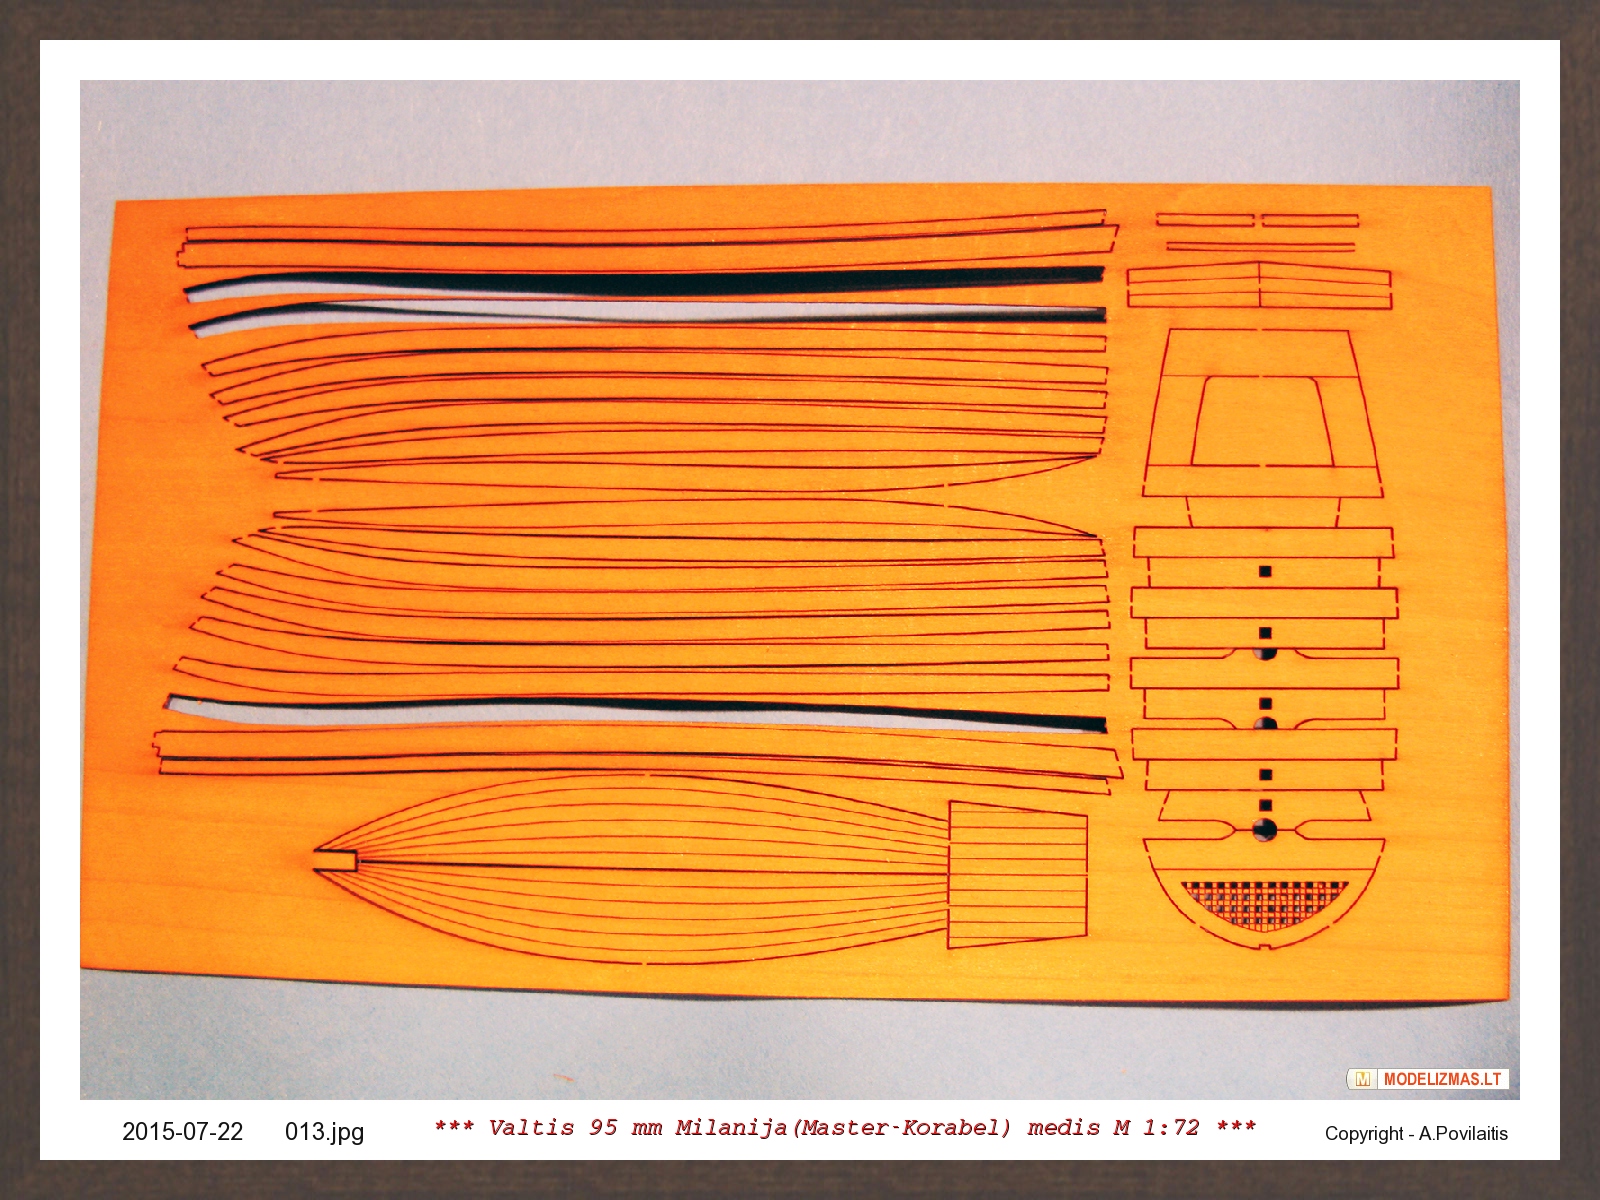
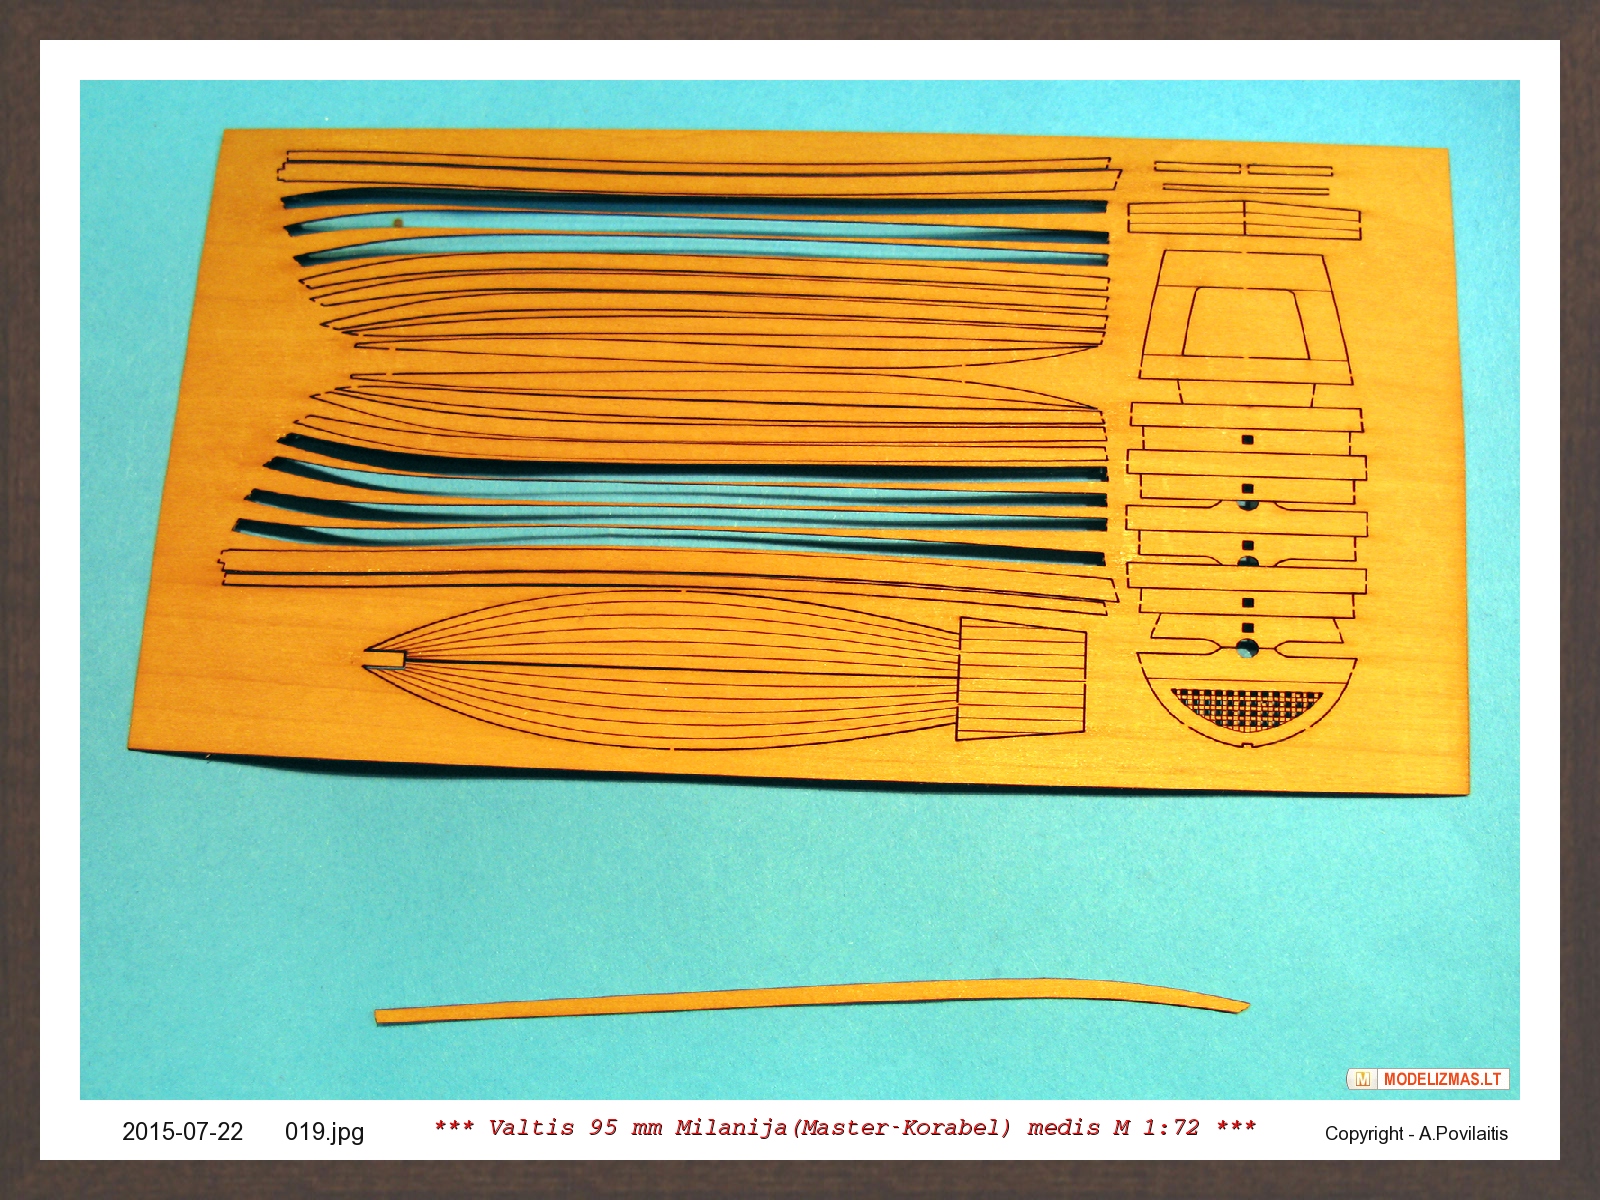
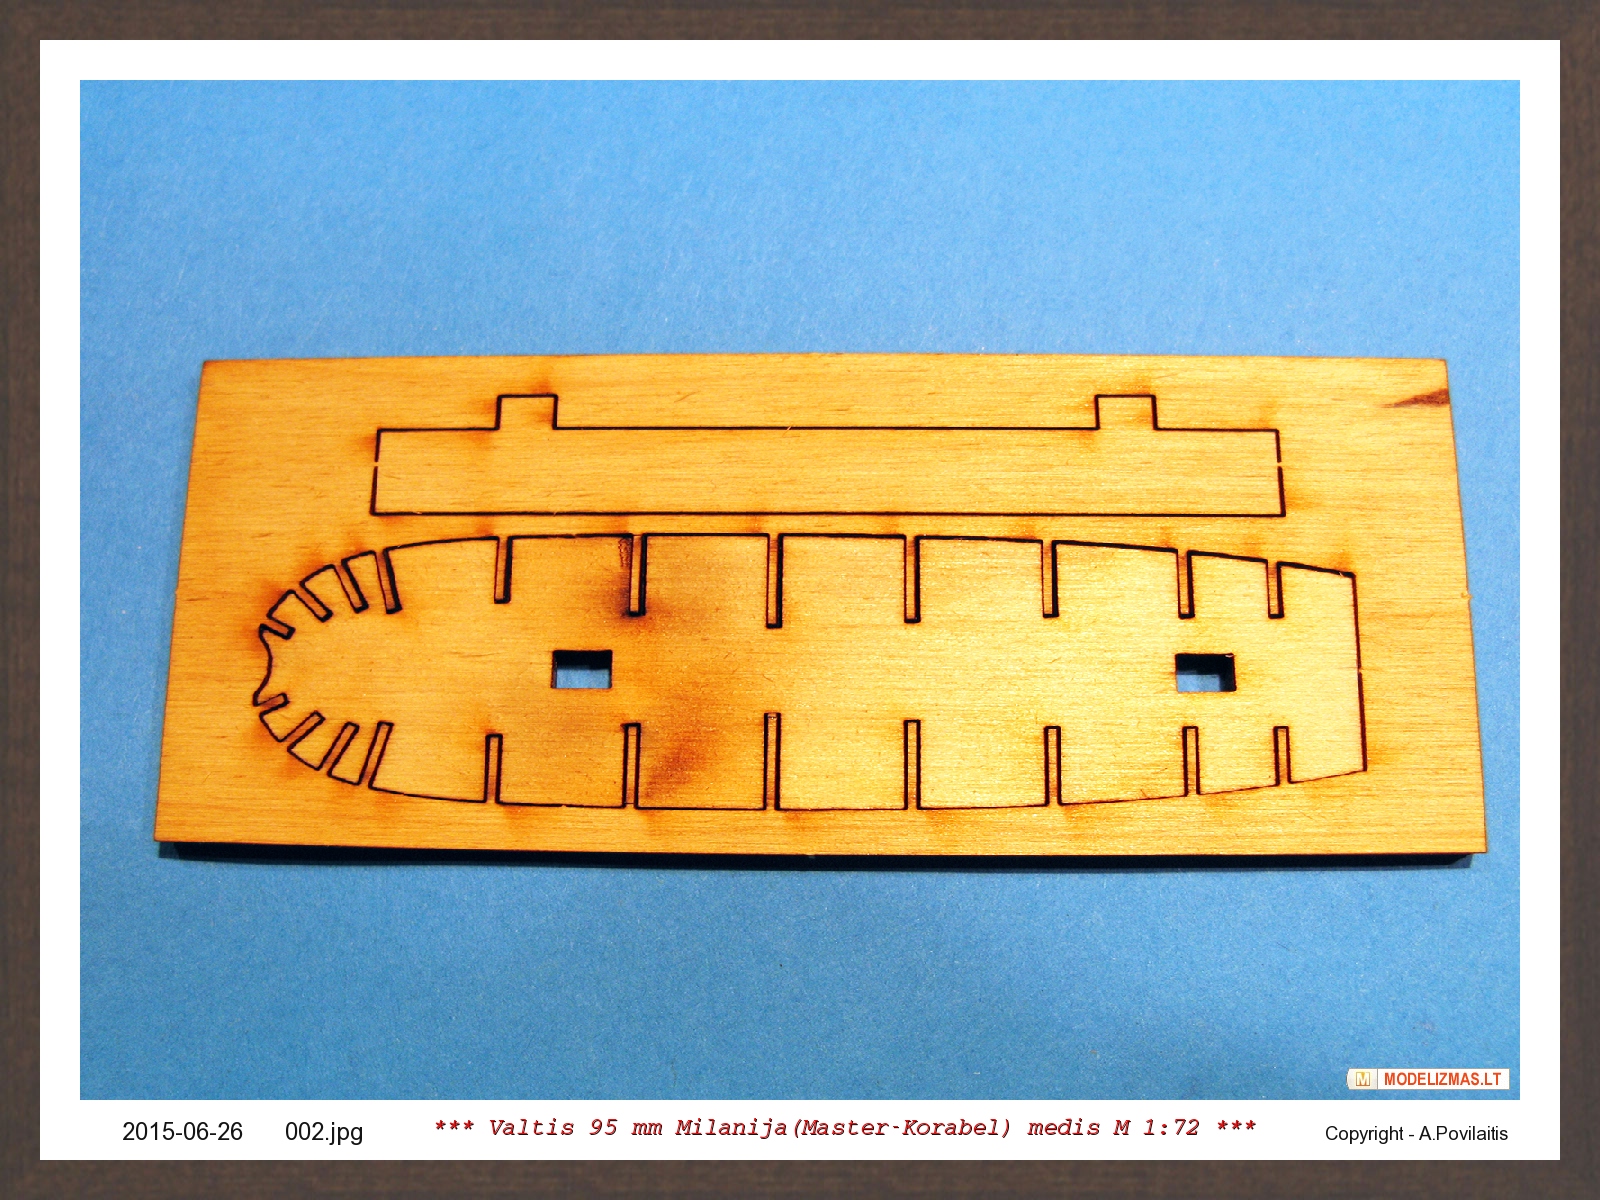
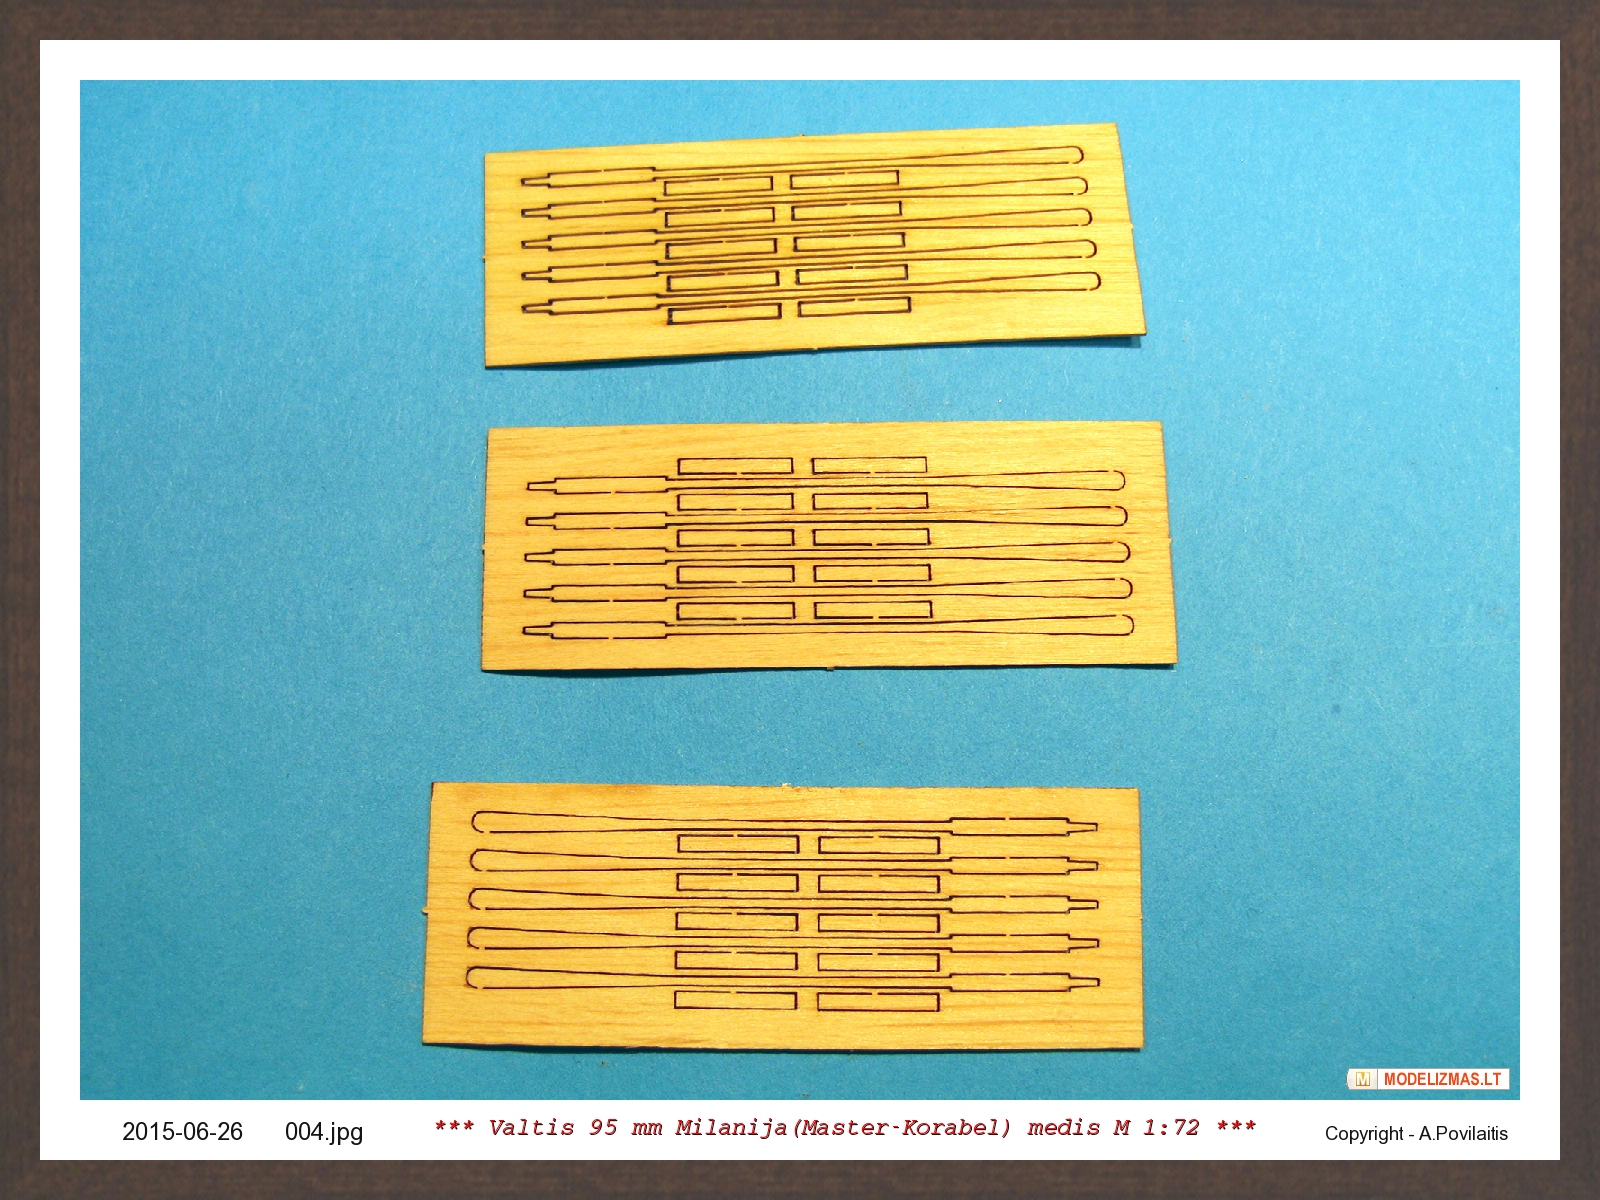
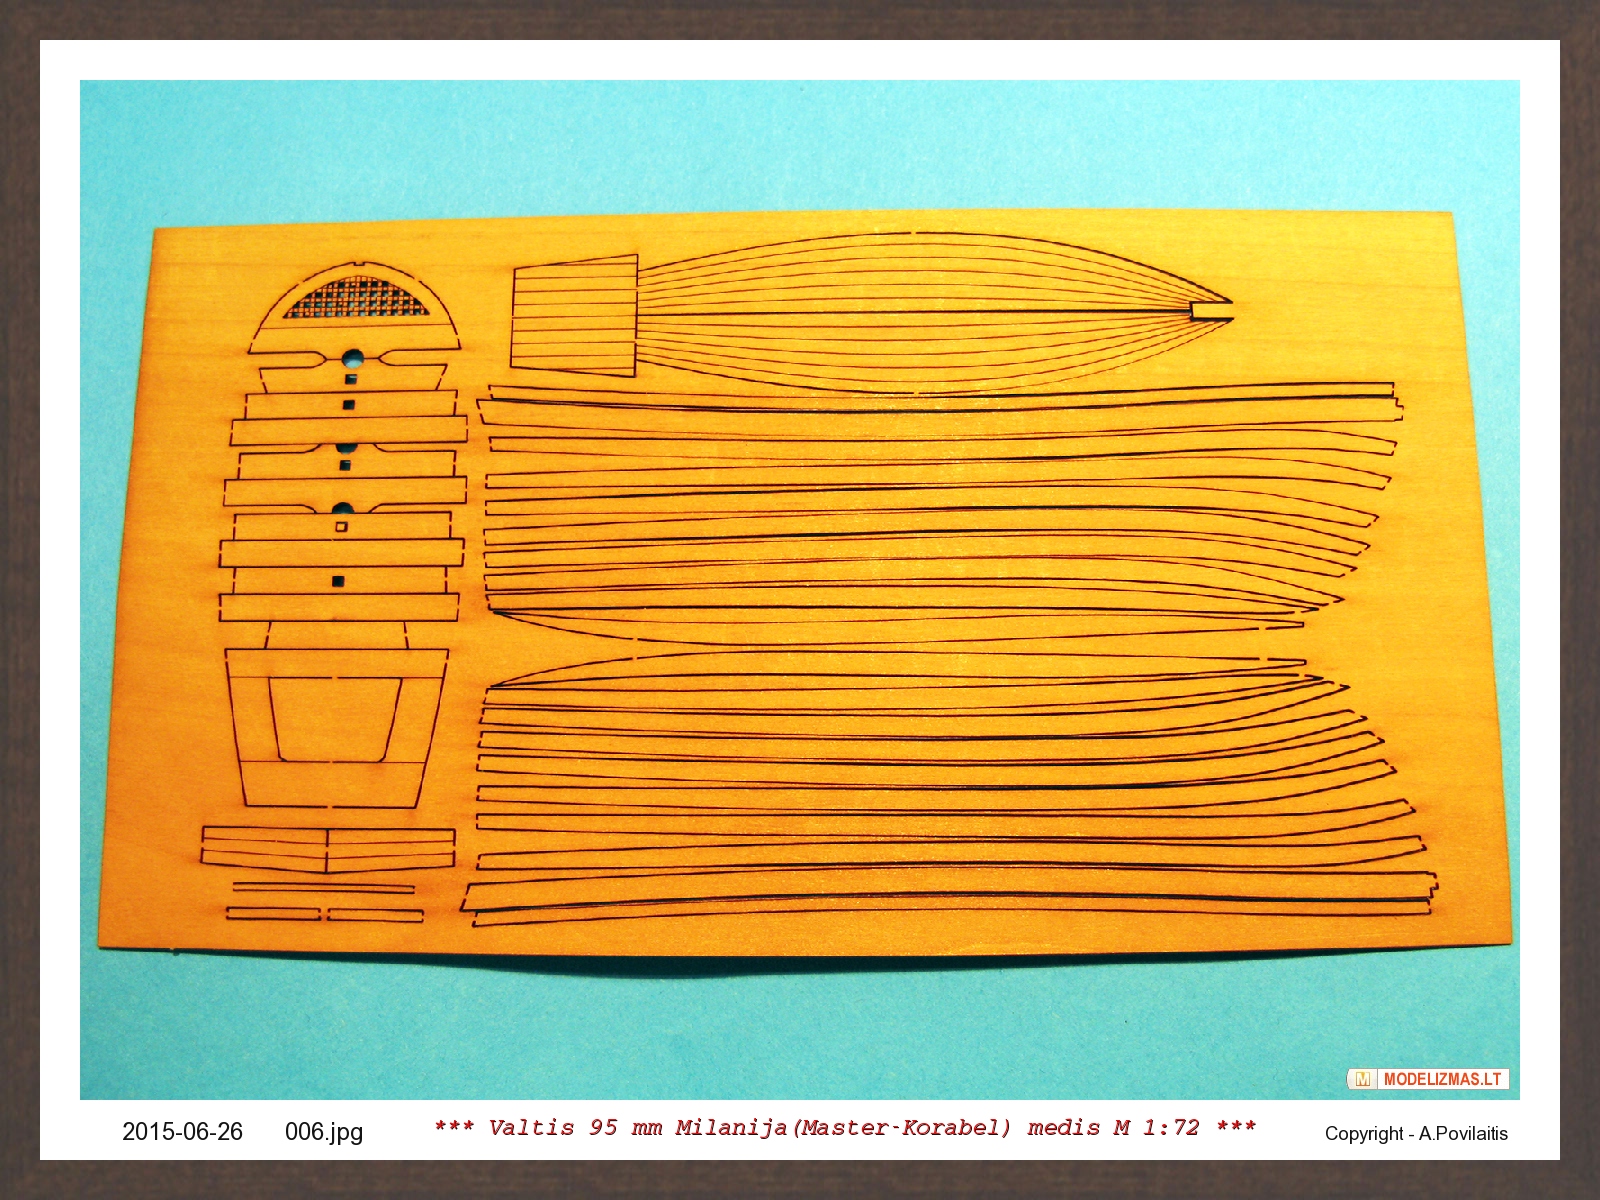
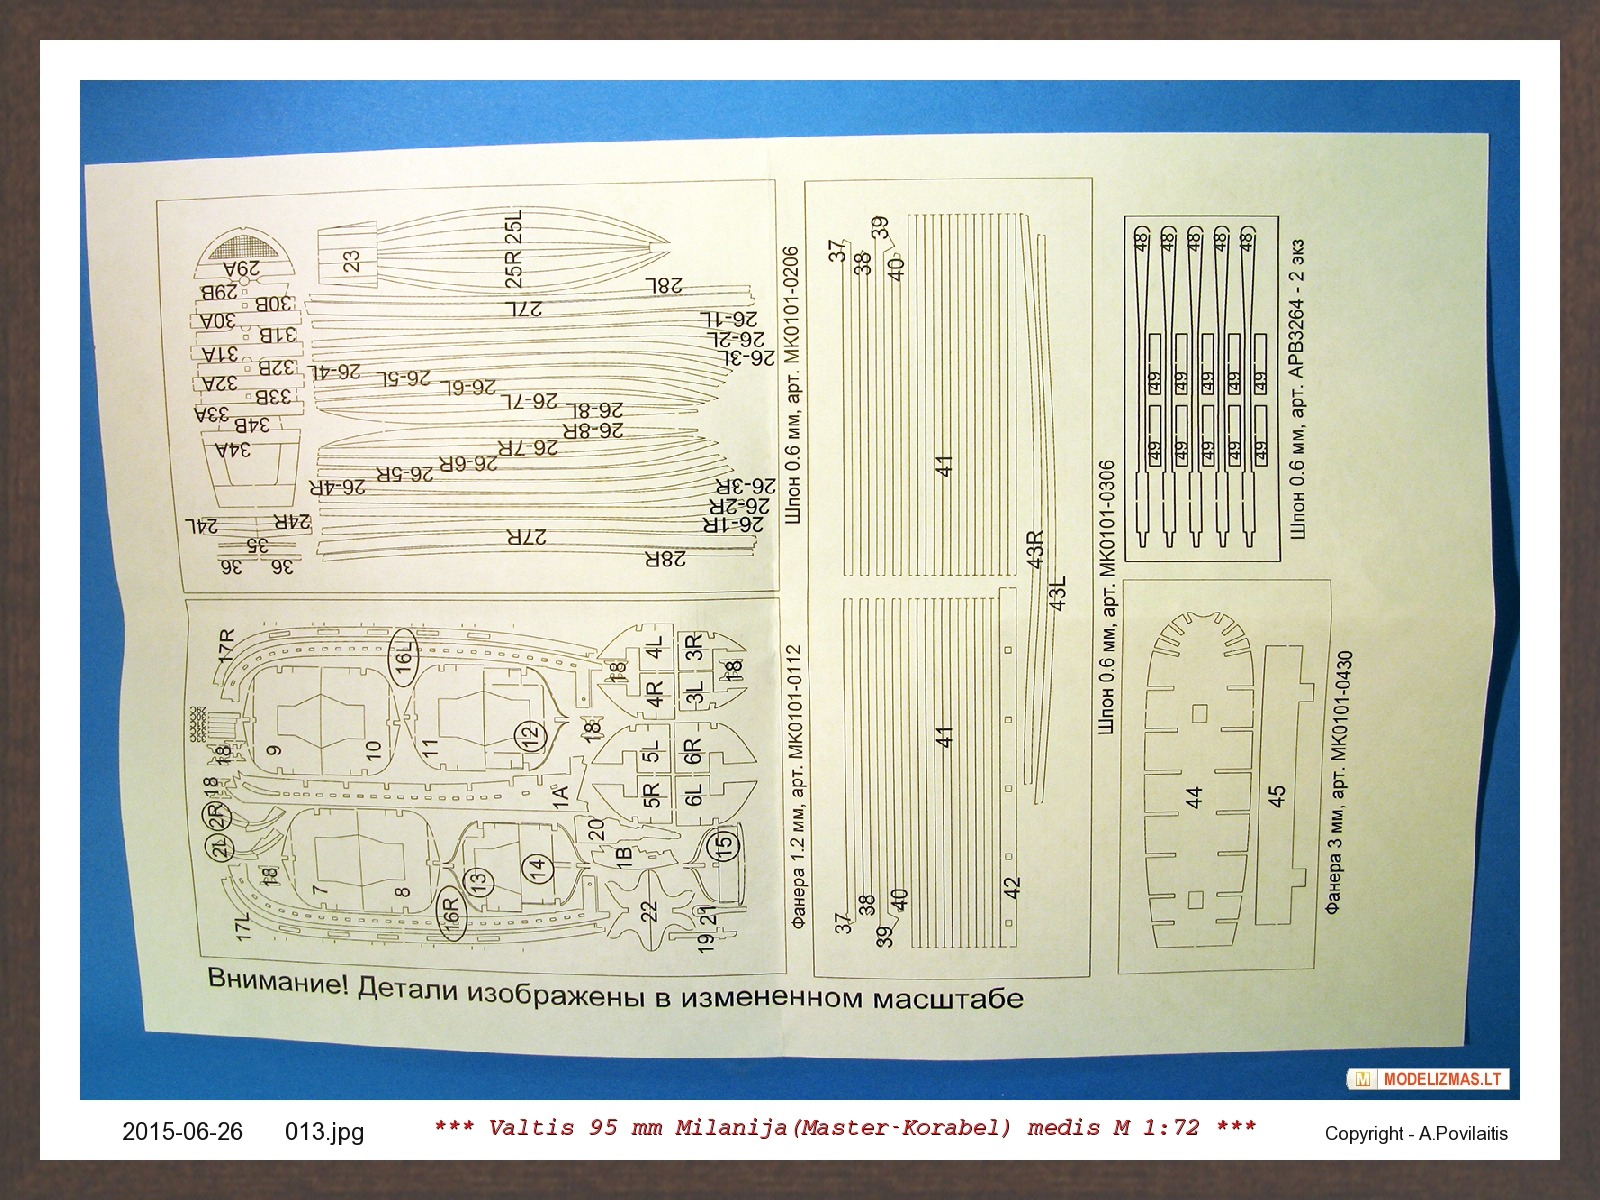
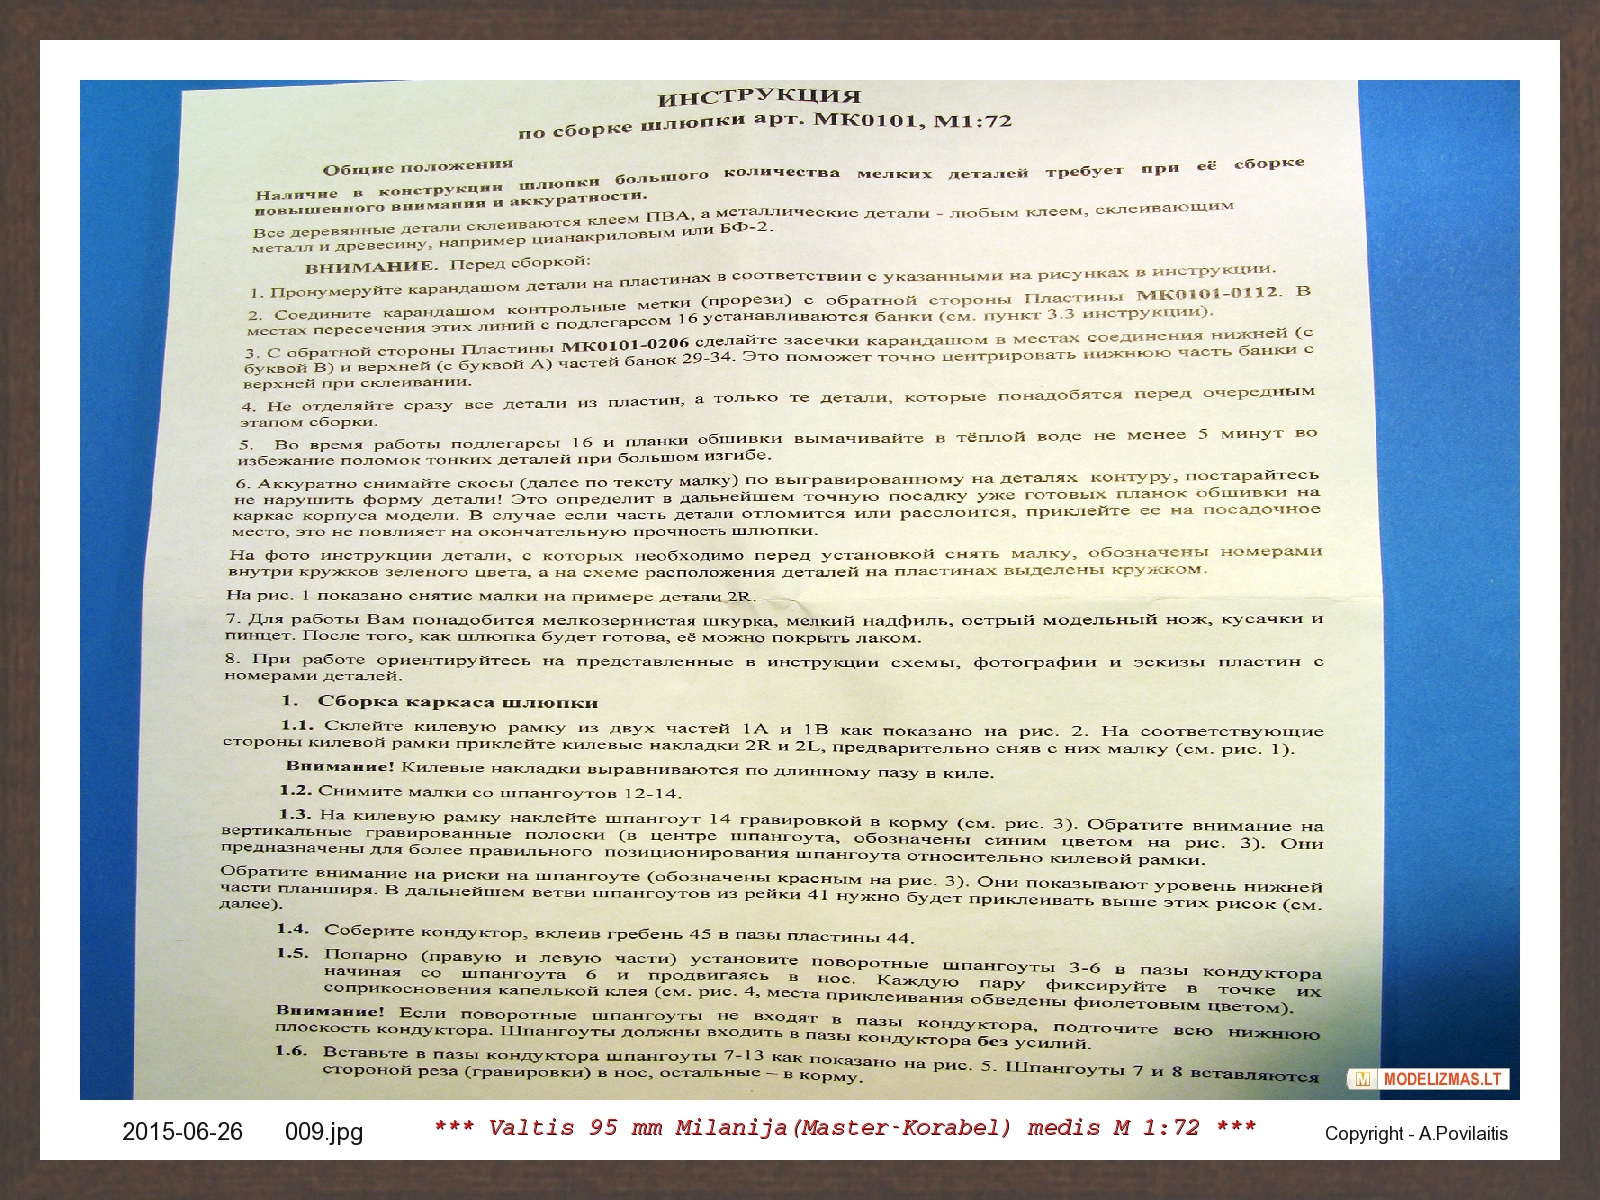
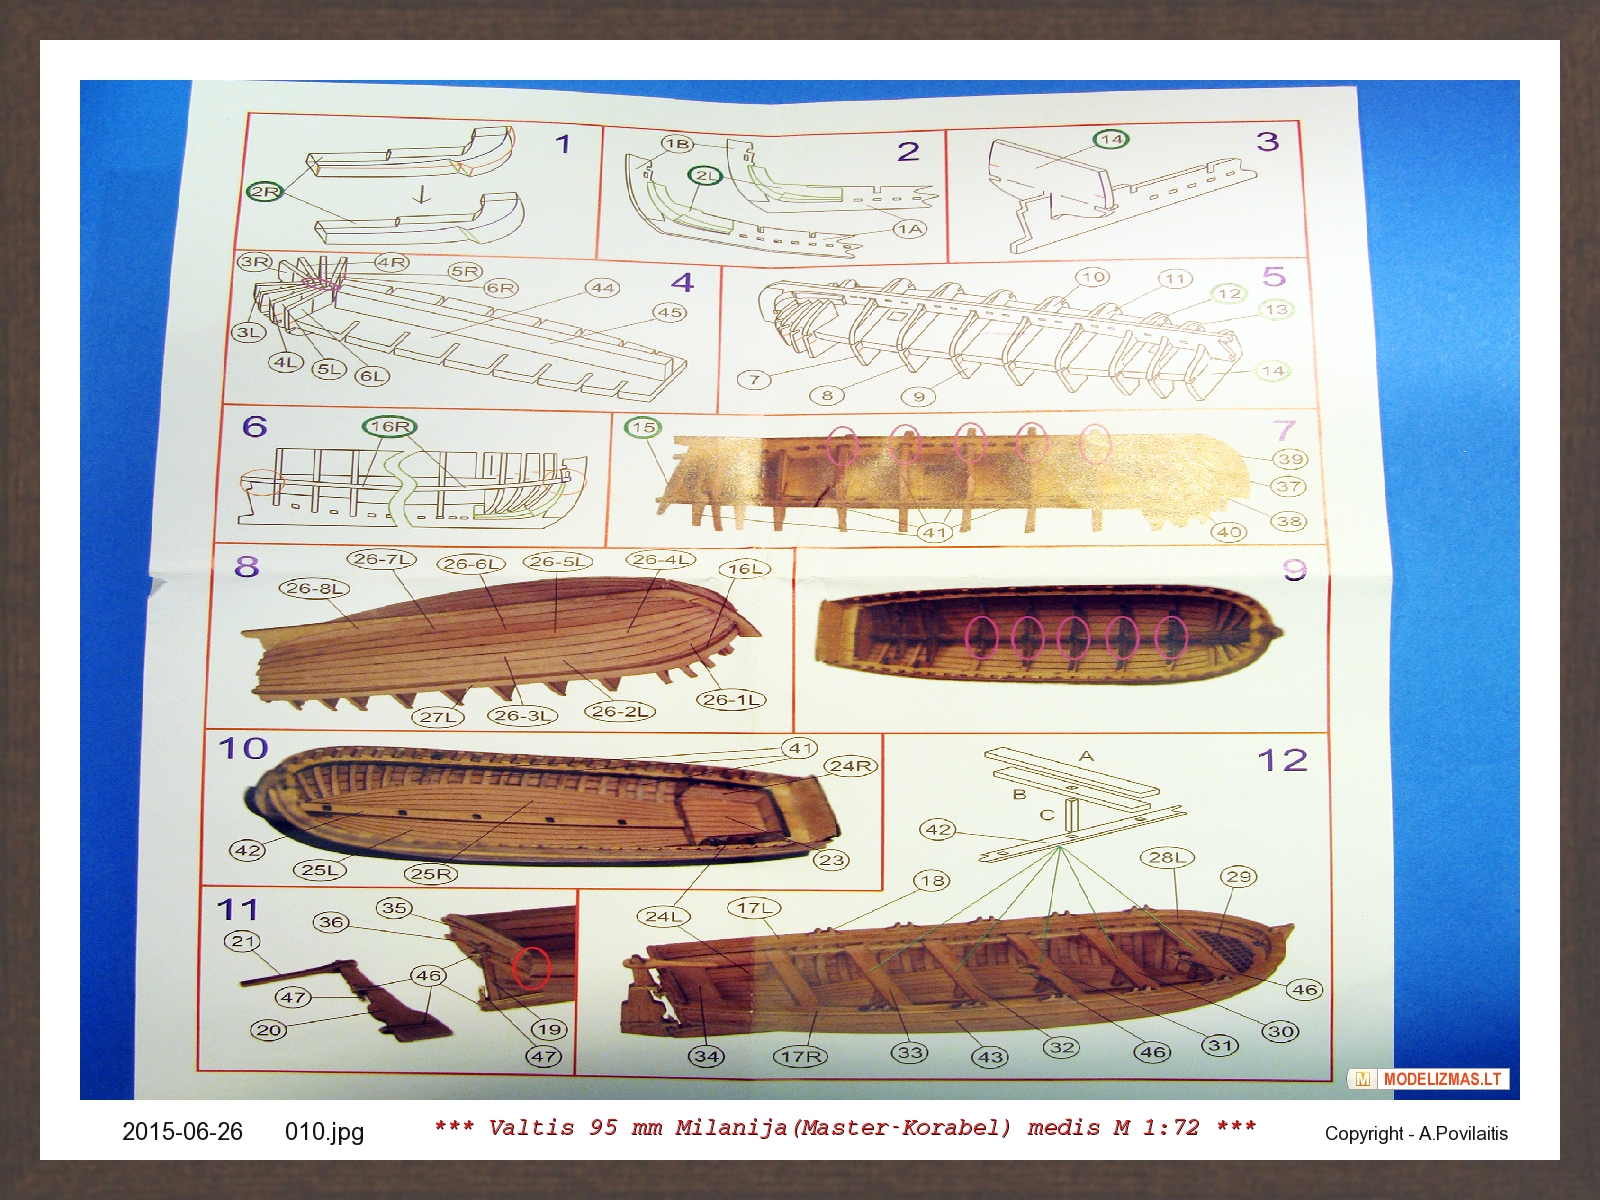
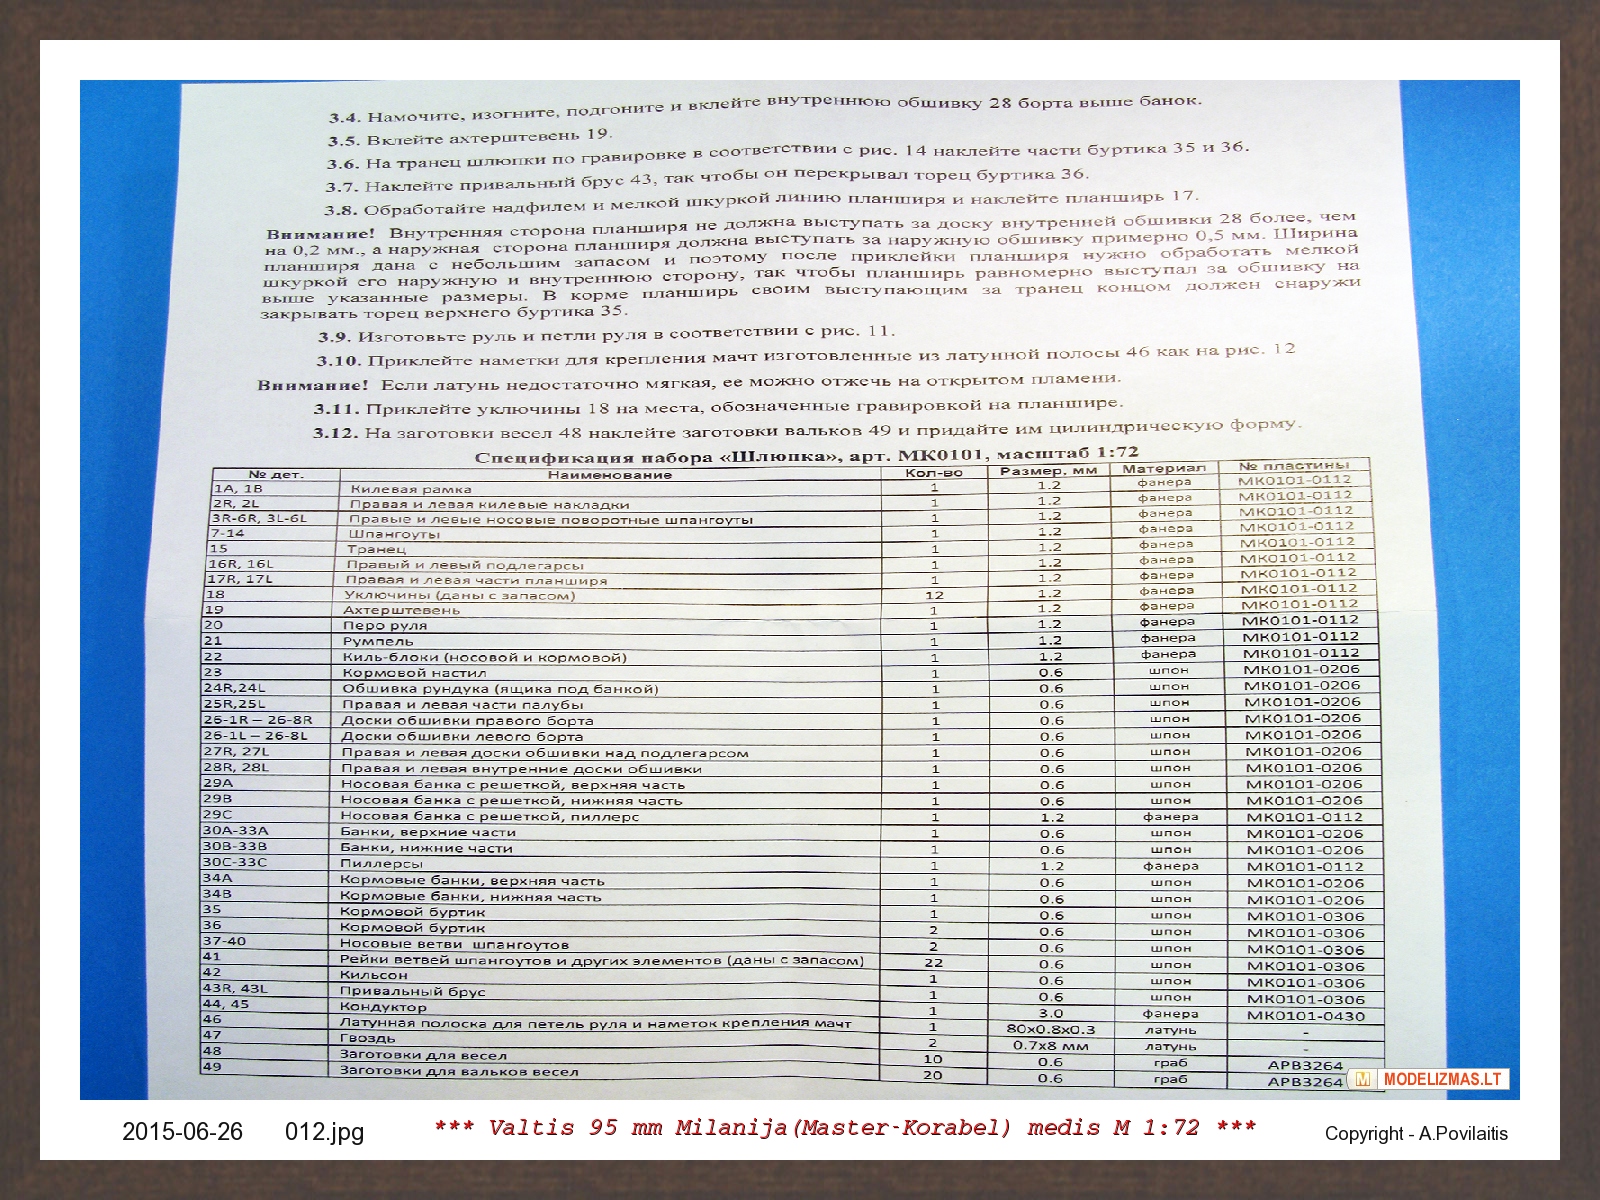
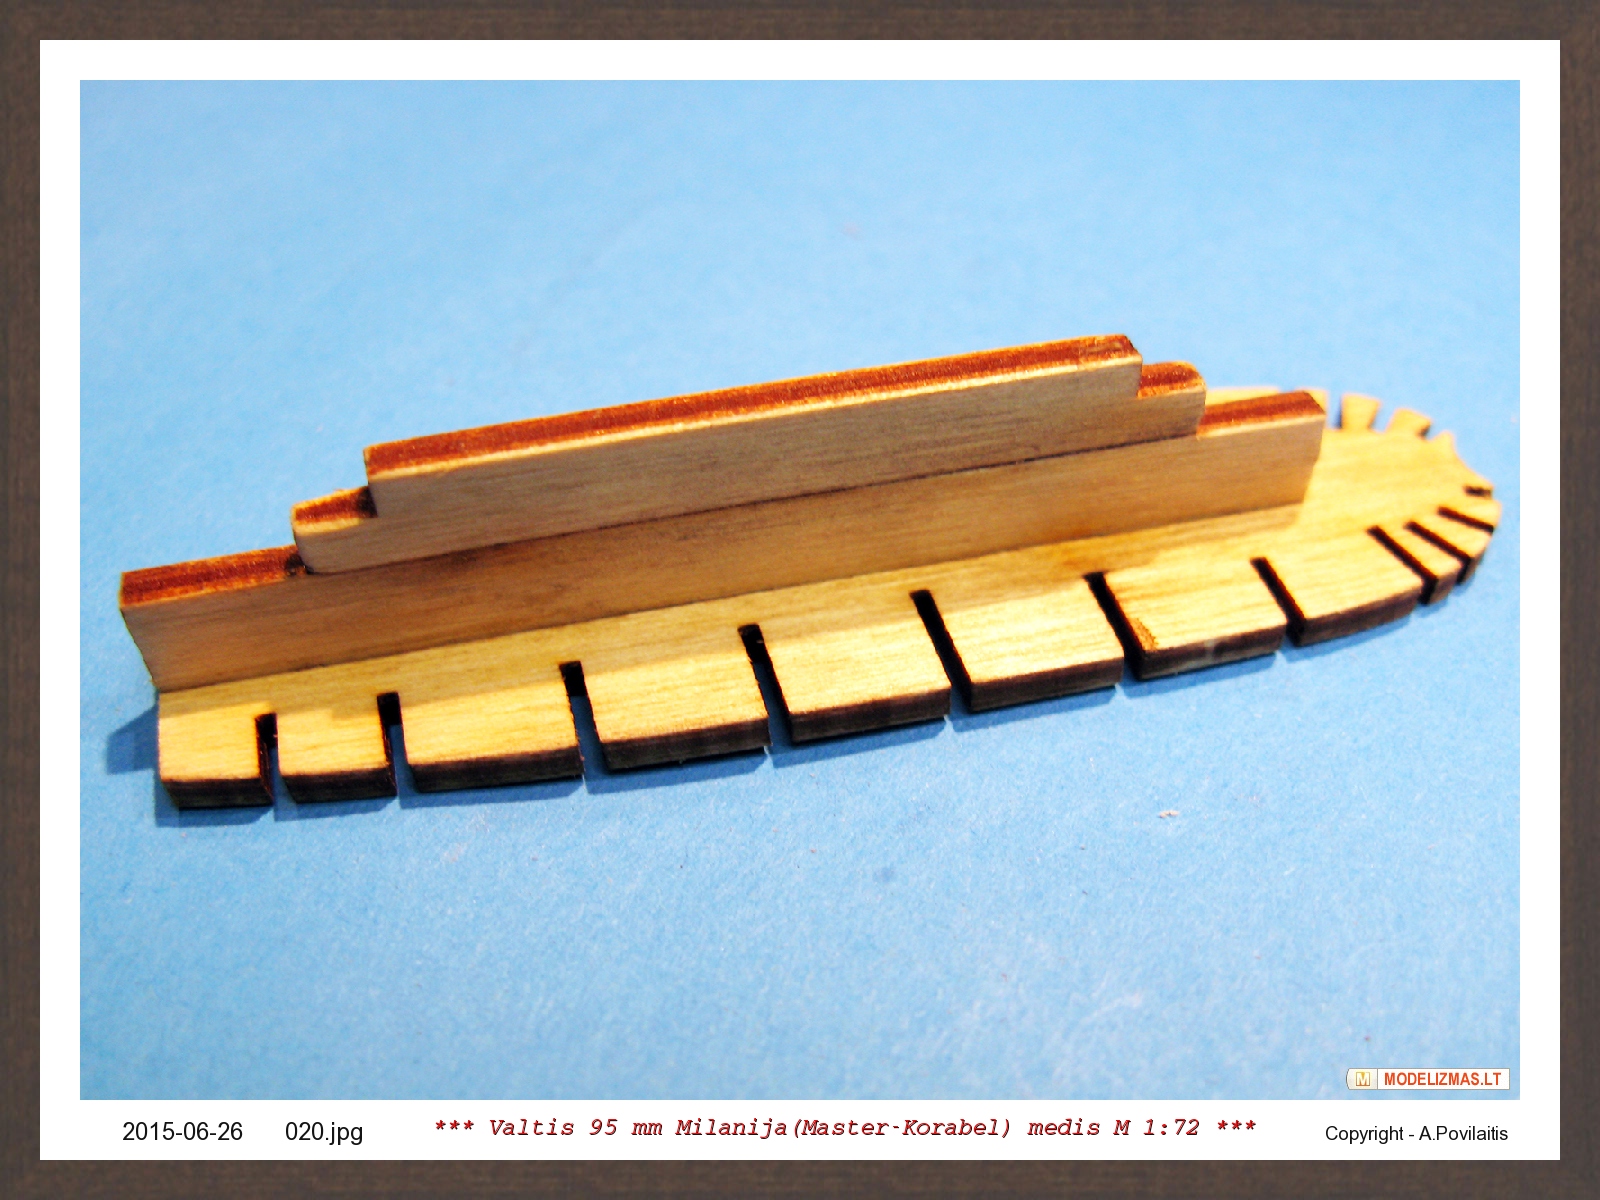
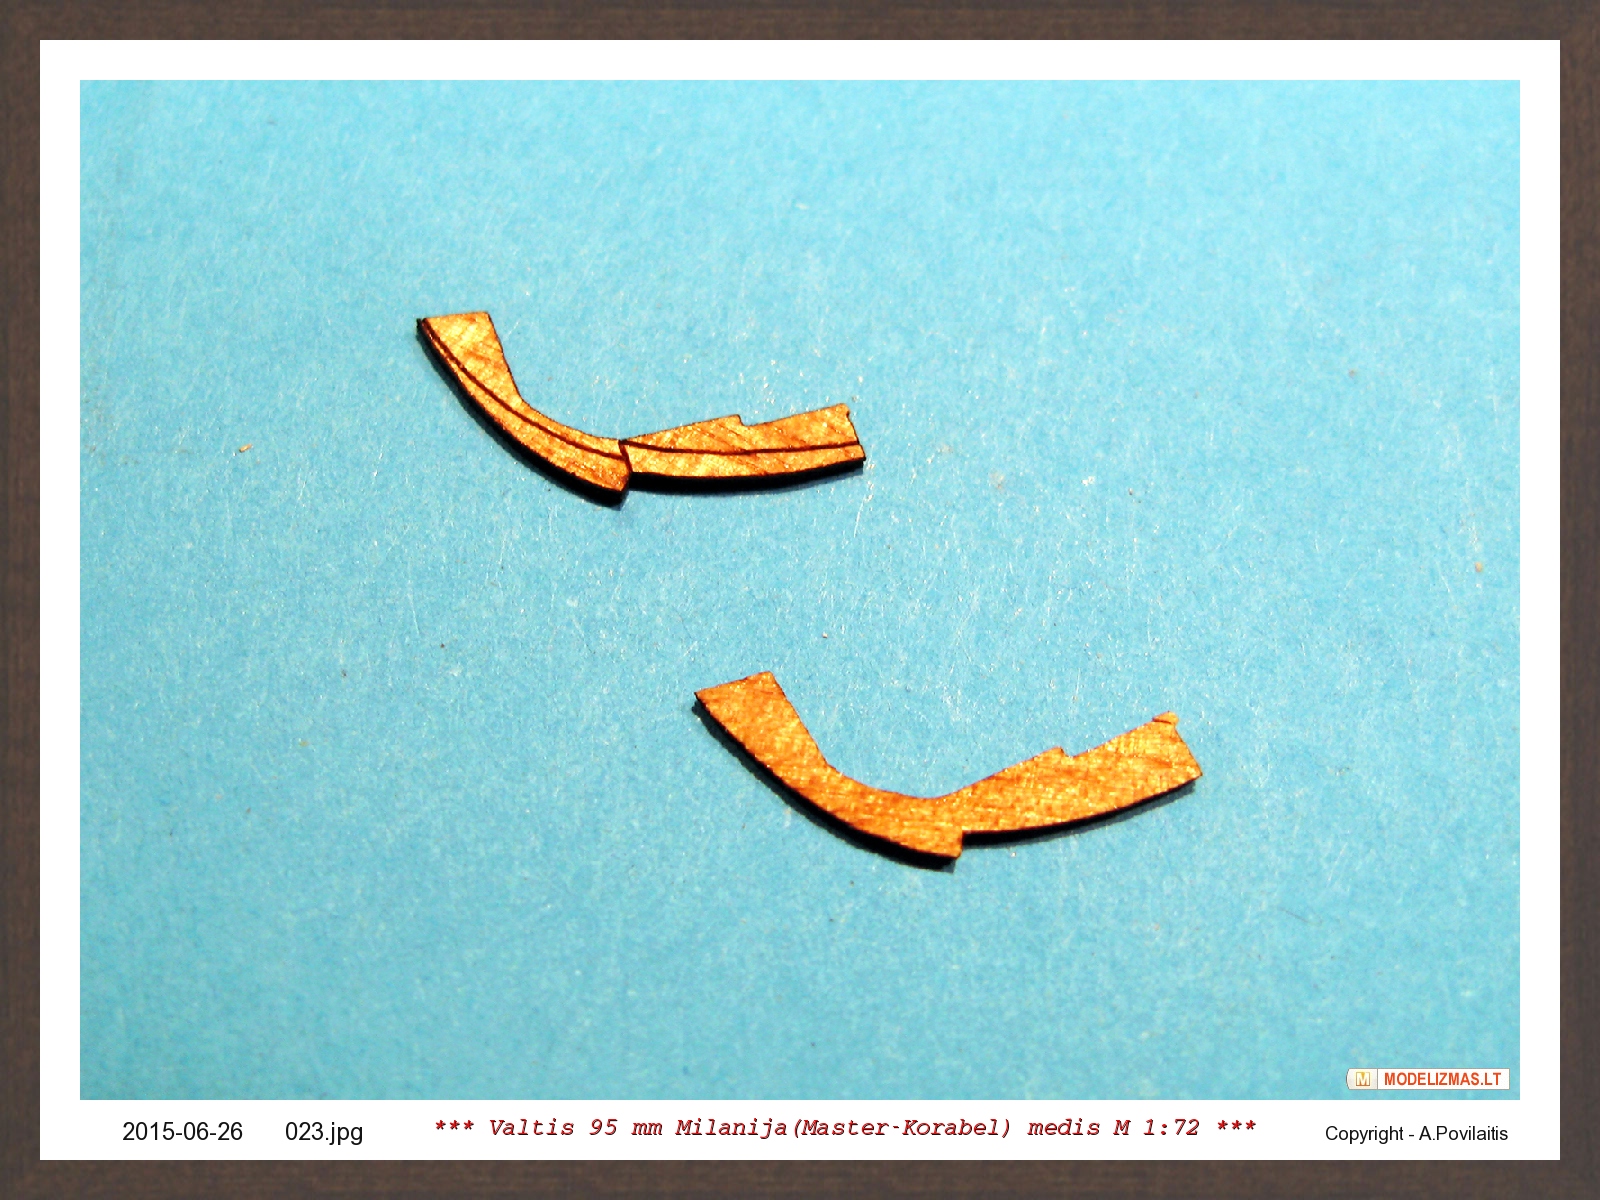
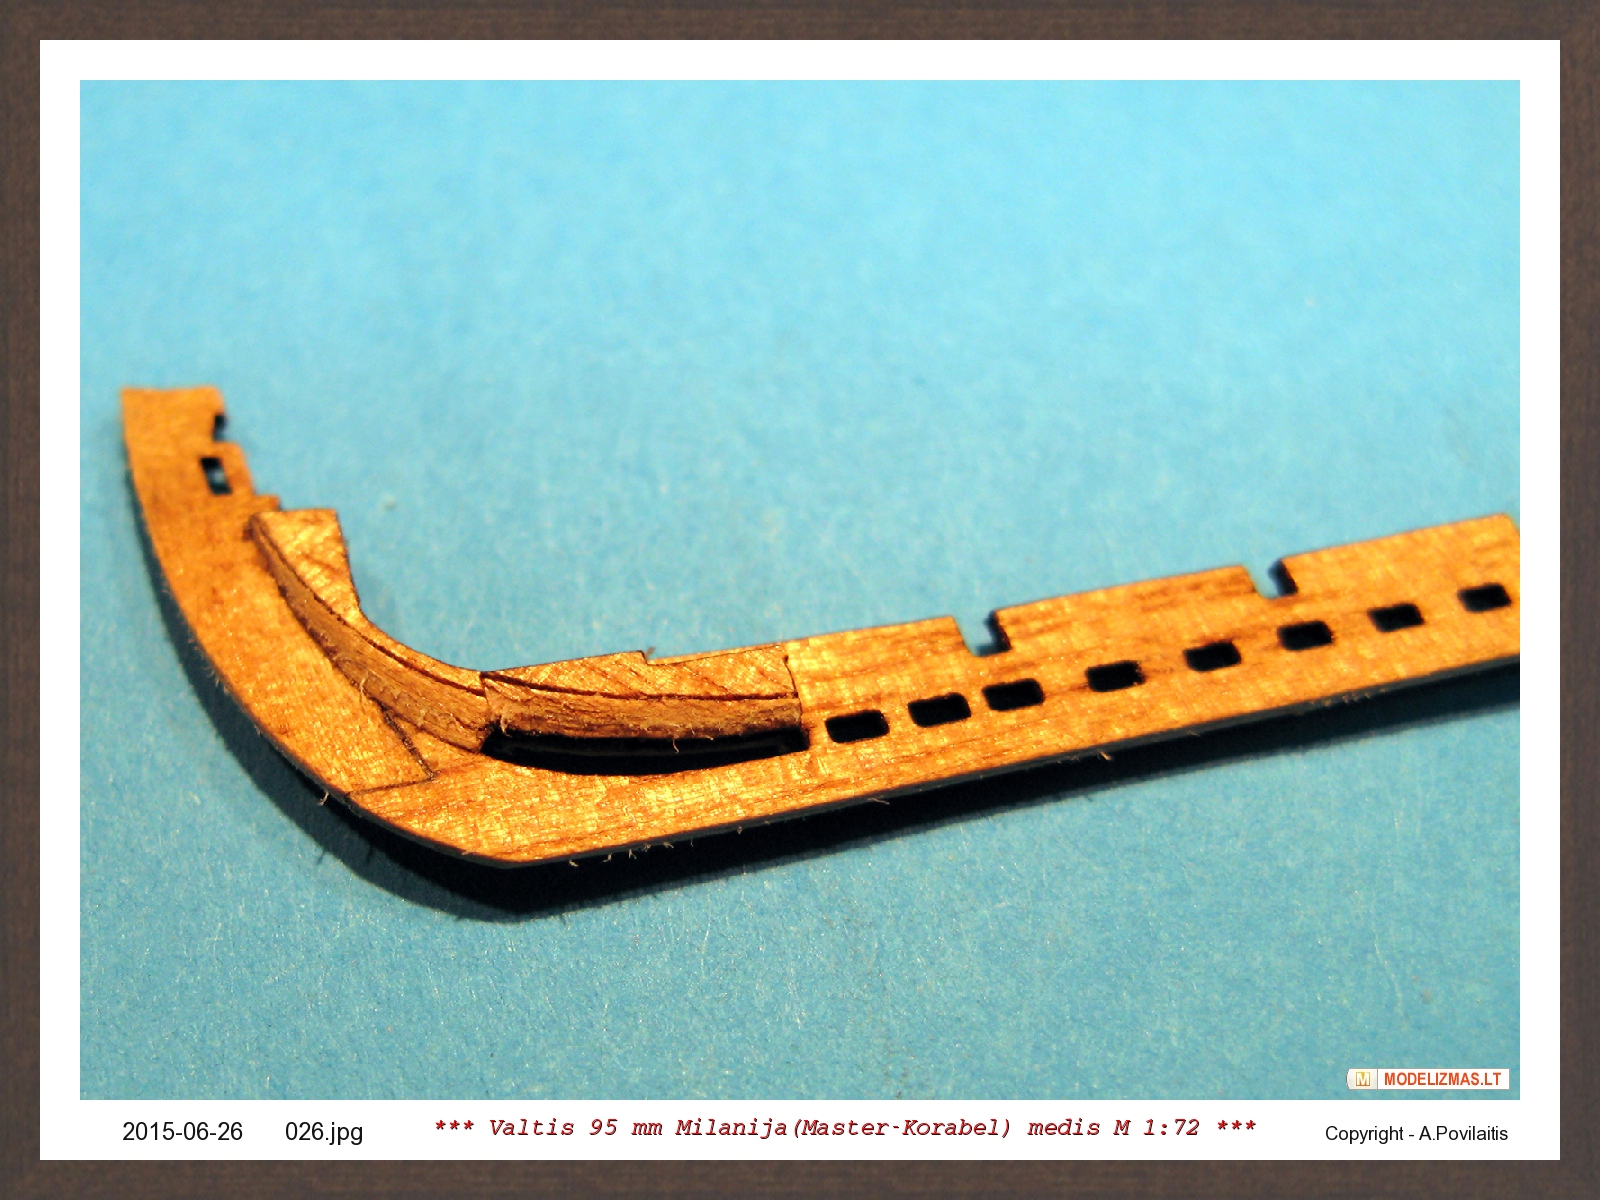
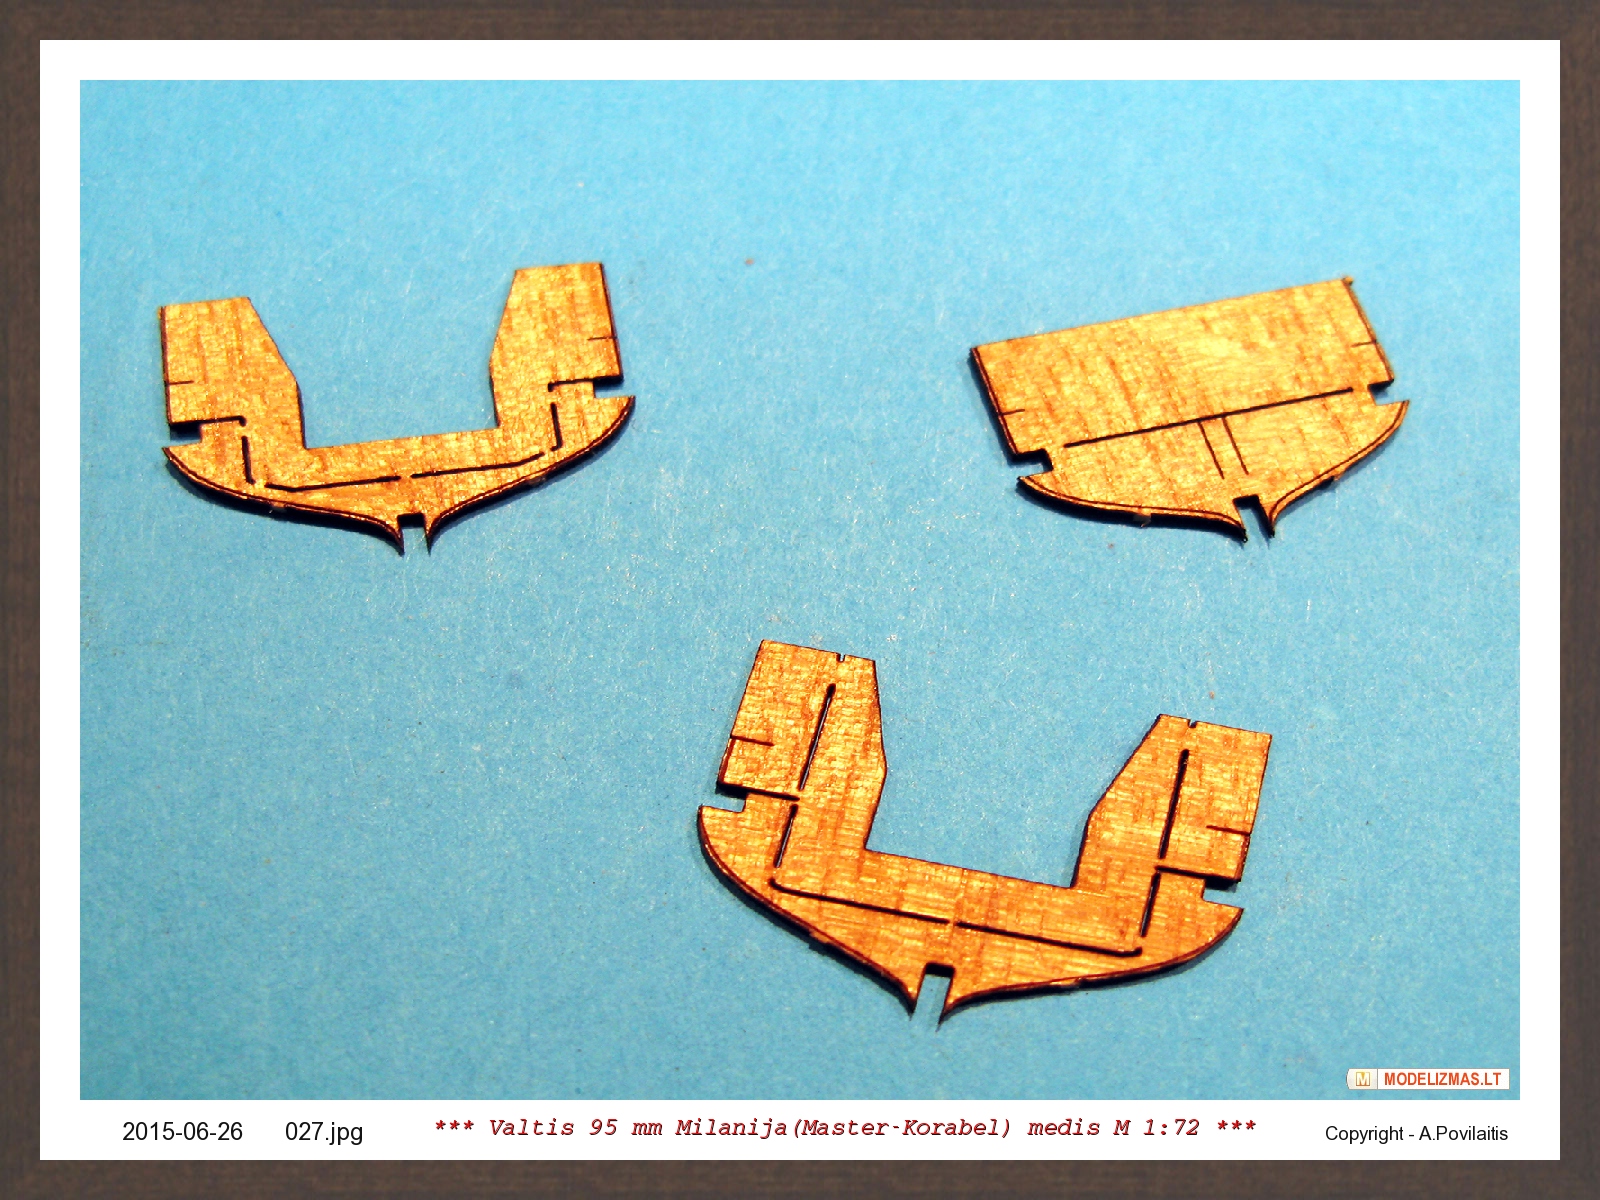
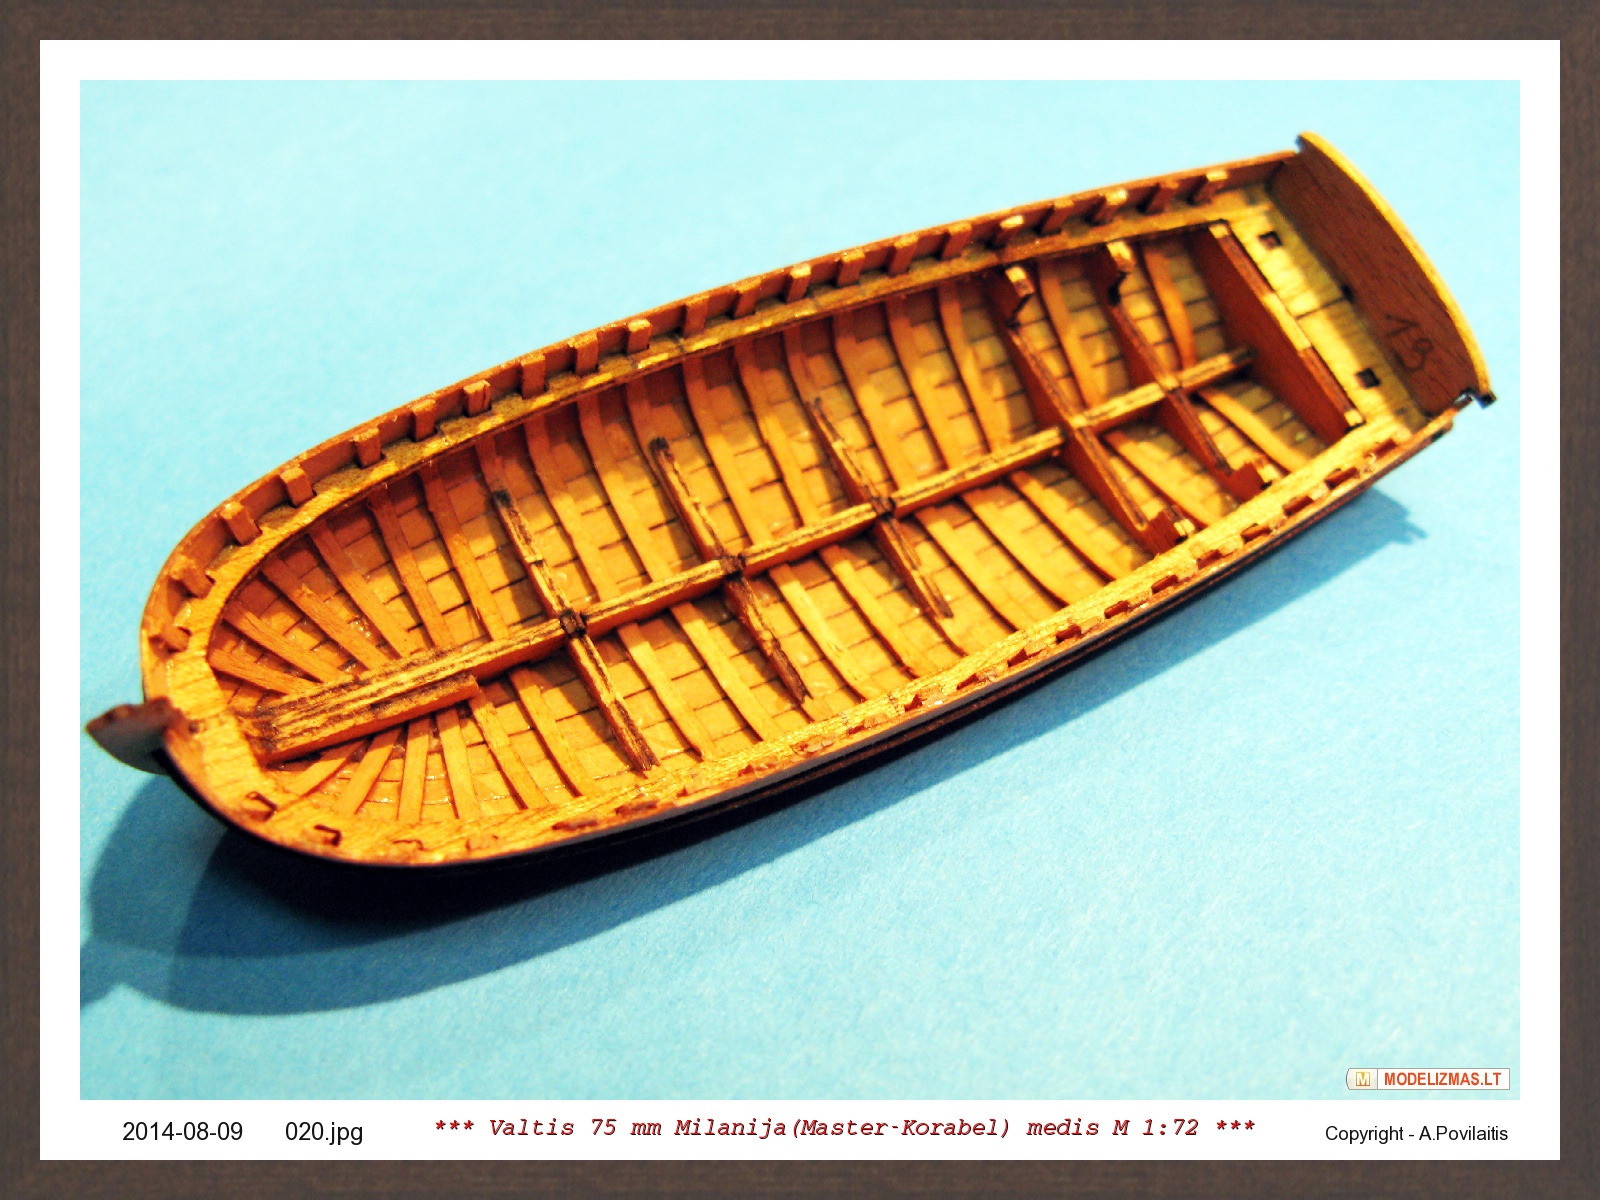
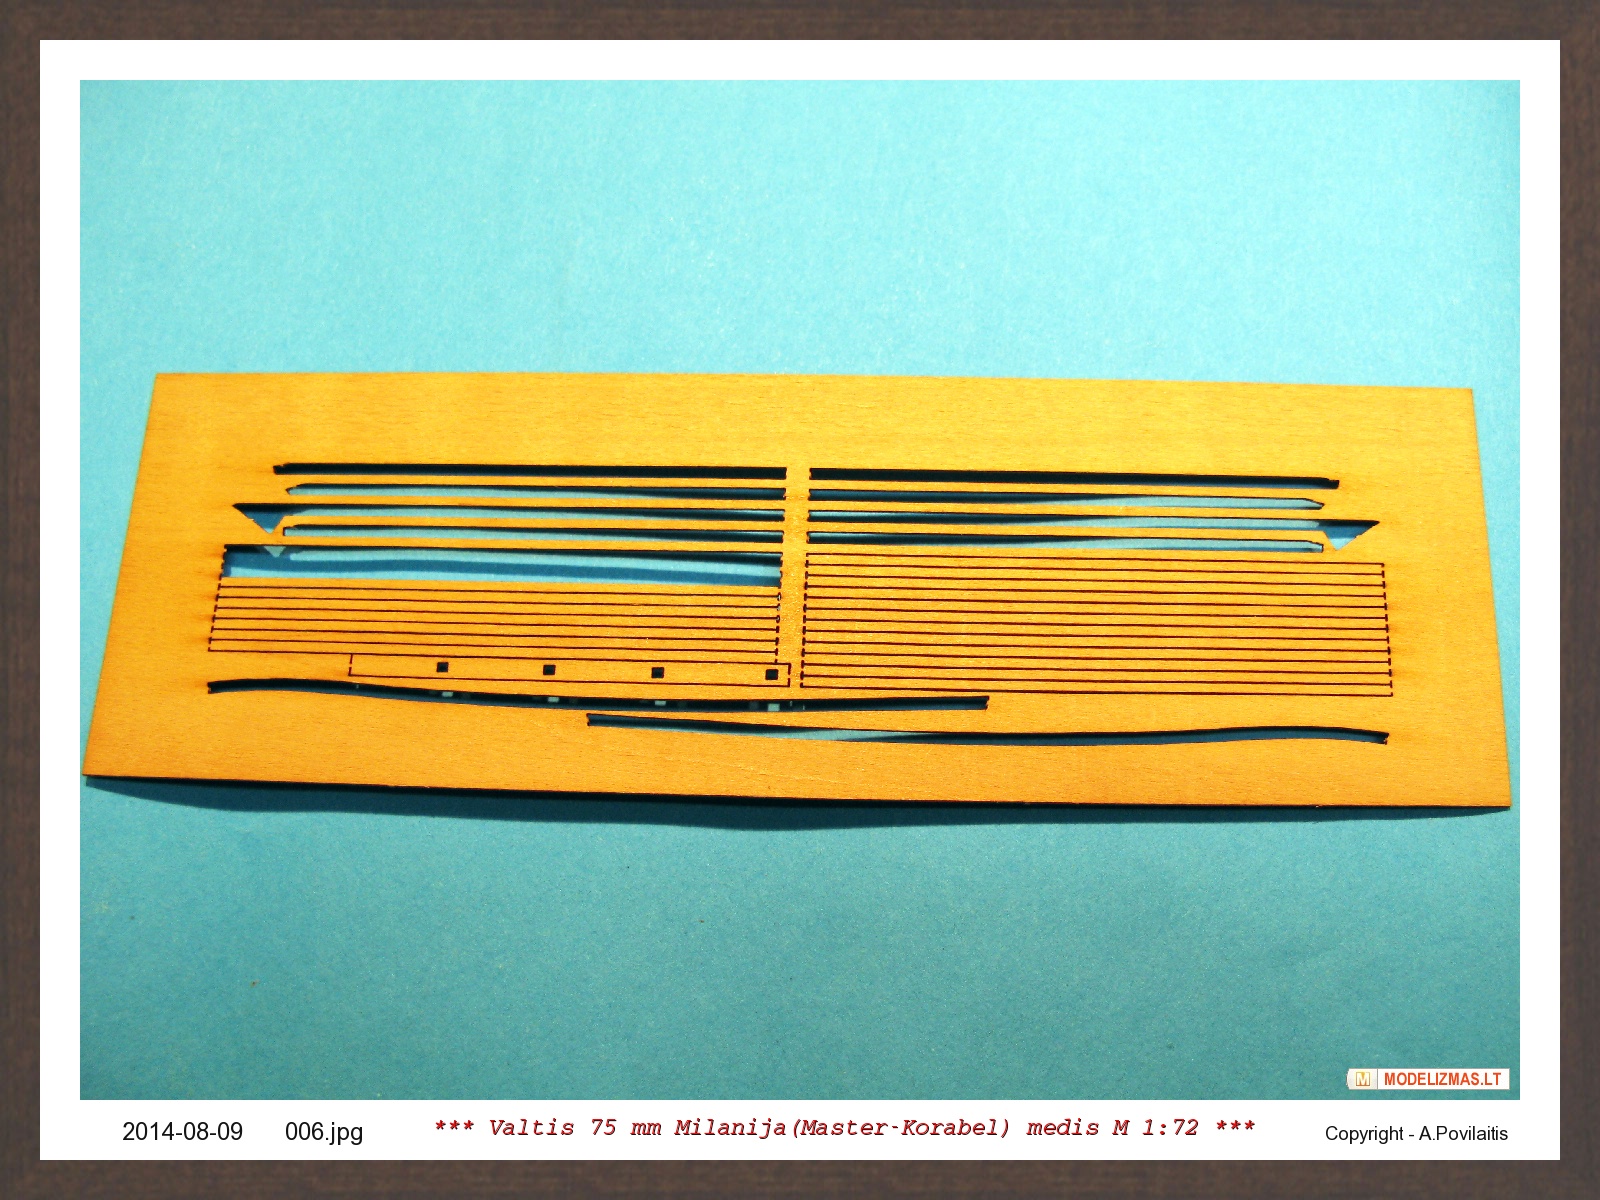
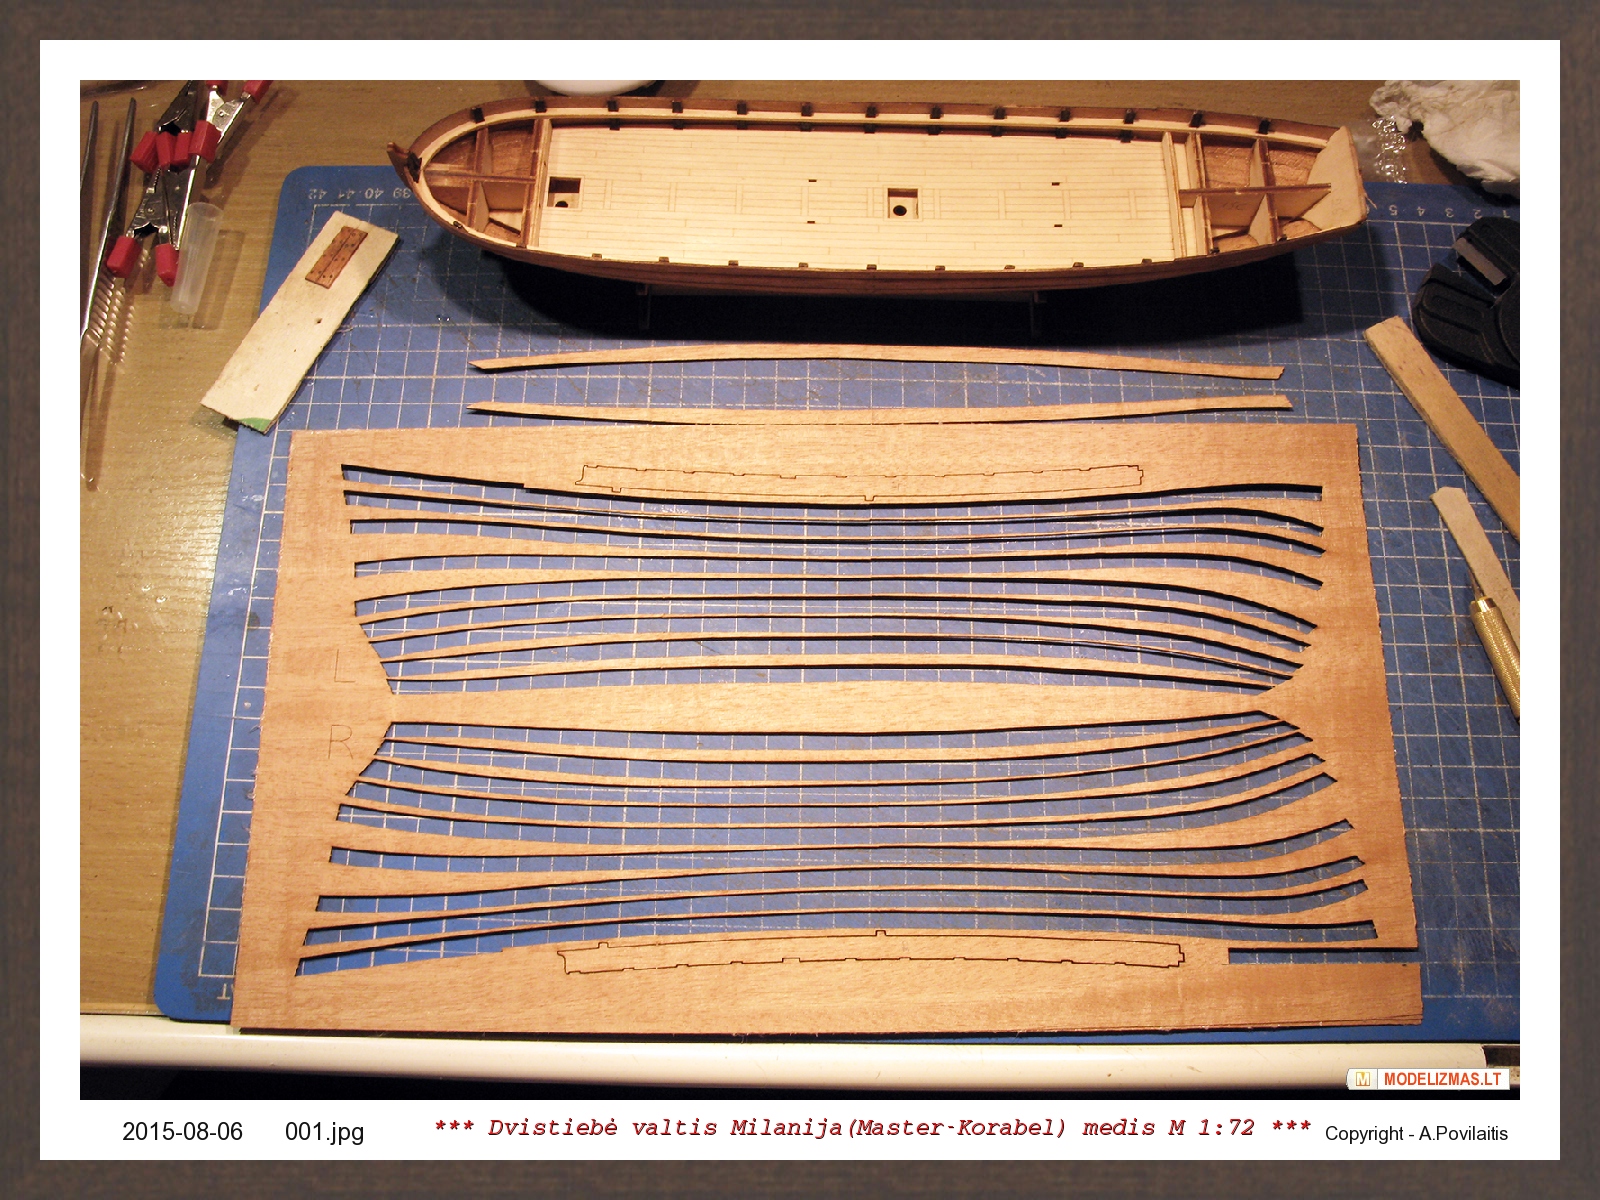
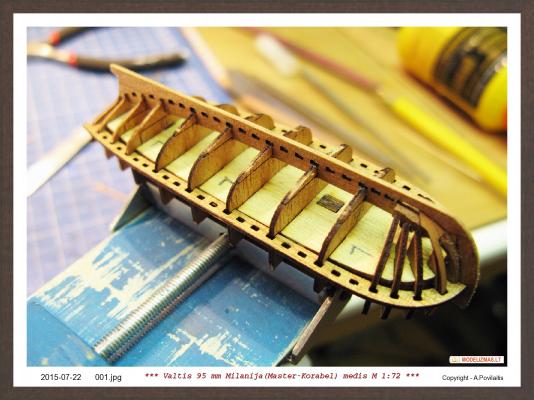
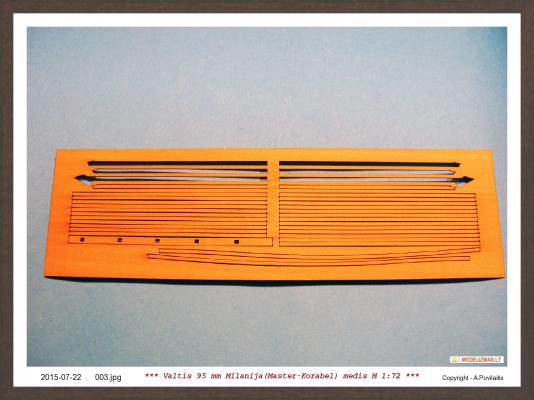
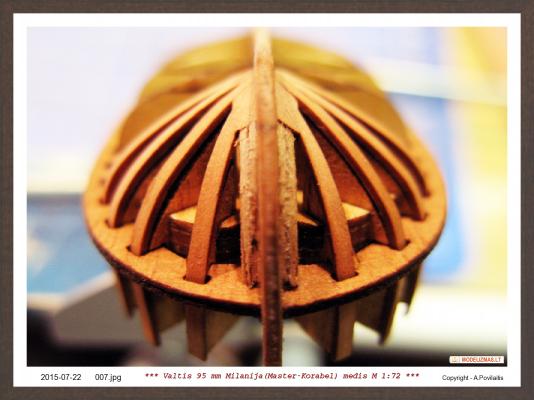
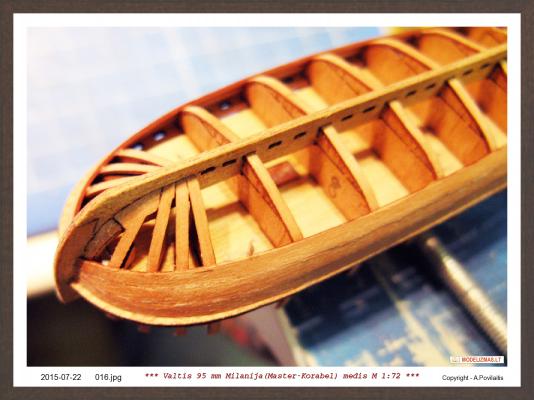
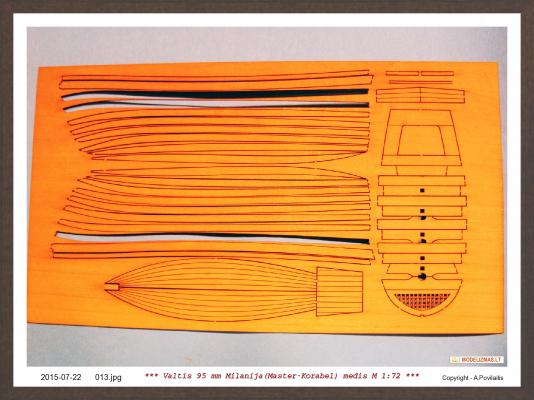
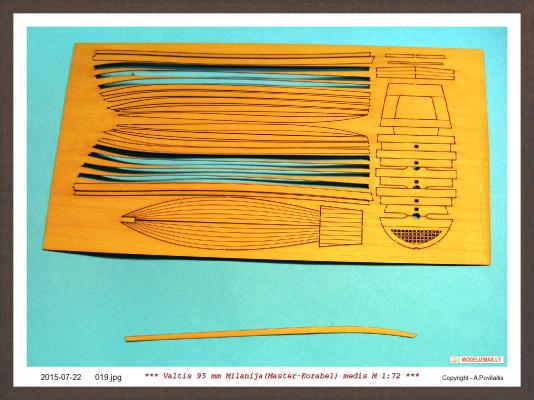
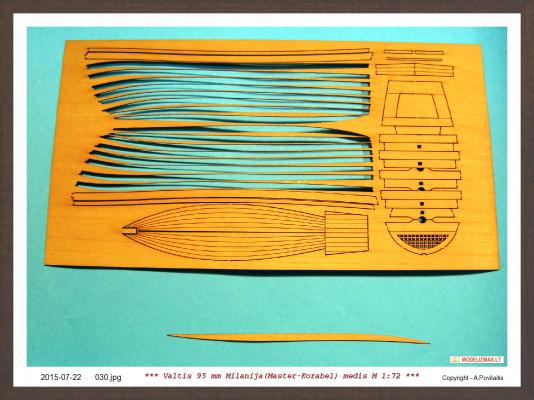
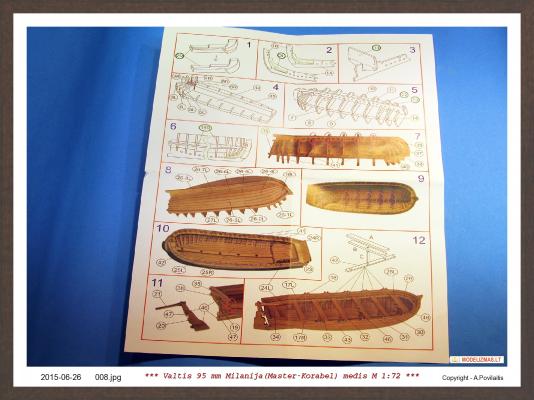
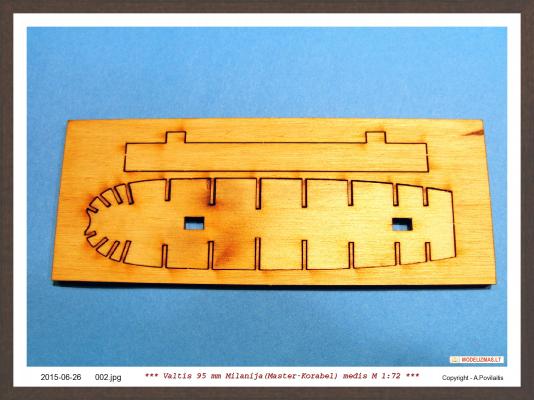
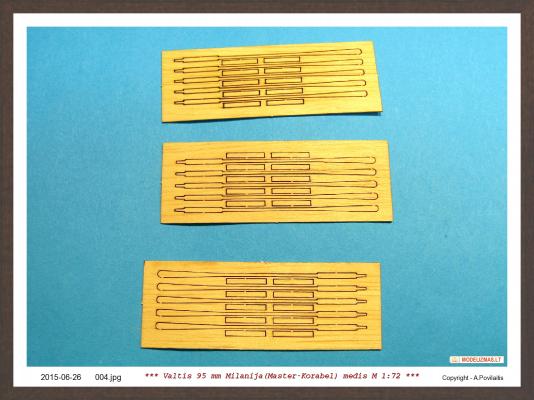
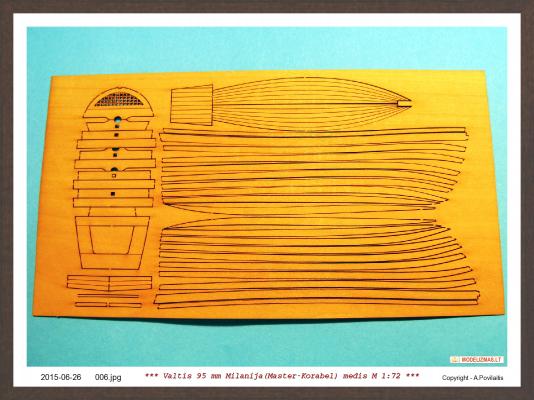
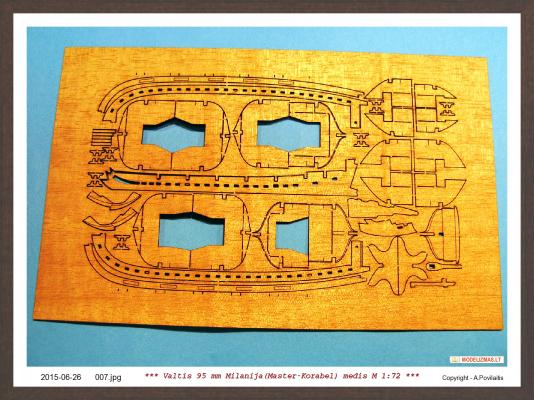
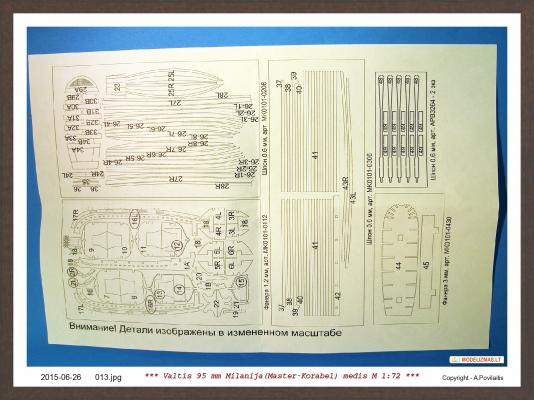
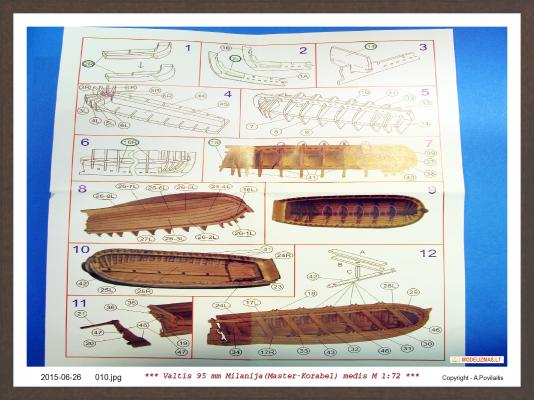
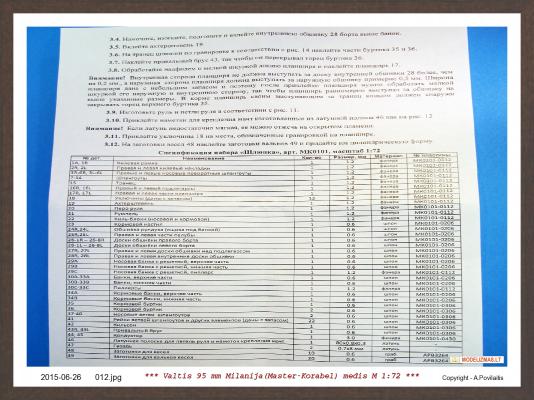
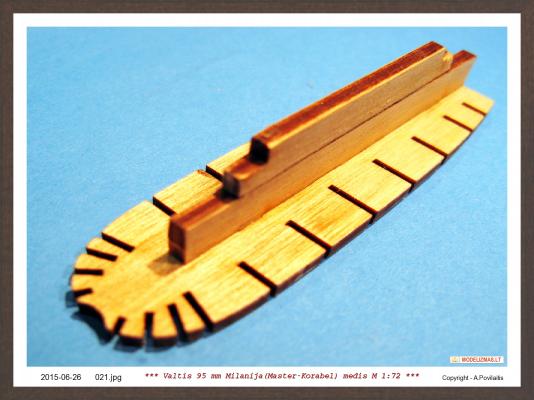
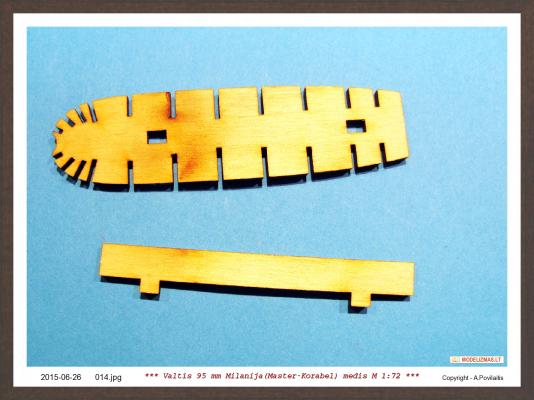
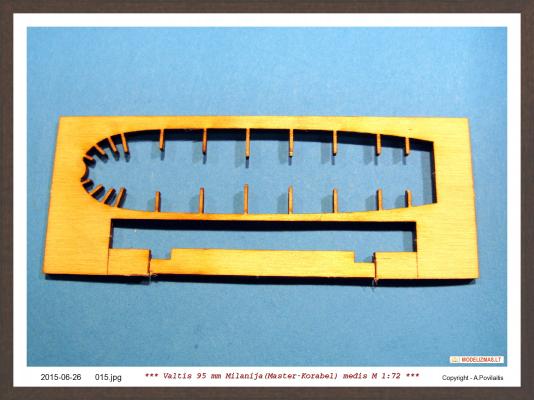
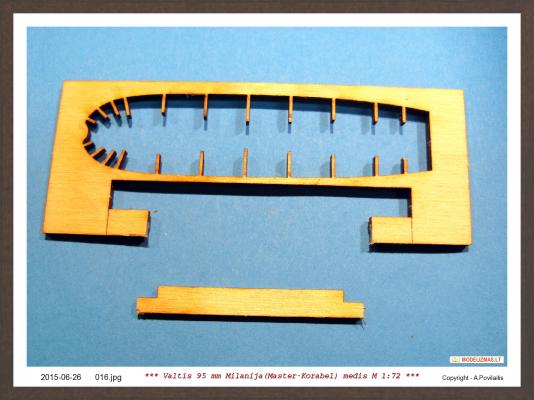
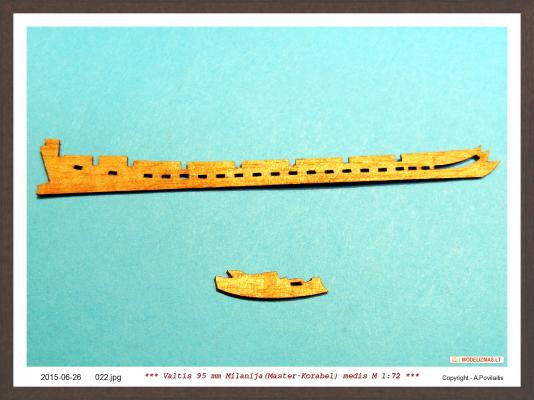
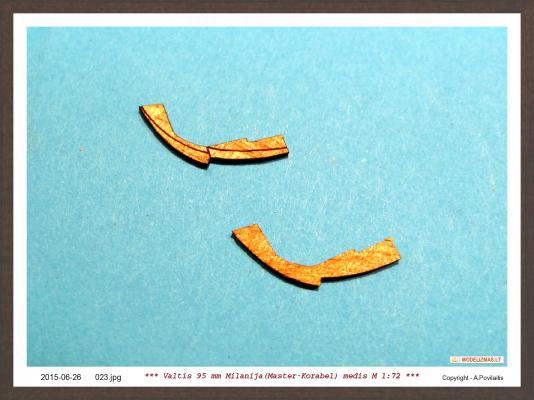
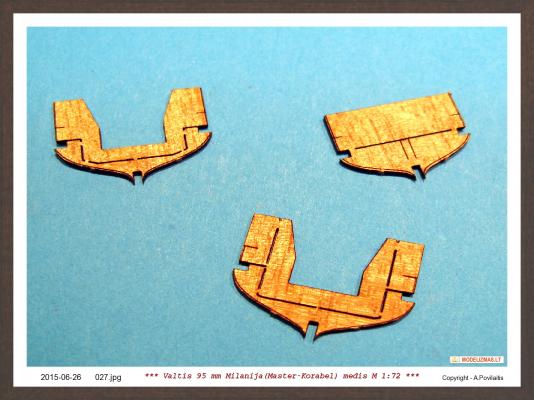
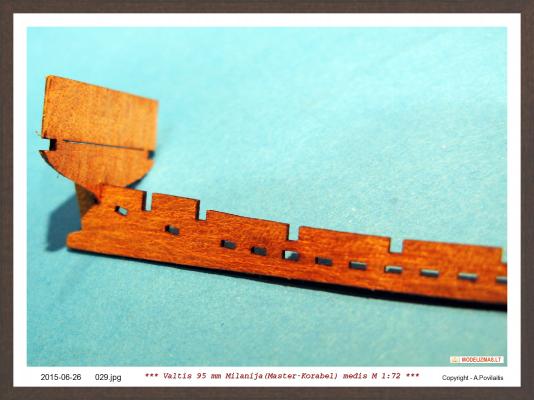
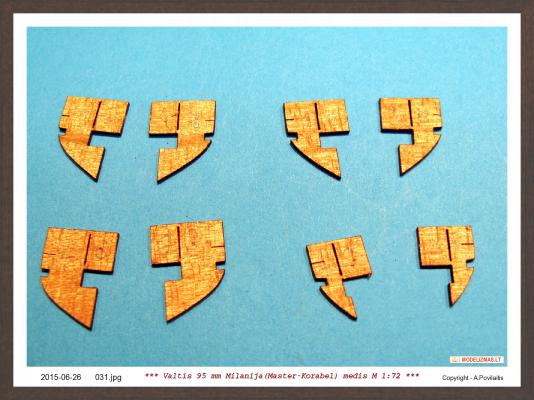
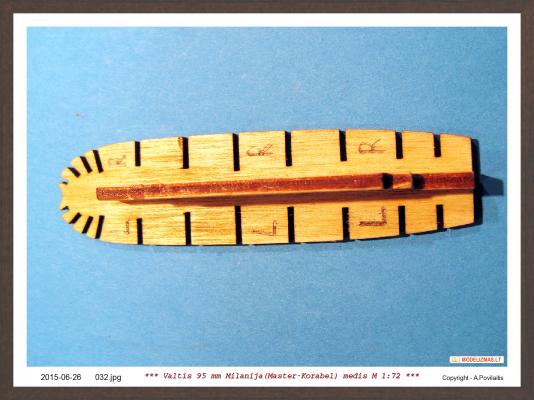
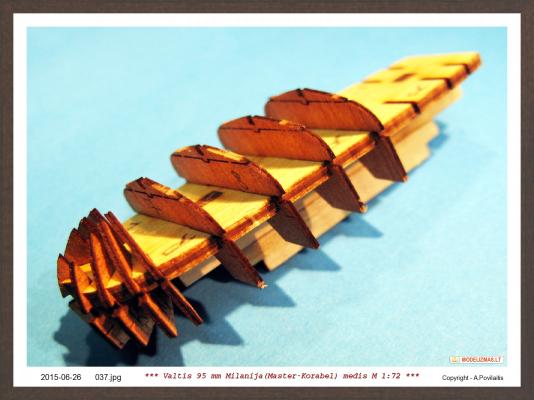
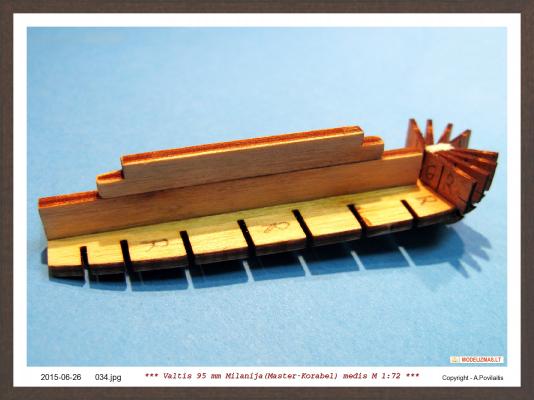
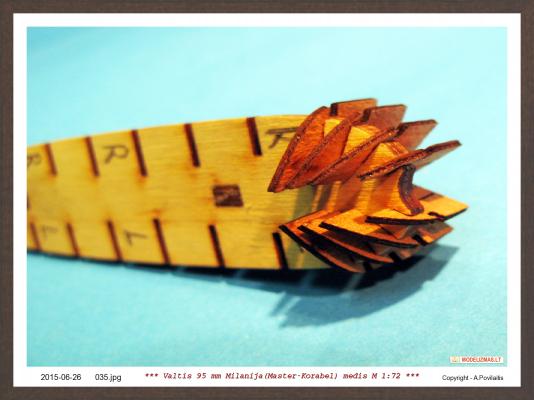
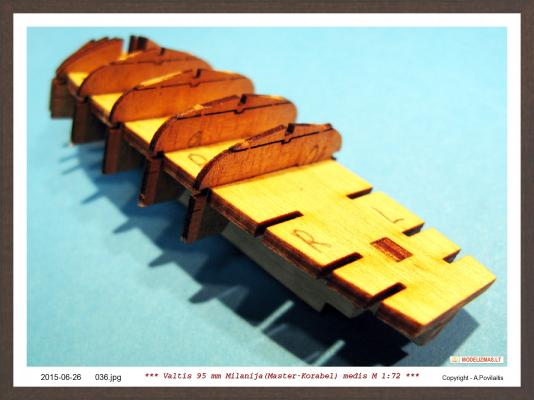
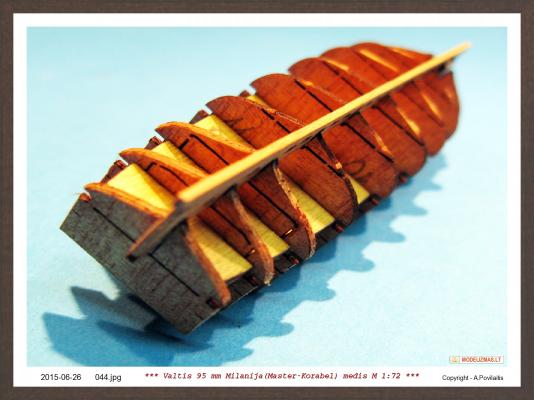
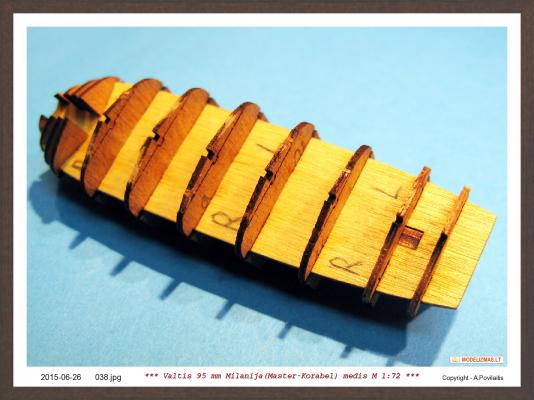
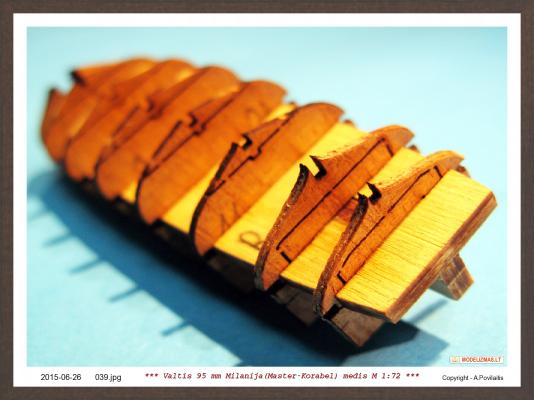
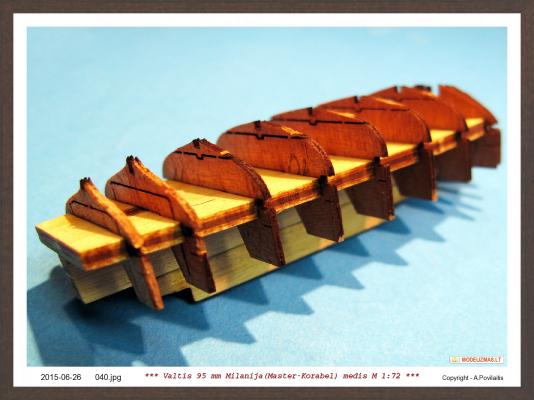
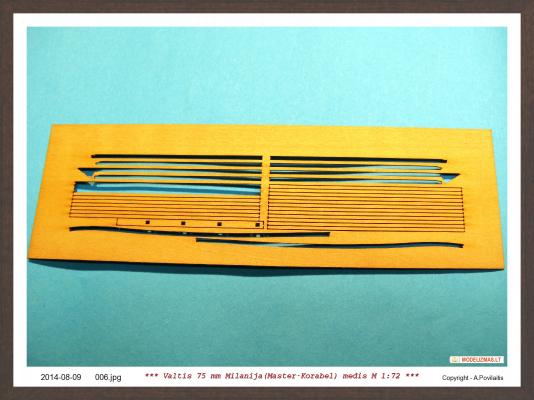
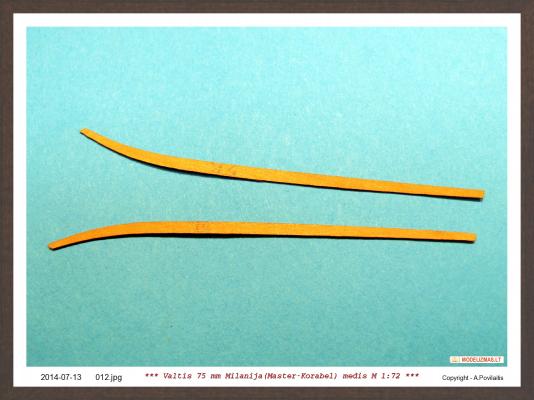
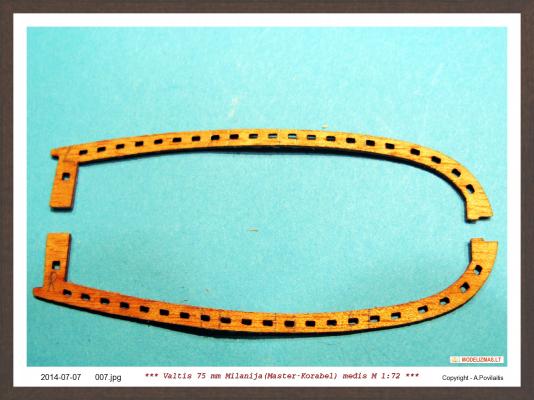
Hi, In some next weeks I'll must end the another boat build. This is very similar to the 75 mm boat, but the result is slightly different. Of course this is Master Korabel production. The boat are 20 mm longer, have more seats, more frames. But construction is the same as in 75 mm boat. So. I make a short build log. At the first - the kit content: Improved the temporary frames holder, sanded and glued the keel. Glued the last temporary frame in the place. Prepared and glued the temporary frames at the hull bow. And placed the remaining temporary frames in to the holder. When glued the keel. Regards, Antanas


- 13 replies
-
- 6
-
-
- 95mm boat
- master korabel
- (and 1 more)
-
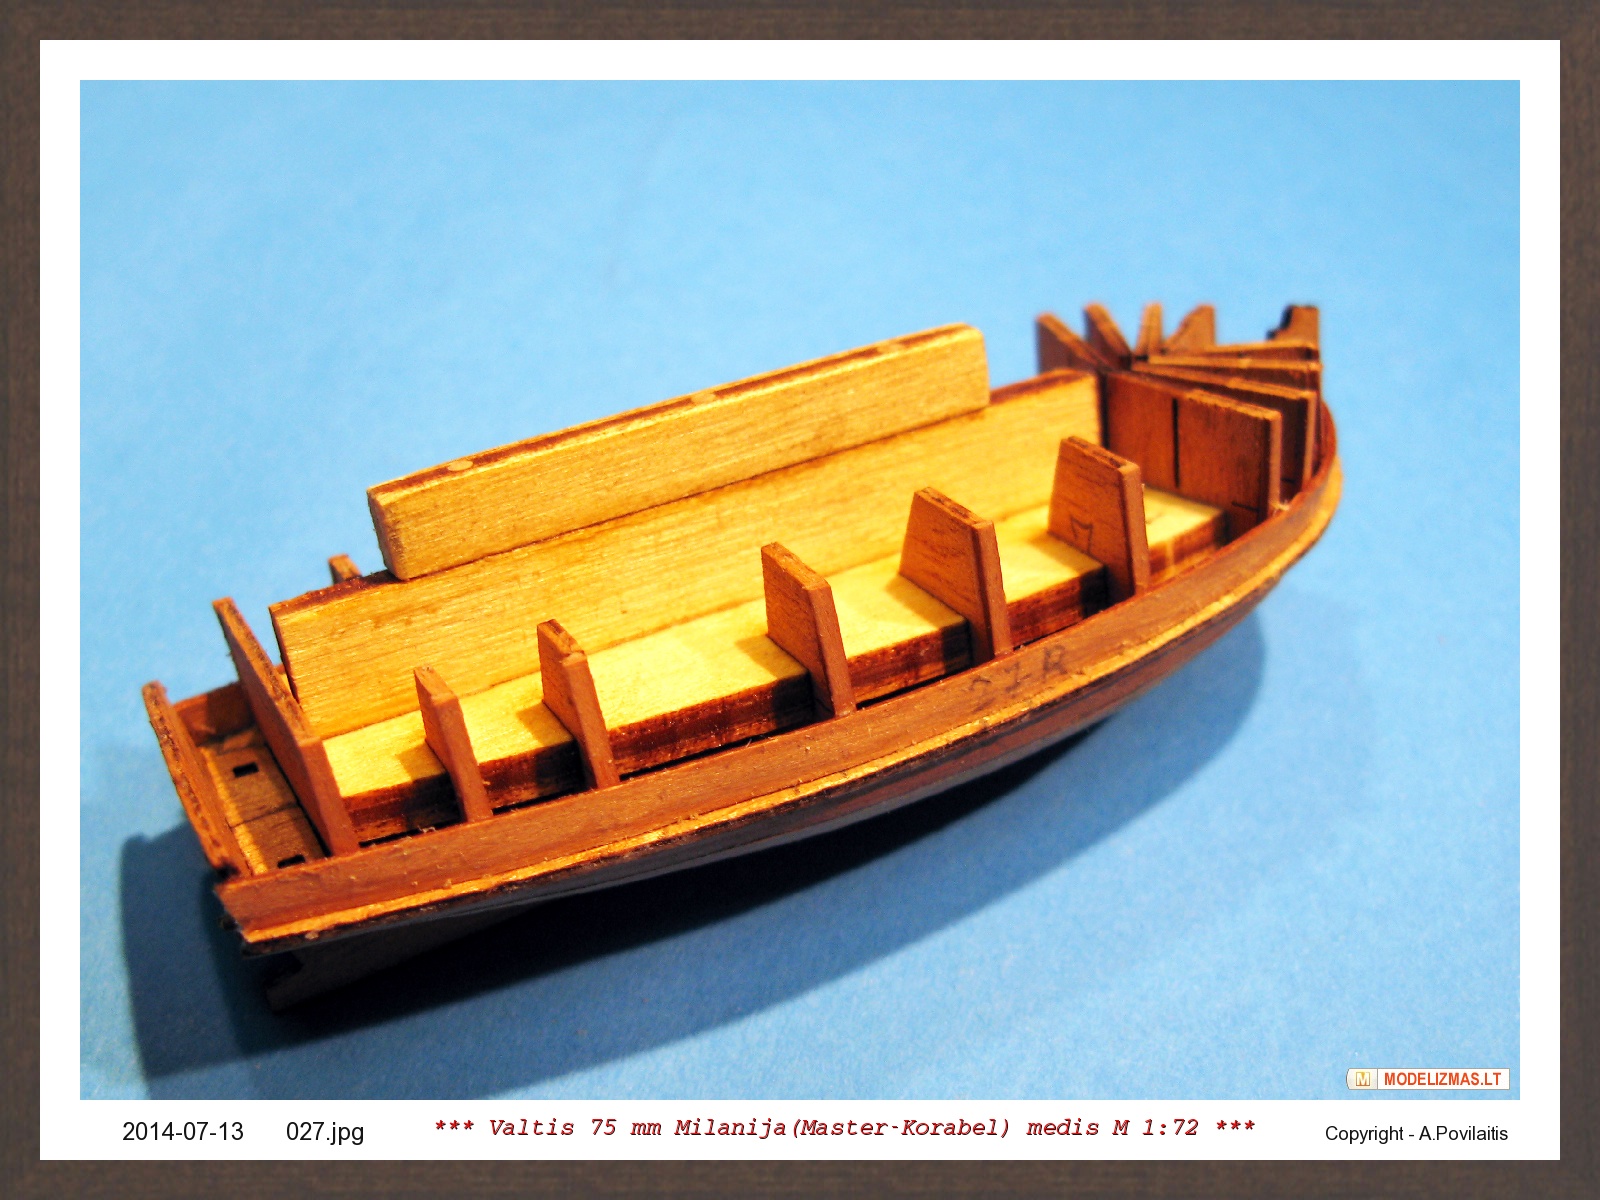
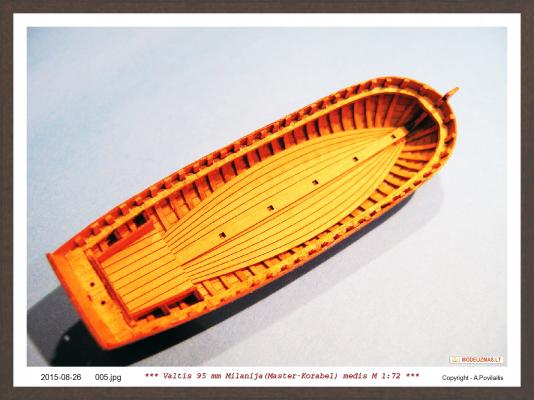
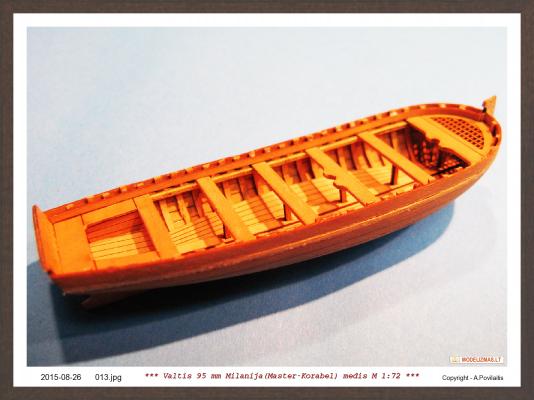
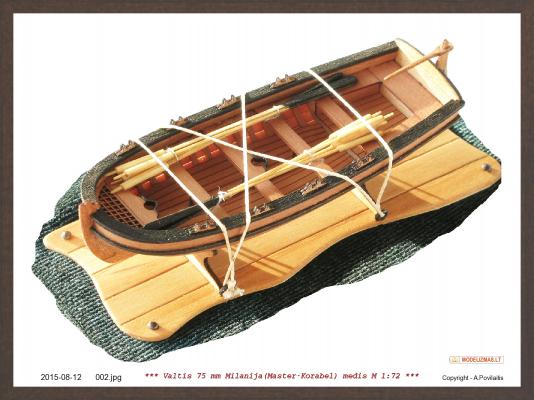
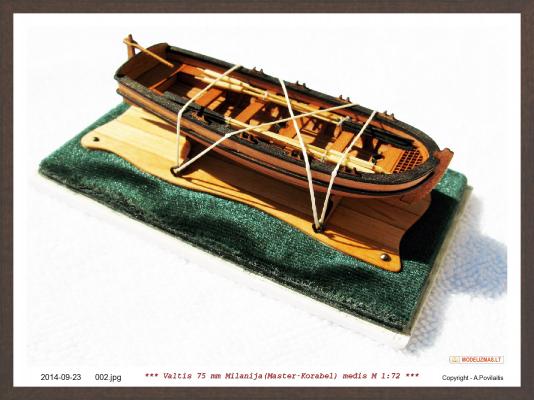
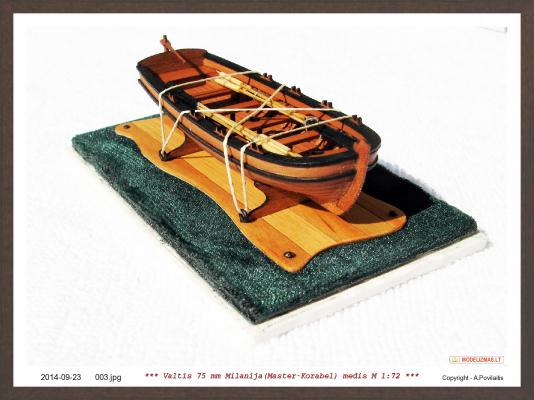
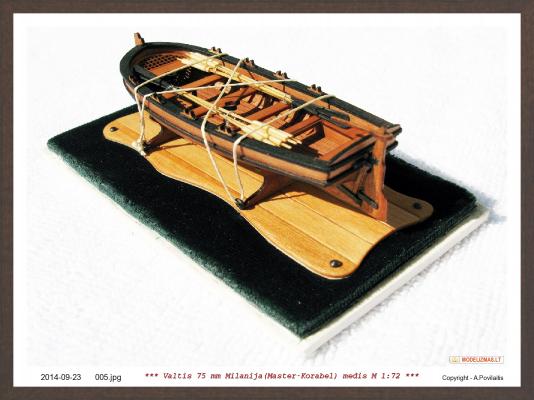
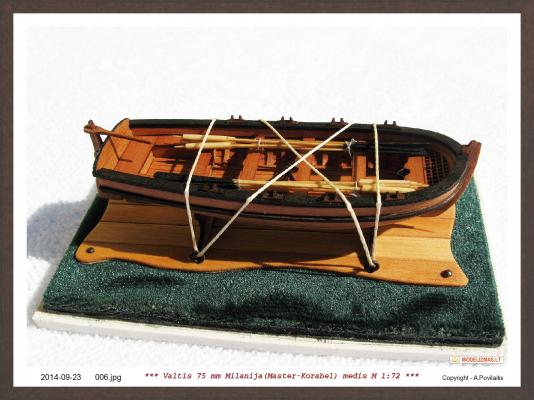
Thank you for the good review gentlemen! Now the final photo session and my impressions... The kit is amazing. 20 $ price and the result was unexpected for me. The process was very easy and enjoyable. Just I was happy and enjoyed the process. Of course, there were some small flaws. First - the boat is very small. And I must to get used to this. Second - two hull planks could be a couple of mm longer. It's great that to work enough a few simple tools. You can work anytime and anywhere. Also, I really liked is that it can be easily manufactured as a great gift. Several are already bestowed and everyone was impressed. Thank You all, watched the build, for the evaluation and support. By. Best regards, Antanas


- 22 replies
-
- 6
-
-
- master korabel
- 75mm boat
- (and 1 more)
-
I'll leave as is. Now it look very well. More supports is unnecessary. It only hide the beatiful hull. Regards, Antanas
- 831 replies
-
- 3
-
-
- Armed Virginia Sloop
- Model Shipways
- (and 1 more)
-
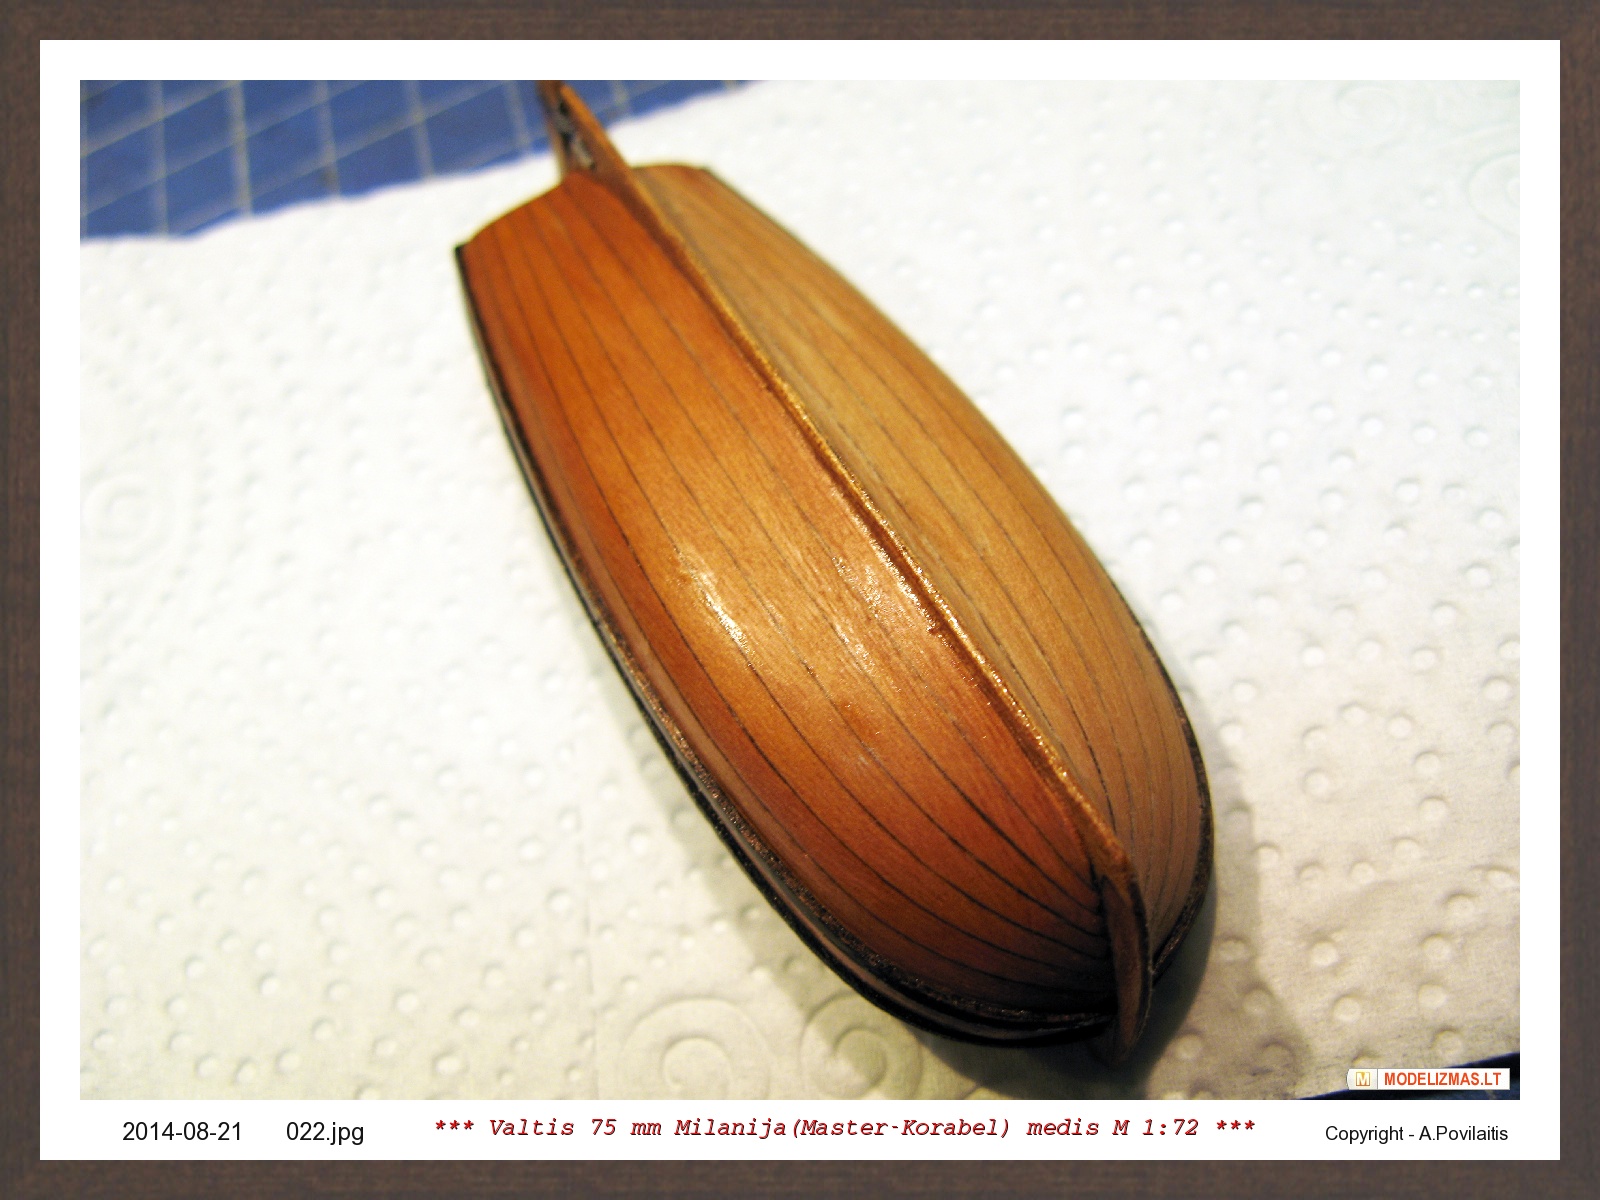
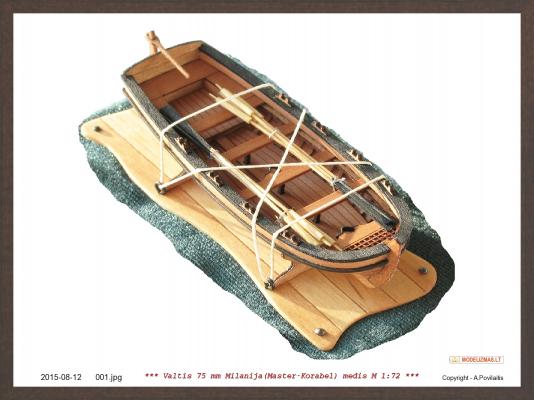
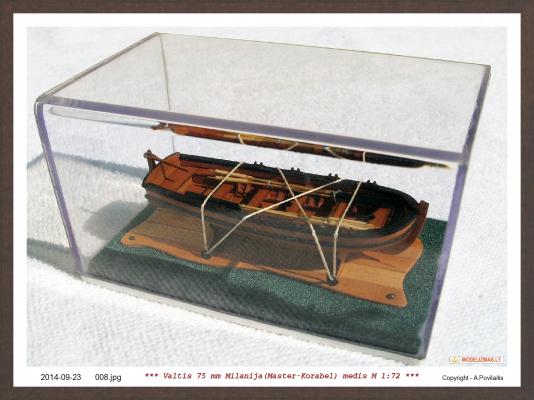
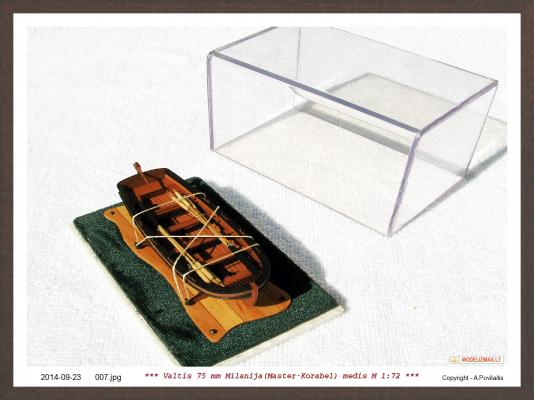
Oil dried up, and the boat tied in place. Model is complete. Picture quality is poor. But I will do a final photo shoot in daylight. Then will be visible the real model view . Regards, Antanas


- 22 replies
-
- 5
-
-
- master korabel
- 75mm boat
- (and 1 more)
-
Thank You RichardG, 50 teeth per 30mm are very good. But the tool is too expensive for me. Maybe later. Regards, Antanas
-
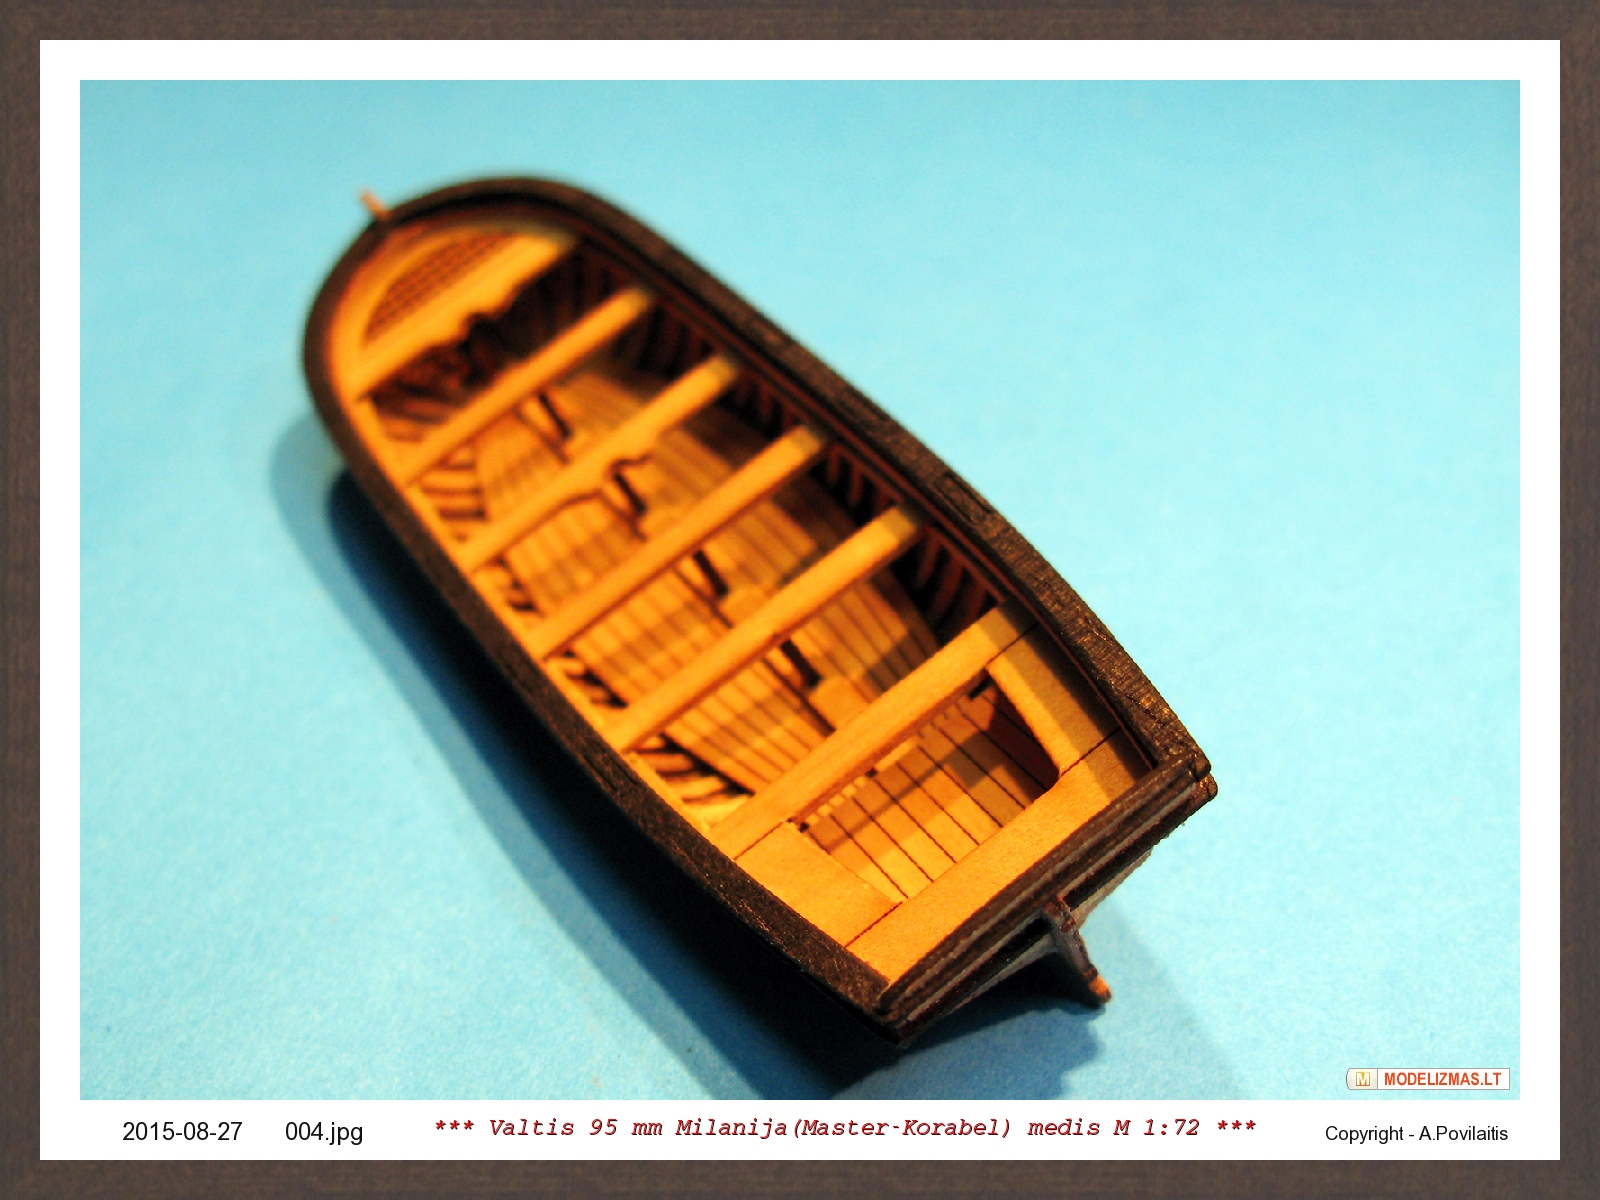
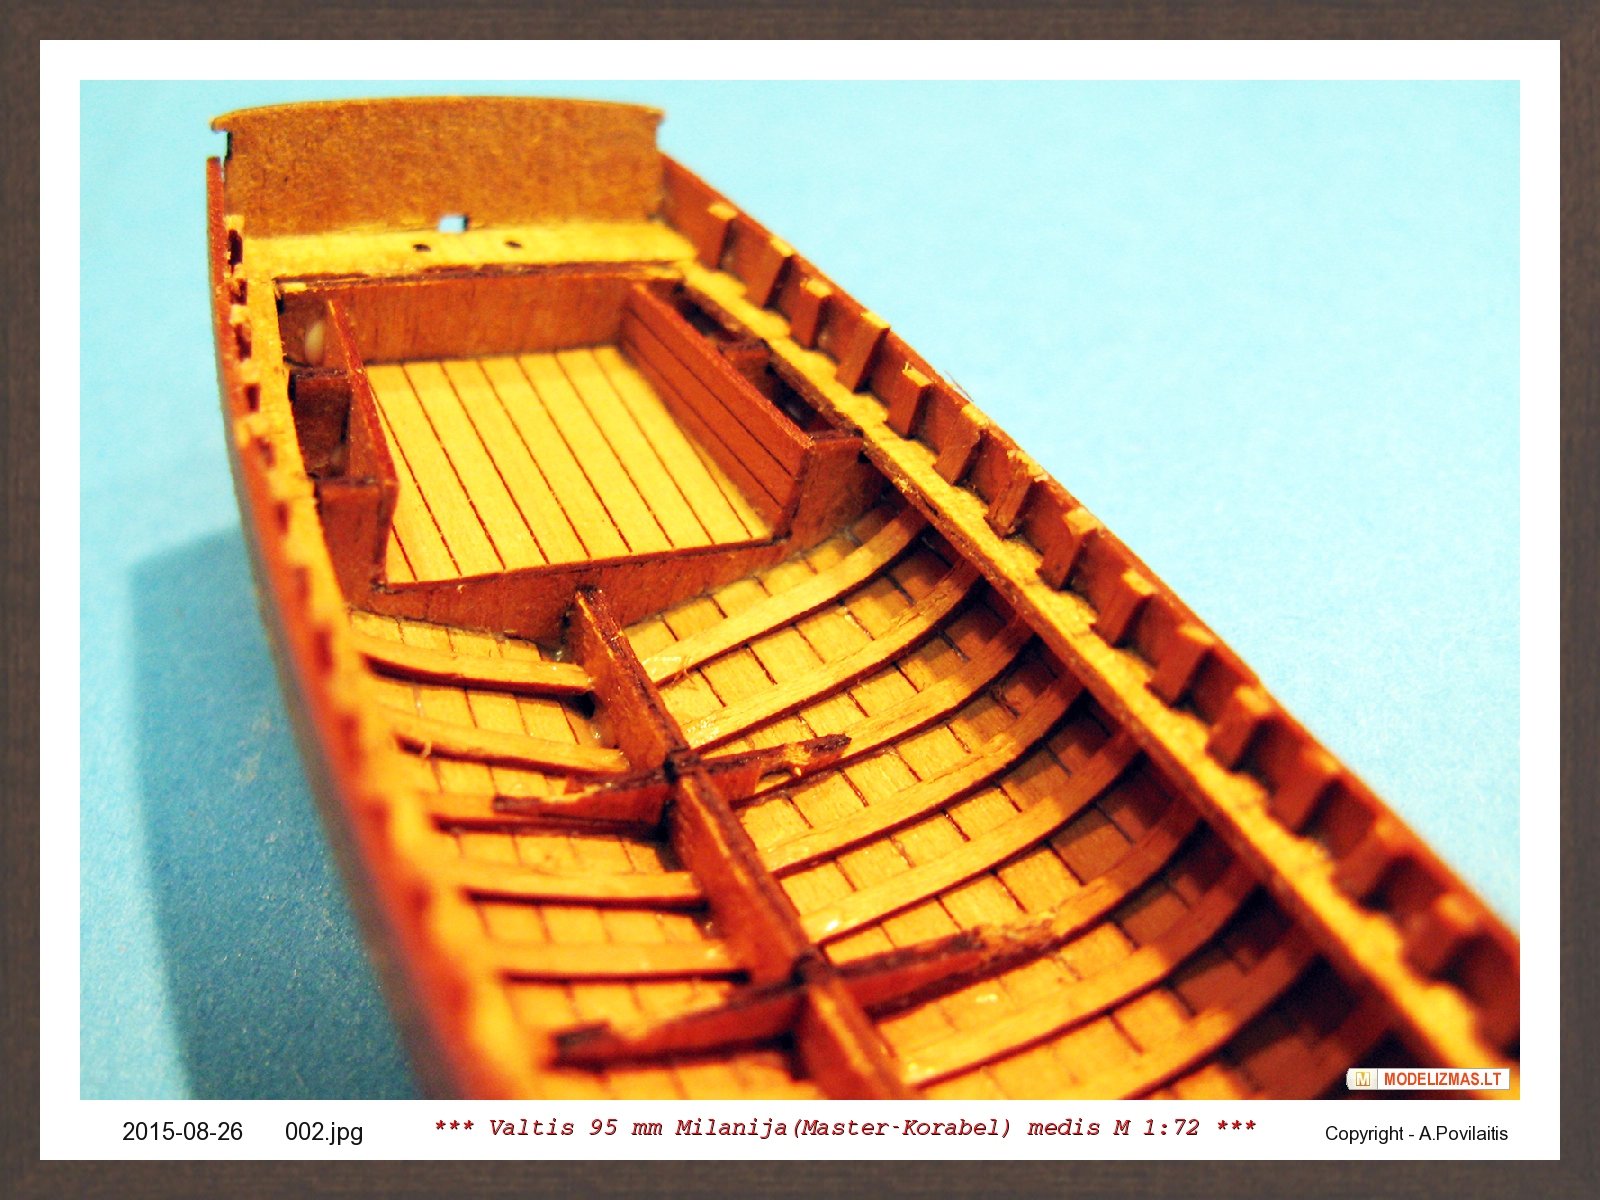
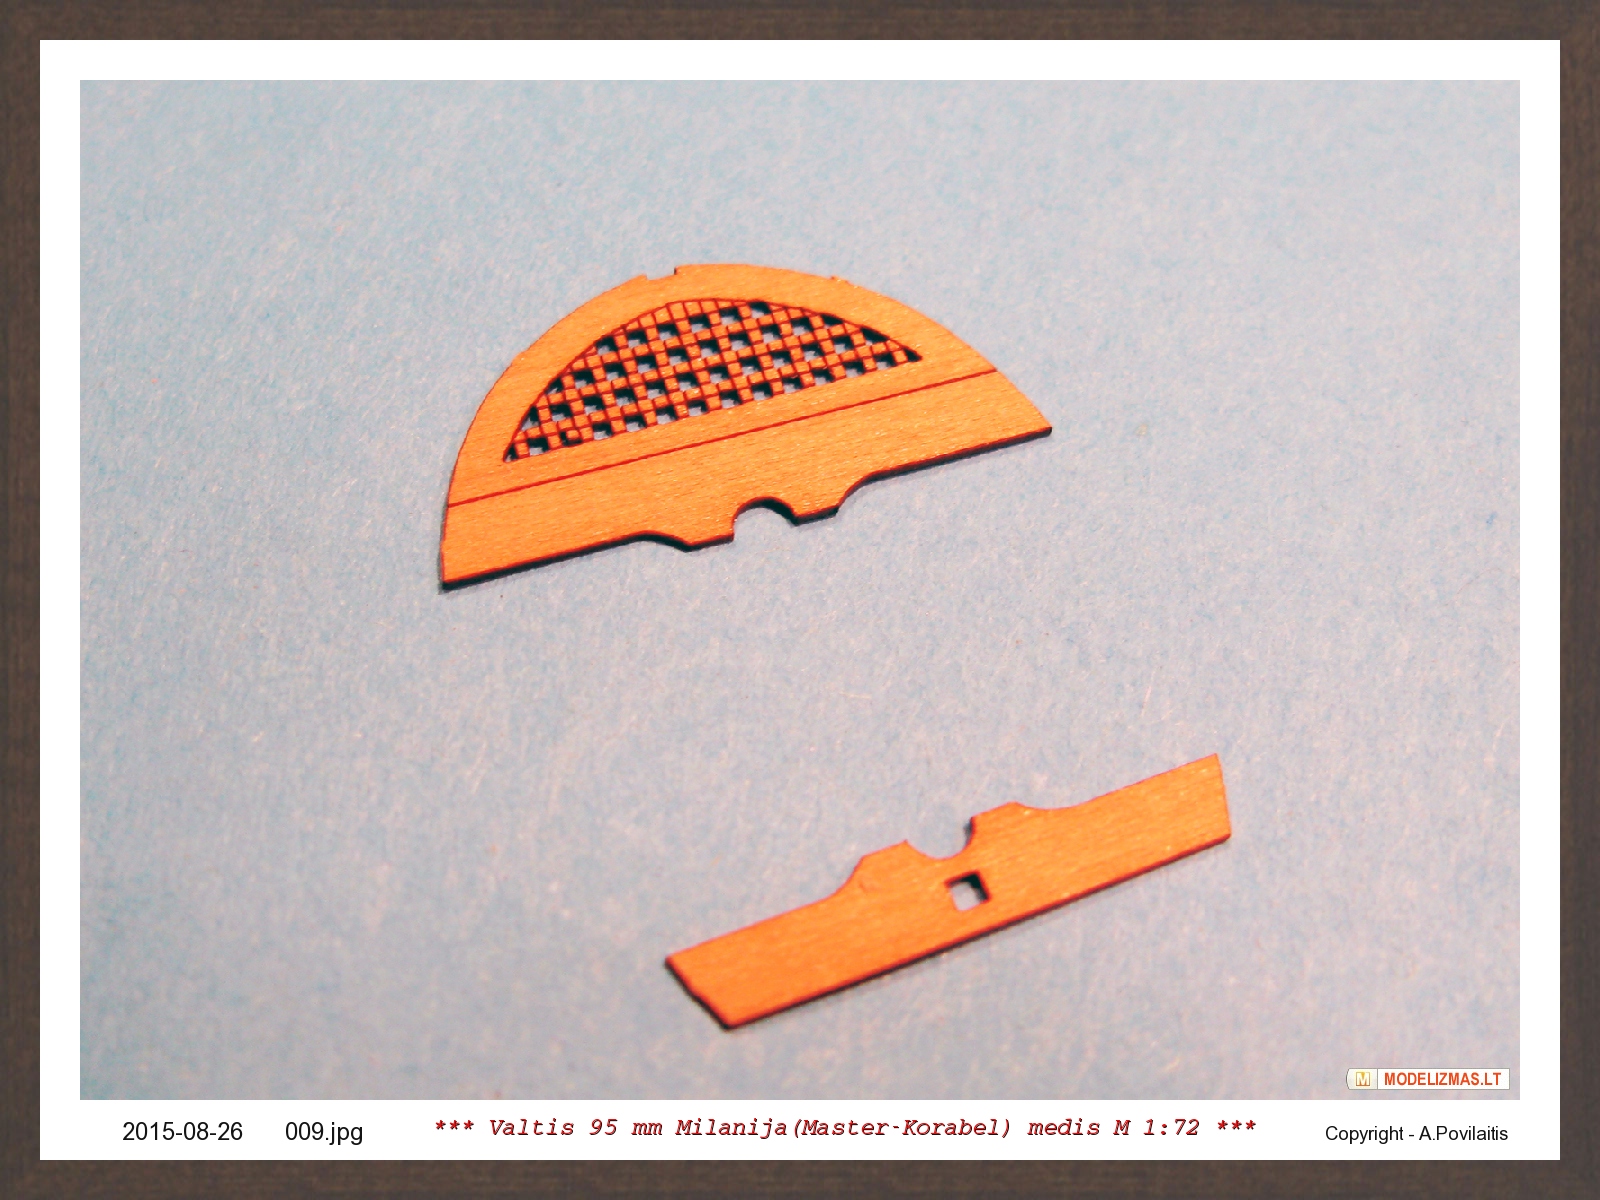
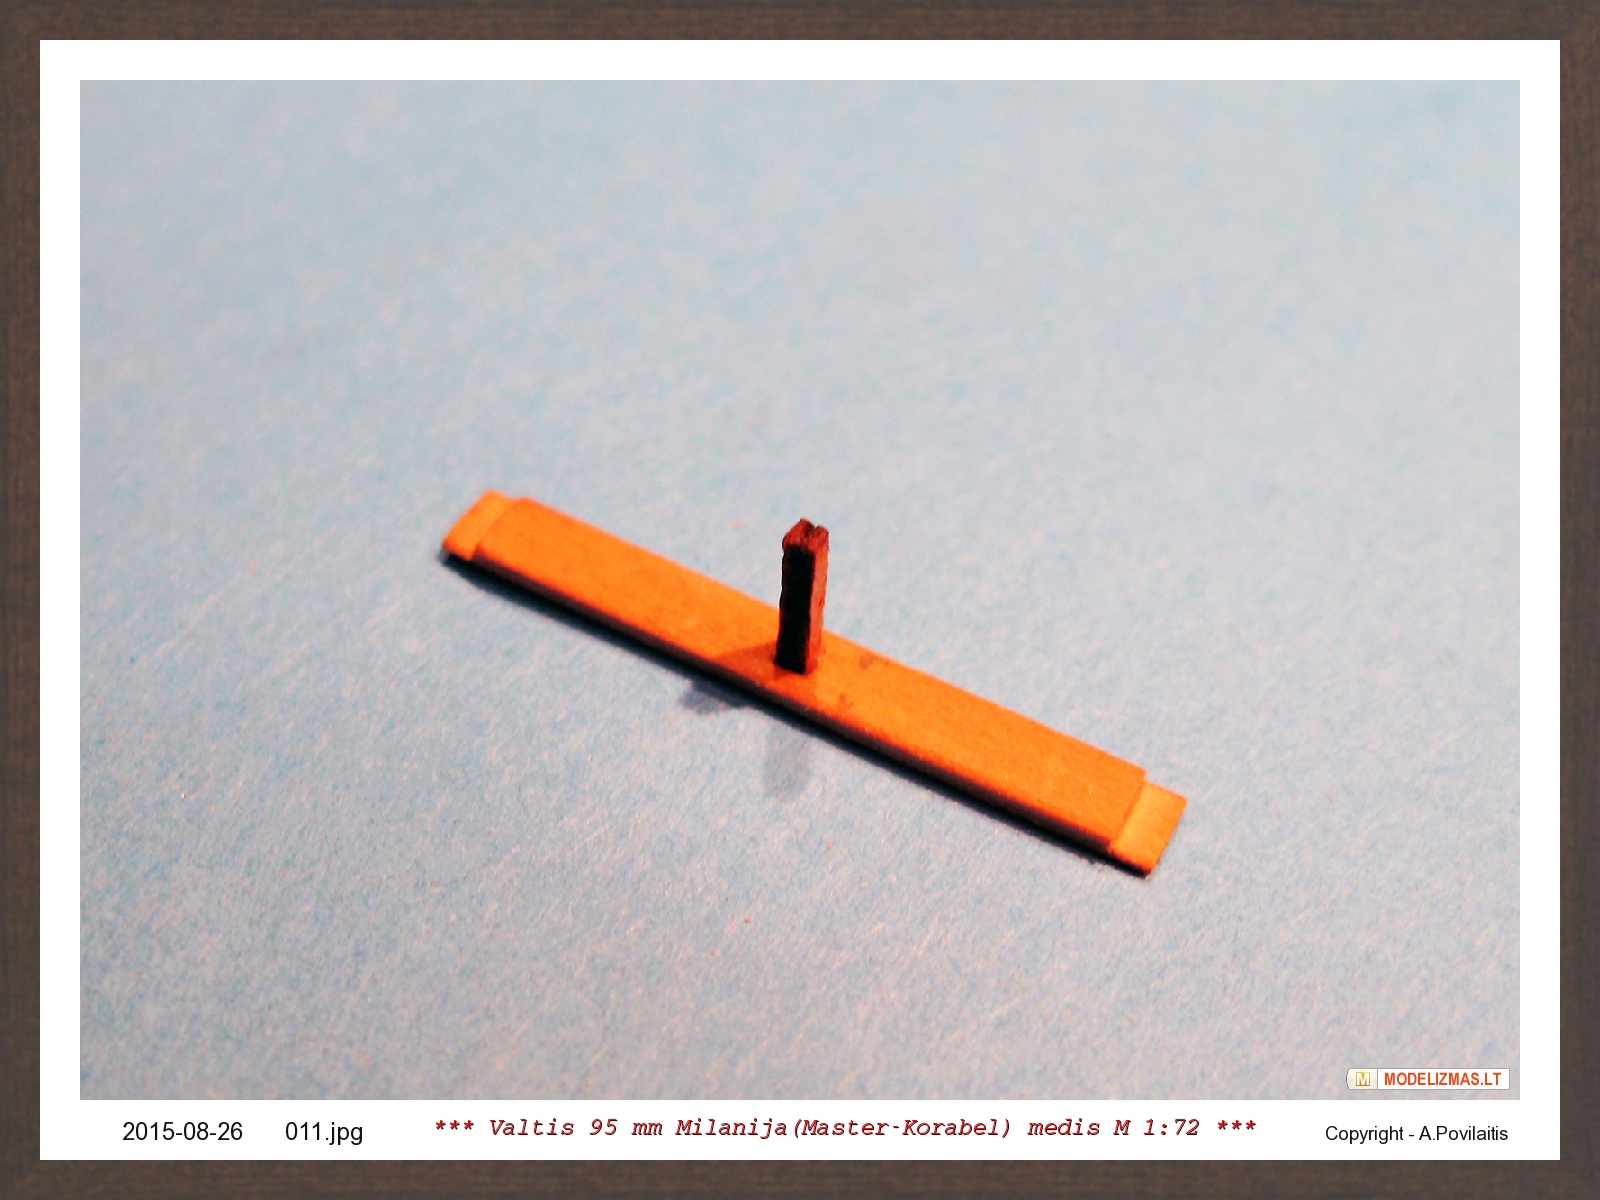
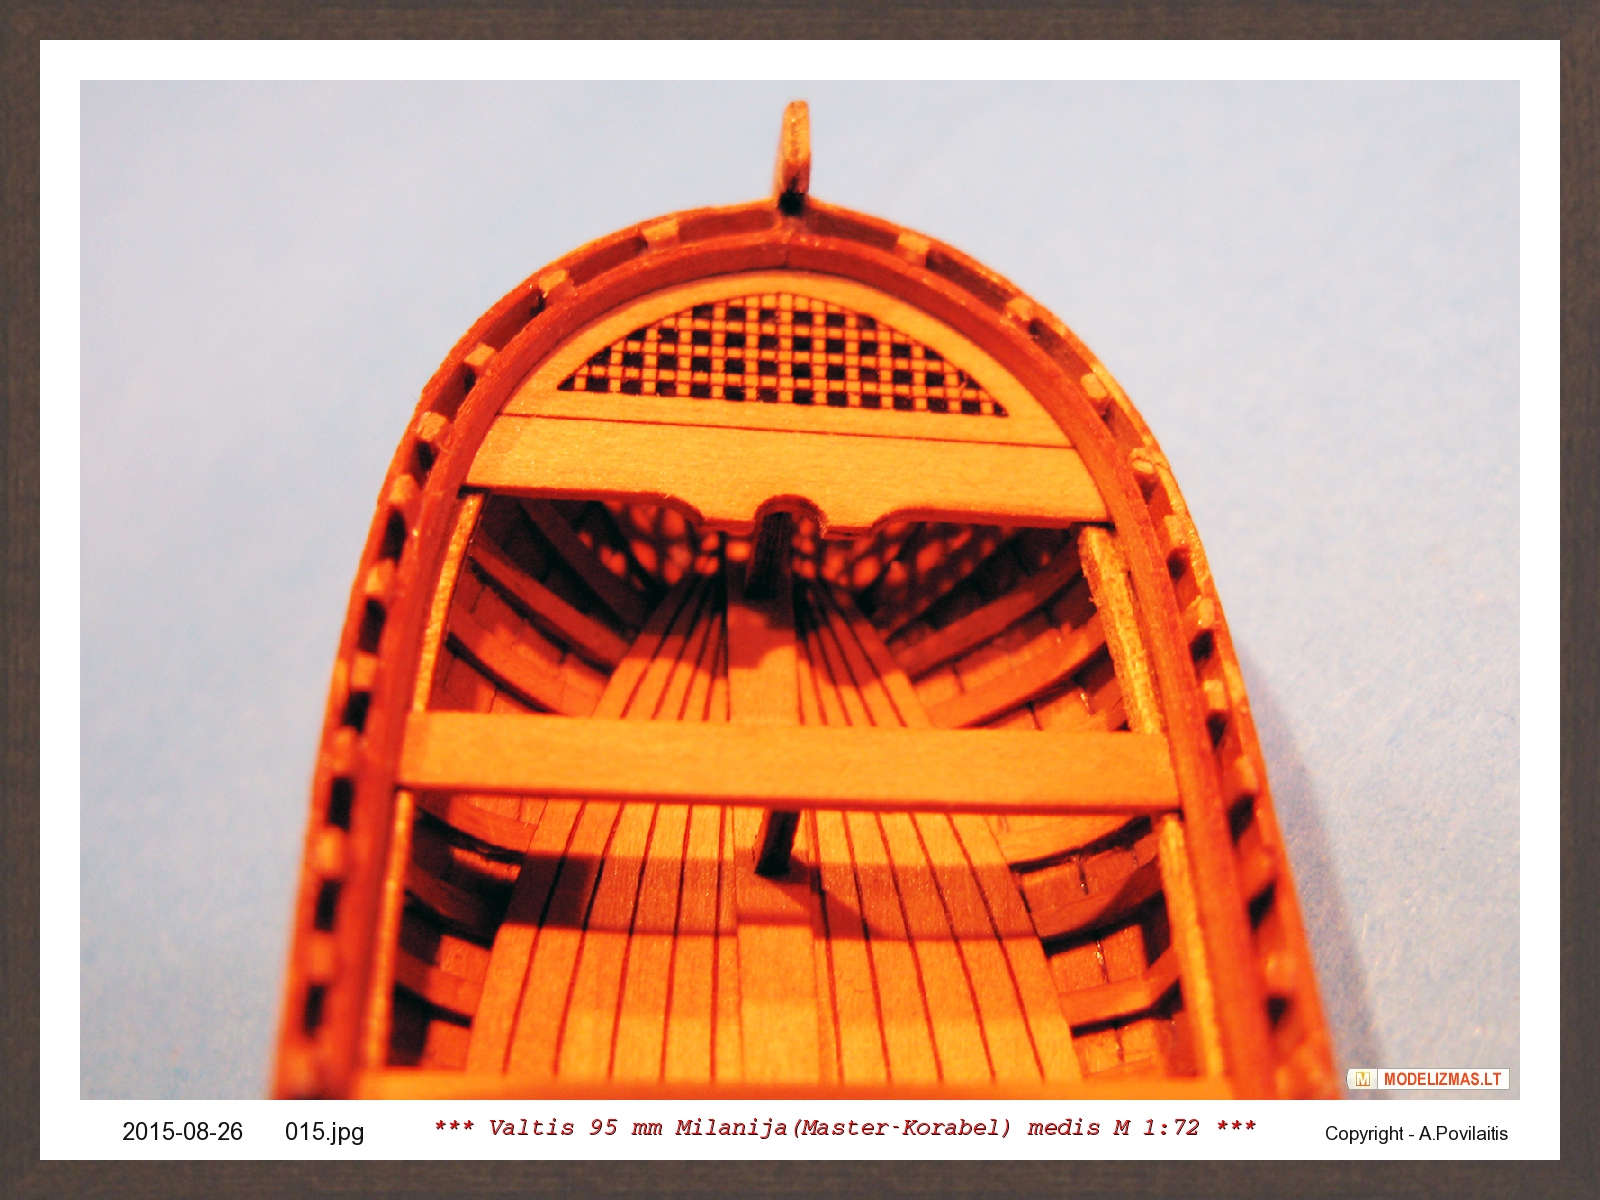
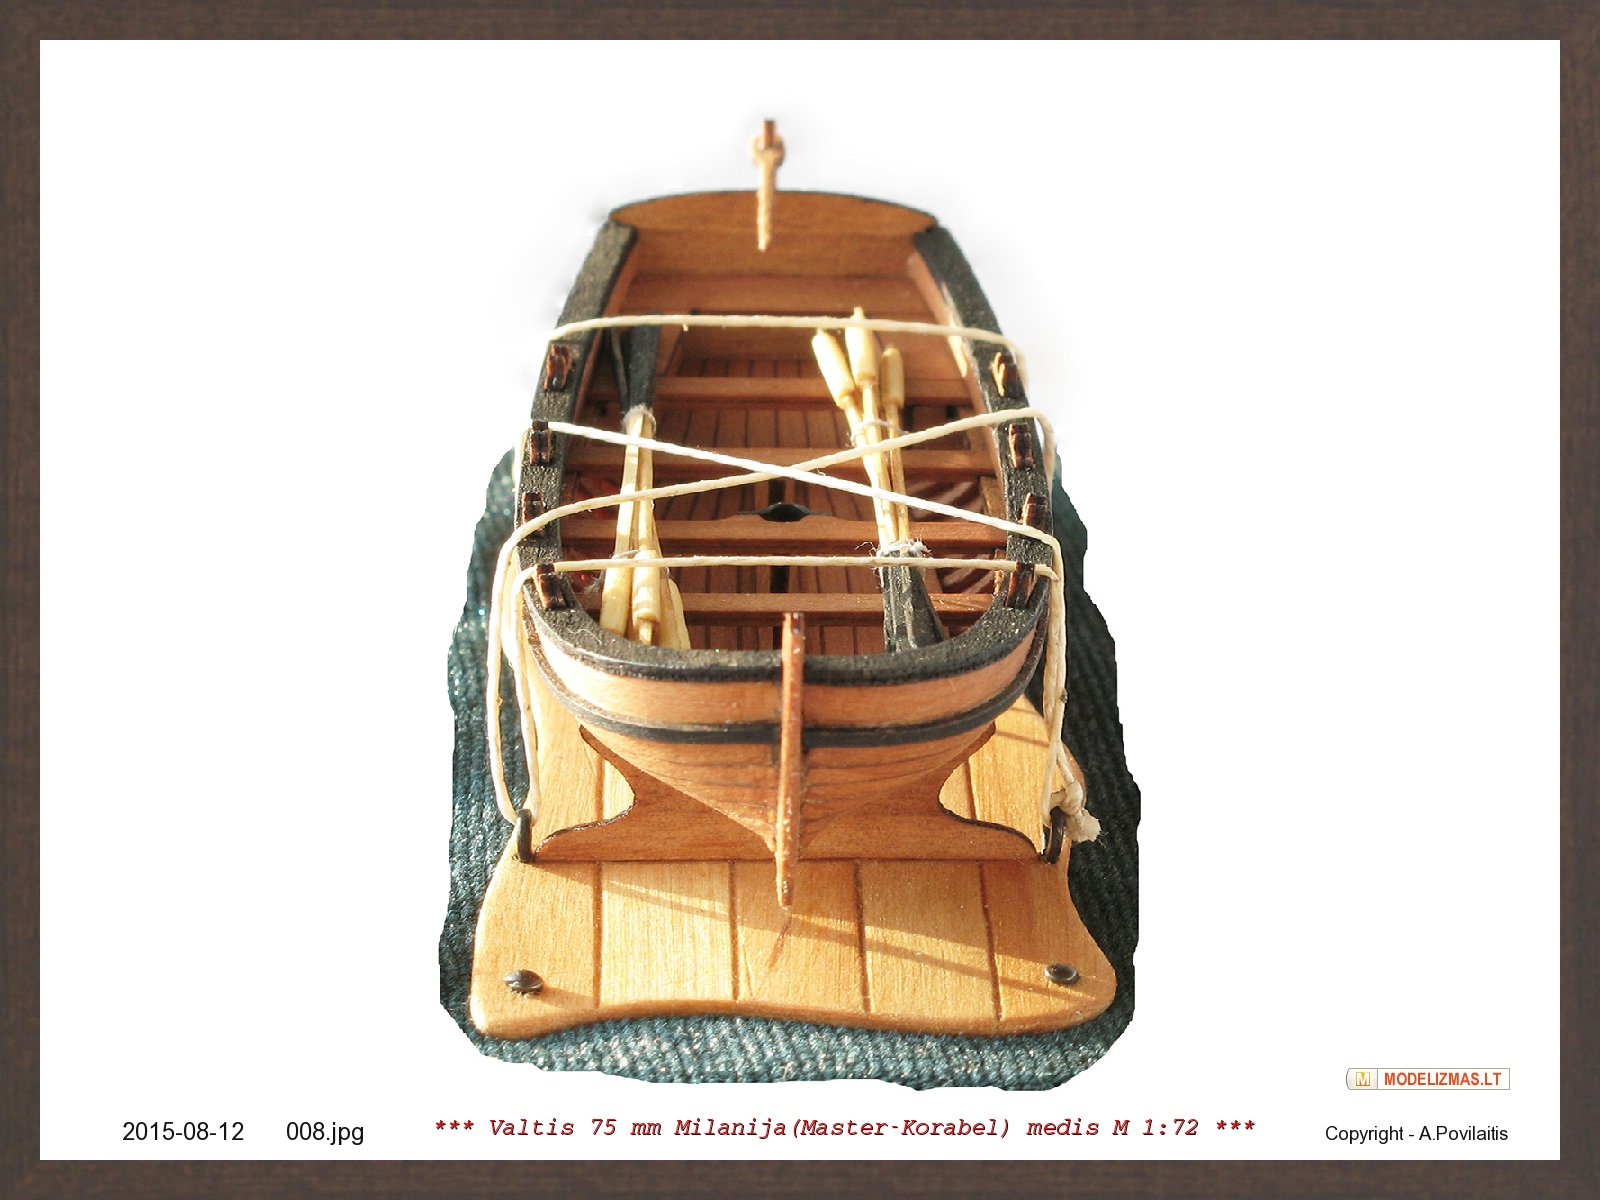
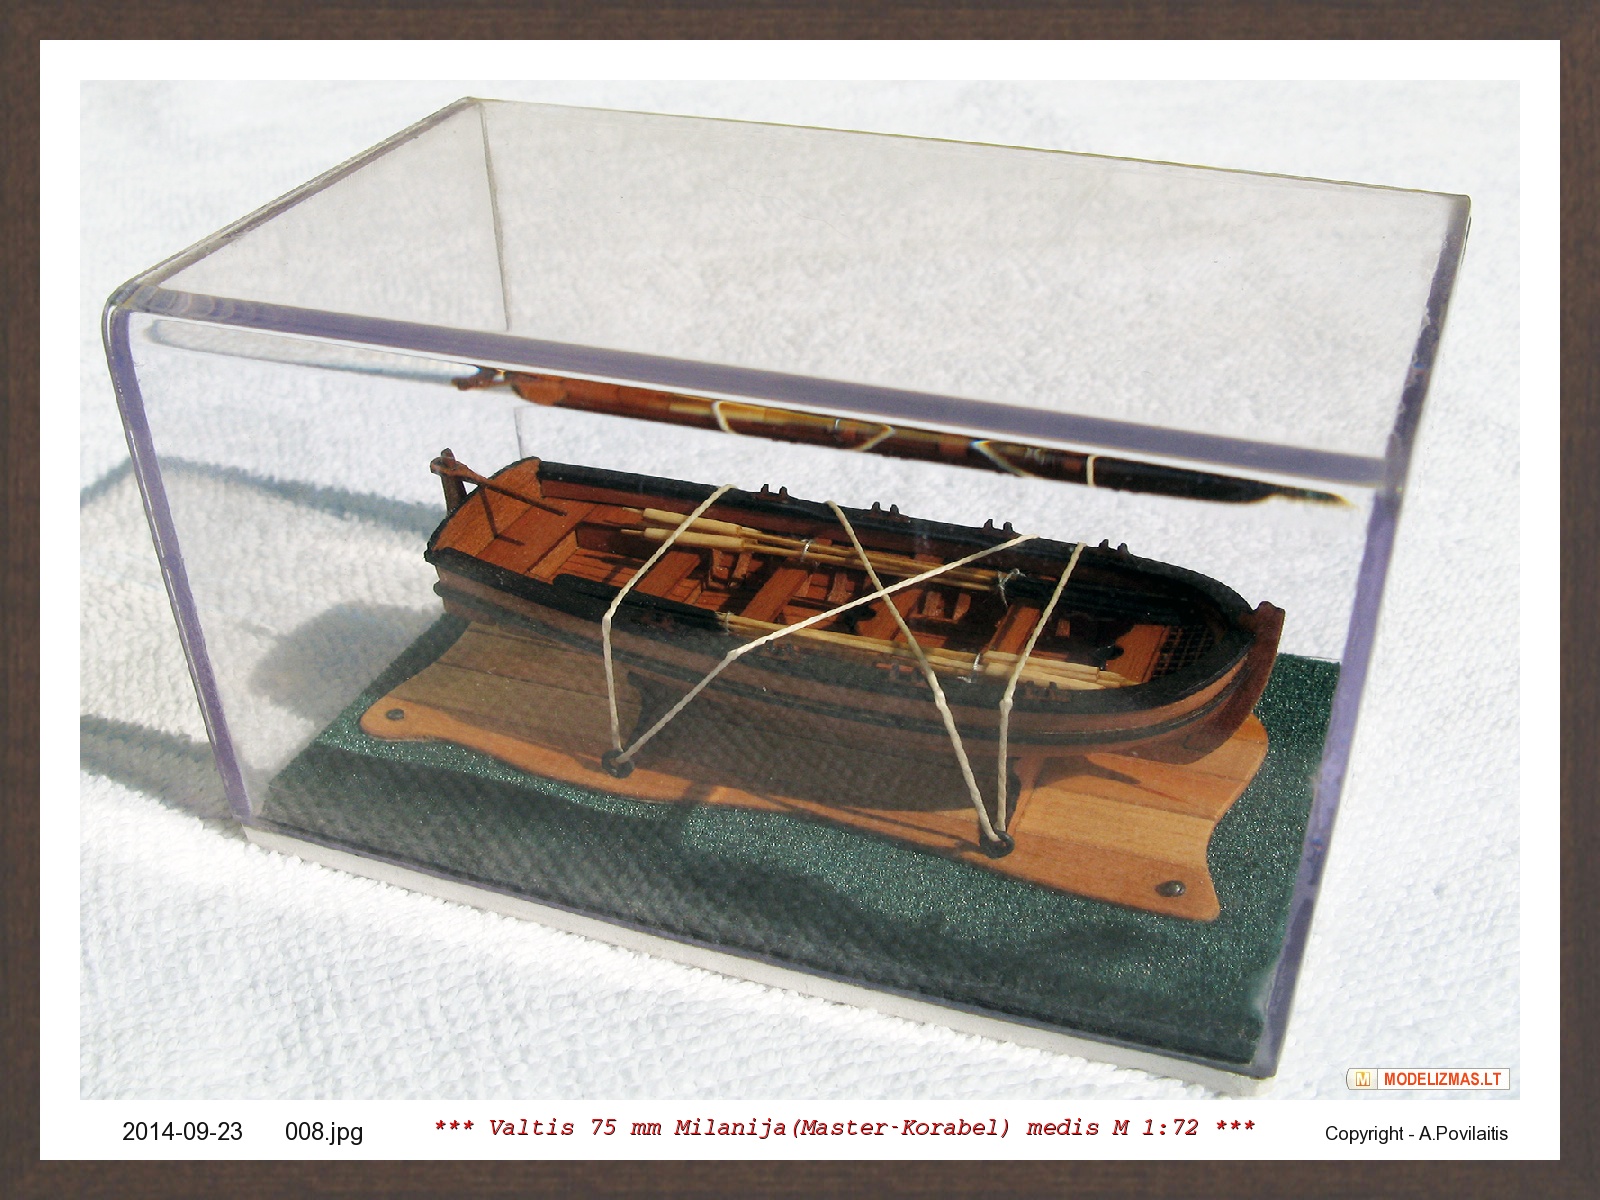
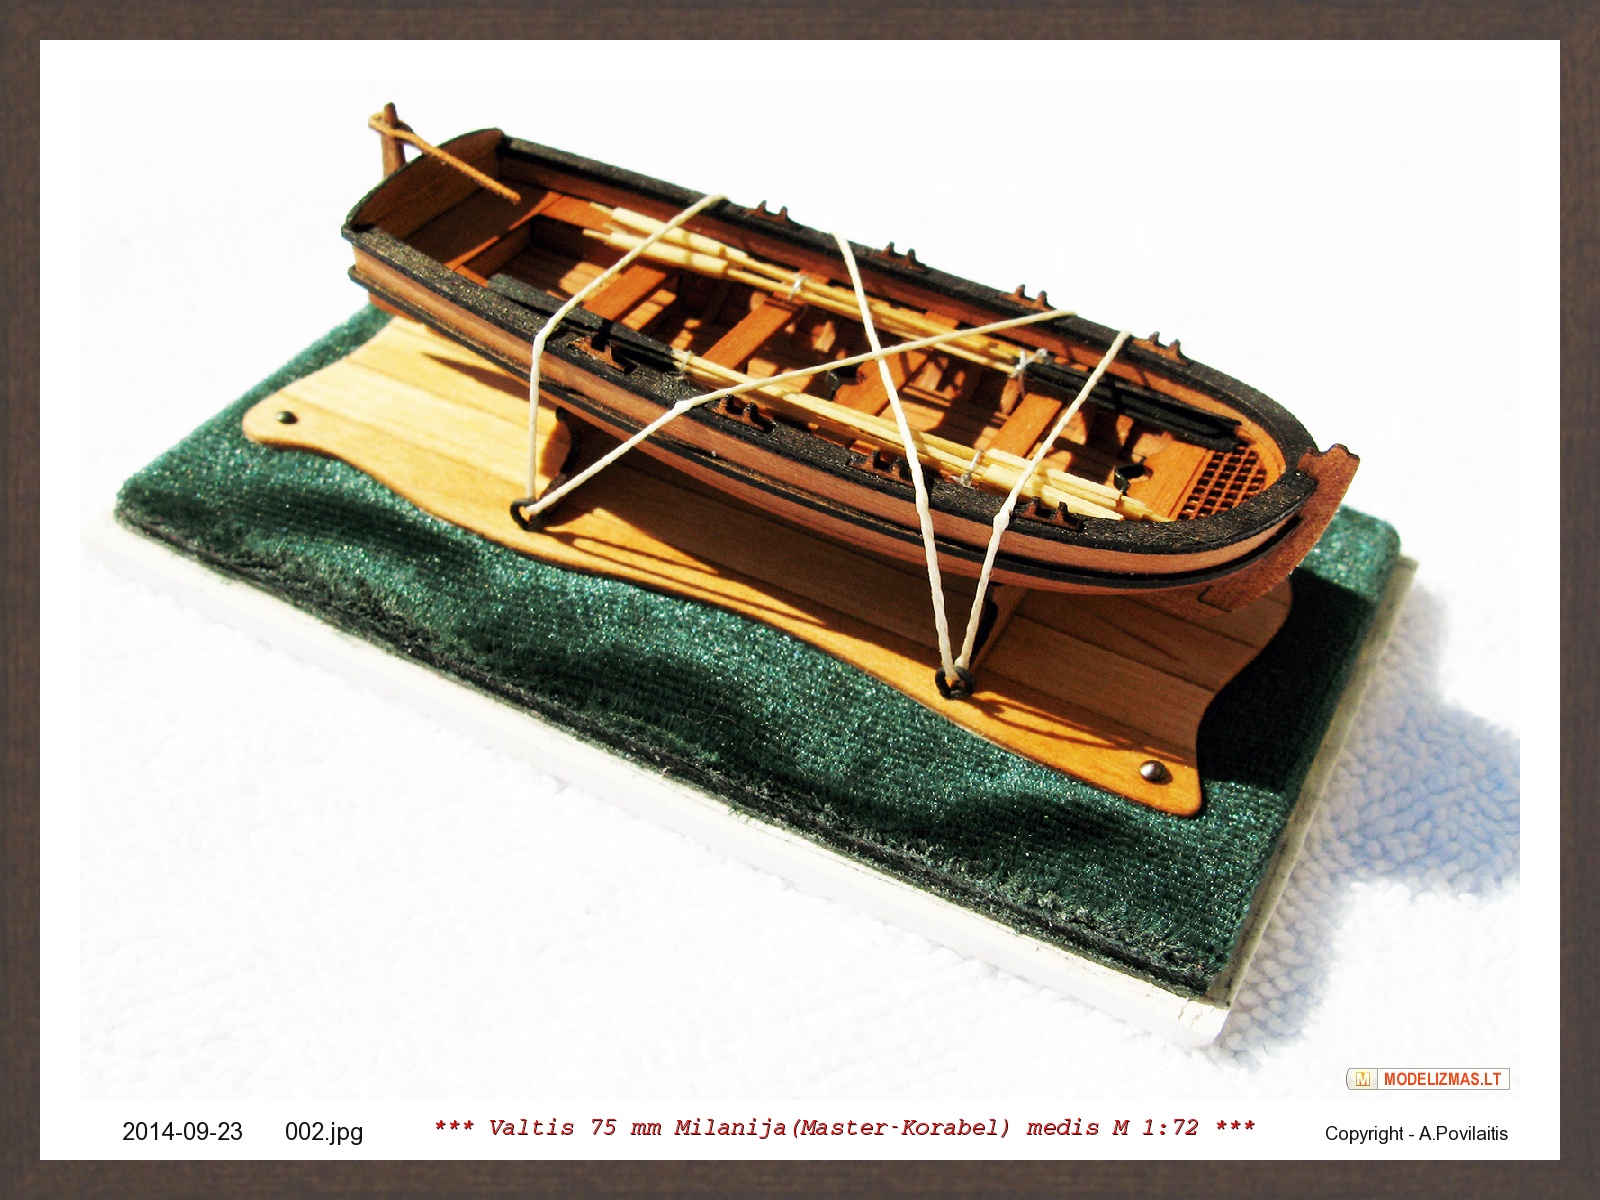
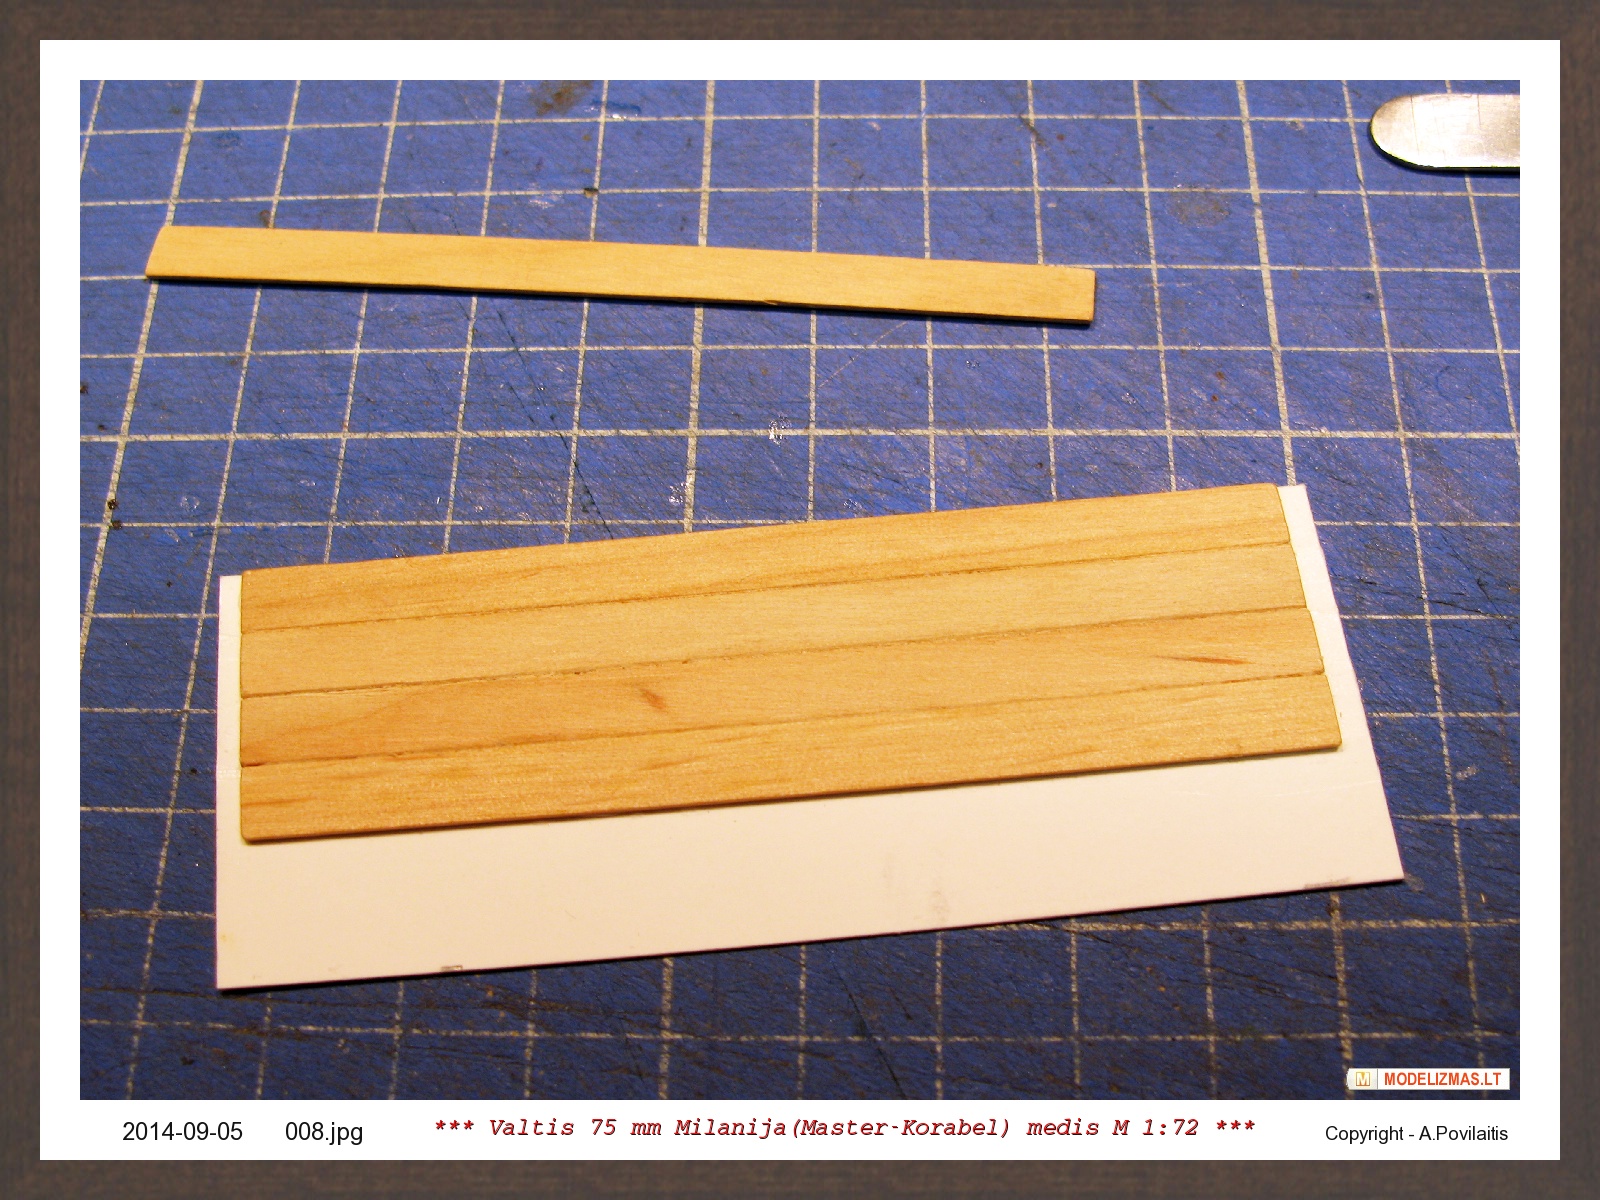
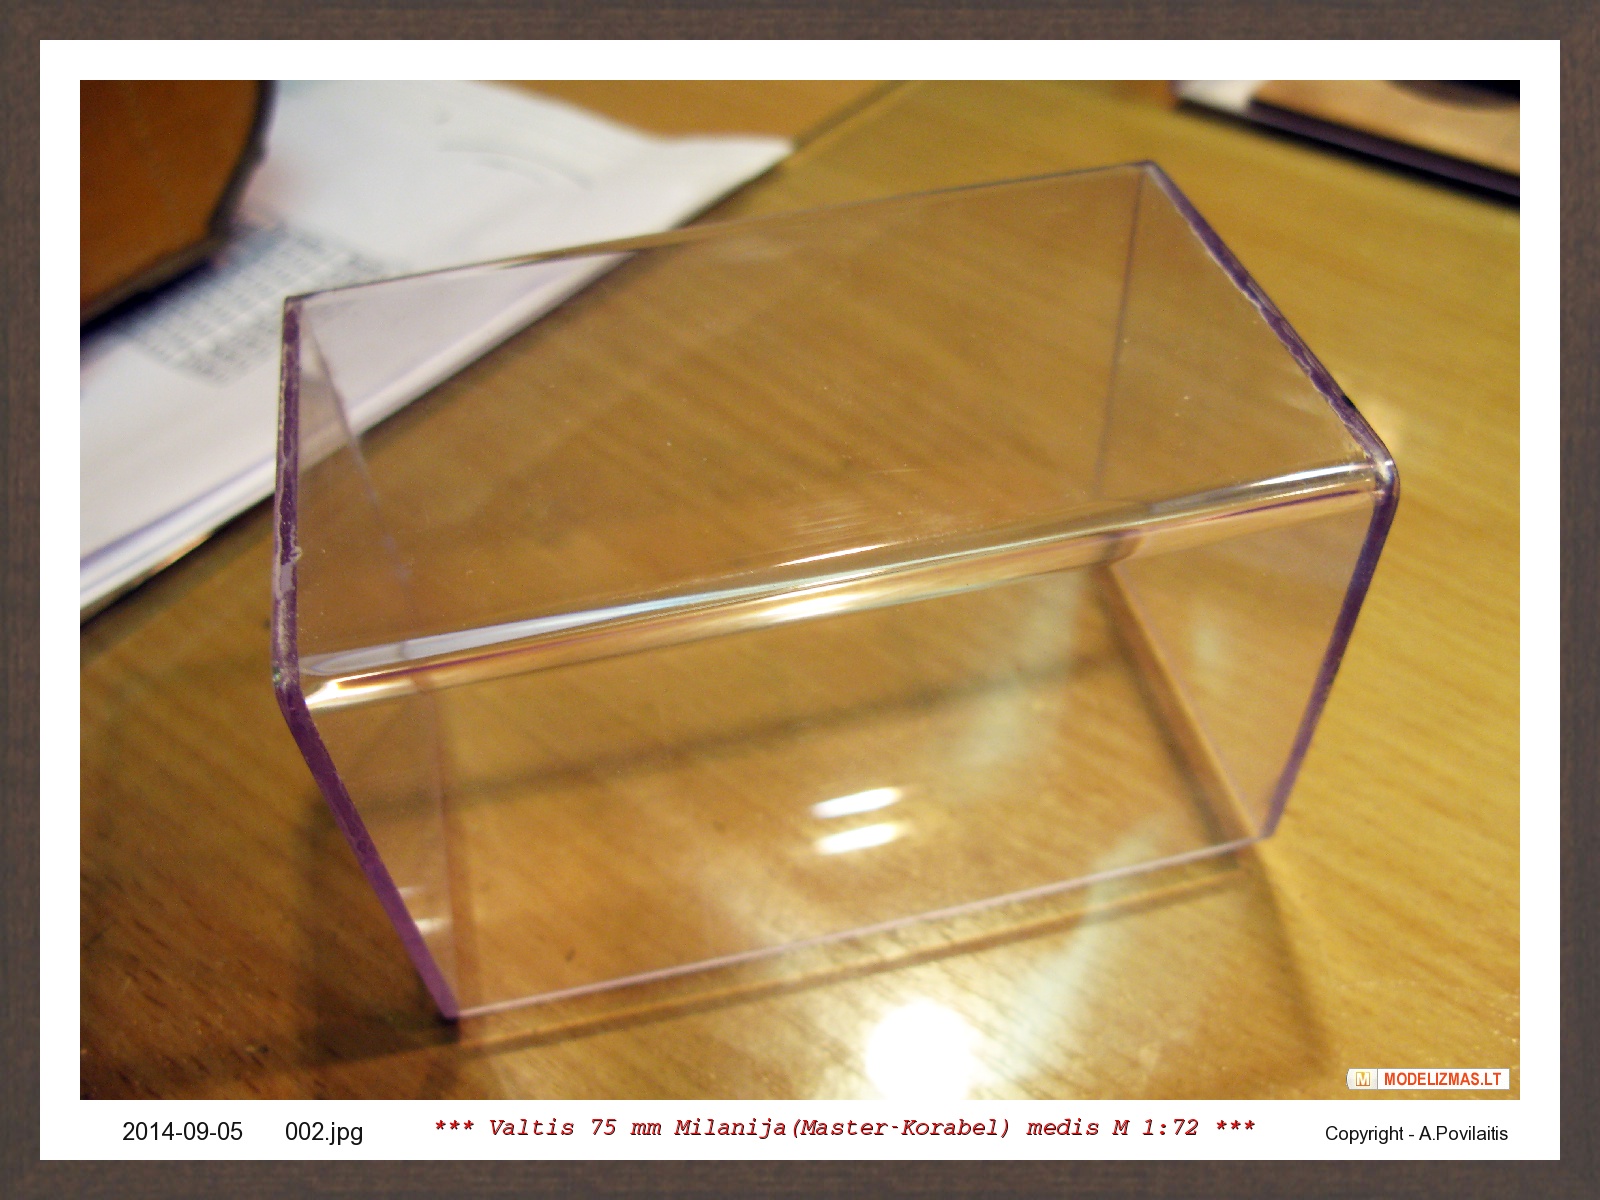
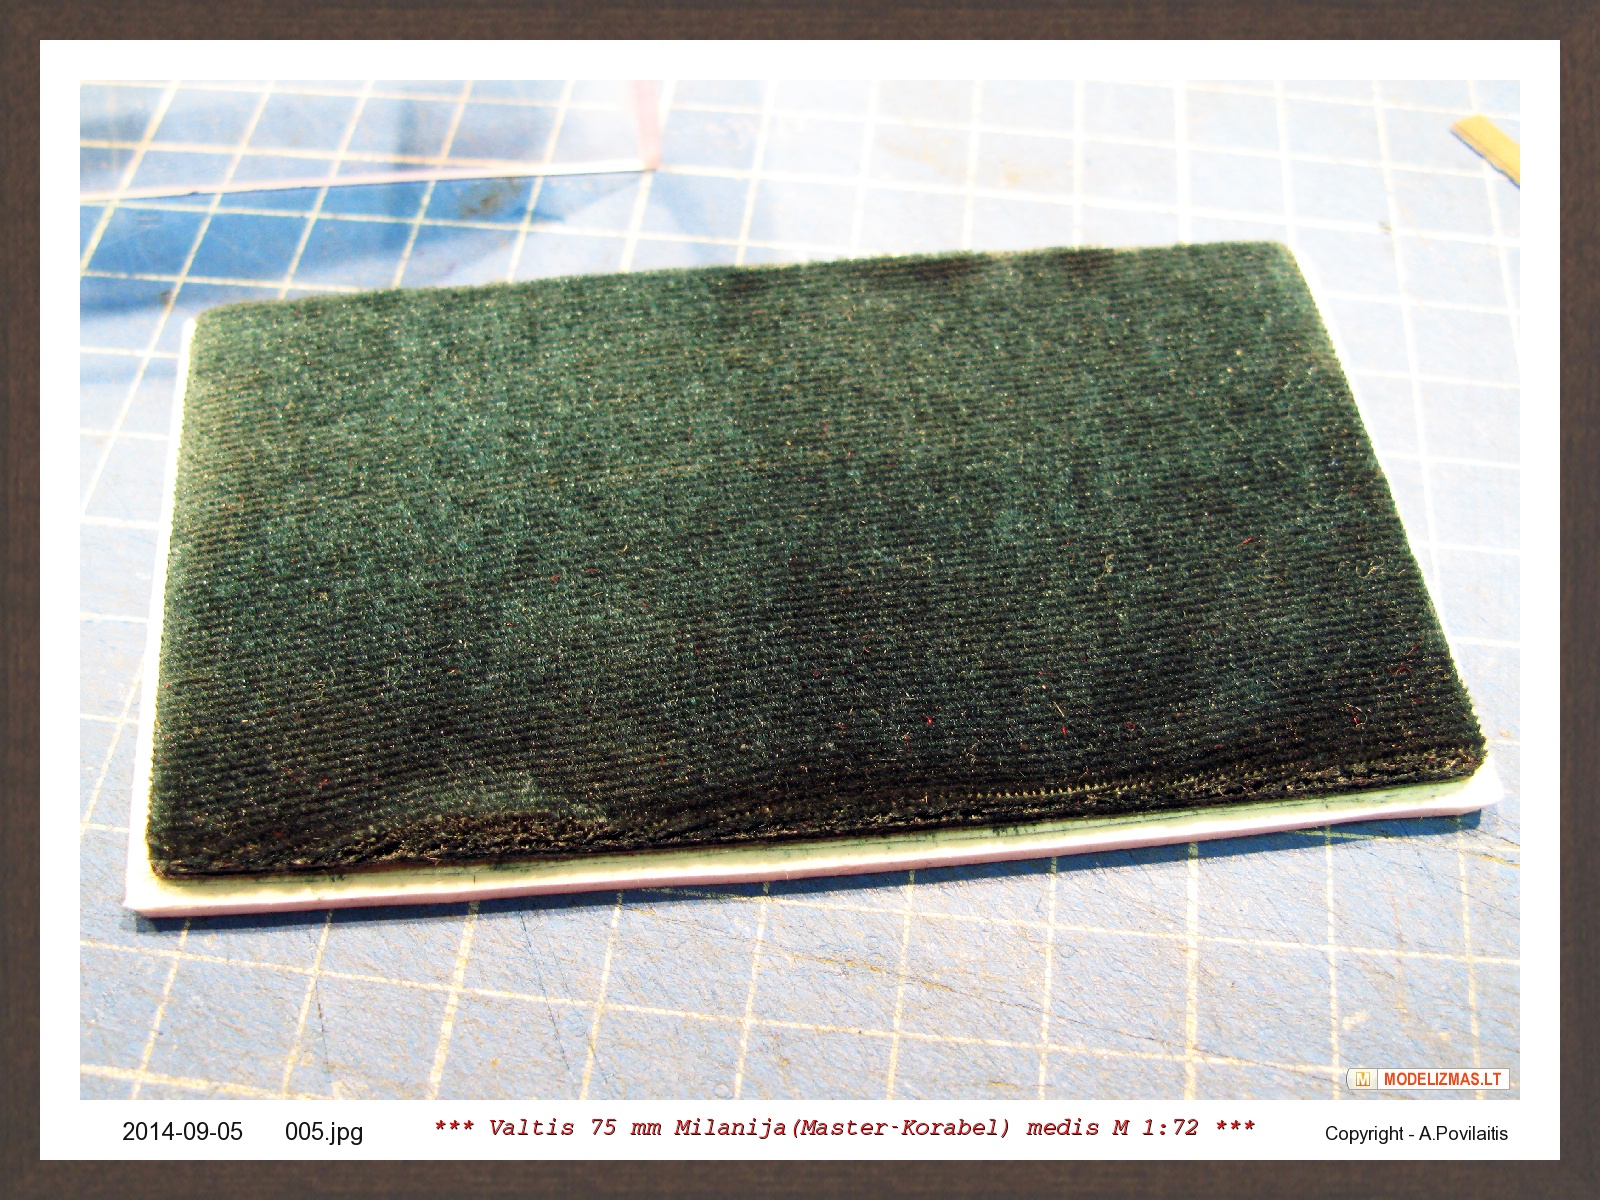
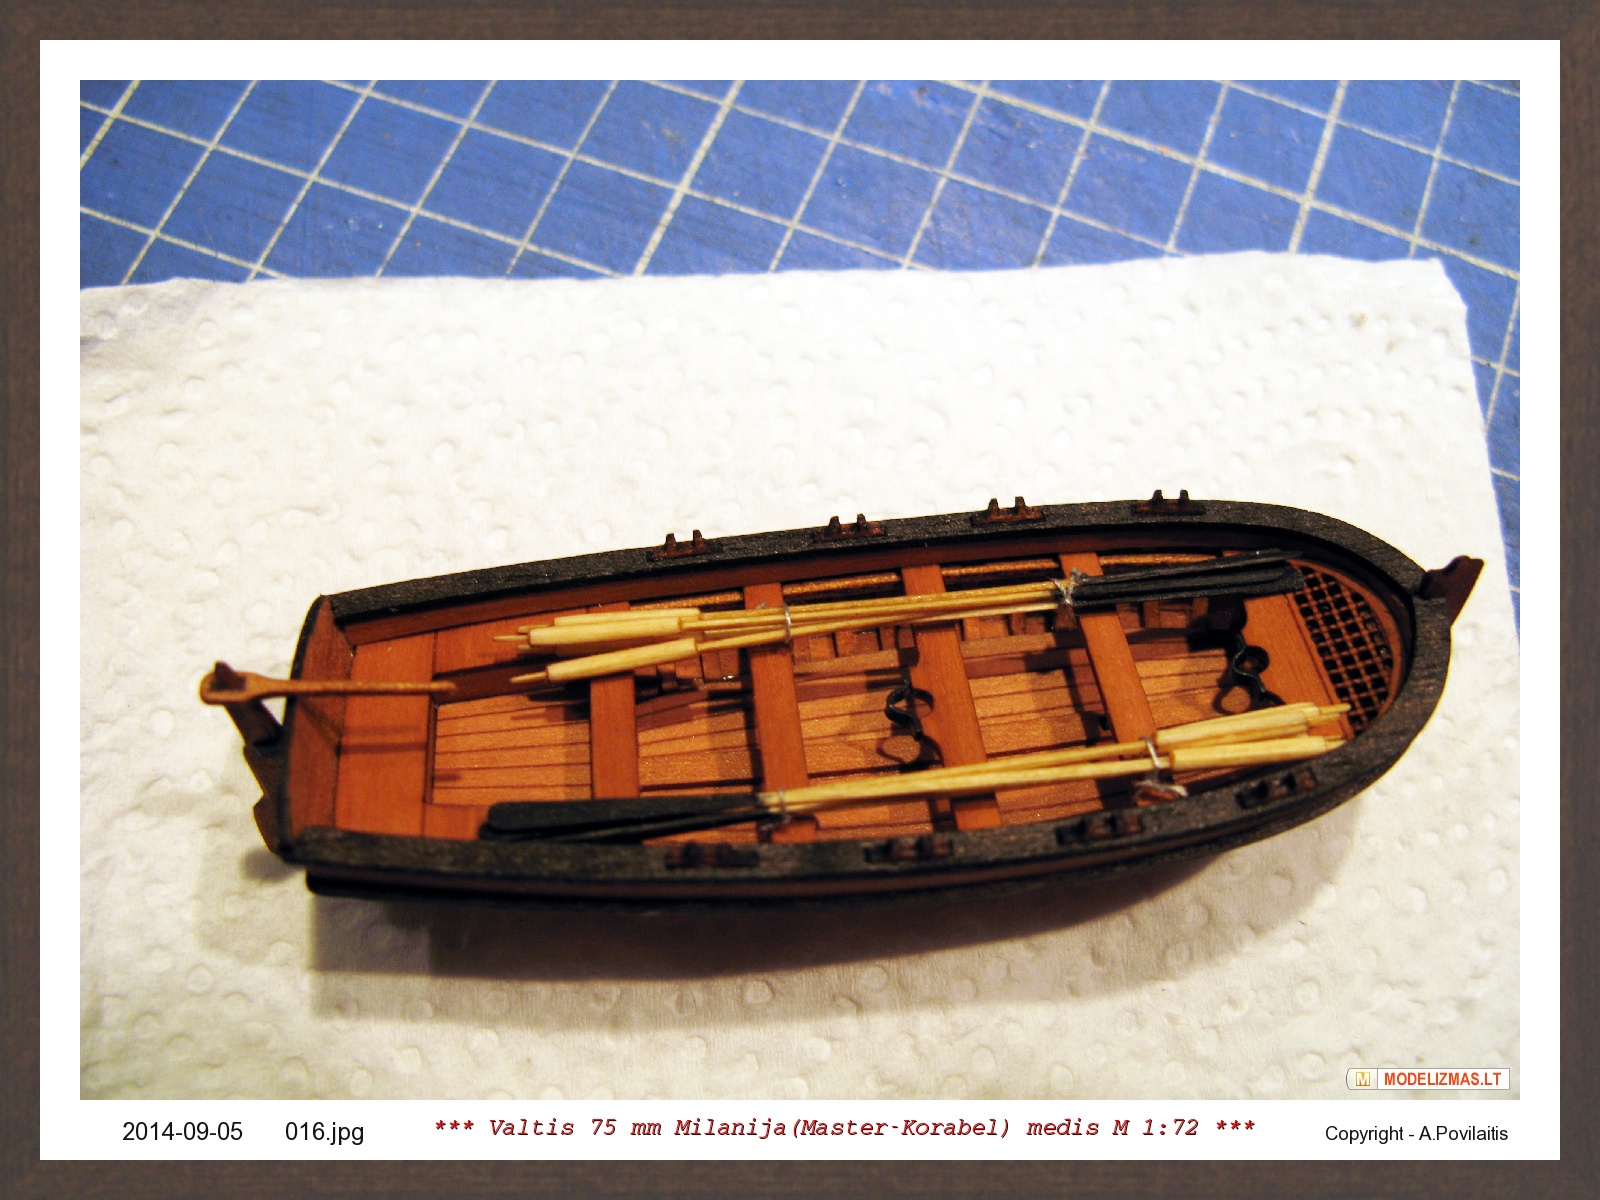
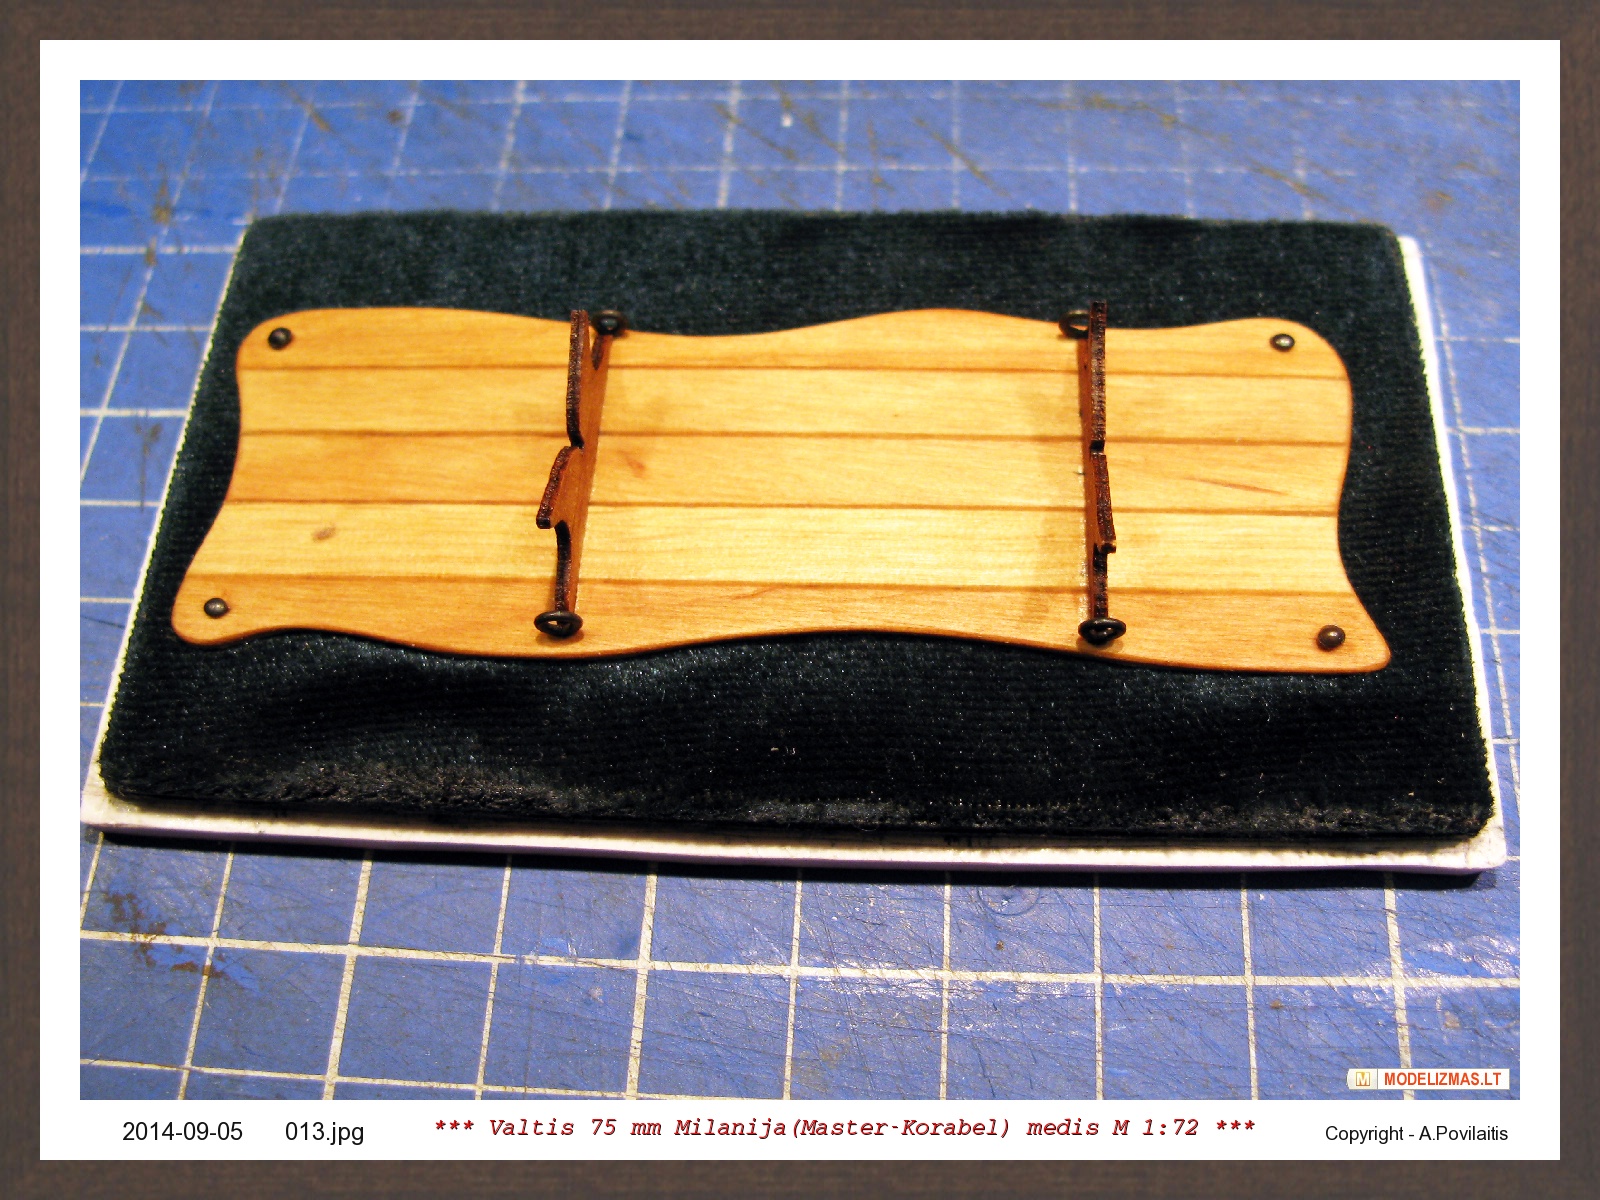
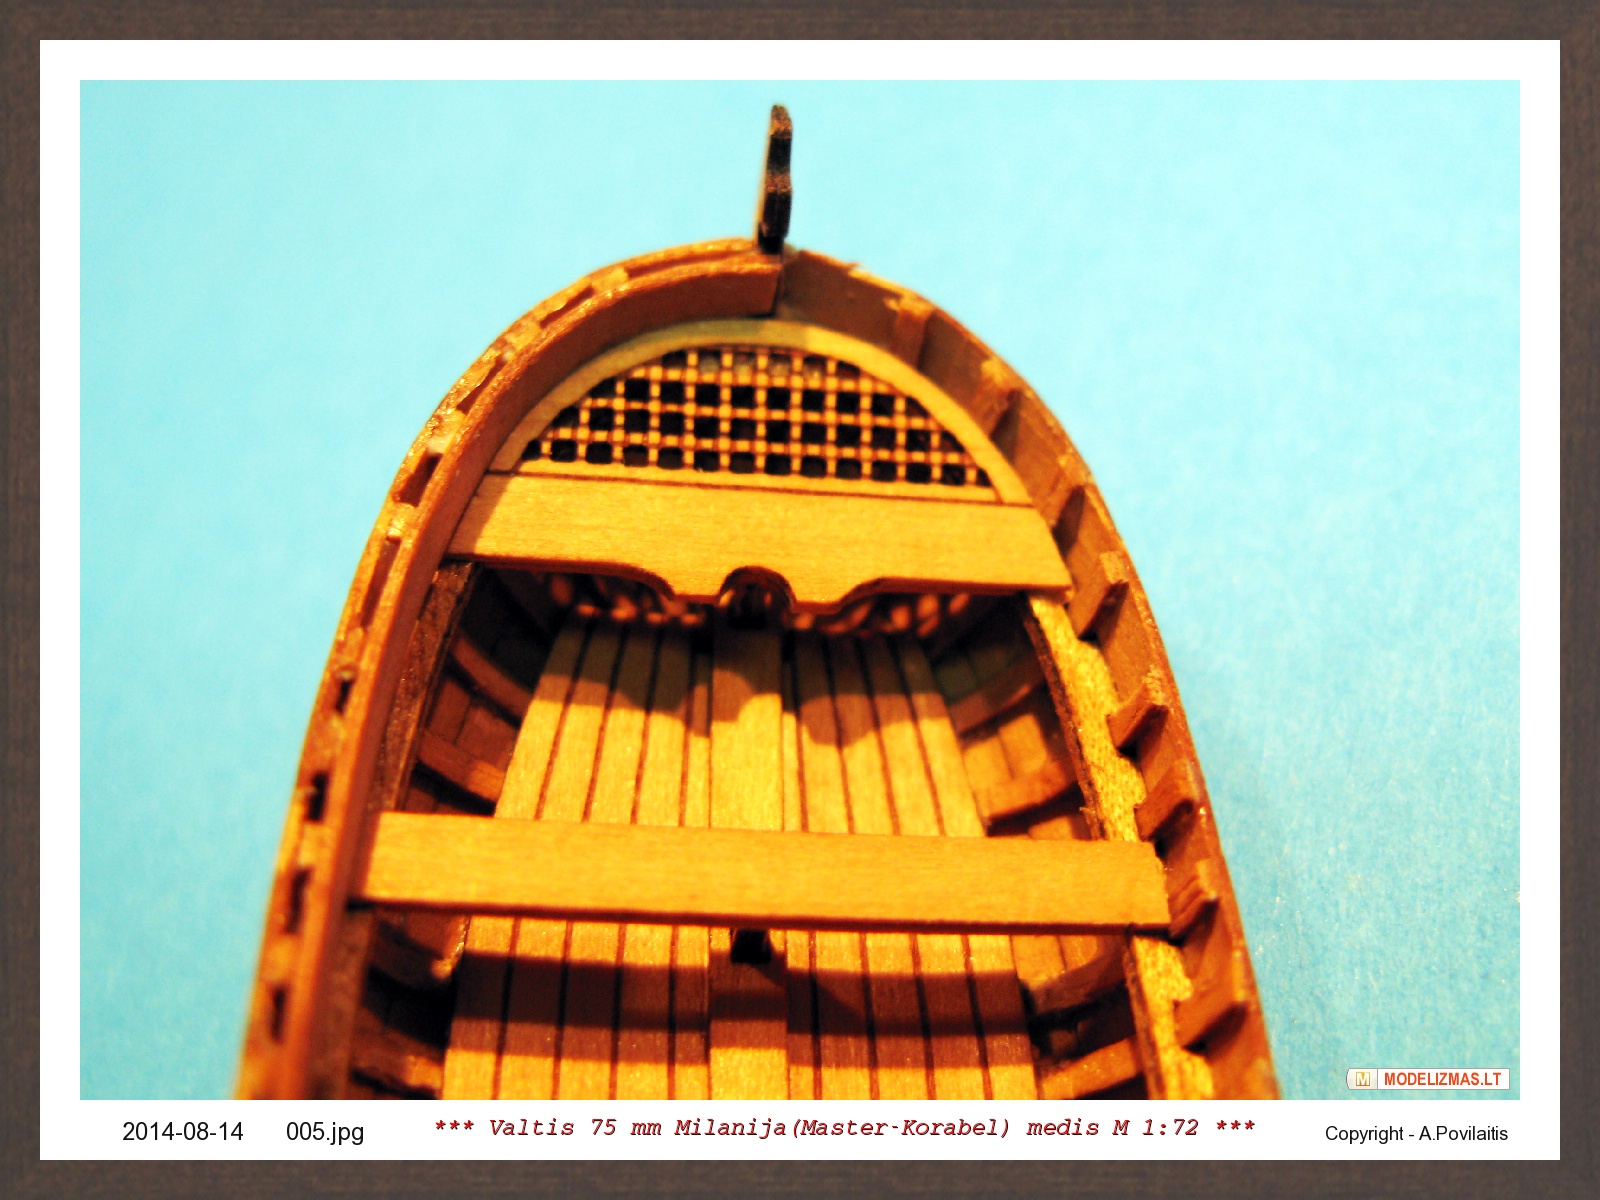
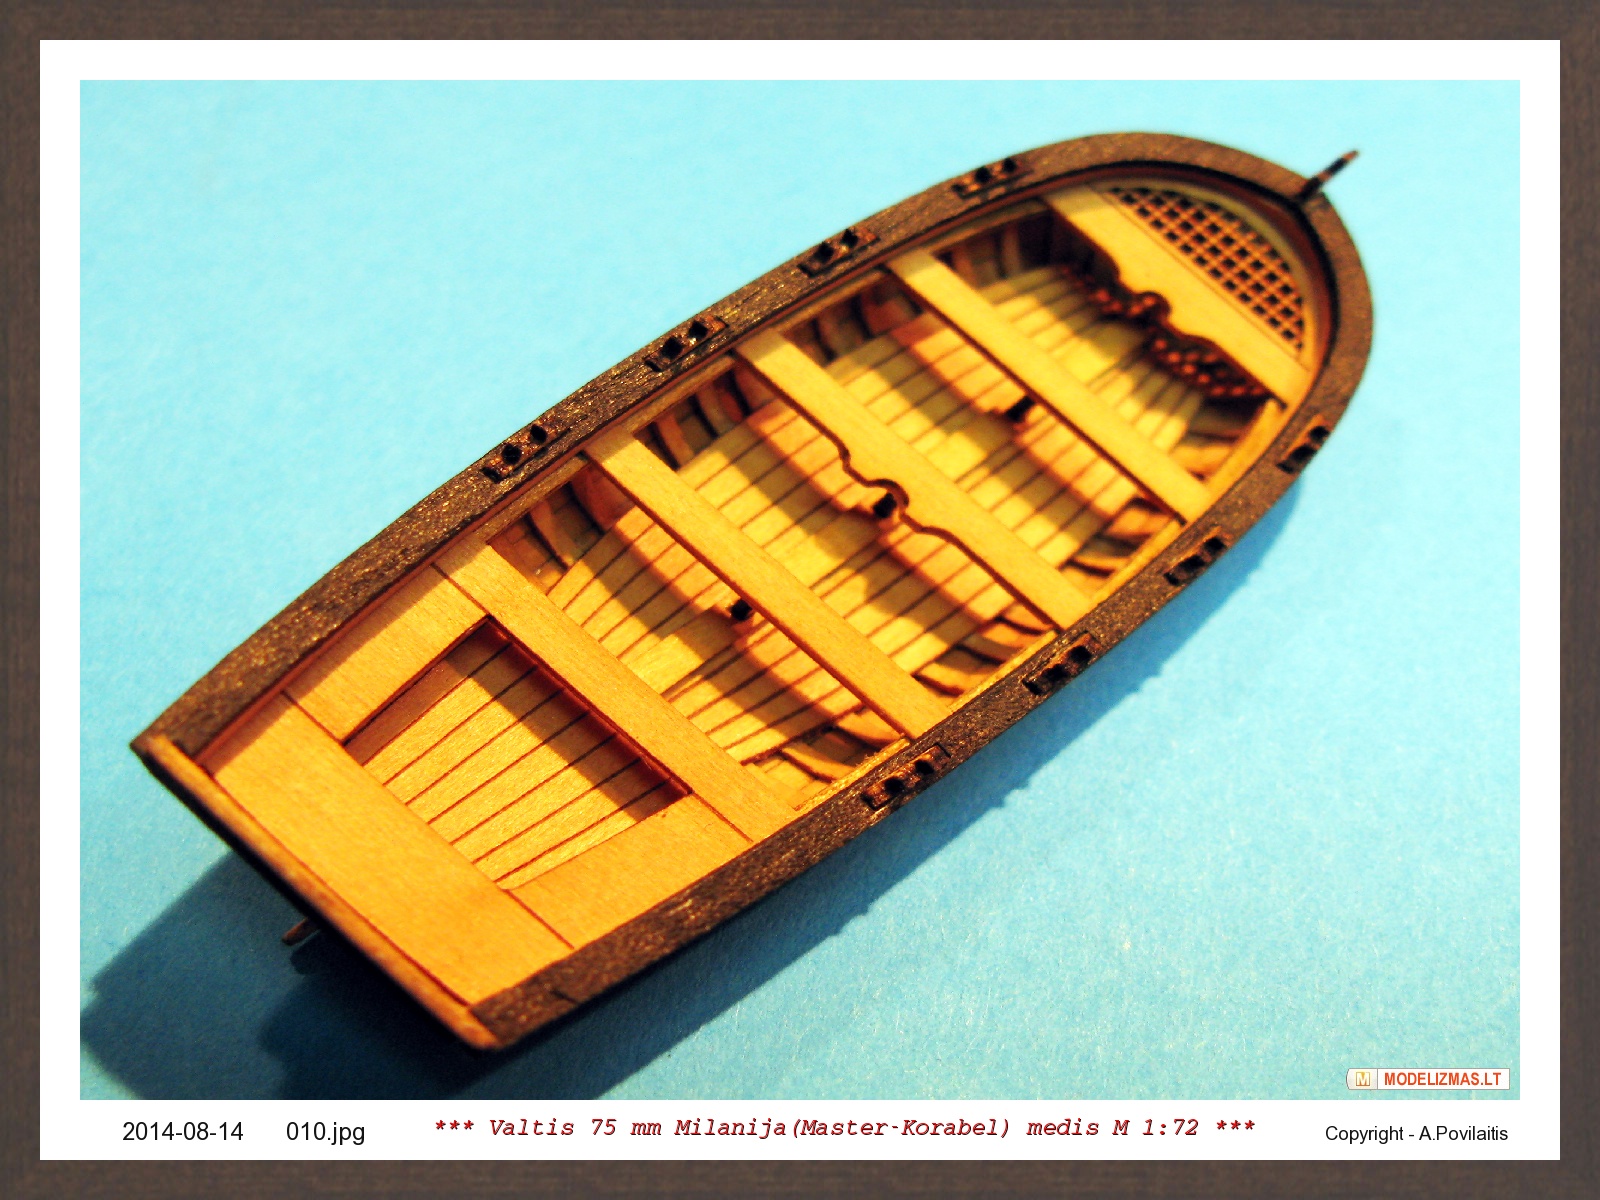
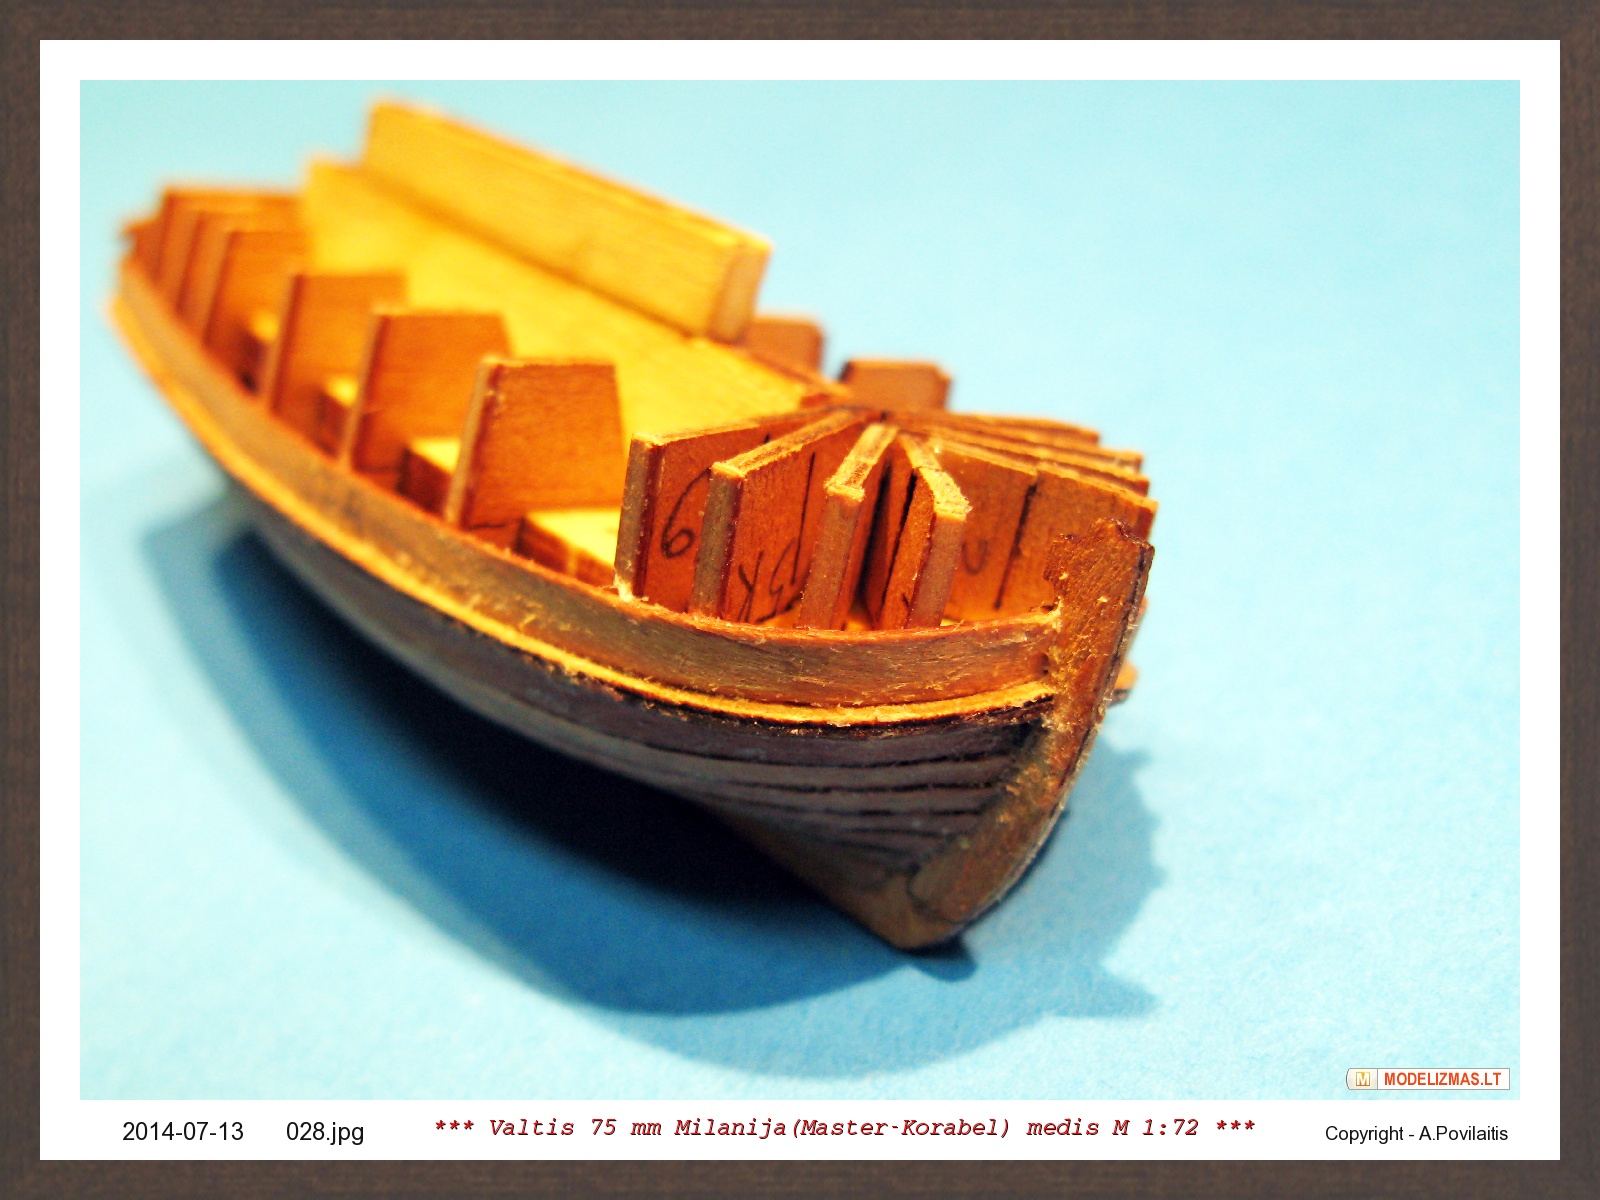
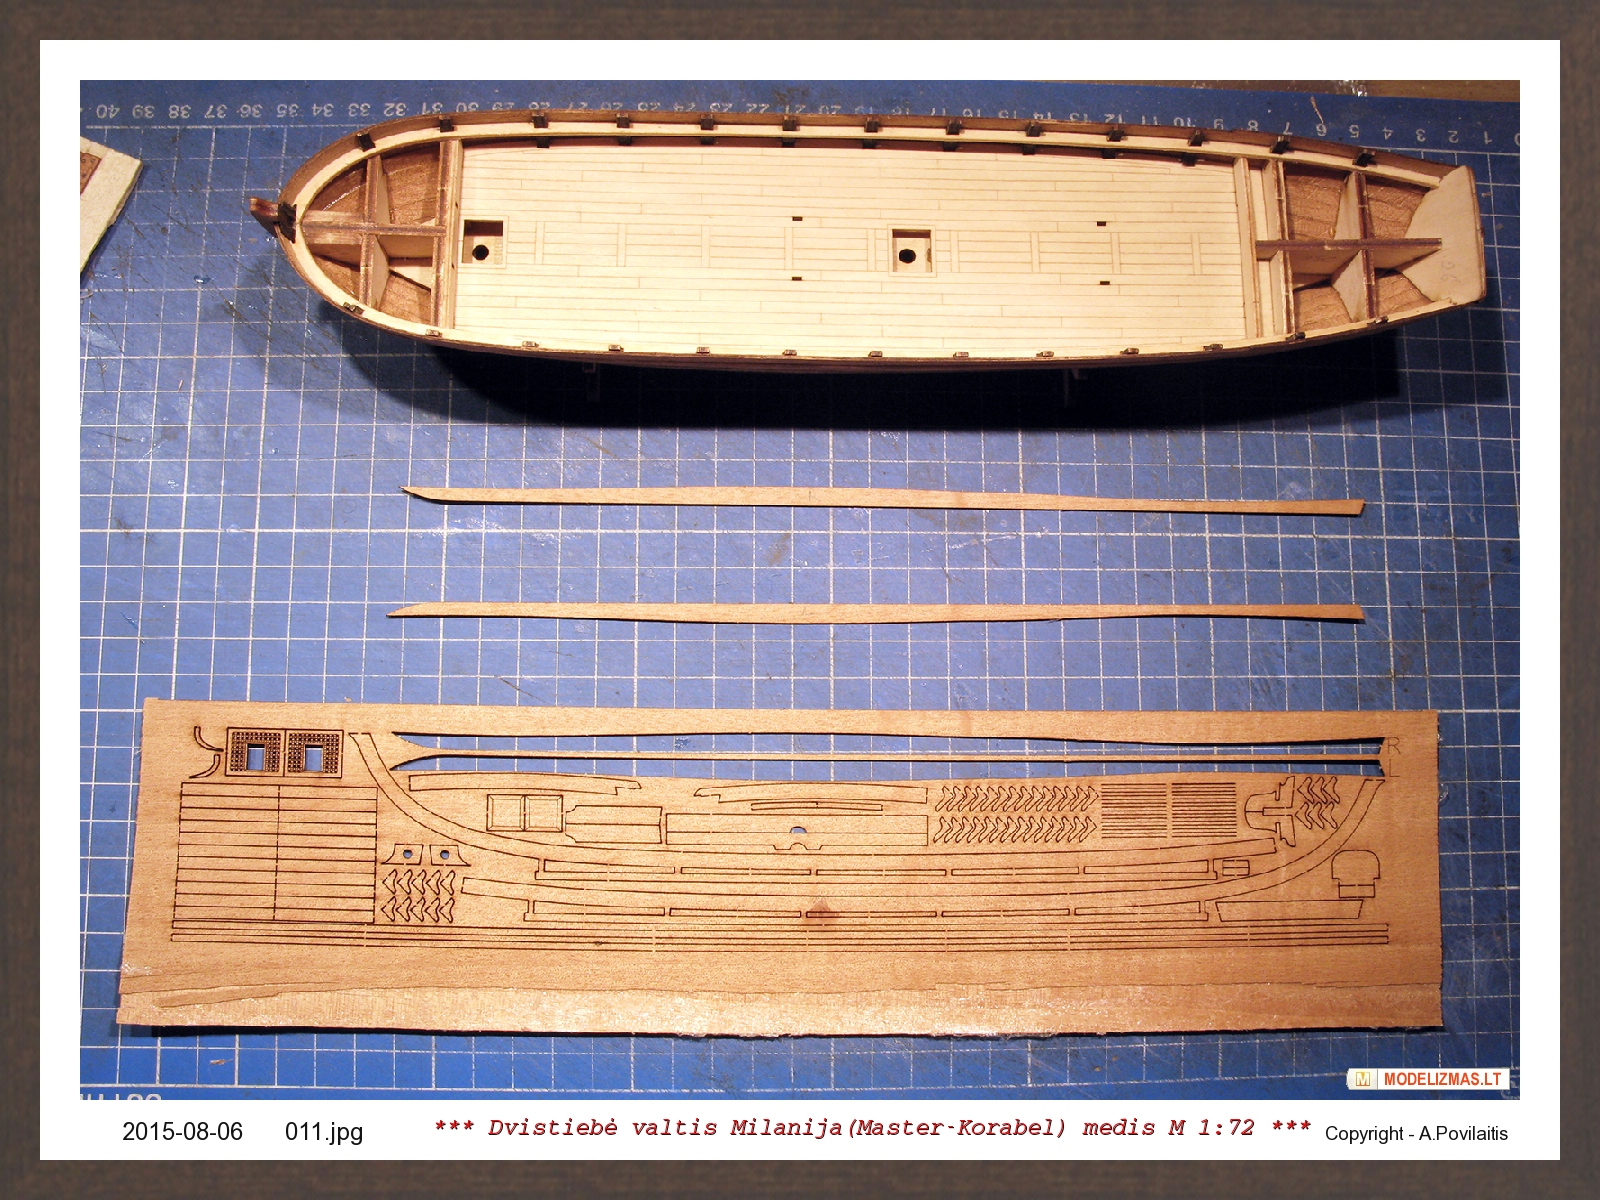
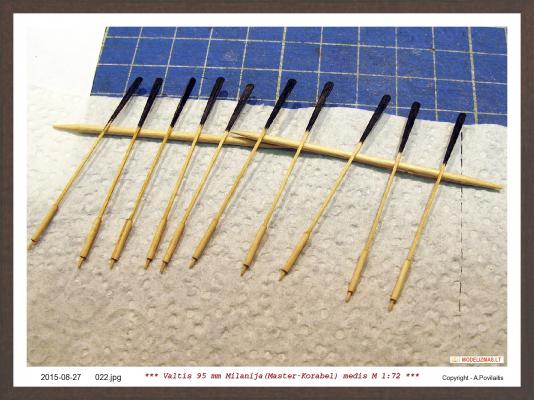
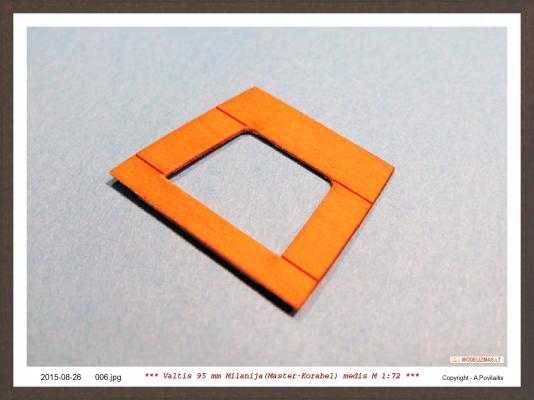
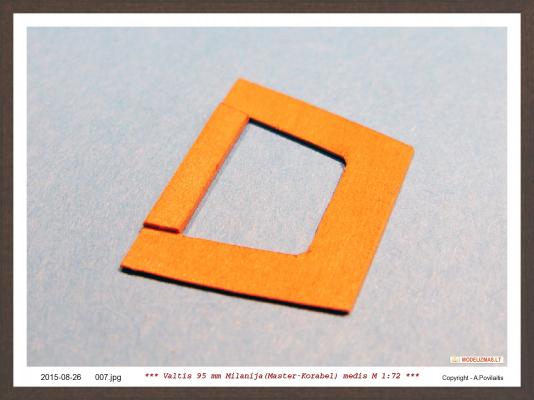
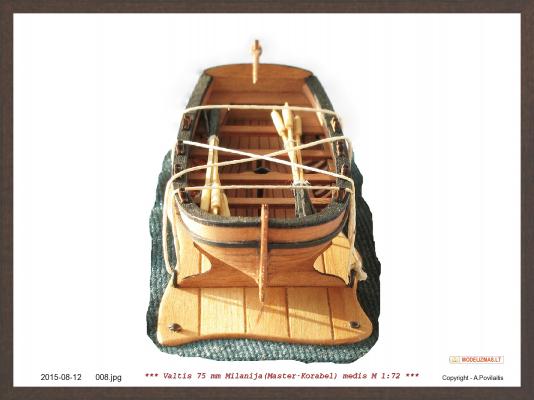
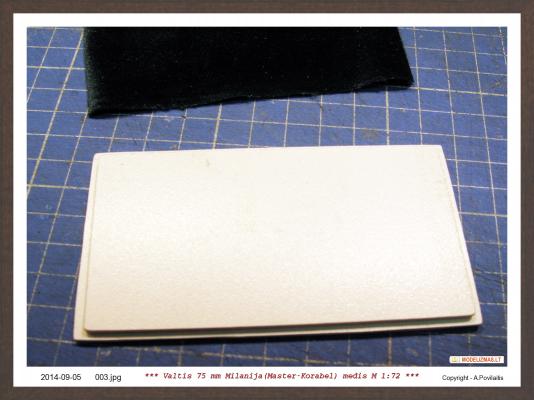
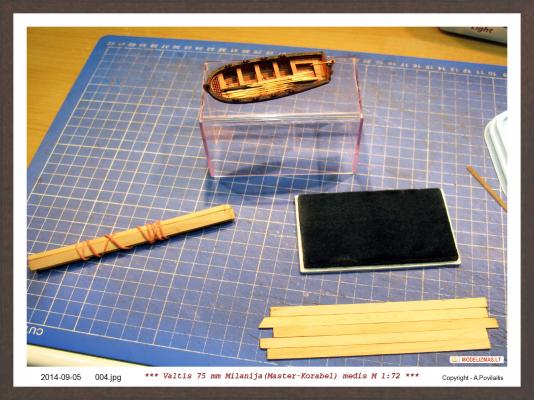
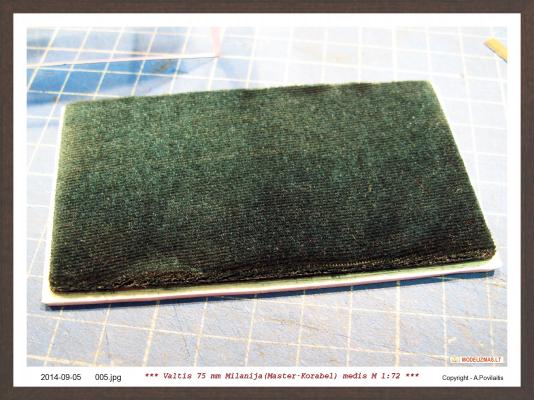
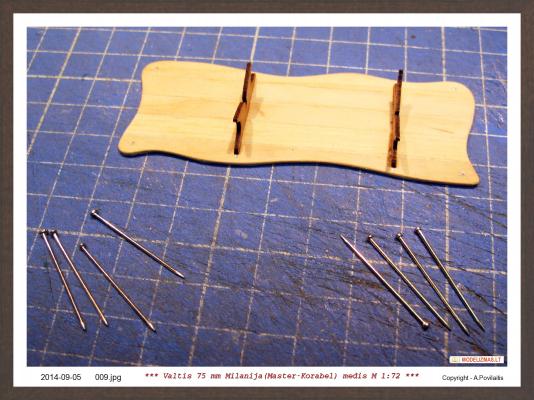
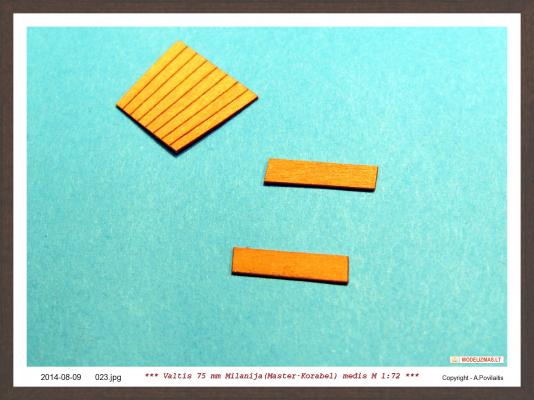
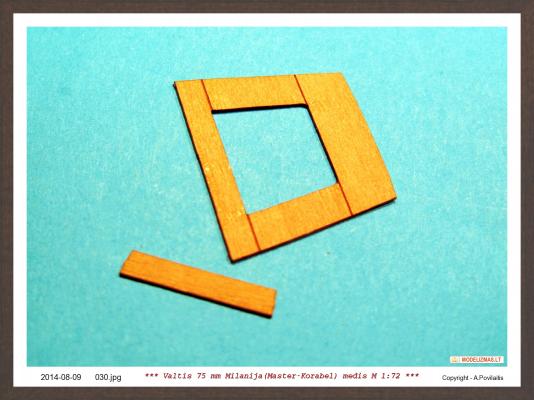
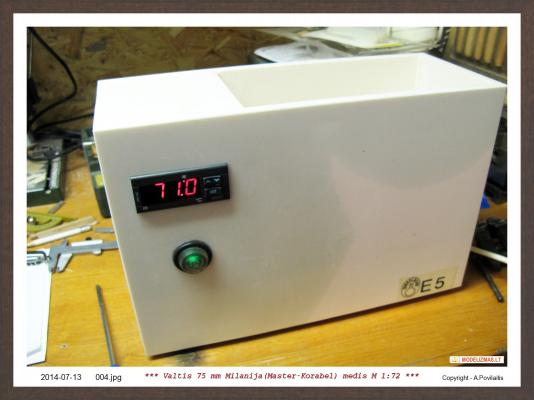
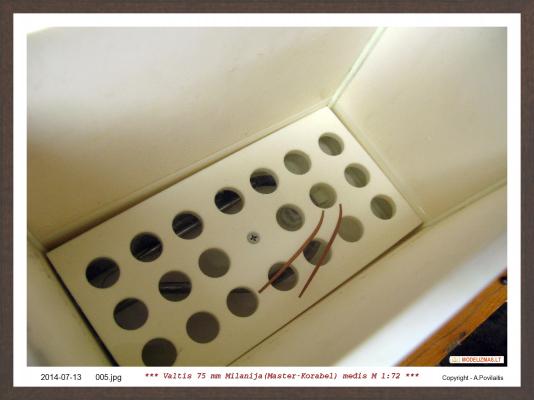
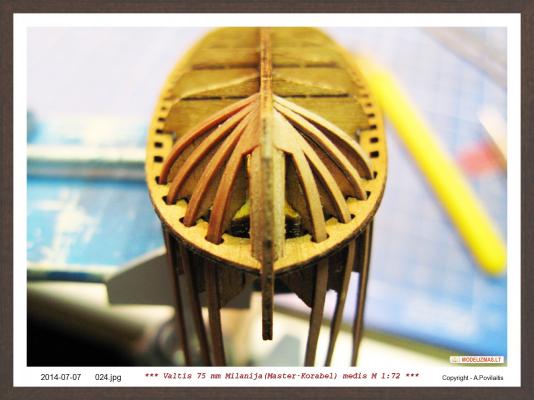
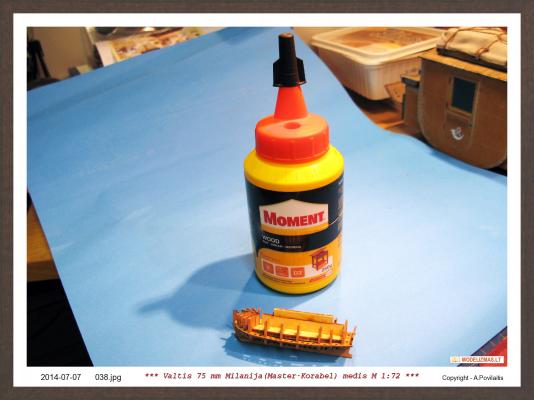
The boat looks completed. But I do not like this end. I always seem to model is complete only when it have the base and display case. Of course, this is my philosophy, but ... Started to produce the display case. Base is made of plastic and a piece of velvet. Velvet very bad adhesion to plastic. My mistake. It was necessary to use a wood. But somehow glue this velvet. Showcase is bended from 2 mm acrylic. I have maked a small bending mashine. On the velvet will make part of the deck. Prepare the black alder planks for the deck planking. Juodalksnio mediena yra fantastiška medžiaga modelių statytojams. Cheap and very beautiful. Bonds boards on thin 0.5 mm cardboard. Of course, showcases and the base material in the set are not included. This is my idea. Trim the deck piece because I want to get a more interesting shape. Glued the keel blocks to the deck imitation. Keel blocks have already been put on the kit. And cover with the flax oil. While the oil is drying up, roll up into two bundles oars. Produced four screws. They will be in the deck corners and adhere to the plastic base. Produced rings. Rings and bolts made of metal pins. At the end the oars are tethered to the seats. Regards, Antanas


- 22 replies
-
- 3
-
-
- master korabel
- 75mm boat
- (and 1 more)
-
Thanks for sharing. Very interesting tool. How many blades are attached to this tool. I read specification : *Length : 190mm. *The thickness of the blade is 0.1mm. *50 blade of the width of 30mm. 50 blades? Or I am missing? Regards, Antanas
-
Very nice and very interesting buil. Thanks for sharing. Your experience will be useful for me. I look forward to continuation. Best Regards, Antanas
- 831 replies
-
- 2
-
-
- Armed Virginia Sloop
- Model Shipways
- (and 1 more)
-
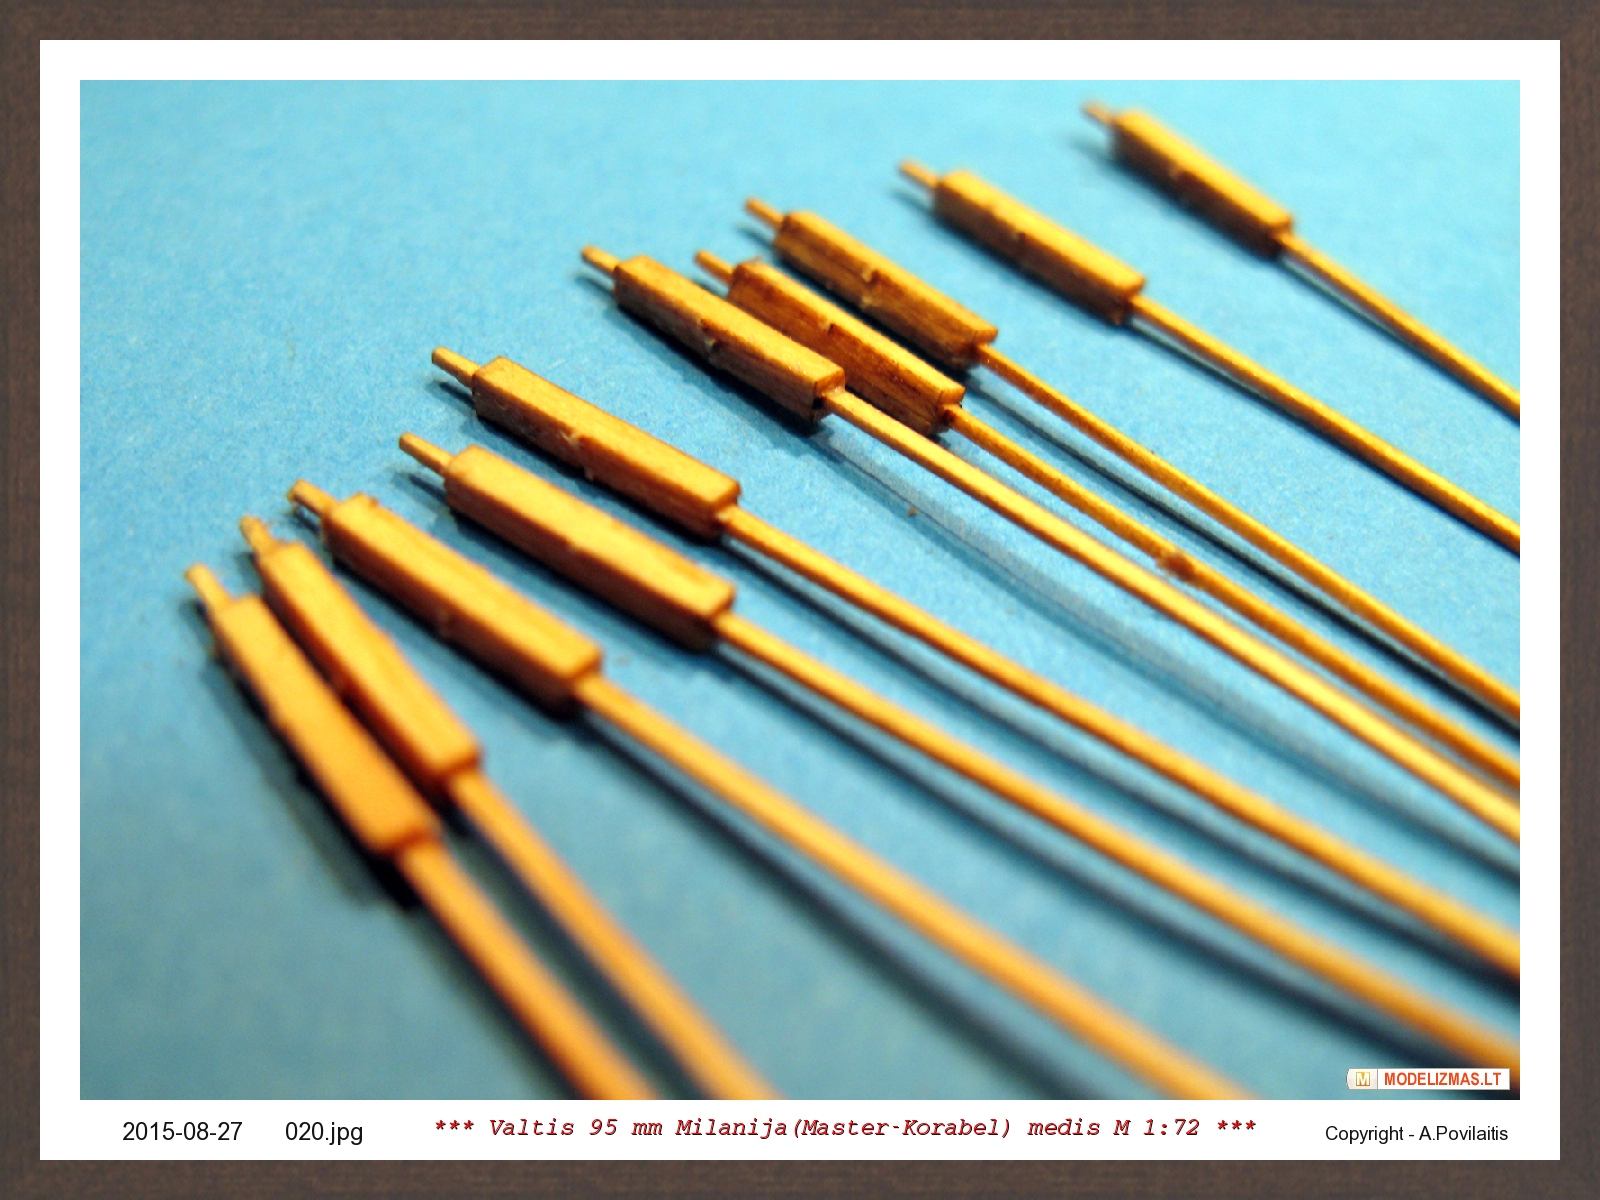
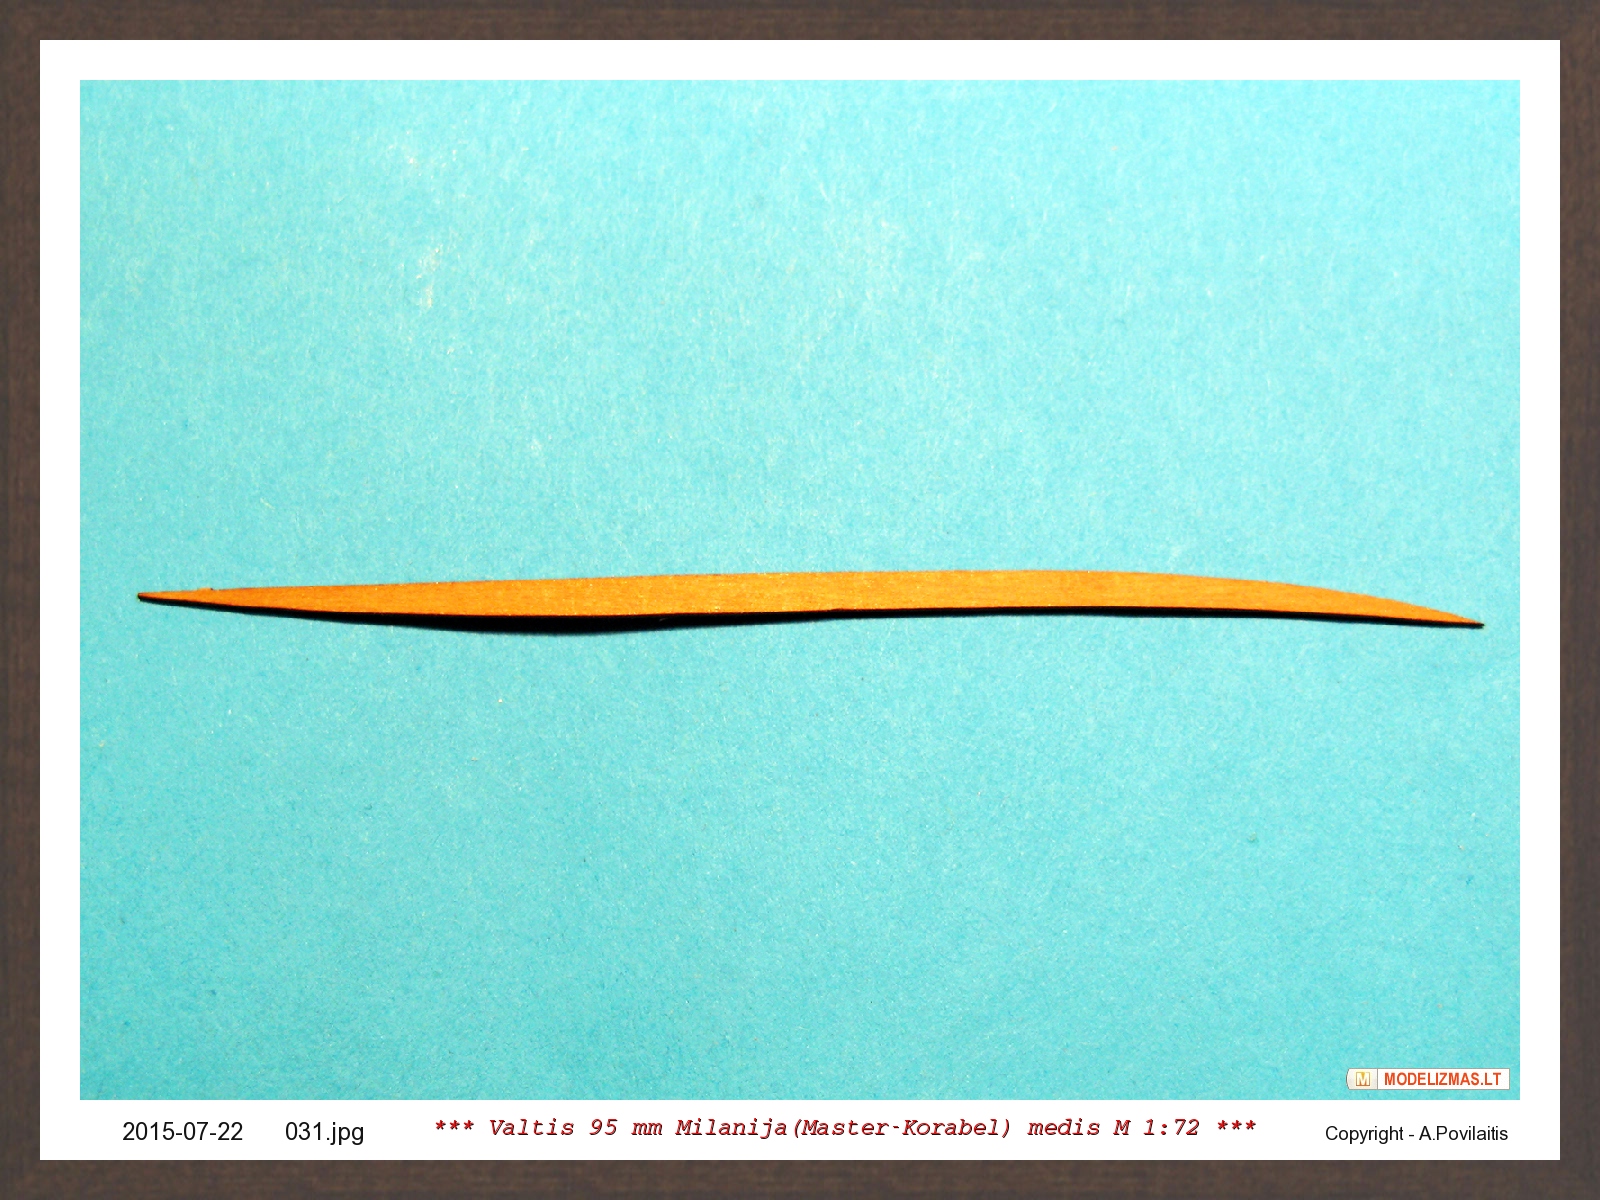
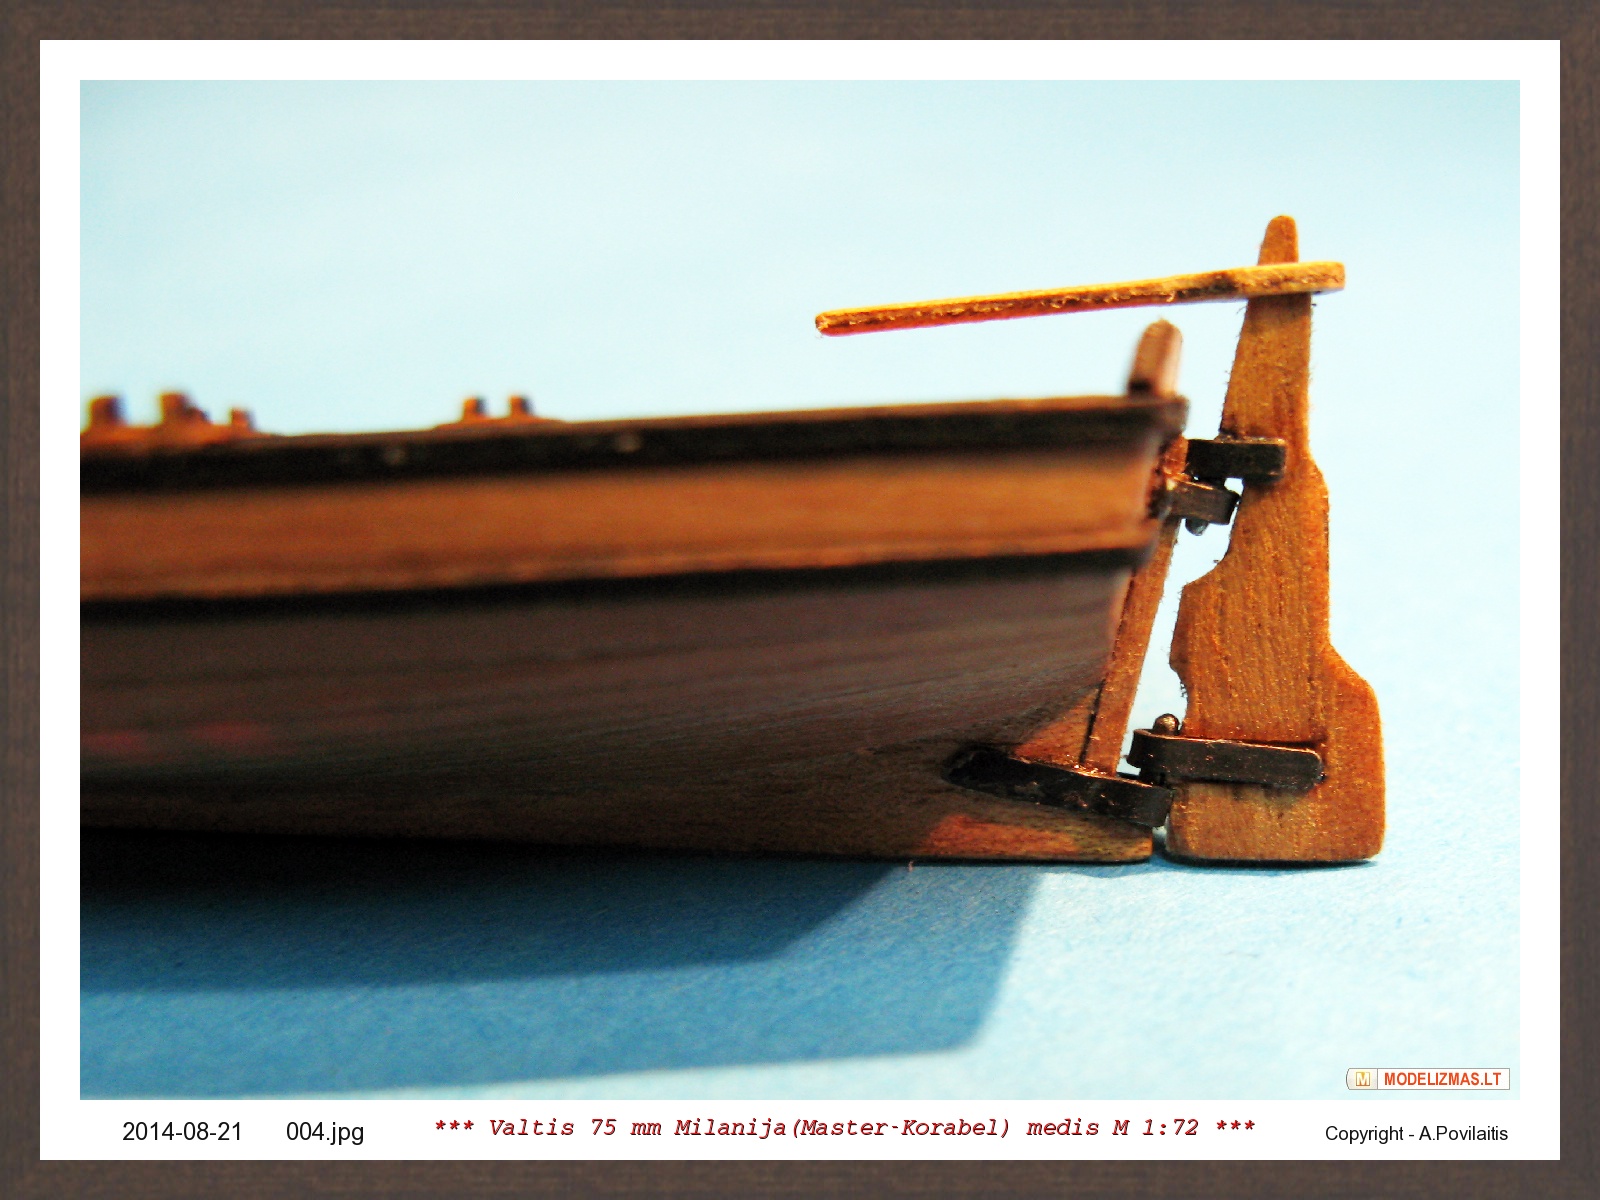
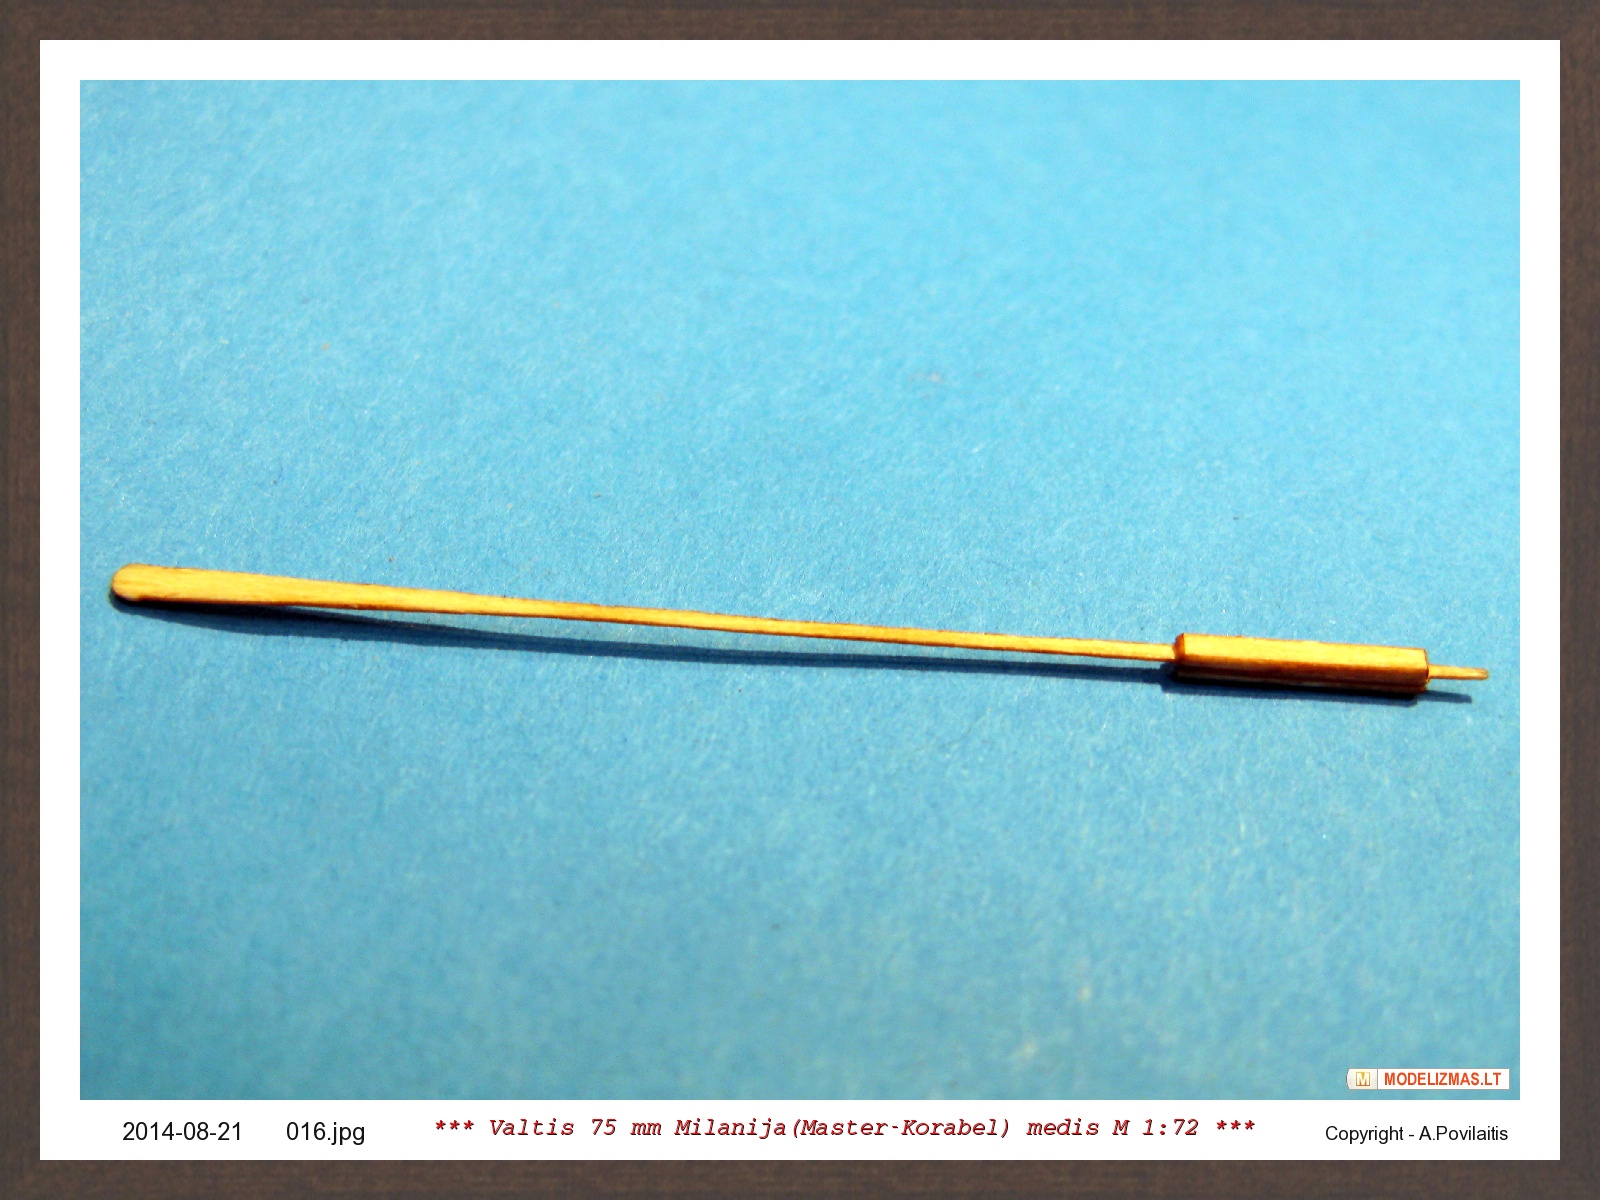
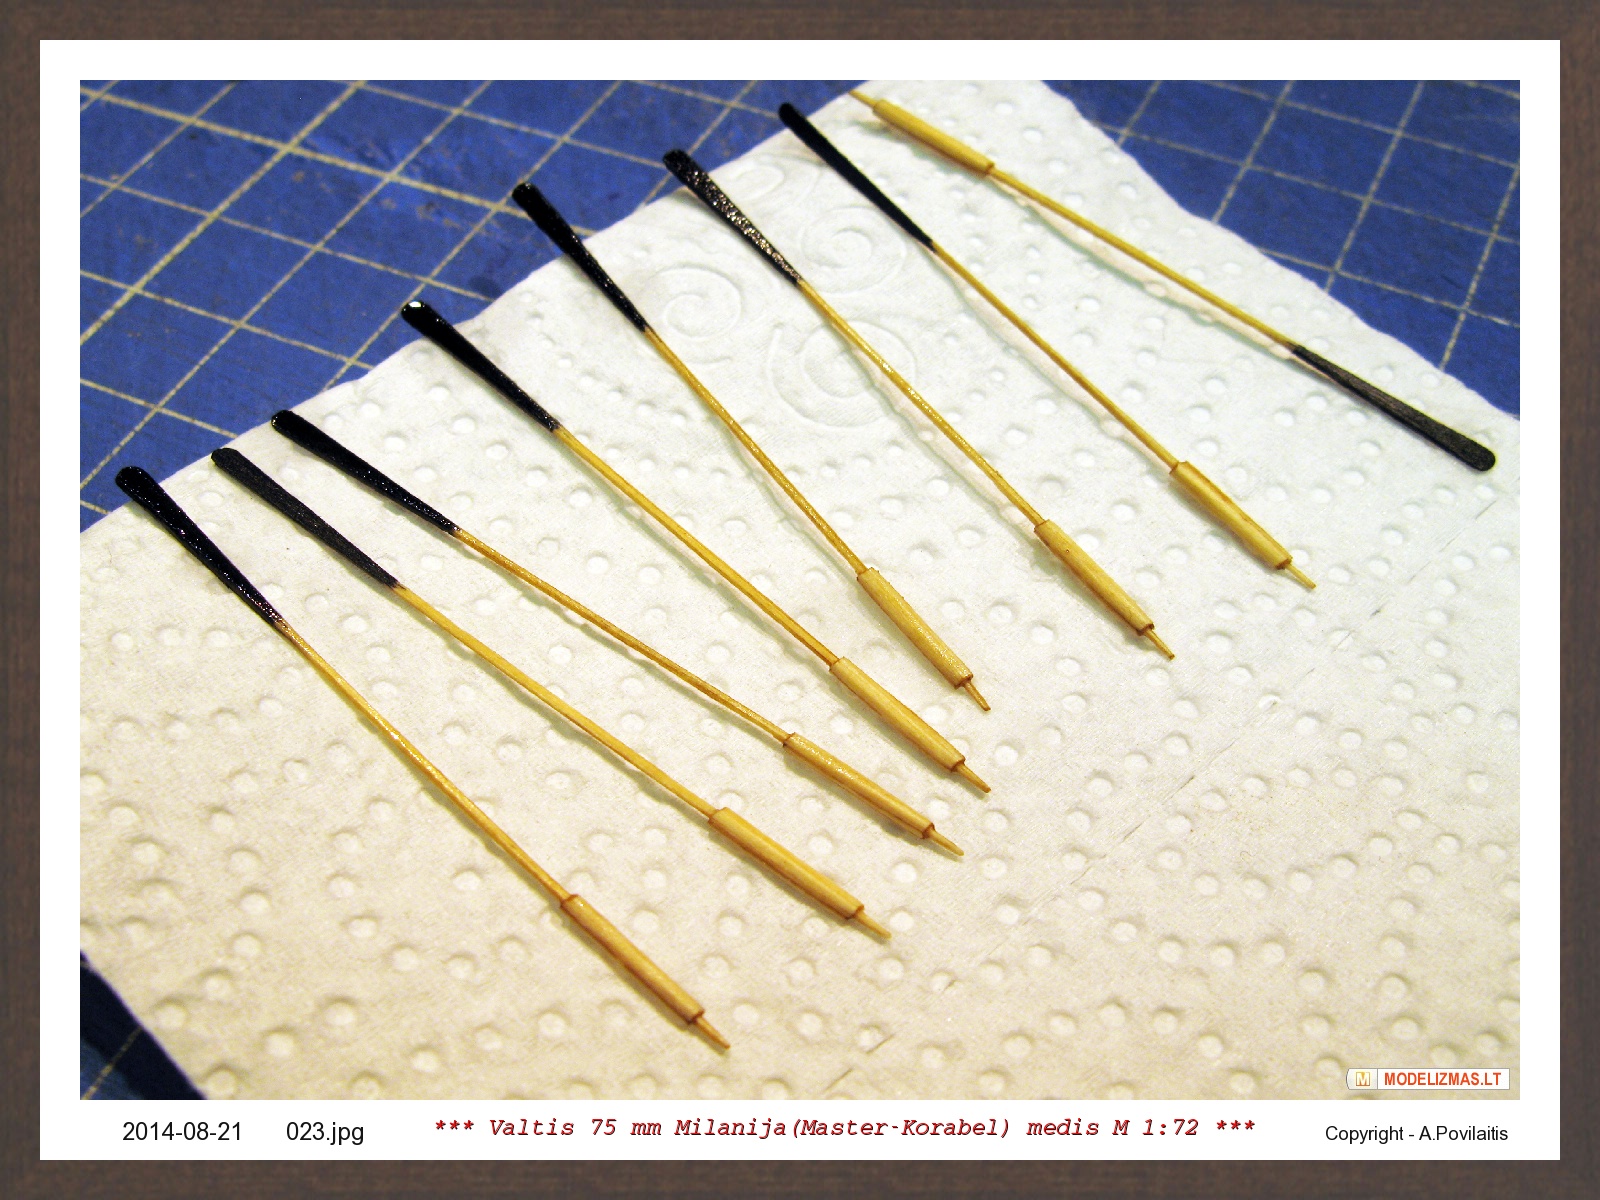
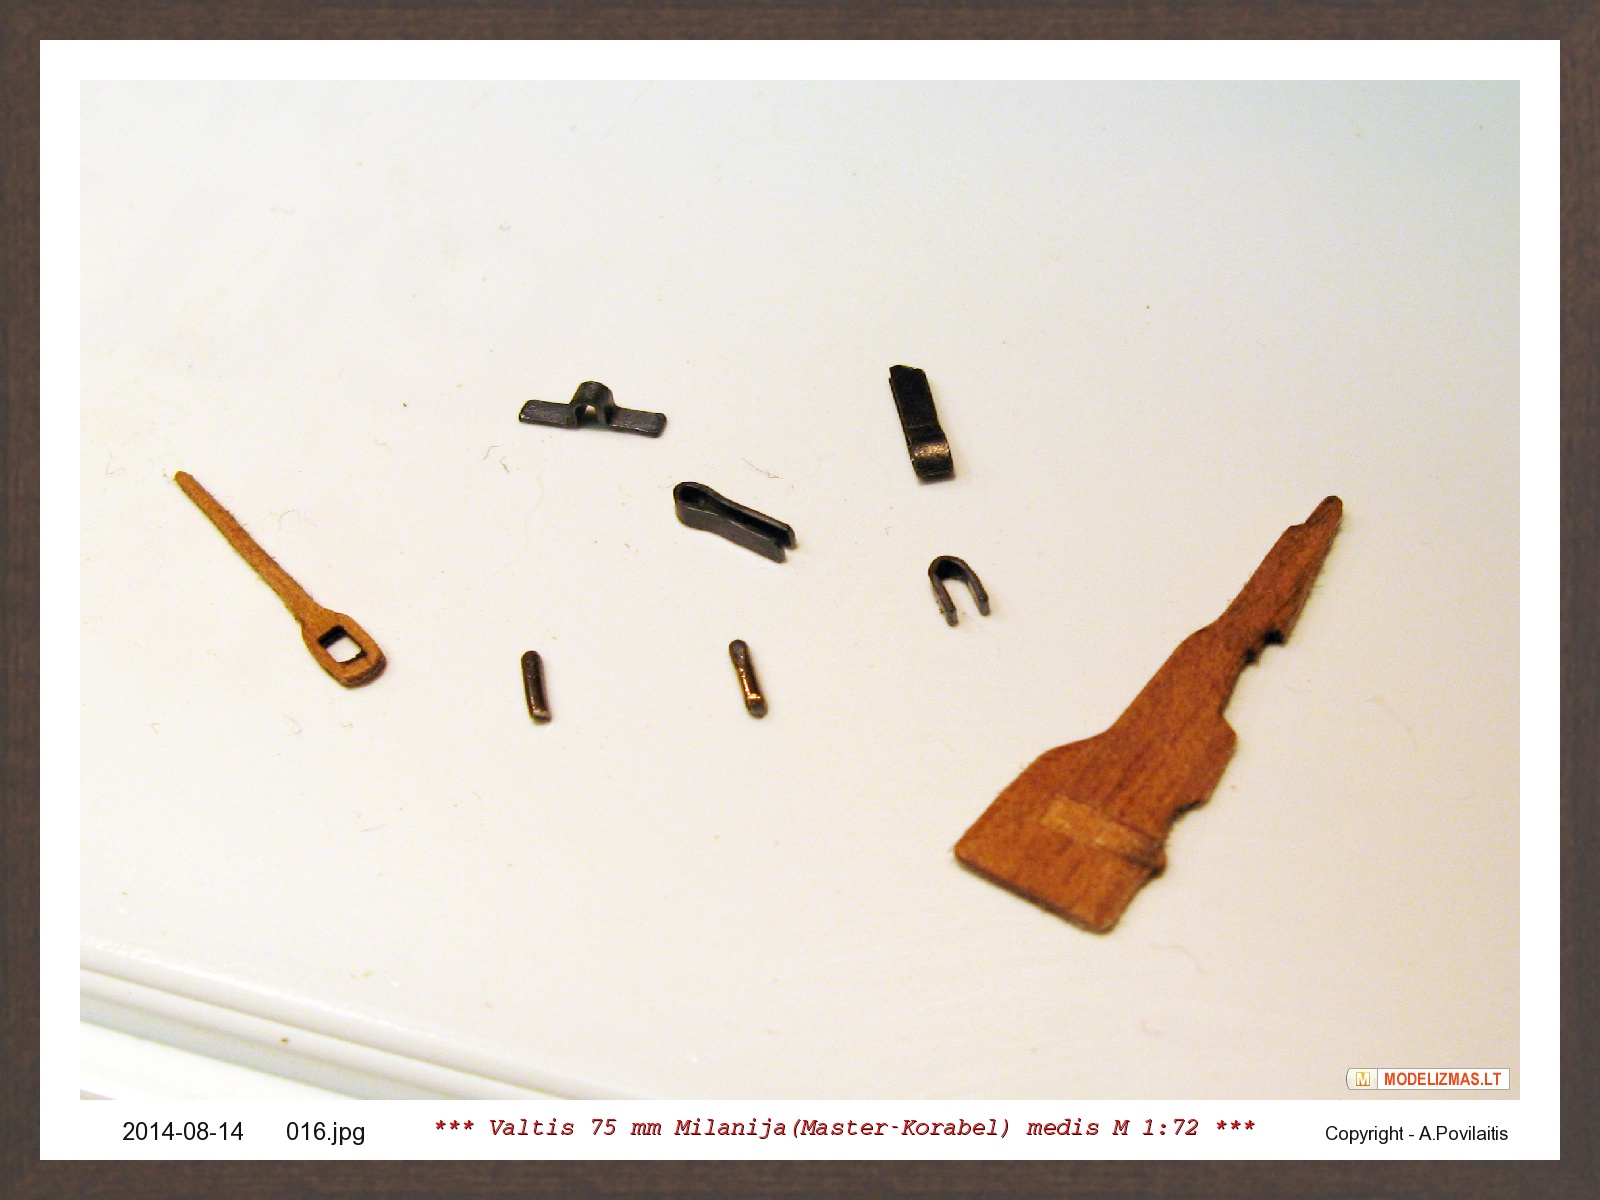
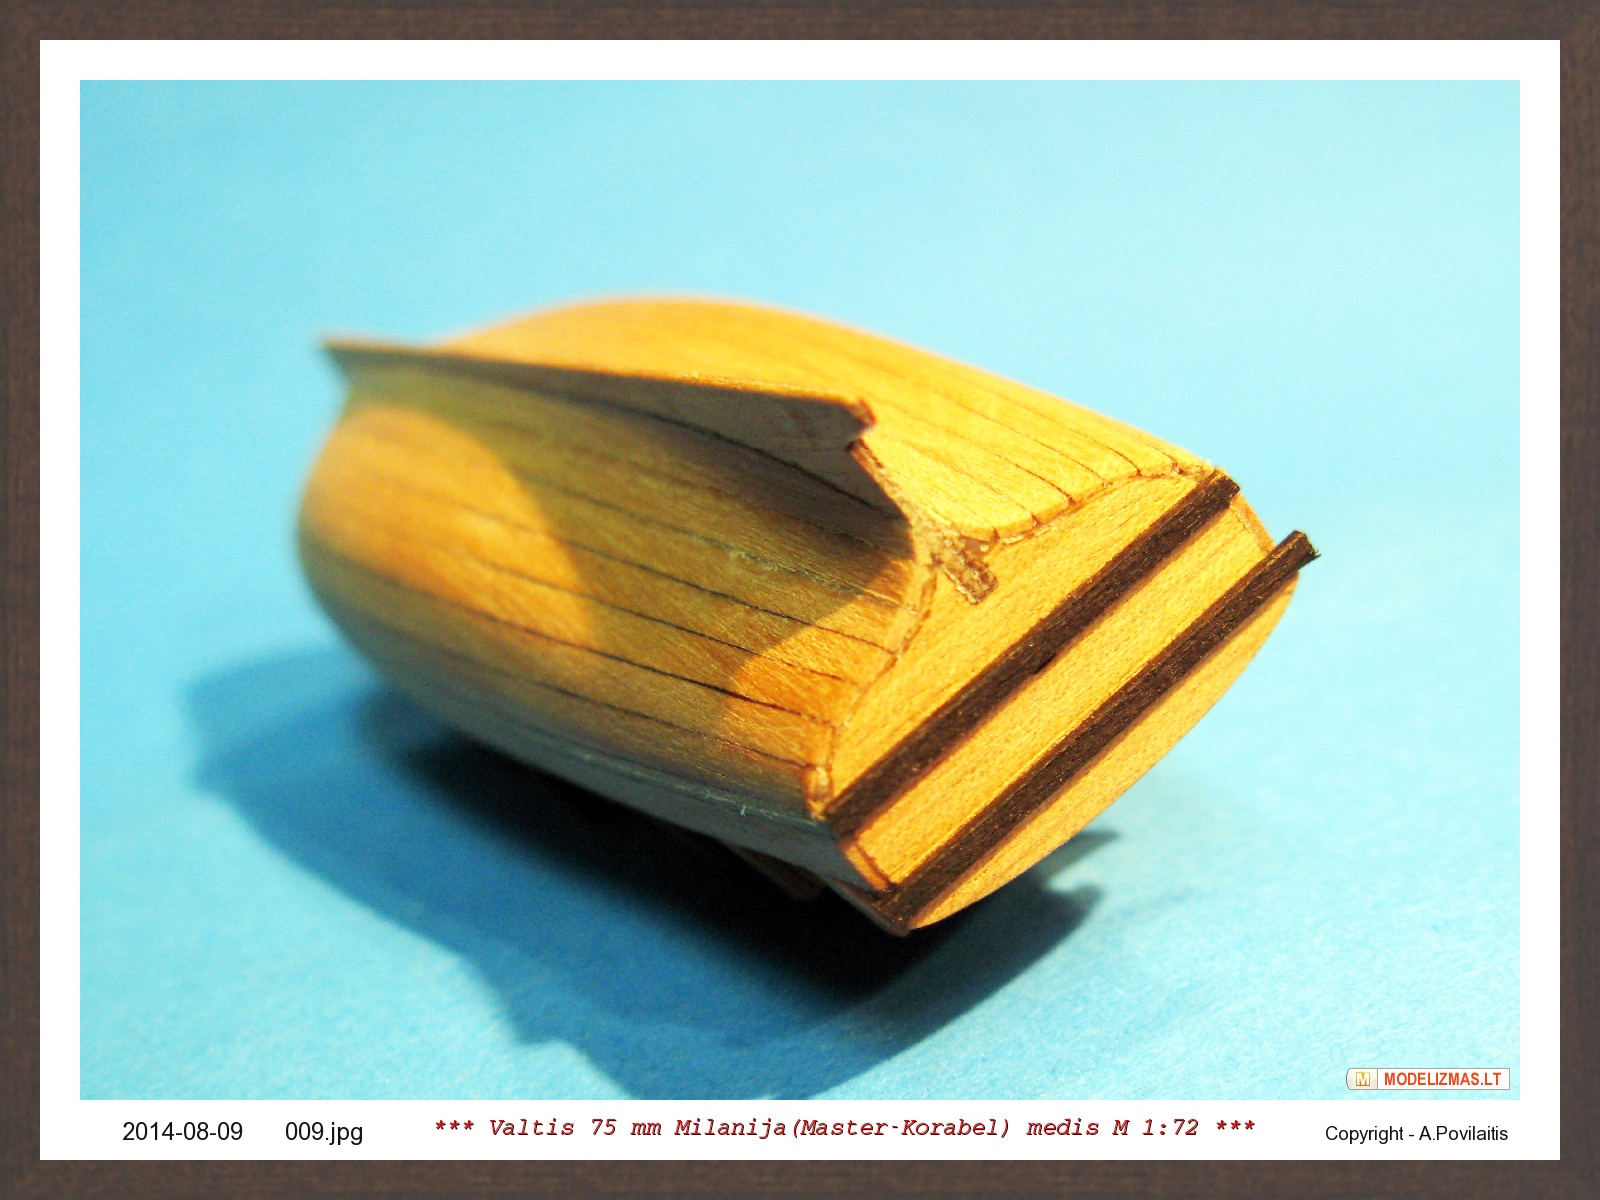
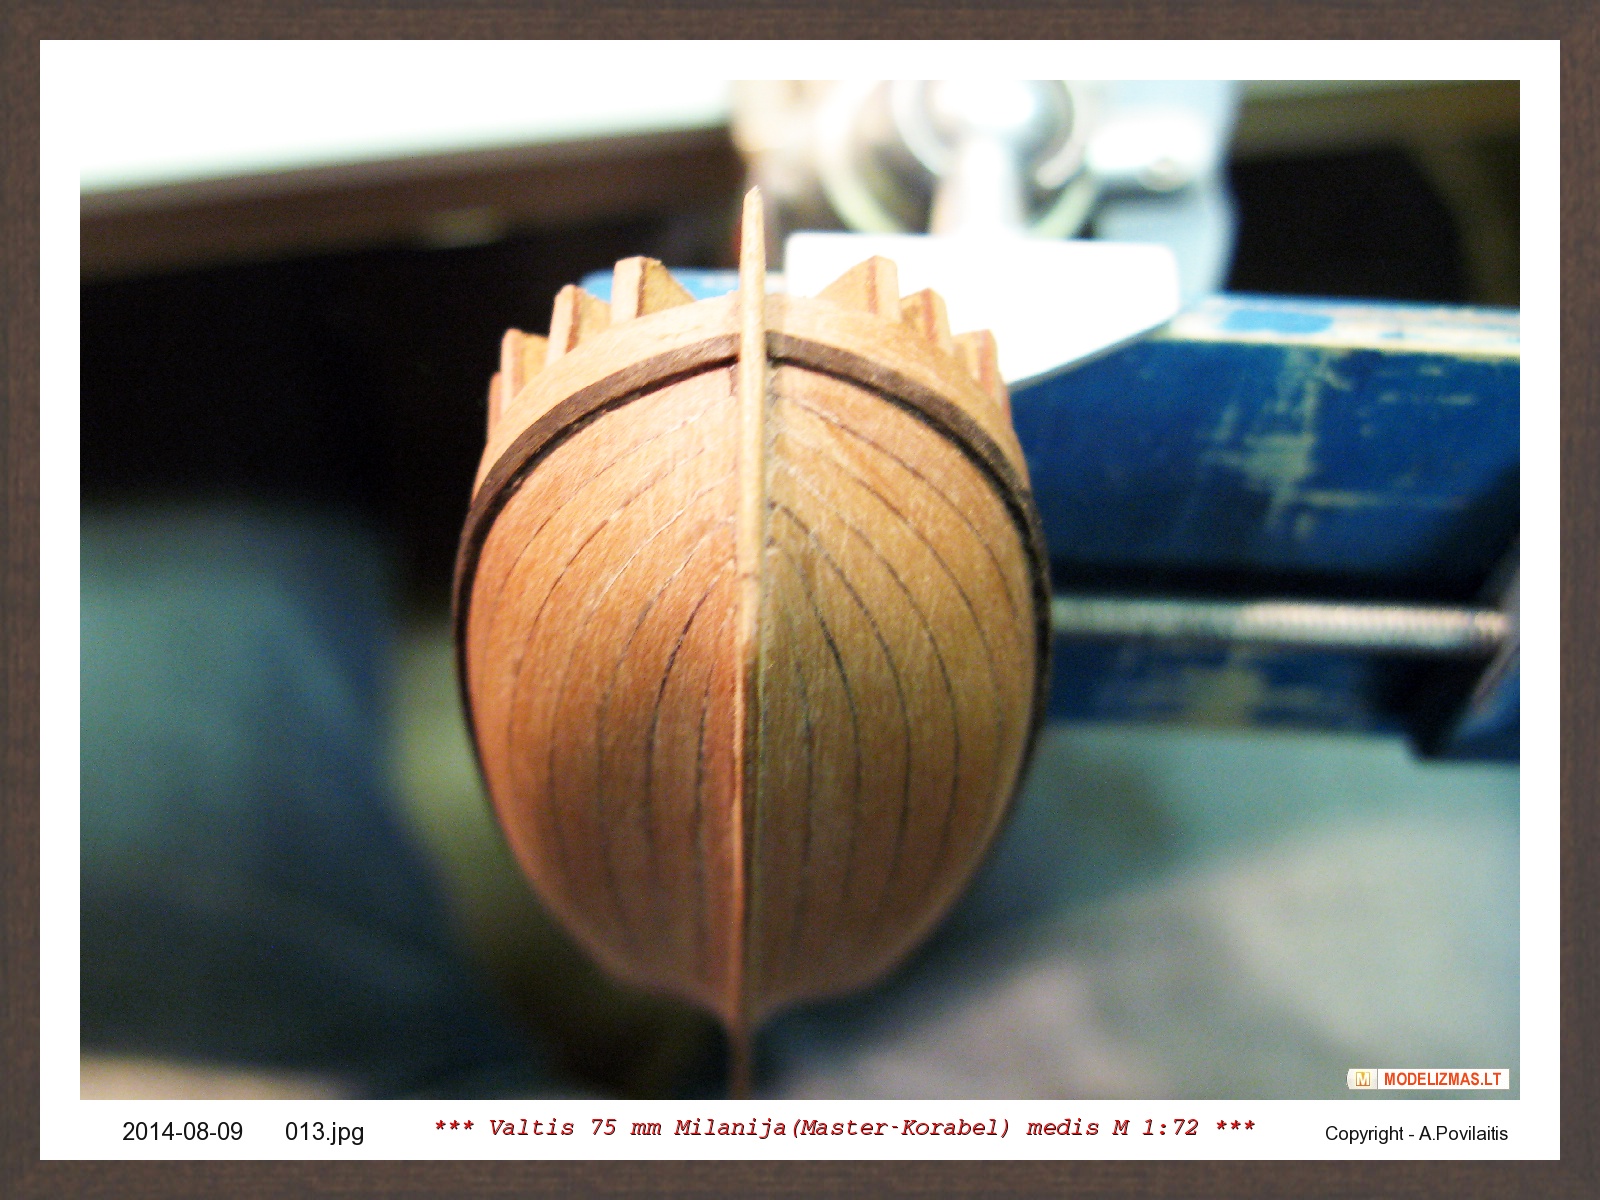
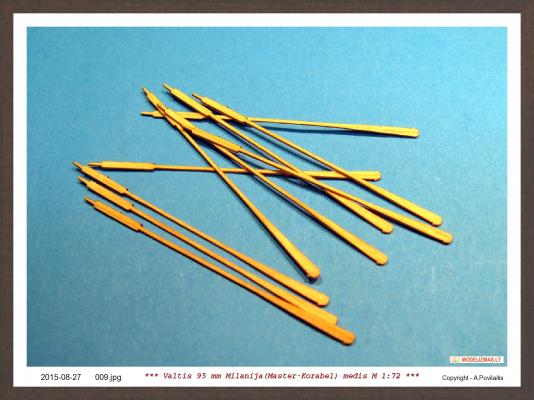
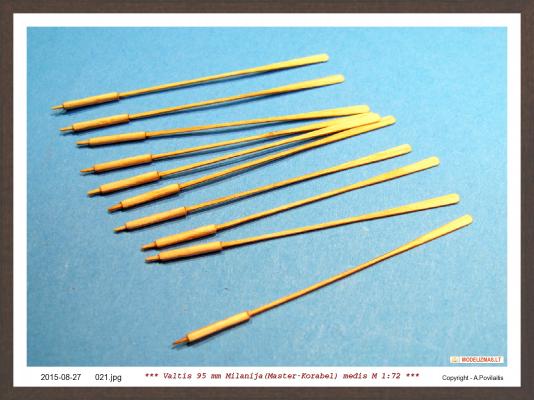
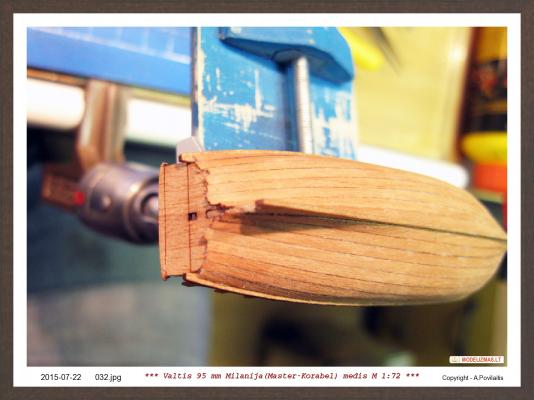
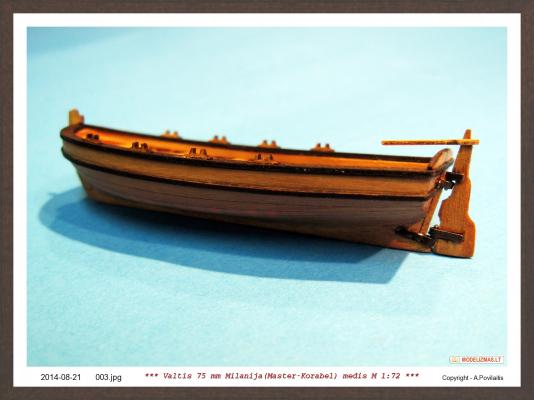
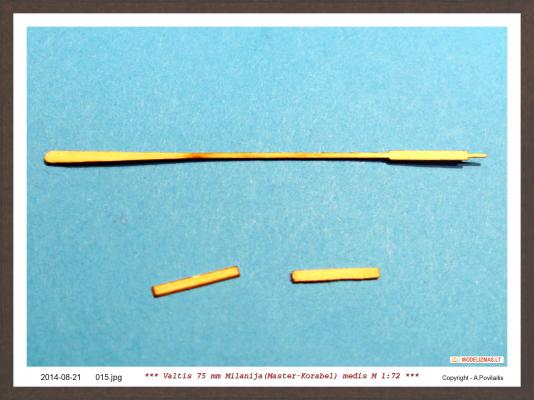
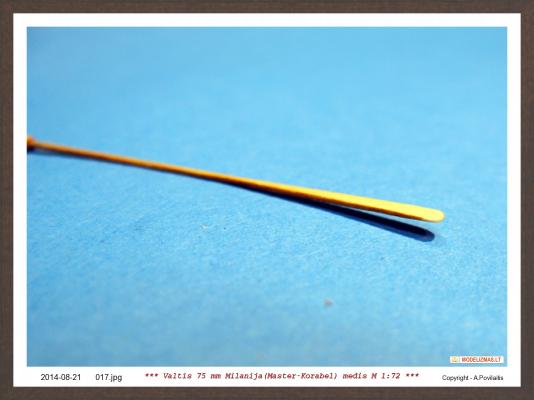
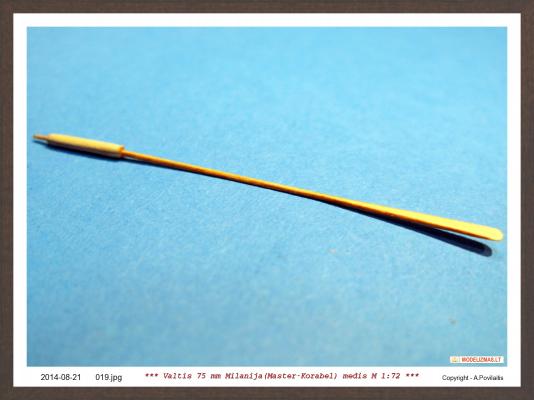
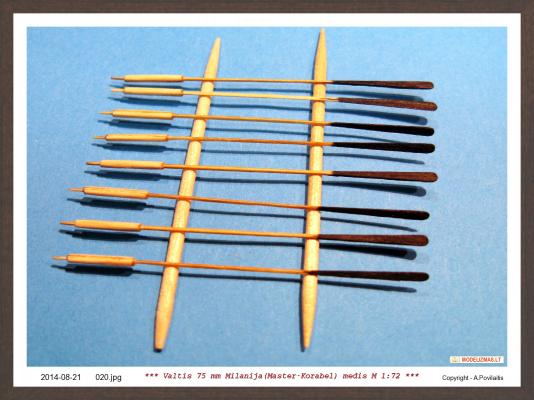
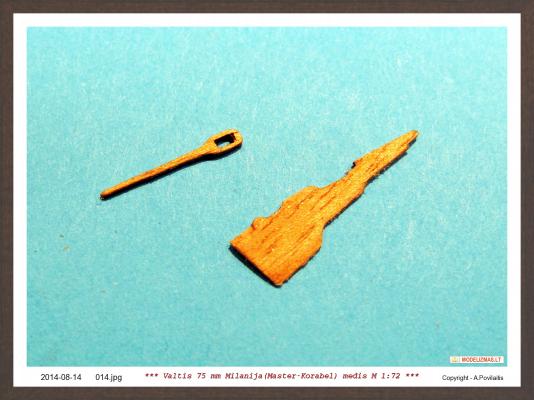
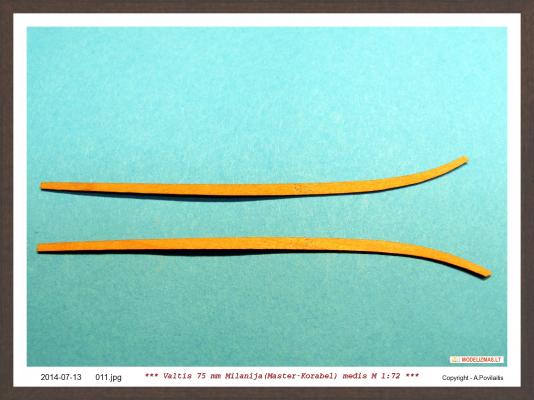
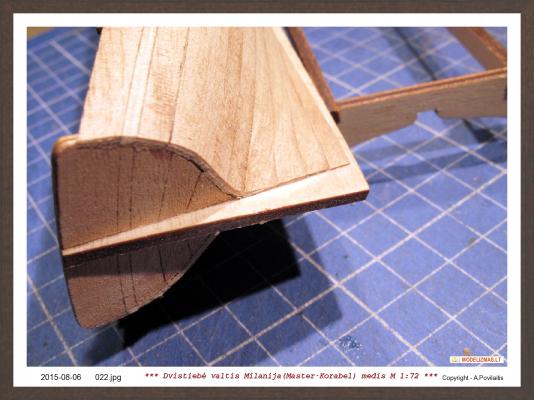
Thank You Keith. Ended the rudder. It turned out badly. But here not change anything. Another will do better. Now the boat looks like this. Then there is the keel blocks and oars. Now oars. Removed from they plate. Each consists from 3 parts. All glued together and then sanding. It is not easy... But done. And painted in black ink. The wood consists of a soft and long fibers. So and failed. I will have to learn how to do it. Valties korpusą padengiu linų aliejumi. Oars also cover flax oil. Still have to fix their painting. Regards, Antanas


- 22 replies
-
- 4
-
-
- master korabel
- 75mm boat
- (and 1 more)
-
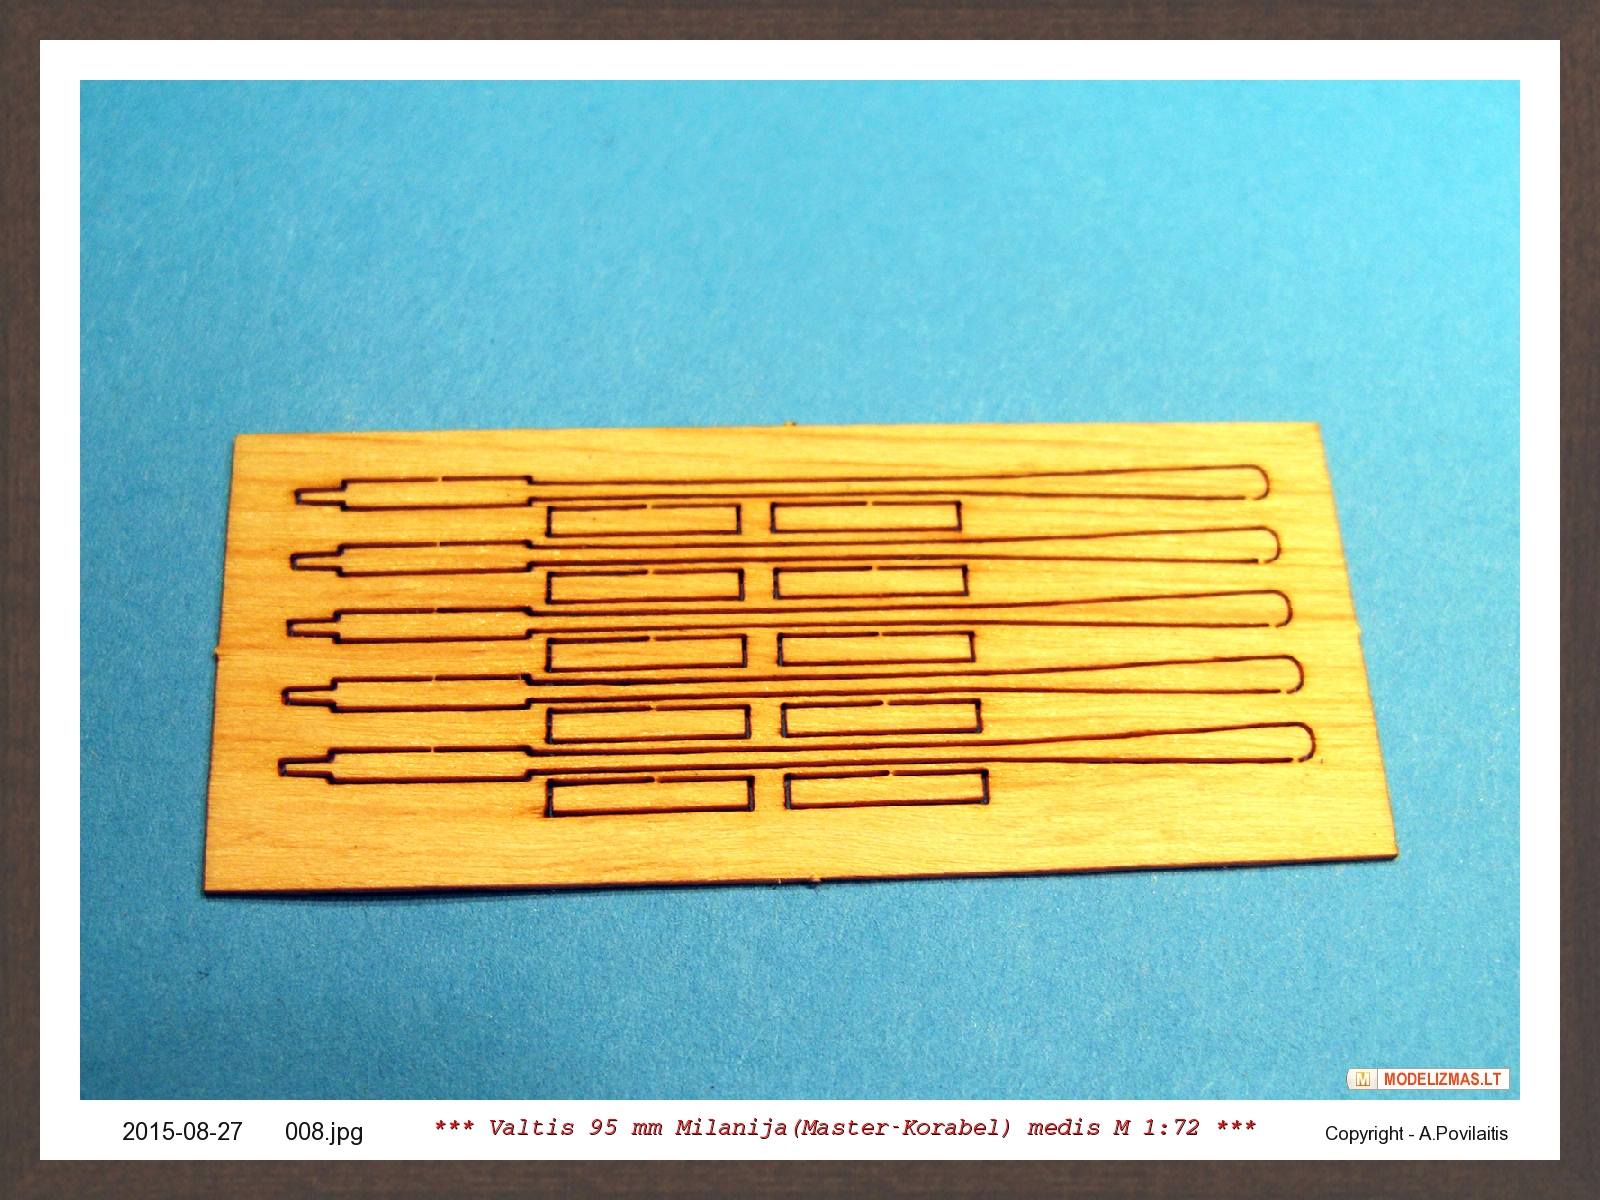
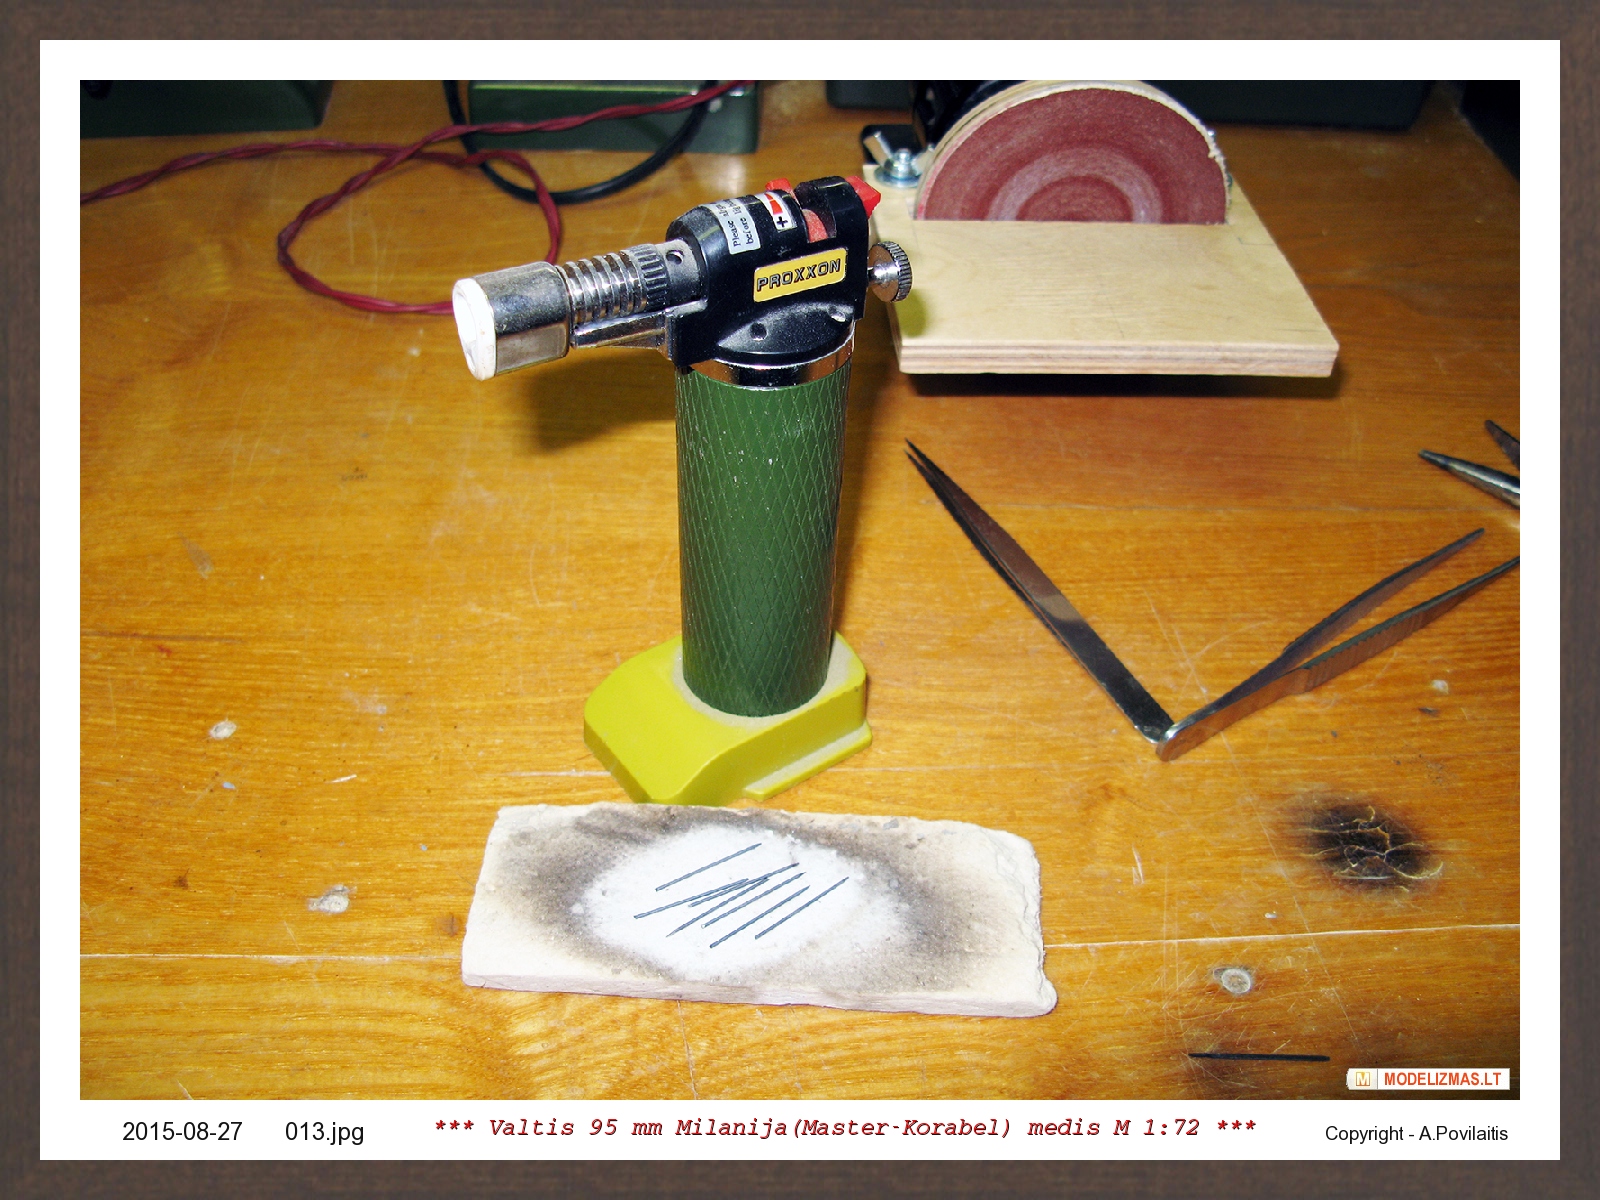
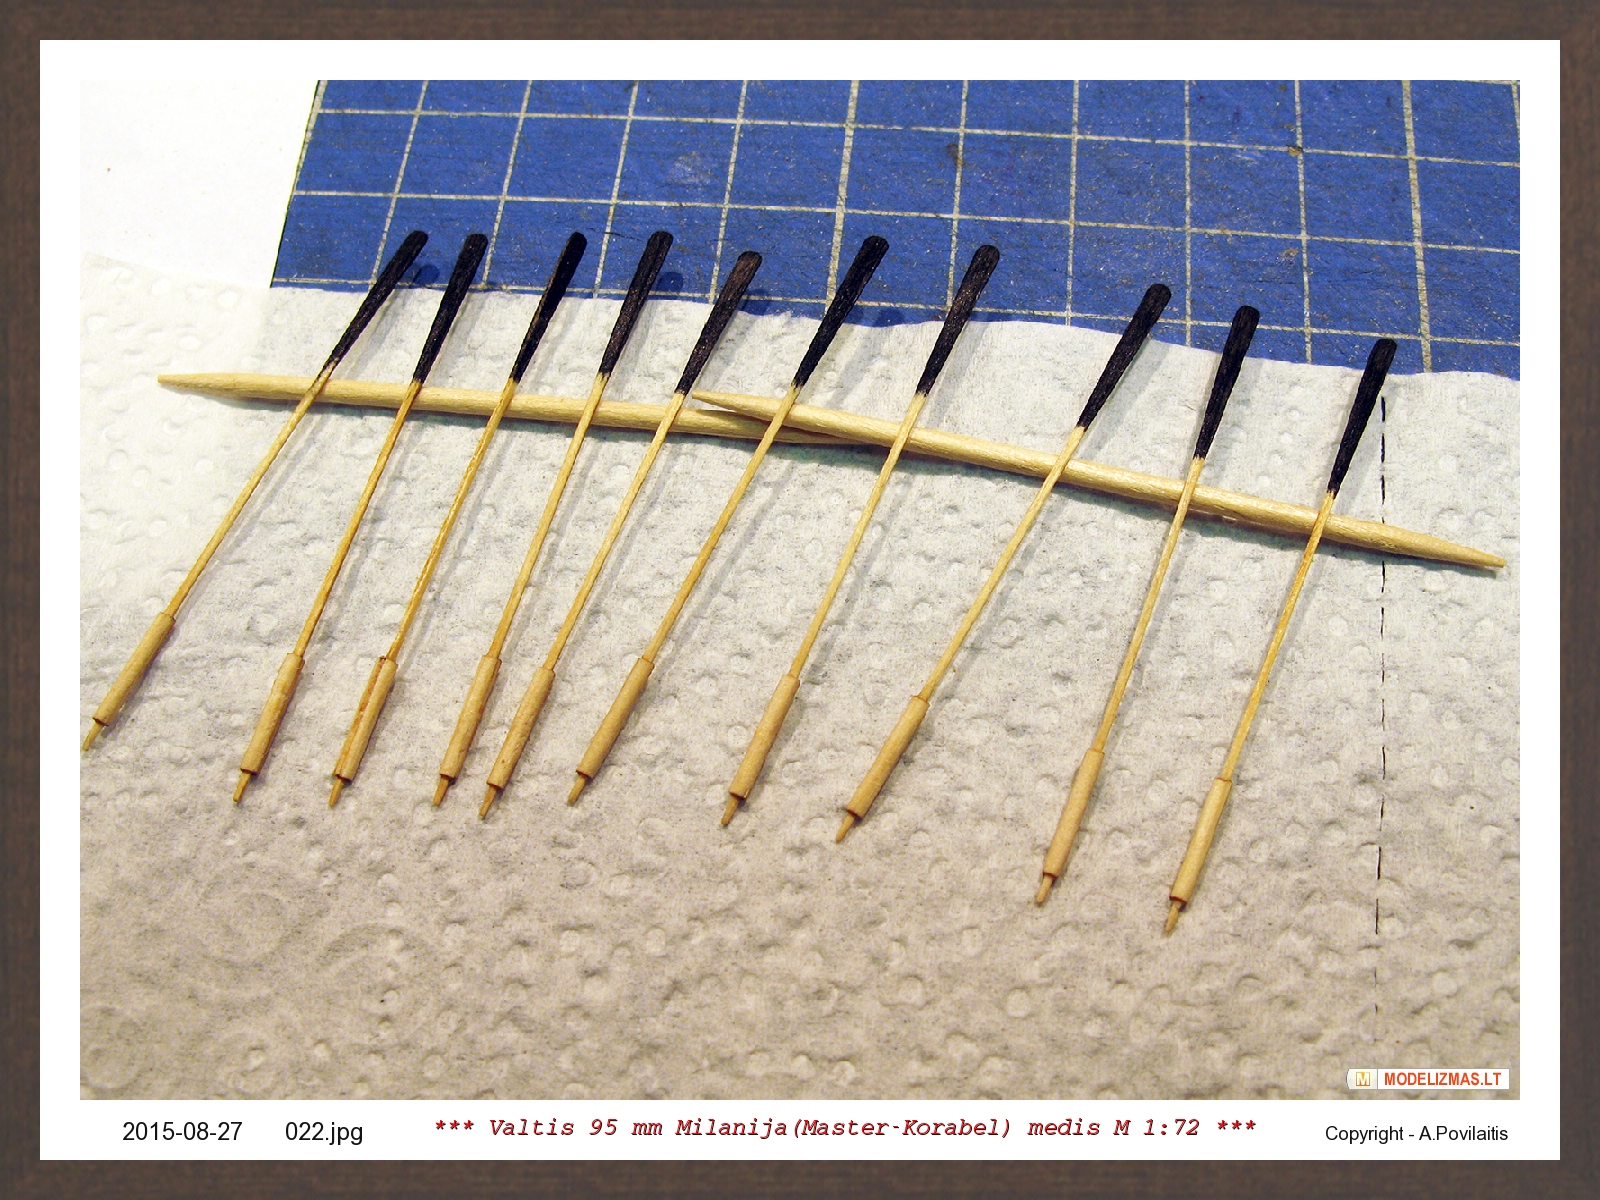
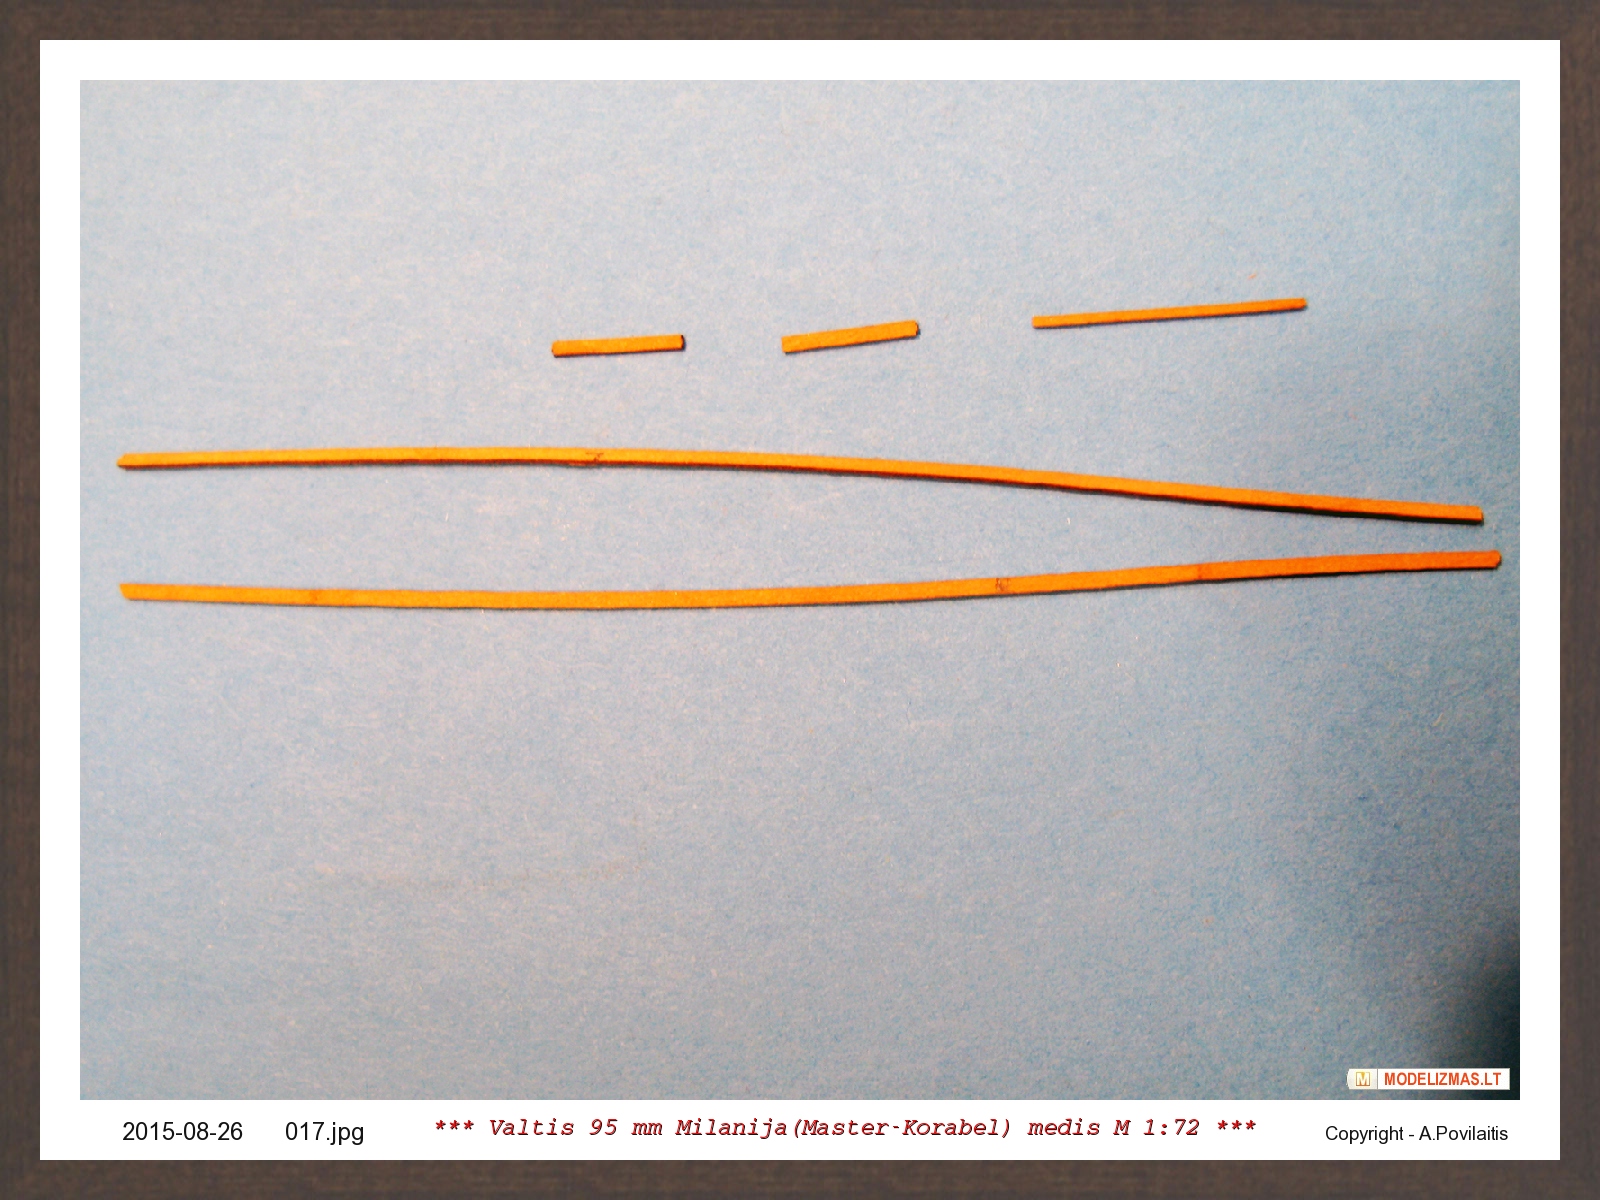
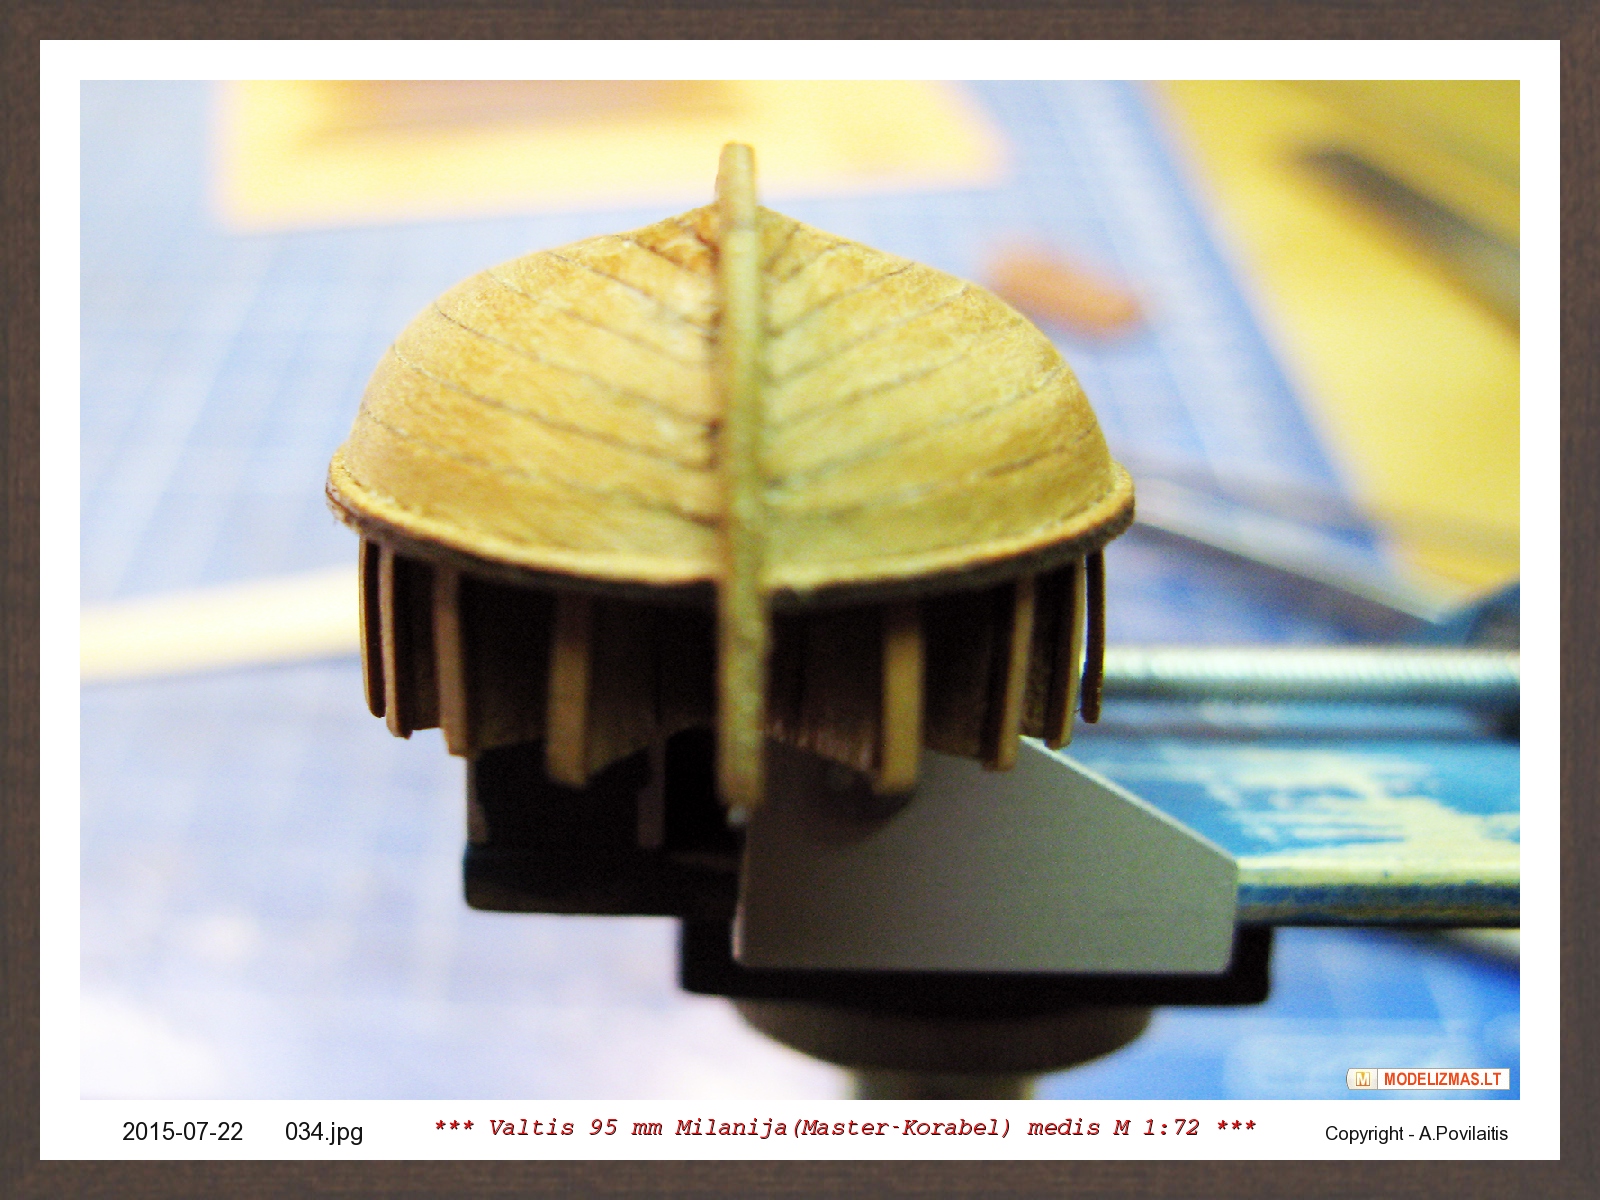
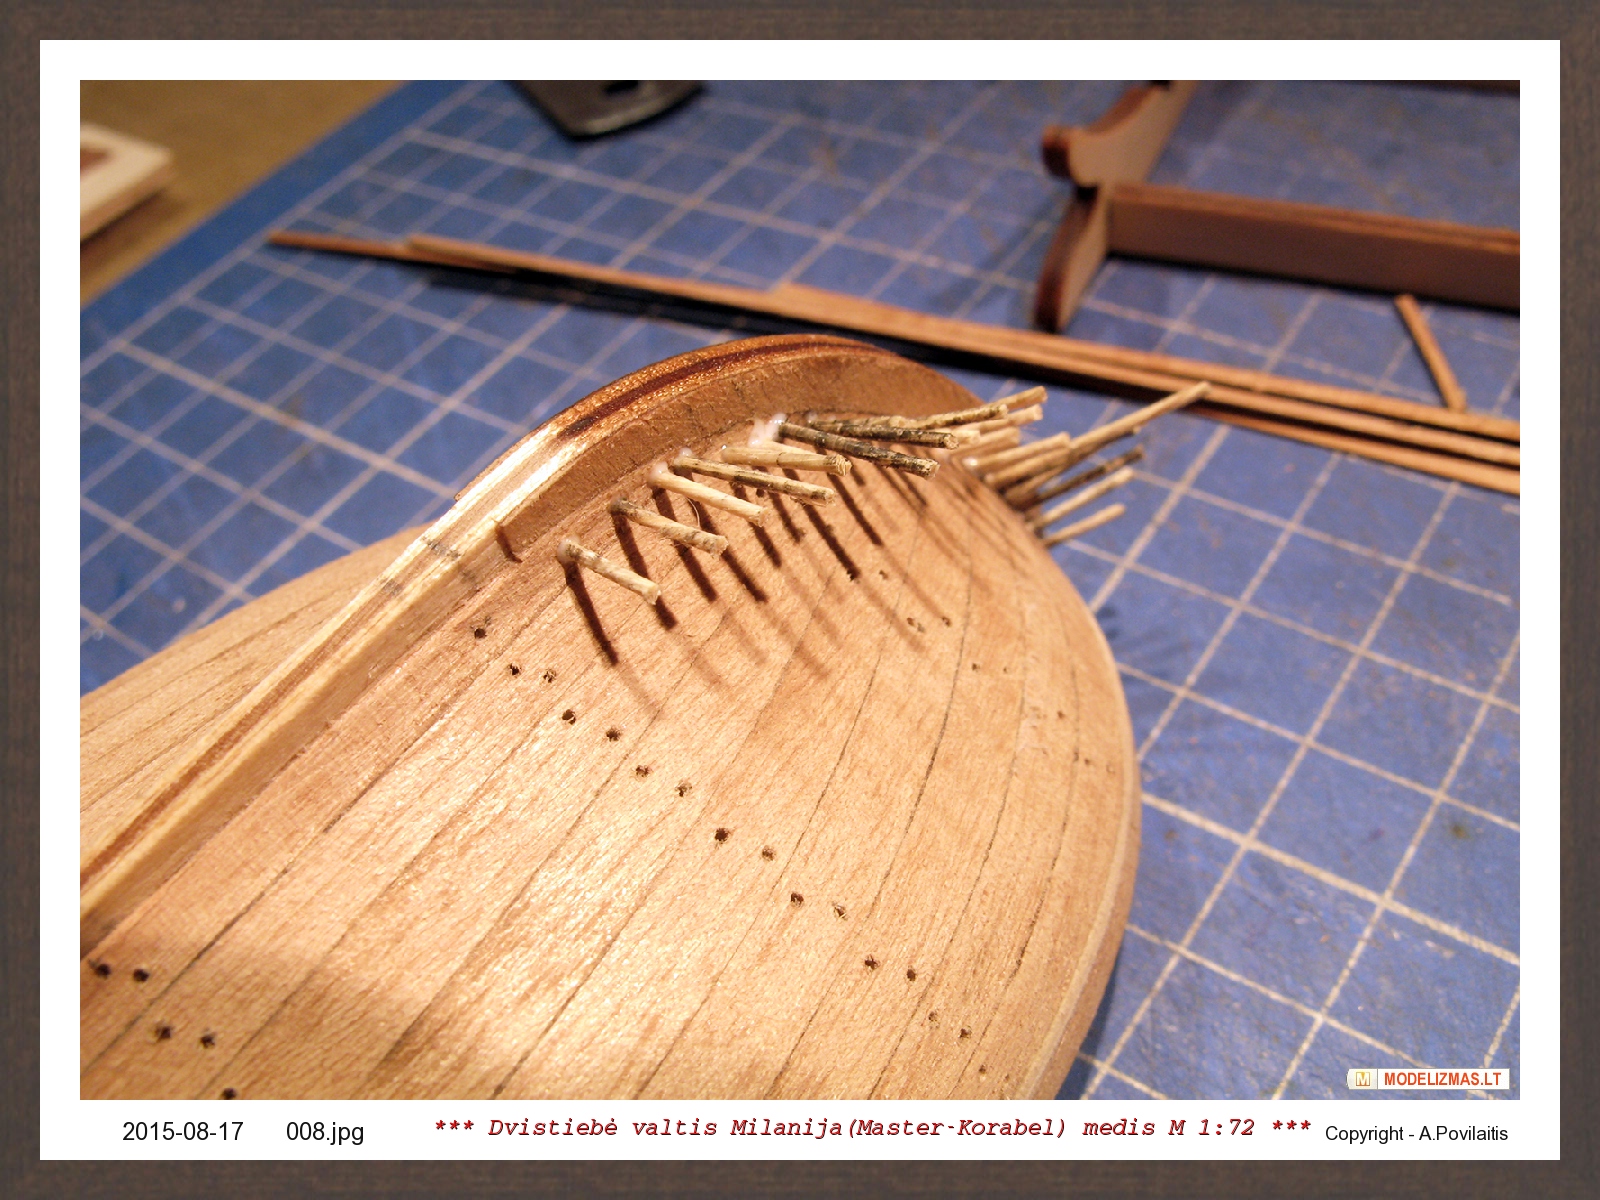
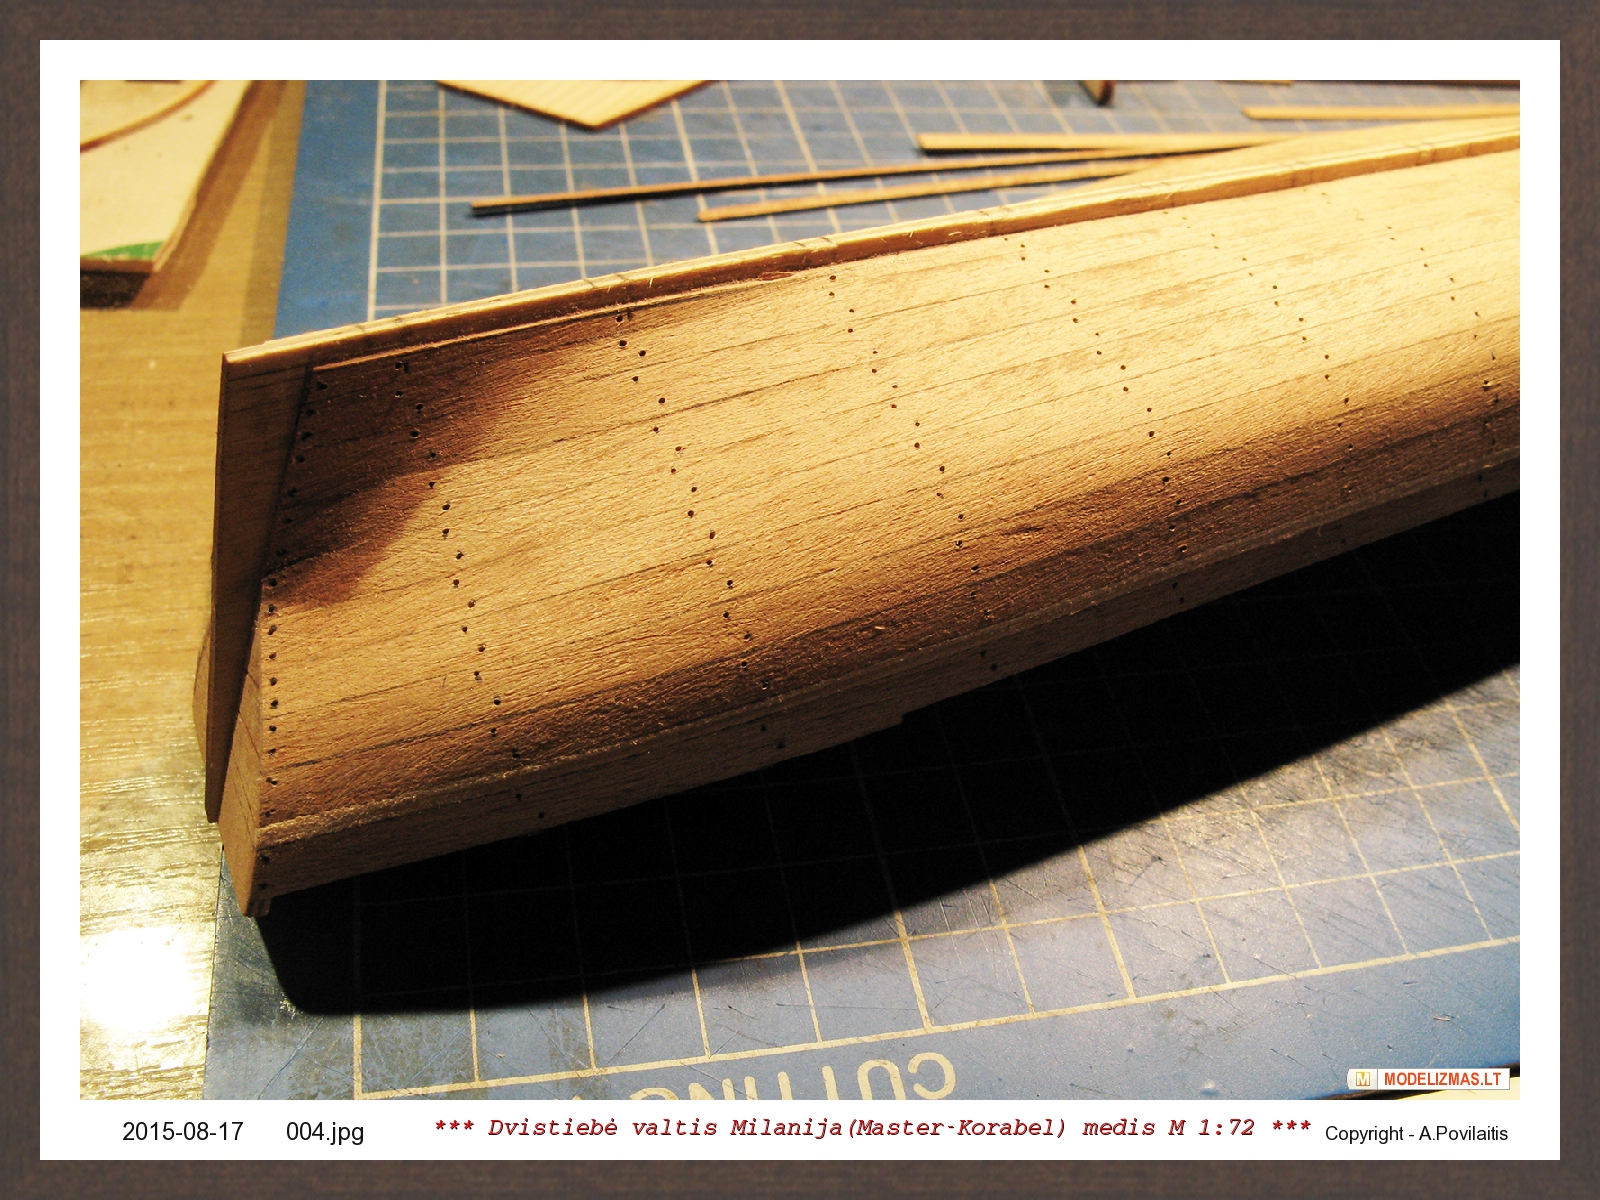
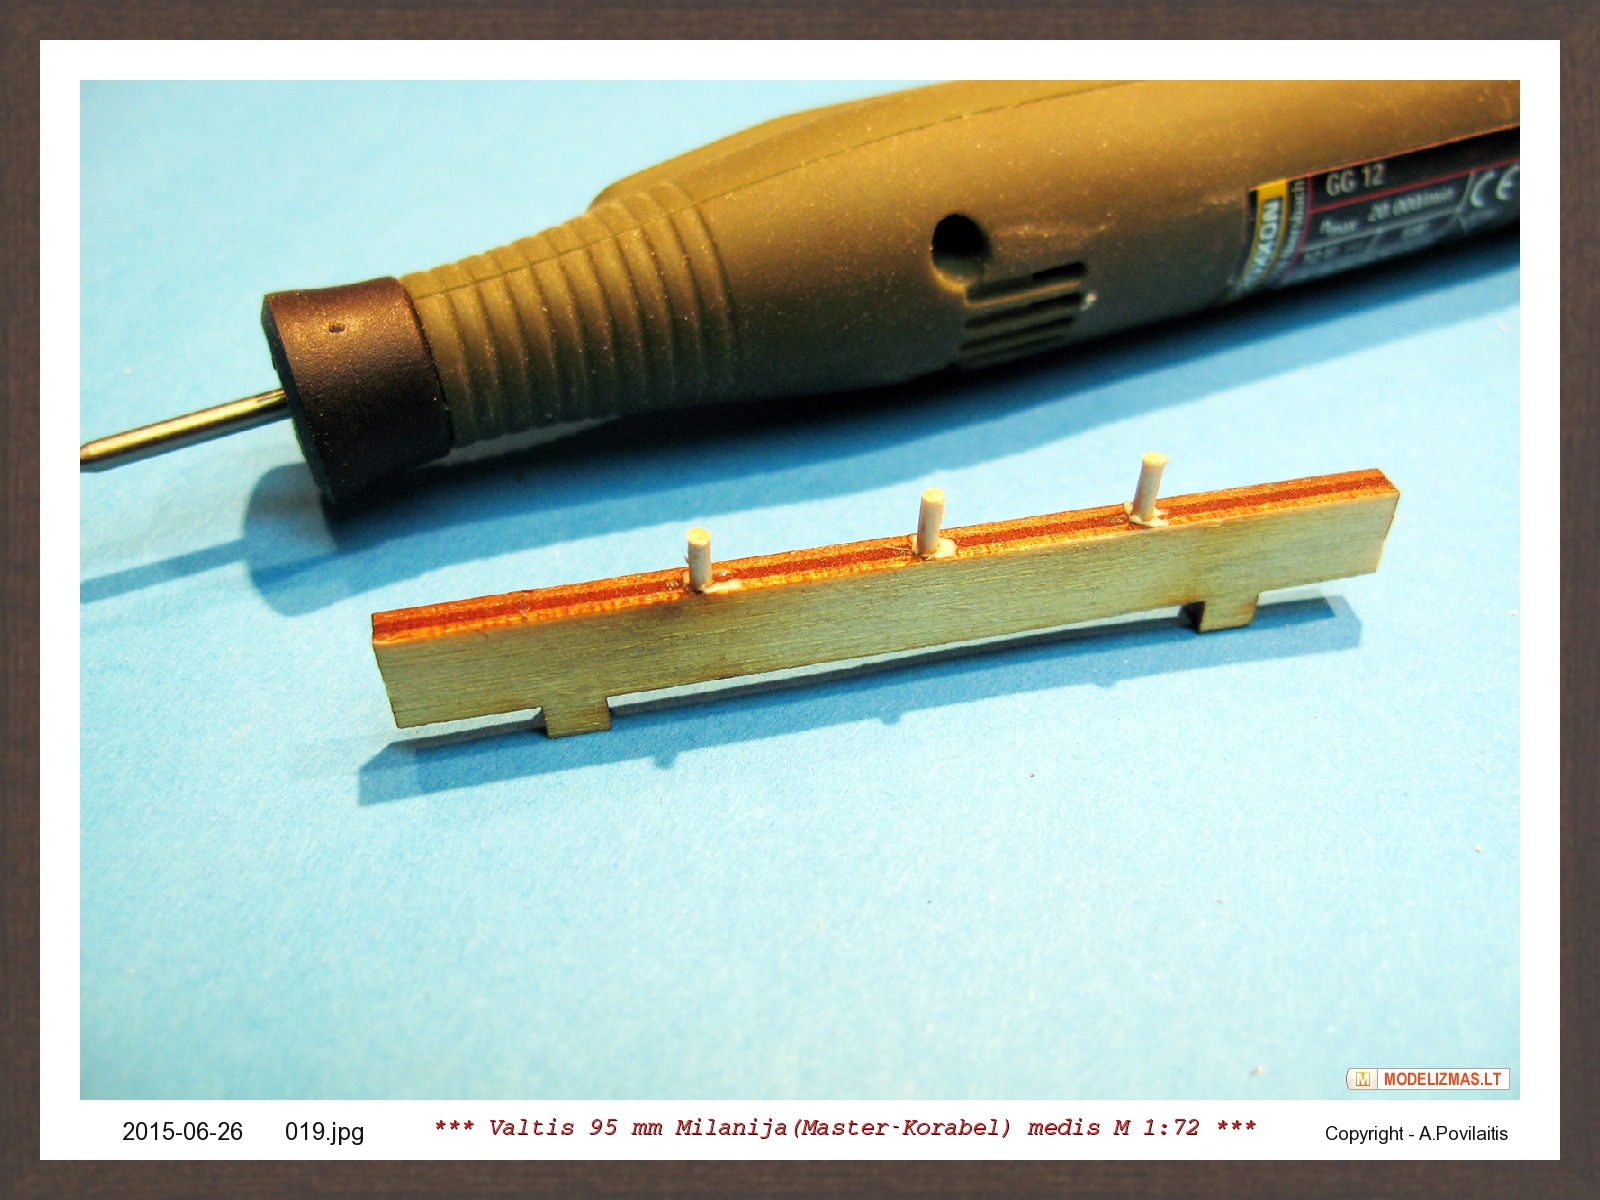
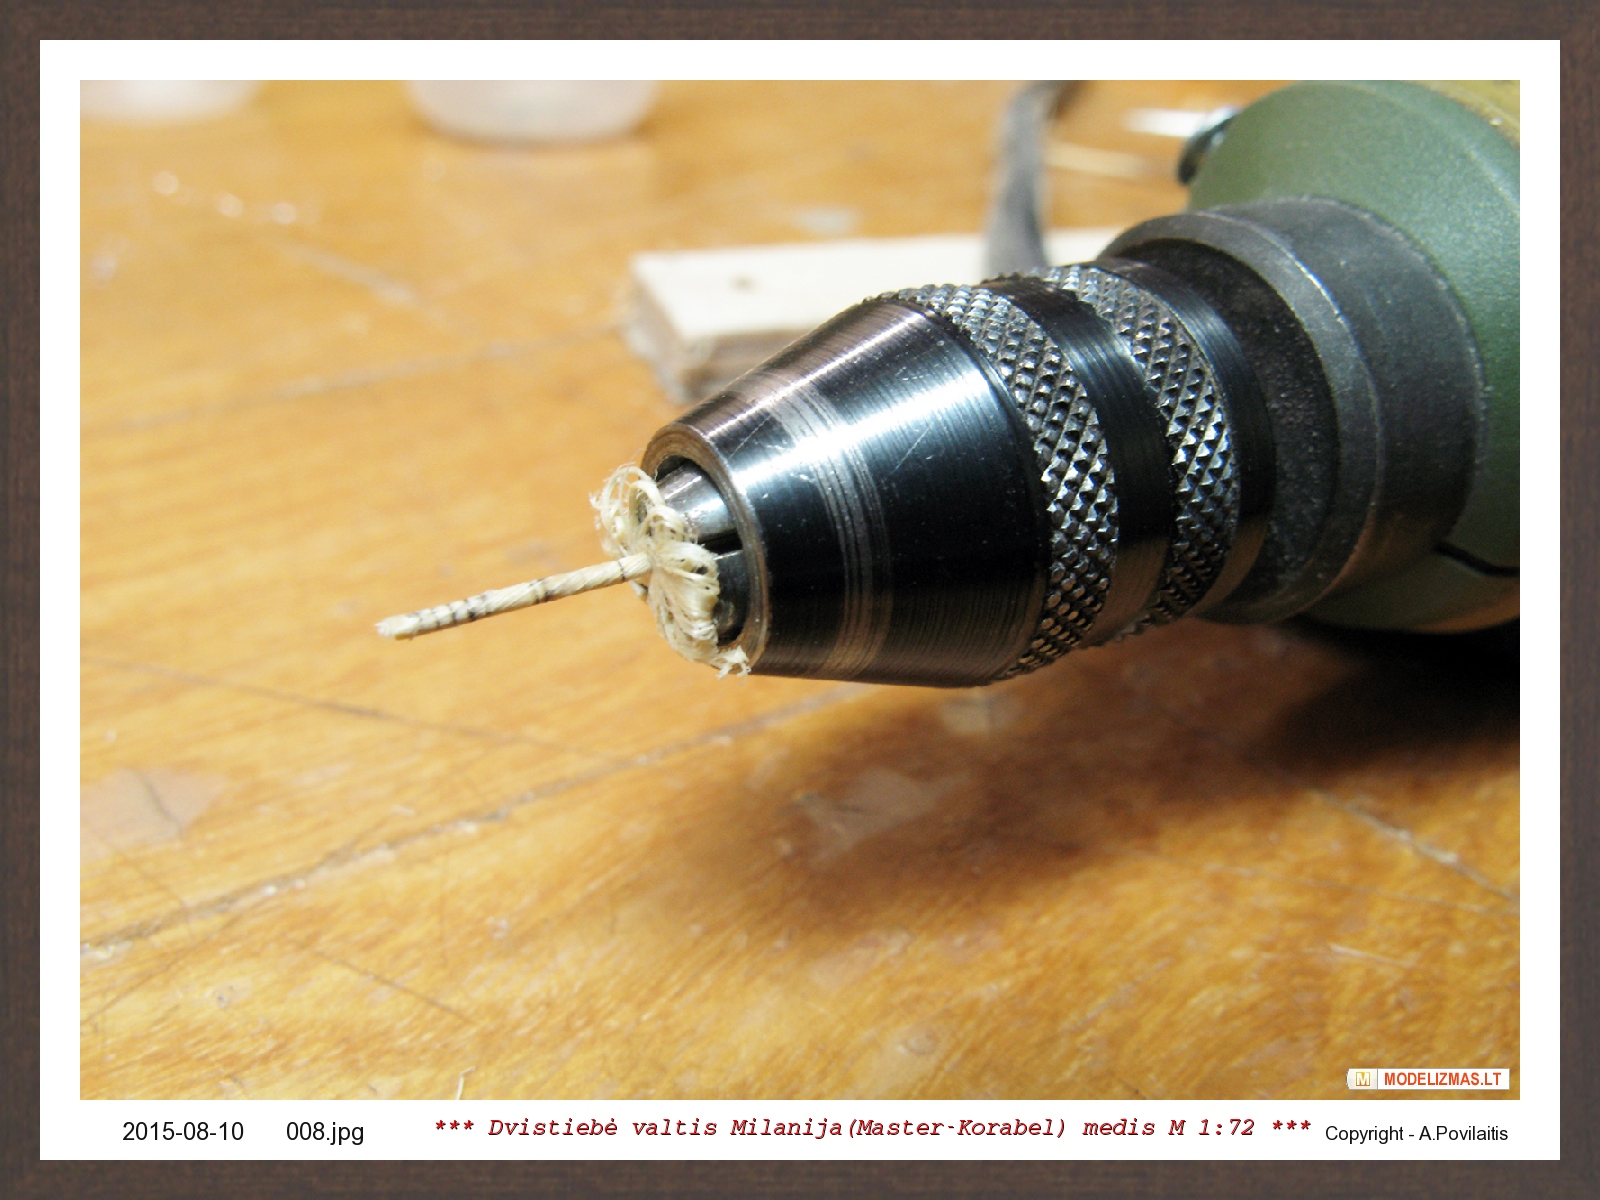
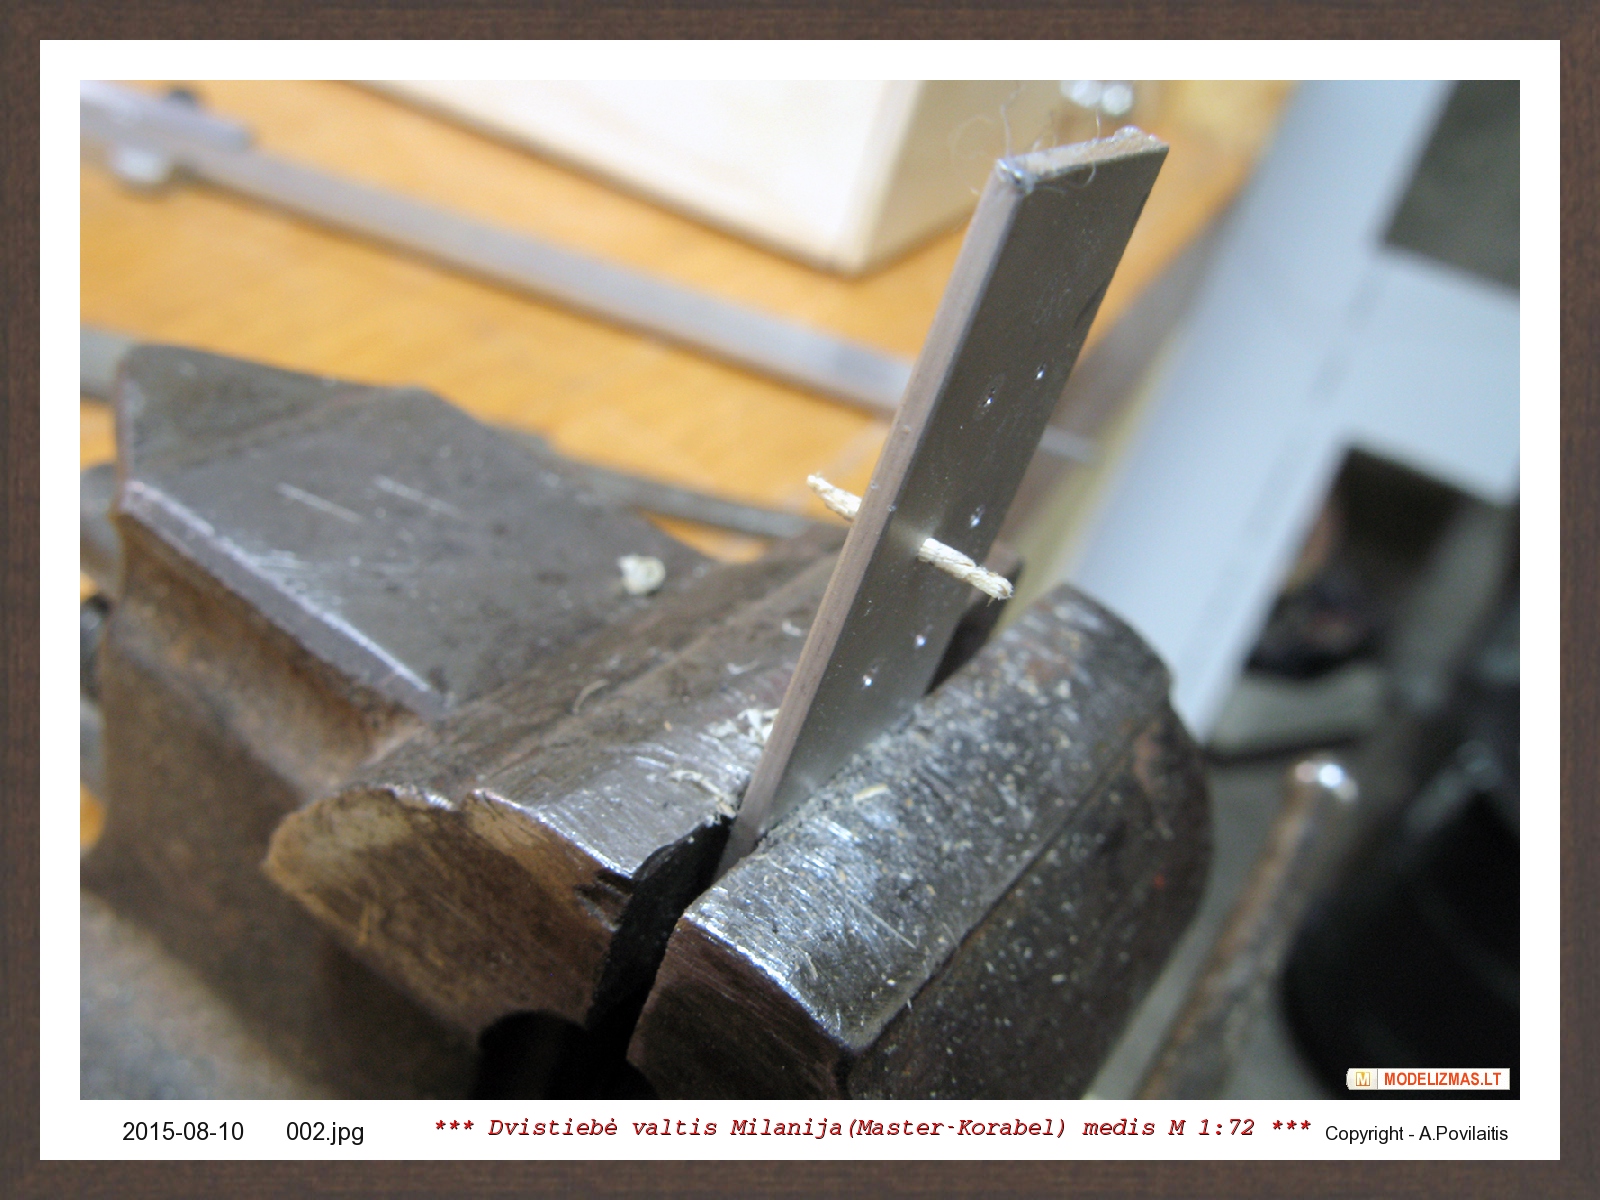
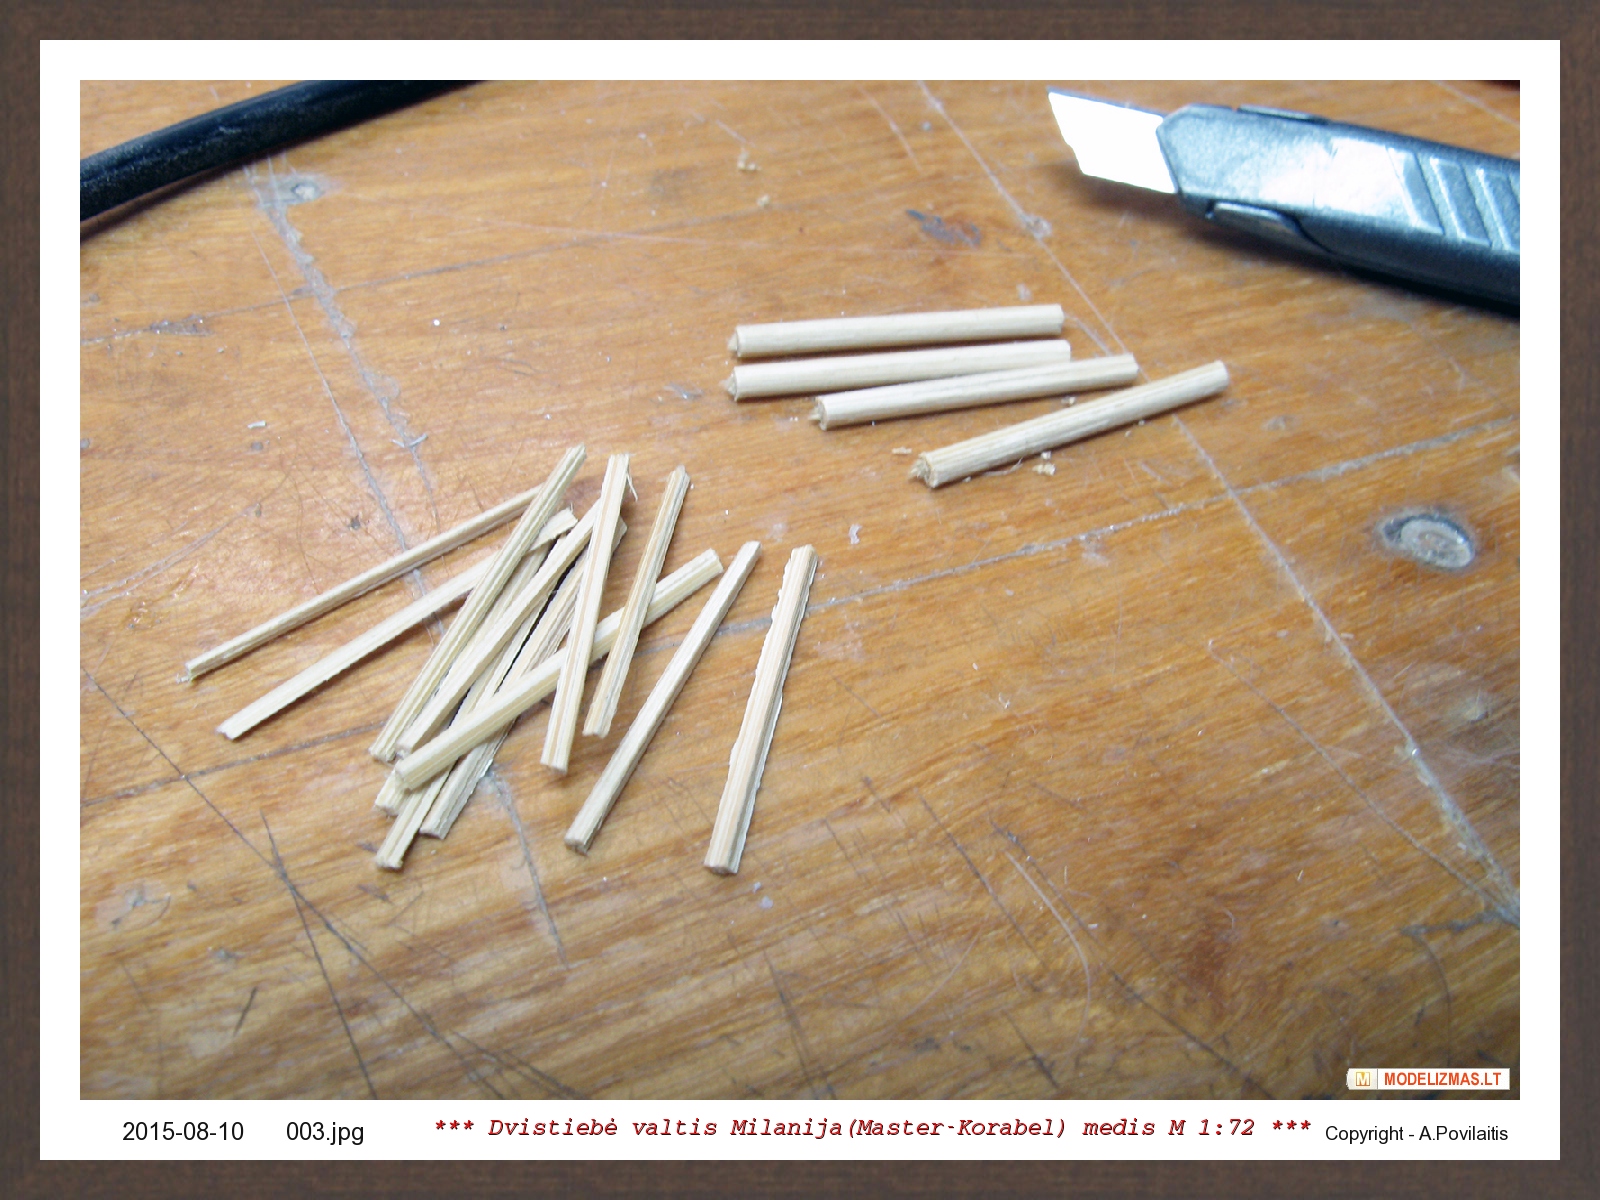
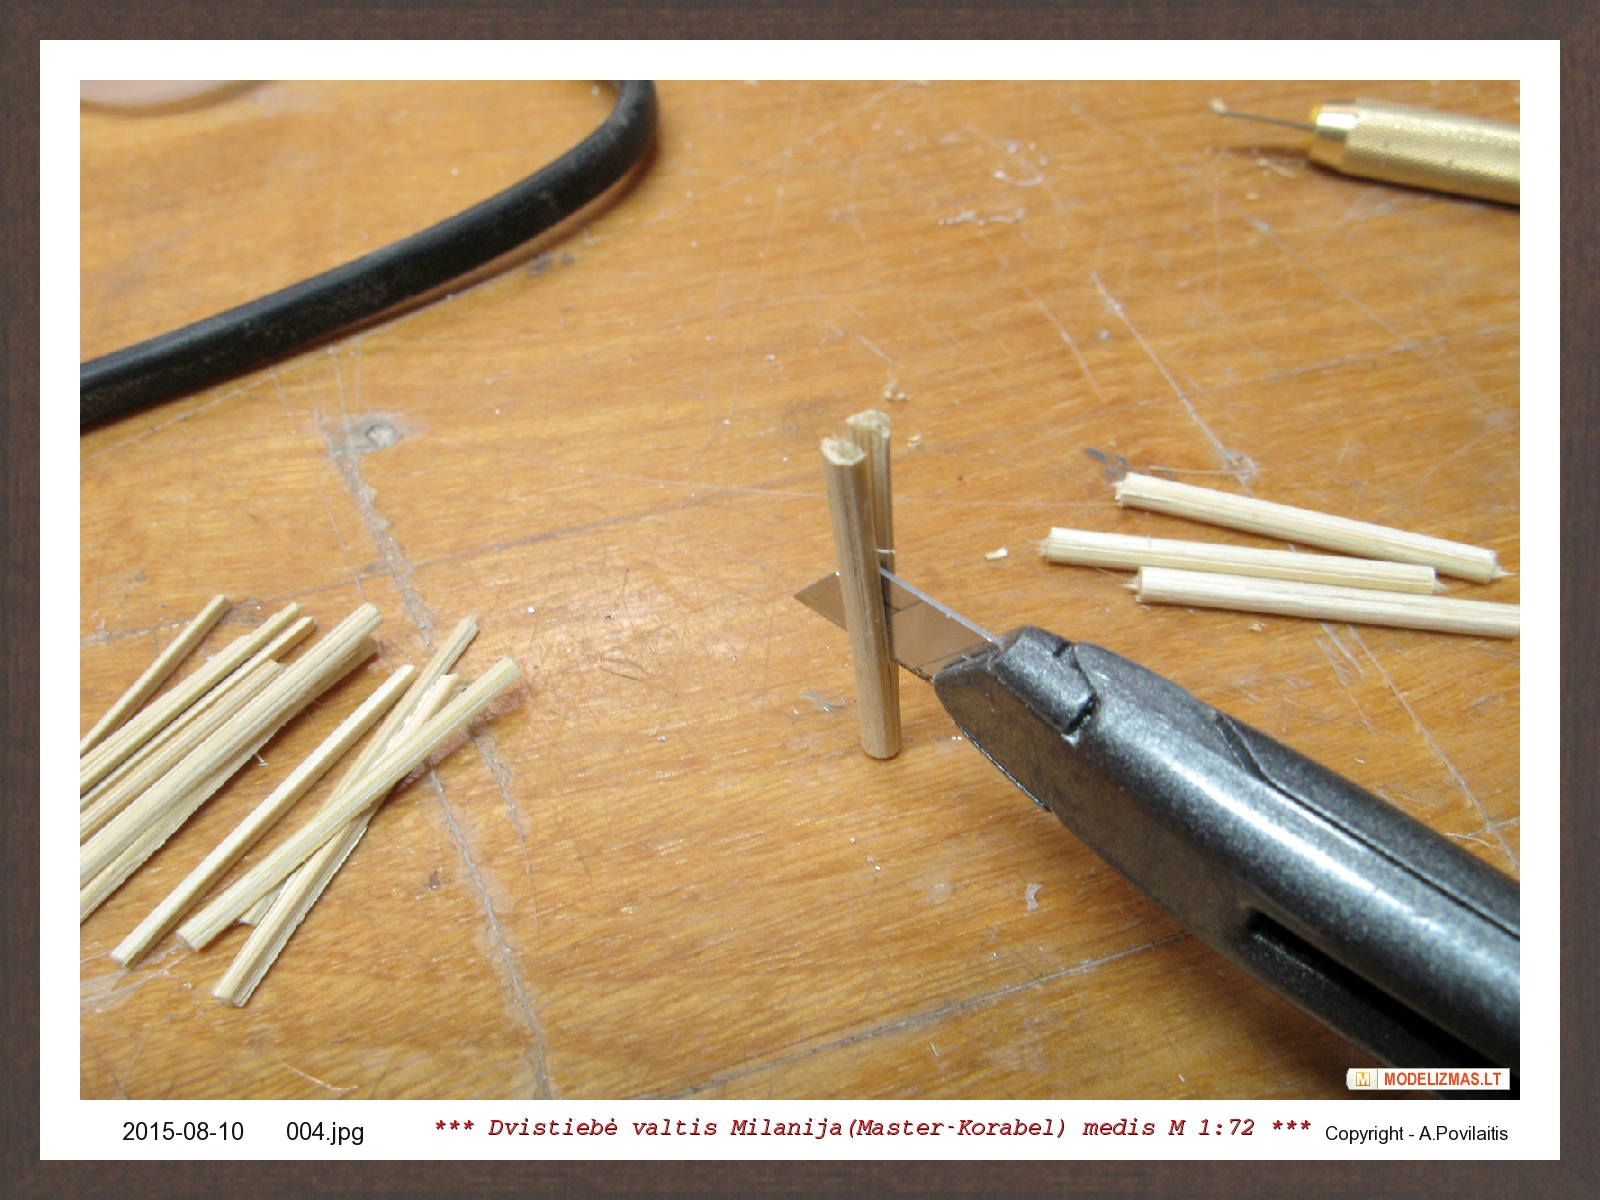
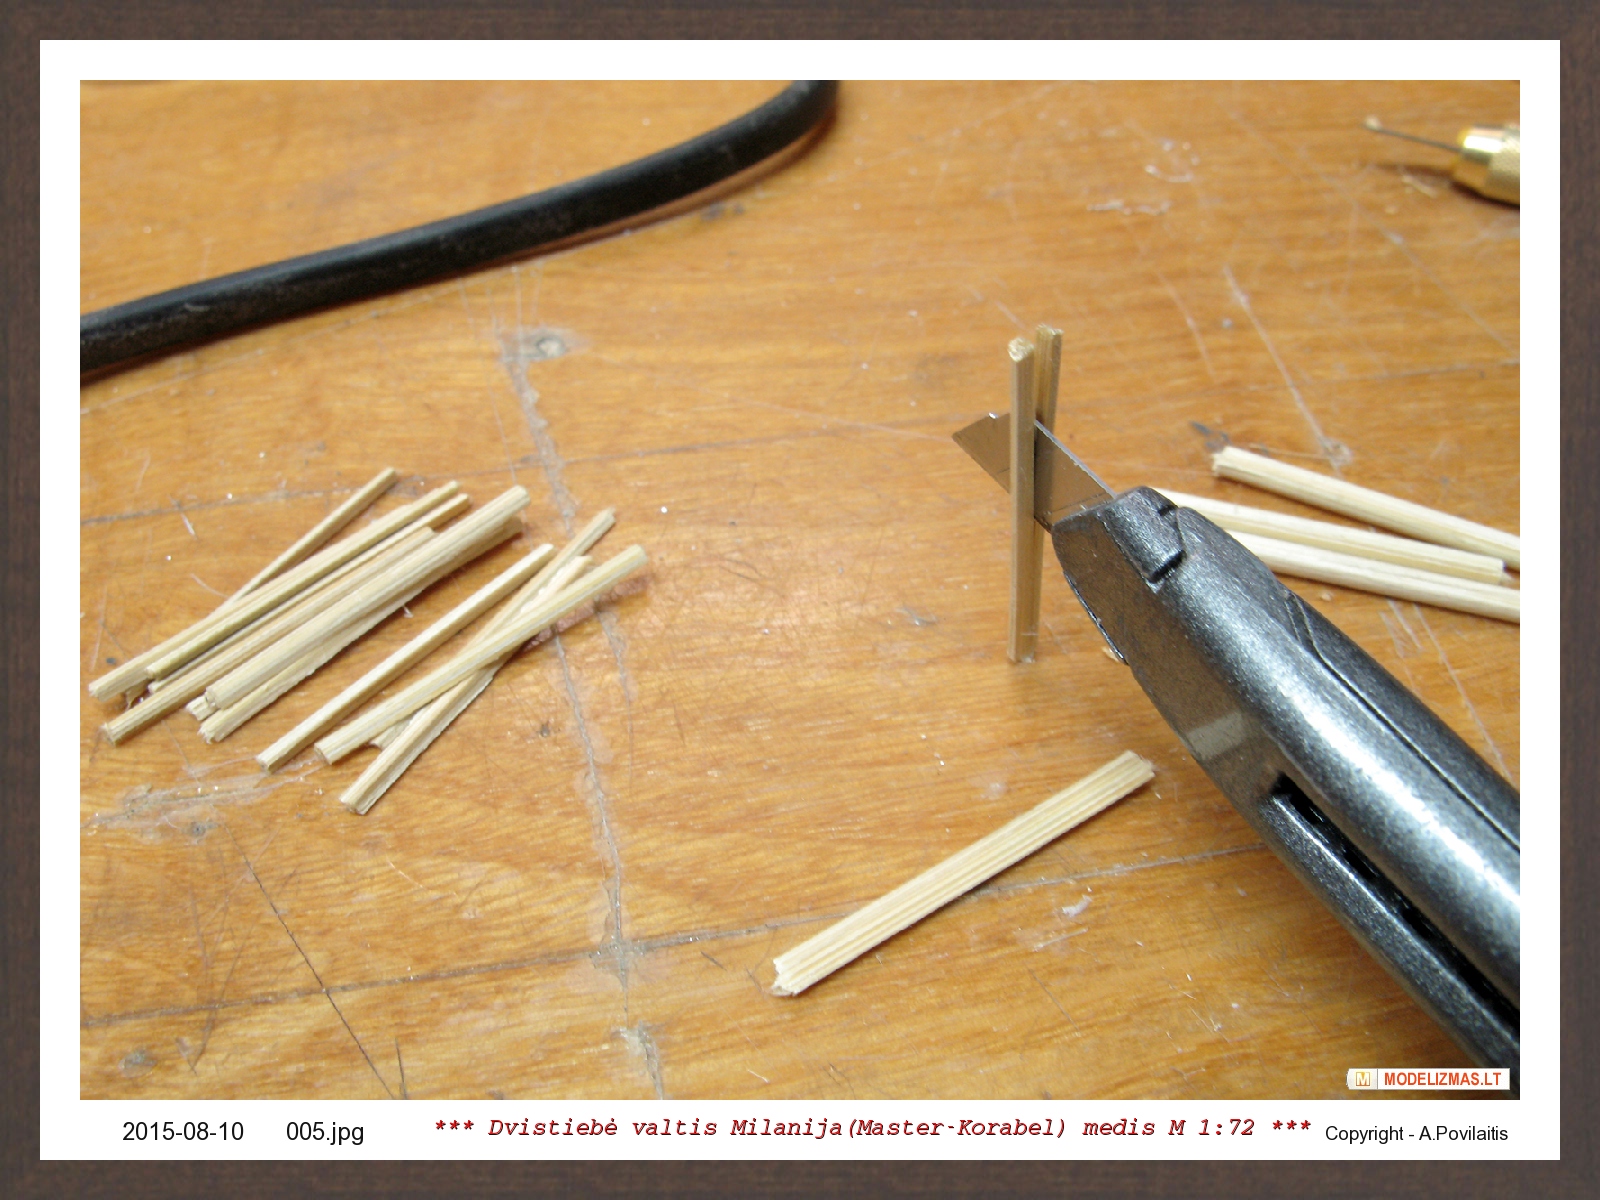
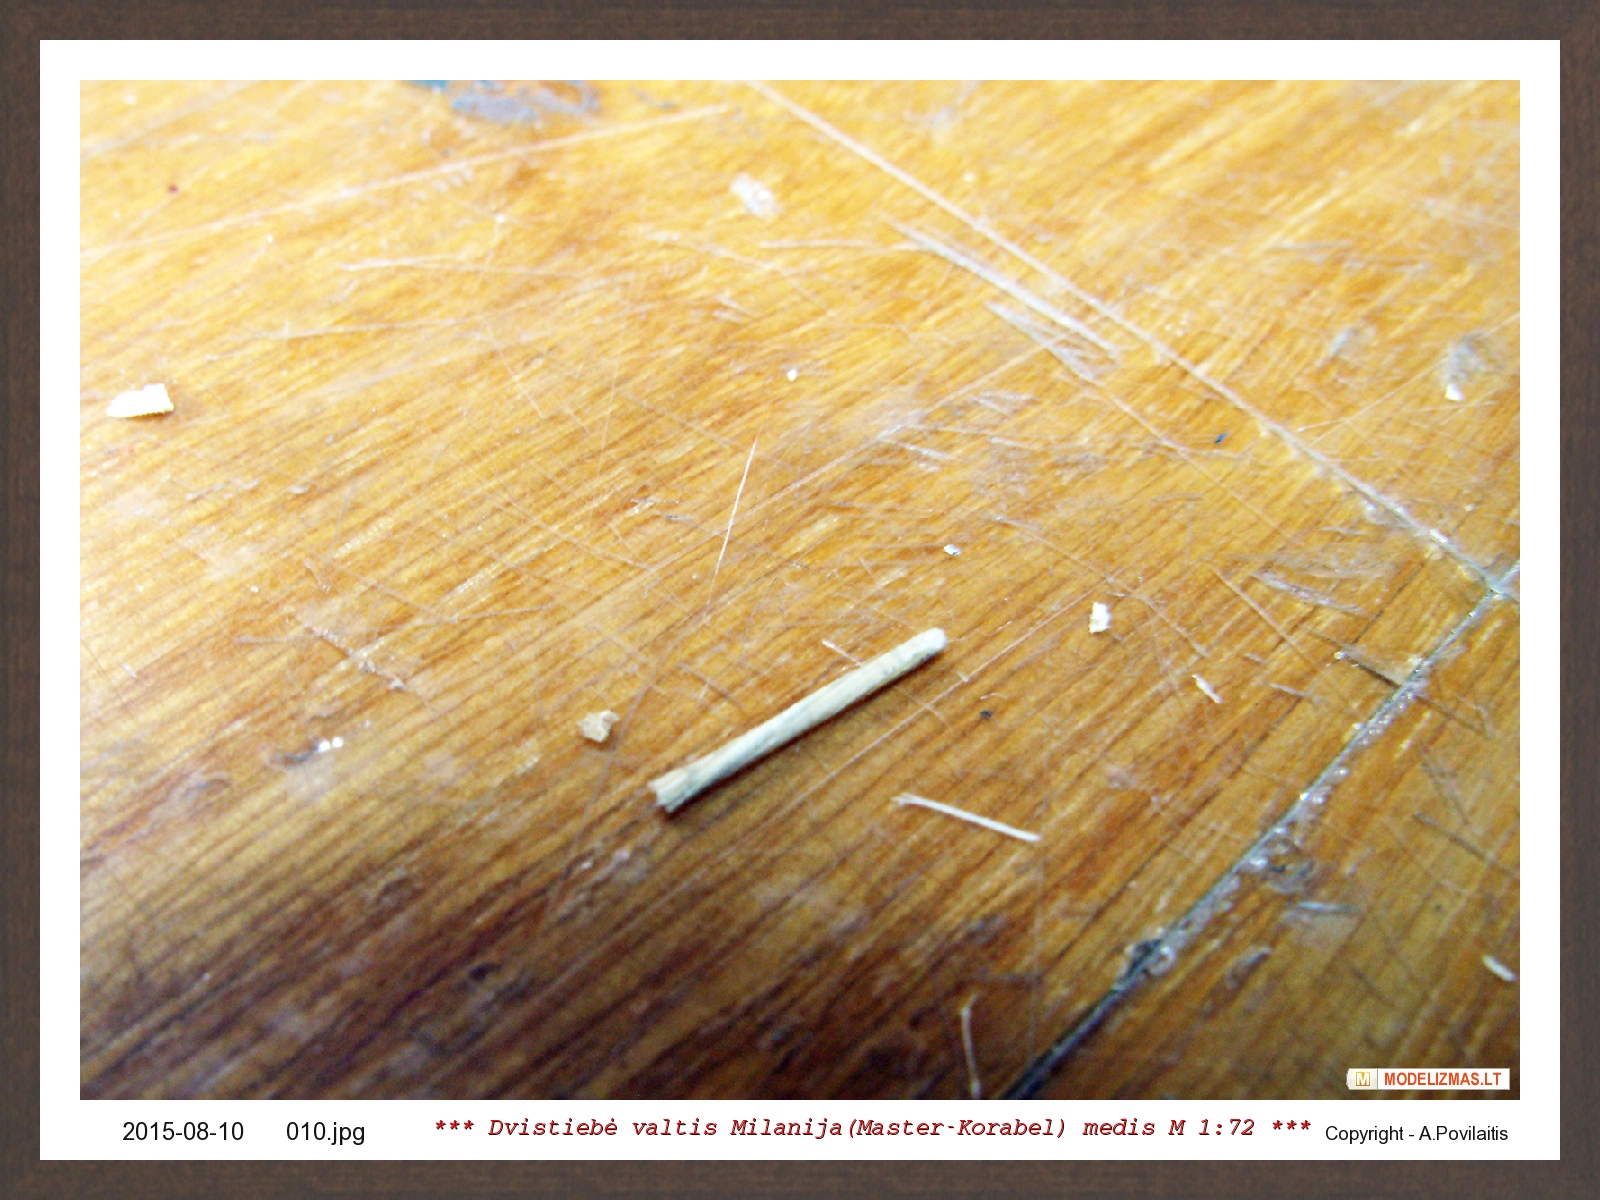
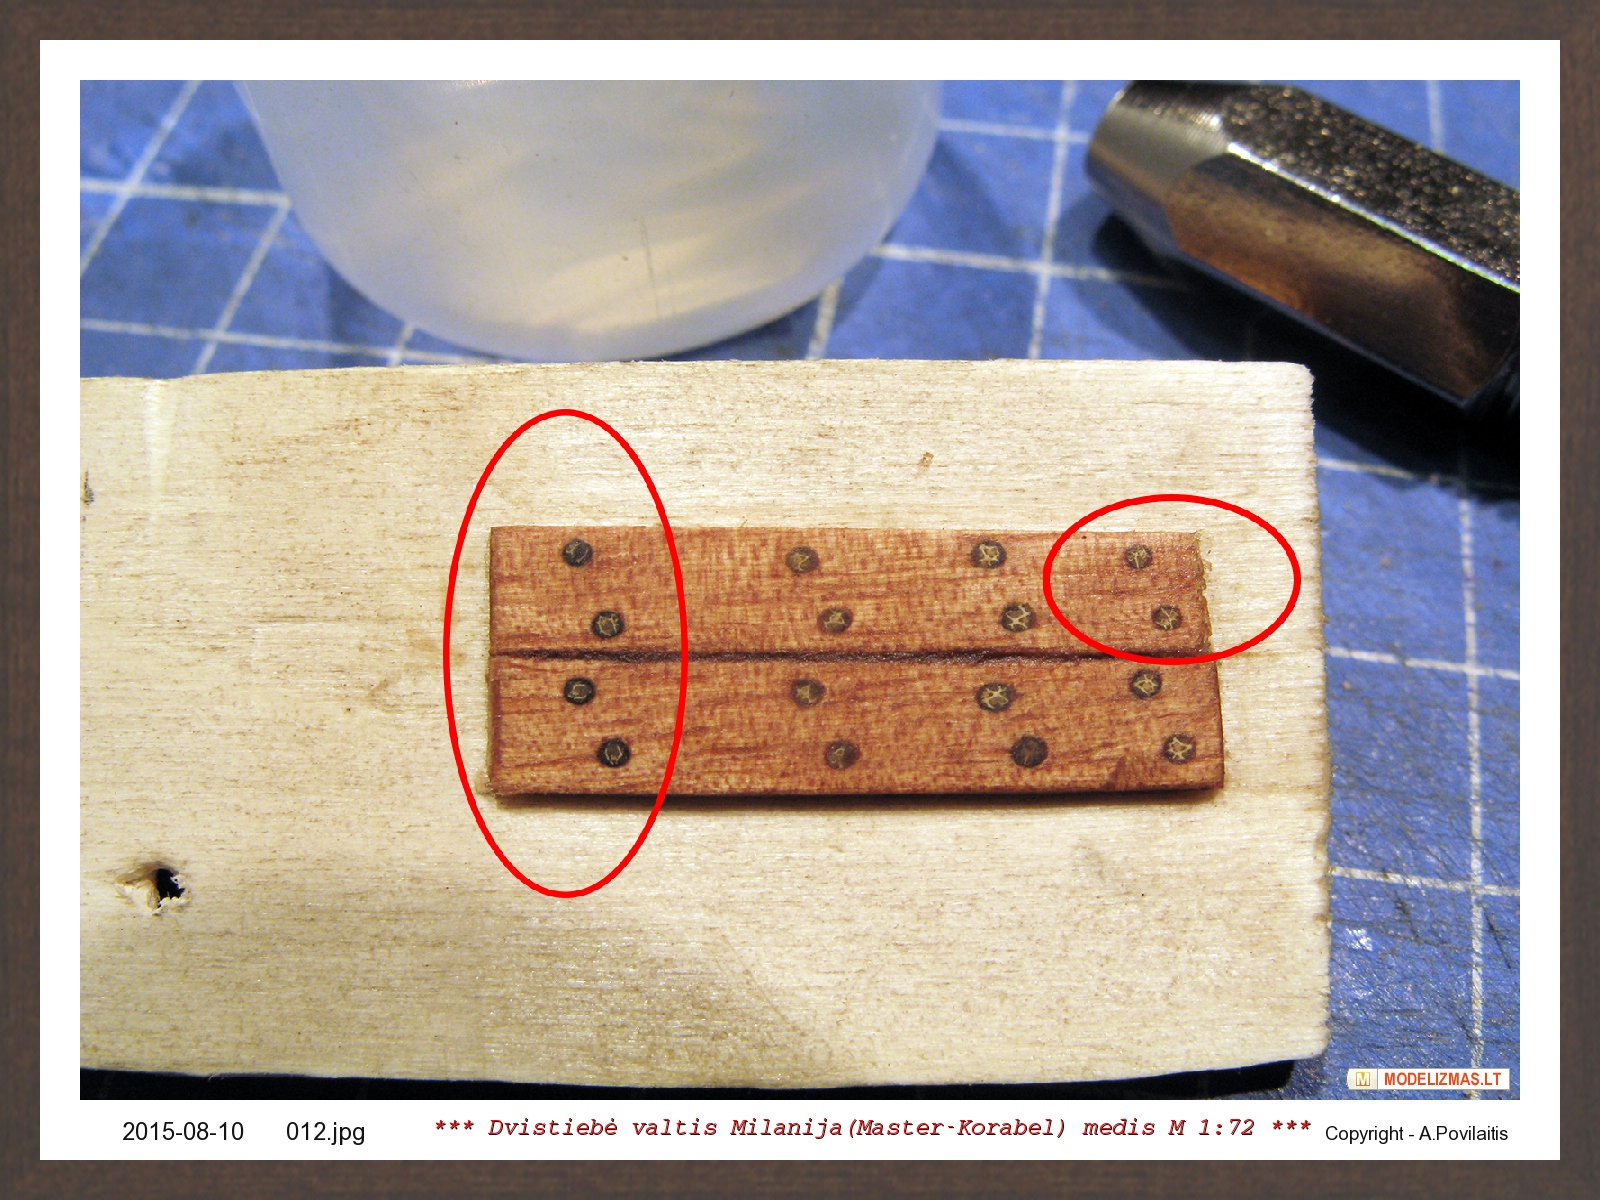
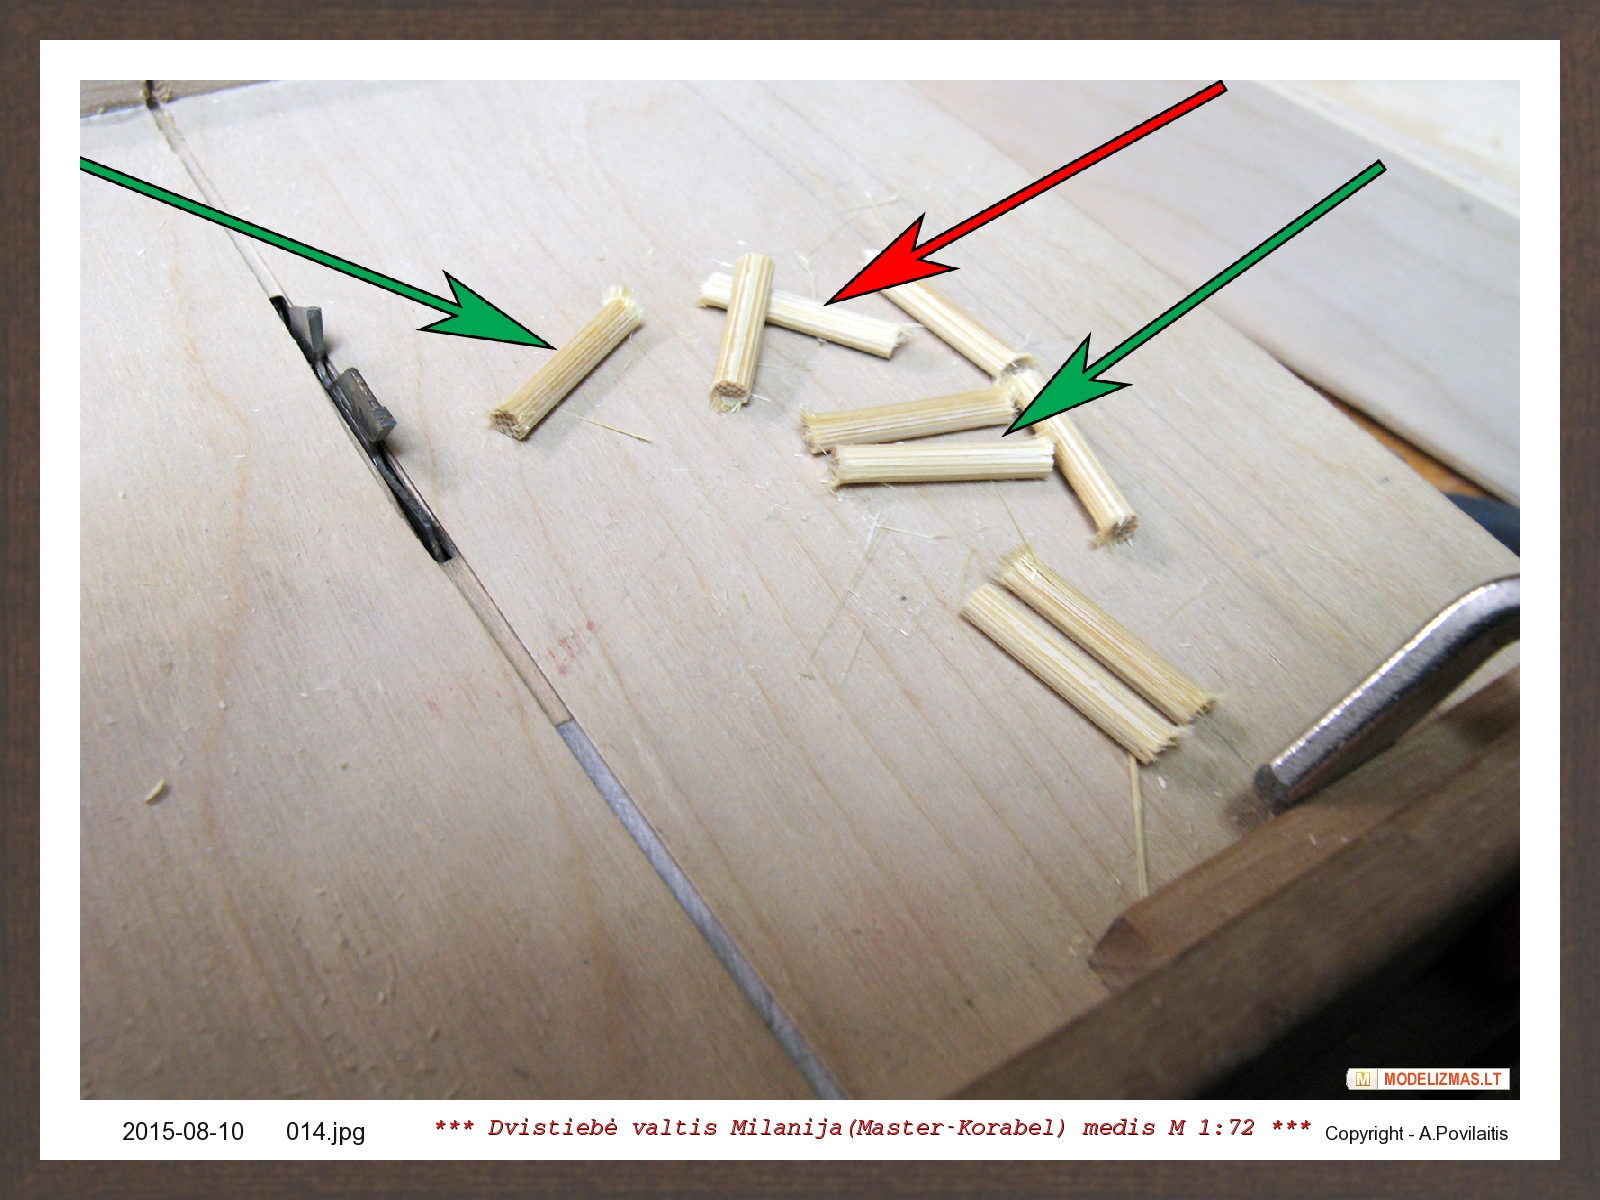
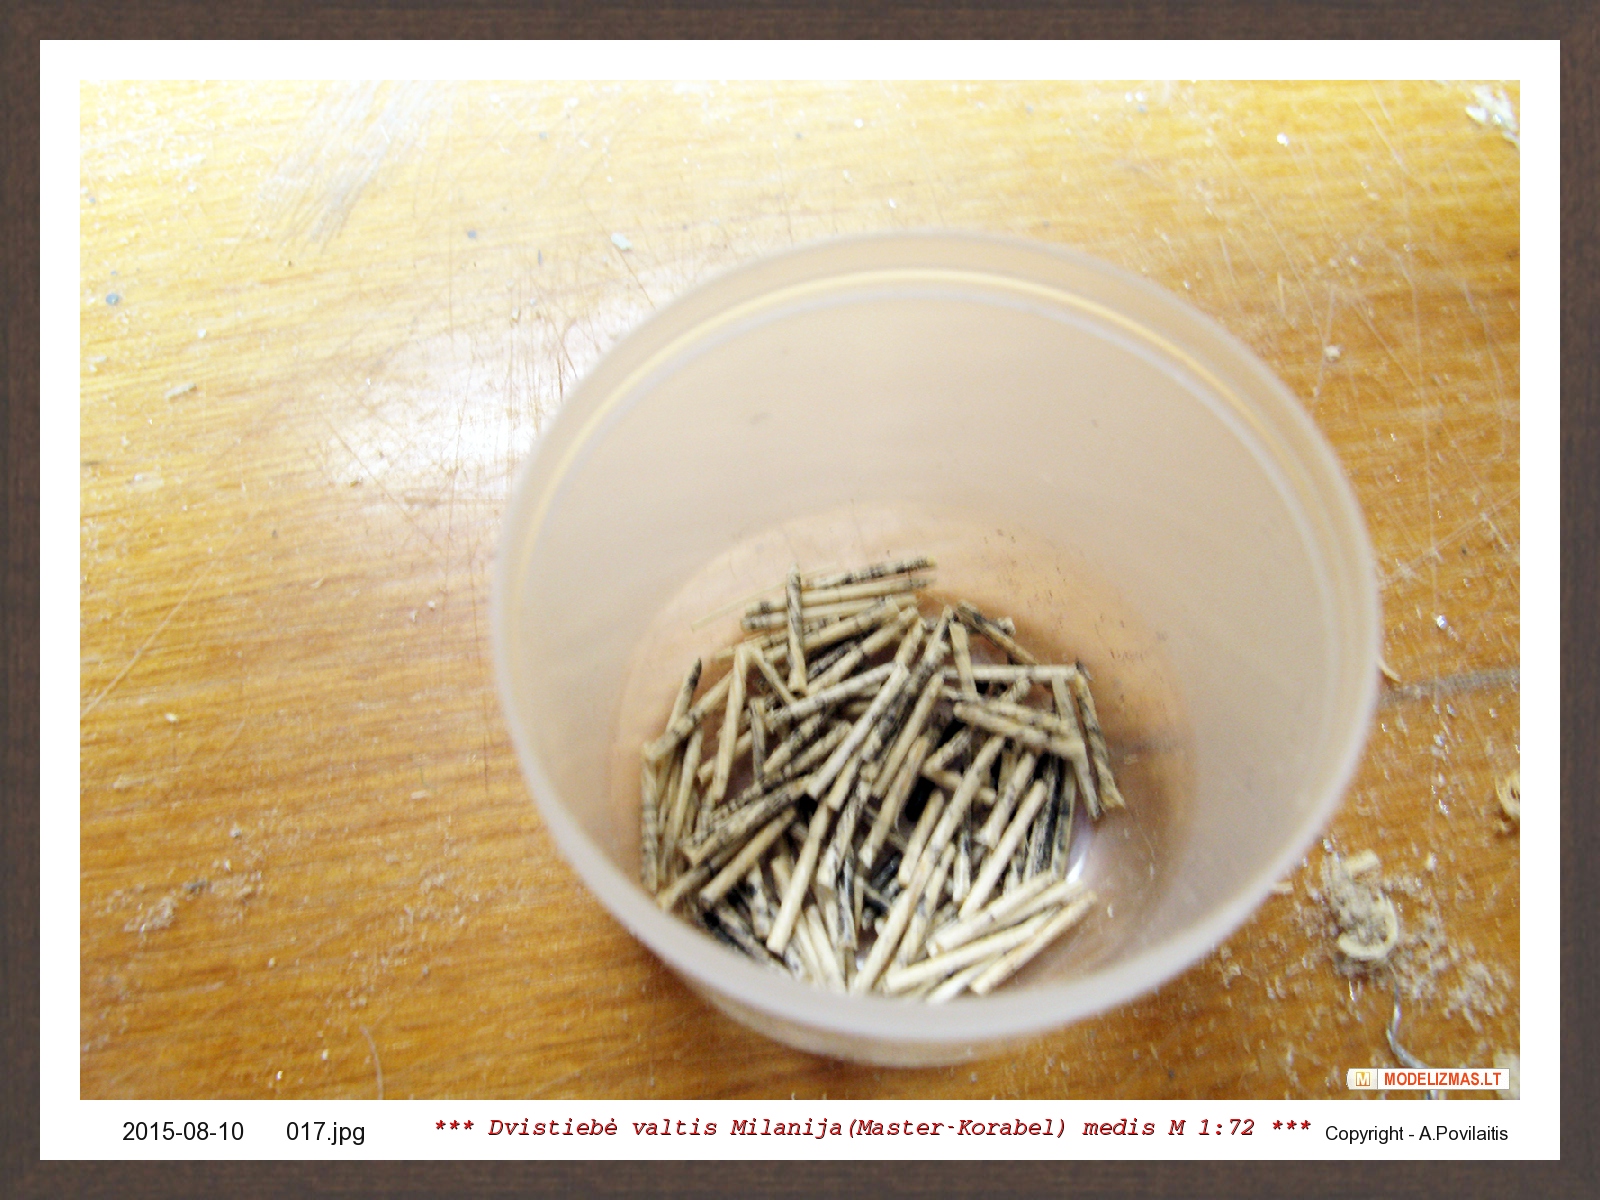
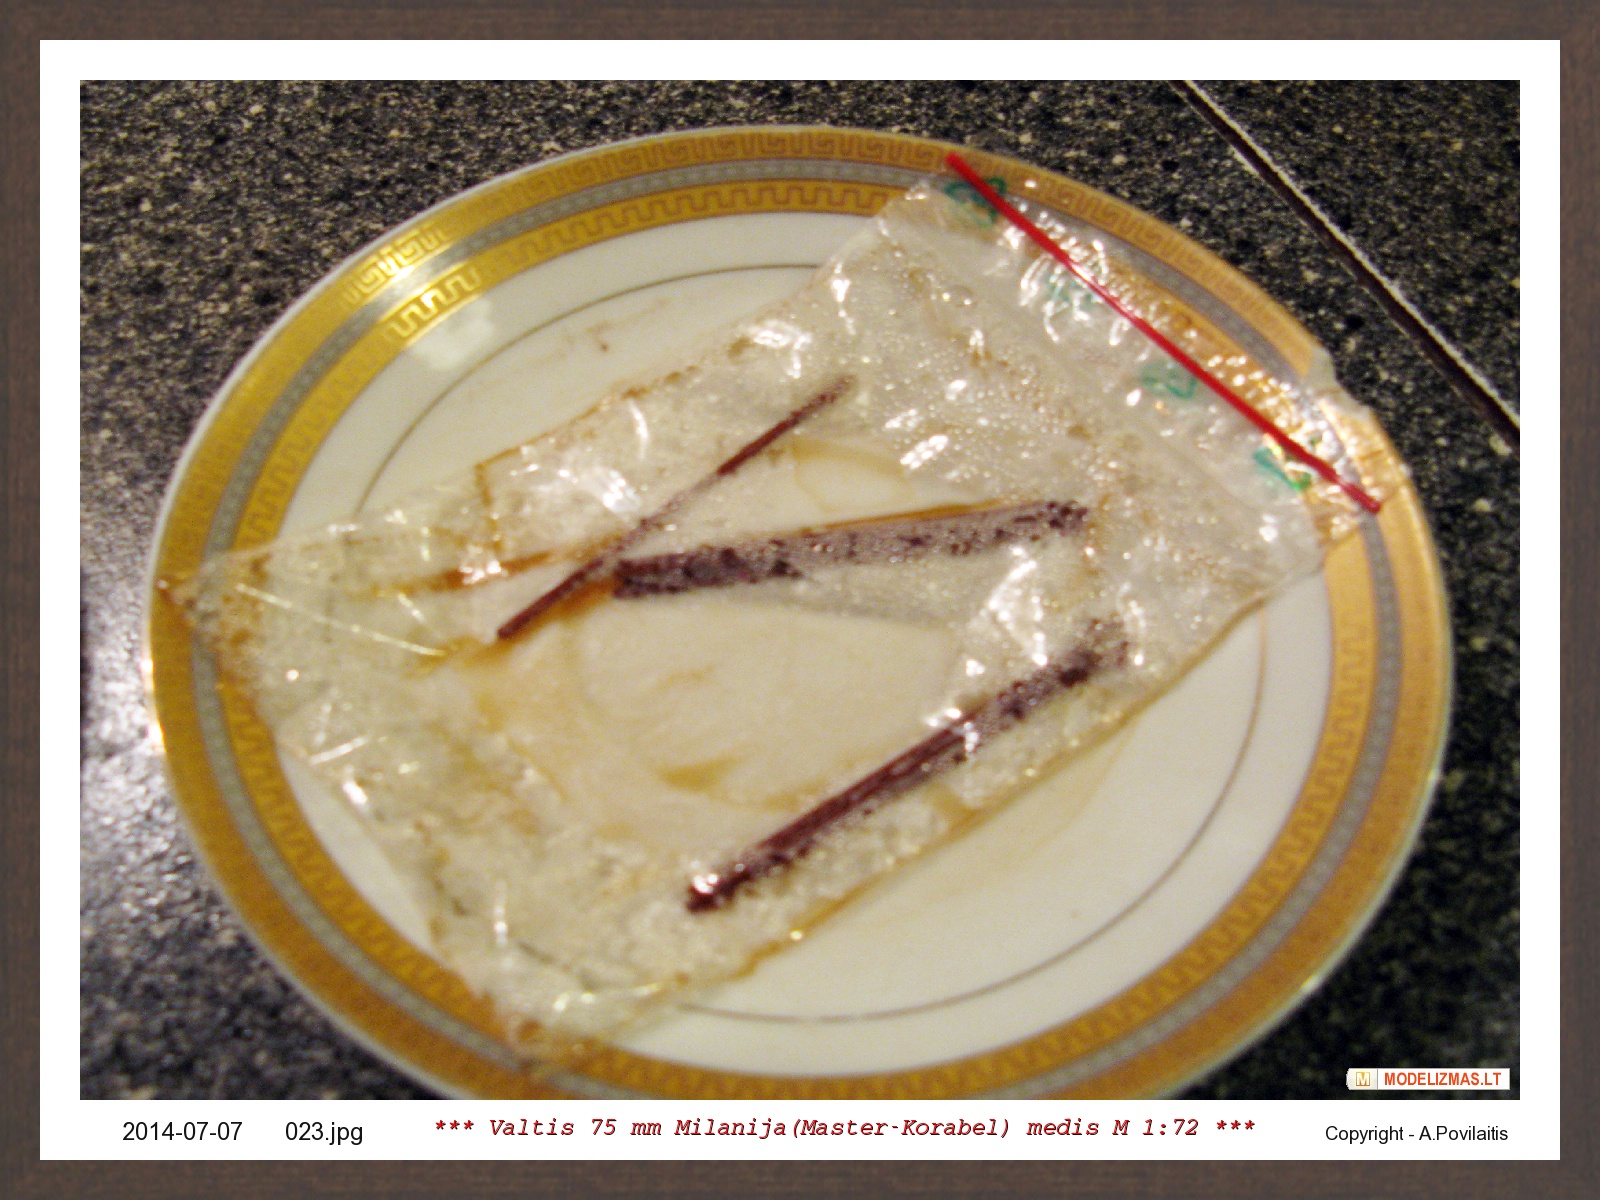
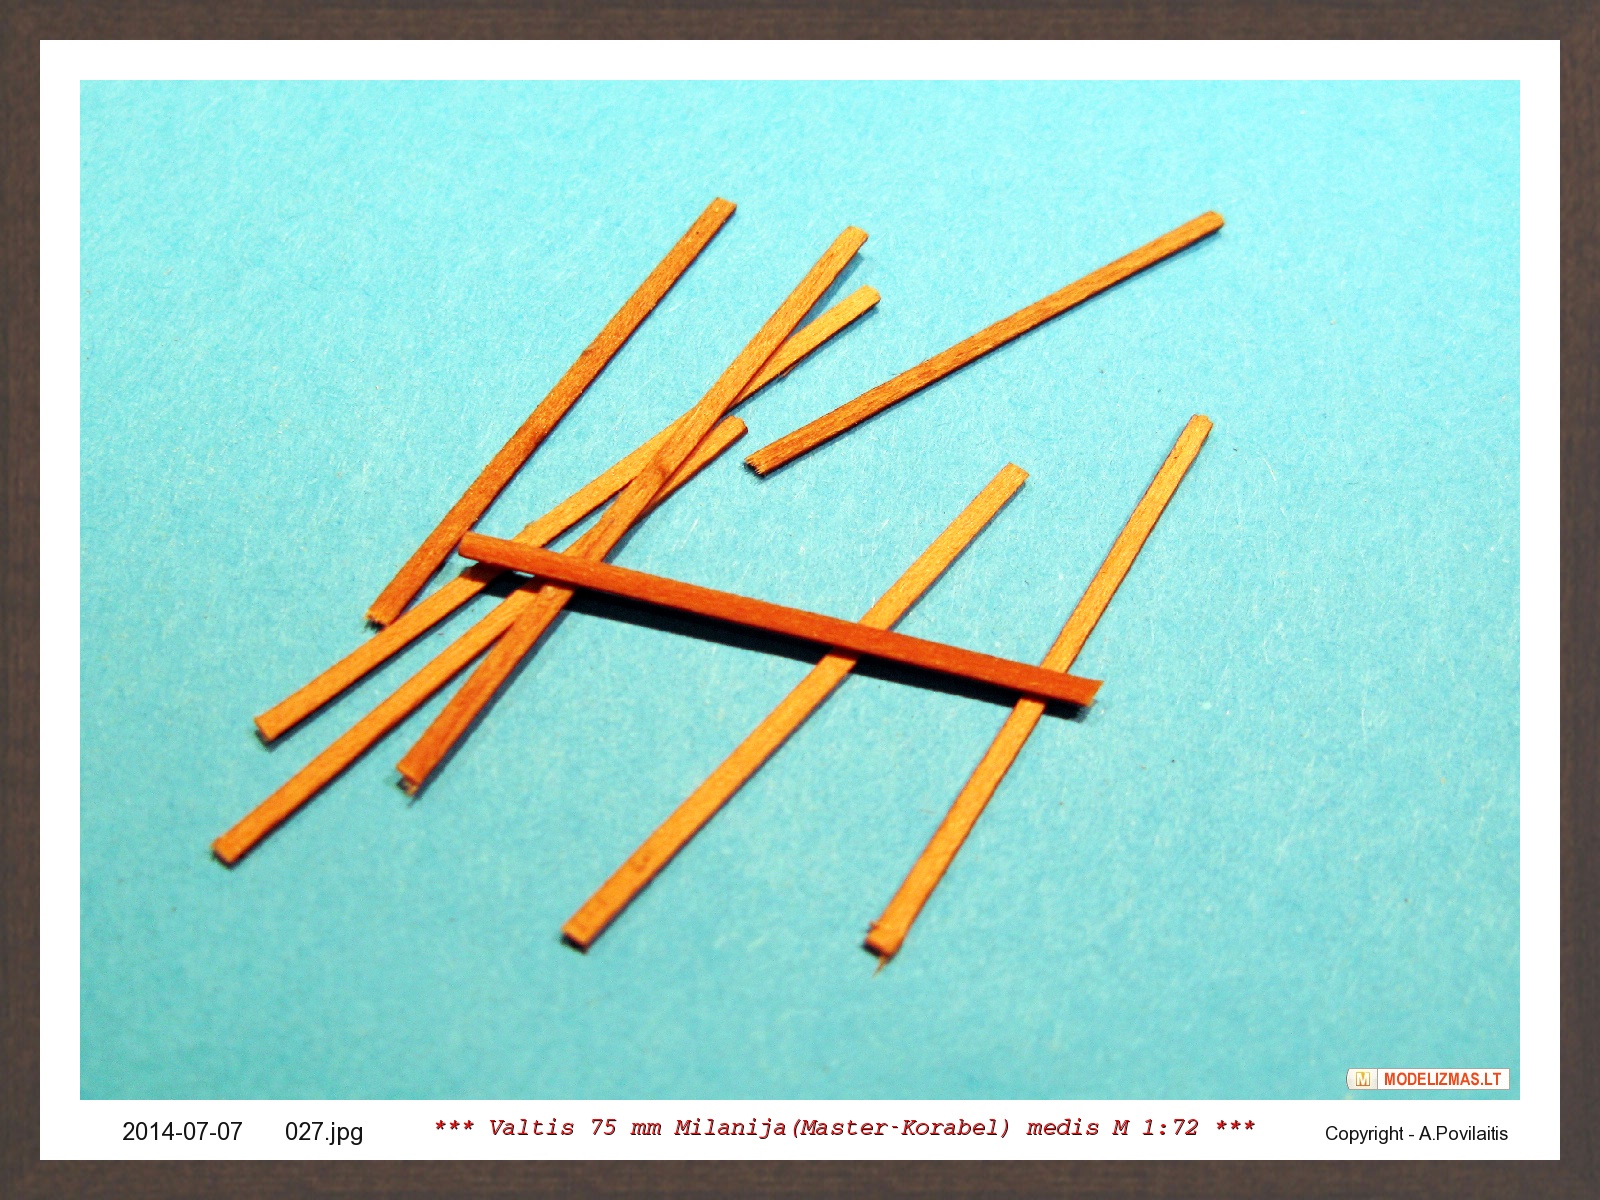
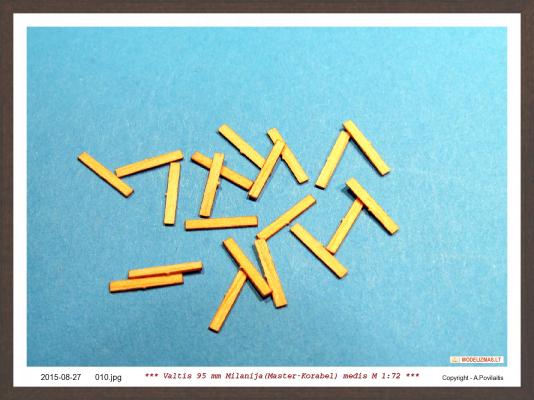
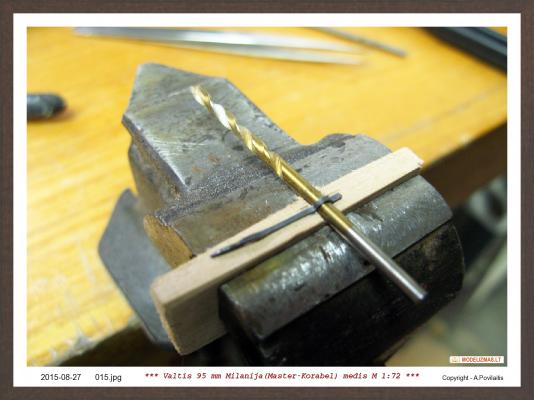
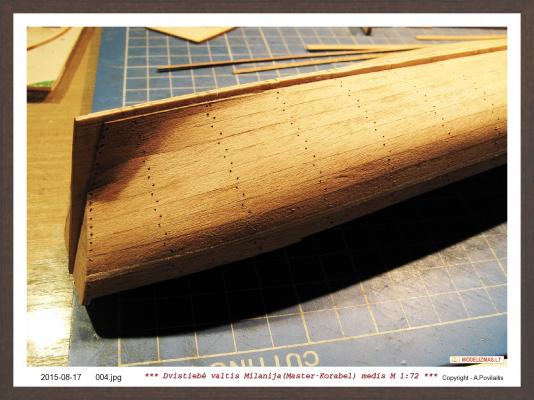
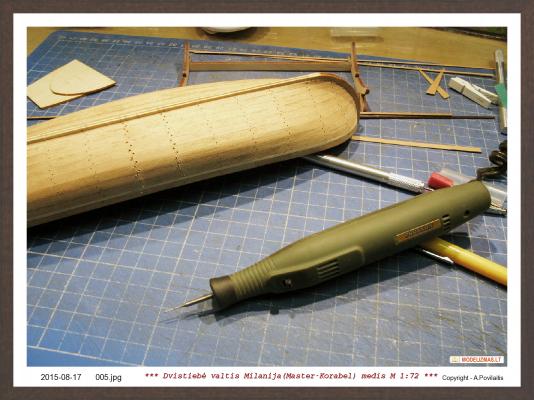
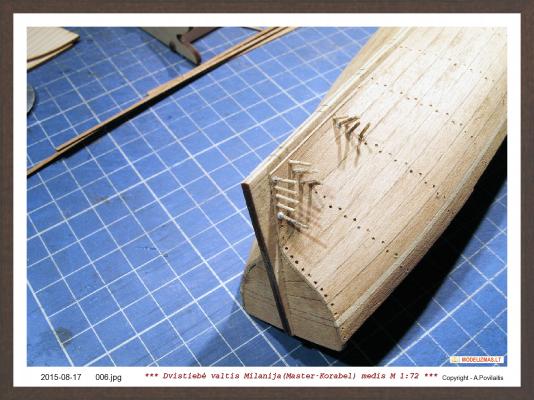
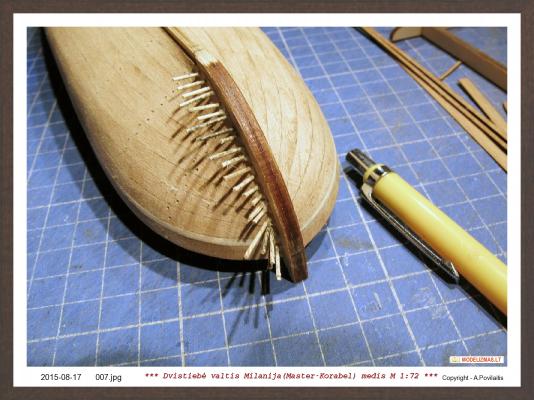
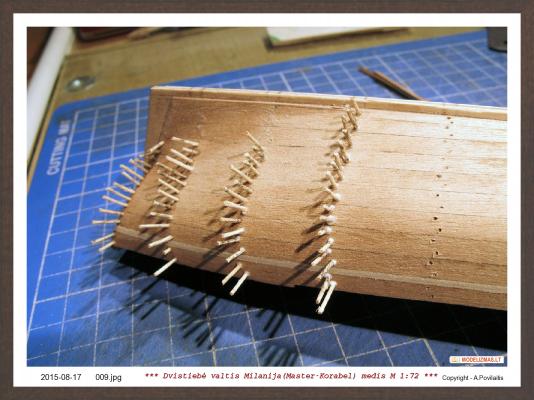
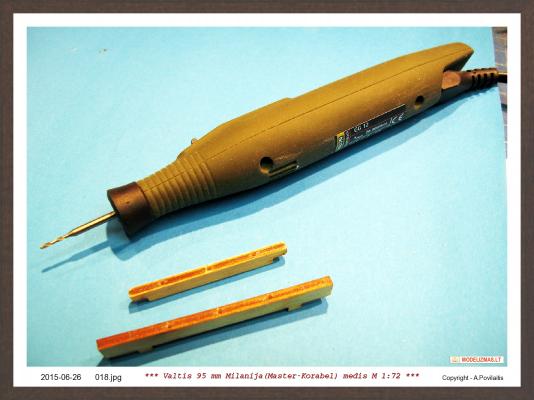
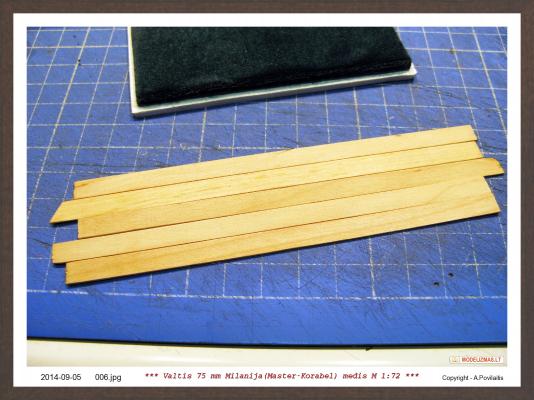
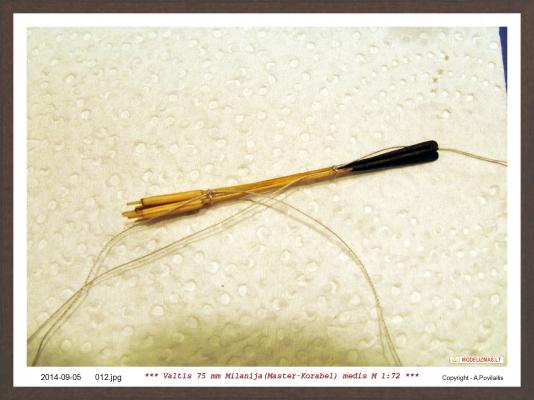
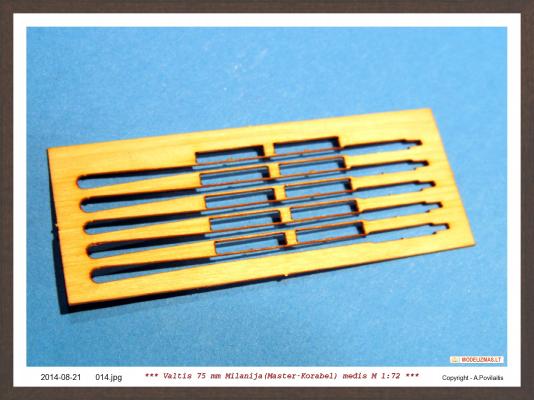
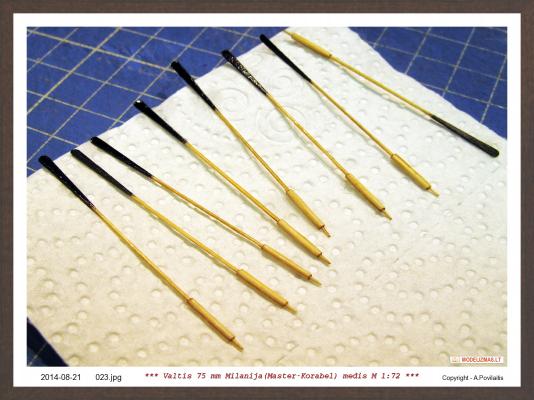
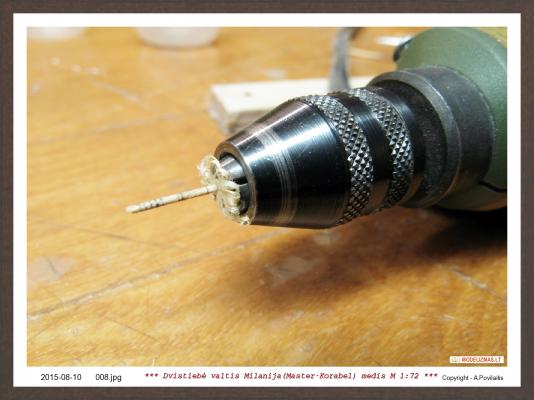
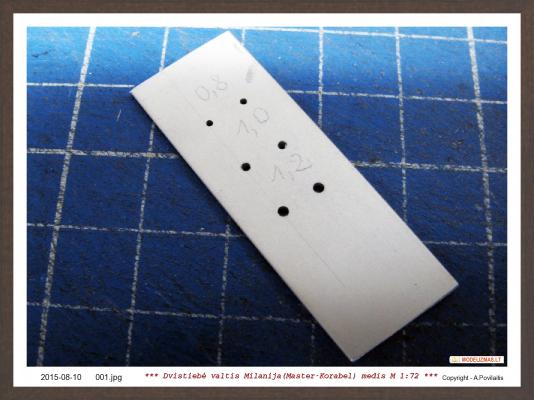
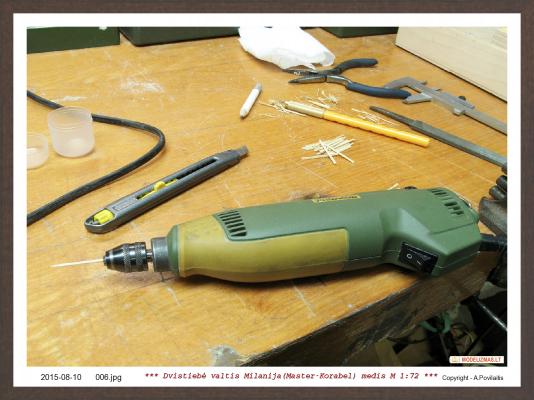
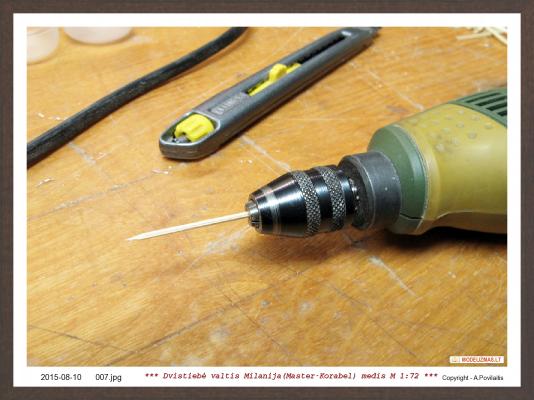
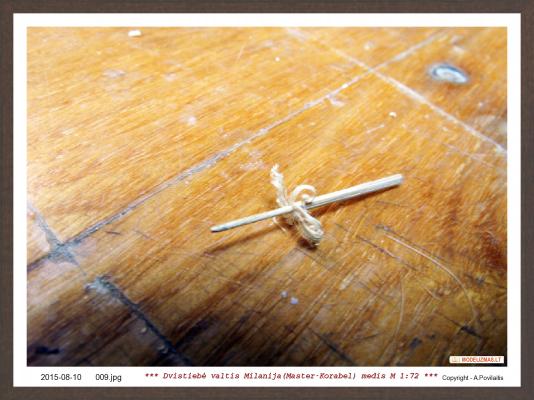
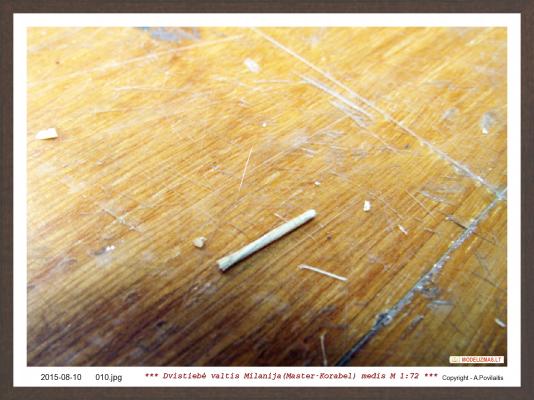
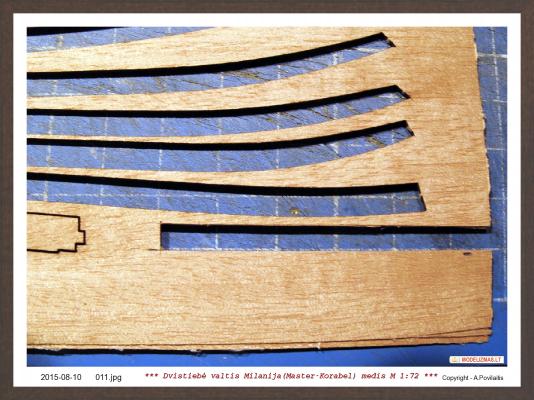
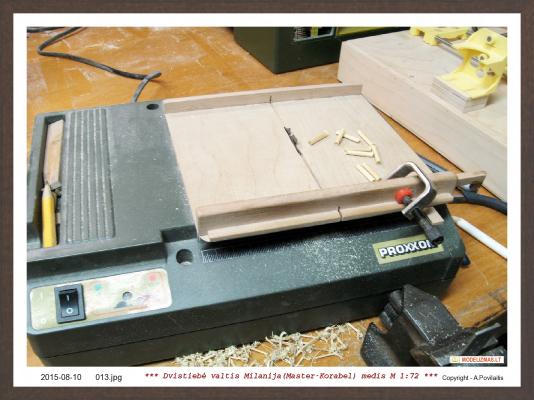
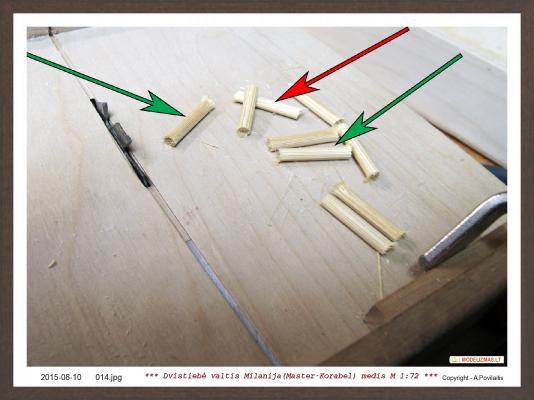
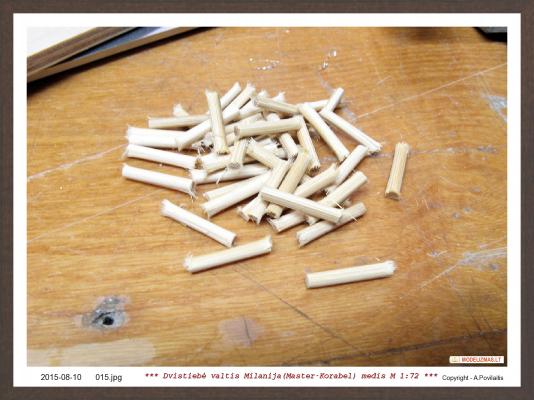
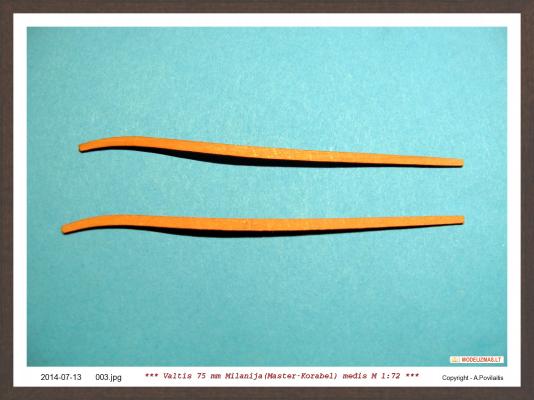
Will continue. I thought to do or not the hull nailing. Of course this is not quite correct nailing, but better than doing nothing at all. I'll try and see what was going to be. But first I need to make wooden nails. I will tried the simple technology. The nails will be done from bamboo rods. In the Aluminum plate i make 1.0 and 0.8 mm diameter holes. Then I put the plate in a vise. Bamboo rotating rod is pushed through the hole and so I get a nail. For this I preparing as much as possible thin bamboo rods. Nails must be a 0.8 mm thick. Taking into account the scale should be about 0.4 mm, but then they just will not be visible. 0.8 will be a compromise. I take a bamboo rod and cut to 20 mm length tips. Then the tips split lengthwise in half. And the half again in half. Embedded in the Proxxon drill. Tapered end. Using 16,000 rpm speed. I try the solution. It does not go through a few steps. It should be 0.8 mm thick at once. Here's the appearance of such nails blanks. From the hull planking plate make 2 the short planks. Glue planks to a piece of plywood. And perform several experiments on nailing. Like result of the right and left. On the Left obtained using black ink soaked in nail 5 minutes. It seems to me very well, but look on the hull through brightly. Therefore, I choose the right option. Quickly prepare Bamboo pieces and can start the production of wooden nails. Even more nails, it turns out one problem. Bamboo should be soft. These are the only white slugs marked in red arrow. Brown slugs marked green arrow is too hard and inappropriate. But it's not a problem. Least produces half the required quantities. Regards, Antanas


-
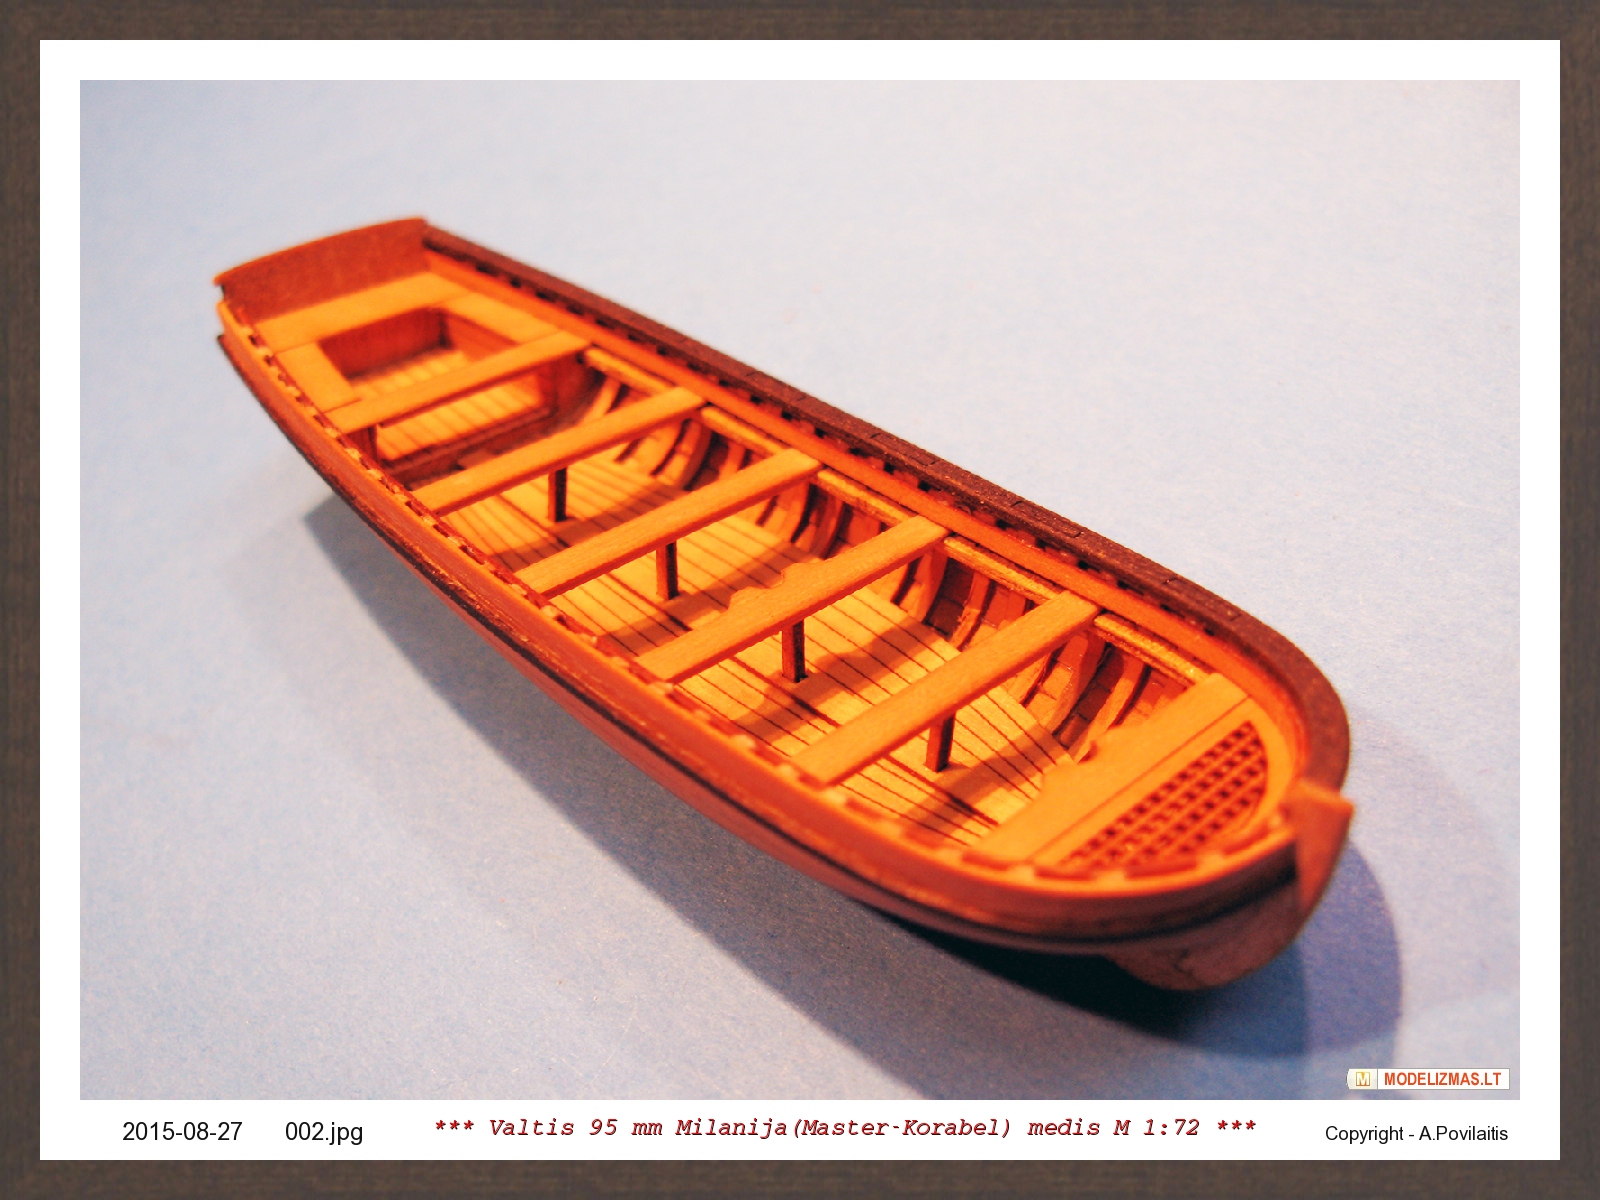
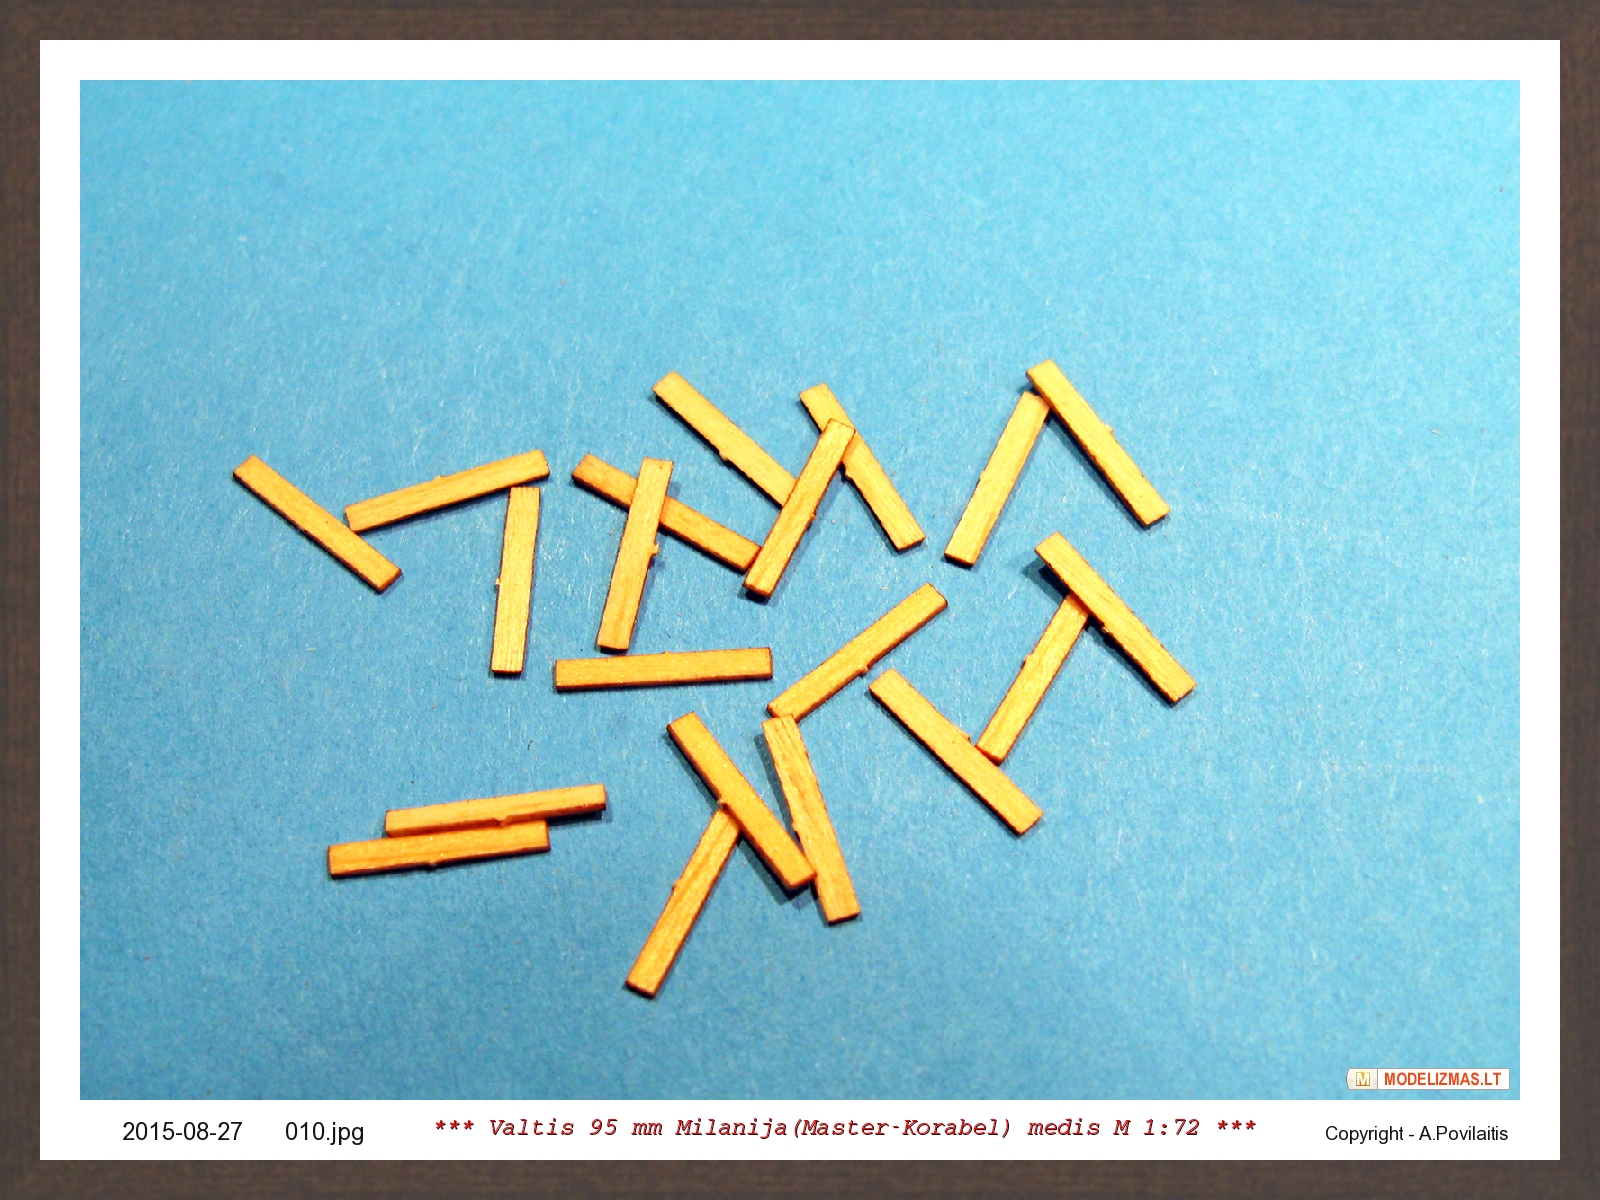
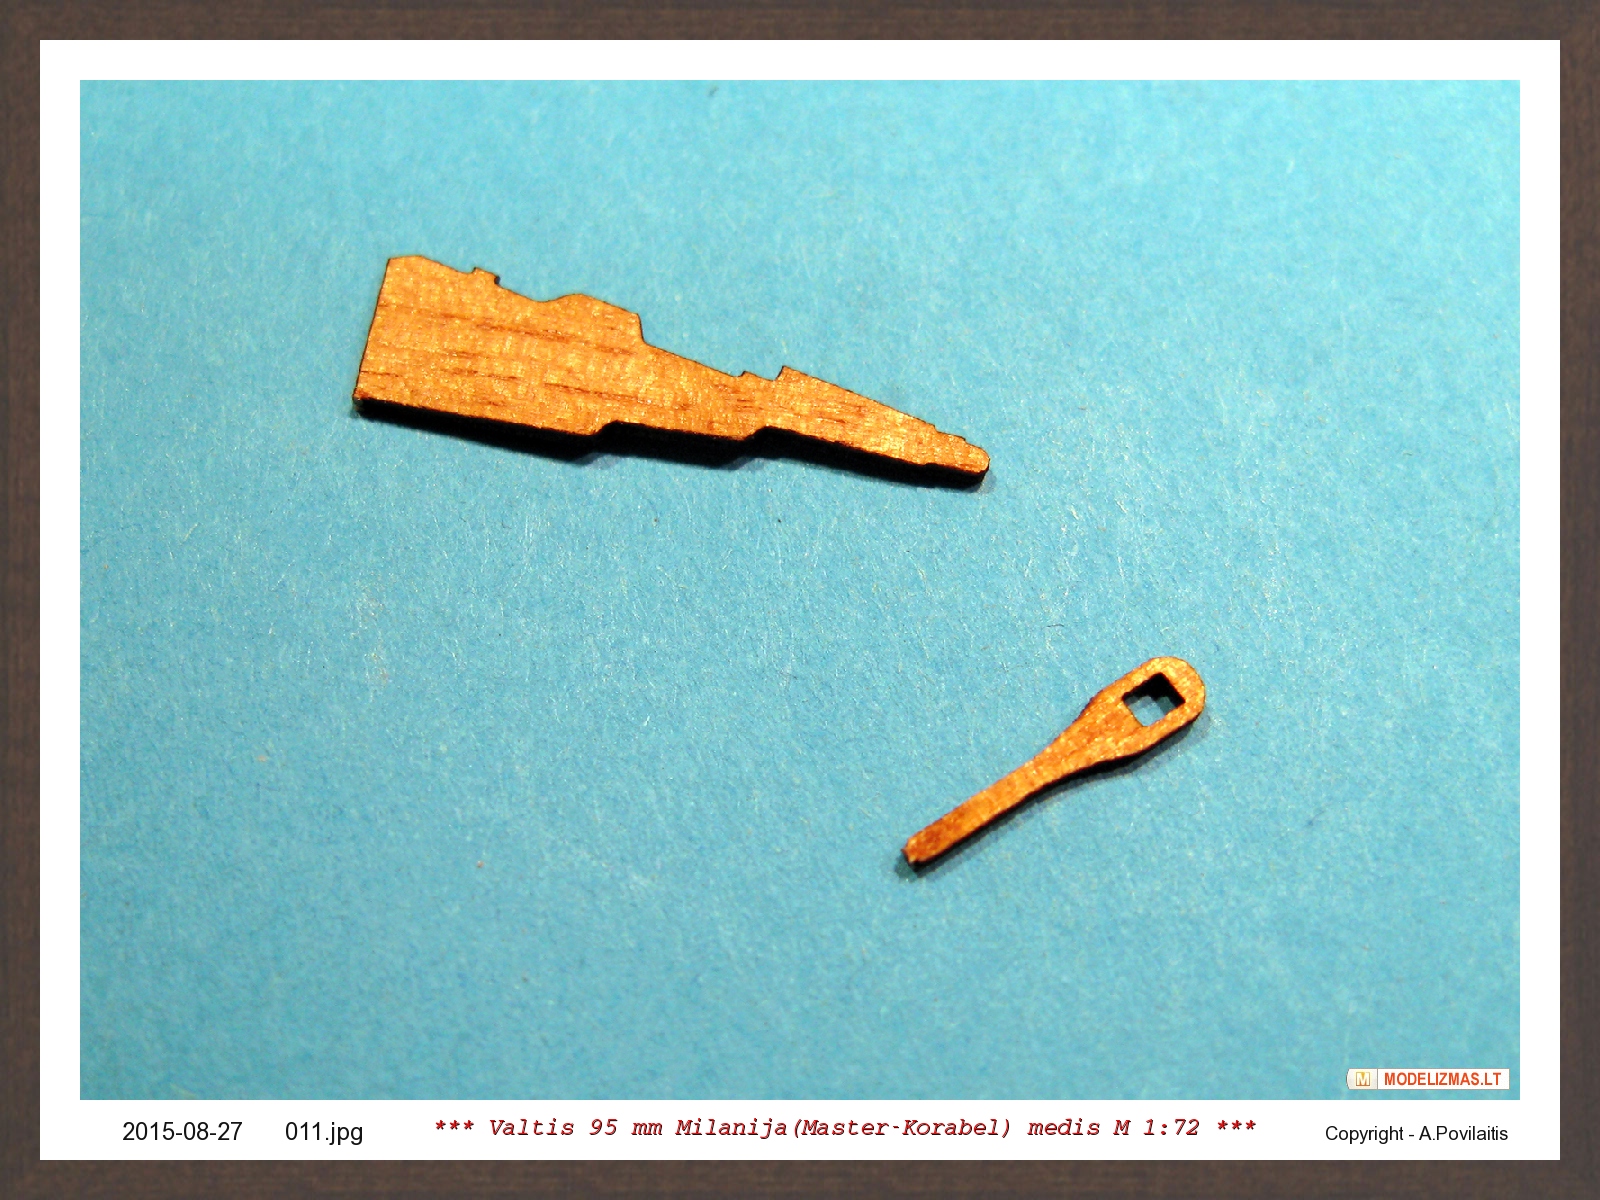
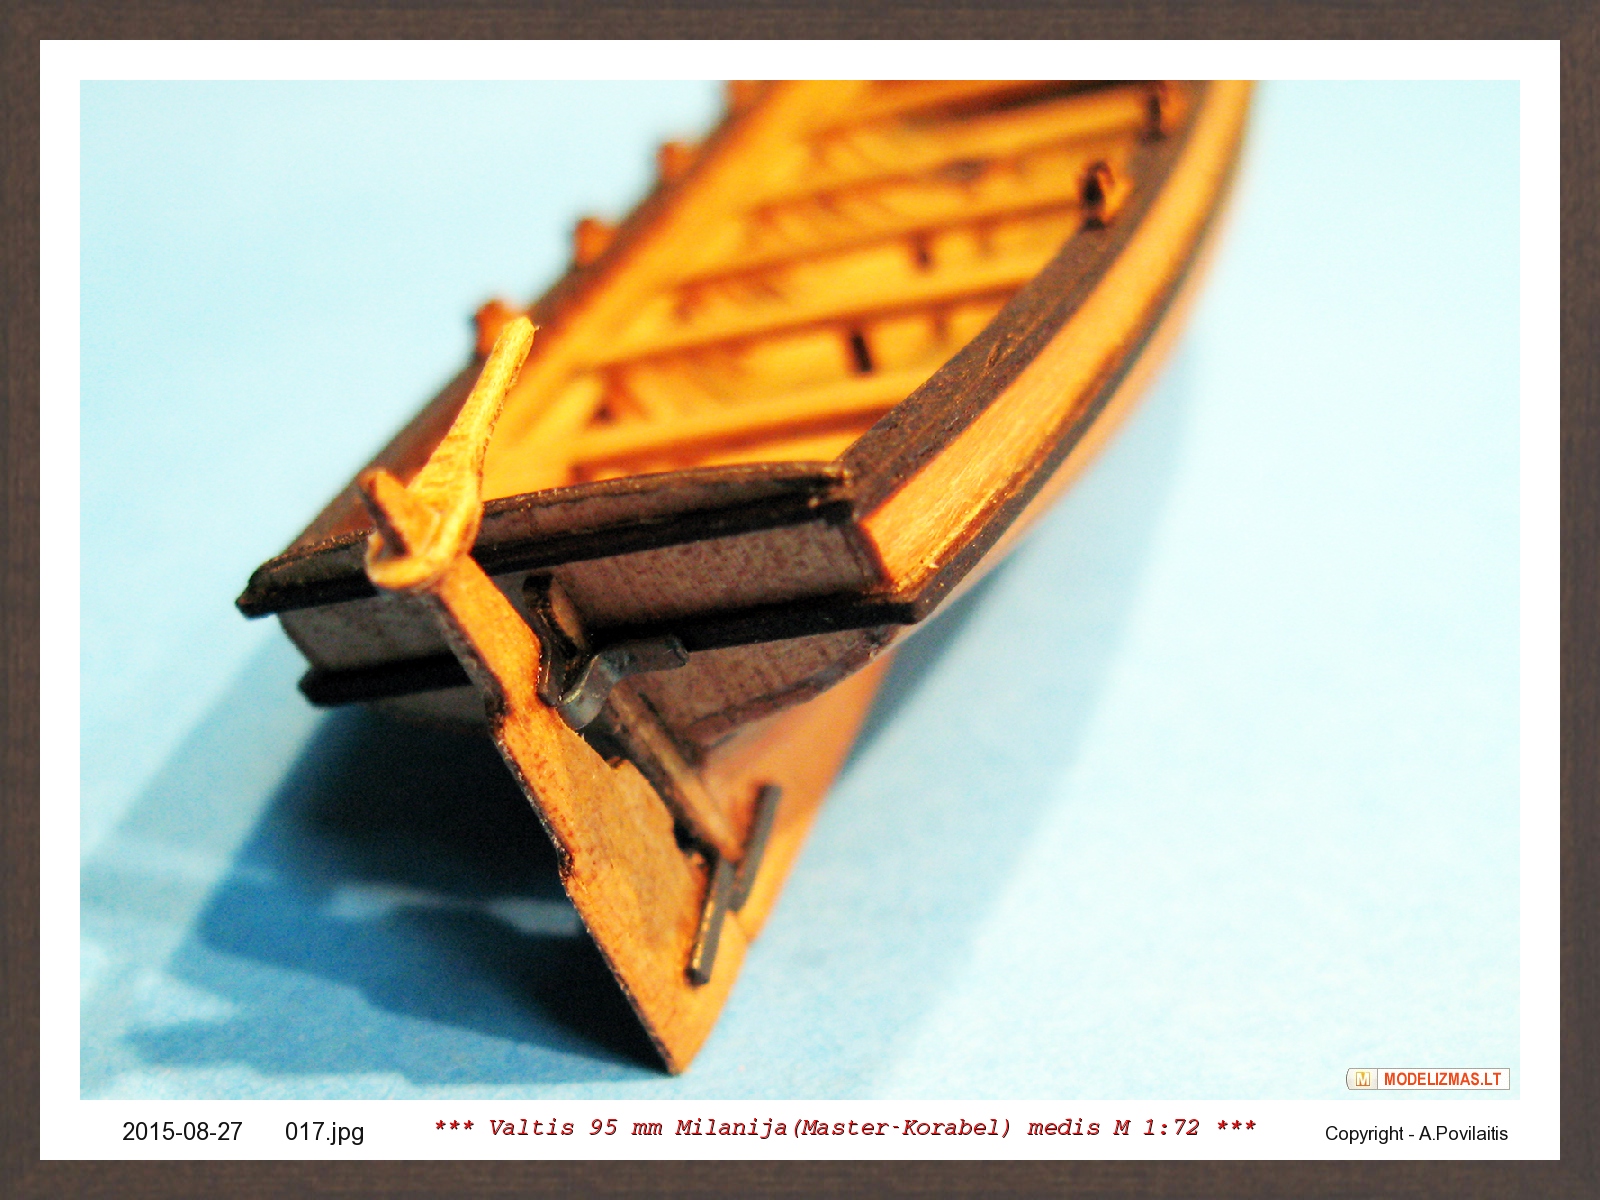
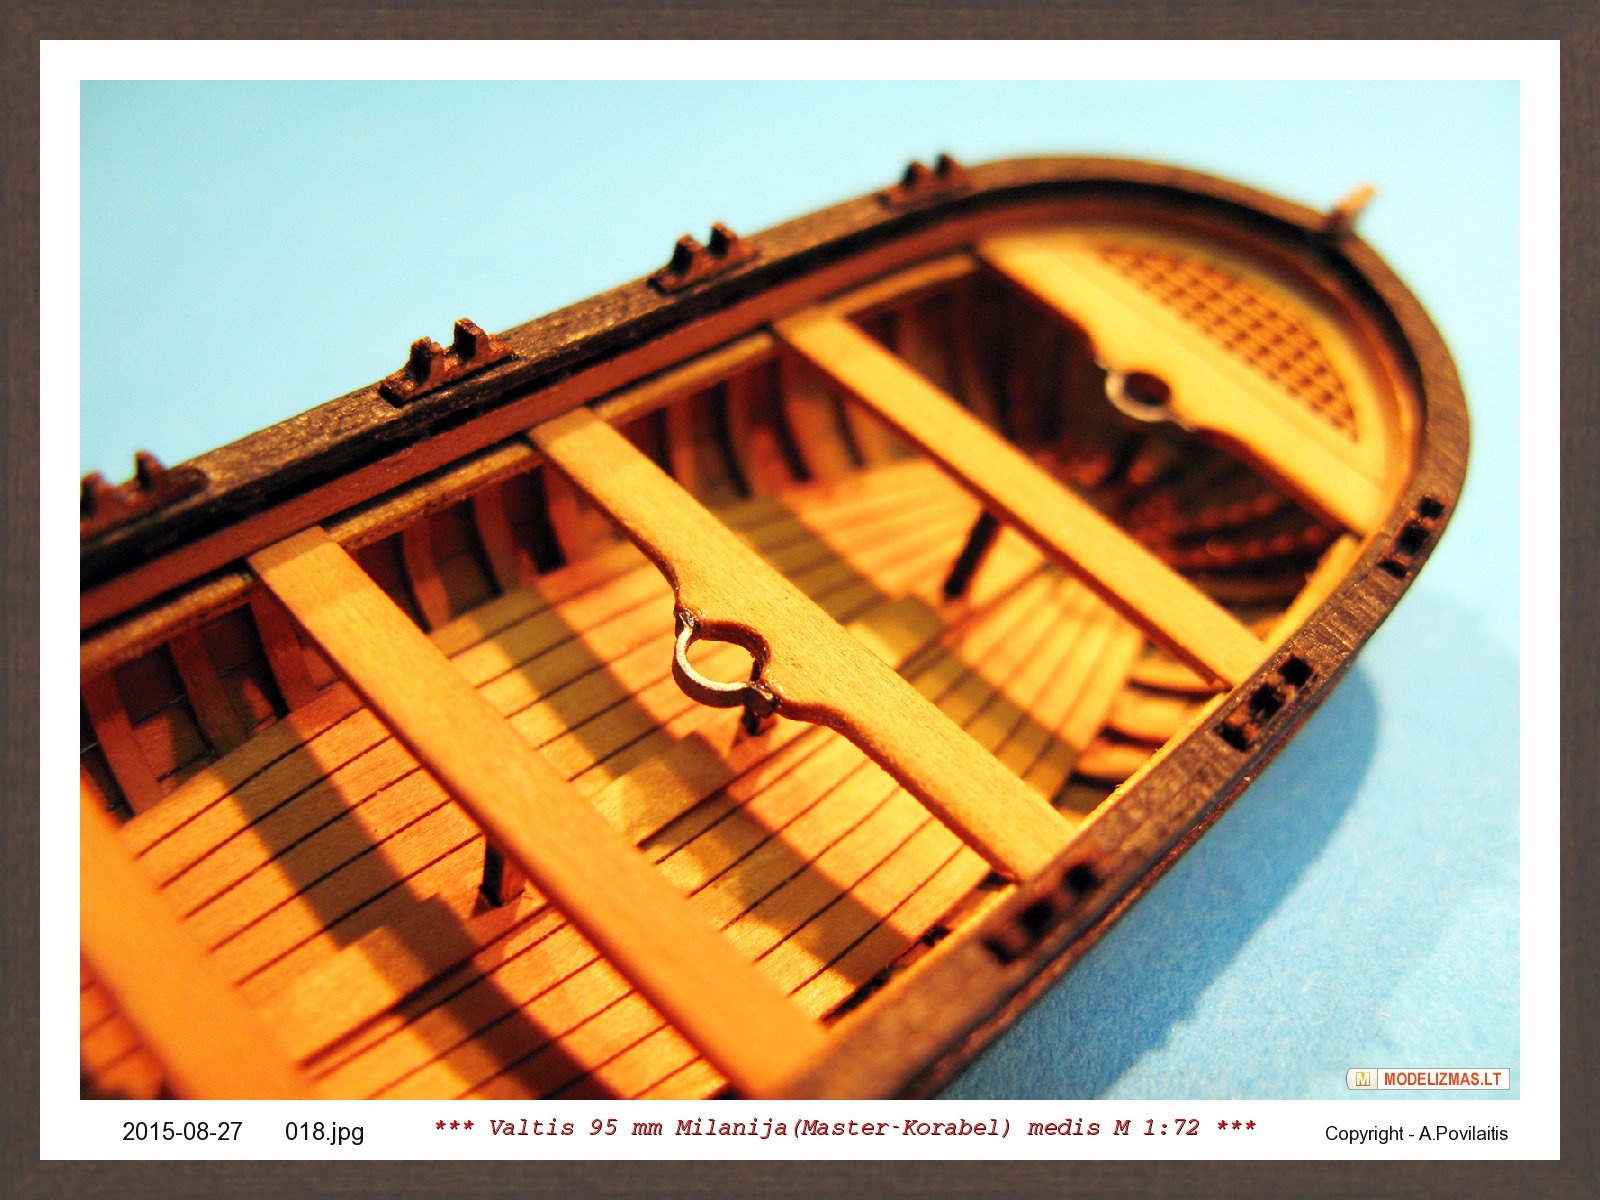
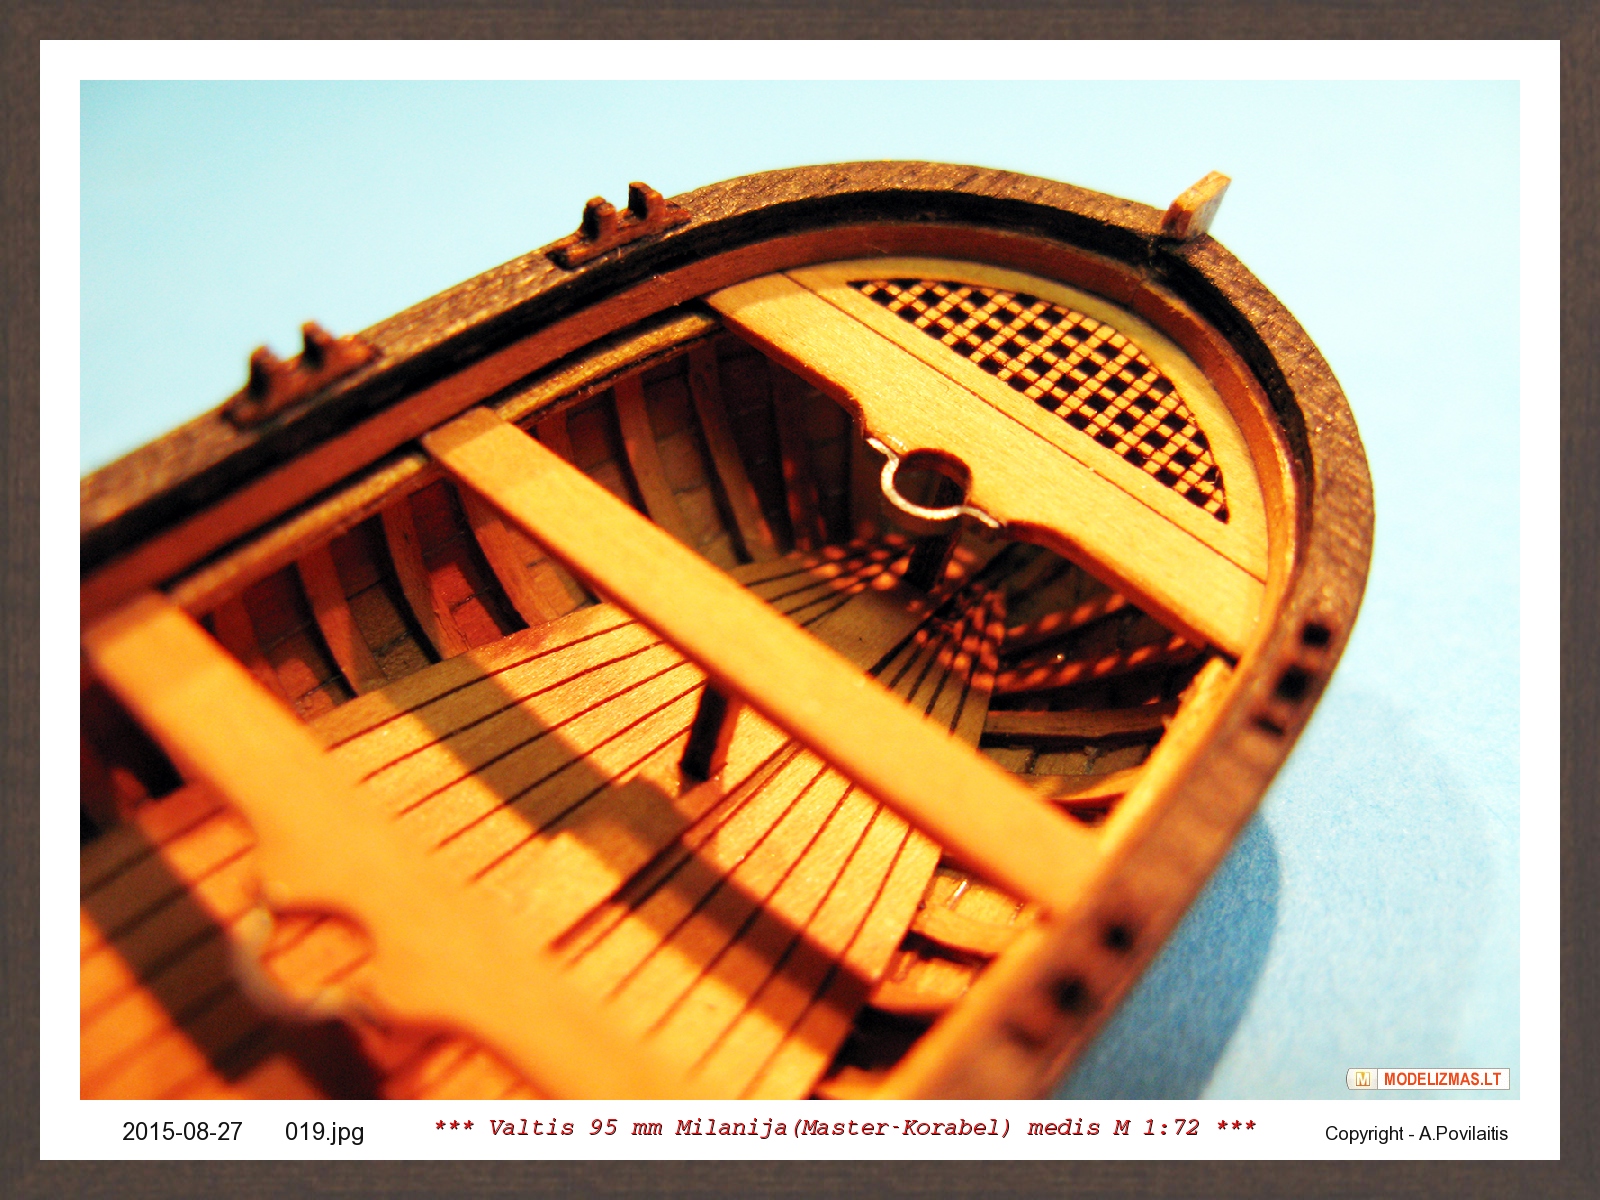
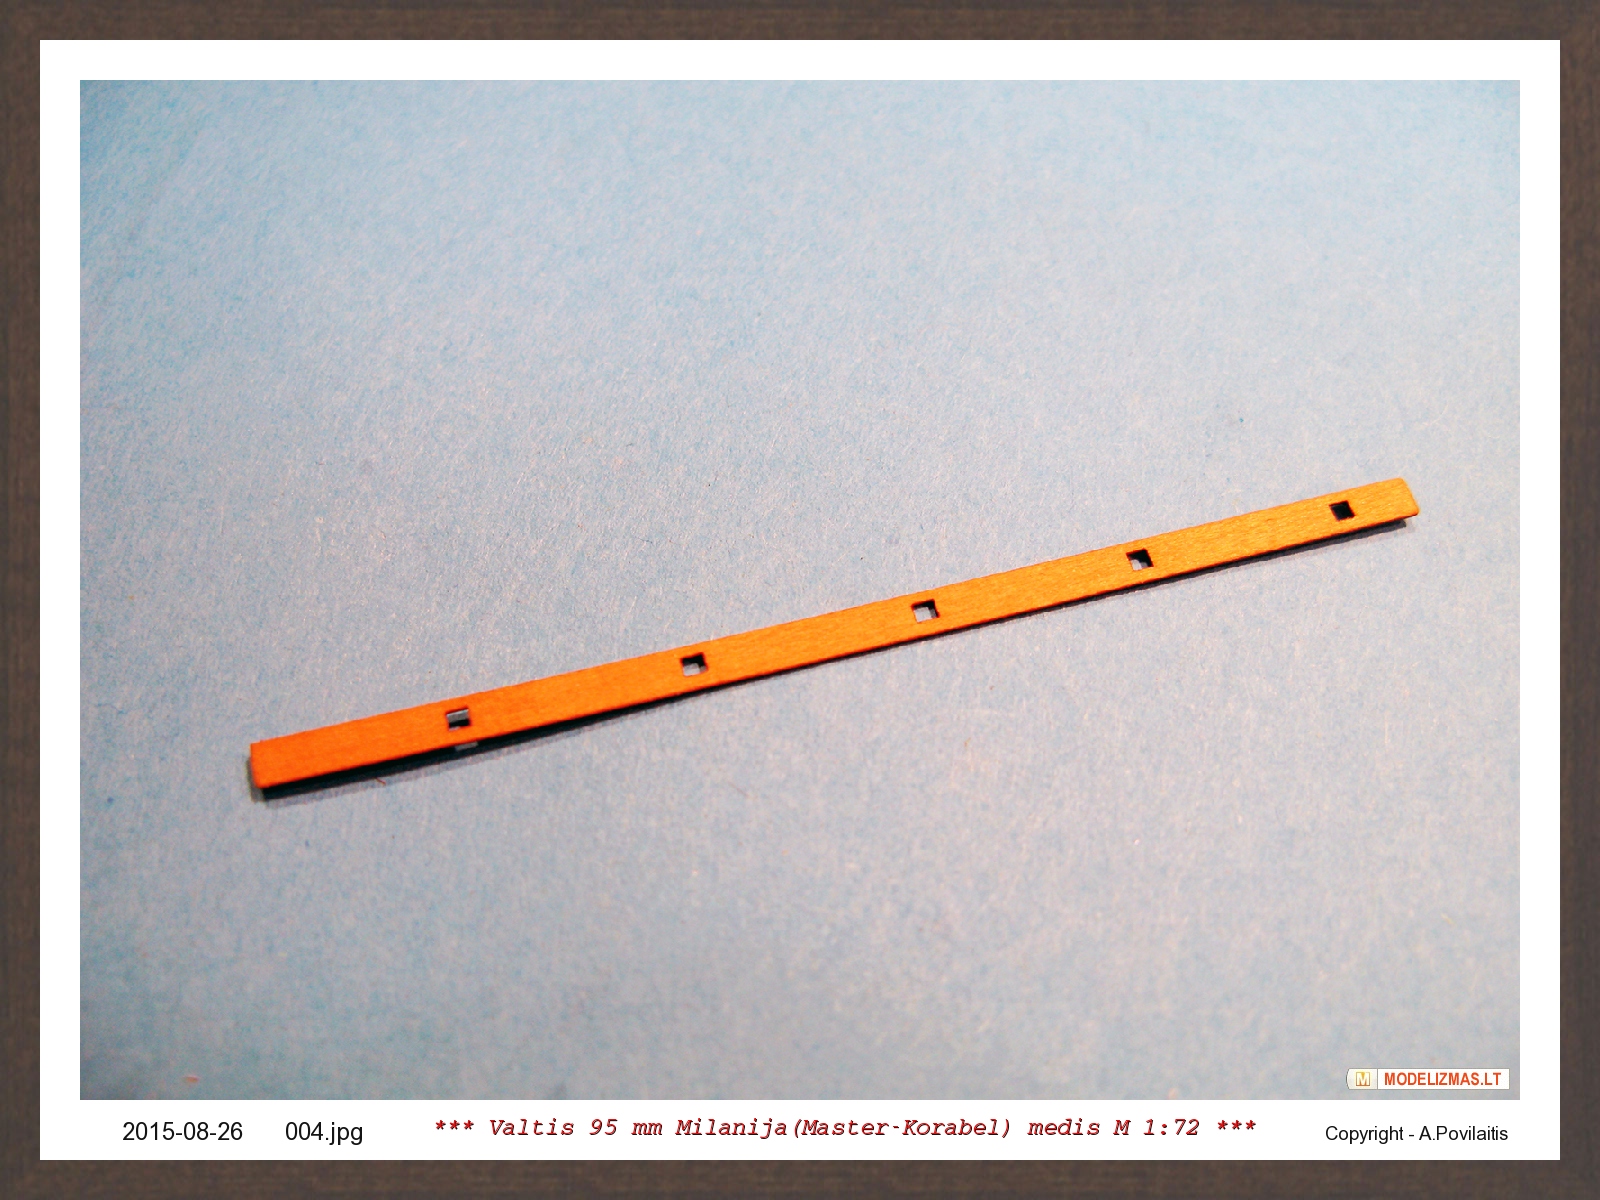
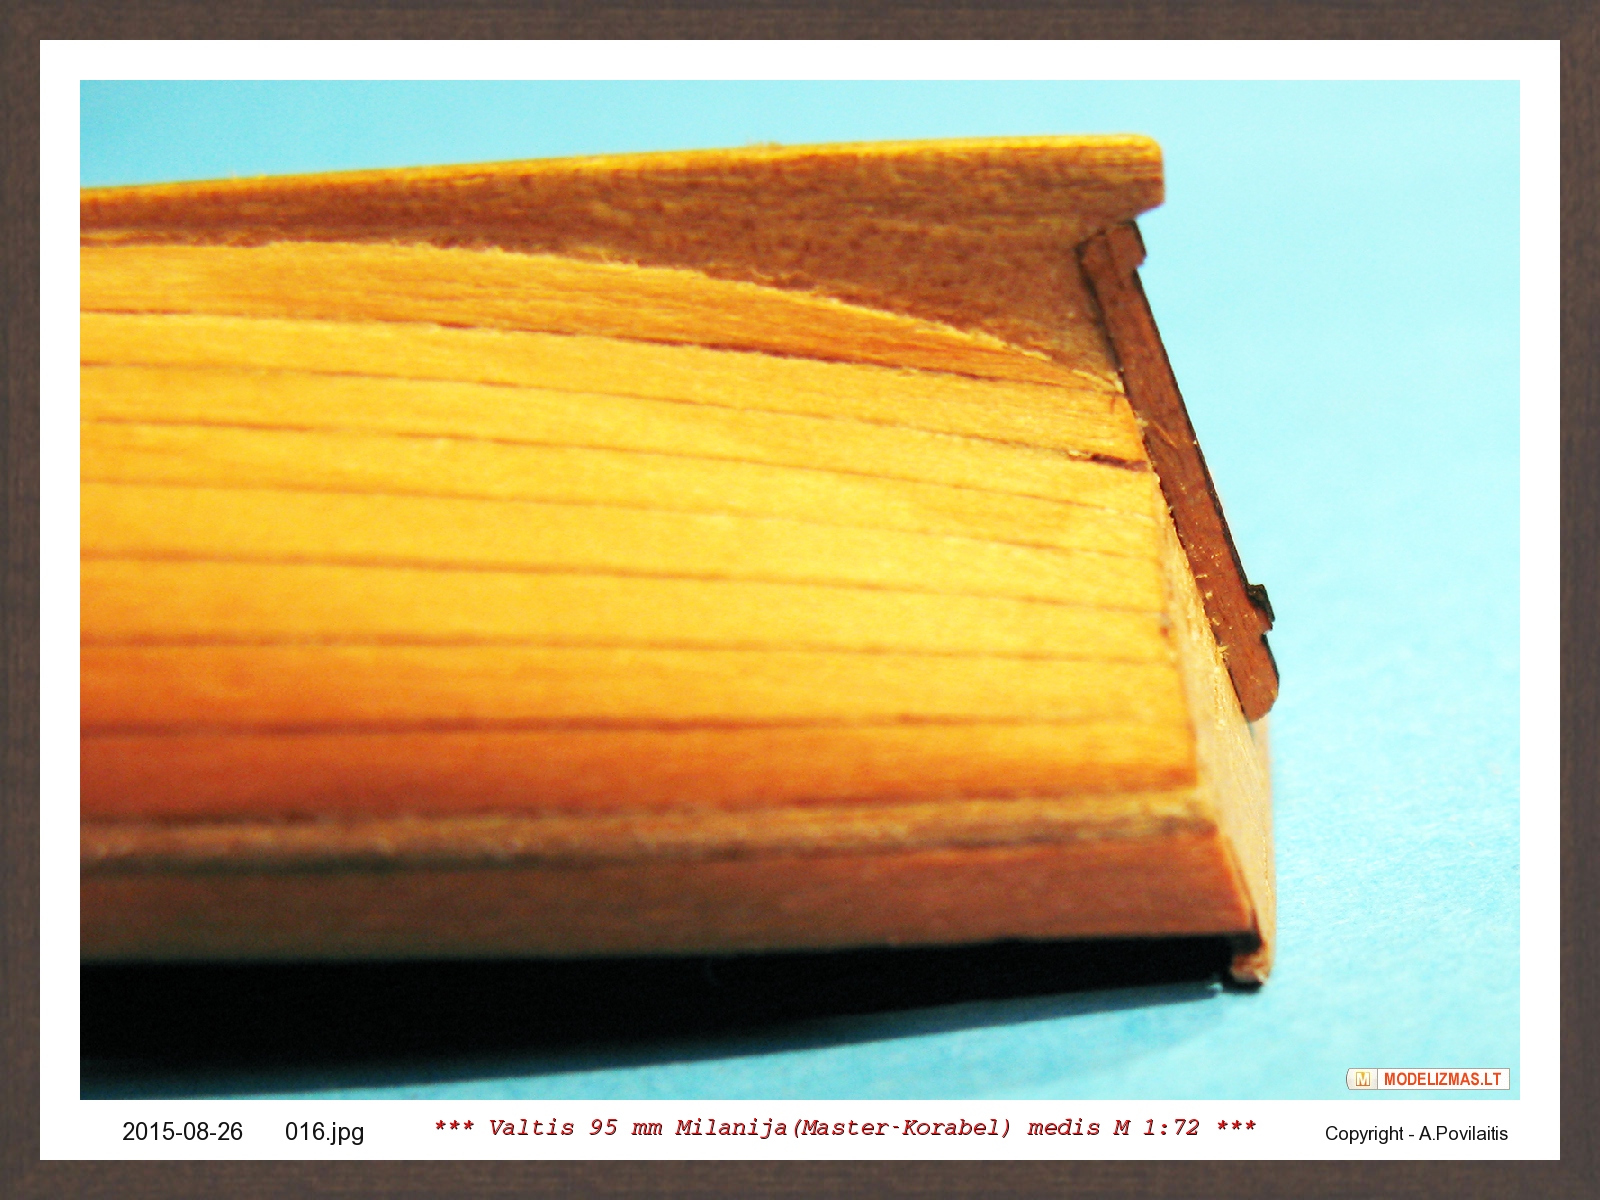
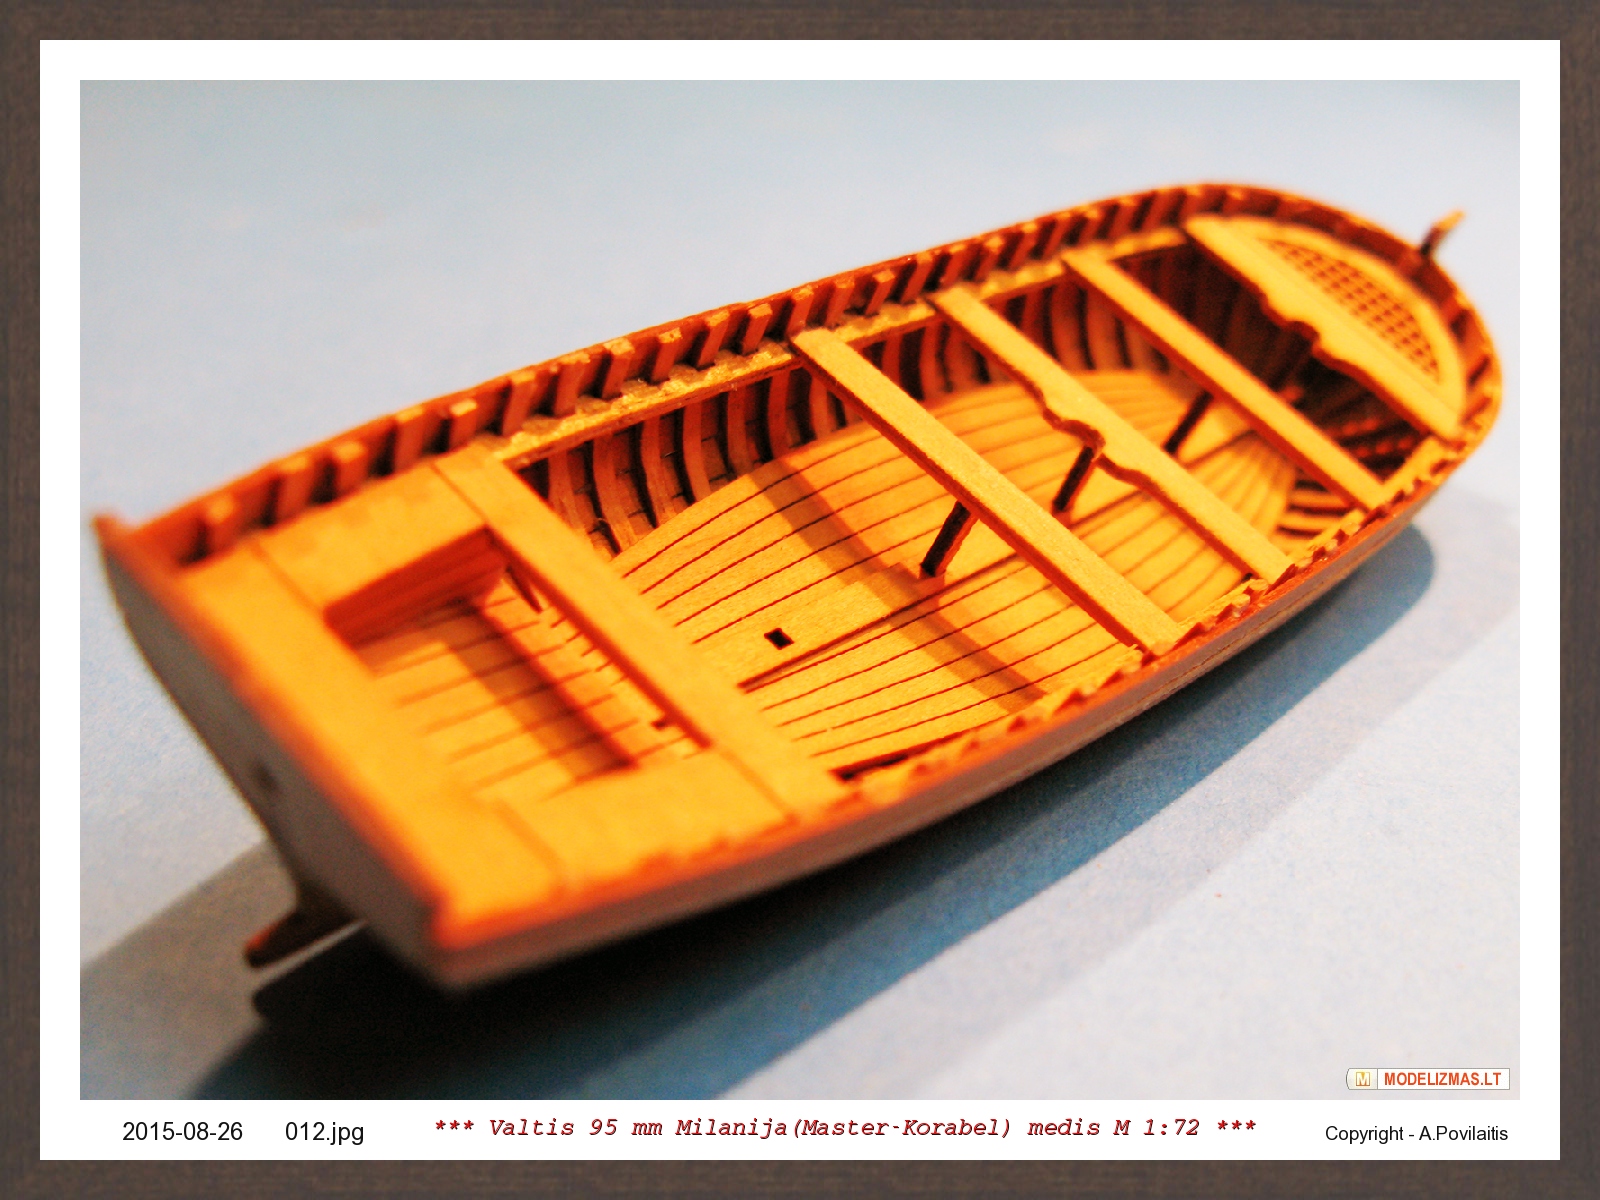
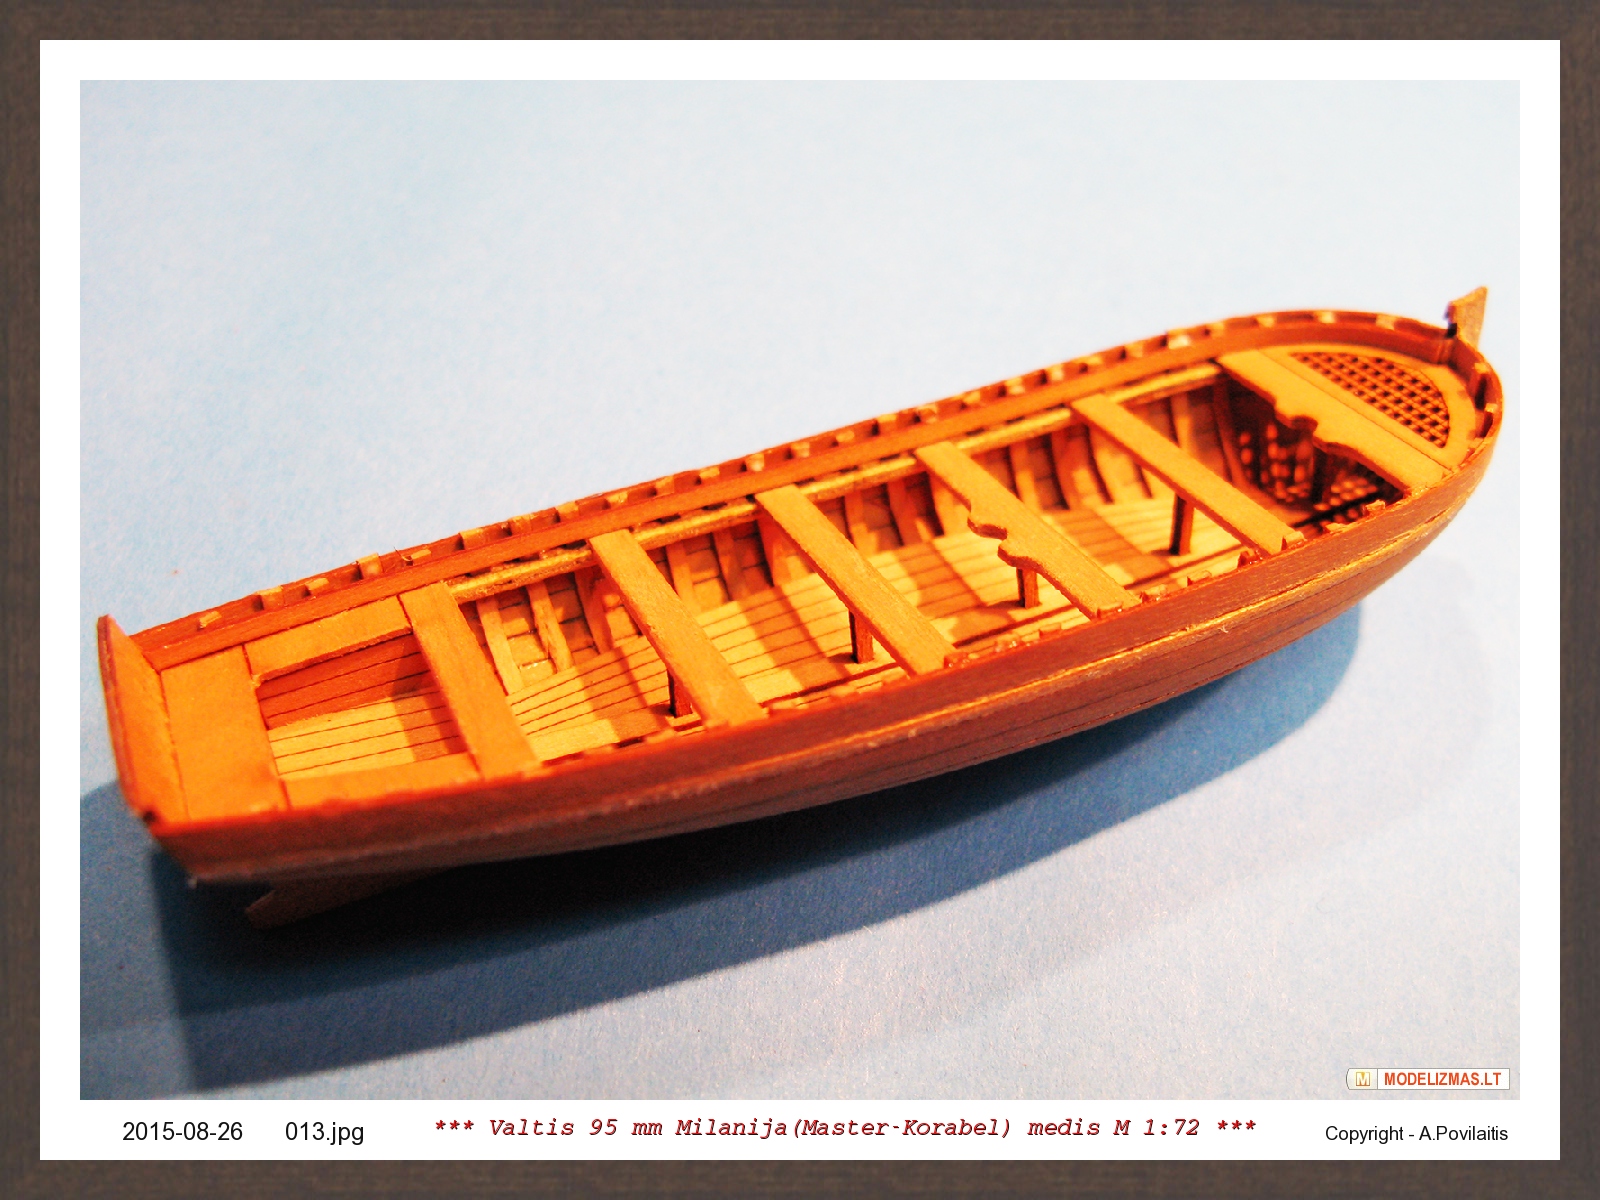
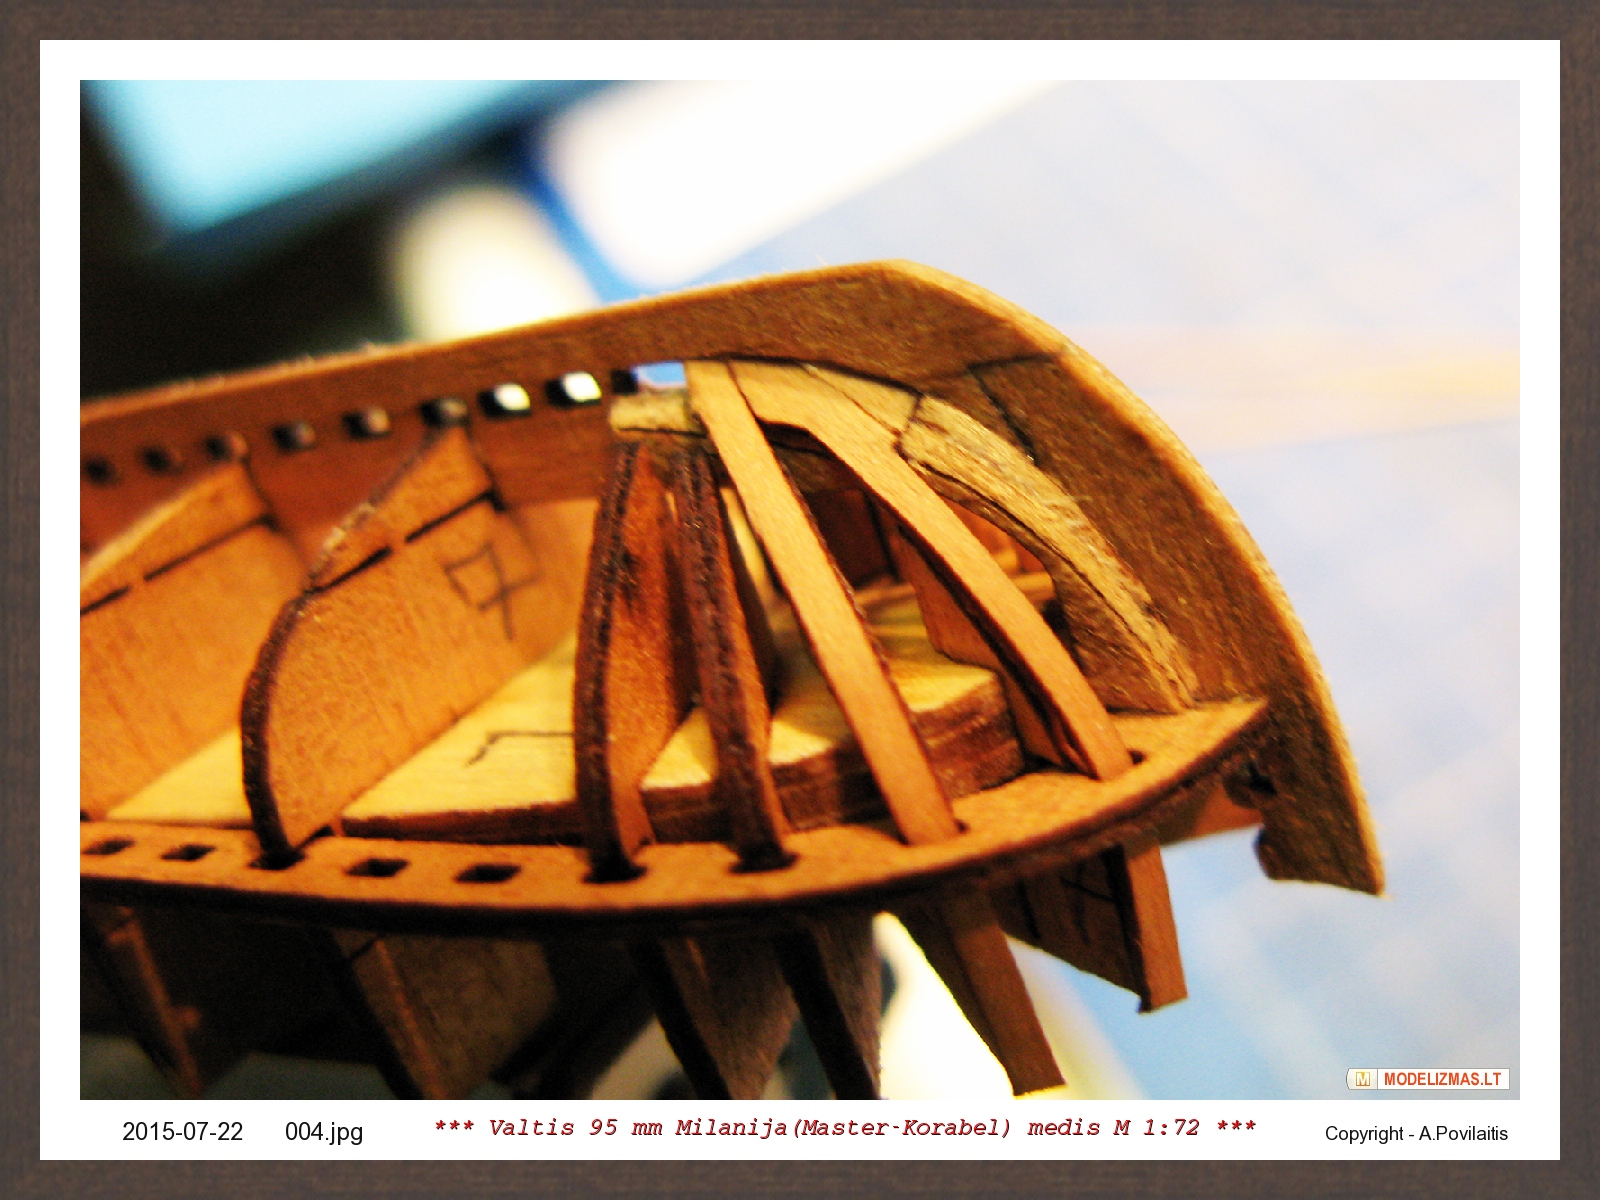
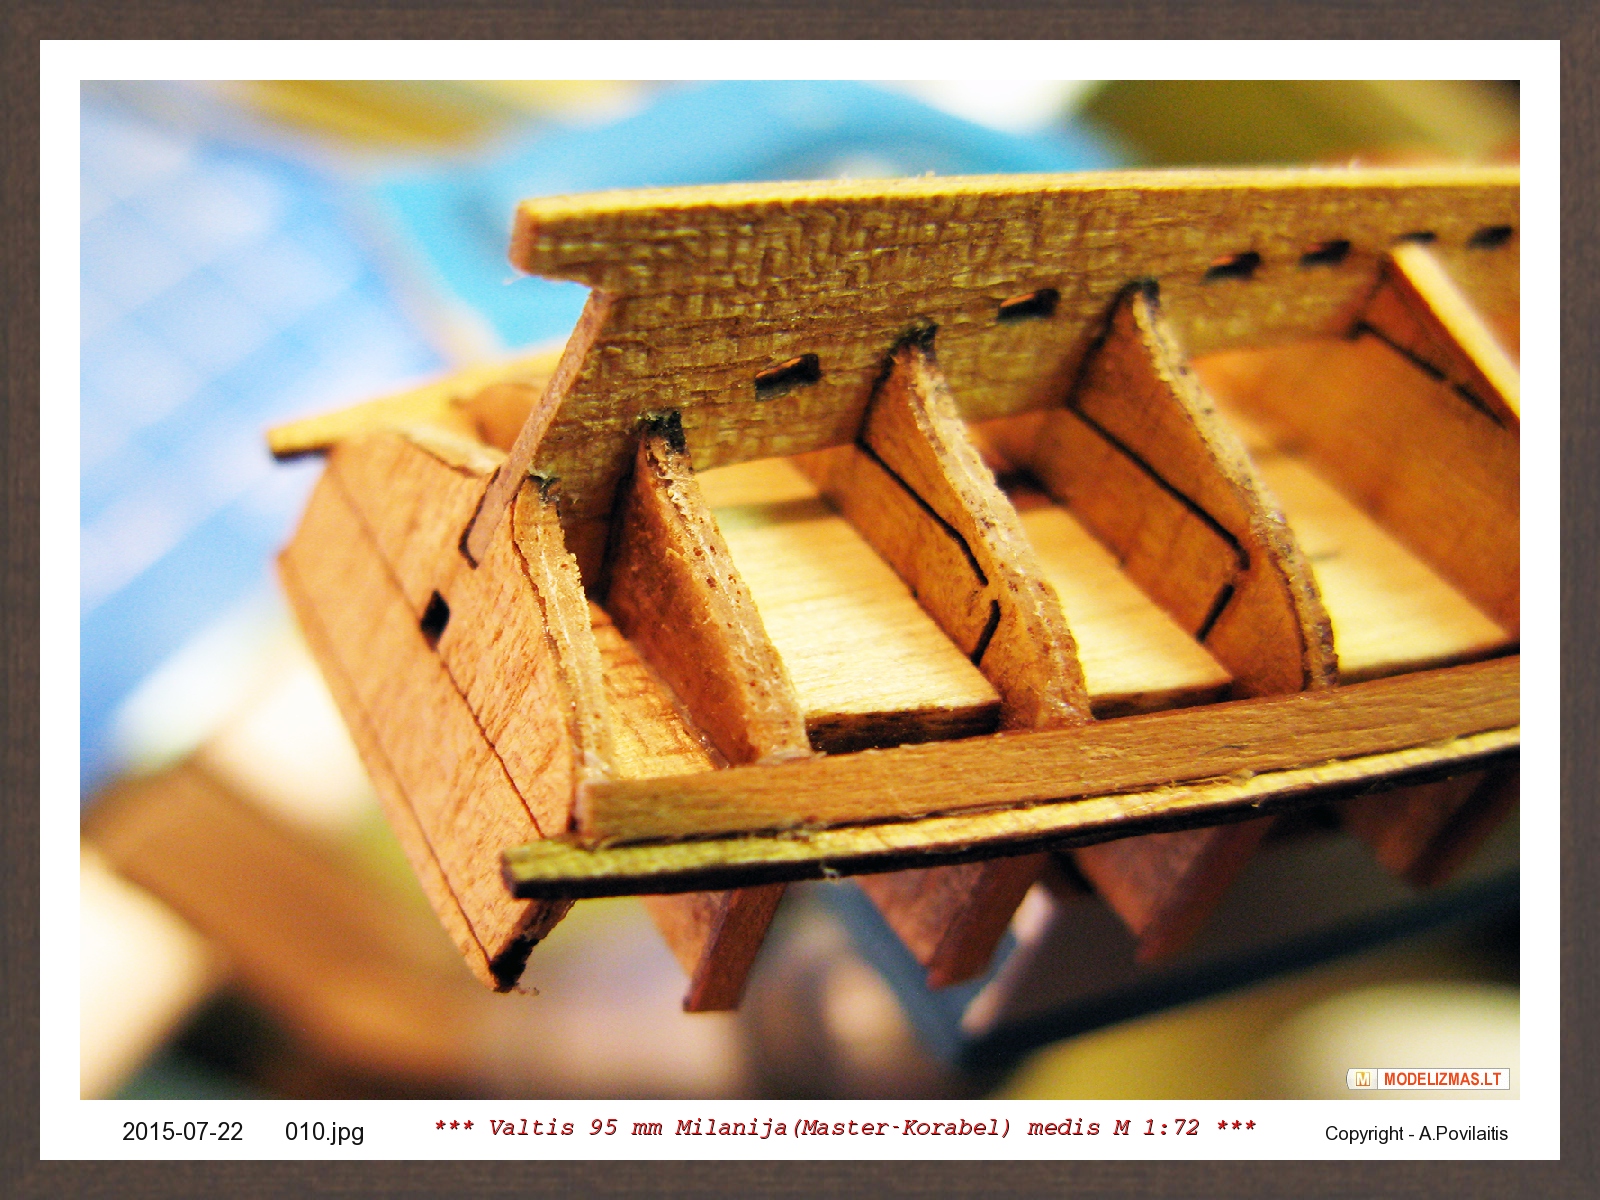
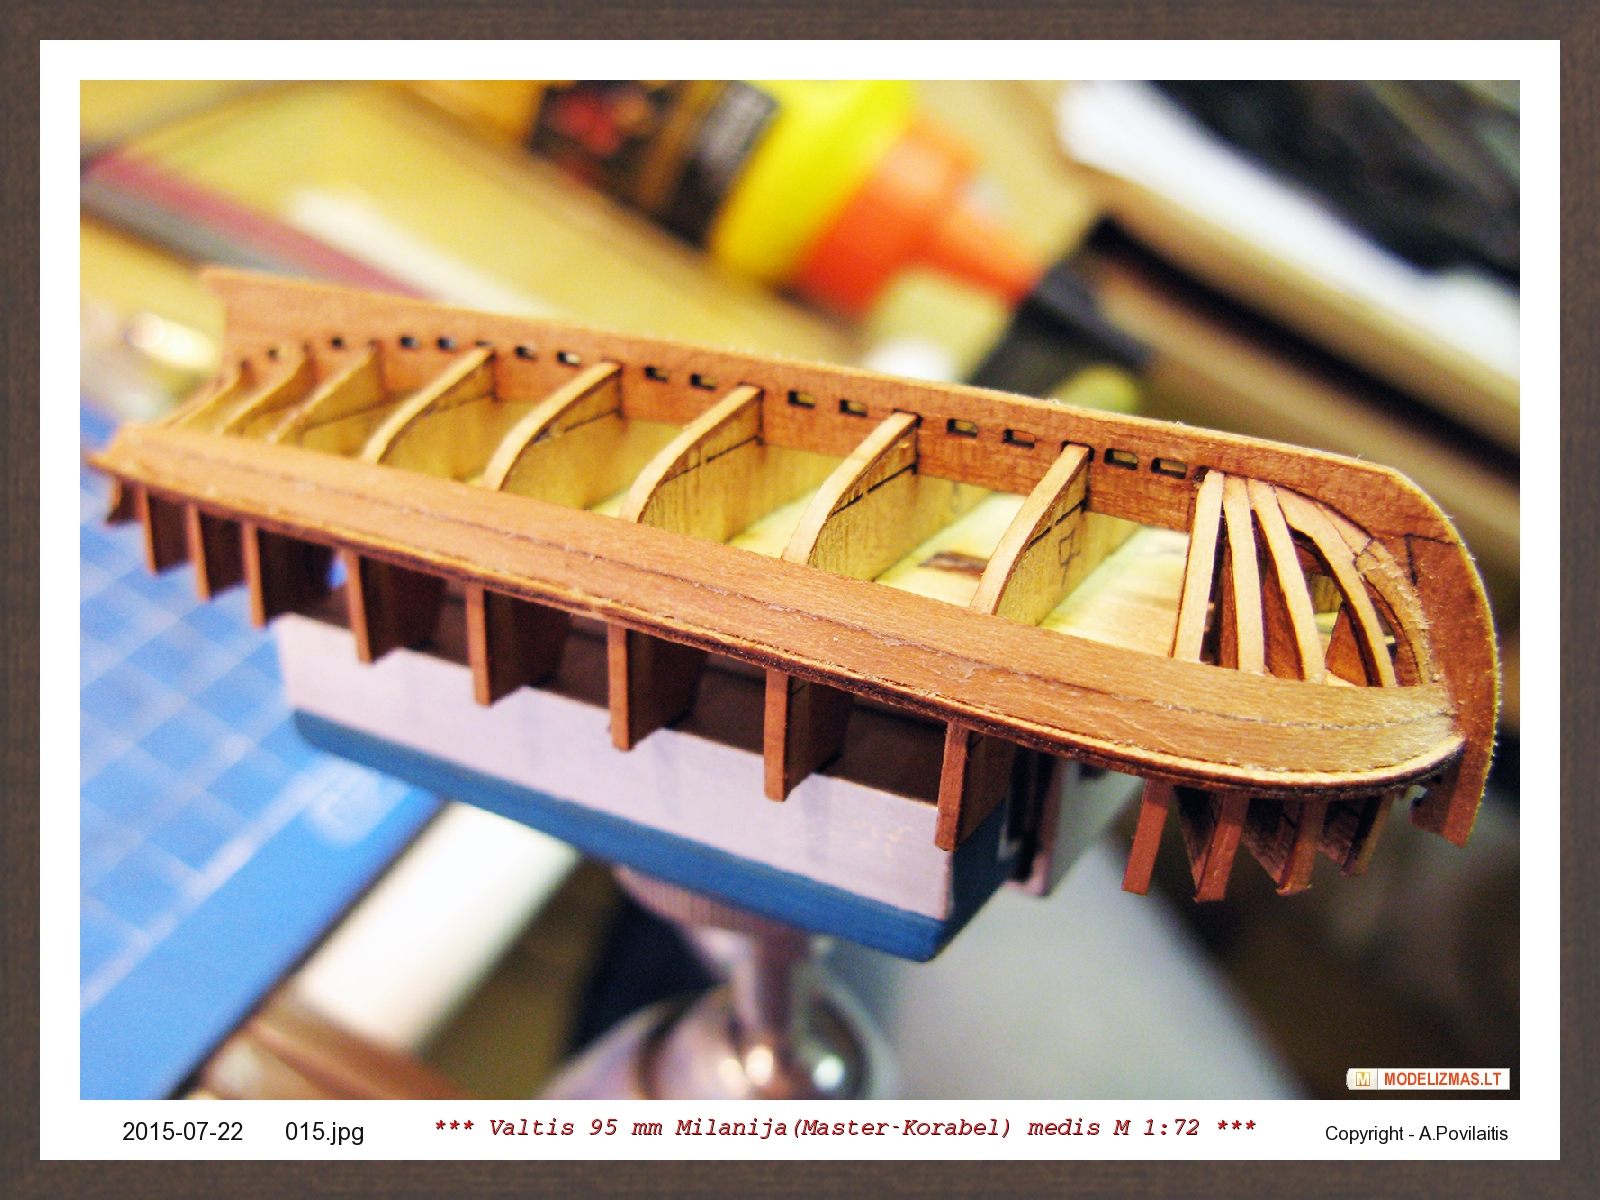
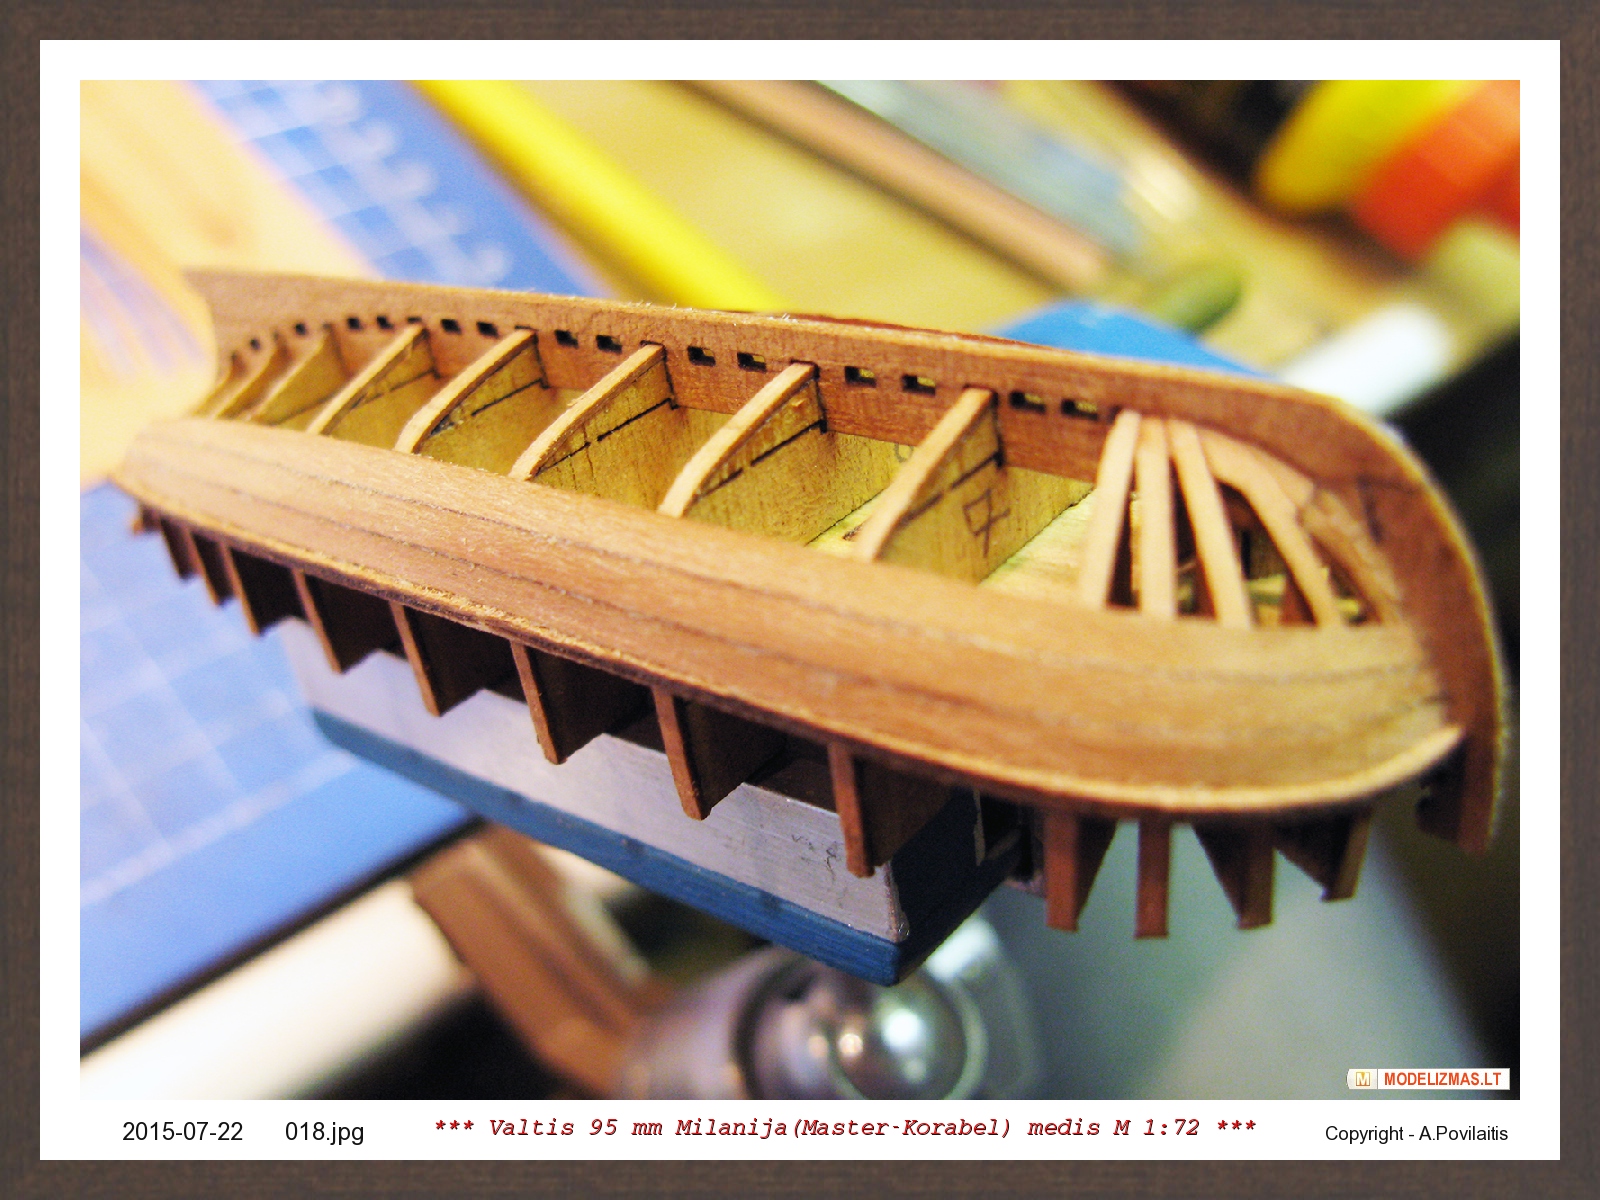
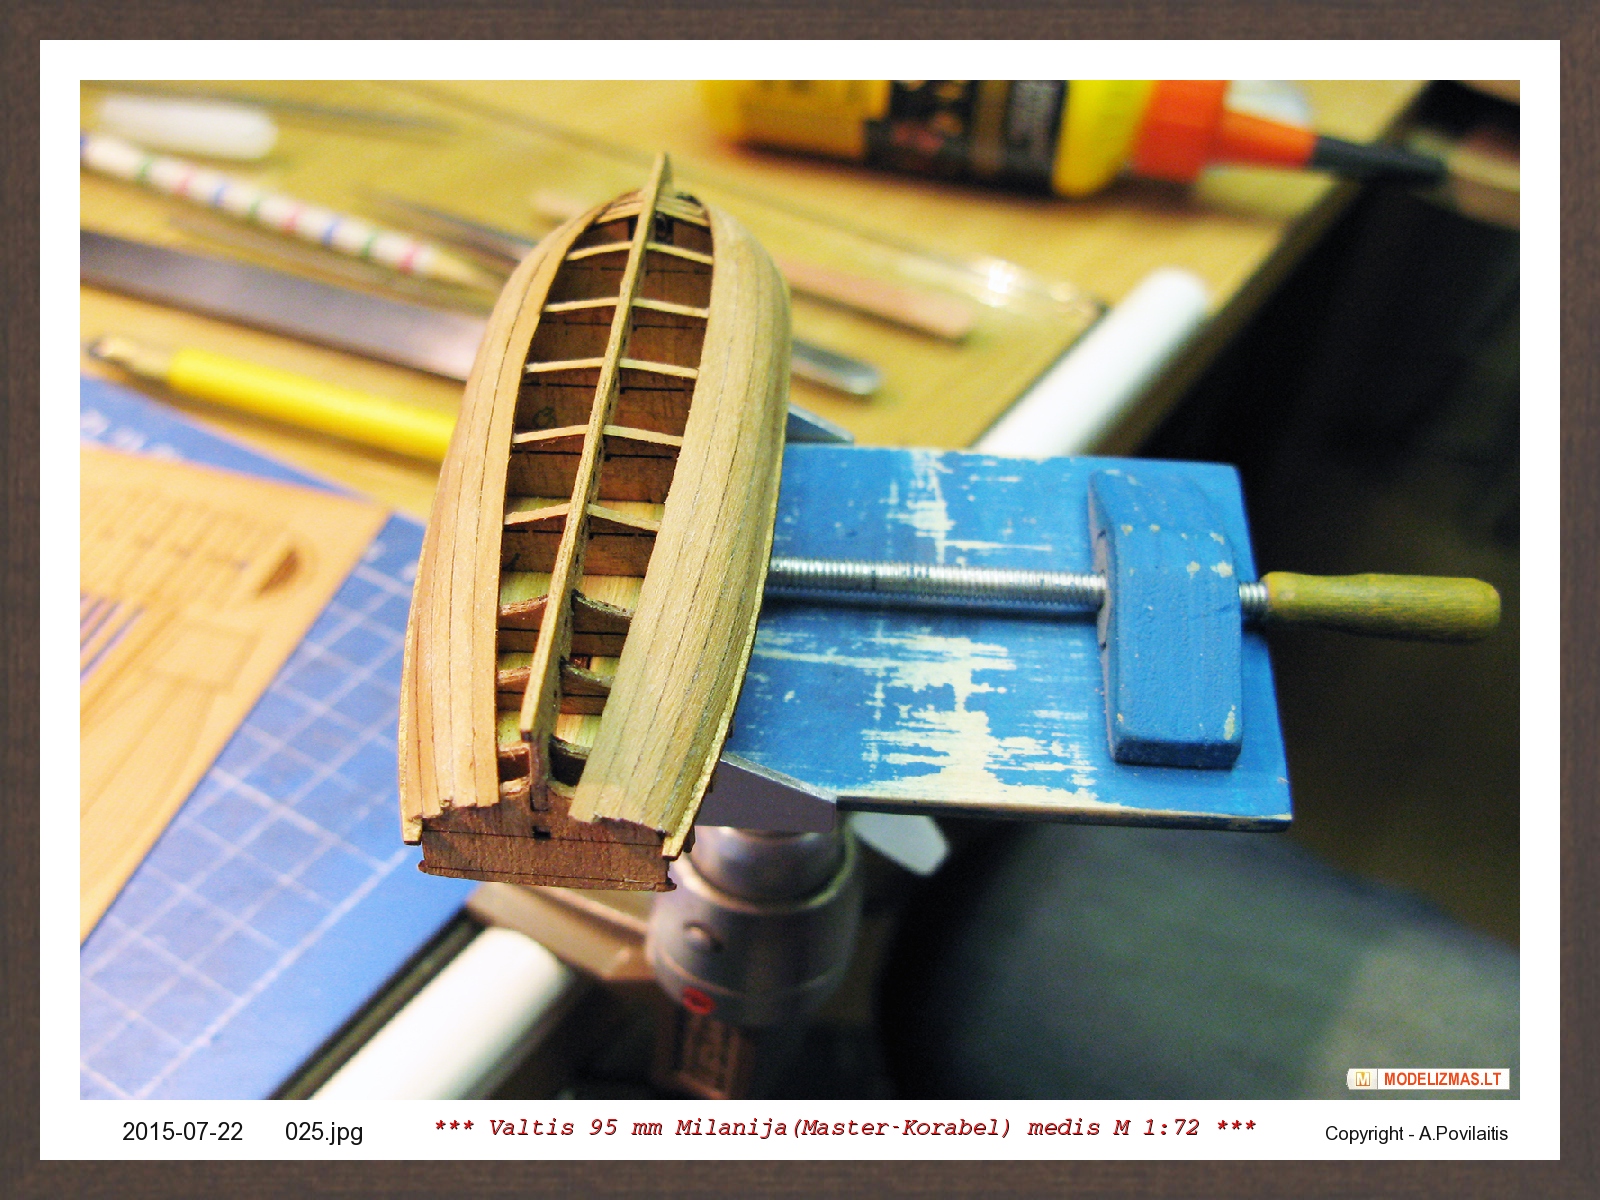
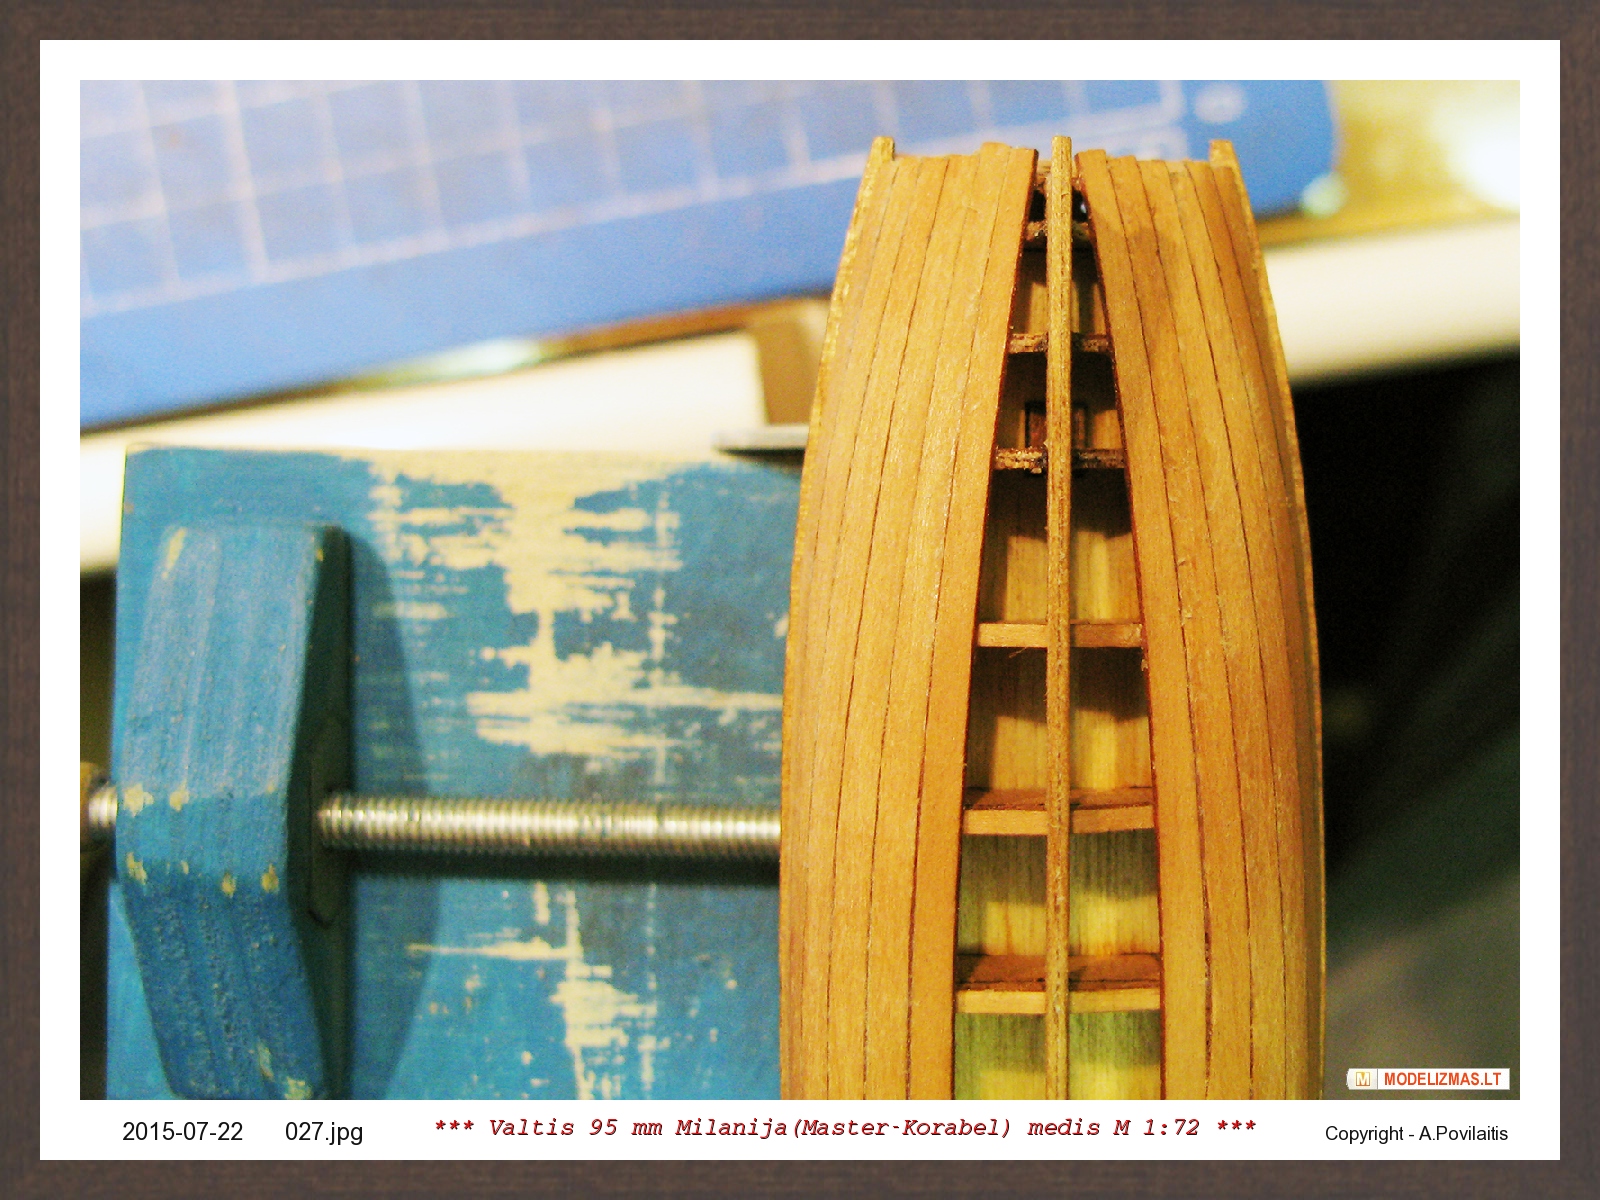
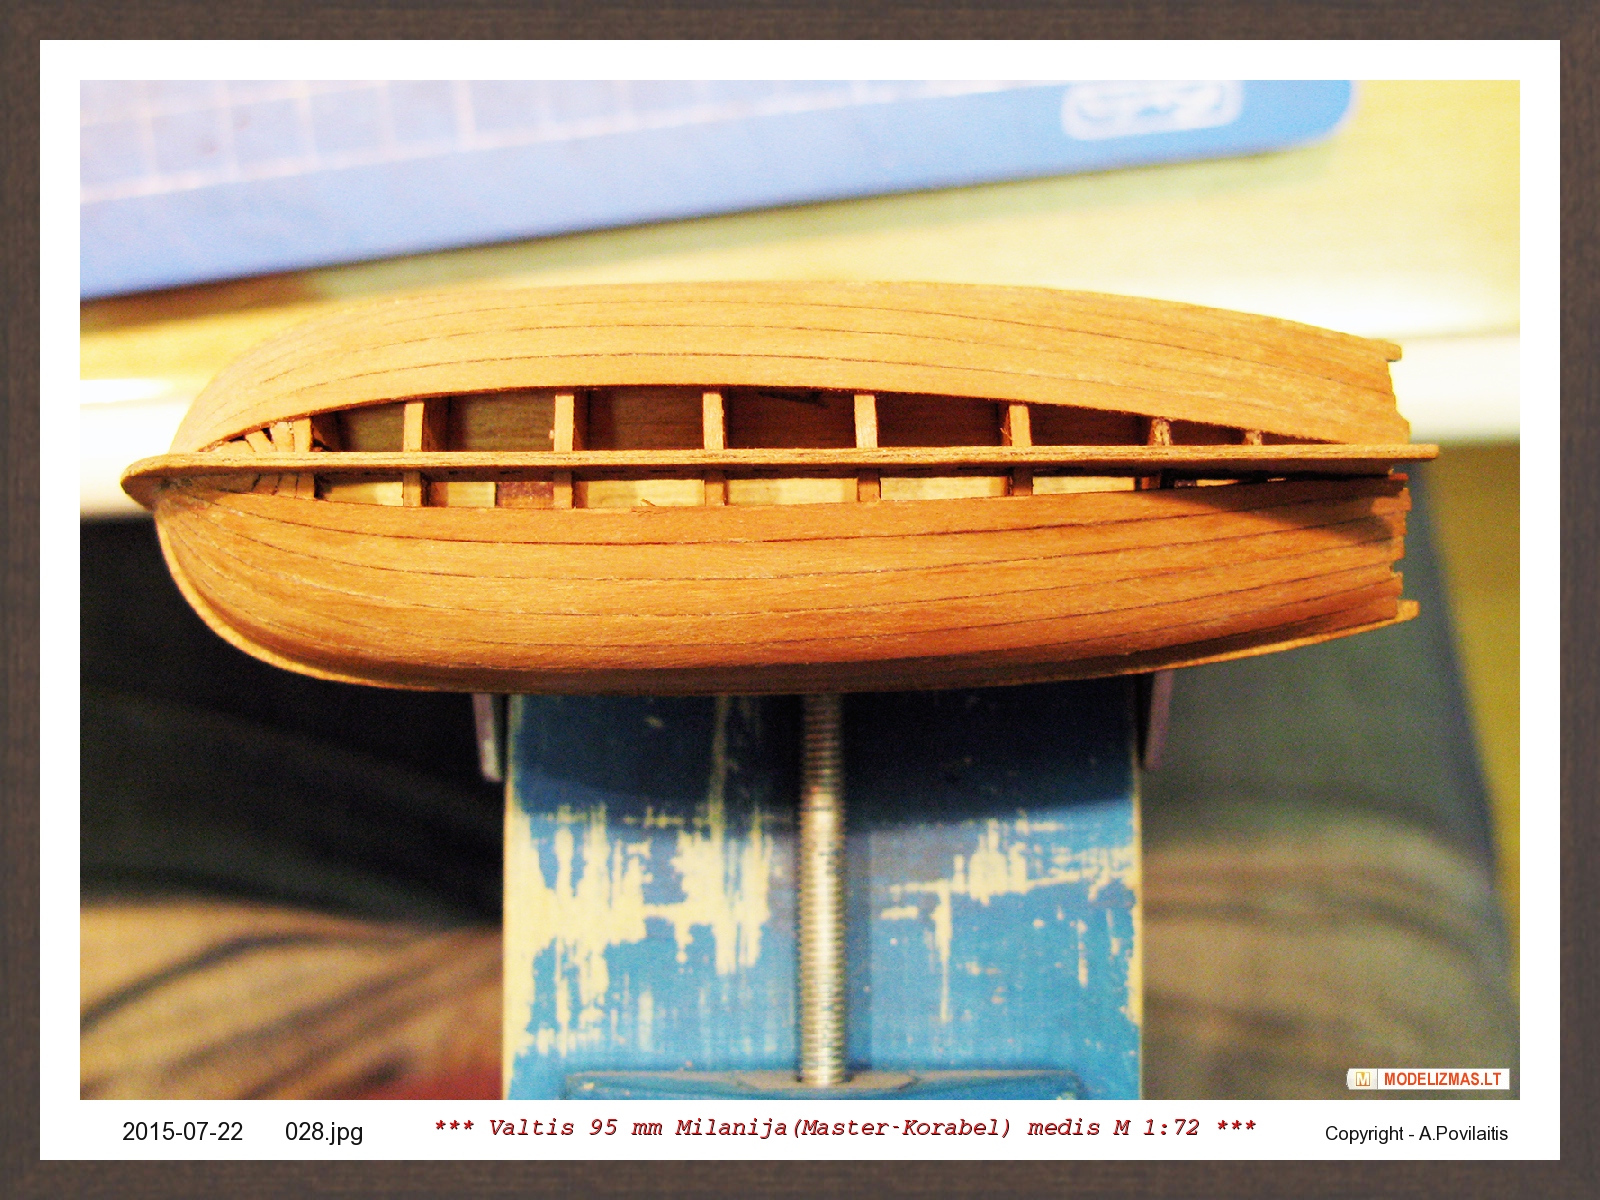
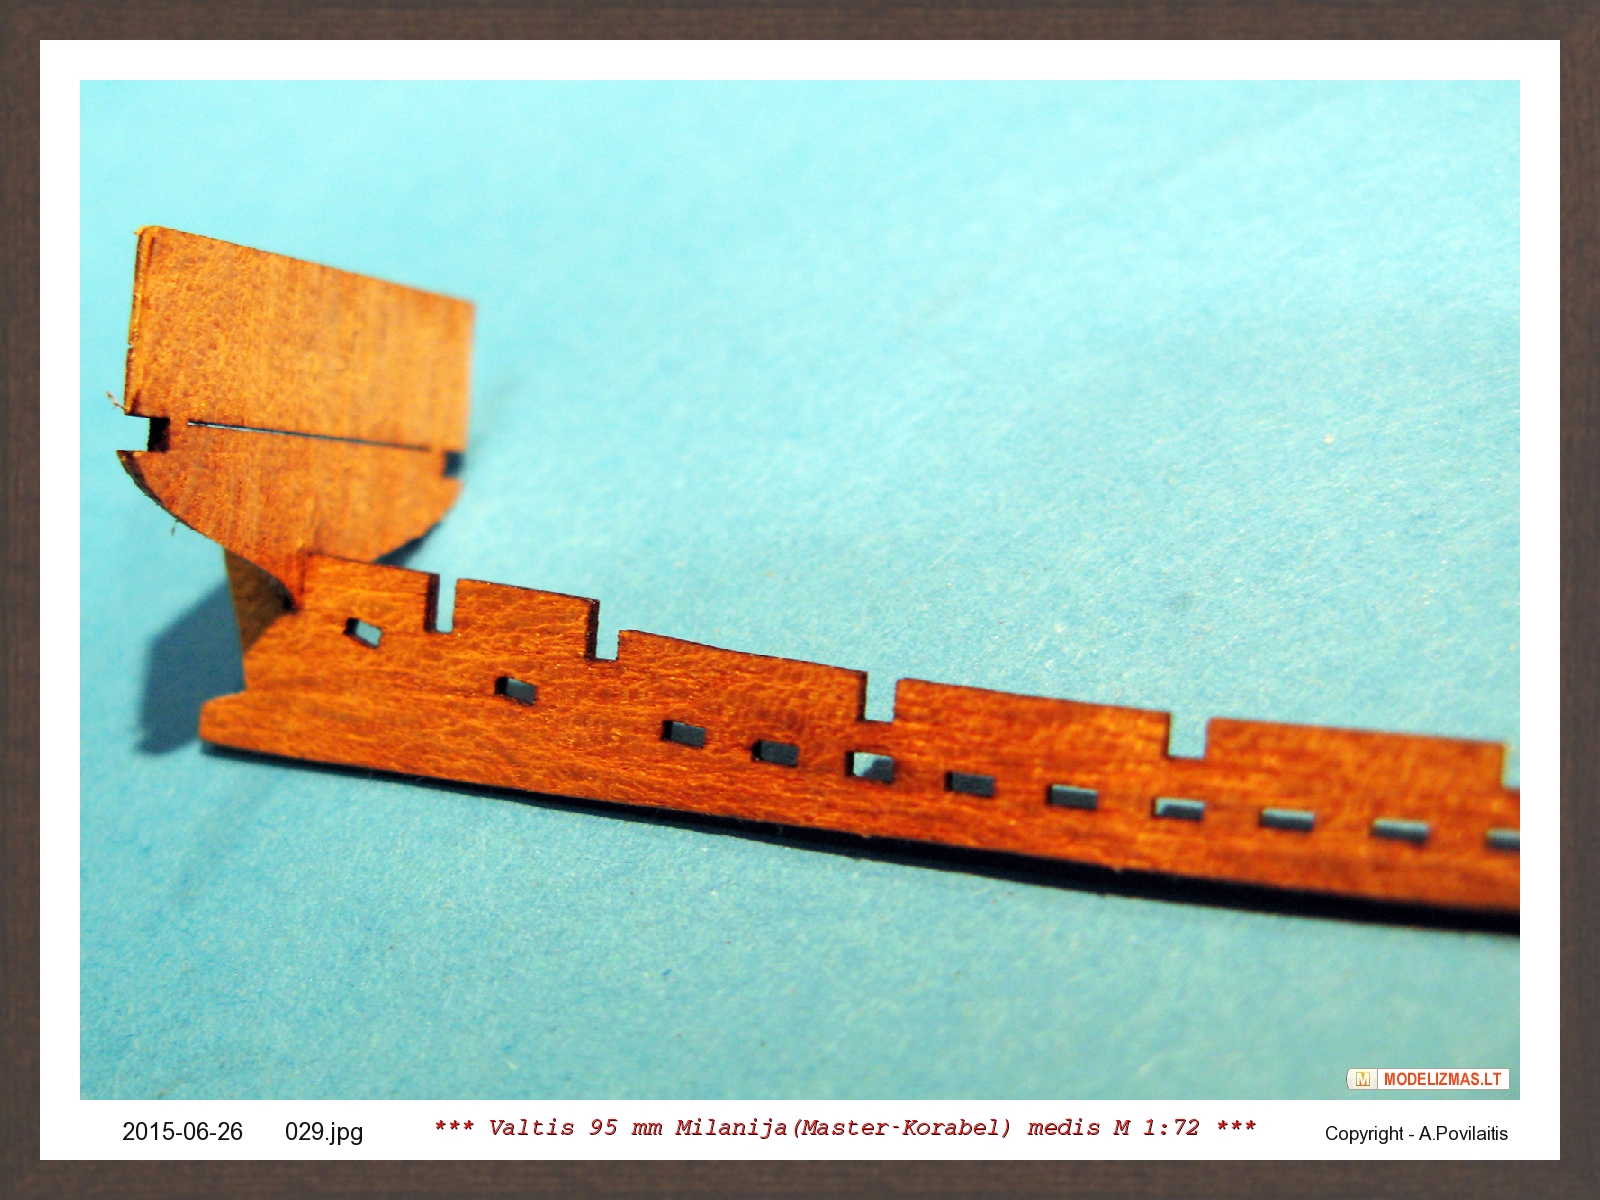
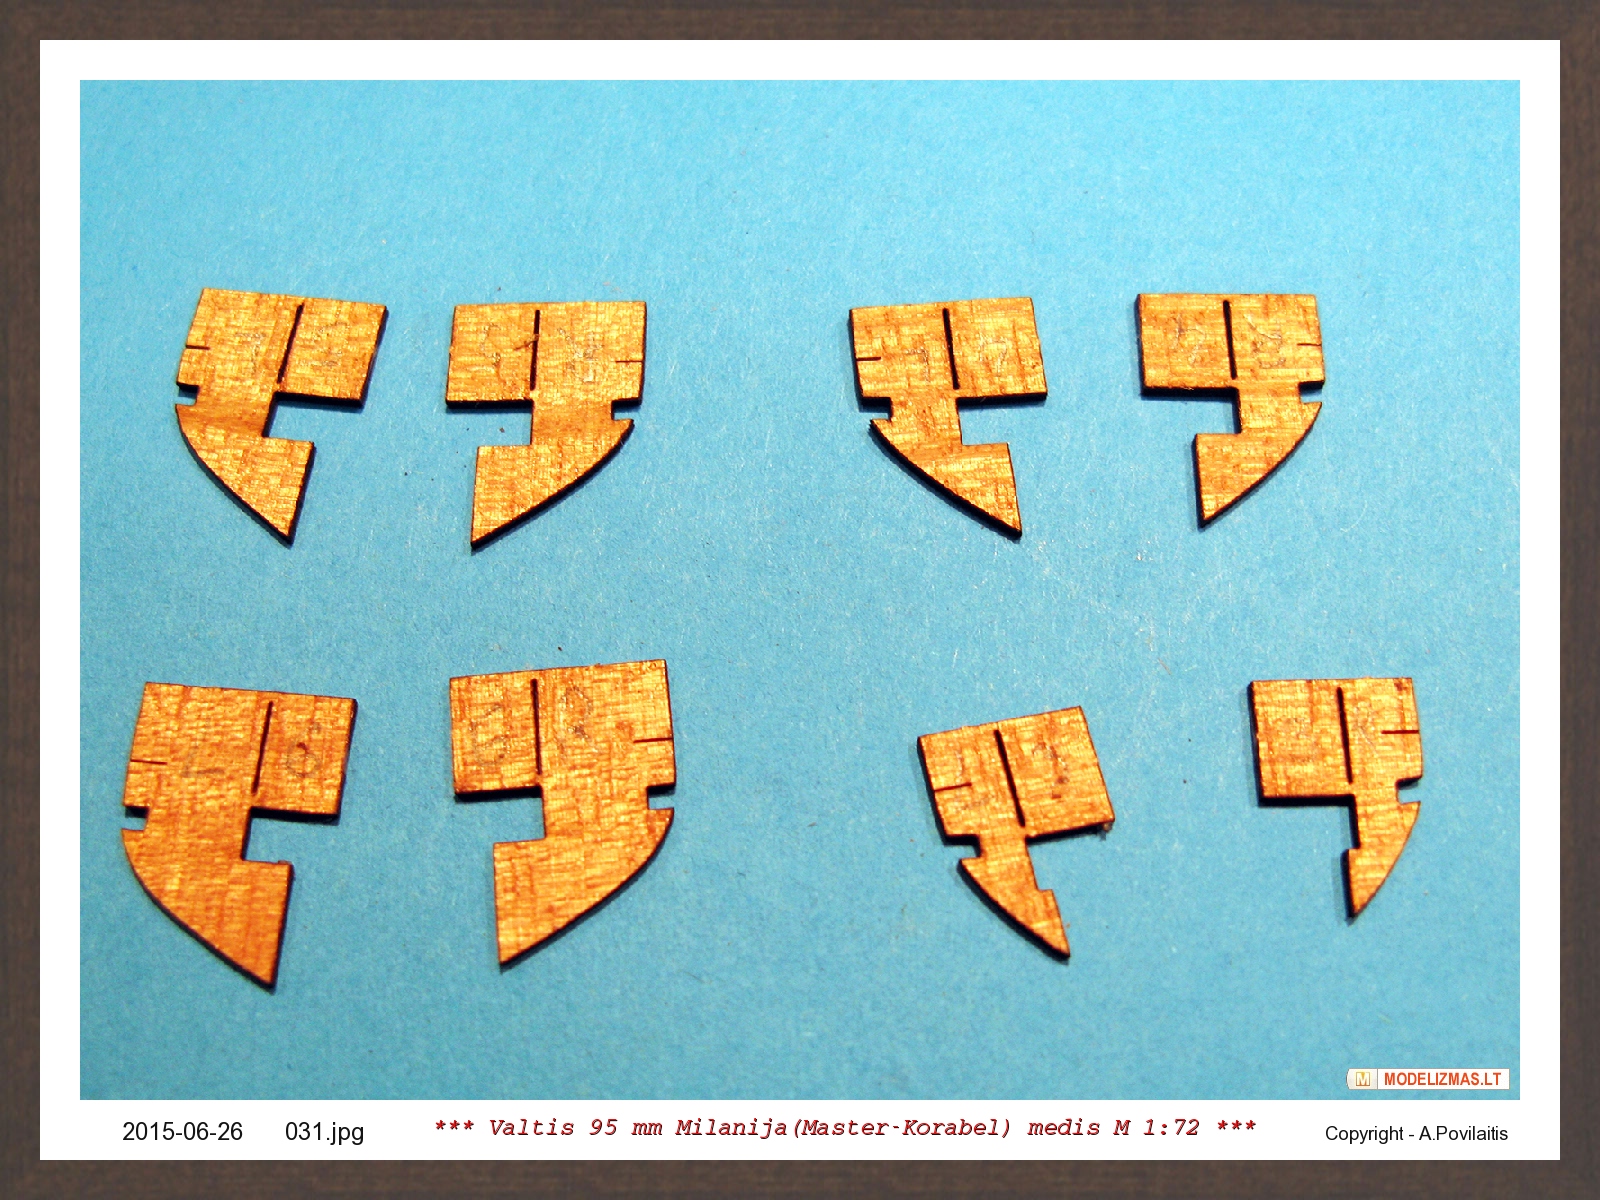
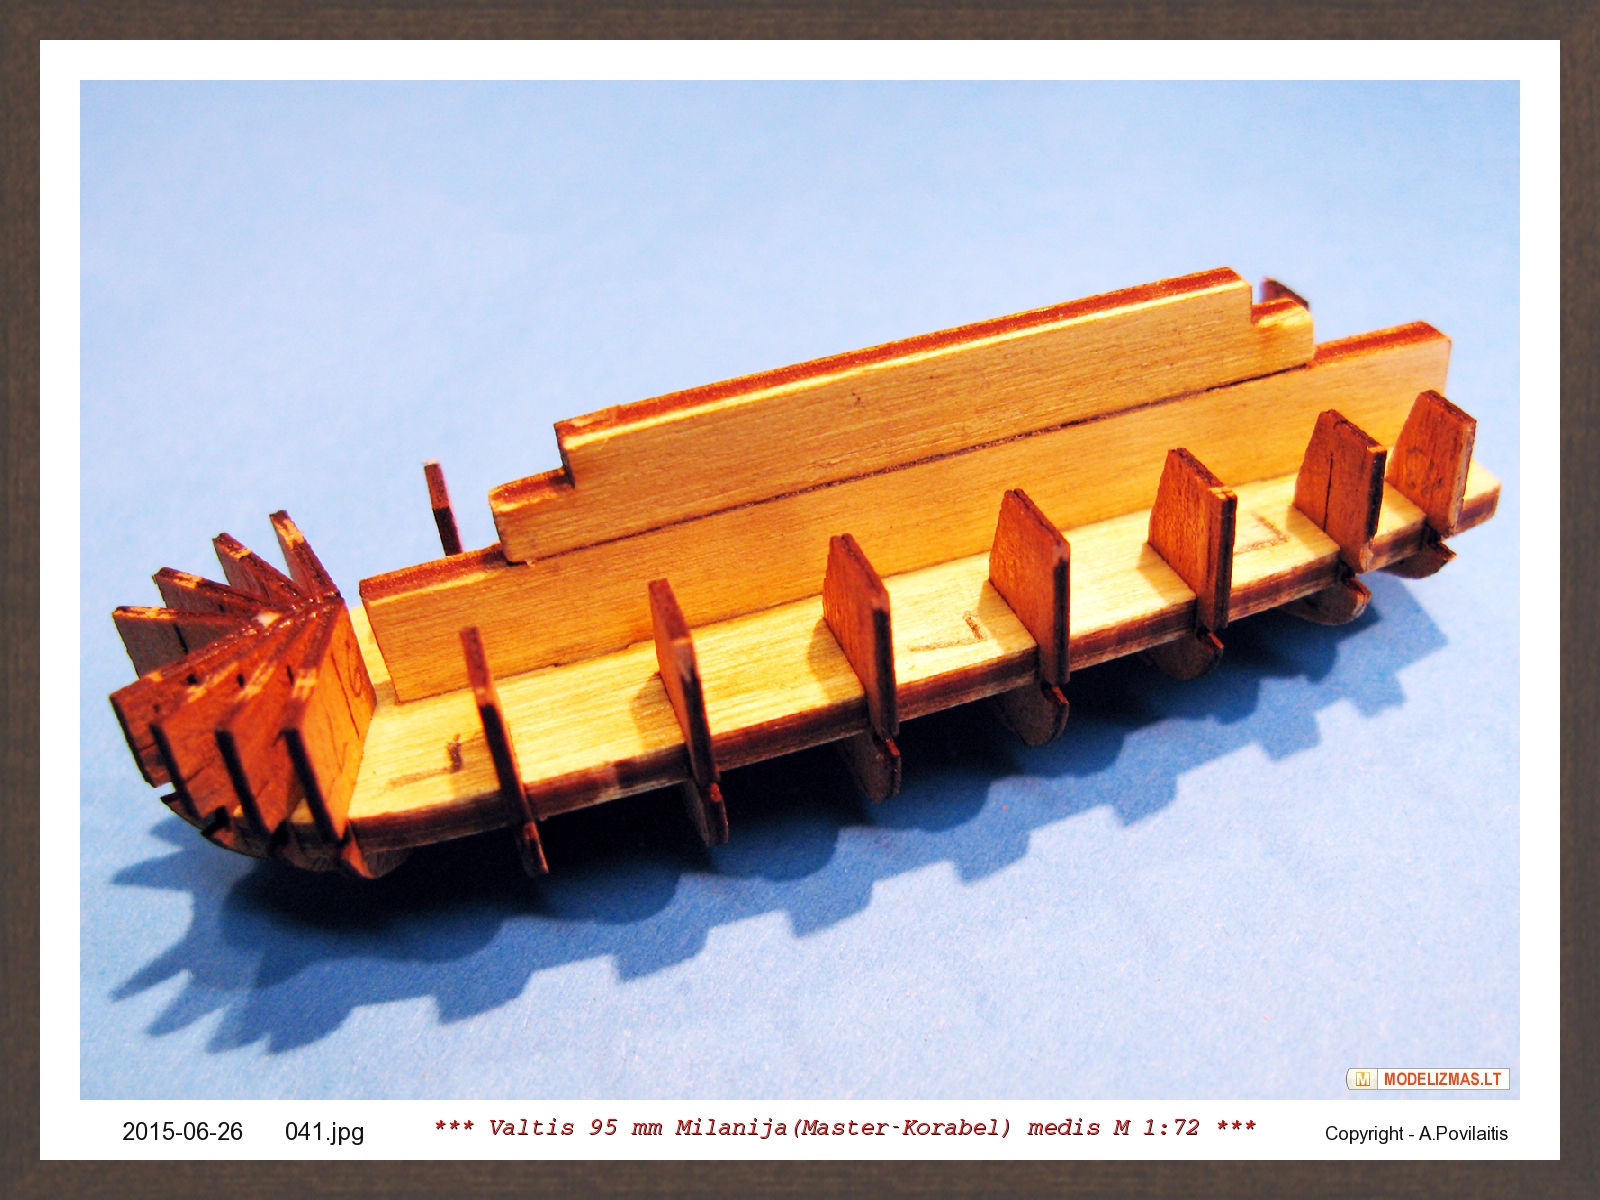
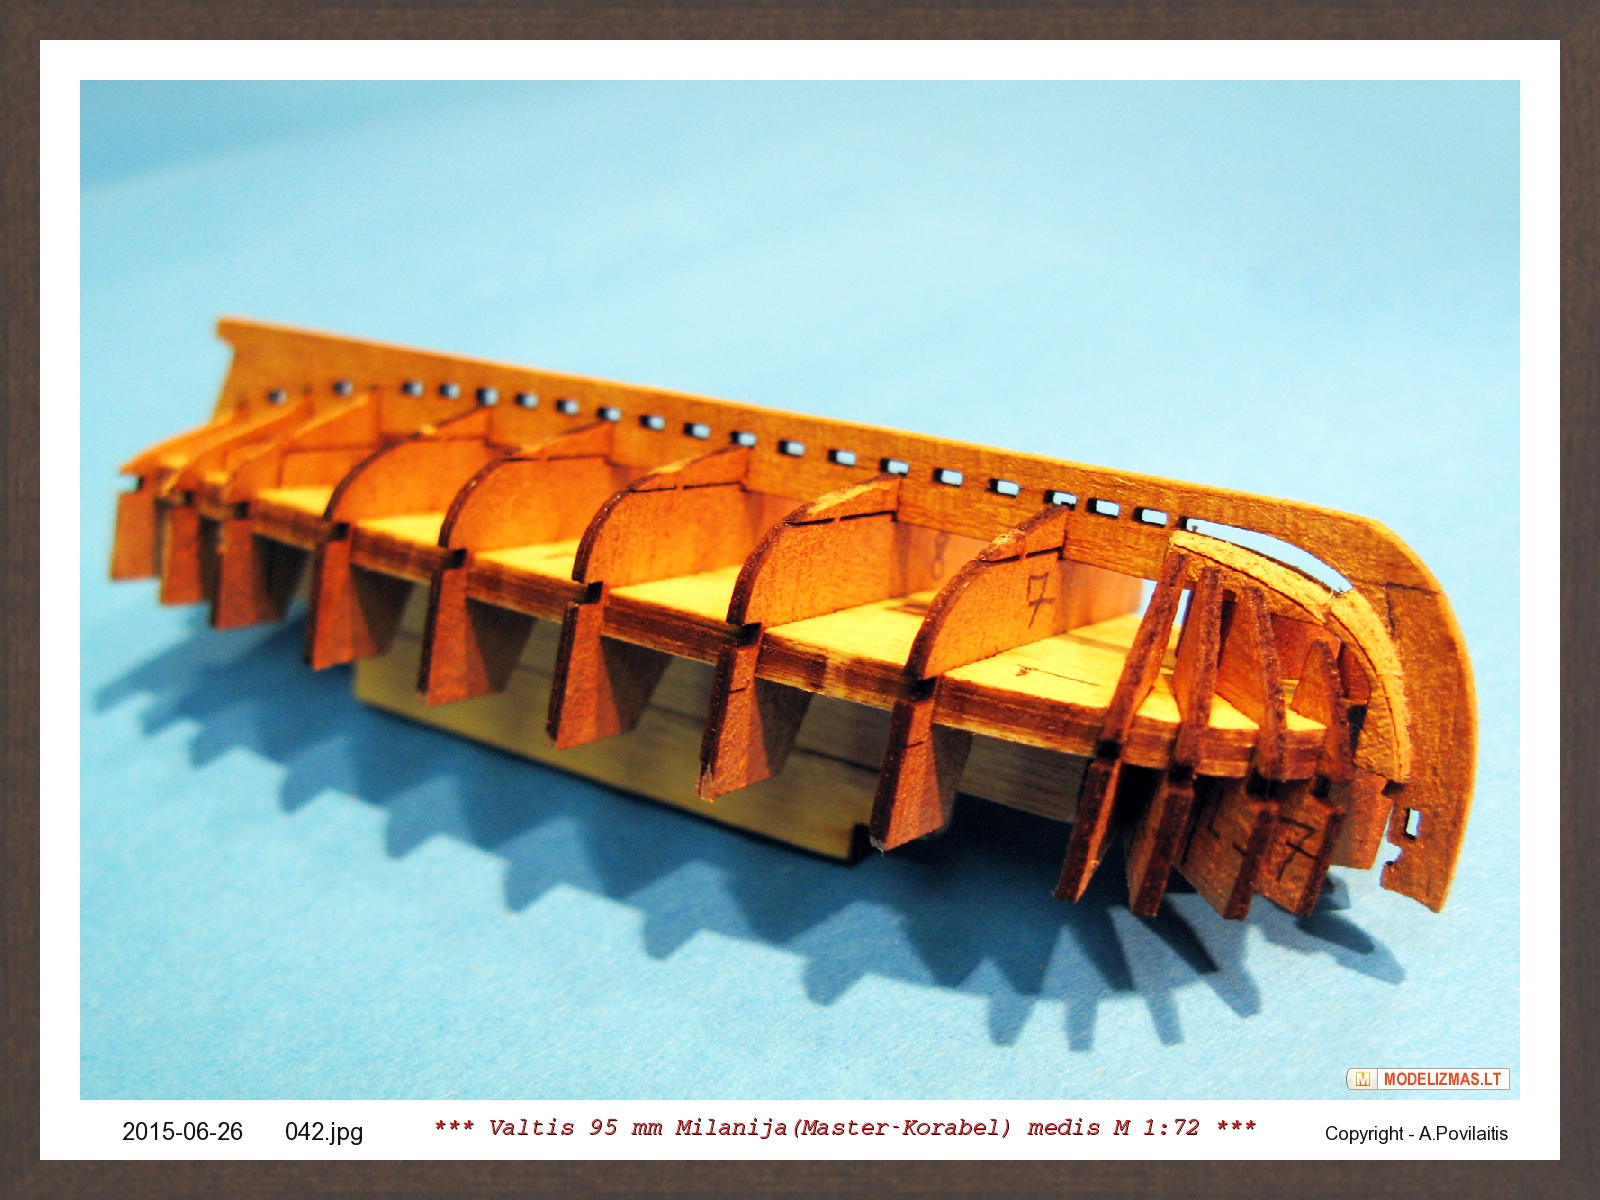
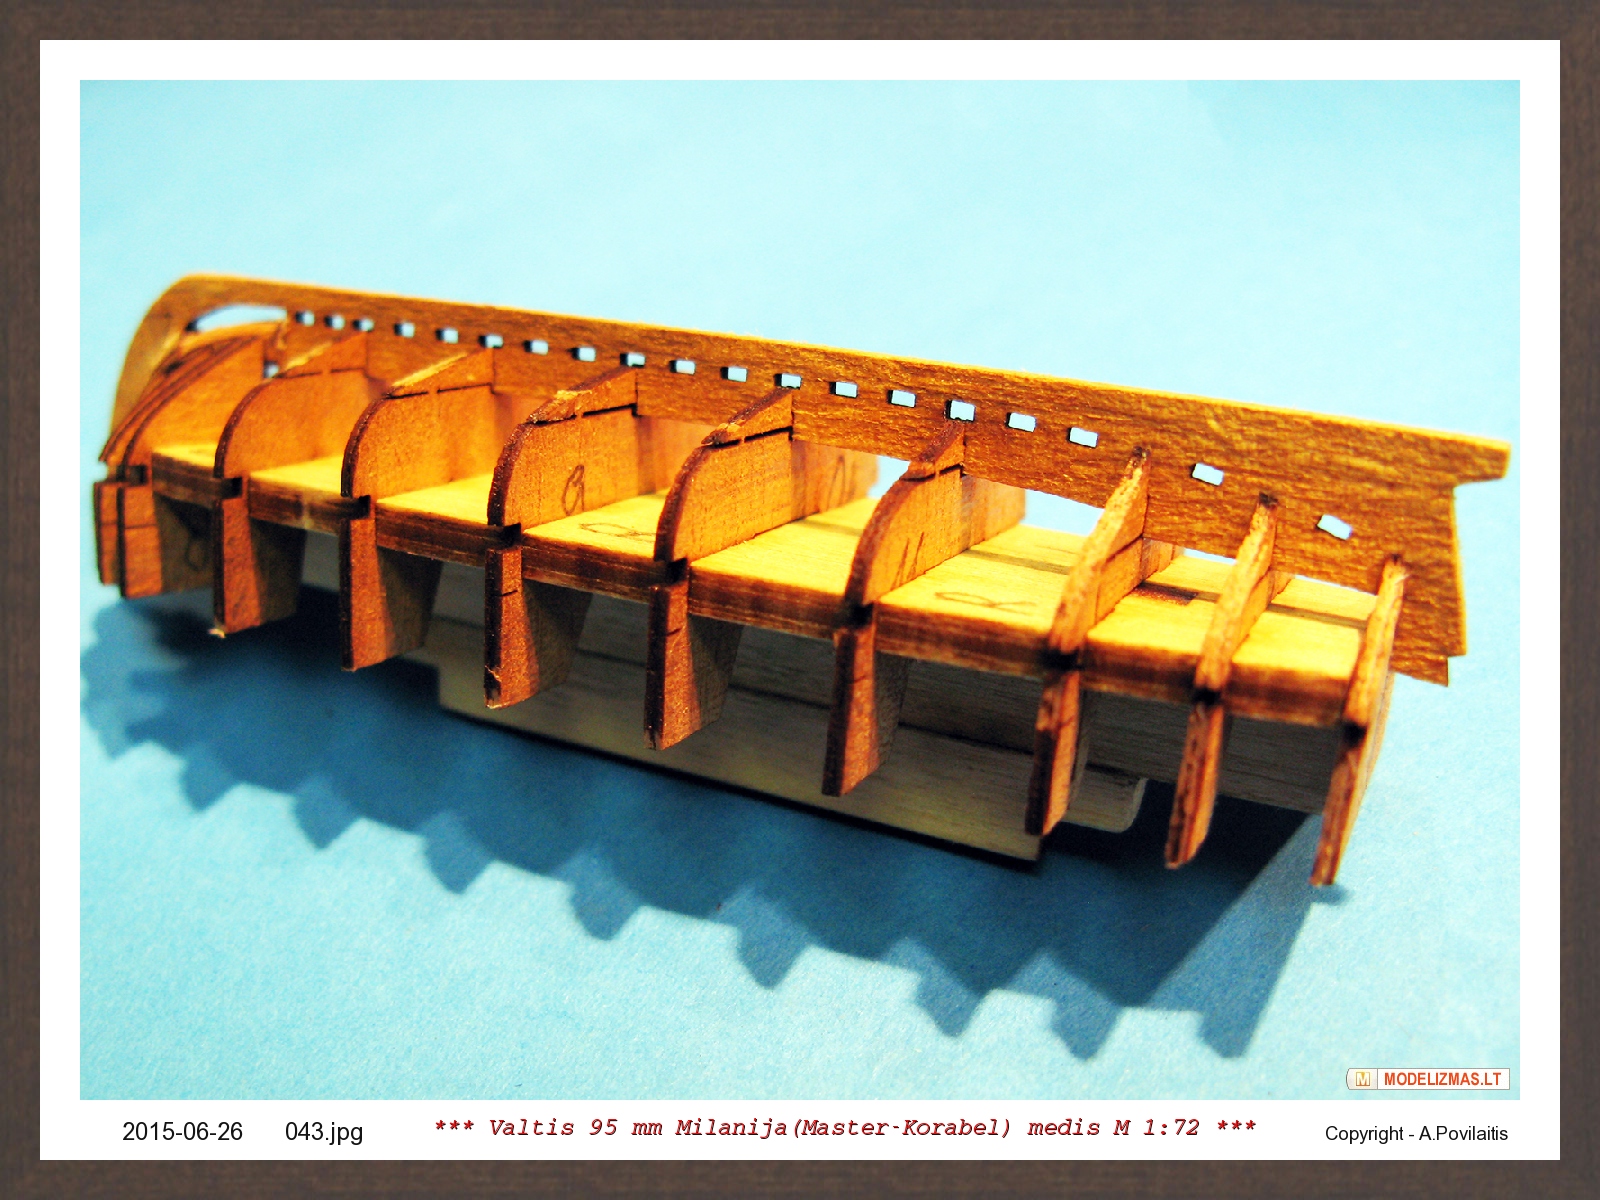
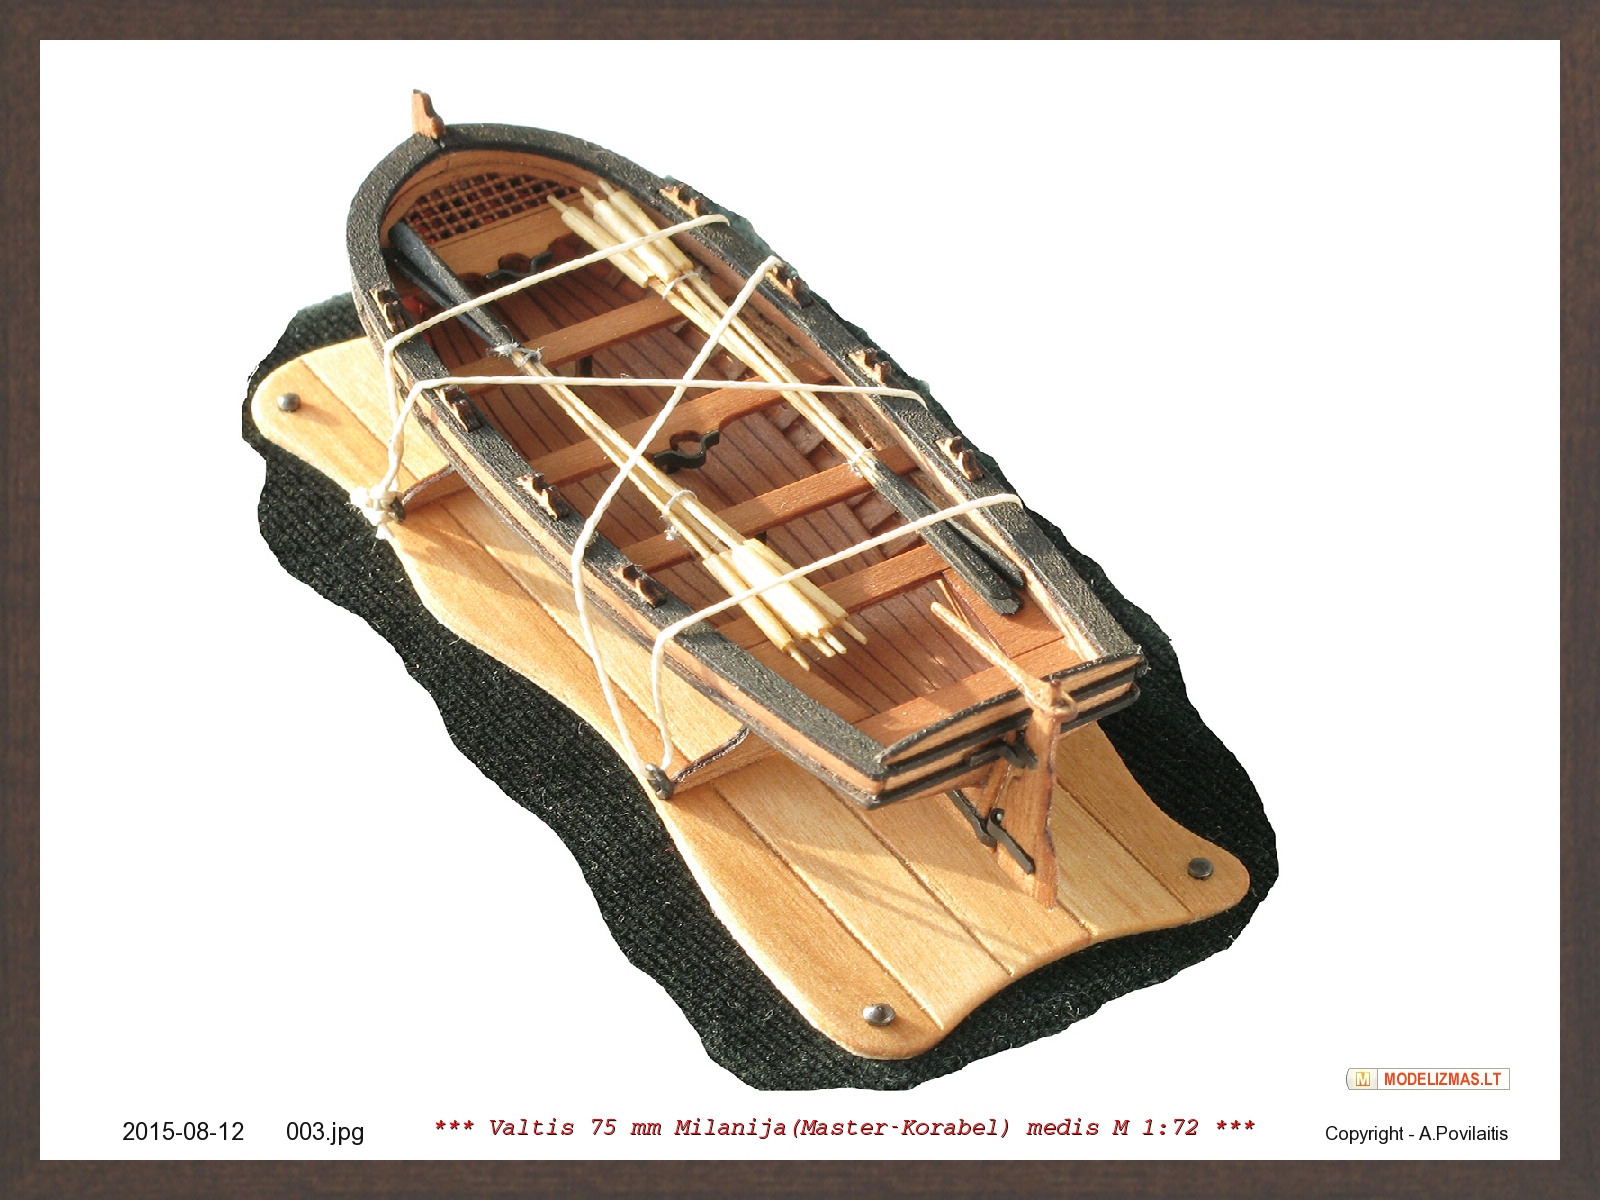
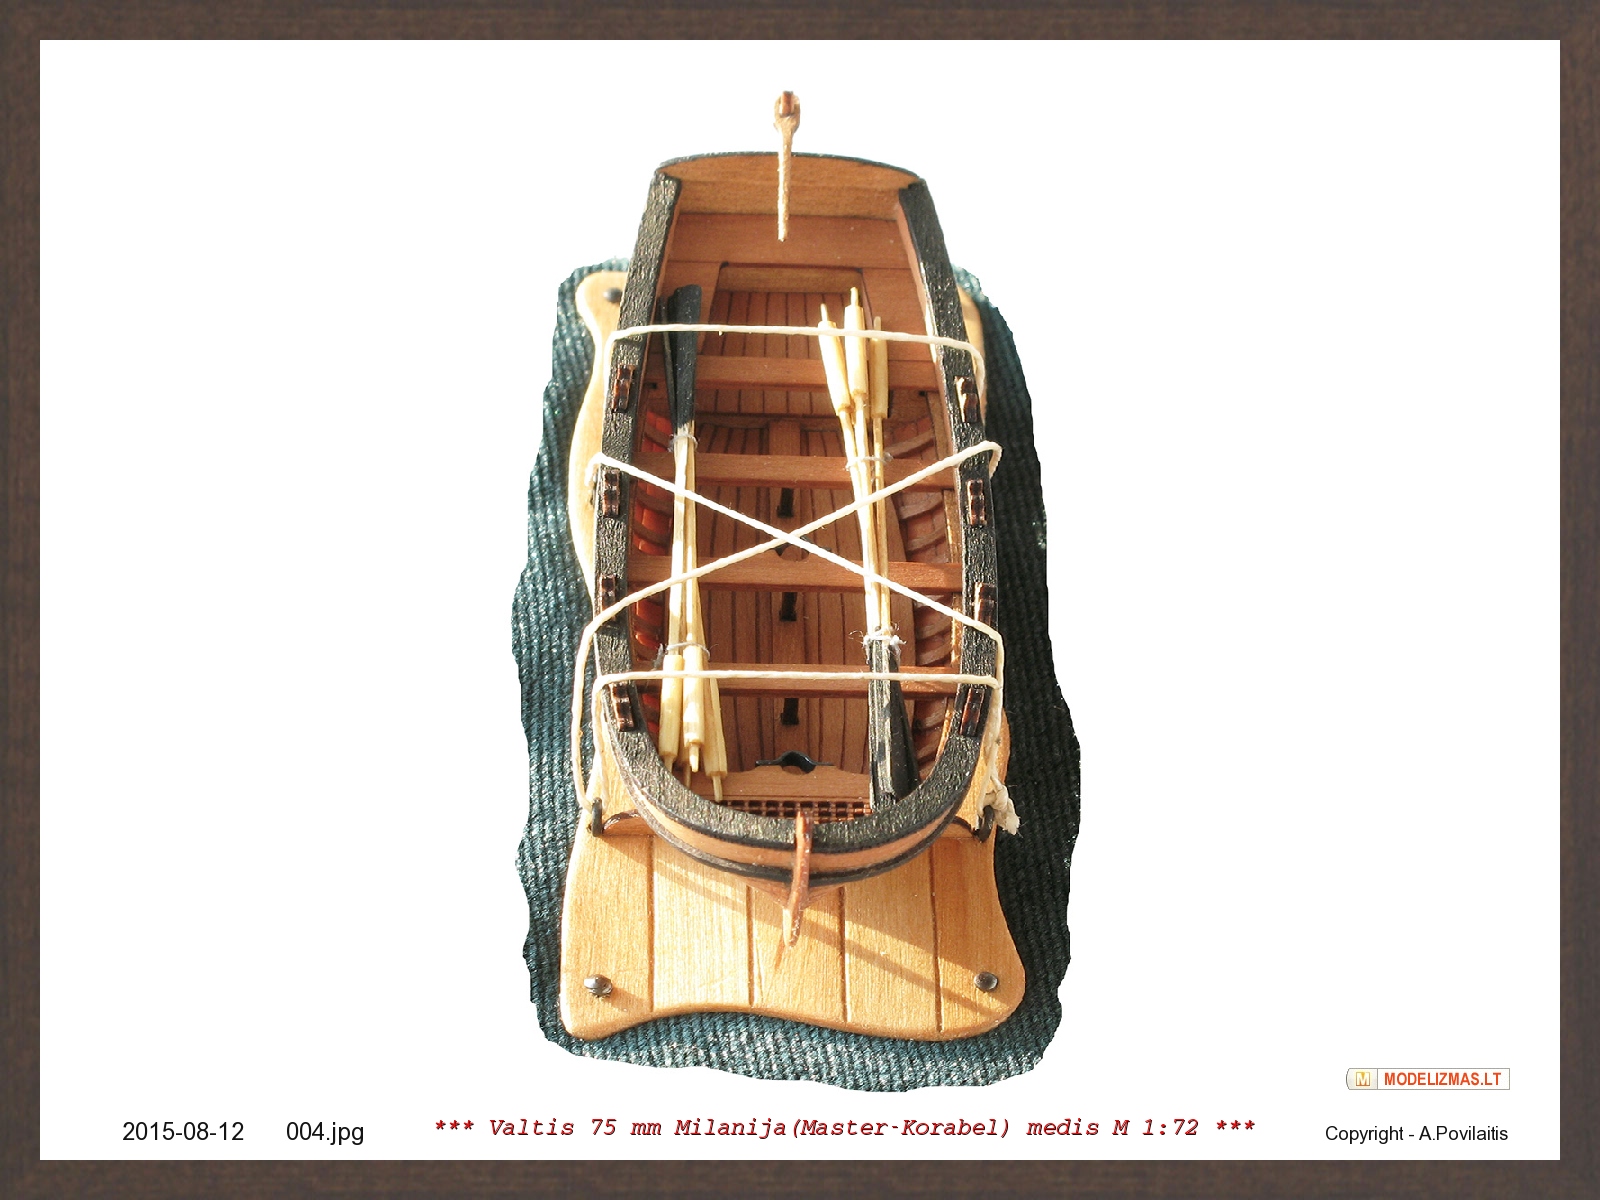
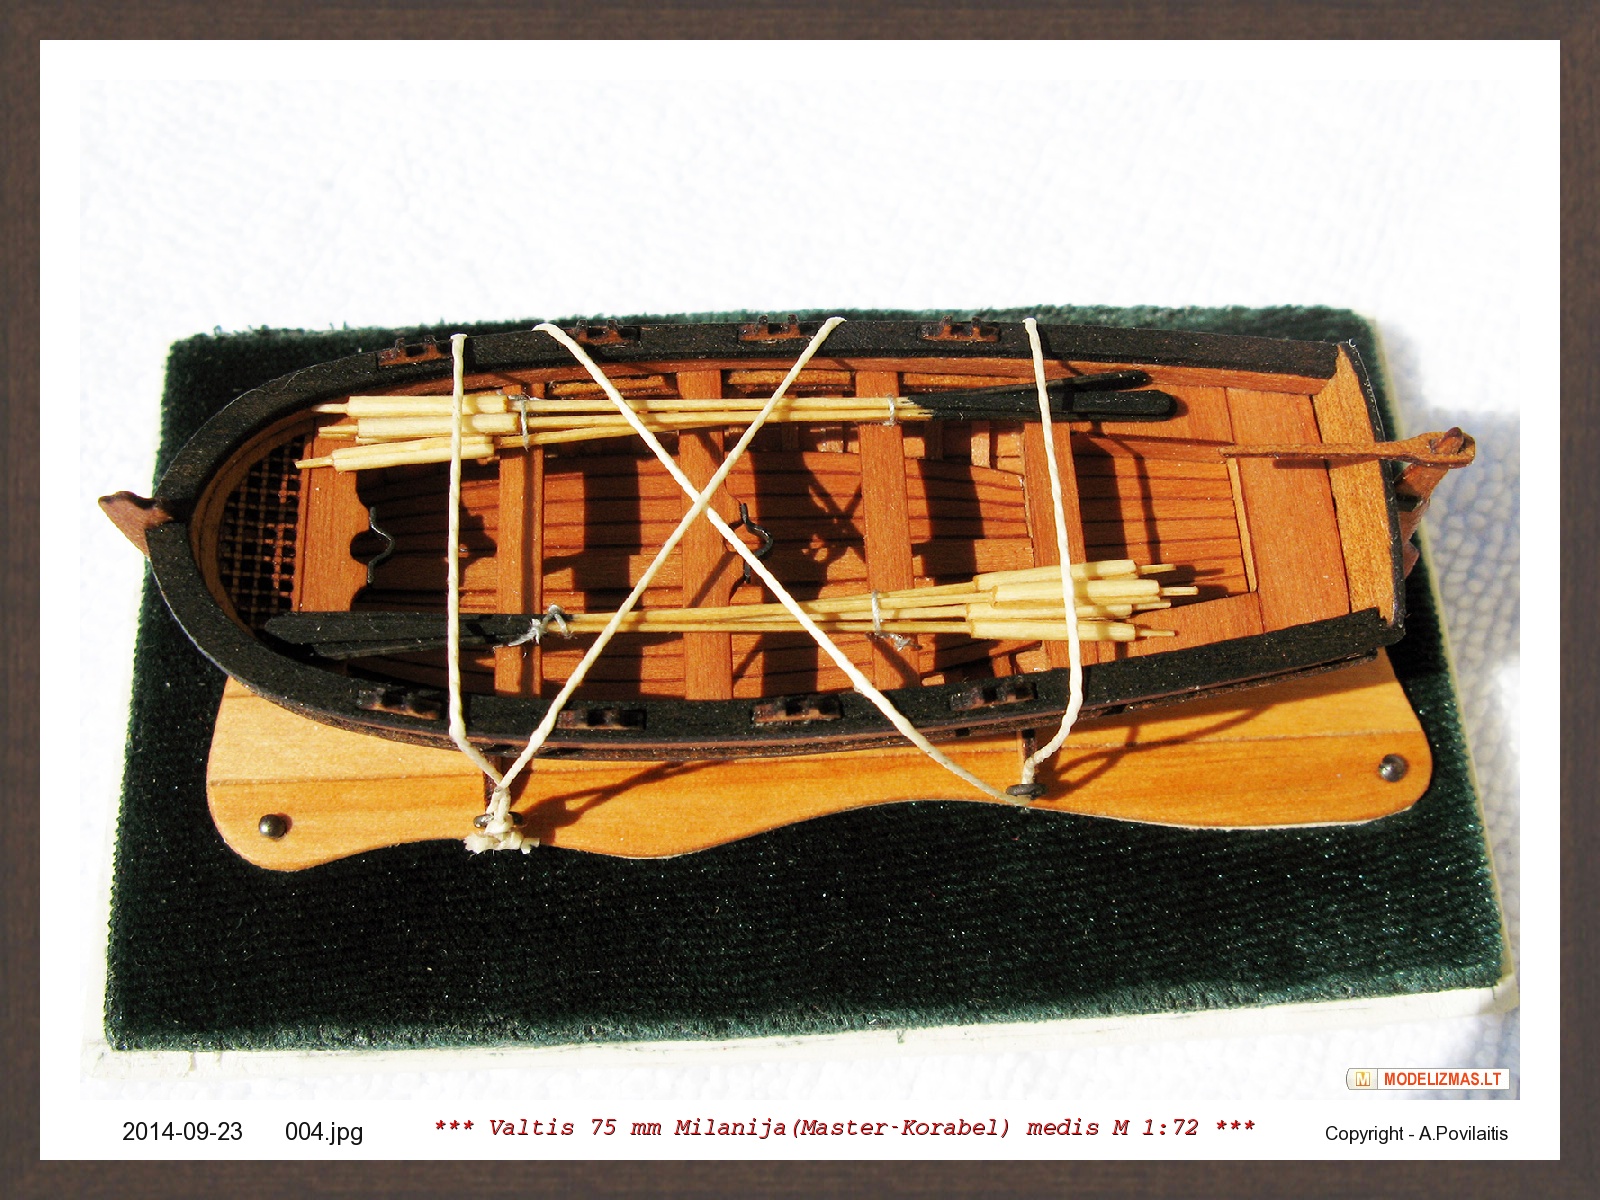
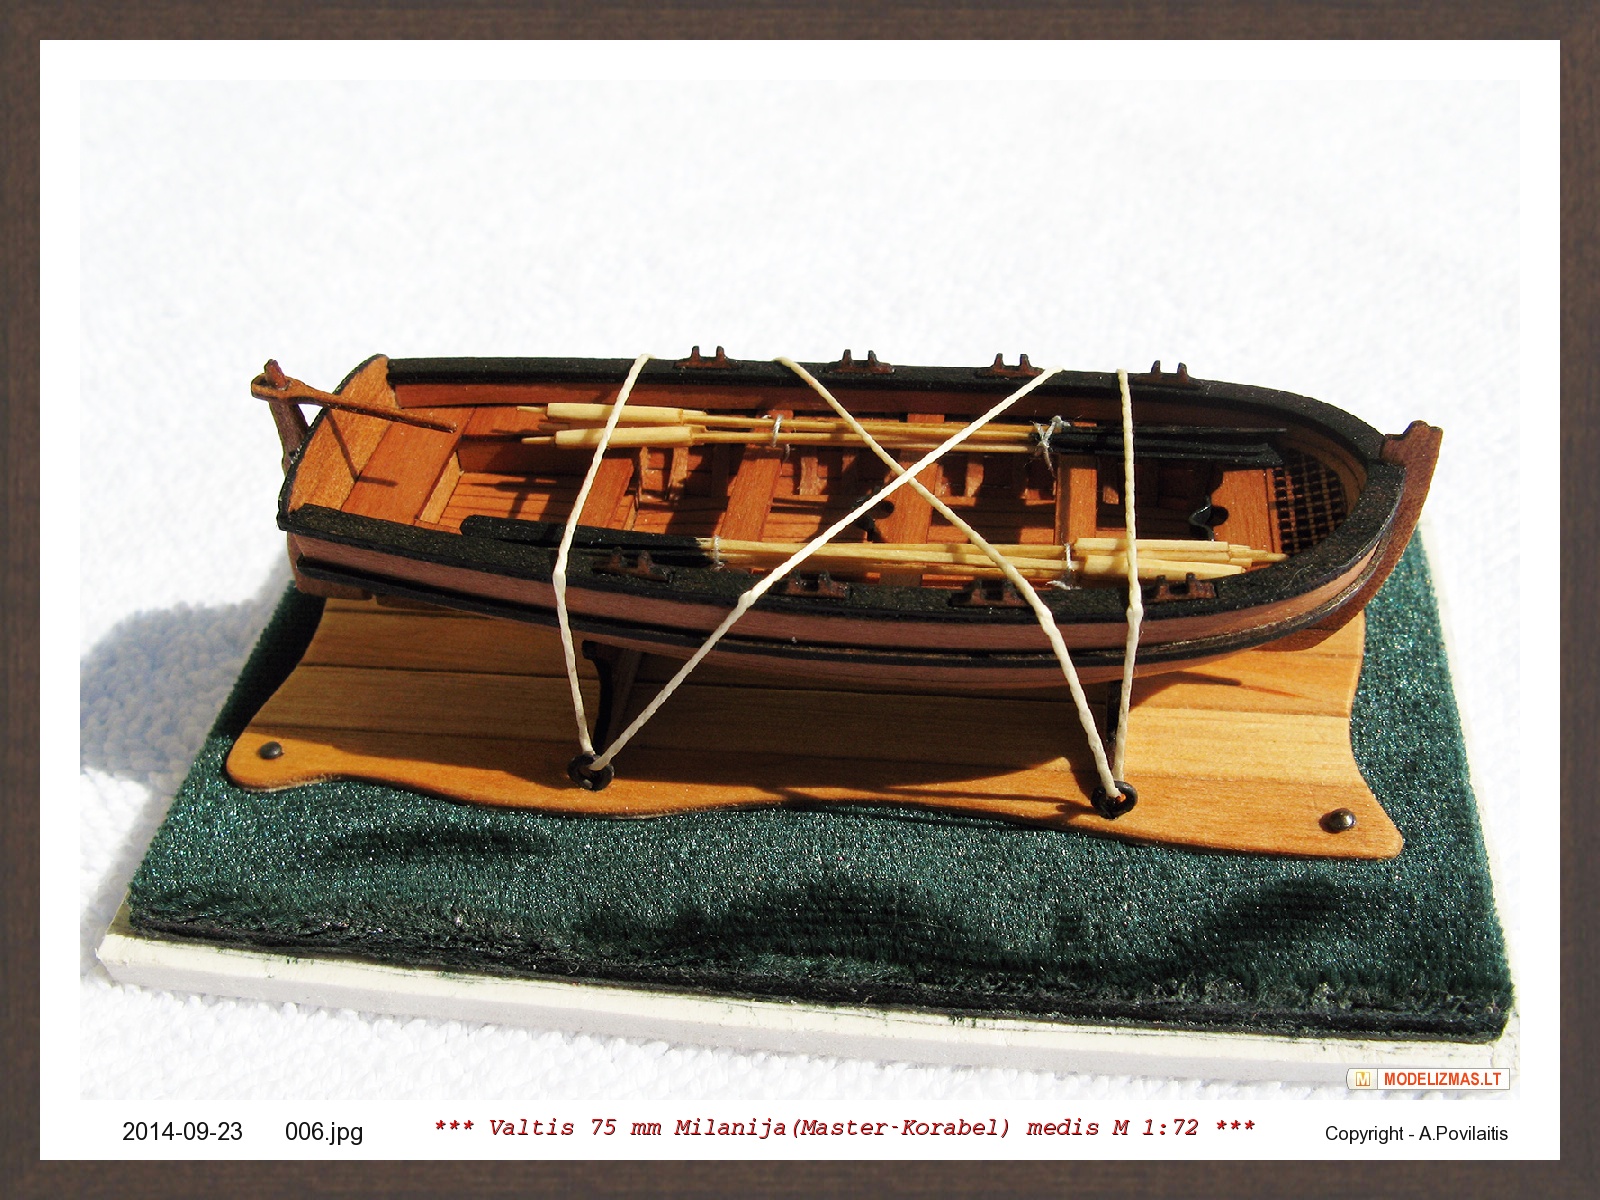
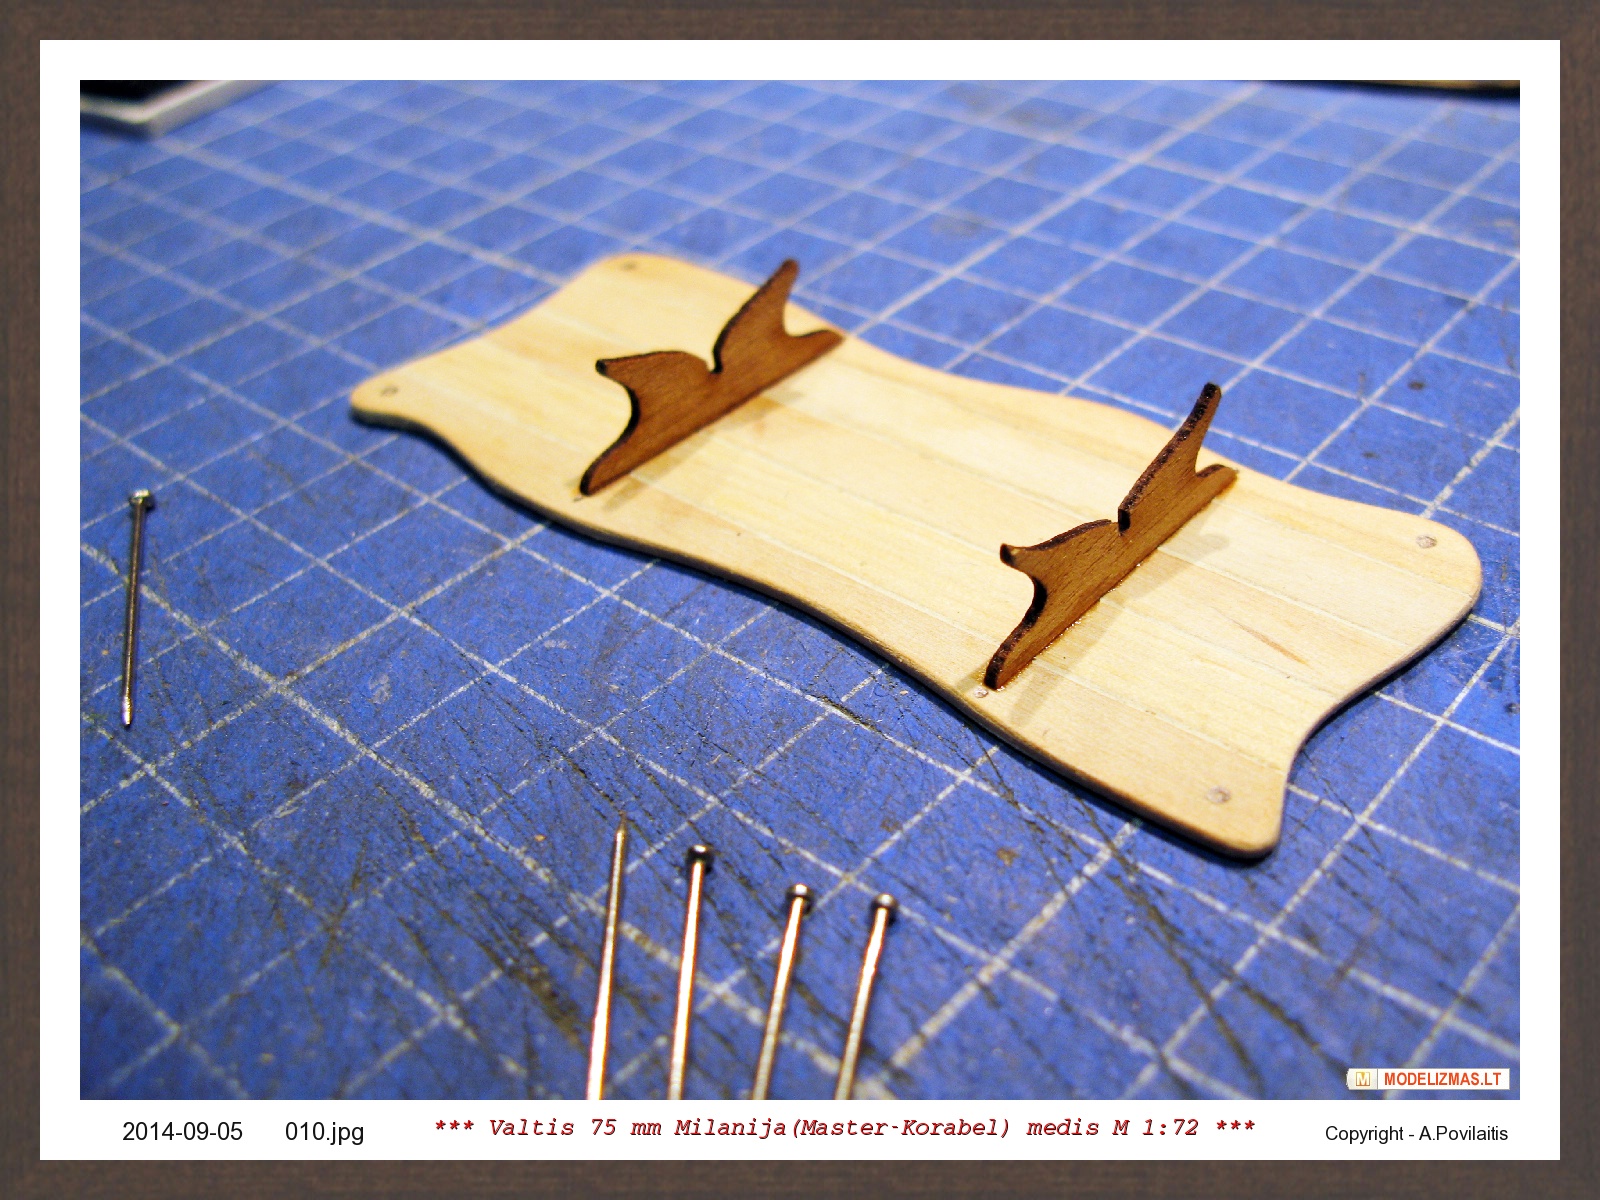
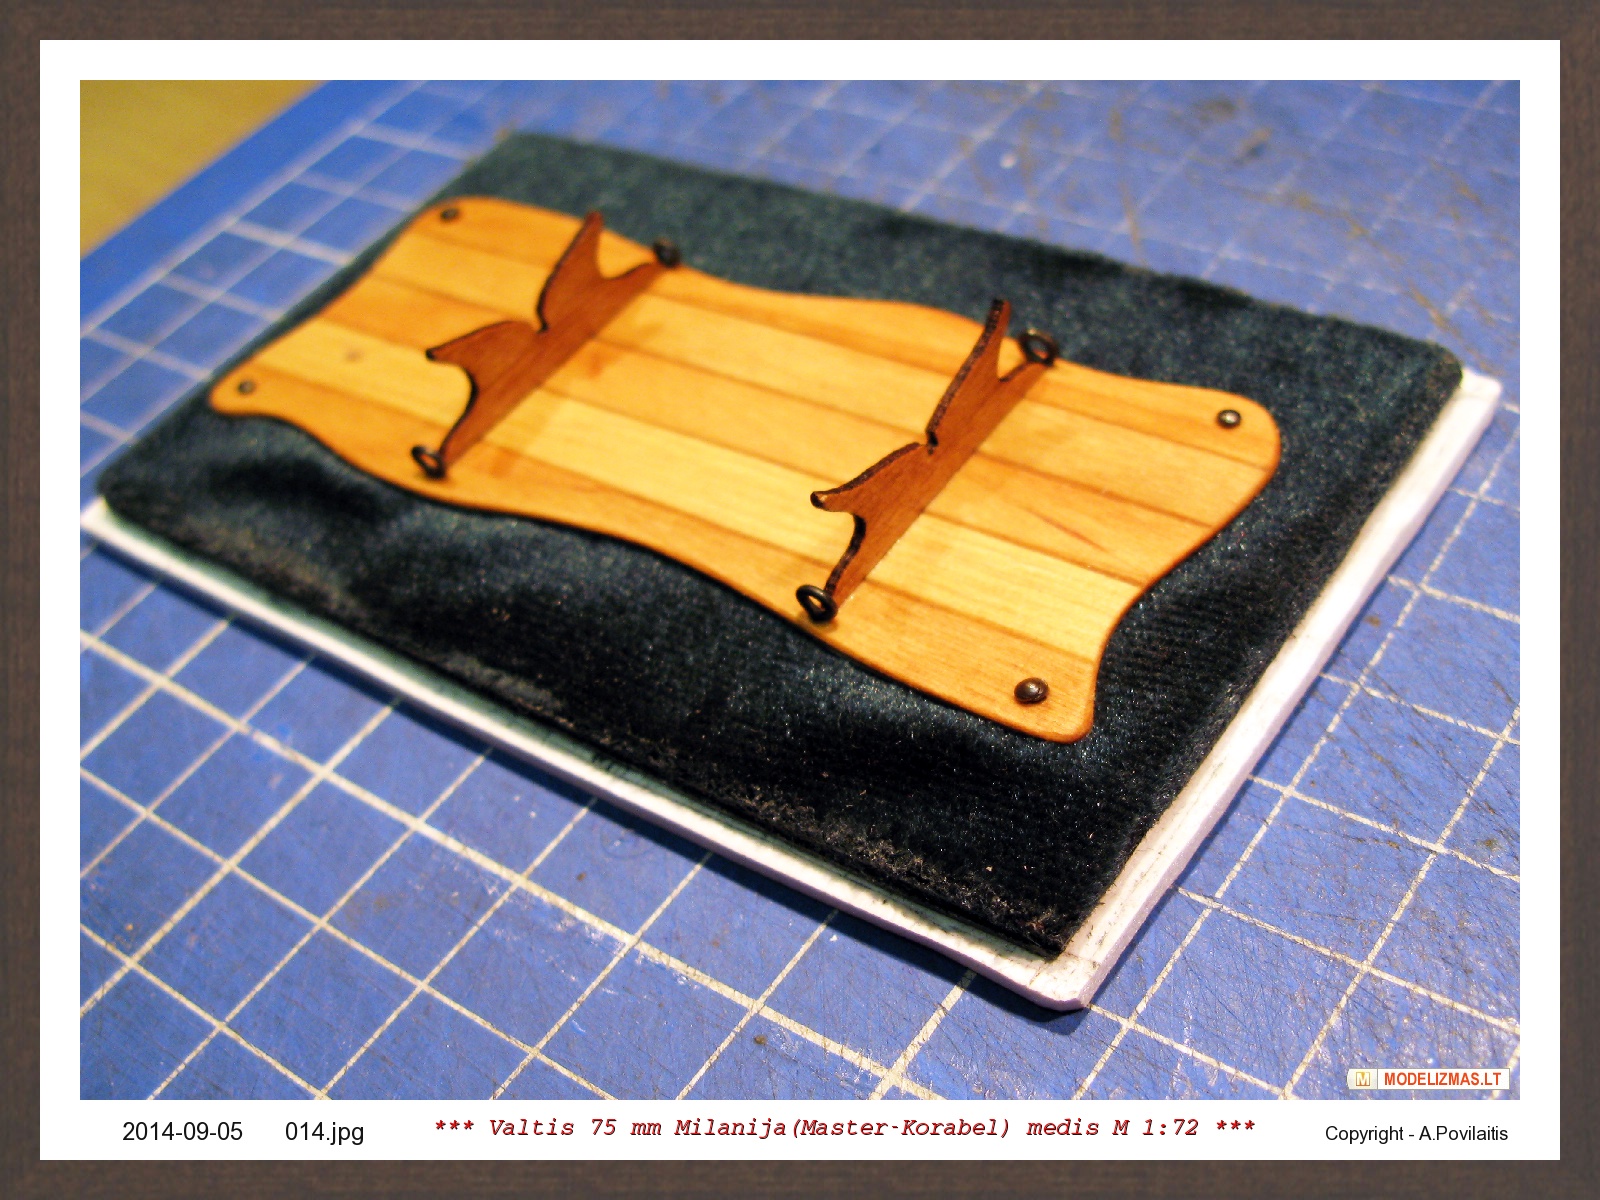
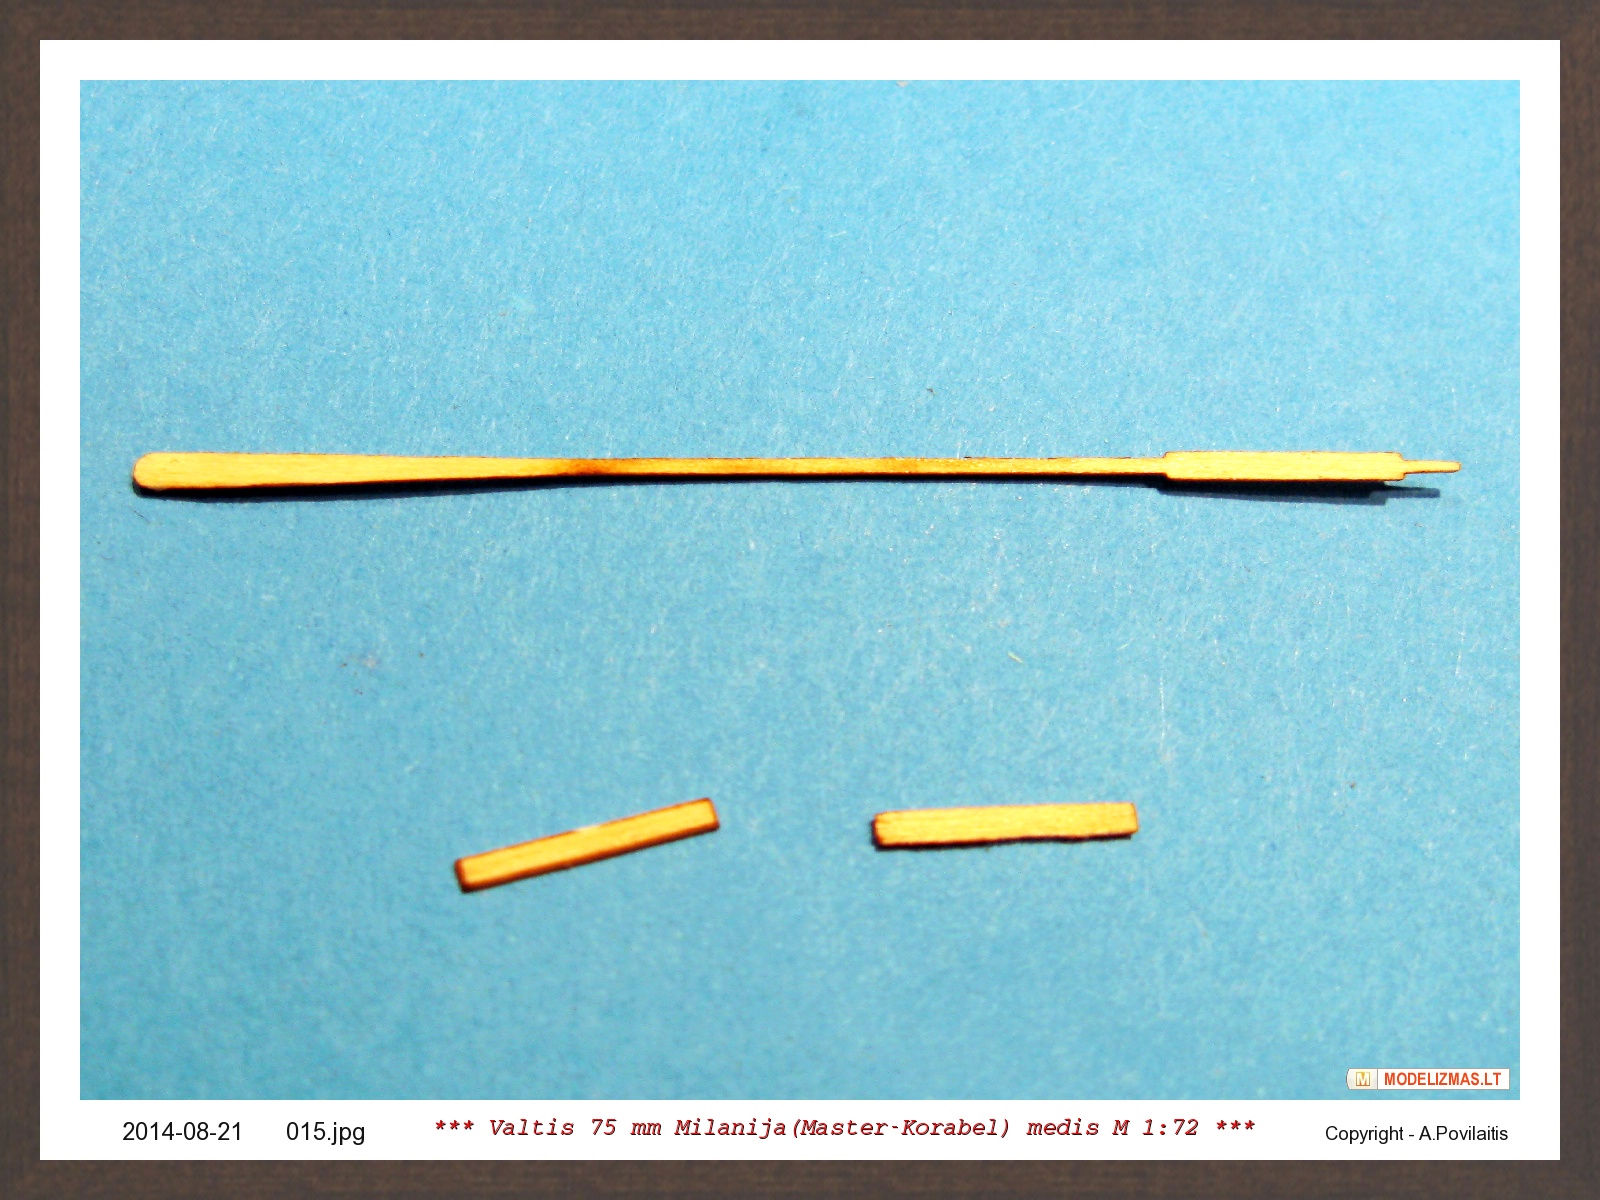
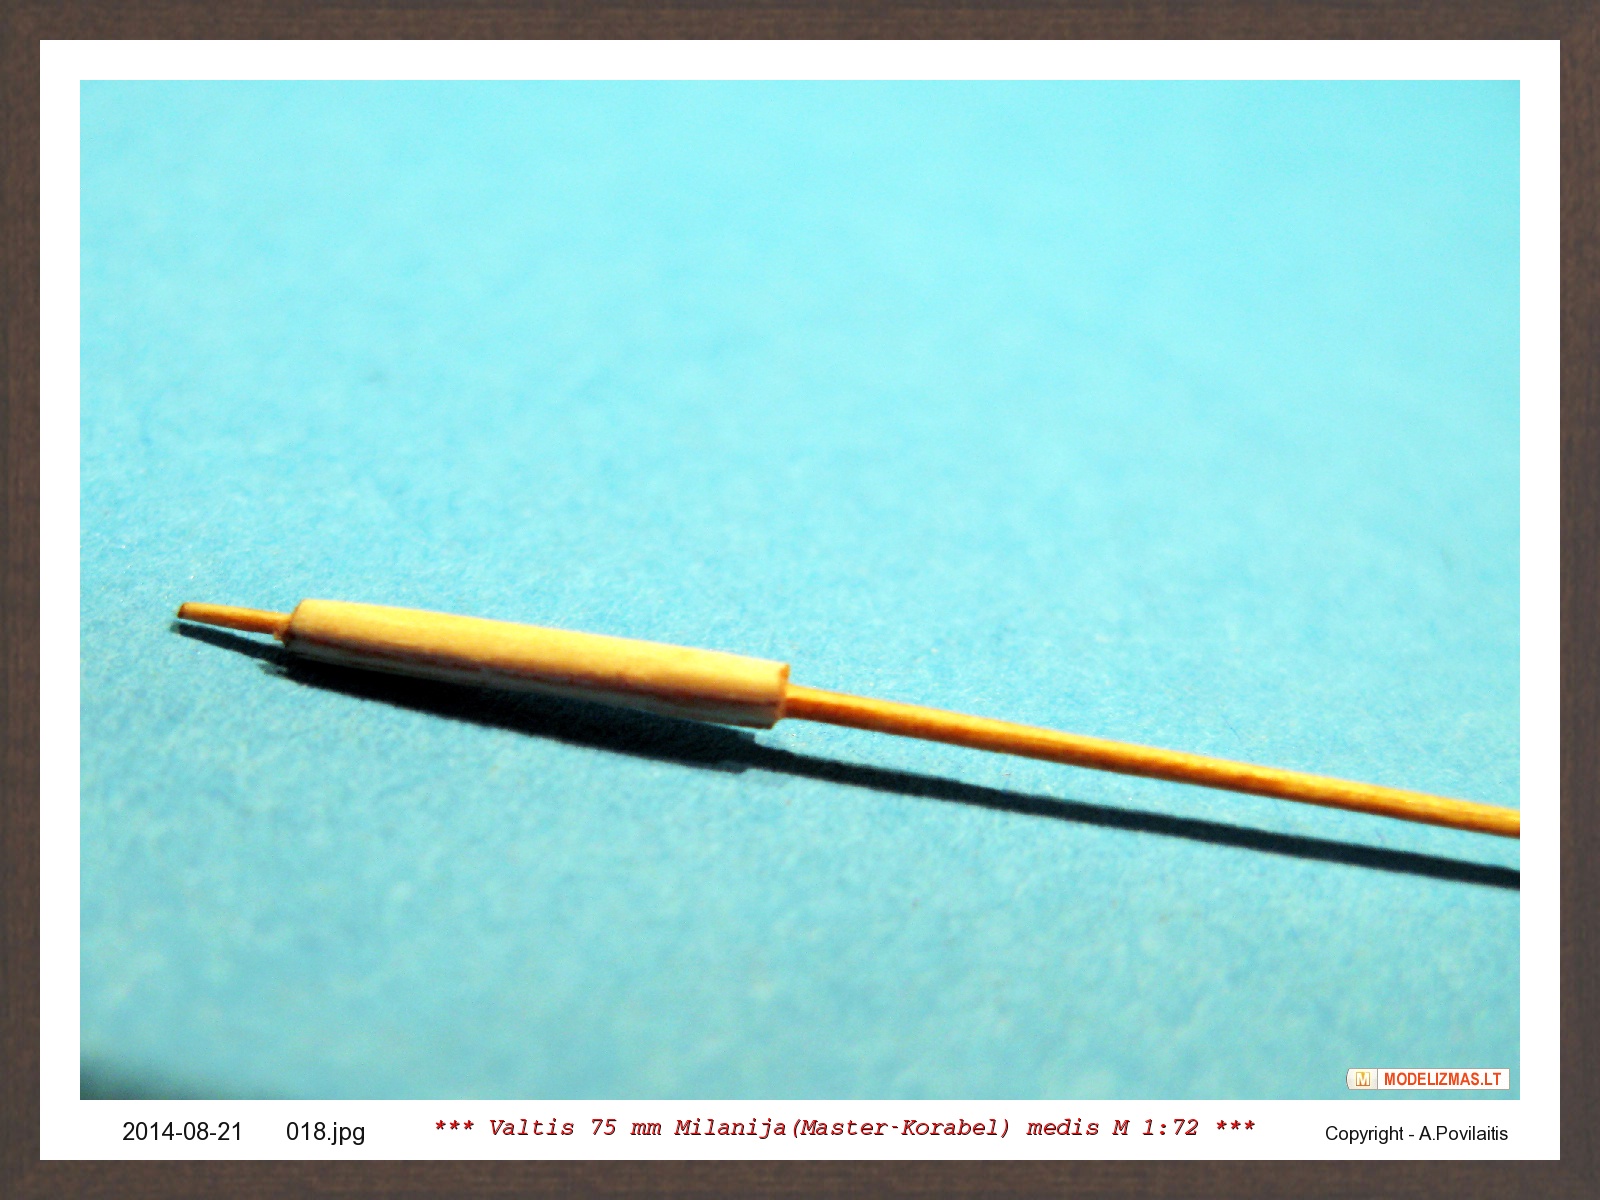
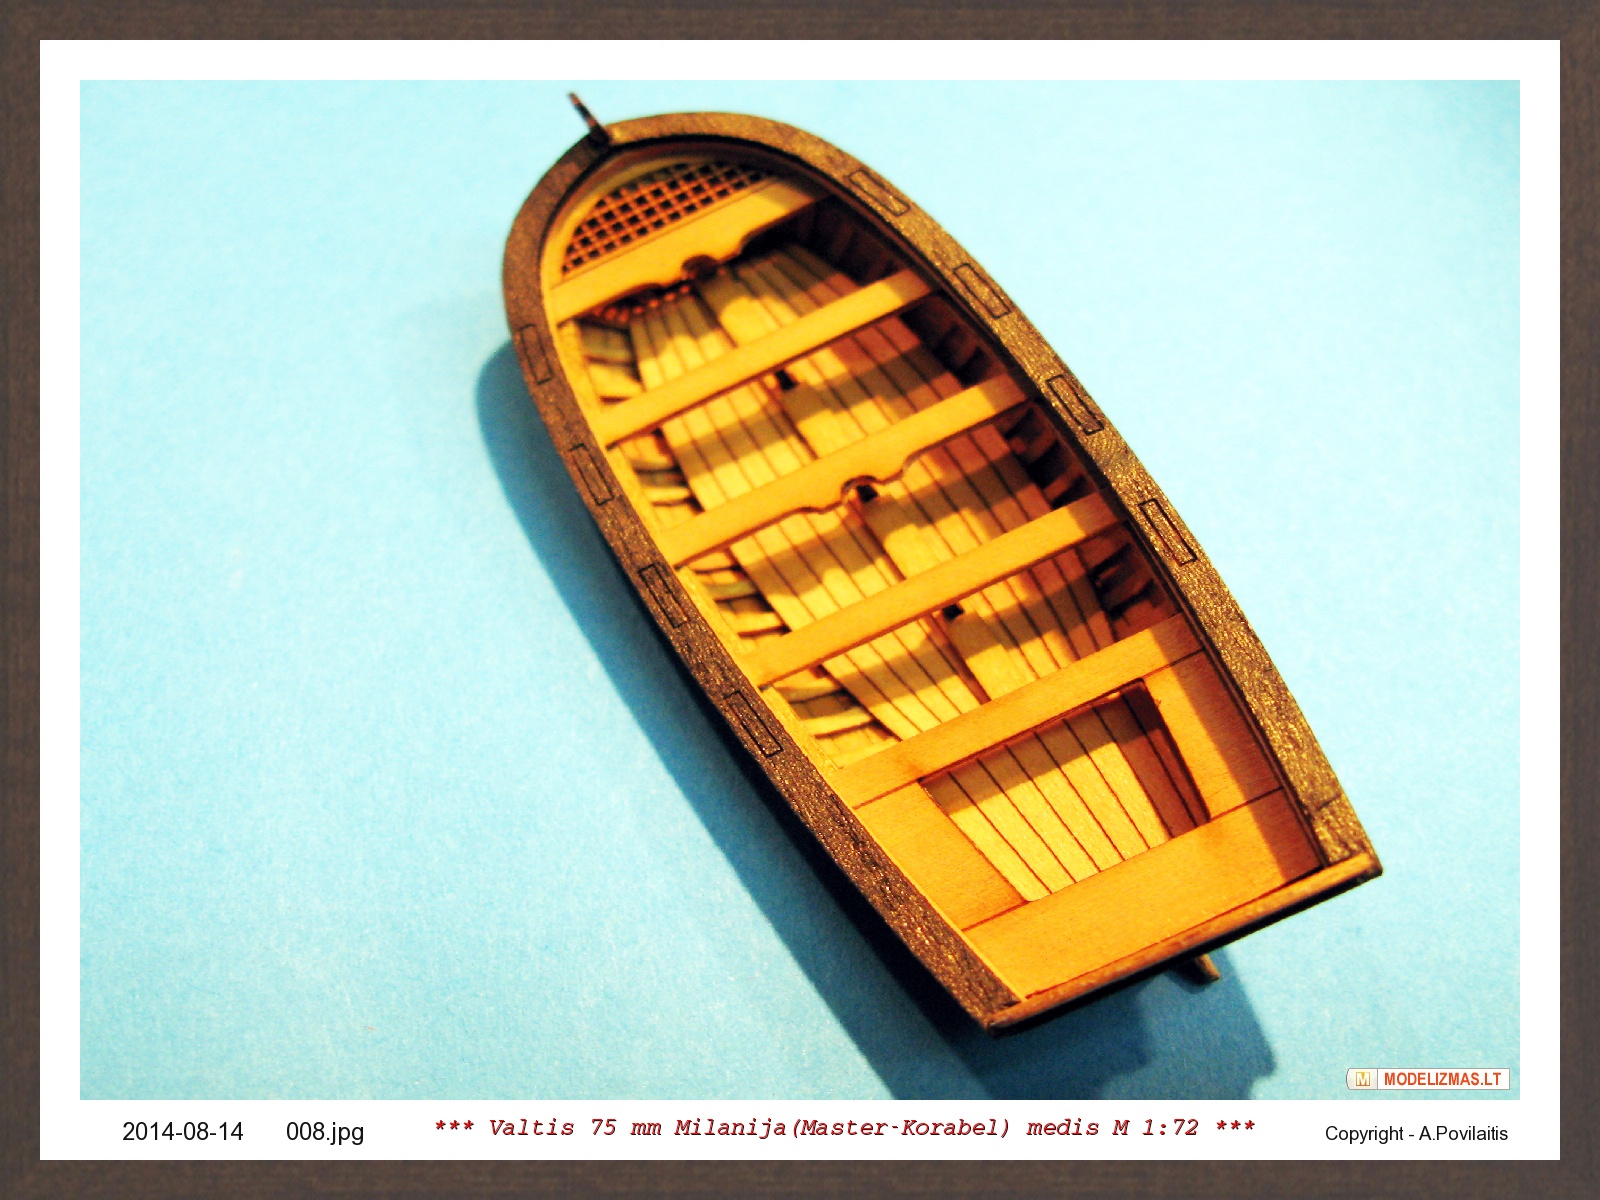
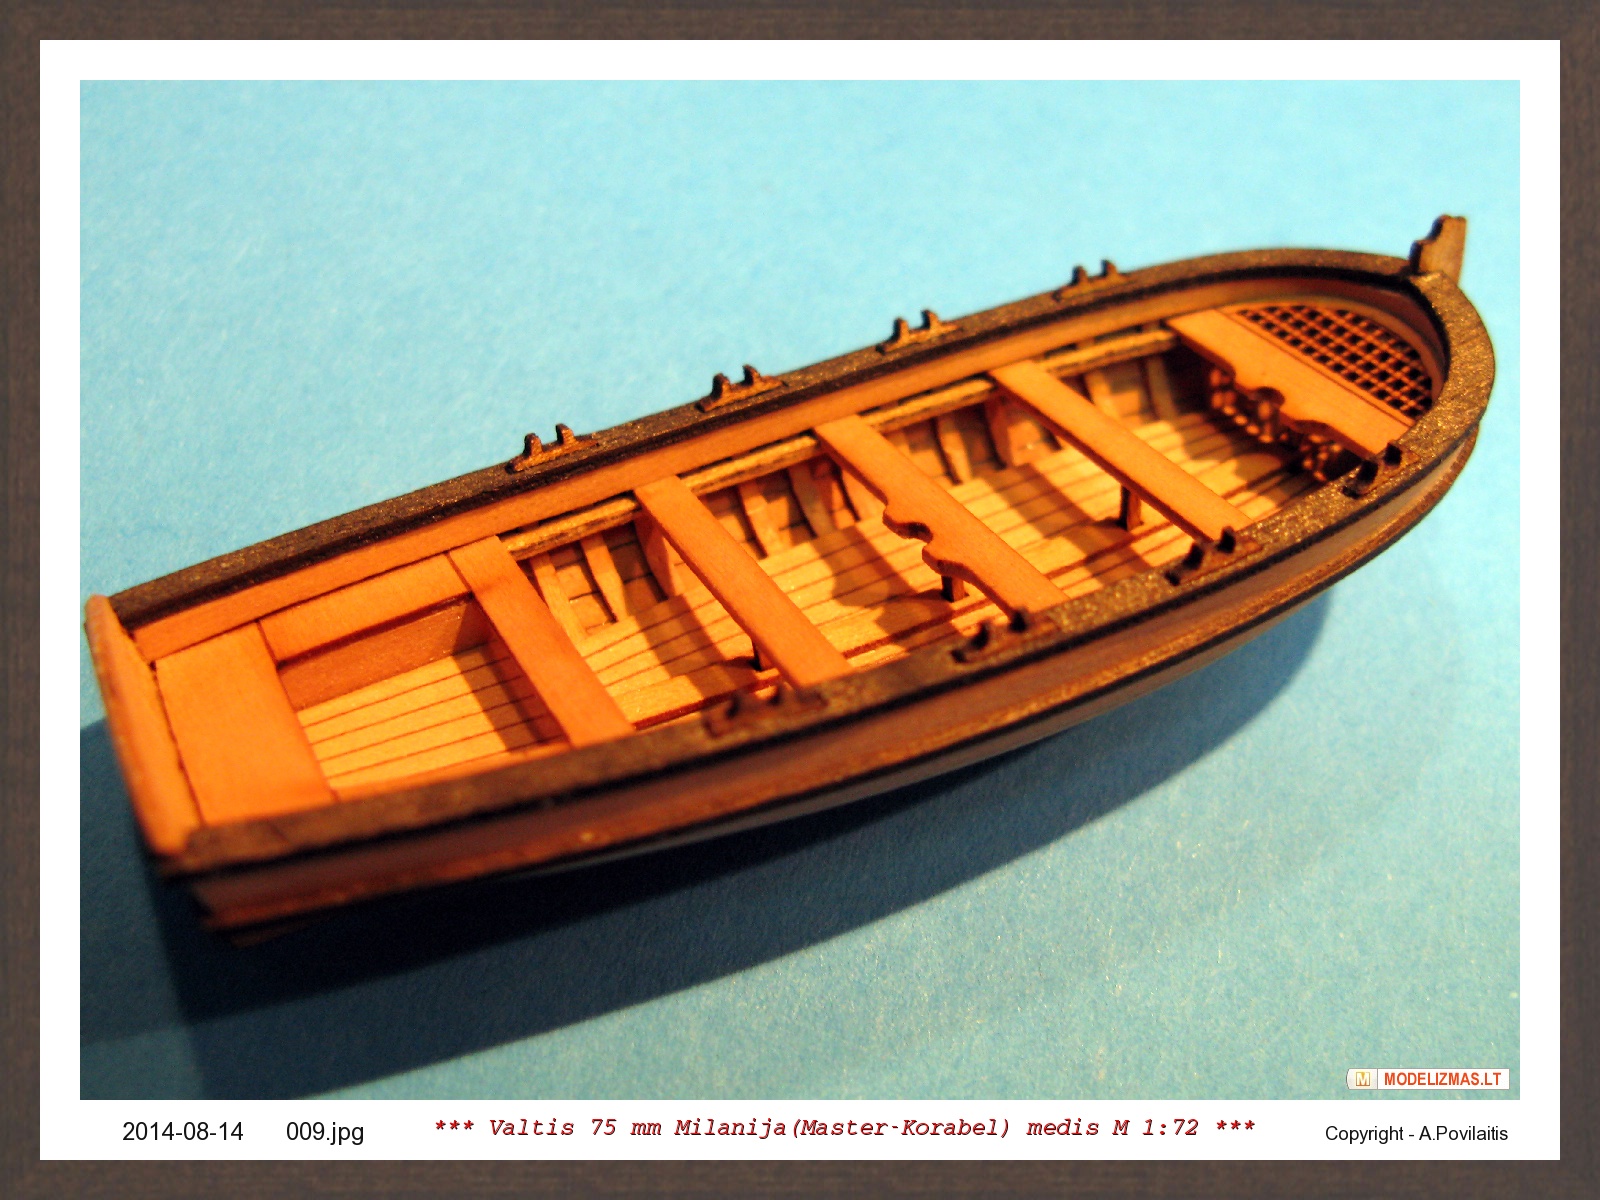
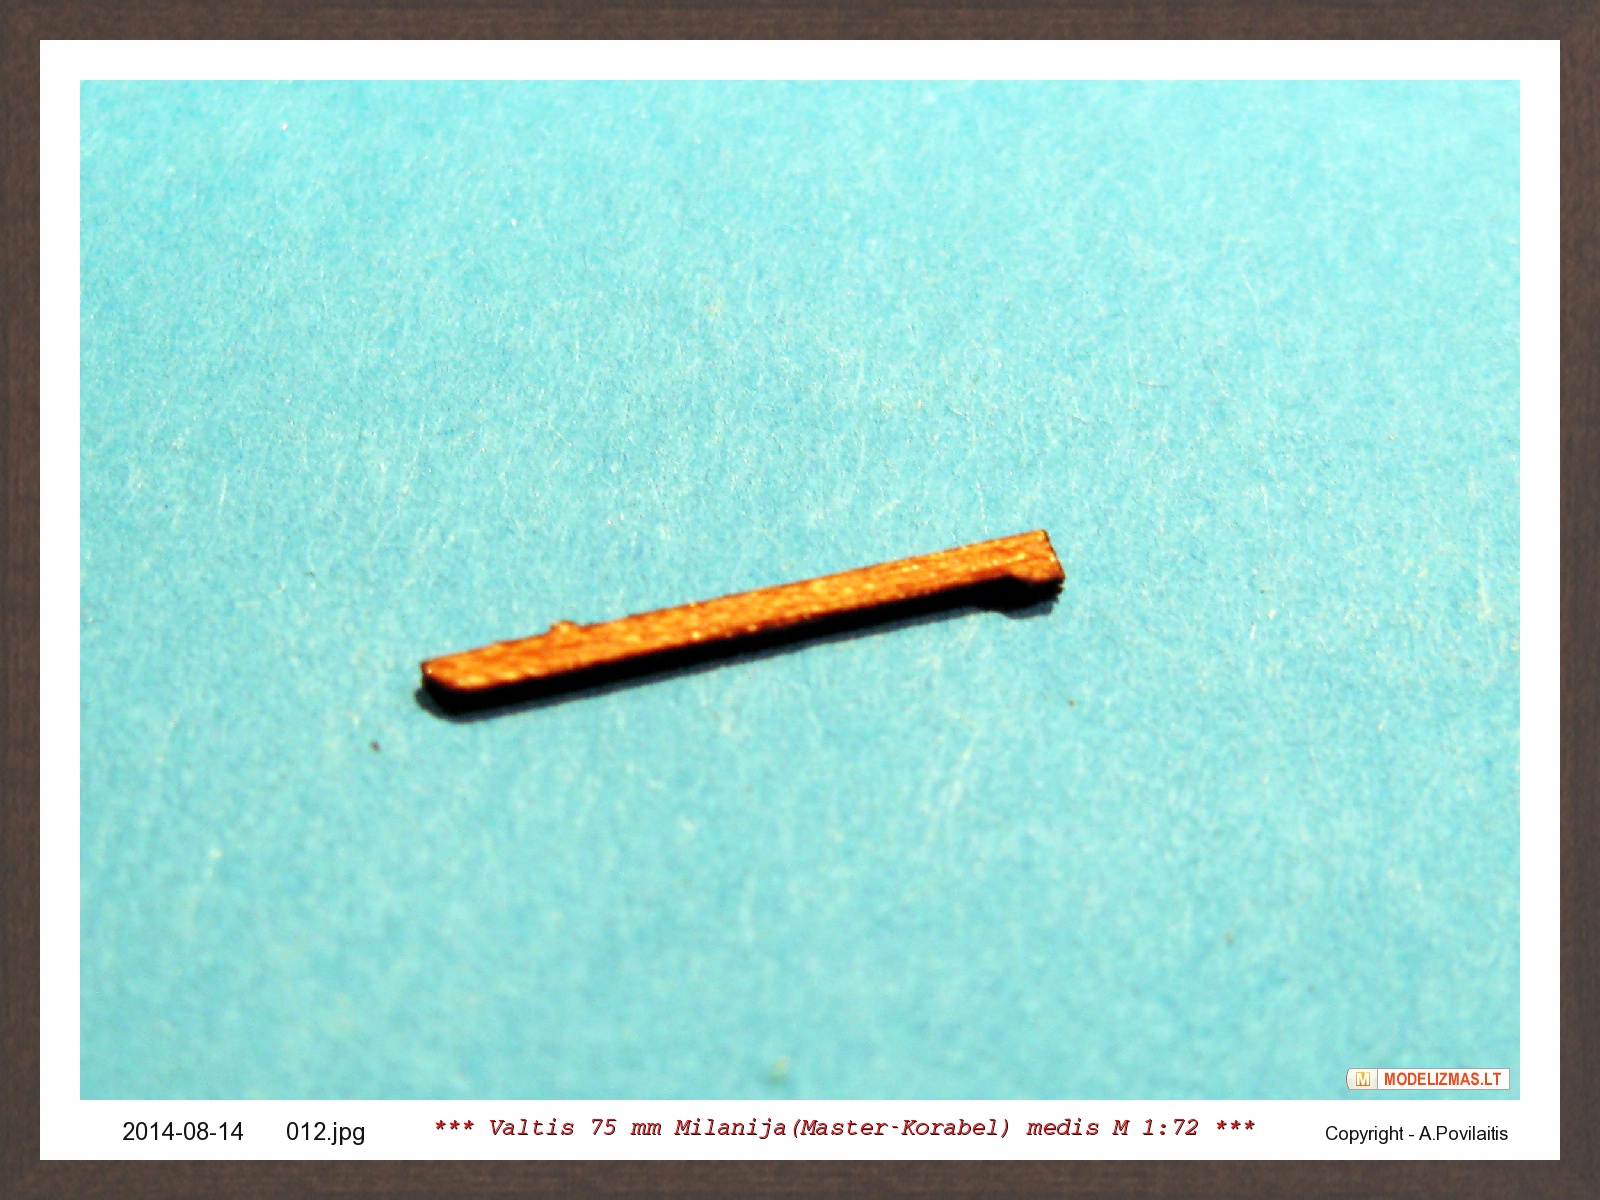
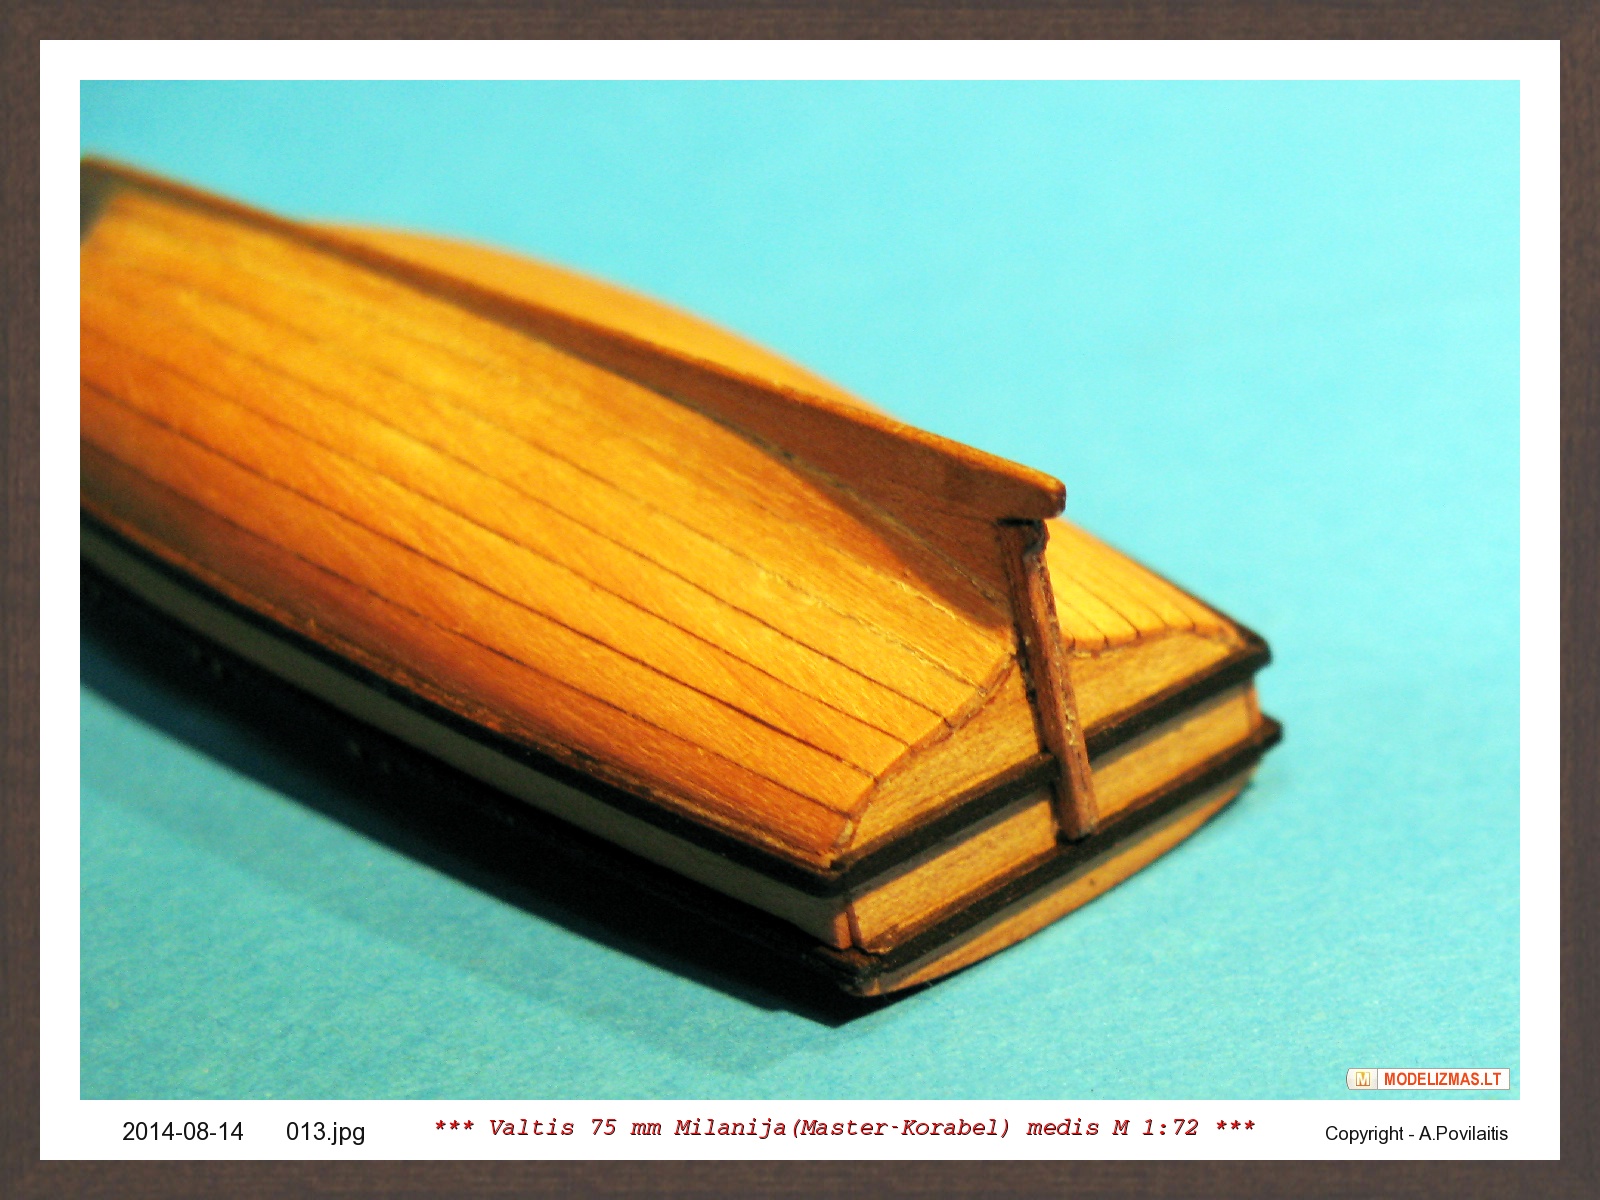
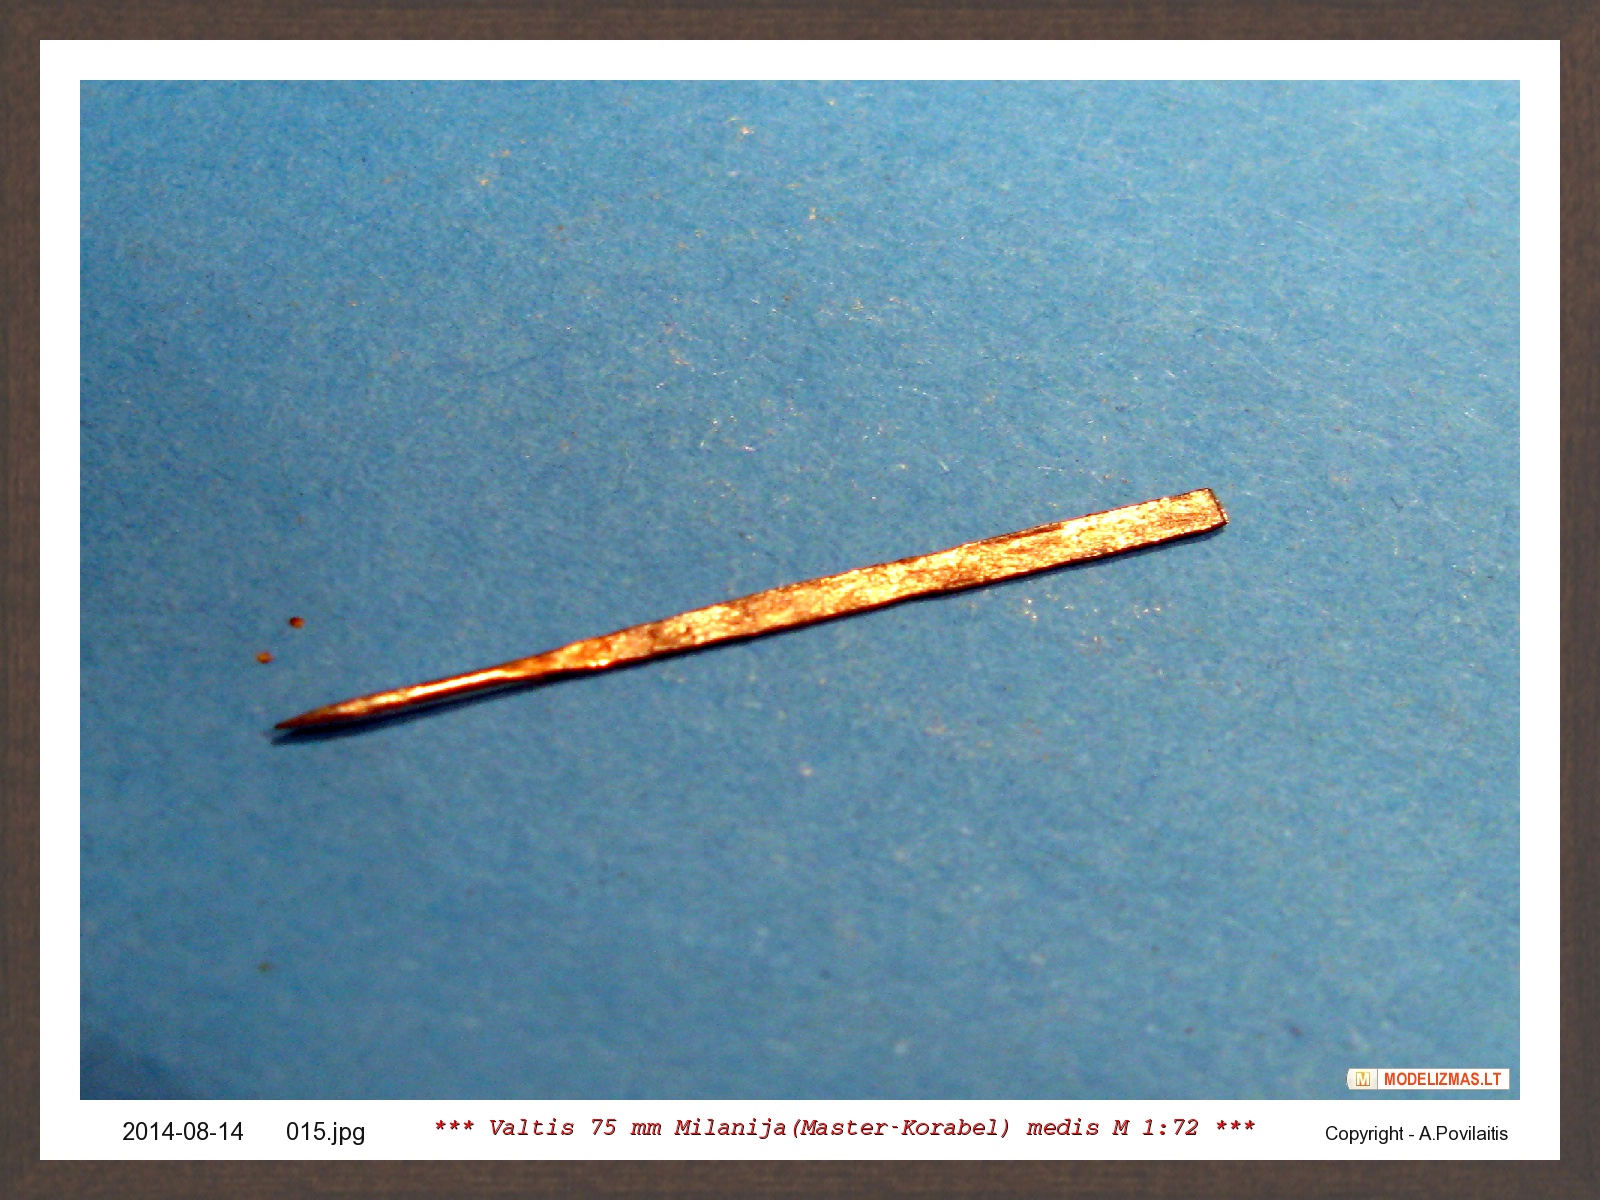
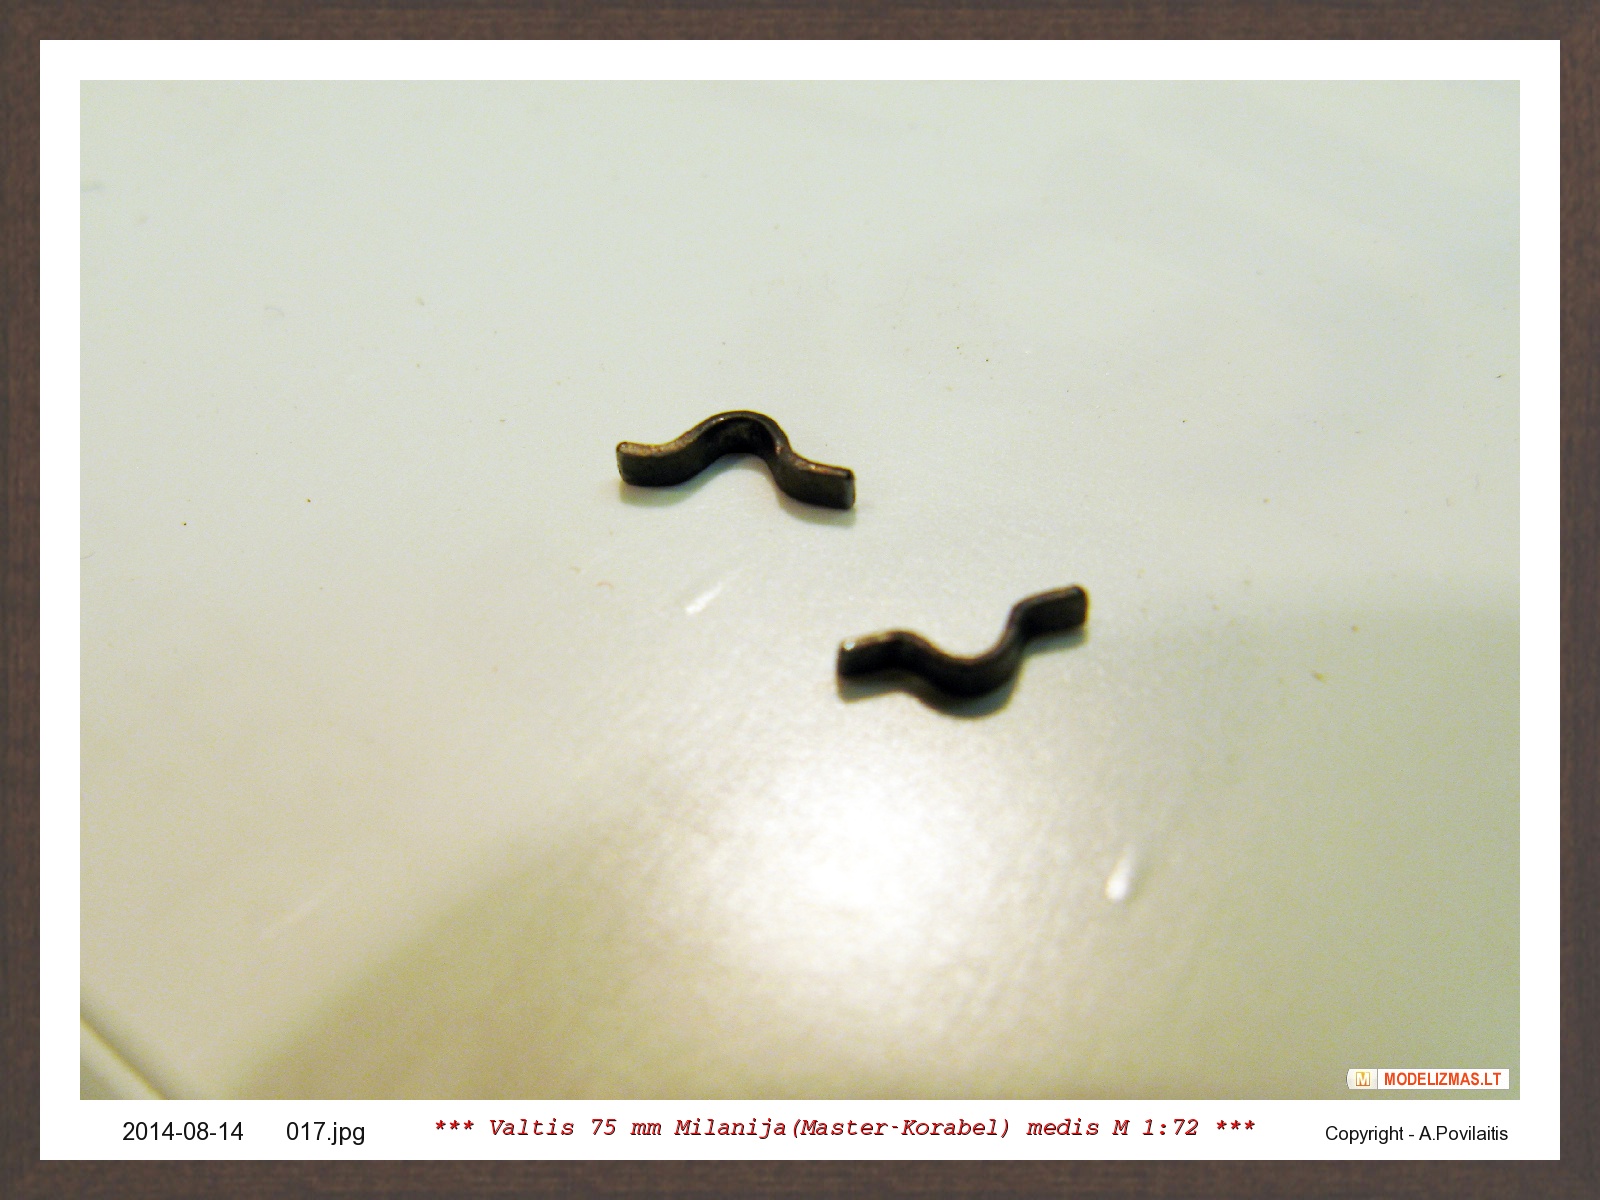
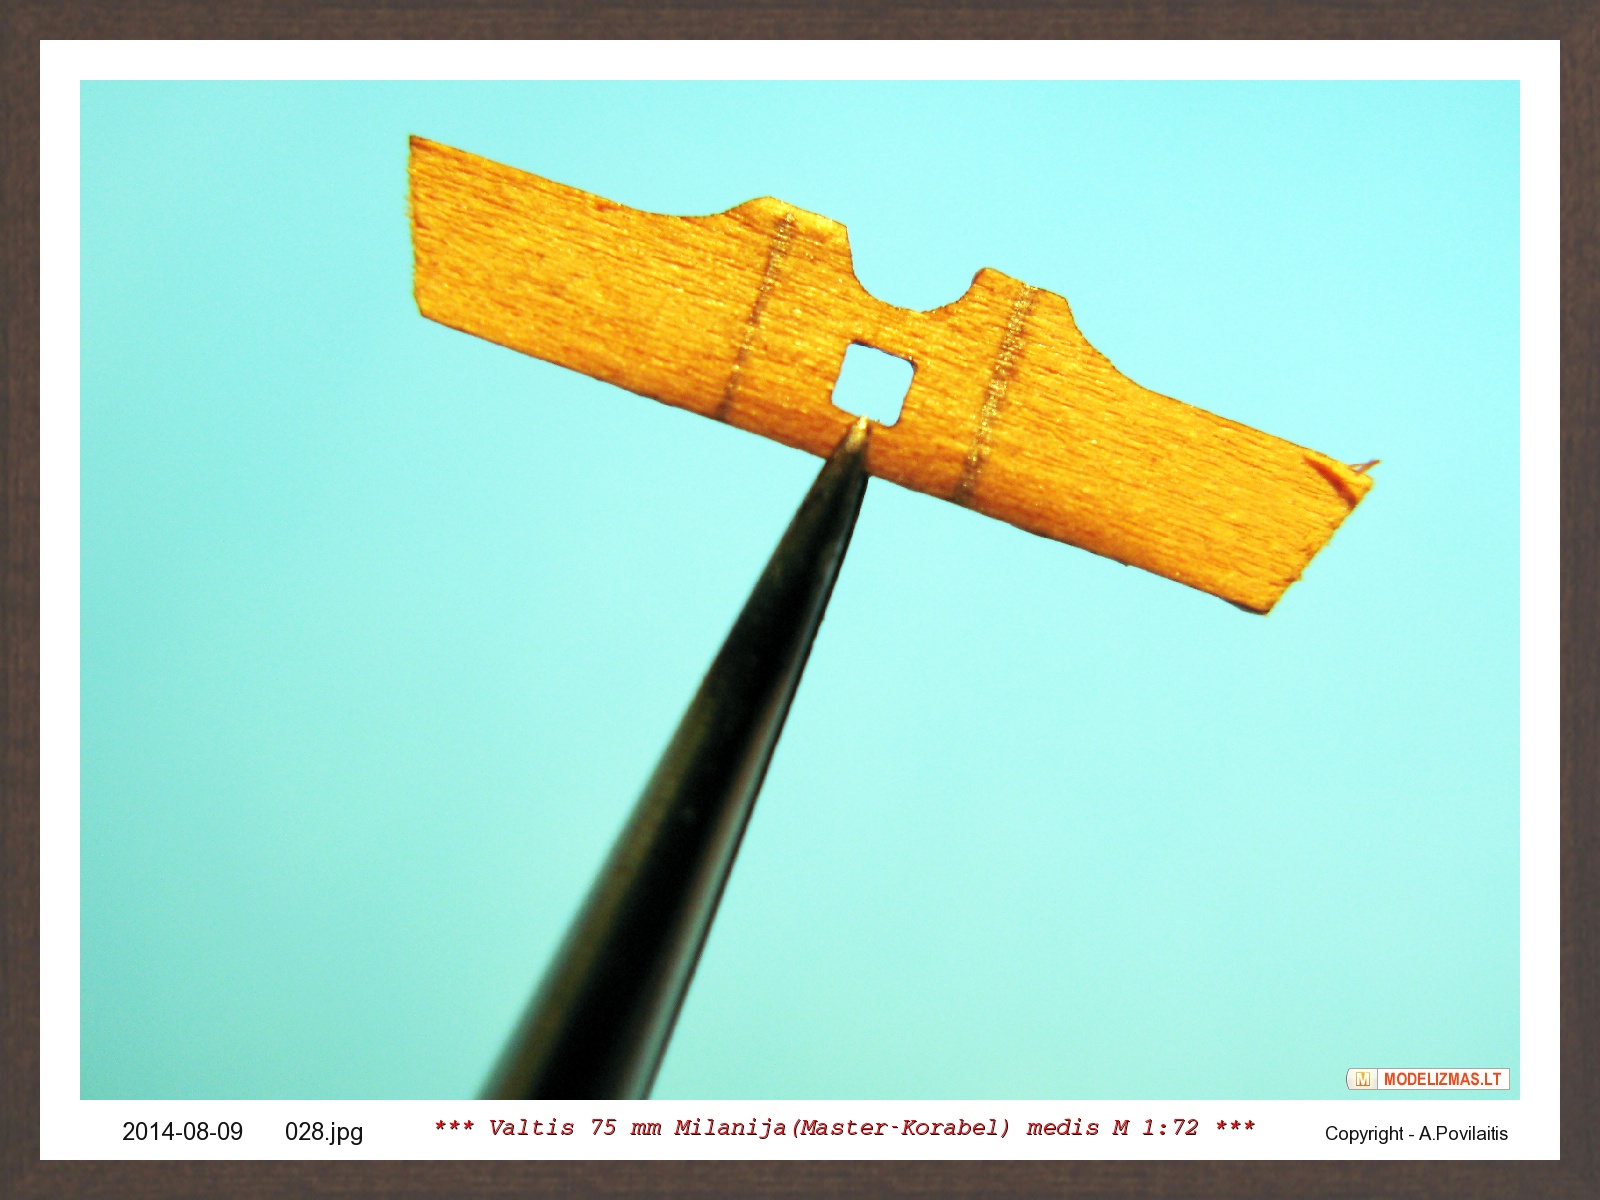
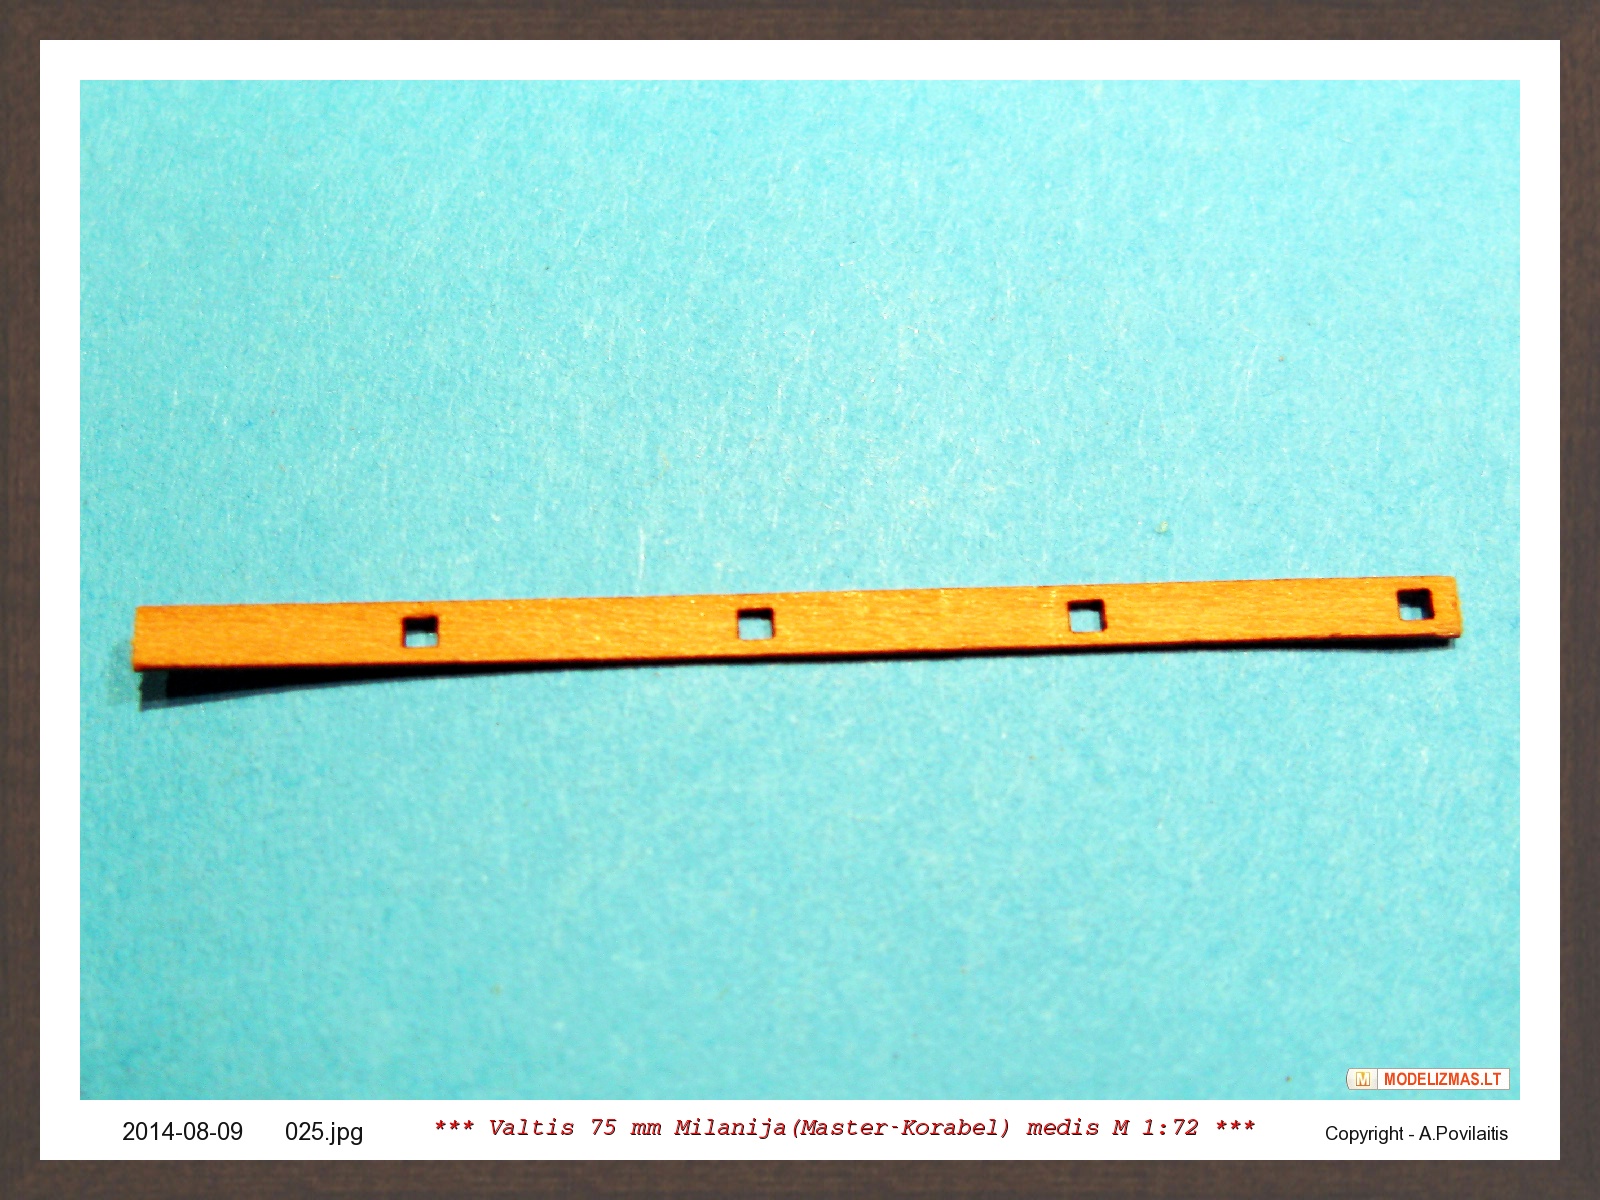
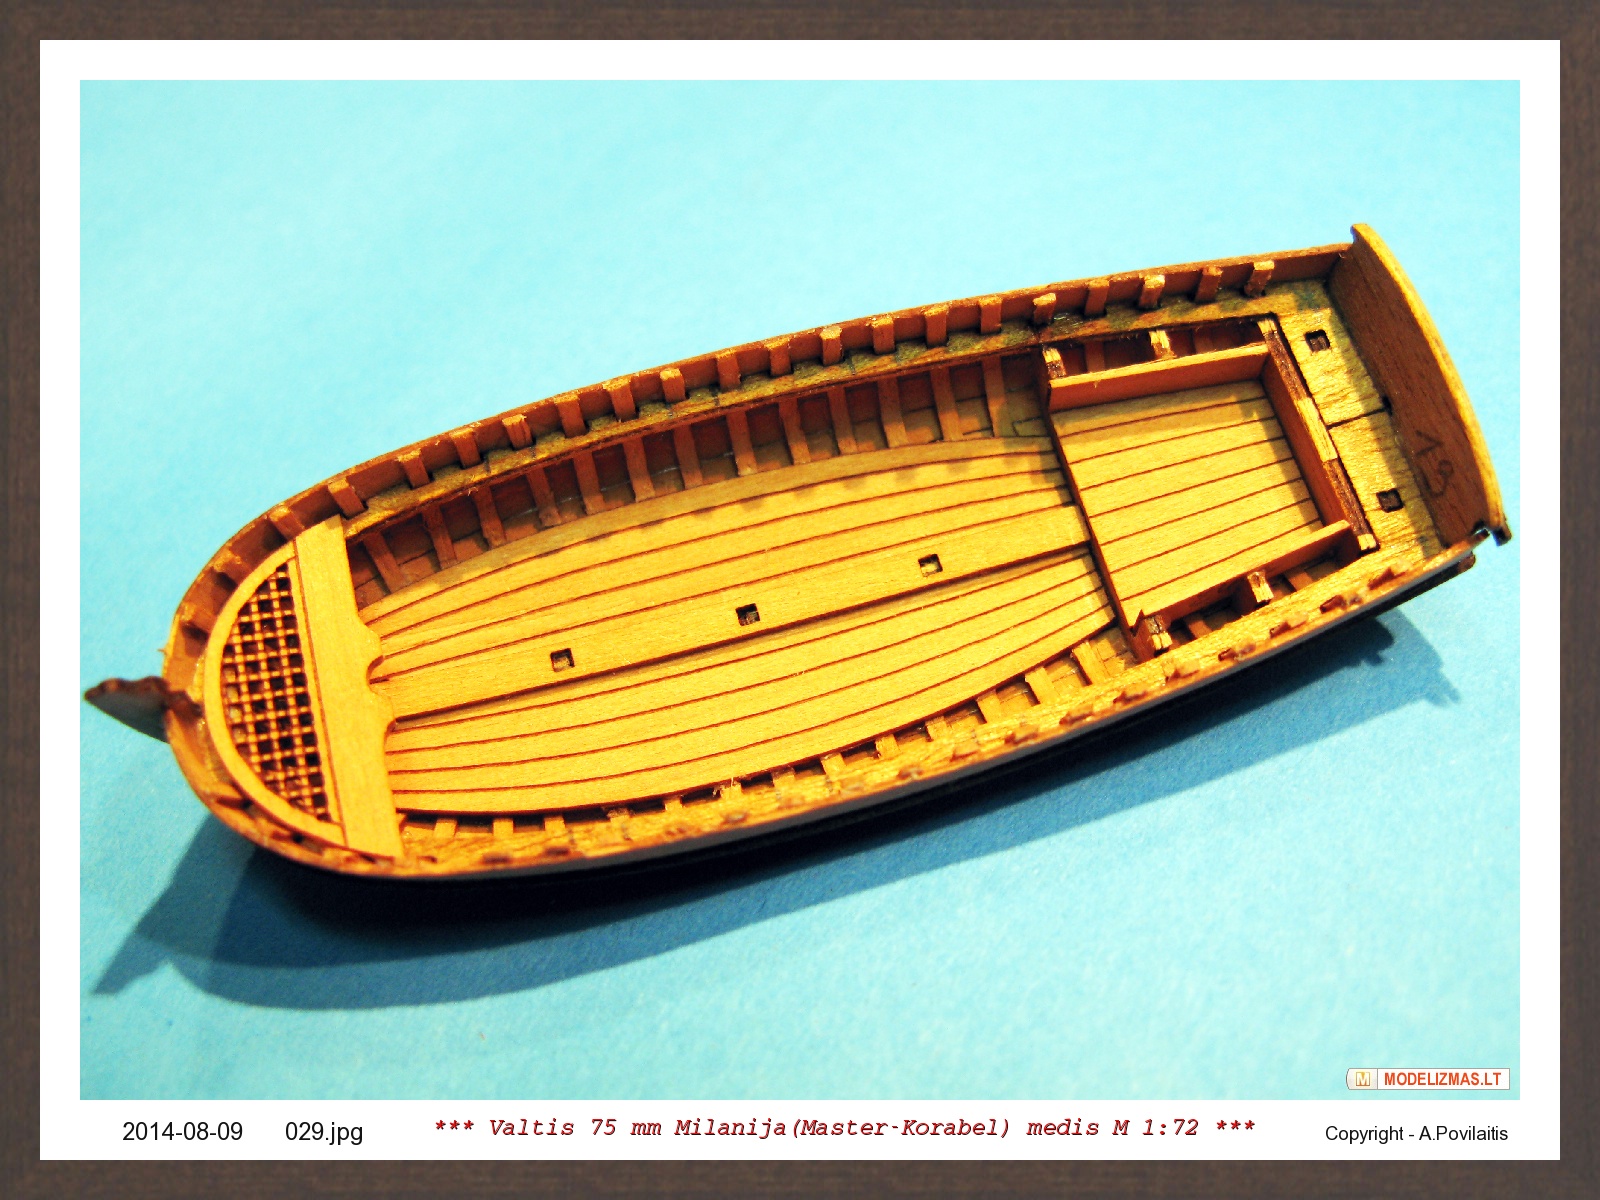
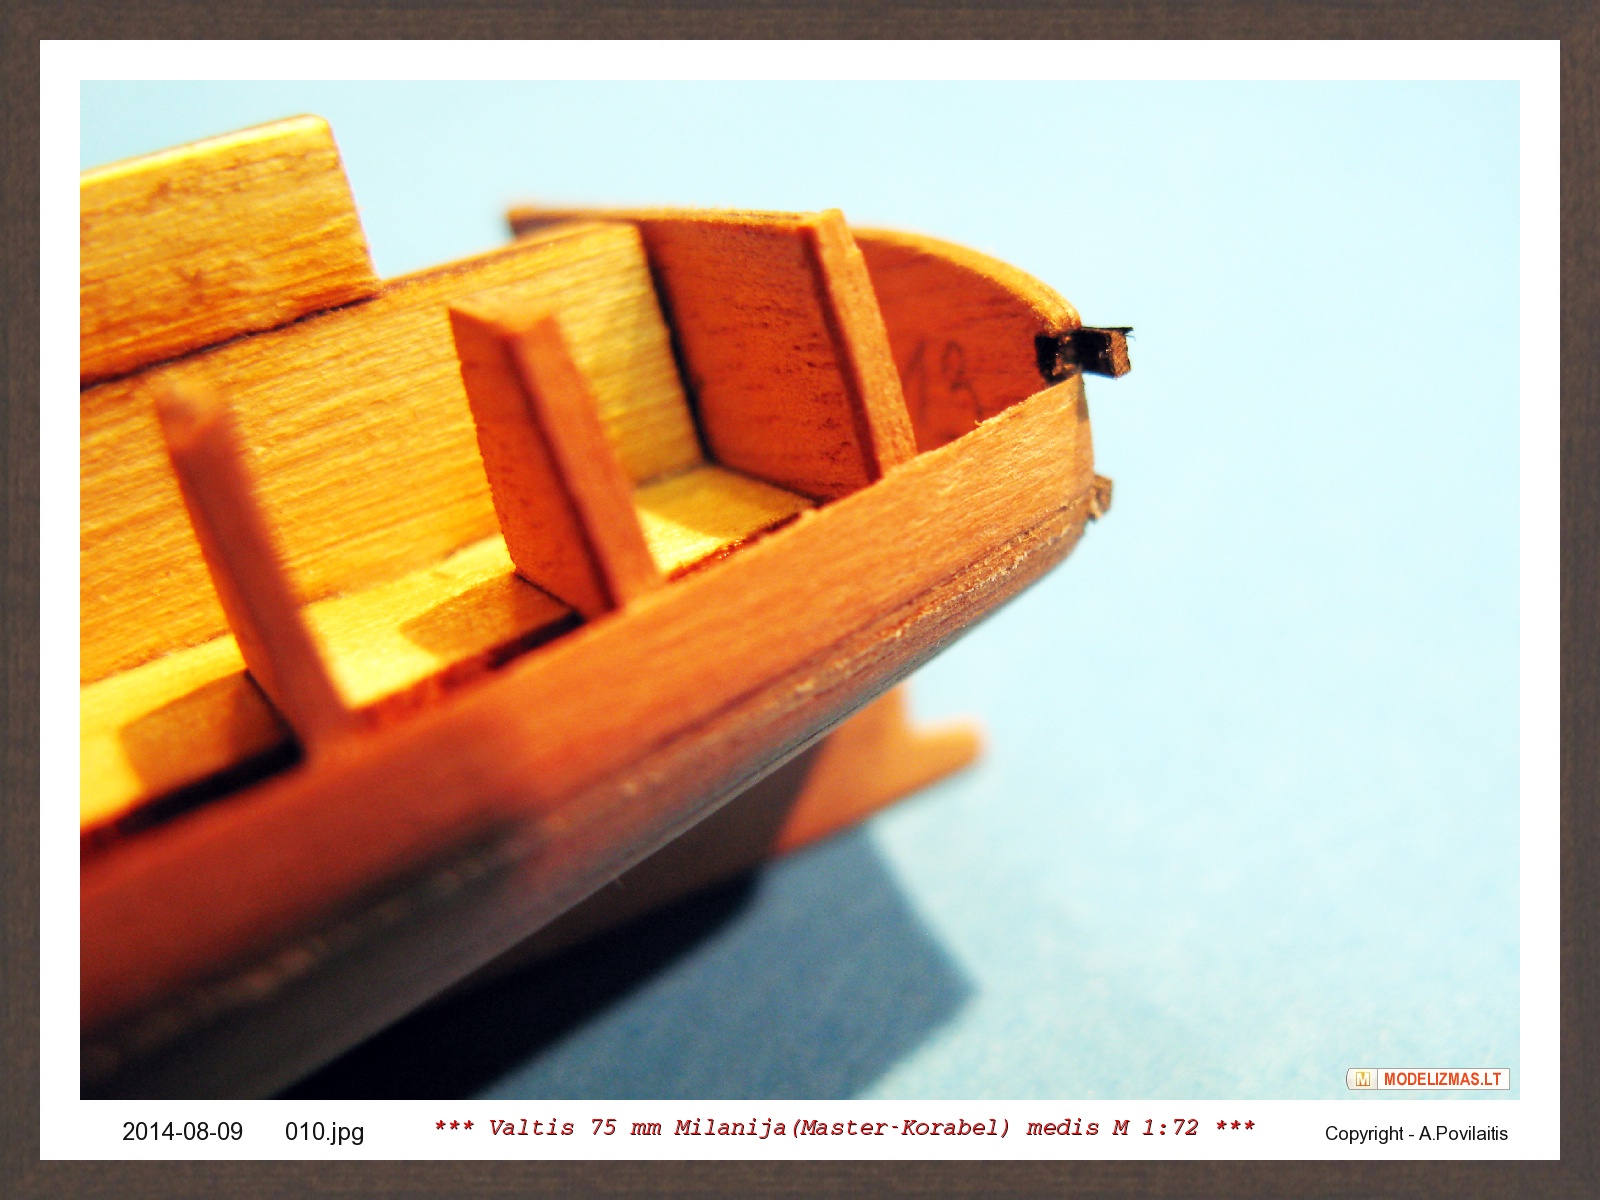
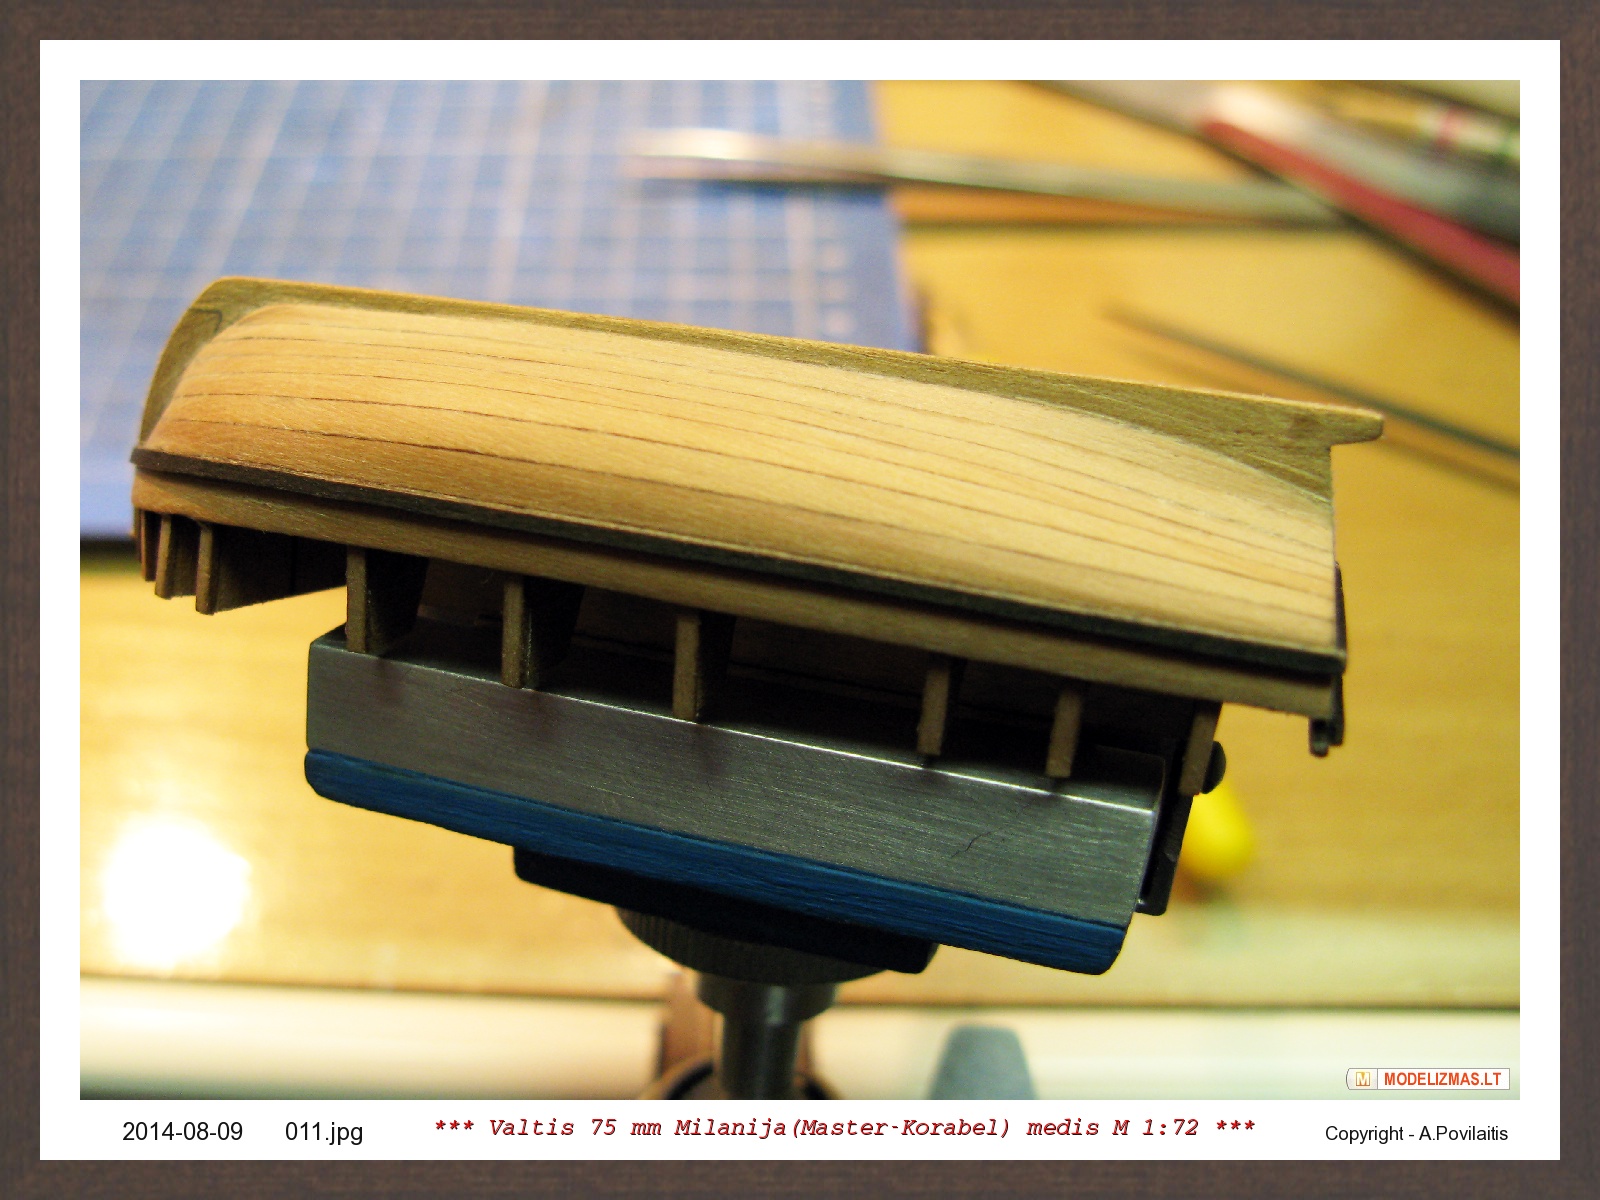
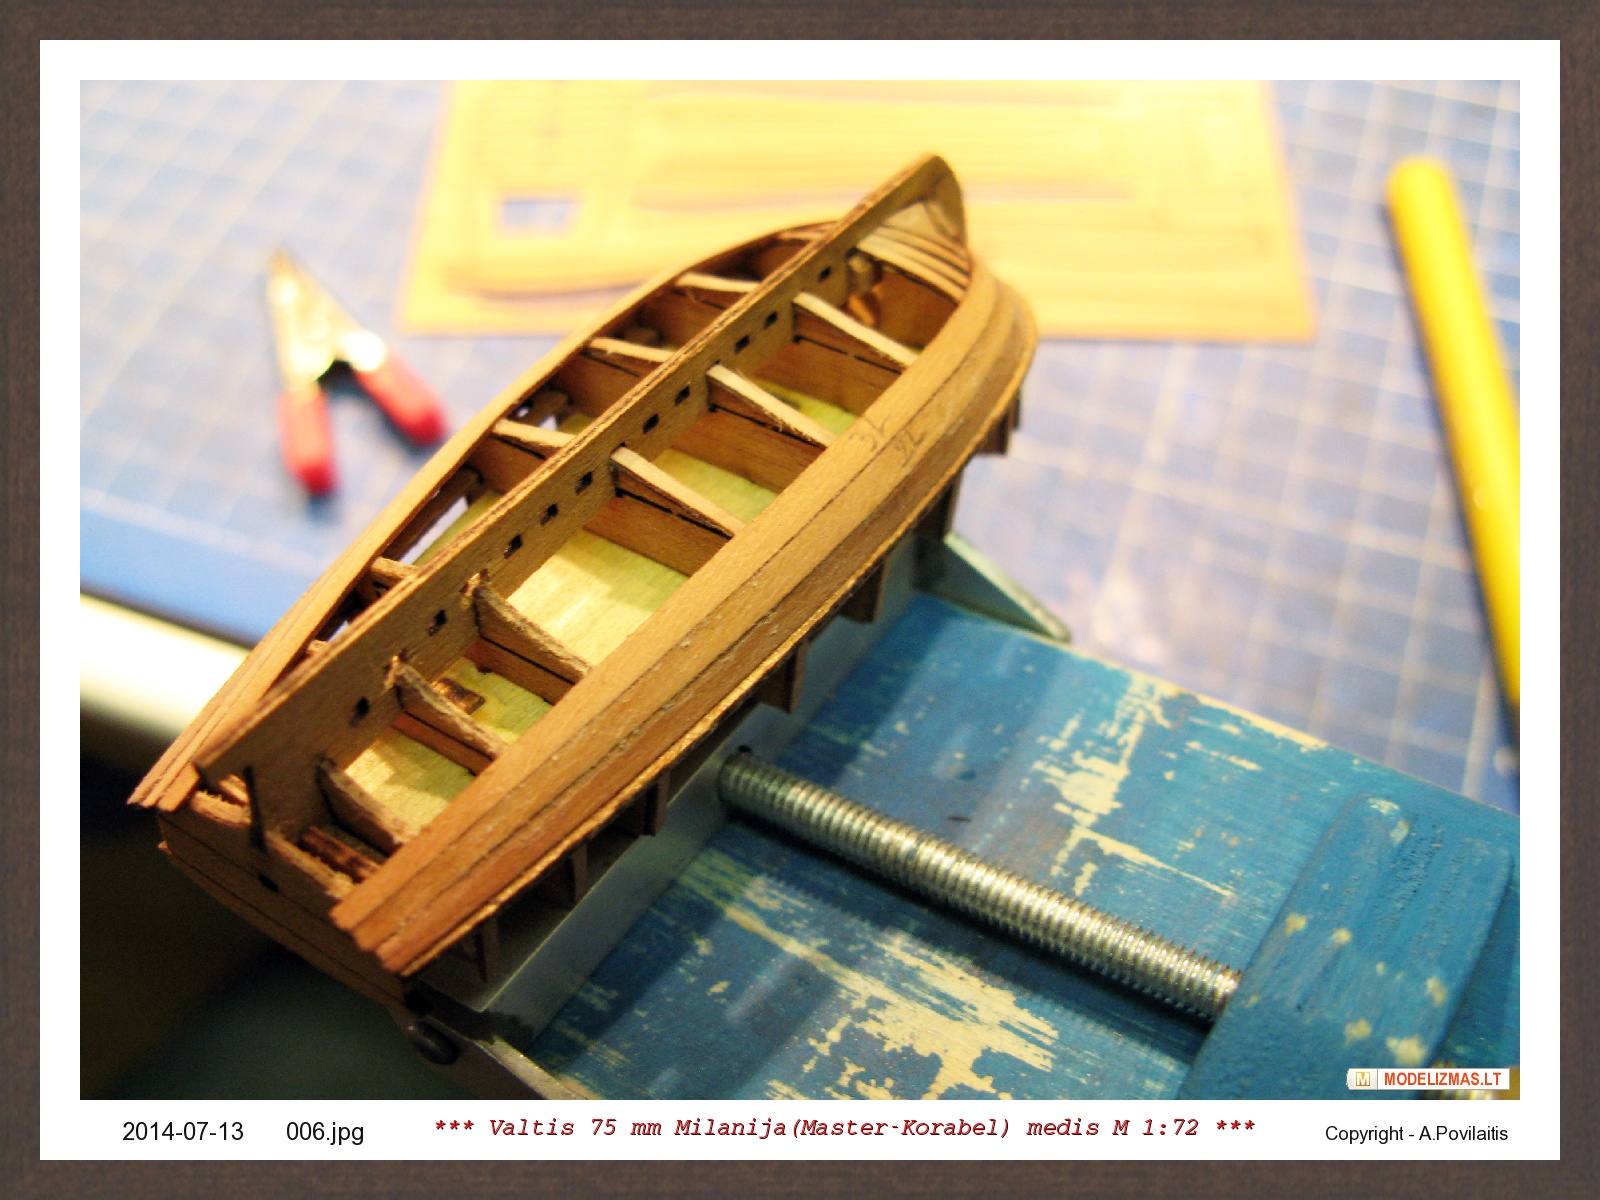
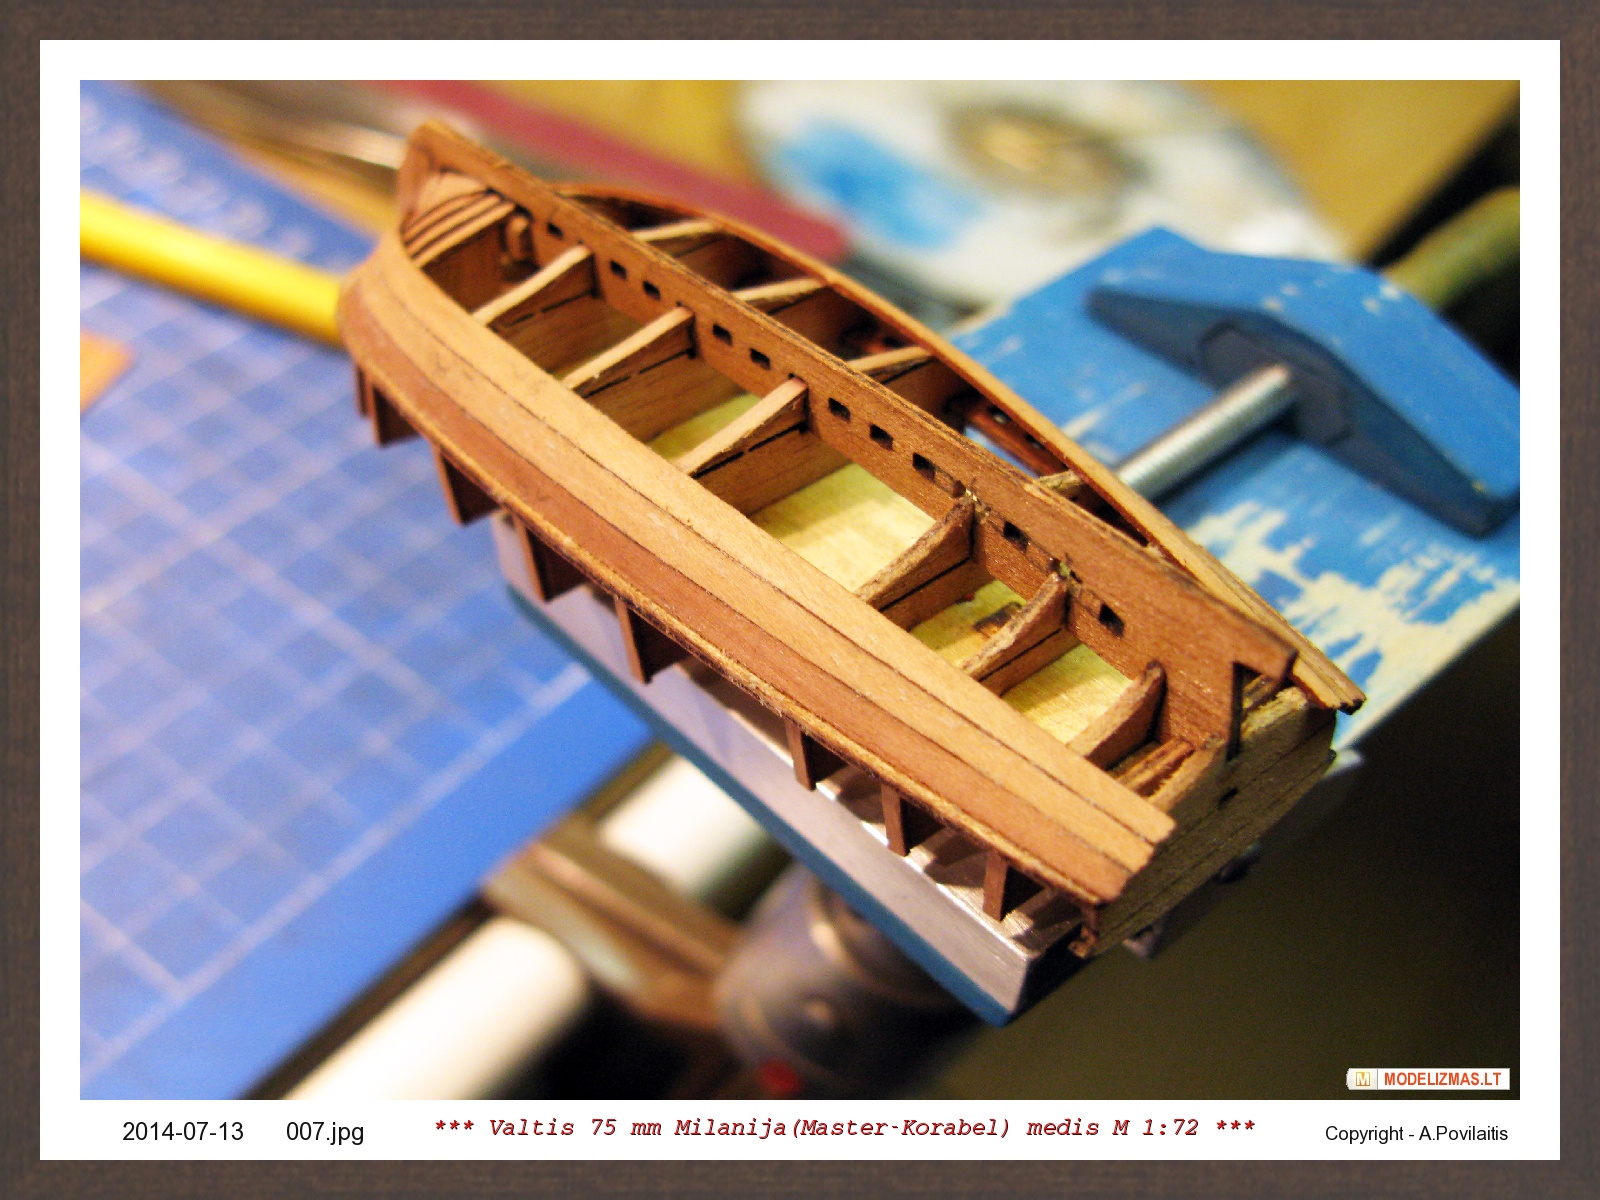
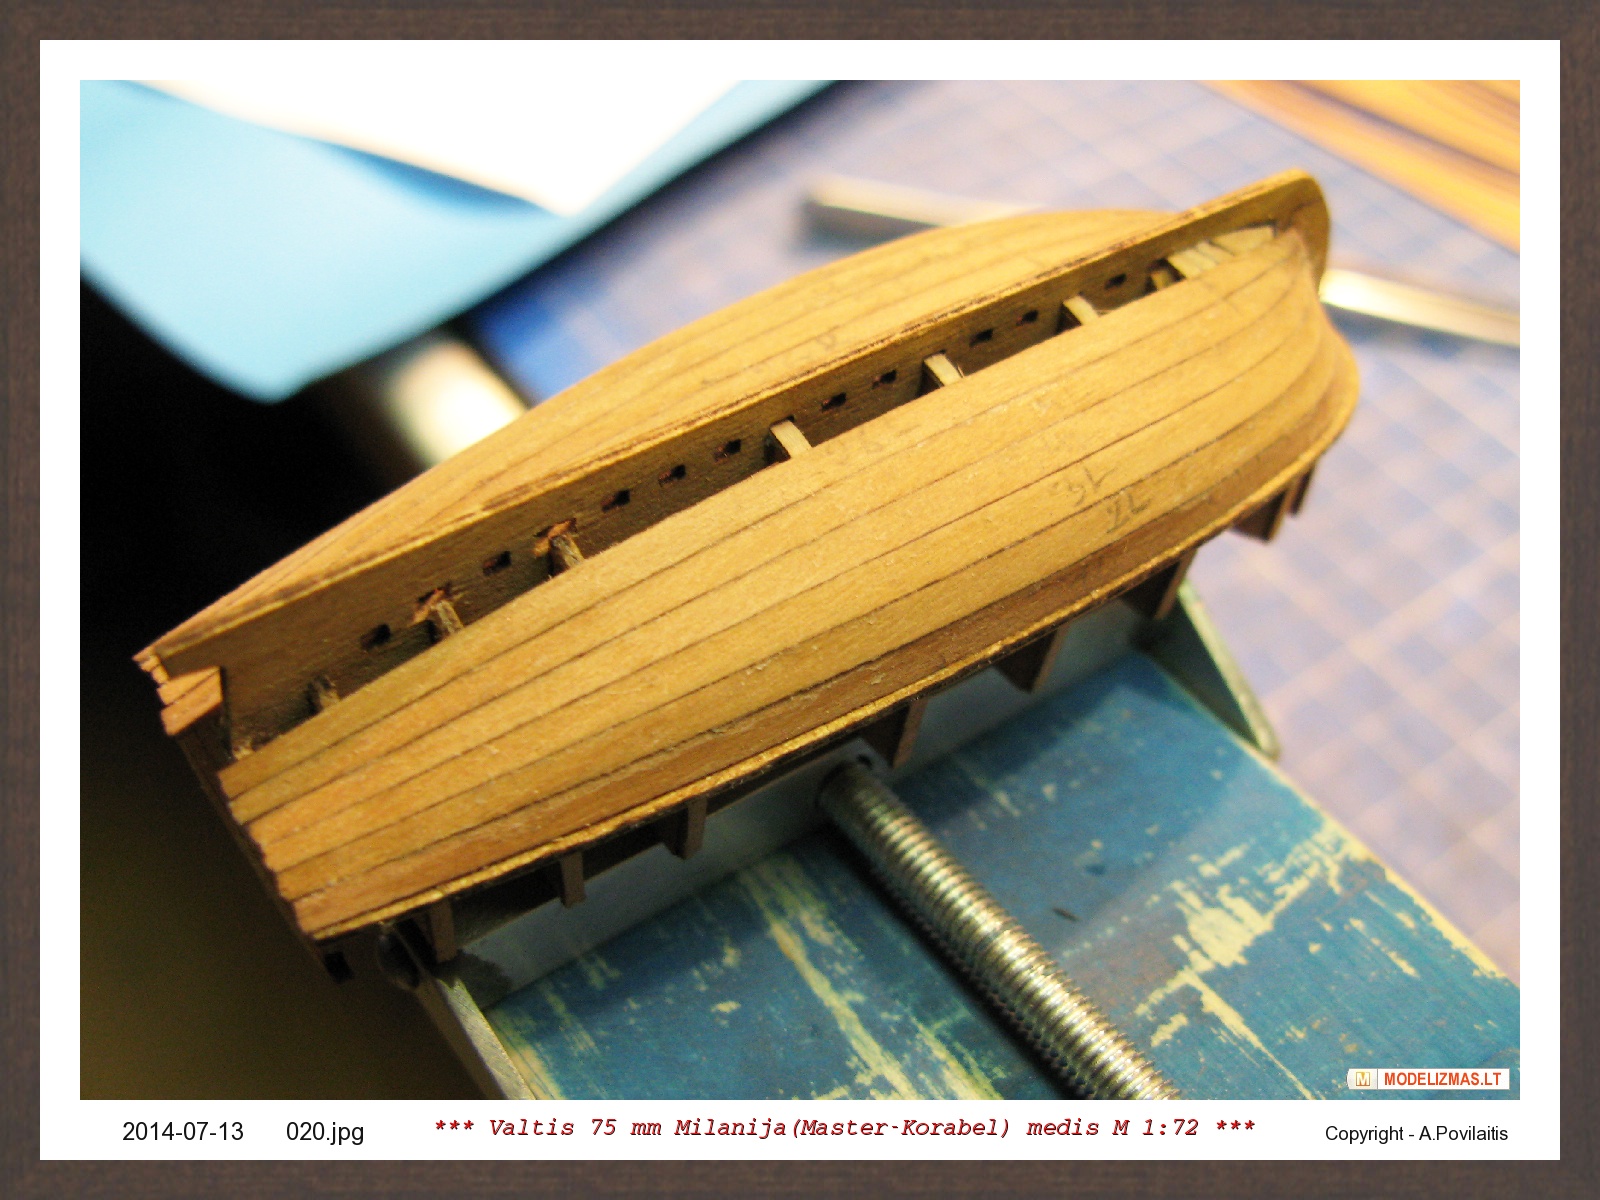
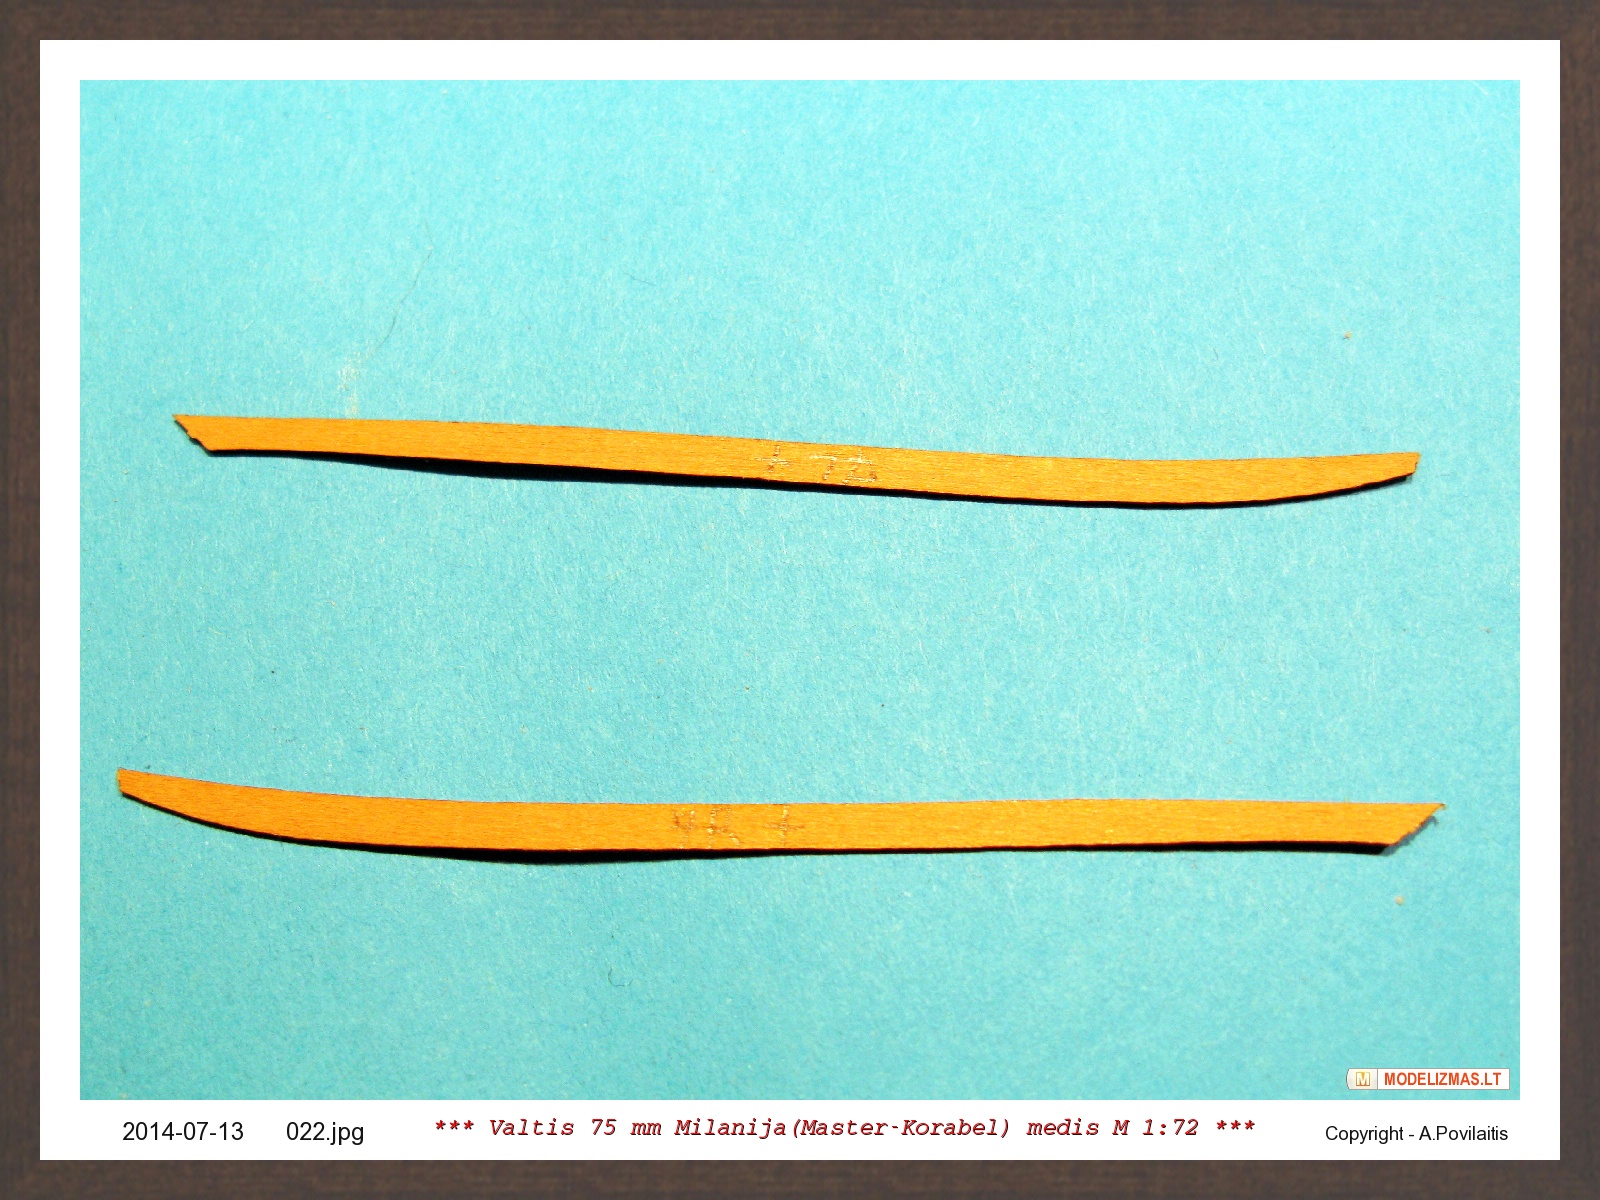
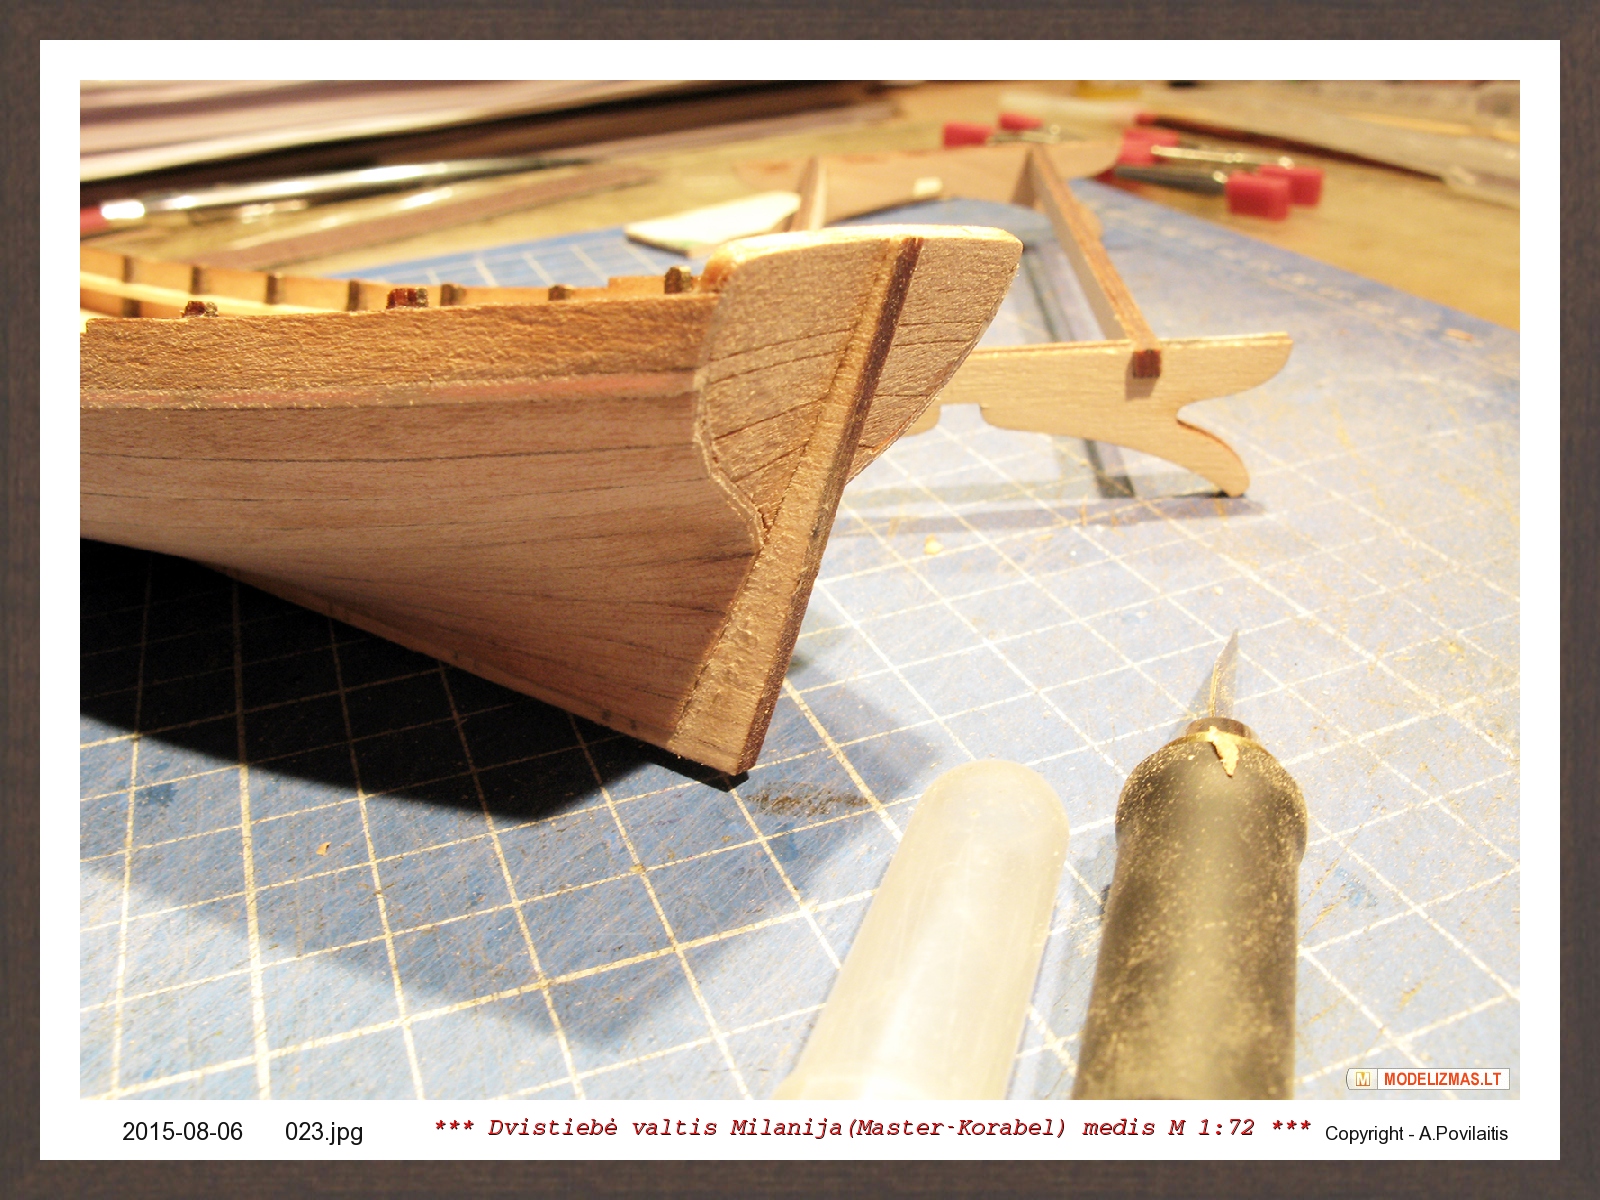
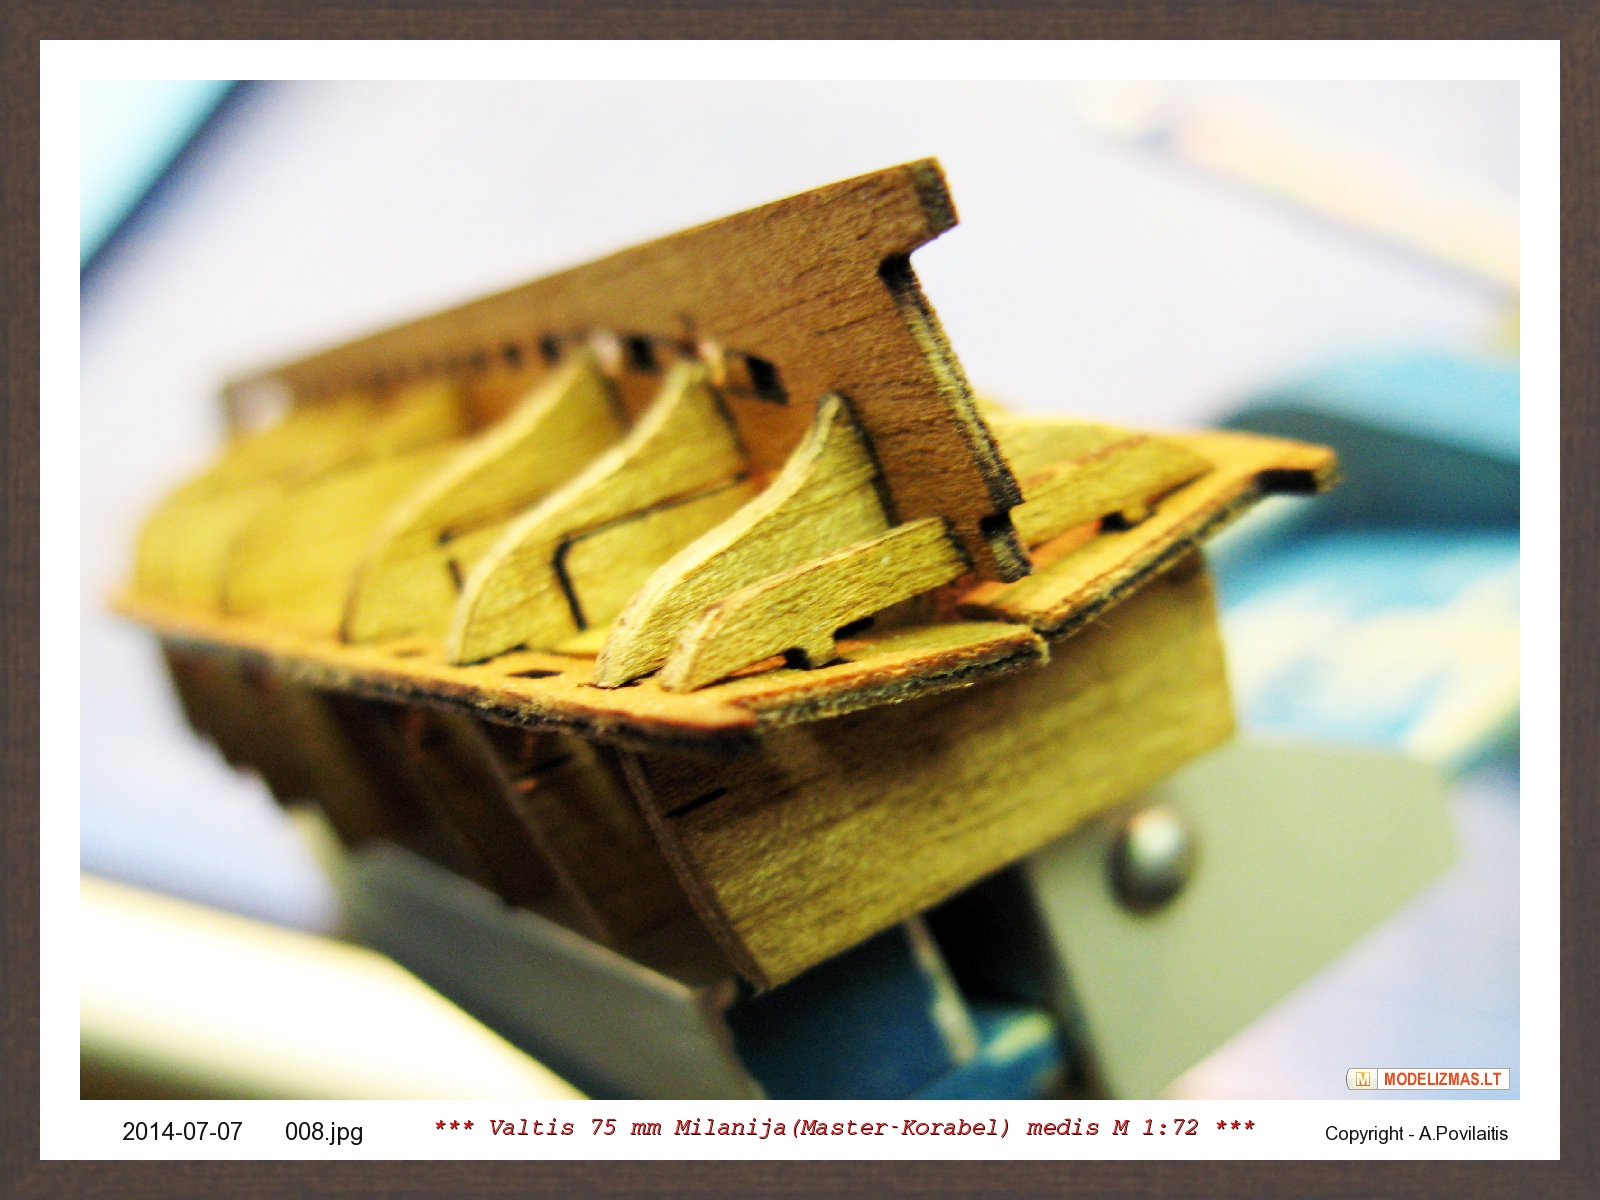
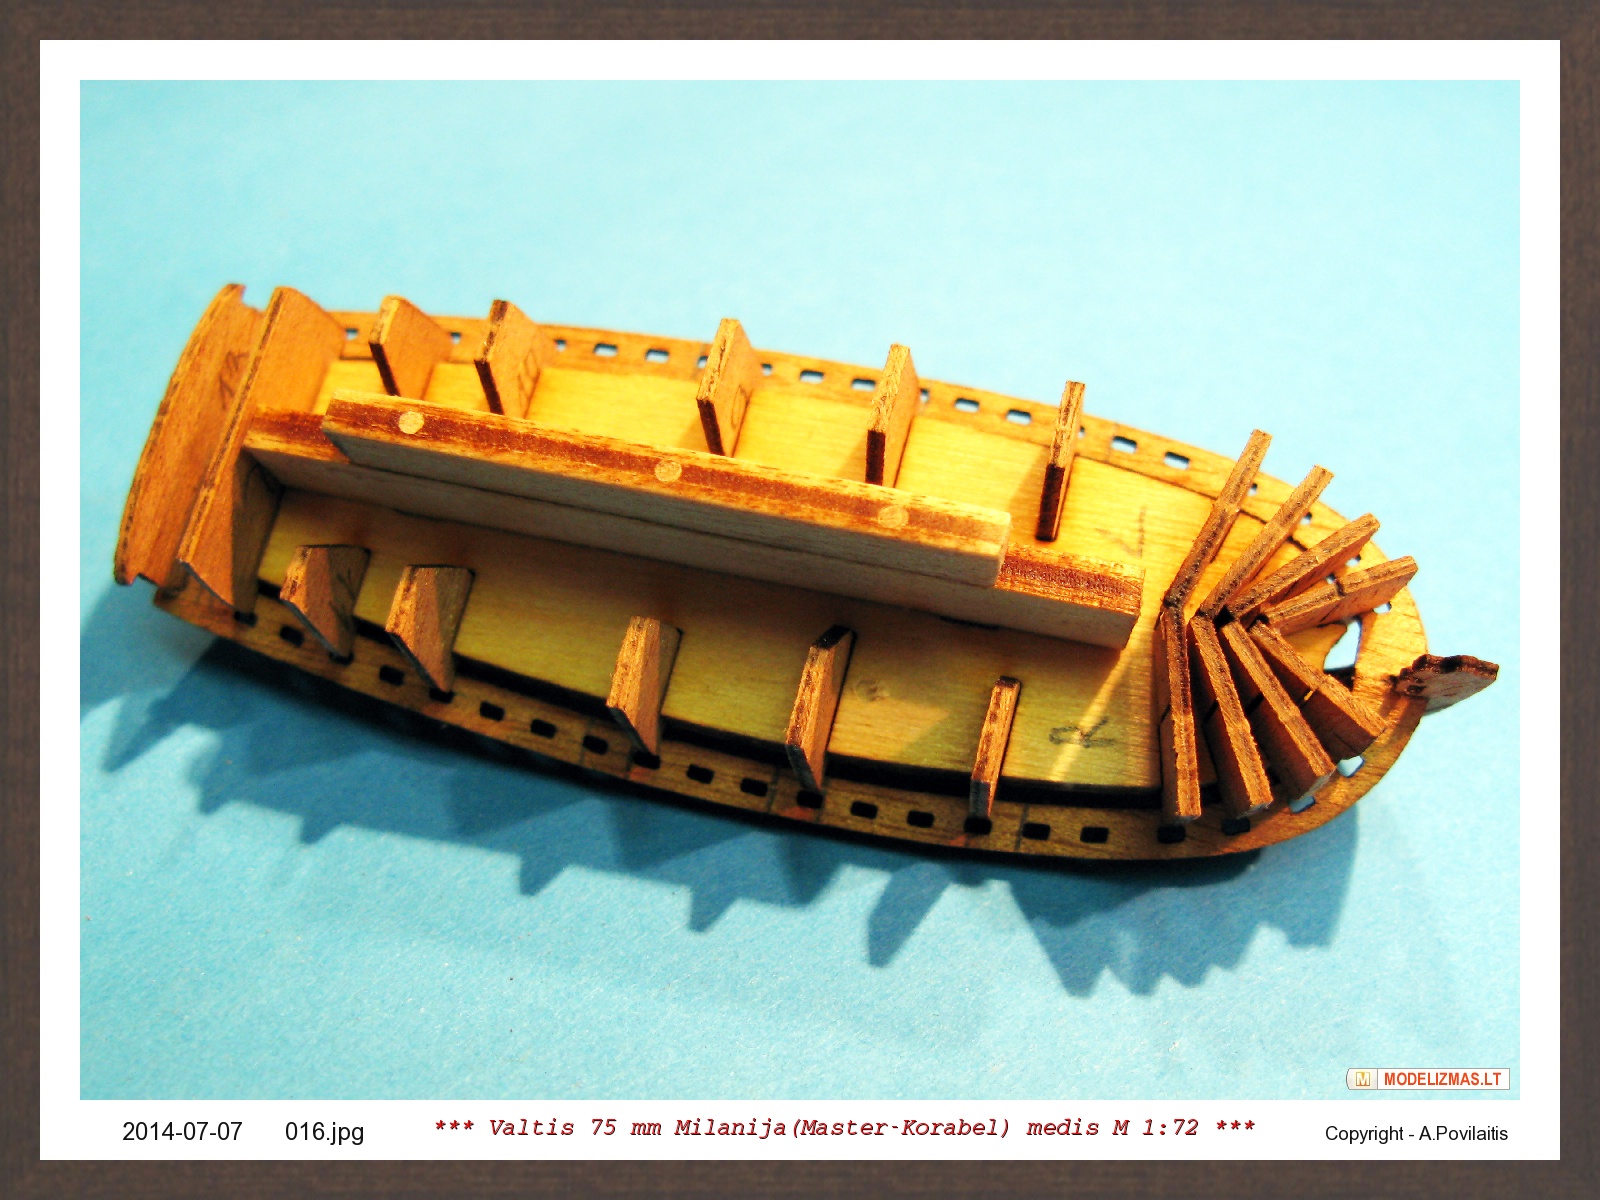
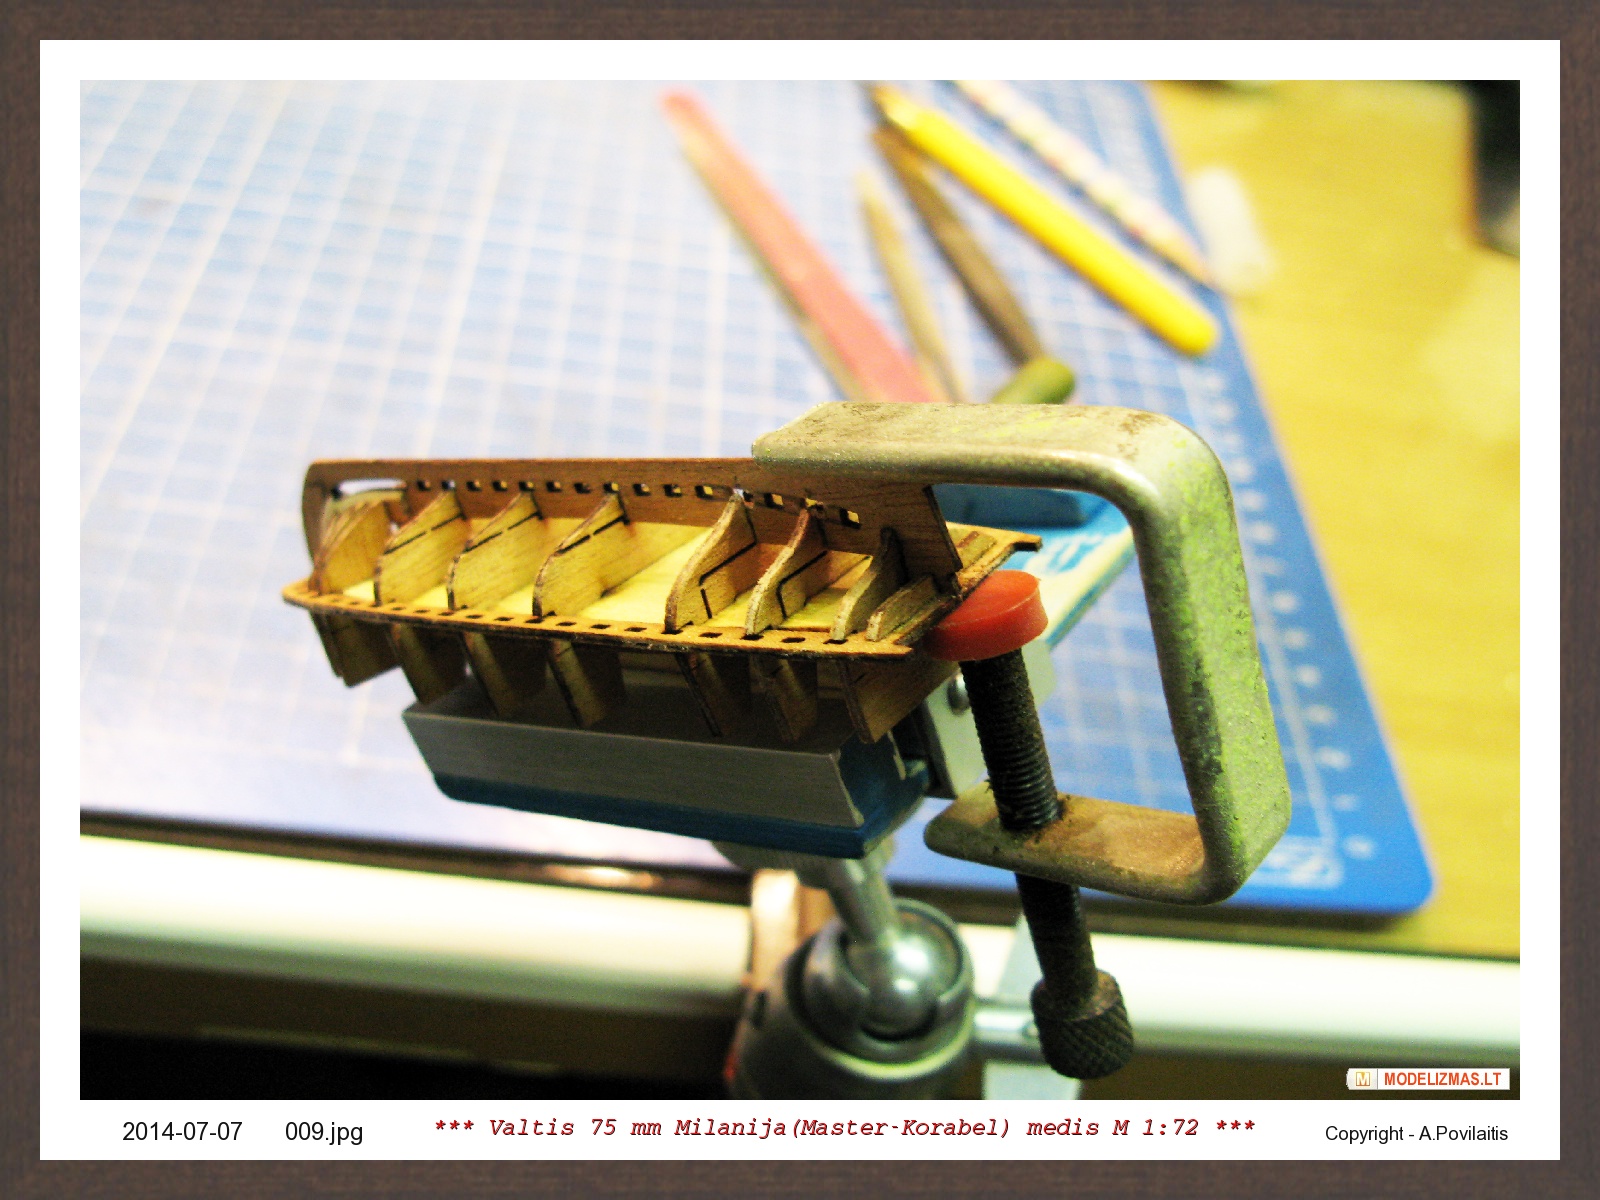
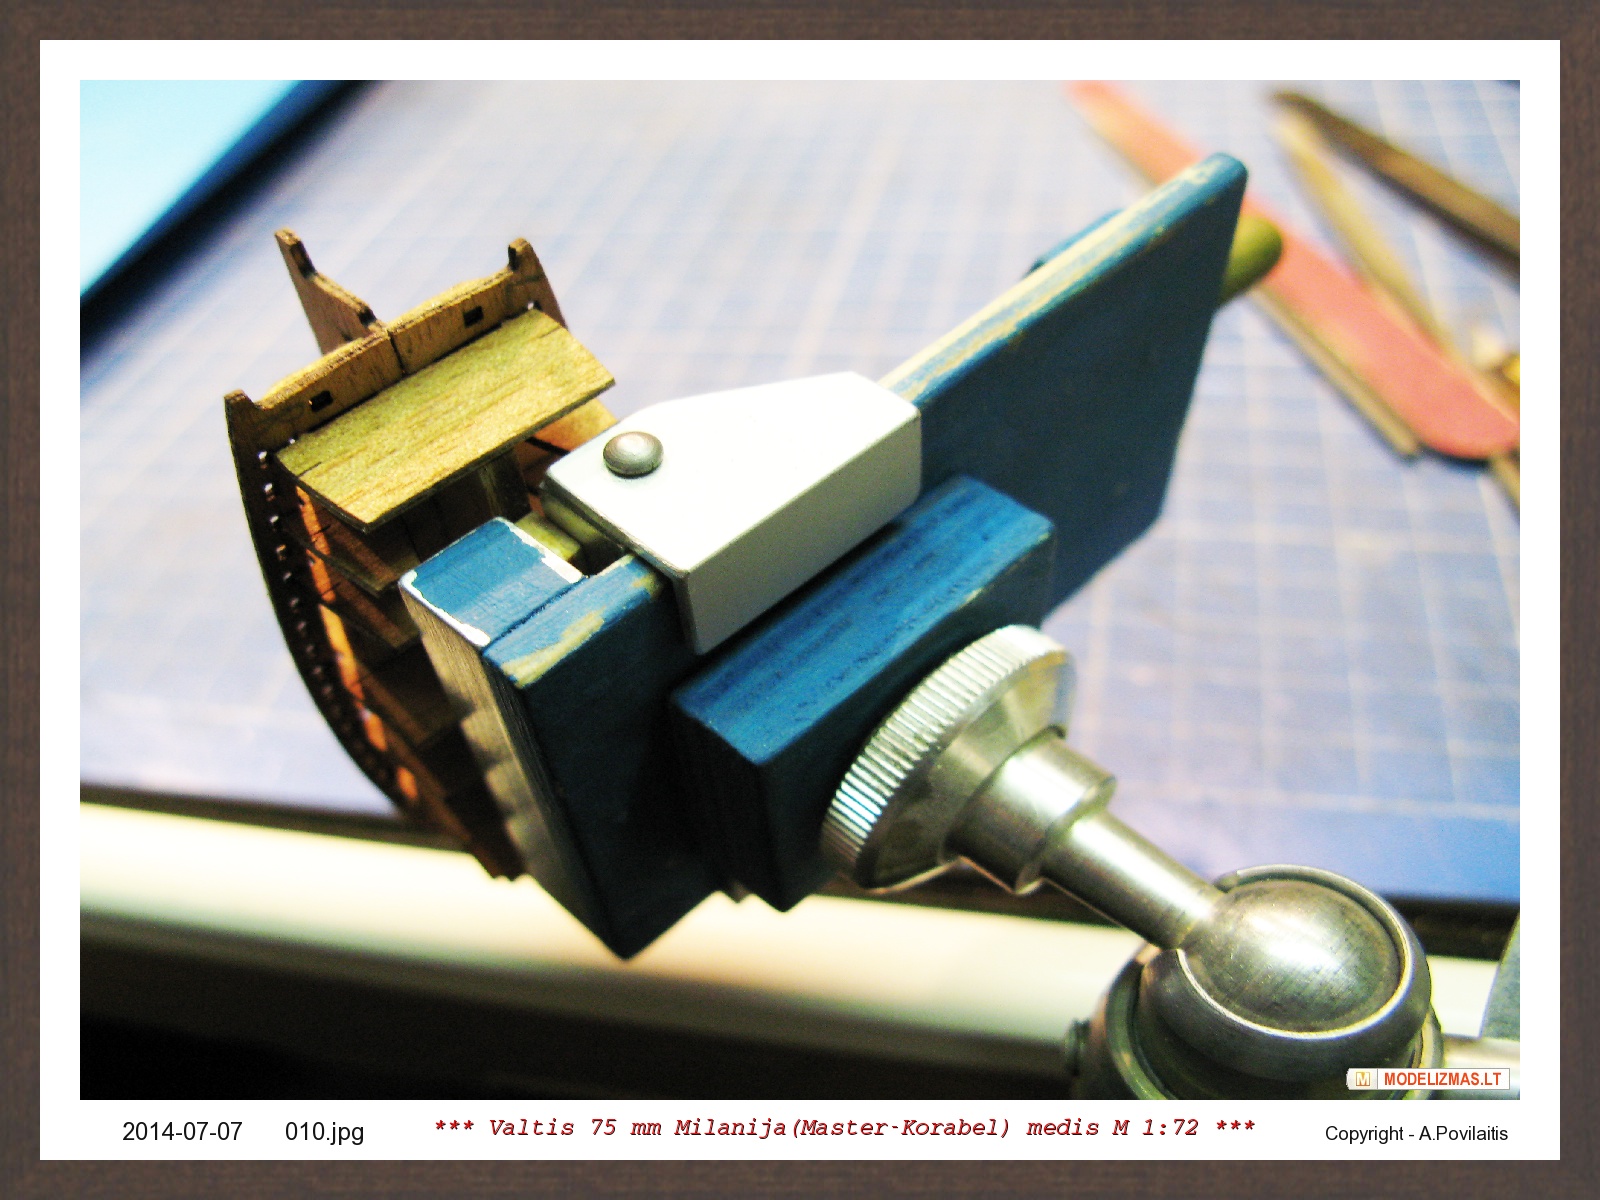
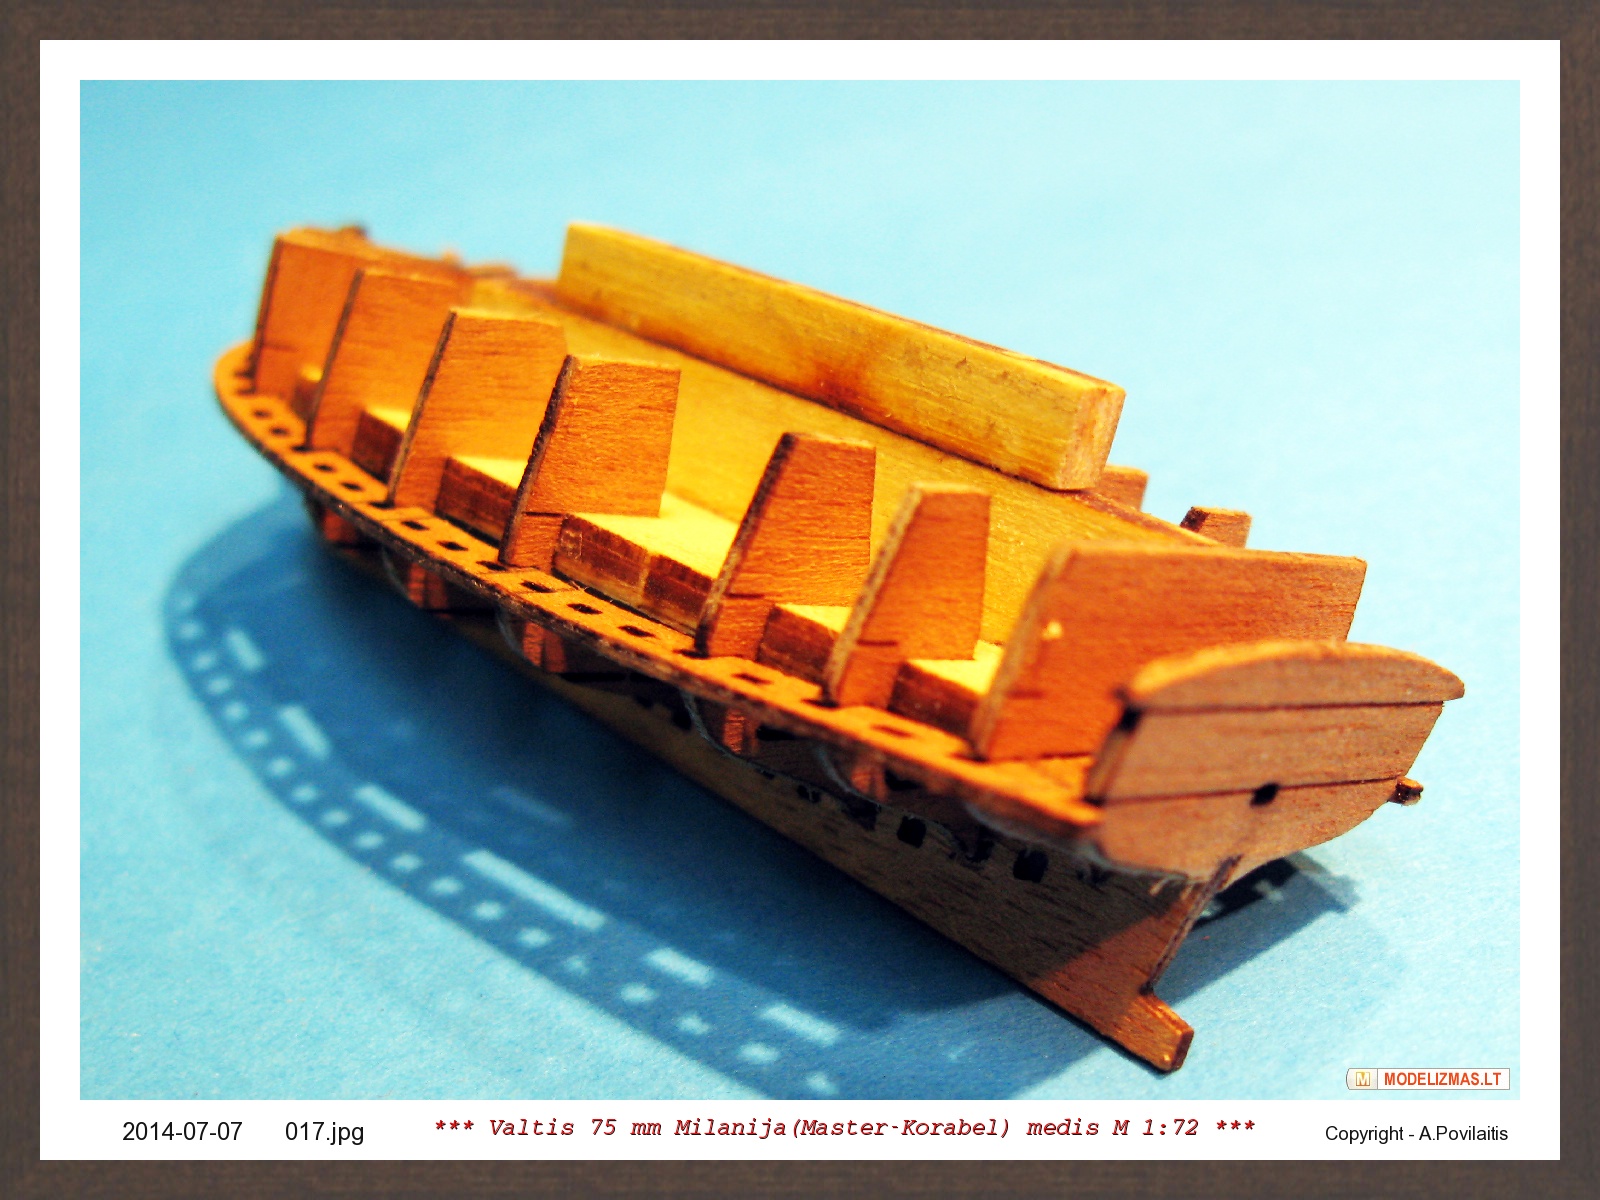
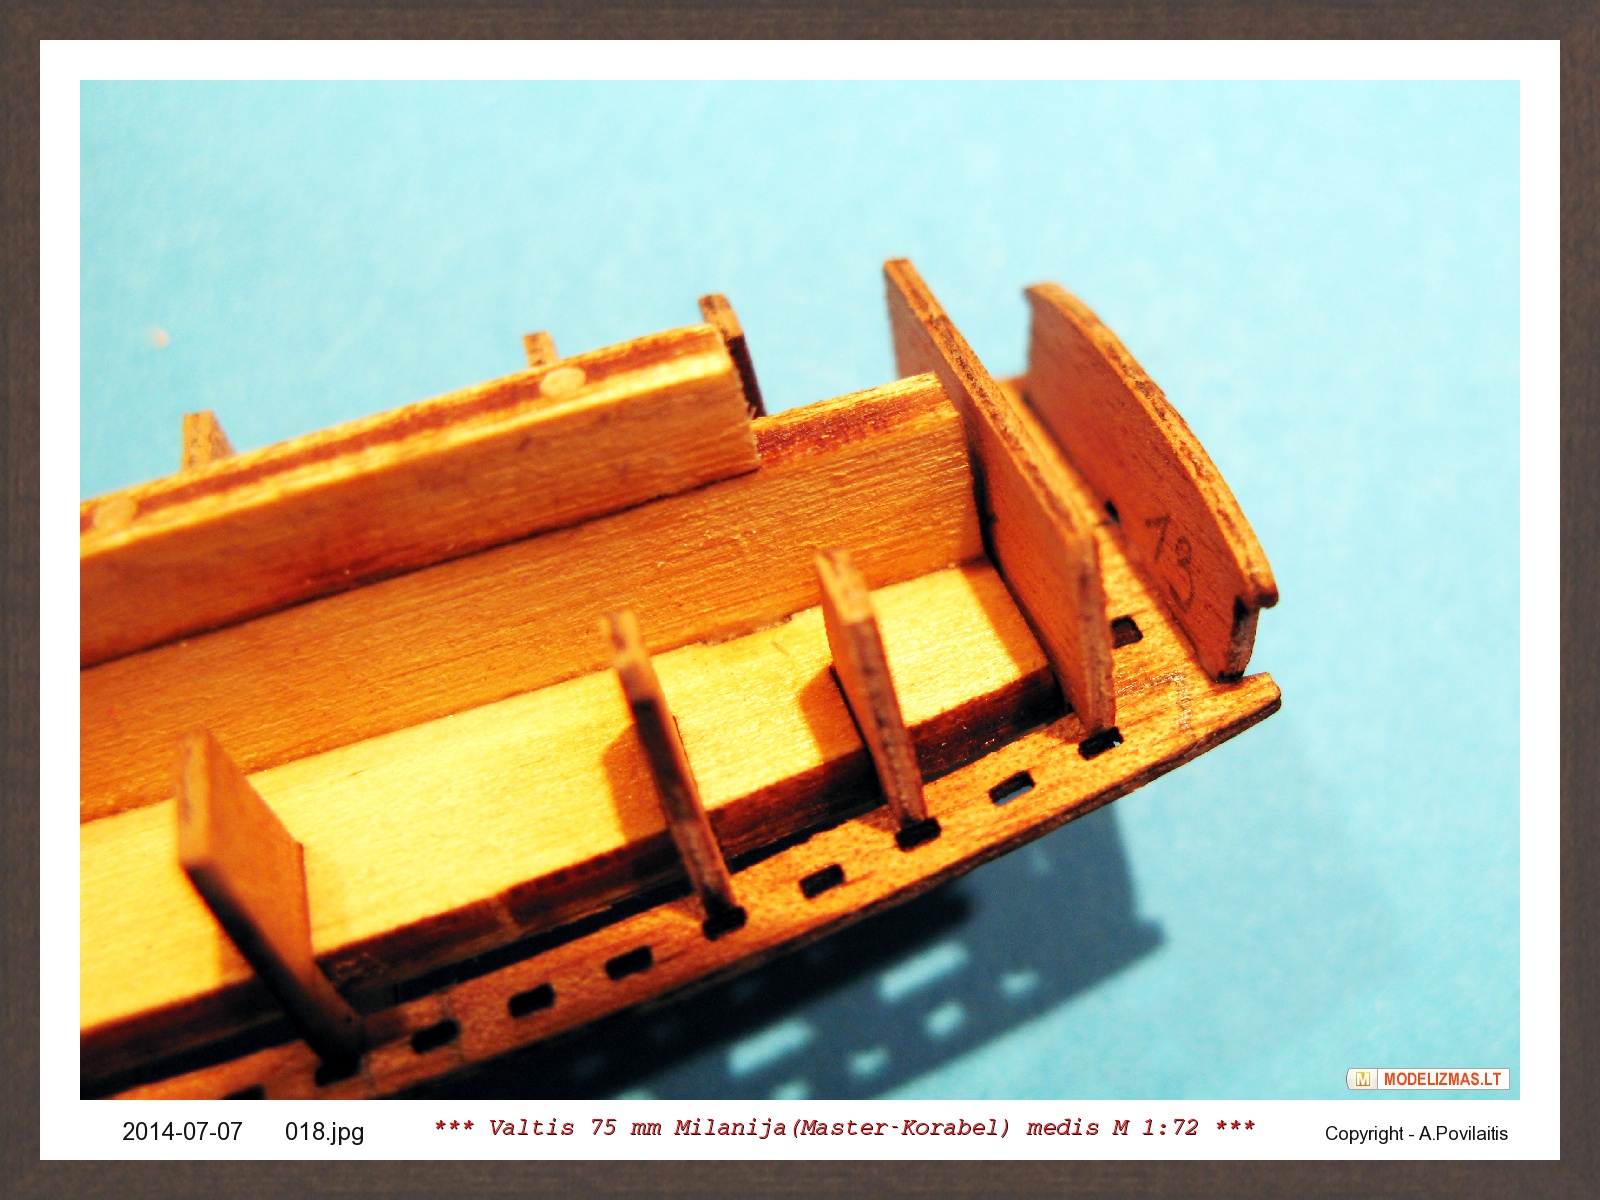
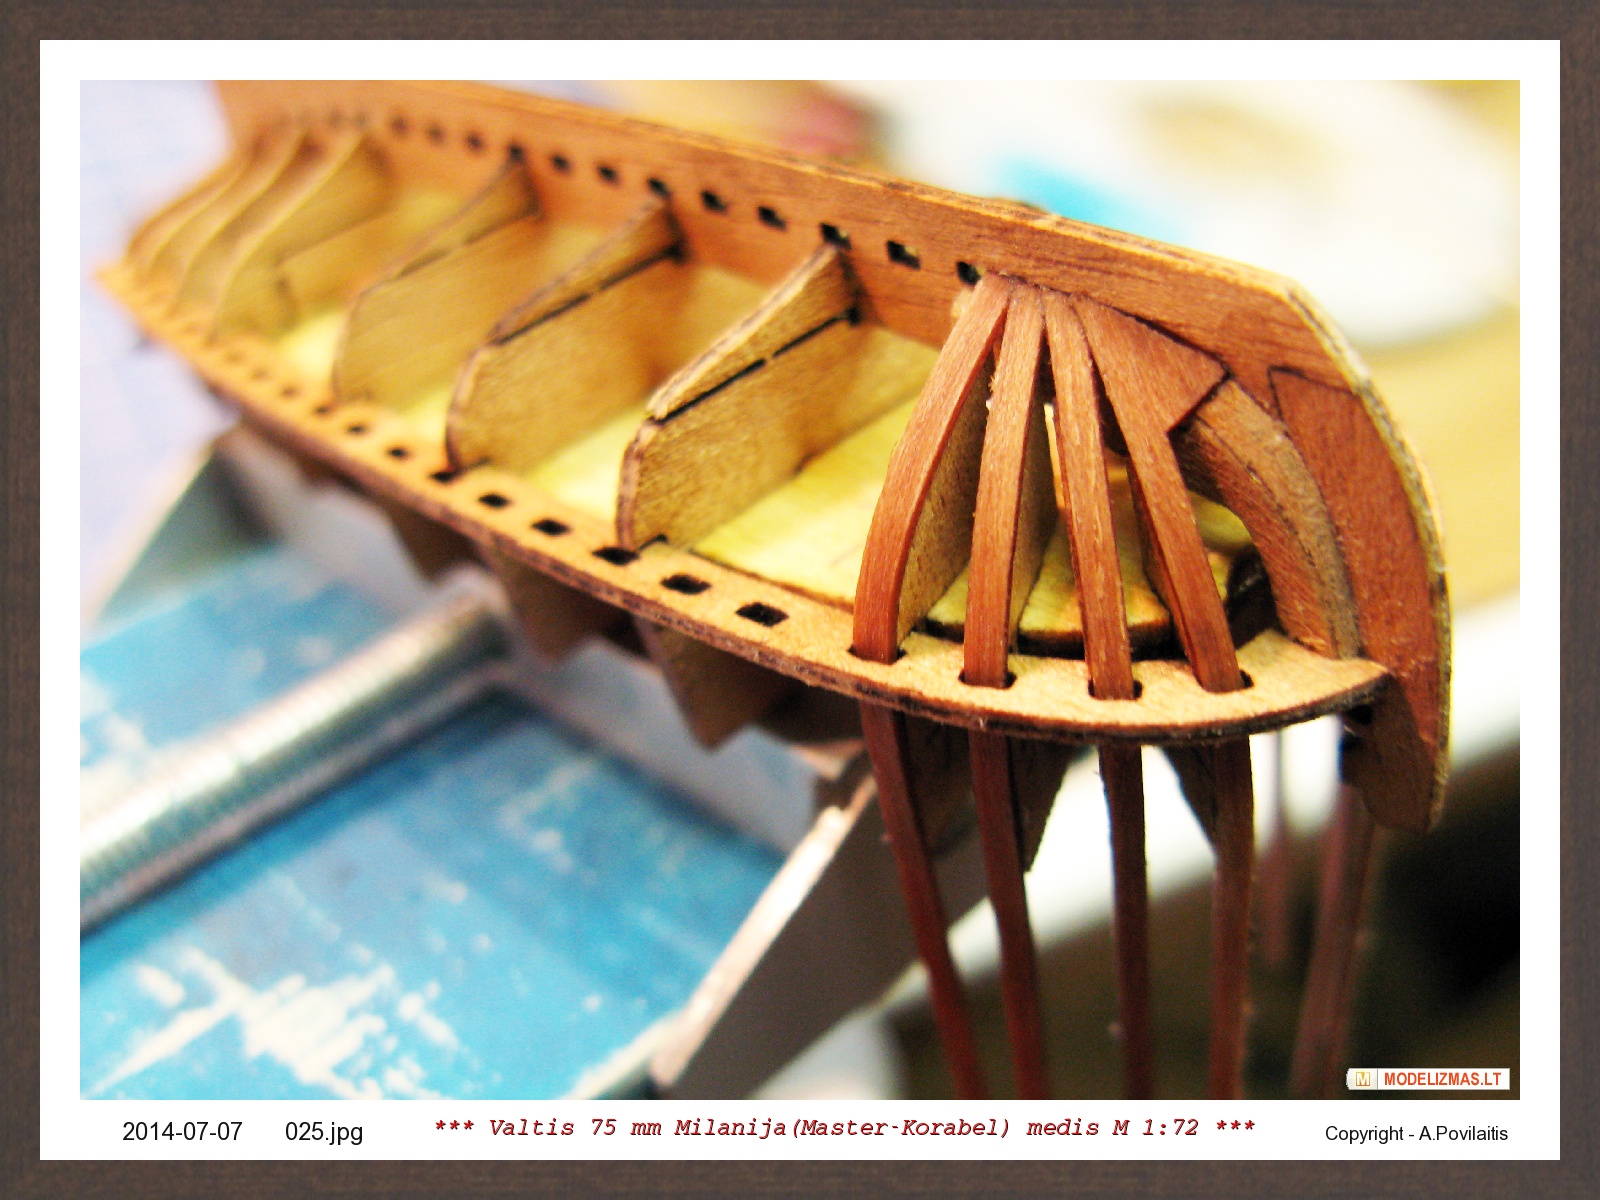
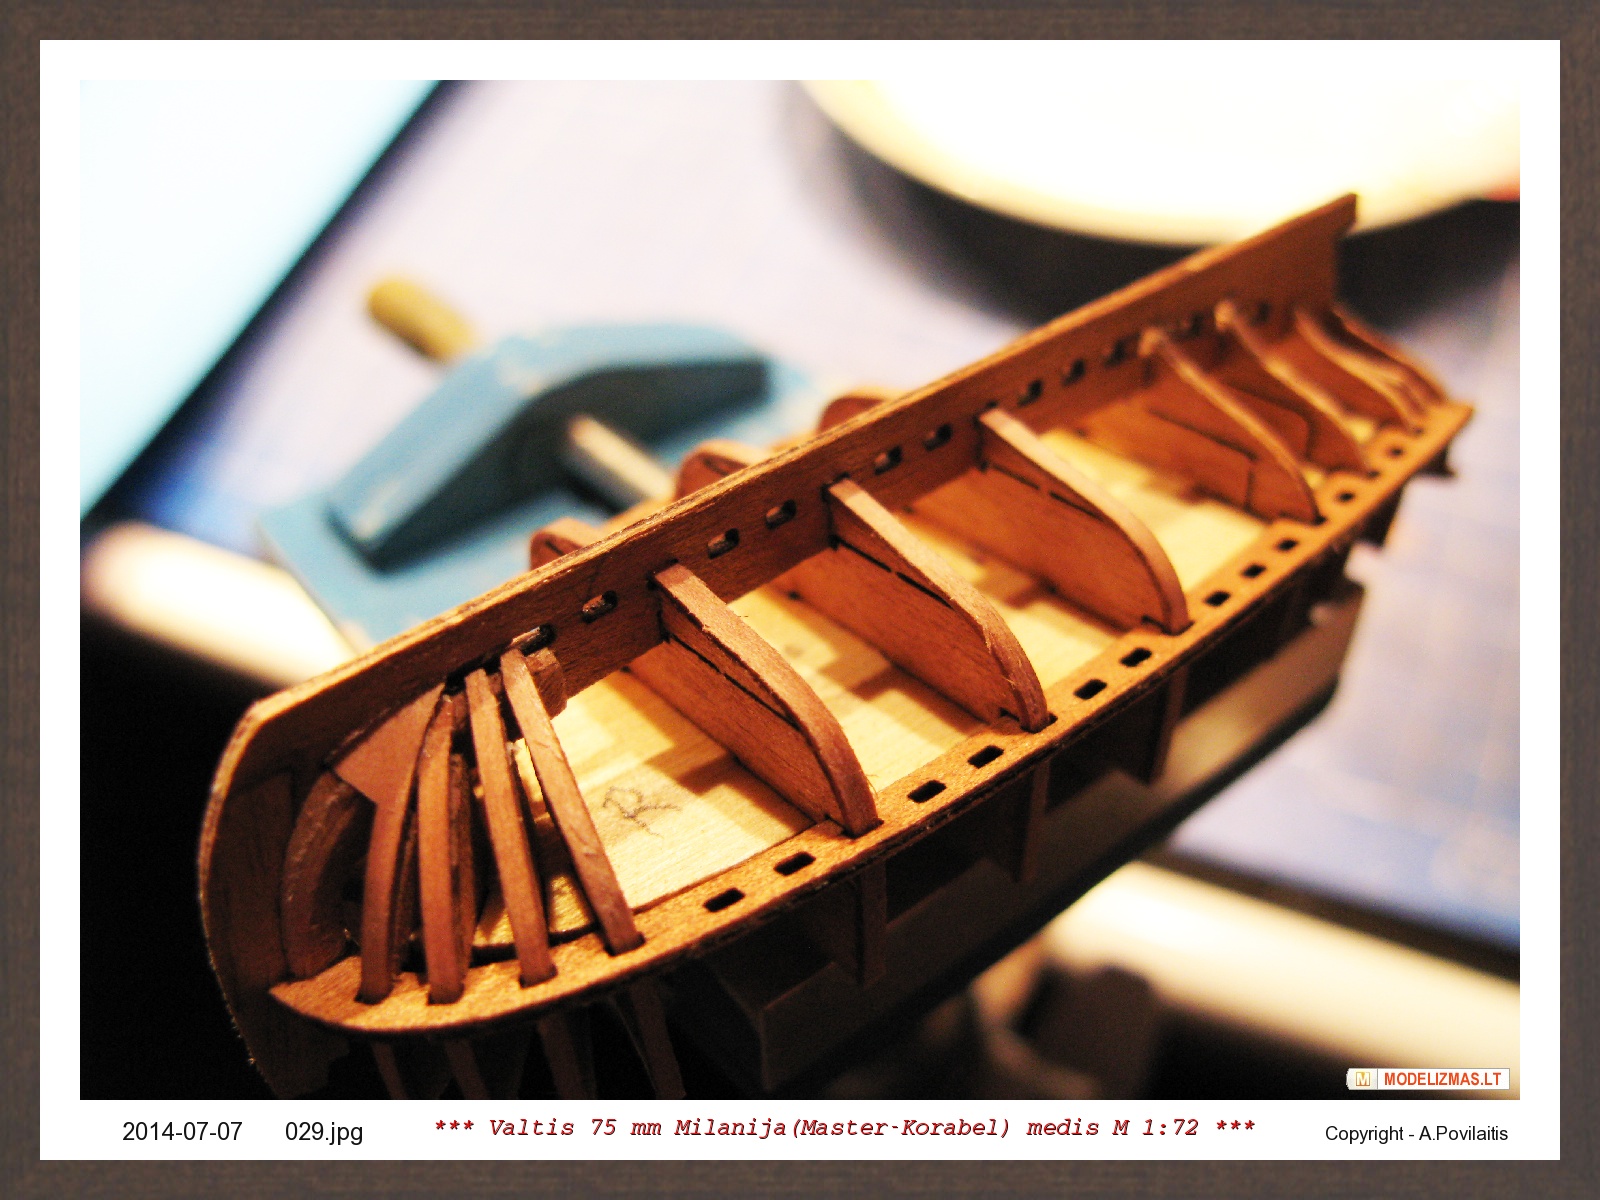
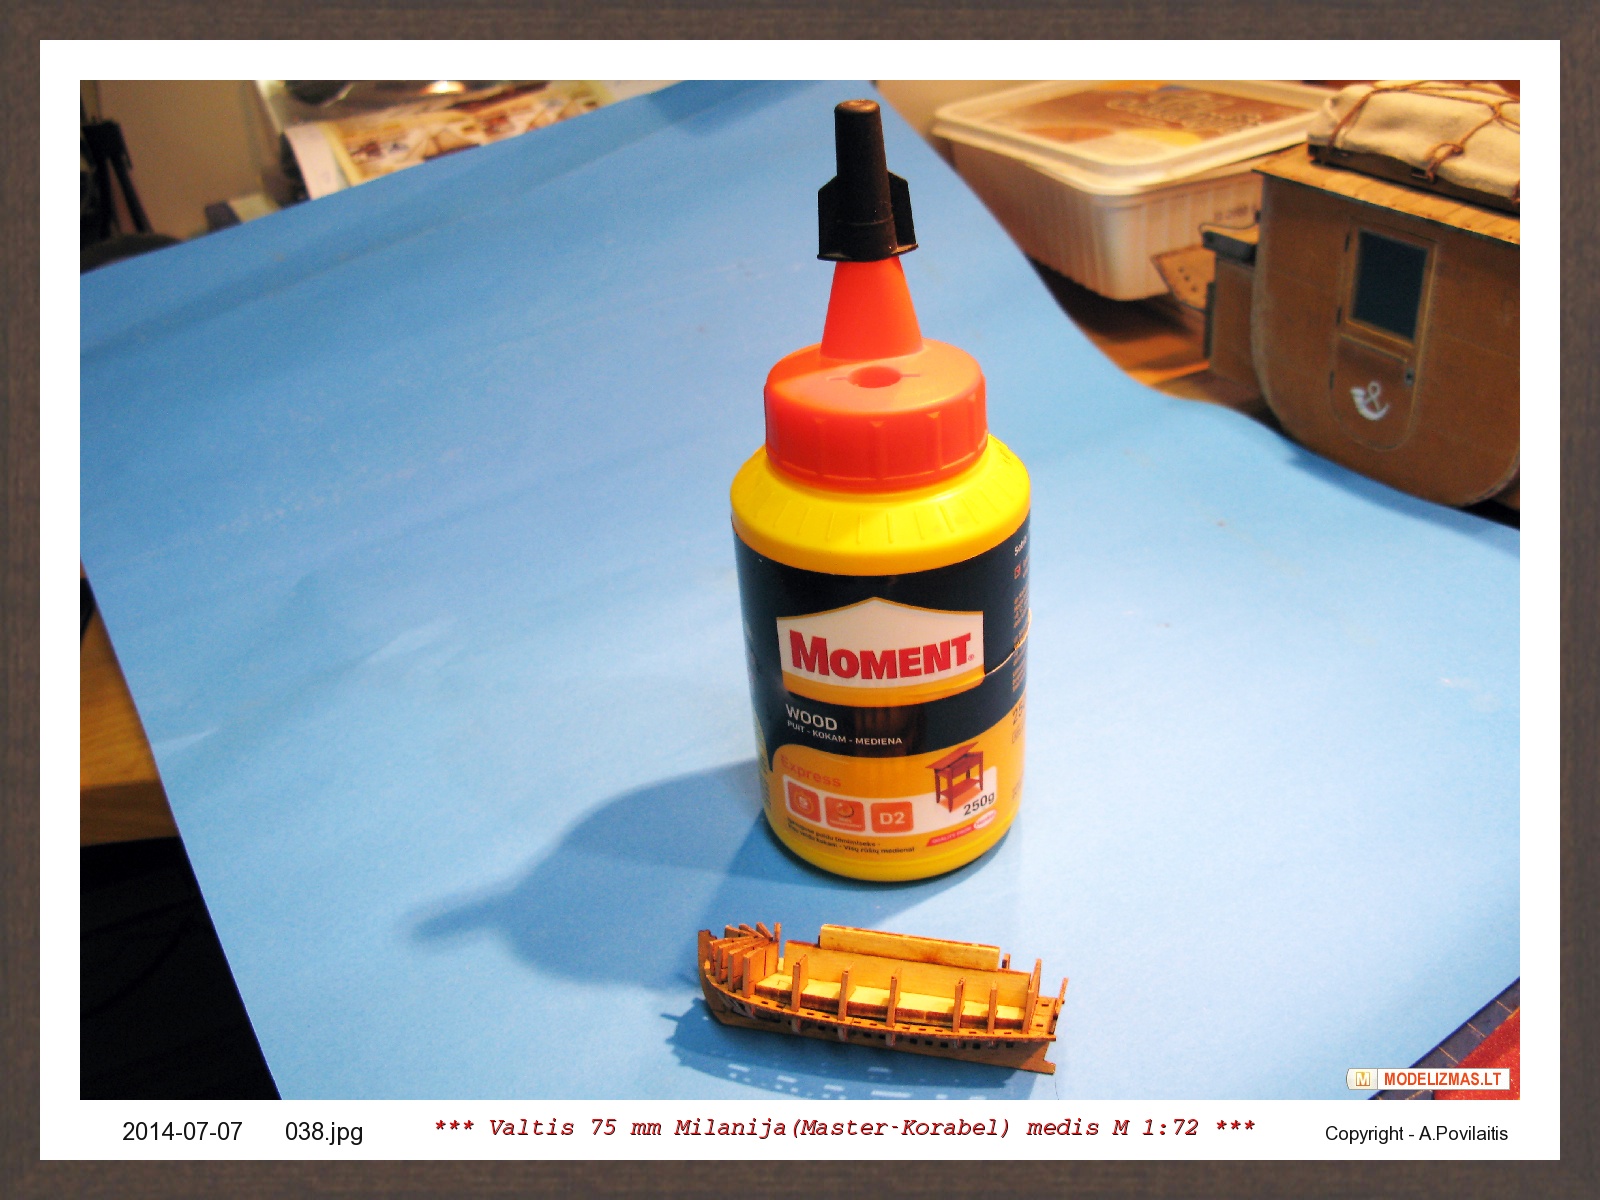
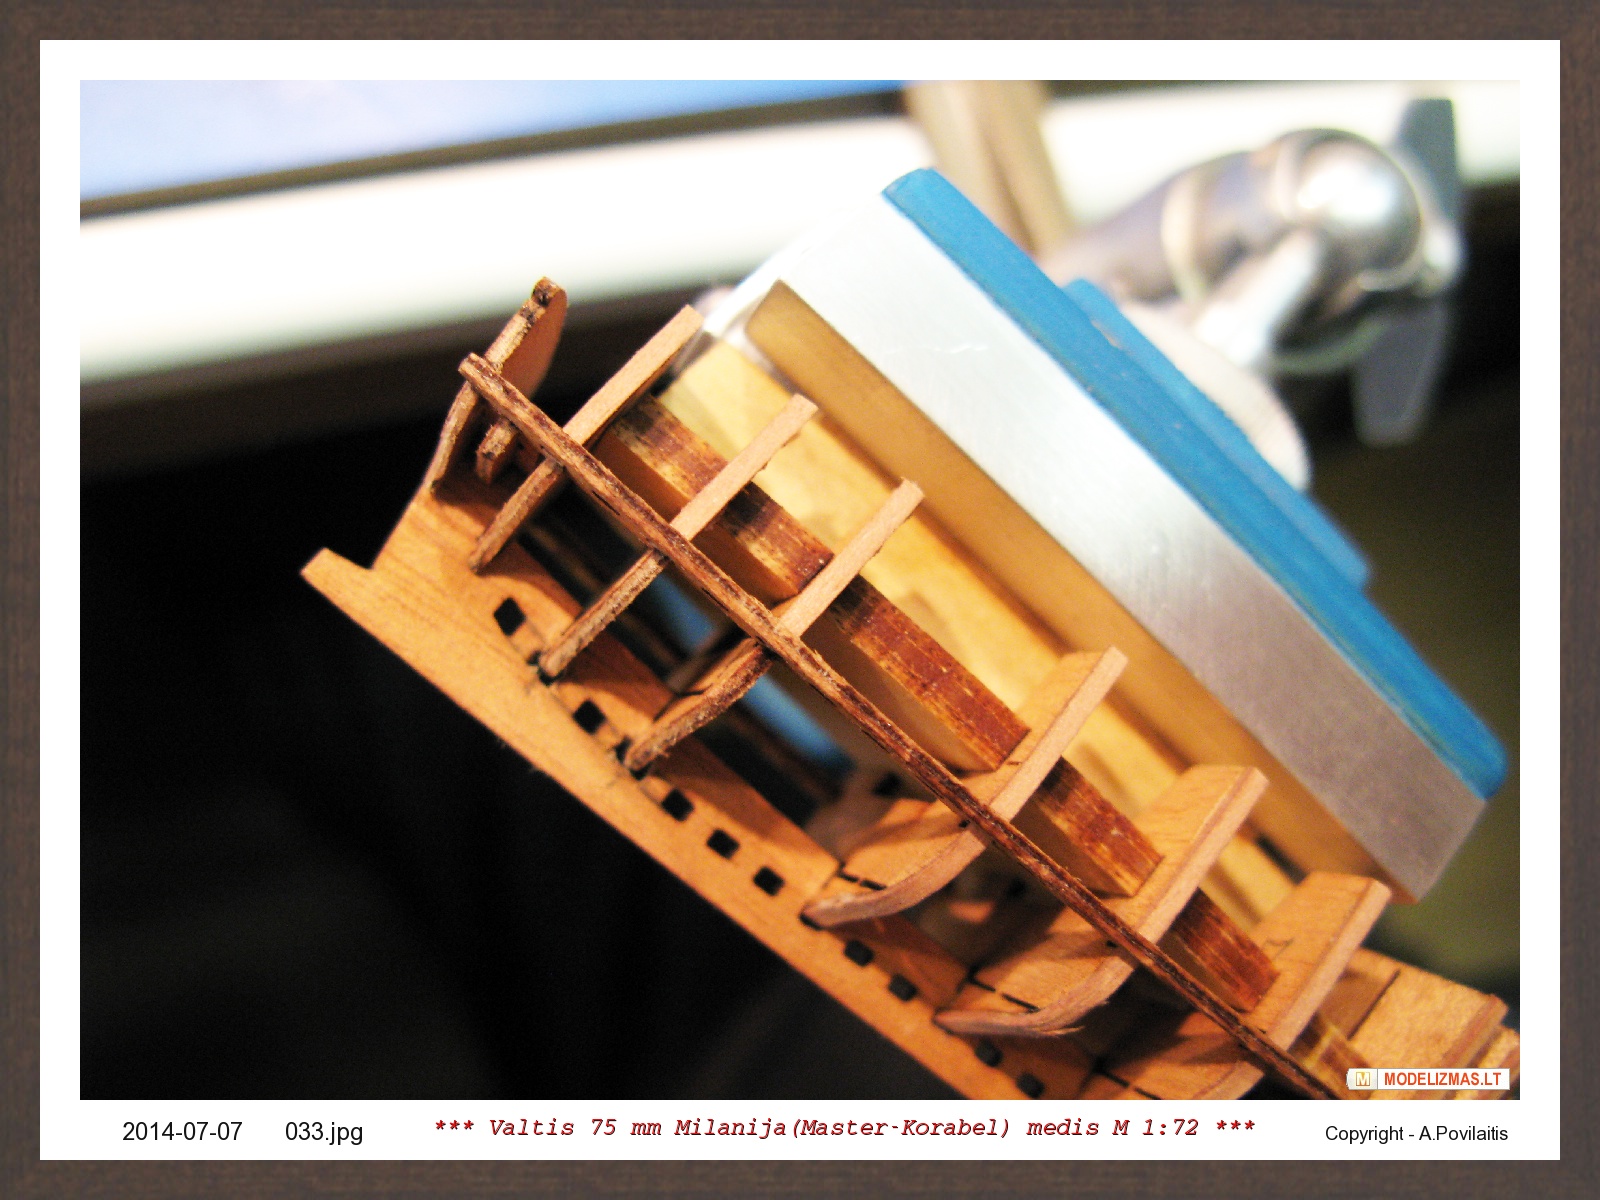
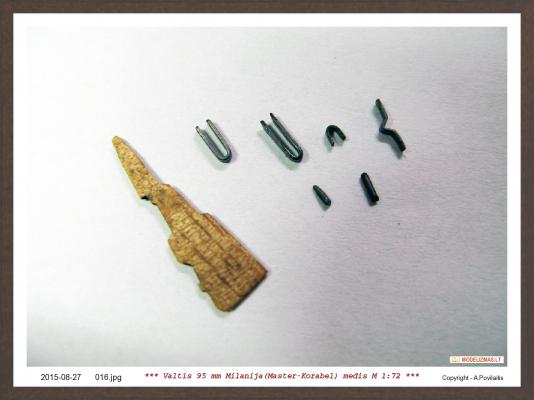
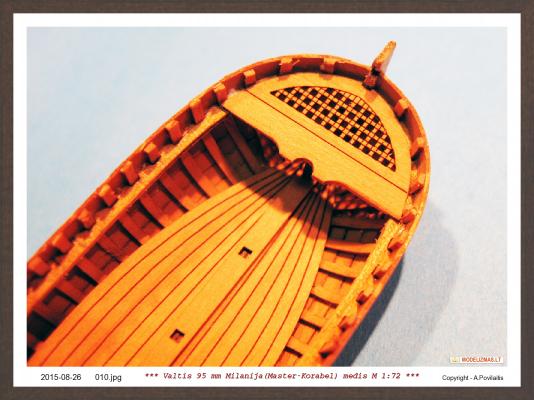
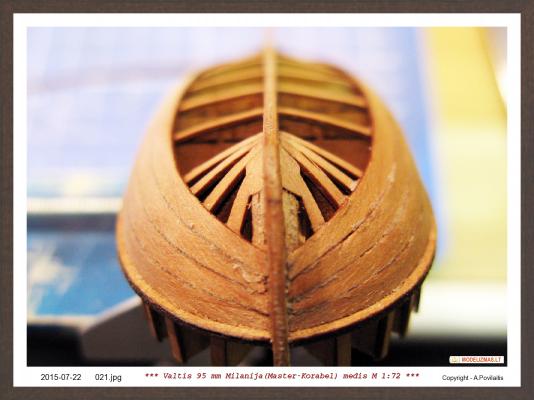
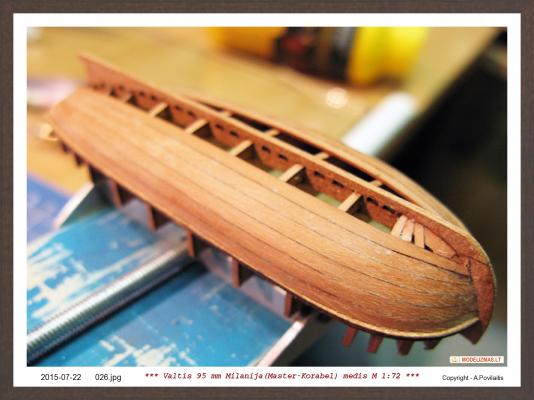
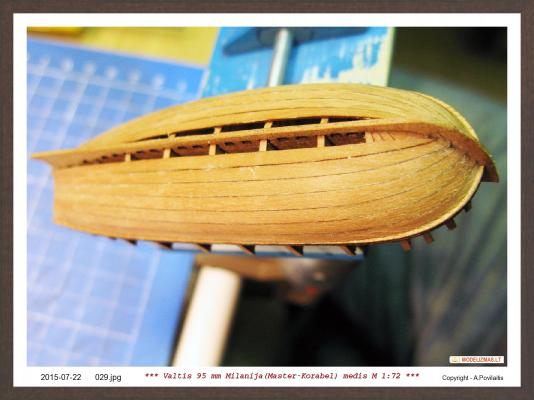
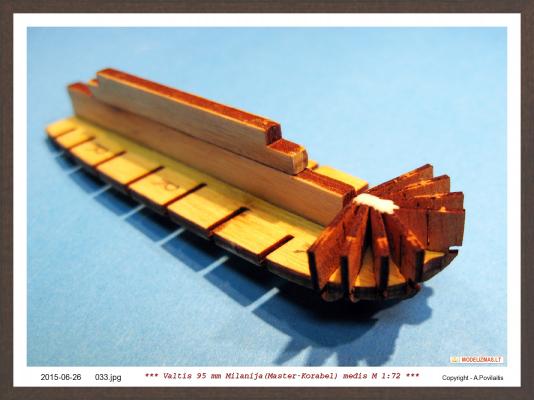
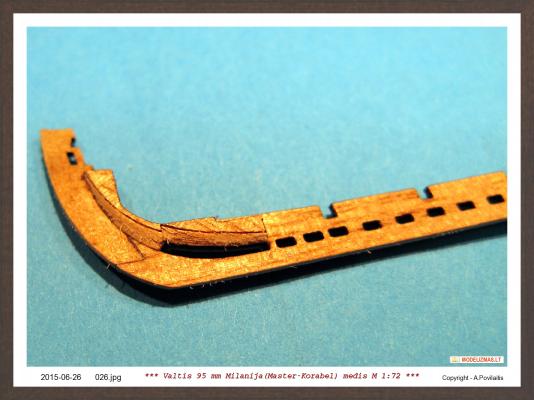
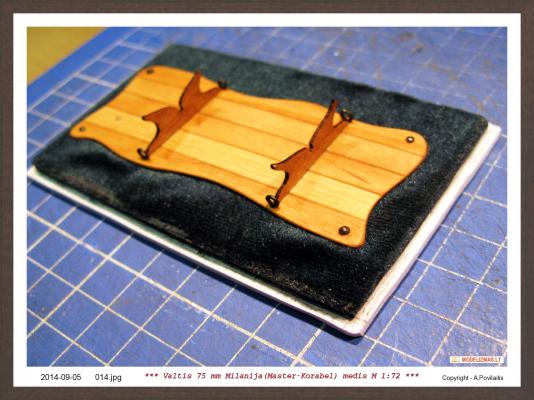
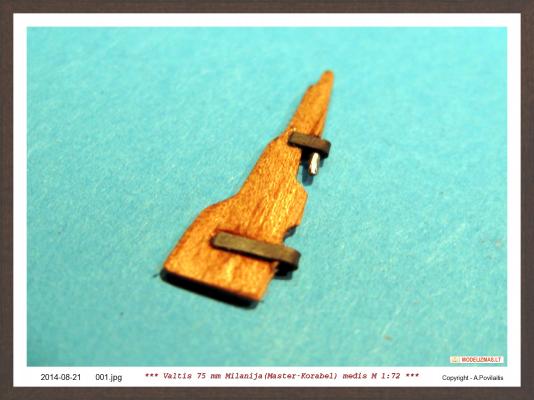
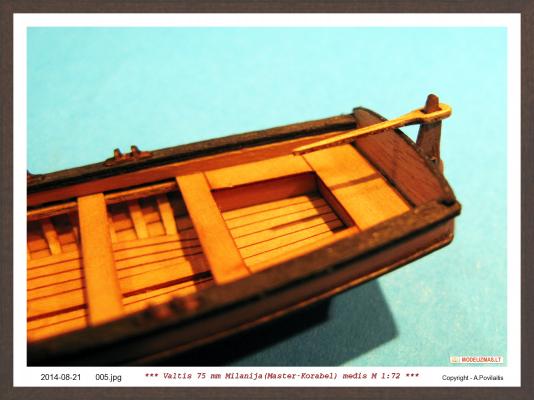
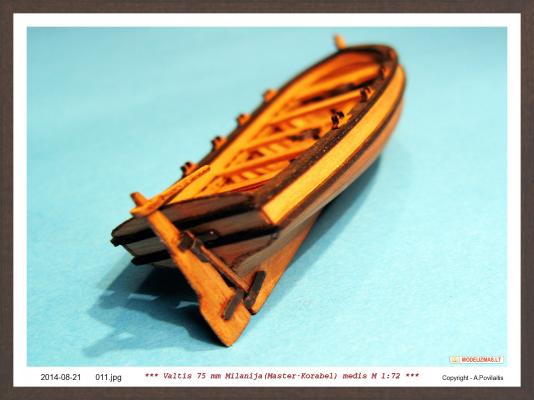
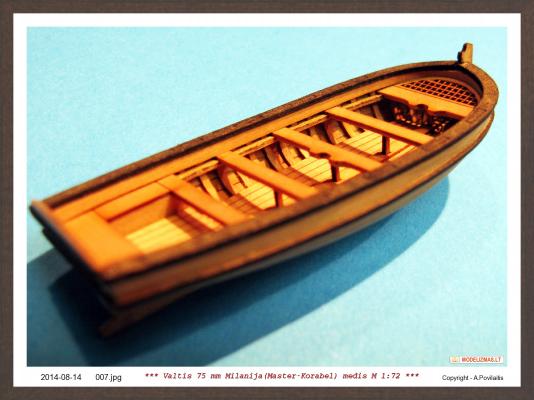
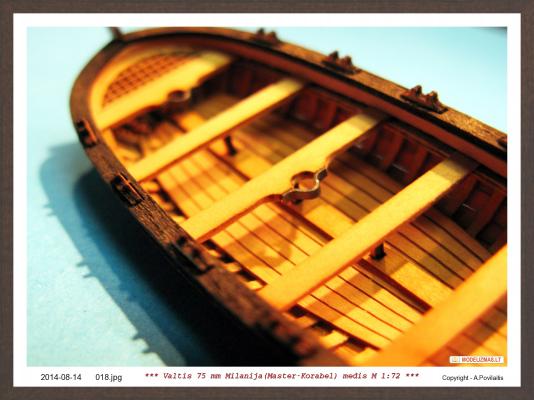
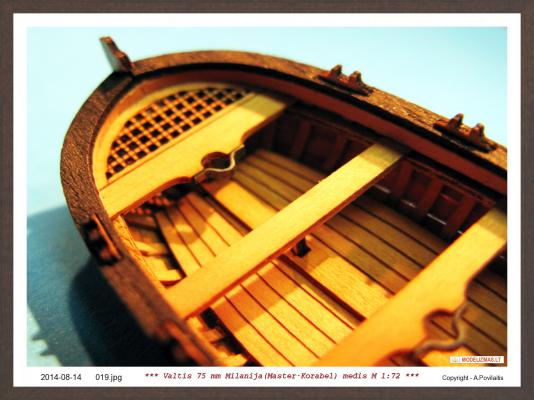
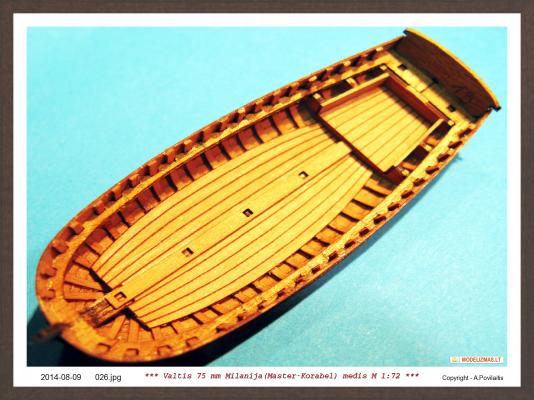
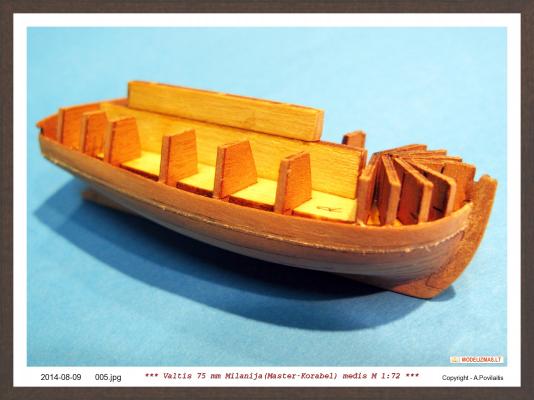
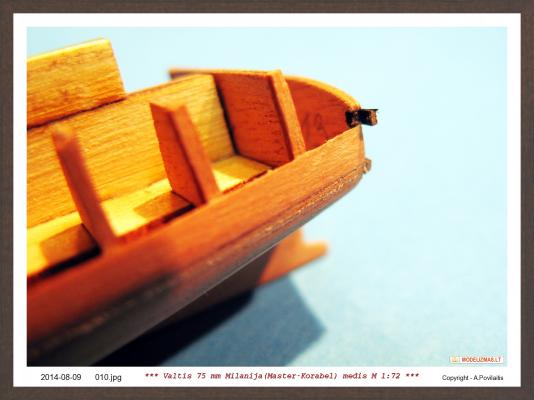
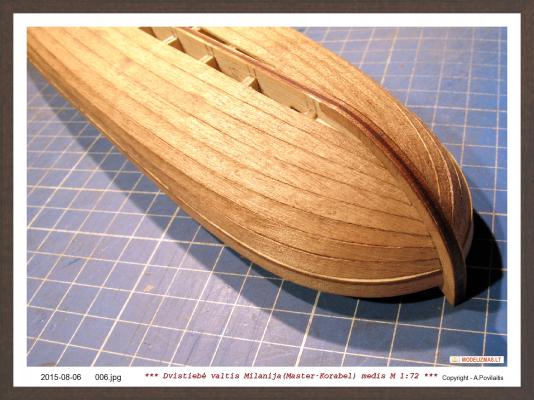
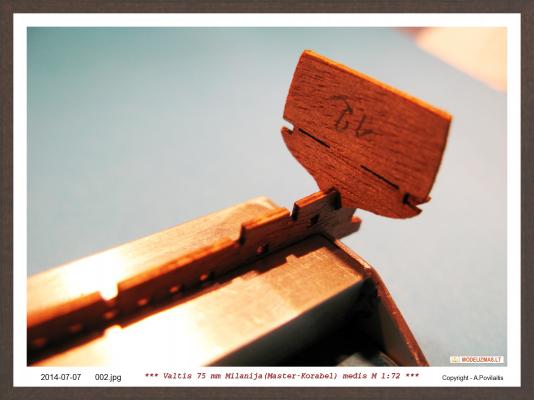
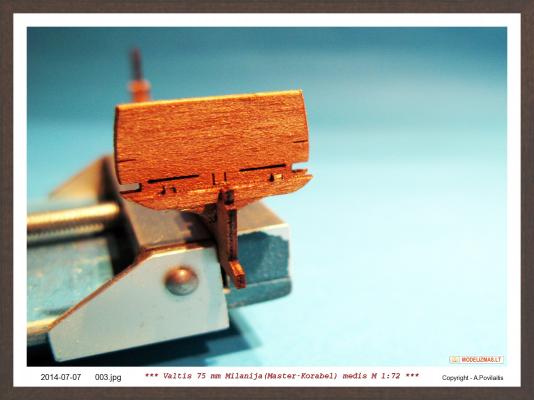
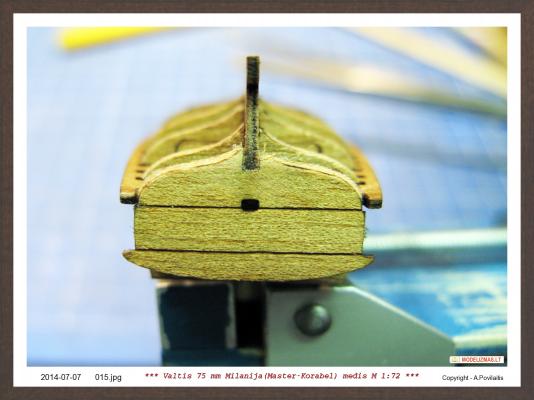
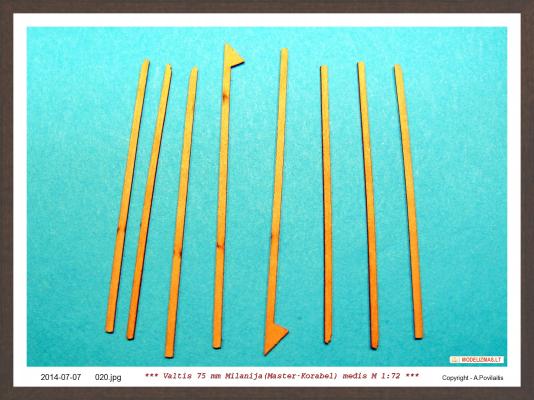
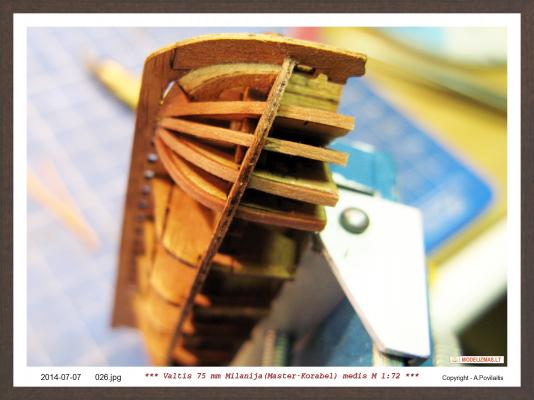
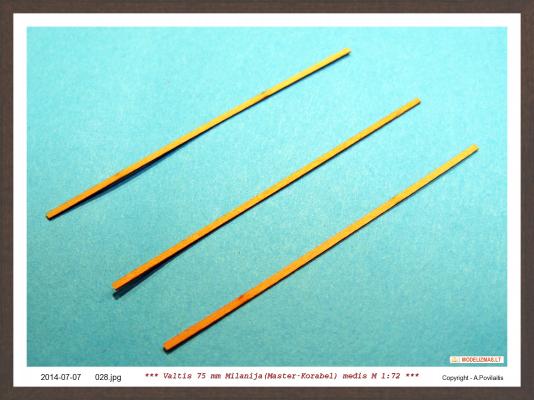
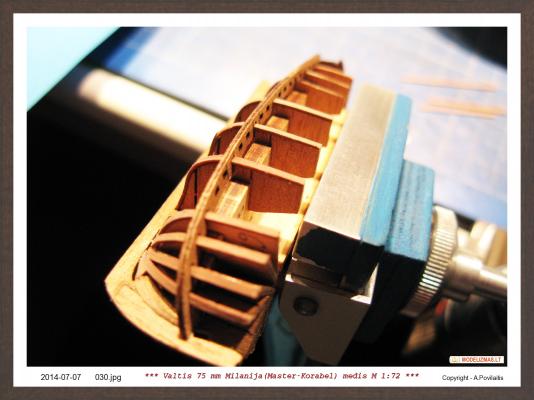
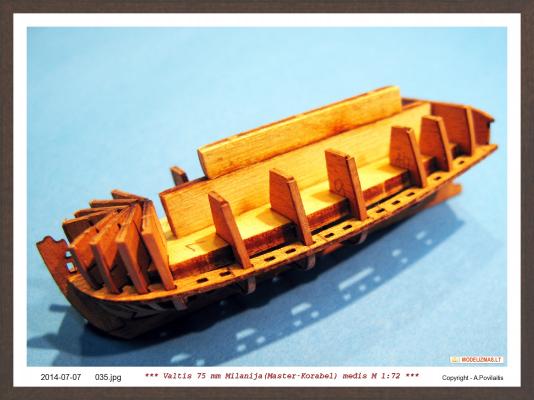
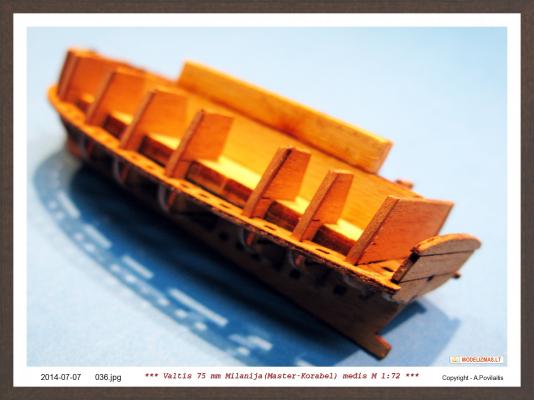
Now the benches. Each are from 2 parts. At the begining of the build log I marked them by pencil. Now I use this marks to properly glue together benches parts. At the bench bottom glue the pillar. Then fitted the another pillar end in the hole at the keelson . If it fit properly glued bench with pillar at the keelson and stringers. Now bend the plank and glued into the place inside. The planksheer painted in black color using the ink. Then glued to the hull. Oars slots are glued to the planksheer . Glued achtersteven. Then spent some time on the rudder. In the kit are included the brass nails and strip. But I not use they. All metal parts I made from steel pins. They not need any blackening. Also maked and masts brackets. They are from steel pins. And glue brackets and the rudder metal parts in the place. Regards, Antanas


- 22 replies
-
- 4
-
-
- master korabel
- 75mm boat
- (and 1 more)
-
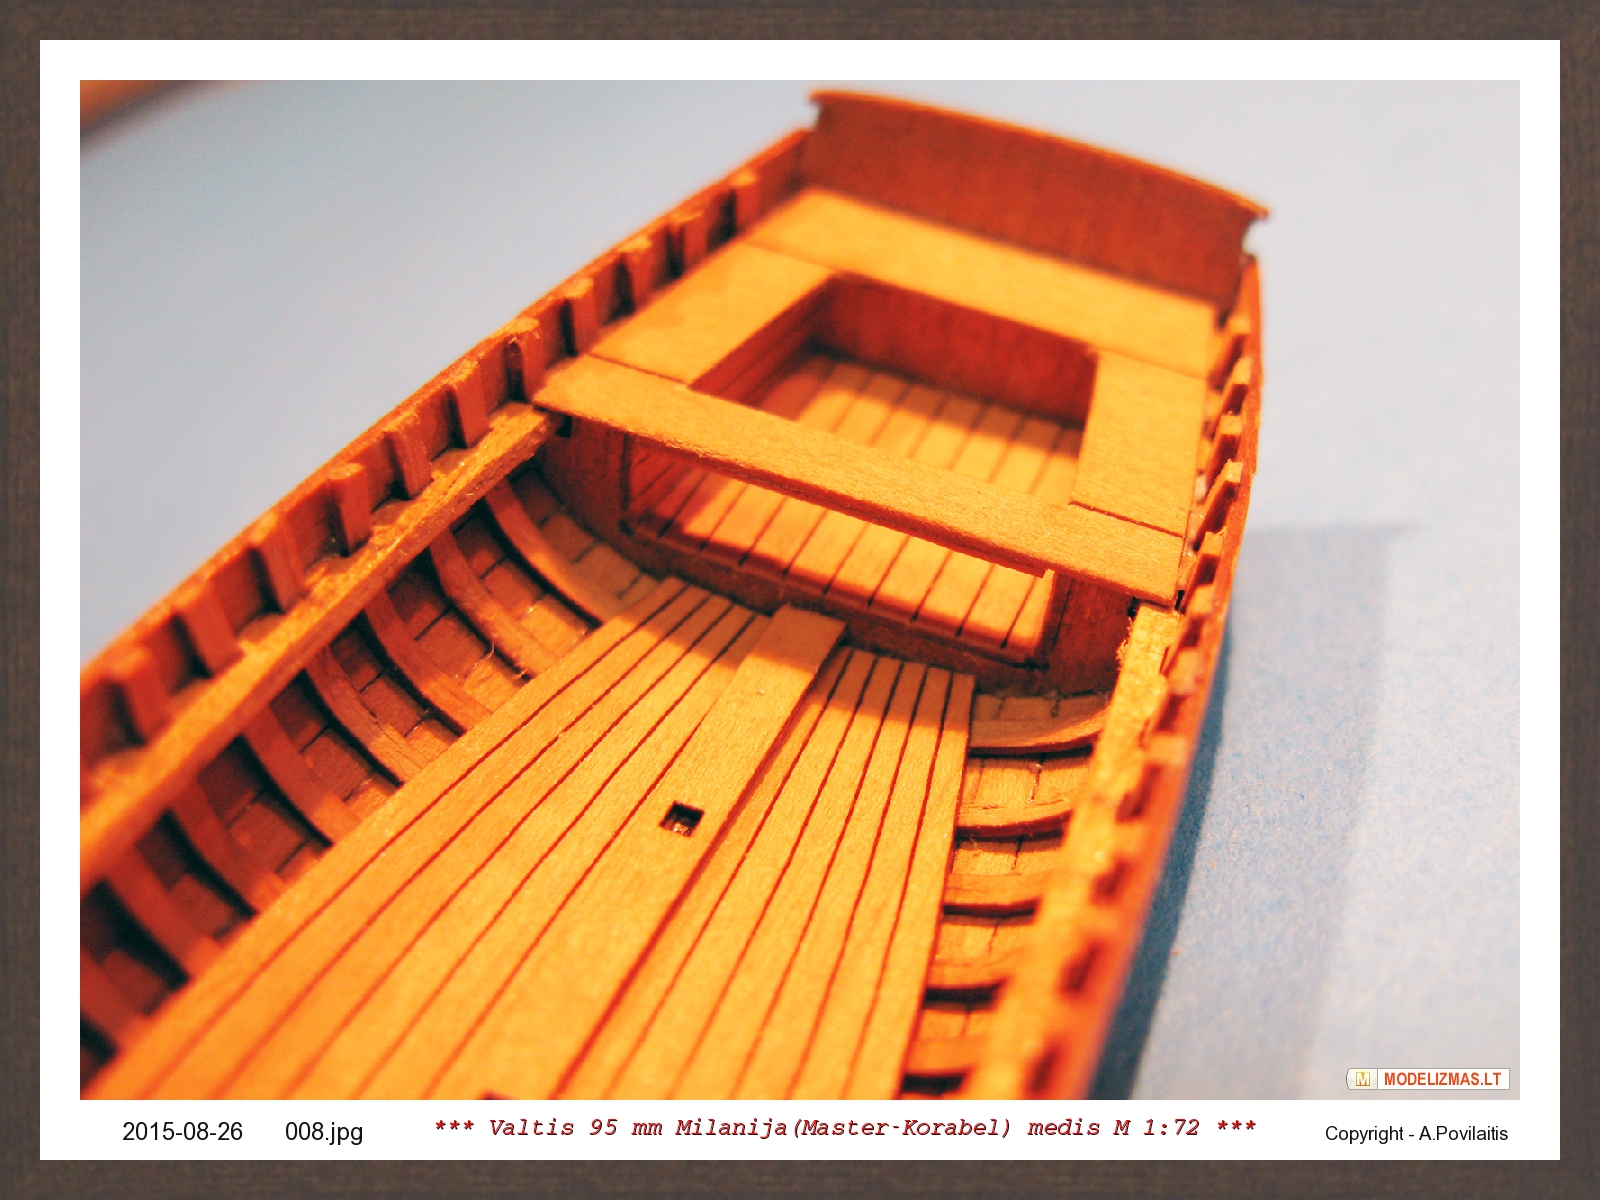
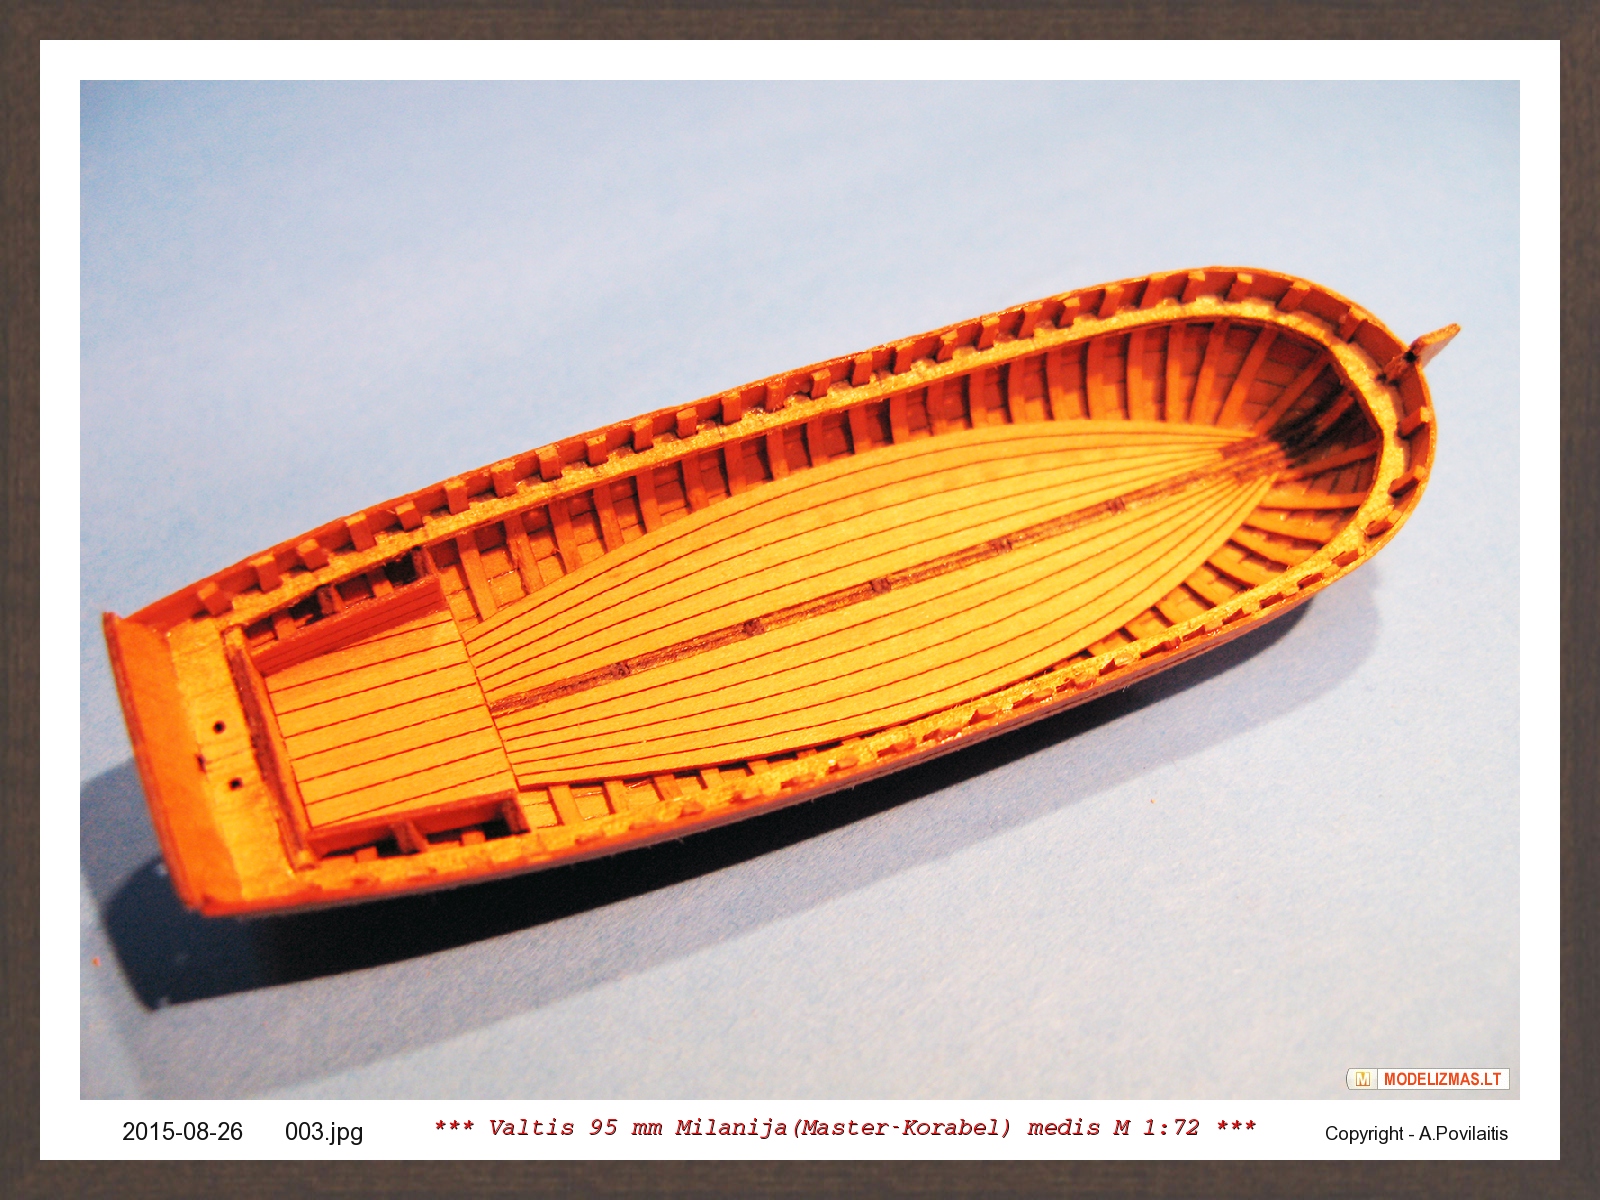
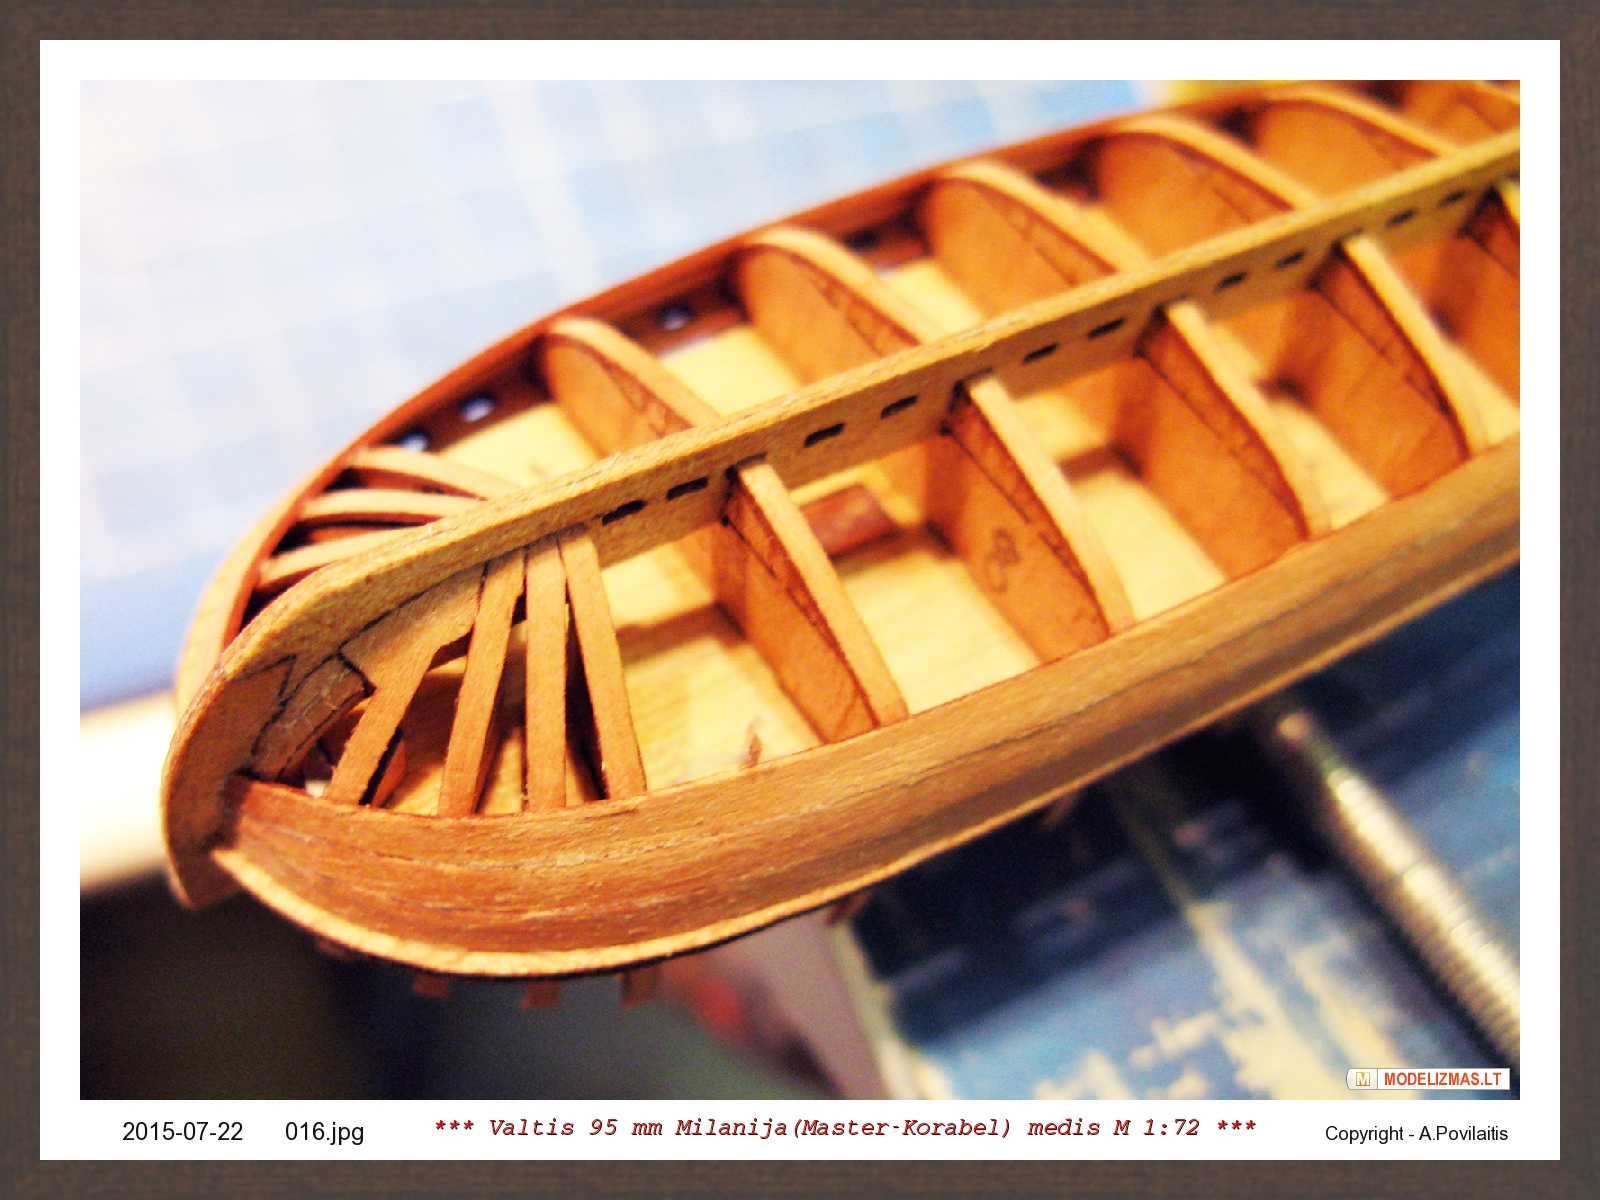
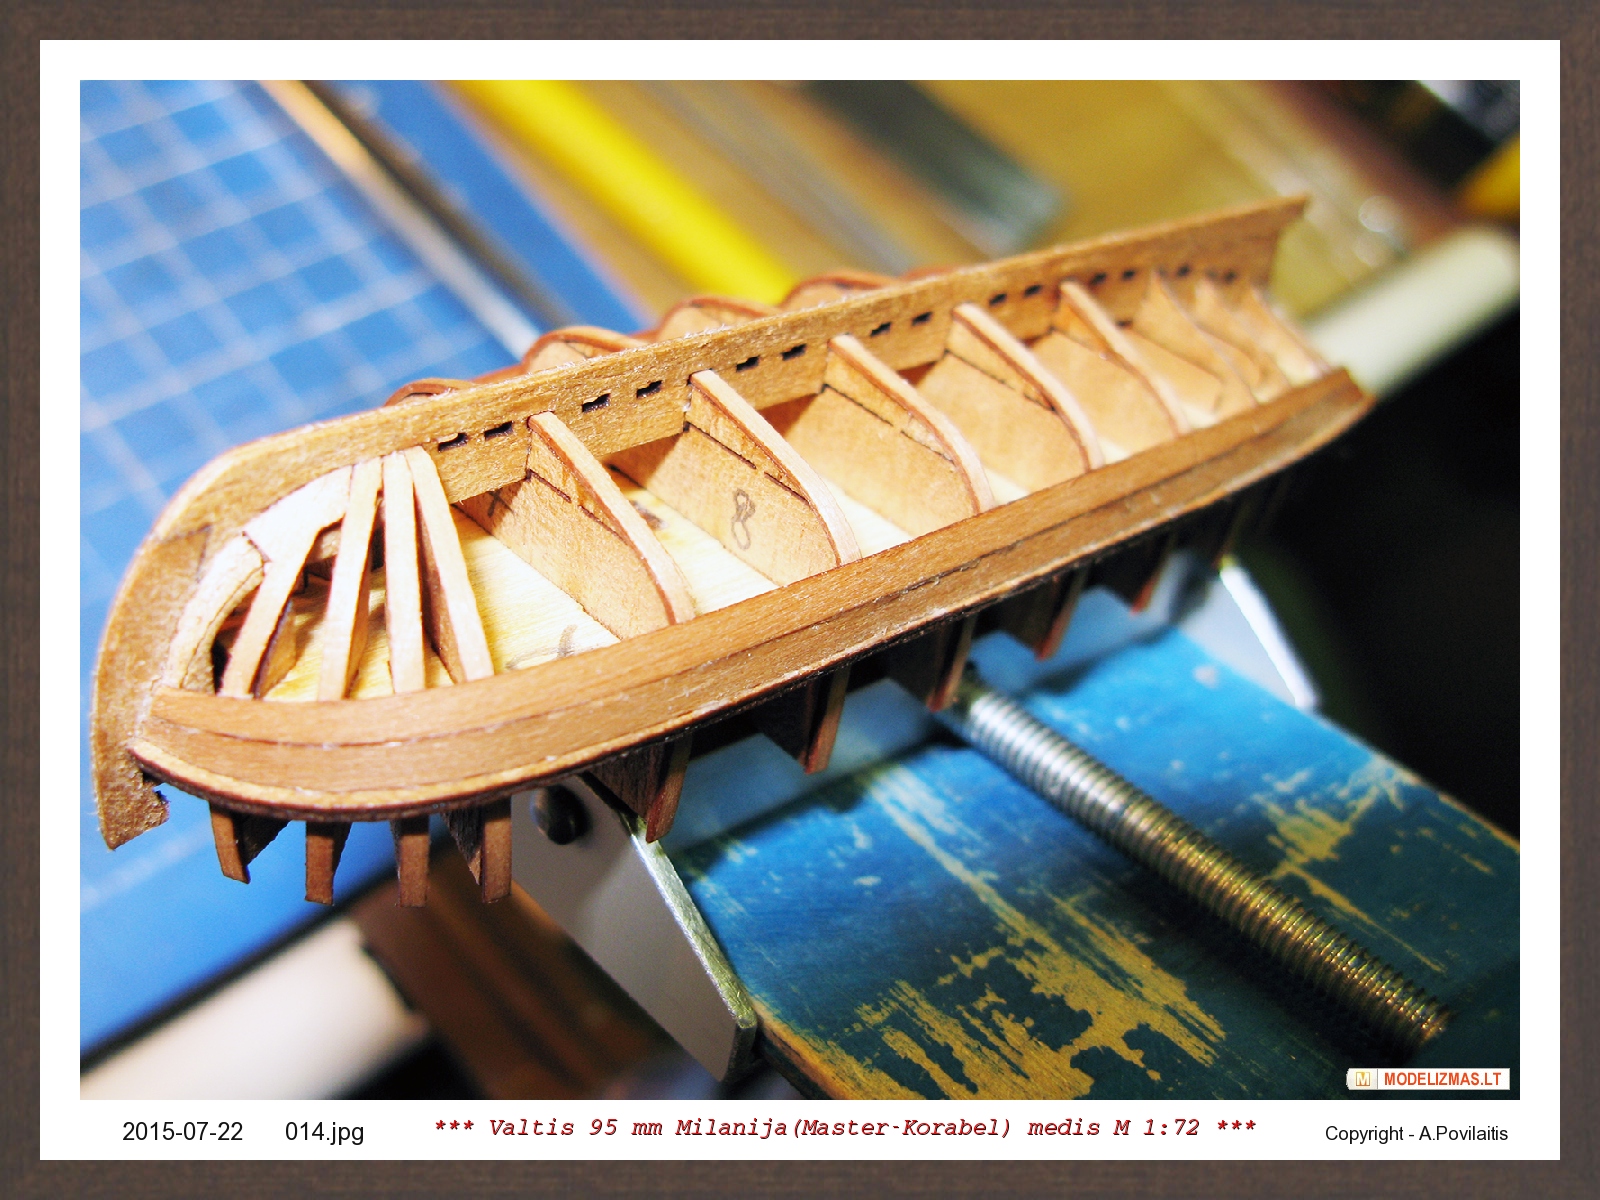
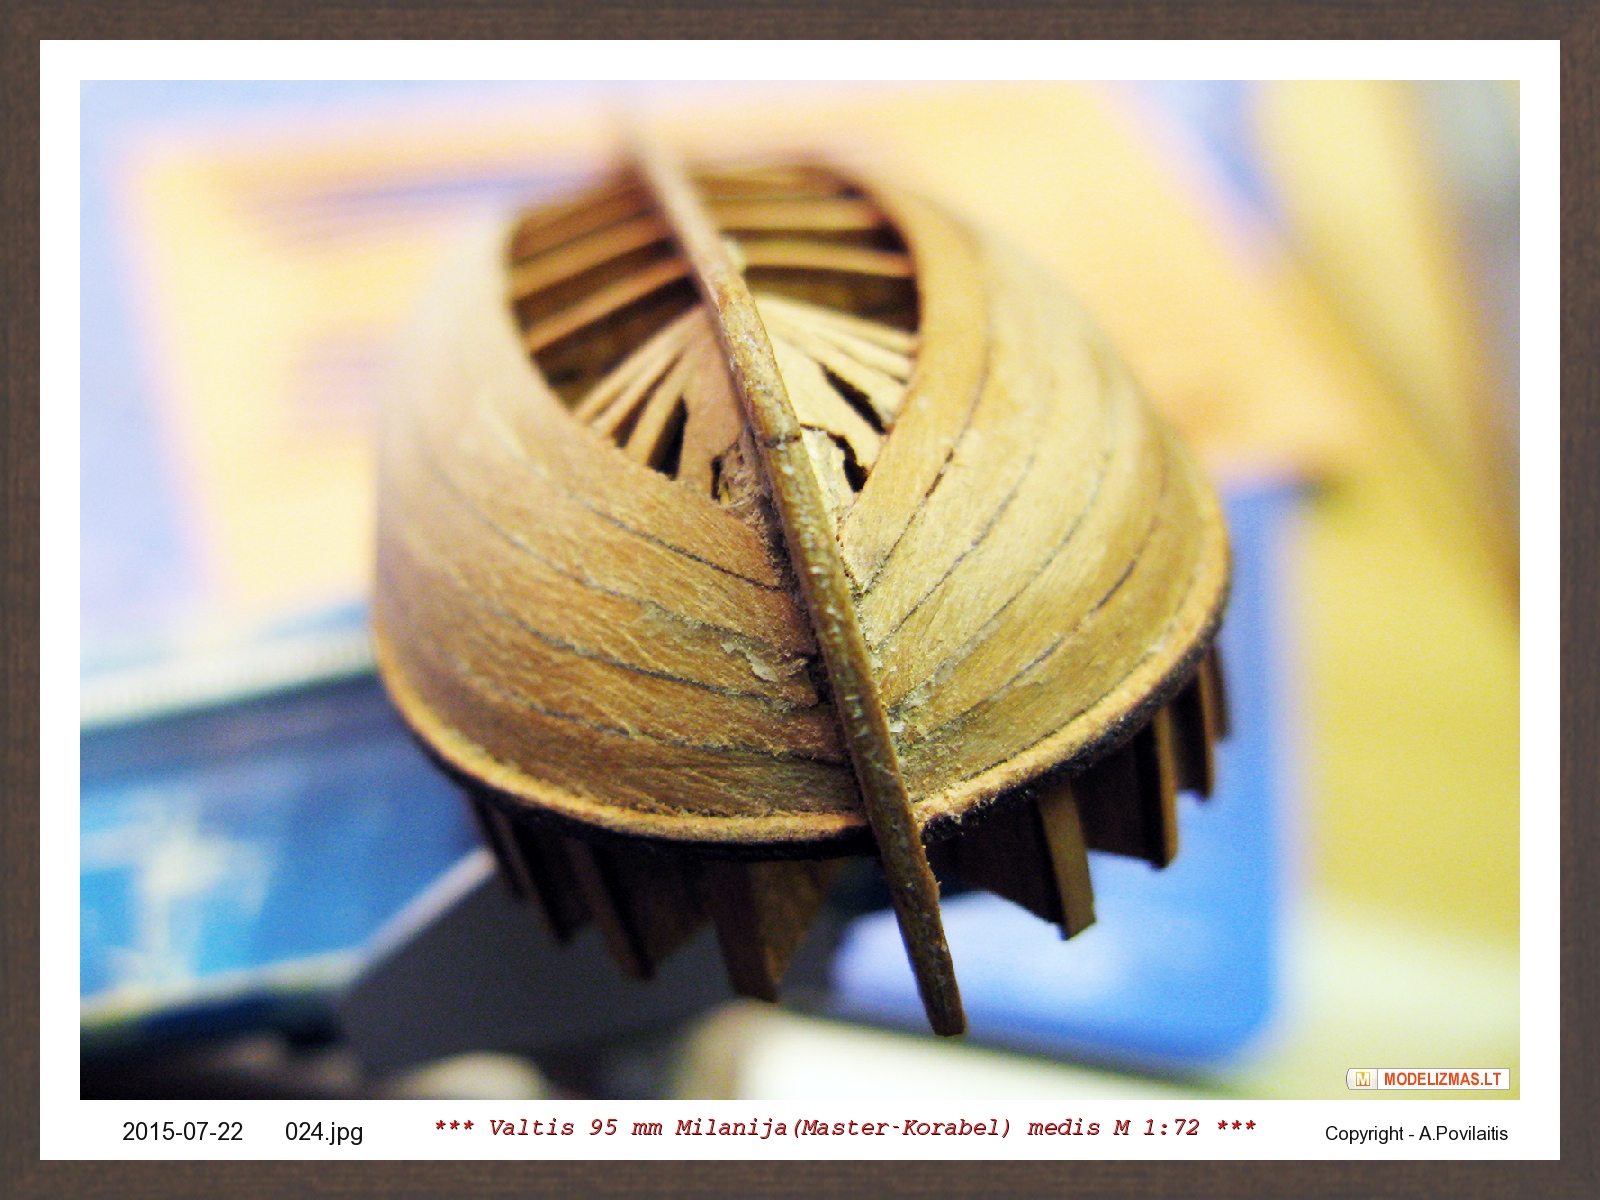
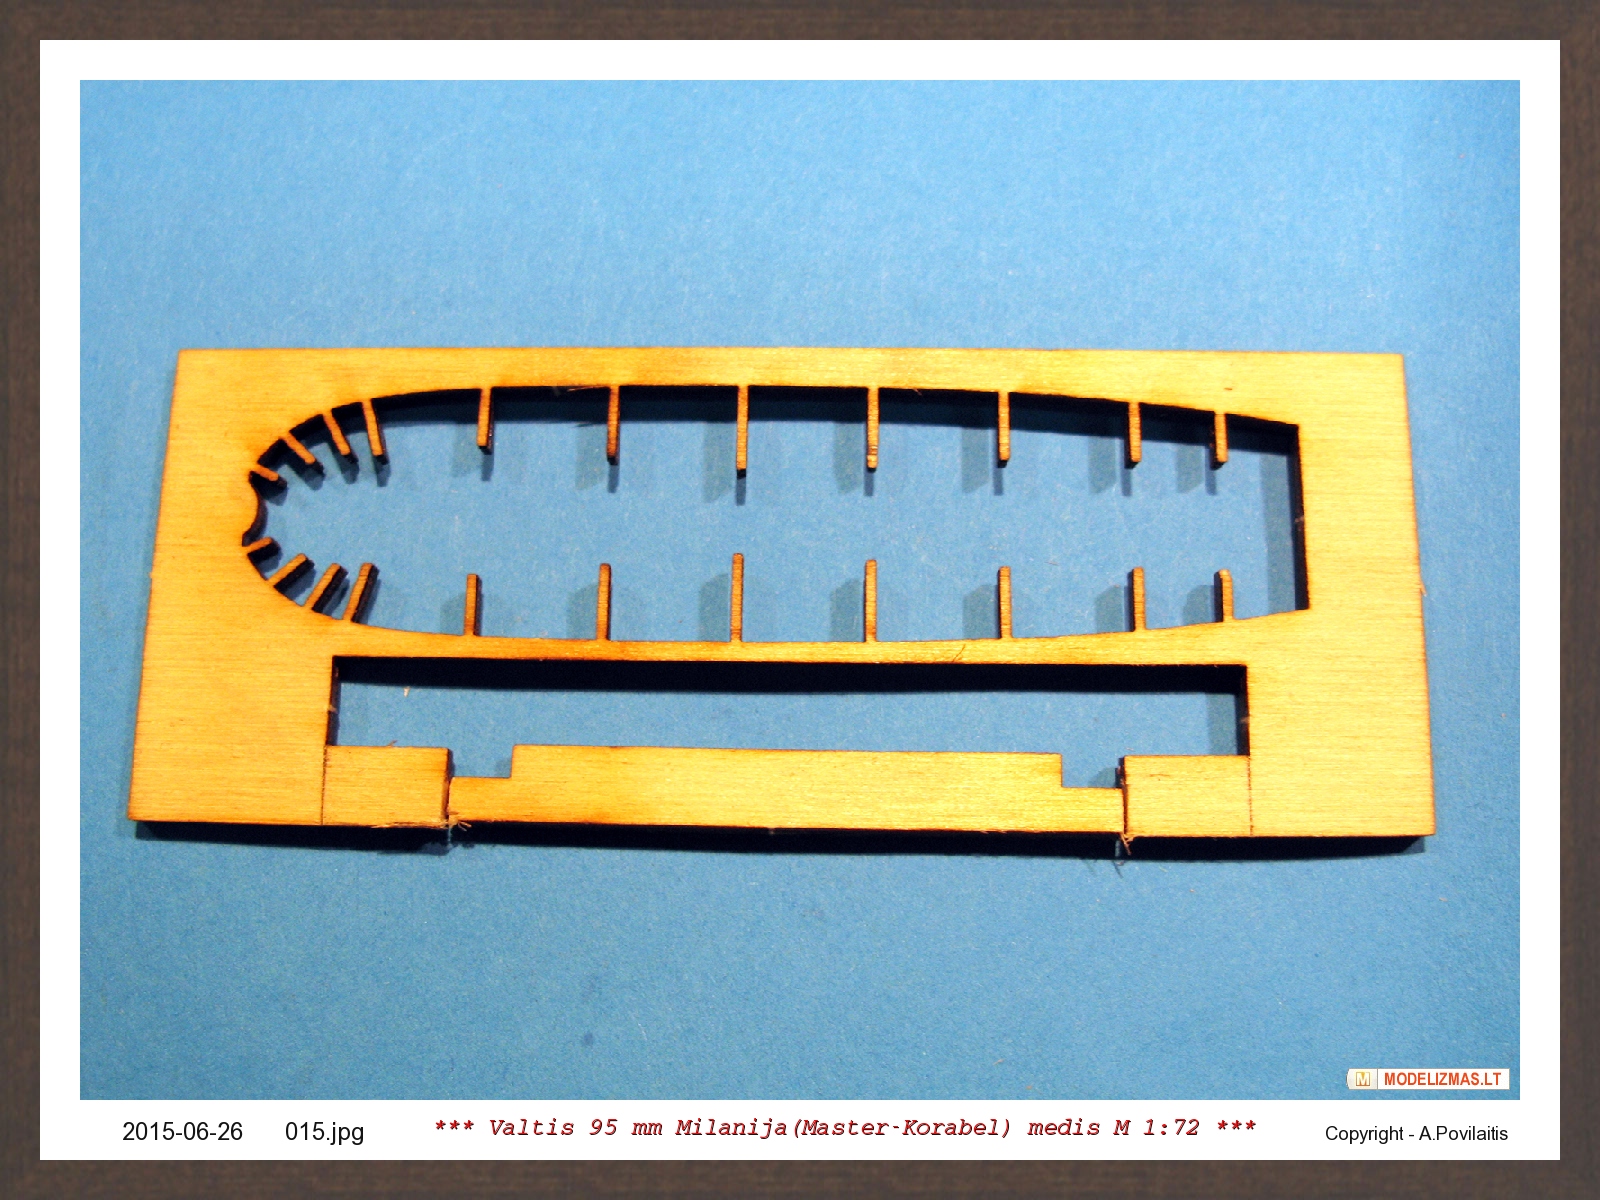
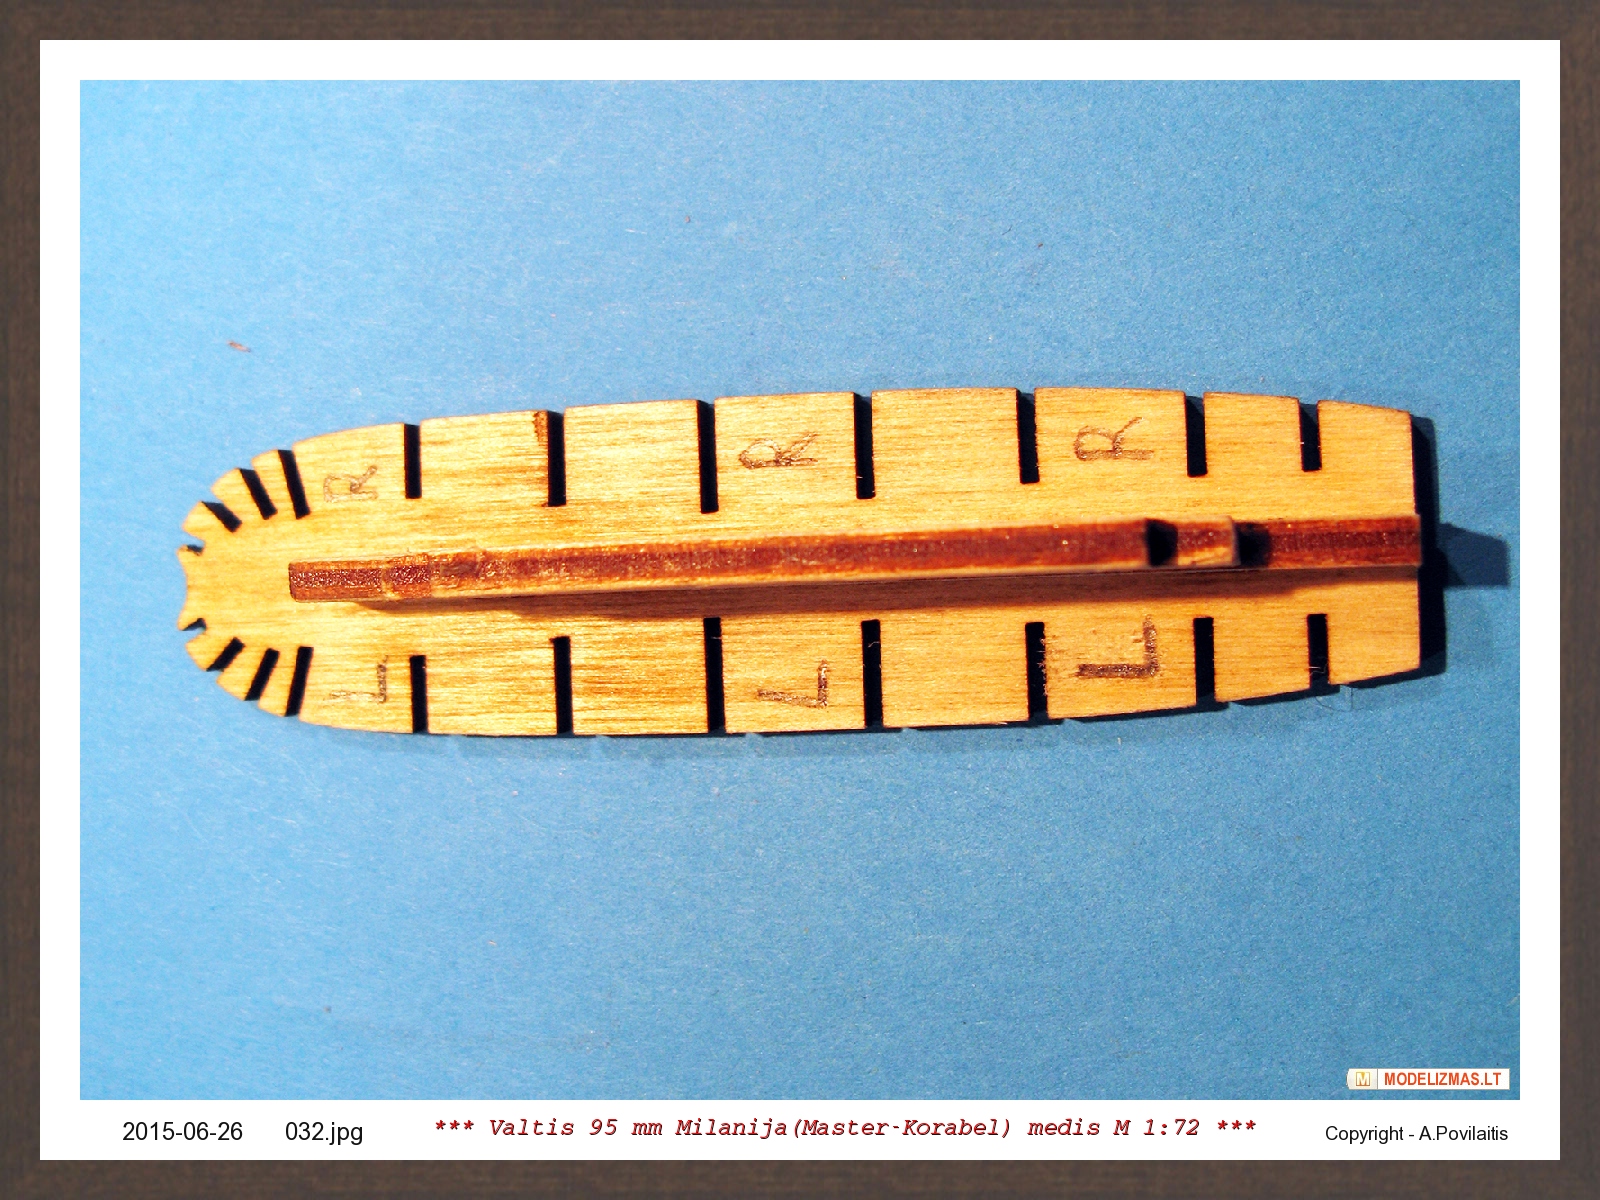
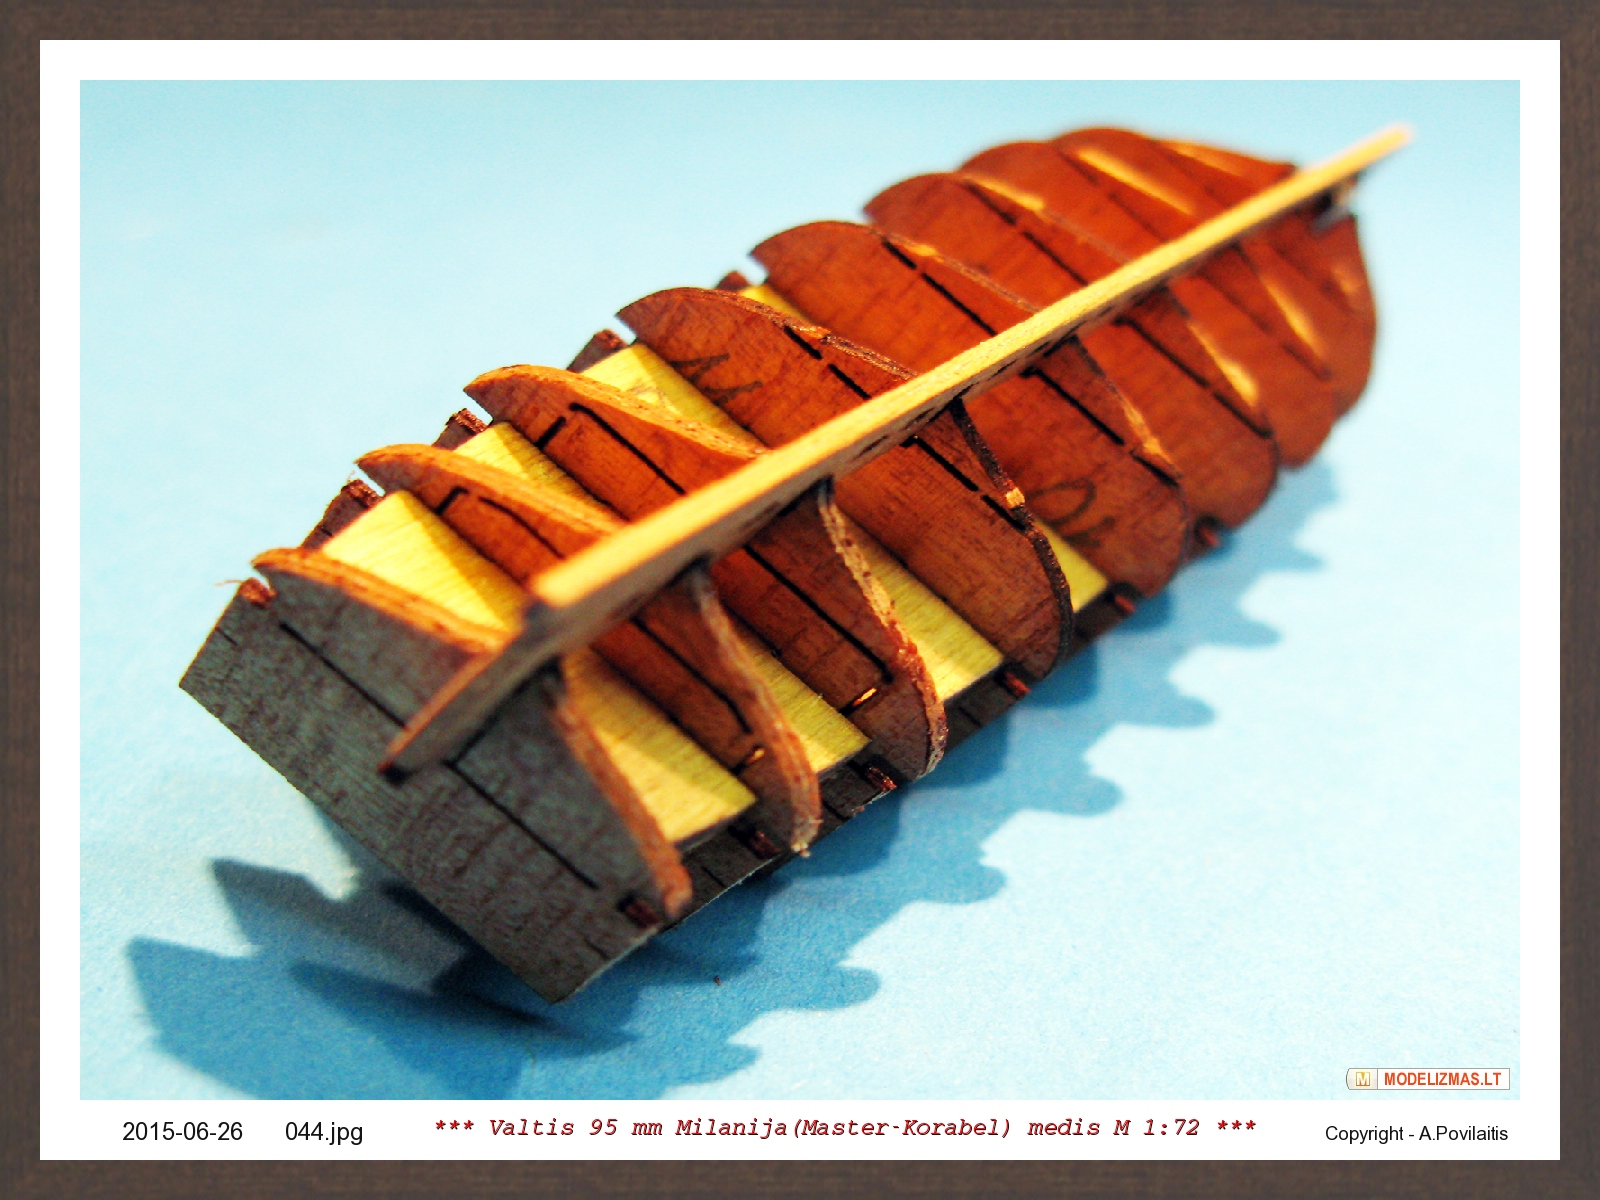
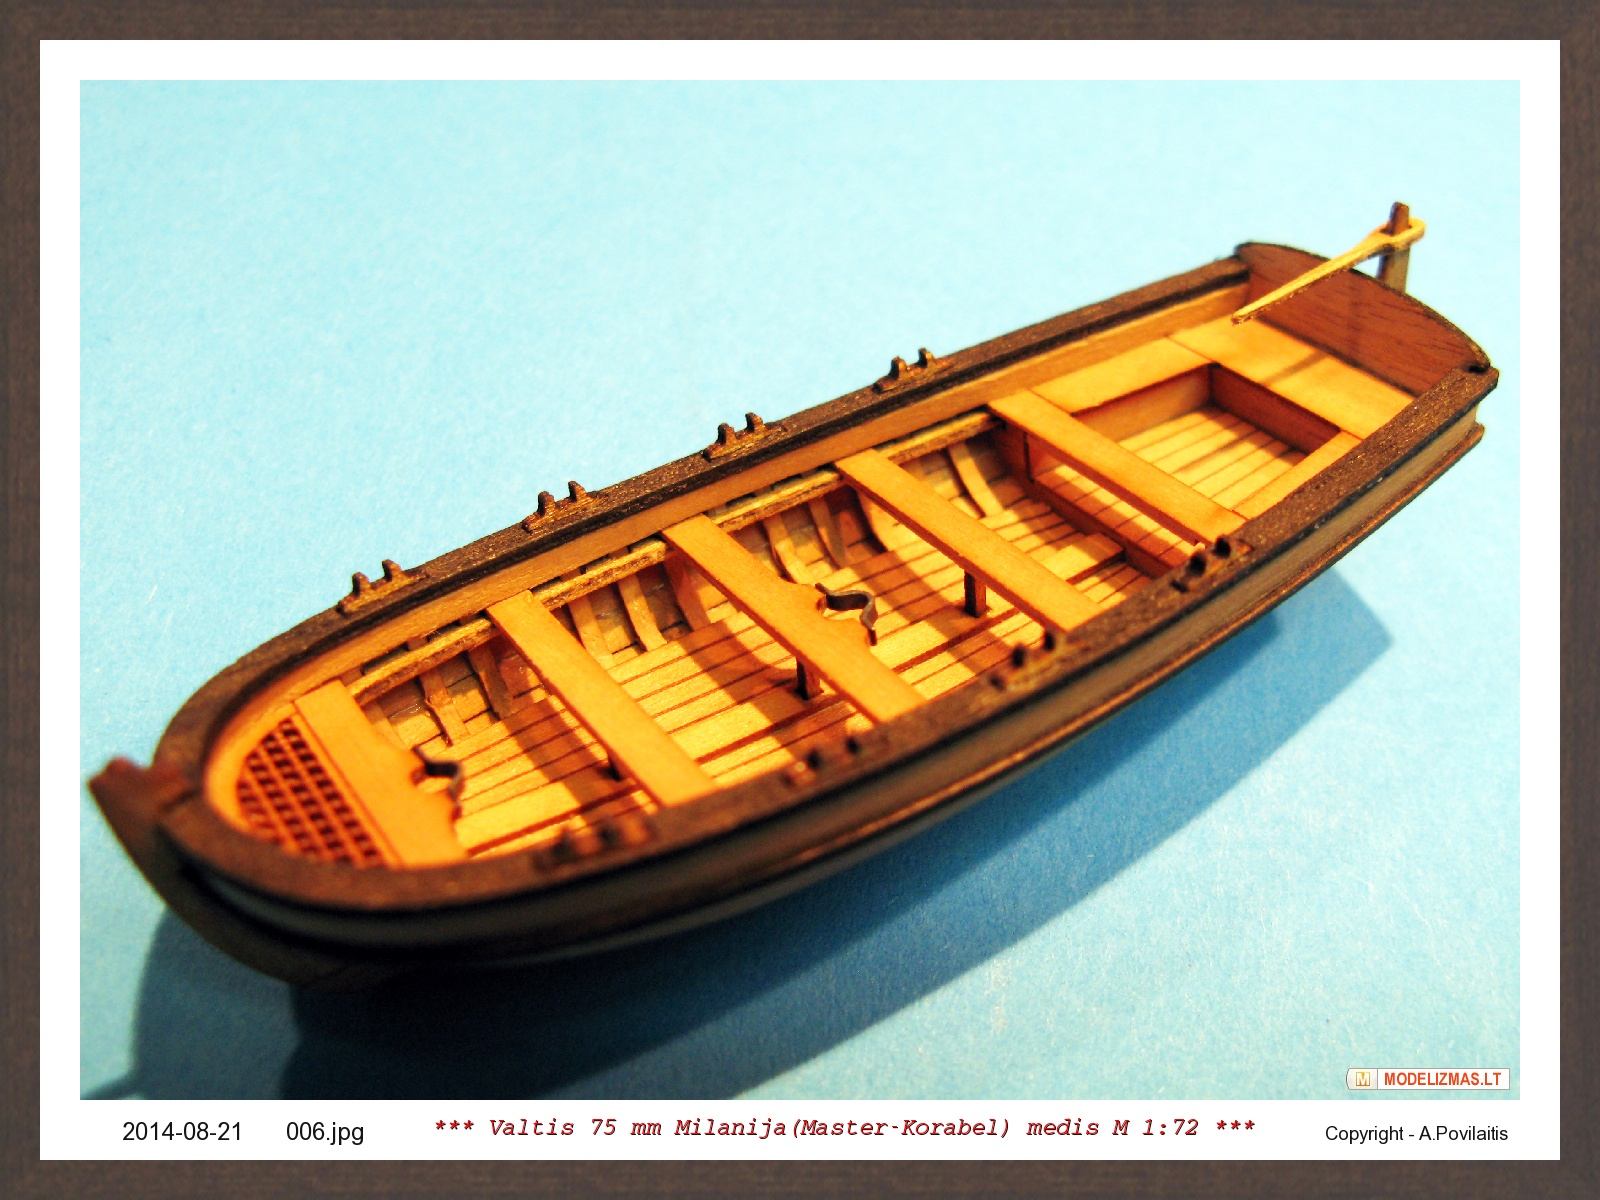
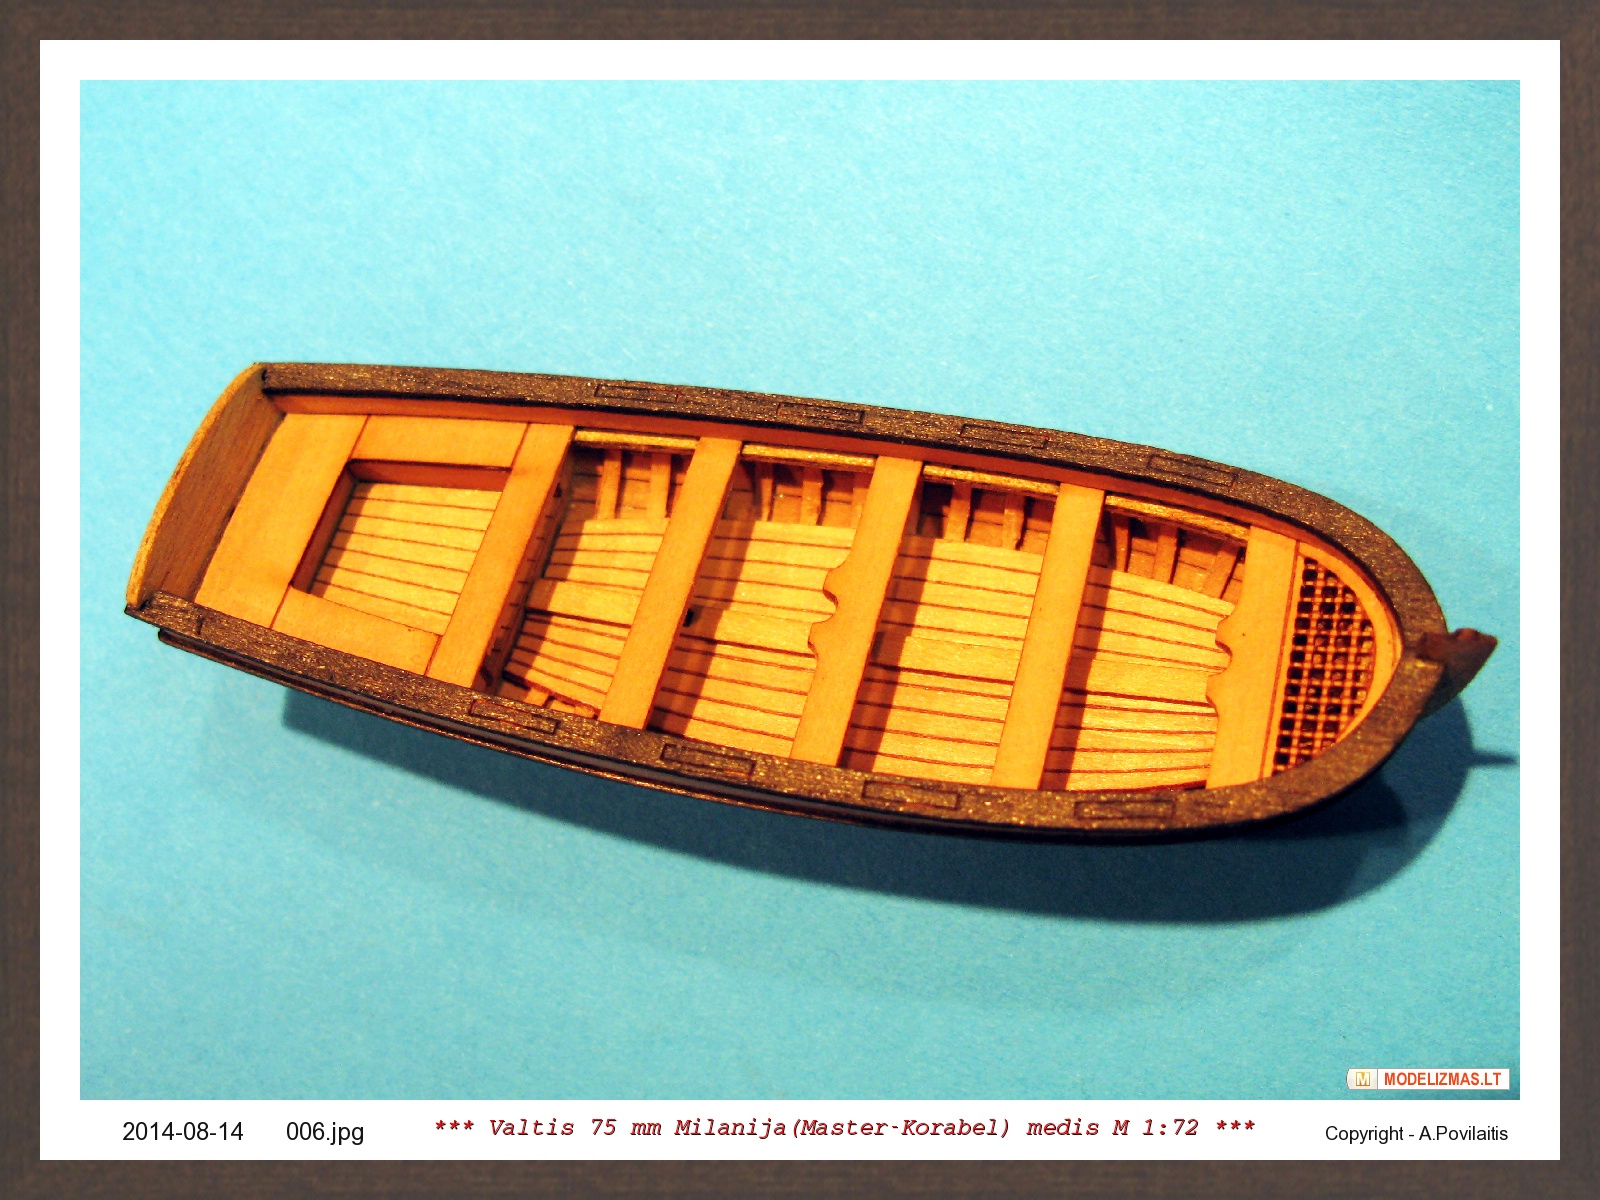
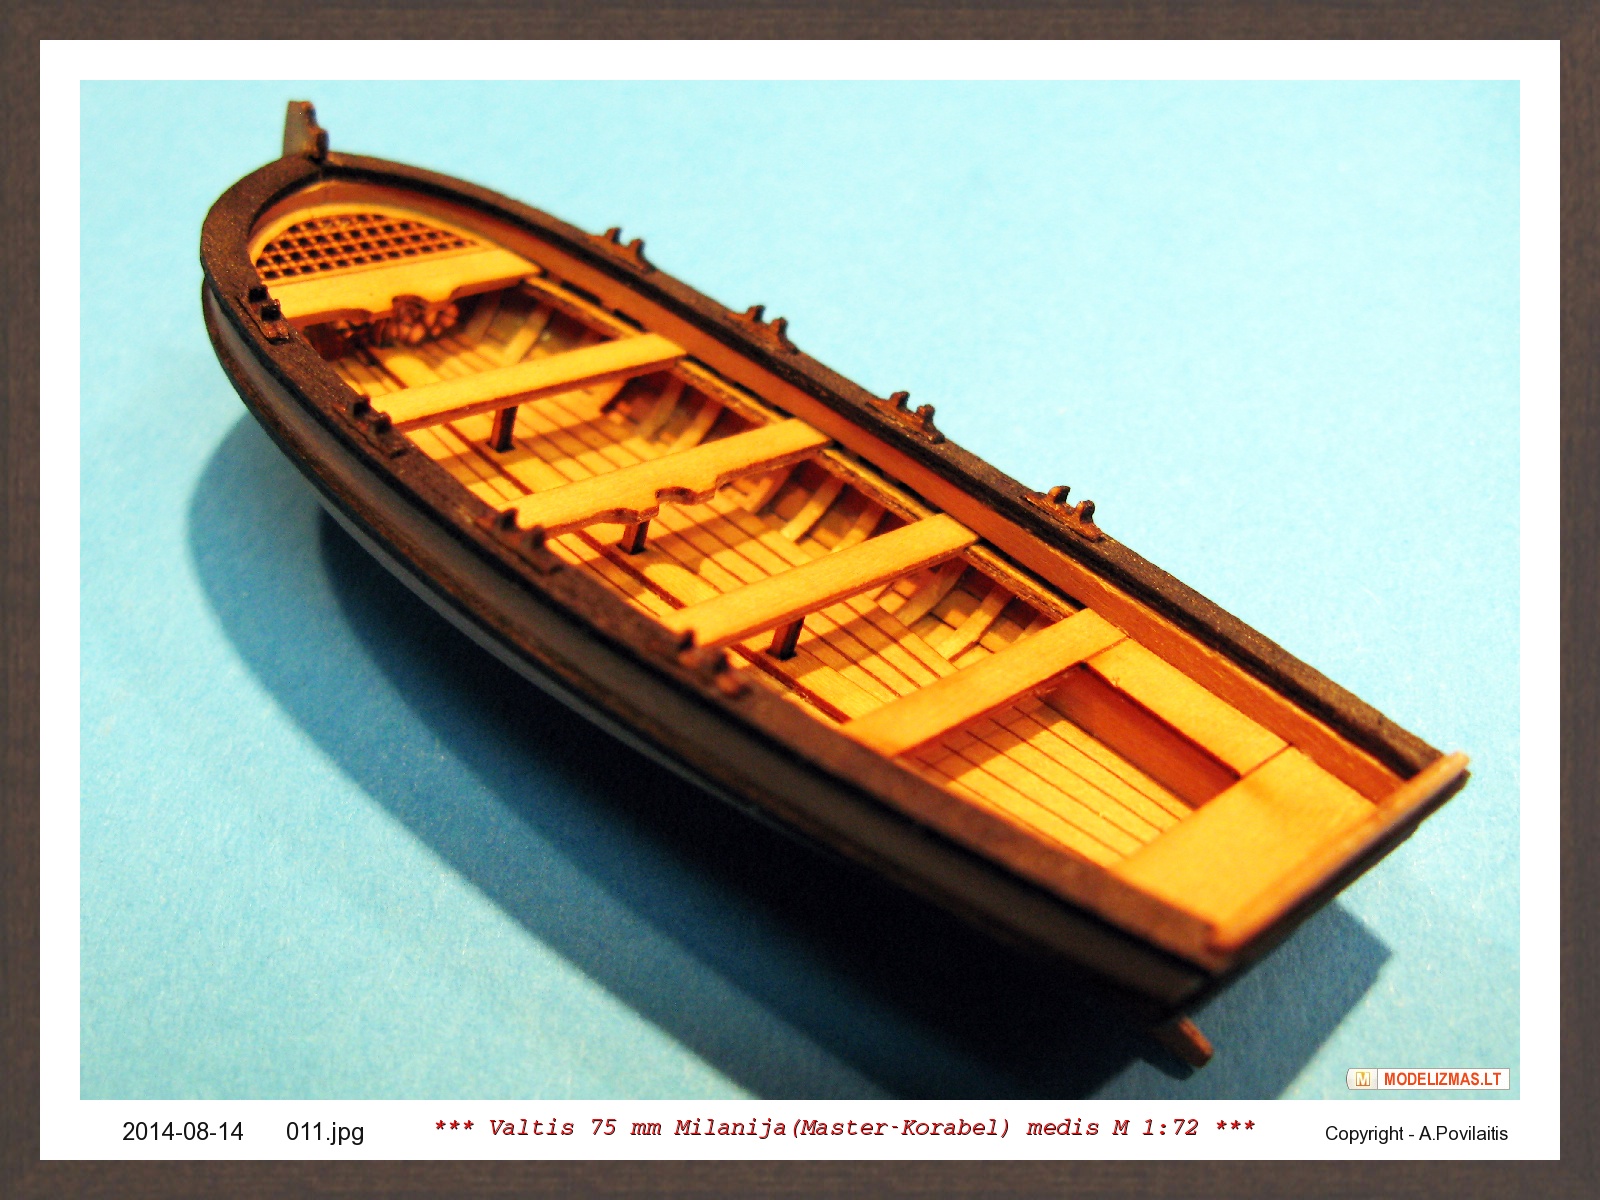
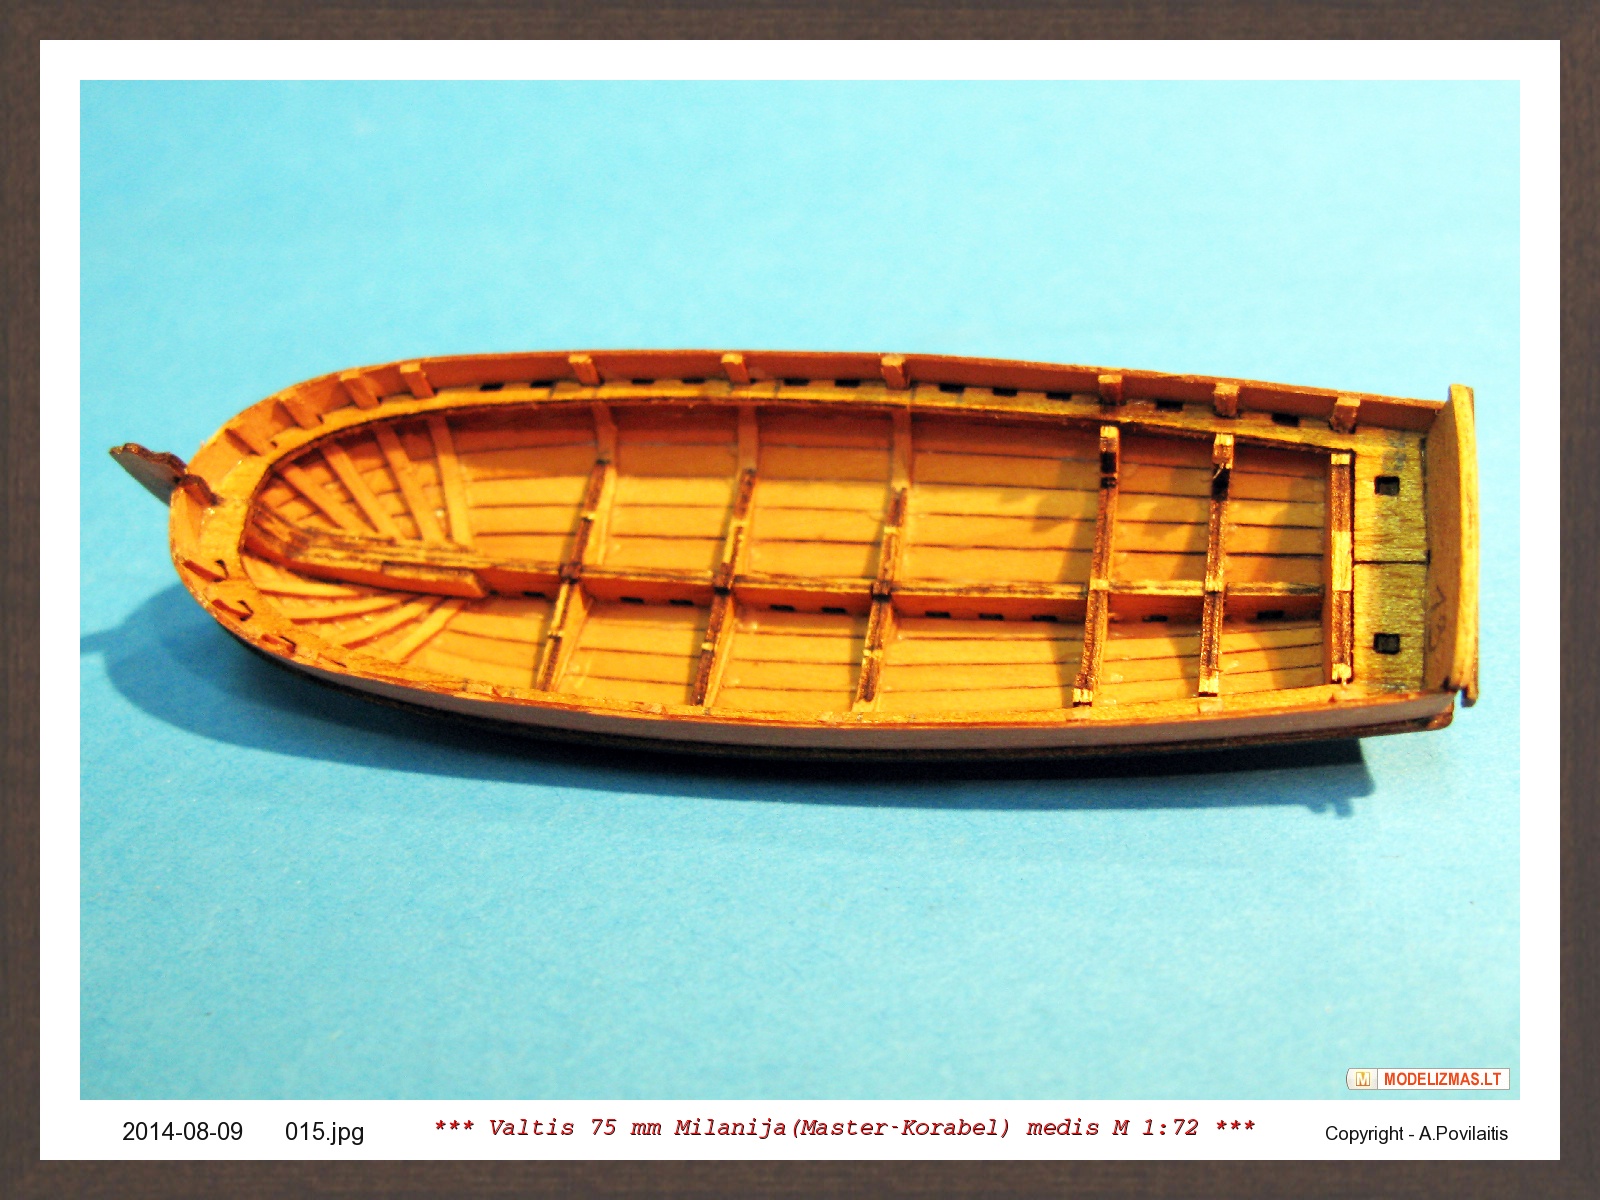
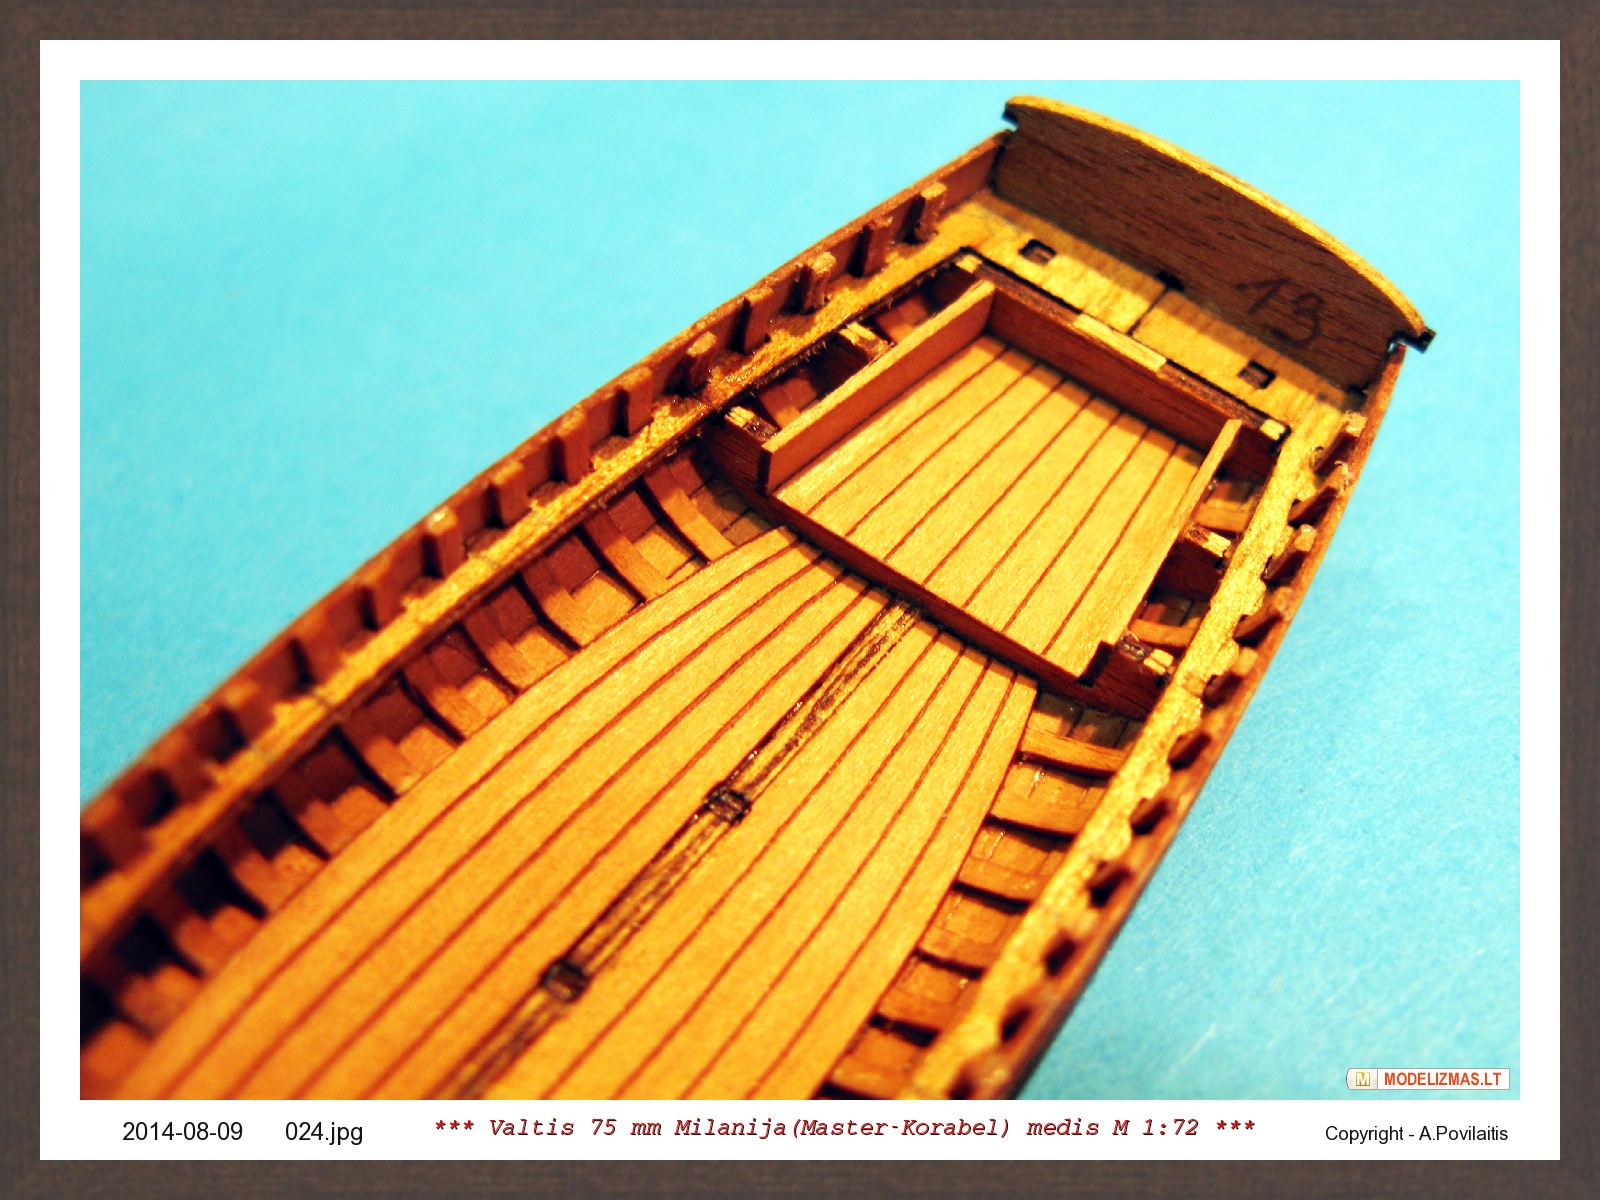
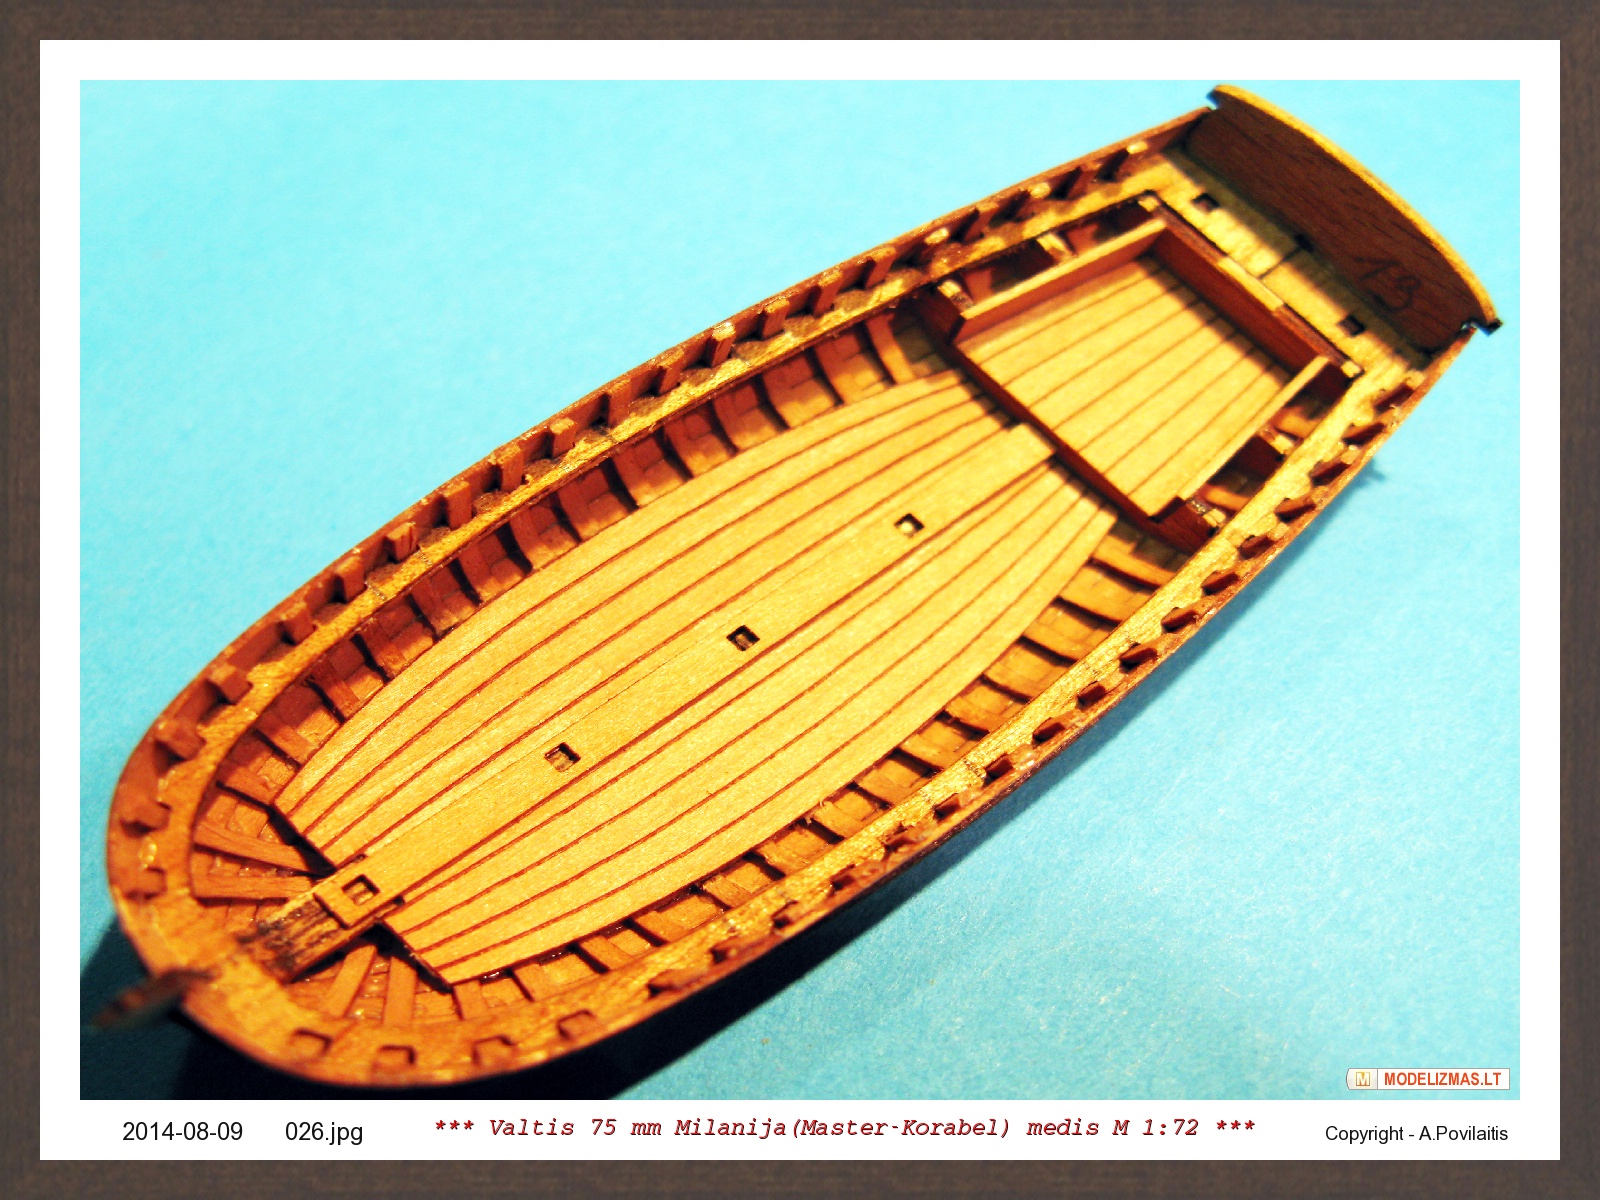
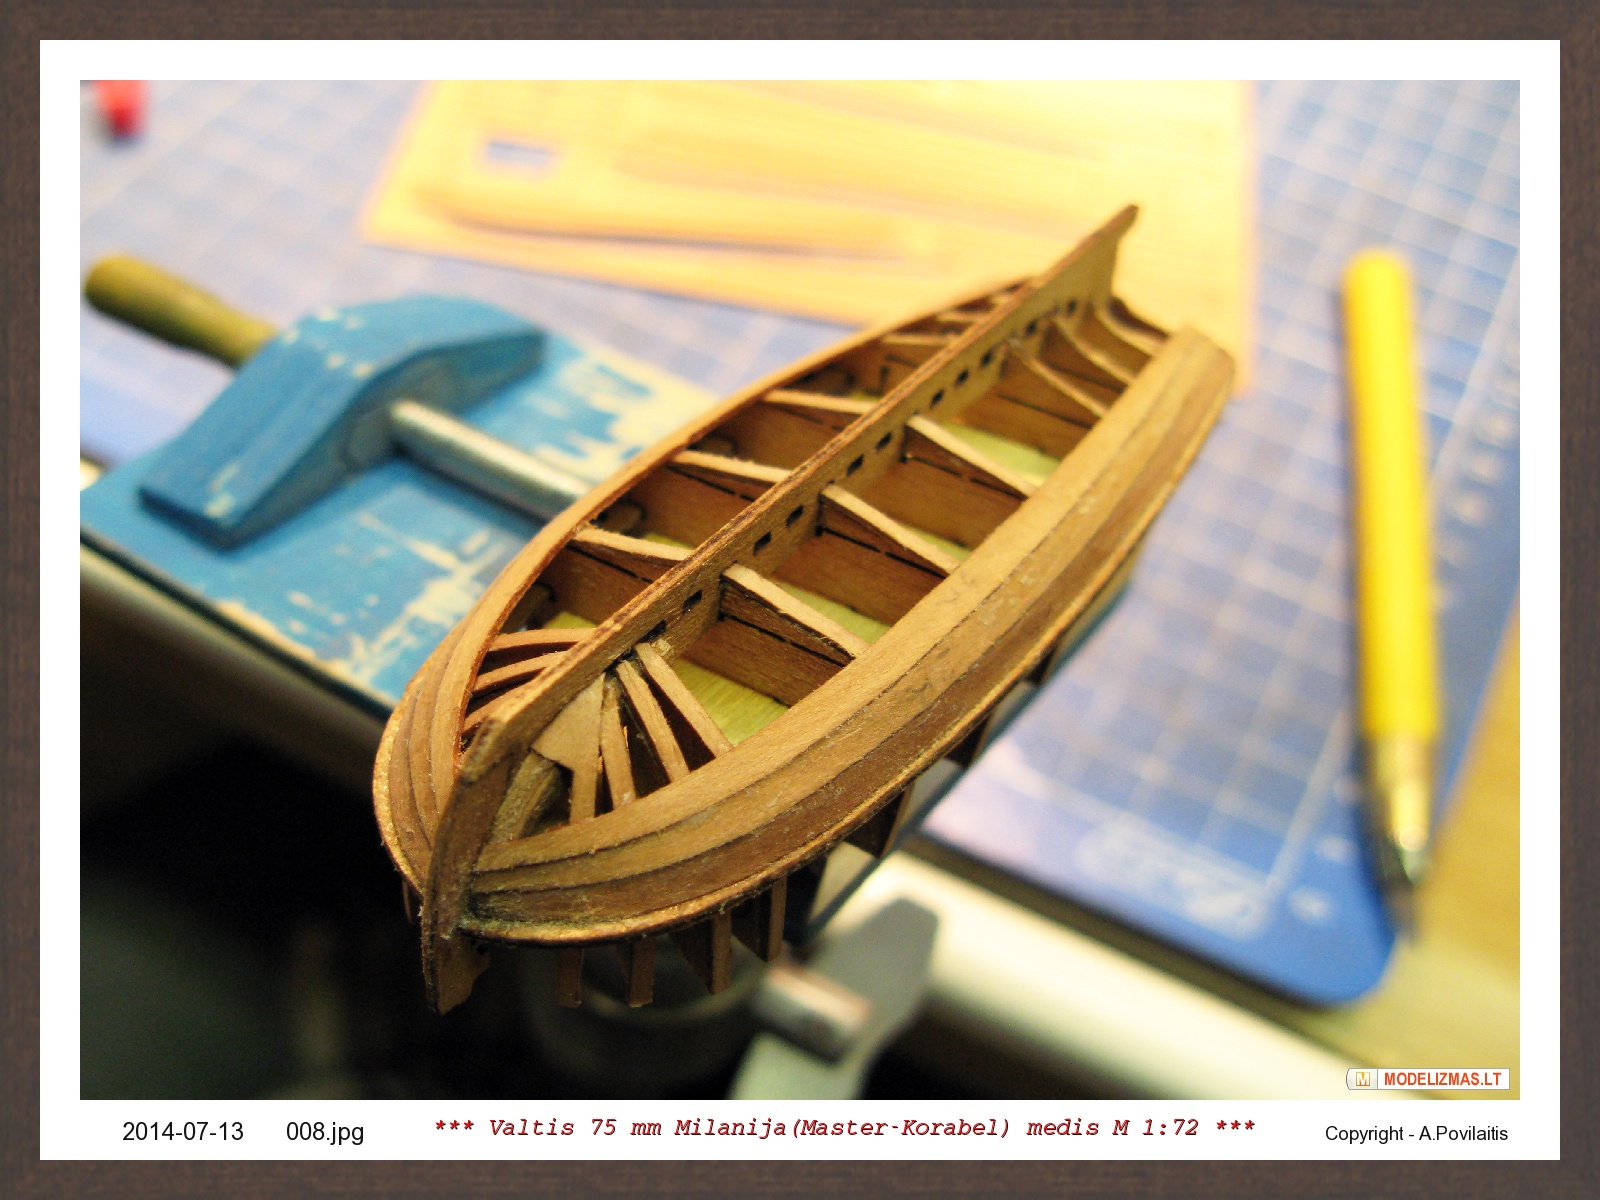
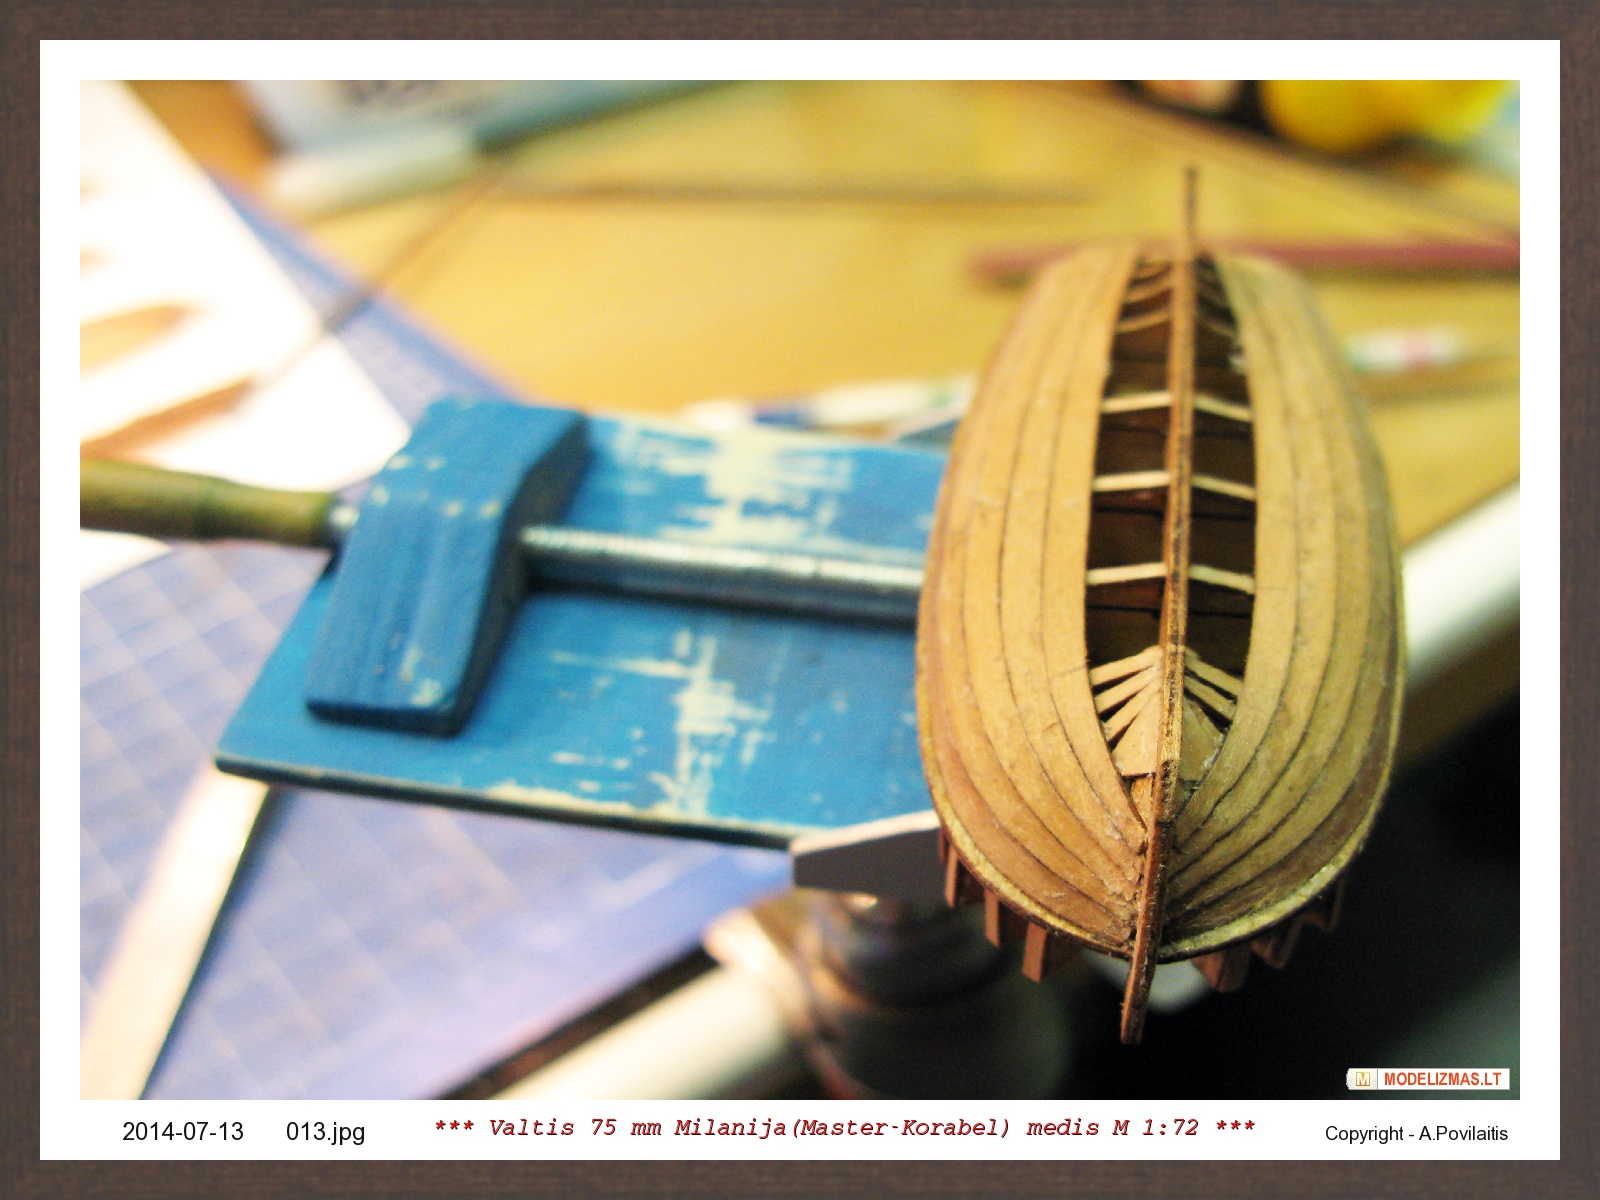
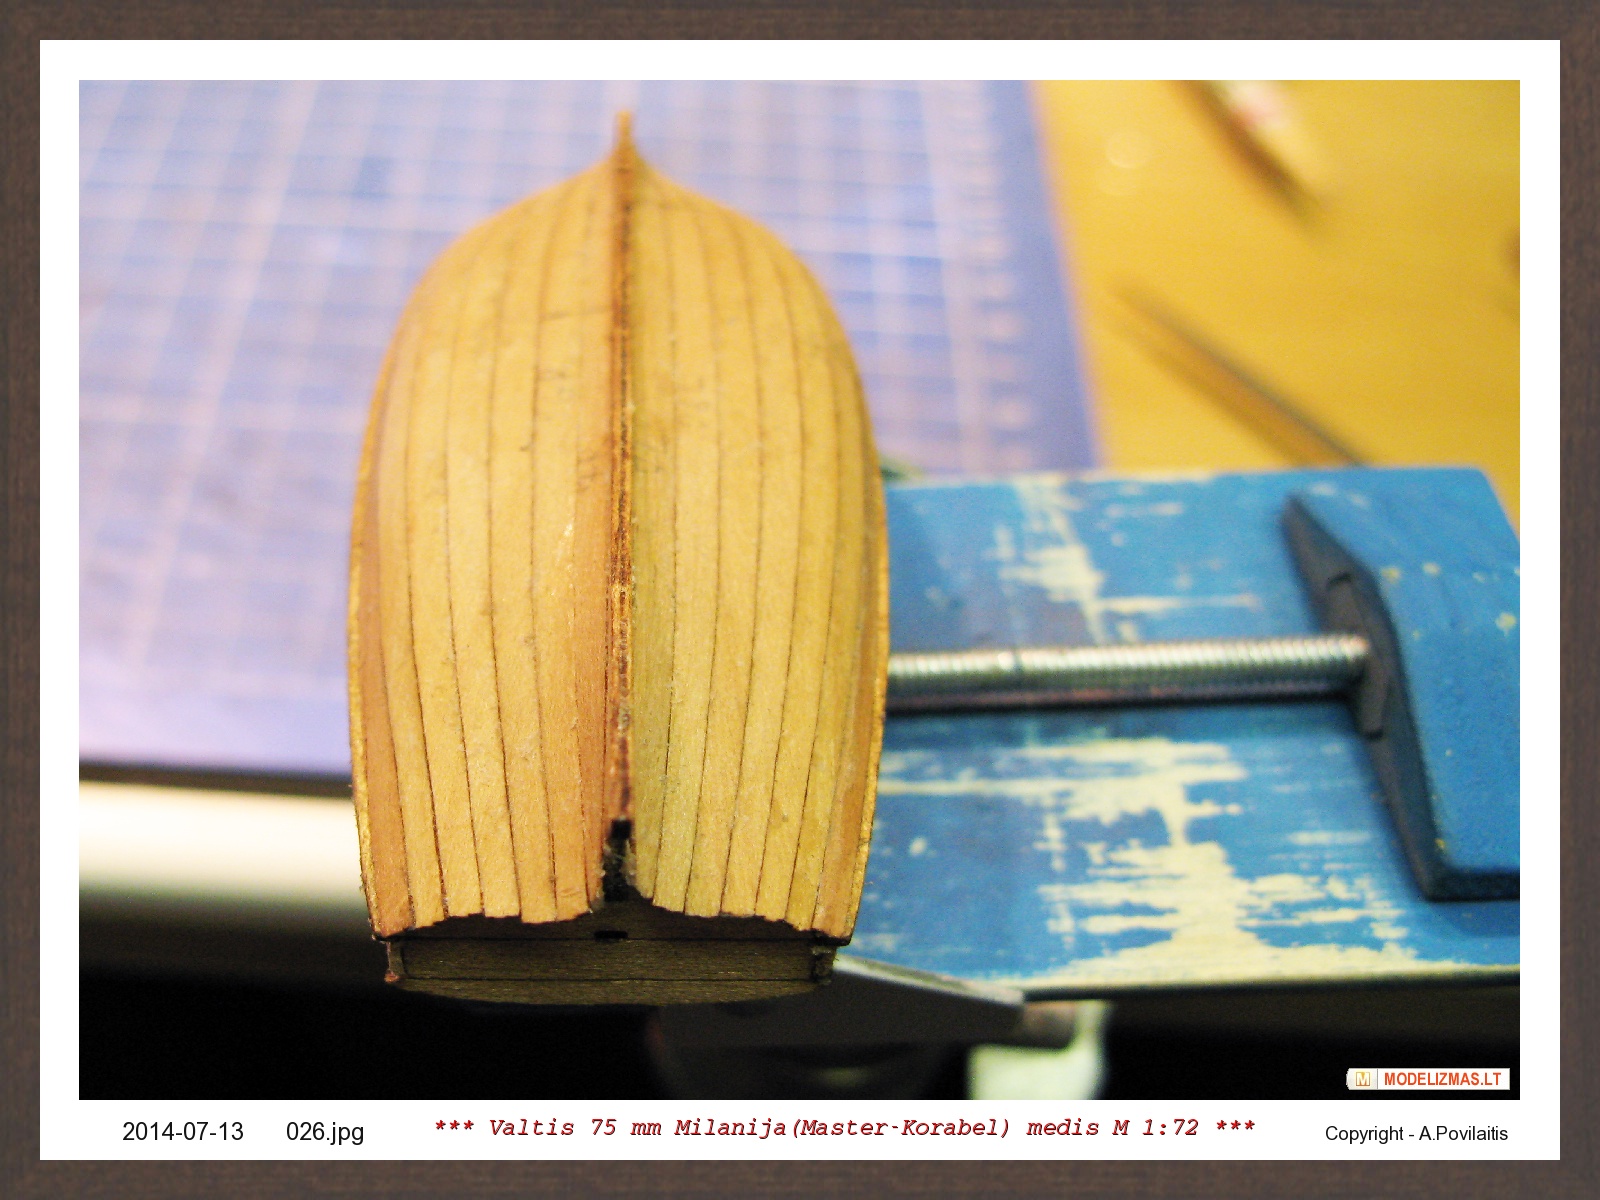
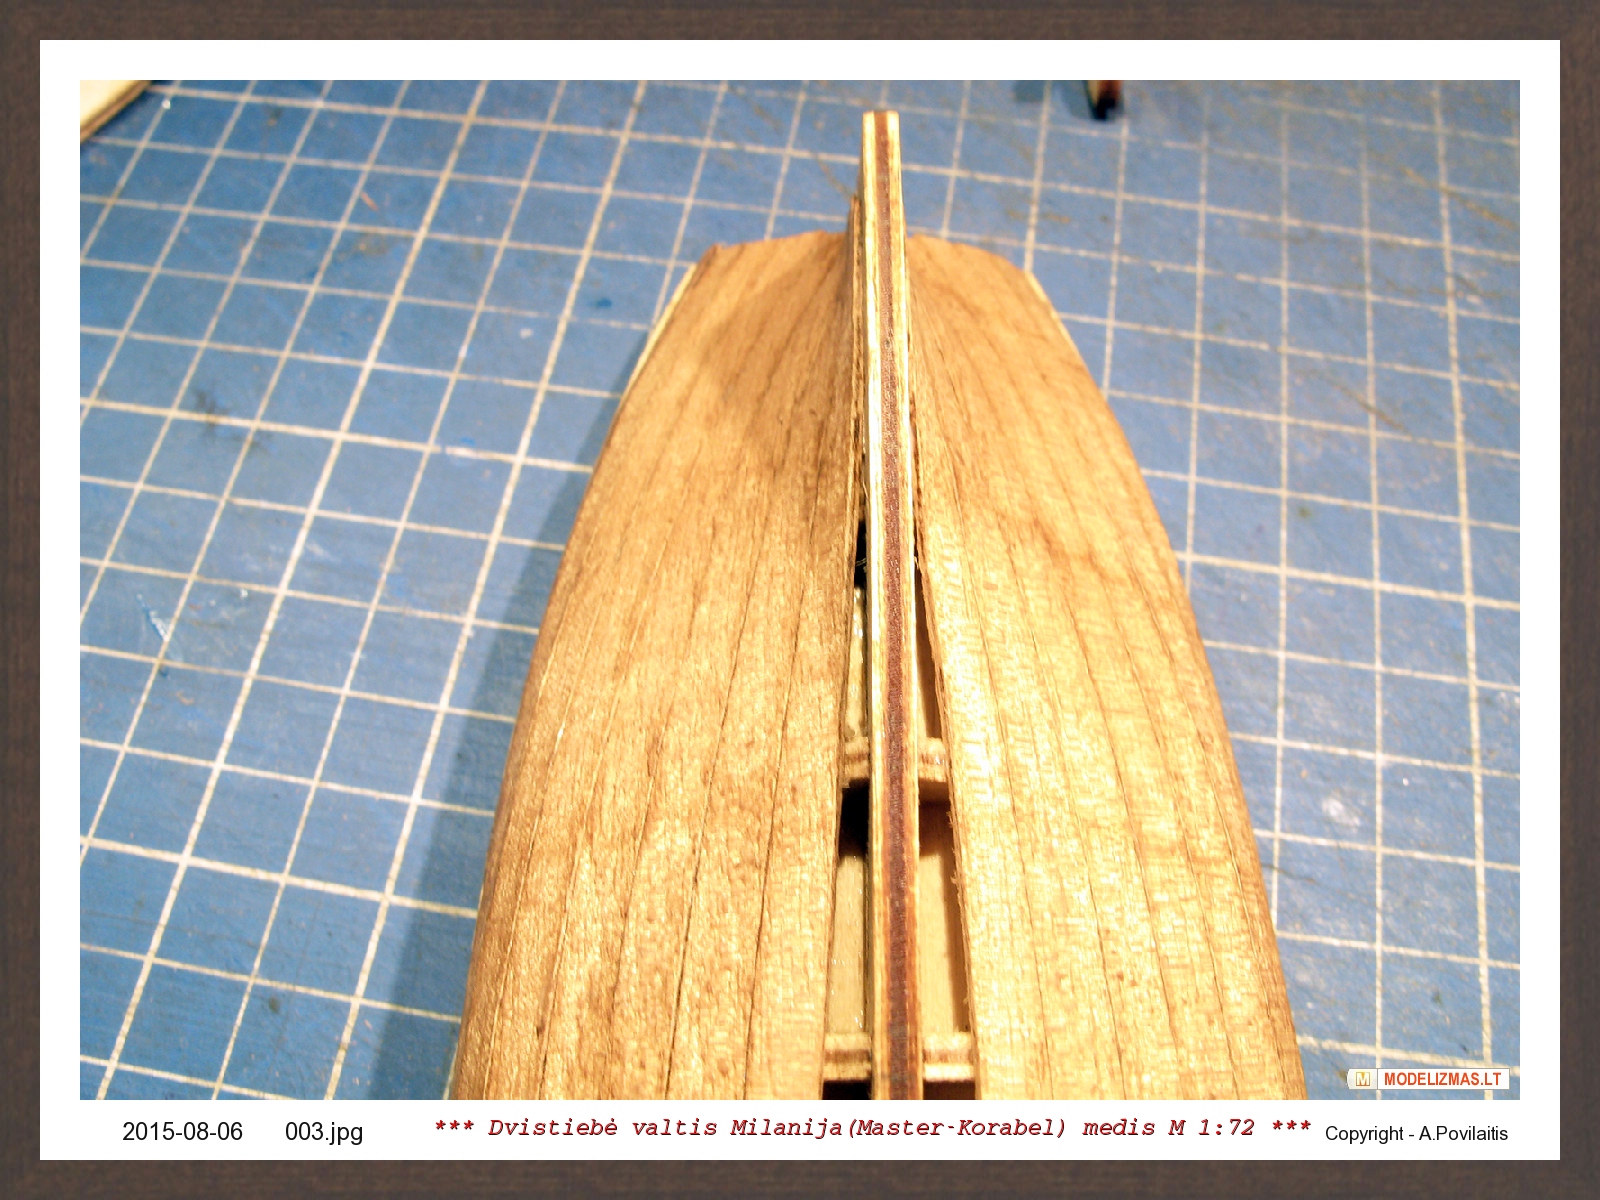
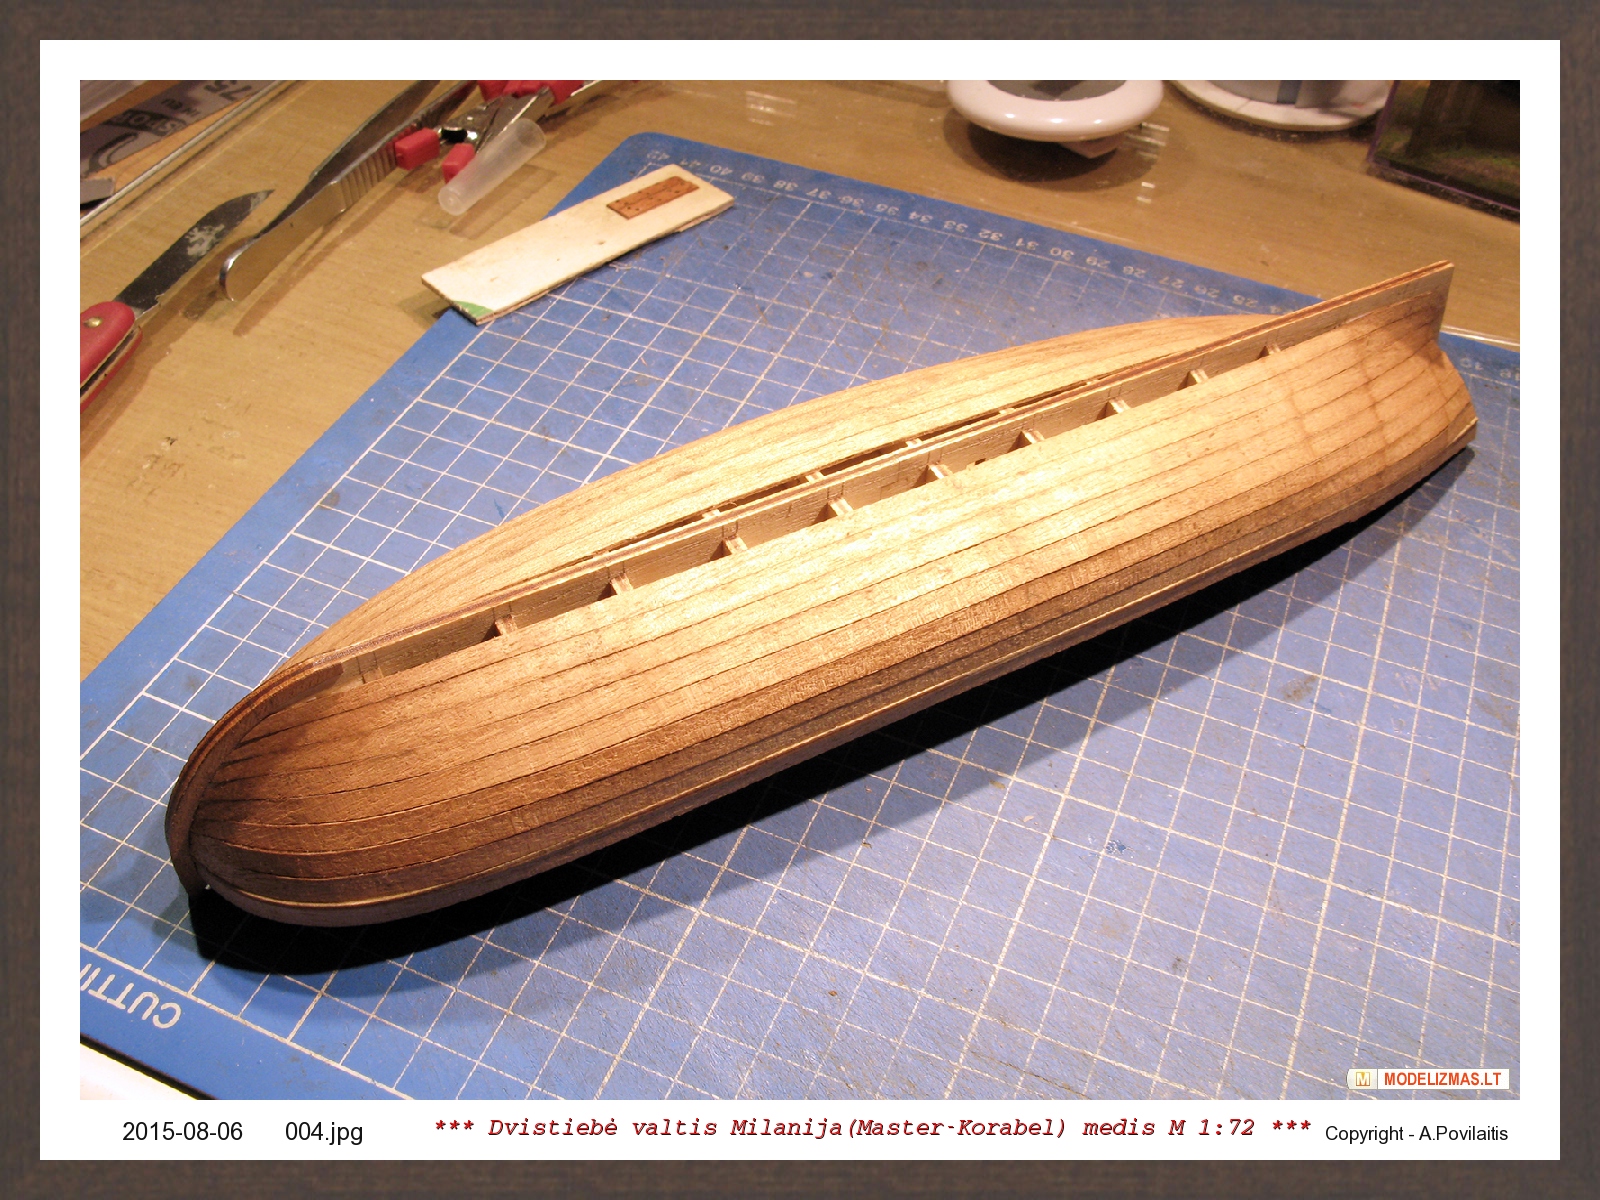
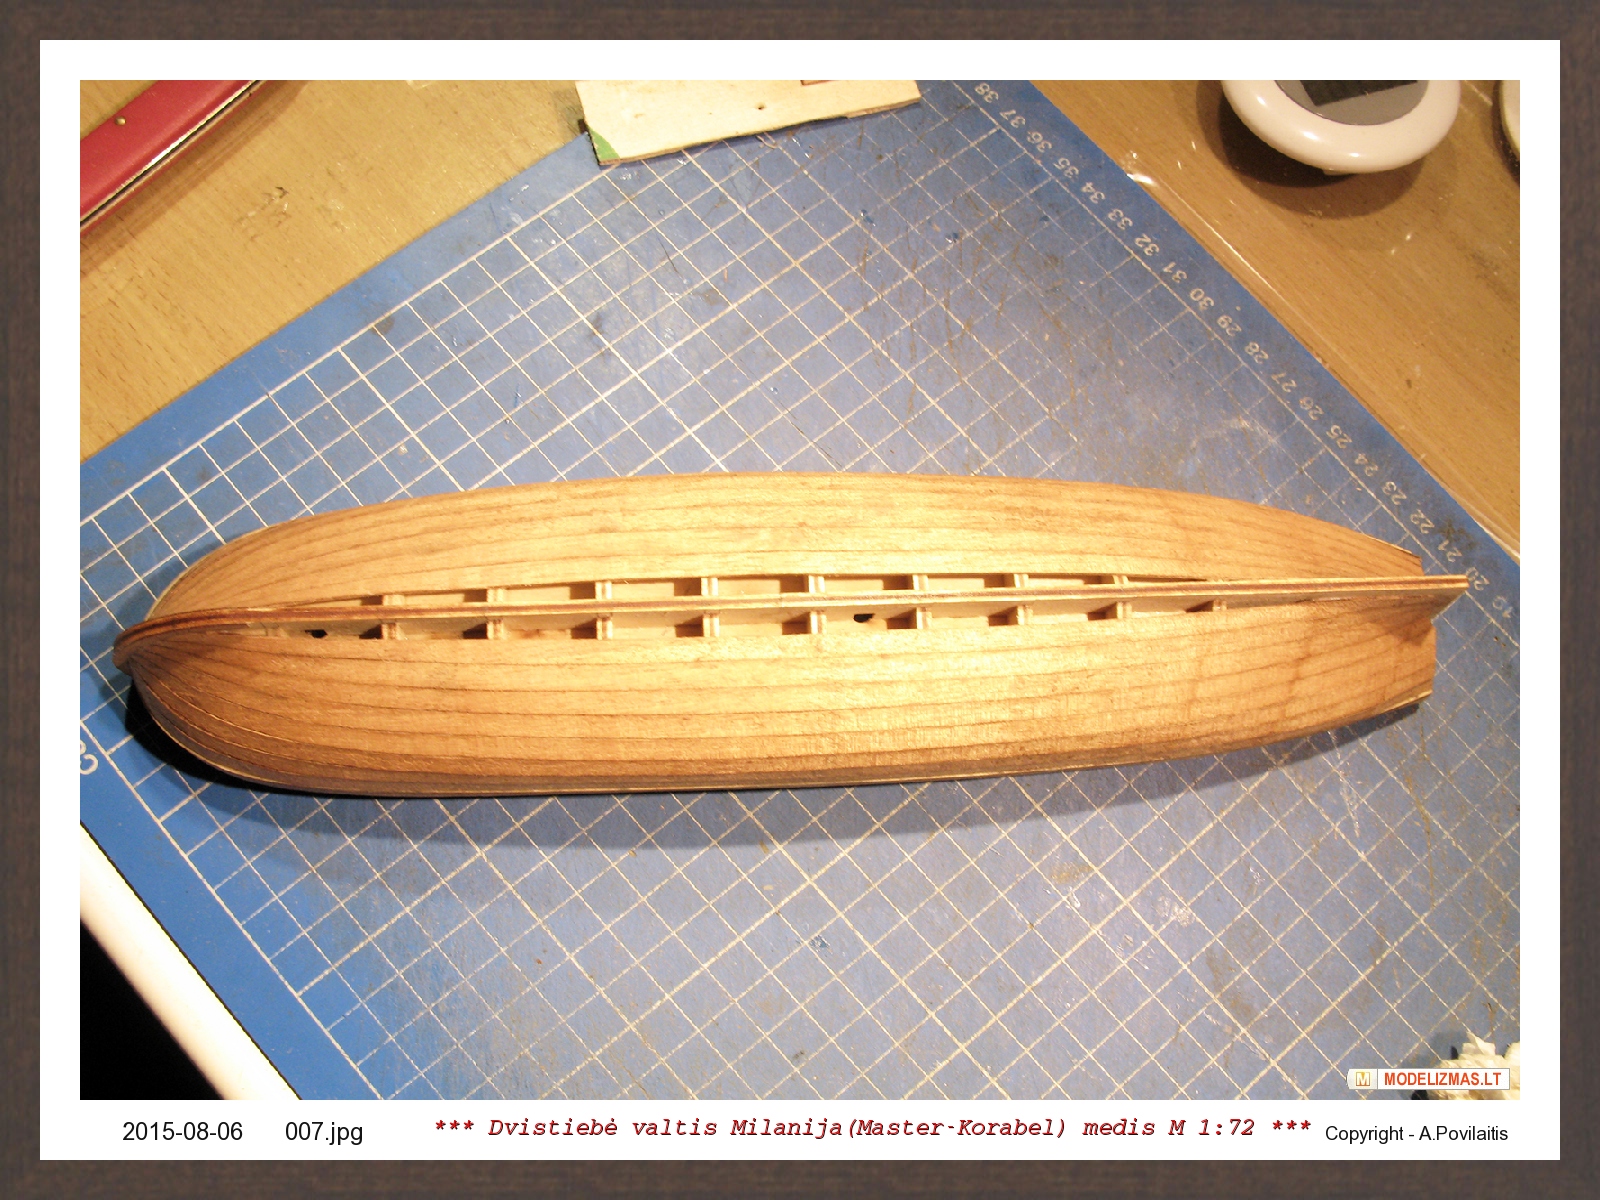
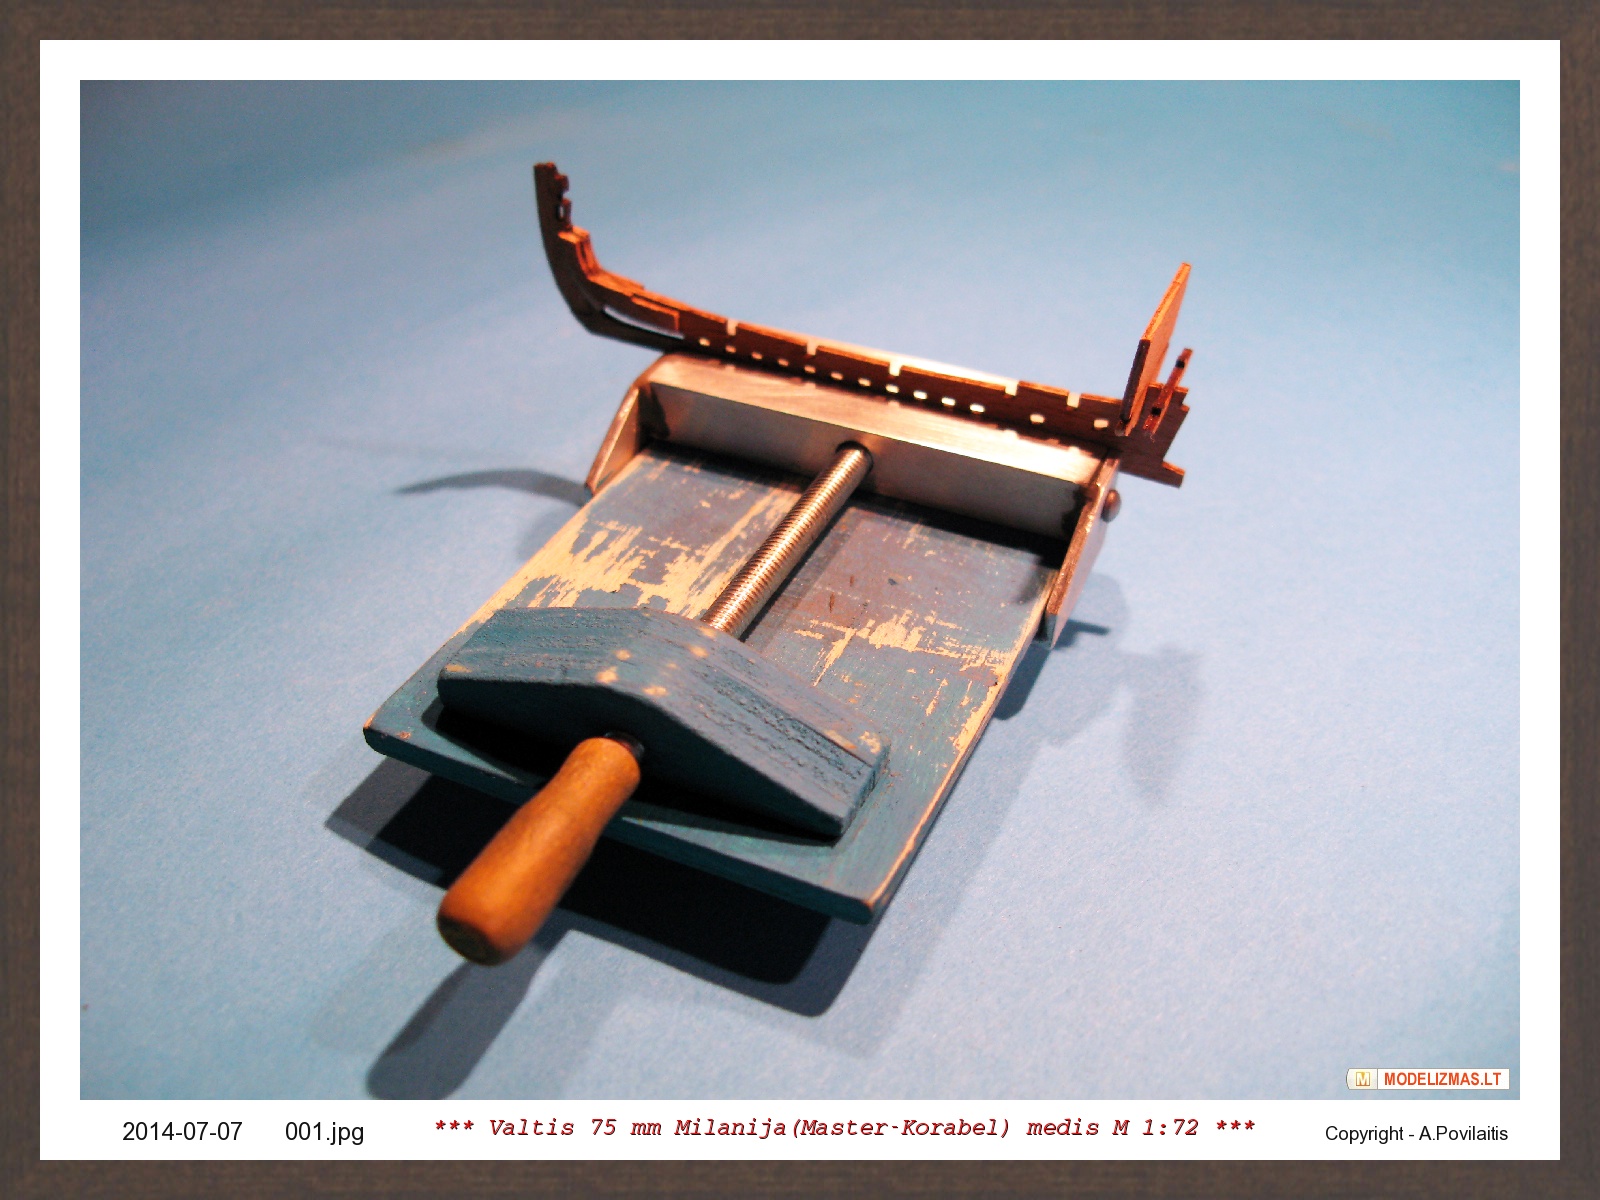
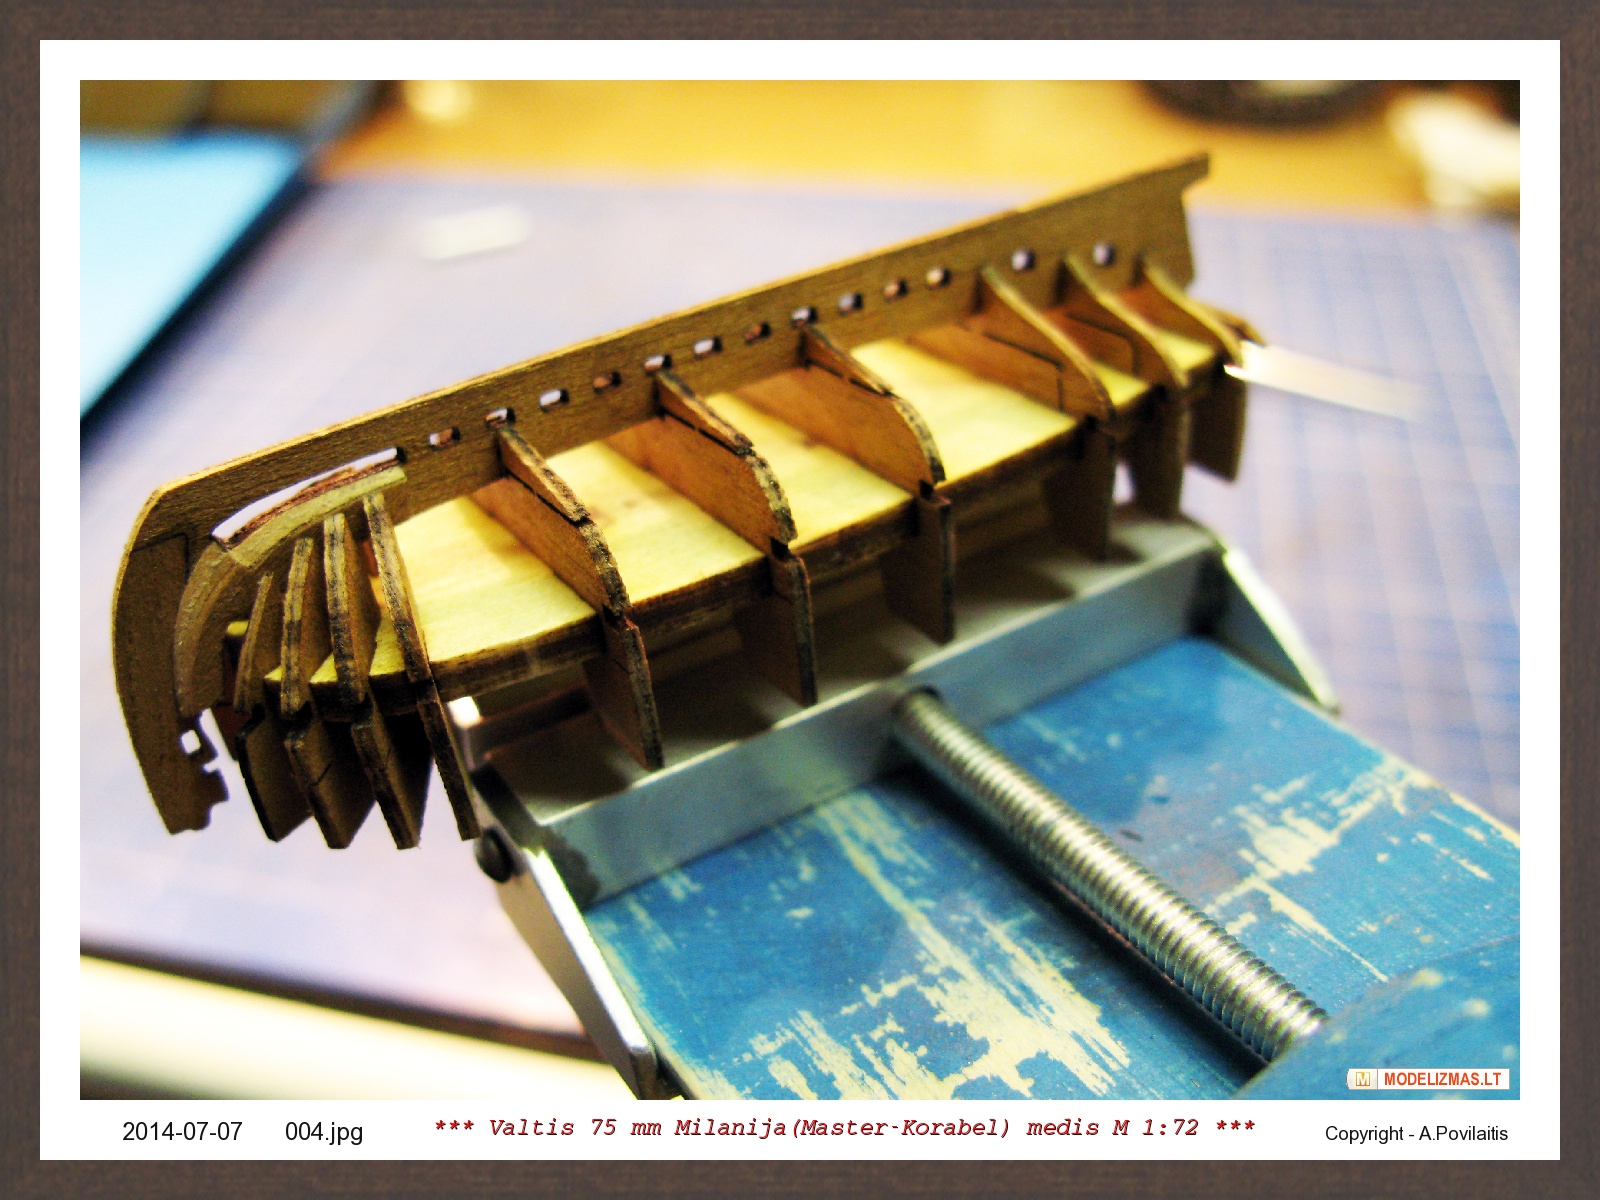
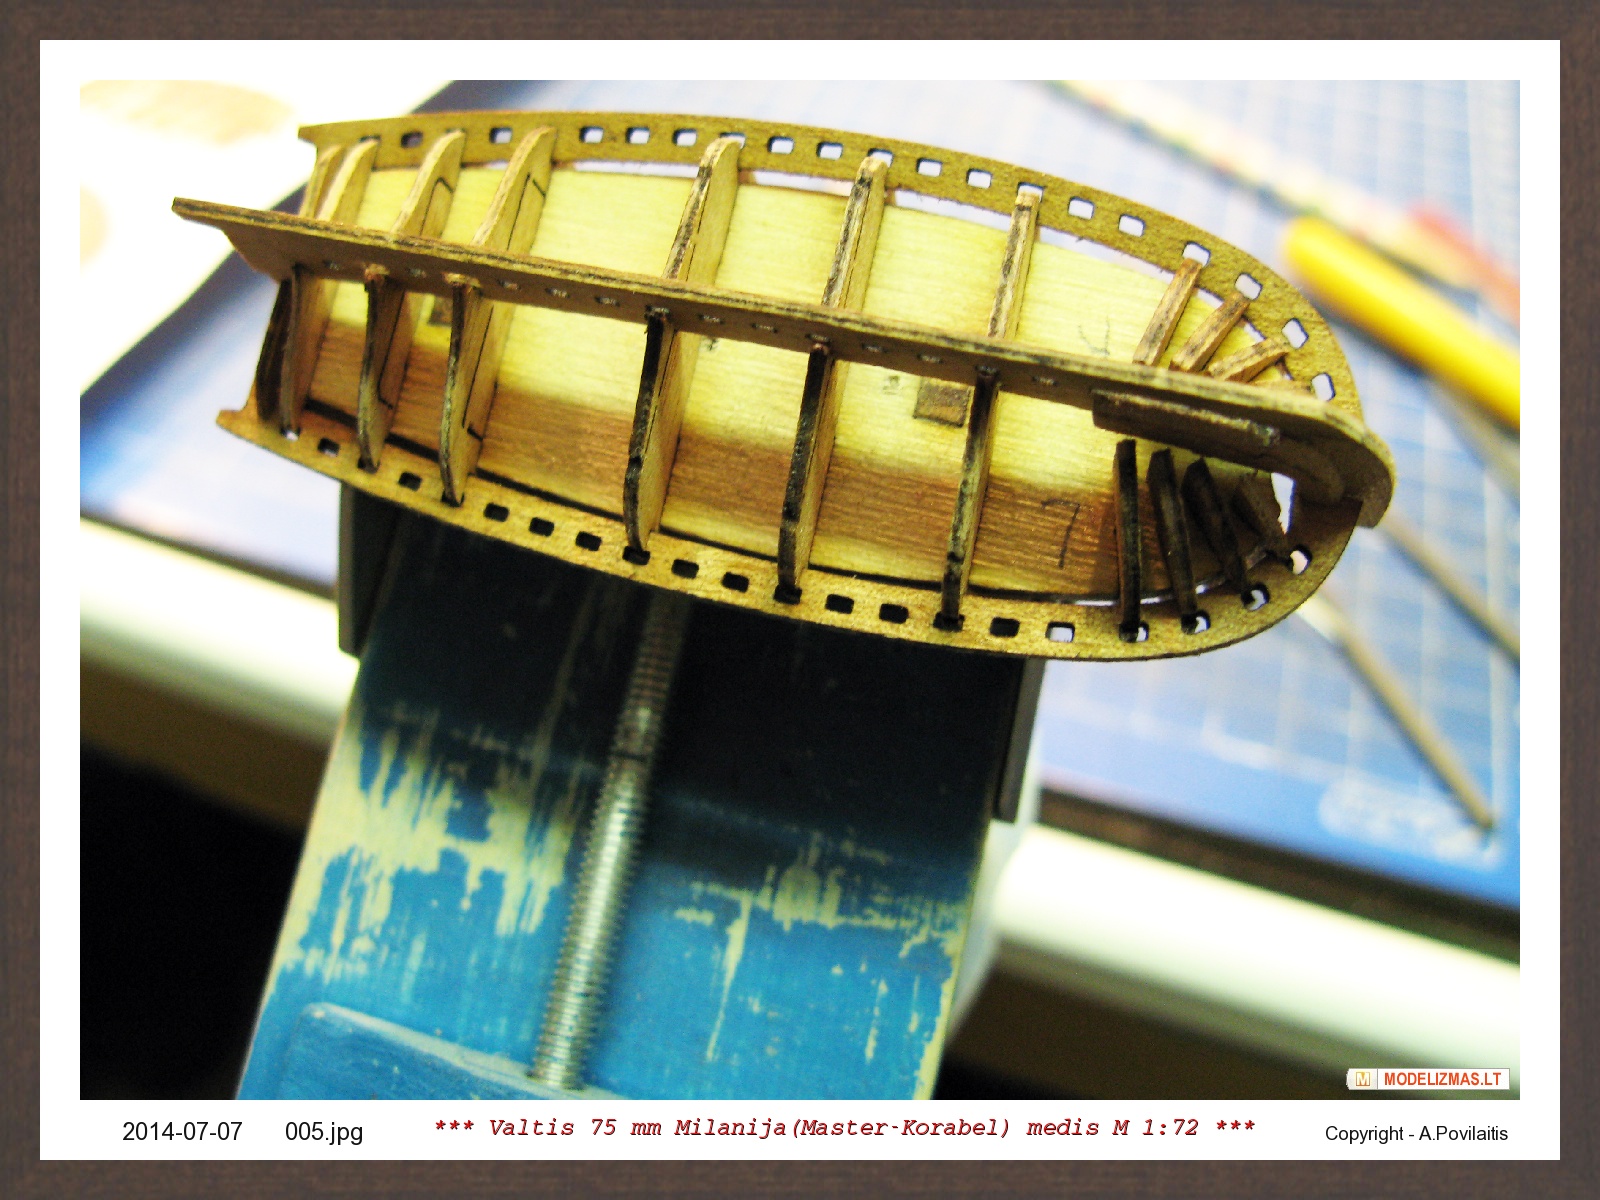
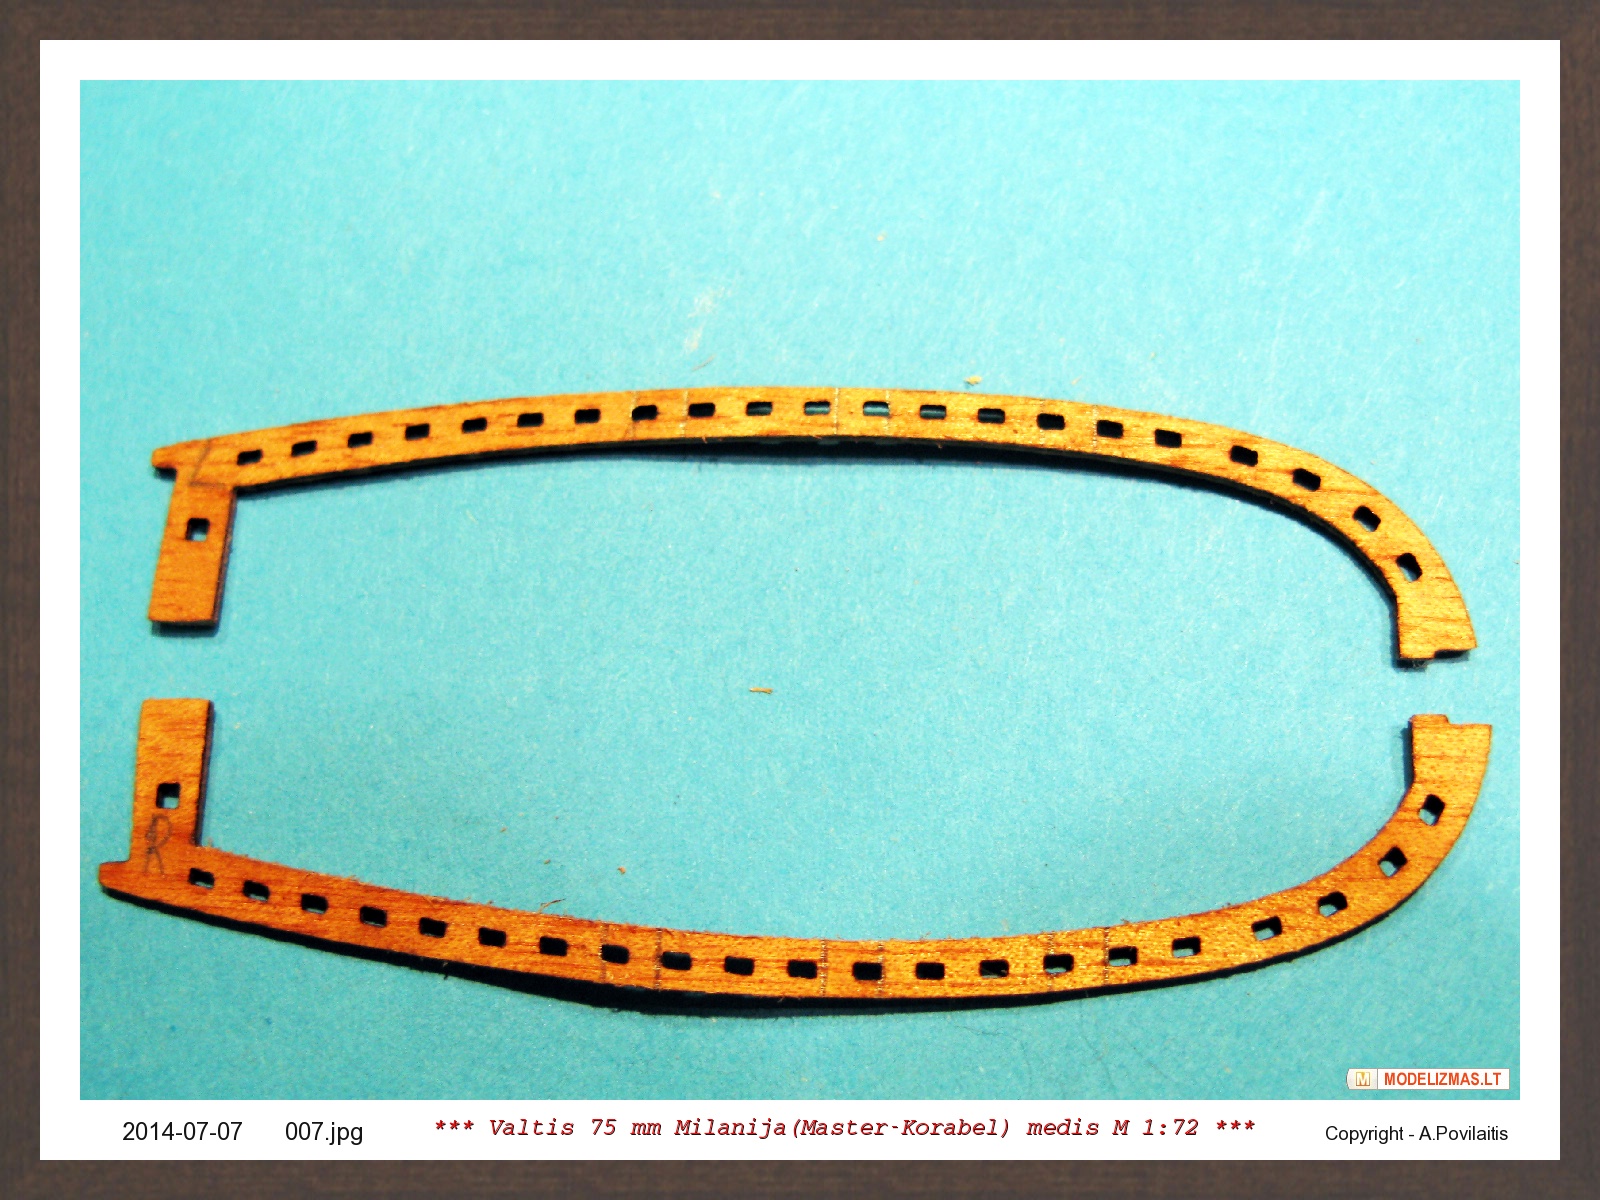
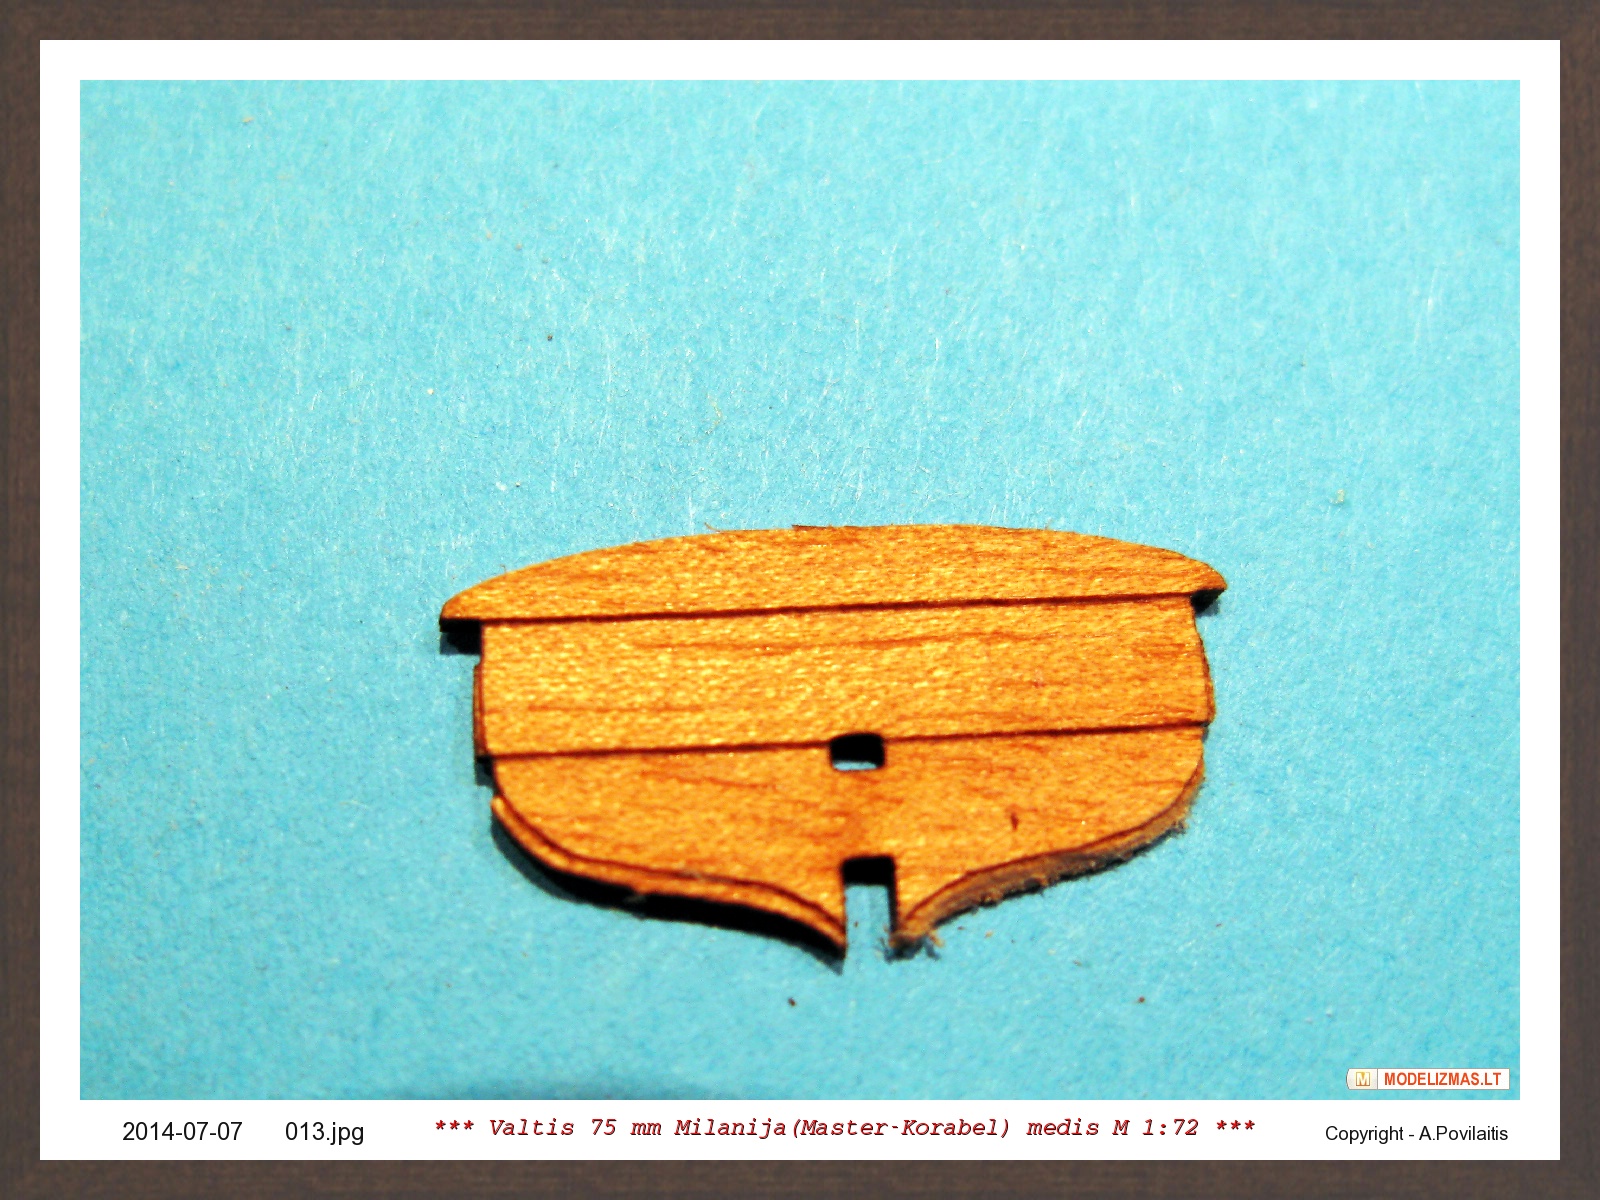
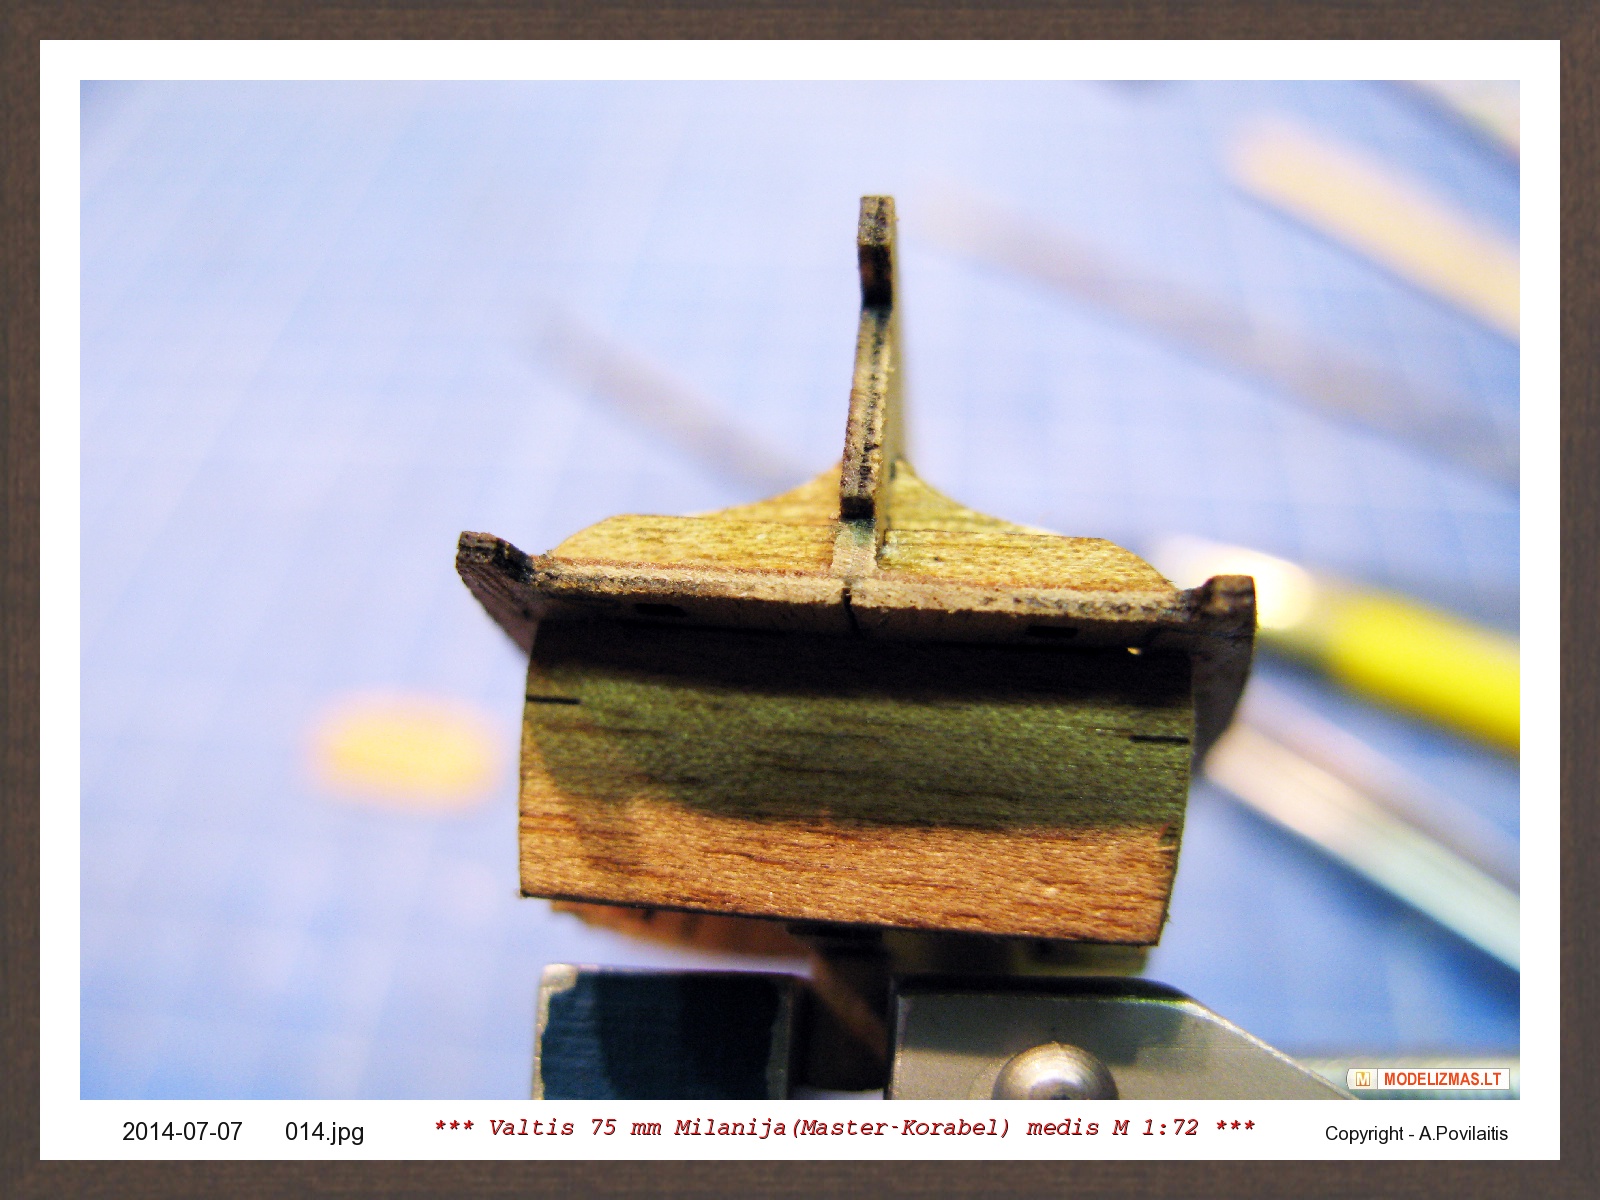
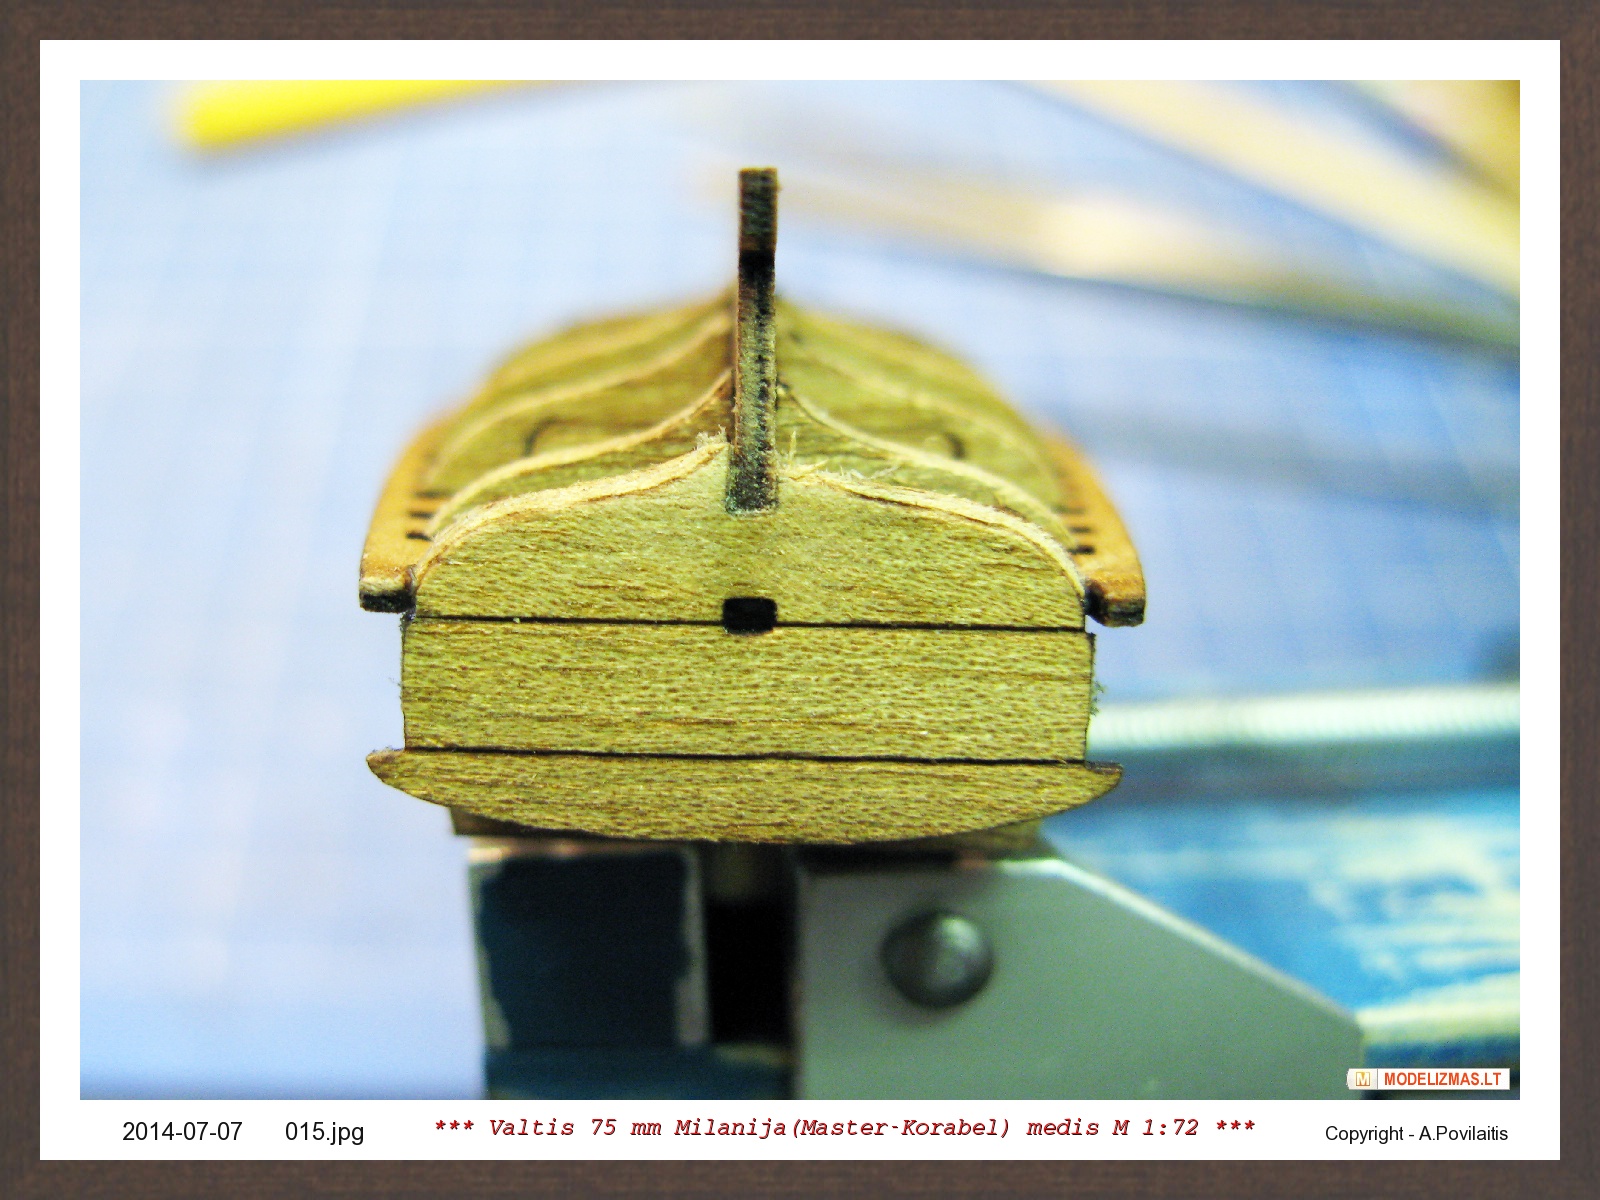
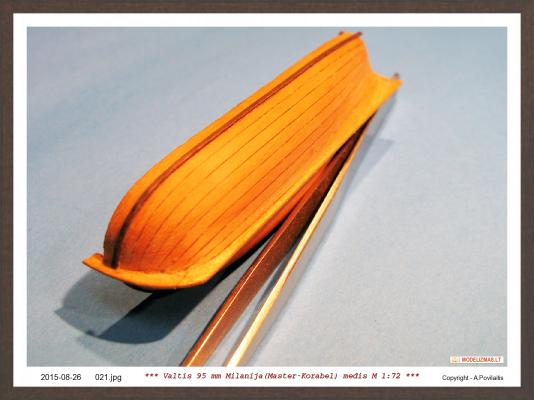
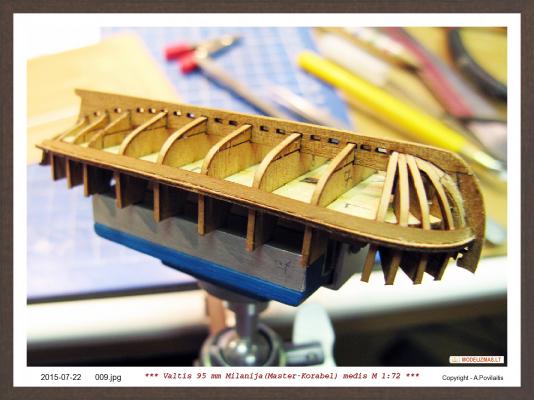
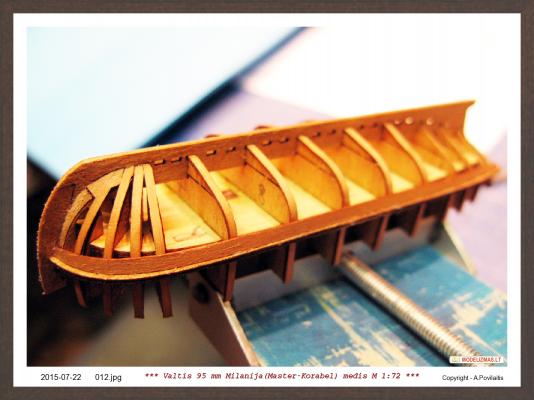
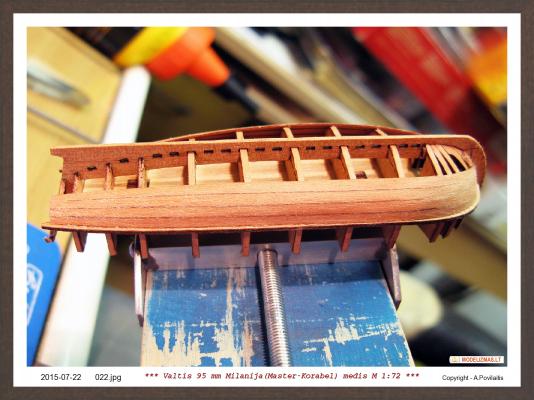
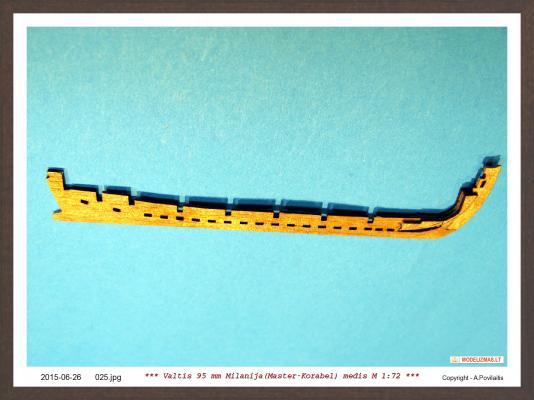
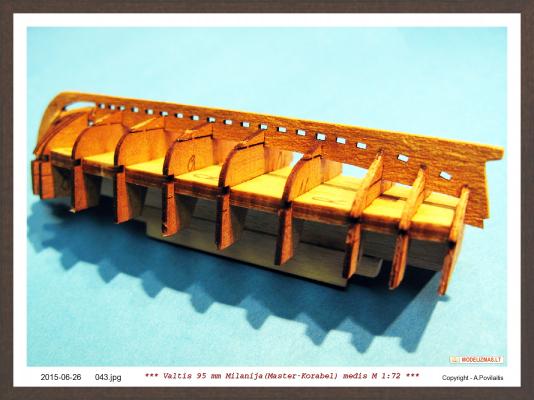
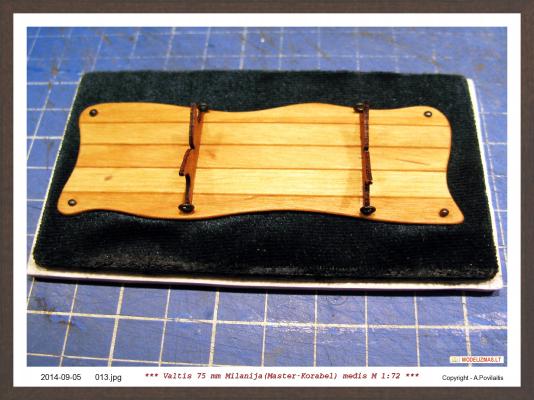
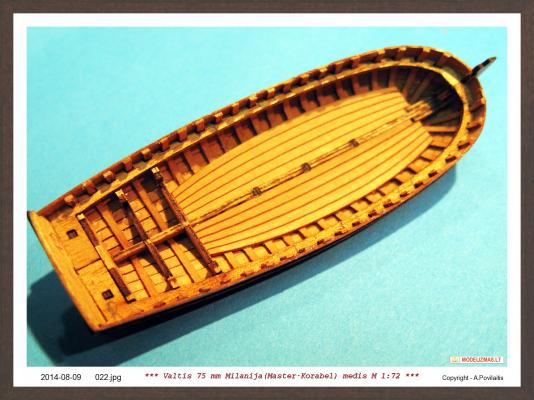
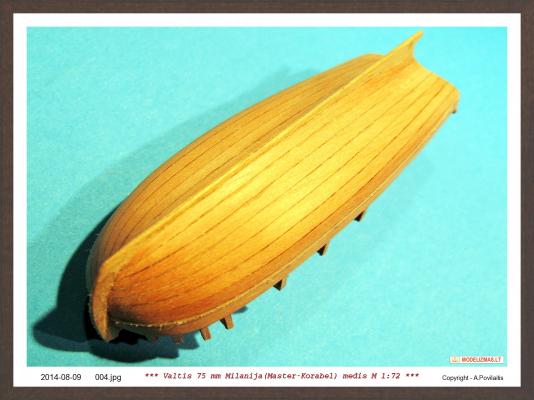
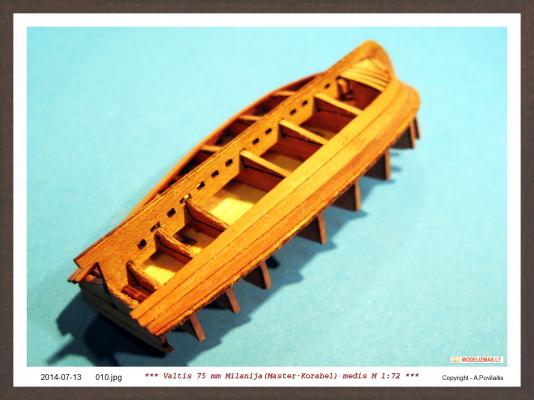
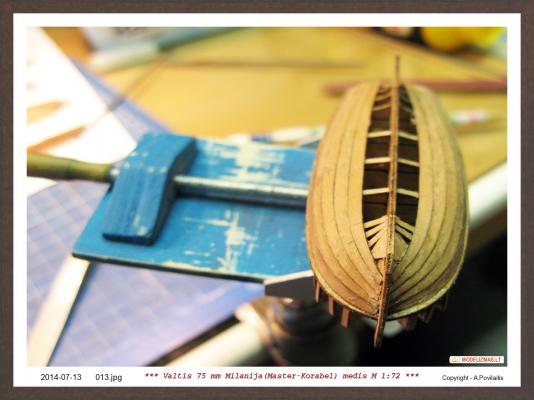
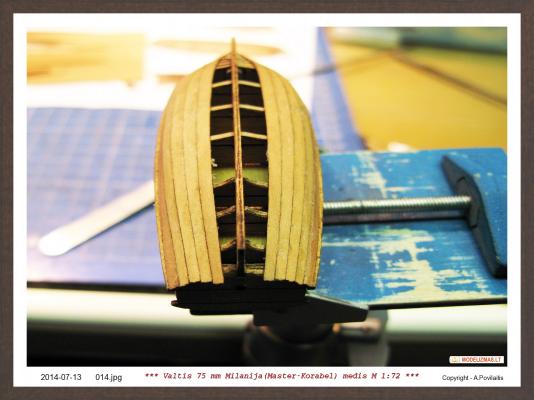
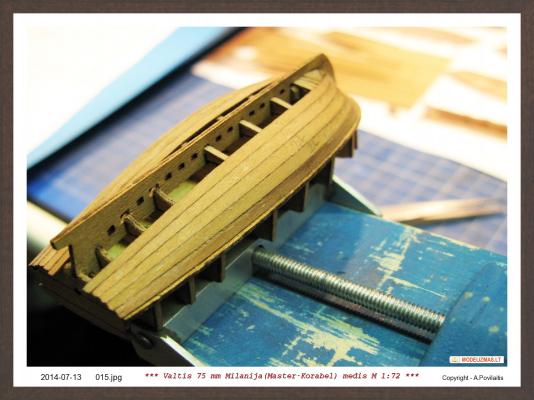
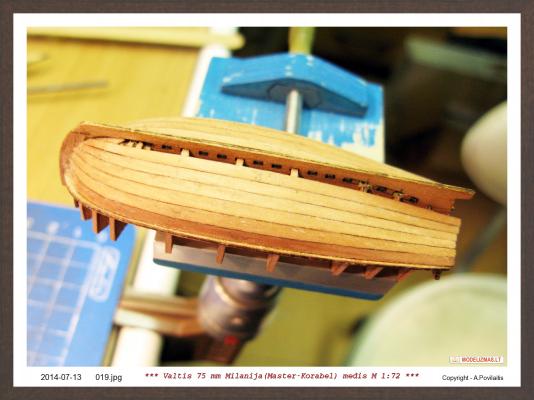
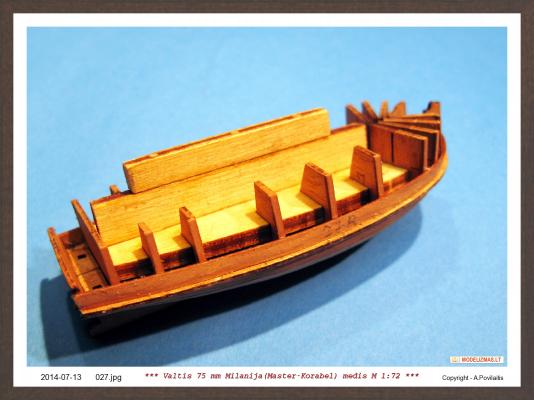
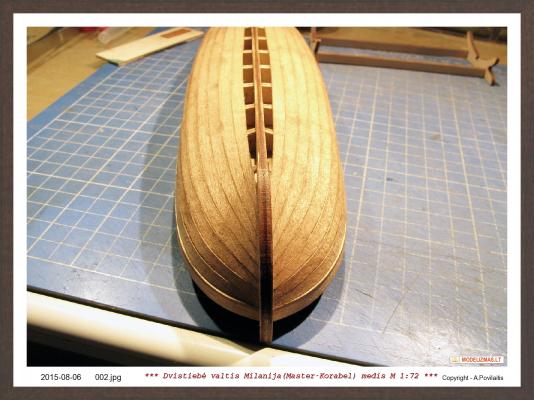
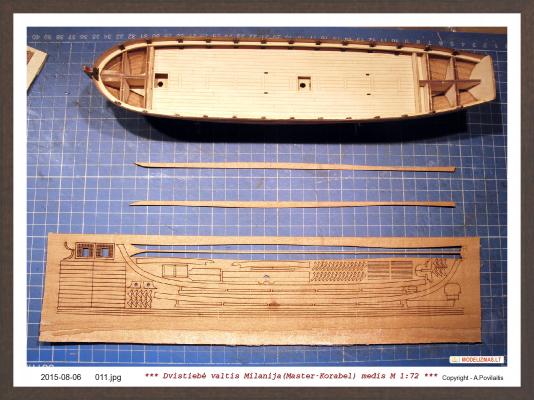
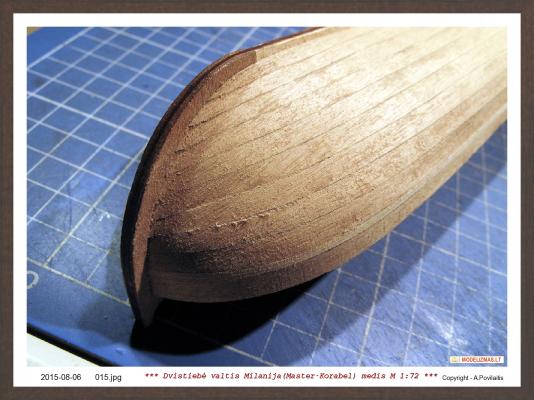
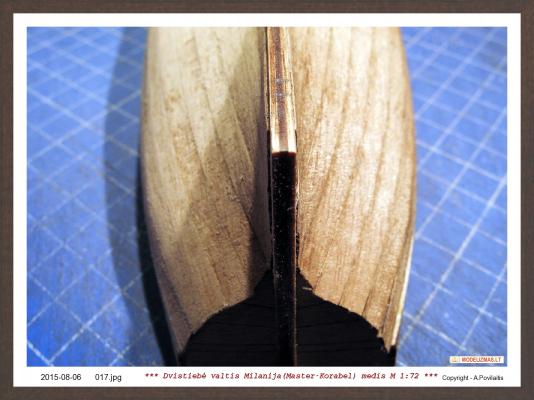
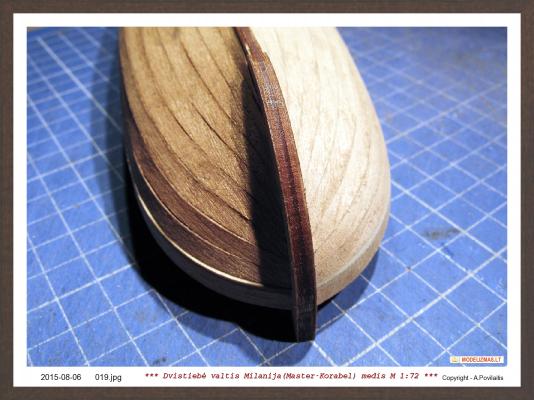
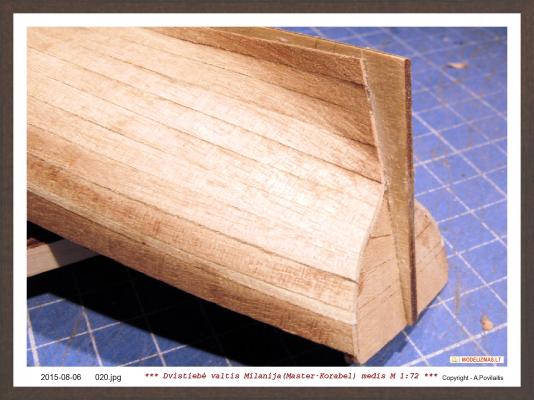
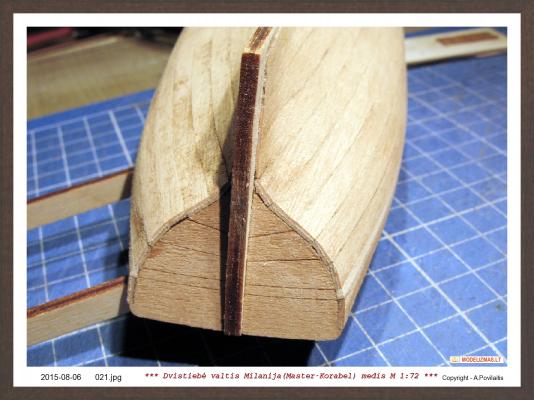
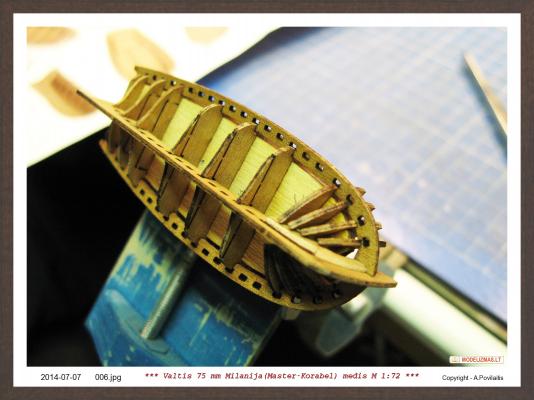
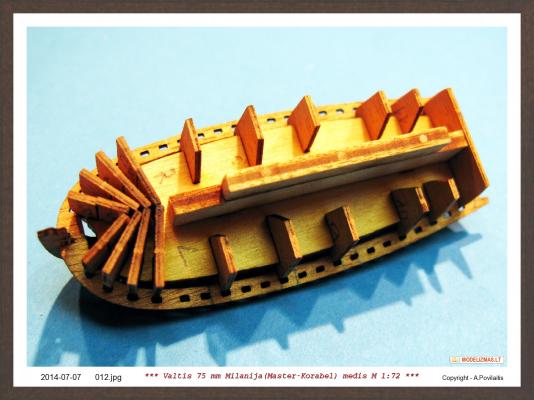
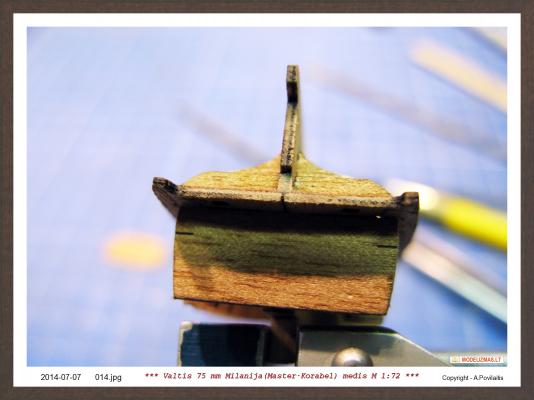
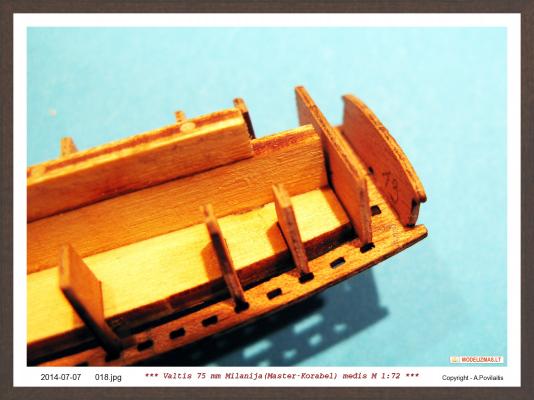
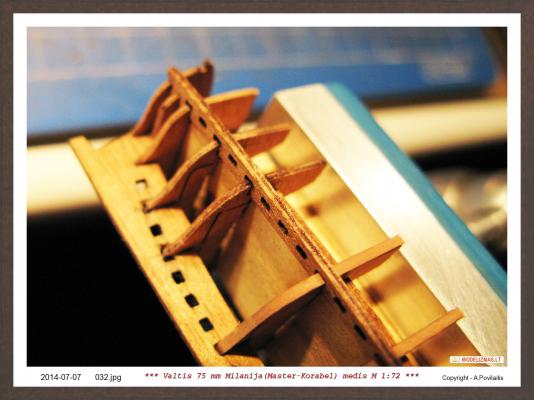
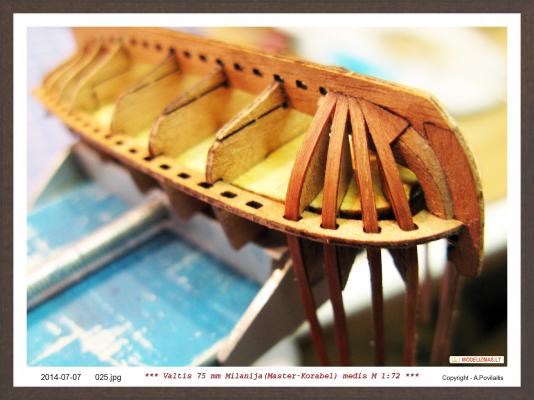
The temporary frames longer no needed. In the hull bow they are destroyed. Then carefully removed the not required temporary frame holder. And removed glue in some places. Then added more frames. For this I glued more pear strips . Now the hull is ended. And the most interesting part. Working on inside parts. At first glued in the place the deck. The deck is made from 2 parts. Then aft deck, bulkheads. Glued the keelson. The bow deck has the thickened part and pillar. And at the end glued the aft seat. Regards, Antanas


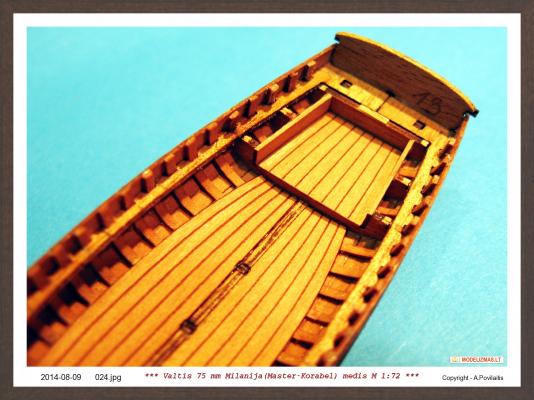


- 22 replies
-
- 4
-
-
- master korabel
- 75mm boat
- (and 1 more)
-
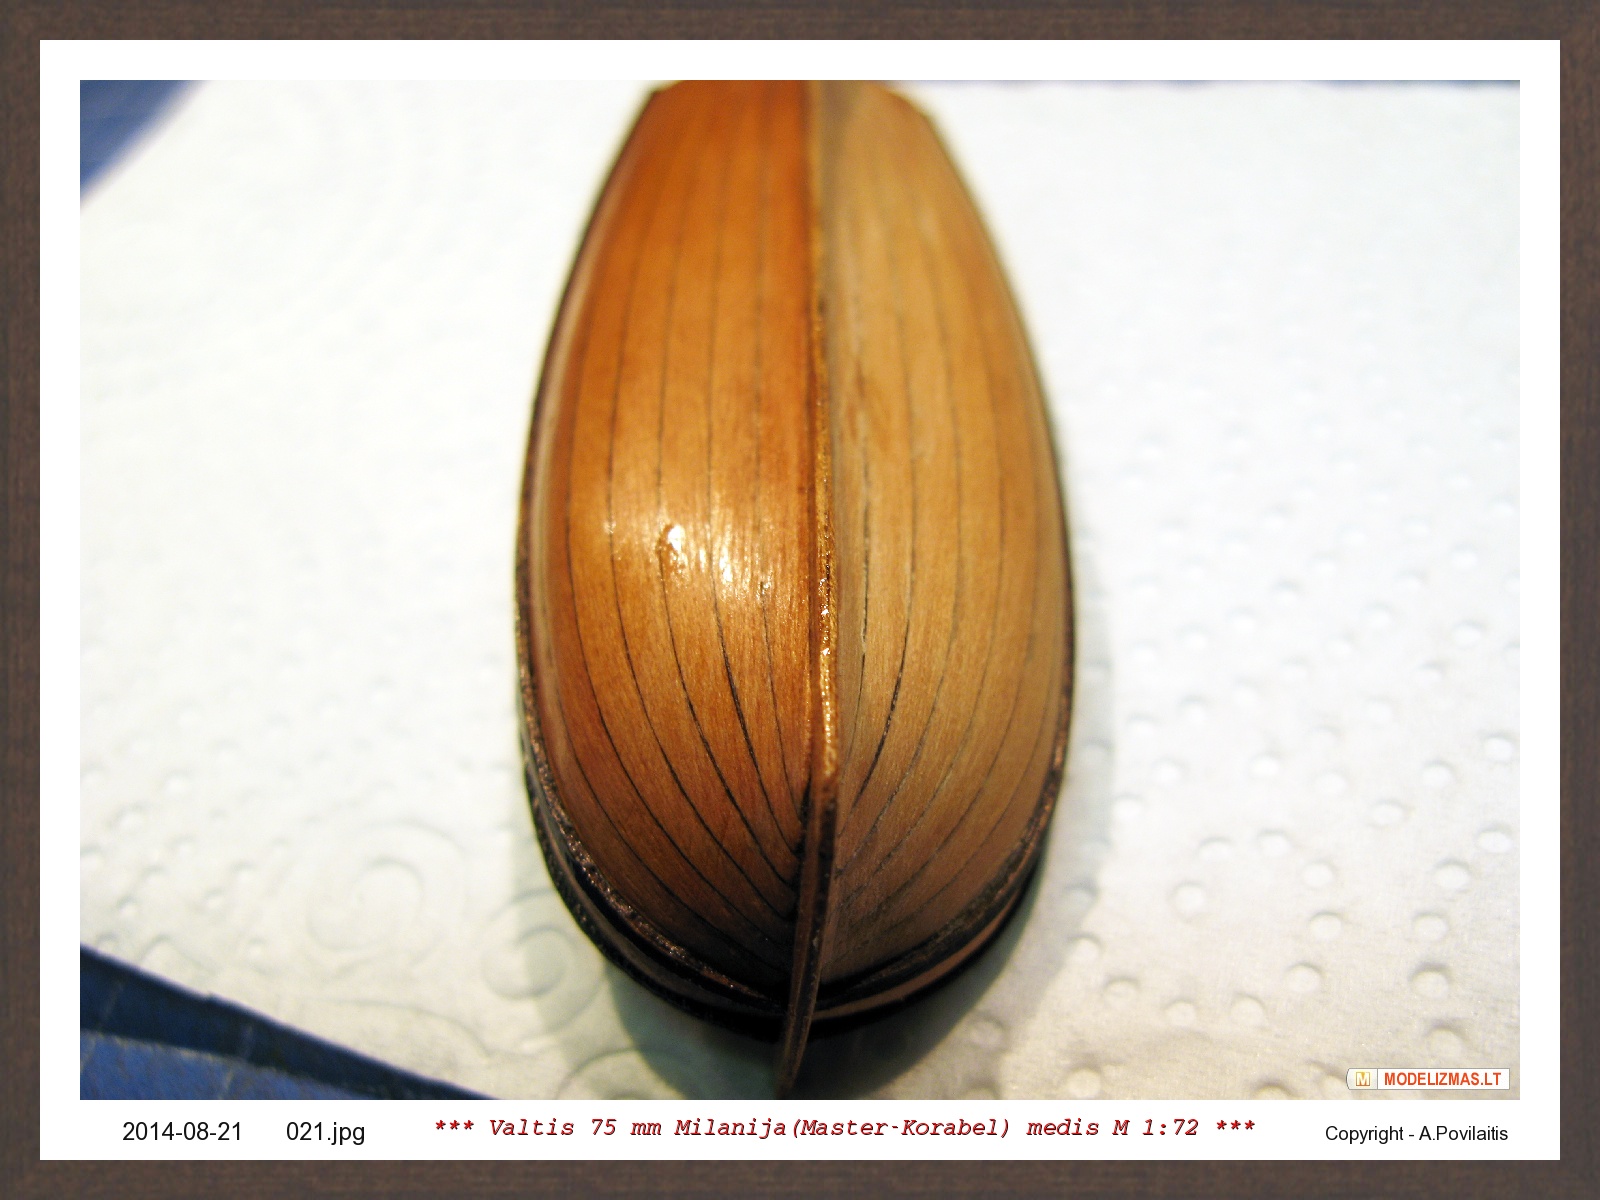
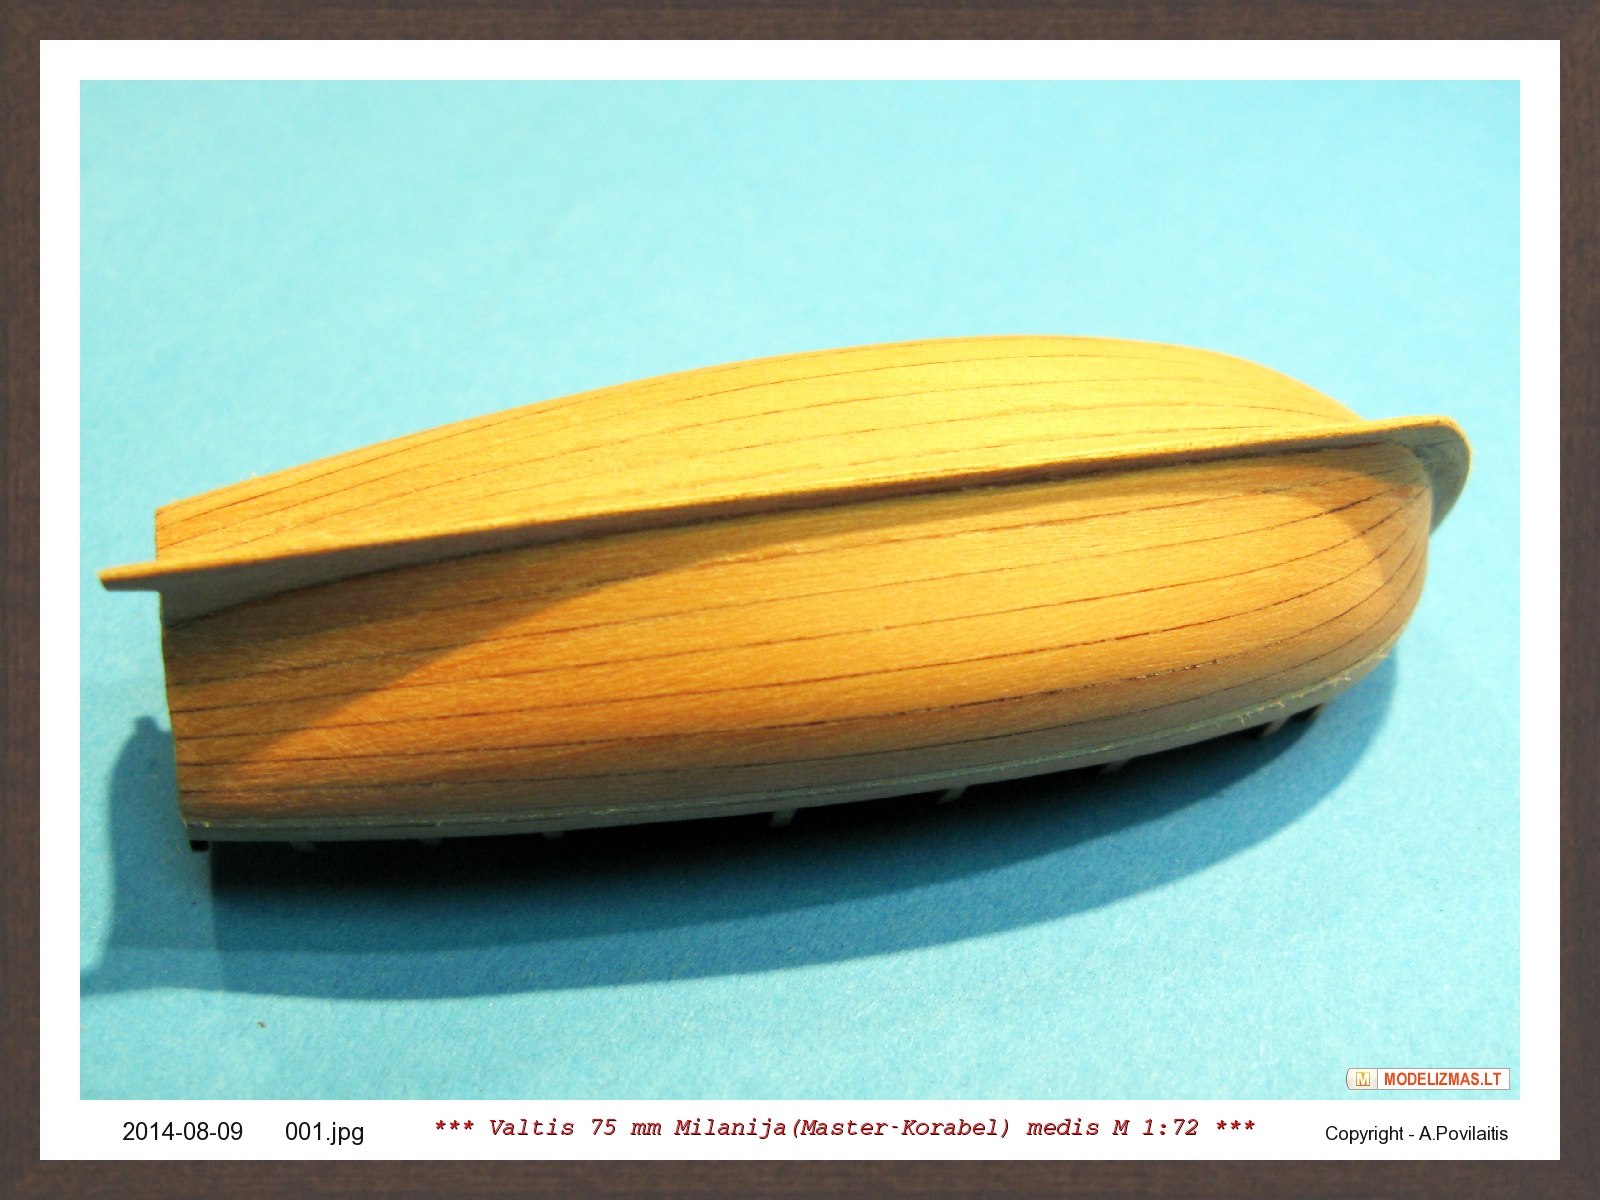
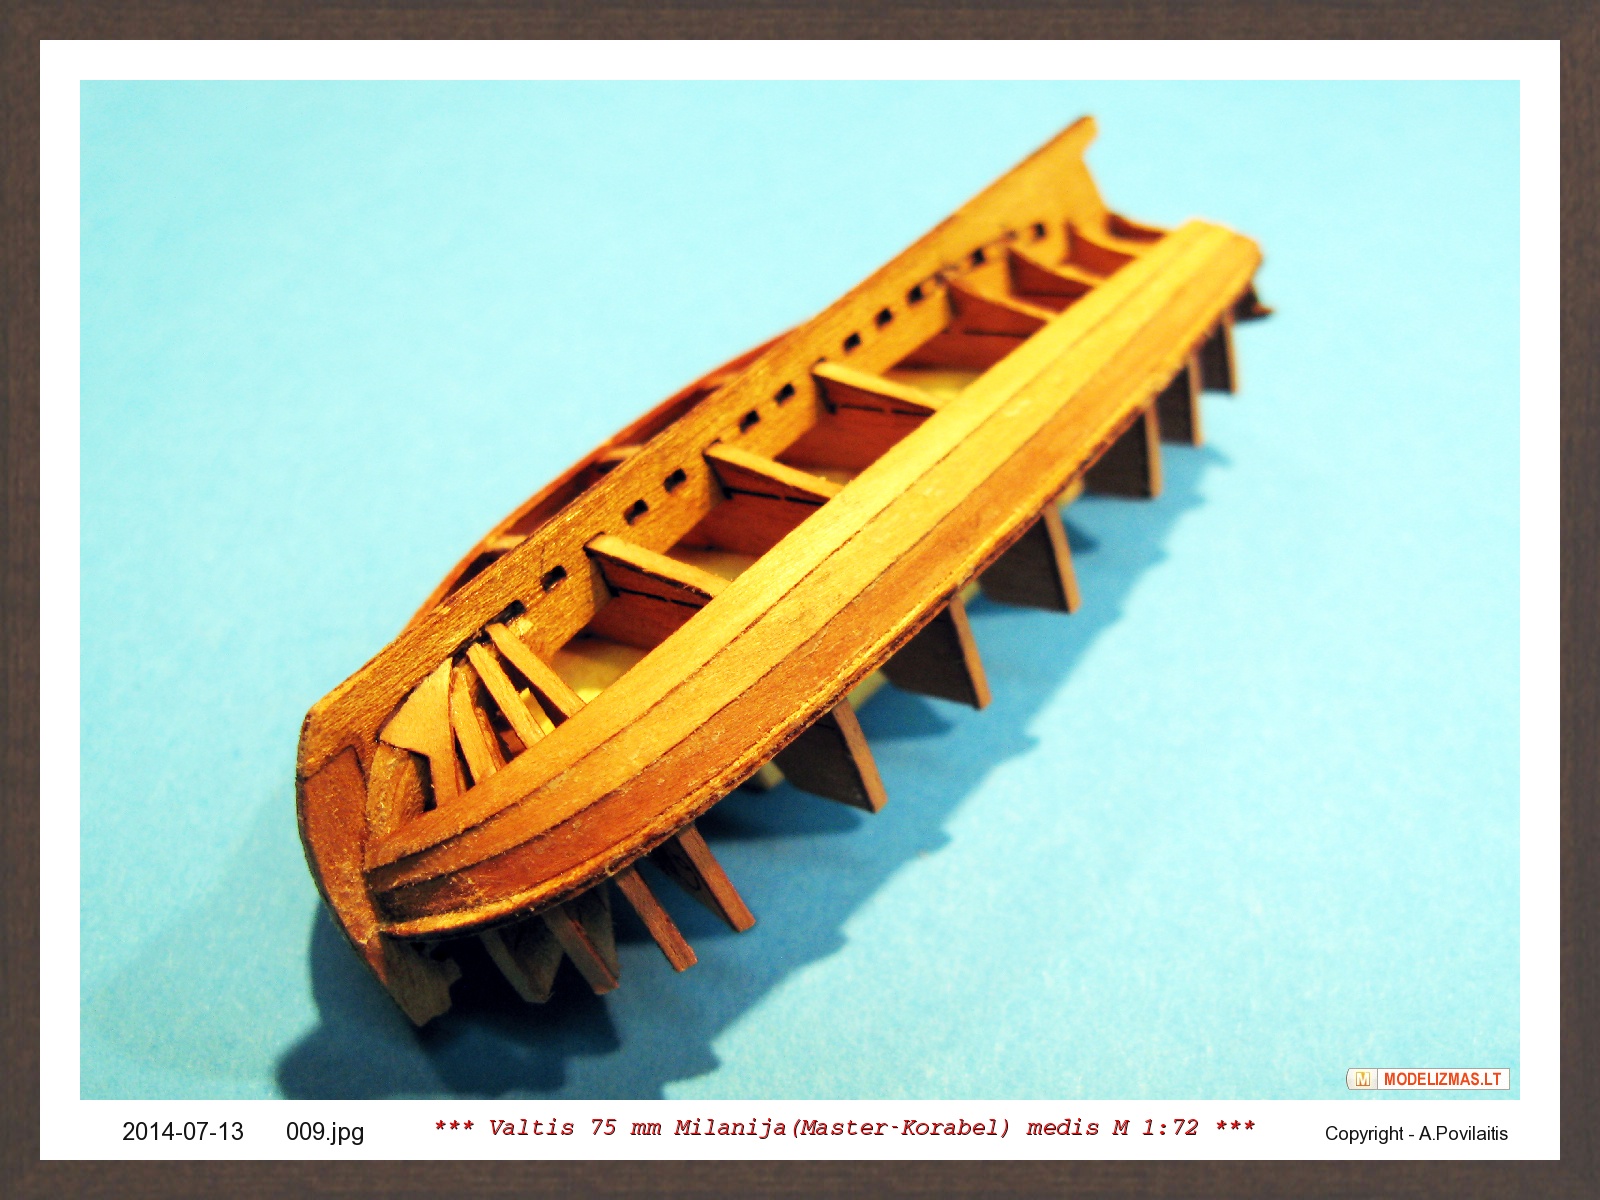
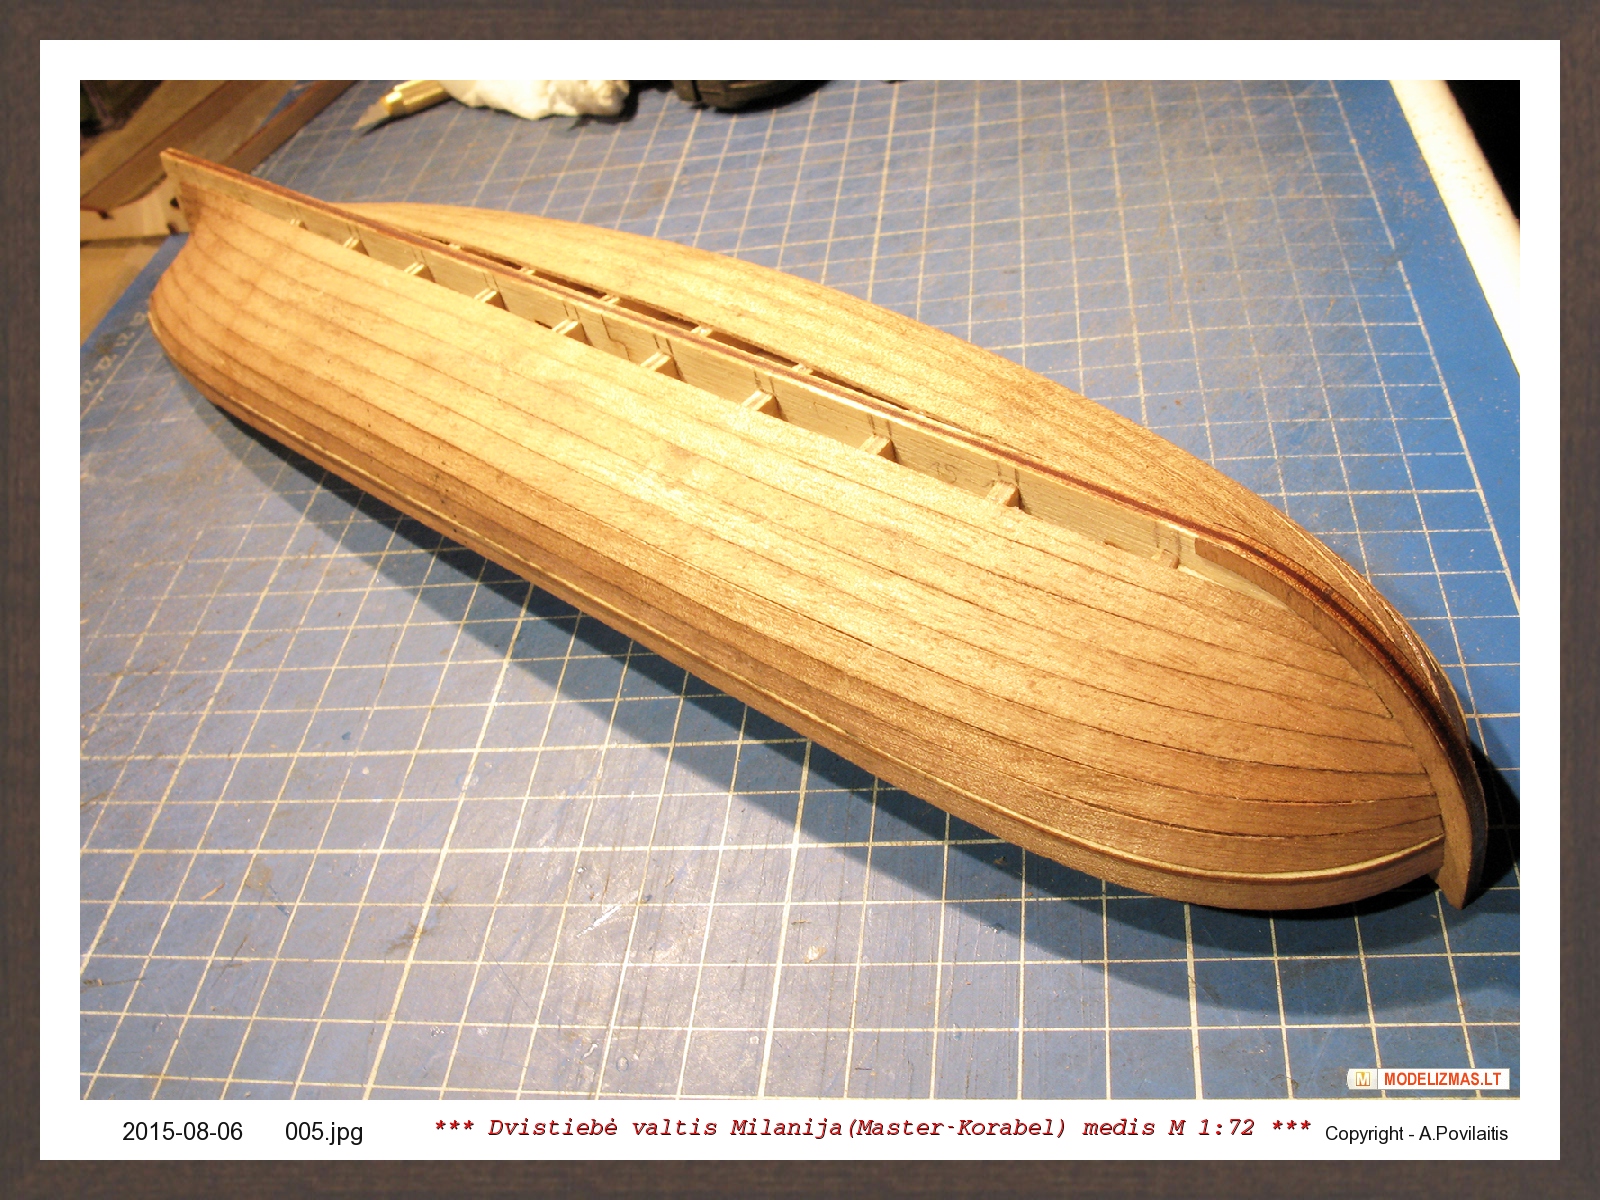
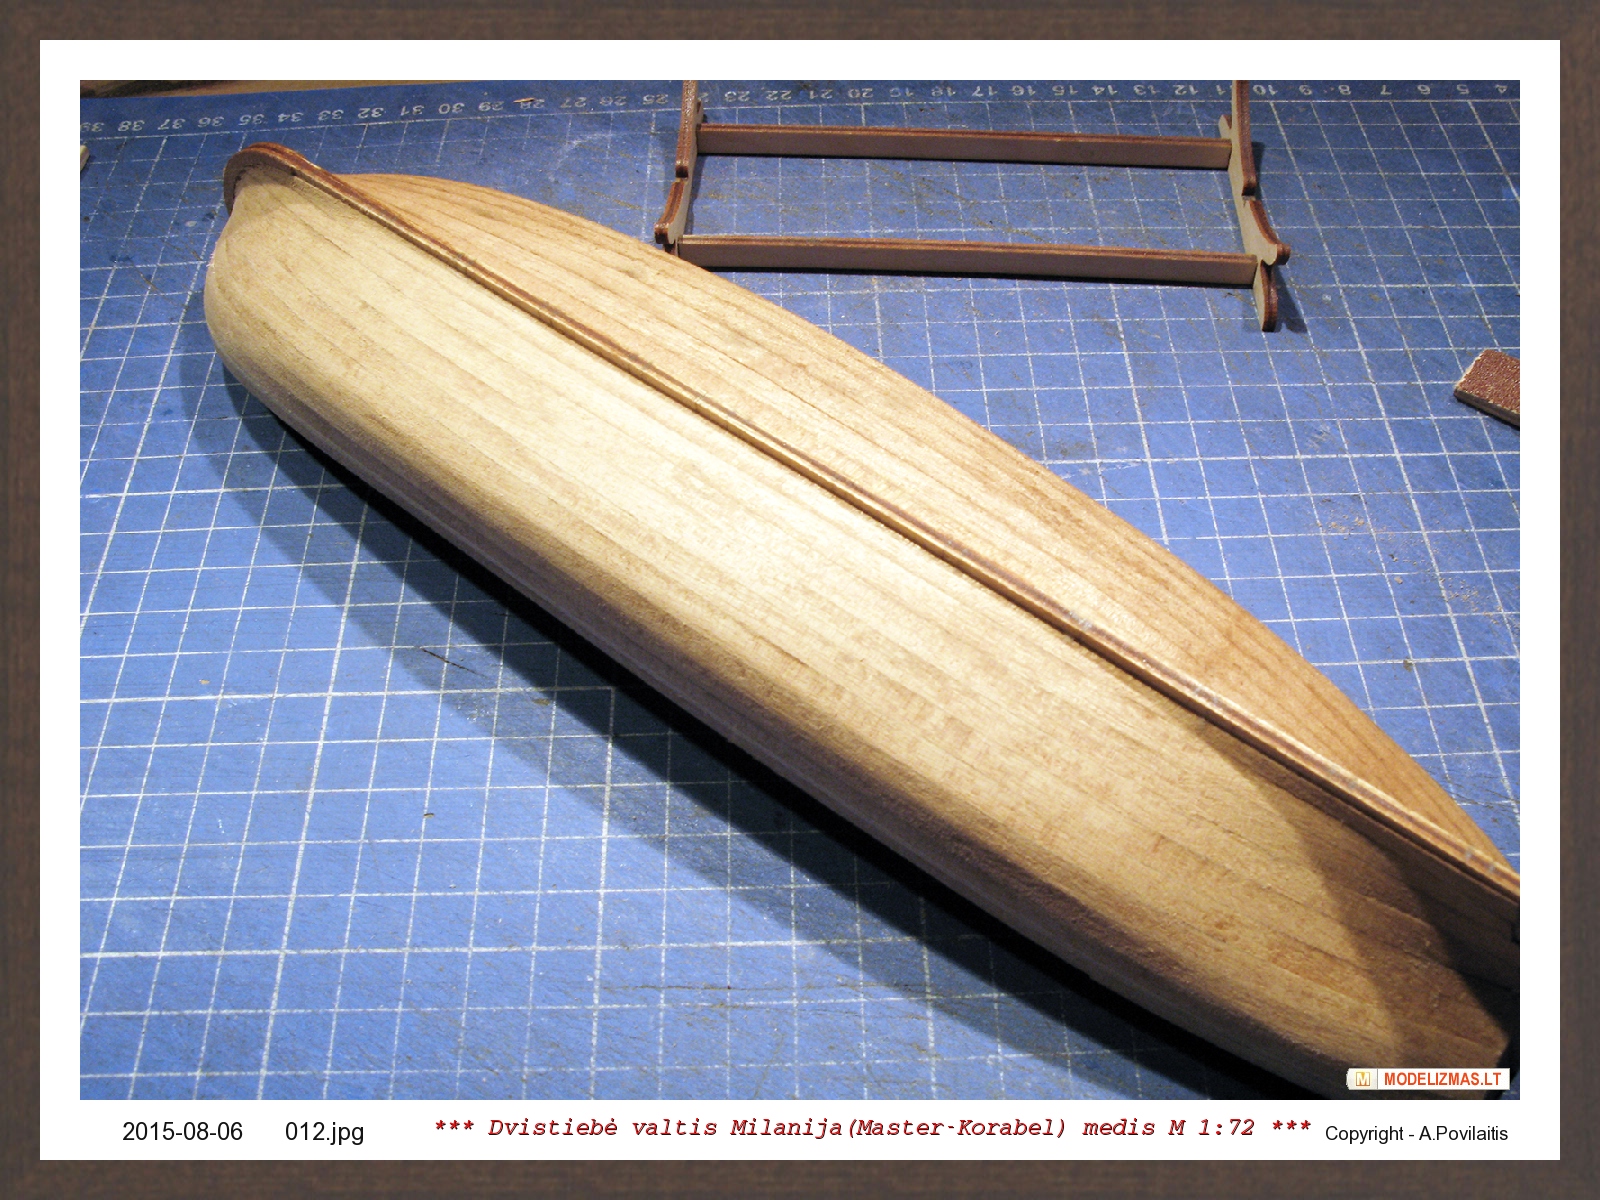
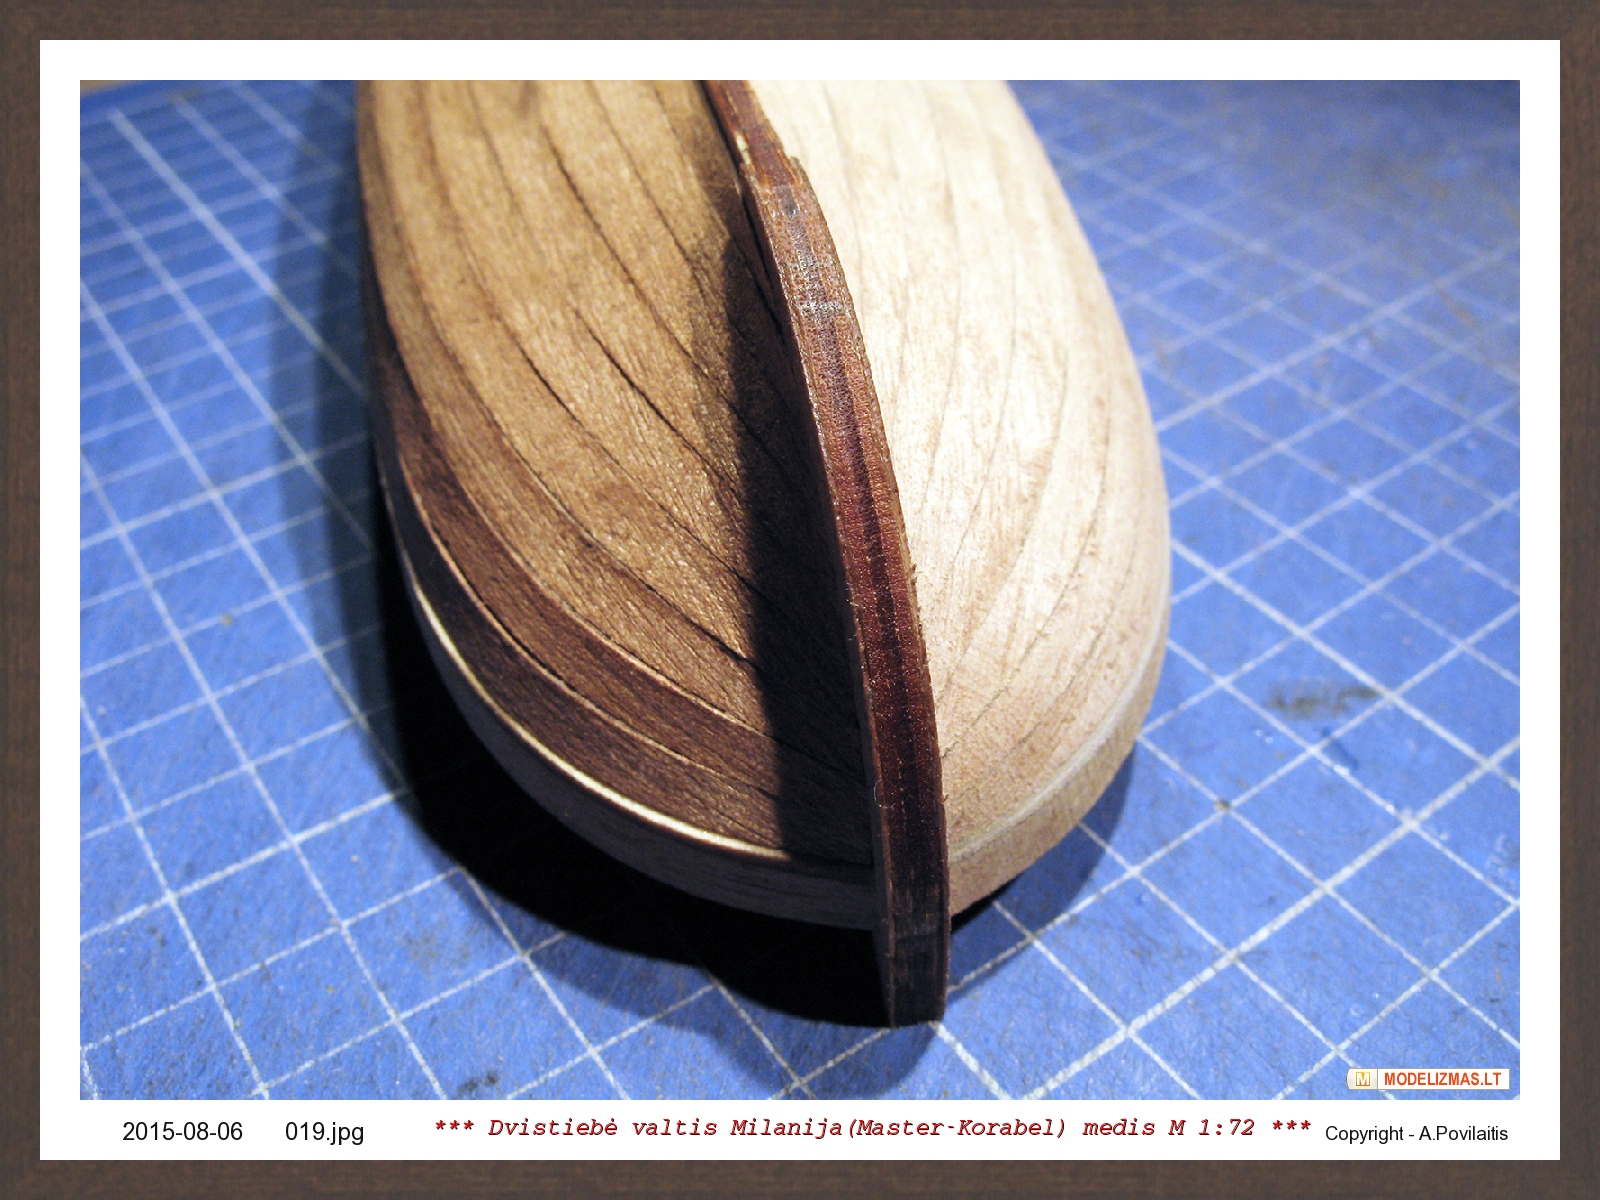
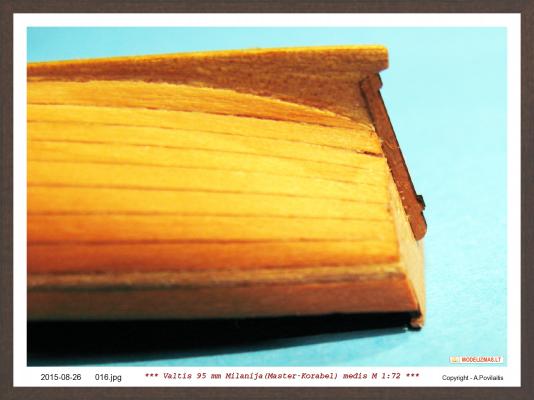
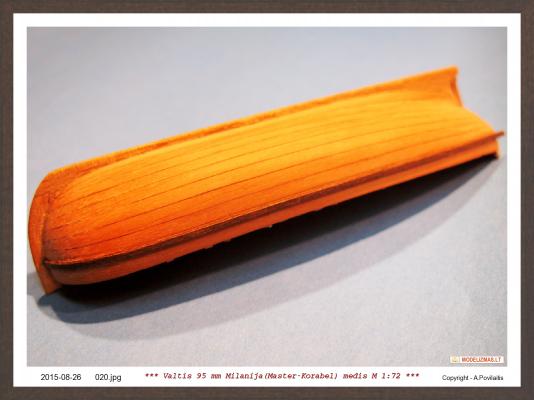
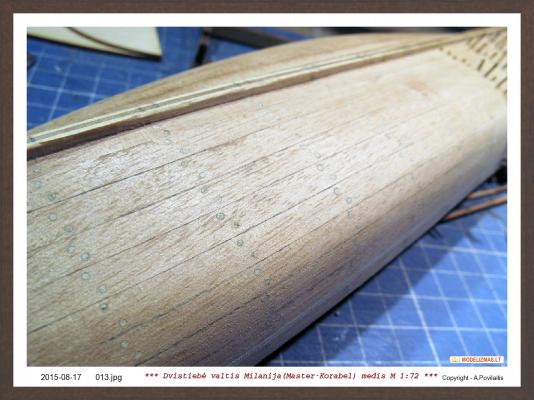
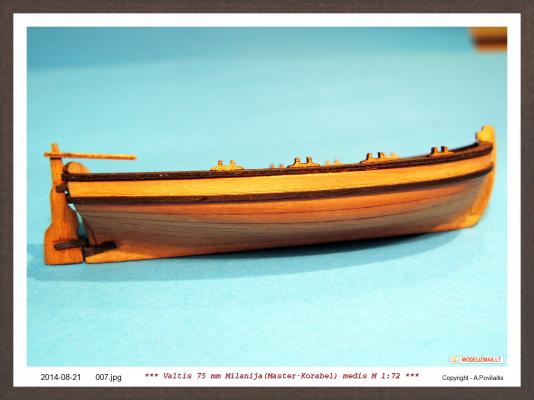
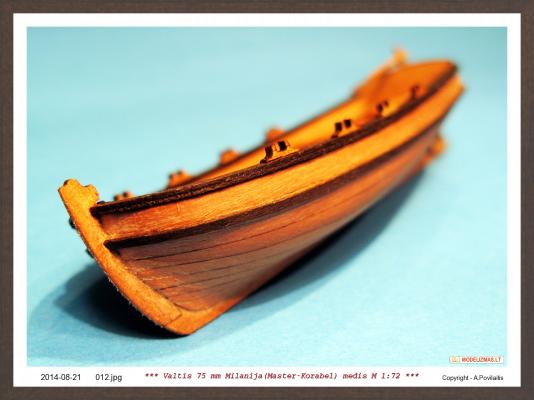
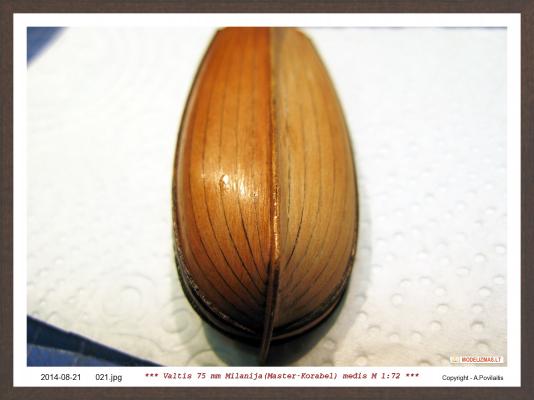
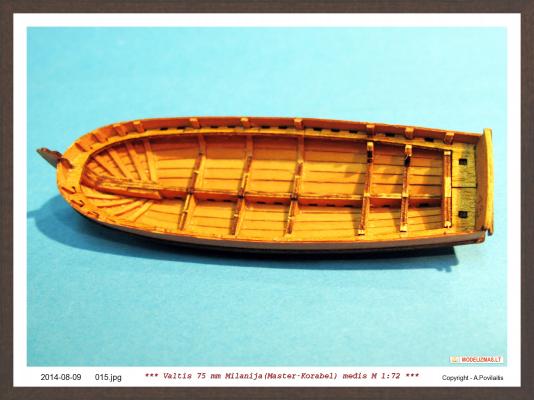
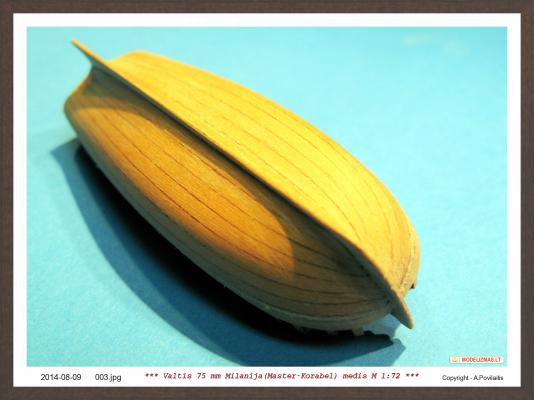
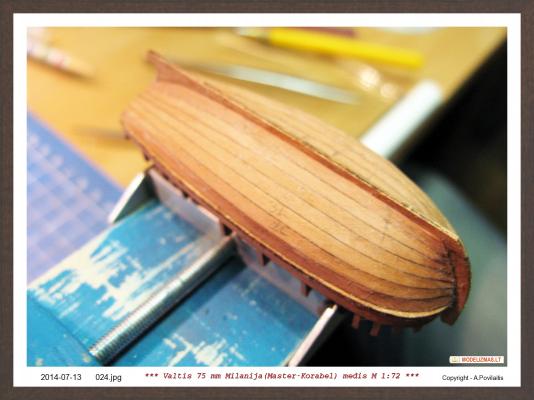
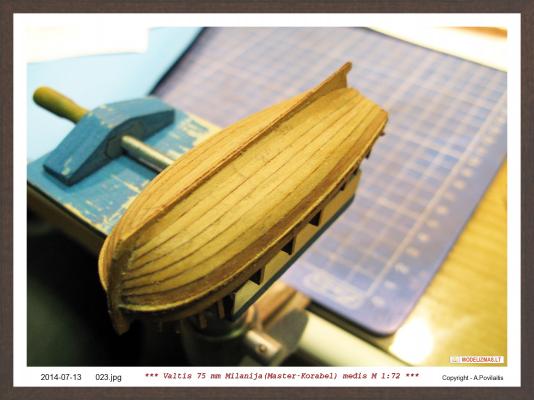
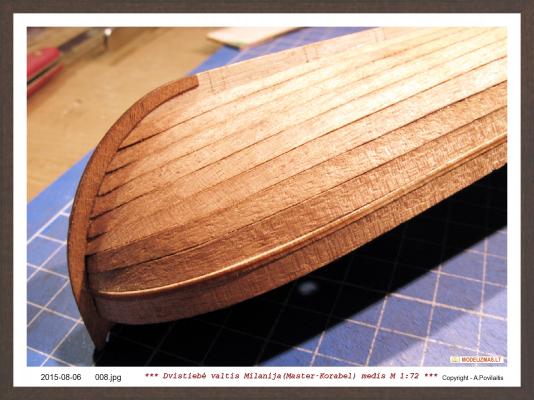
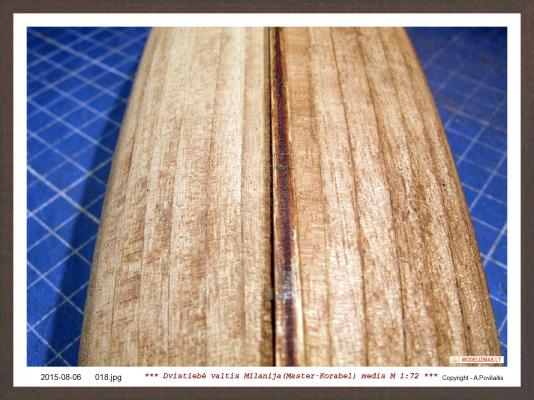
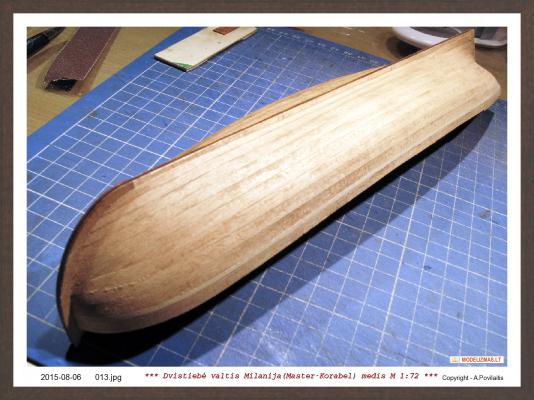
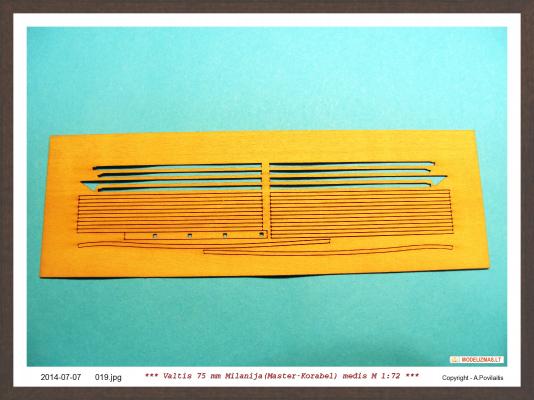
Thank's Nirvana. Now I sanded the hull. Sandpaper with the grit 100, 150, 220 and 400. Removed from the plate wales plank. They are from the pear. But the hull are from the pear too. Hmm... The pear wales on the pear look not very good... And I desided to change the plank color to the black. For this I used the wood finish MINWAX, color ebony. But the result is not good... The planks become not black, but the dark grey... So, I try to use the cheap black ink. At last the result is very good. Glued wales. End sanding and corrections. In some places paints again. And the finally result. Regards, Antanas


- 22 replies
-
- 6
-
-
- master korabel
- 75mm boat
- (and 1 more)
-
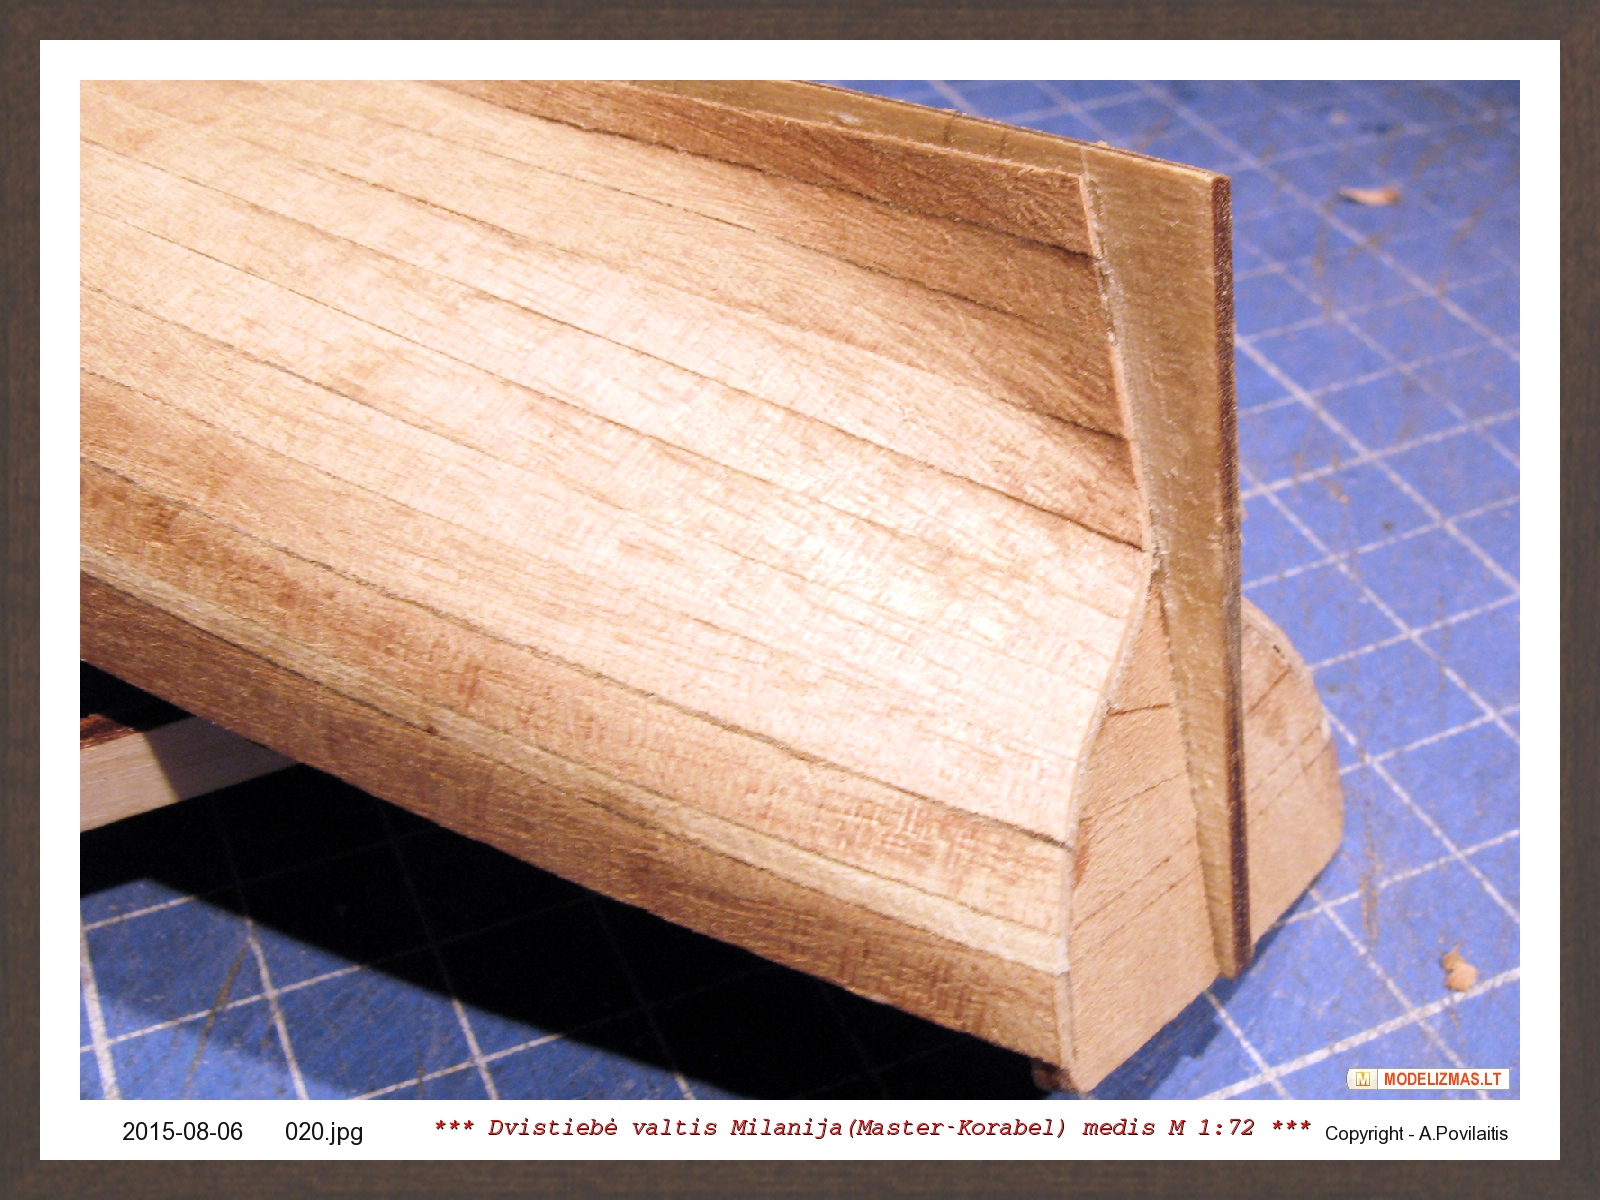
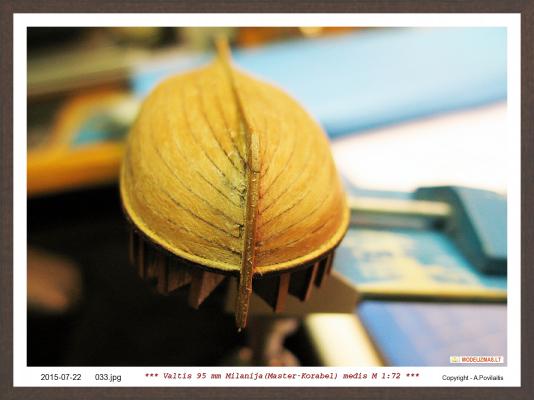
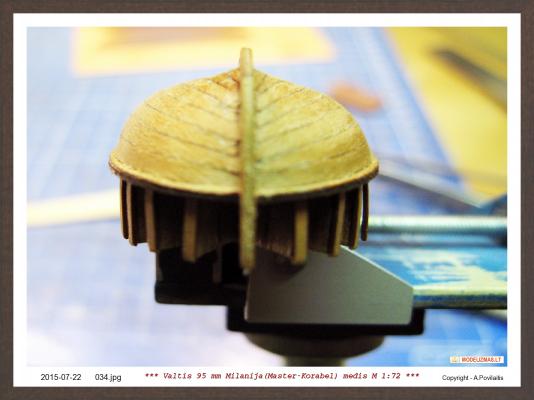
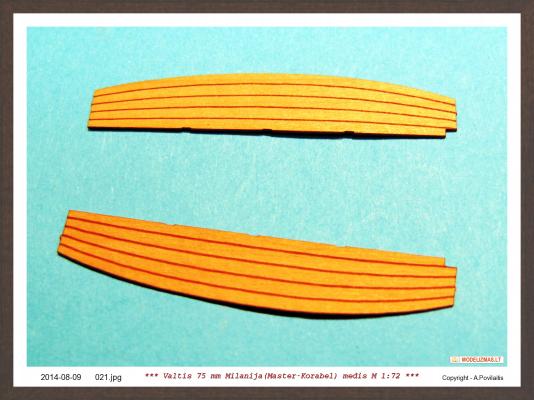
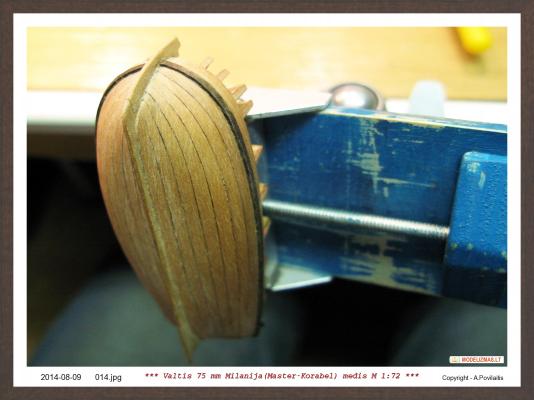
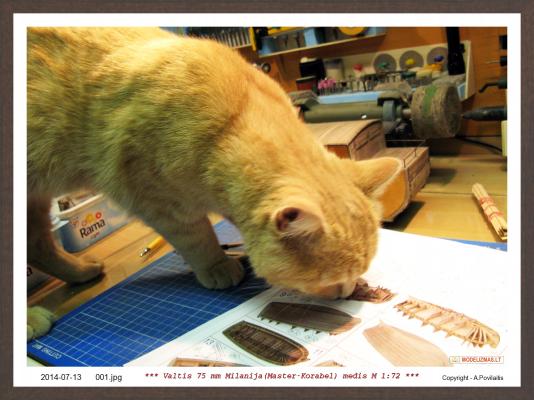
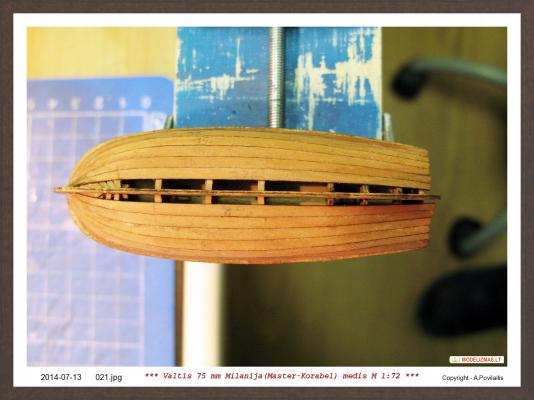
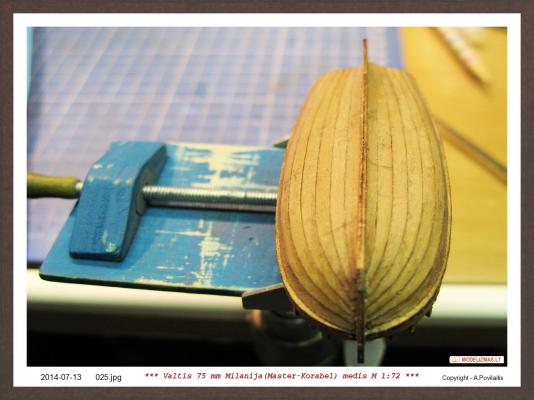
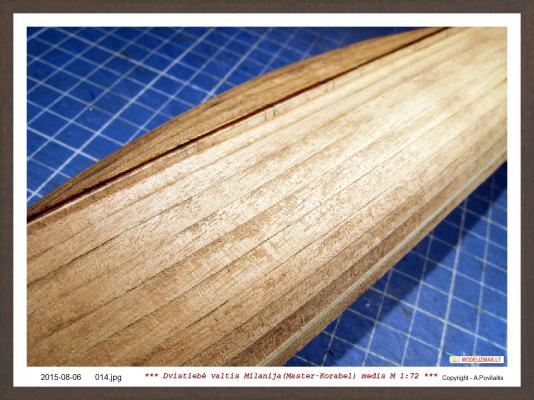
Now the time to make the hull planking. My another cat Dragon carefully read the photo manual and say me what and how I must to do... Removed the first pear planks from the plate and bend it using my "water box". The planks are very small and i working very carefully. Using my wise, pre shaped planks and "water box" , working very quickly and easy. The planks are needed only some fine sanding. Very important is not to change the places of the left and right planks !!! Otherwise the gaps between planks will apear. I marked the planks and not have any problems. So, continued the hull planking... The last planks is wider and longer and must be sanded as I need. Sanded, checked and glued. When dry, glued the last planks above the stringers. Thats all. Ok, ok. It look's terrible... I know, but this is macro photo and the hull is not sanded. I'll do it later. Now only cut the planks at the hull aft. Regards, Antanas


- 22 replies
-
- 5
-
-
- master korabel
- 75mm boat
- (and 1 more)
-
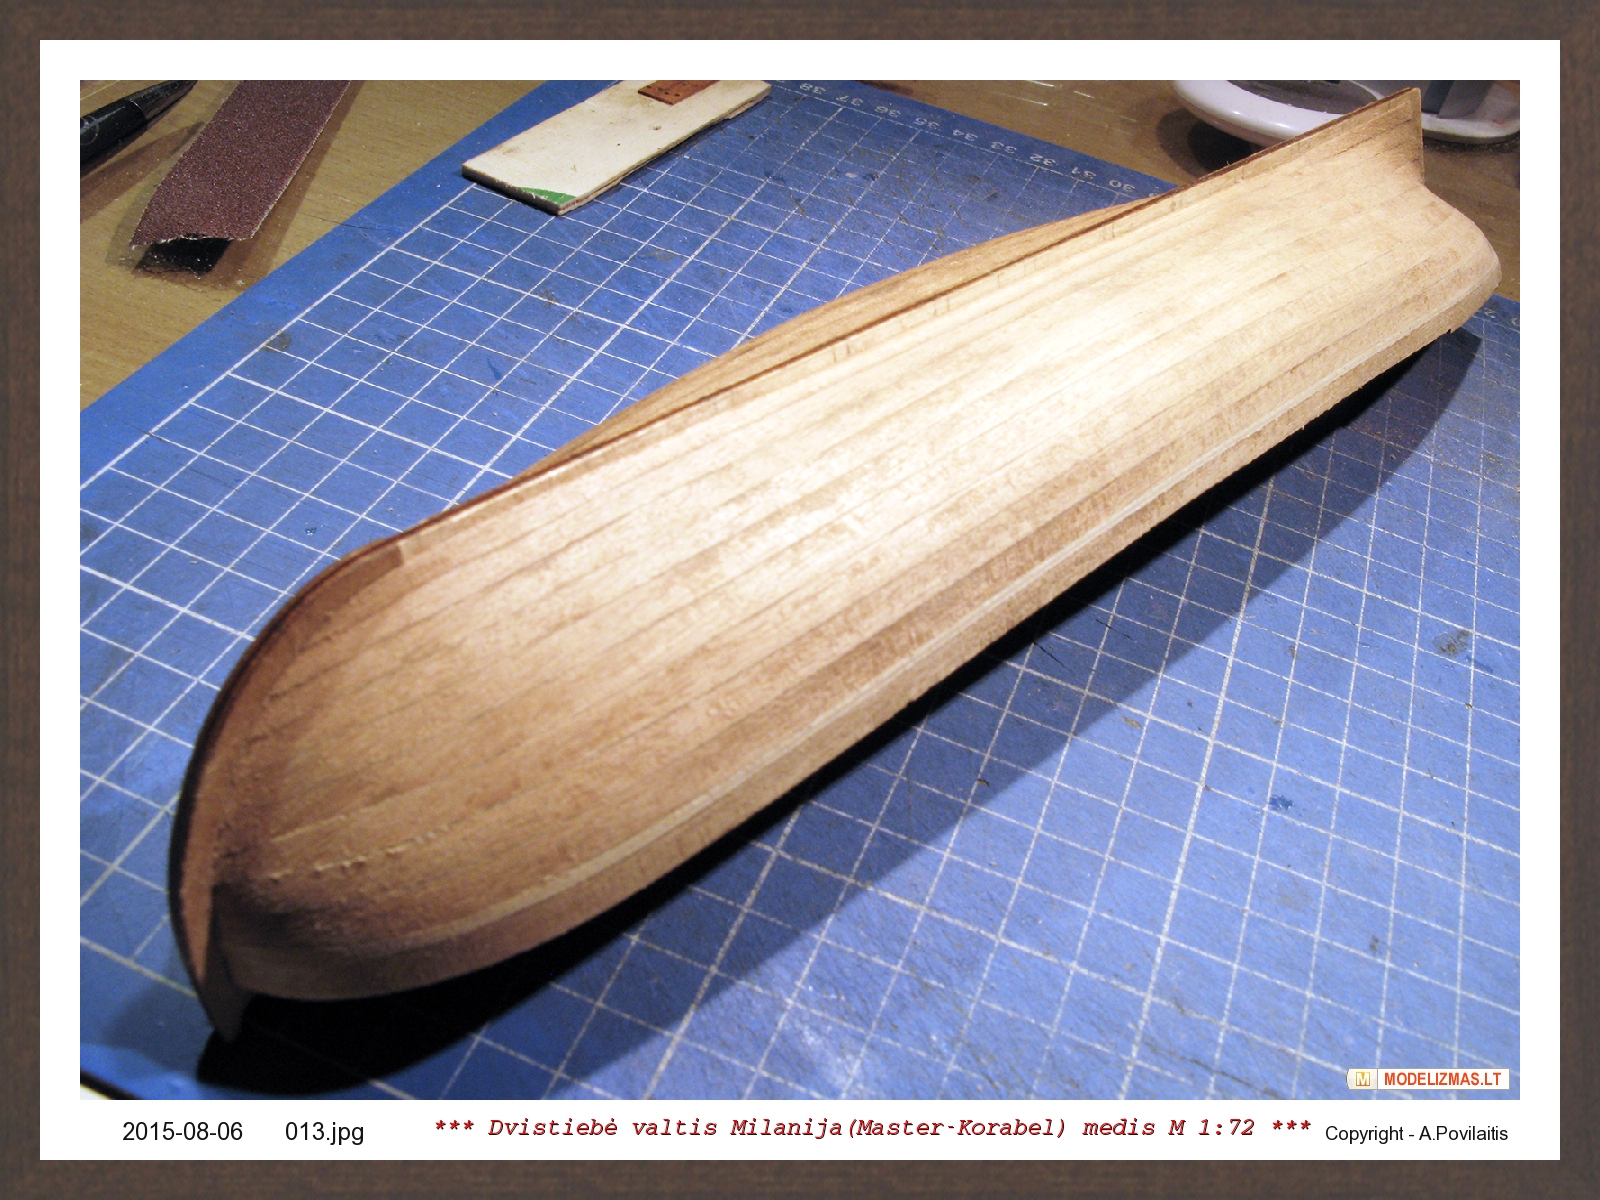
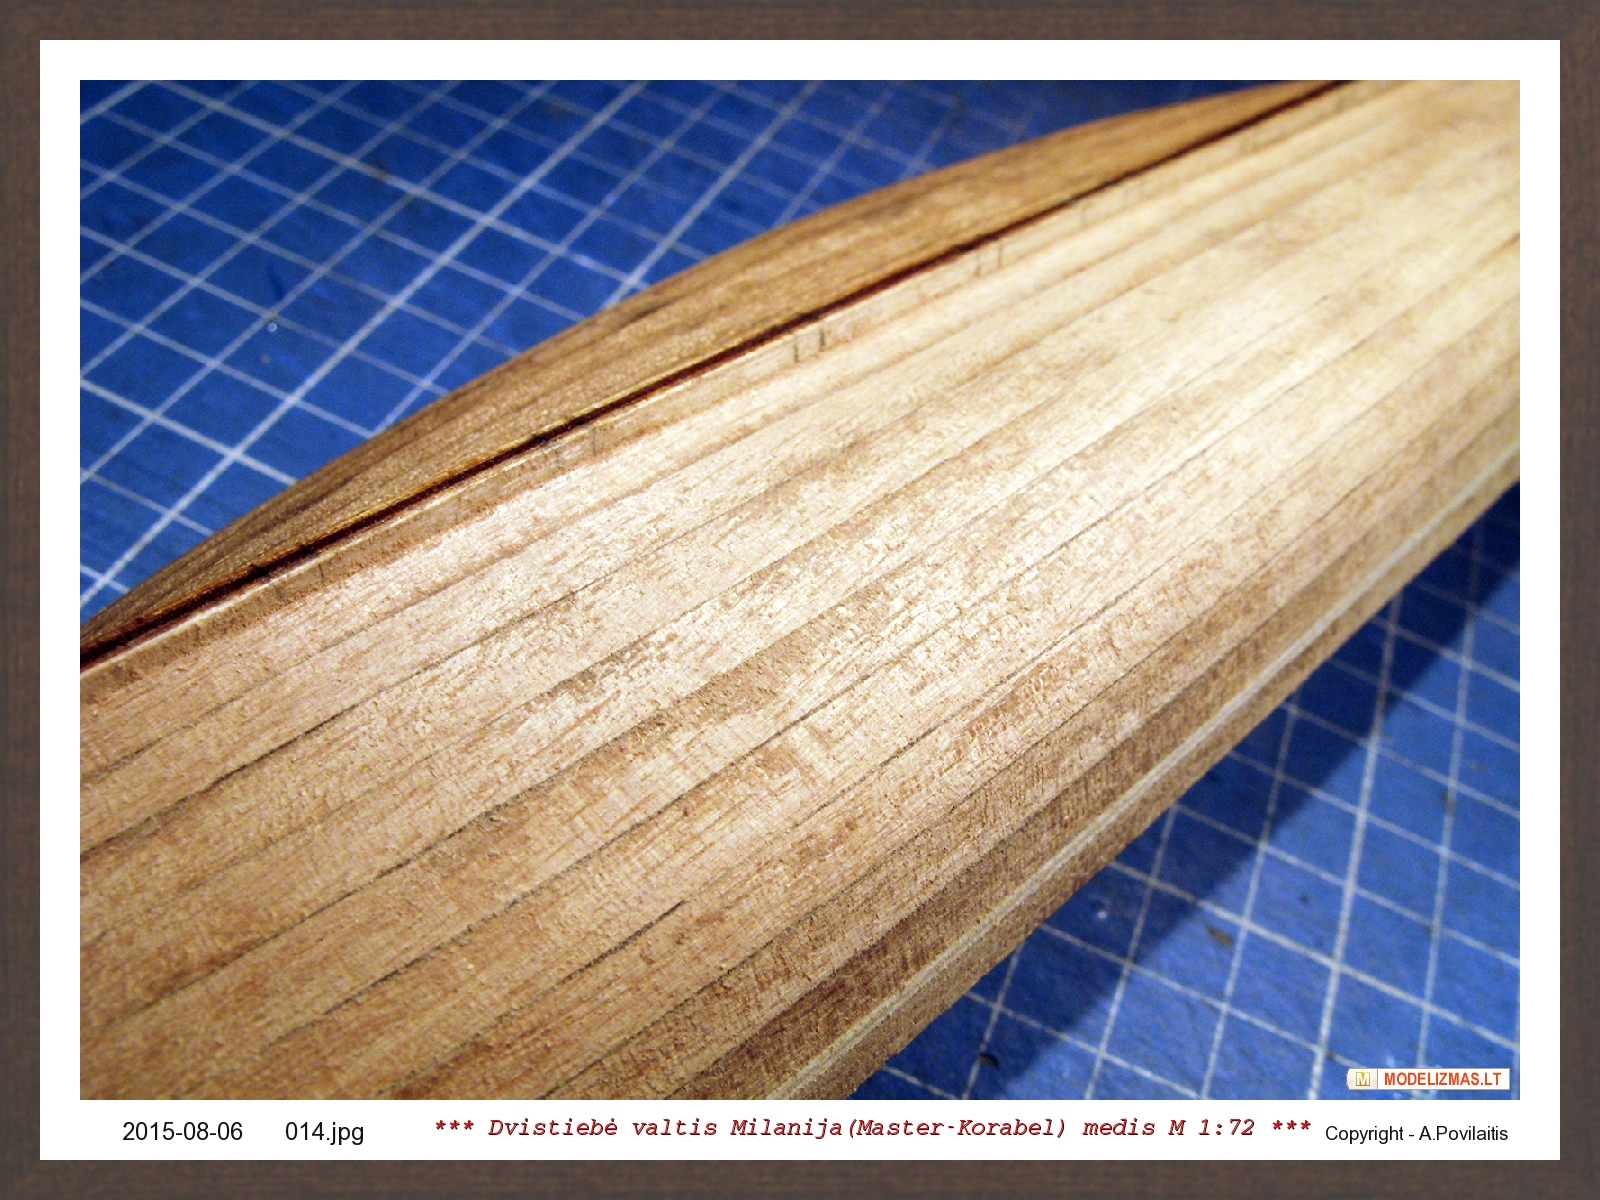
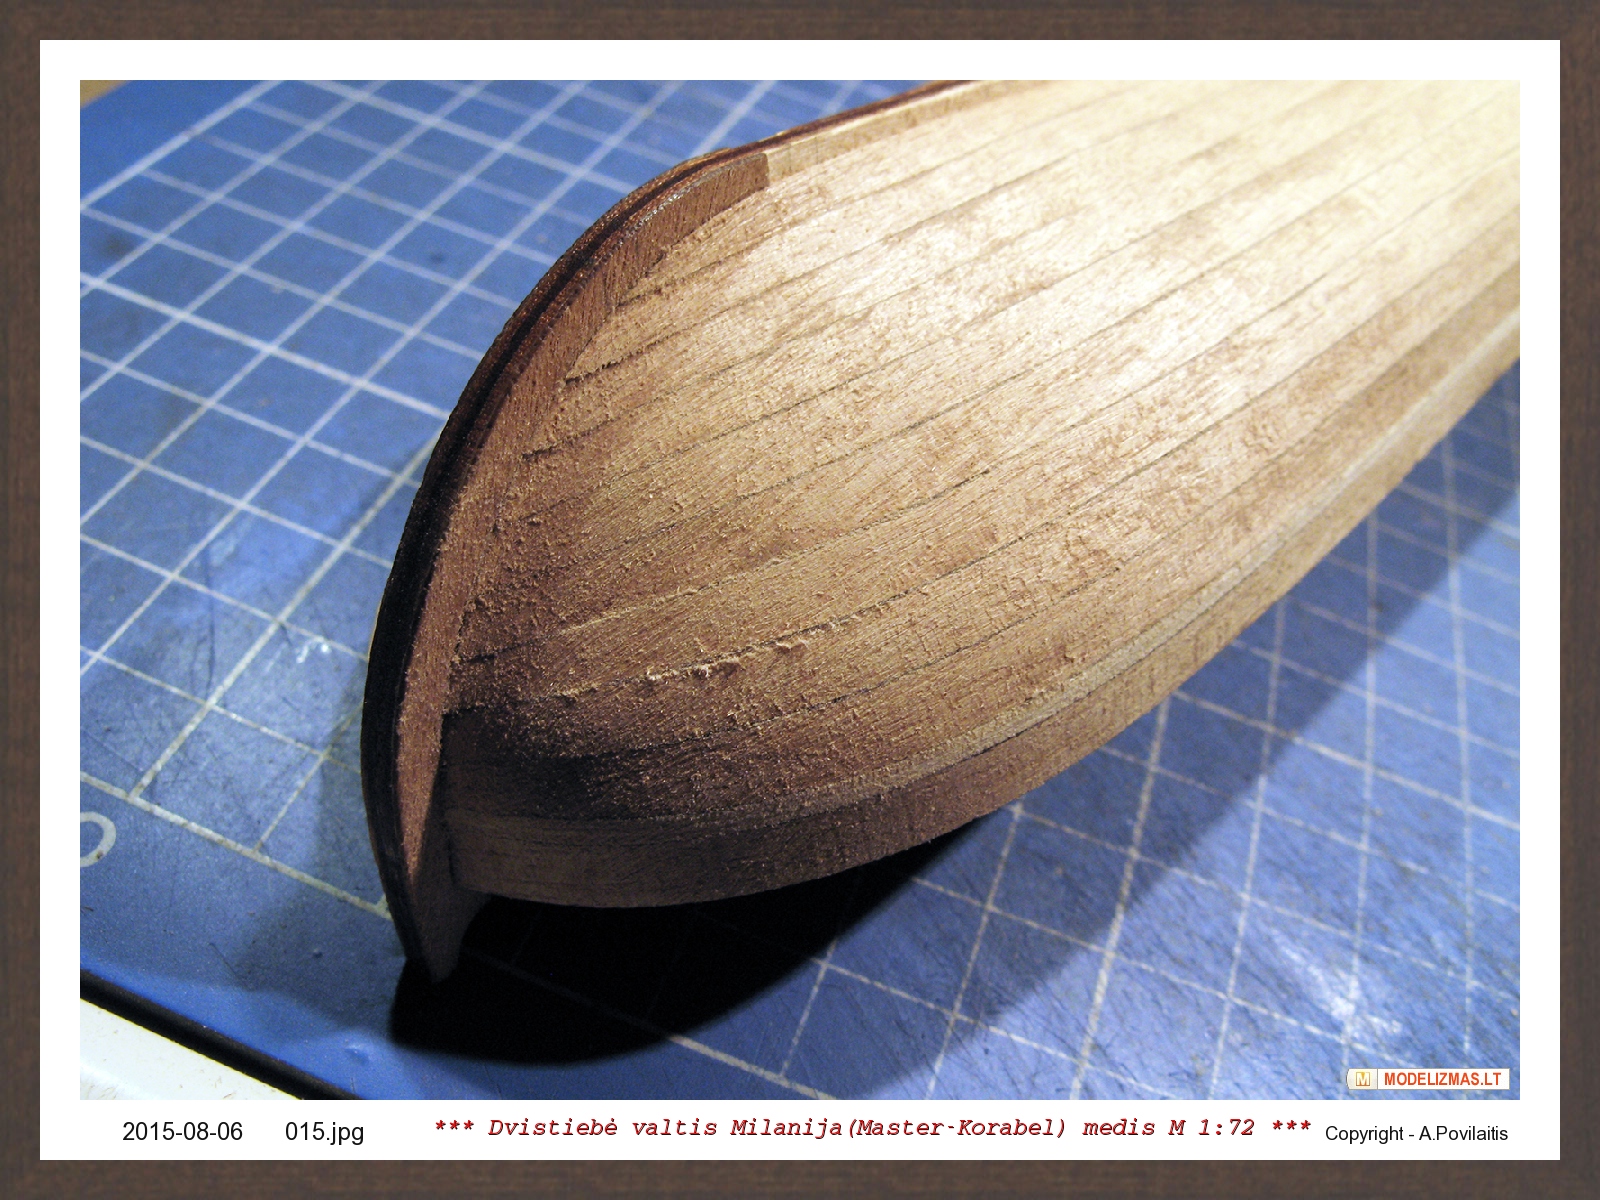
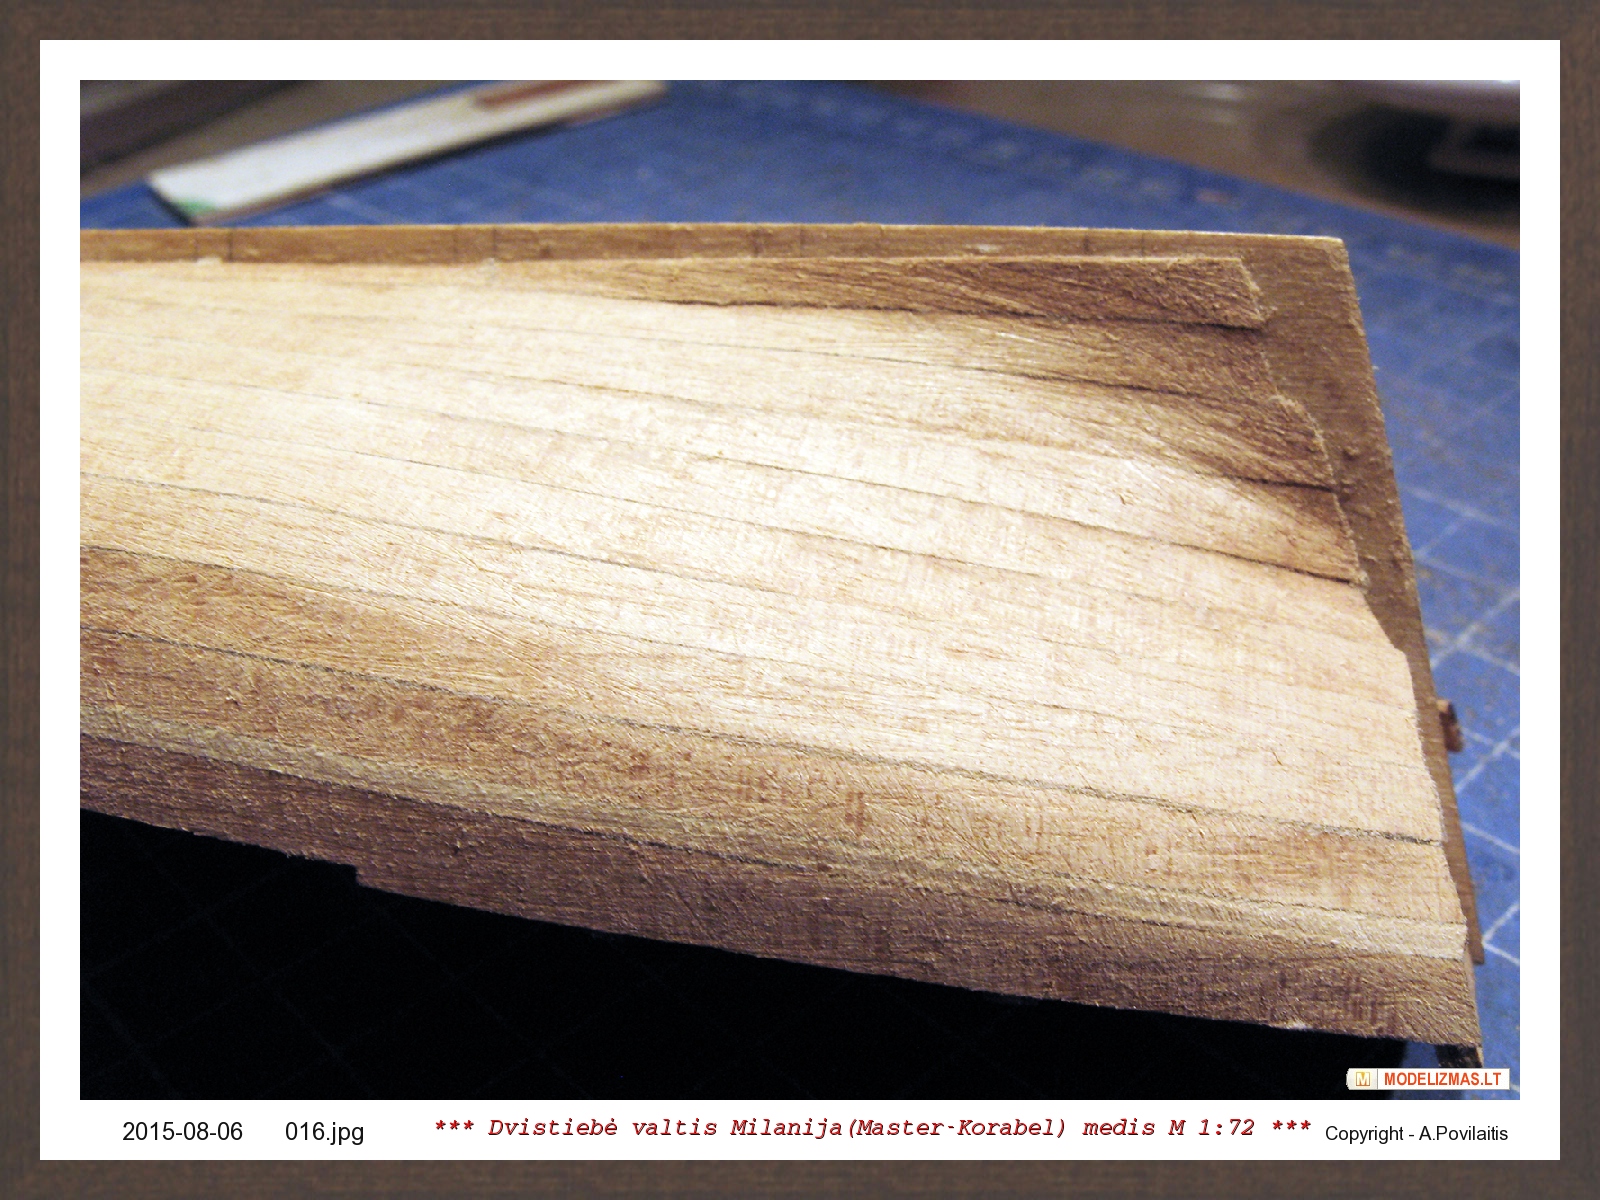
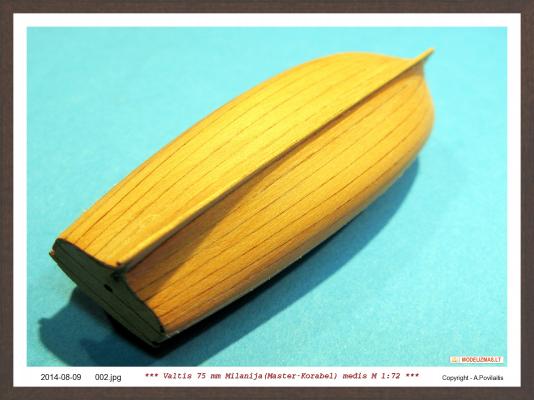
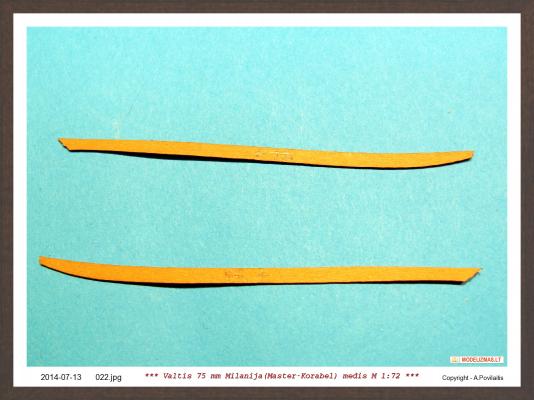
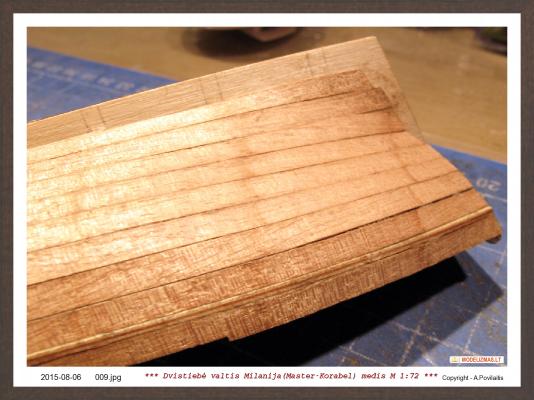
Hi all. The hull planking continued. The last planks from this plate. And the result. And the last planks. They are on the other plate. And they are wider and longer than required. The builder must to fit the planks in to the place himself. This is not very difficult. Some pieces of the sandpaper help me . And the final... Sanded the all hull using sandpaper grit 80. Finally sanding will be made later. This photo shows difference between sanded and not sanded sides of the hull. Planks at the aft of the hull are cutted. Regards, Antanas

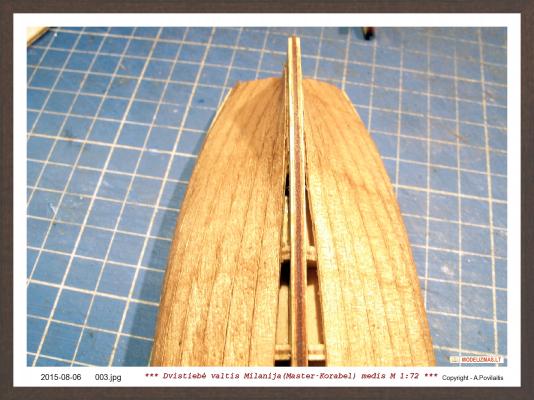


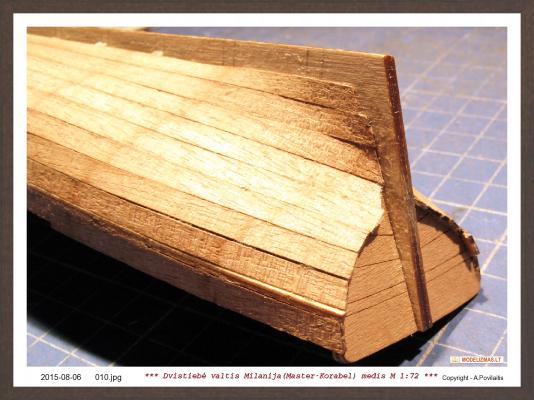
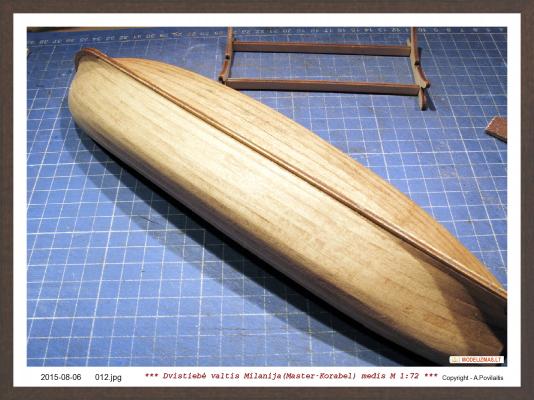


-
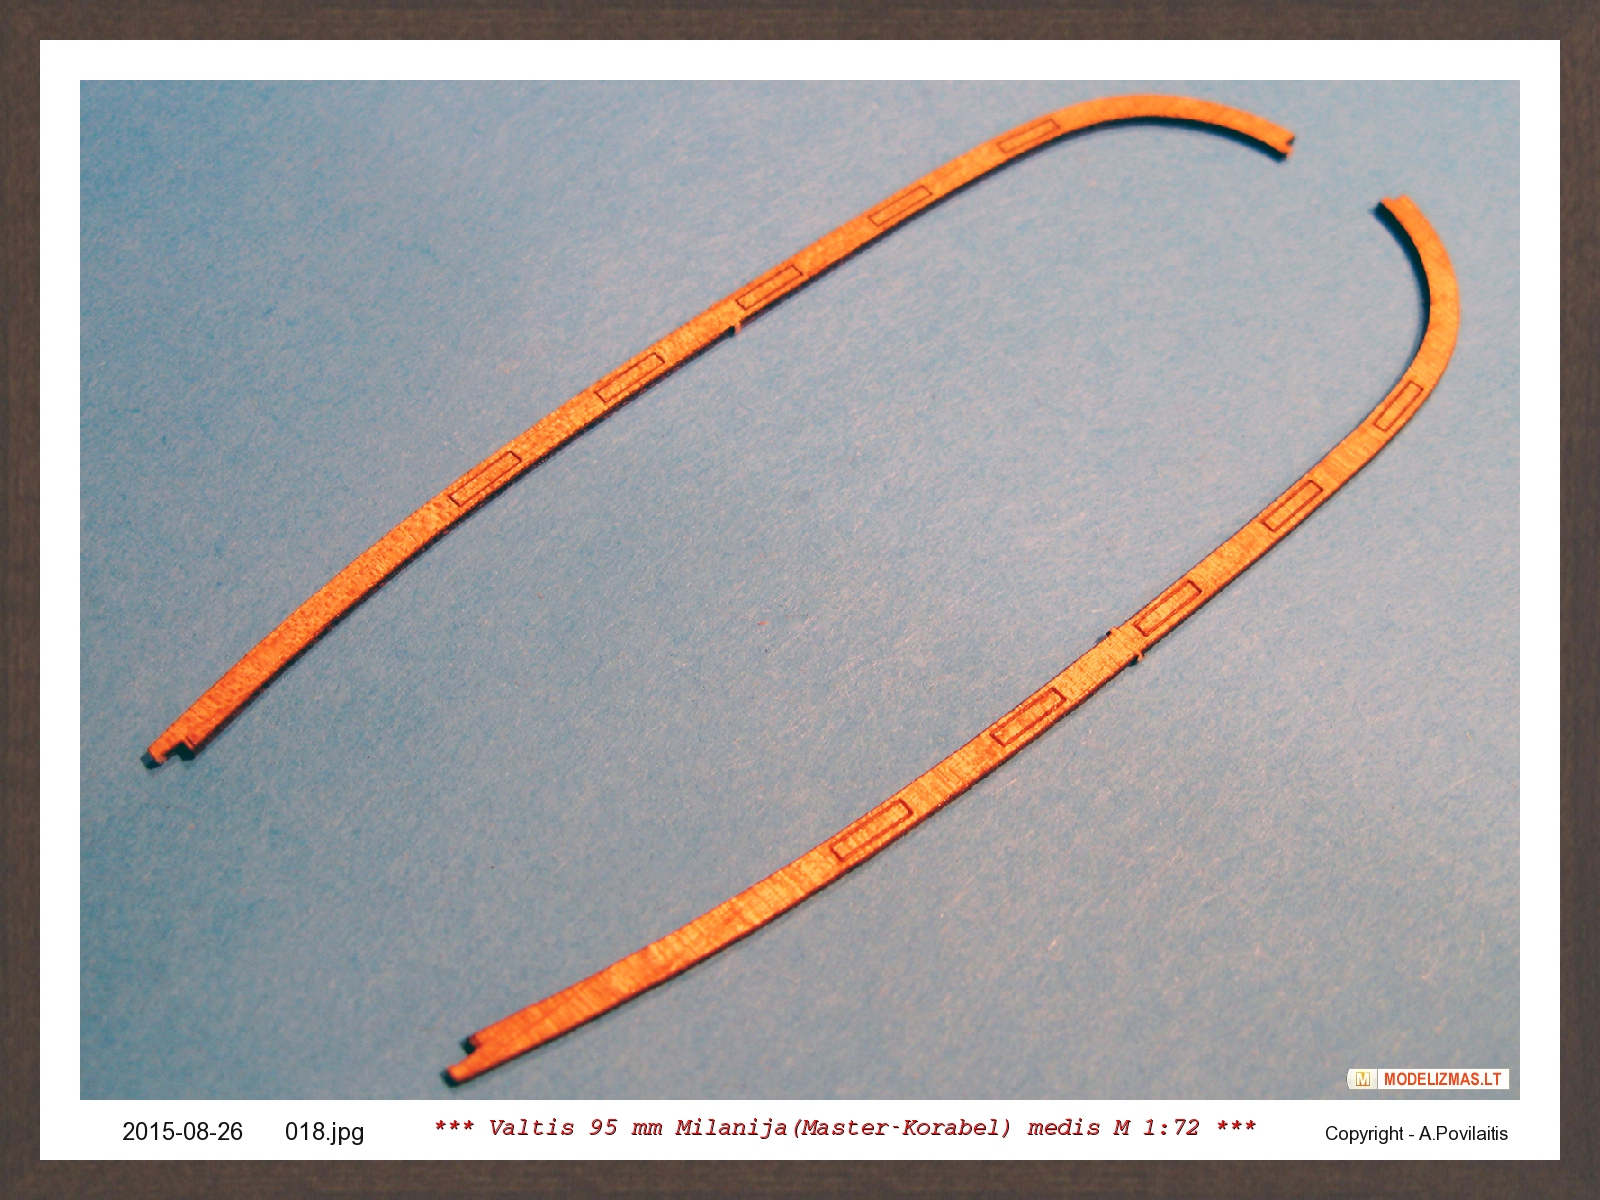
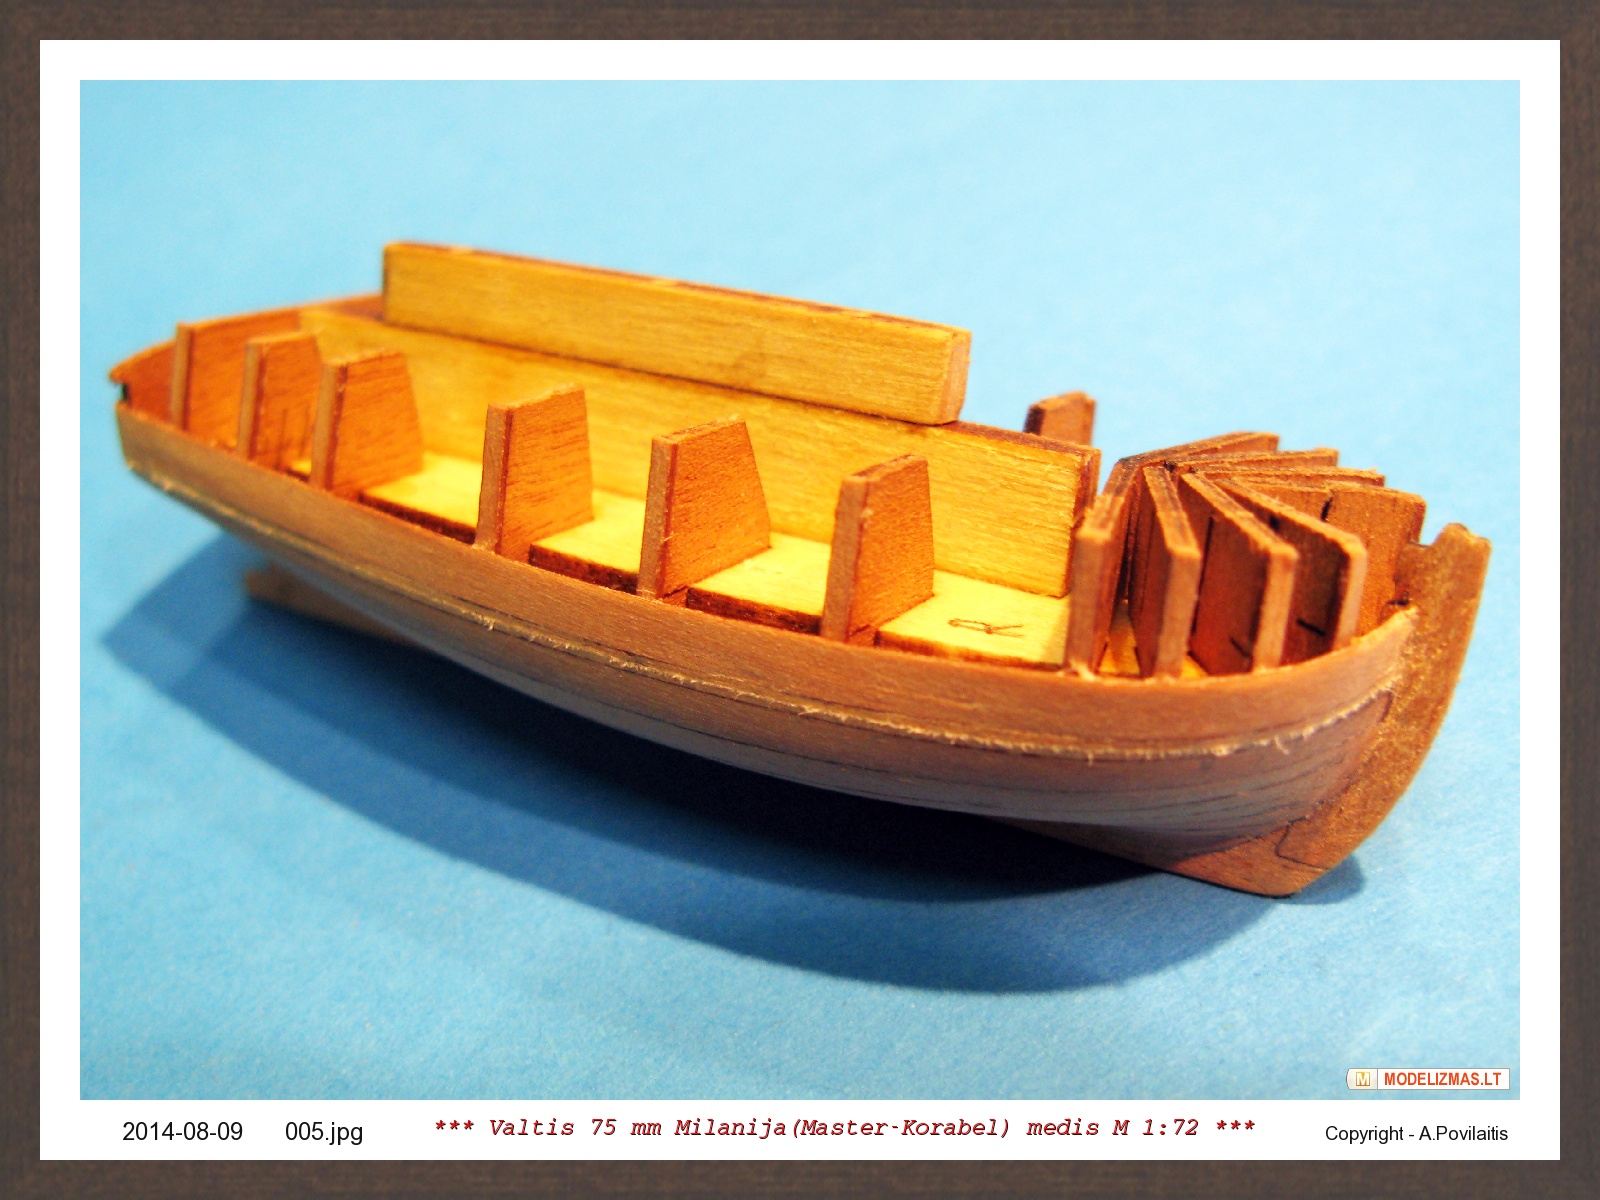
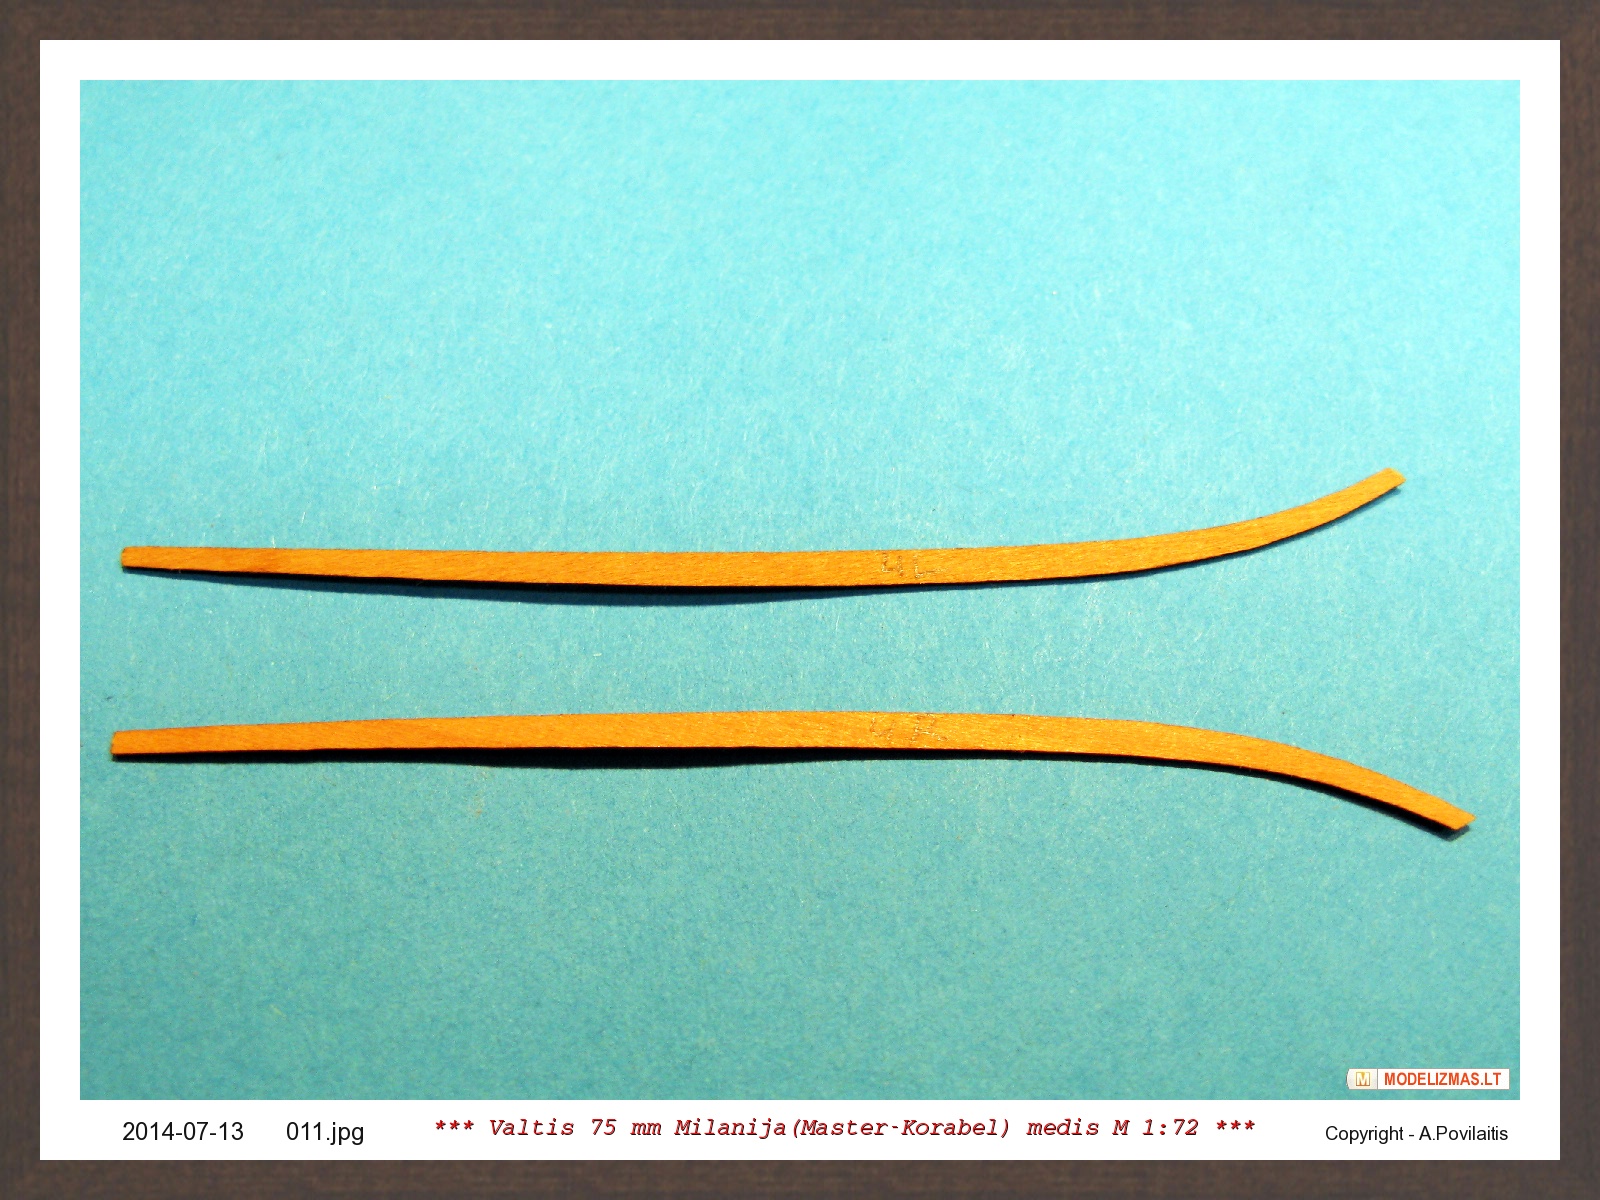
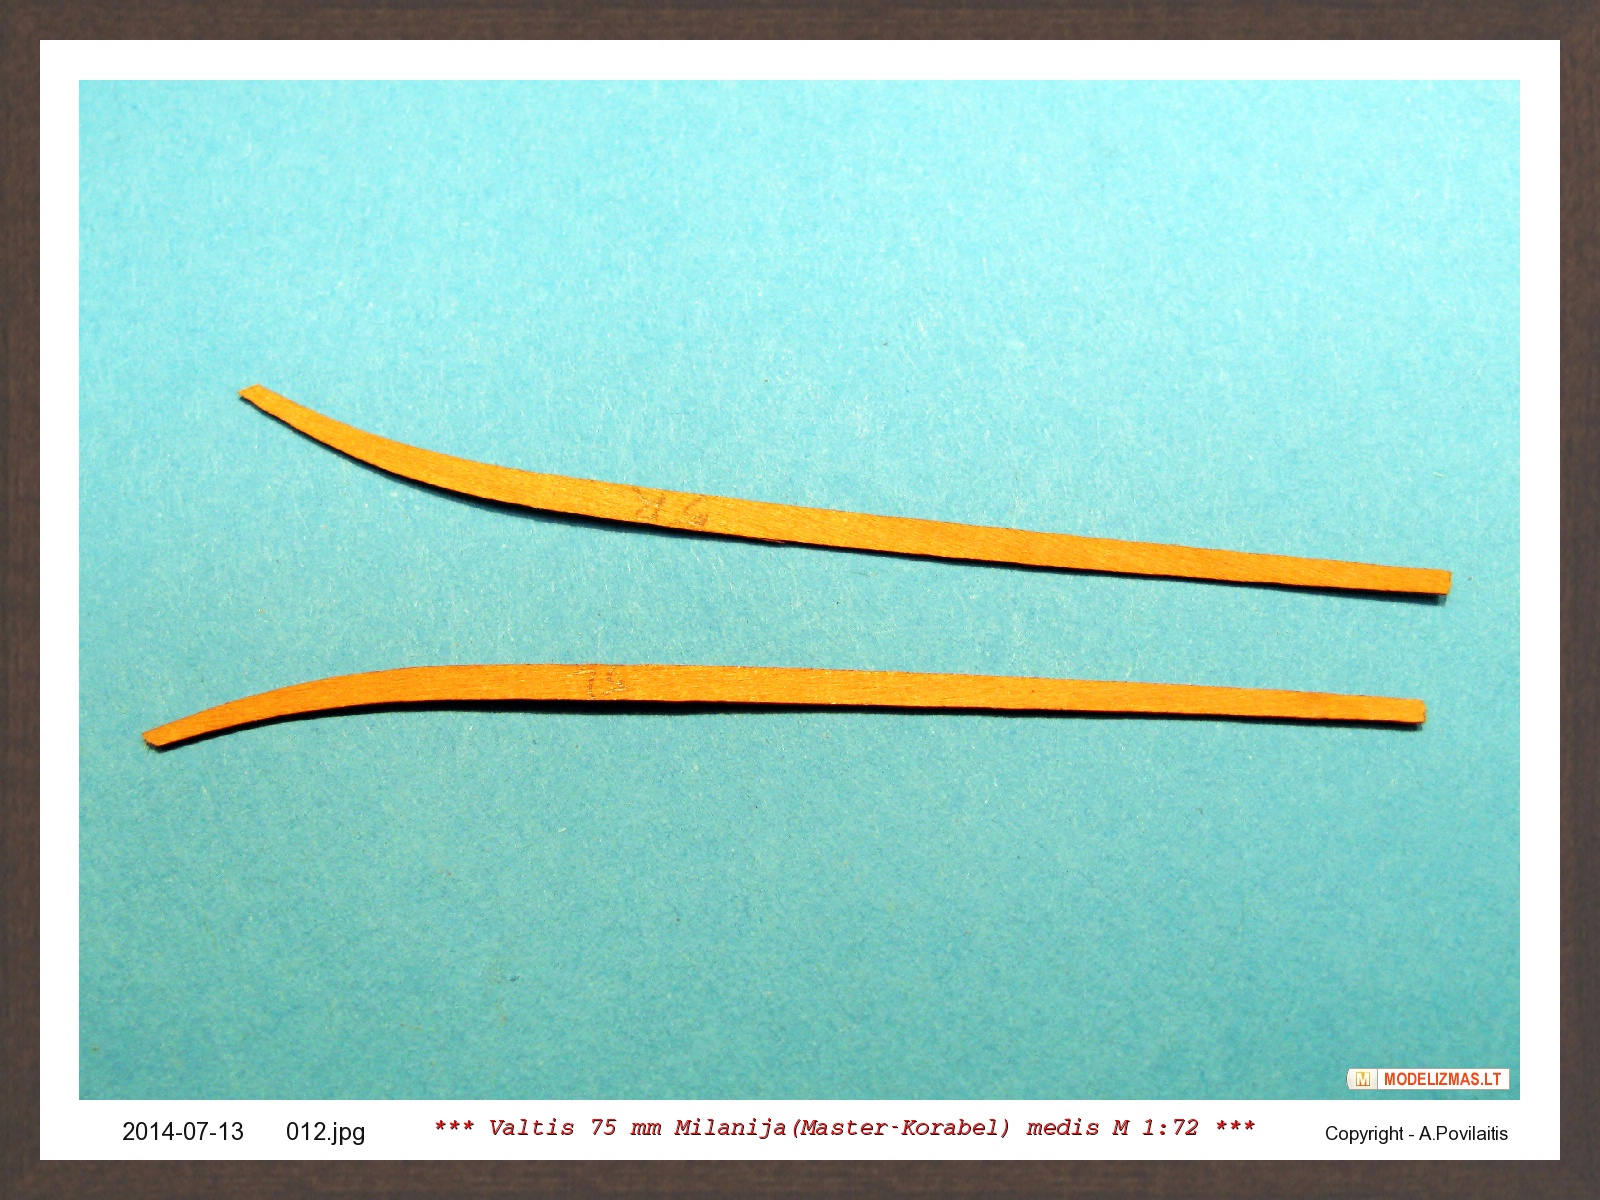
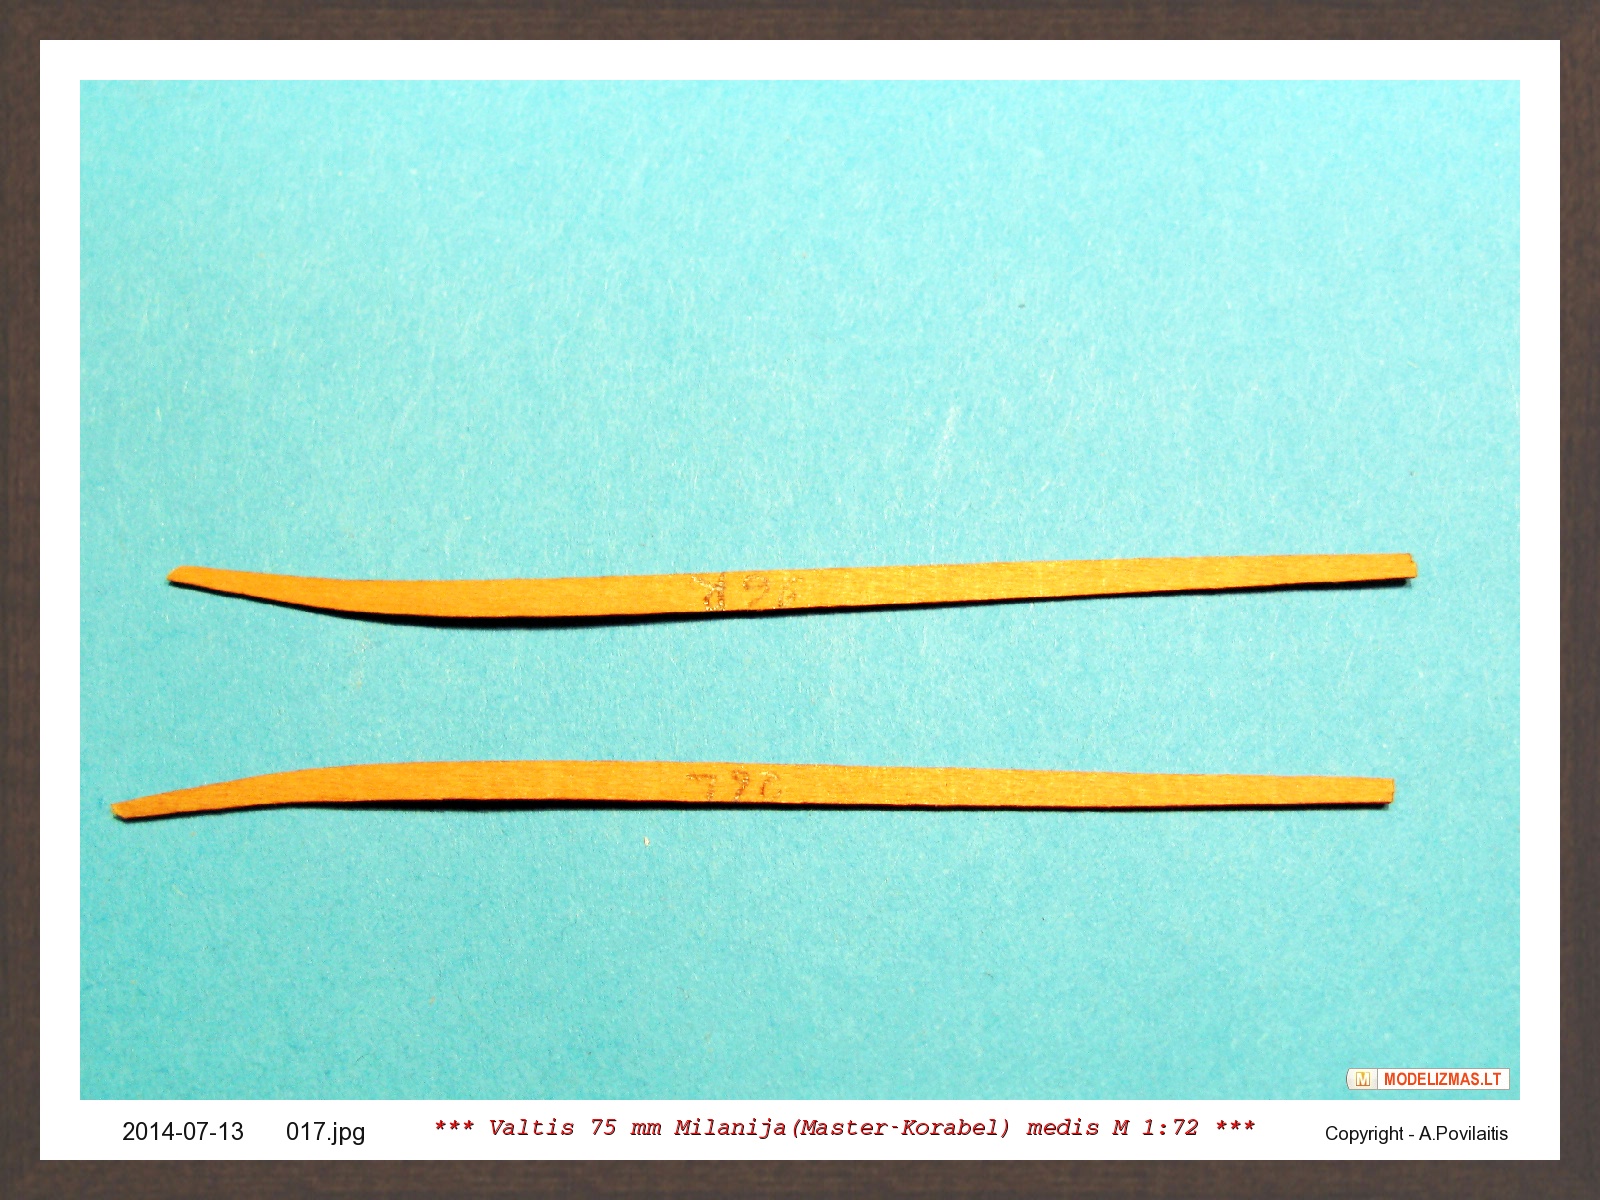
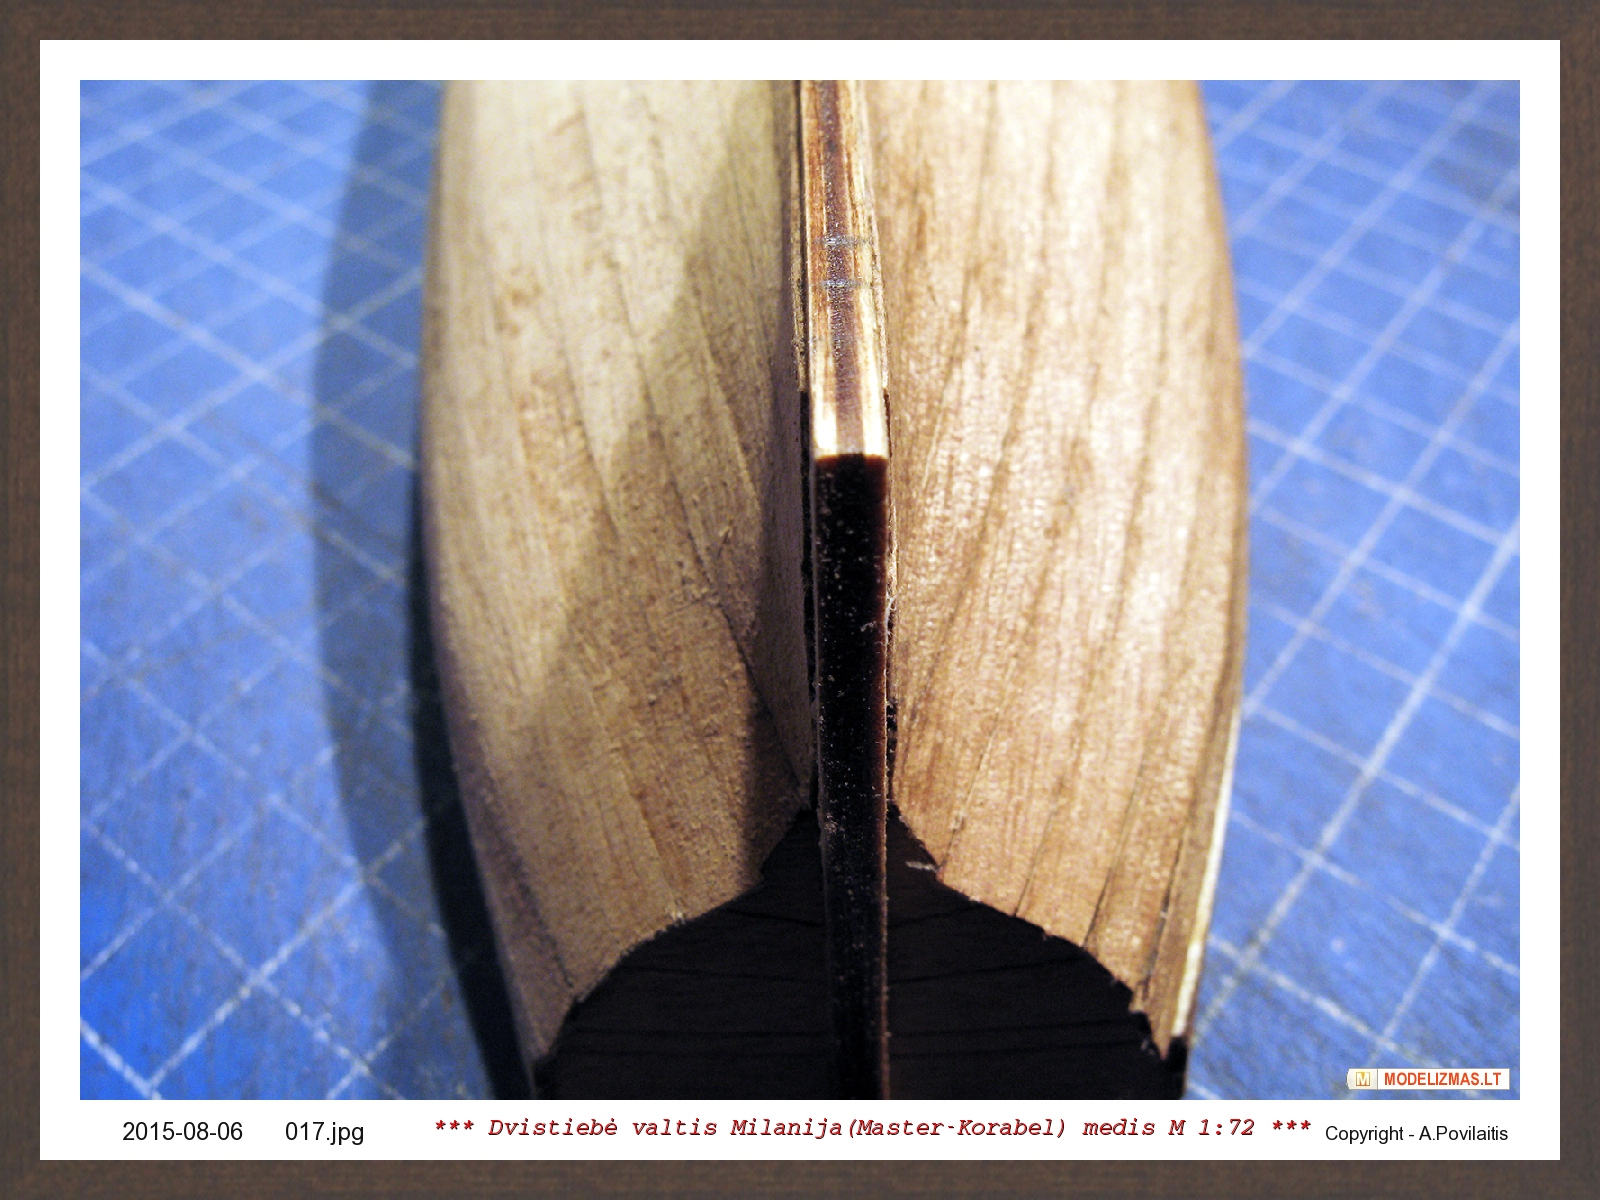
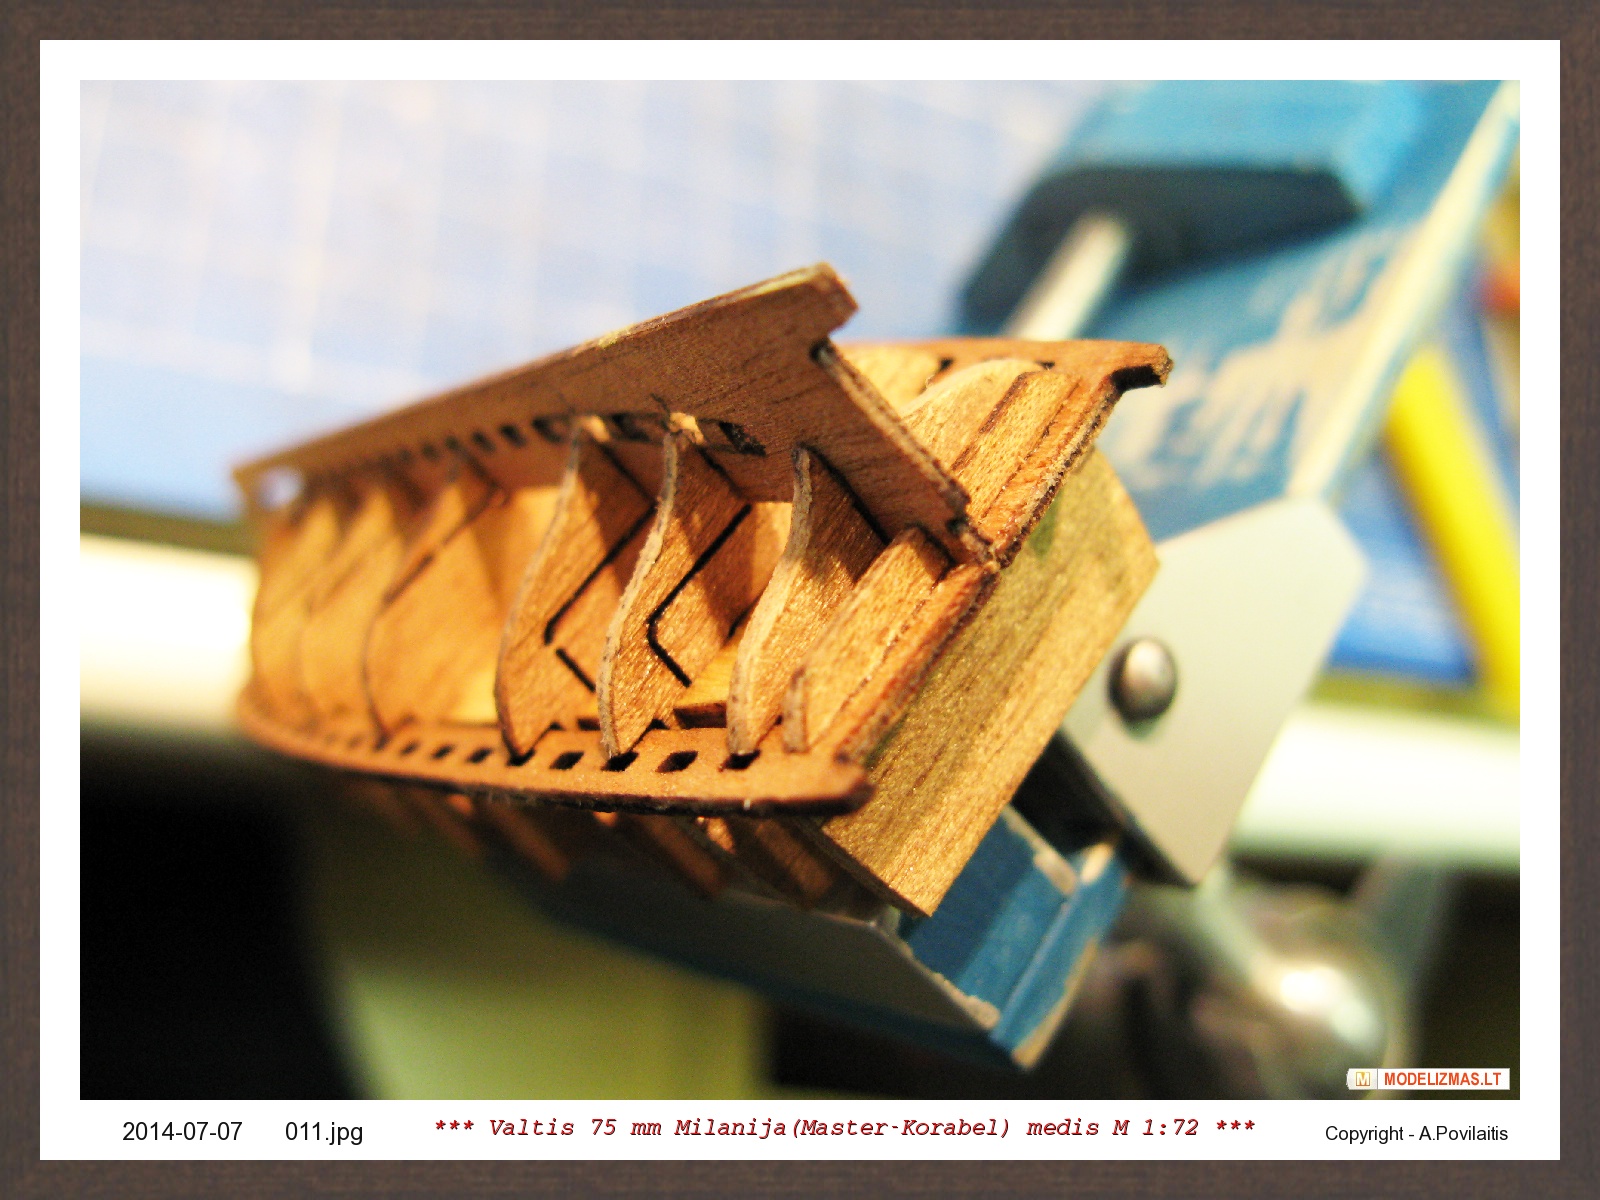
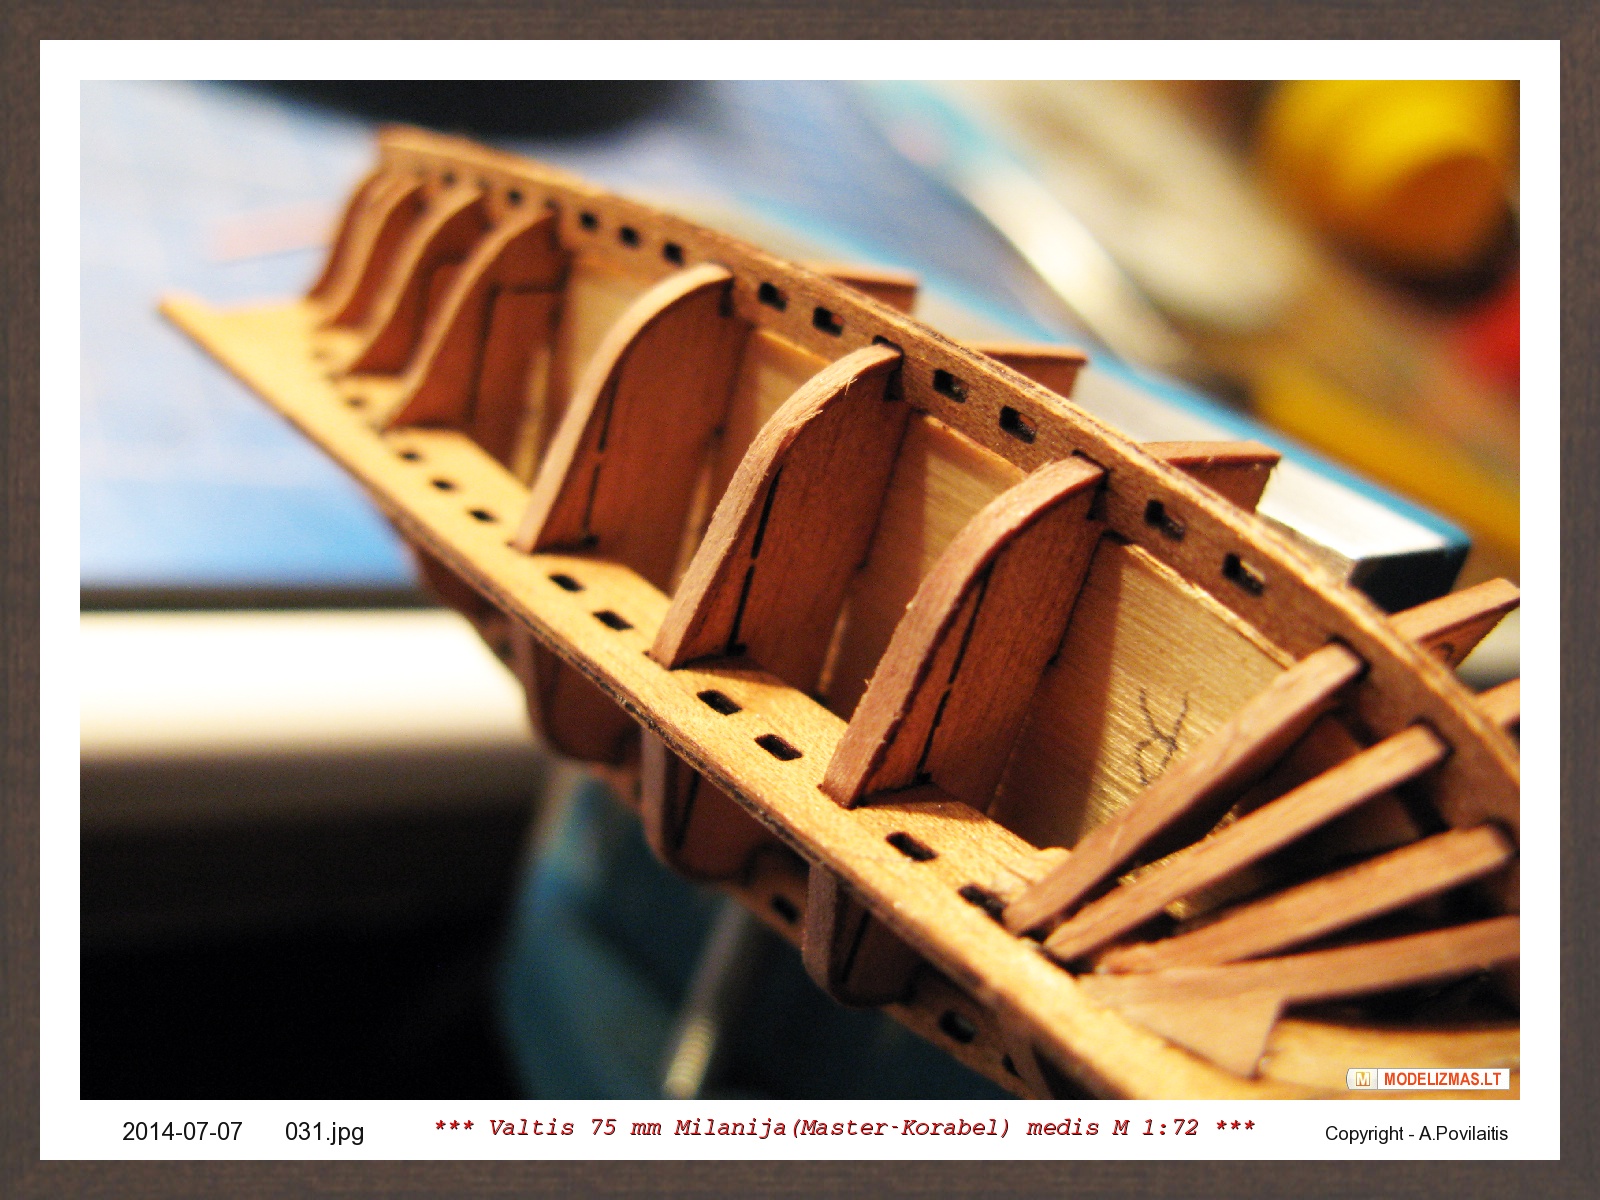
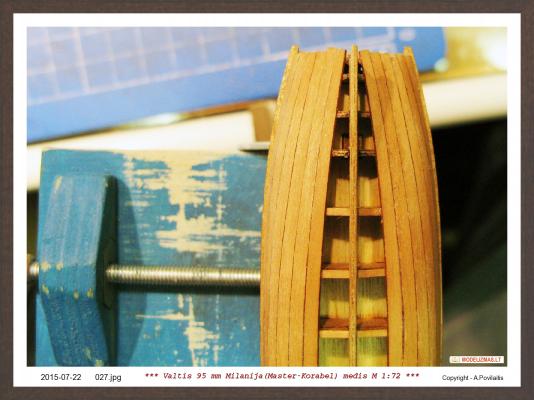
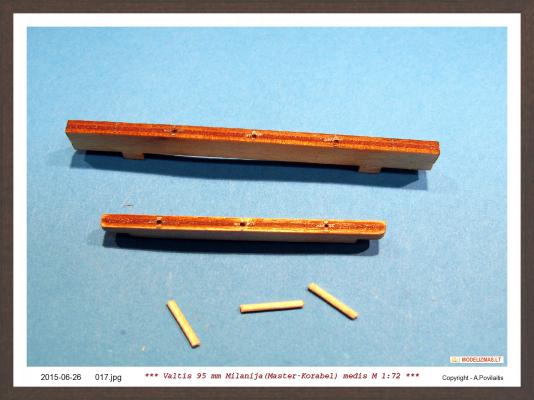
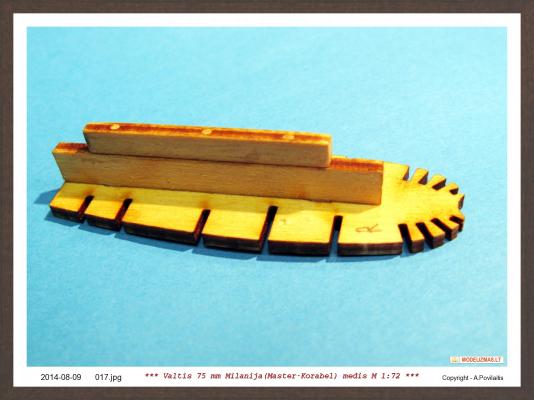
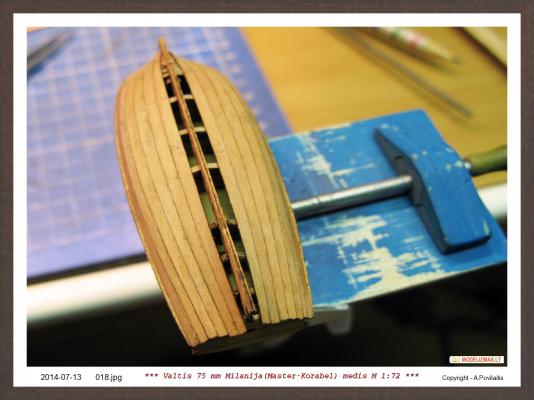
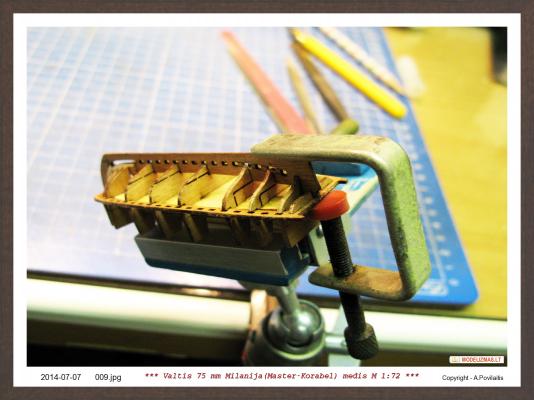
The 12 frame glued to the keel. I corrected it's position some times, until it stay in the right place. And glued the keel to the temporary frames. The glue applied only in the keel notch. Then ad the stringers. They glued only to the keel at the bow and to the 12 frame. Sanded transom and glued to the keel and stringers. Now the time to remove the pear strips from the plate. This strips will be the boat frames. The strips are very small and I used for its bending plastic bag, some water and microwave. My cat Silver verify whether all is well done. 3 minutes in the microwave and done. Now bended with fingers and glued. Glue is applied only to the keel and the top of the frames. The last 3 strips are more short, from stringers to the top of the frame, and glued only to the top of the frame. And the used glue. Regards, Antanas


- 22 replies
-
- 6
-
-
- master korabel
- 75mm boat
- (and 1 more)