CDW
-
Posts
7,760 -
Joined
-
Last visited
Content Type
Profiles
Forums
Gallery
Events
Everything posted by CDW
-
 This old manure mucker, yours truly, was never more grateful as when the farm acquired our first Bobcat skid loader.
 -
Wow, was that a, errant takeoff, or just before it stalled and crashed into the ocean? Very nice photo!
-
Looks Fabulous, Yves! Very impressive indeed. The stanchions and railings are super nice. Everything is super nice really. Kudos!
- 321 replies
-
- 6
-

-
- Finished
- Flower-class
- (and 1 more)
-
Something more like this one: Touch Up Spray Gun 1.6 mm Siphon Feed Performance Tool M578DB Paint | eBay The one you pictured is a HVLP gun (high volume low pressure). Those type spray guns take a very significant compressor to operate. I used to have a 120 gallon 5HP compressor, and mine could not run the HVLP guns when they first came out. Not enough air volume. I was surprised when I looked, because it seems they no longer carry a touchup gun that's not HVLP. There used to be a little siphon feed one they carried that cost about $10, but I guess I'm showing my age. It's long gone.
- 460 replies
-
- 5
-

-
-
- Finished
- Flower-class
- (and 1 more)
-
The next piece I was waiting on were the wooden deck stickers. Those finally arrived from Asia this week. I've been assembling all the little sub-structures that make up the overall superstructure of the Prinz Eugen. I have to say, this model's superstructure and decks will pose as significant a conundrum as I have dealt with before now. There are a LOT of tiny, individual deck pieces, and all the superstructure sub assemblies need to be painted before assembly so once the deck applications are in place, I can then assemble the sub assemblies on top of the deck/s. This becomes one of those kits where the sequence of assembly I choose or fail to choose will have an impact on the final appearance of the model.

- 174 replies
-
- 9
-
-
- prinz eugen
- trumpeter
- (and 2 more)
-
I wonder how well Gesso would work for spraying on with an automotive paint gun, a small one like you use for door jambs or touchups? For a model as large as the Corvette, it could possibly come out a whole lot smoother spraying on vs: brushing it on. I think you could apply lighter coats as well and of course, no troublesome brush marks.
- 460 replies
-
- 5
-
-
-
- Finished
- Flower-class
- (and 1 more)
-
Those Army Painter dry brushes do look very nice! Are the bristles synthetic or natural? Let us know how they work out for you. I'm very interested. PS: I just looked them up...the bristles are natural.
- 143 replies
-
- 10
-
-
-
I noticed the women assembling the Sable brushes in the video I posted actually used their own spittle to put a point on the brush. Did you see that? Don't think I would want to go that far, but it was interesting to see that's the way they did it in the factory.
-
When this type of technology replaces human labor, which probably will happen if things continue on the current trajectory, can you imagine the mischief people are going to get into with so much time on their hands? My old dearly departed uncle used to always say that young men got into too much mischief because they were not working hard enough...had too much energy, too much time on their hands with nothing productive to do. Over time, I can see the wisdom in the things he used to say.
- 460 replies
-
- 8
-
-
- Finished
- Flower-class
- (and 1 more)
-
Alan You are doing much better with your first attempts with a 3D printer than I did. Mine was truly an exercise in frustration with the first printer I bought.
- 460 replies
-
- 6
-
-
-
- Finished
- Flower-class
- (and 1 more)
-
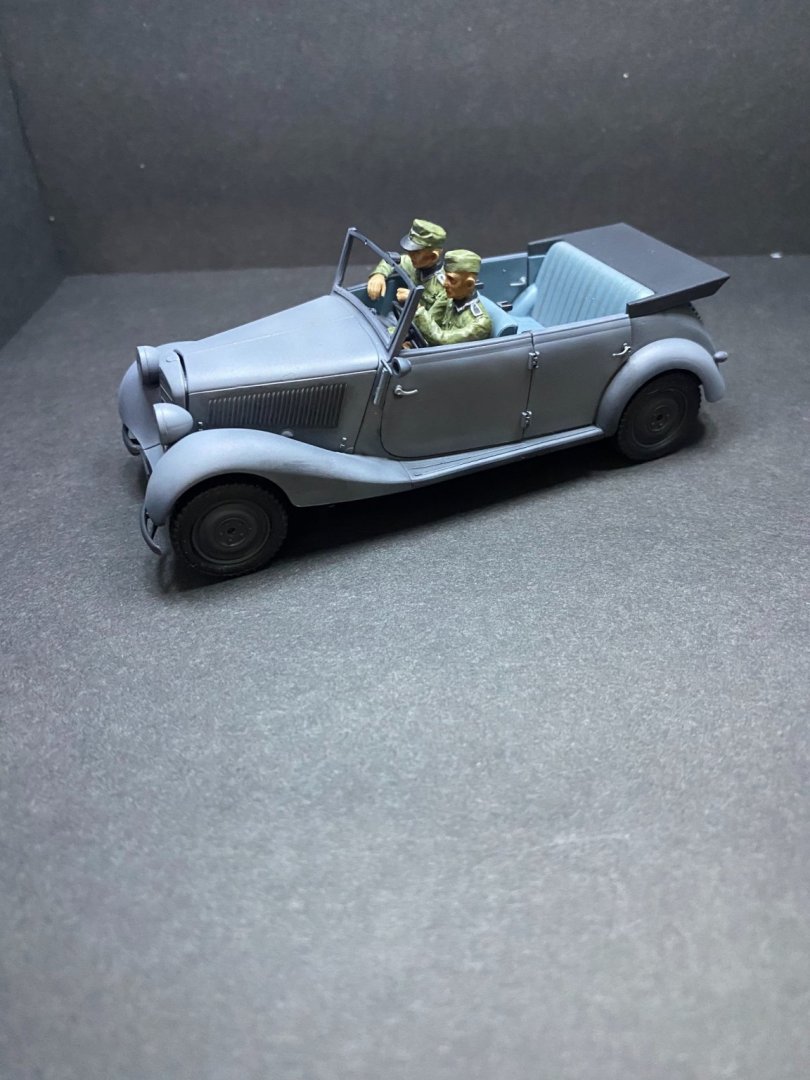
Thanks Alan. I'll eventually dirty it up a bit as it should be in wartime use. Still a lot to go to create a little diorama, including a little concrete pavement and ground cover.
-
So what do you think of the Master's brush cleaner so far? I wondered how long it will last and do you first take most of the paint off the brush on a paper napkin before dipping it in the cleaning solution? I ordered some as well. Should be here tomorrow. Want to eventually acquire some good quality brushes but want to learn to take care of them first or else it's a waste of money.
-
Thanks OC. It's one area of the hobby I have neglected to learn, so it's both a challenge and fun at the same time.
- 143 replies
-
- 10
-
-
Thanks Edward. Like everything else, it takes practice practice practice. There's a lot to learn about mixing paint colors and where to use them in the right places. Thanks Denis...I'll check out Mega Hobby to see the uniform decals. Sounds interesting.
-
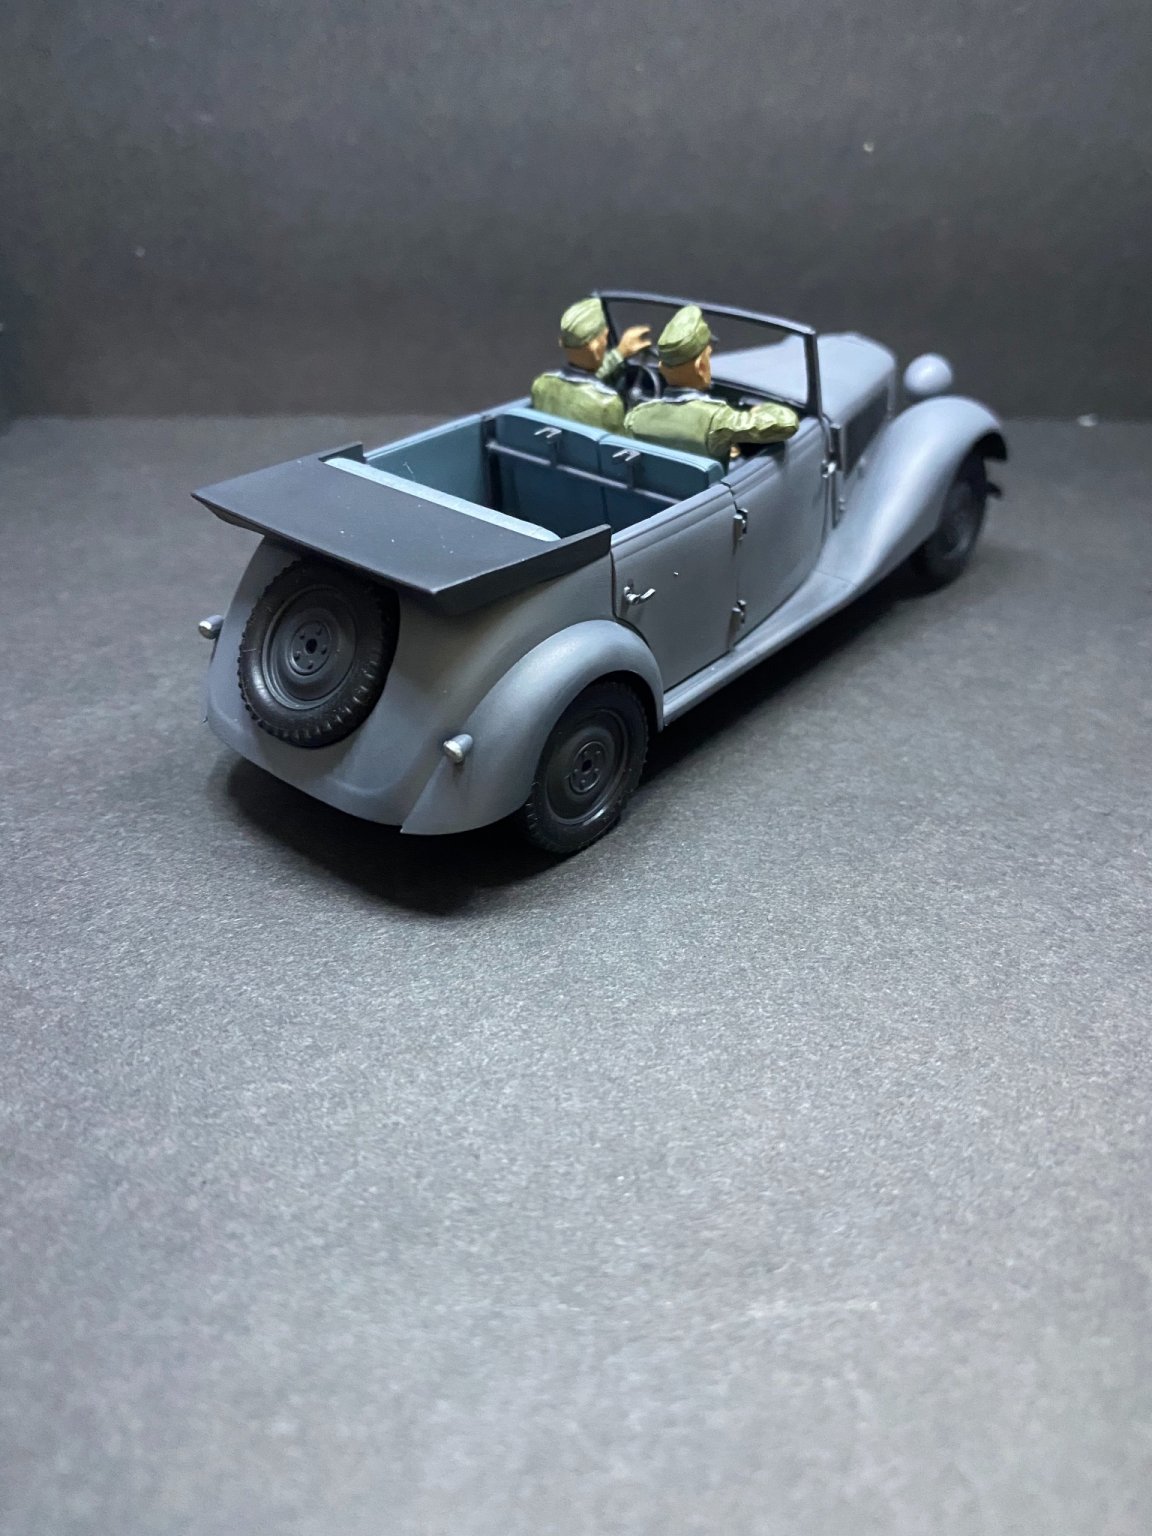
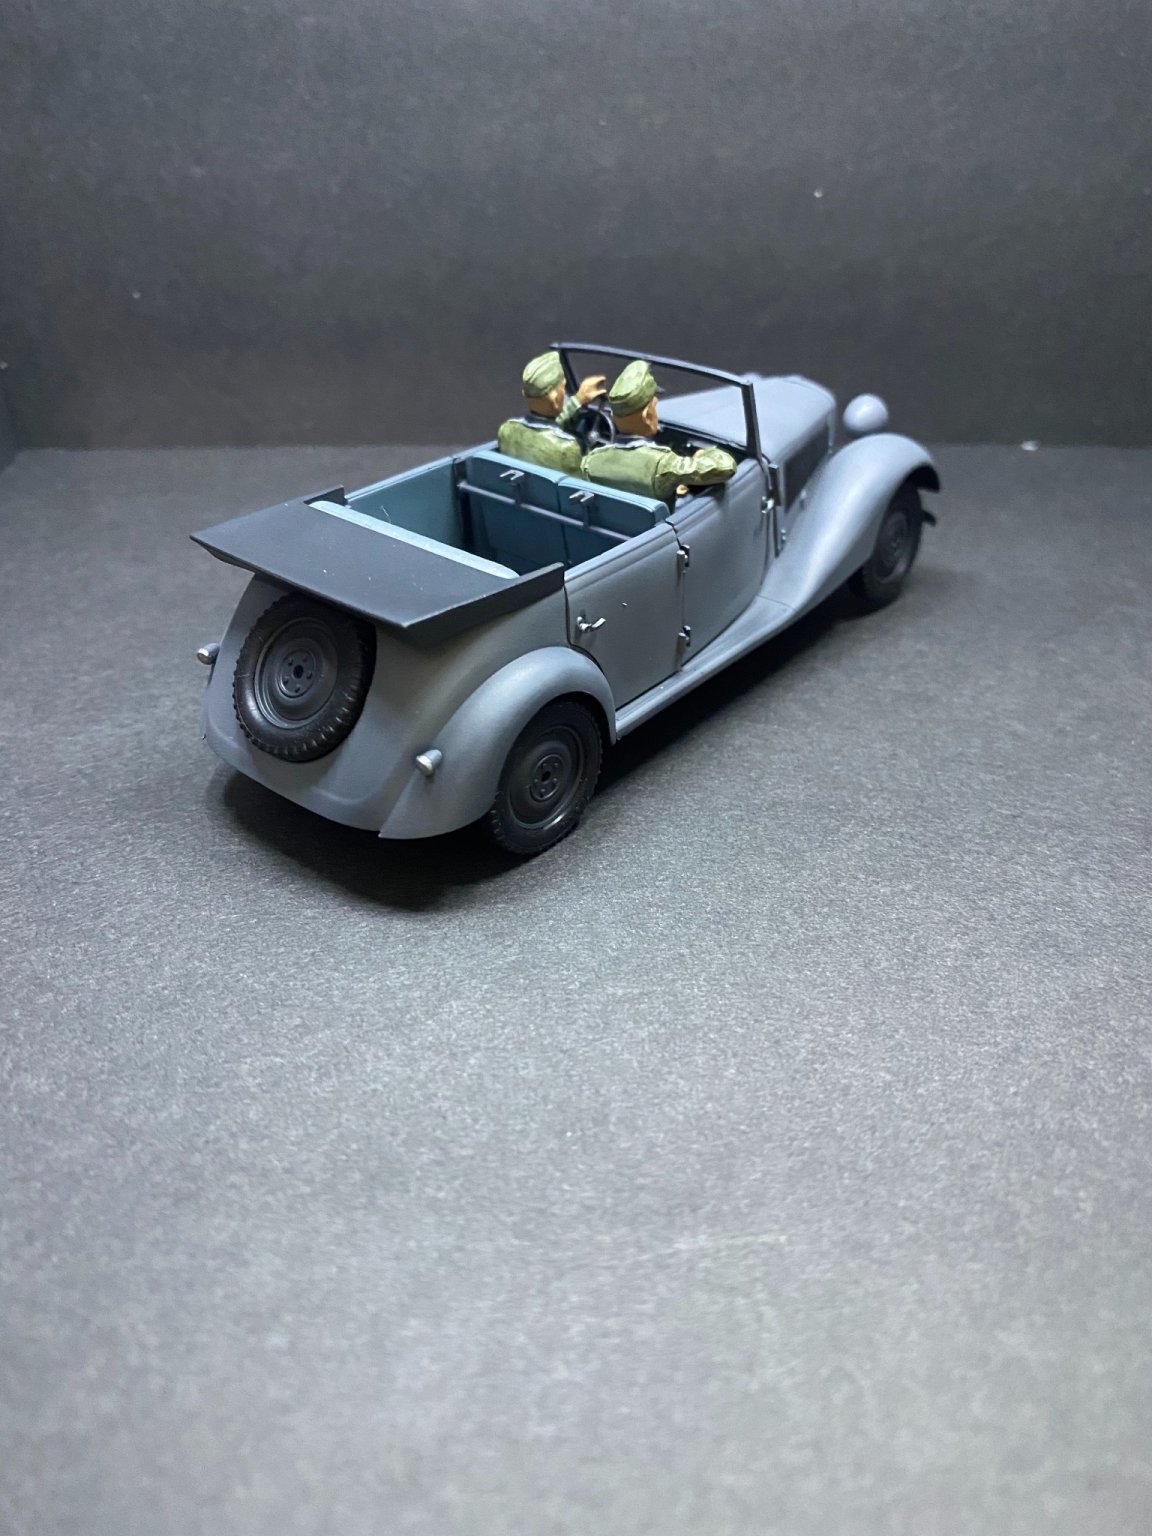
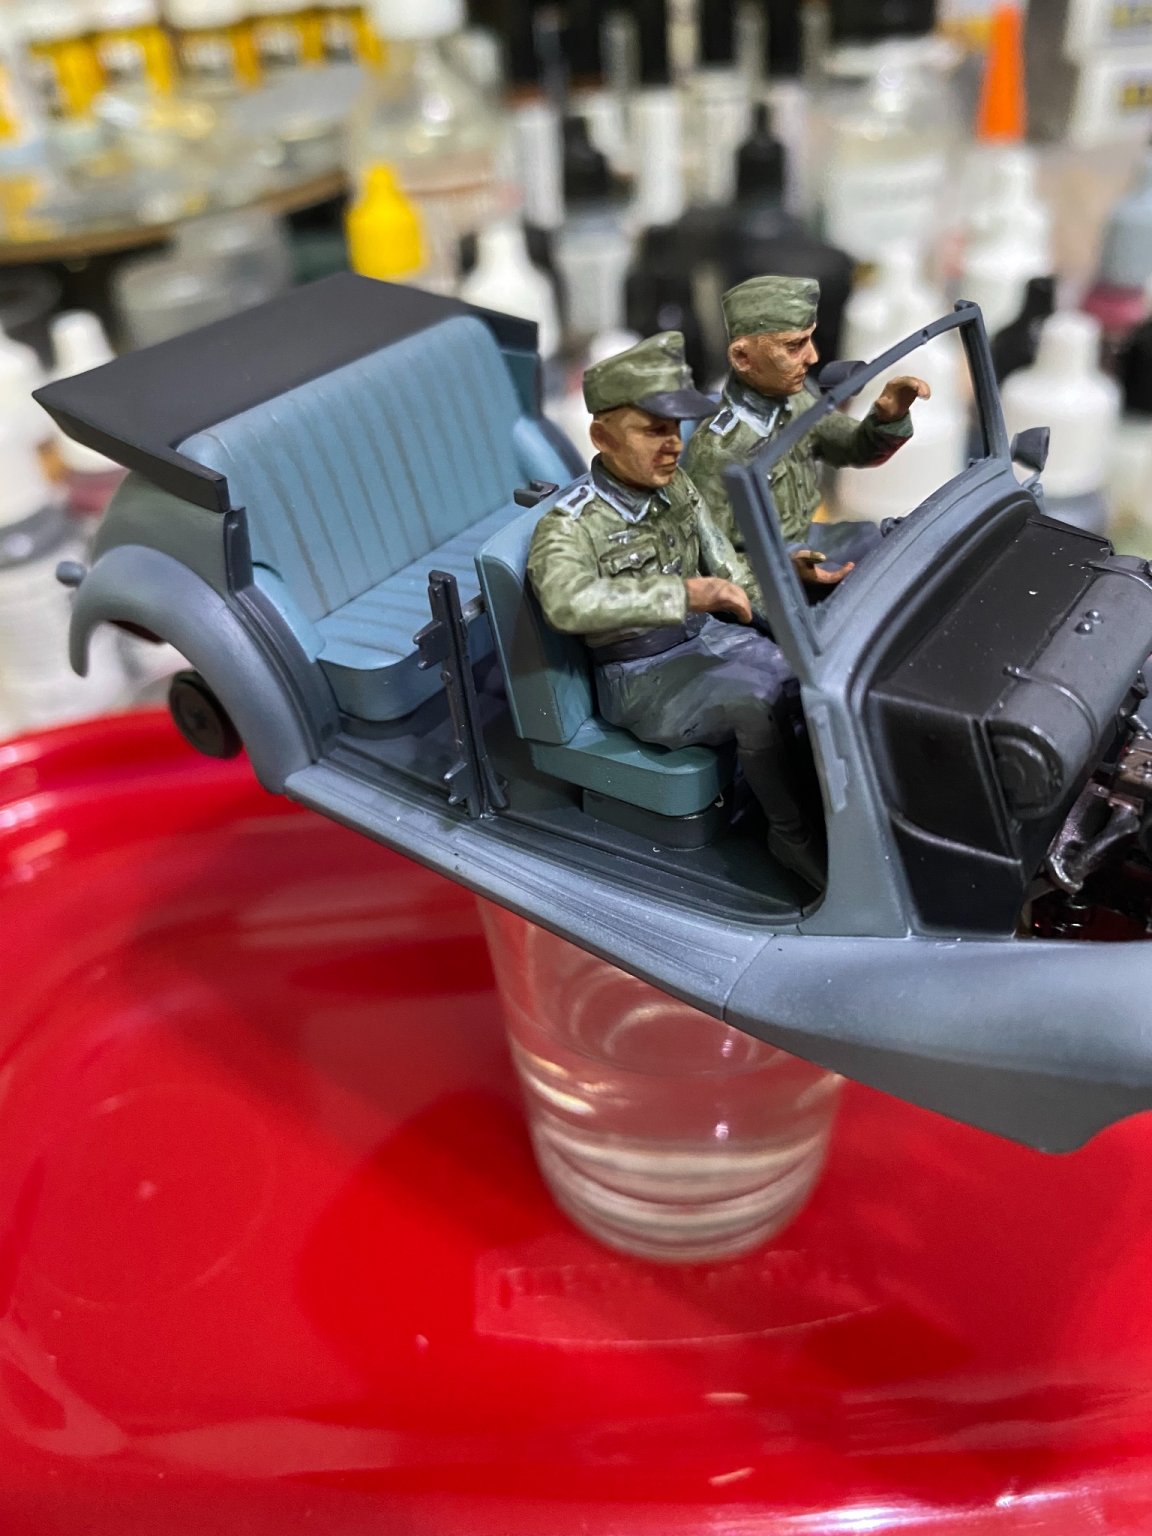
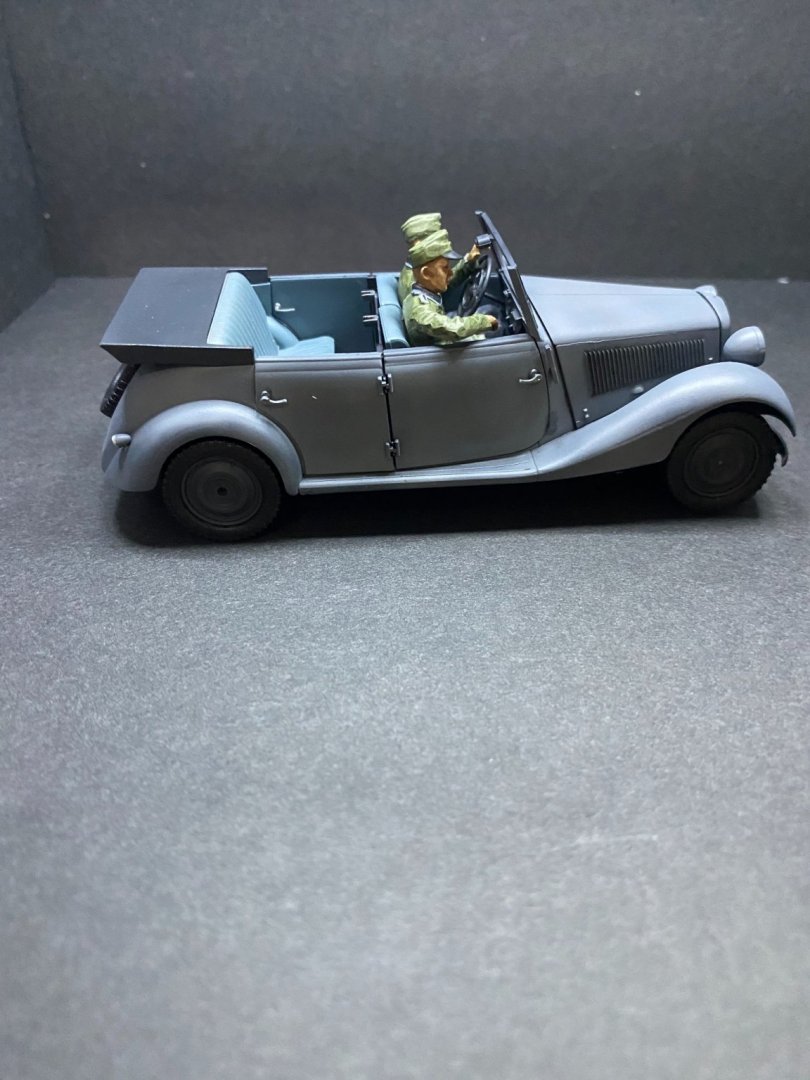
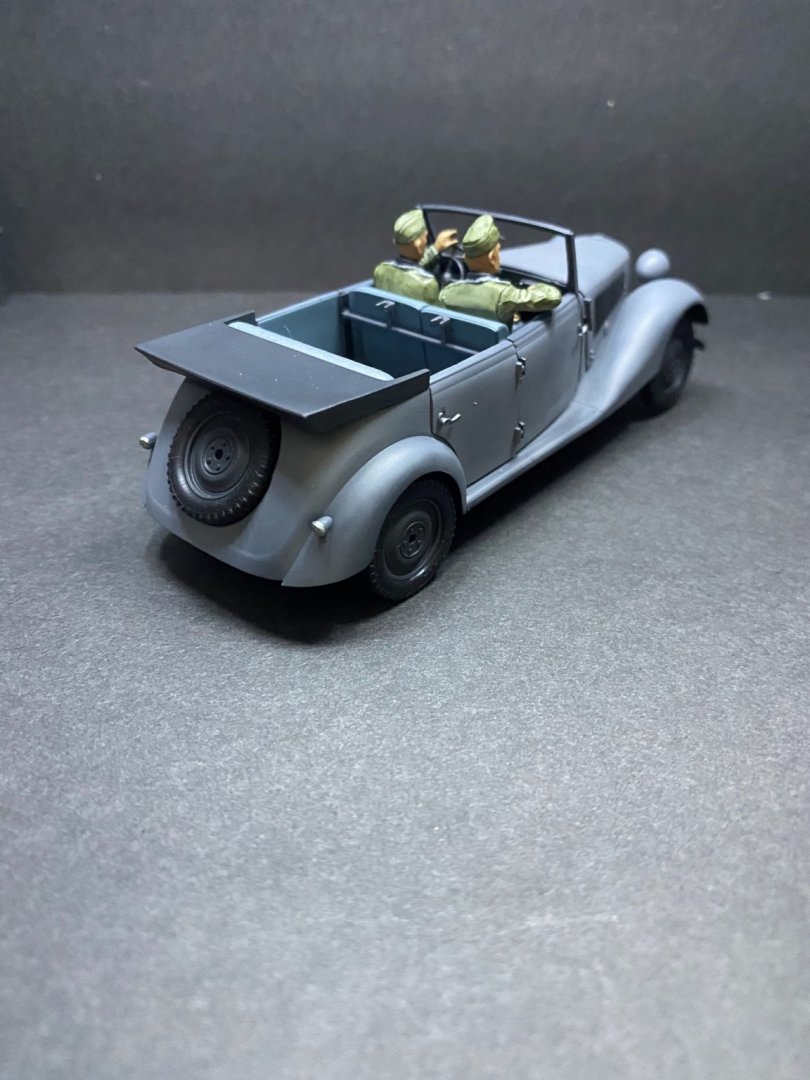
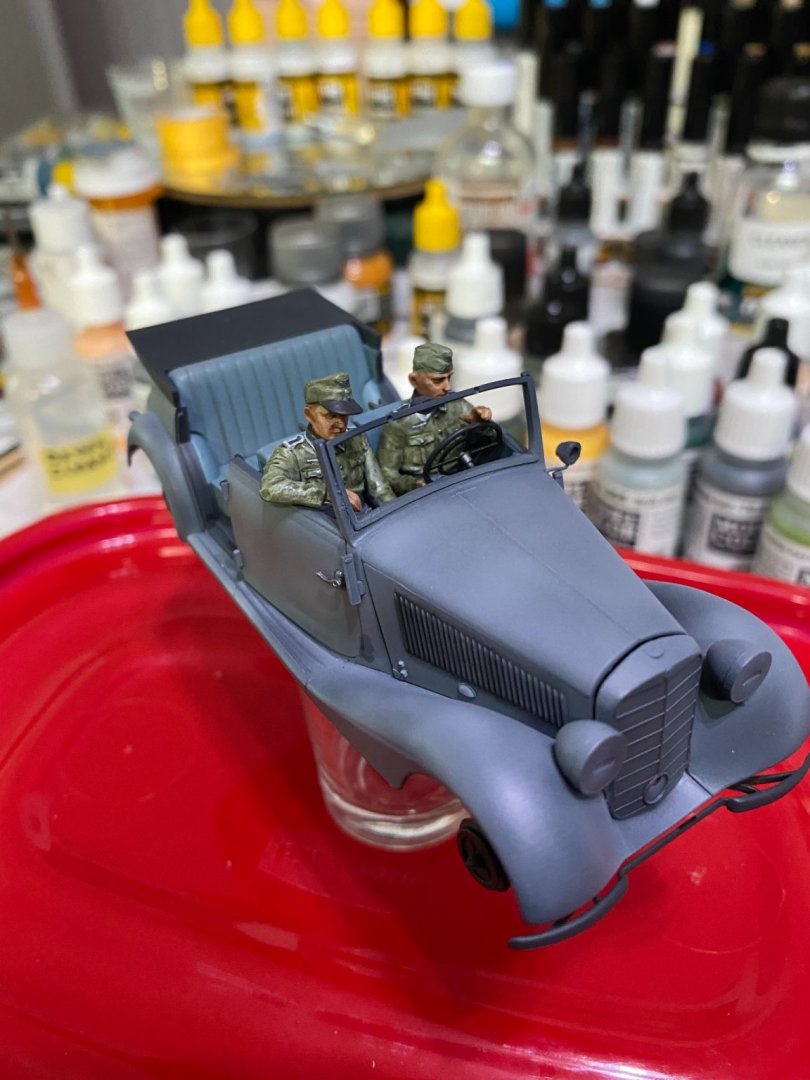
I started this fun little project while I was waiting on some parts I ordered for the 1:700 project Prinz Eugen. As of yesterday, those parts have arrived, so will temporarily put this build on hold while work on Prinz Eugen is completed. Here are some photos on the project status at this time. See you again soon!
- 143 replies
-
- 15
-
-
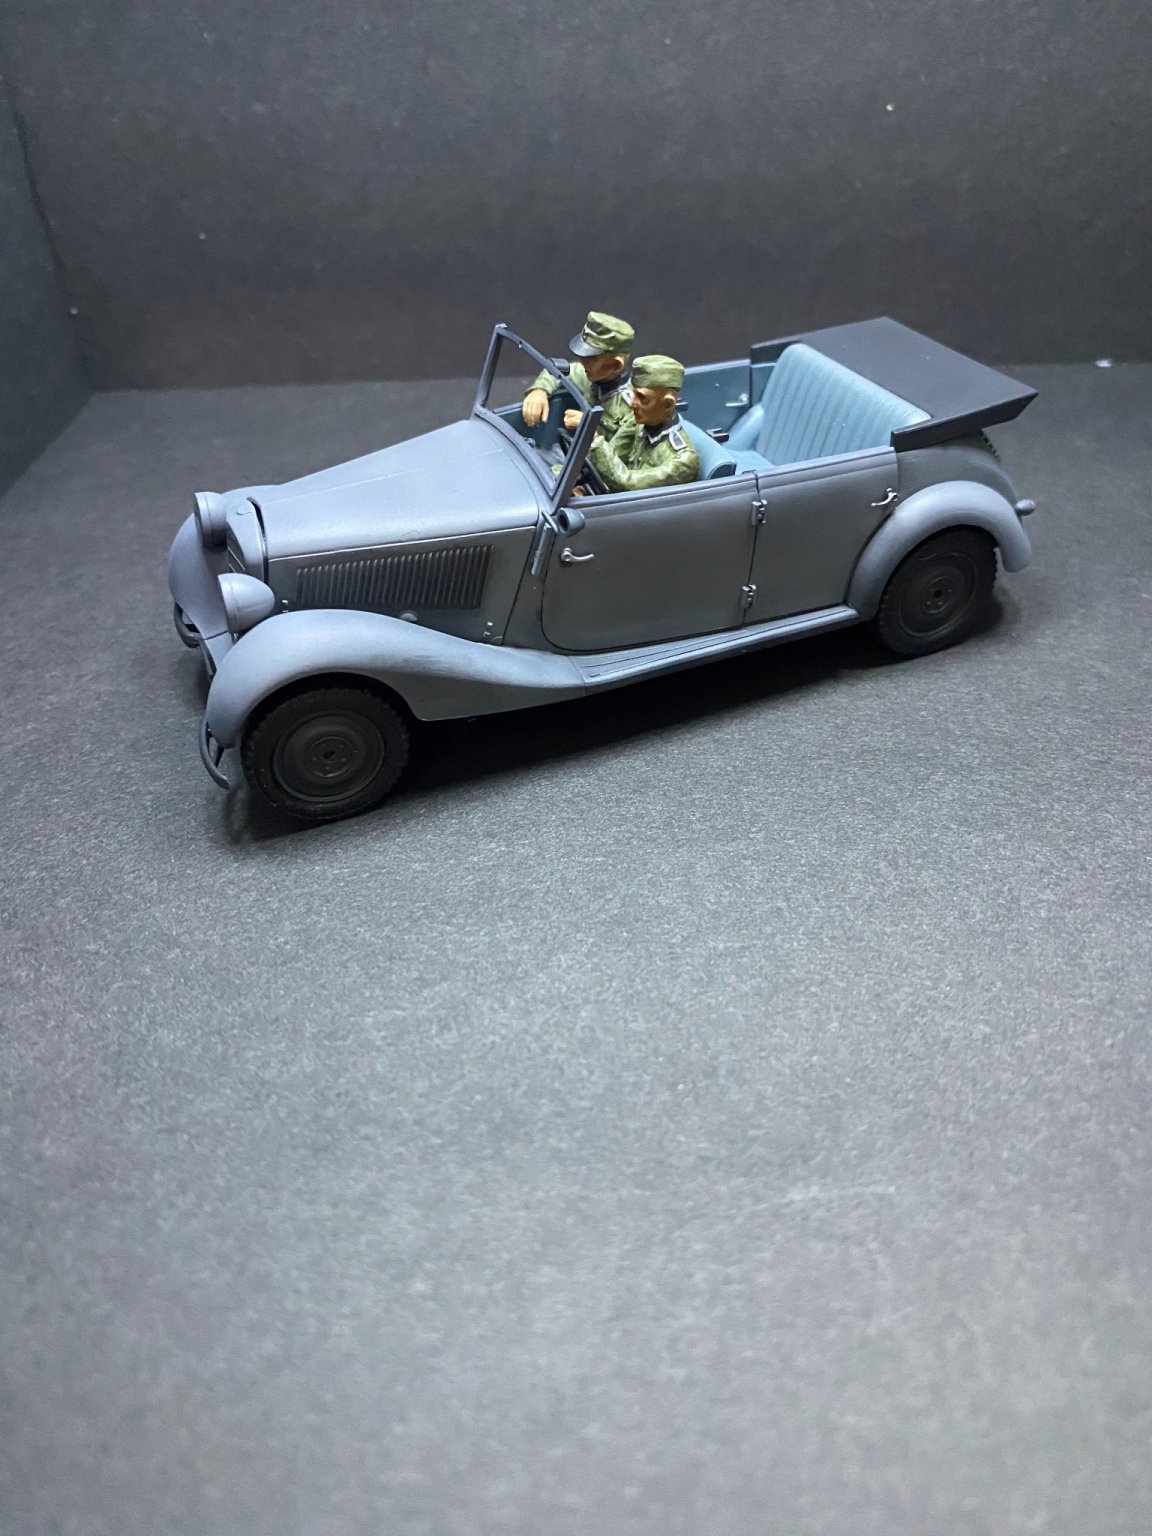
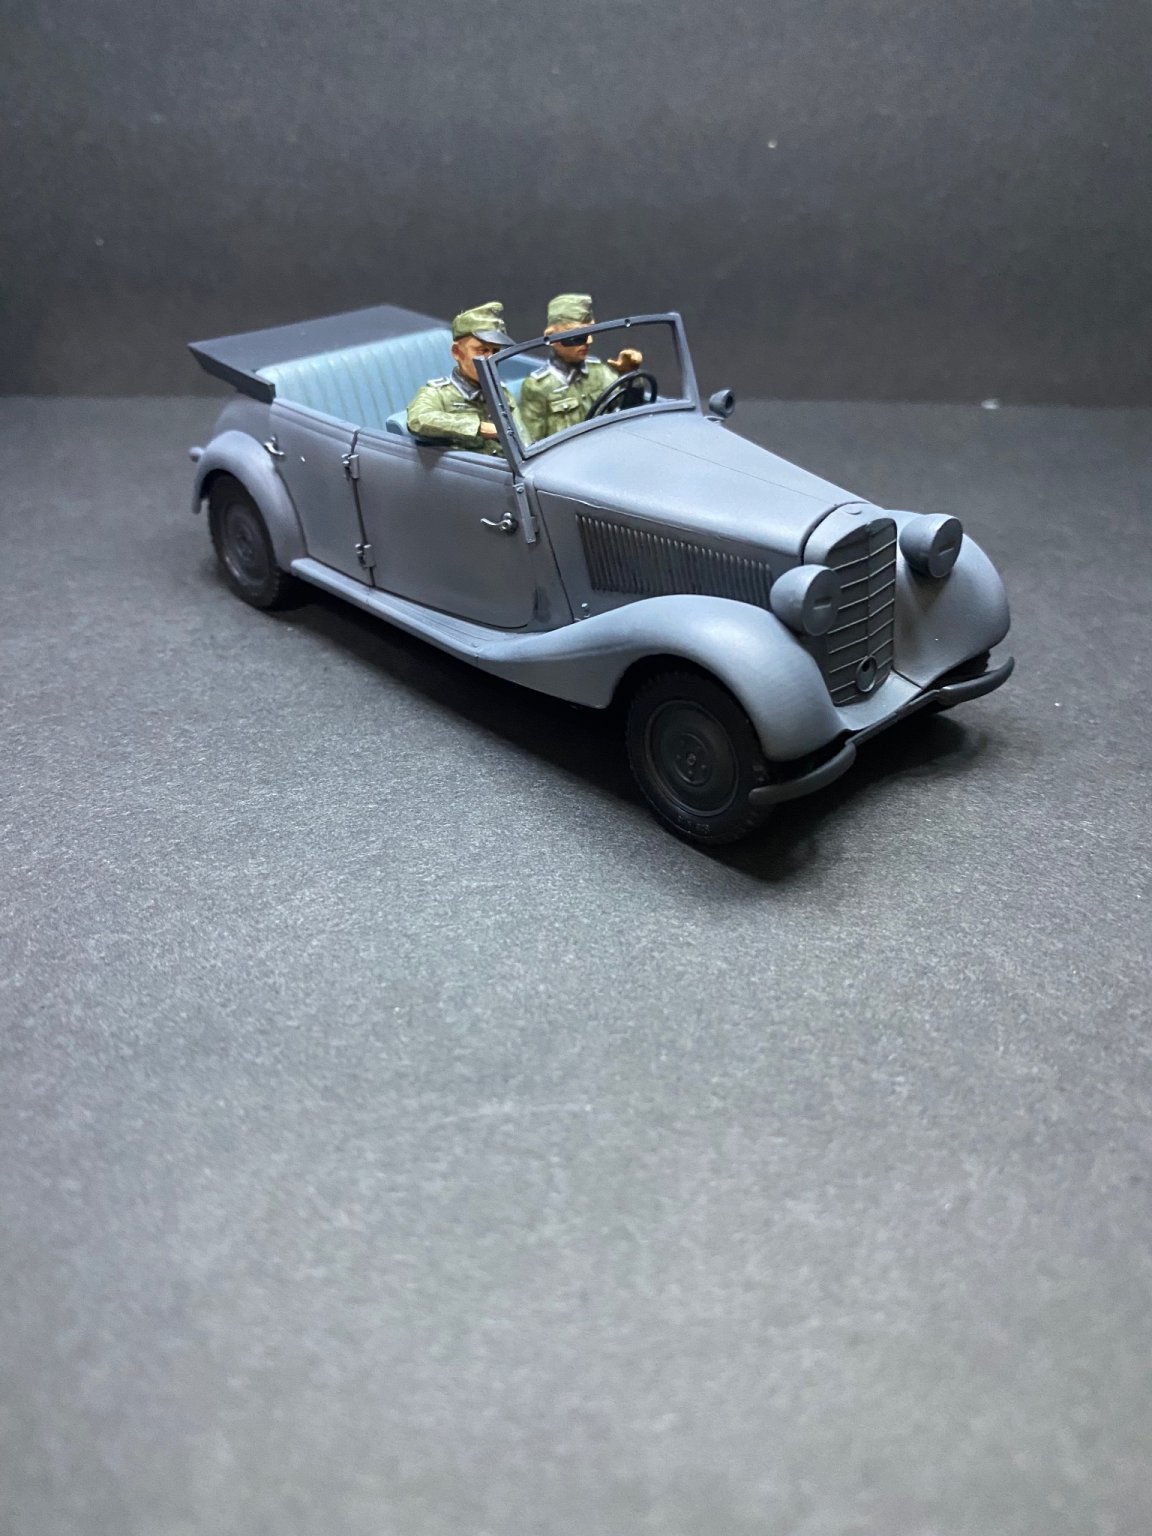
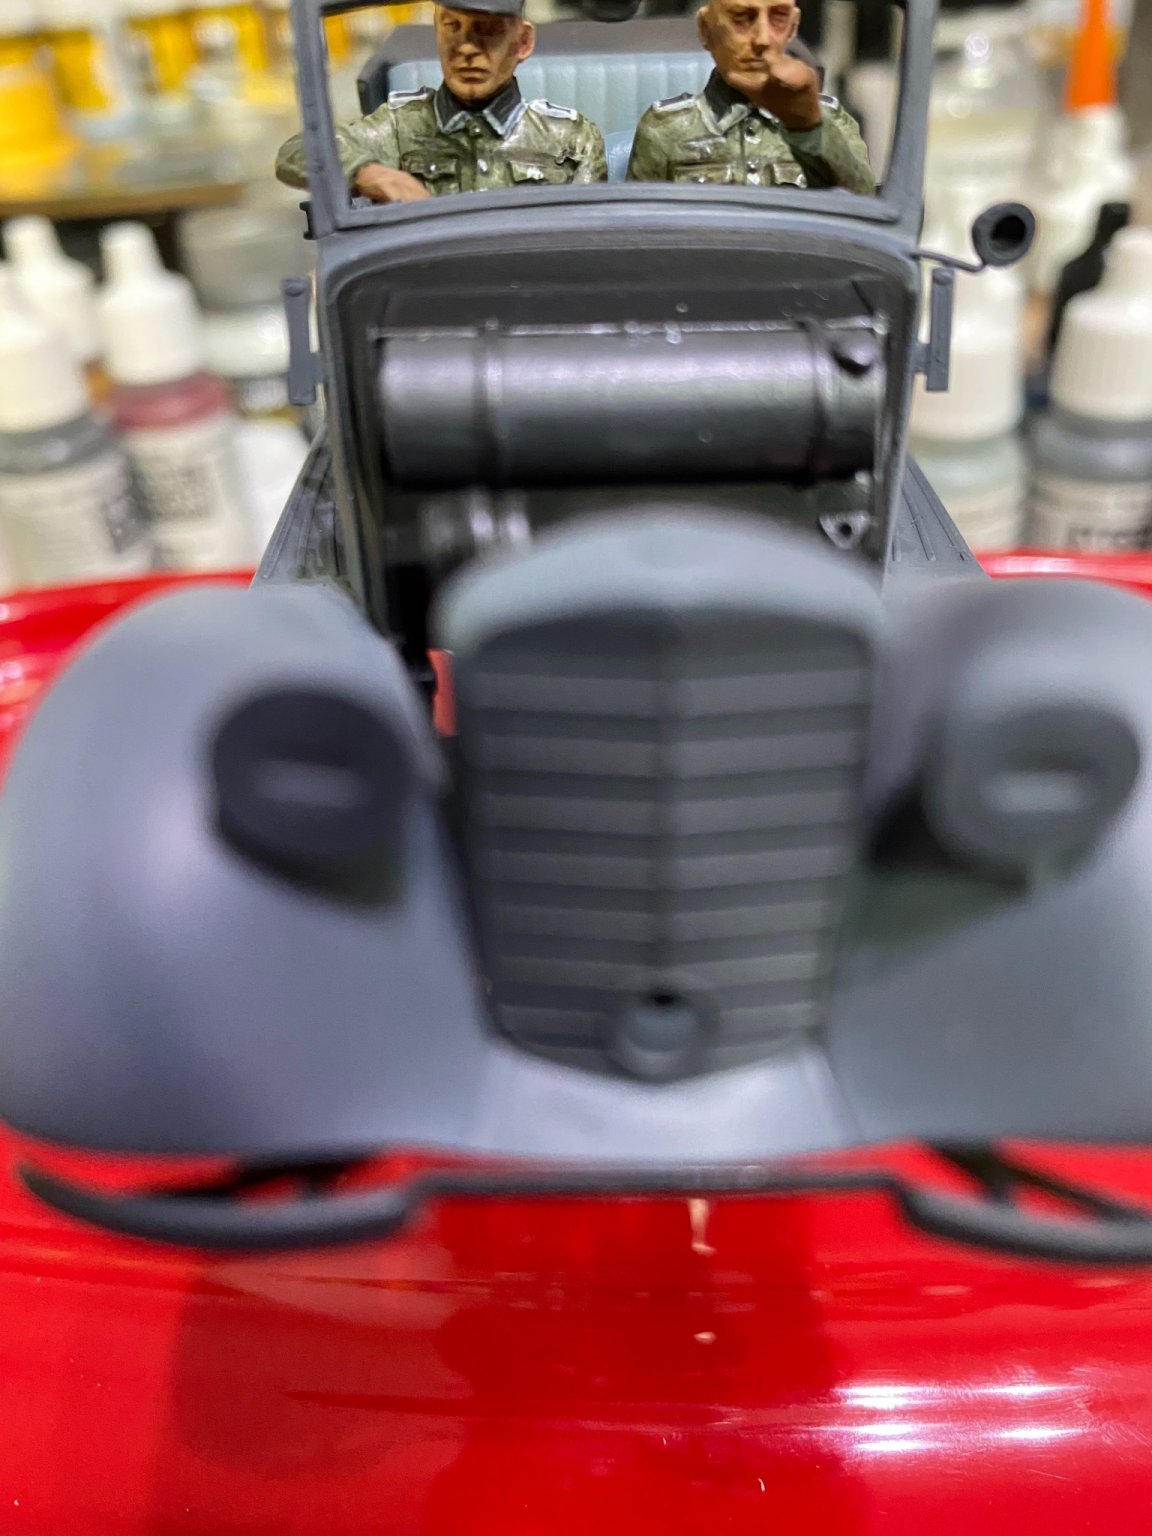
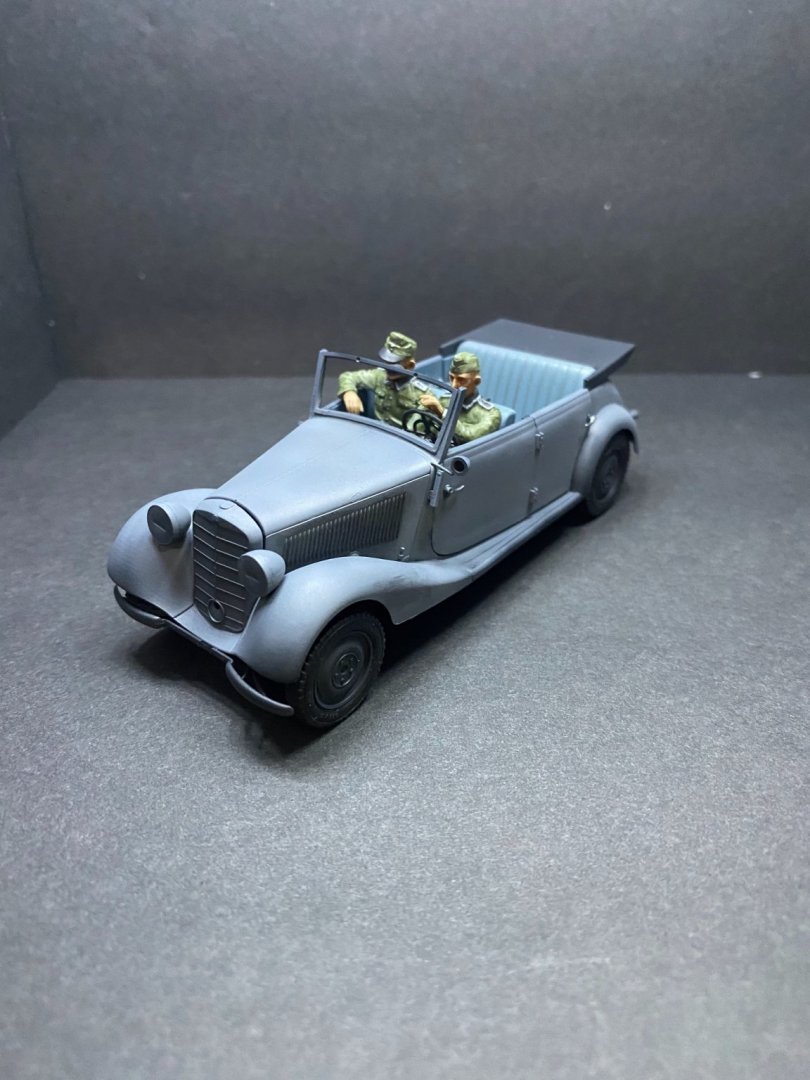
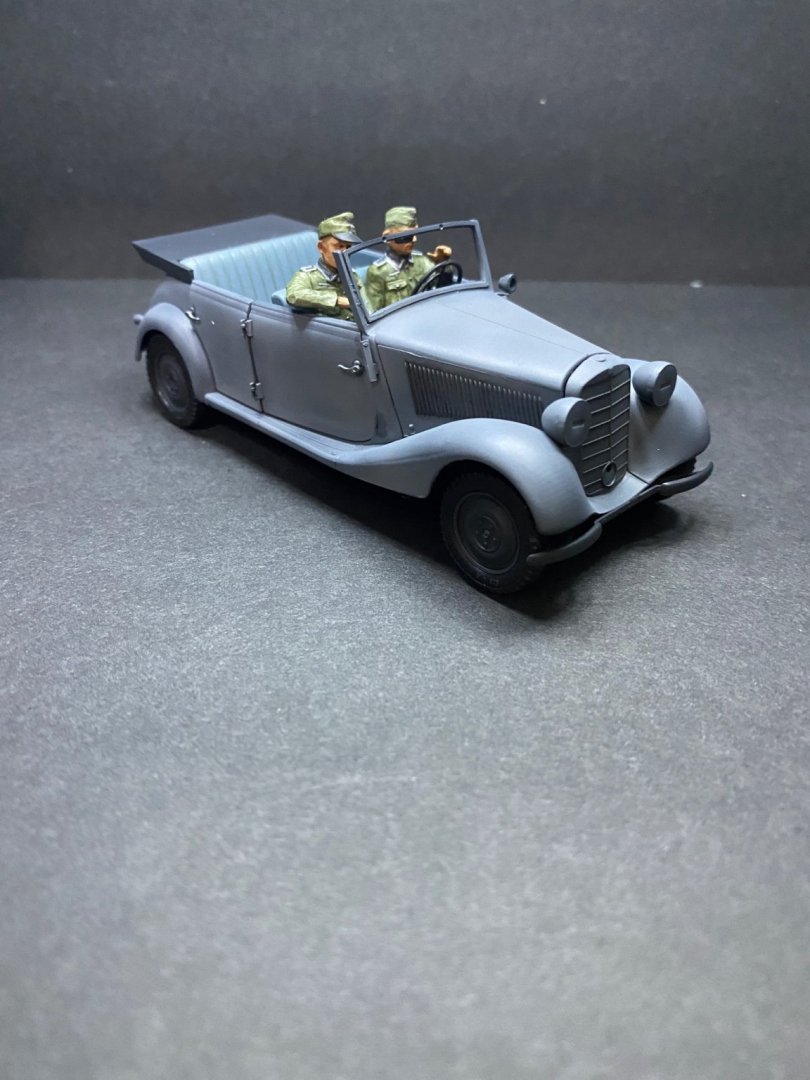
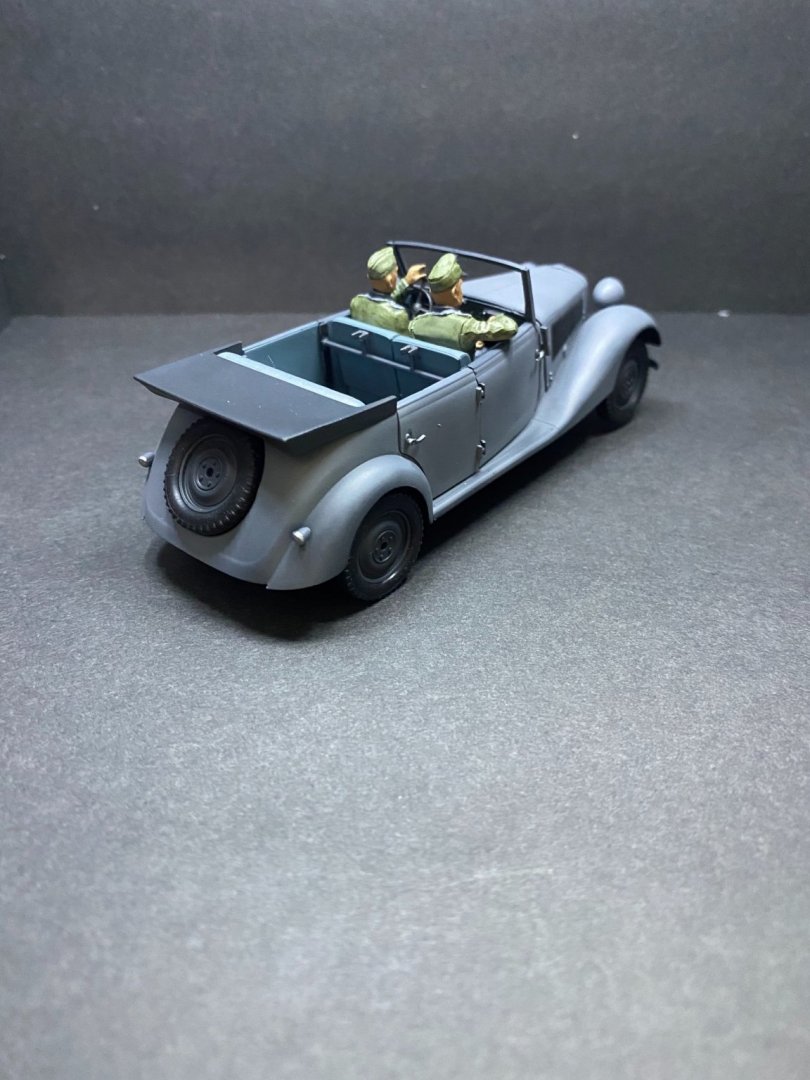
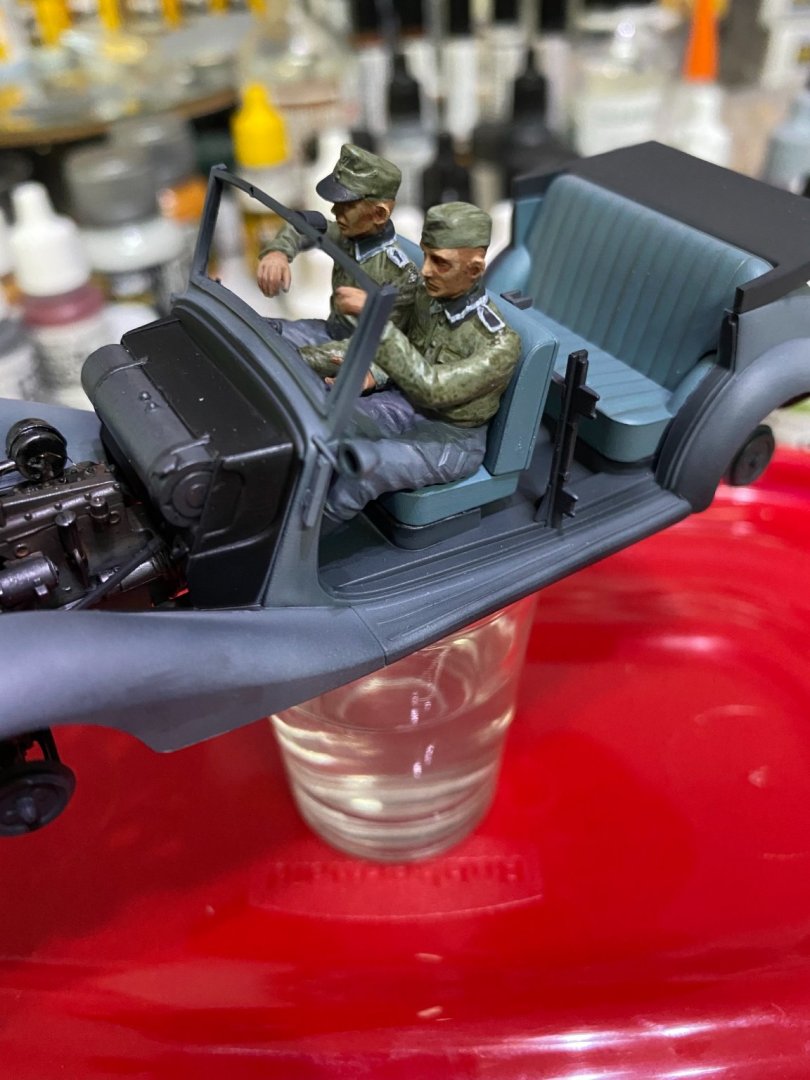
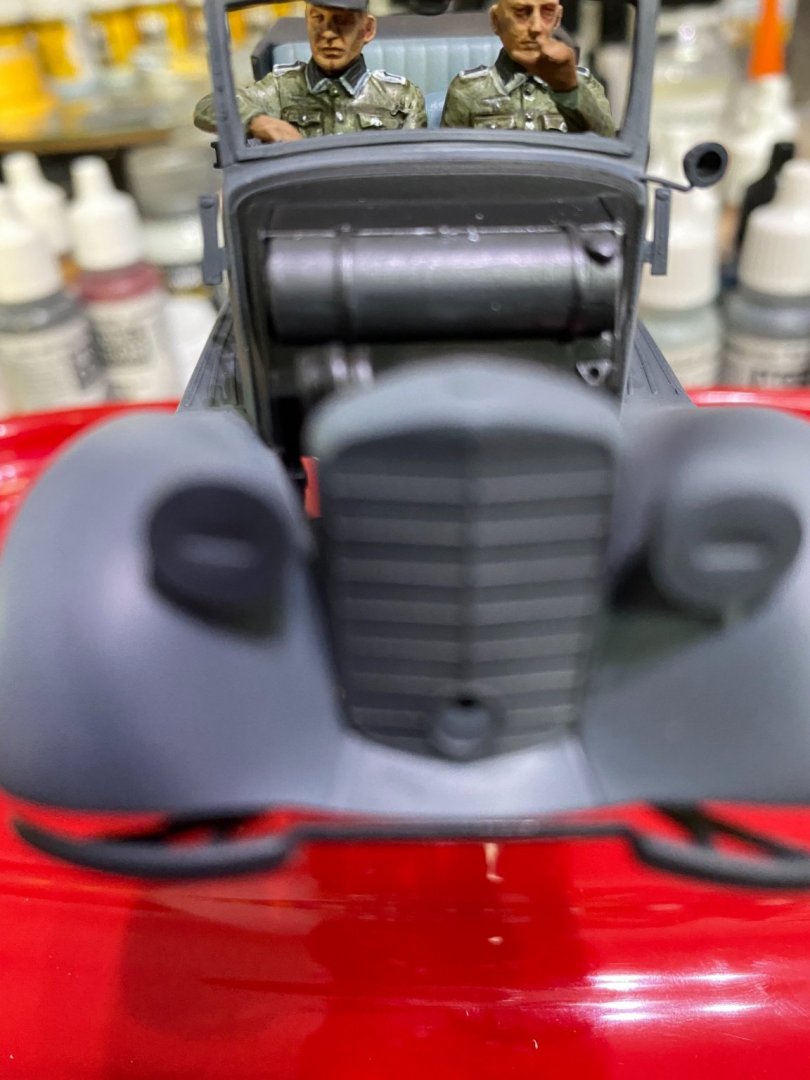
It was interesting to learn from that video the Sable hairs actually have specific features that nature built in that enables them to "hold" more paint. It's amazing to me the brush design is almost 200 years old and was originally ordered by the Queen. Quite a history. This all lead me to another video that goes deep into the subject of paint pigments and how rare/expensive some of them have been and sometimes still are. Certain brown pigments were once obtained by grinding up Egyptian mummies. Yellow pigment from cow **** when fed a specific diet (not even kidding). Blue pigment from very hard to acquire crystals from Afghanistan. Just to make sure I stay at least slightly on topic 😄, here are the driver and front seat passenger photos after painting their lower bodies. Front doors are all buttoned up. Now for the back seat passengers...


- 143 replies
-
- 15
-
-

-
She's a beauty Alan. You are really coming on strong with your modeling skills! Keep up the good work, I always enjoy following your build threads. The $1 foam boards with $1 battery powered LED lights found at the Dollar Tree makes great photo boxes, cheap. Quick and easy. Last time, I wanted to find a light blue pastel foam board but could only get the white ones. Now I have a black one and a white one, but still want the light pastel blue, even if I have to paste on pastel blue paper over the foam.
-
Thanks! I'll buy a tin of the cleaner/preserver next chance I get. It would be a shame to abuse a brand new set of brushes. Hey, we are all friends here discussing our models, tools, and sometimes other interesting tidbits. It's all good to me. 🙂
-
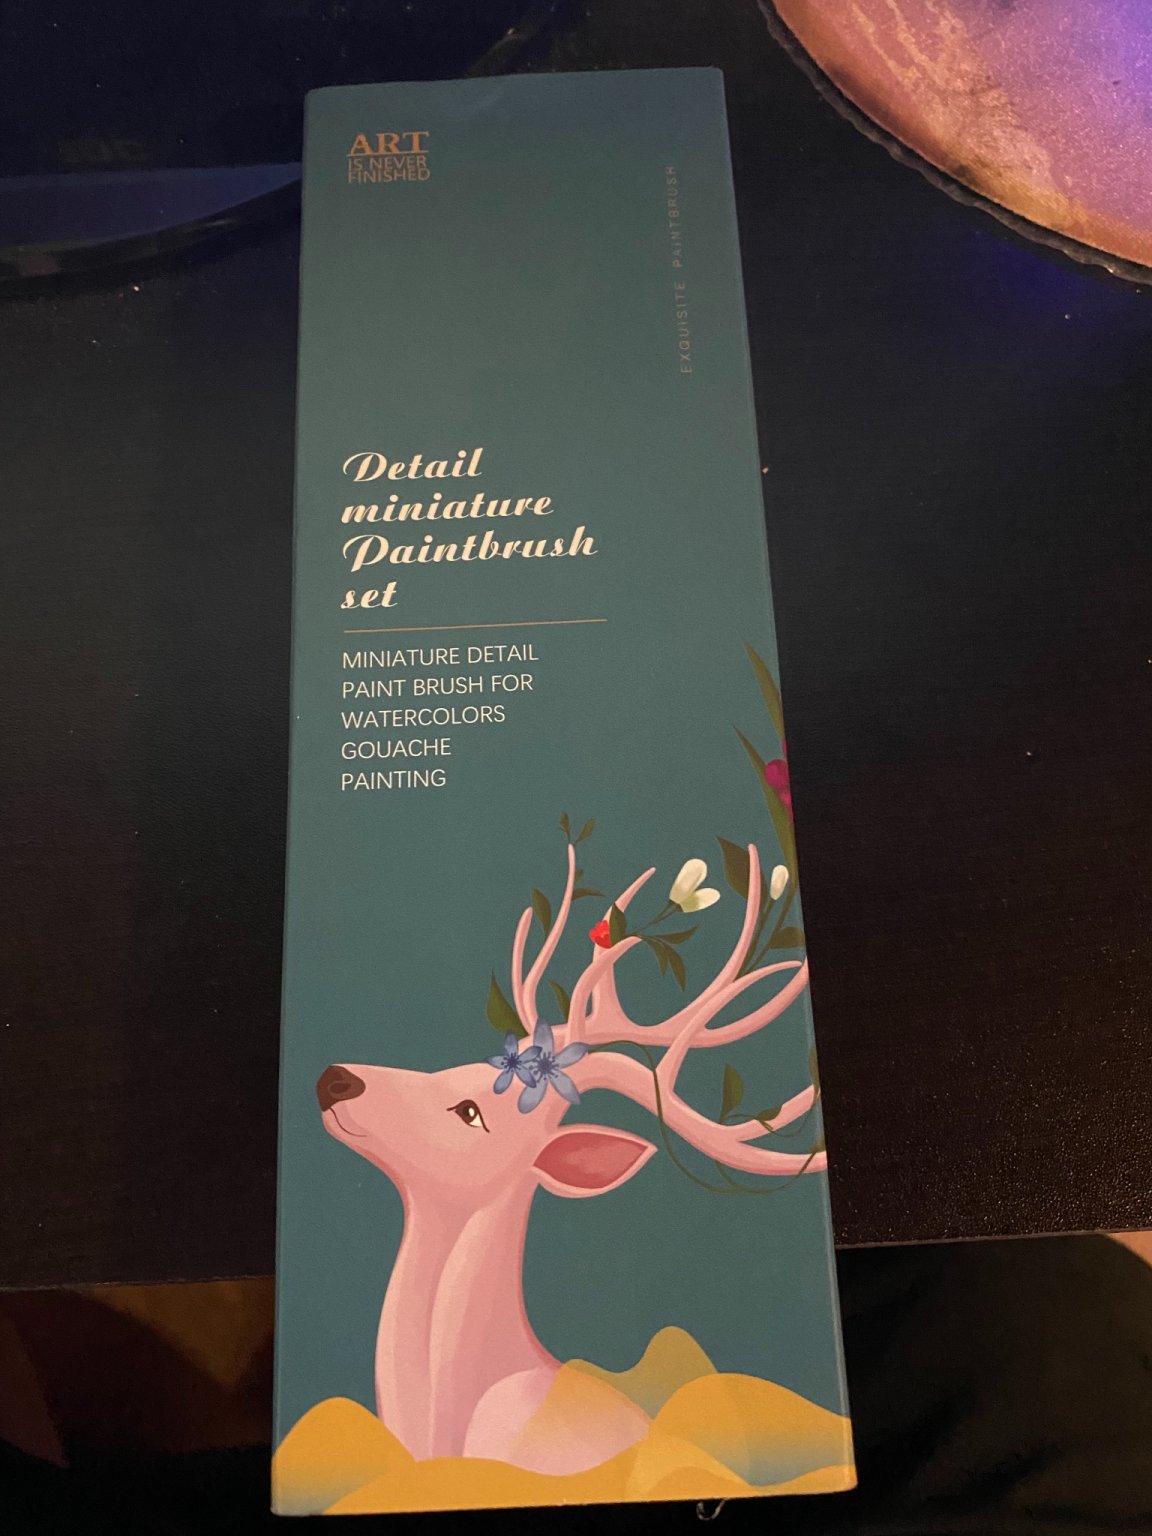
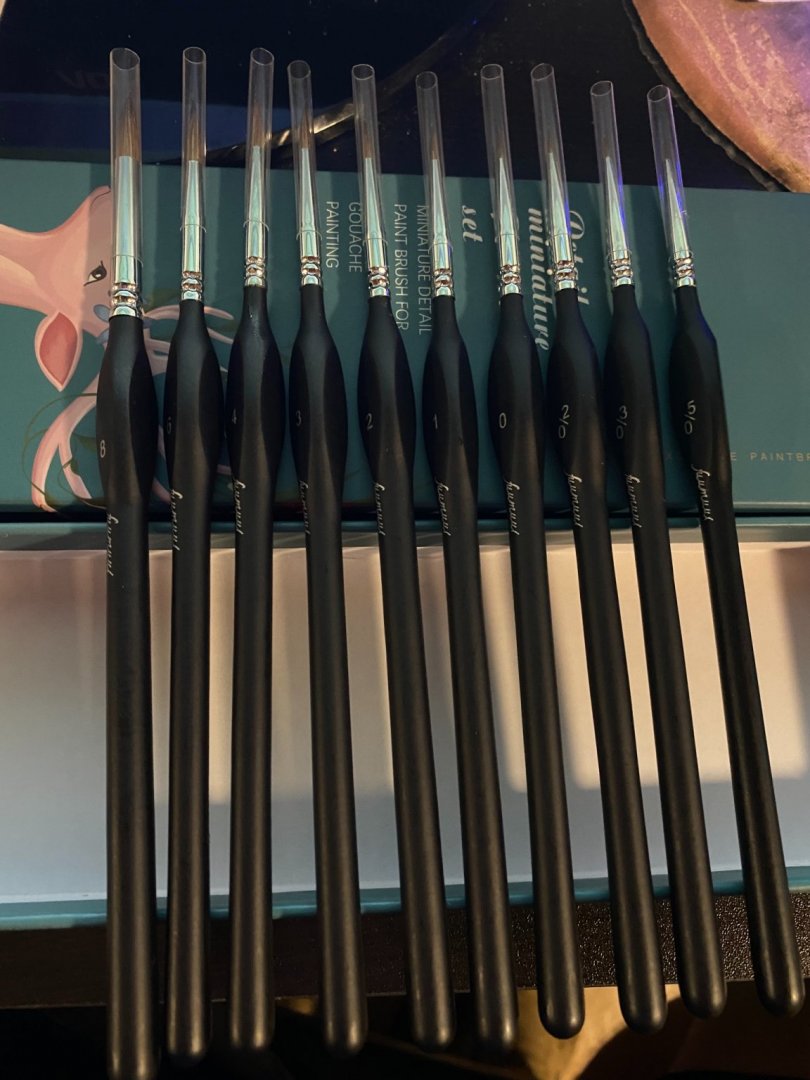
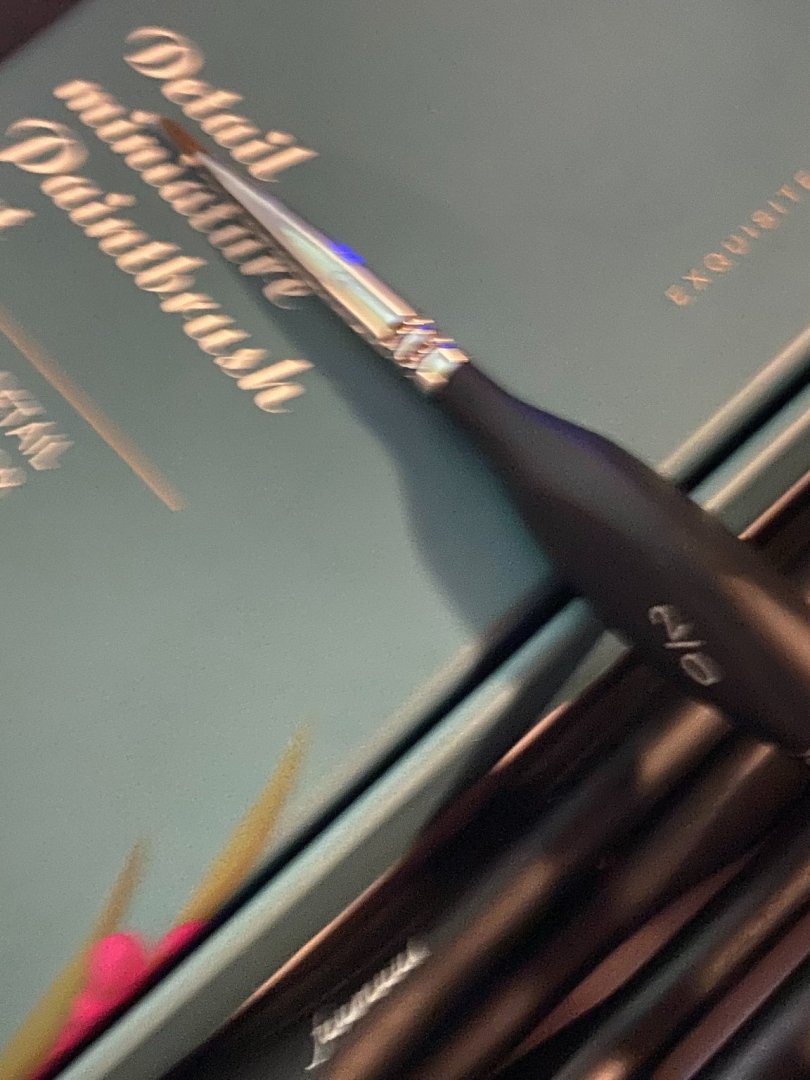
Here’s the set of 10 brushes. Look nice to me. A close up photo of the 2/0 brush.

-
I use plain old water or paint thinner for cleaning my brushes when brushing on acrylics. I've thought about buying a tin of that brush cleaner/conditioner than comes in a flat, round container, but I'm not certain of the benefits of it. I've never owned a set of quality model paint brushes before. Maybe I need to use something that helps keep them in shape? On another note, there's a good Youtube video that shows why Kolinsky sable brushes are highly desirable (and expensive). They are hand made. The video shows how they are made. This makes me wonder if we are really getting genuine Kolinsky sable brushes for the low price we're paying. I doubt it after watching this video. As long as they are decent, I'll be happy. Will let you know later today after they arrive. They are out for delivery.
- 143 replies
-
- 10
-
-
-
Yes, the price has kept me from jumping on it as well as the fact the virus has caused unwanted delays in almost everything production-wise, particularly in the things we would typically not hesitate from buying in countries off shore. There was an item I had bought here, made in the USA on pre-order. A year went by and because of the virus, delivery on it was going to be later but uncertain. I cancelled the order. On a brighter note, I bought a set of 8 10 nice Kolinsky sable brushes at a very good price on Amazon this week. Less than $20.
-
Thanks for sharing that info about Hogan's Heroes, EG. Never heard about any of this before now.